In the remake of Ninja Gaiden 2, known as Ninja Gaiden 2 Black, the Crystal Skulls serve as one of the key collectibles for players. Scattered across each level in the game, these intriguing skulls are skillfully concealed within the game’s environments. Players who have completed earlier versions of Ninja Gaiden 2 will find it easier to locate the Crystal Skulls since they remain in roughly the same locations in this updated version. For newcomers to the game, this guide will help you track down all 30 Crystal Skull collectibles found within Ninja Gaiden 2 Black.
All Crystal Skull Locations in Chapter 1 – NInja Gaiden 2 Black
There are two Crystal Skulls in the first chapter of Ninja Gaiden 2 Black.
In your next game, any Crystal Skulls you’ve gathered during the current gameplay session will be saved and carried forward if you start a new game without finishing the previous one.
Crystal Skull 1:
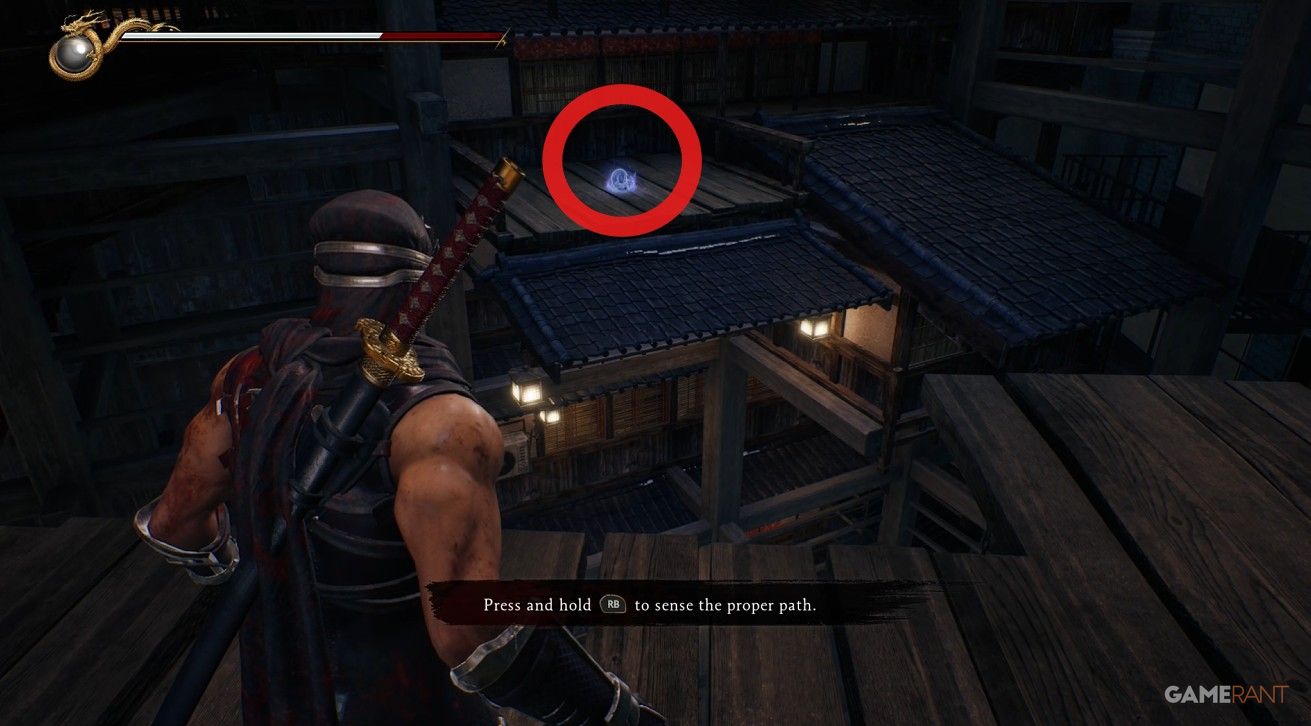
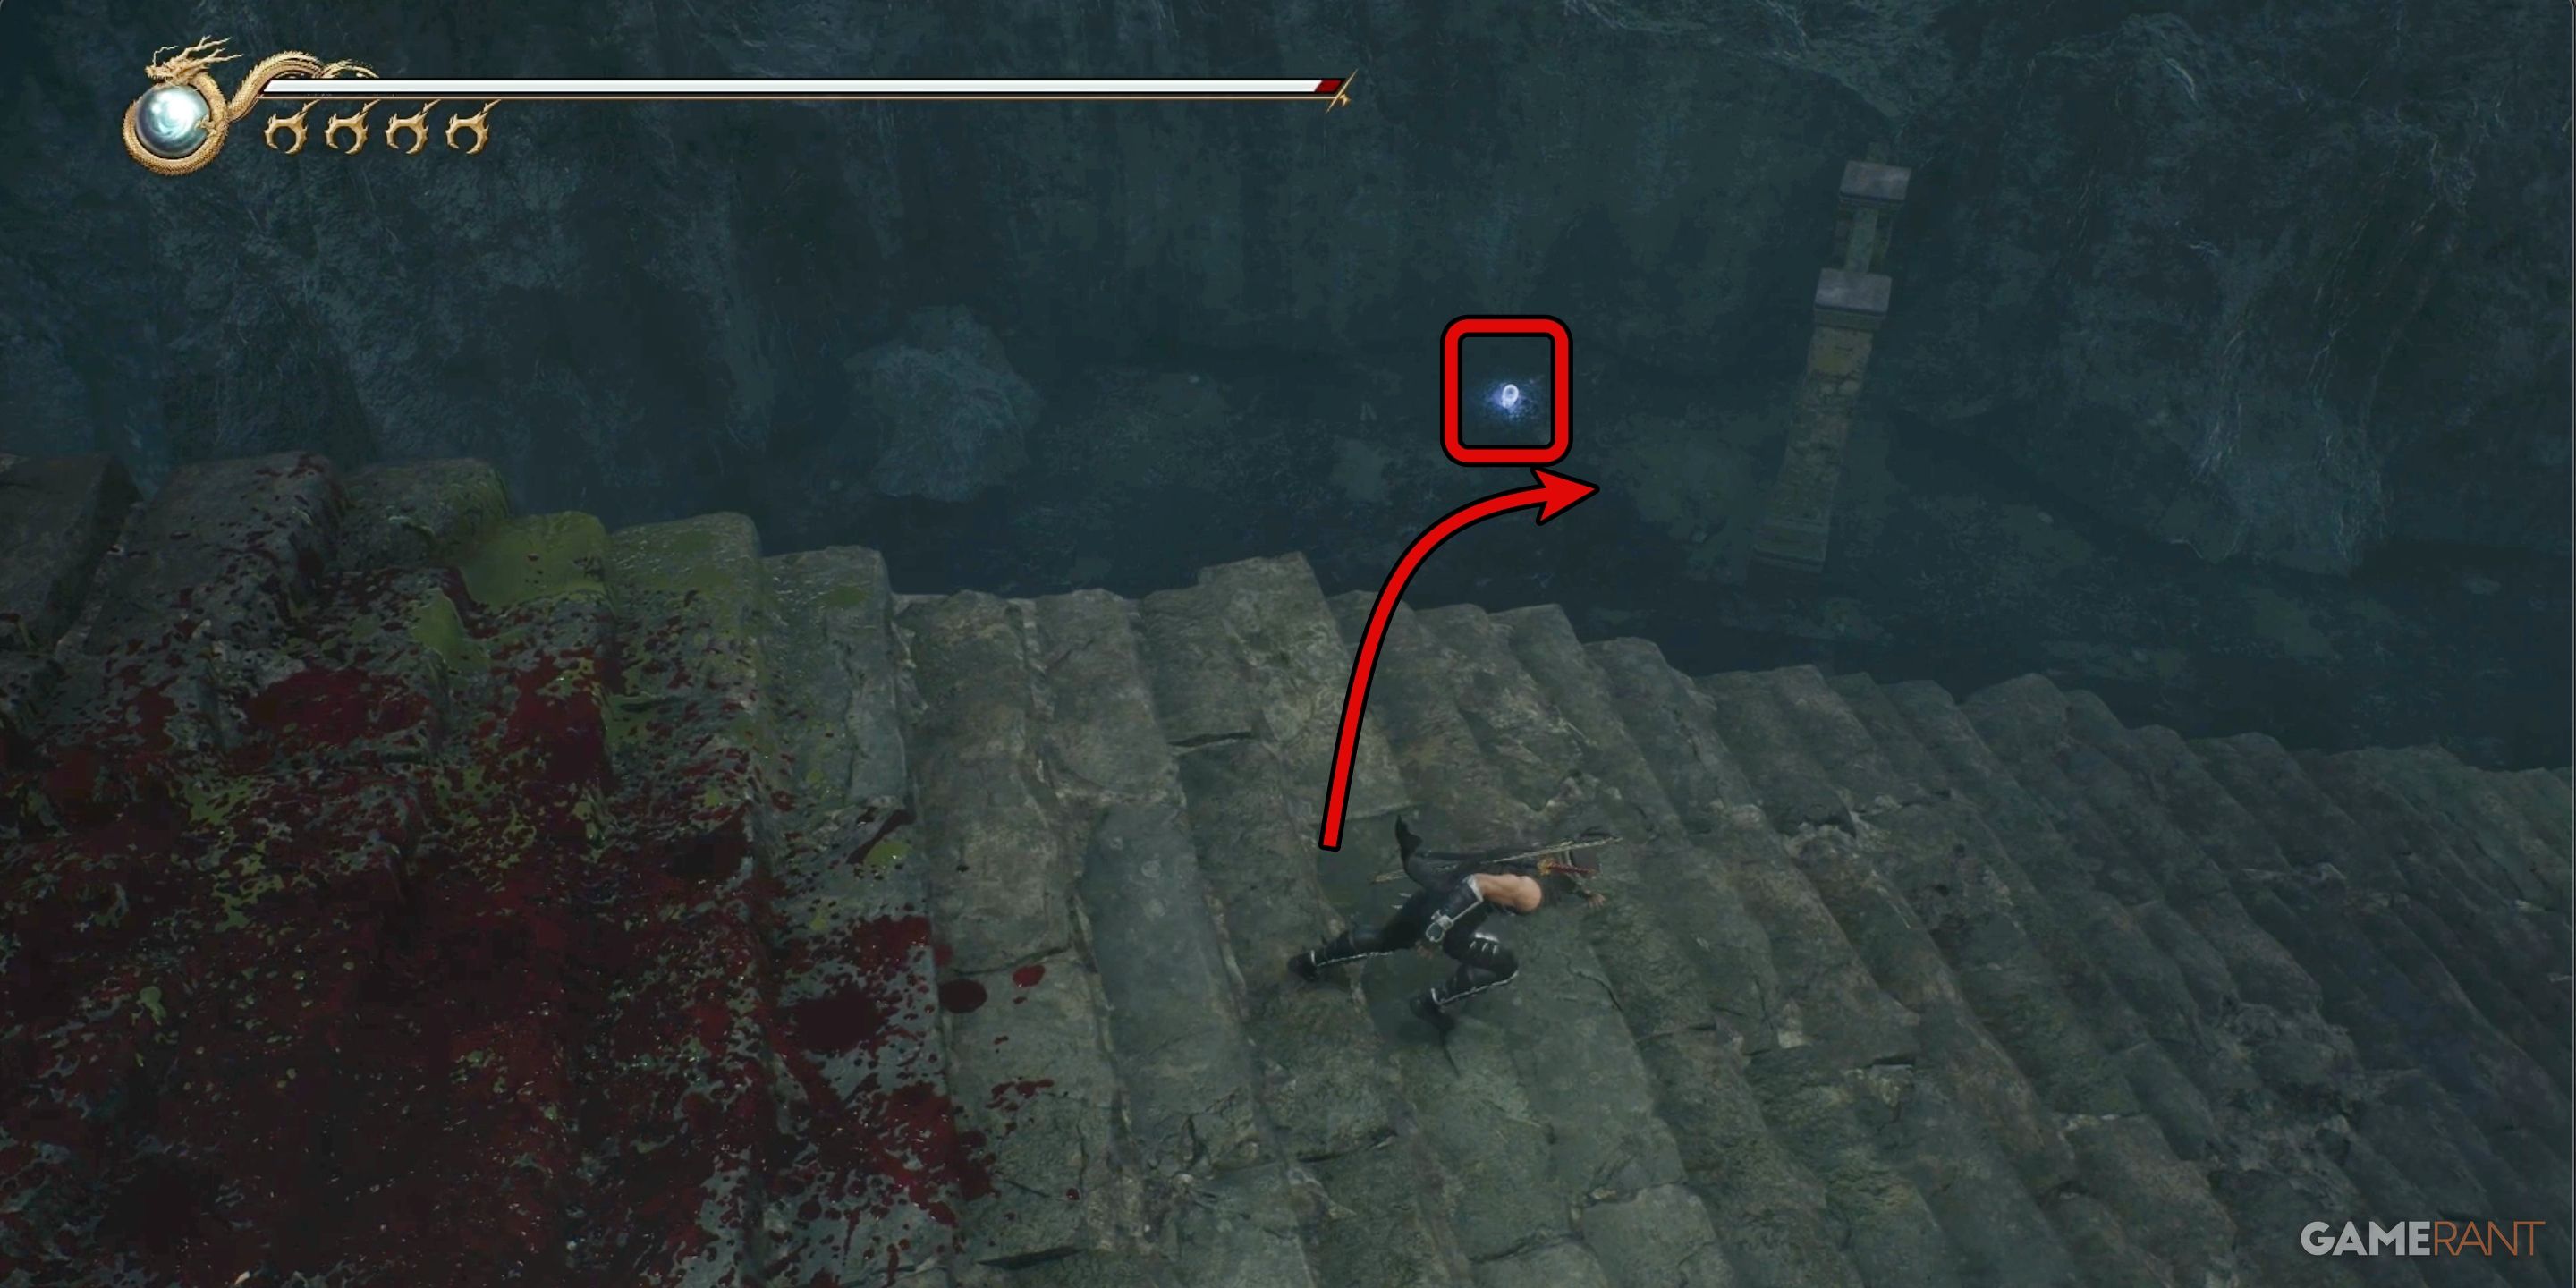
In the very same location where you initially employ the Obliteration method, and following the discovery of the first Lives of a Thousand Deities tucked away within a chamber, you’ll encounter the first Crystal Skull. Upon opening the chest, look up to spot the Crystal Skull, which is perched on the ceiling over a chasm. Be mindful while making your leap, as there are no opportunities for correction should you miss the jump.
Crystal Skull 2:
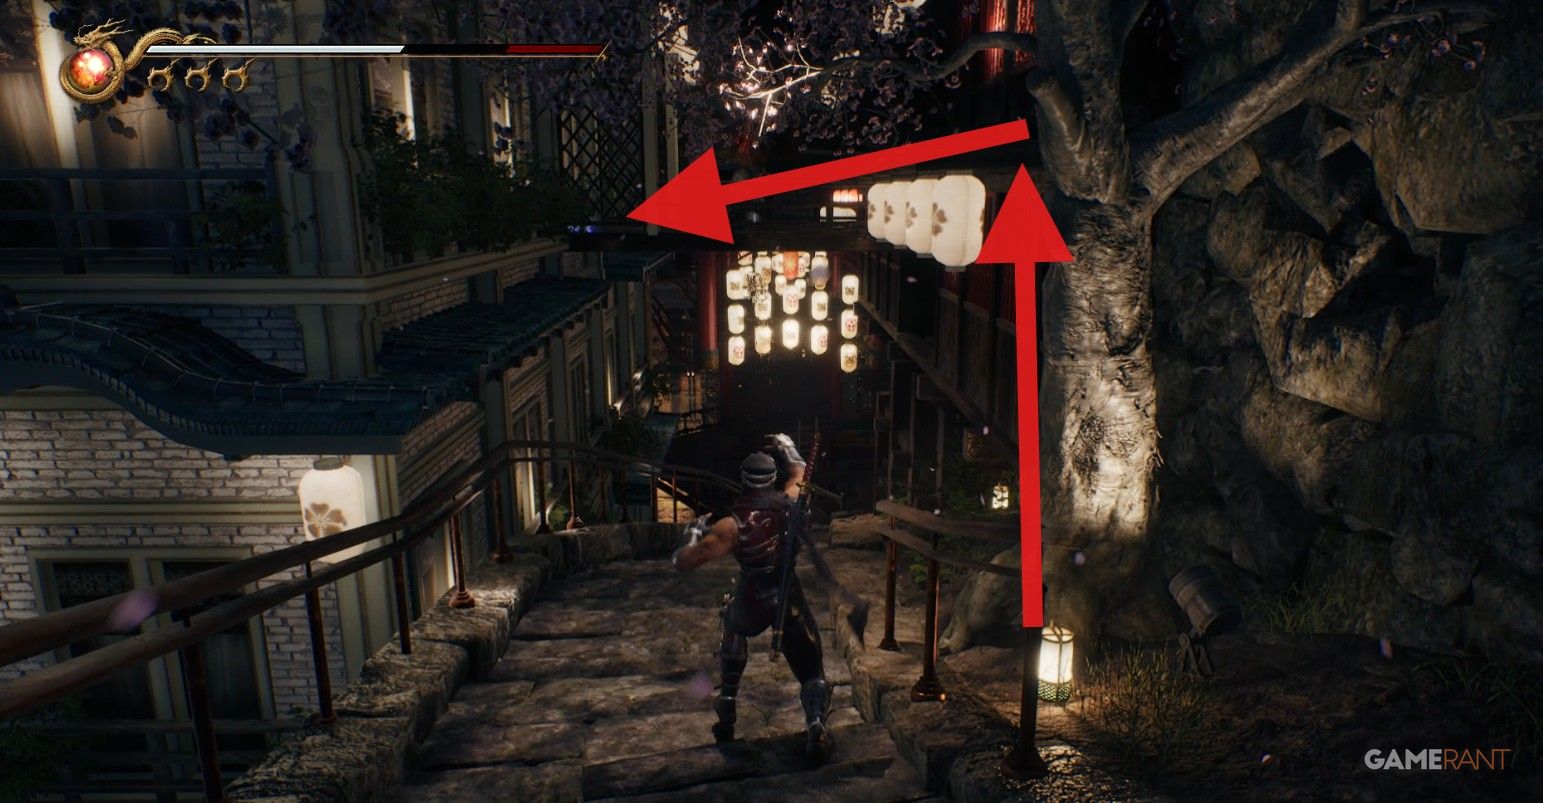
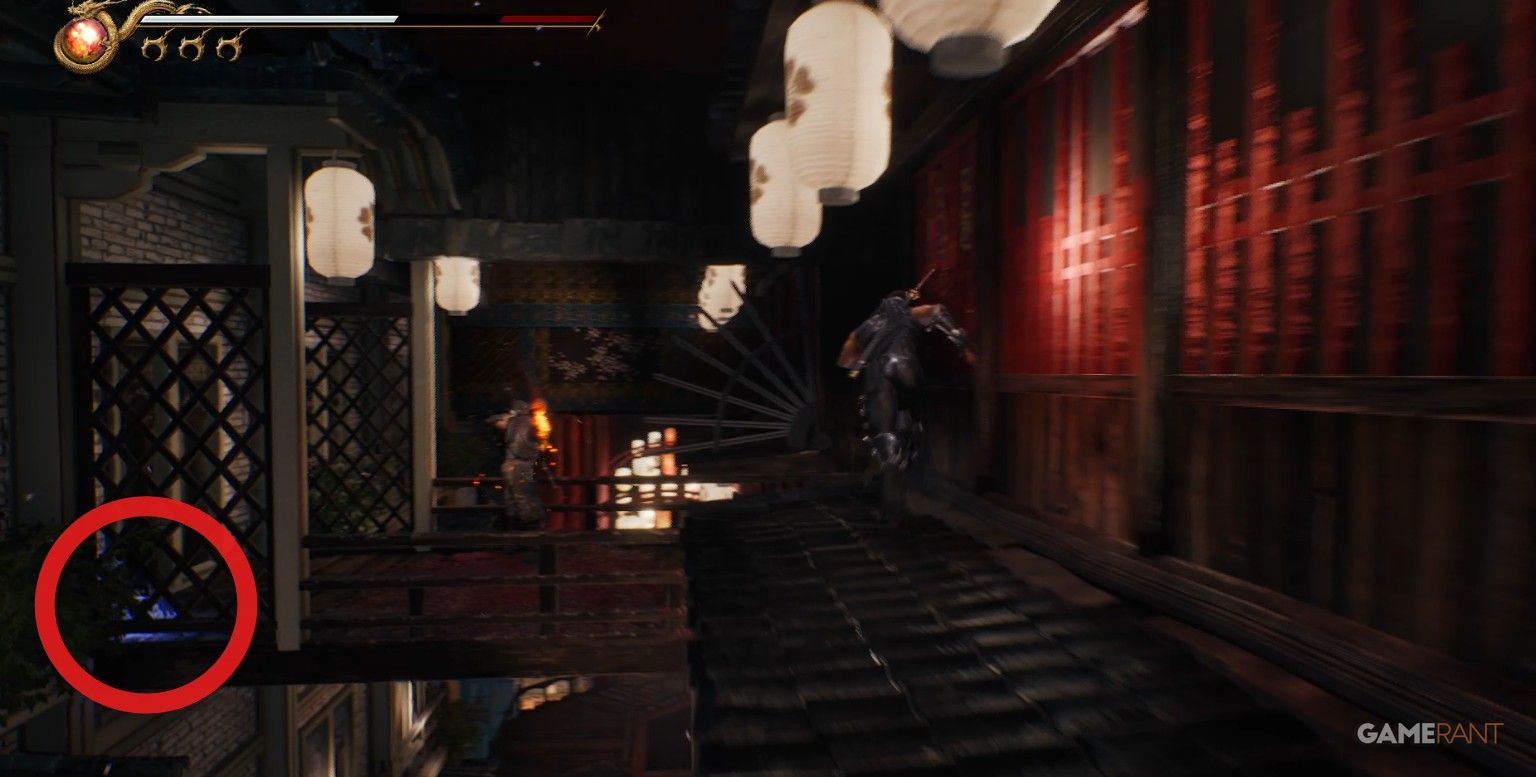
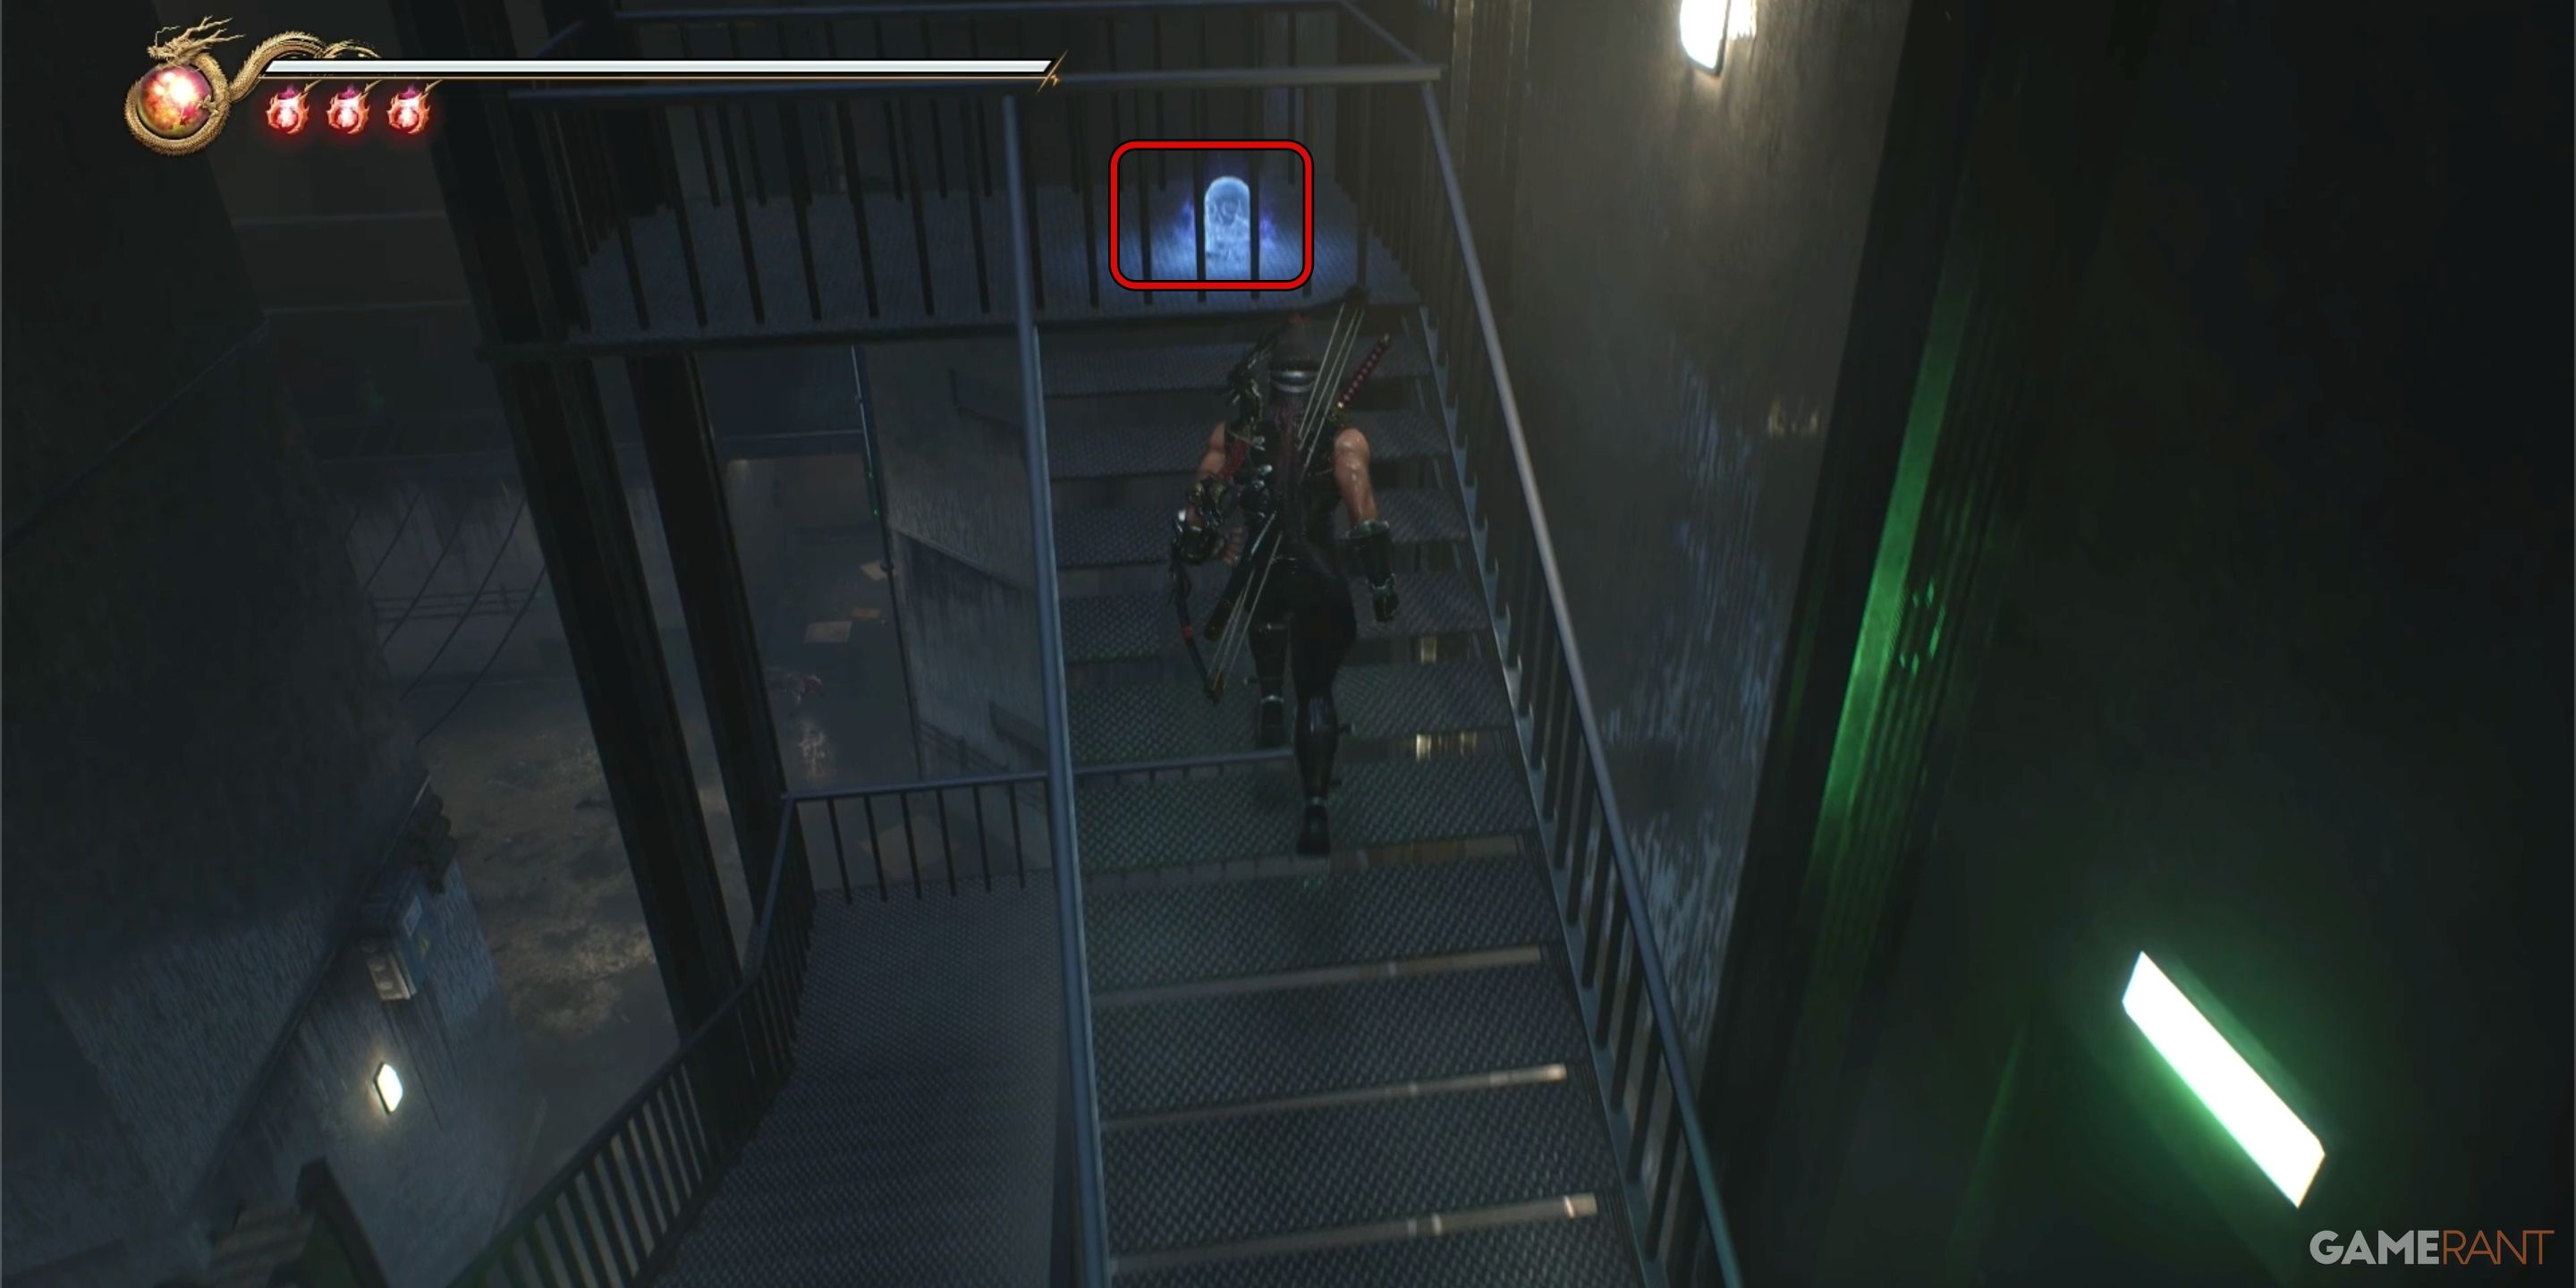
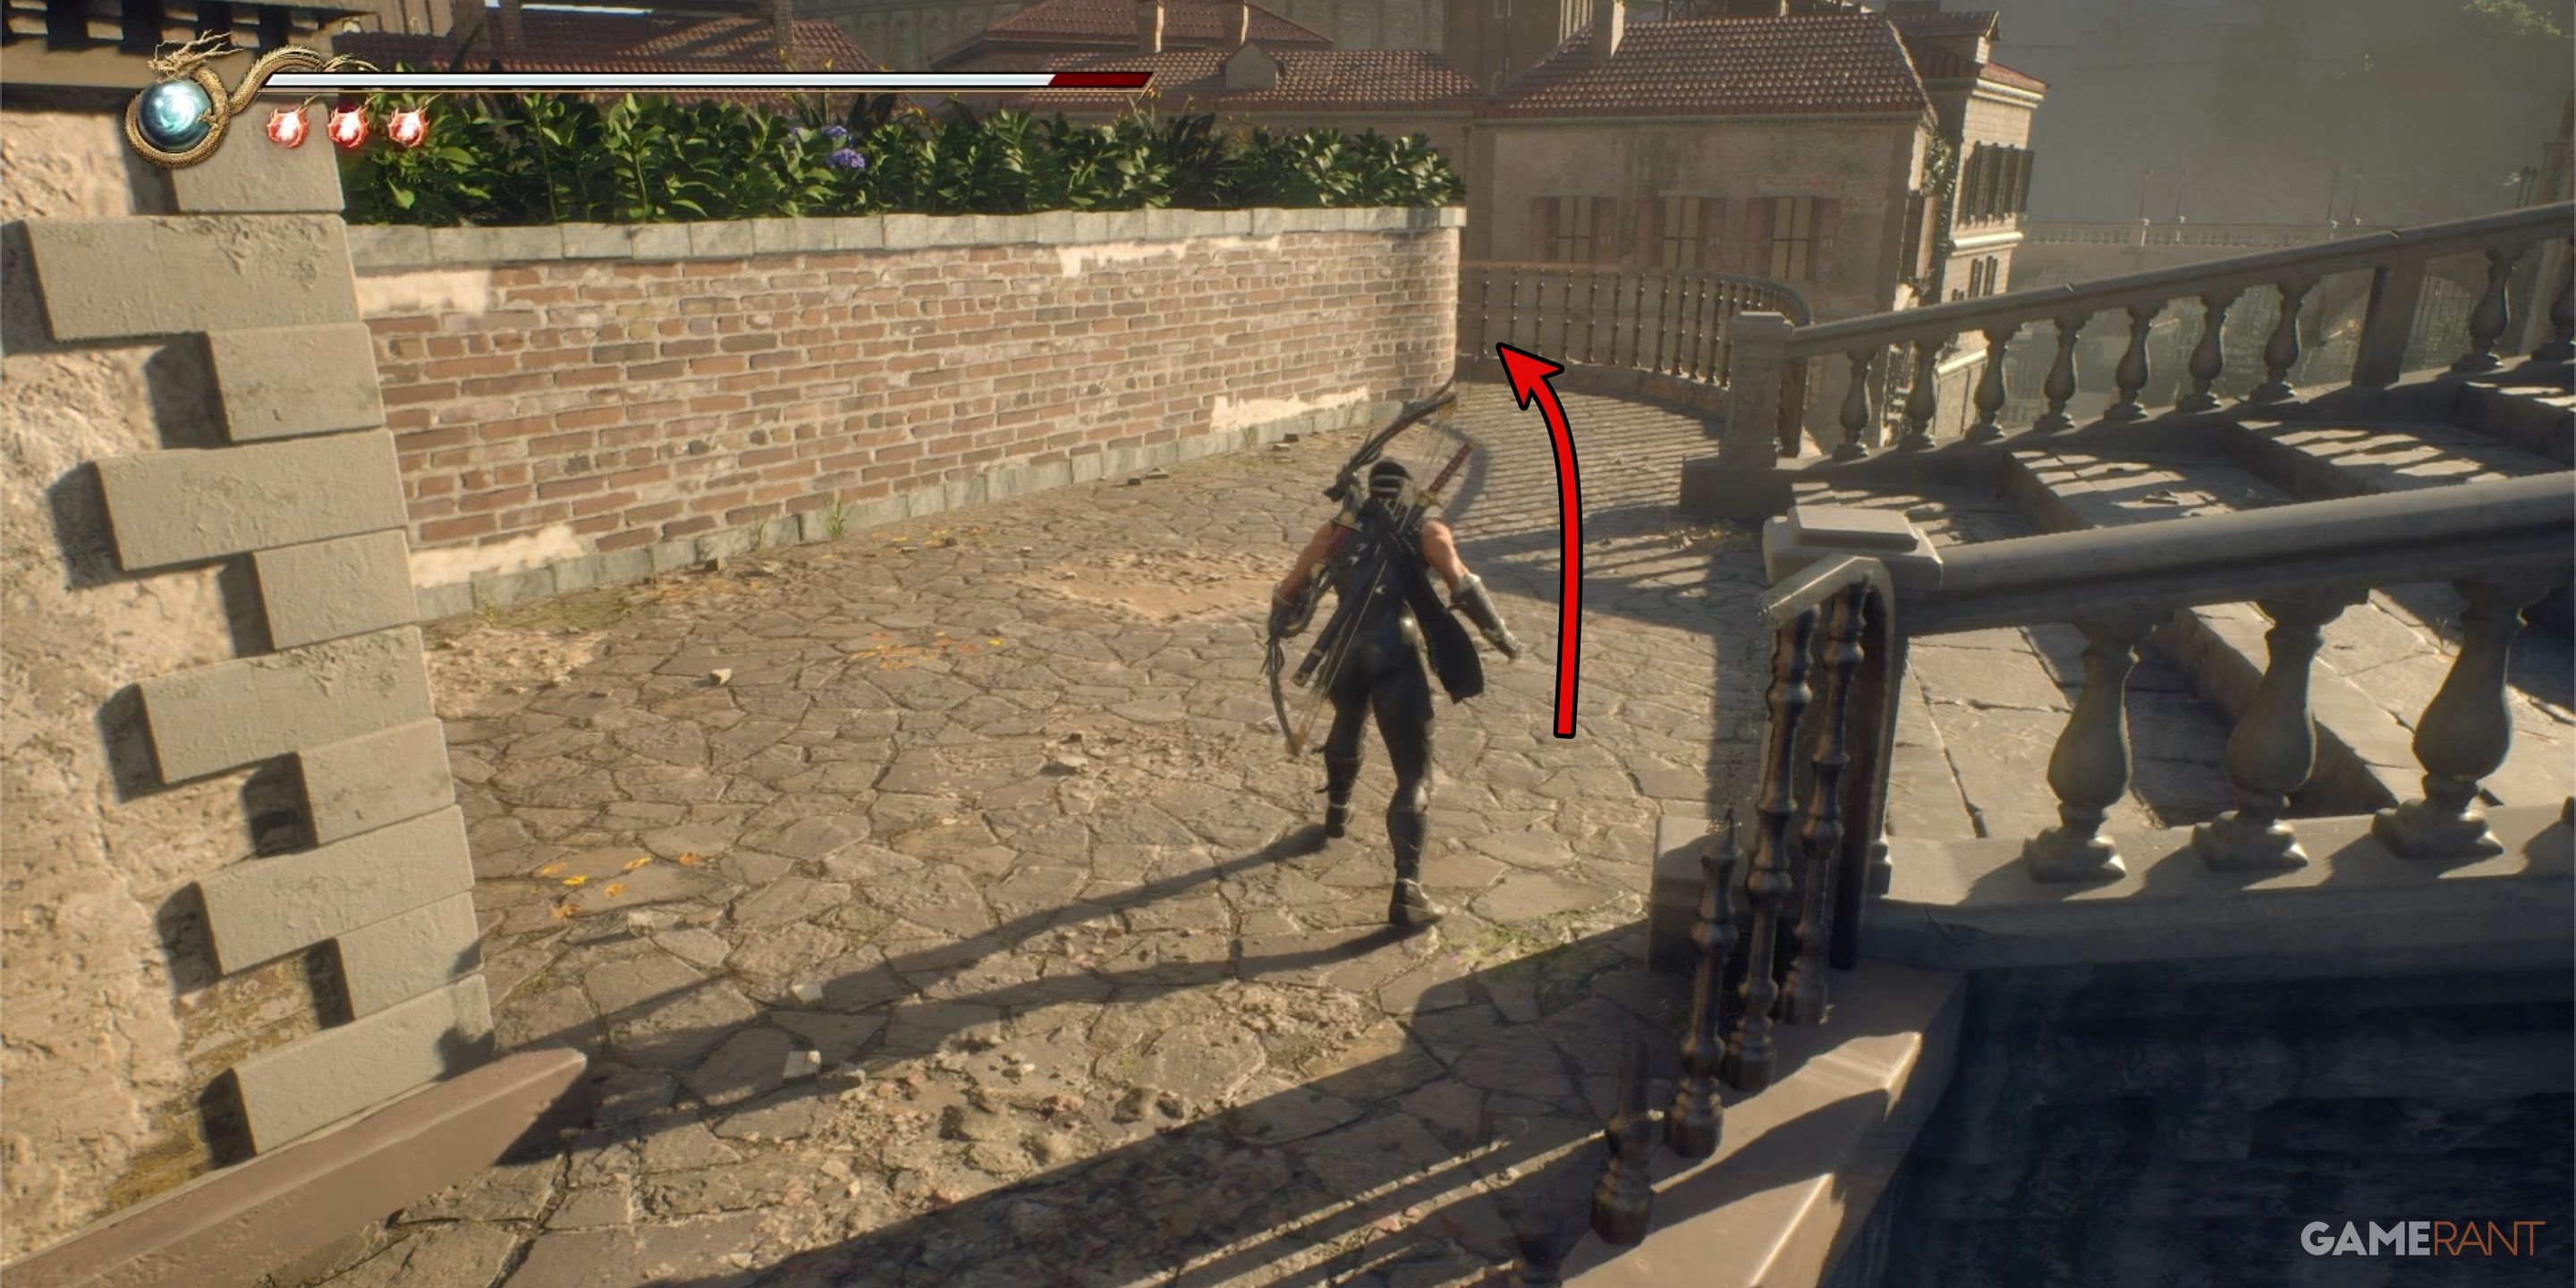
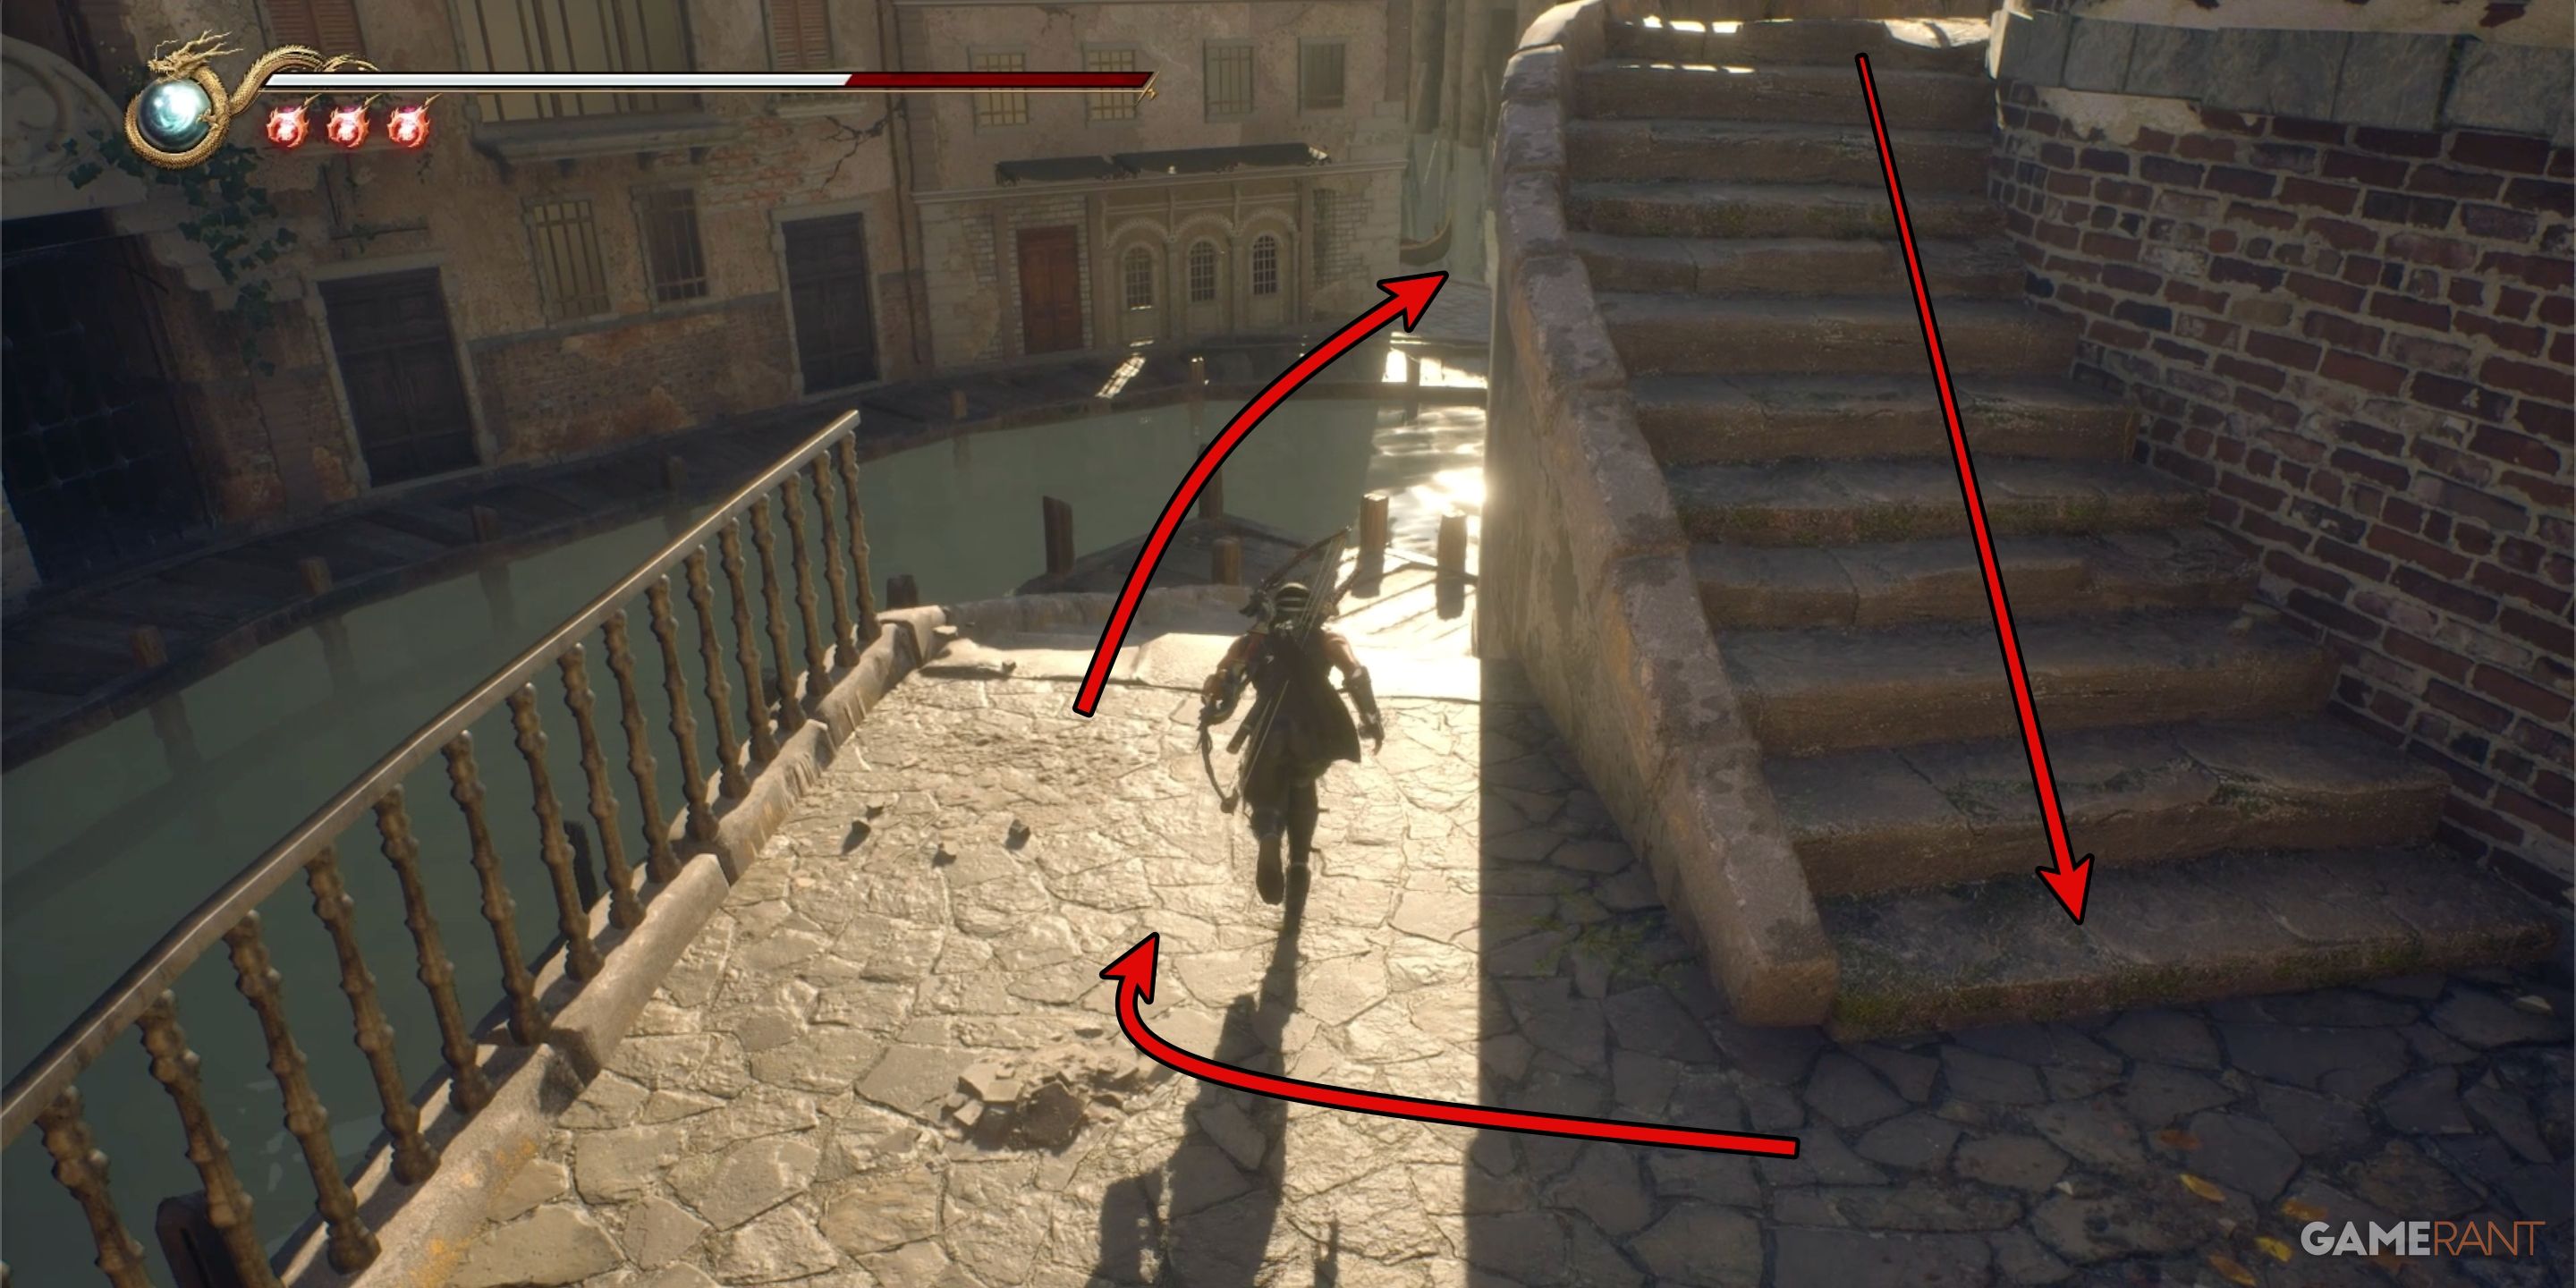
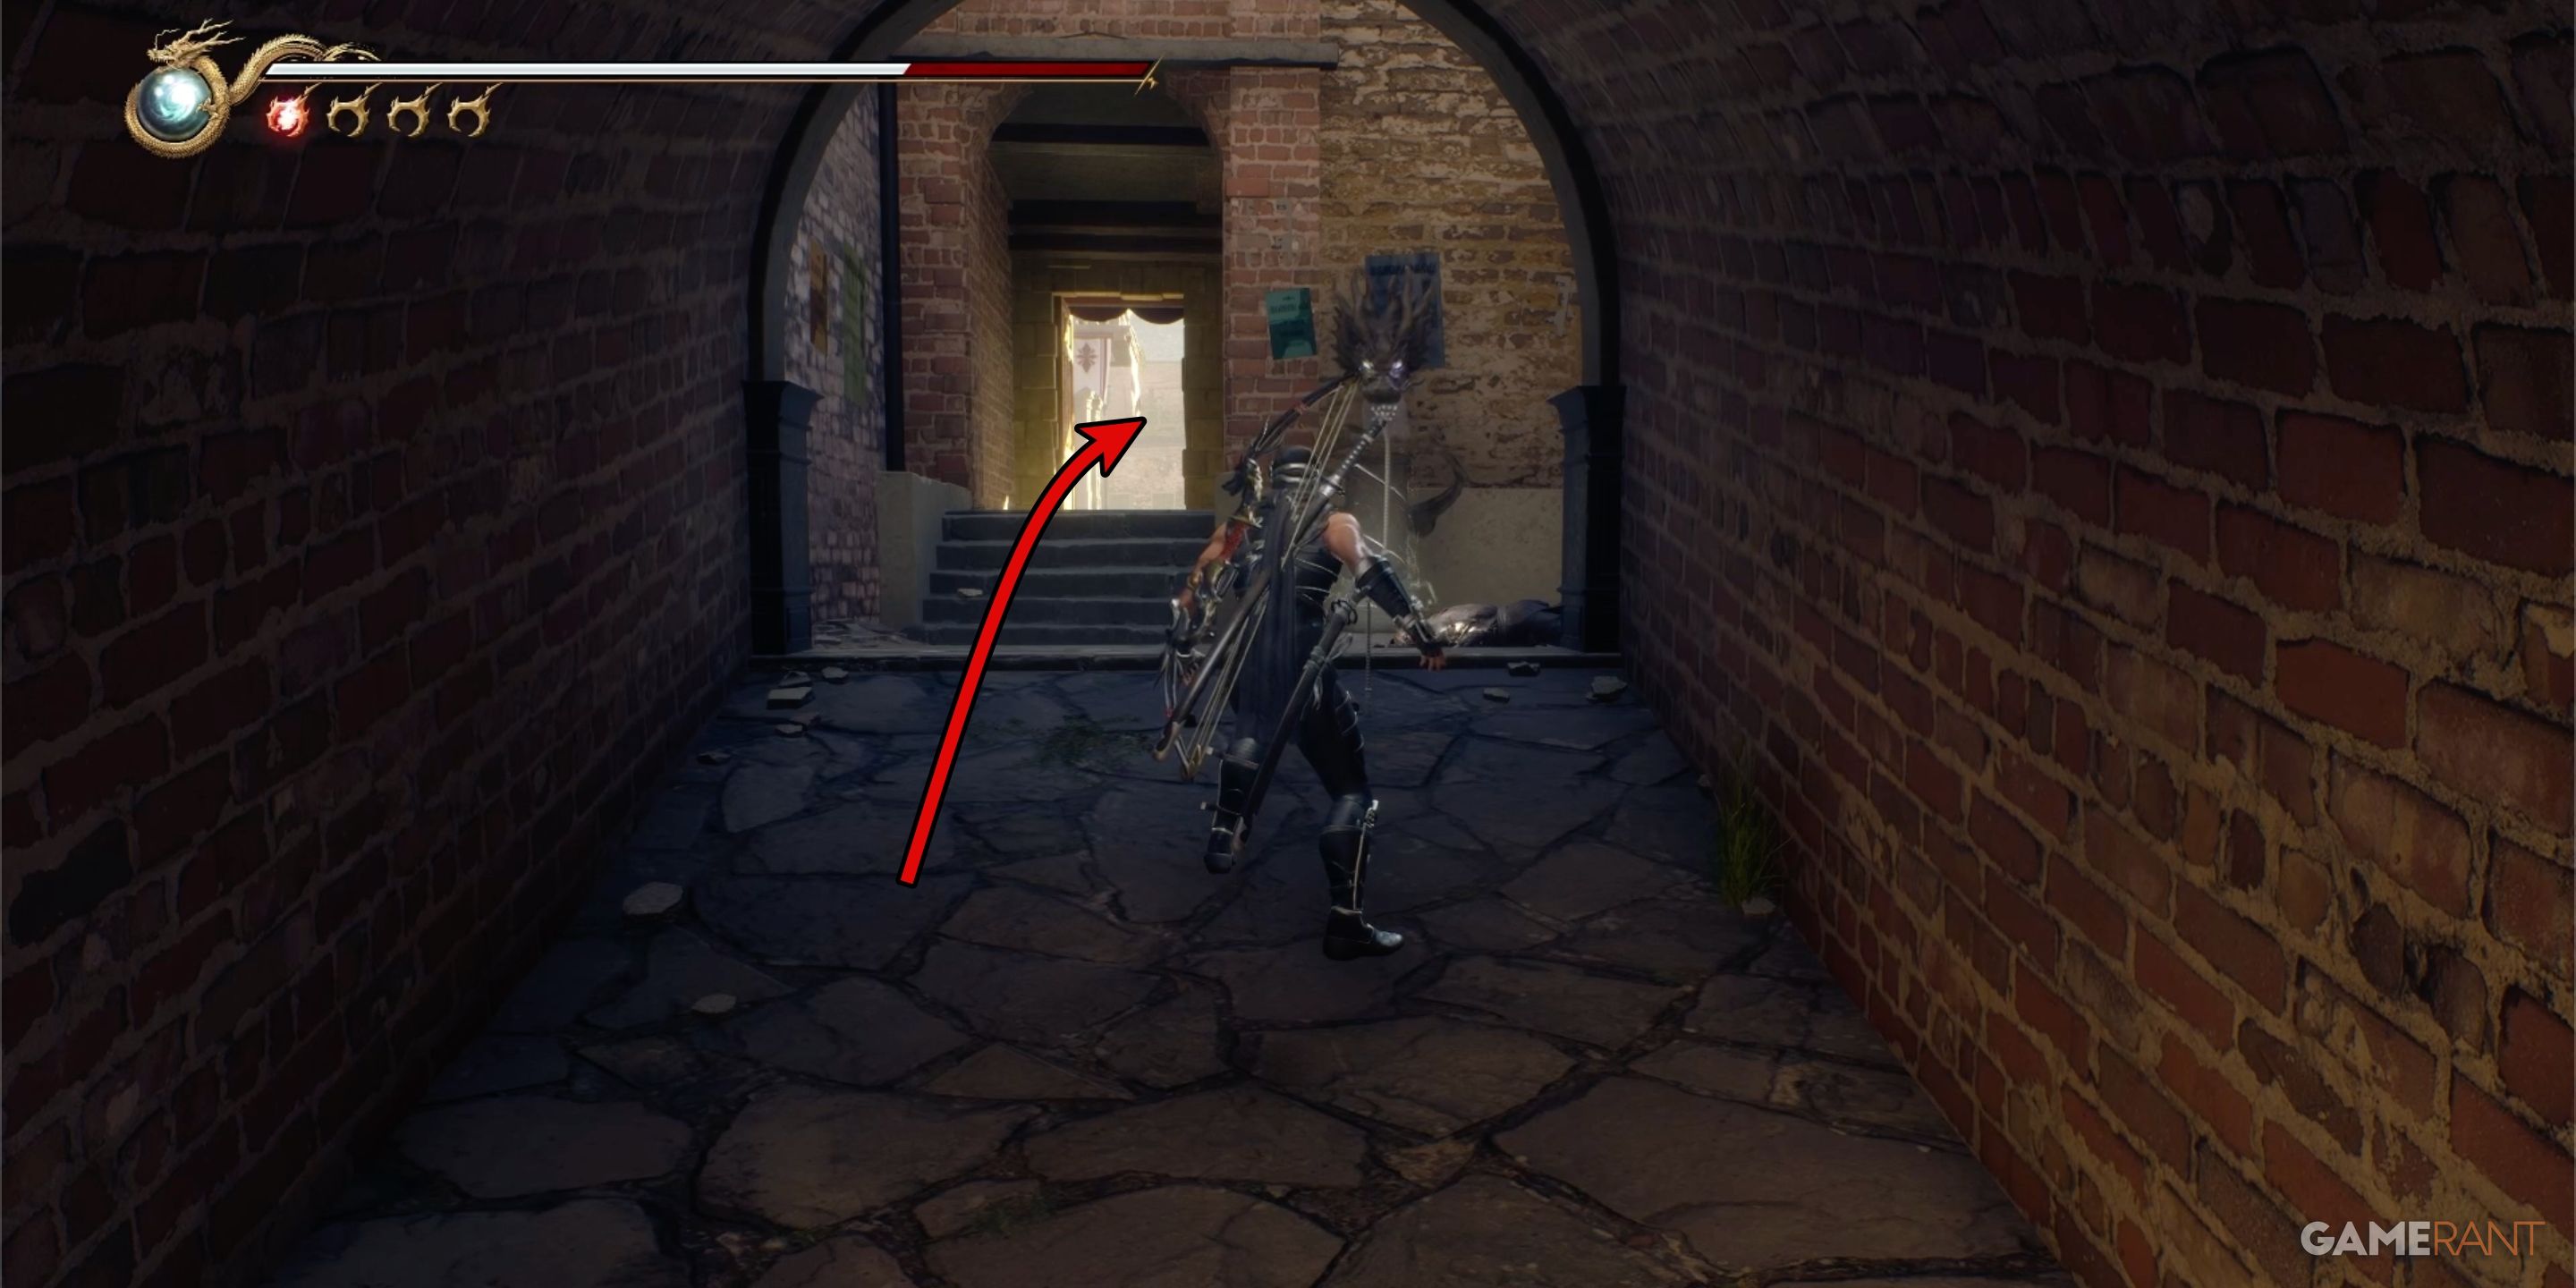
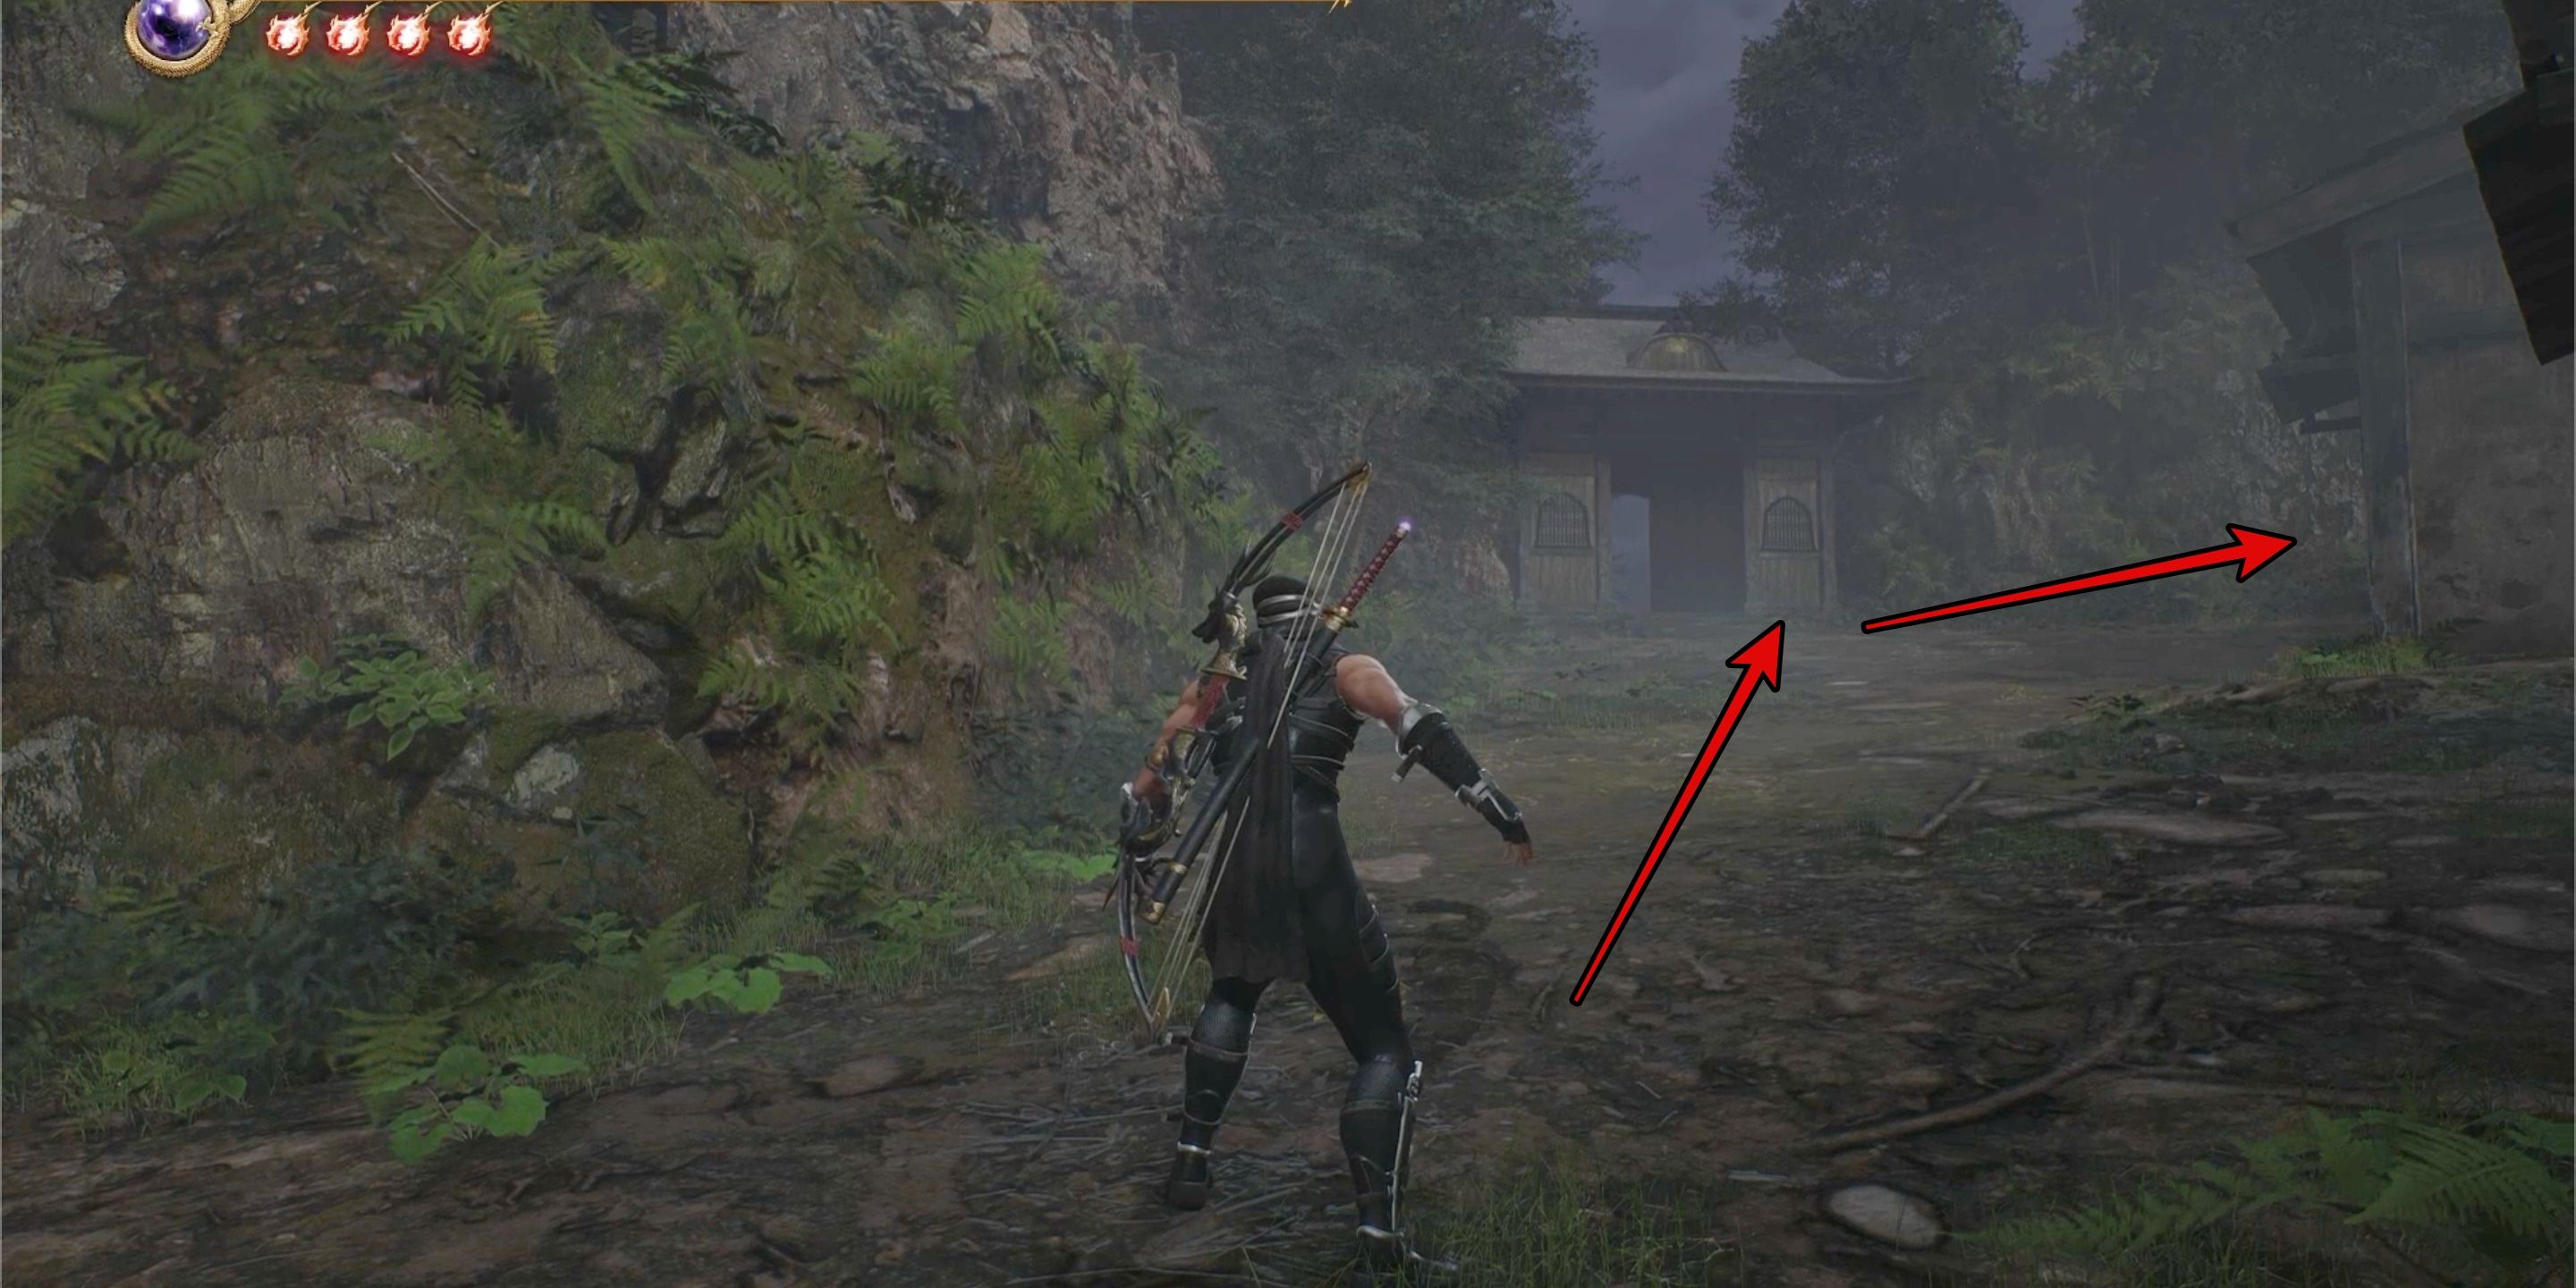
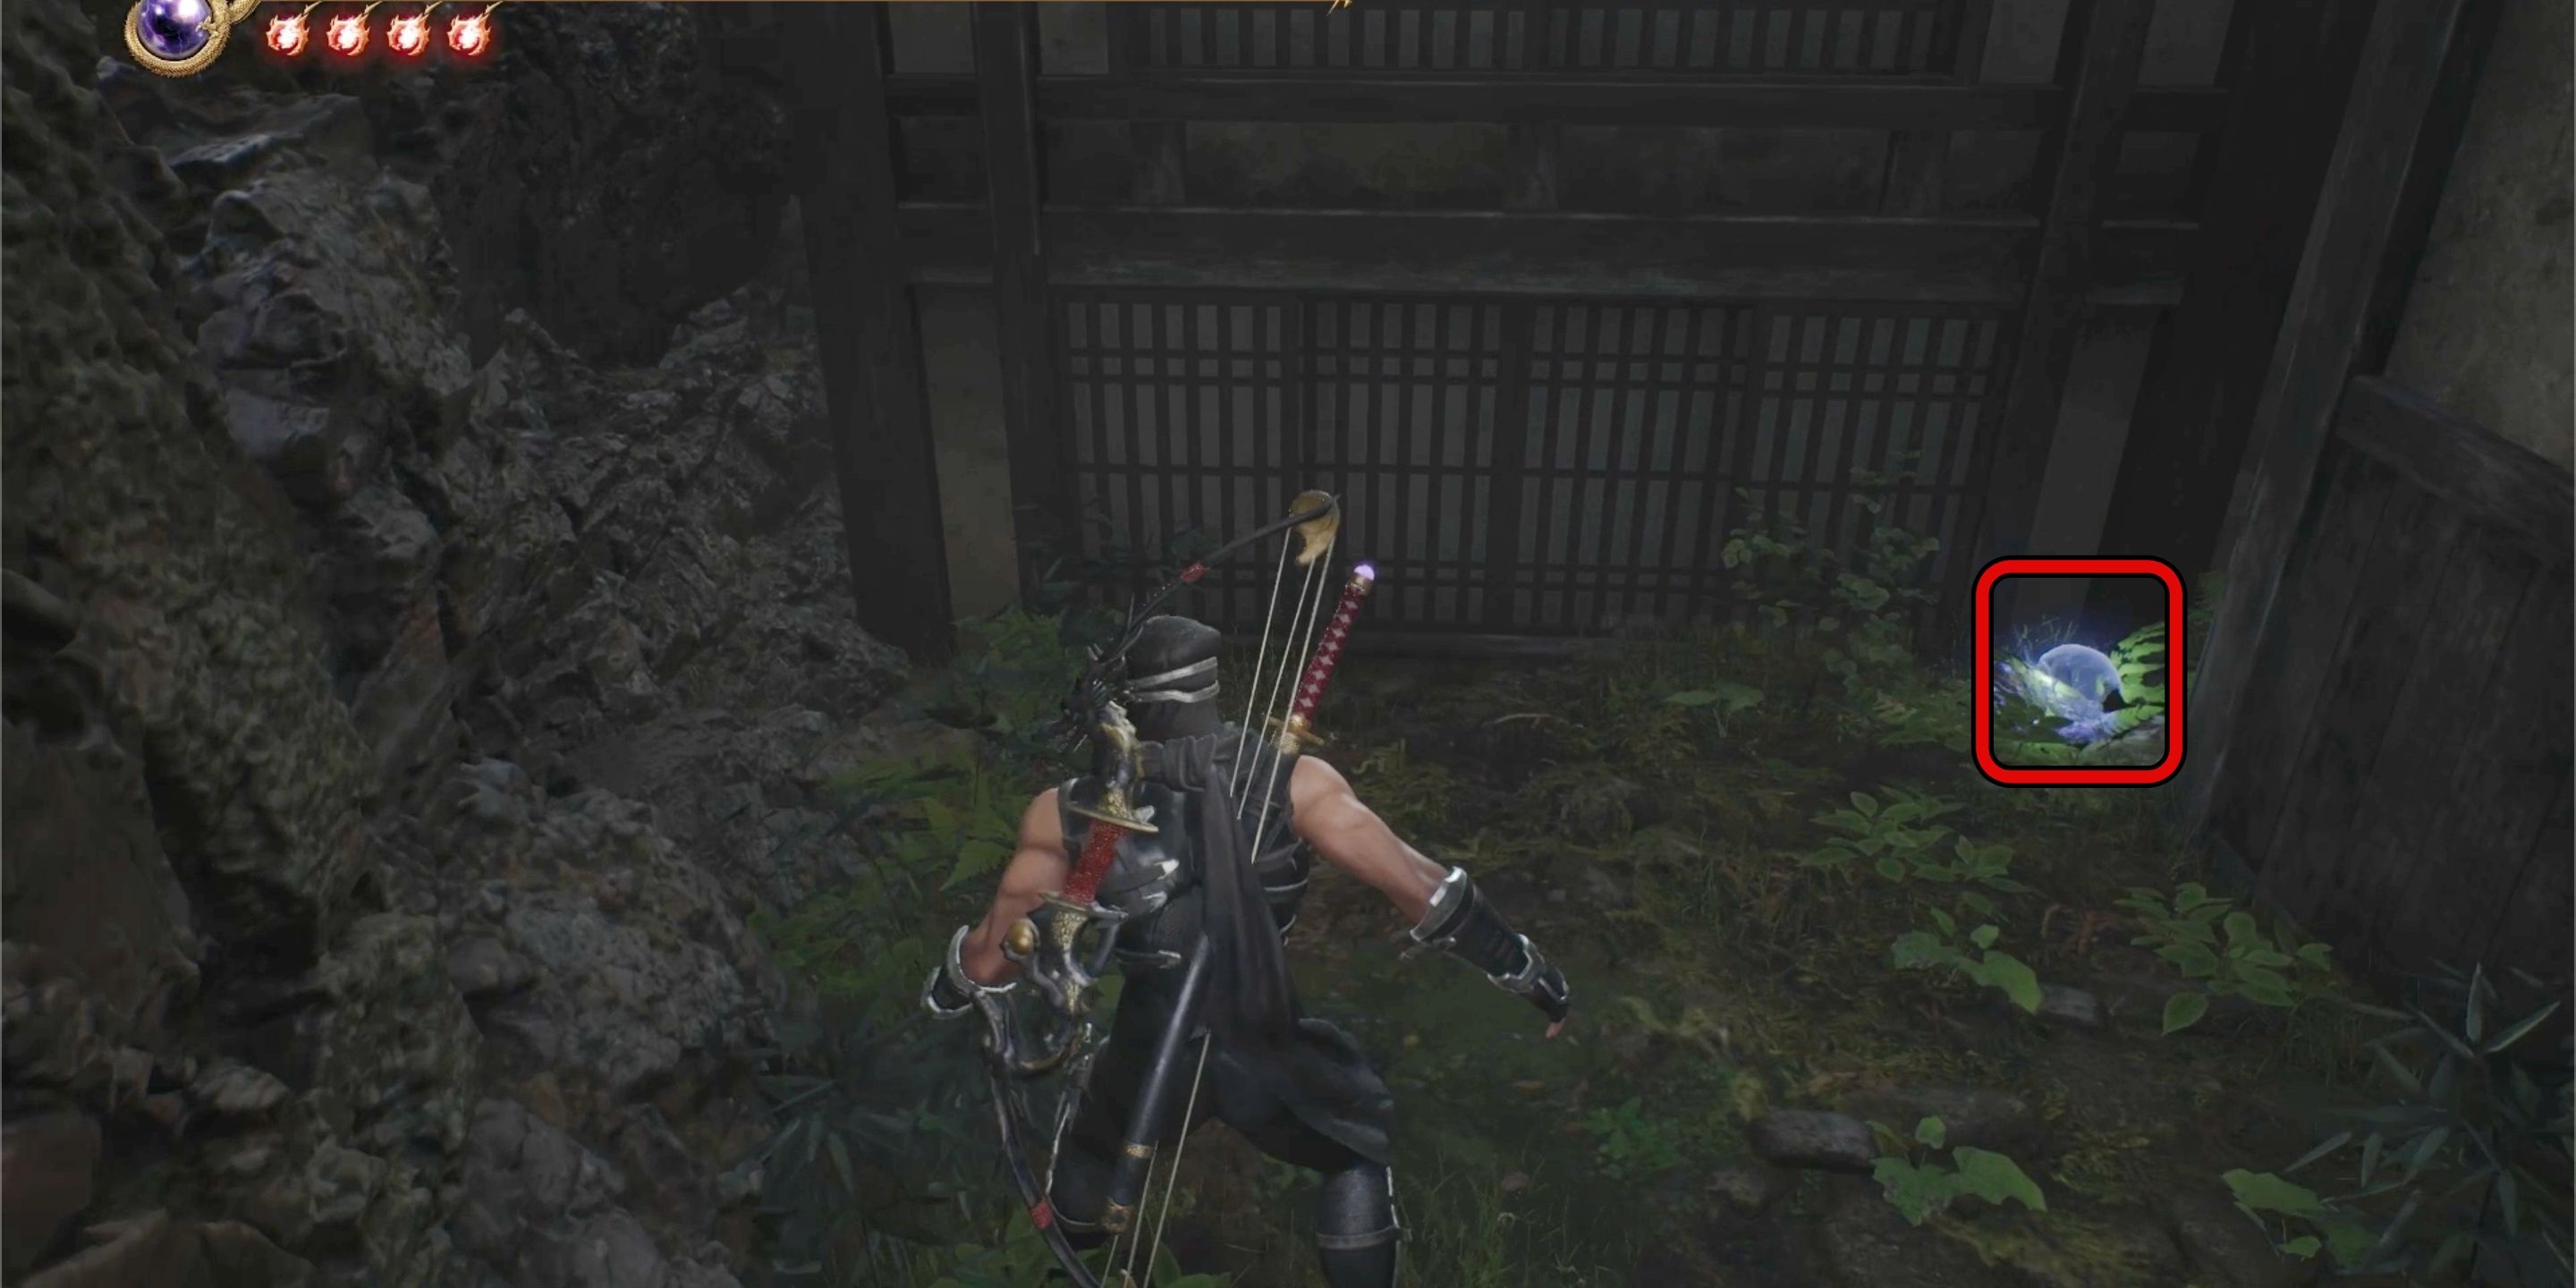
Following your passage under the blooming cherry blossom trees and crossing the bridge, take a sharp right and descend a lengthy stairway. Be prepared for an ambush by an archer hiding above these stairs as you go down. On your right, notice a narrow rooftop edge that will guide you to the overpass where the attacker resides. A tree awaits at the end of this rooftop path, allowing you to scale it and perform a backflip to reach the main path. The second skull is concealed in the same location as the archer, nestled against a doorway at the end of the pathway.
All Crystal Skull Locations in Chapter 2 – Ninja Gaiden 2 Black
There are two Crystal Skulls found in Ninja Gaiden 2 Black Chapter 2 – Castle of the Dragon.
Crystal Skull 3:
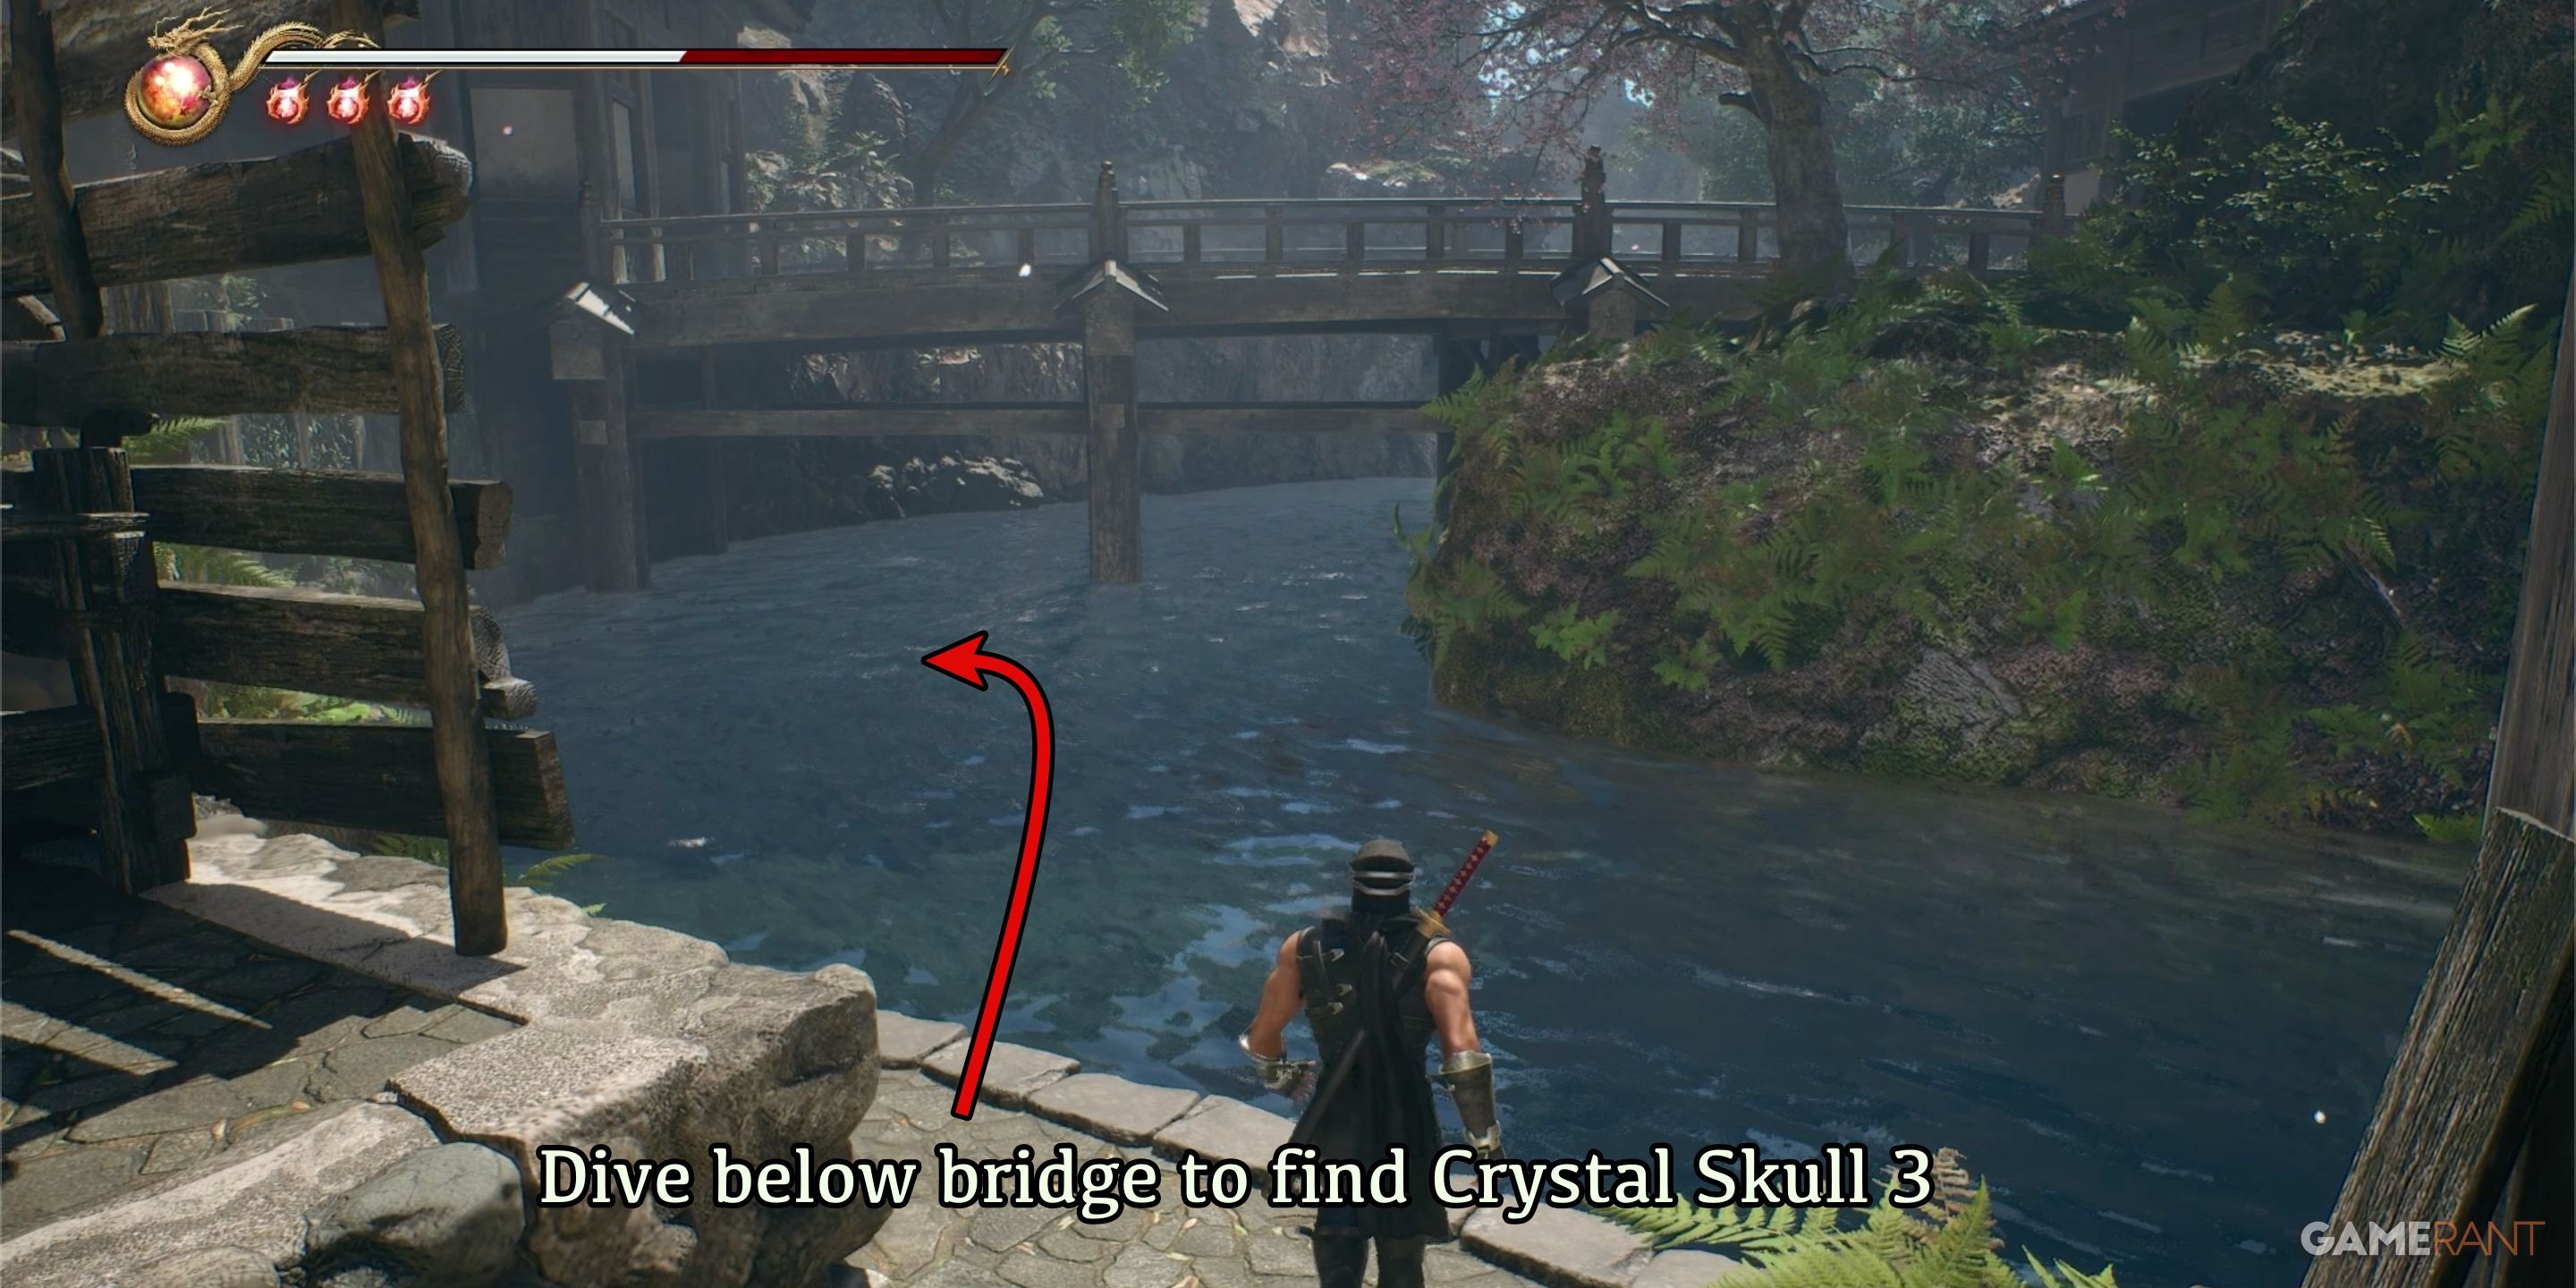
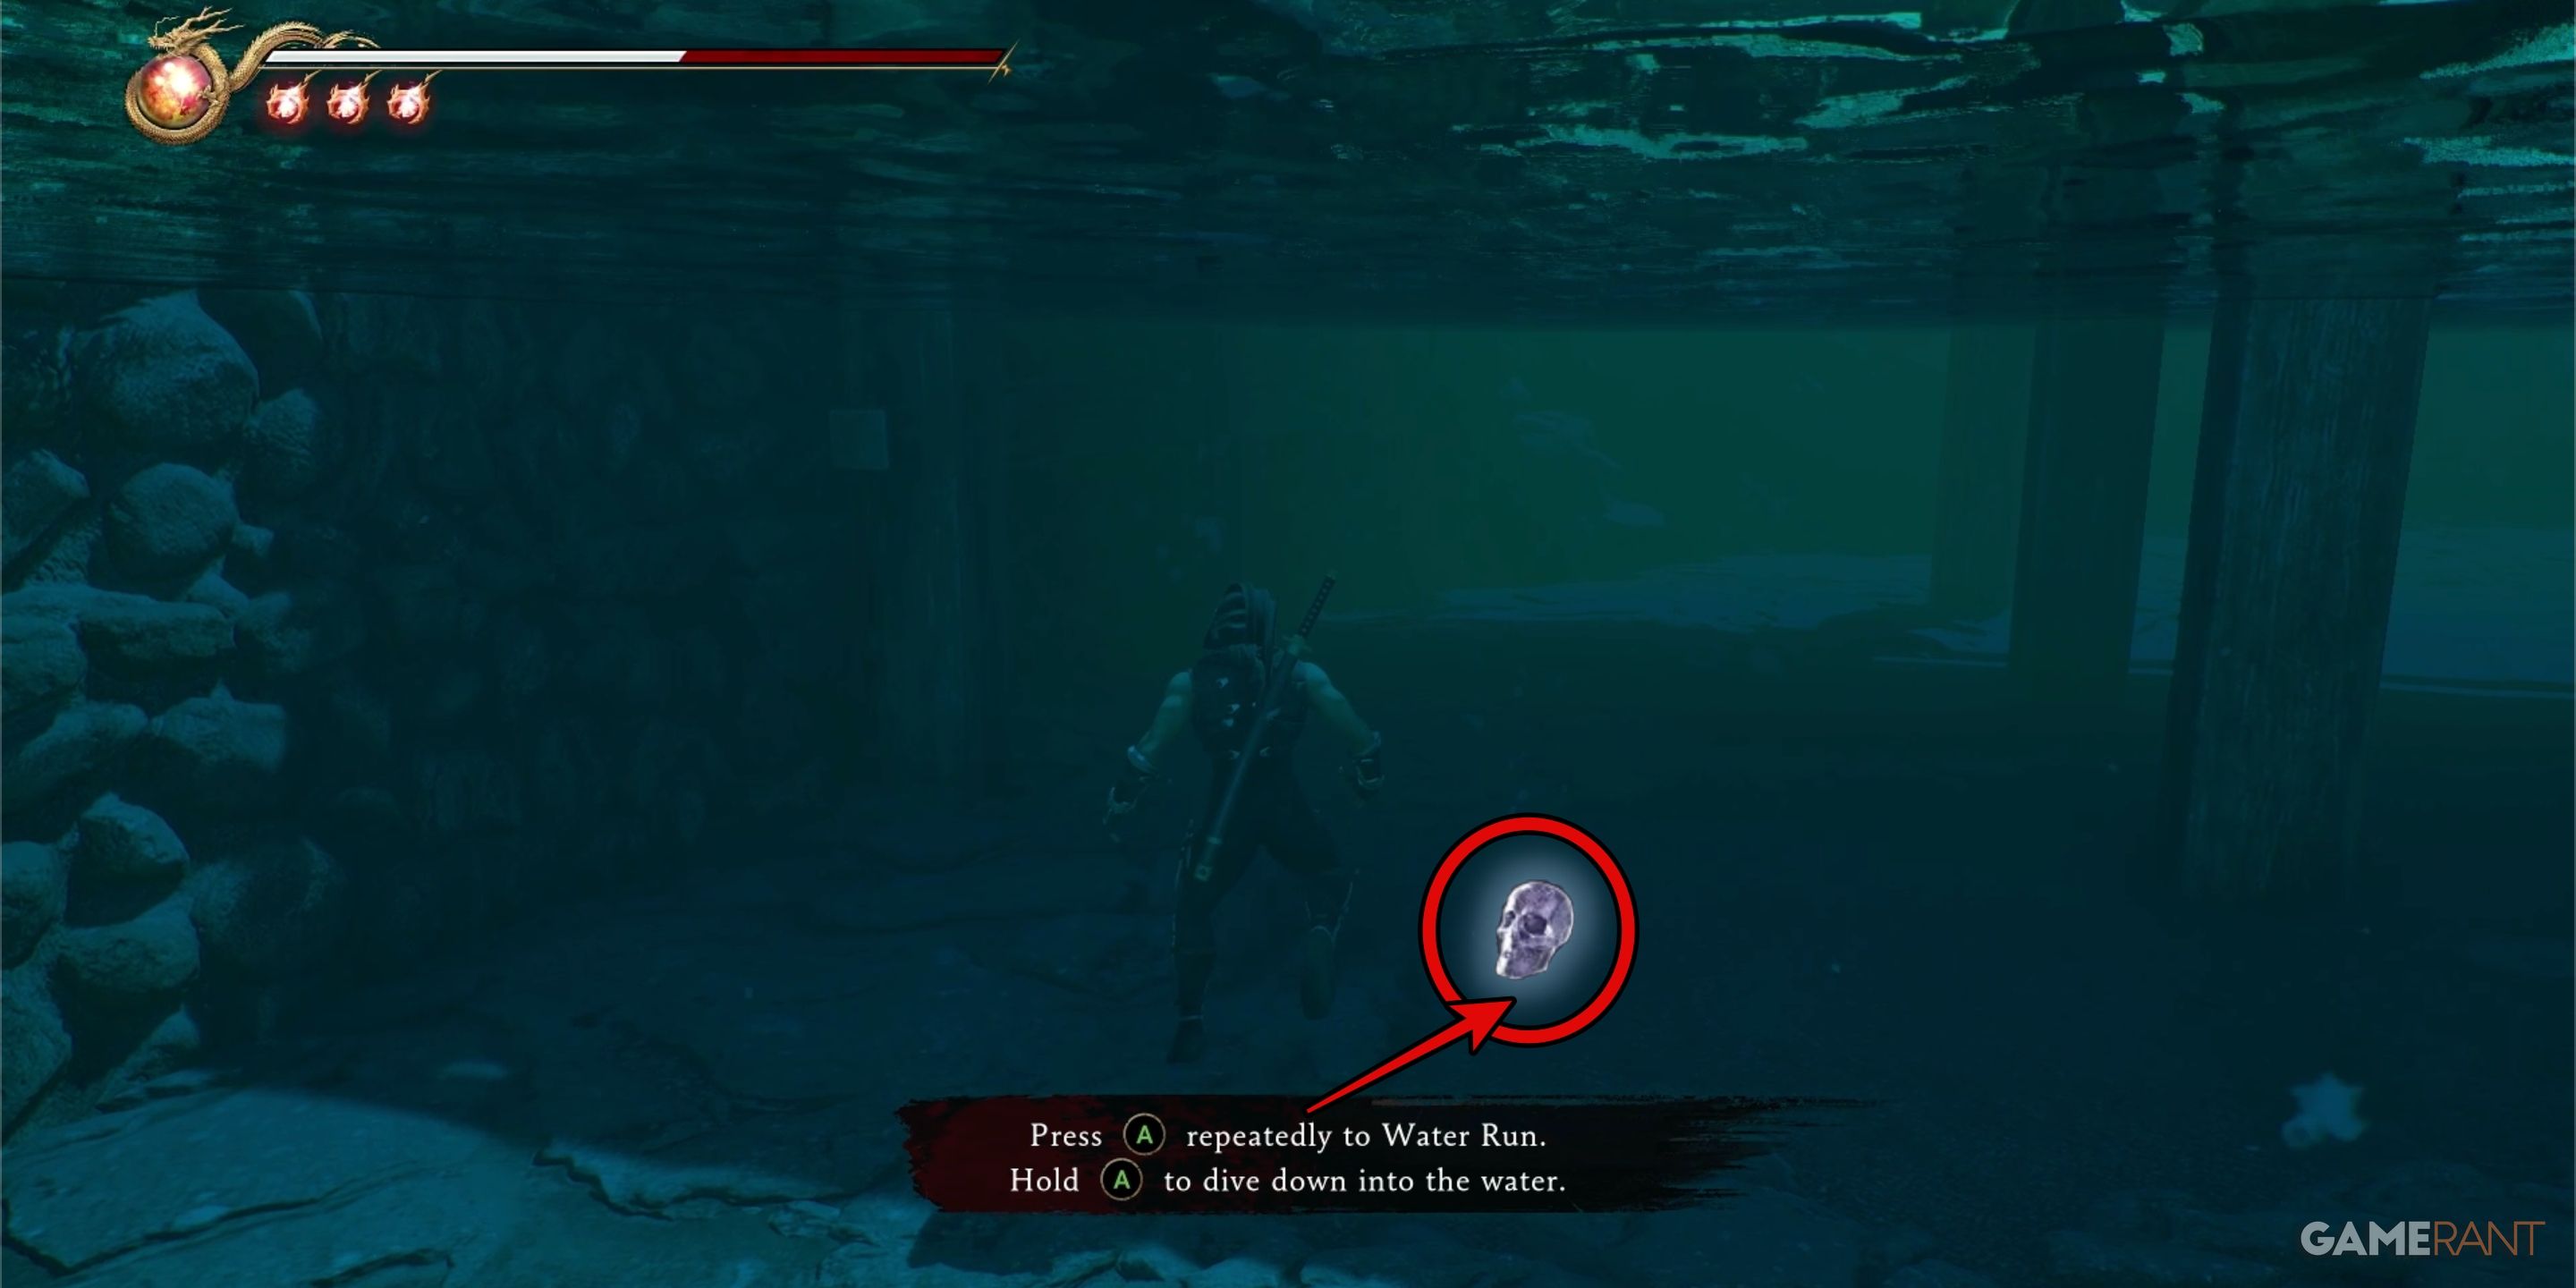
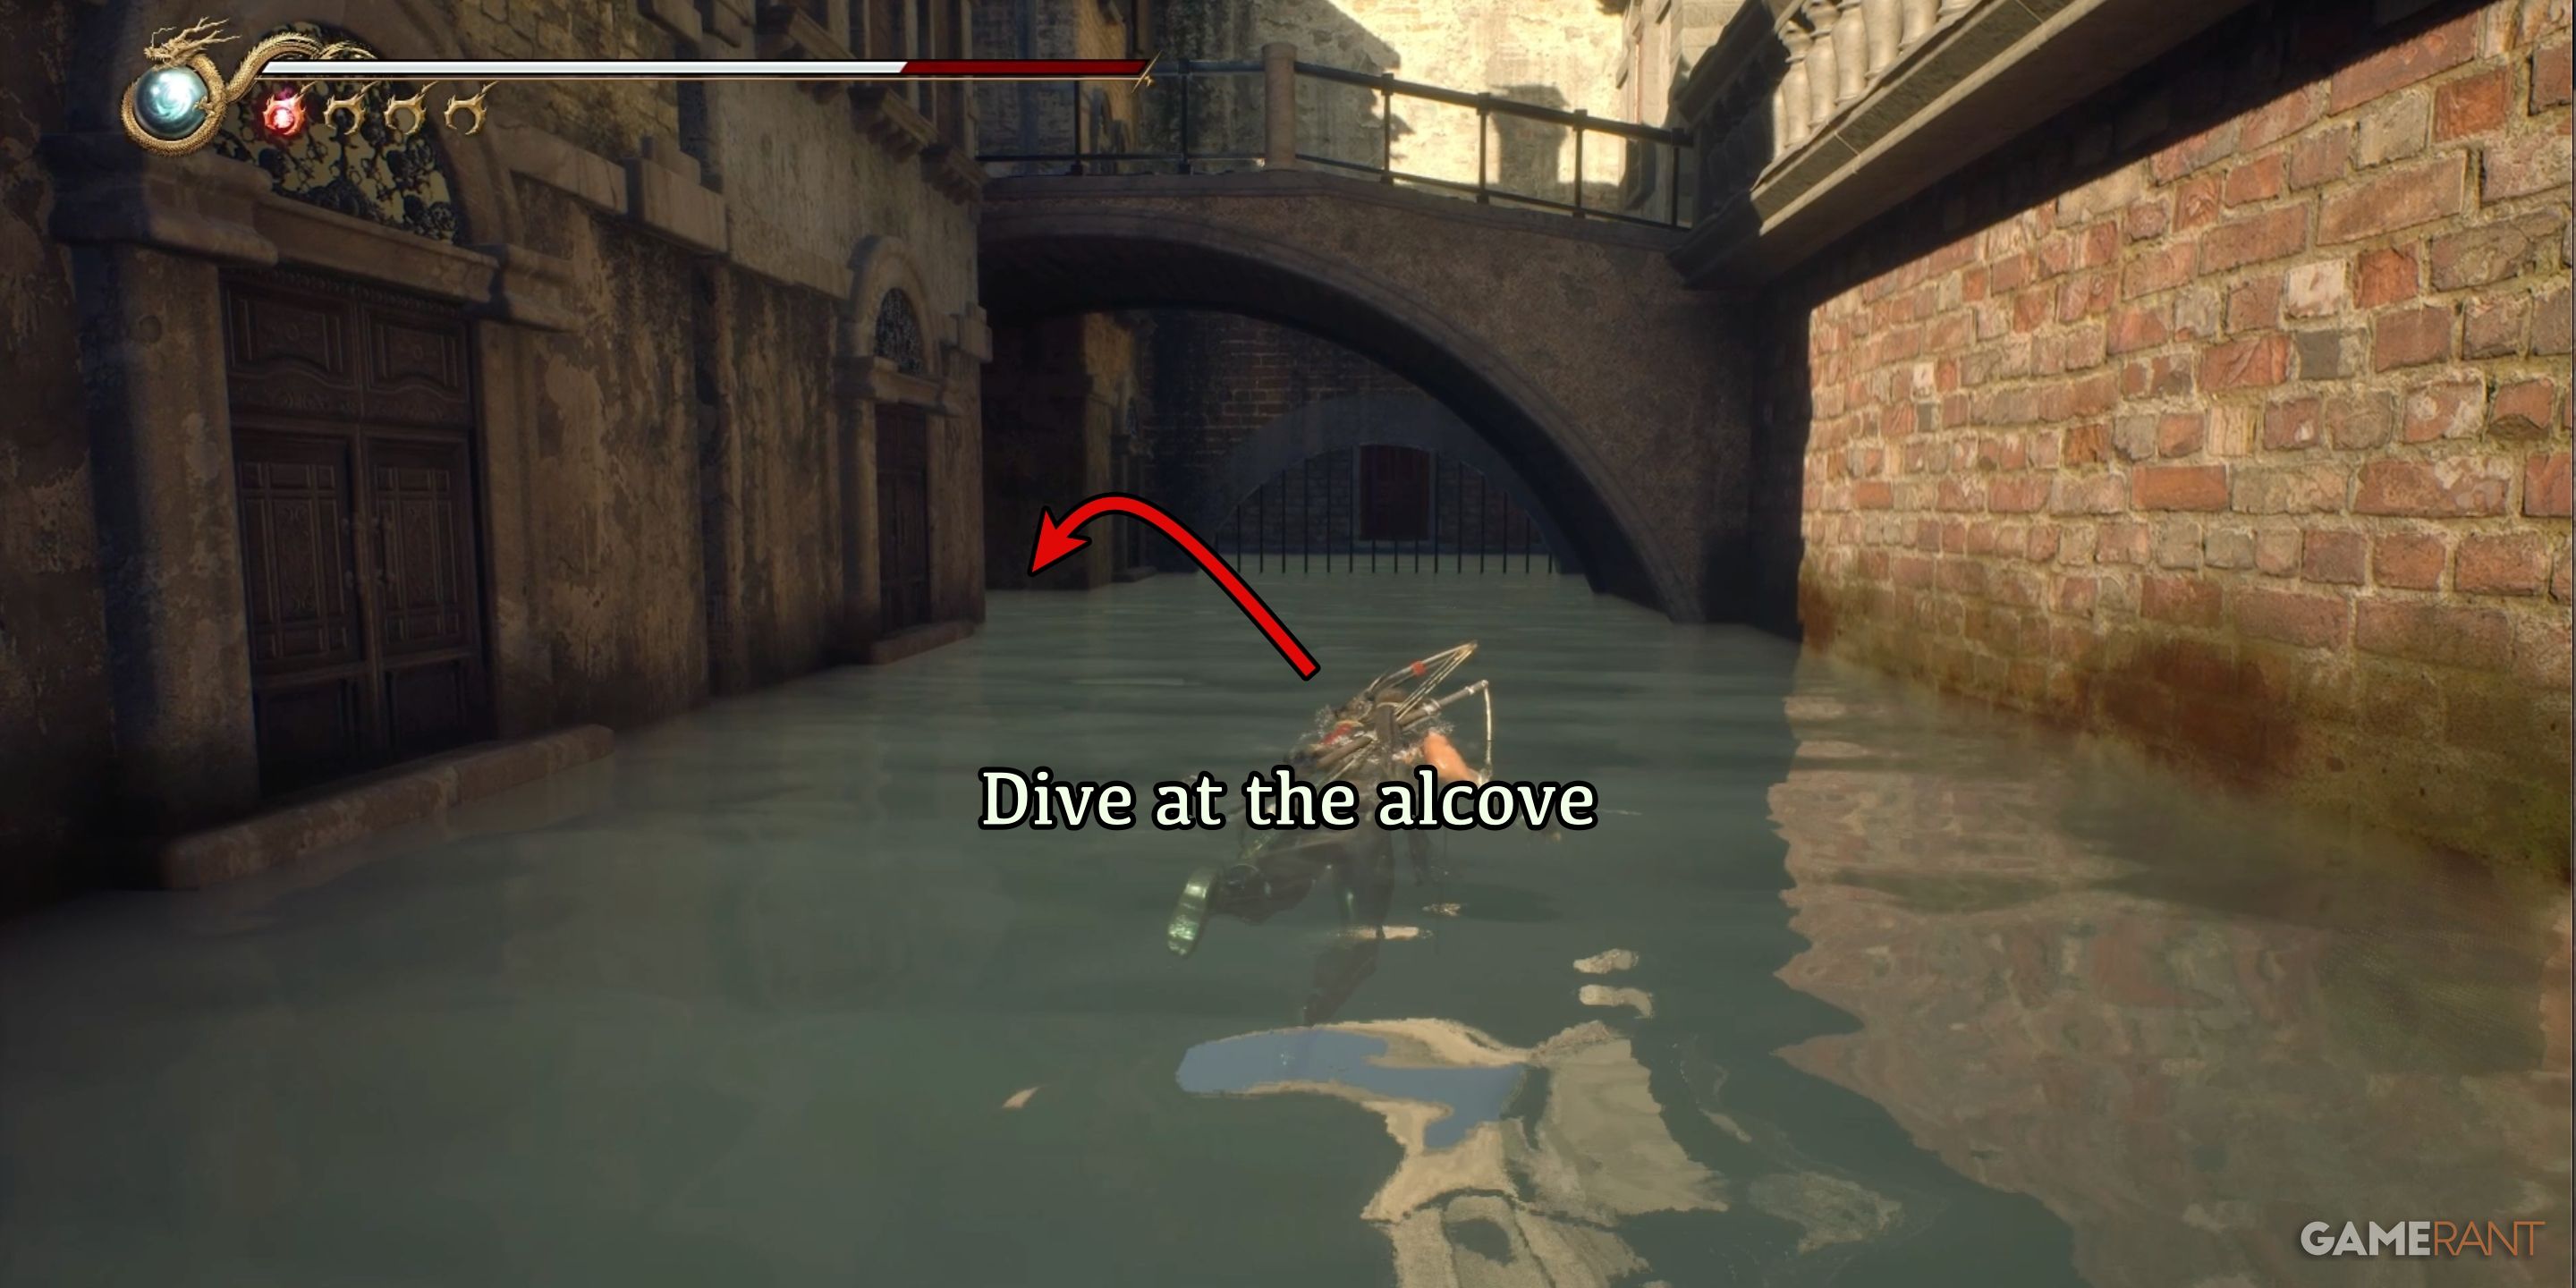
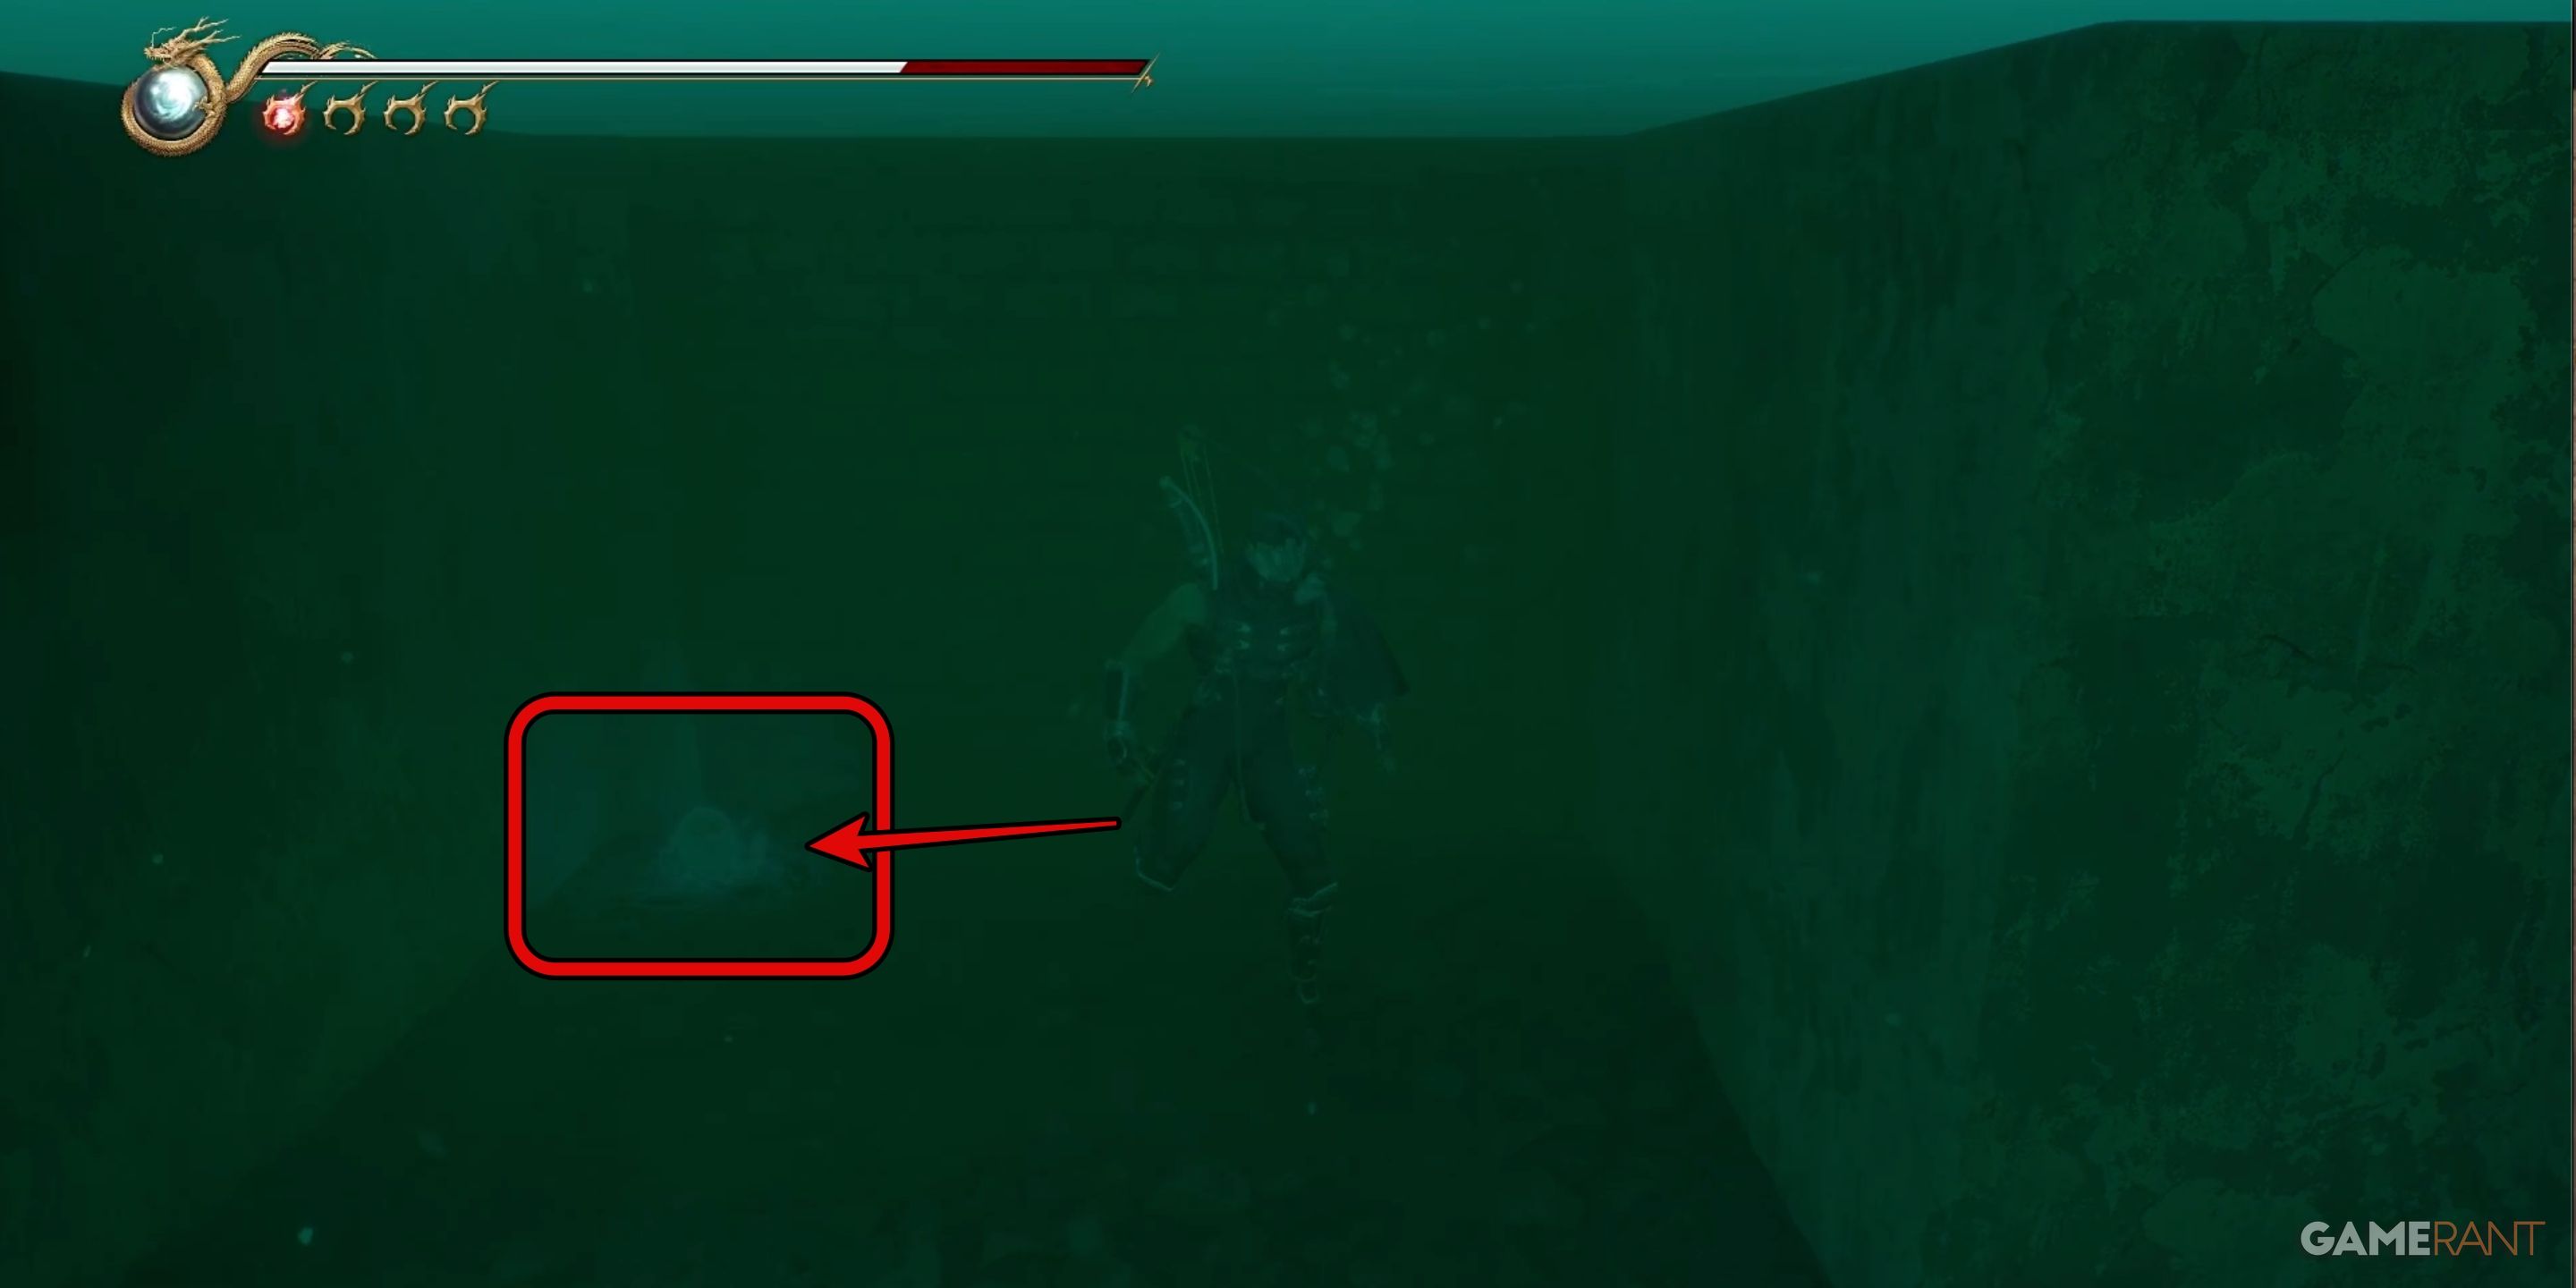
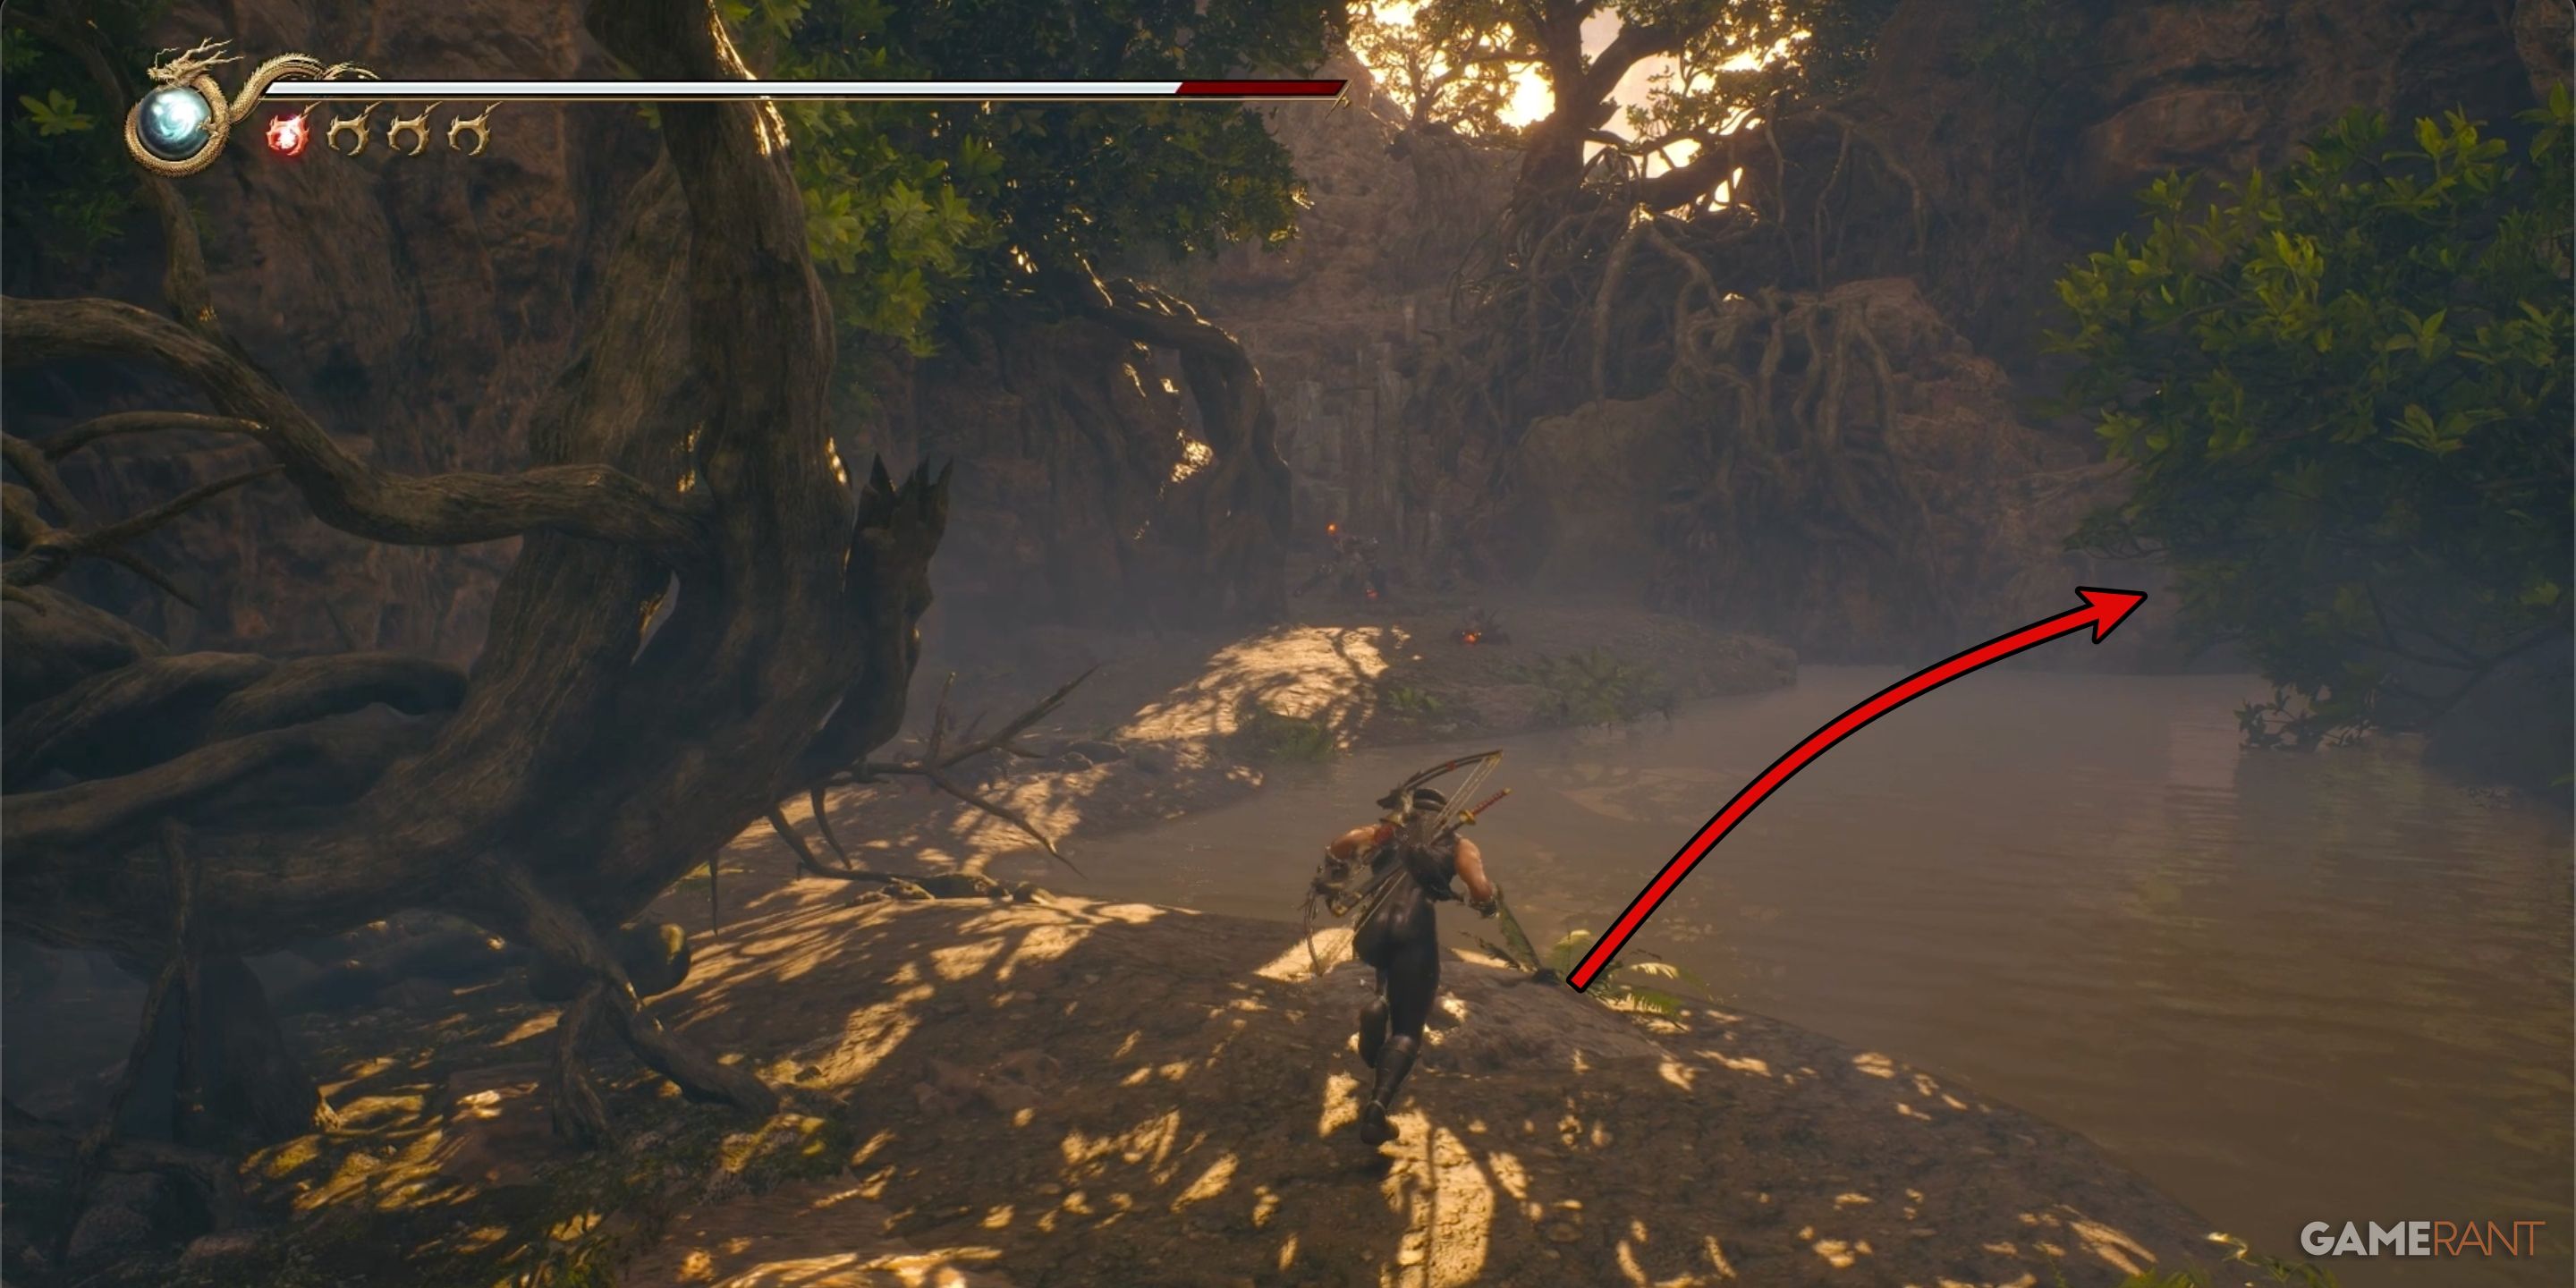
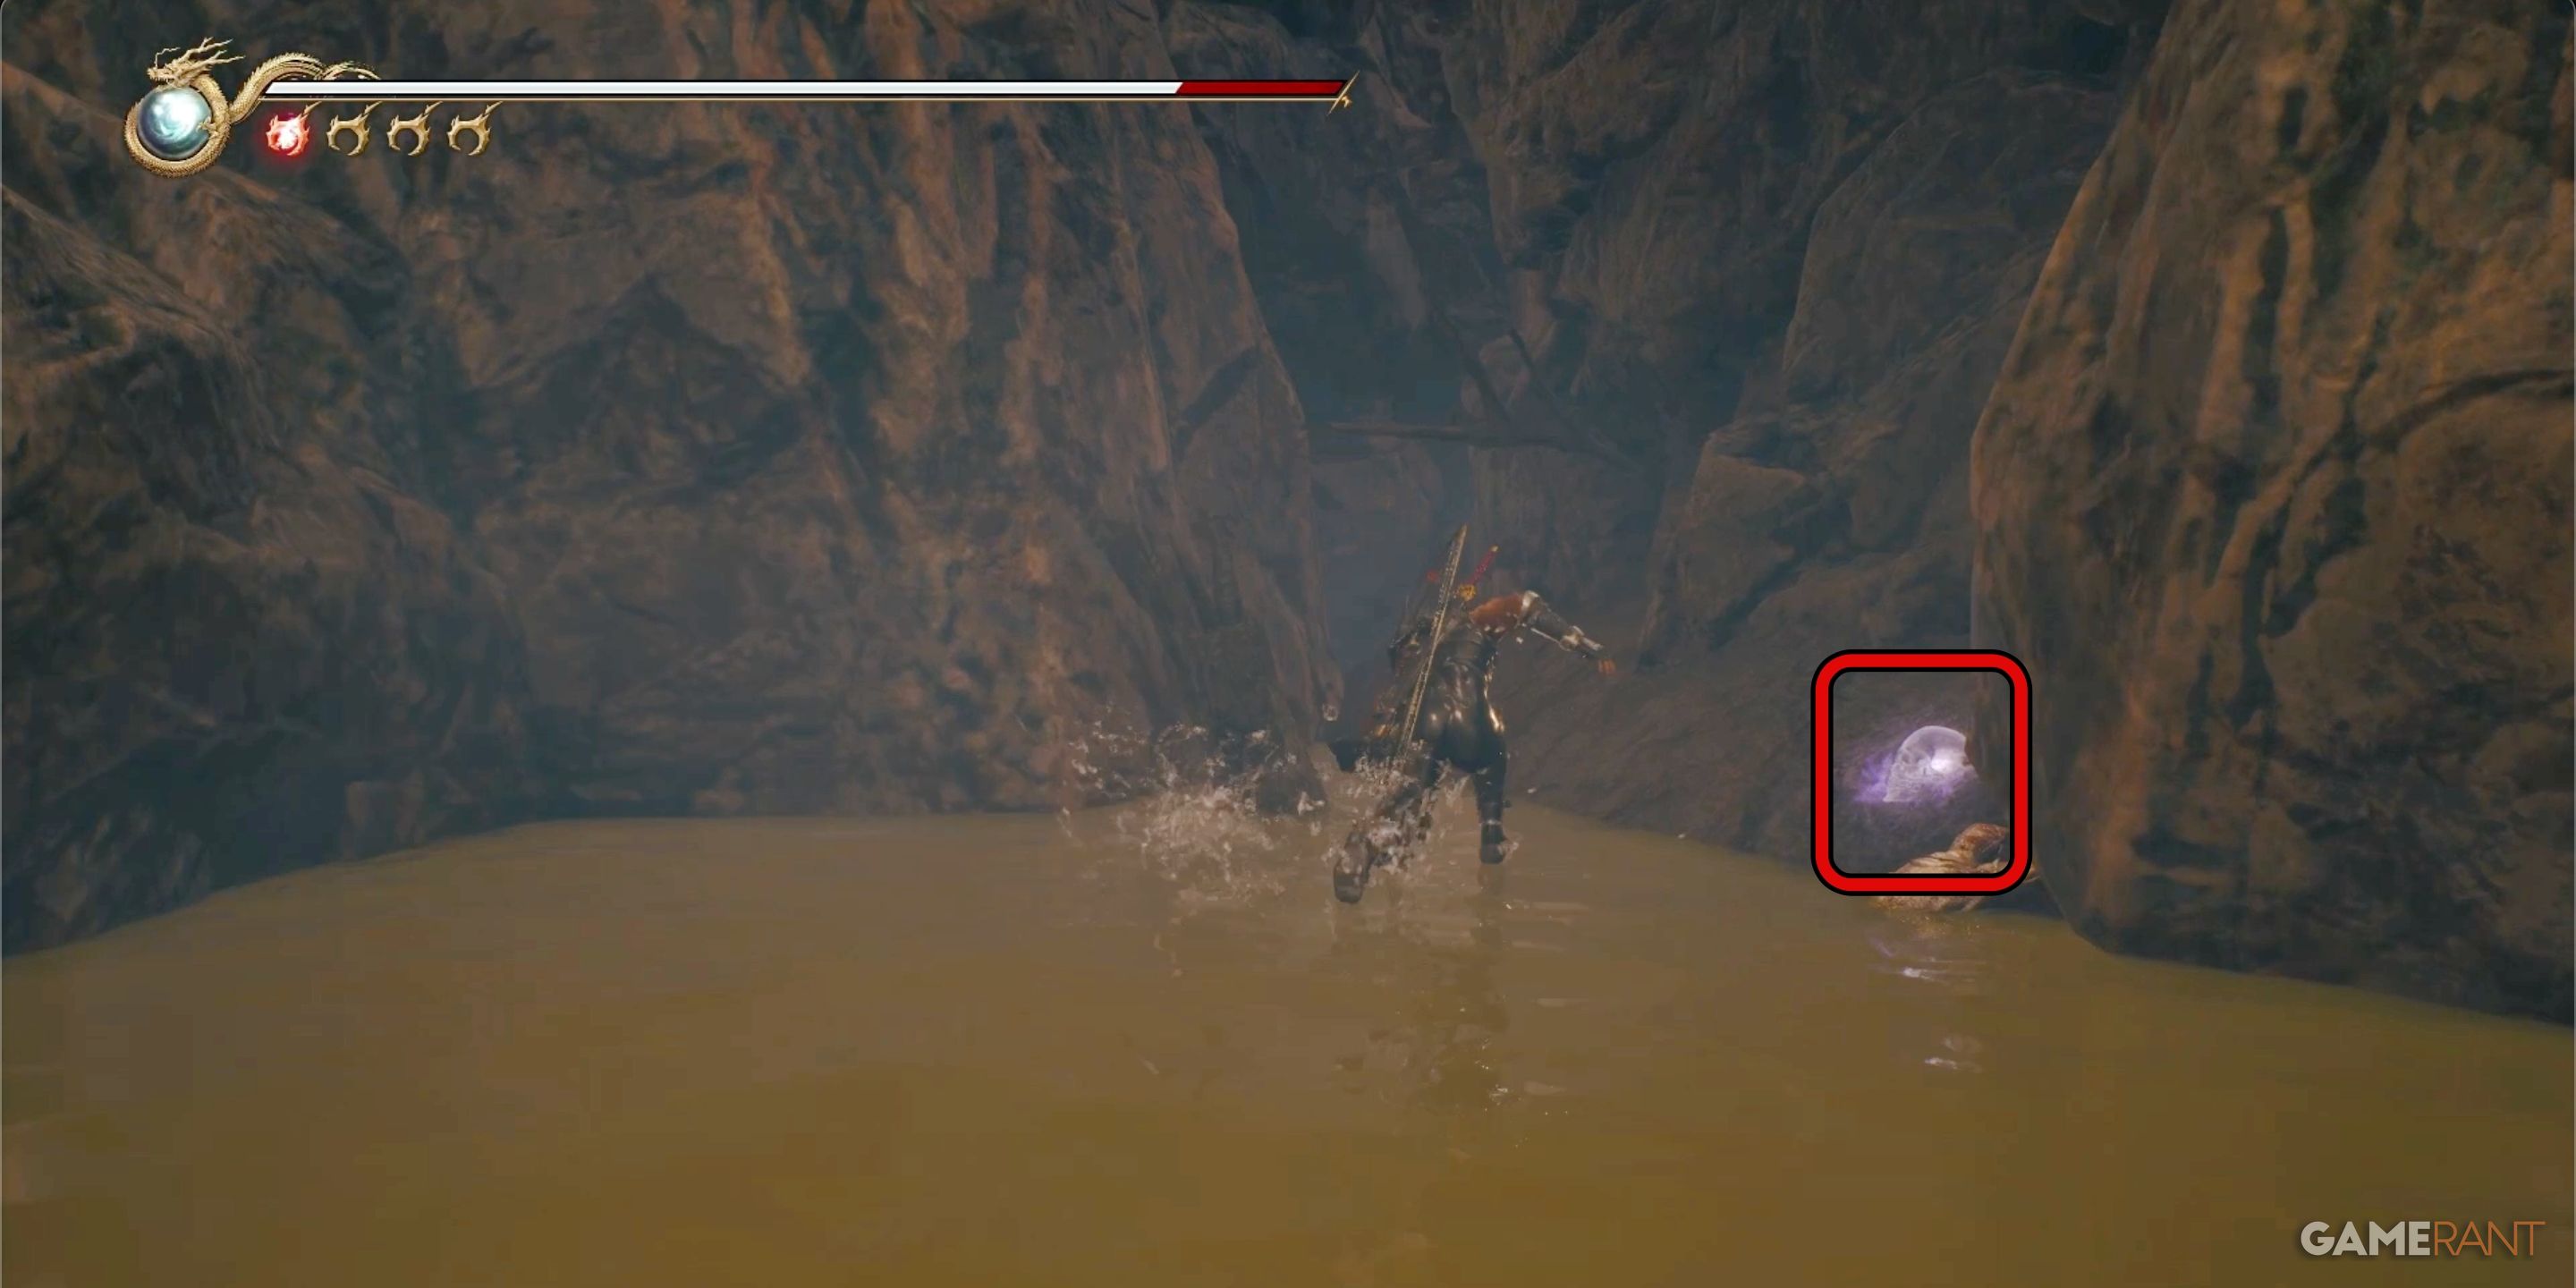
Shortly into the second chapter, you will encounter an area with rivers or canals that you need to navigate through. From your starting position, you can spot a bridge over the water. If you swim underneath this bridge, you will discover the Crystal Skull 3 at the bottom of the canal.
Crystal Skull 4:
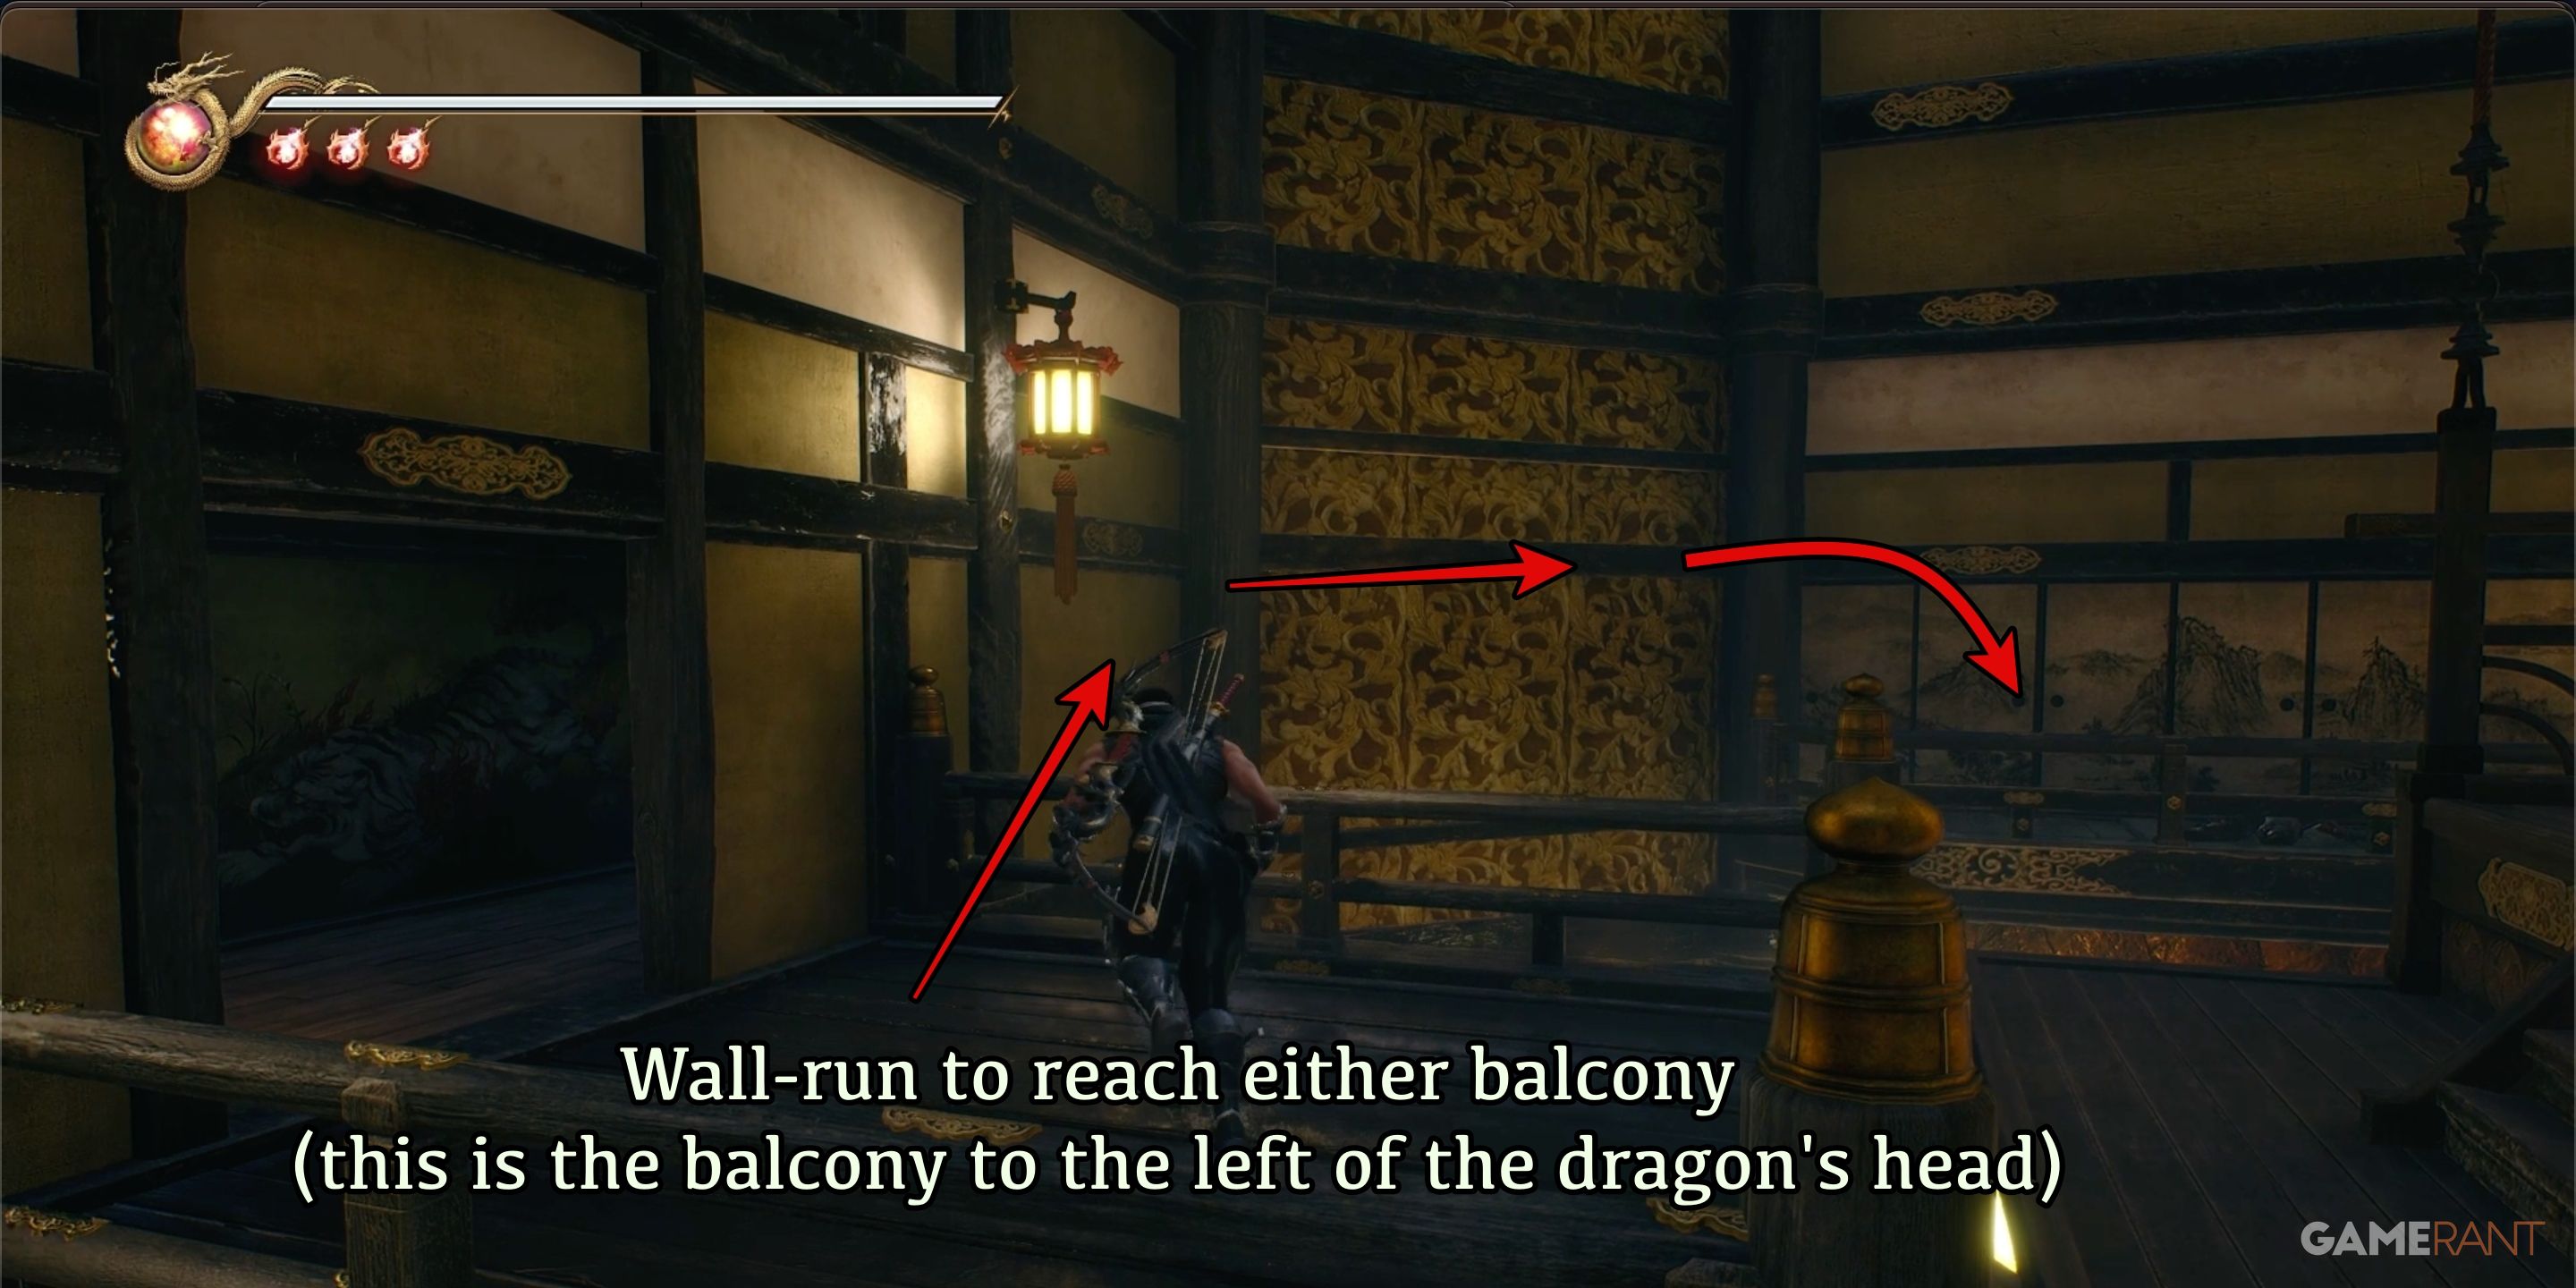

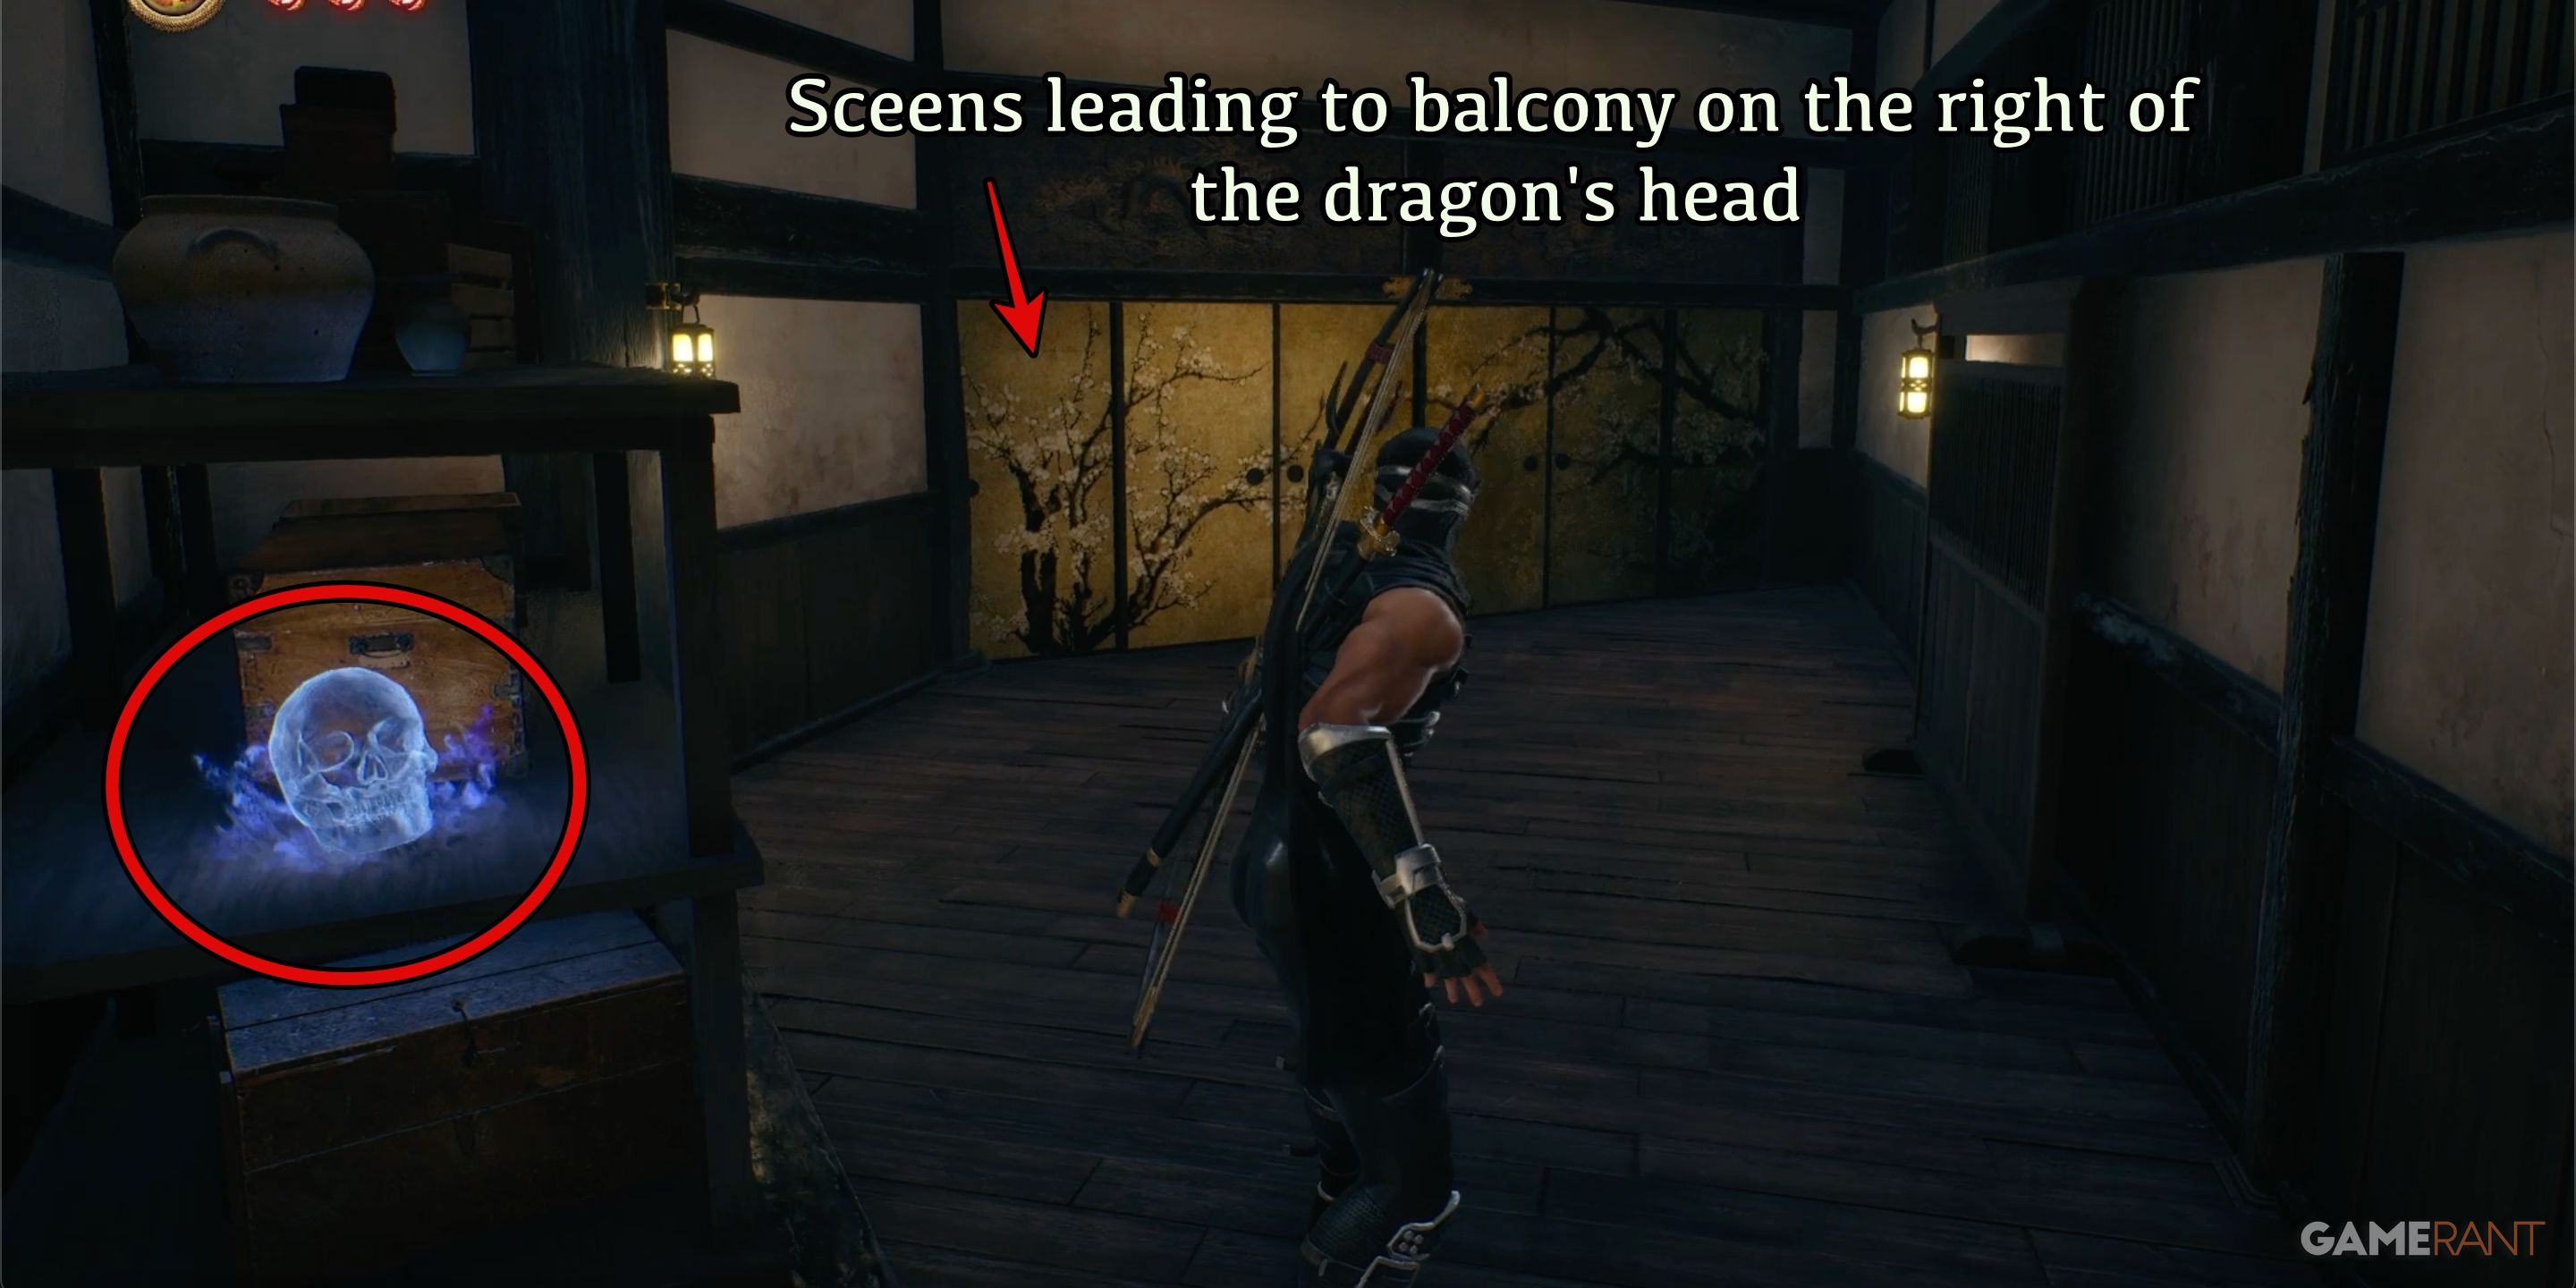
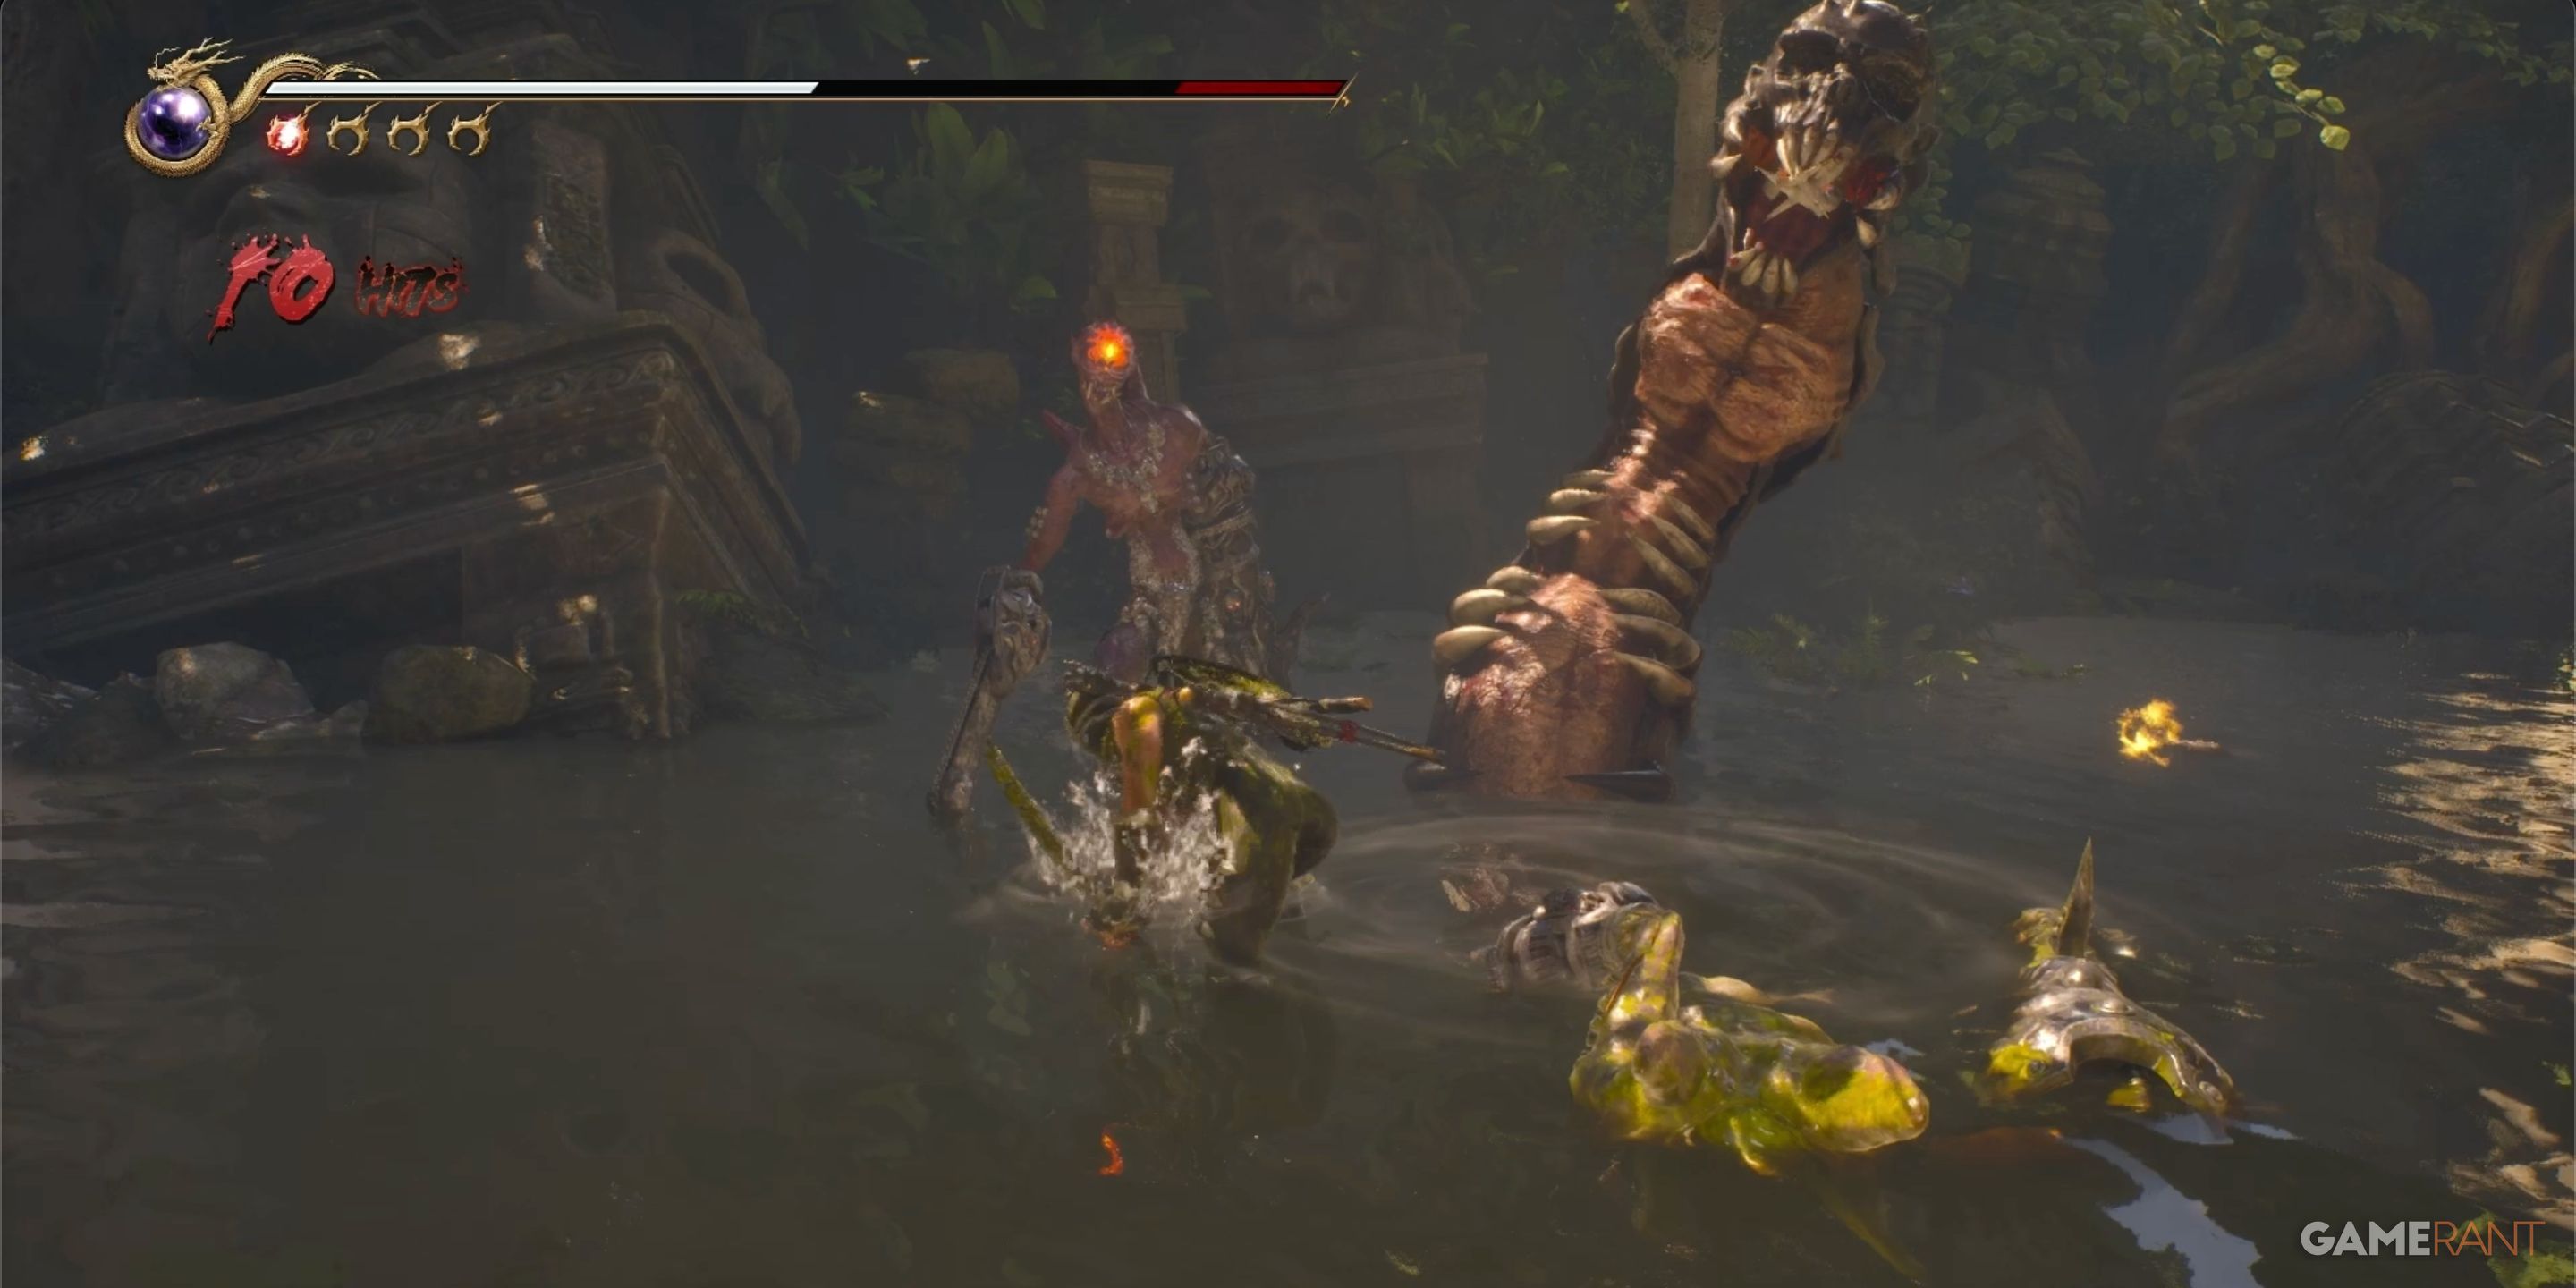
In the game Ninja Gaiden 2 Black, the fourth Crystal Skull is found within the same room as the giant dragon statue’s head, following your encounter with the boss, Gyuki. Inside this chamber, there are two balconies, one on either side of the dragon’s head. To obtain the Crystal Skull 4, utilize wall-running to reach the balcony on the right side (when facing the dragon directly). Upon reaching the balcony, break through the screens with your weapon, and you will find the skull on a shelf within the concealed chamber.
From a technical standpoint, you could leap onto the balcony on the left too, since the room concealed by the screens links to both balconies. Be mindful of the trap door located midway along the connecting path; it leads straight down to a safe spot on the lower level.
All Crystal Skull Locations in Chapter 3 – Ninja Gaiden 2 Black
There are two Crystal Skulls found in Ninja Gaiden 2 Black Chapter 3: Thunderclap of Catastrophe.
Crystal Skull 5:
As a gamer, I found myself in possession of the Vigoorian Flail, venturing into the garage area. Ahead, there loomed a towering staircase, stretching upwards towards a higher platform. The fifth Crystal Skull in NG2B was perched atop those very stairs, making it my objective to climb, defeat any adversaries blocking my path, and finally grab that elusive skull.
Crystal Skull 6:
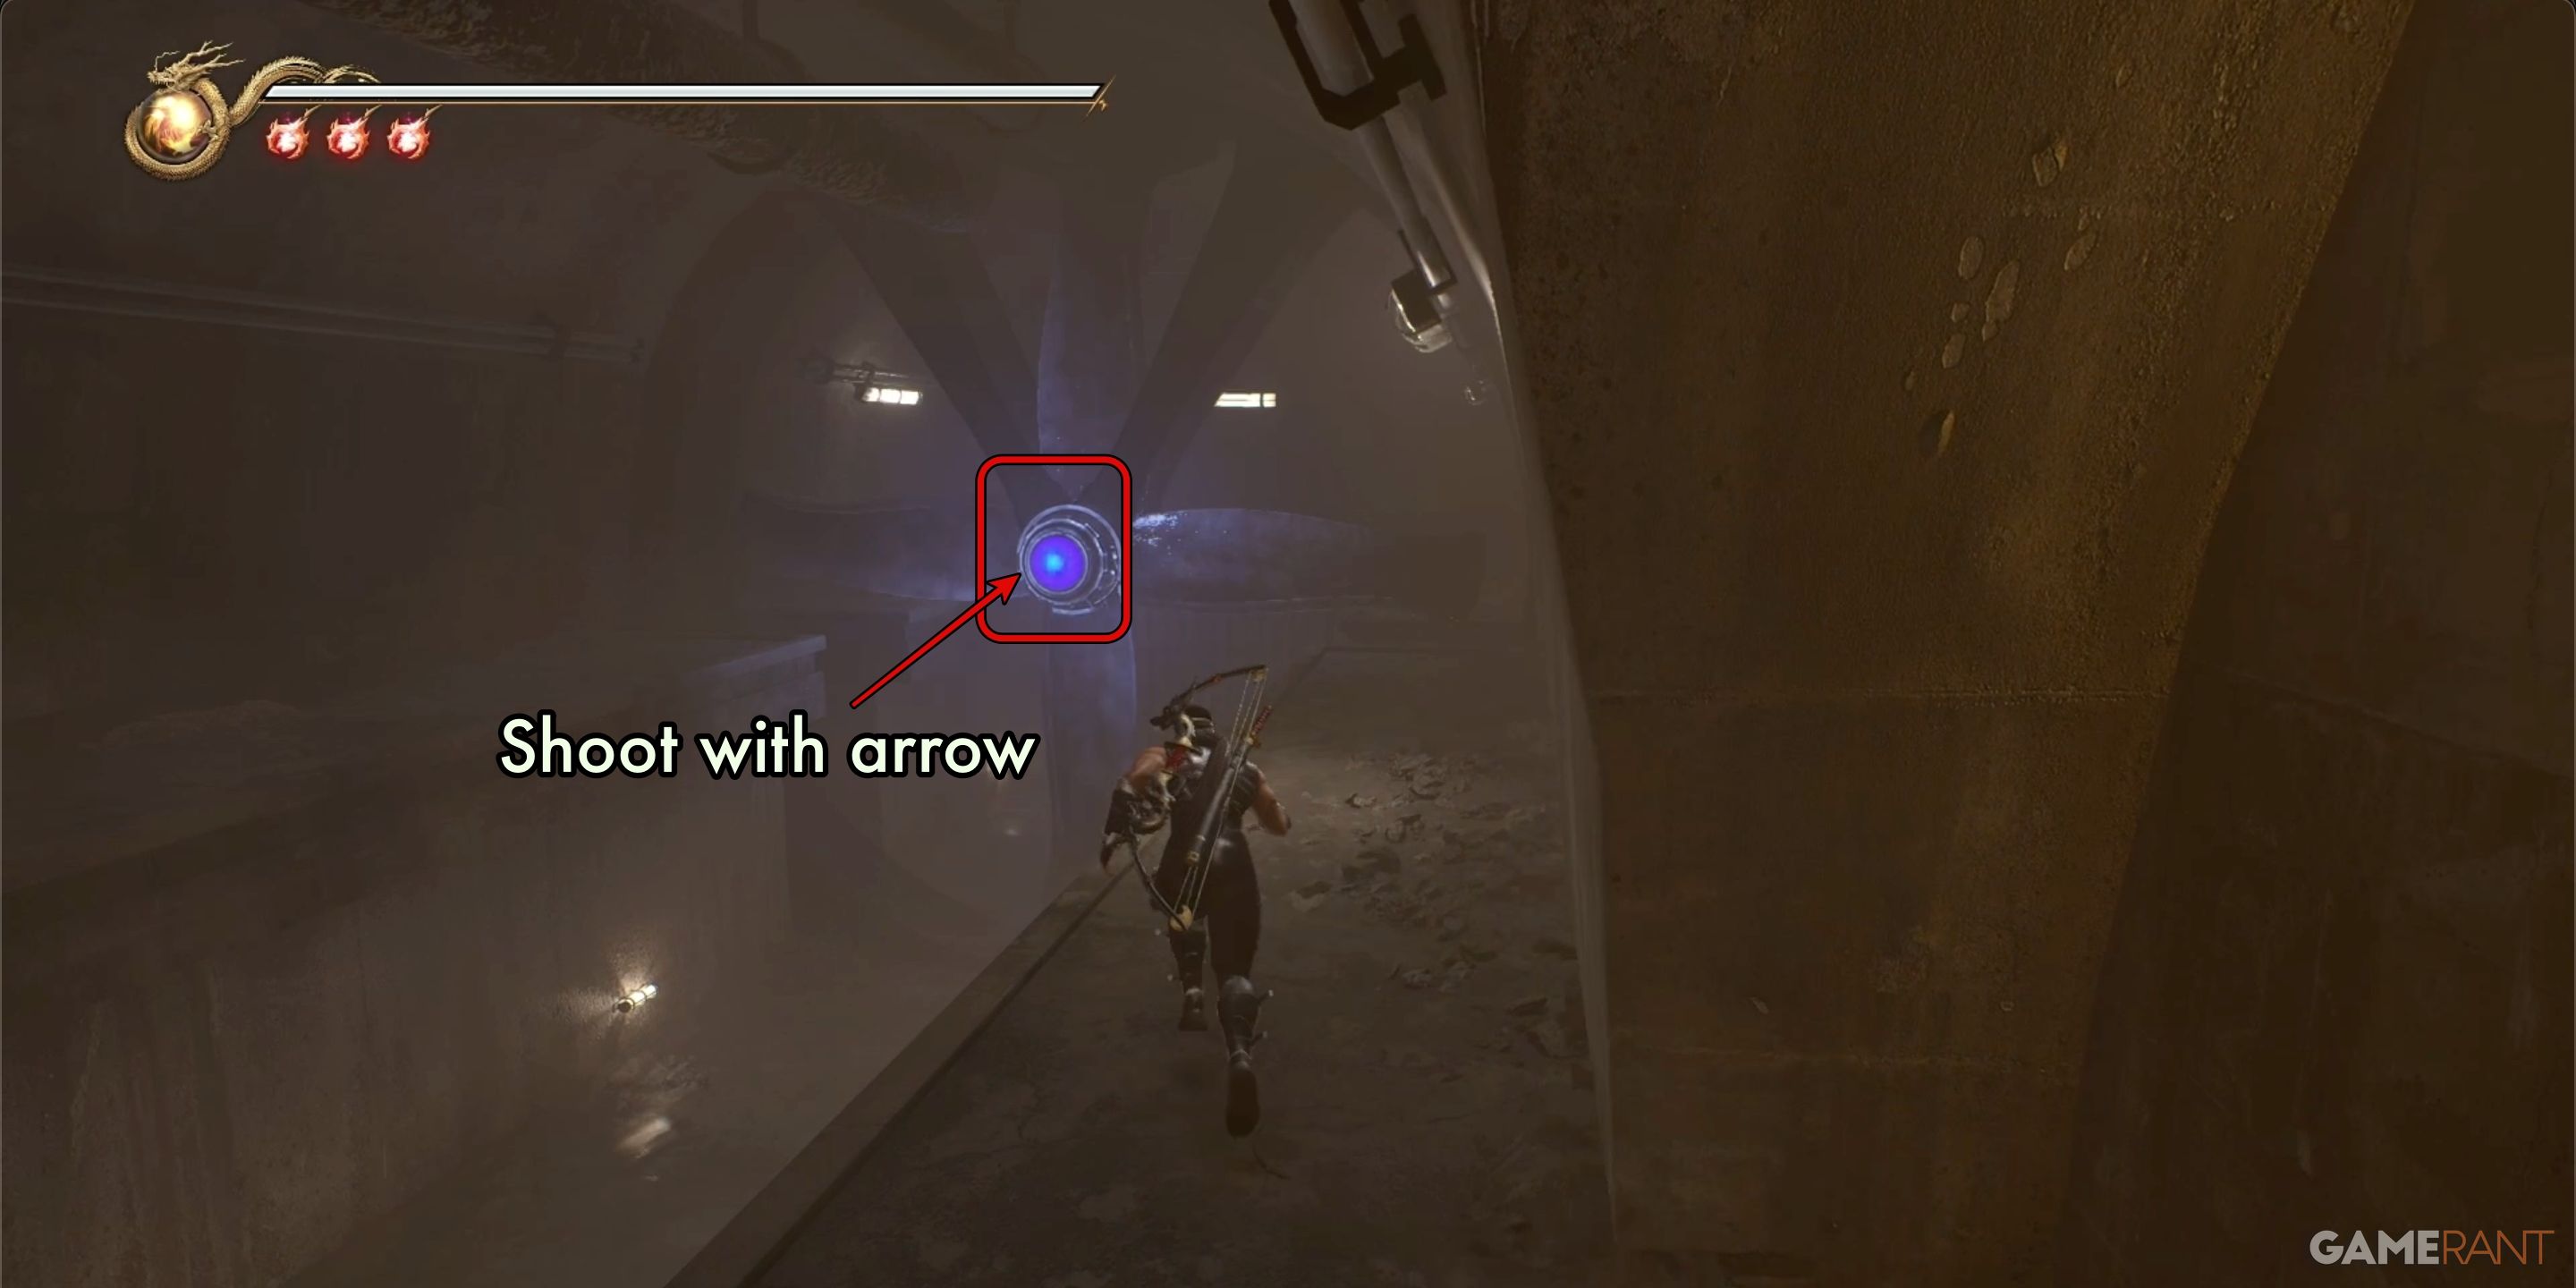
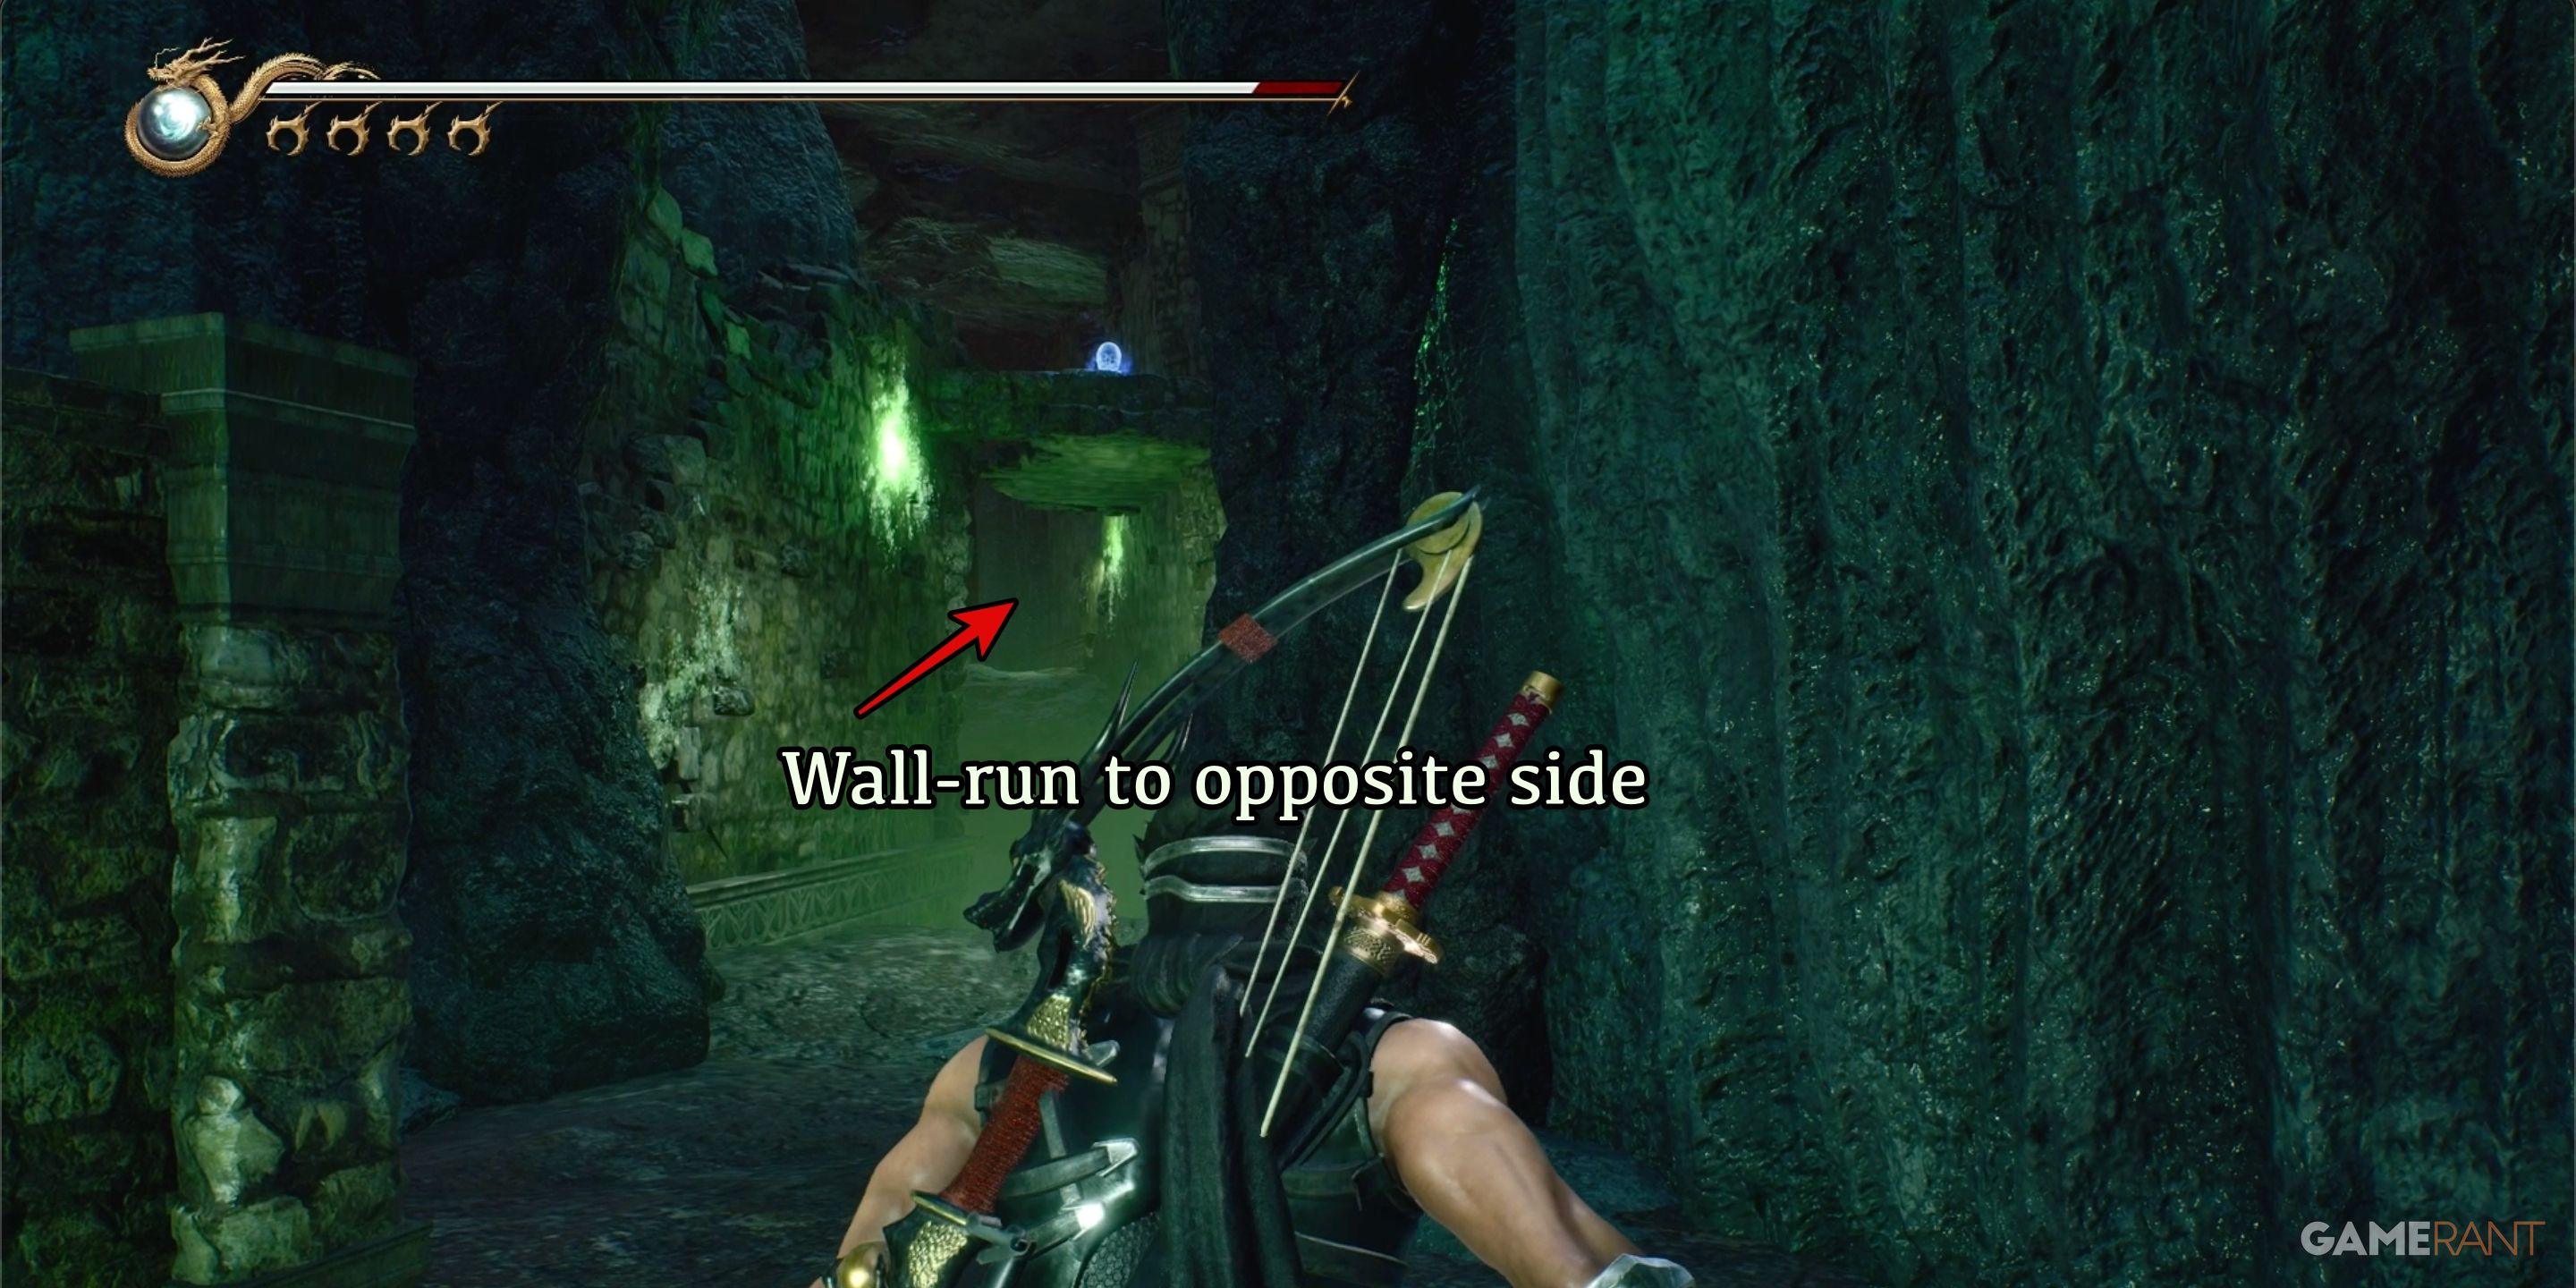
In Chapter 3, the second Crystal Skull is hidden within a tunnel that has massive fans at each end. You’ll recognize the location when you master the skill of transitioning from wall-running to wall-running. Just beyond the tunnel’s entrance, you’ll find a Muramasa Shop.
As soon as you step into the room, veer right and aim for the blue light located in the fan’s center. Once the fan ceases spinning, proceed past it, and at the end of the walkway opposite to where you started, you will find a skull. To grab Crystal Skull 6, use the metal plate on that walkway to perform a wall-run across to the other side.
All Crystal Skull Locations in Chapter 4 – Ninja Gaiden 2 Black
There are three Crystal Skulls found during Ninja Gaiden 2 Black Chapter 4: A Captive Goddess.
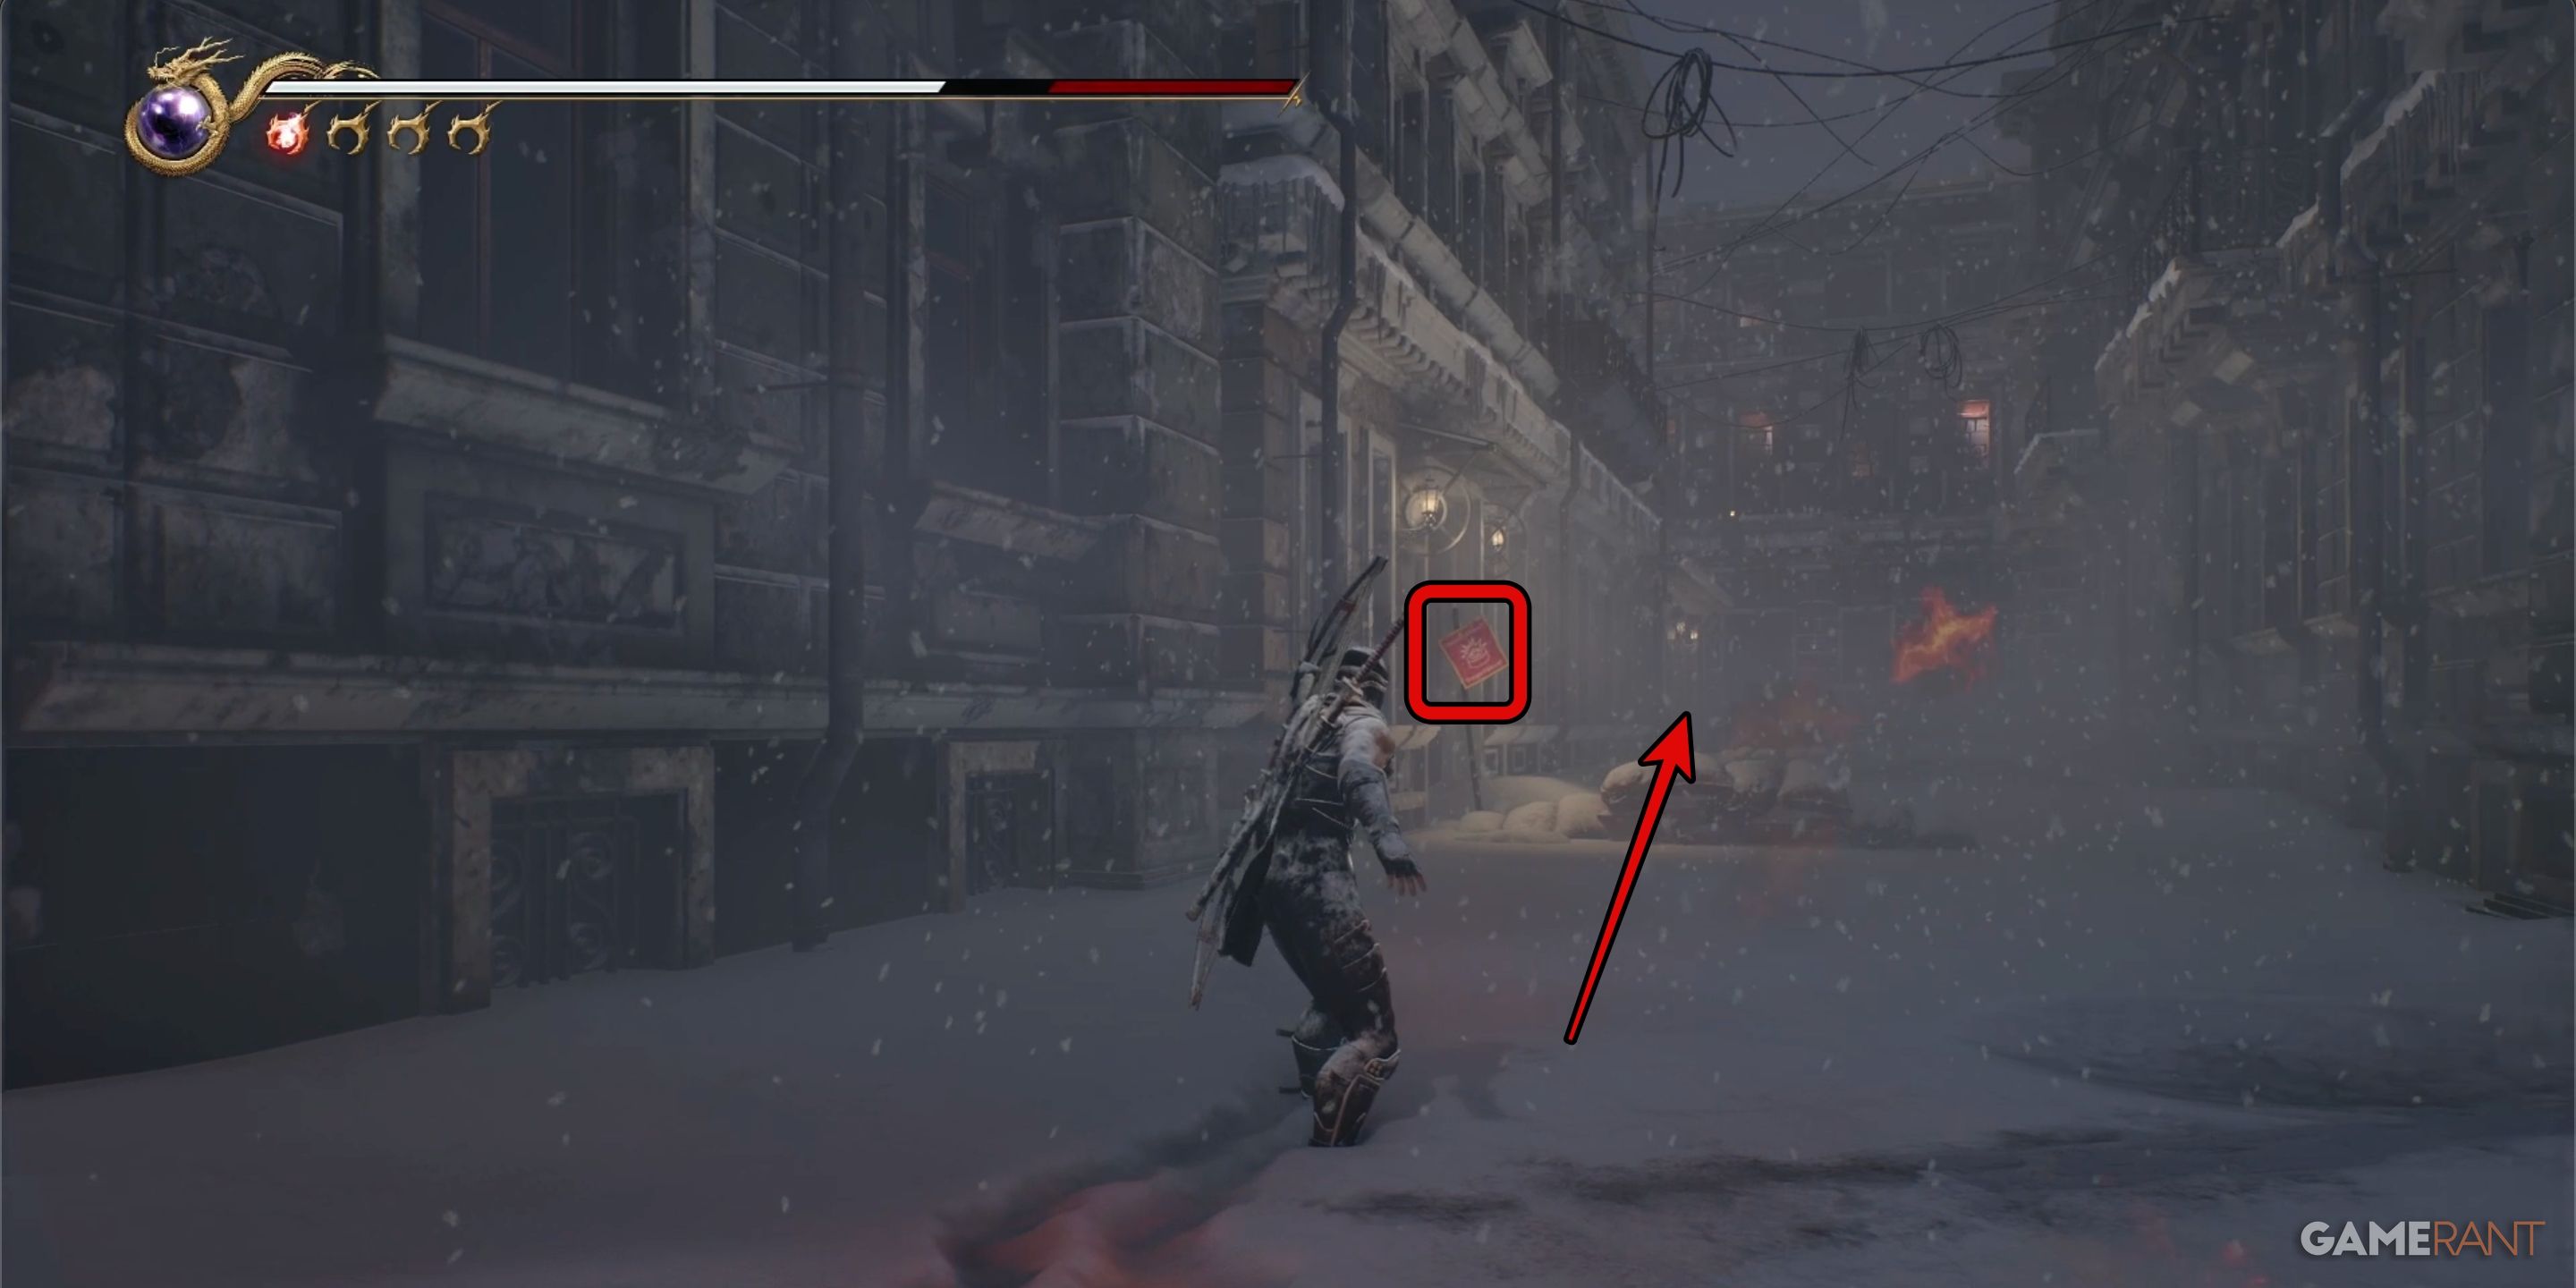
Crystal Skull 7:
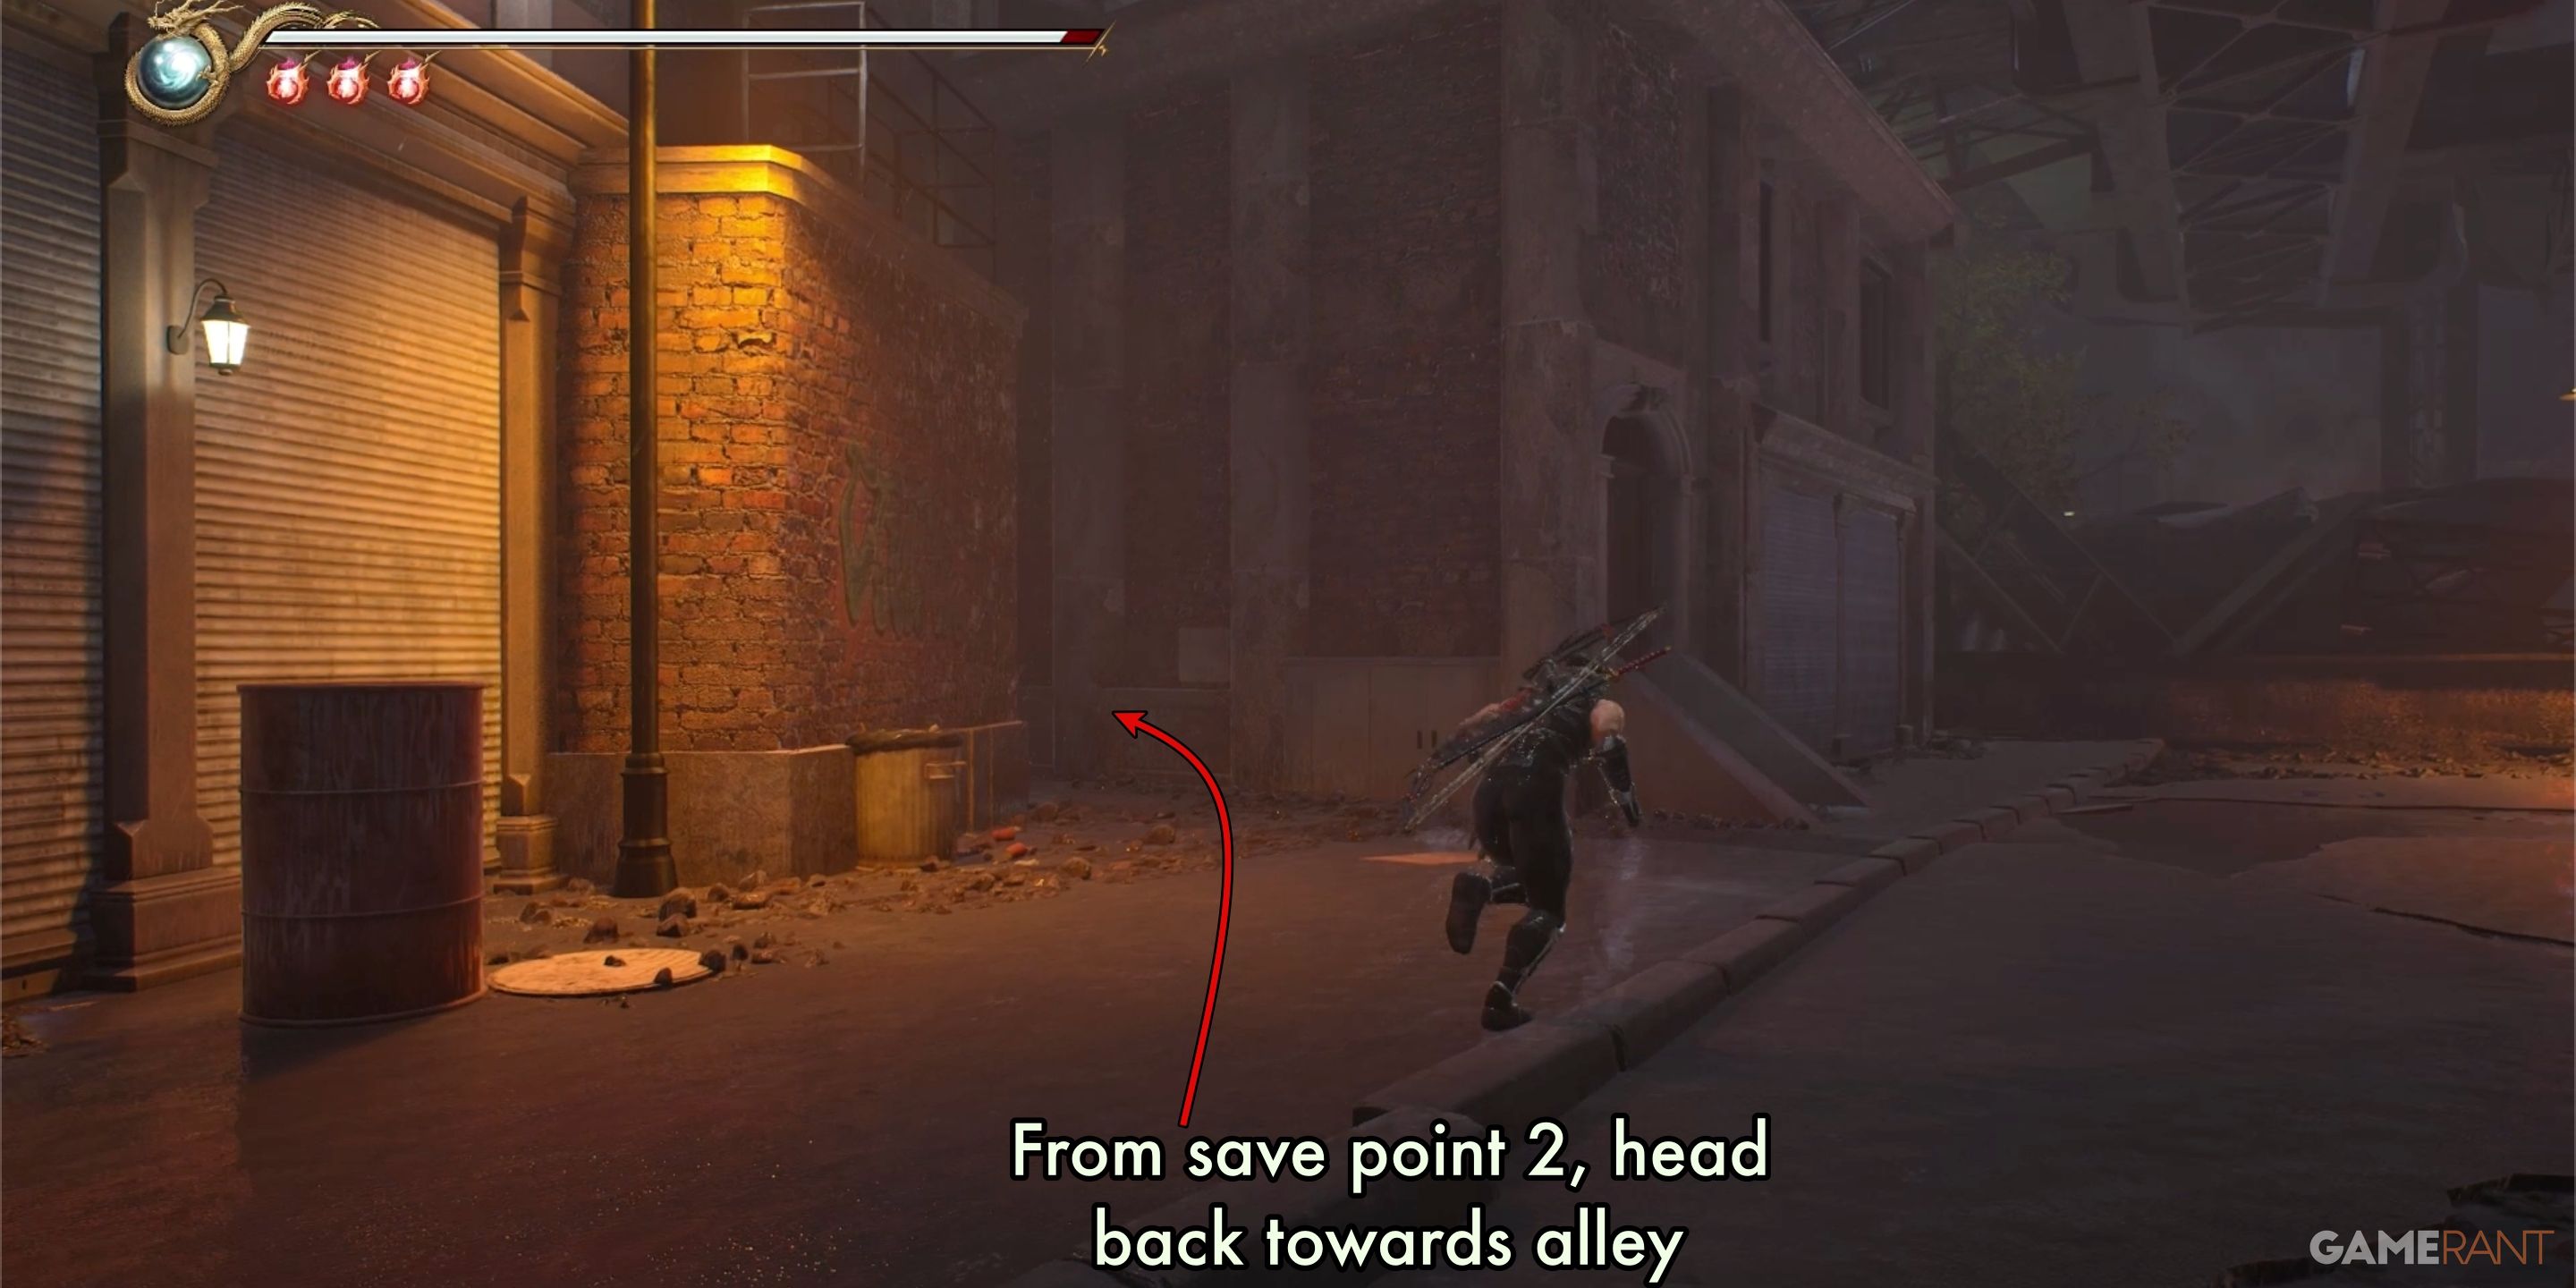
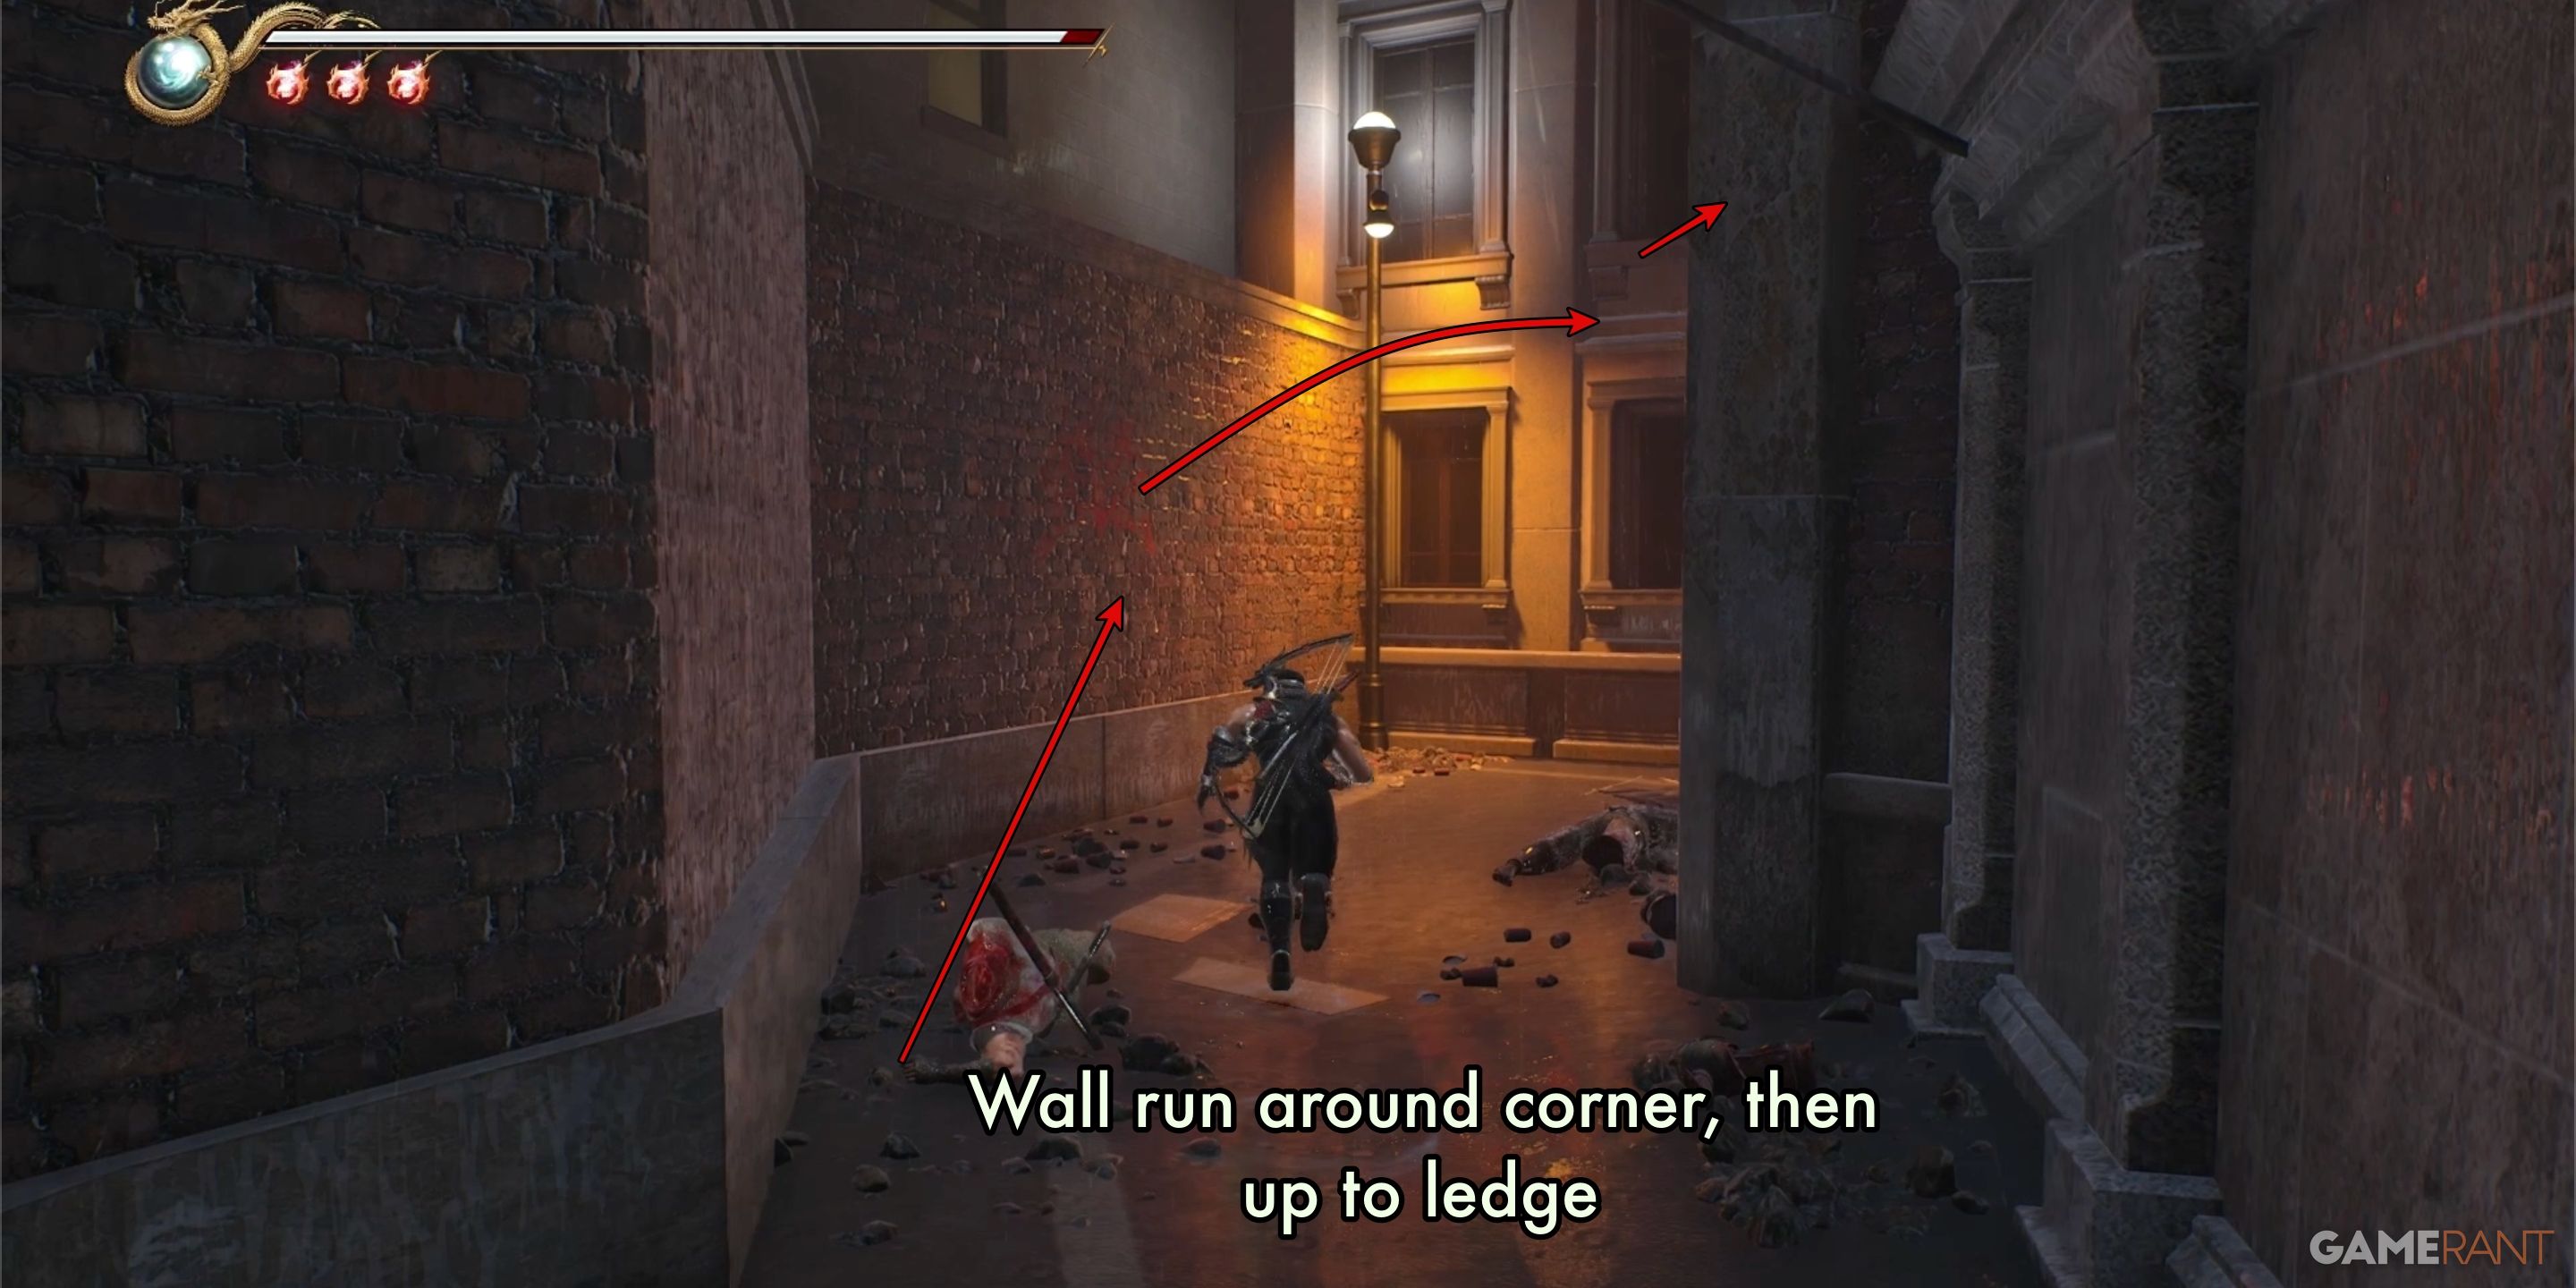
Right as you get to the second safe spot following your descent to ground level, look for a cozy nook or side-alley. Leverage the wall depicted in the image nearby to ascend and reach a small platform that’s home to the Crystal Skull 7.
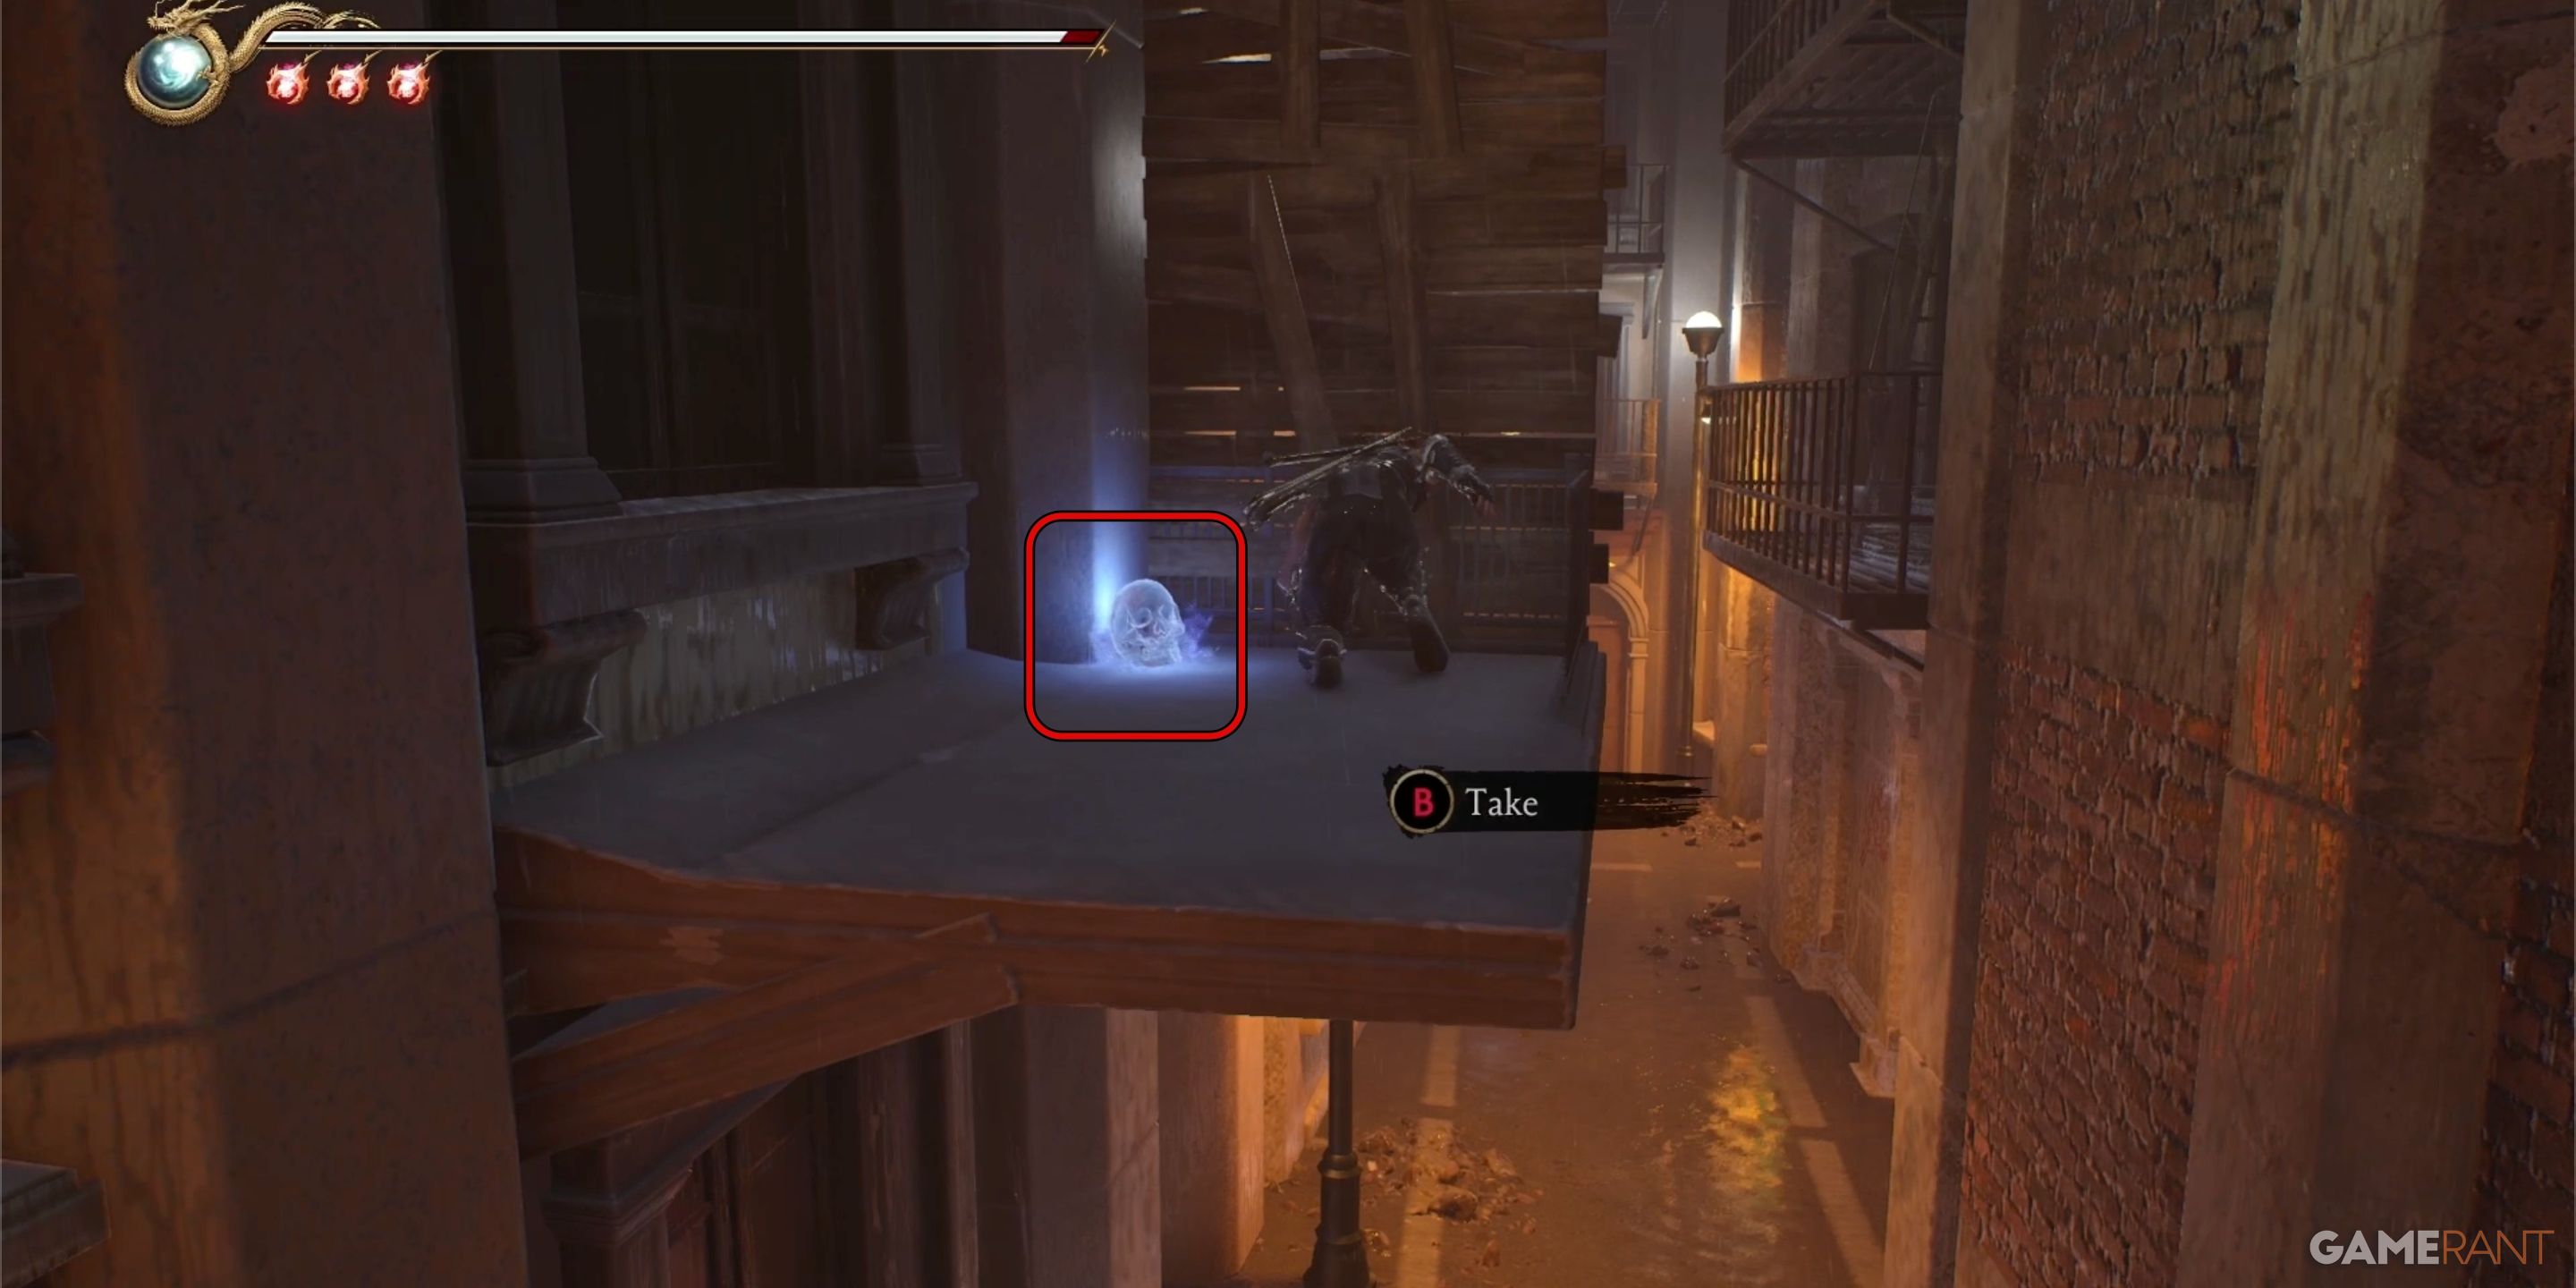
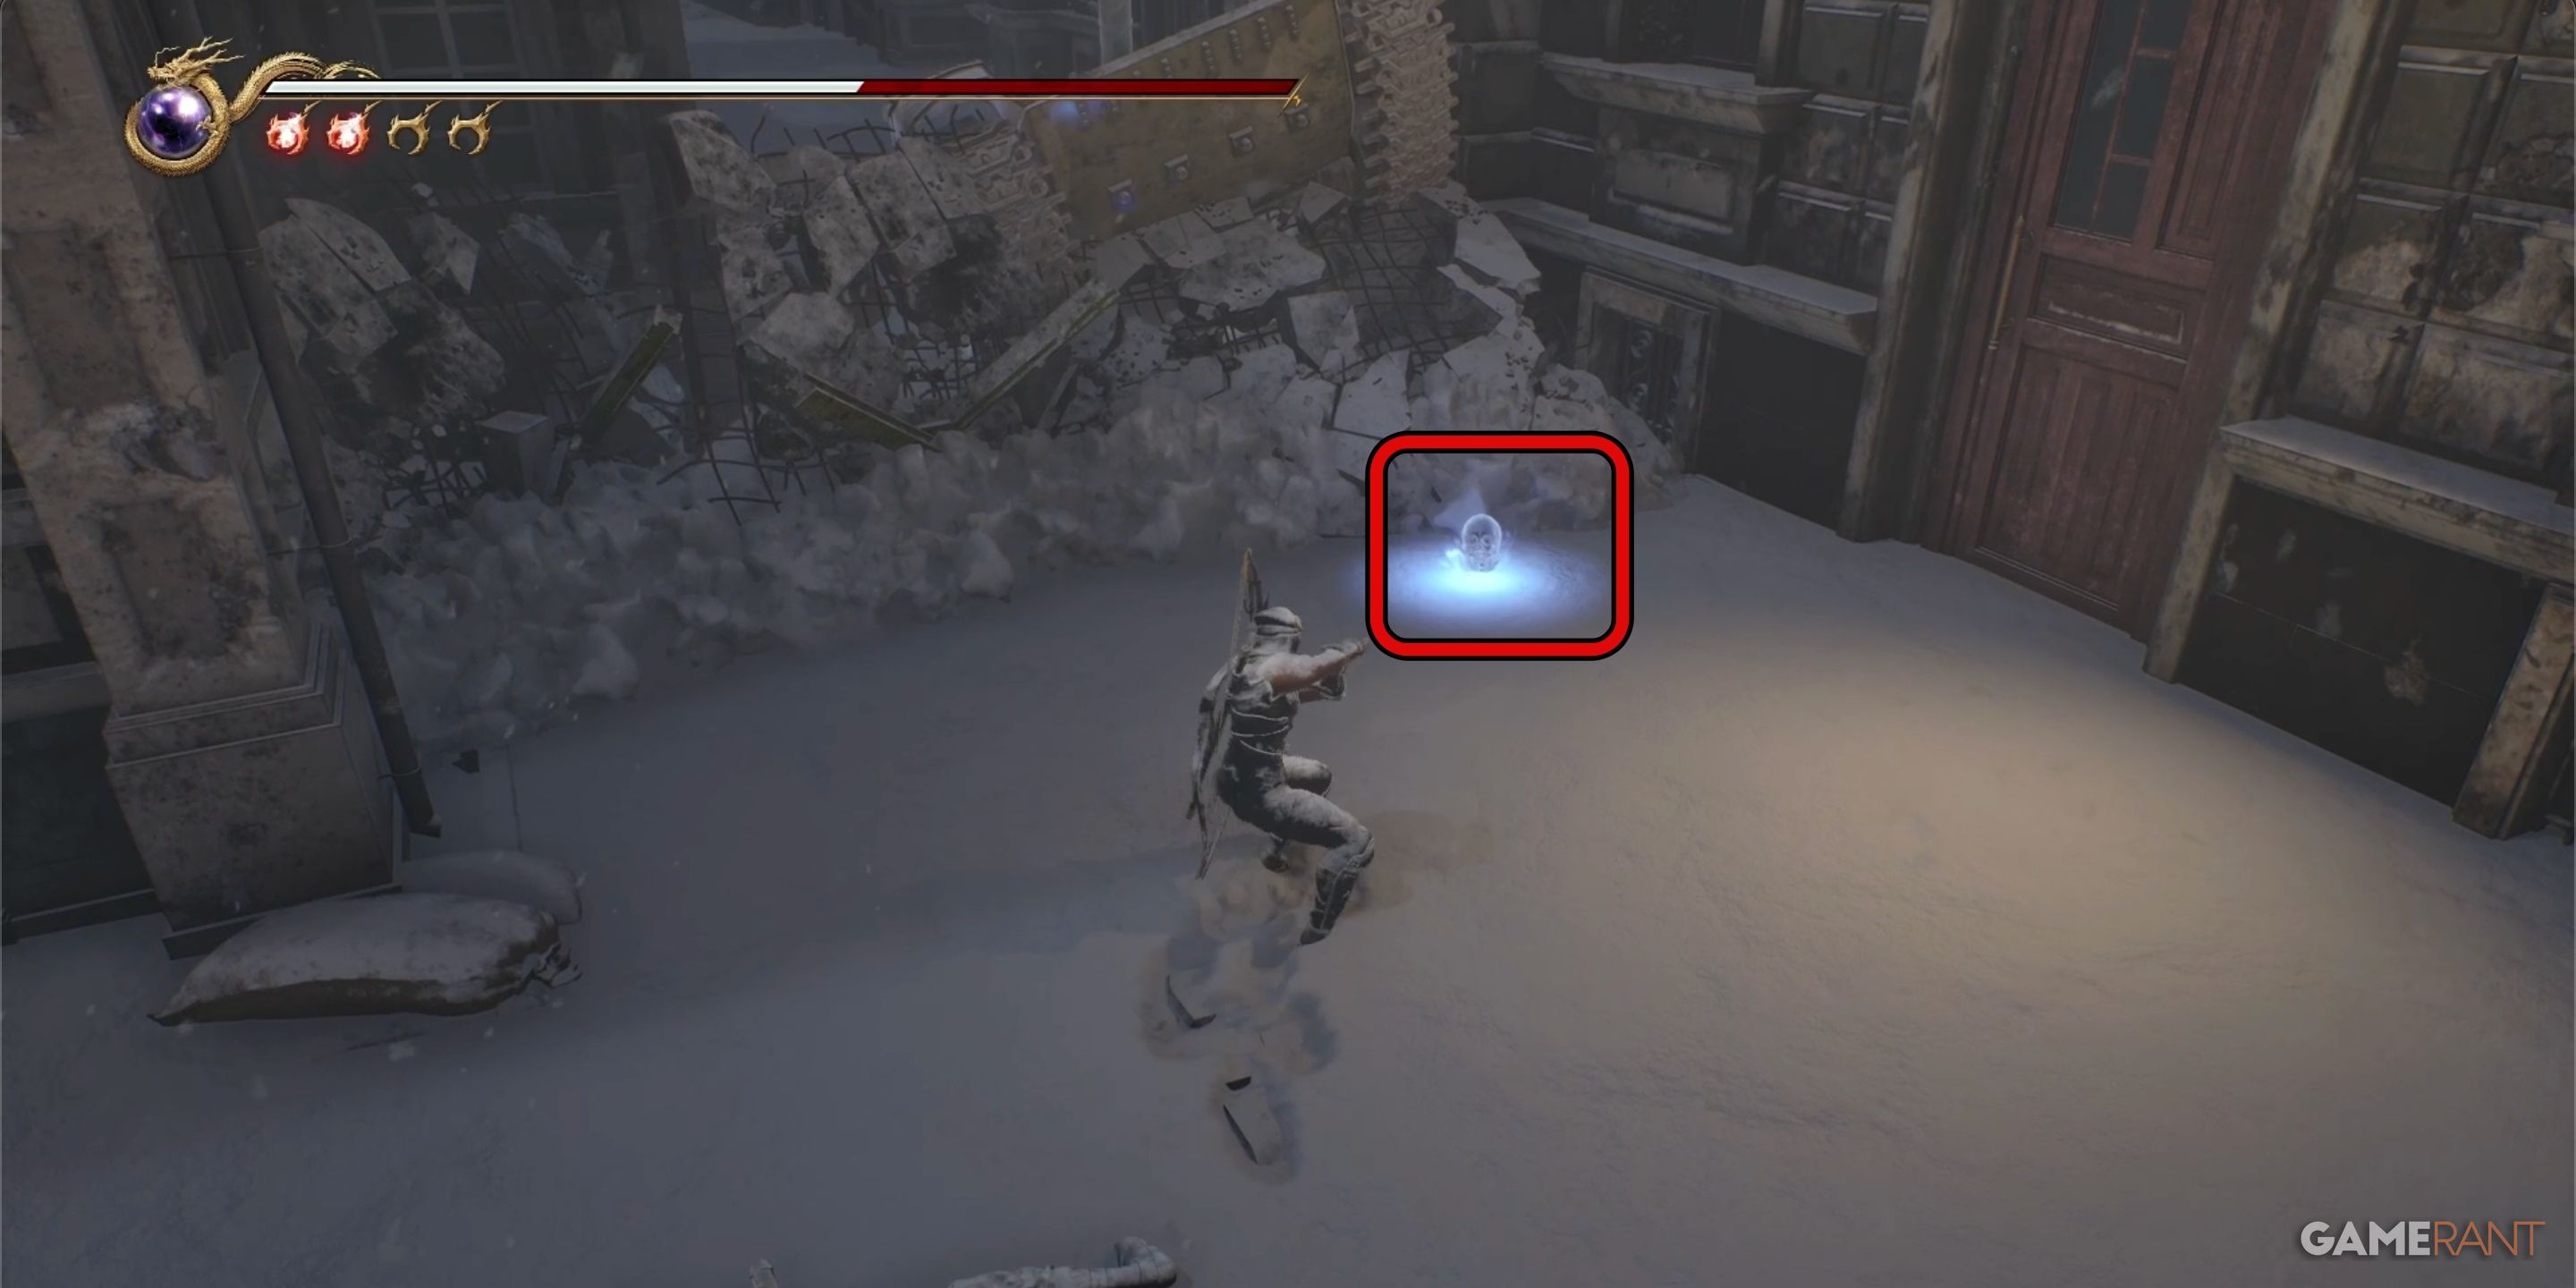
Crystal Skull 8:

In Chapter 4, you’ll discover the second Crystal Skull located following the second safe spot, nestled beneath the elevated highway. Proceed to the end of the freeway and you’ll come across Crystal Skull number 8 hidden on a tiny ledge off to its side.
Crystal Skull 9:
In Chapter 4, the Crystal Skull hidden at the Statue of Liberty’s pedestal can be located. Leap from the stairway where the safe spot is situated, and you’ll discover the skull perched on a metal pipe overhead.
There are no Crystal Skulls found in Ninja Gaiden 2 Black‘s fifth chapter.
All Crystal Skull Locations in Chapter 6 – Ninja Gaiden 2 Black
There are three Crystal Skulls found in Chapter 6: The Aqua Capital.
Crystal Skull 10:
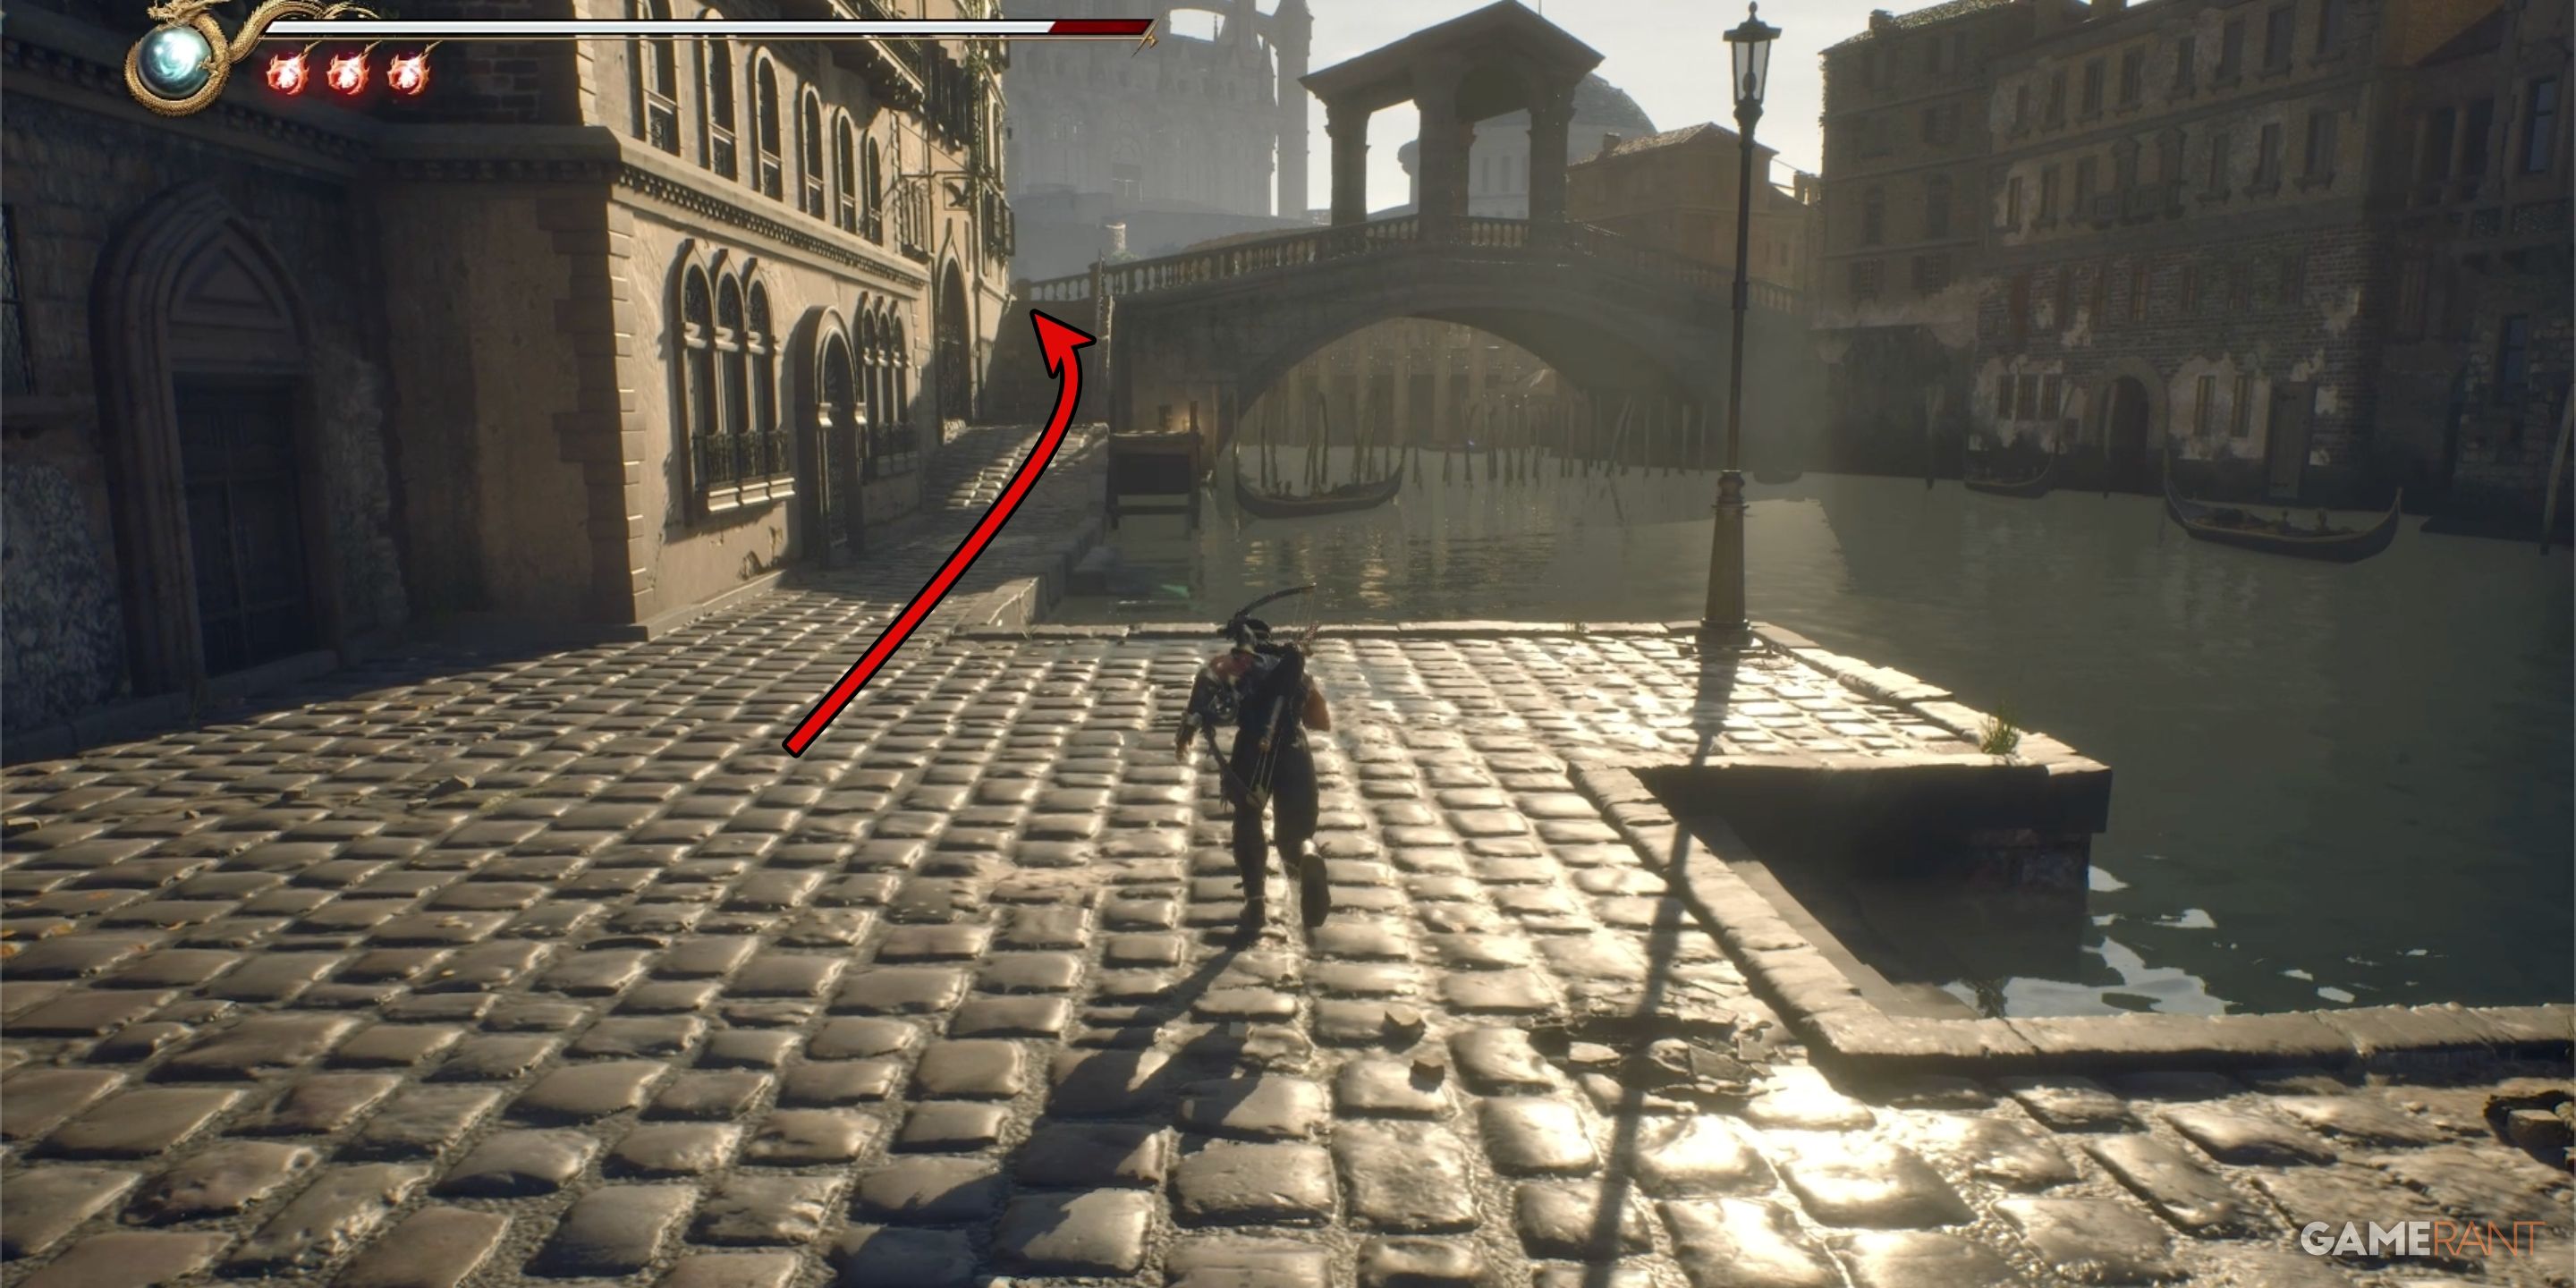
Starting in Chapter 6, climb the stairs leading you towards the bridge; however, veer left at the flower pot instead of taking a right on the bridge. Keep in mind that as you ascend the stairs, you’ll encounter multiple adversaries, so prepare for battle.
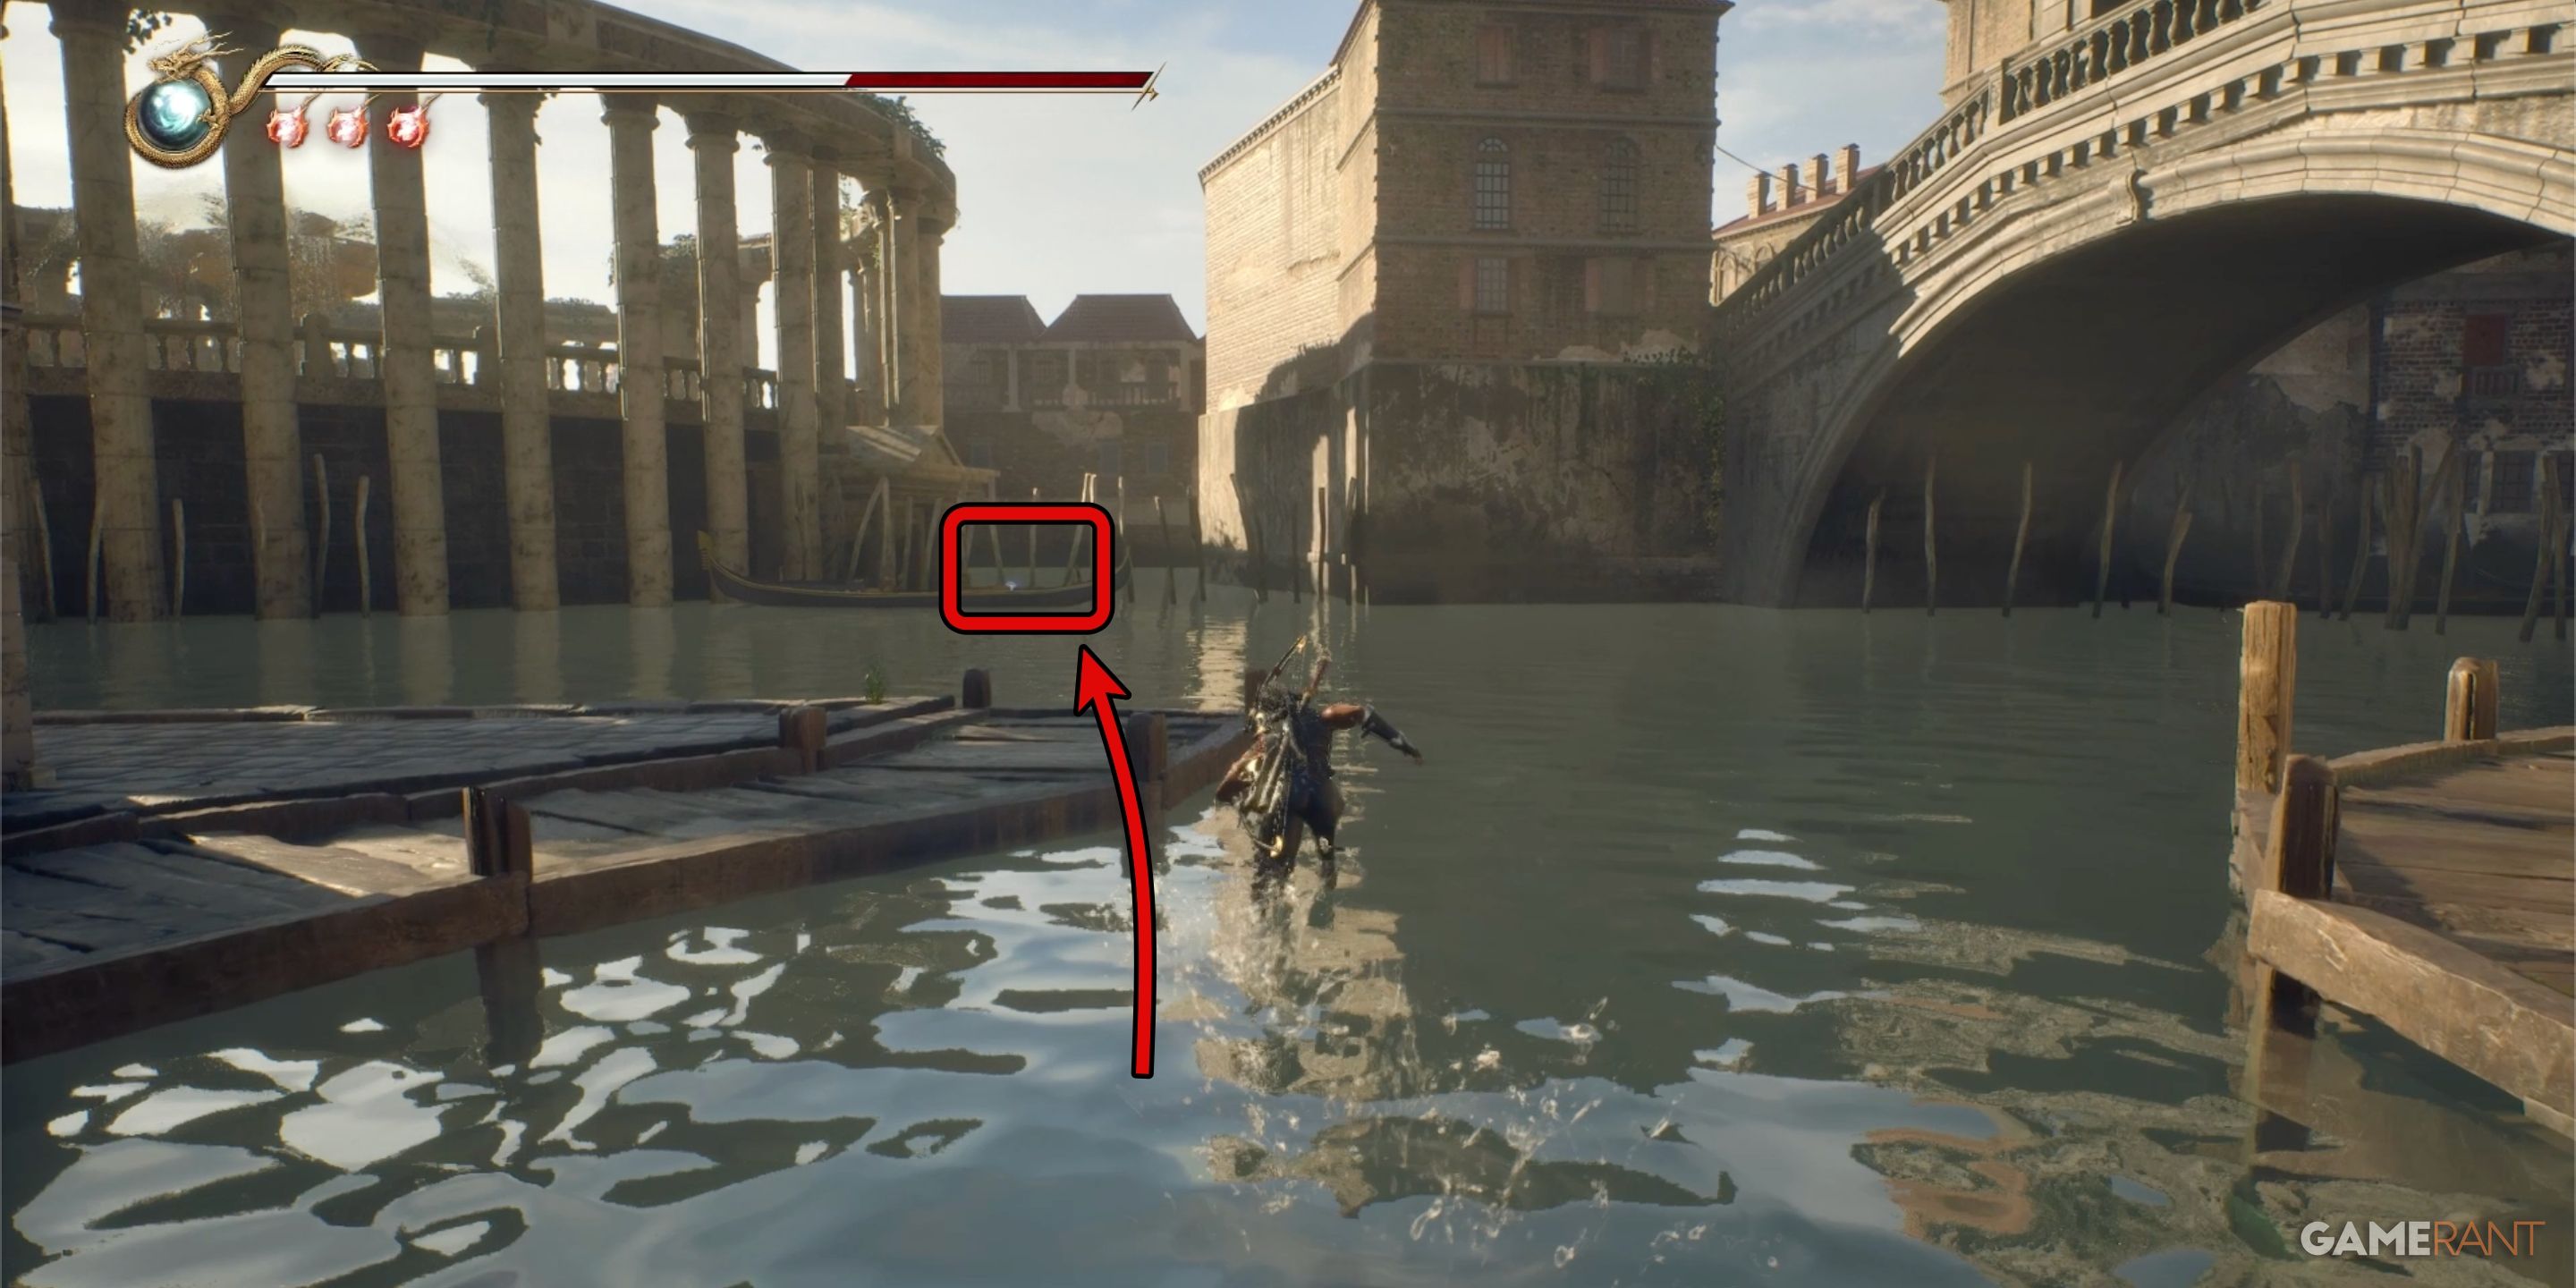
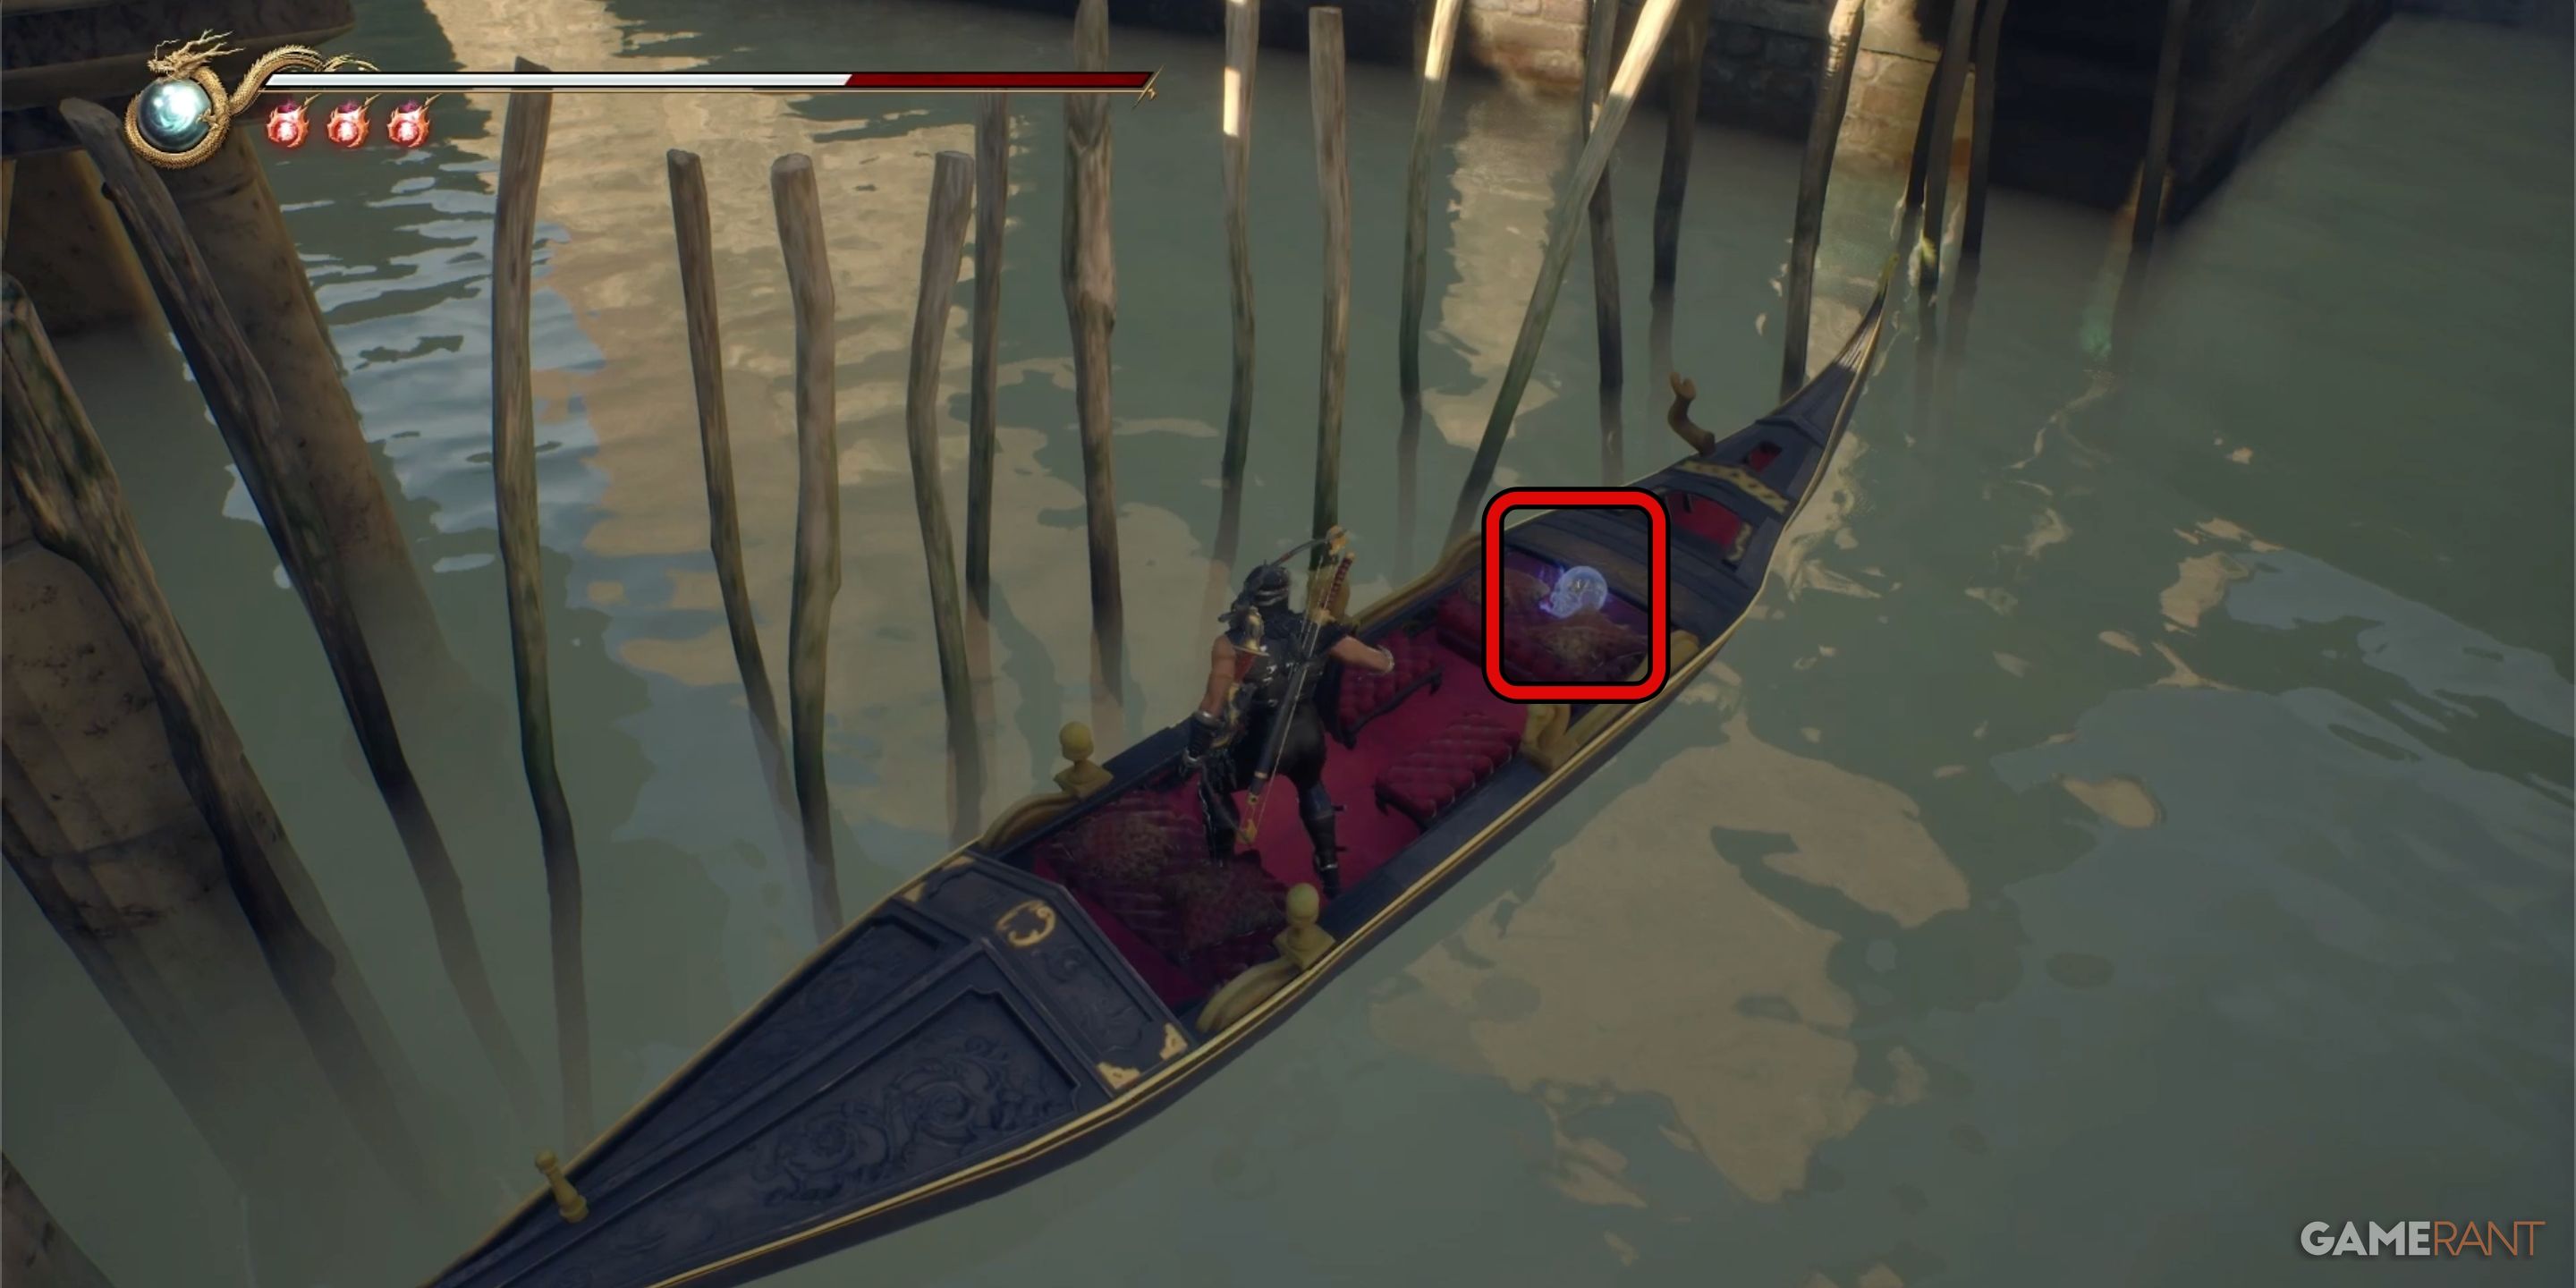
After making a left at the planter, descend the staircase, and proceed straight into the narrow passageway that is cordoned off from where you started. Cross over the water, and you’ll discover Crystal Skull 10 located in a gondola floating on the other side of the passageway.
Crystal Skull 11:
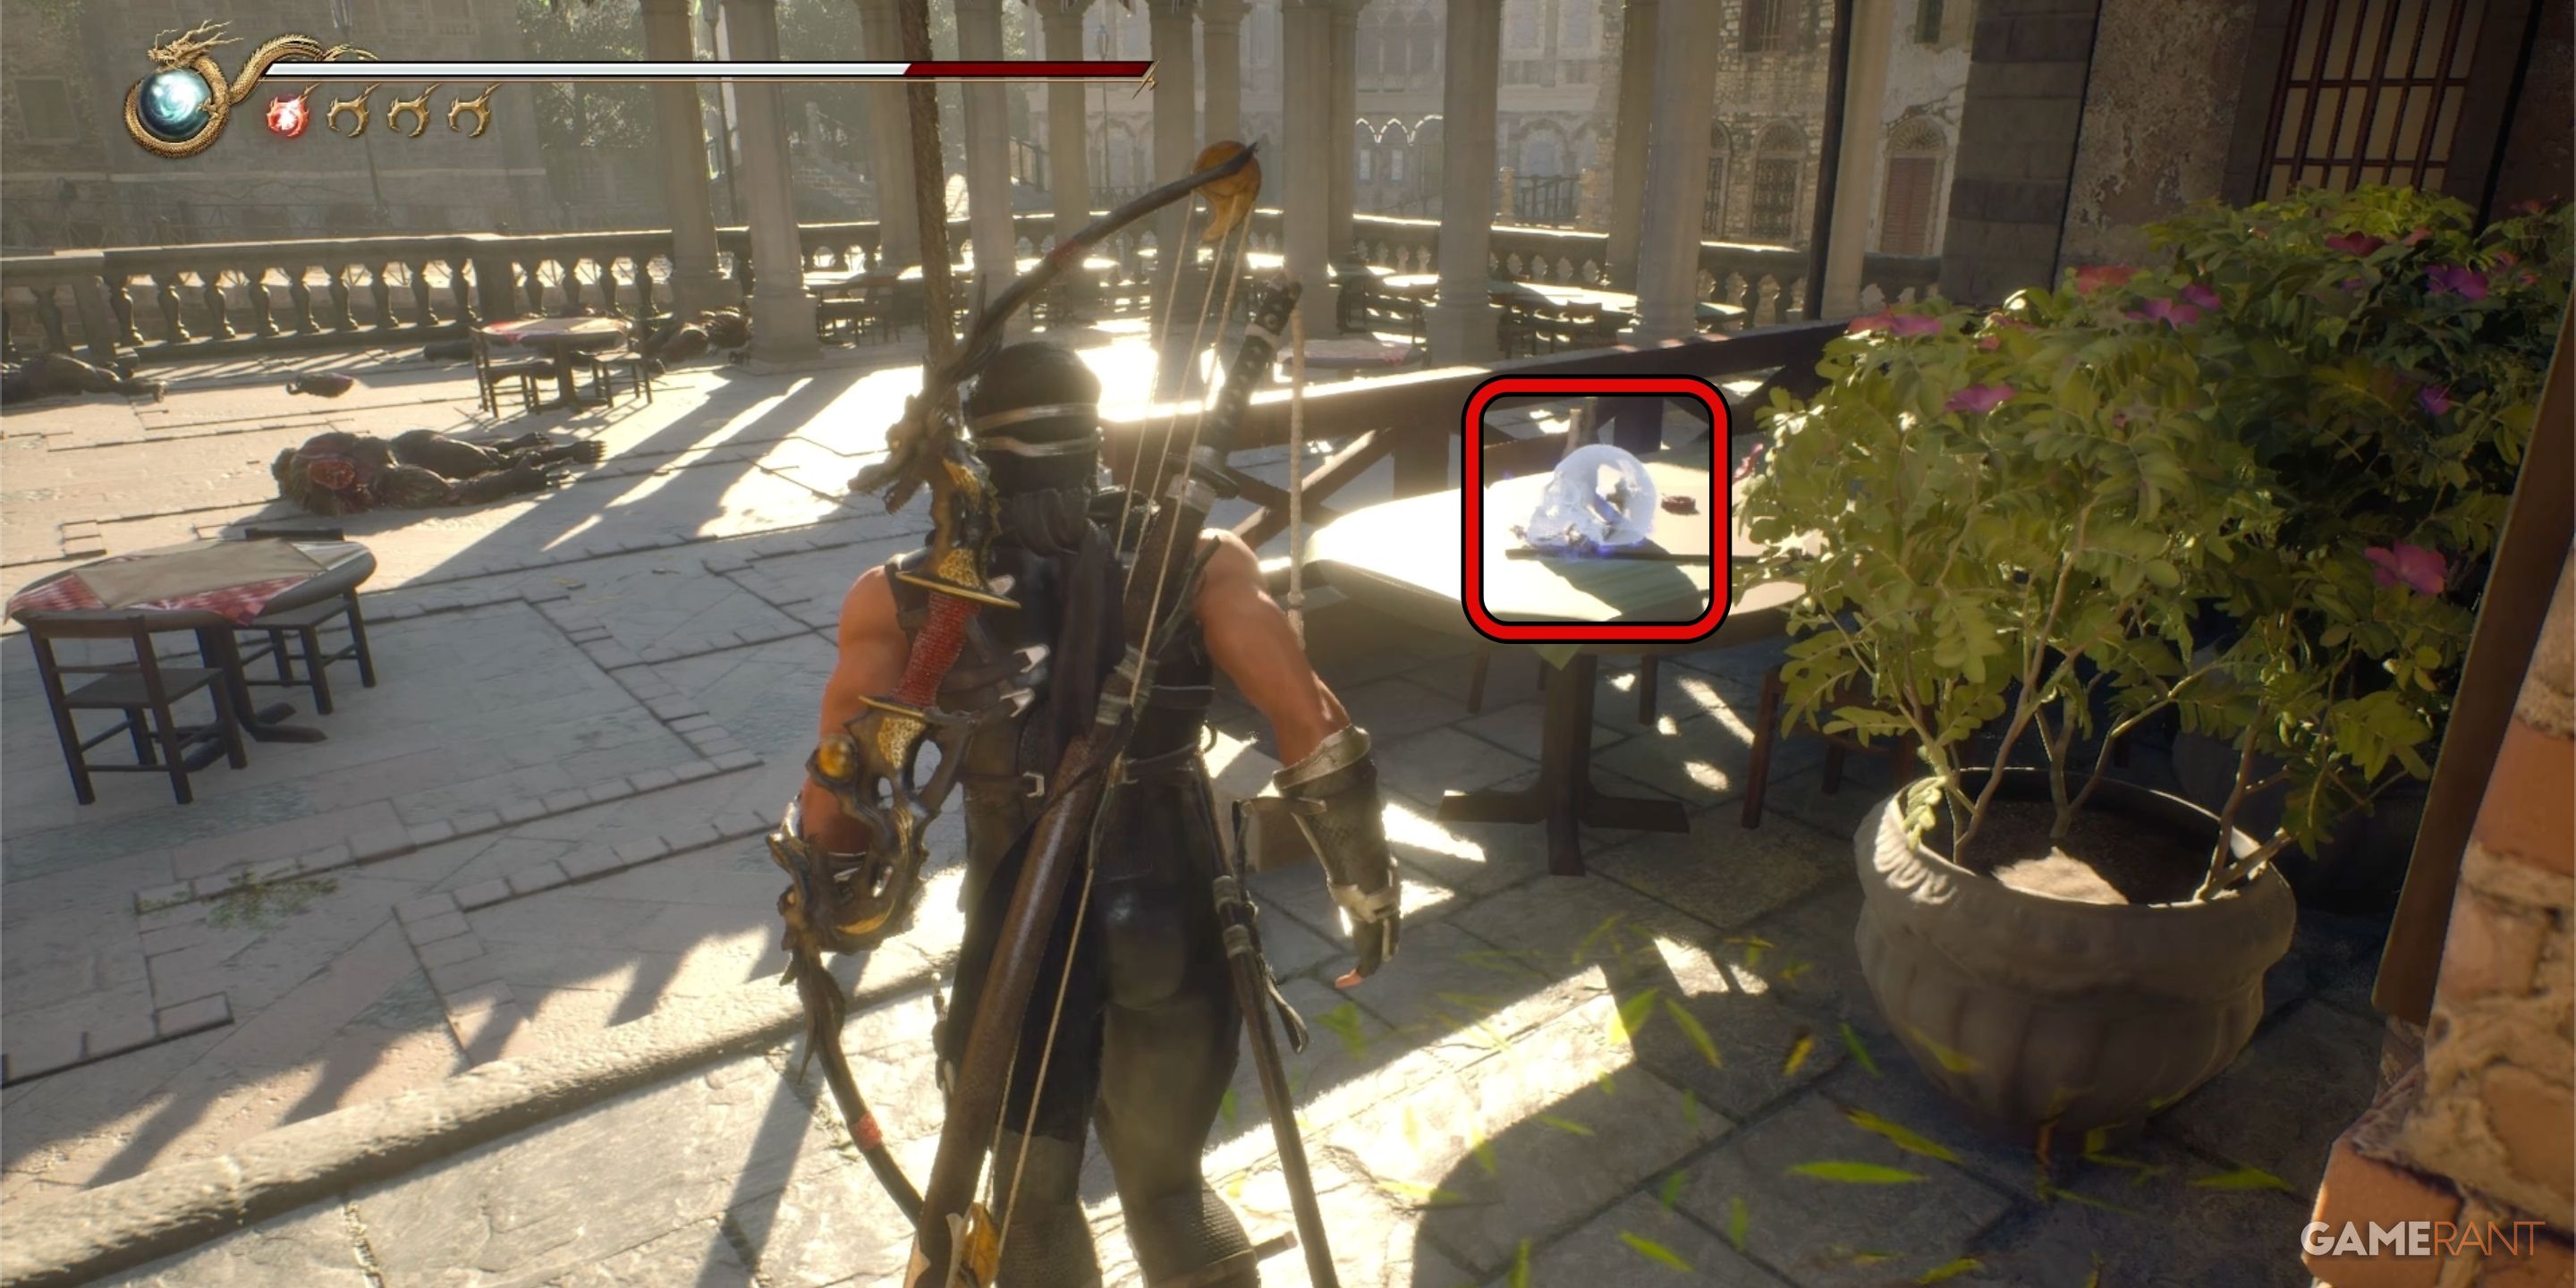
Just past Crystal Skull 10, you’ll find a spot where you can save your progress and obtain Dragon’s Claw and Tiger’s Fang, the twin katanas. Proceed through the entrance following the save point, then take an immediate right upon exiting, leading you to a café patio area. Crystal Skull 11 will be sitting on a table to your right in this area.
Crystal Skull 12:
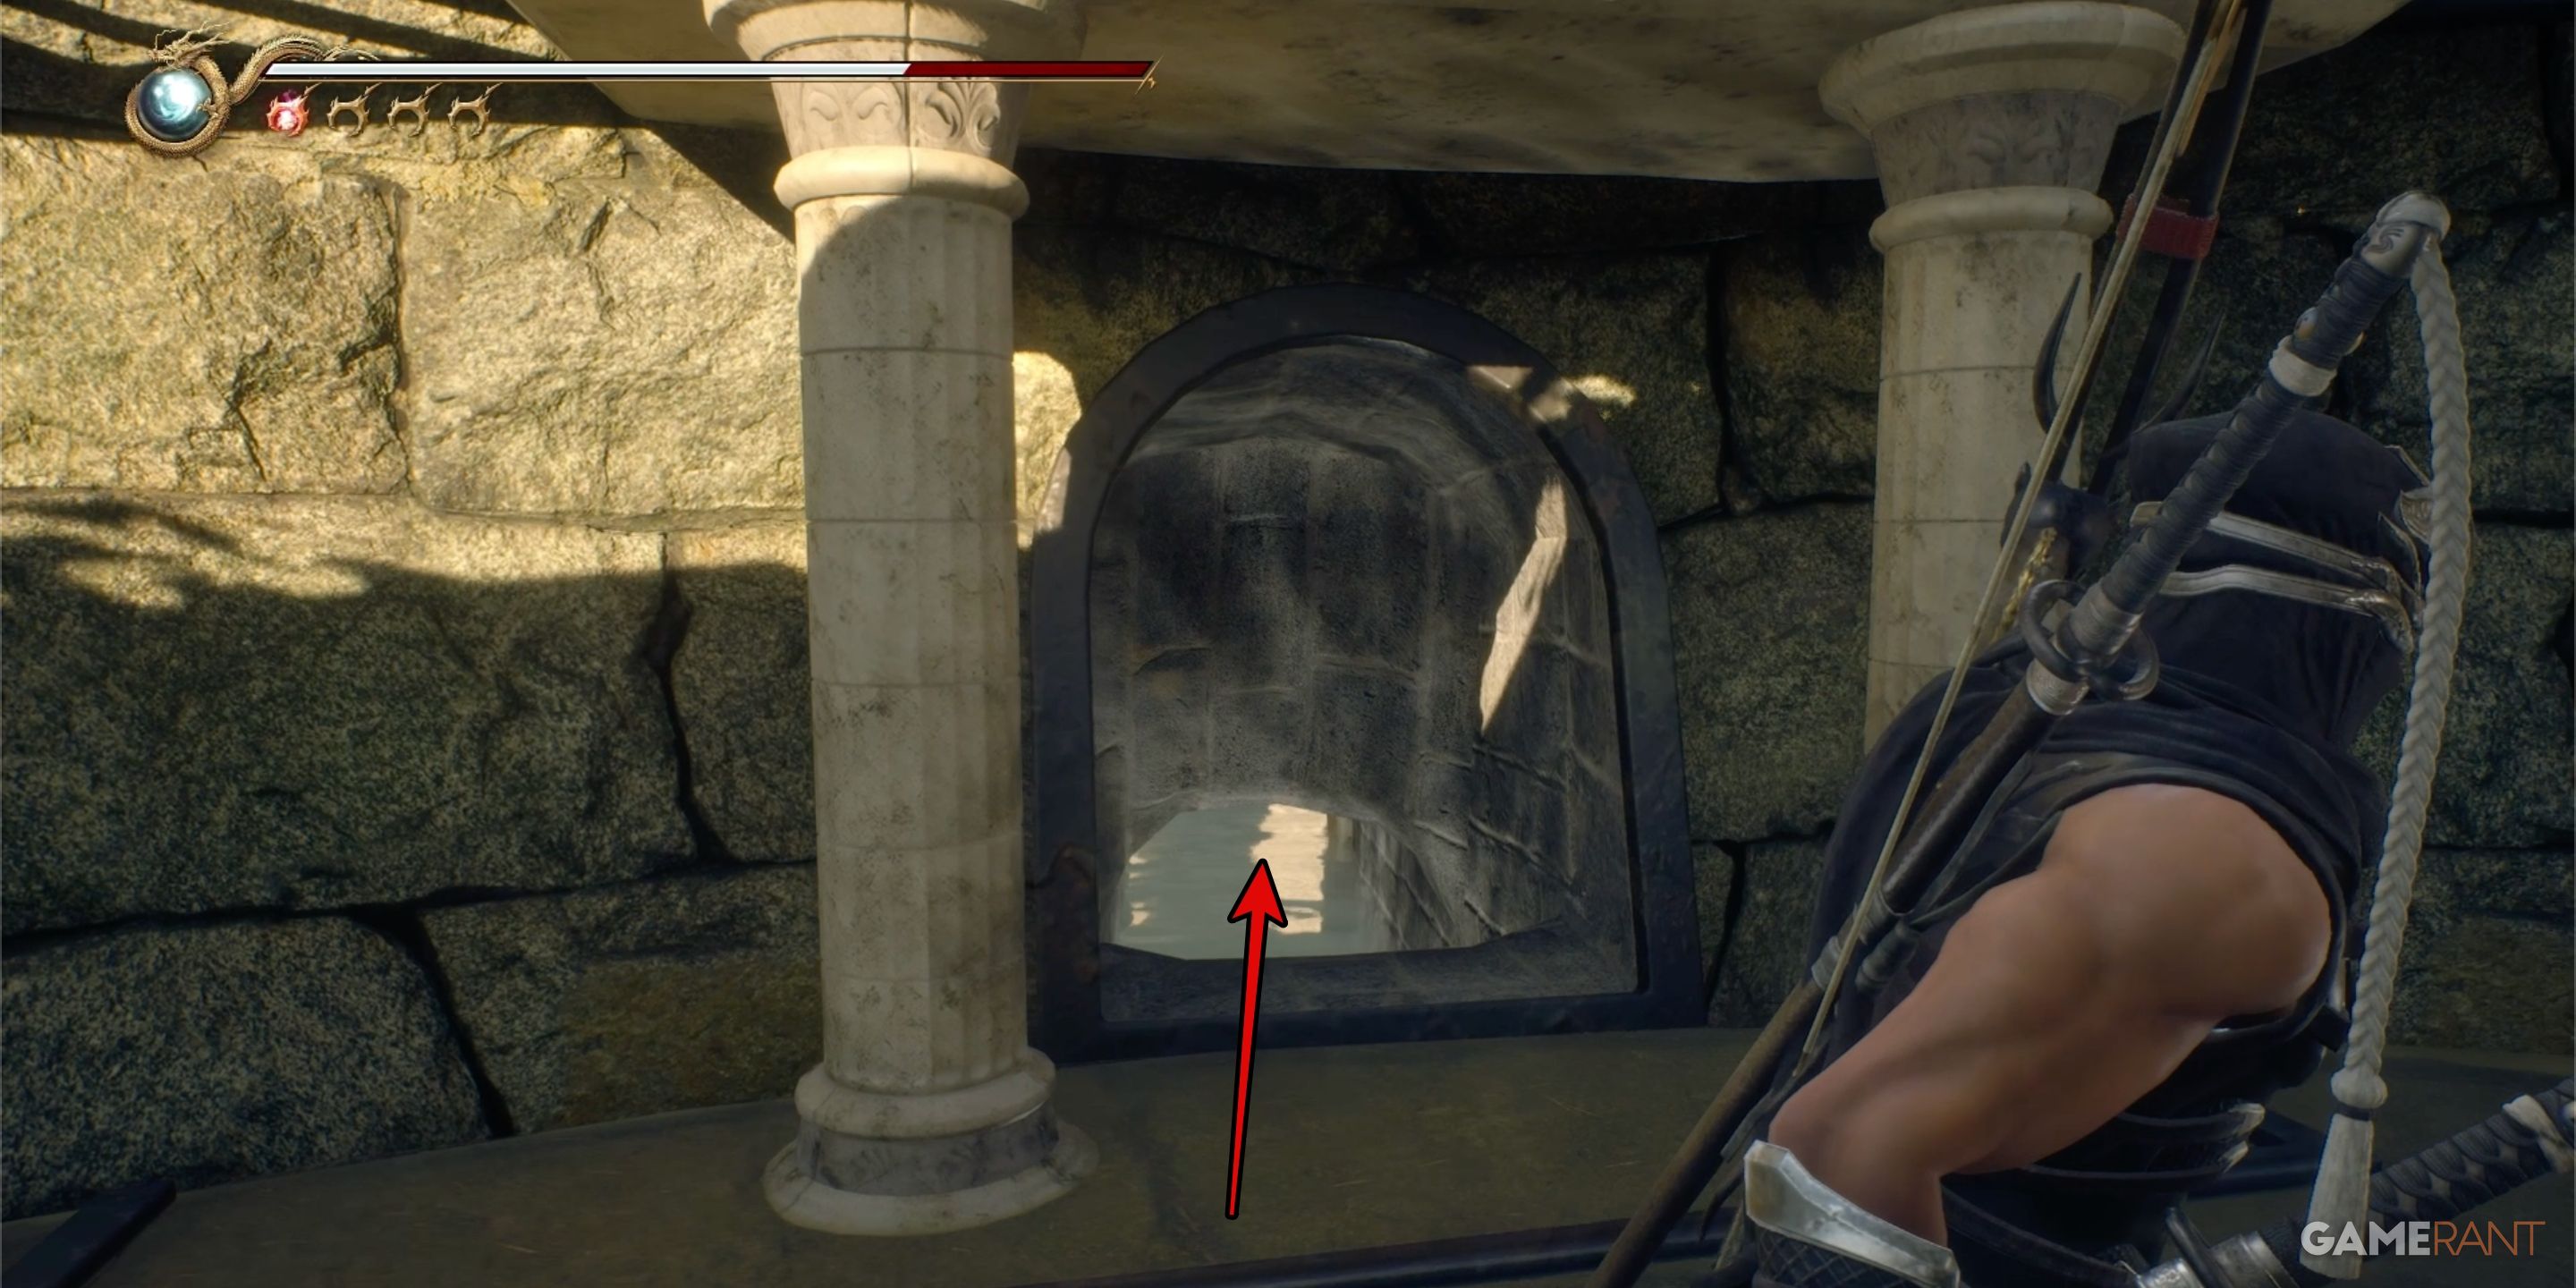
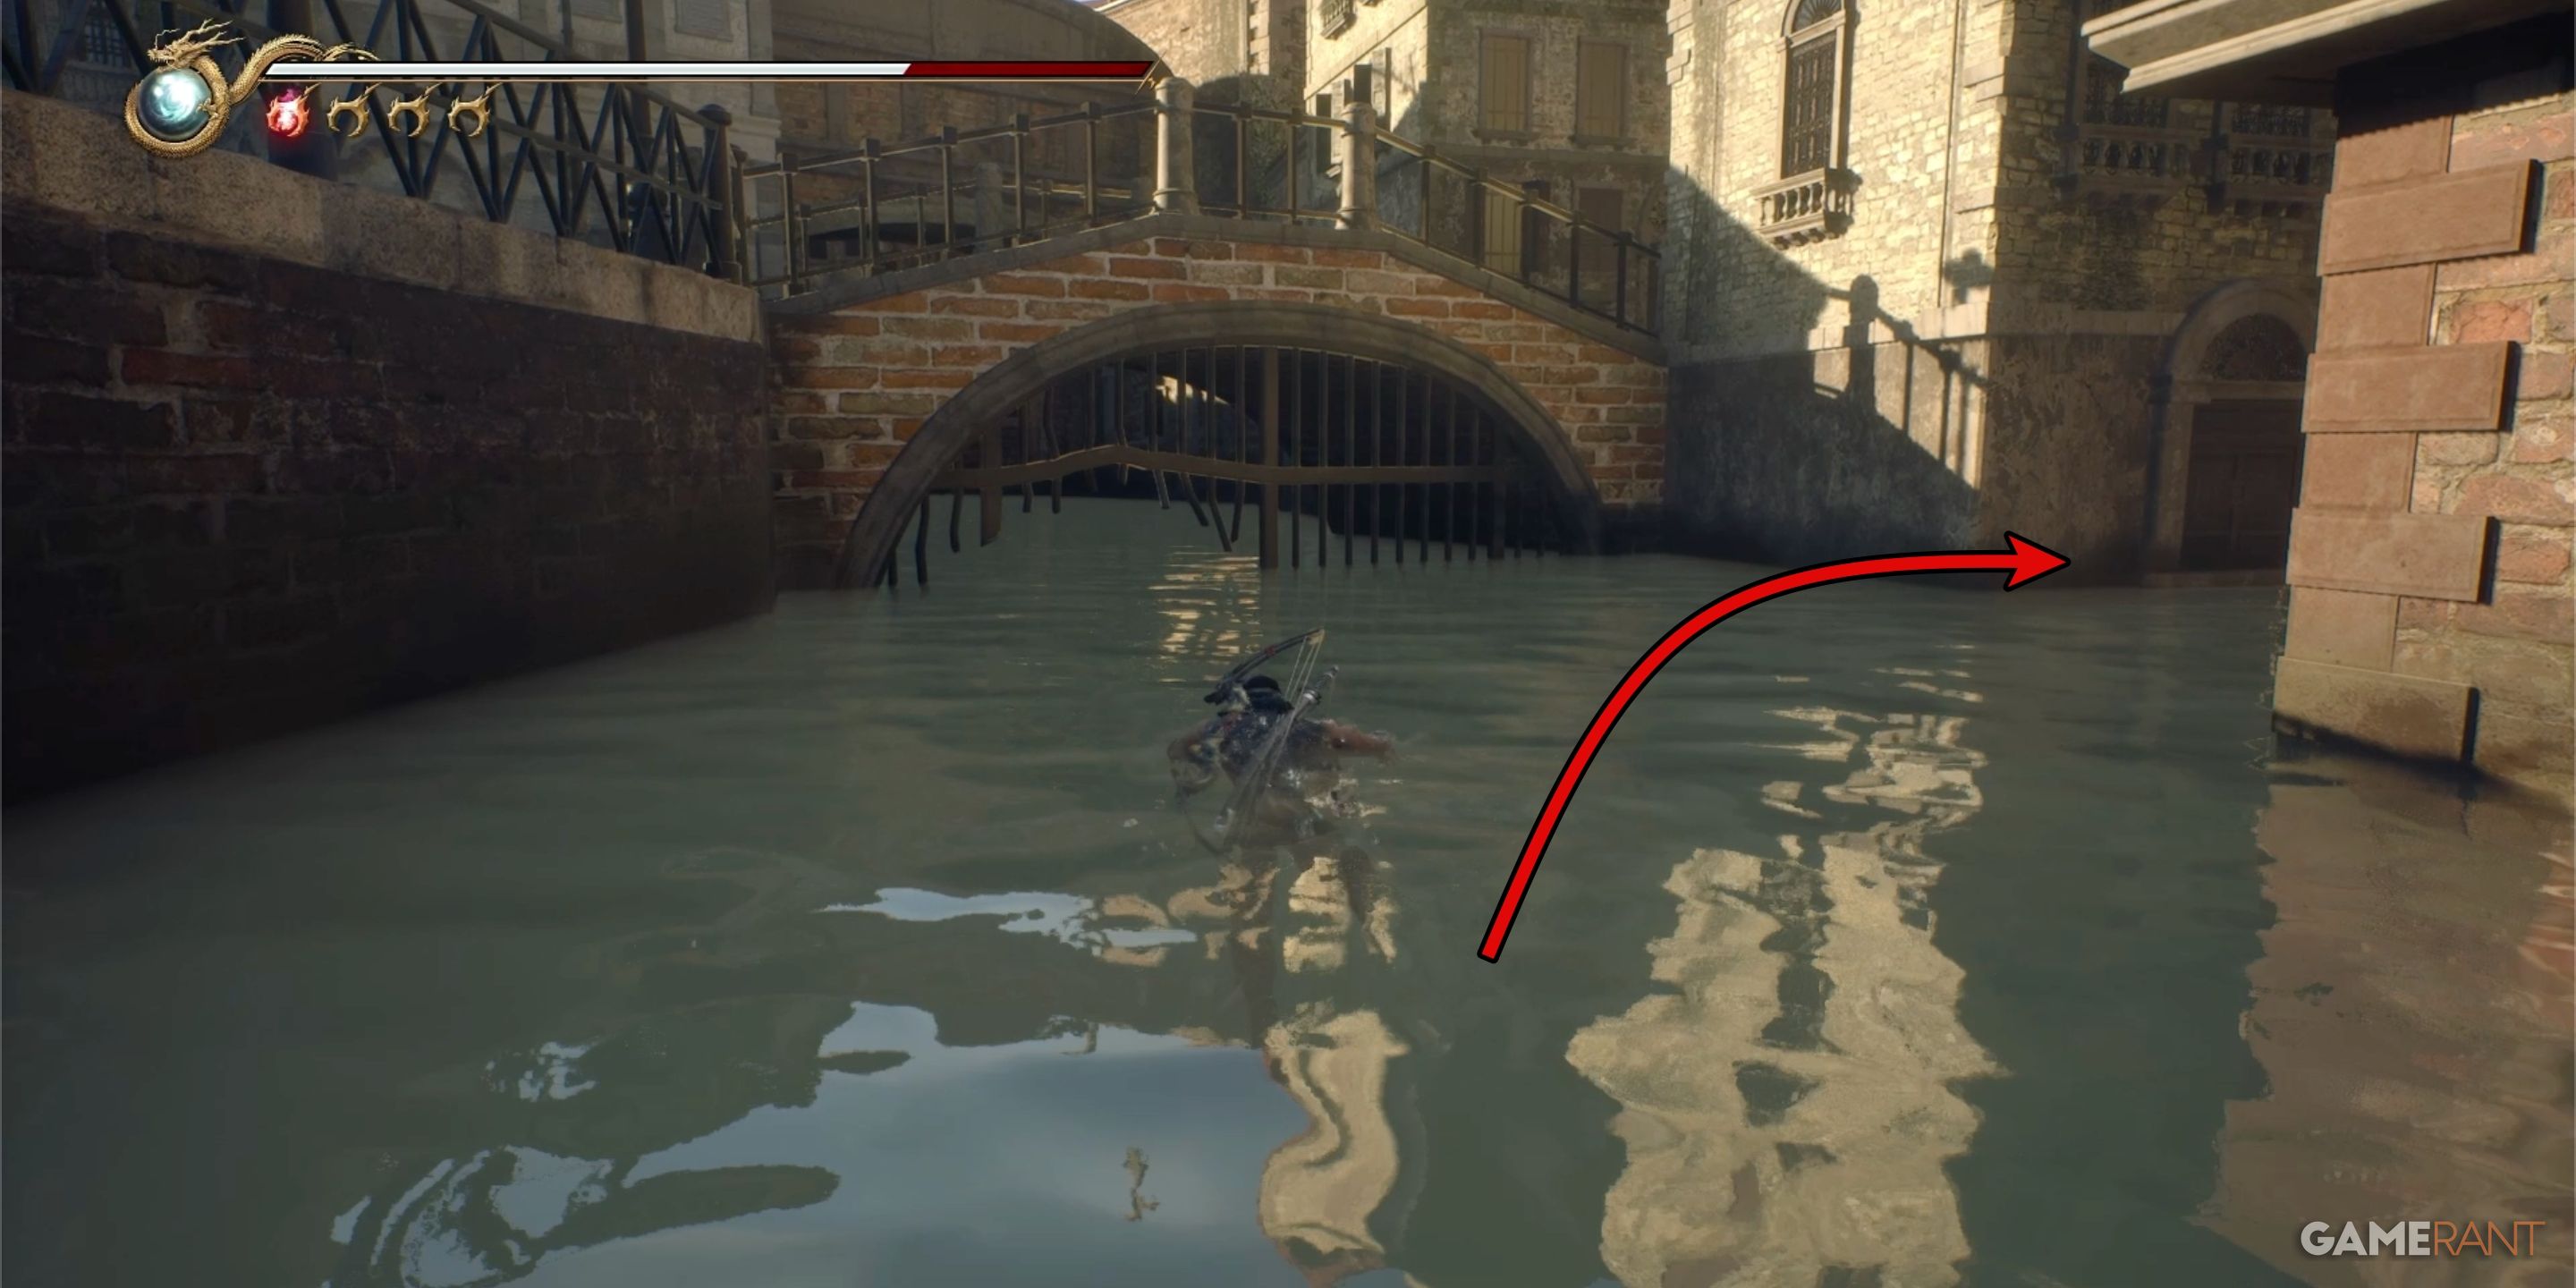
Once you’ve vanquished foes near the grand fountain, jump into the fountain and proceed along the canal. Upon reaching the initial damaged gate, veer right instead of continuing straight (the usual route). This will lead you to a blind alley.
Once you’ve made a right turn, notice the small nook situated under a bridge ahead. The item labeled Crystal Skull 12 can be found on the left side of this nook, resting beneath the water.
All Crystal Skull Locations in Chapter 7 – Ninja Gaiden 2 Black
There are Three Crystal Skulls in Ninja Gaiden 2 Black Chapter 7: The Lyncanthopes’ Castle.
Crystal Skull 13:
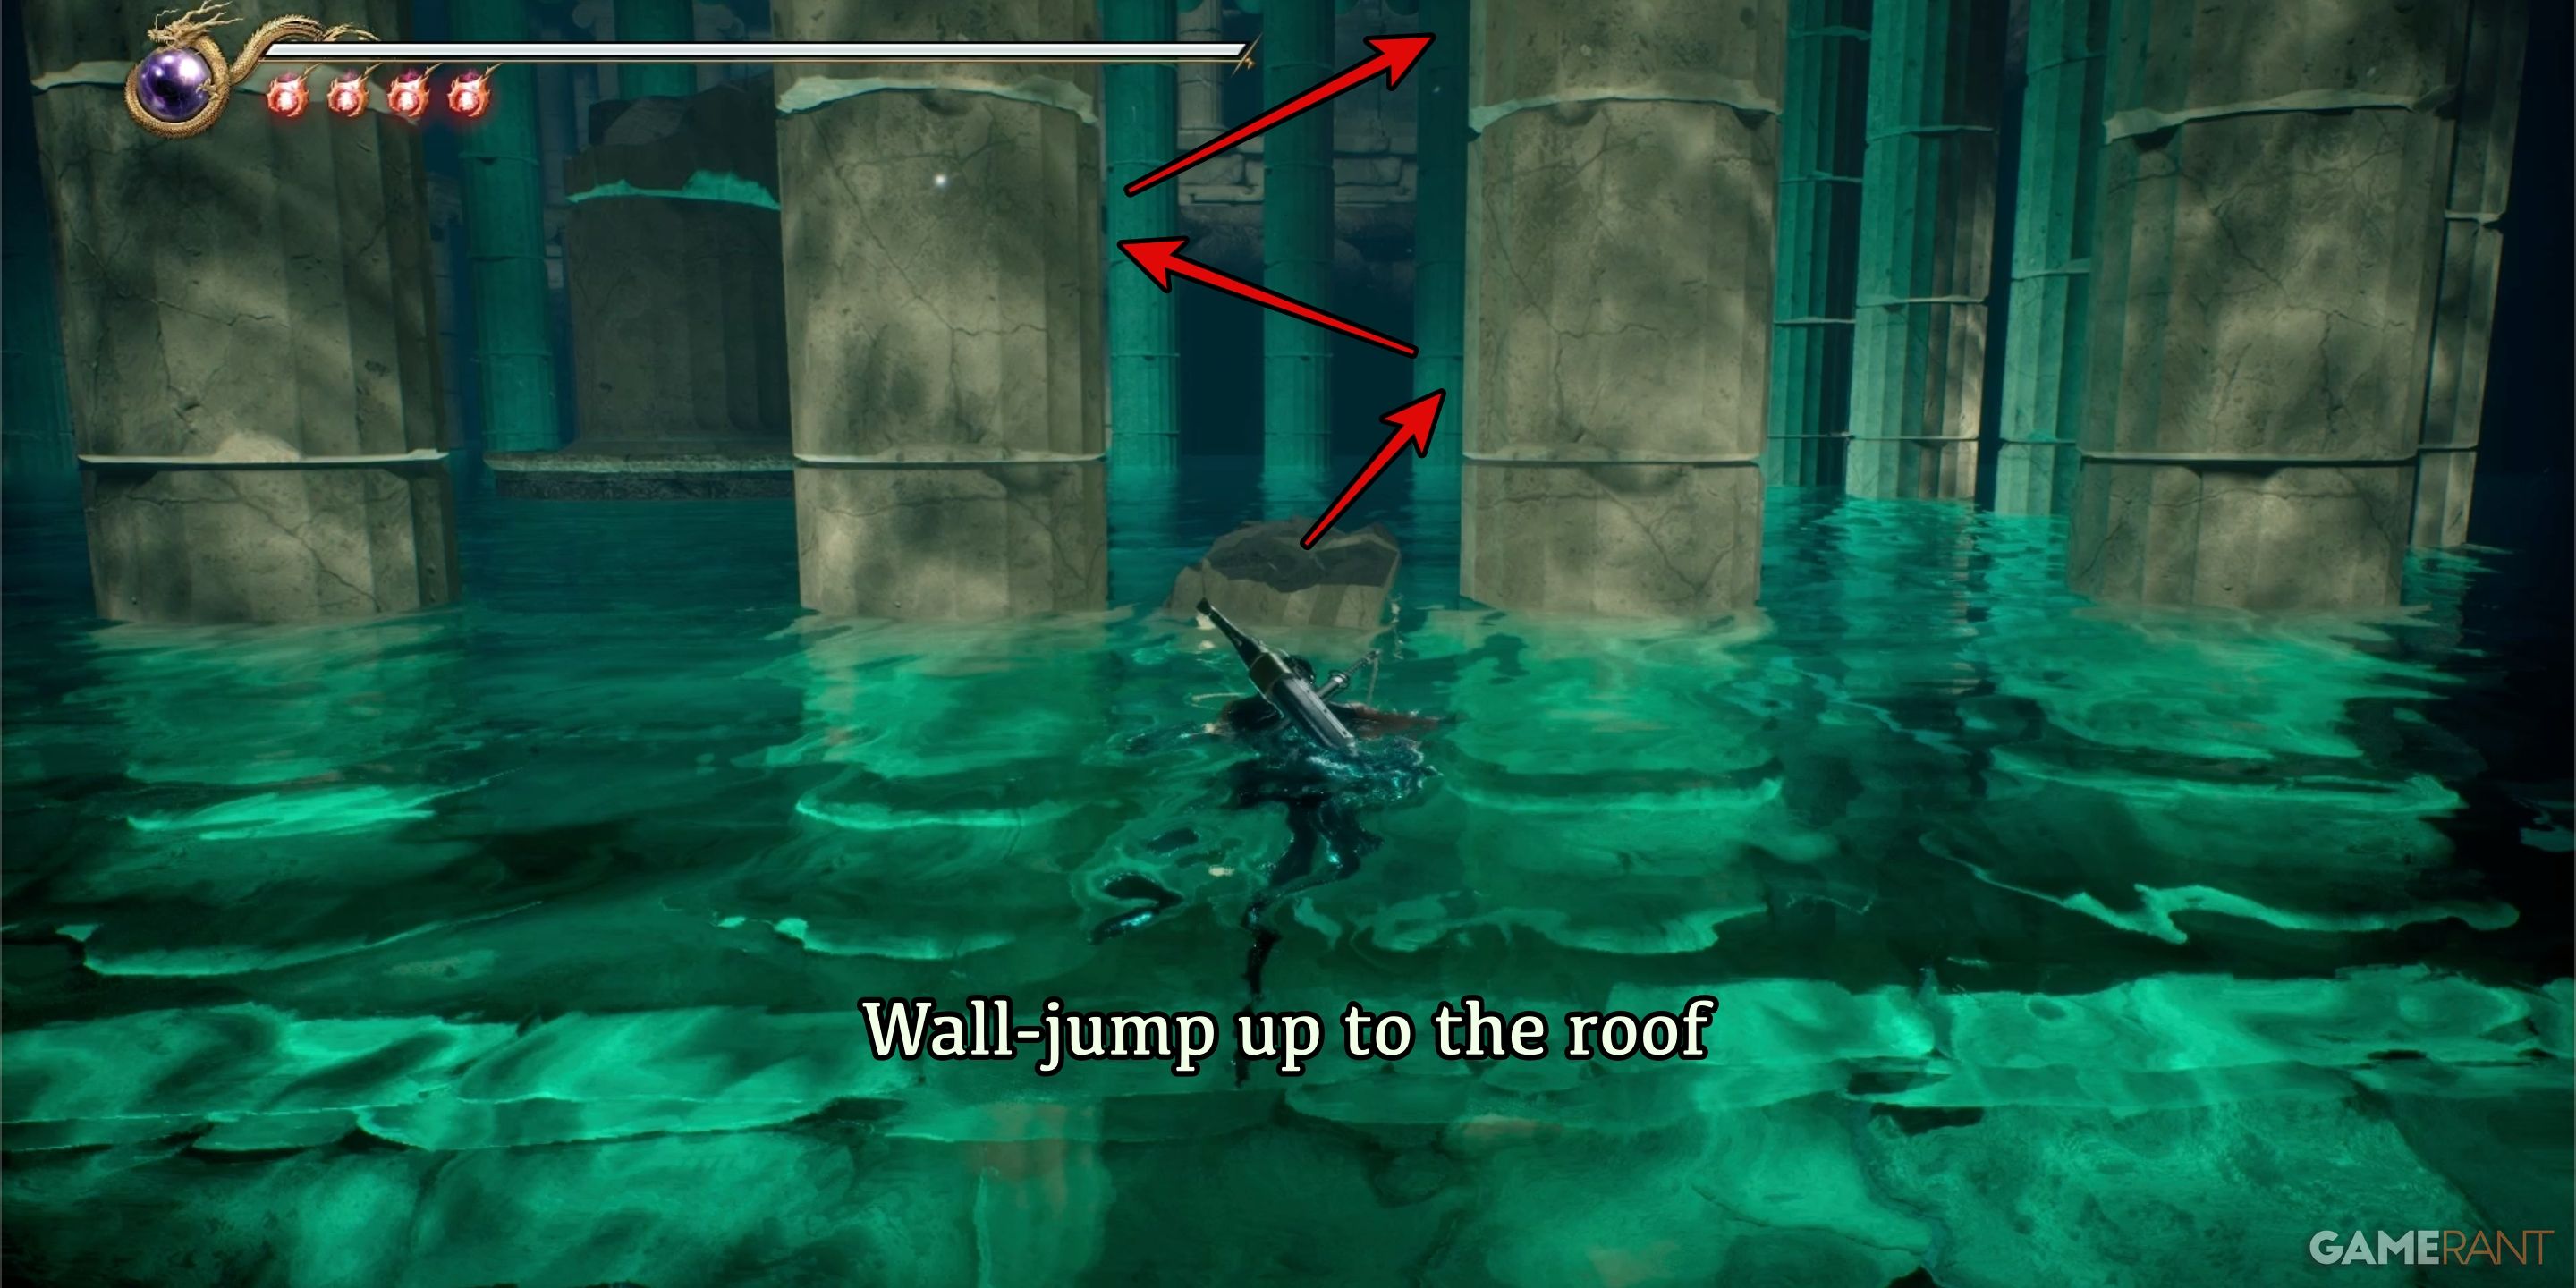
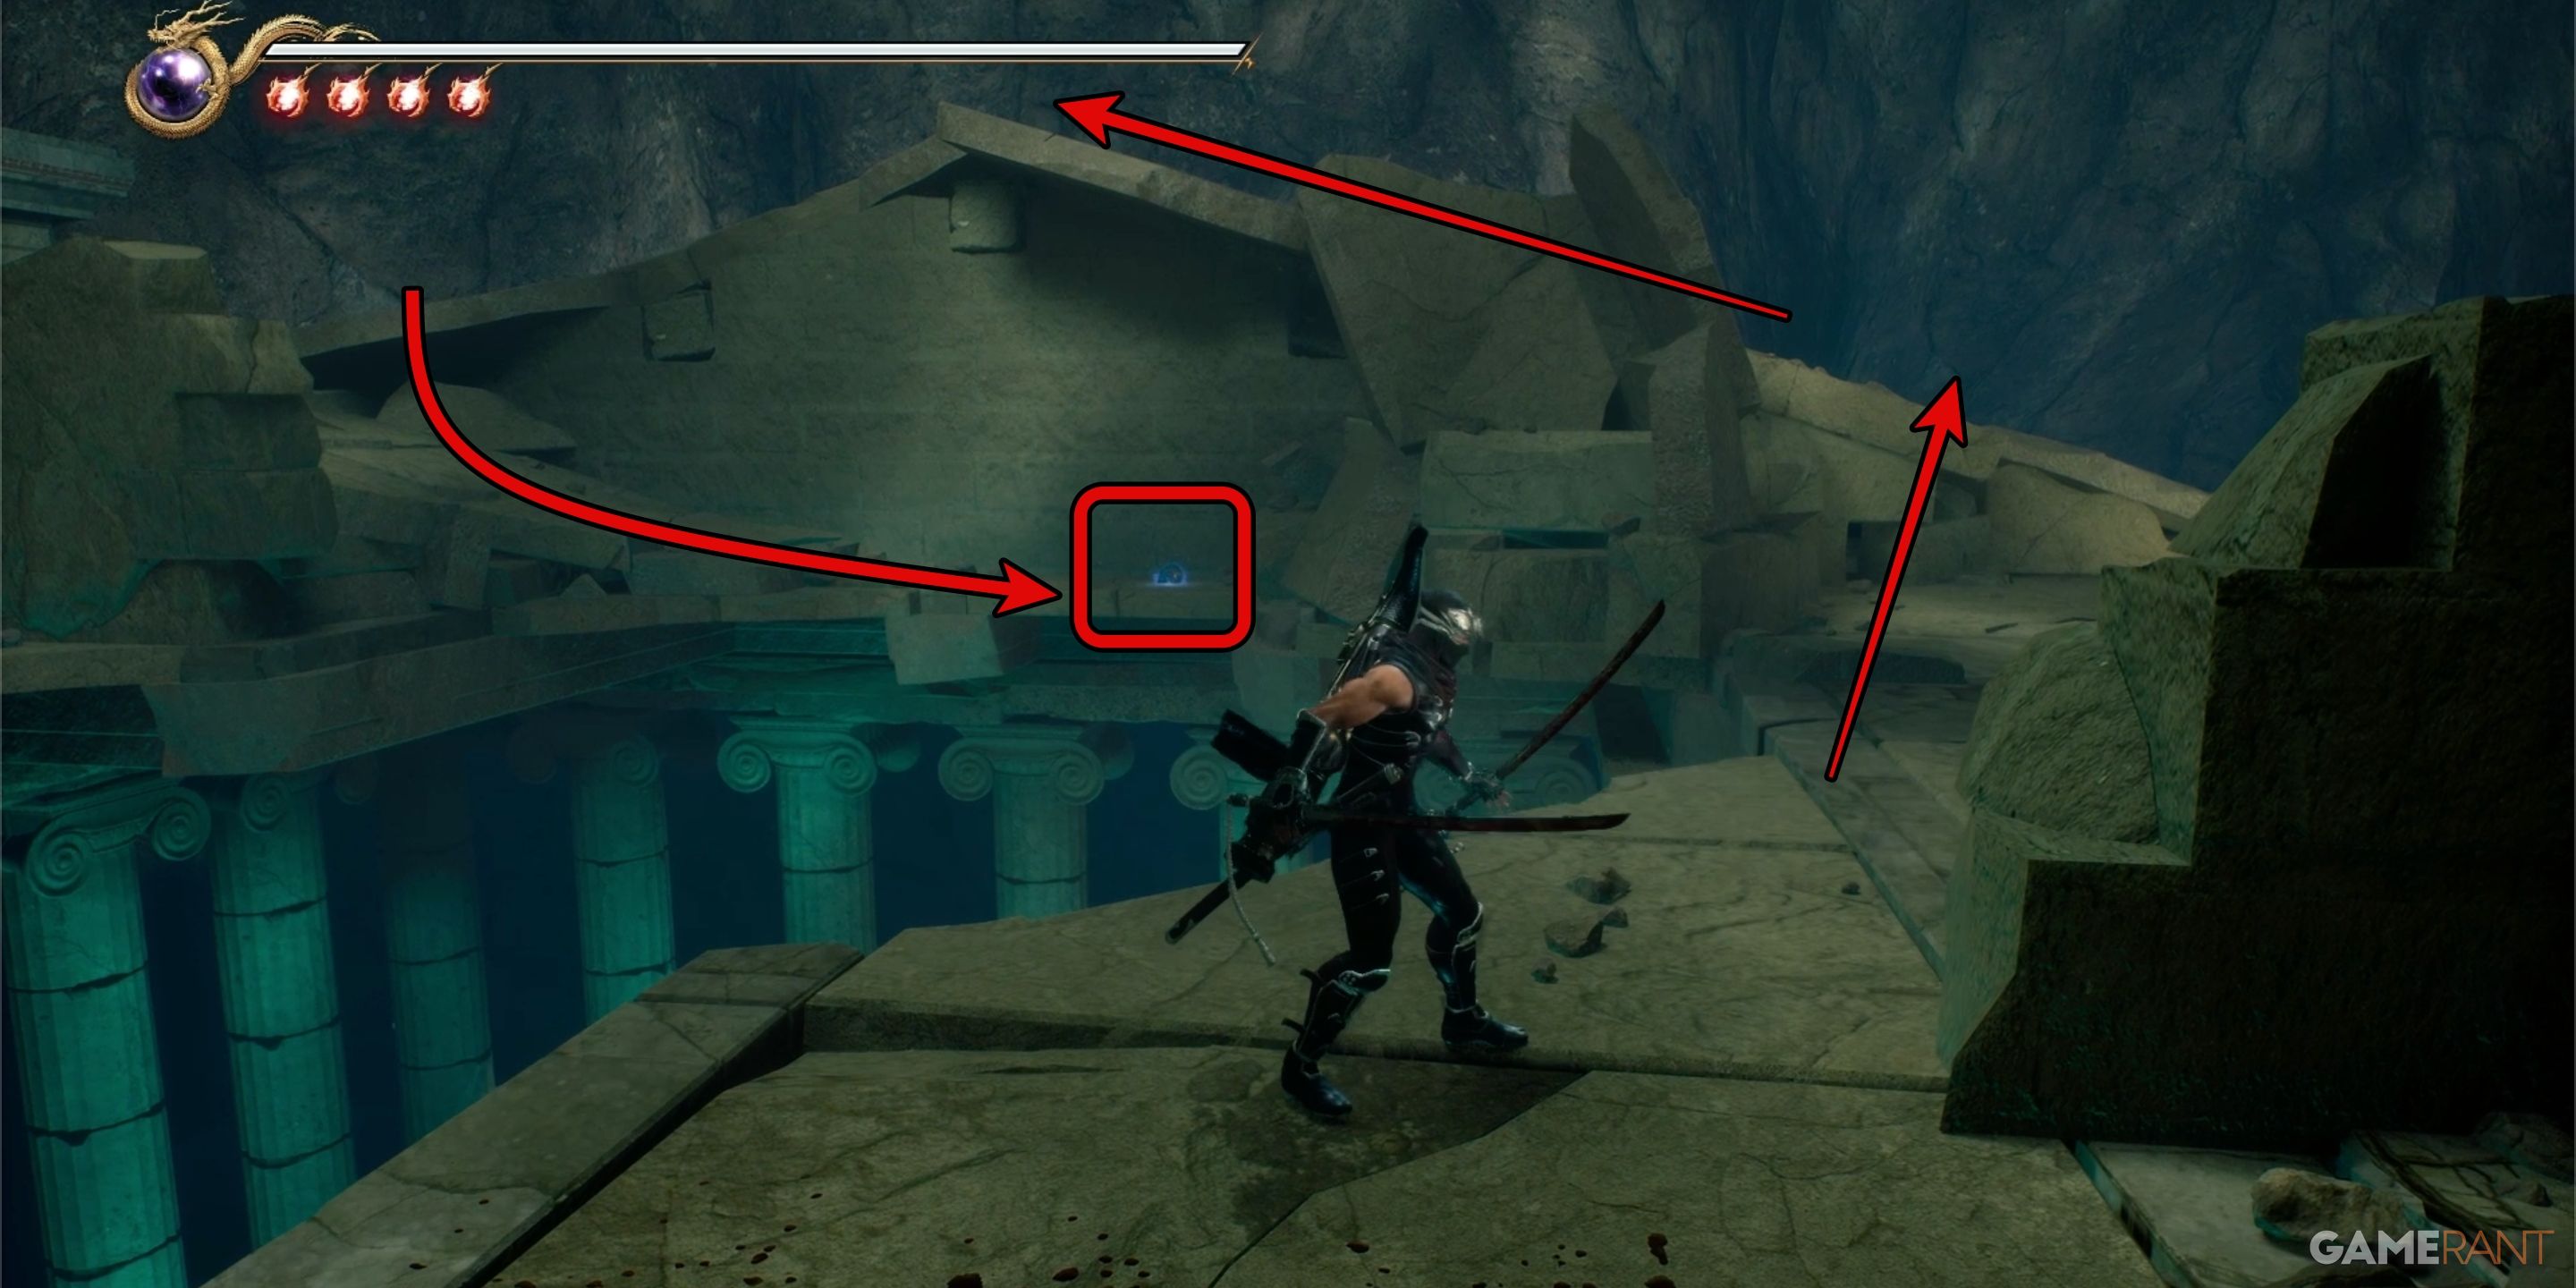
In Chapter 7, the first Crystal Skull isn’t far from the start of the level. Utilize a broken pillar as a launchpad for wall-jumping up to the roof of these ancient ruins, which you encountered at the end of Chapter 6 where the Water Dragon was defeated. Upon reaching the rooftop, look for Crystal Skull number 13 on a ledge situated beneath the pair of stone slabs that create a peak.
Crystal Skull 14:
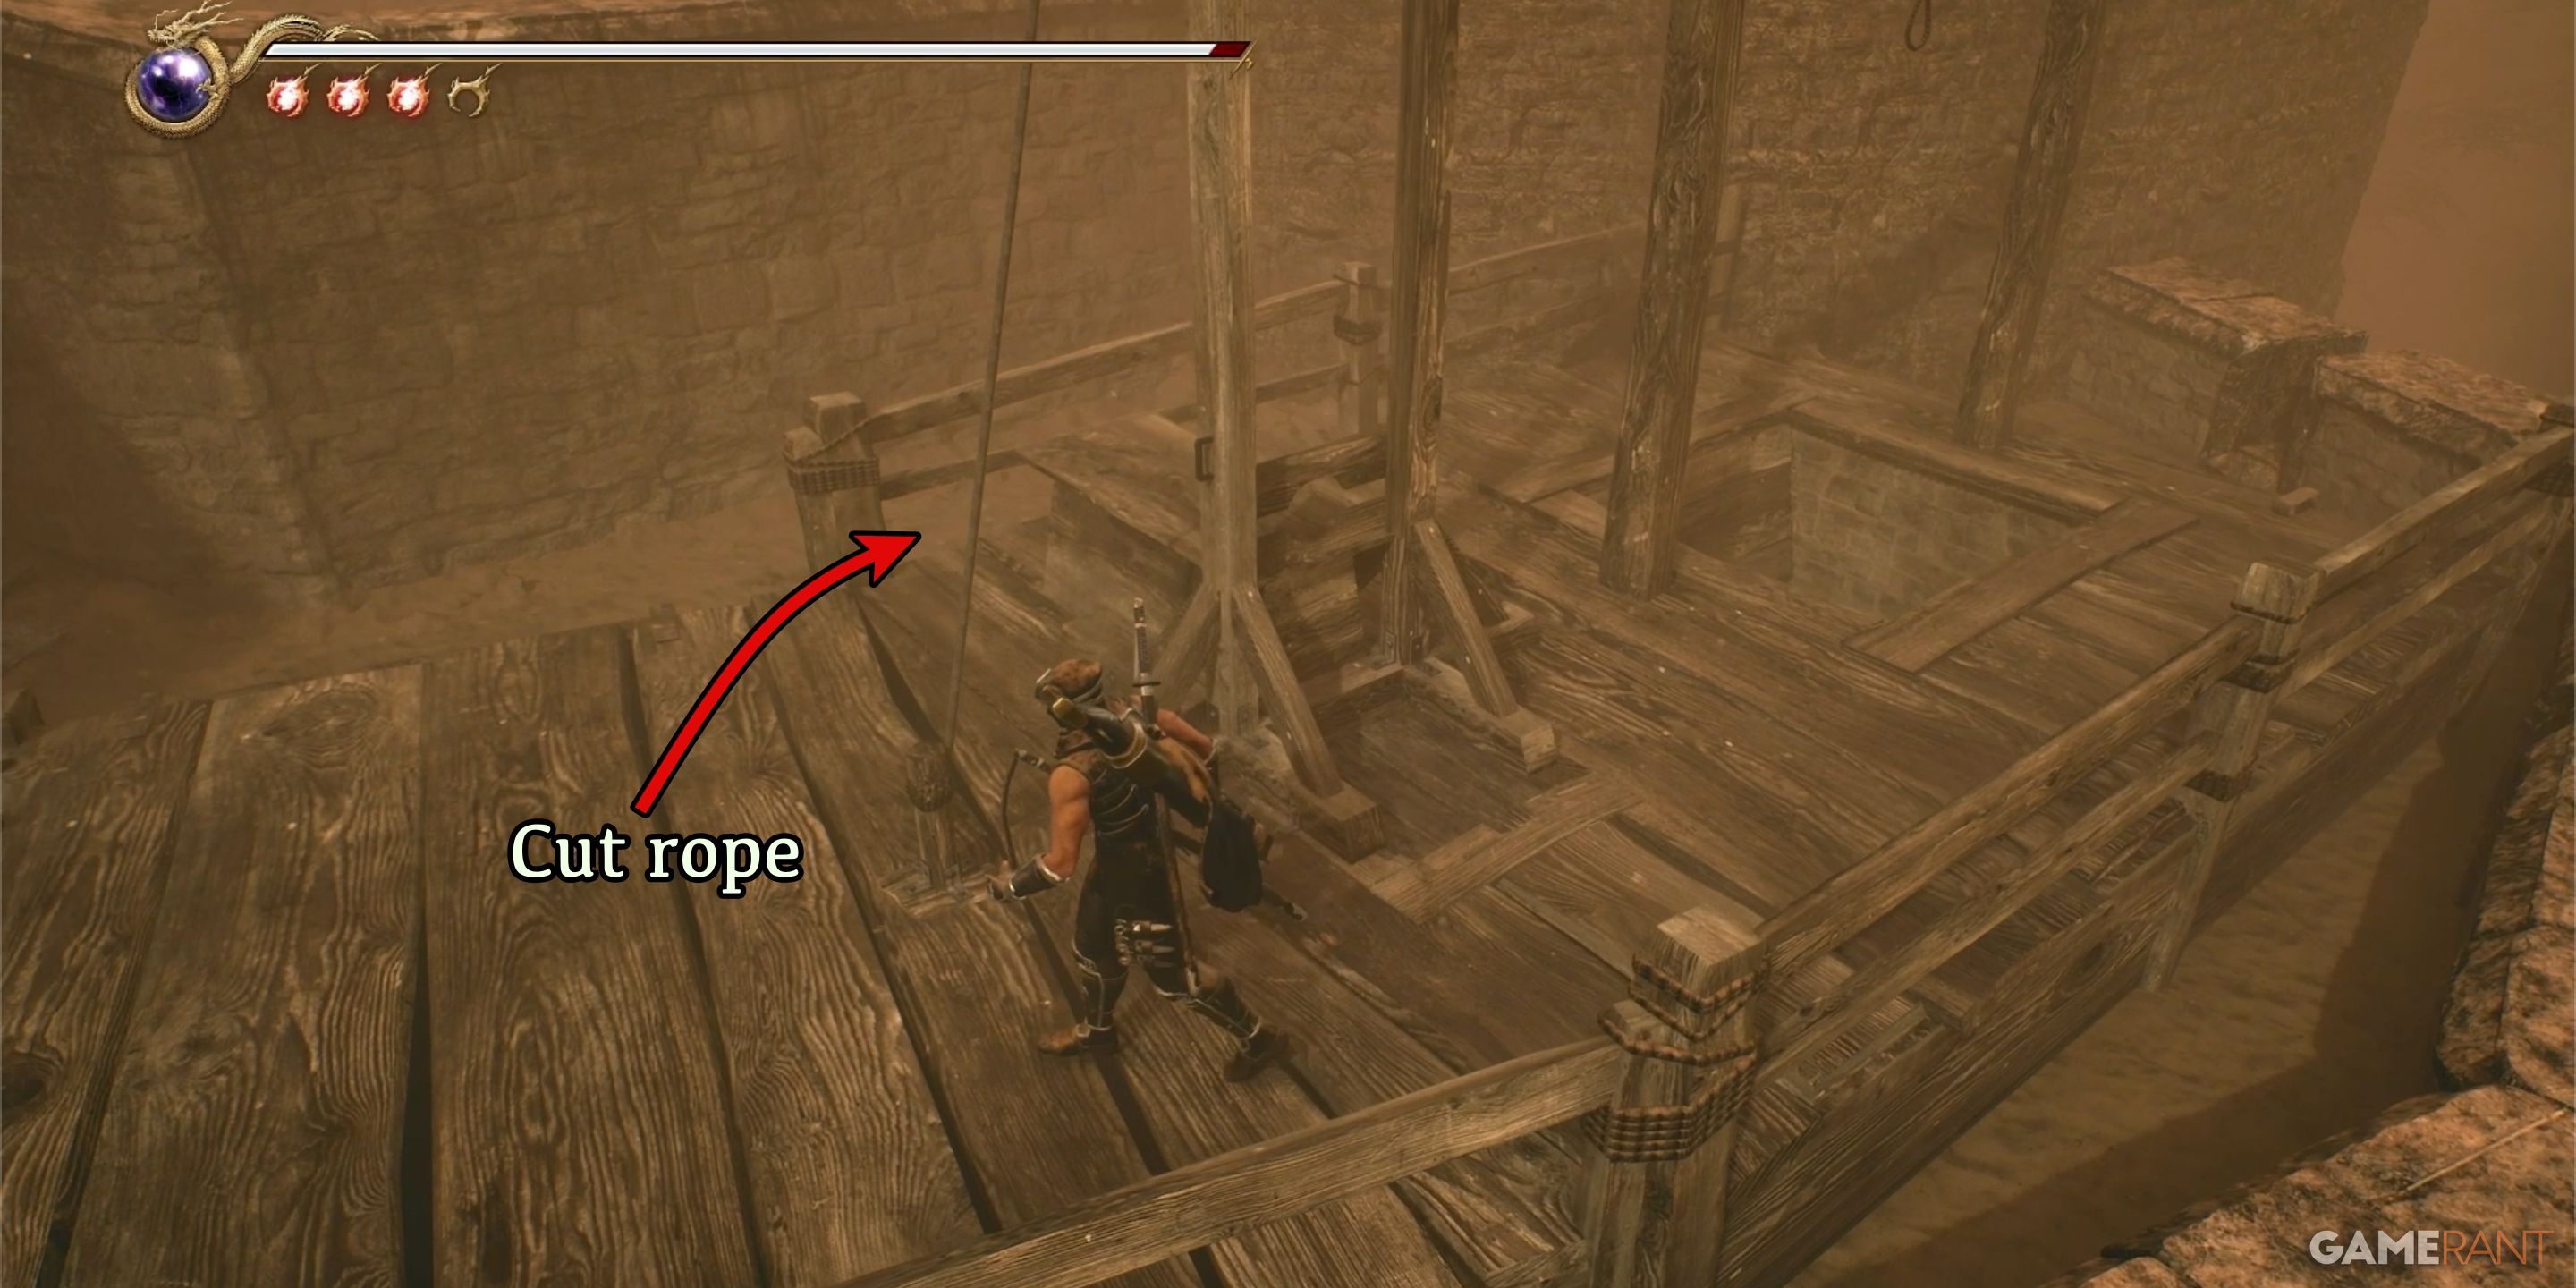
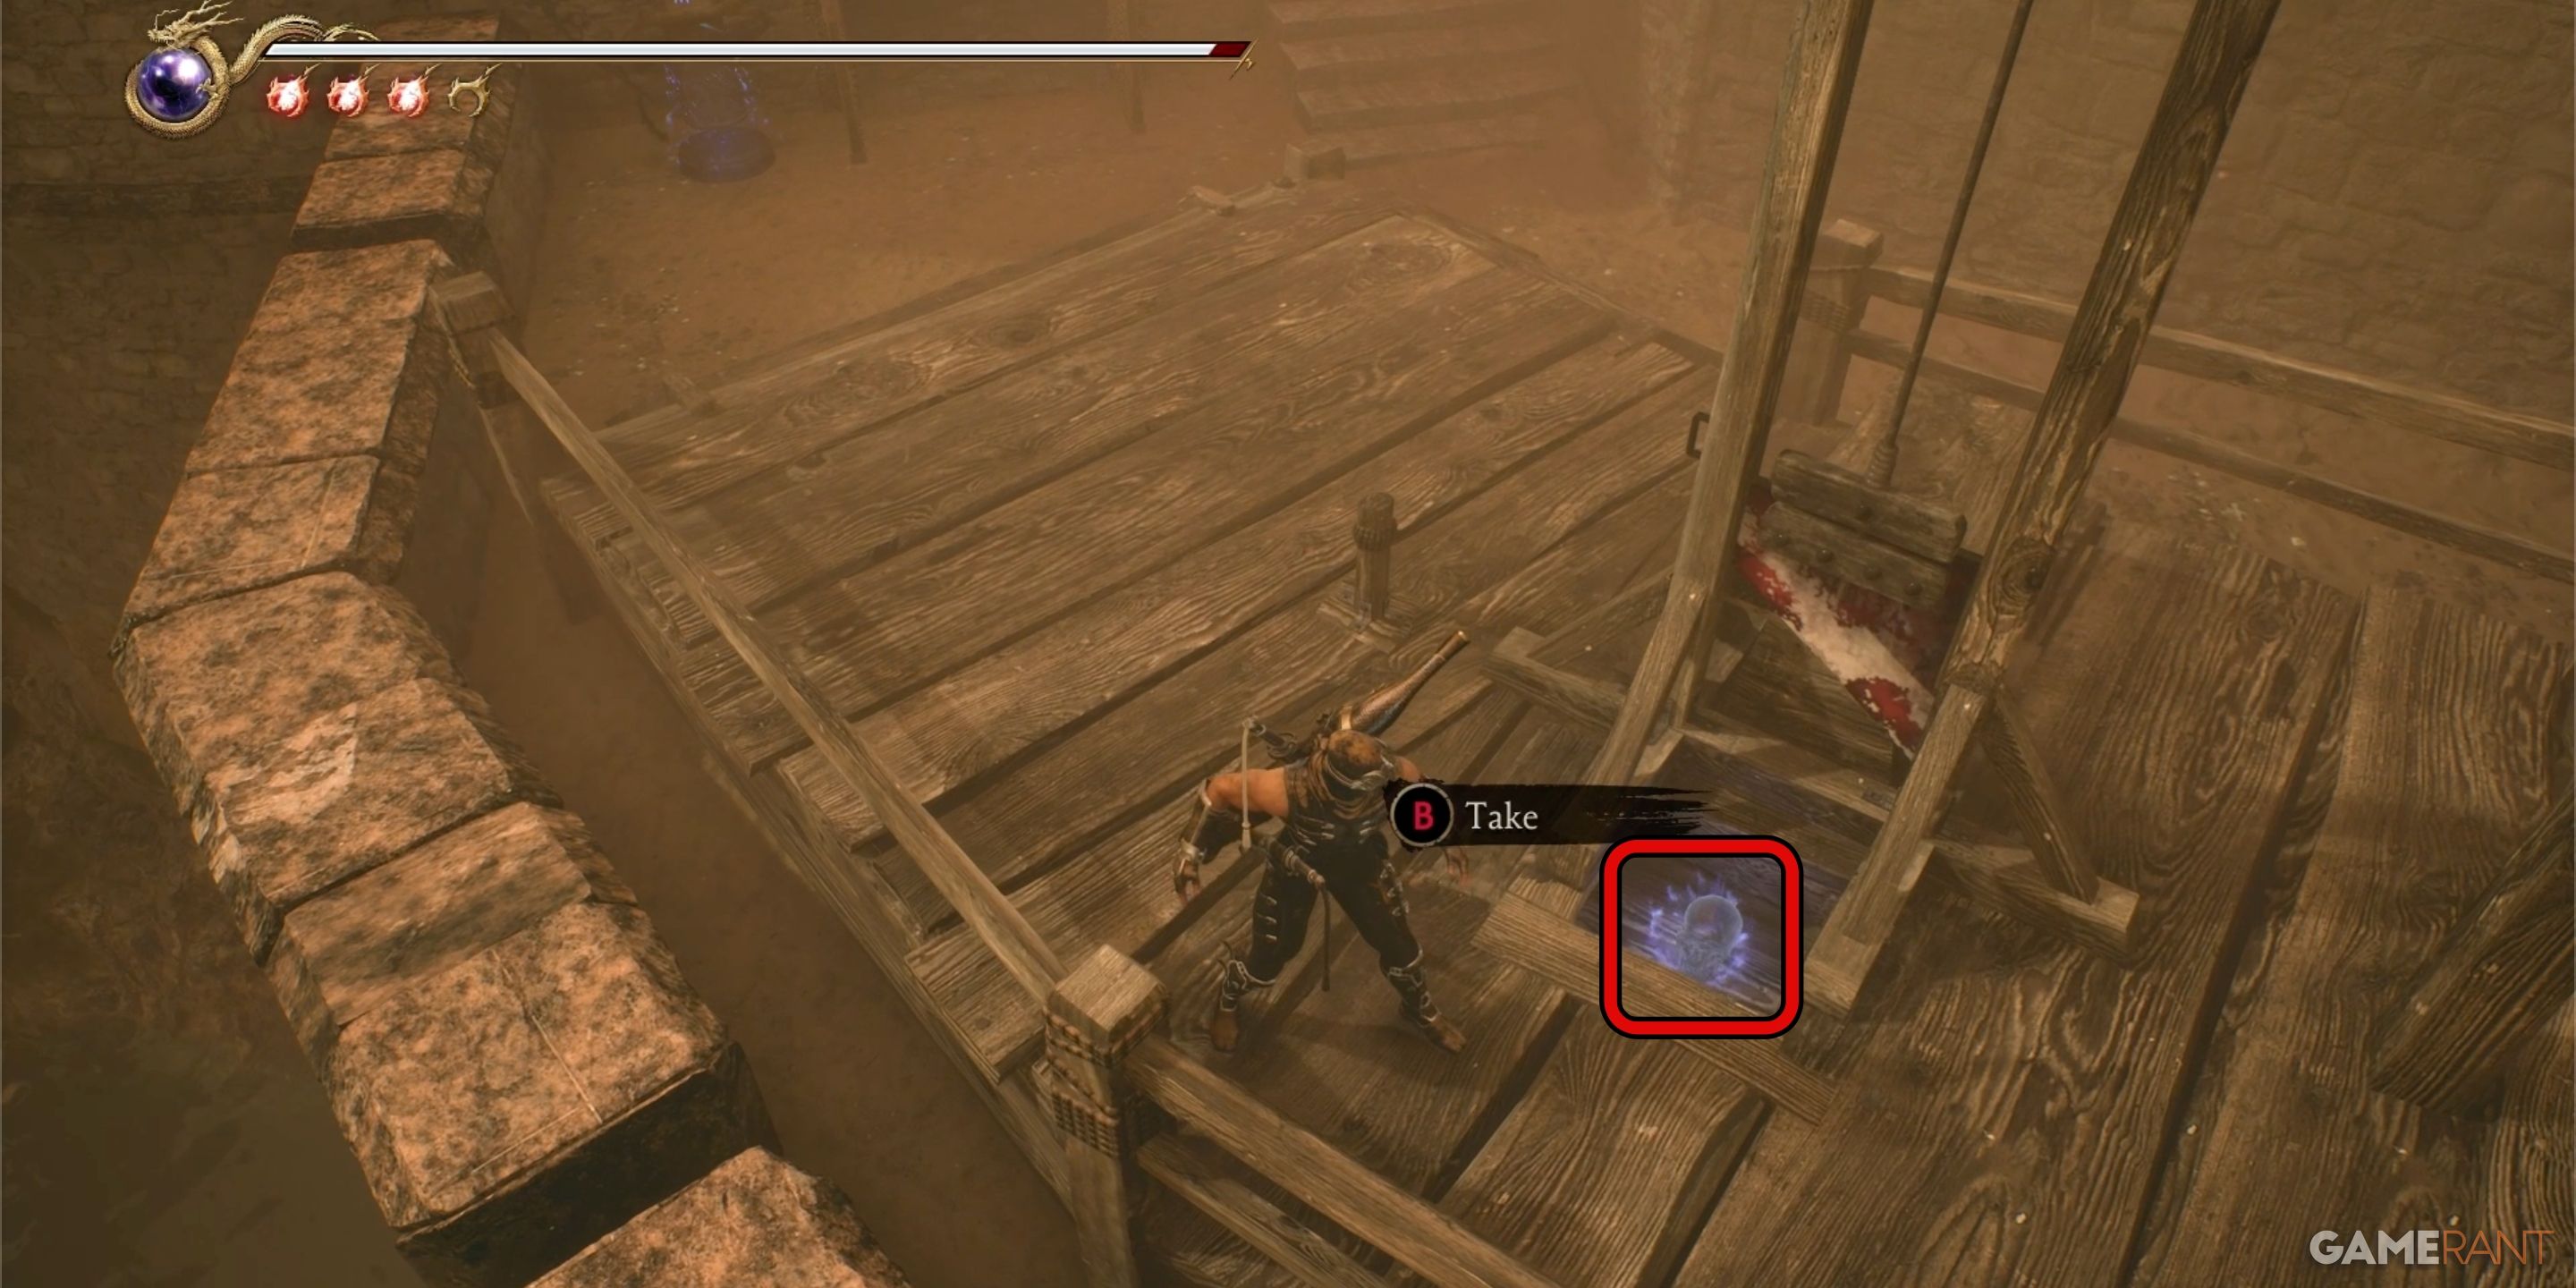
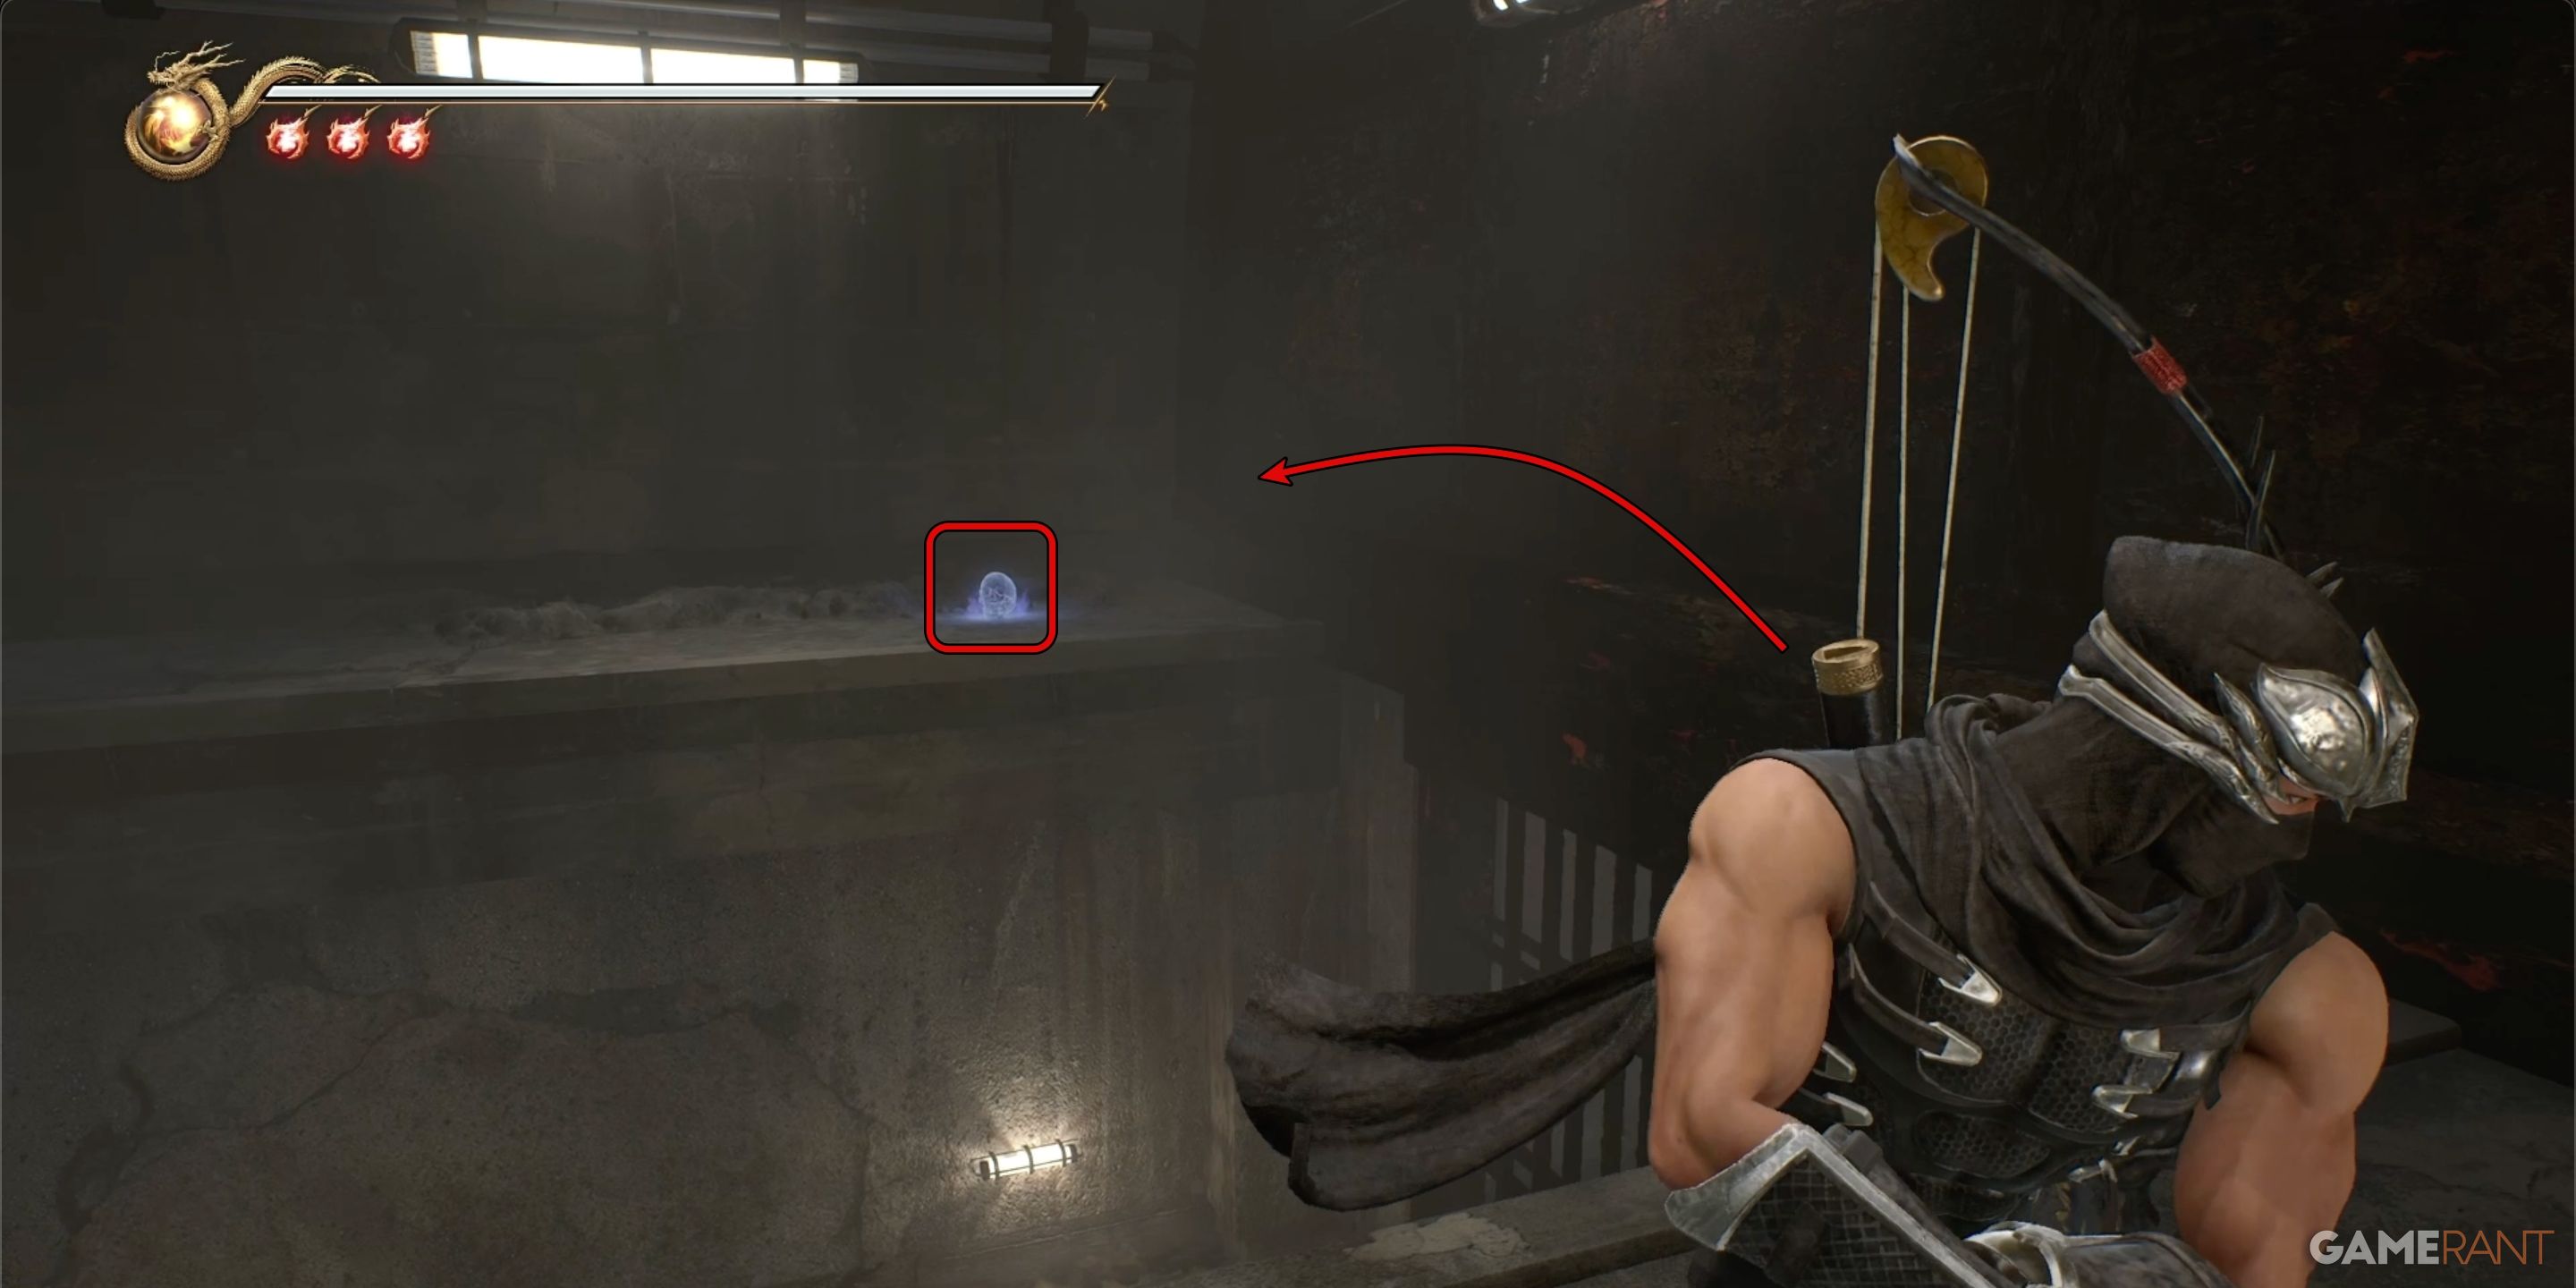
Upon exiting the cave, the following scene presents a guillotine atop the castle walls. After observing a short cutscene featuring Volf, aim and fire your weapon to sever the rope attached to the guillotine’s blade. This action will trigger the blade to drop, unveiling the hiding place of Crystal Skull 14.
Crystal Skull 15:
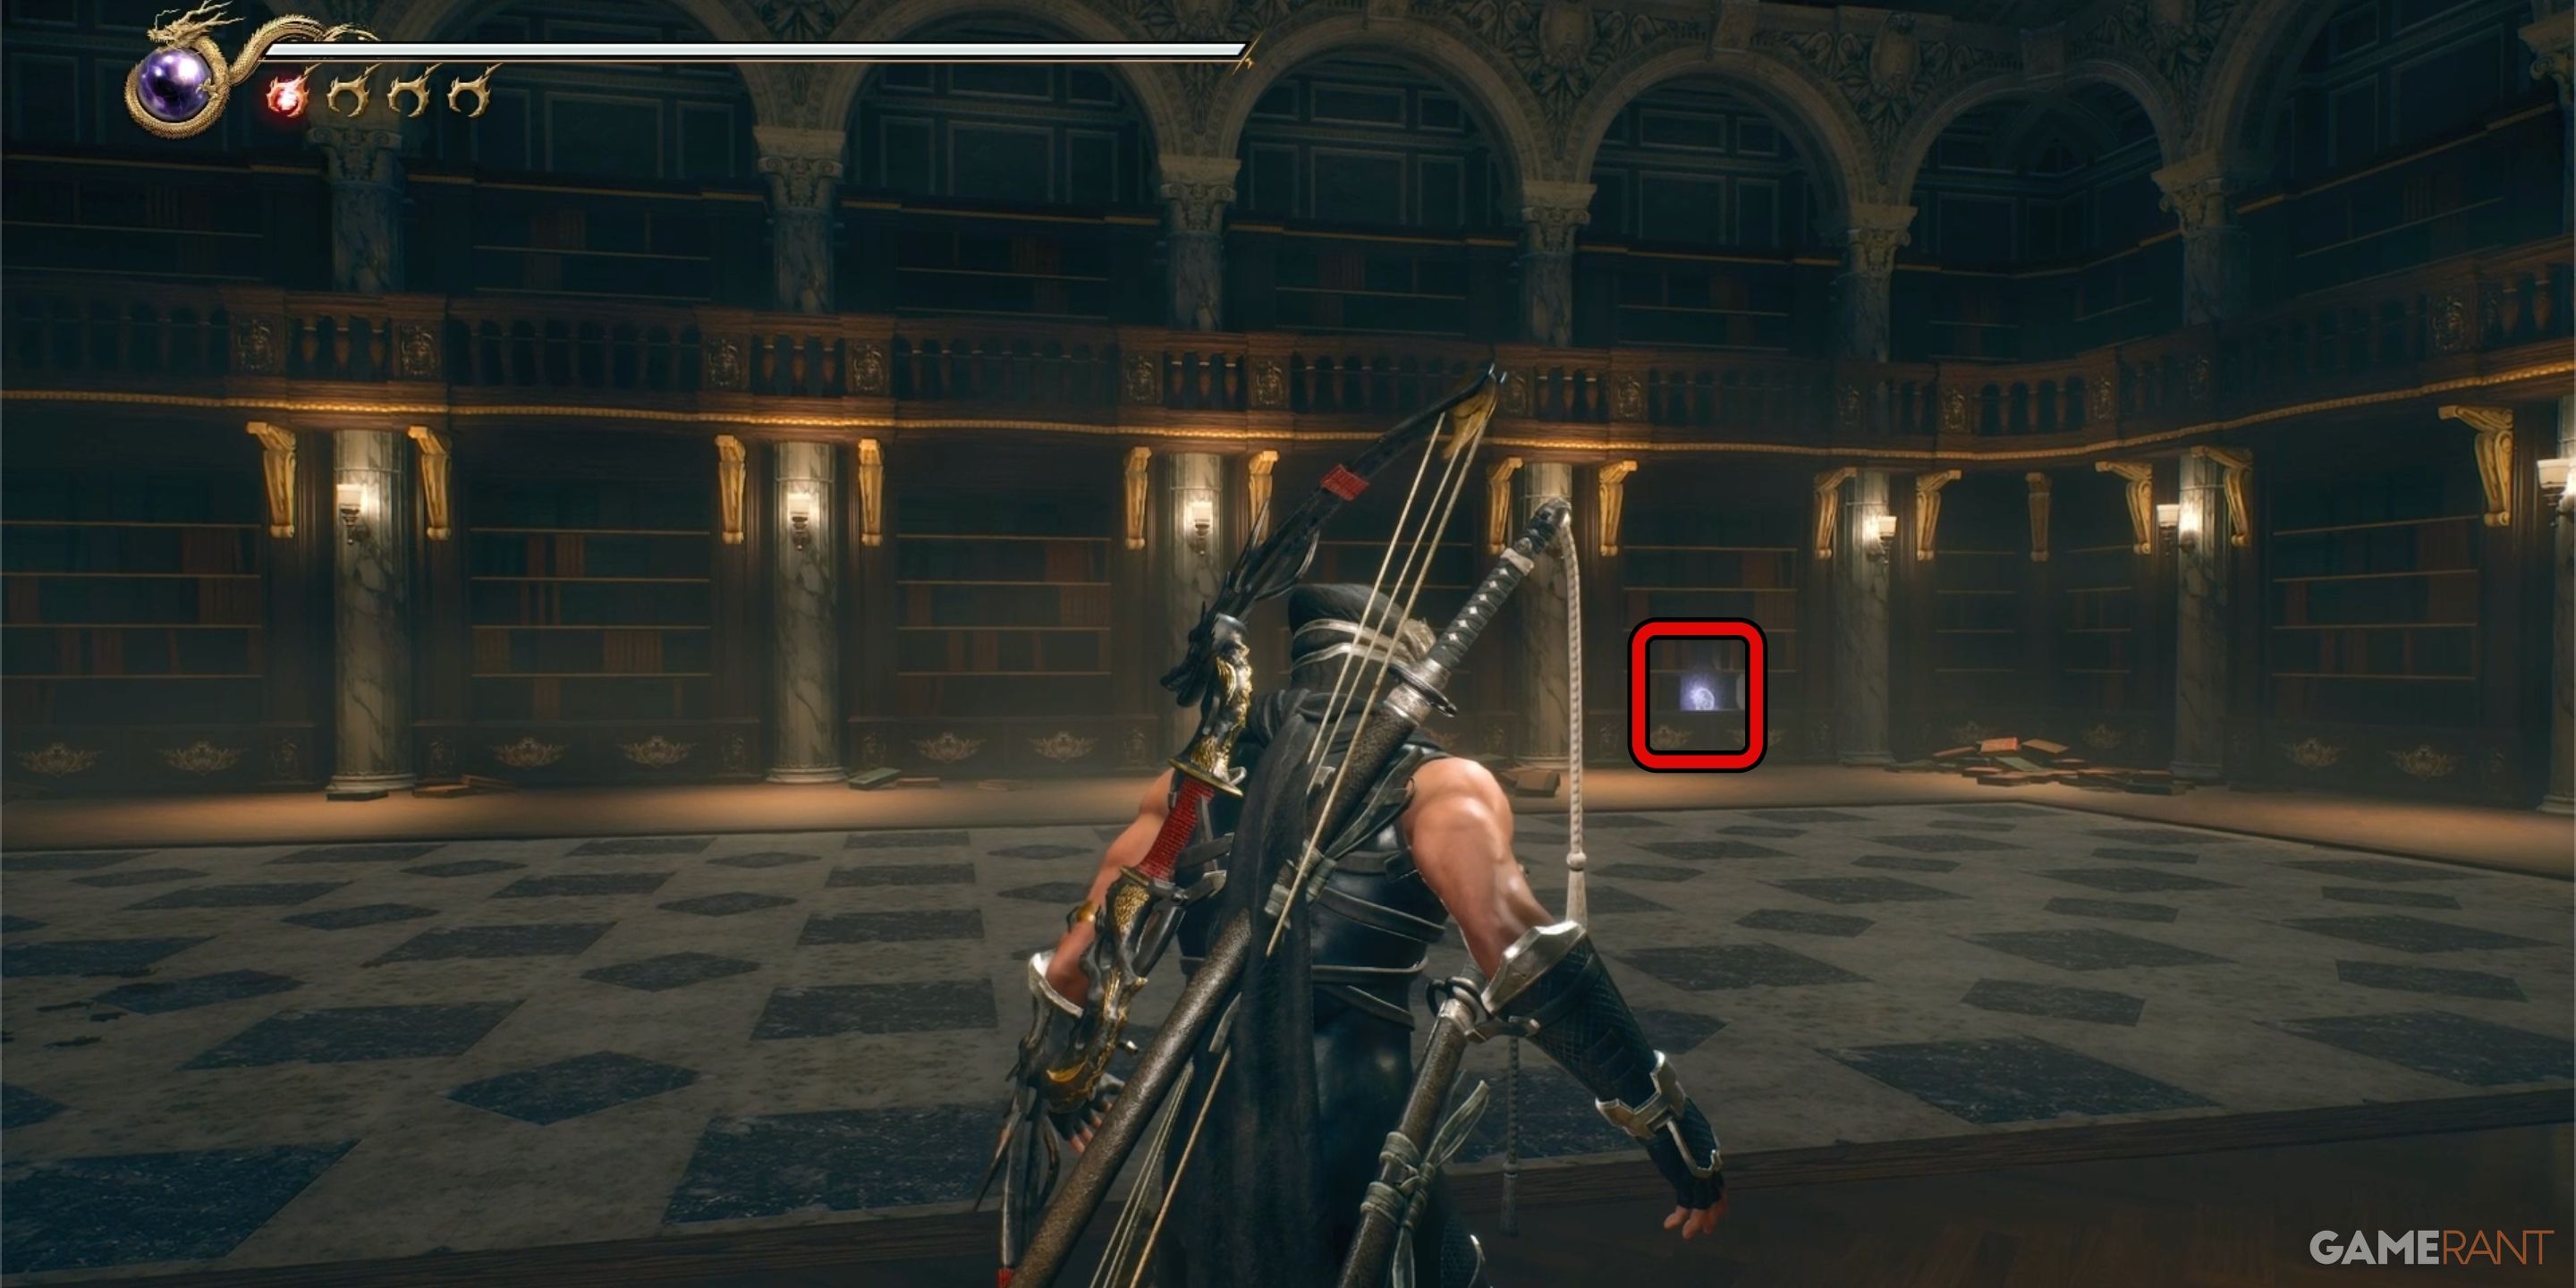
In chapter 7, you’ll find the final Crystal Skull tucked away in a library chamber up the white marble steps where Save Point 6 is positioned. Once you’ve vanquished the adversaries within the library, face the fireplace with your back to it. To your left, near the right corner, there will be a bookshelf. Attack this shelf, and voila! The Crystal Skull number 15 will come into view.
There are no Crystal Skulls found in Chapter 8.
All Crystal Skull Locations in Chapter 9 – Ninja Gaiden 2 Black
There are two Crystal Skulls found in Ninja Gaiden 2 Black Chapter 9: The Flying Fortress Daedalus.
Crystal Skull 16:
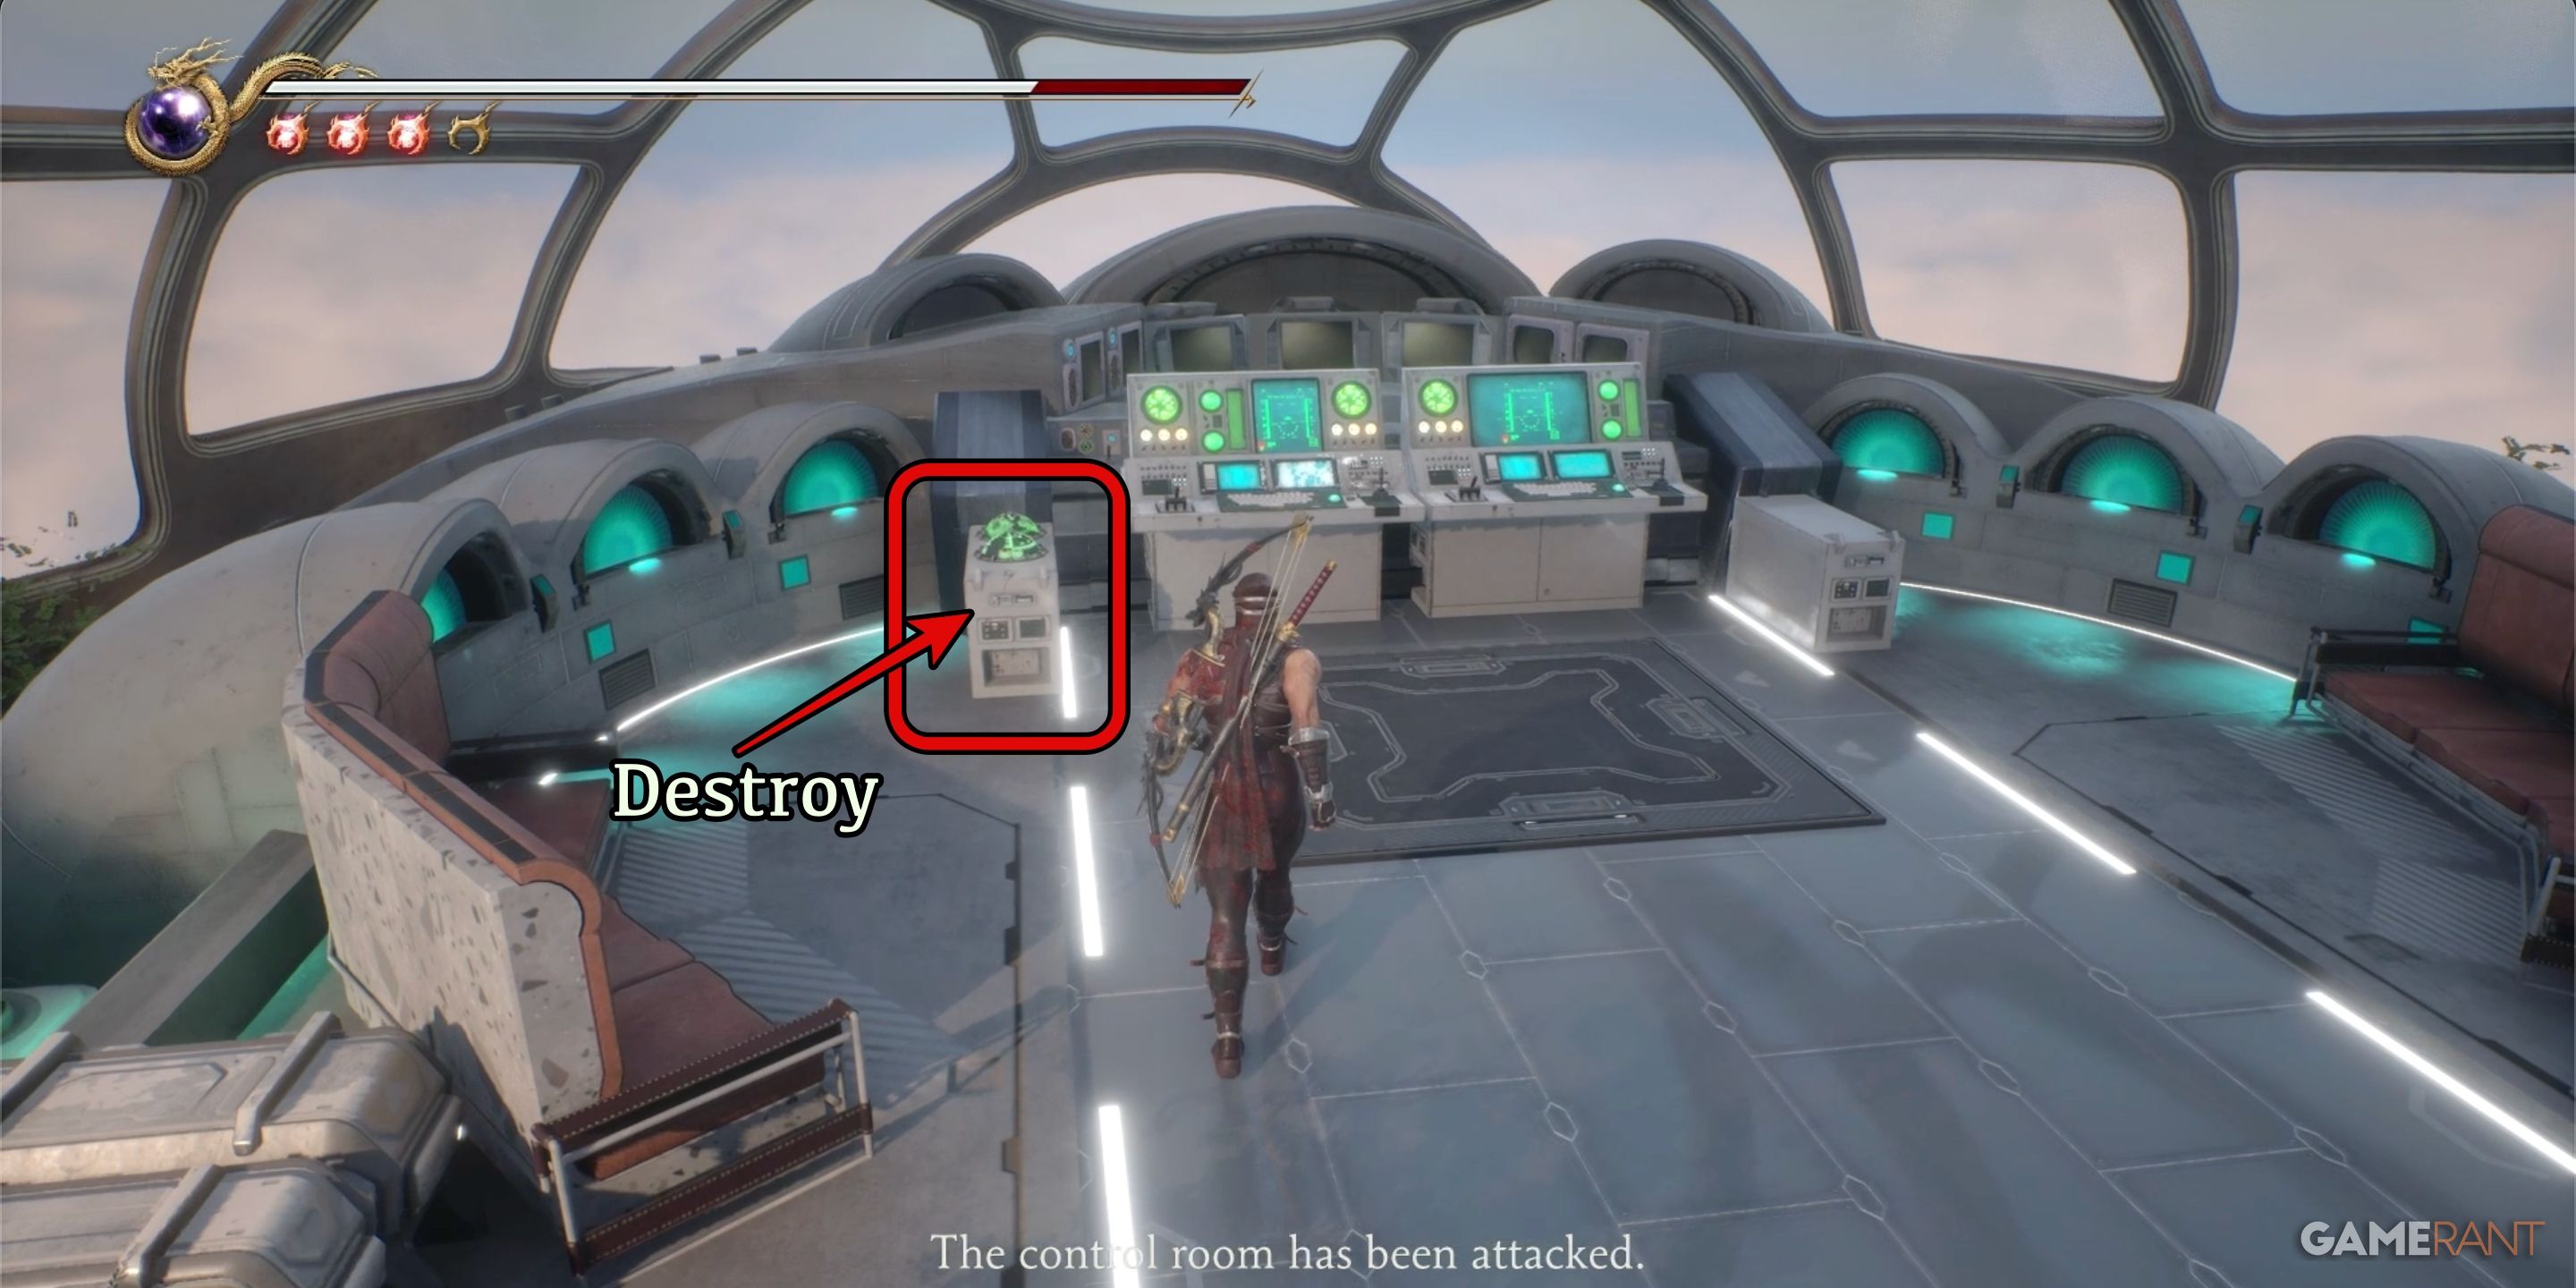
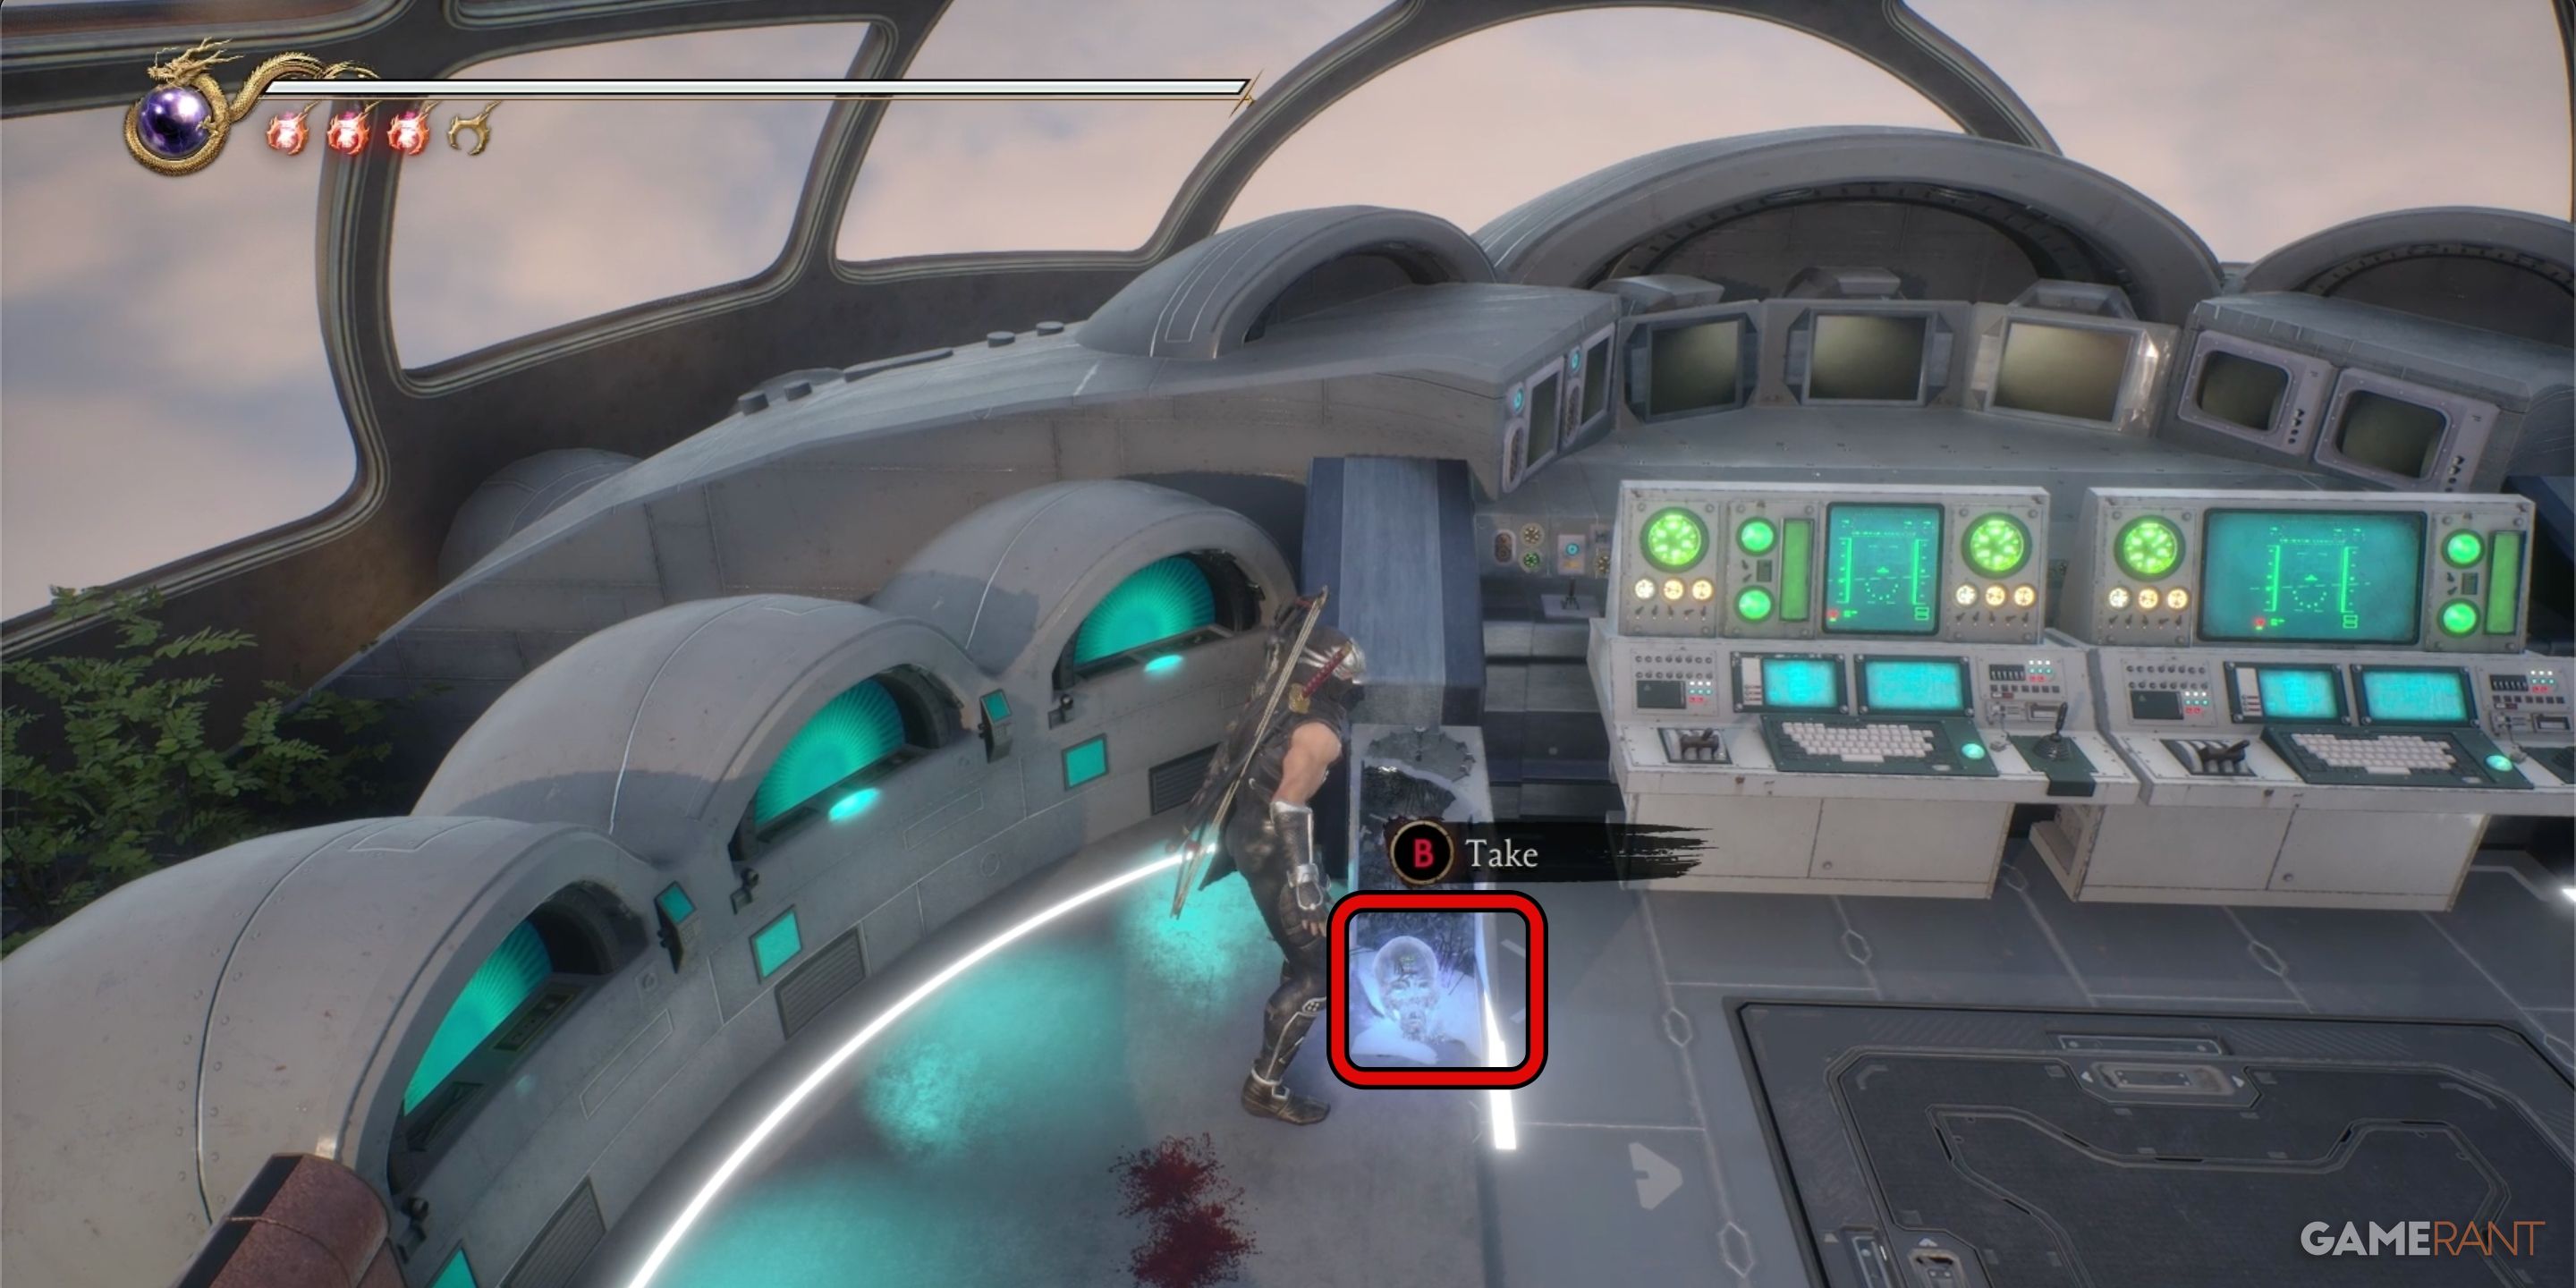
In Chapter 9, the initial crystal skull found is positioned close to the second safety spot within the cockpit area. Following your victory over the ninjas safeguarding the control room, proceed inside and utilize your tool to demolish the compact console situated on the left side of the primary control panel. The destruction of this console will unveil Crystal Skull 16.
Crystal Skull 17:
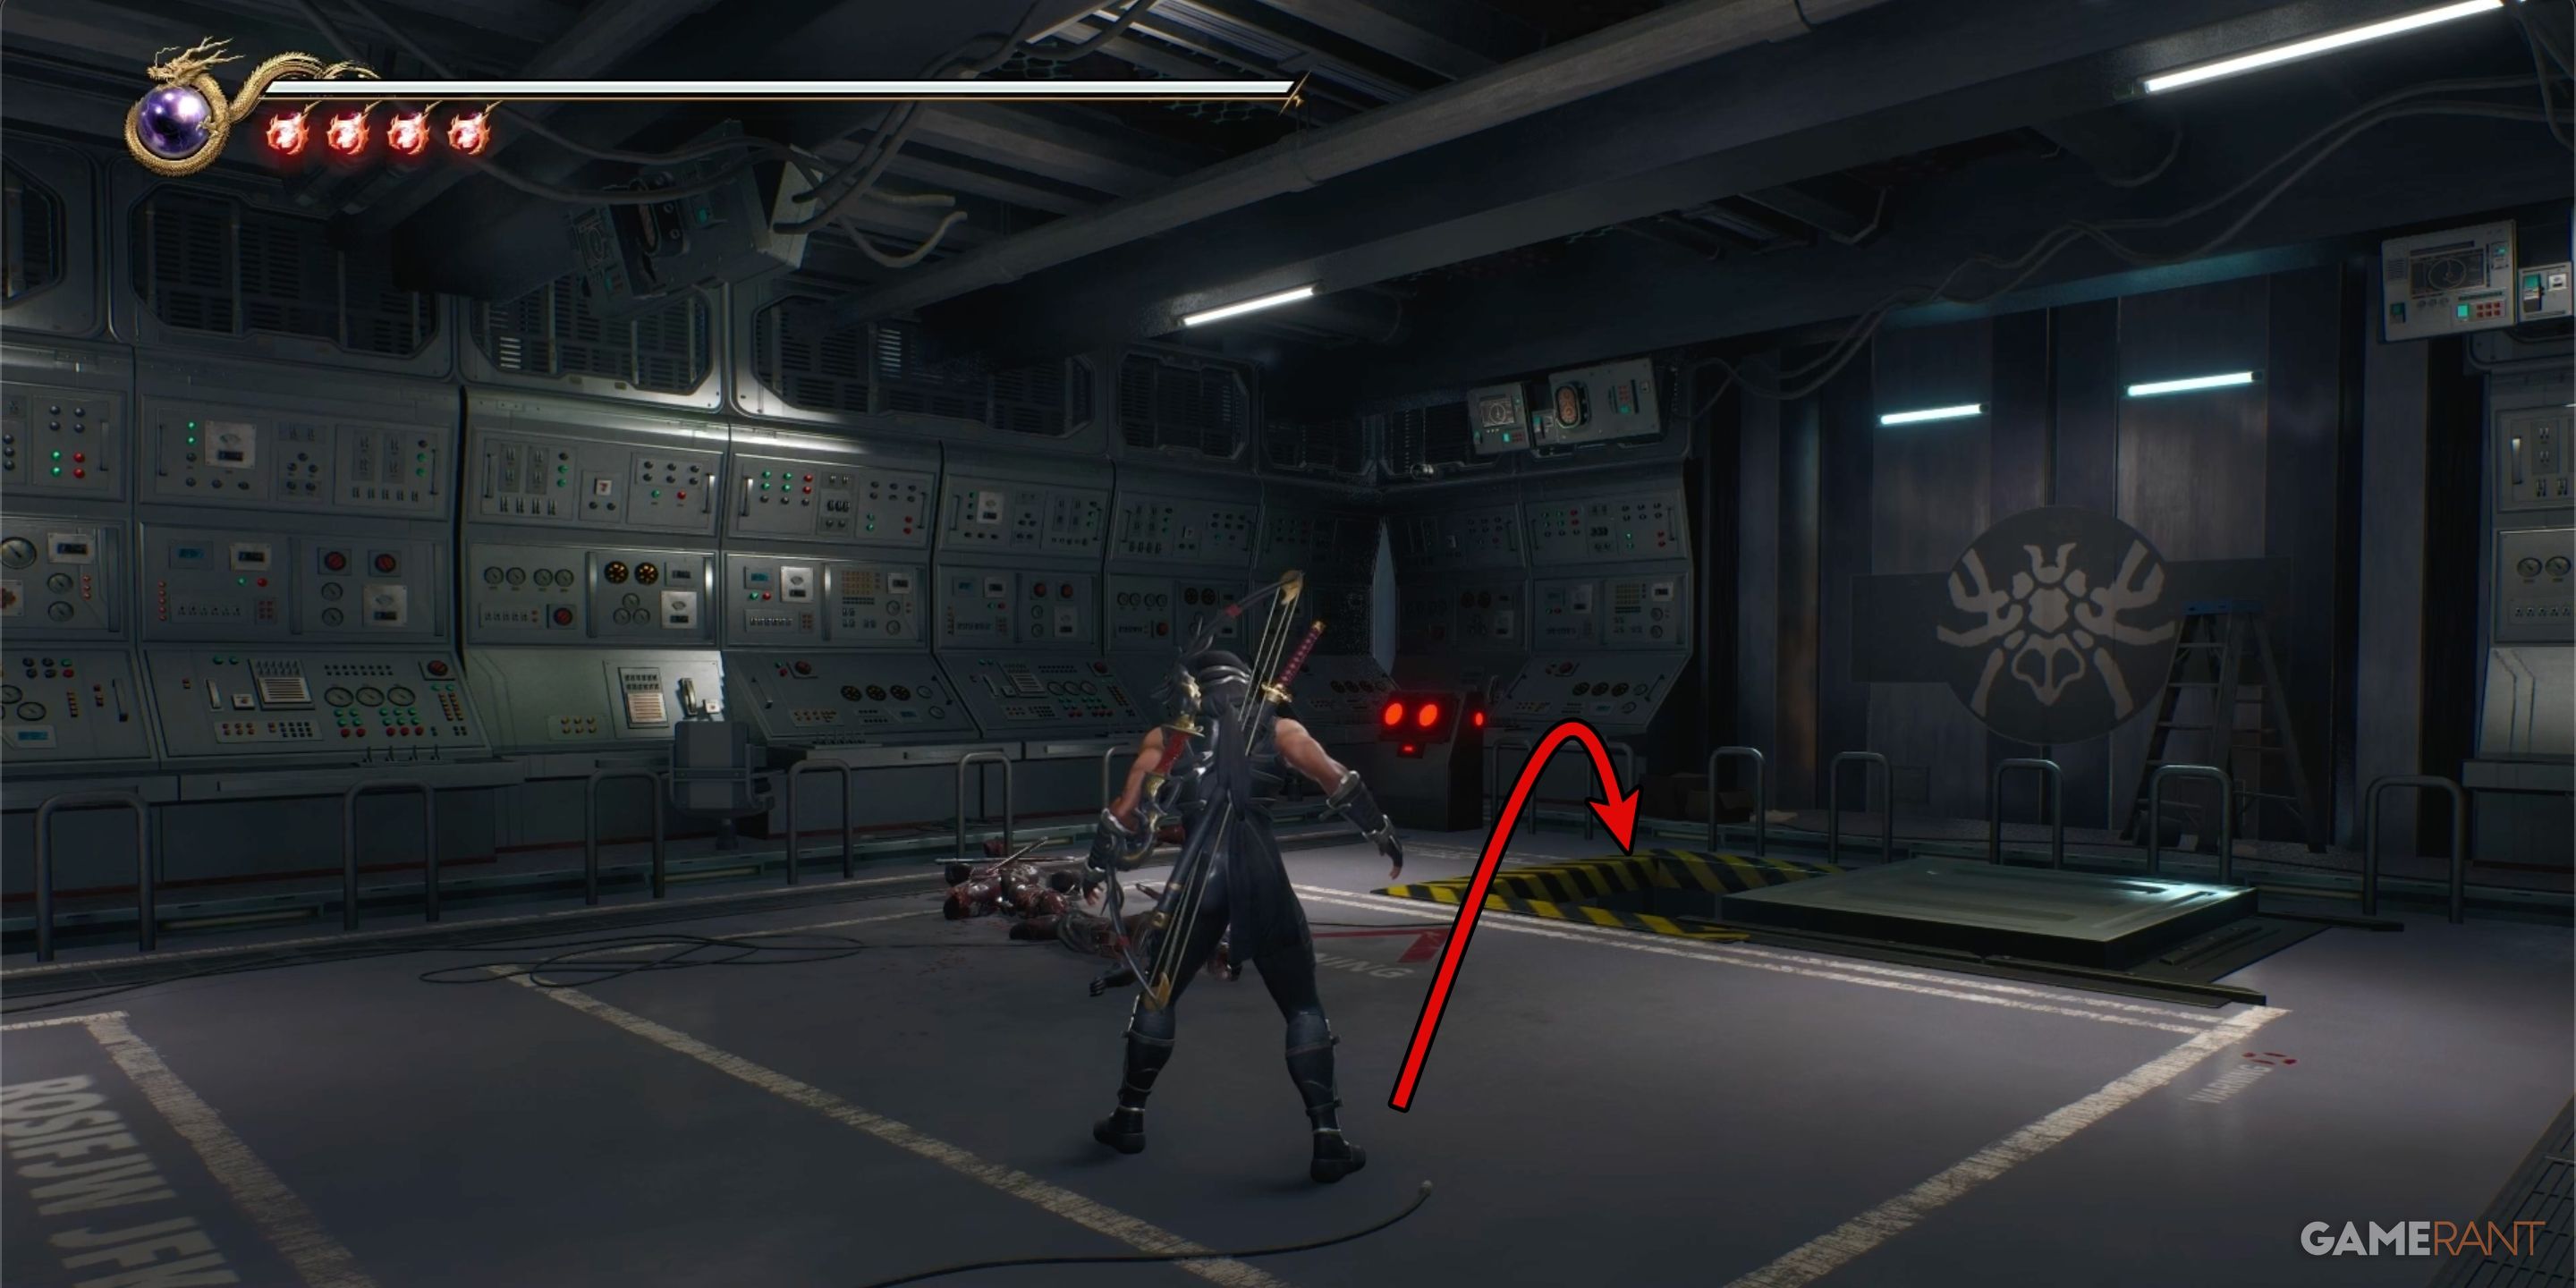
From the fourth save point, which is found in the chamber with the Spider Ninja logo on the wall, use the ladder that becomes available after clearing the chamber to reach the level below.
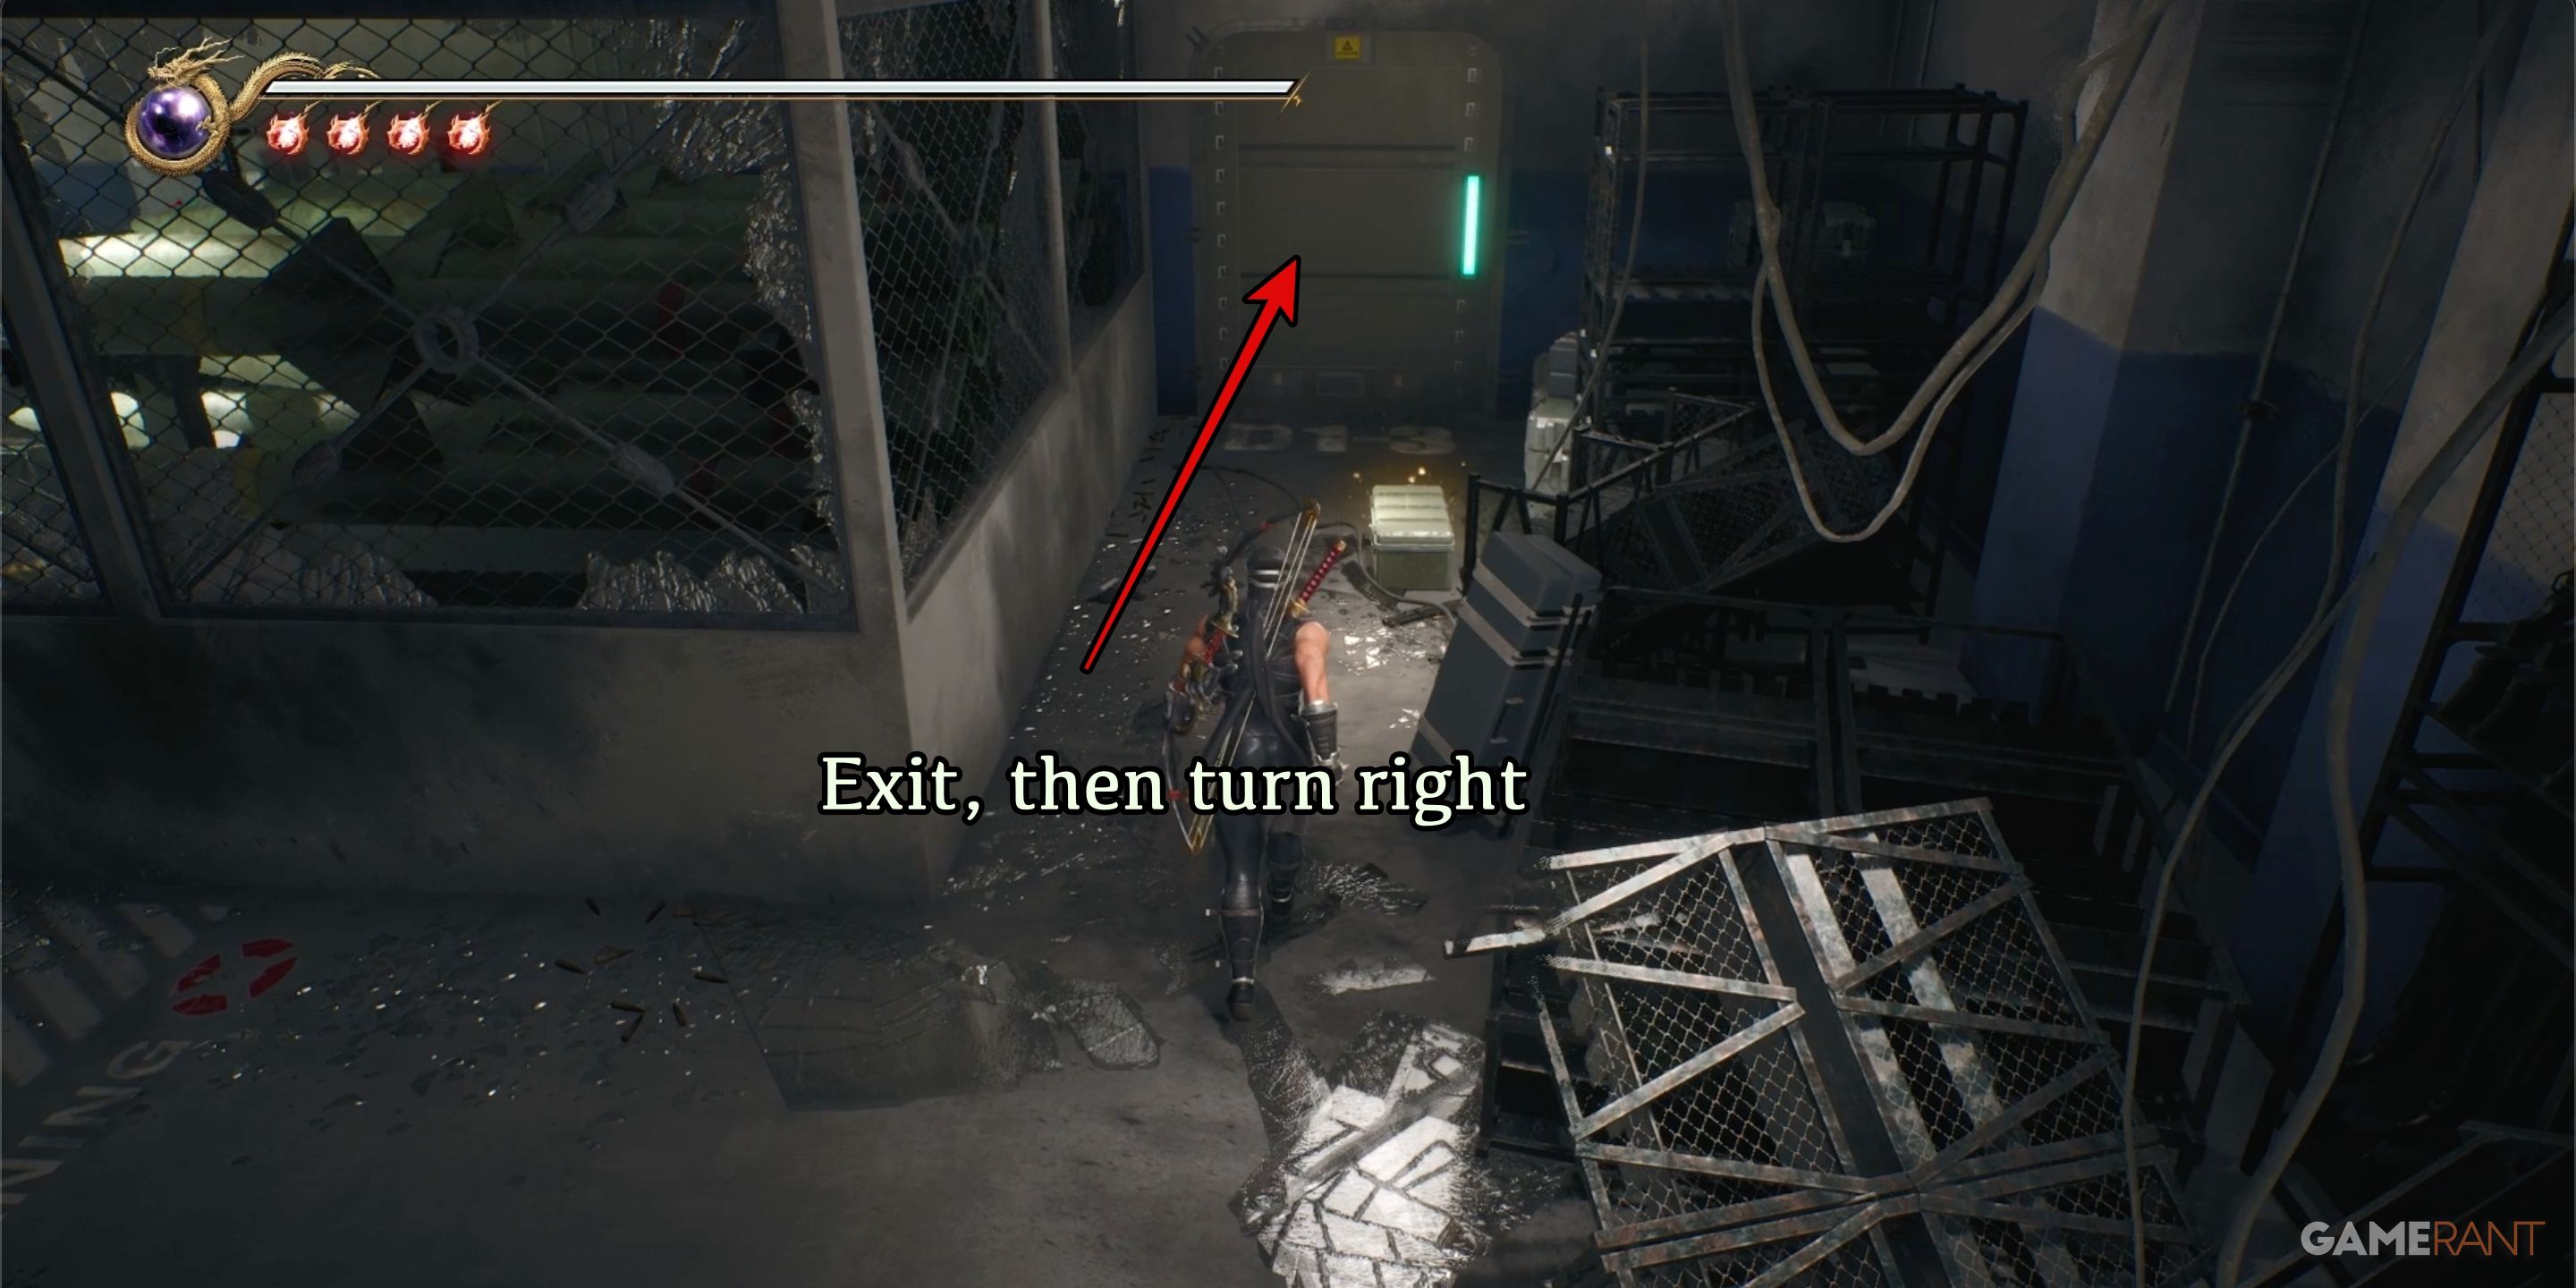
As soon as you reach the ground from the ladder, head out through the first door you encounter. Then, make an immediate right turn. You’ll notice Crystal Skull 17 resting among a heap of broken concrete.
All Crystal Skull Locations in Chapter 10 – Ninja Gaiden 2 Black
Ninja Gaiden 2 Black Chapter 10: Submit, or Die! contains four Crystal Skulls.
Crystal Skull 18:
In Chapter 10, shortly following your initial save point, you’ll stumble upon Crystal Skull 18. After navigating through a brief indoor area, you’ll reach a street strewn with mines. Proceed down the first street, then veer right to discover an extended mine-laden street. Utilize your bow to take out the foes armed with rocket launchers at the end of this street.
You’ll spot Crystal Skull 18 nestled in a corner at the foundation of the structure housing the enemy rocket launchers. Be cautious, as it’s encircled by explosive mines.
Crystal Skull 19:
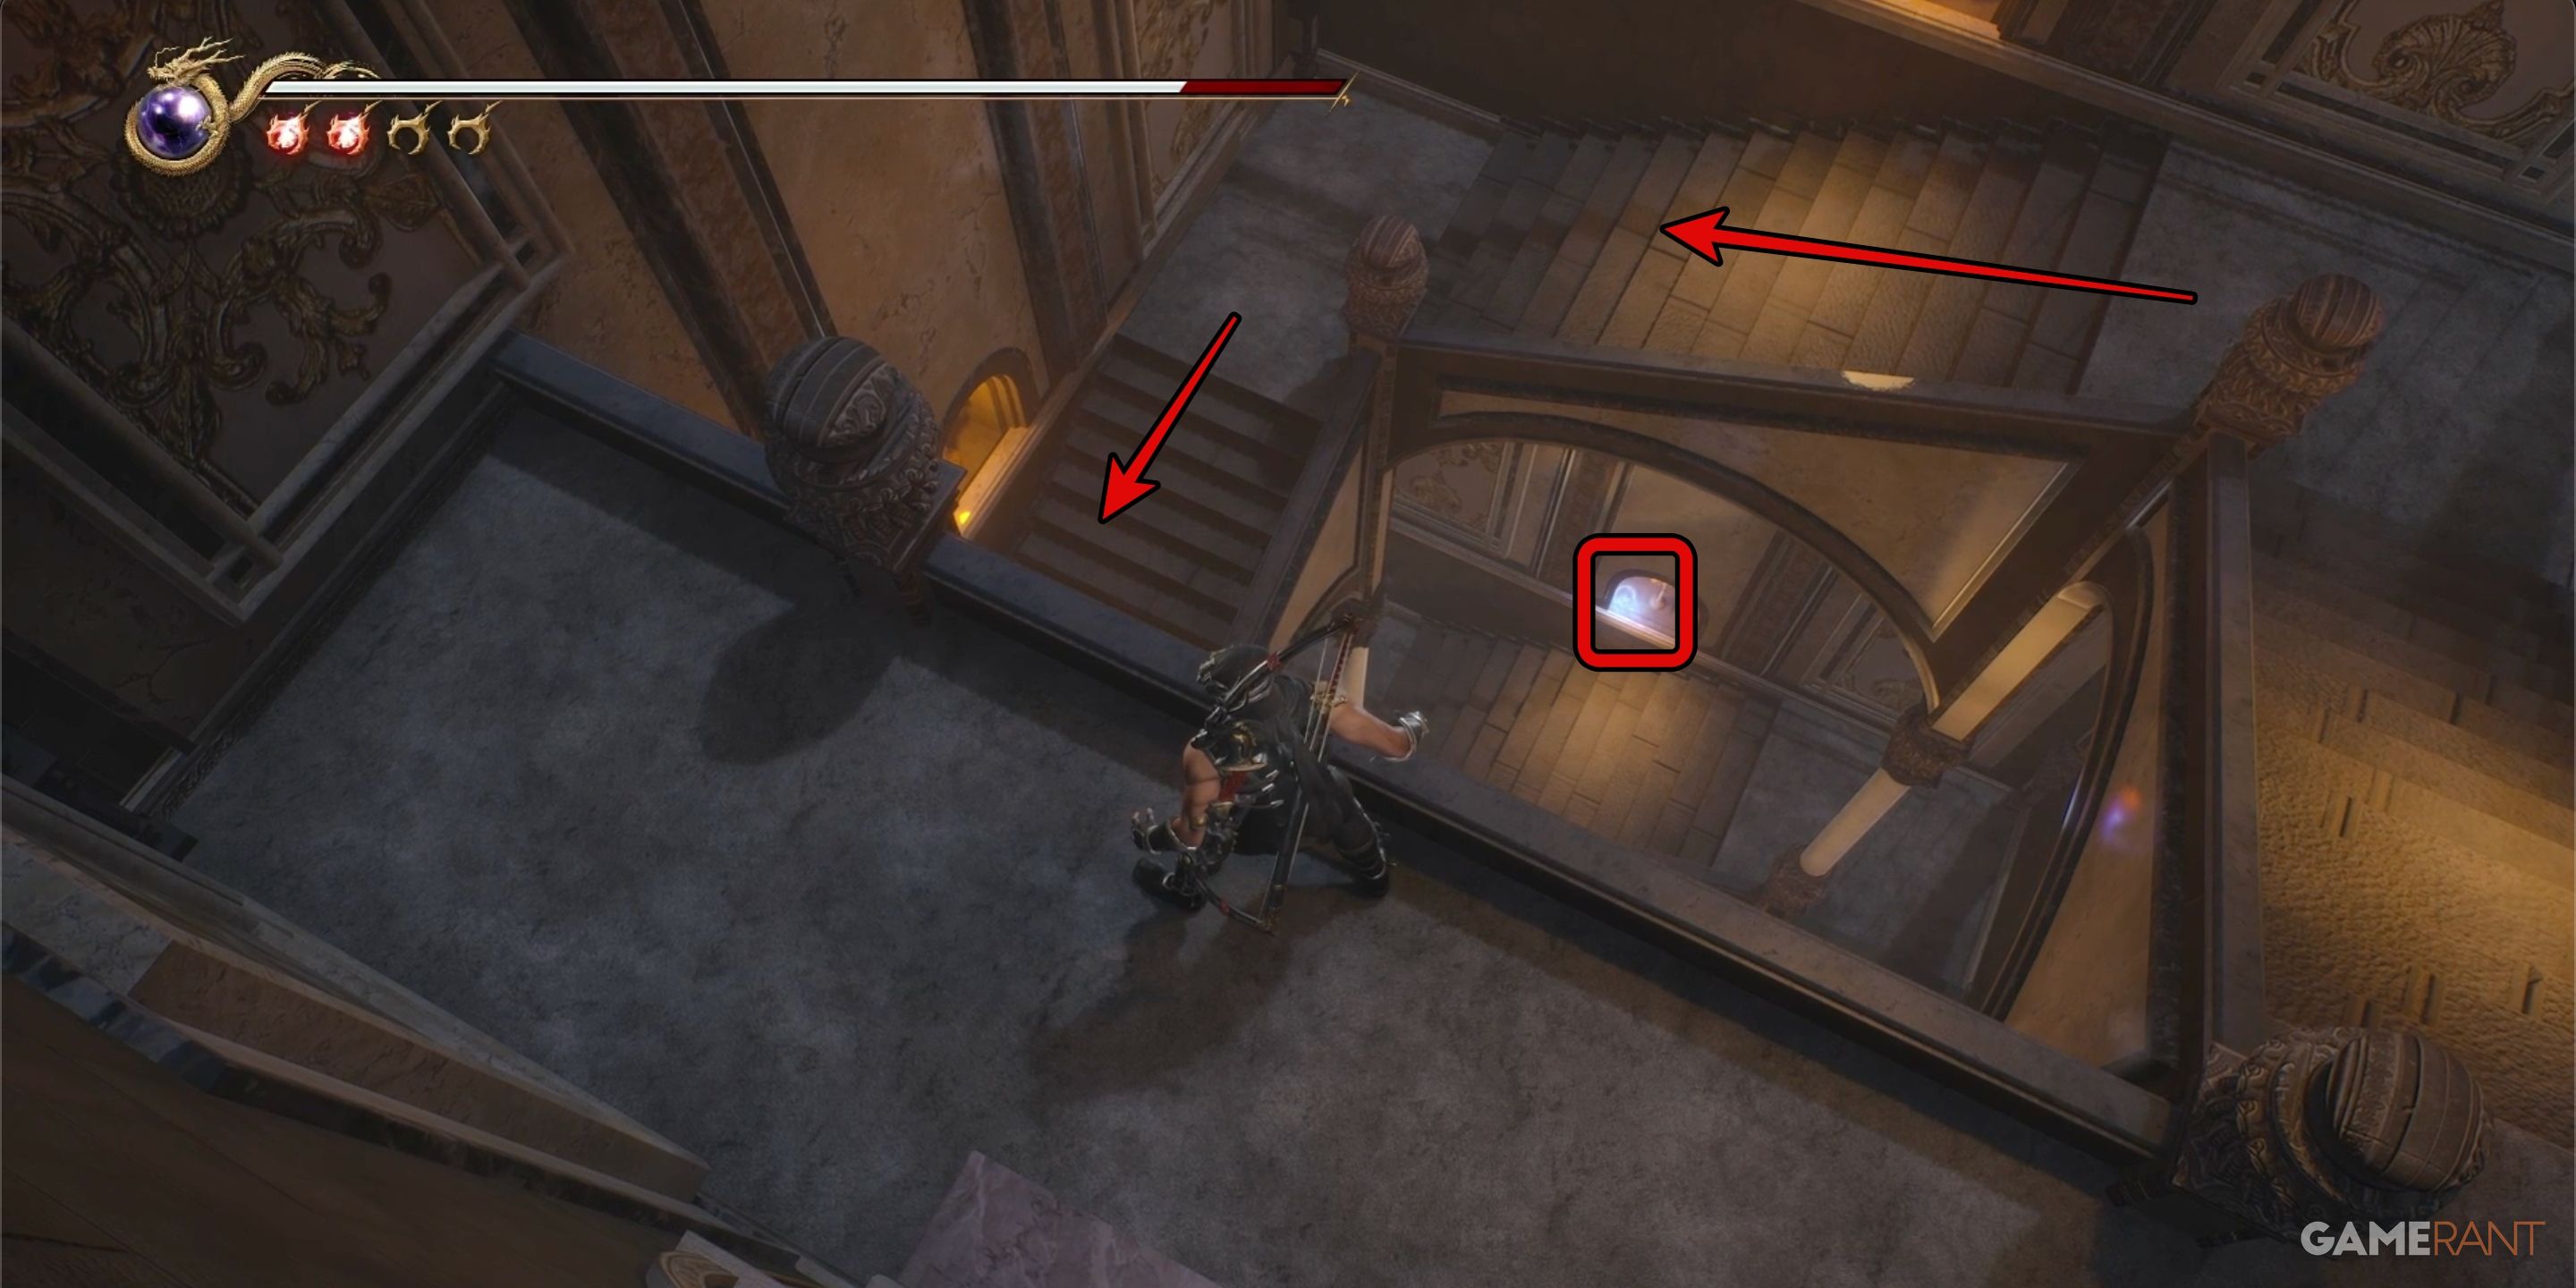
Once you depart from the spacious room containing the church bells and circular metal structure to swing from, you’ll encounter an expansive set of stairs descending to lower areas. From up high, if you peer below, you’ll notice a tiny bas-relief depicting Crystal Skull 19 etched on the wall. Be sure to pick it up as you continue your descent.
Crystal Skull 20:
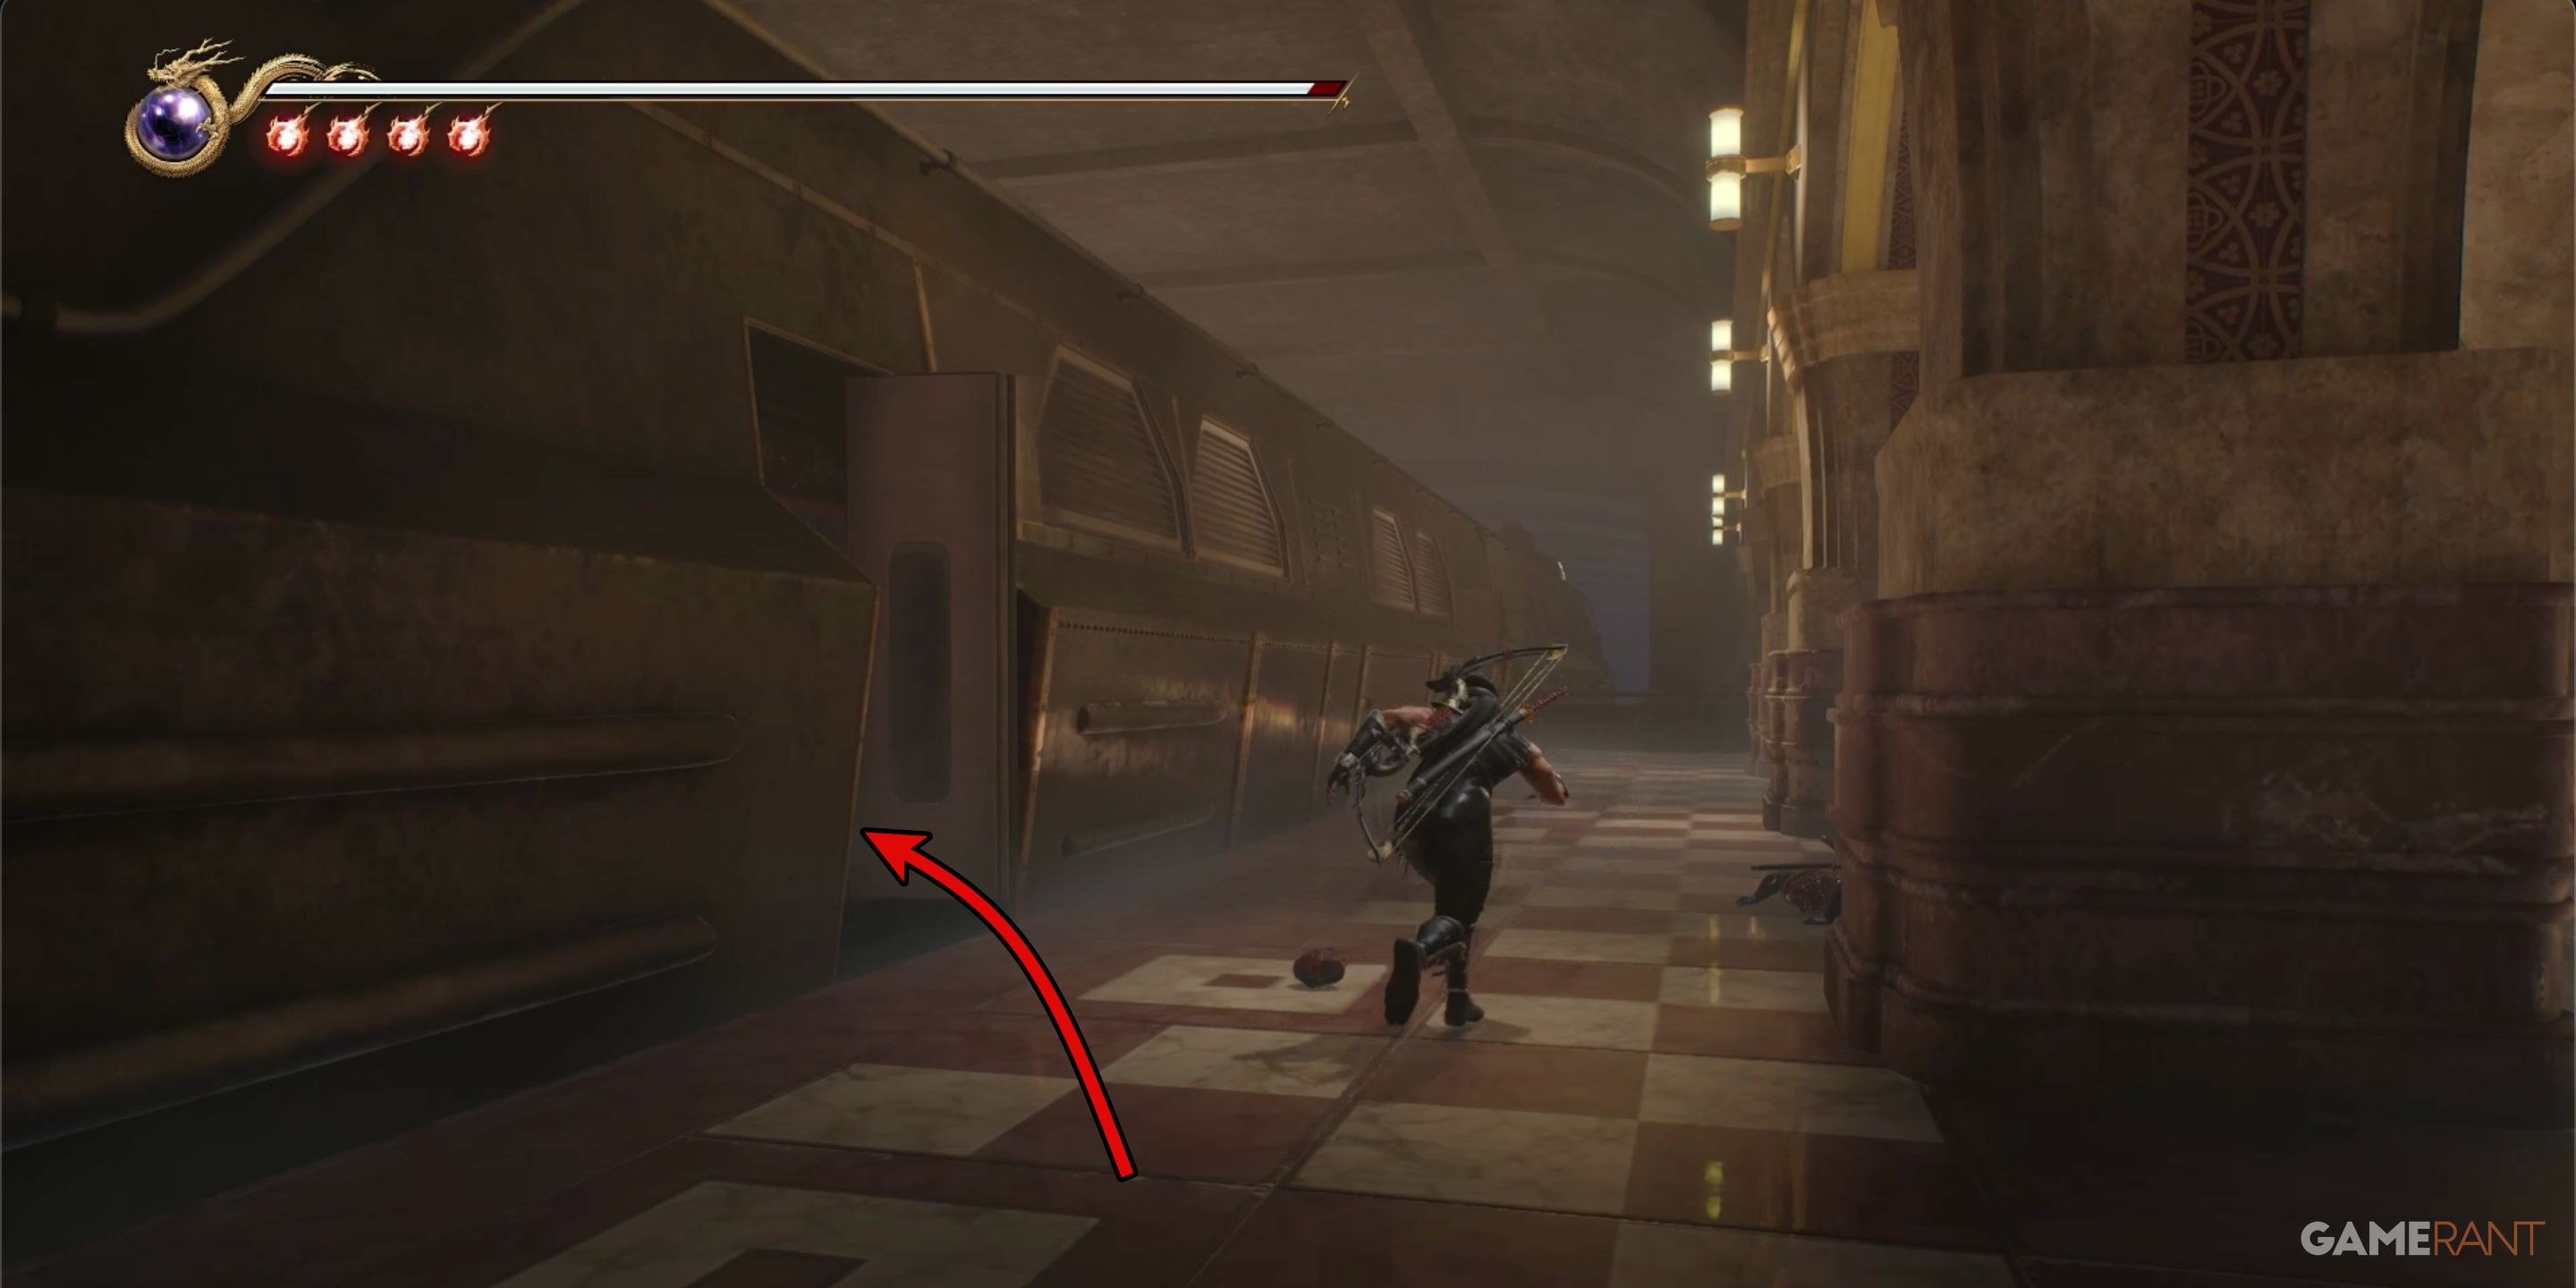
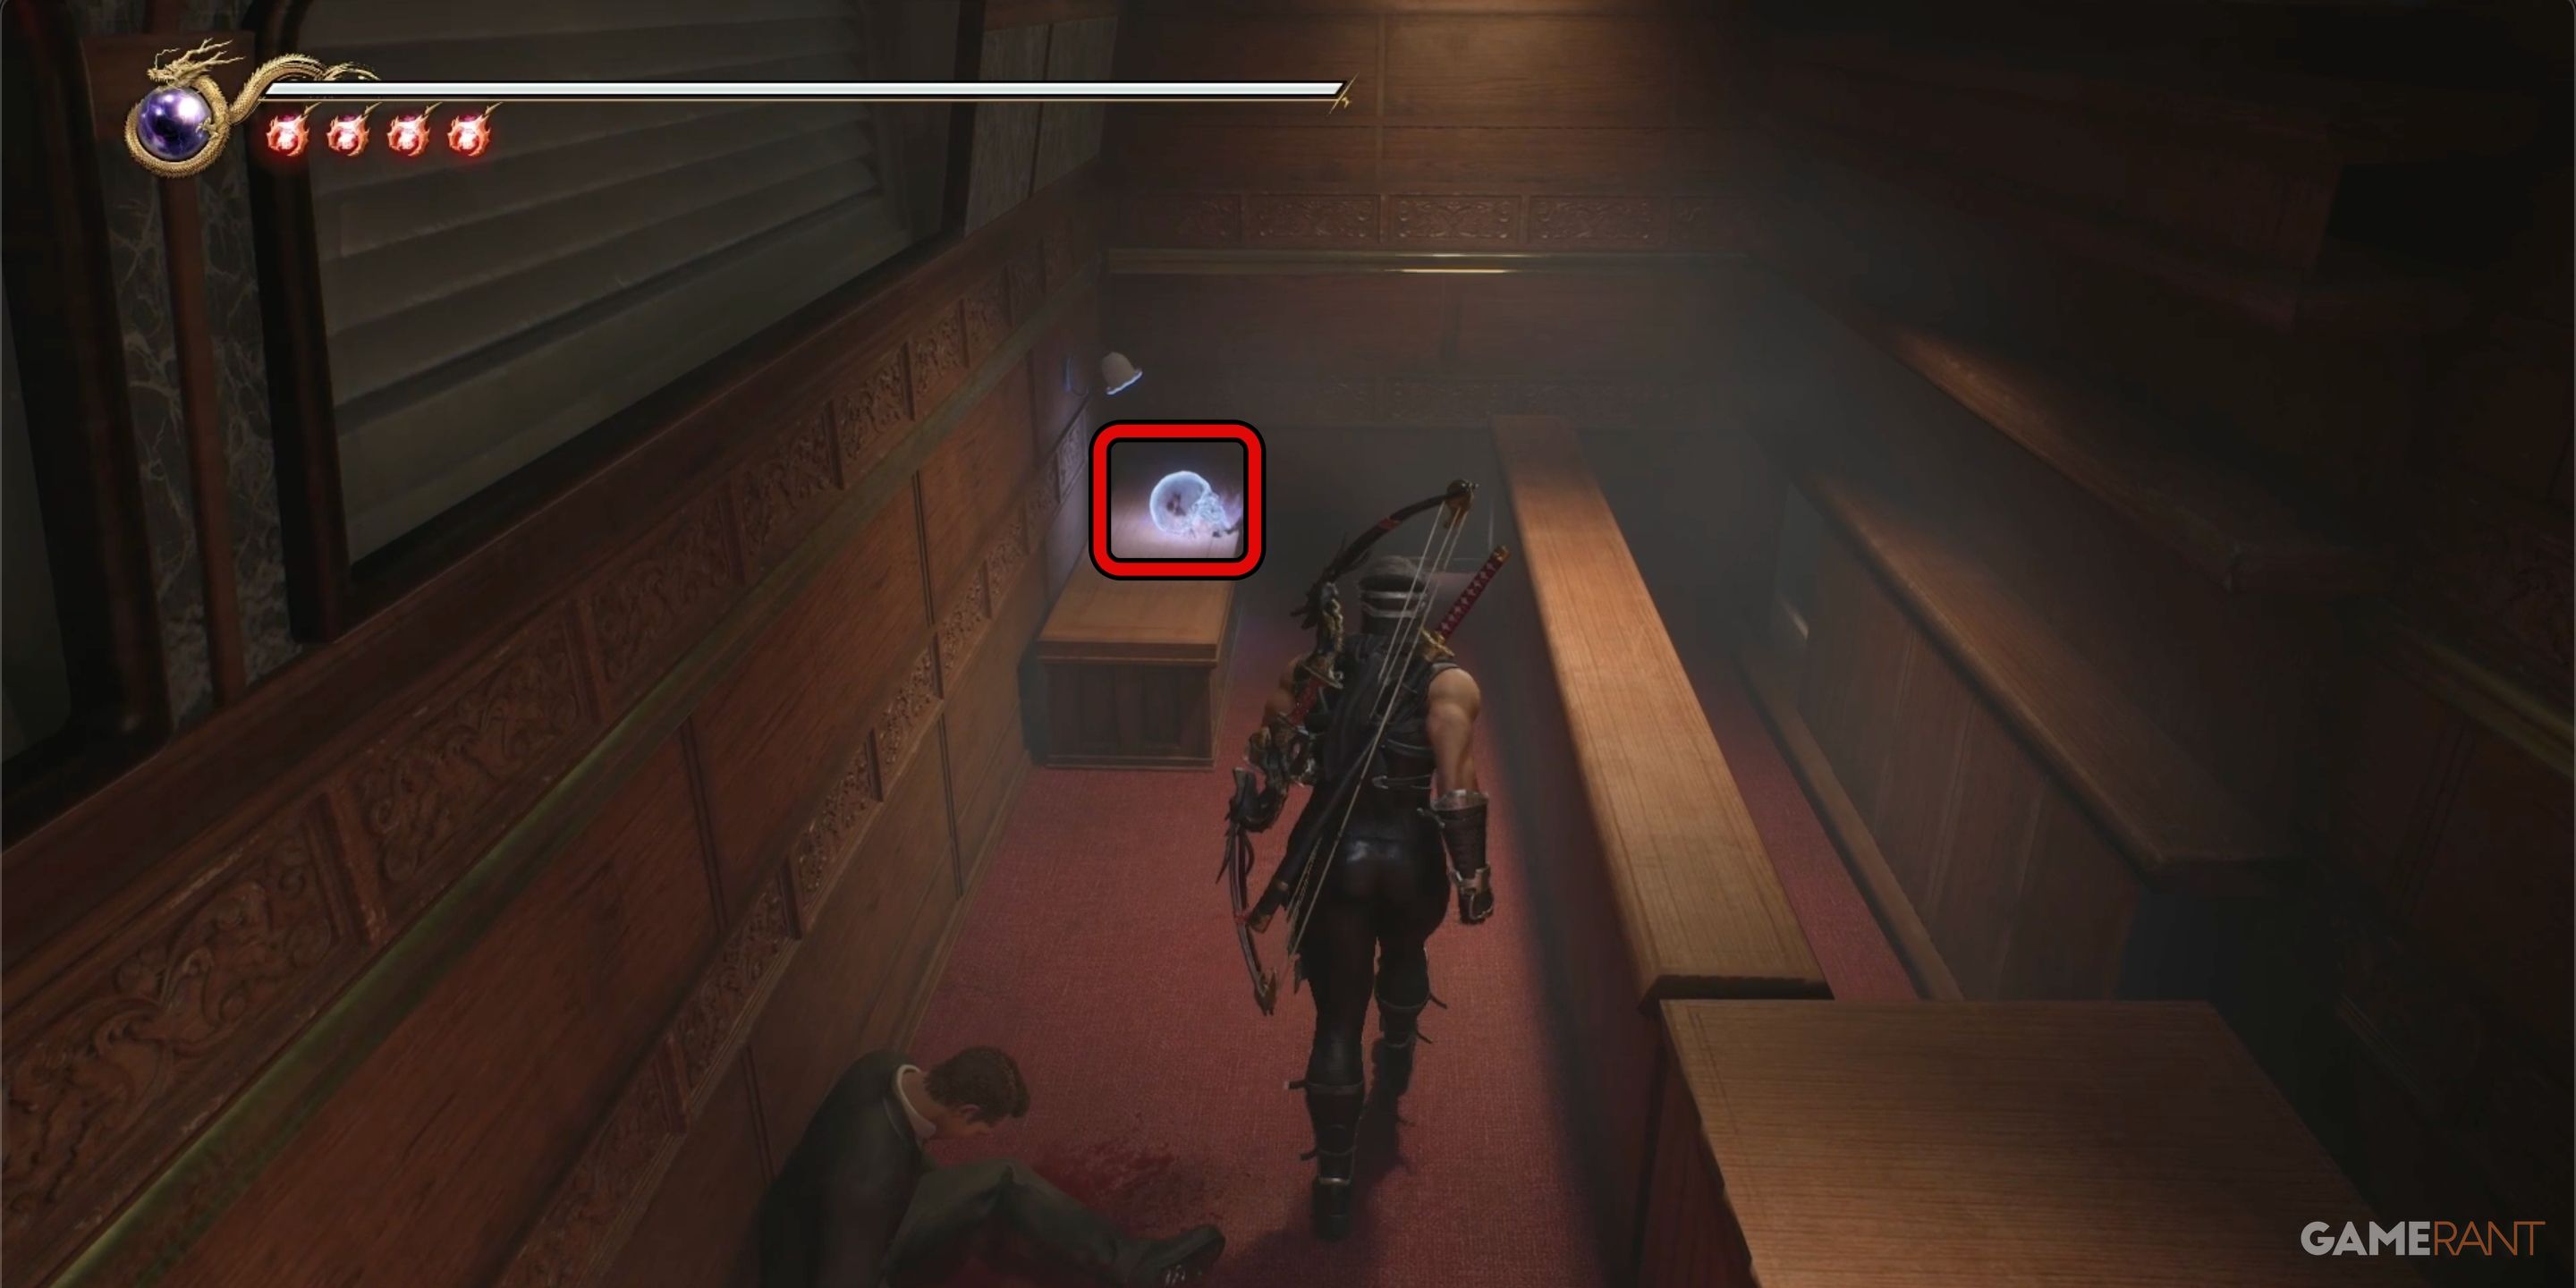
In the vicinity of the train station, specifically where it adjoins an underpass linked to a church, you’ll discover the Crystal Skull 20. Once you’ve eliminated all adversaries from the train platform, step inside the train. The skull will be located in the farthest right compartment.
Crystal Skull 21:
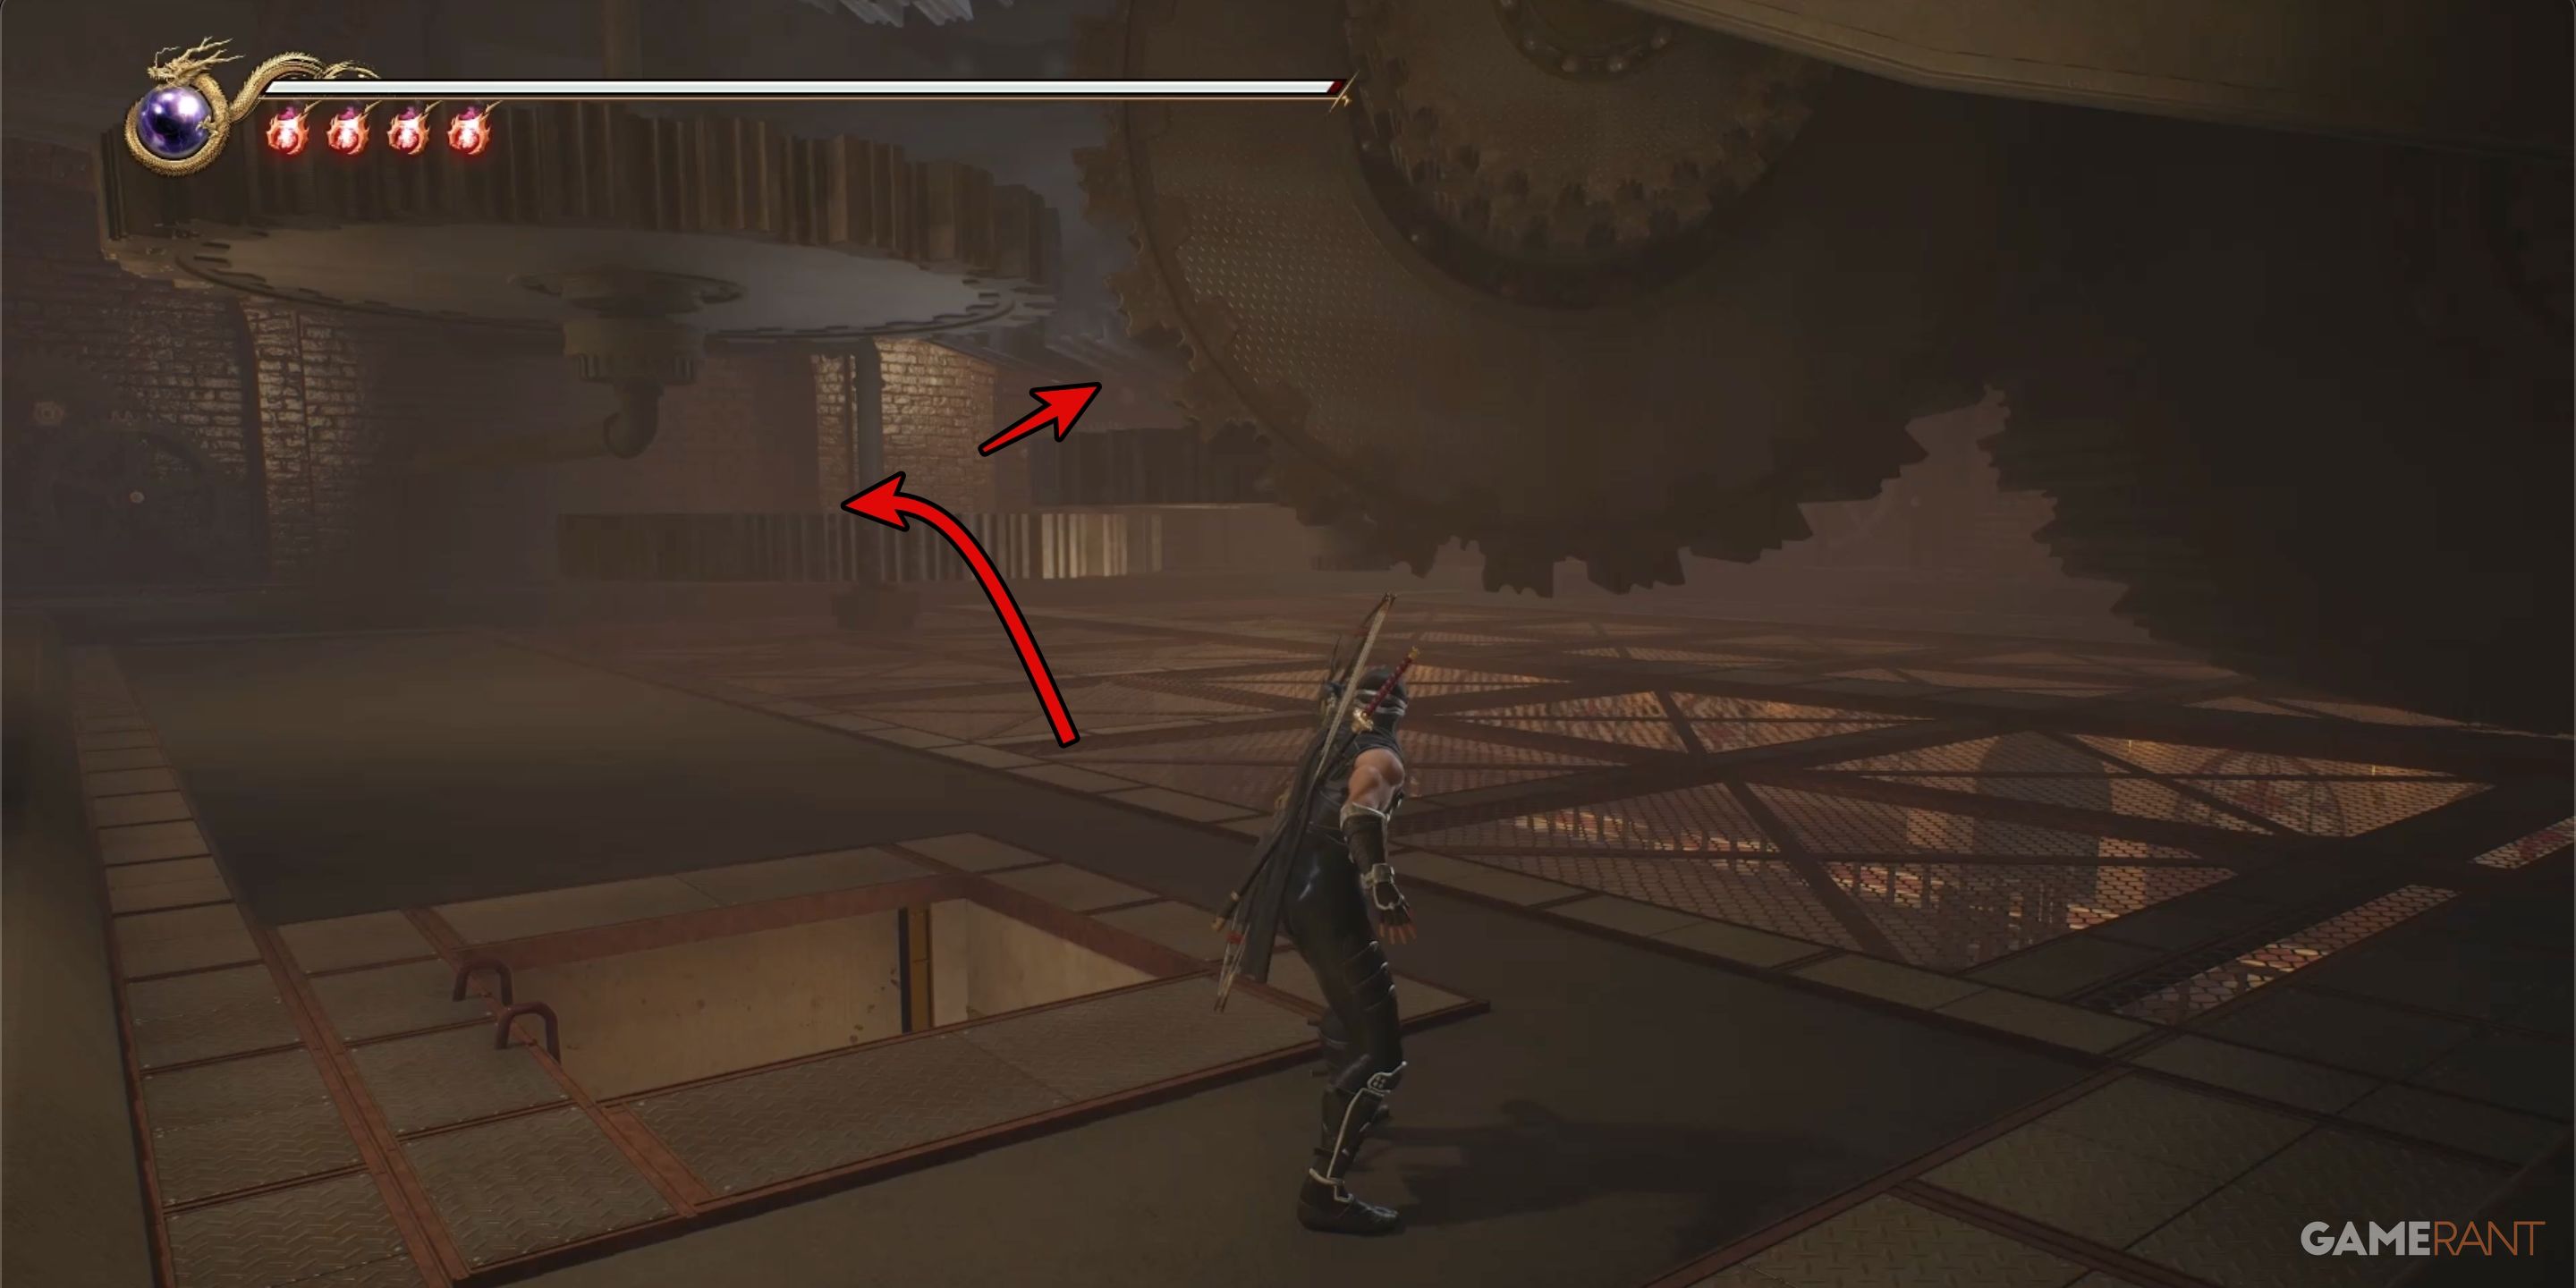
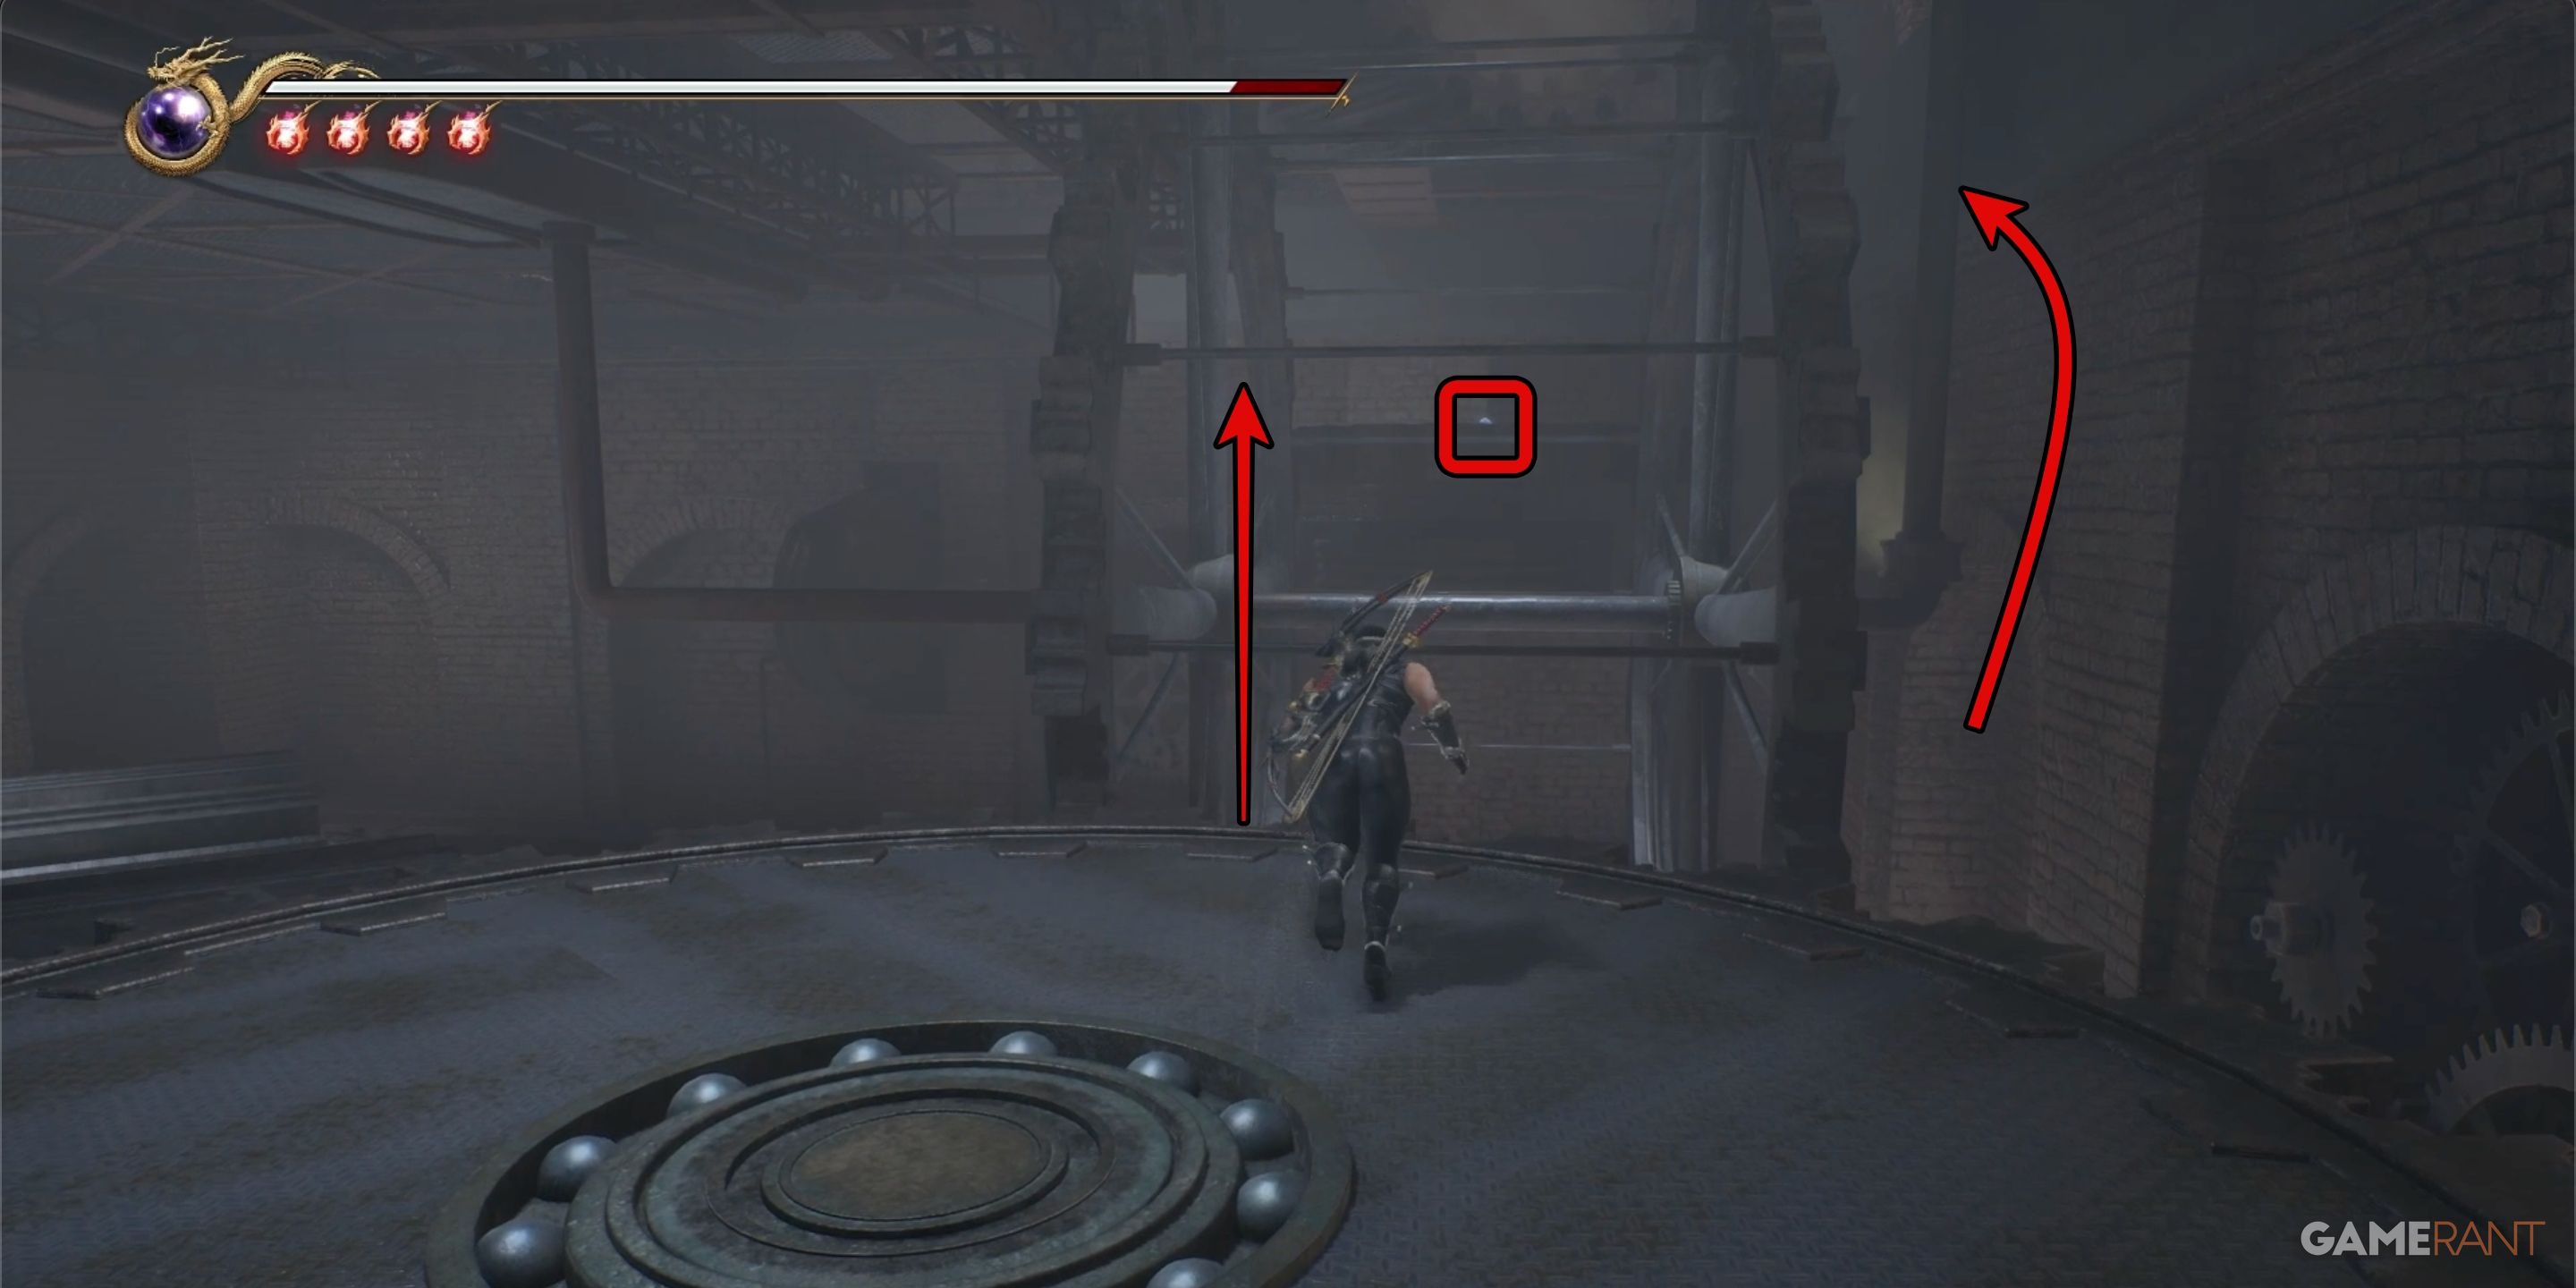
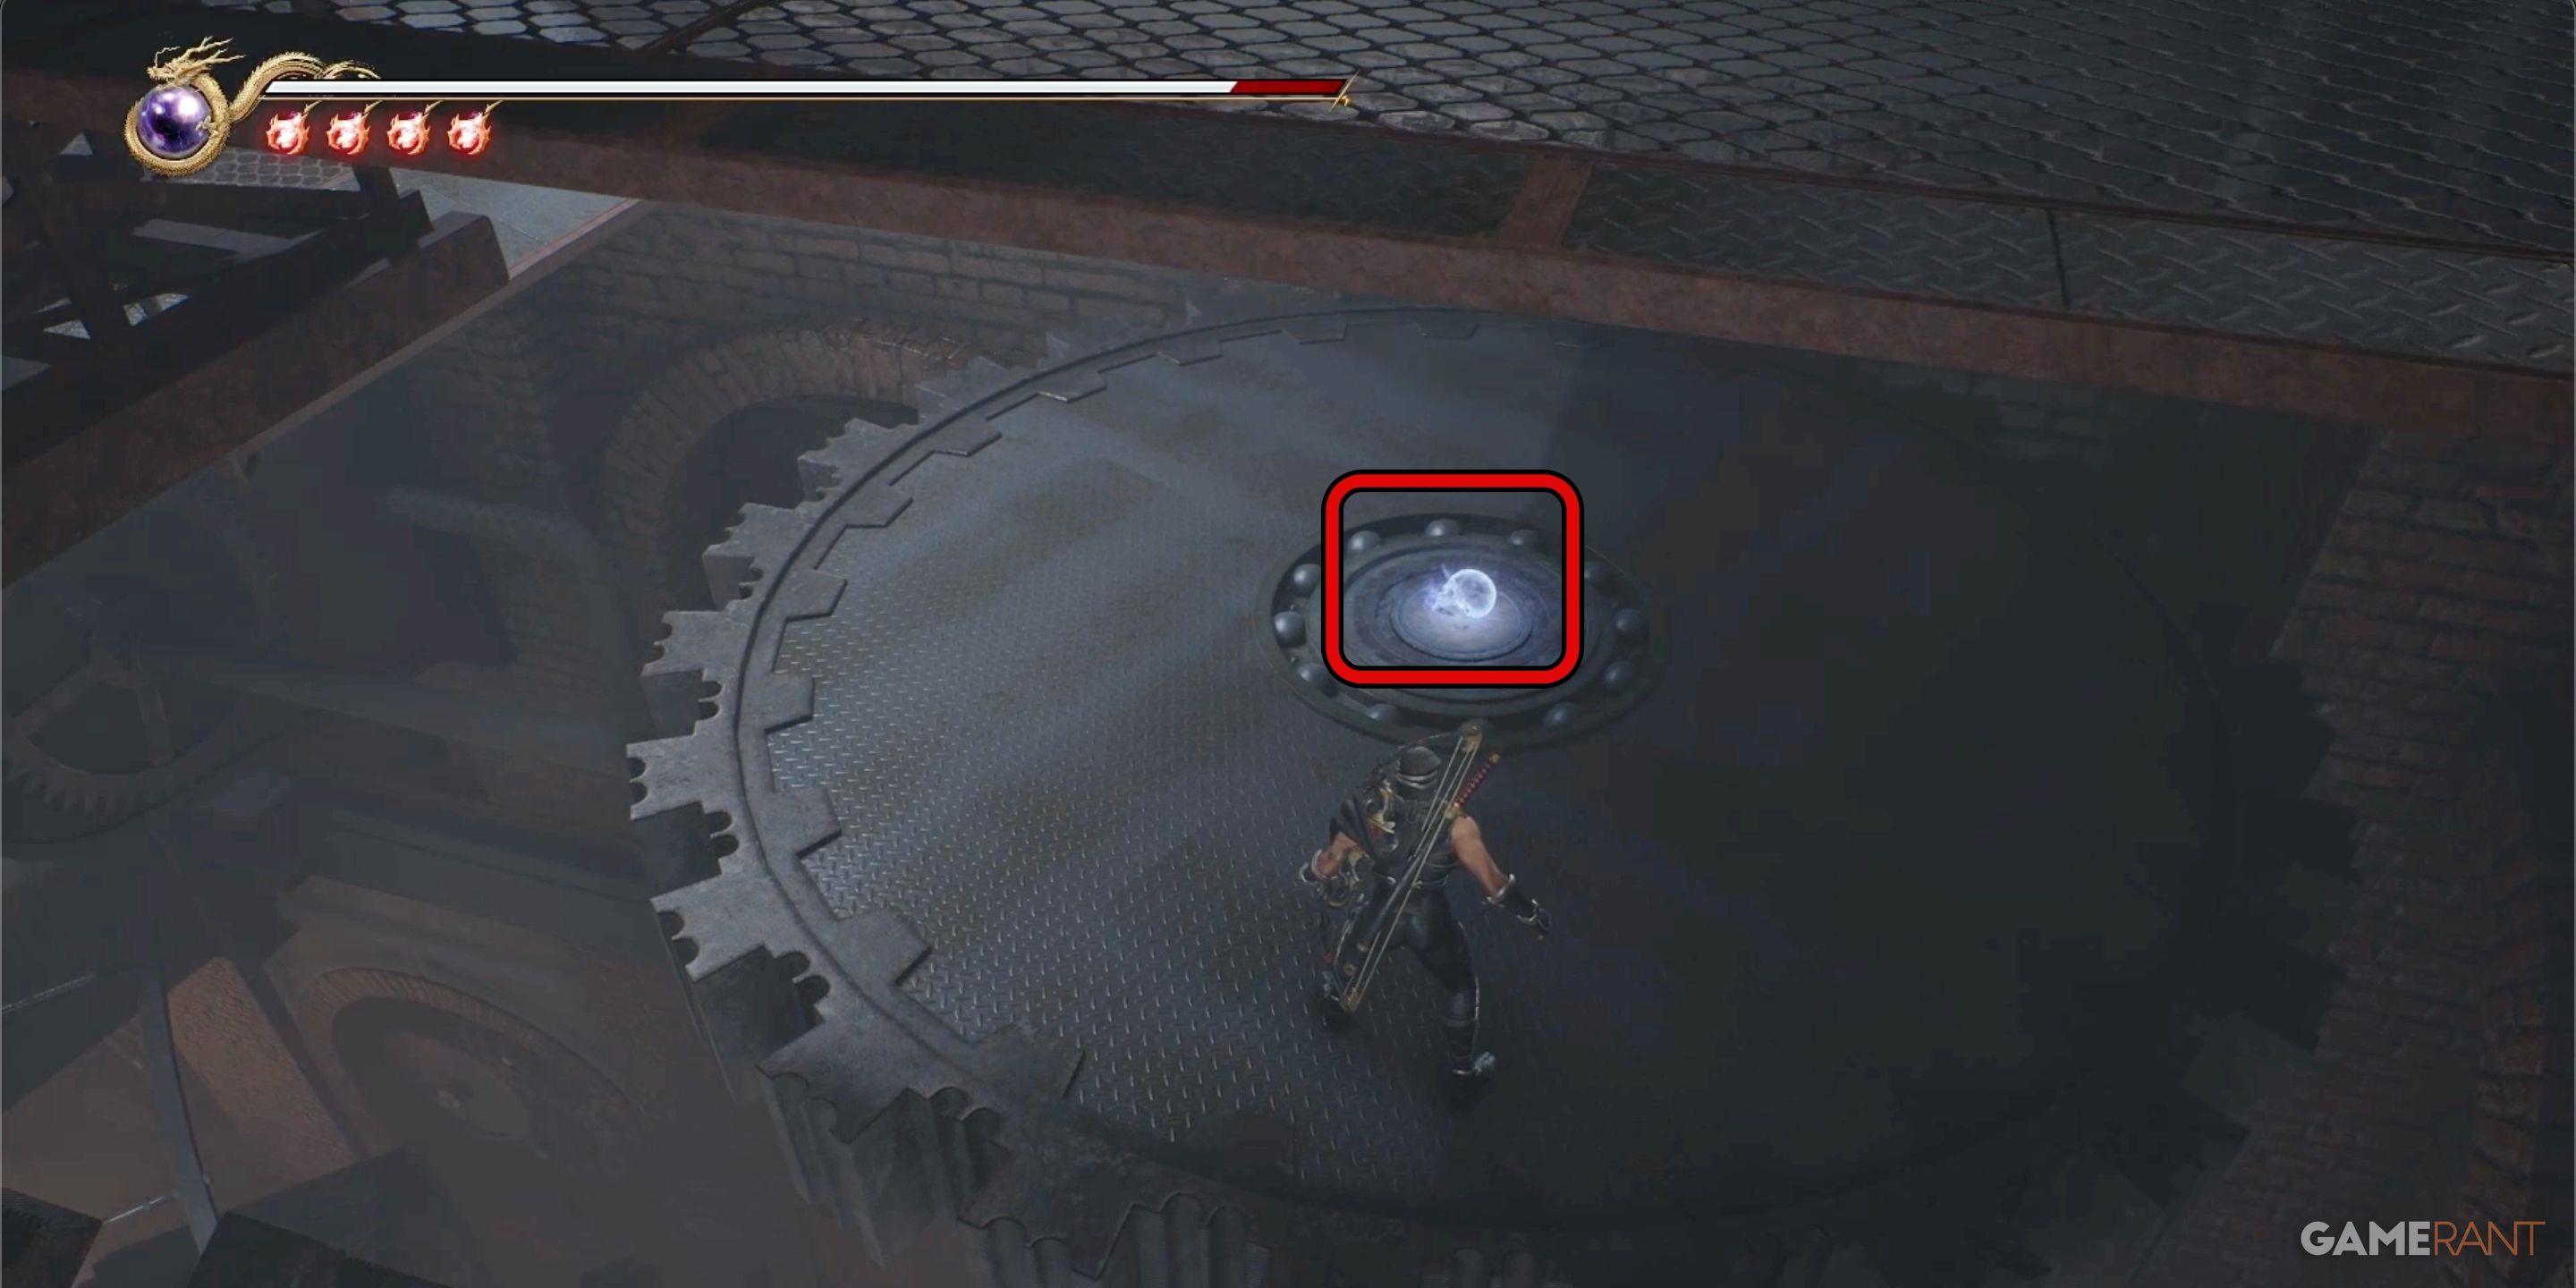
In chapter 10, the last skull, Crystal Skull 21, is located within the area featuring big gears. Climb or navigate up these gears until you encounter a sizable wheel adorned with multiple metal loops. While hanging from this wheel, you’ll spot Crystal Skull 21 resting on the gear below where you will eventually land.
There are no Crystal Skulls in Chapter 11.
All Crystal Skull Locations in Chapter 12 – Ninja Gaiden 2 Black
There are four Crystal Skulls found in Ninja Gaiden 2 Black Chapter 12: Heart of Darkness.
Crystal Skull 22:
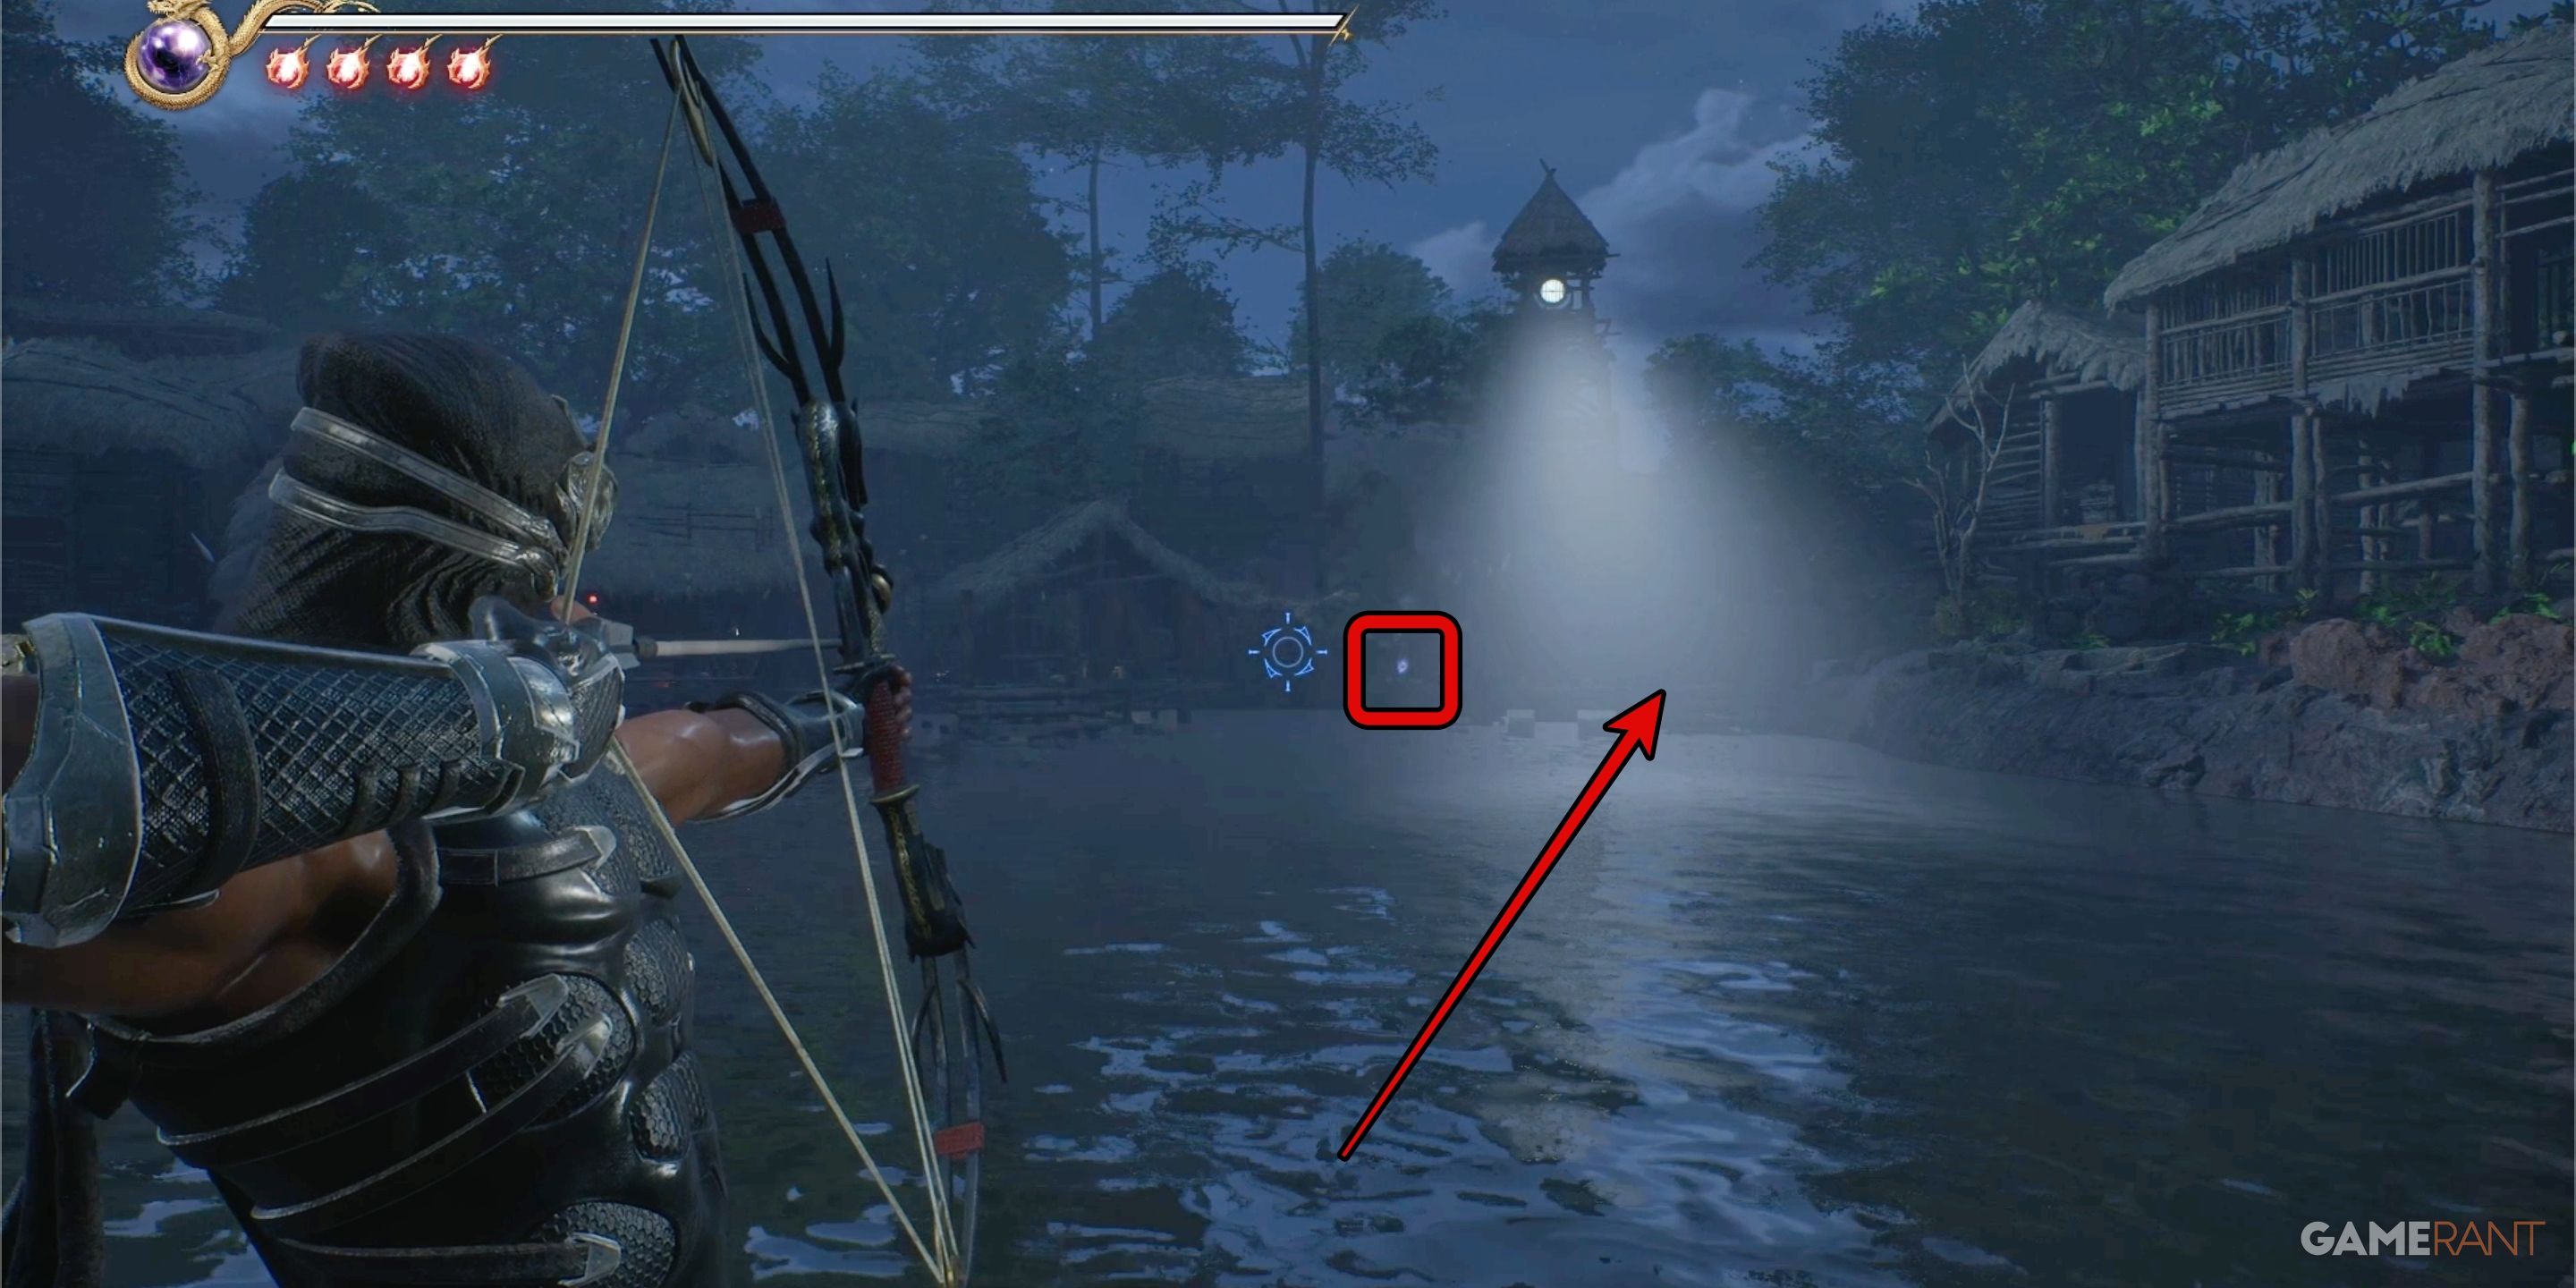
In the opening of Chapter 12, you’ll encounter “Crystal Skull 22”. Following the traversal of two modest swamp ponds and a solitary watchtower, you’ll reach a significantly larger body of water also accompanied by a watchtower, with spotlights flanking it on either side.
By glancing towards the tower on your right, notice the blue light emanating from its base. Swiftly traverse the water and approach the tower on your right. Once there, navigate around to the backside of the tower where you will discover Crystal Skull 22 nestled in a corner.
Crystal Skull 23:
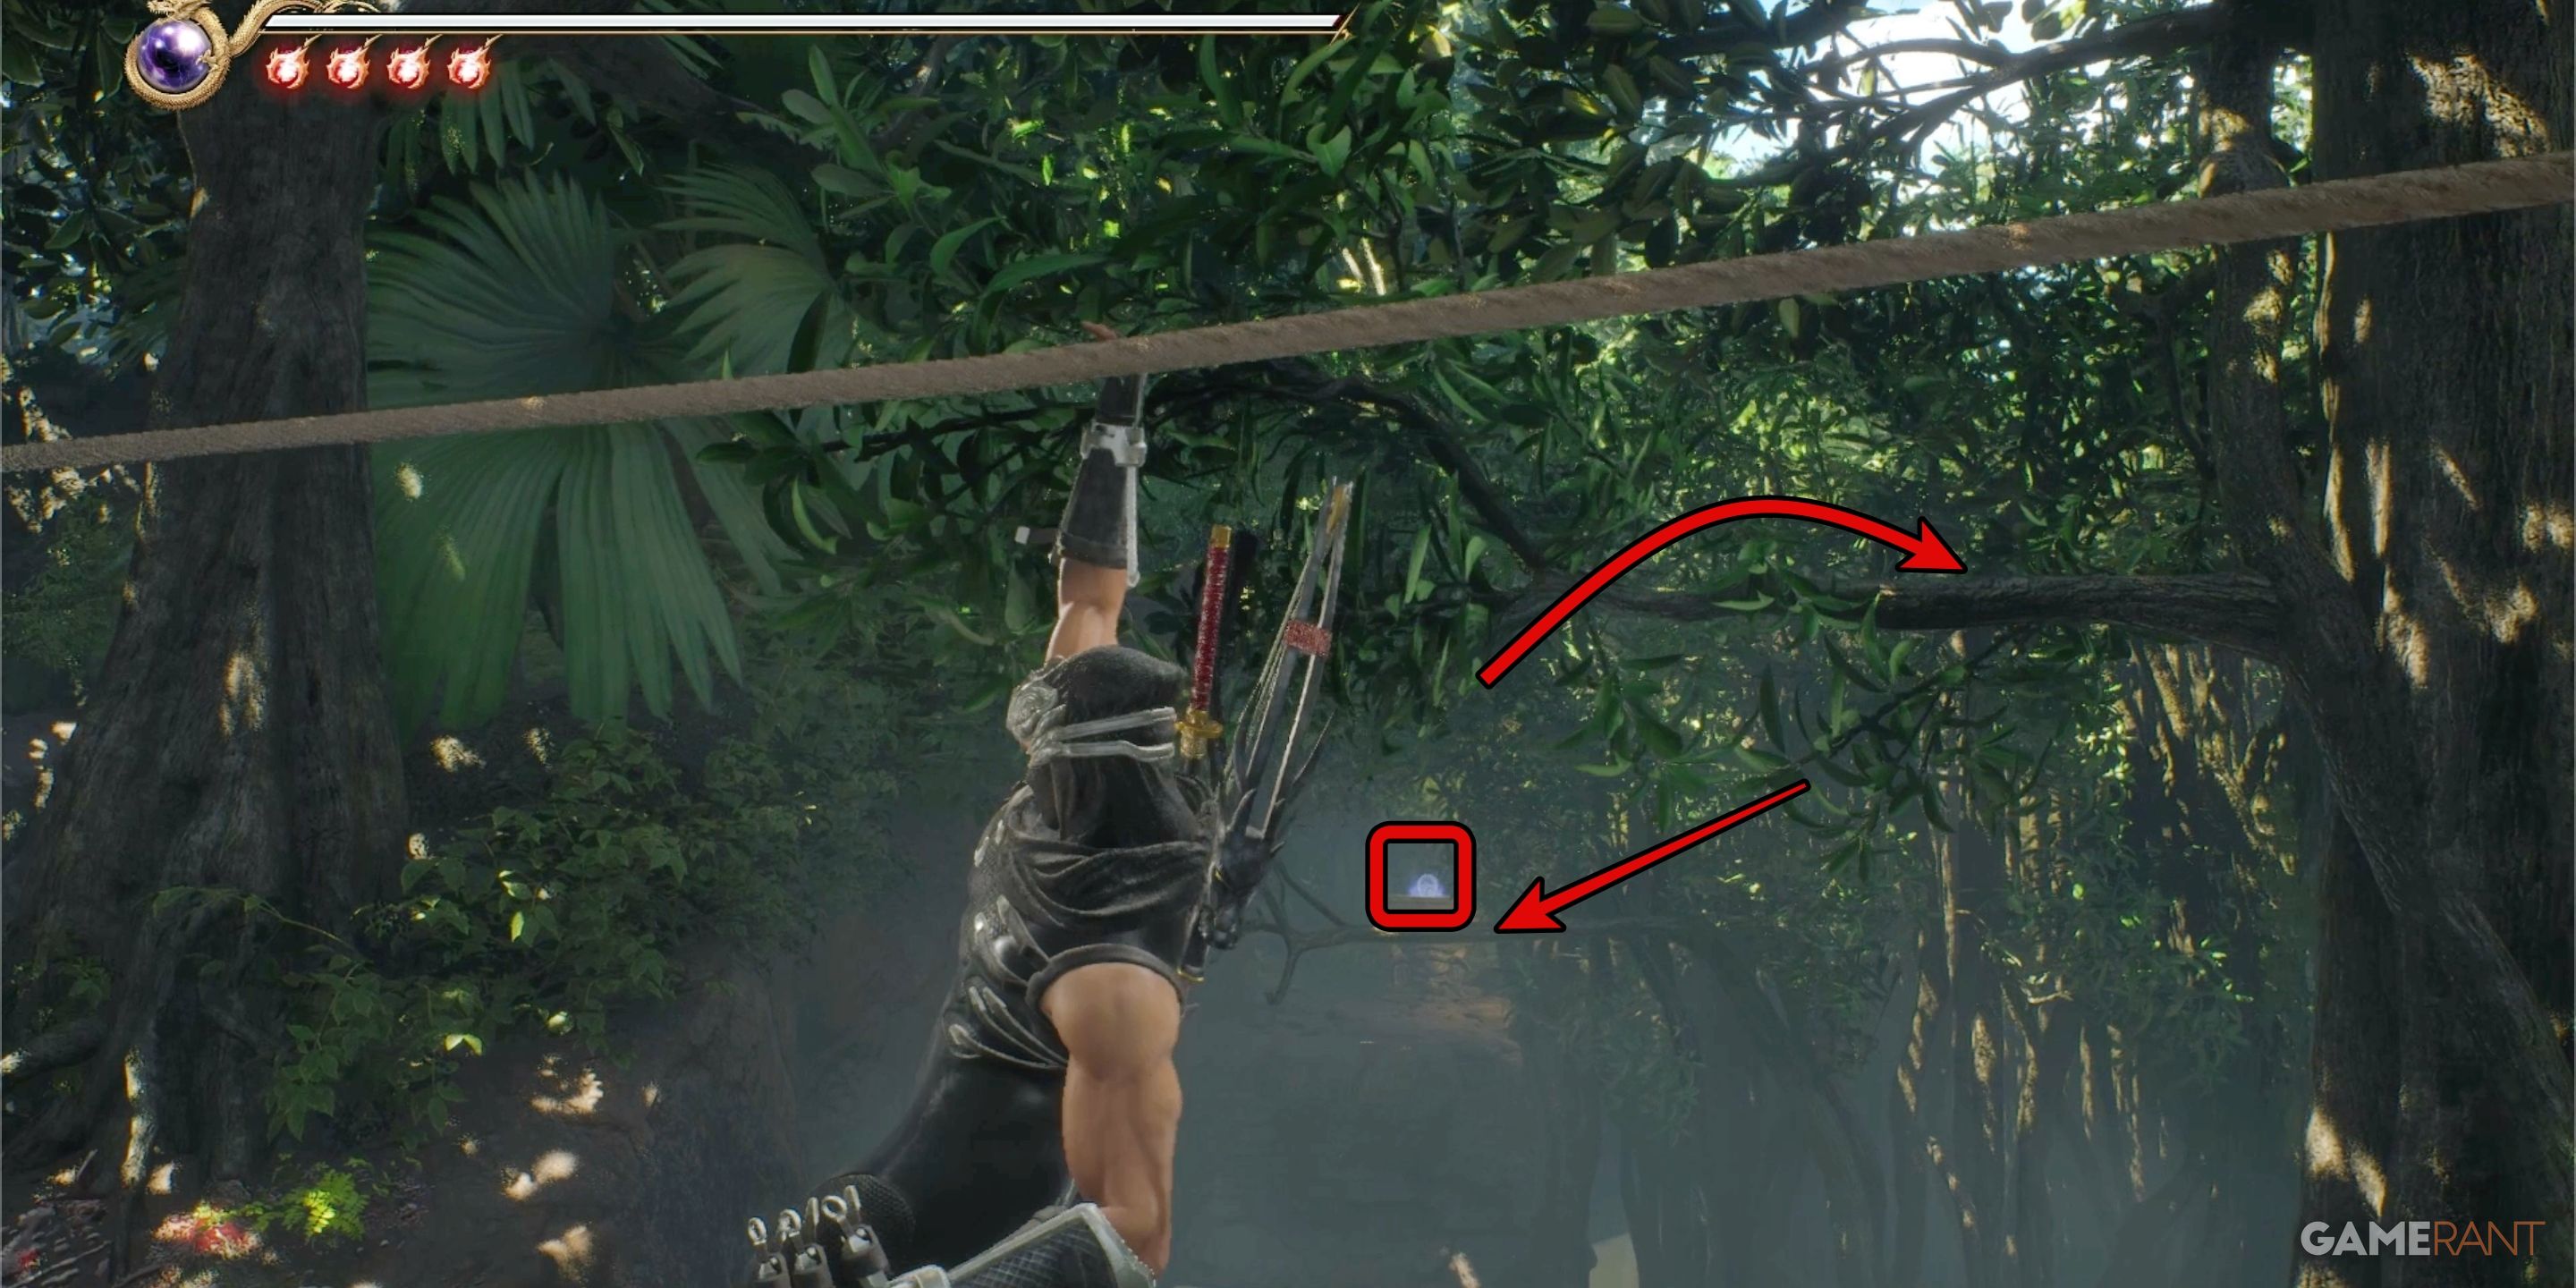
Moving beyond Skull 22 and past the pond illuminated by two spotlights, you’ll find a stretch where you can traverse interconnected tree branches. After this, you’ll navigate through a narrow path filled with numerous insect foes. Lastly, you’ll reach a lengthy rope that serves as your means to cross the pond.
Beyond Skull 22 and over the pond lit by two spotlights, there is a series of tree limbs to swing on. Afterwards, you’ll face a tight passageway teeming with various insects. Lastly, you’ll discover a long rope that allows you to cross the pond.
Both versions maintain the original meaning while using natural and easy-to-read language.
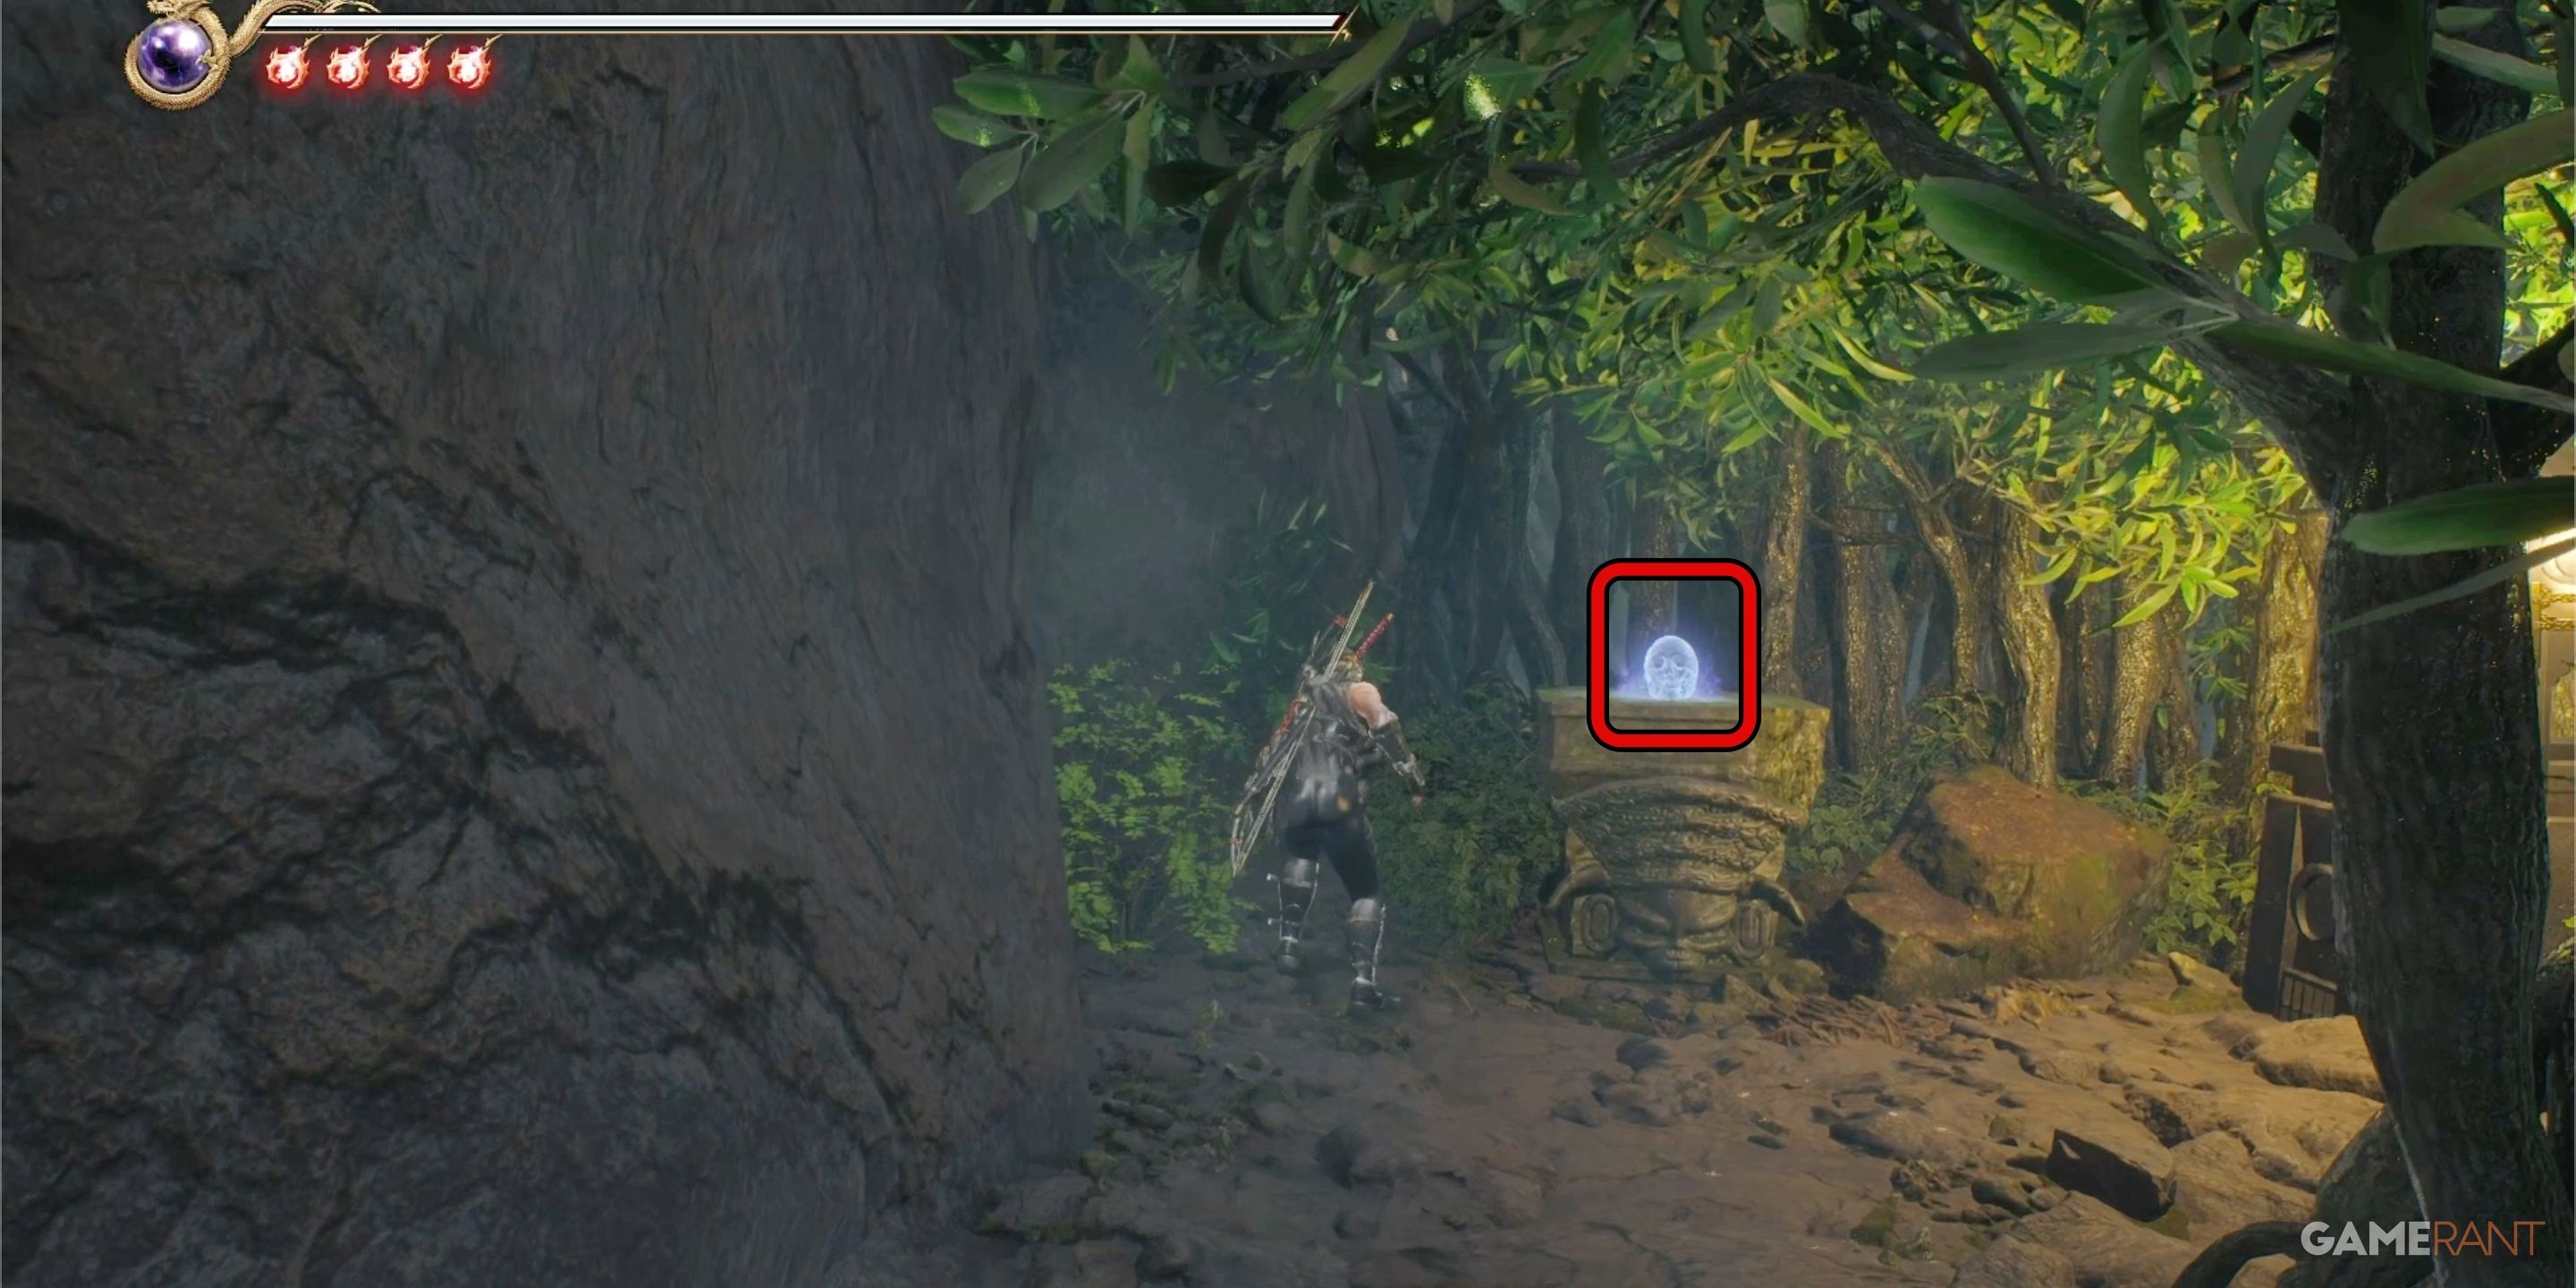
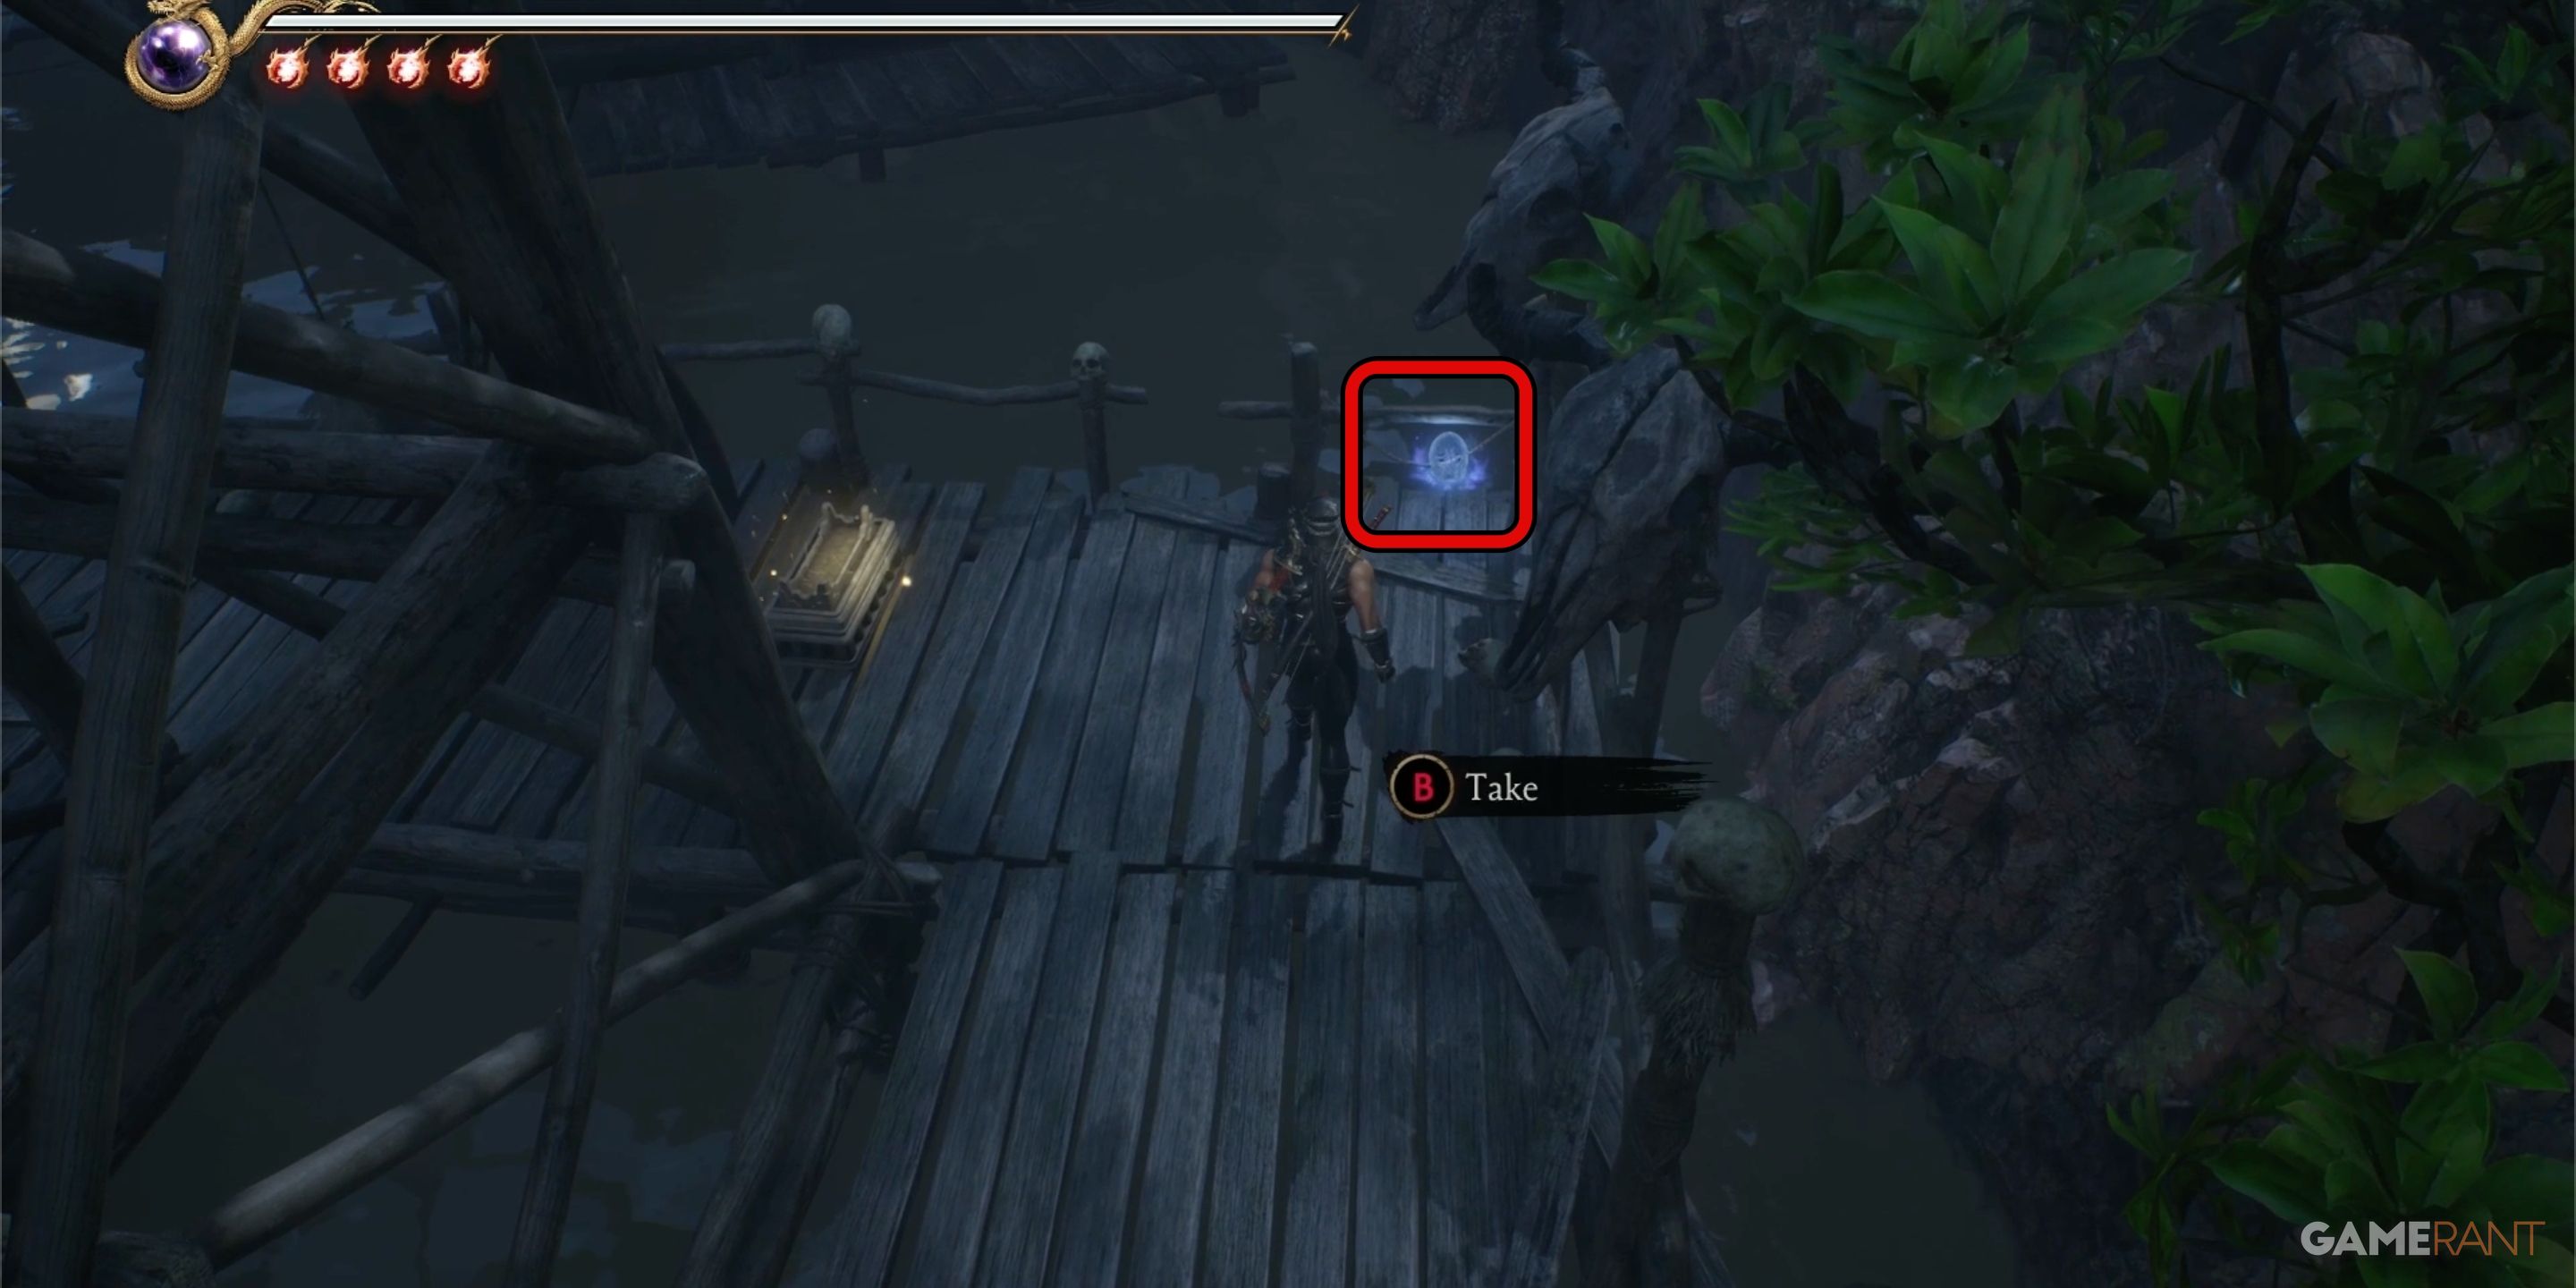
Swinging from the rope, glance to your right, and you’ll spot Crystal Skull 23 perched on a pedestal. By veering to the right, you can utilize nearby tree branches for a swing across to the platform holding the skull.
Crystal Skull 24:

You’ll discover this skull at a location right following the third safe spot in chapter 12, situated at the base of an enormous crater in the earth. Proceed from the safe spot into the area marked by a big, shallow puddle.
As a gamer, stepping into this pond, I’ll encounter two fresh foes: the demon with a chainsaw for an arm and the centipede-like pond demon. Once I’ve taken them down, I’ll discover the Crystal Skull 24 nestled on the ground in the back right corner of the pond, if I’m standing at the entrance.
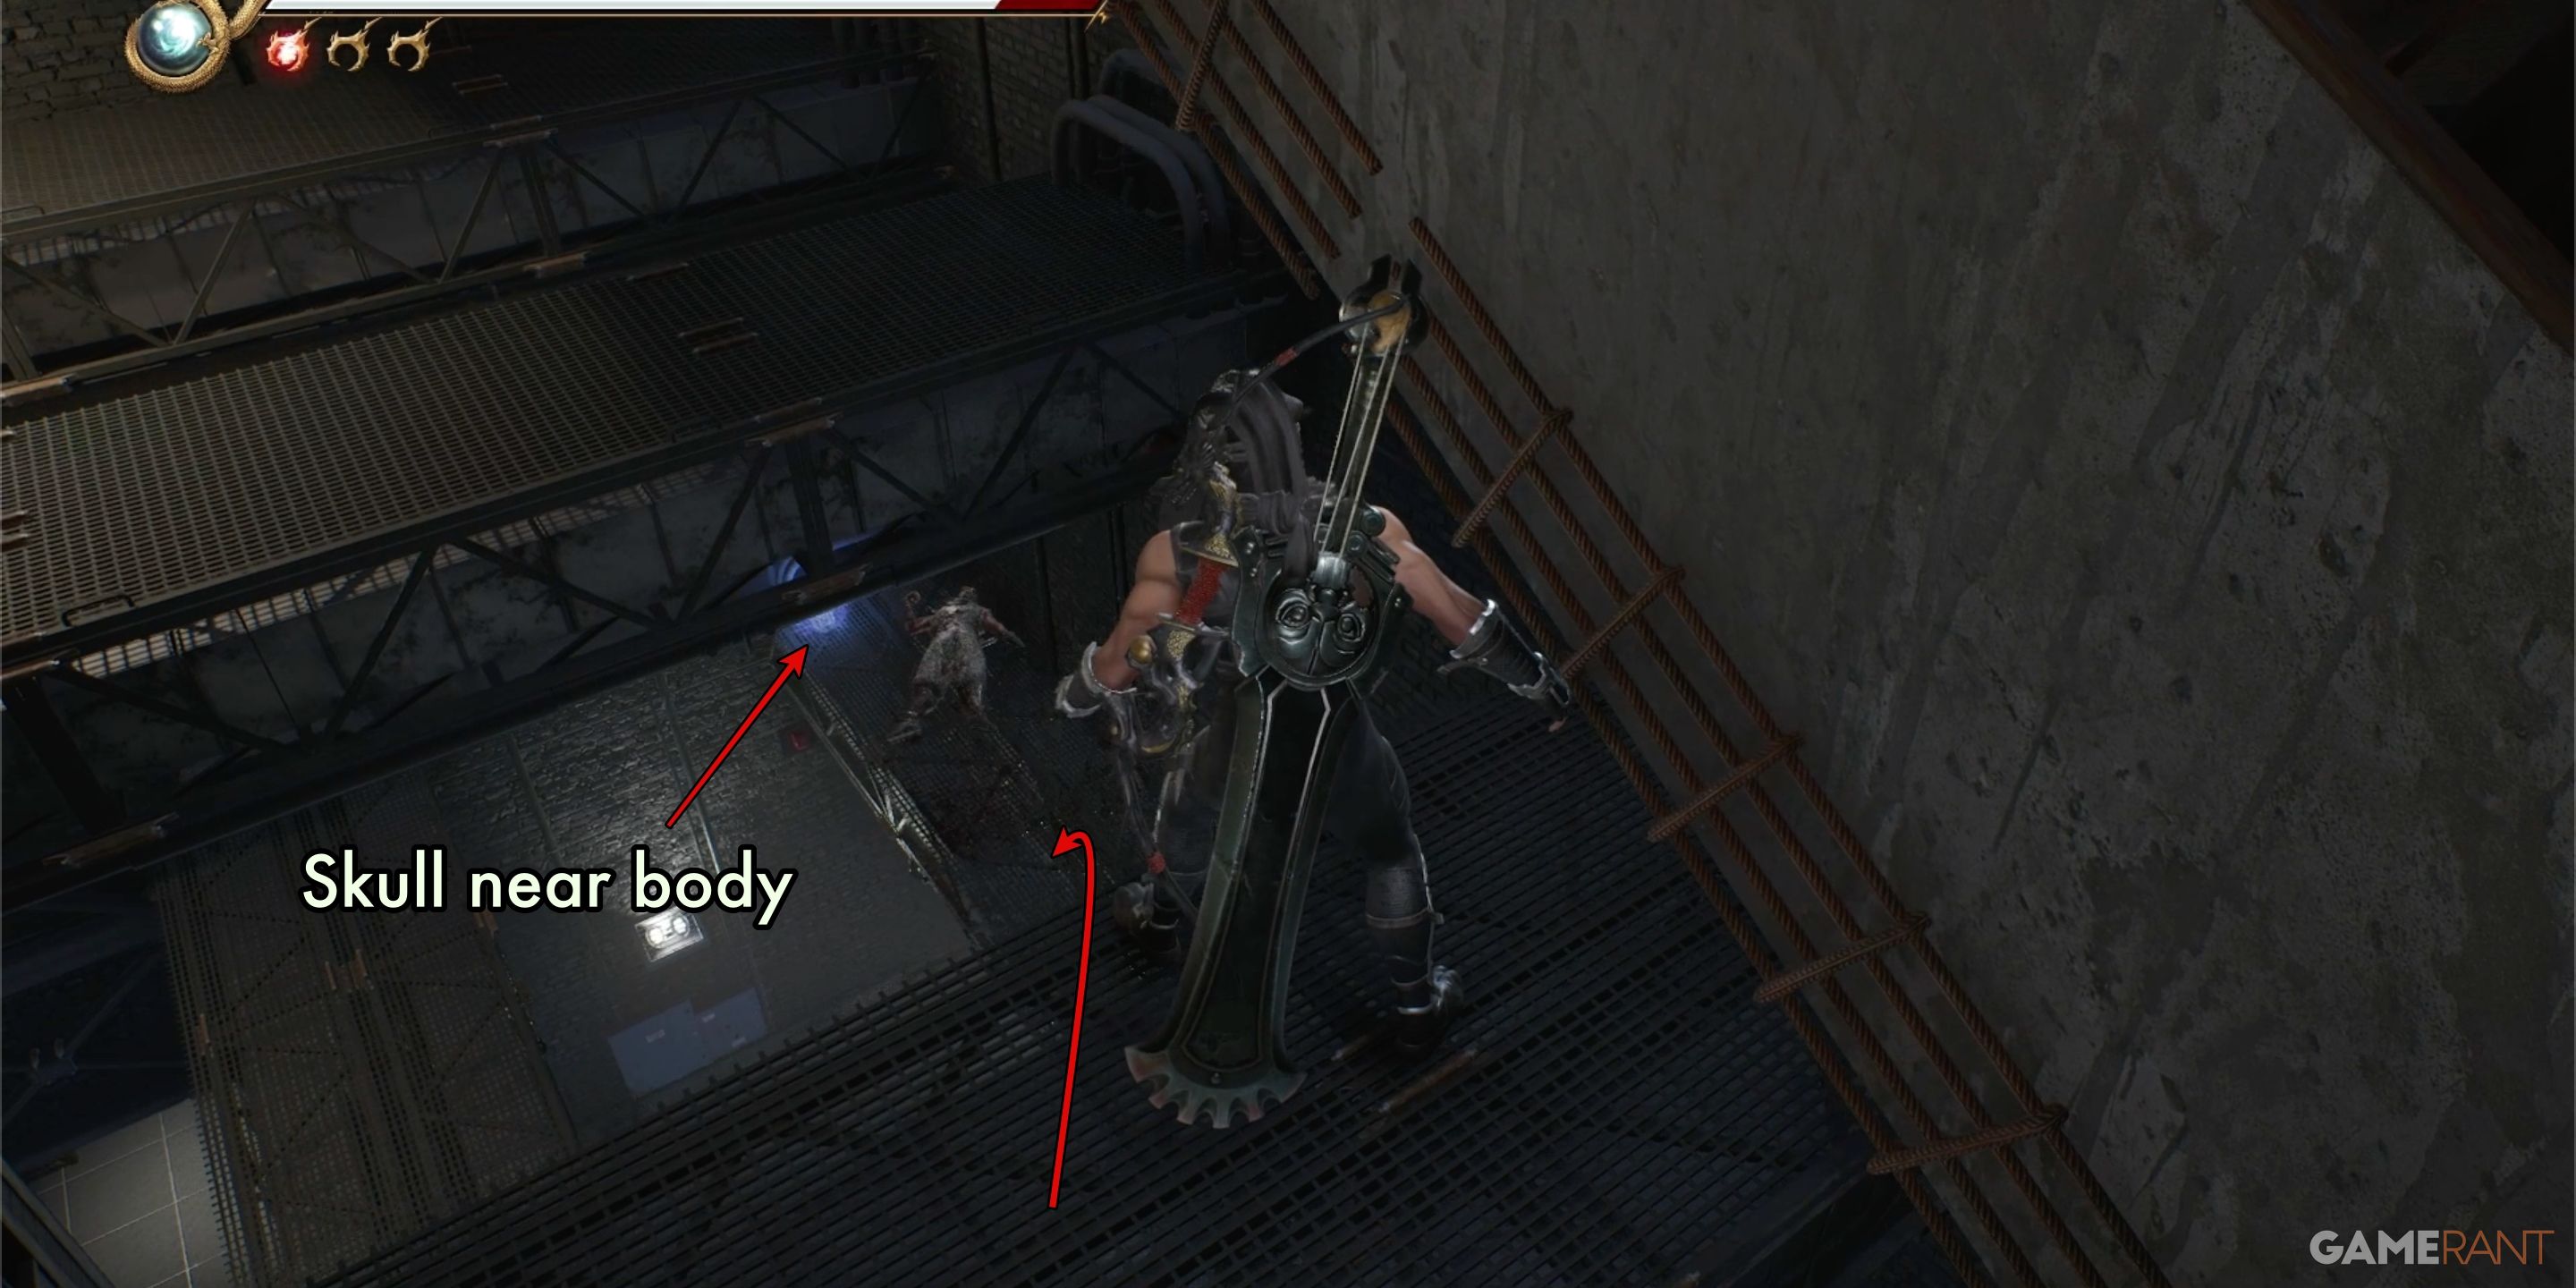
Crystal Skull 25:
Towards the close of chapter 12, I came across a fleeting scene depicting Spider Ninjas’ lifeless forms bobbing in a shallow stream. Venturing to the opposite bank of this river will lead you to Crystal Skull 25, resting on the right side near a deceased body.
All Crystal Skull Locations in Chapter 13 – Ninja Gaiden 2 Black
There are two Crystal Skulls in Ninja Gaiden 2 Black Chapter 13: The Temple of Sacrifice.
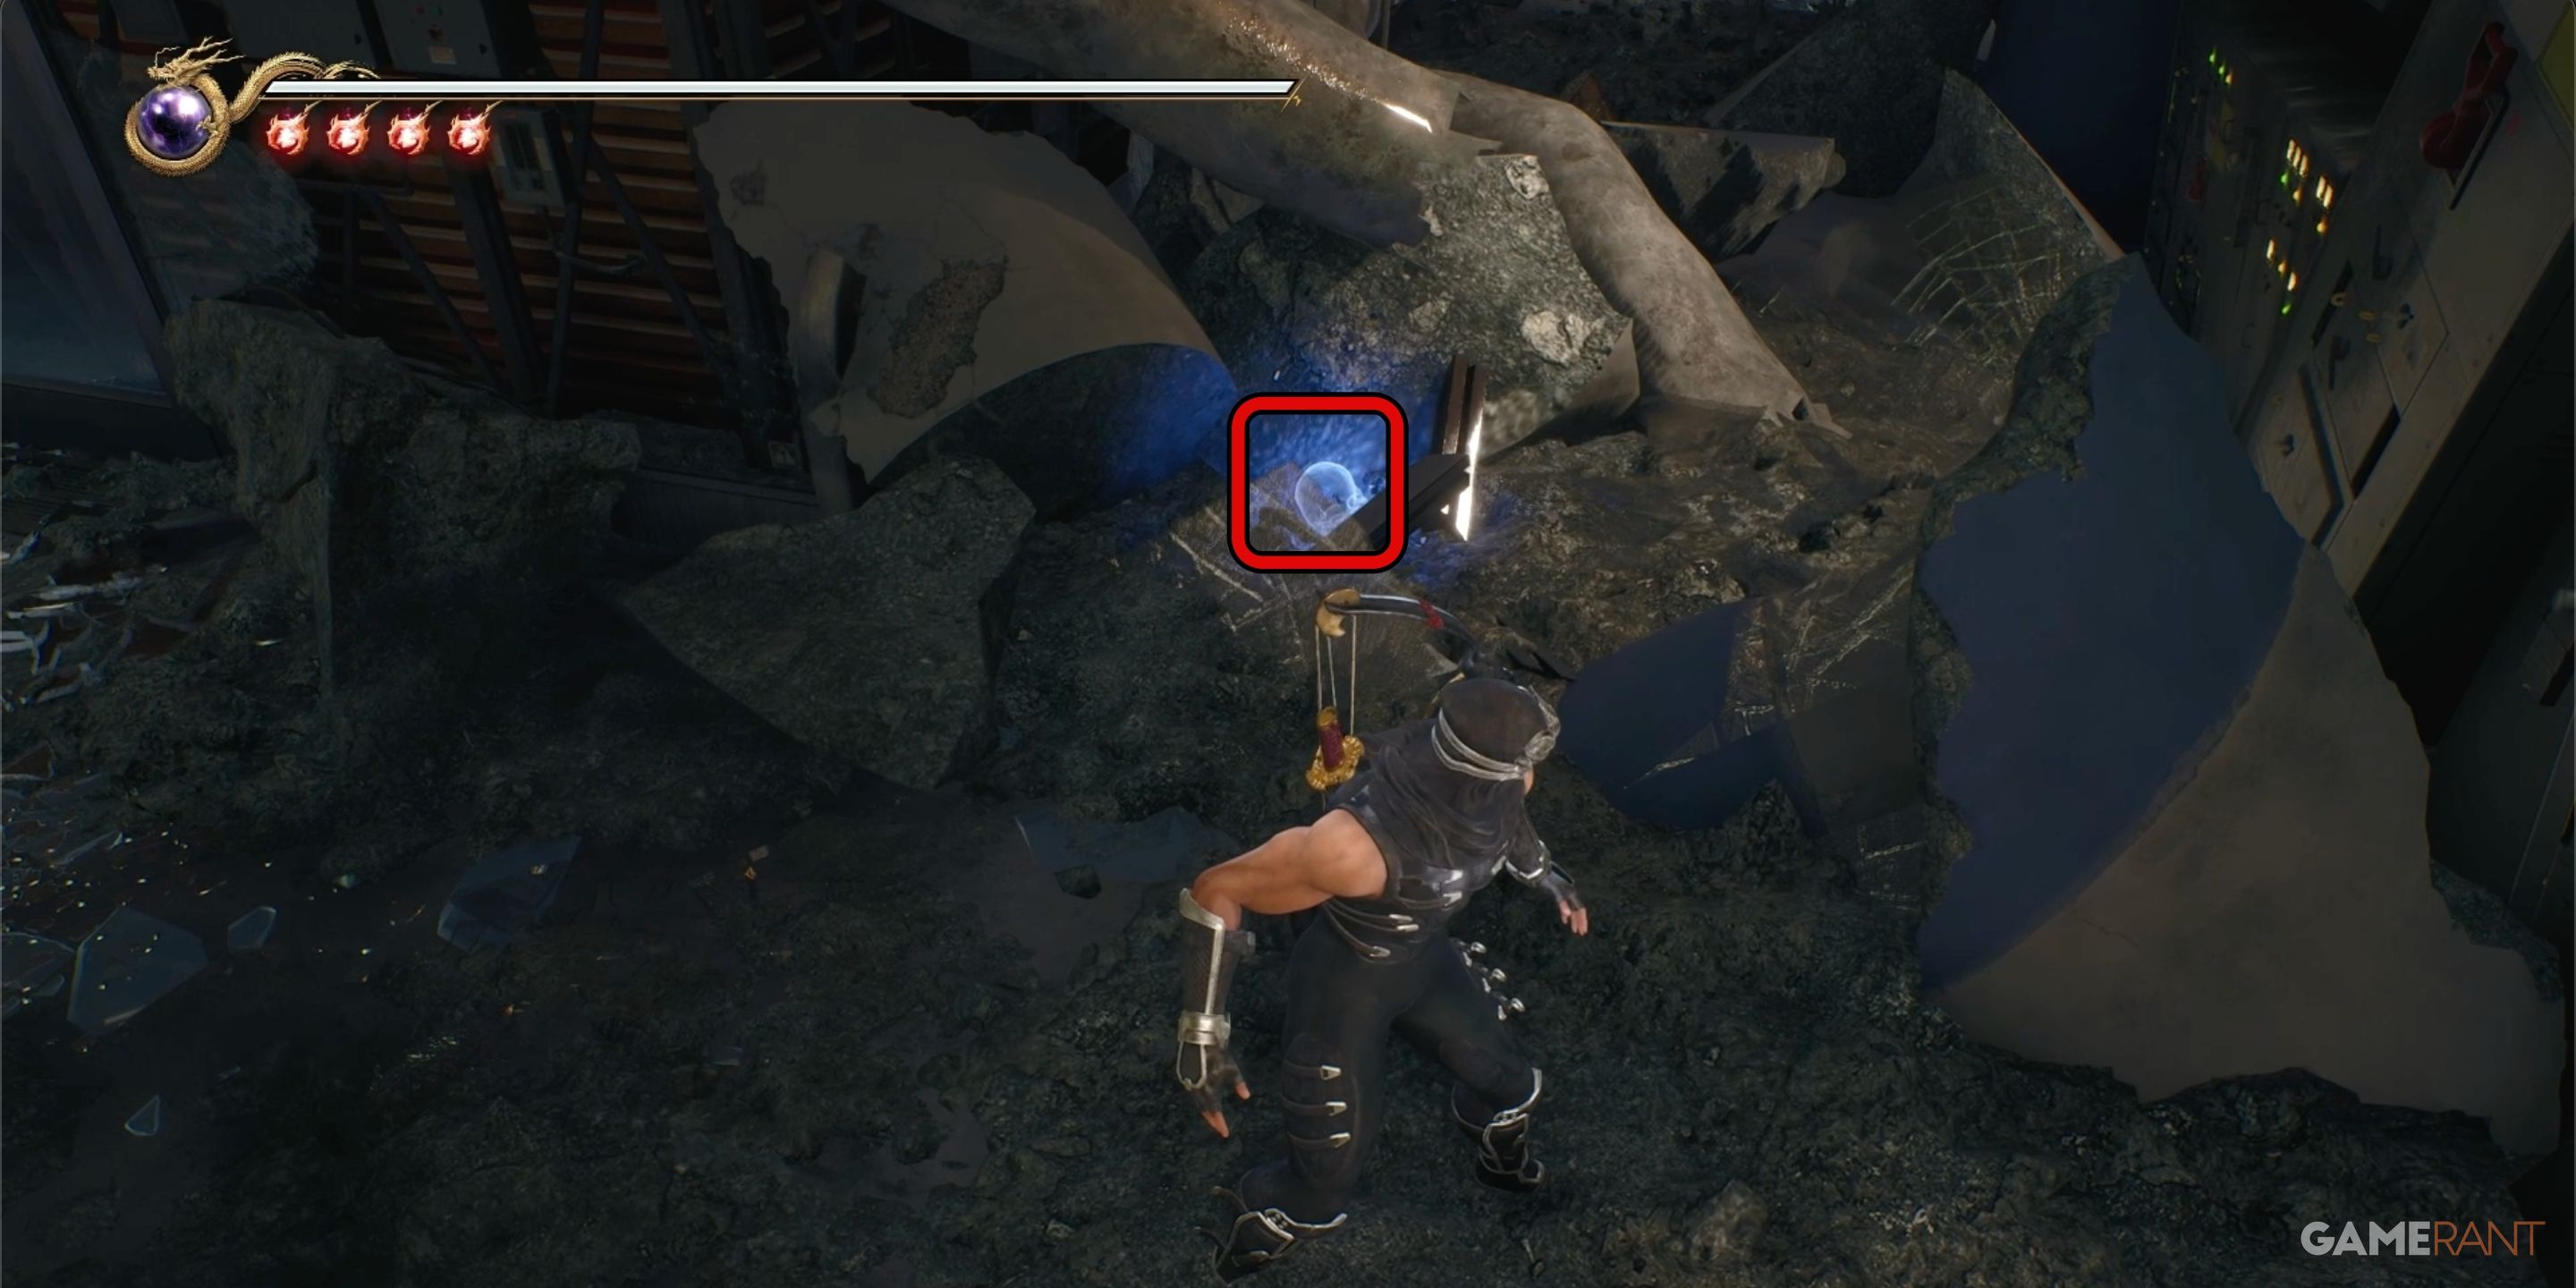
Crystal Skull 26:
After hitting the save spot in Chapter 13’s second act, I dived beneath the earth and found myself at a colossal acid pit. Once I’ve vanquished every last demon, leap into the wall-jump zone at the pool’s end to ascend to higher ground. If you take a breather up there and peer ahead, you’ll spot the Crystal Skull 26 perched on the bricks that I have to navigate across to get to the next area.

As a gamer, I’ll dash against the wall for a wall-run, then, once I hit the other side, I’ll spin around and execute another wall-run to get to that level with the skull up ahead.
Crystal Skull 27:
In the vast cavern with soaring demons, the Crystal Skull 27 is quite accessible; it’s situated slightly to the left of the colossal staircase you traverse upon arrival. A cinematic sequence signals you’ve reached the correct spot. After overcoming the initial adversaries, cast your gaze to the left; there, you’ll spot the skull. As you descend enough on the stairs, you can leap onto the ledge.
All Crystal Skull Locations in Chapter 14 – Ninja Gaiden 2 Black
The final three Crystal Skulls are found in Chapter 14: A Tempered Gravestone.
Crystal Skull 28:
As I advanced through the chapter, I hit my second save spot. Not long after, two colossal spider-ninja adversaries sprang into action. After dispatching those arachnid ninjas, I found myself needing to climb and navigate an imposing structure.
After leaping from the second-story window, you’ll find a big gate ahead that you need to get past to stay on the primary route. Instead, veer to the right and follow the path all the way to its end, which necessitates another right turn near a tiny shed.
Right at the conclusion of the trail, slightly hidden beyond the edge of the storage shed, you’ll spot the Crystal Skull 28 nestled quietly in a corner near a gate.
Crystal Skull 29:
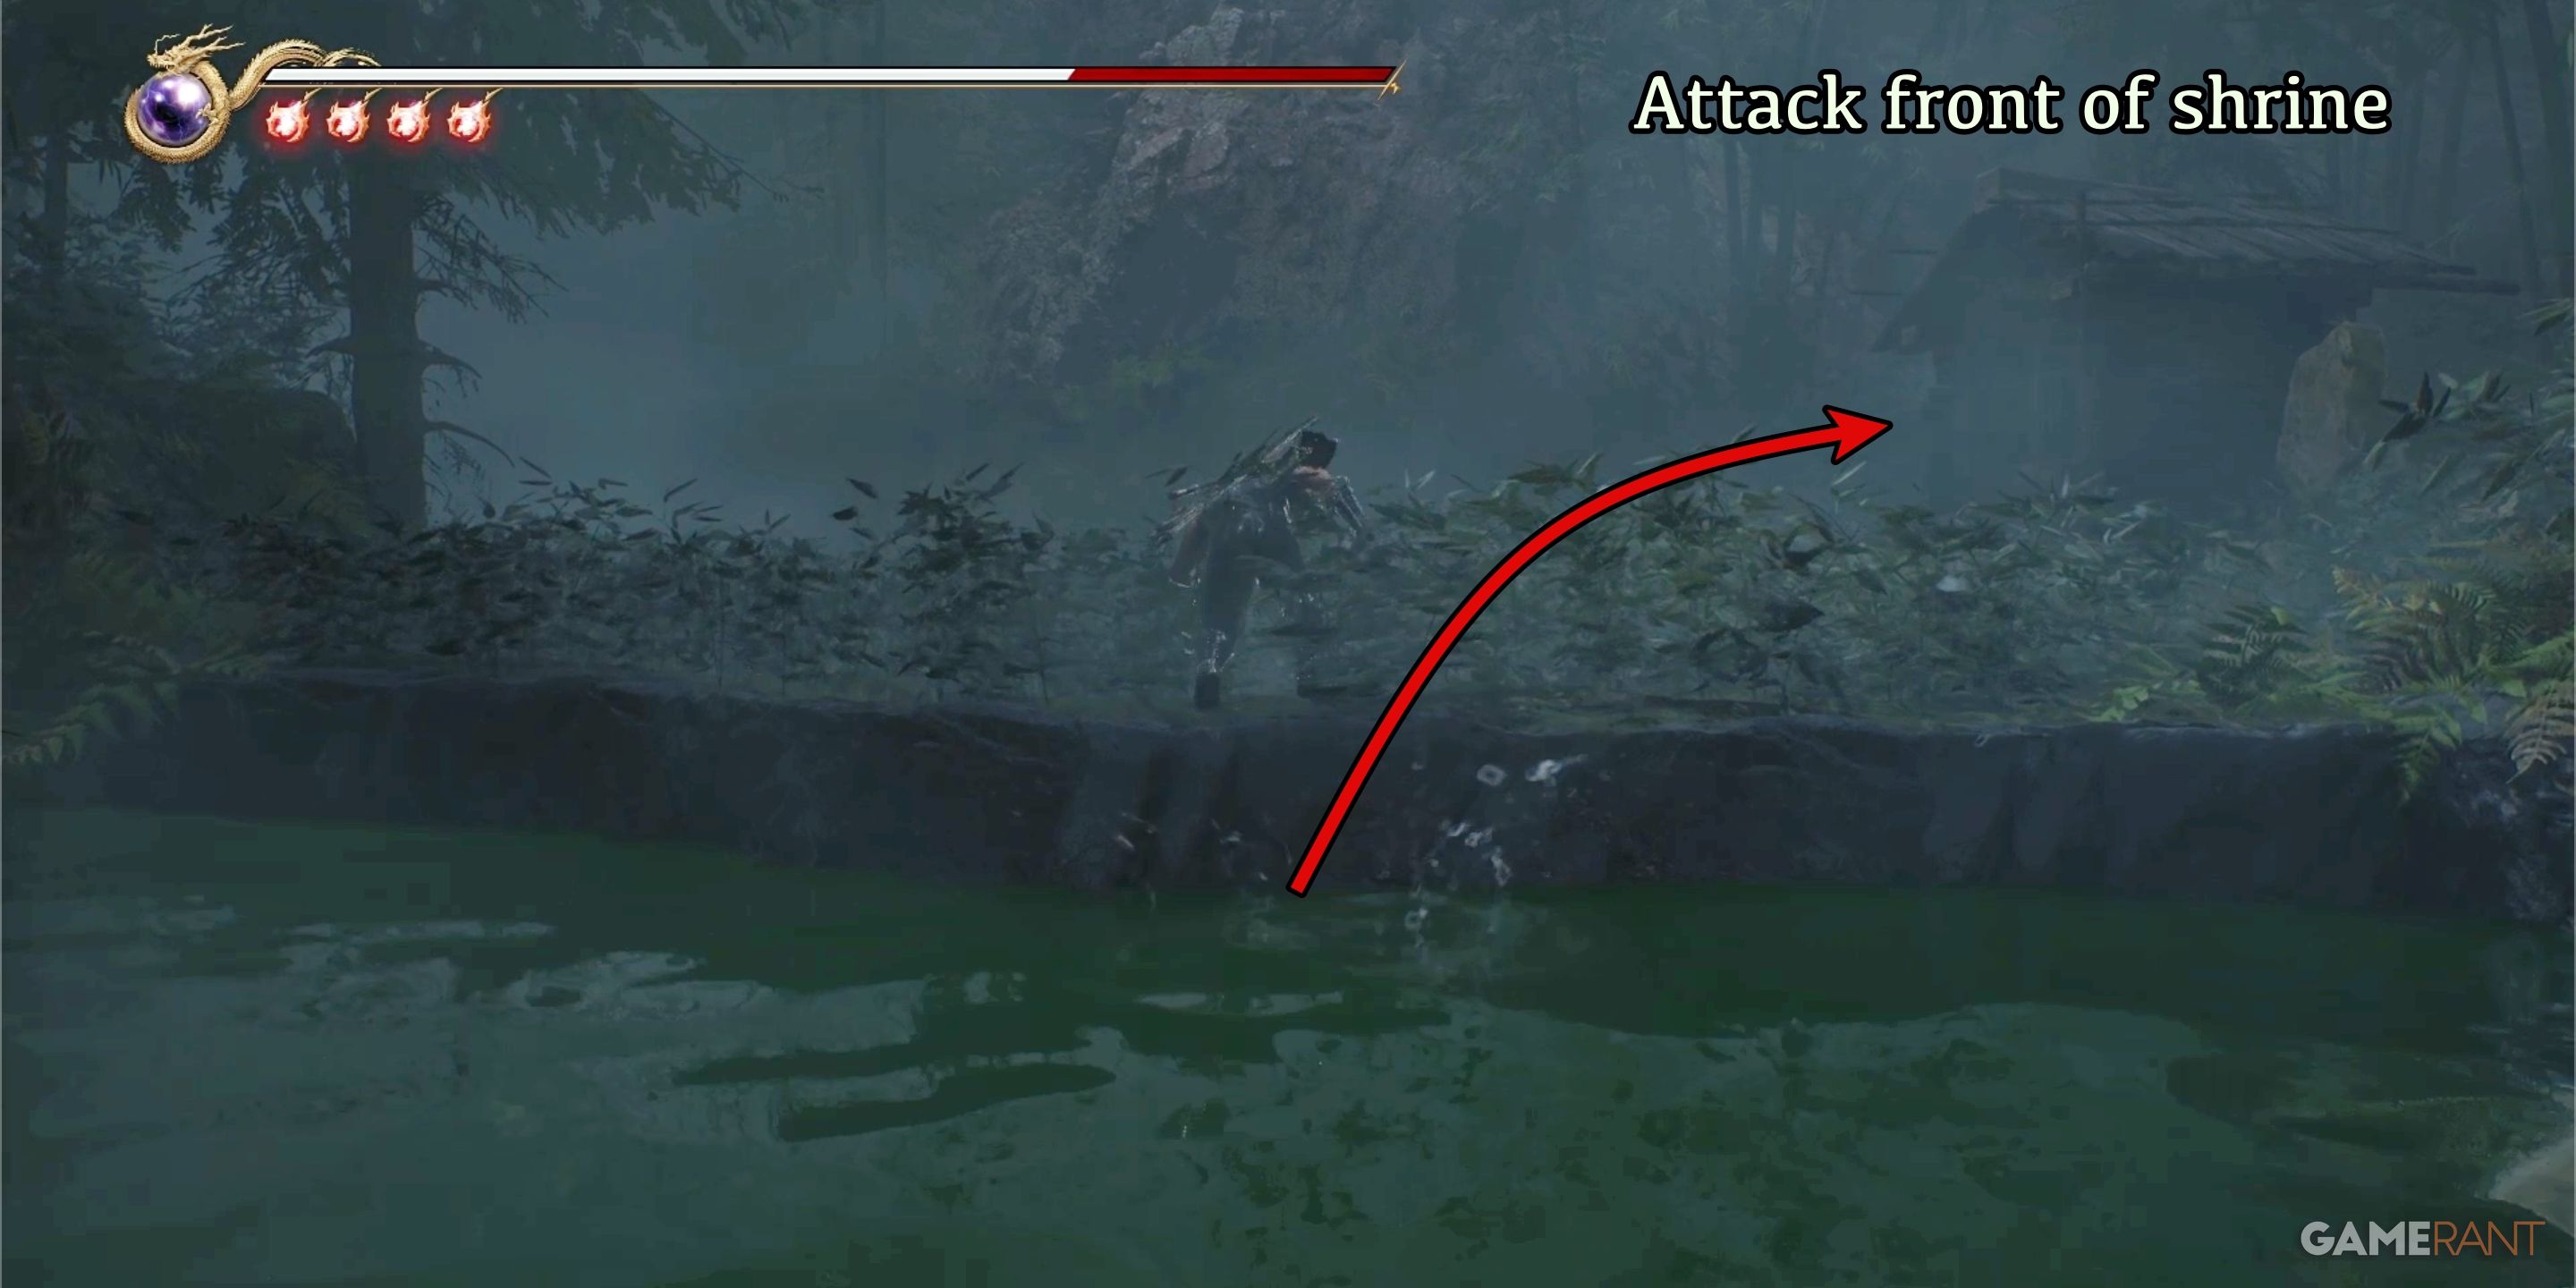
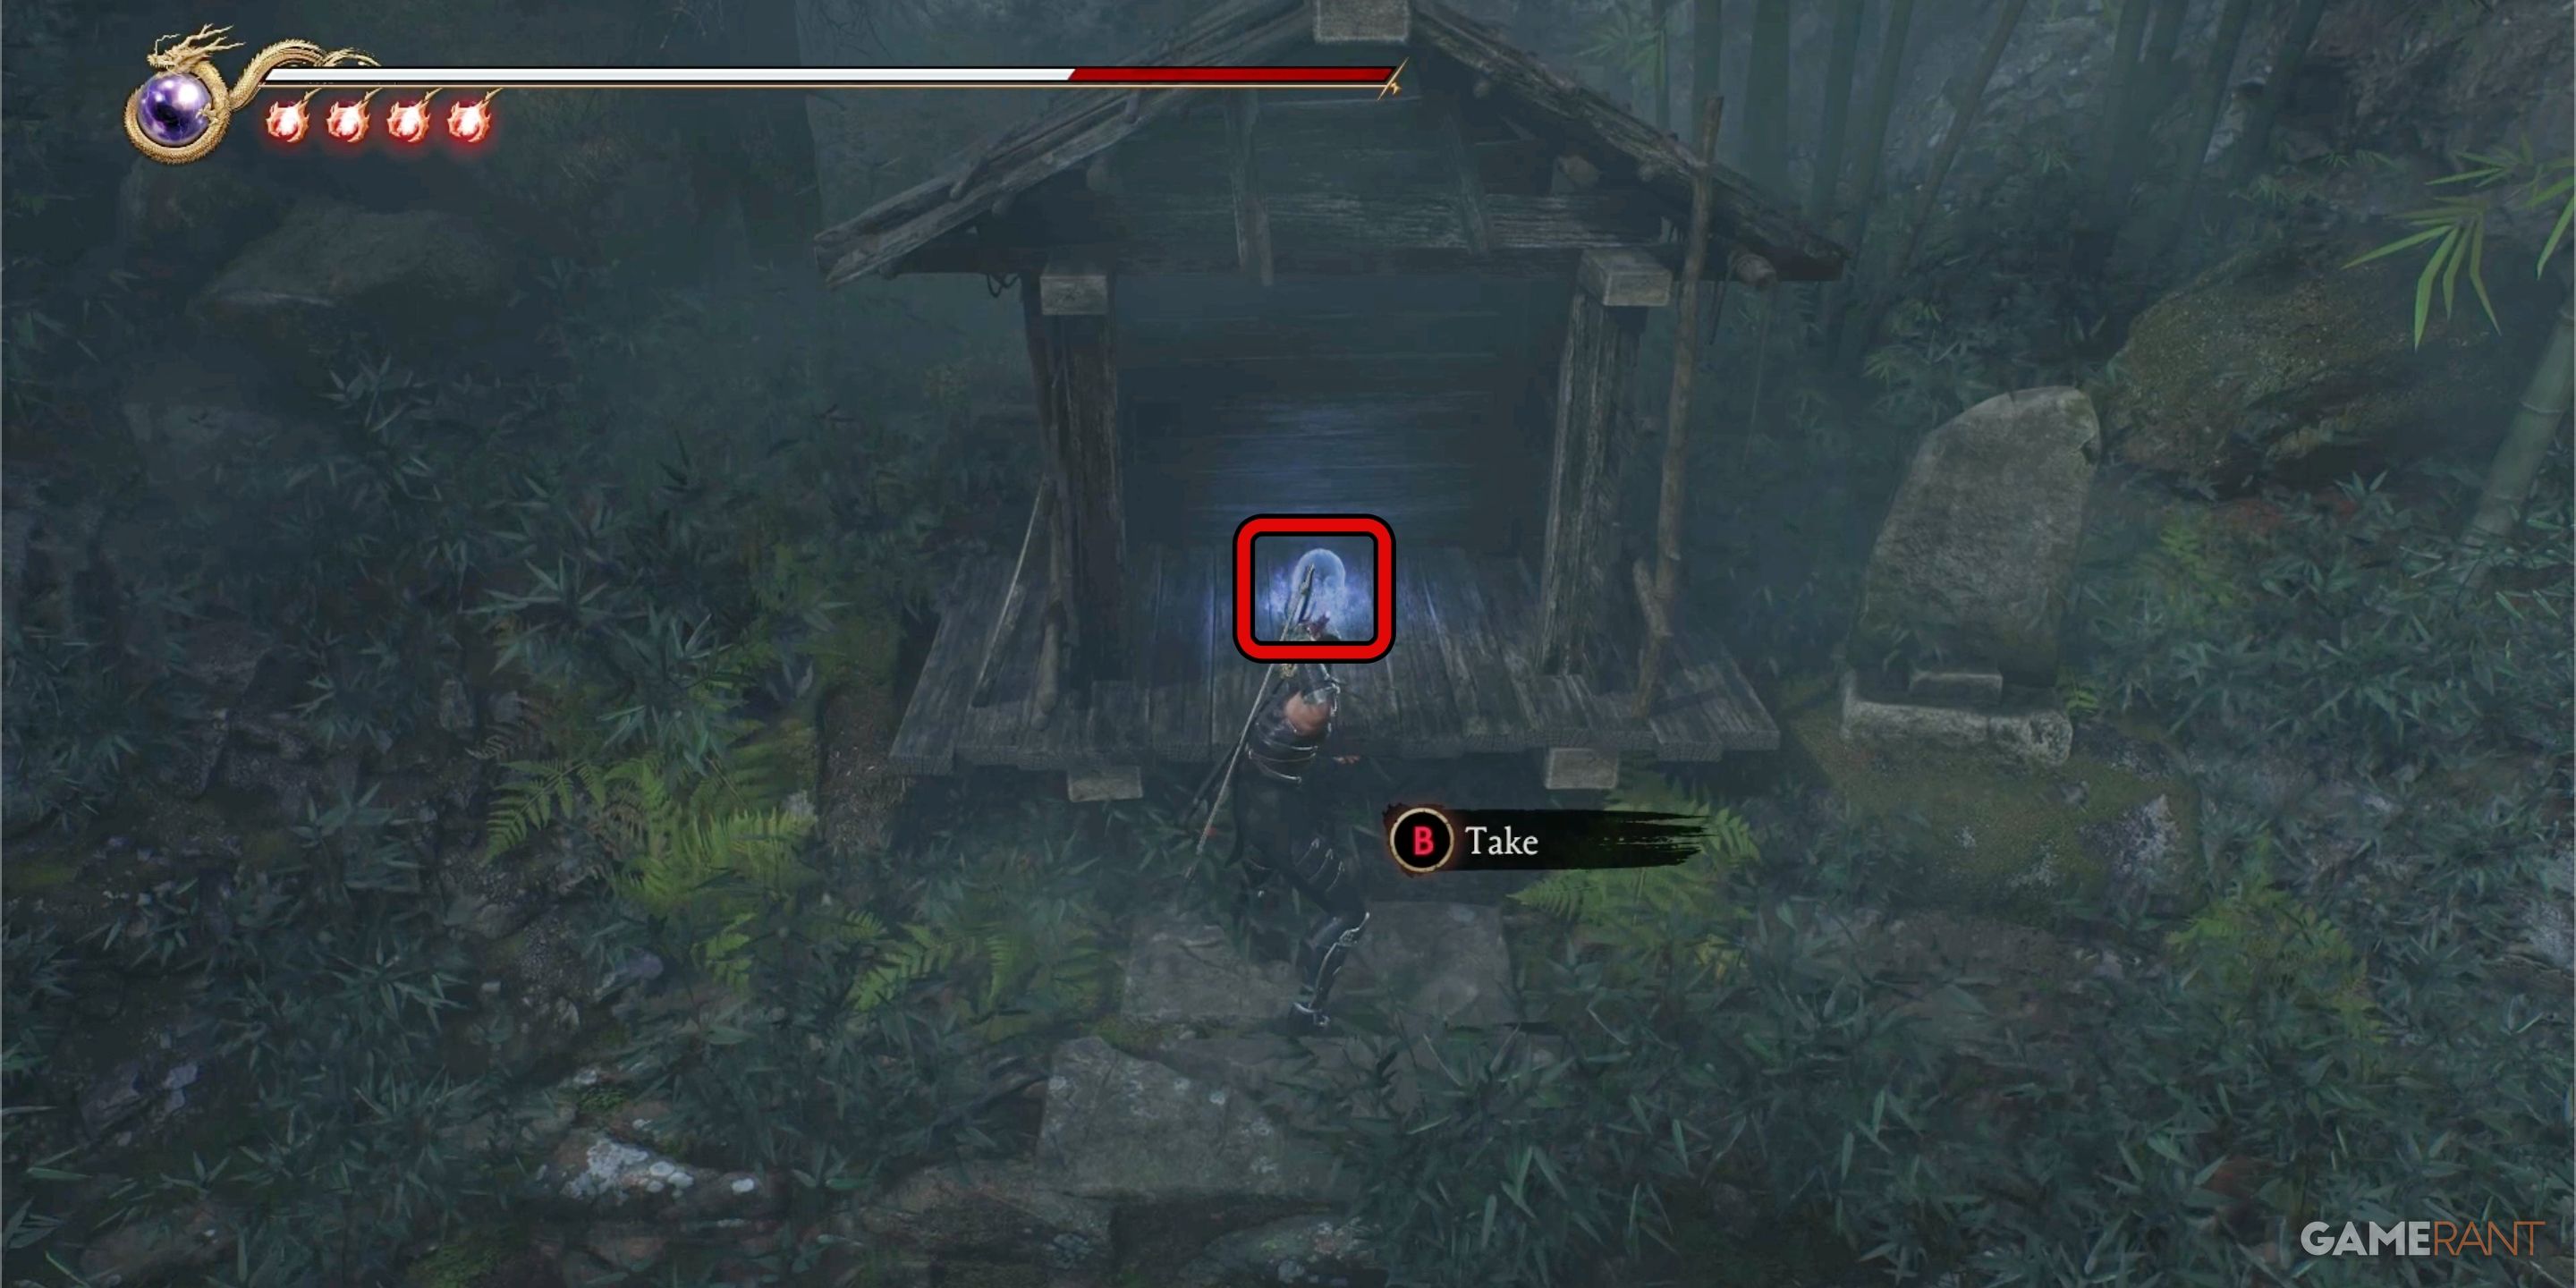
Once you pass Save Point 3, you’ll swiftly come across a short underwater area. Swim through the cave until you surface, and you’ll find yourself in a field of tall grass with a small shrine to your right. If you attack the front of the shrine, you’ll uncover Crystal Skull 29.
Crystal Skull 30:
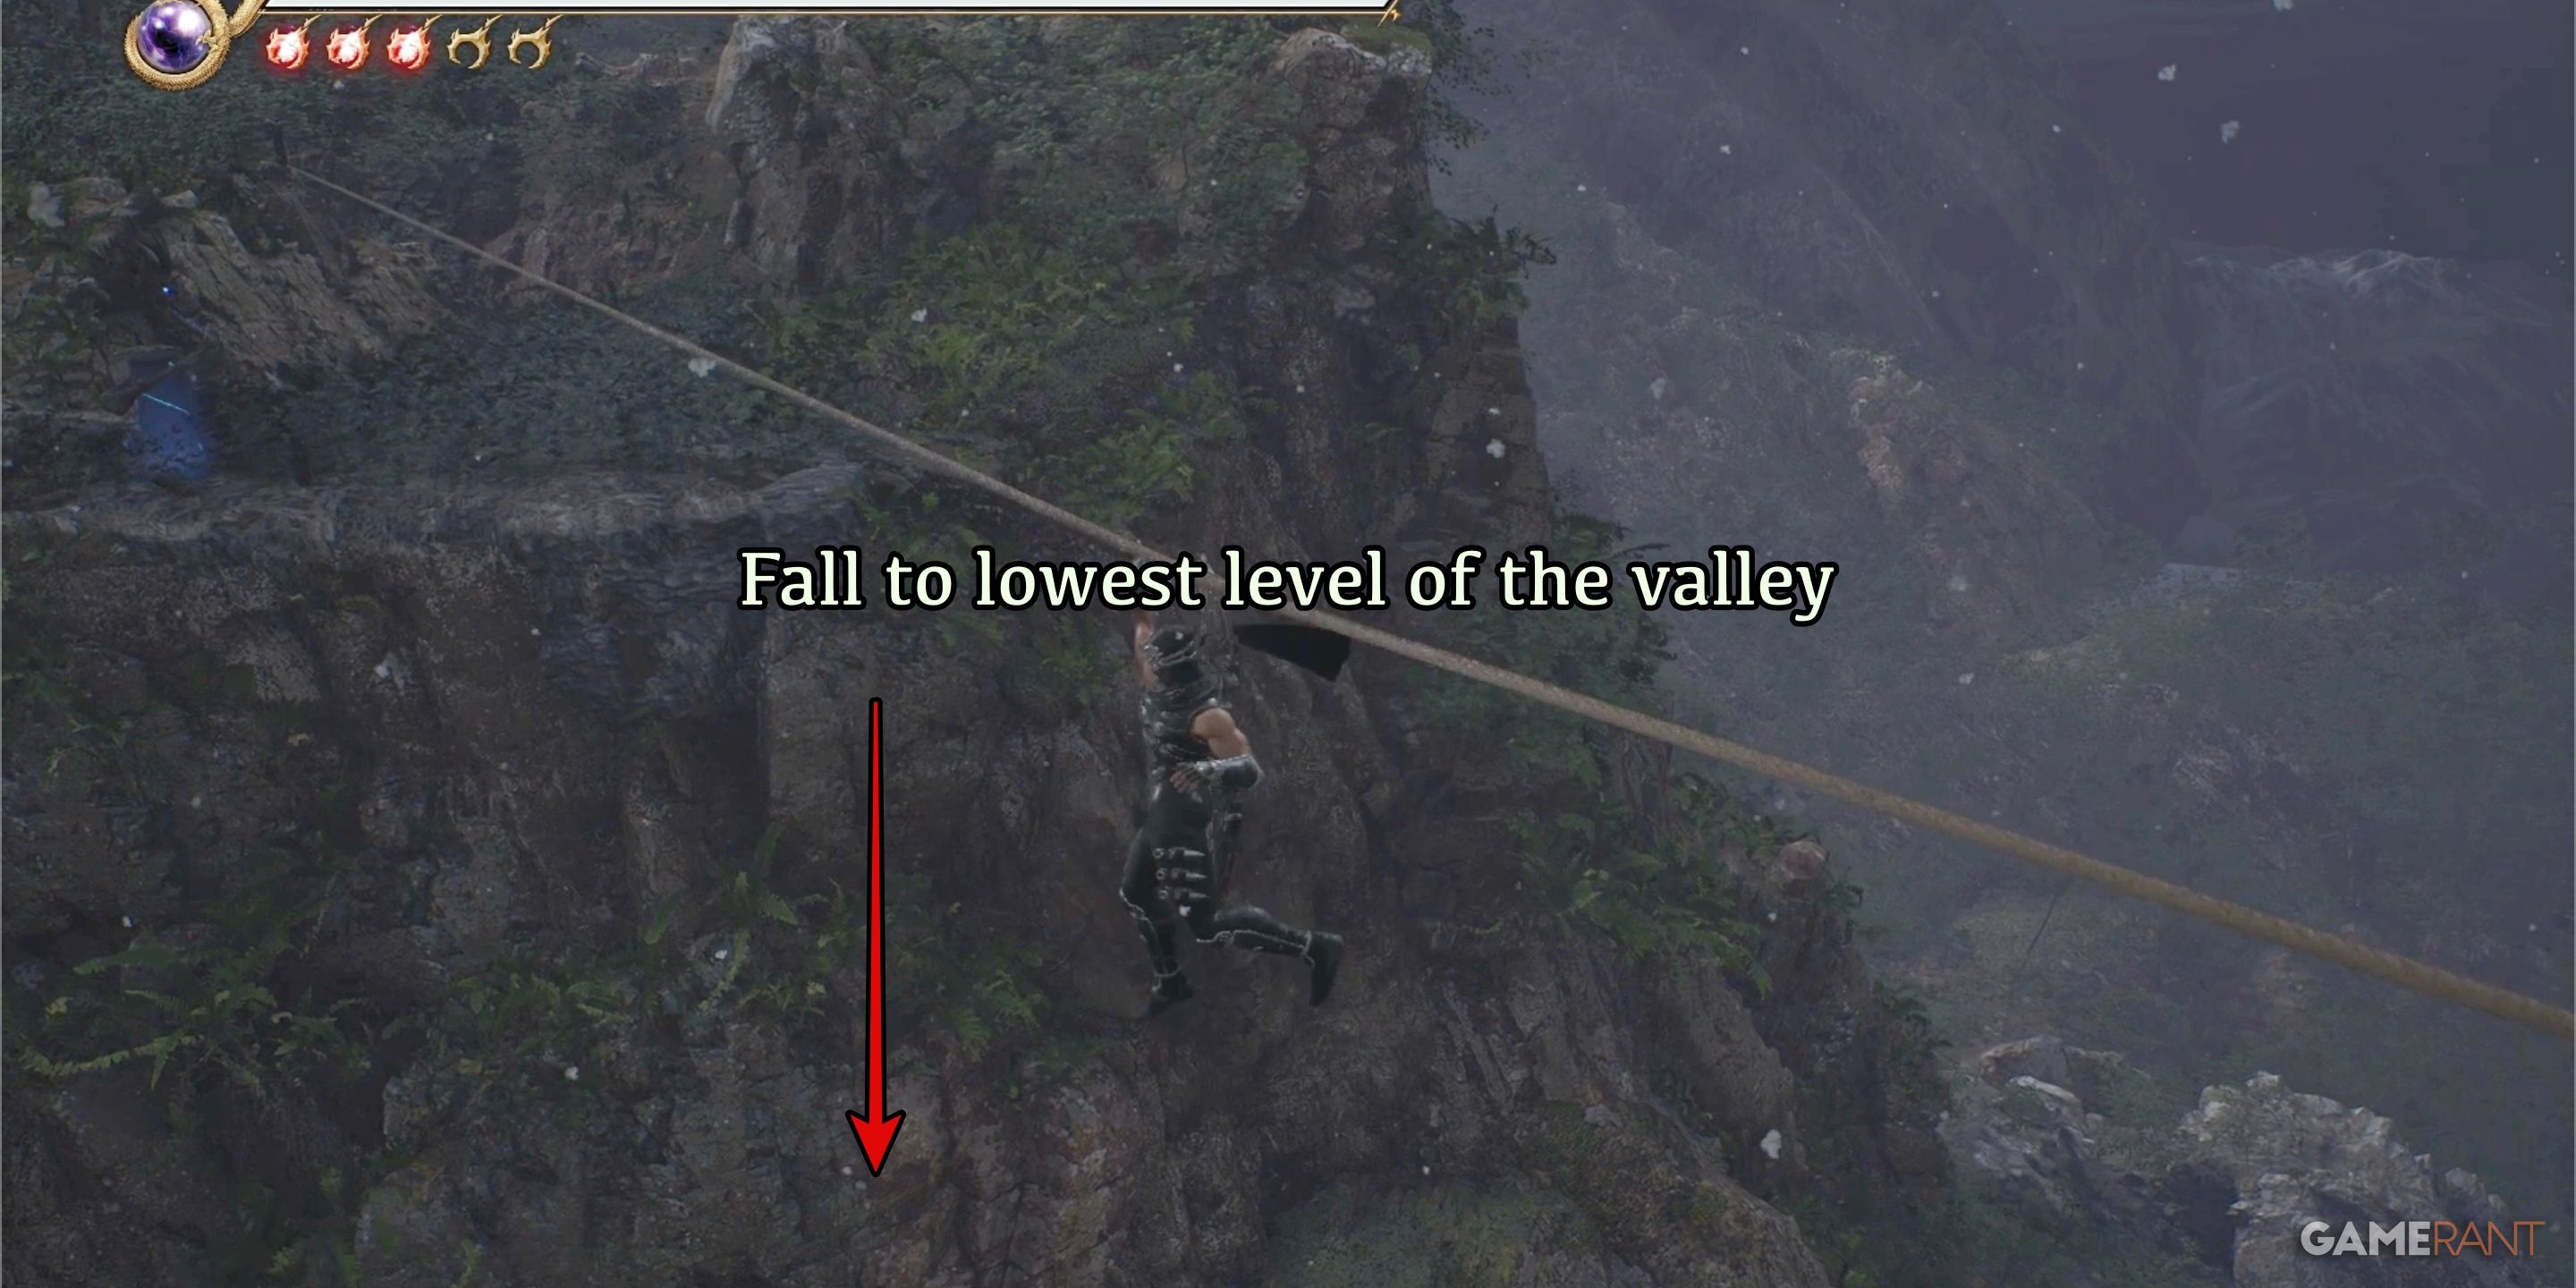
In Chapter 14, right before the fourth safe spot, you’ll encounter a dragon statue. Nearby, you’ll find a rope for traversing a vast gap. Rather than using the rope, it would be more beneficial to leap down into the valley beneath instead.
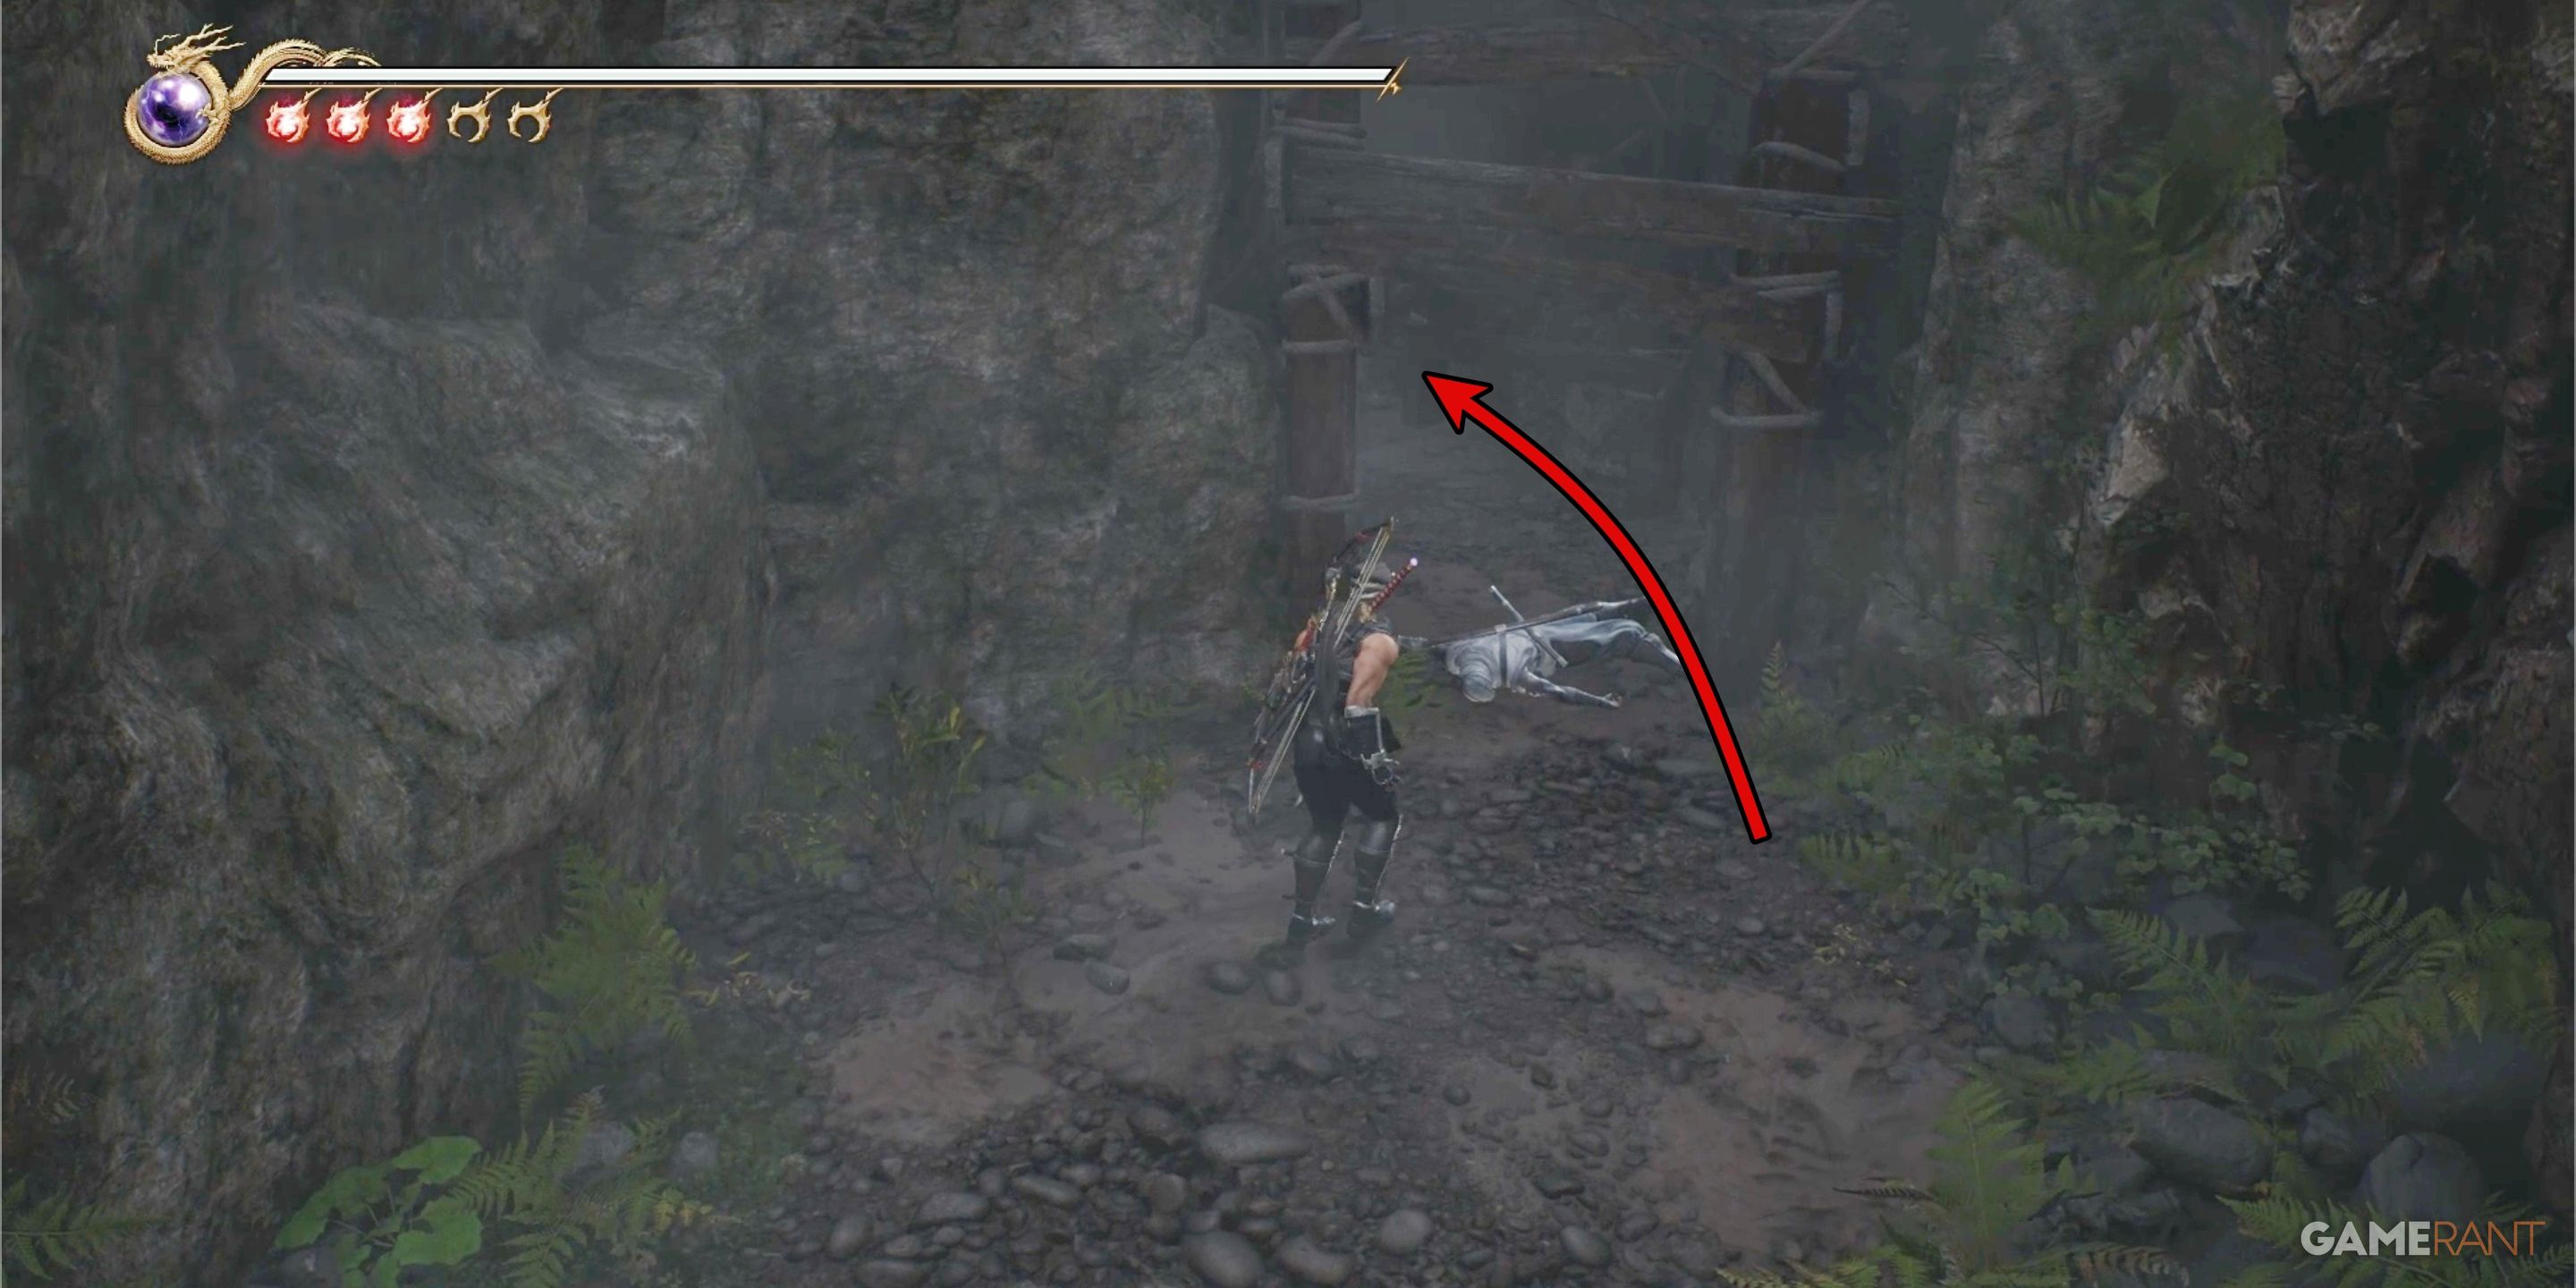
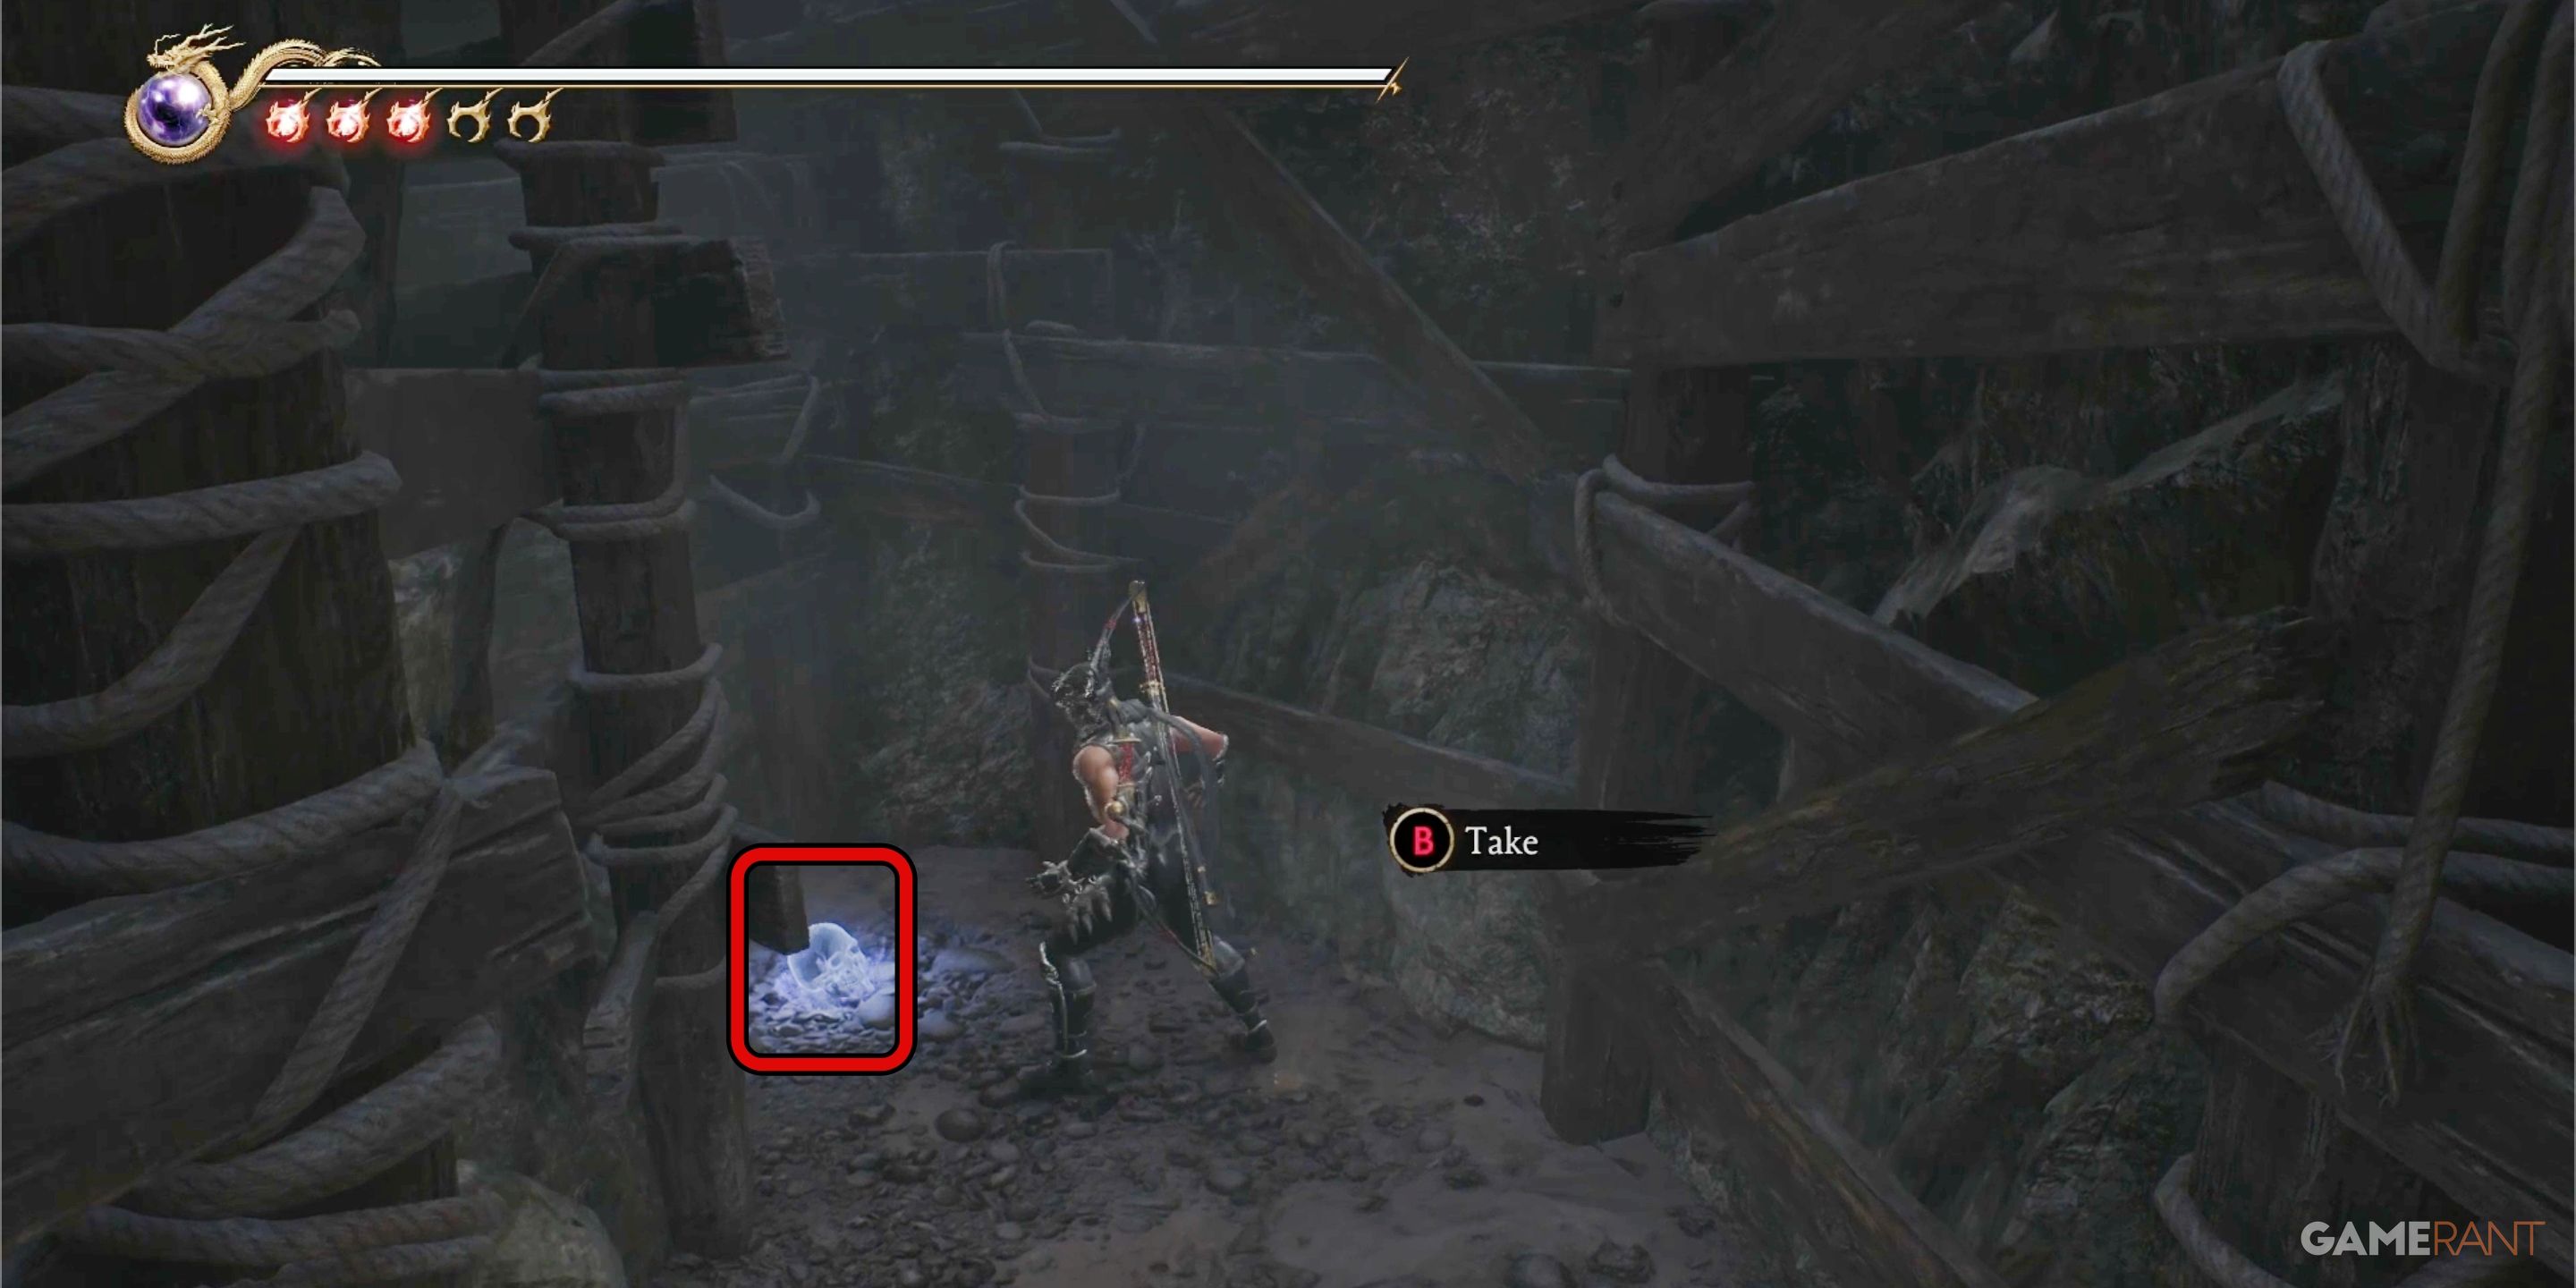
At the base of the chasm, make your way to its end where there’s a tiny cave entrance. Step inside this cave, and you’ll discover Crystal Skull number 30 resting on the floor.
This is the final Crystal Skull in Ninja Gaiden 2 Black.
Read More
- Re:Zero Season 4, Episode 6 Release Date & Time
- NTE Drift Guide (& Best Car Mods for Drifting)
- How to Get the Wunderbarrage in Totenreich (BO7 Zombies)
- How to Beat Turbines in ARC Raiders
- Change Your Perspective Anomaly Commission Guide In NTE (Neverness to Everness)
- Diablo 4 Best Loot Filter Codes
- Danganronpa 2: A Complete Guide To Gifts
- Top 8 UFC 5 Perks Every Fighter Should Use
- Brent Oil Forecast
- All Fish & How to Catch Them in NTE
2025-05-23 06:49