Quick Links
-
??????
- Glowshard #1
-
Field of Hopes and Dreams
- Broken Cake/Spin Cake
- White Ribbon
- Broken Key C
-
Scarlet Forest
- Ragger
- Dice Brace
- Broken Key B
- Starwalker/Egg #1
- Iron Shackle/Moss
-
Card Castle
- Broken Key A/Jevil
- Dainty Scarf/Brave Ax
- Diverging Routes
-
Chapter 1 Light World
- Visit Everyone
-
Chapter 2 Dark World
- Castle Town Visit #1/Silver Card
-
Cyber Field
- Glow Wrist
- Fiber Scarf
- Glow Wrist 2/Blue Checksmark 1
- Blue Checksmarks 2 and 3
- Mecha Saber/Auto Axe
- Tension Bit
- Ragger 2
-
Cyber City
- New Save
- Pink Ribbon
- Bounce Blade
- Moss 2/Egg 2
- Car NPC
-
Queen’s Mansion
- Big Shot Bowtie/Royal Pin
- KeyGen/Broken Sword
- Chain Mail/Basement
- Glowshard #2
- Spamton NEO
-
Castle Town Second Visit
- Chapter 2 All Stars
- Fusions
-
Chapter 2 Light World
- Revisiting Everyone
-
Weird Route
- Starting Incidient
- Freeze Ring
- Thorn Ring
- Aborted Snowgrave
- Snowgrave
- Spamton NEO DX
- Proceed
It’s been quite some time since Deltarune has been in development, and now, following a four-year wait, it appears that the game’s content is being expanded twice as much. This clearly indicates there’s plenty more work ahead for us.
Toby Fox designed Undertale such that the game’s content is restricted based on your decisions, and this concept has been carried over into Deltarune, albeit to a reduced degree.
As a gamer, I can tell you, it’s cool to revisit earlier stages in this game, ’cause there might be hidden treasures or battles that Toby, the game designer, has strategically placed. These one-time items and fights could potentially matter later on, so it’s worth going back to grab them if I can!
I’ll organize all essential items from Chapters 1 and 2, which could be valuable for future reference, potentially influencing events from Chapters 3 and 4.
??????
Glowshard #1
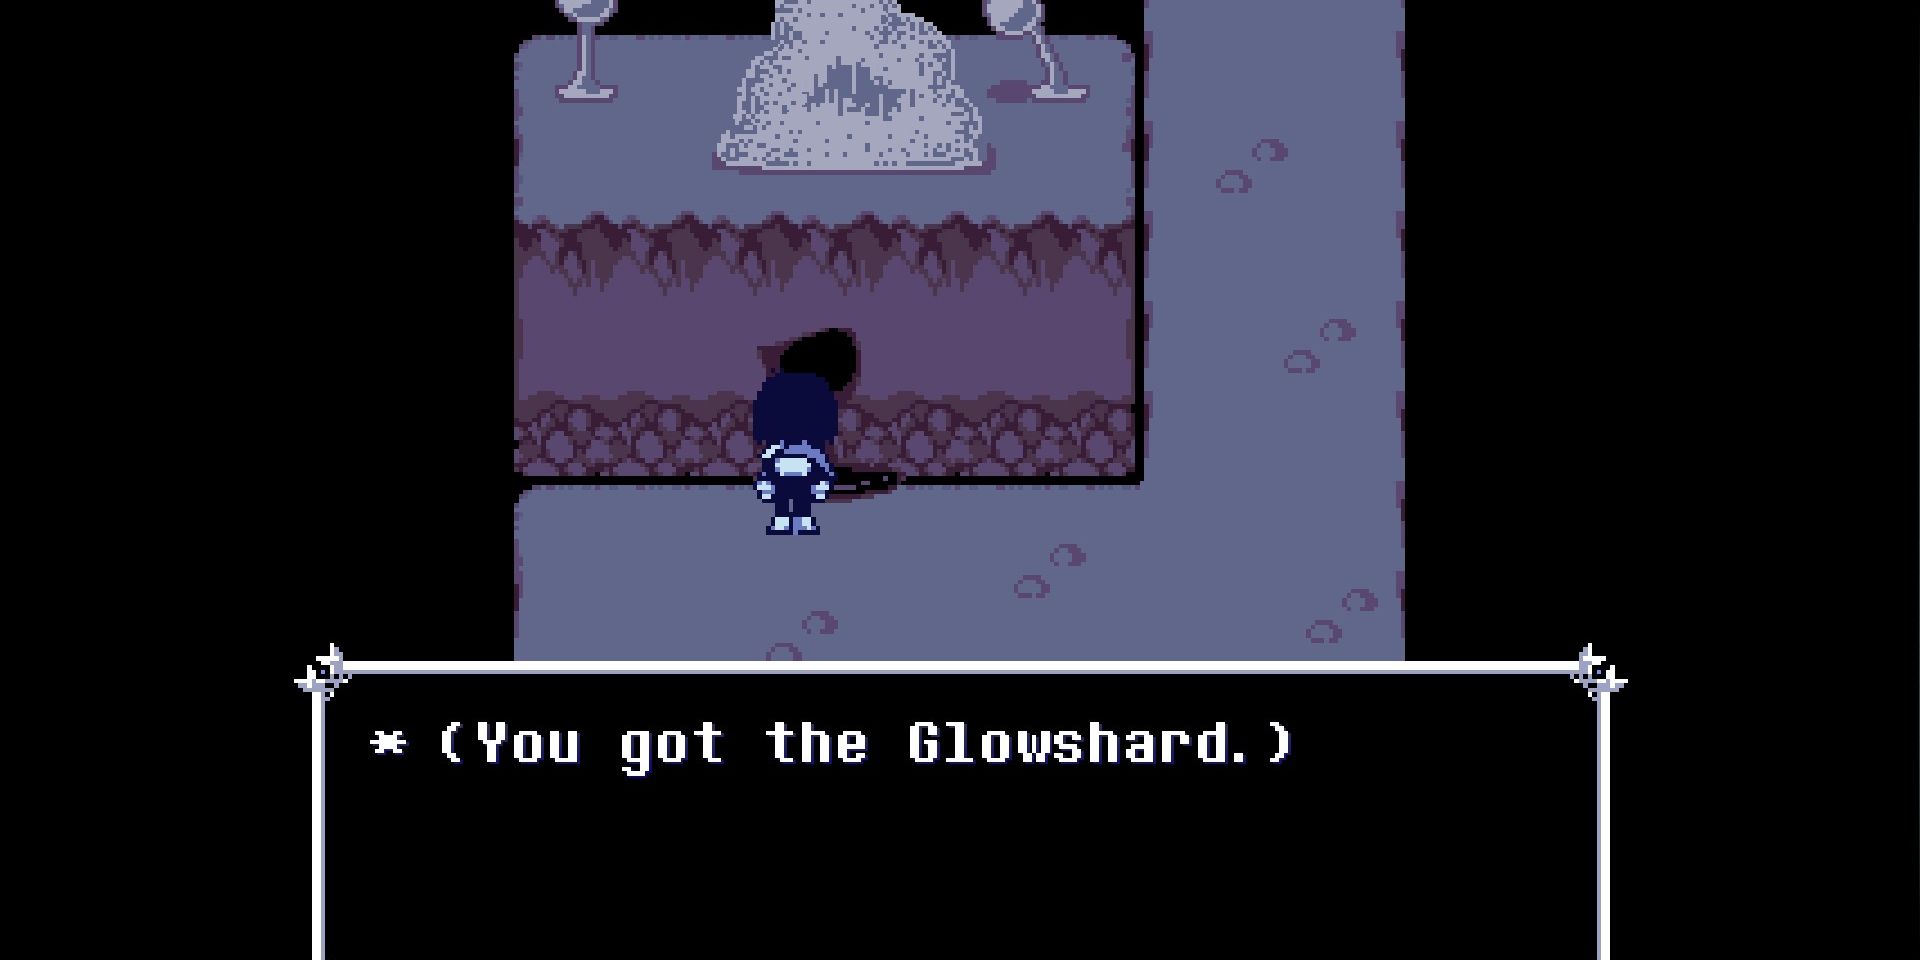
In the opening of the game, the first thing you might overlook is actually the initial object. As soon as you step into the mysterious world of Chapter 1, you’ll encounter a crossroads. Taking the path and examining the adjacent wall will reward you with a fragment.
In every chapter, you’ll find one of these items, and while it lets you instantly save a Rudin, the cost rises with each passing chapter. So, it’s smarter to collect them and consider selling them, ideally around Chapter 6 or 7, as their value tends to peak then.
Field of Hopes and Dreams
Broken Cake/Spin Cake
The damaged cake is conveniently located on the primary trail, but it’s not edible. Later, when you encounter Malius in the Crimson Forest, ask him to fix it. After that, return to the Top Chef where you initially found it, or wait until Chapter 2’s Castle Town for the cake to be repaired and consumable again.
Using the Top Cake, which boasts immense power, just once seems like a wise trade-off, as it’s given to the Master Chef in exchange for the perpetually renewable Spin Cake. This decision proves beneficial over time, as the Top Cake gains strength with each passing chapter.
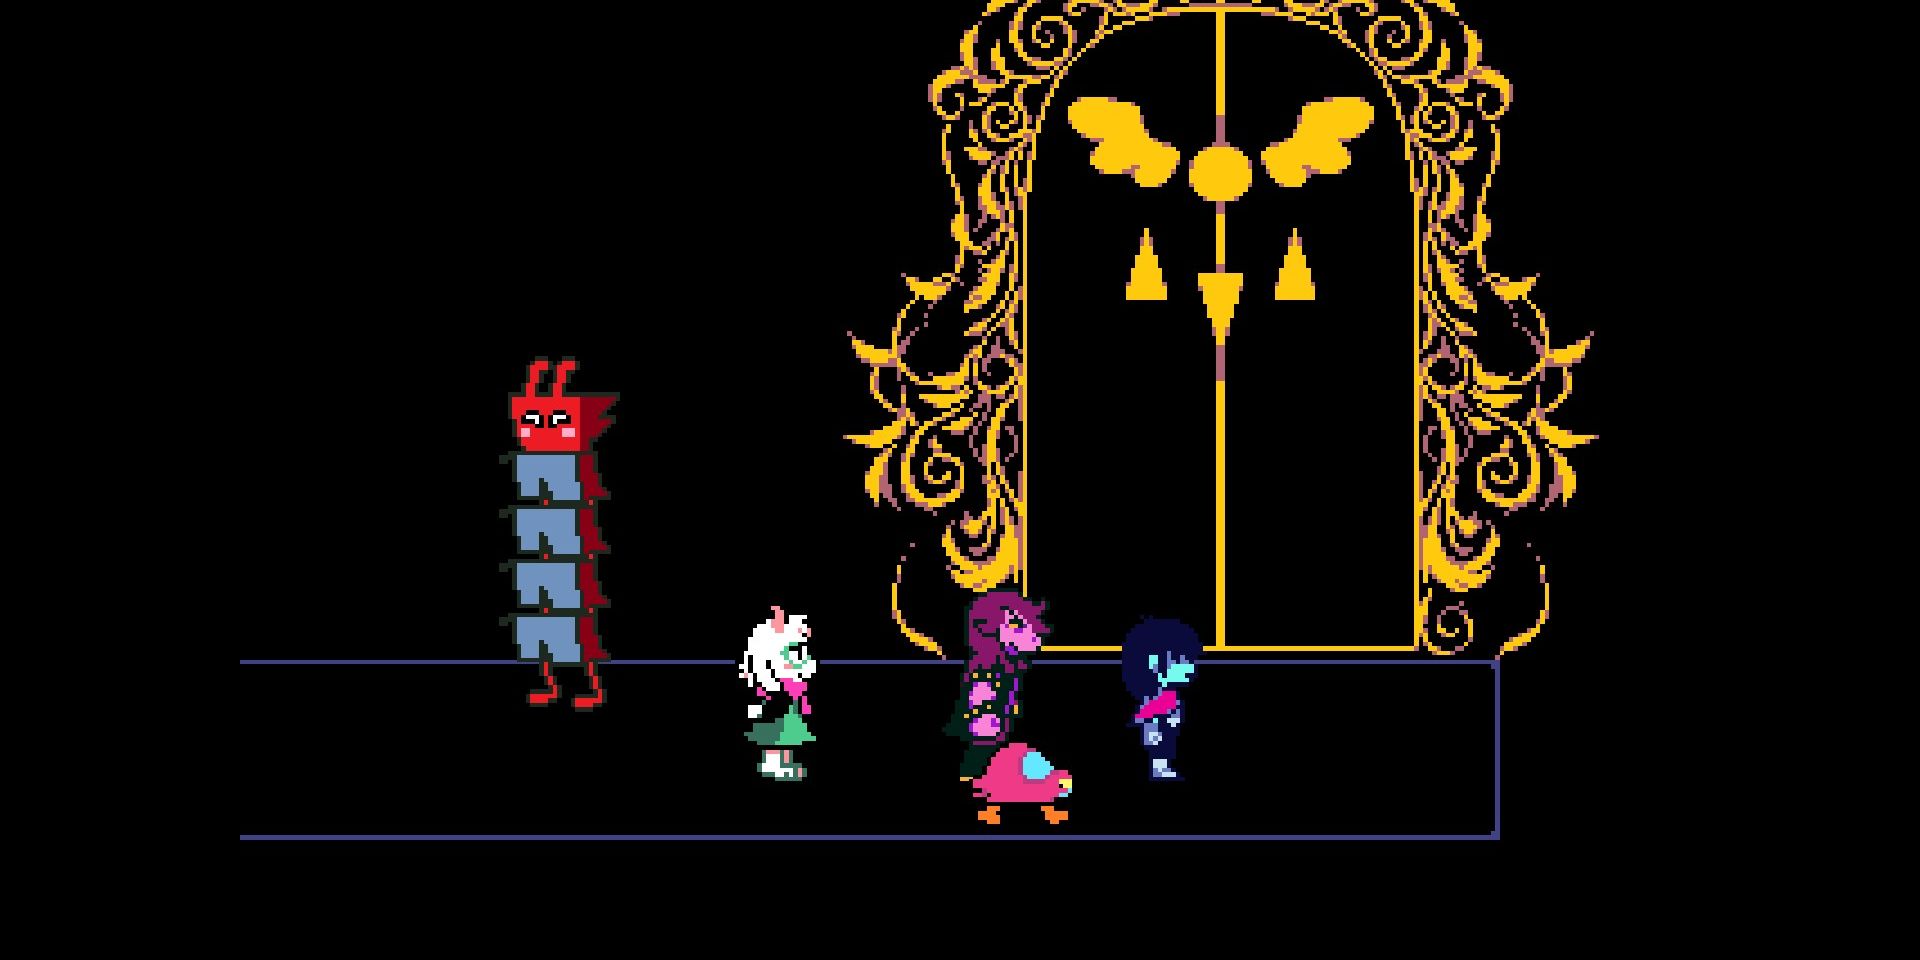
White Ribbon
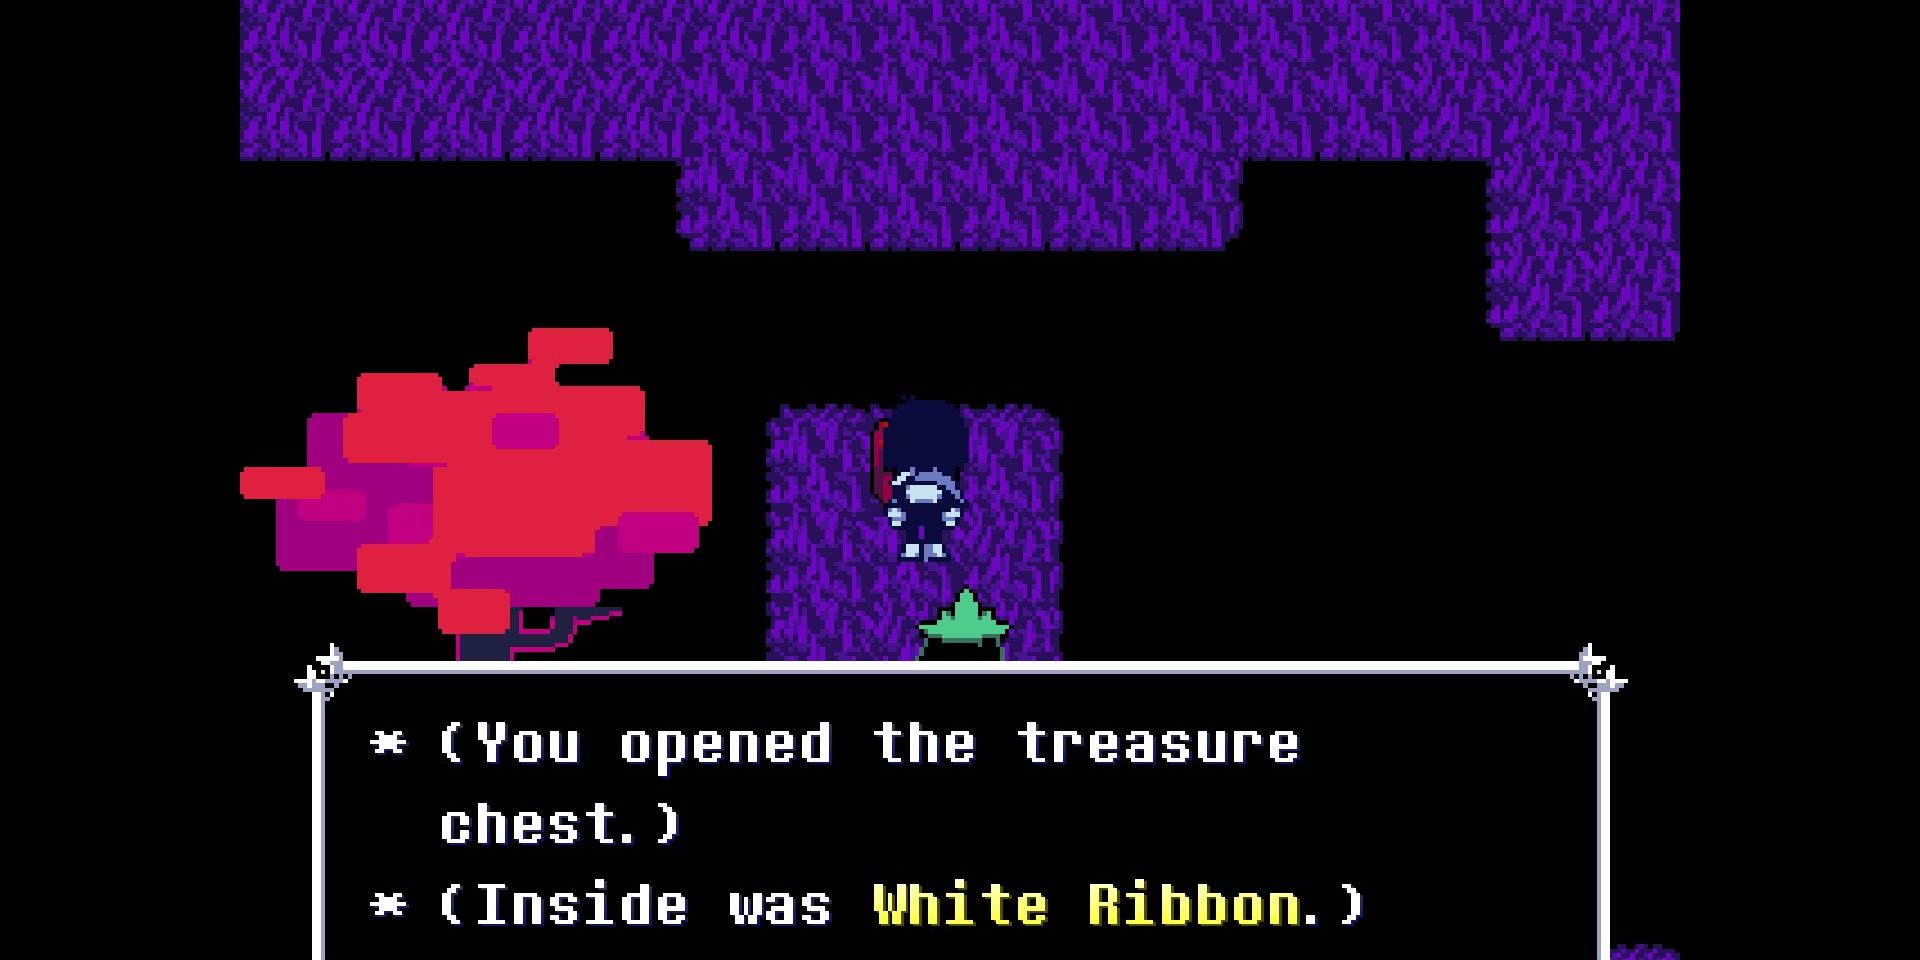
In the Field of Hopes and Dreams, there’s an area where you can’t help but notice a distinctive white ribbon situated within a chest right when you begin. However, it’s crucial that you navigate your way downwards and then towards the left to pick it up and save it for later use.
This accessory boosts his defenses and has Ralsei utter a cute phrase whenever you attach it to him. Later, if you acquire another ribbon, you’ll be able to combine them to create an extraordinary item.
Broken Key C
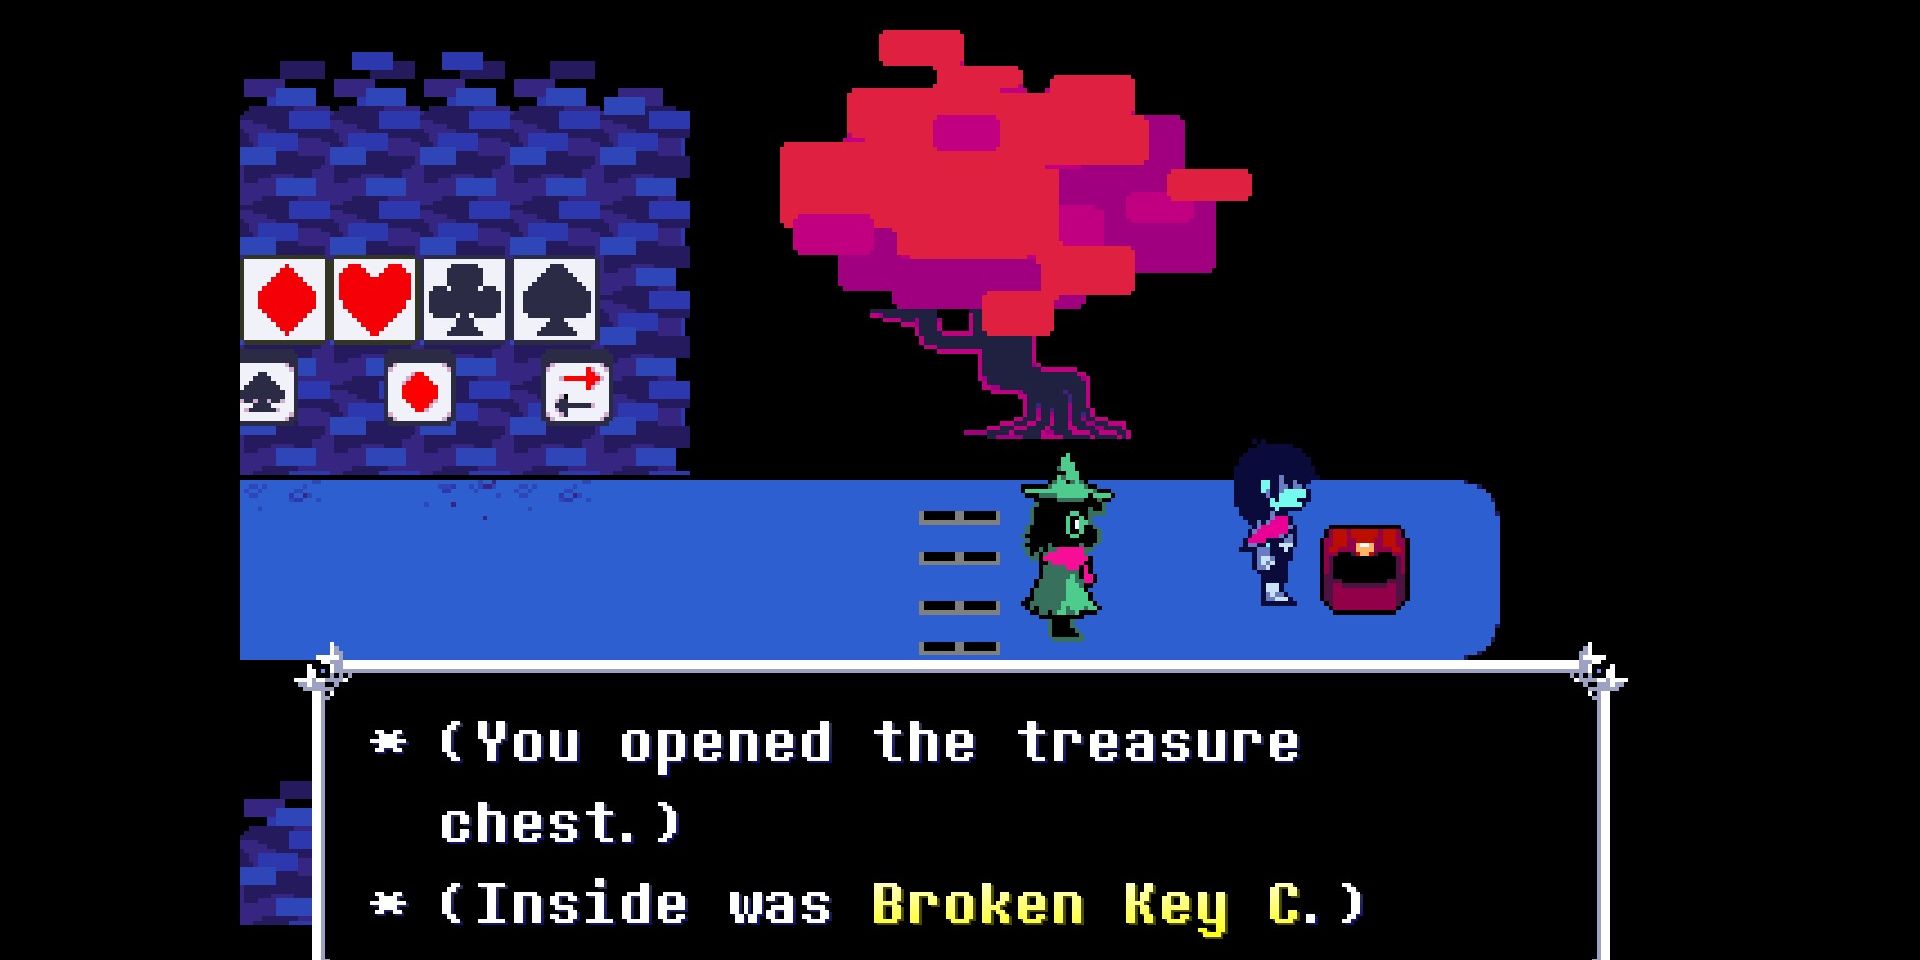
You’d be better off obtaining the third key ingredient right away, as we’ll need it later when we confront Jevil in this chapter. It can be found by deciphering a code located in the room directly above the chessboard entrance.
To reach the chest, you simply need to enter the sequence: Diamond, Heart, Club, Spade. Although this sequence resembles the one used in the Card Castle, you can input it prior to your arrival at that location.
Scarlet Forest
Ragger

After sampling some tantalizing Salsa straight from a wooden stump and shaking off the brief moment of skepticism about Undertale, I found myself encountering foes who were spinning diamonds in a circular formation.
Coordinate your movements with the diamonds and ascend, as that’s the path leading to the Ragger – an attack item designed for Ralsei, who isn’t particularly skilled in attacking. However, if you aim to confront Jevil using forceful means, this is the recommended approach.
Dice Brace

Once Lancer and Susie have left with their blueprints, another mystery regarding a suit pattern is waiting for you in the adjoining room. Interestingly, you can unravel this puzzle within the same room itself, but here’s a hint: The solution is Spade, Diamond, Club.
This provides a +2 boost to any character’s defense, rendering it extraordinarily beneficial throughout Chapter One, since the majority of defensive alternatives available are significantly subpar compared to this one.
Broken Key B
To unlock this section of Jevil, you’ll find it tricky because you must first navigate through the room filled with dancers that you need to avoid. Then, proceed towards the bottom right corner where ReviveMint is located. Finally, follow an invisible path hidden at the base of the Dancer Square to continue your journey.
This leads you to a room featuring an unpleasant interaction with three Rabbicks. Above, you’ll find Broken Key B – ironically, it seems we’re gathering these keys in reverse order.
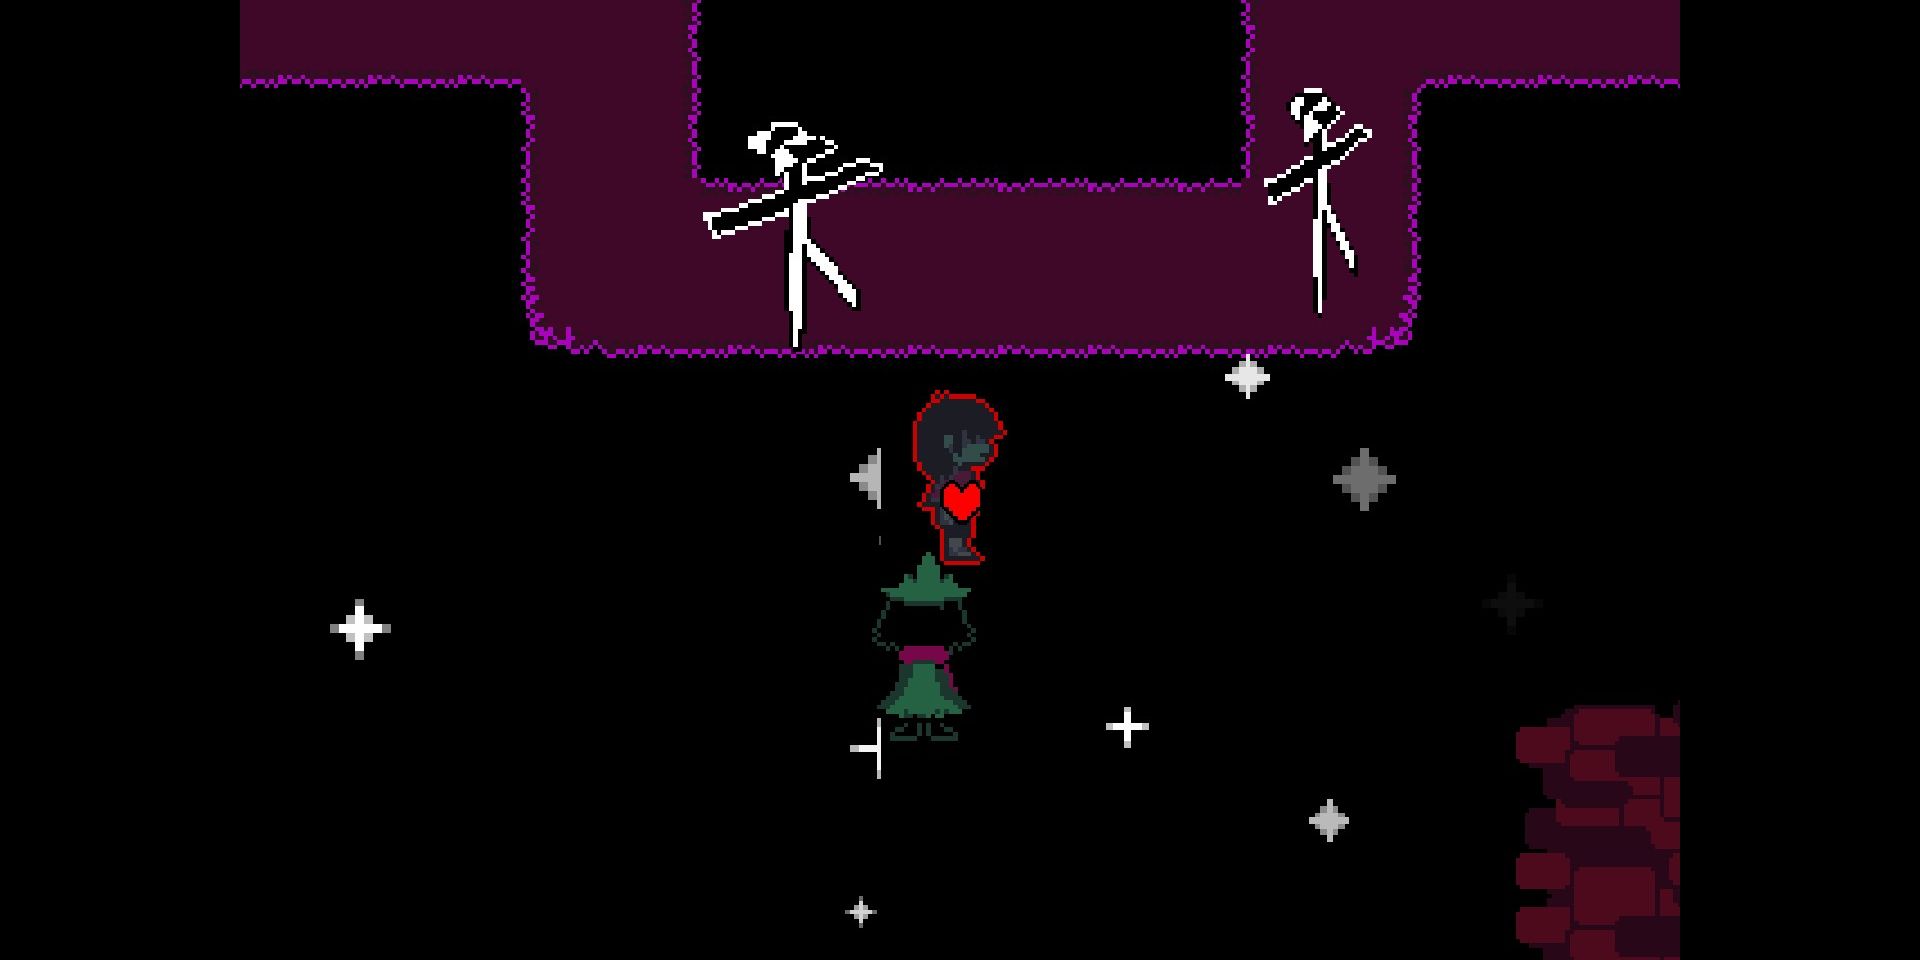
Starwalker/Egg #1
In this scenario, you can navigate through a shared space and here’s how: First, traverse the room filled with stars that fire at you. Once you’ve cleared it, turn around to converse with The Original Starwalker who will make a brief appearance in Chapter 2 later on.
1. Follow these steps: Move into the adjacent room, then return to the Starwalker room, and continue this routine until you reach a room that has a solitary tree.
2. Upon reaching the tree, interact with its uppermost part for a conversation with the man there. If he extends an offer, accept it. In doing so, you’ll receive an egg as a result. This egg isn’t crucial to your mission but also not entirely irrelevant.
Iron Shackle/Moss
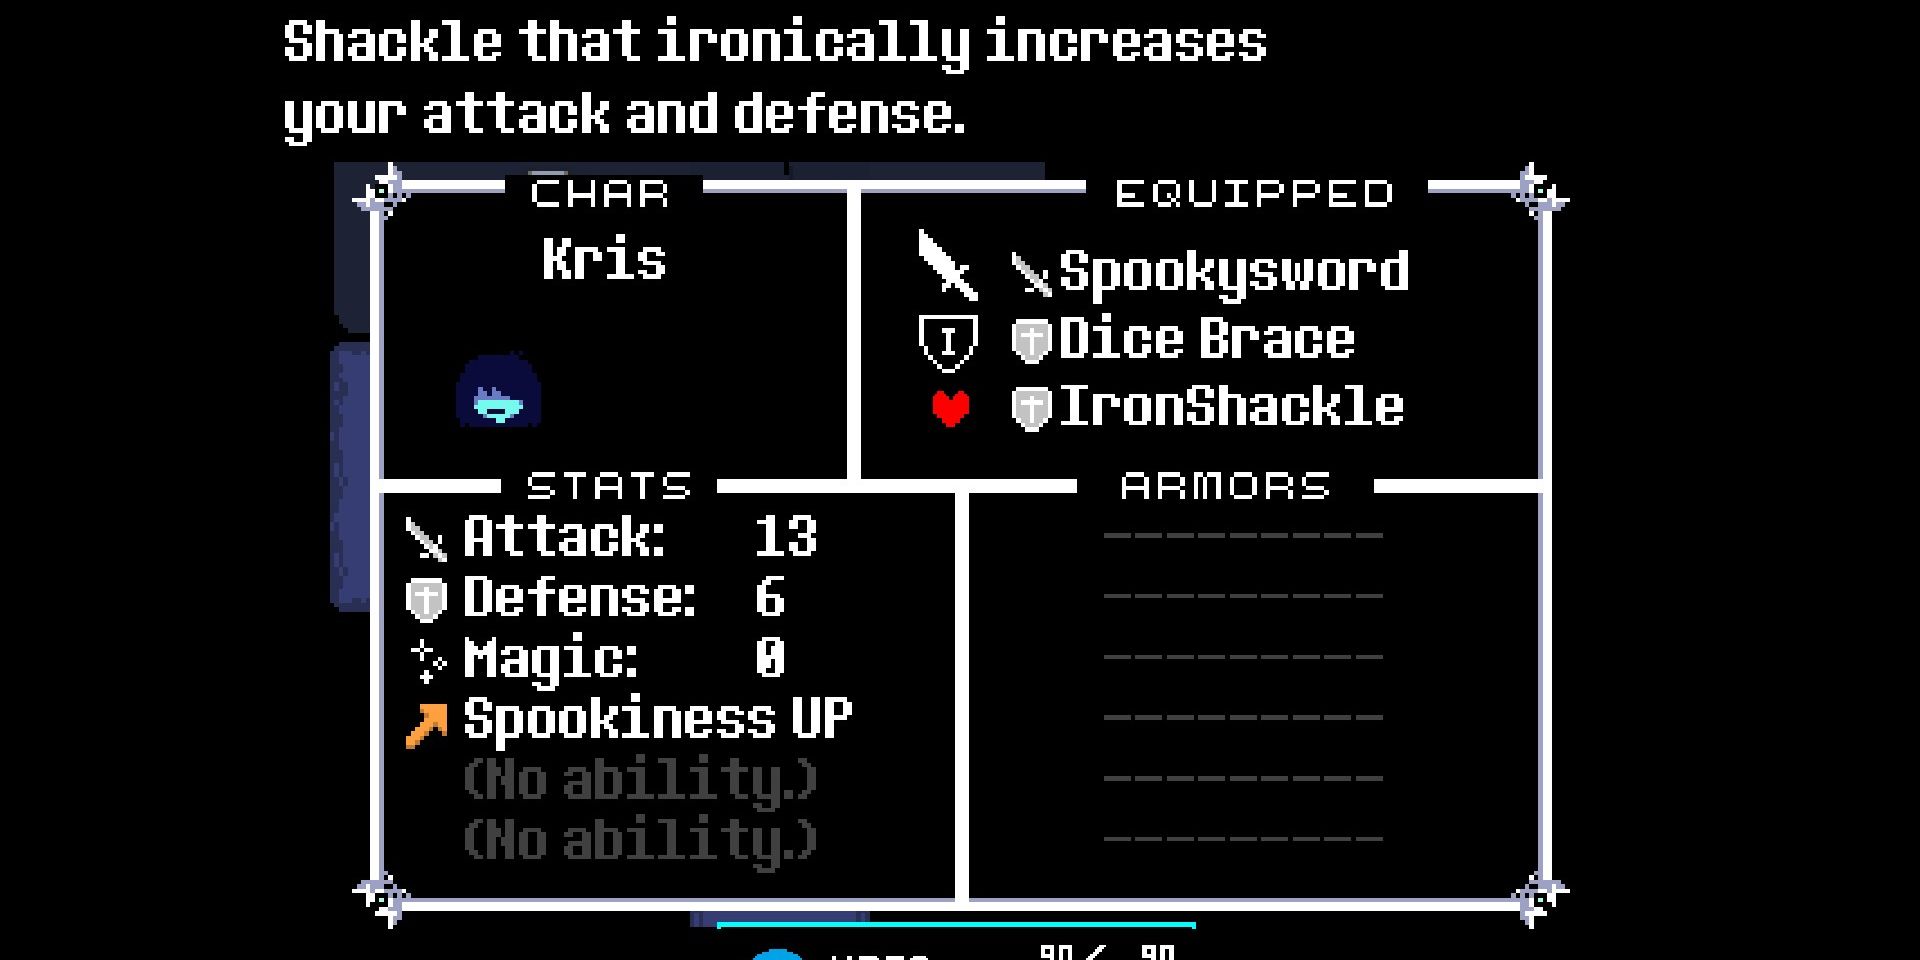
Immediately upon being imprisoned, you can seize the sturdy Iron Manacle, an unexpectedly powerful artifact. It boosts both your offensive and defensive capabilities, making it one of the most effective items currently available. If desired, there’s even some moss nearby.
As I progress through Chapter 2, I’ll eventually reach Castle Town. There, I’ll have the opportunity to combine my Iron Shackle with a Glow Wrist to create a Spike Band. This nifty item trades some defensive strength for a significant boost in offensive power instead.
Card Castle
Broken Key A/Jevil
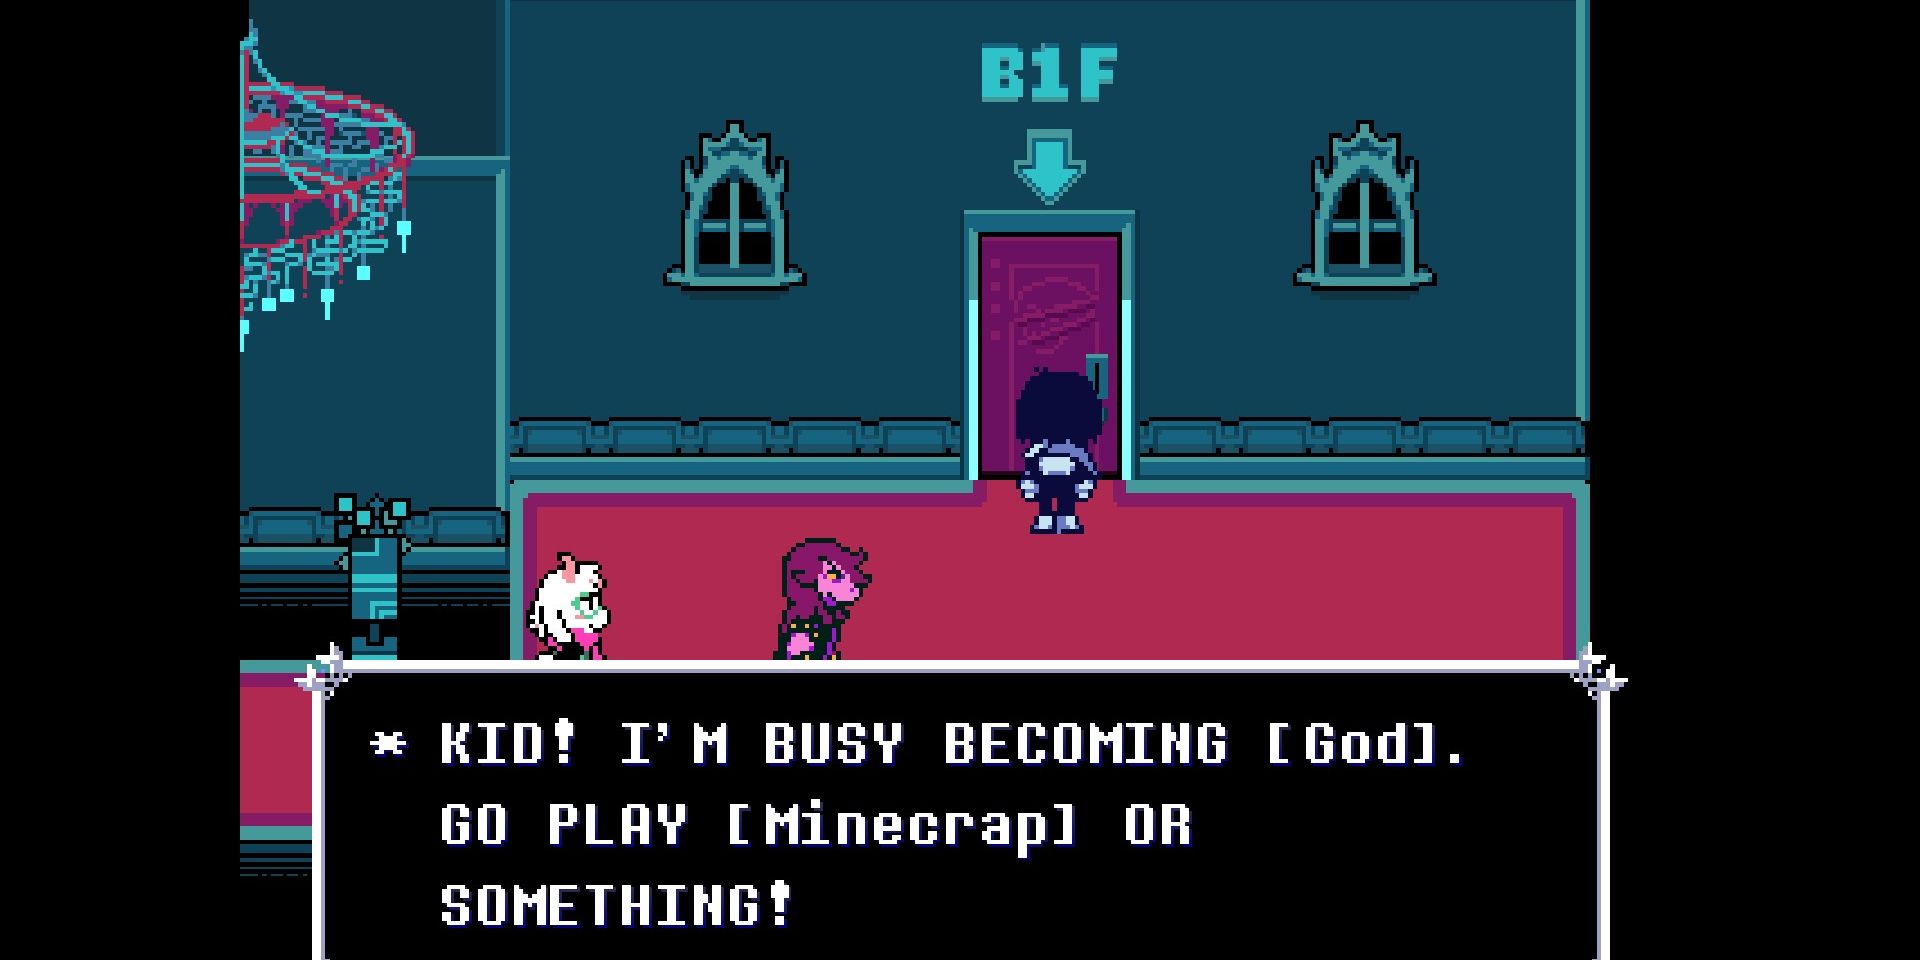
Head back to the elevator that delivered you from the prison, and upon pressing the buttons, you’ll notice a freshly appeared “?????” option, leading you directly down to the basement.
After dealing with the door, make your way back to Seam’s shop, pick up the last piece of the Broken Key from him, and grab at least two Amber Cards while you’re there. Then, head to Mallius for repairs, and you’ll be all set for the upcoming fight.
Be sure to gather essential health supplies, don’t forget to acquire the “Spin Cake” if it’s not in your possession yet, and outfit each of your team members with protective gear like the Amber Card from Seam’s store prior to venturing forth.
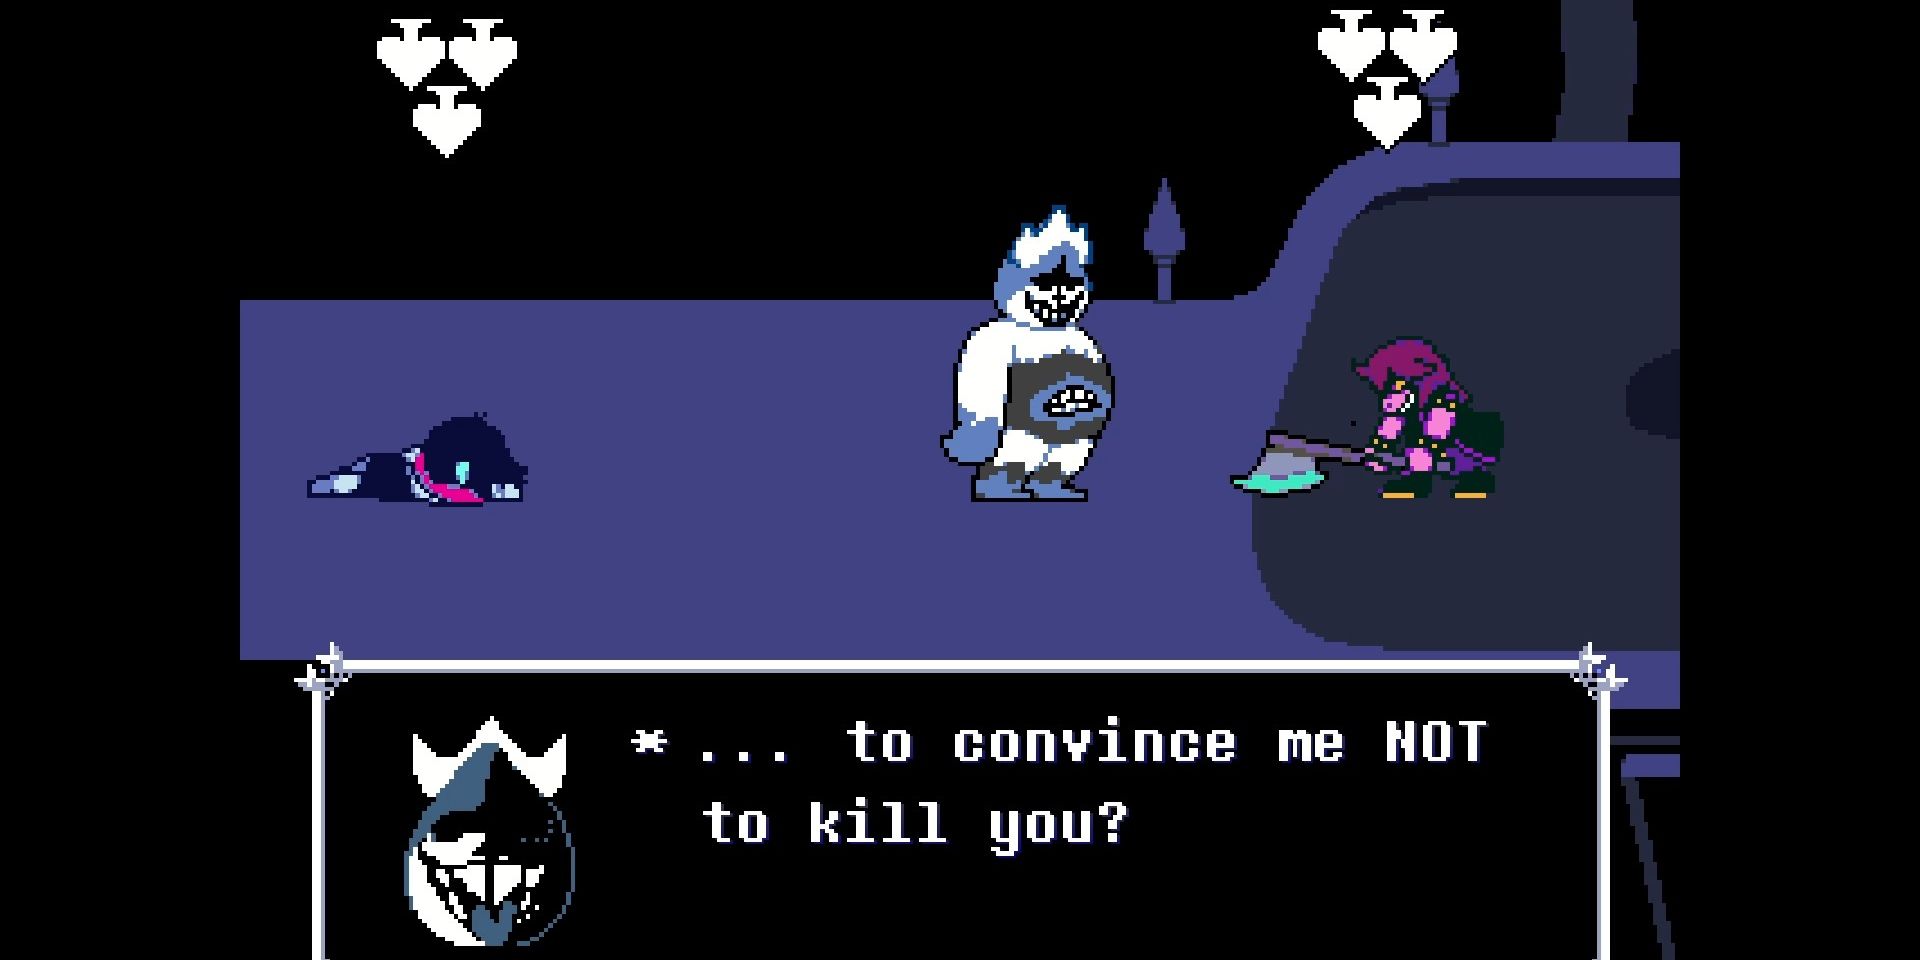
You have the option to choose between two scenarios involving Jevil and the Shadow Crystal. No matter what, you will obtain the Shadow Crystal. However, depending on your choice, you can either pacify Jevil or defeat him using force, as there are two different items provided for each outcome.
Should you engage in combat, you’ll obtain the Devil’s Blade, an item exclusive to Susie that boosts her Attack, Magic, and provides a reduction on Rude Buster’s cost. This weapon is particularly advantageous if Susie serves as your primary damage dealer.
Instead of engaging him directly, wear him out first and then employ Ralsei to soothe him. This tactic will net you Jevil’s Tail, a versatile equipment piece that can be equipped across your party members. It offers a substantial enhancement to Attack, Magic, and Defense, making it generally the superior choice for boosting your team’s overall combat effectiveness.
Dainty Scarf/Brave Ax
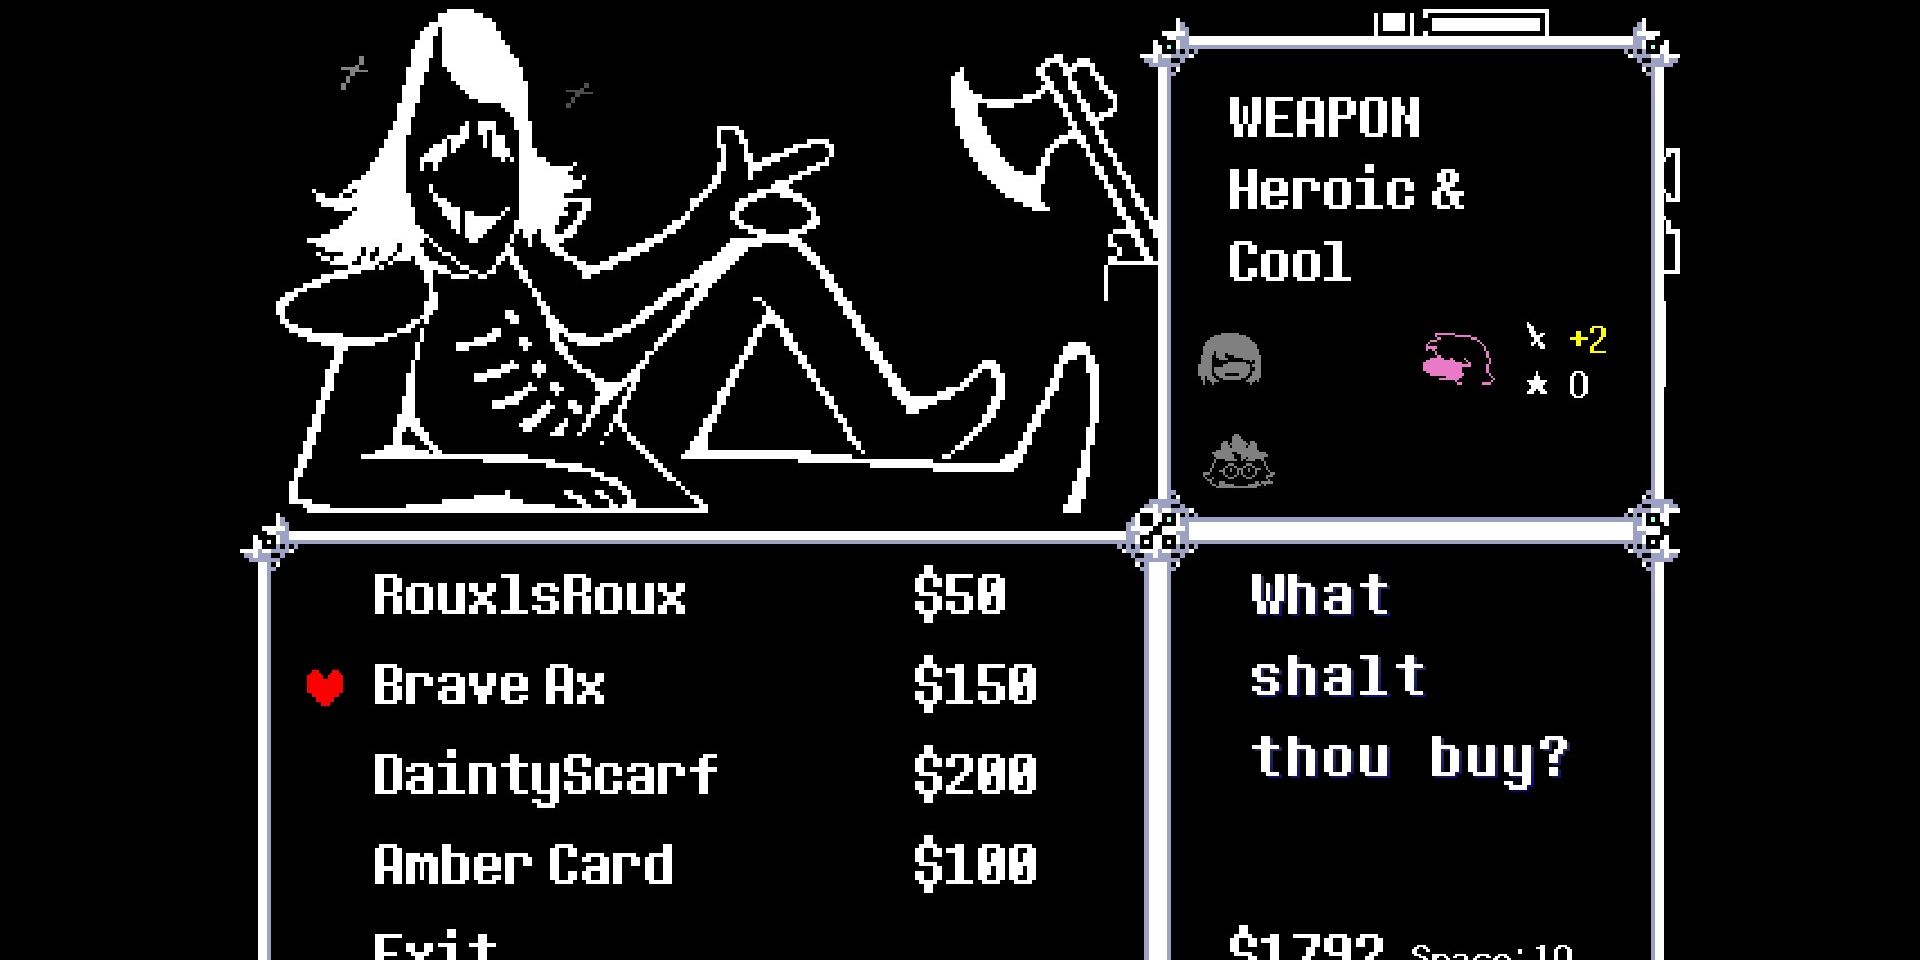
In Chapter 2, Rouxls Kaard joins you, but due to his boisterous nature, he can only establish his store in Chapter 1, where the unique items like the Brave Ax and Dainty Scarf are exclusively available, as no other location could tolerate his loud music.
For Susie, the Axe is quite a useful weapon since she doesn’t have anything superior right now. On the other hand, the Scarf takes away some of Ralsei’s attack power but provides magic instead, which is a fantastic trade-off given his role as a healer.
Diverging Routes
At this juncture, you’re probably facing a significant choice to make. Much like in Deltarune, where the storyline splits based on whether you choose to kill an adversary or spare them all.
This scenario presents a variant conclusion where the king is either escorted away by his people or put under anaesthesia by Ralsei. Considering the peculiar development in Chapter 2 and the three paths in Undertale, it would be wise to save your game twice – once for a violent approach and another for pacifism. Adhering to one of these styles might become crucial as the story progresses.
As a peace-loving gamer, if by chance I unintentionally let harm come to one of the enemies during my quest, I can track down that foe hidden within the chambers of the Card Castle and extend an apology. This gesture should help me get back on track with my pacifist journey.
Regardless of the path you choose, upon returning to the normal world, remember there are no checkpoints. Completing this chapter will permanently commit your decisions to your save file when you revisit Chapter 2.
Chapter 1 Light World
Visit Everyone
Prior to moving on to the following chapter, remember that there are numerous experiences within the initial short segment of Light World in Chapter 1 that, if not initiated immediately, will prevent you from enjoying some fantastic interactions in Chapter 2.
You can have a conversation with Undyne, discovering she’s unaware of Alphys. Then, go to check on Rudy in the hospital. Lastly, visit the town’s underground bunker, where you’ll find Entry #17’s sound playing, but at a reduced speed of 666%.
In addition to this, you should chat with Sans, agree to spend time with his sibling, attempt knocking on what seems to be Mettaton’s door a few times, and spend some time by the ocean to converse with Onionsan; these interactions are crucial for the upcoming chapter.
Alternatively, you might choose to converse with Asgore, then venture into his store’s backroom for some interactive fridge action. The egg from before could be placed inside, though its purpose here is uncertain. However, there seems to be a parallel in Chapter 2, so I decided to proceed this way.
To kick off Chapter 2 with an amusing moment, have a chat with Noelle near the gate and share some information about Susie. Then, mention that she eats chalk for added humor. Following this, feel free to flush the toilet multiple times, around a dozen, before retiring for the night. Don’t forget to catch the credits rolling to ensure your progress is saved.
Chapter 2 Dark World
Castle Town Visit #1/Silver Card
At present, Castle Town doesn’t require immediate attention since you’re planning to visit it later. However, there are a couple of unique interactions worth experiencing. For instance, you can engage in special conversations with Toriel and Alphys by following them with the Trash Orb. Additionally, Seam has some exclusive dialogue about Jevil that you might find interesting.
Additionally, now that you’ve got additional storage space, don’t forget to save your Glow Shard and any other valuable items by setting them aside, and combine two Amber Cards to create a Silver Card for some extra income during Chapter 2.
Cyber Field
Glow Wrist
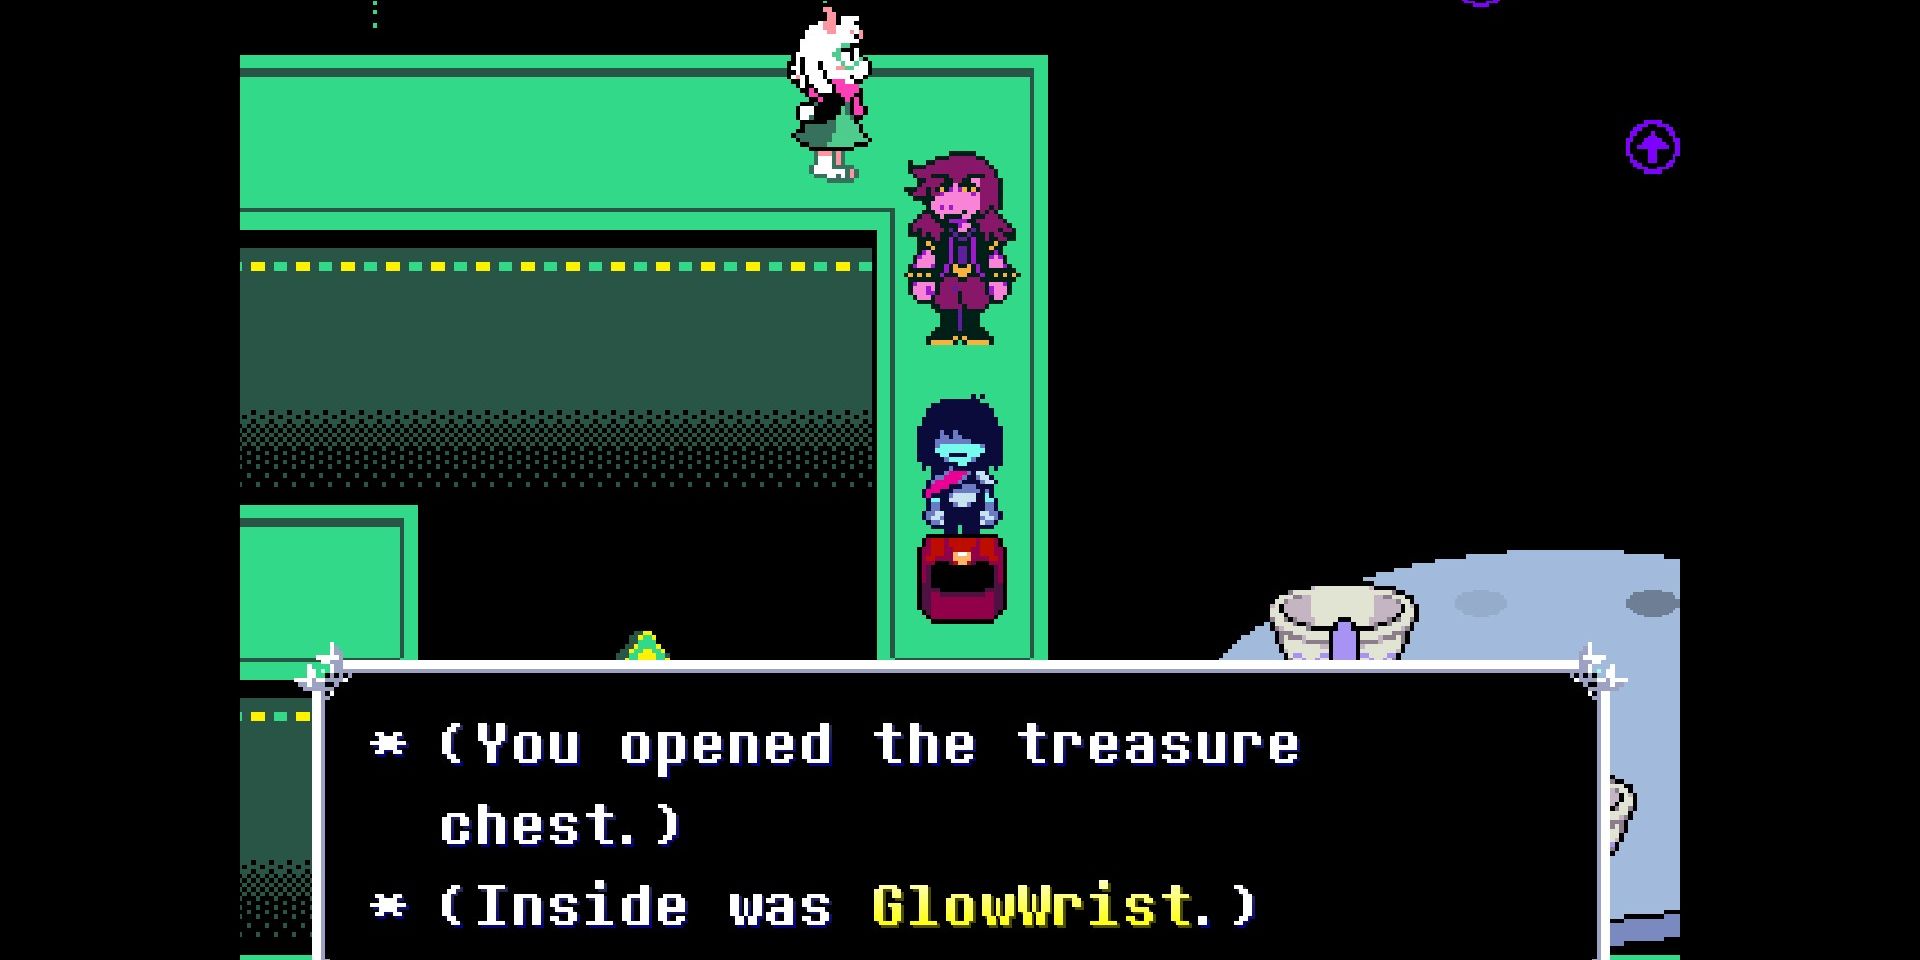
In the Dark World, you can quickly locate the Glow Wrist by moving right along the pathway preceding the initial Teacup ride, and it provides a moderate boost of +2 defense.
If you’ve misplaced an Amber Card and it was replaced by a Silver Card, this alternative is suitable. However, when we return to Castle Town, it works best when combined with the Prison Shackle.
Fiber Scarf
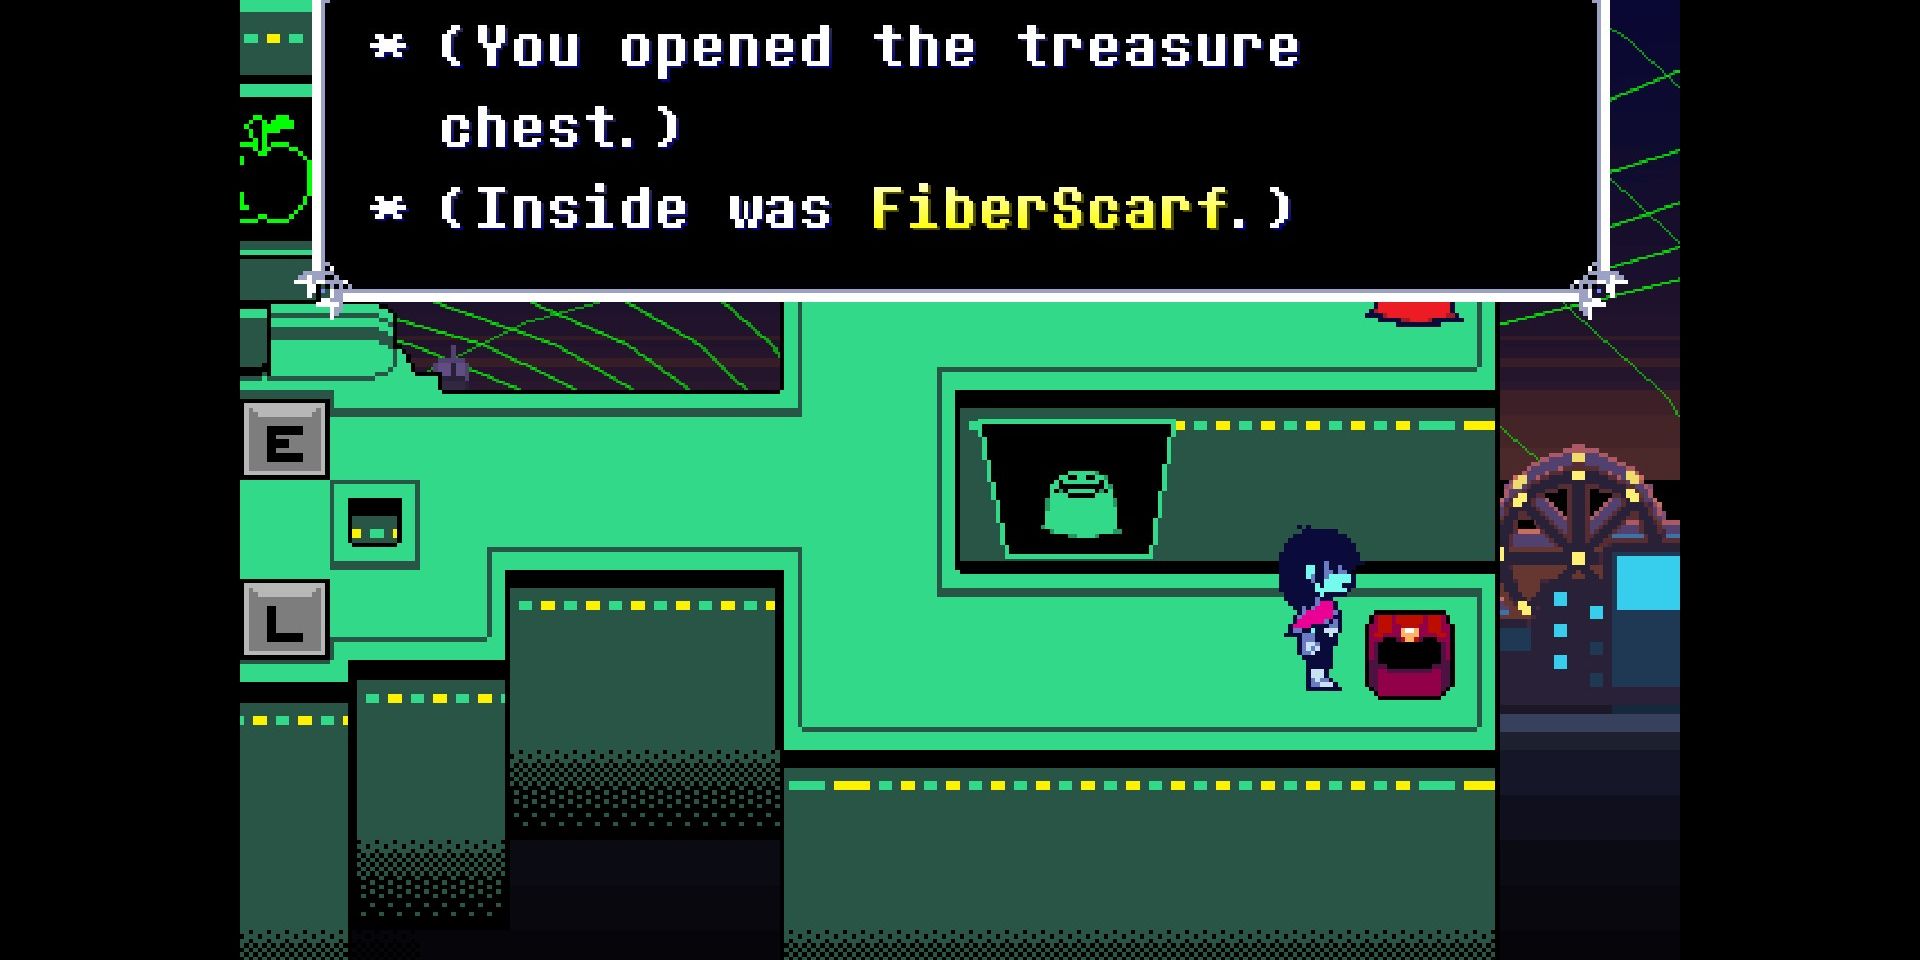
Following a brief explanation from Ralsei about the repercussions of aggression, move forward and slightly to your right. Solve a straightforward riddle that spells out “APPLE,” for which you receive a Fiber Scarf as a reward. Meanwhile, Nubert is present in this area as well.
The Fiber Scarf boosts Attack and Magic by 2 points, which may appear superior to the Dainty Scarf. However, if you plan to use Ralsei for attacks, this is indeed true. Yet, it’s essential to remember that the Dainty Scarf provides additional healing benefits, a feature the Fiber Scarf lacks. Therefore, take this aspect into account when making your decision.
Glow Wrist 2/Blue Checksmark 1
Although you likely don’t require another Glow Wrist, this chest remains somewhat significant. To interact with the green mouse-pointer character, proceed slightly upward immediately following the room where they sell bagels, and he will assign you a mission to locate Blue Checksmarks.
Right after that, pass under the initial swinging obstacles, then descend, and voila! You’ll encounter a treasure box containing the Glow Wrist. Also, you’ll notice your first Blue Checksmark nearby – something that, from my experience on Twitter, is often associated with mischief or trouble.
Blue Checksmarks 2 and 3
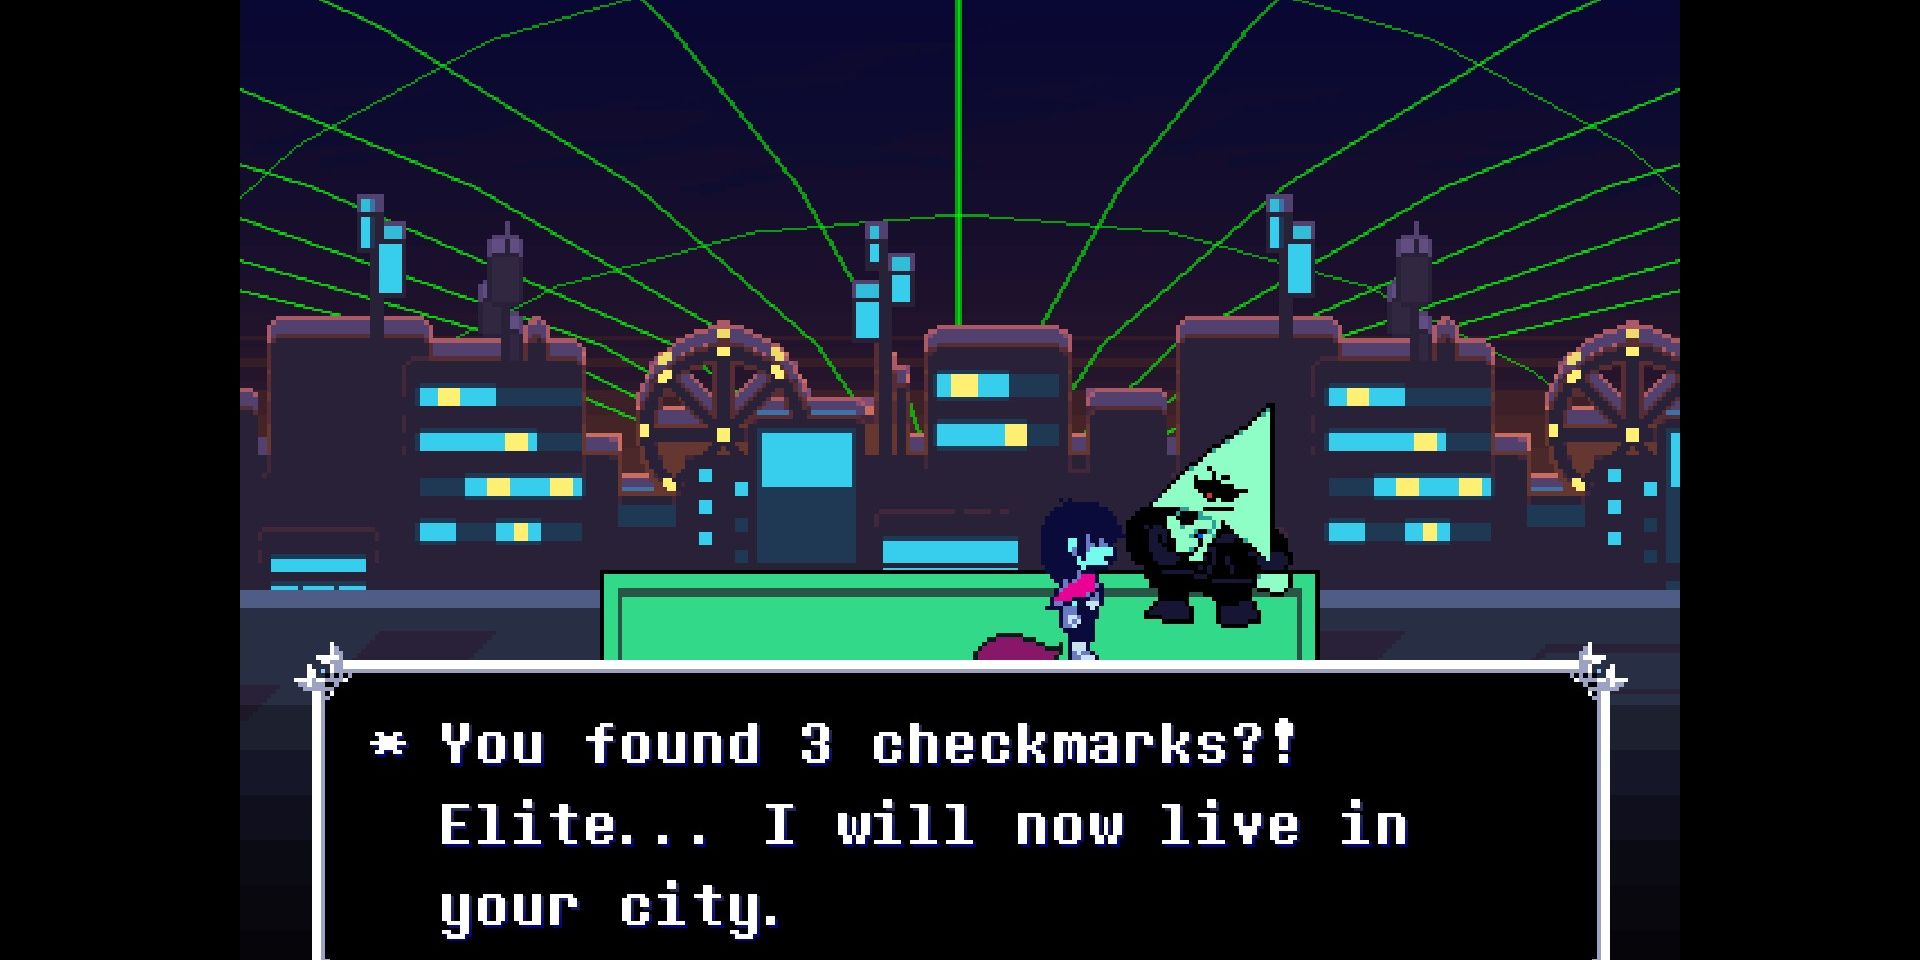
In the same area, you can find the second and third checkmark symbols that resemble blue teacups. The third one offers a longer journey deeper into Cyber World, whereas the first two serve as complimentary rides leading to additional checkmarks.
As a fan, I was tasked with spelling out “GIASFELFEBREHBER” which, starting from the top-left corner and moving downwards, was quite straightforward. Later on, I found myself returning to converse with the hacker fellow, and it turned out he’d be visiting Queen’s Mansion and Castle Town in the near future.
Mecha Saber/Auto Axe
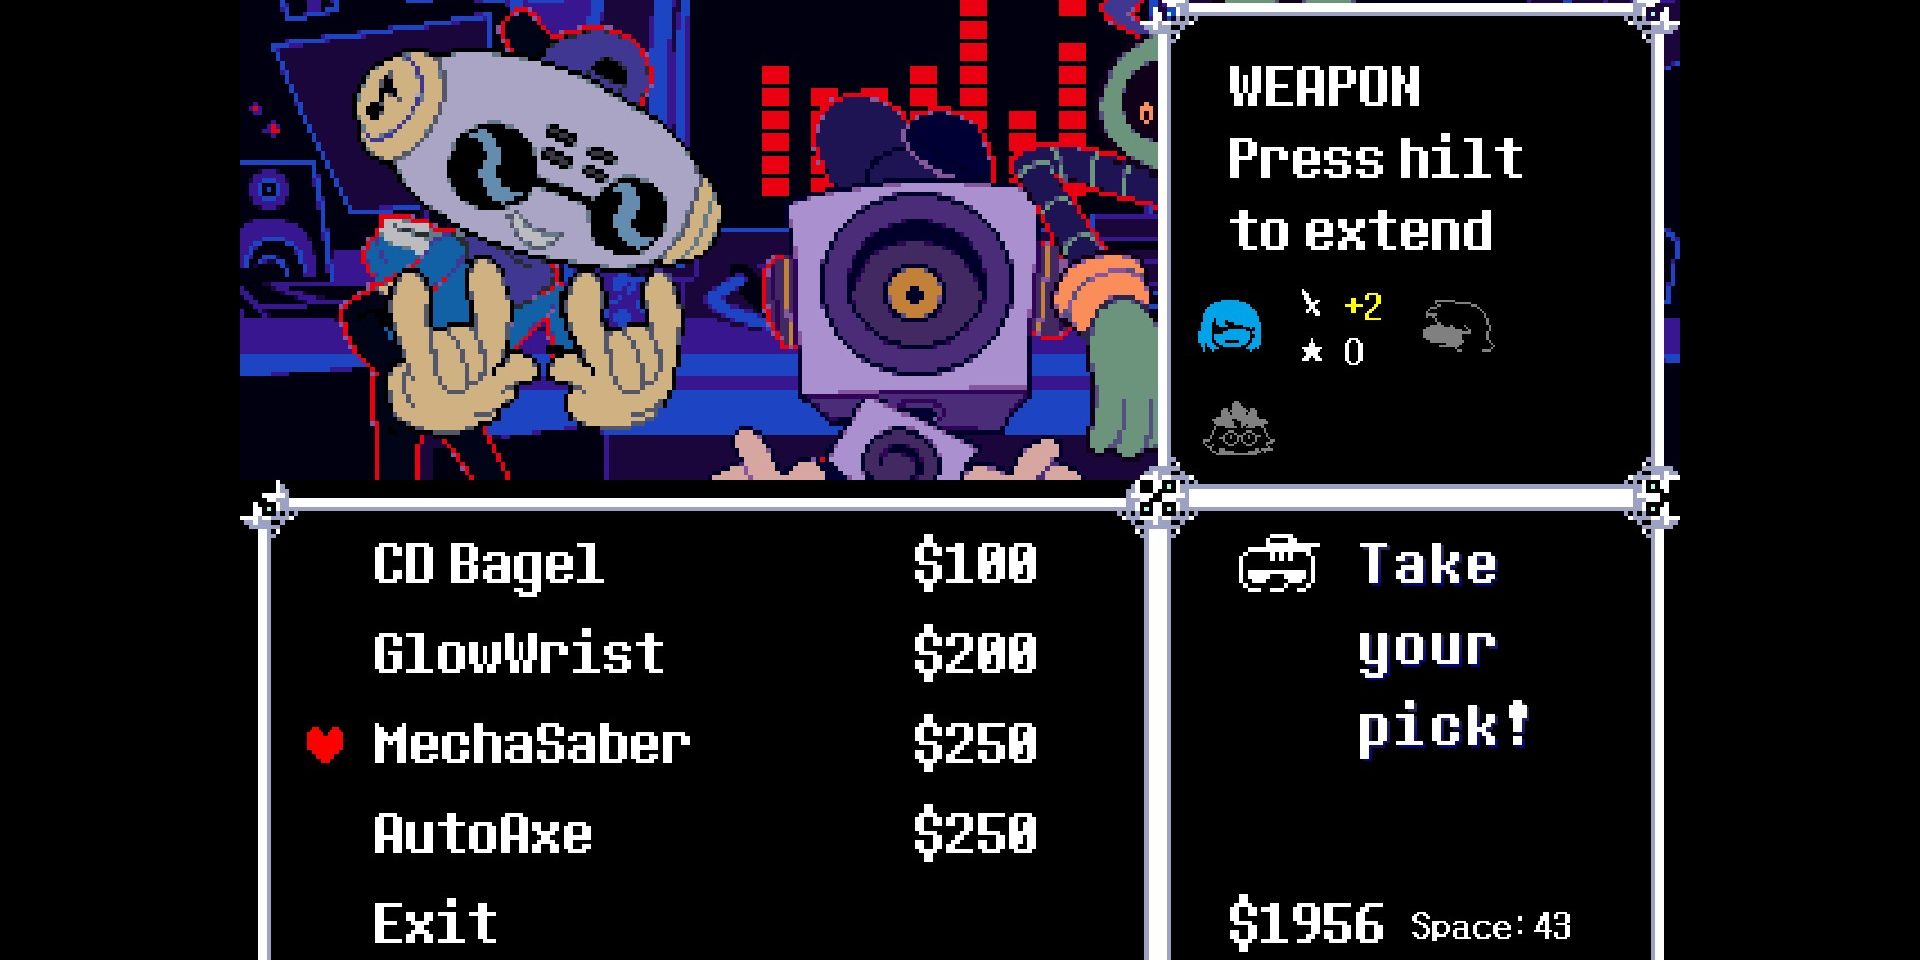
After sharing a dance with them, you can visit their store and purchase two effective weapons: the Mechanical Sword for Kris and the Automatic Axe for Susie. These are useful additions if you plan on resorting to violence.
In the game, the Mecha Saber is currently the top choice for Kris when it comes to weapons, but compared to it, the Auto Axe falls significantly short, especially if you opt to fight against Jevil rather than obtaining the Devil’s Tail, while the Devil’s Knife emerges as a better alternative in such a scenario.
Tension Bit
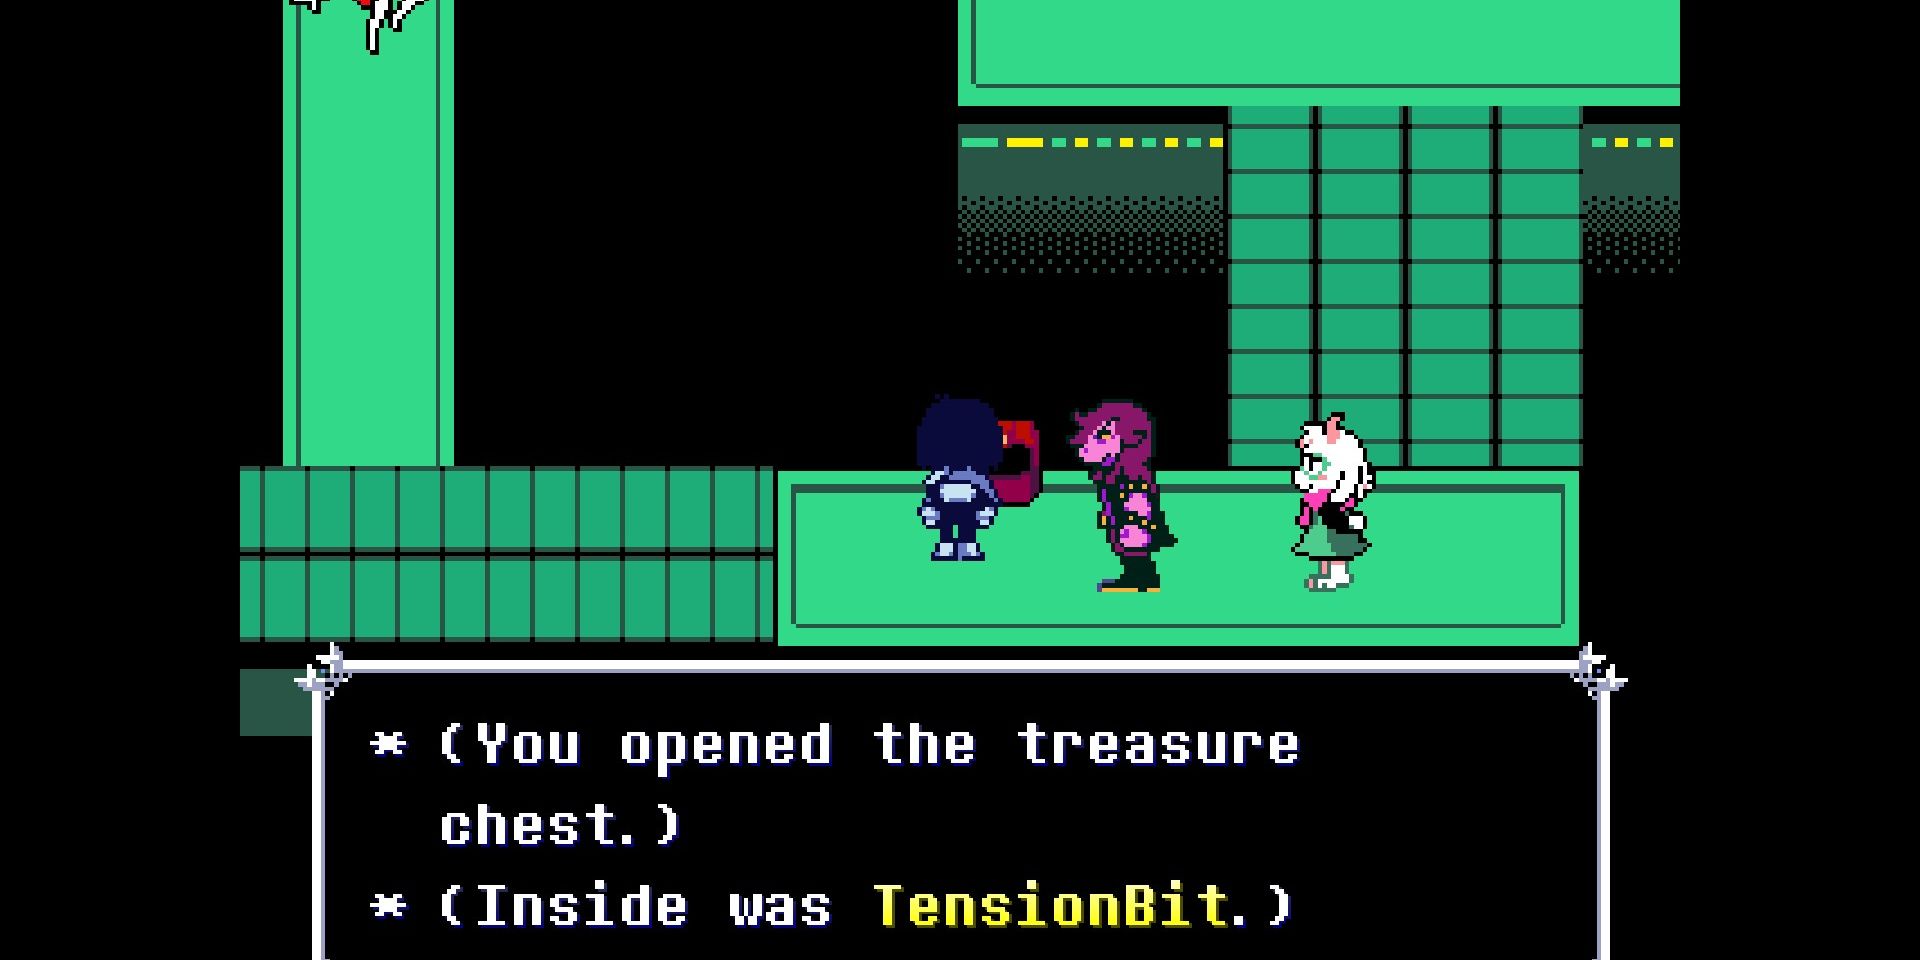
Inside the store where the animated “Save” symbol is found, proceed by moving upward and to your right, followed by a long descent. At the end of this journey, you’ll find the Tension Bit – a single-use item that grants you an immediate 32%TP boost during combat when utilized.
It’s wonderful, but please don’t use it in combat. You can combine it with another item we’ll acquire later to create one of the game’s top accessories, but losing it beforehand means you miss out on that opportunity completely.
Ragger 2
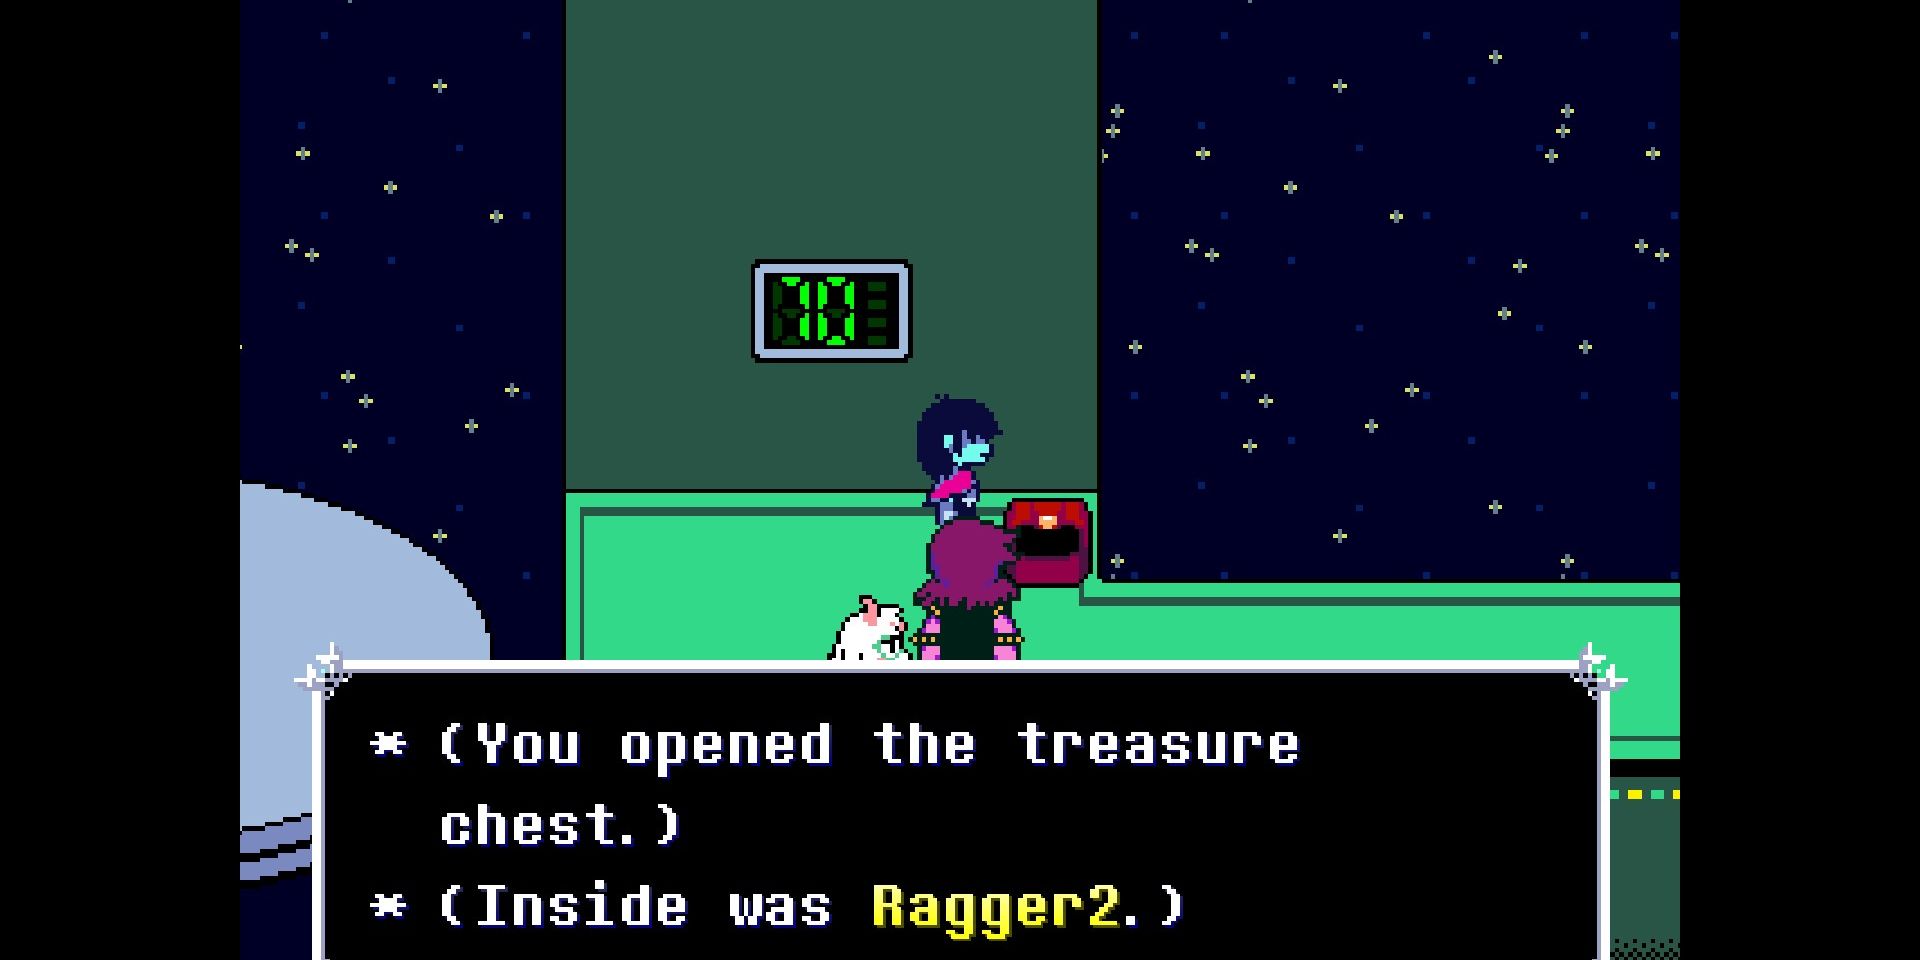
On the upcoming giant Teacup attraction, it’s crucial to align precisely with each marker, a task that might prove challenging if your depth perception isn’t great, like mine. If you can hit all 70 of them, you’ll earn the Ragger 2 as a reward.
As a die-hard fan, I can confidently say that this character is an impressive enhancement over the Ragger from the initial chapter, boasting an extraordinary attack power. However, there’s a catch: its magic abilities will diminish. In a No Mercy scenario, I would still advise against choosing it, but if you prefer that playstyle, by all means, give it a go!
Cyber City
New Save
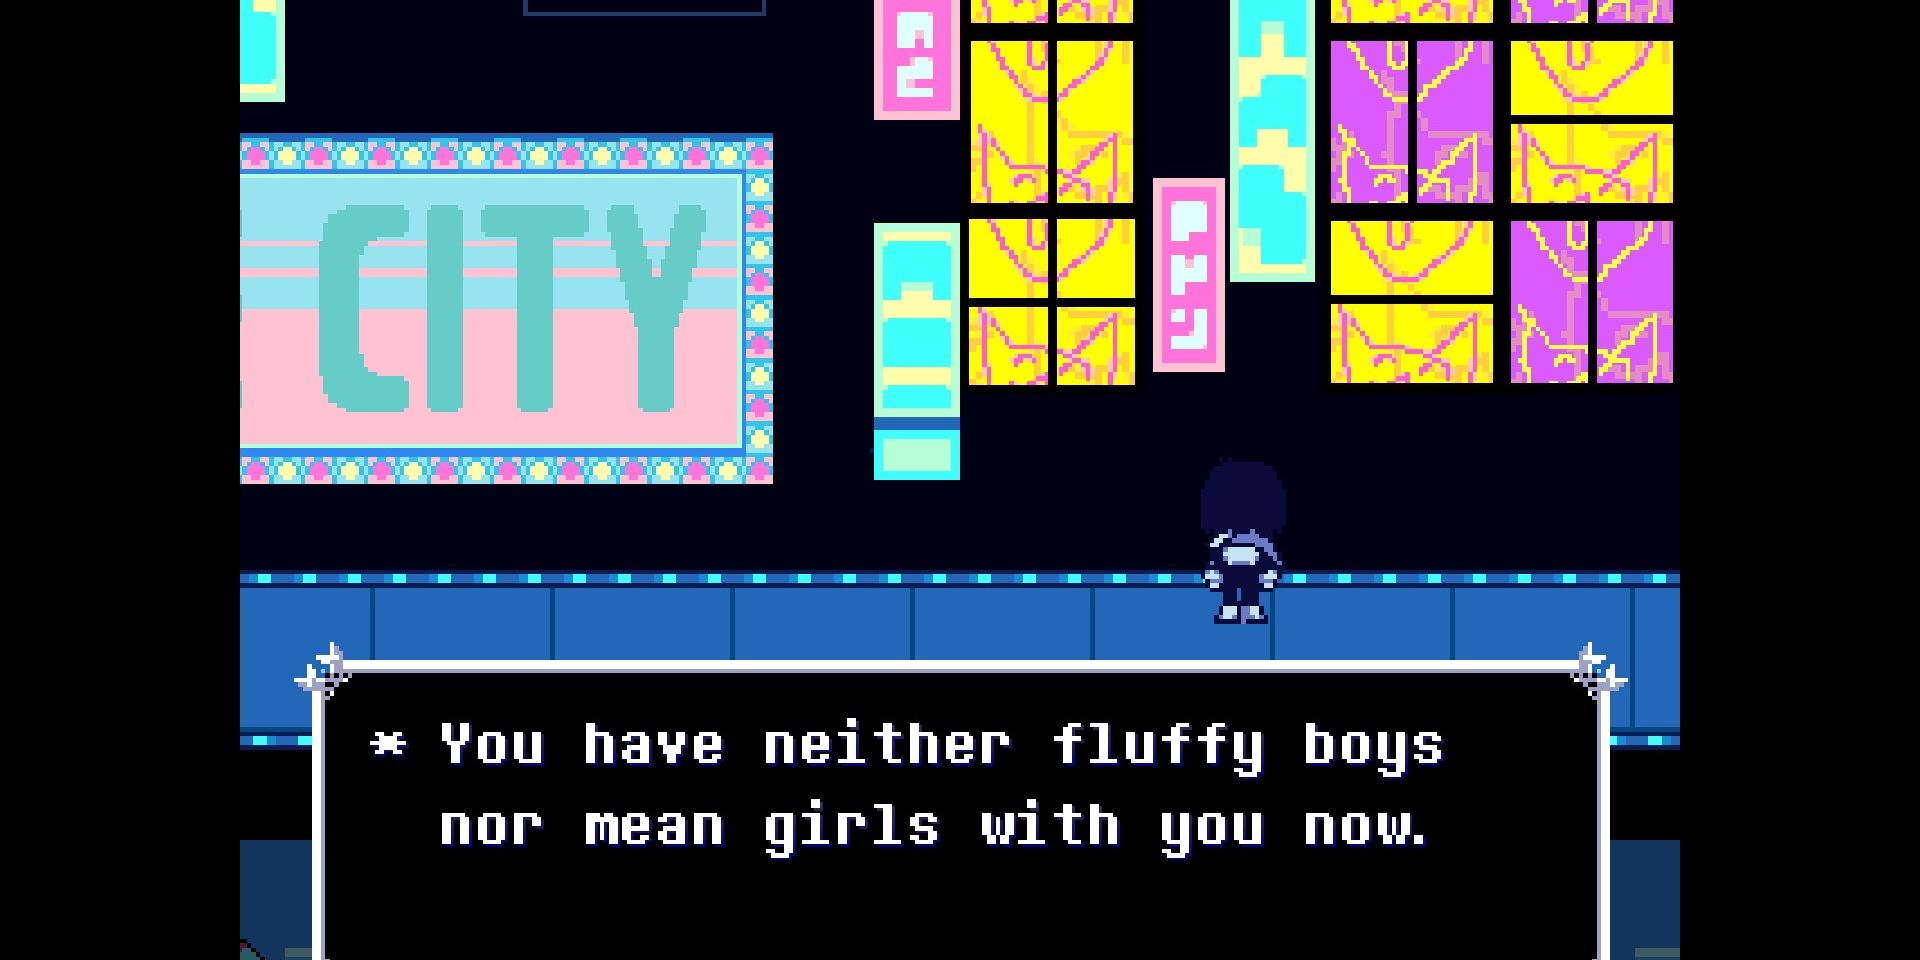
Once Kris goes separate ways with the group, feel free to embark on the Odd Path. Personally, I enjoy starting a fresh game for a No Mercy challenge, but in this case, you can duplicate your current save here since it serves as the starting point.
After wrapping up our primary objective, let’s delve deeper into the specifics of the route. This process will entail deploying Noelle to immobilize every adversary, coupled with a variety of dialogue options and some items that cannot be used simultaneously across these routes.
Pink Ribbon
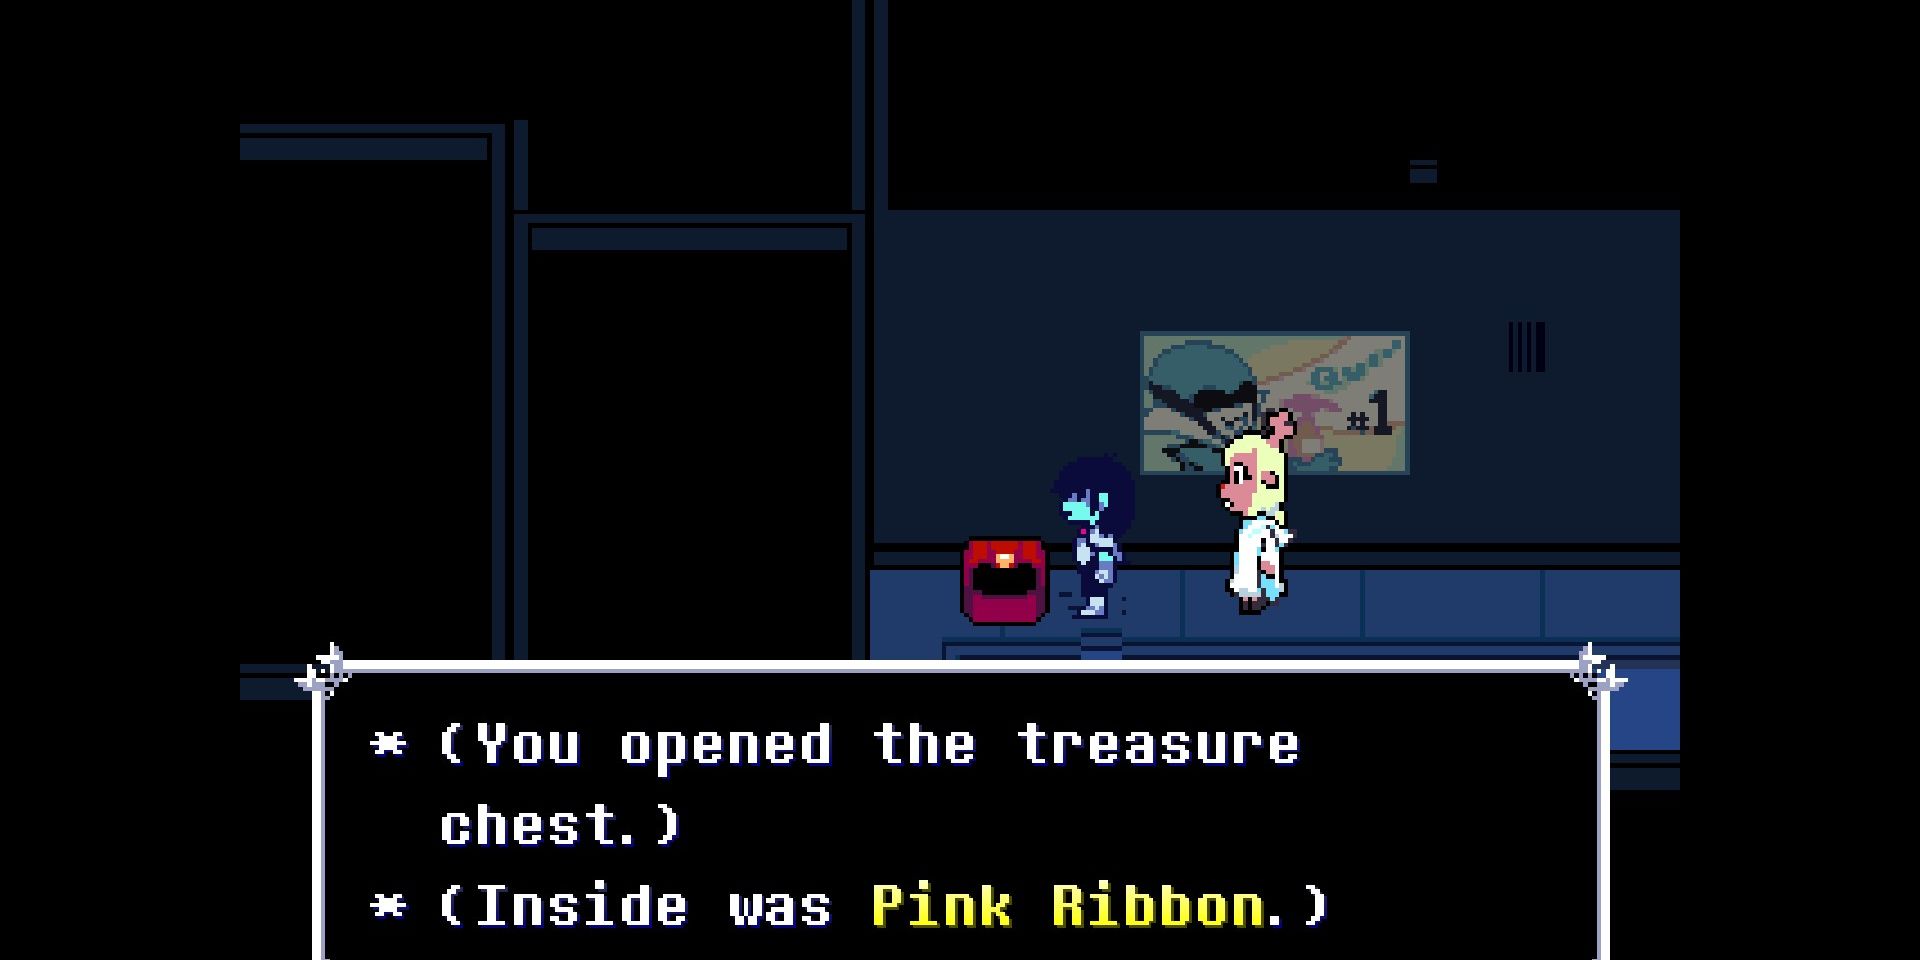
After explaining battles to Noelle together with ViroViroKun, make your way to the left, towards a cozy little side street that houses the Pink Ribbon symbol.
Regardless of the path you choose, I strongly recommend obtaining this item. While it may not be ideal for defensive purposes, it substantially expands your Graze area, granting you a significant boost in TP for casting spells and healing. Additionally, it paves the way for an exceptional fusion down the line.
When you reach Castle Town, anything that Noelle has equipped will become unavailable. So, if you plan on giving her the Pink Ribbon, make sure to retrieve it again before leaving the Cyber World.
Bounce Blade
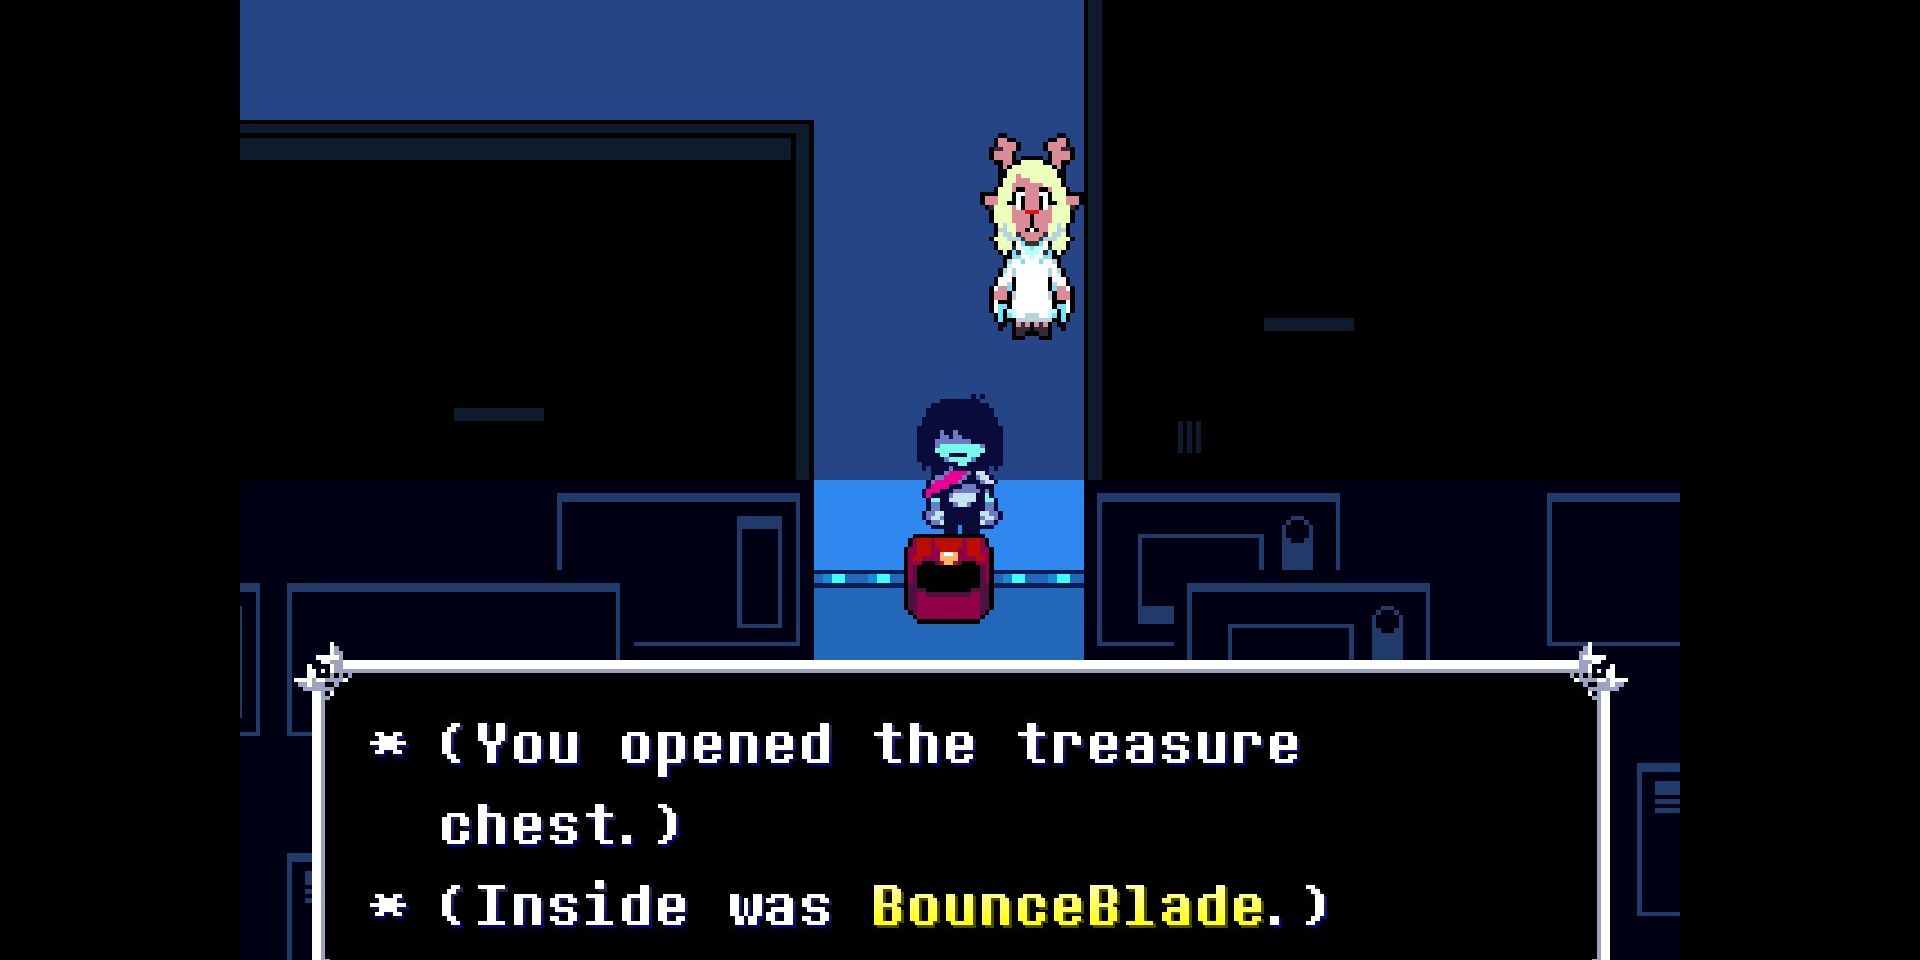
In the very same room filled with mouthwatering shoes reminiscent of Noelle’s flavor and aromatic tea, you can proceed downwards past a ViroViroKun, eventually reaching a locked chest where the Bounce Blade awaits.
To find that delightful shoe tasteful of Noelle and her flavored tea, as well as the elusive Bounce Blade, move towards the lower part of the room after passing by ViroViroKun, and open a secure chest at your destination.
At a glance, it might appear inferior due to its lower offensive power compared to the Mecha Saber. However, its advantage lies in the boosted defense it offers by one unit, which I find appealing. Moreover, given my fondness for Blade Bouncing, it resonates with me.
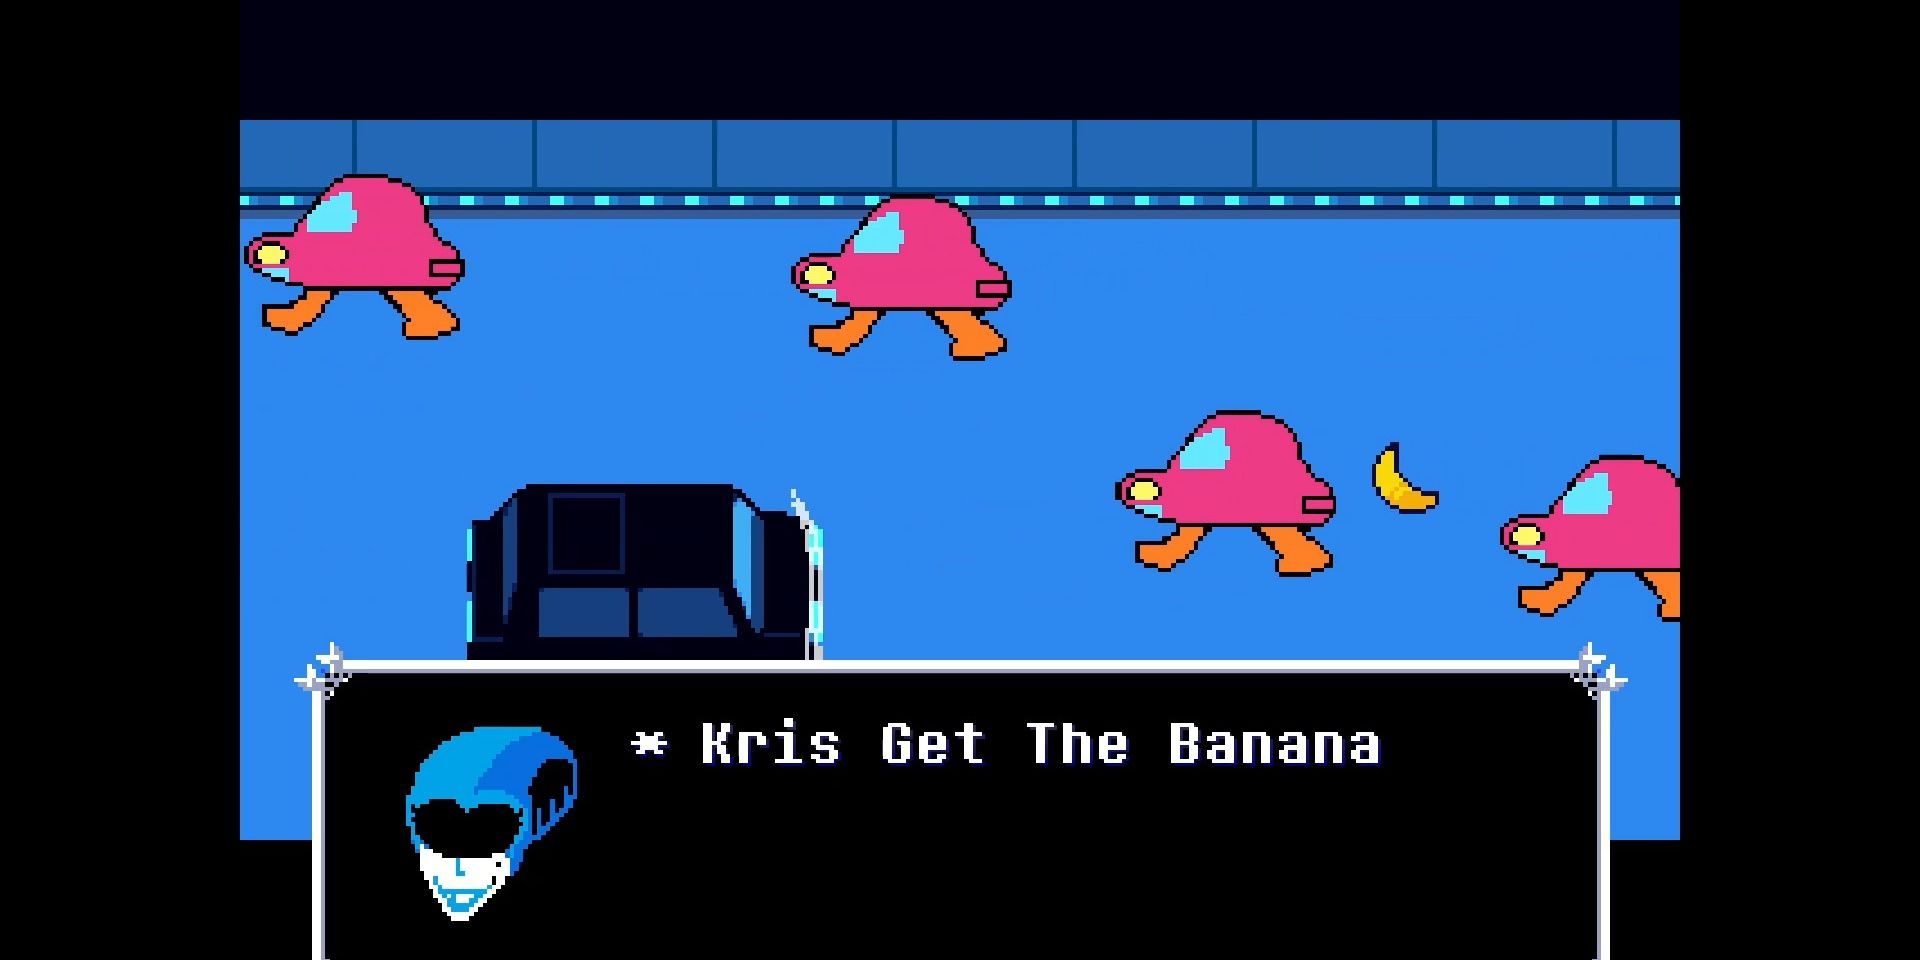
Moss 2/Egg 2
In the traffic control area filled with red and yellow vehicles, move beyond the line of red vehicles first, followed by pressing both buttons. Then, proceed downward and veer right towards a small corridor marked with caution signs. Only when the yellow cars remain stationary, continue your journey further down and enter the left-side hallway.
Go to the room on your left, encounter Toby Fox personally, and then you’ll find a room offering free moss. Similar to the egg room from Chapter 1, keep leaving and re-entering this room until you’re in a different one, featuring another tree, a new man, and if you respond affirmatively, he will give you another egg.
Car NPC
While cruising with Queen and Noelle in the car, if you manage to avoid colliding with other vehicles, you’ll be rewarded with a miniature car NPC back in Castle Town. To do this skillfully, just keep alternating between the left and right controls, or simply use the ‘L’ key if that’s more comfortable for you.
Queen’s Mansion
Big Shot Bowtie/Royal Pin
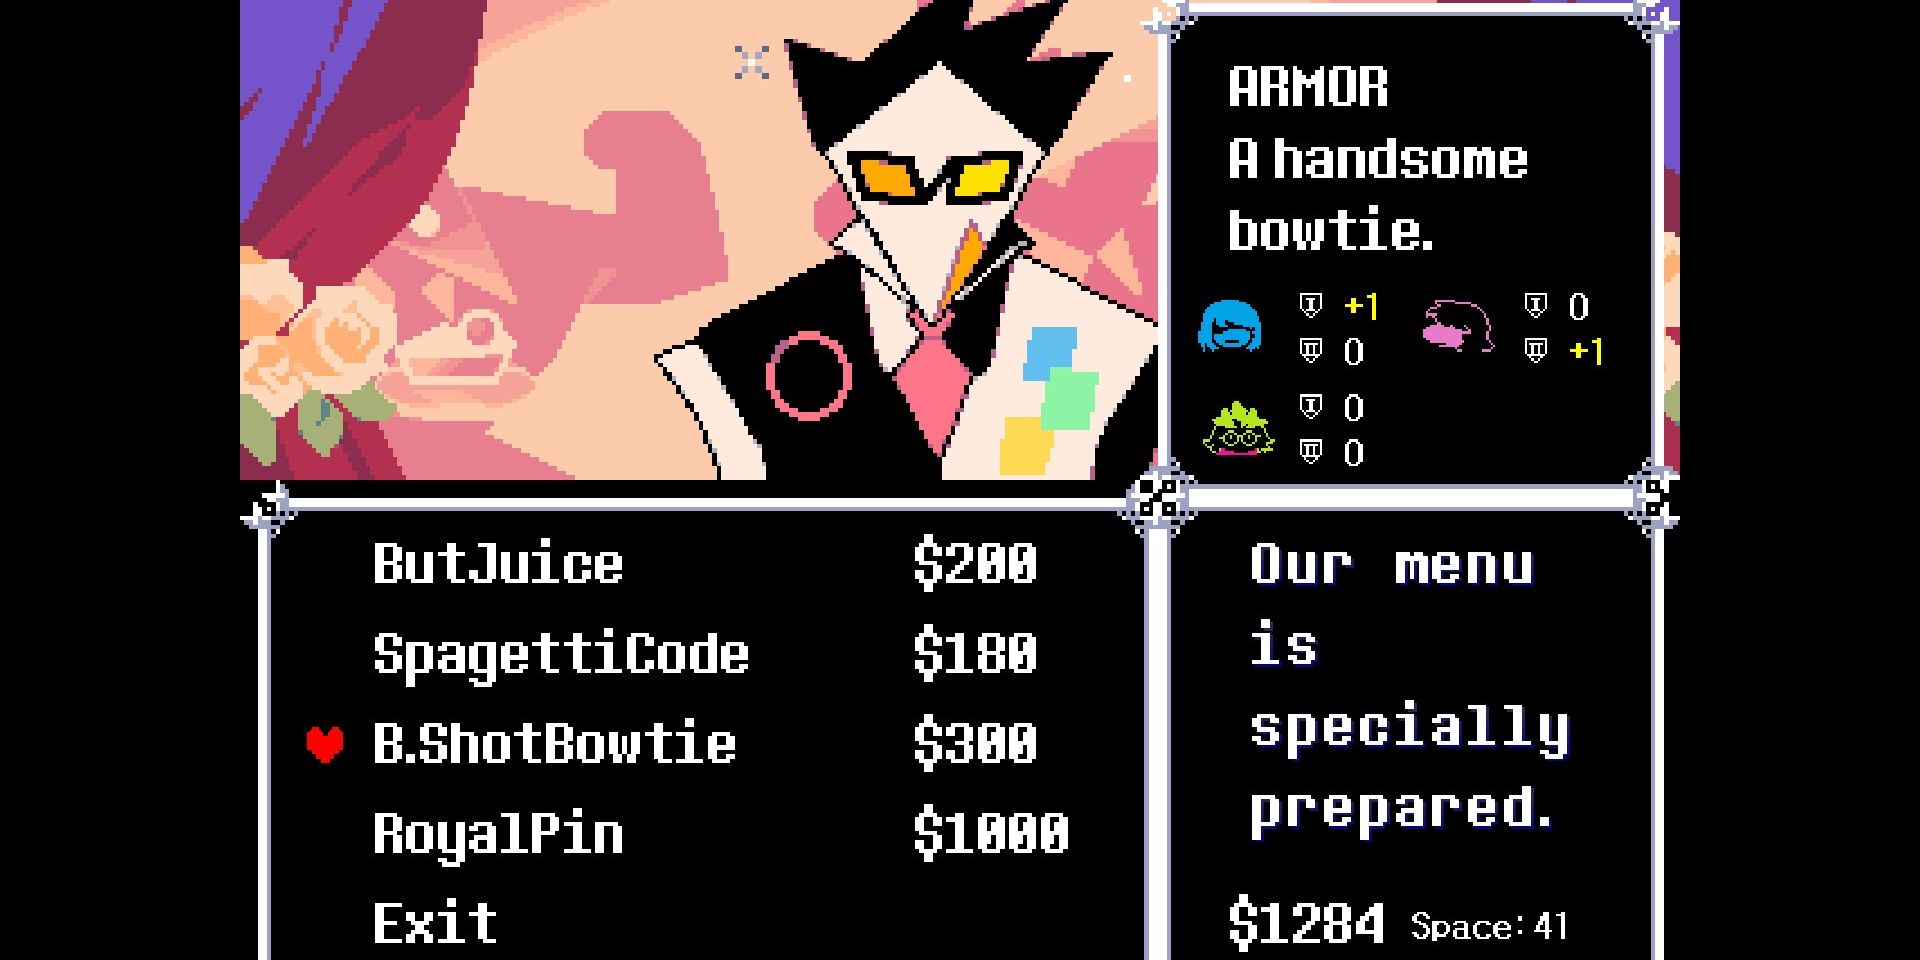
After a very prolonged period without any additional items, you can finally step into Queen’s Mansion’s Café. Here, you have the opportunity to purchase both the Big Shot Bowtie and the Royal Pin, plus the Spaghetti Code, a non-essential but useful healing item.
After a long stretch without any extra items, you can enter the café in Queen’s Mansion. This is where you can buy the Big Shot Bowtie and the Royal Pin, along with the Spaghetti Code – a healing item that isn’t crucial but still beneficial.
The Royal Pin is undeniably a superior armor option for any character. On the other hand, although the Big Shot Bowtie might seem less impressive at first glance, it is essential for future fusion purposes, so make sure to secure it as soon as possible.
The Royal Pin is an outstanding piece of armor that any character would be lucky to wear. Conversely, the Big Shot Bowtie may not seem particularly impressive initially, but it plays a crucial role in future fusion processes, so don’t forget to pick it up promptly.
KeyGen/Broken Sword
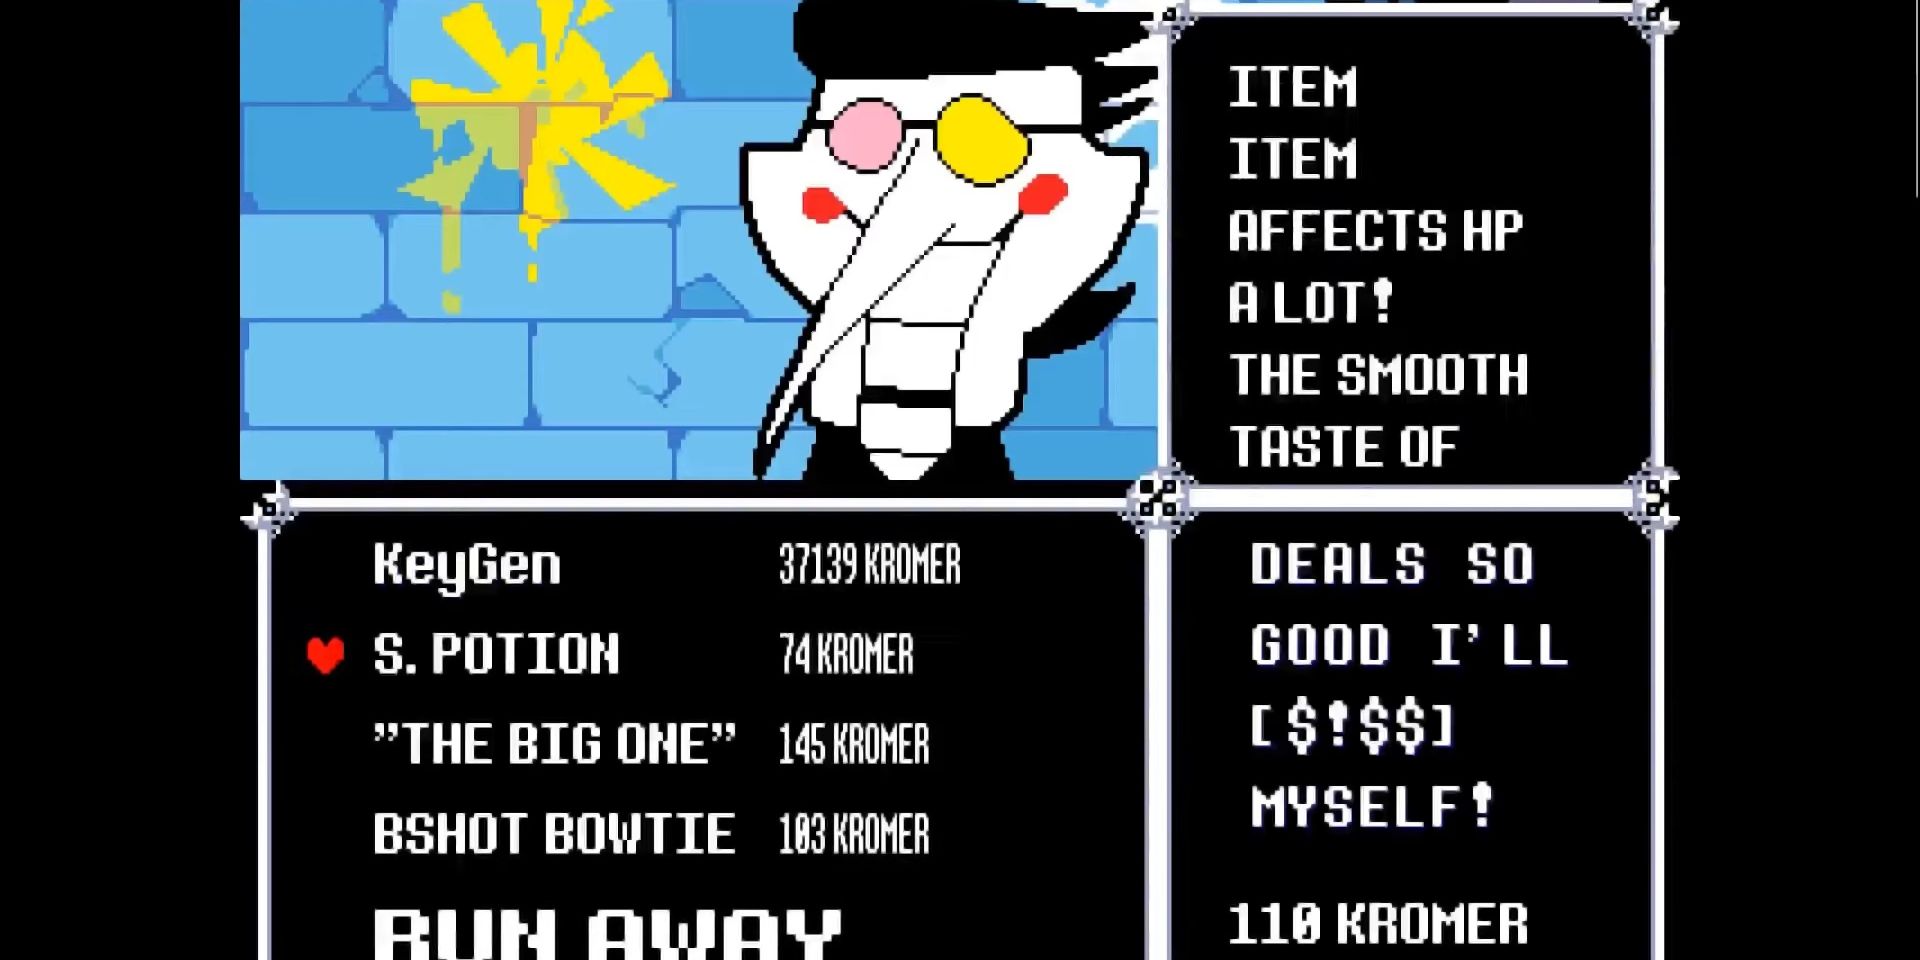
Since you’ve reached a rapid transportation portal, it might be an ideal moment to retrace your steps to the trash heap, veer left upon arrival, and step into Spamton’s store. Engage in conversation with him initially before we proceed to shopping.
Purchase the KeyGenerator from him, being mindful to synchronize your mouse click so as not to accidentally spend a large amount ($48132) on it. Additionally, you may want to pick up the Broken Sword and Frayed Bowtie as well, items that aren’t particularly useful at this moment but could prove valuable in the future.
Chain Mail/Basement
Following your interaction with the tall, cat-woman figure brandishing a whip, it becomes clear that the creators of this game are well aware of their audience’s preferences. As you navigate through traffic, you’ll eventually meet the Hacker. He’ll share some information about a secret entrance in the next room that you should keep an eye out for.
Initially, let’s focus on the chest, inside you’ll find Chain Mail. This armor offers 3 defense points, making it superior for this specific stat compared to many other armors.
As for reaching the backdoor, just trail behind the Hacker and respond when his cursor switches to a hand symbol, indicating that you should interact with the object at that location.
In this area, you can find a hidden passage leading to the basement on the right side. Once there, travel all the way to the left to deactivate the shield and experience the most challenging tea cup ride you’ve ever had. Keep in mind that it was even tougher before the latest update.
I’m heading in that direction now, where I’ll eventually stumble upon the motionless form of Mettaton NEO, and find an Empty Disk tucked away with him. Later on, I plan to take this to Spamton, initiating a new challenge for a thrilling superboss encounter.
Glowshard #2

As you ascend Queens’ grand estate, you’ll stumble upon a peculiar scene – butlers running while being pursued by flying pots. Feel free to bypass them or engage in the spectacle, but regardless of your choice, proceed towards the first ominous door you find down this corridor, illuminated only by shadows.
Engaging with any of these domes will bring forth an alien spaceship foe that fires at you, but if you activate all of them under constant gunfire, the prize will be another Radiant Crystal for safekeeping until a future act.
Spamton NEO
Since you’re passing by the garbage dump on your way to confront Queen, why not stop by first? Show Spamton the Empty Disk, and he’ll upload himself onto it for you to utilize down in the basement.
Ensure you have stocked up on potent healing supplies and some rejuvenation items prior to encountering Queen. Afterward, return to the robot body where the Empty Disk was found initially, insert the newly acquired disk, and exit the room to initiate the battle with the boss.
The battle is nowhere near as challenging as Jevil’s, thanks to the easy-to-use heal option (F1), but similar to him, a decision must be made here. You can opt for mercy by severing his strings to acquire the Deal Maker, or choose aggression to obtain the Puppet Scarf in return.

The Armor Known as “The Deal Maker” offers impressive protection with 5 Defense and 5 Magic points, a 30% bonus on earnings from every battle, and the unique feature of being wearable on both hands. On the other hand, the Puppet Scarf is an advanced version of Ragger 2, boosting Ralsei’s Attack by 10 but reducing his Magic by 6.
In my gaming experience, I’d advise against relying on brute force in this scenario. The Puppet Scarf seems to weaken Ralsei’s capacity to regenerate health by healing into the ground, making it less effective. Instead, having a superior defensive item would probably increase your chances of coming out victorious in most encounters.
Regardless of your choice, by the story’s conclusion, you’ll acquire an intriguing novelty and a significant Shadow Crystal, which may prove crucial later on. If you manage to secure the Shadow Mantle in the upcoming chapter, there’s a chance you could find a third crystal.
In the Dark World, there seems to be no more items to acquire, but remember that unlike Chapter 1, once you save anywhere within Castle Town, you can’t return to the Cyber World. This means you’ll need to restart Chapter 1 from scratch if you want to gather anything else.
Castle Town Second Visit
Chapter 2 All Stars and Fusions
With the fountain now secured, let’s return to Castle Town for an exciting round of conversations with our freshly-recruited comrades from Chapter 2, as well as a treasure trove of brand-new items – particularly those intriguing fusion concoctions I’ve been looking forward to.
To start off, there’s still at least one battle left on my hands, facing Jigsaw Joe’s Chapter 2 All Stars in the Party Dojo. The initial rounds aren’t too difficult, but taking down two Werewires simultaneously can be quite a challenge. A strategy that seems to work best is by continuously grazing to build up TP for Ralsei to heal and keep me in the fight.
Using this gives you a Tension Gem, much like the Tension Bit, which should never be employed during combat. Instead, it serves as another TP (Time Point) restoring item, but I have a strong hunch that it will be a one-time use item crucial for a fusion in the future.
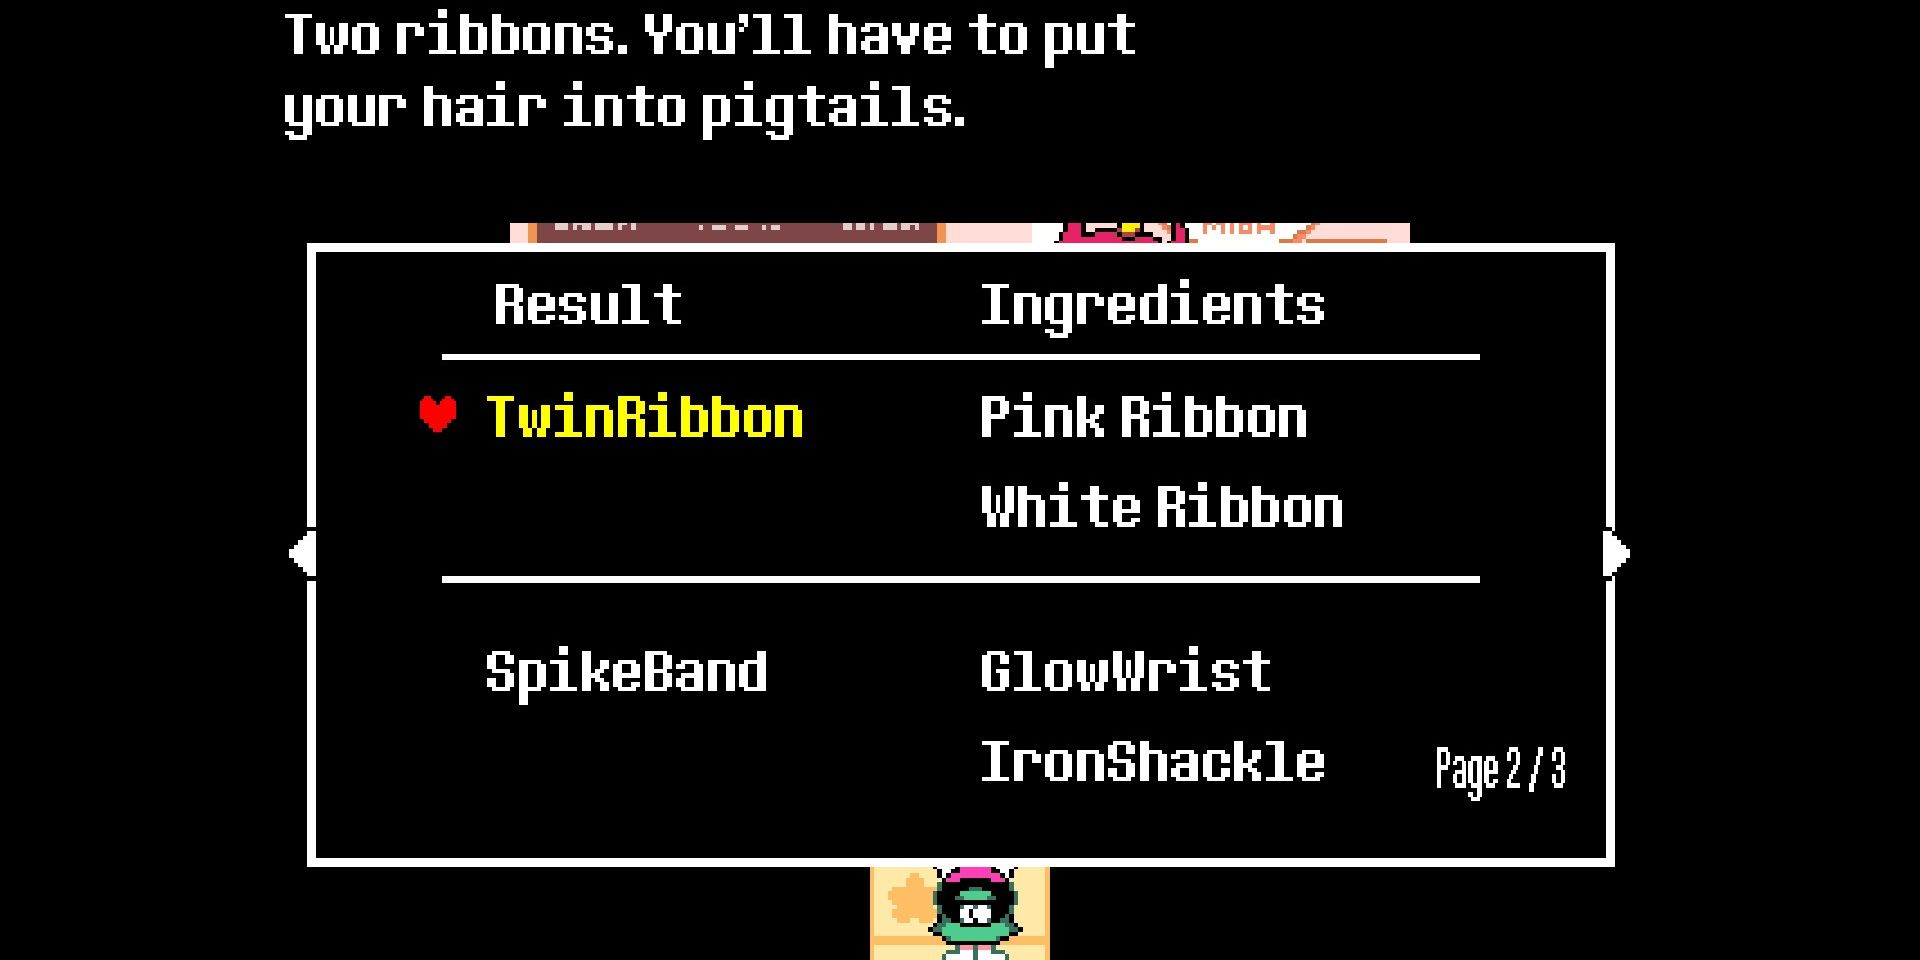
As for the topic of combinations, why not head over to Top Bakery? There you can merge your ribbons to create a Twin Ribbon. If you’d like, you could also combine your Glow Wrist and Iron Shackle into a Spike Band, and your Big Shot Bowtie and Tension Bit into a Tension Bow.
The Twin Ribbon is a remarkable addition to your equipment, extending your Reach Limits and offering an additional 3 points of defense. Pairing it with the Tension Bow is particularly beneficial, as it provides extra Turn Points along with an added 2 points of defense.
The Glow Wrist boosts attack power at the expense of defense; the DD-Burger is an improved option only if you already have Dark Burgers; and the Twisted Sword is not available at this time, but it would have been a unique find on a strange route regardless.
During your visit, feel free to stop by the café and take a moment to appreciate the unique Swatch design featured in the LTS demonstration version. Also, while you’re there, make sure to verify if you’ve successfully recruited everyone. It’s quite straightforward on a pacifist path, but it never hurts to double-check.
Swing by Seam’s store for additional intriguing conversation that subtly reveals information about the mysterious secret boss in Chapter 3, witness a heartfelt scene between King and Queen, and finally bid farewell to the Dark World permanently from this point onward.
Chapter 2 Light World
Revisiting Everyone
Following that, there’s still a heap of tasks left in this luminous realm. I need to swing by Rudy’s place to introduce him to Susie, catch up with Undyne and hand over her chocolates to Alphys, and then make my way to the Graveyard for a quick chat with Father Alvin. I should clarify that he’s not The Knight.
Head towards a fresh setting that appears to be connected to Gaster’s Bunker, followed by a brief pitstop at Sans’ store. Here, you have the option to postpone dealing with your brother, and if you don’t plan on keeping all the eggs for yourself, you can place your egg in a basket filled with others.
Visit Mettaton’s apparent dwelling once more, claiming to seek another individual. The next day, you will be assigned to provide them with amusement. Meanwhile, linger by the seashore once more to subtly hint at upcoming events.
Once that’s done, feel free to return home knowing you’ve prepared a complete Pacifist-style game save with the highest possible completion level. Don’t forget to watch the closing credits before saving.
Weird Route
Starting Incidient
If you’re interested in taking the Unusual Path, also recognized as the Snowgrave Path, feel free to proceed. Otherwise, we’ll wrap up here. This path begins when Noelle joins your team in the Cyber World. So far, everything that happened before this moment doesn’t hold any significance.
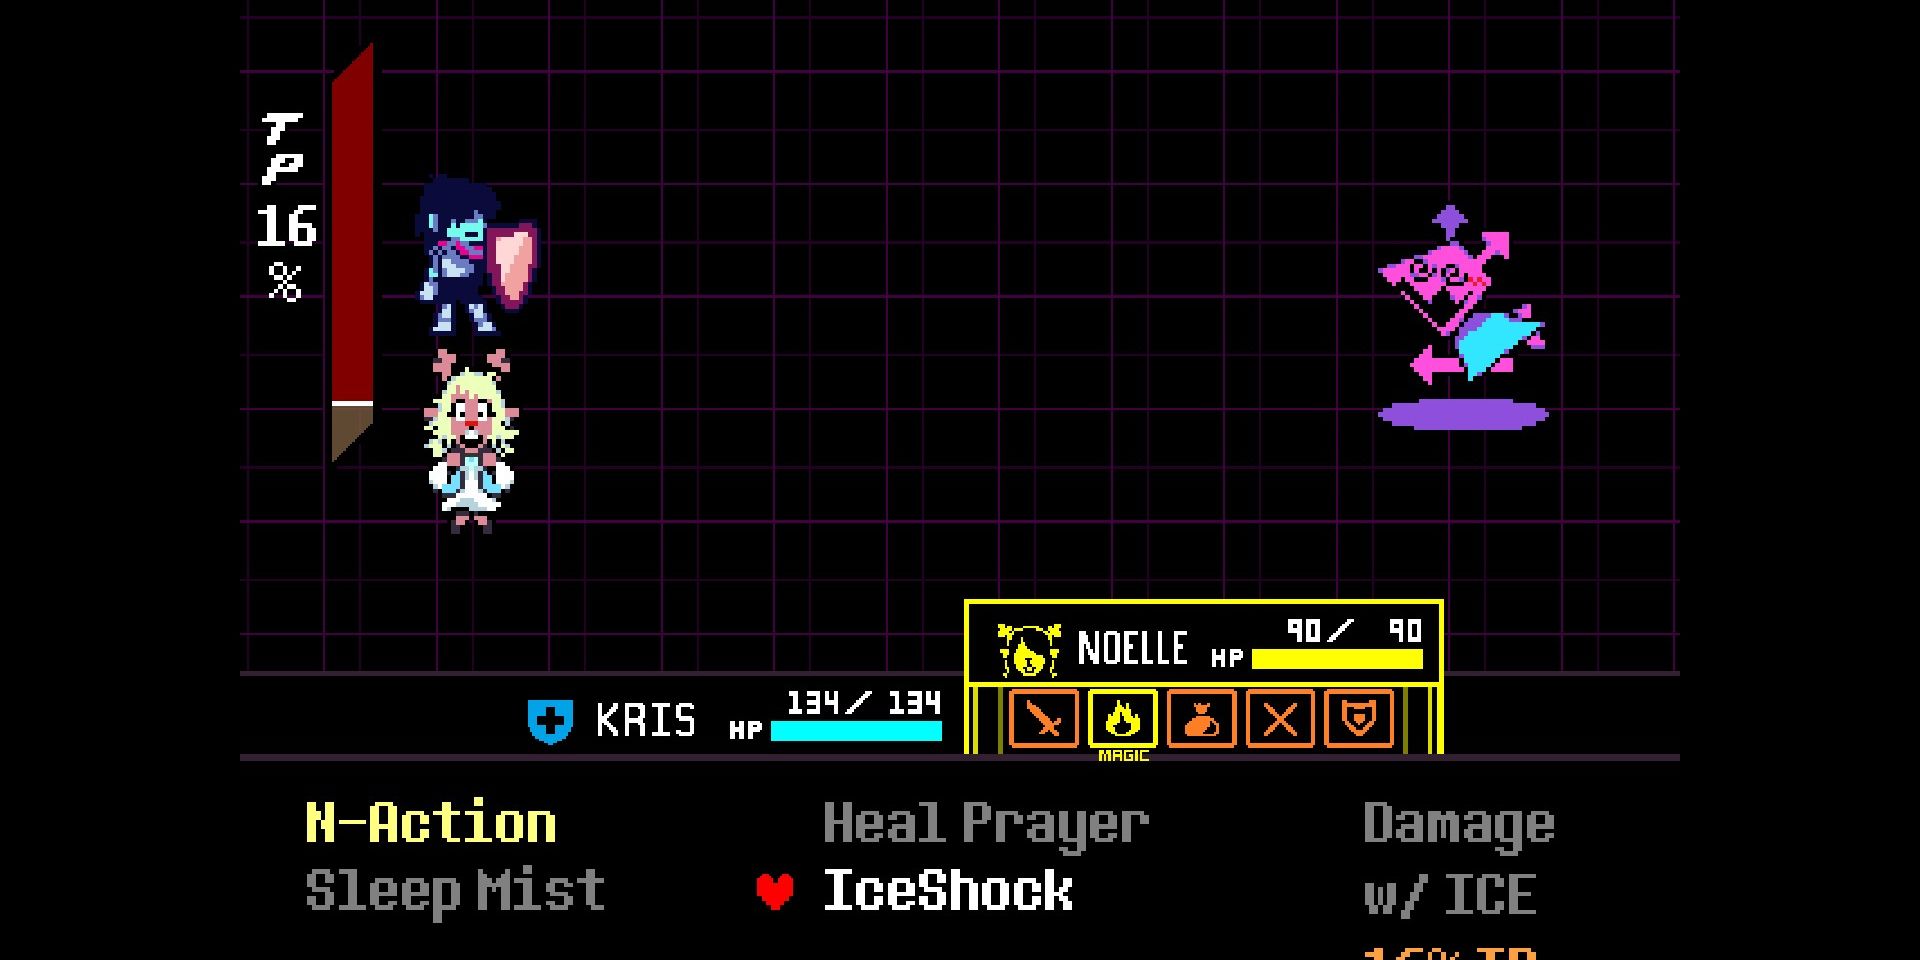
Once she joins your team, try to retreat as much as feasible. Disregard Noelle’s objections and consistently move to the left, utilizing her special ability, Ice Shock, solely to eliminate and freeze any adversary. Be sure not to miss a single one, so thoroughly inspect every nook and cranny of each room for enemies.
If you stop Werewire and ViroViroKun at Spamton’s shop and hear a small sound cue, that means you’re on the correct path. Next, select “Proceed,” while only using Ice Shock against the enemies without defeating them normally or sparing them, as doing so will end the path.
After turning every adversary stationary within a specific room, you’ll notice the identical audio cue. When you enter the Irksome Mouse Room, disregard the puzzle and instead focus on exiting the room. Disregard Noelle until you are presented with two options, then select “Advance.
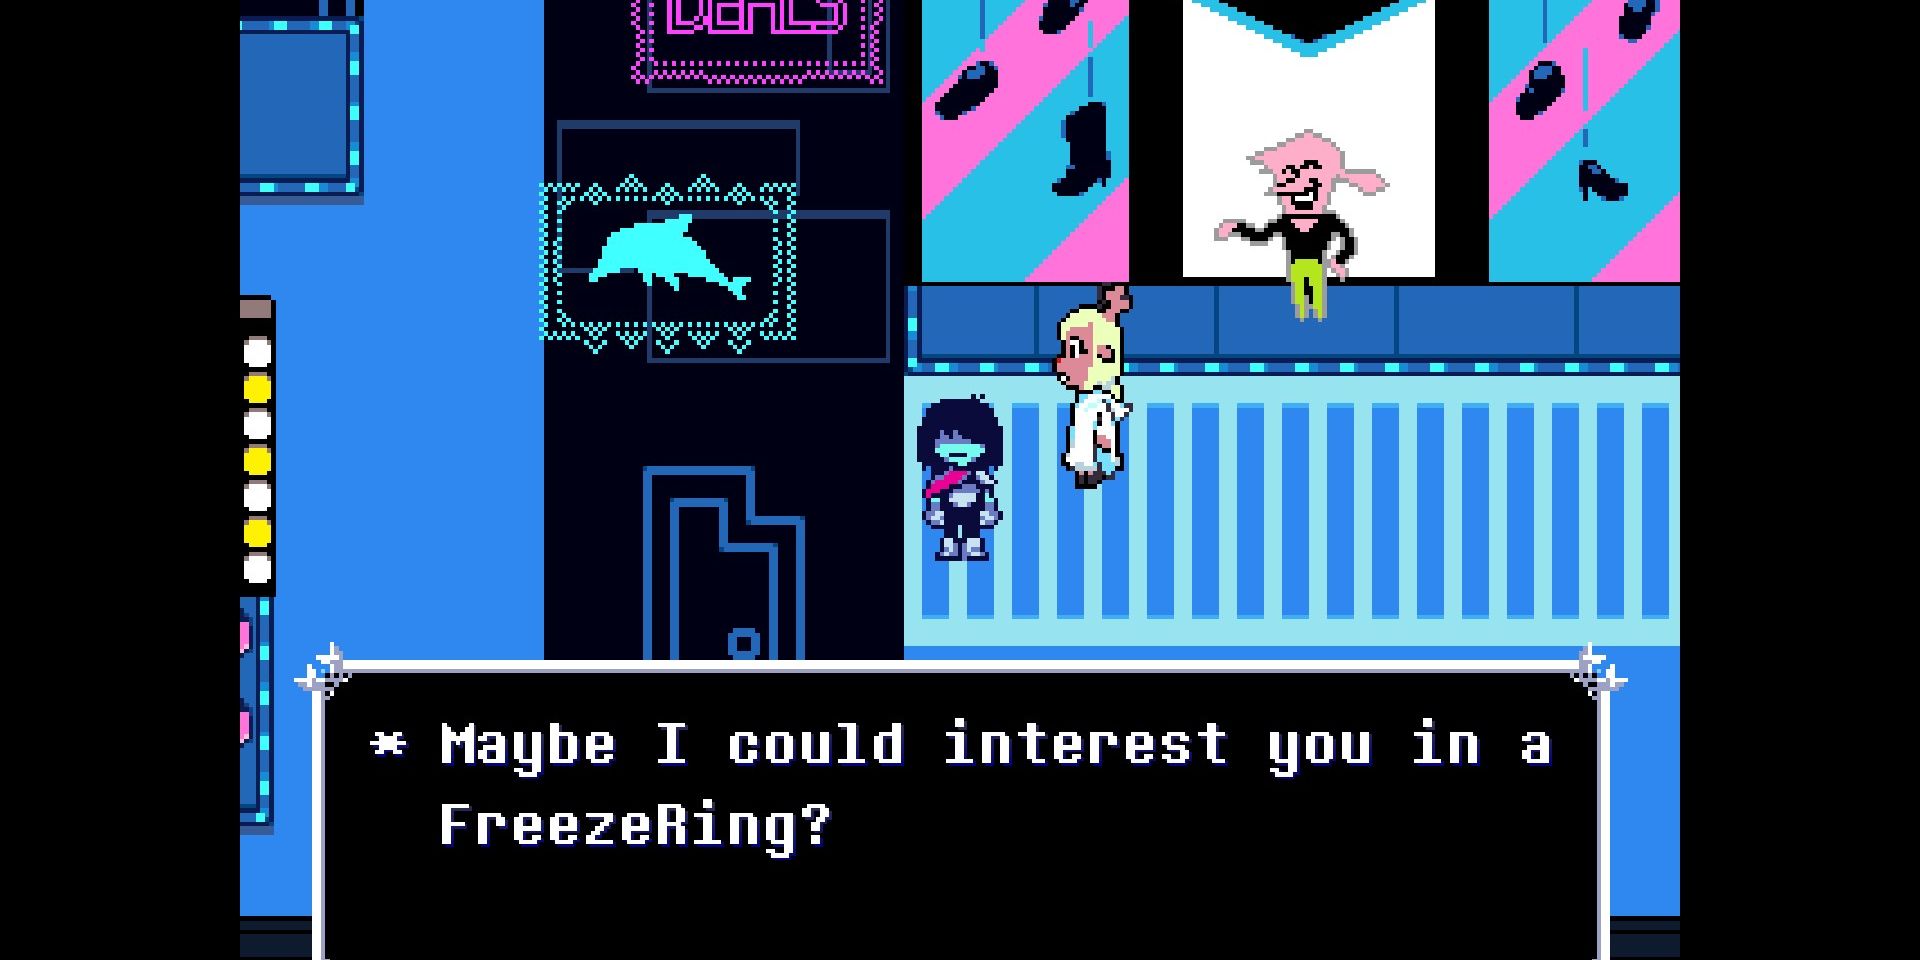
As soon as you arrive at the room marked by the Ferris Wheel sign, speak to the vendor on your right-hand side. When he asks a question, respond with “We’re something different”. If he doesn’t present a ring, circle the area and immobilize each adversary within this room, then revisit the vendor.
Freeze Ring
Once you depart, the store owner might inquire if you have an interest in a complimentary Ice Band. If you respond with “Secure it” to each dialogue prompt, this will ultimately lead to Noelle employing her abilities to acquire the band, and afterwards erasing the memory of the event.
If you’d prefer to increase the tension a bit more, head to the sign and invite Noelle to join you for a spin on the Ferris Wheel. Once that’s done, proceed to the switch, and when she mentions feeling strange, reassure her by saying “It’s normal.
After that, the rest of the journey should be quite straightforward. Attach the Freeze Ring onto Noelle, then use her Ice Shock ability on all opponents until they are defeated. Respond with “Proceed” to every dialogue prompt you encounter, until you reach the dumpster where you previously discovered the egg and moss.
Thorn Ring
Speak to the dumpster, and Spamton will share details about a ring you can acquire after defeating all the opponents. Remember to reduce the count on the counter before entering the room where Berdly is fighting, then return to speak with Spamton once more.
In my world, the last obstacle you’ll face is a Popup residing among a pile of trash cans, so take him down first and return to Spamton. He will offer you the Thorn Ring for $1997, an item crucial for Noelle, whom you should equip it with before moving on to see Berdly.
Aborted Snowgrave
Should you choose, you have the option to quit at this juncture, sparing Berdly. The journey will proceed as usual from hereon, but by doing so, you can take the Thorn Ring off Noelle and keep it for your own use instead. This is the sole method to retain the ring, and it could prove beneficial when facing the Twisted Sword in the future.
Snowgrave
Absolutely! If you intend to continue with the plan, freezing Berdly is the last action required. Remember not to apply IceShock on him; instead, protect him and build up TP to 100%. Once that’s done, instruct Noelle to employ her latest skill, Snowgrave, provided you have equipped the ring for it.
Initially, she’ll decline a couple of times, but persistently instruct her to summon Snowgrave. Eventually, she’ll eliminate Berdly by encasing him in a massive ice sculpture, after which she exits the scene, leaving no escape from this specific pathway.
Spamton NEO DX
After ascending, you’ll notice that nearly half the length of Chapter 2 is eliminated due to your actions. The castle is now entirely taken over, with many rooms inaccessible and numerous items off-limits to you.
Once you navigate past Pipi’s labyrinth without engaging with the Queen, you’ll find yourself on a direct route towards Spamton NEO. There’s not much preparation involved, just remember to grab something from the vending machine before you set off. Good luck!
In any battle involving Spamton, remember that pressing F1 gives you an immediate healing option, once per game save. For this specific encounter, I’d recommend concentrating on defense and utilizing the X-Slash move periodically, while also taking care to restore your health occasionally.
When my defenses heighten, it’s time to ACT and cry out for assistance. While Kris struggles to grab Noelle’s focus, I manage to do so quite easily. After freezing the battle with that icy strike, I can seal the fountain and head home, all feeling quite routine-like.
Proceed
In the seemingly familiar realm of Light World, a chilling contrast emerges when I pay Rudy a visit at the hospital. It serves as an unsettling testament to the profound impact my actions have had on Noelle’s mental state. If you’re feeling especially adventurous and want to give her another scare, consider strolling closer to her or donning her watch during the cutscene.
Apart from this, your game progress includes a Peaceful Savior state, a Strange Pathway save, and potentially an Unfinished Strange Pathway save. Do take another look at the ending credits for the completion details to proceed into Chapter 3.
Read More
- Violence District Killer and Survivor Tier List
- All Data Pad Locations (Week 1) Destiny 2
- Top 8 UFC 5 Perks Every Fighter Should Use
- ETH PREDICTION. ETH cryptocurrency
- How to Farm XP in Battlefield 2042 (2025)
- Unleash Devastation: Top Rupture Teams to Dominate in Limbus Company!
- One Piece Chapter 1158 Preview: The God Valley Incident Edges Closer
- PENGU PREDICTION. PENGU cryptocurrency
- The 20 Best Real-Time Strategy (RTS) Games To Wishlist In 2025
- Compulsion Games’ South of Midnight: A Journey Through the Deep South’s Mythology and Folklore
2025-05-29 02:44