
Guide on Locating All Text Logs Hidden in the Mailboxes Throughout the MCM Facility for Five Nights at Freddy’s: The Secret of the Mimic, as these crucial pieces of lore are skillfully concealed within the game. This guide aims to help you find each and every one of them.
To make navigation smoother and reading more enjoyable, this guide for the game FNAF: Secret of the Mimic is structured by listing the mailboxes in the sequence they can initially be acquired. However, it’s important to note that the game provides some flexibility for backtracking, which allows you to collect them out of order if needed. A few mailboxes are situated in spots that cannot be accessed later (these will be clearly marked in their respective sections.).
What do Mailboxes do in Five Nights at Freddy’s: Secret of the Mimic?

Mailboxes are scattered throughout the MCM Facility, and you can access them using the Data Diver to retrieve your mail. After retrieval, you’re able to read the mail at any of the computer terminals situated across the game. These Mailbox messages often contain helpful tips, guide you towards hidden locations and collectibles, and completing all 42 can yield significant rewards. Moreover, these mails offer insights into the factory operations, the individuals responsible for its demise, and the story of Edwin Murray and his family.
All Mailboxes available before earning the Achievement: Olly Olly Oxenfree (Mailboxes 1-3)
In this area, you can get all the mailboxes before achieving the mentioned milestone that concludes the Jackie Chase series.
Mailbox #1 (Missable!)
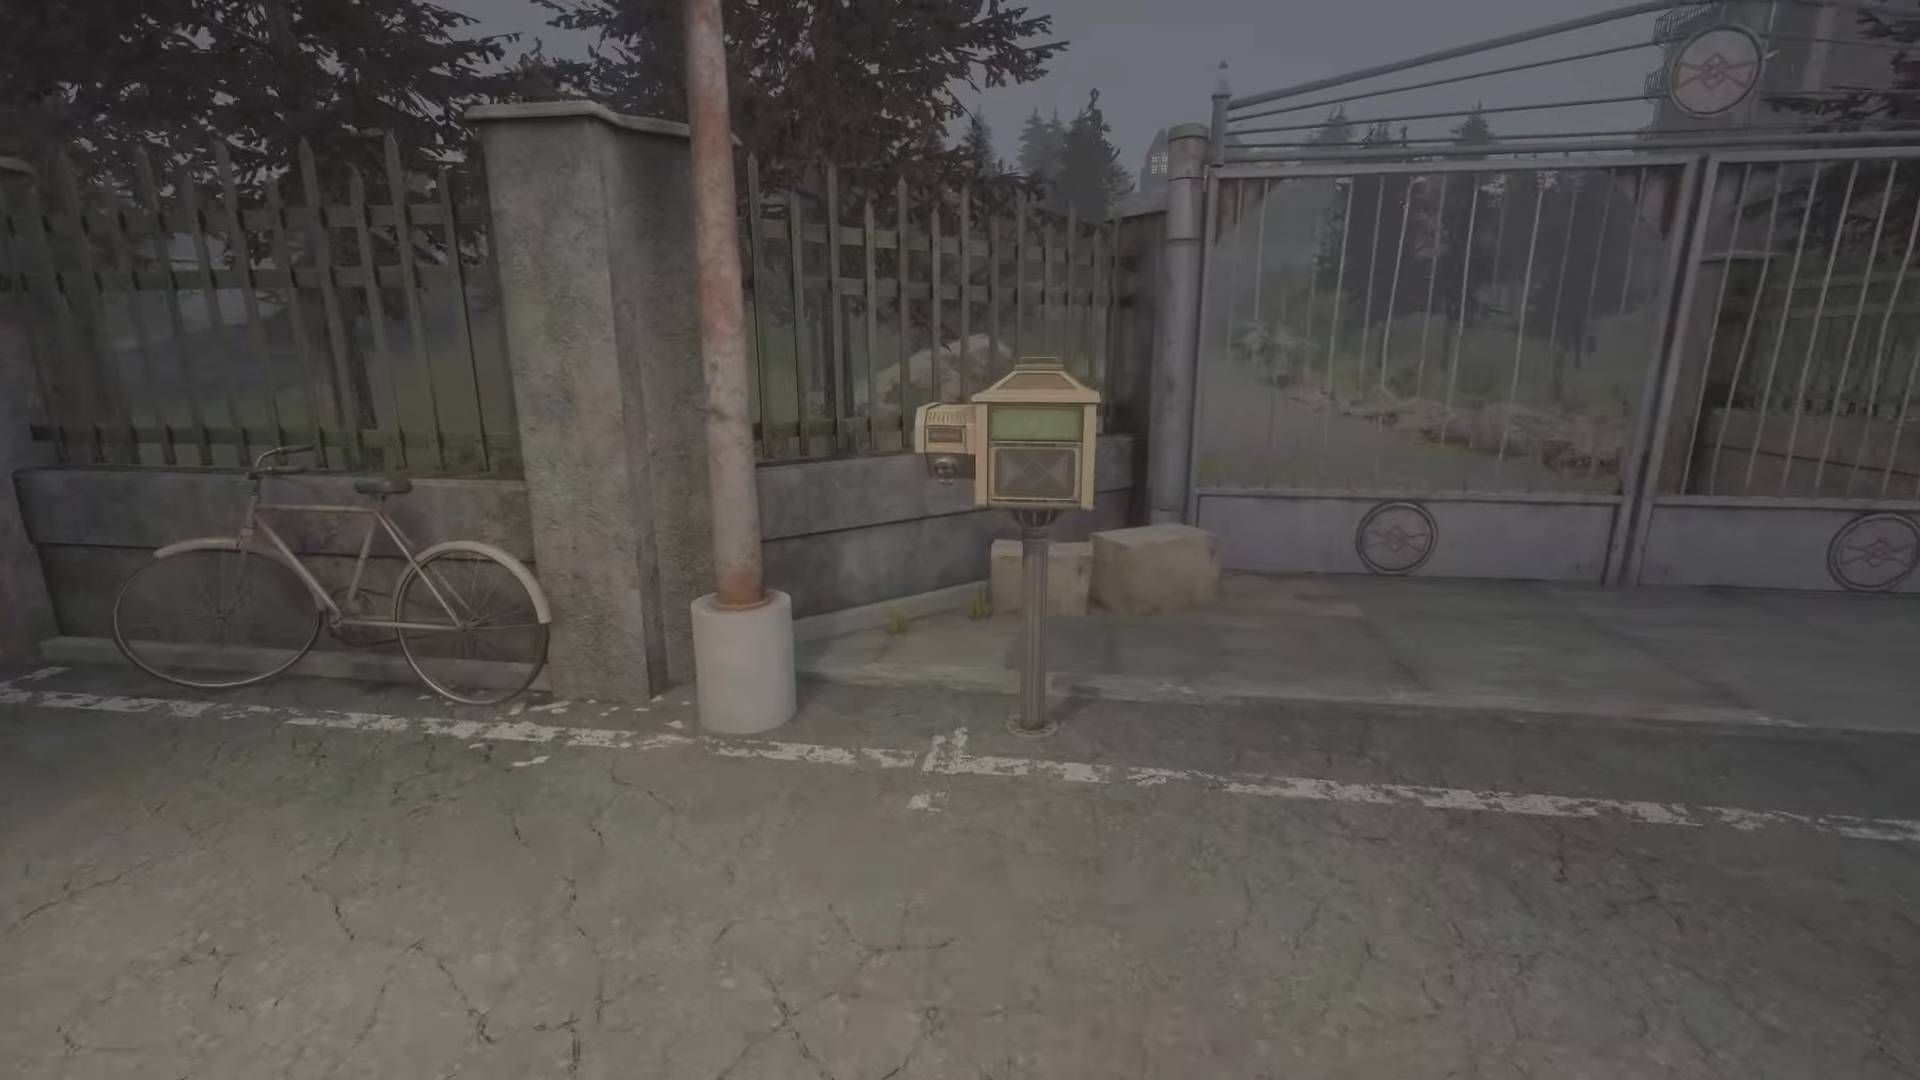
At the outset of the game, as soon as you step out from the van, take a left turn and proceed towards the gate that obstructs the path leading up to the house perched on the hill. You’ll spot the mailbox to your left, near the gate. It’s essential to locate this outdoor area before entering the MCM building because once you do, there’s no way to revisit it until you start a new game plus.
Mailbox #2
The second mailbox is situated straight ahead following the welcome presentation and passing through the side entrance. It’s located to your left as you step into the corridor, which continues towards the security office.
Mailbox #3
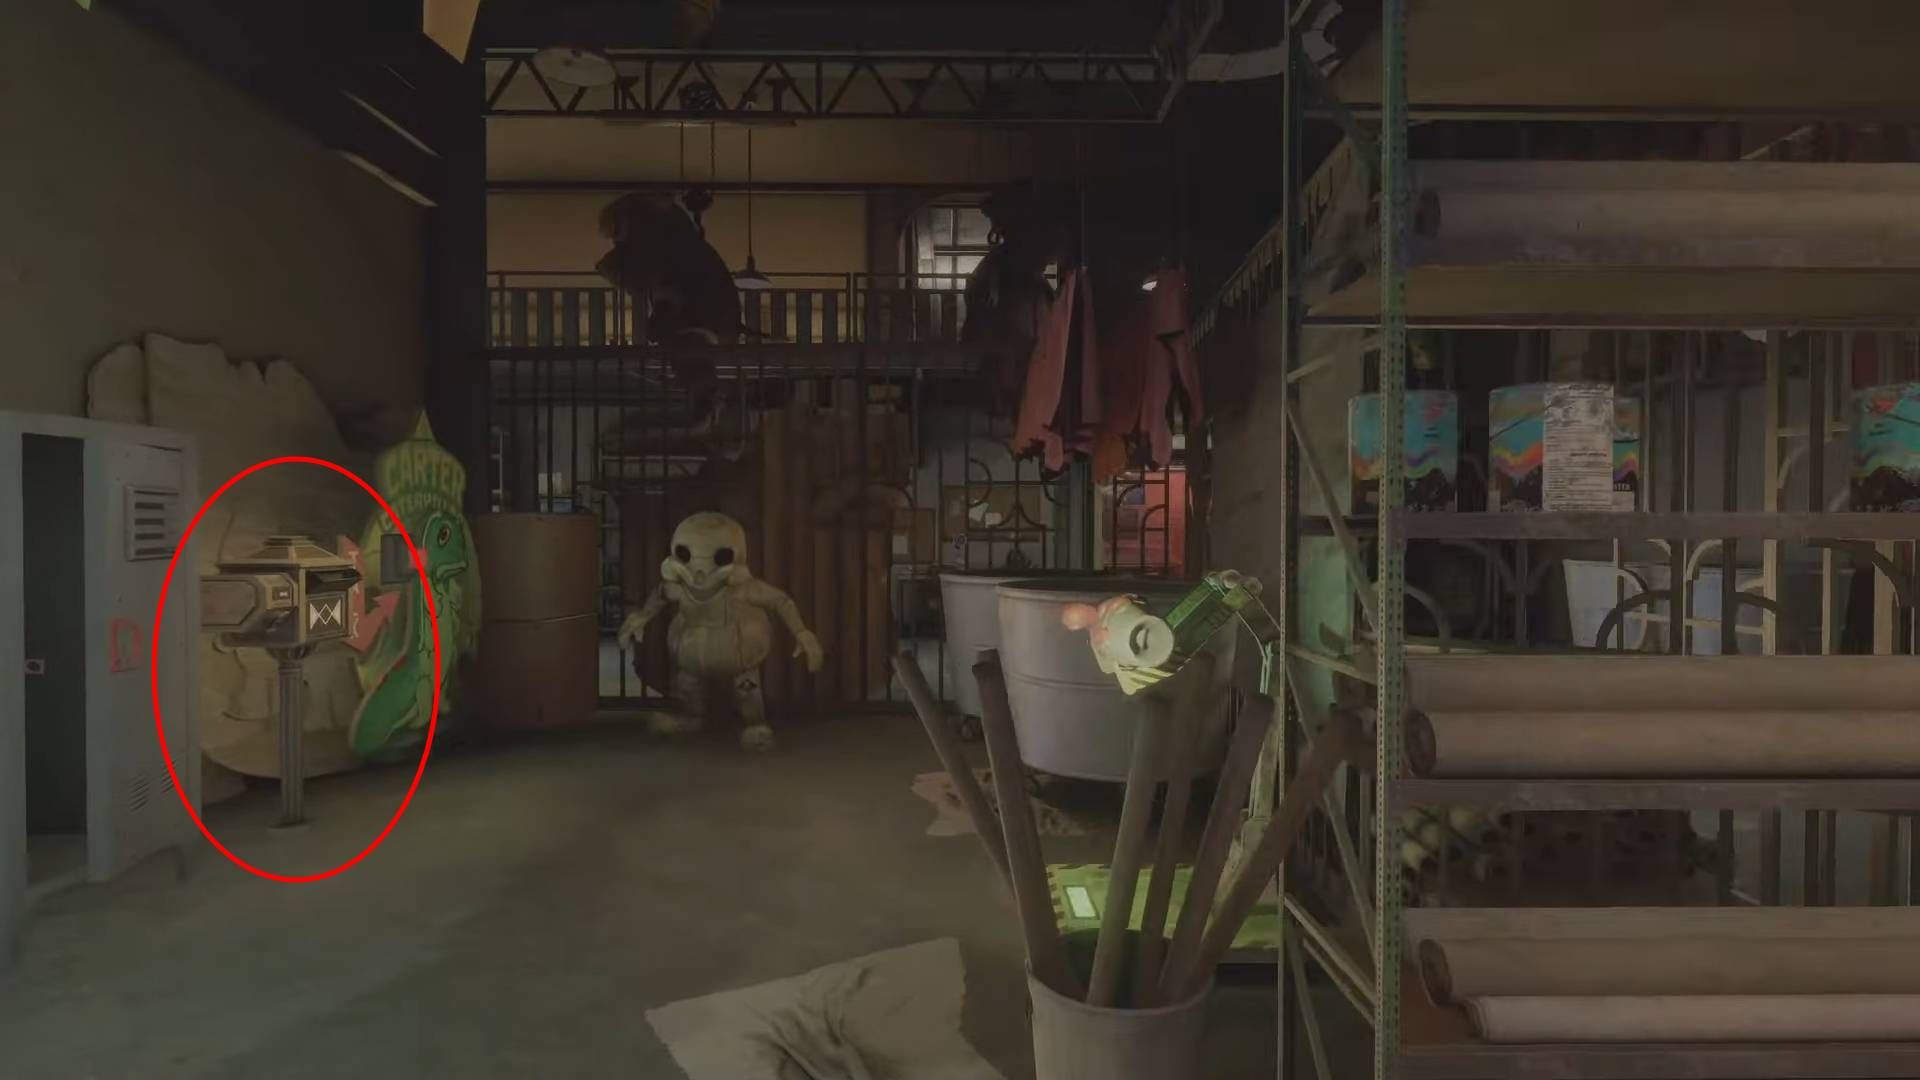
Following your initial meeting with the Mimic, proceed past it and then look to your left to locate the third and last mailbox for this section. After successfully avoiding and deceiving the Mimic to reach the door leading deeper into the factory, you’ll find this mailbox there. There won’t be another mailbox available until after your meeting with Jackie.
All Mailboxes Before Earning the Achievement: Tickets Please (Mailboxes 4 & 5)
During your visit to the Big Top Showroom, you’ll spot mailboxes scattered around. Fortunately, you won’t have to worry about missing these mailboxes permanently because you can always return here conveniently within the game whenever needed.
Mailbox #4
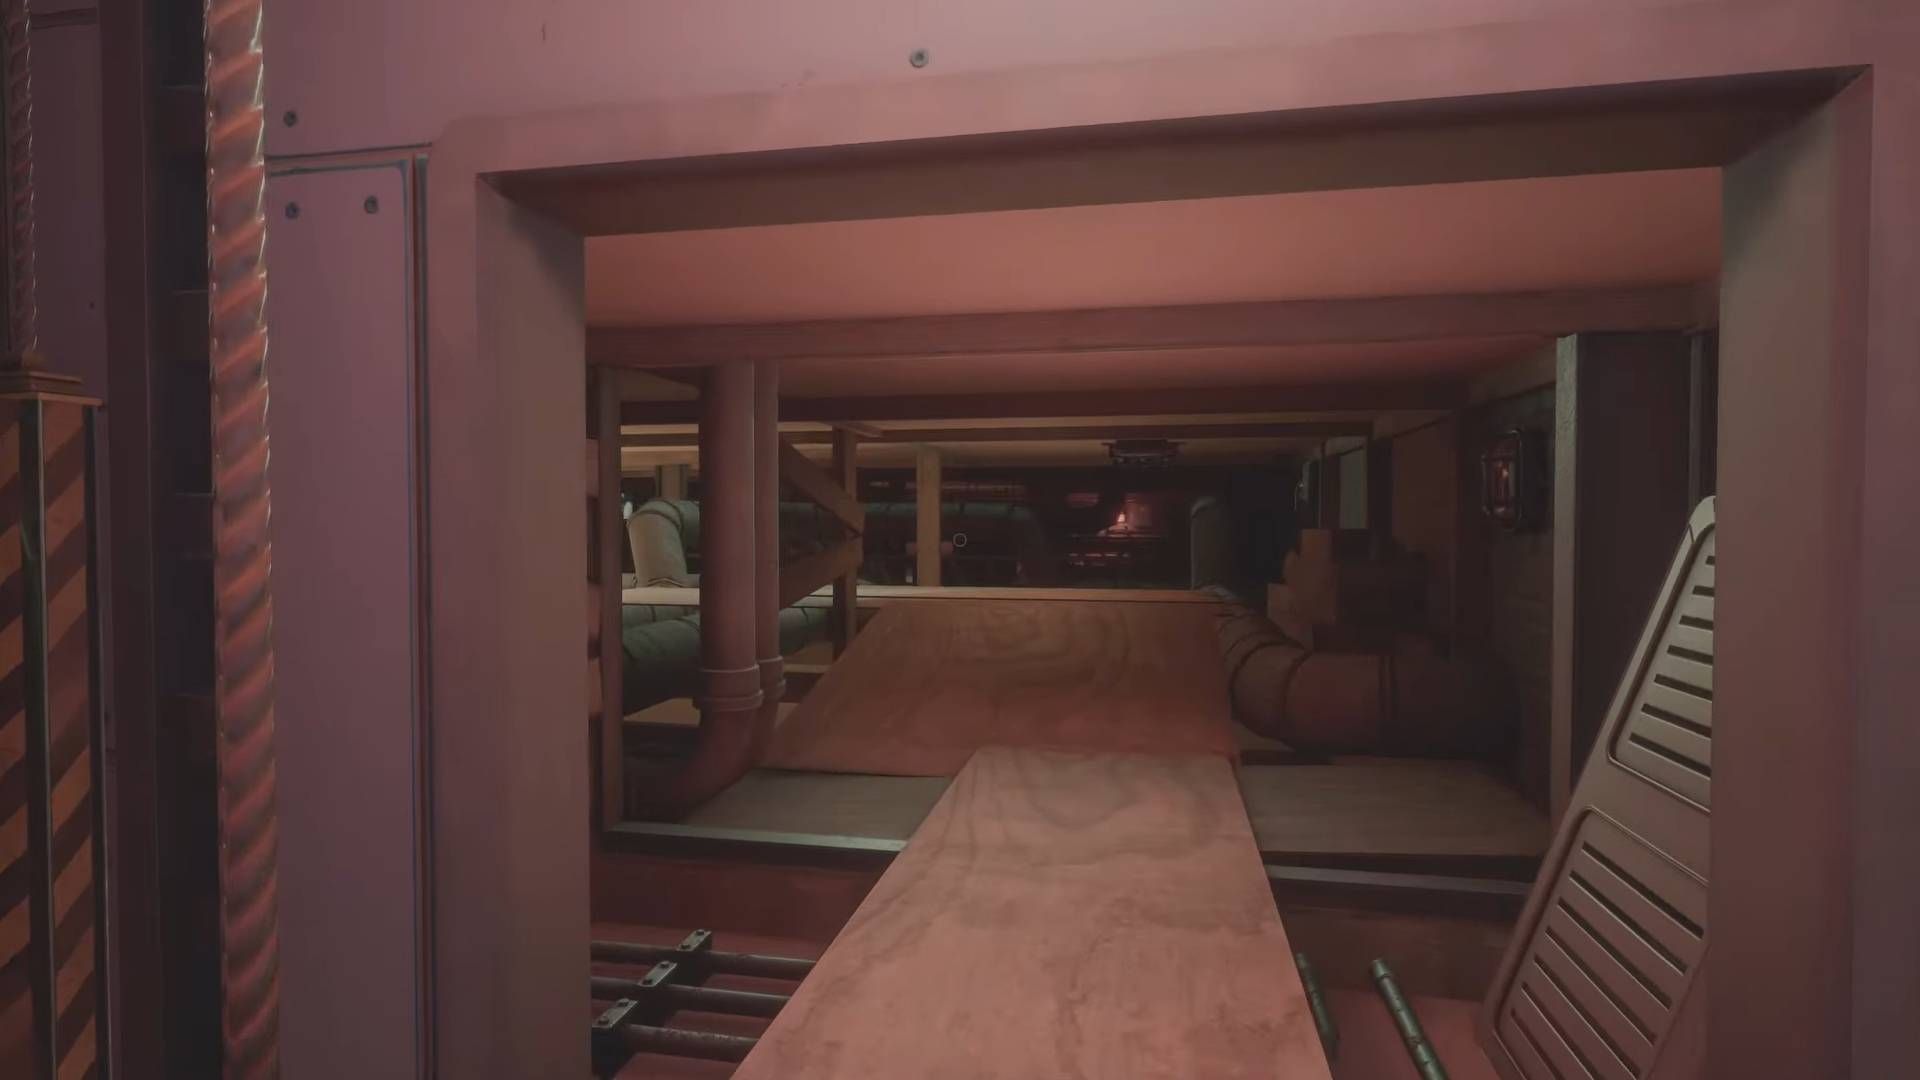
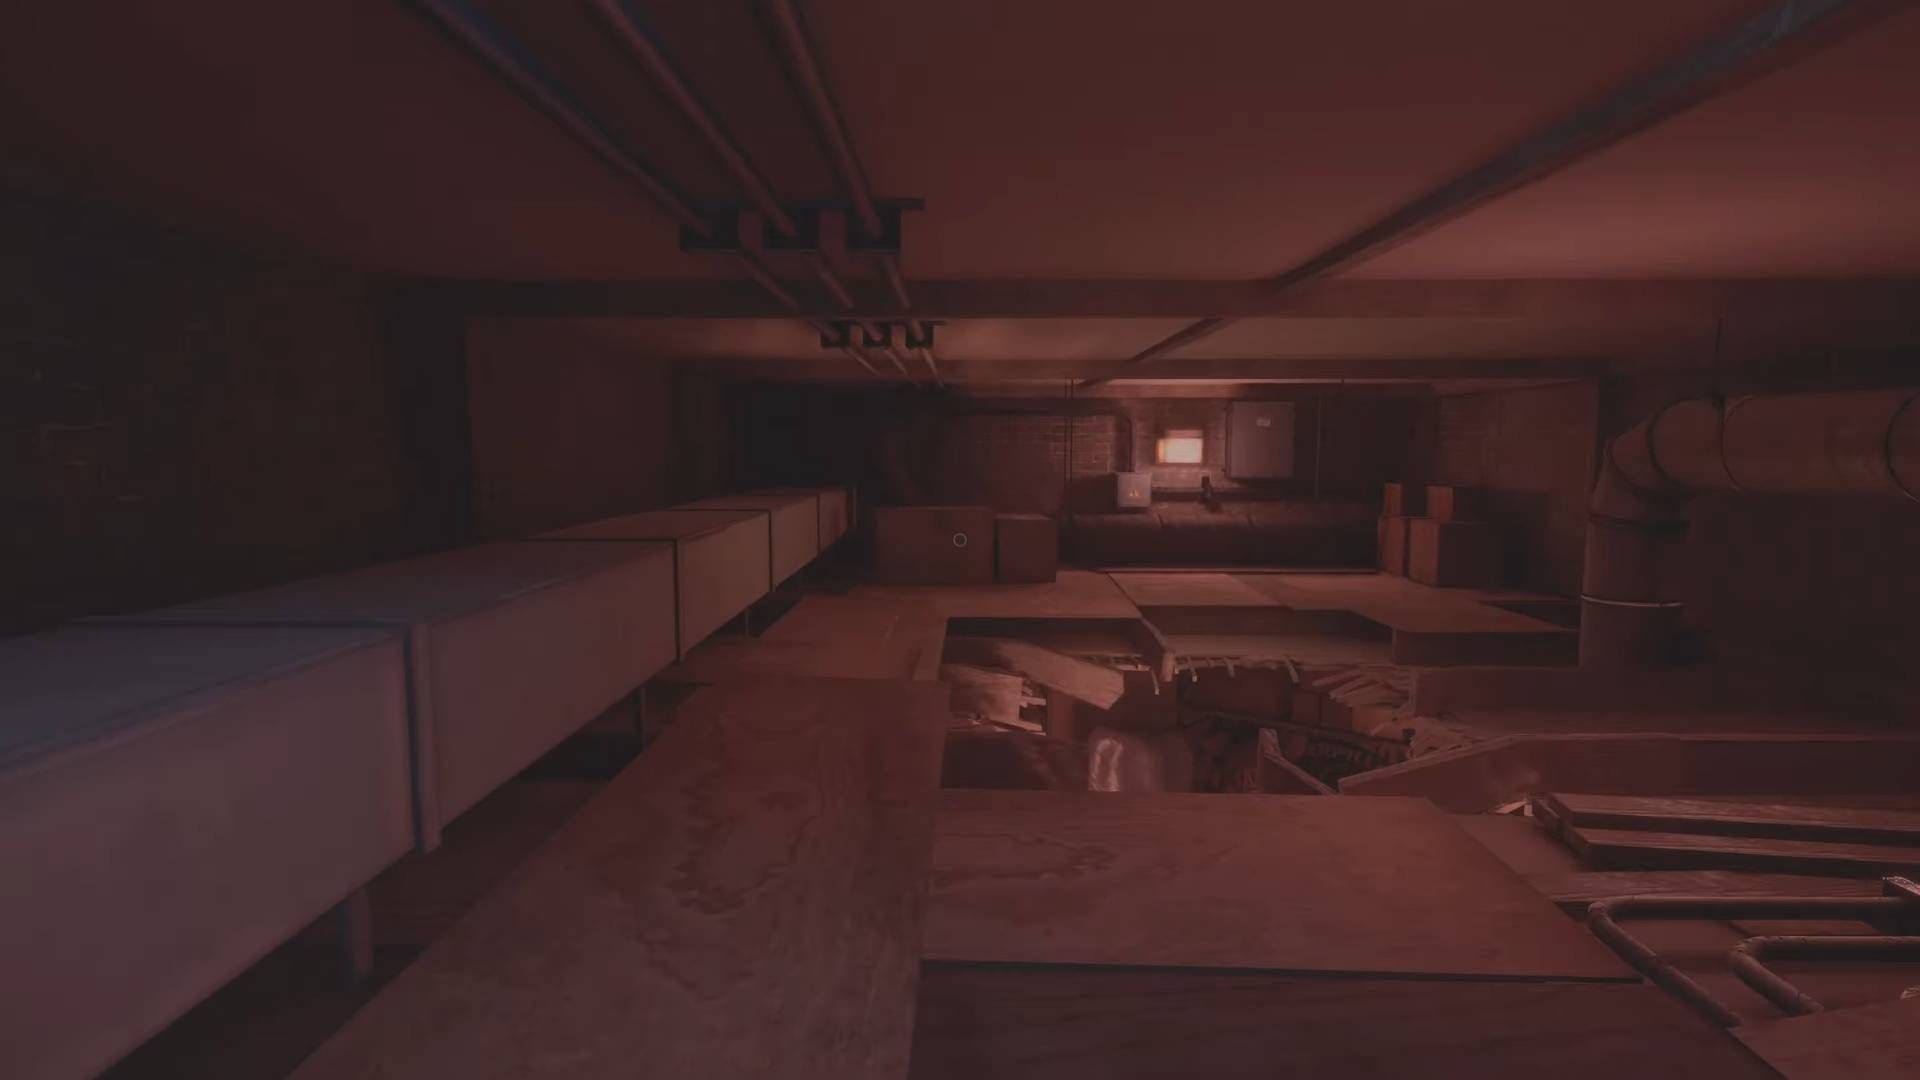
After finishing the elevator repair minigame, you’ll spot the mailbox nearby. Then, rotate around and proceed through the vent situated next to the terminal. This path will lead you up and over the elevator. Once there, you can access a crawlspace which lets you descend into a locked room housing a mailbox, a collectible item, and a crank that can be employed to open the door leading back to where you were moments ago.
Or, more casually:
Upon wrapping up the elevator repair minigame, you’ll notice the mailbox isn’t far off. Spin around and move through the vent next to the terminal to find a path that takes you above the elevator. This route eventually leads to a crawlspace where you can jump down into a locked room containing a mailbox, a cool item, and a crank to open the door back where you were before.
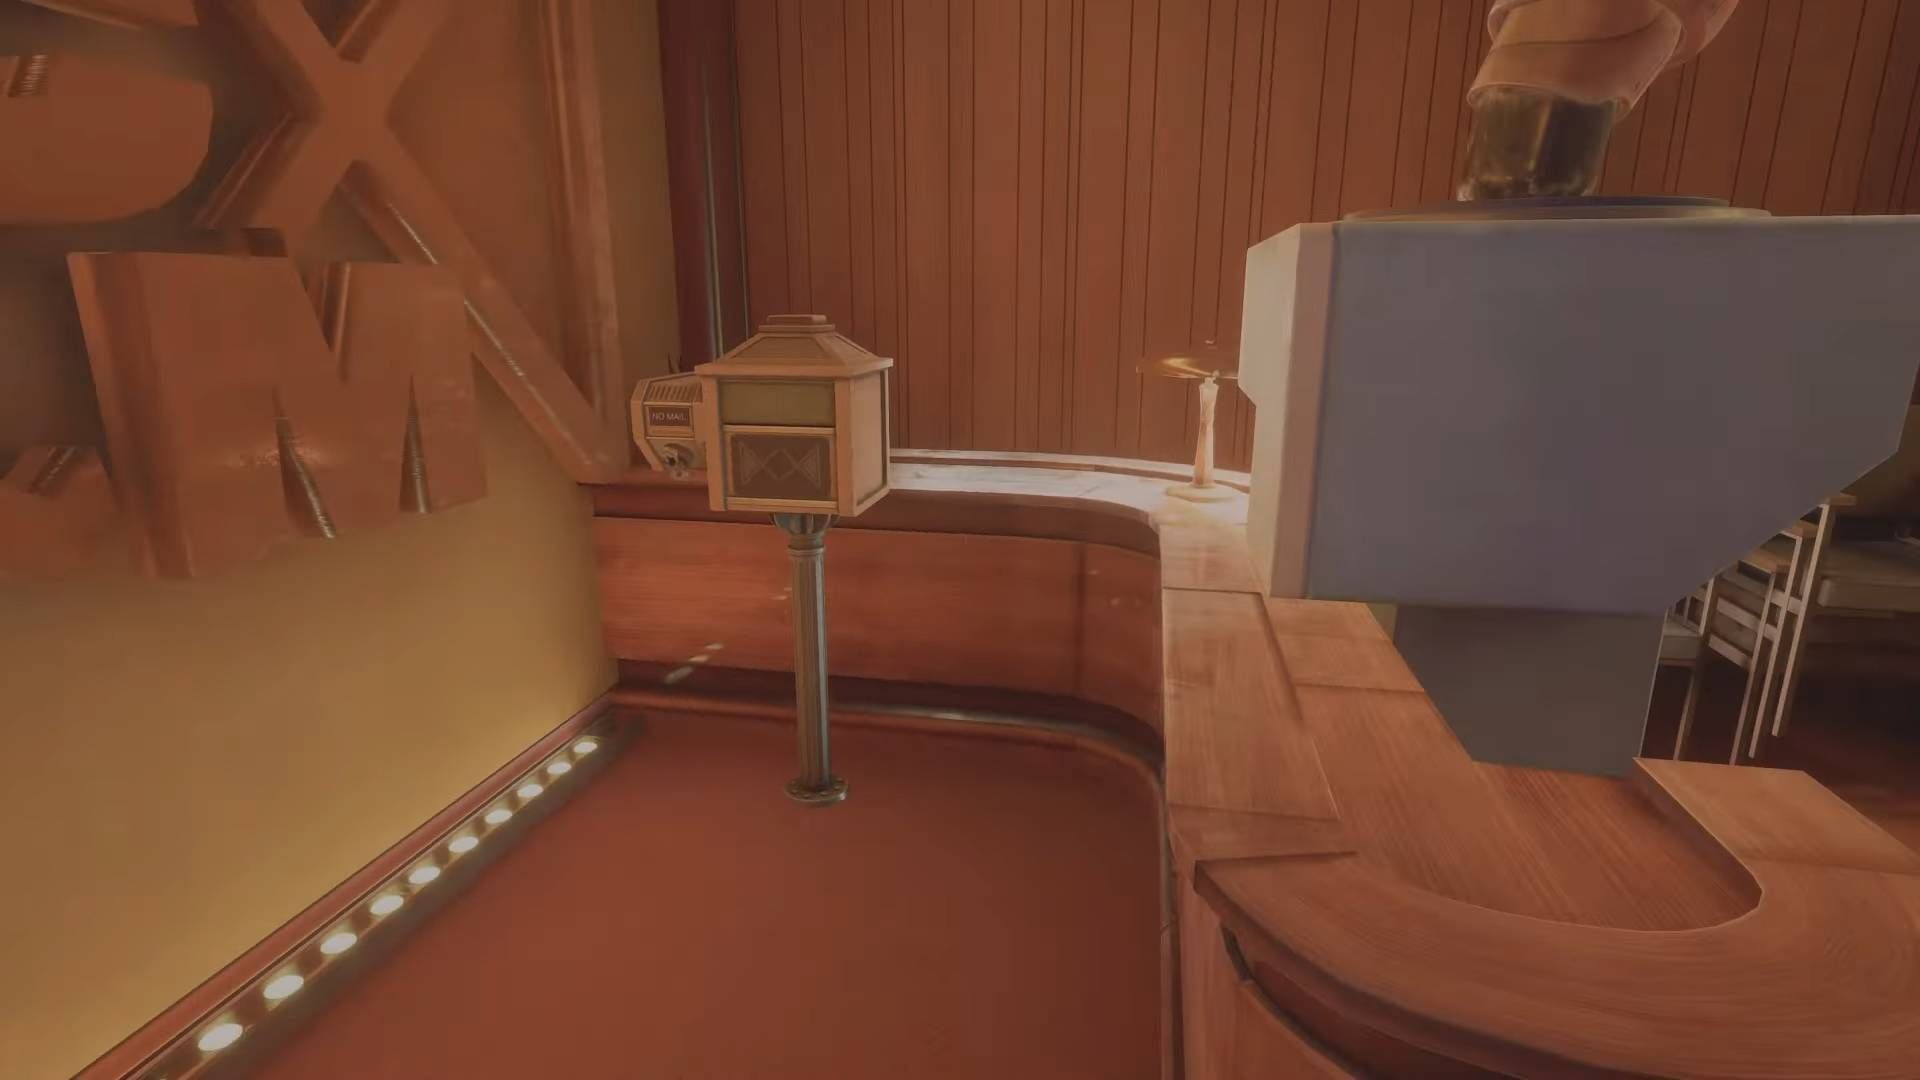
Mailbox #5
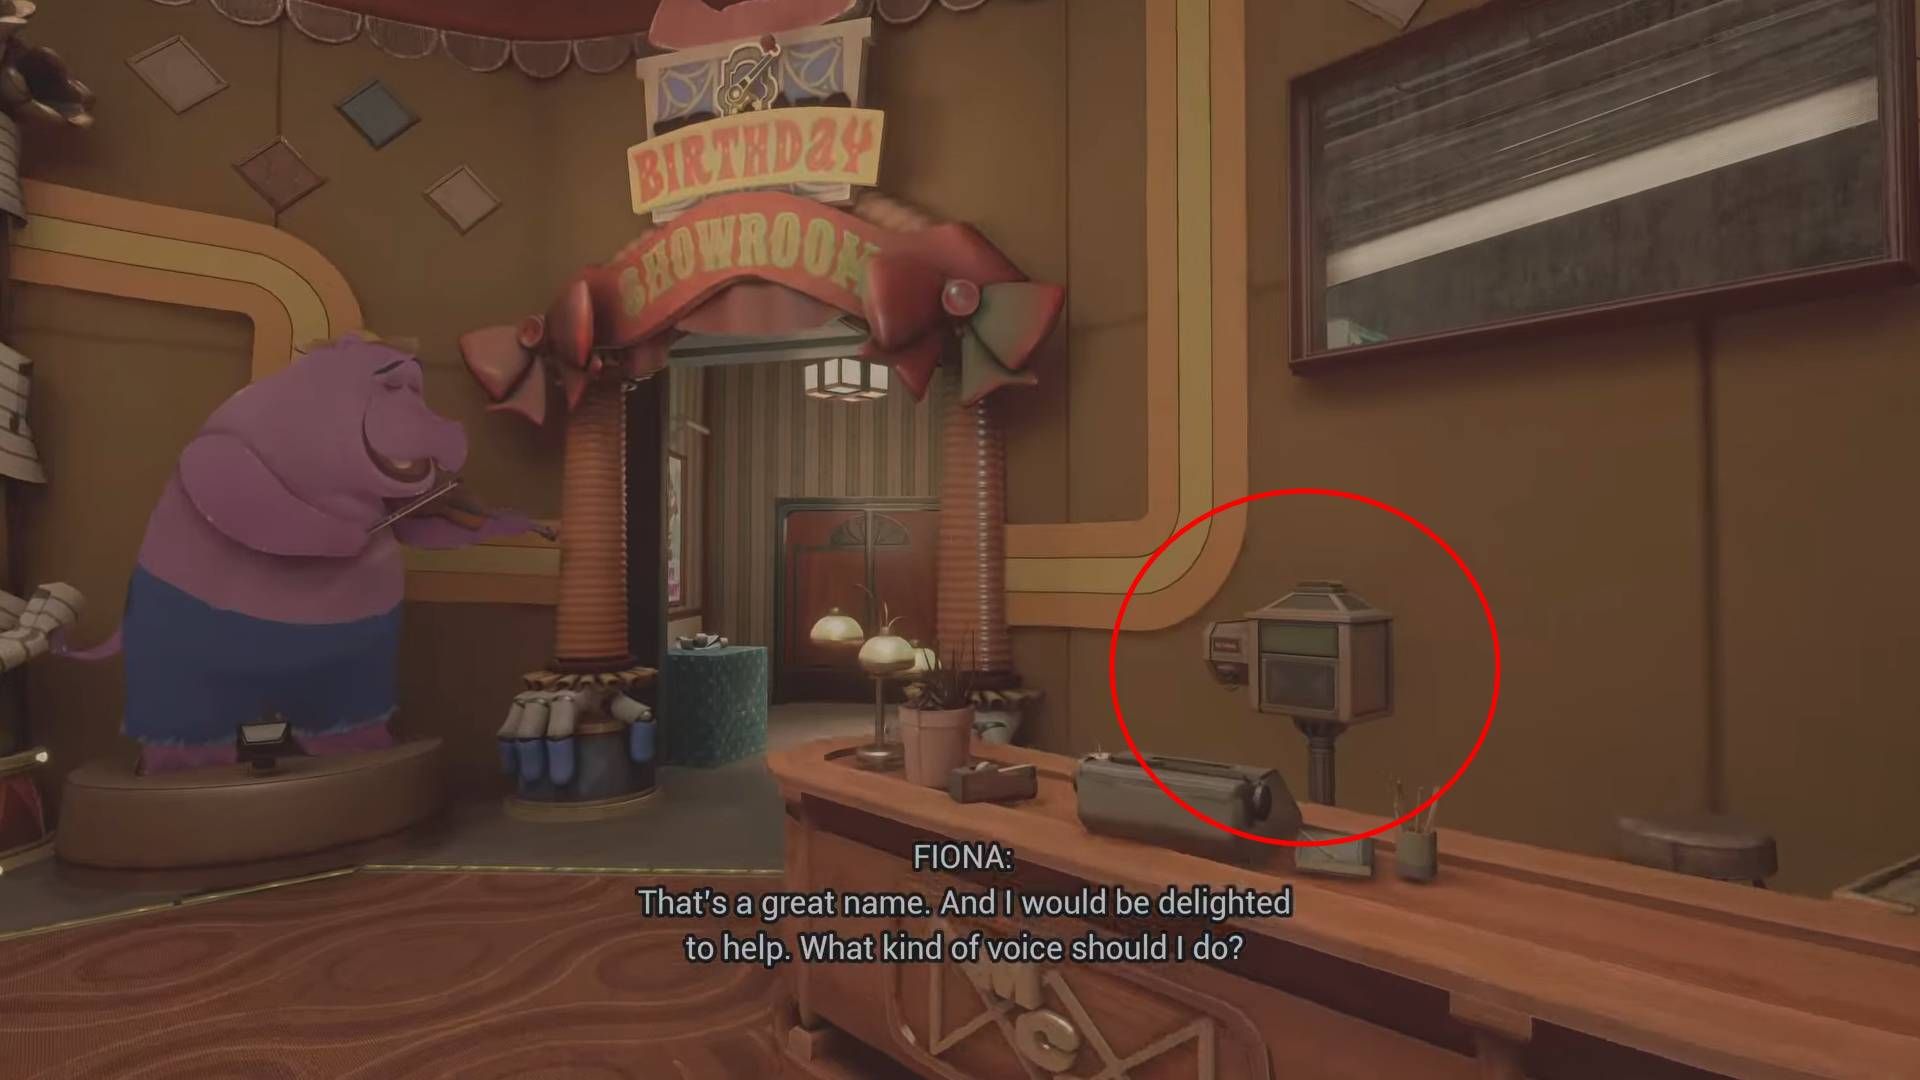
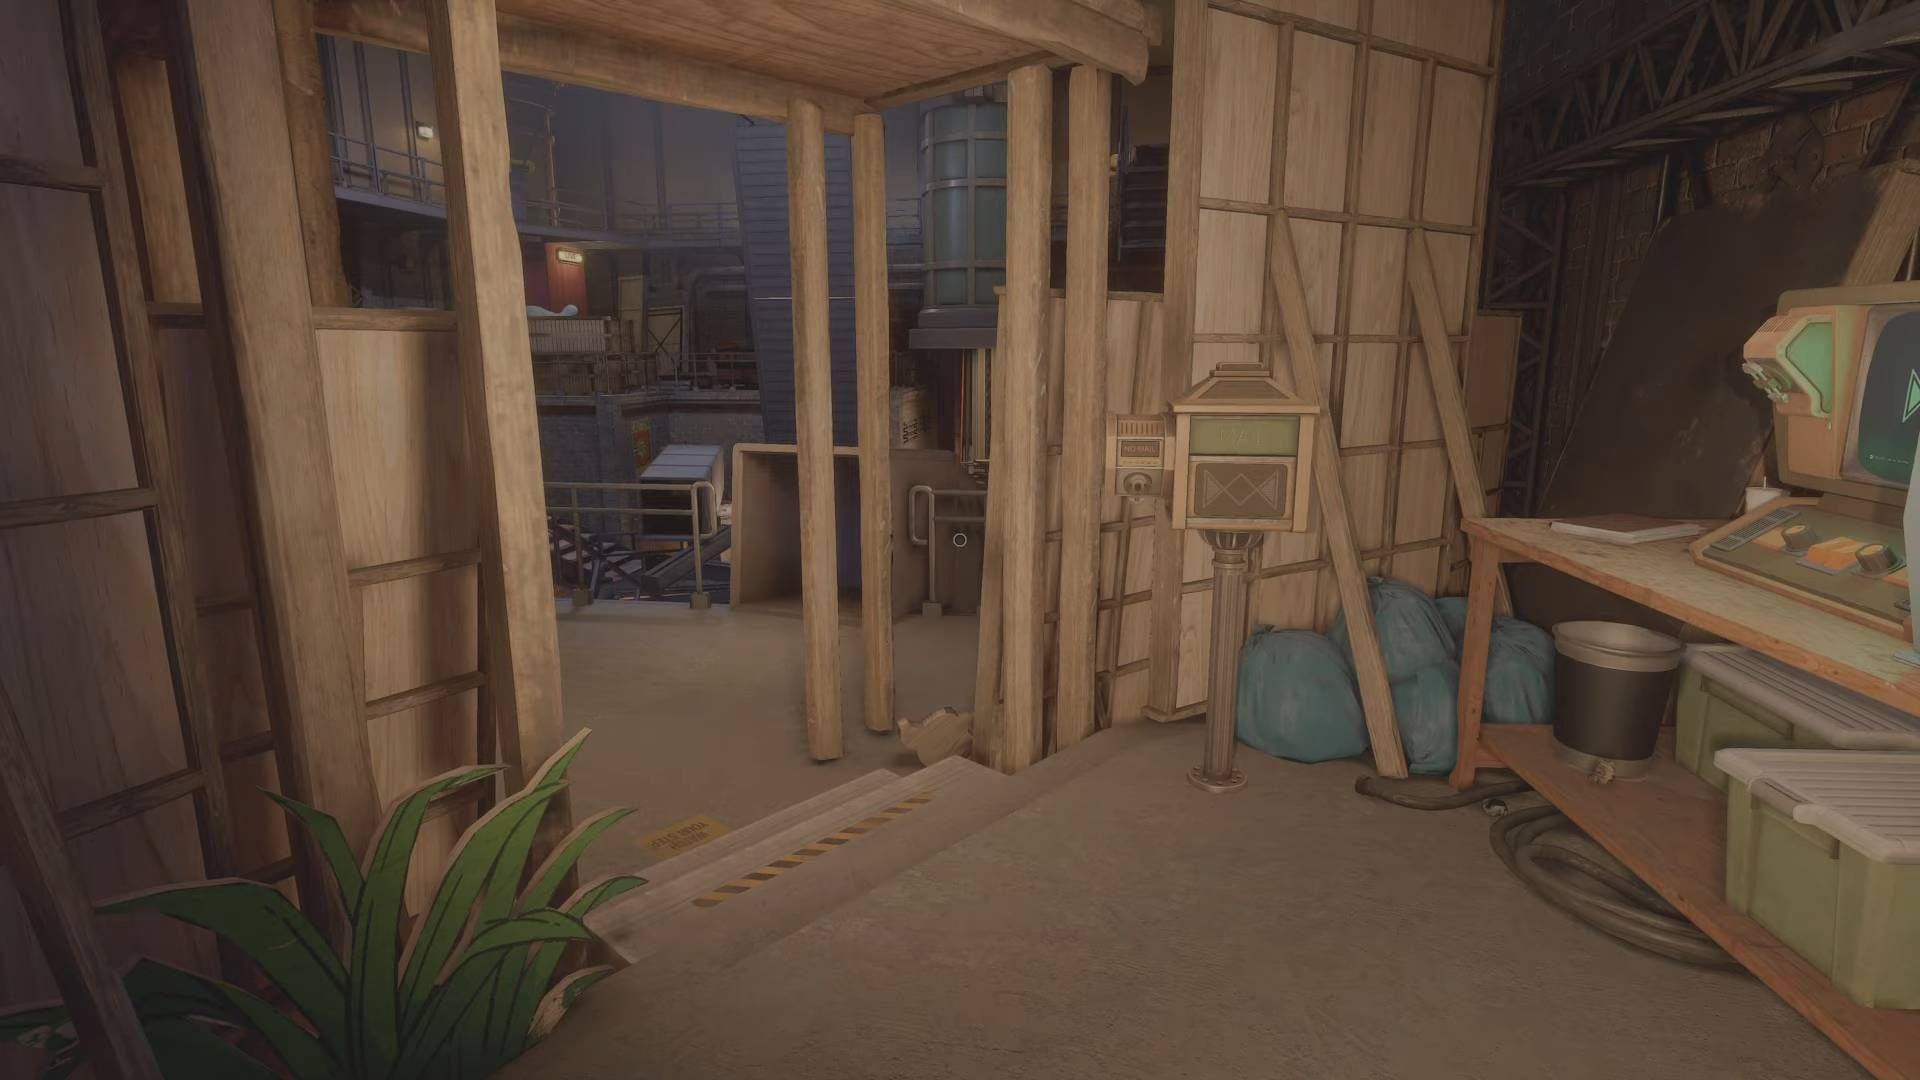
The mailbox located at slot number 5 is situated near the entrance of the Birthday showroom, which you reach by using the fixed elevator and going up to the second level. To your right, as you stand in front of the Mr Helpful service station, you’ll spot the mailbox behind a desk.
All Mailboxes Available Before Earning the Achievement: Aye Aye, Captain! (Mailboxes 6-12)
These Mailboxes can all be found before completing the Puppet Show in the Theater.
Mailbox #6
You’ll discover the Mailbox if you take a slight diversion on your path to the Workshop. Once you’ve stepped into the Main Hall, veer left instead of right at the first chance, and you’ll come across a door that leads to the Theater. Since you have Creator Access, you can proceed now. Make your way to the farthest part of this zone to find the ticket booth. Nearby, there’s a lever that initiates a generator puzzle. Solve the generator puzzle to reactivate power in this area and open some shutters; however, be cautious as the Mimic will appear once power is back on.
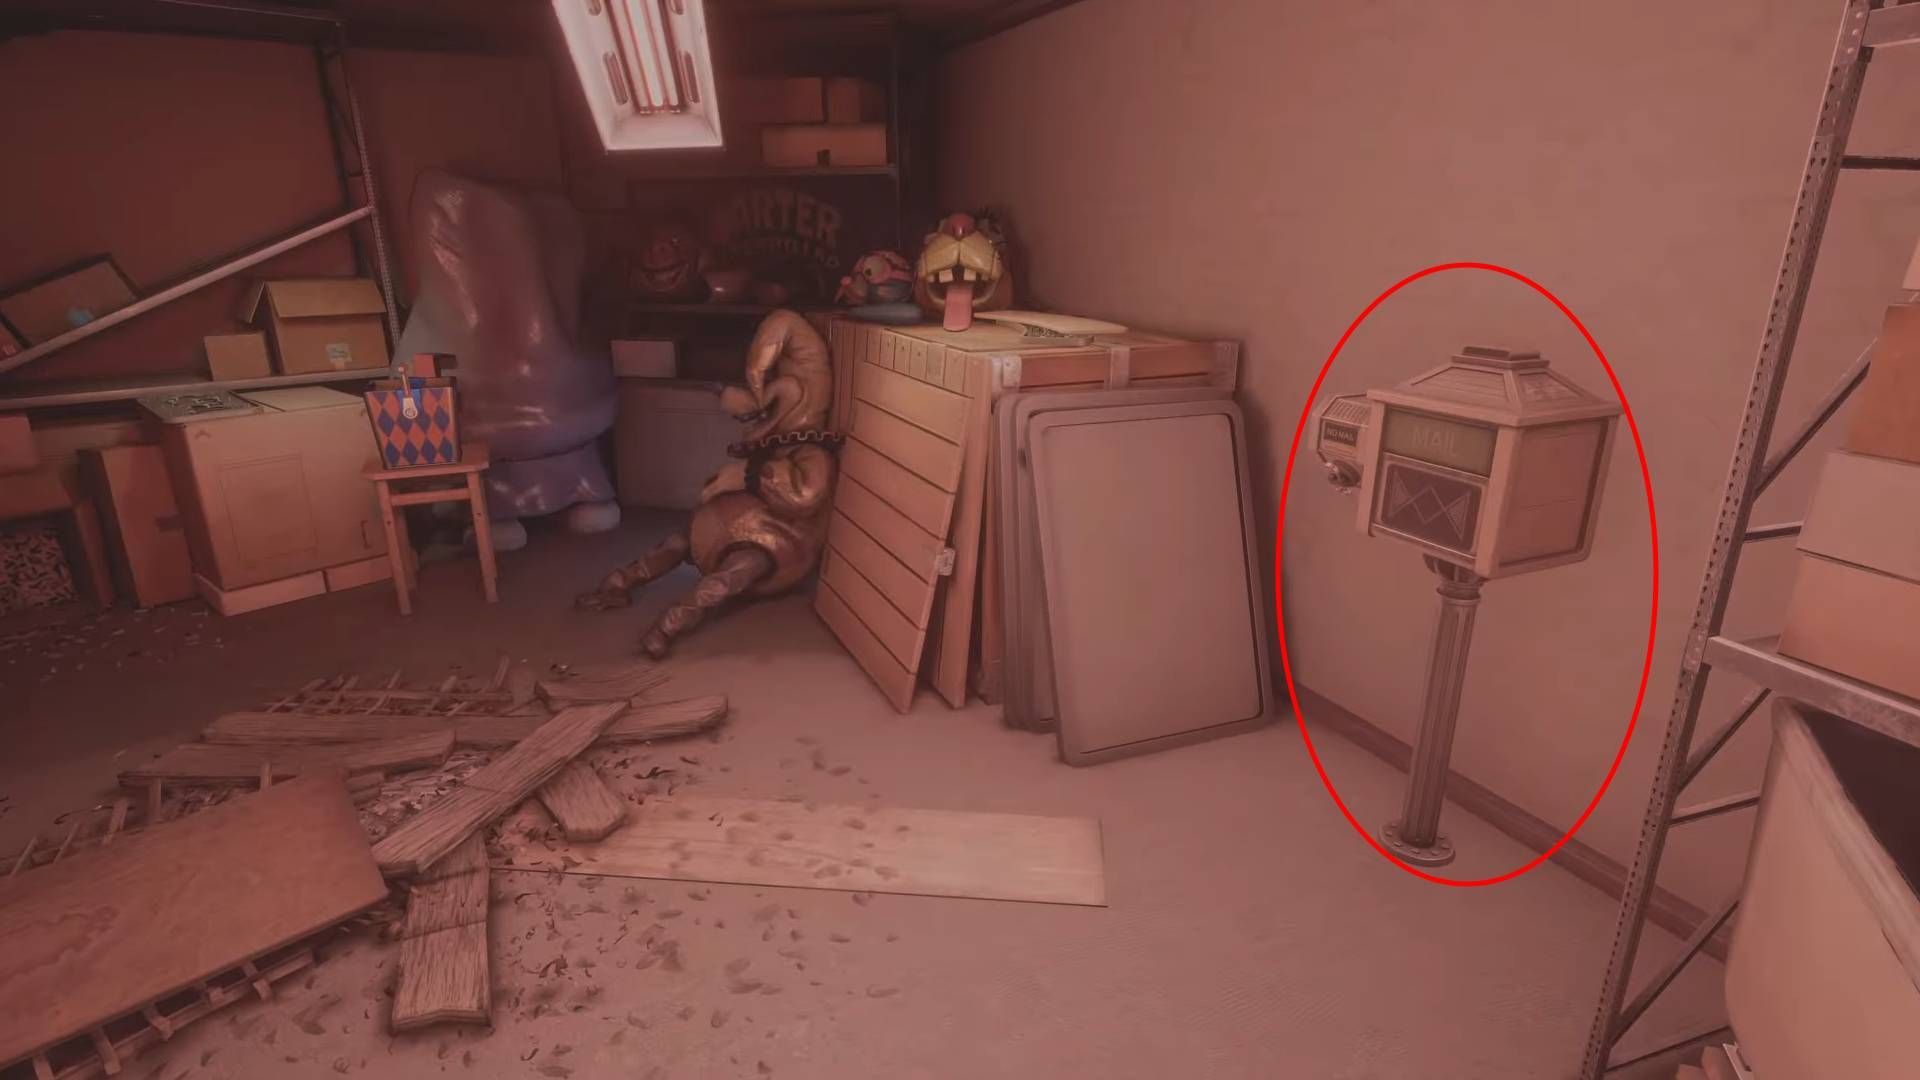
Slip past the Mimic and make your way towards the indicated crawlspace to gain access to an overhead vent. Upon reaching the upper level, proceed through the second door on your left to discover a compact room containing both the mailbox and a hidden collectible item.
Mailbox #7
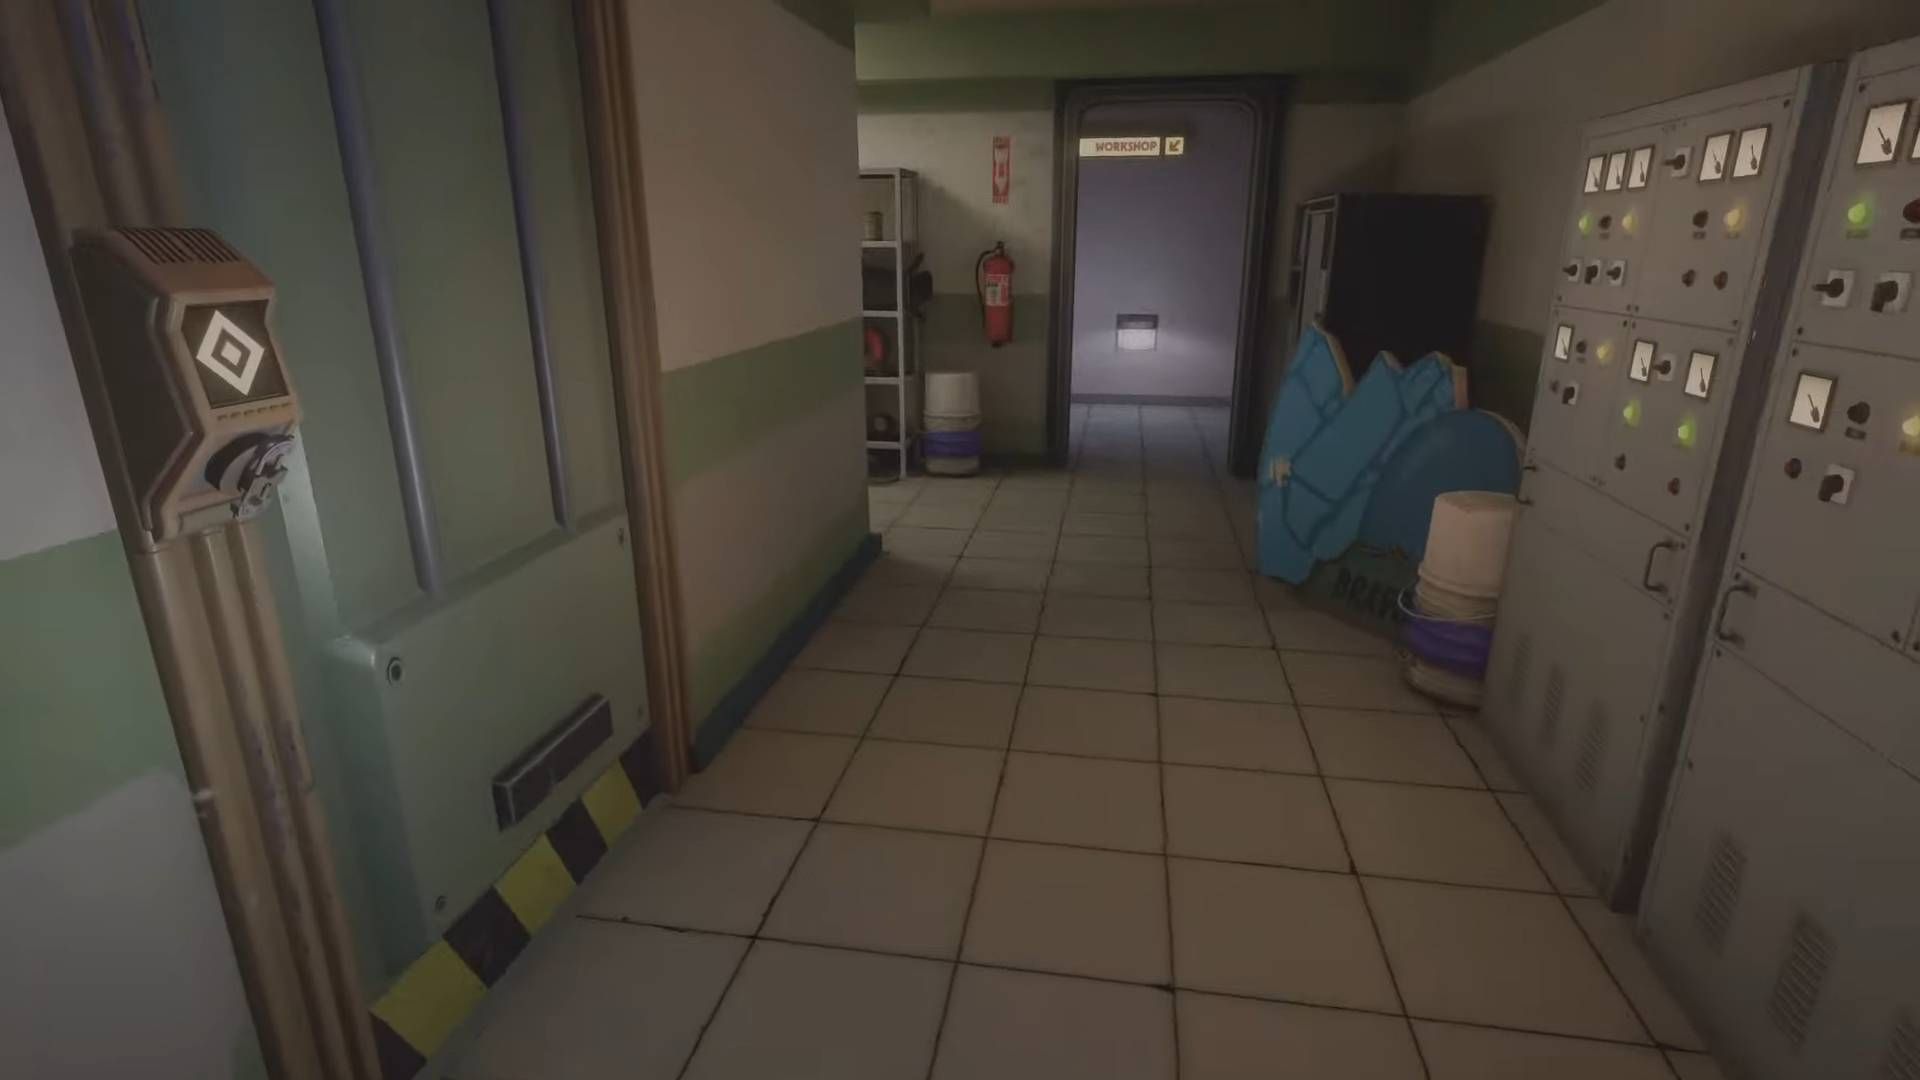
You’ll spot the mailbox right after you enter the workshop, near a gap in the corridor that leads to the Springlock Assembly Room.
Mailbox #8
This Mailbox can be found near the winch that lowers the Springlock Suit head, in the workshop.
Mailbox #9
This Mailbox can be found in the workshop, in the area the Springlock Suit head is lowered into.
Mailbox #10
You’ll find this Mailbox in the area of the workshop that has the Springlock Suit’s Cannon Arm. Just follow the arm, and once you reach it, look towards where you were previously standing.
Mailbox #11
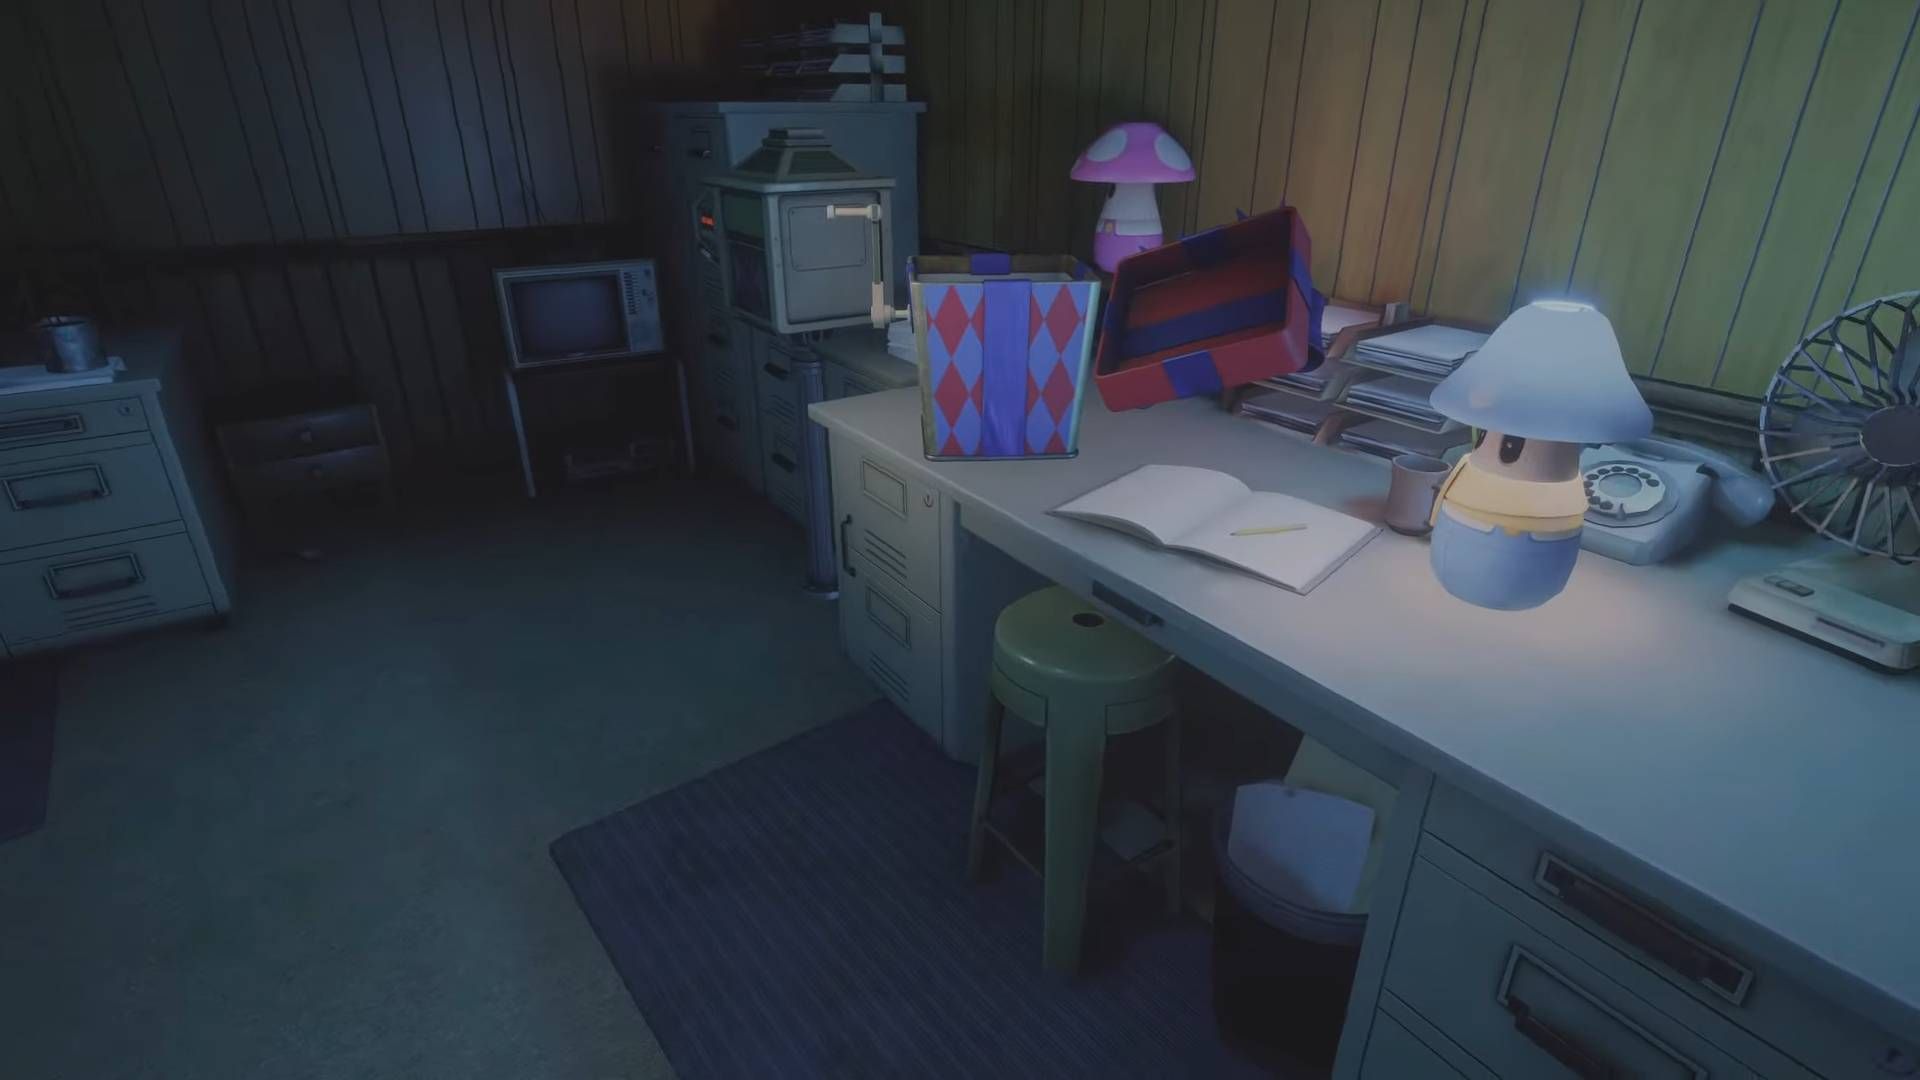
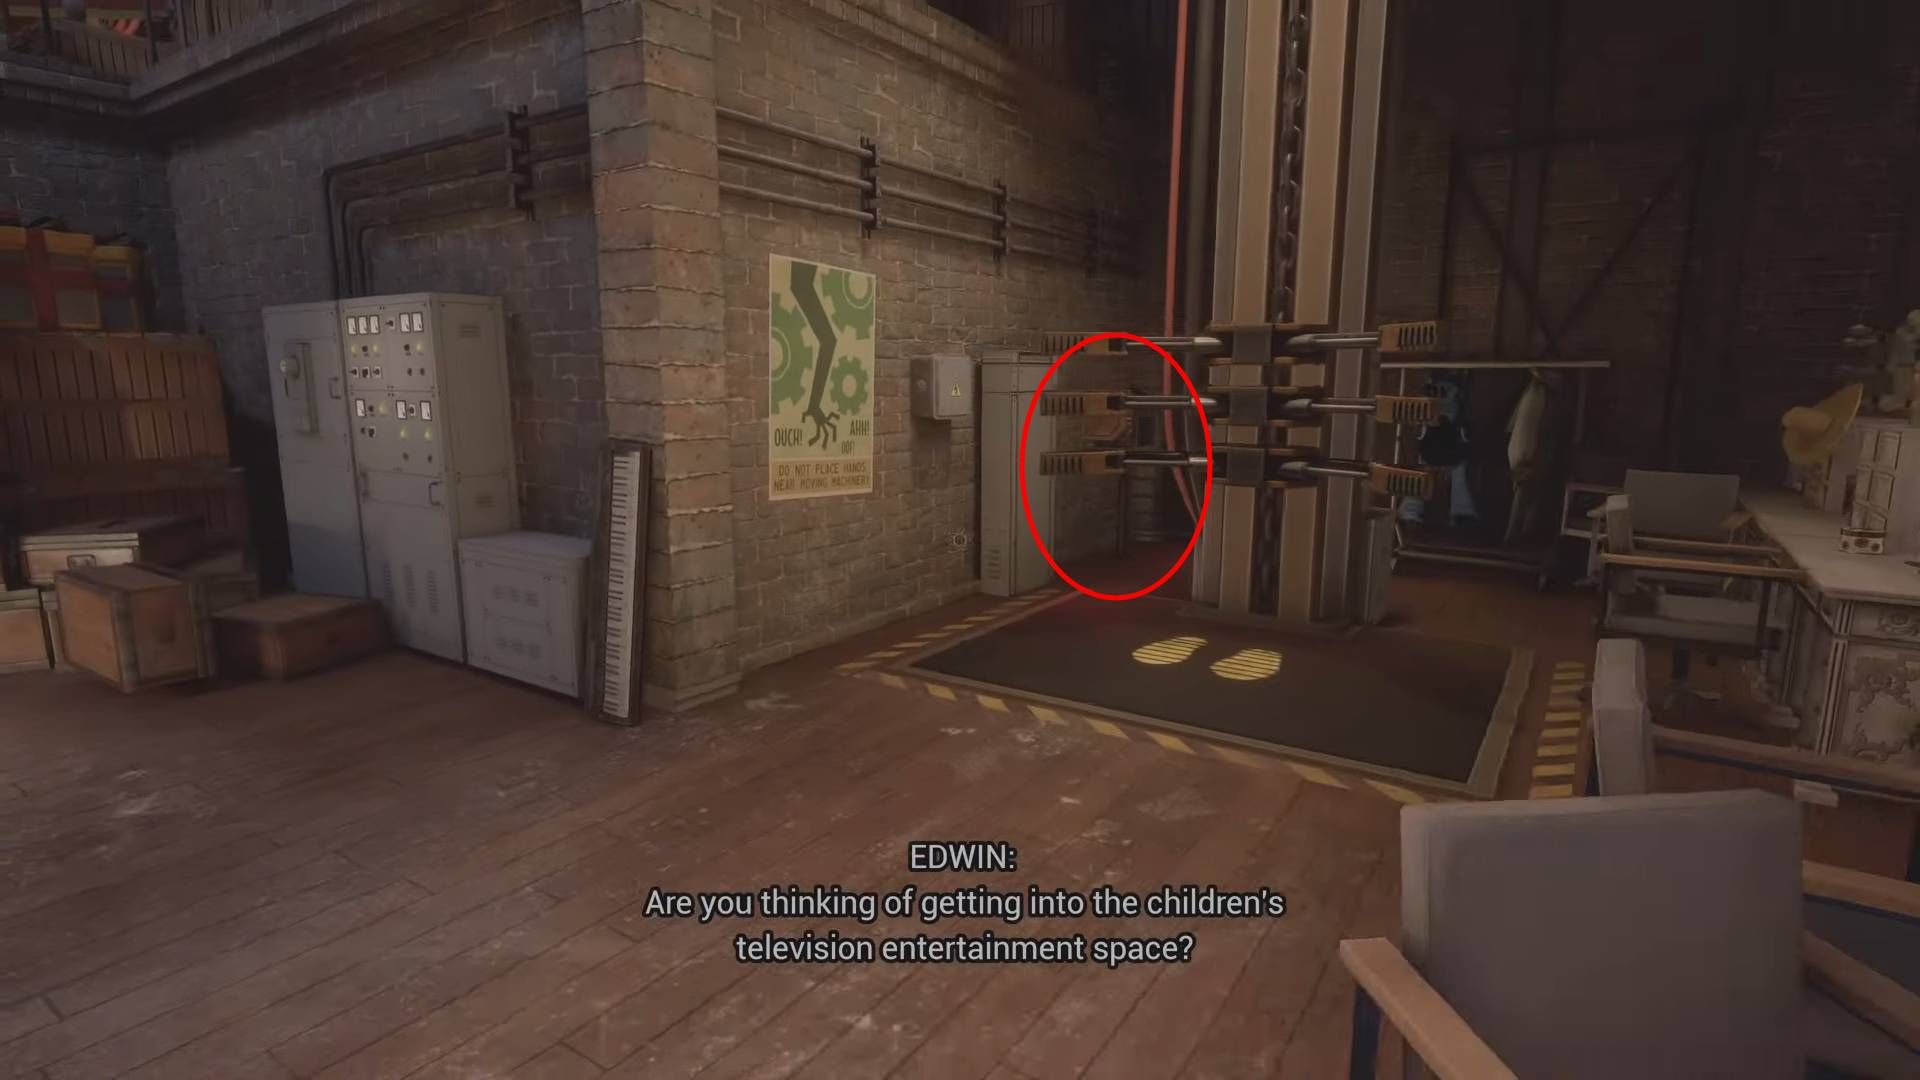
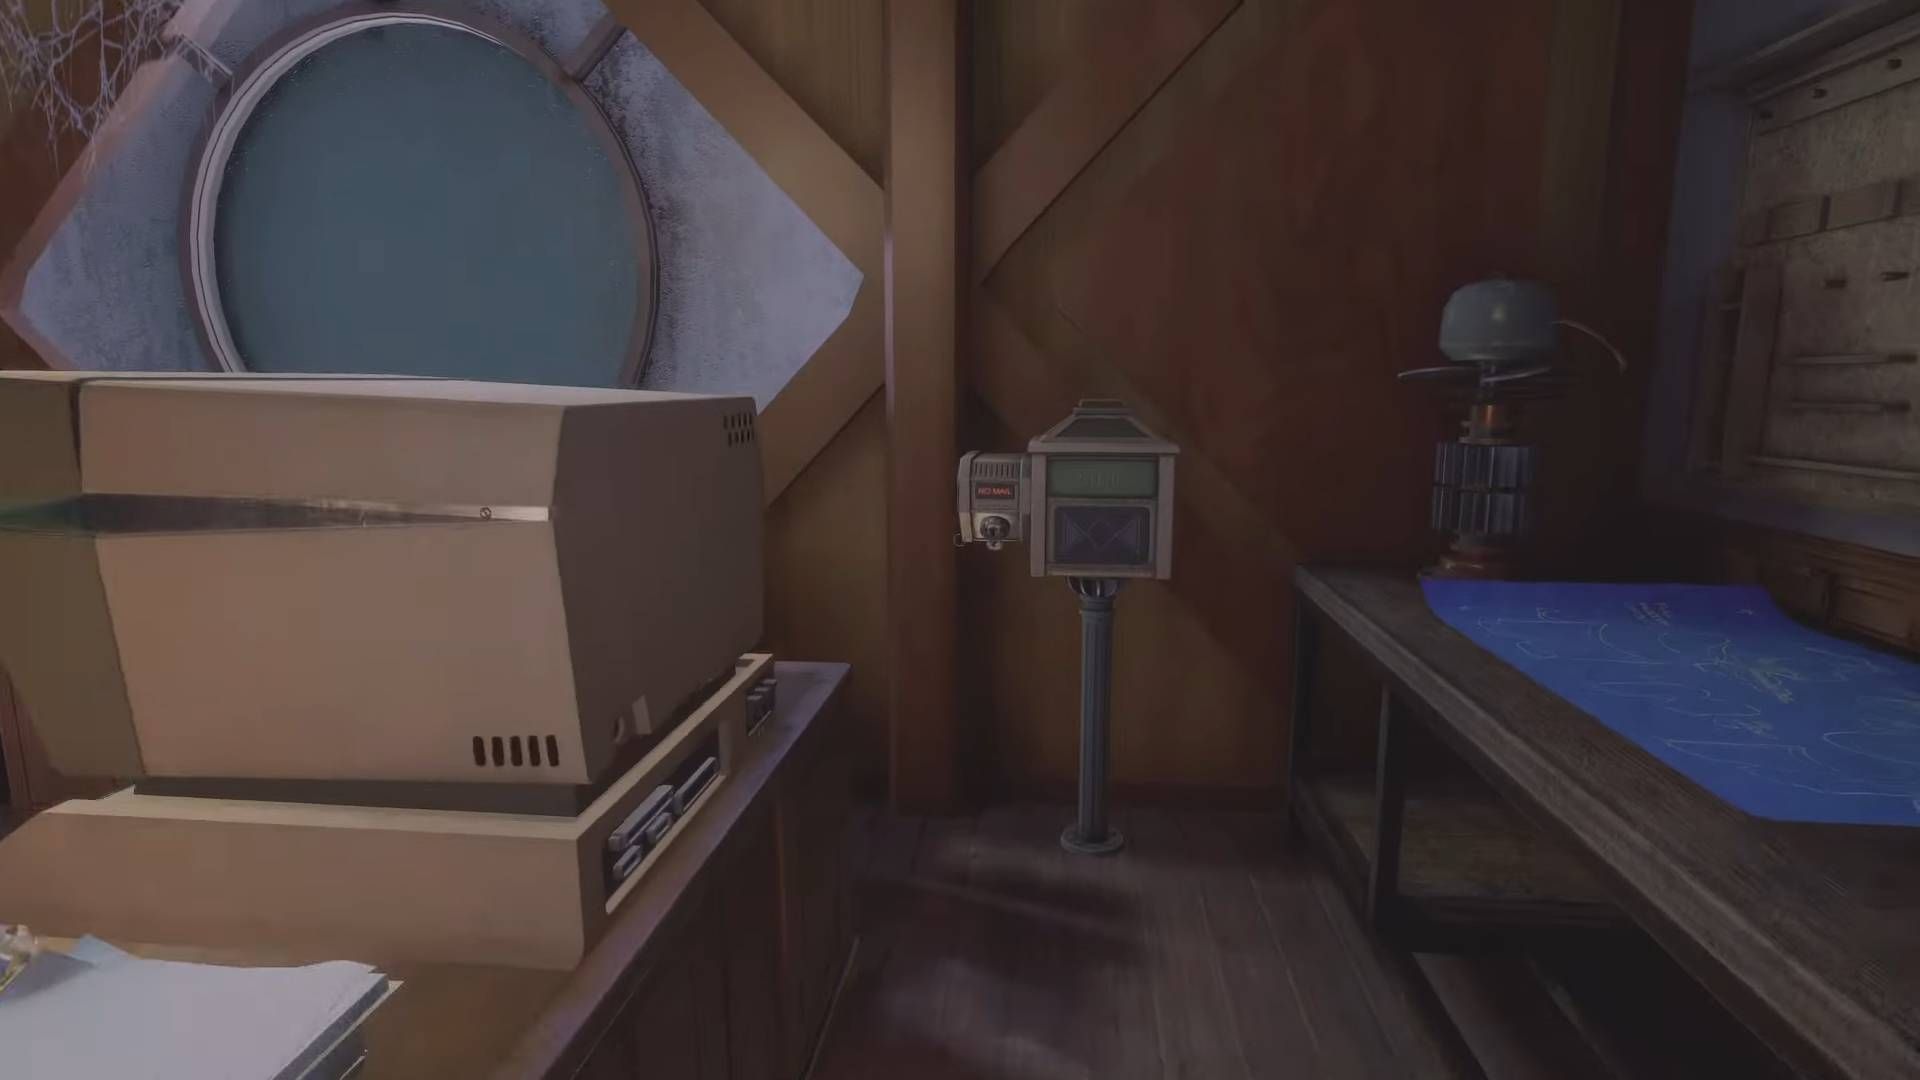
Upon reaching the TV Studio, you will discover a mailbox tucked away in the compact room that also houses the terminal, inventory system, and audio log.
Mailbox #12
You’ll discover the final mailbox tucked away in the TV Studio, following your exit from the Springlock suit and traversing the vent tunnel. Here, you’ll find an elevator that only operates with the Springlock Suit. The mailbox is located behind this elevator.
All Mailboxes available before earning the Achievement: Doctor’s Orders (Mailboxes 13-16, All Missable!)
In the Doll Hospital Area, these items are accessible but may be permanently overlooked if not gathered during your initial visit. Keep in mind that failing to auto-save before death will cause you to forfeit any mailboxes collected since your last auto-save, requiring you to retrieve them again later.
Mailbox #13
As you pass through the Creator’s Door to evade Dolly, upon reaching the primary area of the Doll Factory, you will notice a mailbox on your left side, resting beside a generator. This generator could prove useful in diverting Dolly’s attention.
Mailbox #14
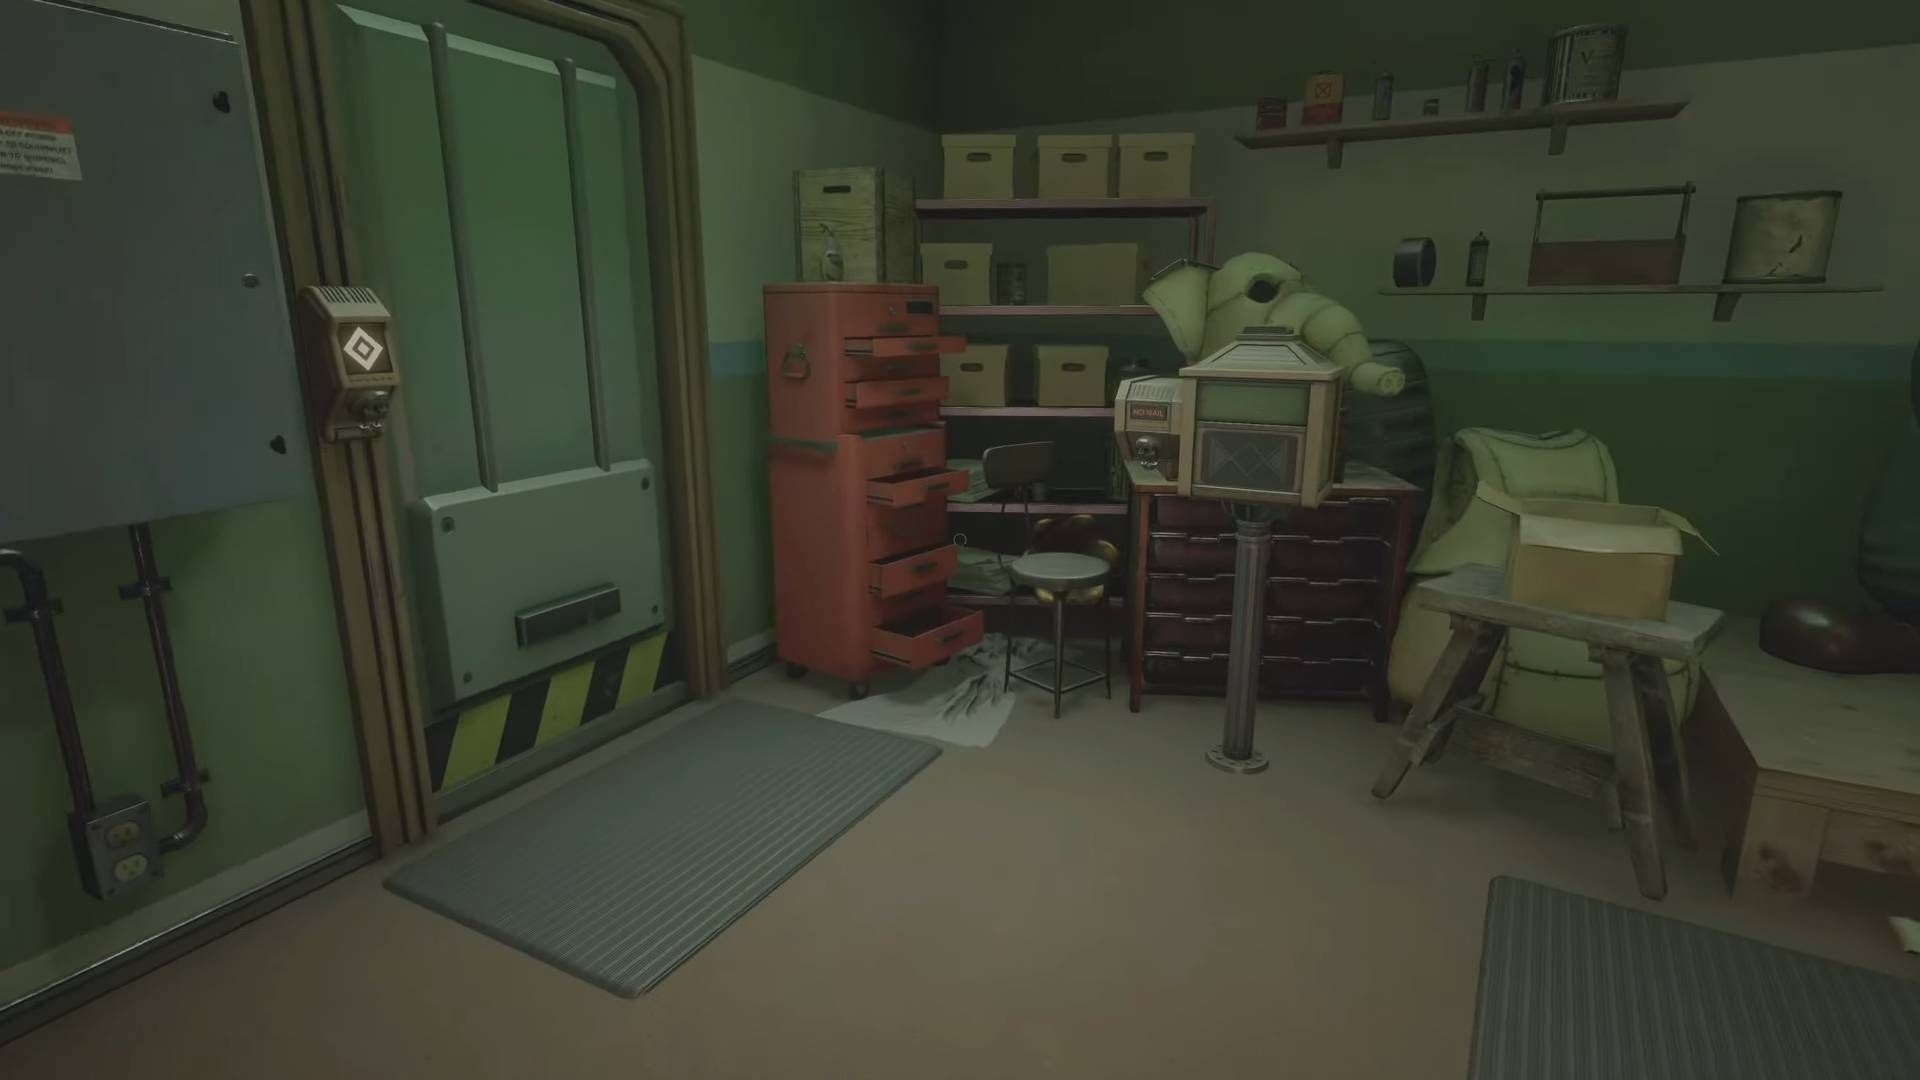
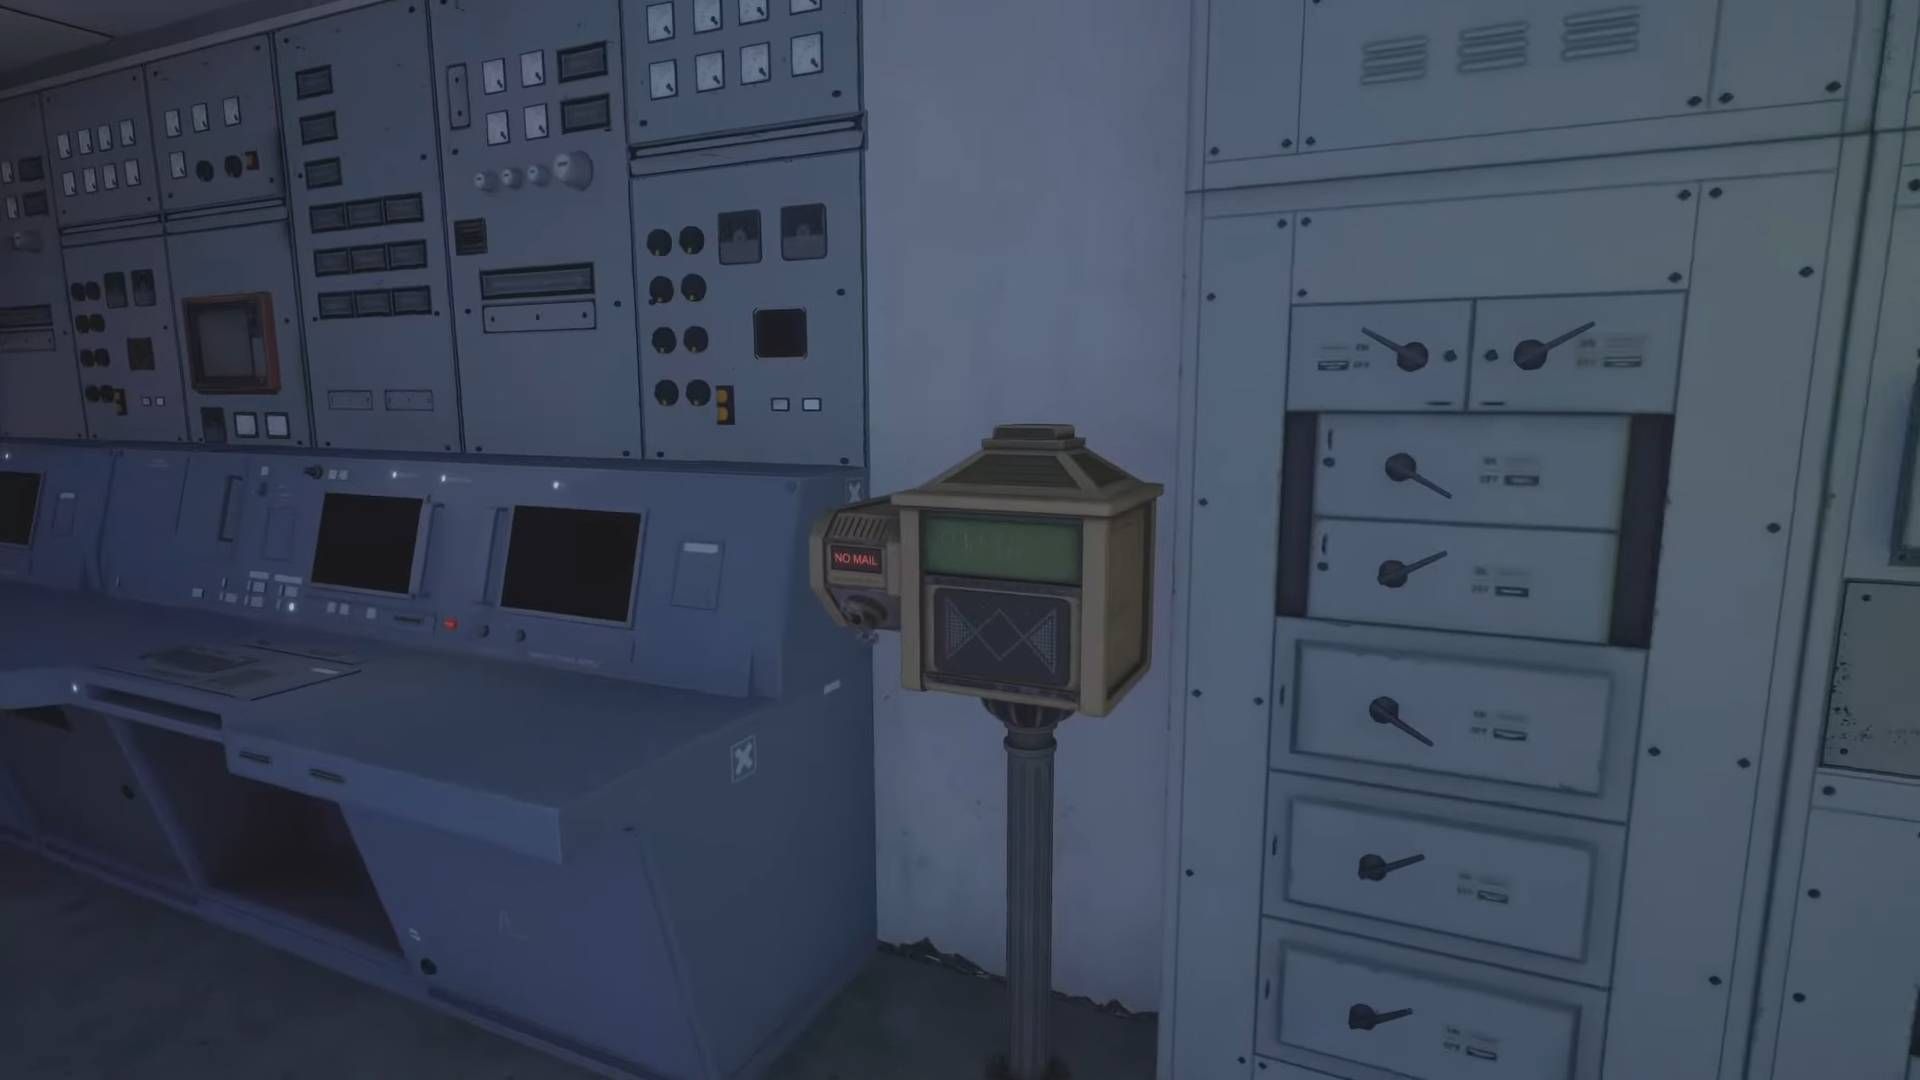
Upon navigating to the Incinerator Room via the ventilation system, you’ll spot the Mailbox situated on your right side, close to a computer terminal.
Mailbox #15
Upon returning to the Doll Hospital from the Burning Room, proceed straight, pass by the rubbish shoot, and glance towards your right to spot this mailbox close to a door that is accessible solely by Dolly.
Mailbox #16
This Mailbox is found in the same room as the Admin Permissions Upgrade Terminal.
All Mailboxes Available Before Earning the Achievement: Fundophobia (Mailboxes 17-35)
The mailboxes you can access before completing an encounter with a specific monster located in the facility’s basement are primarily located in the Warehouse, Admin Block, and the basement area themselves.
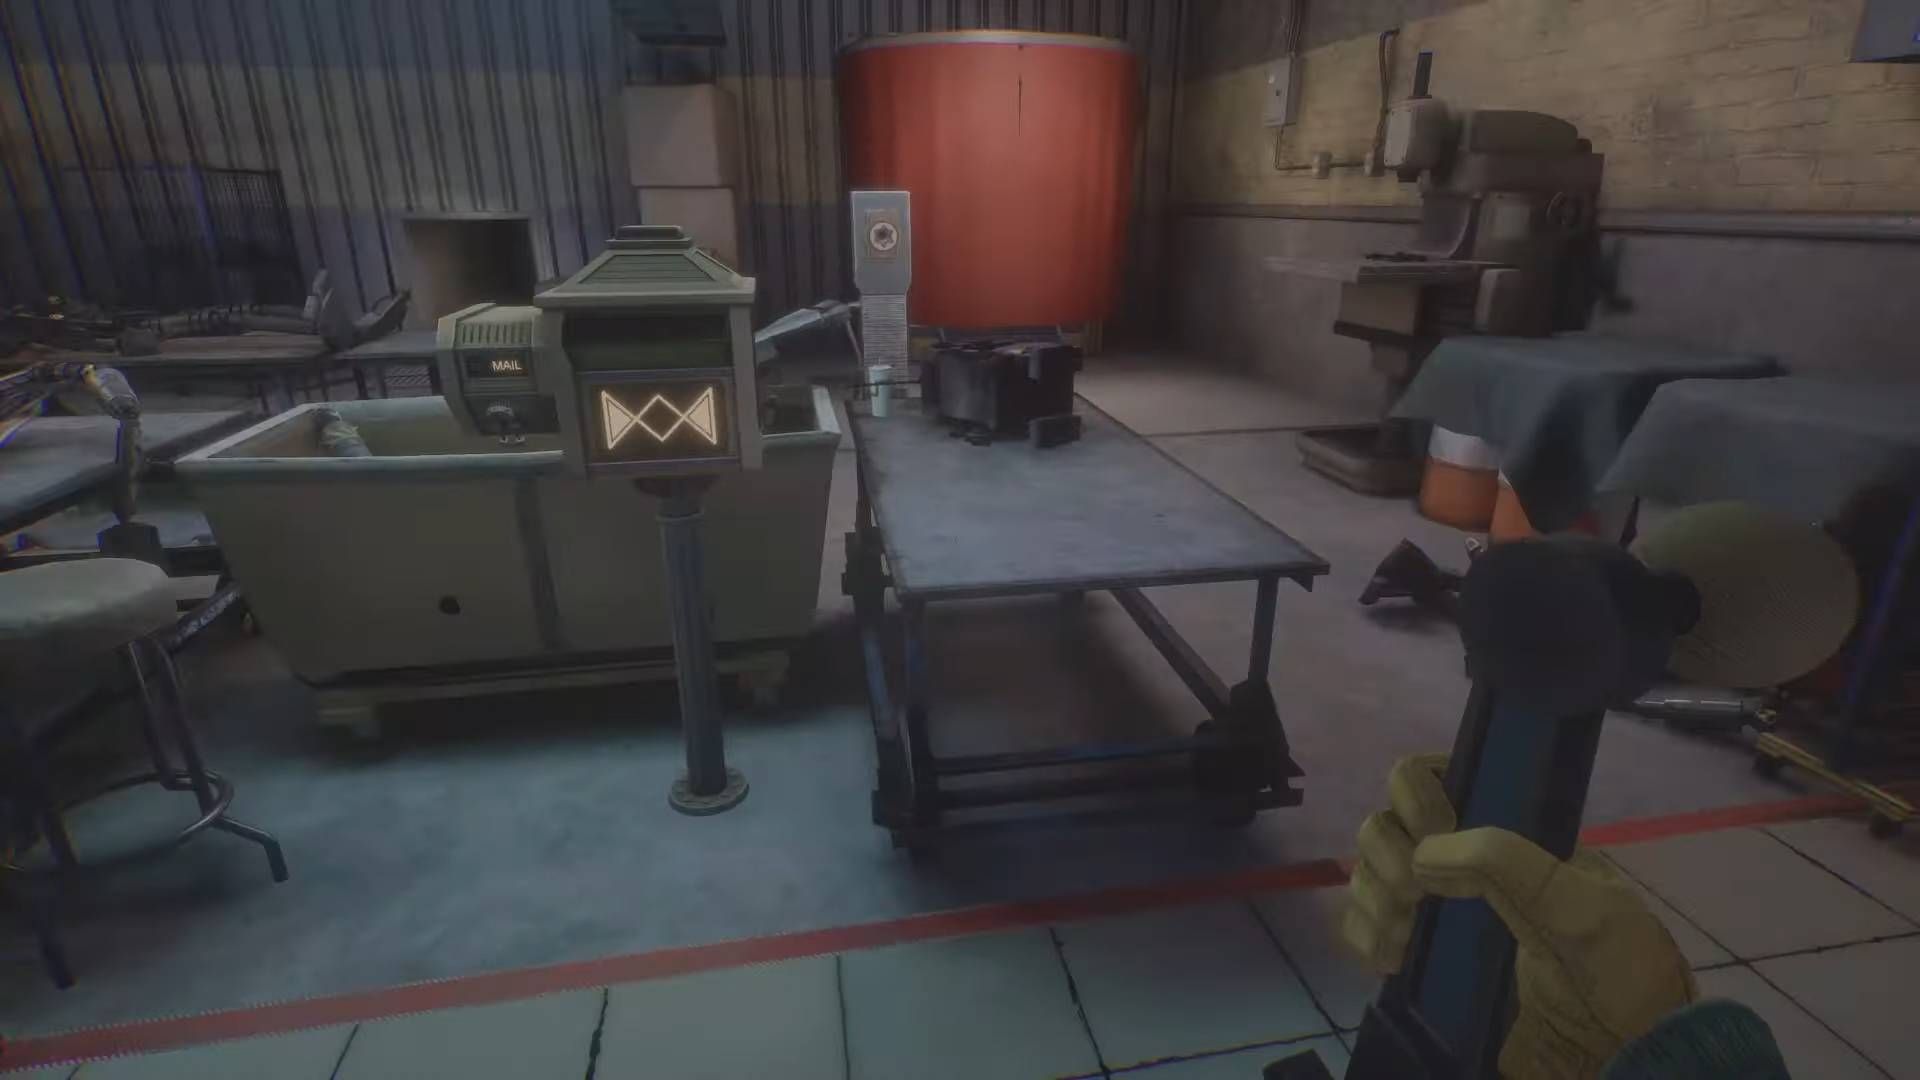
Mailbox #17
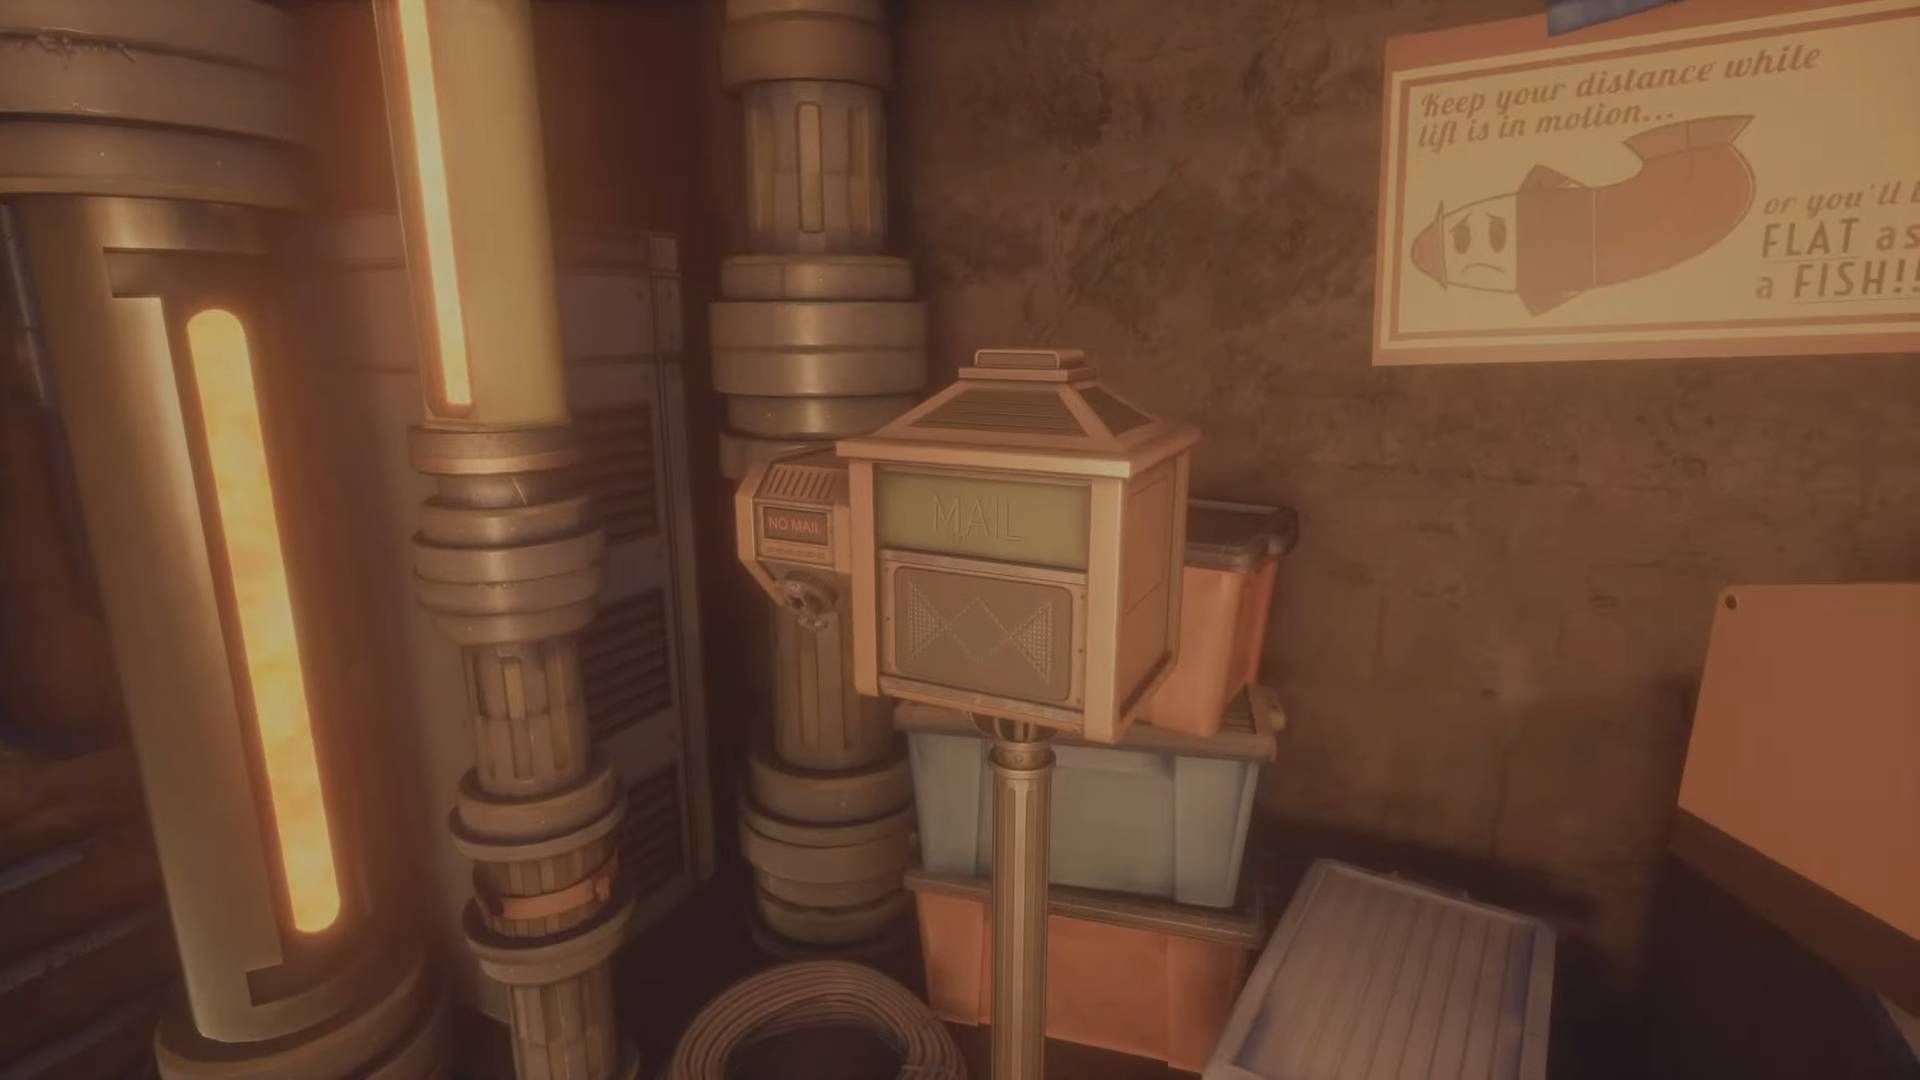
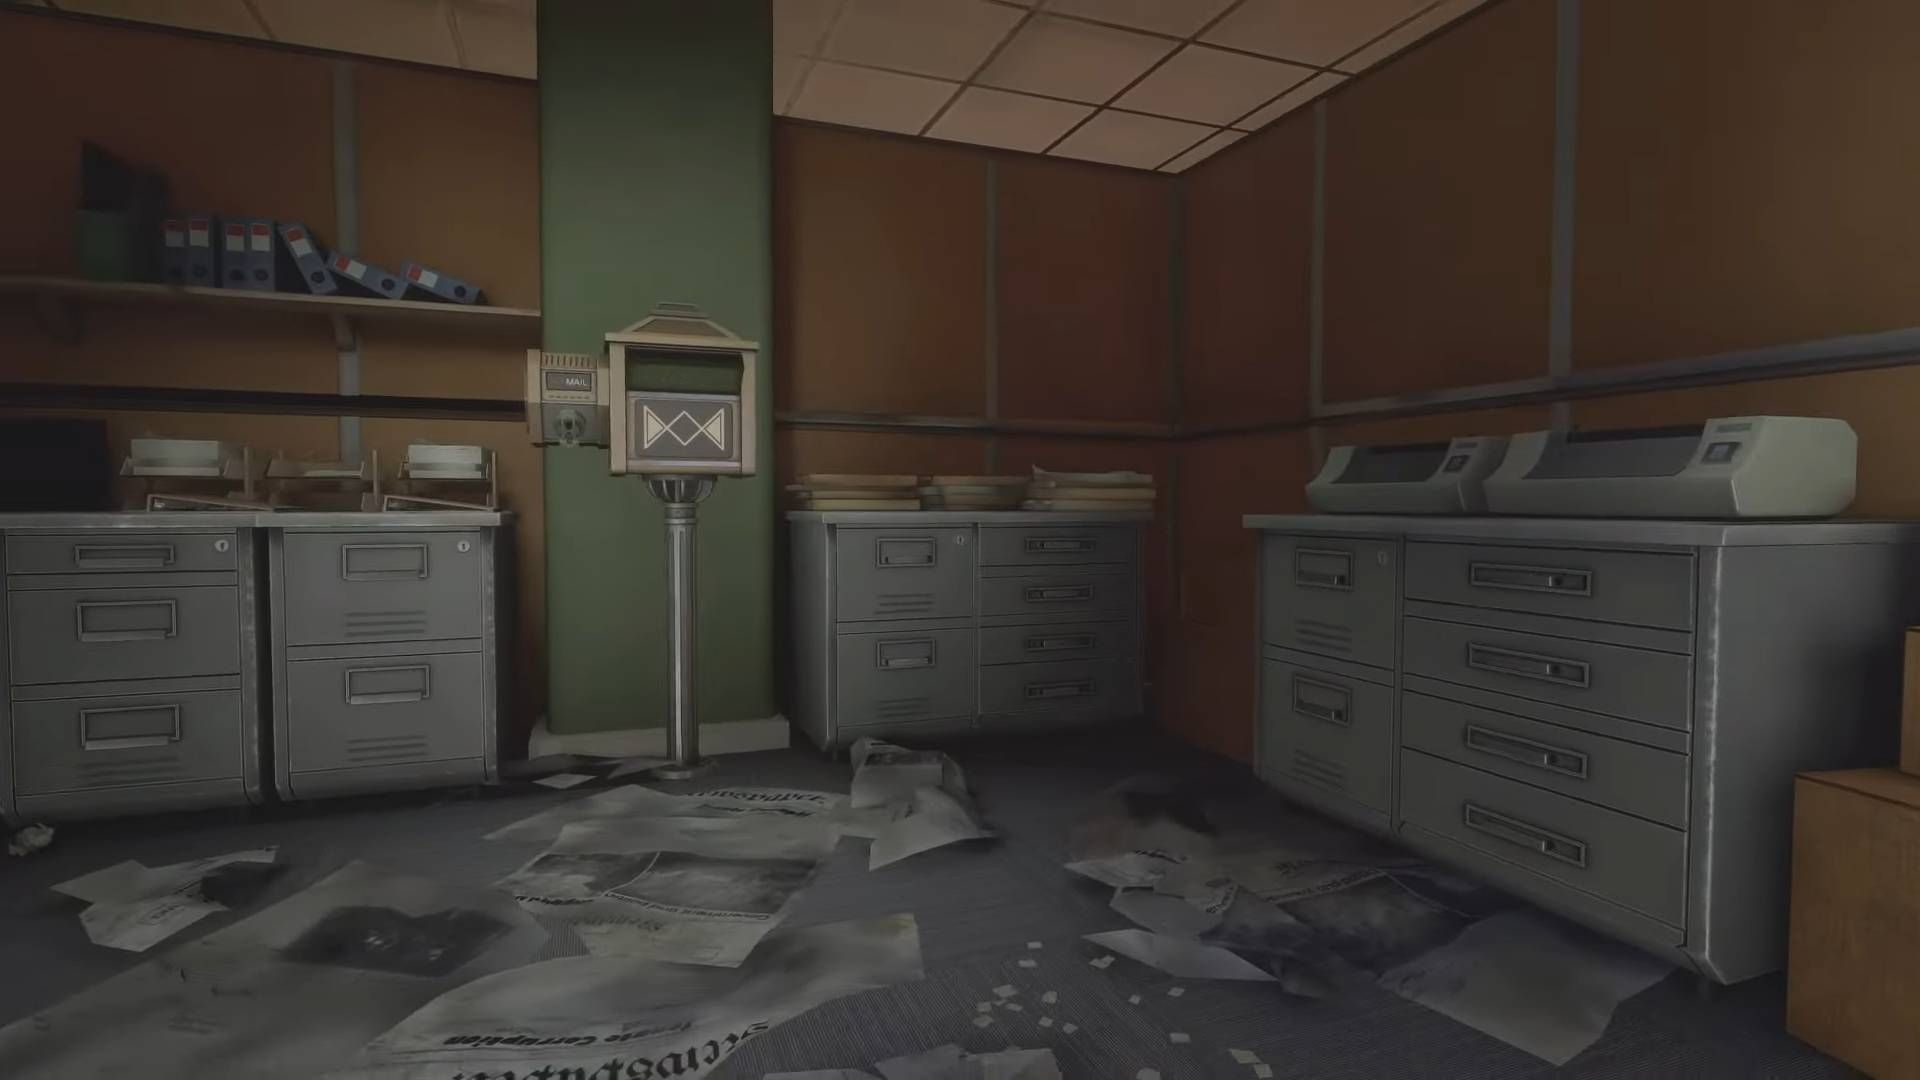
You’ll find this mailbox in the central corridor, next to an elevator and across from its entrance. Beyond that door lies the Mail Room, but you’ll need administrative permissions to gain access as it was locked earlier.
Mailbox #18
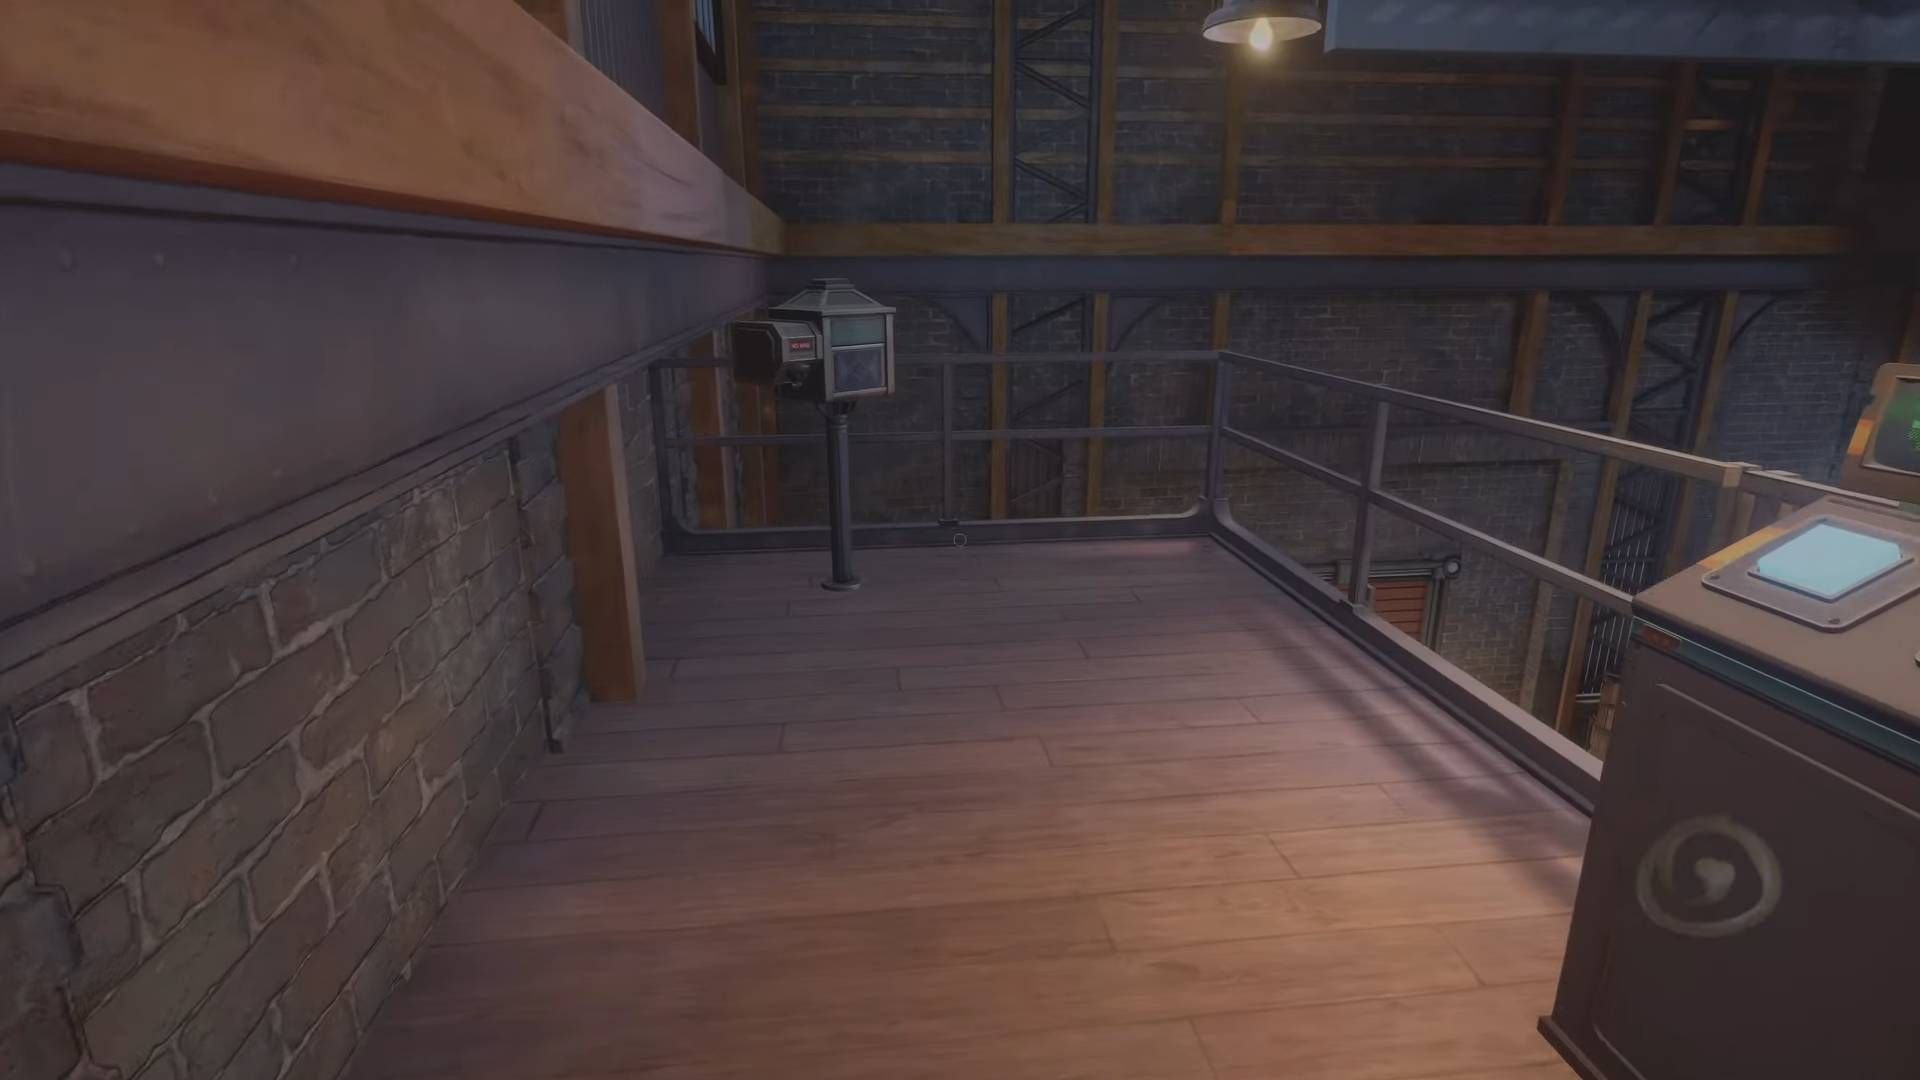
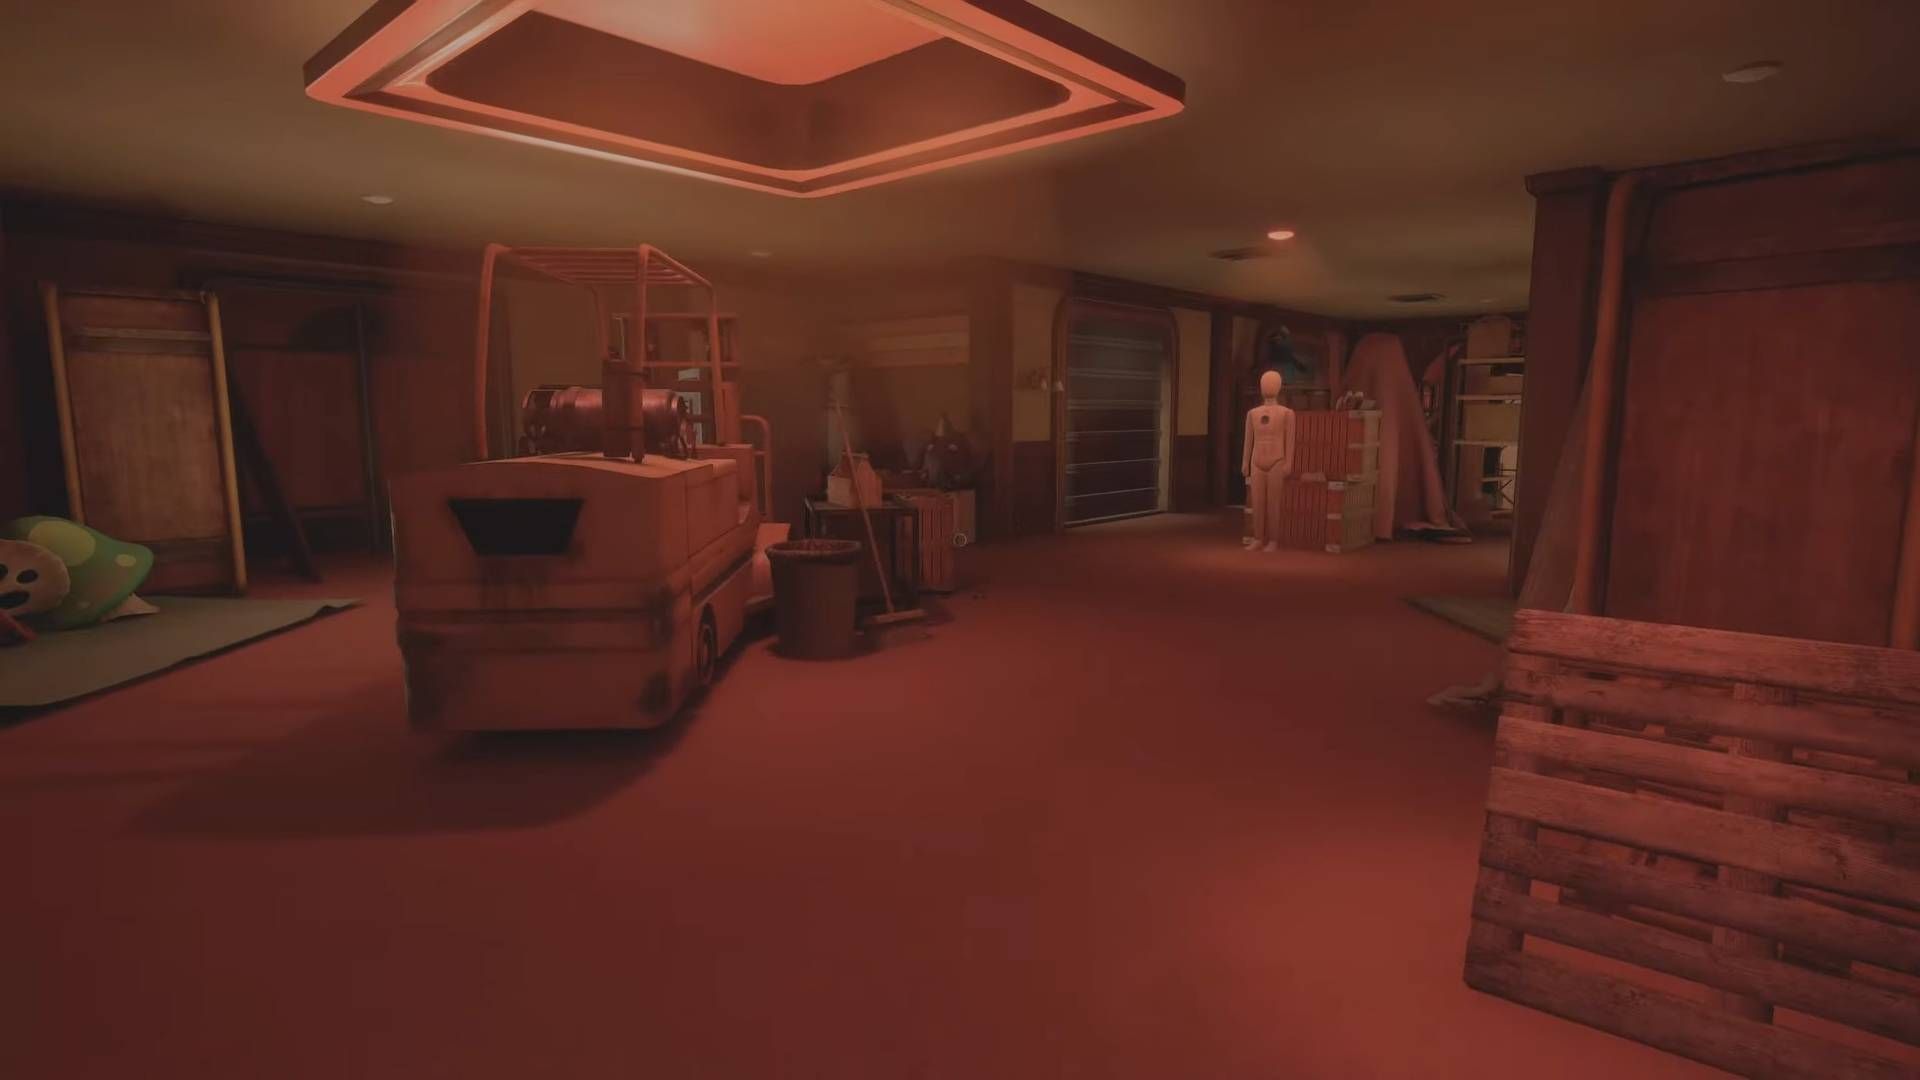
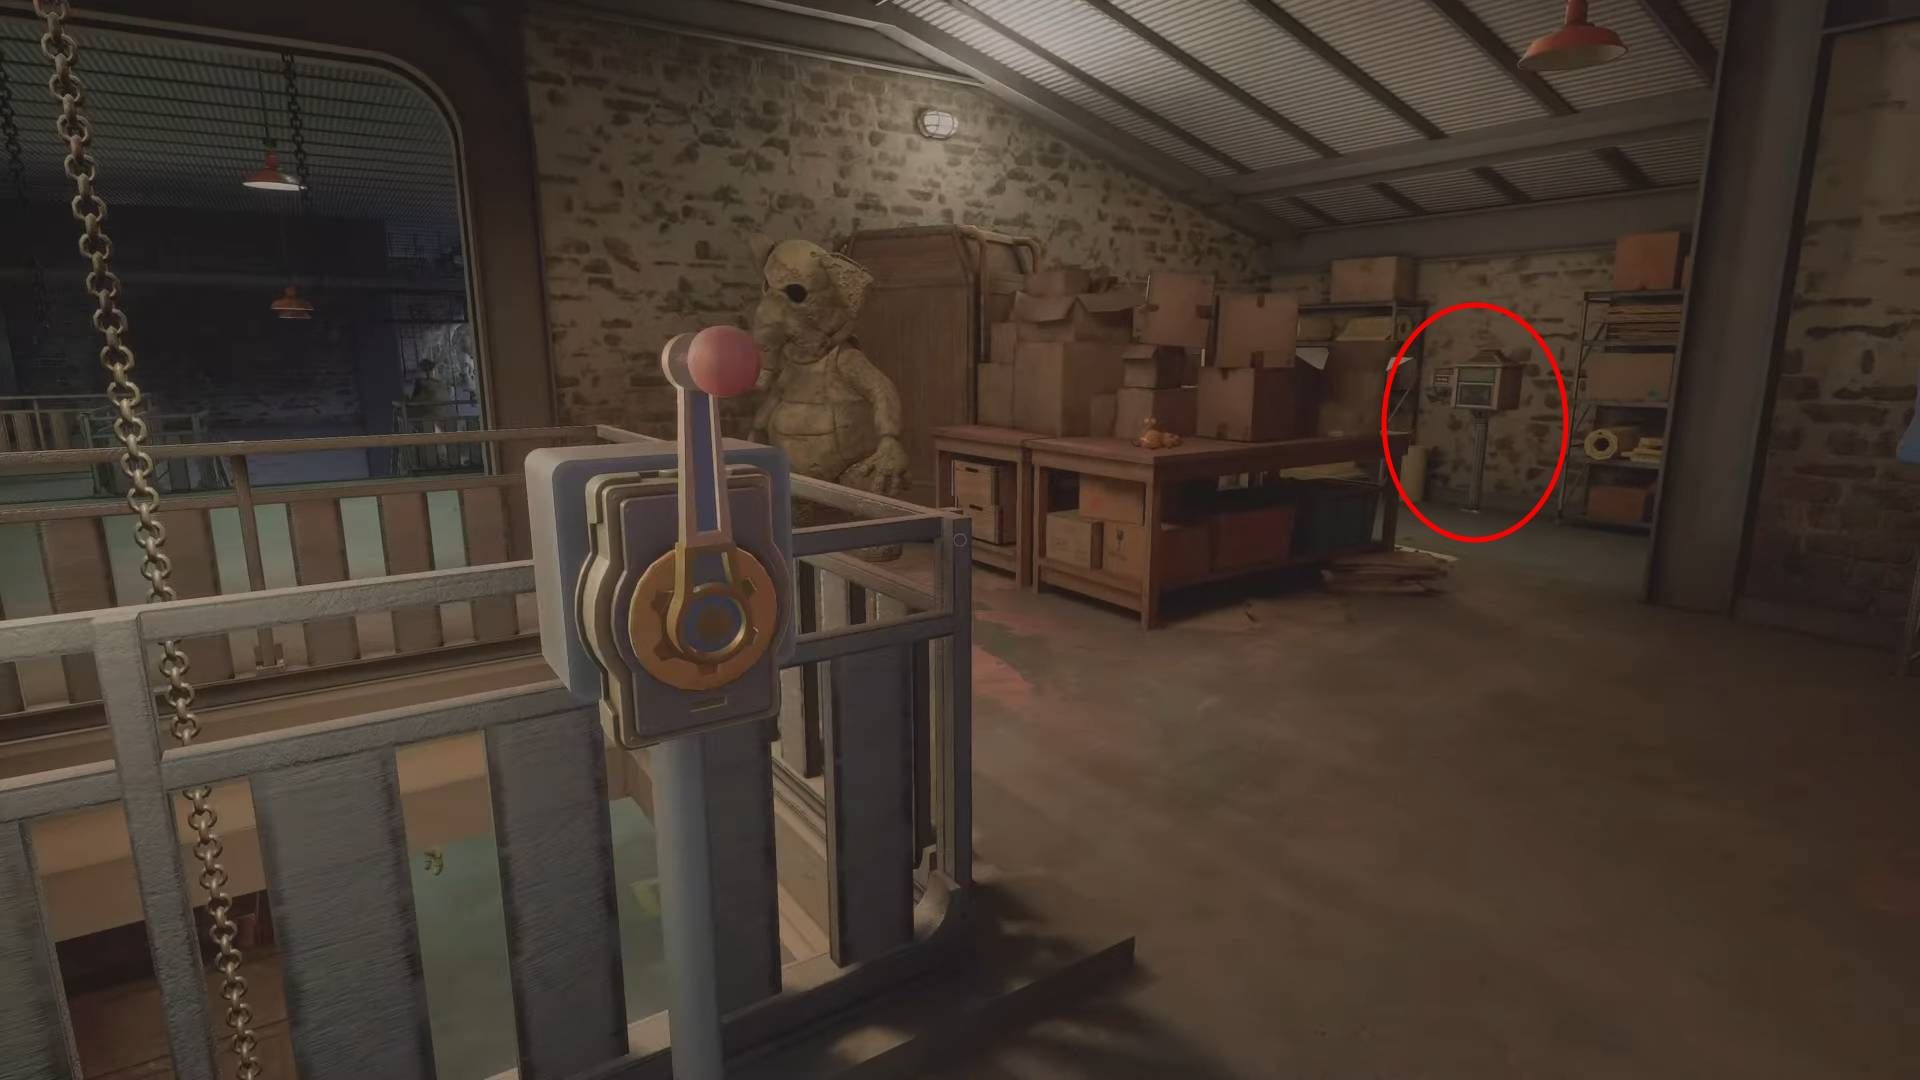
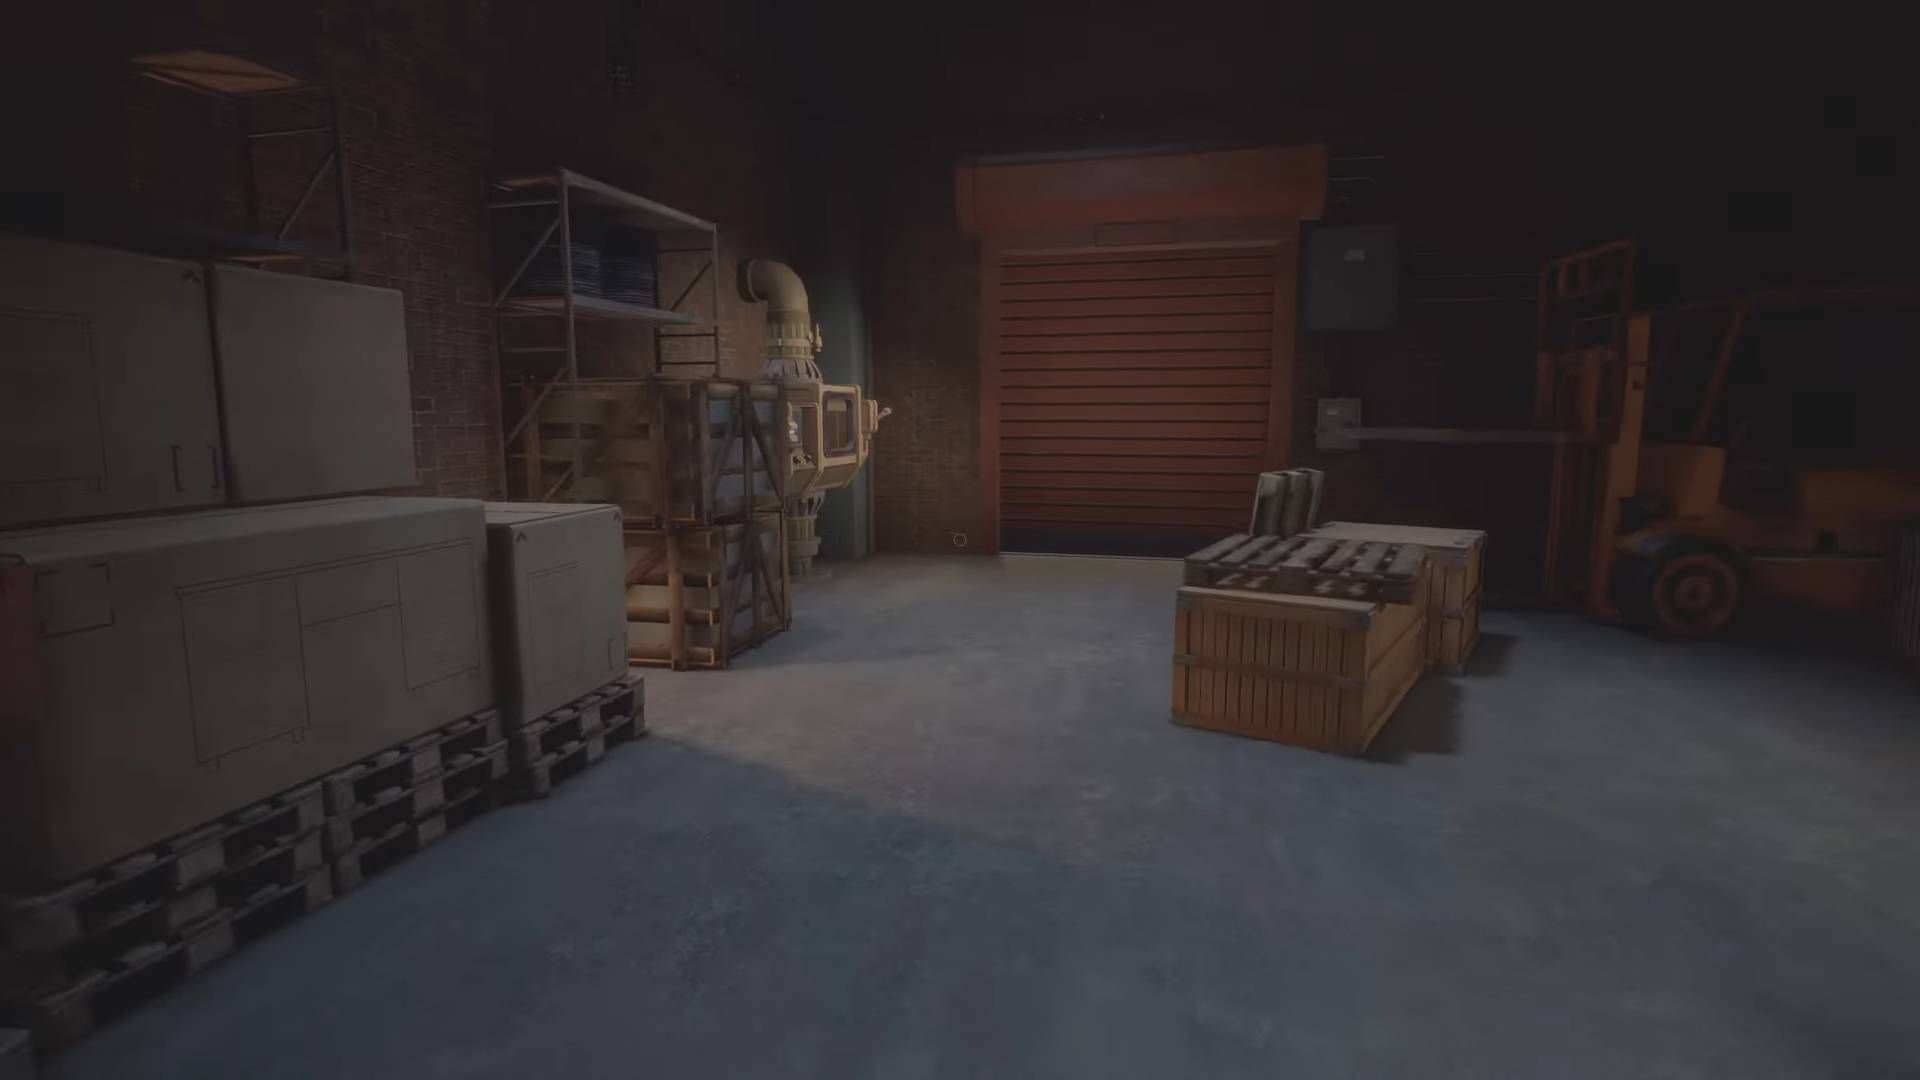
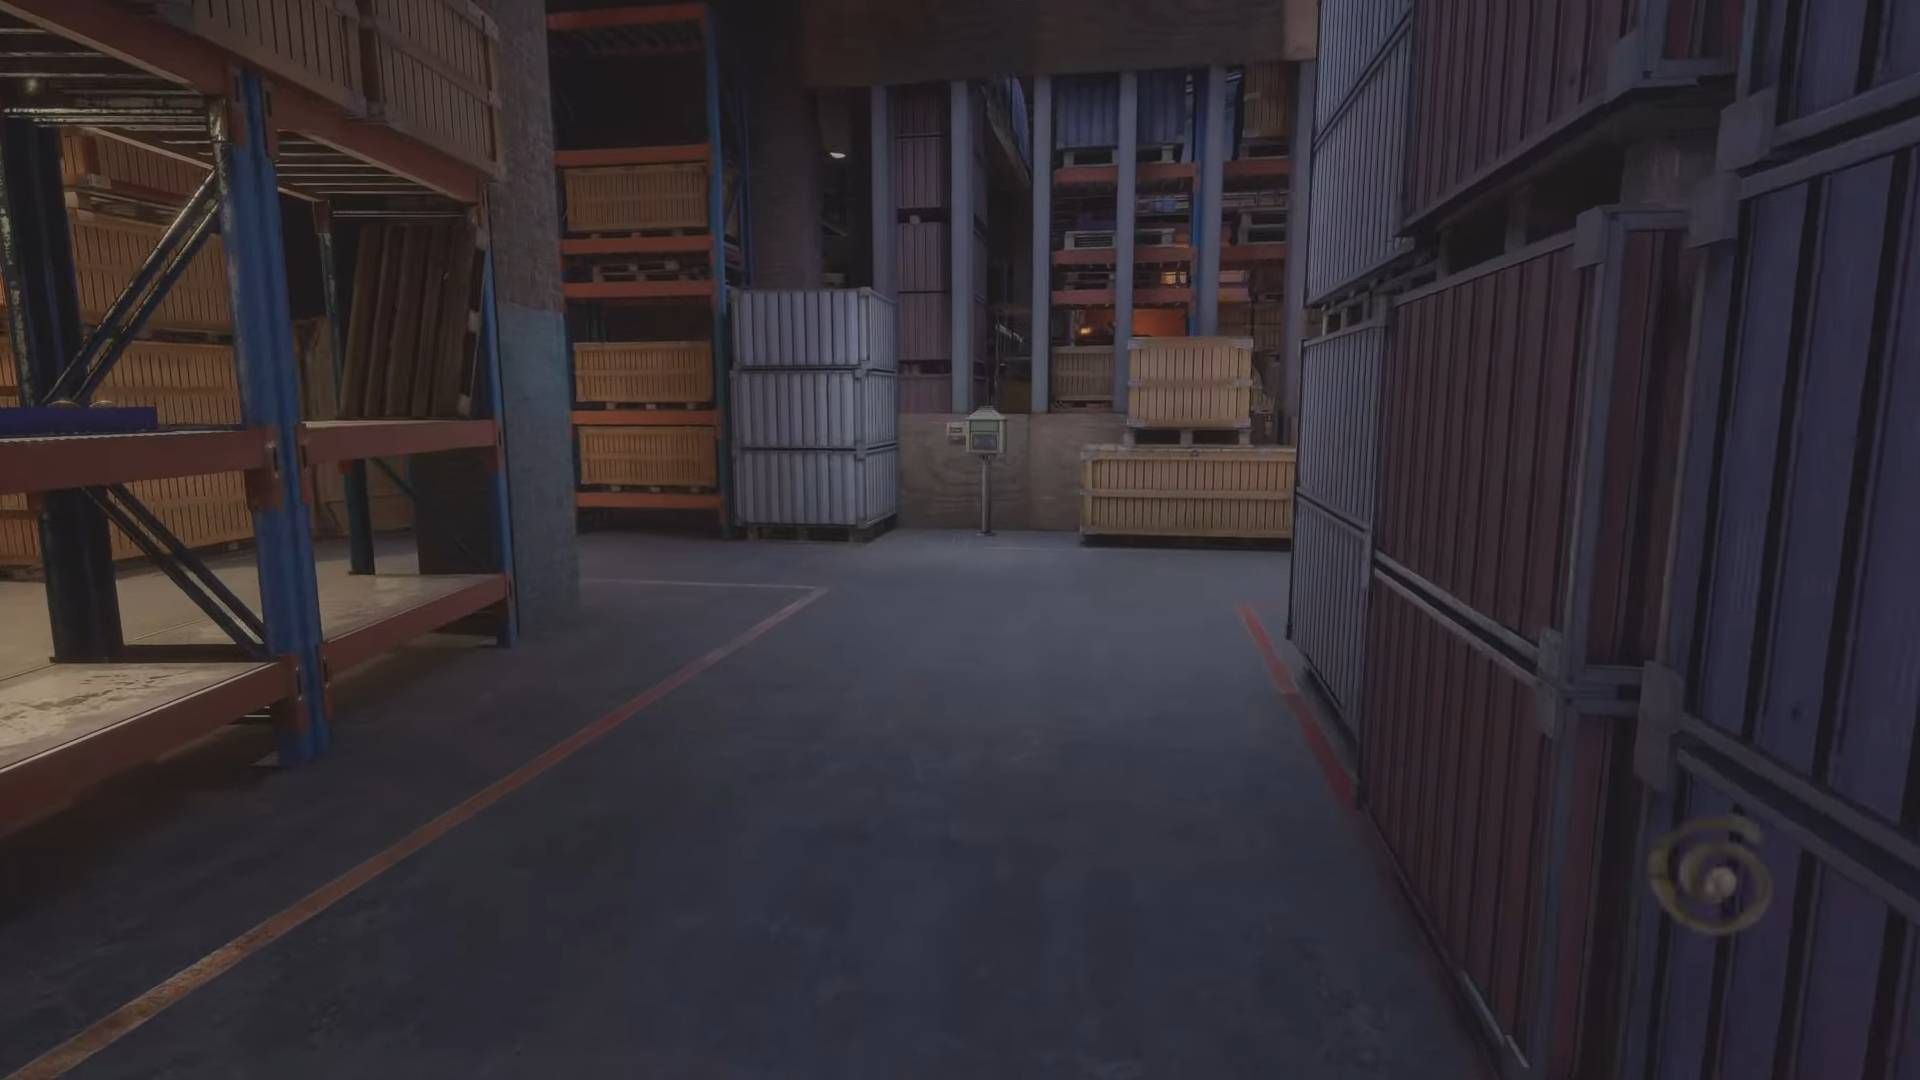
In the Loading Dock area, following your successful power restoration and avoiding Chica, you will discover it. This item is situated on the elevated platform where the cargo crane control system resides.
Or more casually:
After restoring power while dodging Chica in the Loading Dock, head over to that raised part with the cargo crane controls – that’s where you’ll find what you’re looking for!
Mailbox #19
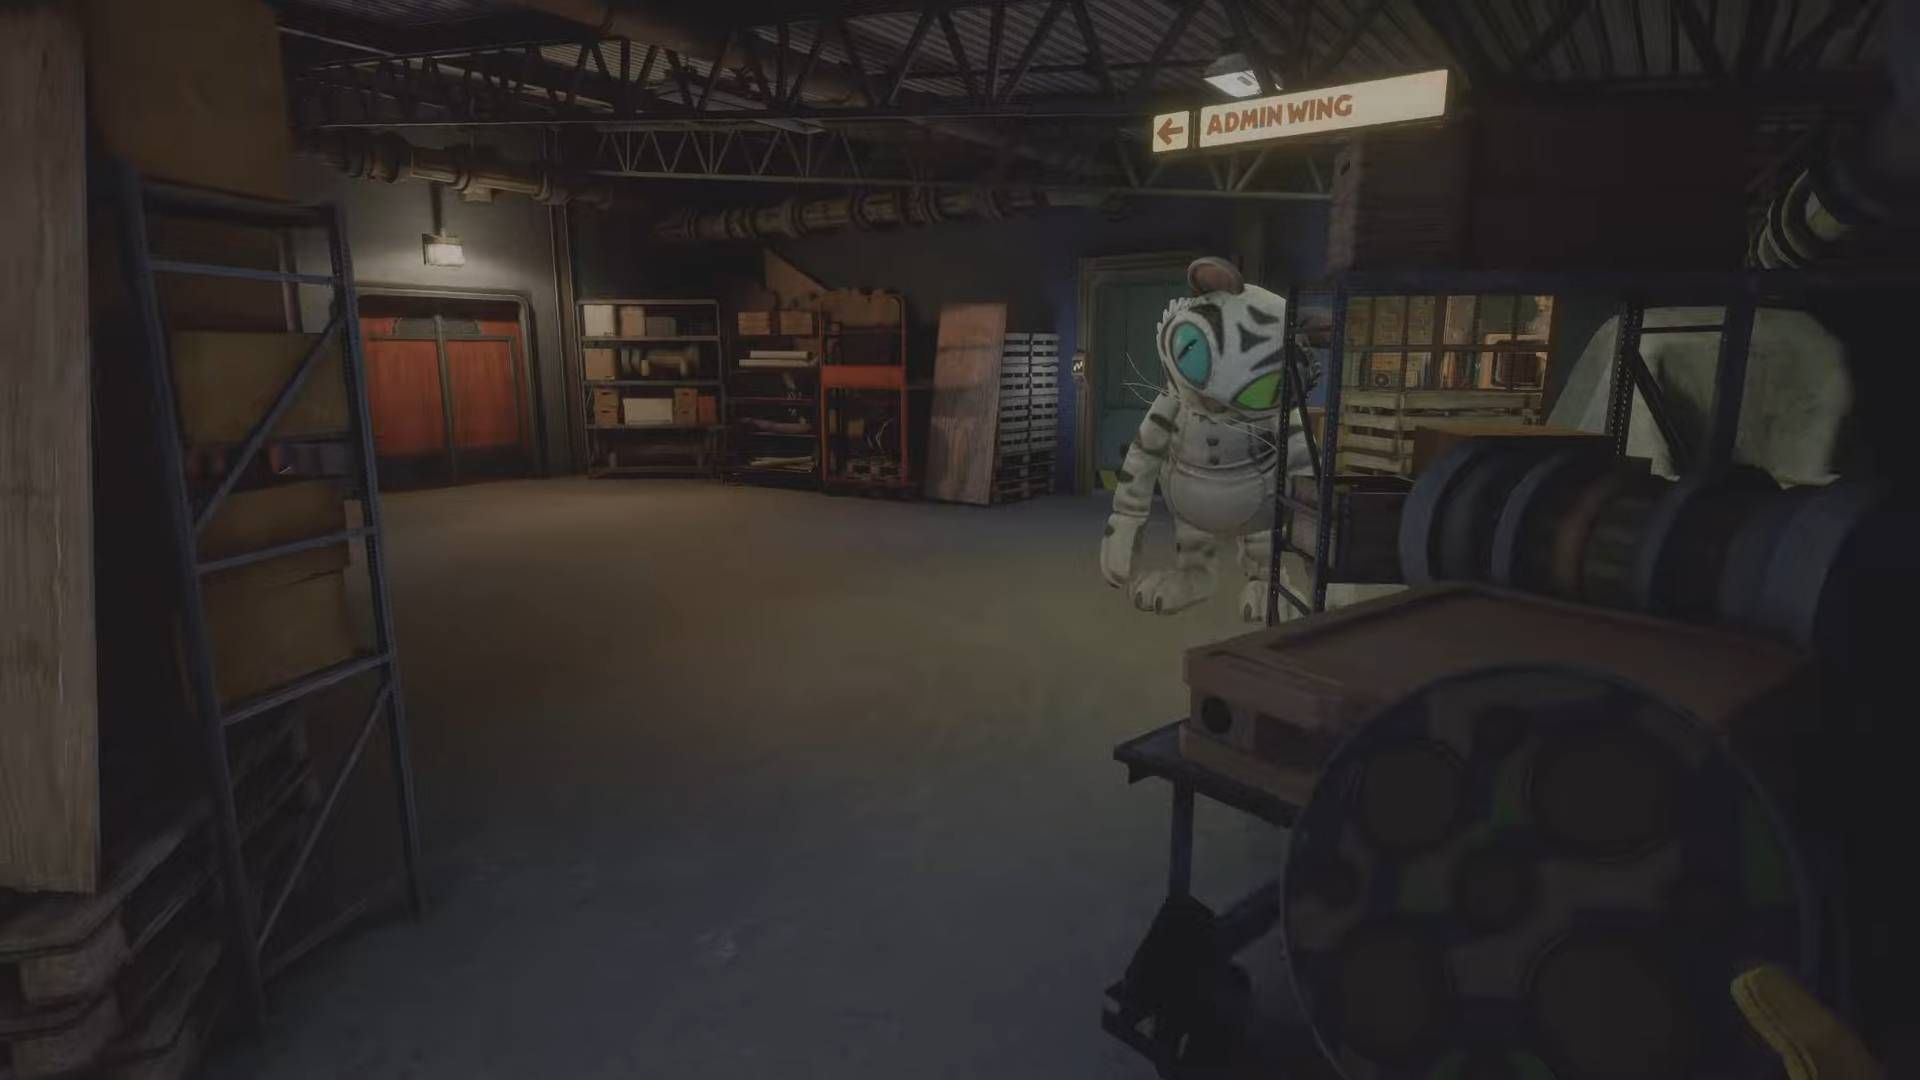
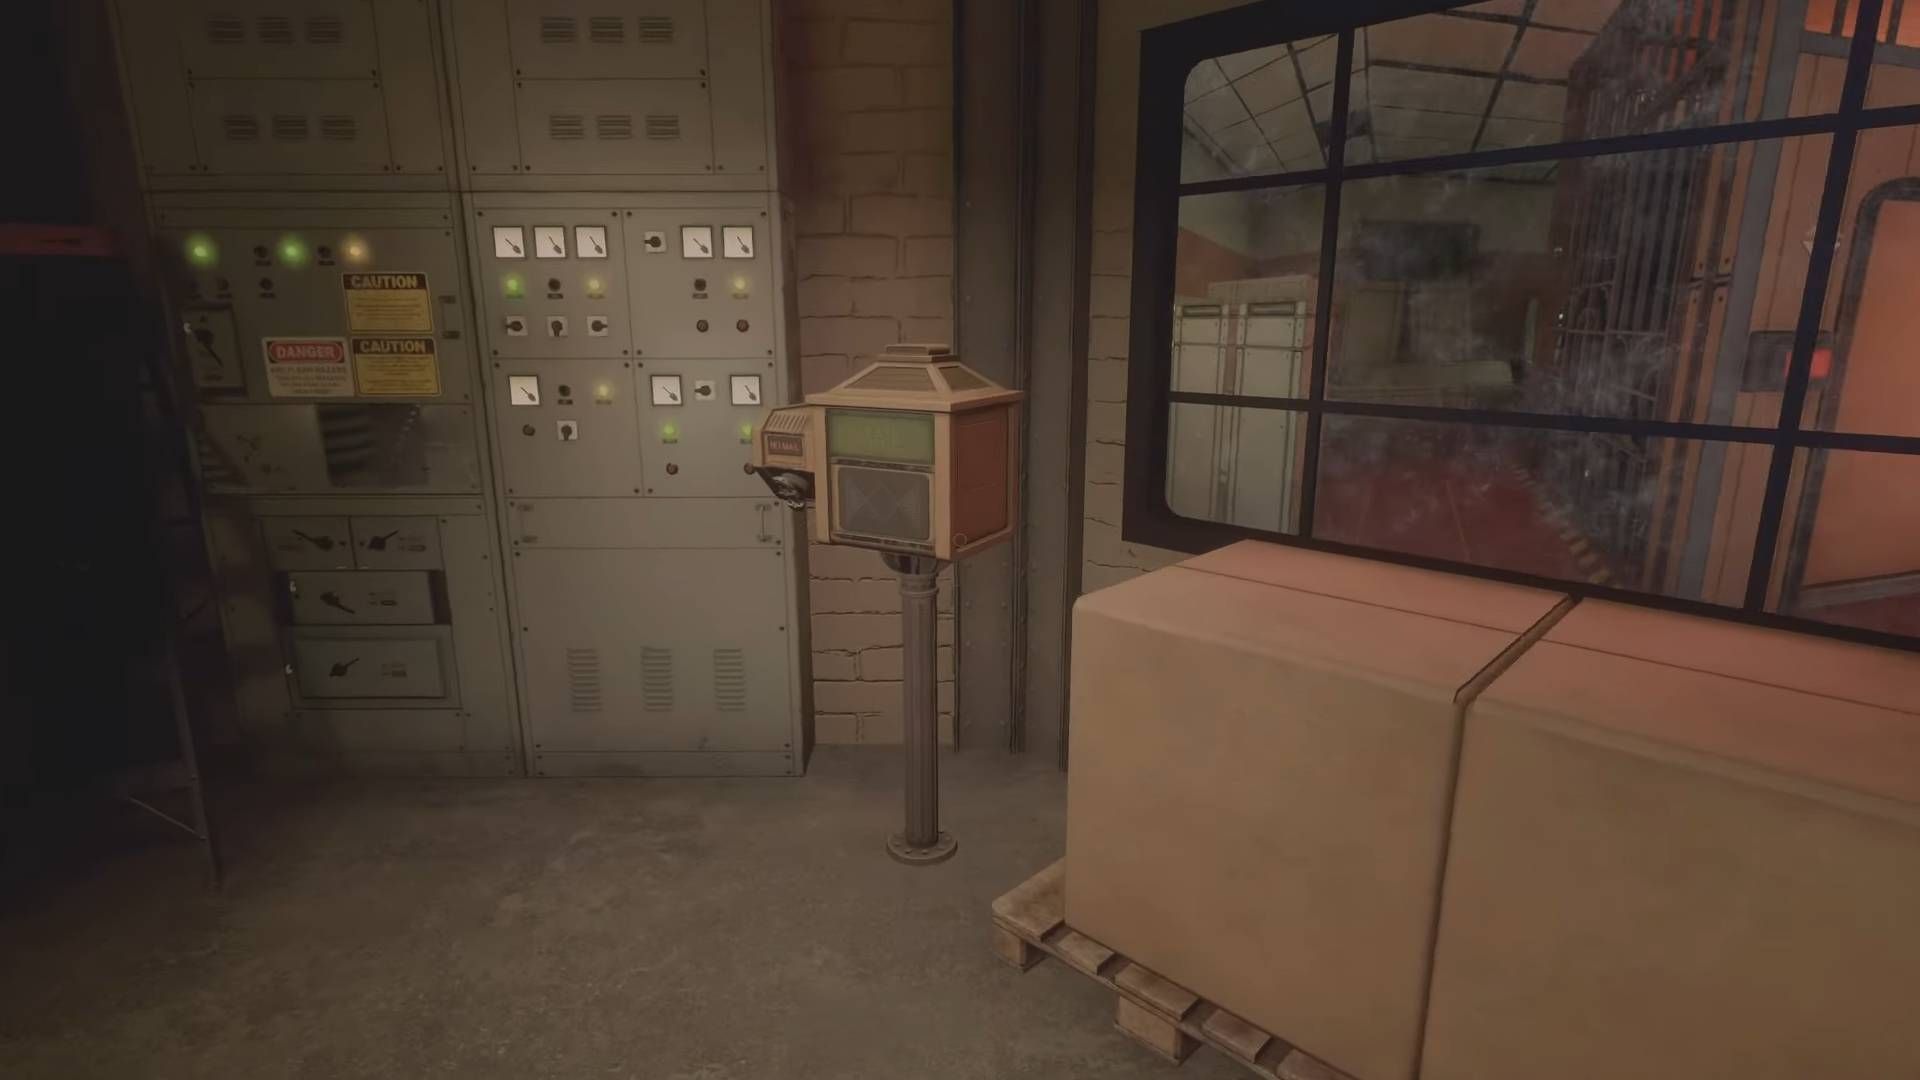
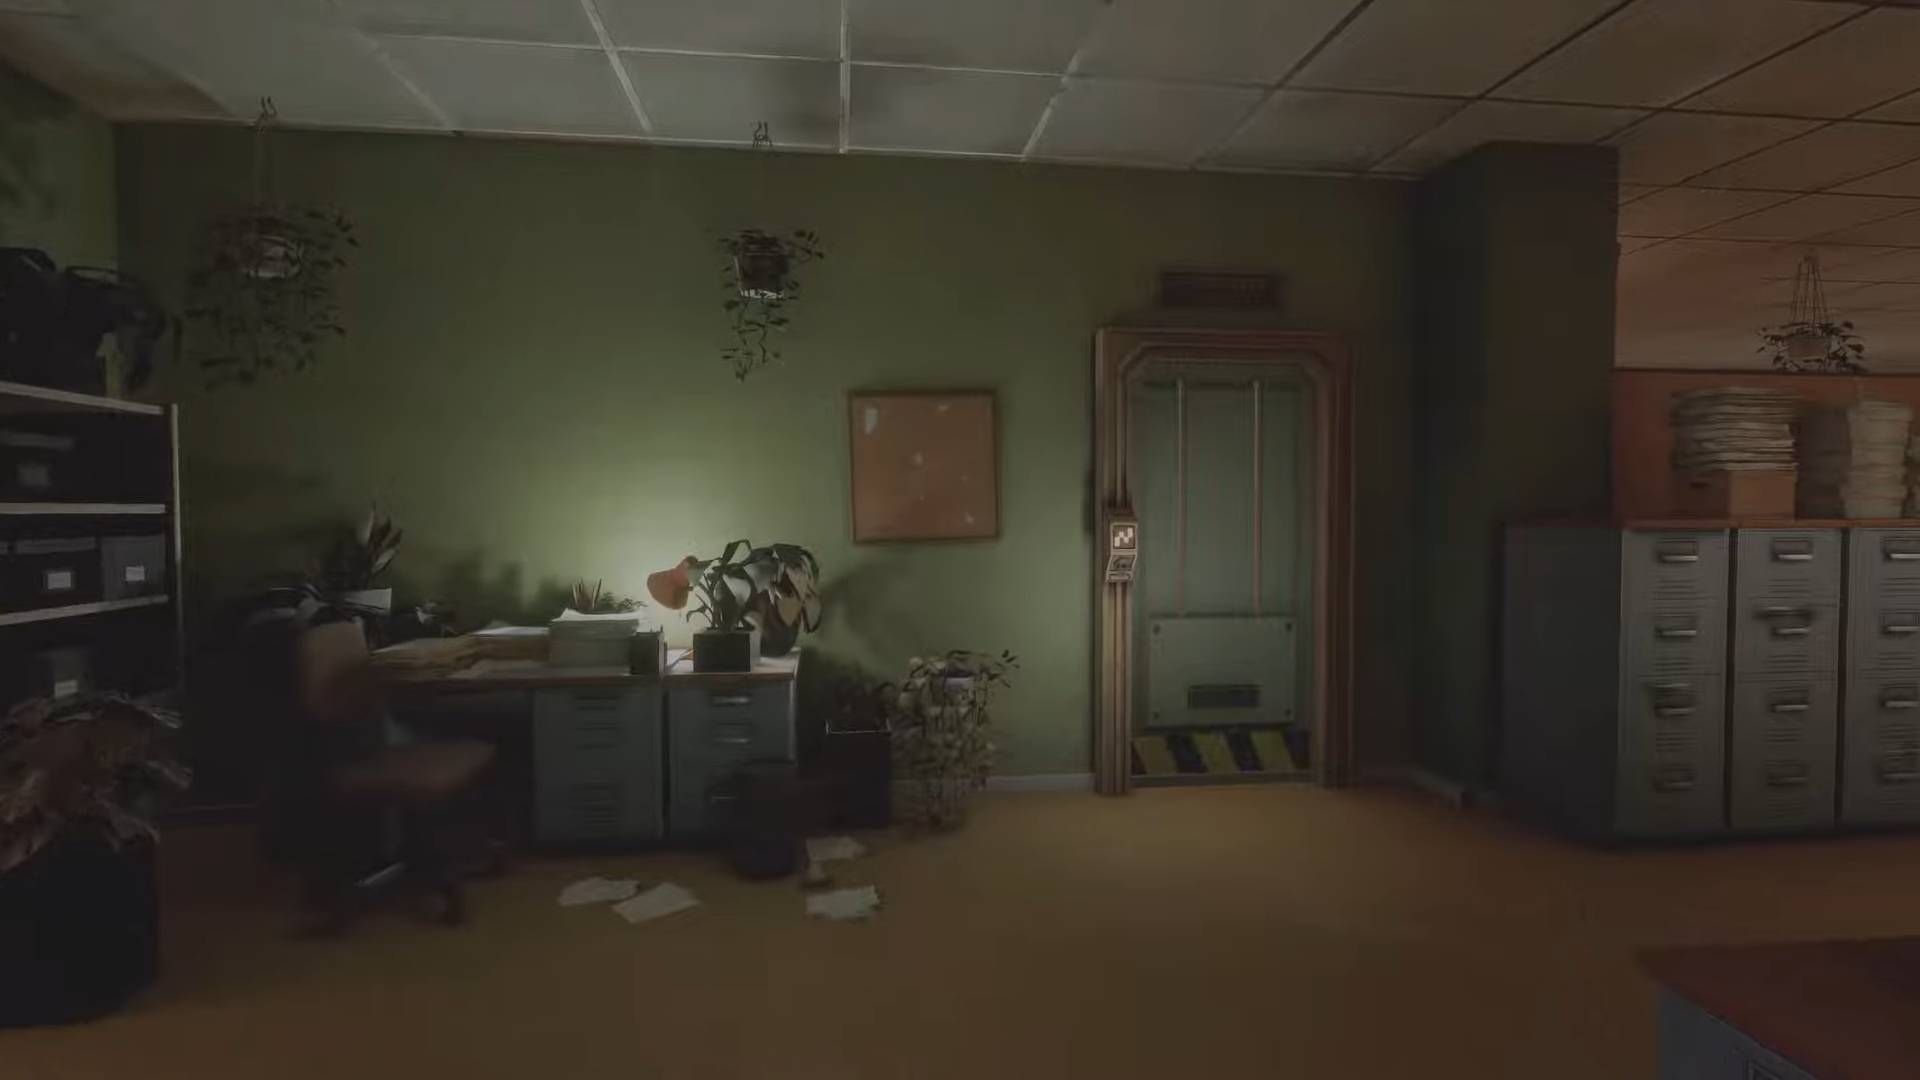
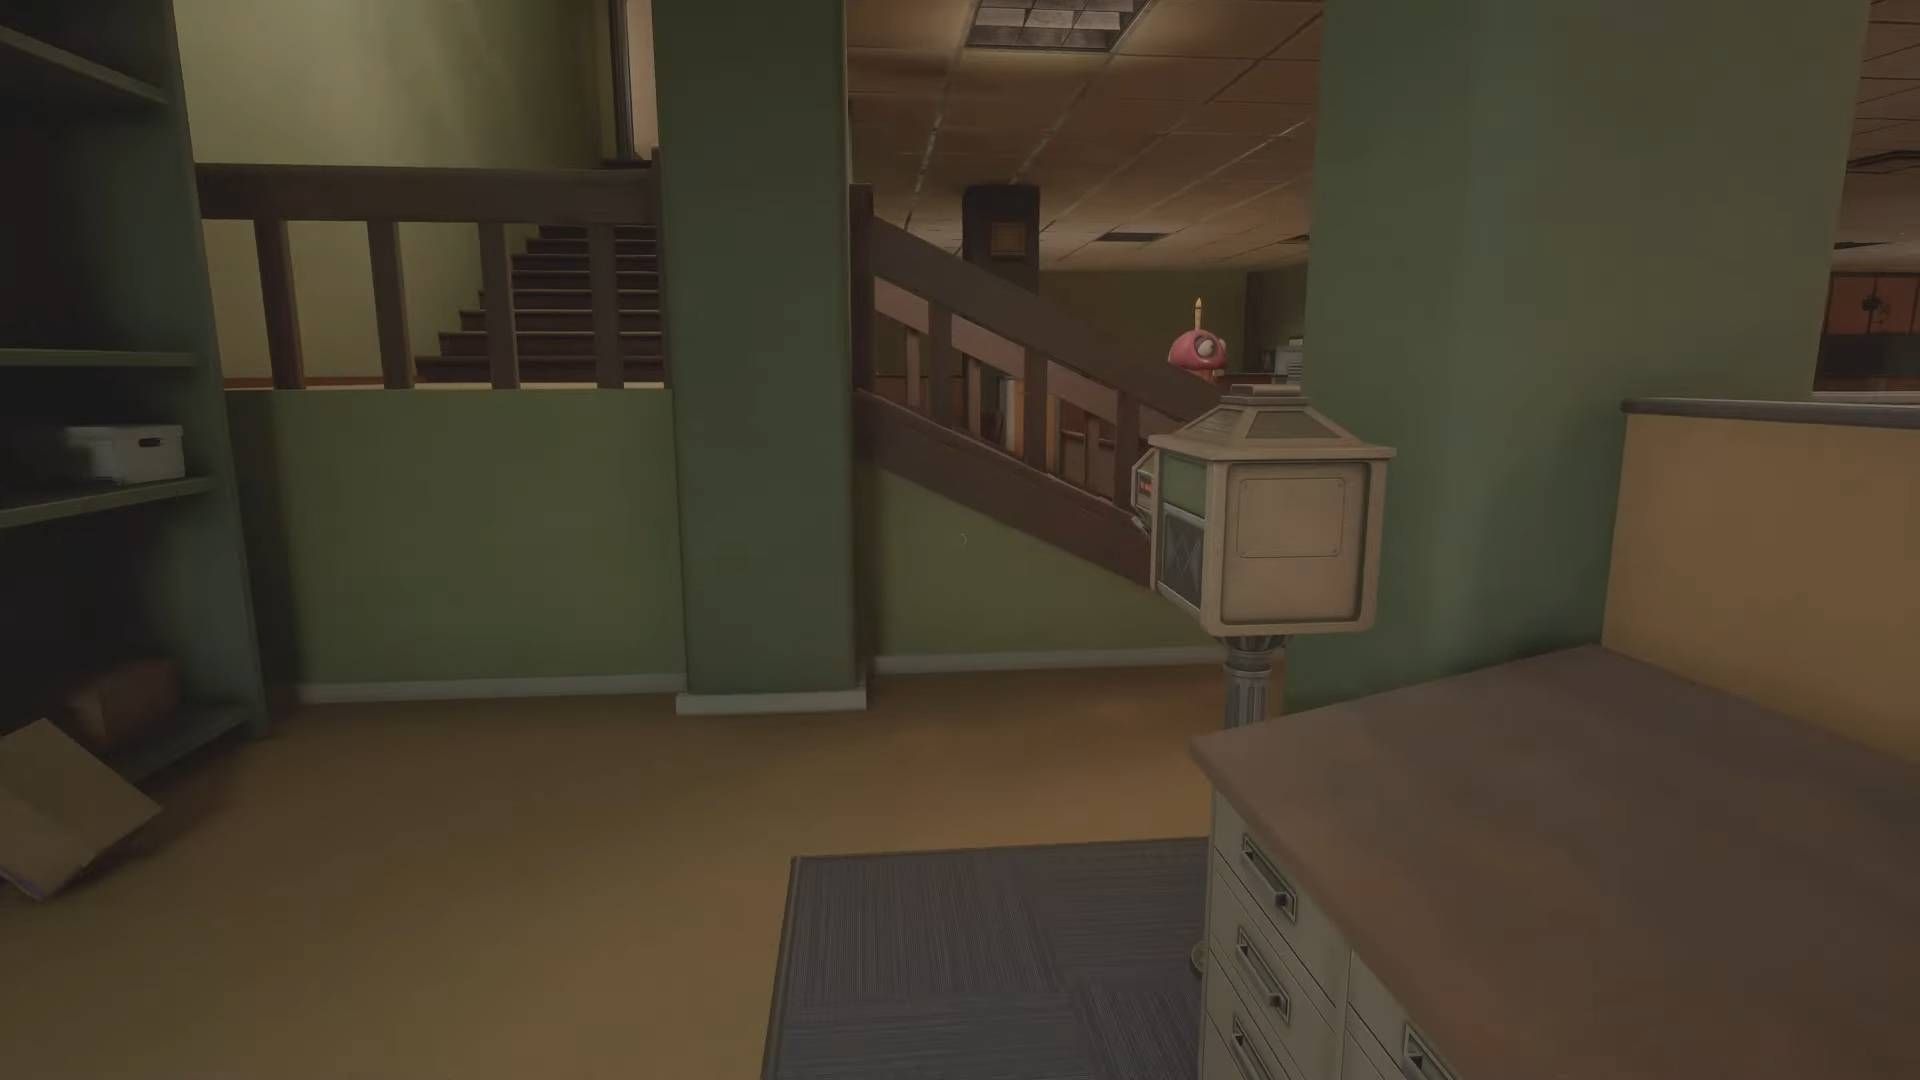
The mailbox is situated within a compact office, located beyond the Loading Dock and following the resolution of the Loading Dock Challenge. Upon entering, you’ll catch a glimpse of the White Tiger for a moment near the entrance.
Mailbox #20
You’ll find this Mailbox as you exit the office, proceeding directly forward along the path. Continue walking towards the doors that open up to the Showrooms and the location situated above the Welcome Show.
Mailbox #21
Heading down from where I spotted Mailboxes 19 and 20, I noticed a door nestled beside an inventory machine on my right. As I approached it, it swung open. Upon entering, I simply turned right, and there, straight ahead, I found the mailbox you’re looking for.
Mailbox #22
Once you’ve retrieved Mailbox #21, make your way back to the starting point. The subsequent mailbox will be located near the doorway that leads to the Administrative Block.
Mailbox #23
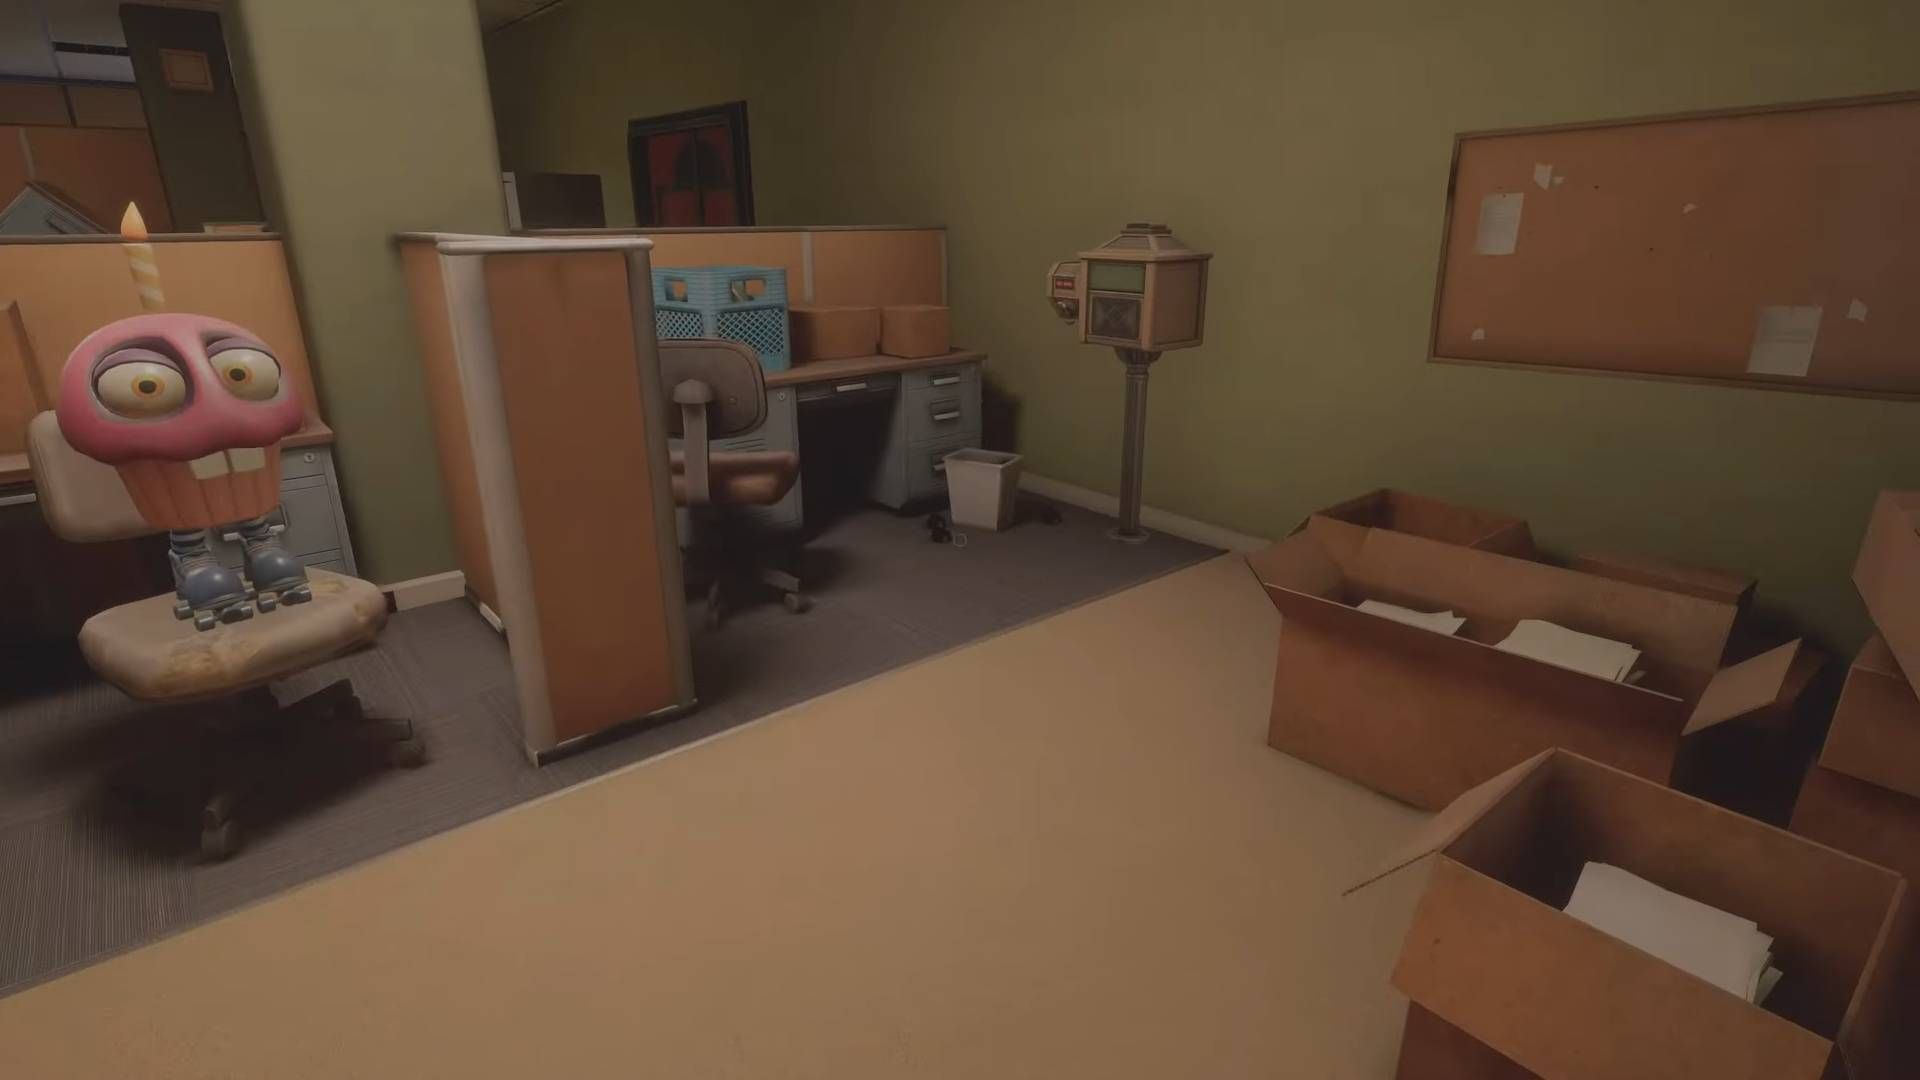
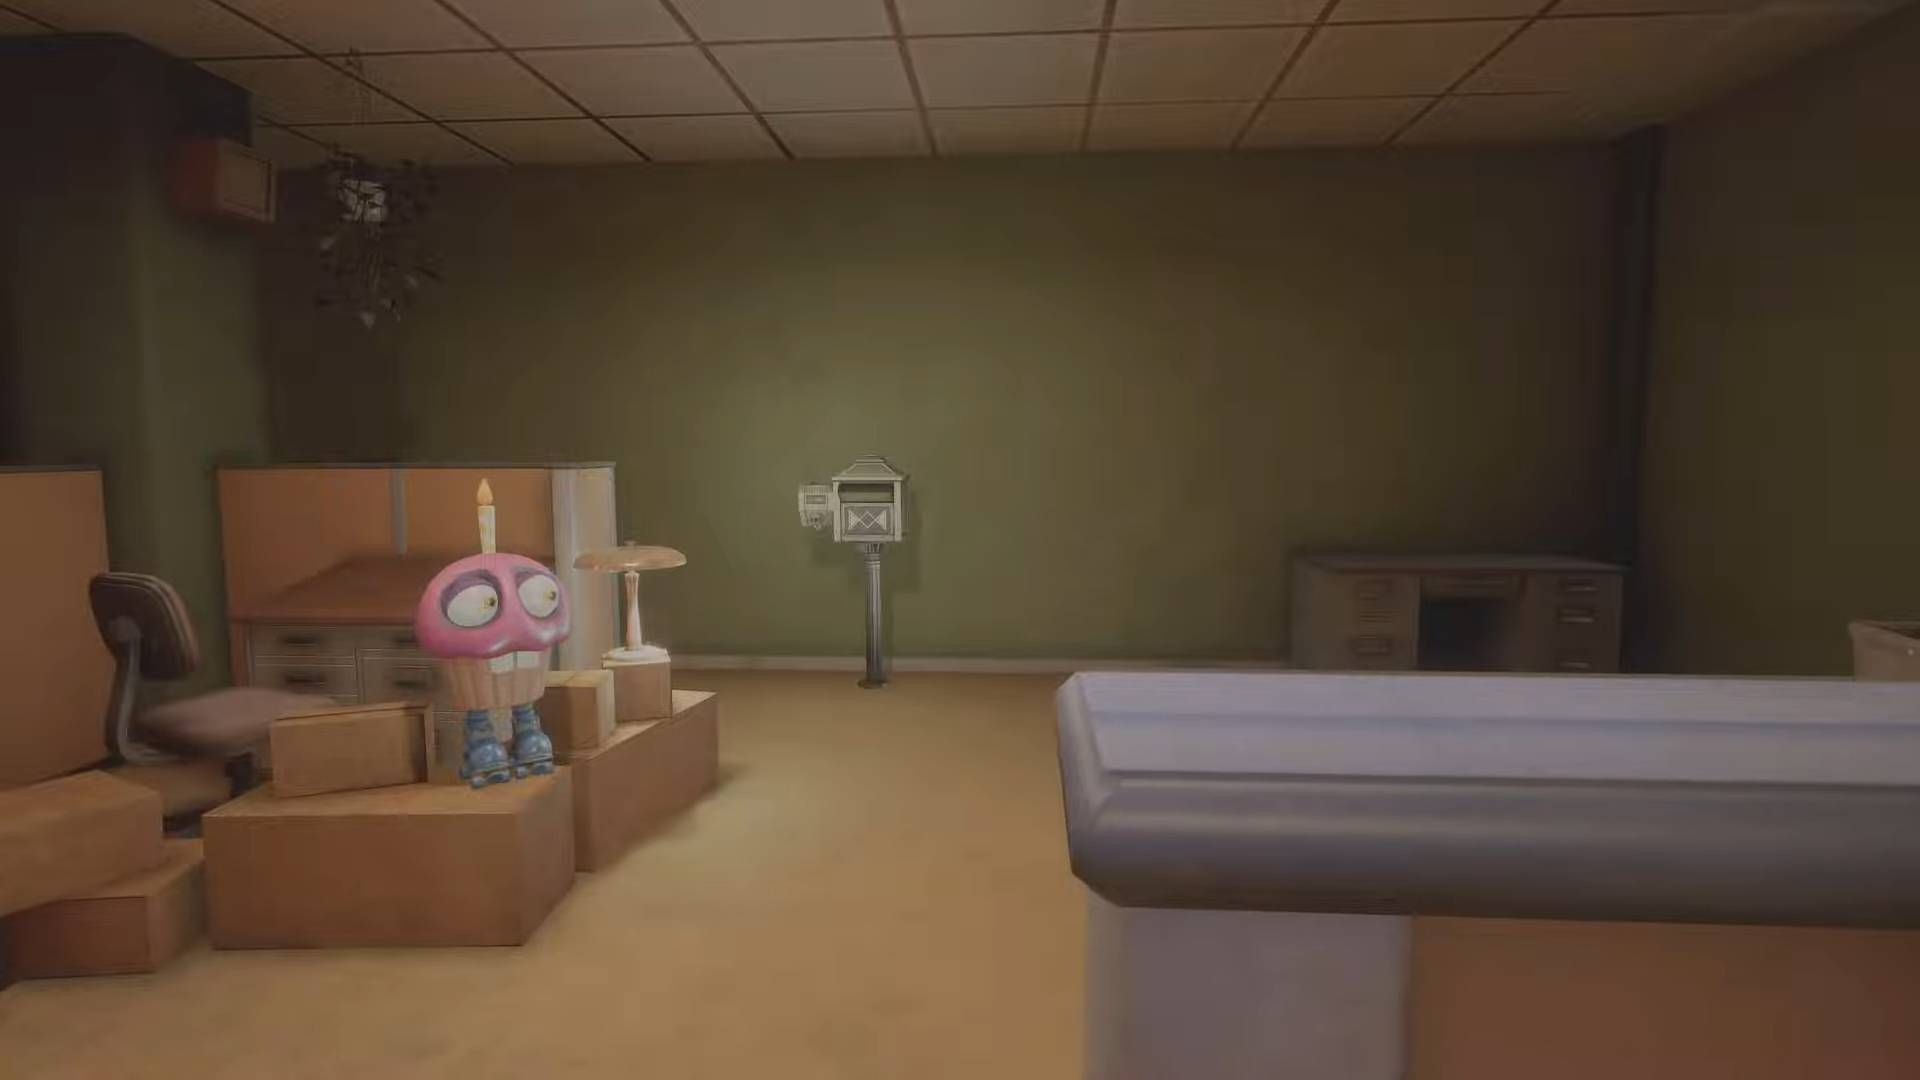
As I step into the heart of Admin Block, I spot the mailbox conveniently positioned to my right – it’s where Chica keeps a watchful eye over everything using her trusty Cupcakes as backup.
Mailbox #24
As a devoted fan, I’d like to share a bit about my favorite spot – Mailbox number 24. It’s nestled snugly beside our usual meeting room, the one with the lock, right next to that handy keypad we all know so well. If you’re familiar with the area, it’s just a little nook around the bend from Mailbox #23.
Mailbox #25
As a gamer, I navigate to the right upon picking up Mailbox #24, and there, tucked away, I stumble upon Mailbox #25 hidden within an alcove. Interestingly, it’s situated across from a concealed locker where I could potentially take cover if needed.
Mailbox #26
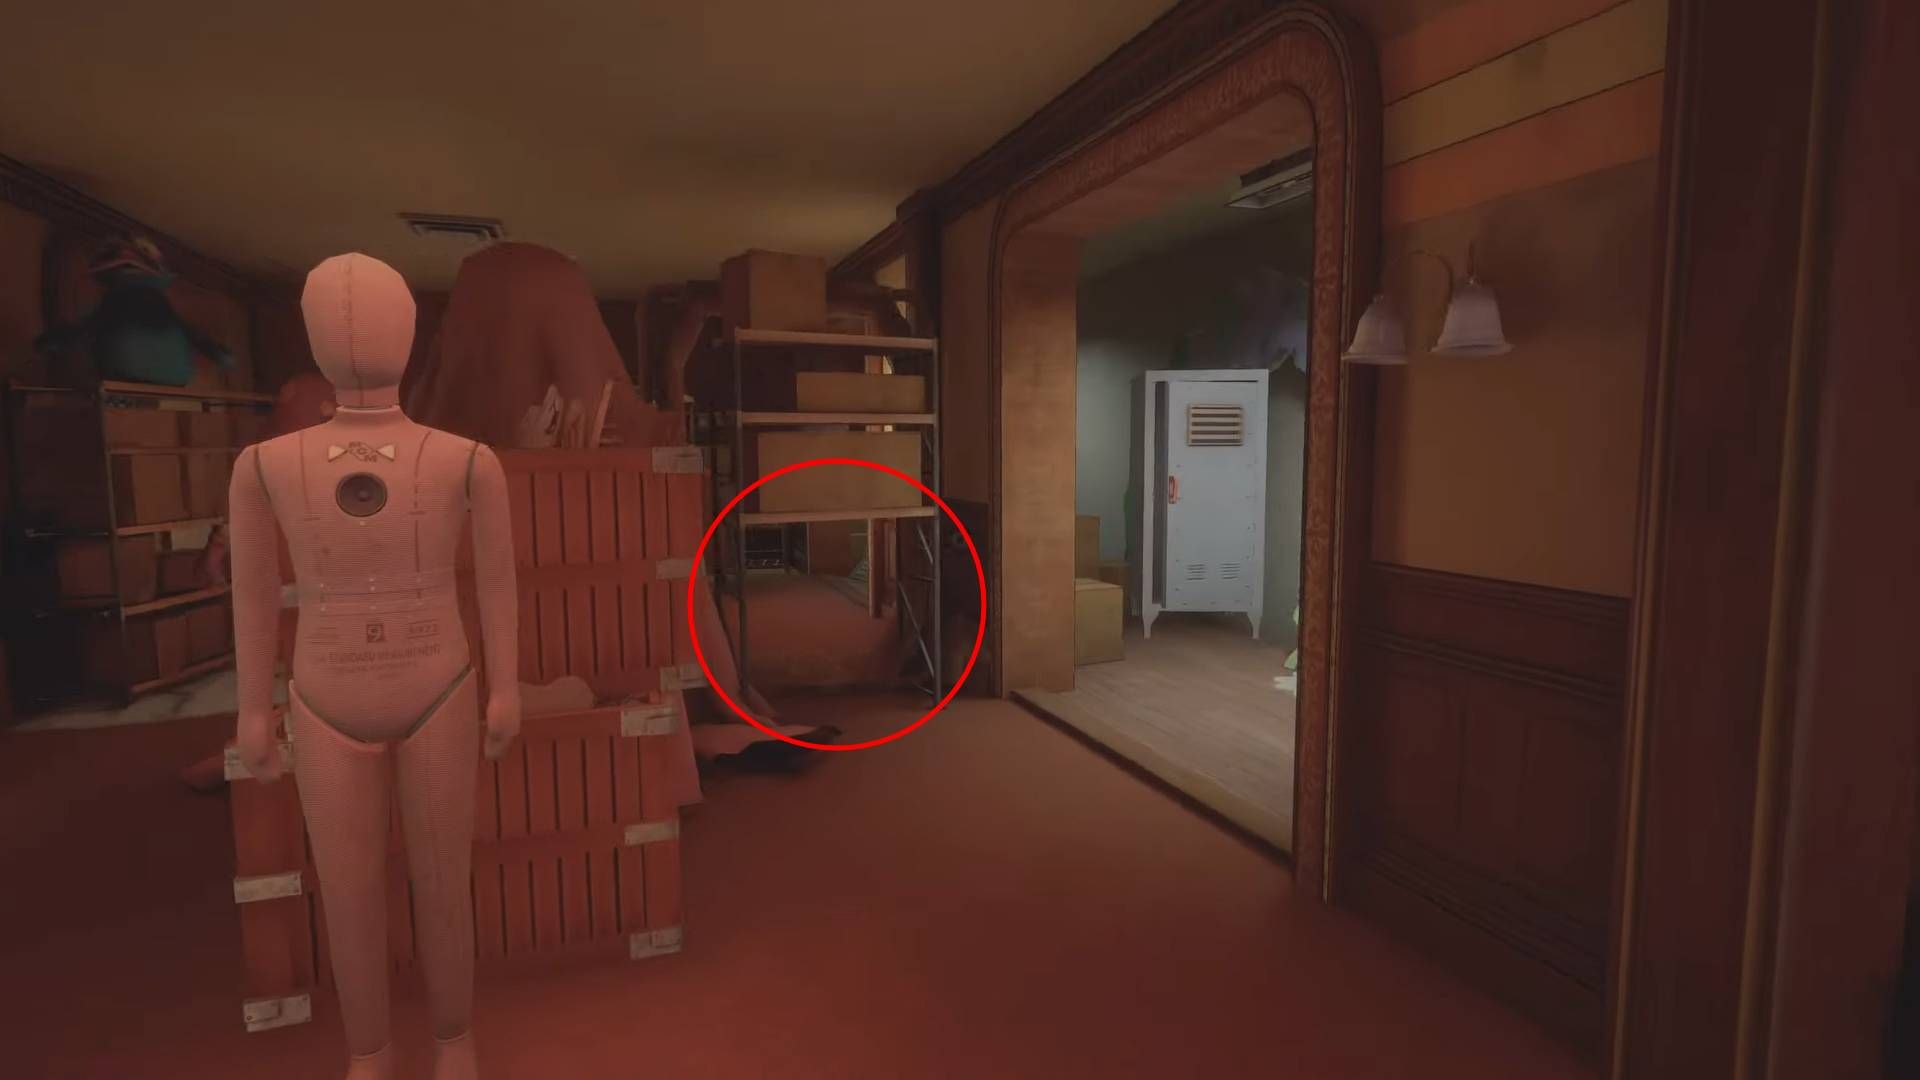
The mailbox located at number 26 can be found deeper within the Administrative Building, close to a storage locker, and on the side of an access-controlled door leading towards the kitchen.
Mailbox #27
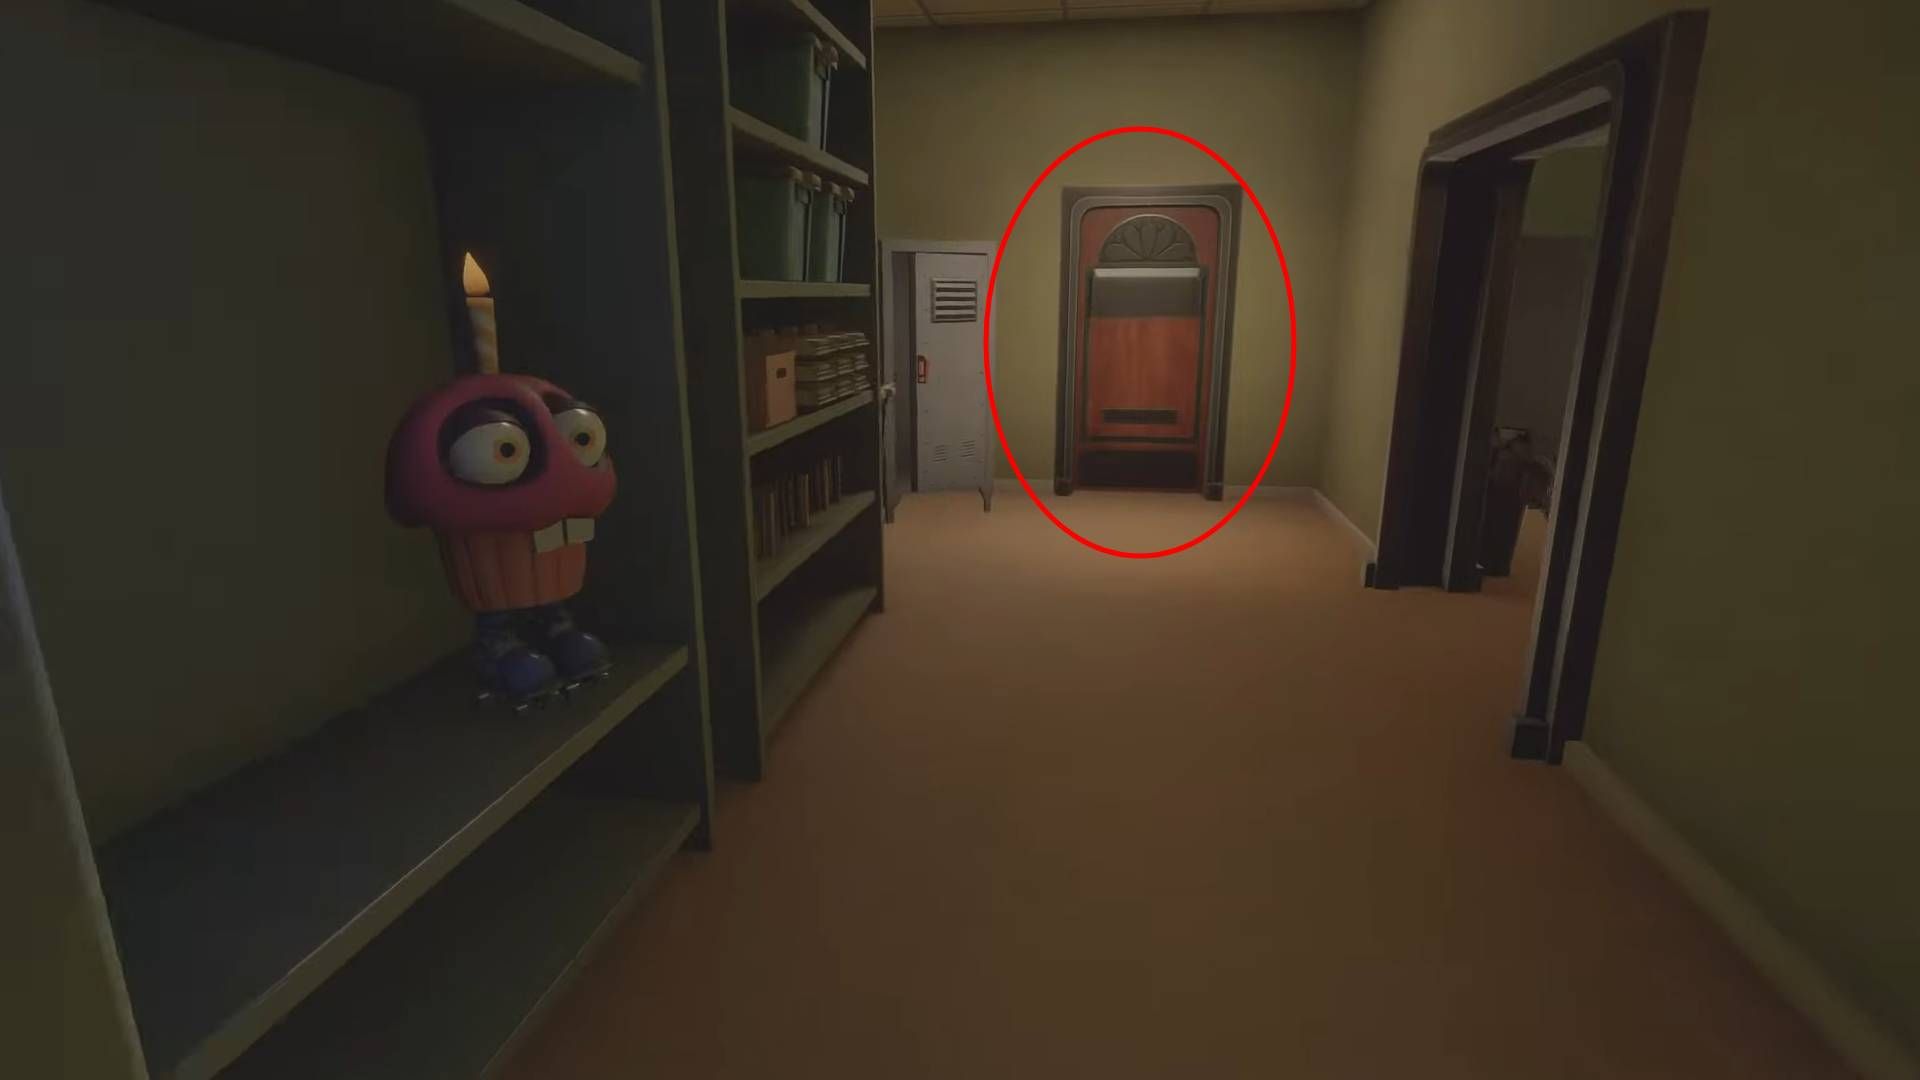
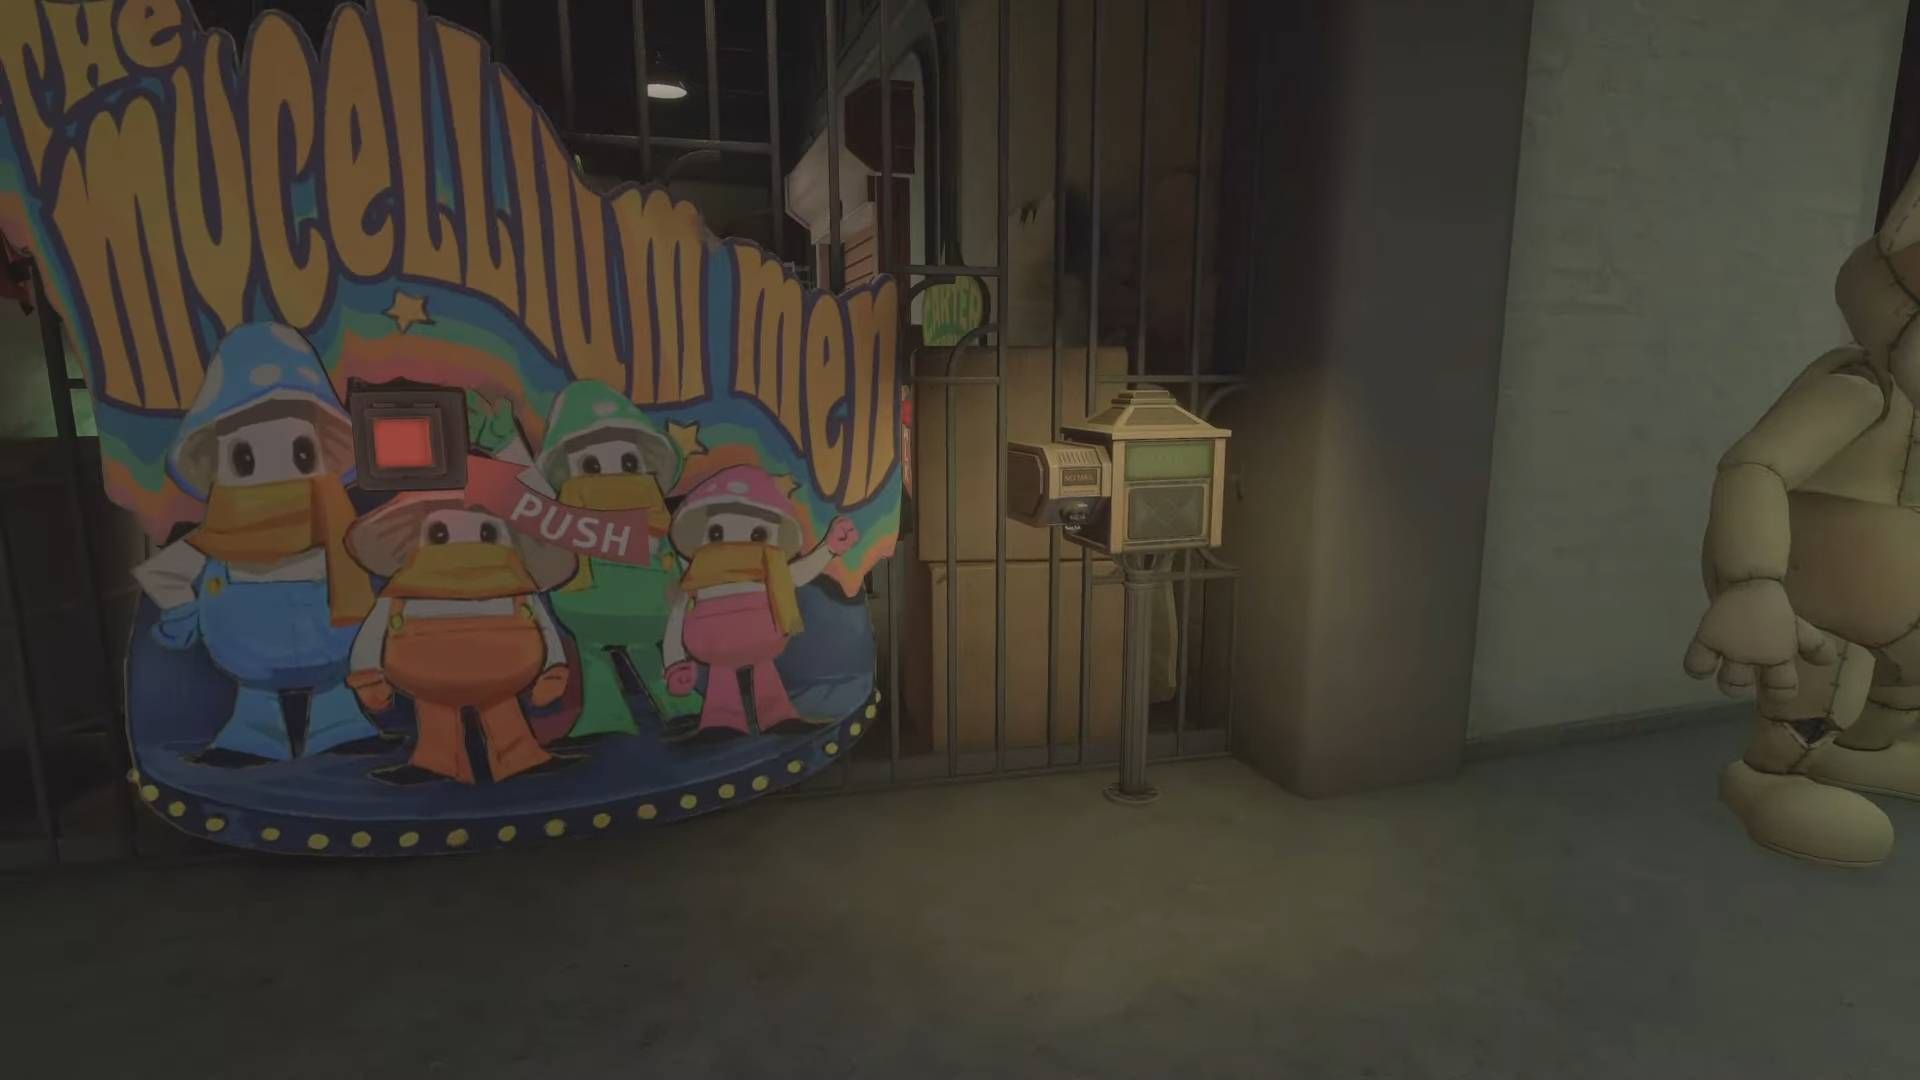
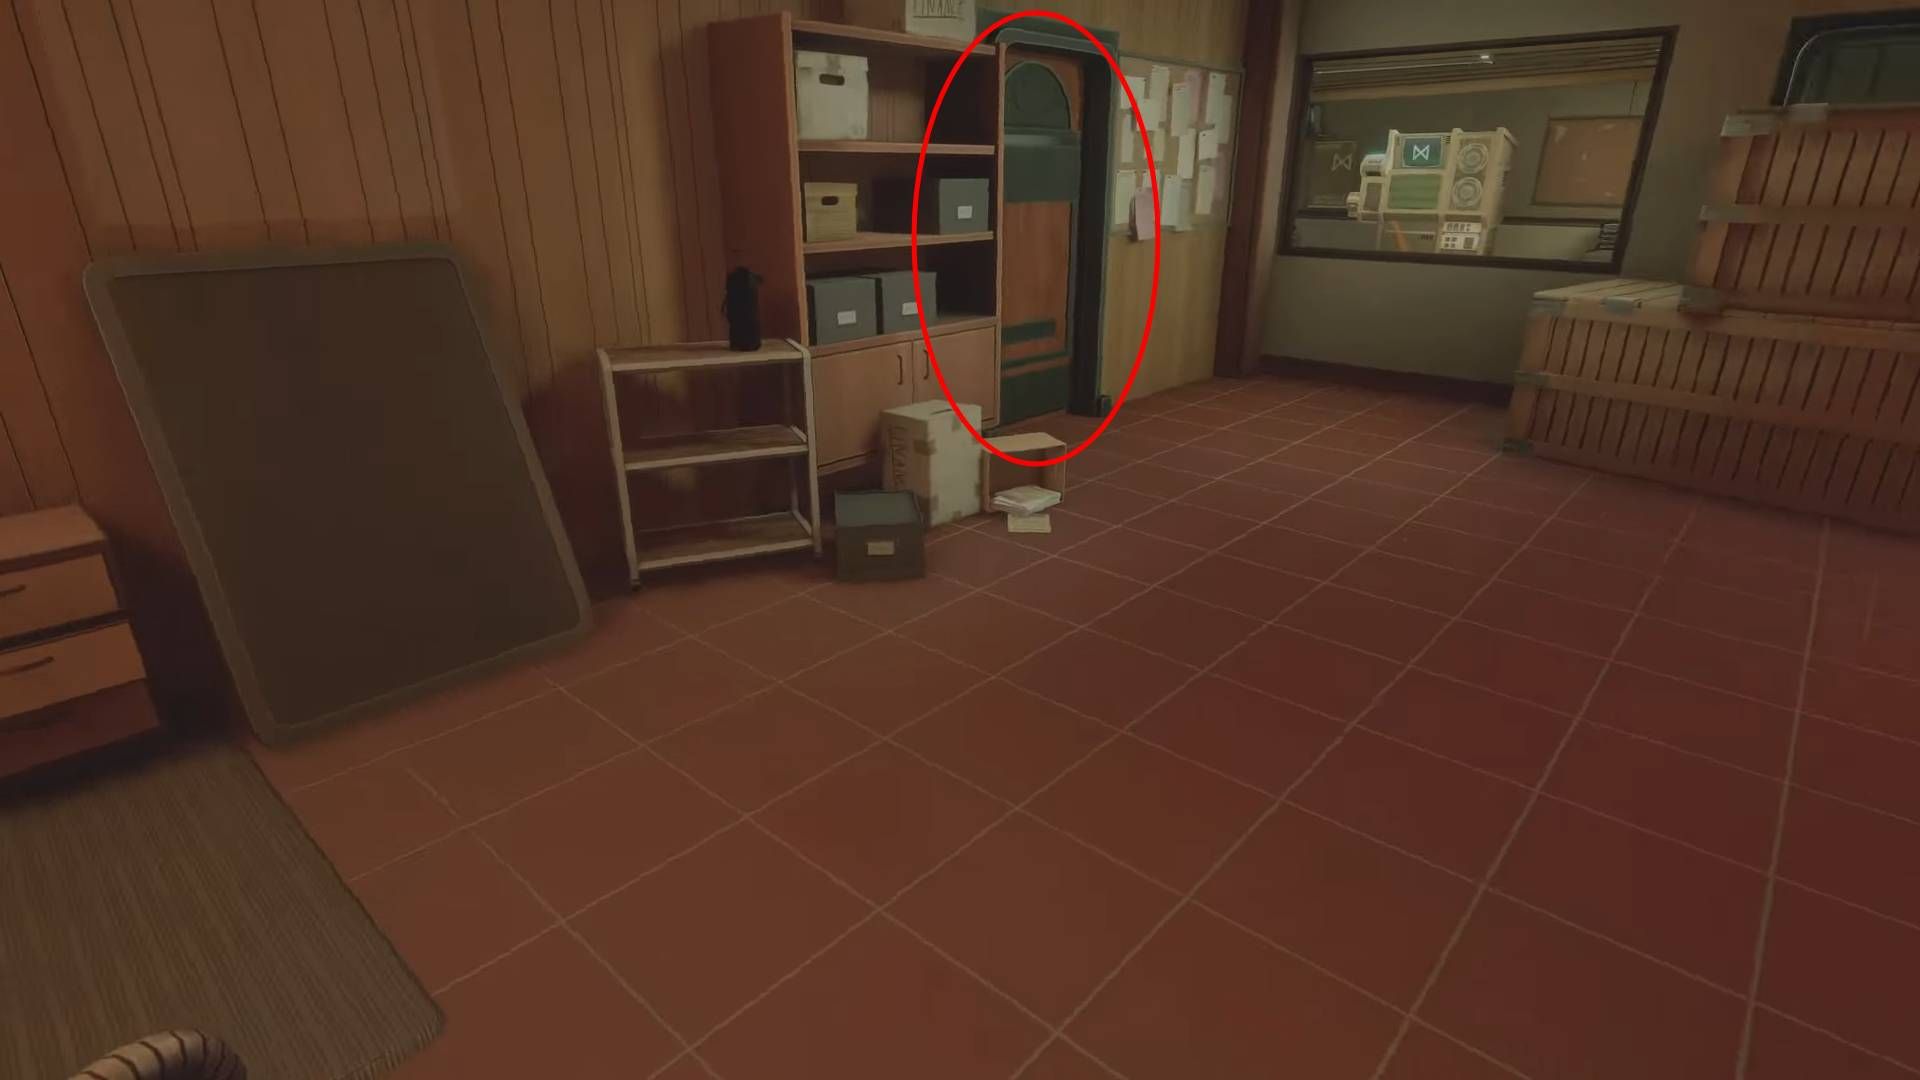
The mailbox you’re looking for is located at the far end of the slim corridor, right beyond the door I previously mentioned. Simply walk through the door depicted in the image, and it will open as you approach it.
Mailbox #28
Once you’ve picked up Mailbox #27, leave the room, take a left turn, and proceed into a fresh part of the Admin Block. Locate Mailbox 28, which is situated to your left and hidden behind a desk.
– Grab Mailbox #27, then leave the room, head left, and find Mailbox 28 (behind a desk) in the new Admin Block section.
Mailbox #29
After getting Mailbox #28, head past the staircase and look on your left to find this one.
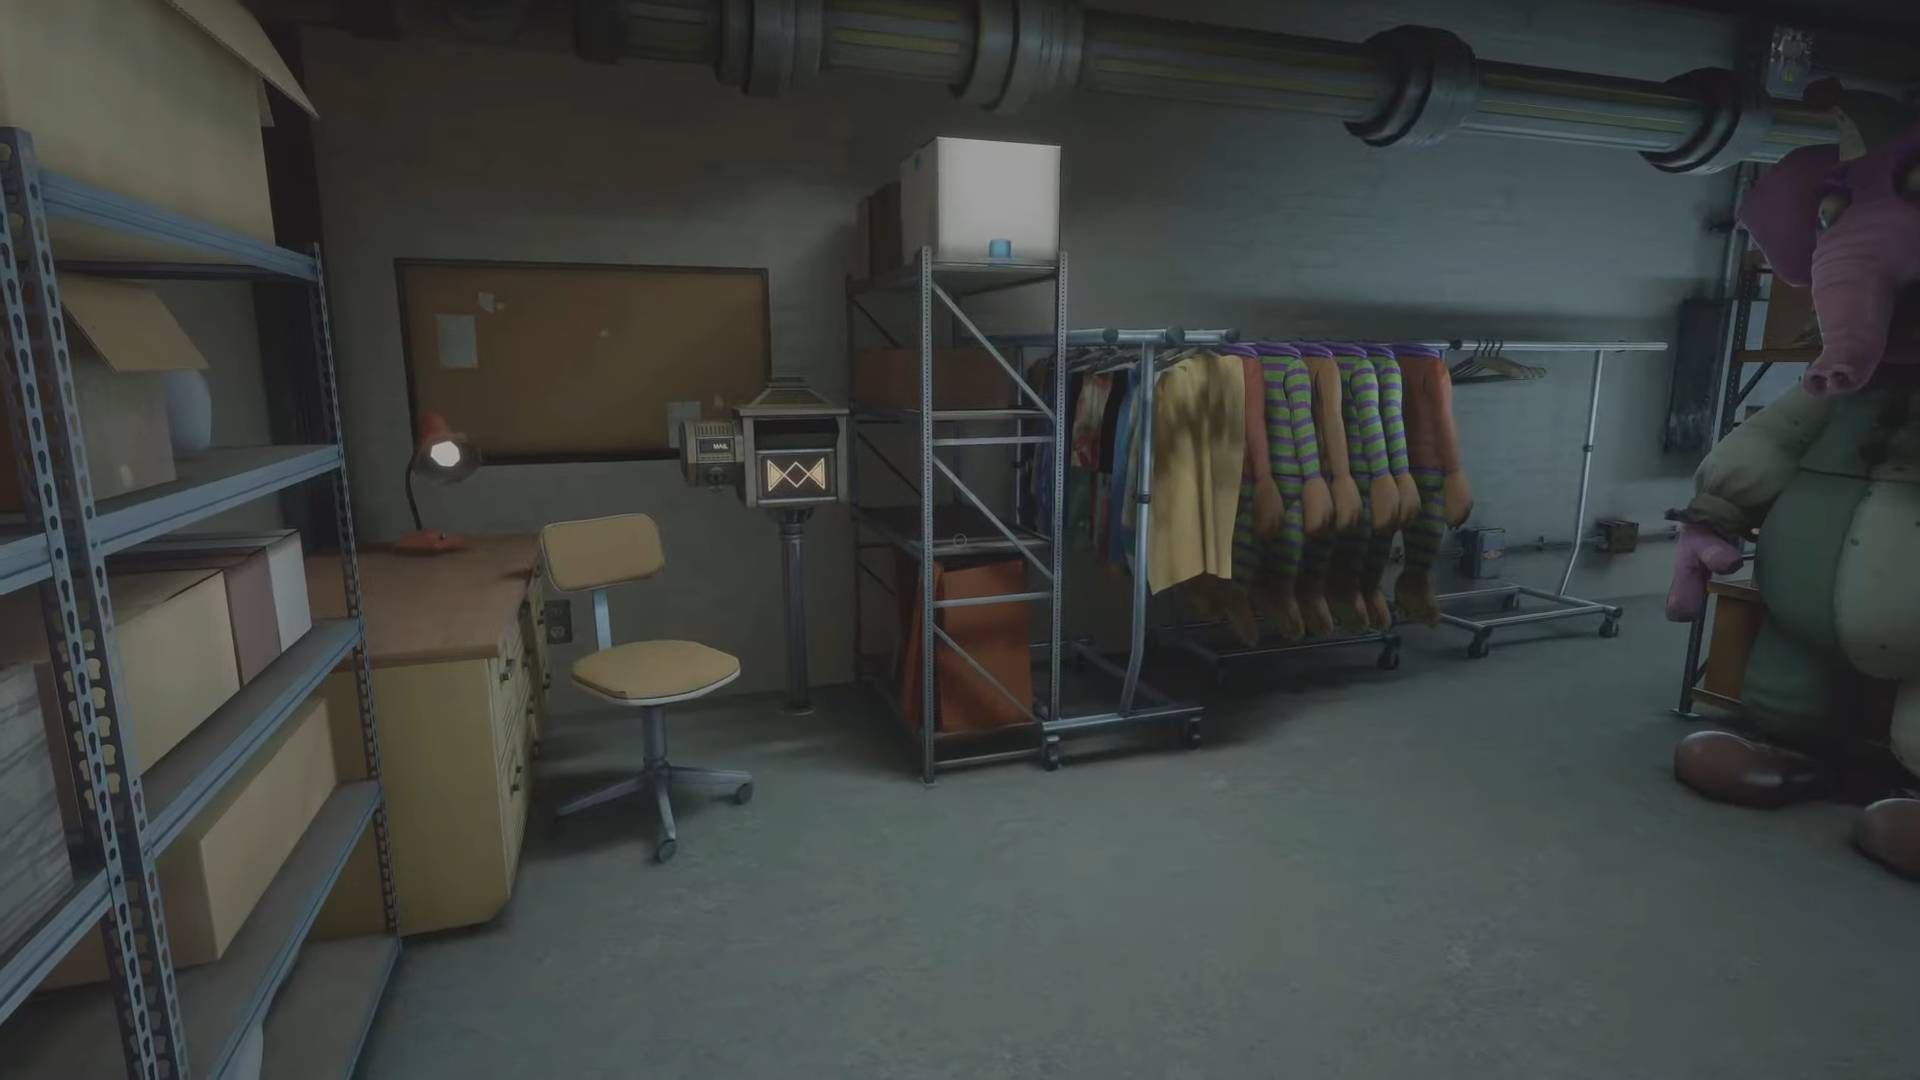
Mailbox #30
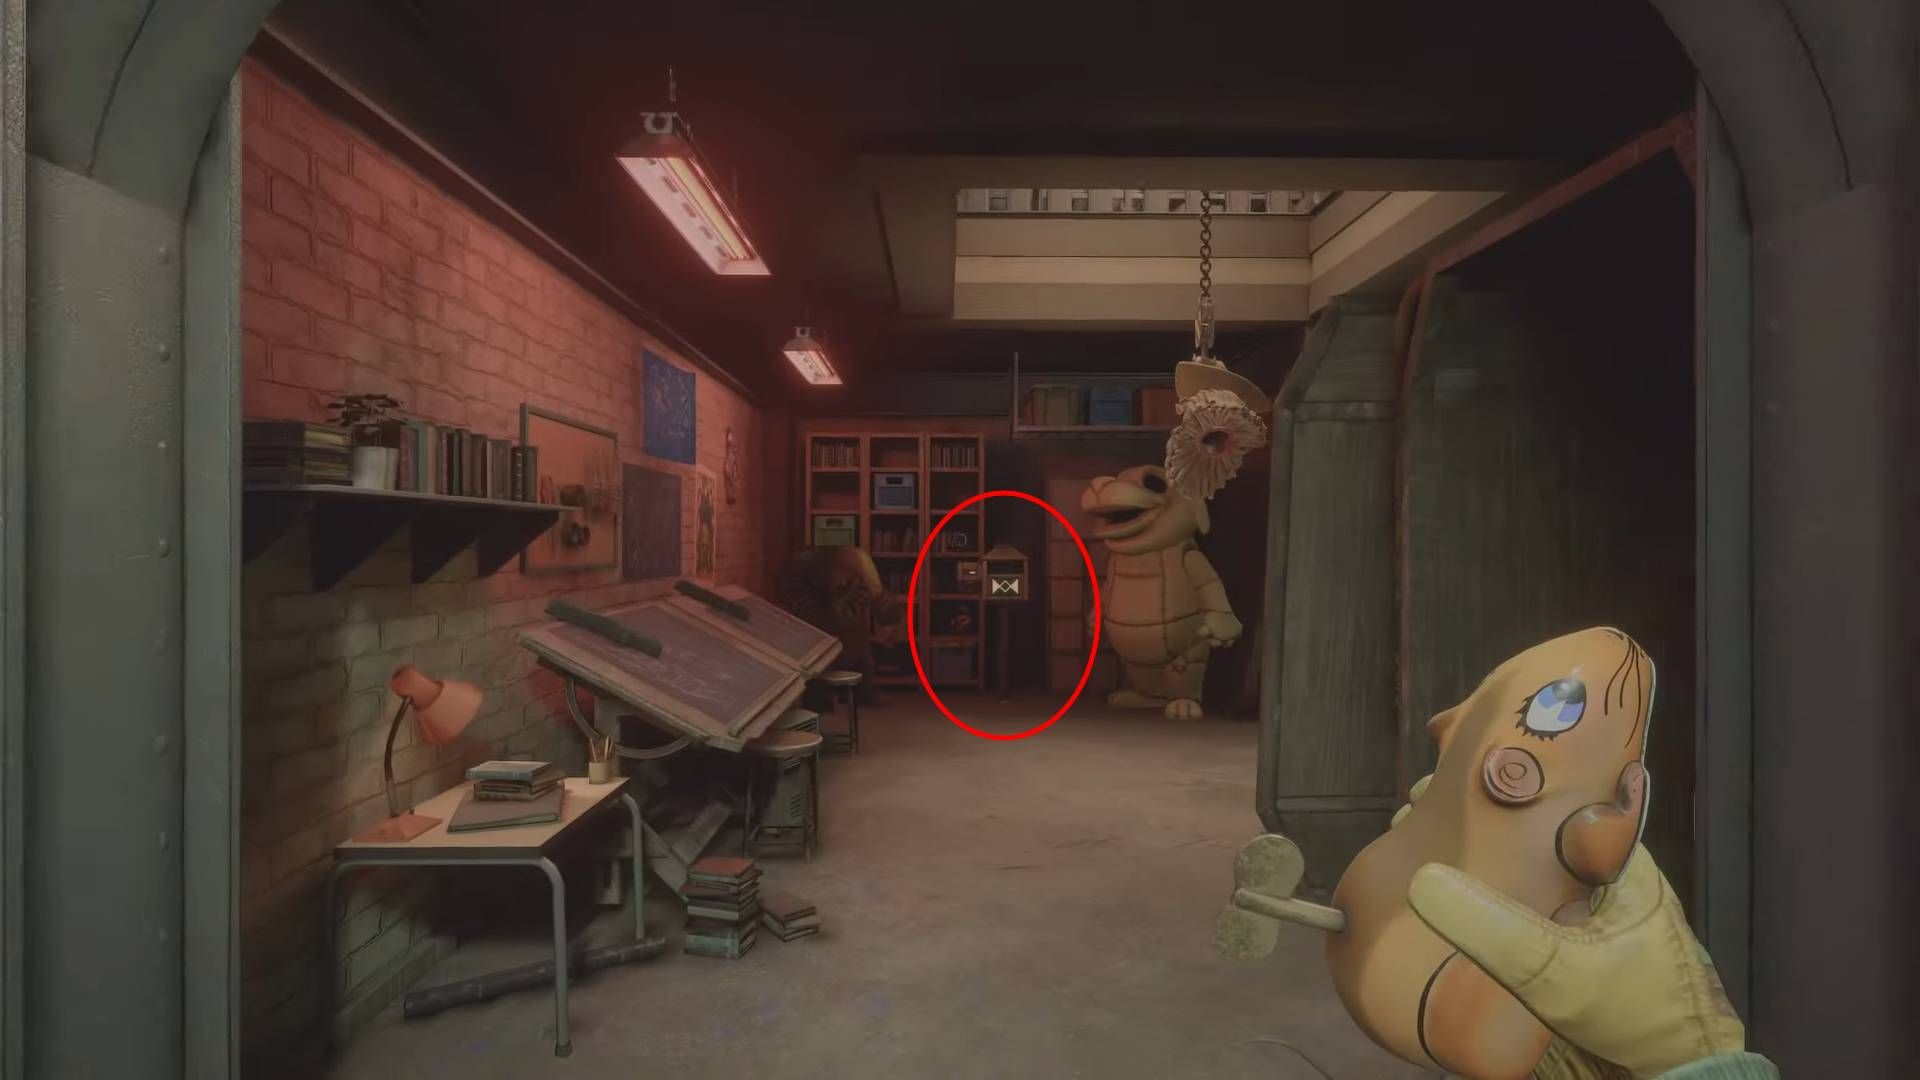
Following your ascent, locate the room indicated in the picture by passing through its doorway. Inside you’ll discover a disorganized space with Mailbox #30 tucked away.
Mailbox #31
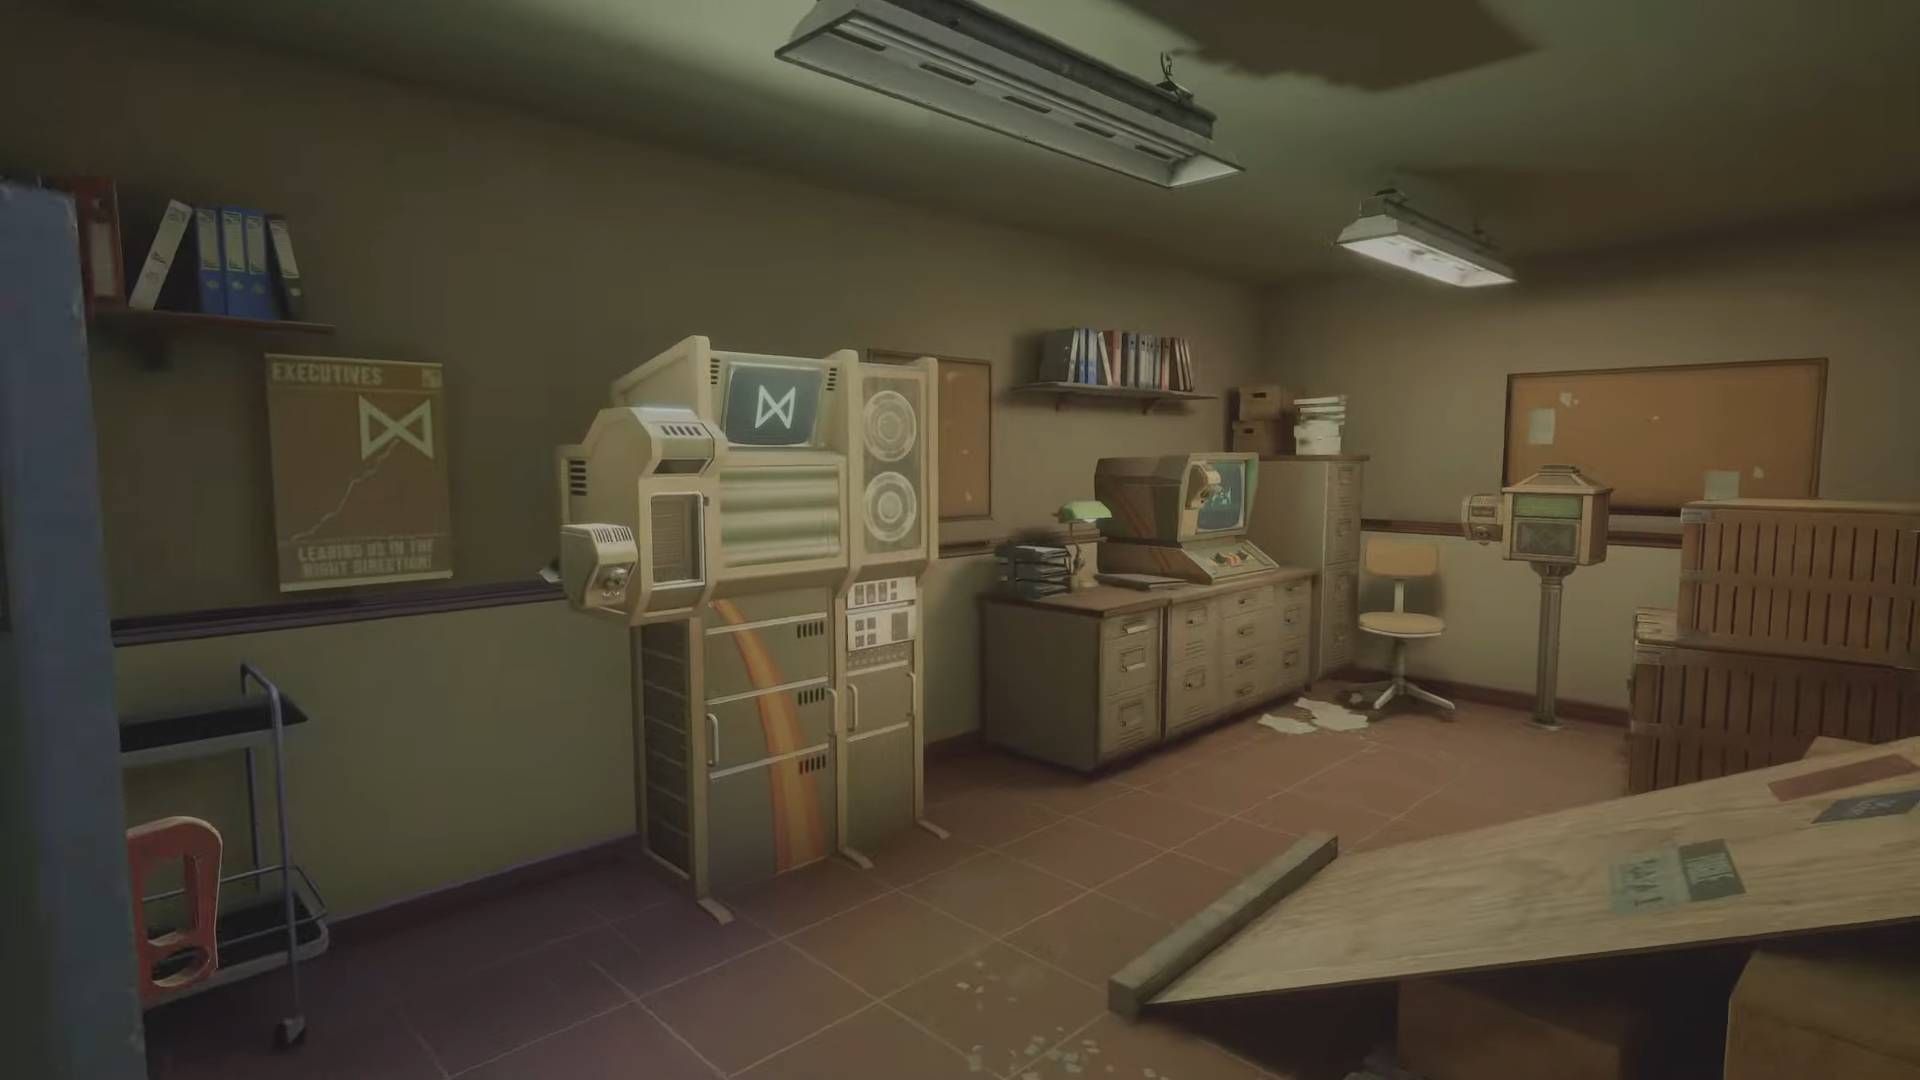
Mailbox #31 can be found in the same room as the Executive Access Upgrade Terminal.
Mailbox #32
Following obtaining Executive Privileges and navigating via the window, look at the area behind the Helpful Terminal to discover the Mailbox.
Mailbox #33
“I recently discovered that Edwin’s Office can be accessed via the Executive Door, which is conveniently located next to Mailbox #32.”
Mailbox #34
After descending the elevator to the basement, you’ll find yourself in a large room where there’s a staircase in the center that continues deeper below.
Mailbox #35
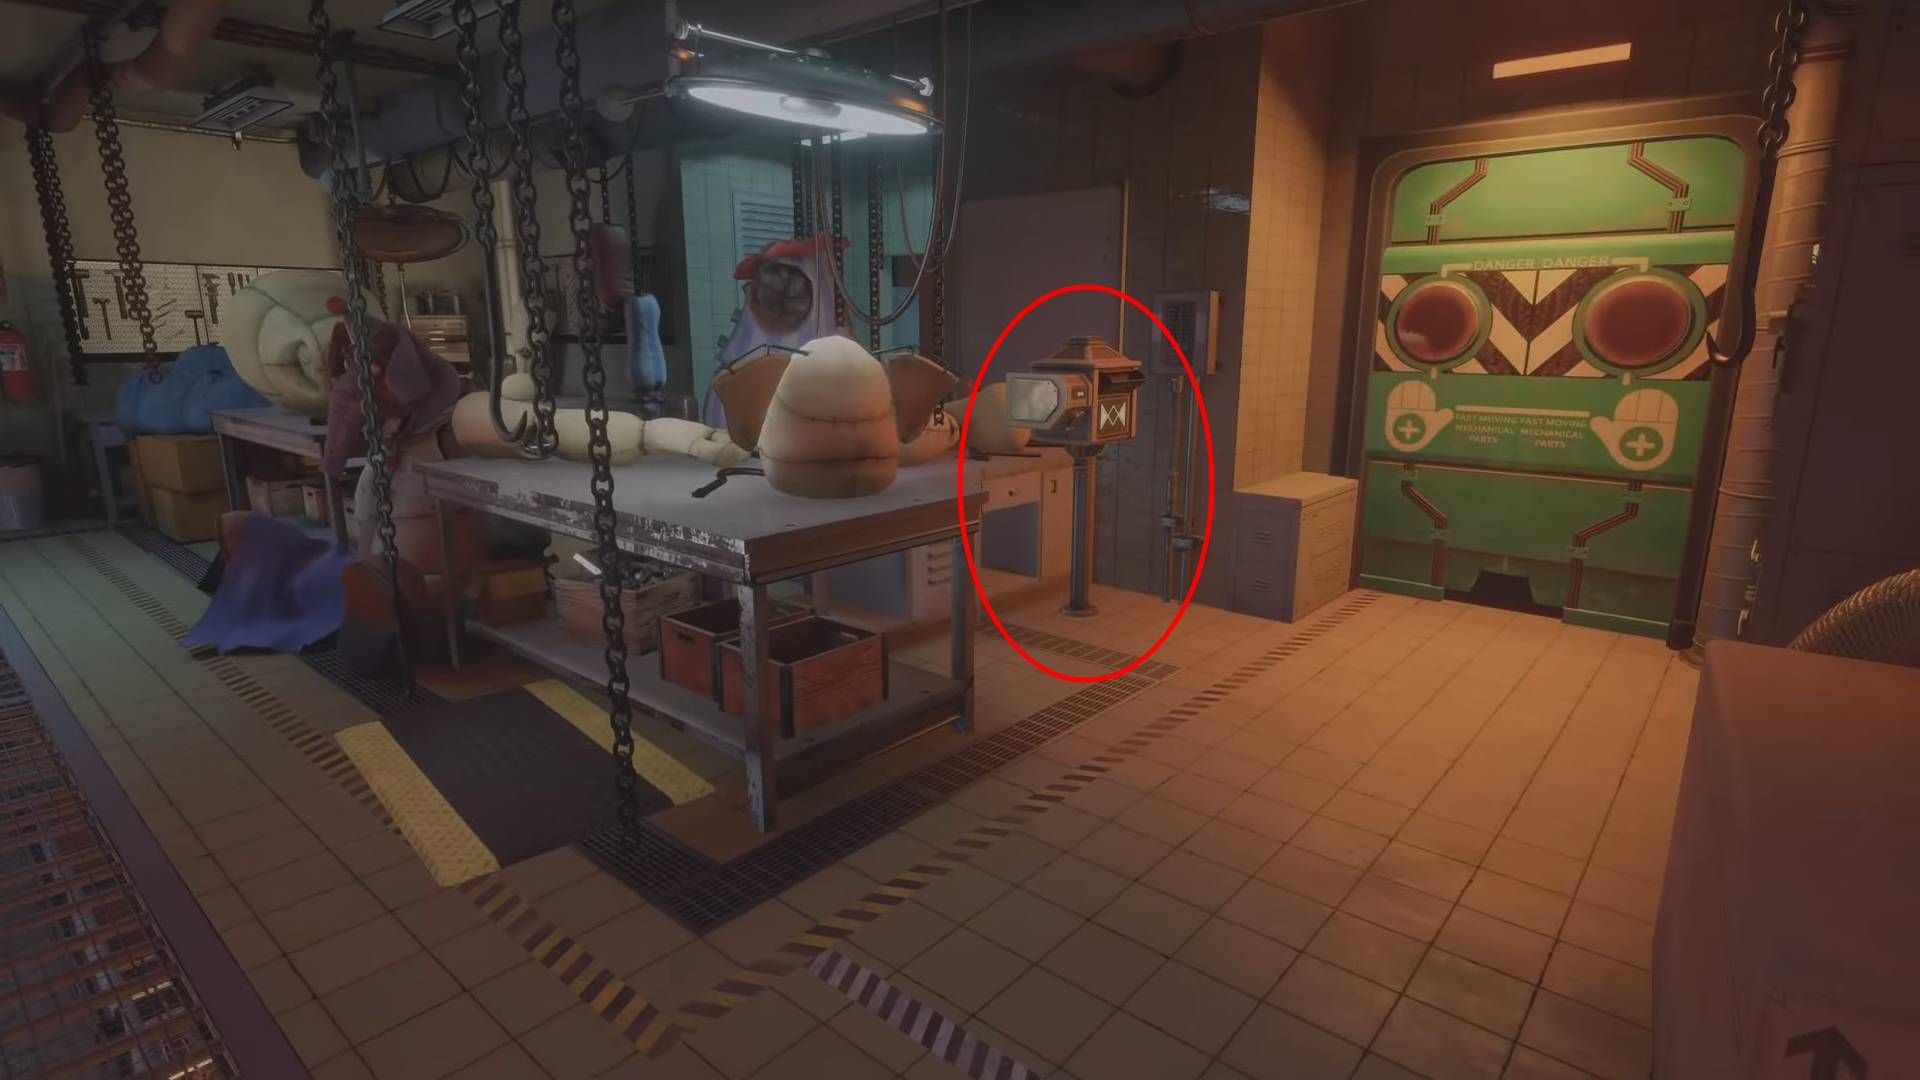
Once you’ve ridden the elevator up from the basement level, you’ll find yourself in a storage area close to the Security Office. As you walk through this storage space, the Mailbox will be positioned on your right side.
All Mailboxes You Can Get Before Activating Parachute.exe or Handing Over the Data Diver (Mailboxes 36-39)
The mailboxes can only be opened before reaching a fixed route’s lockpoint. However, some of them are accessible either by retraceing your steps or by acquiring Executive Access, which allows access to otherwise inaccessible areas. This is also an opportunity for you to retrace your steps and collect any missed mailboxes from earlier sections, provided they aren’t among the permanently unobtainable ones.
Mailbox #36
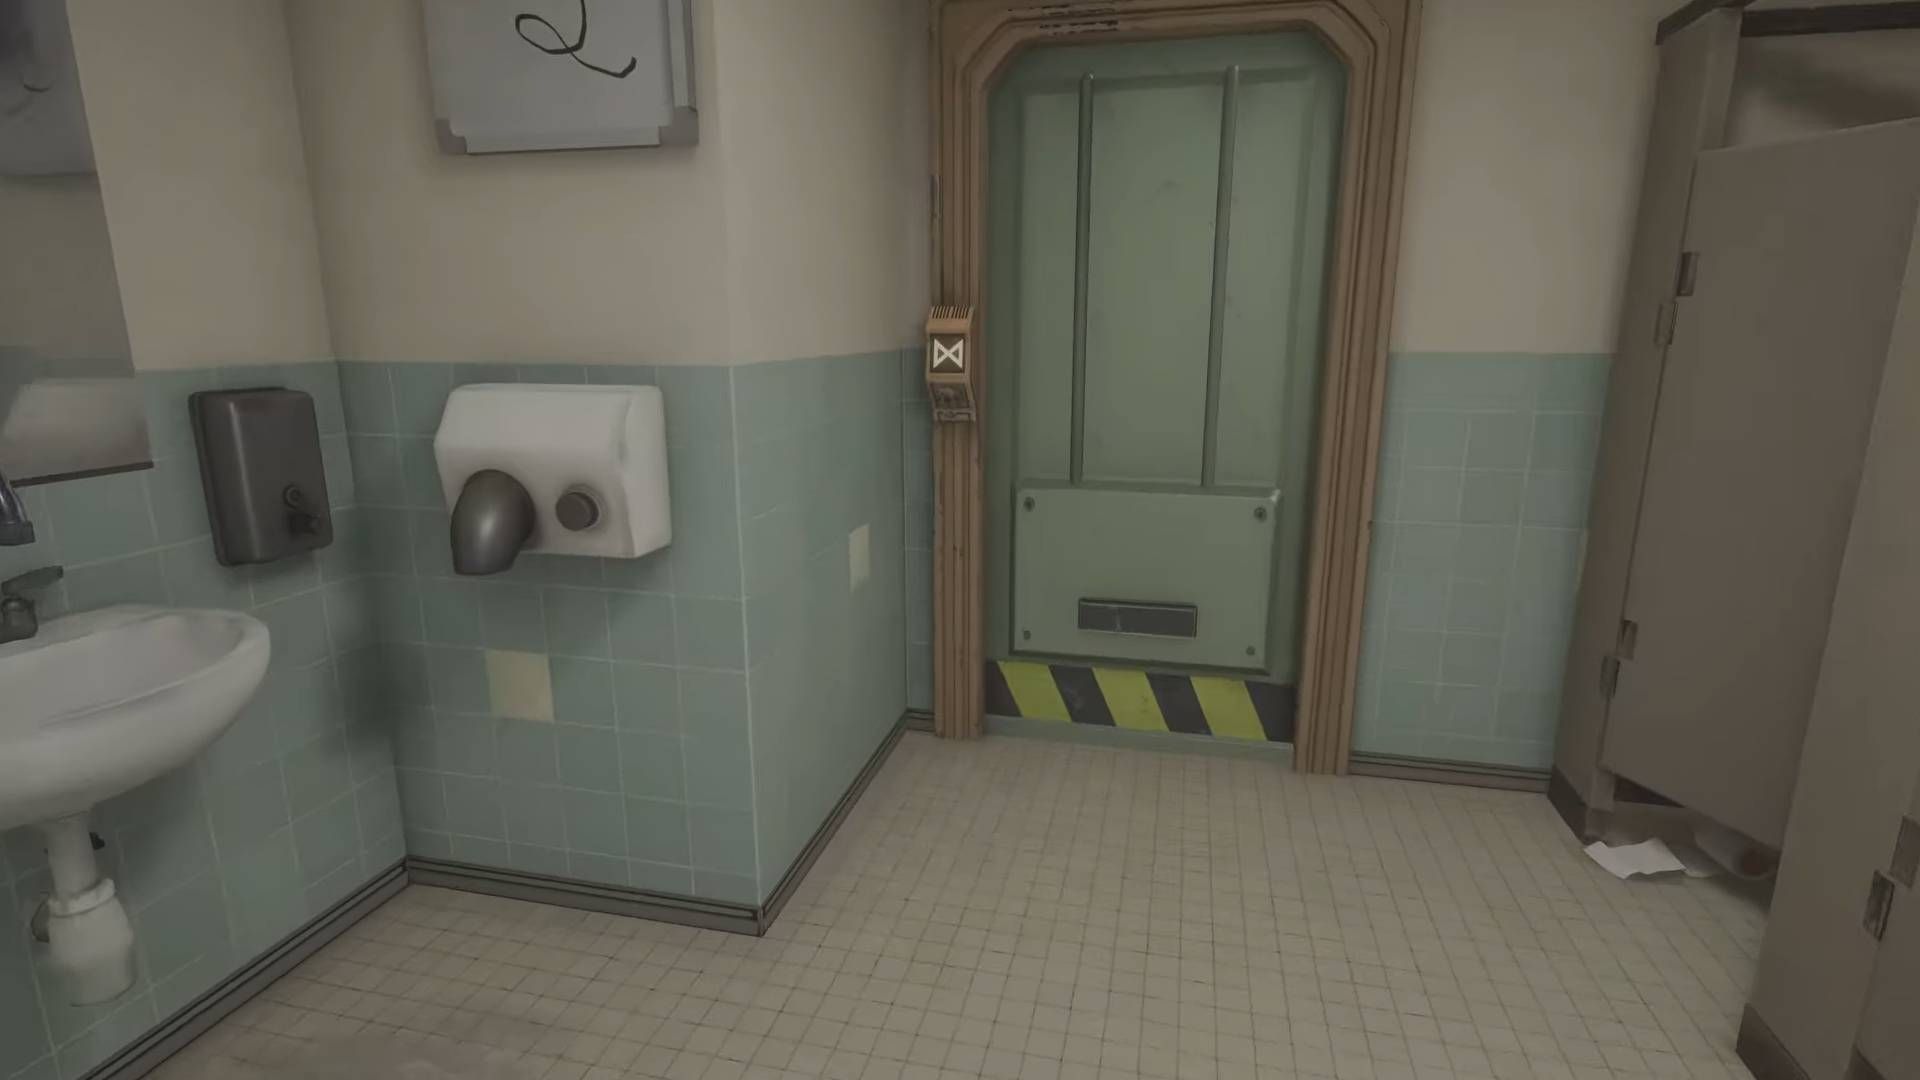
The Mailbox is located inside the Executive Restroom. To get there, proceed down the main corridor, pass through the secure entrance door into the locker room, and then continue beyond to the cafeteria area. From there, you’ll find a door that opens into a regular restroom. Inside this restroom, look for the Executive Door which leads to the Executive Restroom, where you will discover the mailbox.
Mailbox #37
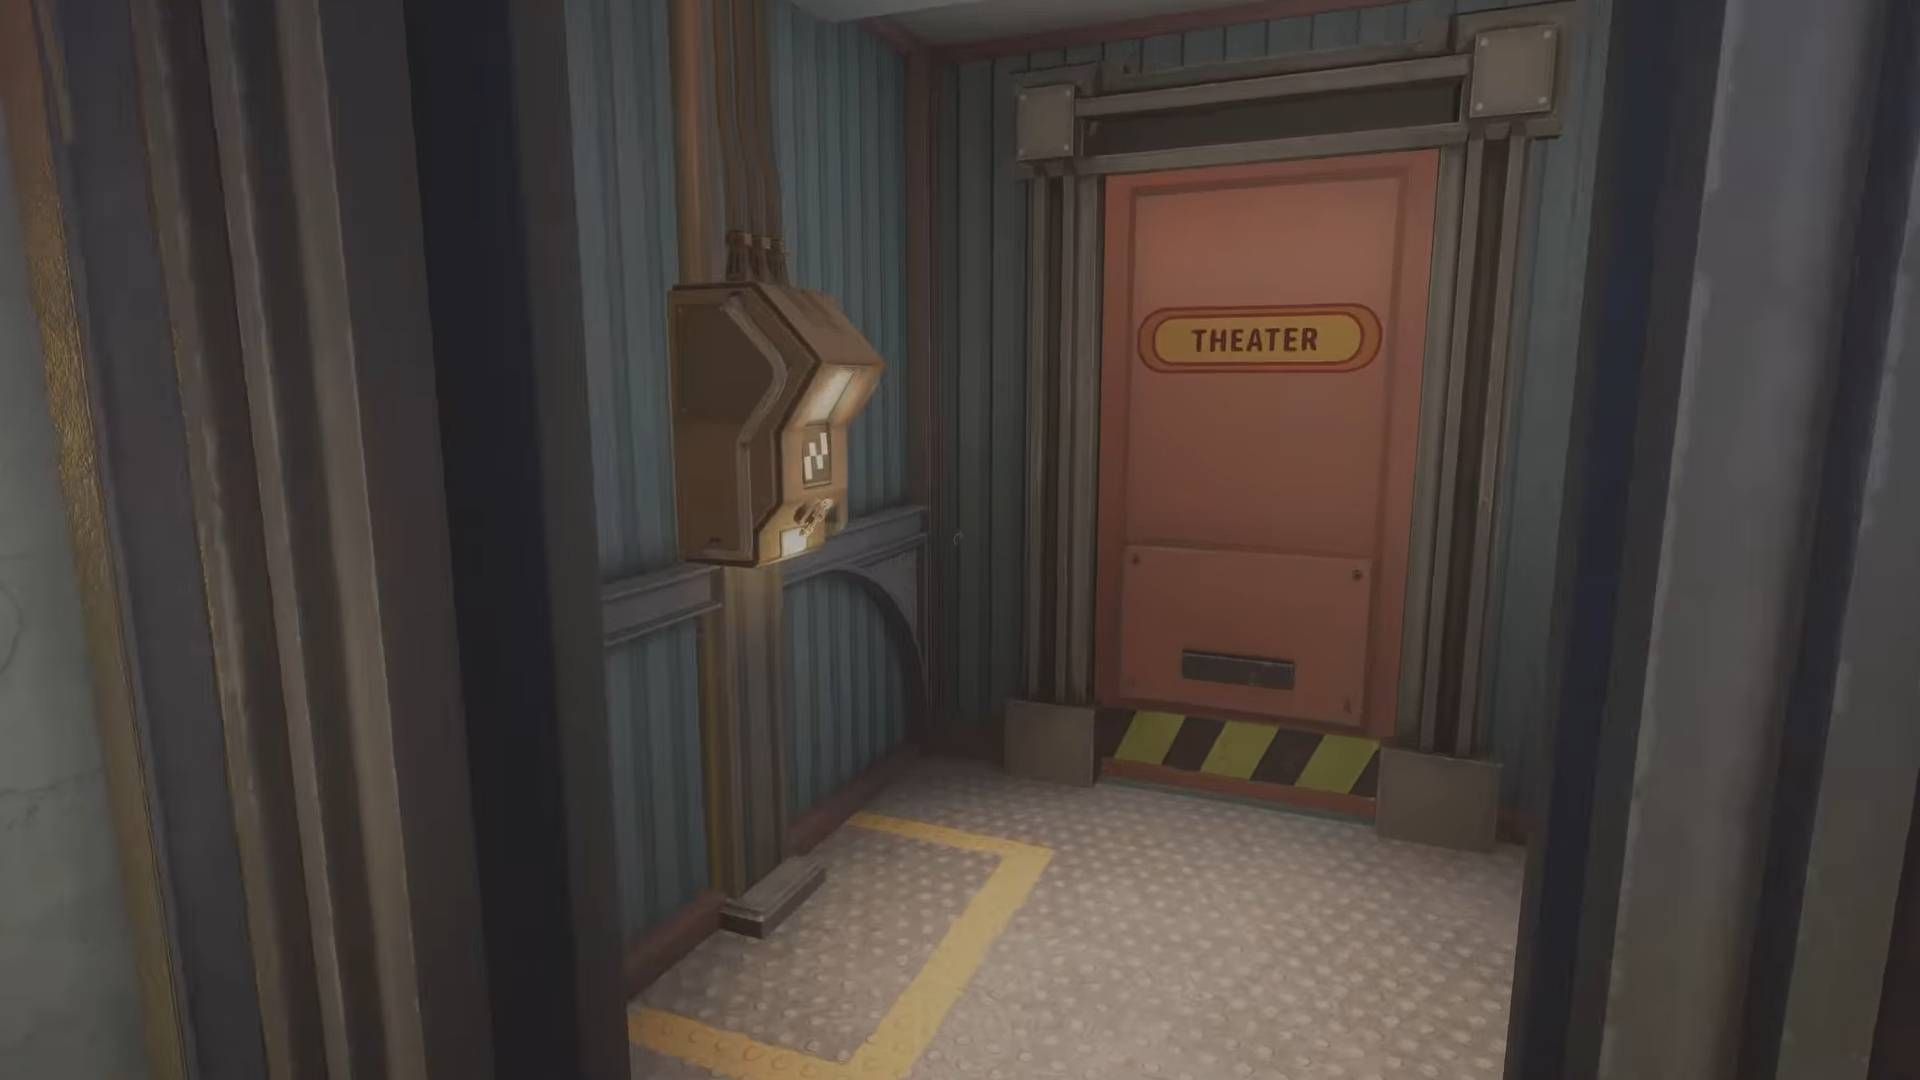

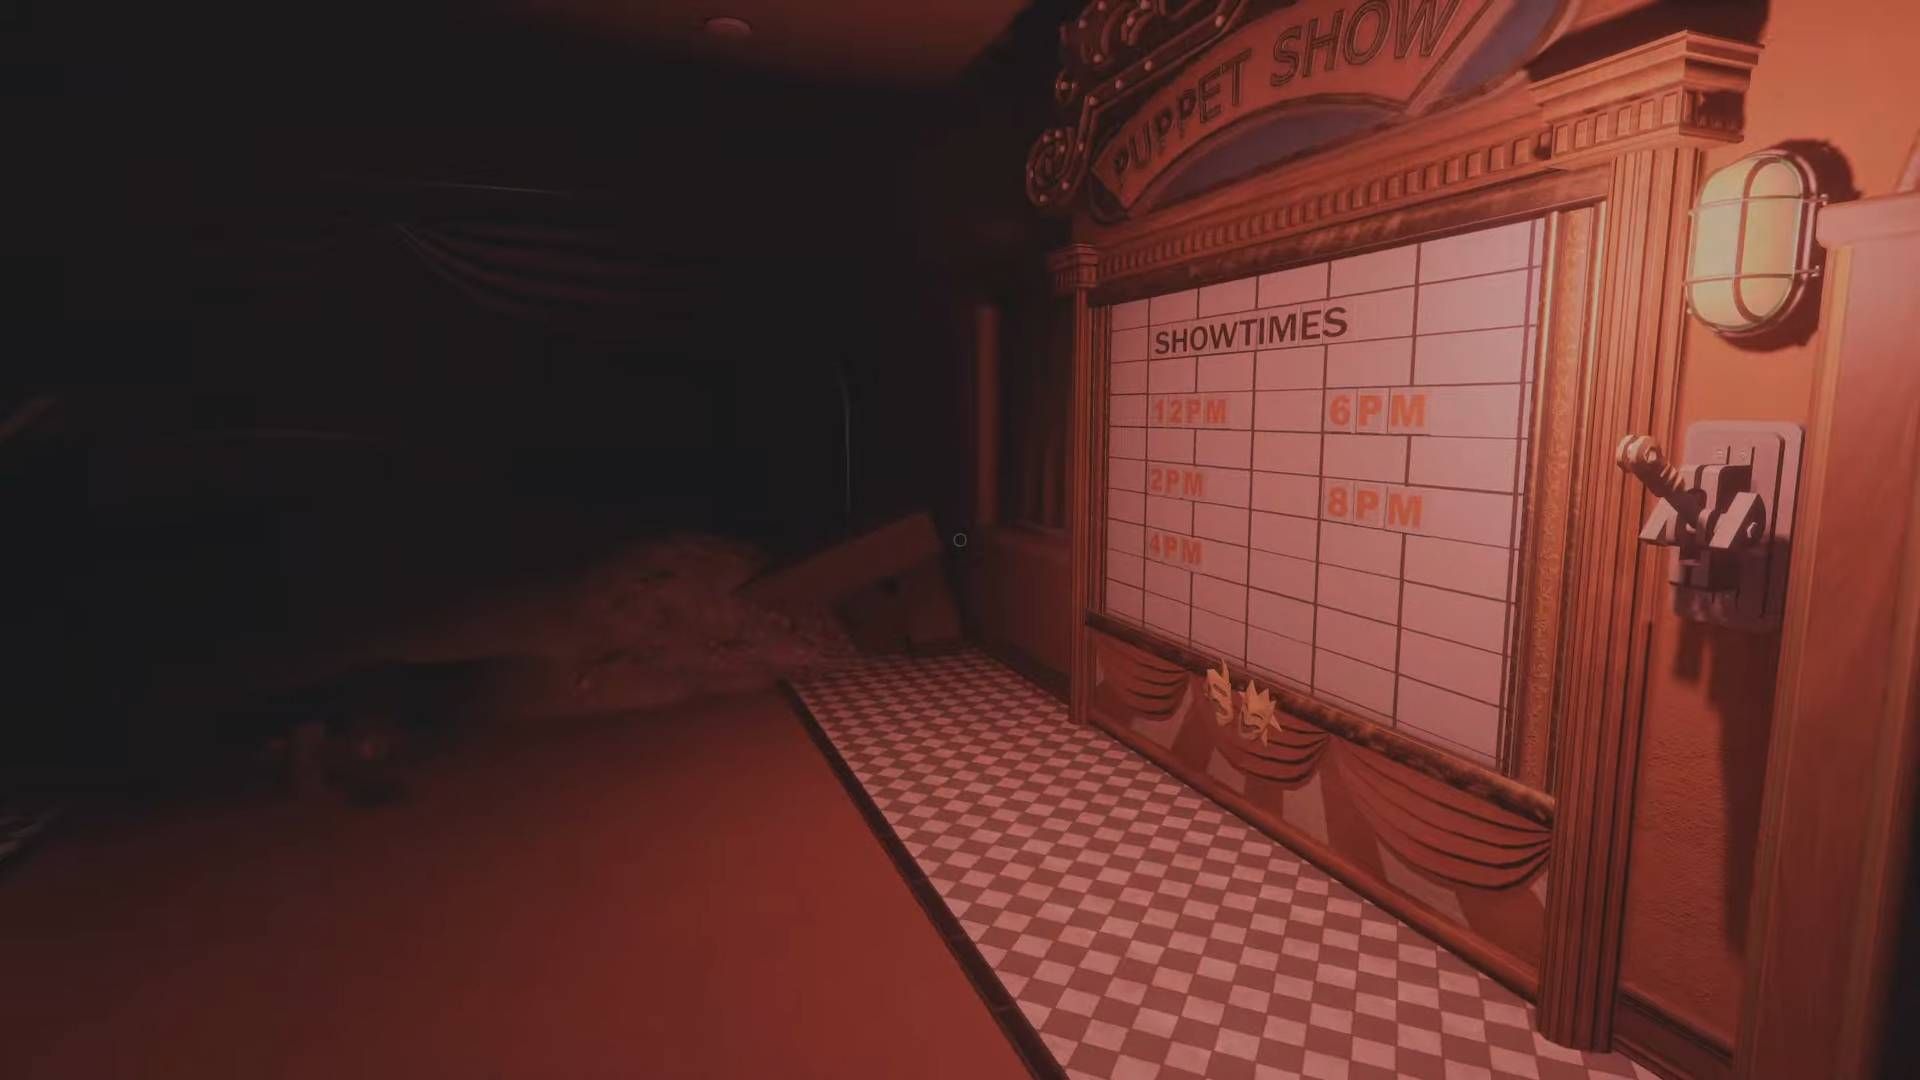
To access the specified area, make your way into the theater first, then look for the Admin Door indicated in the provided map. This path will lead you to the part of the theater that caved in during the Foxy Puppet Show. Upon reaching this location, you’ll discover a mailbox hidden beneath some fallen debris.
Mailbox #38
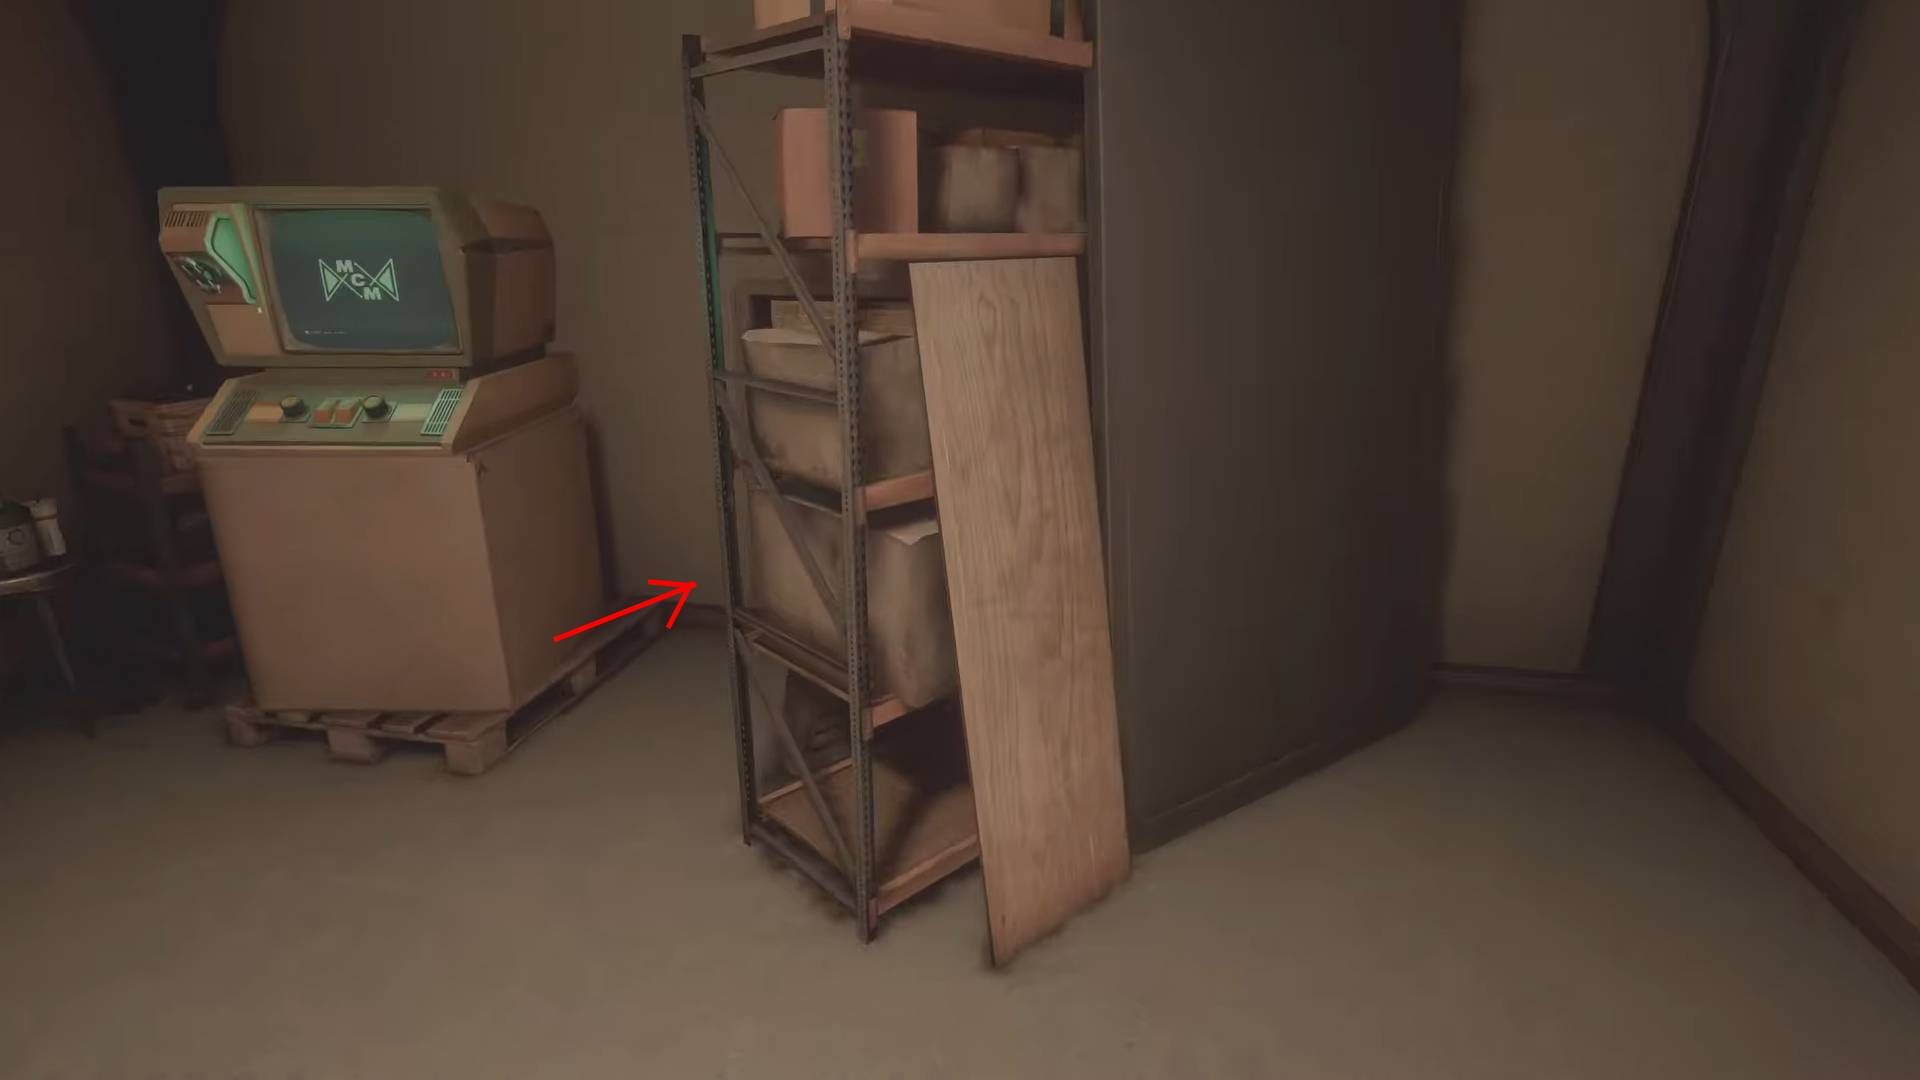
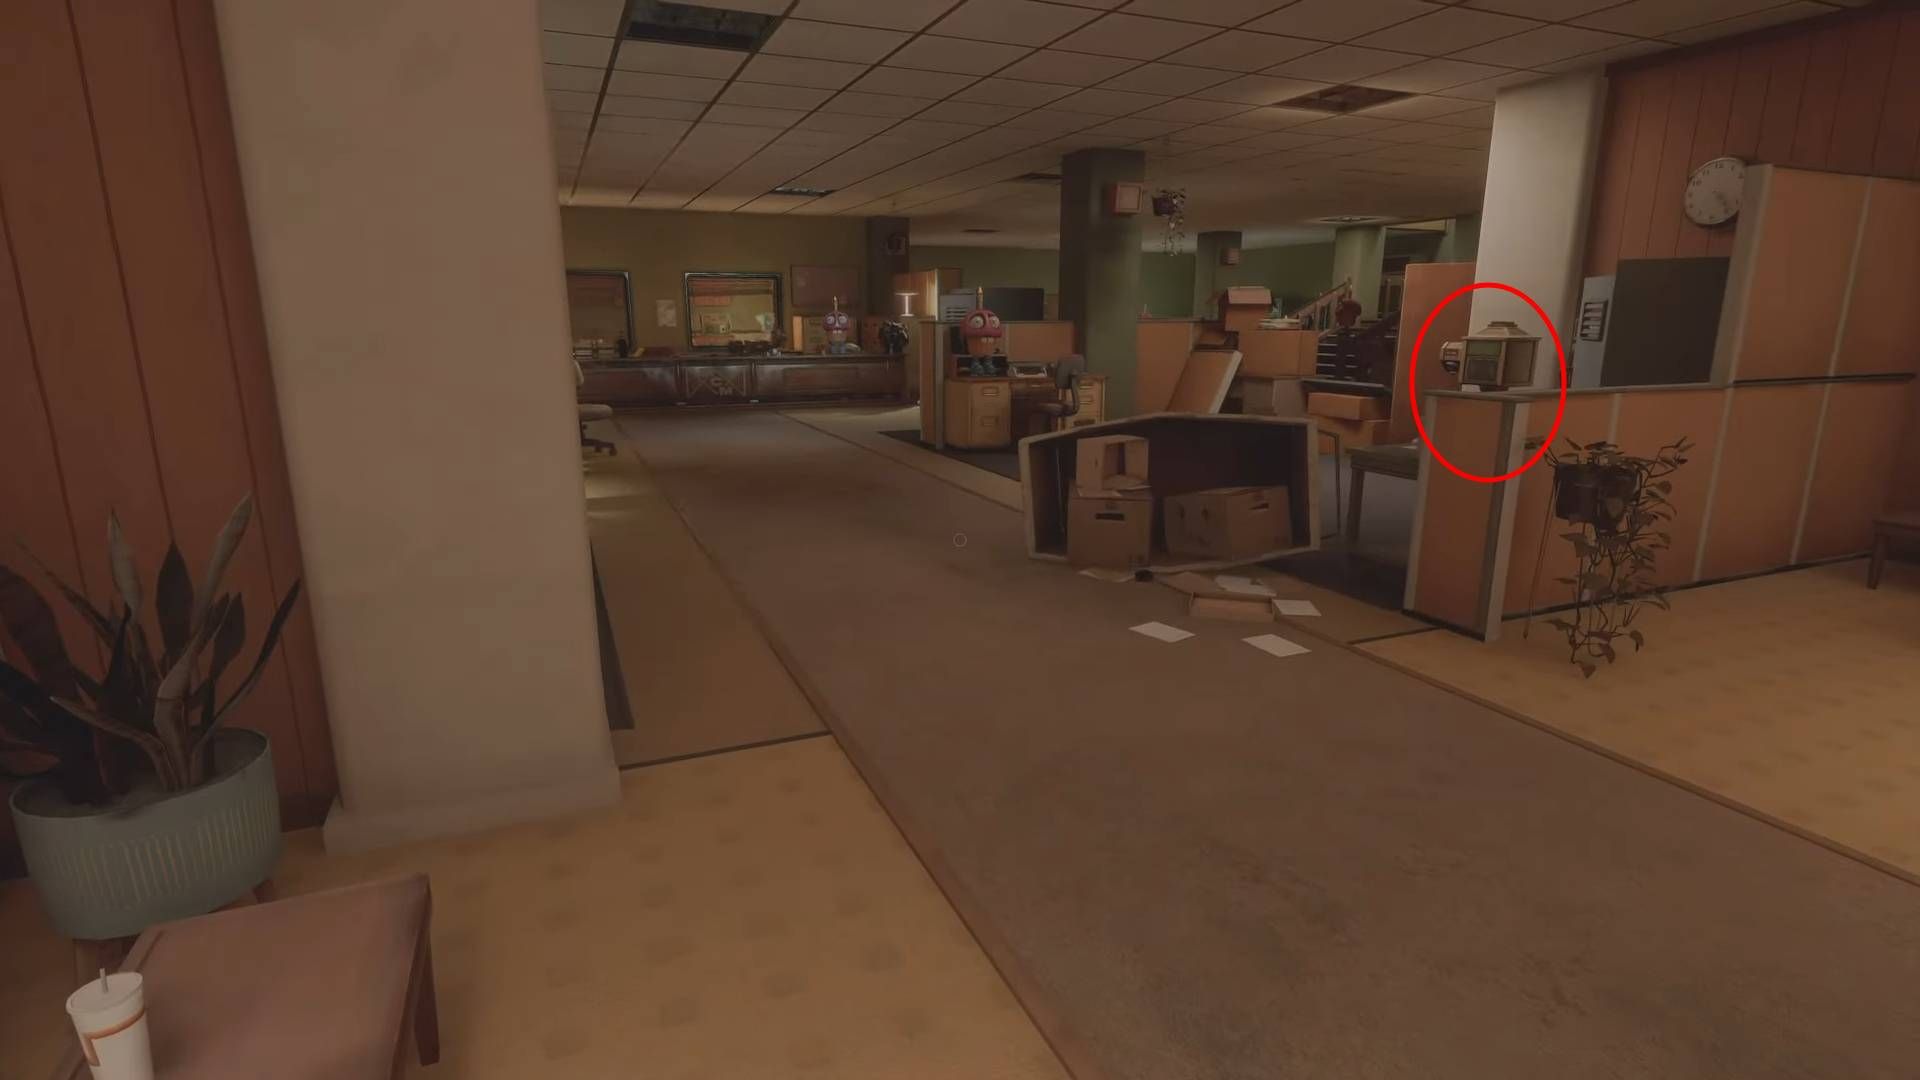
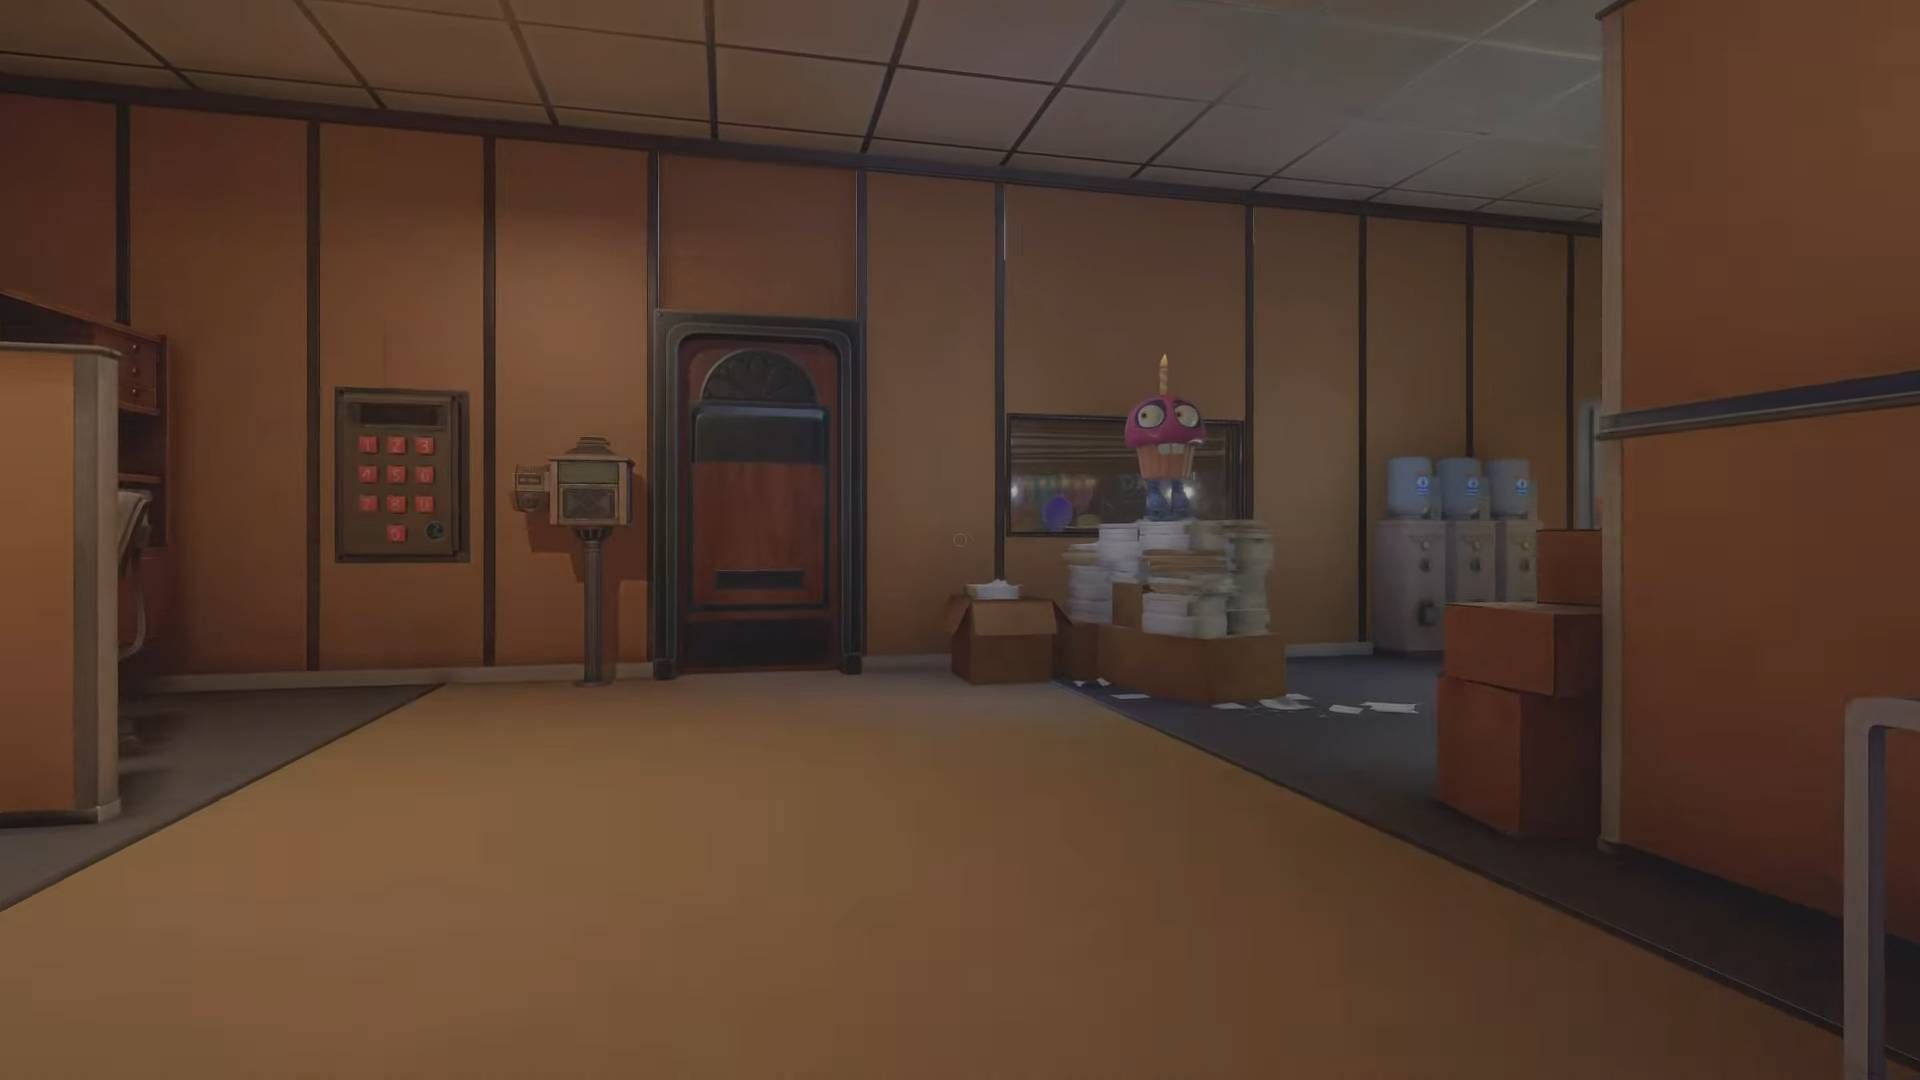
The mailbox labeled as #38 can be located within the Retail Showroom, it’s situated close to a computer workstation and not far from a door with a numerical keypad.
Mailbox #39
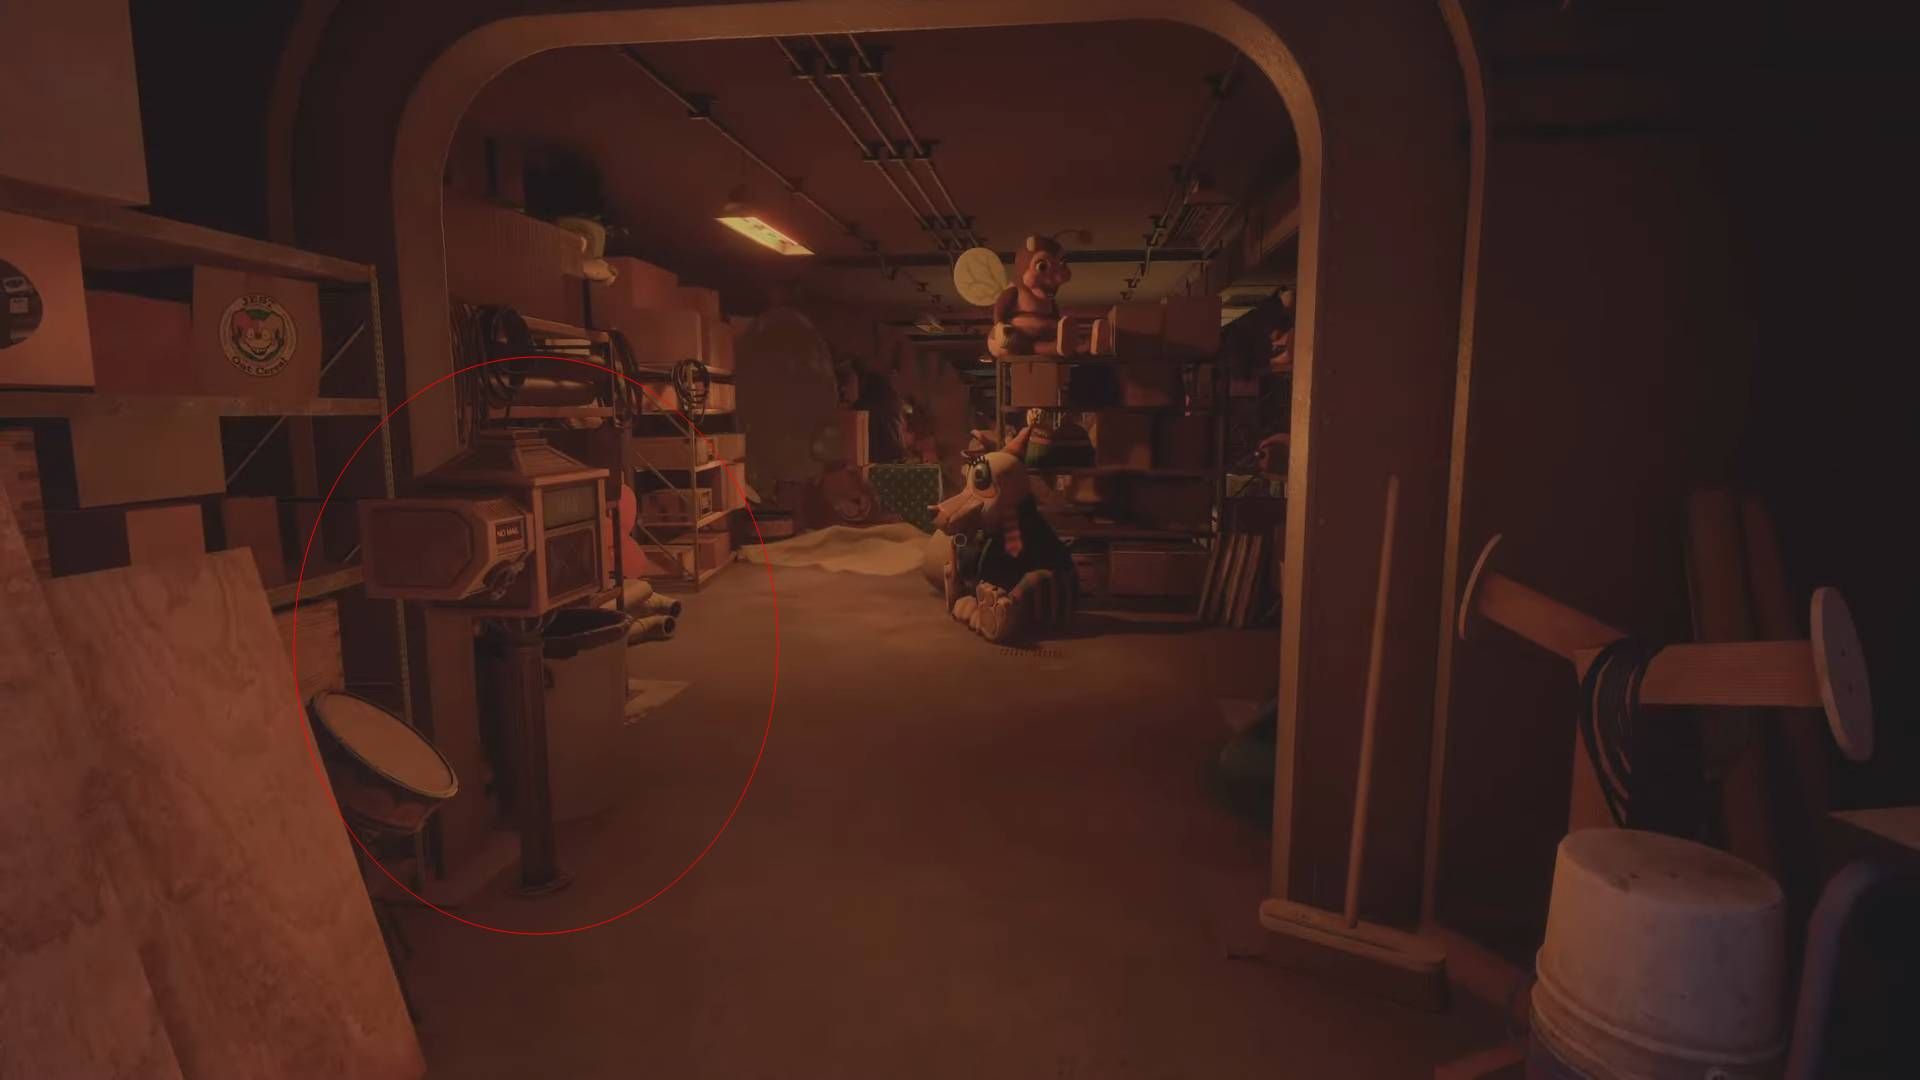
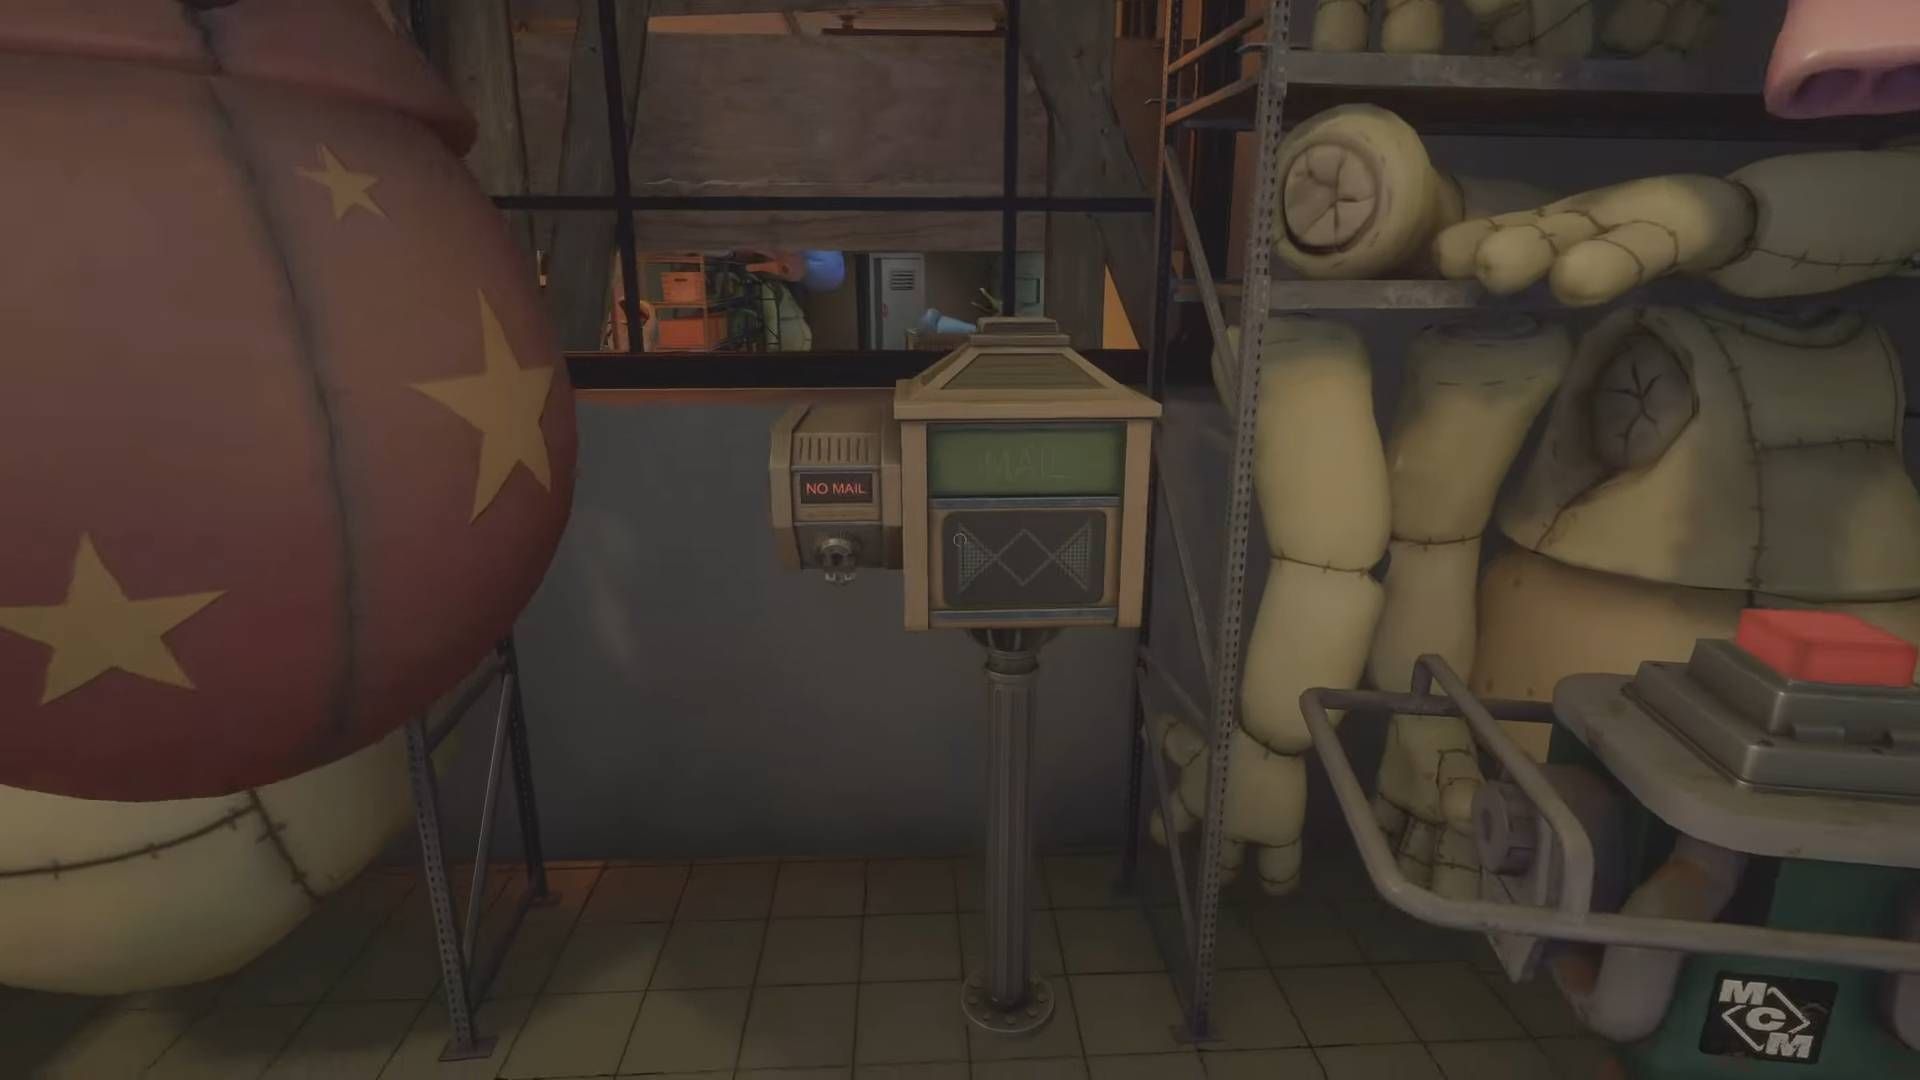
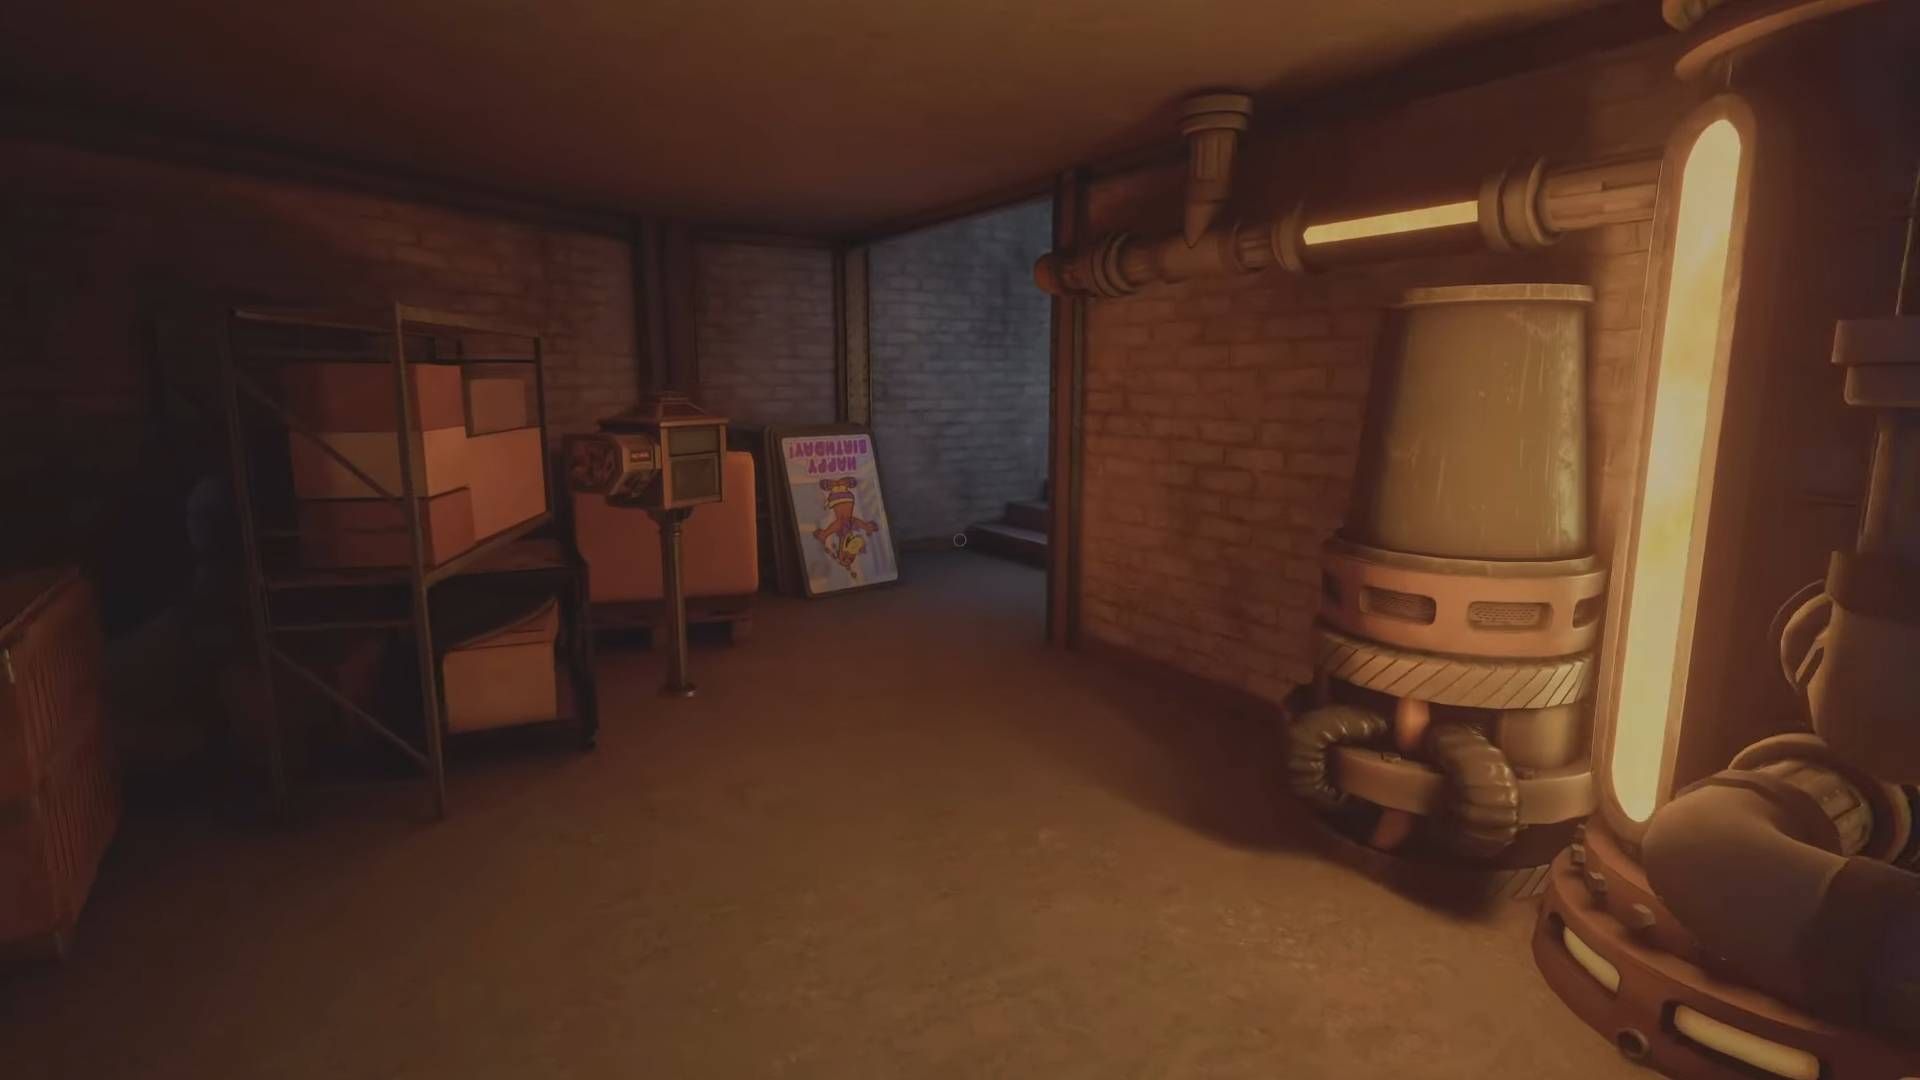
The Mailbox is located in a small room tucked away under the Retail Showroom, close to where the moon appears to have fallen. You’ll find a Clean-O-Vac, some inventory, and a computer terminal in the vicinity.
All Mailboxes Available After Activating Parachute.exe (Mailboxes 40-42)
To get to the remaining mailboxes, you’ll first have to revisit the Security Office with executive privileges, bypass Dispatch, and then use Parachute.exe on the nearby computer terminal to unlock the way to the game’s second and third conclusions. Keep in mind that if you don’t access these mailboxes during your exploration of the newly accessible zones, you might miss them entirely.
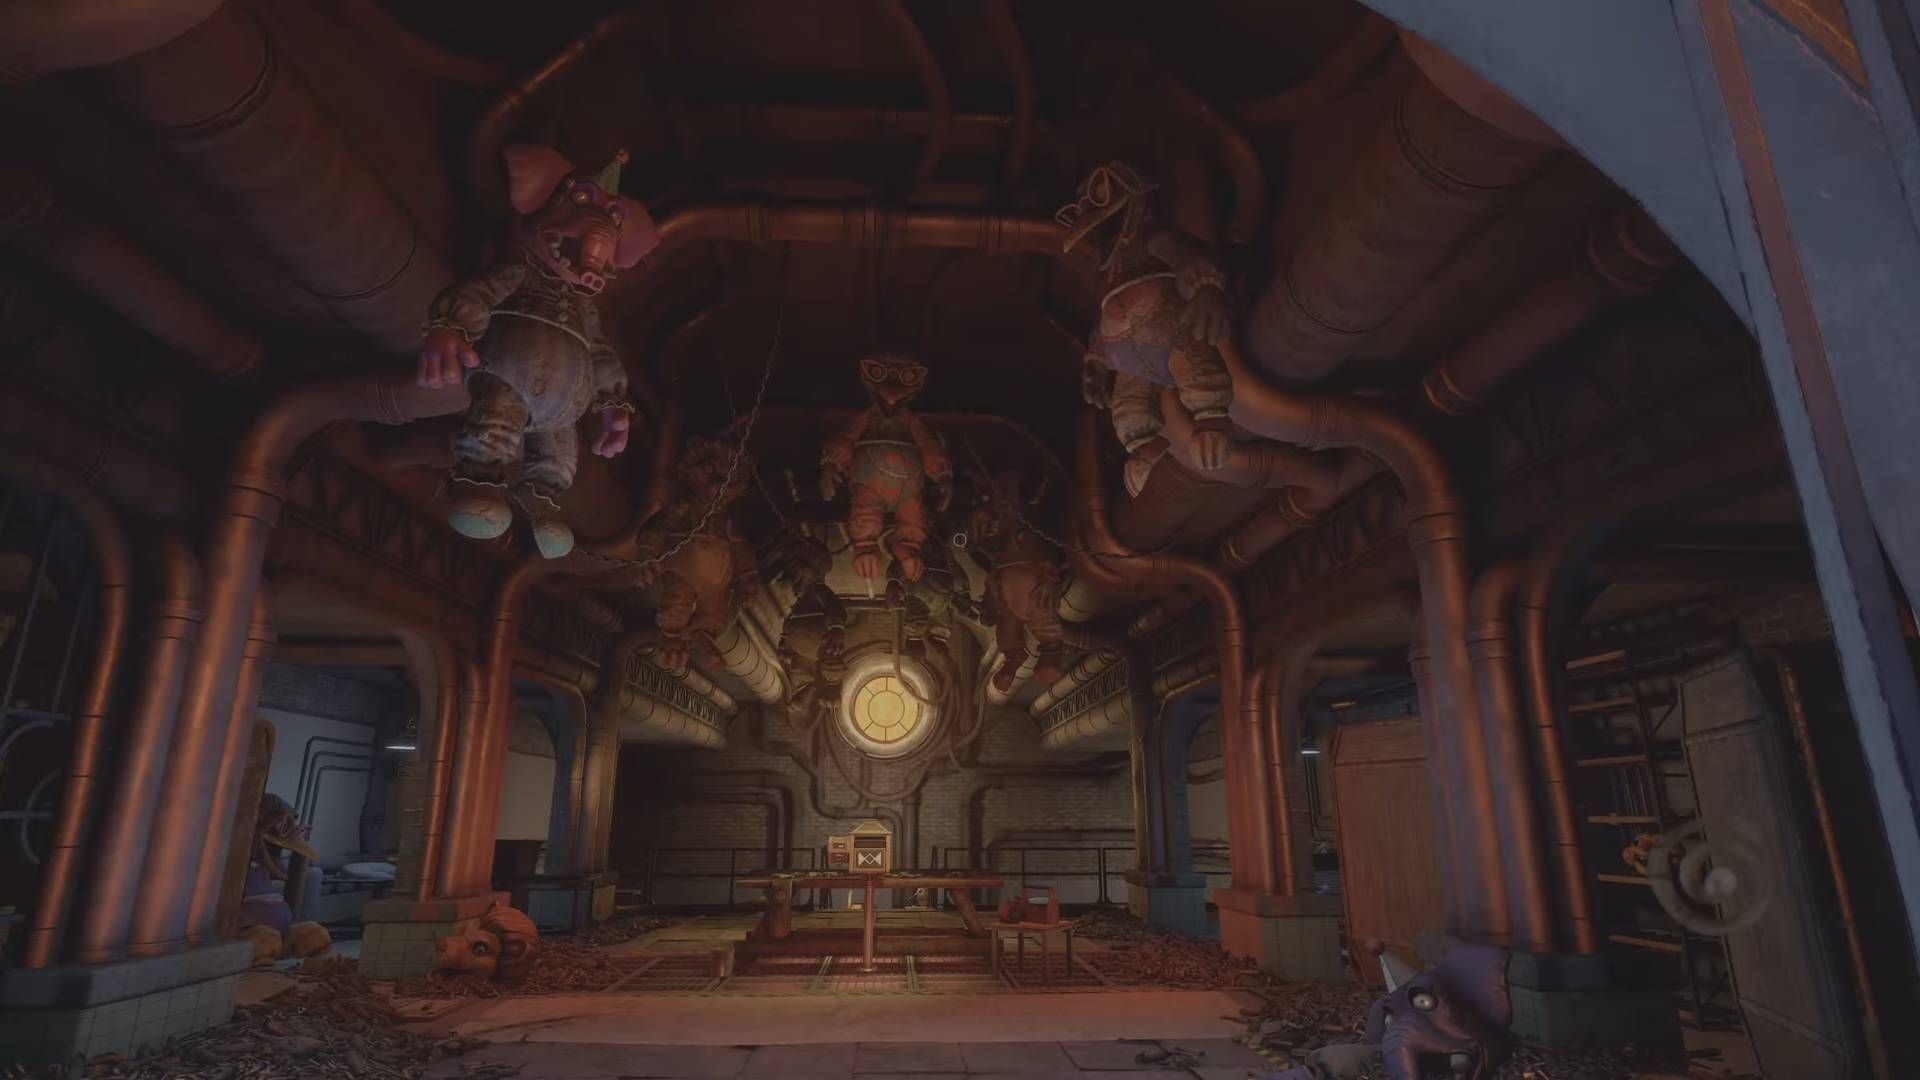
Mailbox #40
You’ll discover this Mailbox in the pizzeria located below the factory. Once you’ve managed to find your way into the adjacent room, you’ll come across the Springlock Freddy Suit there.
Mailbox #41
Following your encounter with F10-N4, you’ll find yourself in a spacious room where vehicles are available to transport you from the factory to Edwin’s House. Upon entering, you’ll notice that the 41st mailbox is located centrally within the room.
Mailbox #42
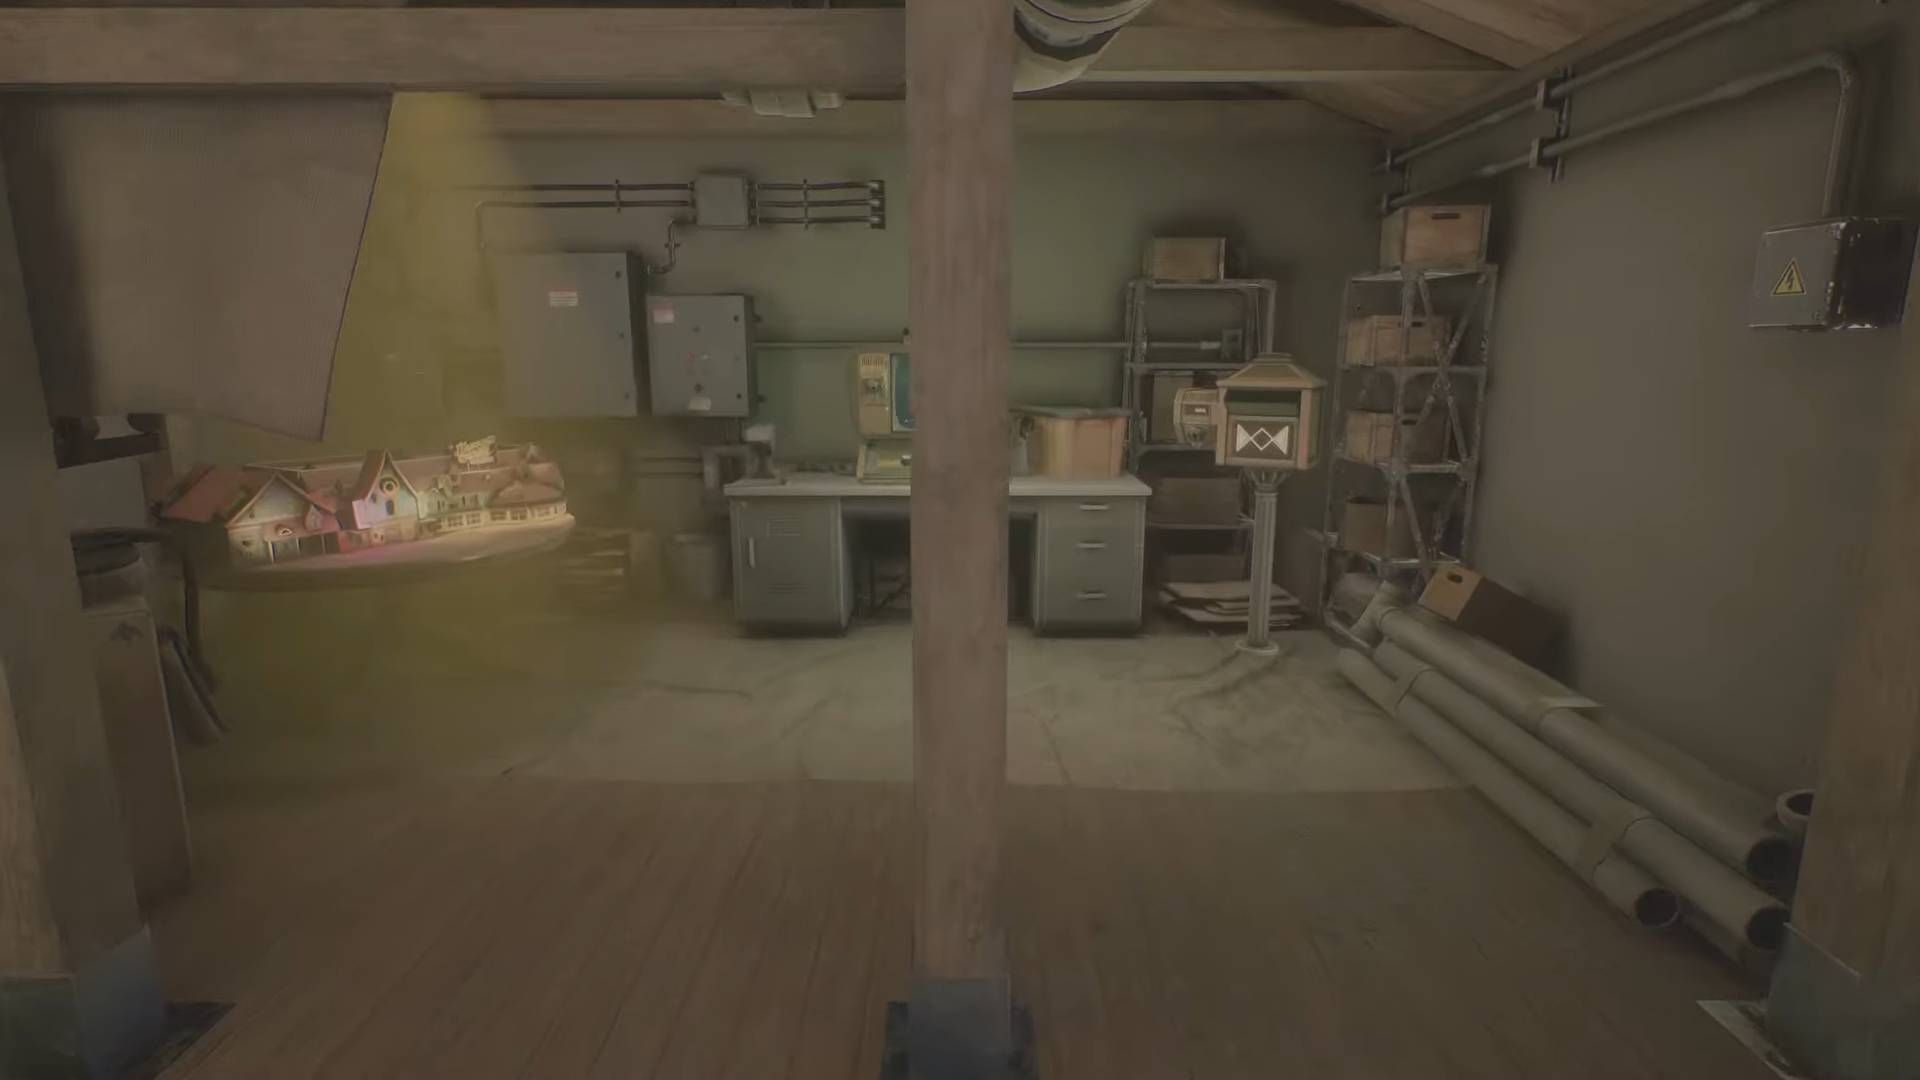
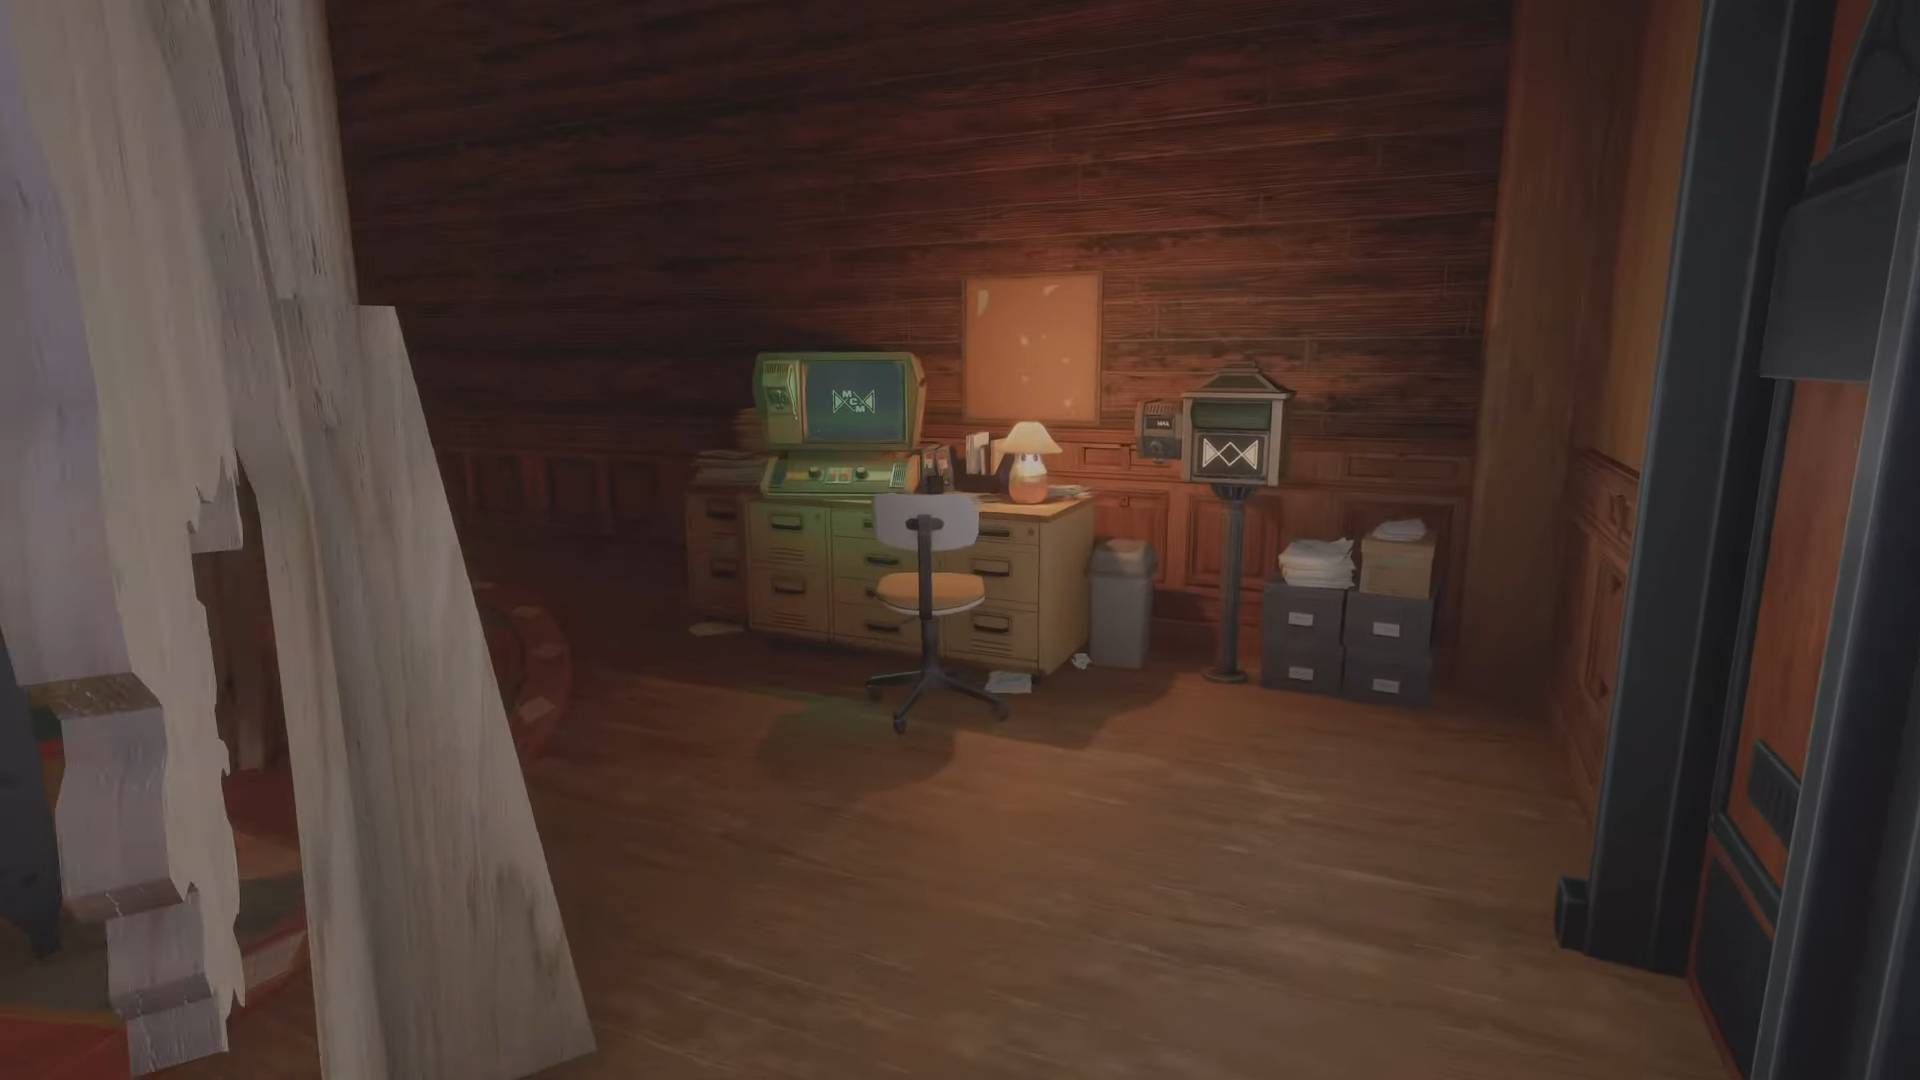
The Last Mailbox can be located in the room preceding Edwin’s Office within his residence, where you’ll also find a computer terminal and a factory model.
Read More
- Forza Horizon 6: Find the Ohtani Treasure Chest Location
- NTE Drift Guide (& Best Car Mods for Drifting)
- LEGO Batman Legacy of the Dark Knight Batcave Minikits & WayneTech Caches
- Diablo 4 Best Loot Filter Codes
- USD RUB PREDICTION
- Boruto: Ikemoto Has Already Hinted At Sasuke’s New Eye After Return
- Top 10 Must-Watch Isekai Anime on Crunchyroll Revealed!
- Cookie Run Kingdom Timeline of Fate Update Guide
- Deltarune Chapter 1 100% Walkthrough: Complete Guide to Secrets and Bosses
- Starsand Island’s Rarest Achievements and How to Earn Them
2025-07-04 19:42