In Death Stranding 2: On the Beach, Kojima Productions has introduced numerous enhancements to make Sam’s tasks smoother and the game more engaging for players. Unlike in the first game where collecting a significant amount of crafting materials was limited, in DS2, Sam can now explore a variety of mines yielding specific resources. Additionally, an intricate monorail system has been added, allowing Sam to effortlessly transport large amounts of materials. In this tutorial, we’ll be demonstrating the locations of every mine in Death Stranding 2 and providing instructions on how to achieve the Dig!Dig!Dig! Trophy.
All Mines in Death Stranding 2 (& How to Restore Them)
As a devoted fan, I’m excited to share that Death Stranding 2: On the Beach features a total of nine mines scattered across the game world. Interestingly, five of these mines function as hubs, strategically positioned along the monorail tracks. This setup enables my character, Sam, to distribute the resources from these mines to locations at both ends of the monorail line. The remaining four mines are smaller, off-the-grid sites that aren’t connected to the monorail system. Despite their independence, these smaller mines often lie near roads, making them valuable sources of building materials nonetheless.
In Death Stranding 2: On the Beach, here’s what I’ve discovered about the mines and their resources:
1. Abandoned Mine – This mine is filled with abandoned equipment, offering a mix of basic and advanced materials that can be useful for various purposes.
2. Deserted Mine – This mine is a bit more challenging to navigate but offers rare and valuable resources, such as exotic minerals and advanced technology components.
3. Haunted Mine – Be careful here! The spirits are active in this mine, but if you manage to extract the materials, you’ll find precious metals and high-end technology components that can significantly boost your gear.
4. Forgotten Mine – This mine is a treasure trove of resources from the pre-Bridge Collapse era. The materials found here are incredibly valuable and difficult to come by elsewhere, making them invaluable for crafting top-tier equipment.
- Smoke Hill Mine (Small) – Ceramics
- Mine North of F1 (Large) – Special Alloys
- Twin Valley Mine (Small) – Chemicals
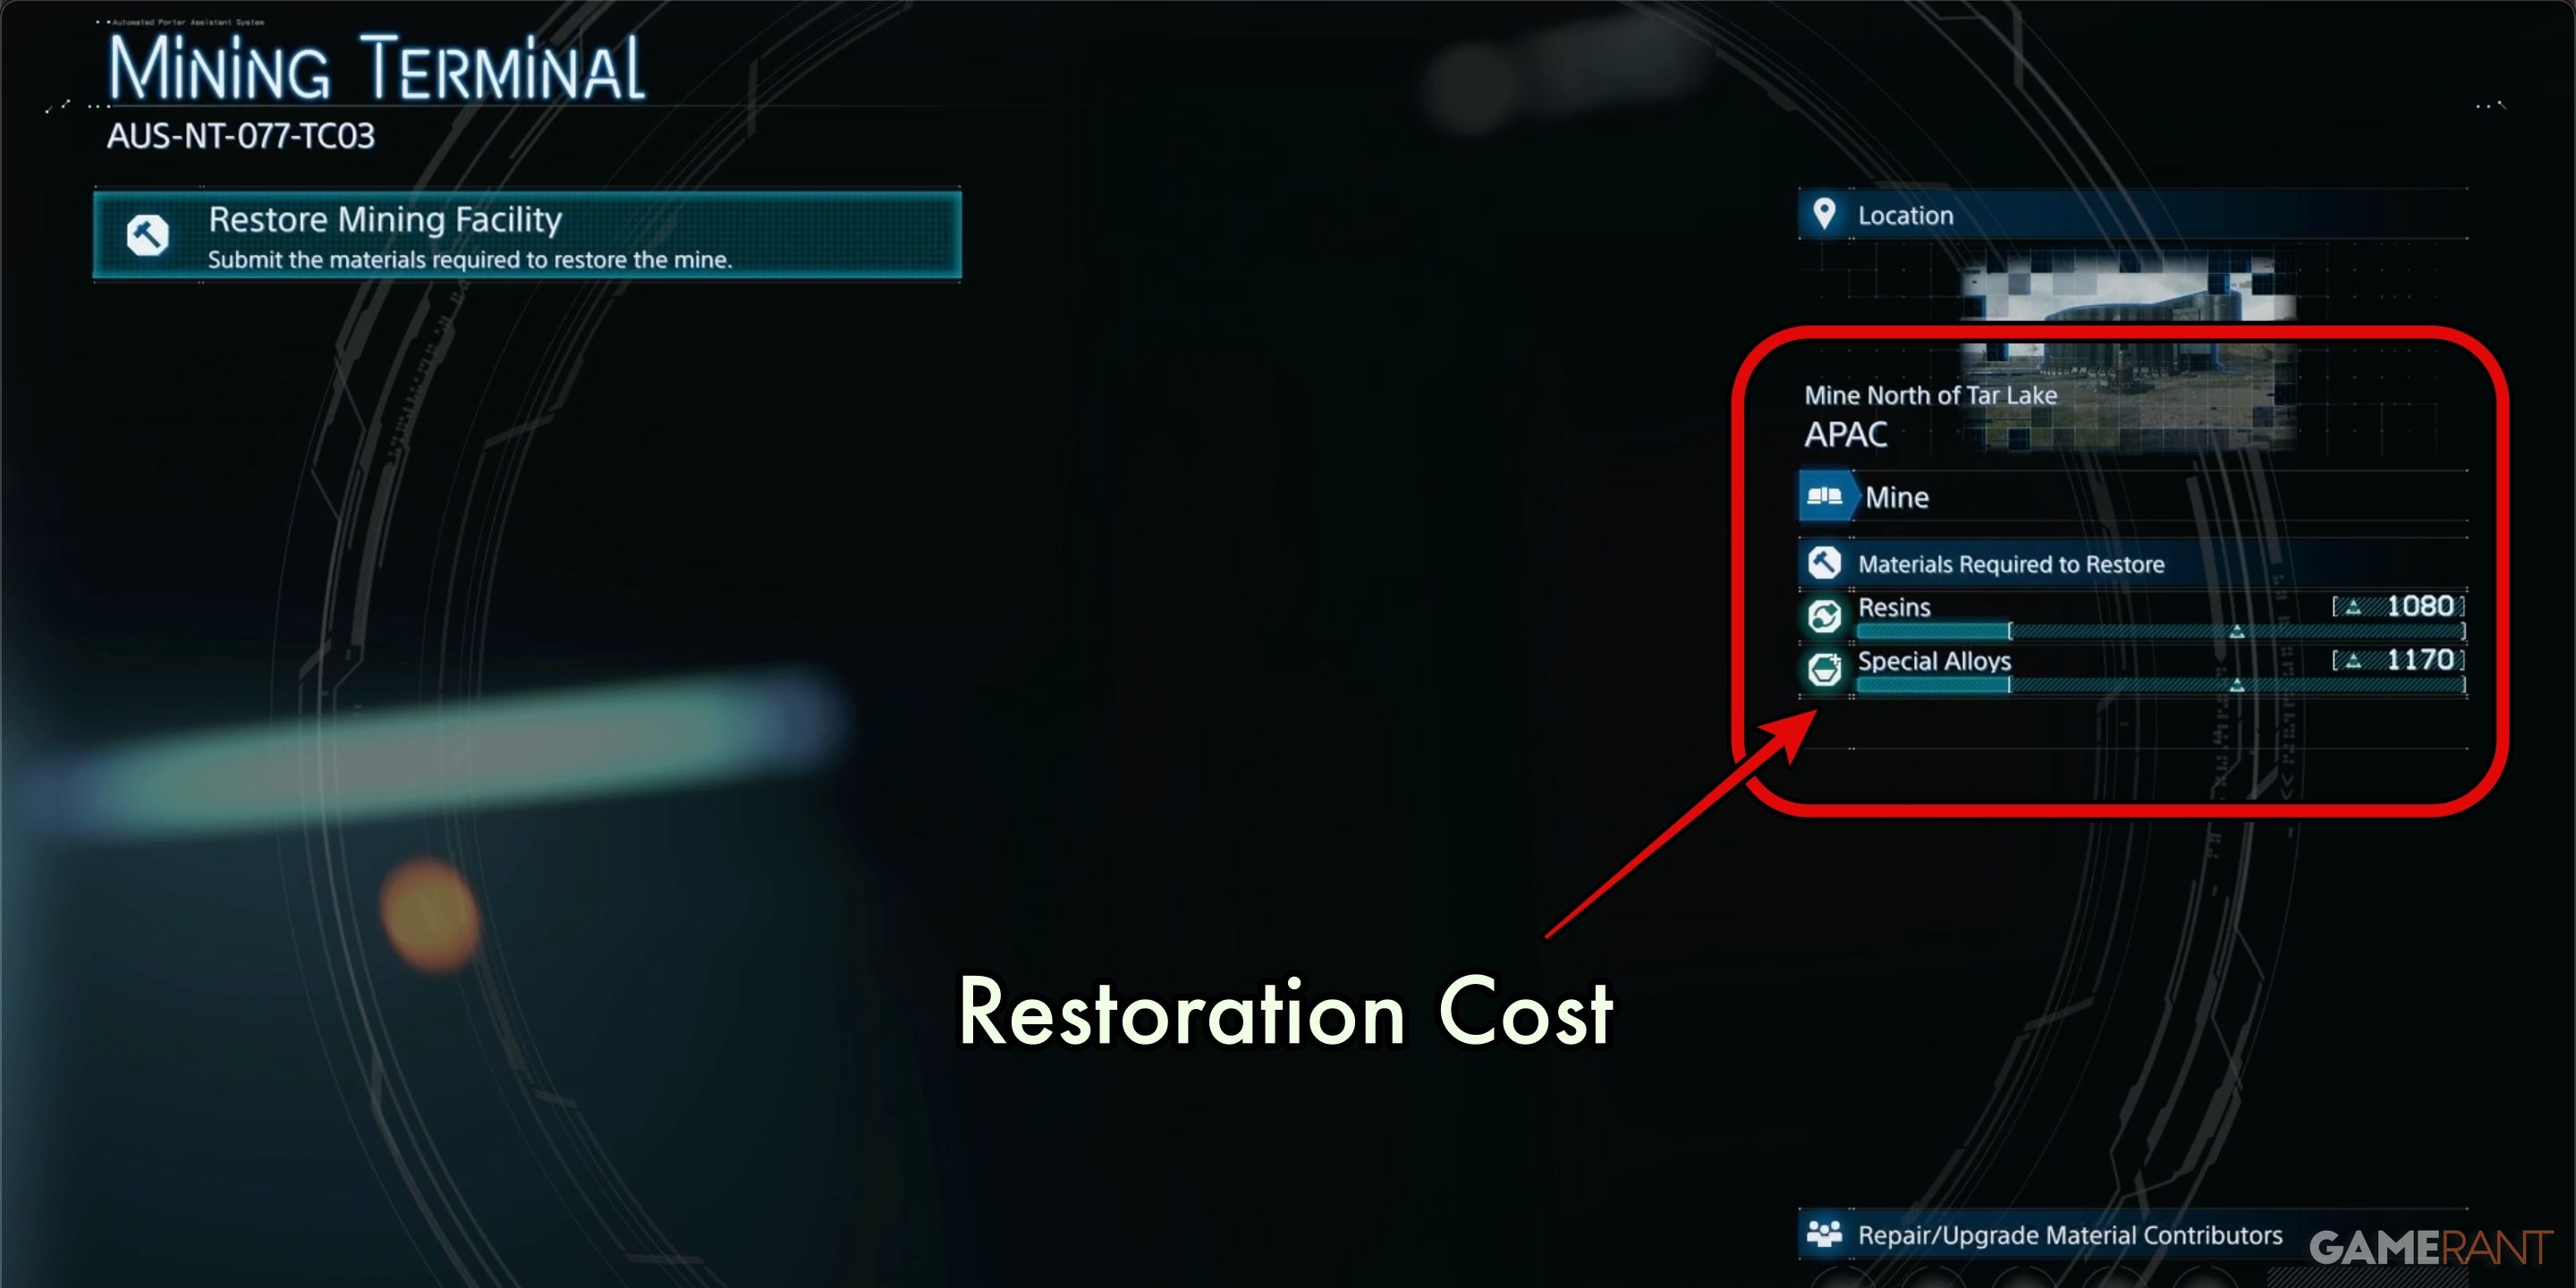
- Mine North of Tar Lake (Large) – Ceramics
- Mine Near F3 Crater (Large) – Resins
- Northeastern Mine (Large) – Metals
- Savanna Mine (Small) – Special Alloys
- Mine North of F6 (Large) – Resins
- South Edge Mine (Small) – Metals
How to Restore & Upgrade Mines:
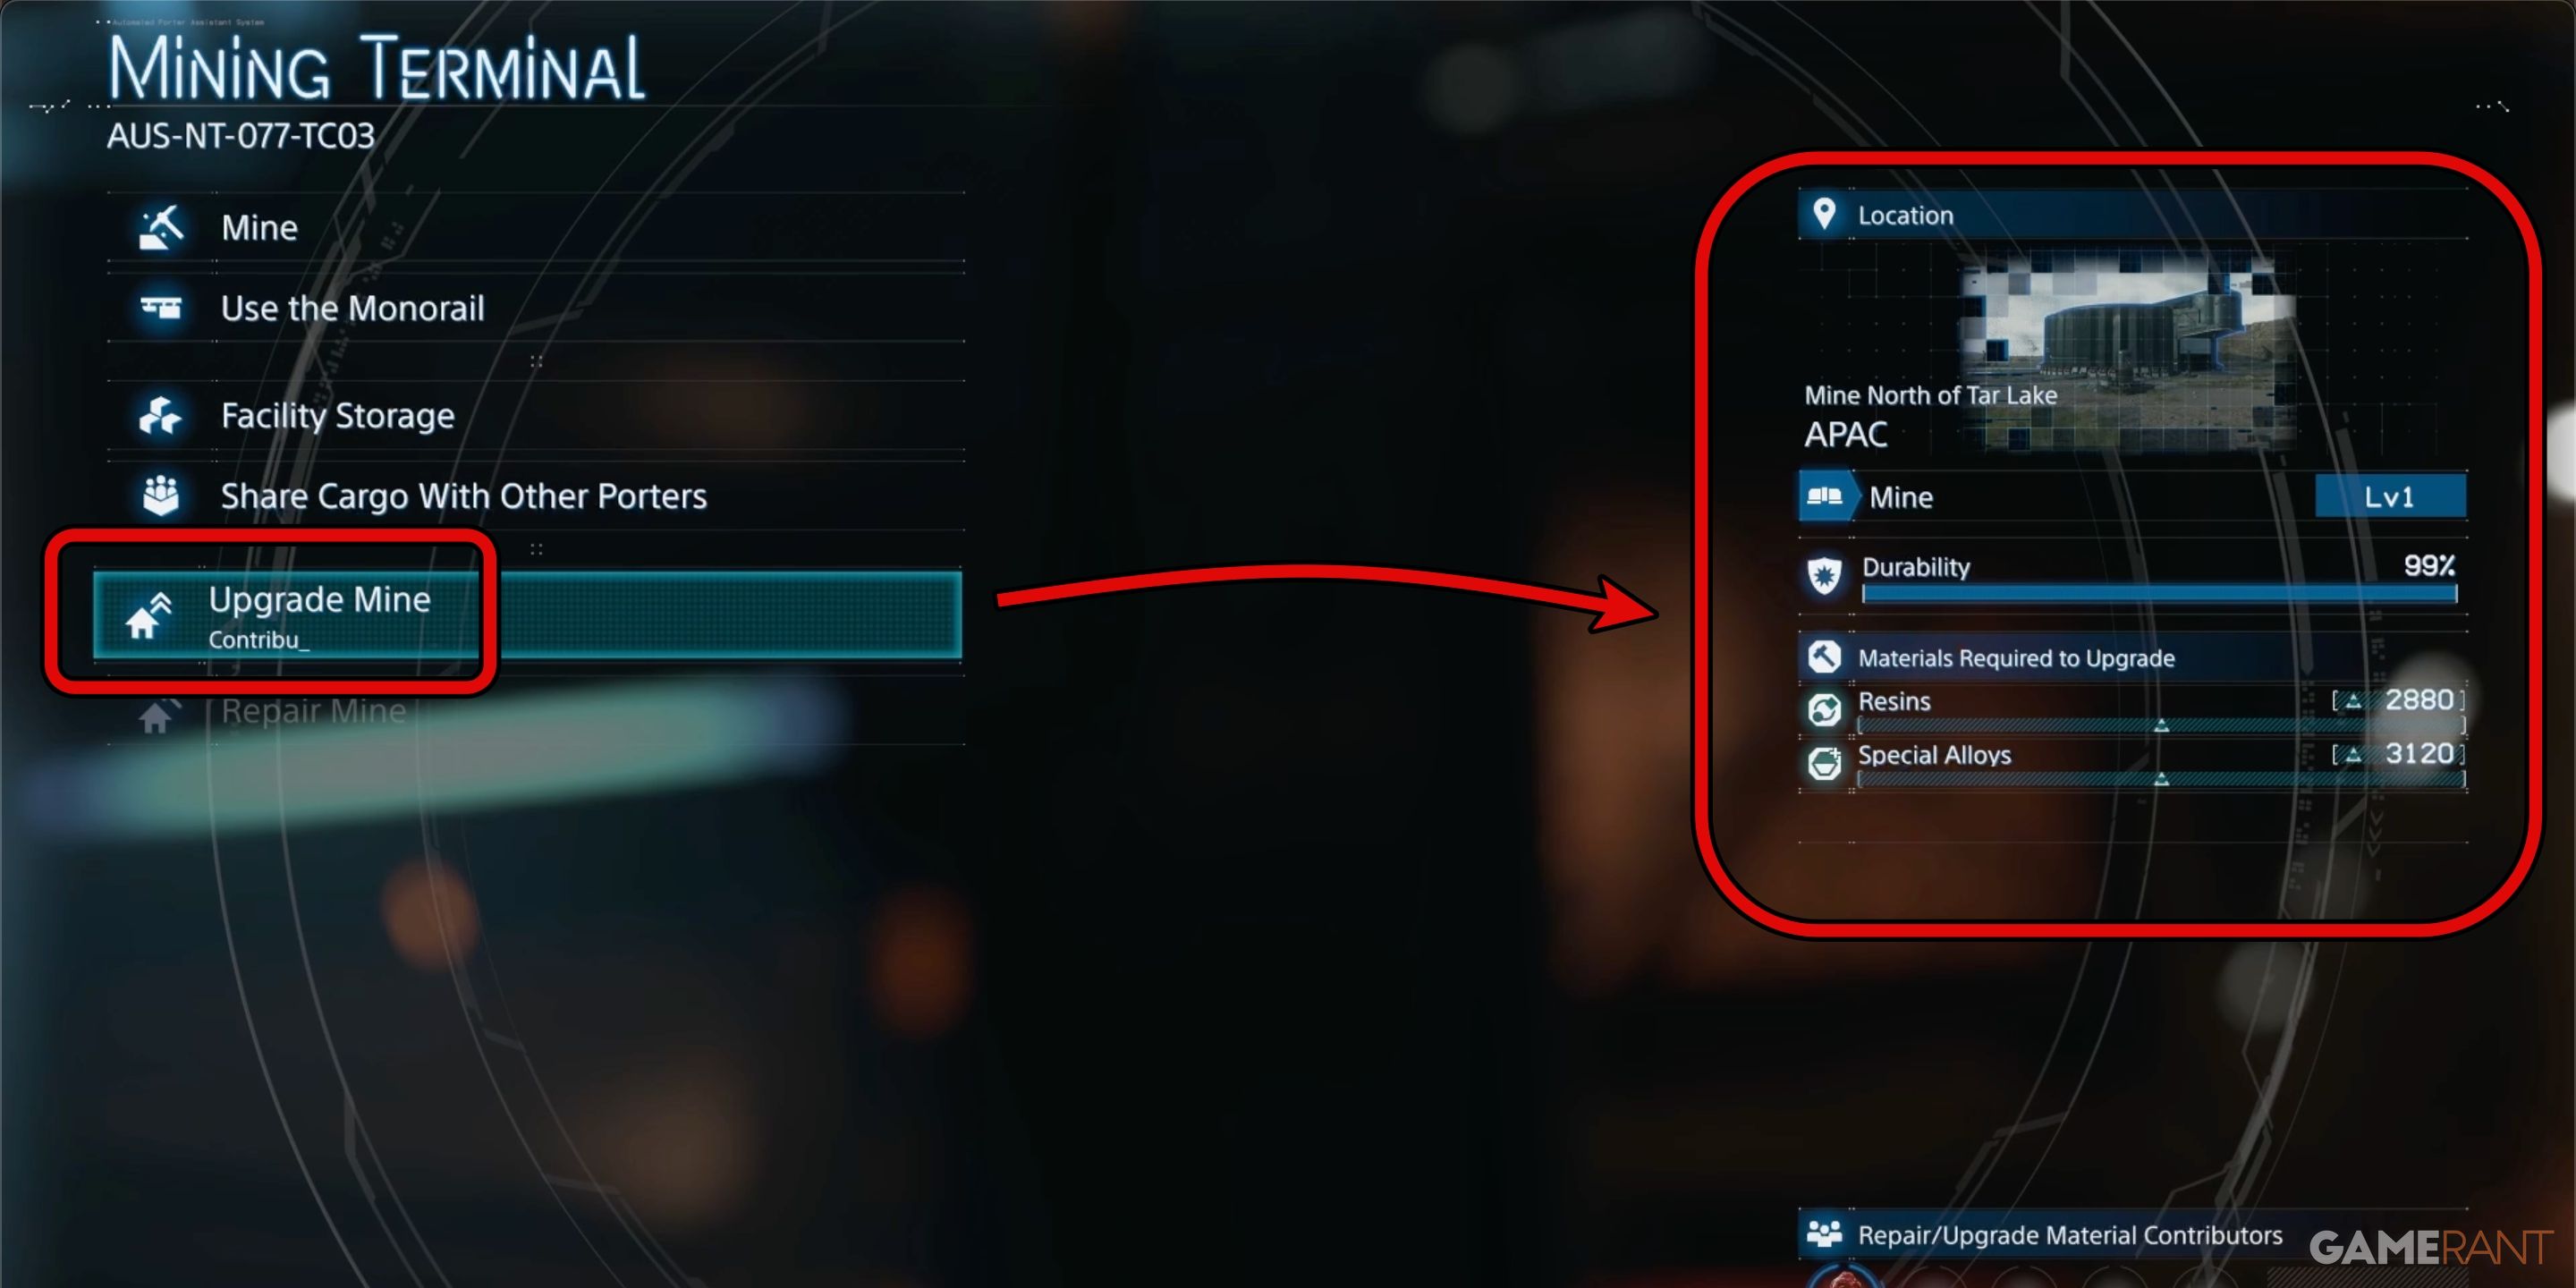
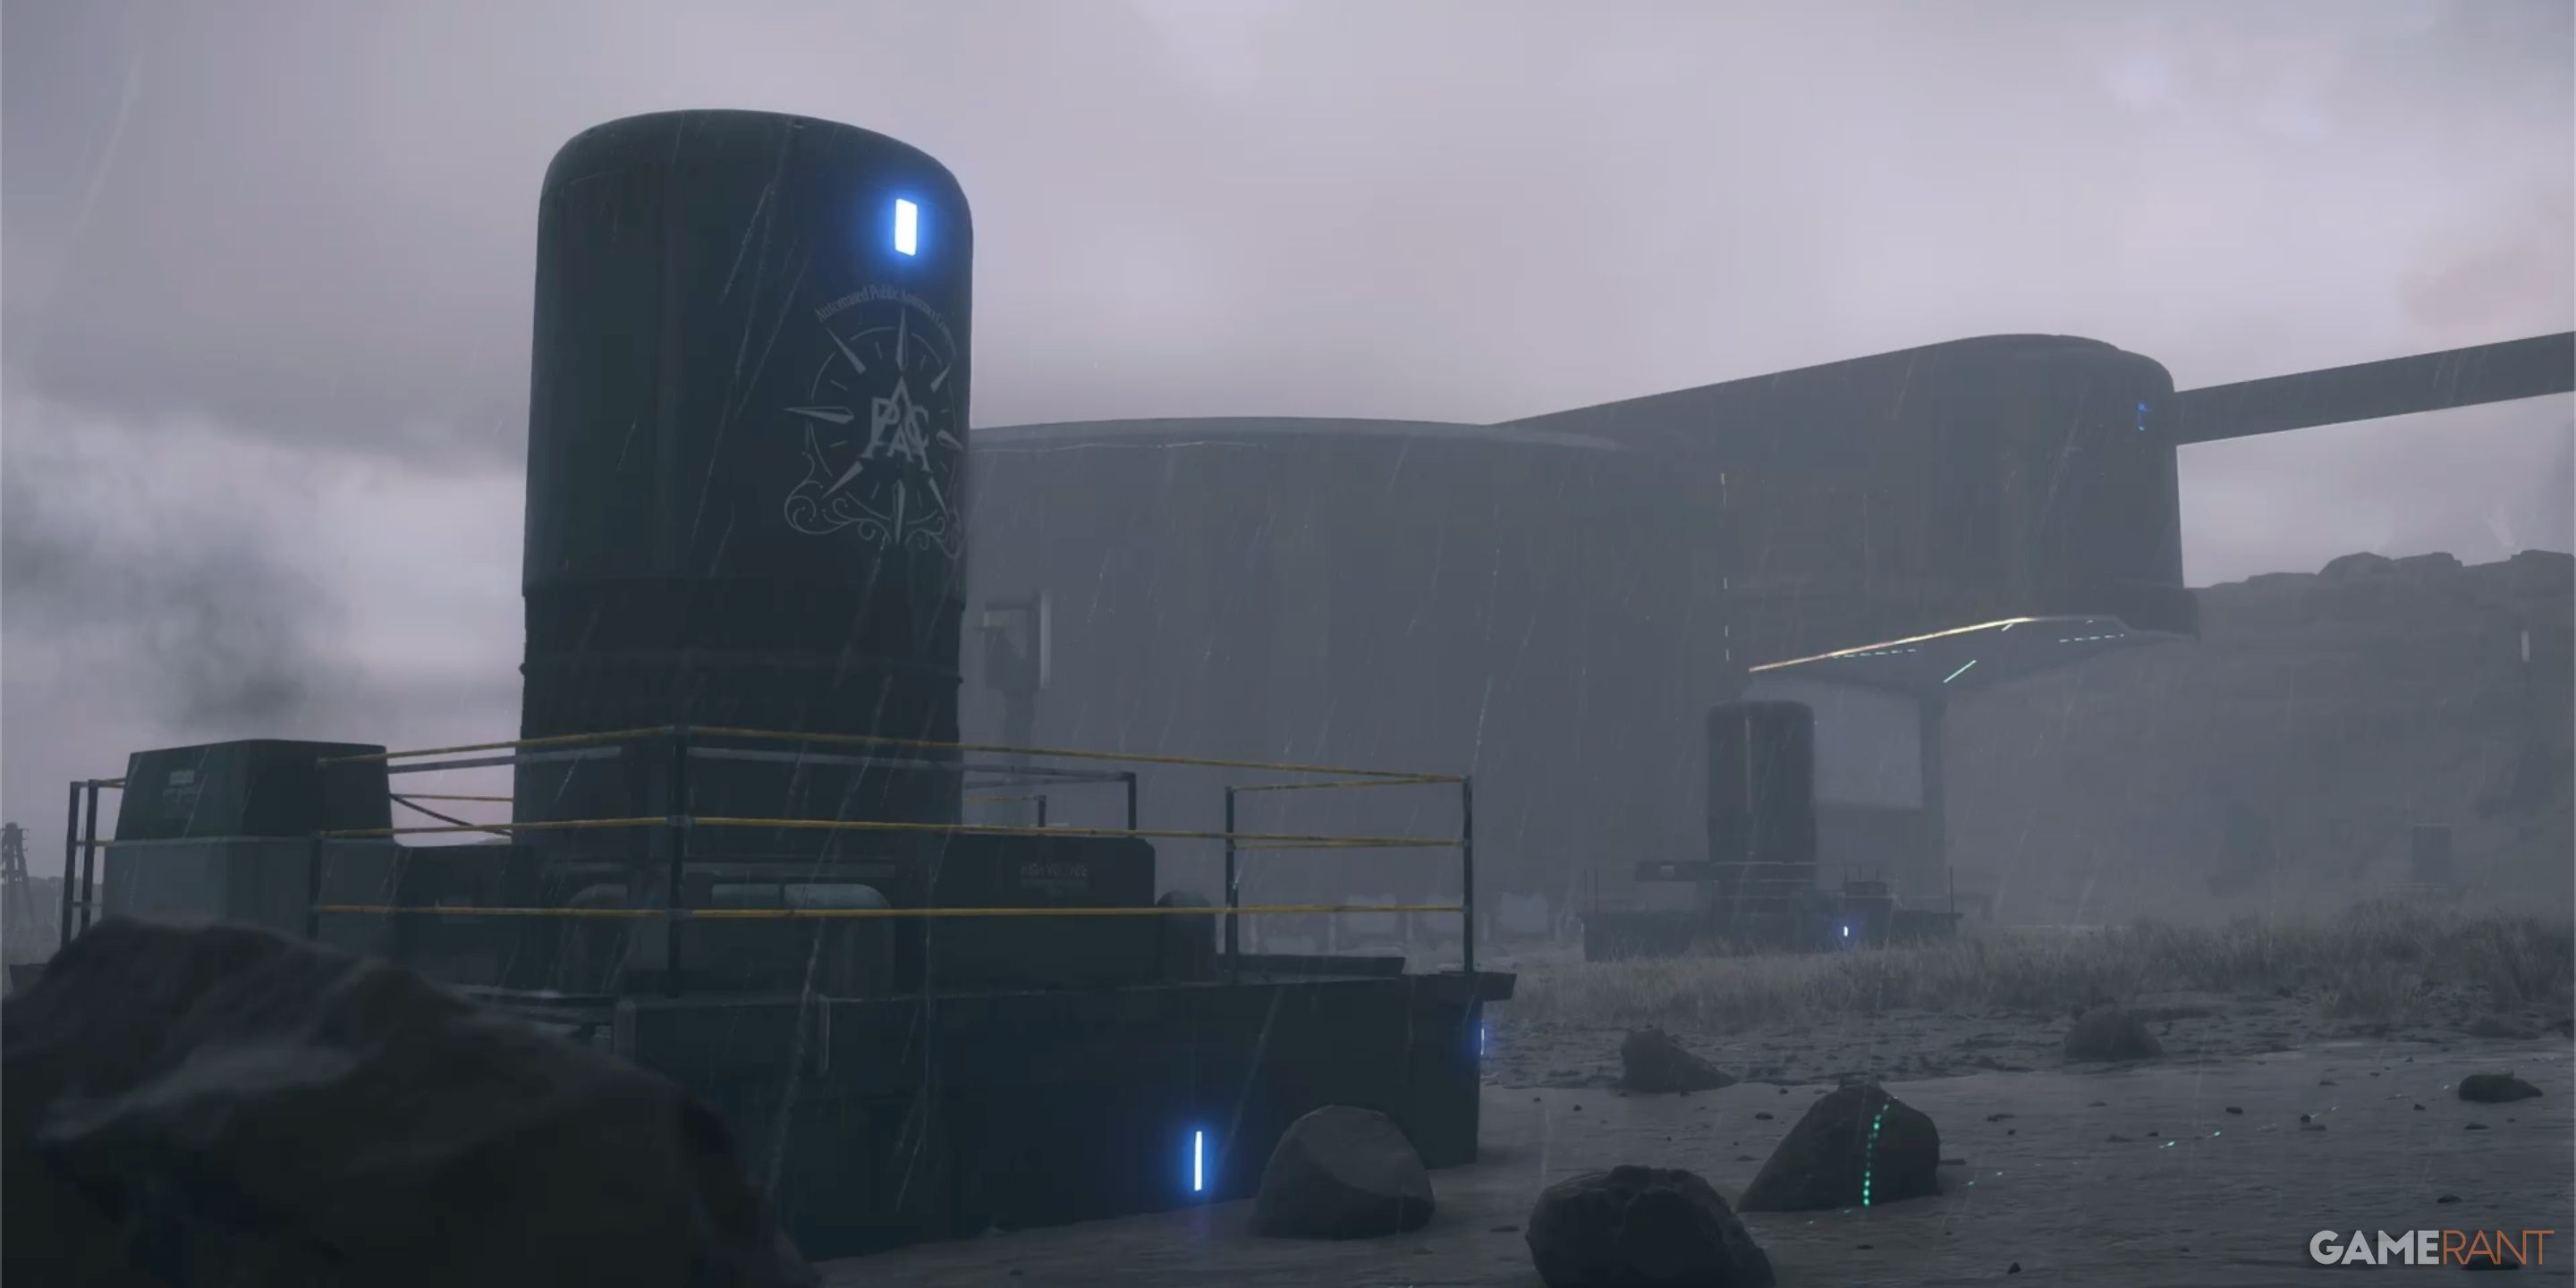
To start utilizing the resources from DS2’s mines, you should initially focus on rebuilding them. You’ll come across this task relatively early in the game when you receive an order to rebuild Smoke Hill Mine. In essence, all mines will ask Sam to add particular materials for restoration. The larger mines will always demand Special Alloys and Resin, while smaller ones appear to need only Special Alloys. Upon rebuilding a mine, it will then request Chiral Crystals in return for the unique resources it provides.
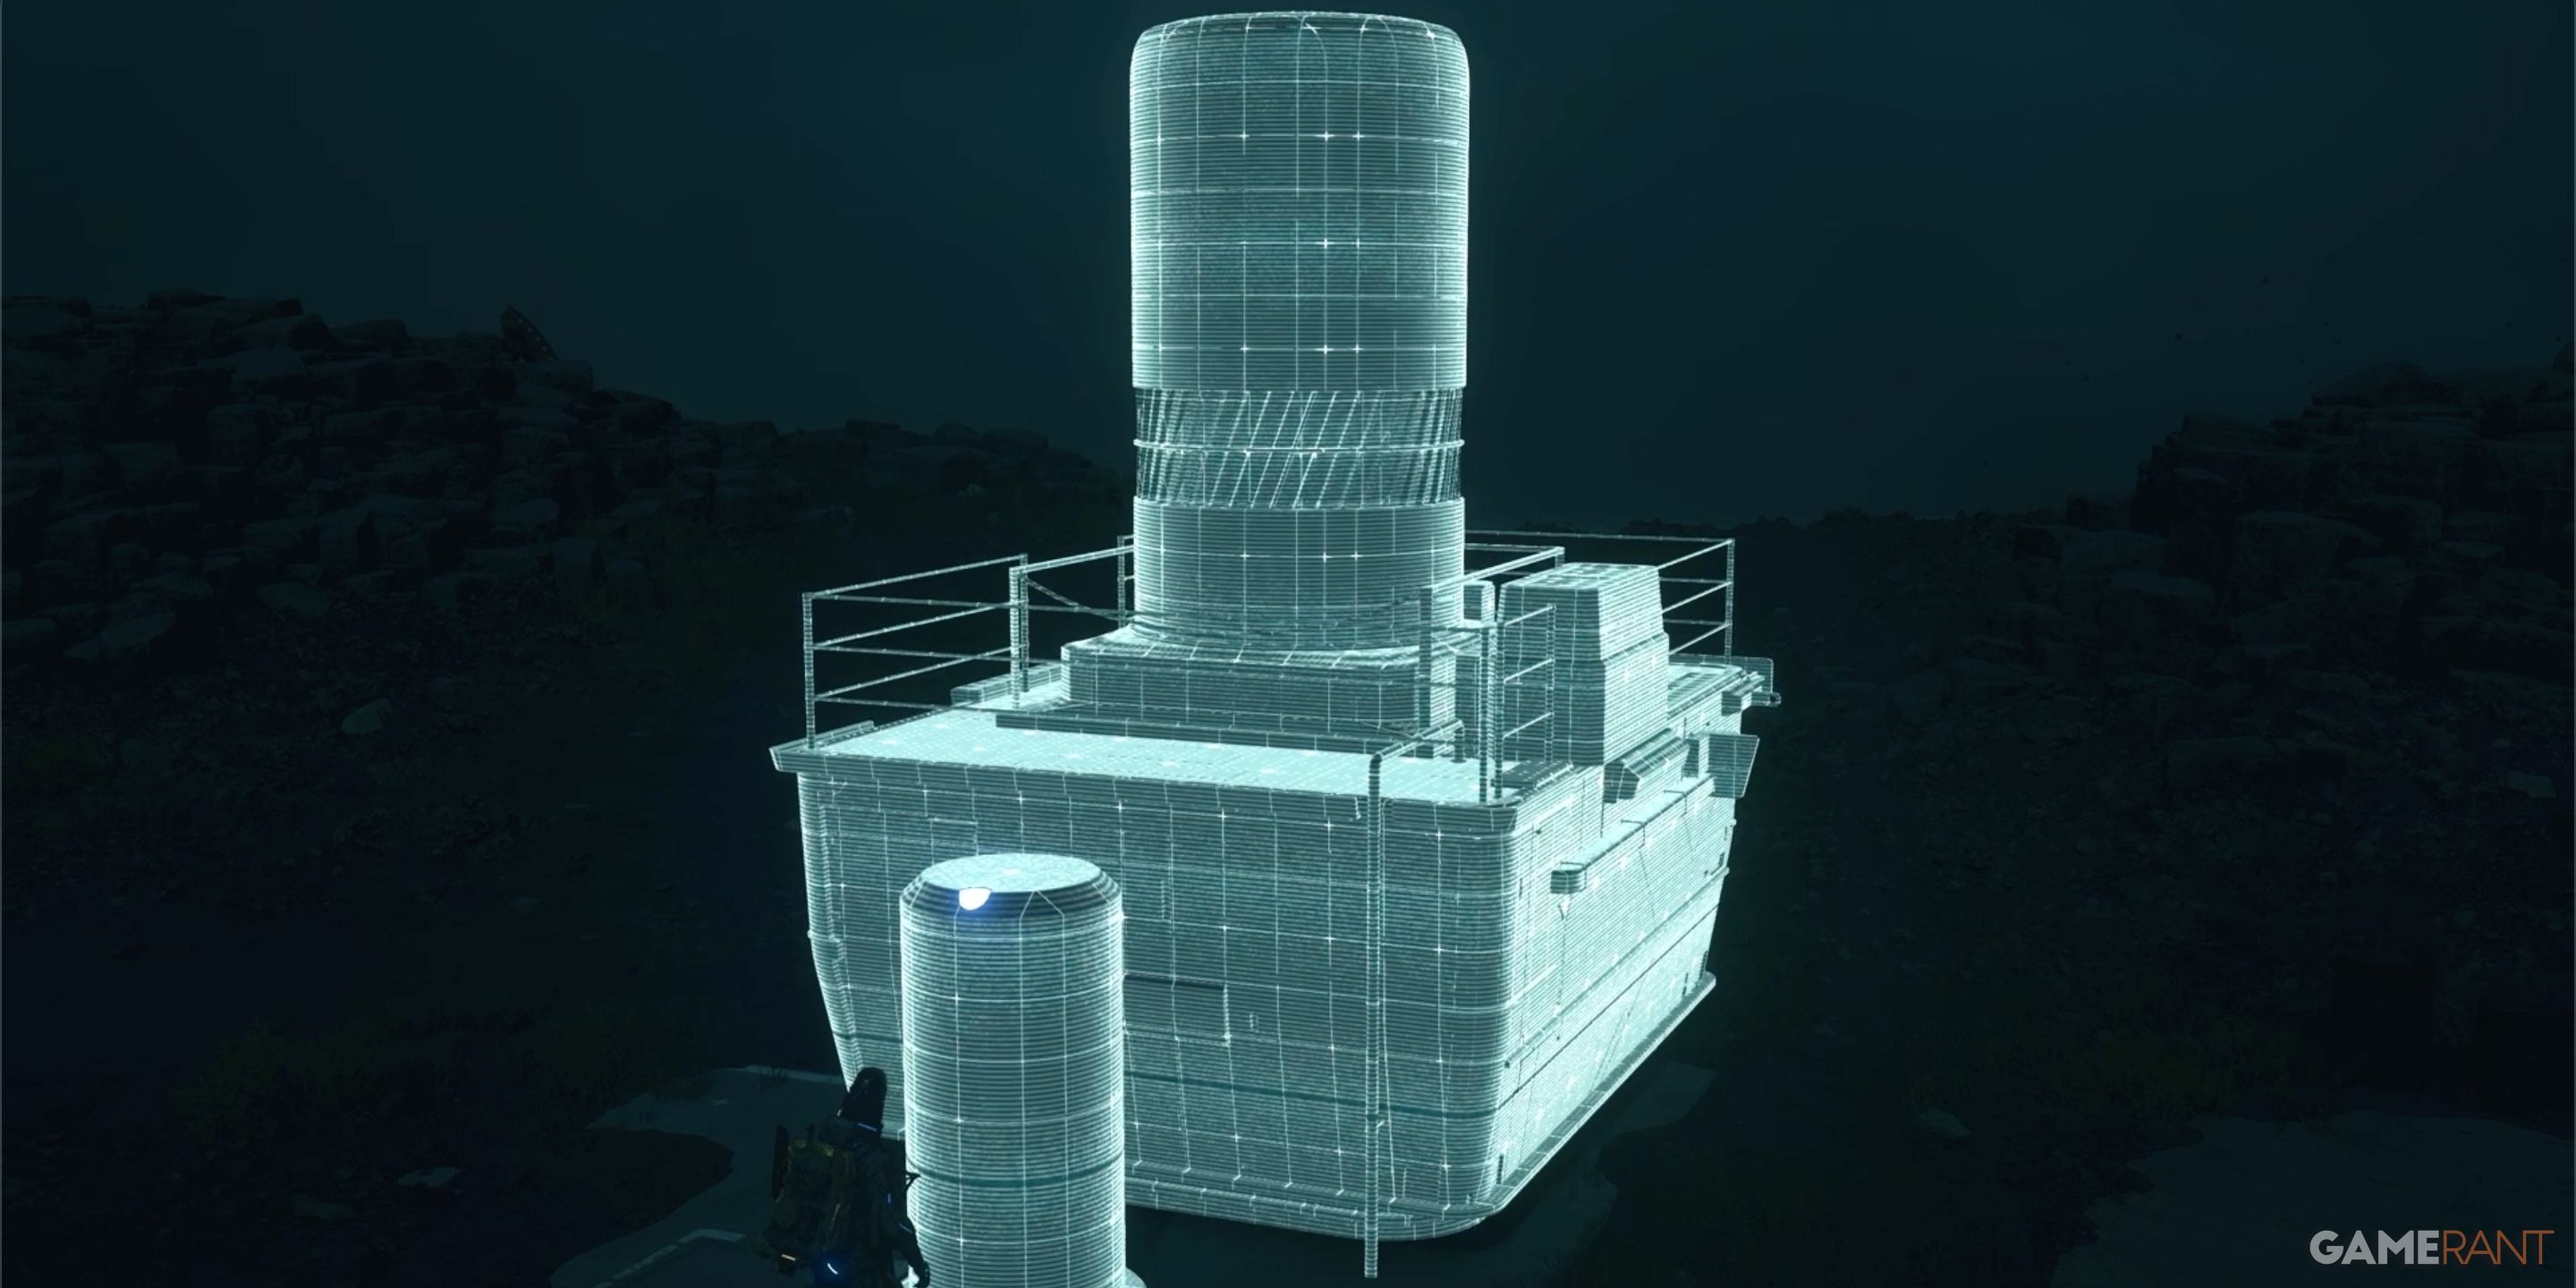
Once a mine has been successfully rehabilitated, it undergoes two enhancement phases. During these stages, additional restorative material is incorporated into the mine. Each enhancement increases the mine’s yield of resources and makes it stronger against potential harm.
In Death Stranding 2, similar to other significant structures, mines can be collaboratively built by all players when linked to the Chiral Network. If you lack the resources for repair, remember to frequently visit these mines as other players may have added necessary materials.
Smoke Hill Mine:
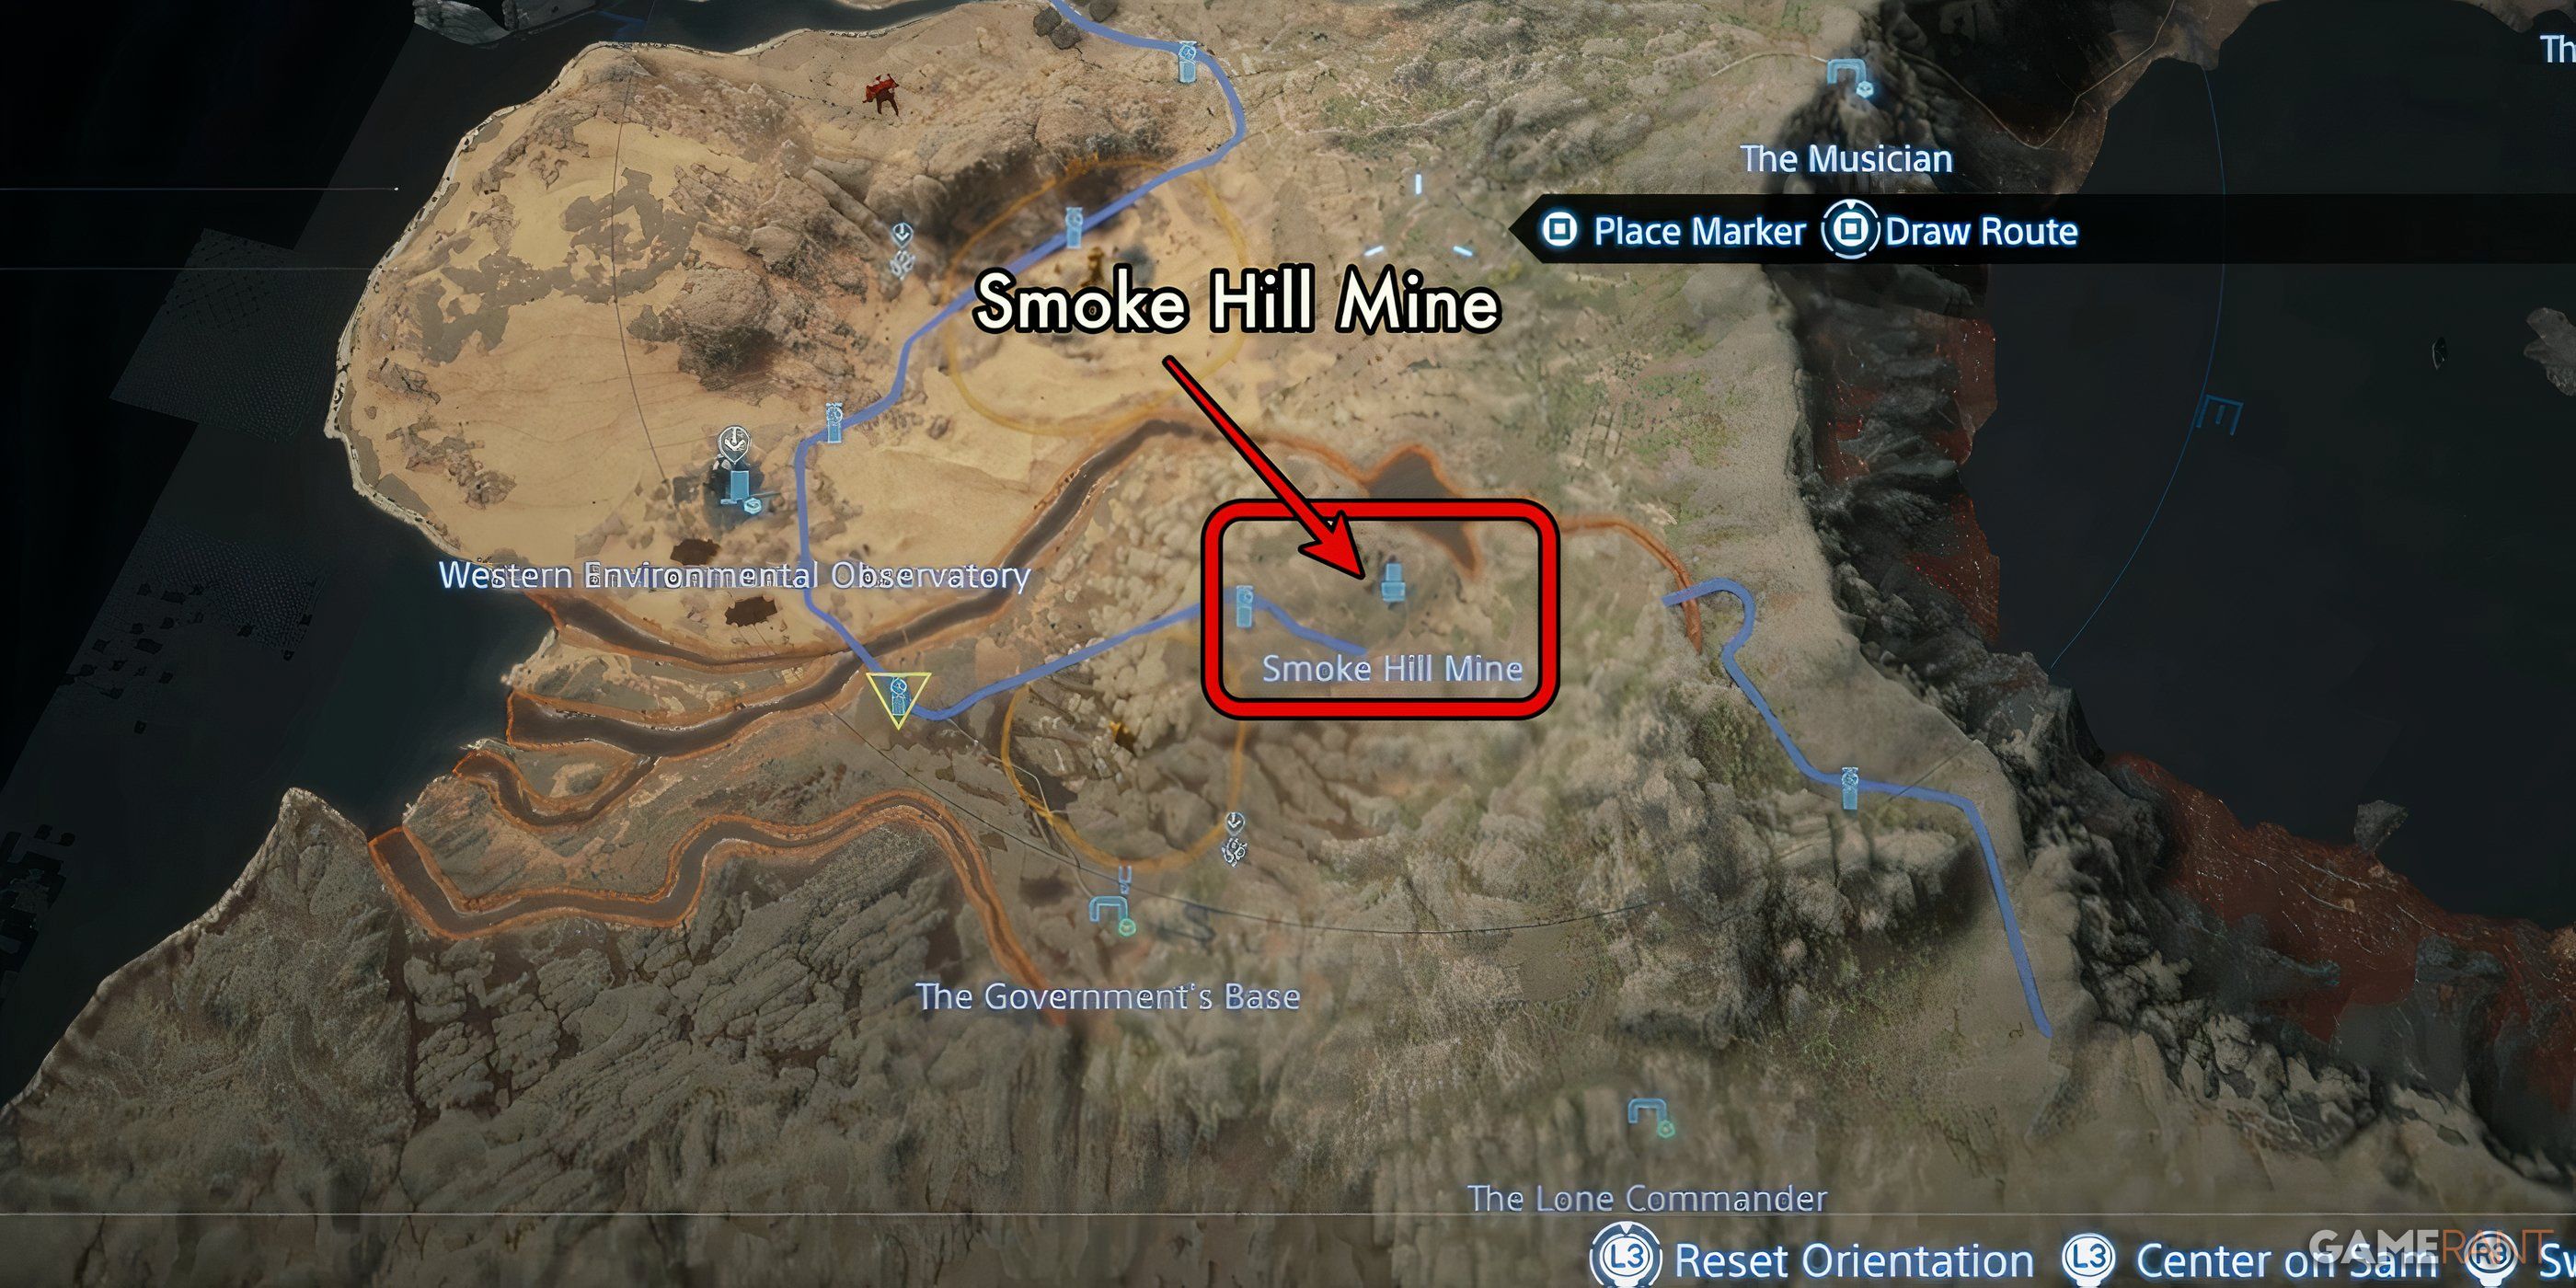
The Smoke Hill Mine, which is situated to the north of the Government Base and to the east of the Western Environmental Observatory in southwestern Australia, will cost 800 Chiral Crystals for 960 units of Ceramics at Level 1.
Mine North of F1:
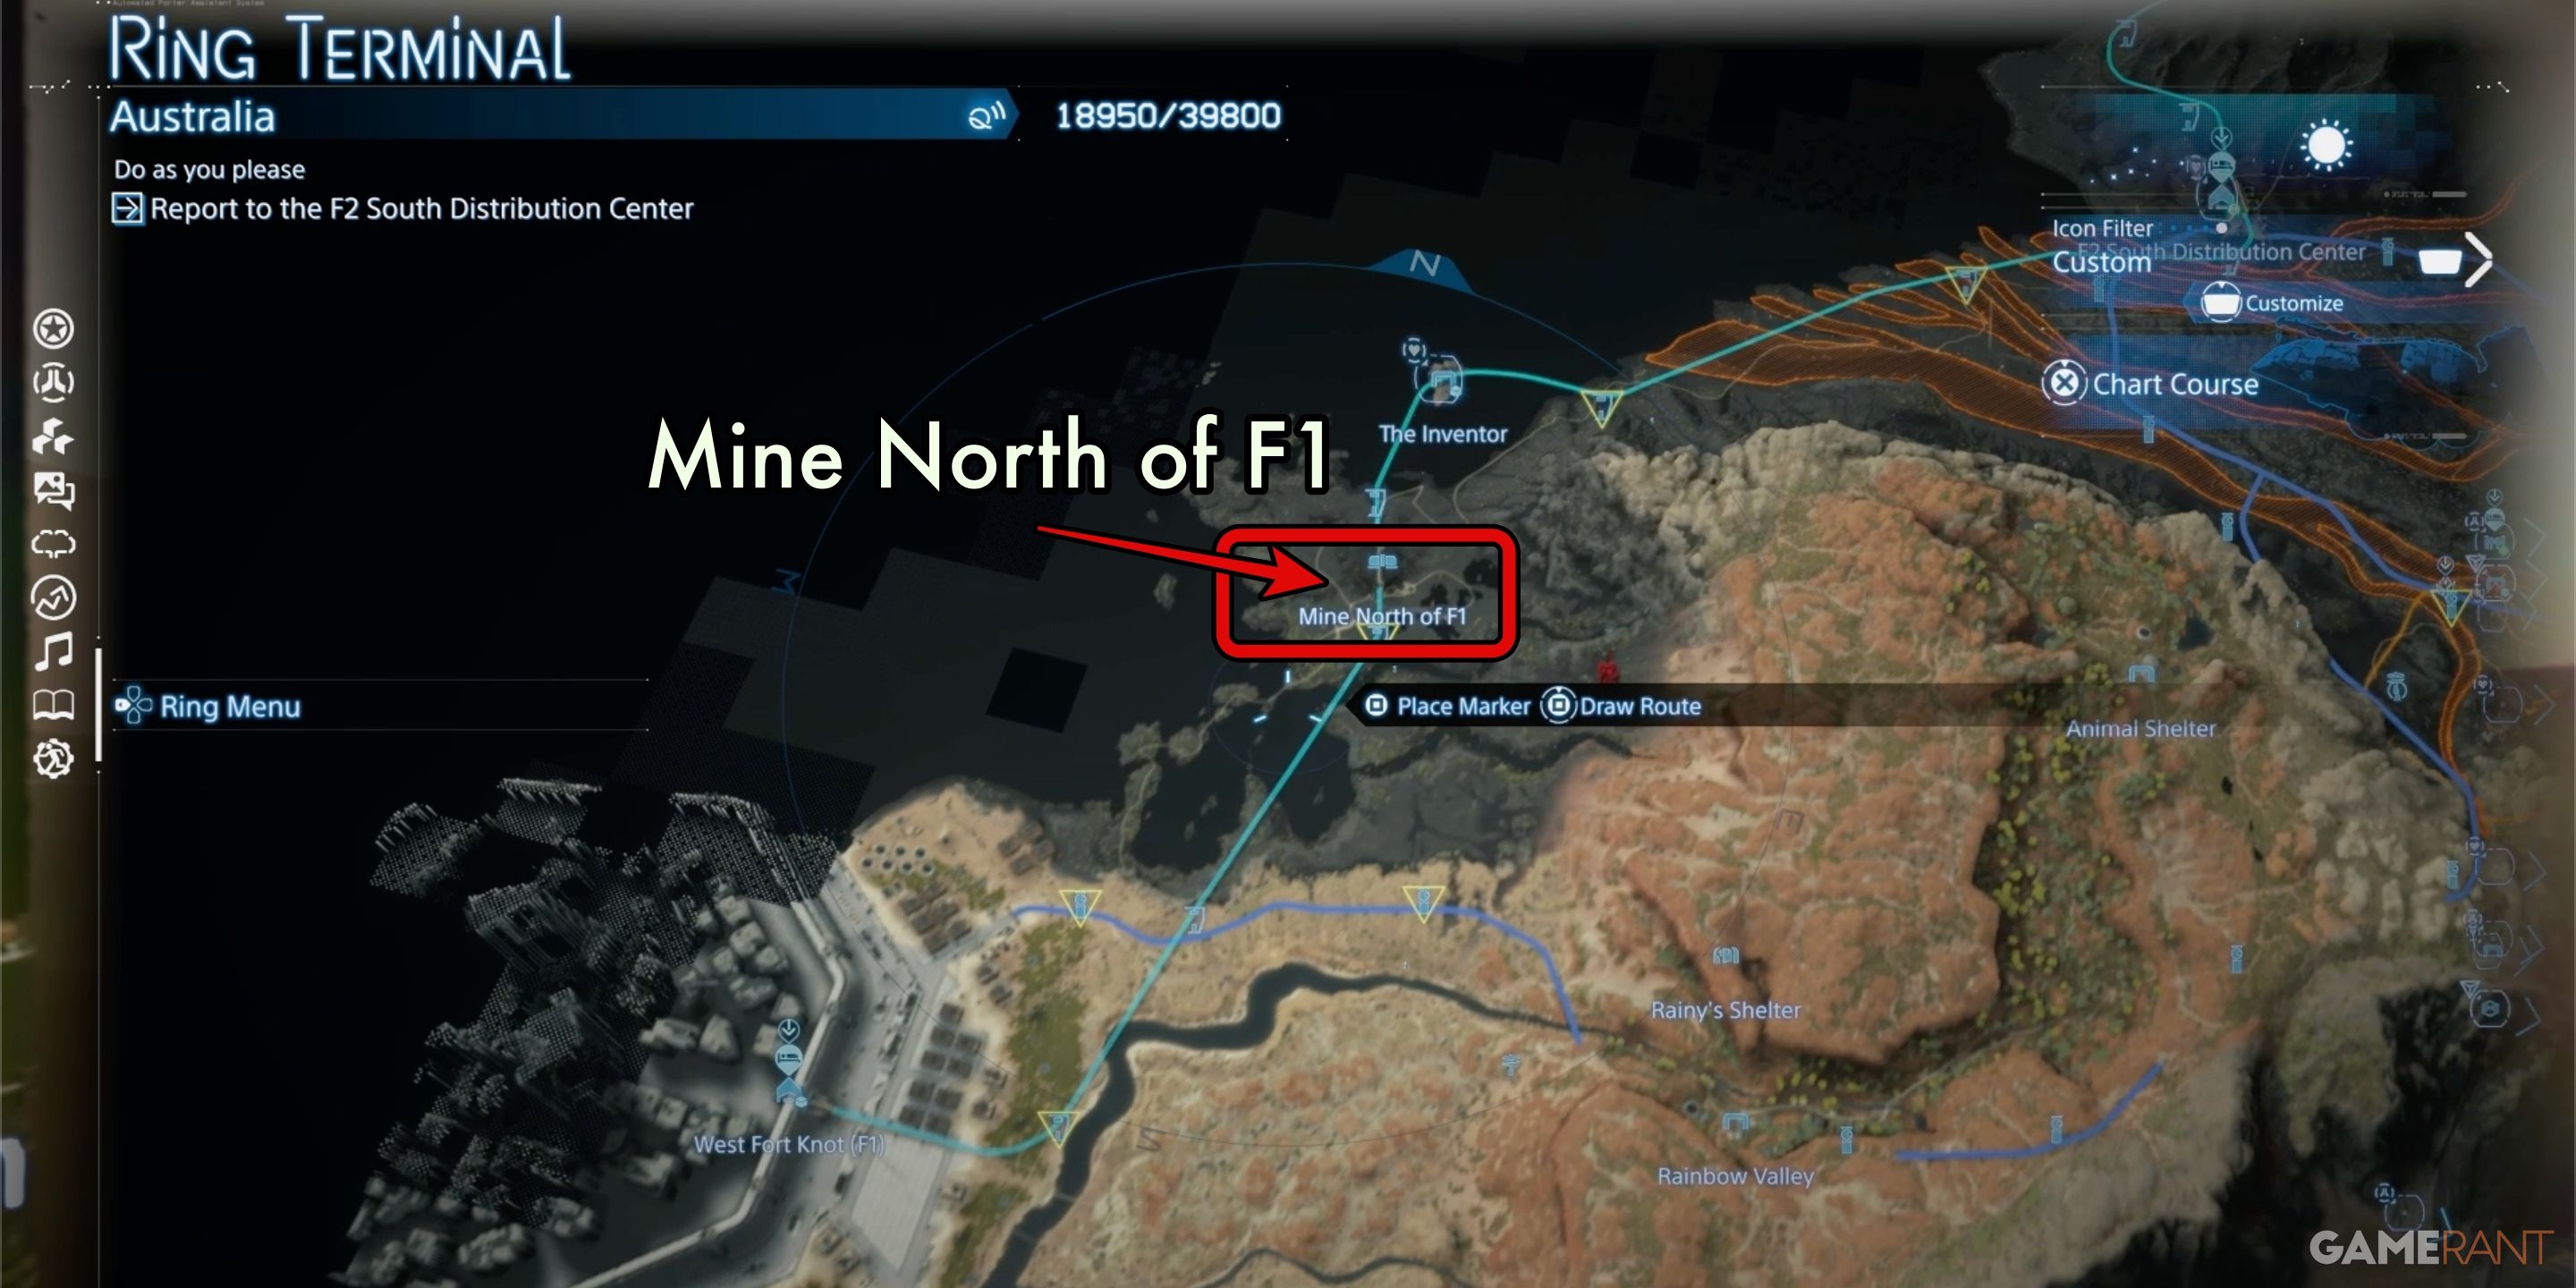
The mine situated to the north of F1 lies along the western coastline, up north from West Fort Knot. It’s probably the big mine on the monorail that you’ll initially come across. The inventor can be found on a tiny island situated just north of this mine. At level 1, the mine north of F1 demands 2000 Chiral Crystals for supplying 4800 units of Special Alloys.
Mine North of Tar Lake:
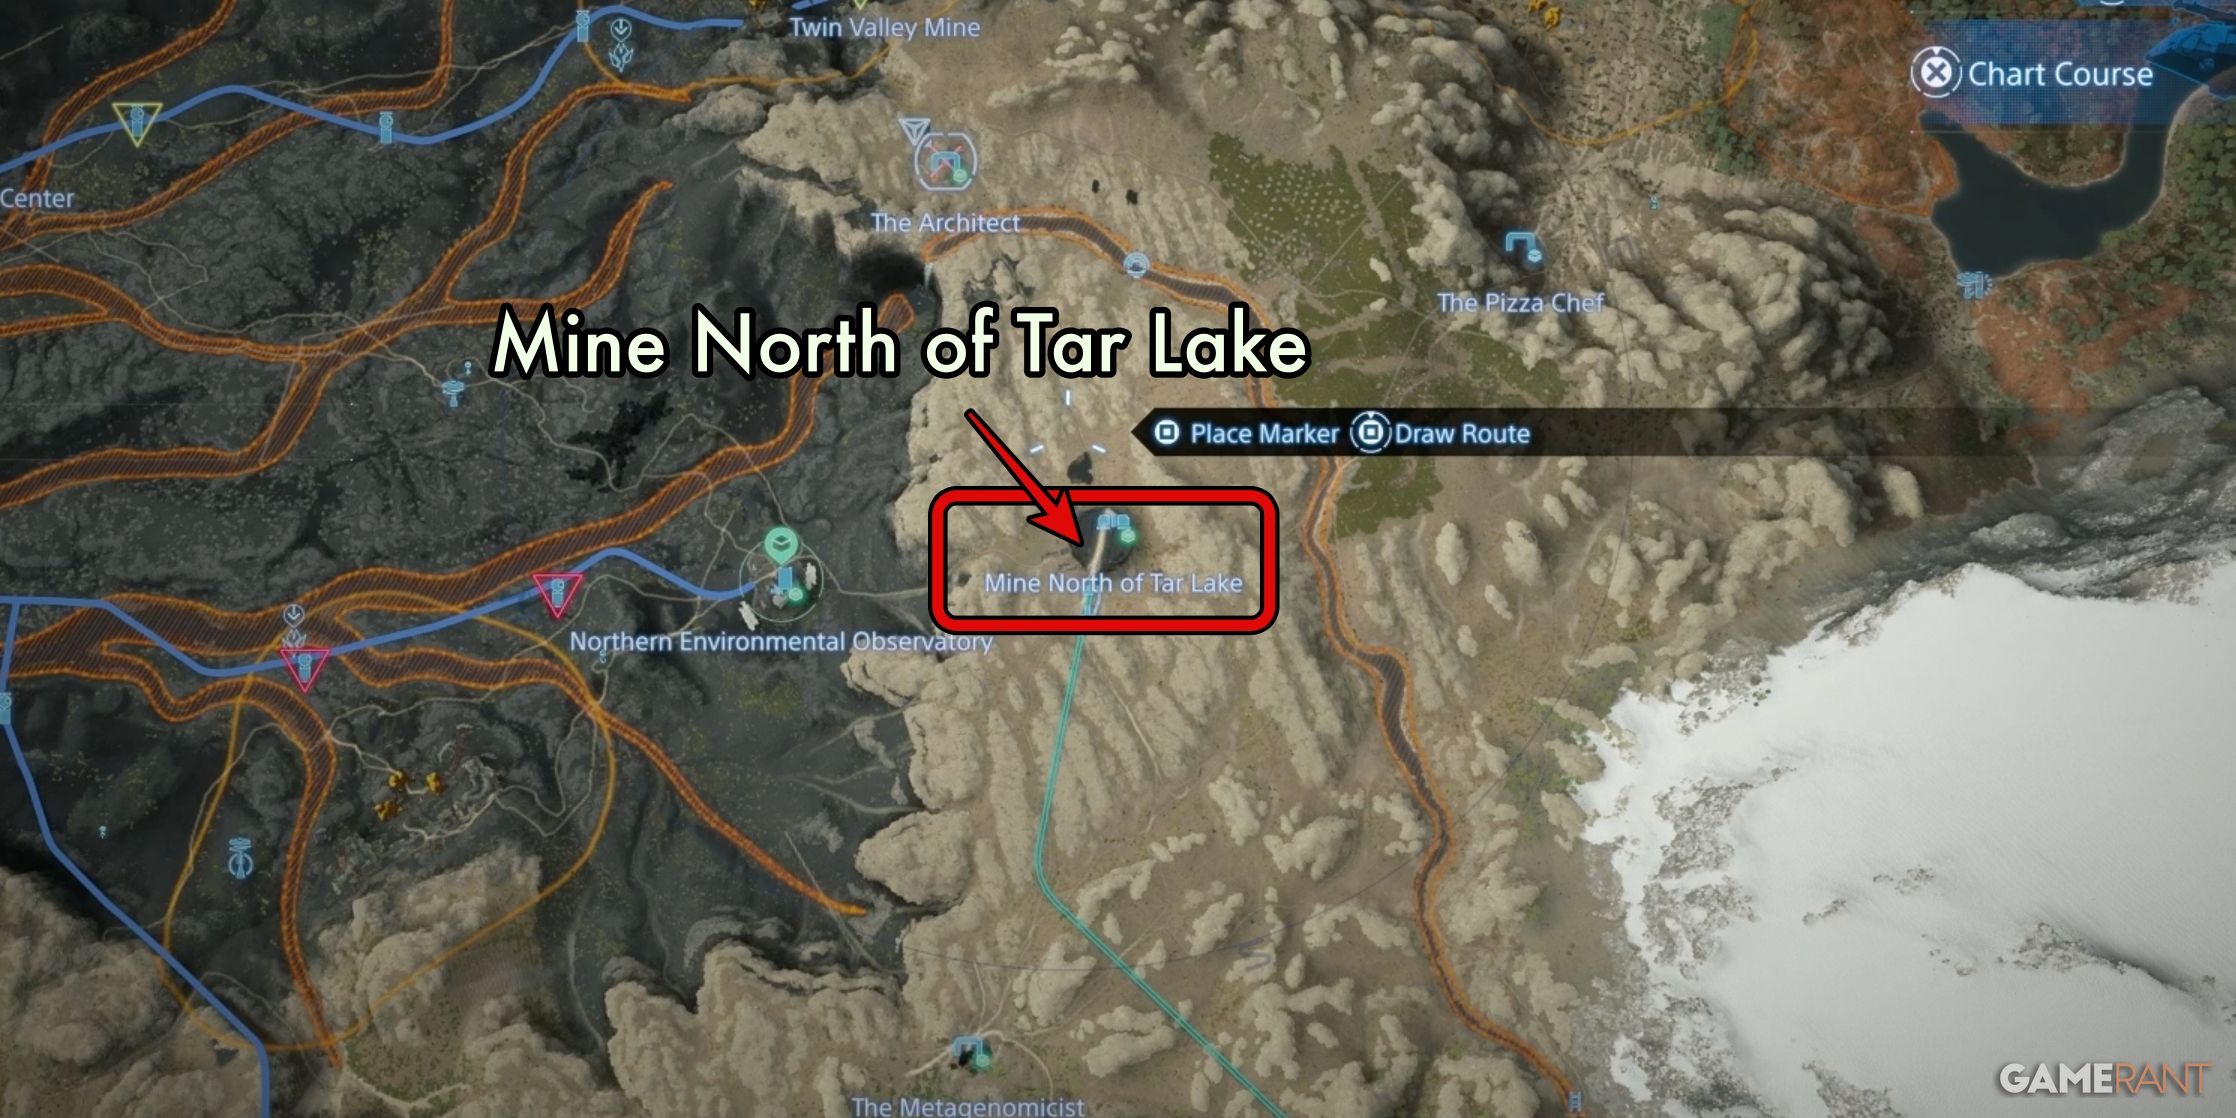
Geographically speaking, the mine just northeast of Tar Lake is the next one Sam can rehabilitate. This mine lies directly east of the Northern Environmental Observatory. At Level 1, this mine will cost you 1600 Chiral Crystals for a set of 3200 Ceramics.
Twin Valley Mine:
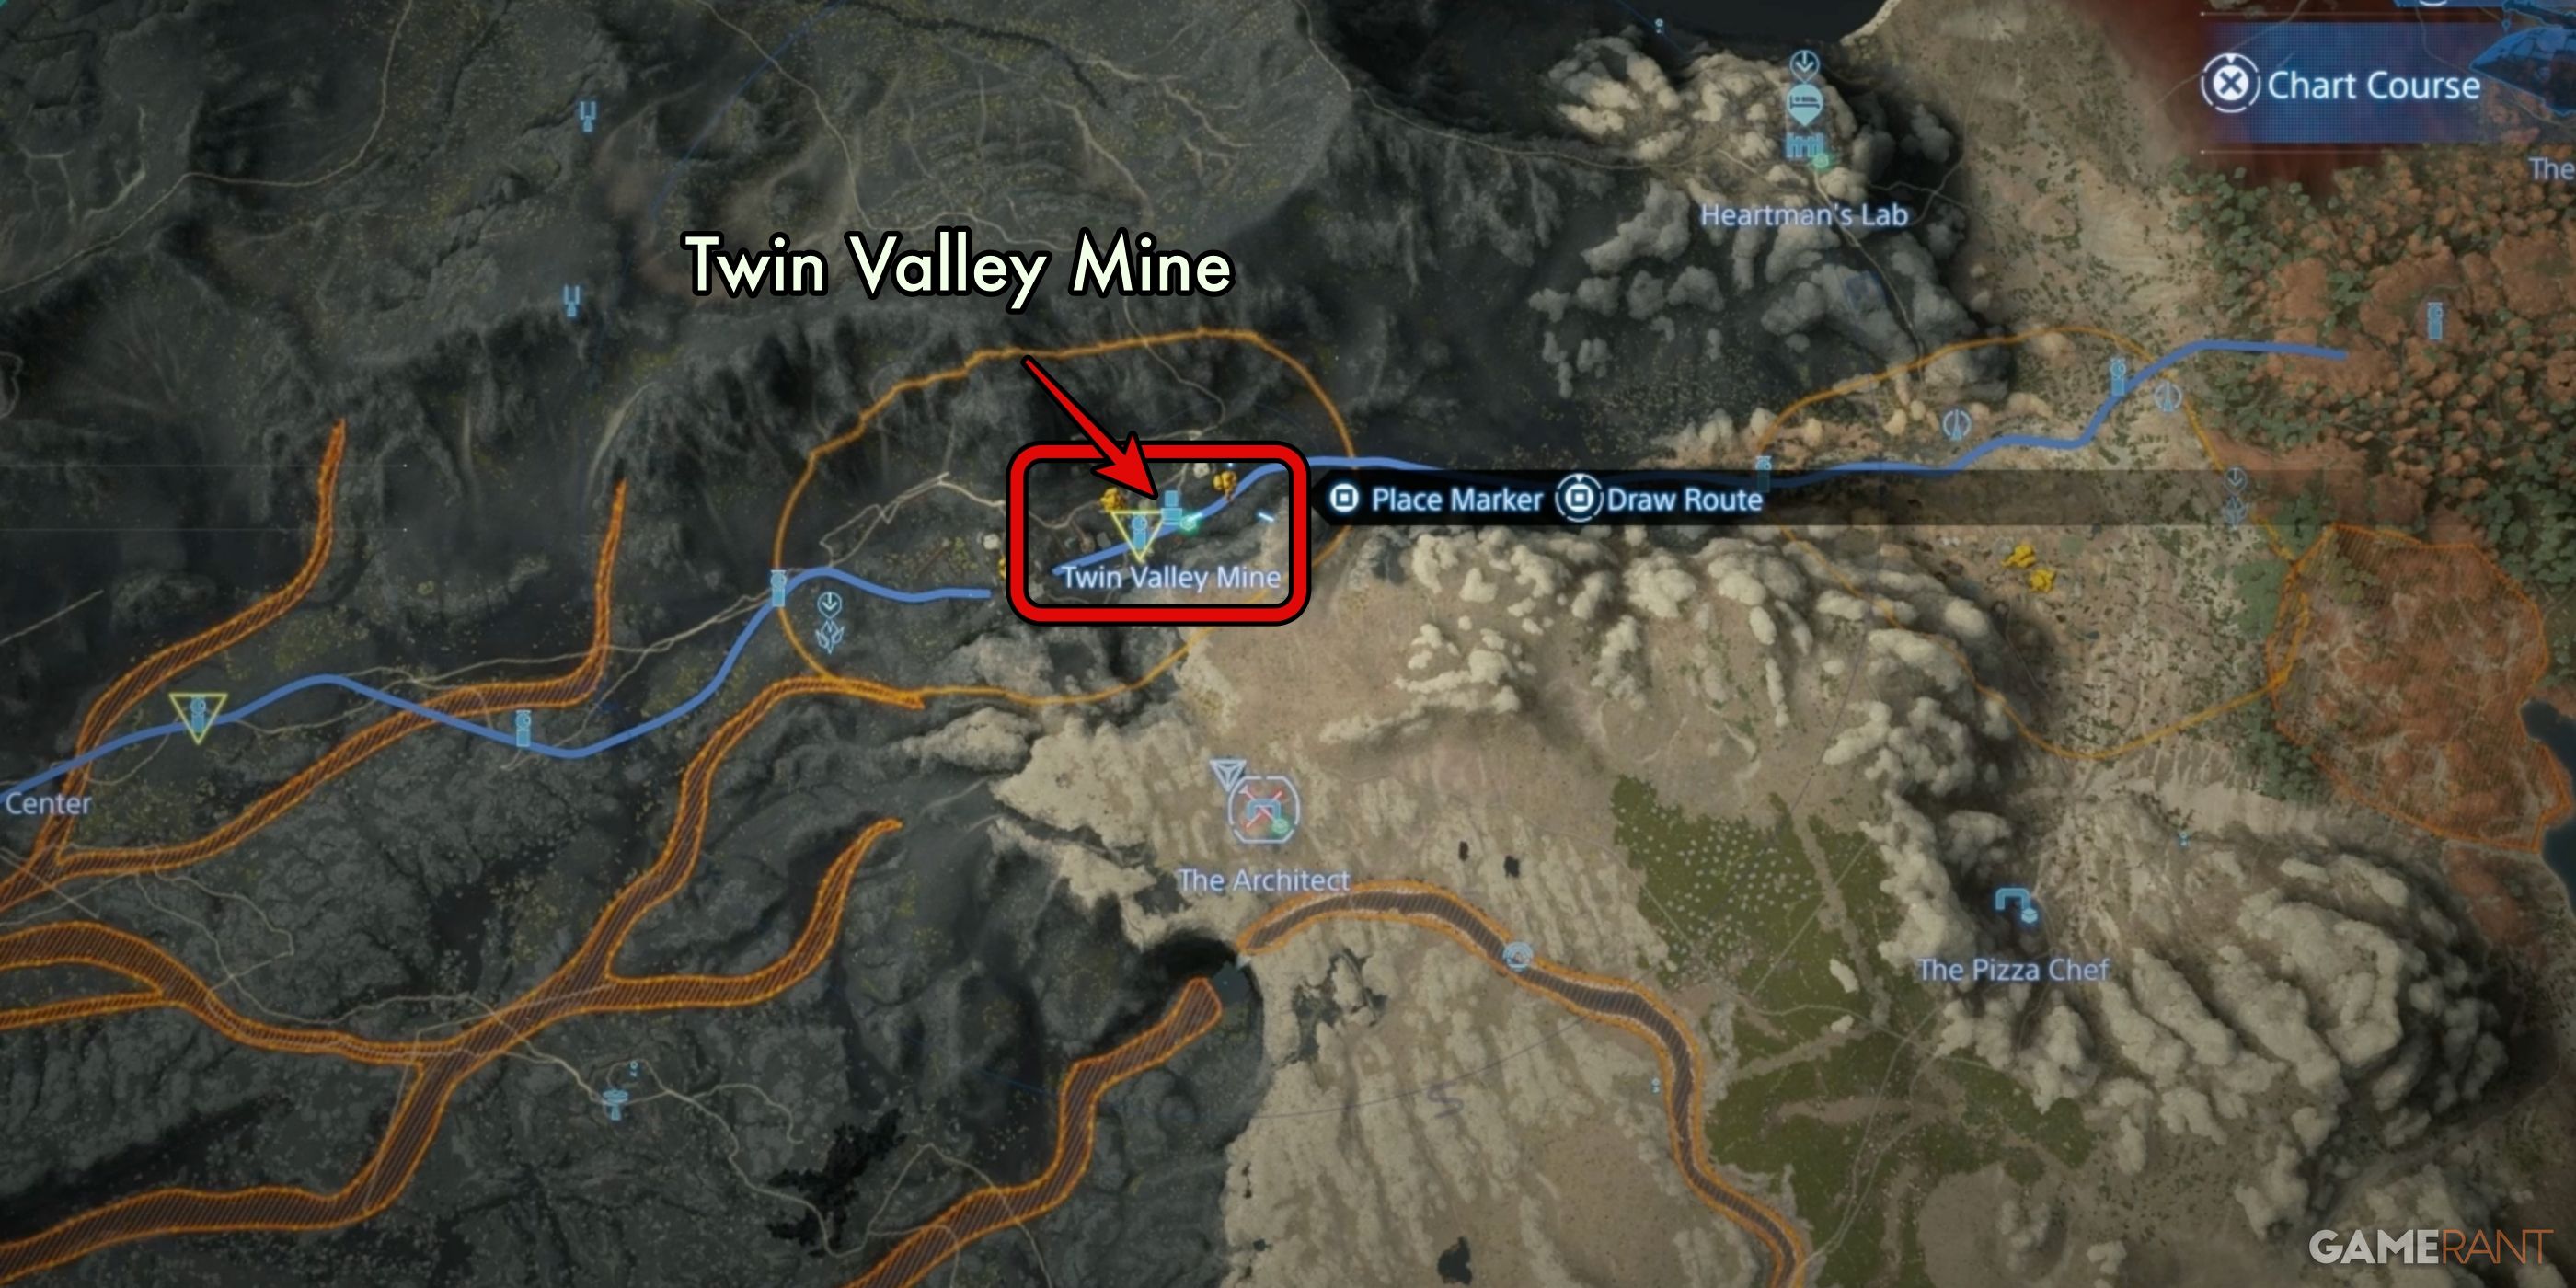
The Twin Valley Mine lies to the north of Tar Lake Mine, beyond the Architect’s location. Restoring it can be challenging due to its strategic position within an adversary’s encampment. To locate it, head east along the road or Auto-Pavers from the F2 South Distribution Center. You’ll find the mine just after Auto-Paver AUS-HIGHWAY-03-04. This relatively small mine demands 1200 Chiral Crystals in exchange for supplying Chemicals x720.
Mine Near F3 Crater:
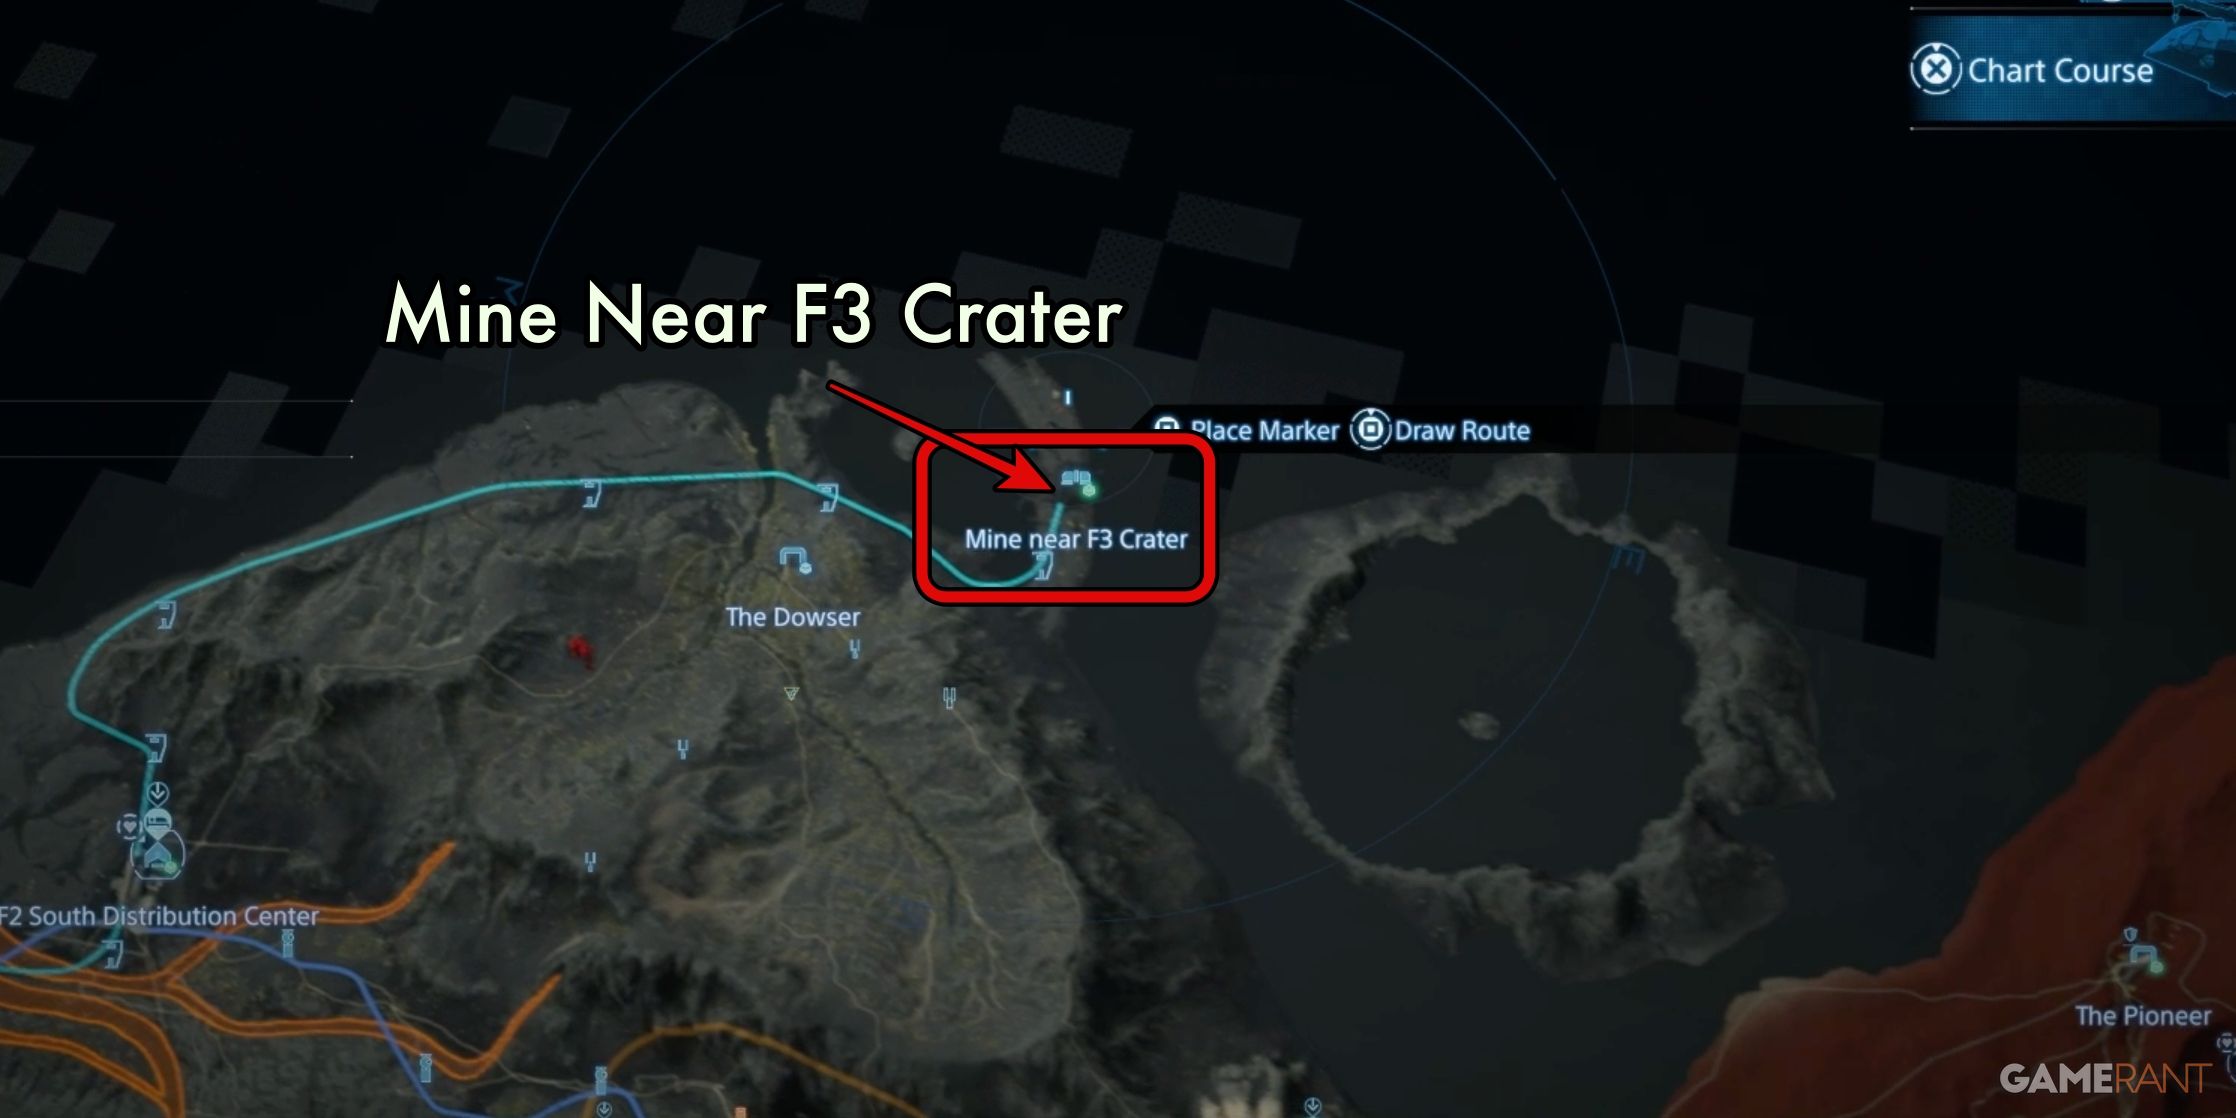
By examining the heart of the map’s northern border, you’ll find a vast crater lake. To the west of this crater lies an extended peninsula where the Mine Near F3 Crater is situated. At level 1, this mine requires 1000 Chiral Crystals for 3200 units of Resins.
Or:
Looking towards the center of the map’s northern edge reveals a colossal crater lake. To the west of this crater, you’ll notice a lengthy peninsula where the Mine Near F3 Crater is found. At level 1, this expansive mine asks for 1000 Chiral Crystals to provide 3200 units of Resins.
Or:
If you gaze at the center of the northern coastline on your map, you’ll spot a gigantic crater lake. To the west of that crater, you’ll find a long peninsula where the Mine Near F3 Crater resides. At level 1, this large mine demands 1000 Chiral Crystals to deliver 3200 units of Resins.
Northeastern Mine:
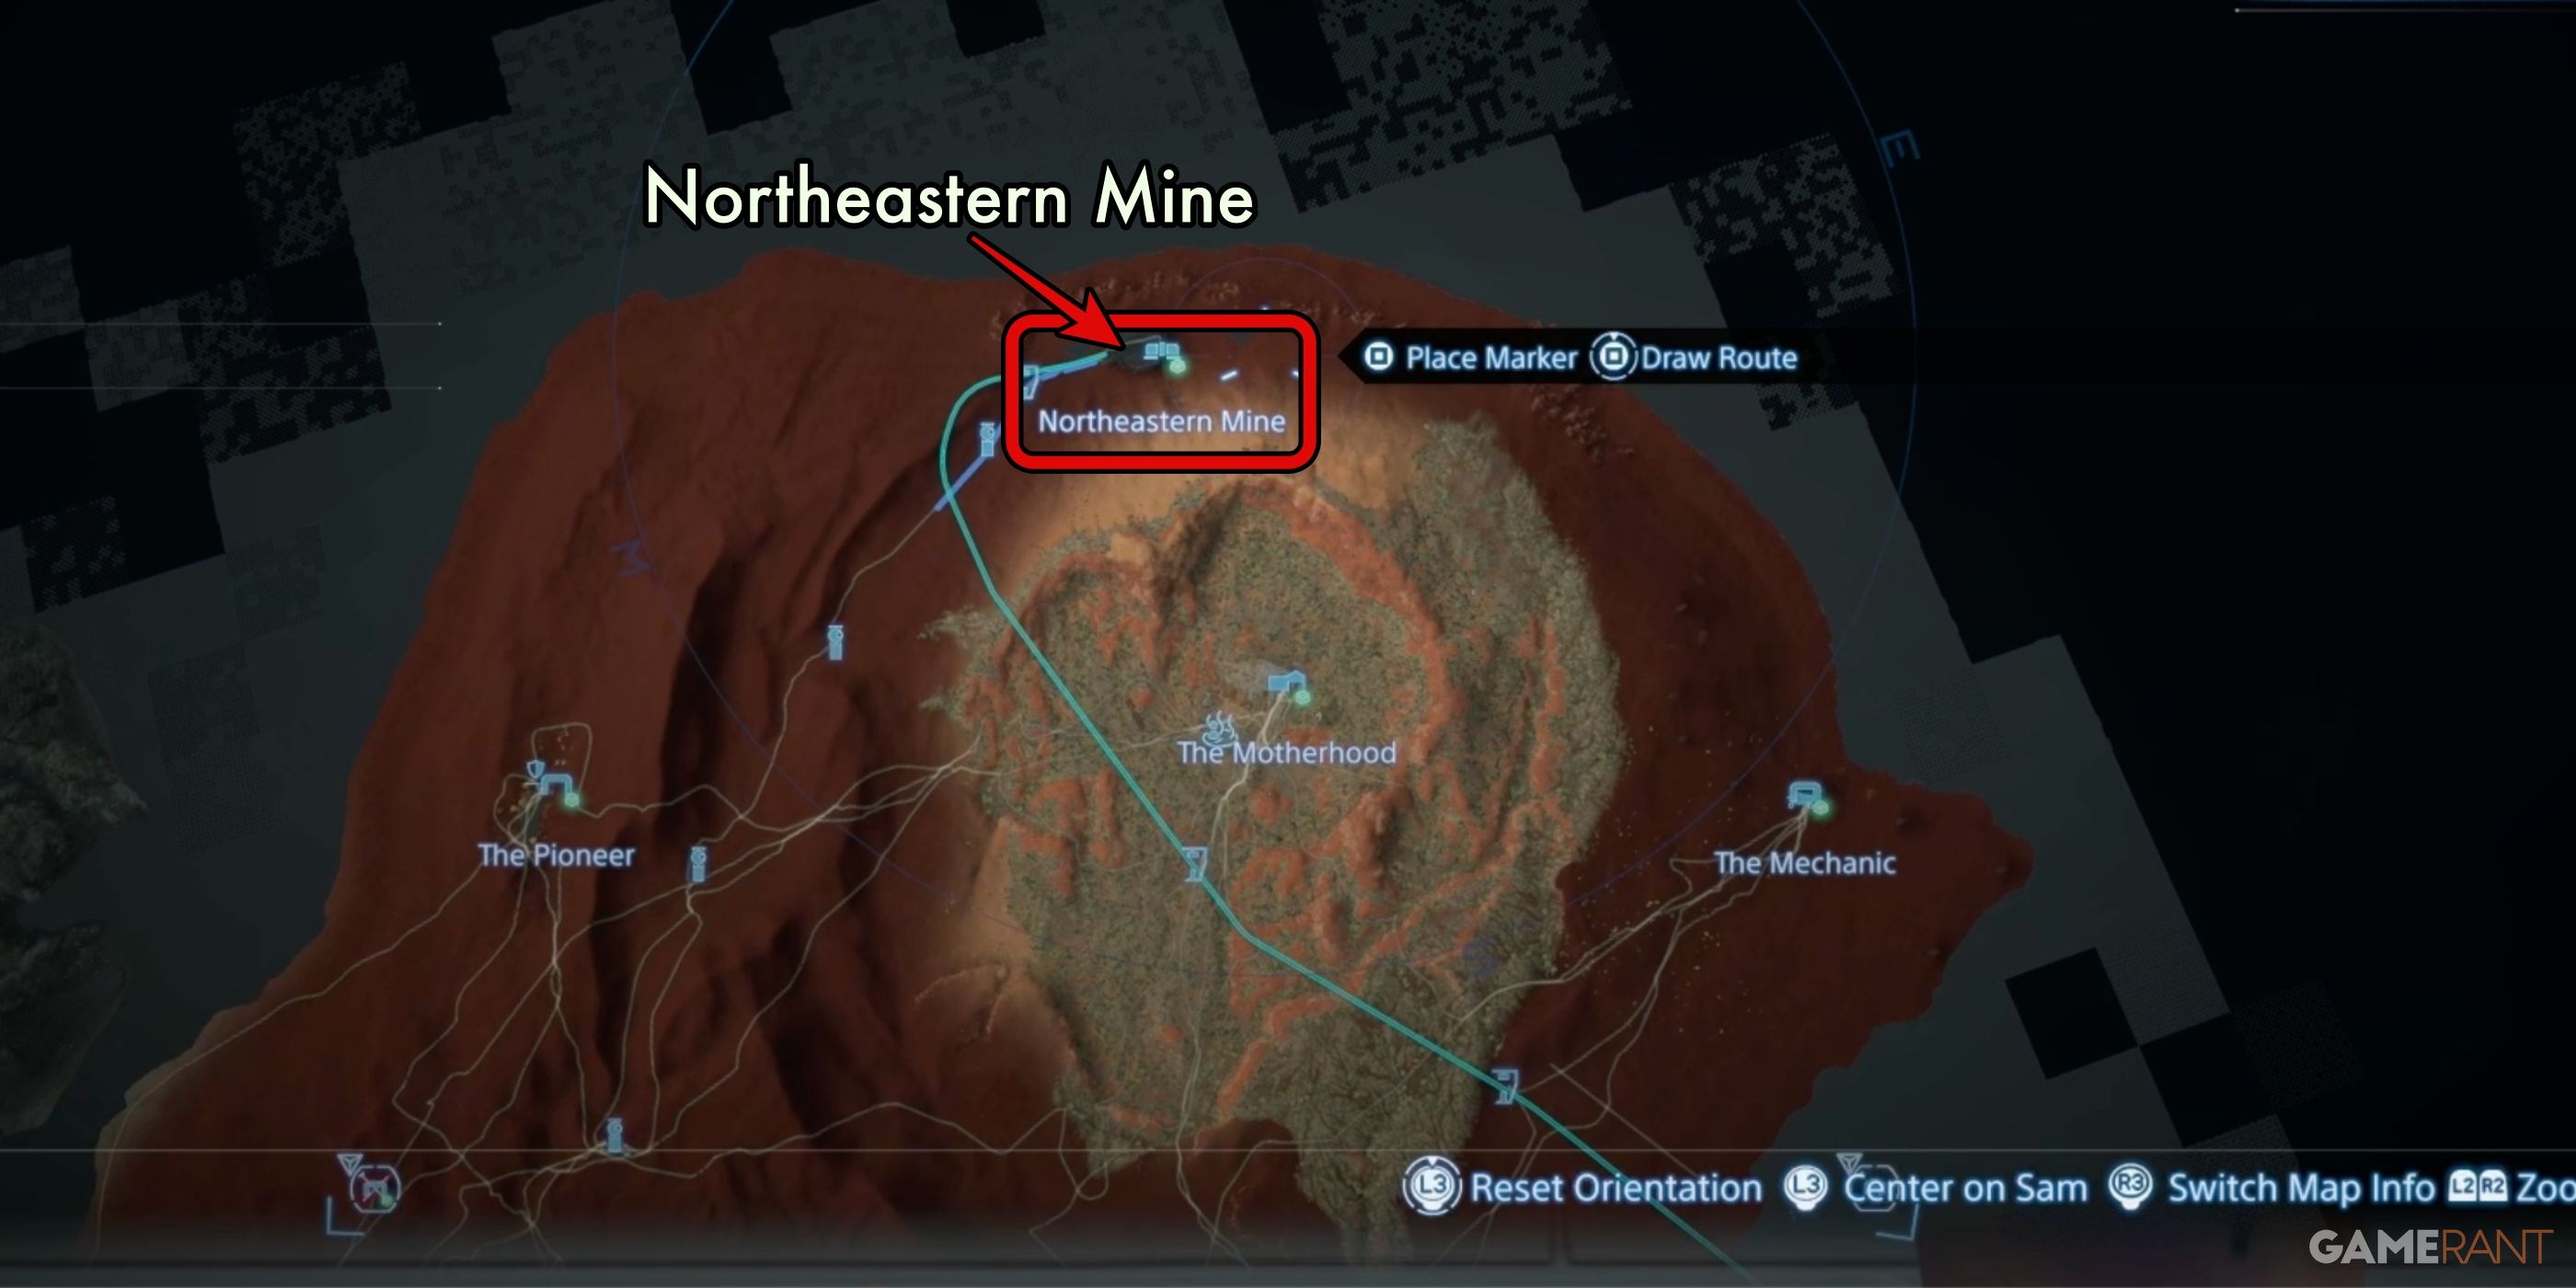
You’ll discover the Northeastern Mine located a bit beyond the northern boundary of the lush green region known as the oasis, nestled in the northeastern desert. The oasis is the expansive area of vegetation encircling The Motherhood. The mine lies just a tad to the northwest of their shelter. At level 1, this extensive mine requires 1200 Chiral Crystals for a bundle of 4800 Metals.
Savanna Mine:
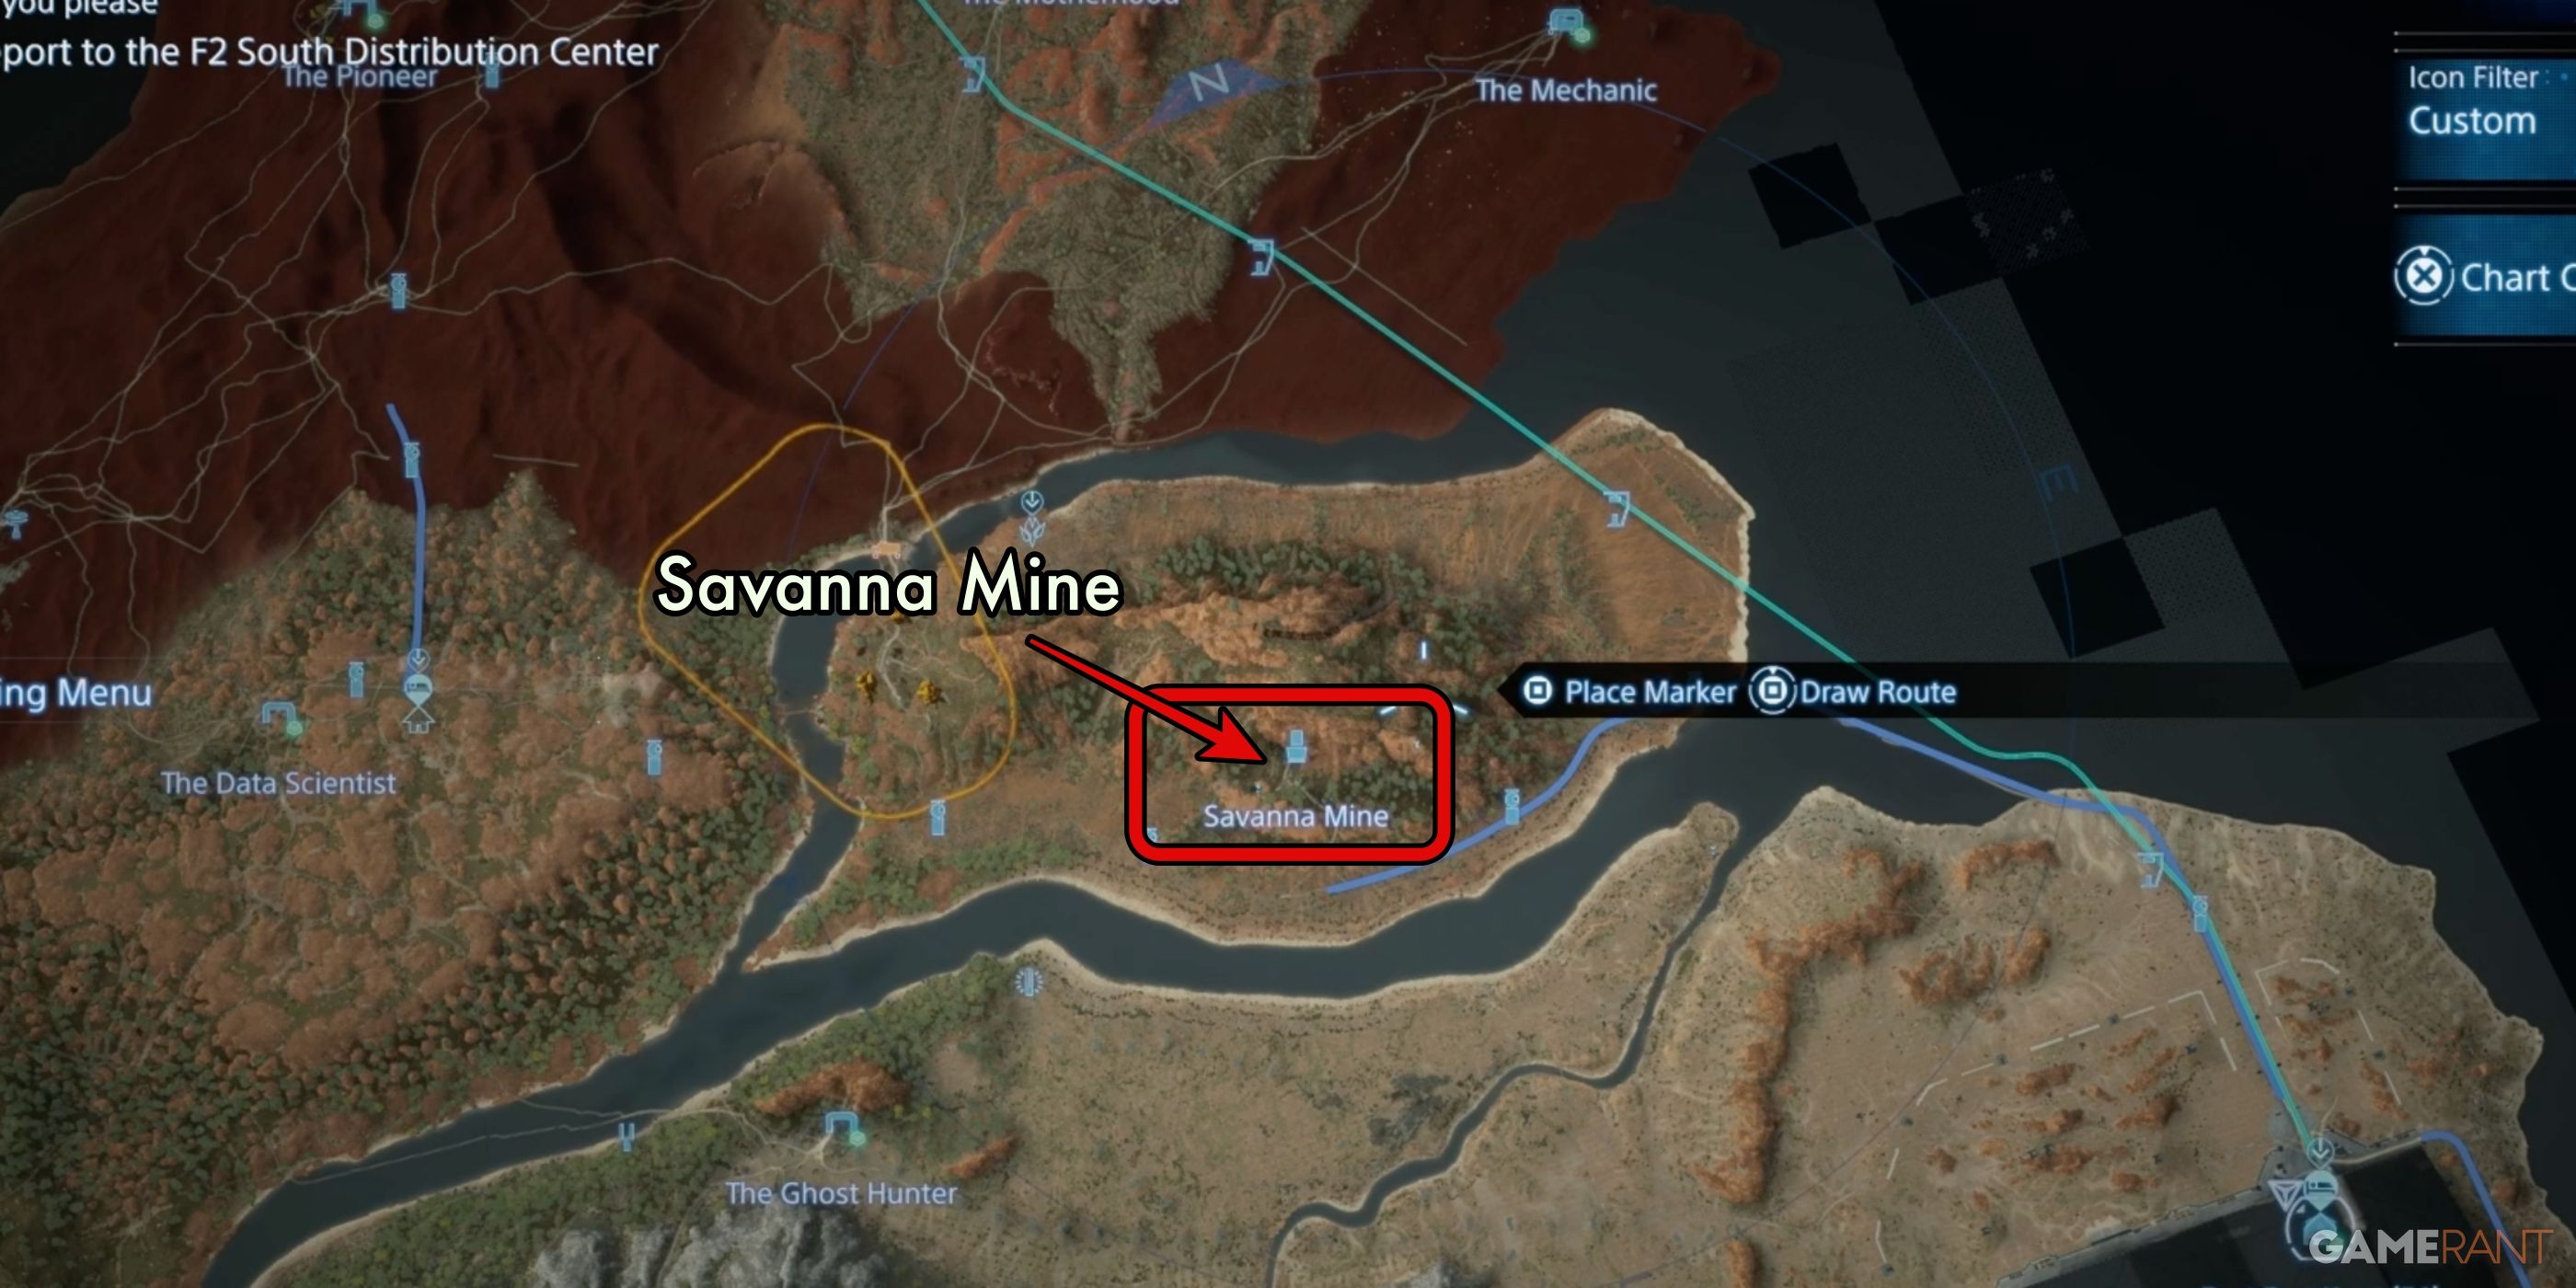
The Savanna Mine is situated on an island in the east, sandwiched between a desert in the north and mountains in the south on the map. The nearest shelters to this mine are the Ghost Hunter to the southwest and East Fort Knot to the southeast. This modest mining operation demands 900 Chiral Crystals for supplying 2400 units of Special Alloys.
Mine North of F6:
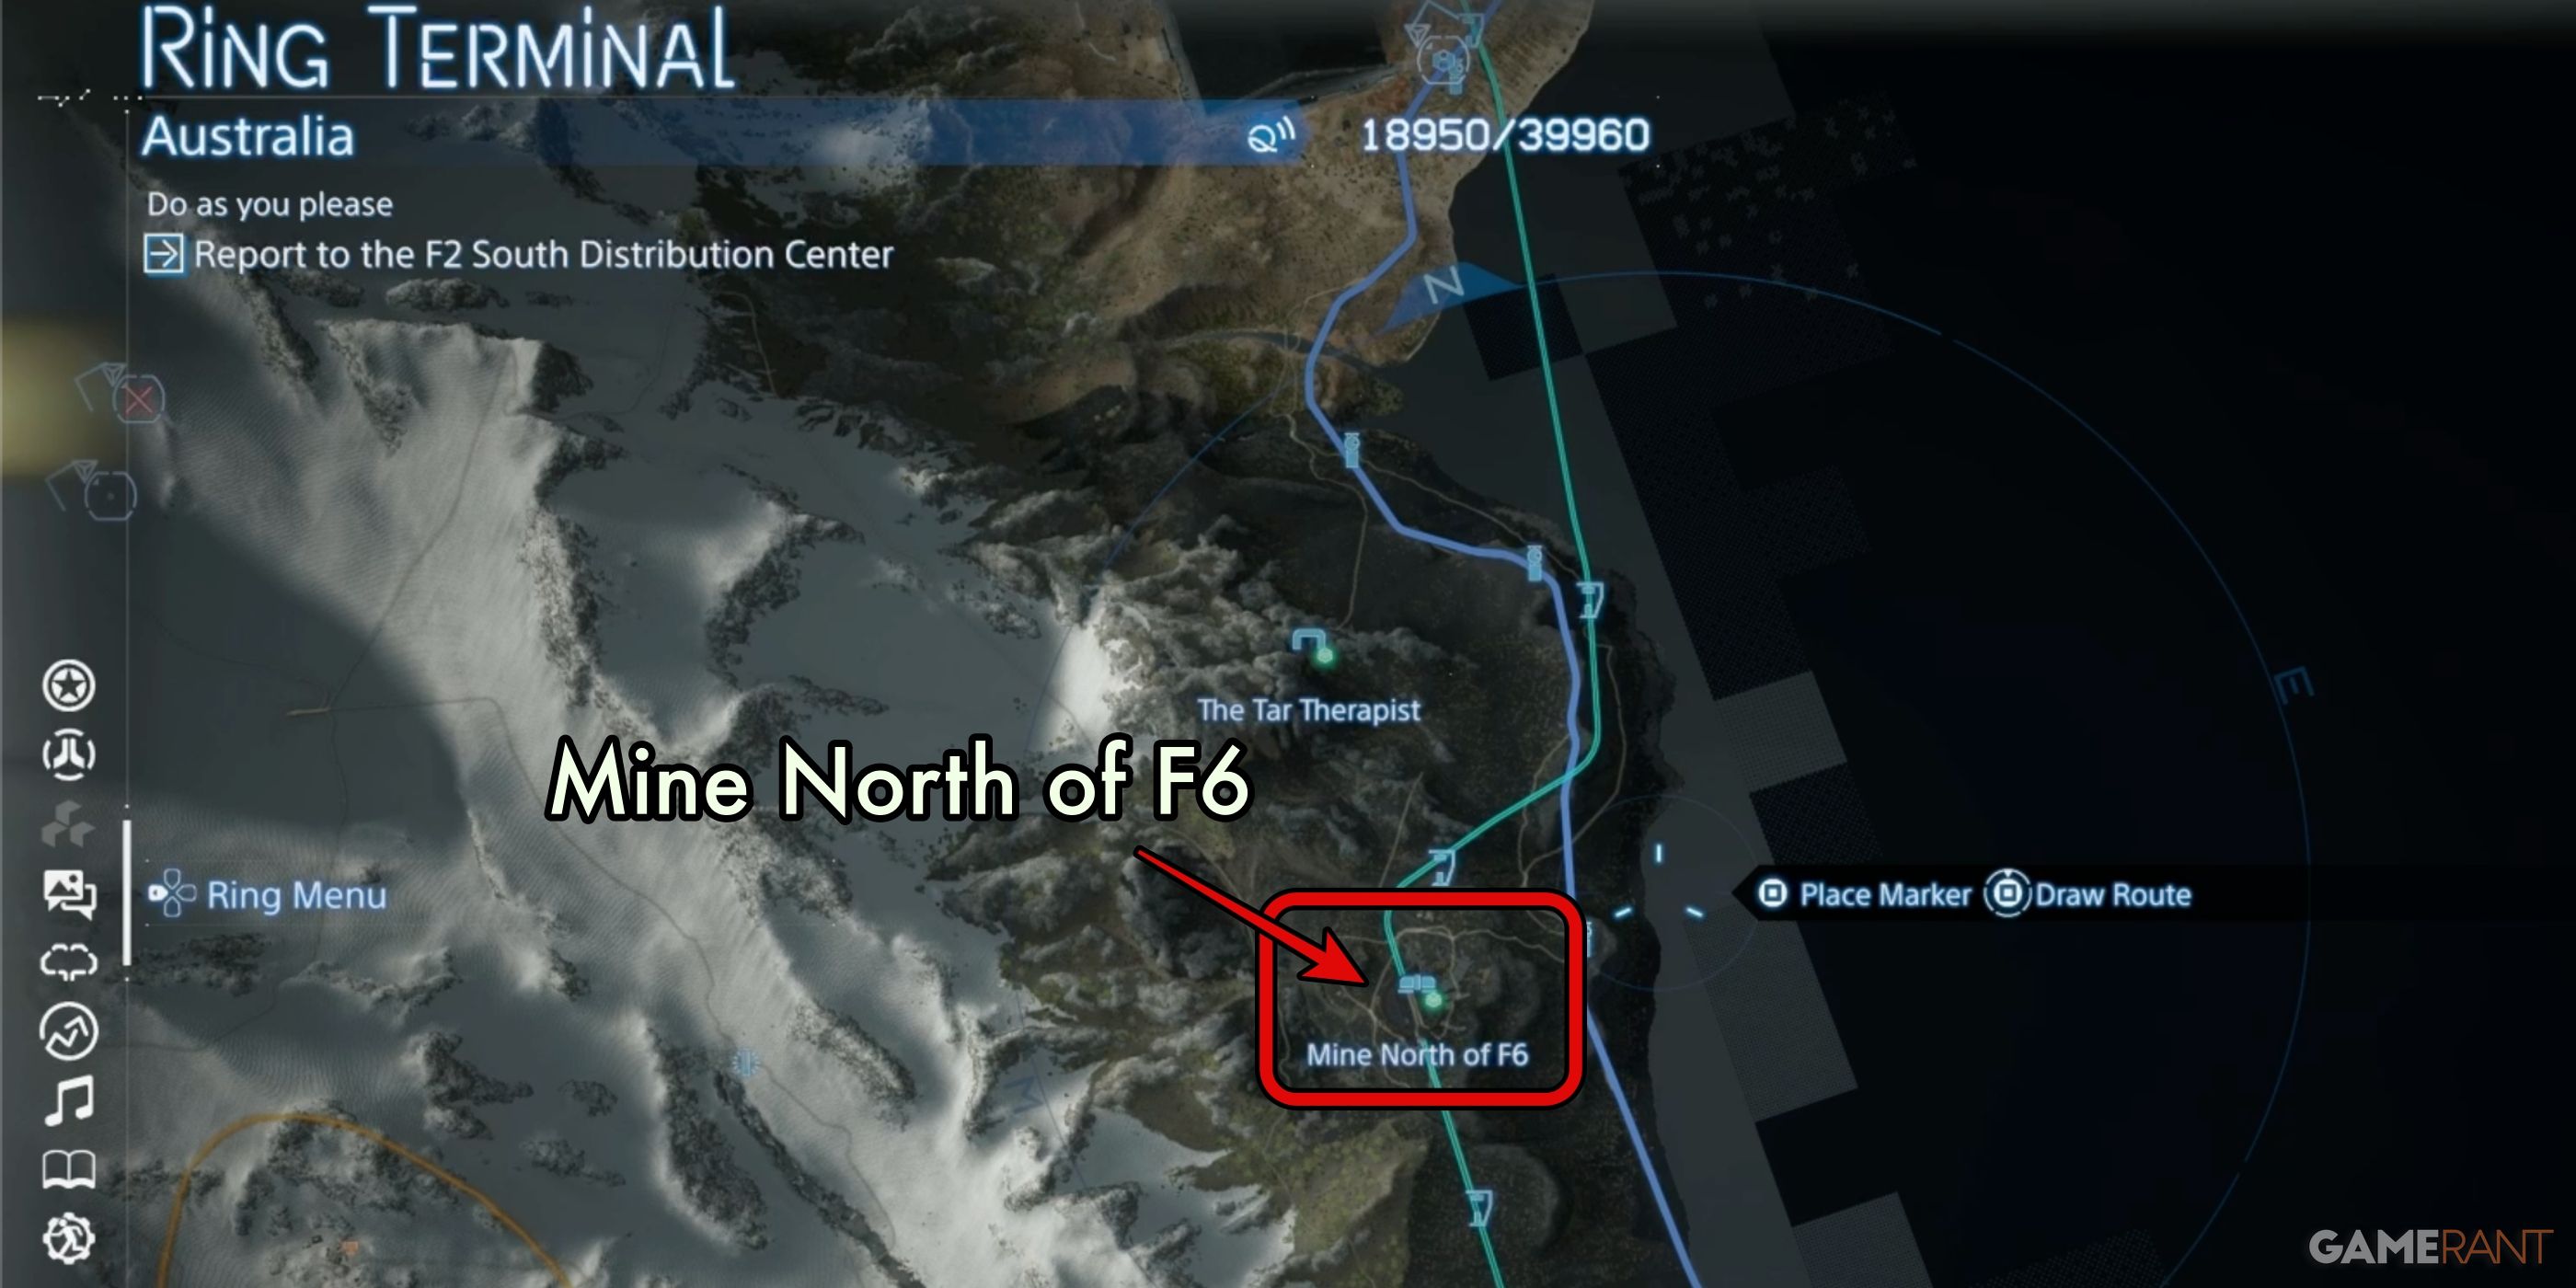
The last big mine, referred to as Mine North of F6, is situated along the southeastern coastline of Australia. By following the monorail route or tracklayers southward from East Fort Knot, you can easily spot this massive circular structure. If you’ve found The Tar Therapist and their hideout, then proceed directly southwards. At level 2, this large mine will require 1000 Chiral Crystals in exchange for 3840 Resins.
This version maintains the original meaning while making it easier to read and understand. It breaks down the information into simpler sentences and uses clear language that is easy to follow.
South Edge Mine:
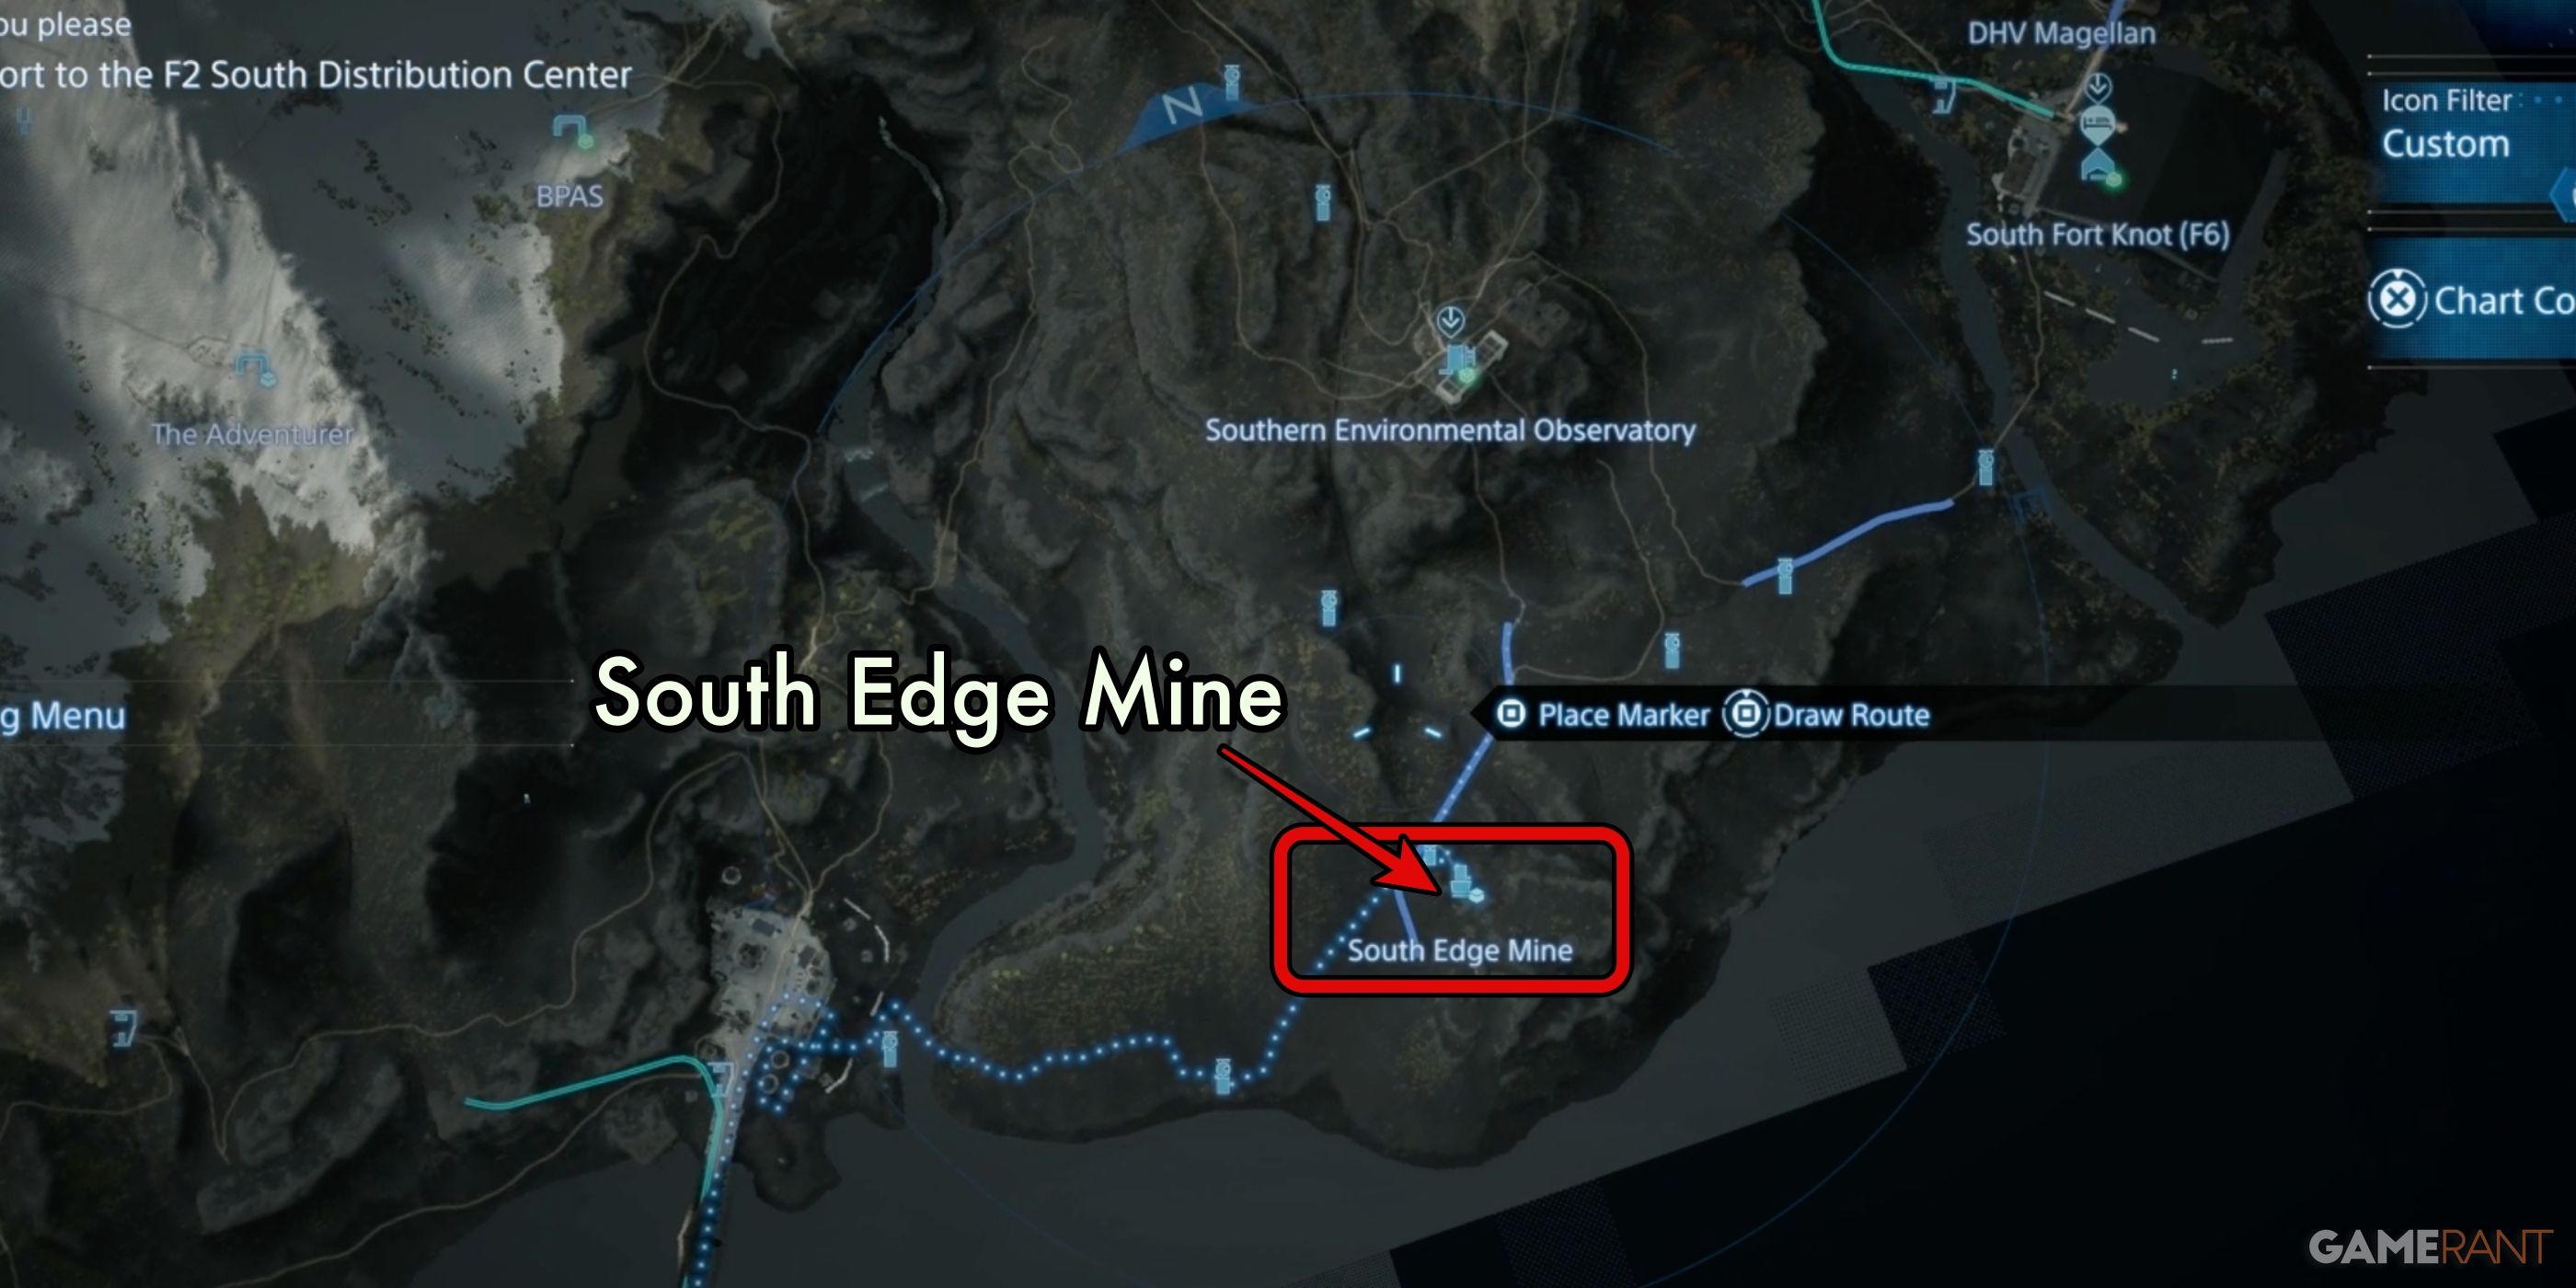
The last mine, known as the South Edge Mine, is situated right south of the Southern Environmental Observatory. Alternatively, you can travel southwest from South Fort Knot along the roads. This is a modest mine that usually won’t appear until quite late in the game. After it’s repaired, it becomes an excellent supplier of Metals for the numerous Auto-Pavers in the area. At level 1, this small mine requires 600 Chiral Crystals to yield 1200 units of Metals.
At present, these nine spots are the only ones where mines have been found within Death Stranding 2. As soon as new mines are uncovered, we’ll promptly update this information.
How to Unlock the Dig! Dig! Dig! Trophy in Death Stranding 2
As a dedicated gamer, I found that grabbing the “Dig! Dig! Dig!” Trophy in DS2 is a breeze! All you’ve got to do is fix up any three mines, regardless if they’re big, small, or a mix. Once you’ve gotten them functioning again, voila! The trophy magically appears on your collection.
Read More
- Quantum Agents: Scaling Reinforcement Learning with Distributed Quantum Computing
- All Skyblazer Armor Locations in Crimson Desert
- Every Melee and Ranged Weapon in Windrose
- Boruto: Two Blue Vortex Chapter 33 Preview — The Final Battle Vs Mamushi Begins
- How to Get the Sunset Reed Armor Set and Hollow Visage Sword in Crimson Desert
- Zhuang Fangyi Build In Arknights Endfield
- Windrose Glorious Hunters Quest Guide (Broken Musket)
- Jojo’s Bizarre Adventure Ties Frieren As MyAnimeList’s New #1 Anime
- Black Sun Shield Location In Crimson Desert (Buried Treasure Quest)
- Grime 2 Map Unlock Guide: Find Seals & Fast Travel
2025-07-07 08:34