Guiding You Through the First Mission in Abiotic Factor: Unlocking the Cafeteria Door for Dr. Jager
In this game, the initial mission presents a challenge to the player as they navigate through a sequence of rooms with the ultimate goal of freeing Dr. Jager who is trapped behind a locked cafeteria door. Although this mission occurs post-tutorial, it effectively introduces many mechanics that will be encountered throughout the game. However, there are some intricate aspects to complete, such as obtaining an Energy Brick to unlock the said door. Herein, we’ll take you step by step through Abiotic Factor’s first mission, showing you how to create an Energy Brick and open the cafeteria door.
How to Open the Cafeteria Door in Abiotic Factor
Opening Mission Walkthrough – Speak with Dr. Thule
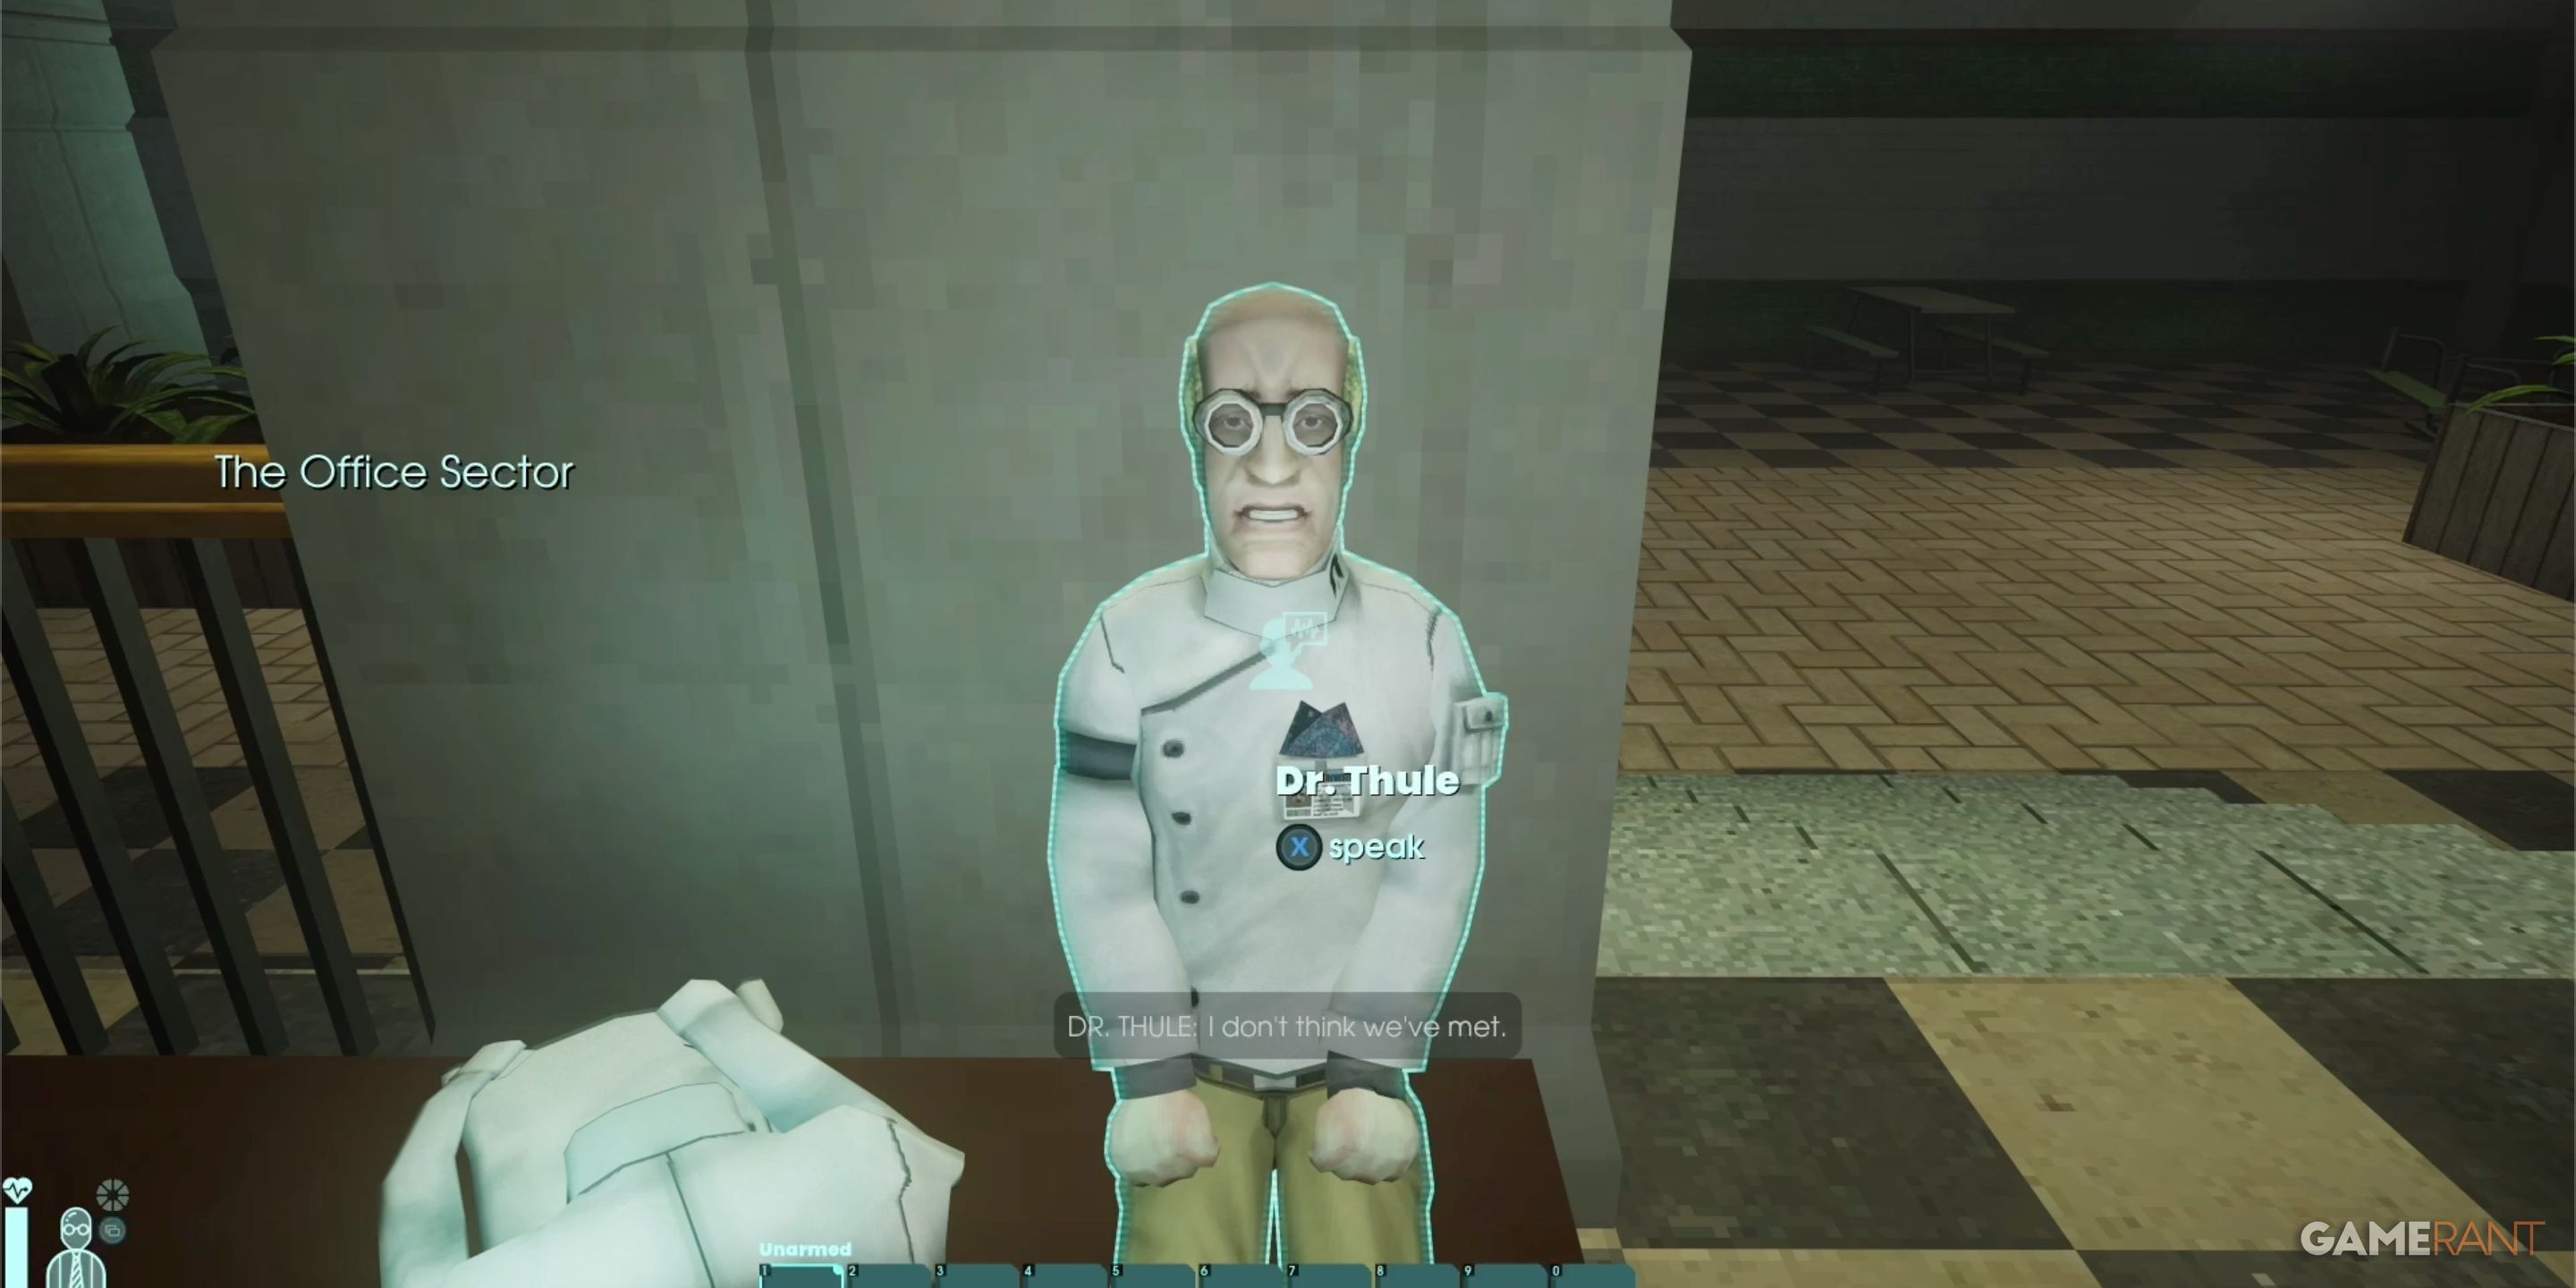
In a casual and clear manner: You begin your journey in an ordinary setting called The Office Sector, where guidance is scarce. The only instructions you’ll get are from Dr. Thule, who is sitting on a bench in the cafeteria. He informs you that his colleague, Dr. Jager, is currently locked out of the cafeteria and assigns you the task of unlocking the door. However, he doesn’t provide any hints on how to complete this task.
Step 1: Locate the Vents in the Storage Room
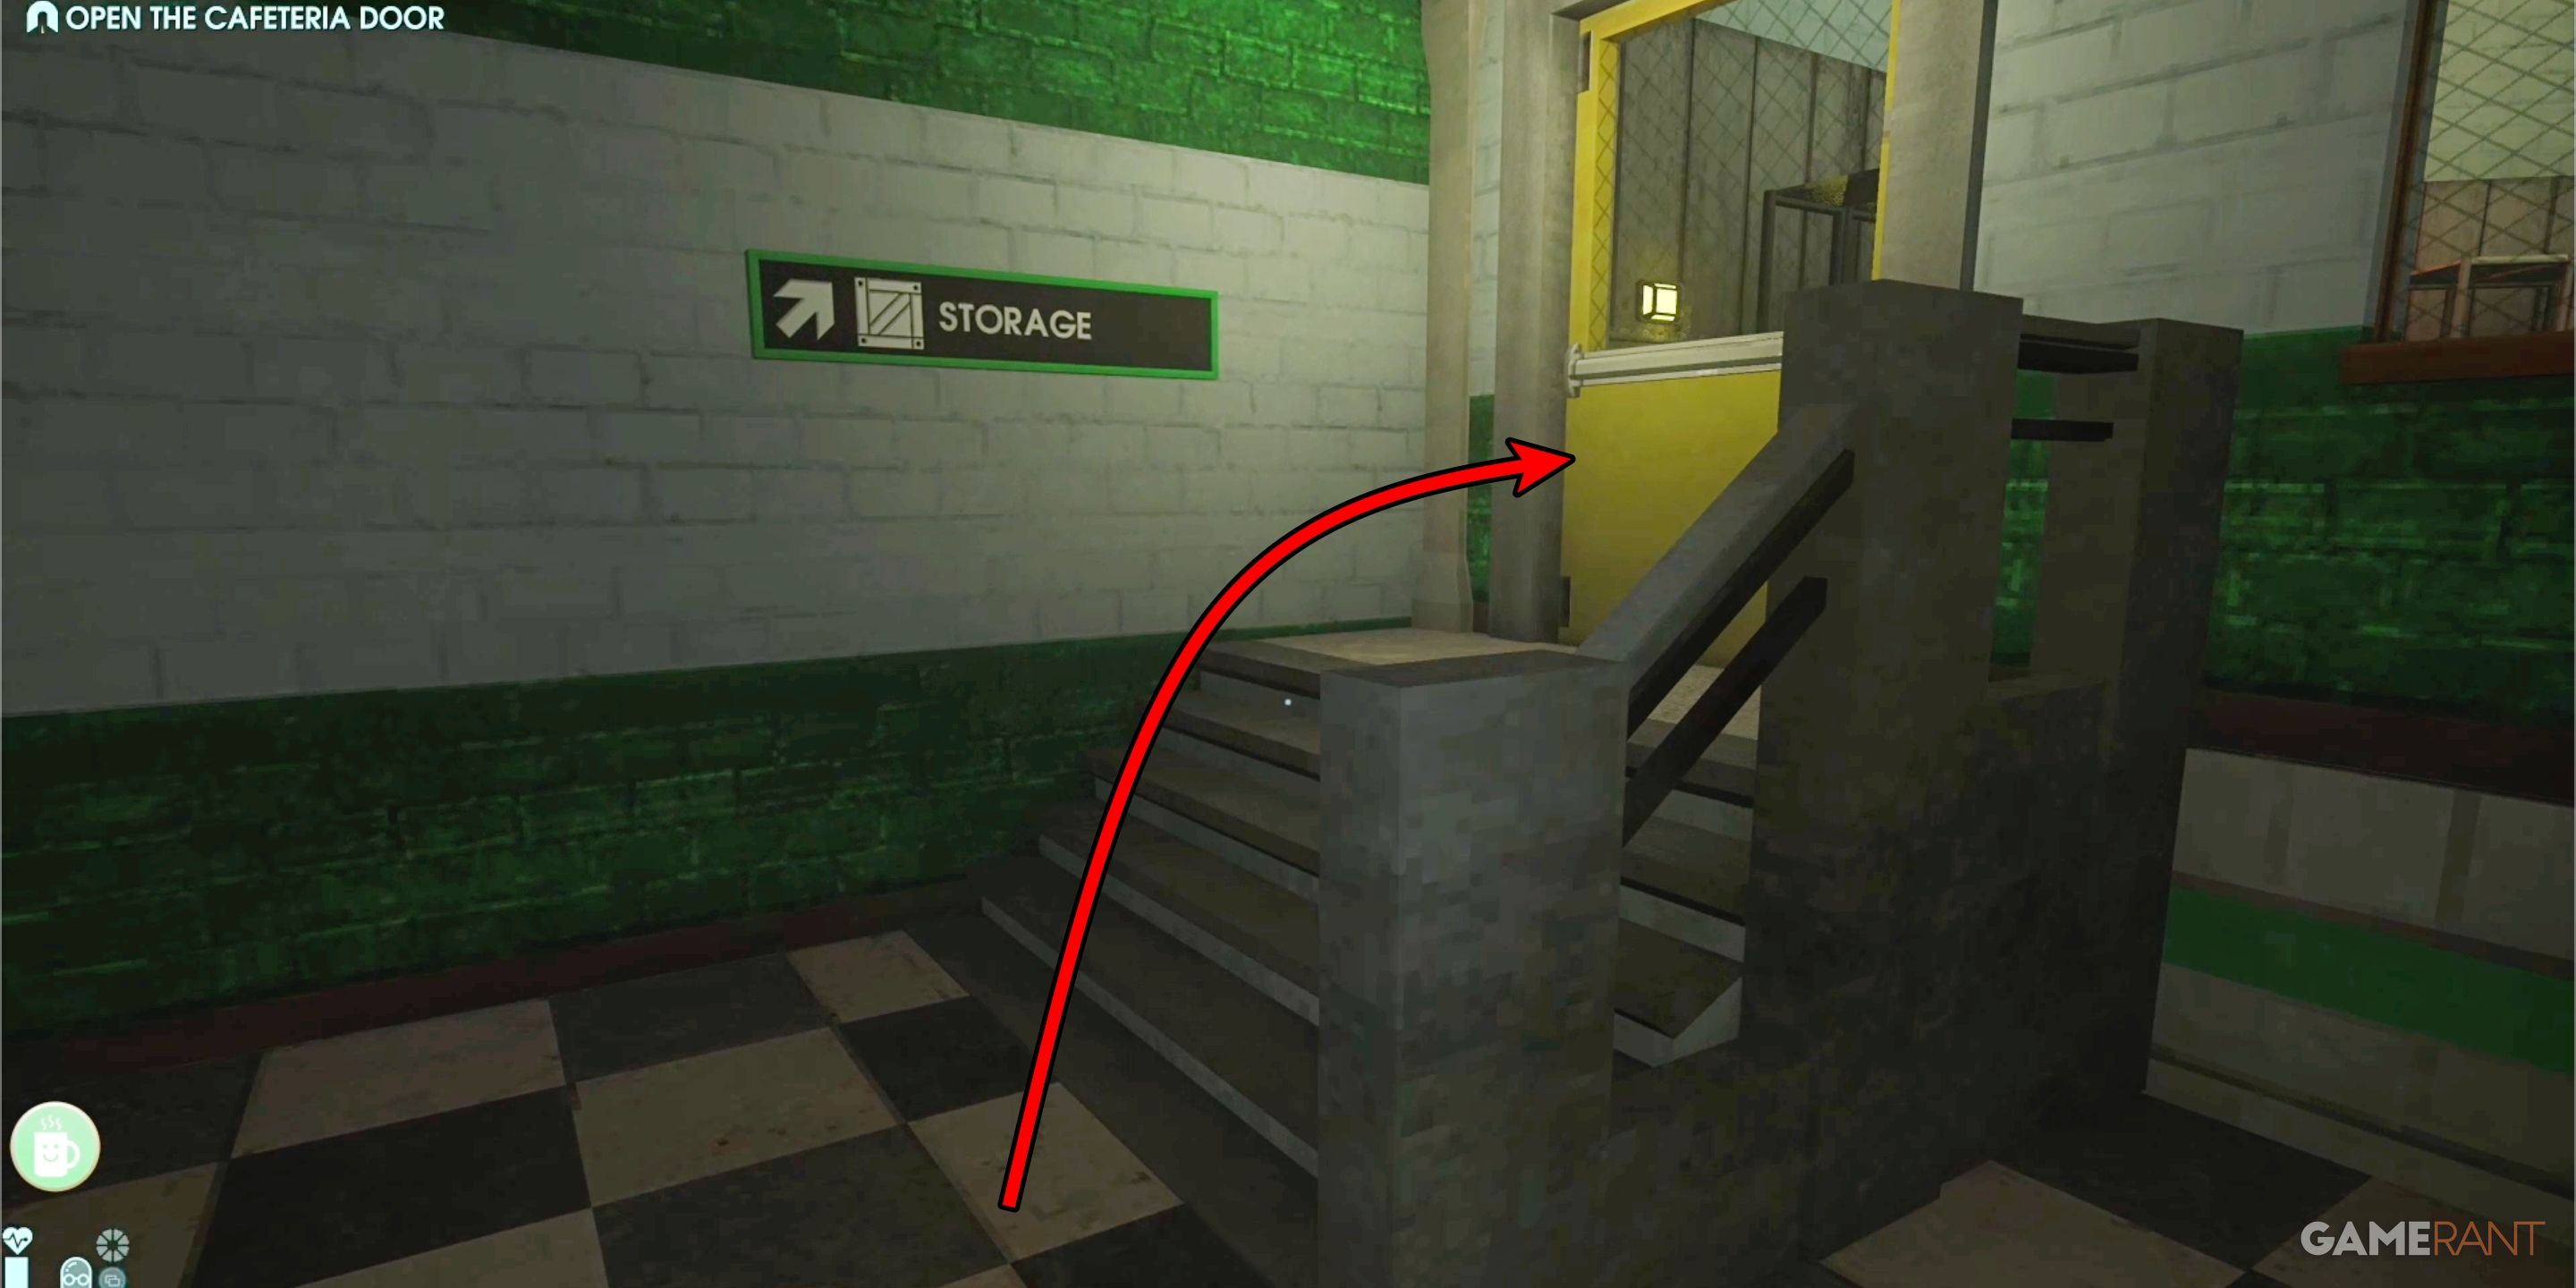
Start by heading straight to the Storage Area, which isn’t too far from the elevator. Upon leaving the elevator, take a right and stick to the wall. You’ll notice the windows that offer a peek into the Storage Area ahead. Proceed down the stairs to the lower level, and then make your way into the Storage Area.
Ensure you collect any stray items you encounter during your journey as much as your capacity allows. You’ll discover some Cloth Scraps on the bench near Dr. Thule, and you’ll find Duct Tape on the shelves in the Storage Room. Don’t forget to gather the Metal Scraps after dismantling the vents. Most items you find will prove useful for crafting later in the mission. It’s also worth mentioning that gathering loose items and materials may sometimes unlock new crafting recipes; so collect everything you can find, even if you need to put some aside temporarily.
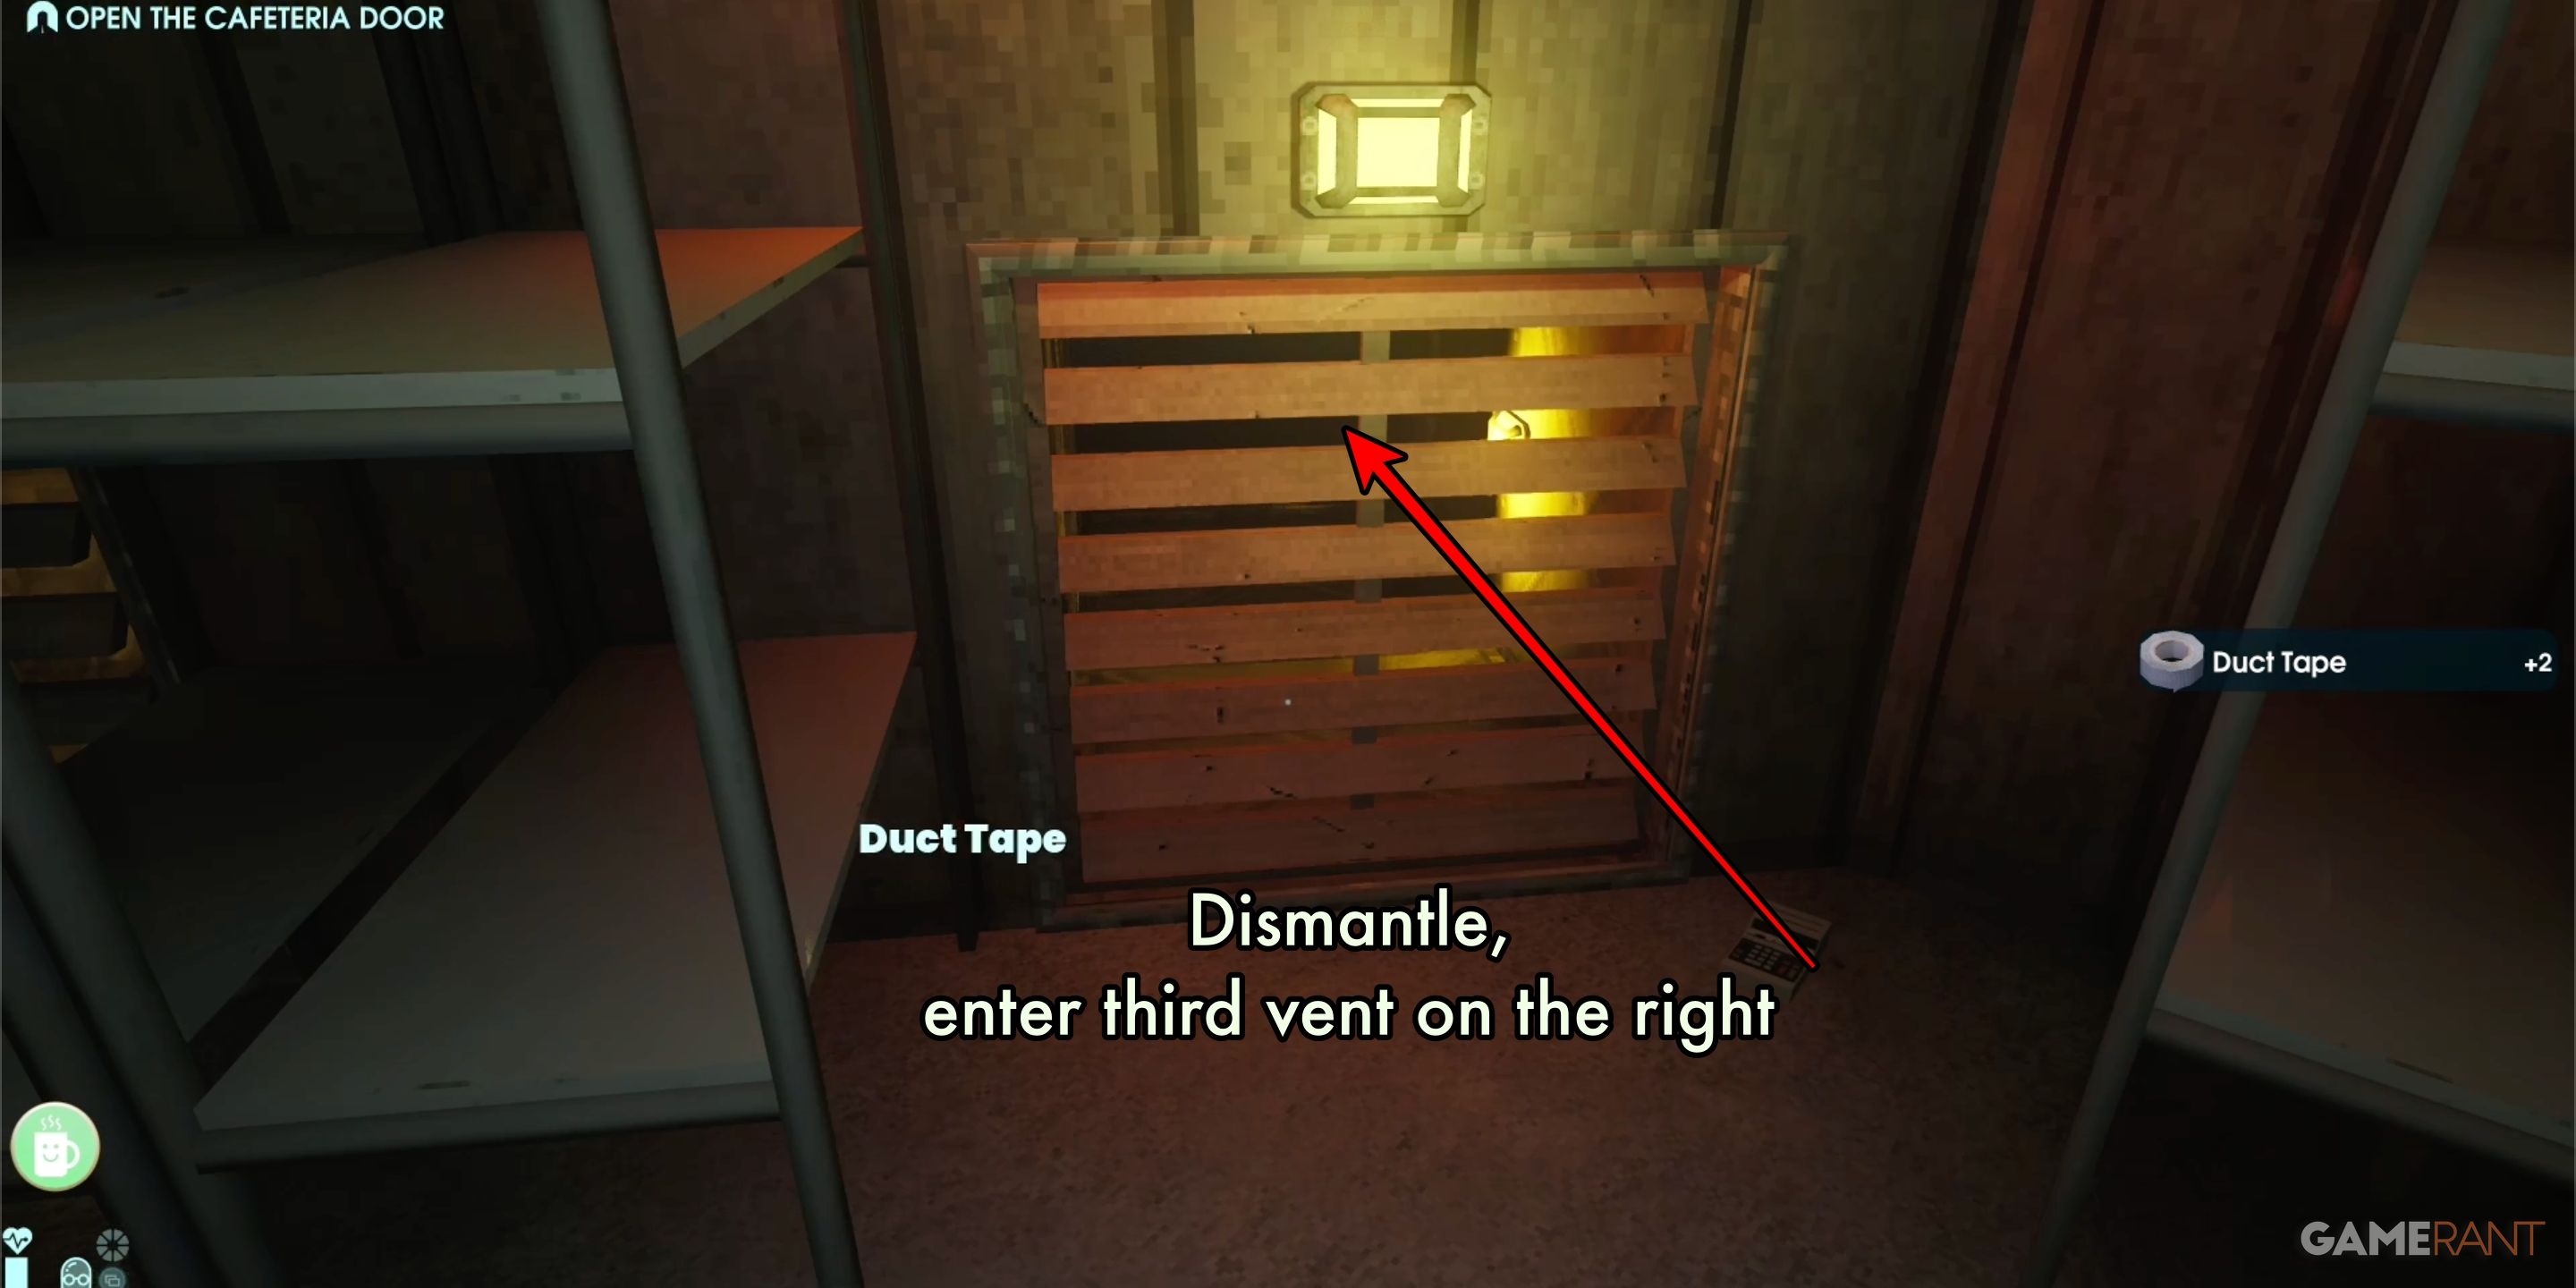
In the Storage Room, there are three air vents embedded at floor level in the wall. Use the dismantling tool to take out these vents. The vent located on the far right leads into the next room, while the vents on the left are blocked off (but they both have a solitary roll of duct tape inside). When you’re prepared, press ‘B’ or ‘Circle’ to squat down and then venture into the vent on the right side.
Step 2: Combat Encounters
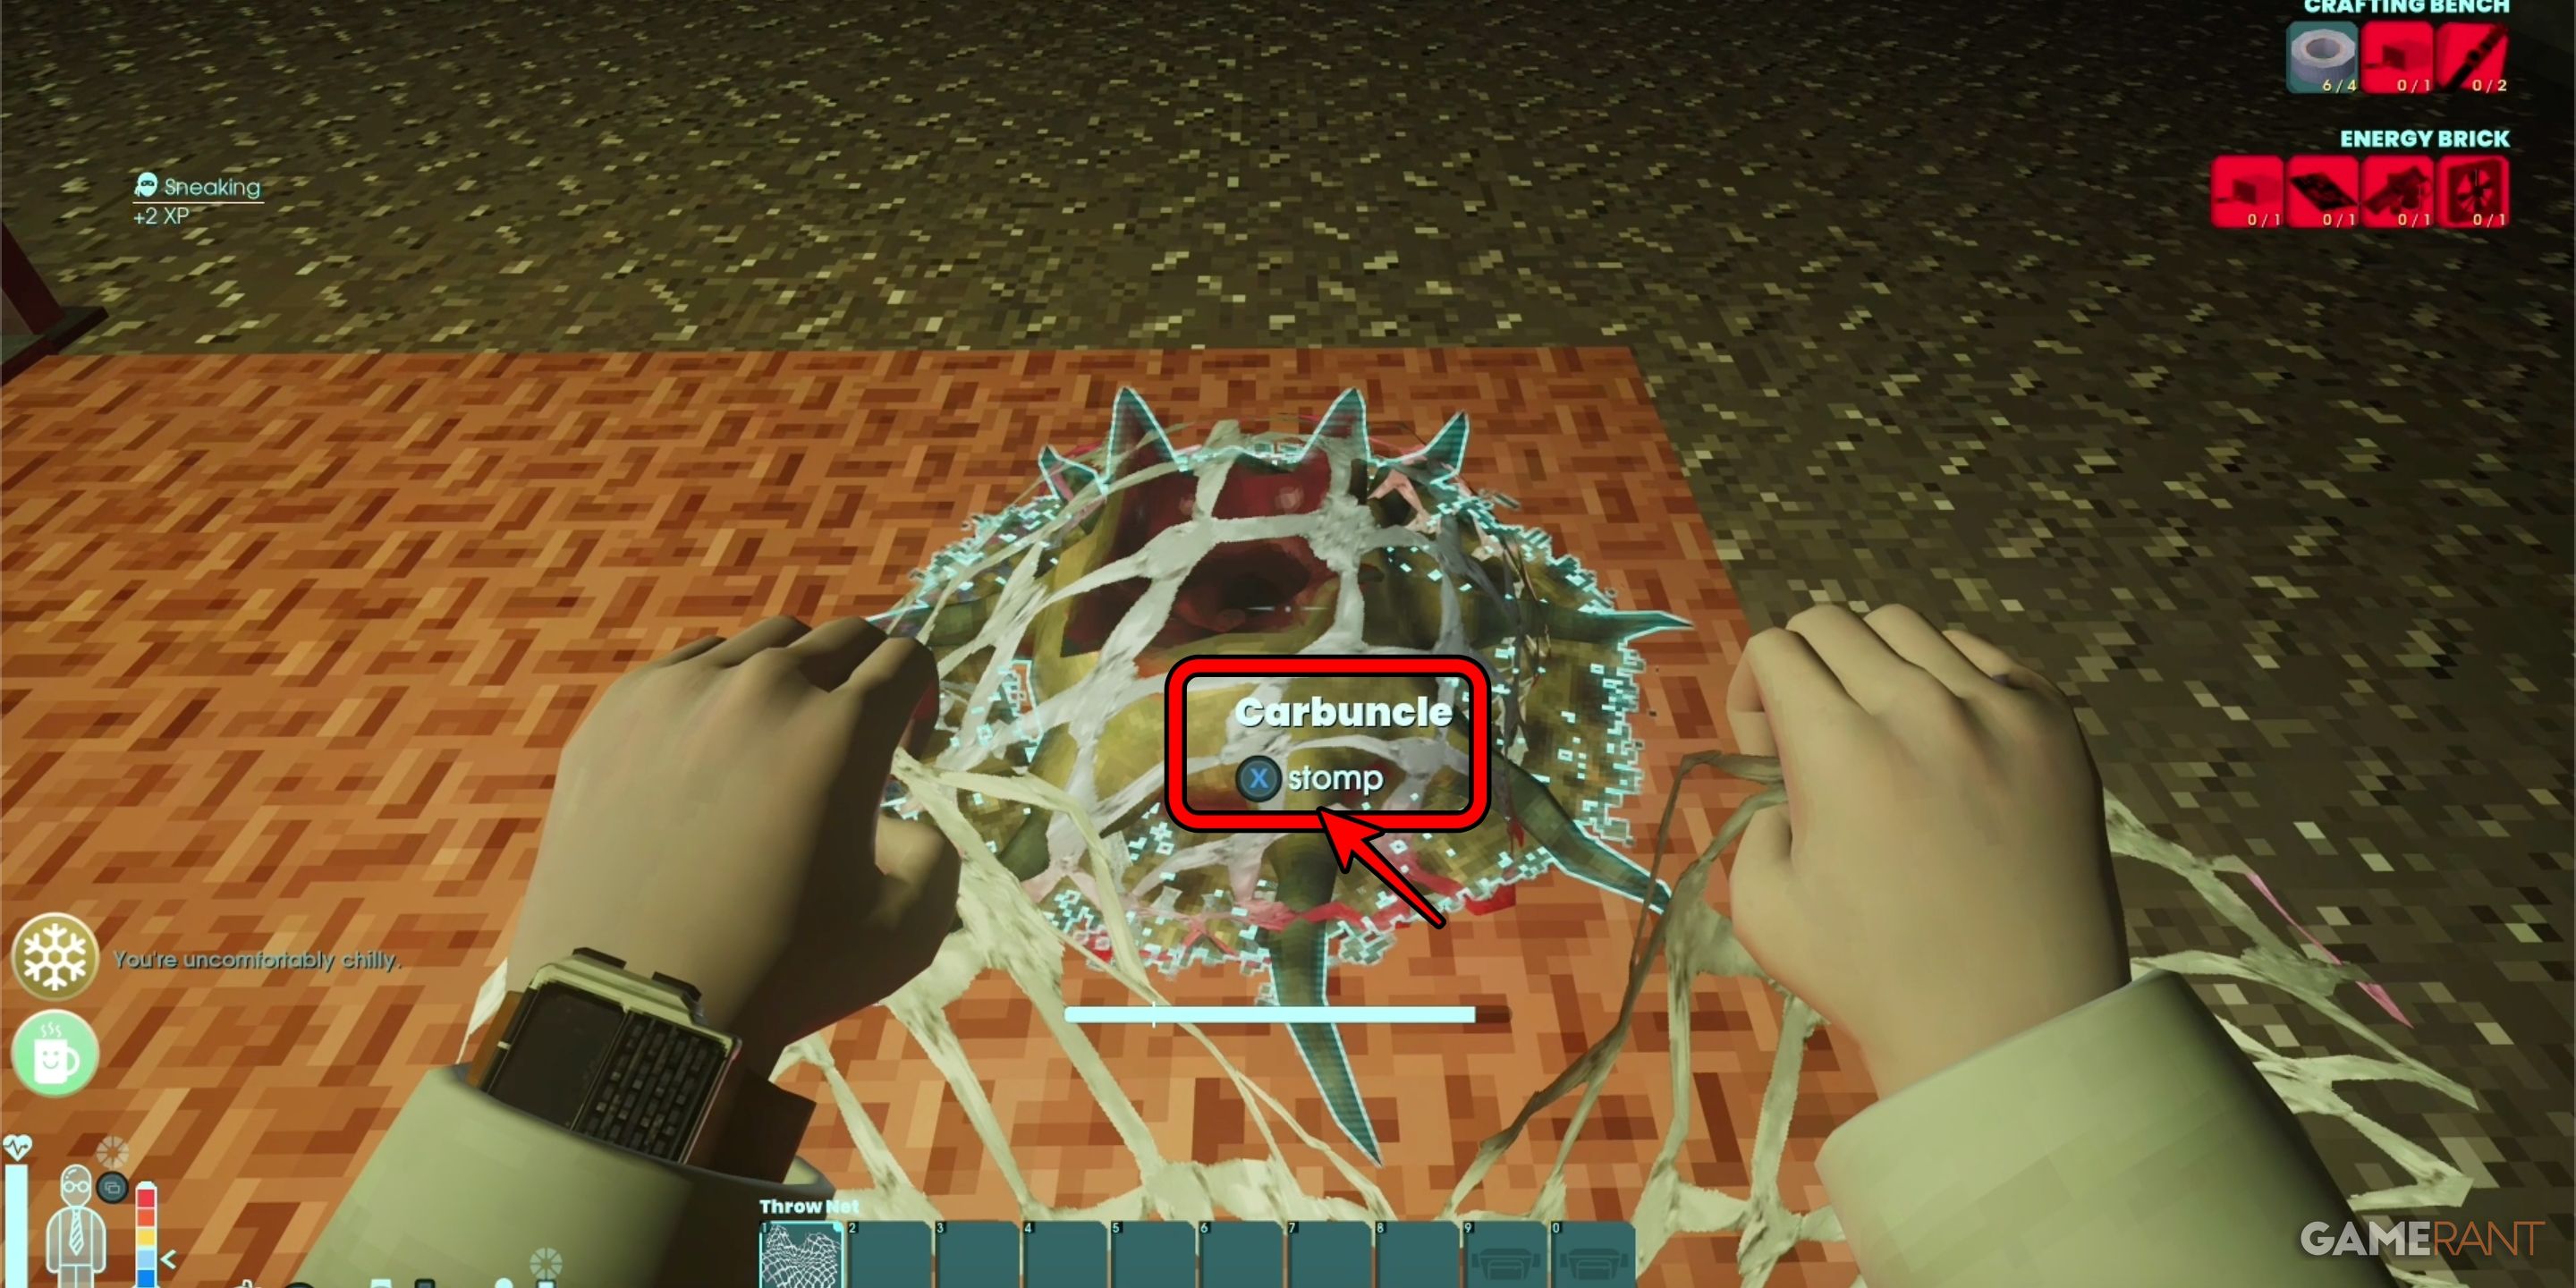
As you emerge from the vent and step into the following chamber, you’ll notice a pile of rags on the floor. Gather these, then access your crafting interface. In this menu, you’ll want to create your initial set of Throw Nets. You’ll require just one cloth scrap to produce three nets in total.
Toss the net around the Carbuncle that’s in the middle of the room, followed by moving towards the captured foe to deliver a Stomp, effectively eliminating the Carbuncle. This tactic should work for all enemies you encounter before reaching the cafeteria door.
After defeating the Carbuncle, proceed through the gray door and take a right turn. You’ll find yourself in a room filled with fans, and there’ll be an enemy waiting for you in the center. This is a chance to show off your skill with the net. Capture it, then crush it underfoot. To leave this room, search for the vent emitting a yellow light. Venture into the vent, but don’t forget to grab the items from the toolbox before you go. You’ll definitely want a screwdriver for future use. Follow the vent until you reach its end. This will lead you to another room where you can drop down safely.
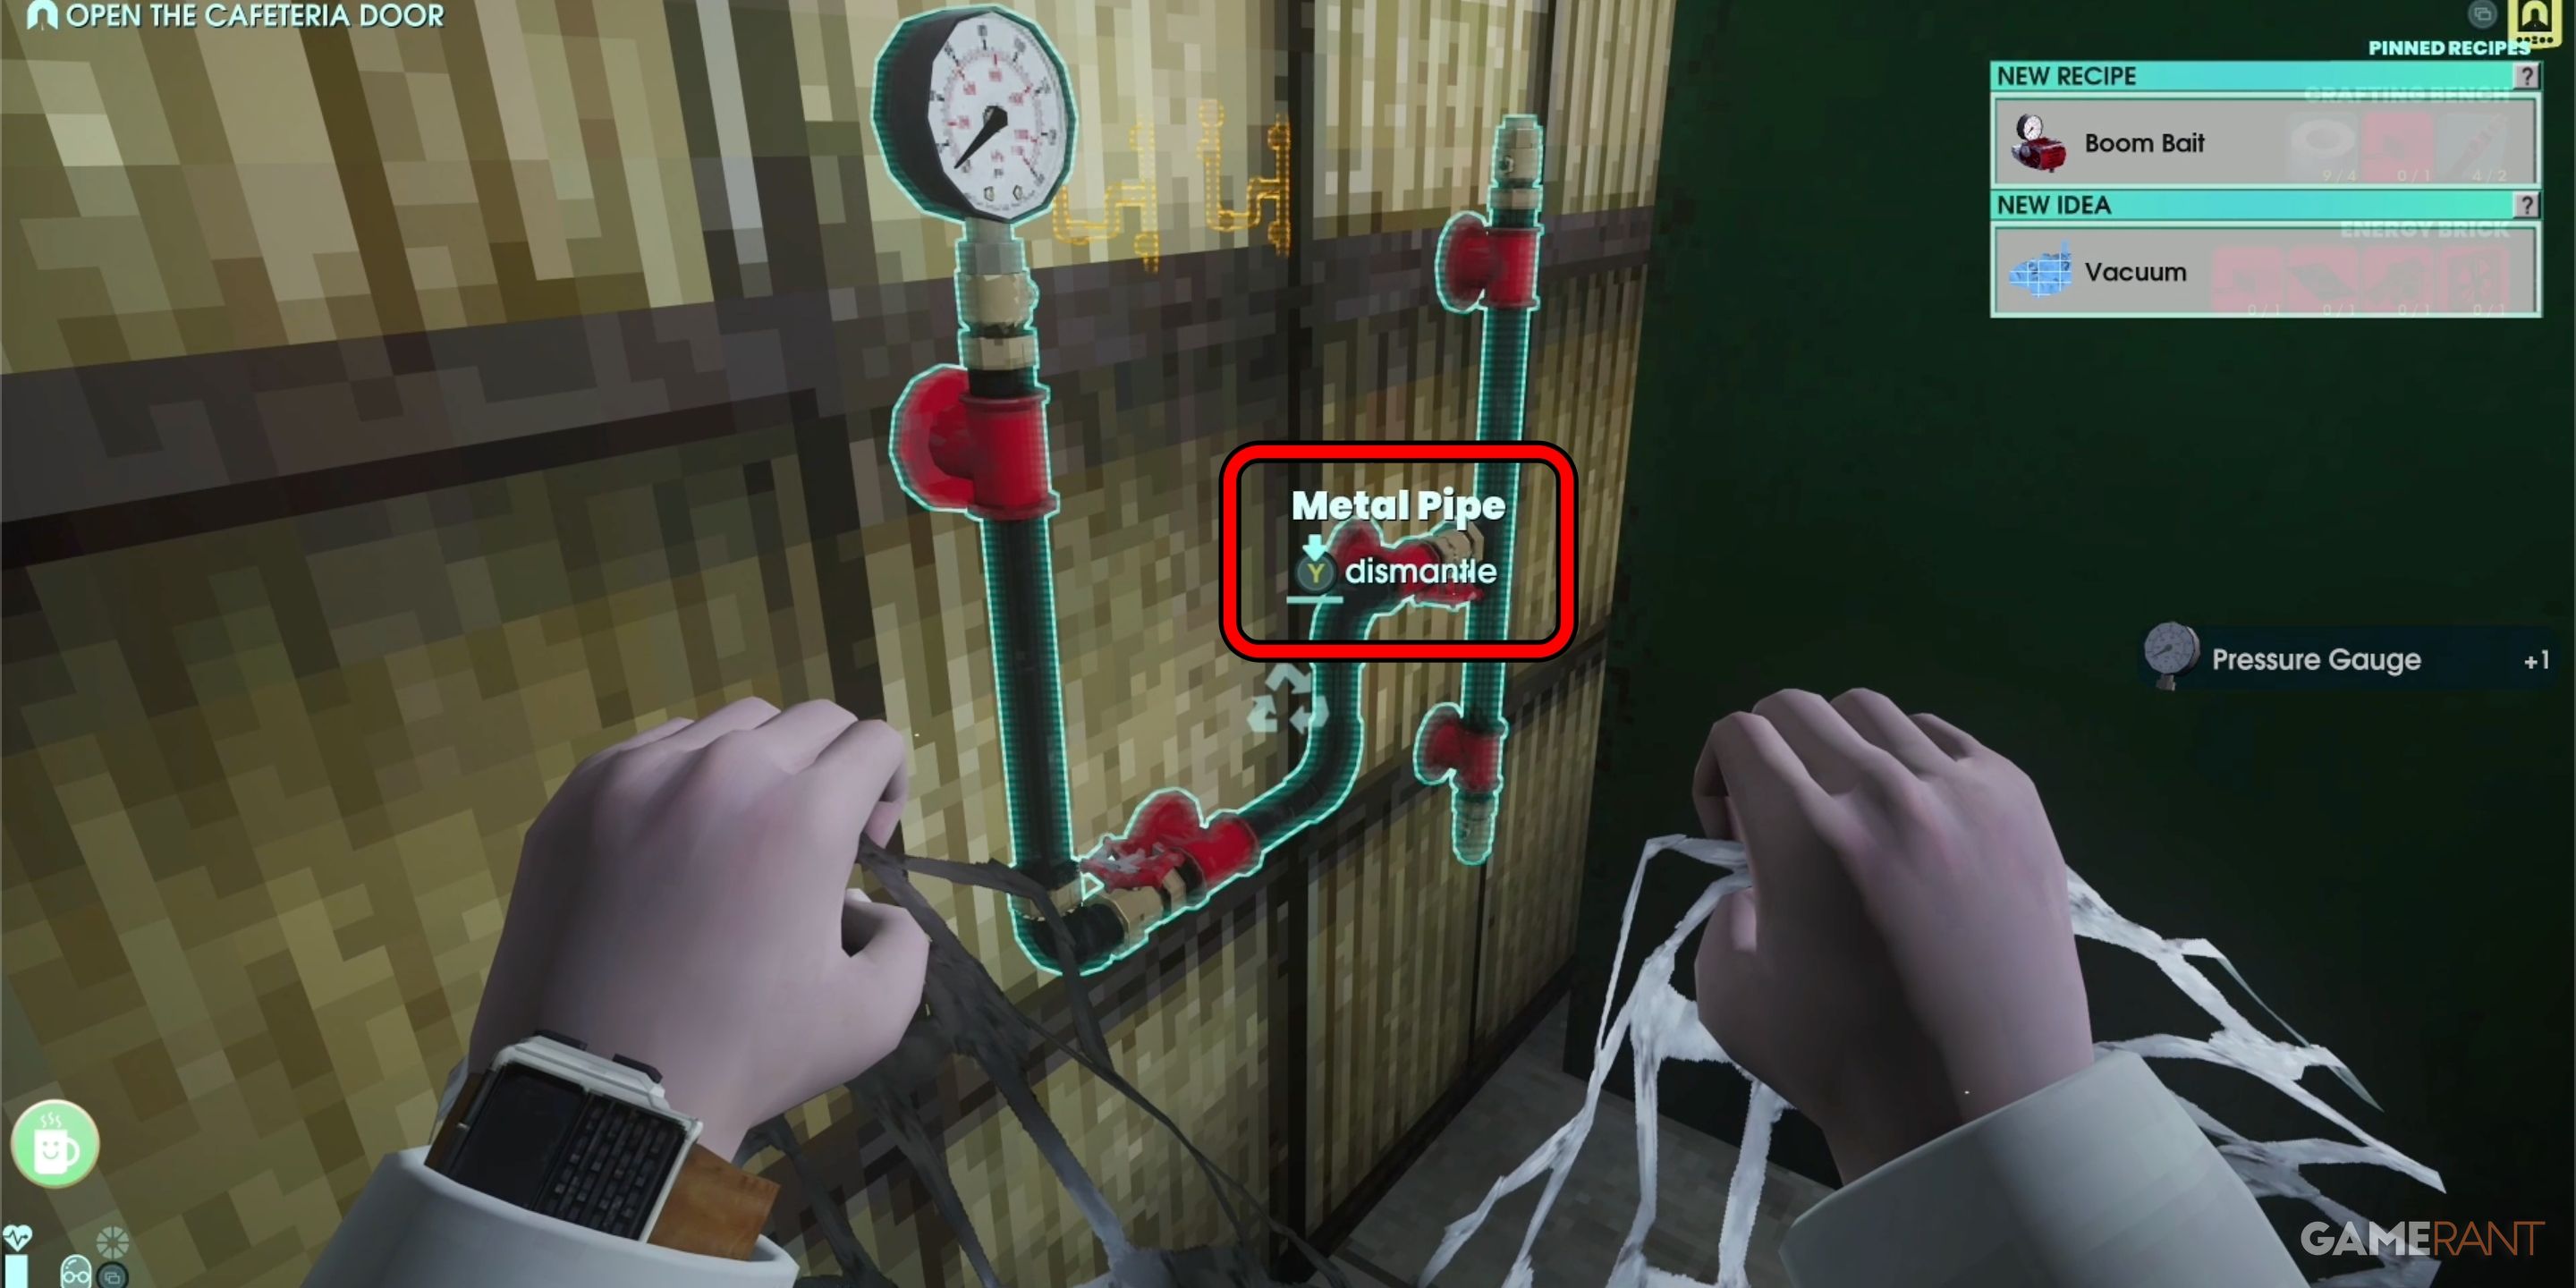
When descending into the lower area, keep an eye out for the yellow-marked metal pipes along the walls. Be sure to disassemble at least three of these, retrieving the Metal Pipes as I did. If your storage is limited, you can skip the Pressure Gauges for now, although they do hold recipes that could be useful later on.
Be cautious of the third assault by the same type of enemy in this room. It’s expected to move more swiftly this time, so keep an eye on its movements and dodge when it jumps. Toss a net first, then squash it afterwards. To leave this area, locate the orange door hidden on the lower level.
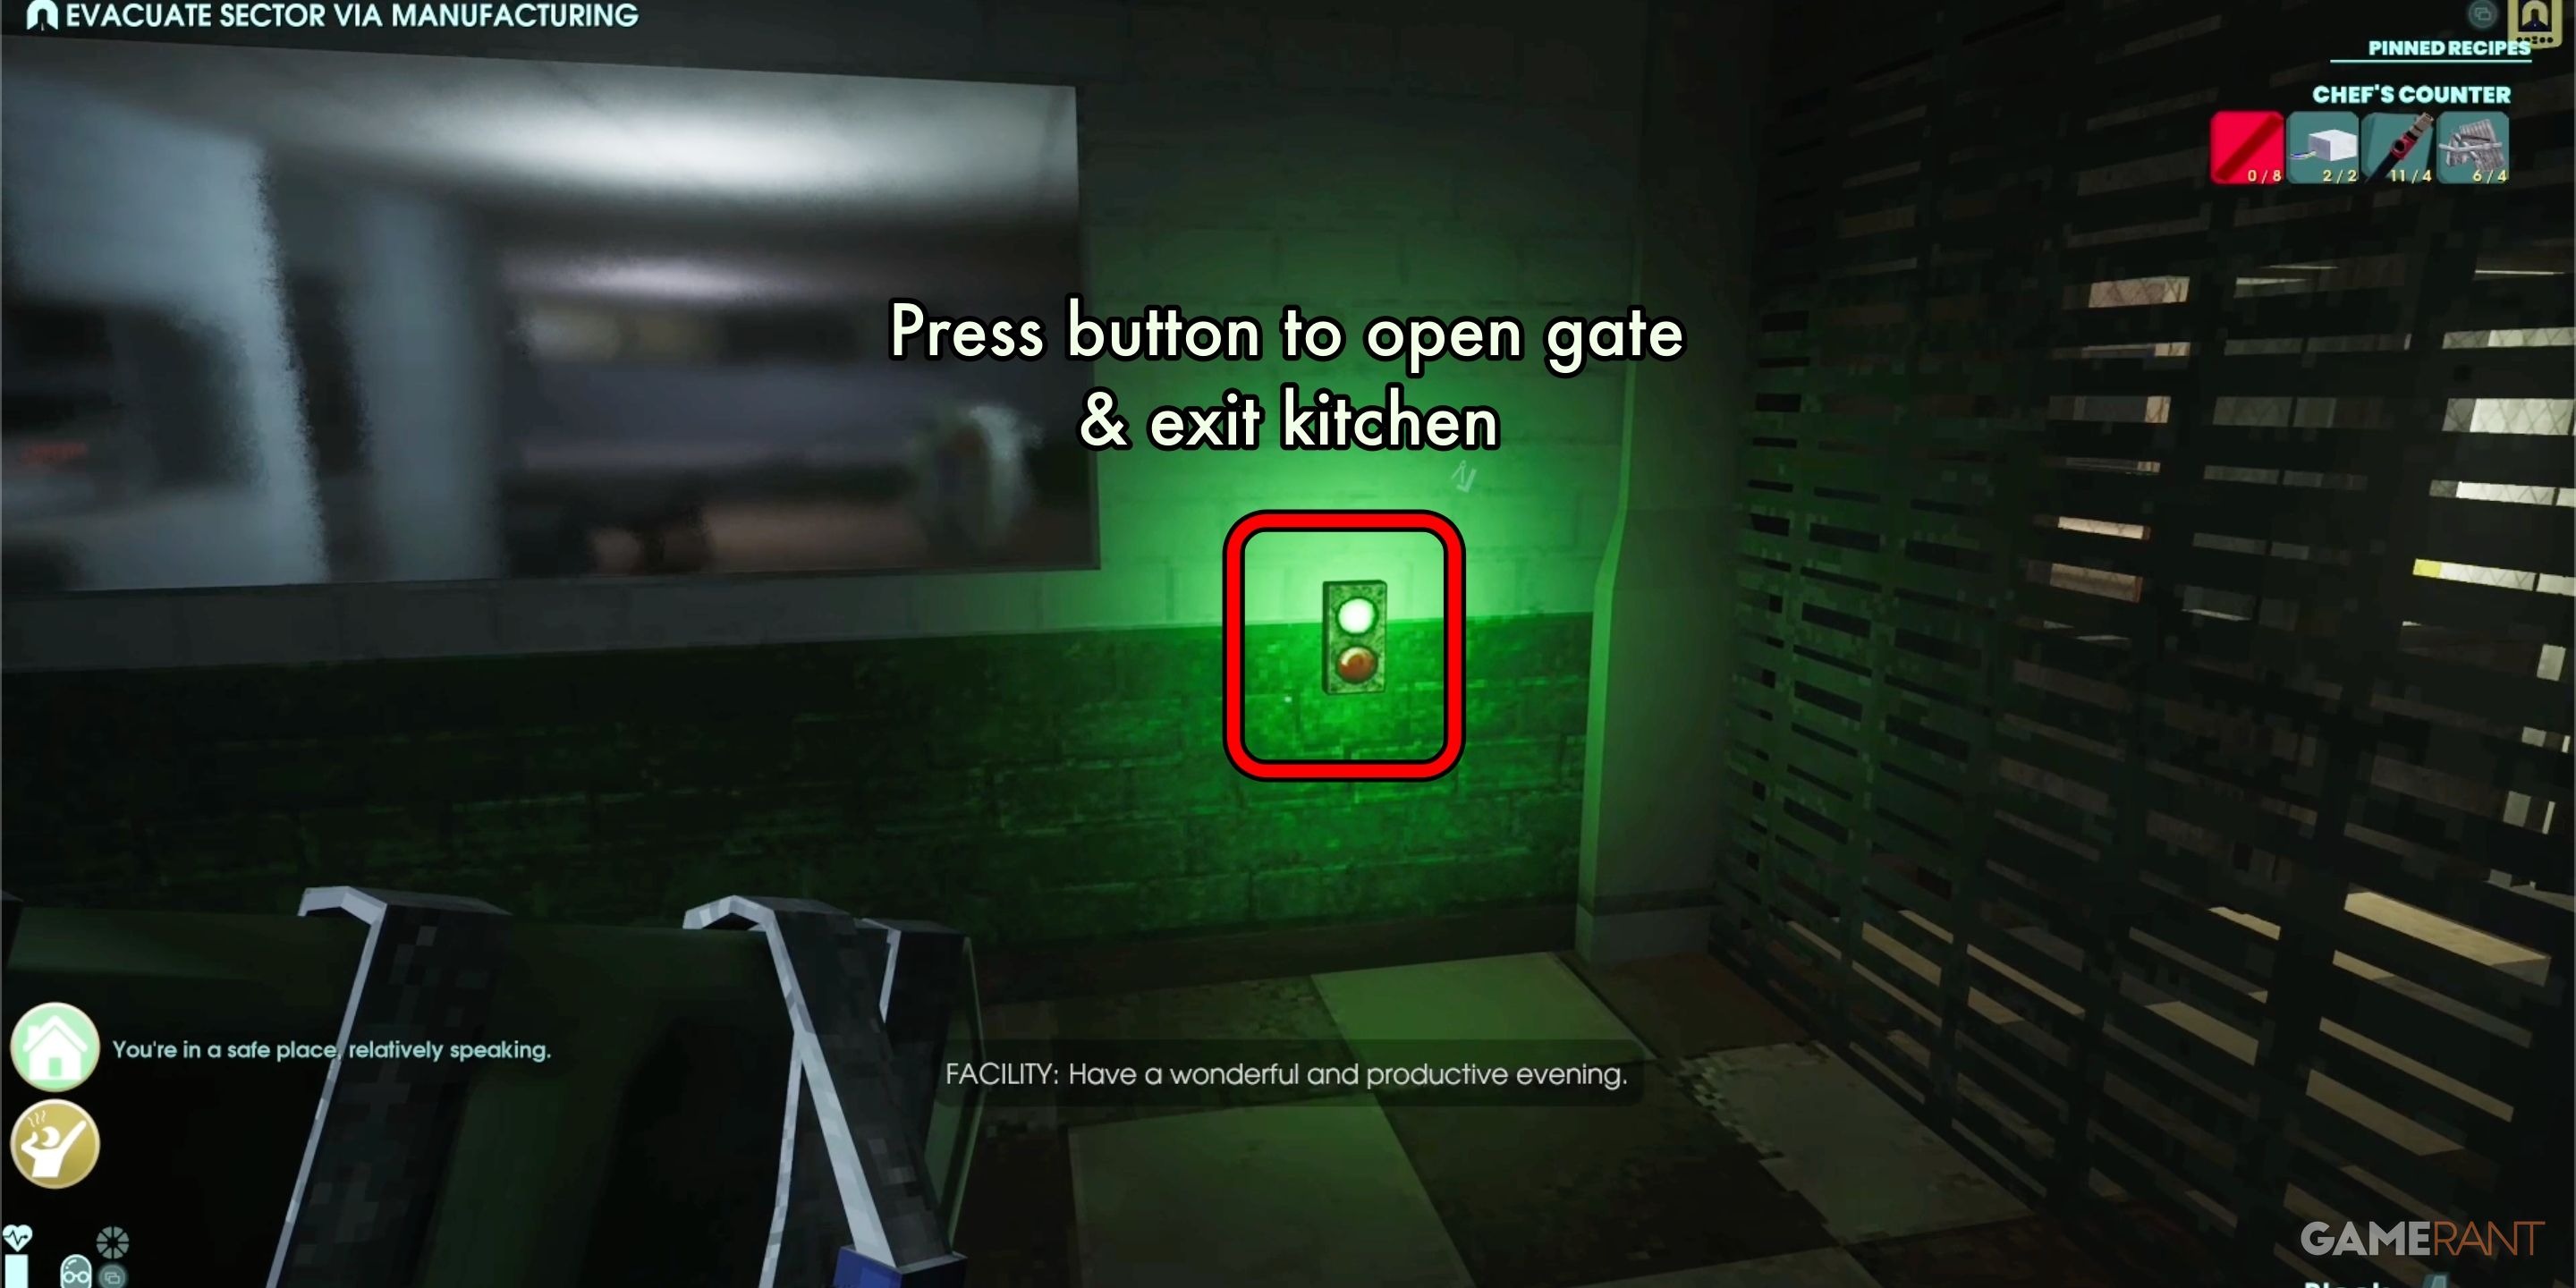
Upon entering the following room, don’t forget to snag the Flashlight resting on the crate. Proceed through the ensuing space, and take a right turn after encountering the computer. This path will guide you to the kitchen. Inside, there are numerous Metal Knives that it would be wise to collect, along with a cooking station. Be cautious of various adversaries. You’ll likely stumble upon a locked door that seems to access an office. This is the Security Office, your next objective. To get there, you need to leave the kitchen by pressing the green button on the wall near the metal gate.
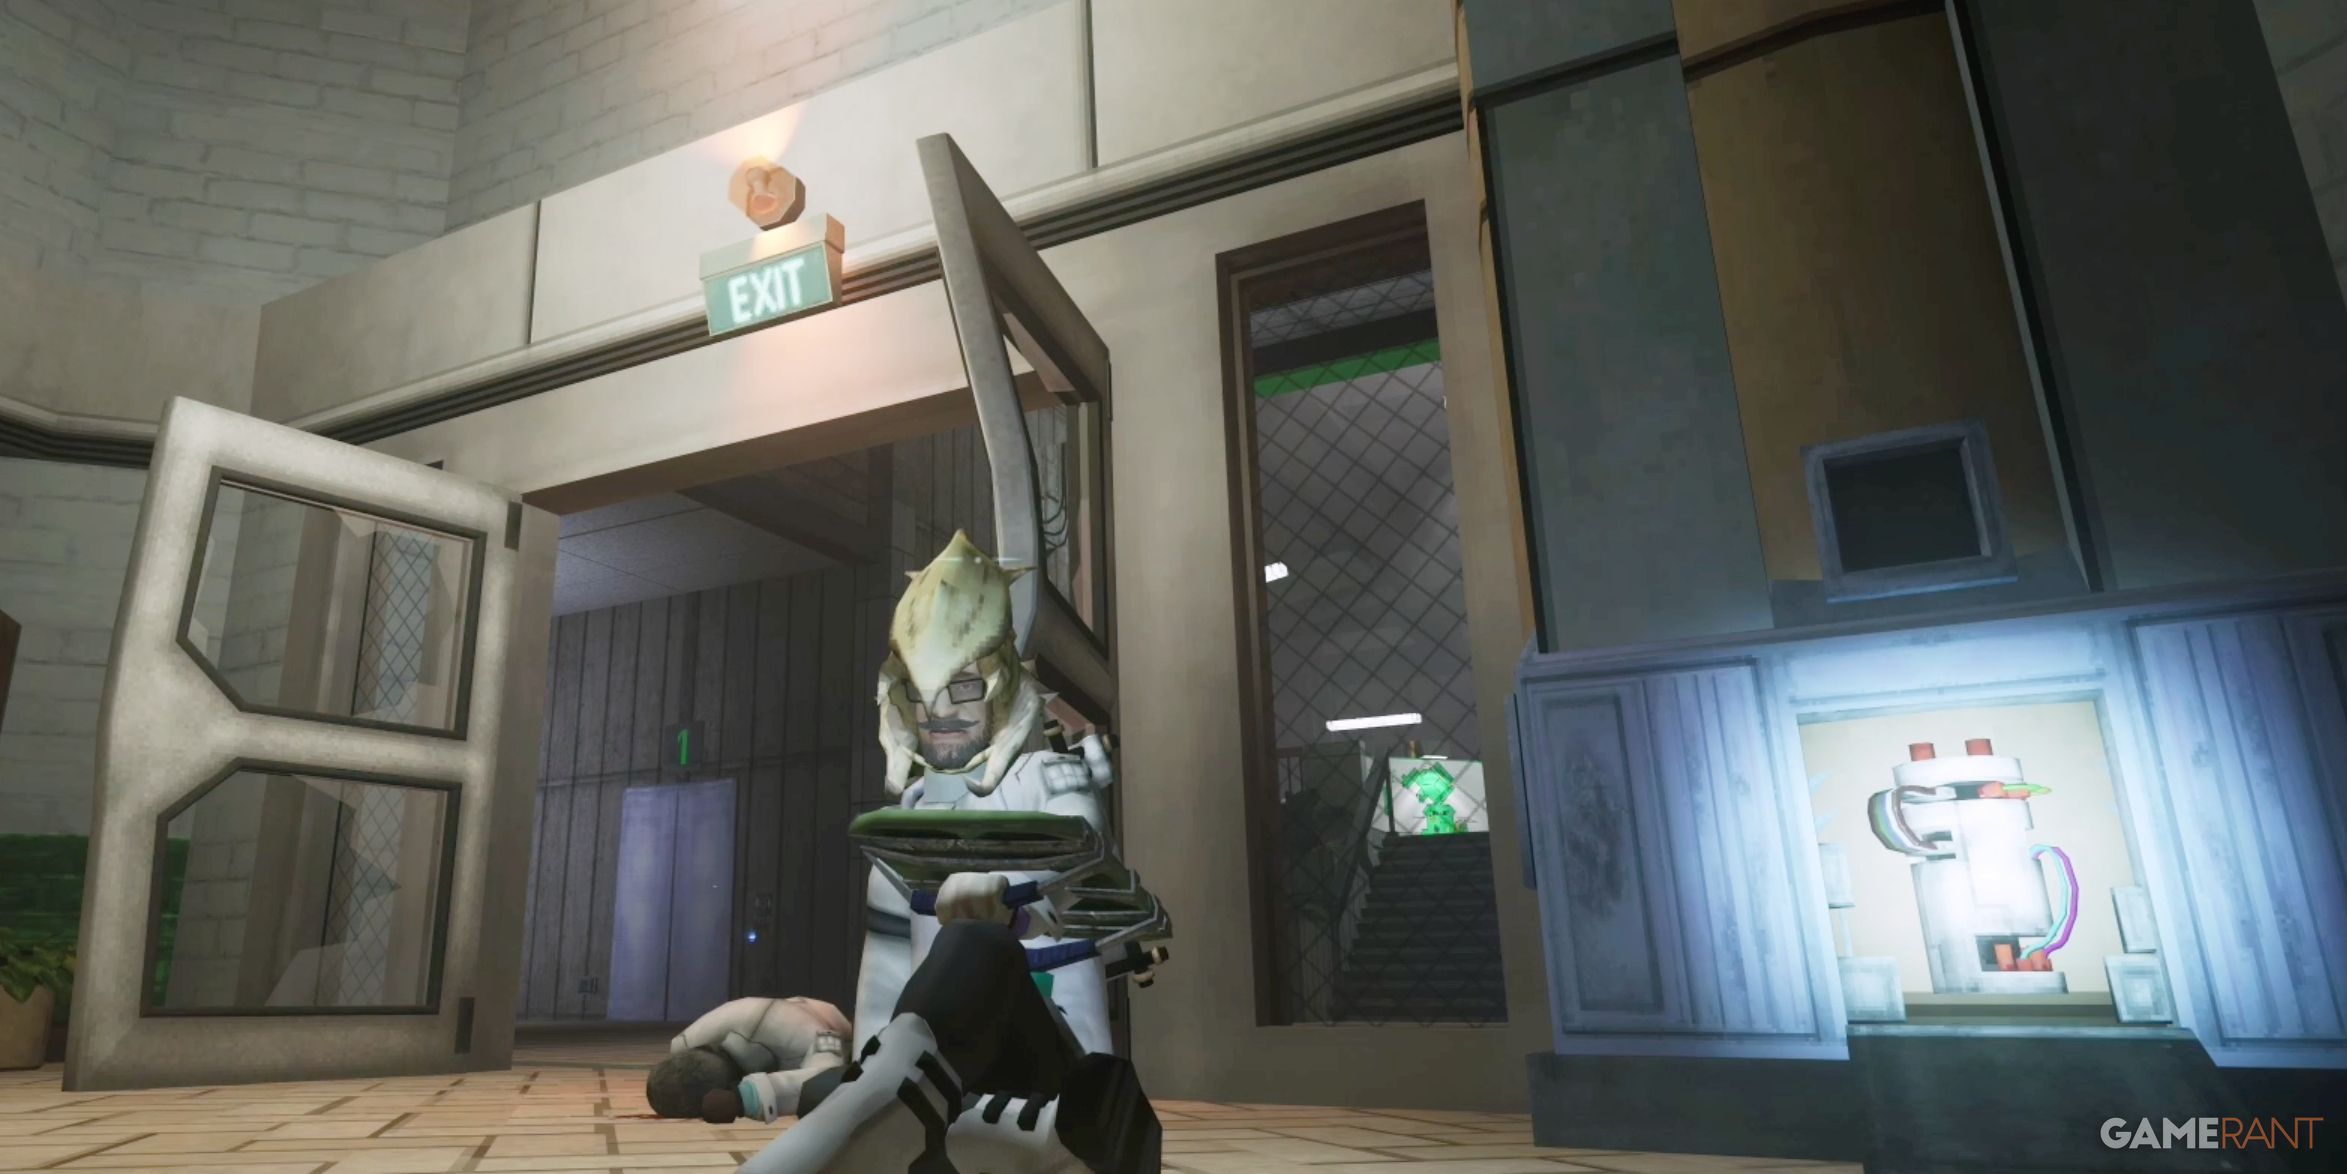
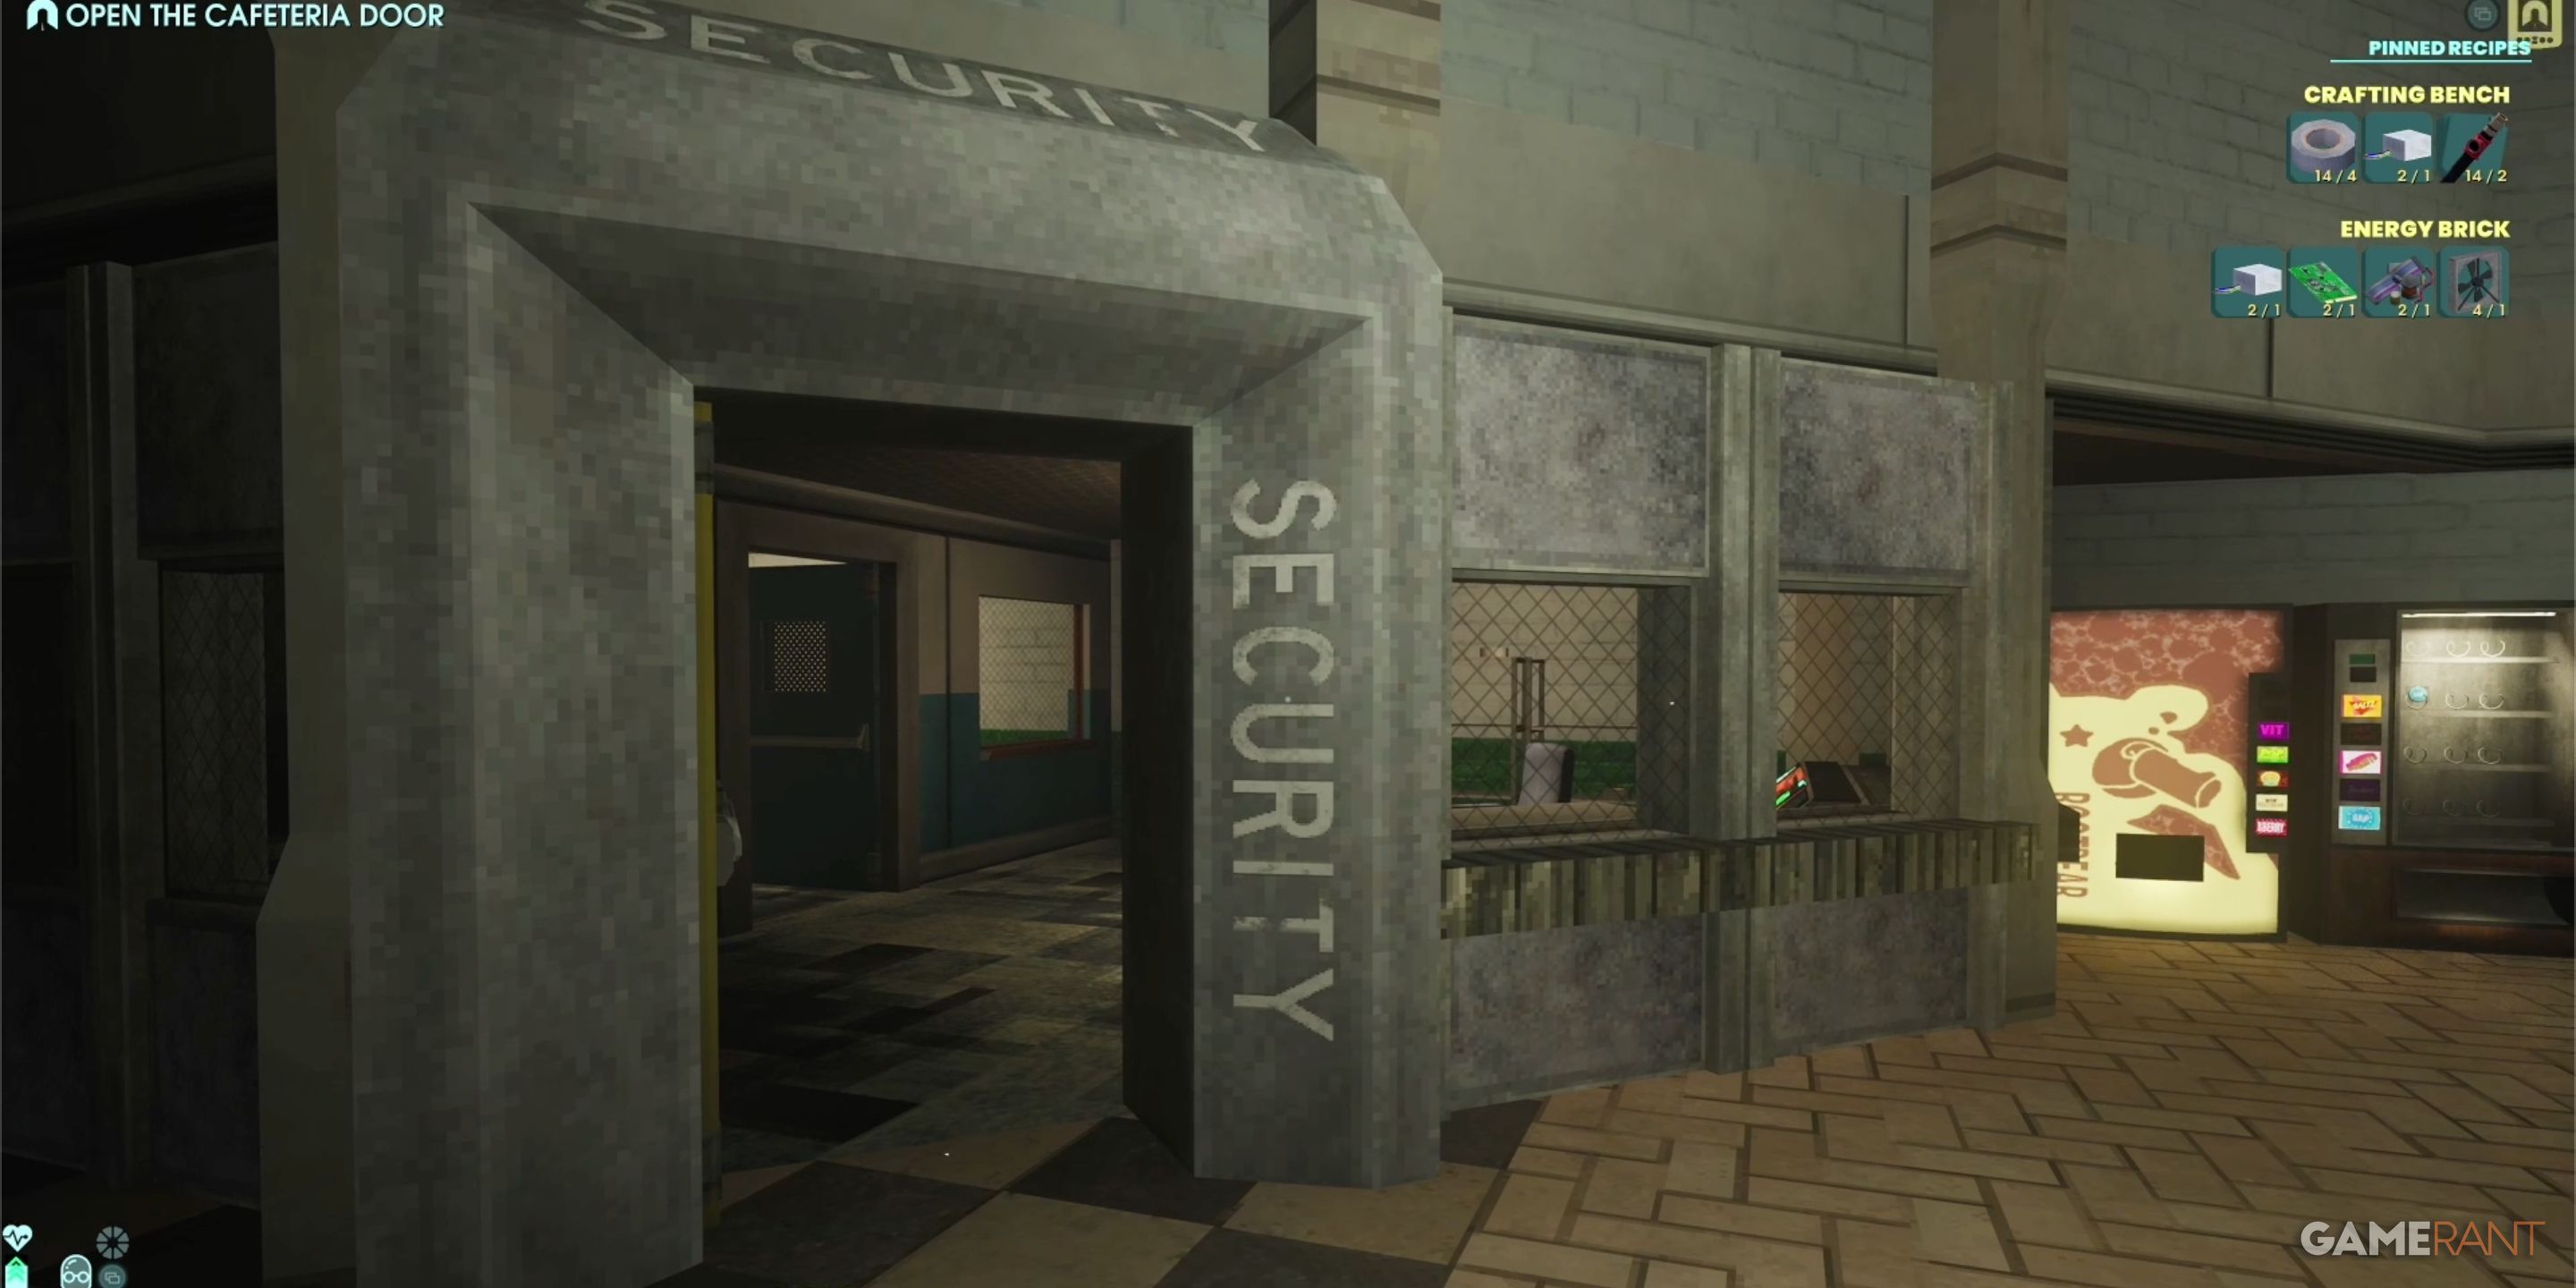
Leaving the kitchen, take a left turn, and you’ll spot the entrance to the Security Office. If you gaze forward, you’ll notice the door where Dr. Jager is trapped, as well as a foe damaging some electronic devices. Here, you’ll need to employ the Energy Brick. Proceed to the Security Office, and get ready for the upcoming stage of the procedure (refer to How to Make an Energy Brick for instructions).
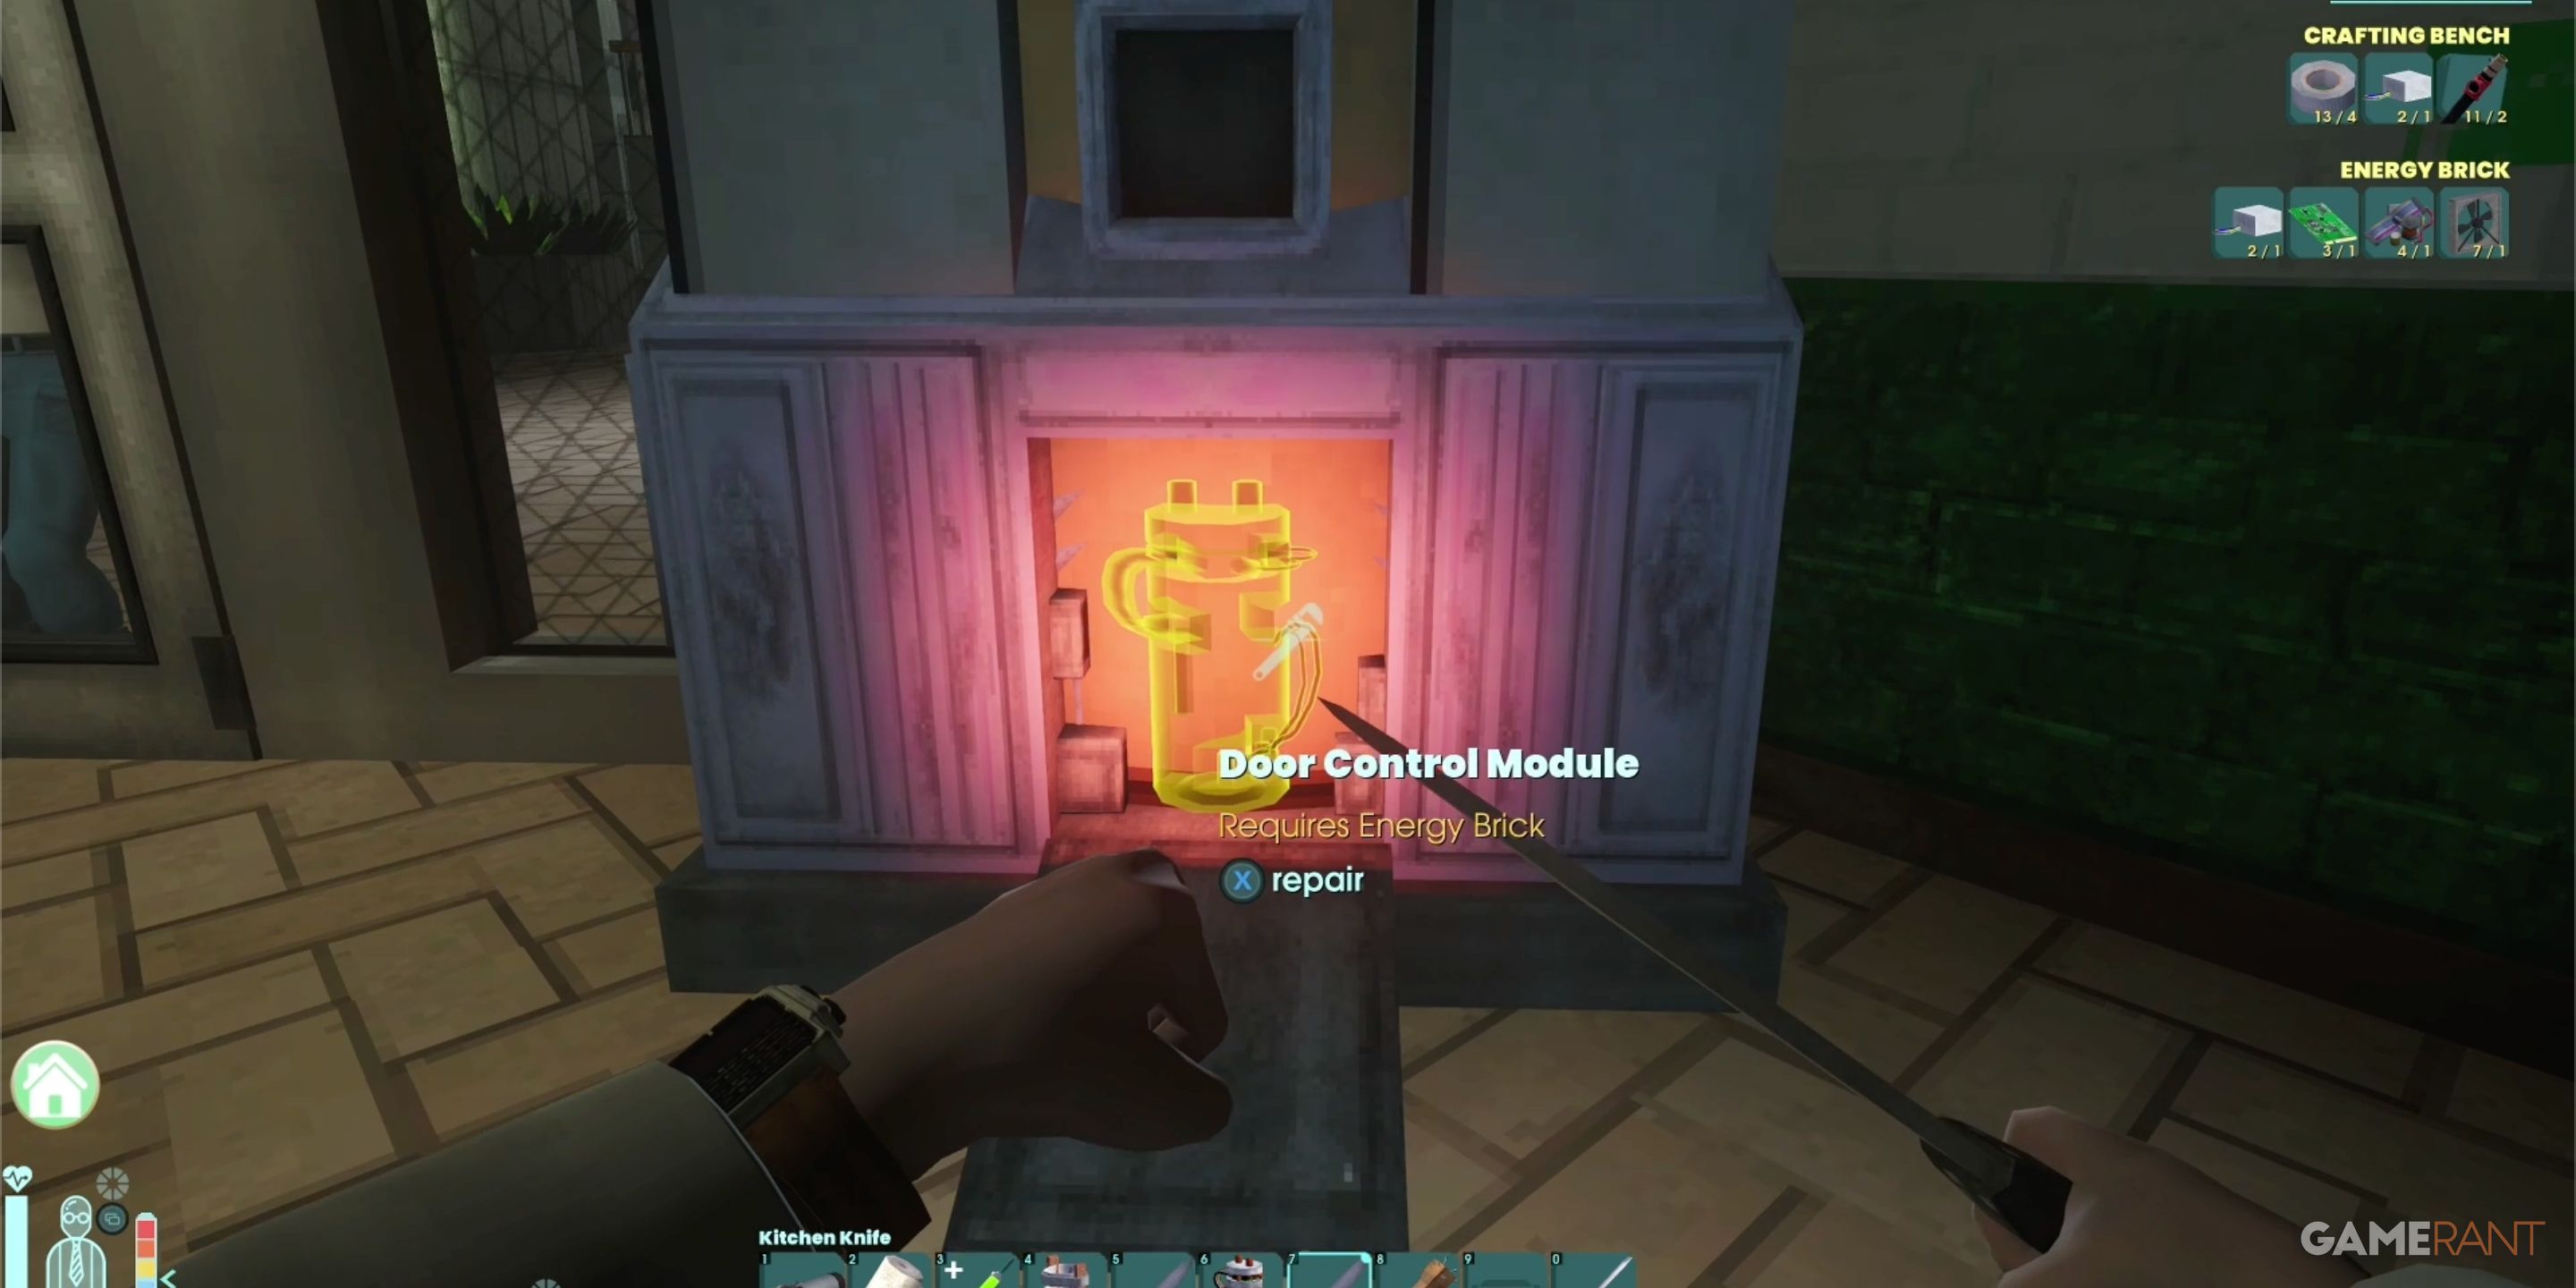
After obtaining the Energy Brick, head back to the foe causing damage to the electronic components within the wall. Defeat this enemy, then find a spot on the wall where you can insert the Energy Brick. This repair will fix the lock mechanism of the door. With the door now open, complete the mission.
Approach the Cafeteria Door with caution, as upon opening it, a formidable enemy known as a Peccary will suddenly appear and catch Dr. Jager off guard. This beast poses a far greater threat than anything you’ve faced so far. Ensure that you are fully ready before deciding to unlock the cafeteria door.
How to Create an Energy Brick in Abiotic Factor
Check Crafting Recipes
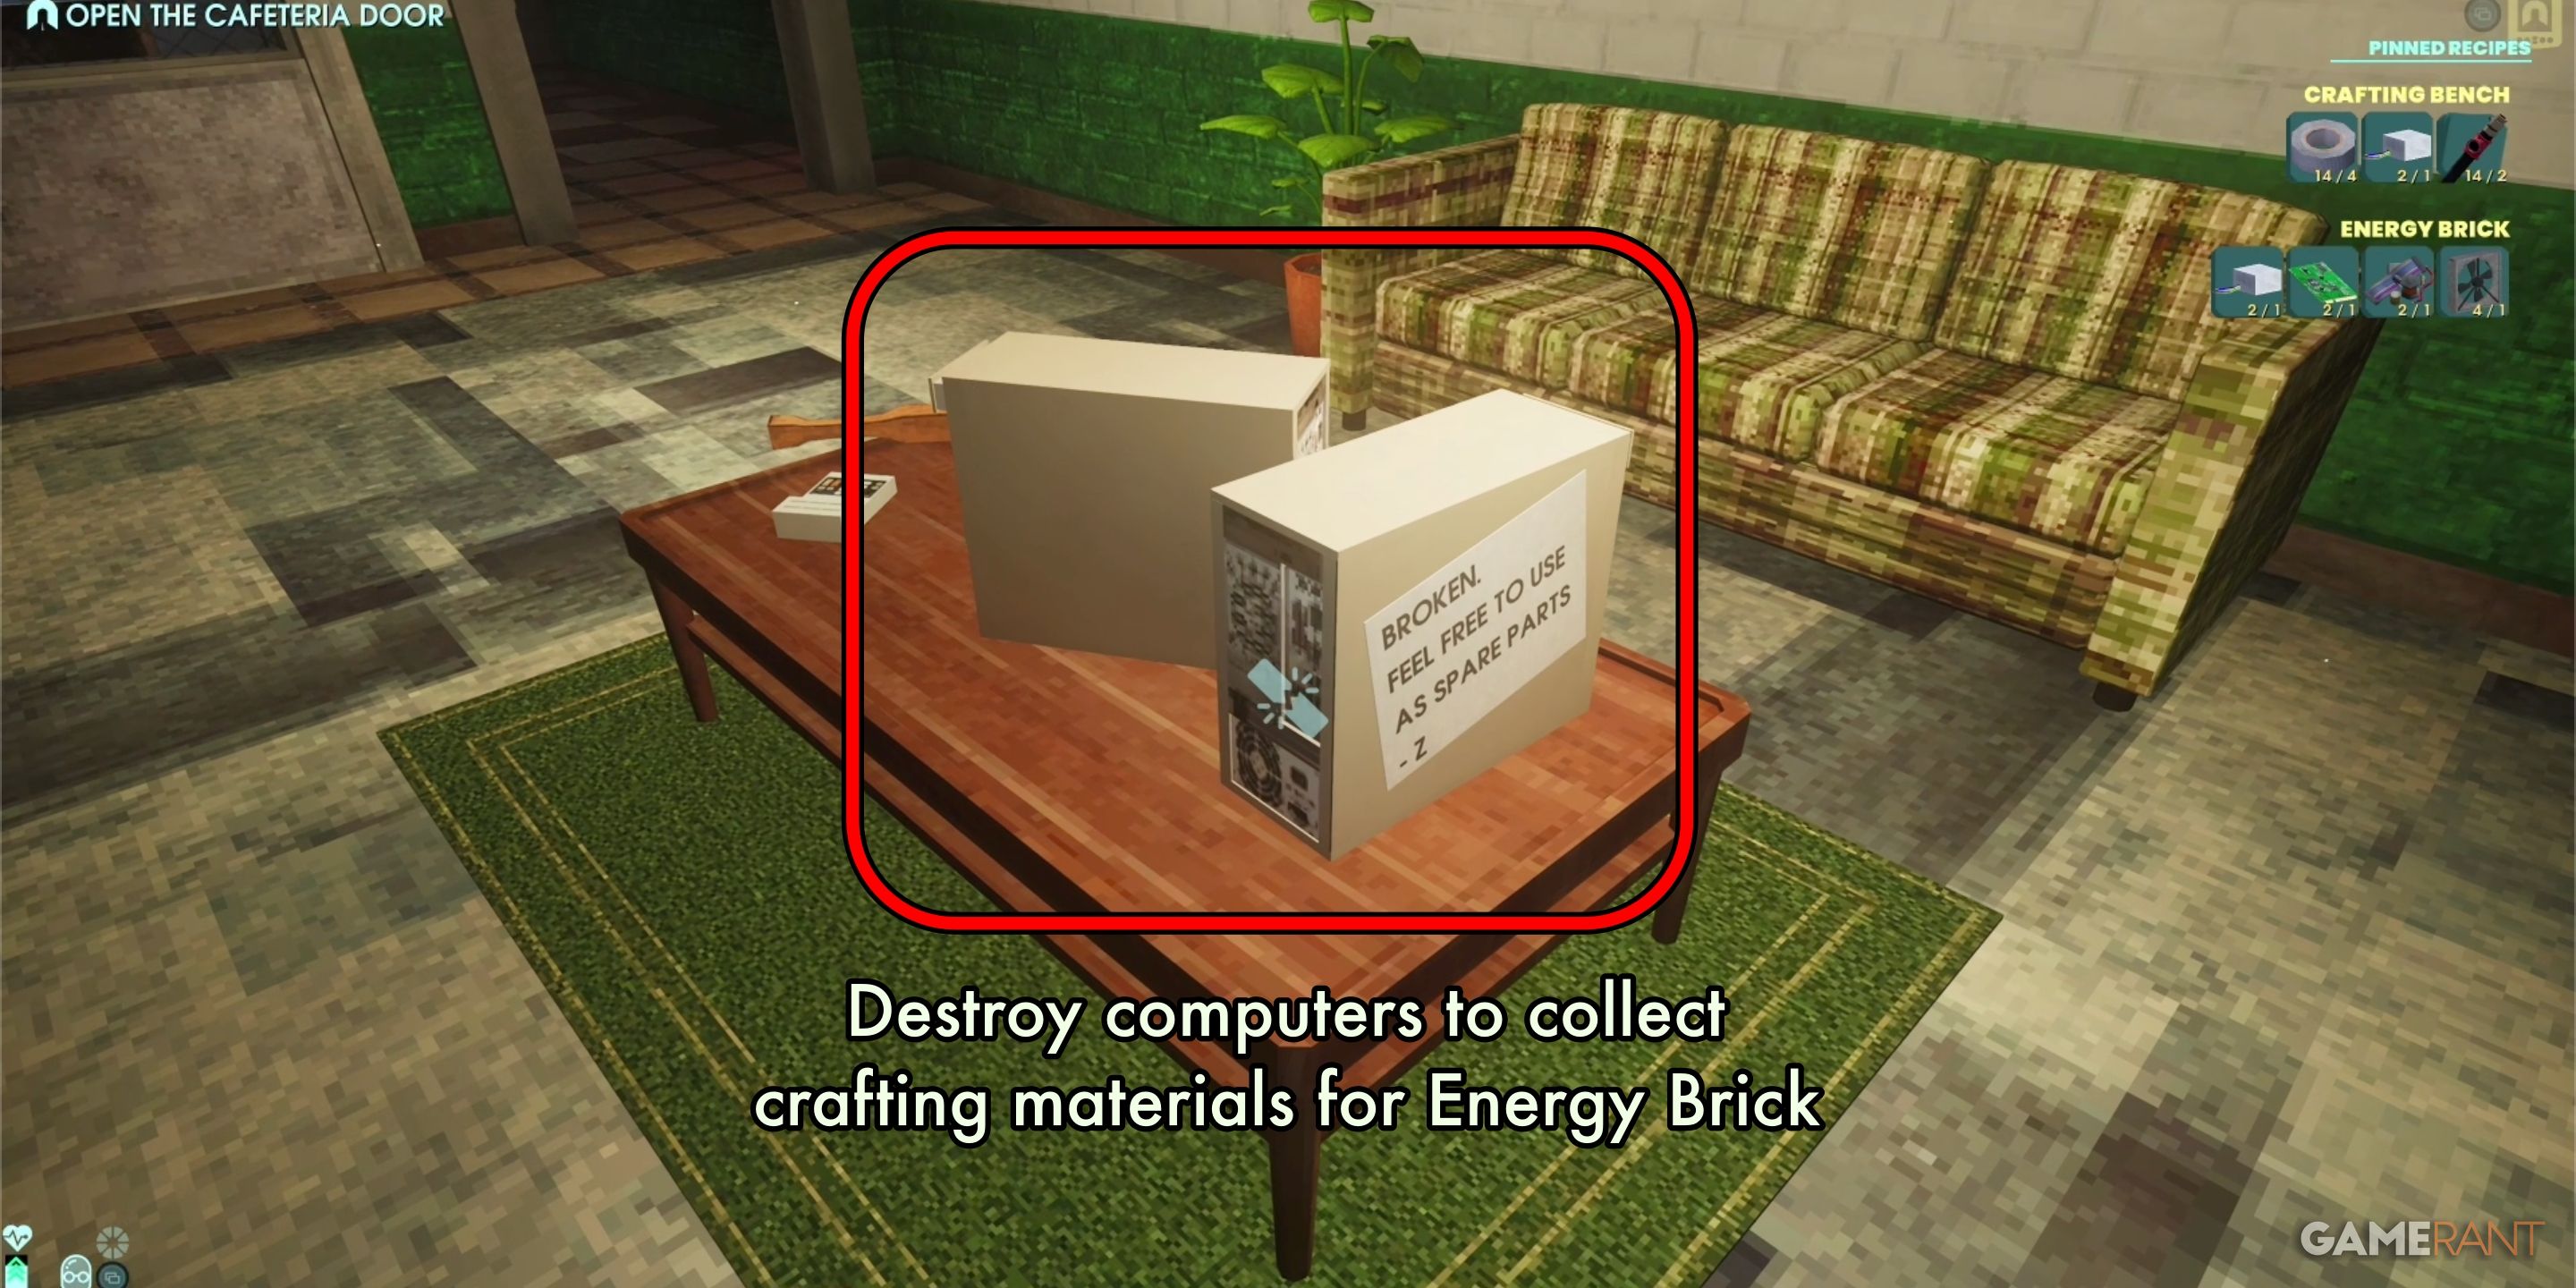
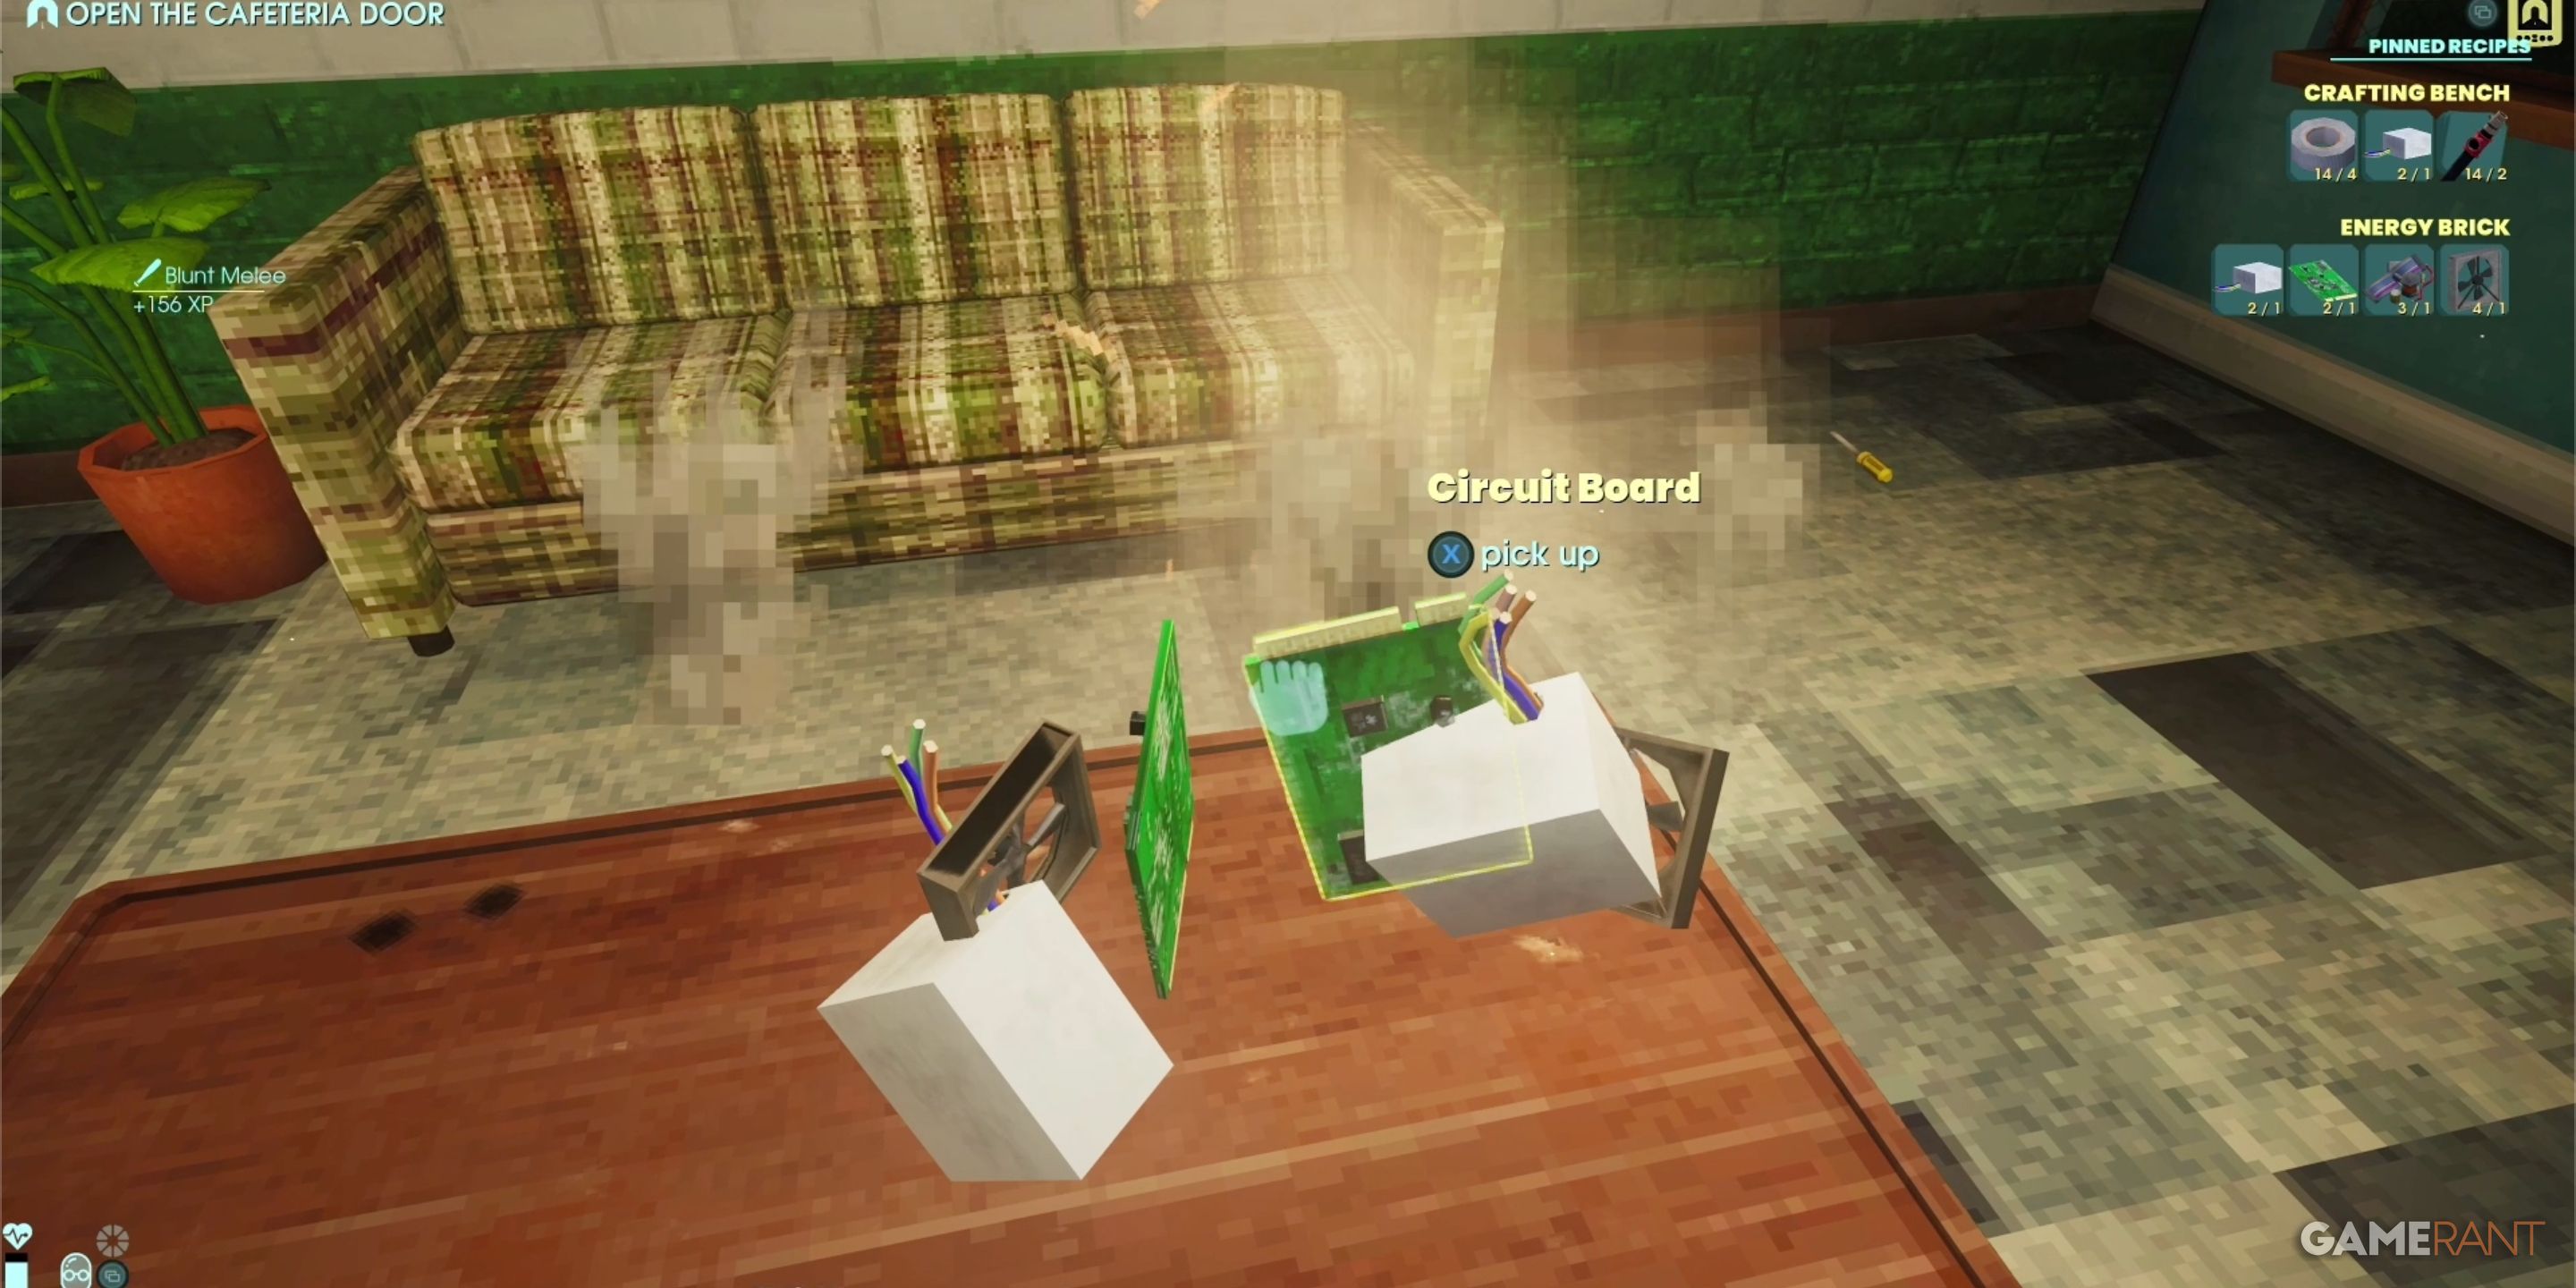
Once you step into the Security office, proceed through the initial space, and enter the subsequent room where a television and a coffee table are noticeable. Atop this table, there seem to be two damaged computers, along with some tech debris such as a calculator and a table leg. Grab the table leg, and employ it to smash the two malfunctioning computers.
Following multiple instances of use, these computers will break down into essential parts. For each computer used, you’ll receive the following rewards:
- Circuit Board x1
- Power Supply Unit x1
- Case Fan x1
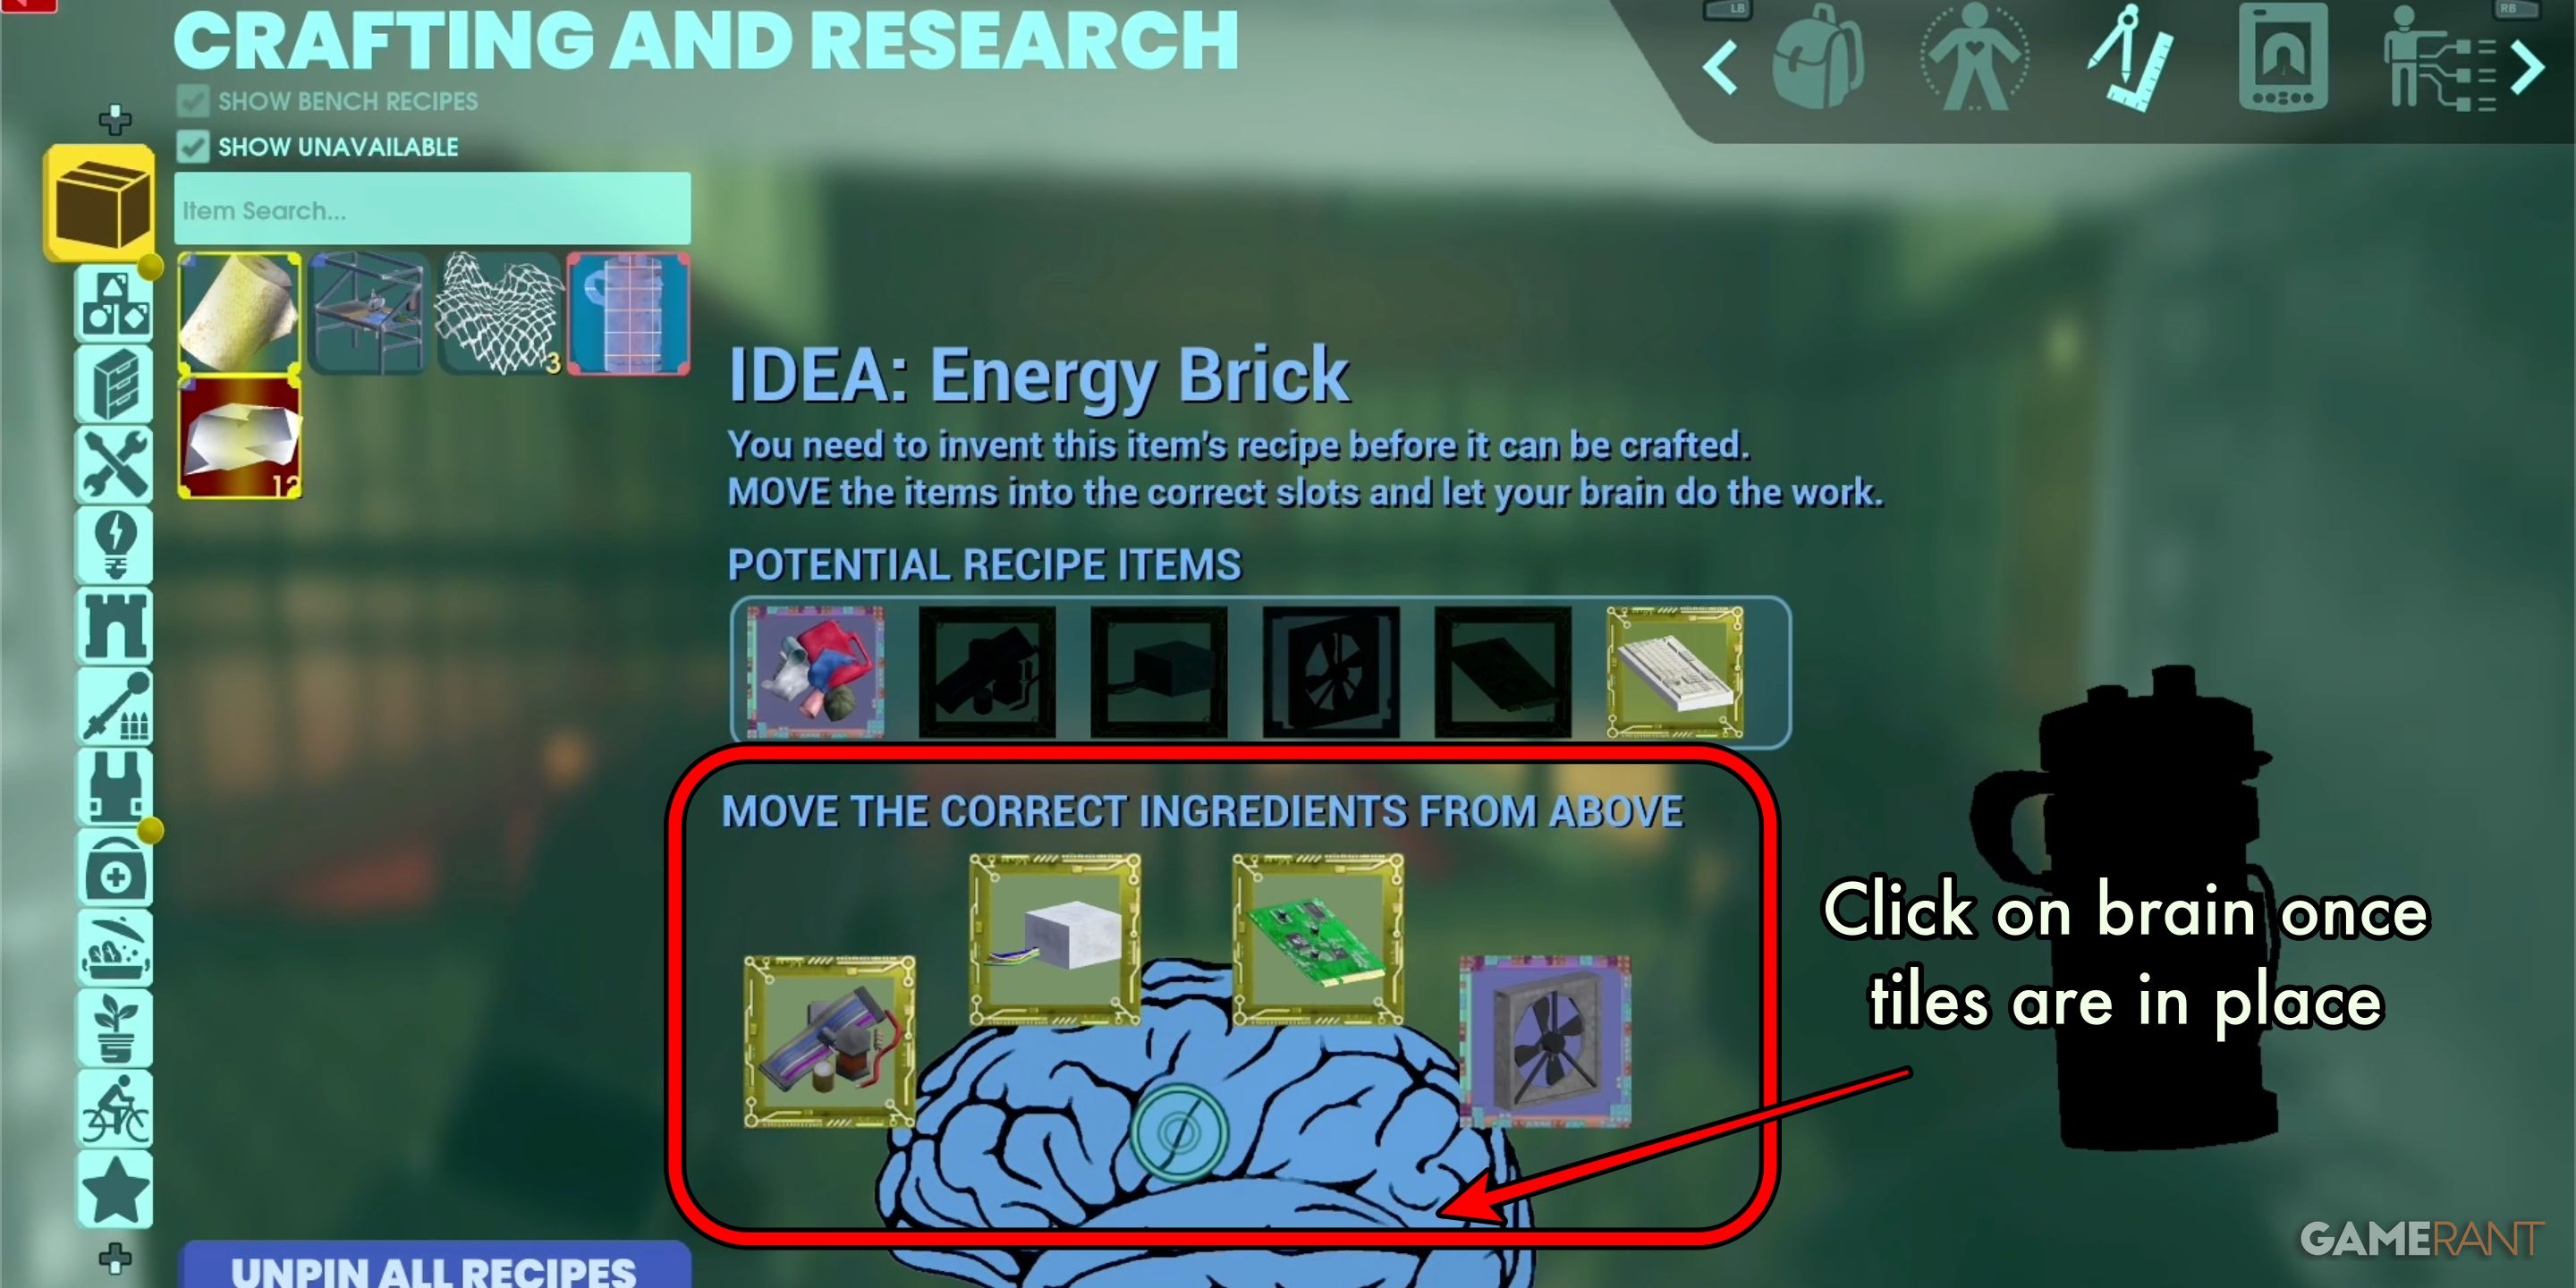
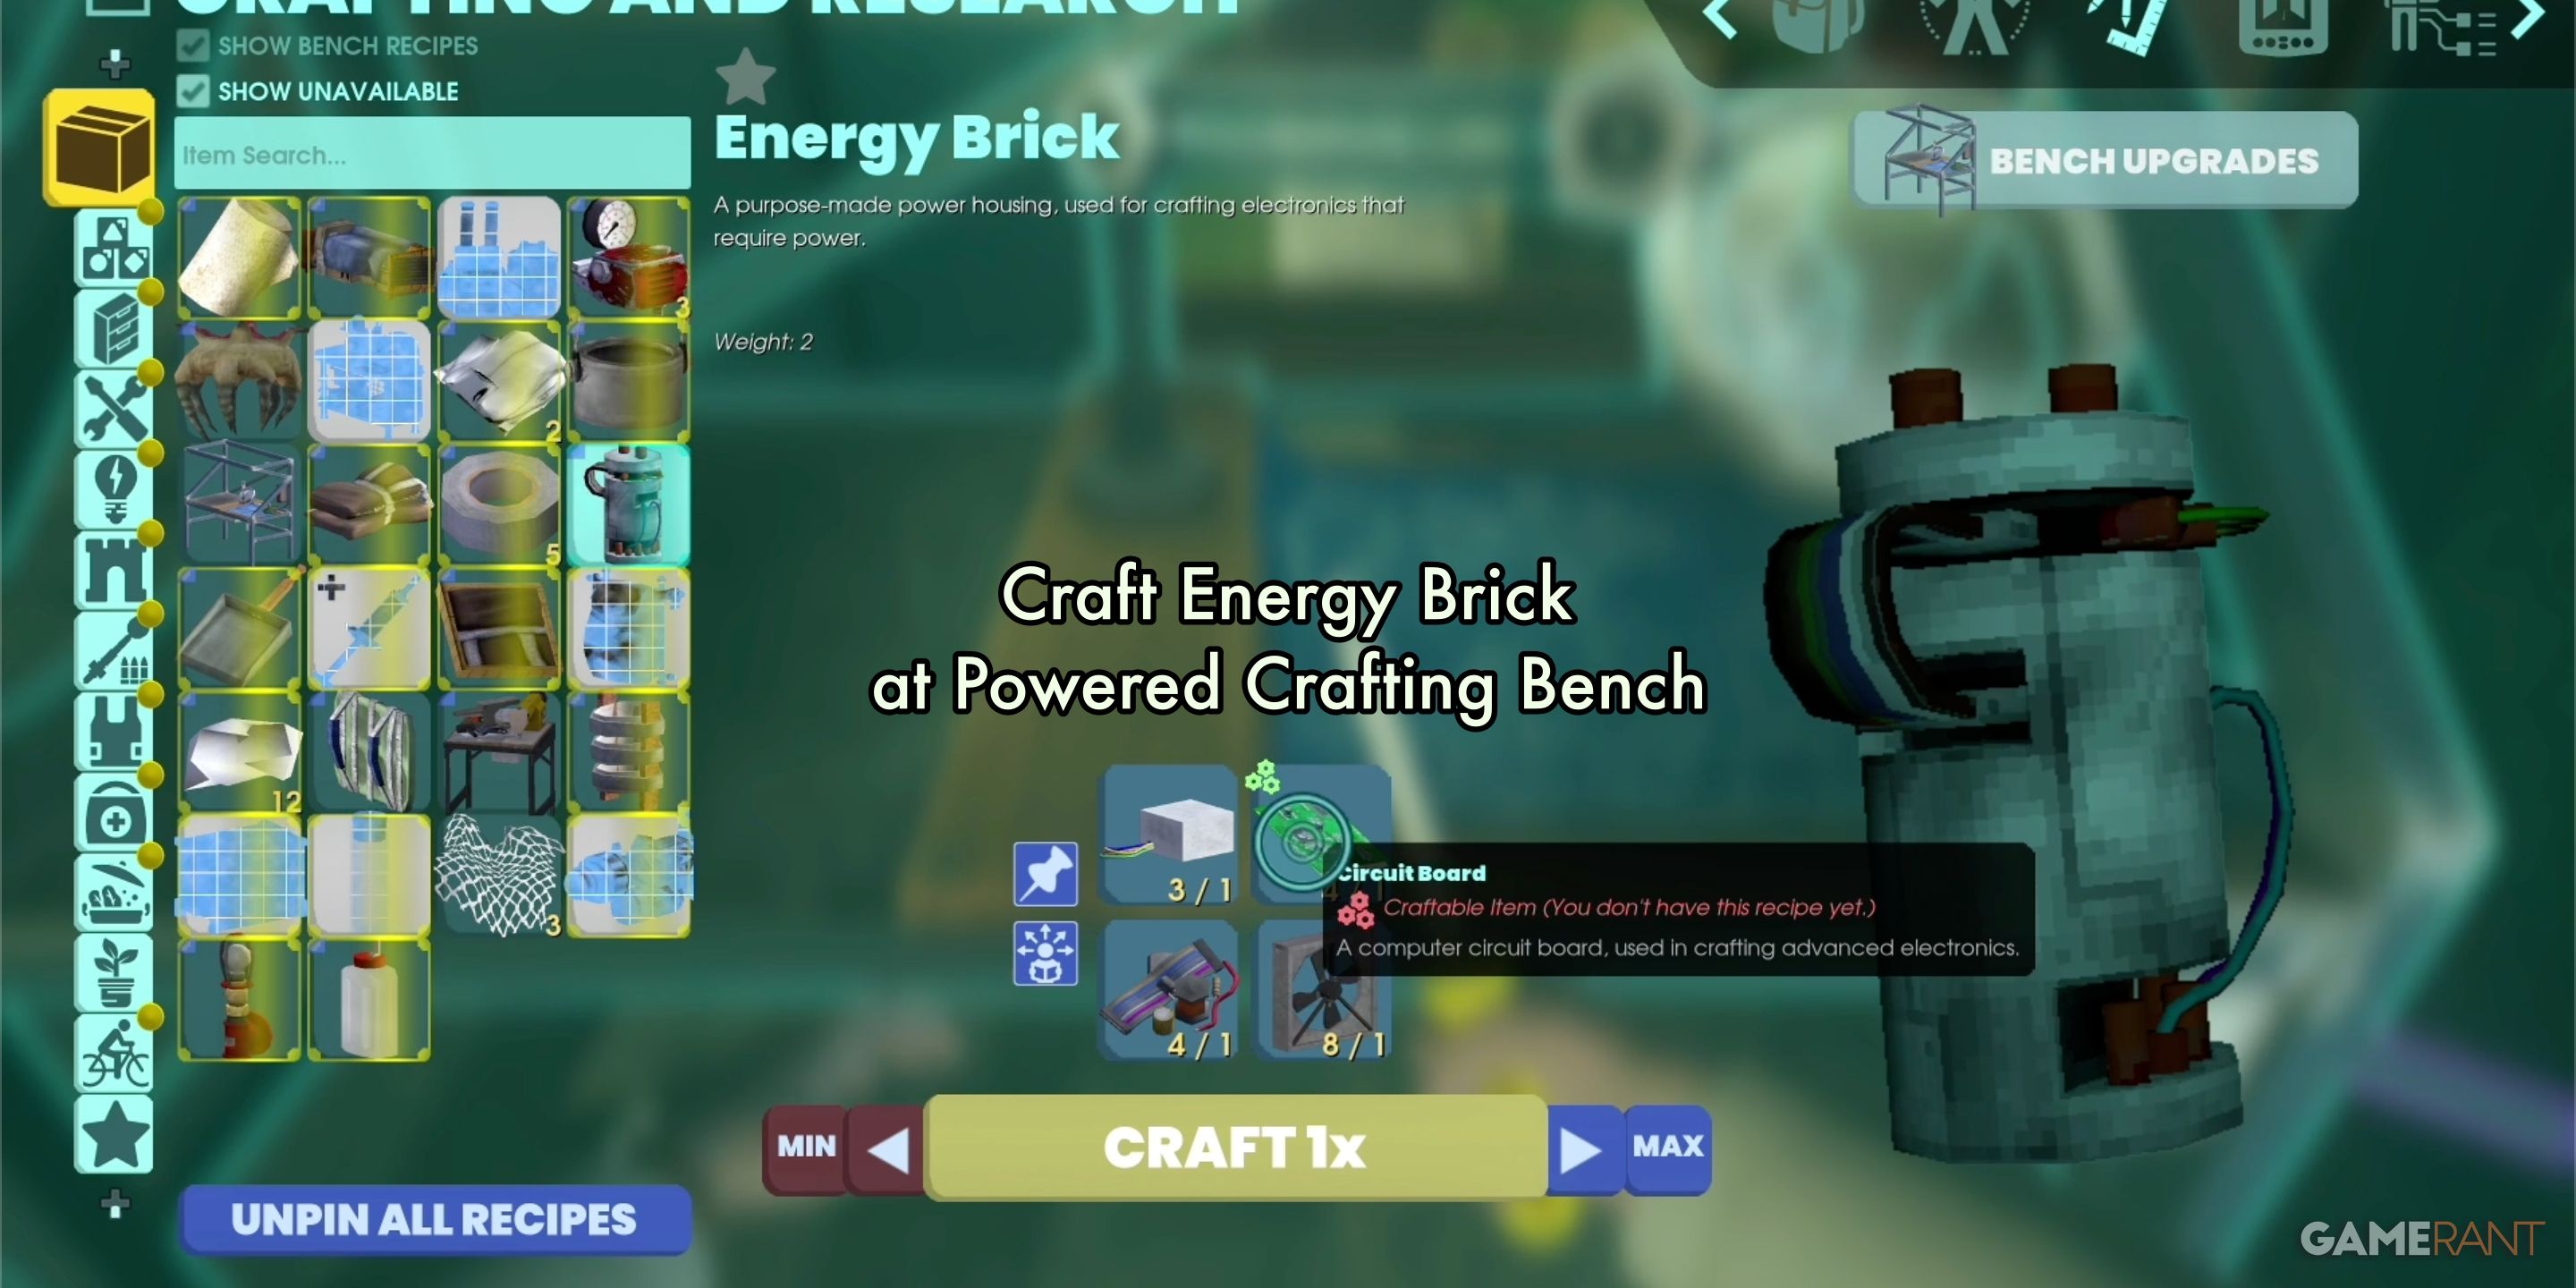
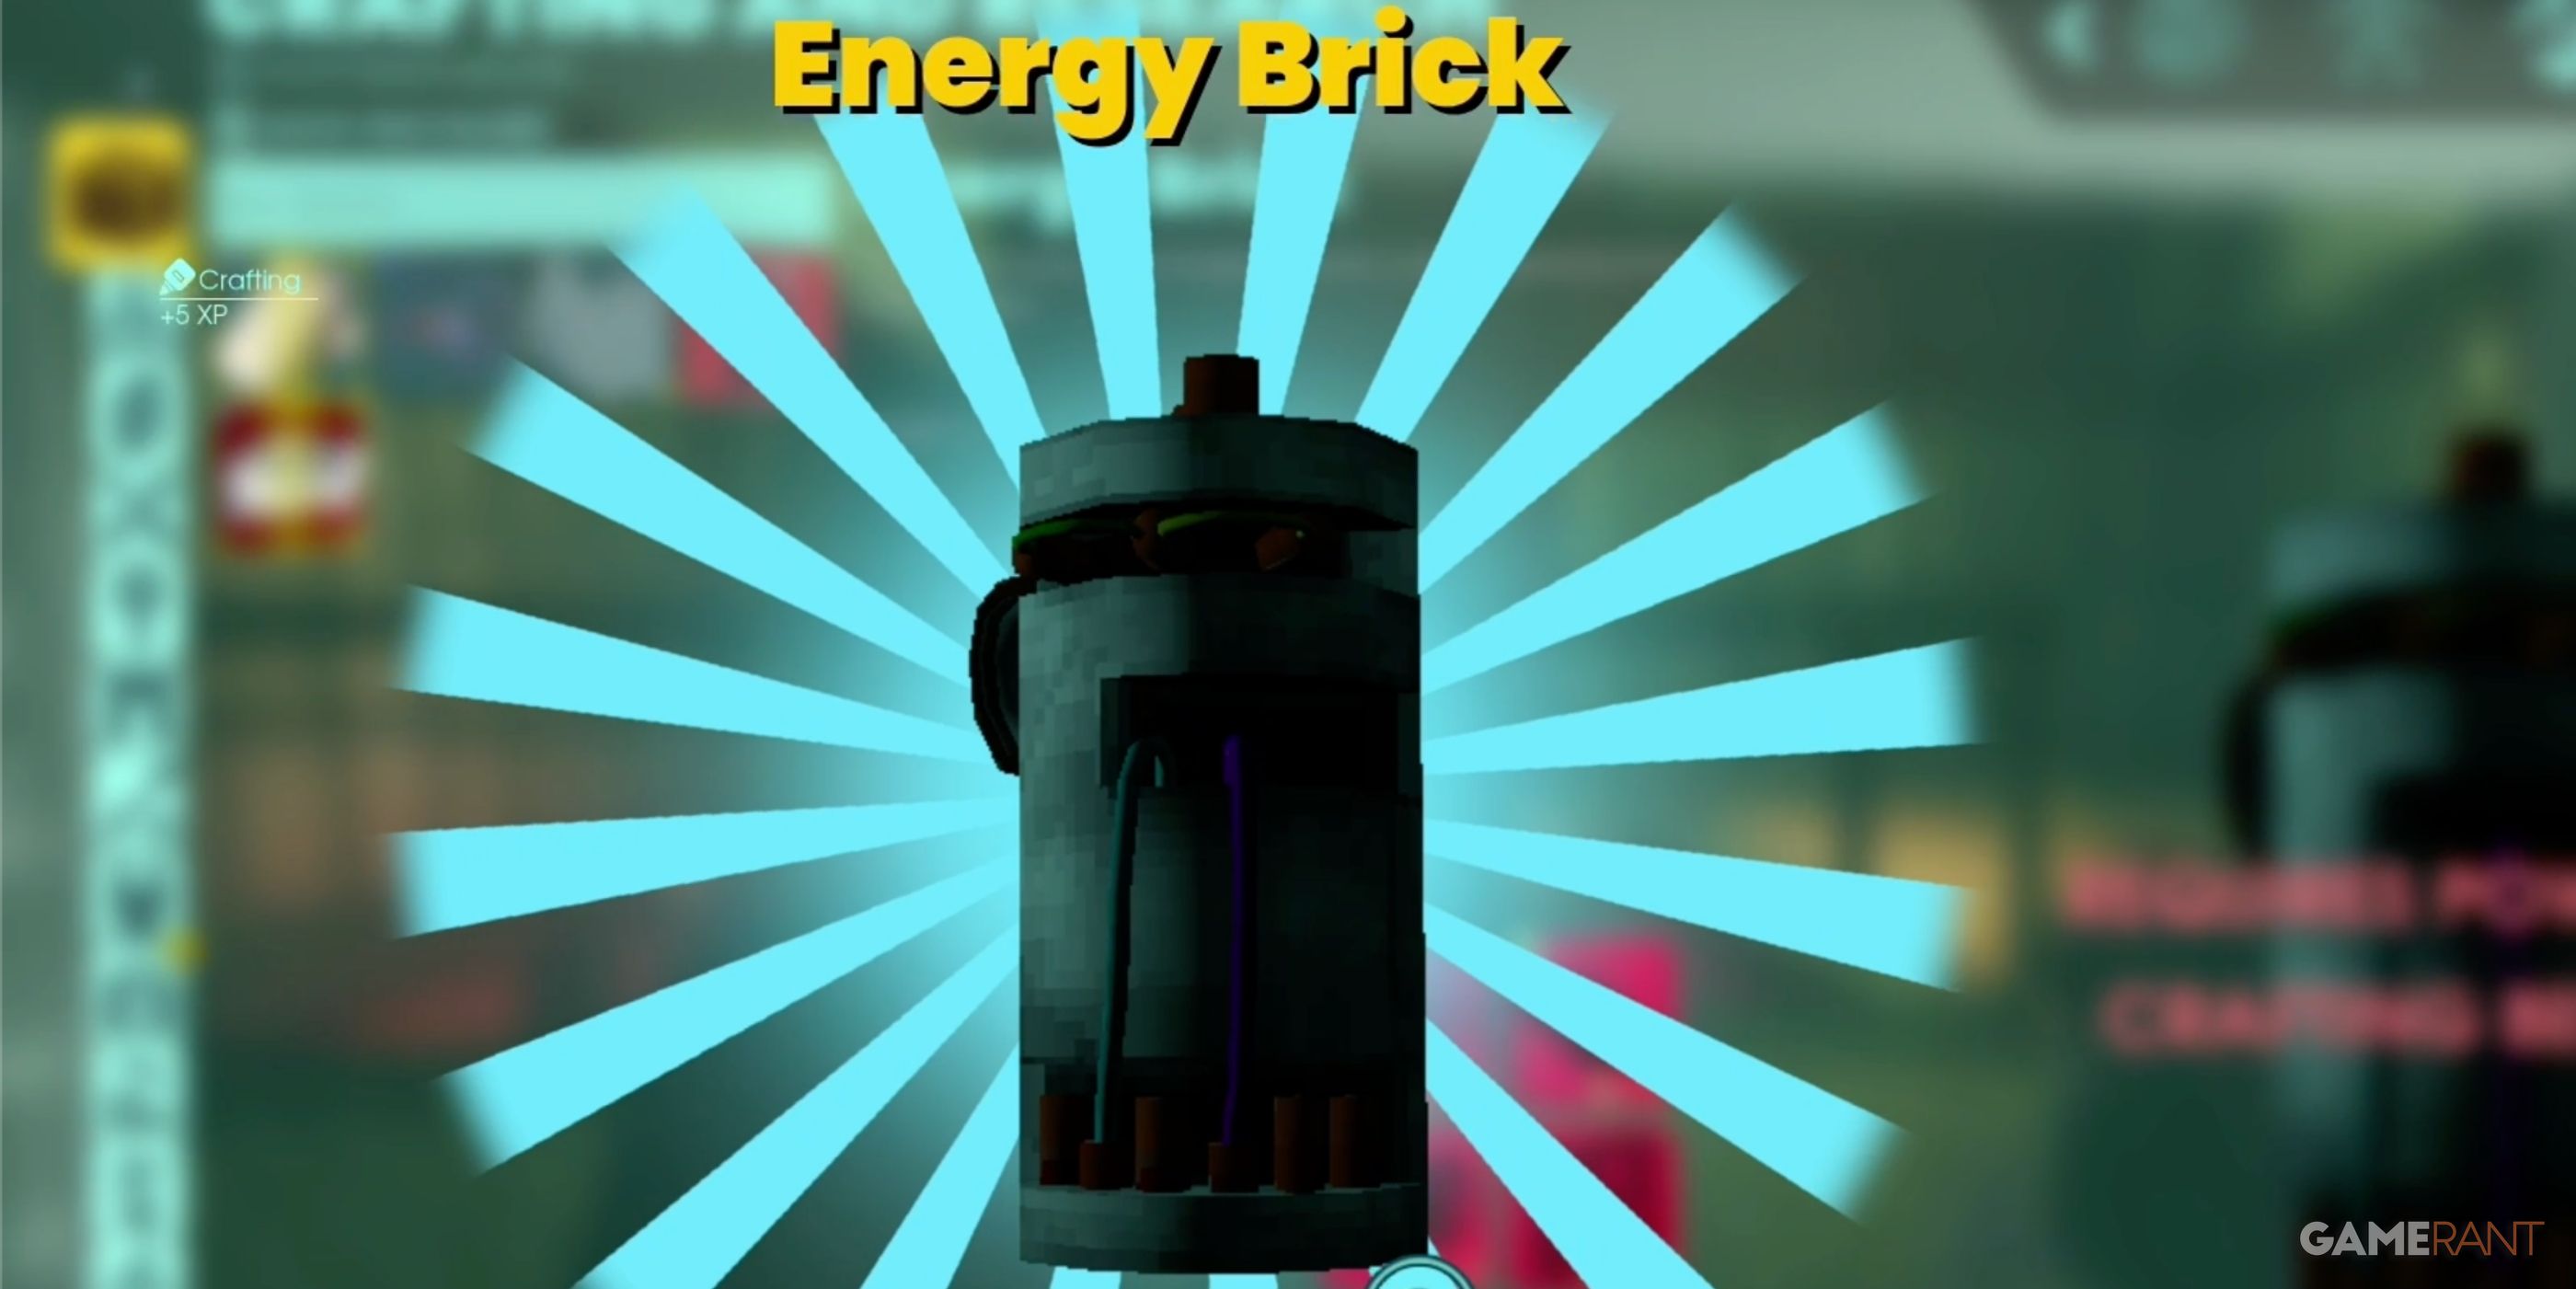
Fortunately, most of the essential items for building the Energy Brick are at hand, including the Scrap Tech. If you look through your crafting recipes, you should now find a section labeled as “Concept: Energy Brick“. This is where you’ll discover the full crafting recipe once unlocked. Currently, you need four items to create these components – Tech Scrap, Circuit Board, Power Supply Unit, and Case Fan. Once obtained, place each item in its designated slot and then click on the brain icon to initiate the crafting process.
This will now allow you to craft the Energy Brick on any Powered Crafting Bench in Abiotic Factor.
Energy Brick Crafting Recipe:
| Energy Brick | Tech Scrap x1 Circuit Board x1 Power Supply Unit x1 Case Fan x1 |
|---|
Read More
- Re:Zero Season 4, Episode 6 Release Date & Time
- NTE Drift Guide (& Best Car Mods for Drifting)
- How to Get the Wunderbarrage in Totenreich (BO7 Zombies)
- How to Beat Turbines in ARC Raiders
- Change Your Perspective Anomaly Commission Guide In NTE (Neverness to Everness)
- Diablo 4 Best Loot Filter Codes
- Brent Oil Forecast
- Danganronpa 2: A Complete Guide To Gifts
- Top 8 UFC 5 Perks Every Fighter Should Use
- All Fish & How to Catch Them in NTE
2025-07-23 01:35