
In the early stages of the game “Hollow Knight”, players encounter Hornet, a character who uses needles and is set to star in the sequel “Hollow Knight: Silksong”. Hornet puts the player’s skills to the test, and if you manage to defeat her, you will receive the Mothwing Cloak as a reward.
After defeating Hornet in the game Hollow Knight, the Knight gains a new skill called a dash, which allows for quick movement across short distances on land or even mid-air. This feature expands the game world significantly, but figuring out where to go next can be challenging. For tips on what to do after defeating Hornet in her initial appearance as a boss in Greenpath, follow this guide.
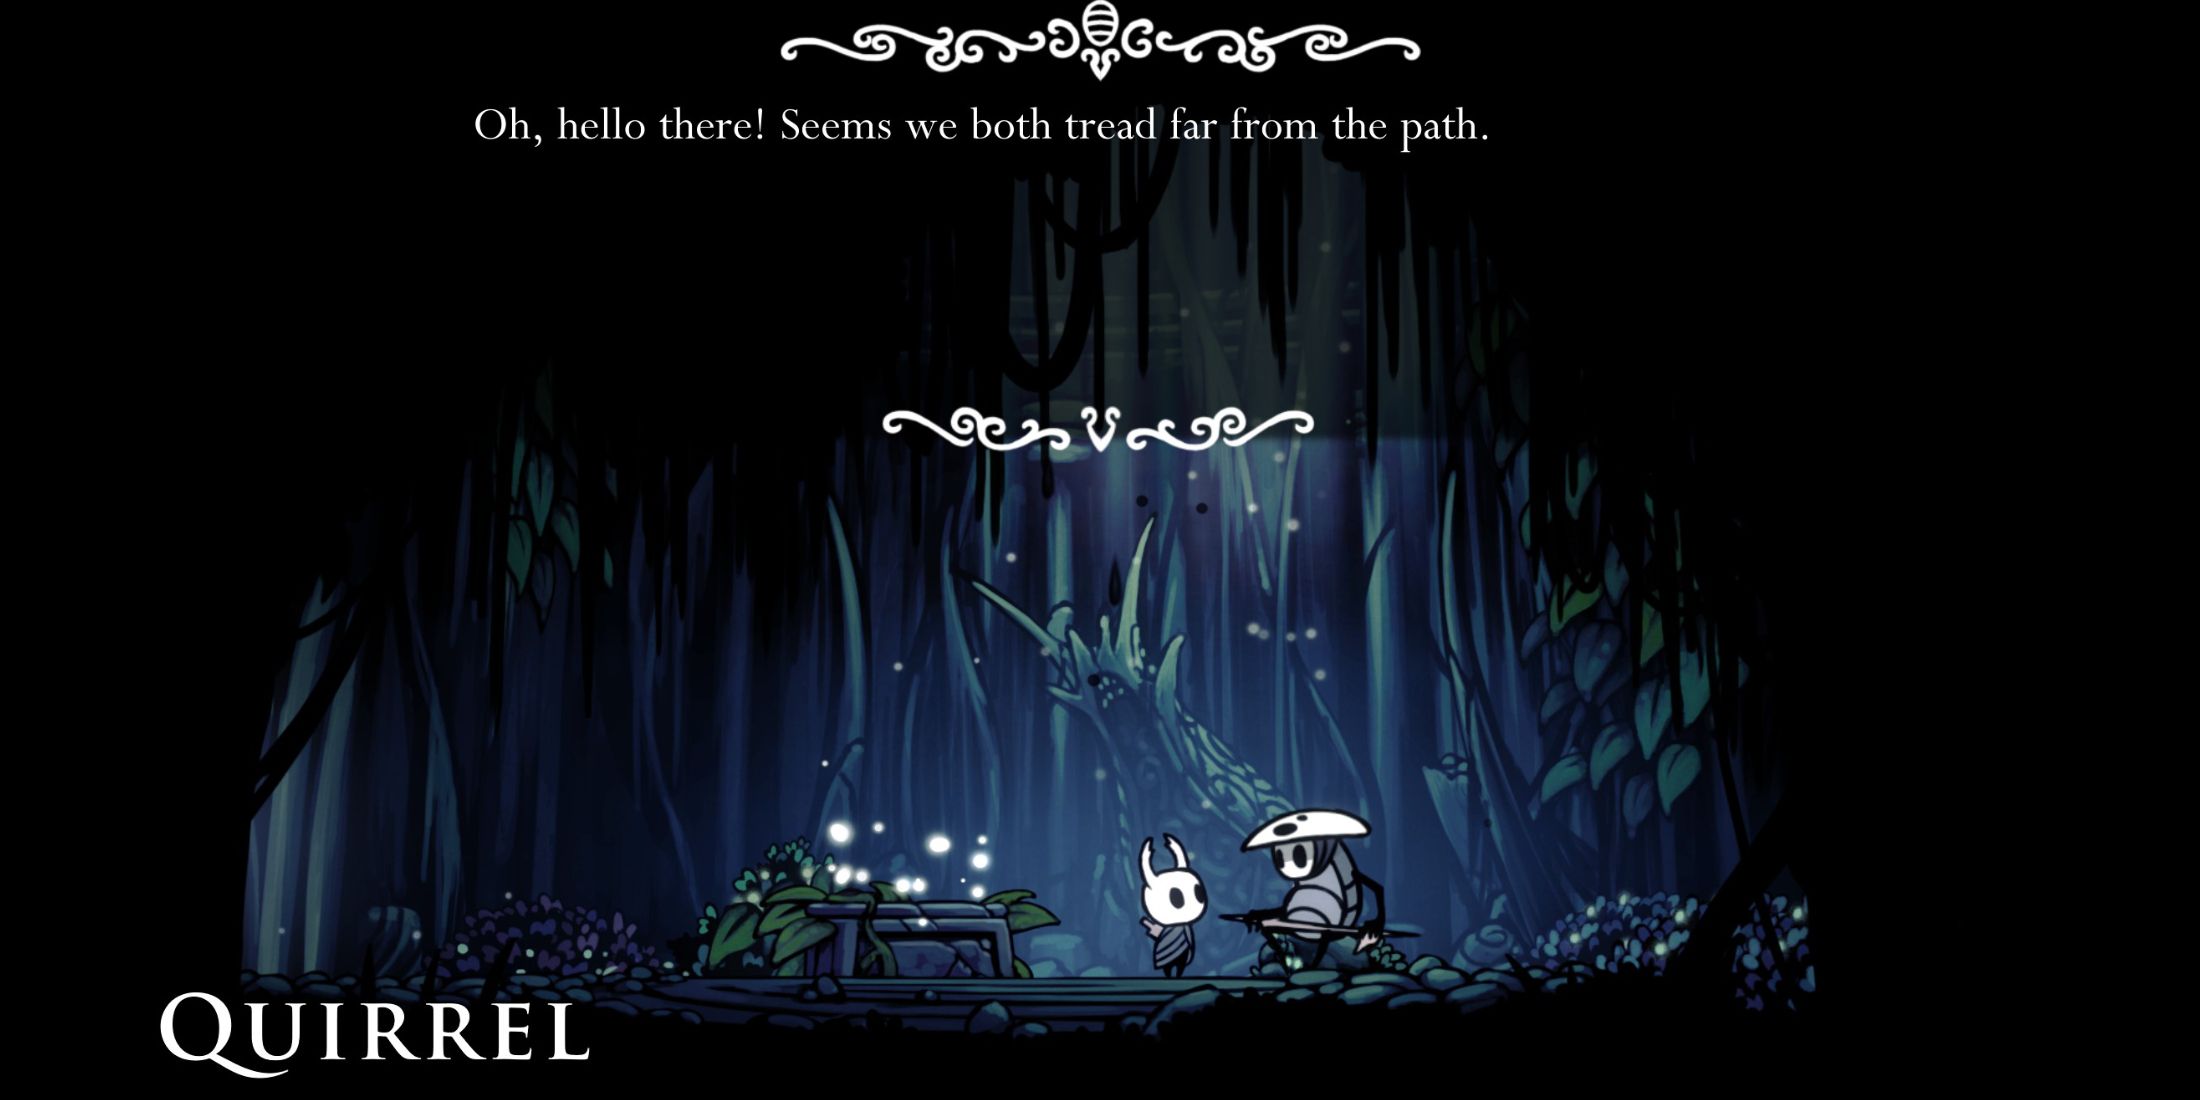
Find Quirrel By The Lake of Unn
Left From Hornet’s Boss Arena
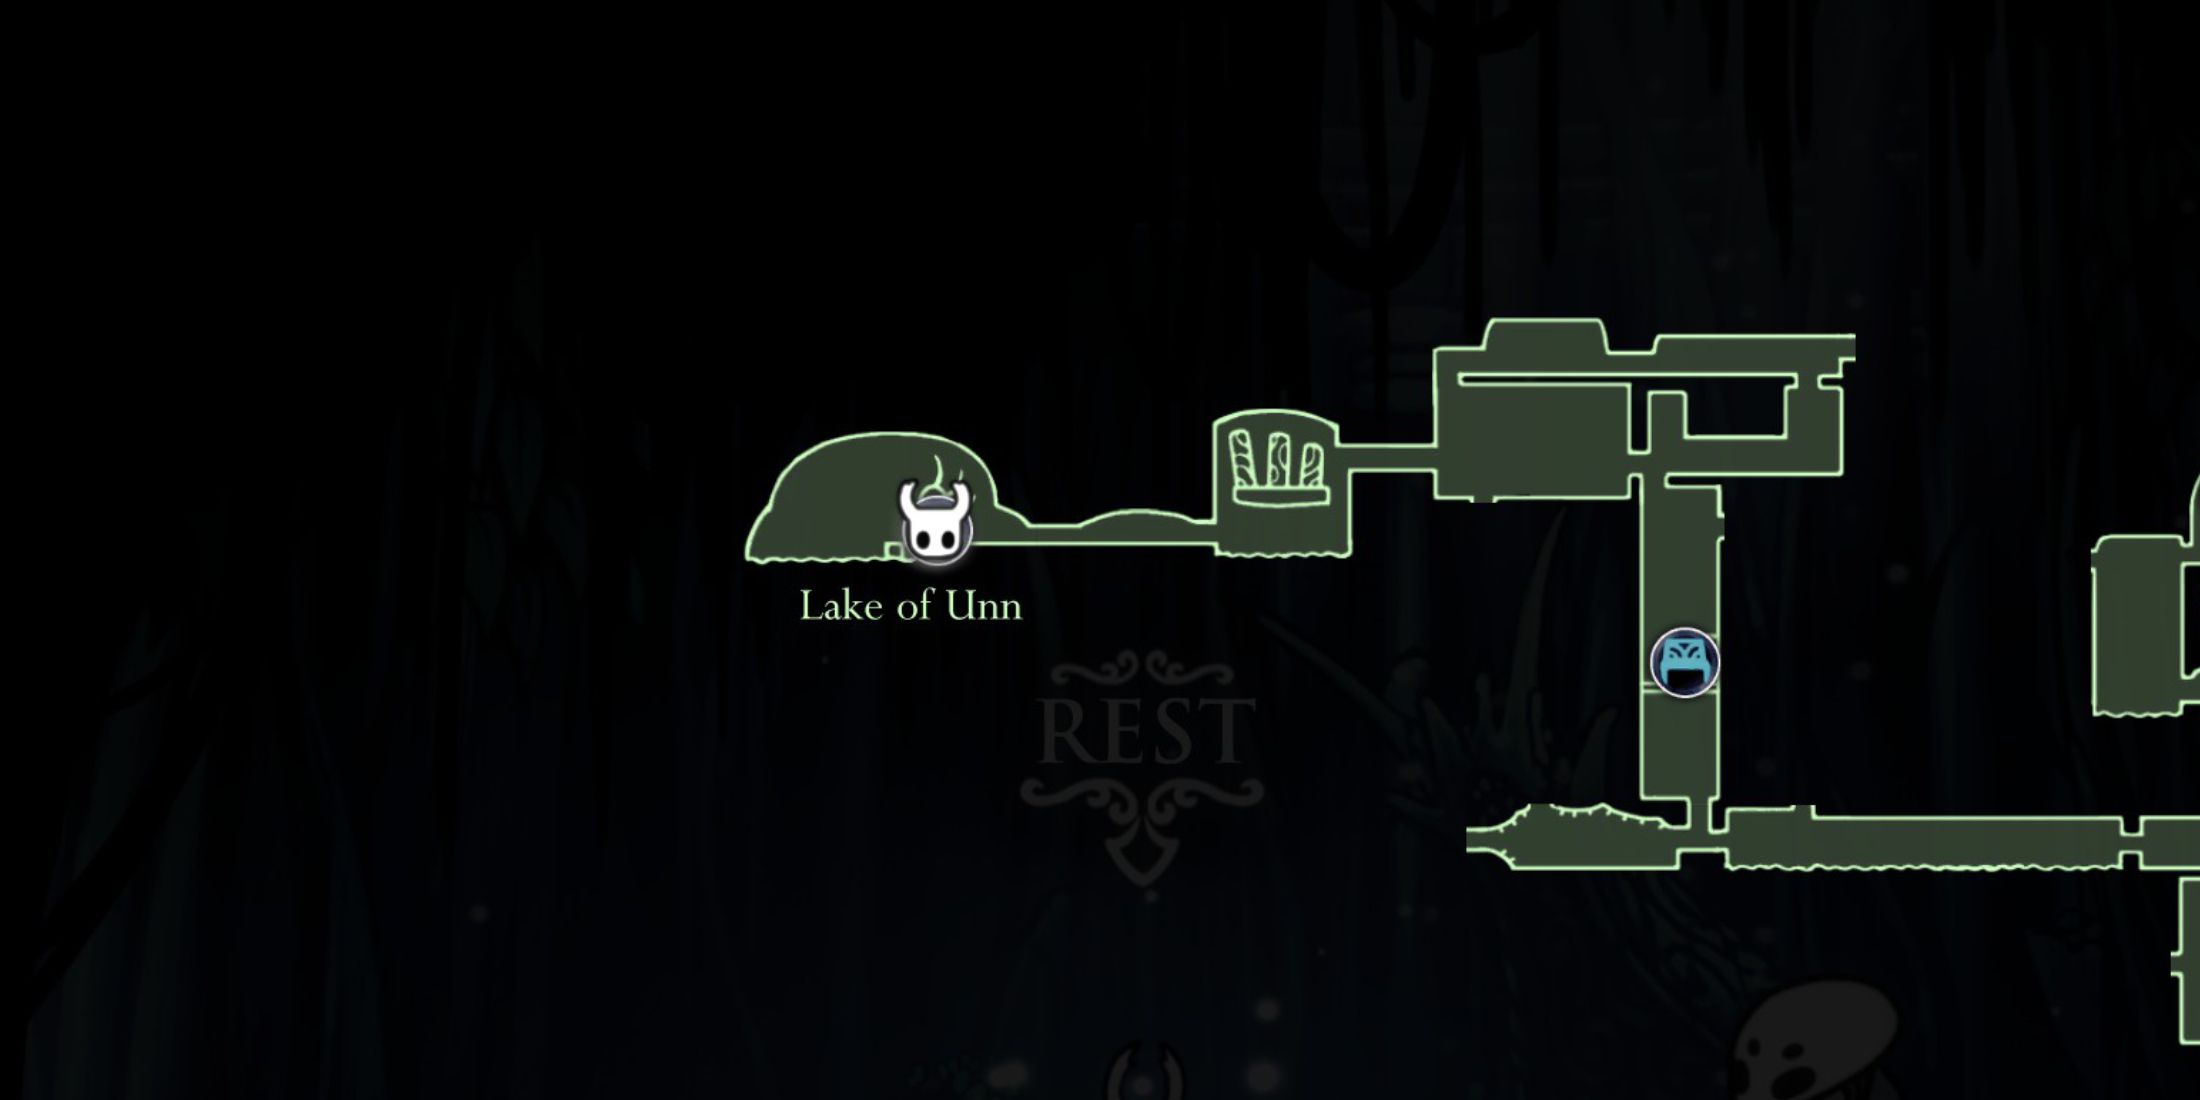
After your initial victory over Hornet in the game ‘Hollow Knight’ and obtaining the Mothwing Cloak, your first action should be to proceed to the left of her arena. Utilize your new dash power to cover ground quicker, and after a brief stroll, you’ll reach the Lake of Unn.
Enter the small cabin near the Lake of Unn’s pier, and you’ll discover a comfortable seat for relaxation, alongside a travel companion named Quirrel. He carries a tool that looks like a nail. Friendly and masked, Quirrel was bestowed his unusual headgear by the dreamer Monomon. Engage him here to initiate his NPC quest.
Get The Hunter’s Journal To Track Enemies
Far Right Of Greenpath

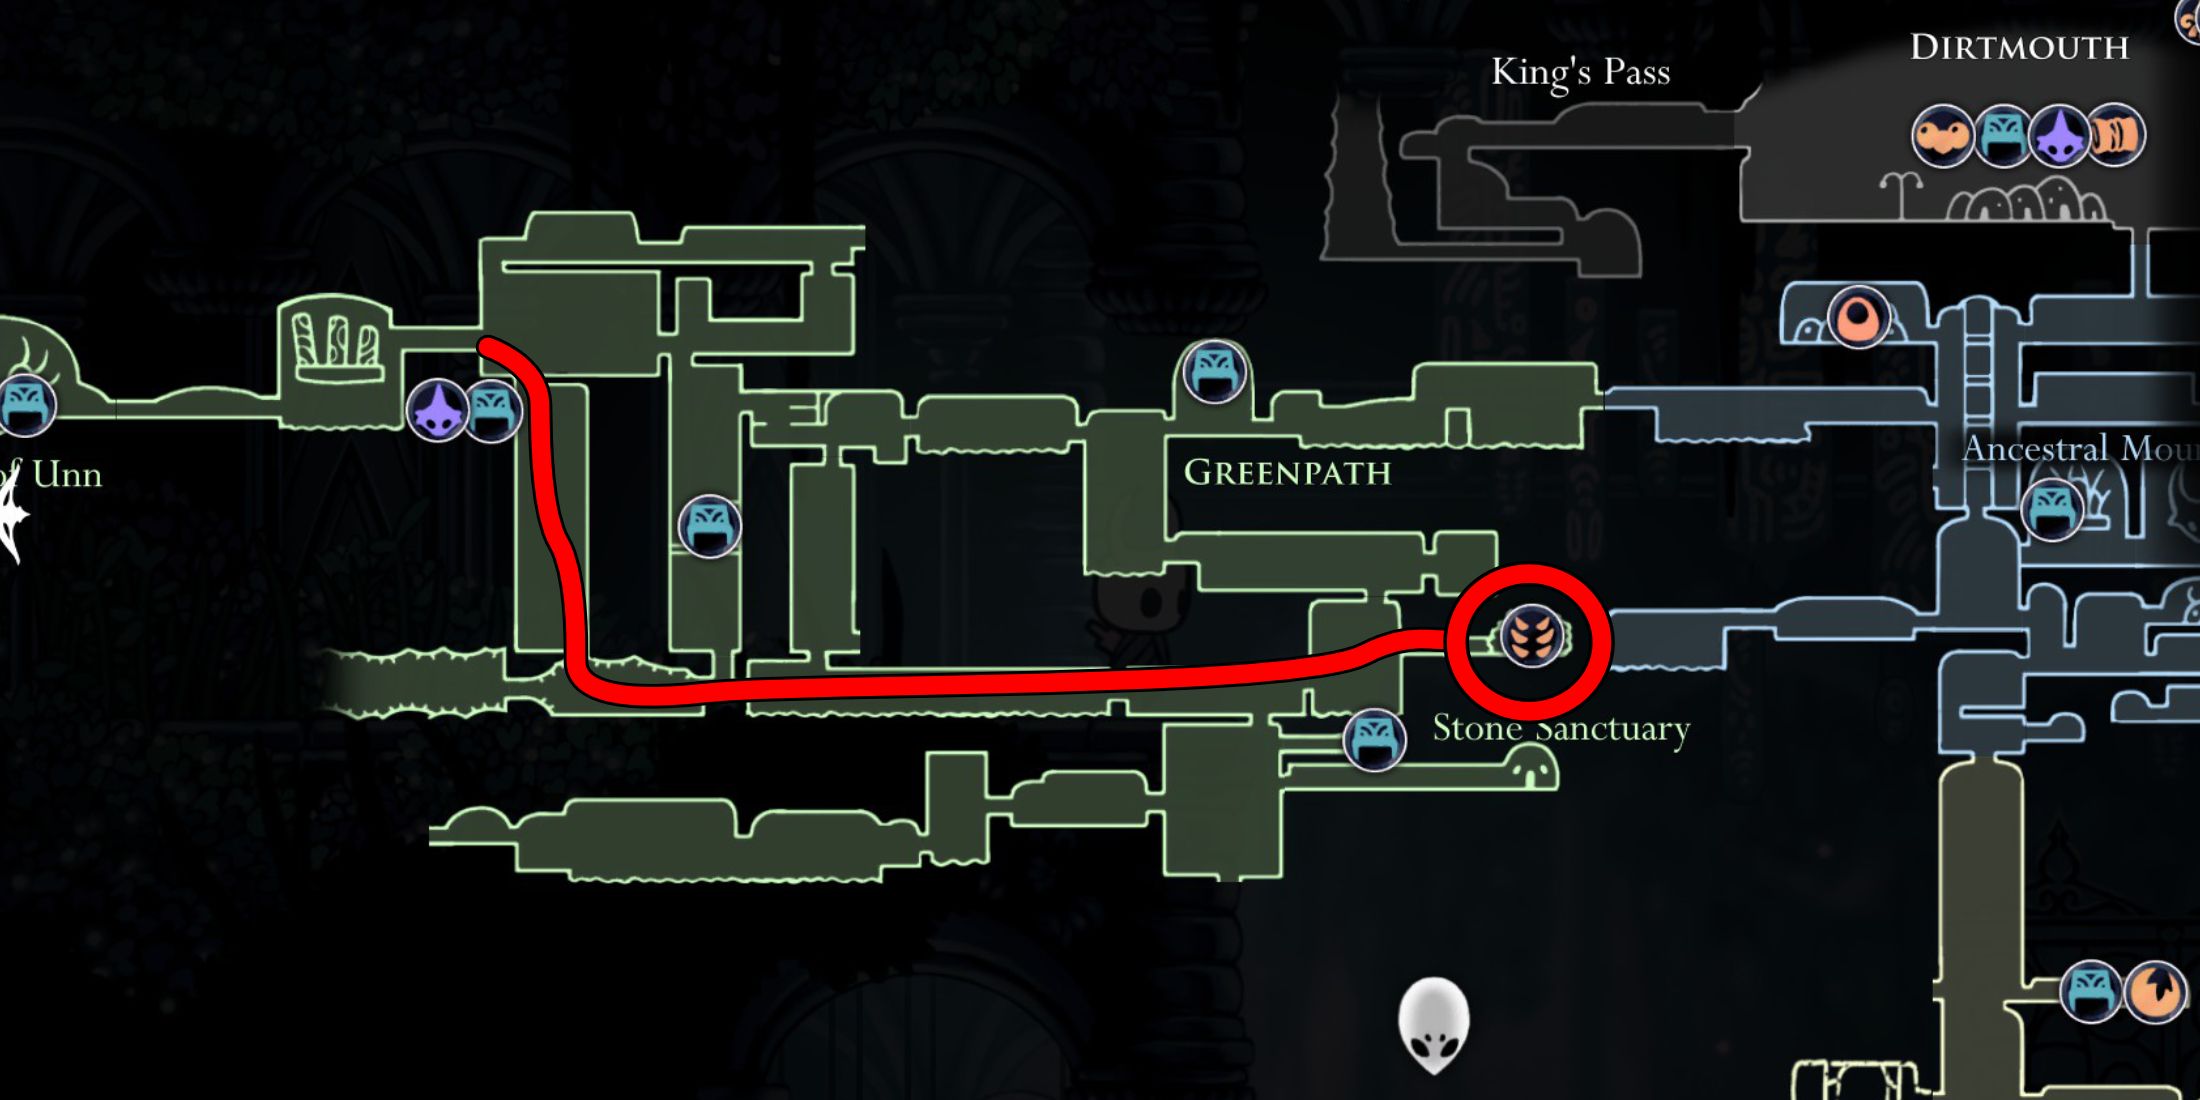
If you haven’t grabbed it as you entered Greenpath, head towards the farthest corner of the area and locate the Hunter there to get hold of the Hunter’s Journal. This valuable artifact will provide a comprehensive guide on your player menu about every creature you defeat, offering detailed information on each one.
Upon defeating the specified amount of each foe, you’ll uncover hidden details or additional backstory concerning that particular enemy.
Starting from your supervisor’s office at Hornet’s lair, veer to the right, then descend, followed by a long trek to your right again, will lead you to the Hunter’s hideout. As you near the cave, the Hunter may let out an intimidating roar. Proceed further and engage in dialogue with the colossal spider to acquire its diary.
Find The Queen’s Station
Between Fog Canyon & Fungal Wastes

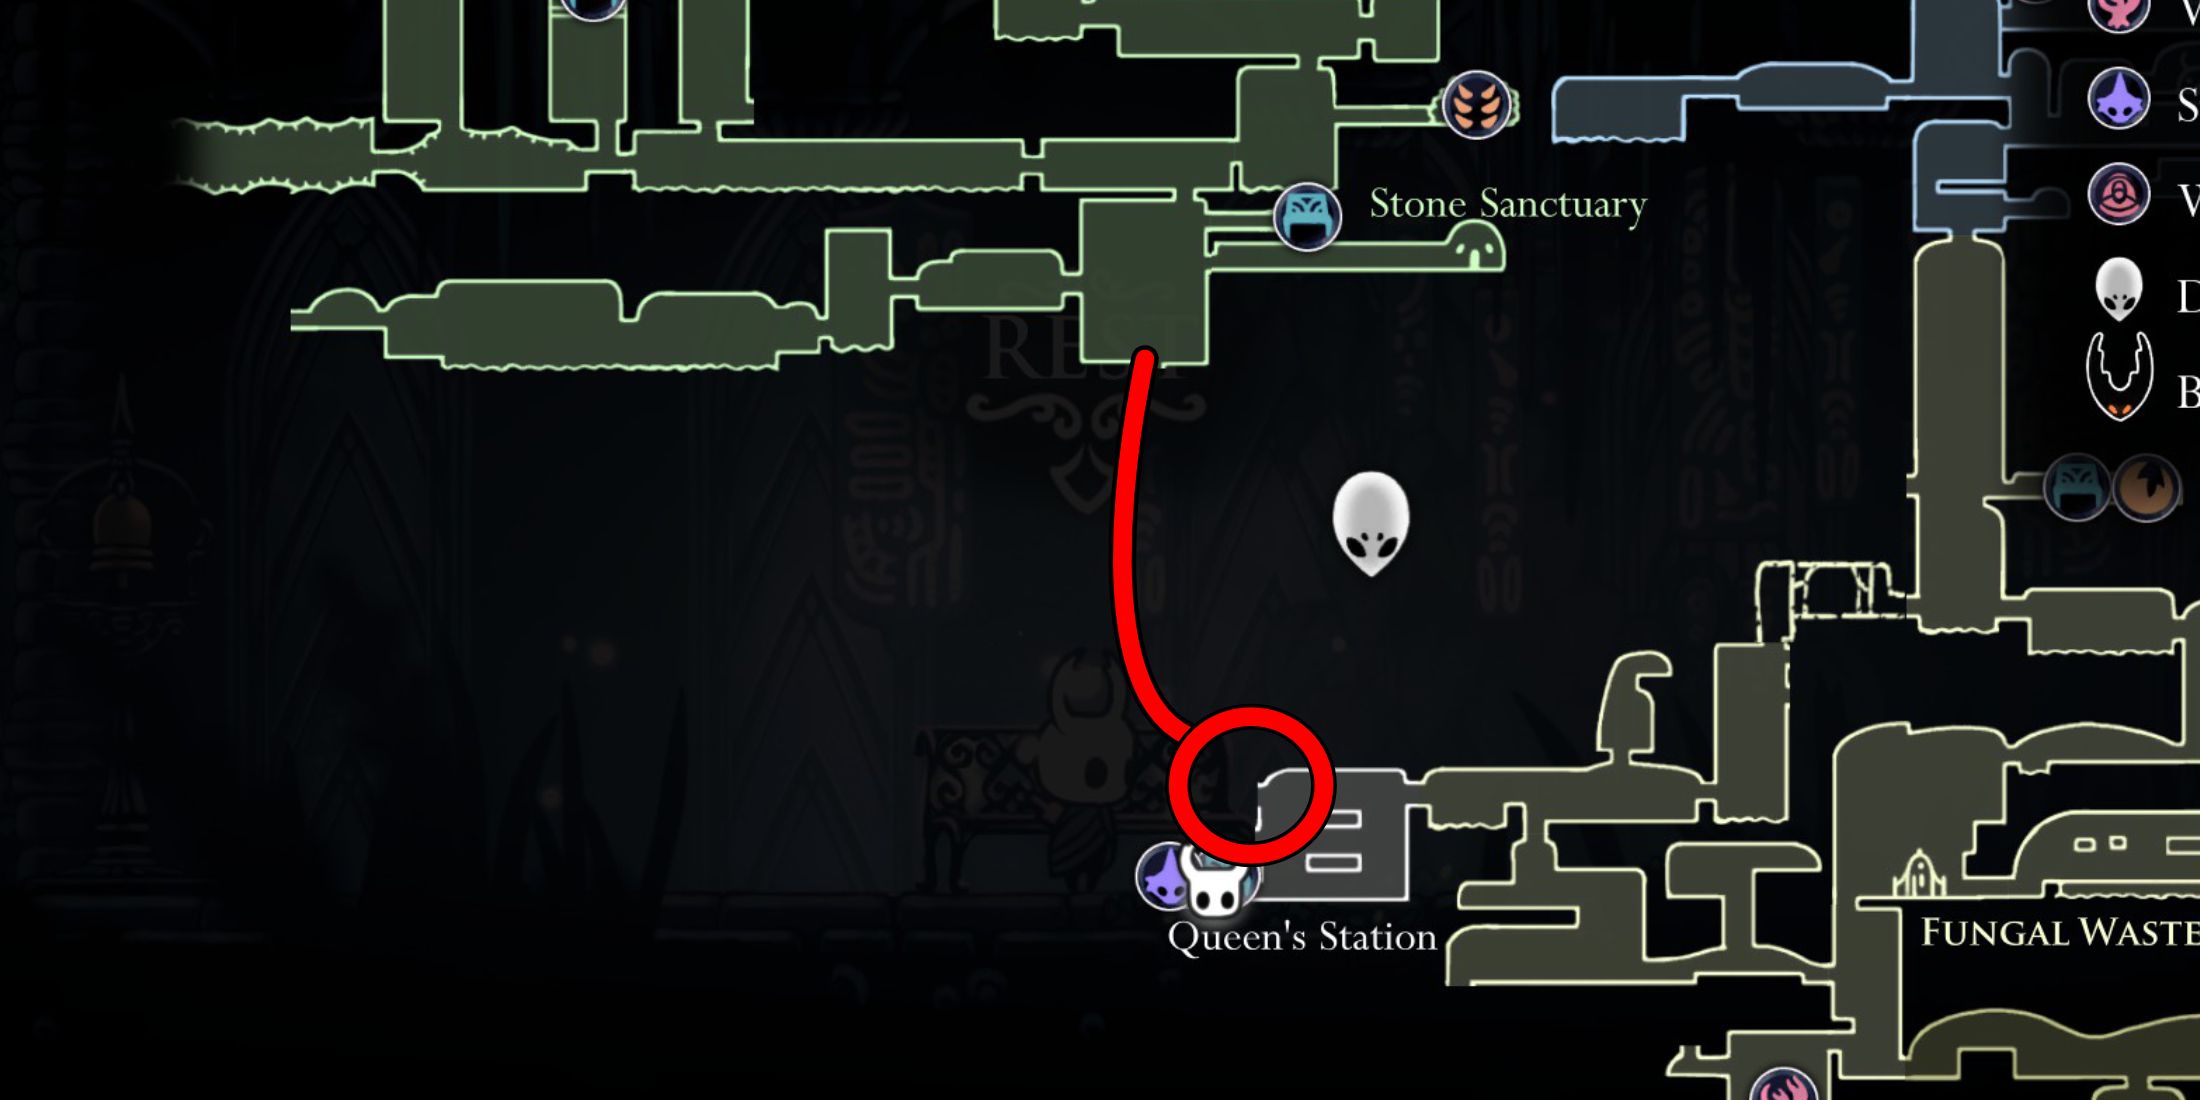
Once you’ve defeated Hornet, your primary objective becomes locating the Mantis Claw and advancing further within Hollowset. Make your way to Fog Canyon, a location nestled beneath Greenpath that links up on the lower right corner.
Step gently into these waters to dodge the towering jellies that can propel themselves swiftly towards you upon contact, causing a shock of two HPs damage. Instead, take your time to delicately glide down (ensuring no contact with them), until you reach the Queen’s Station locale.
As a cinephile, I’d rephrase that statement like this: “I’m excited to announce that we’re expanding our transit network! Starting from now, you can easily access the Stag Station, which is nestled below and slightly to the left of the Queen’s Station. This upgrade will make our movie-going journeys smoother and more enjoyable in the days ahead!
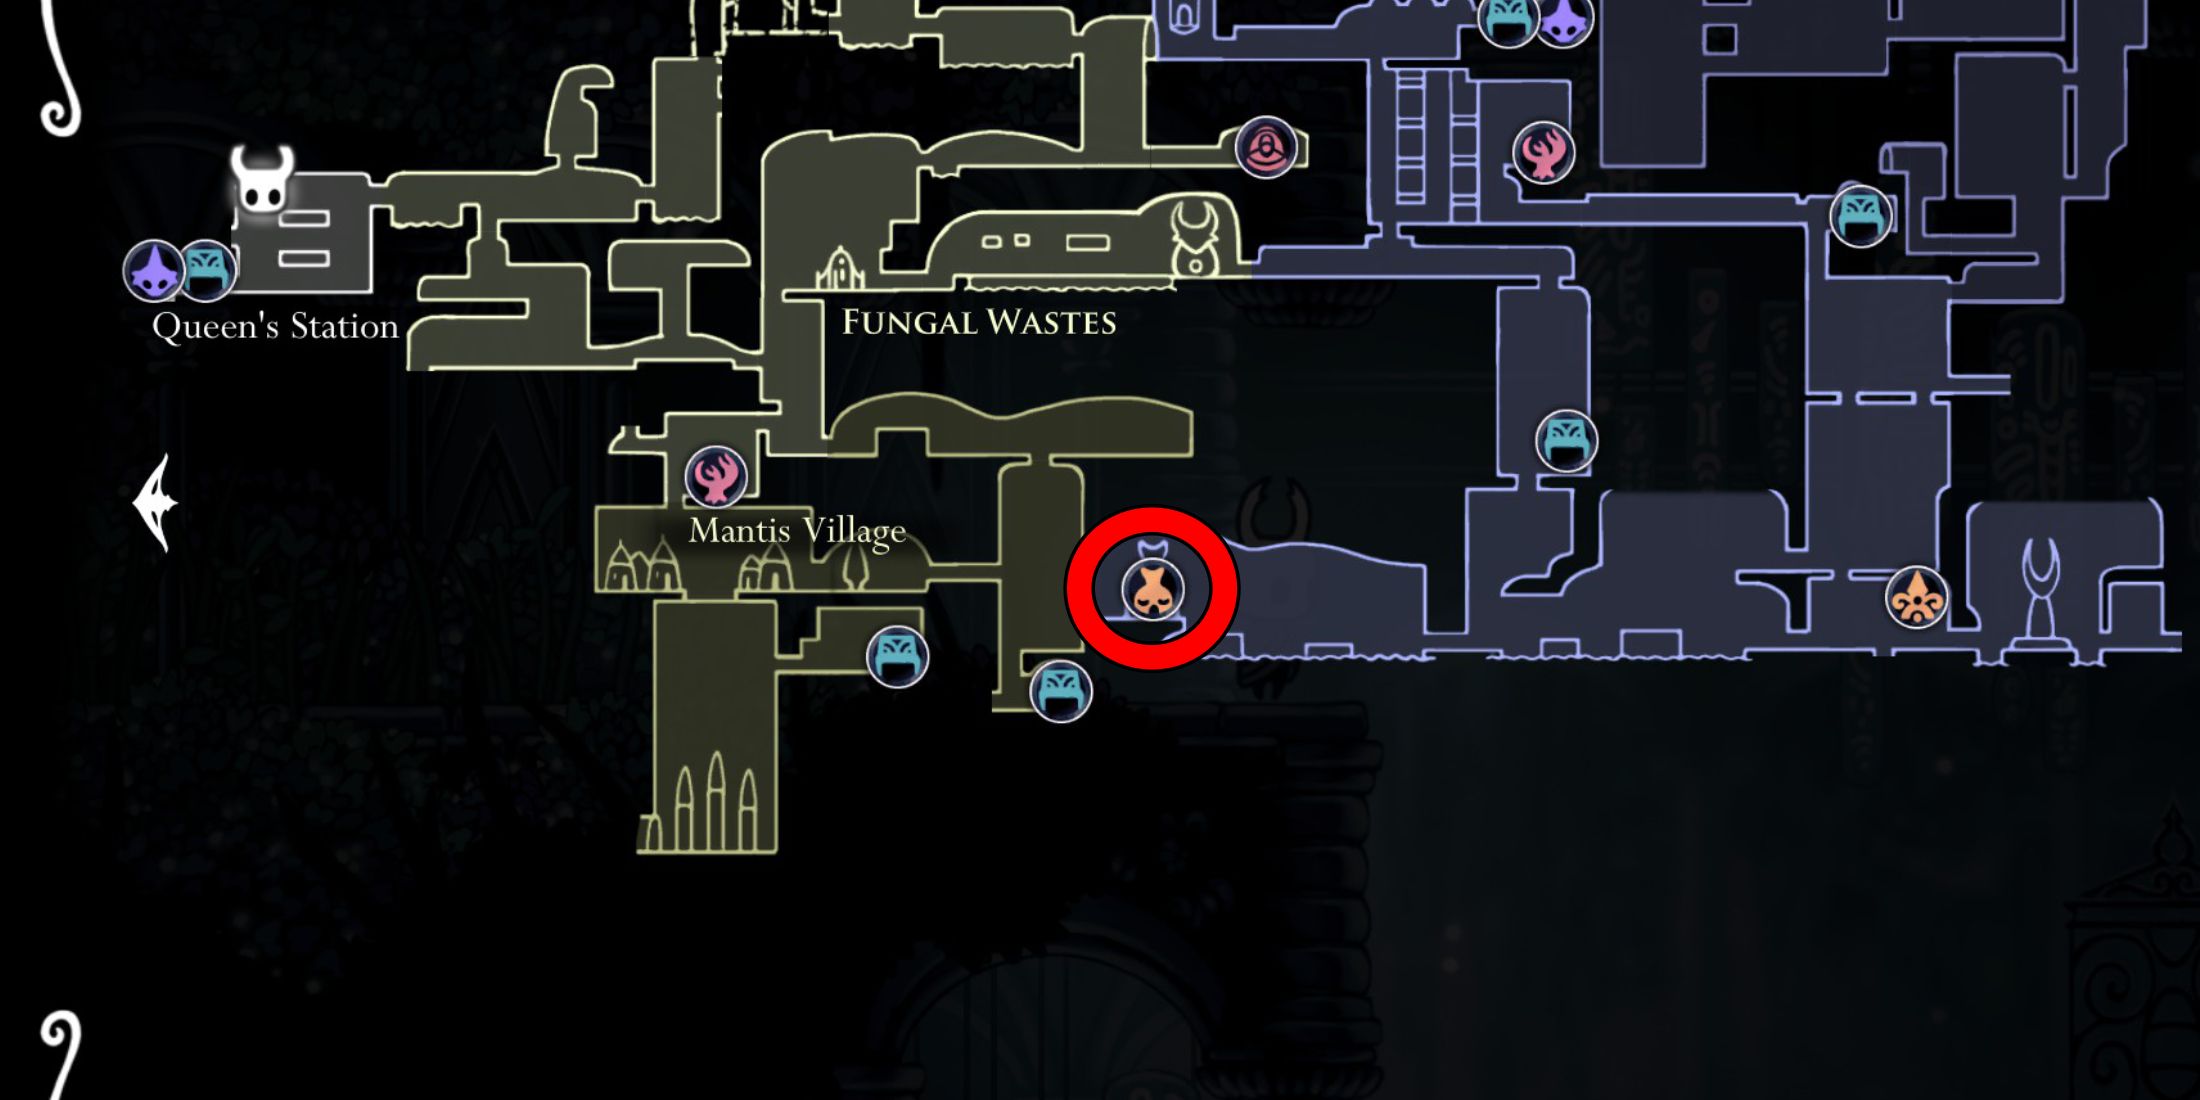
Get The Mantis Claw
In Mantis Village Below The Fungal Wastes
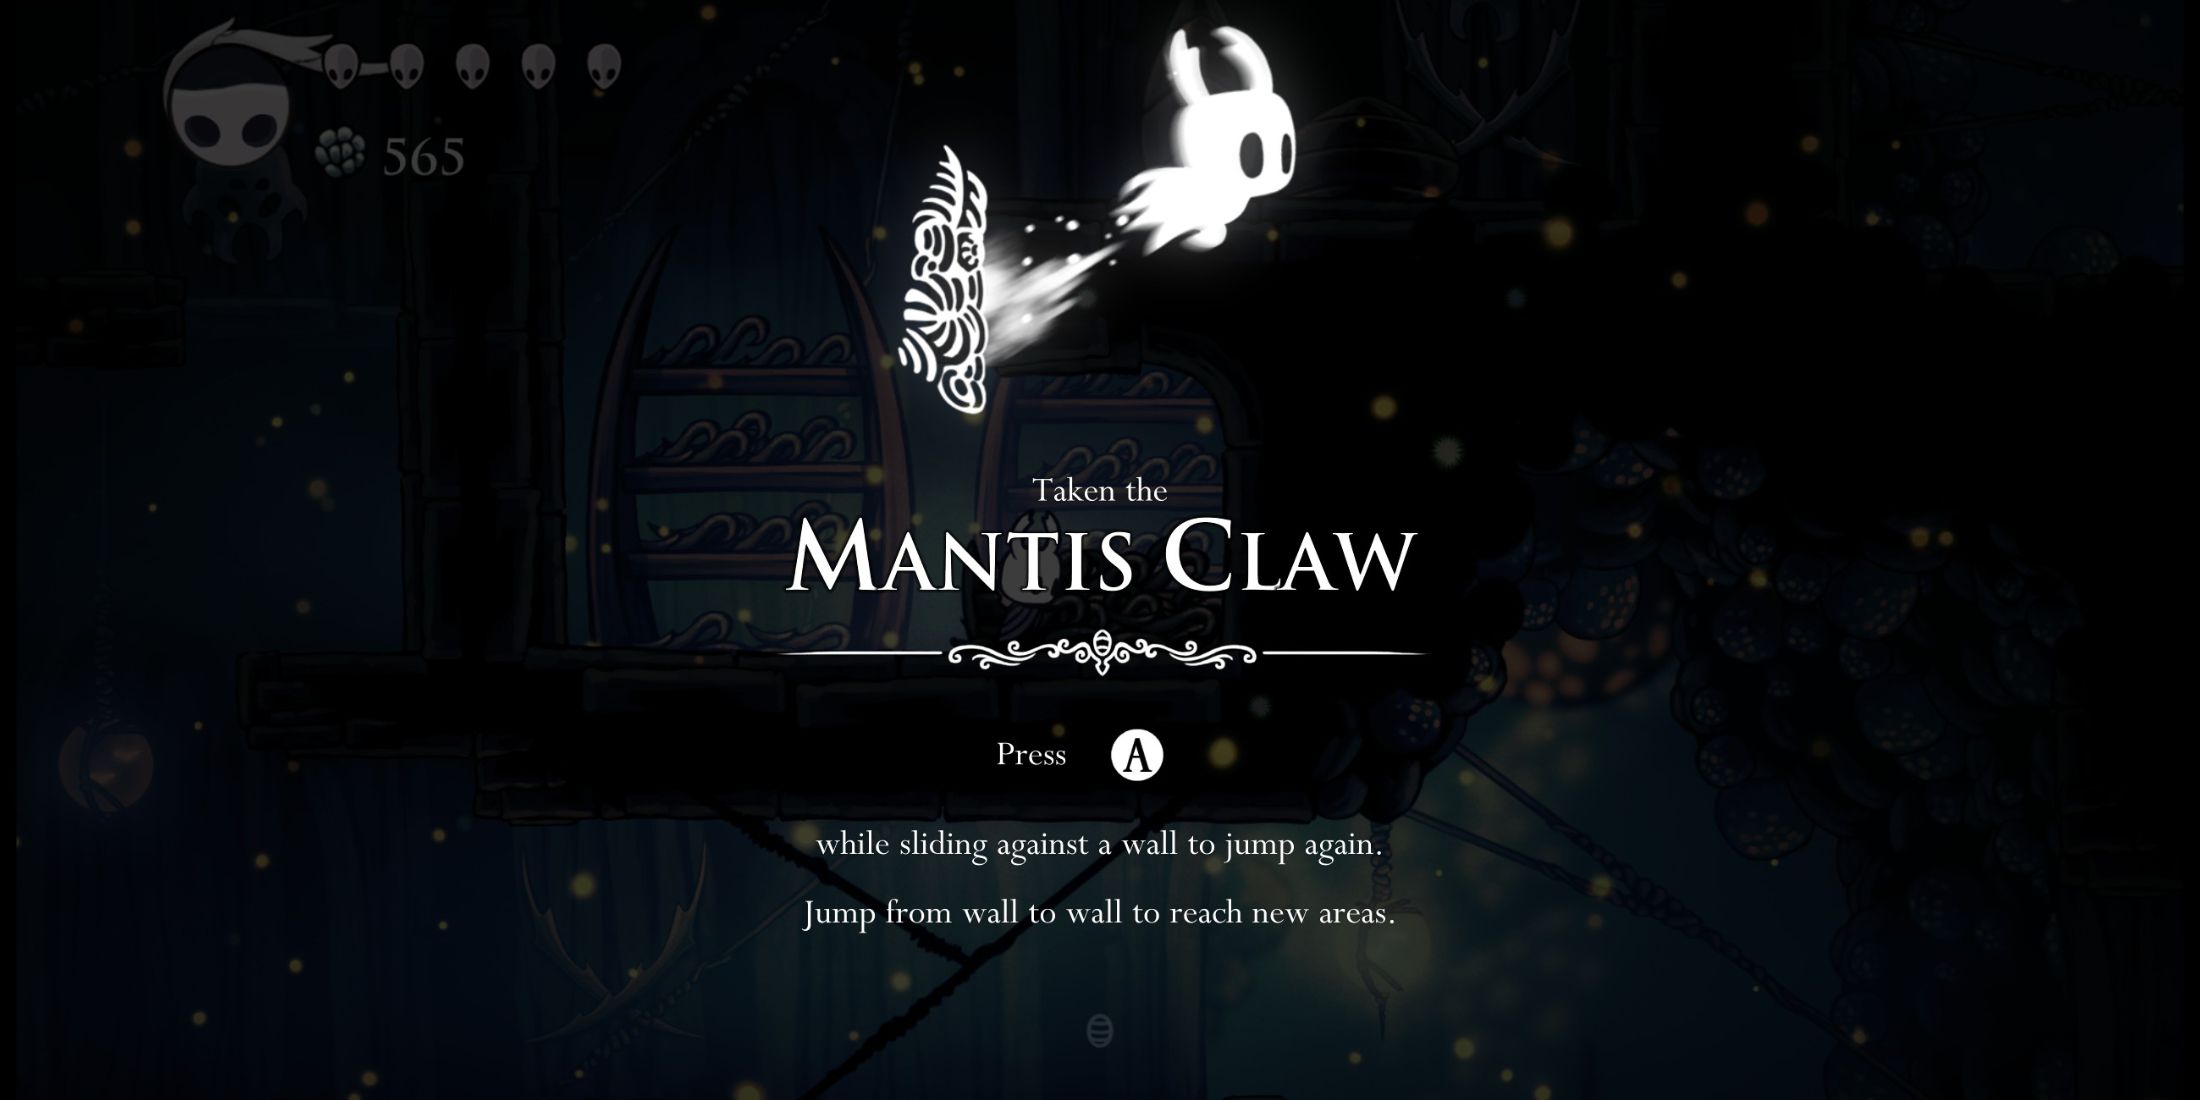
After successfully accessing Queen’s Station via Stag Station, your objective becomes locating the Mantis Claw hidden in the Mantis Village. Similar to the Mothwing Cloak, obtaining the Mantis Claw grants you a new skill – the power to climb vertical surfaces like walls.
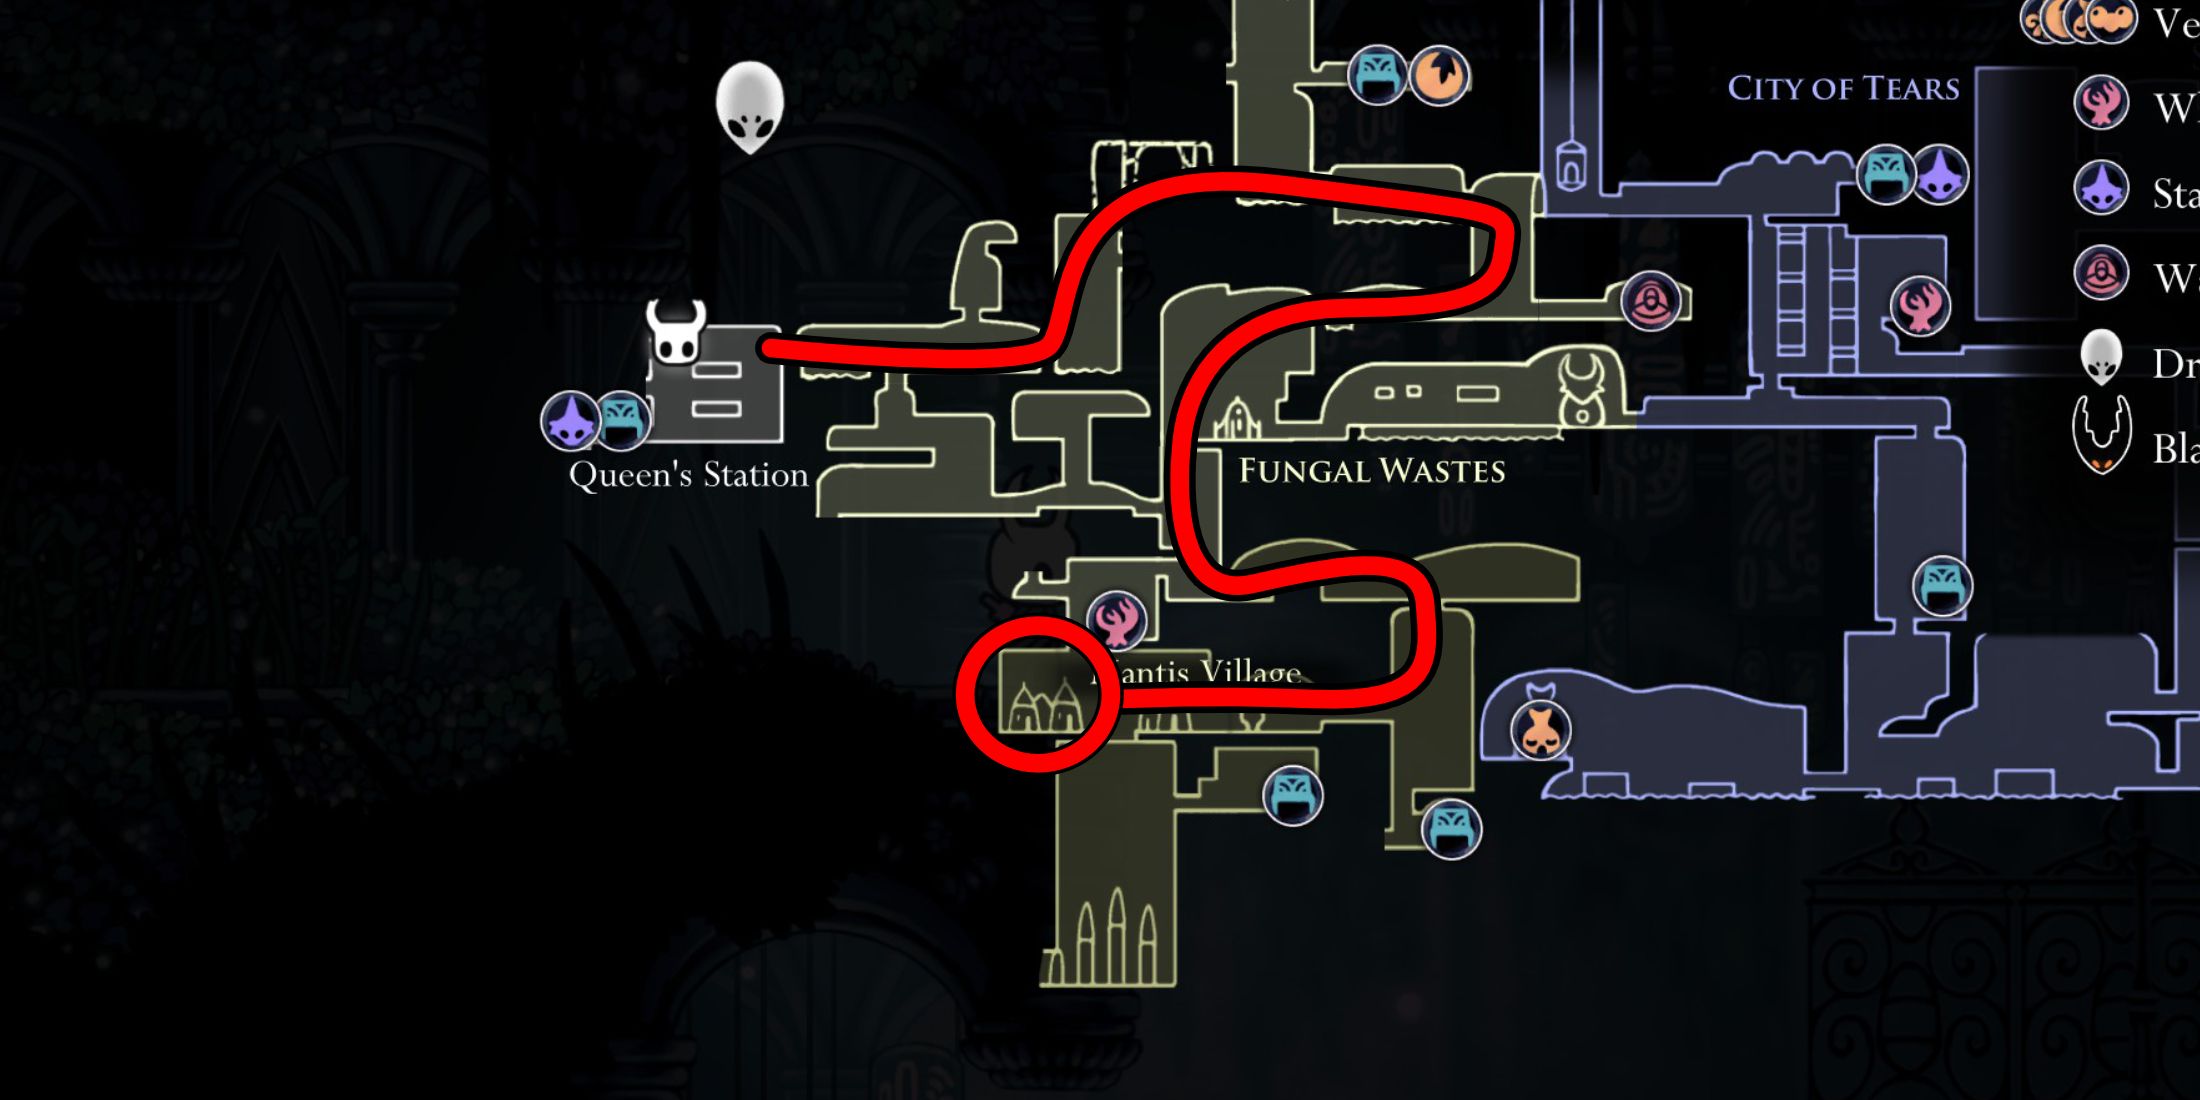
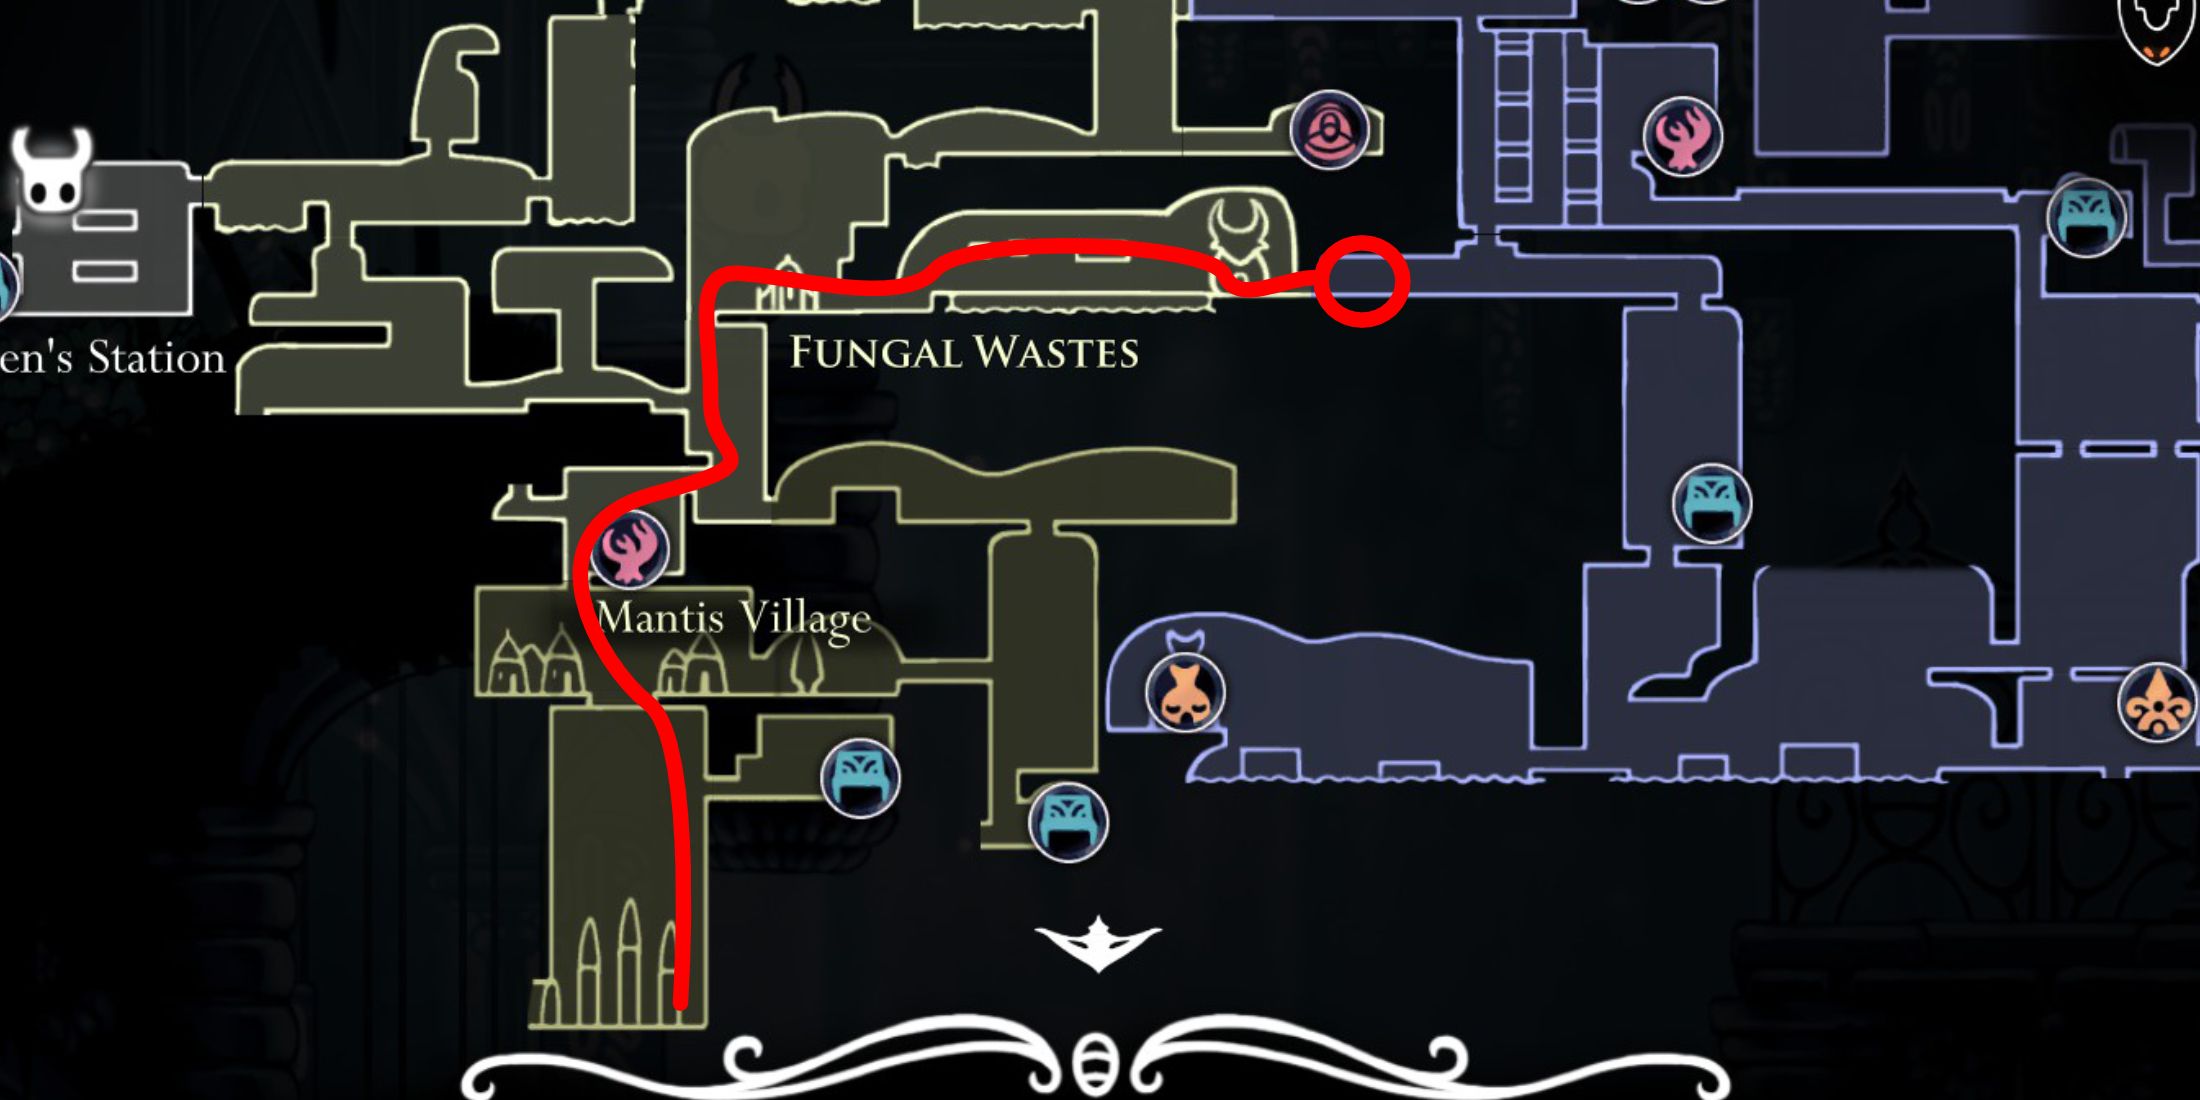
Starting from the Queen’s Station, go through the upper right archway. Proceed forward within the Fungal Wastes until you locate the entryway to Mantis Village on the lower right corner of the map.
There’s no need to eliminate the Mantis Lords to obtain the Mantis Claw. Instead, just venture into the village and search for a hut on the left side of the main large room. Doing so will grant the knight access to various new locations, such as a jumping challenge located on the right side of Queen’s Station, which eventually leads to a Mask Shard.
Find The City of Tears
From Mantis Village, Head To The Top-Right

The heart of the Pale King’s kingdom was known as the City of Tears. Upon obtaining the Mantis Claw, you can navigate towards its entrance. To reach it from Mantis Village, climb up until you exit through the top exit. Leave the room via the upper-right door, then ascend again until you enter a room above where you’ll see a colossal statue near a long corridor.
As I navigate with my Mantis Claw, I tread cautiously across the prickly pathway ascending towards the city’s entrance. Once there, I gently insert the City Crest into the statue standing guard before the gate. This action magically unveils the entrance, granting me access to the city beyond.
Remember to finish your tasks before entering the City of Tears, as once you’re in, the gate will close and you won’t be able to exit or re-enter for some time.
Upgrade Your Nail
Bottom-Left Of The City of Tears
In the heart of The City of Tears, an intricately adorned and perpetually drizzling metropolis, navigating can be a bit maze-like. Upon arrival, your initial mission is to ascend a few rooms to reach the Stag Station, located above the entrance hallway. After that, make your way downwards until you’ve reached the lowest levels of the city.
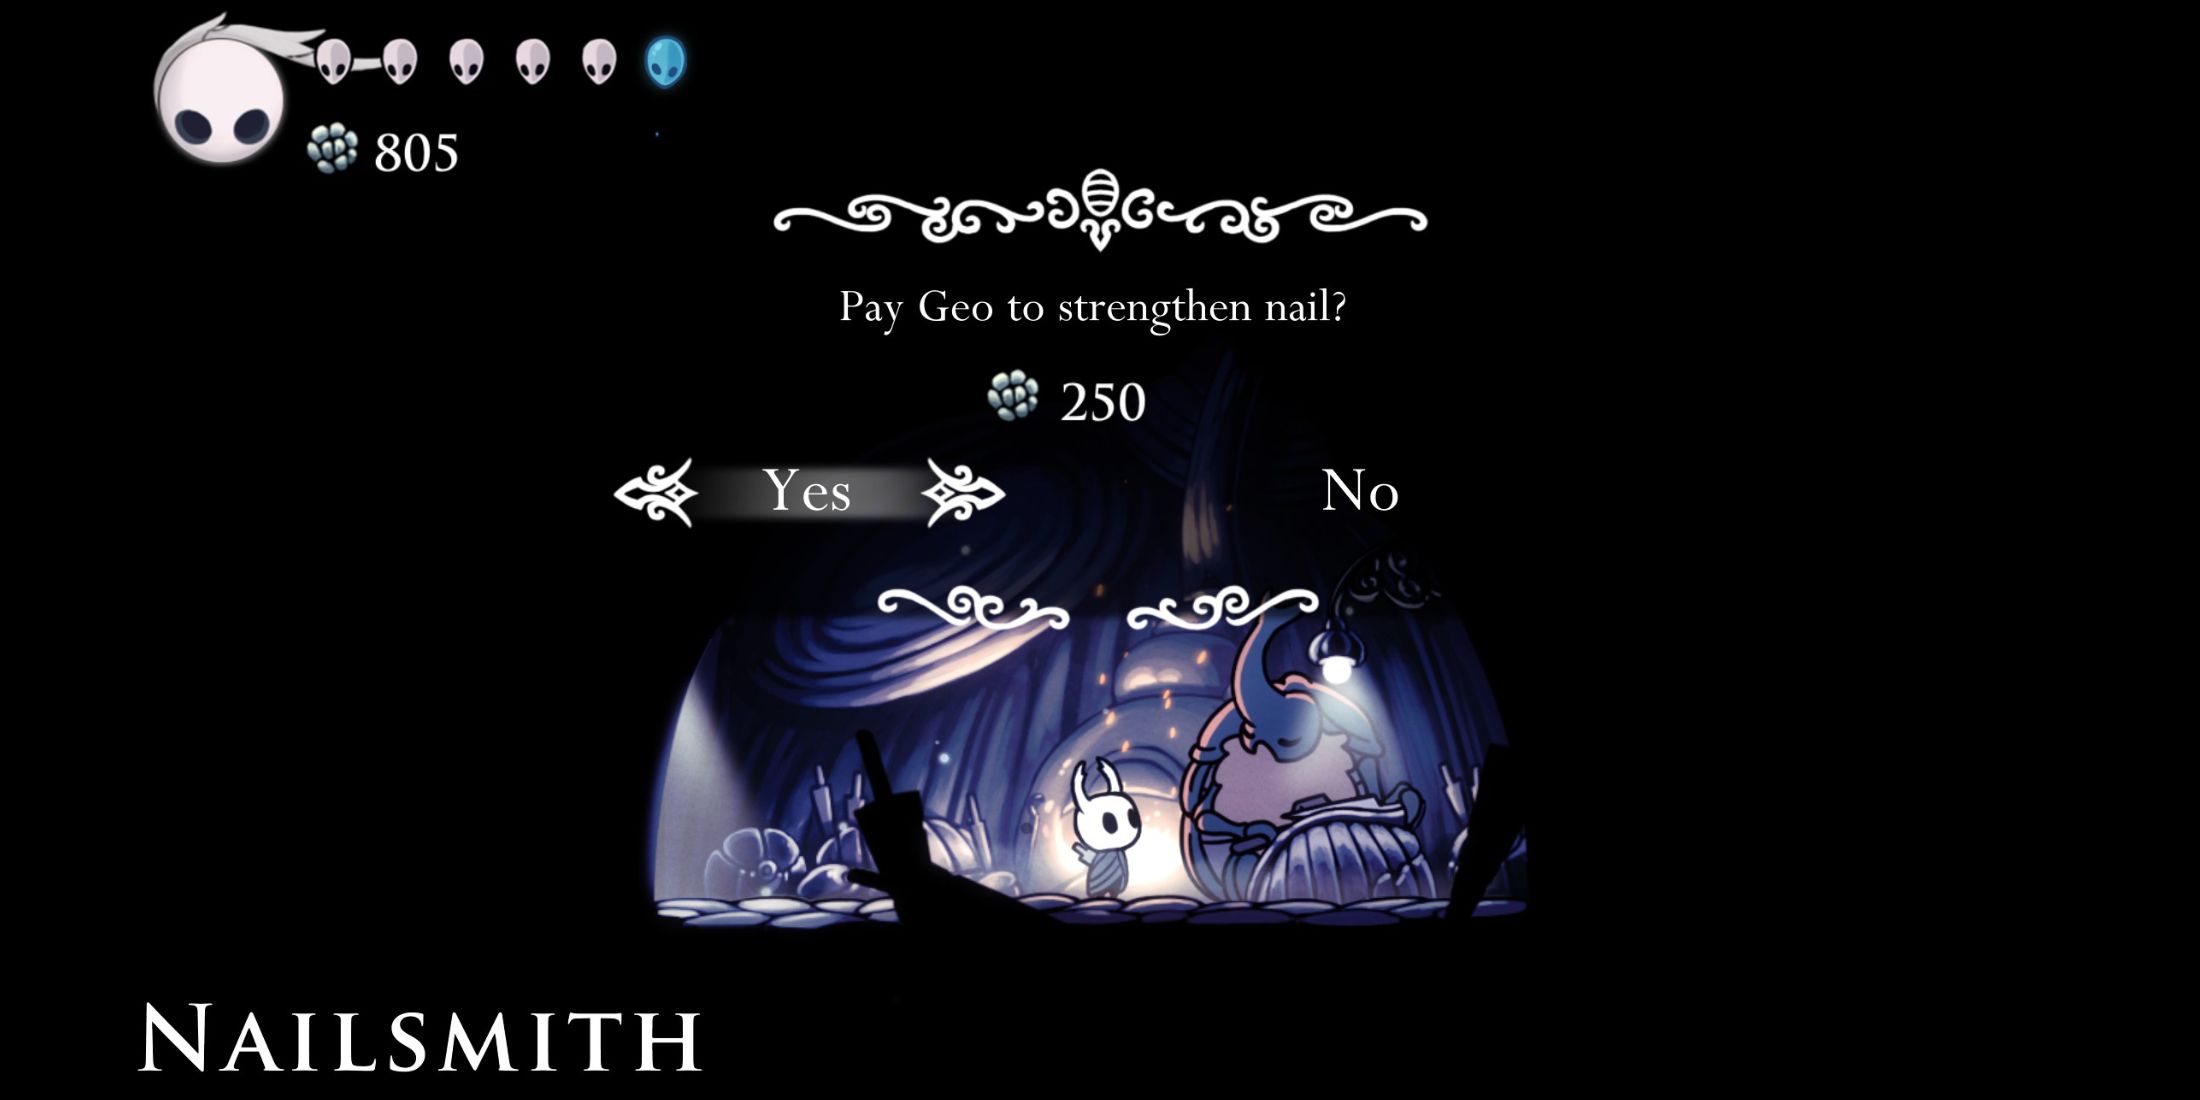
In my film critique, let me share an intriguing detail: When water lies beneath your feet, veer left until you stumble upon an oversized nail signpost. This distinctive marker serves as the calling card of a skilled artisan known as a Nailsmith. Rest assured, should you follow these directions and turn left at the sign, you’ll find the humble abode of this master craftsman nestled to its immediate left.
As a movie buff, I’d rephrase it like this: “Make your way to the hut nestled on the bottom-left corner of the City of Tears, where you’ll encounter the Nailsmith. For 250 Geo, he’ll enhance your damage nearly twice as much. However, as you aim for further upgrades, be prepared to shell out more Geo and a rare material called Pale Ore.
Buy A Simple Key & The Lantern From Sly
In Dirtmouth – 2750 Geo Total
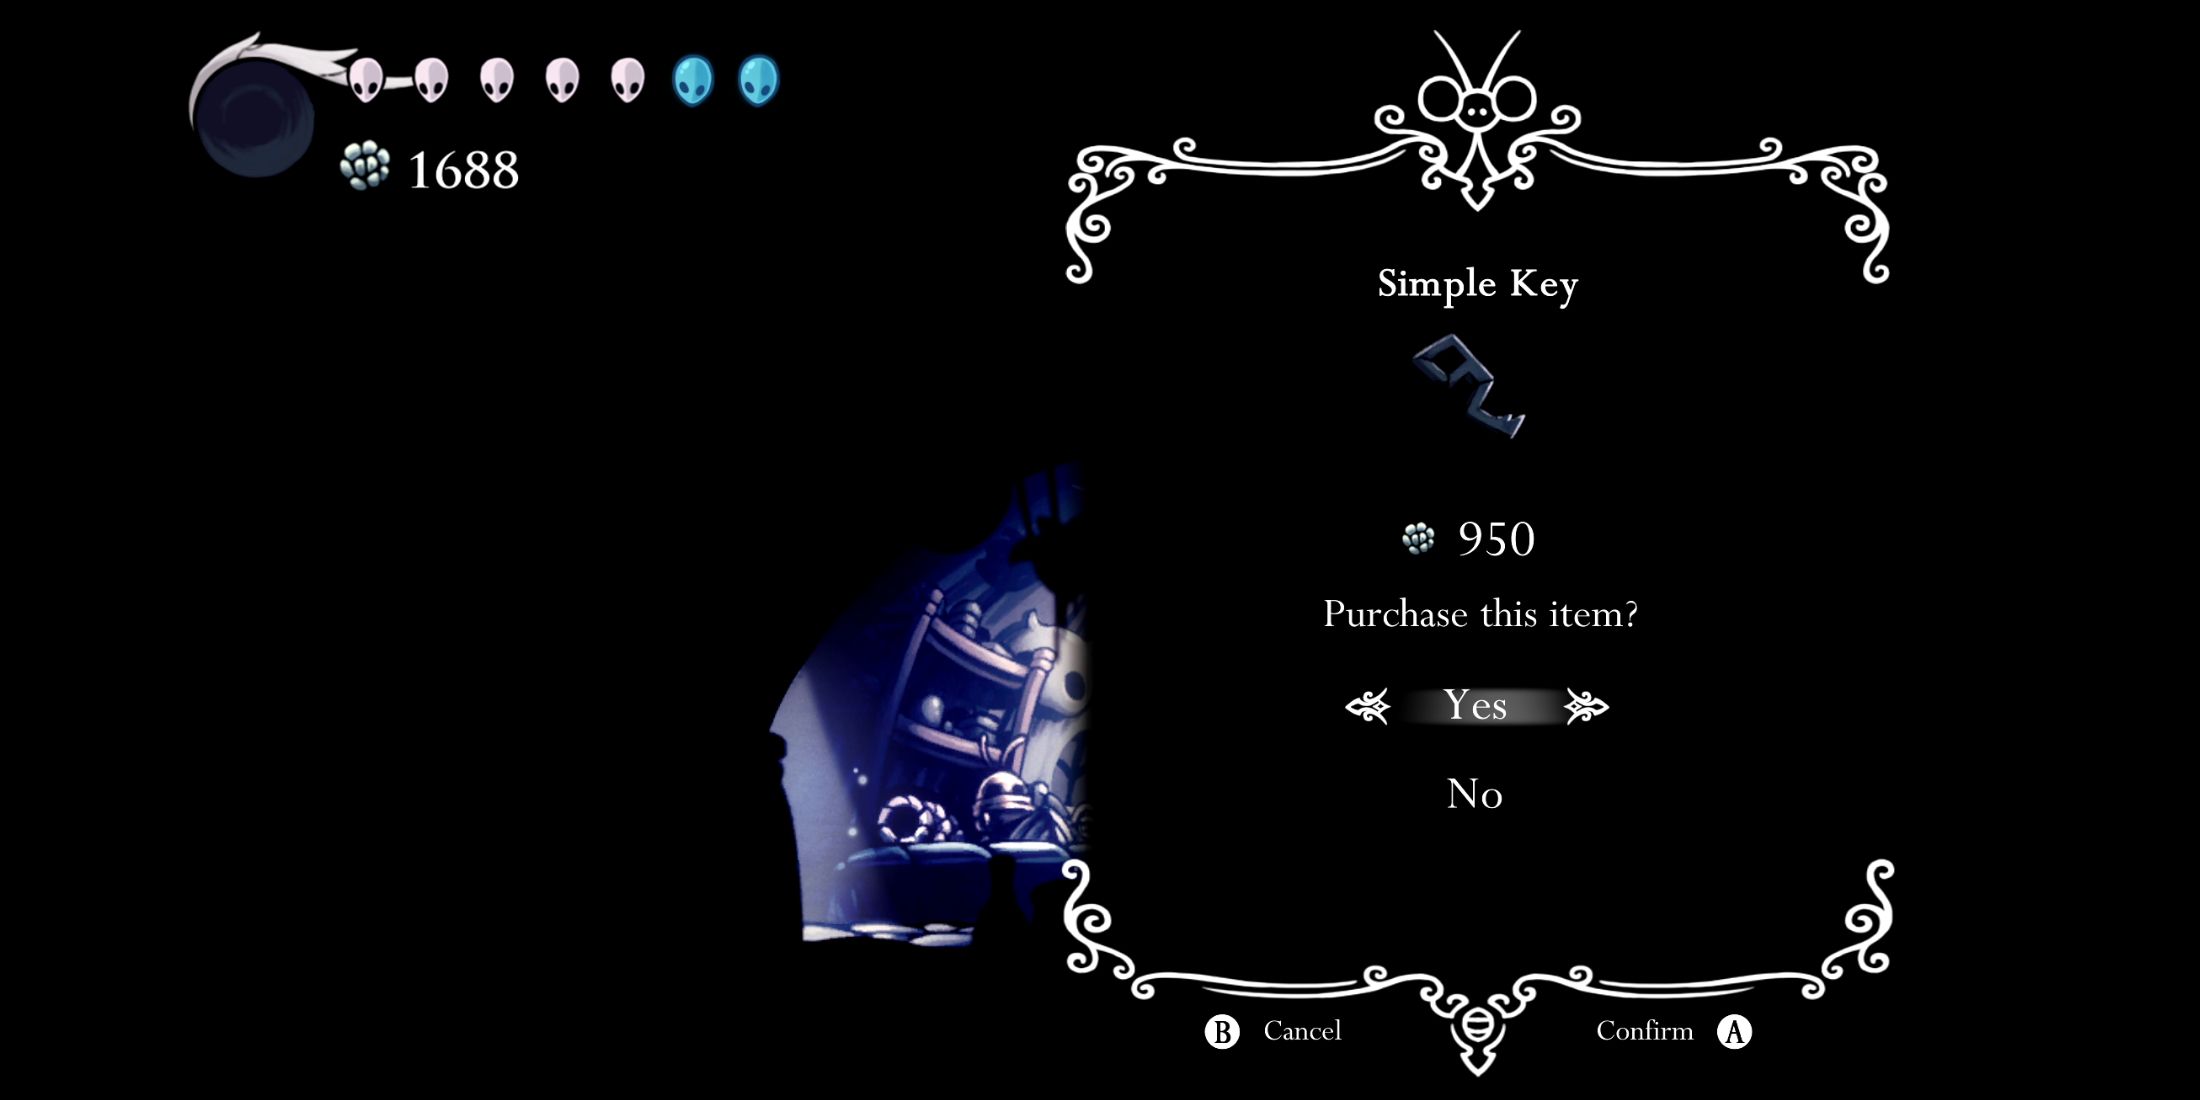
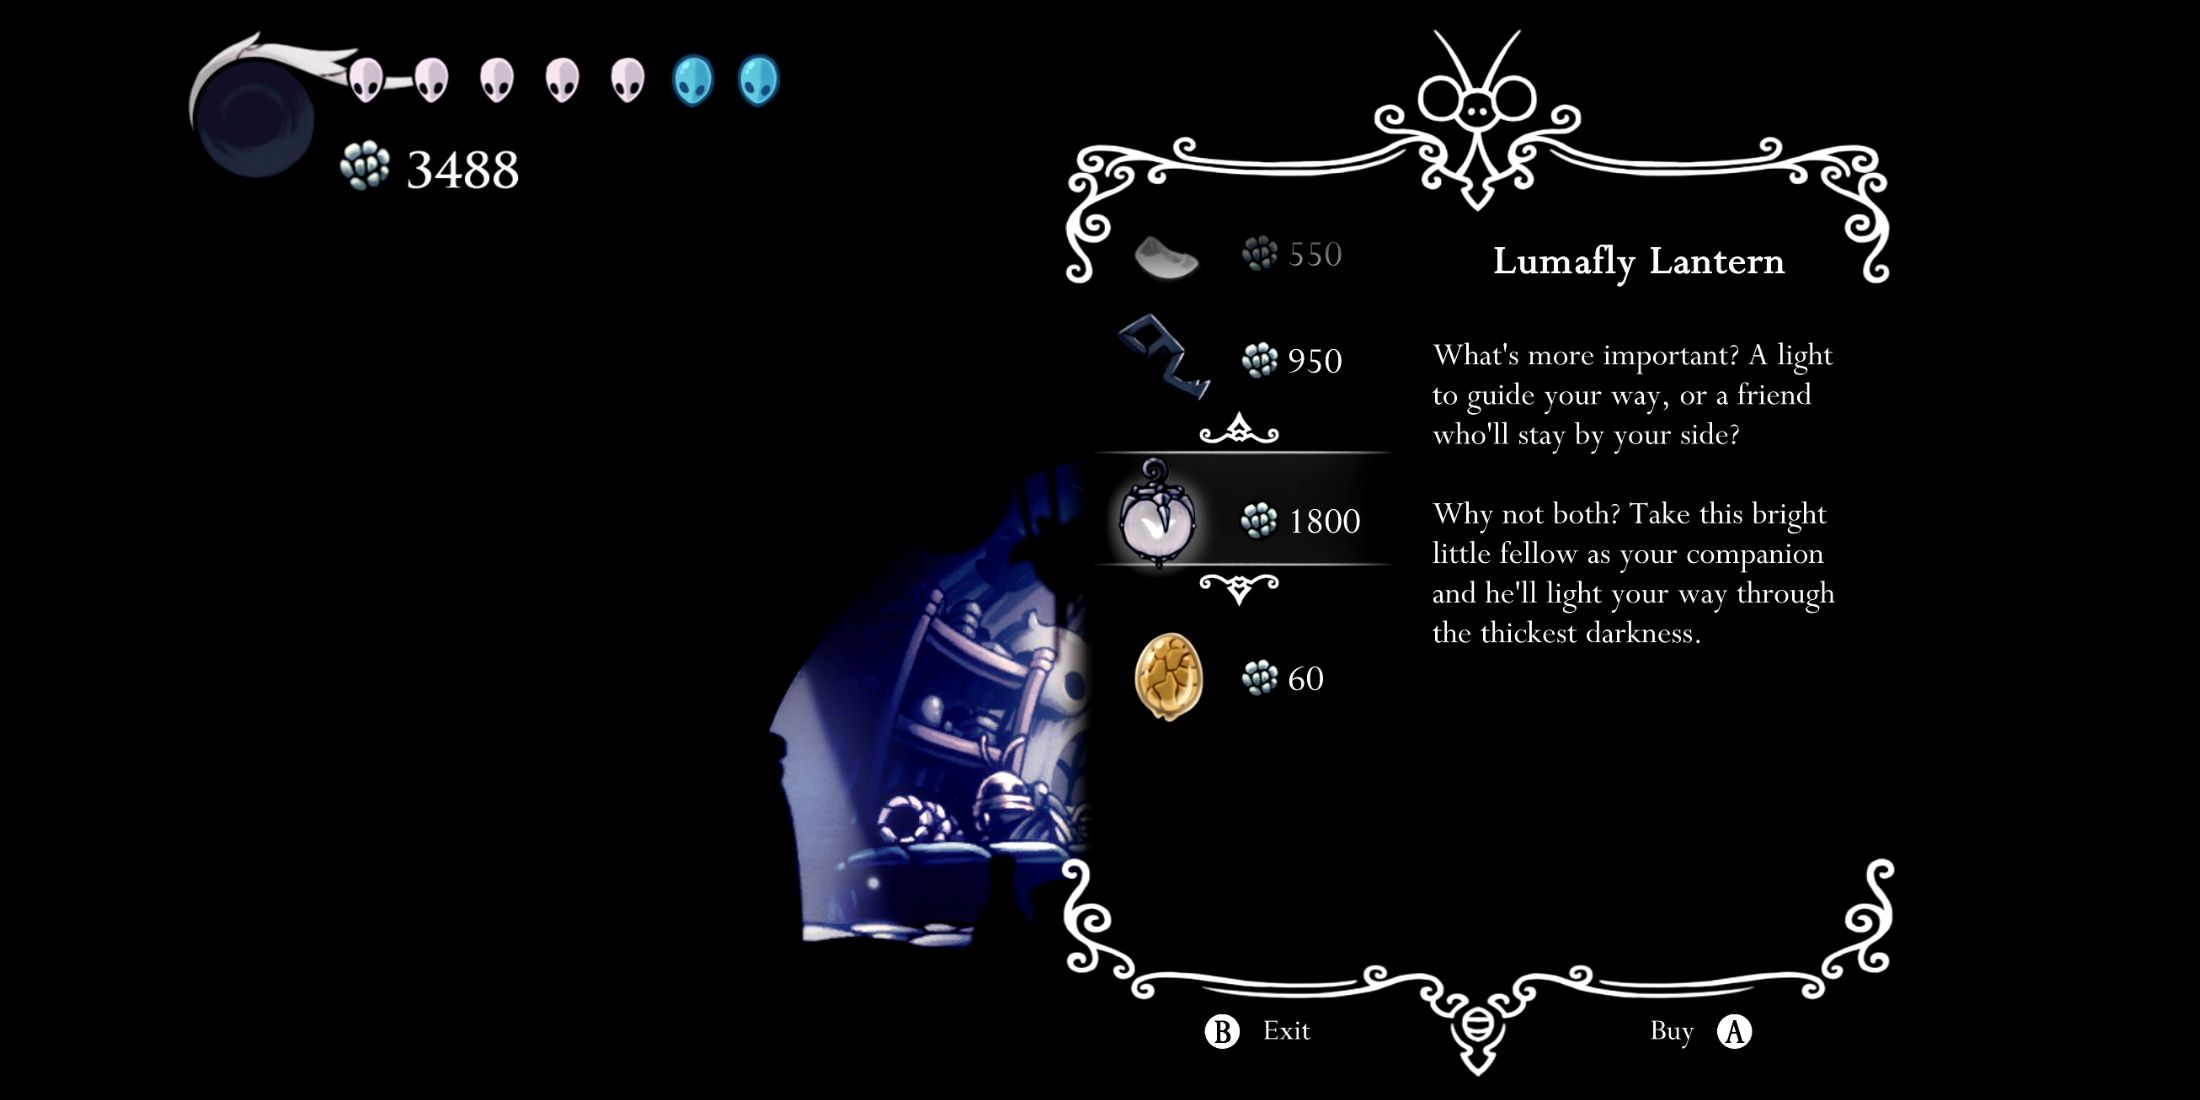
After defeating Hornet in Hollow Knight, the final step would be to return to Dirtmouth and buy two essential items from Sly: the Simple Key and the Lumafly Lantern.
- The Simple Key is required to get into the Royal Waterways, which is one location you could go to after the City of Tears.
- The Lumafly Lantern is necessary to see in extremely dark areas, like the entrance to the Crysal Peak or the entire Deepnest zone.
To put it plainly, you’ll be spending a substantial amount of your Geo if you decide to purchase both the Simple Key and the Lumafly Lantern. The Simple Key is priced at 950 Geo, and the Lumafly Lantern comes at 1800 Geo.
One quick method to obtain Geo is by trading your accumulated Relics with Relic Seeker Lemm (such as Wanderer’s Journals or Hallownest Seals). Lemm often offers a large amount of Geo in exchange for these precious items, so make sure to stray from the usual path occasionally to find these valuable treasures hidden off the beaten track.
Being near the Nailsmith, the antiquarian Lemm finds it straightforward to acquire Relics swiftly for purchasing nail enhancements – providing you also have sufficient Pale Ore on hand.
Read More
- Console Gamers Can’t Escape Their Love For Sports Games
- ARC Raiders Boss Defends Controversial AI Usage
- Top 8 UFC 5 Perks Every Fighter Should Use
- Top 10 Must-Watch Isekai Anime on Crunchyroll Revealed!
- Best Open World Games With Romance
- Top 10 Scream-Inducing Forest Horror Games
- Games That Will Make You A Metroidvania Fan
- Best PSP Spin-Off Games, Ranked
- How to Unlock the Mines in Cookie Run: Kingdom
- Best Uriel Build in Warframe
2025-08-23 20:46