In the game Shinobi: Art of Vengeance, there are an impressive 55 Oboro Relics scattered throughout the game, many of which cannot be obtained during a single playthrough of a level.
Most stages will contain five relics, some of which can only be reached after Joe gains specific movement skills. You can use these relics at the shop to unlock additional items for purchase; this range includes amulets, attacks, enhancements, special items, keys, and outfits.
Given that some of the Oboro Relics might prove challenging to find, this user-friendly guide will outline where each relic is hidden within the game ‘Shinobi: Art of Vengeance’.
All Oboro Relics in Oboro Village in Shinobi Art of Vengeance
Oboro Relic #1
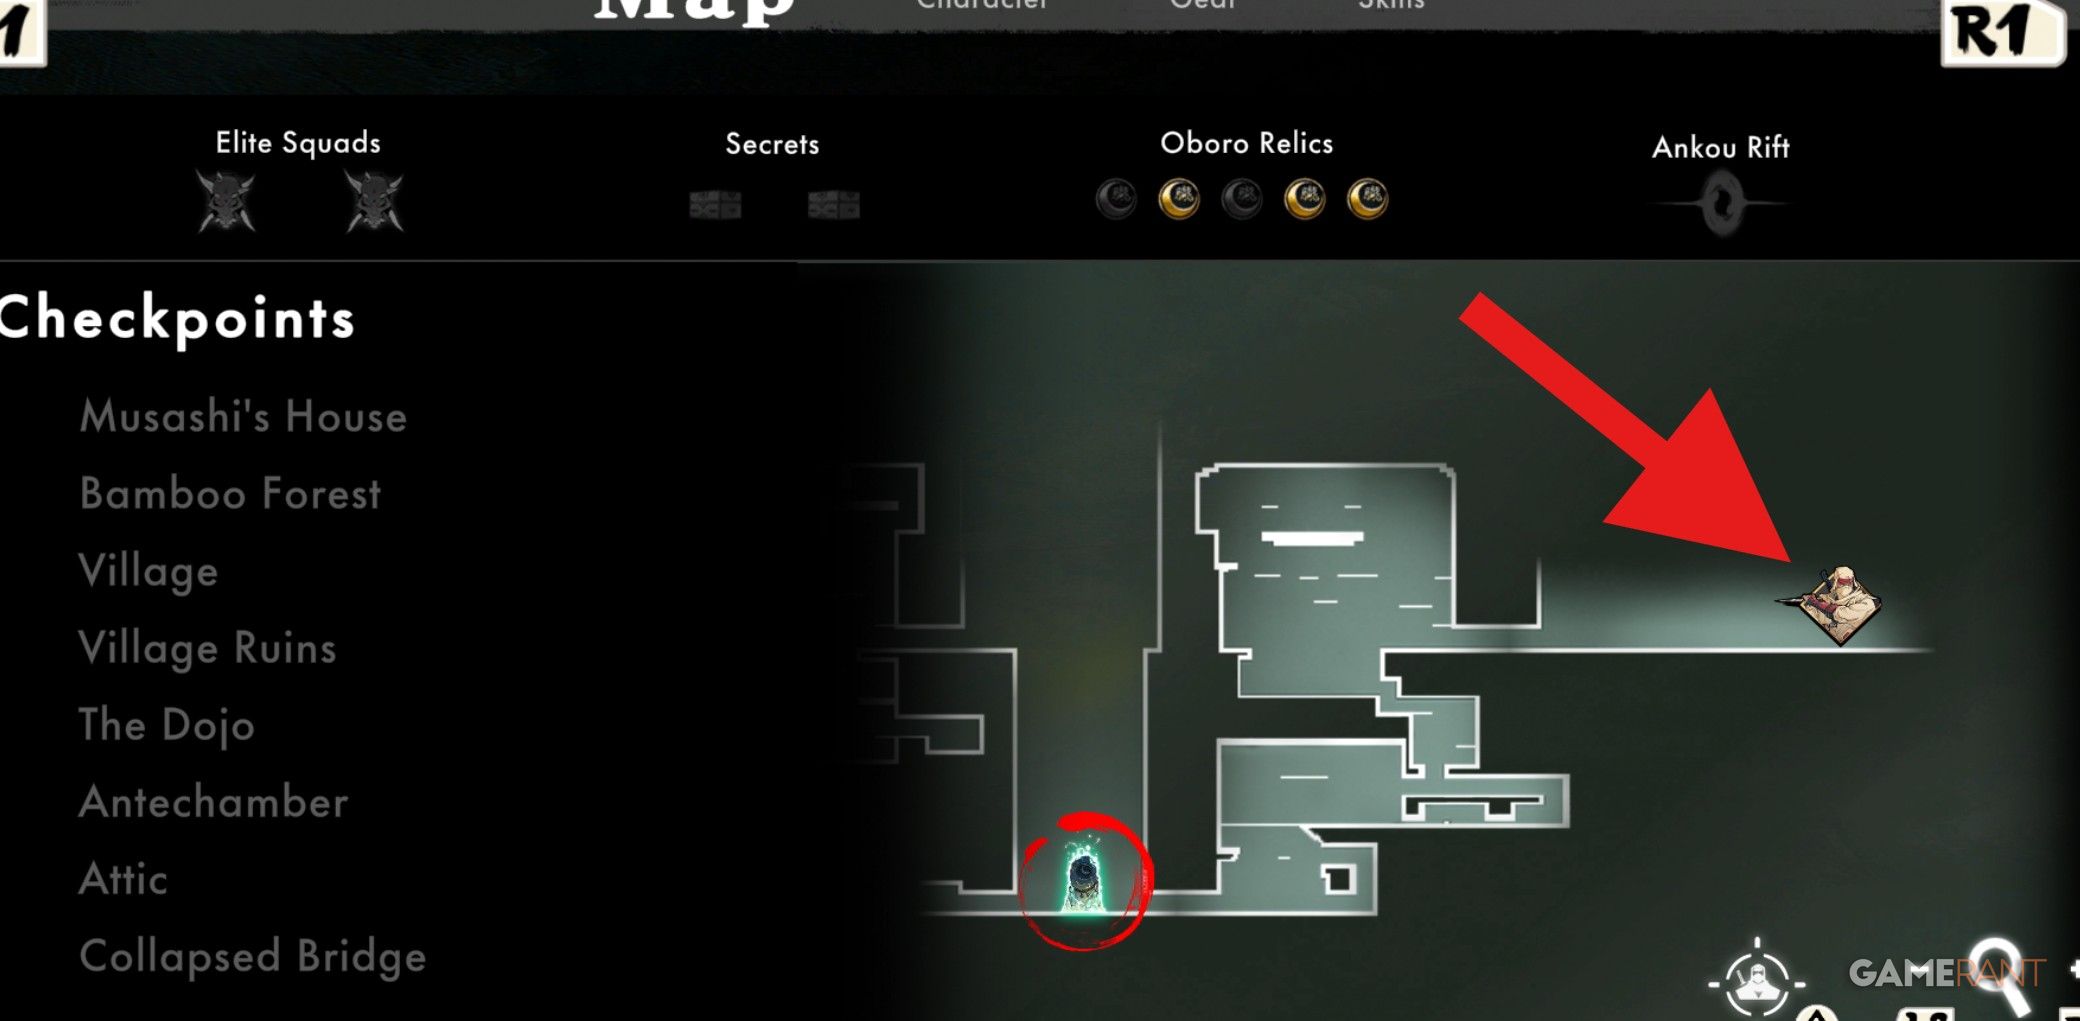
In my gaming adventure, I can’t grab that relic until I snag the Sword Dive Ningi further along in the Submarine Base stage. Once I’ve acquired it, make a beeline back to the Village Ruins checkpoint, veer left, and you’ll spot the chest hiding beneath a green Yokai barrier.
Oboro Relic #2
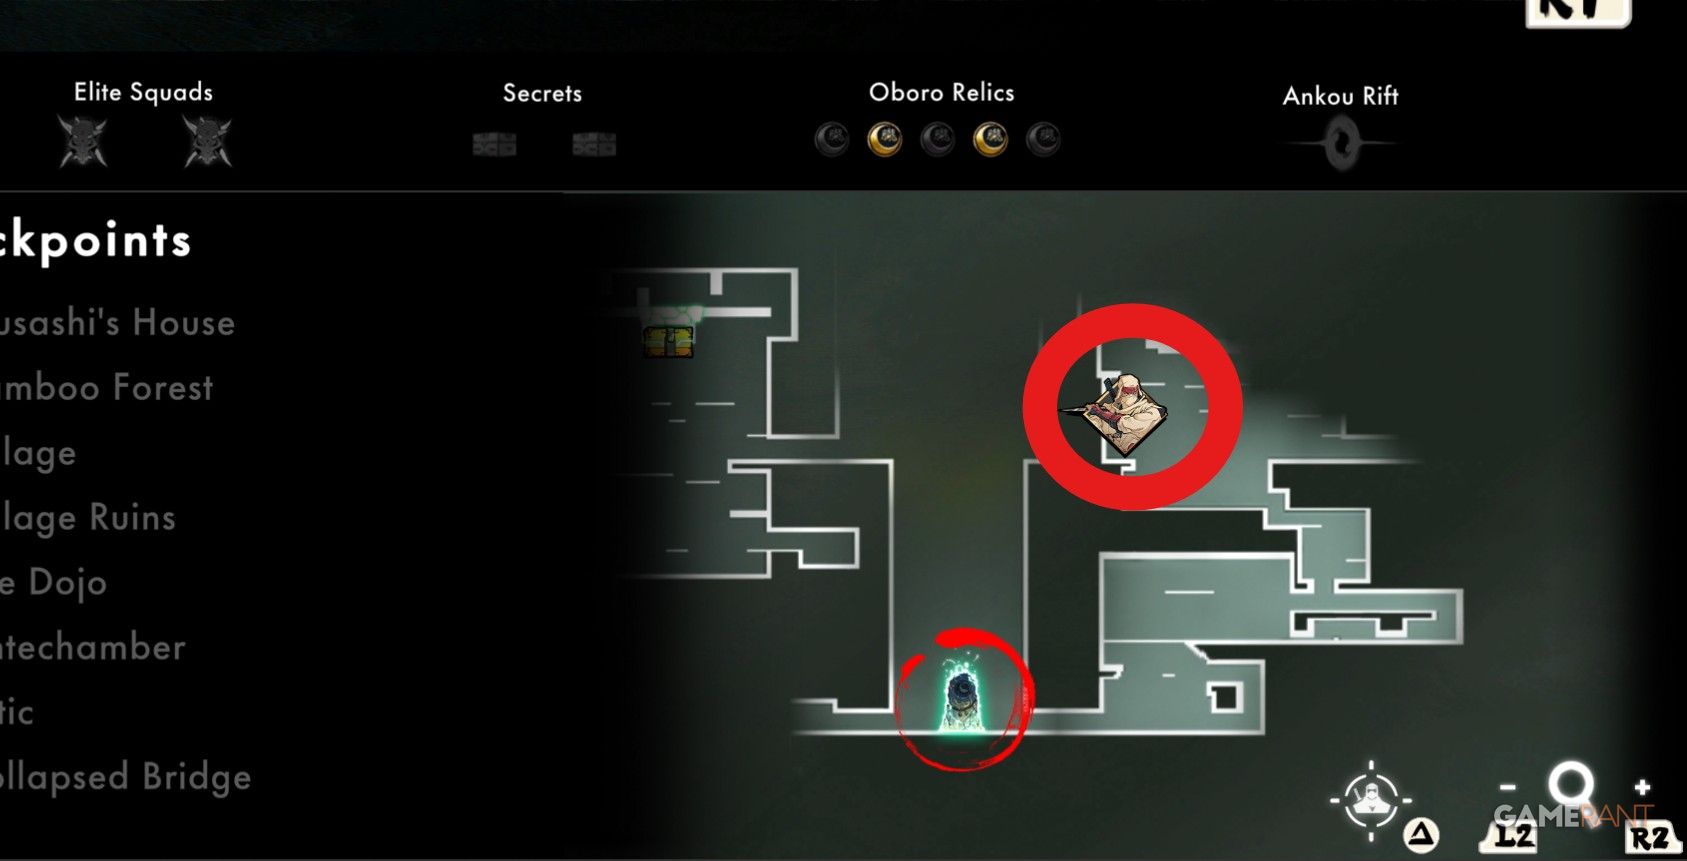
Once you’ve cleared the Antechamber checkpoint, veer right and follow the lower-right path to encounter some foes and discover a chest filled with an Oboro Relic.
Oboro Relic #3
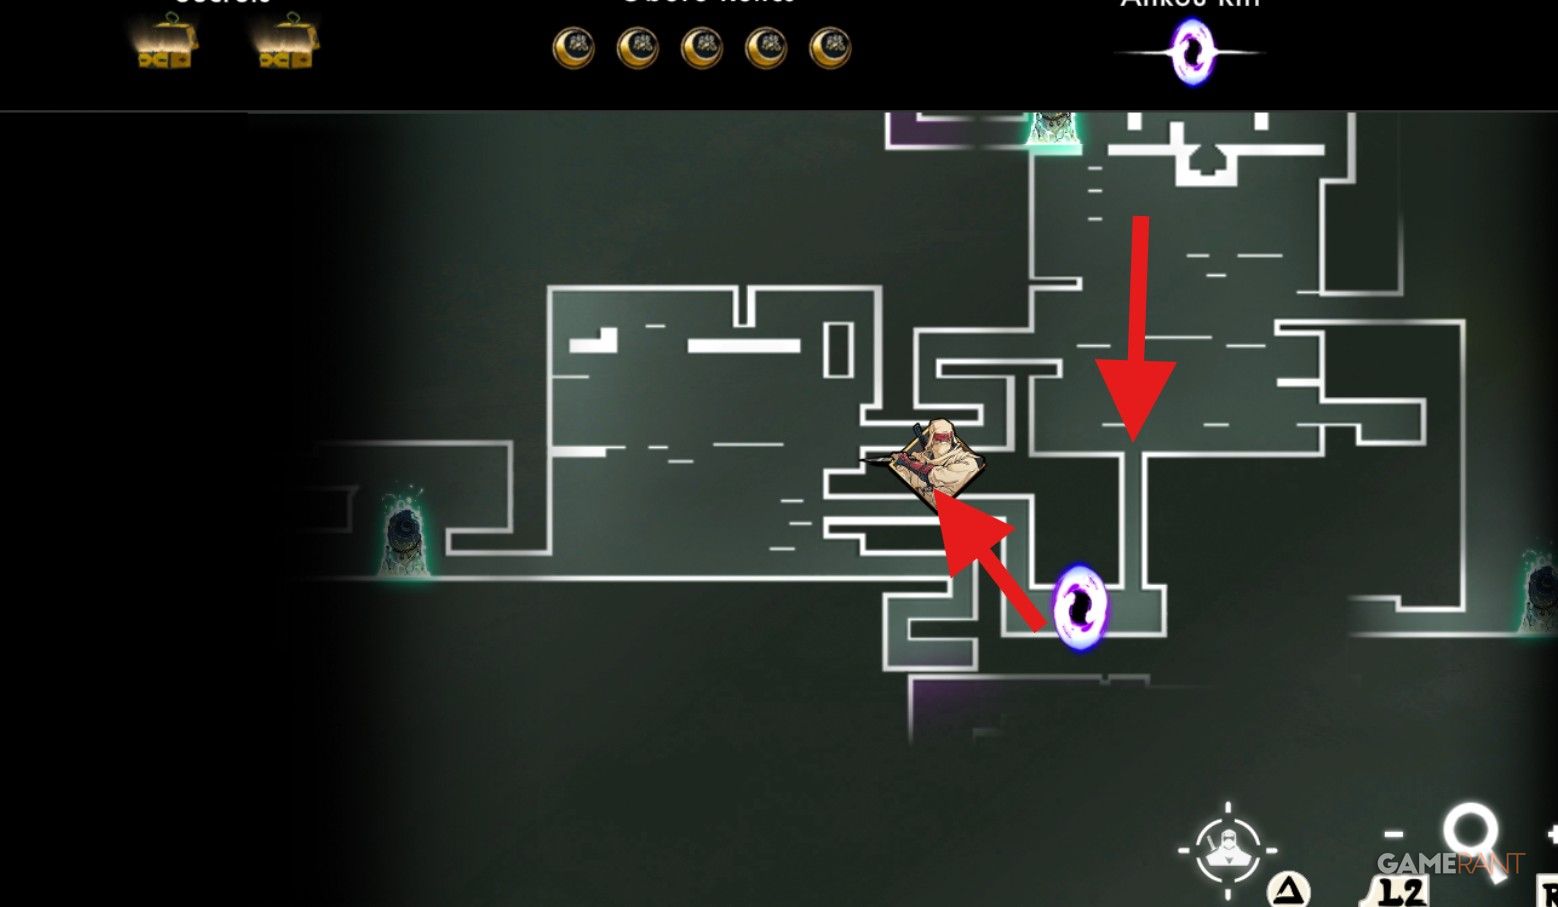

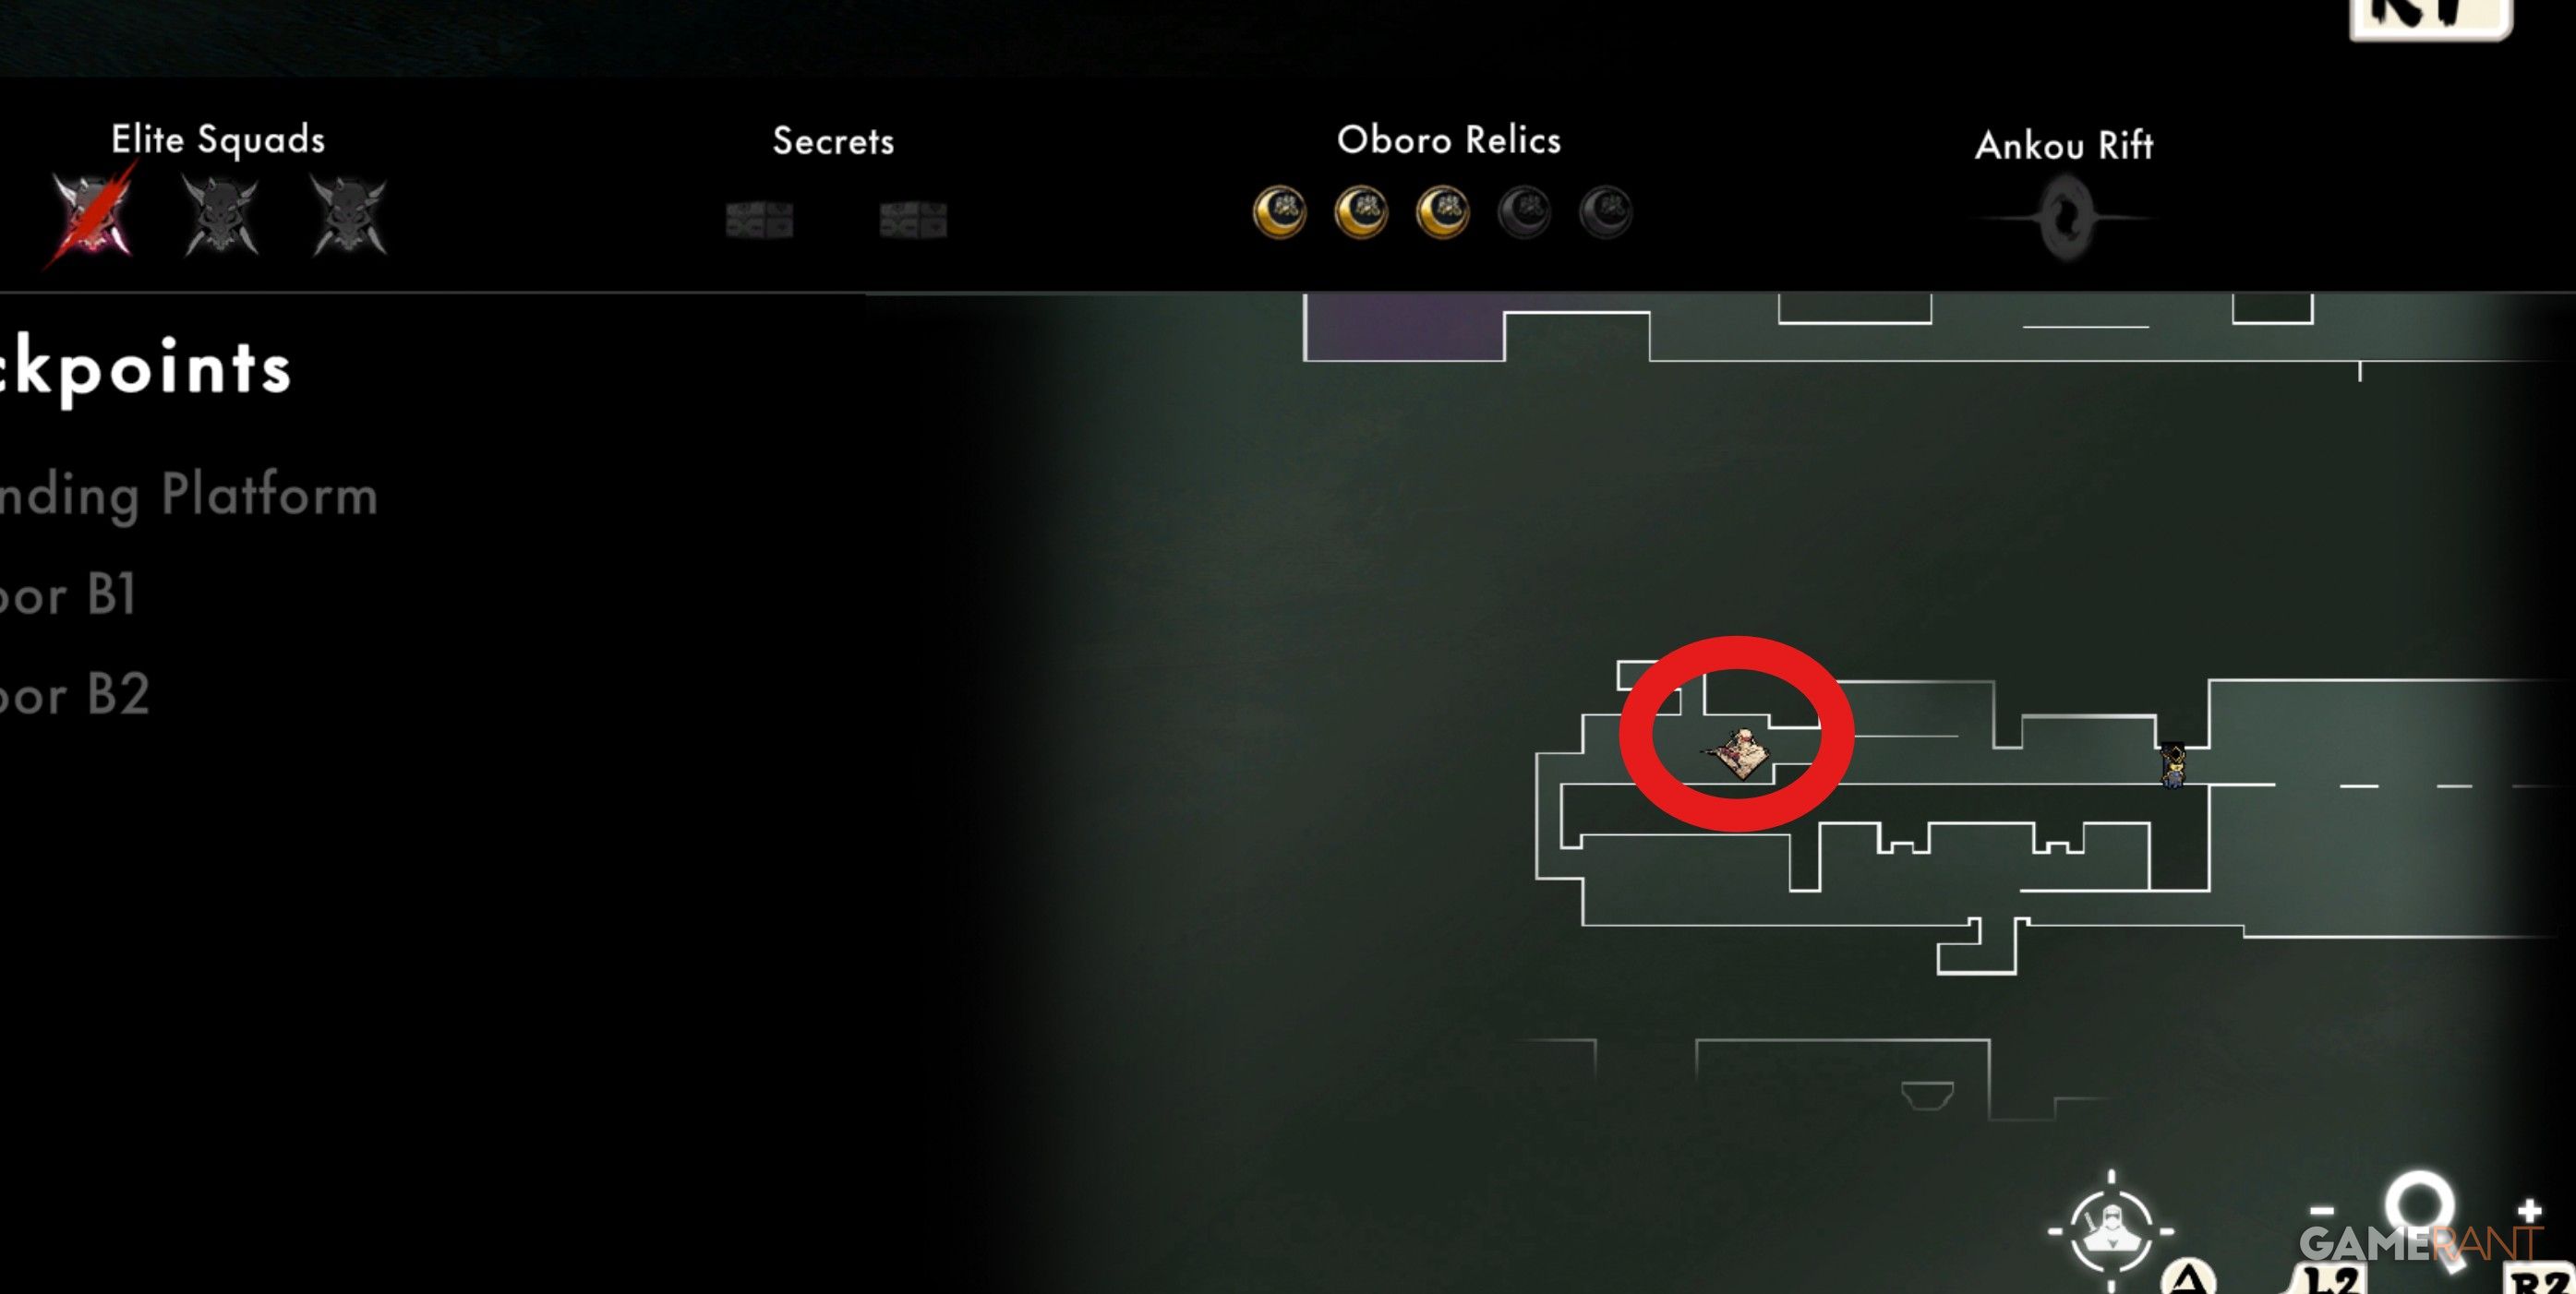
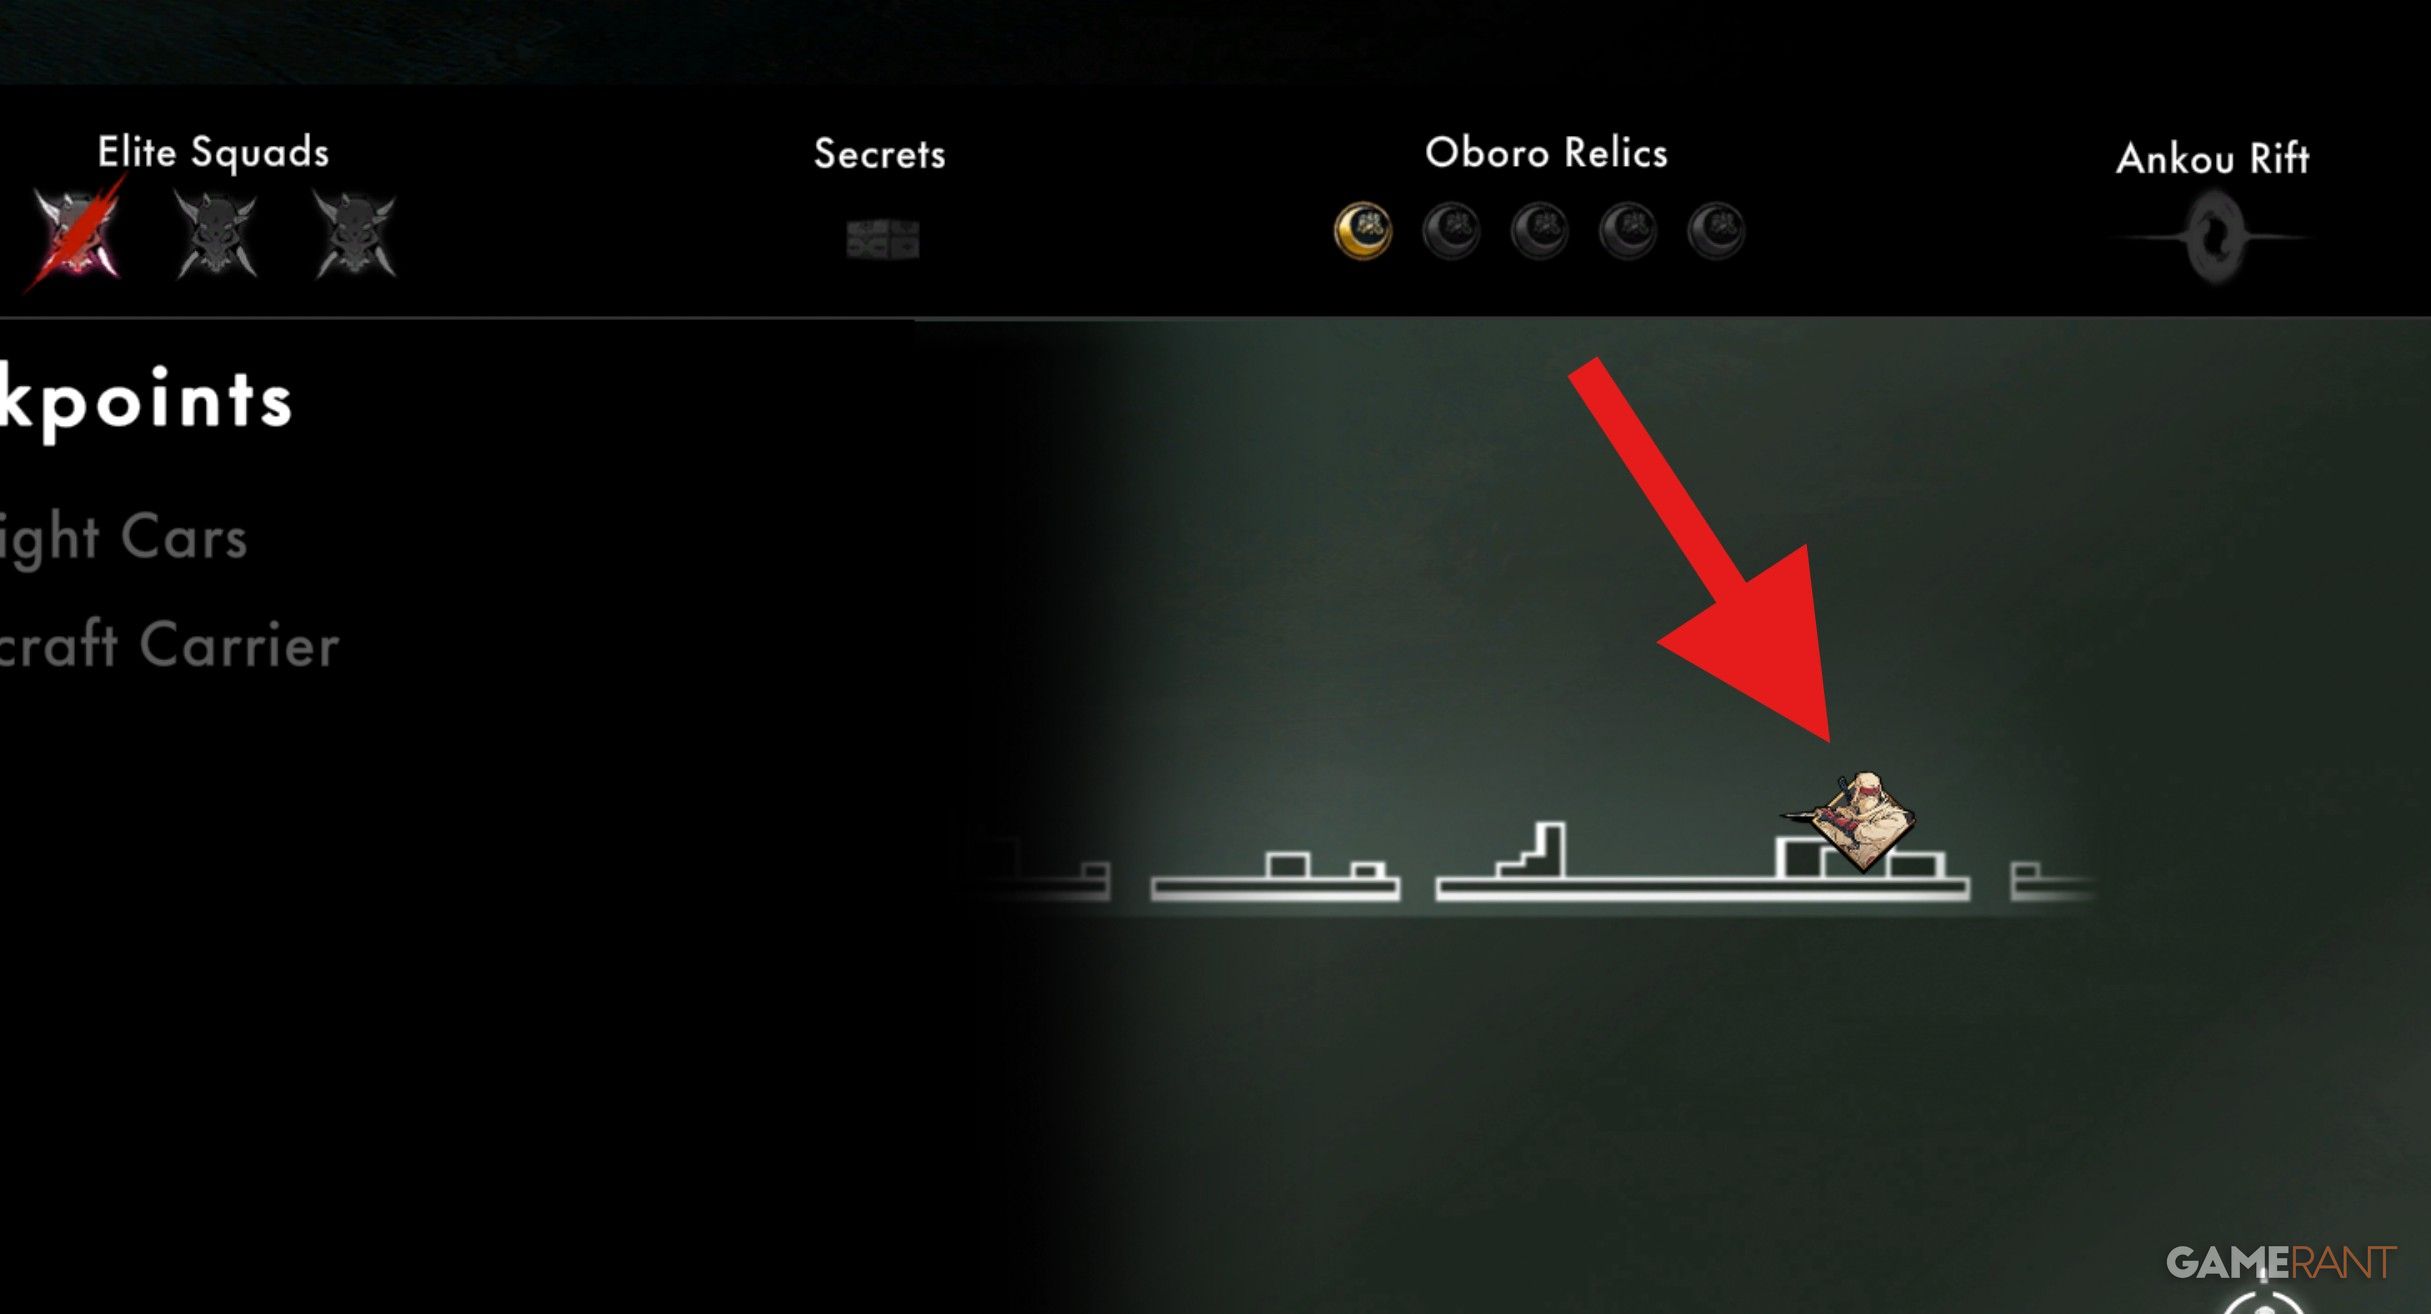
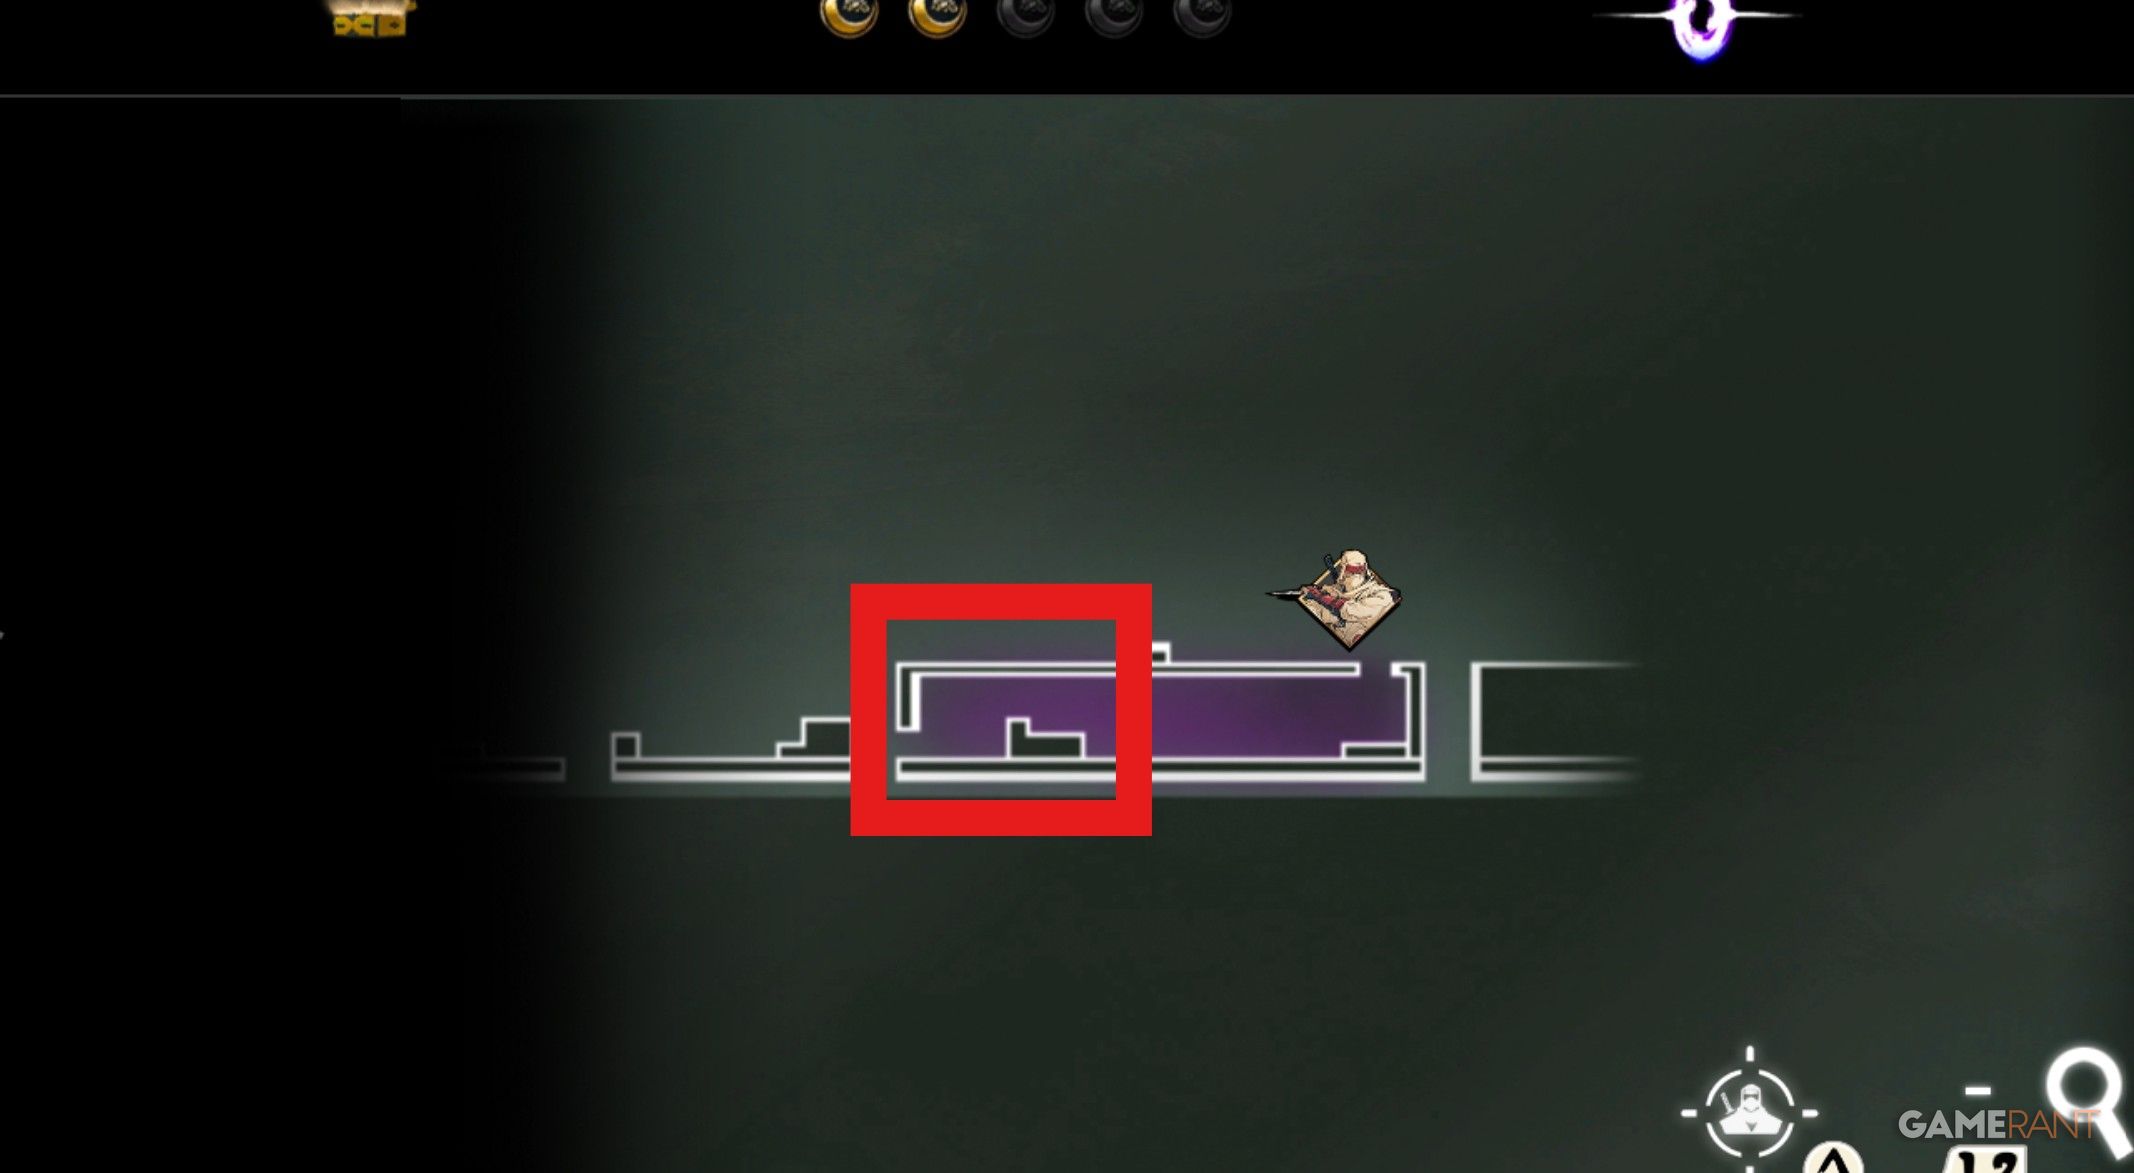
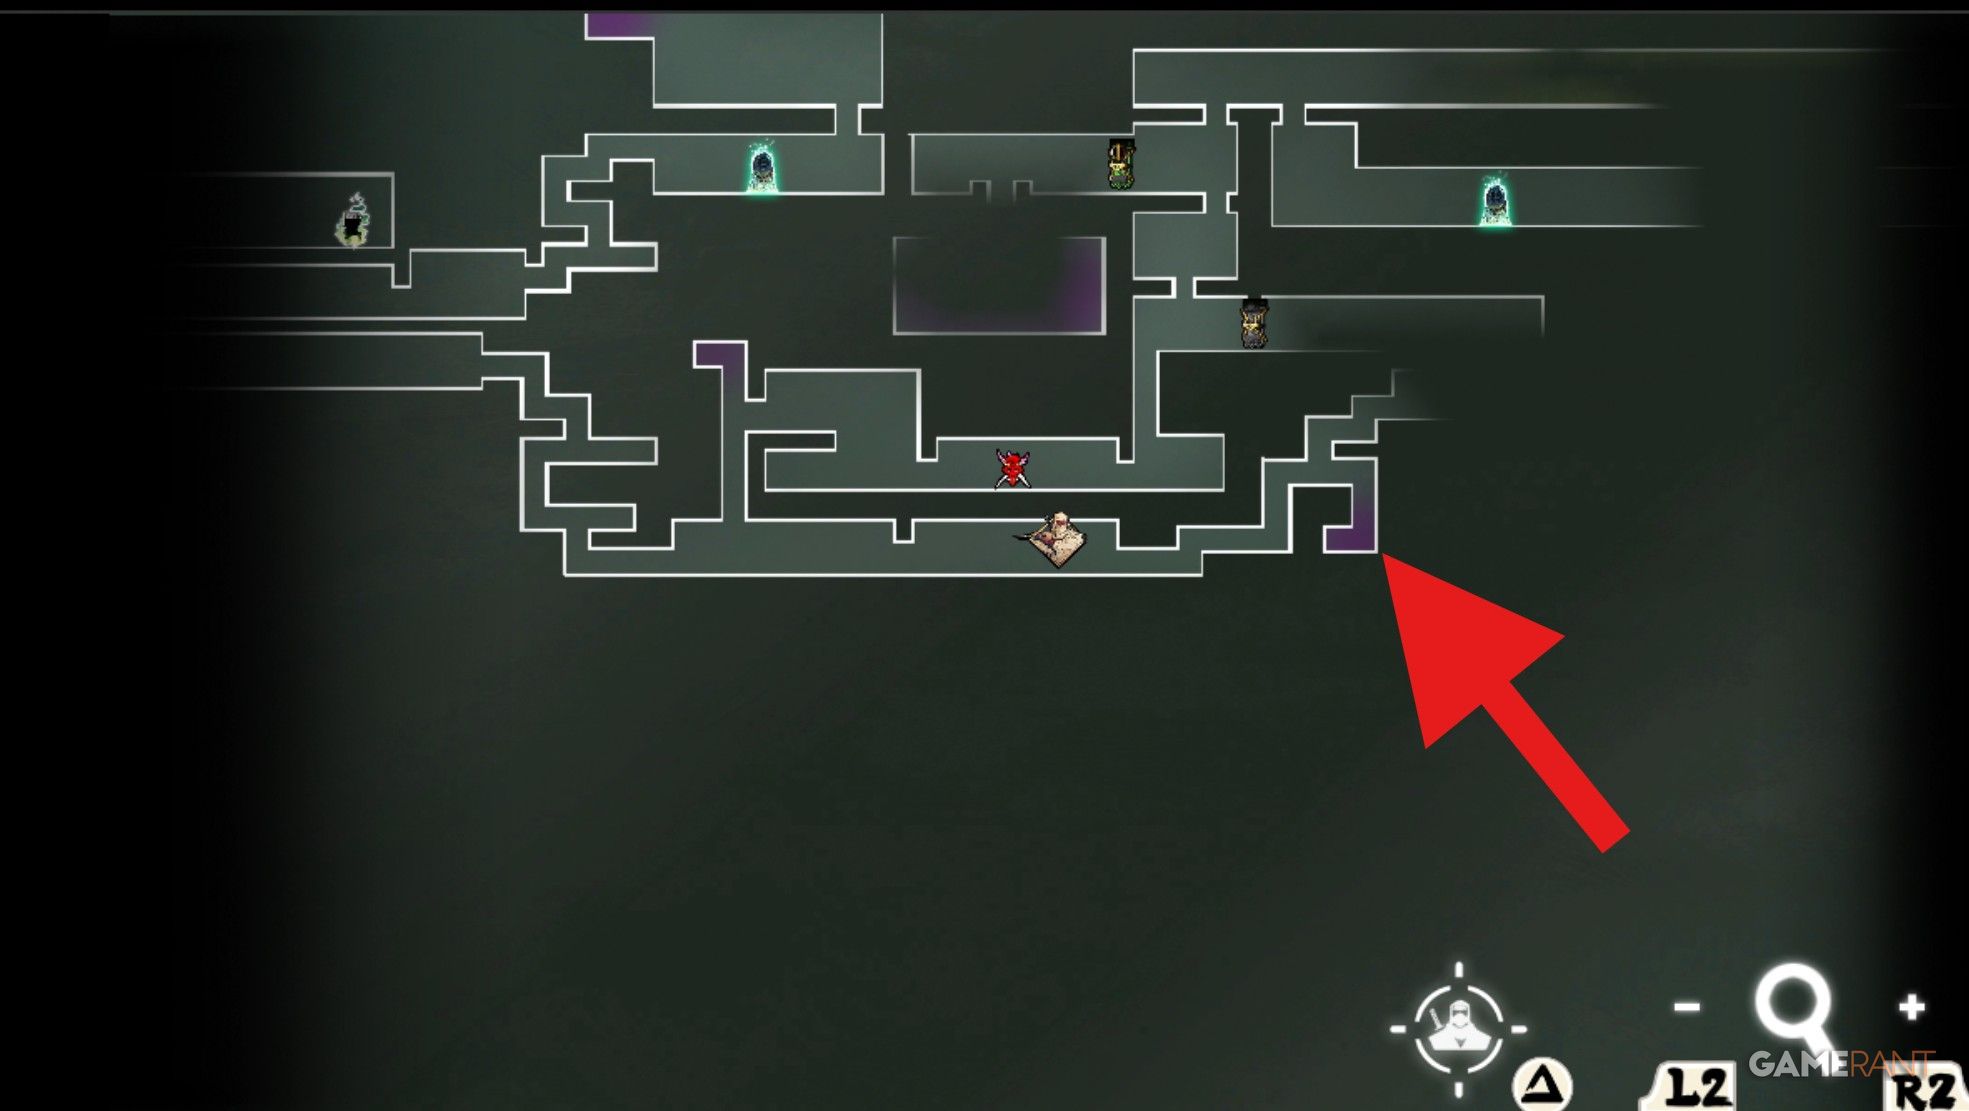
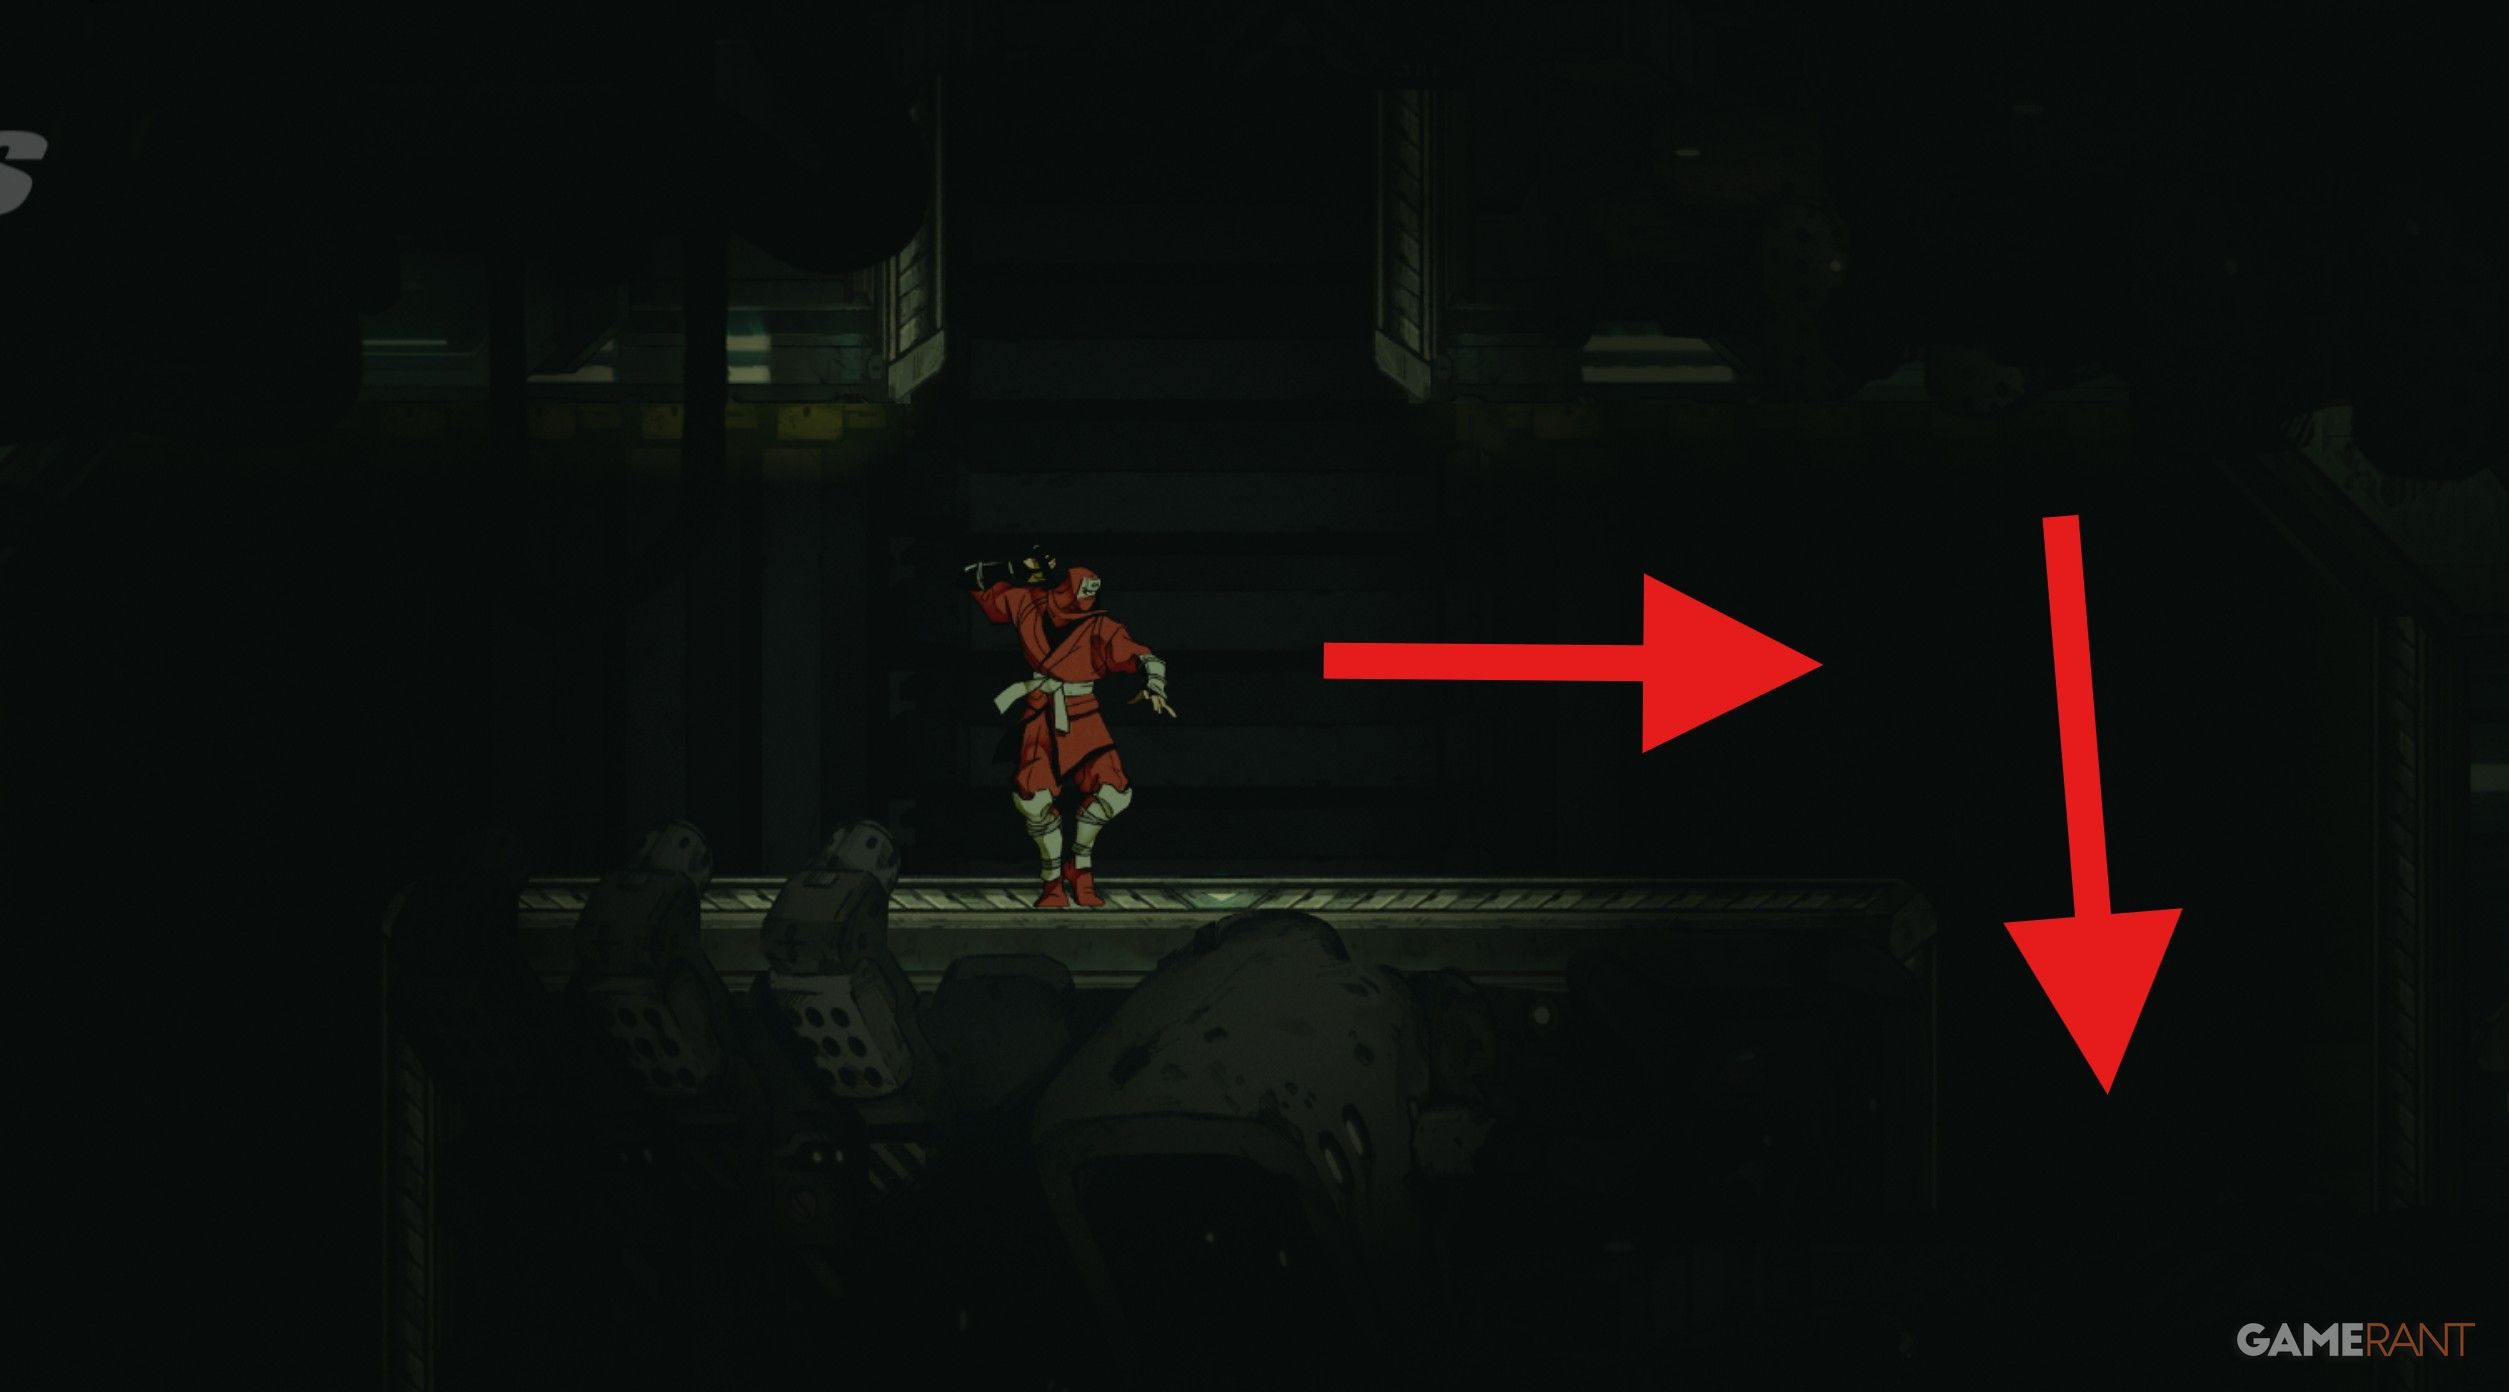
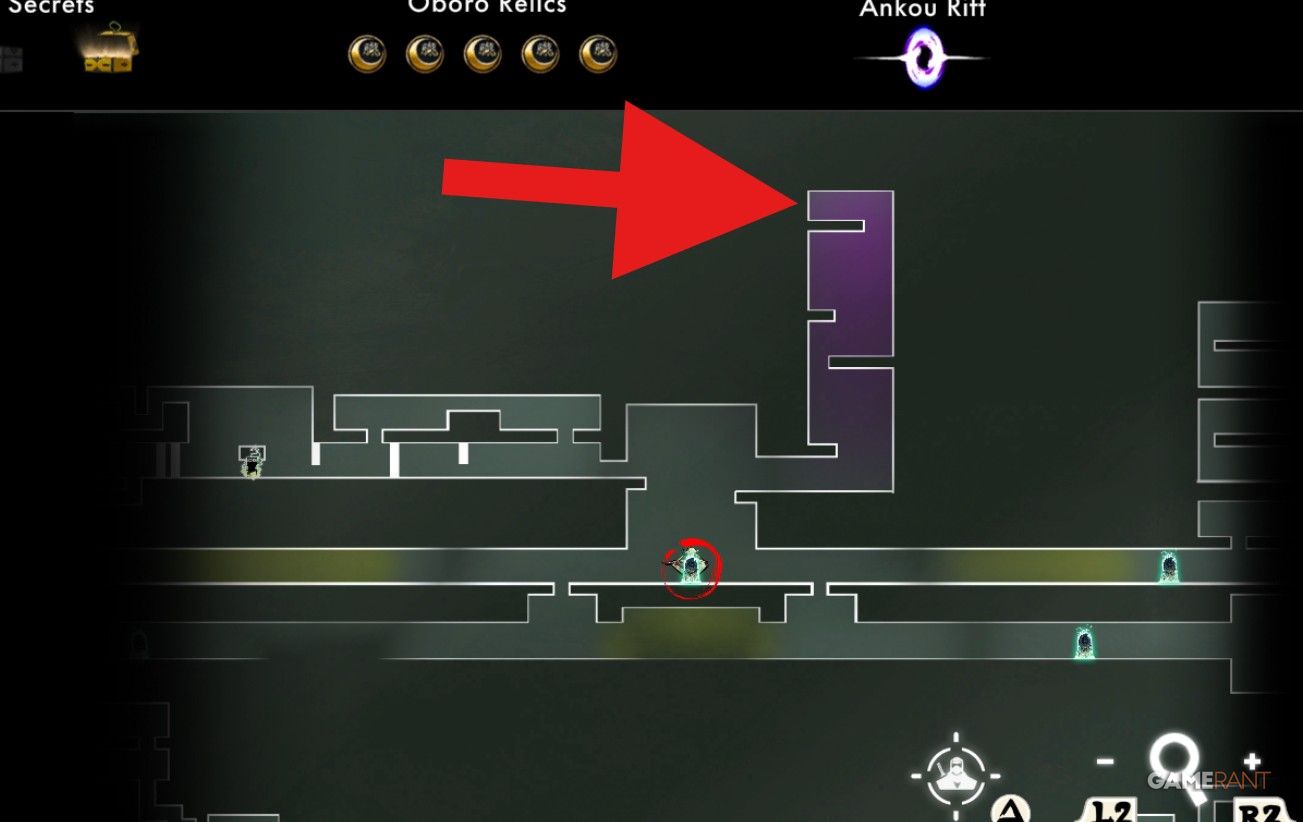
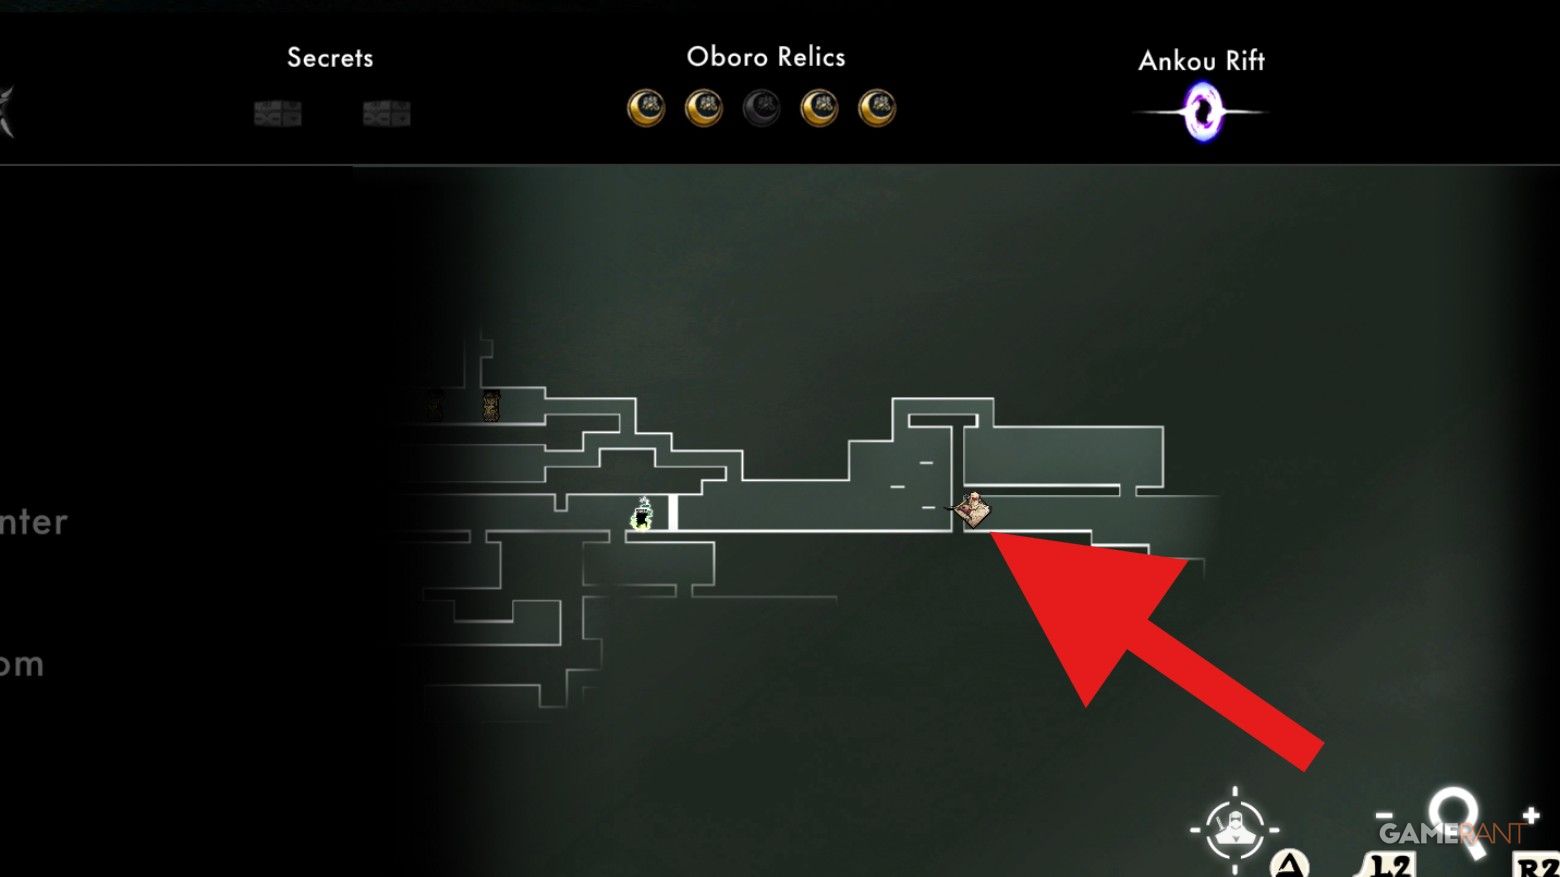
After obtaining the Sword Dive Ningi later on, transport yourself to the Attic checkpoint. Make your way to the lowest section of this area and you’ll discover a green Yokai barrier. This will guide you towards the Ankou Rift. To find a chest containing the Oboro Relic, move to the left side of the rift.
Oboro Relic #4
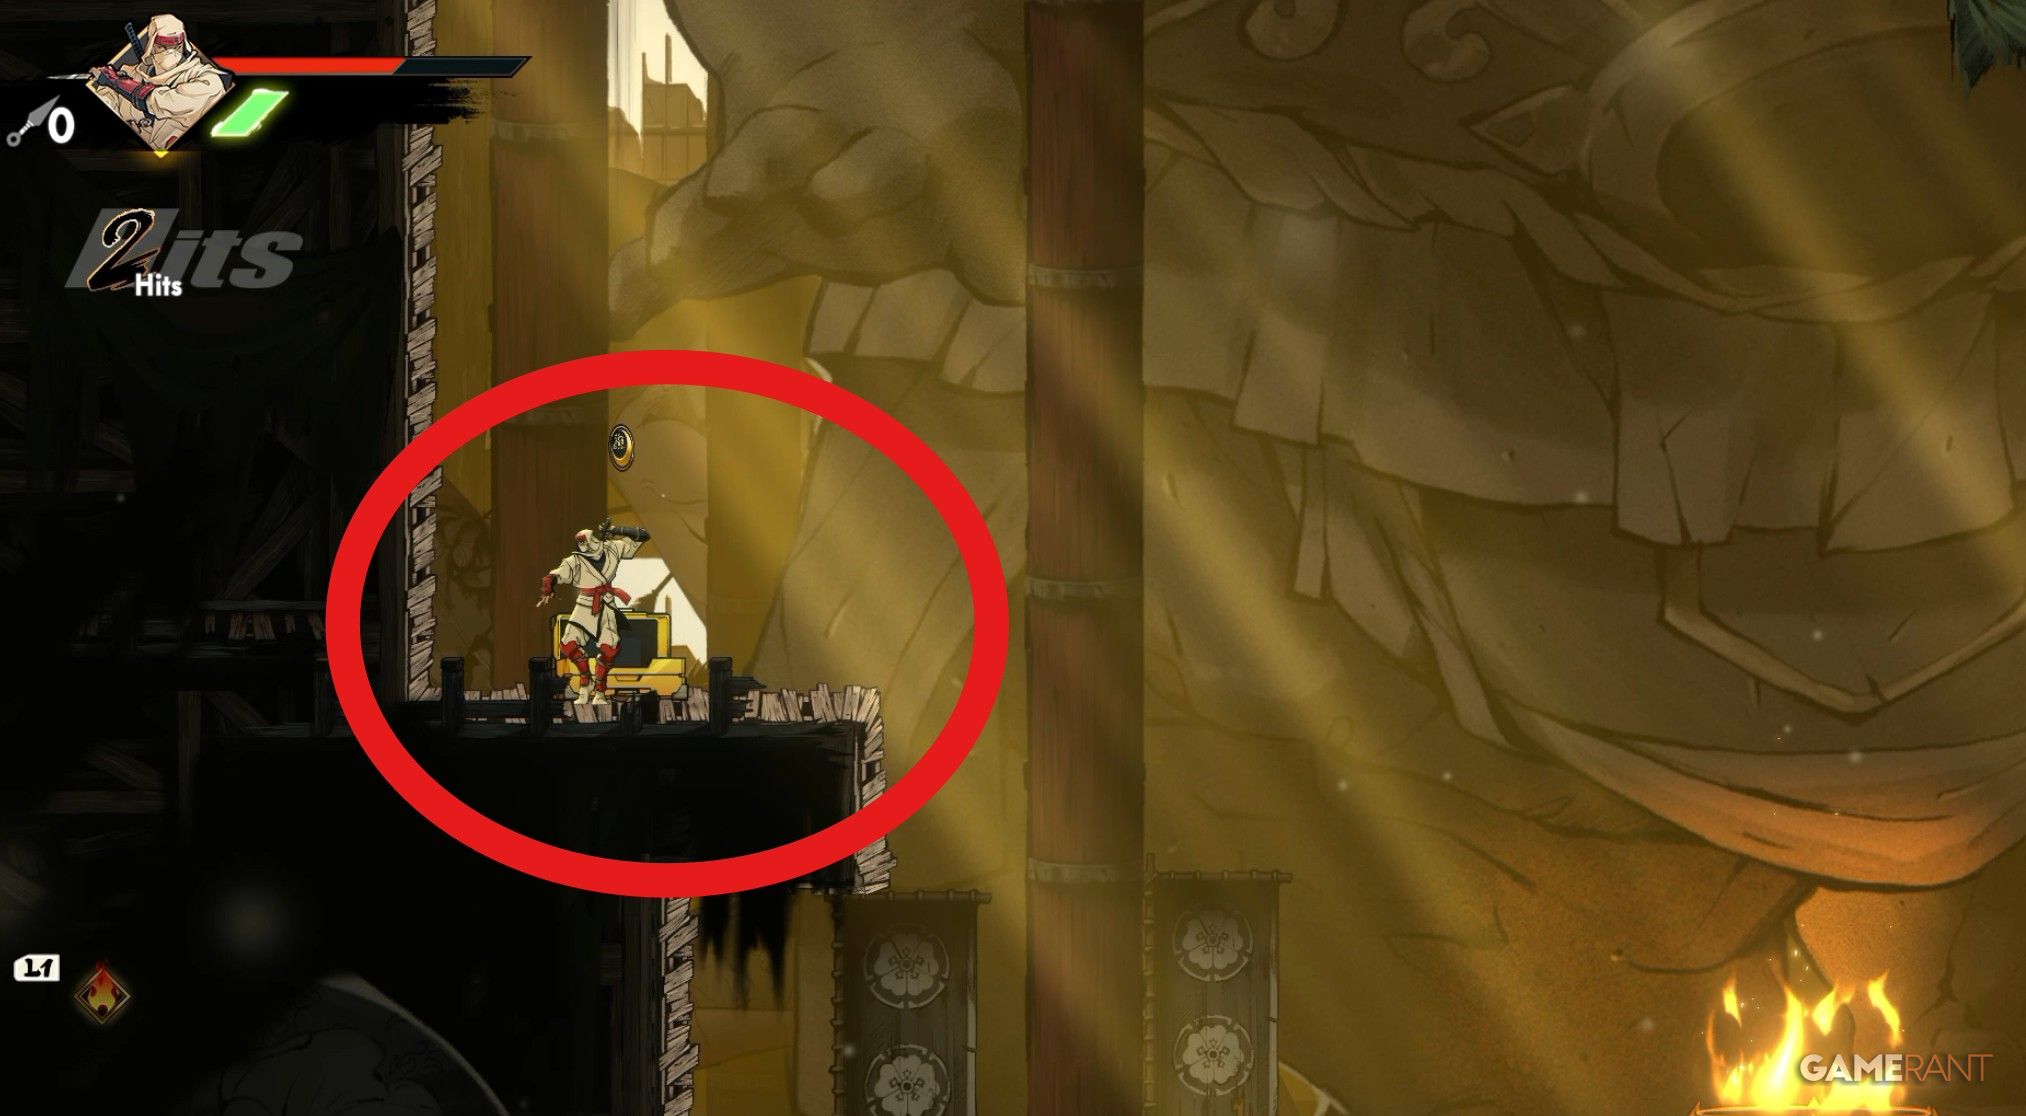
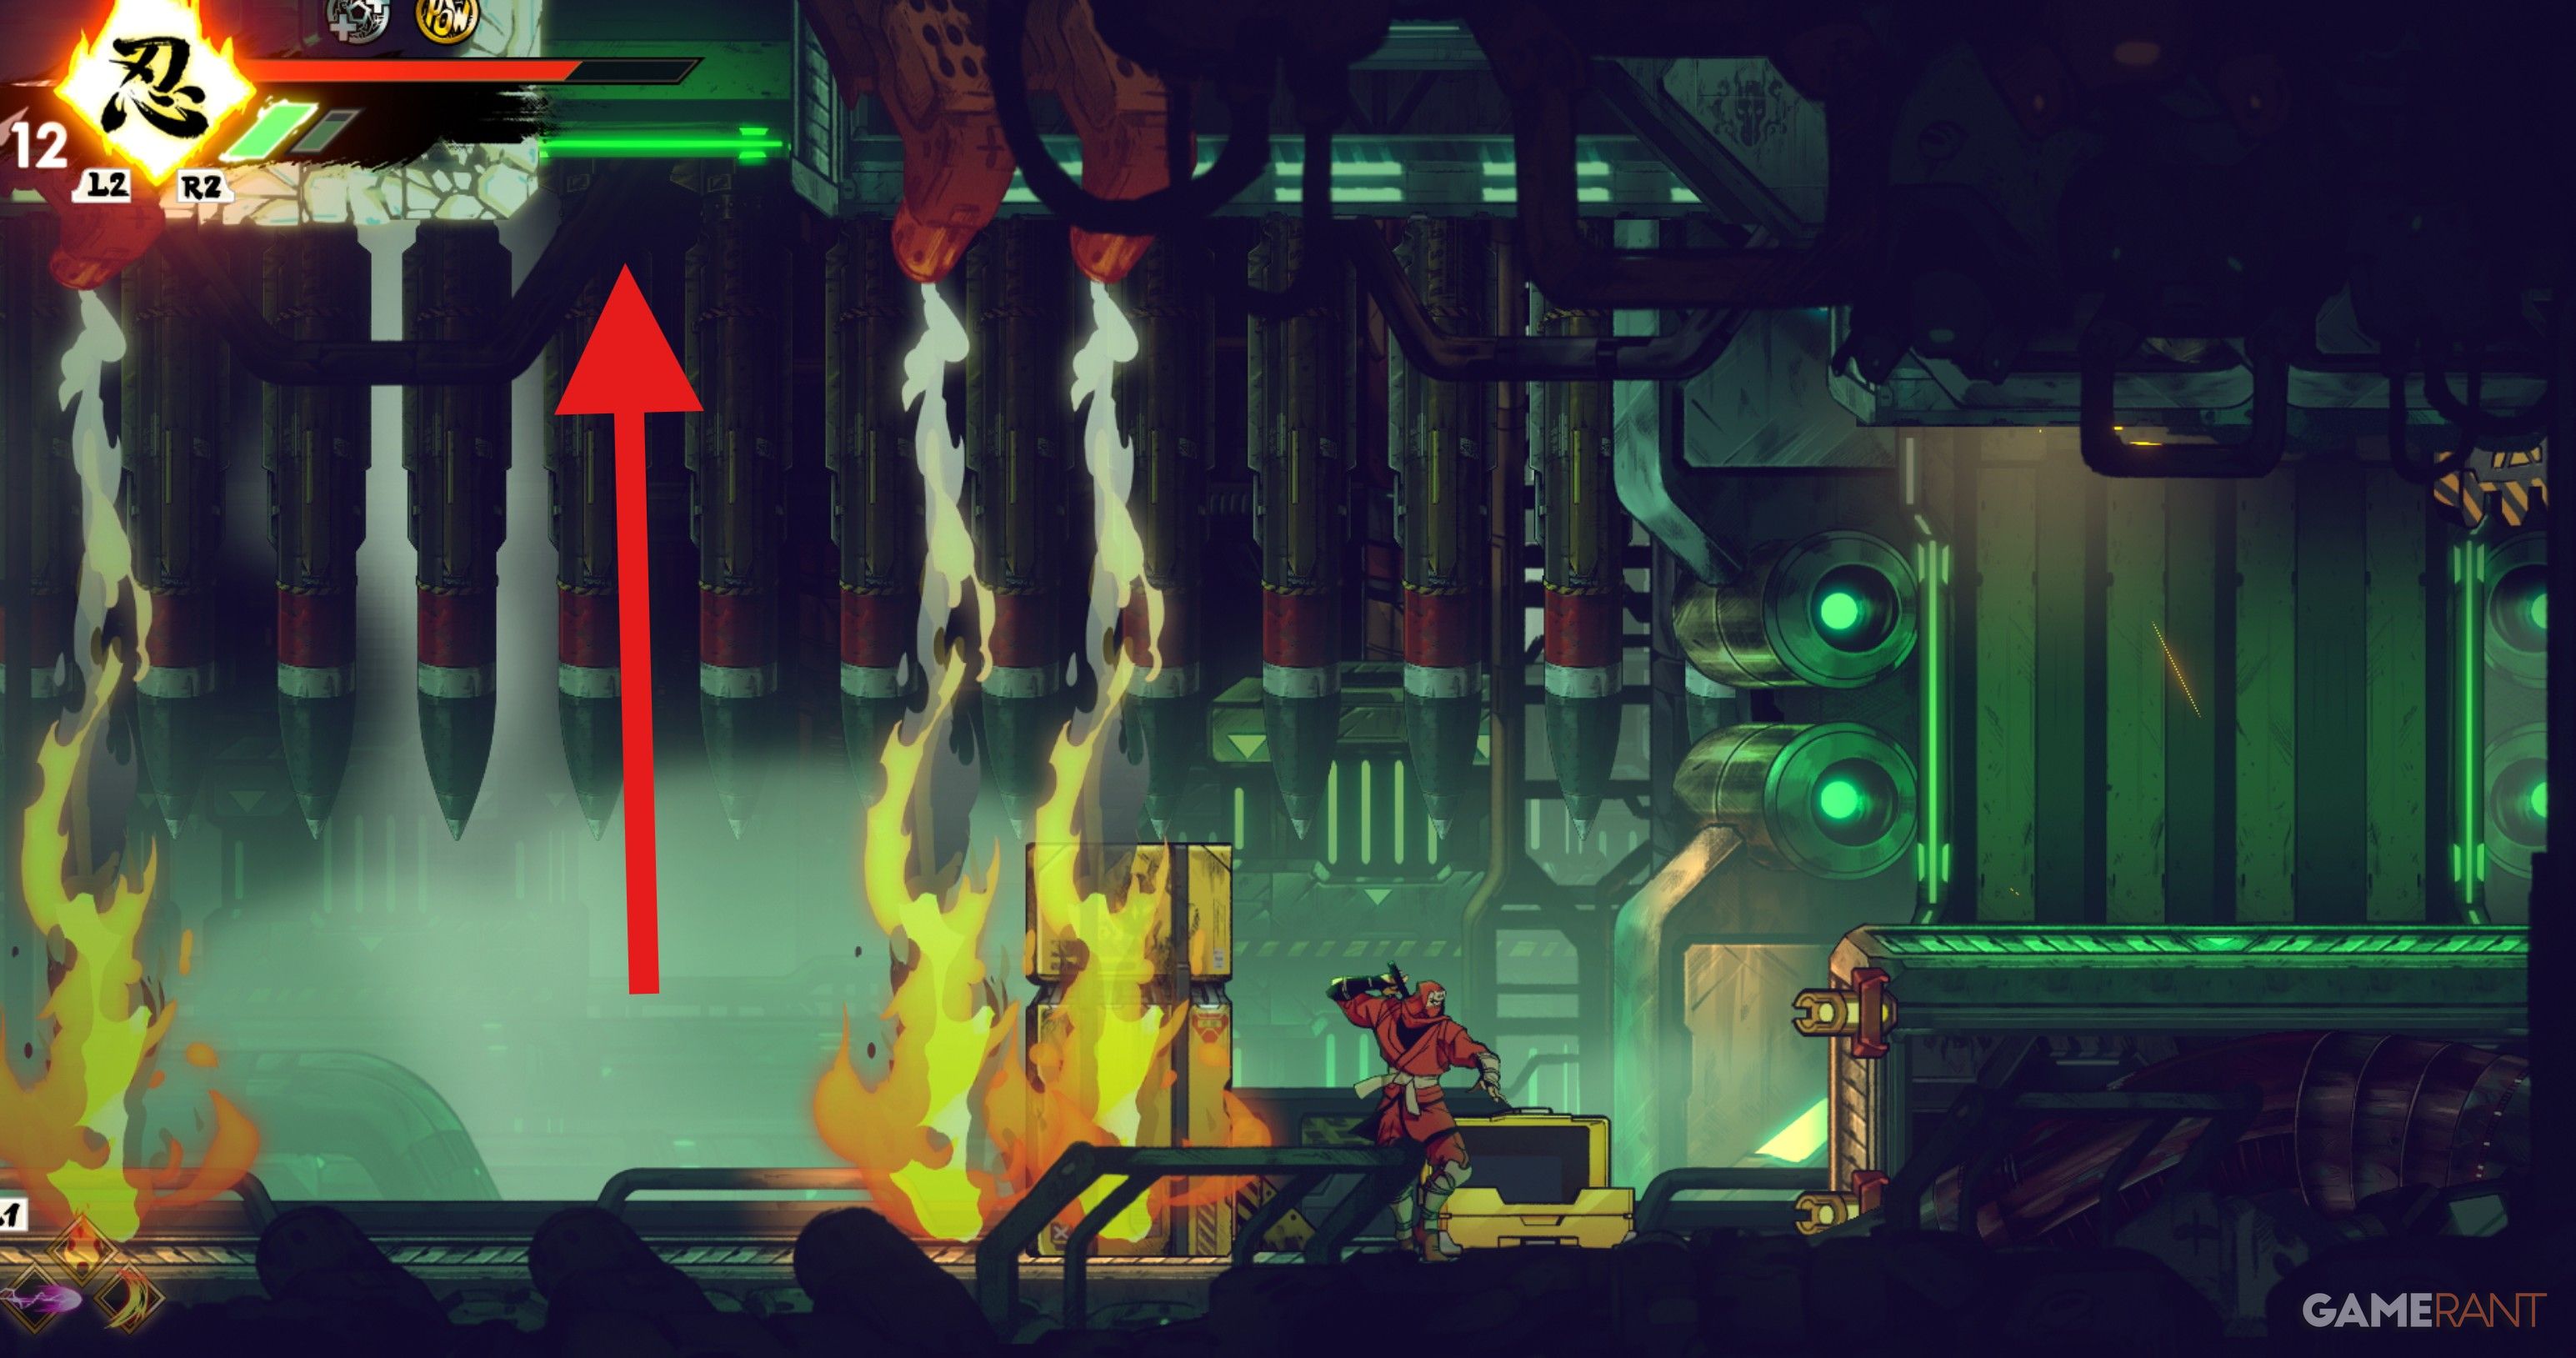
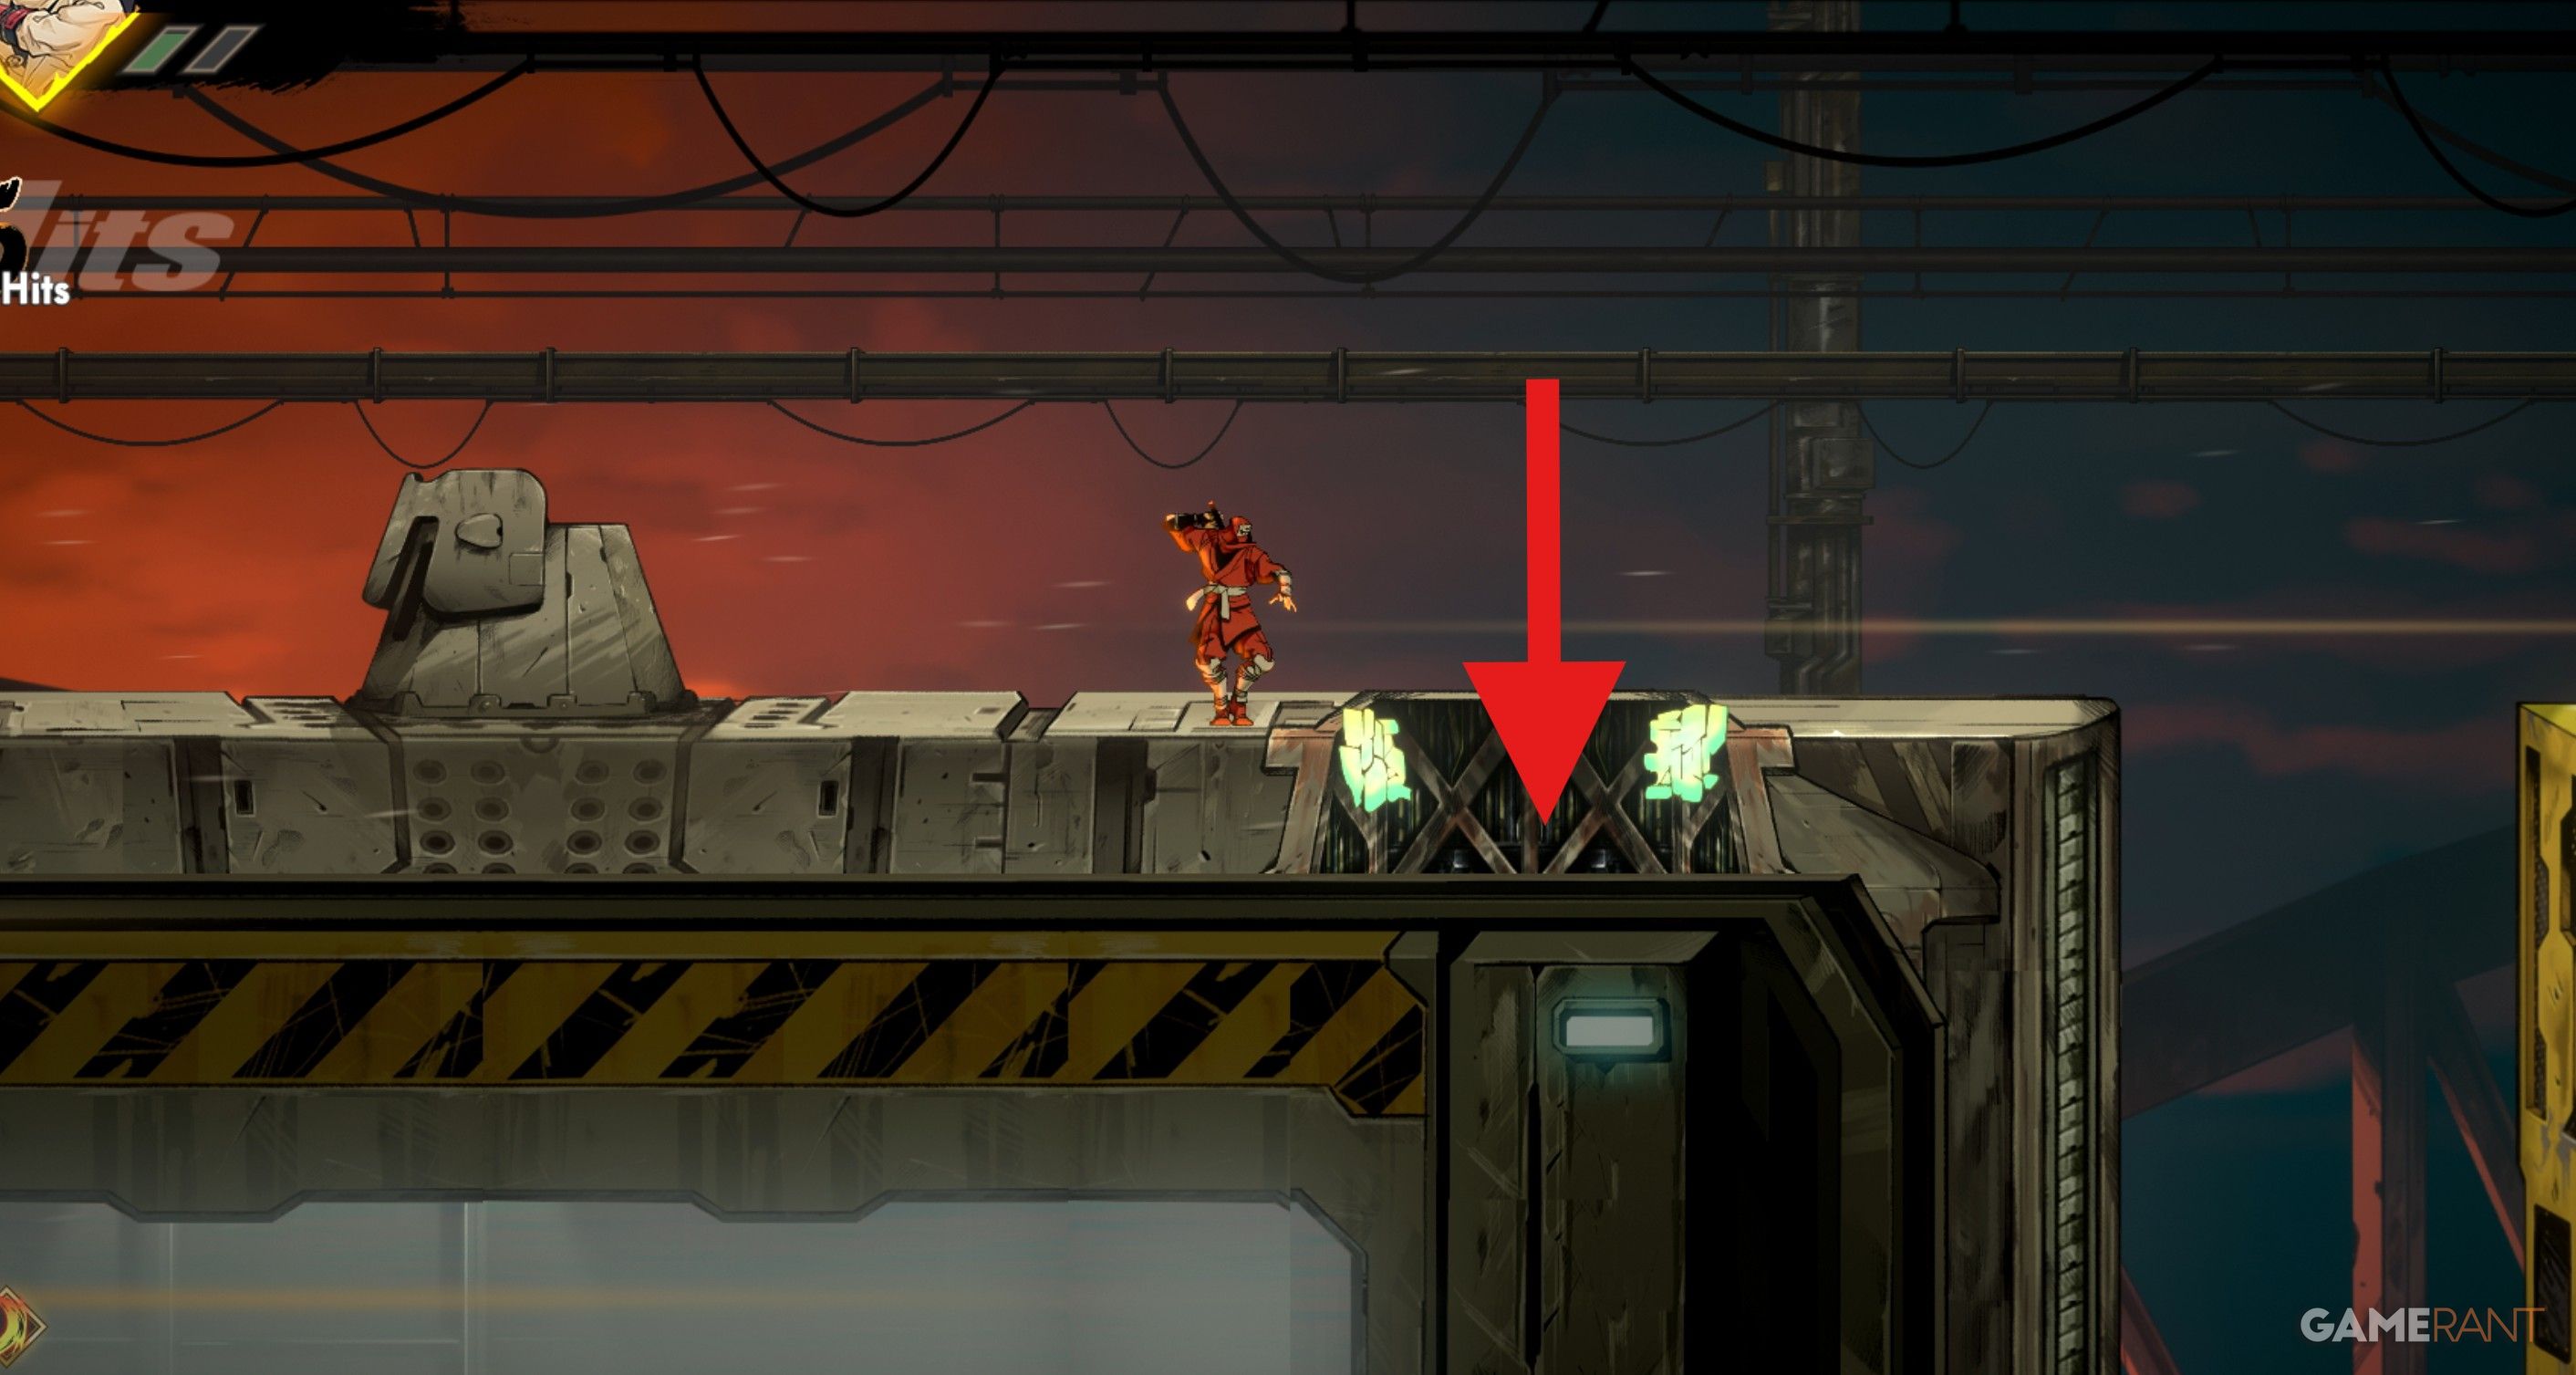
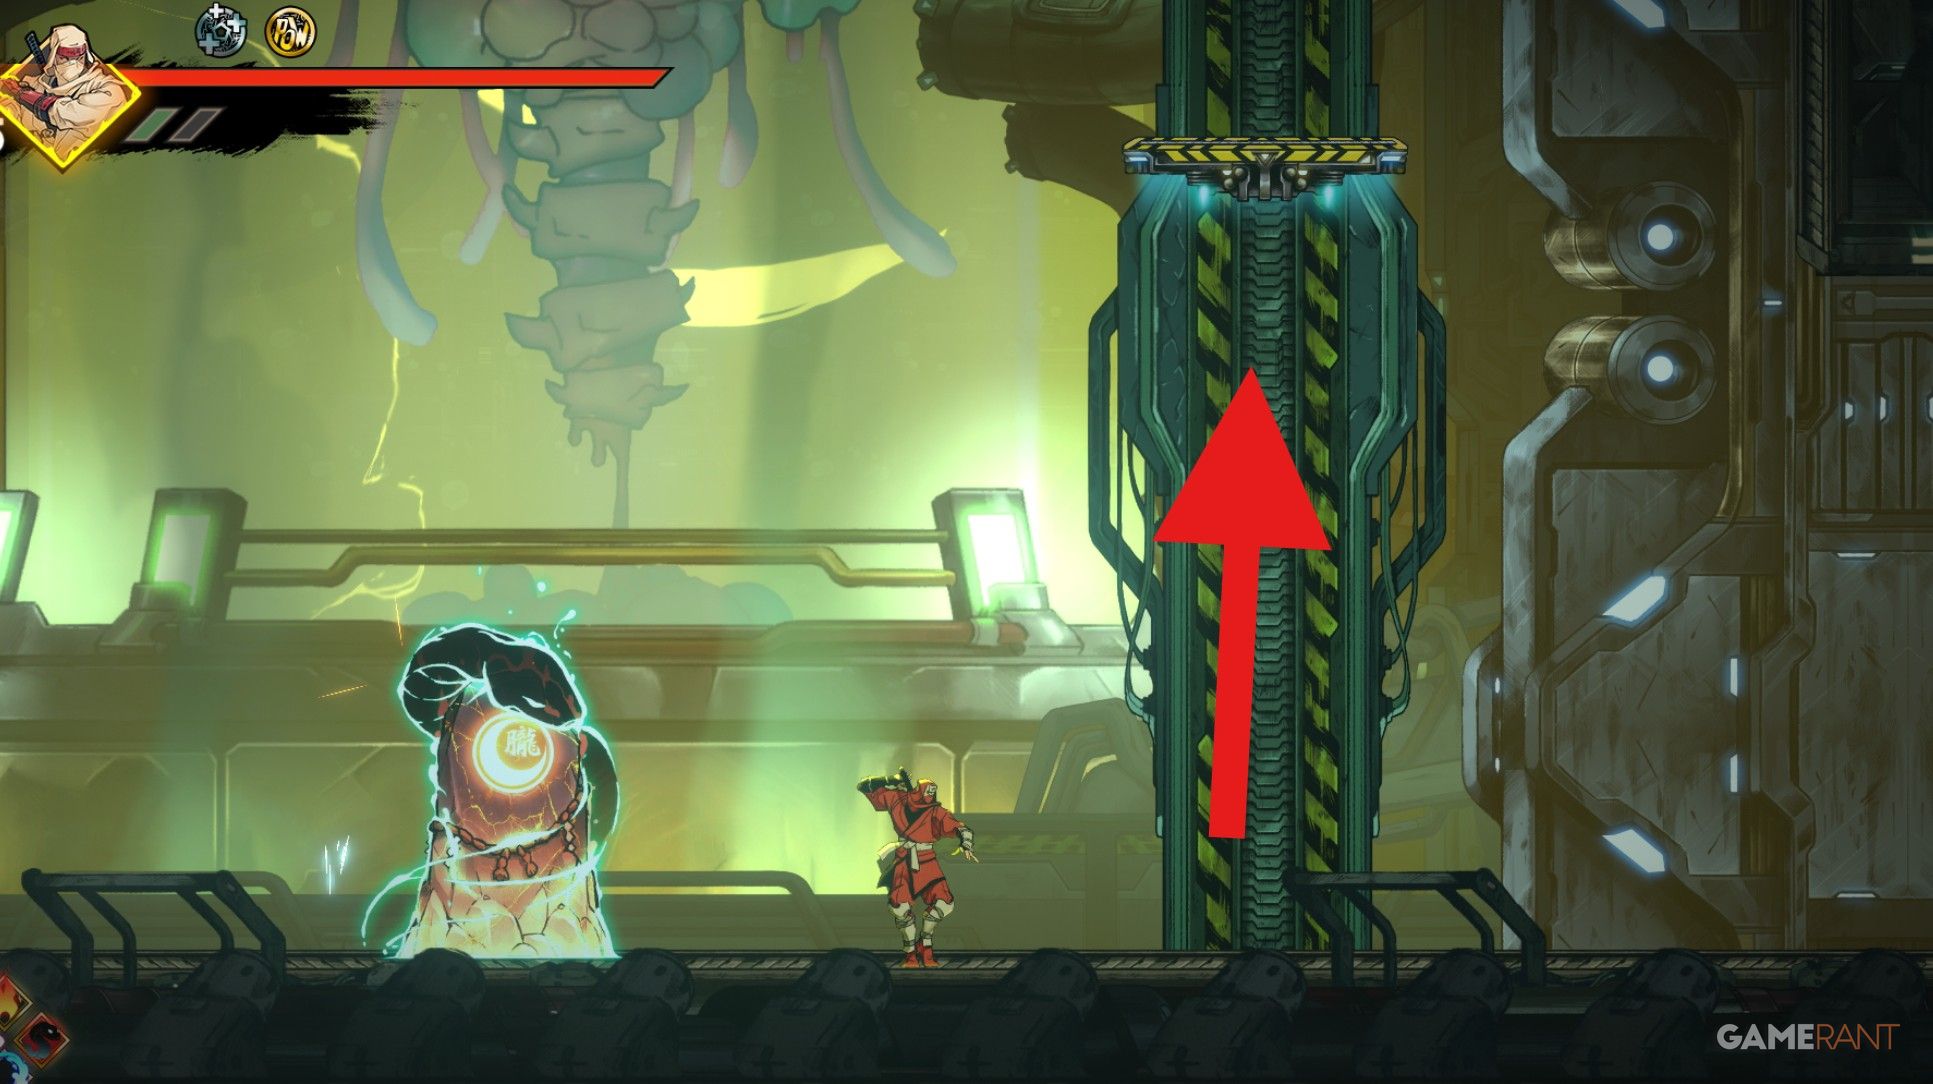
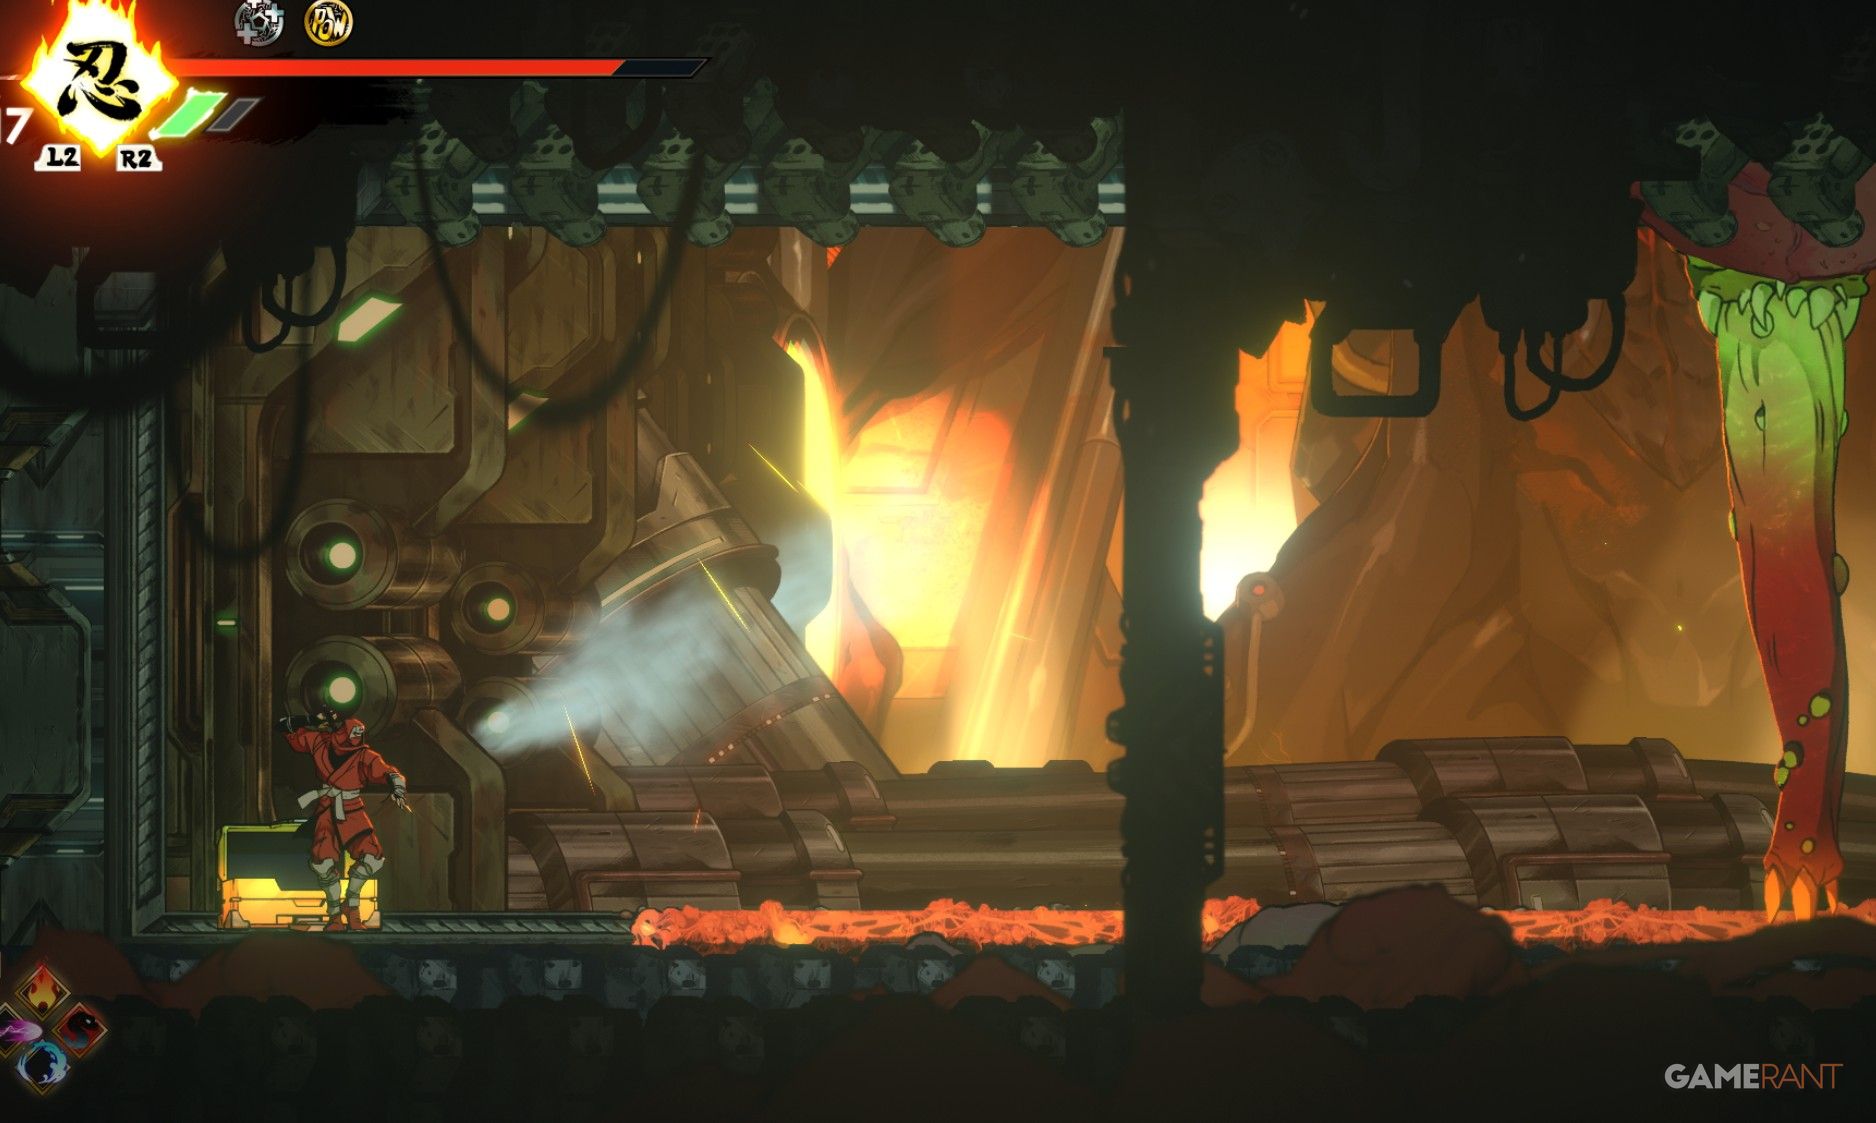
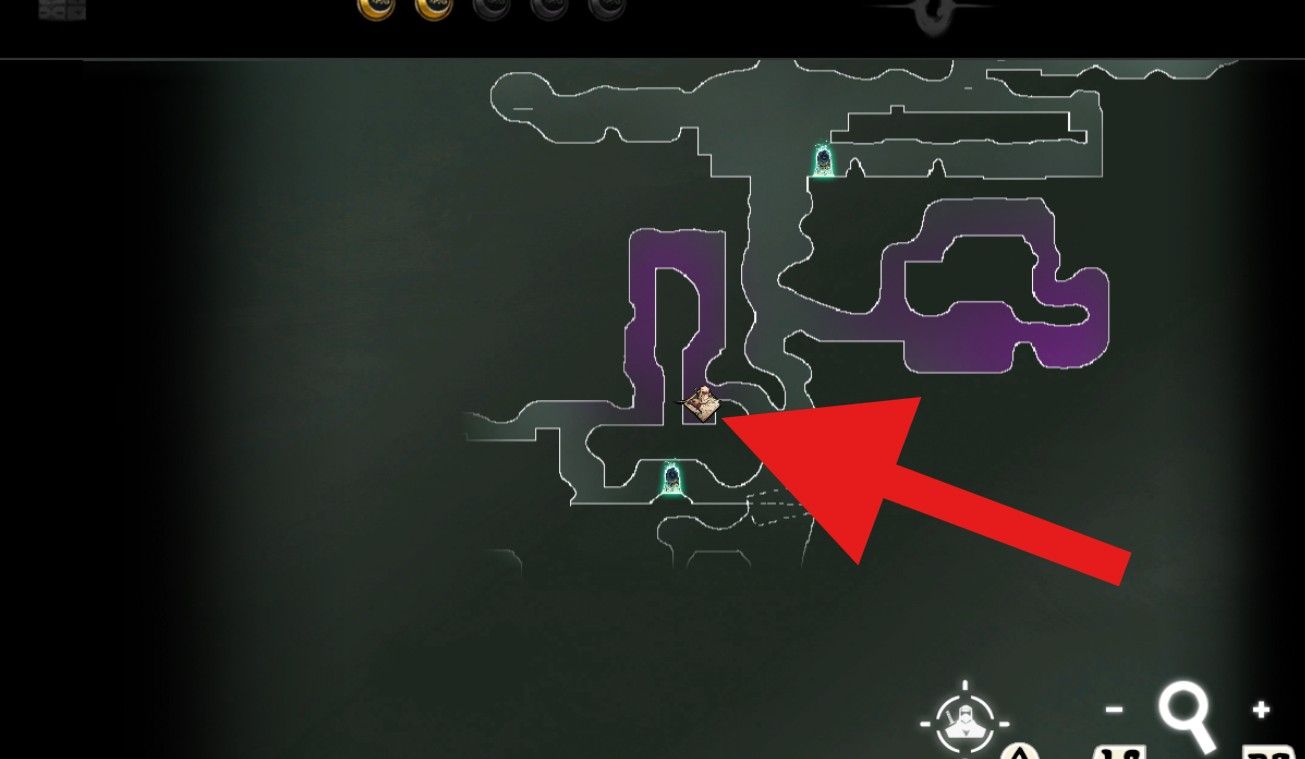
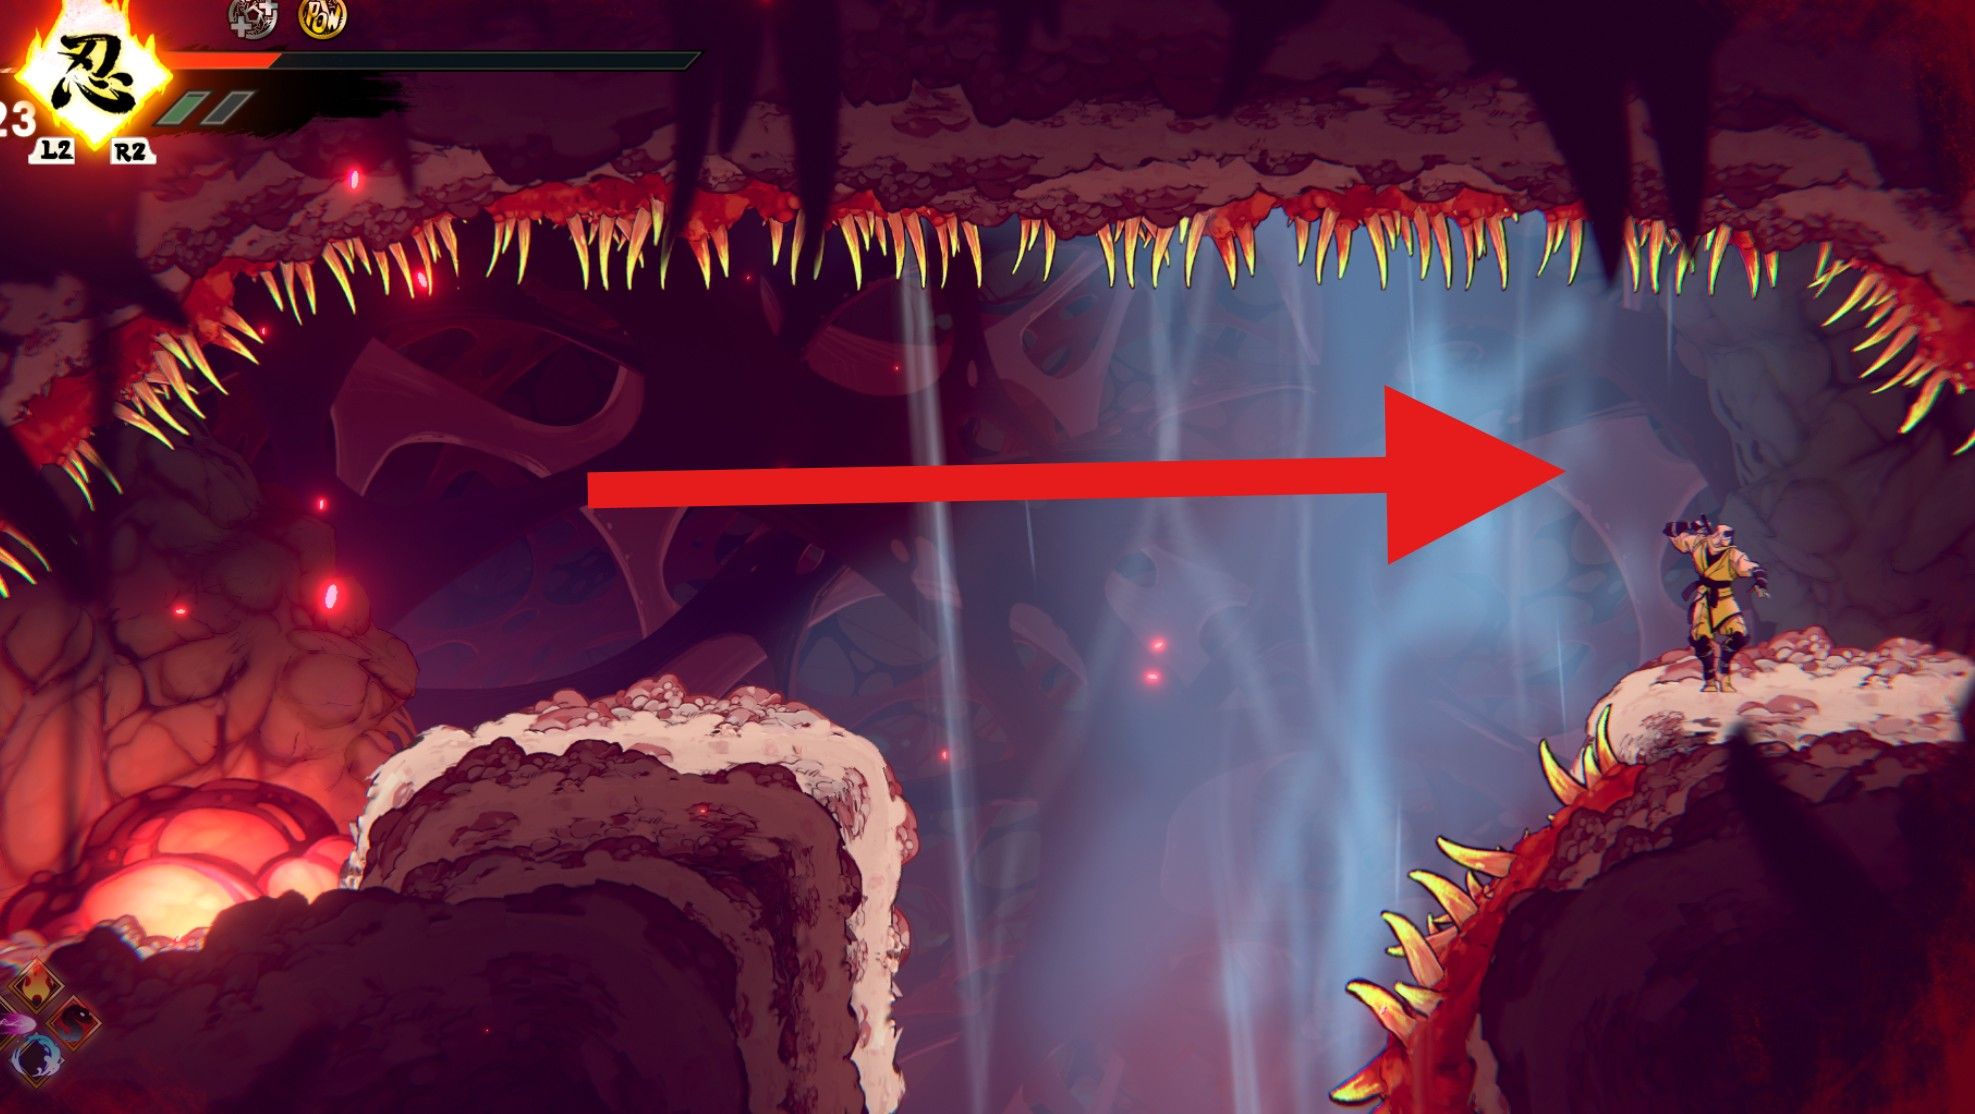
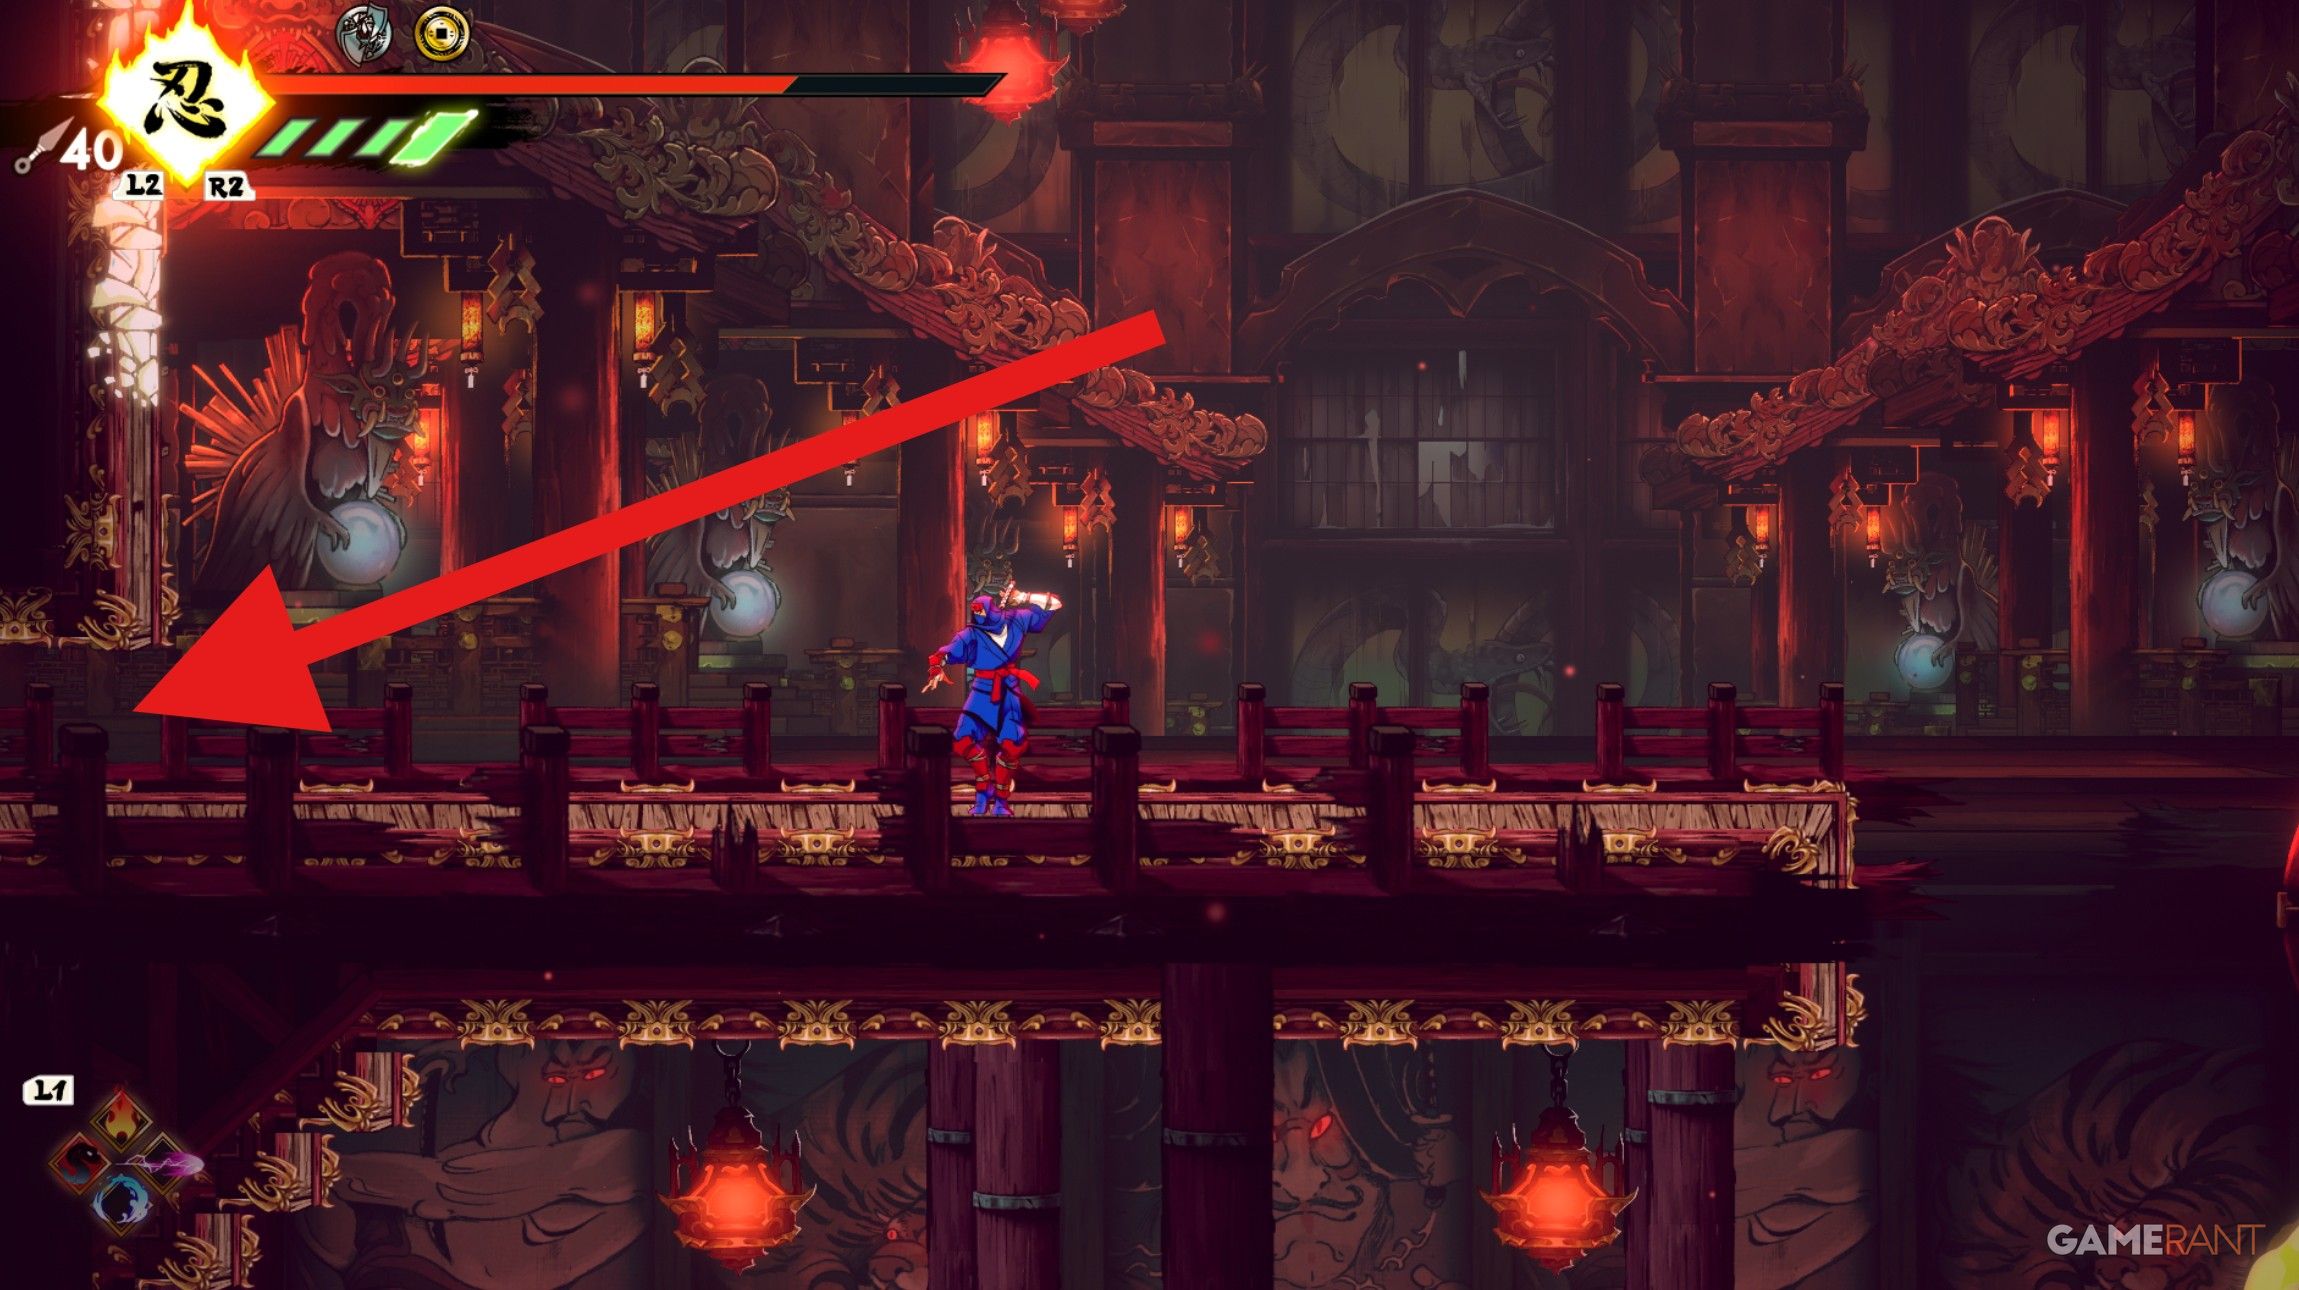
Starting at the “Collapsed Bridge” checkpoint, turn right and move forward to an area enclosed by a locked door. Crawl under this locked door to engage in combat with some foes, followed by activating a switch to unlock it. Ascend until you reach a room featuring a large, fiery cauldron at its center. By going left, you’ll discover a chest sitting on a platform high above. With your agility, double jump and cling to the wall sideways to get to the chest located up there.
Oboro Relic #5
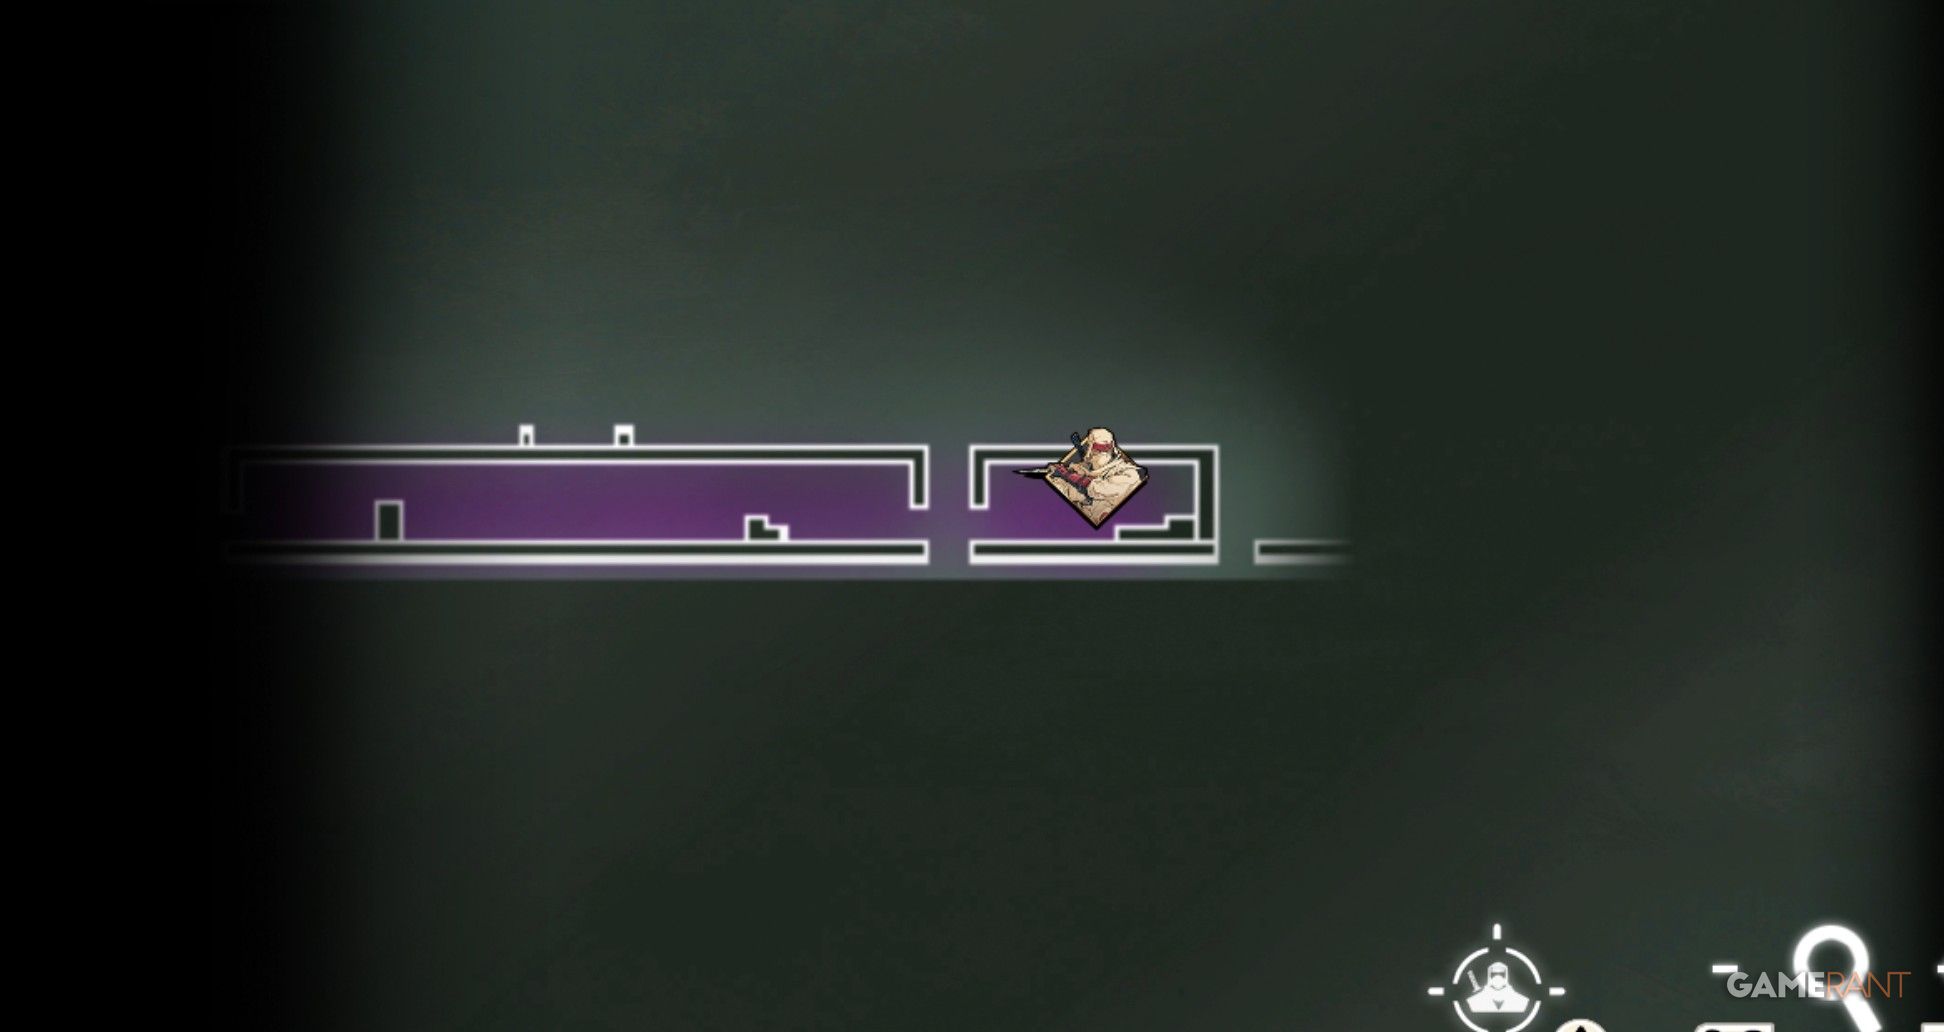
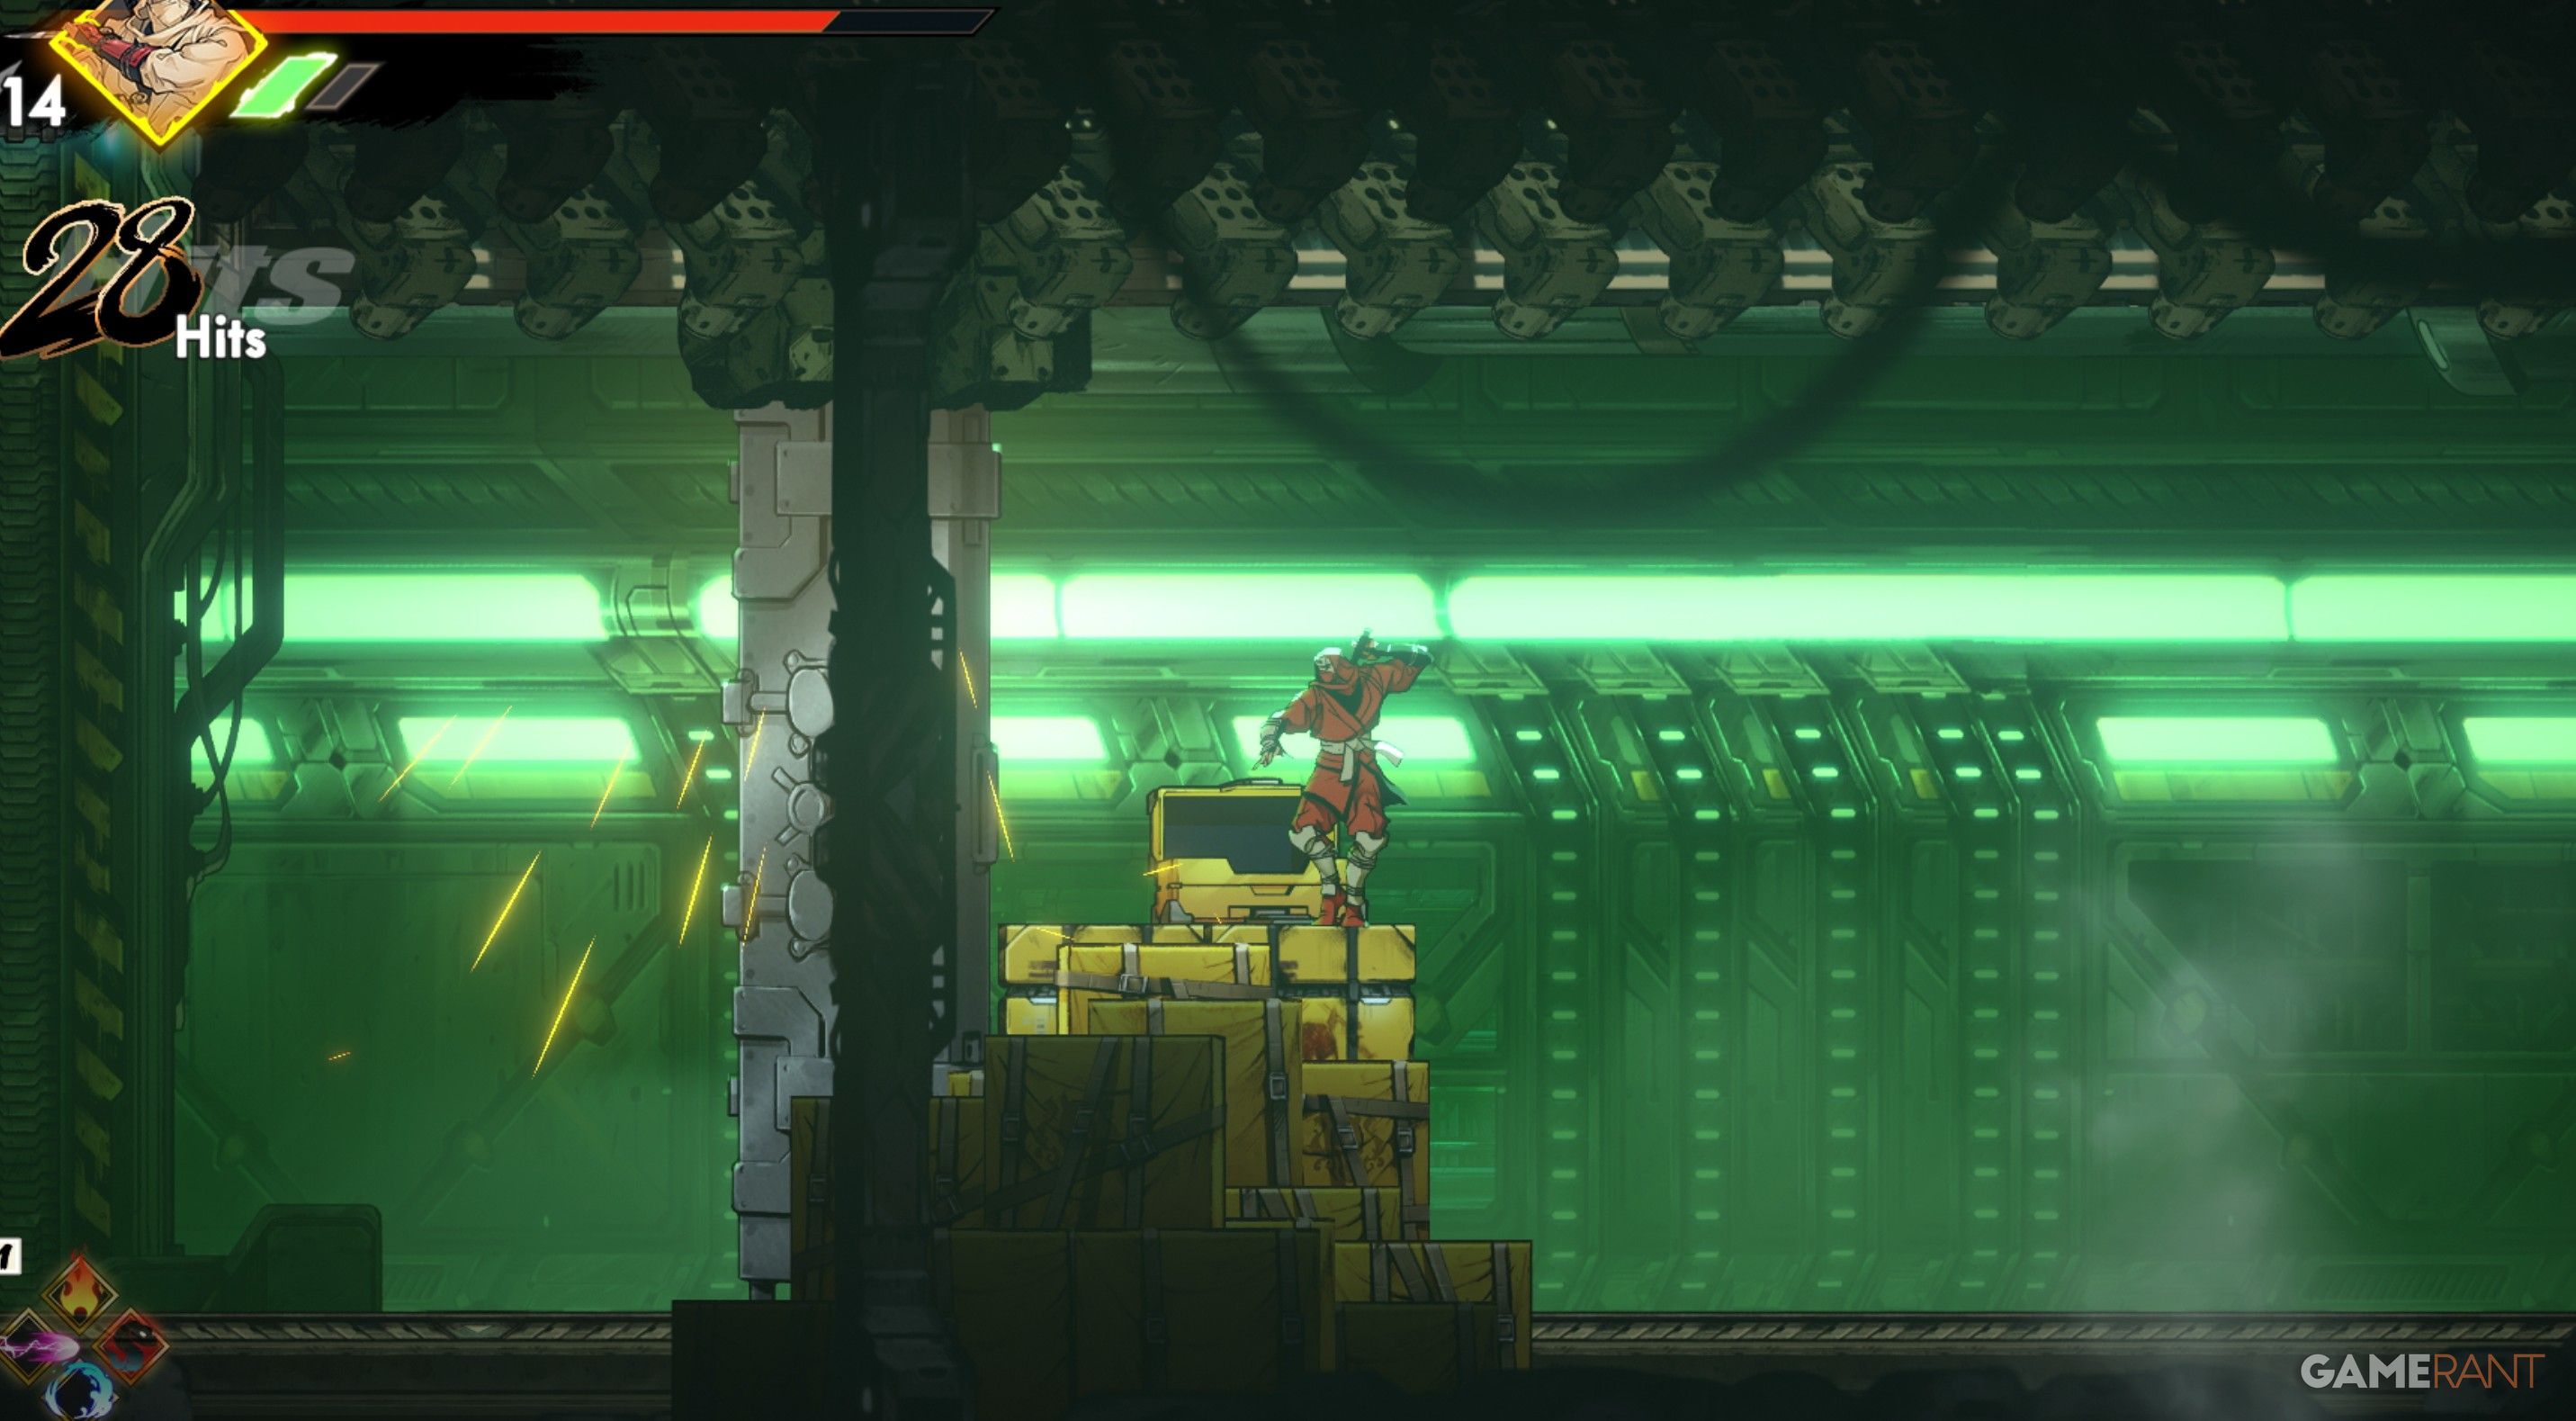
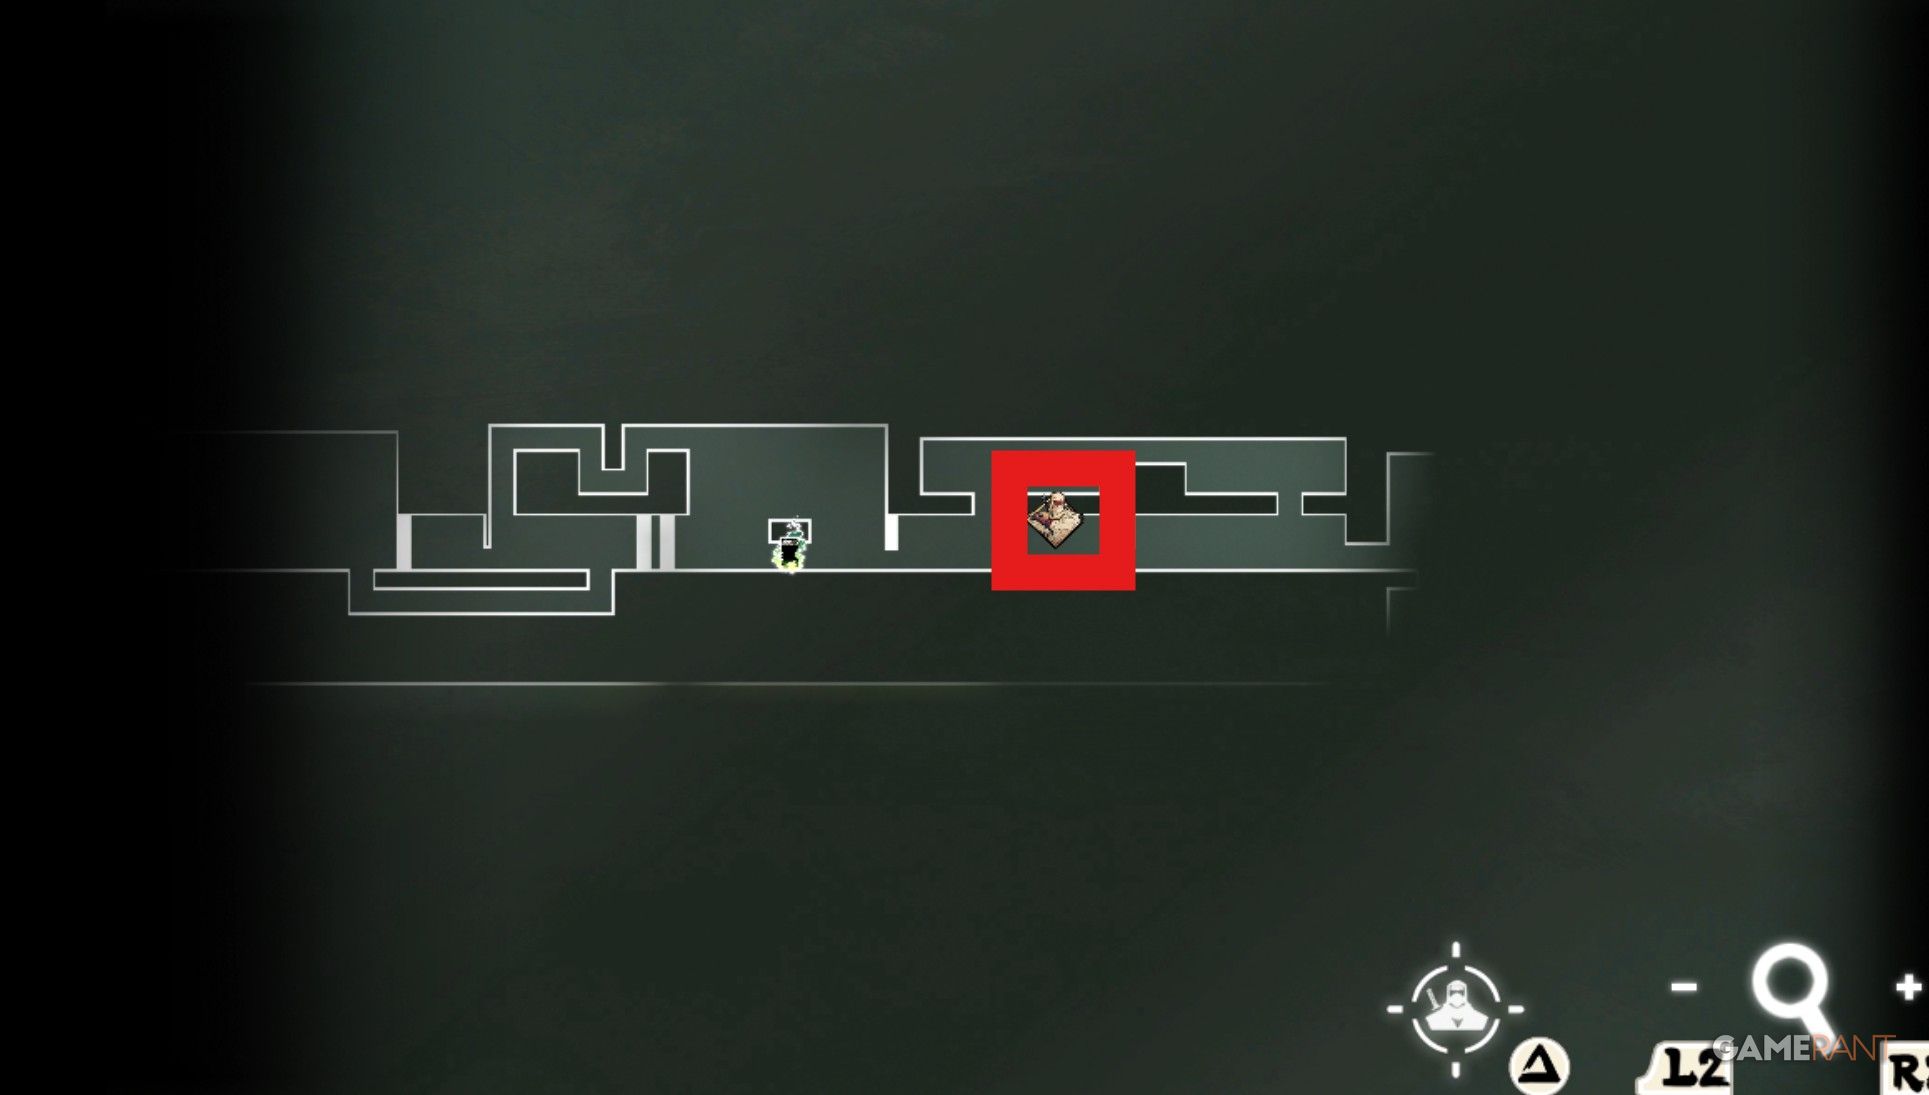
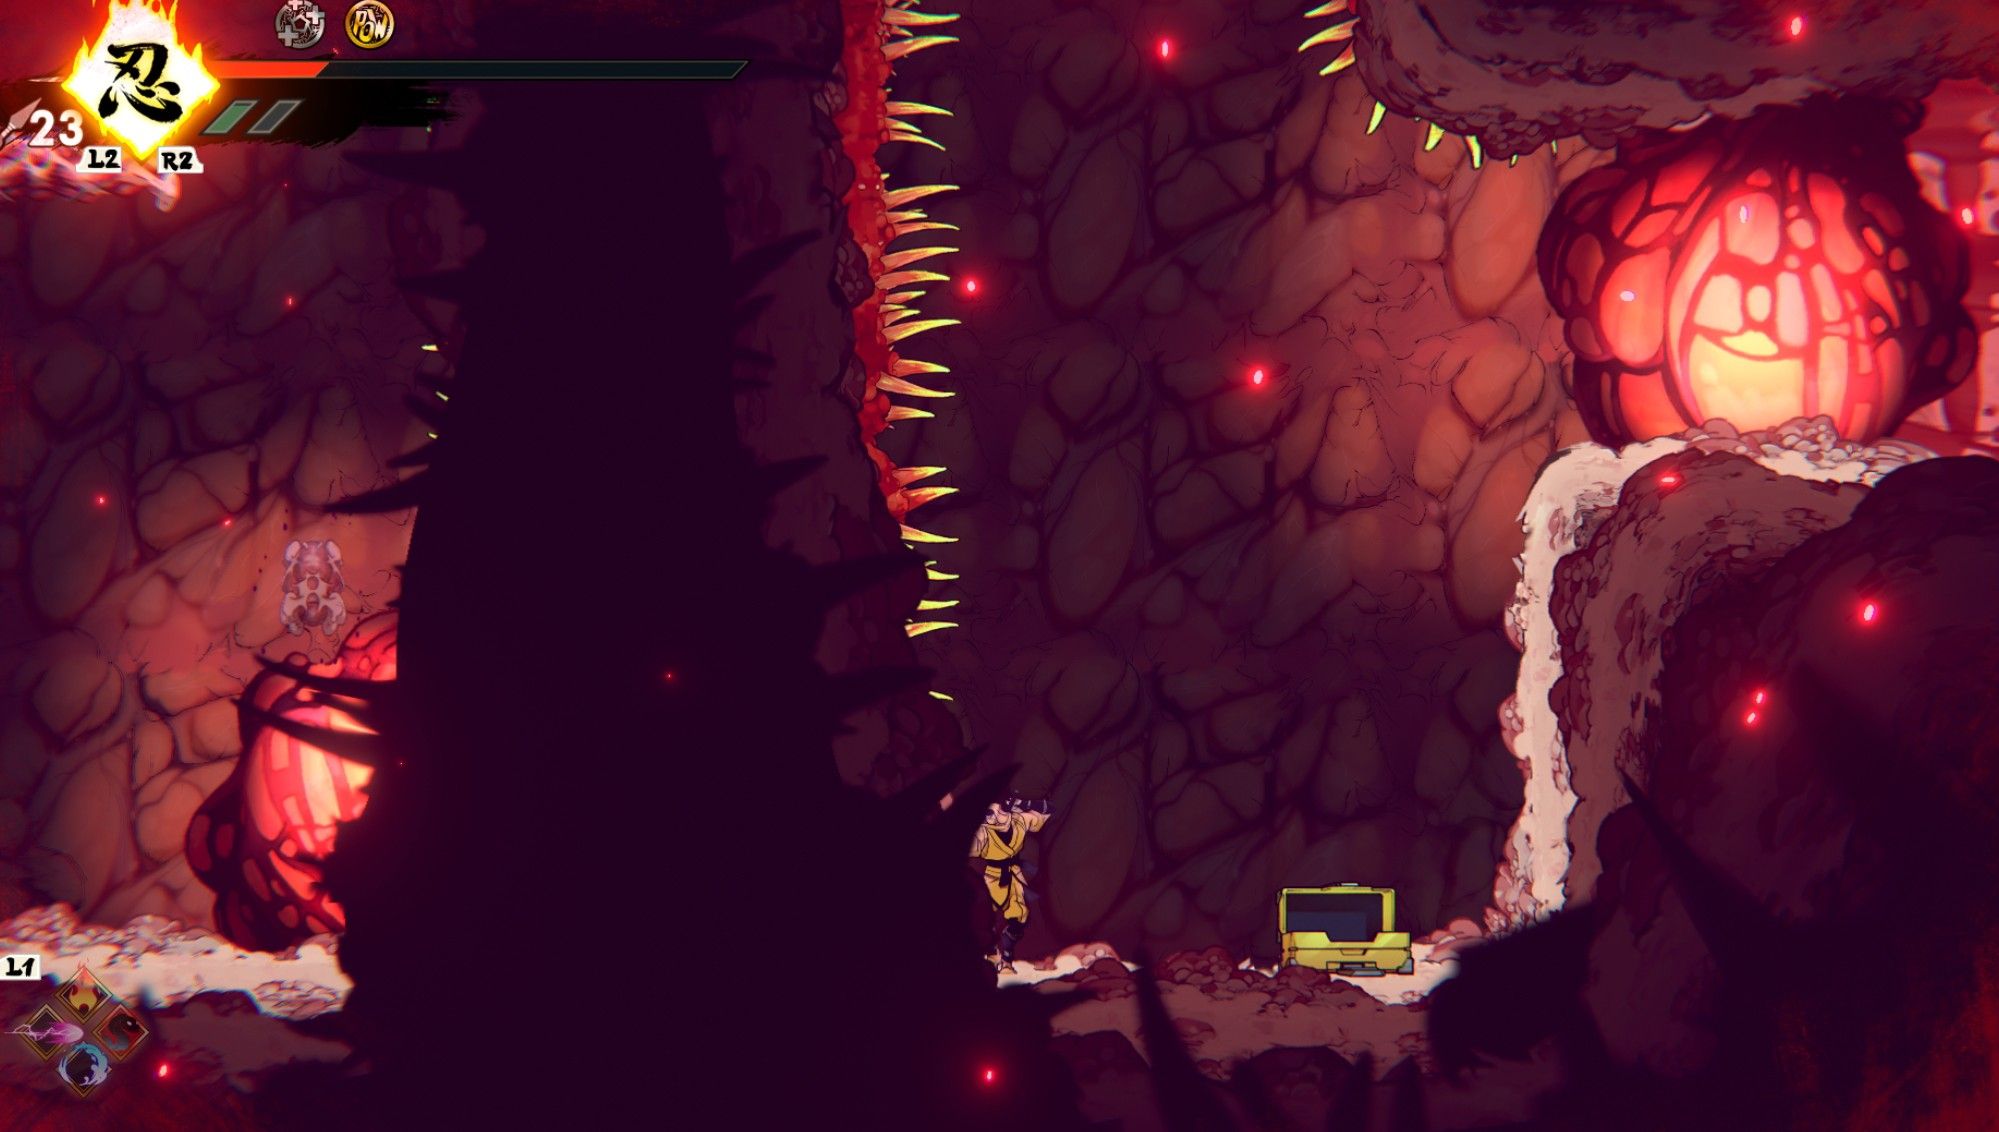
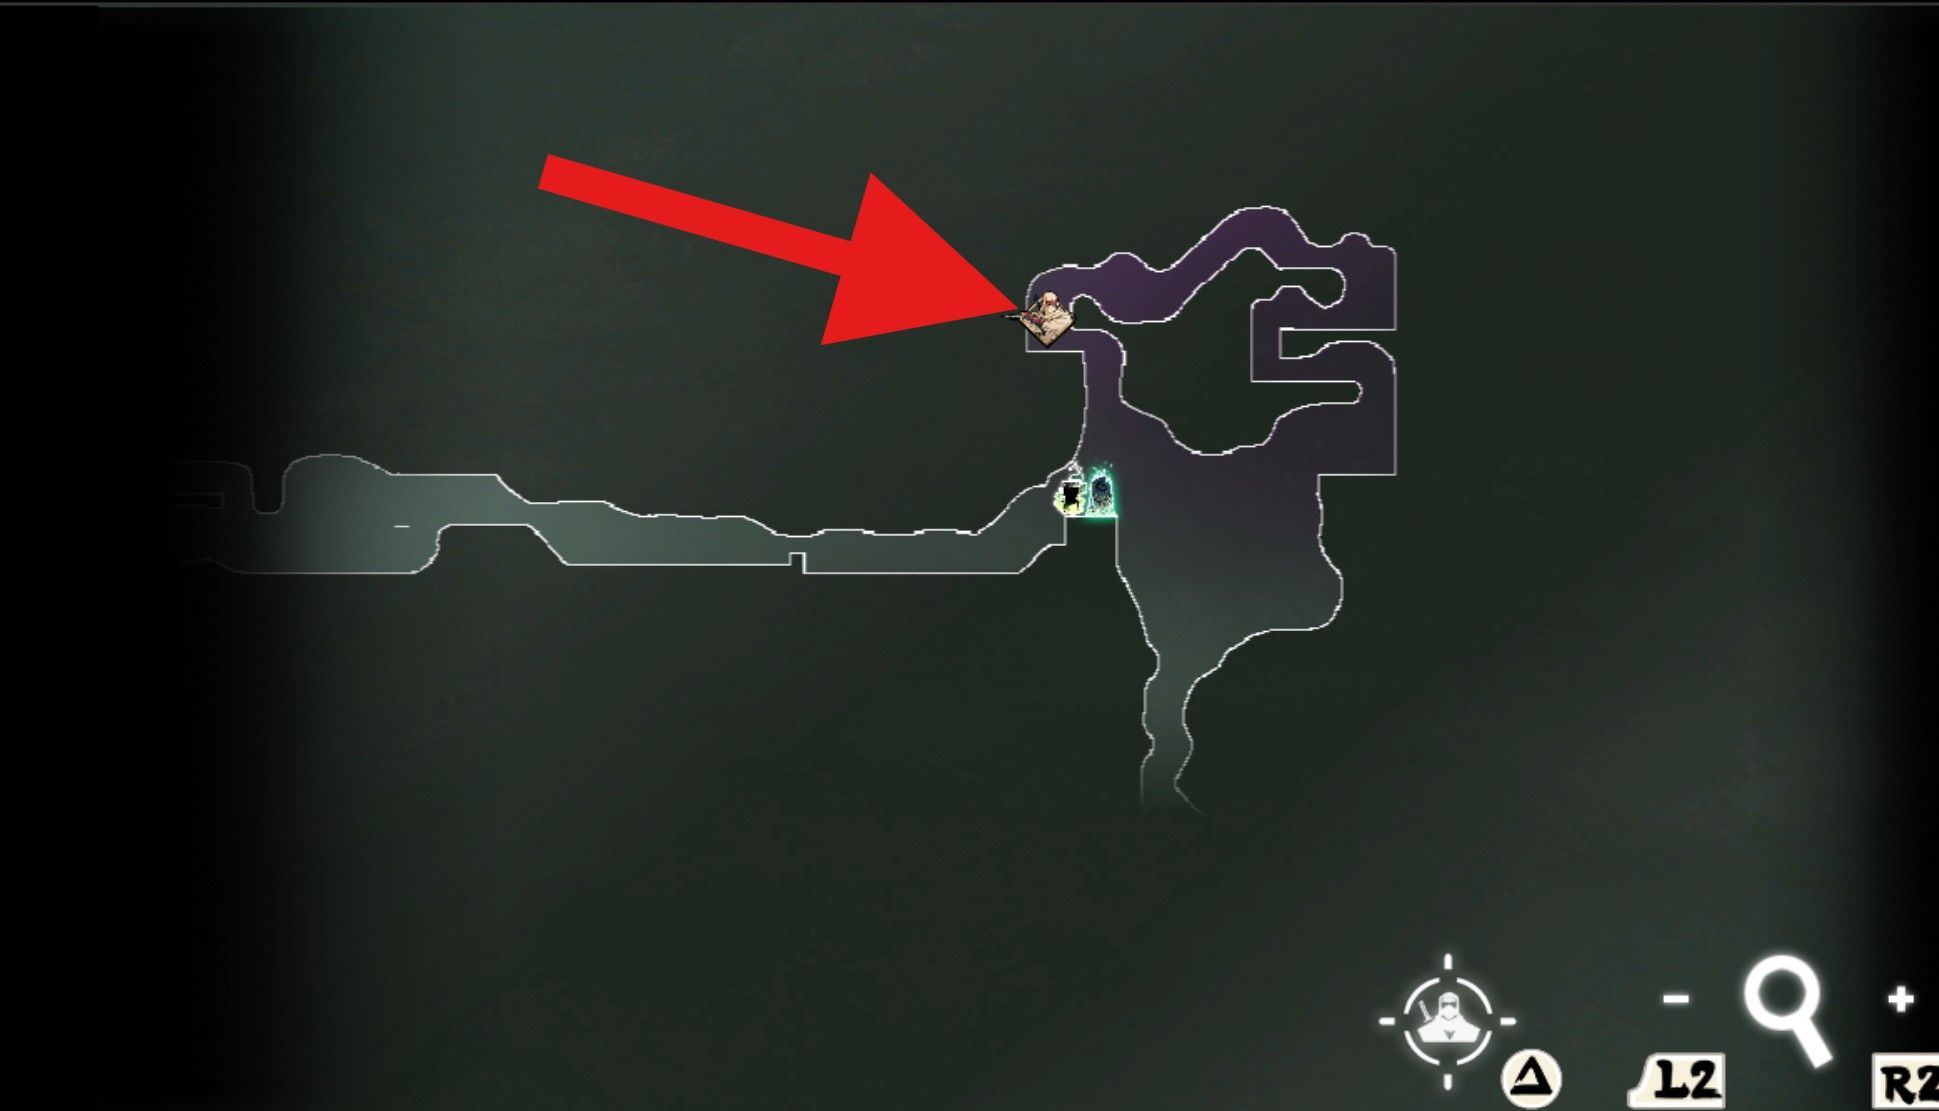
A short while following your acquisition of the fourth Relic, as you proceed along the primary path, you’ll discover a chest situated on the ground.
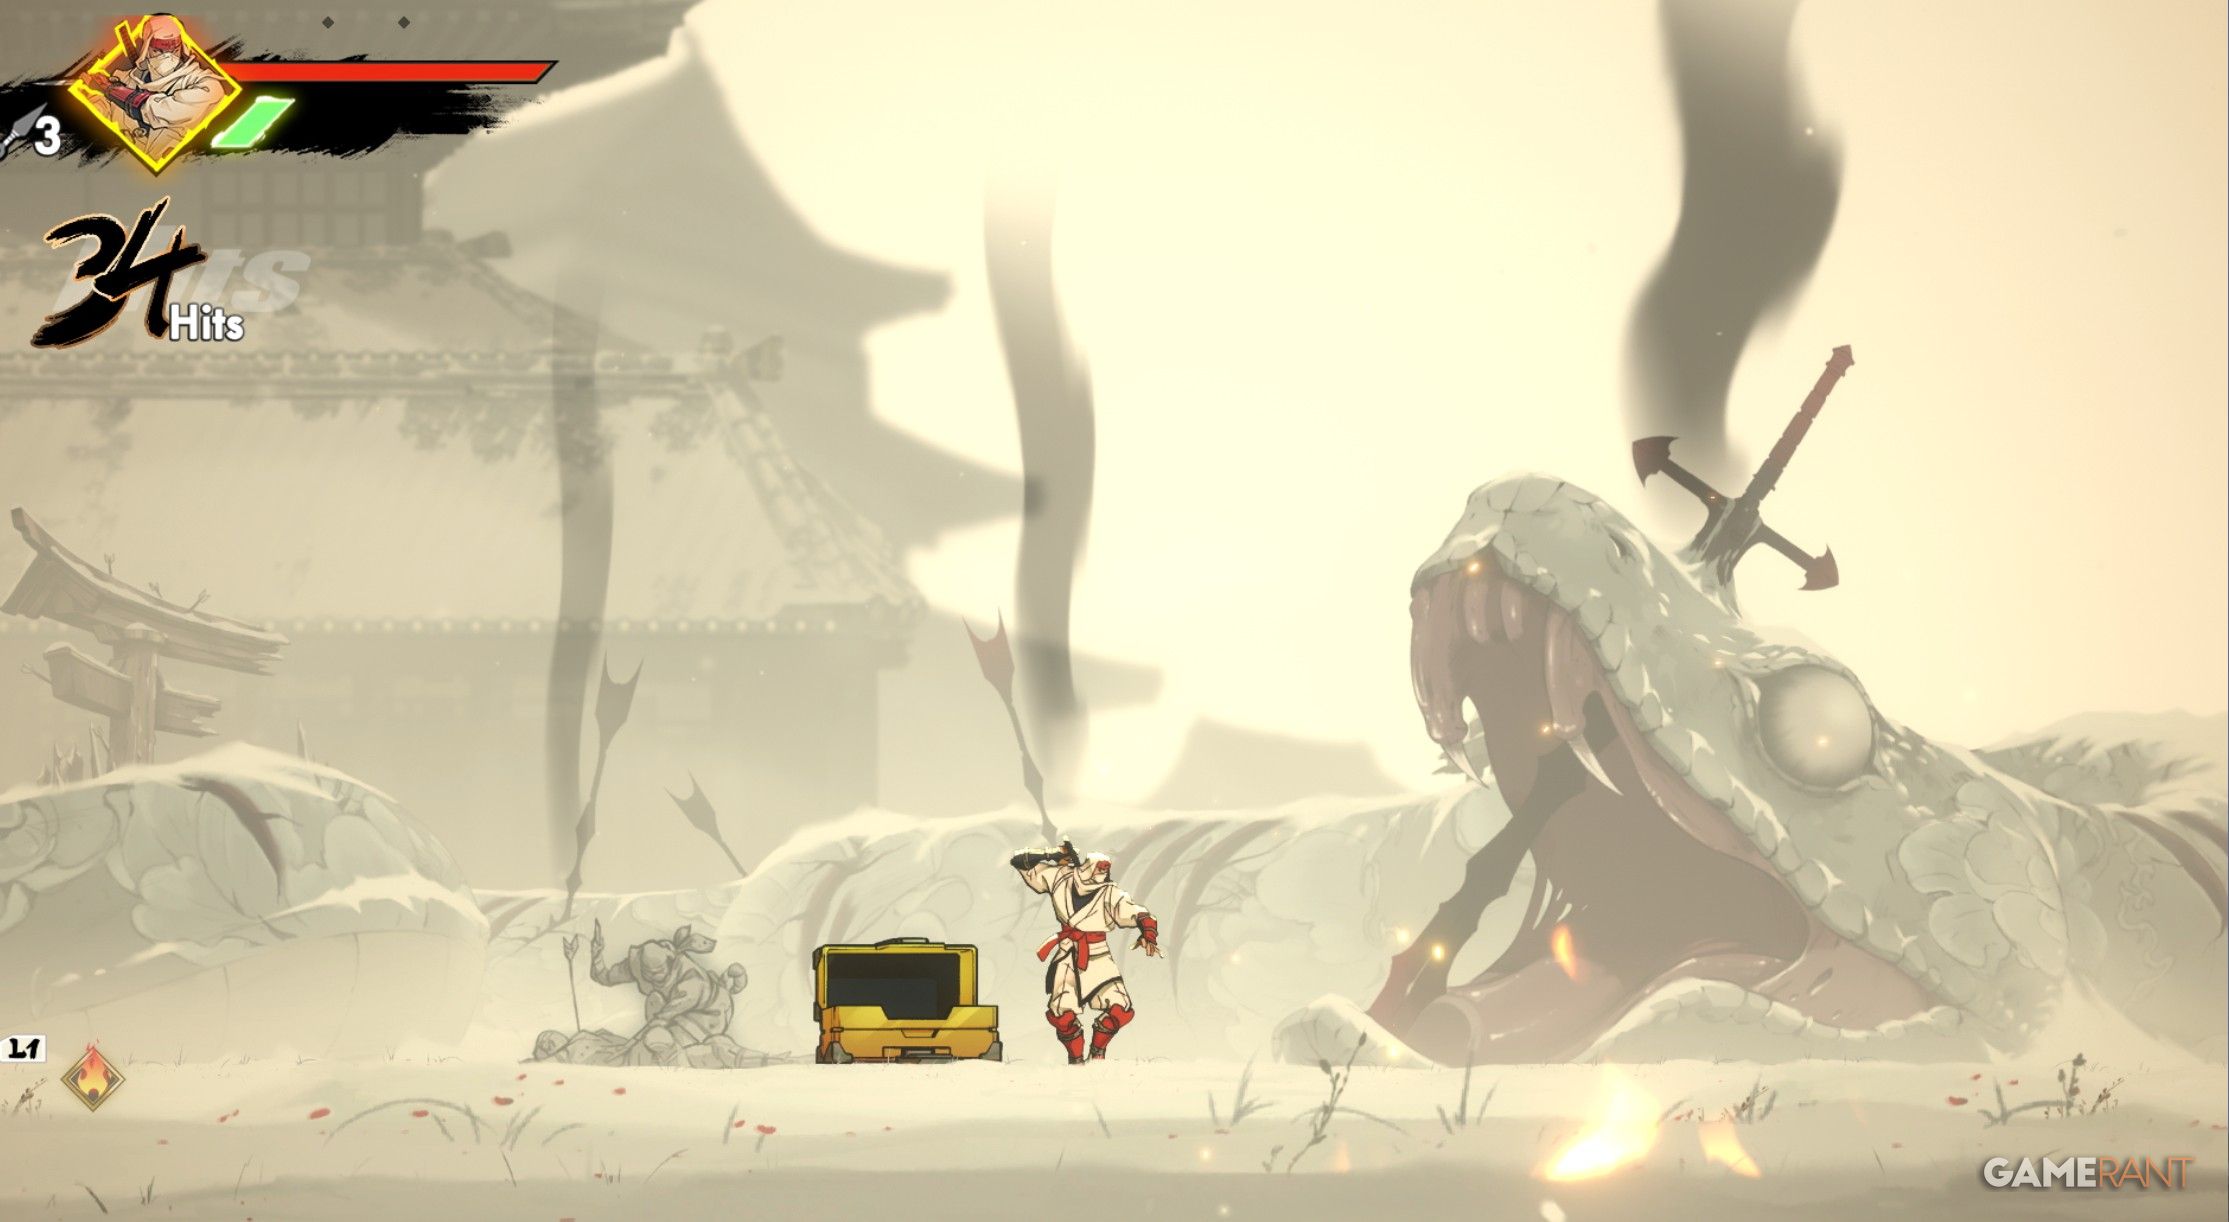
All Lantern Festival Oboro Relics in Shinobi Art of Vengeance
Oboro Relic #1
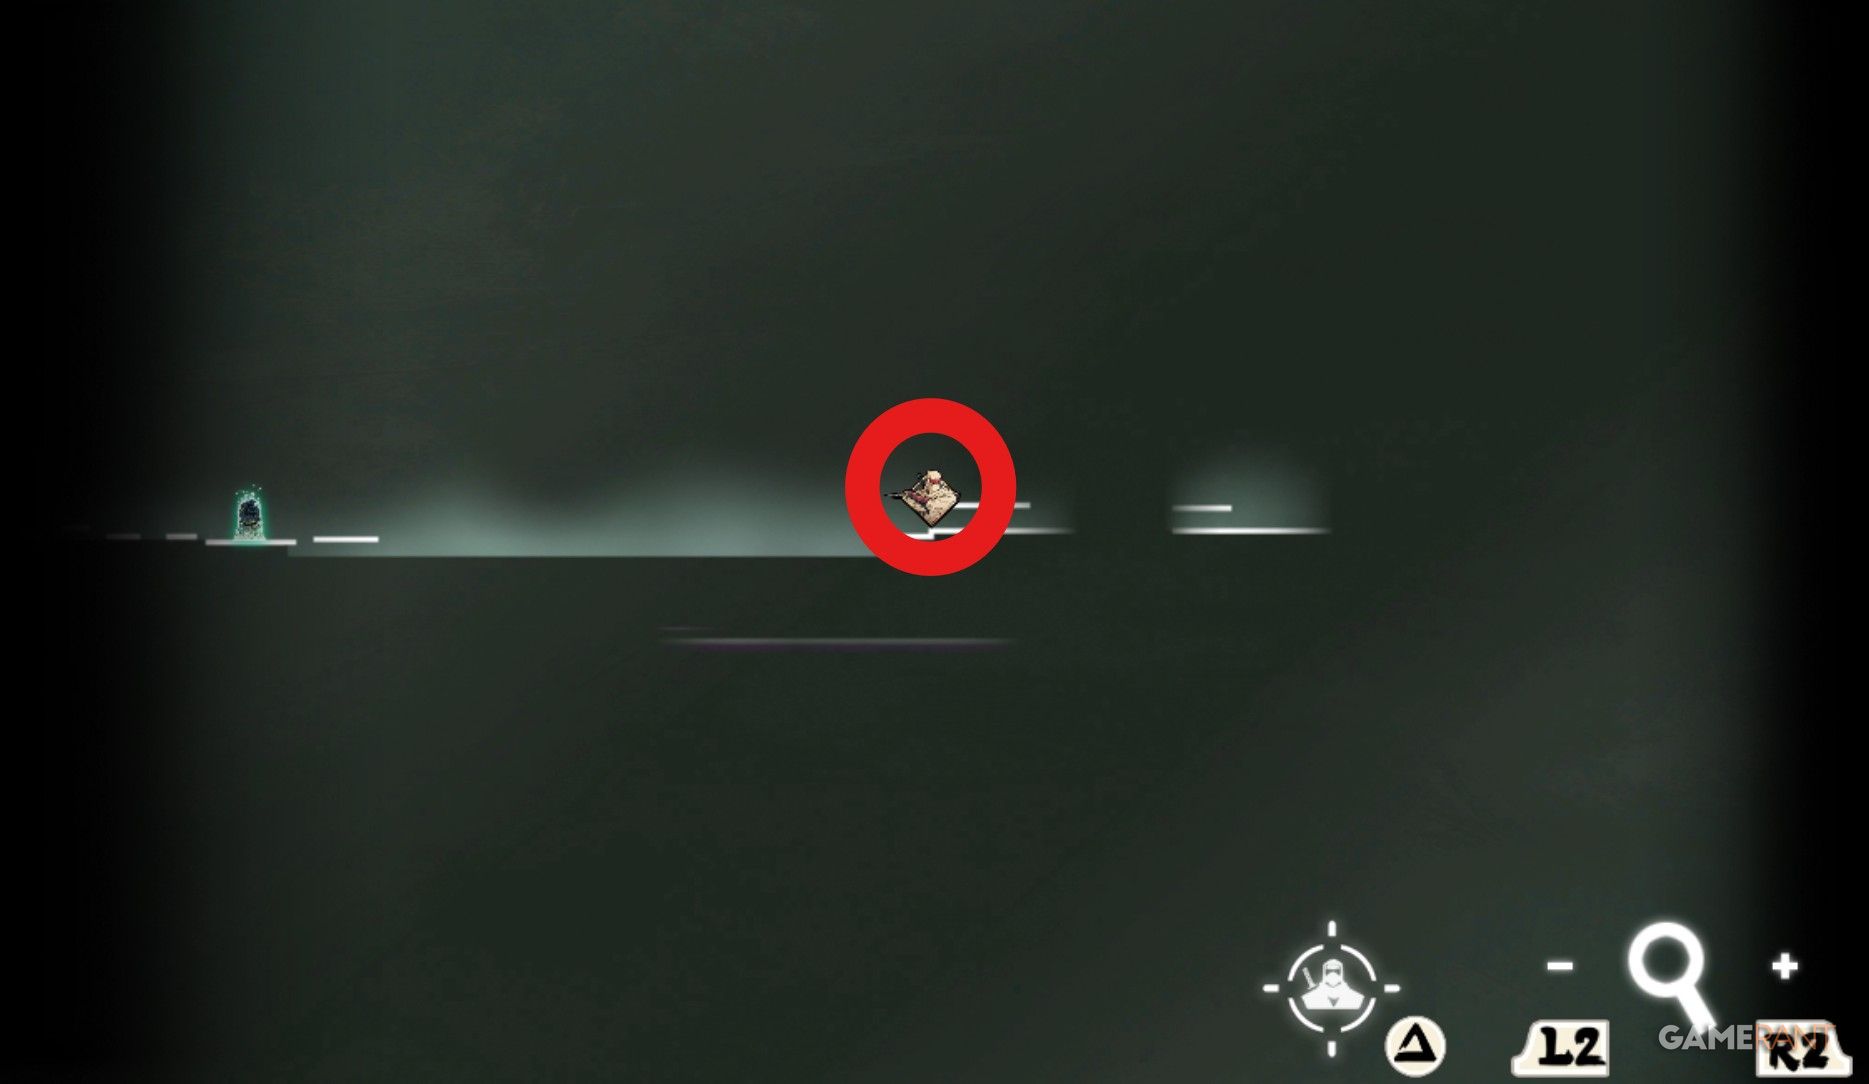
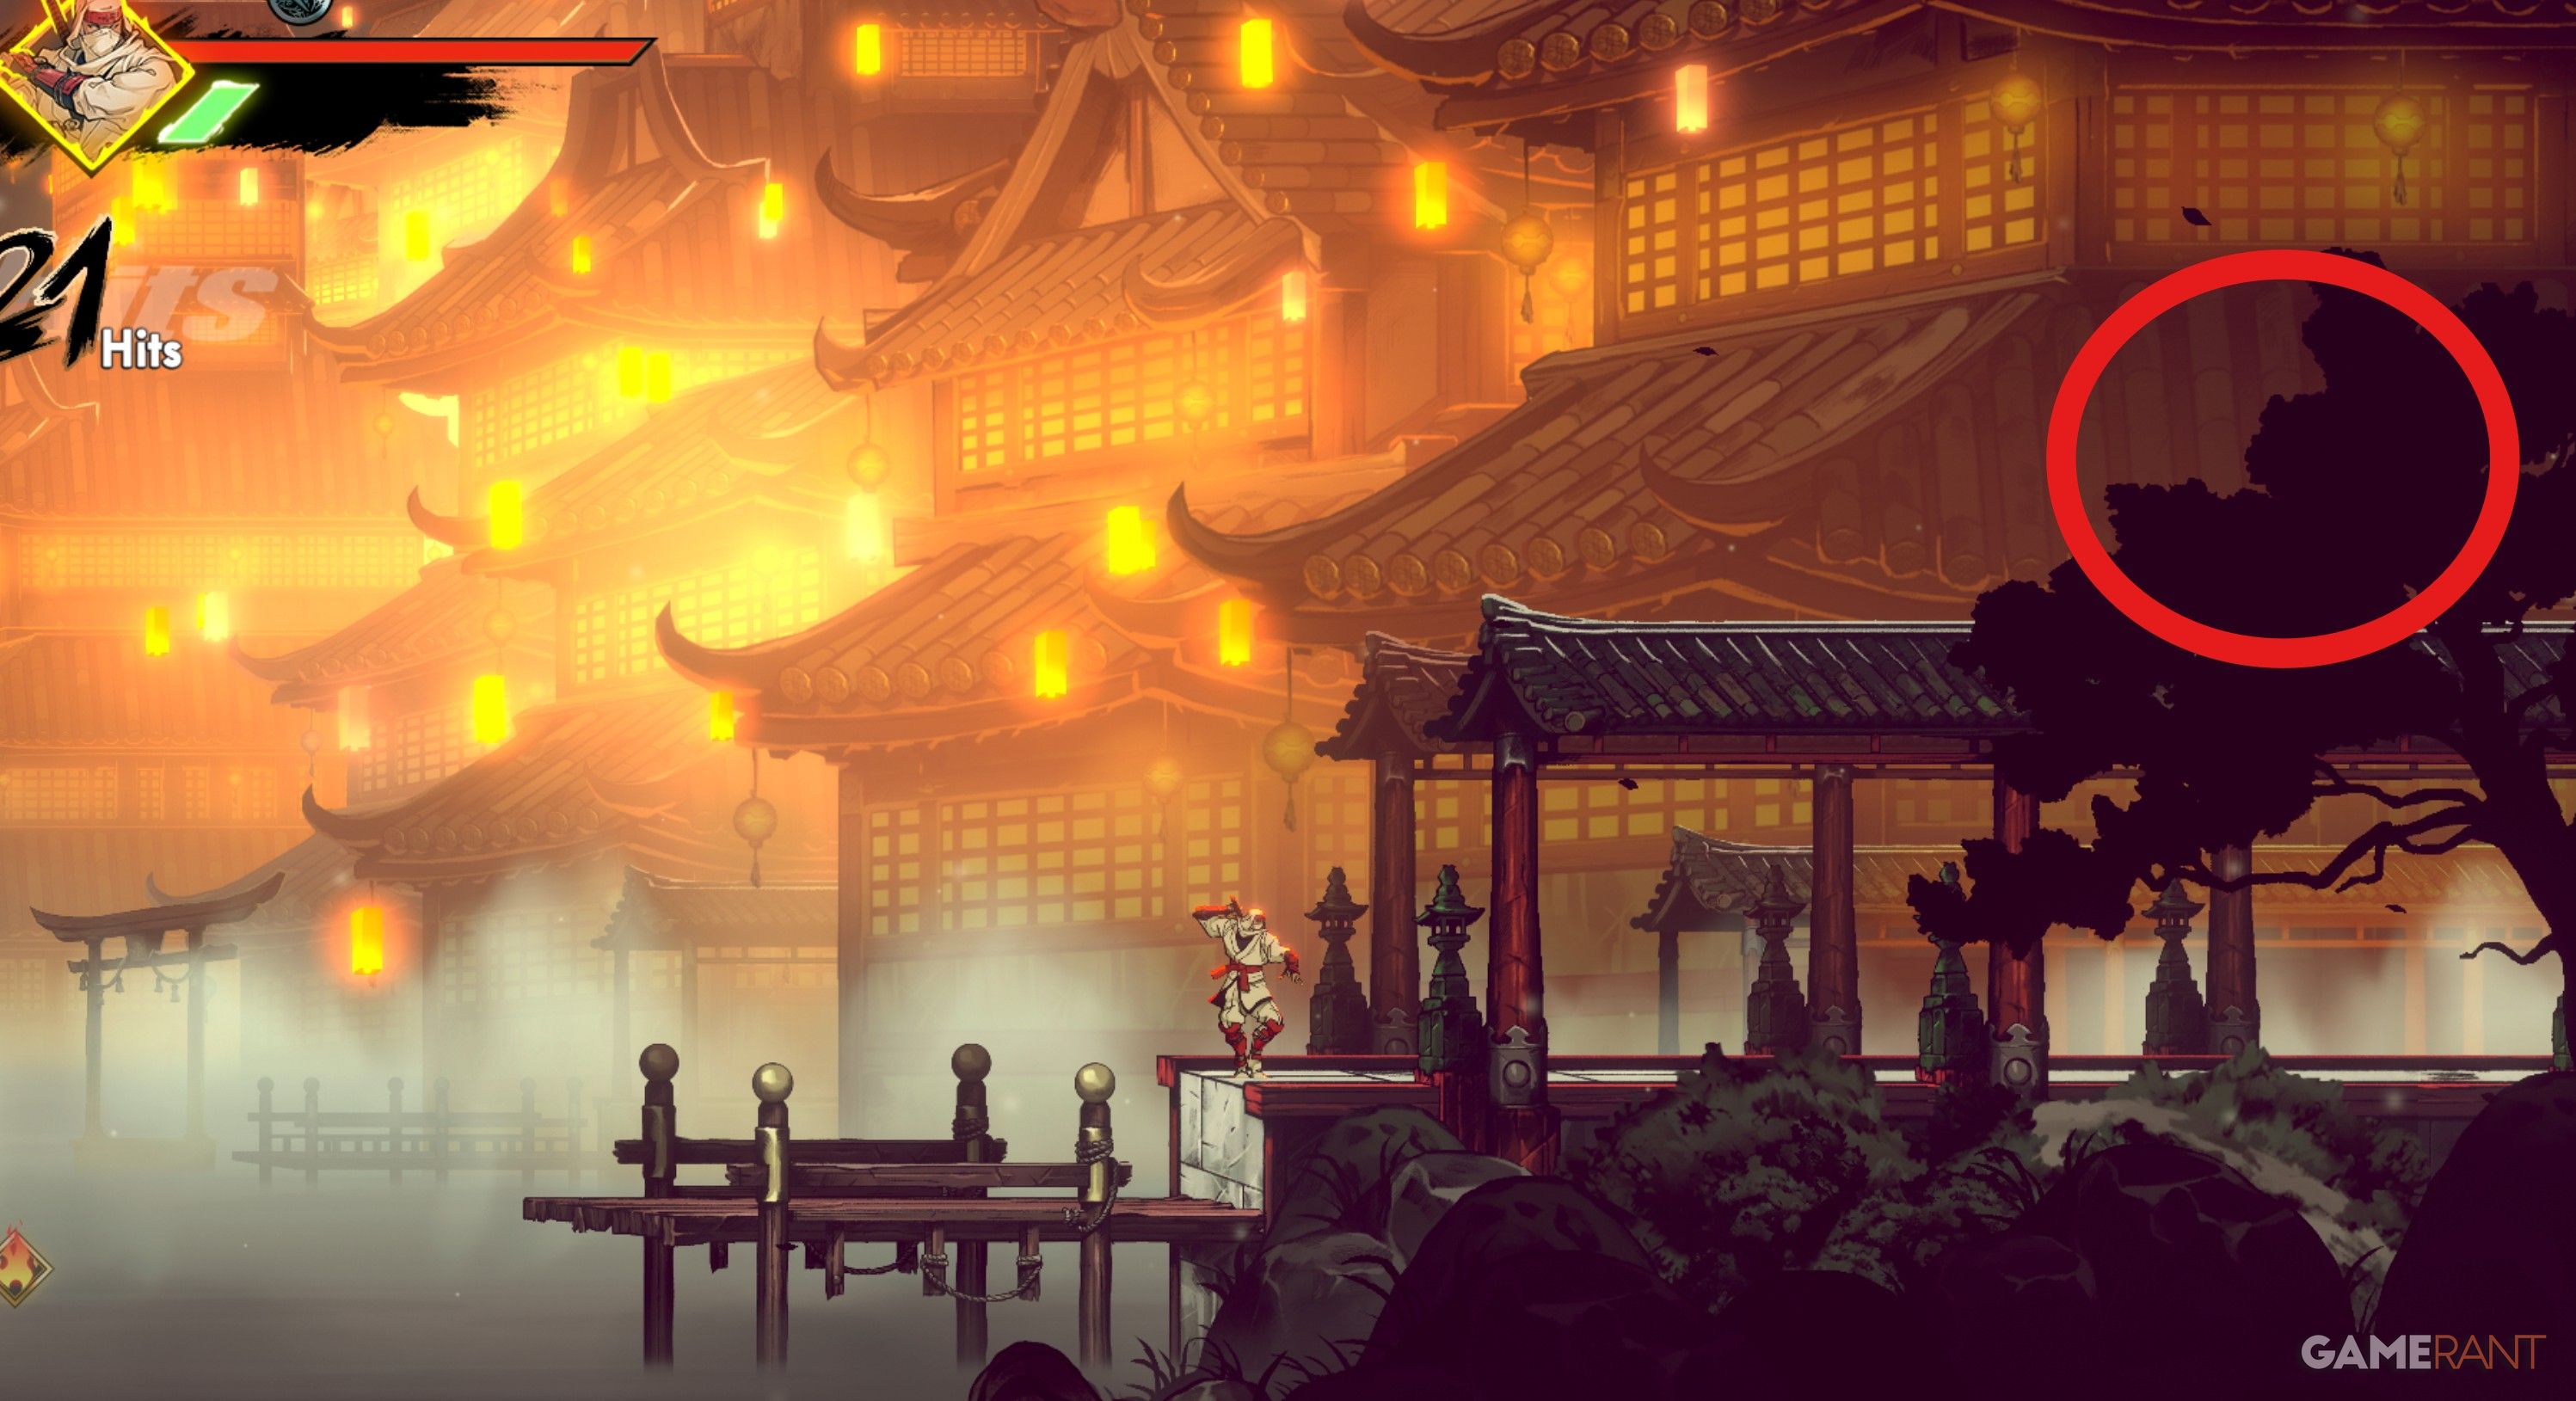
Instead of proceeding along the path after the boat section, head towards the rooftop to discover a secret chest concealed by a tree behind it.
Oboro Relic #2

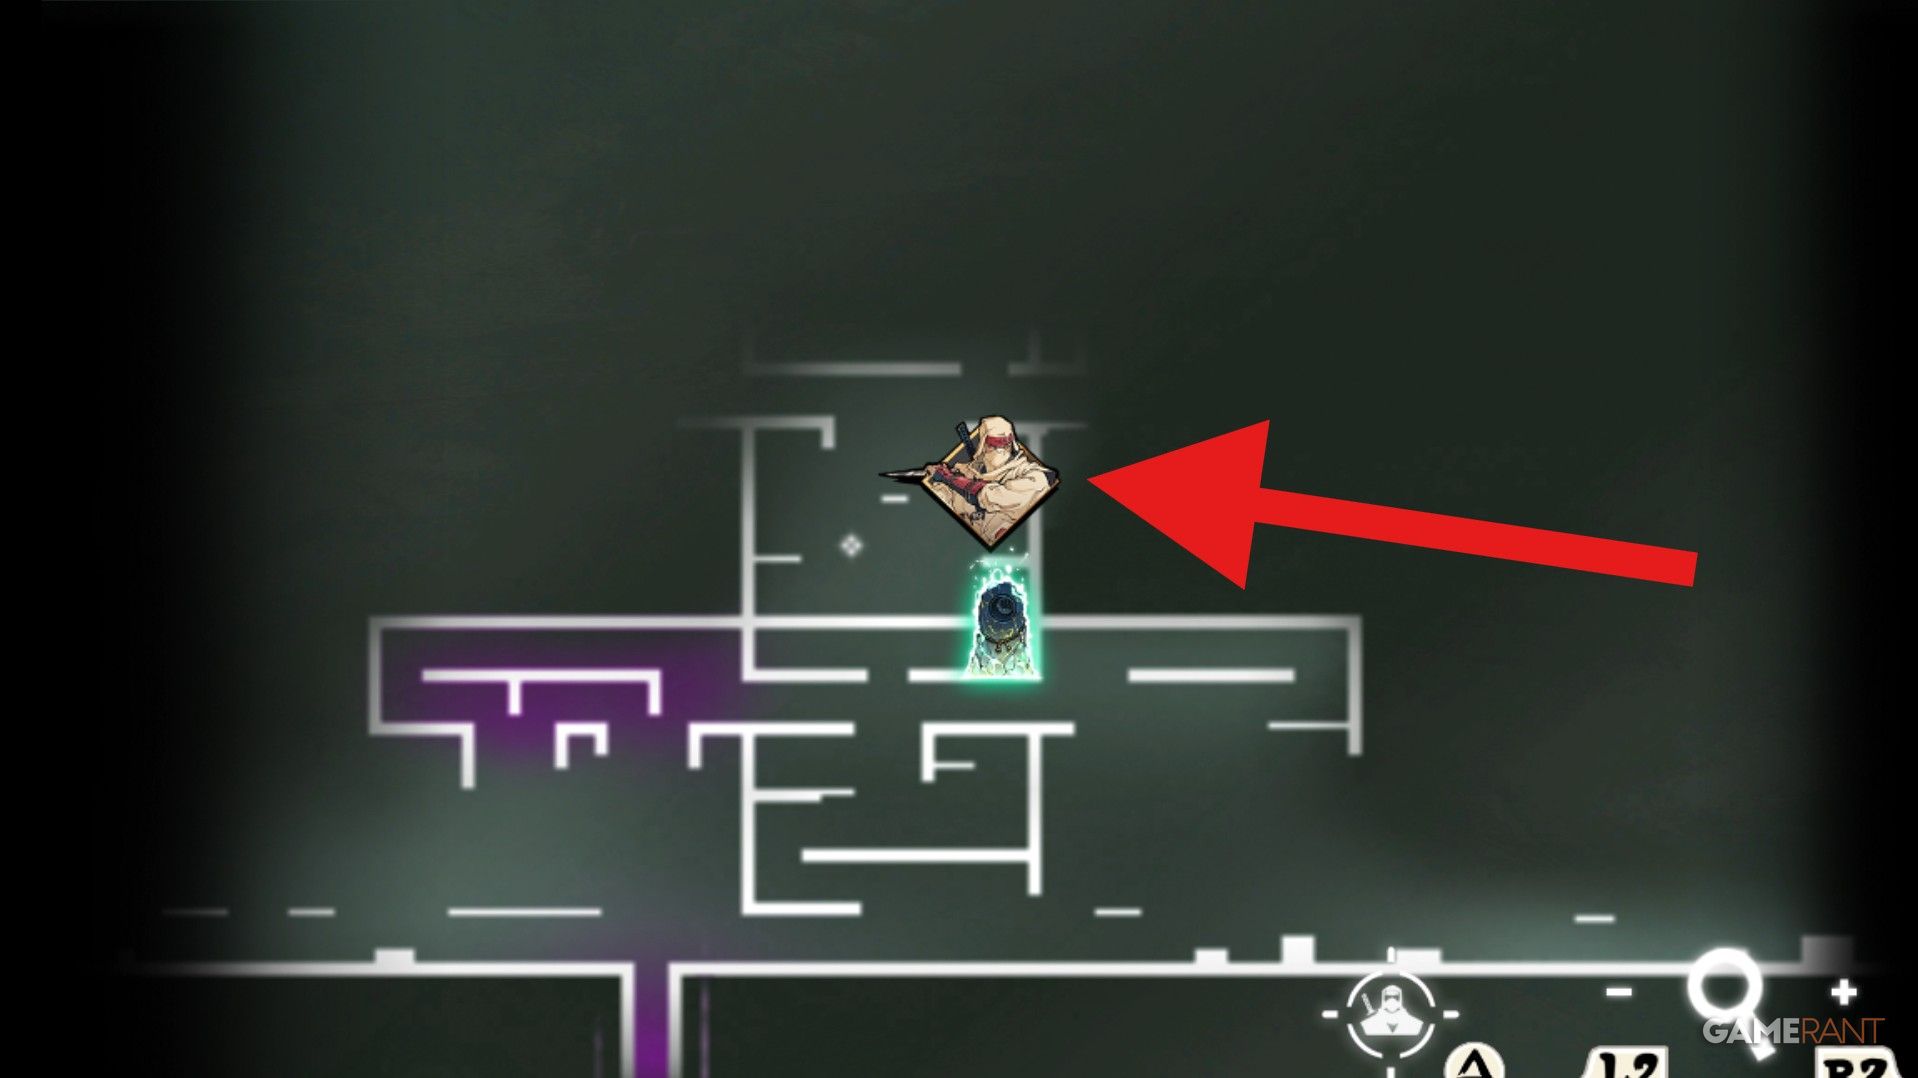
Once you’ve cleared the Tower checkpoint, keep moving to encounter one of those pesky foes who wield axes. Directly above this adversary, there’s a hidden treasure chest containing the Oboro Relic.
Oboro Relic #3
As a thrill-seeker, I follow the trail to my left, eagerly venturing towards an exciting battle segment that awaits. Triumph in this fight rewards me with a tantalizing treasure hidden within a chest.
Oboro Relic #4
Once you’ve mastered the “Cannon Punch”, shatter the luminescent, fissured Yokai barrier, climb to the platform above, and there you will discover a chest containing the fourth Relic of this stage.
Oboro Relic #5
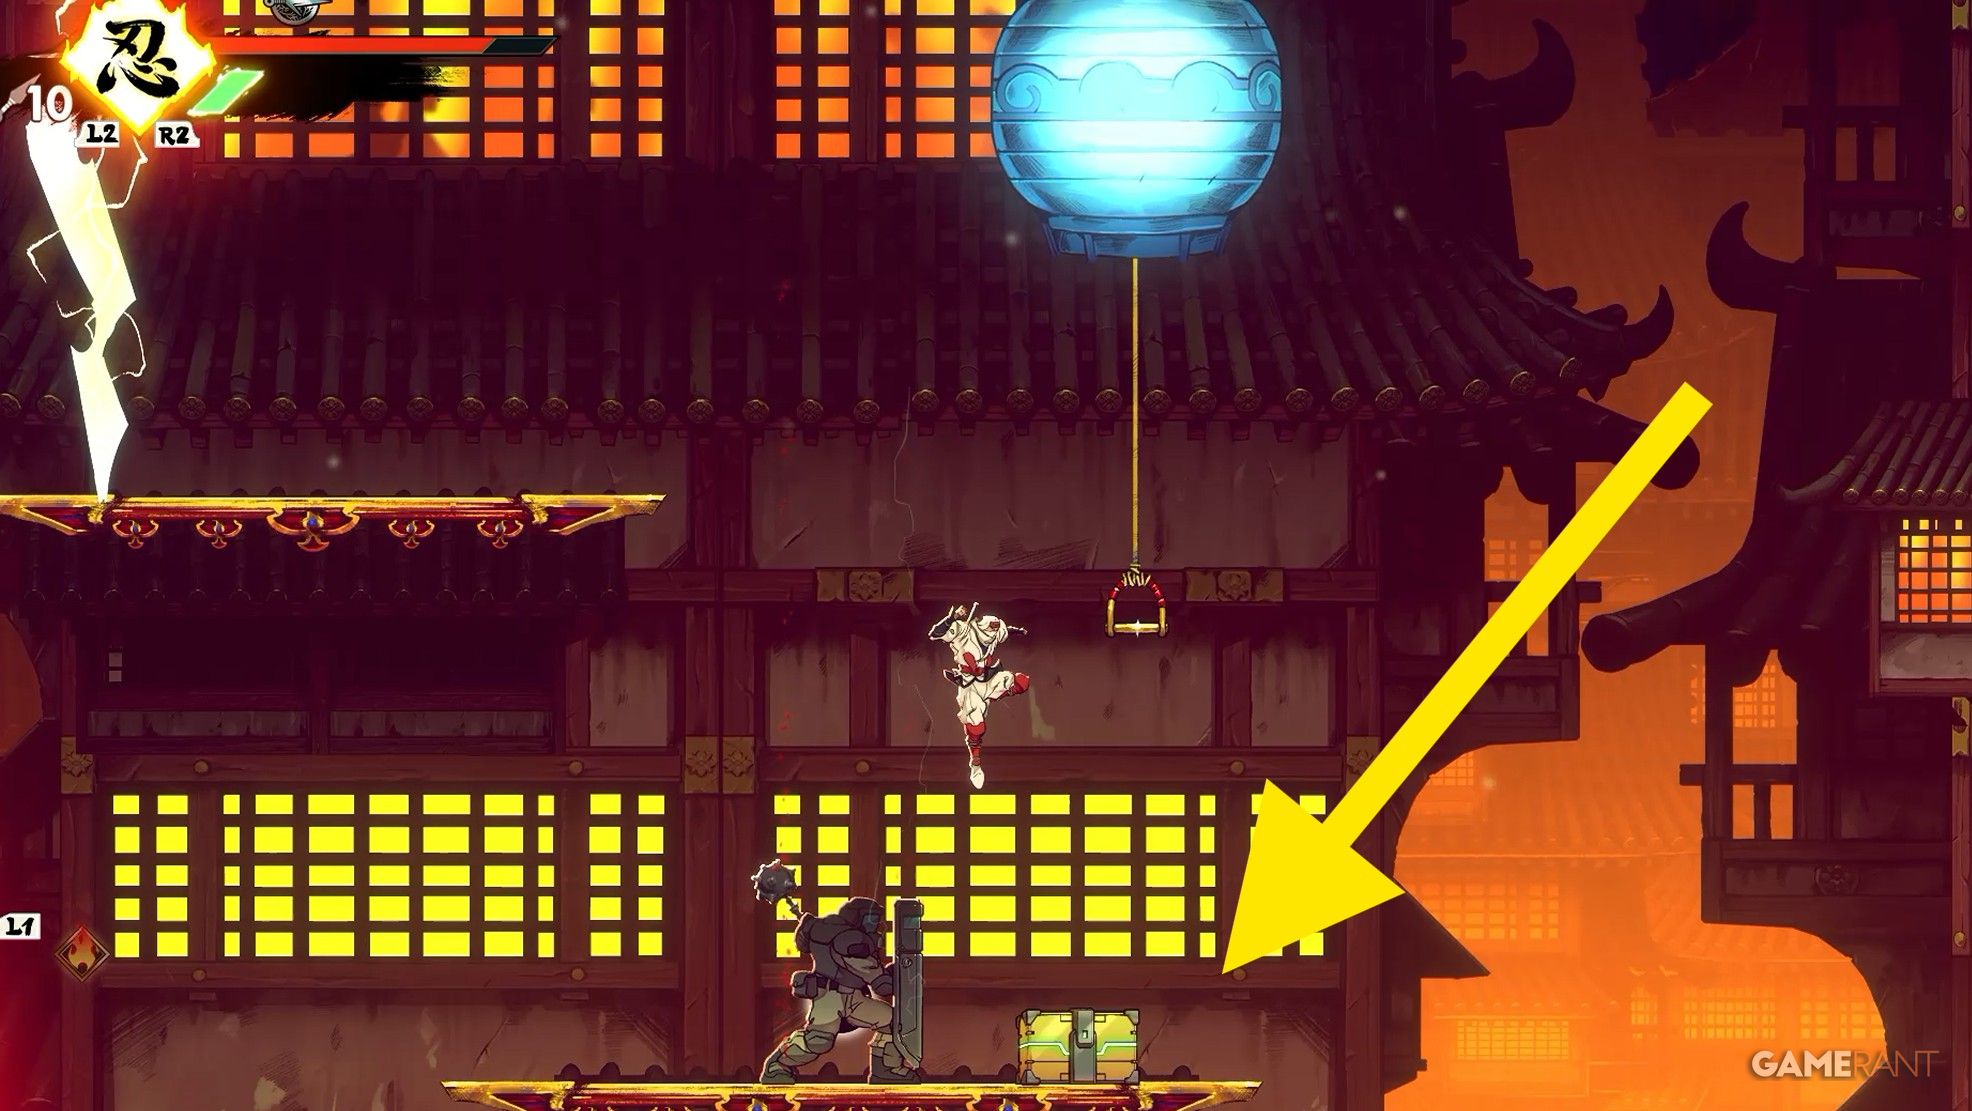
After you’ve passed the Fireworks checkpoint, continue until you reach the third paper lantern. Instead of going up from there, descend slightly and you’ll encounter an enemy guarding a treasure chest containing the final Oboro Relic.
All Oboro Relics in The Mountain in Shinobi Art of Vengeance
Oboro Relic #1
To locate the initial Oboro Relic, it’s essential that you ascend to the Mountain Peak checkpoint as an alternative route. Begin your journey from the Waterfalls checkpoint, navigate through the crucial pathway until you arrive at the facility entrance. Instead of entering, veer upward and trace the trail till you discover a wall suitable for use with your Ninja Claws.
Oboro Relic #2
After passing the Waterfall checkpoint, look for the seemingly unreachable chest located to your left. To grab it, follow these steps: move upward first, then veer left, and finally descend to discover a hidden entrance.
Oboro Relic #3

Once you’ve acquired the Ninja Claws, make your way back to the Secret Factory checkpoint. From there, go upward and then turn left to discover a chest that contains the Relic.
Oboro Relic #4
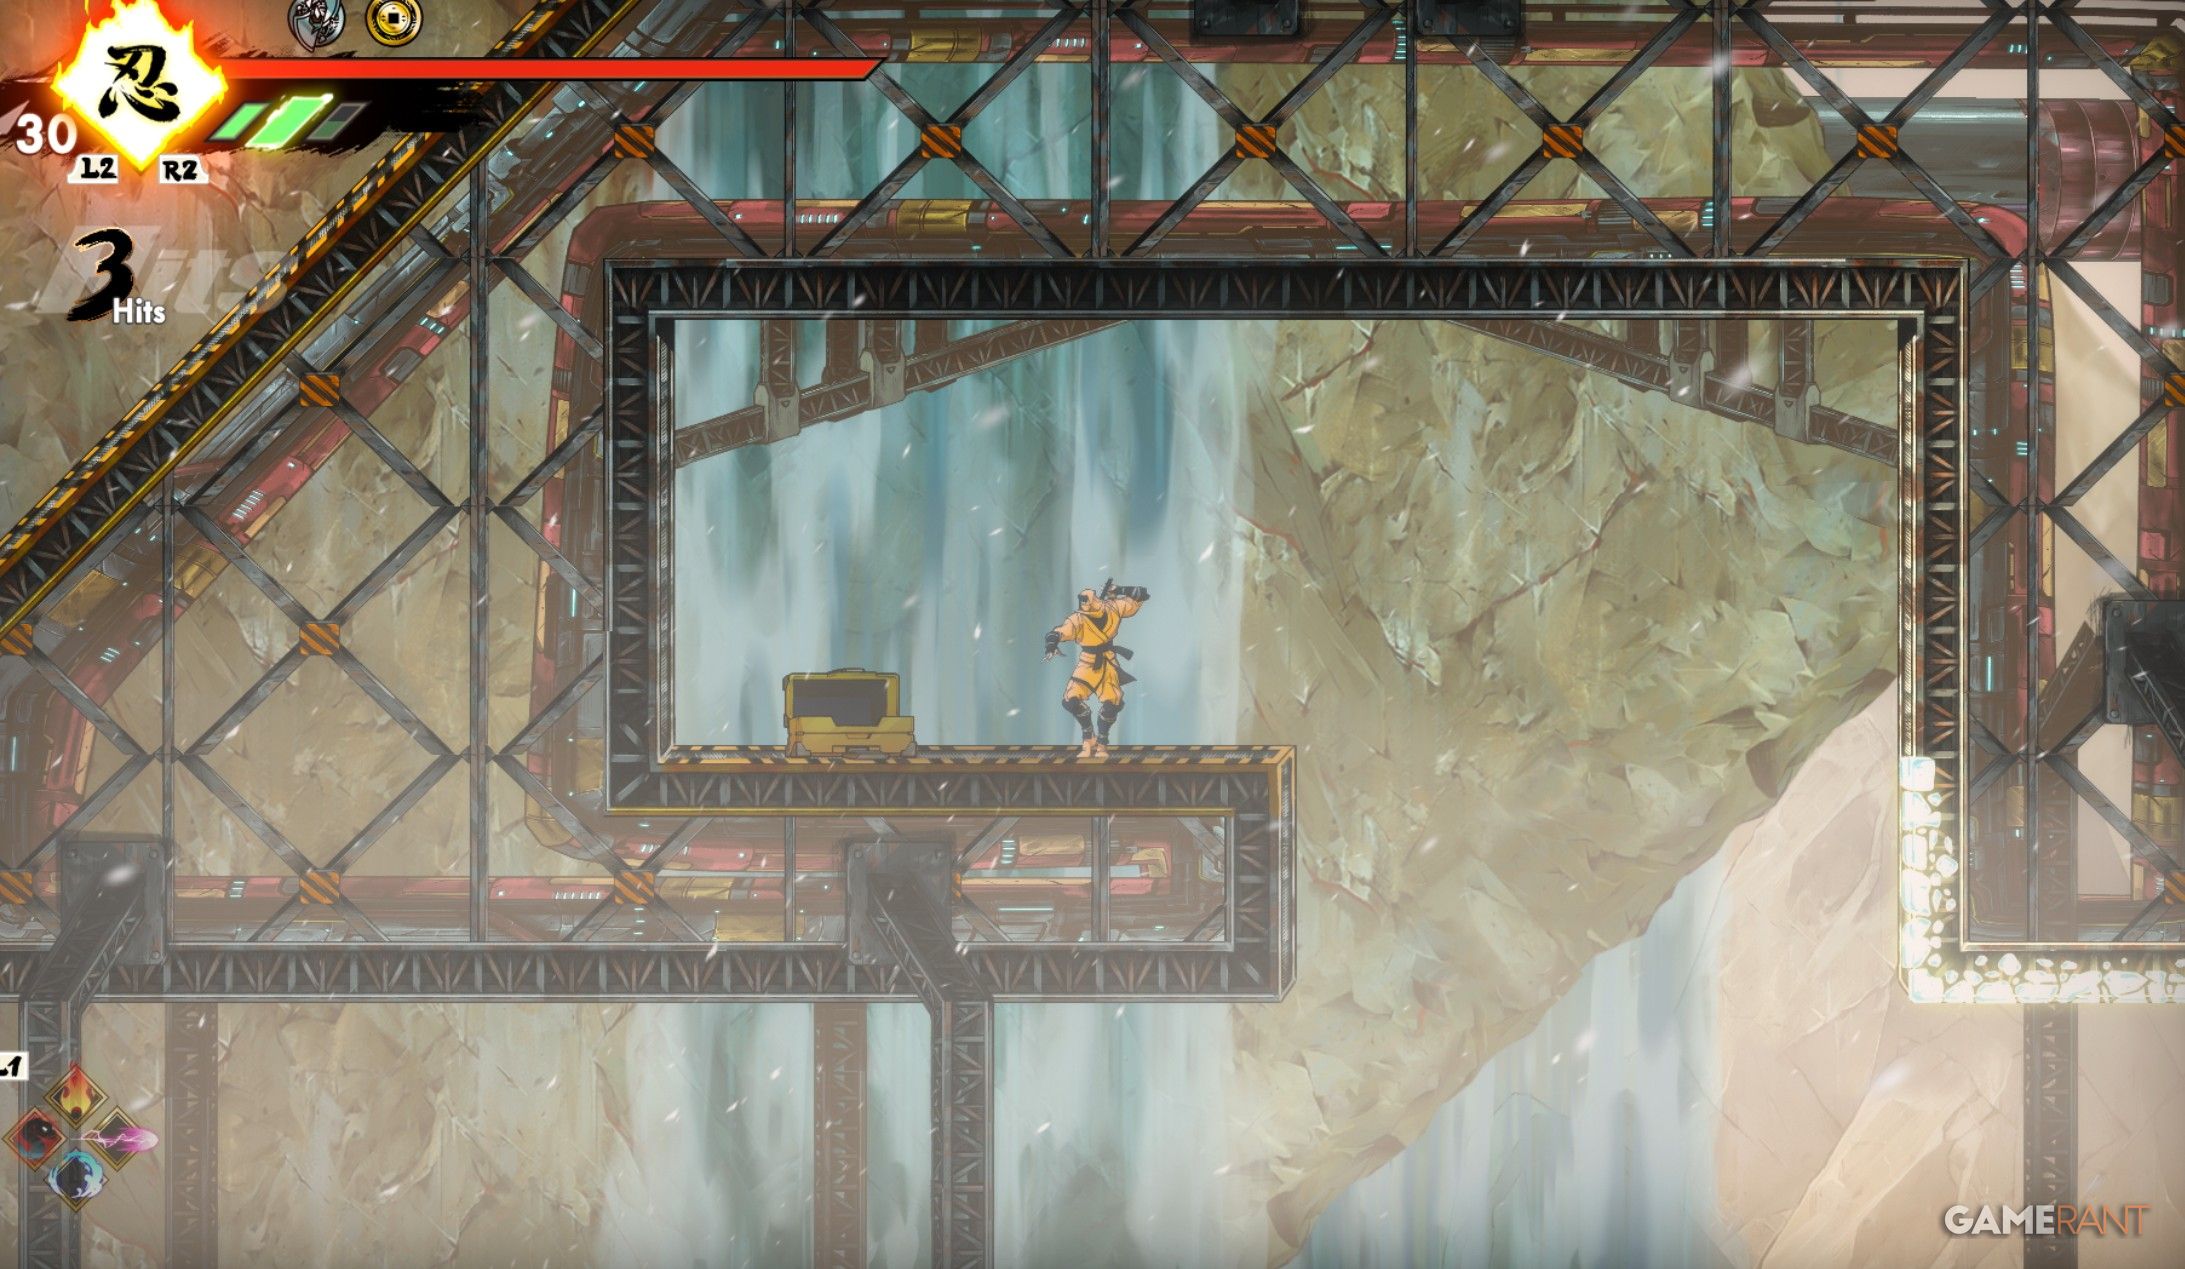
After crossing the checkpoint at the junkyard, you’ll encounter a stretch where spinning gears will fire at you. Your goal is to evade them quickly. Once you’ve outrun the last one, make your way back to its origin on the left side to discover a hidden treasure chest.
Oboro Relic #5
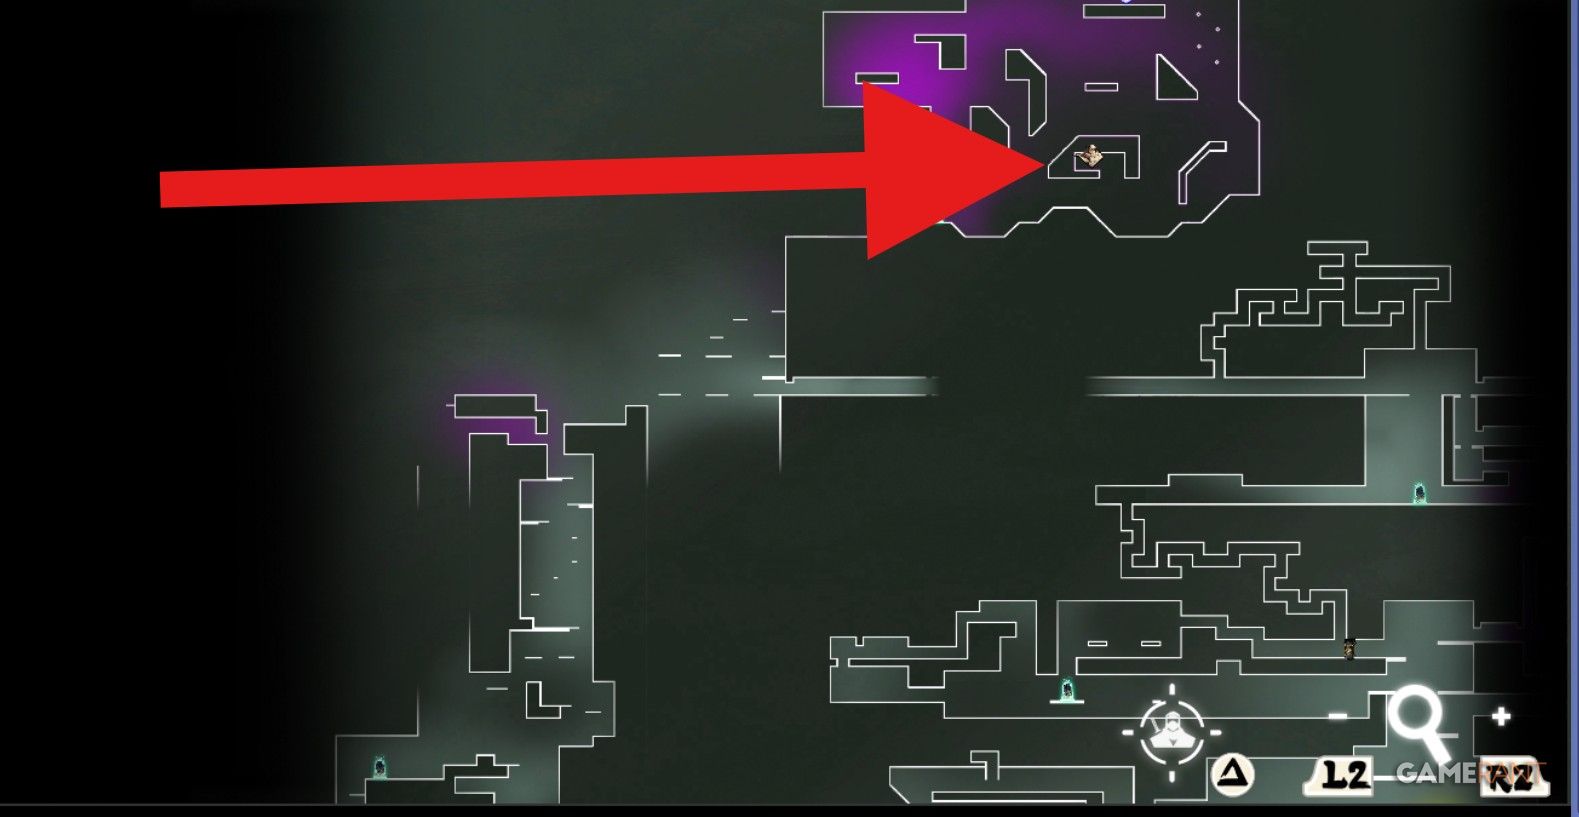
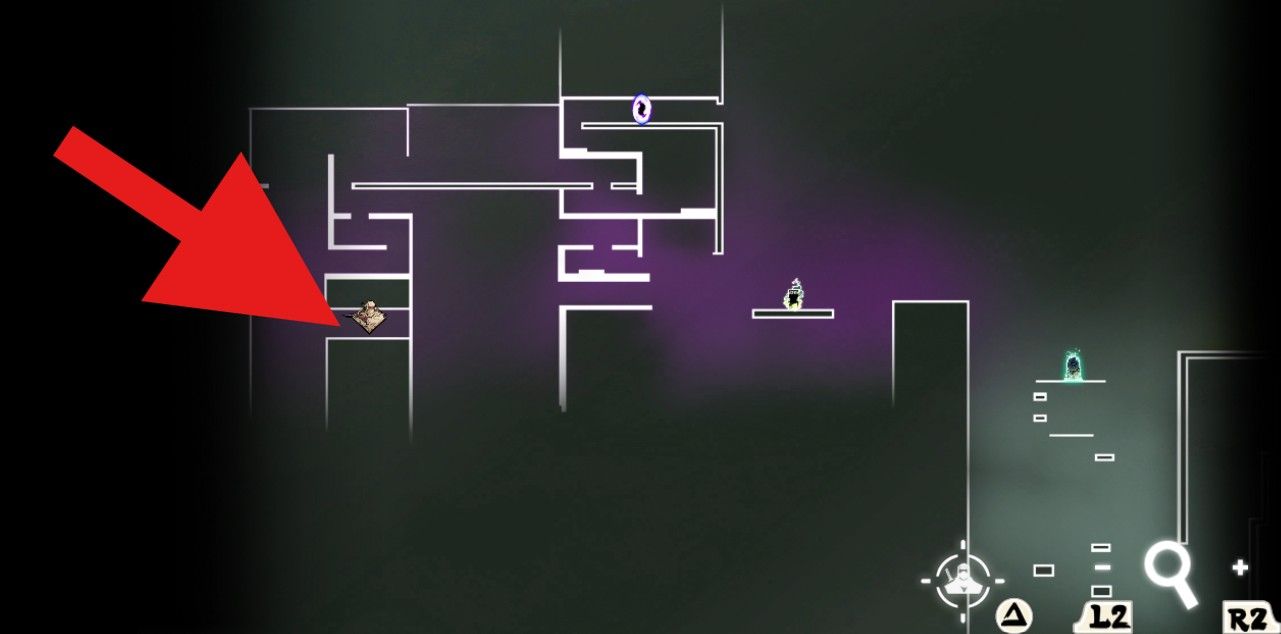
Navigate to the “Excavation Site checkpoint” in Neo City, after obtaining both the Ninja Claws and the Ninja Hook. Then, venture into the upper section located near the Shop for your exploration, where you can discover the fifth relic.
All Oboro Relics in Neo City in Shinobi: Art of Vengeance
First Oboro Relic
As an avid adventurer, I’d steer myself towards the East District checkpoint. Once there, I’d veer to the right and then ascend to the left. The goal is to encounter a verdant Yokai barrier that can be shattered using the Sword Dive technique mastered at the Submarine Base.
Second Oboro Relic
Upon acquiring the Ninja Hook, quickly make your way towards the East District checkpoint. After that, move right, followed by going downwards, and finally veer left to discover the hidden chest.
Third Oboro Relic
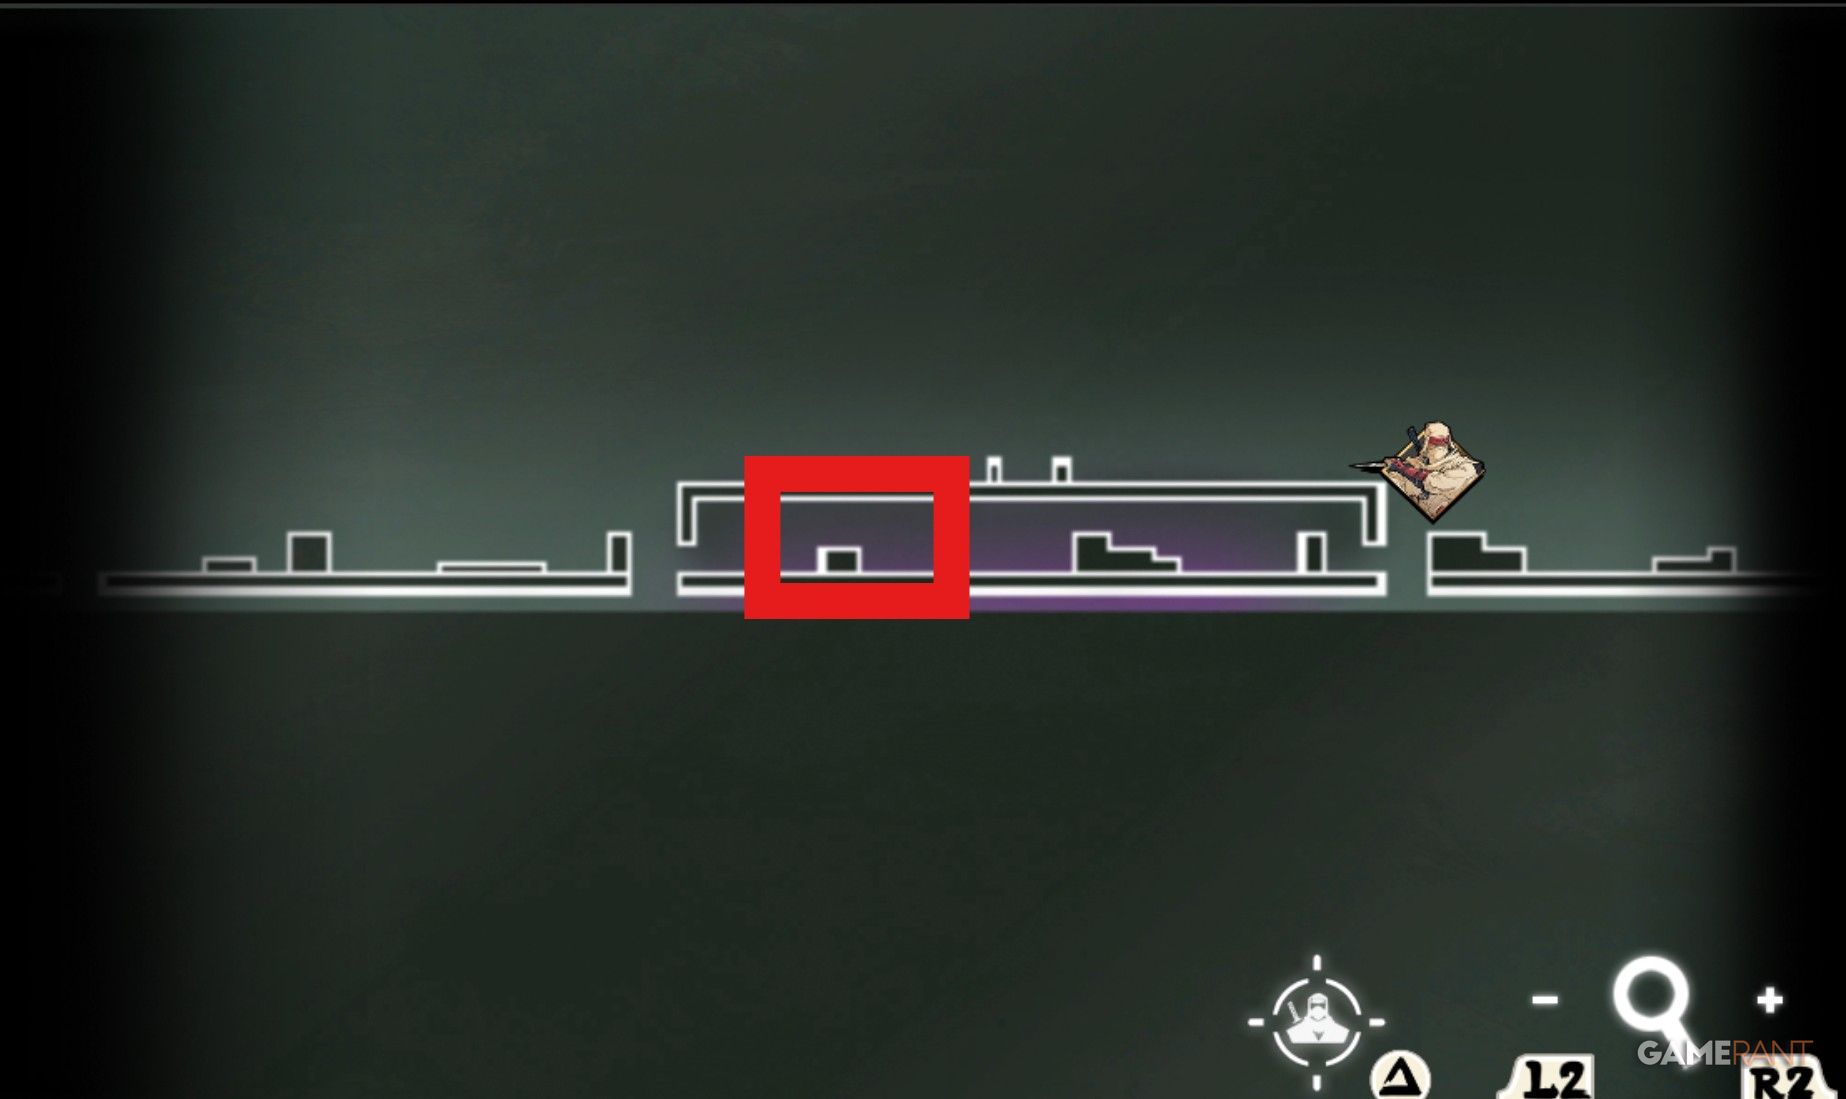
Travel to the South District checkpoint (requirements include the Sword Dive from the Submarine Base and the Ninja Hook). Proceed into the area on the right, where you’ll encounter a green Yokai barricade that can be dismantled. You’ll notice a chest guarded by electricity, so navigate downwards to the left to locate the switch that shuts off the power.
Fourth Oboro Relic


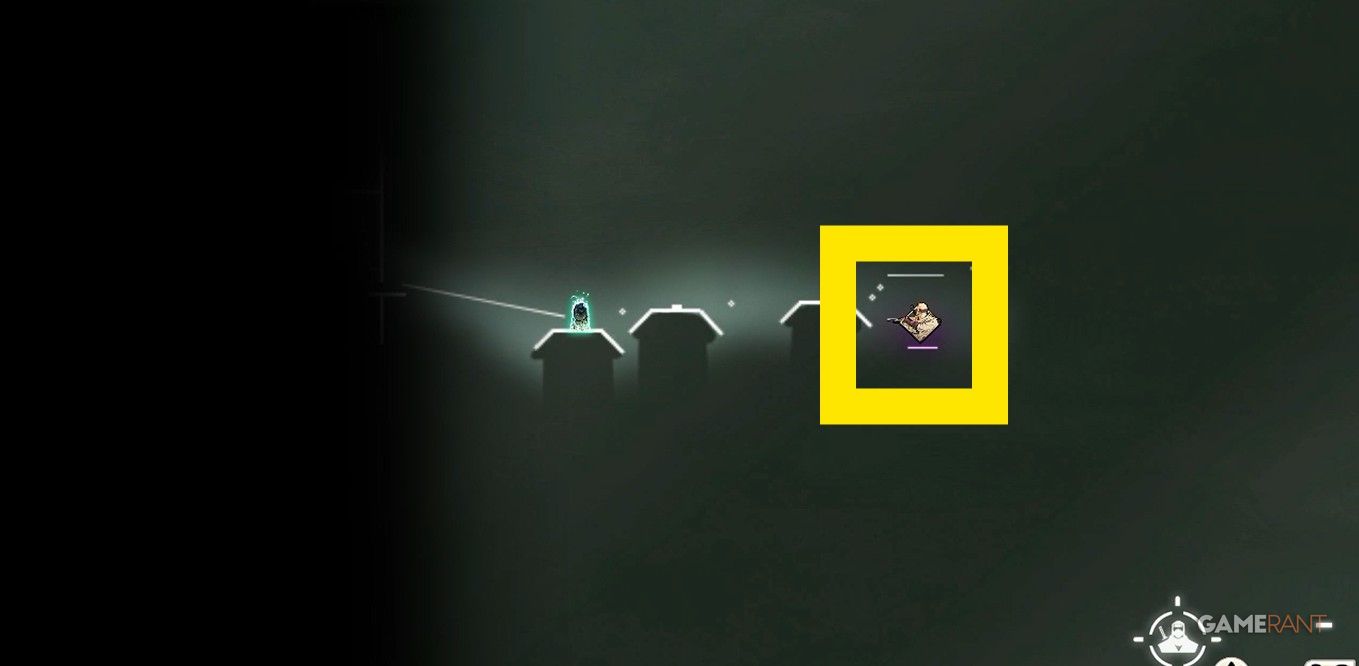
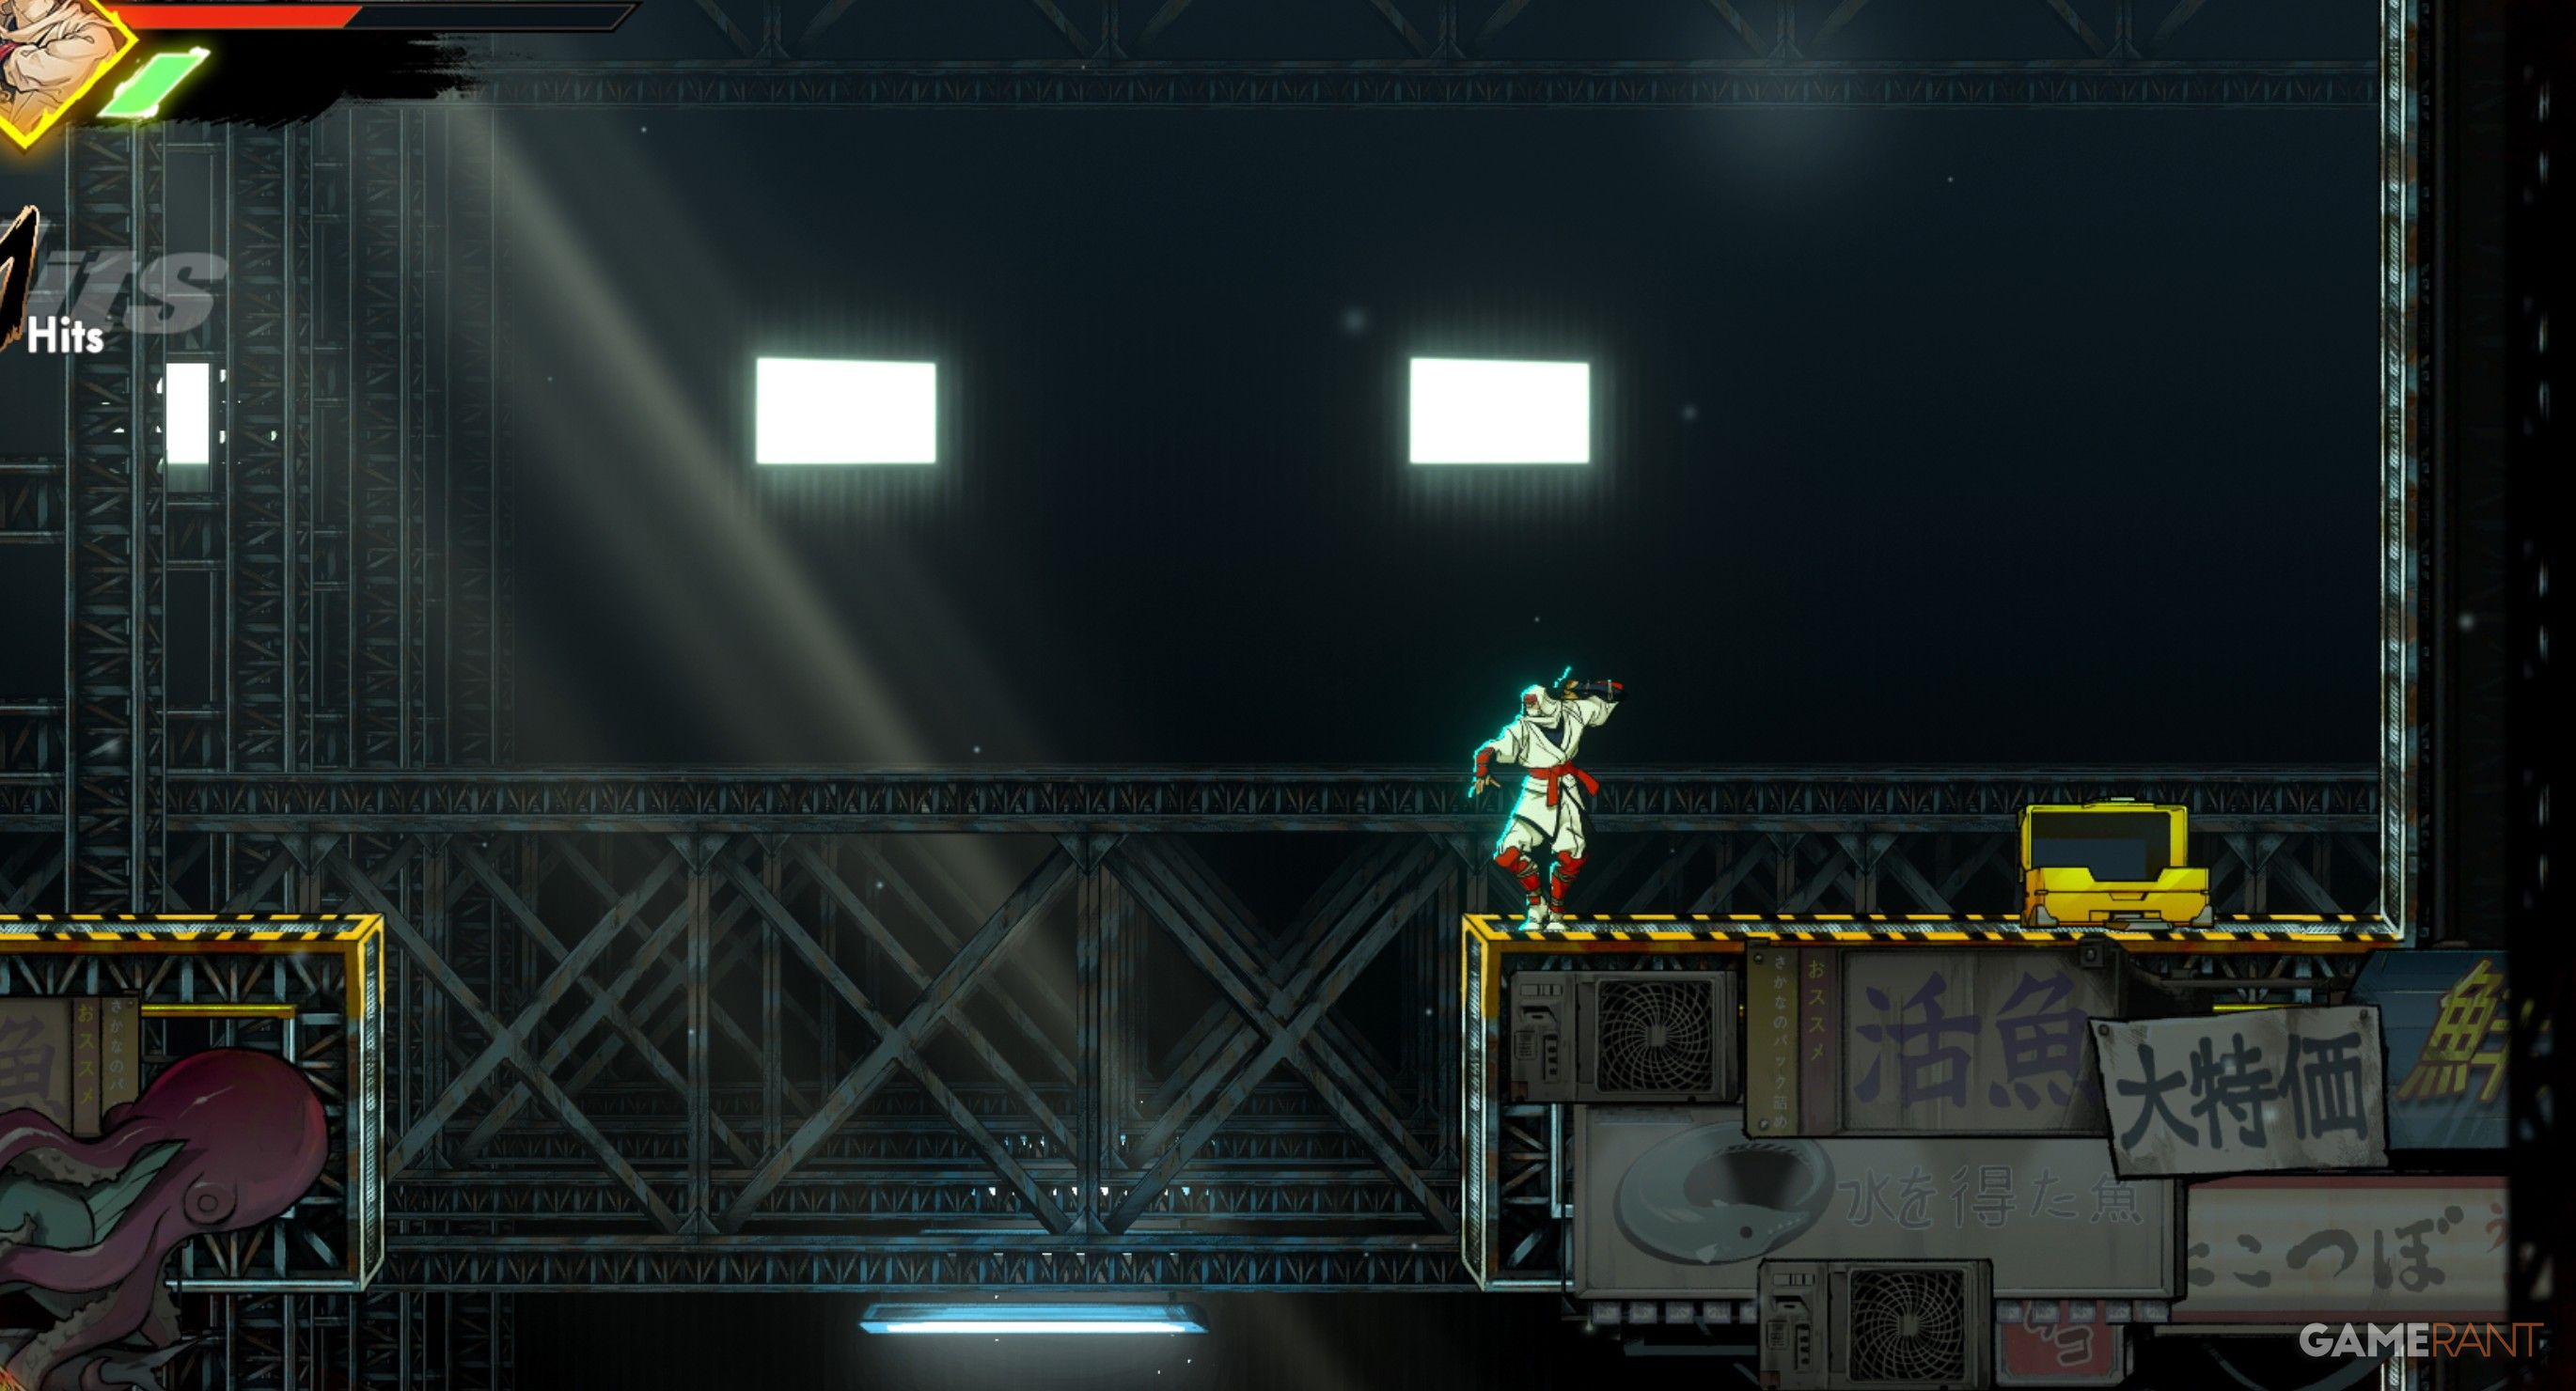
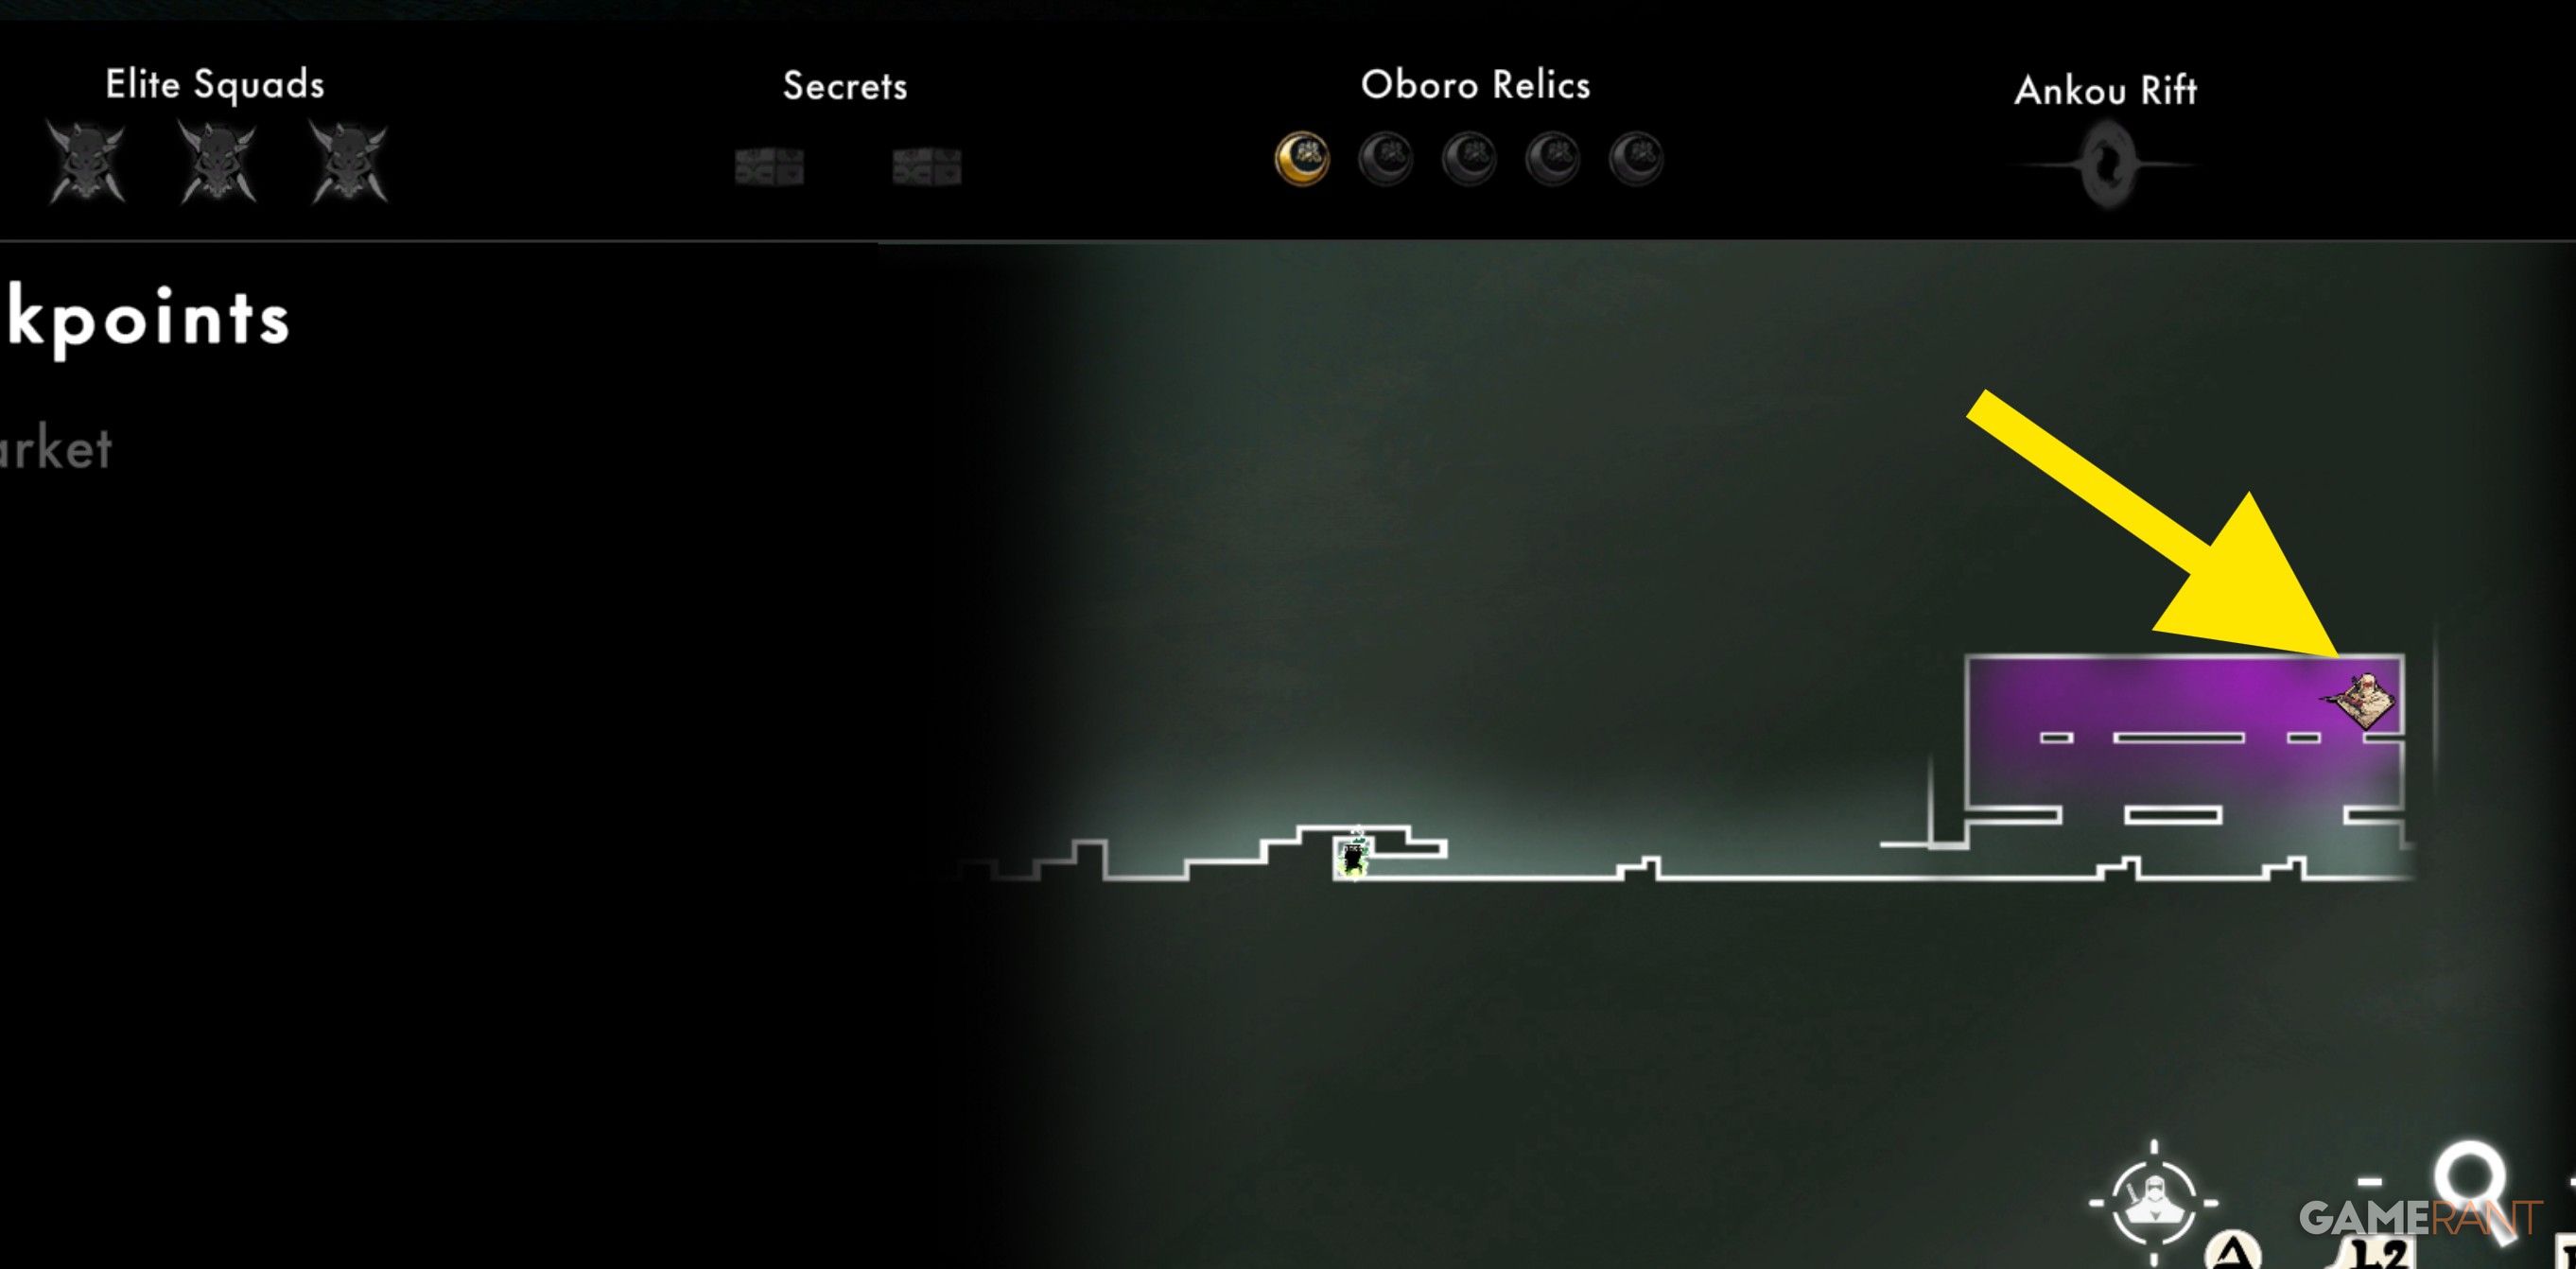
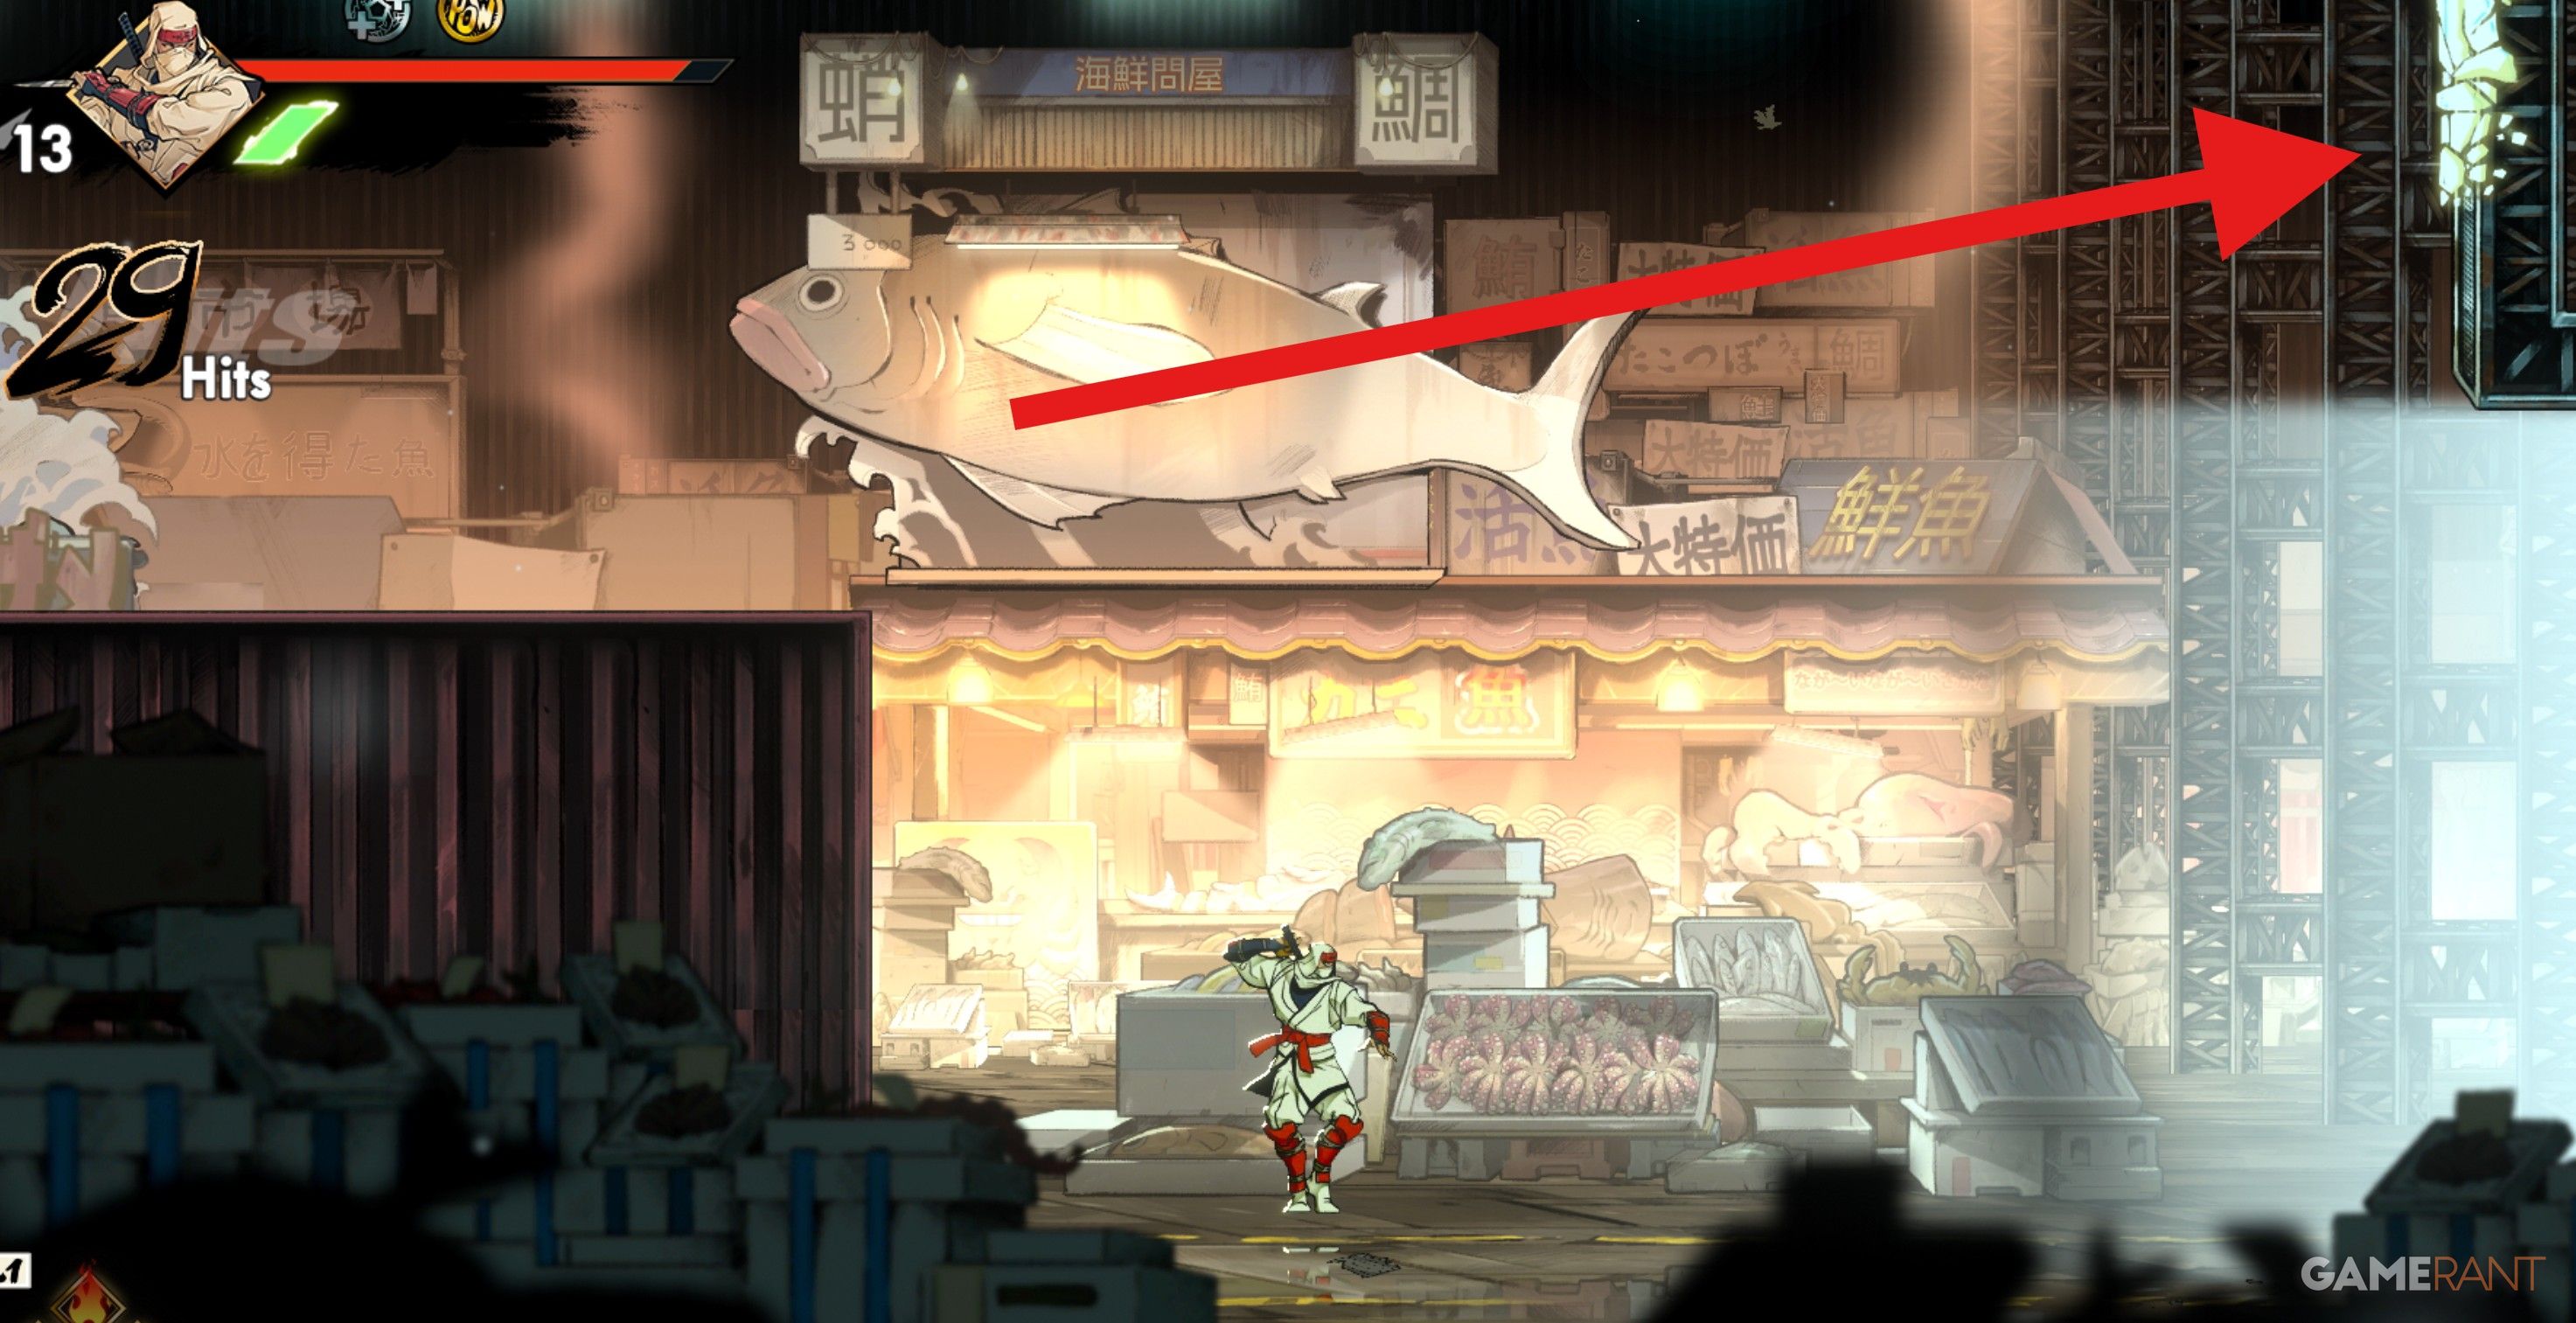
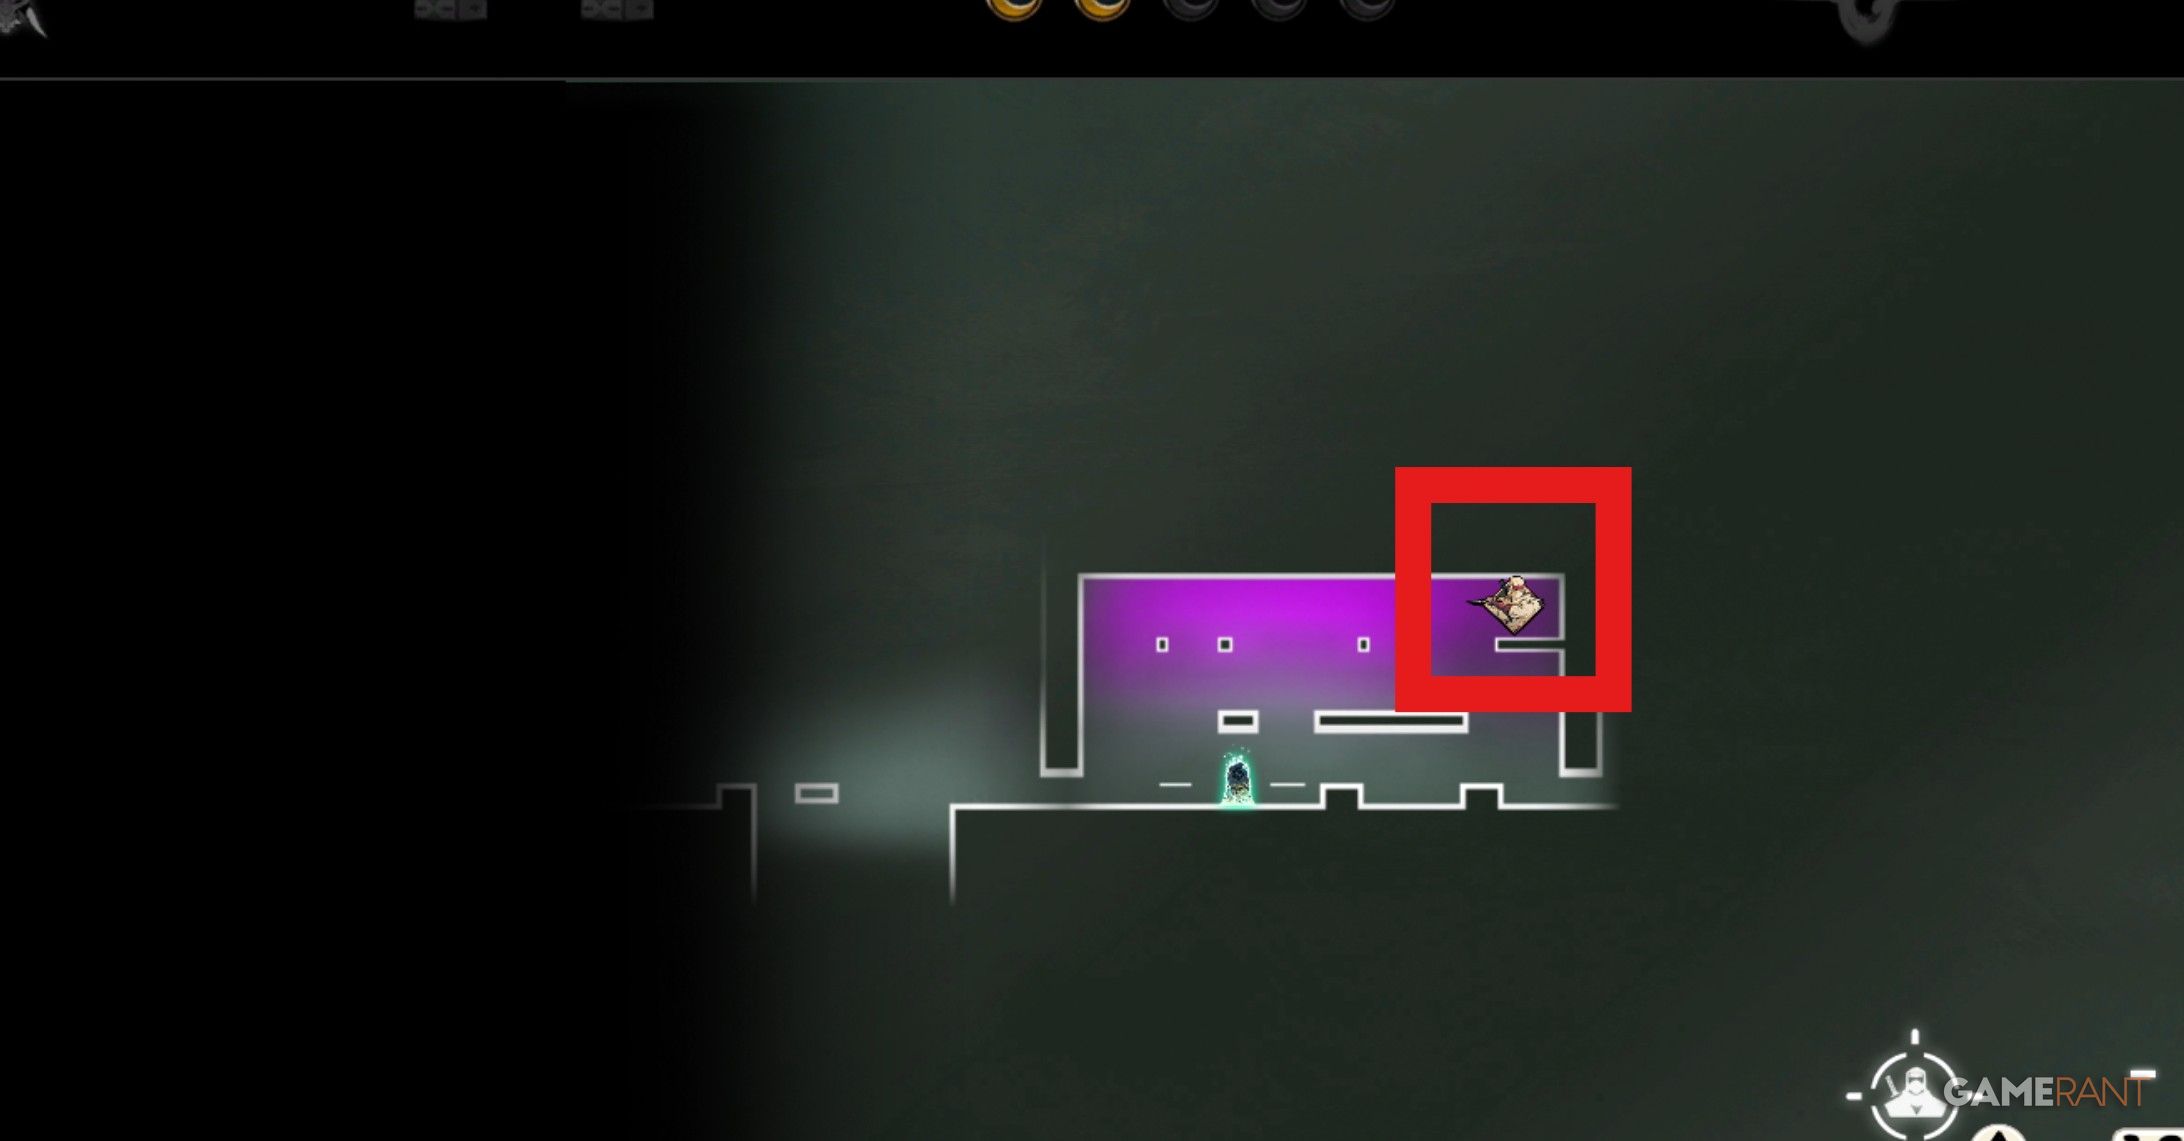
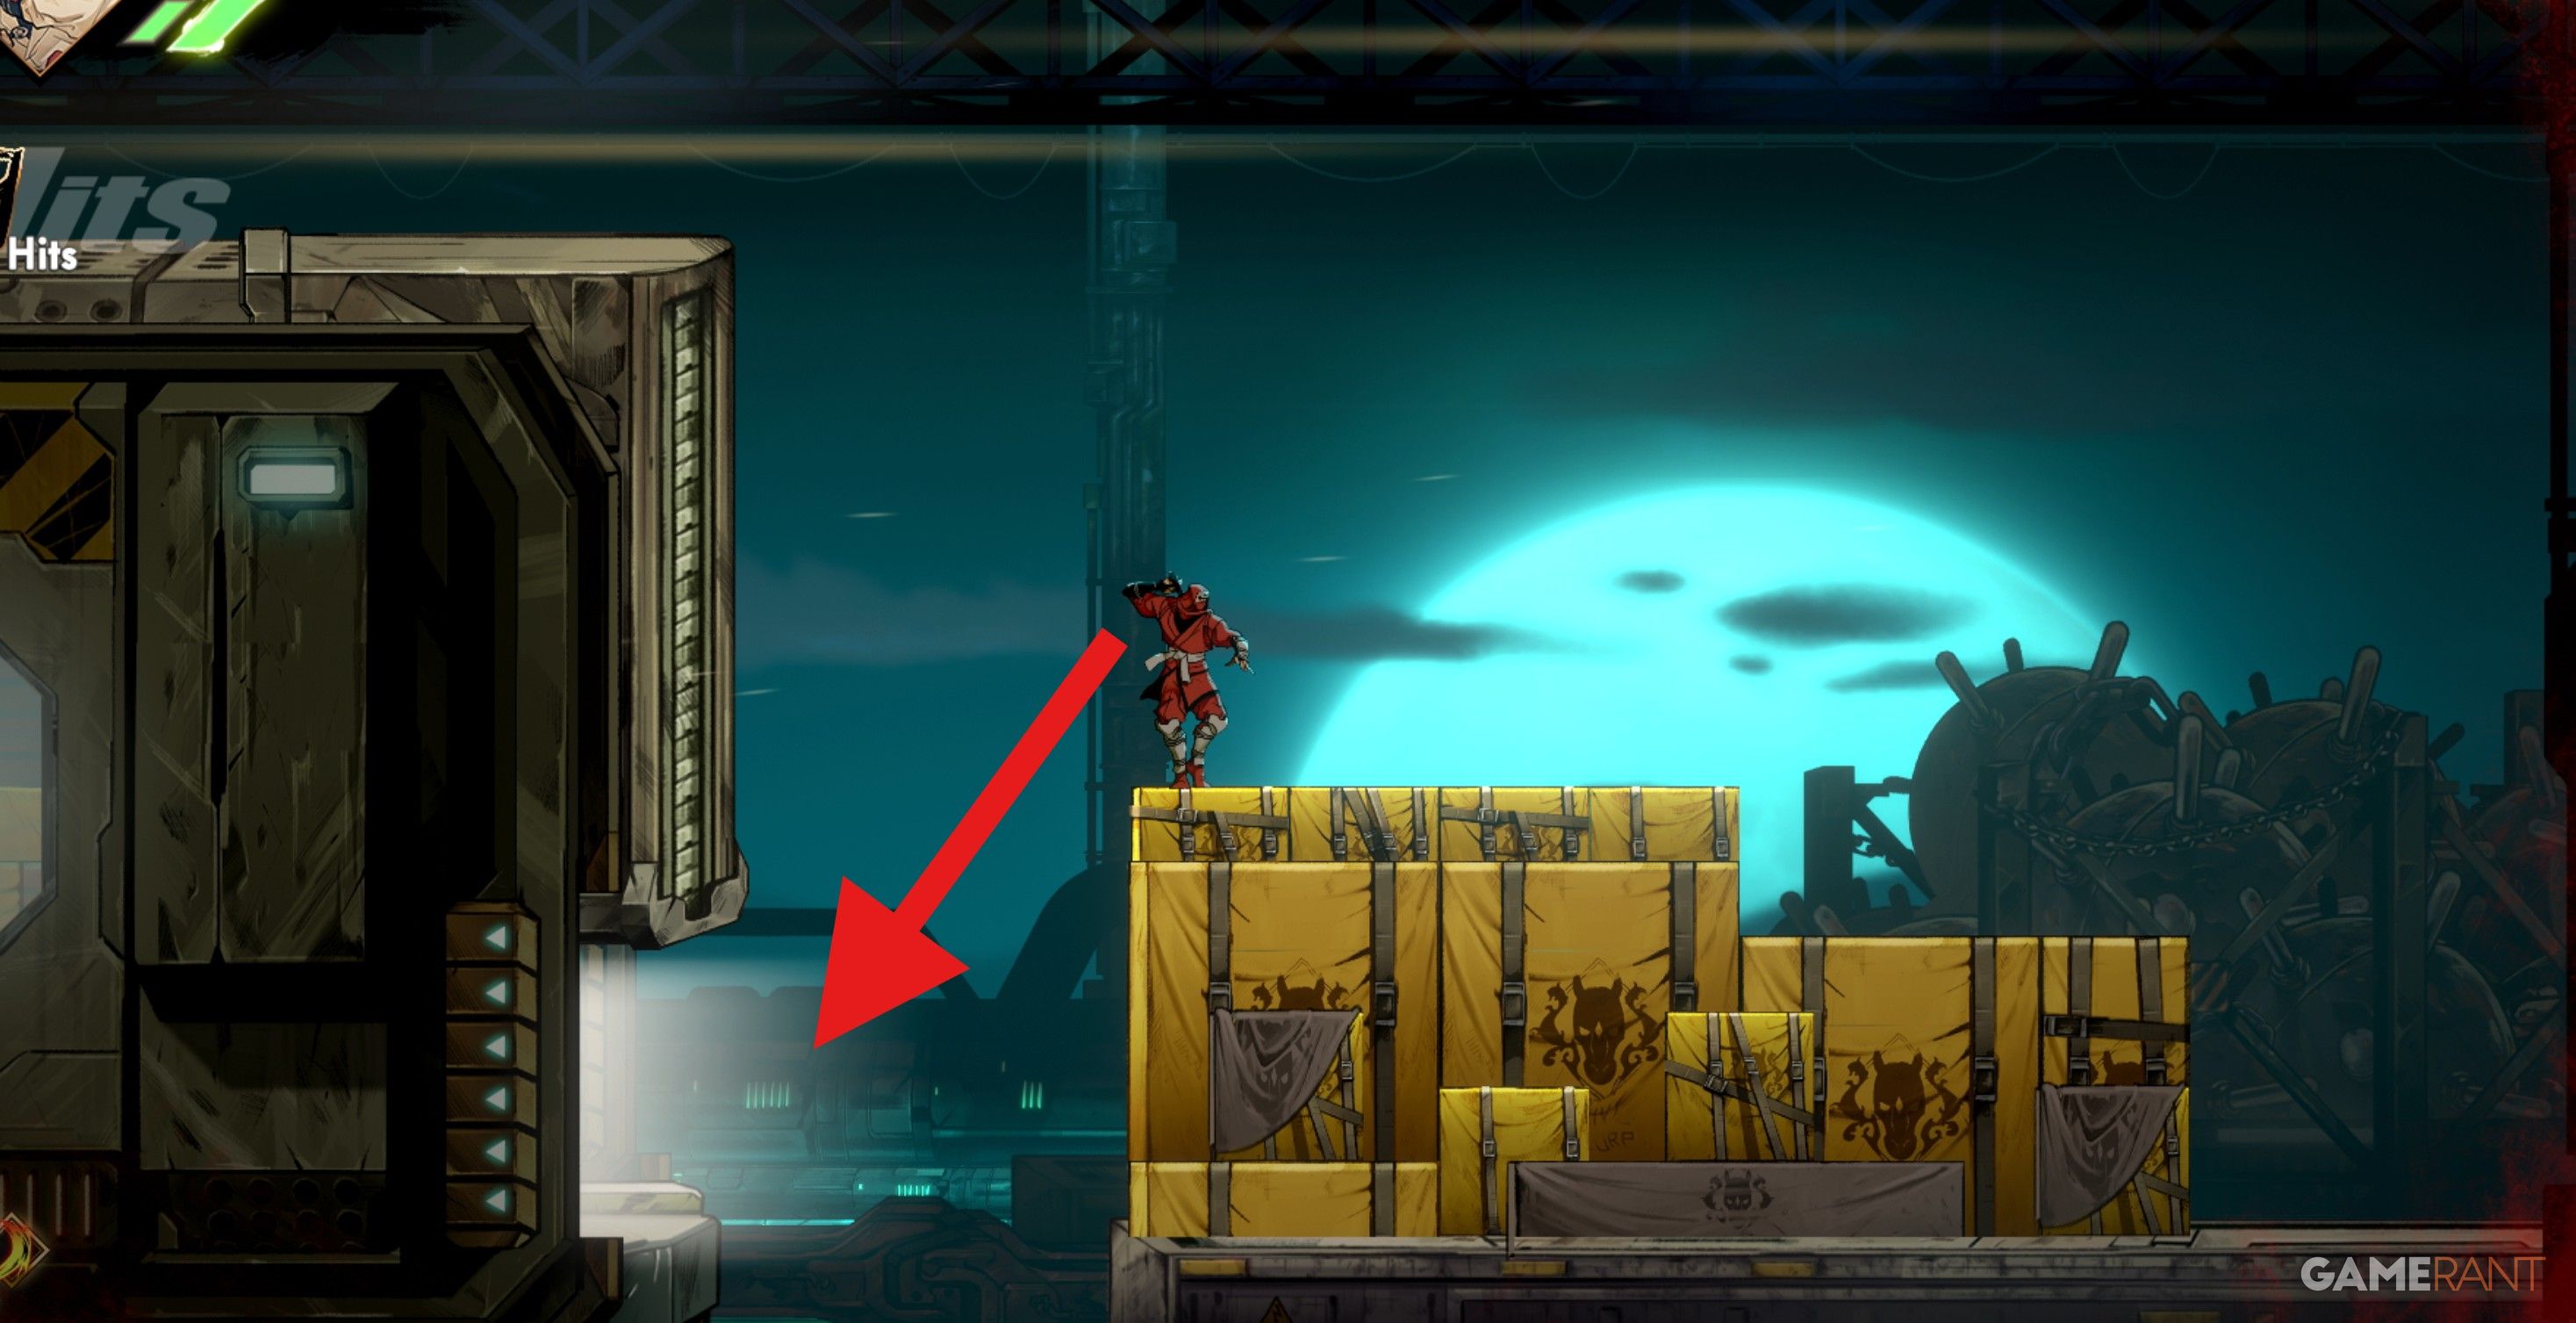
At the checkpoint by the West Entrance, locate the blue marker high up near the SEGA sign. This is where you can utilize your Ninja Hook skill, which you’ll acquire later in the stage. Upon doing so, you’ll enter an optional area to your left. Inside, you may discover the Oboro Relic, an Ankou Rift, a shopping venue, and a hidden chest on the far left that requires the Glider from the Desert level to access.
Fifth Oboro Relic
Leaving from the city’s main checkpoint, veer rightward and pass by the store owned by the vendor. You will discover a series of platforms along the way that allow you to leap onto them, ultimately leading you to the last artifact of the level.
All Oboro Relics in Fish Market in Shinobi Art of Vengeance
First Oboro Relic
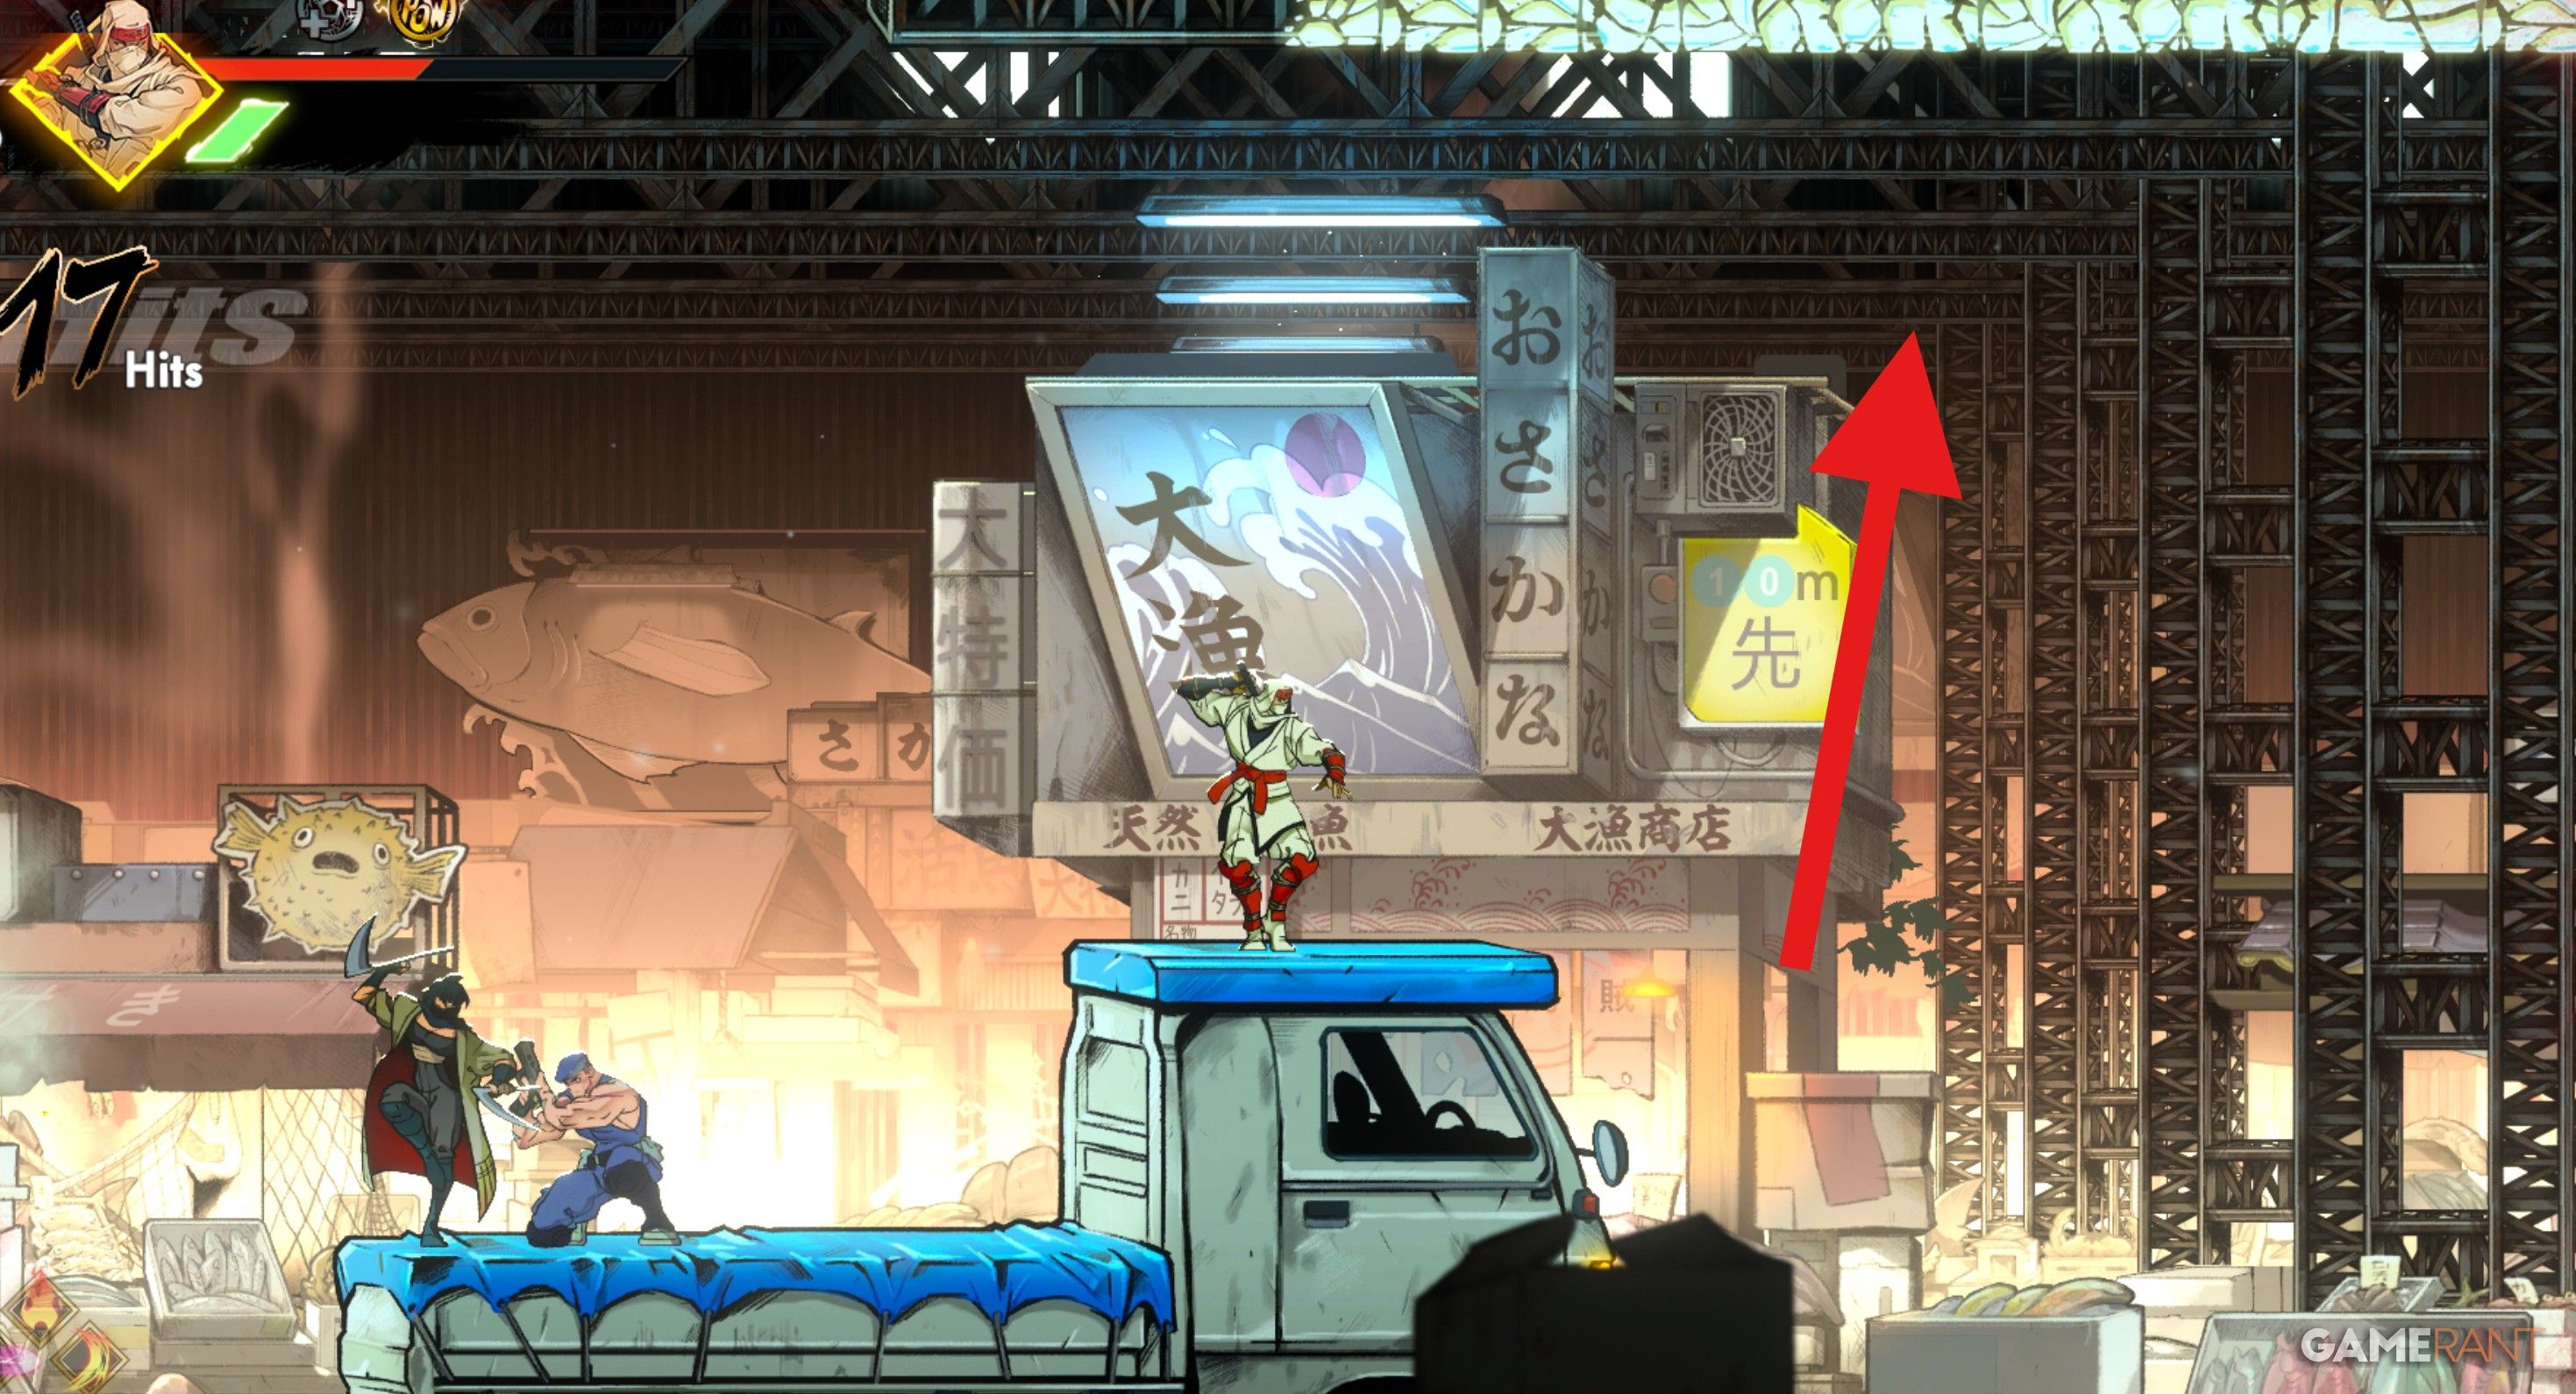
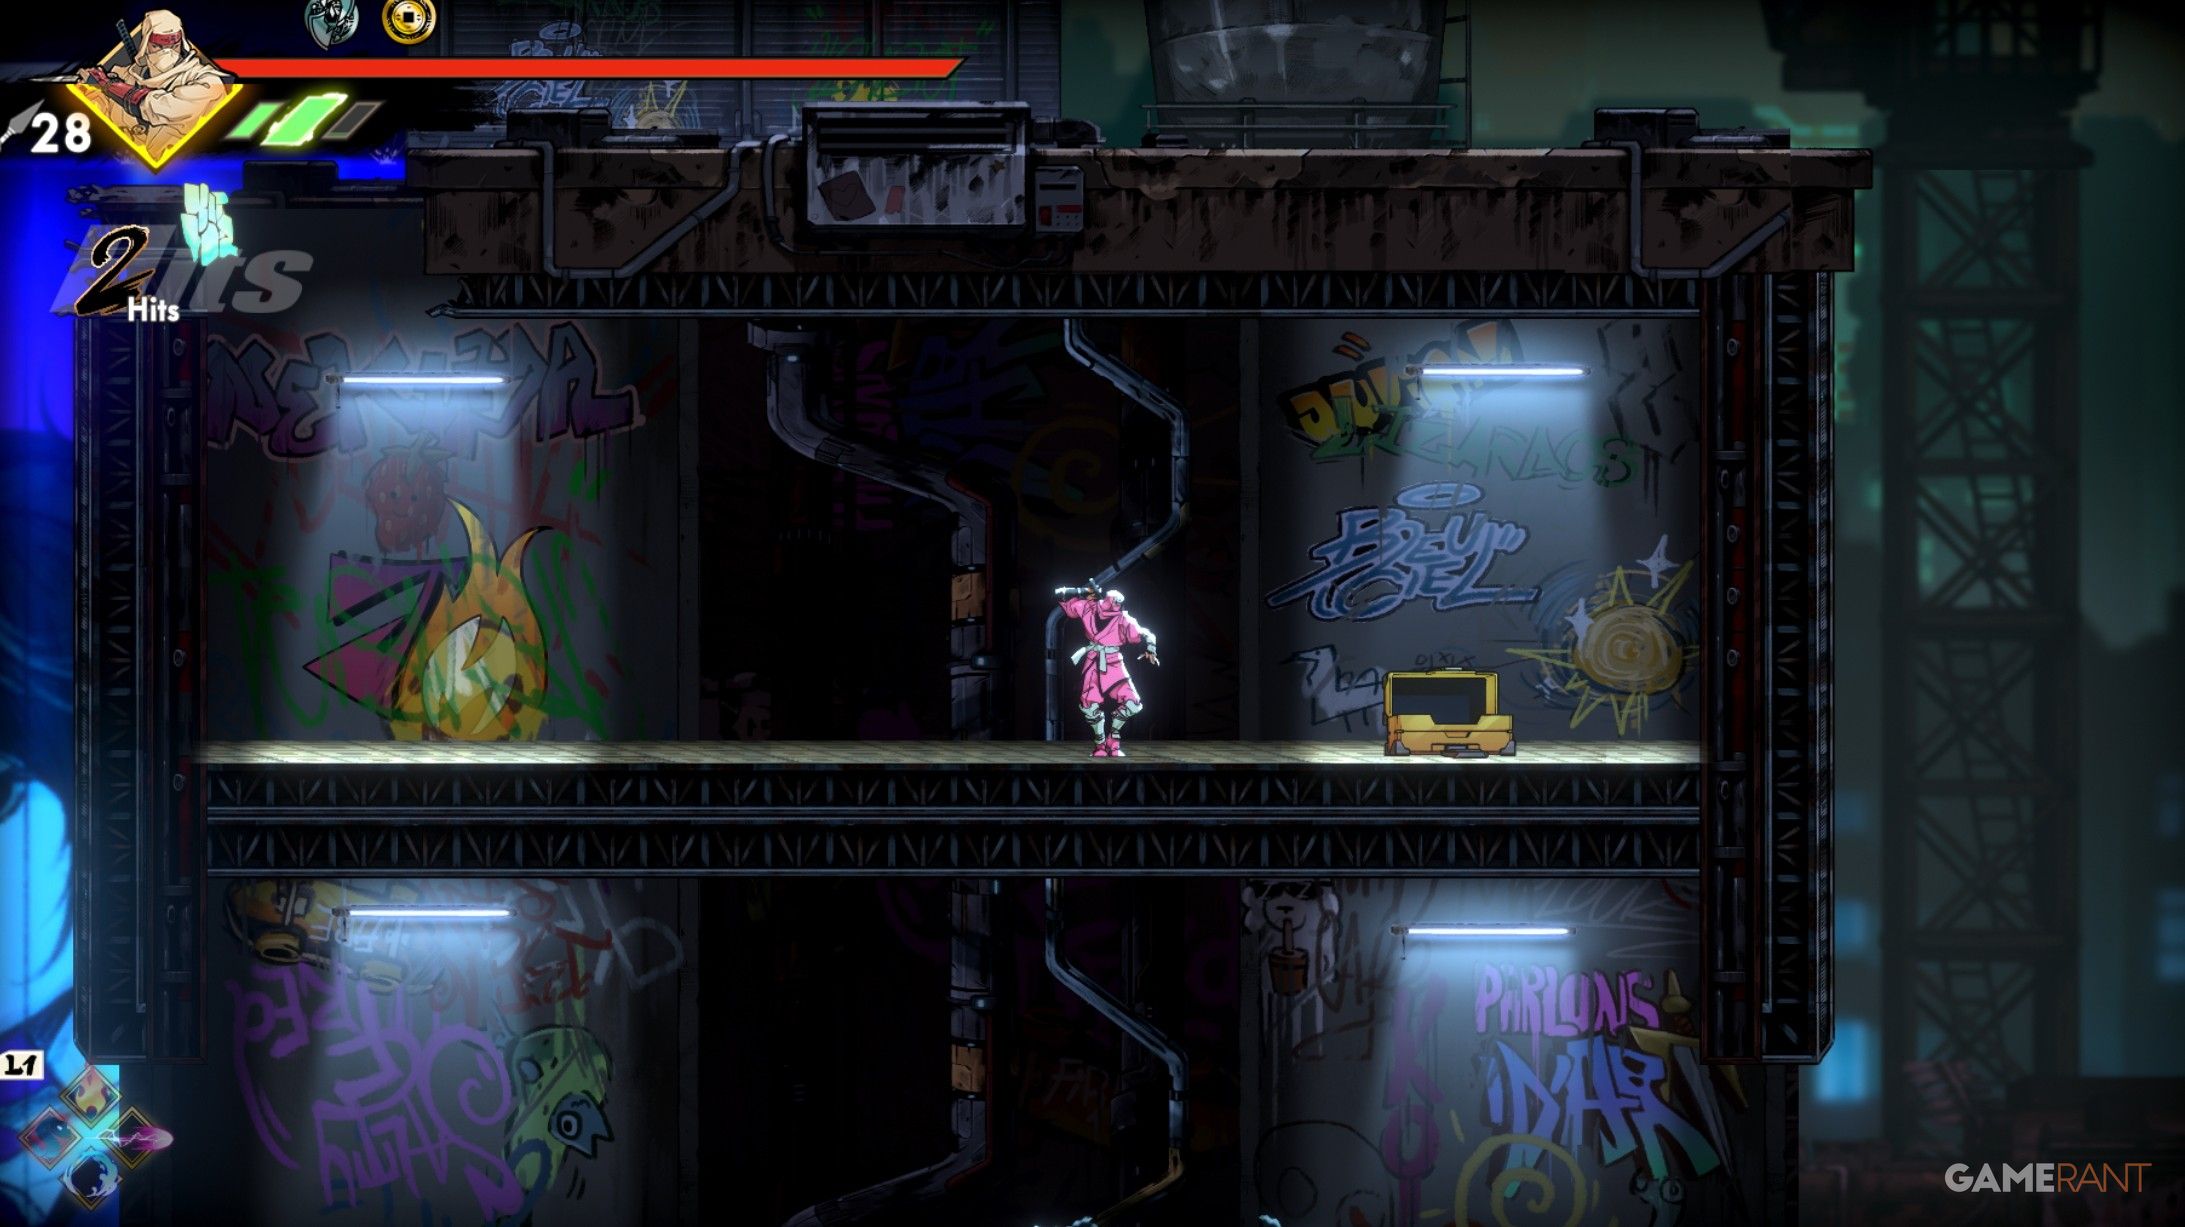
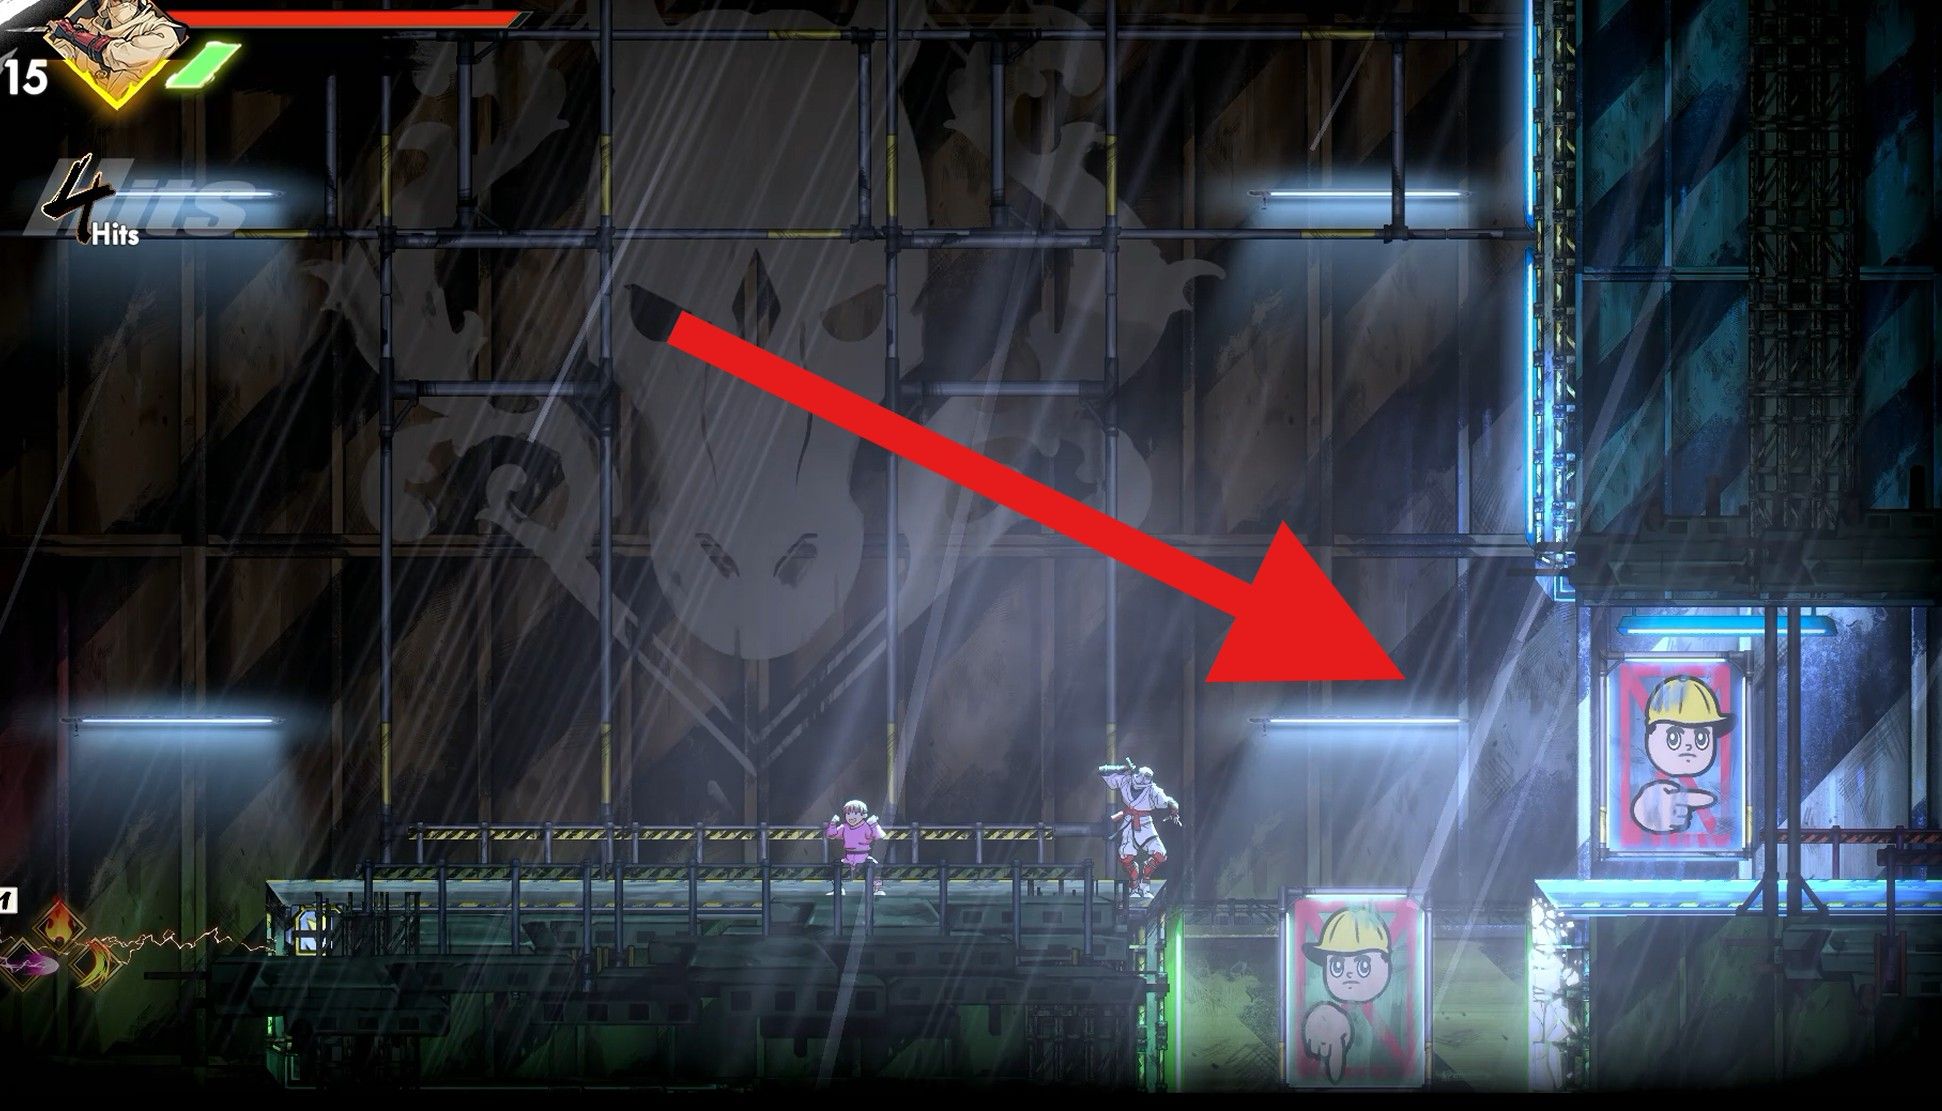
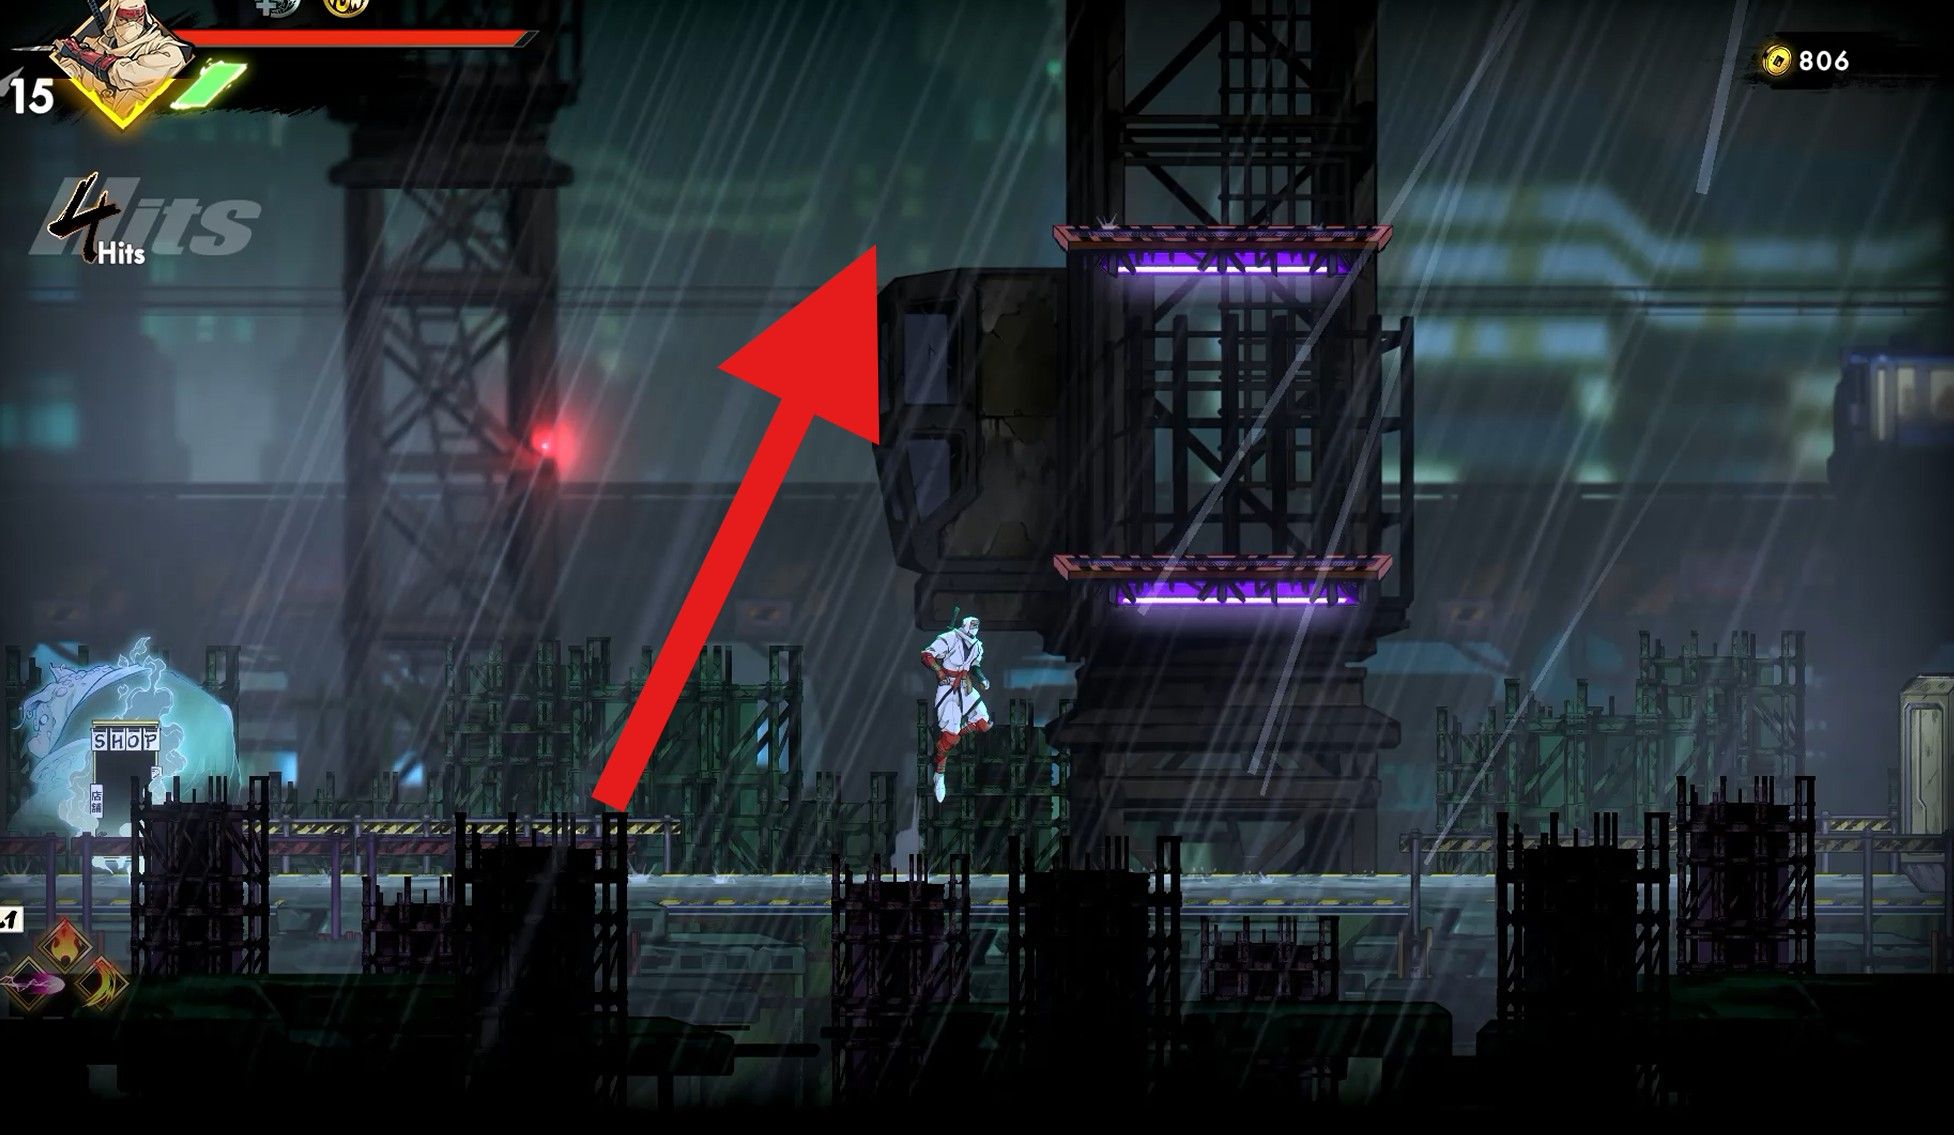
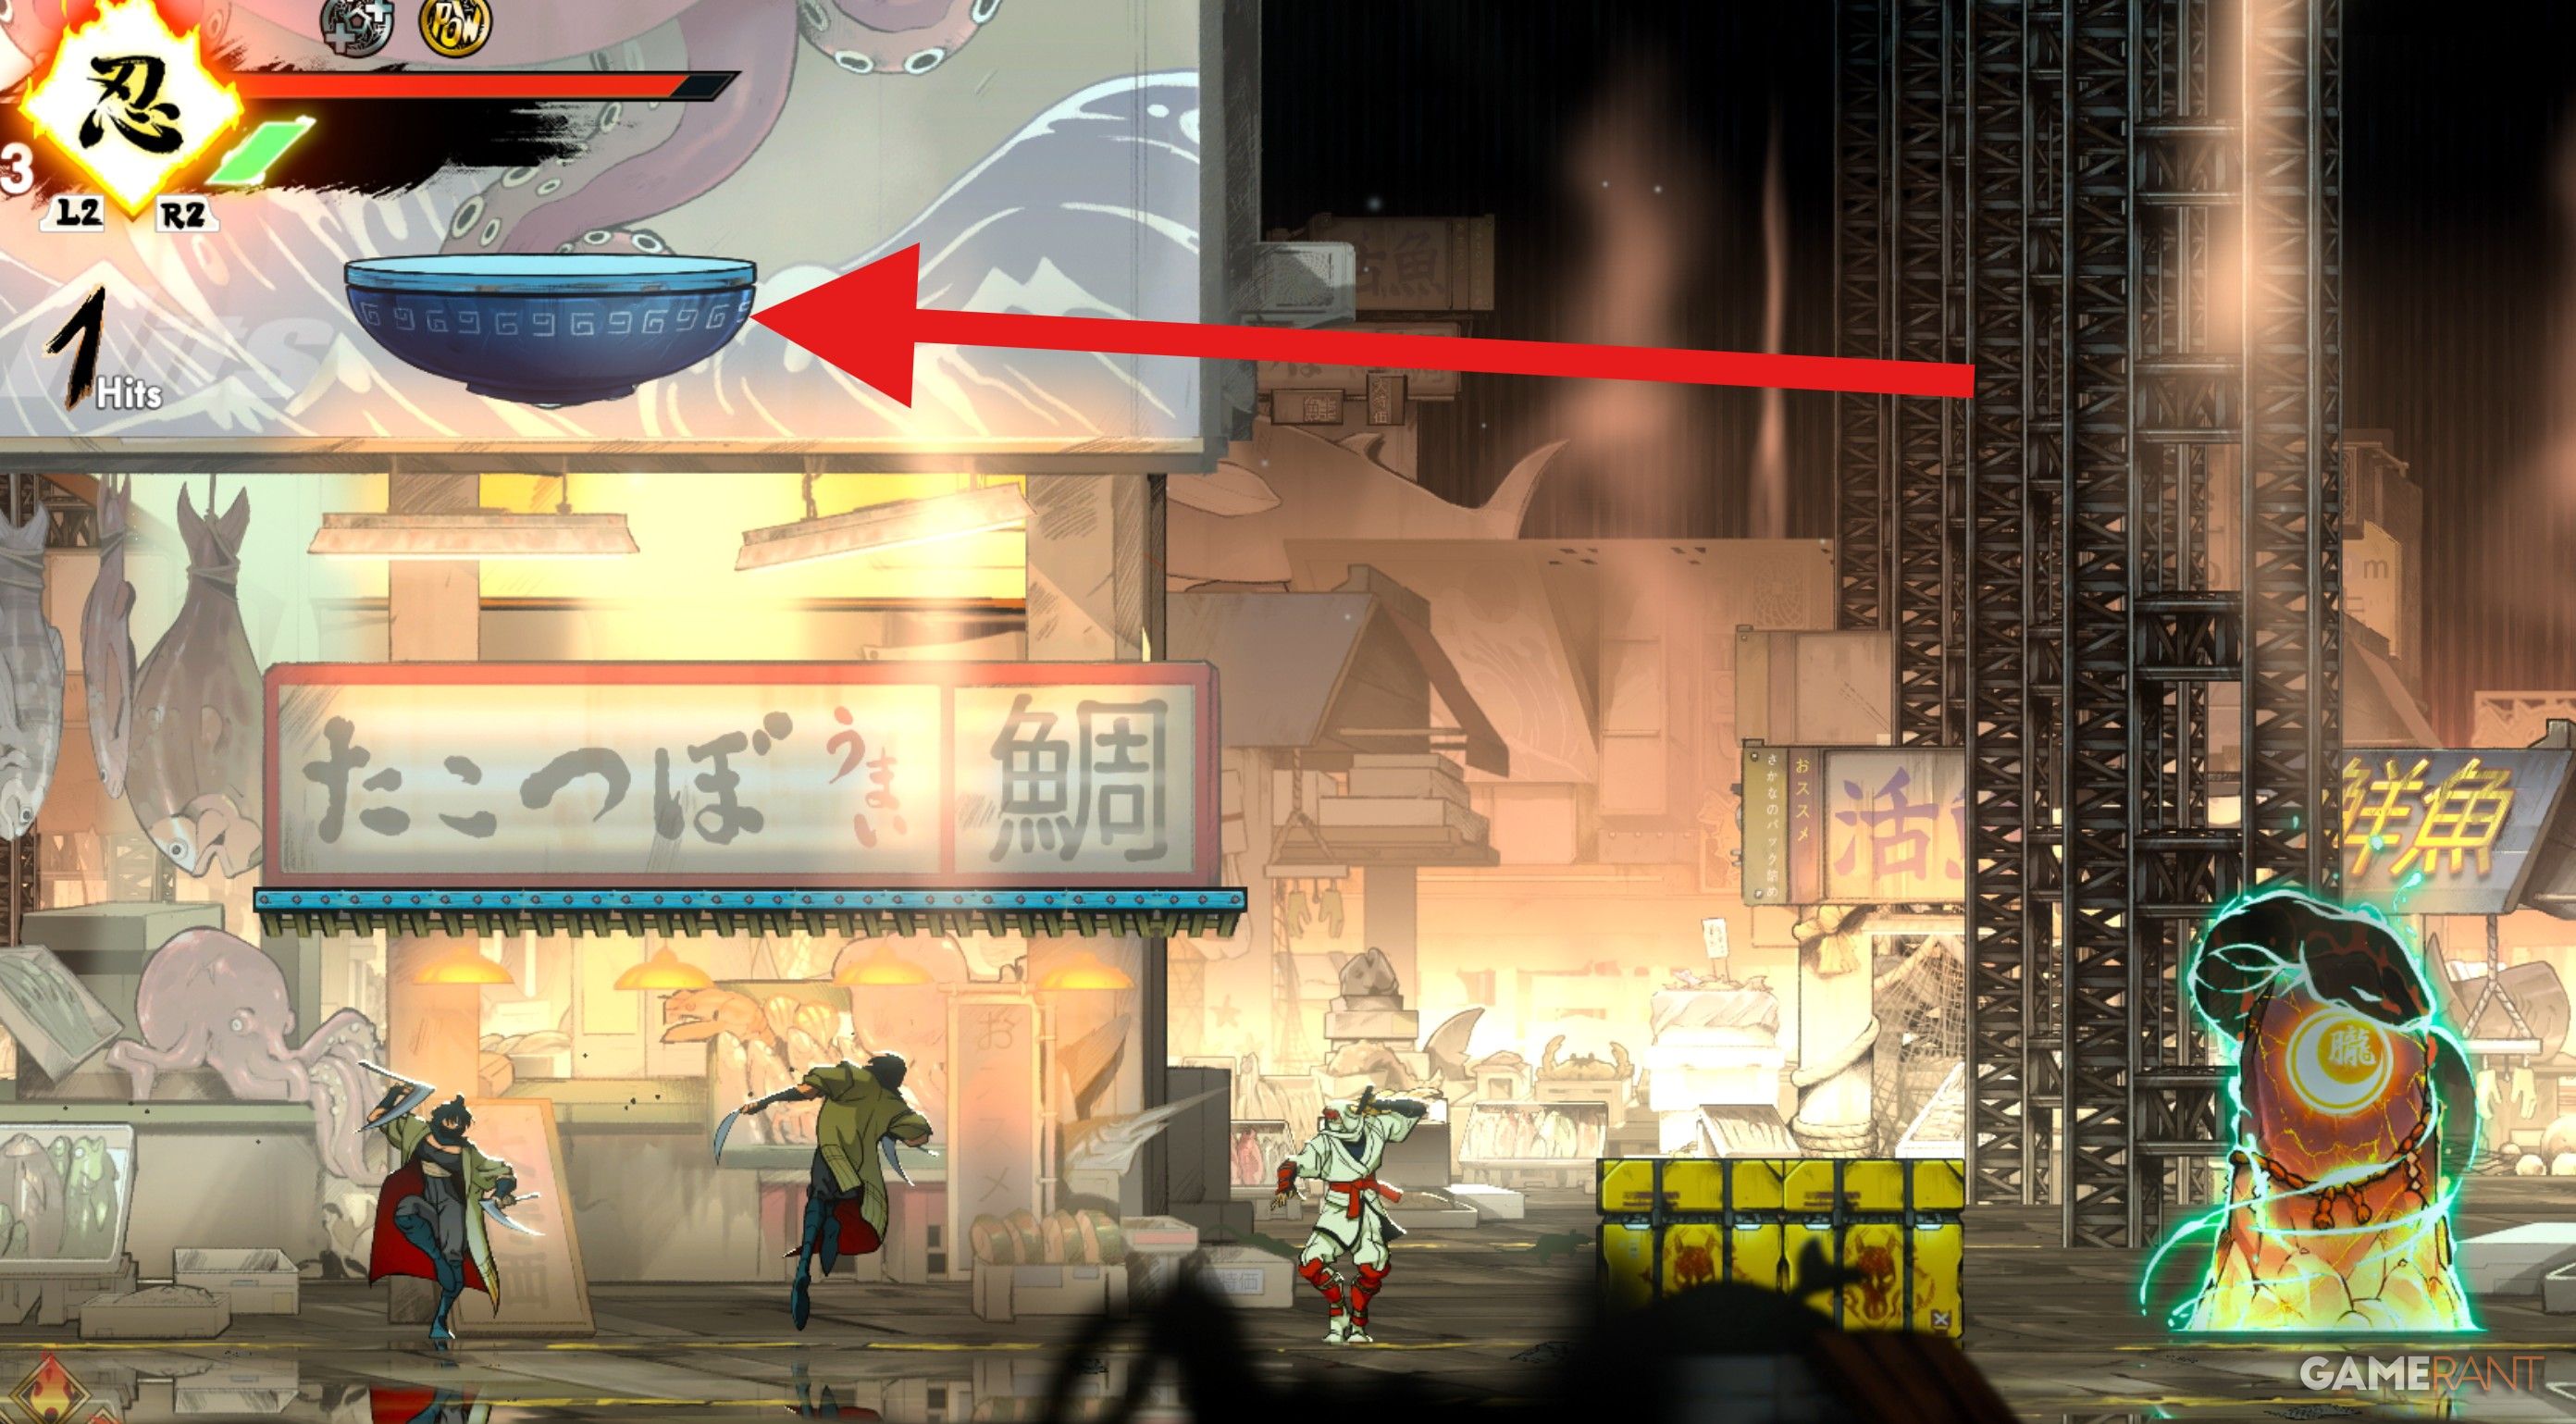
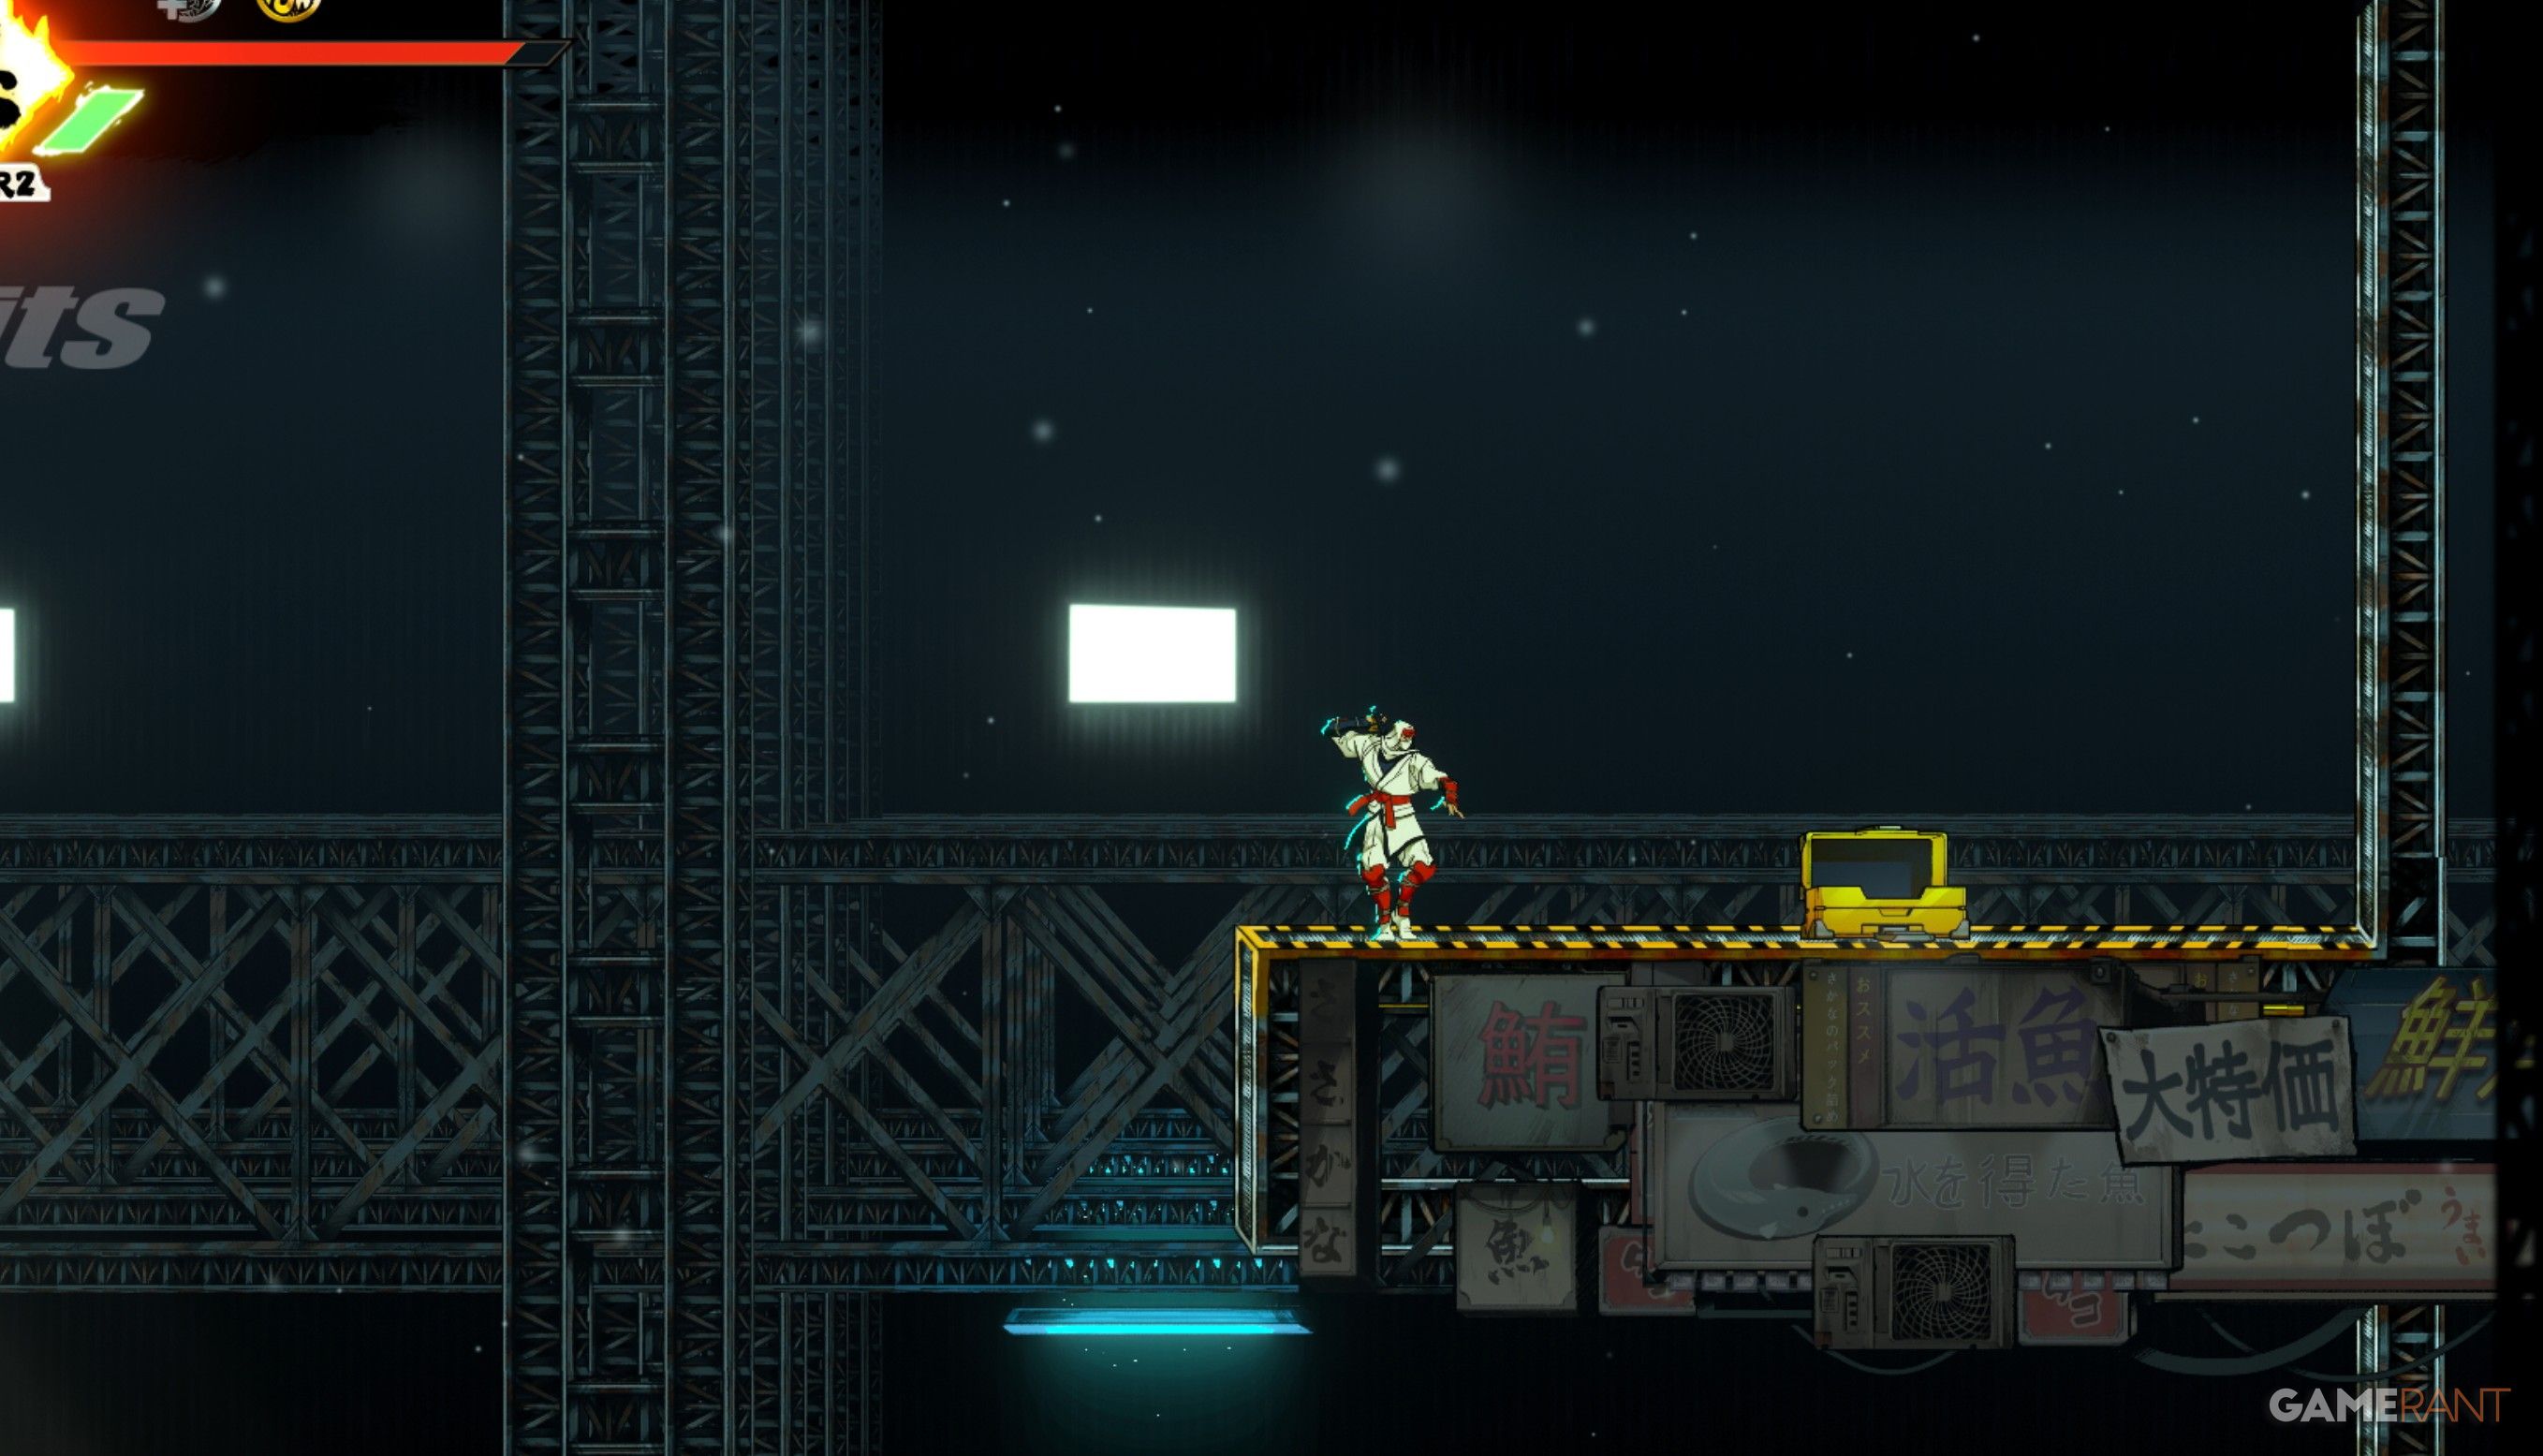
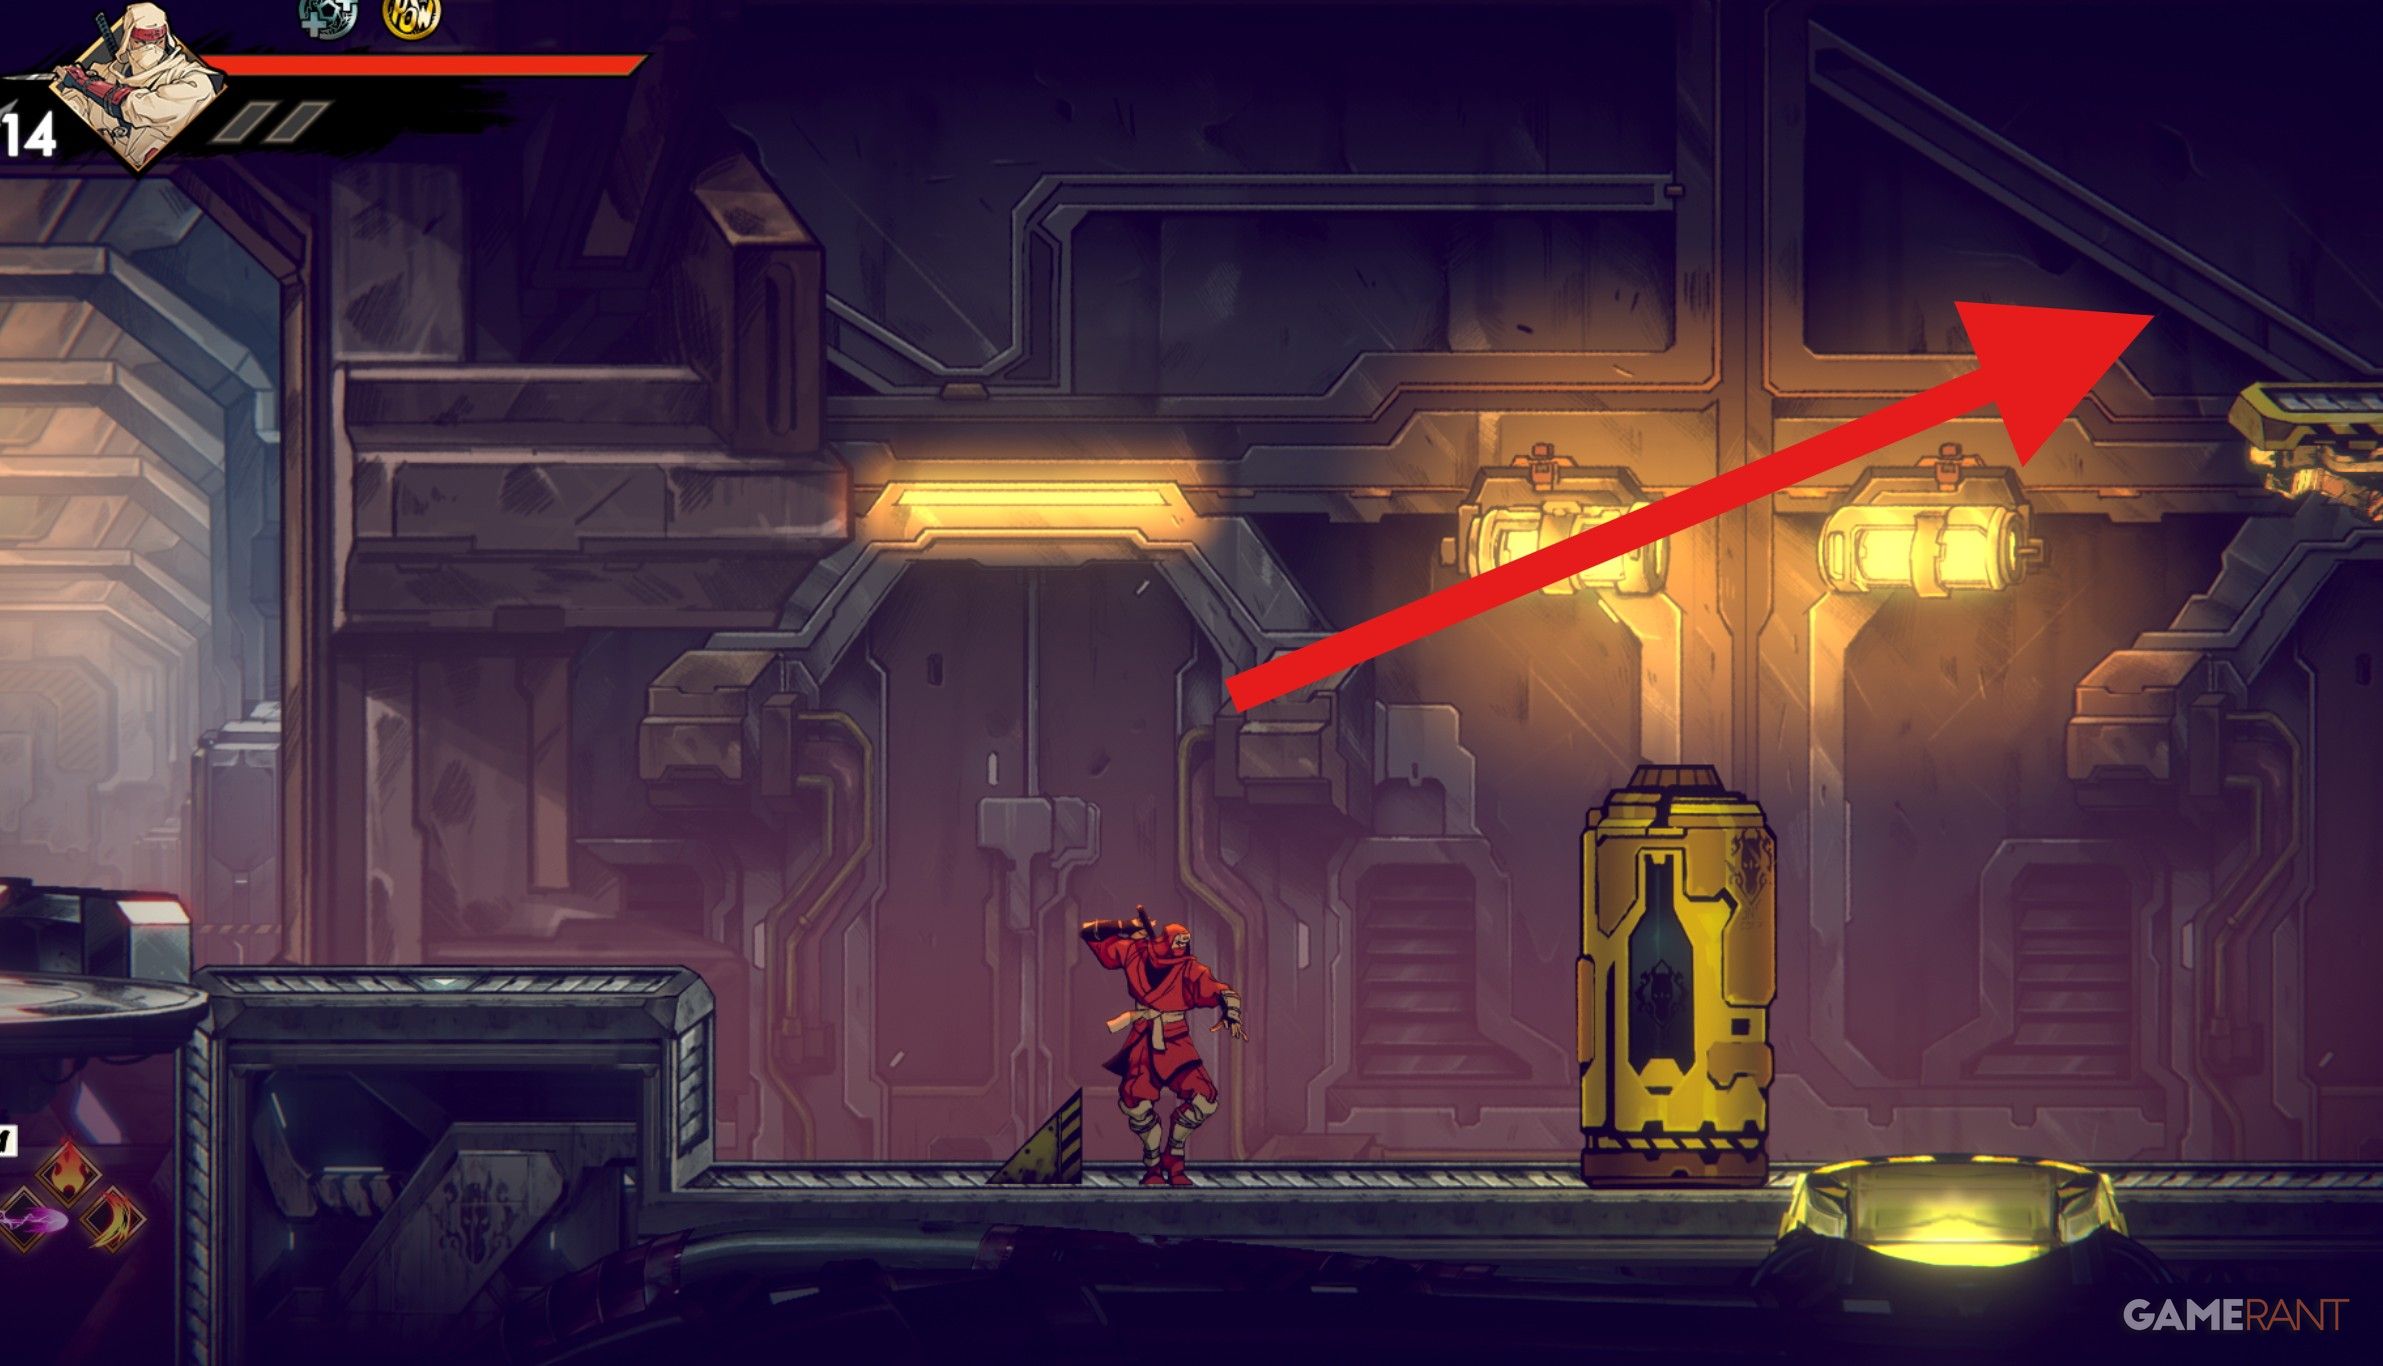
As soon as you step into the bustling fish market, position yourself atop the initial blue vehicle you come across along the pathway, and you’ll discover a section of the ceiling overhead is reachable using your Ninja Claws power.
To discover the secret location, proceed towards your right, followed by an upward direction. After that, move to your left and again ascend until you encounter some adversaries. Once you have defeated them, look for the Oboro Relic within a treasure chest ahead.
Second Oboro Relic

After clearing the Warehouse checkpoint, you’ll notice a wall on the right just before the exit that can be scaled using your Ninja Claws, similar to the last Relic. To locate another wall for scaling, veer left, climb up, and then move to the right where some chests await.
Third Oboro Relic
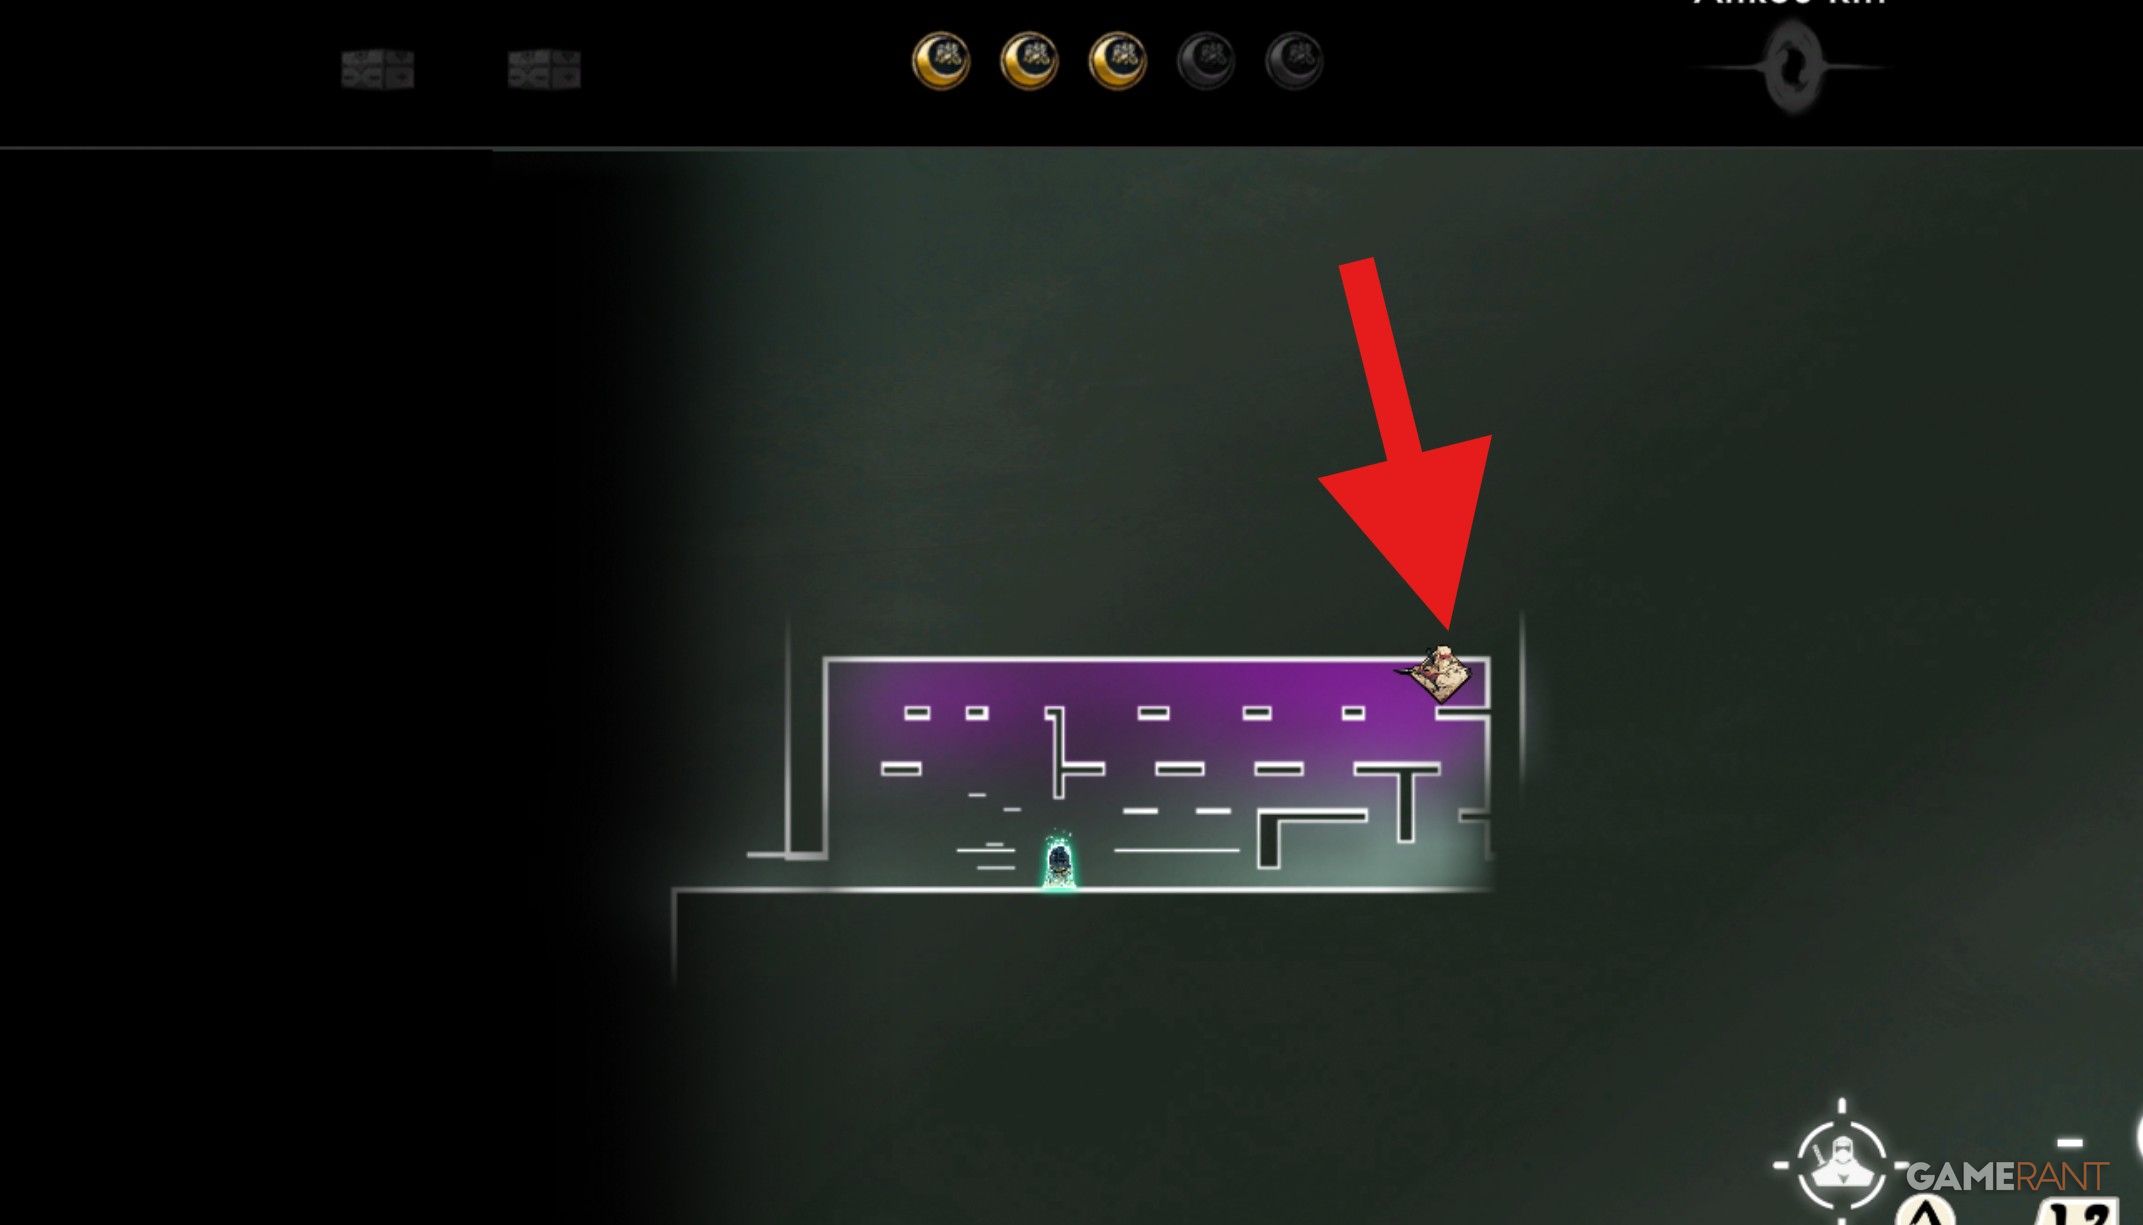
As a gamer, here I am, stationed right beside the Octo Sign checkpoint. From this spot, an intriguing sight catches my eye – a spinning octopus-carrying platform! I hop onto one and let it whisk me skyward. Next, I leap towards the platform on the left, discovering a wall ripe for some good old Ninja Claw action. With determination in my heart, I choose the upper path, which guides me smoothly to my coveted collectible.
Fourth Relic
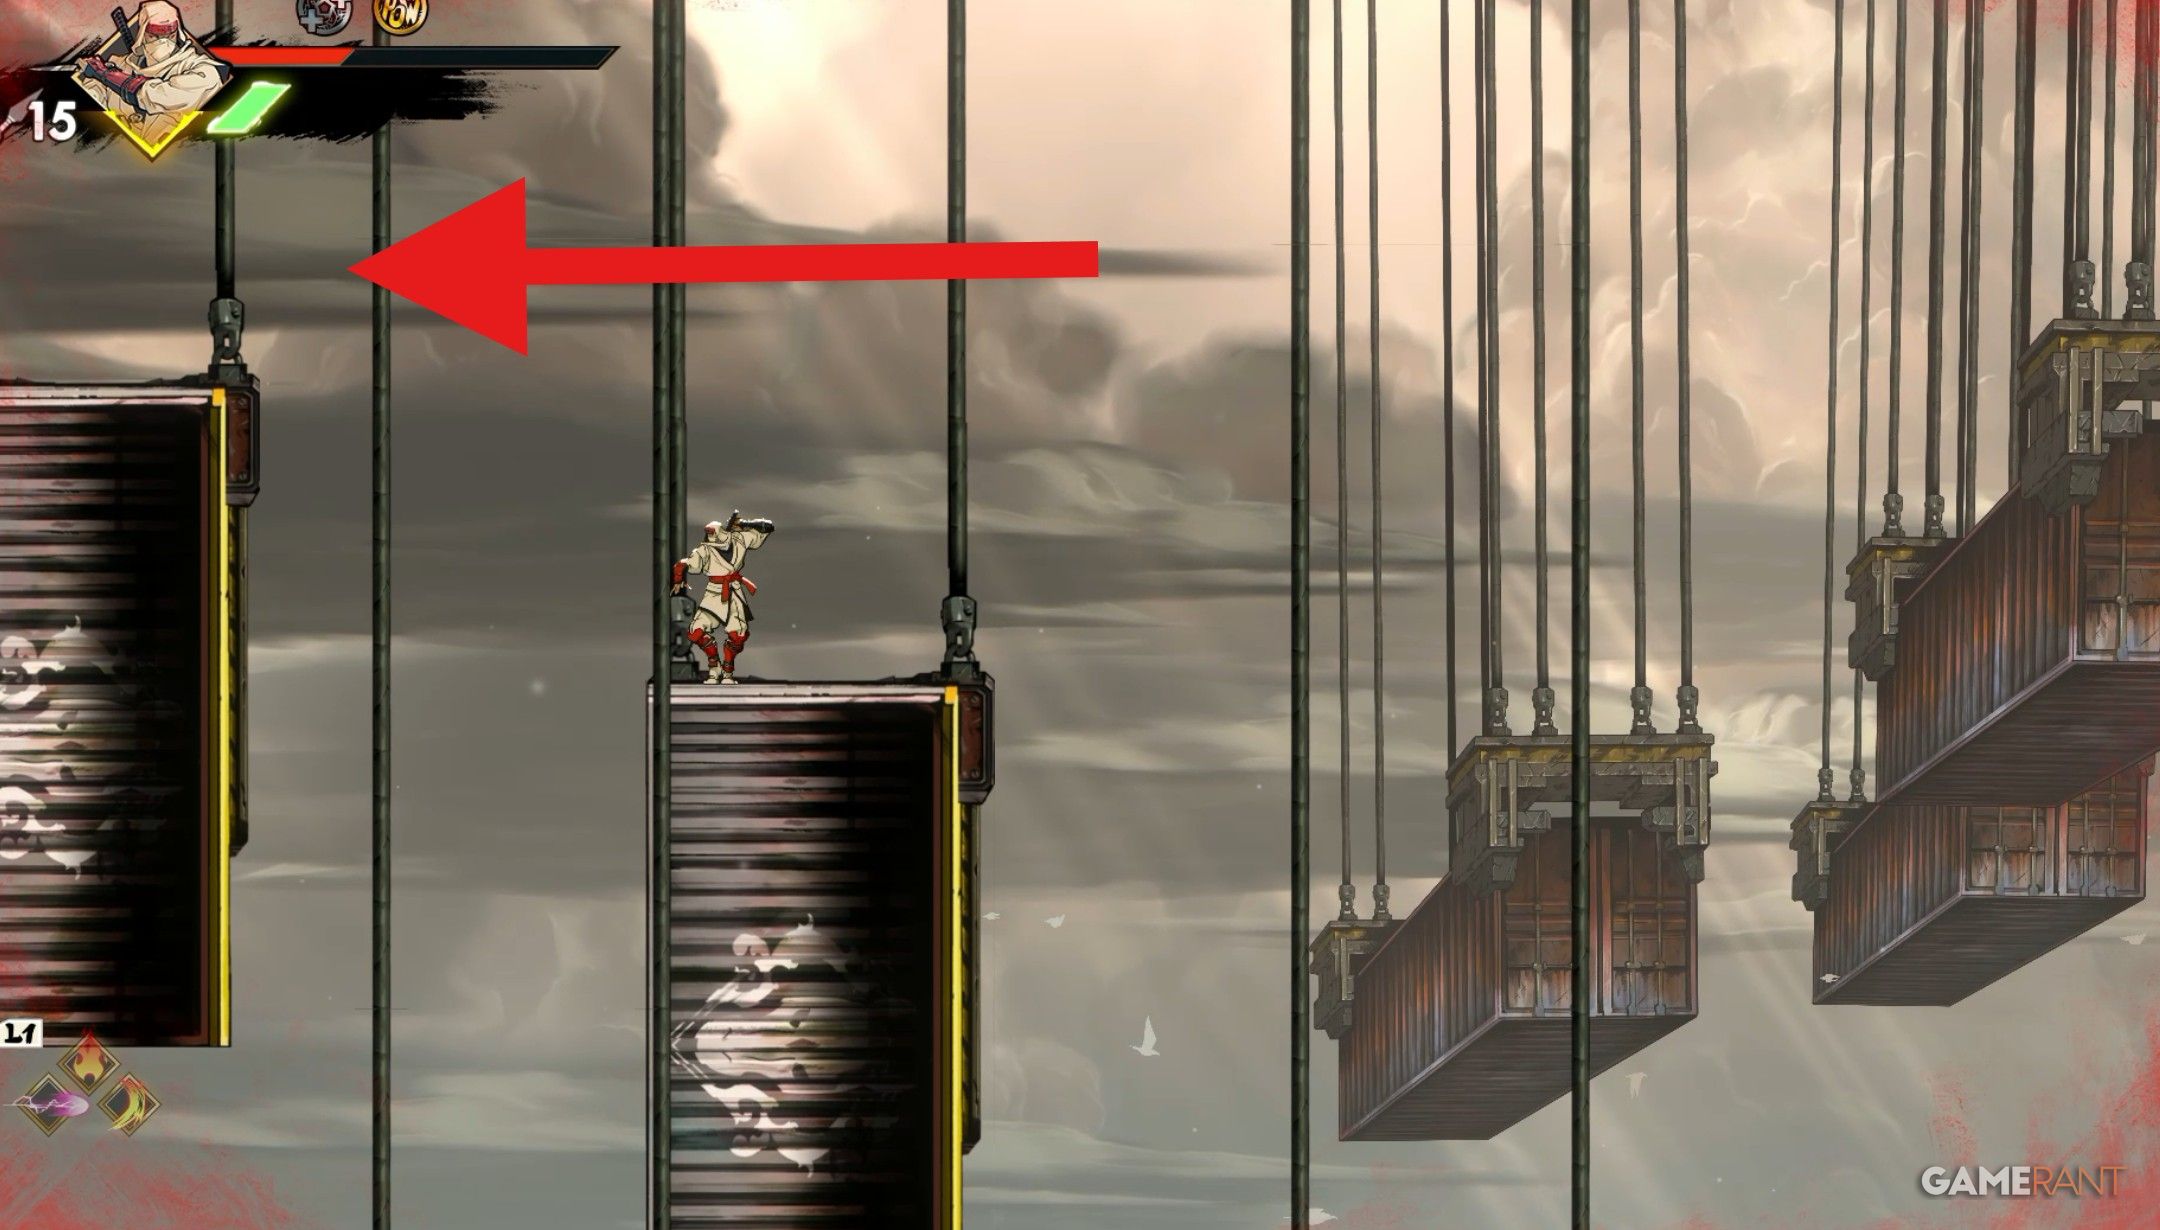
Following the Storage Checkpoint, you’ll encounter a stage requiring you to leap onto moving cargo containers. When you reach a pair of containers suspended vertically, stand on the left one and let it lift you up. You’ll notice a platform to your left; just navigate along that path towards the Relic.
Fifth Oboro Relic
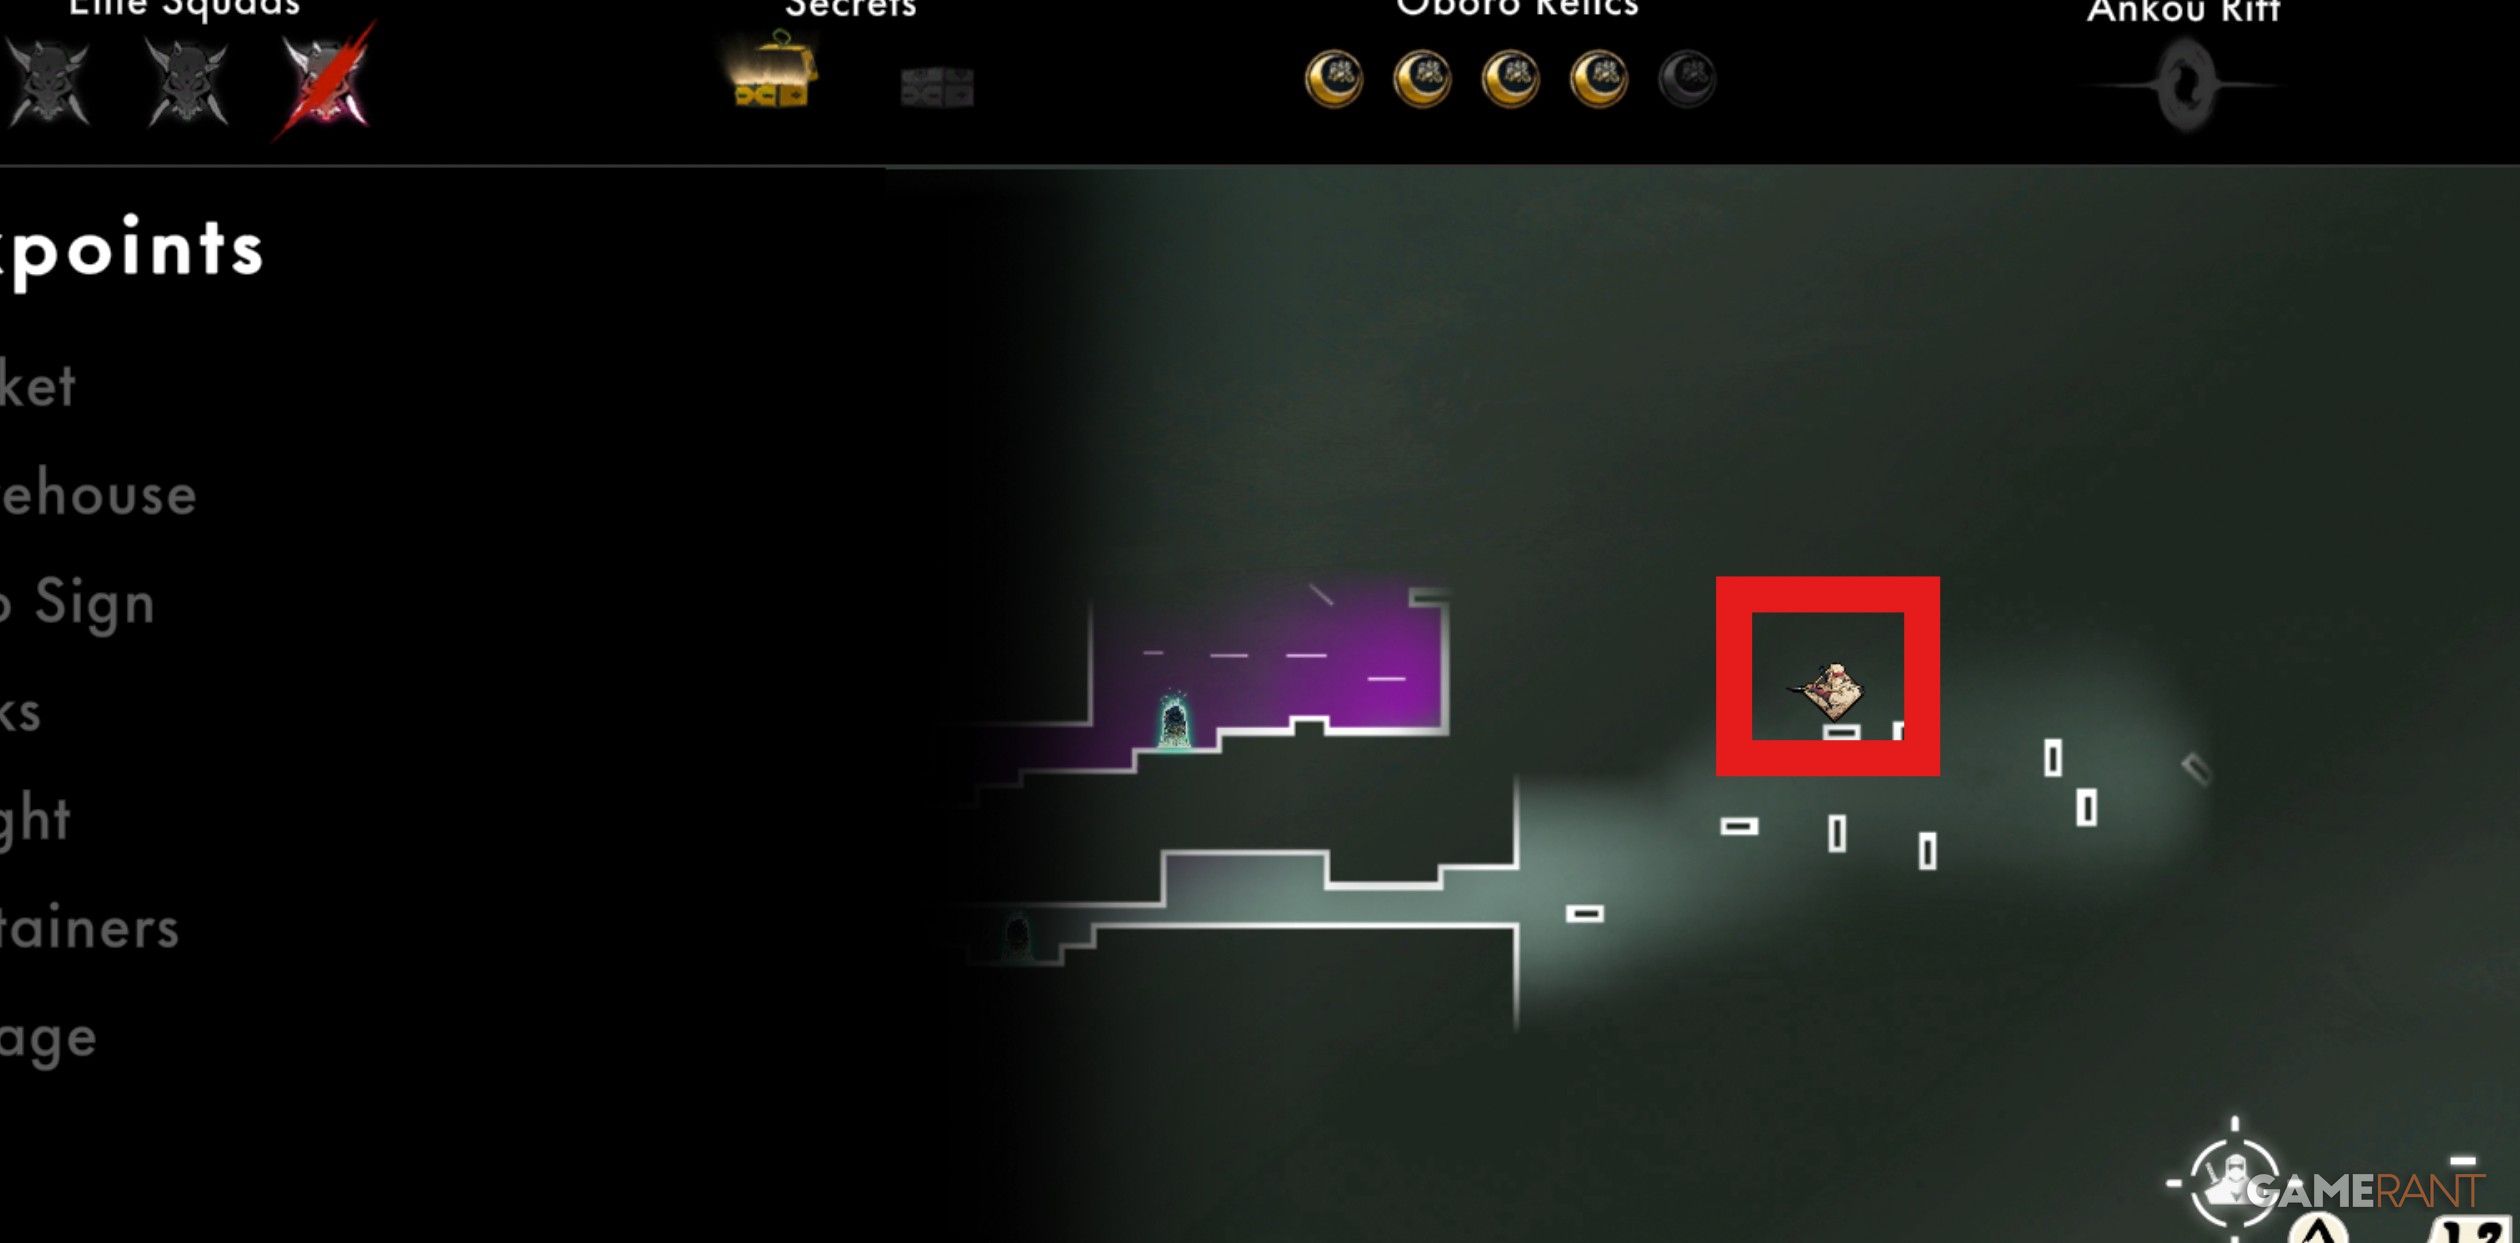
Make your way to the Storage checkpoint location, which is above the Containers checkpoint. Once there, go right, then upward, and finally turn left to discover the treasure chest containing the Relic.
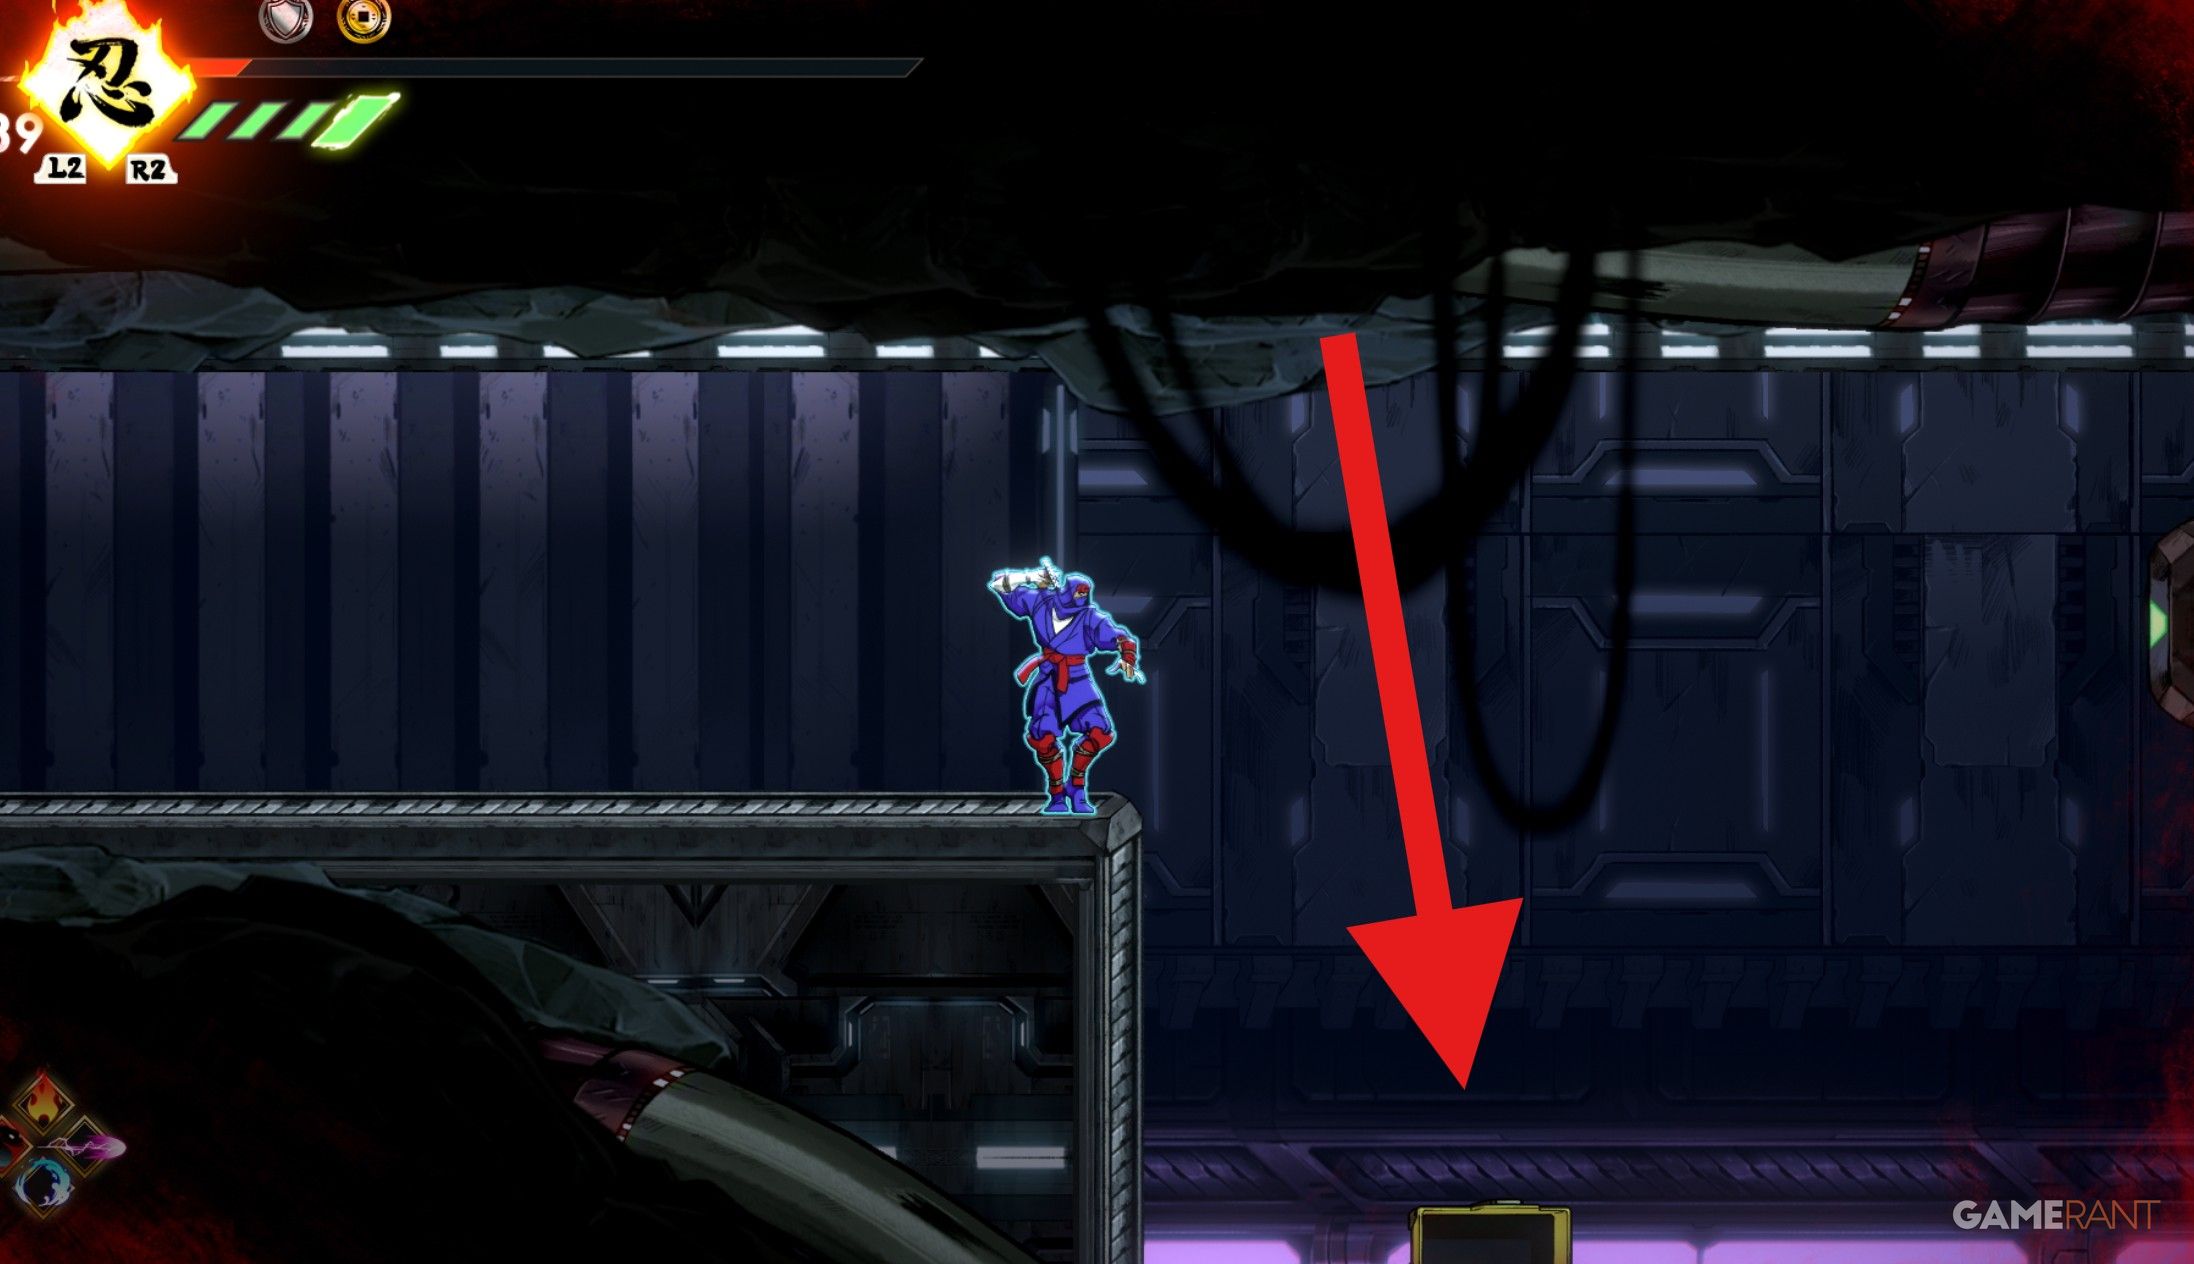
All Submarine Base Oboro Relics in Shinobi Art of Vengeance
First Oboro Relic
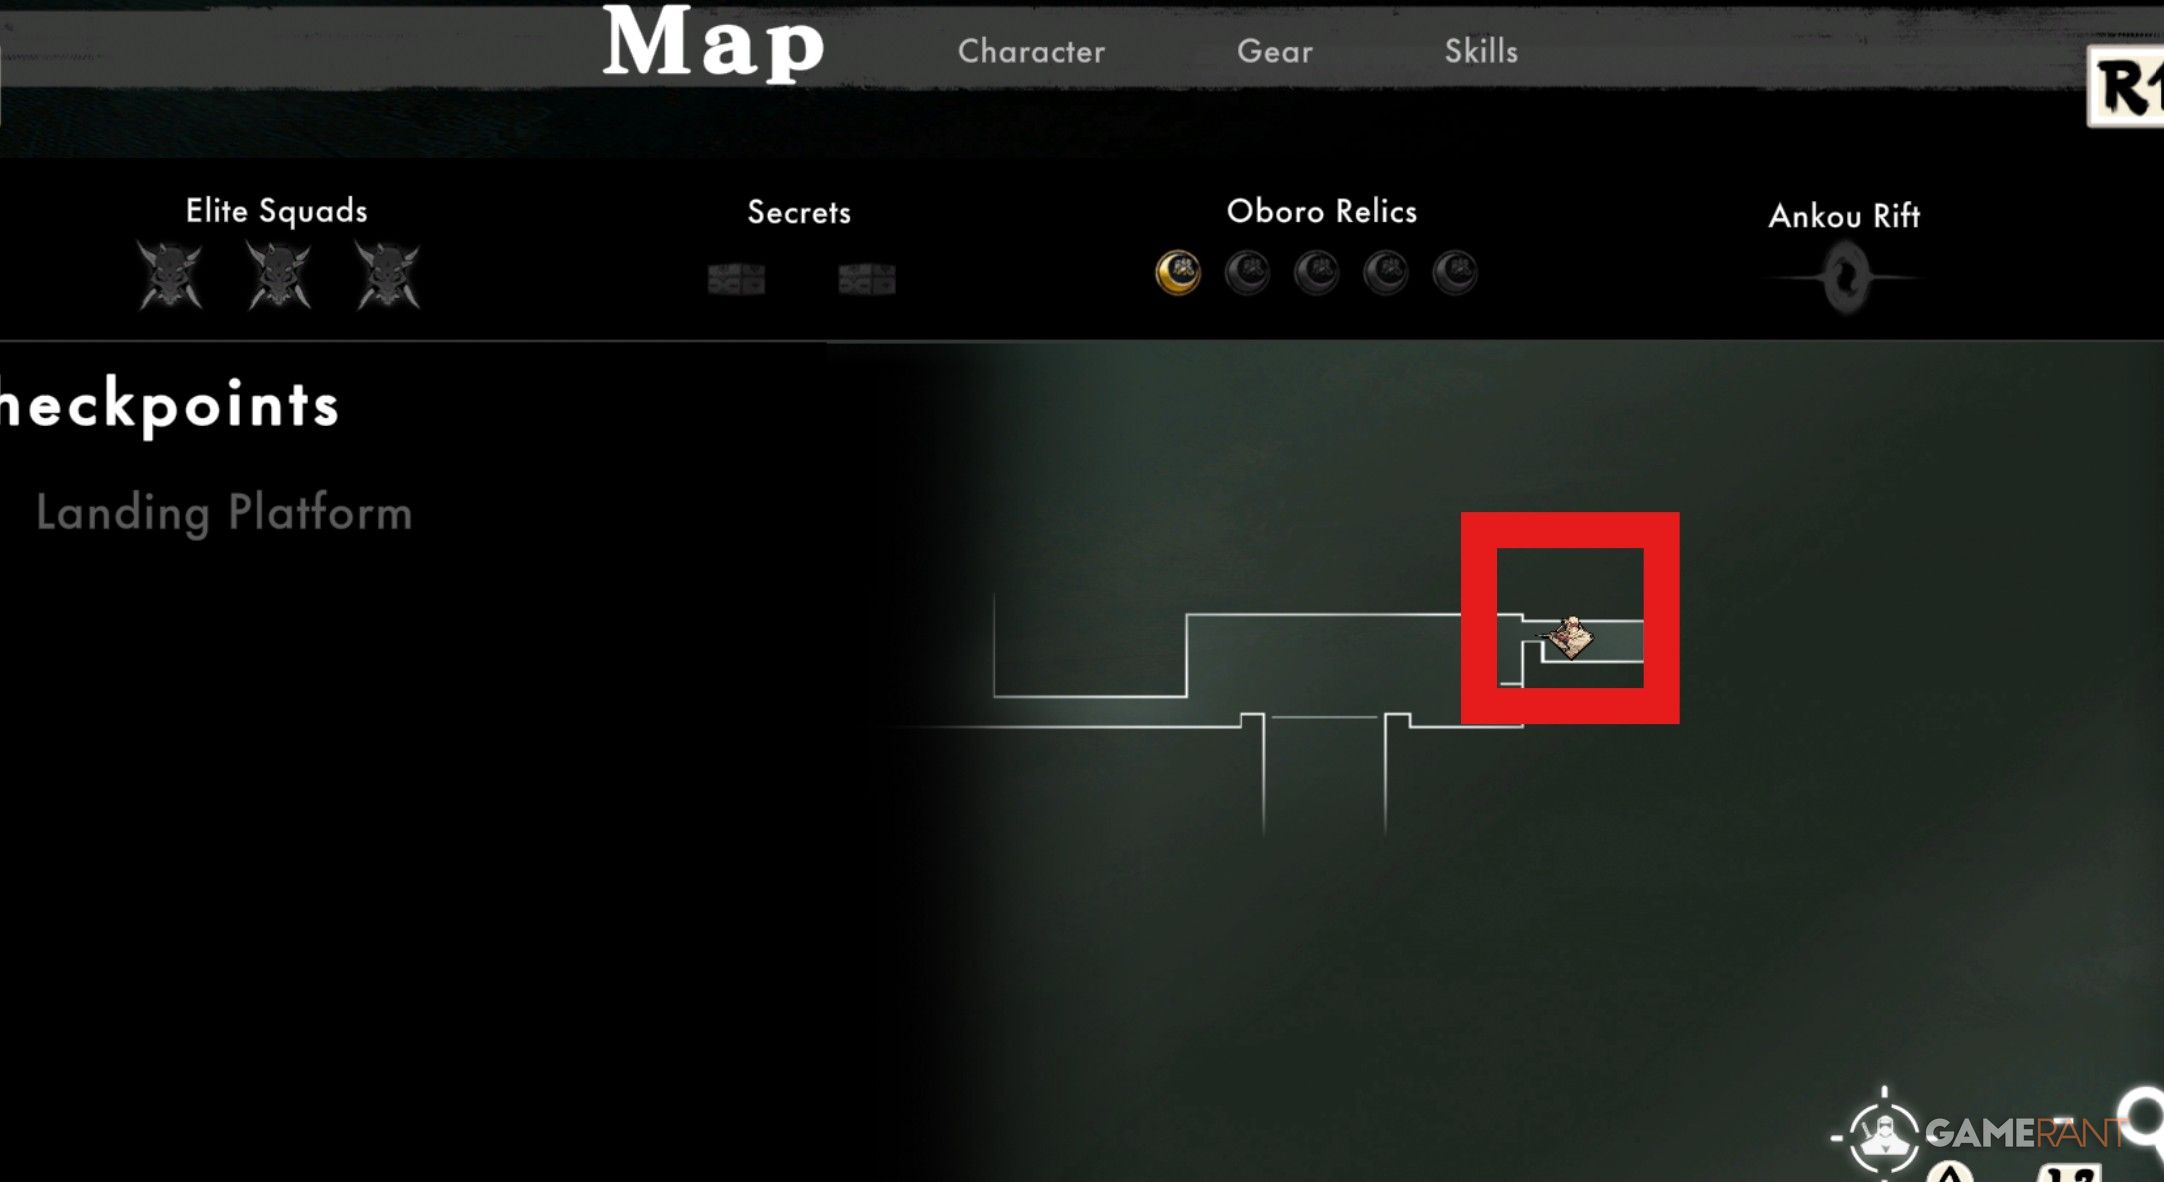
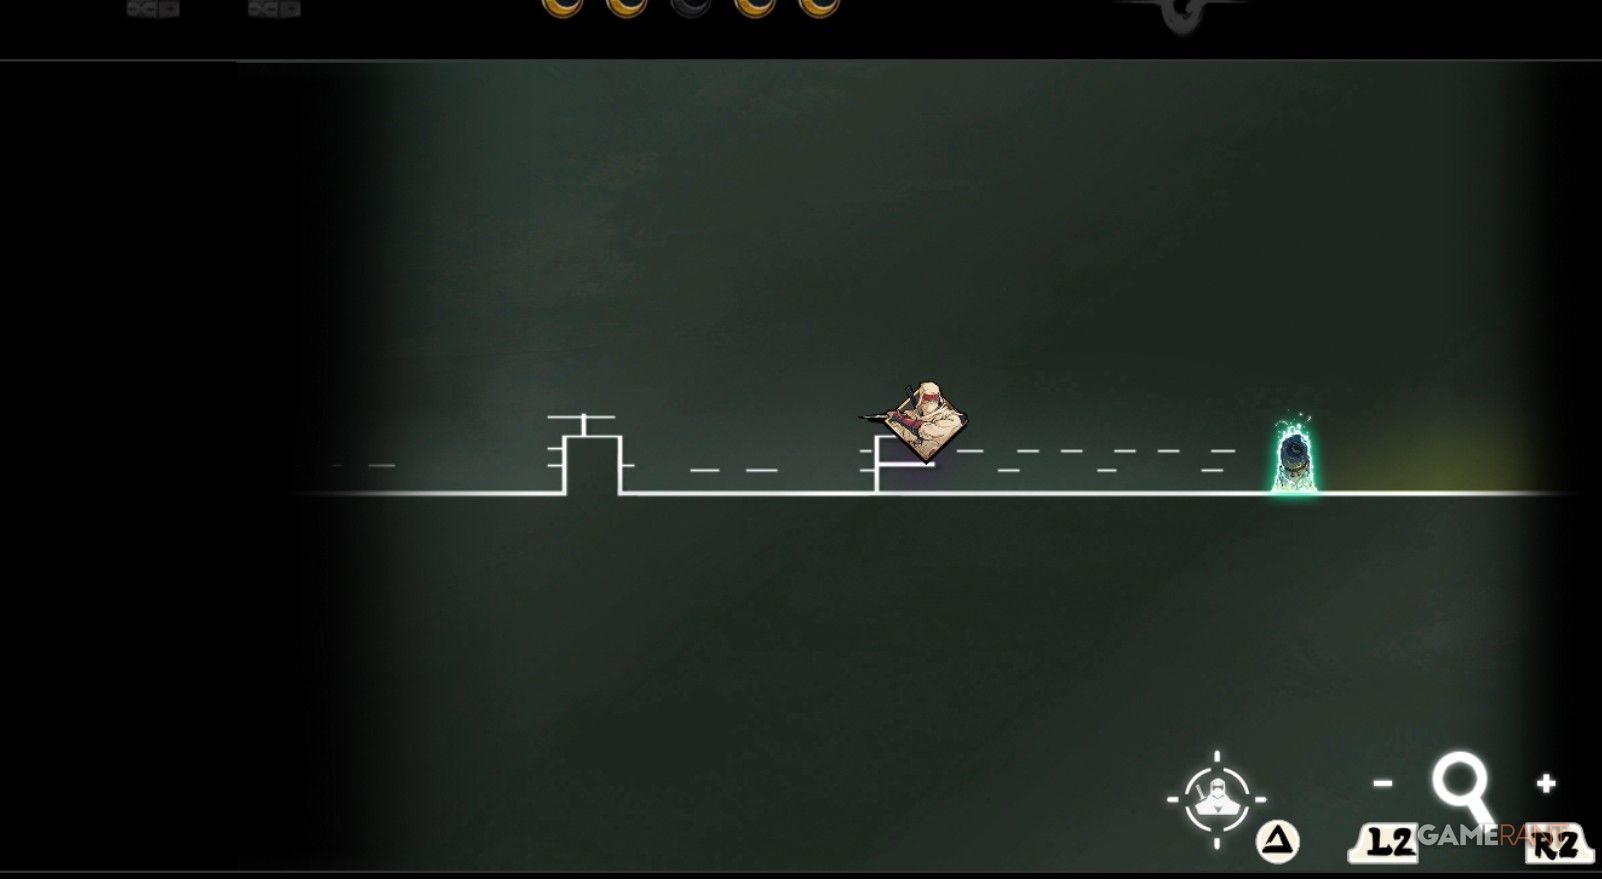
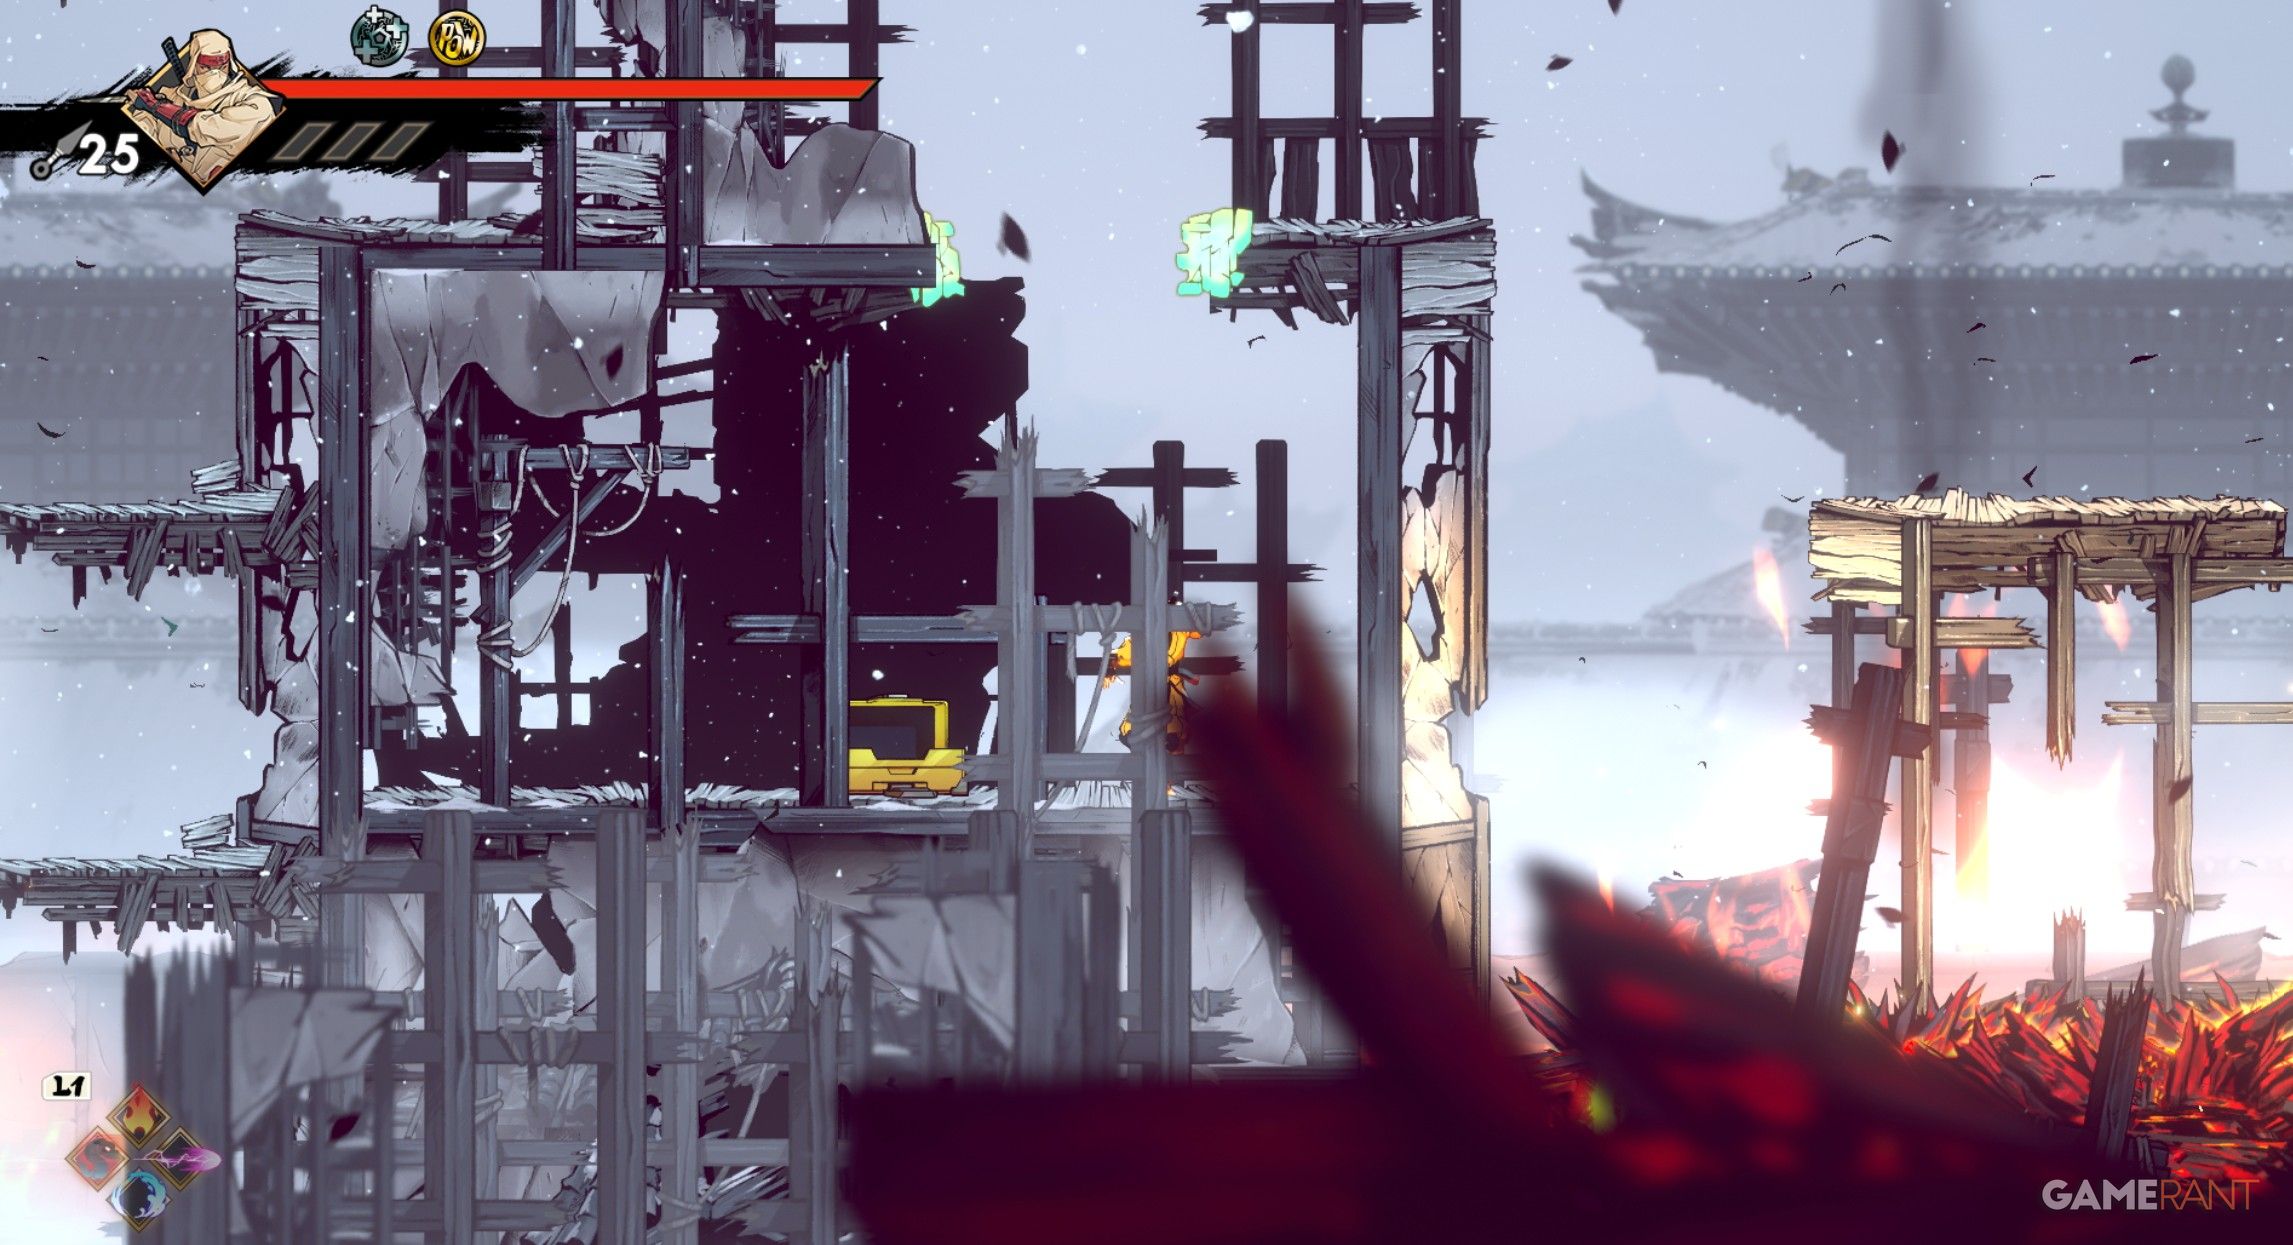
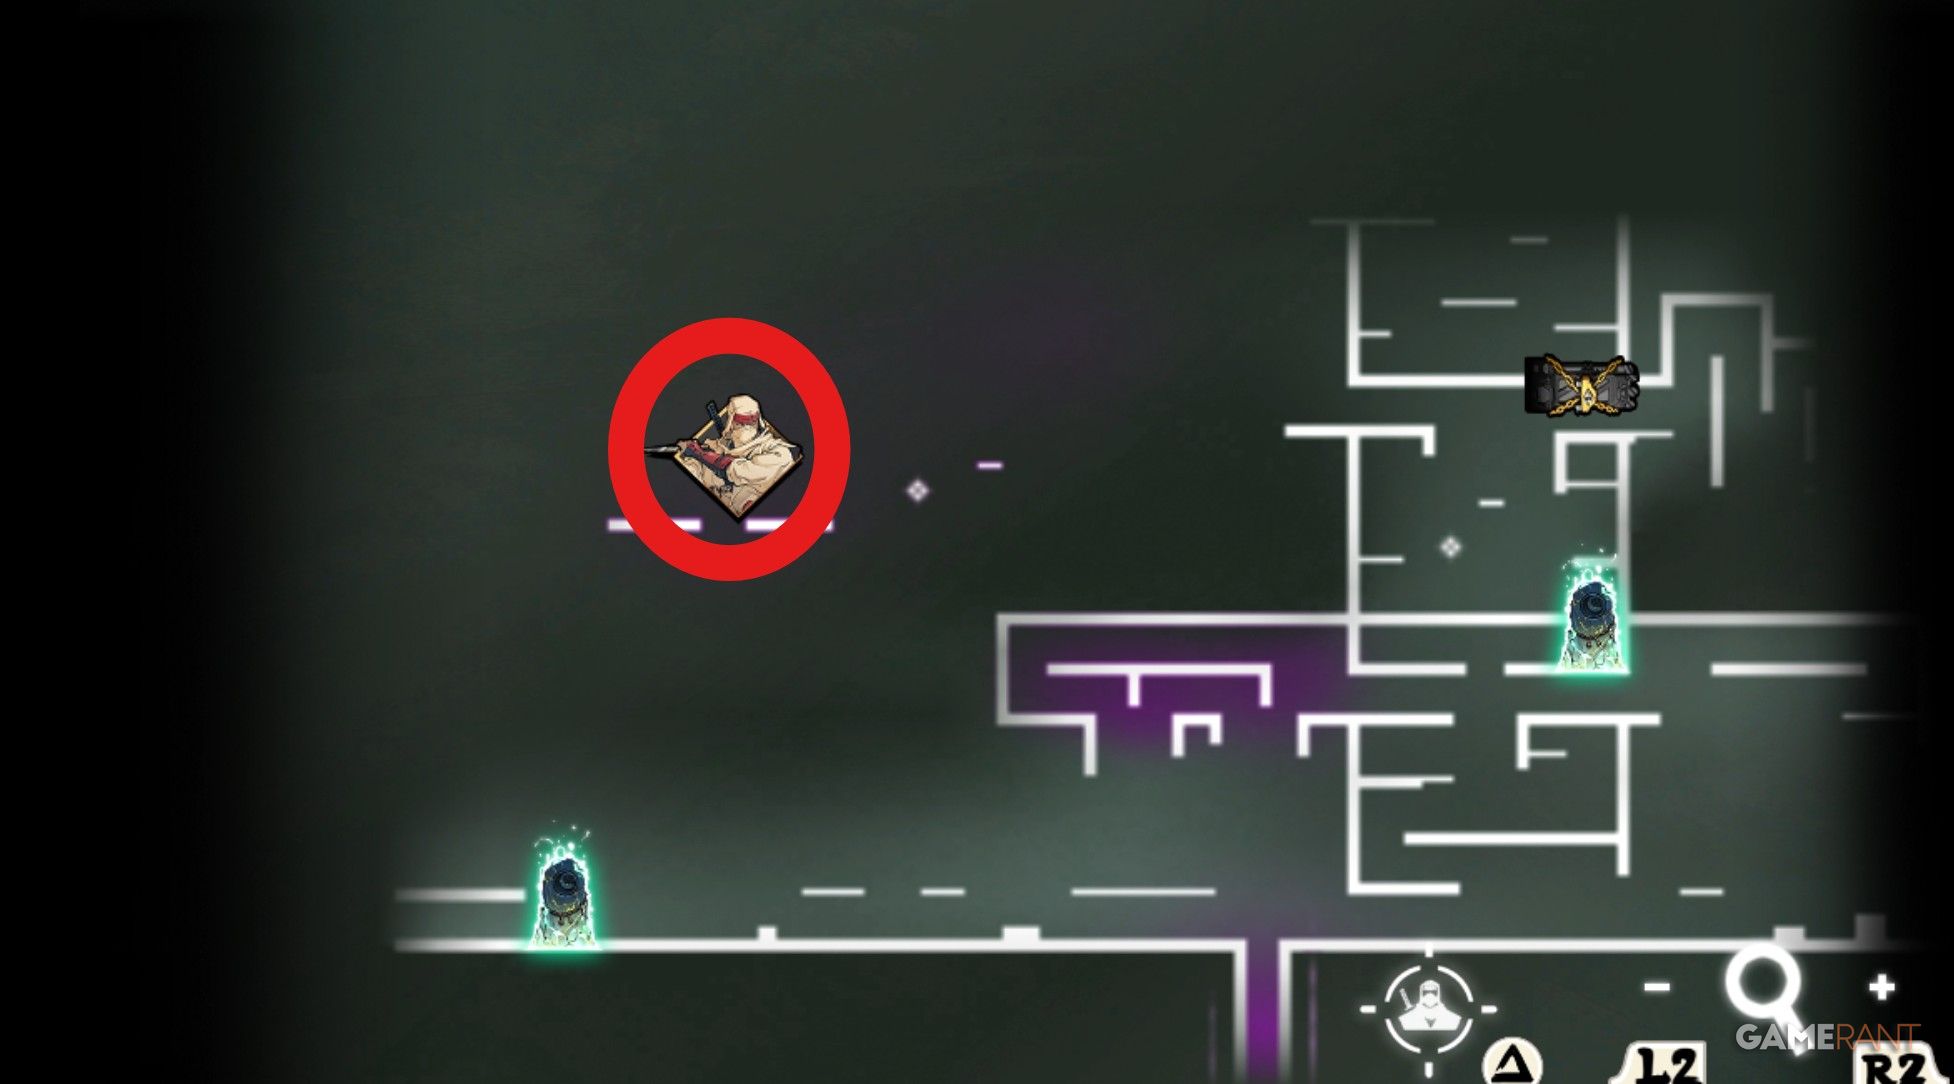
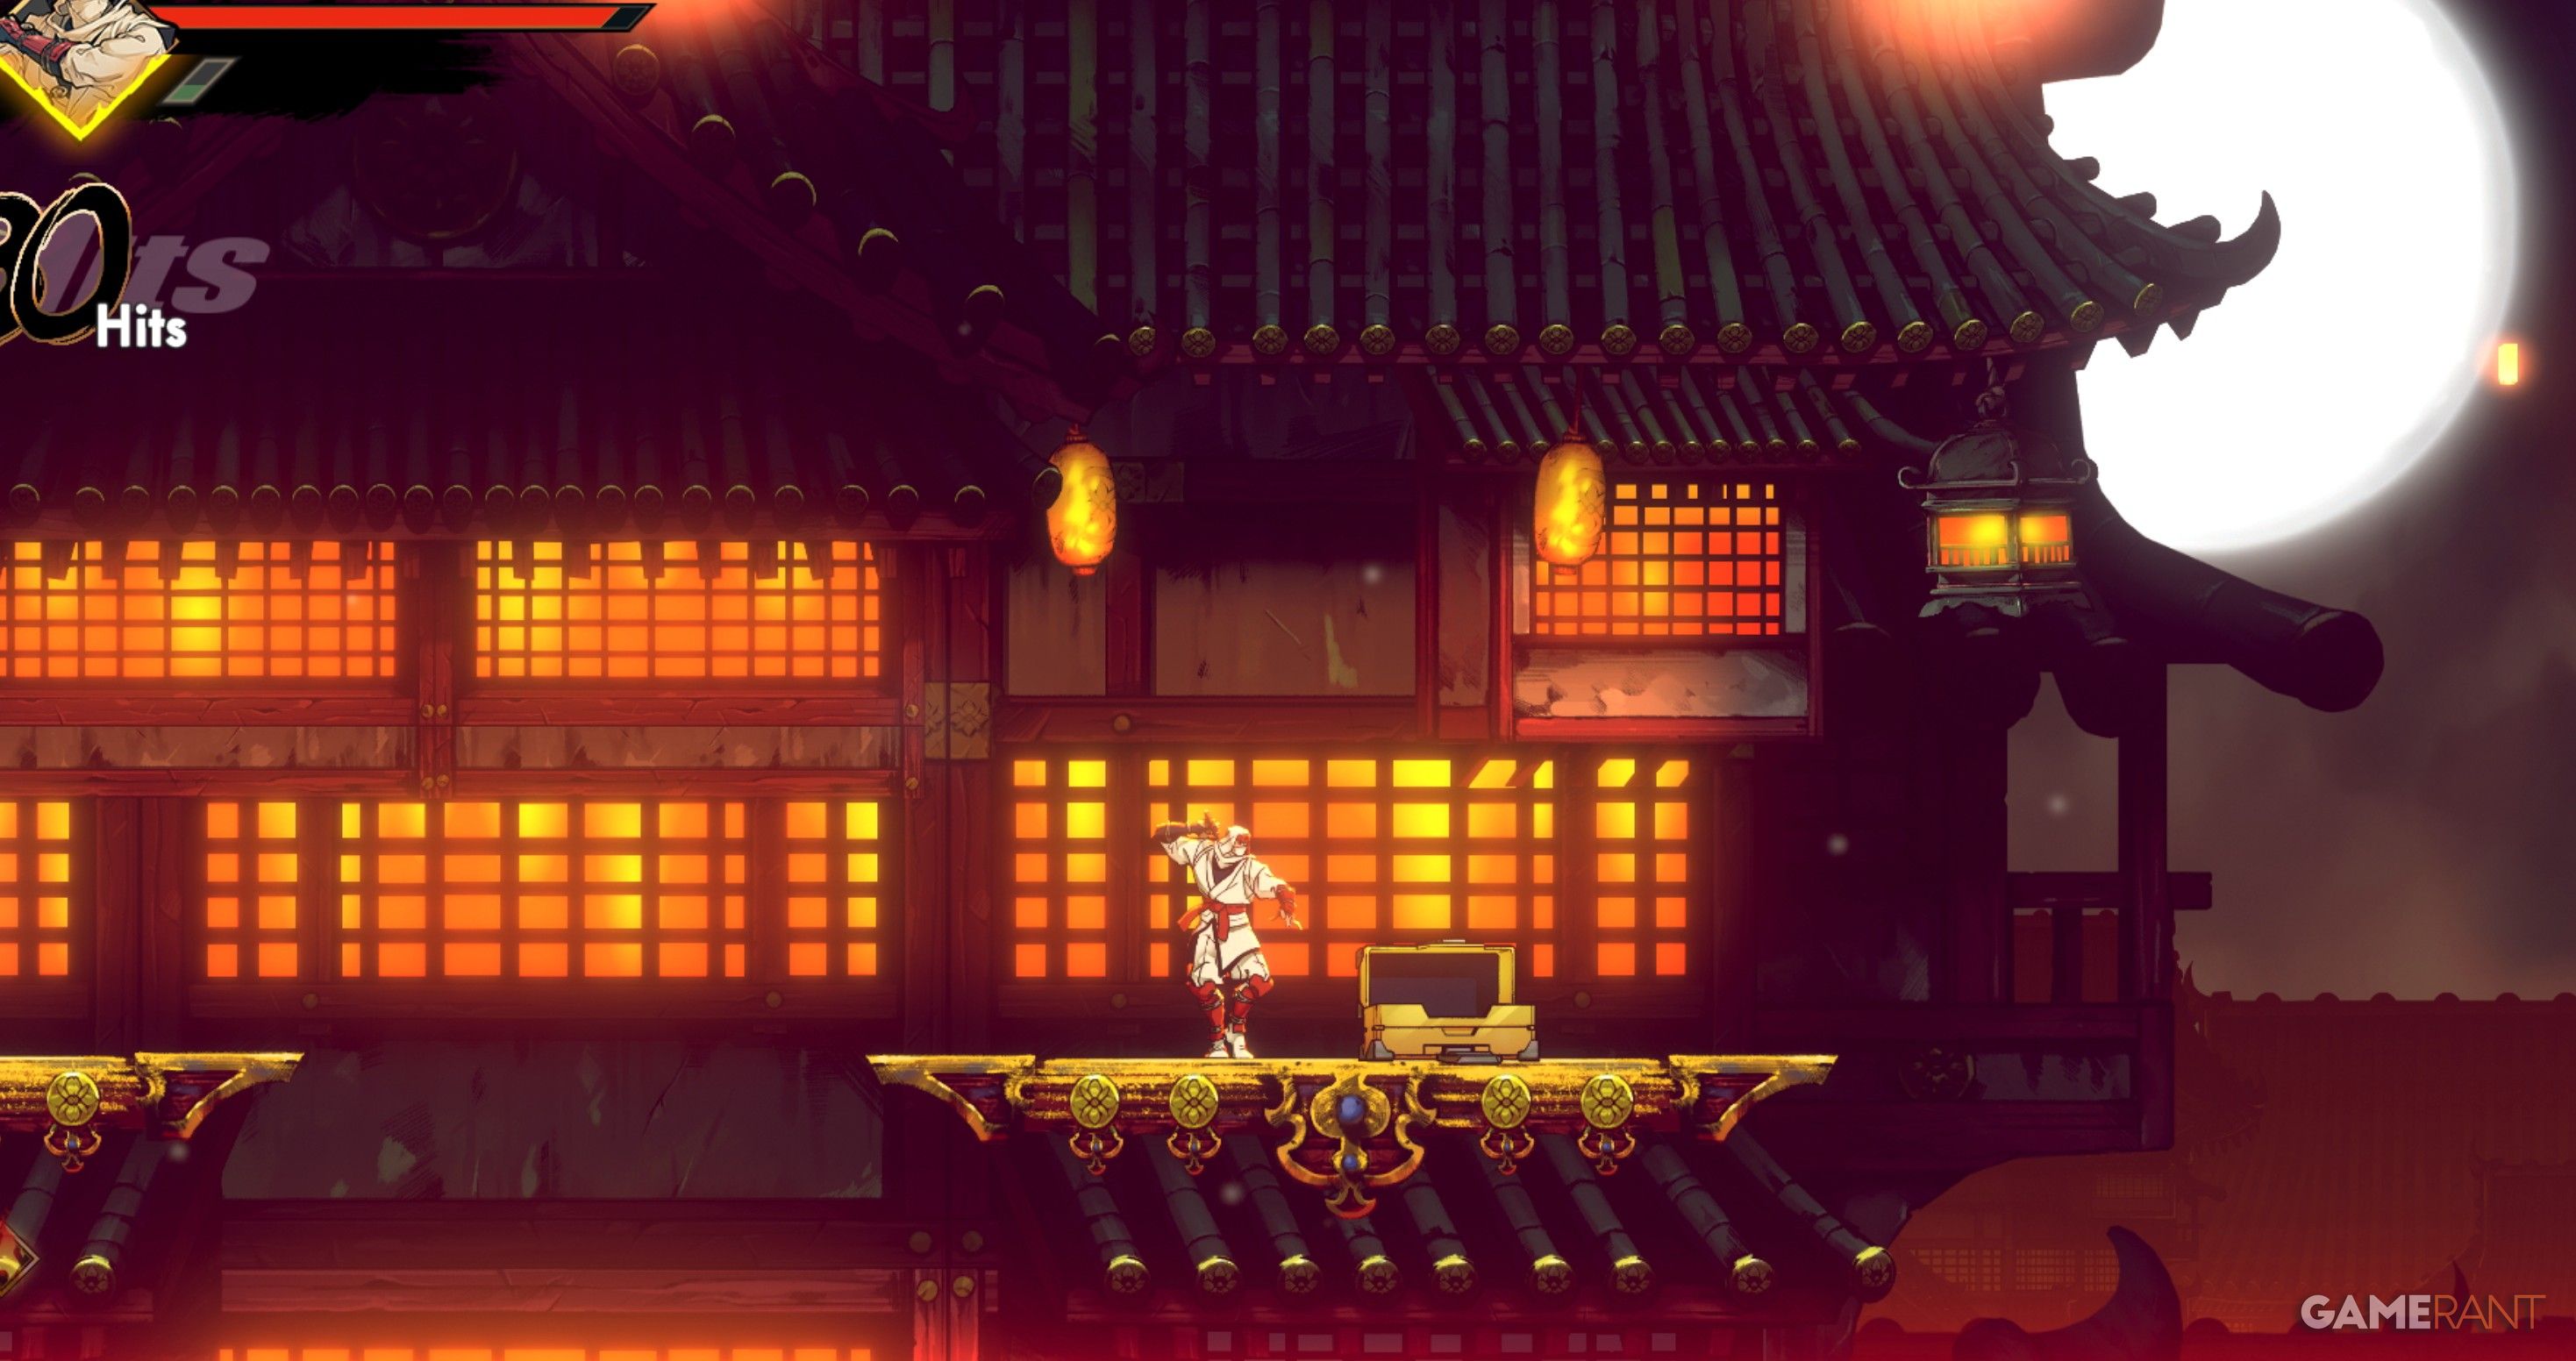
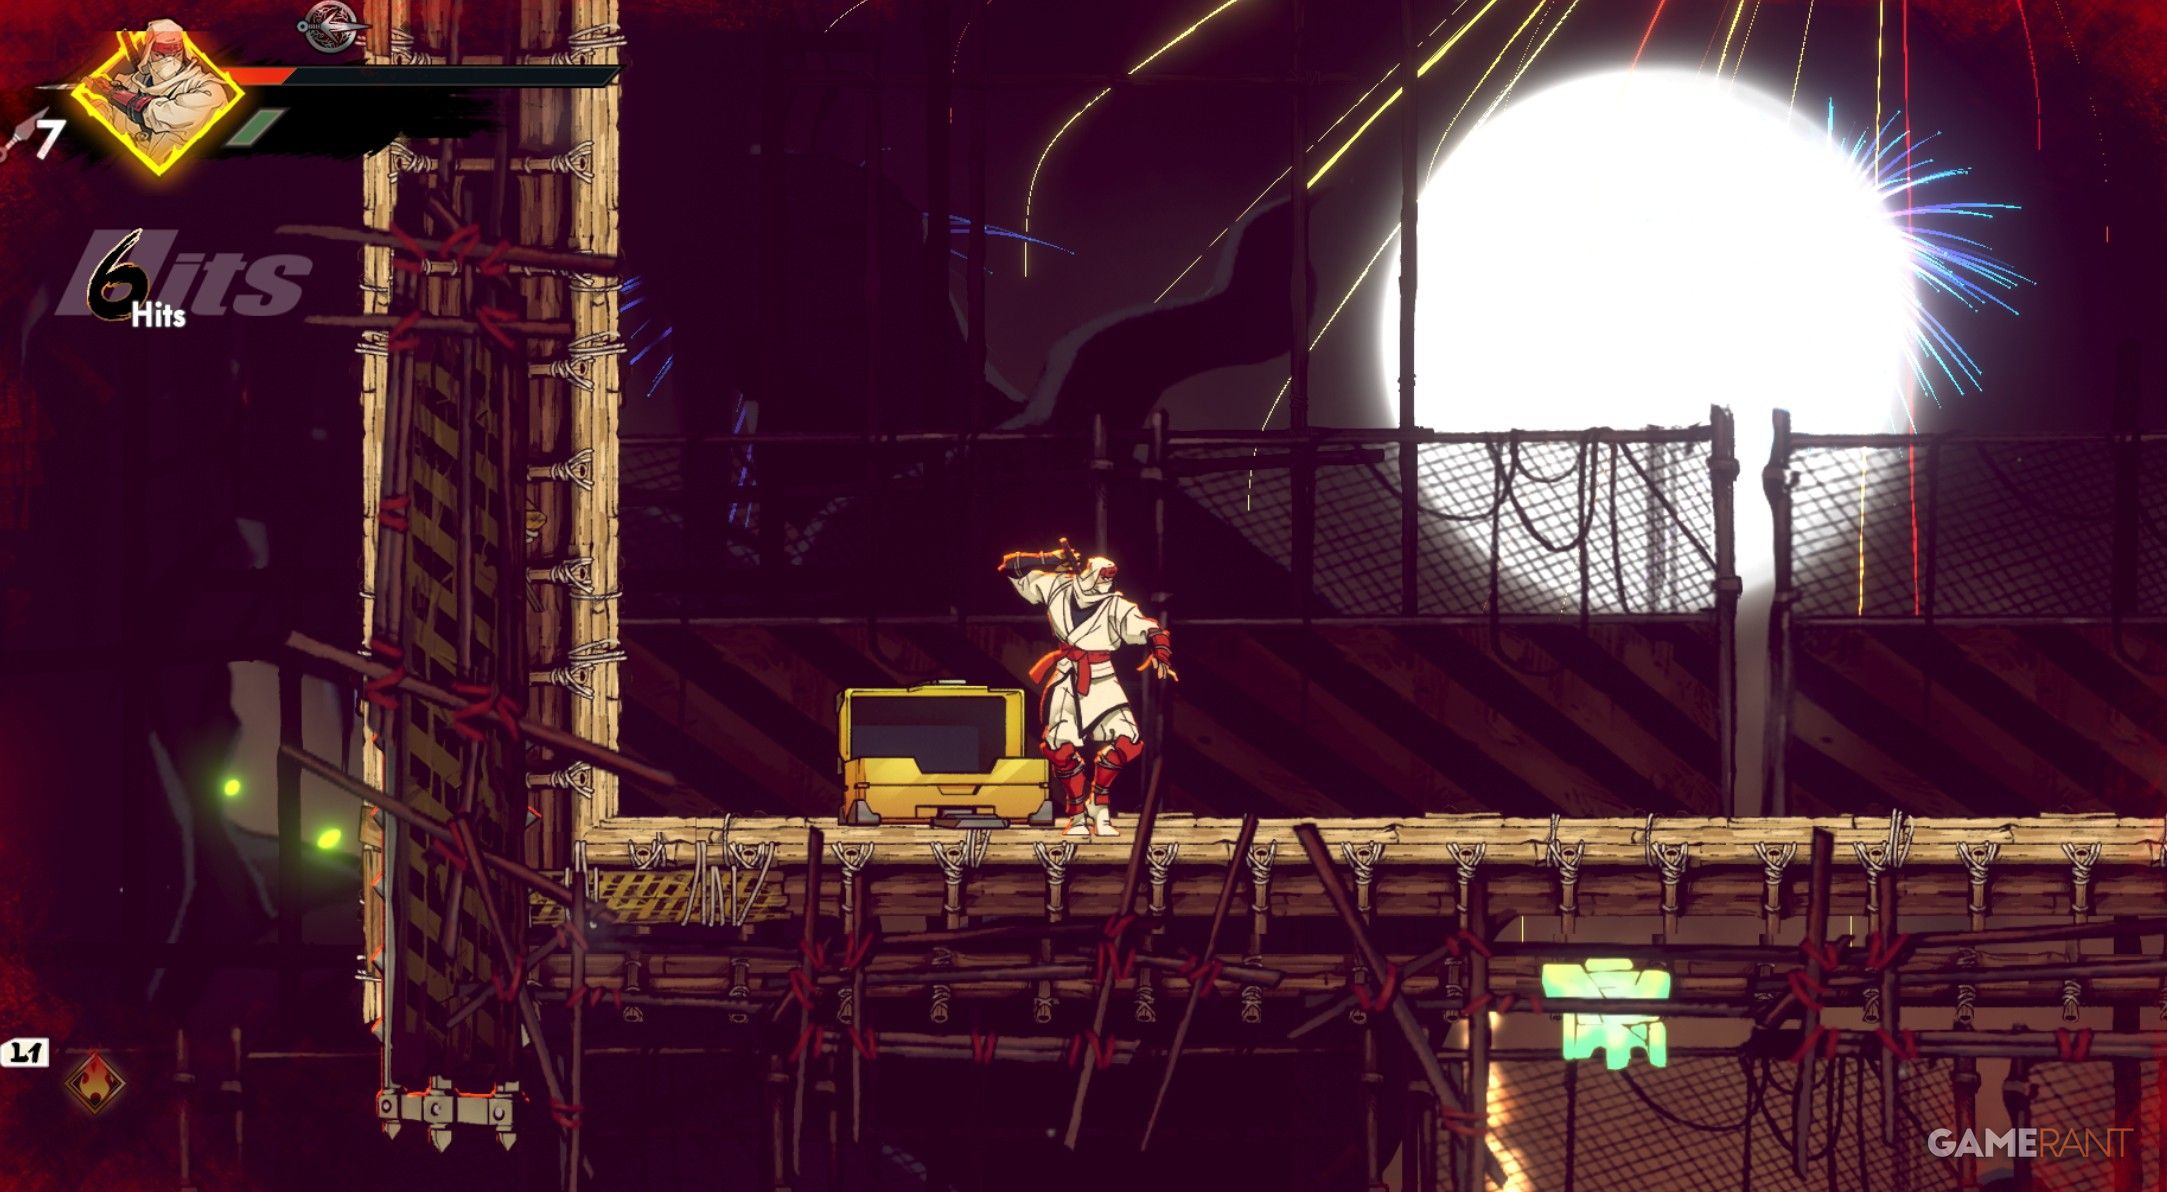
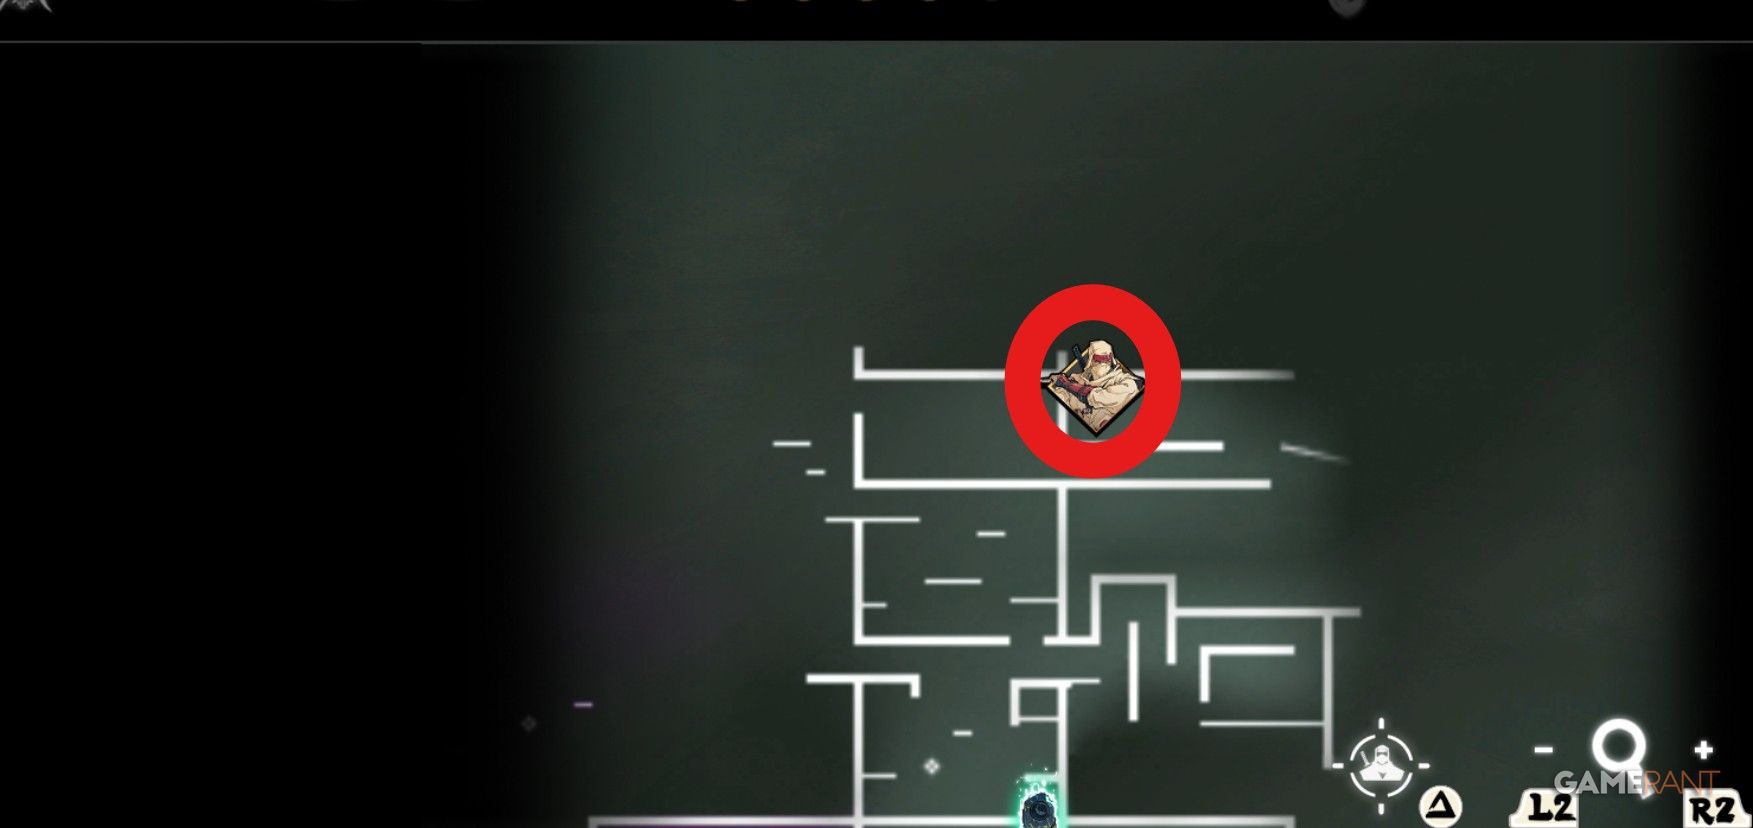
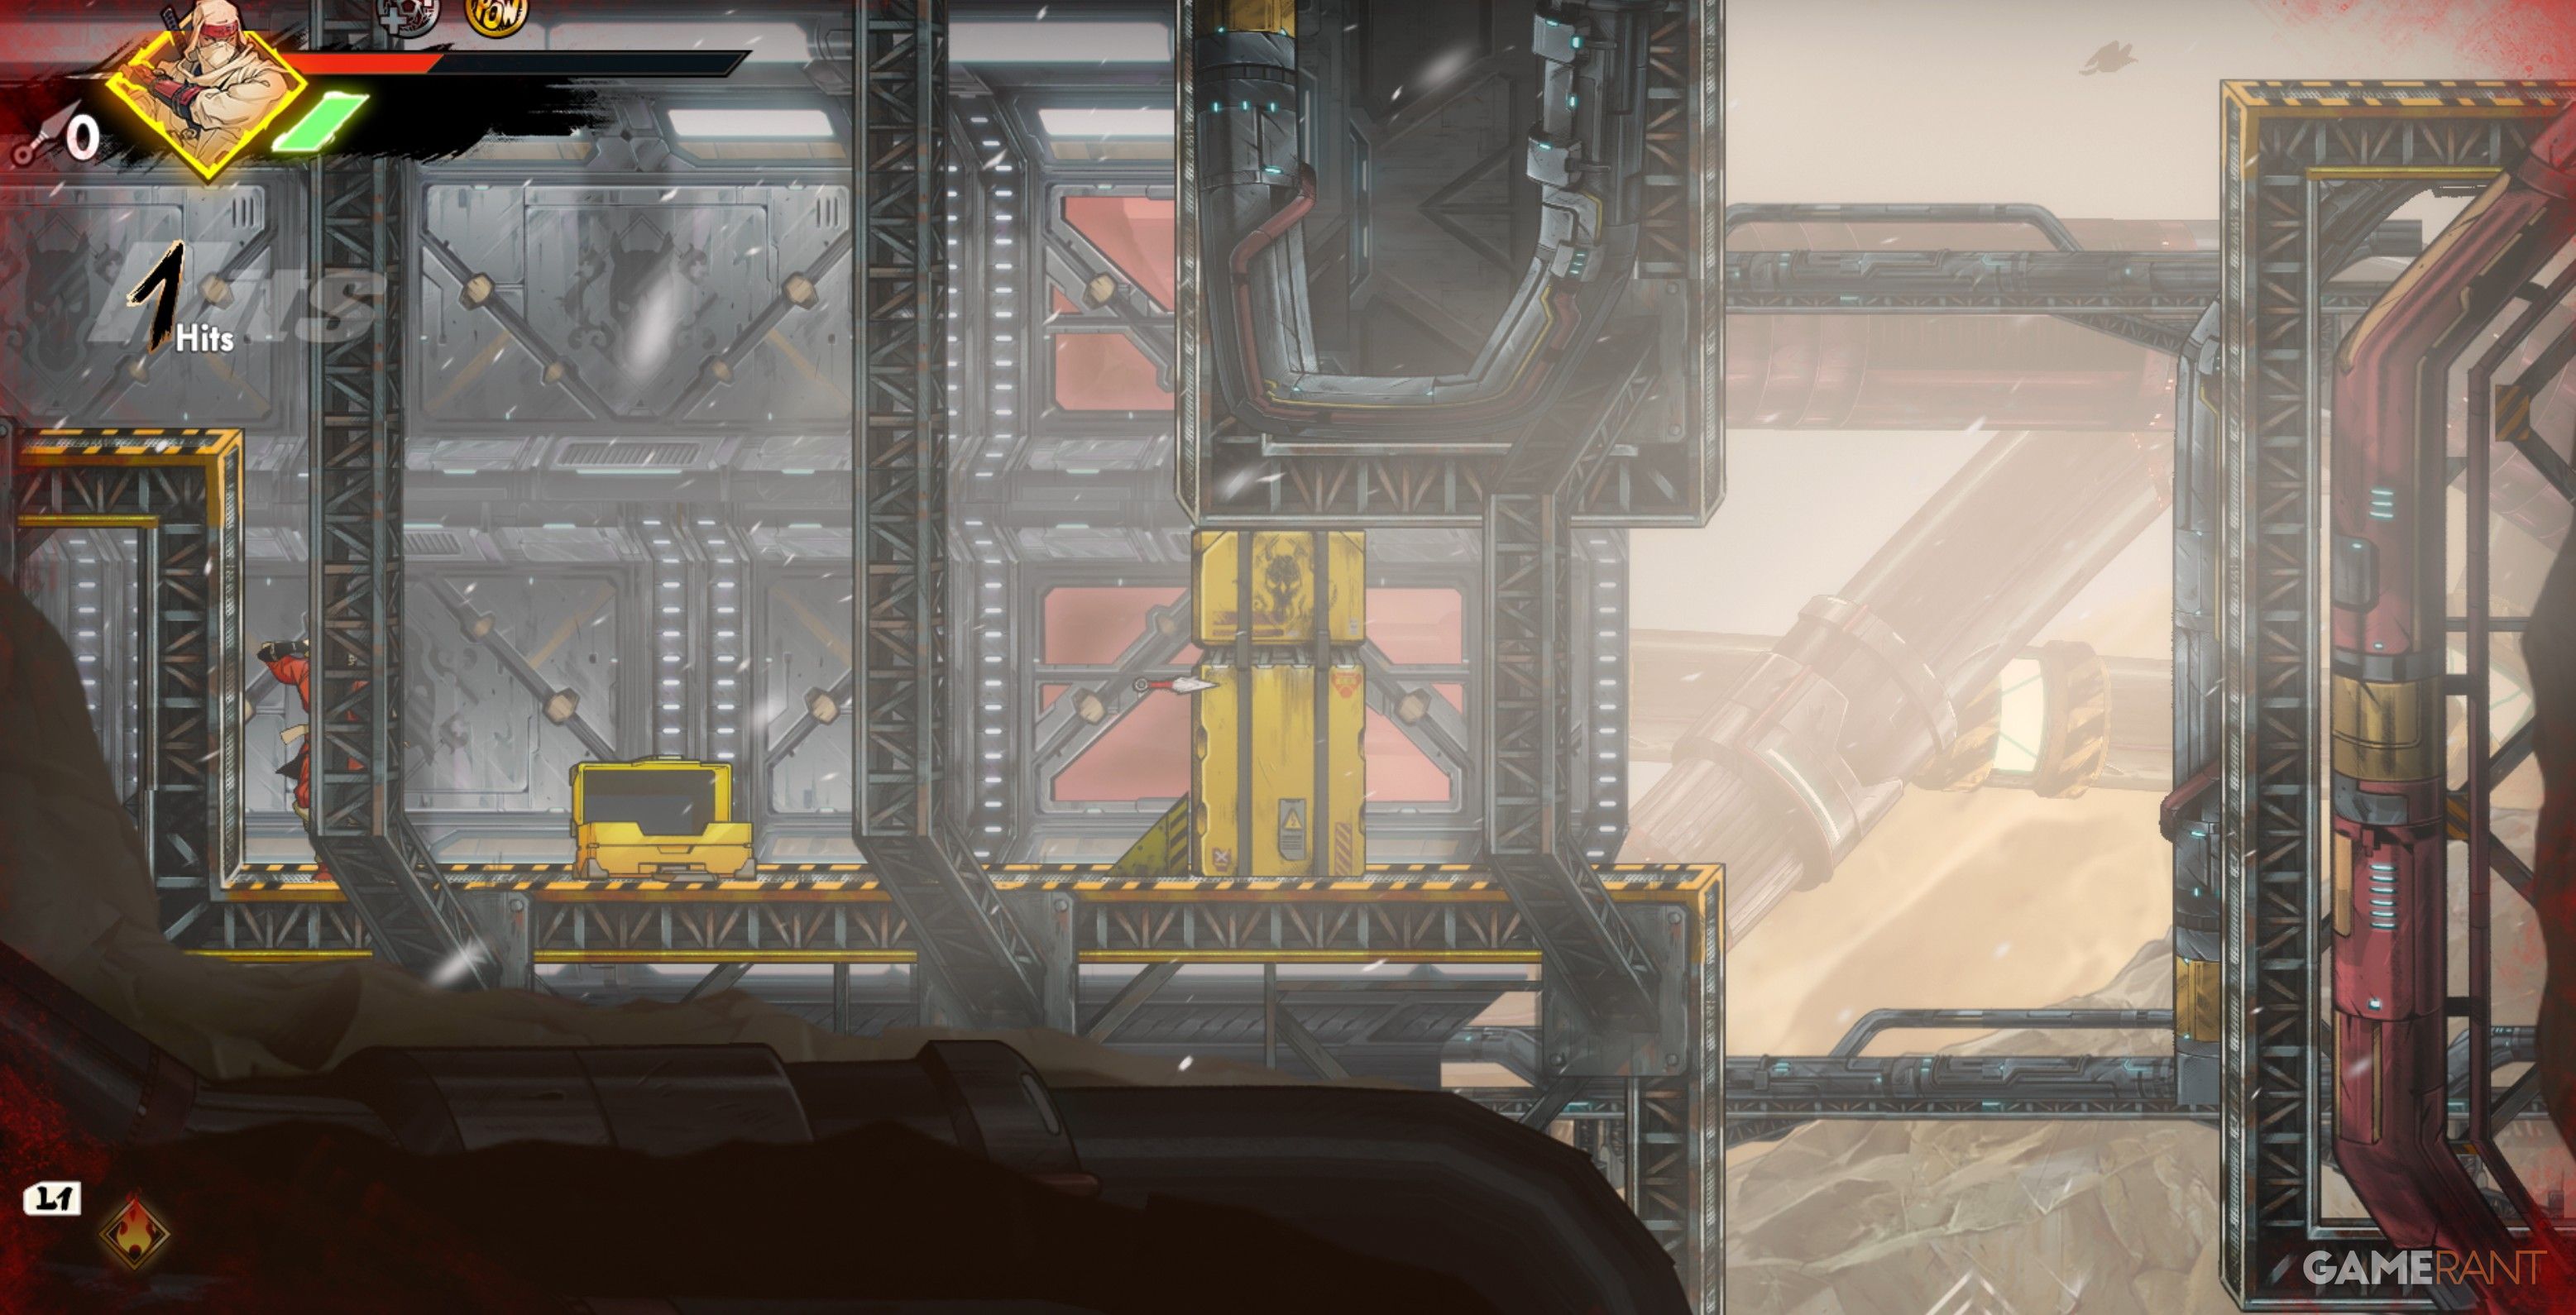
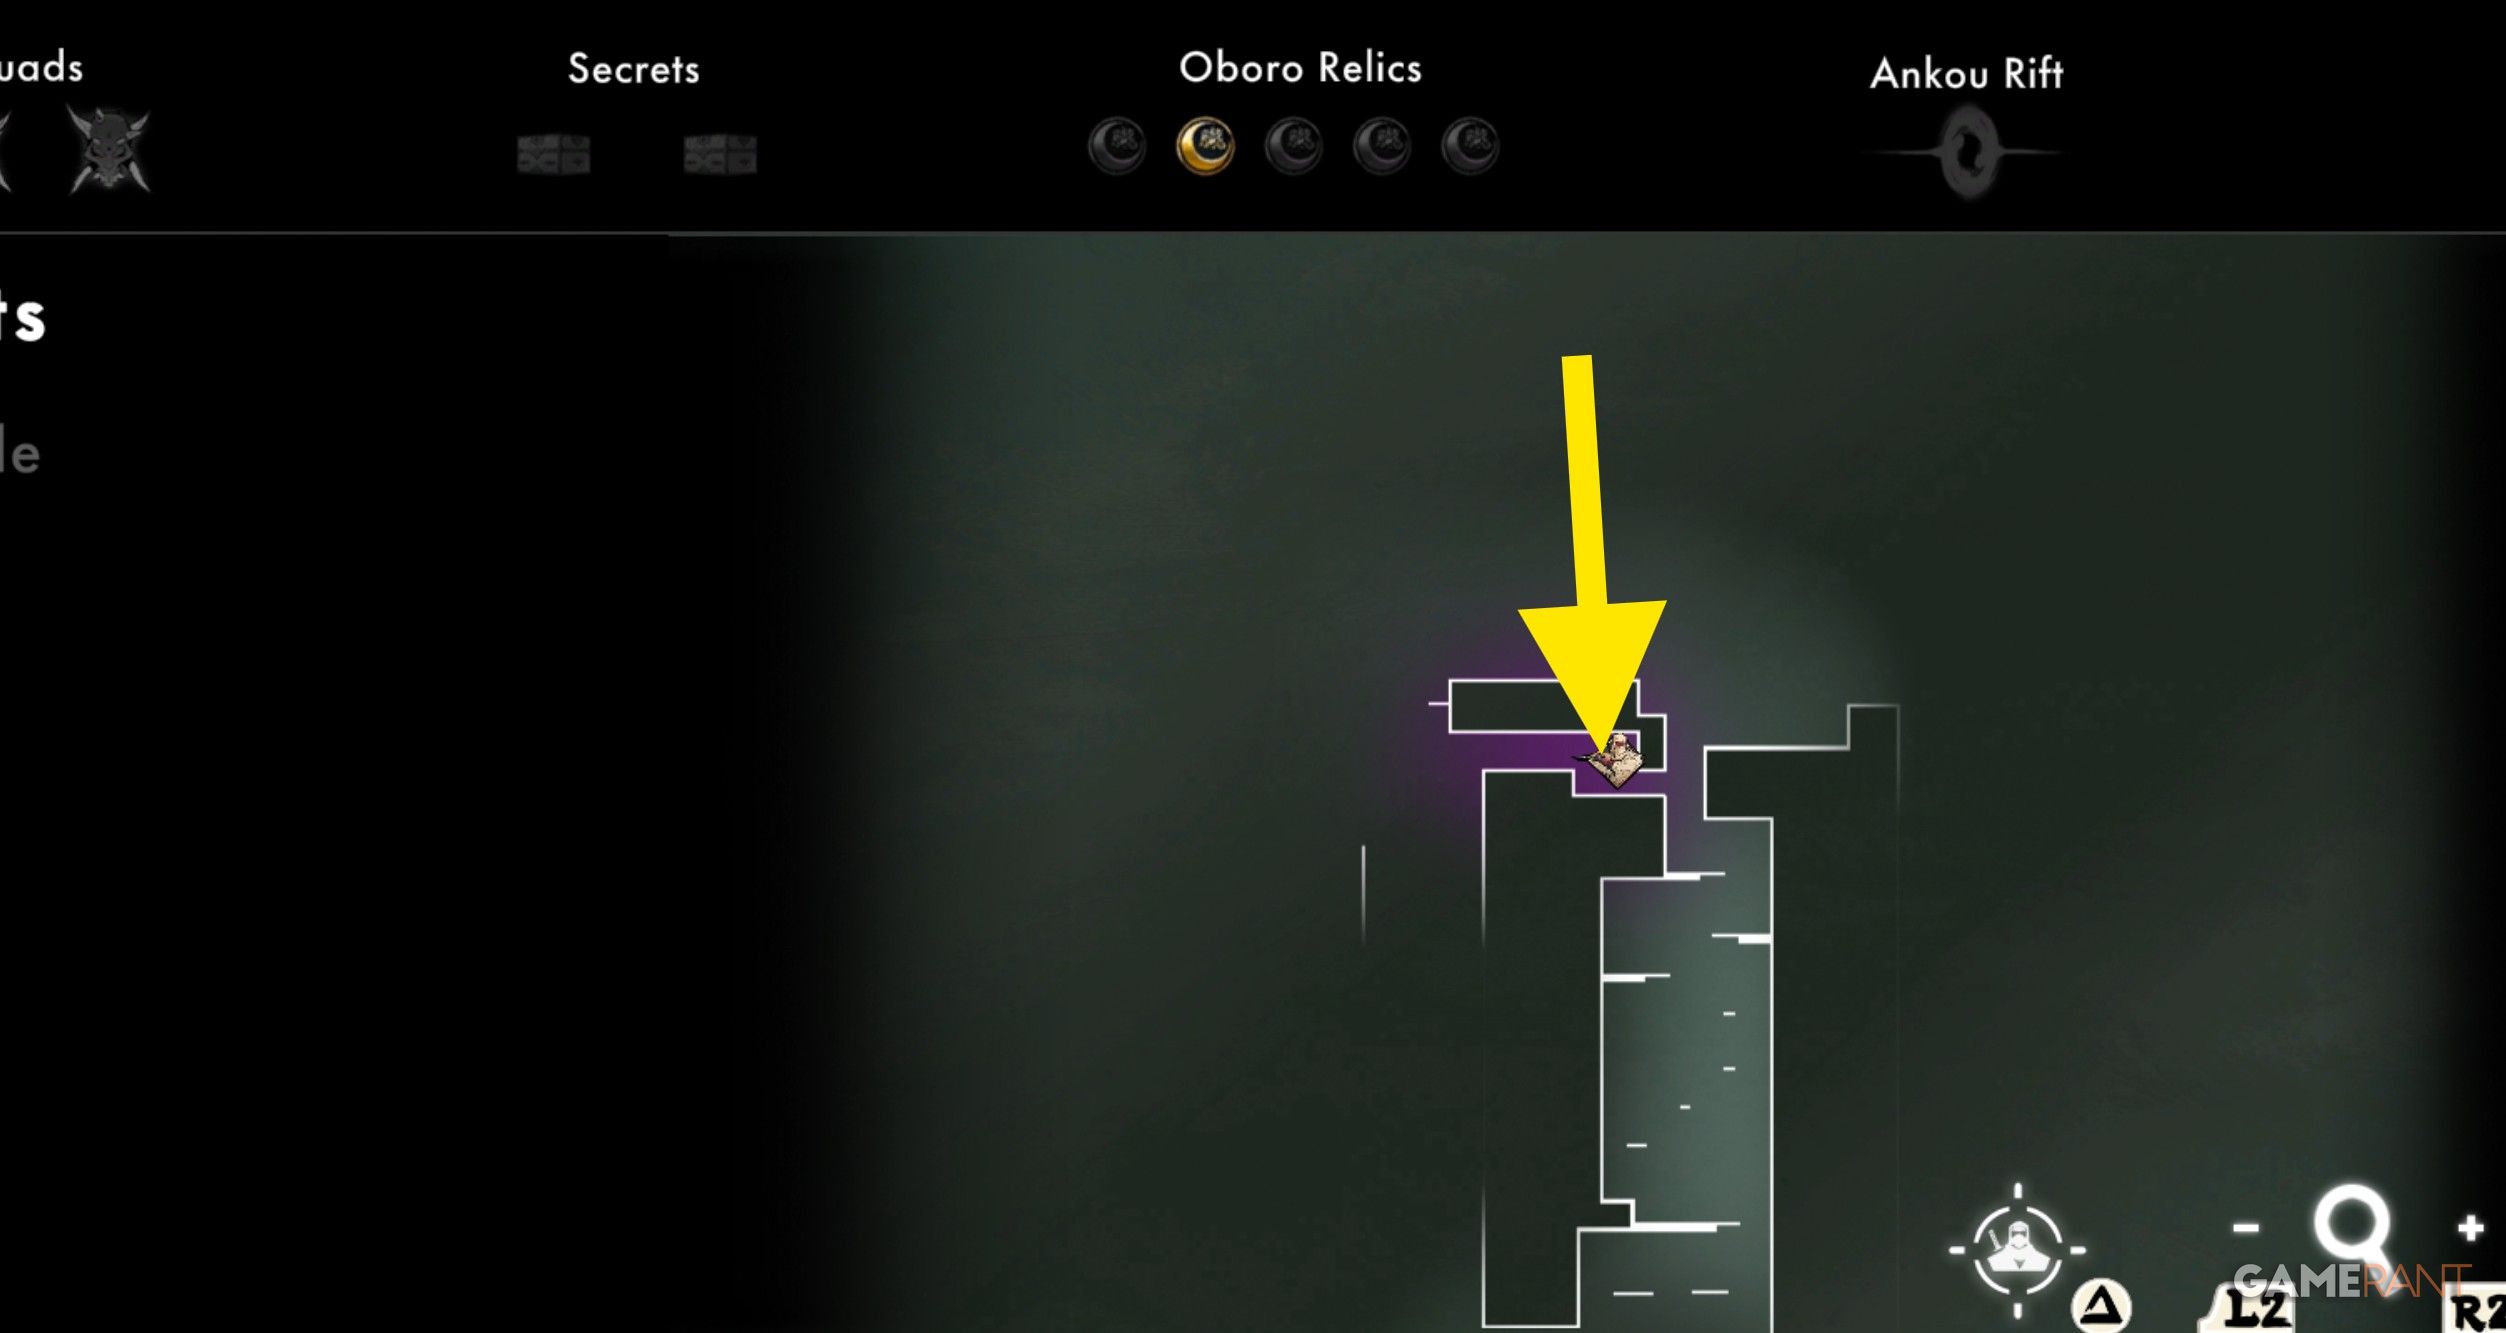
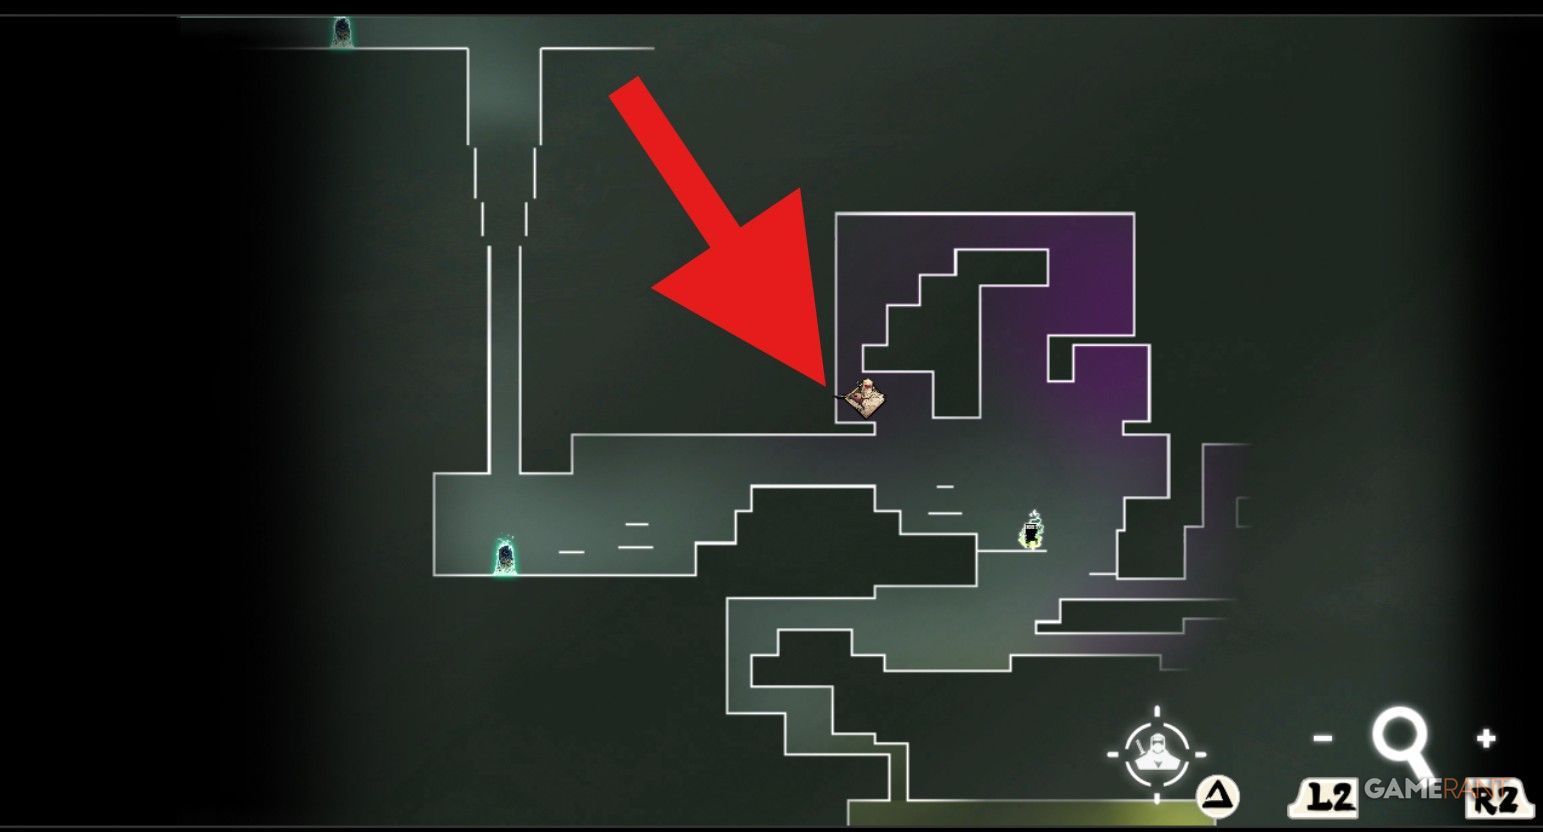
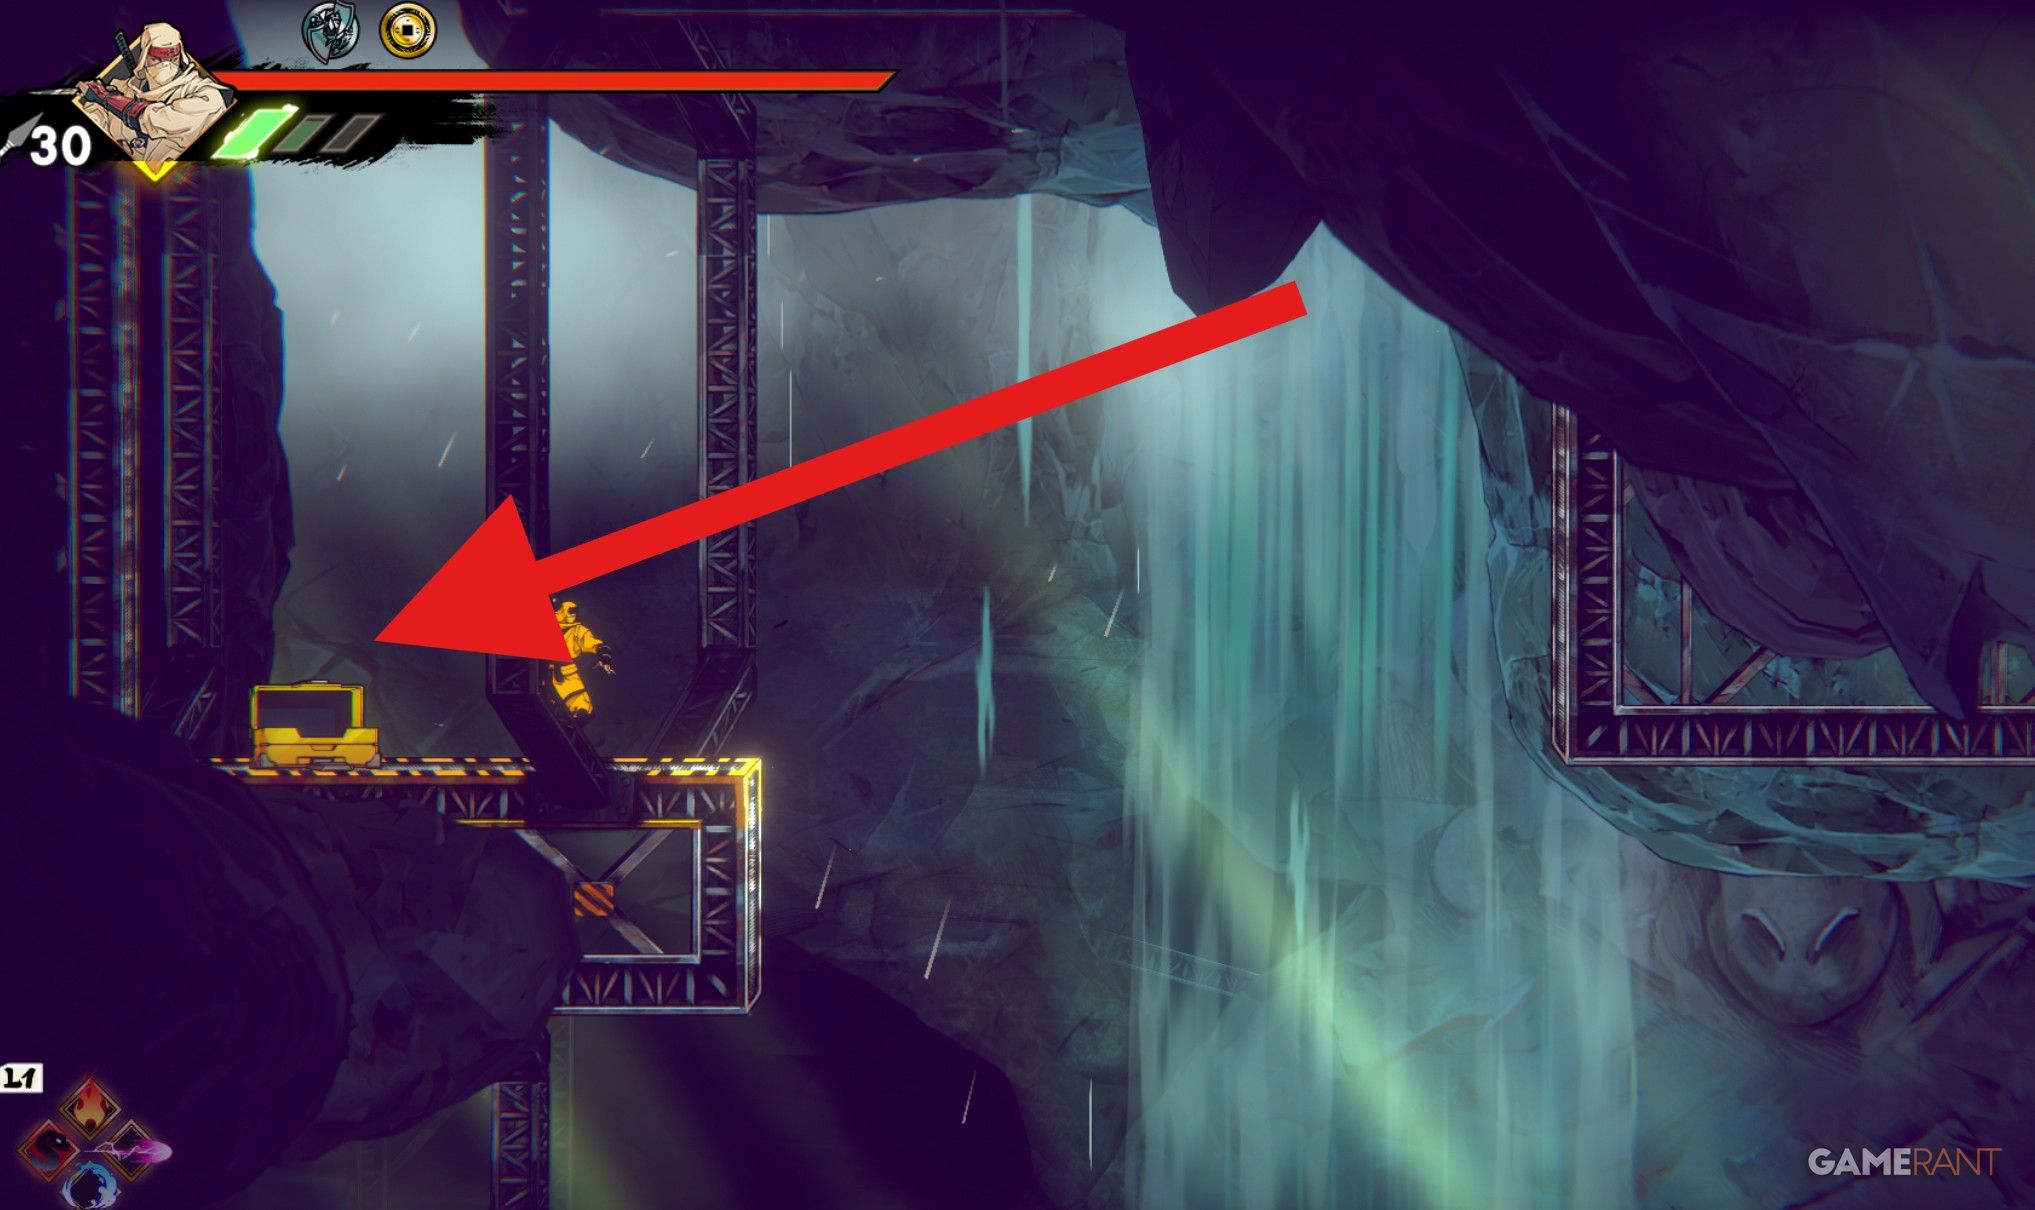
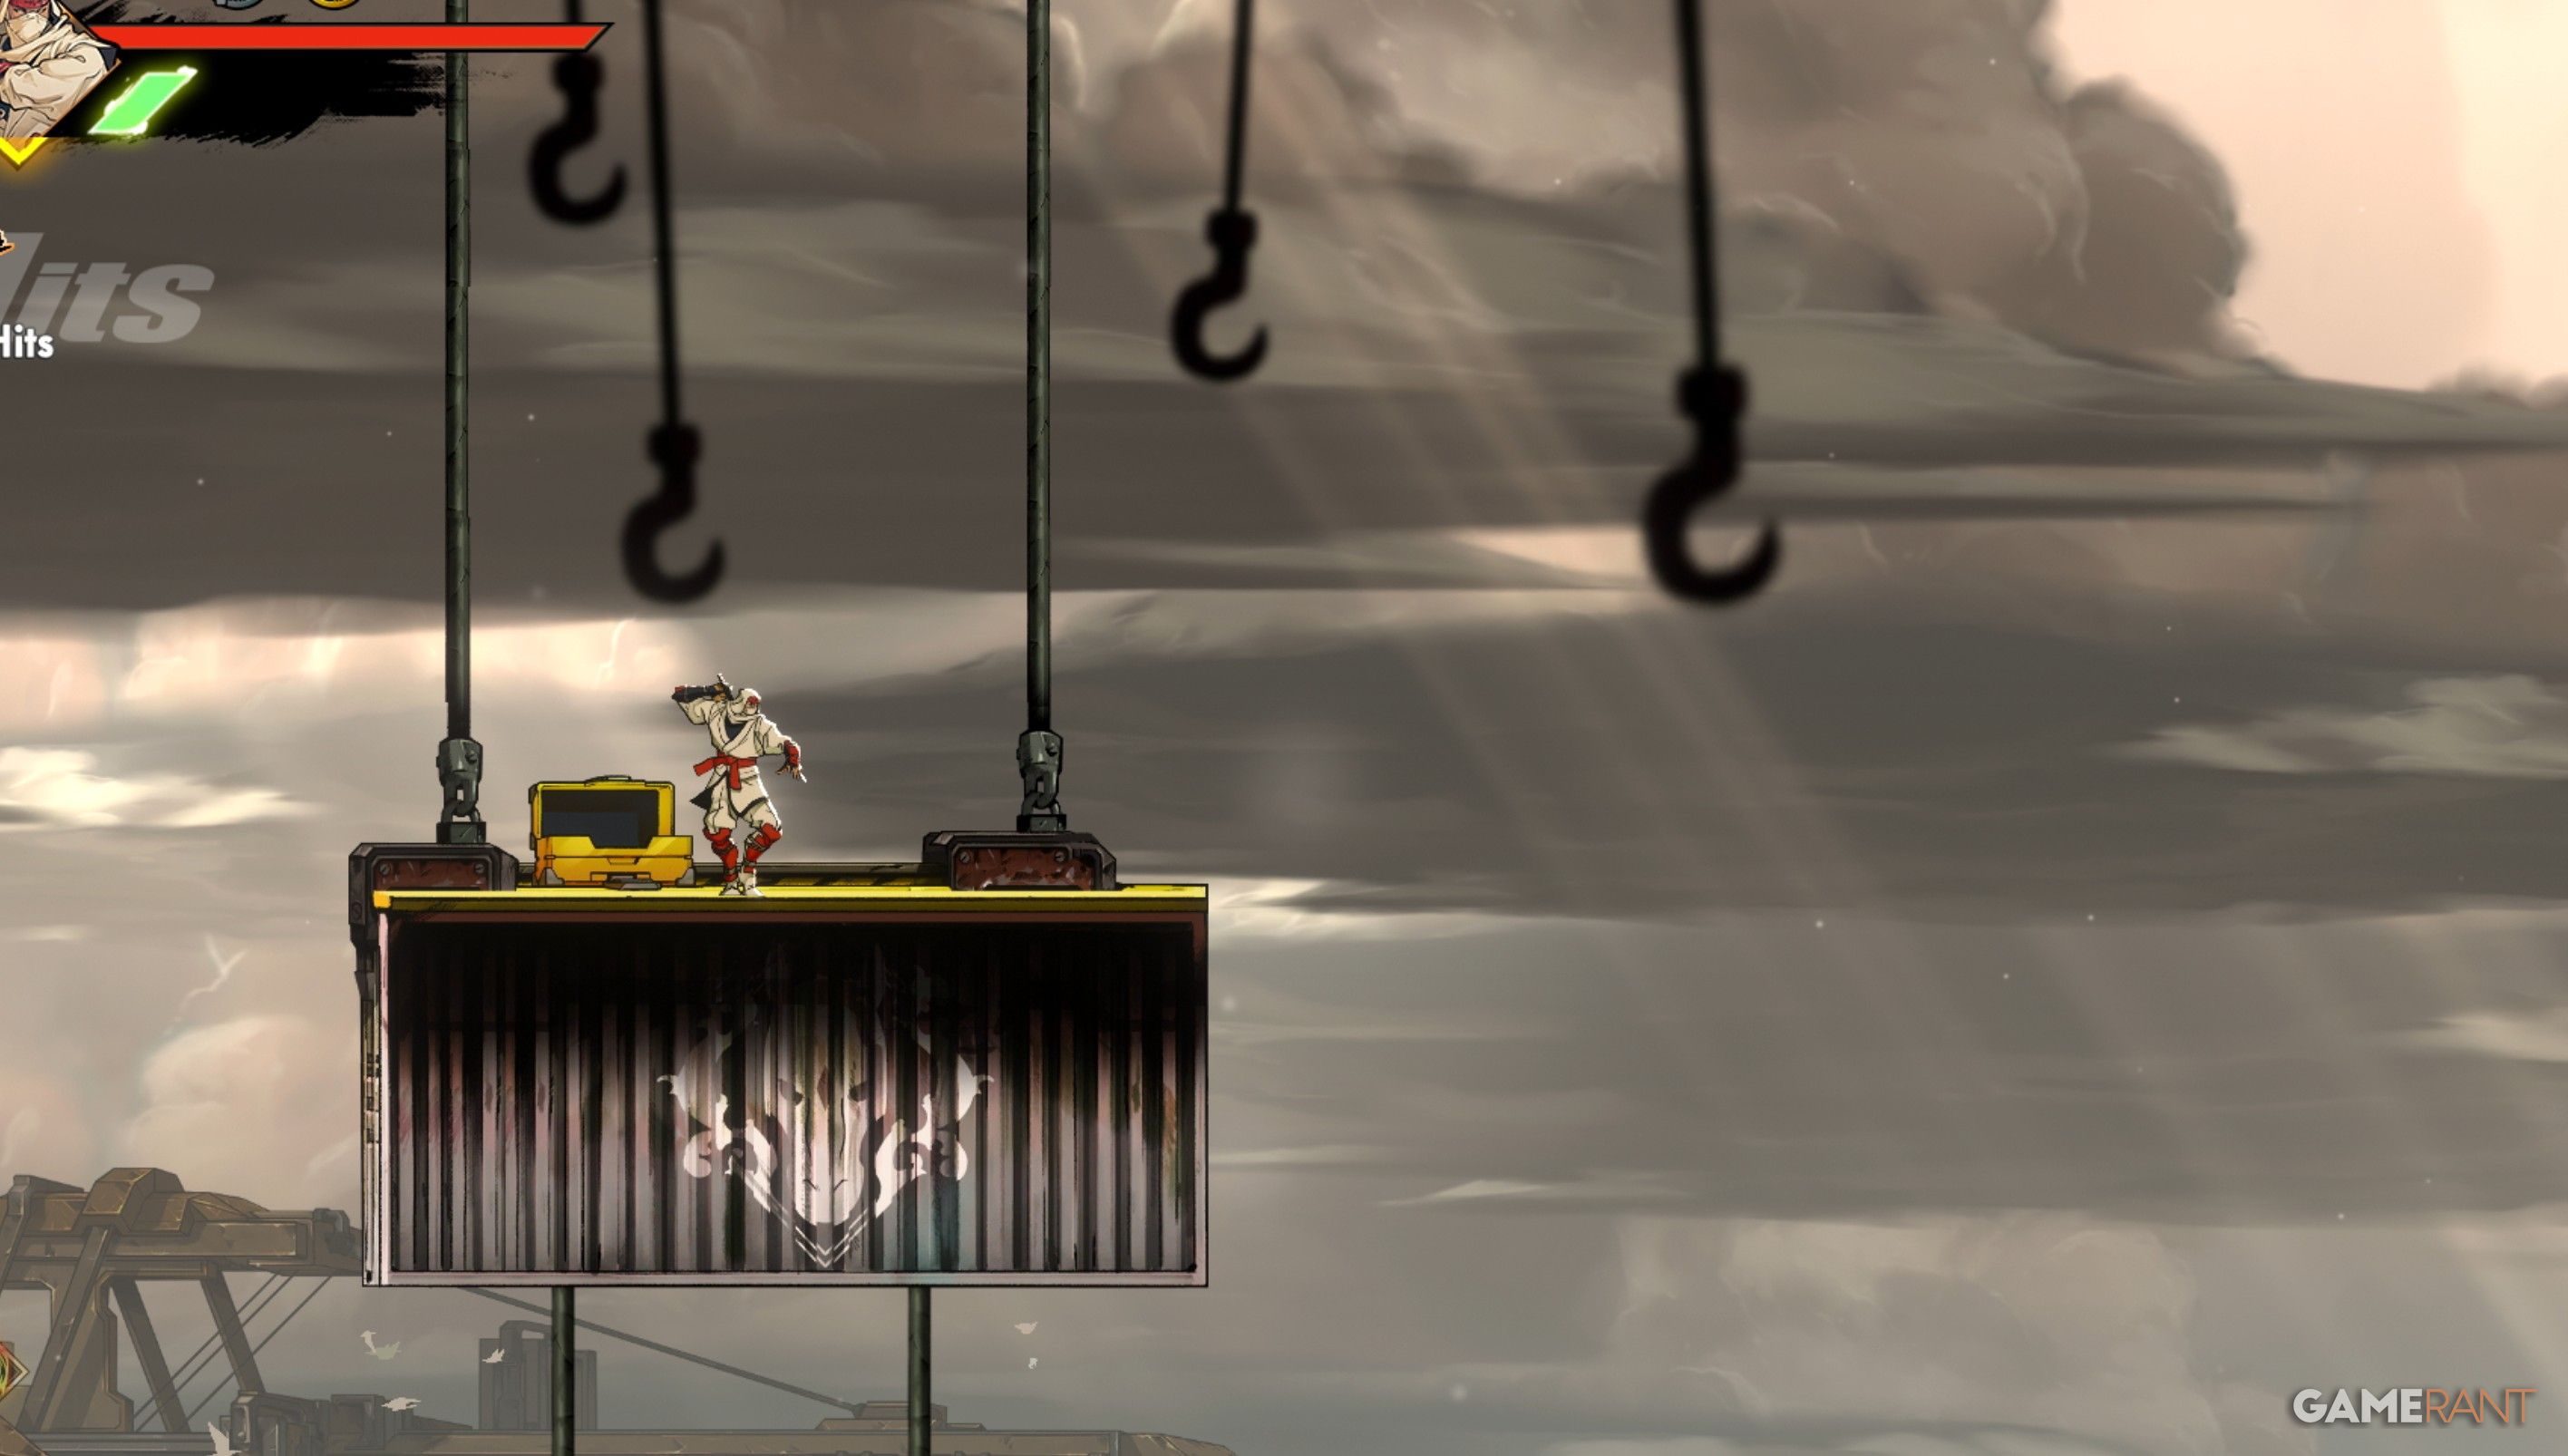
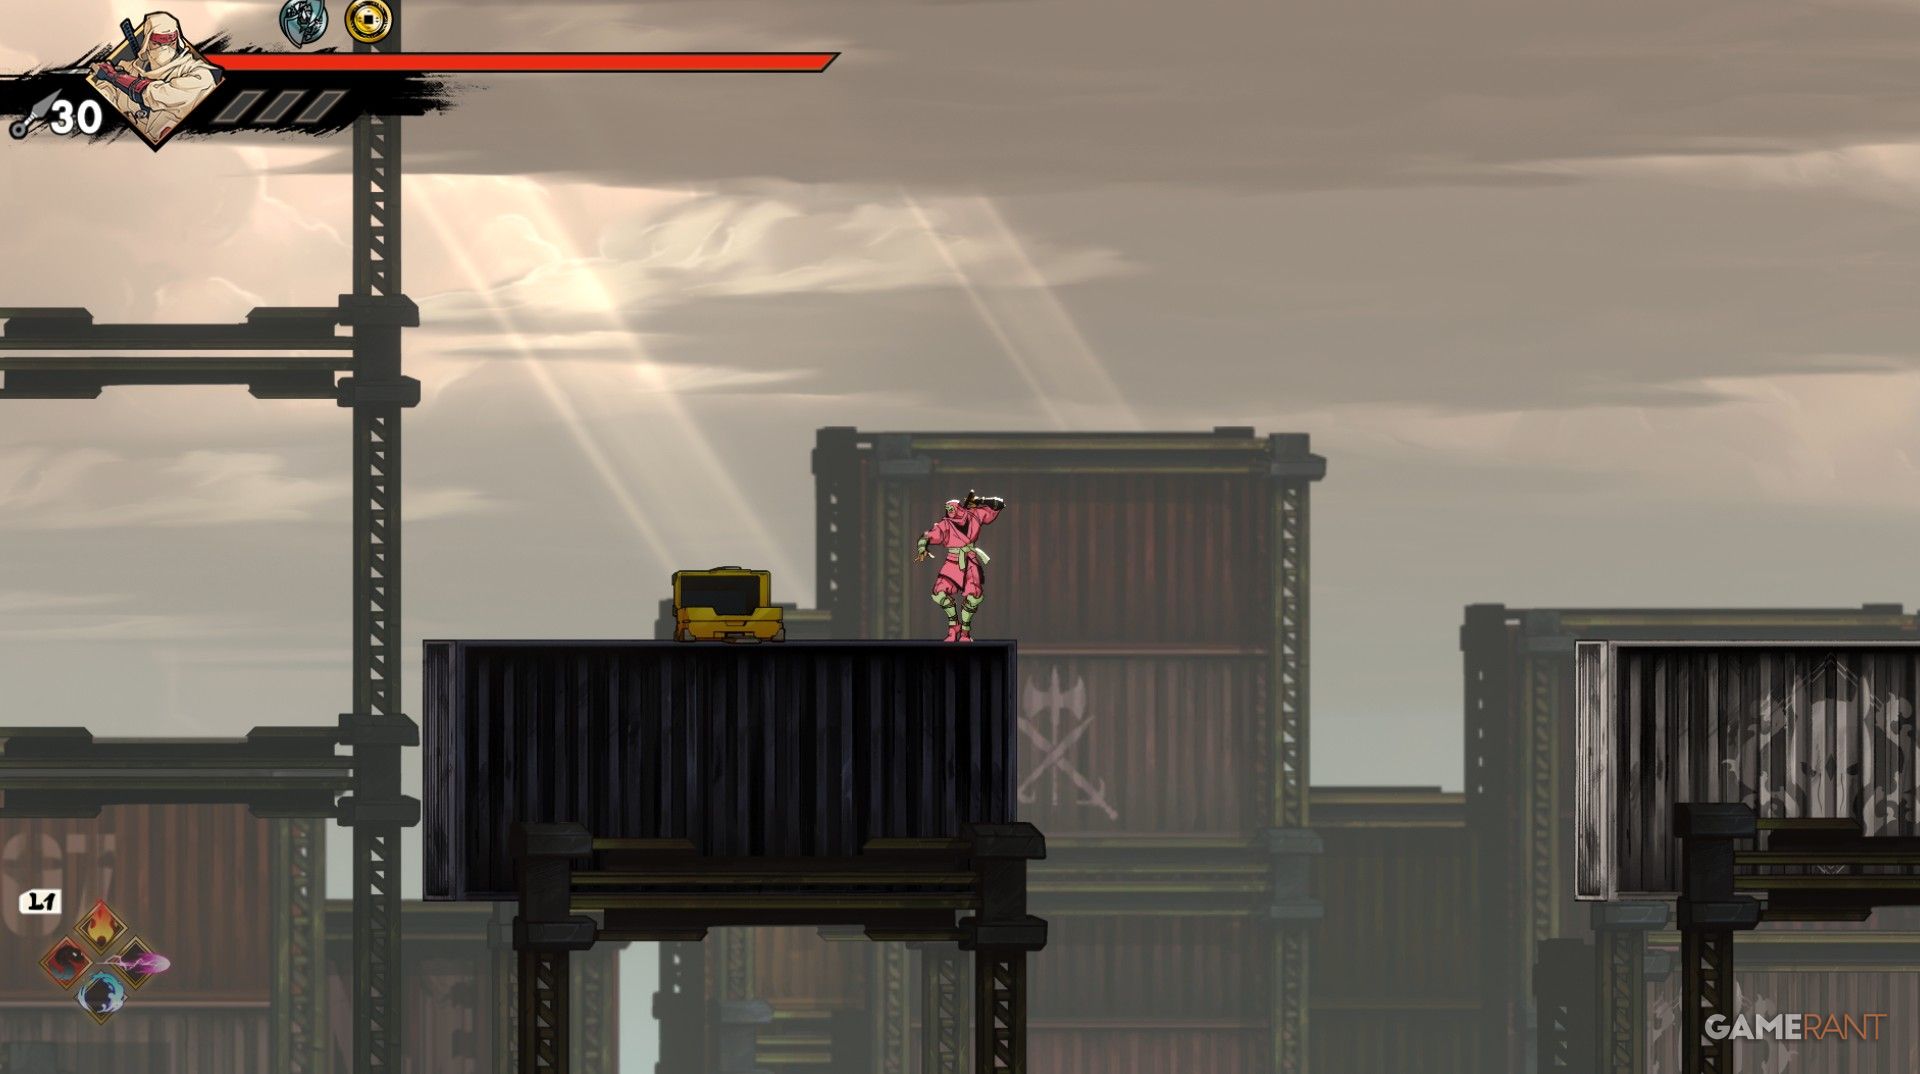
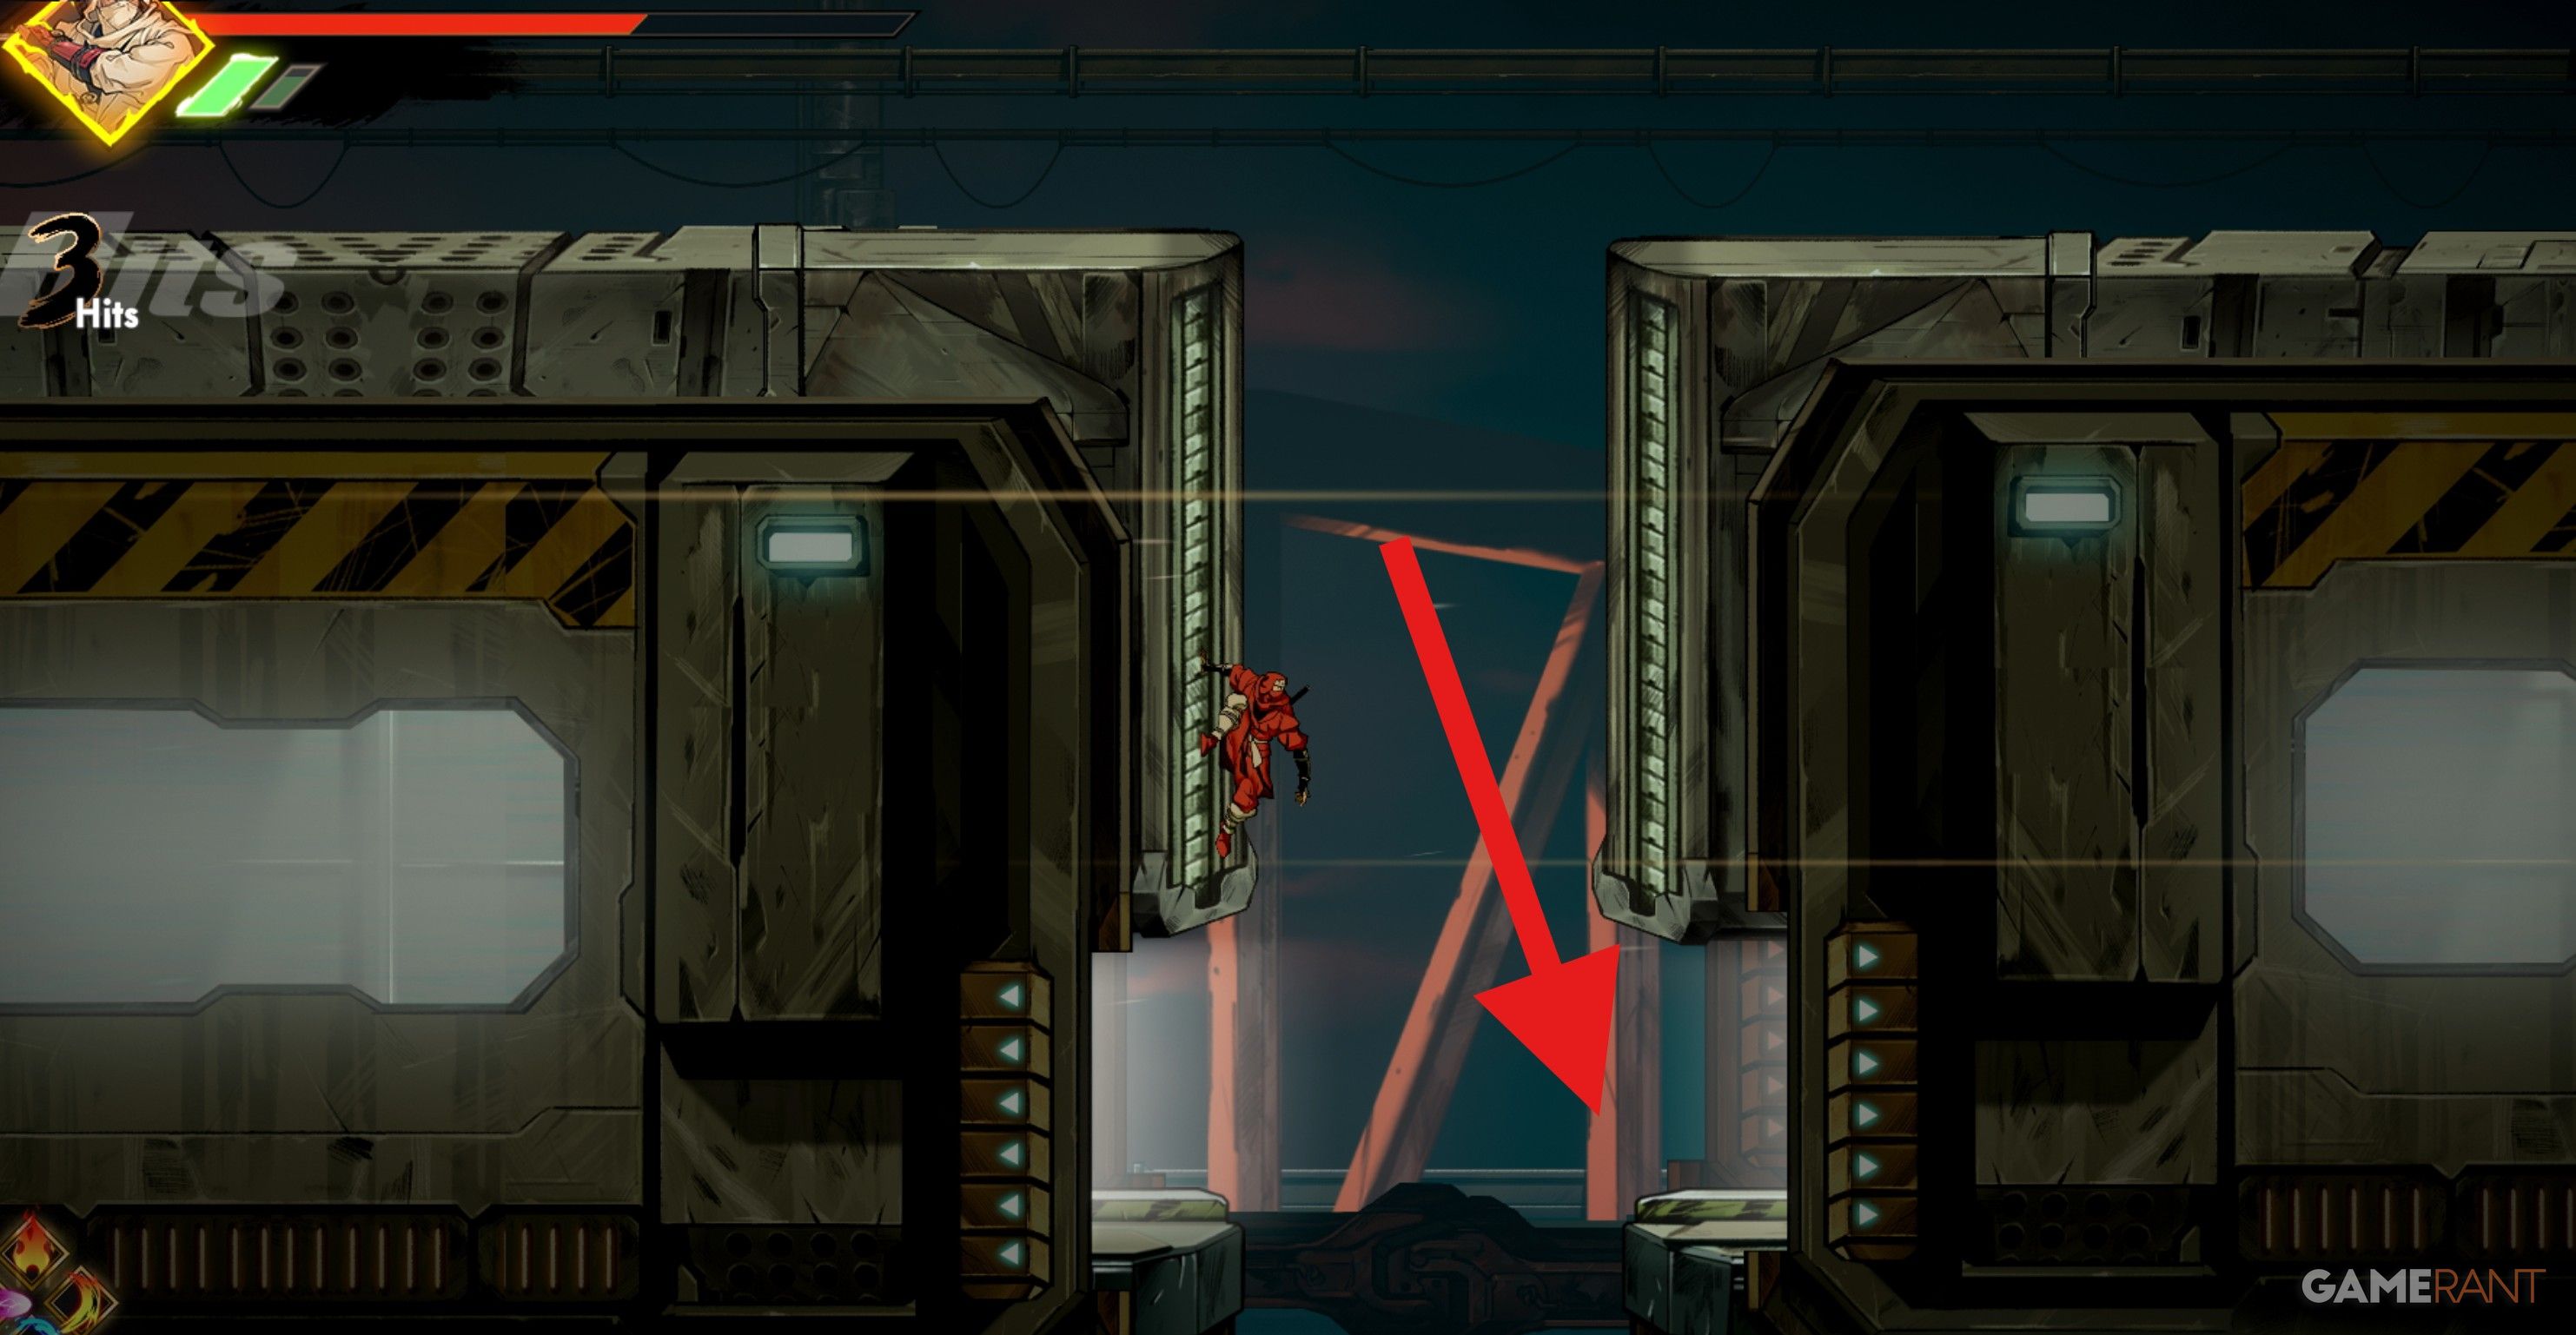
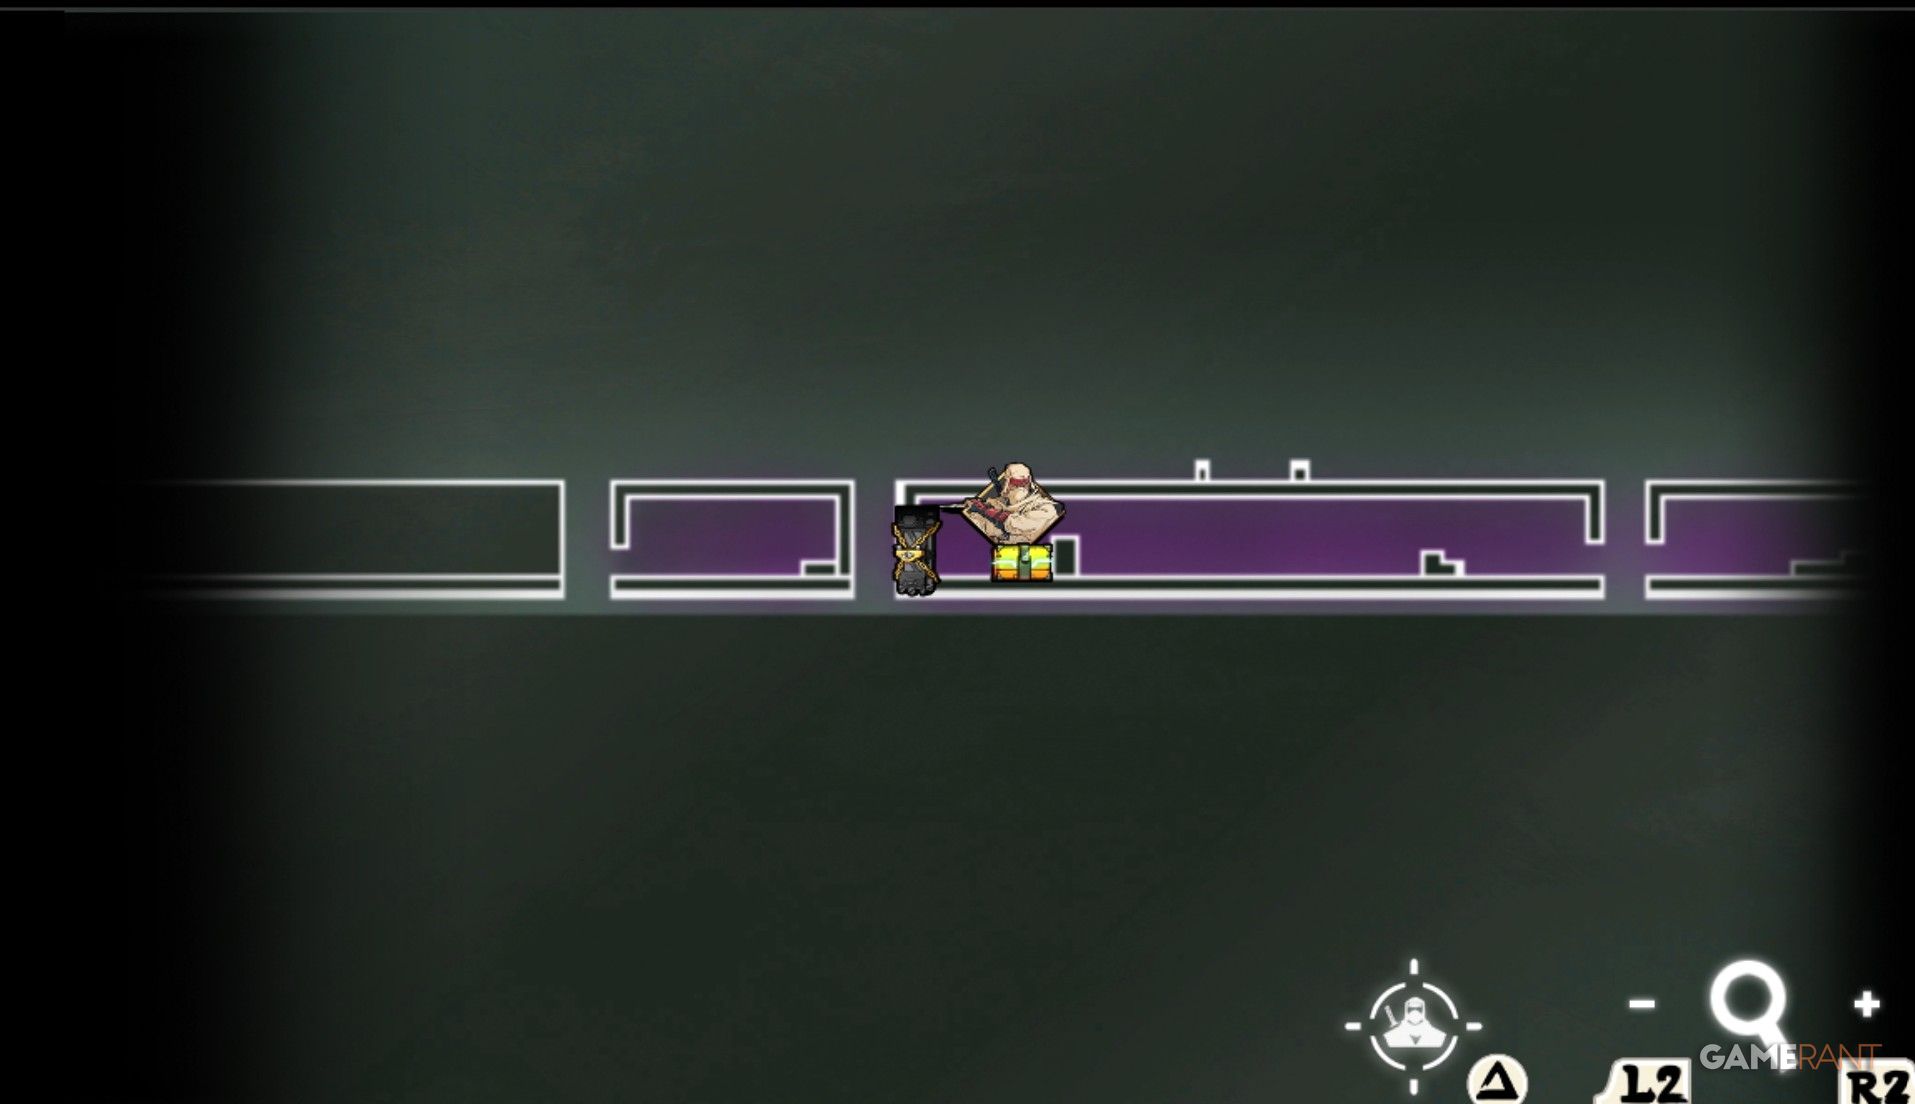
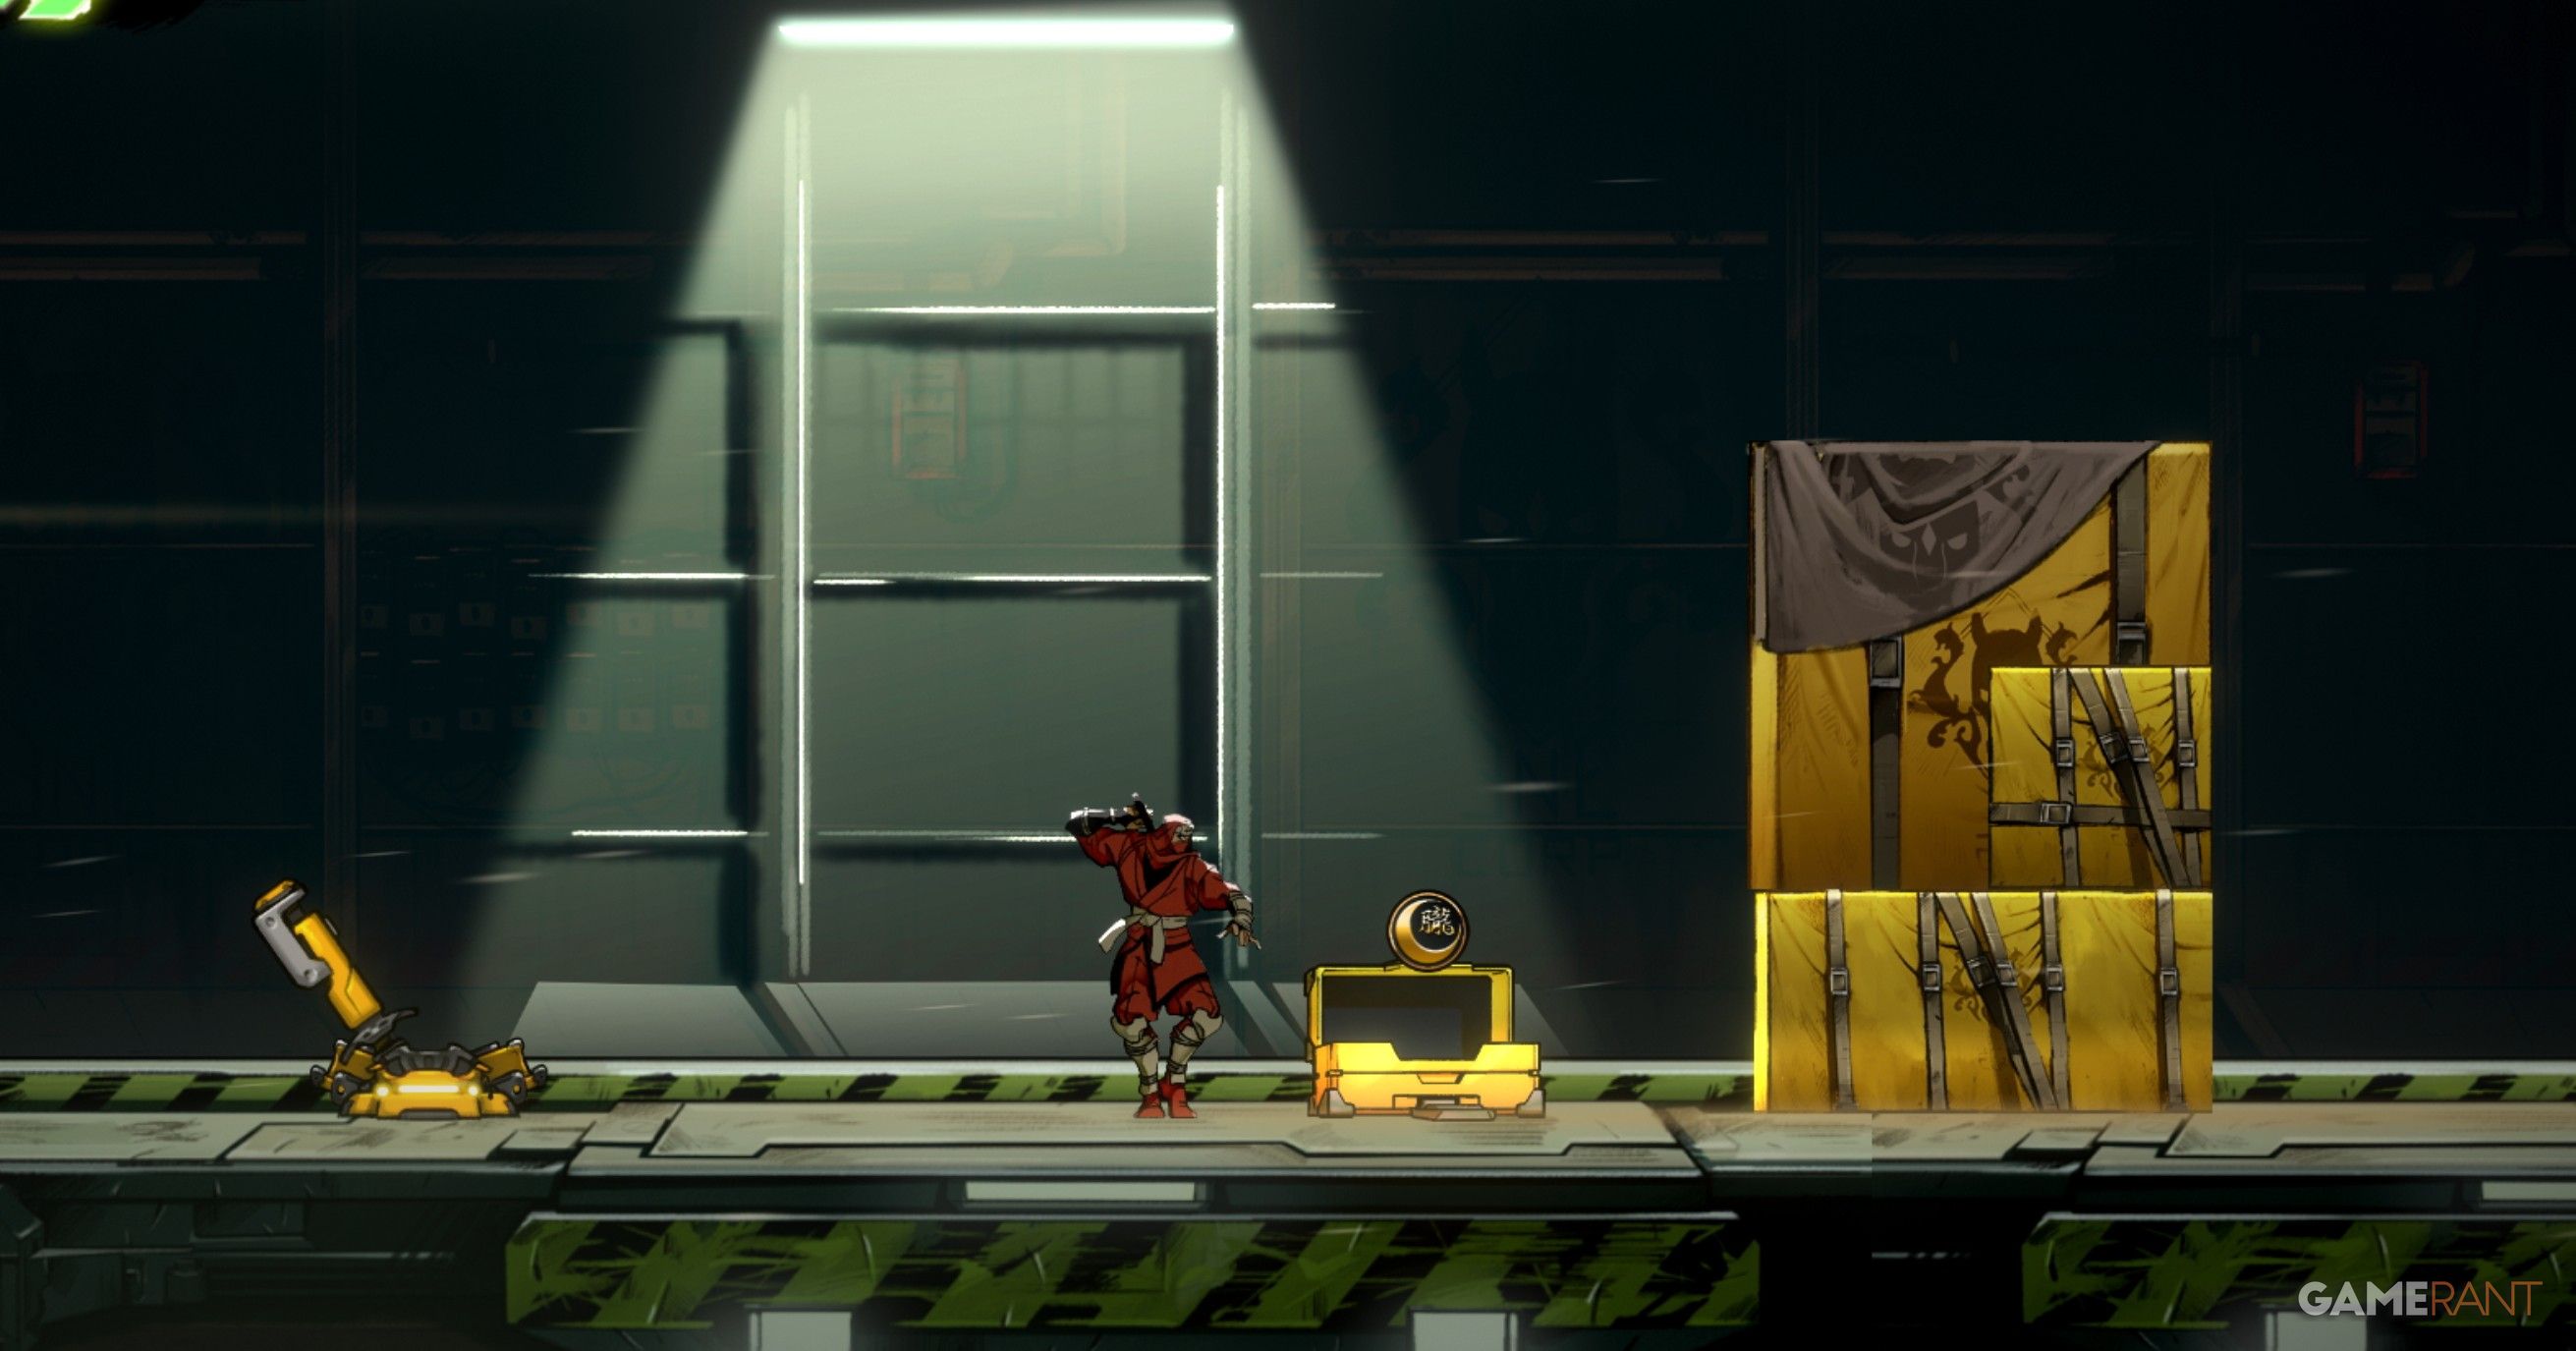
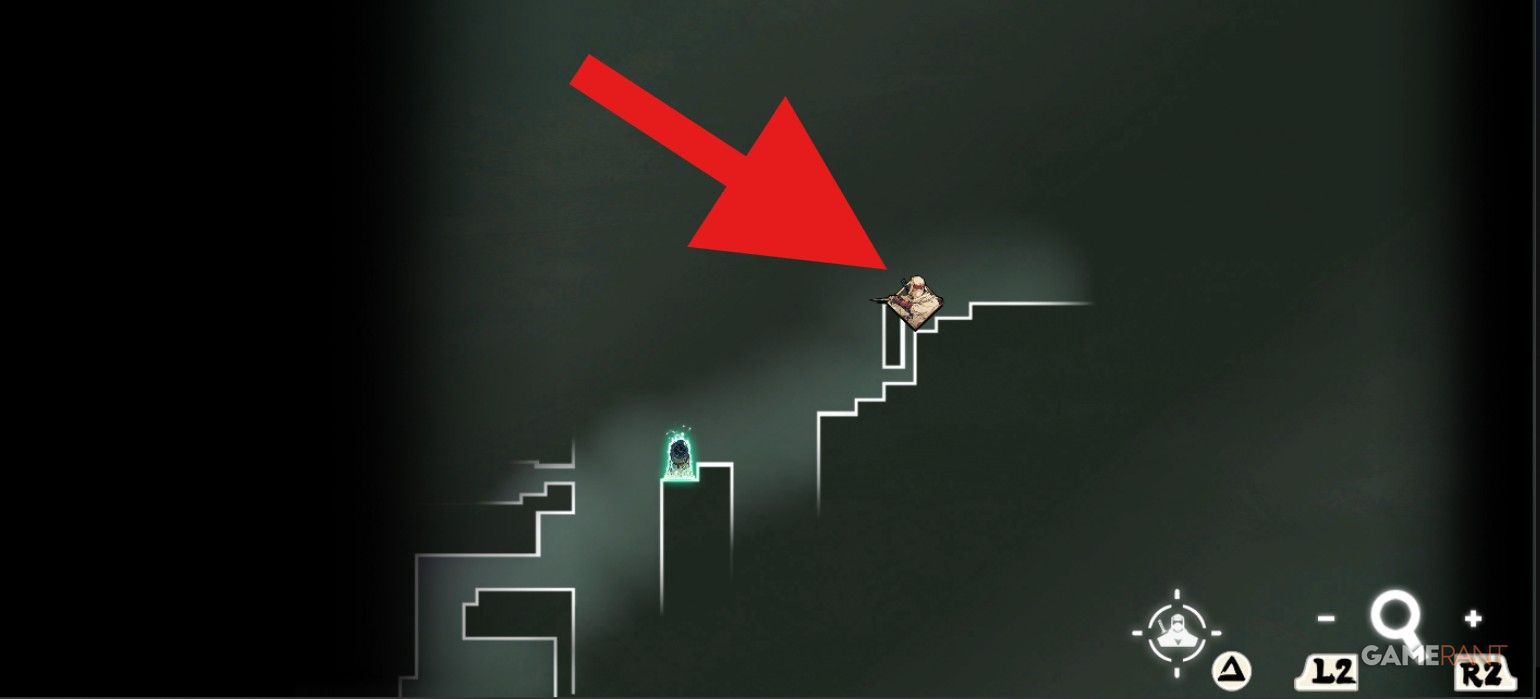
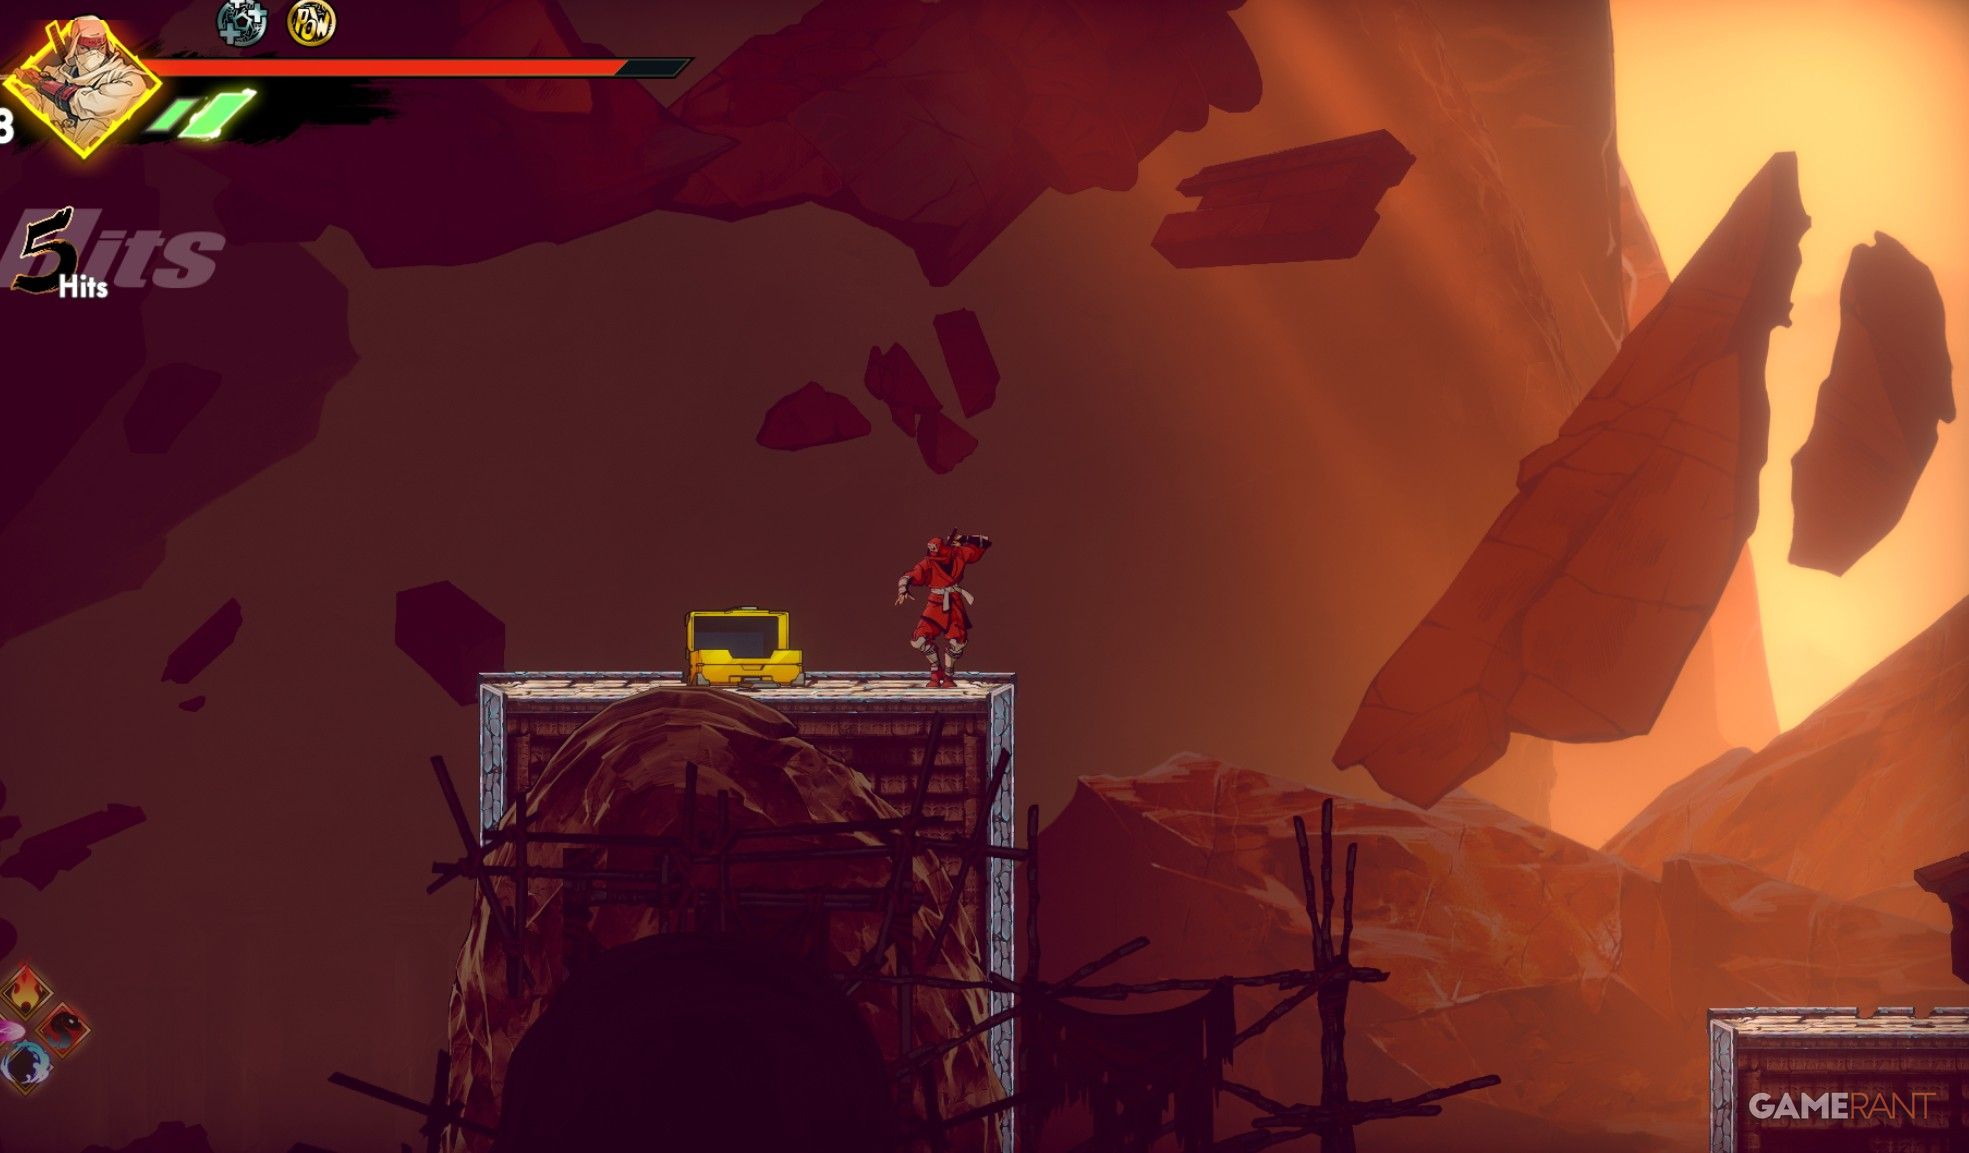
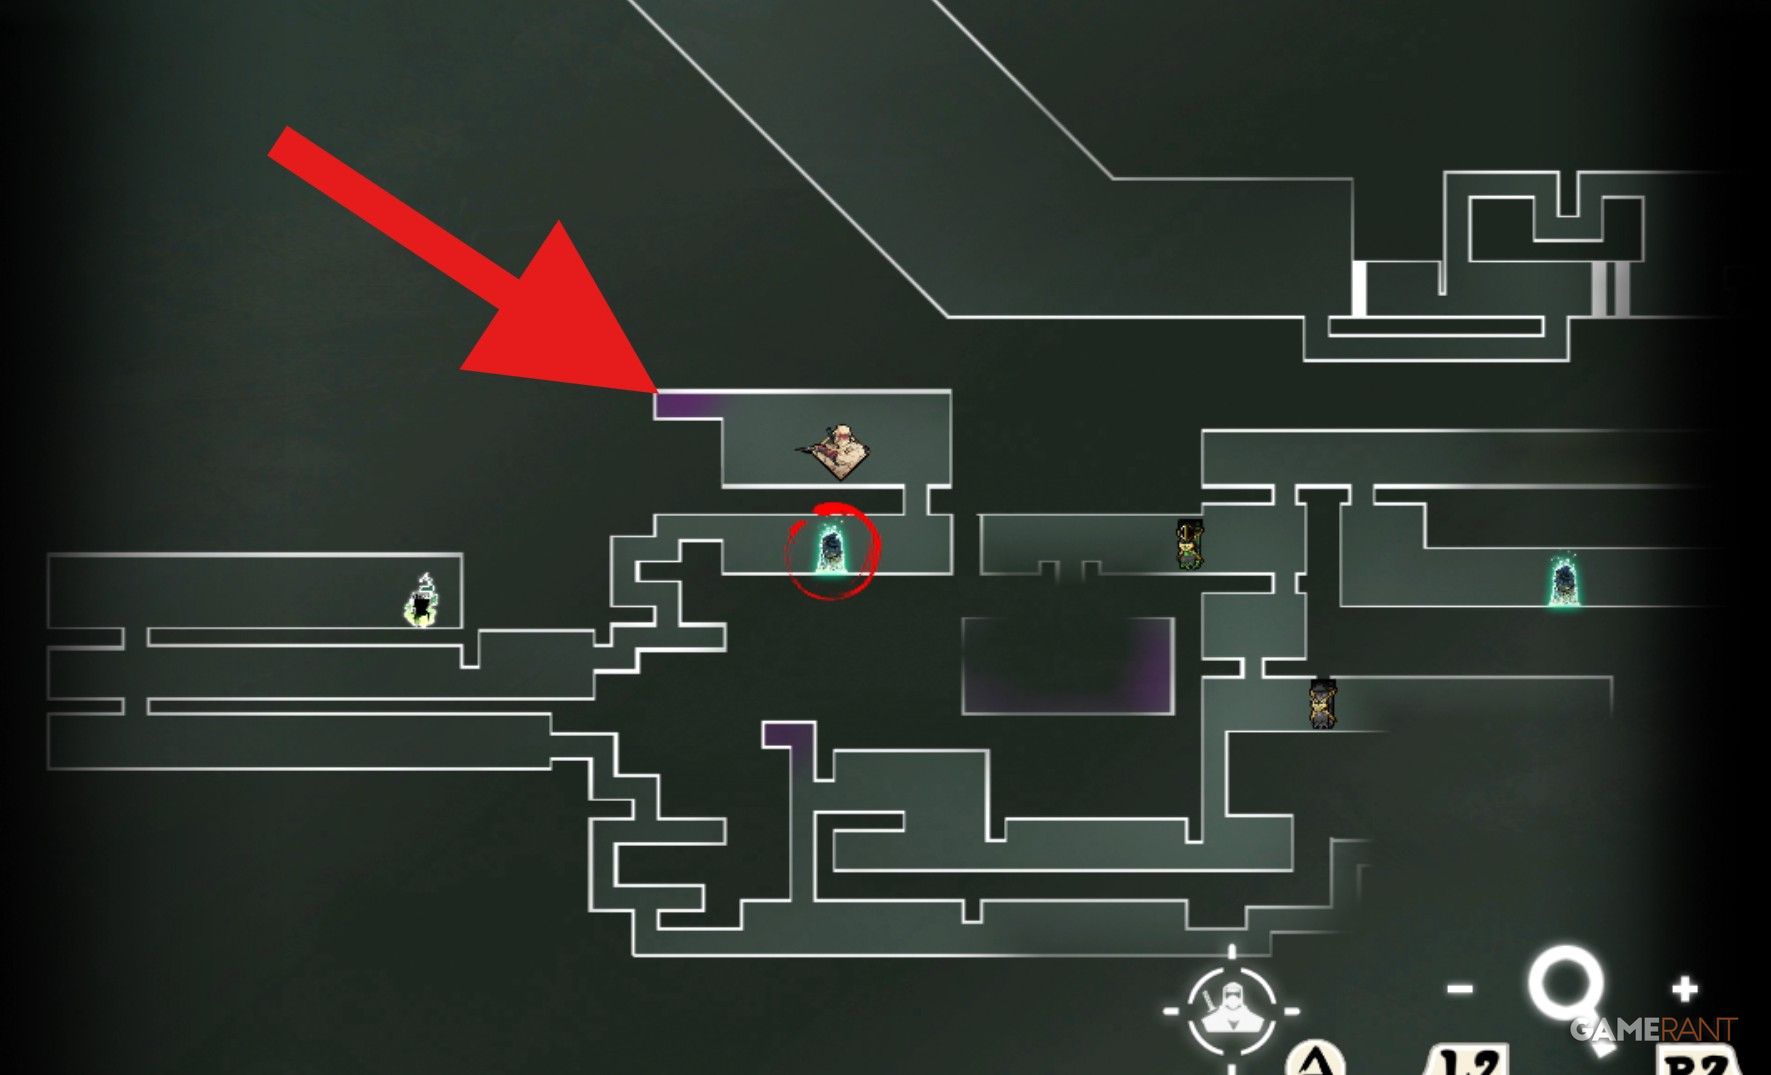
To start the elevator, you should locate a yellow container-like object and insert it into the designated slot. Prior to going down, gaze upward and towards your right to spot a platform that will transport you to a treasure chest.
Second Oboro Relic
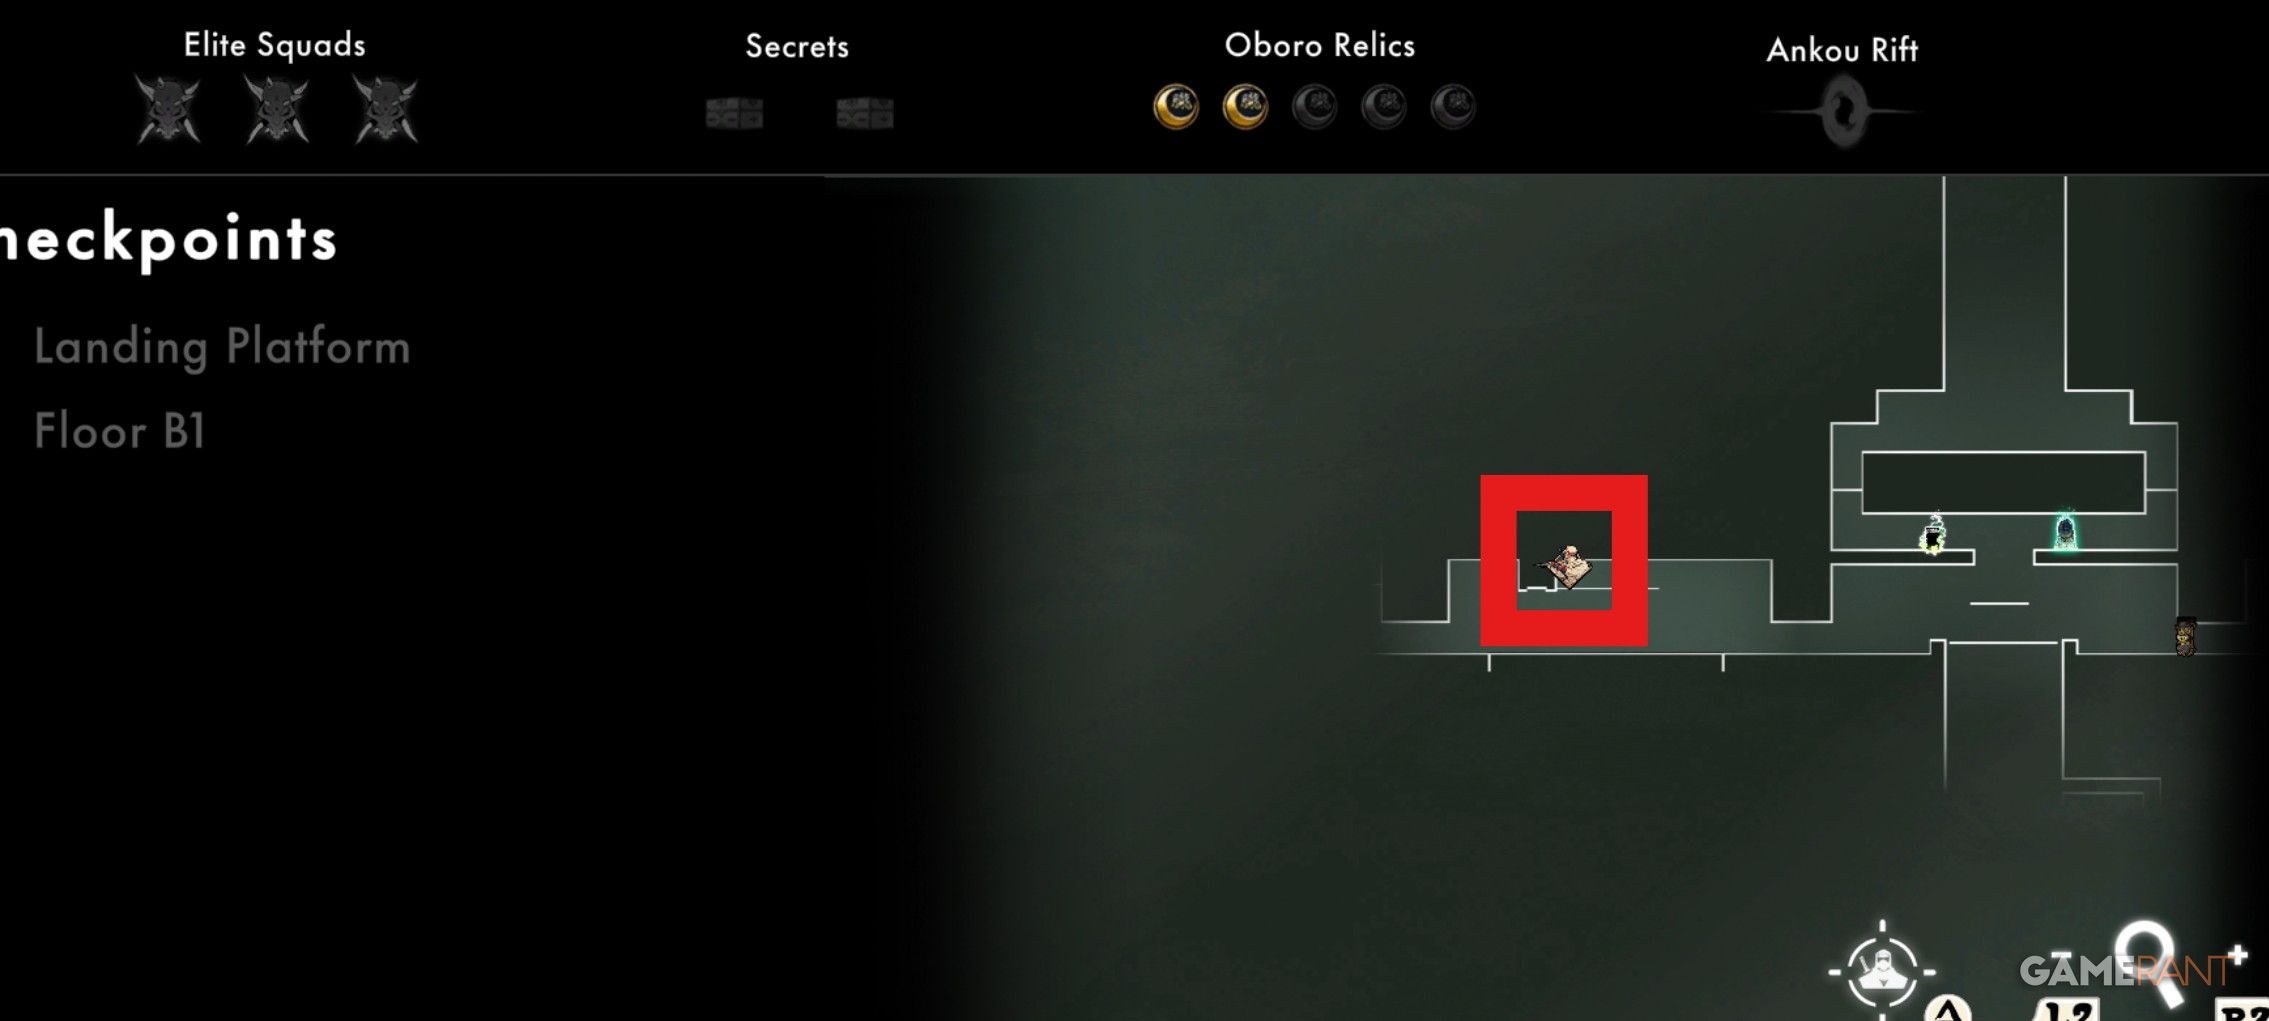
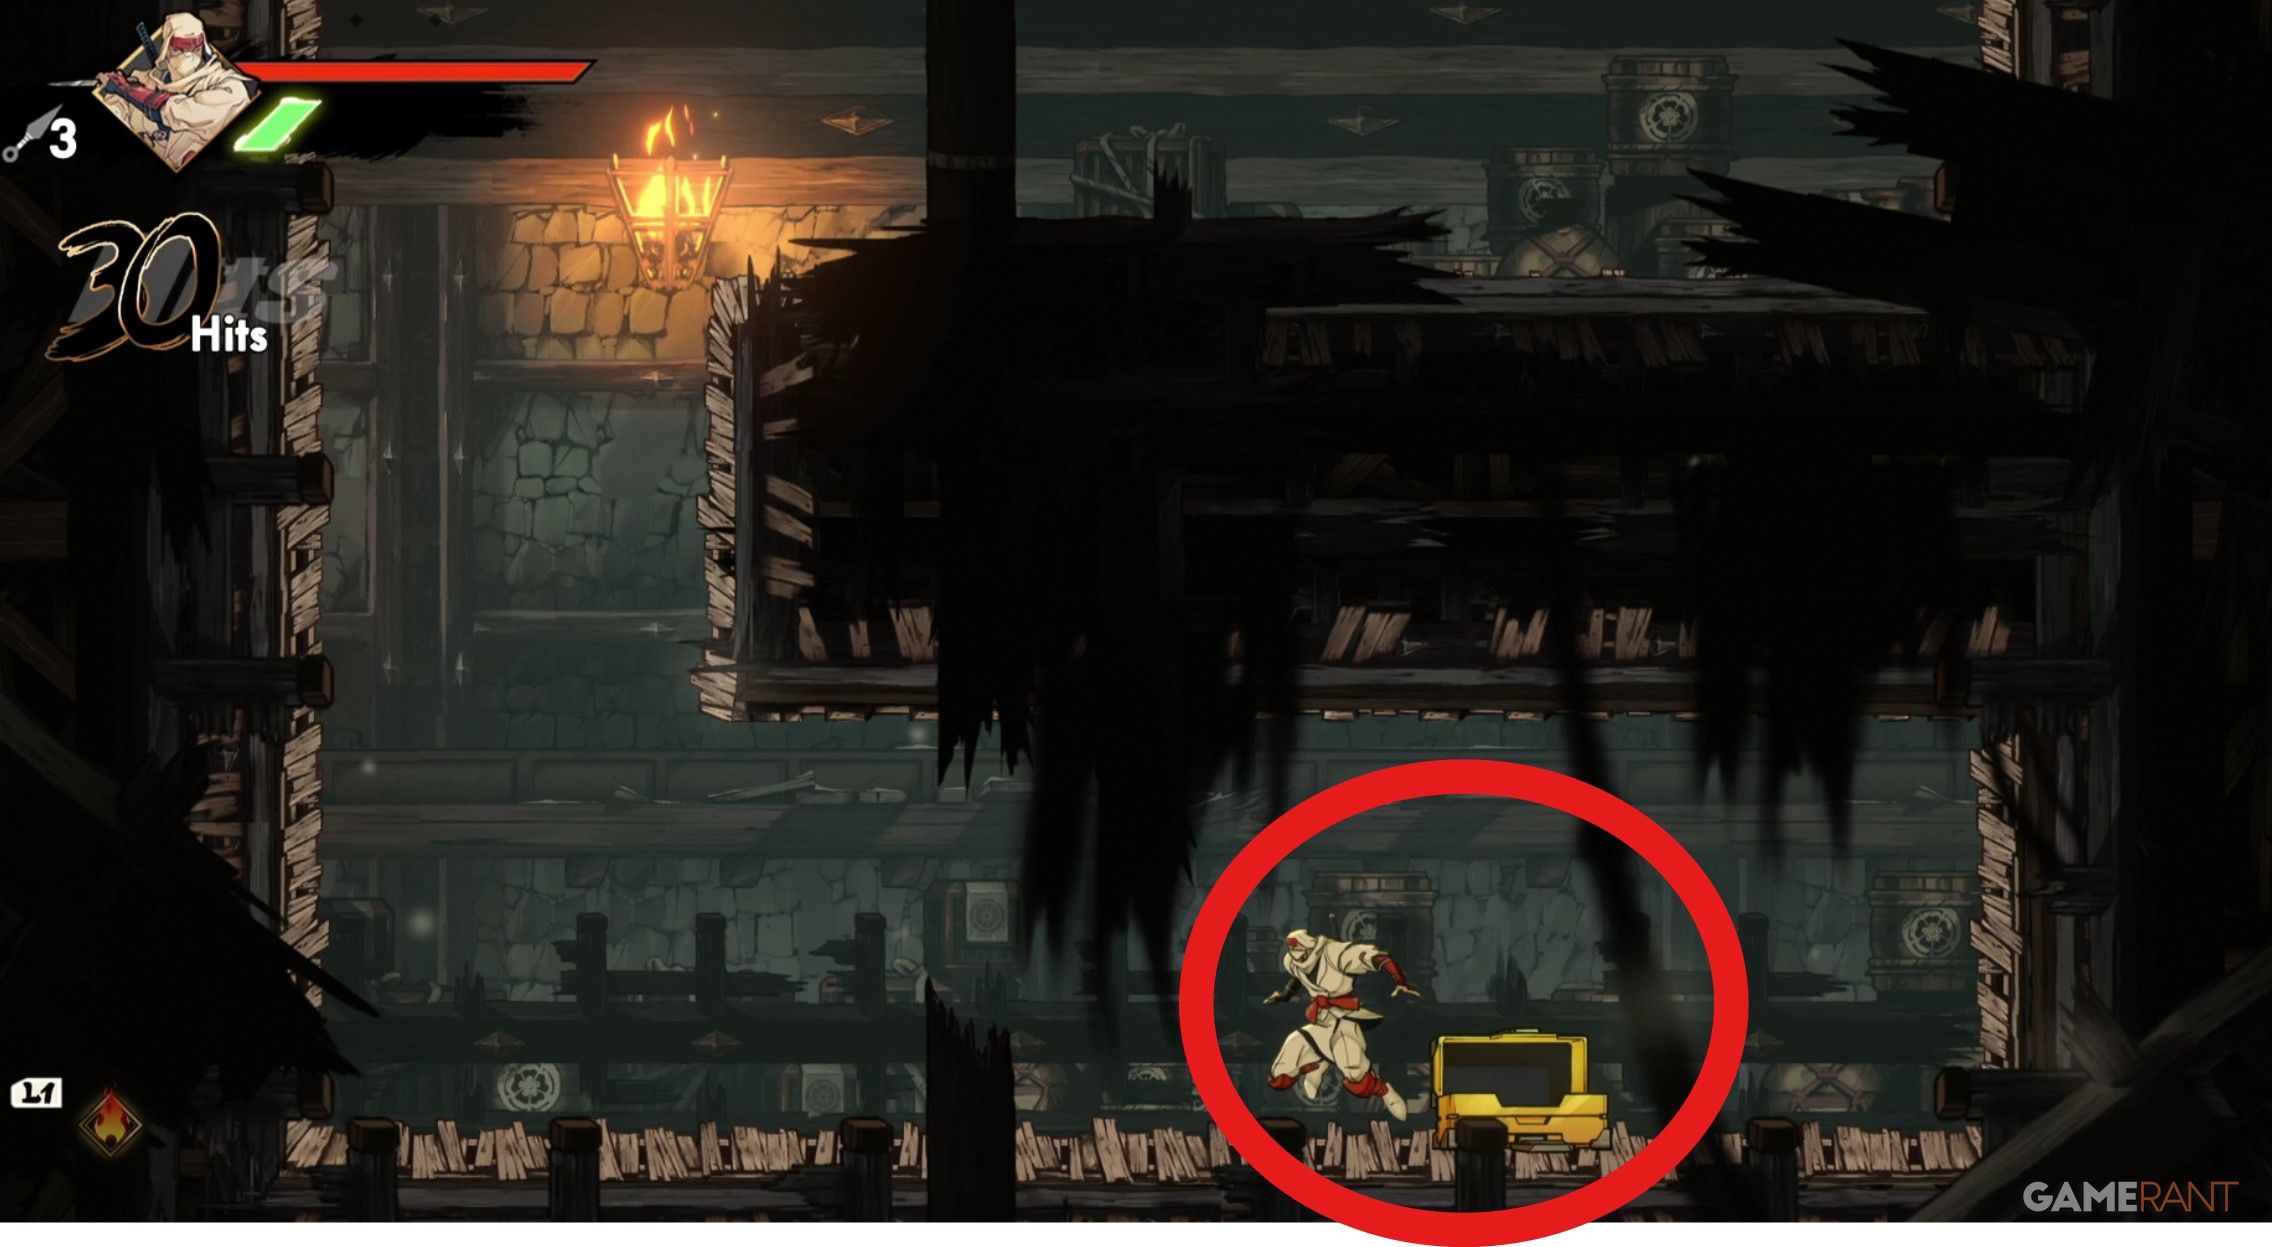
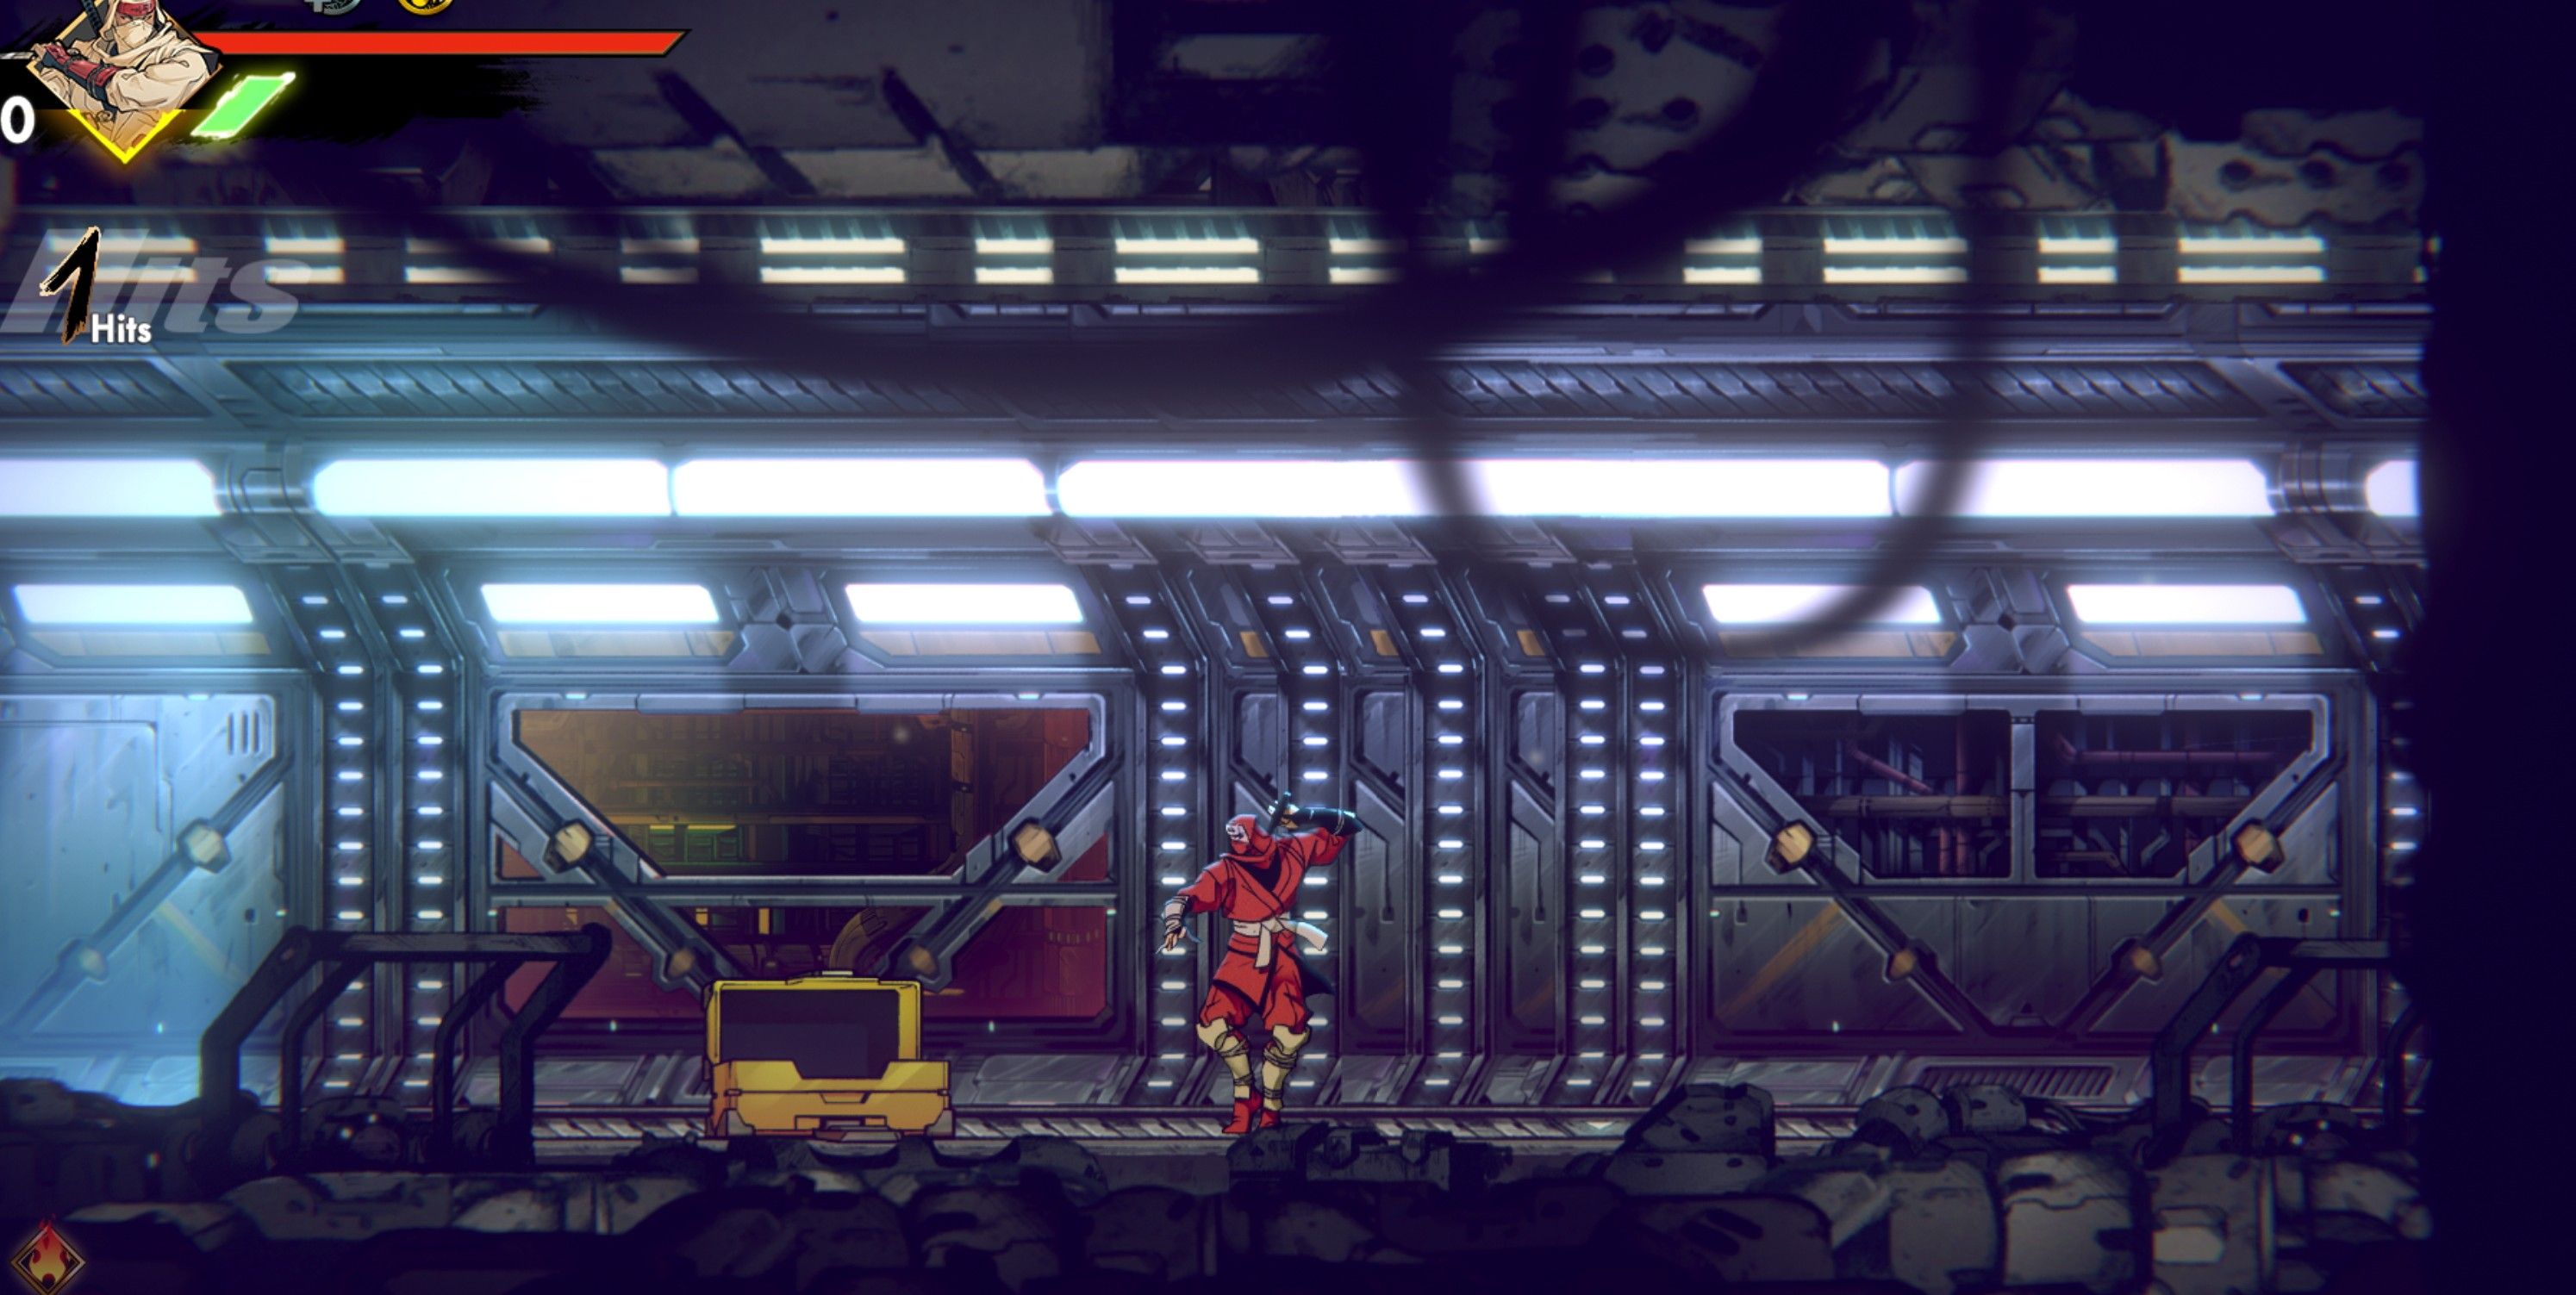
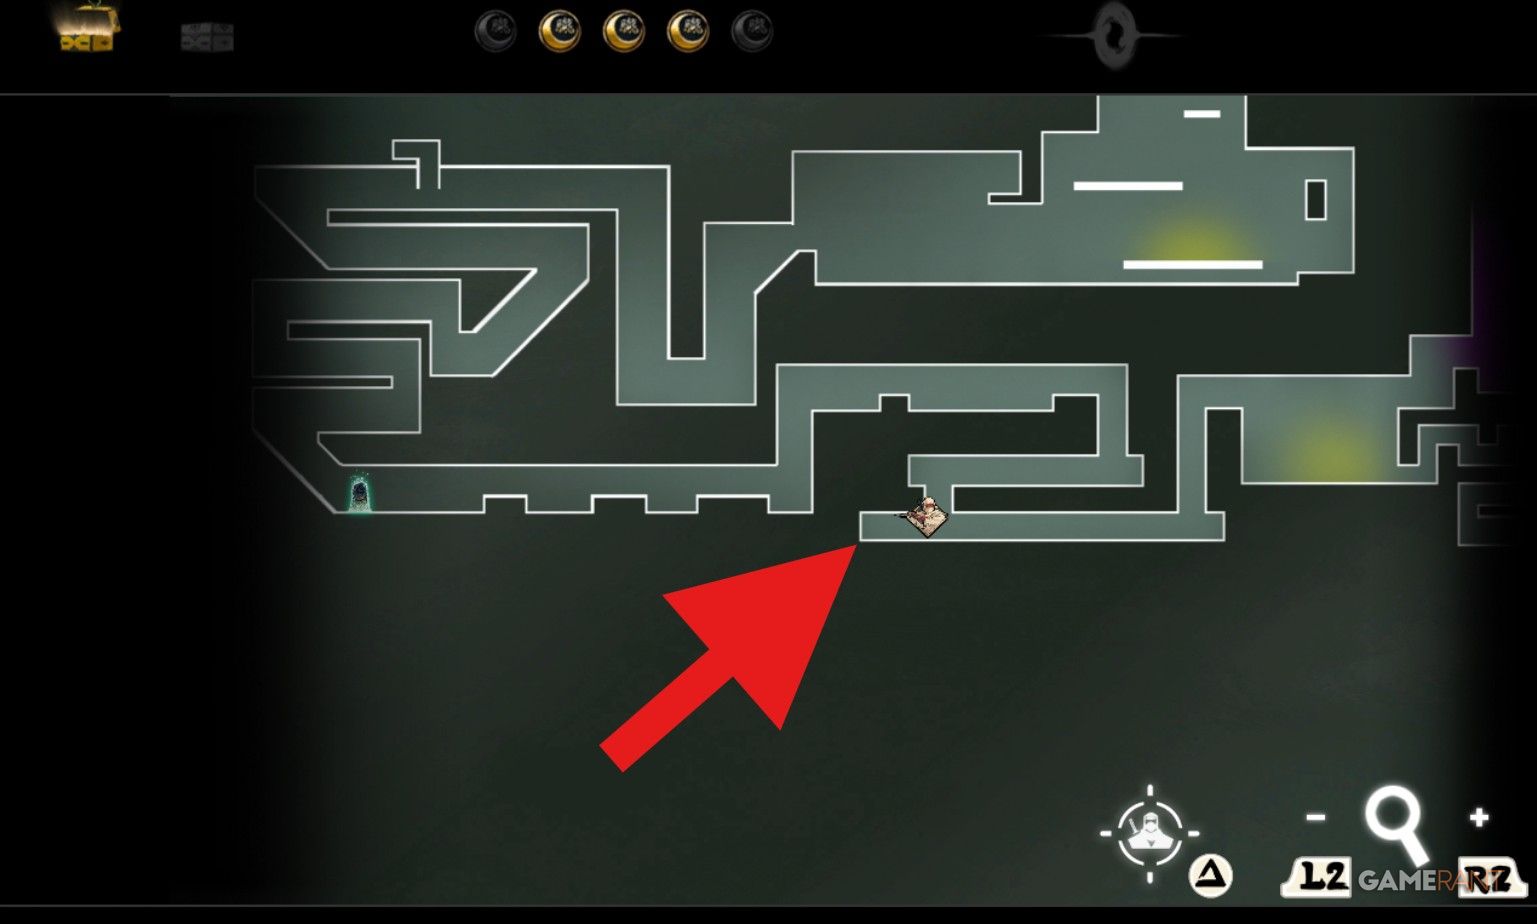
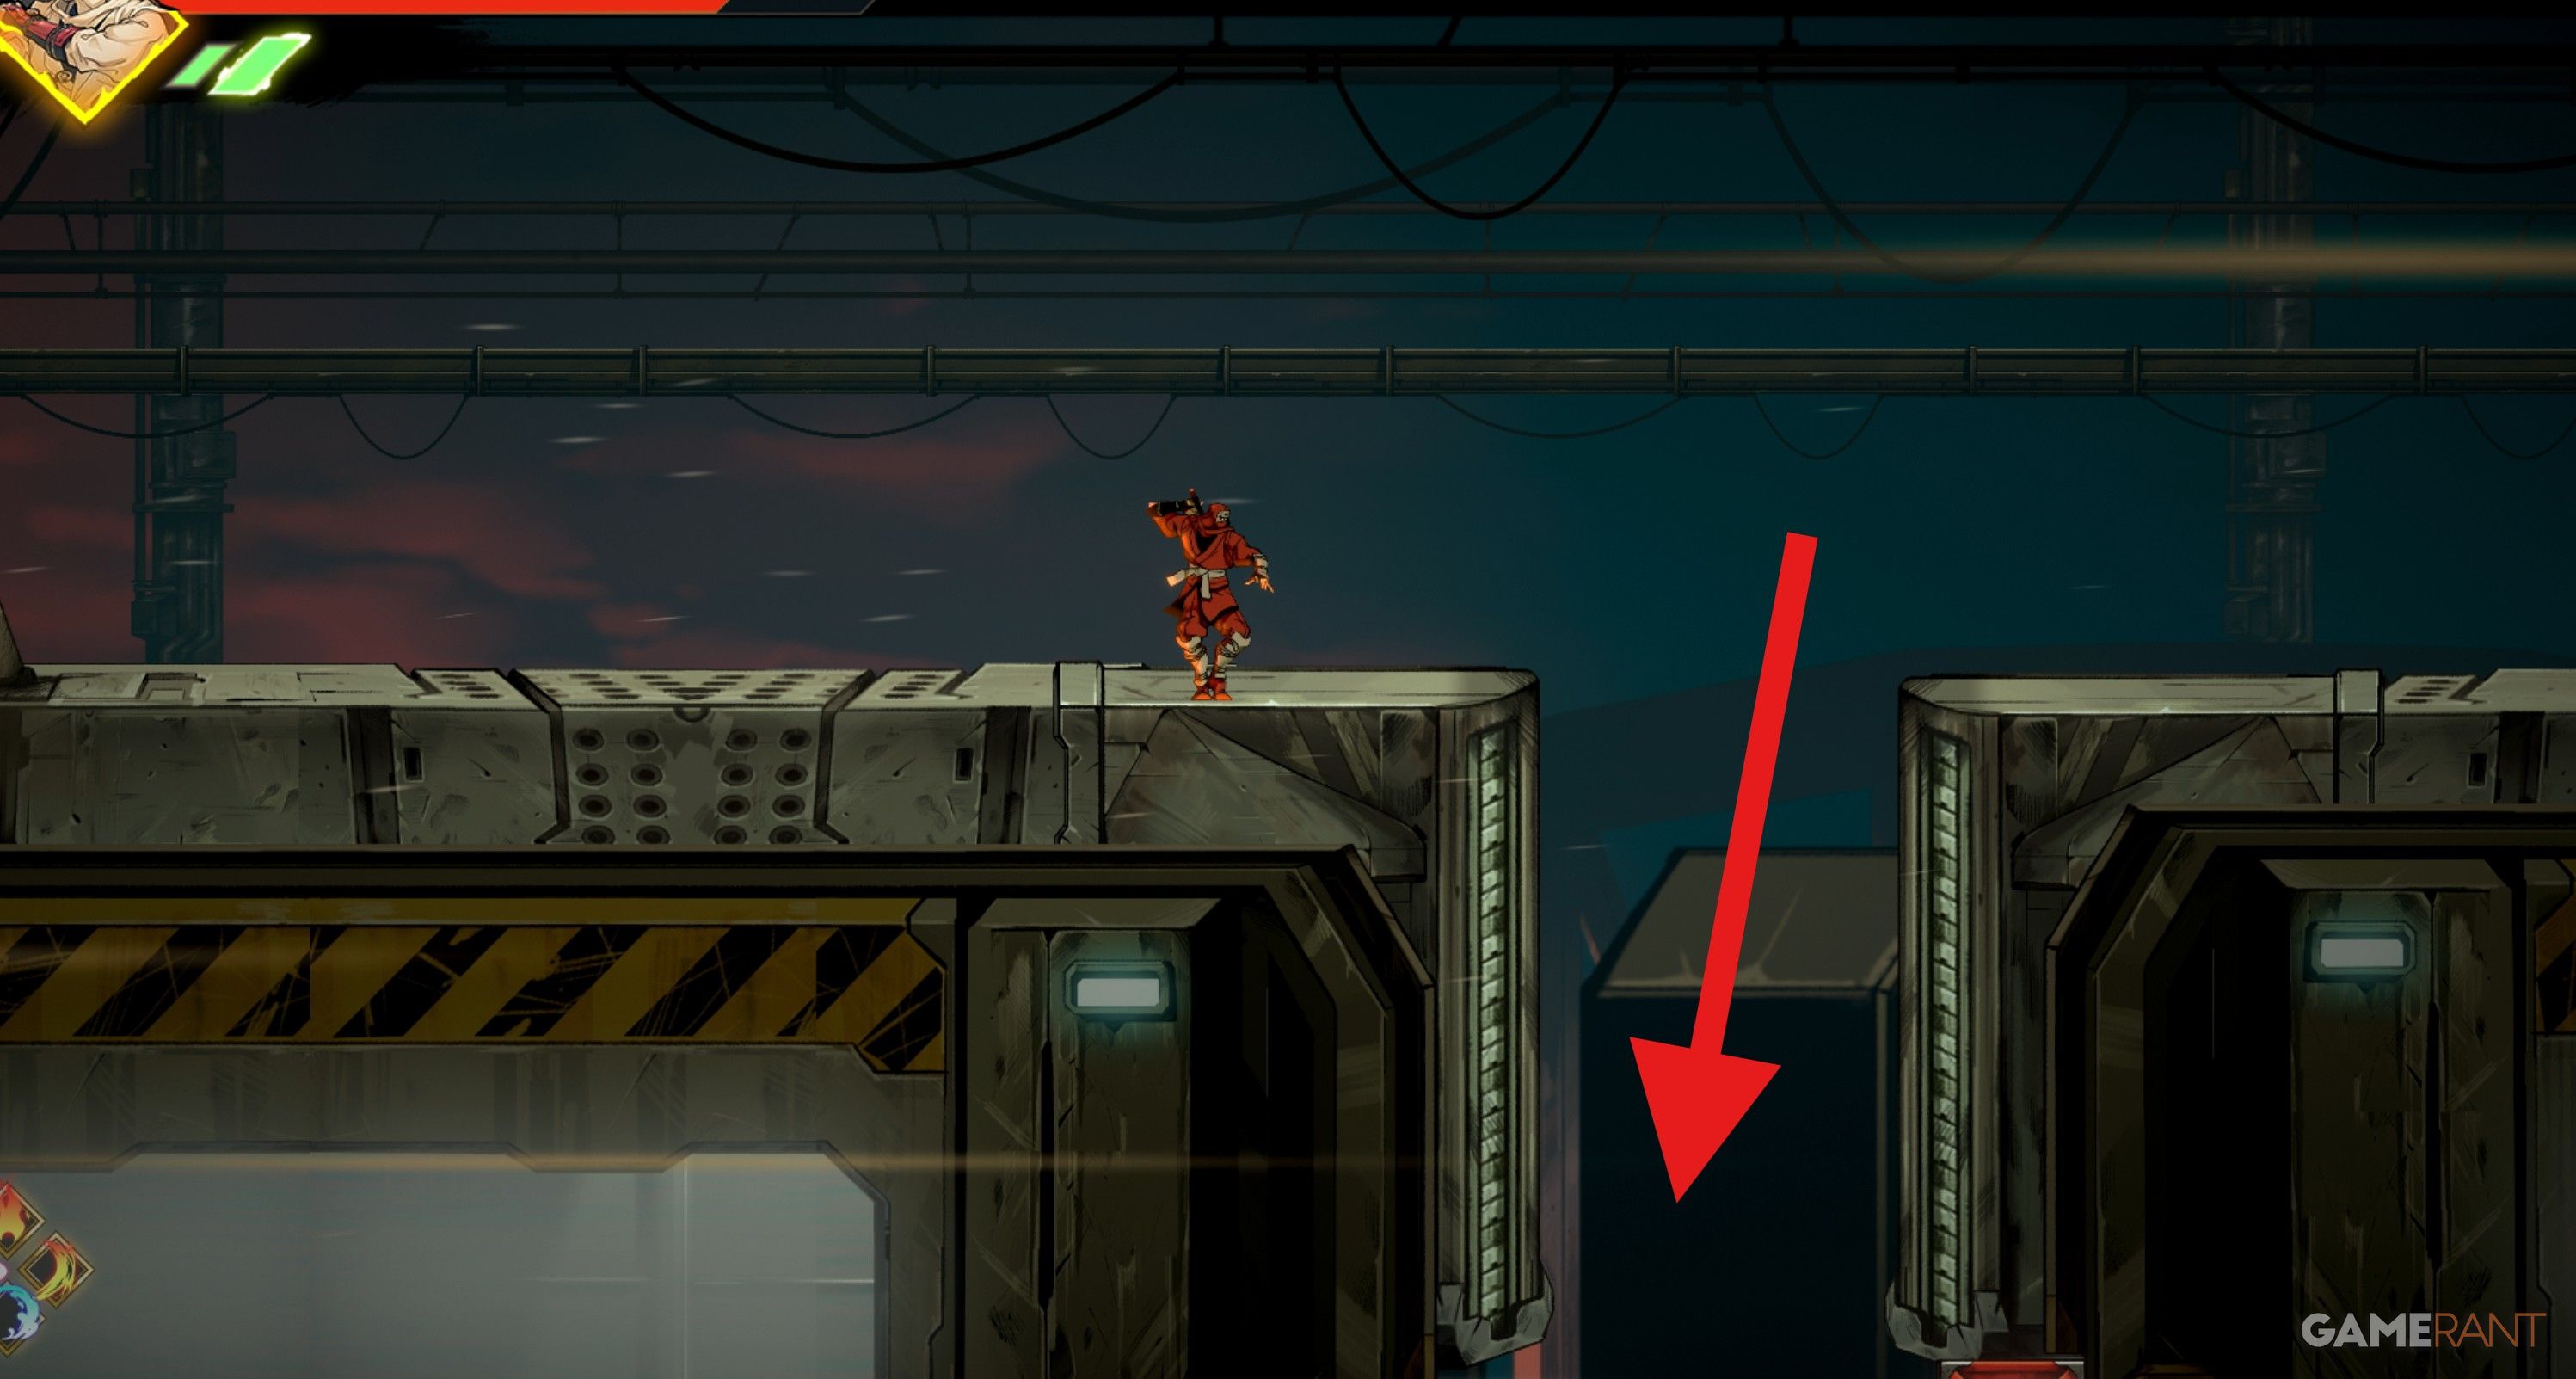
Following your descent in the elevator, proceed past the security point on floor B1, then veer towards the left where you’ll spot a lever. Pulling this lever will cause a red container to descend. Move the container to your right and use it as a stepping stone to leap onto it, thus reaching the treasure.
Third Oboro Relic
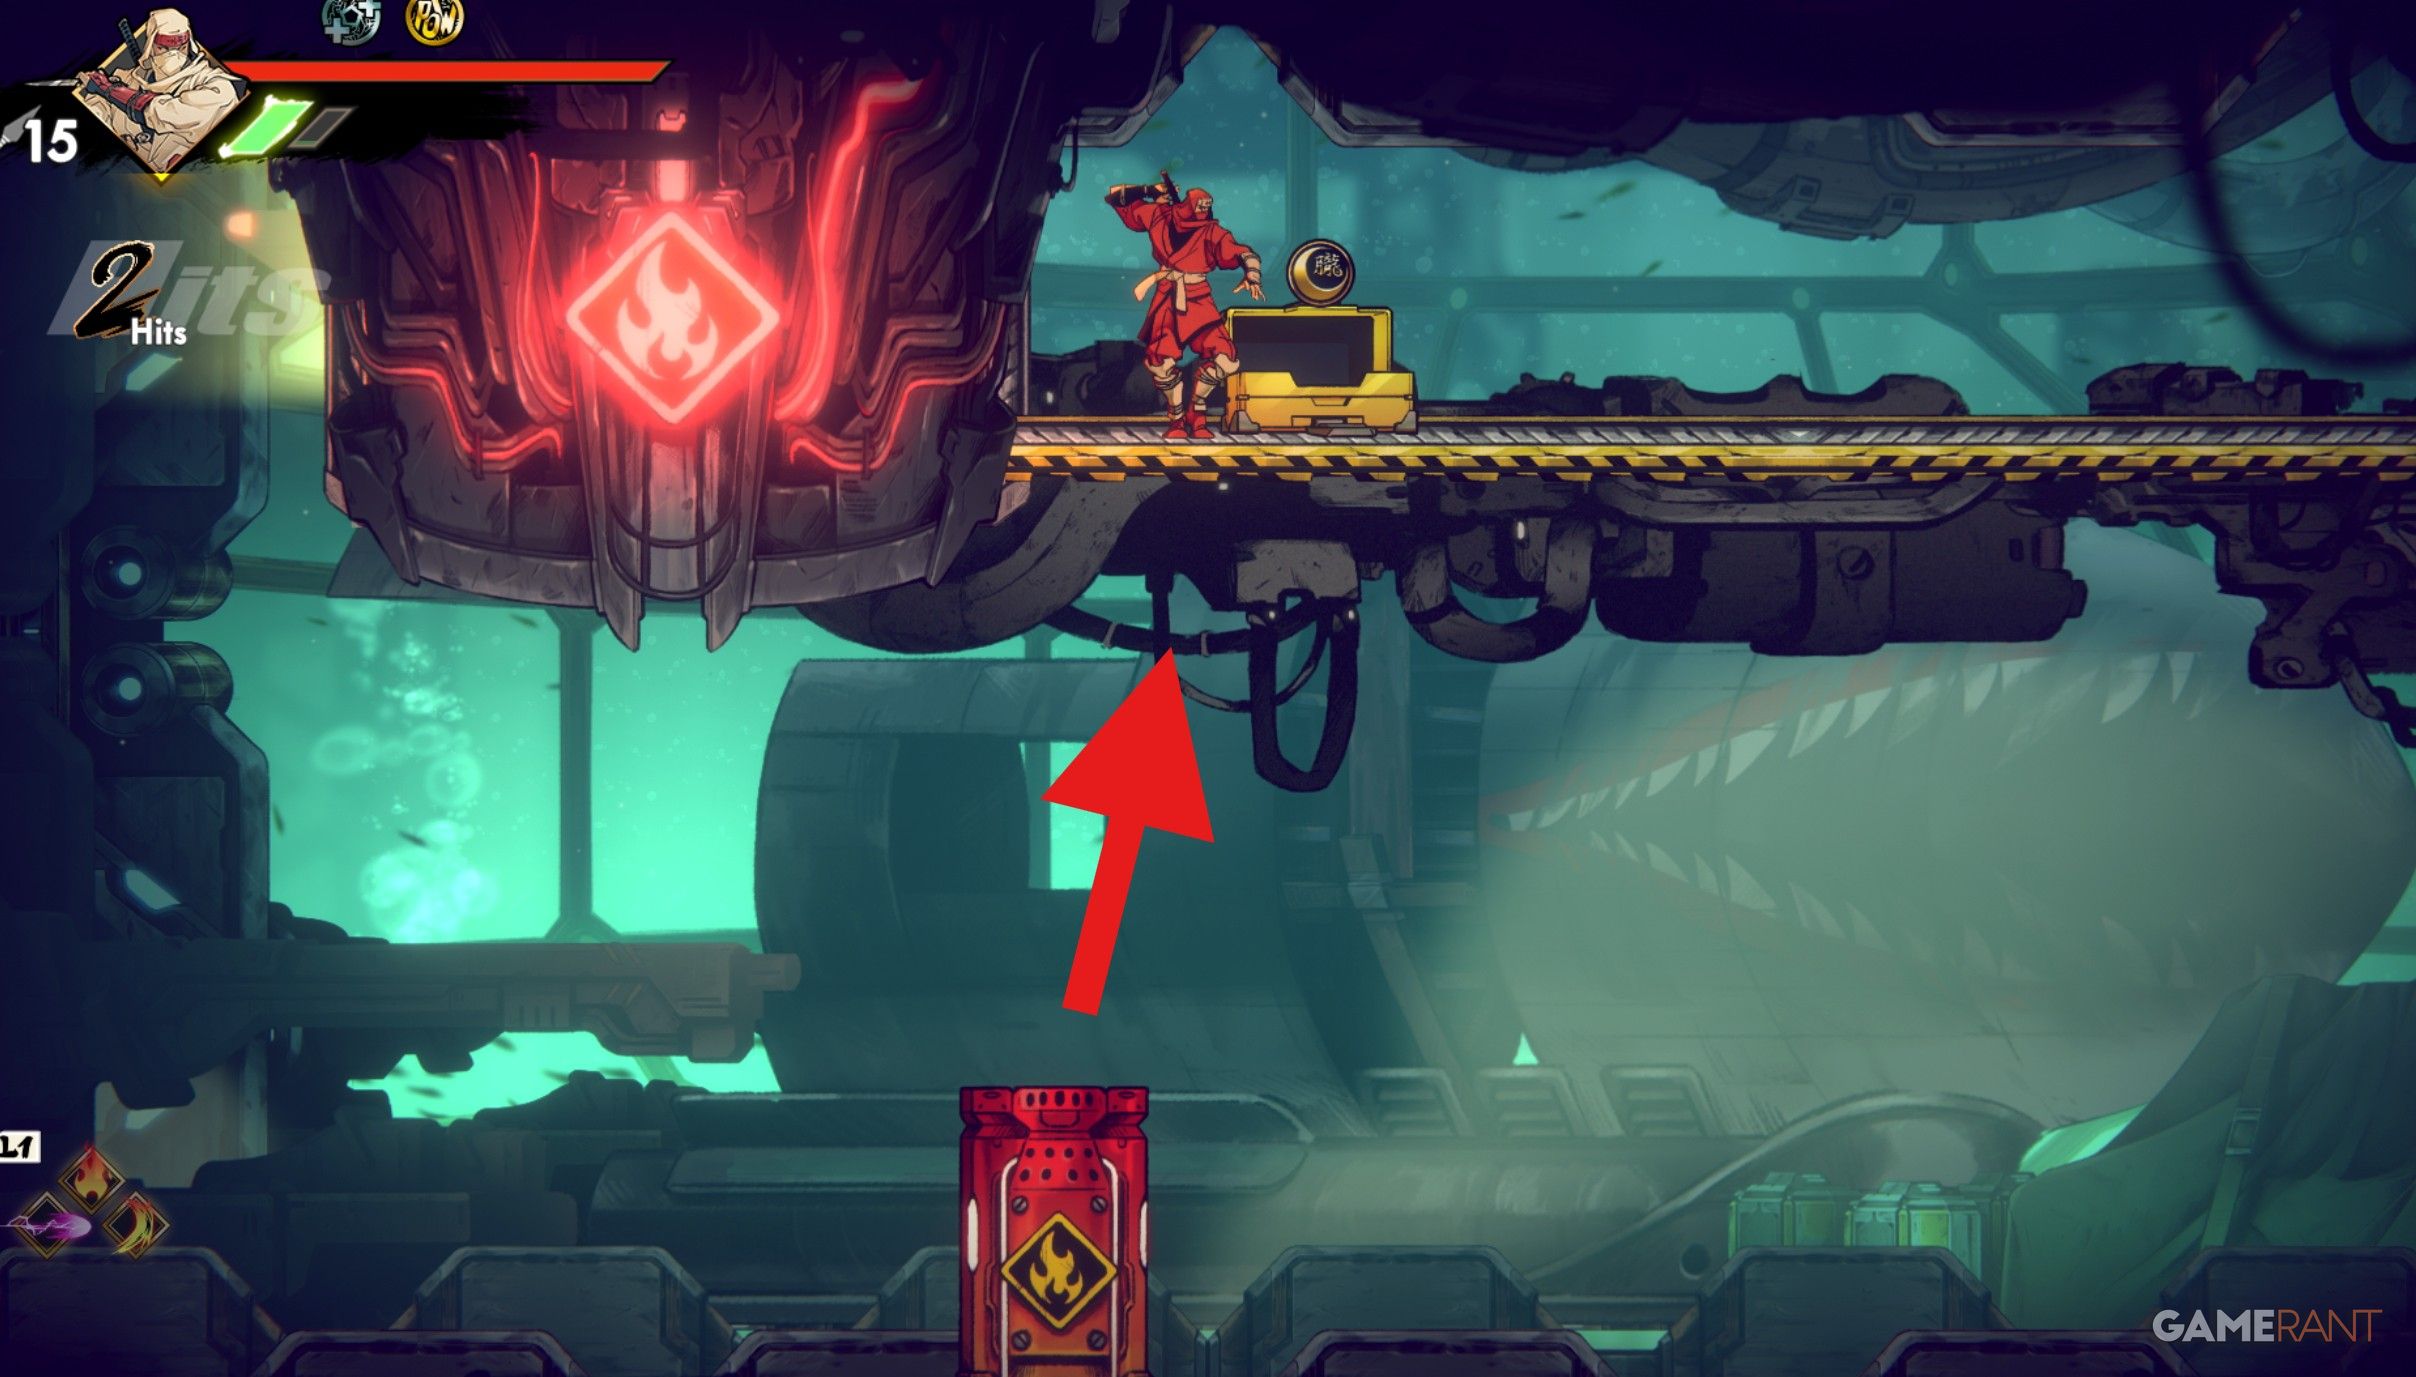
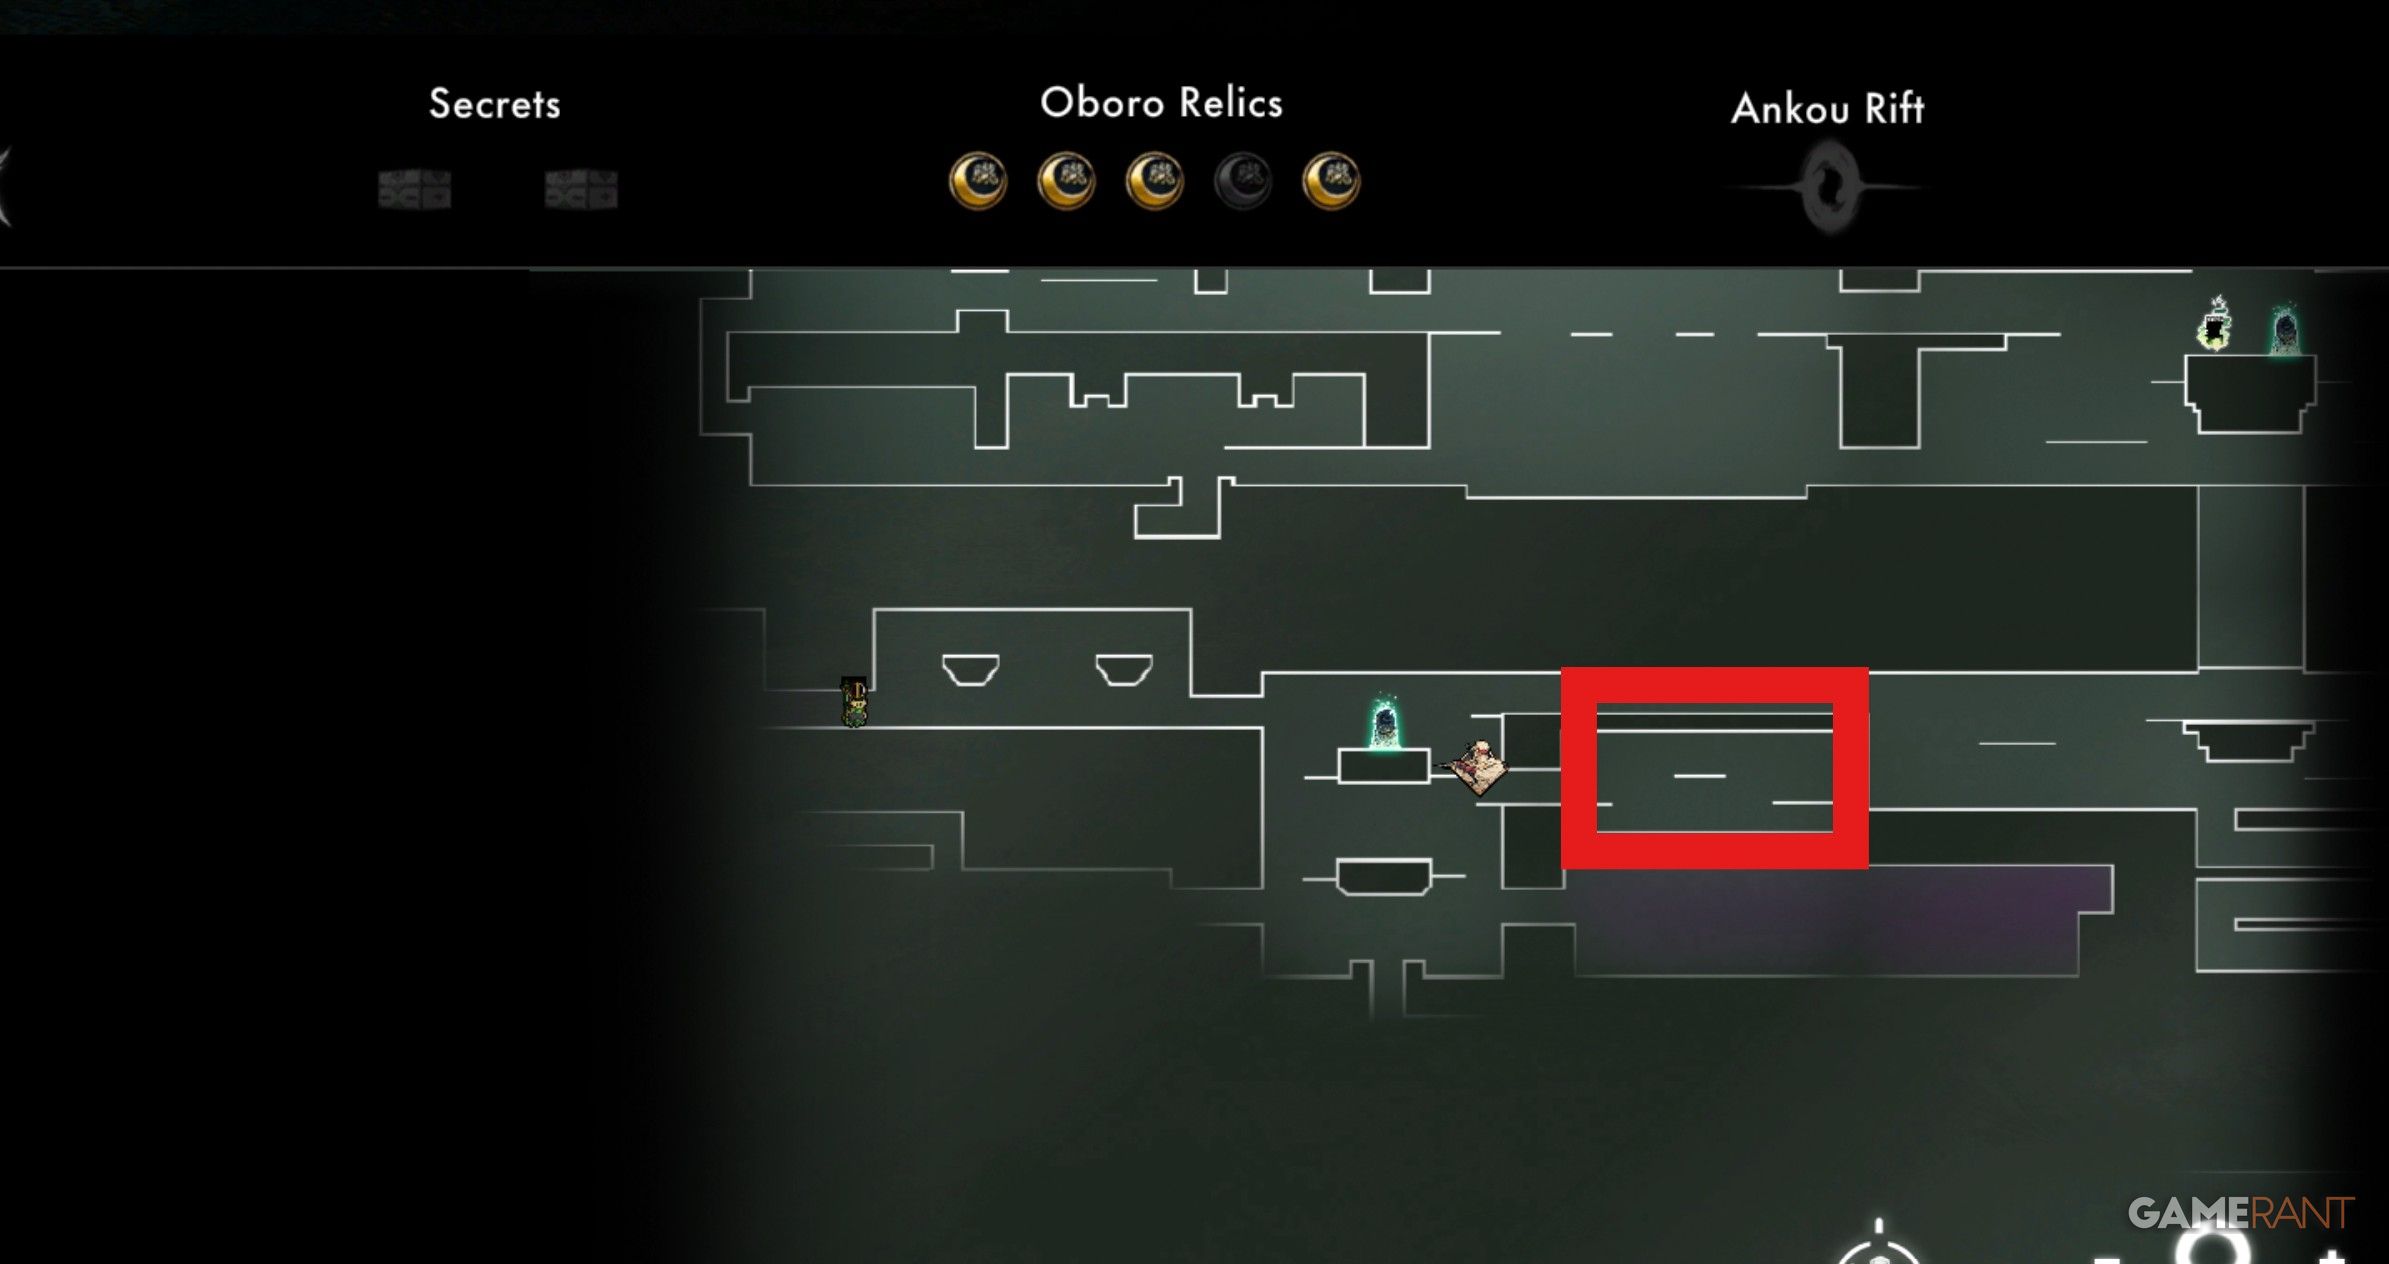
On the left part of Floor B2, you’ll encounter a situation where you must navigate one of the fire extinguishers towards laser beams, all while enduring attacks from flames above. Eventually, you’ll come across a key room on the critical path that houses a treasure chest concealed behind some beams. To access another area, use your Ninja Claws to latch onto the ceiling and locate a hidden crevice containing a switch.
Fourth Oboro Relic

Make your way to the B3 checkpoint on the third floor, then head towards the path located on the upper-right corner of the room. Before proceeding, don’t forget to use the Ninja Claws to open a wall on the left side. This route will take you to an additional area housing the Oboro Relic in a chest. To access this treasure, you’ll first need the Glider acquired during the Desert stage.
Fifth Oboro Relic

Once you’ve removed the water beneath the Flooded Sector checkpoint, proceed to enter the room located on your right to discover a chest.
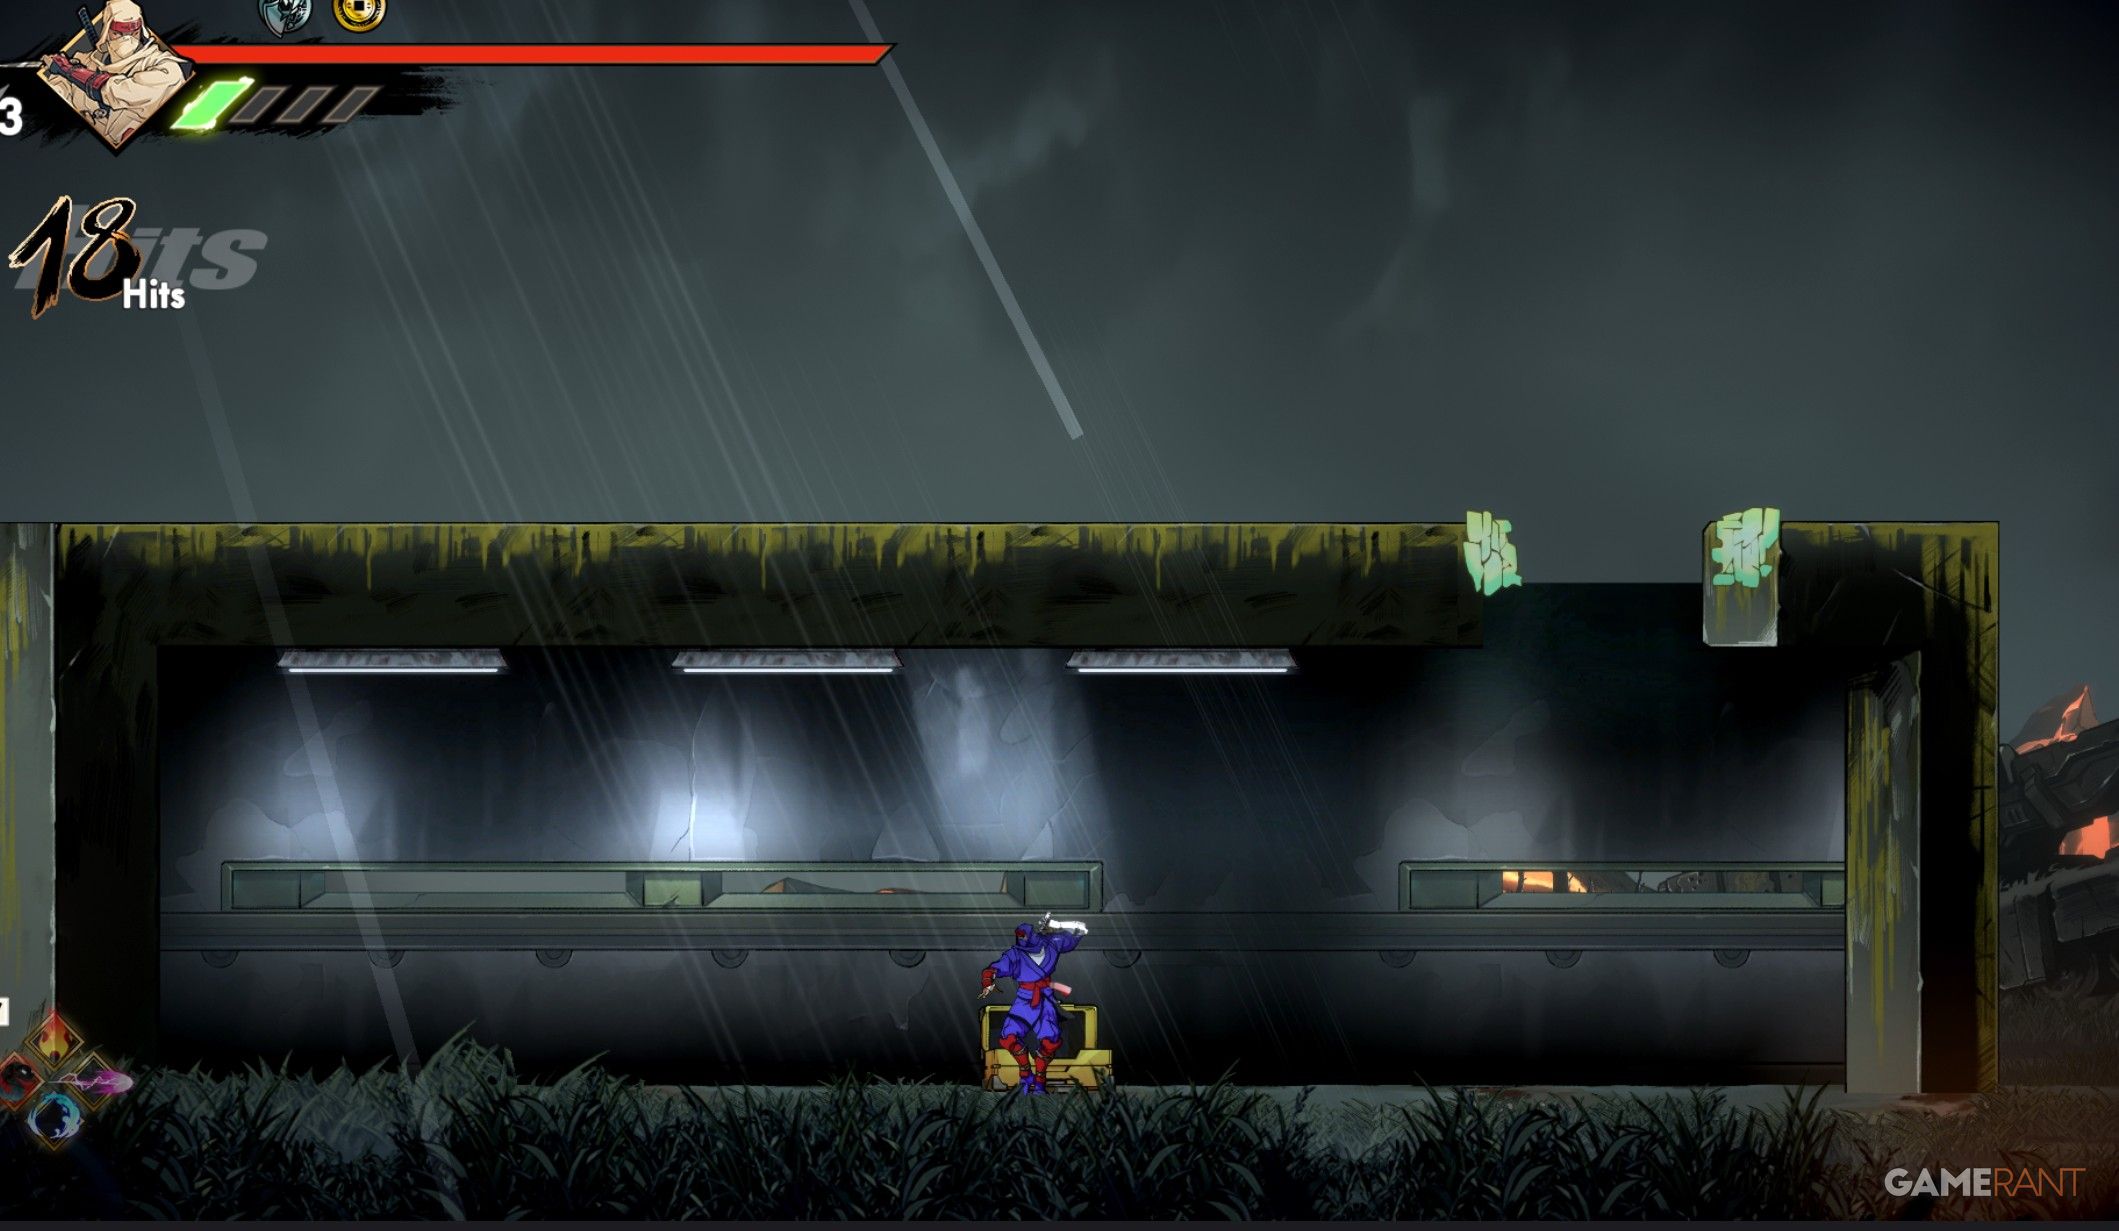
All Mad Train Oboro Relics in Shinobi Art of Vengeance
First Oboro Relic
Upon clearing the Aircraft Carrier checkpoint, you’ll encounter a green Yokai barricade on the primary route. To discover the first Relic, break through this obstacle using your Sword Dive.
Second Oboro Relic
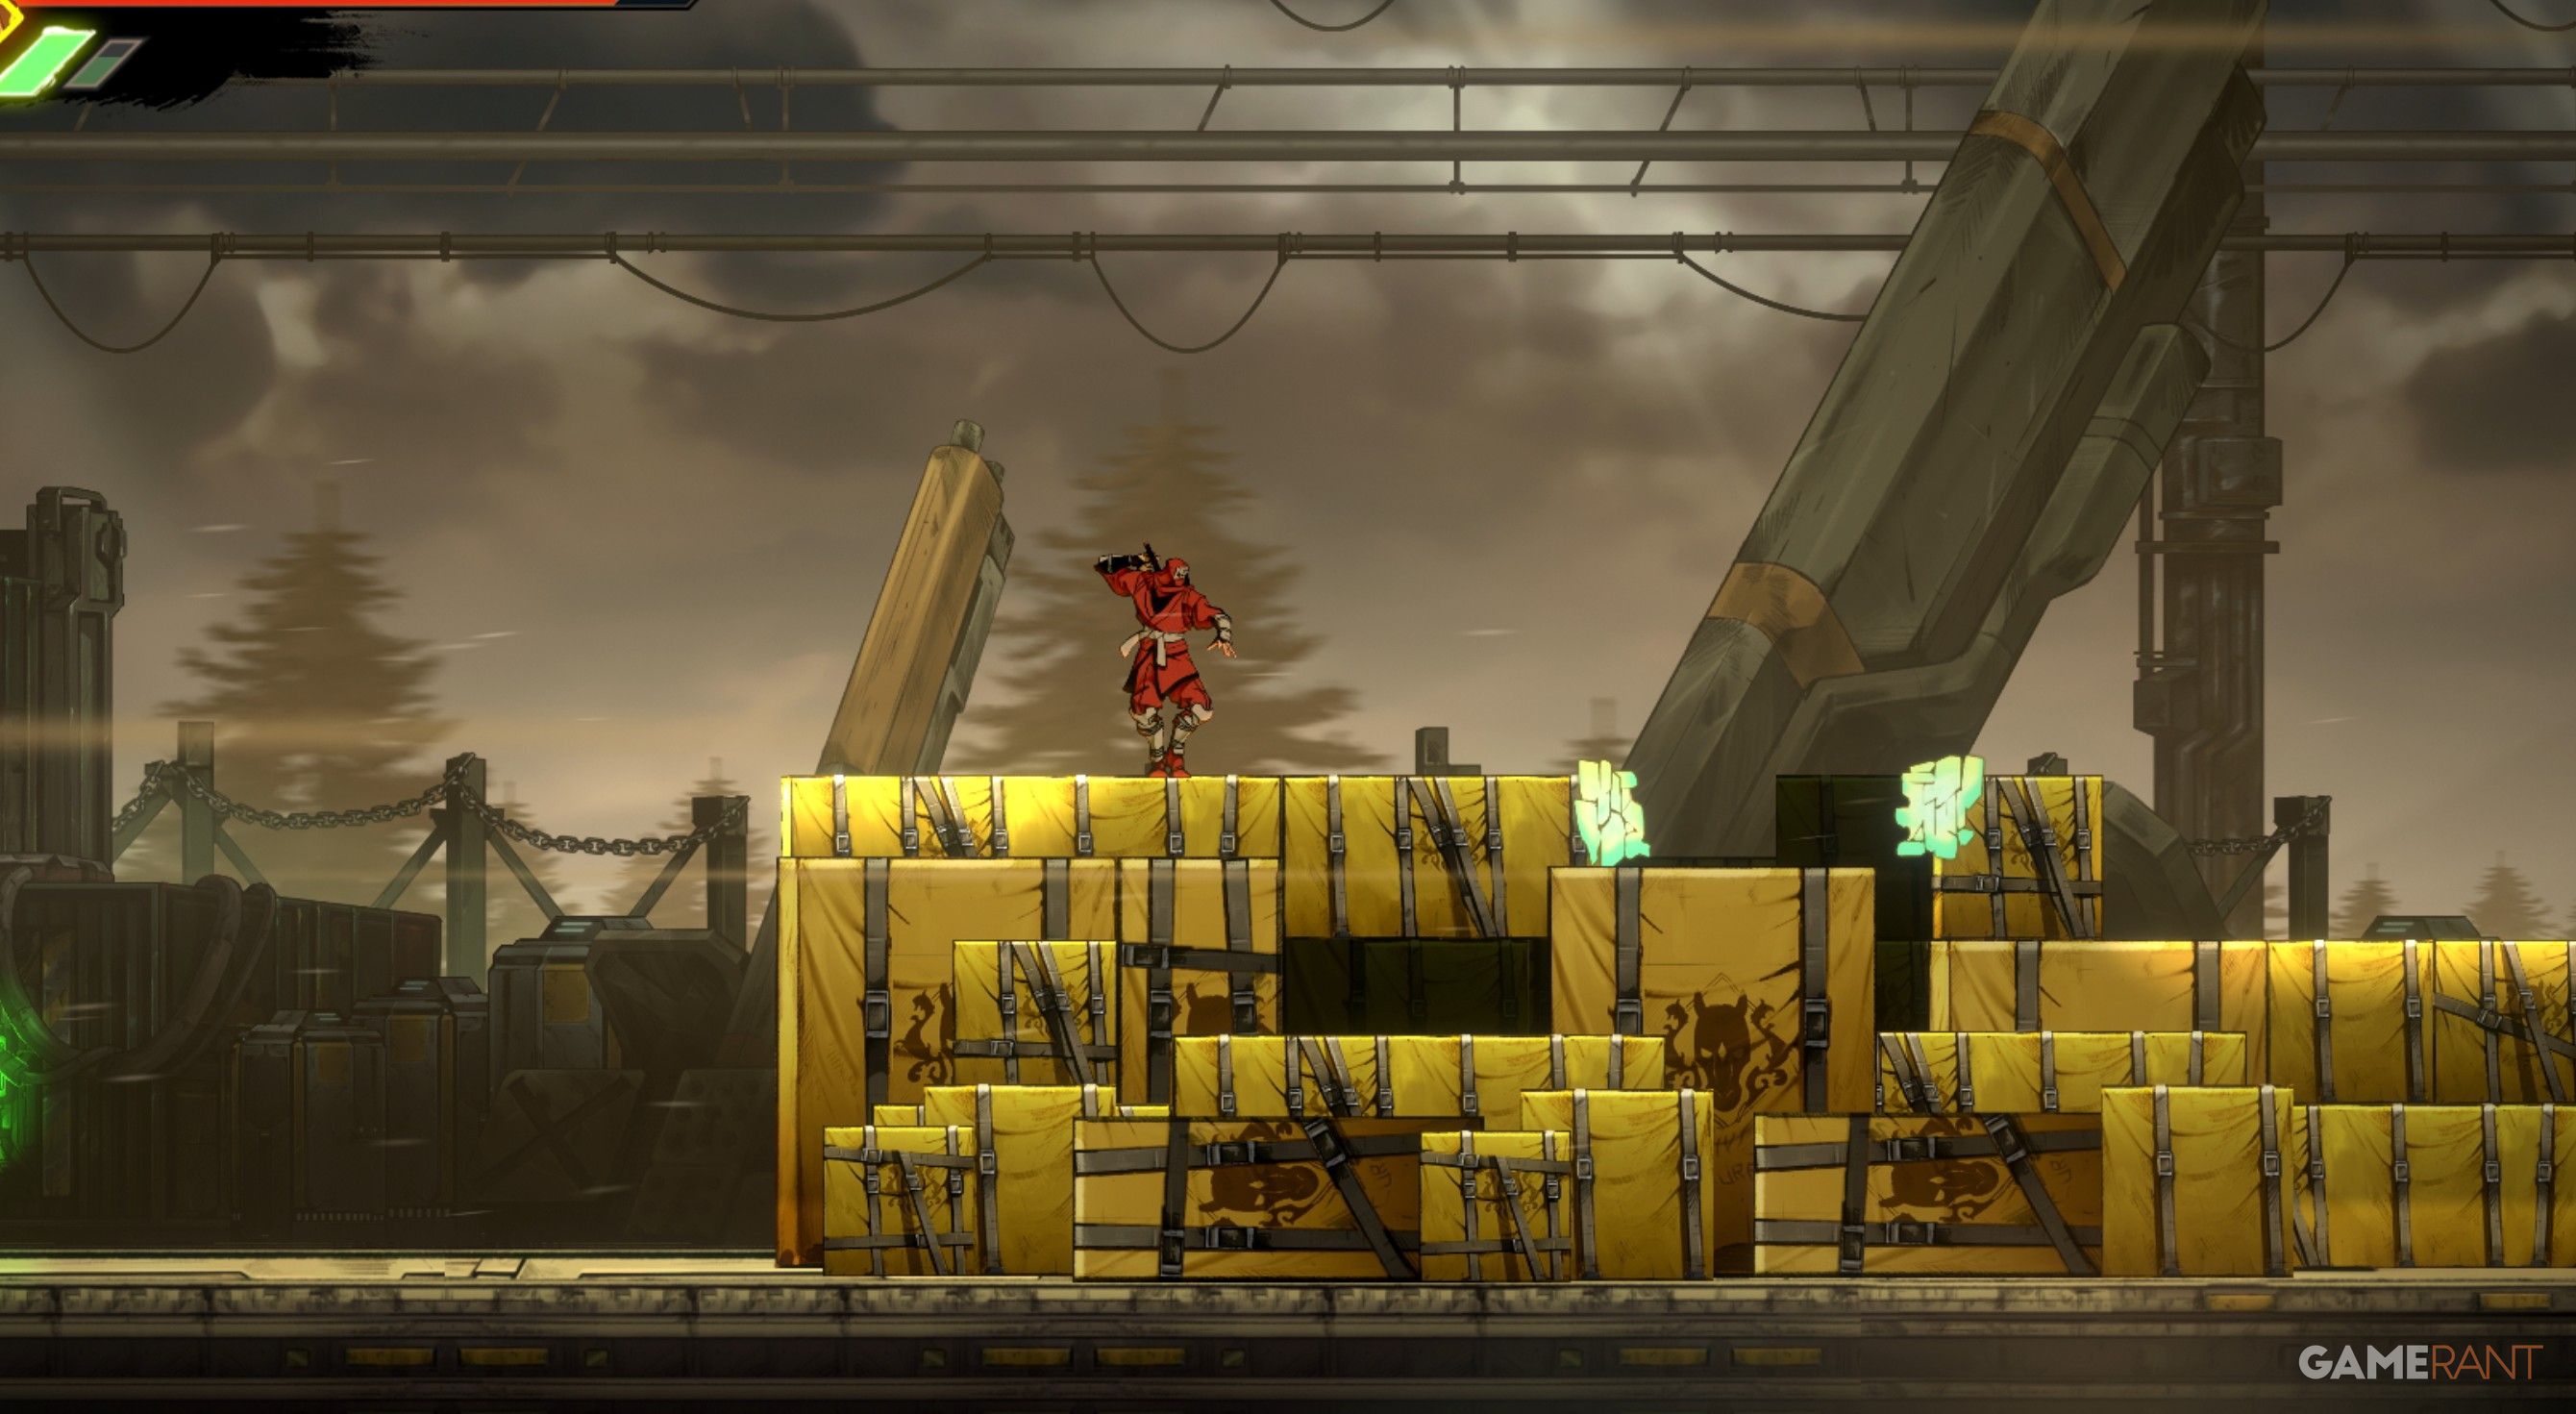
Following your successful victory against the Arachno Tank Carrier, proceed along the path and leap onto the upcoming cart. This will lead you to a green Yokai barricade that you can destroy. The relic-containing chest will be located on the left side of the container.
Third Oboro Relic
Keep going until you spot a pair of crates filled with explosives barricading an entryway to a storage unit. Blow up those containers and step inside to retrieve the third Oboro Artifact.
Fourth Oboro Relic
Go to the container located to the left, which is where you recently obtained the third Oboro Relic. Near a switch, you’ll discover a chest.
Or more concisely:
Find the chest by the switch, beside the third Oboro Relic’s pickup location (to its left).
Fifth Oboro Relic
As soon as the helicopter begins pursuing you, you’ll ultimately encounter some foes, and afterward, you’ll come across a cart with a secure door at its top. Jump onto the cart and travel to the end. You can access the cart via its rear entrance. Sprint through it towards the left to discover the final Oboro Relic on the stage (prior to reaching the Command Car checkpoint).
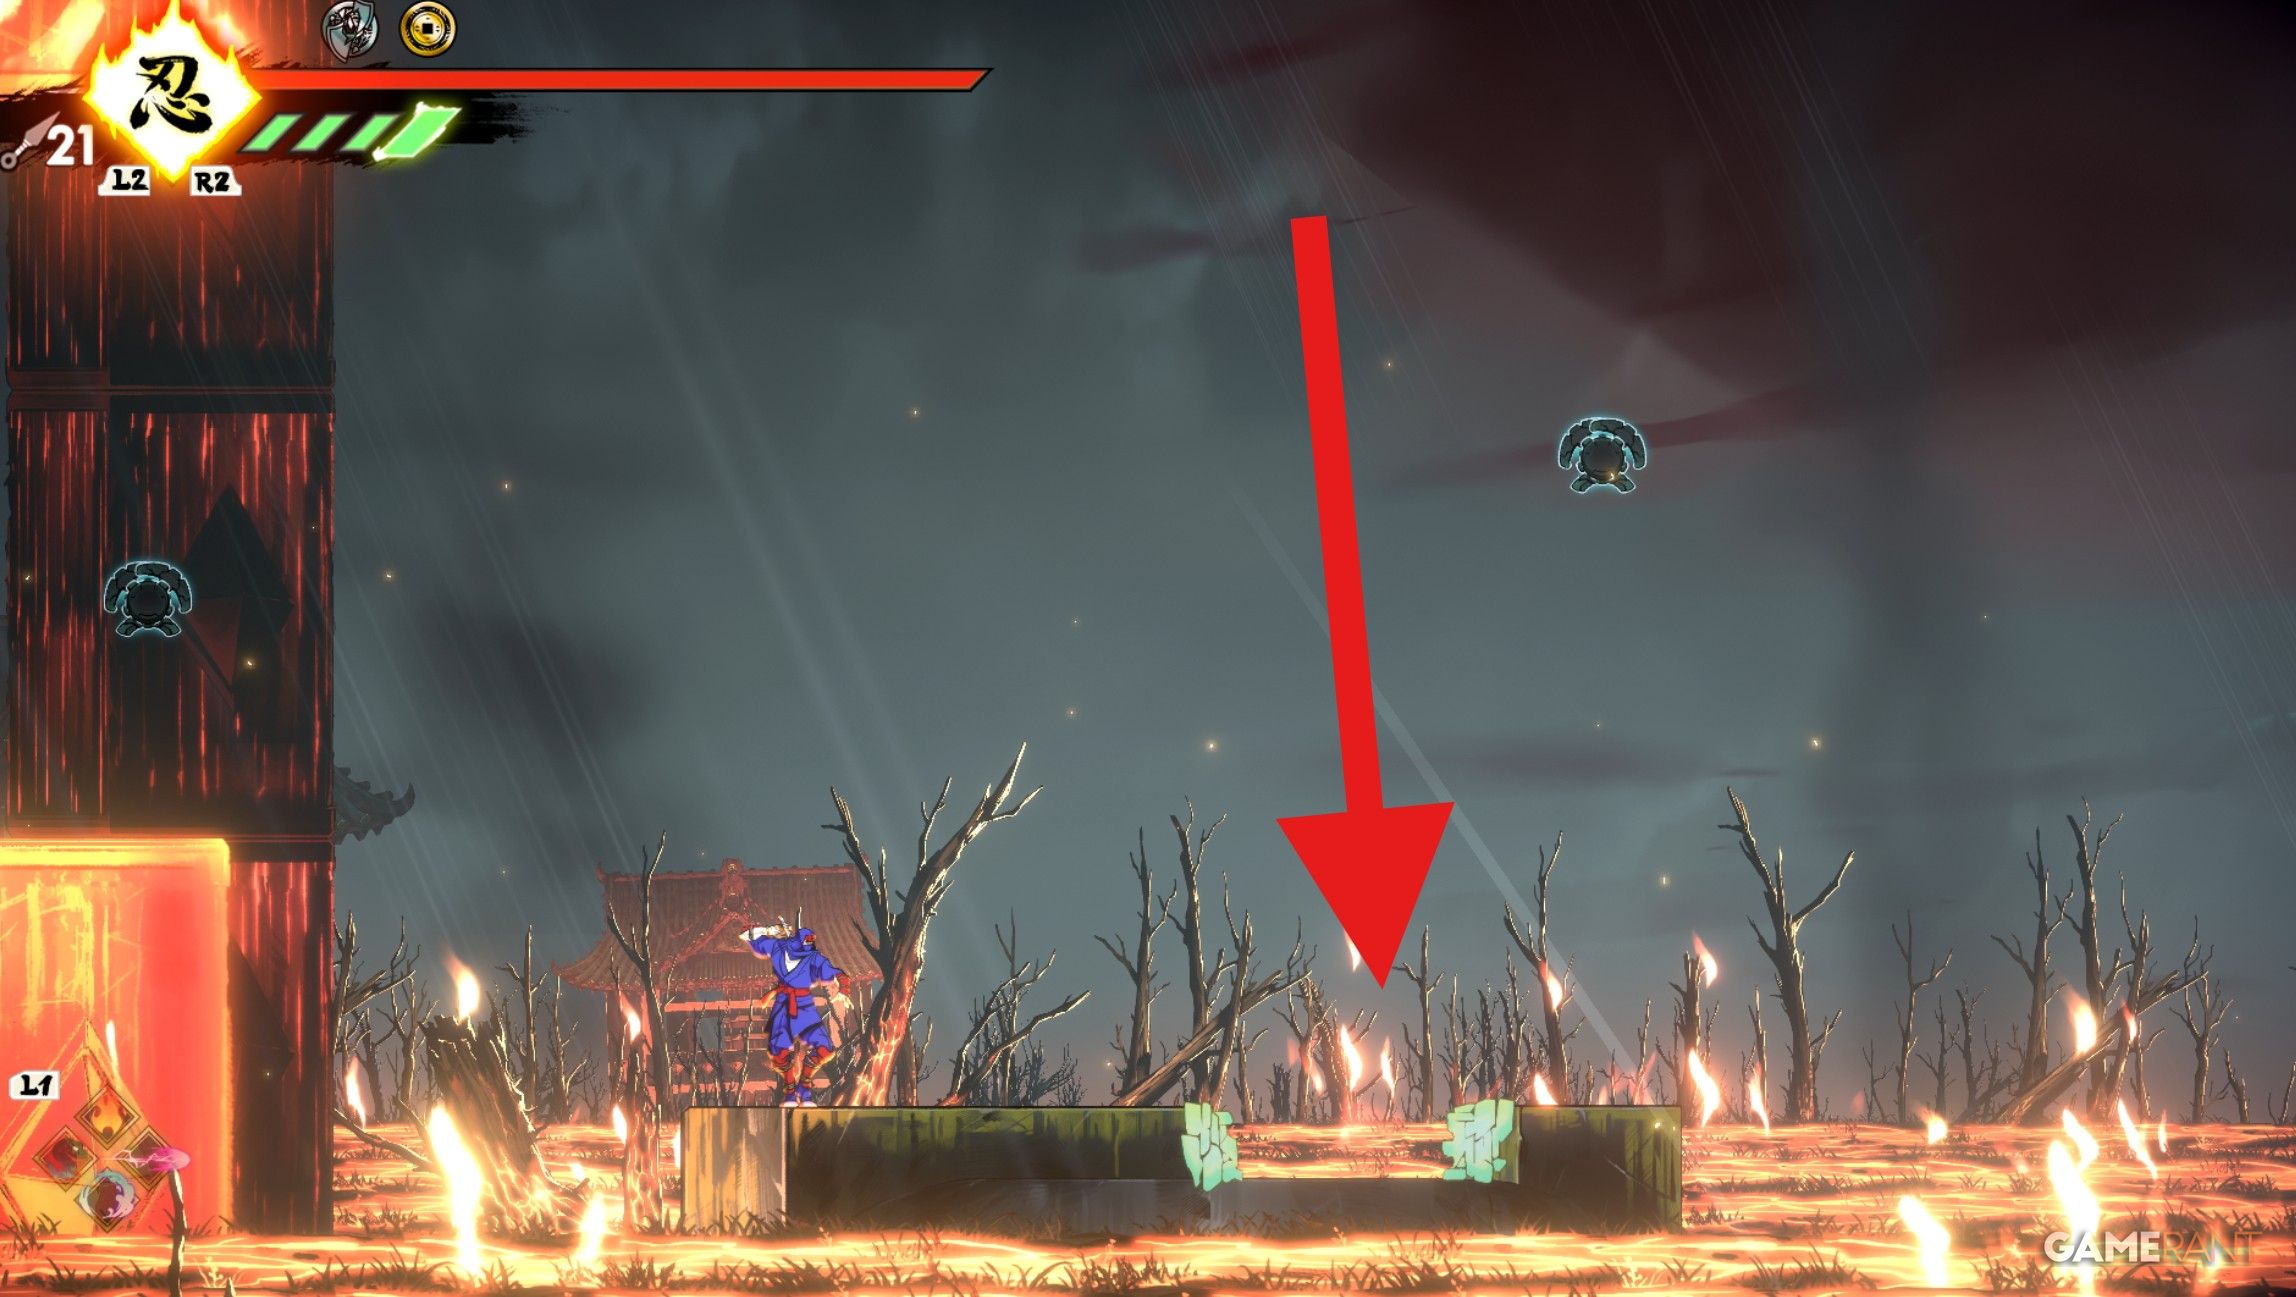
All Desert Oboro Relics in Shinobi Art of Vengeance
First Oboro Relic
Following part of the path through the Dunes, you’ll come across a sizable gap that eventually takes you to a store. To locate the chest with the initial Oboro Relic, take a right, then descend and circle around.
Second Oboro Relic
To get to the hidden treasure, head to the right of the Crevasse checkpoint. You’ll find a place where you can perform a wall jump that leads to a cordoned-off area. Break through any Yokai barriers obstructing your path, and eventually, you’ll come across a treasure chest containing the Relic in this sectioned-off area.
Third Oboro Relic
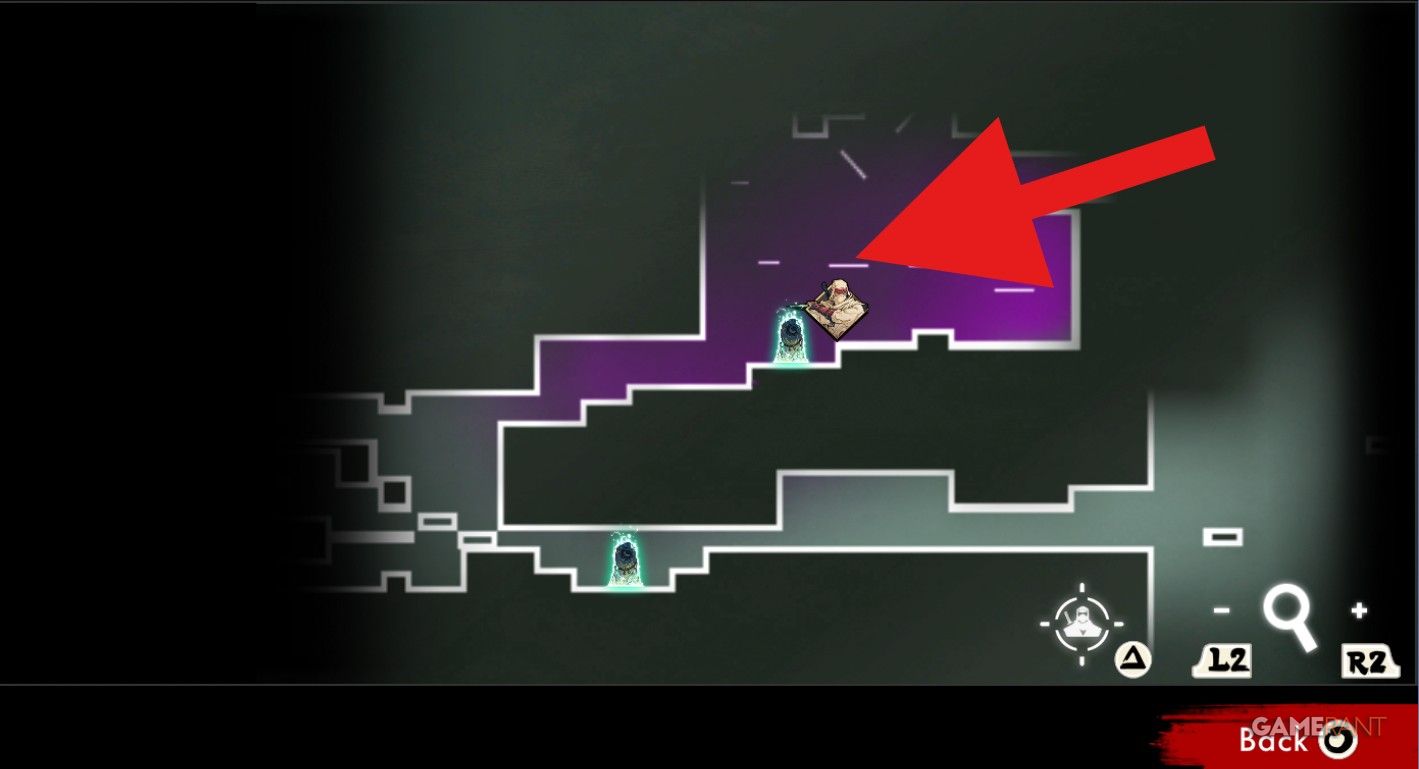
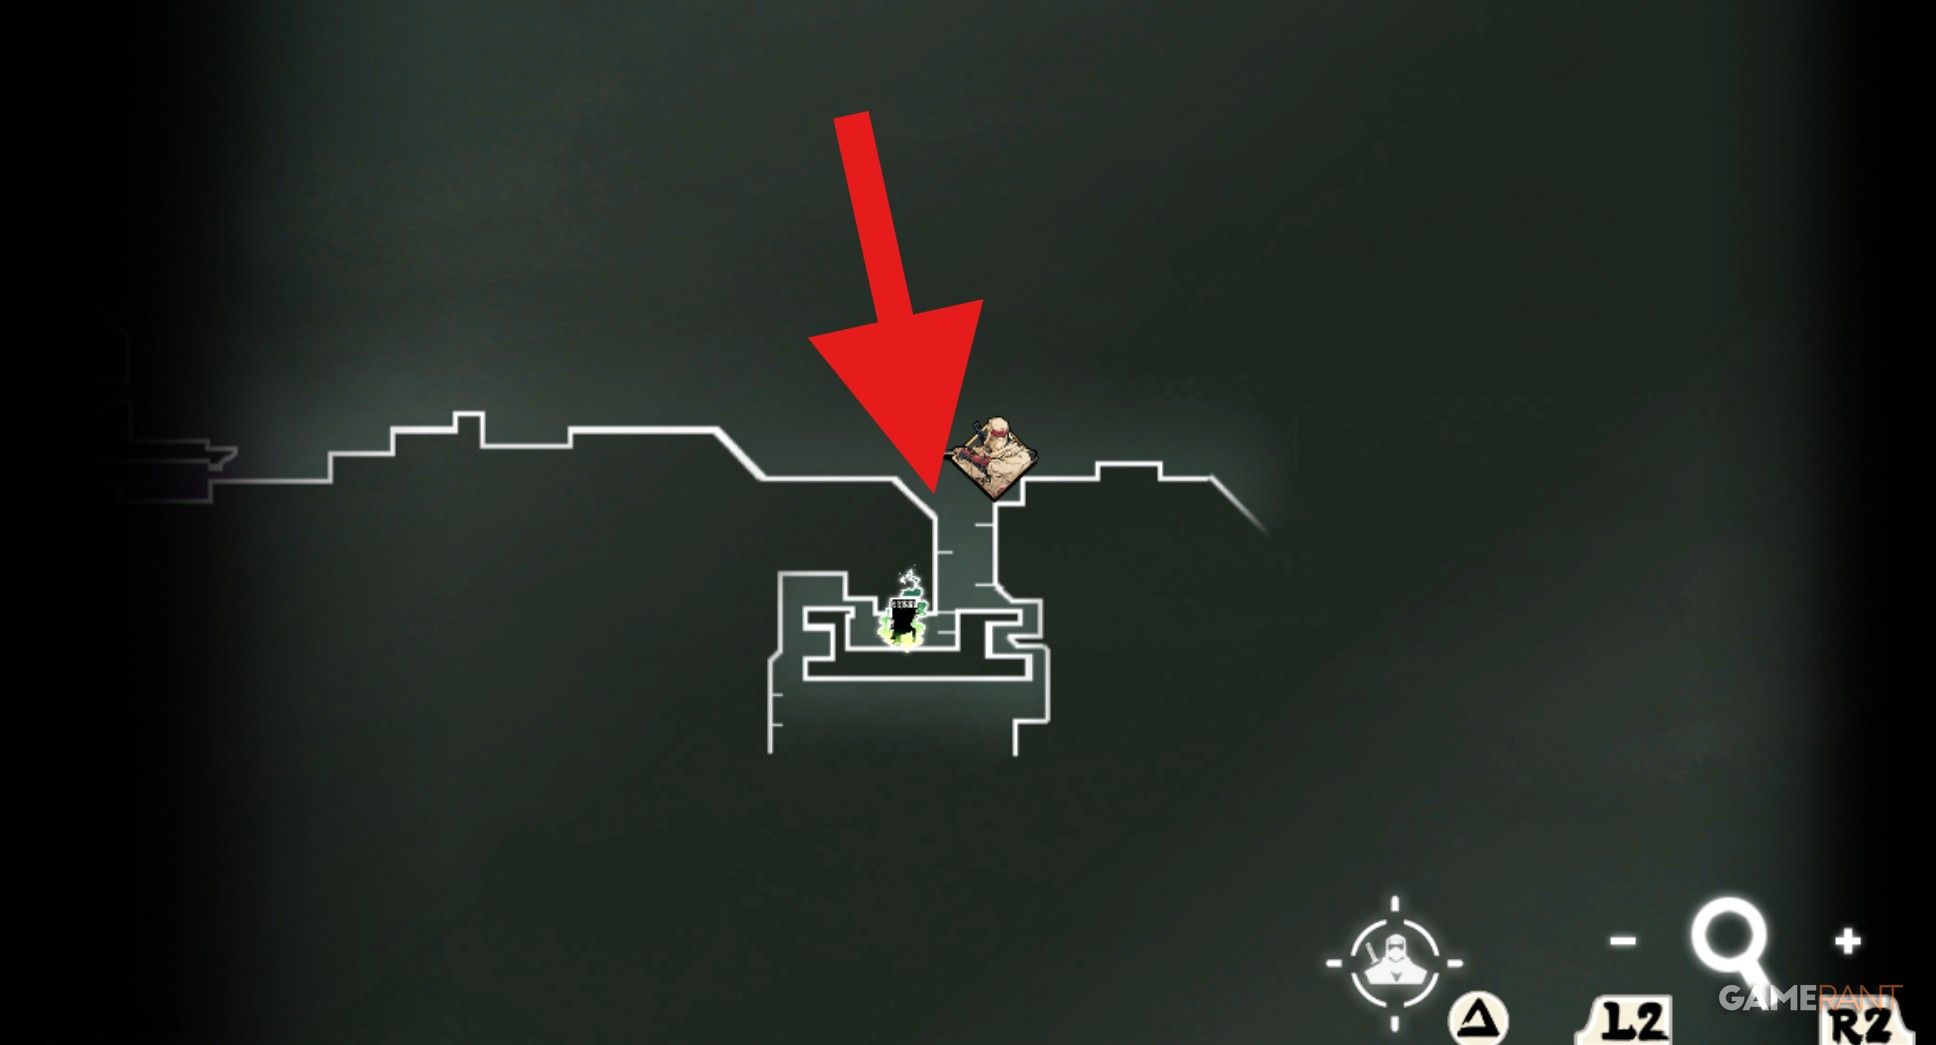
Upon arriving at the Ruins checkpoint, veer left and walk along the path as it descends, which will eventually lead you to the Astral City checkpoint. From there, look out for a radiant purple barricade that needs disabling by ascending this section and activating a switch at its summit. Once you’ve reached the switch, lower yourself to the area directly beneath it to uncover a chest.
Fourth Oboro Relic
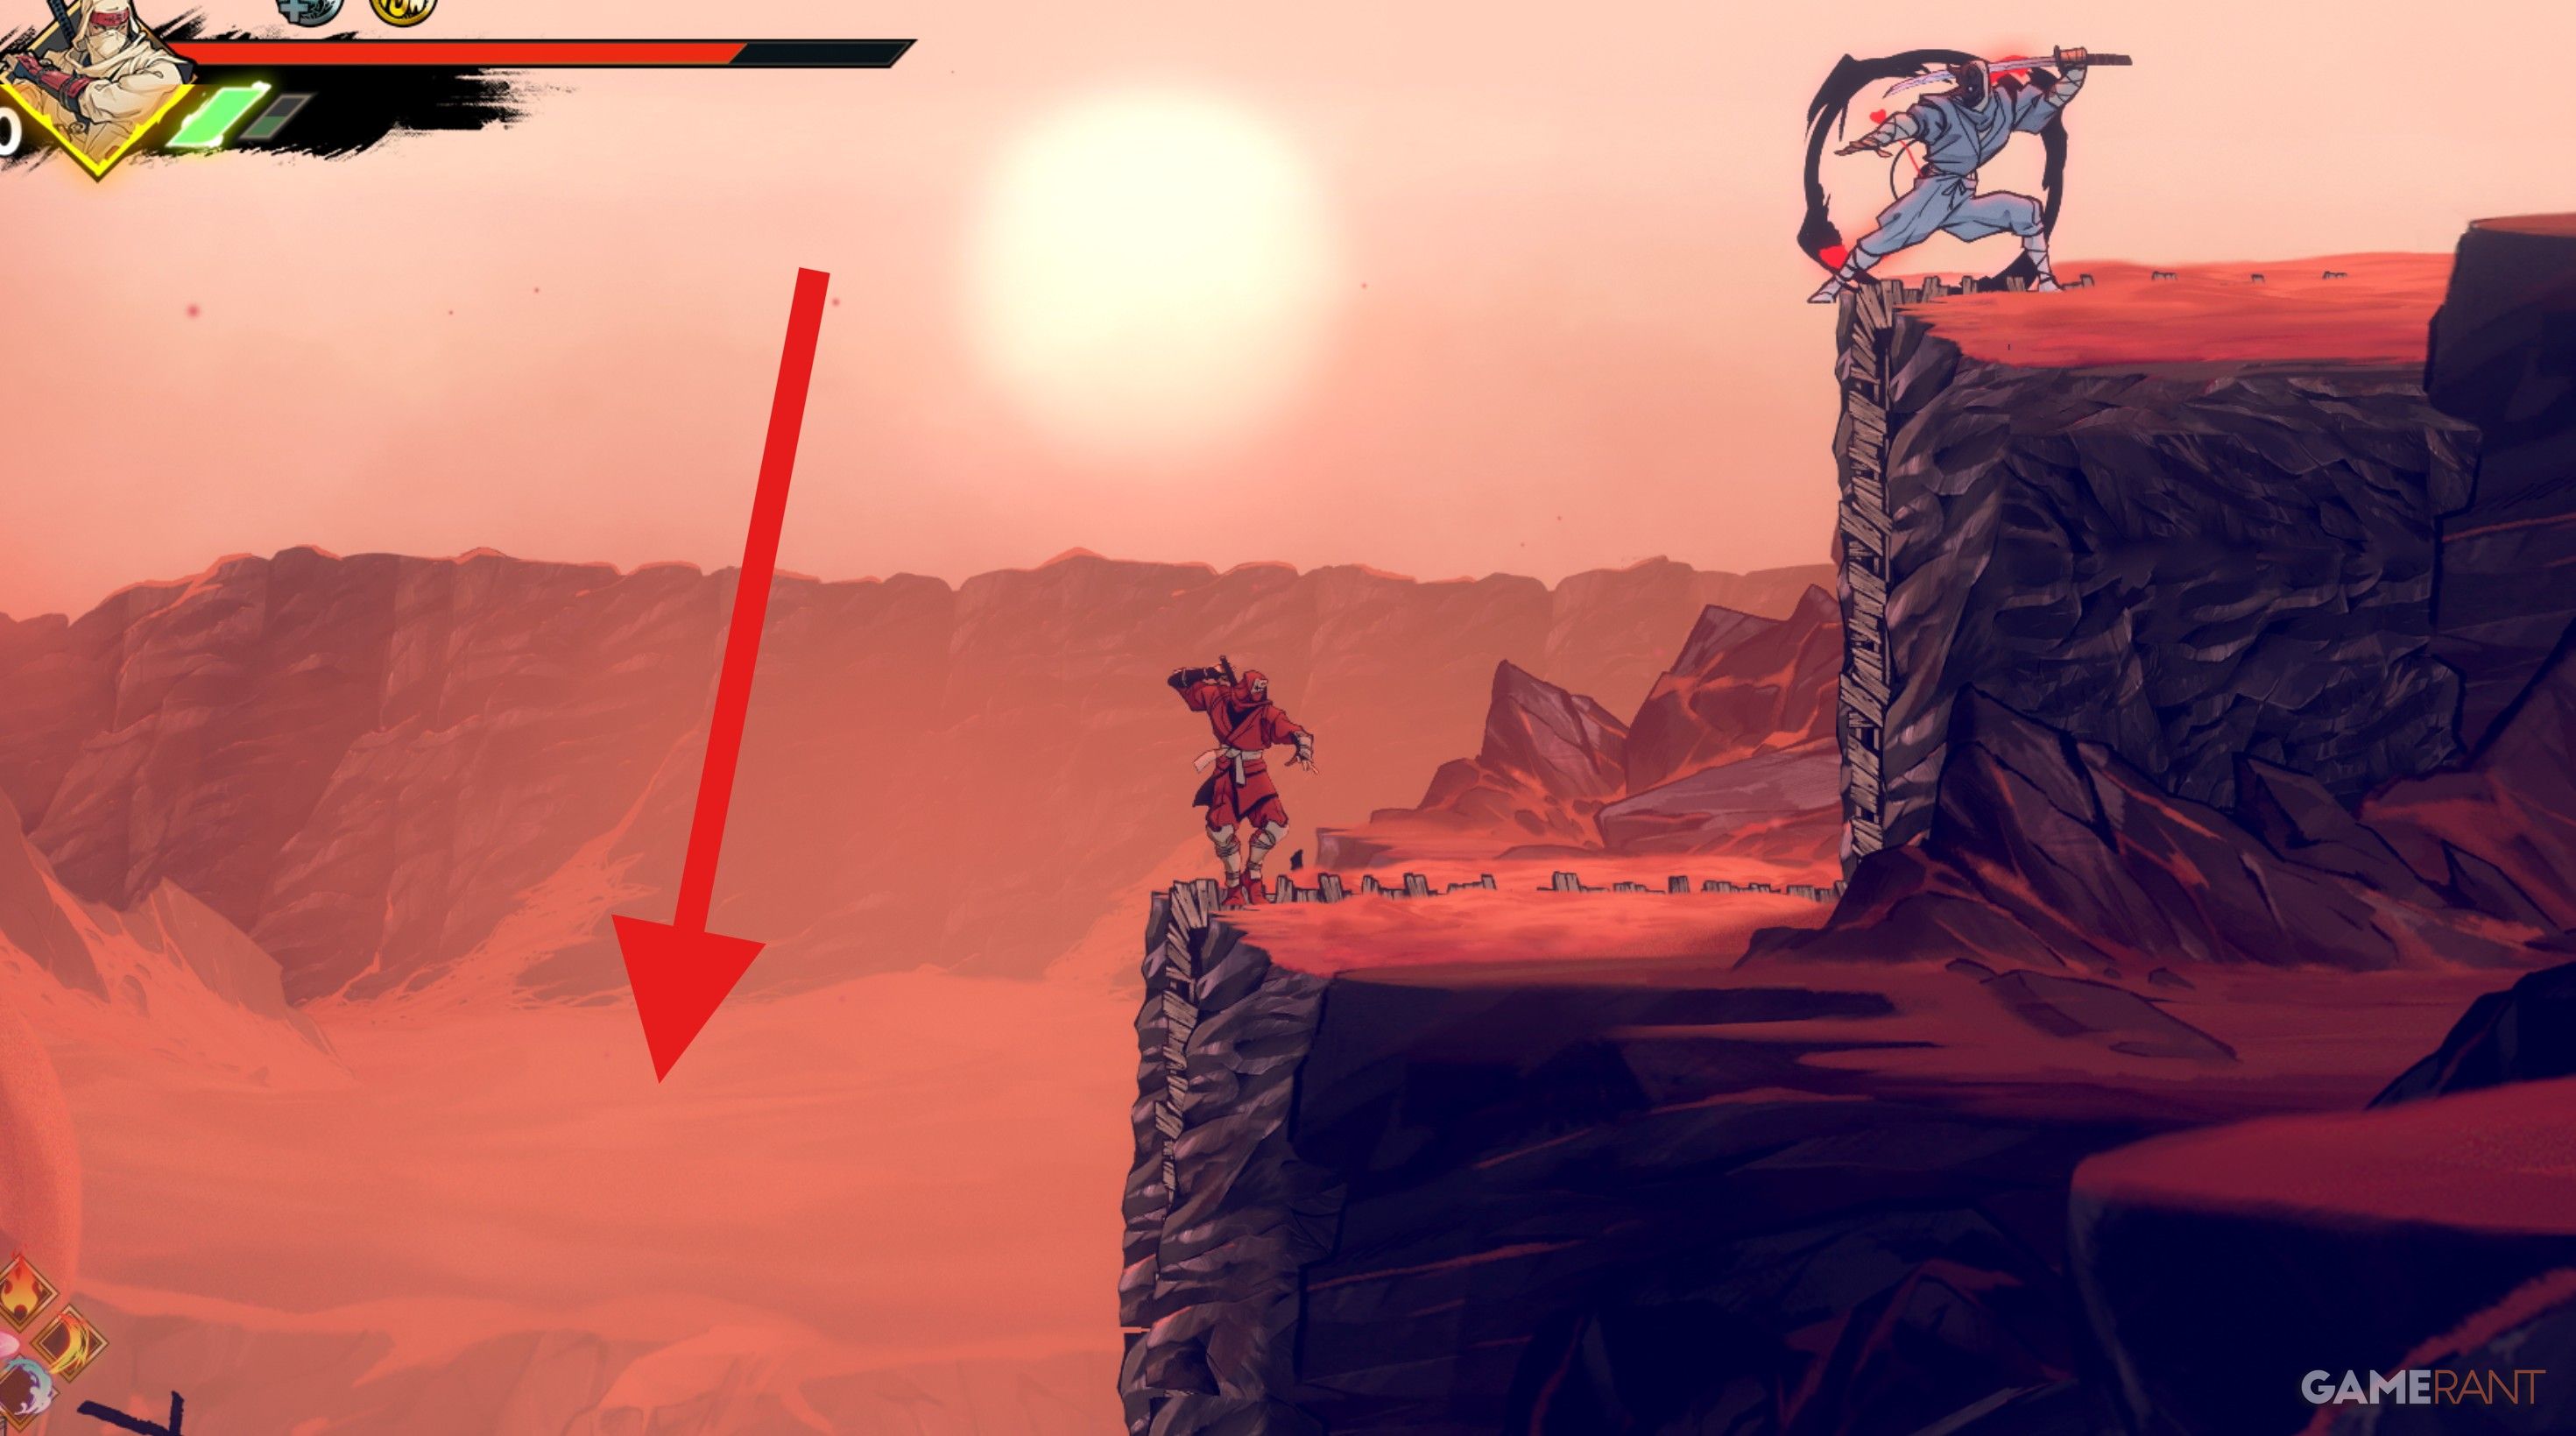
Journey swiftly to the Astral Ruins checkpoint, then venture into the purple, optional region on your left. To reach the chest containing the Relic, you might want to utilize your Glider and finesse your smooth sailing abilities.
Fifth Oboro Relic
Upon reaching the checkpoint at the Astral Ruins near the end of the stage, follow the main route and you’ll spot the chest with the Oboro Relic on a ledge slightly to your left, not long after navigating through a wall jump sequence.
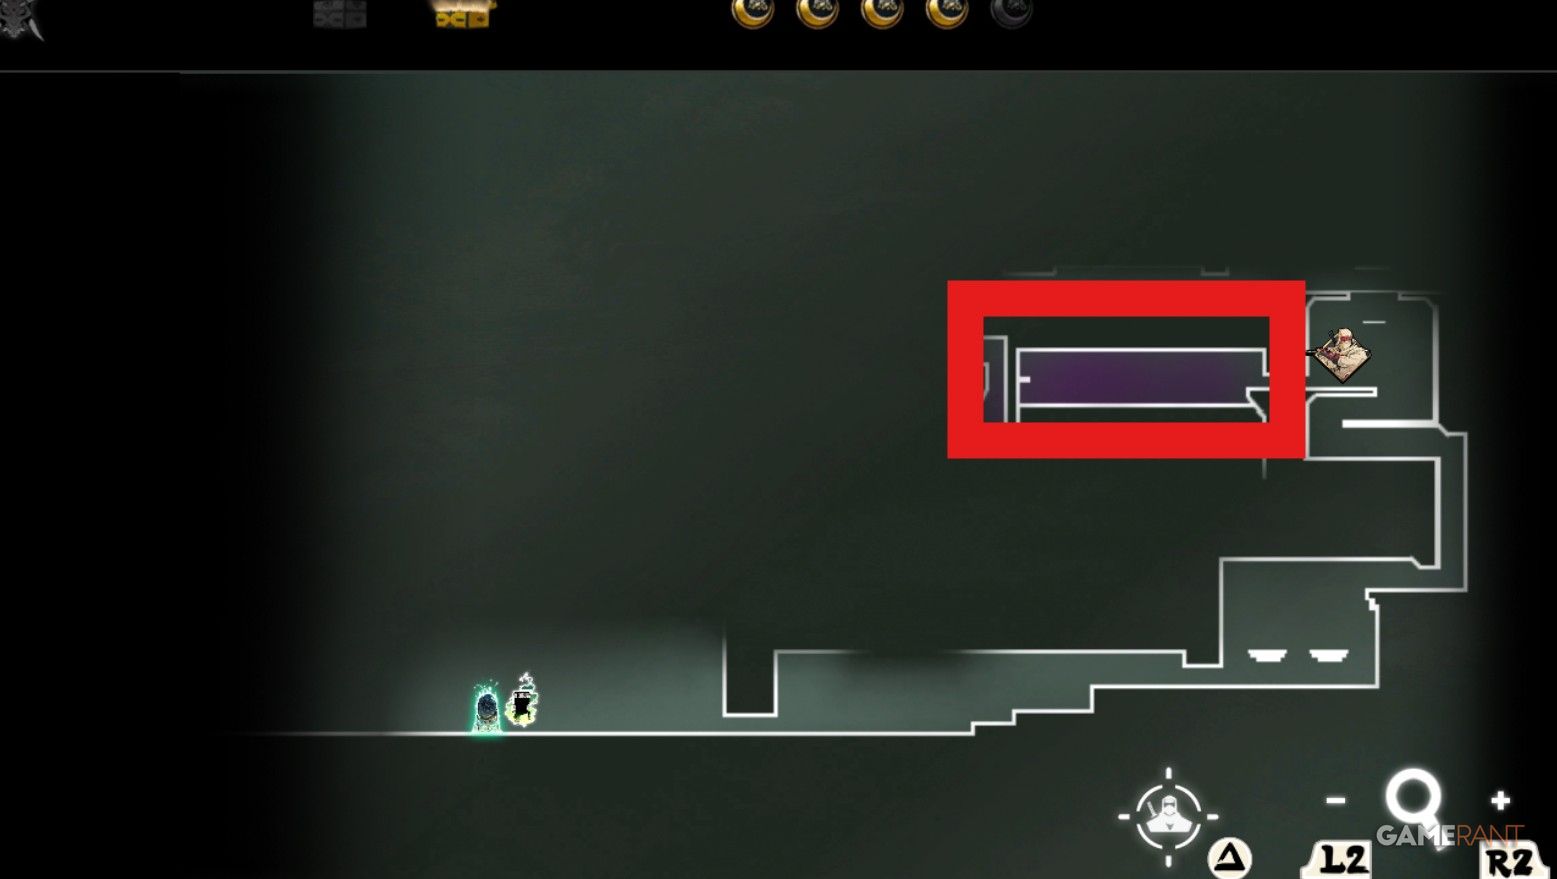
All ENE Corp Laboratory Oboro Relics in Shinobi: Art of Vengeance
First Oboro Relic
Second Oboro Relic
Once you’ve turned off the power in the West Control Center, make your way downwards and stick to the lower route to encounter one of the Elite Squads. Continue moving right until you reach a narrow passageway; when it divides into two paths, choose the right one instead of going up, and you’ll find another Relic there.
Third Oboro Relic
After you’ve opened all the doors throughout the facility, make your way back to the checkpoint known as the Control Center. Here, you’ll find two moving platforms-one on the left and one on the right. Opt for the platform on the right, which will guide you towards a room containing a challenge. In this challenge, you’ll need to navigate using your glider over some updrafts while being careful to dodge lasers.
Fourth Oboro Relic
Starting from the checkpoint at the Eastern Control Center, take a turn to your left first, then follow the moving platform’s direction. Continue running towards its edge until you reach a chest containing an Oboro Relic located on the extreme left side.
Fifth Oboro Relic
Upon reaching past the shopkeeper at the entrance, you’ll notice a closed door and a chest hidden behind it. To access the chest, leap onto the nearby moving platform, move towards the right, descend, and then proceed to the left. This will lead you to the chest, situated near a formidable adversary.
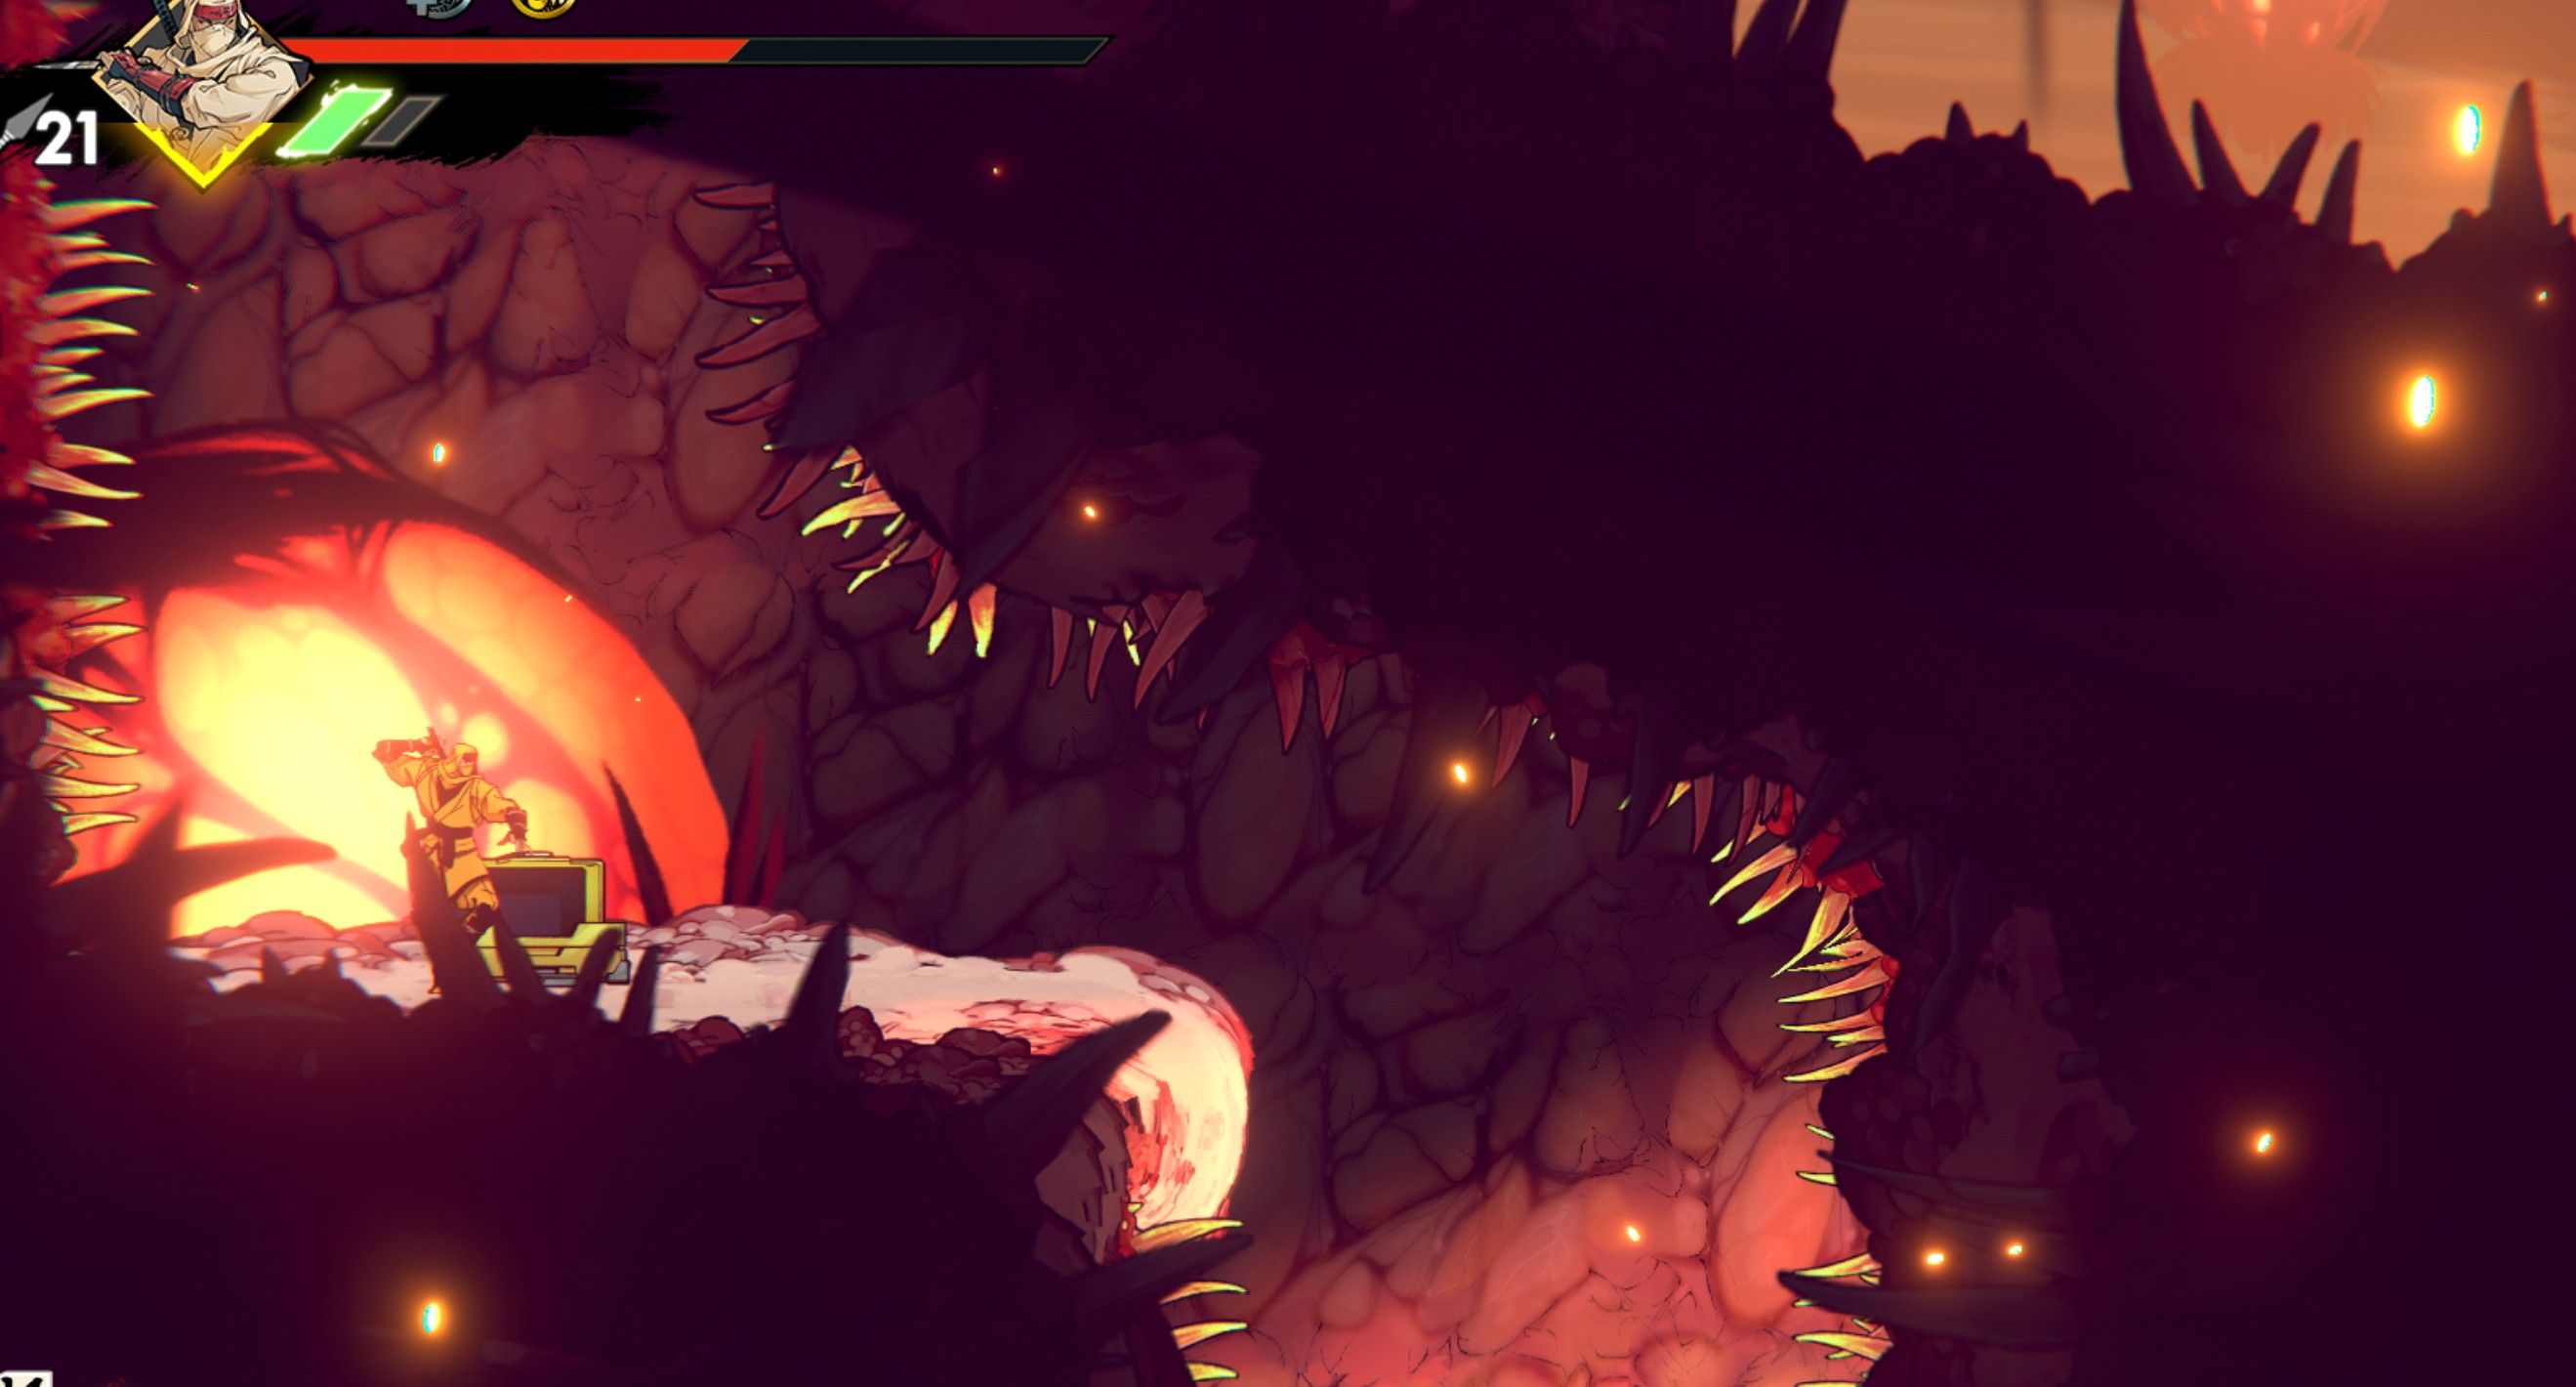
All Kaiju Oboro Relics in Shinobi: Art of Vengeance
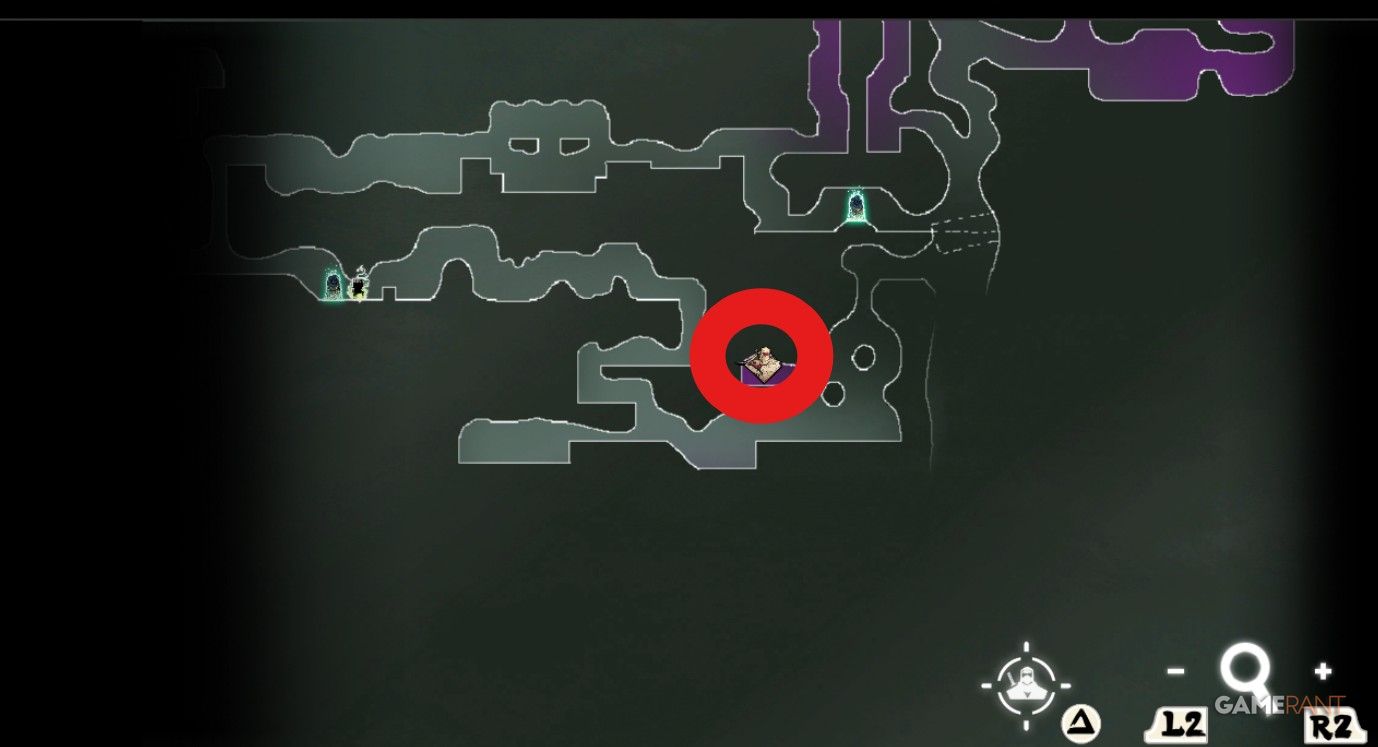
First Oboro Relic
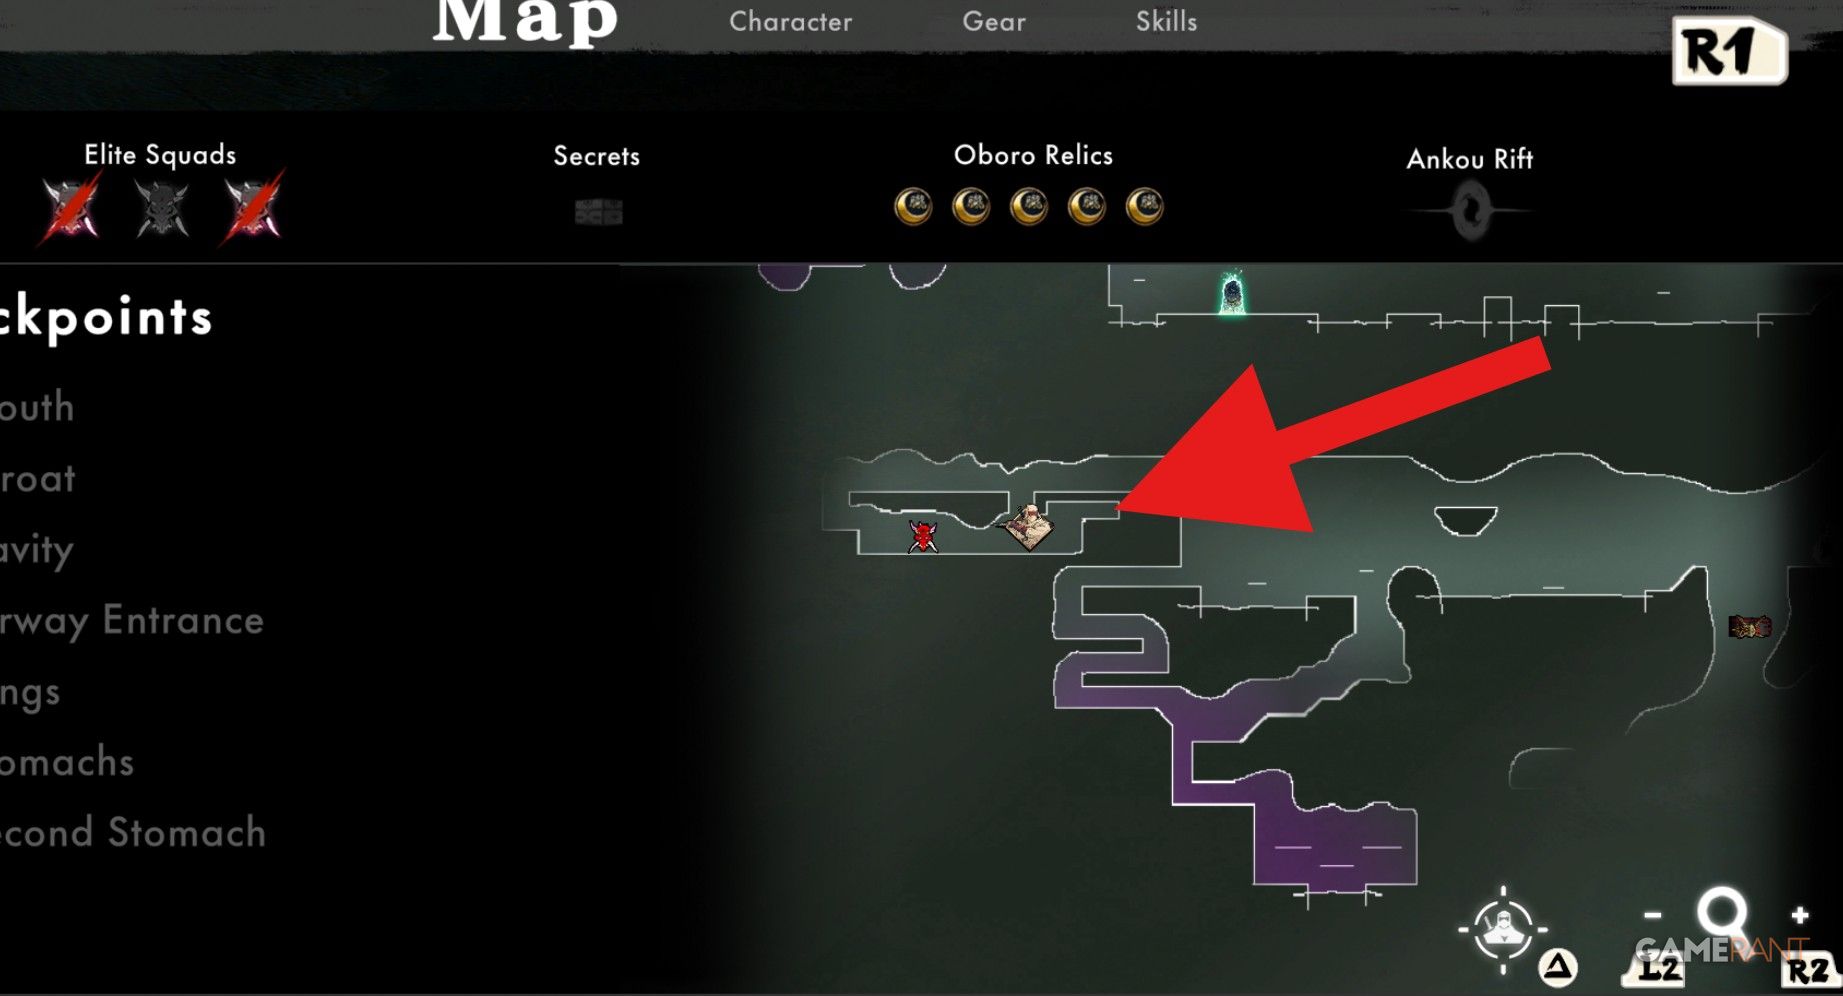
Head to the left past the Airway Entrance checkpoint, ascend using your glider, and subsequently, move to the room on your right to encounter a platforming challenge, where a Relic awaits as a prize.
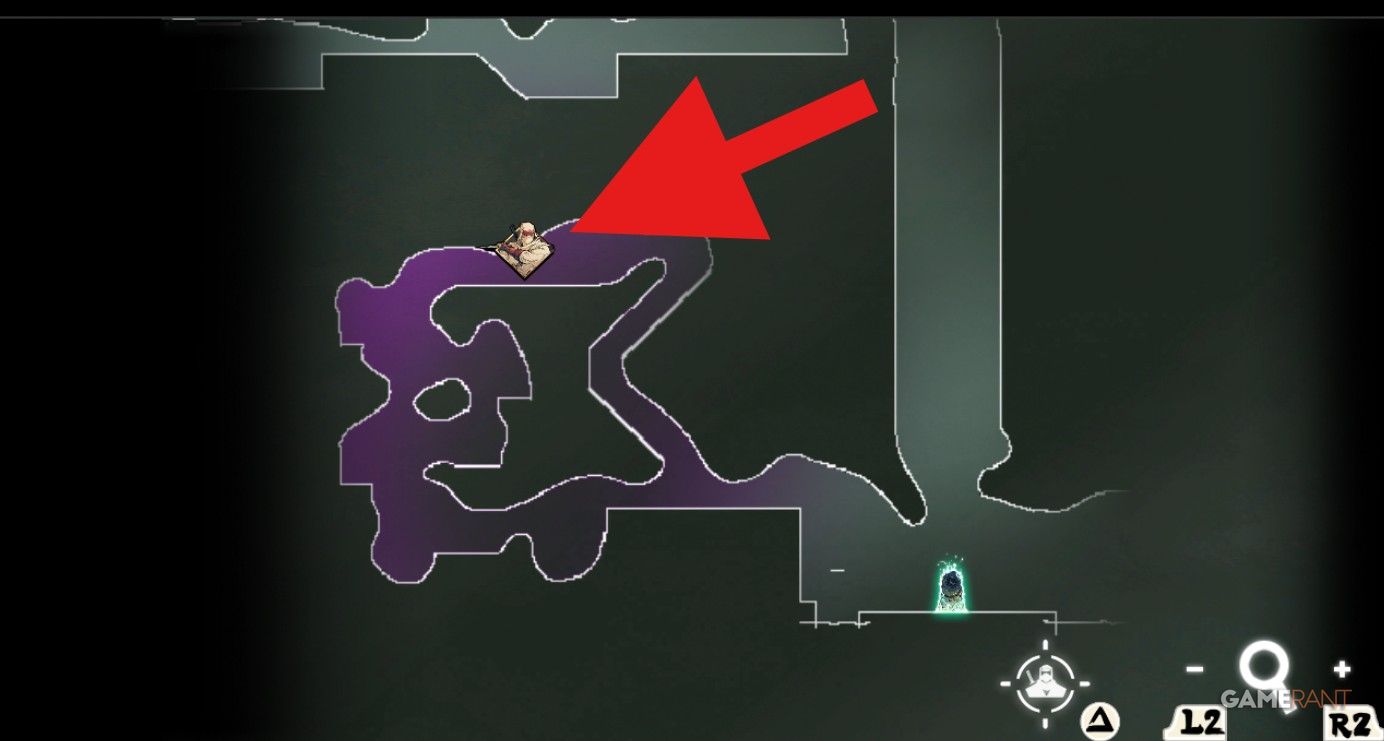
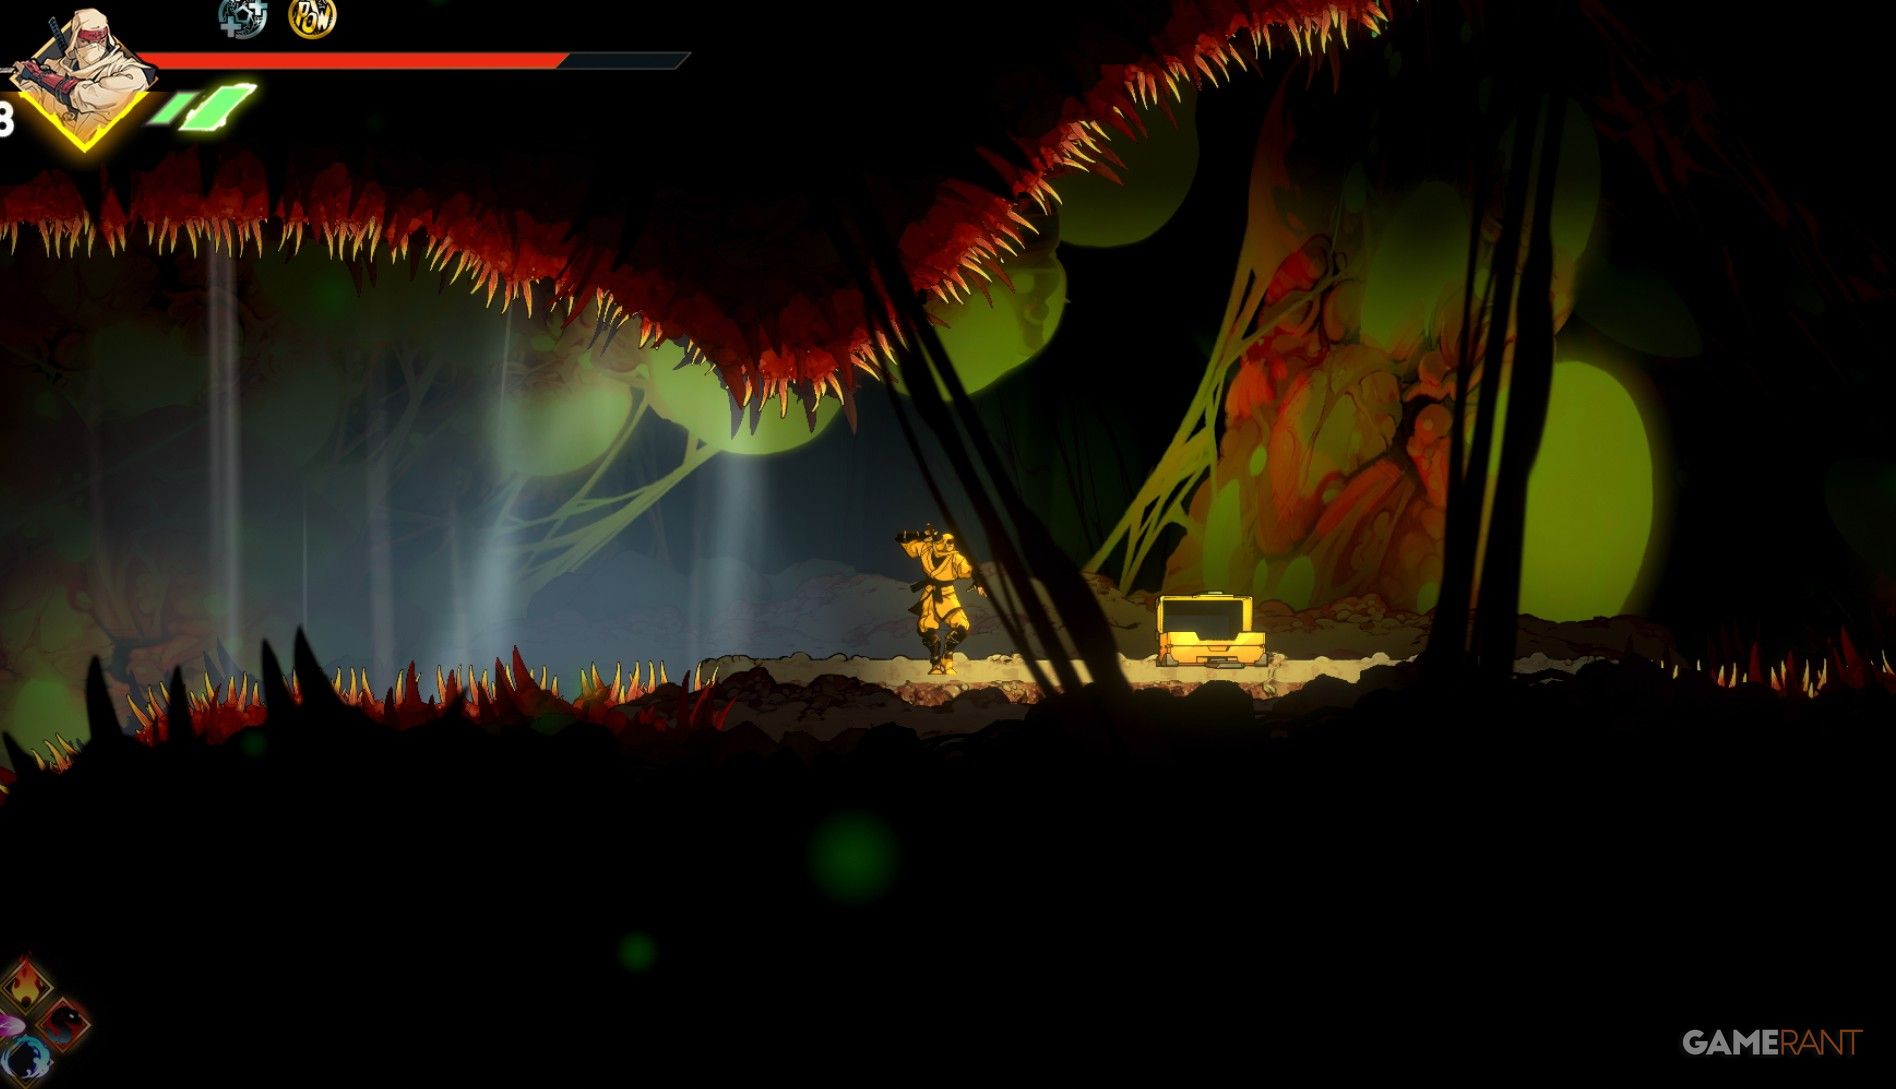
Second Oboro Relic
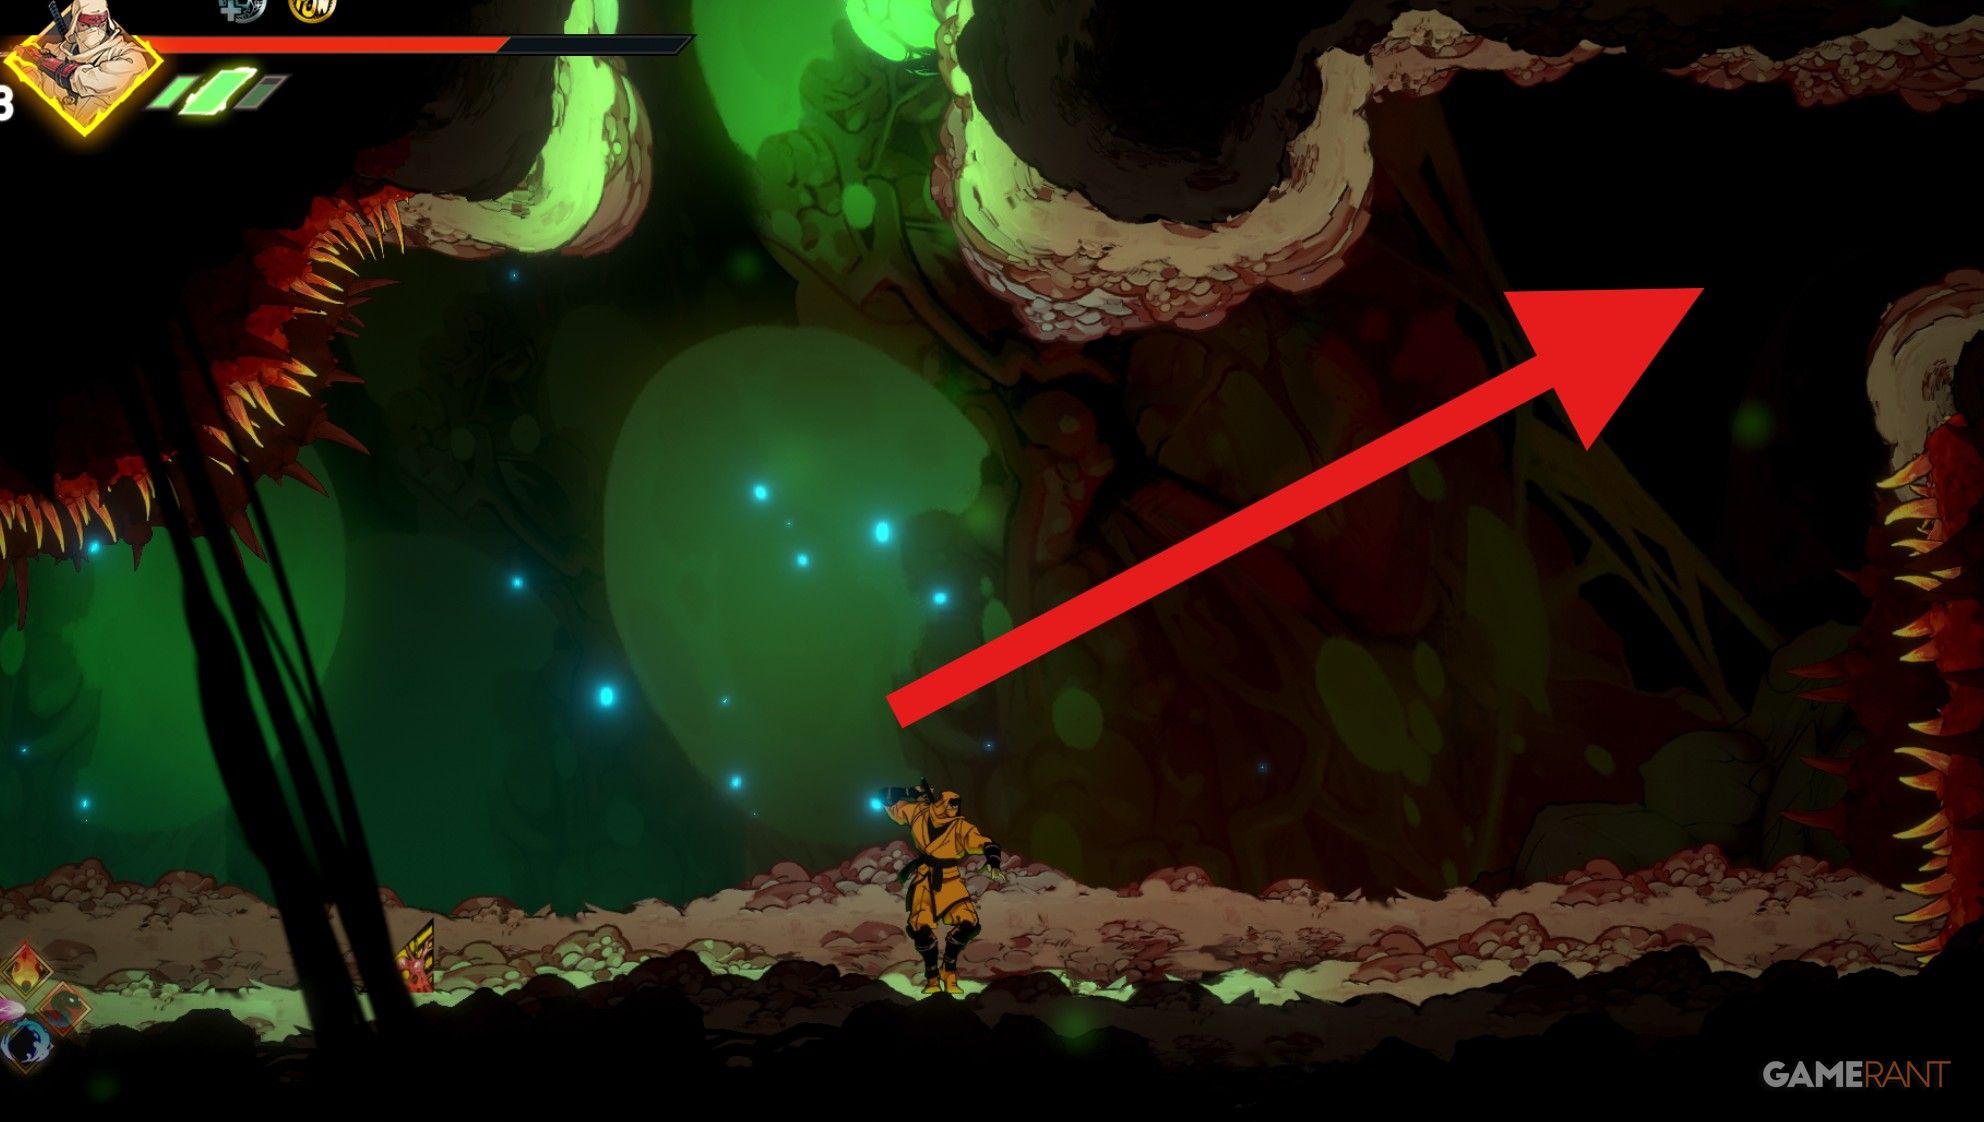
At the Throat checkpoint, take a long leap to your right and sprint. This will lead you to a grappling hook that can help you reach an elevated section. The chest is located along the path in the top-left part of the area.
Third Oboro Relic
Upon successfully navigating through the checkpoint referred to as “Lungs,” you’ll proceed to a segment of the second wind draft that ascends. To your left, there’s a discreet nook concealed, where you can discover a treasure chest.
Fourth Oboro Relic
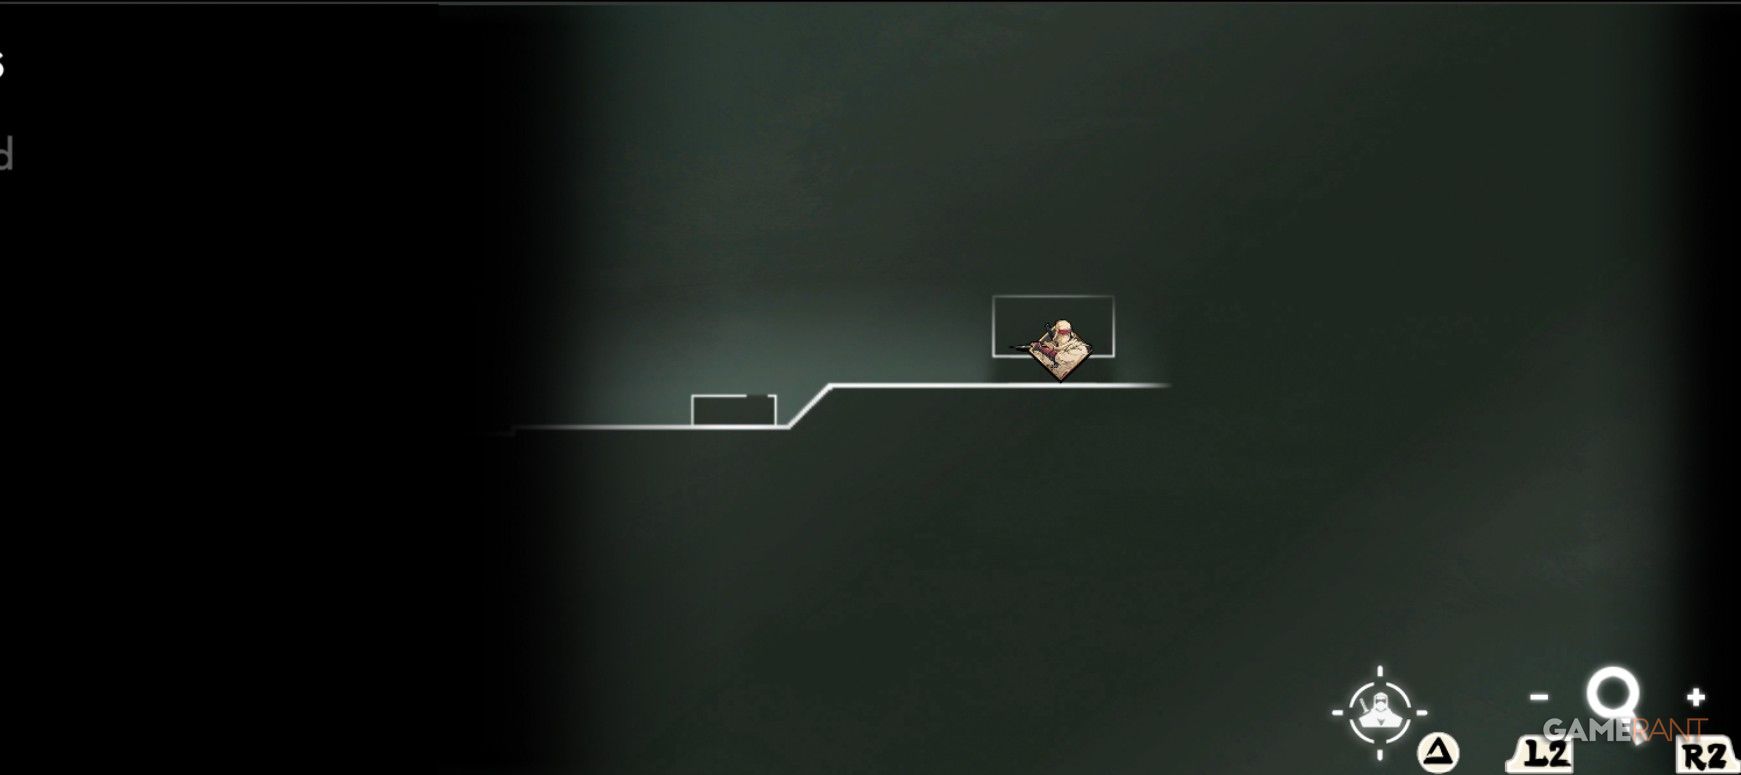
When you get to the checkpoint known as “Stomachs”, take the path to your left which leads to an optional location containing a chest.
Fifth Oboro Relic
You’ll discover the Relic hidden inside a chest situated to the left side of the checkpoint after the Second Stomach. It’s in close proximity to where one of the Elite Squad battles takes place.
All Assault Oboro Relics in Shinobi: Art of Vengeance
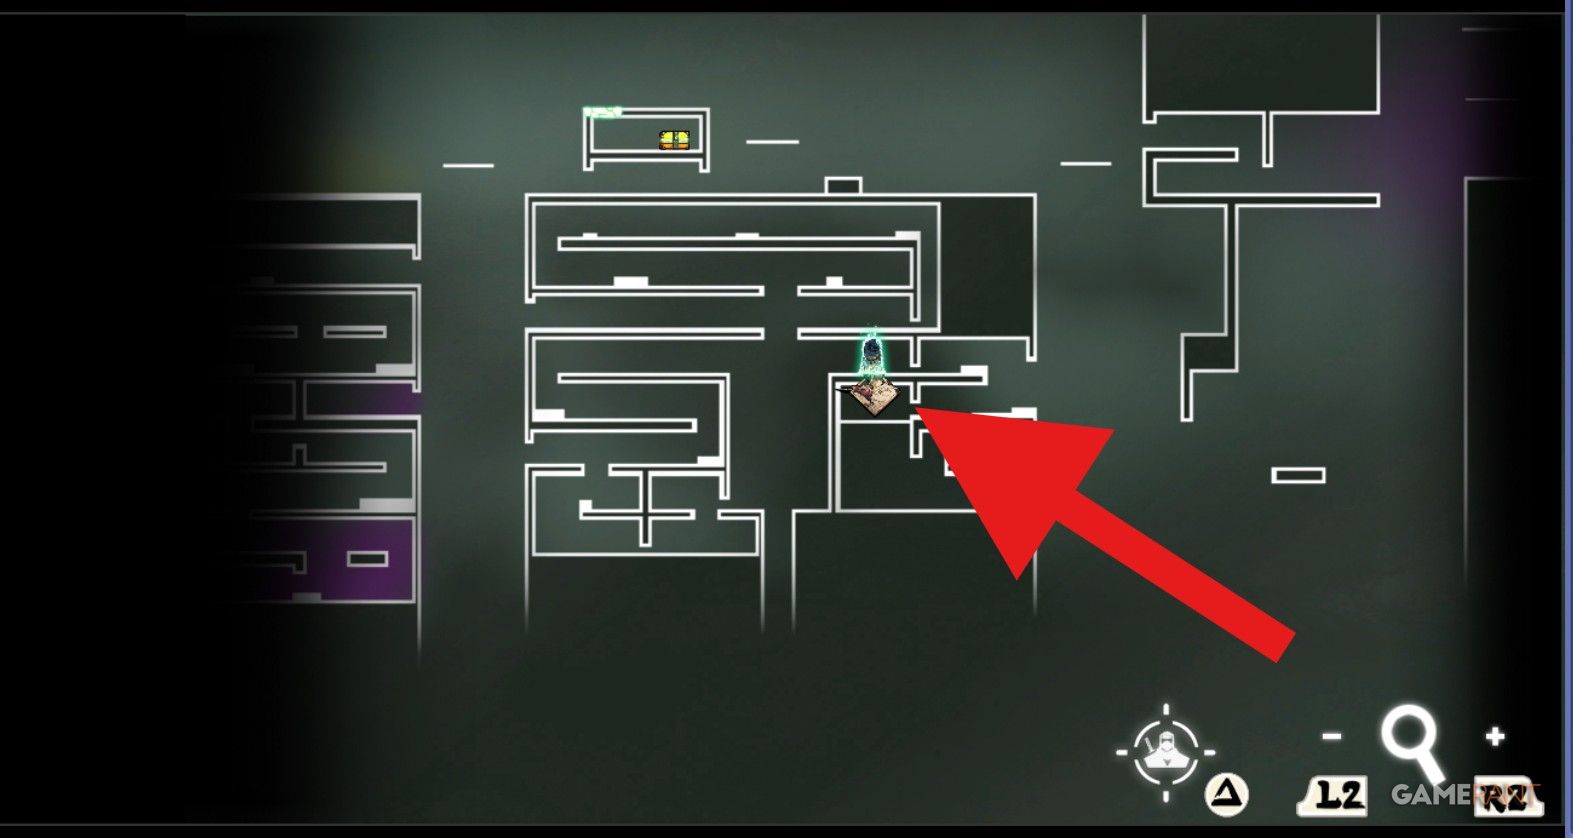
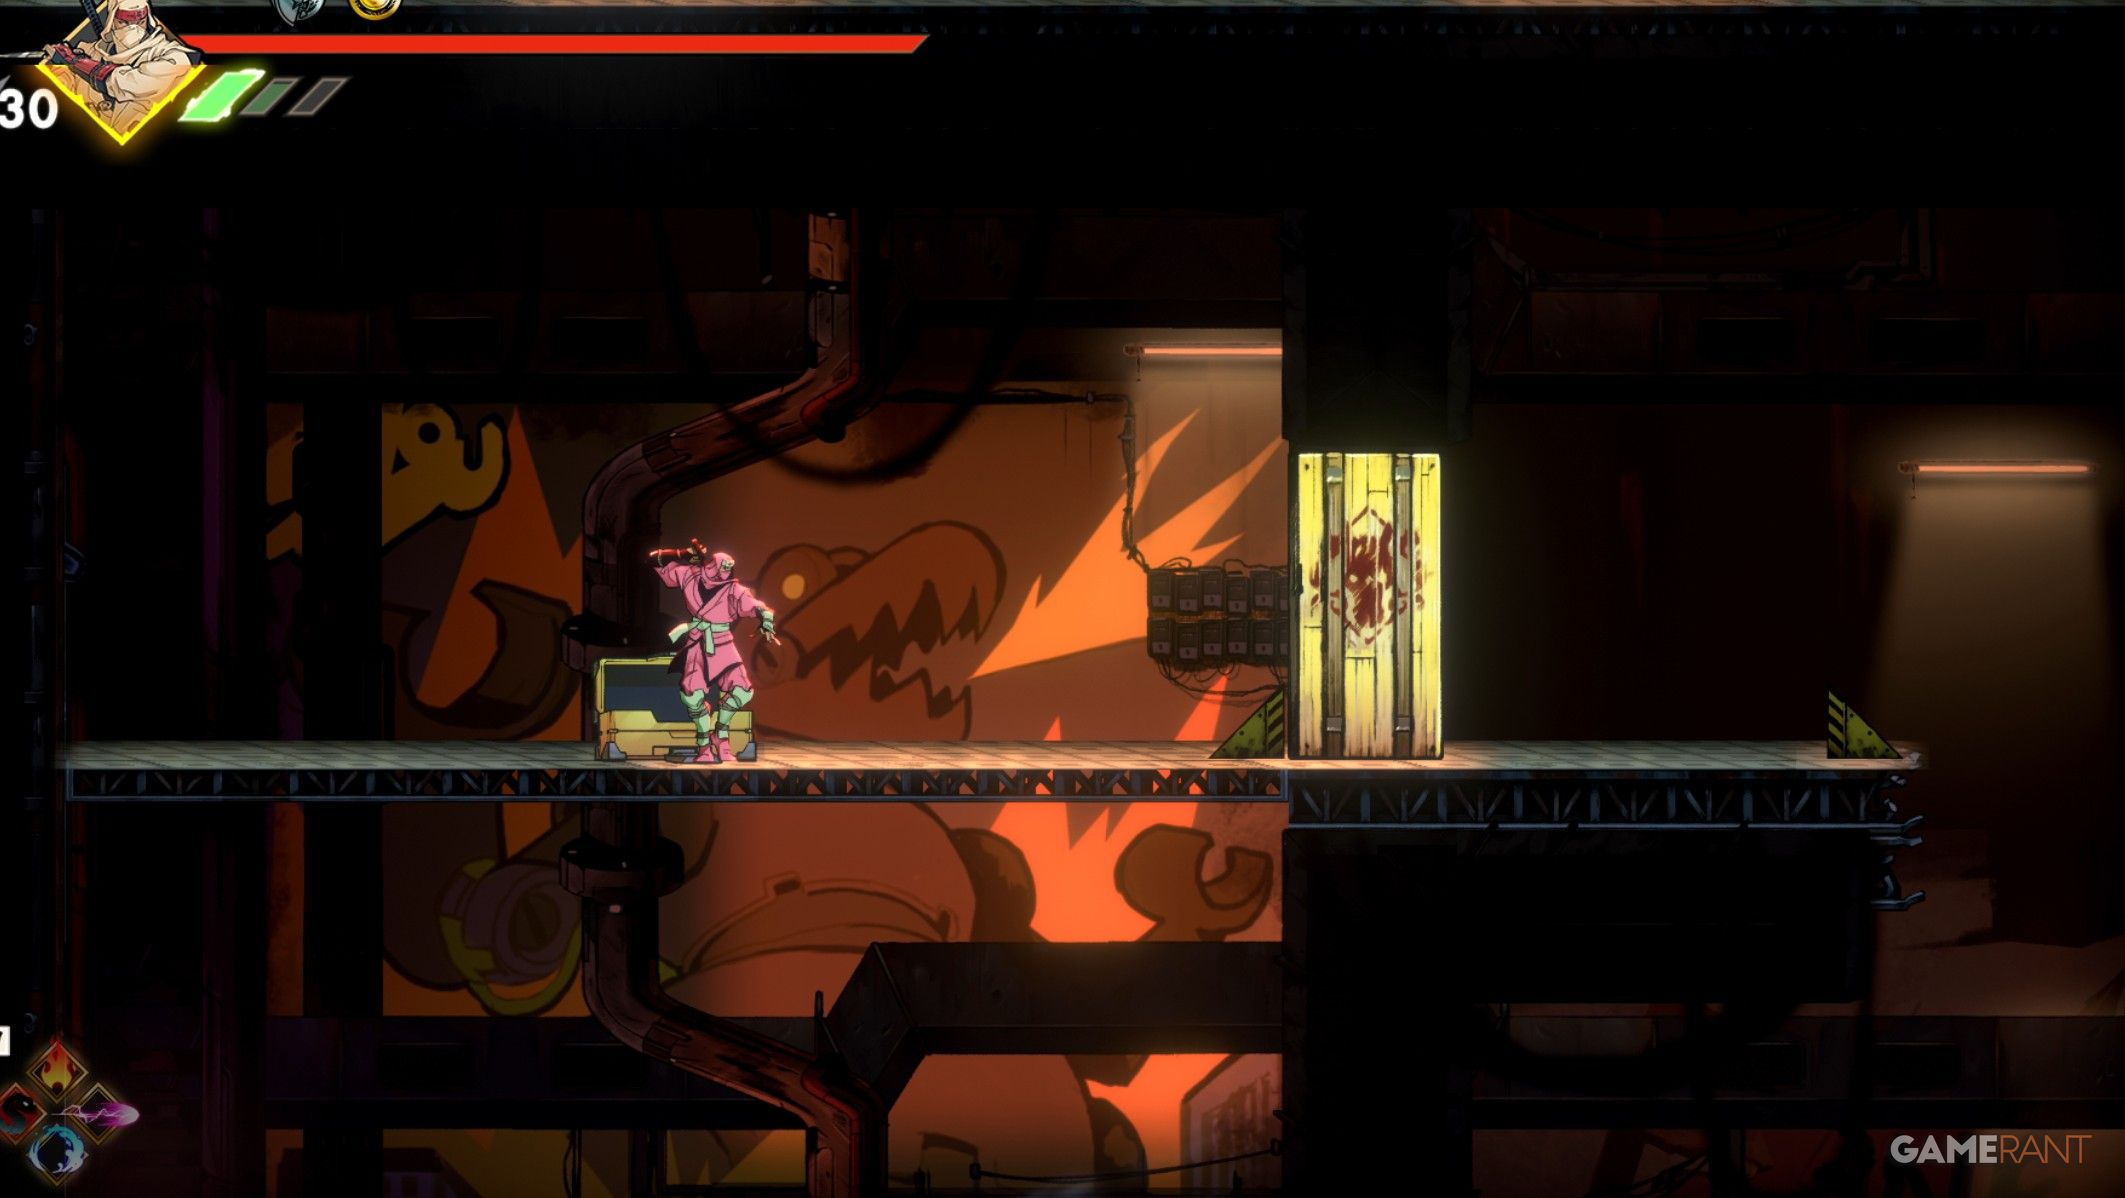
First Oboro Relic
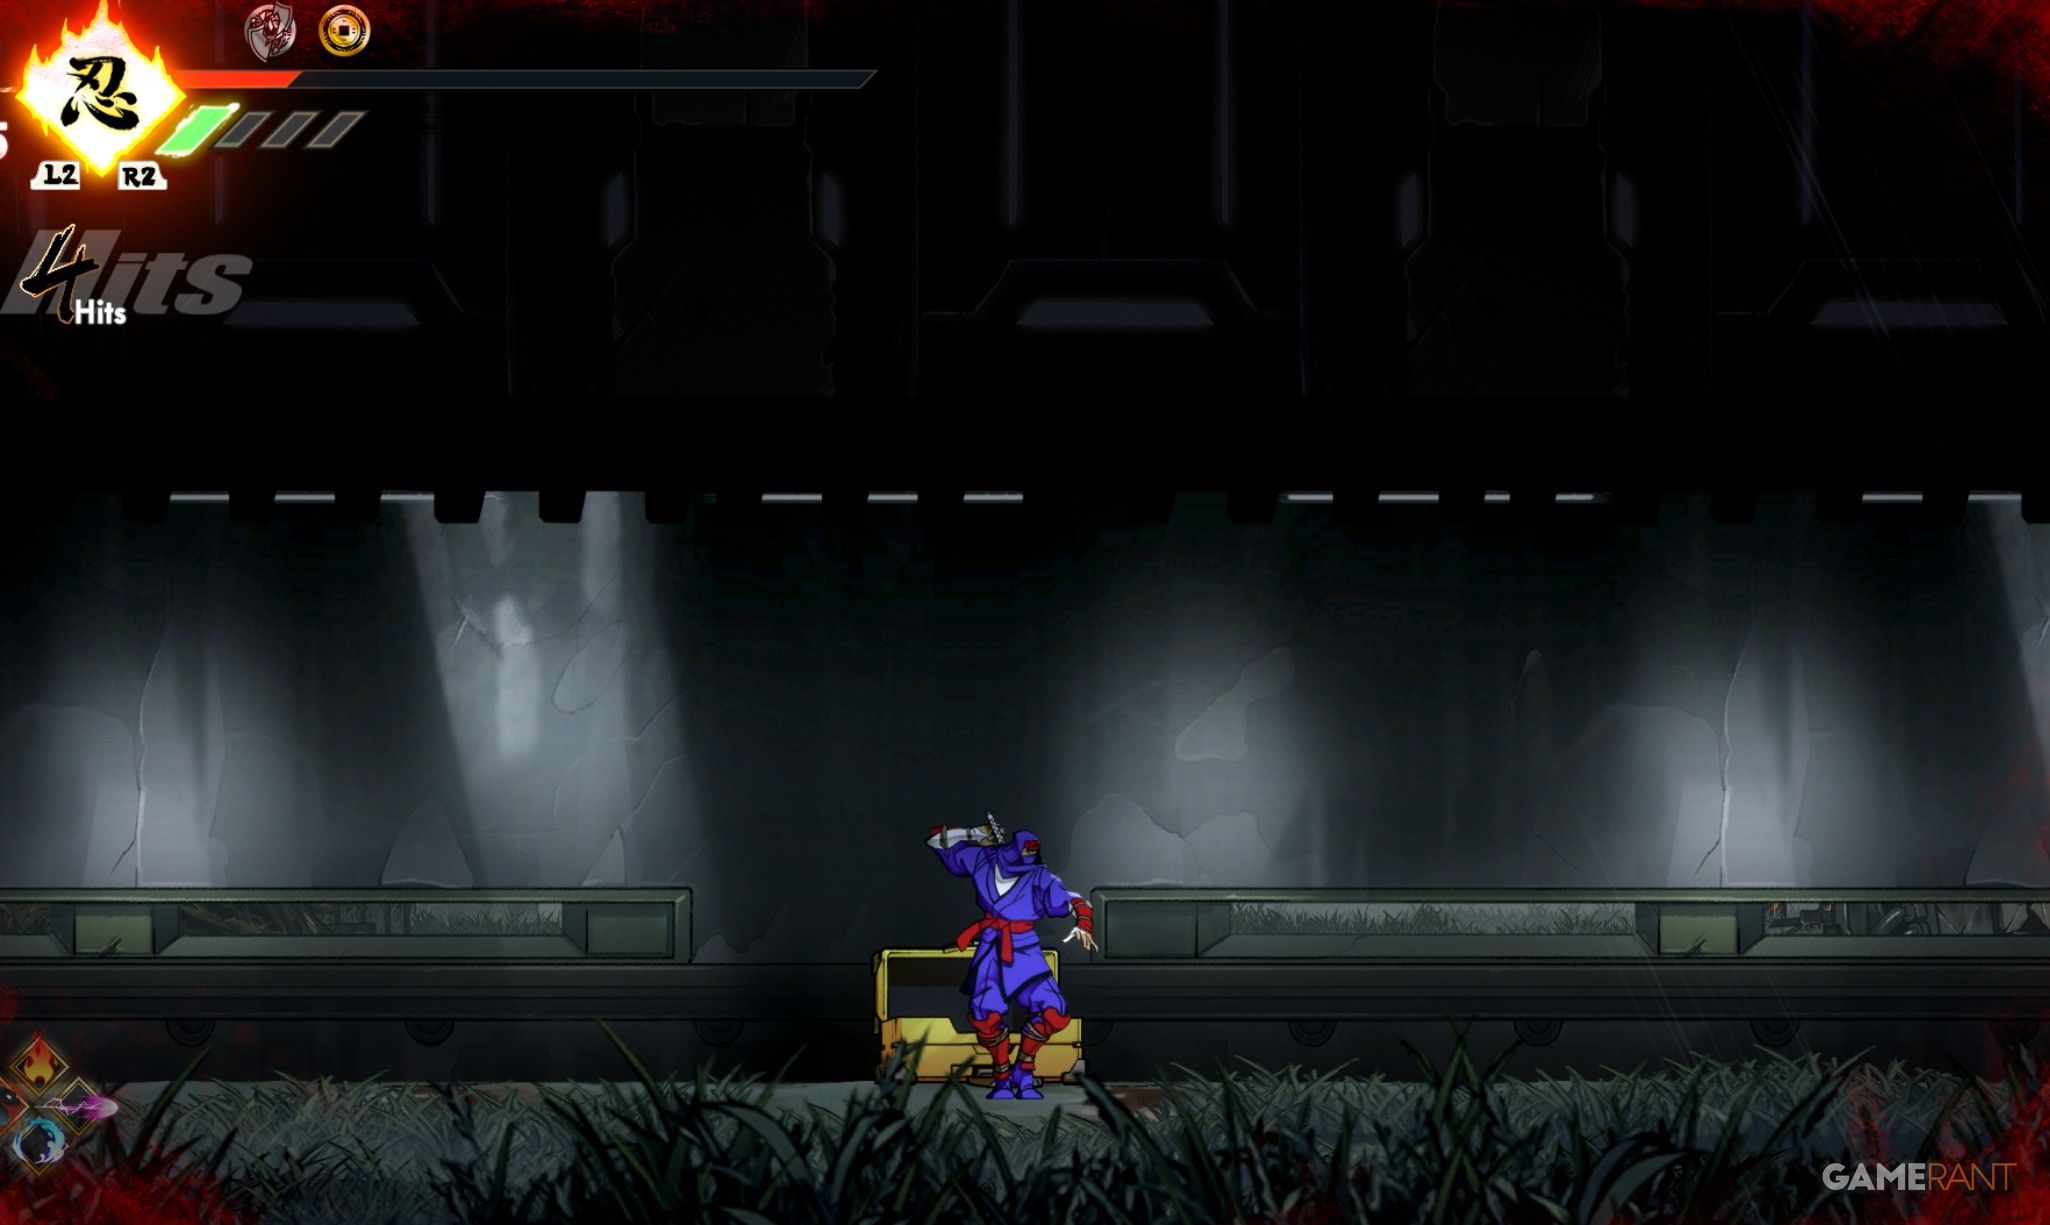
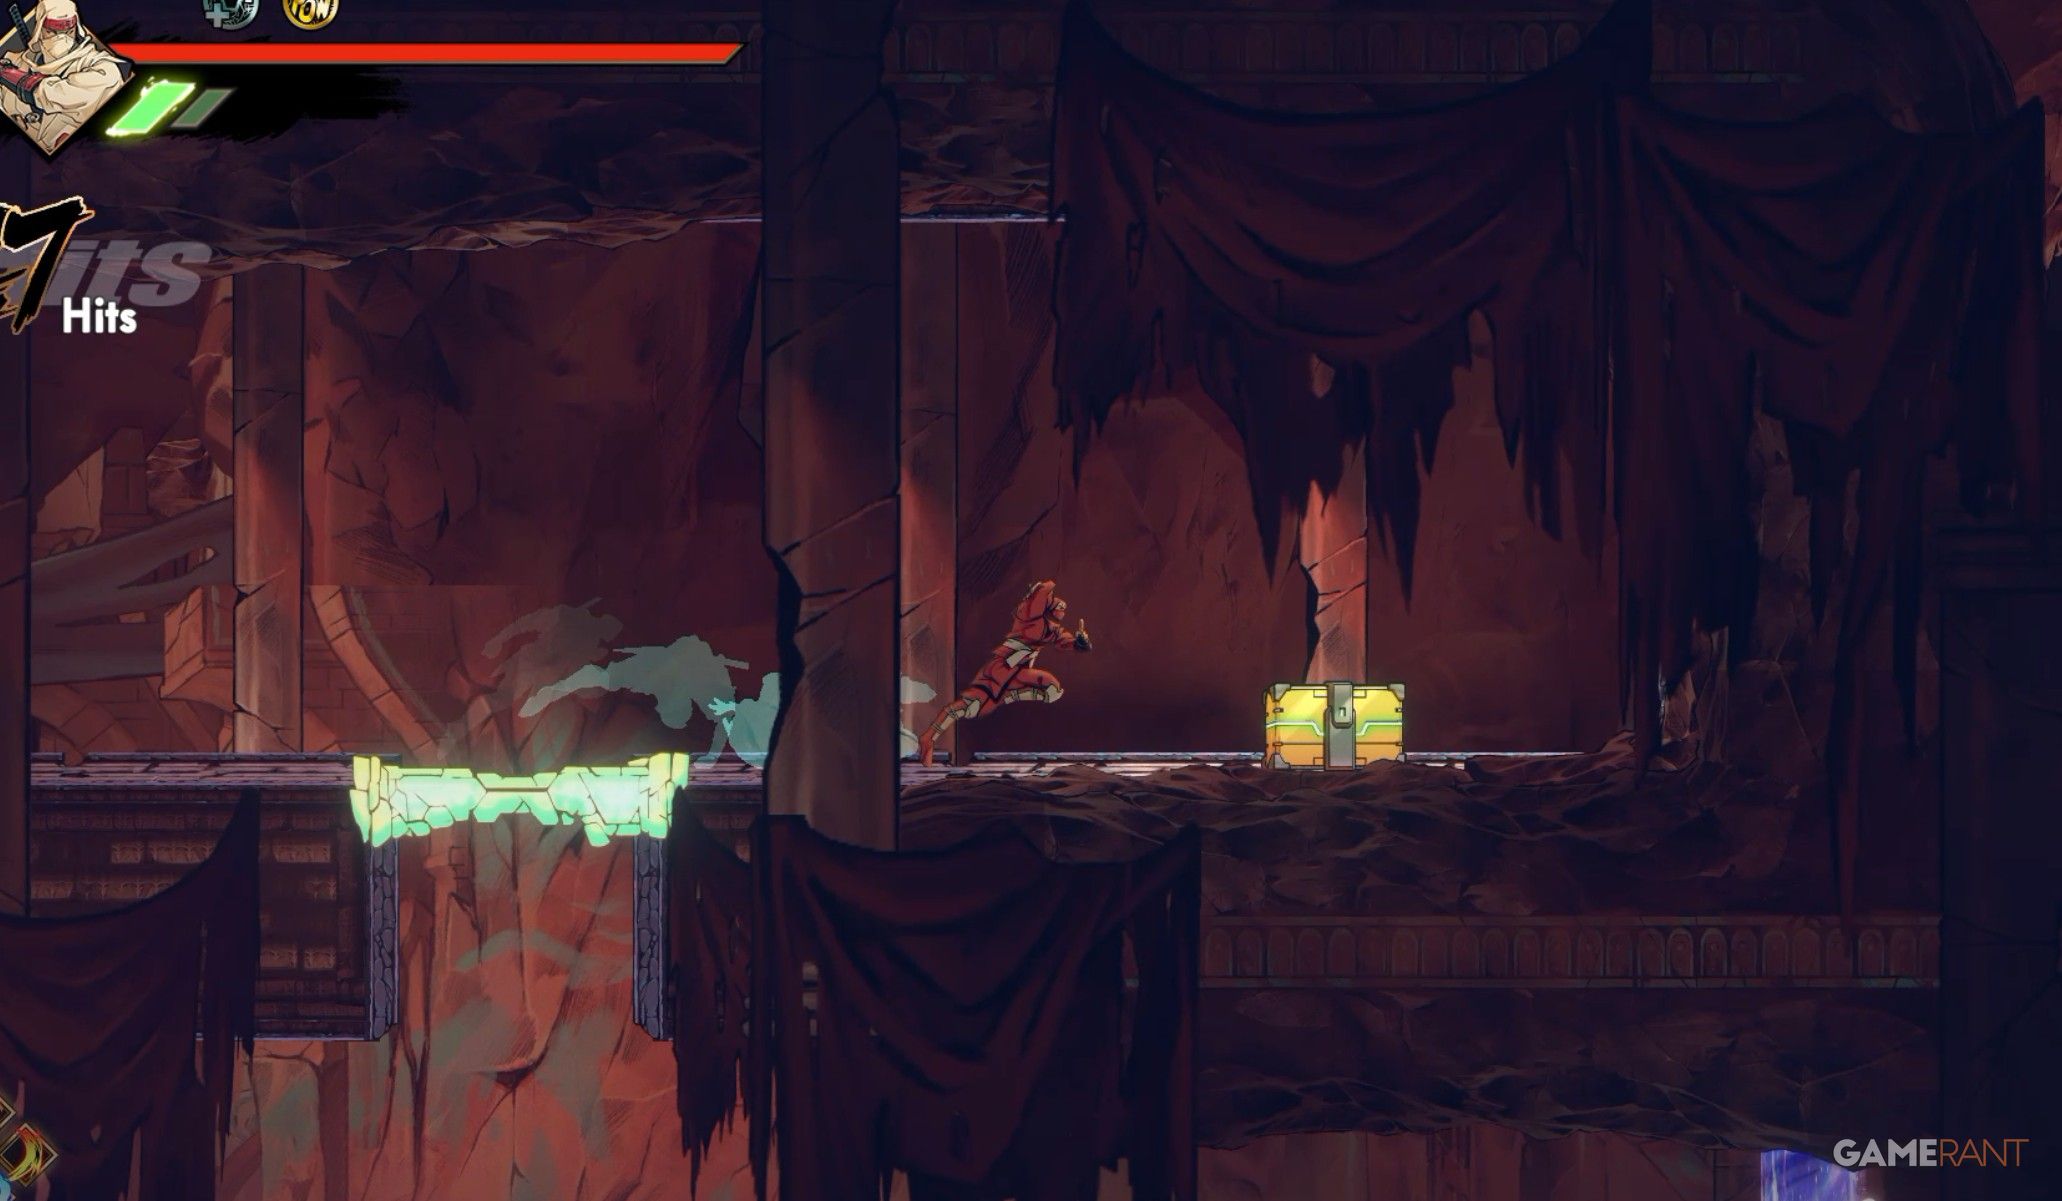
As you progress along the critical path, you’ll reach a point before the Bunker checkpoint where an automatic locking door appears, followed by enemies attacking you. Overcome them, and the first Oboro Relic will be within your grasp.
In a more casual tone: Moving forward on the critical path, you’ll soon come across an automatic door that locks just before the Bunker checkpoint. This area will be swarming with enemies trying to take you down, but if you manage to beat them, the first Oboro Relic will be there for the taking!
Second Oboro Relic

Beyond the Bunker checkpoint lies a sight of some container storages guarded by green Yokai barriers. The treasure, the Relic, can be found in the second one you come across.
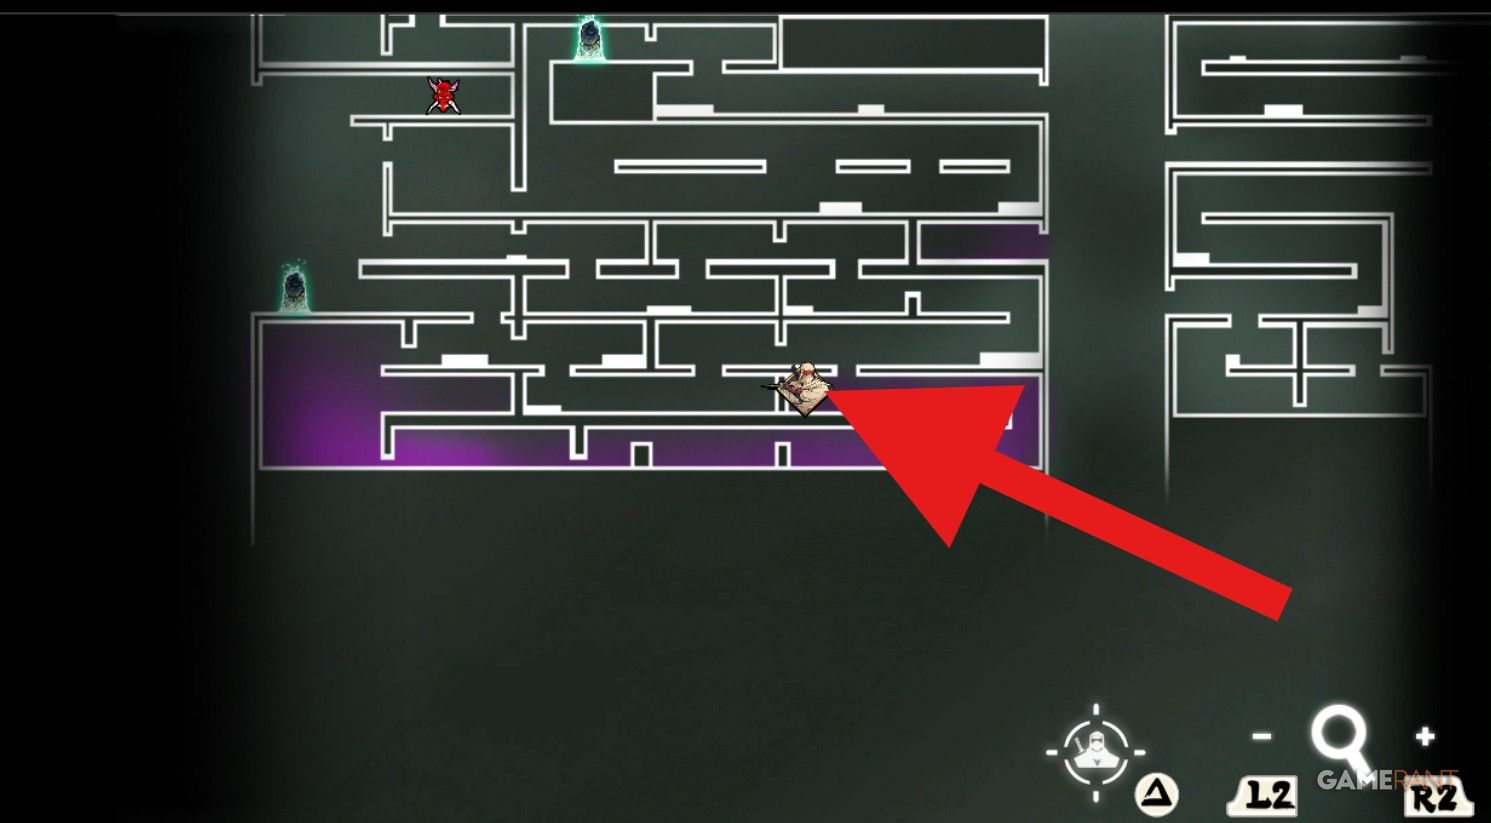
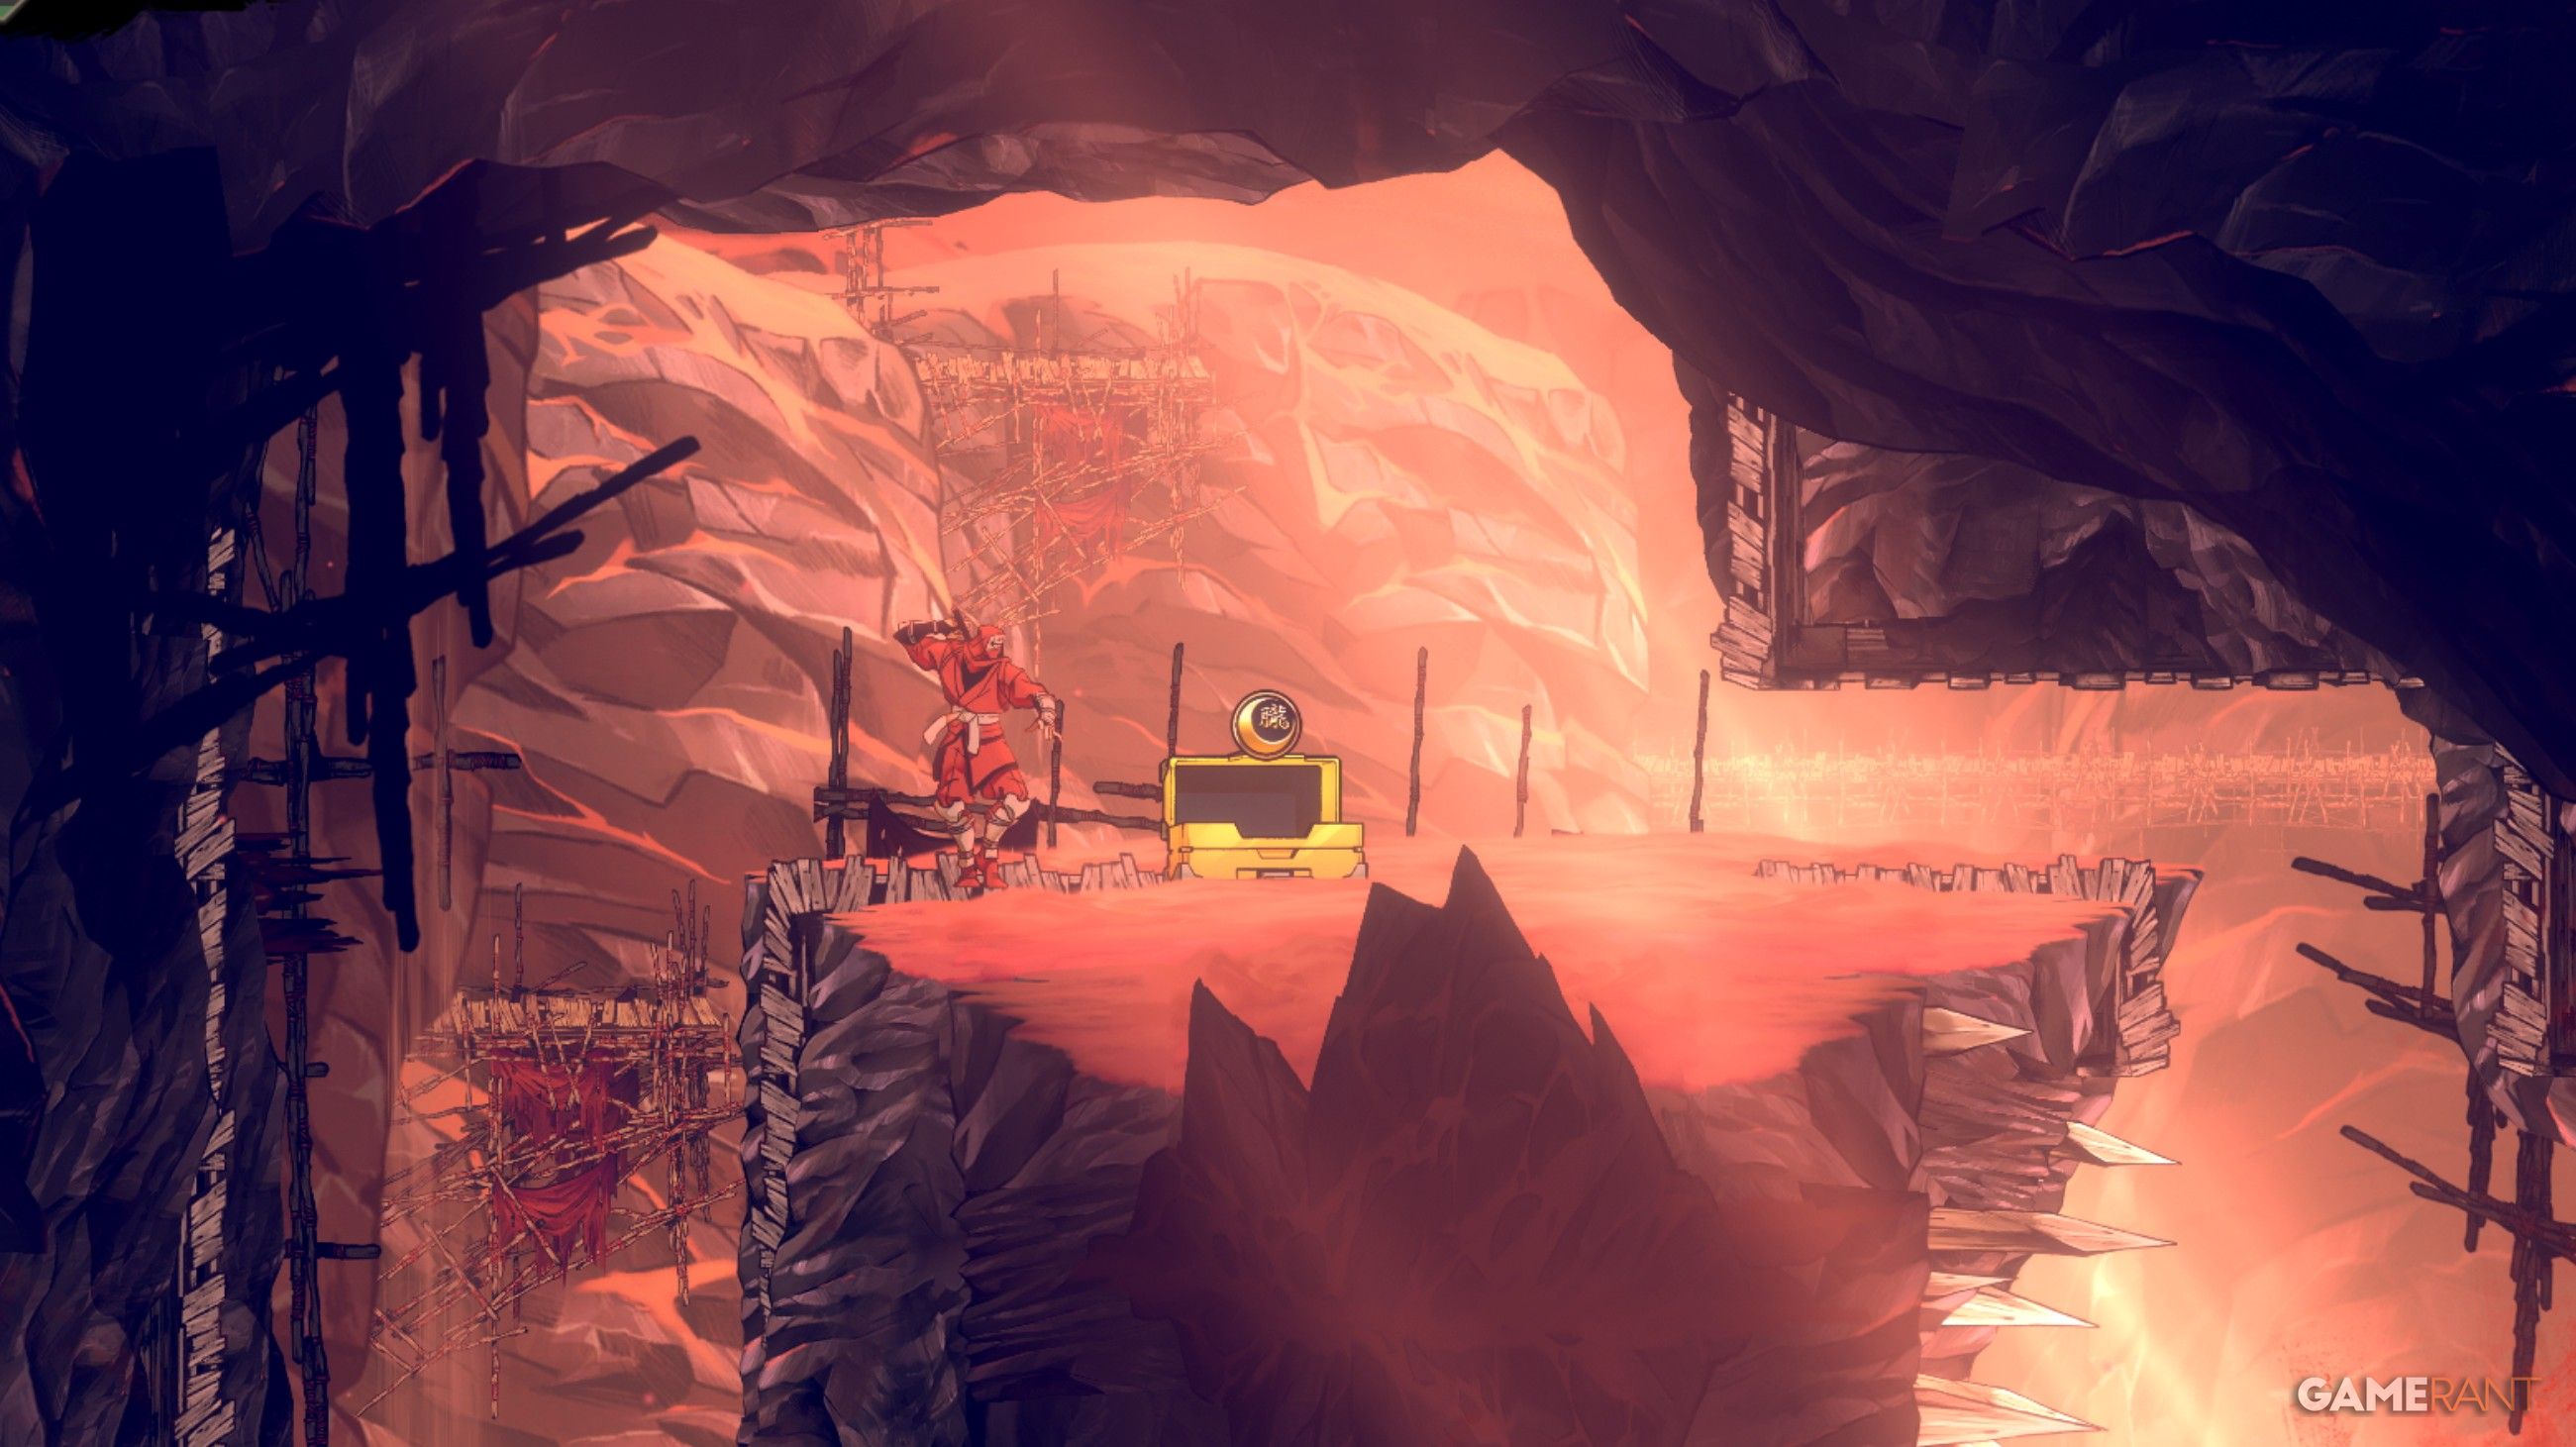
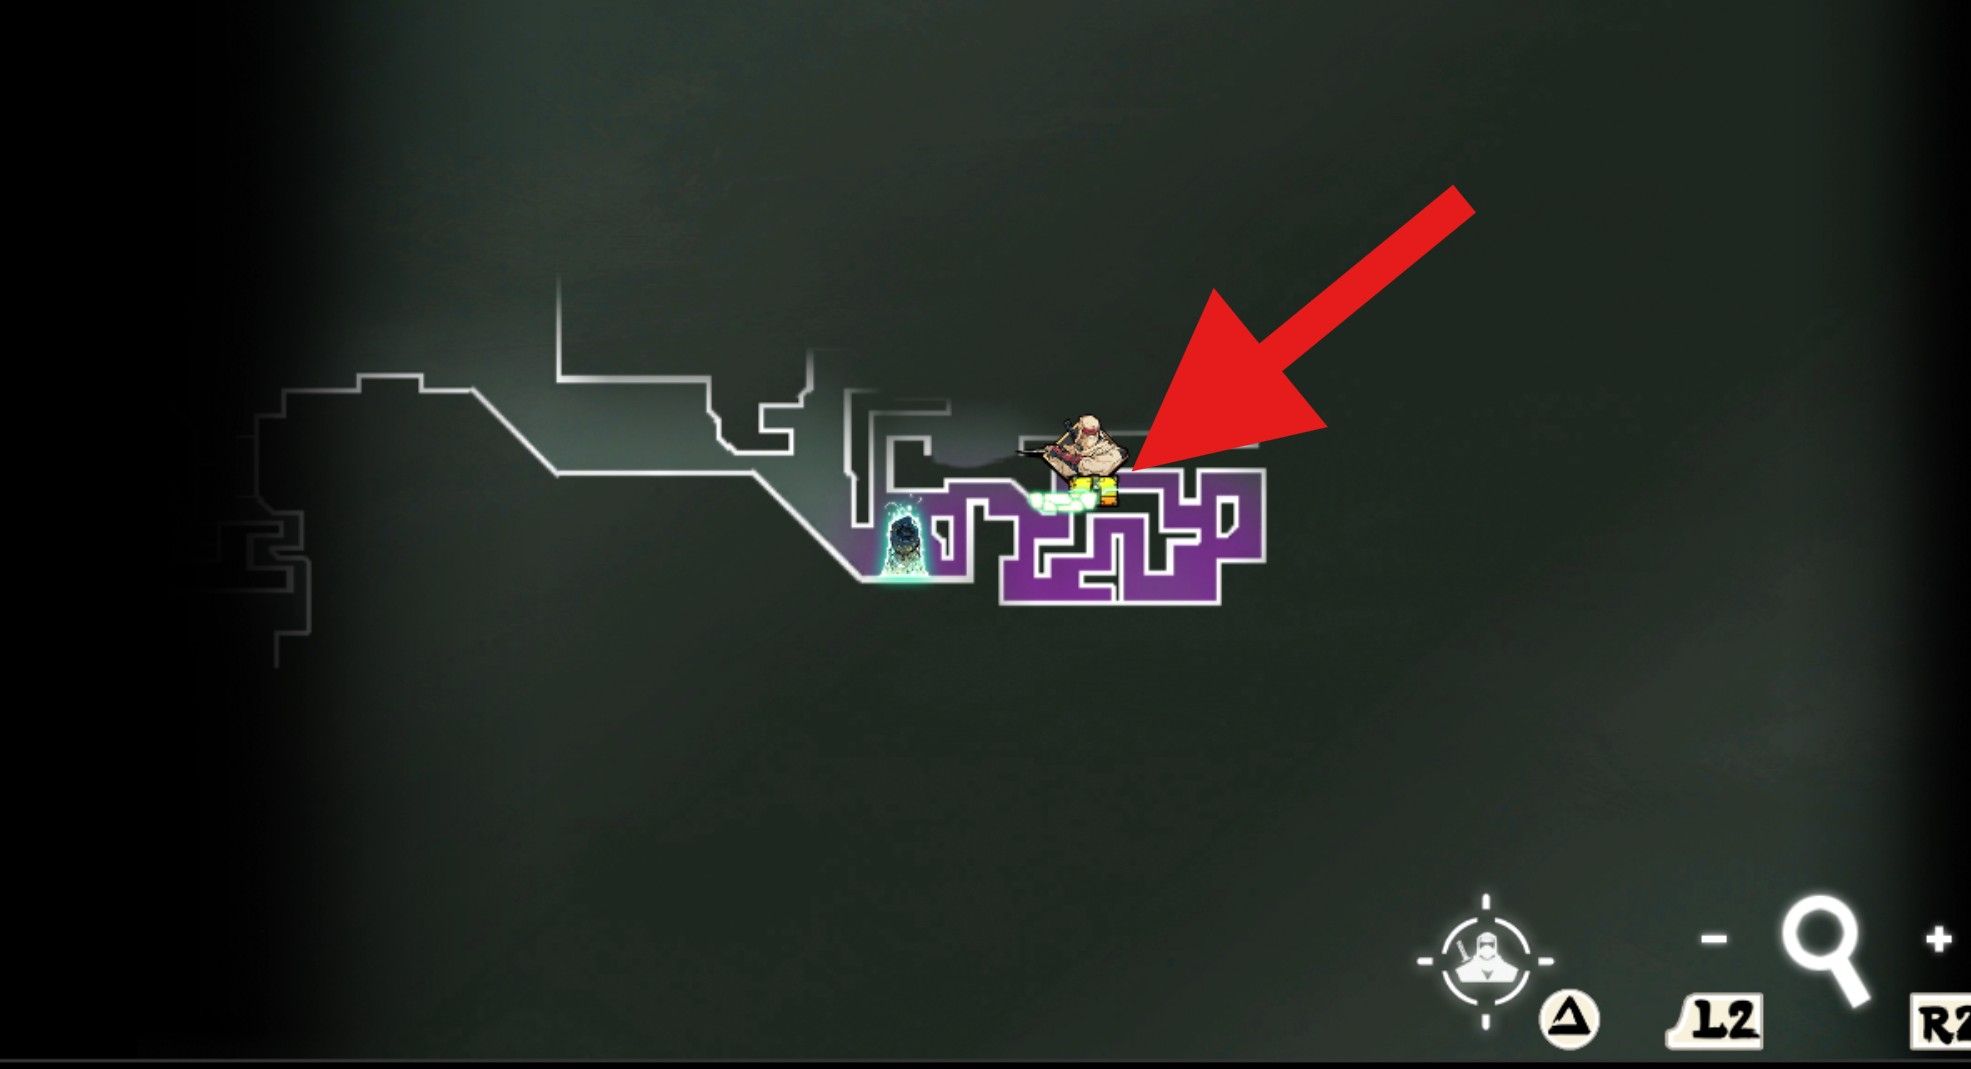
Third Oboro Relic

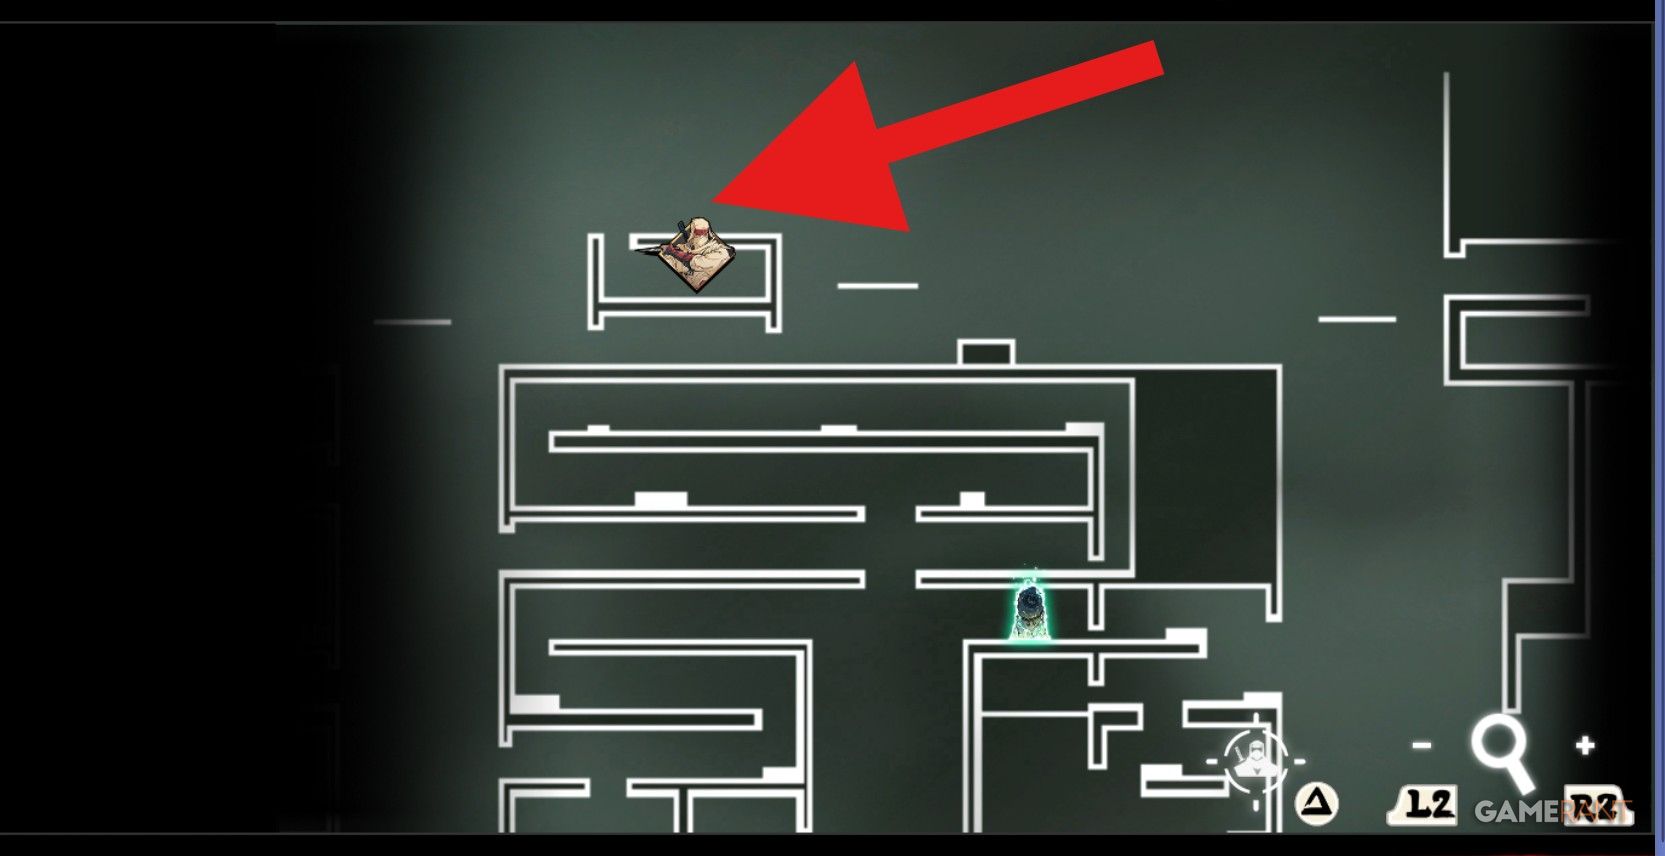
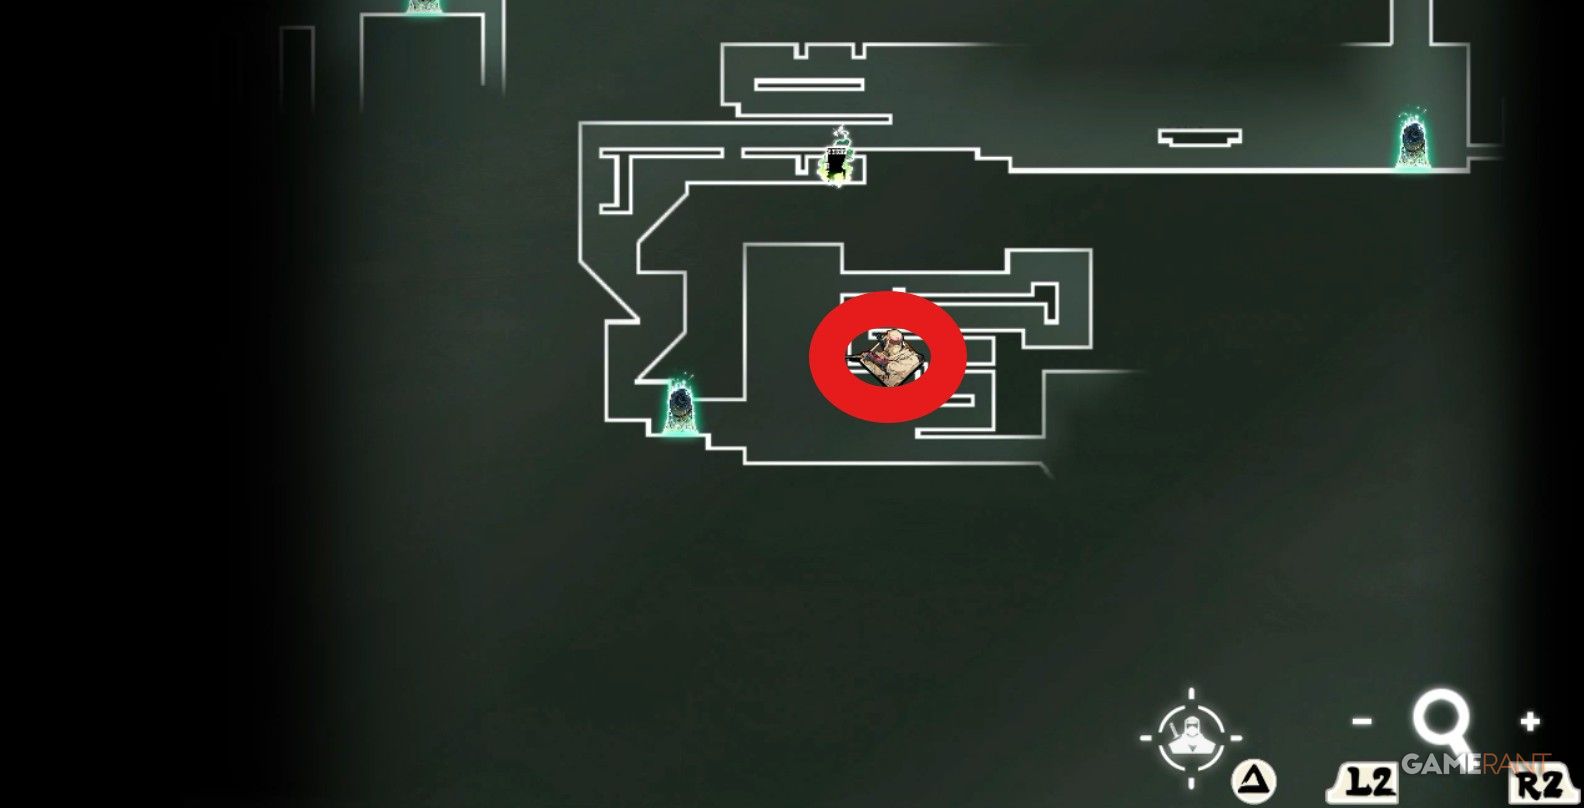
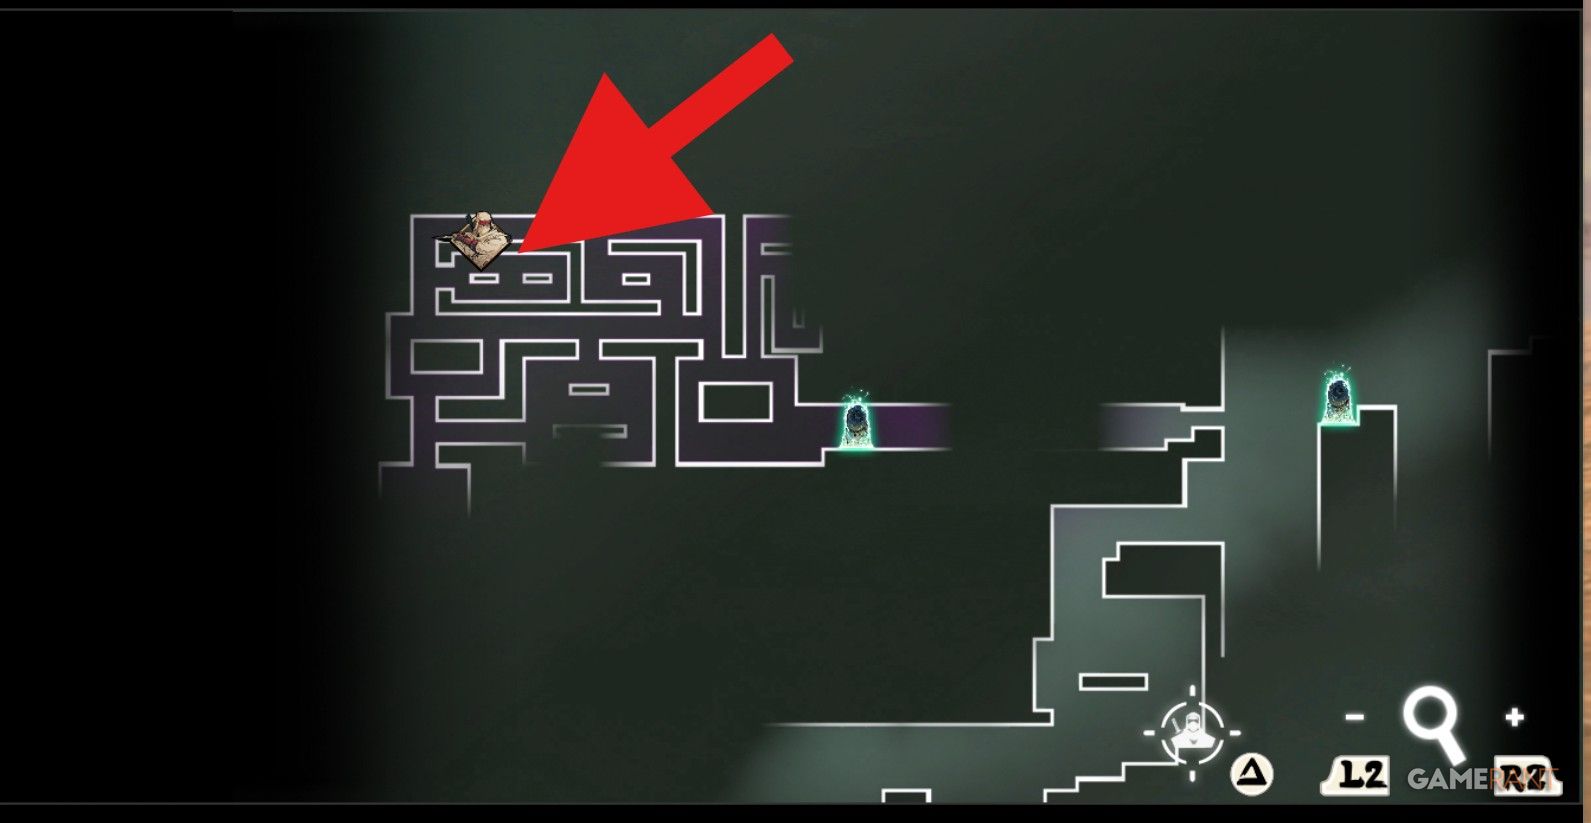
Just past the Siege Tower checkpoint, I stumbled upon a mysterious green barricade guarded by a Yokai. Feeling adventurous, I decided to use my Sword Dive on it, and was led to a hidden area brimming with a challenging platform maze. After successfully navigating this tricky labyrinth, I was rewarded with the coveted Oboro Relic and engaged in an intense Elite Squad battle! What a thrilling find!
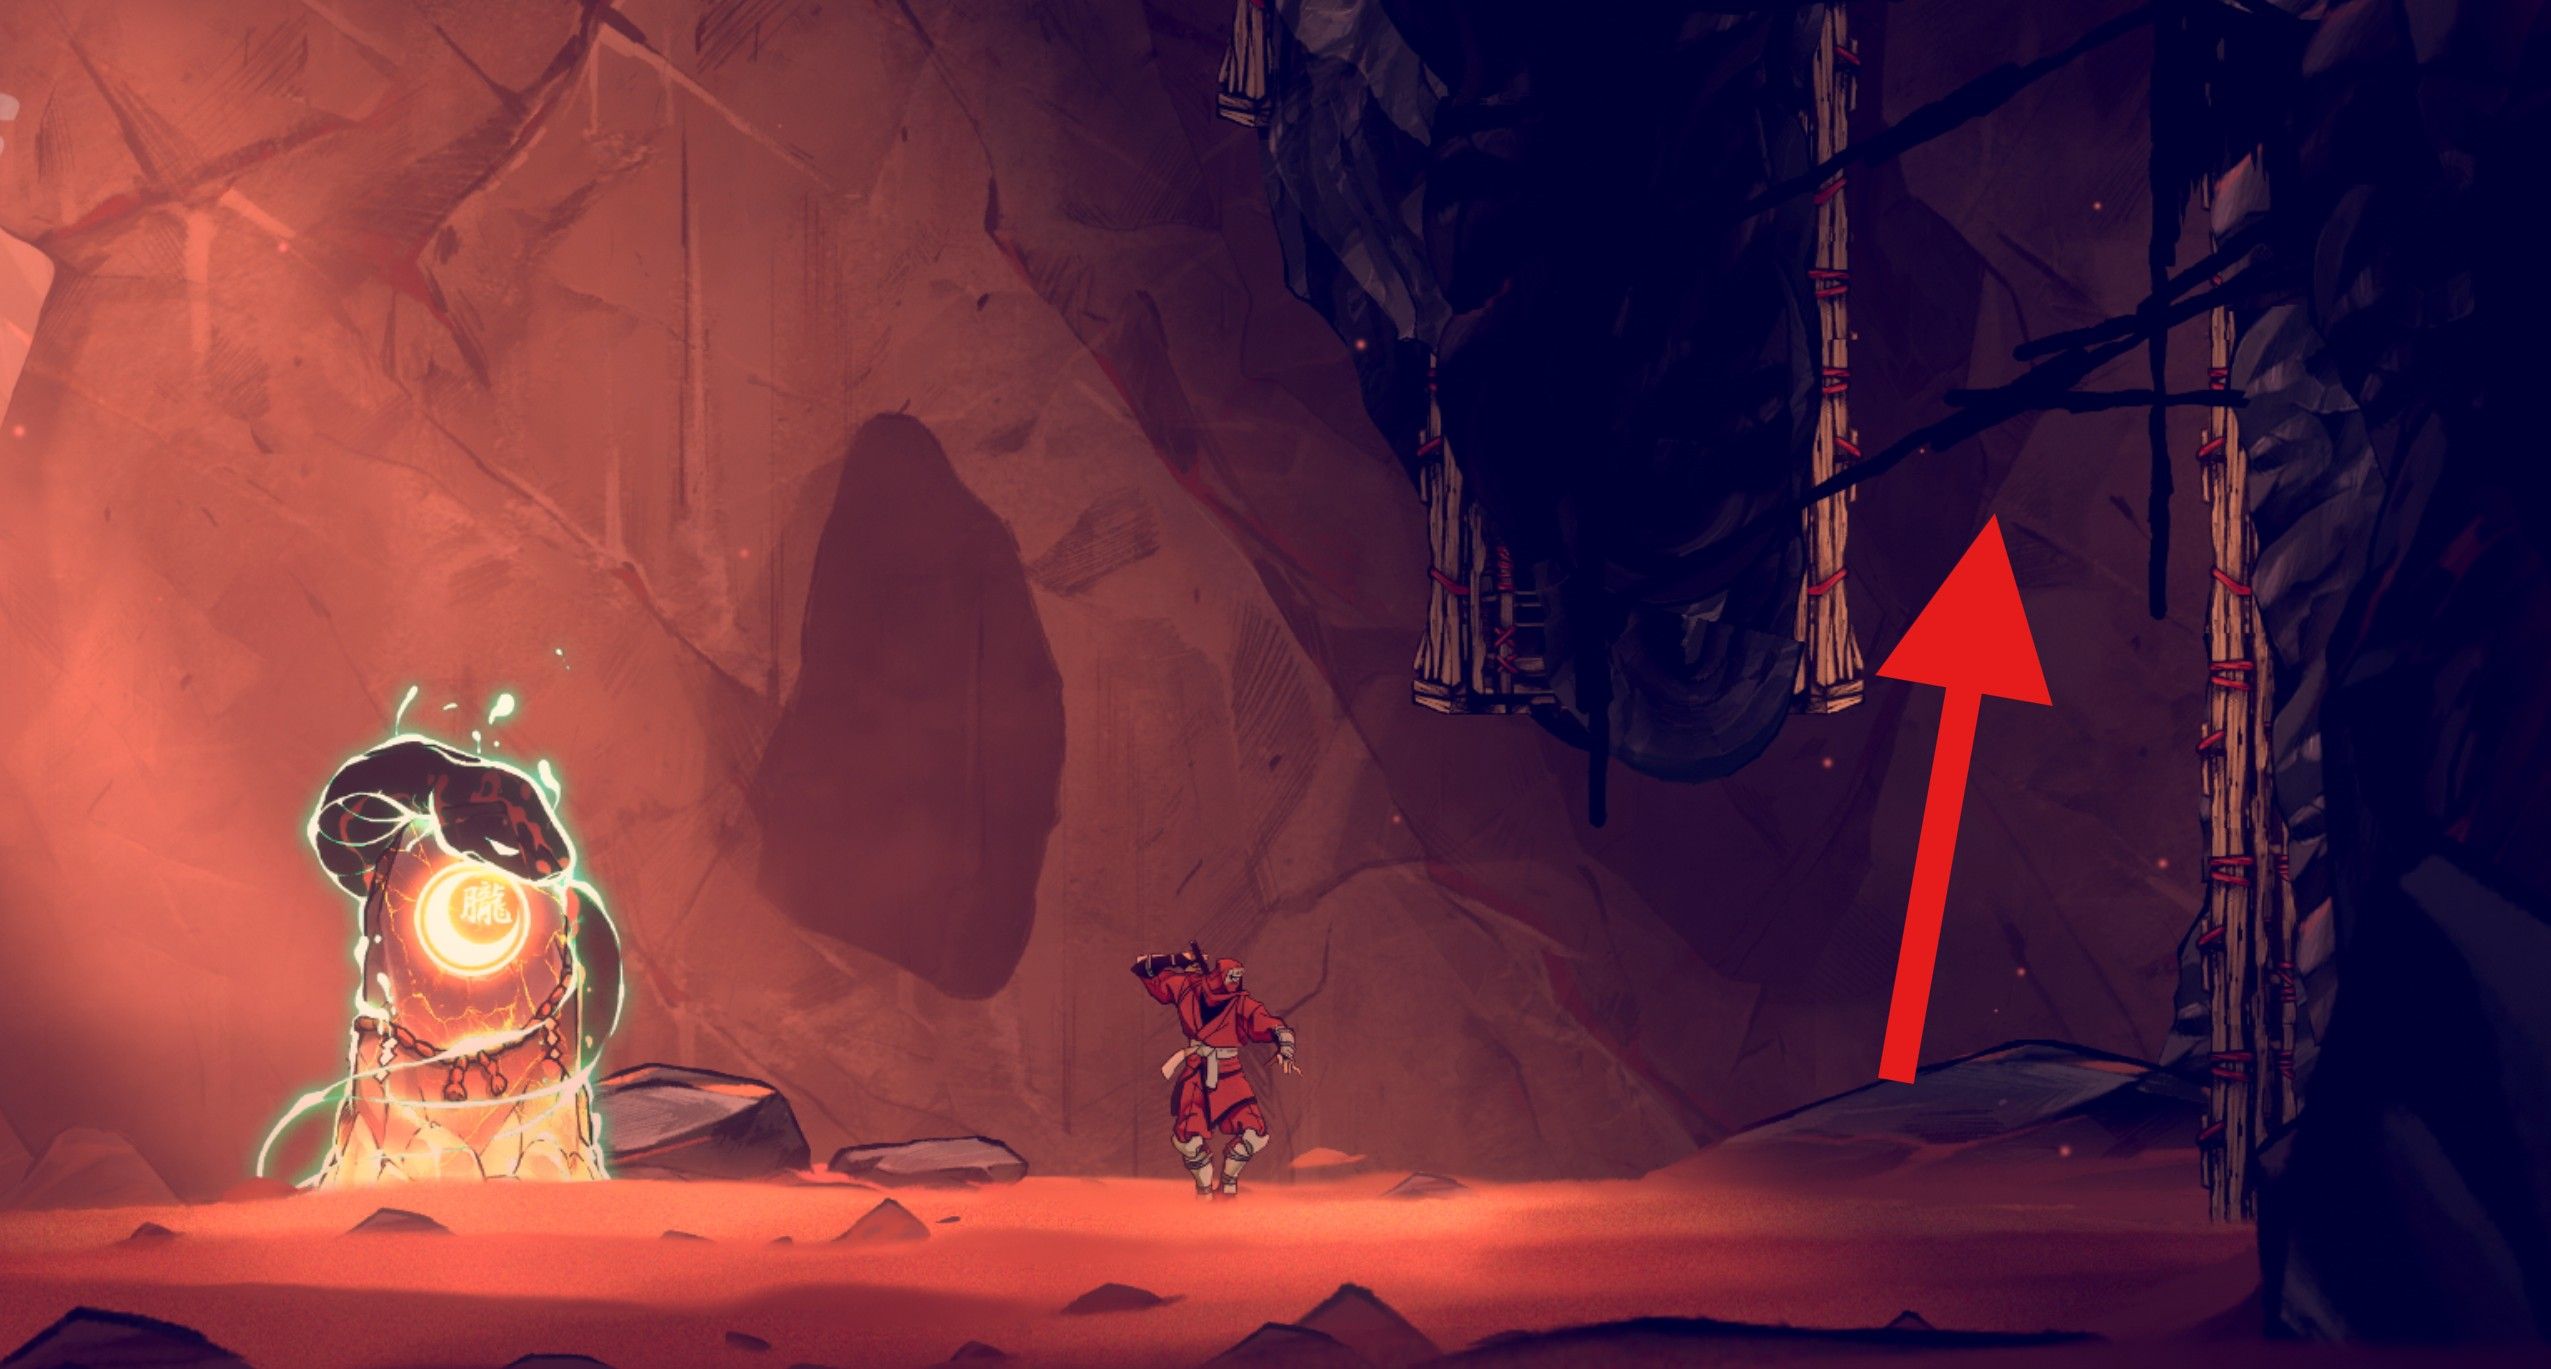
Fourth Oboro Relic
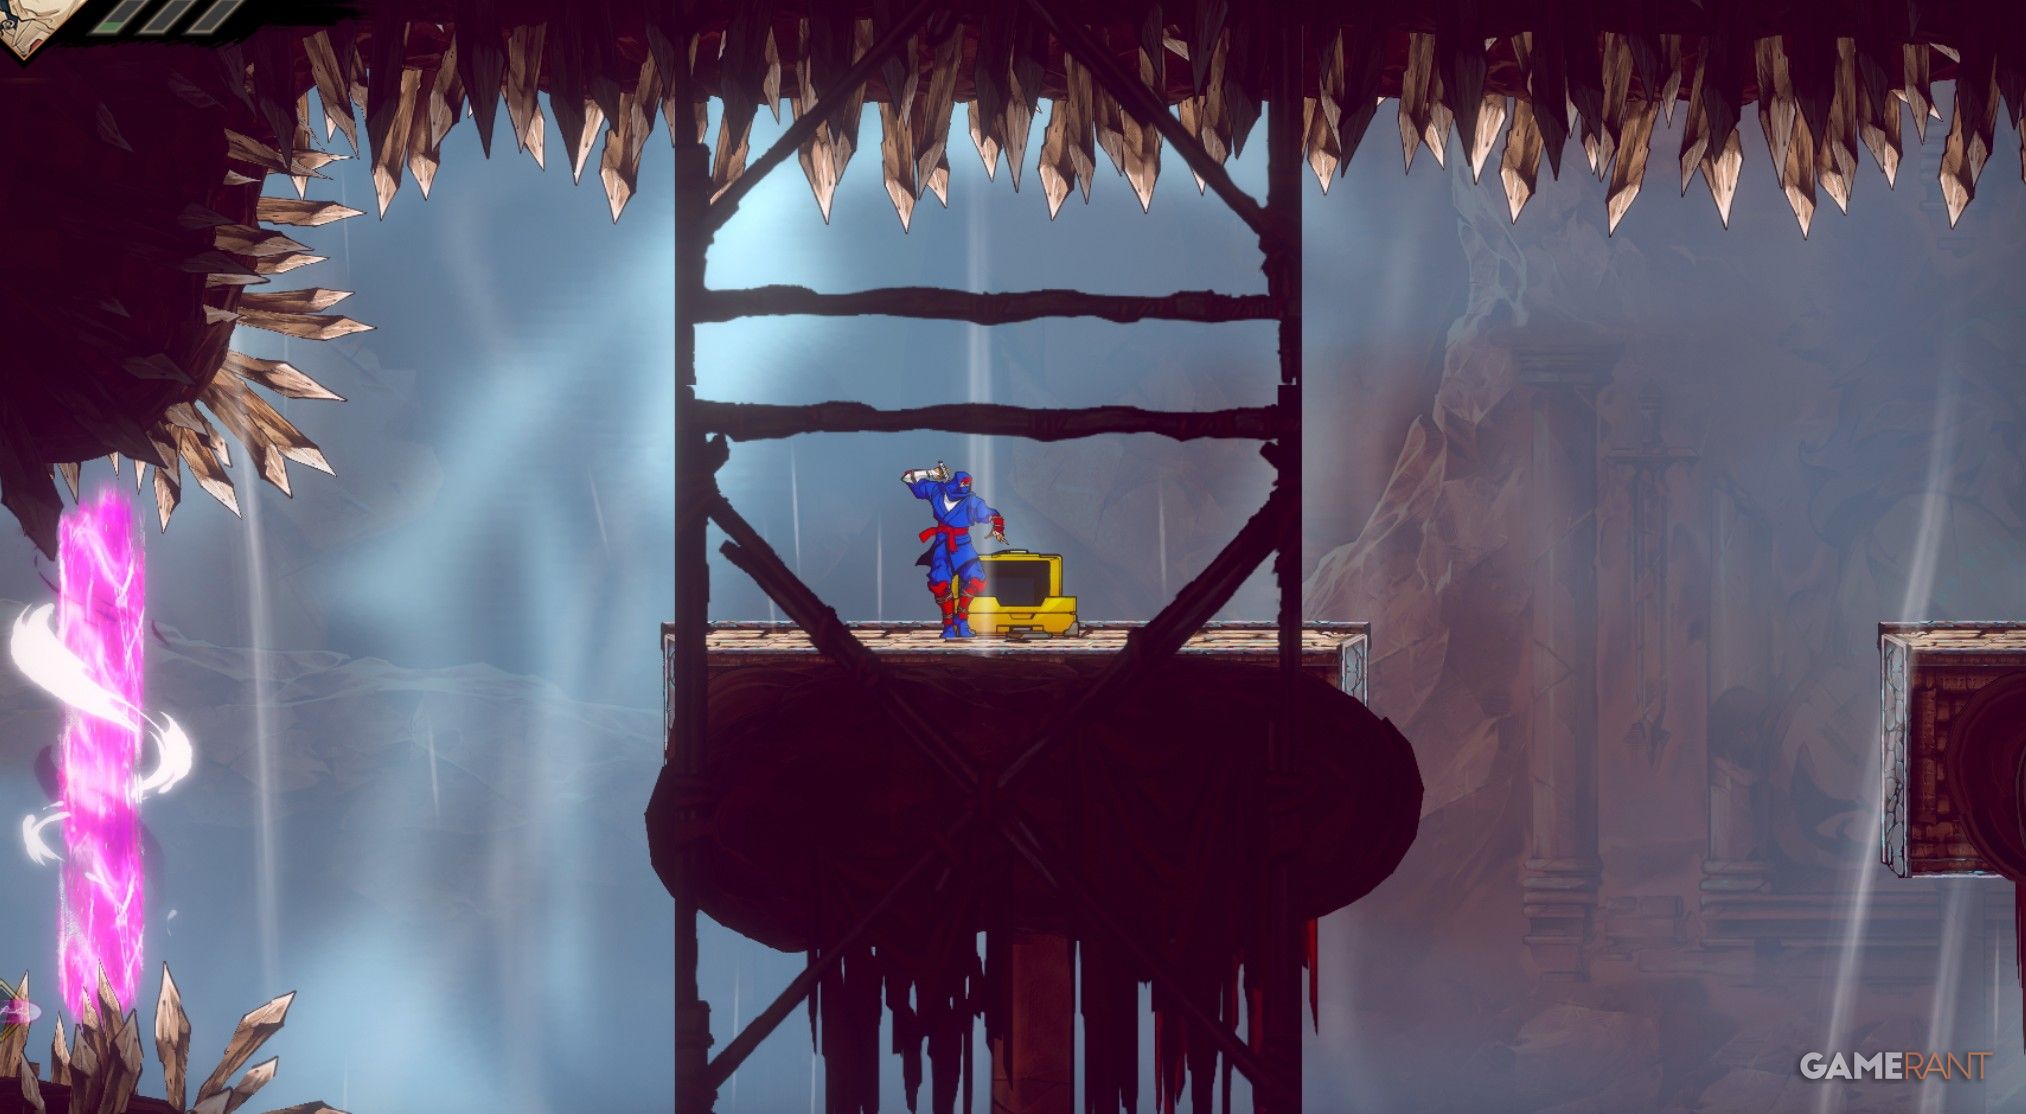
After crossing the Ruse’s Castle checkpoint, you will eventually encounter spinning fire barriers. You’ll notice a small area to roll into on the left side before employing your Ninja Claws on a wall (it’s located beneath the Throne Room checkpoint).
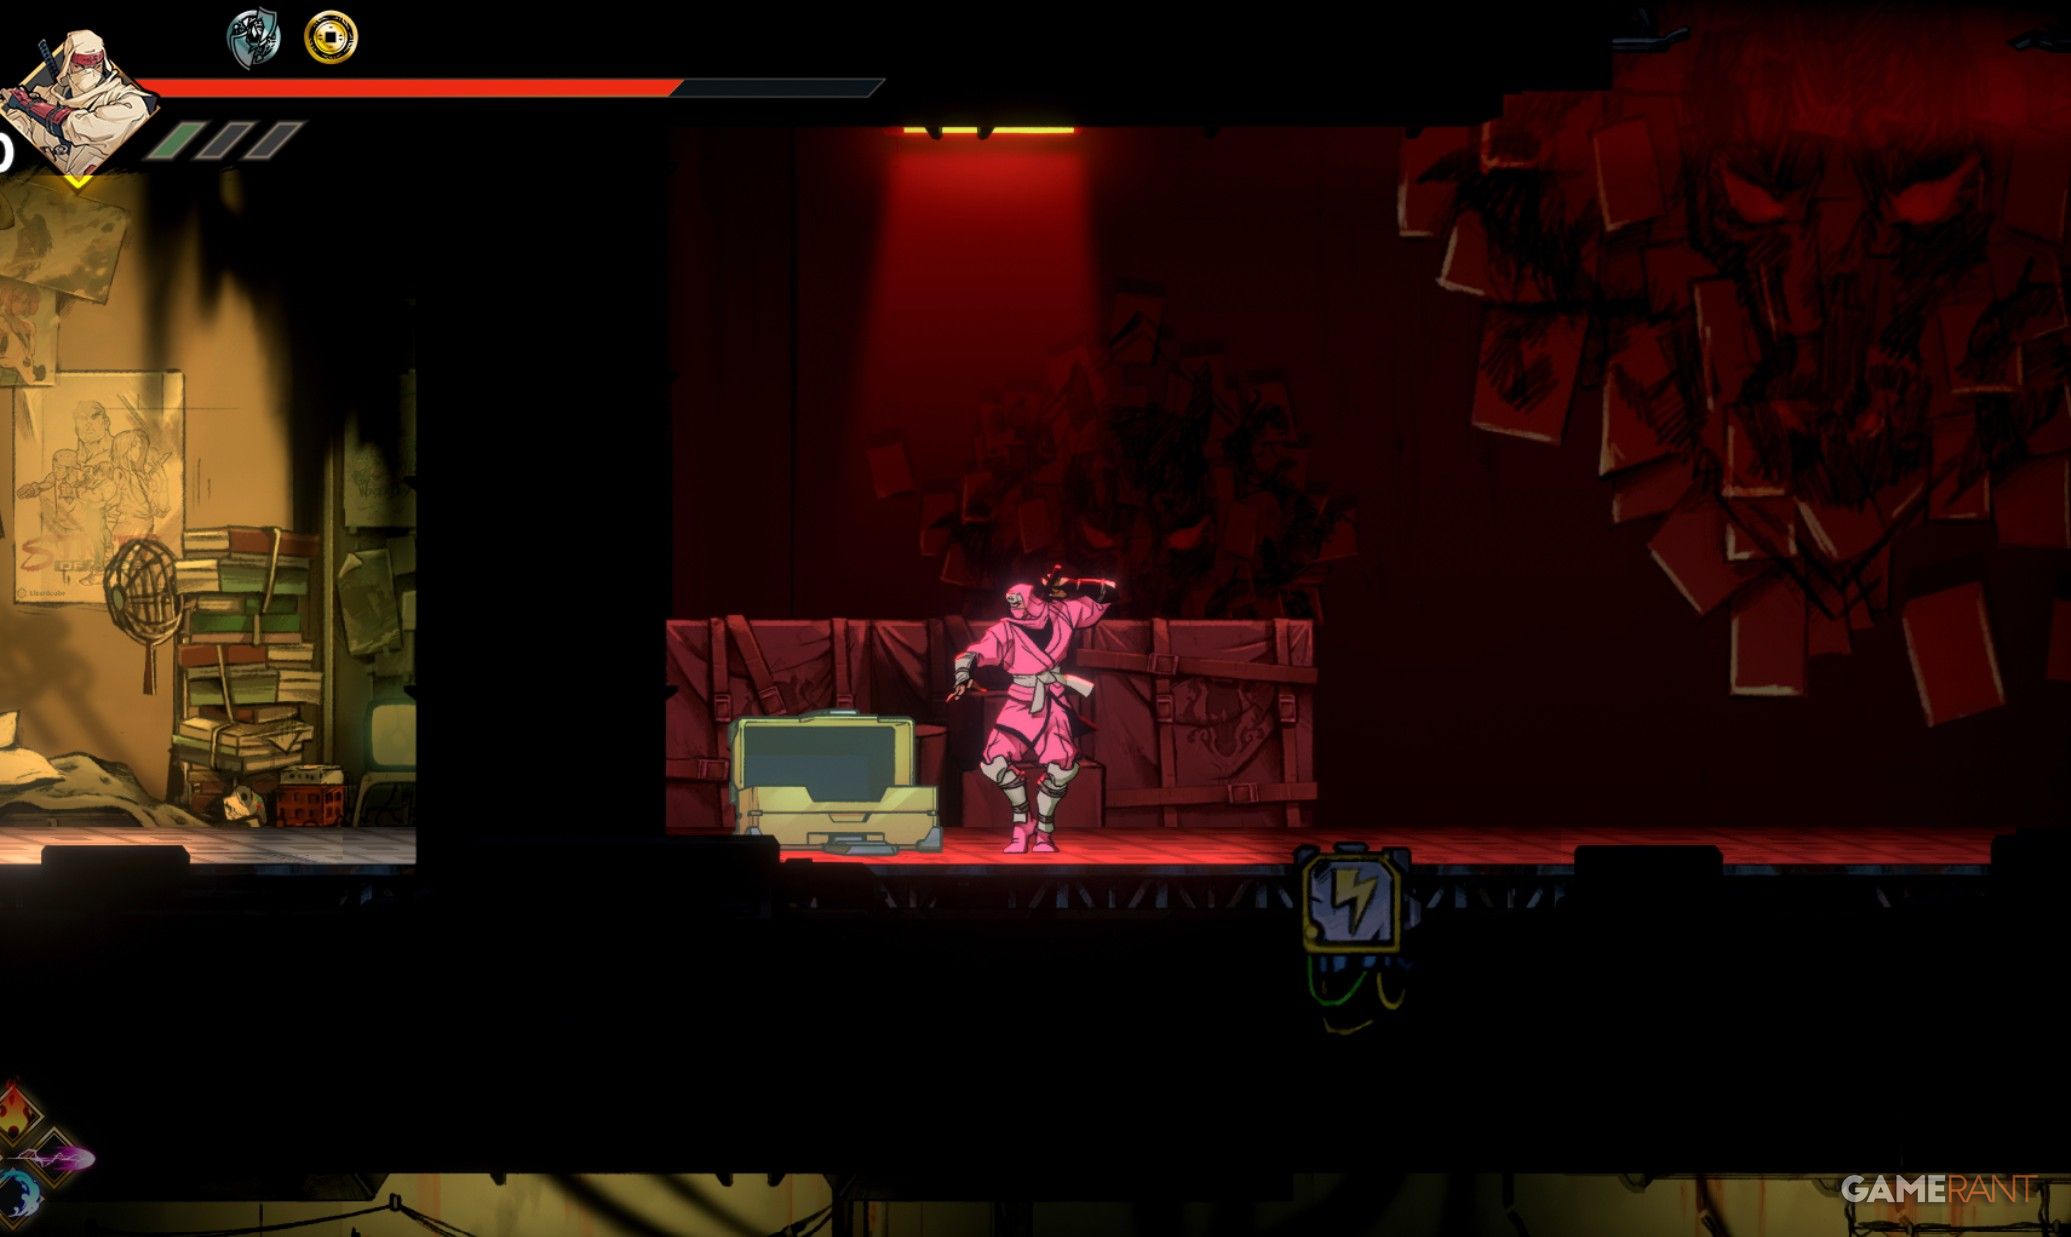
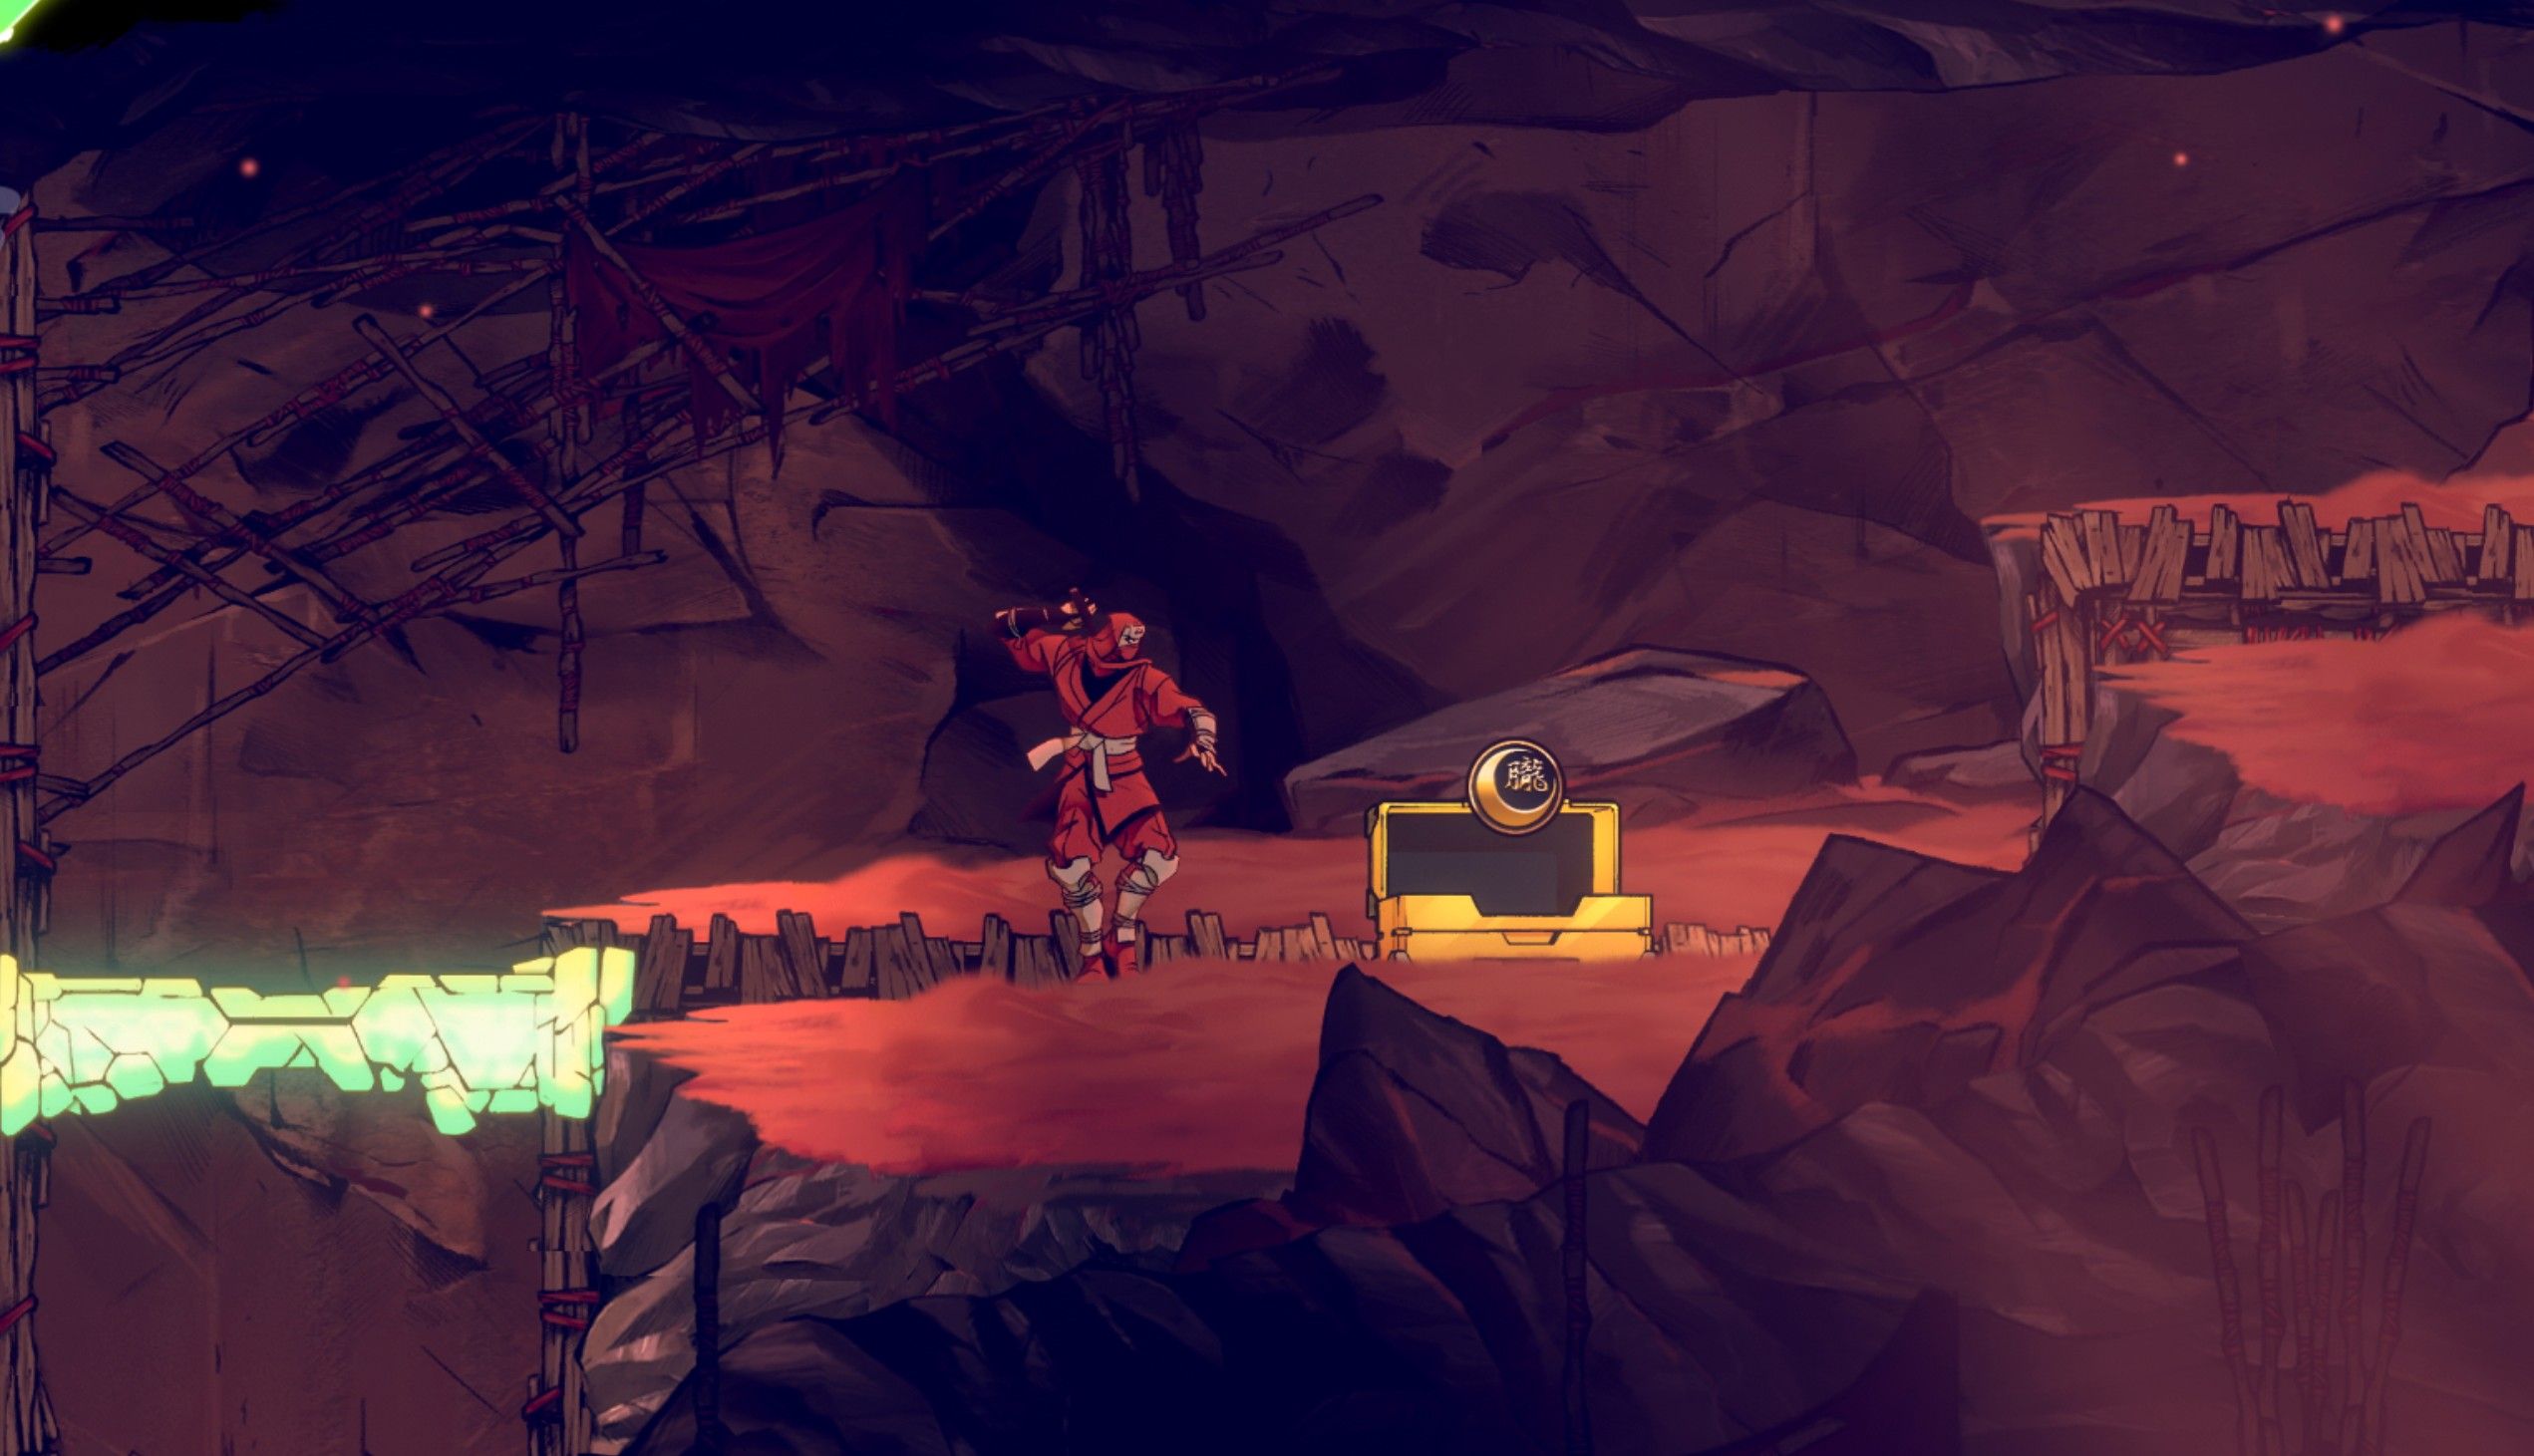
Fifth Oboro Relic


Head towards the area to your right past the Throne Room checkpoint, and you’ll come across a different section; look to your left to spot a chest containing the relic.
All Shop Items in Shinobi Art of Vengeance

In Shinobi: Art of Vengeance, here is a rundown of all the items that can be obtained, along with the required number of Relics for their appearance.
Or in a more conversational style:
In the game Shinobi: Art of Vengeance, you’ll find a variety of items waiting to be discovered! To make them appear, though, you’ll need to collect some Relics. Here’s a list of everything that will become available.
- First shop visit
- Double Slash – 500 Gold
- For One Relic
- Water Ninpo – 3500 Gold
- Knee Attack – 1500 Gold
- Two More Relics
- Aerial Slash – 1000 Gold
- Kunai Burst – 1500 Gold
- Two More Relics
- Aerial Spin – 1500 Gold
- Max Health Boost – 3500 Gold
- Medic Amulet – 2500 Gold
- Four More Relics
- Finishing Blow – 2500 Gold
- Max Kunai Boost Upgrade – 3000 Gold
- Aquatic Warrior Amulet – 3500 Gold
- Four More Relics
- Super Kick – 3000 Gold
- Rising Strike – 2500 Gold
- Six More Relics
- Aerial Kunai Boost – 2500 Gold
- Launch Kick – 3500 Gold
- Six More Relics
- Cannon Punch Finisher – 4500 Gold
- Sakura Slayer outfit – 8000 gold
- Ten More Relics
- Ninpo Cell Boost – 6000 Gold
- 20 More Relics
- Lab Key – 10000 Gold
- Jungle Creeper Outfit – 12000
Read More
- Quantum Agents: Scaling Reinforcement Learning with Distributed Quantum Computing
- All Skyblazer Armor Locations in Crimson Desert
- Every Melee and Ranged Weapon in Windrose
- How to Get the Sunset Reed Armor Set and Hollow Visage Sword in Crimson Desert
- Zhuang Fangyi Build In Arknights Endfield
- Windrose Glorious Hunters Quest Guide (Broken Musket)
- Jojo’s Bizarre Adventure Ties Frieren As MyAnimeList’s New #1 Anime
- Best Dual-Wield Swords Build in Crimson Desert
- Black Sun Shield Location In Crimson Desert (Buried Treasure Quest)
- Boruto: Two Blue Vortex Chapter 33 Preview — The Final Battle Vs Mamushi Begins
2025-08-26 07:09