Following their victory against the Last Judge in Act 1, players of Silksong will witness a cutscene revealing the majestic Citadel perched high above Pharloom. Upon obtaining entry into this fortress, Hornet’s primary objective transforms into seeking an audience with the one responsible for her imprisonment at the game’s beginning, in order to uncover why such extensive measures were taken to capture her.
In contrast to Act 1, Act 2 of “Silksong” offers a significantly more ambiguous structure, making it challenging to determine which path to take next due to the abundance of potential directions presented.
In simpler terms, this walkthrough details the steps needed to finish Act 2 within the game ‘Silksong’. It provides navigation and charts for locating each essential boss and item found in Act 2. Additionally, it offers advice on overcoming every challenge required during the progression through Act 2 in ‘Silksong’.
Silksong Act 2 Walkthrough – Reaching the Cogwork Dancers

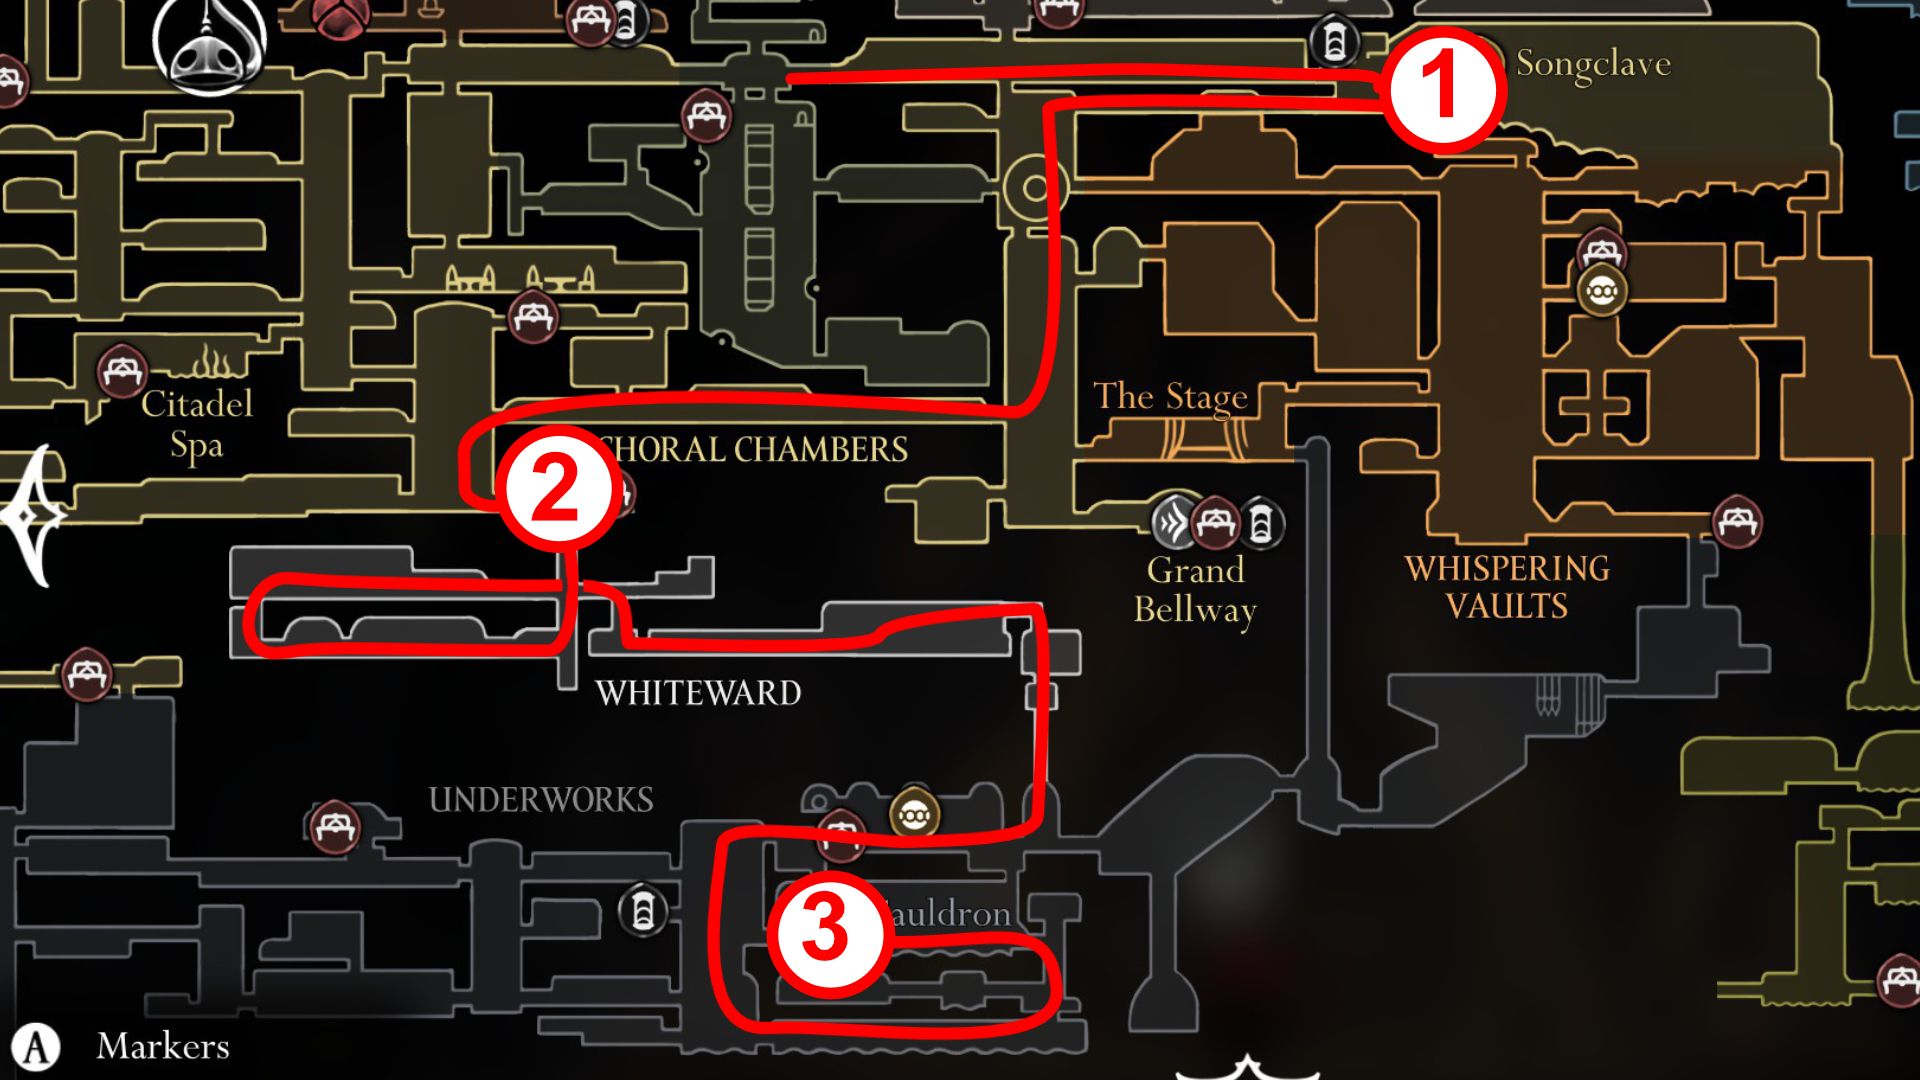
| Map Marker 1 | LOCATION: Grand Gate map |
|---|---|
| Map Marker 2 | LOCATION: Underworks map |
| Map Marker 3 | LOCATION: Choral Chambers map |
| Map Marker 4 | LOCATION: Top-left Choral Chambers bench |
| Map Marker 5 | BOSS: Cogwork Dancers |
- New Areas: Grand Gate, Underworks, Choral Chambers
- Mandatory Bosses: Cogwork Dancers
The Grand Hall & Underworks

Upon entering the Citadel, you’ll soon encounter a machine displaying a miniature model of the Citadel. Interact with it and provide Rosaries as payment to receive the map for the path leading to the Grand Gate region. Then proceed to the right and step into the elevator.
At first, the elevator moves upwards after Hornet repeatedly pulls a lever. Later, it plunges down into the basement level of the Underworks.

To locate the Underworks map, proceed along the path given earlier. Once found, make your way through the adjacent corridors to your right. Keep going until you discover an exit leading upward. After taking that, veer left and ultimately leave the Underworks, ascending into the Choral Chambers above.
Navigating The Choral Chambers

Starting at the Underworks entry point, head left from the park bench, then ascend and veer right to locate the map kiosk for the Choral Chambers. Don’t forget to pay your Rosaries for accessing the detailed map of this vast Citadel district.
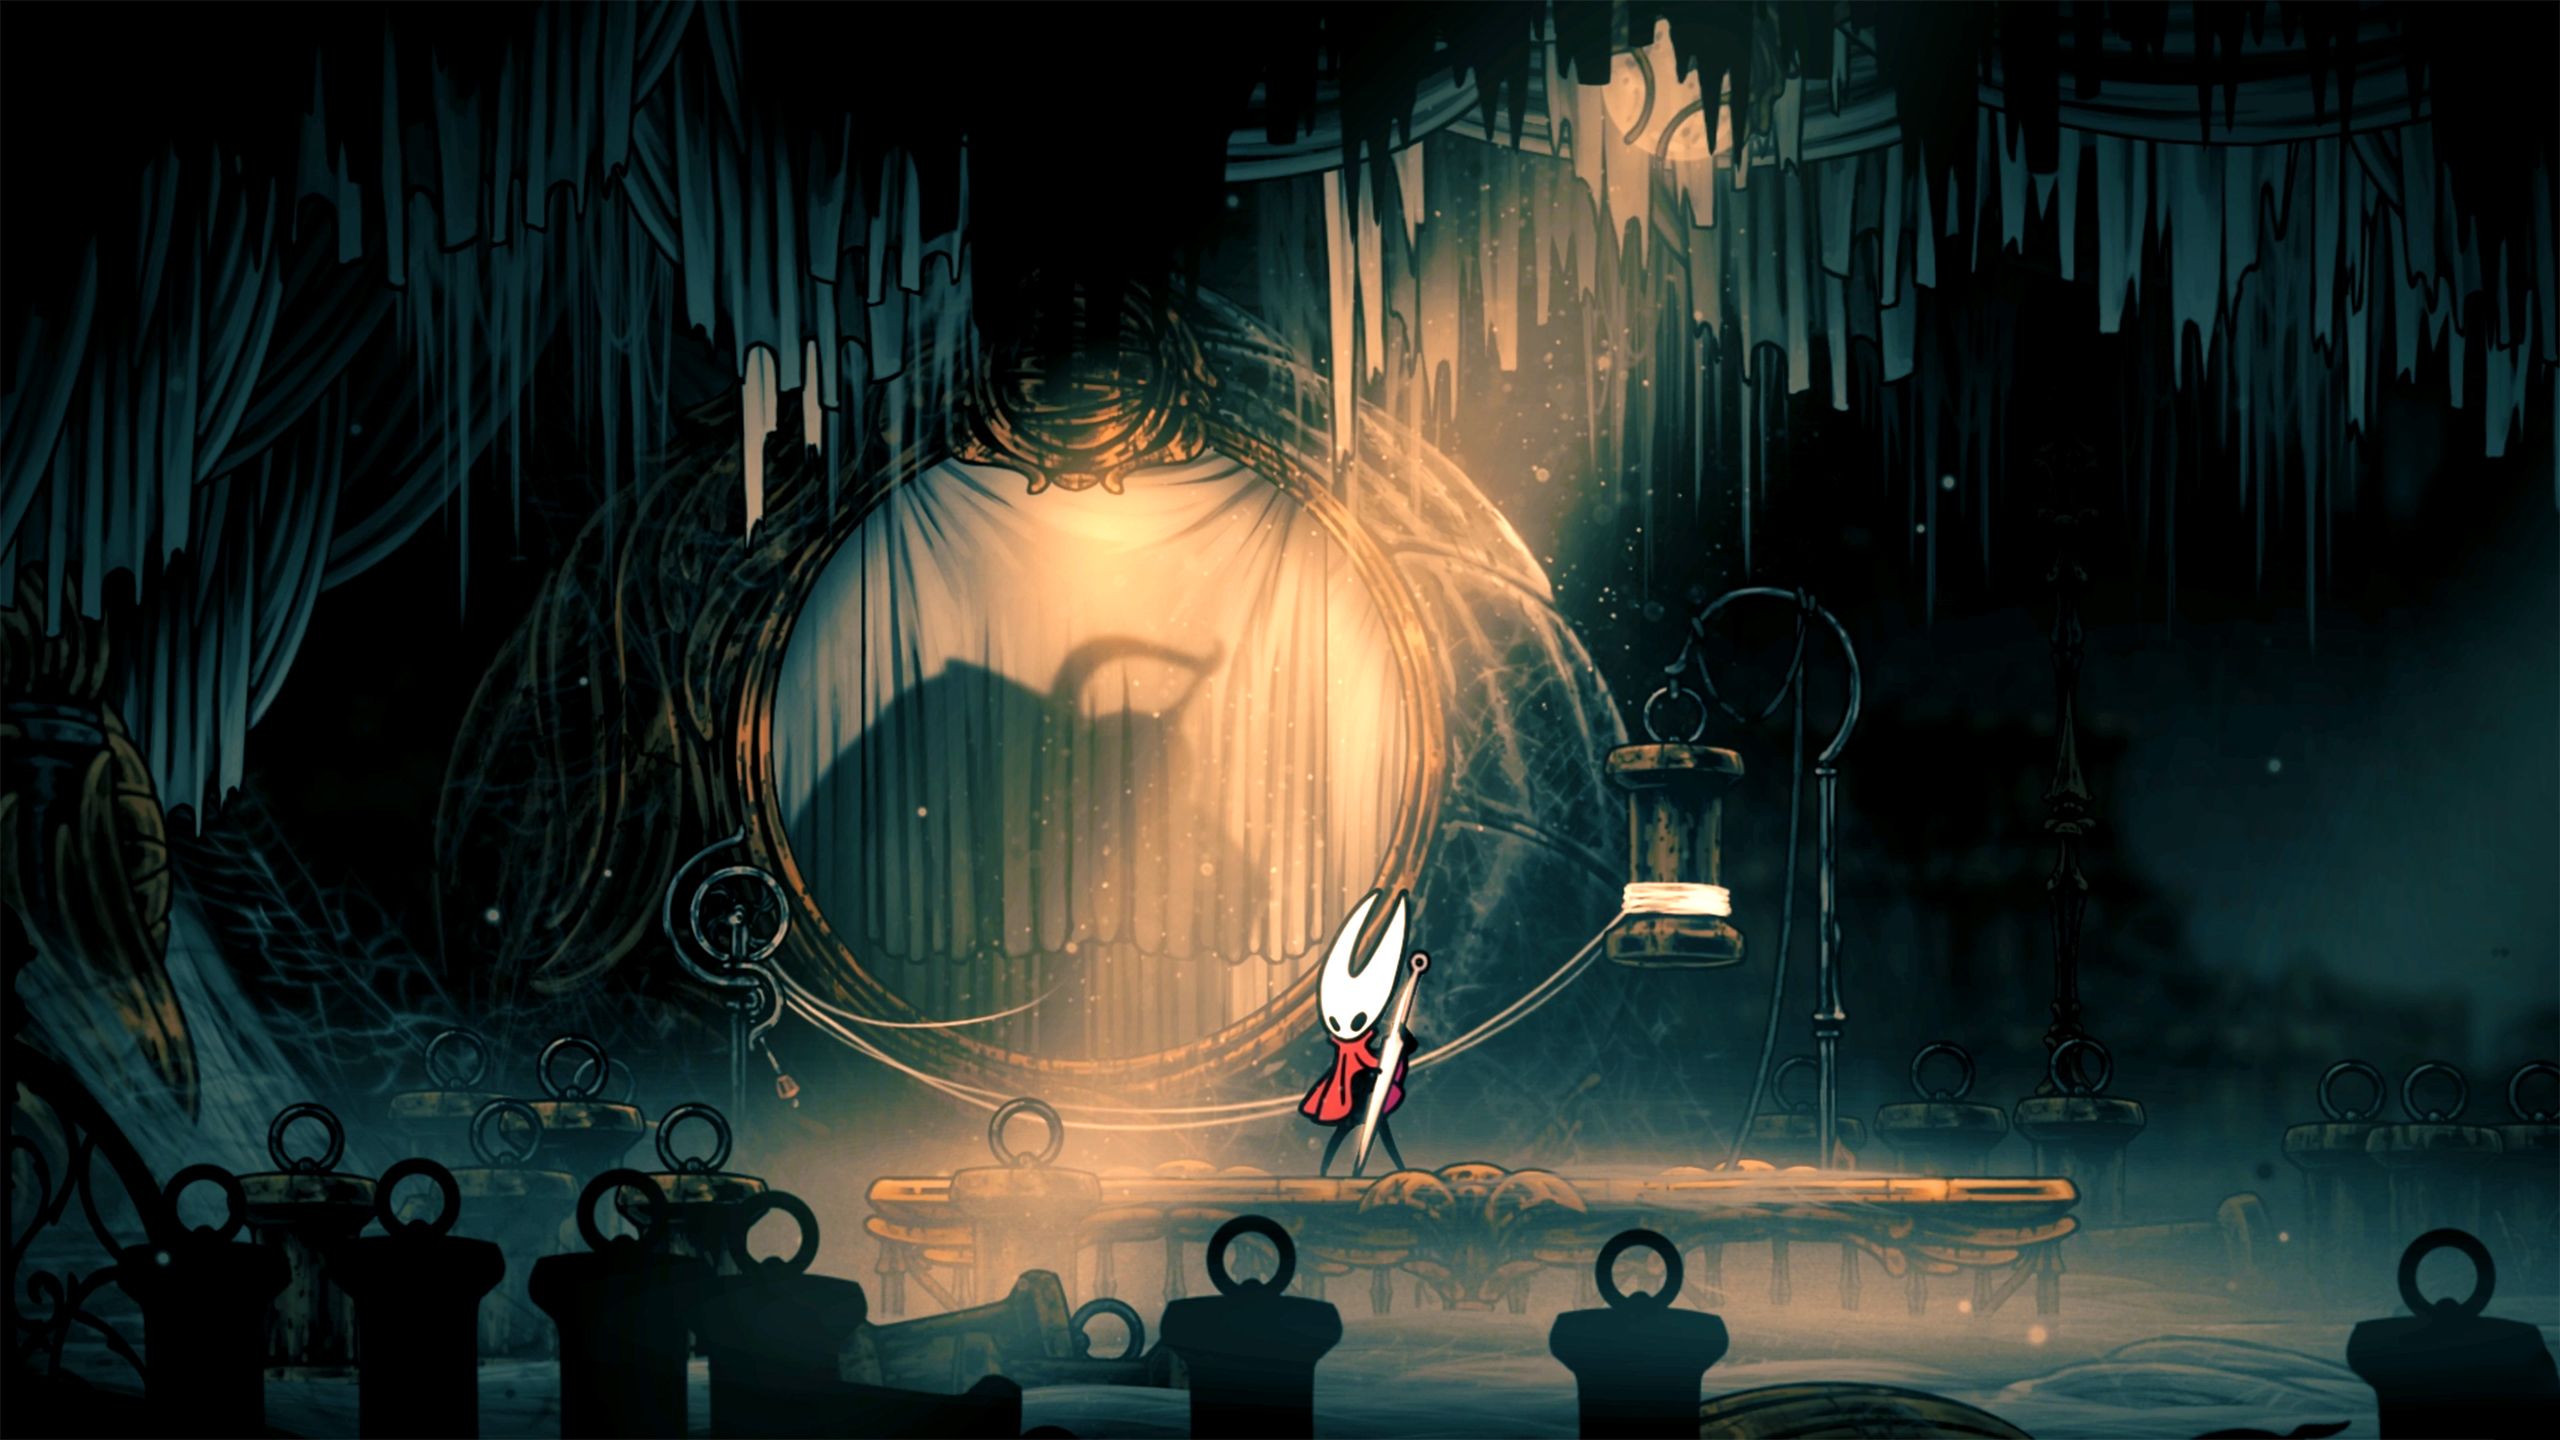
Upon obtaining the map, proceed towards the right, then follow a path that curves to the left as indicated in the diagram above. You’ll meet Lace once more, however, at this point, there is no need to engage her in battle – that’s still to come later.

As I venture forth, I’ll ascend through a towering chamber adorned with many side chambers. Later on, I’ll veer left to discover a sturdy bench resting beneath a suspending hook – rest assured, this spot will prove crucial in our journey ahead.
At present, take a seat on the bench, and later proceed towards your right. Ensure you leap over the two substantial obstacles along the path, and you’ll find yourself at the boss fight with the Cogwork Dancers.
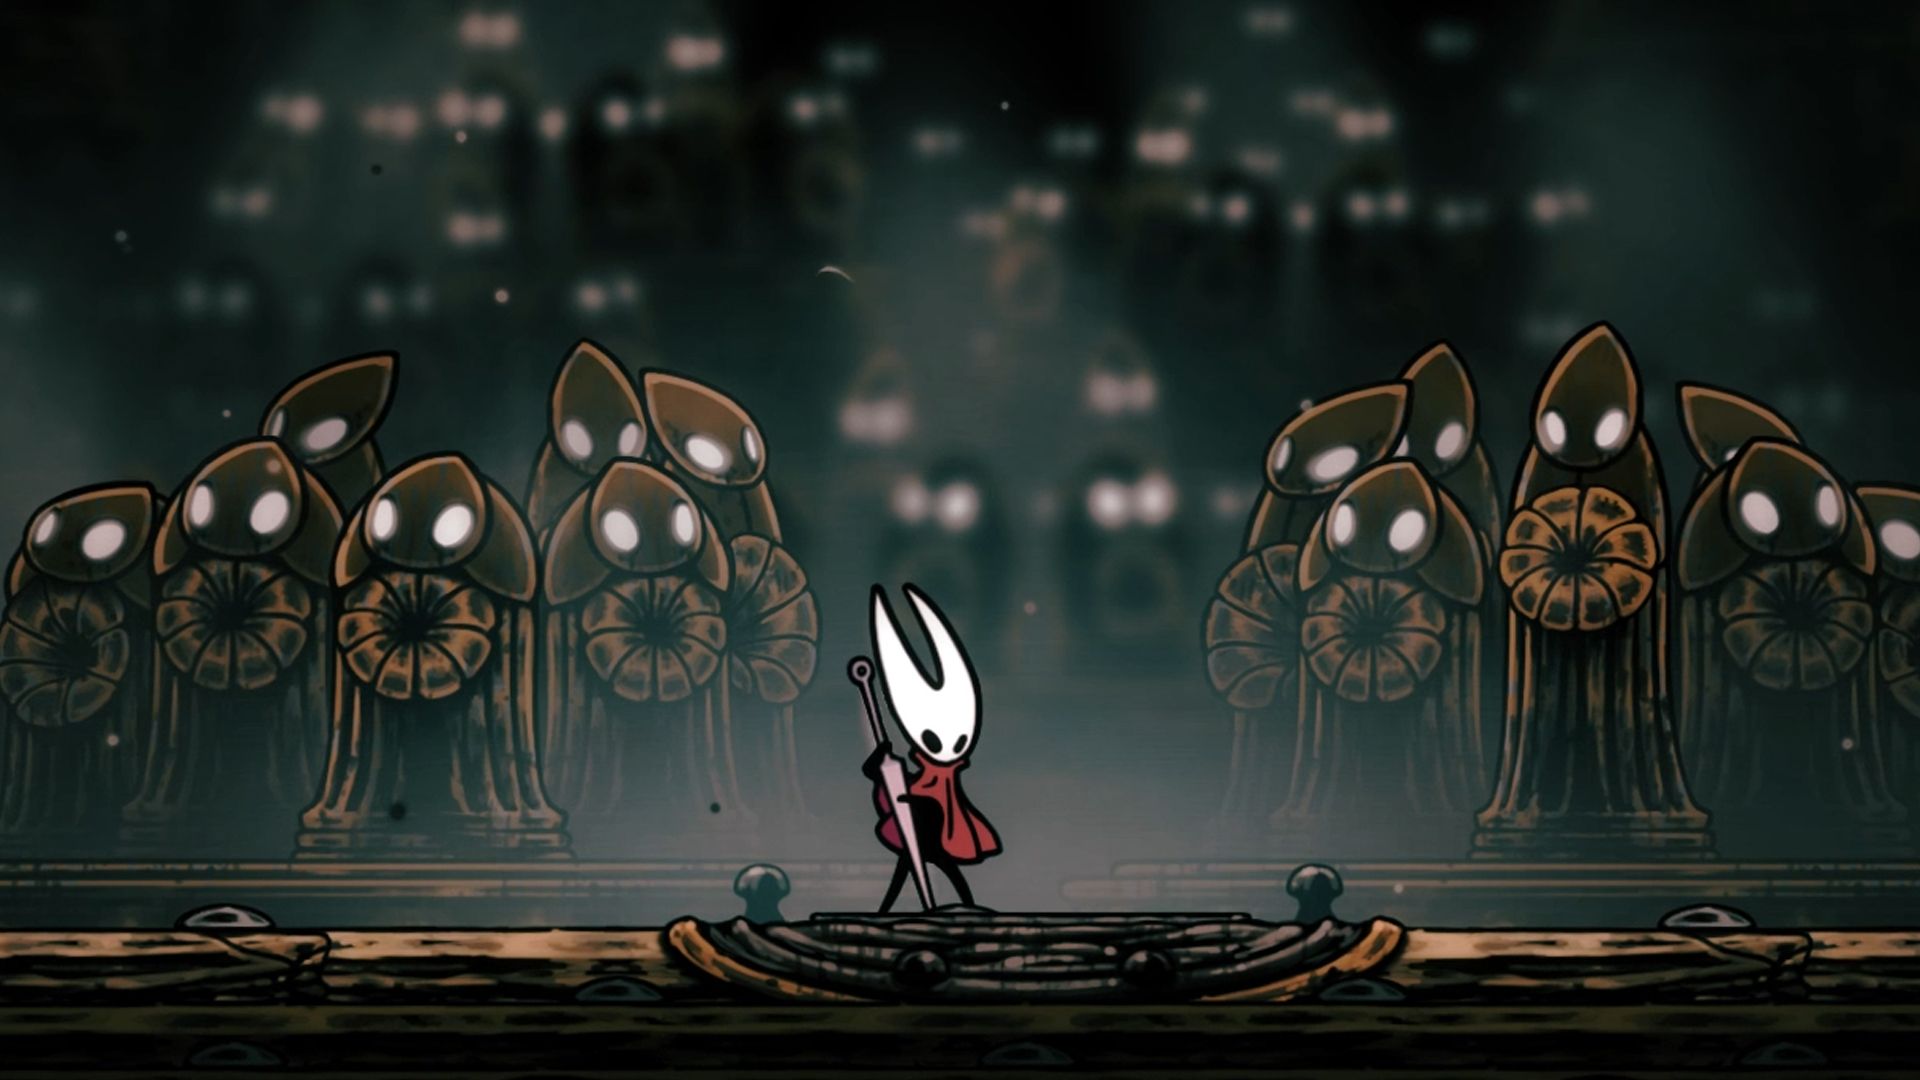
The Cogwork Dancers & Ancient Statues
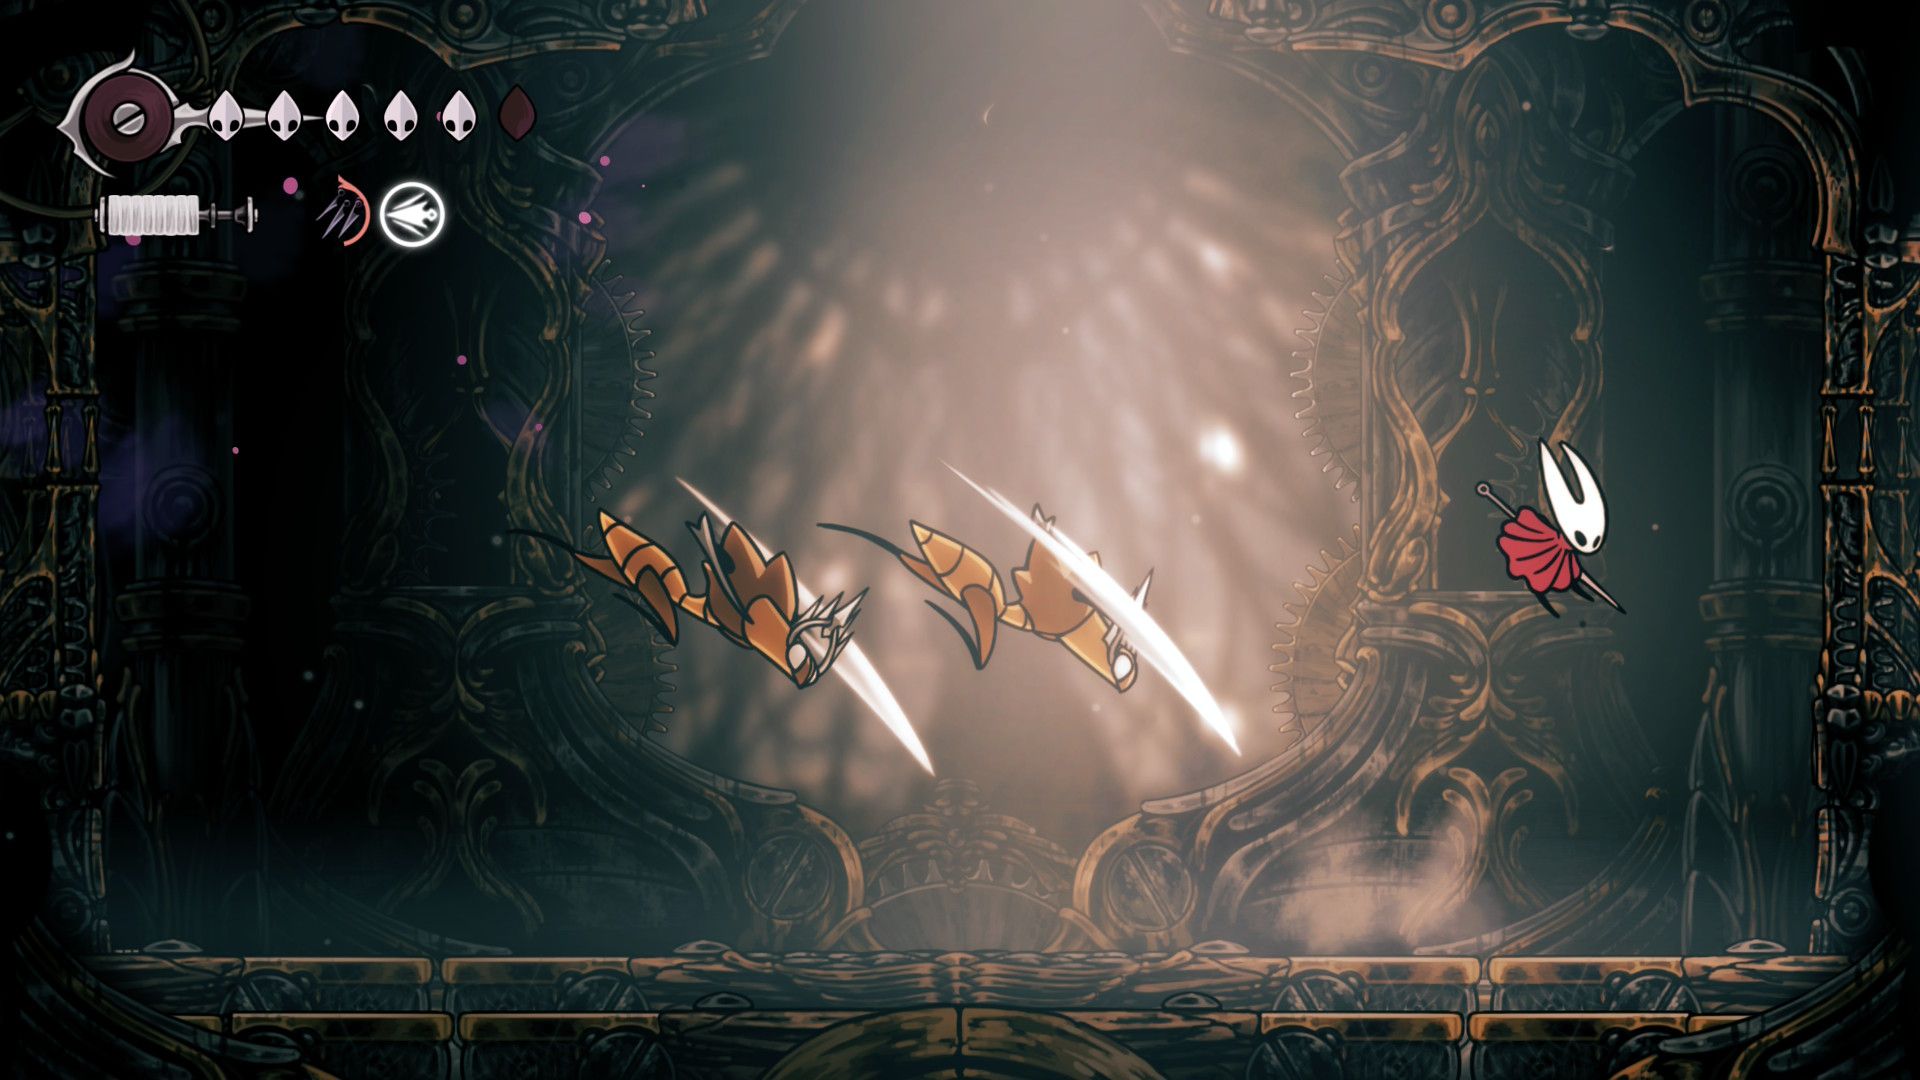
In the game Silksong, the Cogwork Dancers stand out as a distinct boss due to their distinctive behavior: they synchronize their dancing and attacks with the rhythm of the music, offering hints about their upcoming direction. However, beware that these dancers aren’t just for show; as you advance, they will increasingly speed up, making it more challenging to dodge their attacks and predict their actions.

As I vanquished the rhythmic mechanical foes known as Cogwork Dancers, the room spun around me, revealing towering relics of antiquity – three titanic Ancient Statues. In a mysterious language, they beckoned to me, Hornet, instructing me to collect the three fragments of the Threefold Melody, an ancient melody imbued with power. Once learned and performed in their presence, I must play this song before these statues to reach the coveted Crown of Pharloom.
Silksong Act 2 Walkthrough – Exploring & Collecting Act 2 Abilities
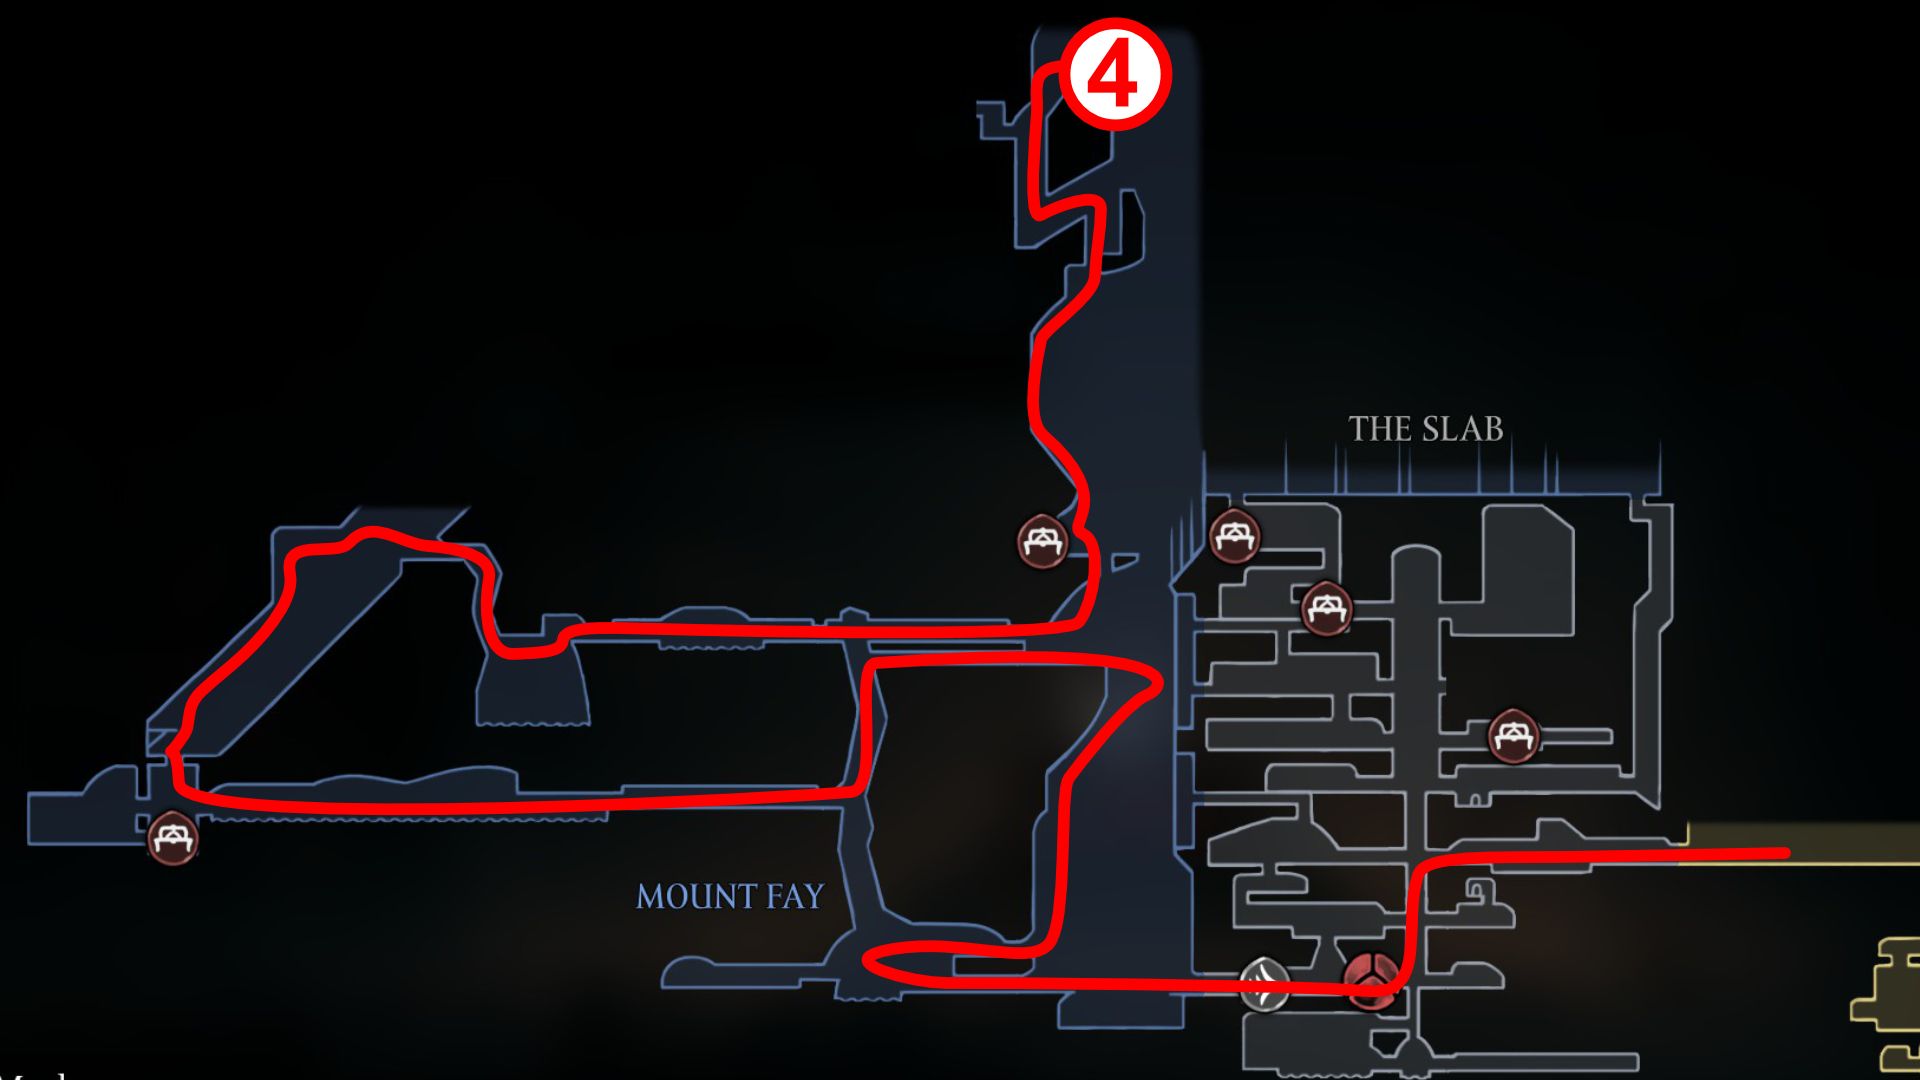
| Map Marker 1 | LOCATION: Songclave & White Key |
|---|---|
| Map Marker 2 | LOCATION: Whiteward Locked Door |
| Map Marker 3 | ABILITY: Clawline |
| Map Marker 4 | ABILITY: Faydown Cloak |
- New Areas: Songclave, The Cauldron, Mount Fay
- New Abilities: Clawline, Faydown Cloak
- Mandatory Bosses: N / A
Unlock Songclave & Get Clawline

Upon exploring the ancient statues on the right side, leading you towards the upper-right corner of the Choral Chambers, your goal is to locate the Grand Bell. Once you’ve entered the building, give the bell a good toll, summoning the peculiar Caretaker to the vicinity. This enigmatic character will then stand outside, ridiculing Hornet for sounding the bell.
Venture out from here and then come back, and what was once an ordinary locale will transform into the central hub of Songclave – a bustling new town featuring a unique structure called the Wishwall, as well as merchants peddling their goods.
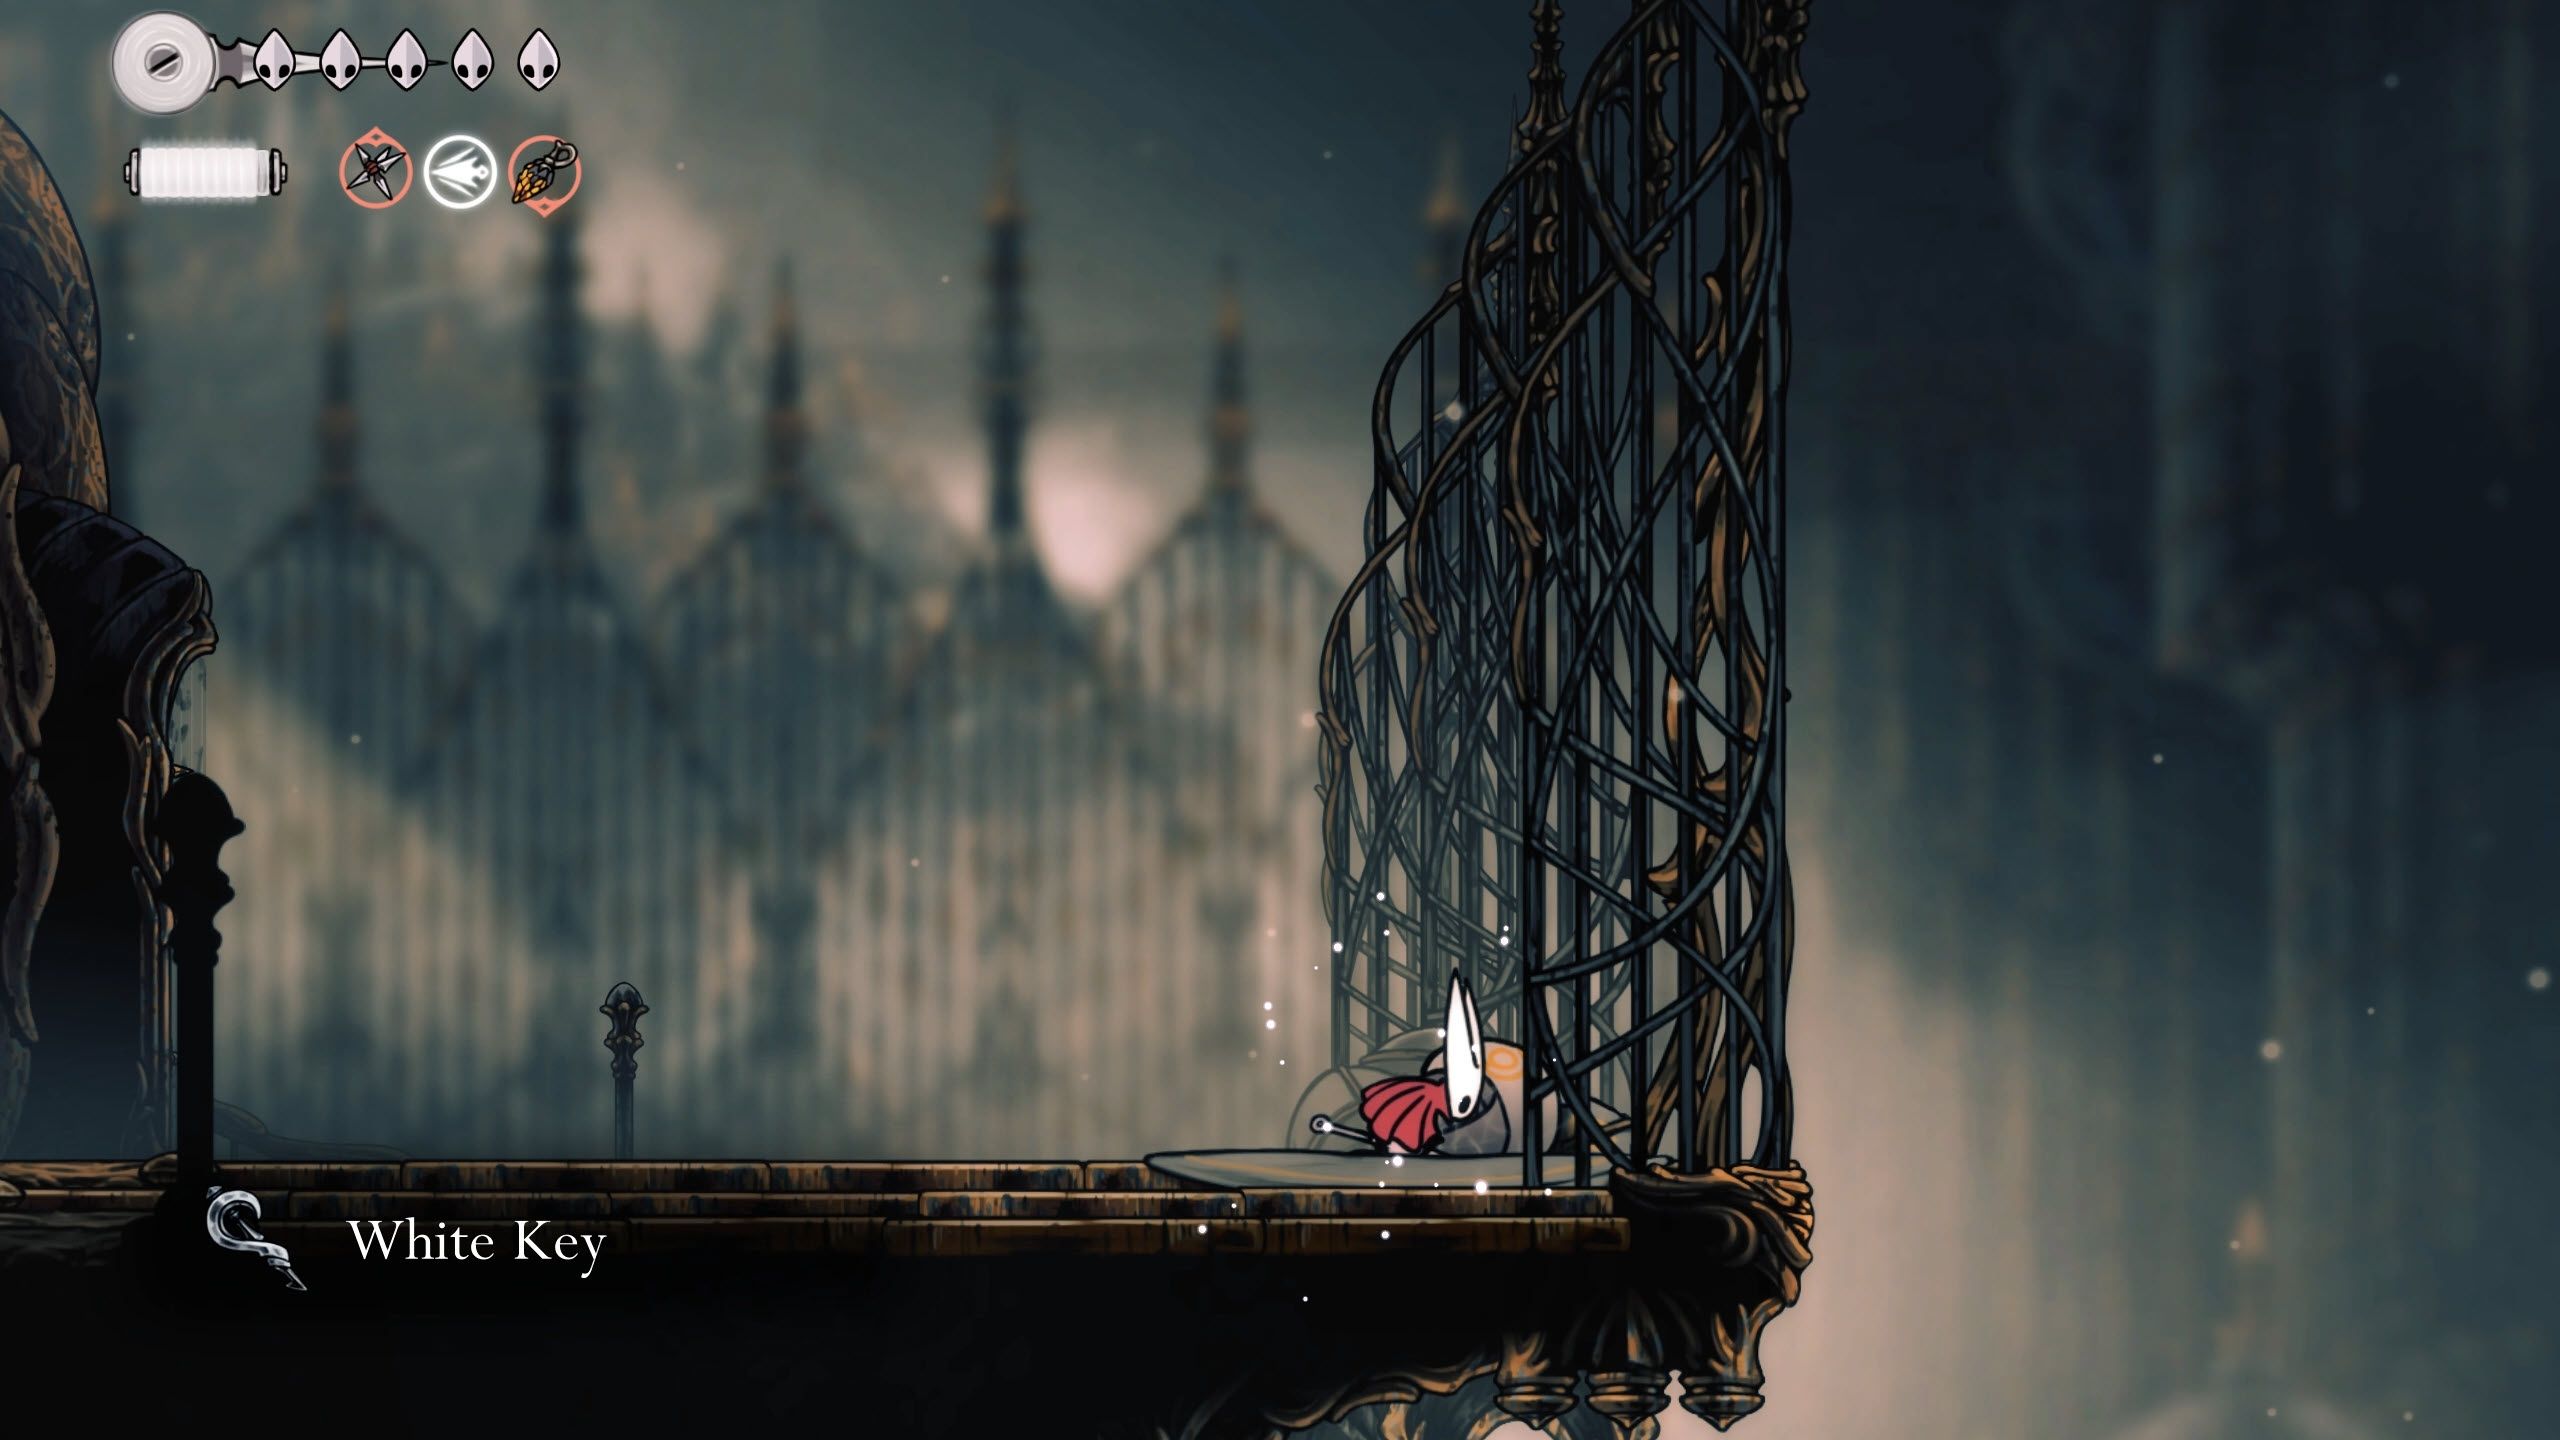
Make sure to head completely to the outskirts of Songclave before departing, as the White Key that grants entry into the Whiteward zone is hidden towards the far-right side of the town.
Head towards the base of the Choral Chambers by passing through the grand rotating entrance, then proceed along a lengthy corridor to your left. You’ll eventually come across a secure door painted white, which can be unlocked using the White Key. Once opened, make your way down to the lowest level via the elevator.
Circumvent the periphery on the right, being cautious to bypass the hazardous distorted adversaries en route, to descend into The Cauldron – a subsection within Underworks.
To reach the Weaver Statue situated amidst molten lava, trace the path indicated above. Obtaining this statue grants Hornet the Clawline ability, a crucial one needed to finish the game. This ability will unlock entry to various new locations in Pharloom, such as Mount Fay.
Optional: Get the Faydown Cloak

In the game Silksong, the Faydown Cloak stands out as a particularly beneficial Ancestral Art, even though it is classified as an optional item. This cloak endows Hornet with the capacity for a double jump, but to acquire it, you’ll need to conquer one of the toughest platforming challenges that Silksong has to offer.
To reach Mount Fay, head entirely left from the Choral Chambers, cross a bridge, and enter The Slab. Descend to the base of The Slab where you’ll find a Bellway. From there, proceed to the left, using your Clawline to access a secure, cozy cave situated on the left side of the snowy exterior region.

Purchase the Mount Fay map from Shakra, and after that, gear up for a swift and accurate ascent to the summit of Mount Fay, where you can obtain the Faydown Cloak.
Silksong Act 2 Walkthrough – Completing the Threefold Melody

| RED Map Marker 1 | LOCATION: Travel between the Cogwork Core’s lower and upper halves |
|---|---|
| RED Map Marker 2 | QUEST ITEM: Architect’s Melody |
| BLUE Map Marker 3 | BOSS: Trobbio |
| BLUE Map Marker 4 | QUEST ITEM: Sacred Cylinder/Vaultkeeper’s Melody |
| BLUE Map Marker 5 | NPC: Vaultkeeper Cardinius |
| GREEN Map Marker 6 | BOSS: High Halls Gauntlet |
| GREEN Map Marker 7 | QUEST ITEM: Conductor’s Melody |
- New Areas: Cogwork Core, Whispering Vaults, High Halls
- Mandatory Bosses: Trobbio, High Halls boss gauntlet
After successfully vanquishing the Cogwork Dancers and obtaining the Clawline (and if desired, the Faydown Cloak), players are now prepared to begin gathering components of the Threefold Melody. The initial piece they should aim for is referred to as the Architect’s Melody.
Step One: The Architect’s Melody (RED)

To obtain the Architect’s Melody, descend into the Cogwork Core from the room where you battle the Cogwork Dancers boss, then circumnavigate the base of the central wall in this chamber. Utilize your agility and downward attacks wisely to dodge the spinning cogs.
Upon ascending, you’ll discover a doorway on the upper right. This entrance grants access to a challenging interior zone. Navigate through this area to locate the exit, which will take you to the upper portion of the Cogwork Core, situated above the boss room of the Cogwork Dancers.
To access the shortcut, grab hold of the Clawline hook, and afterwards, face the ultimate challenge to ascend to the summit of the Cogwork Core.
In this scenario, your task is to decipher the Architect’s Melody riddle and manually rotate four large cylinders in such a way that all the lines and symbols align evenly across them all.
Once you’ve finished, play the Needolin to master the Melody of the Architect, with a choir of old statues harmonizing together as you perform on your Needolin.
Step Two: The Vaultkeeper’s Melody (BLUE)

To obtain the next segment of the Threefold Melody, seek out the Vaultkeeper’s Melody, concealed within the Whispering Vaults. To reach this location, retrace your steps through the Cogwork Core from its base, but instead of exiting via the door leading to the upper half and the Architect Melody, choose the passageway located beneath that door.
Keep moving to your right, and you’ll eventually come across a handle on the left side of a large spinning door (the giant wheel gate). Pull that handle, then go through the spinning door to reach the other side and gain access to the Whispering Vaults.

Navigate your path through the intricate, spacious chamber upon entering, striking containers as you go to unveil secret passages, and continue until you spot an exit on the bottom-left corner. Once there, veer towards the left side to unlock a battleground known as The Stage. Engage in combat with Trobbio to advance further.

After vanquishing Trobbio, make your descent into the Underworks through a drop on the right side of his battle arena. Move upward and to the right, which will lead you back to the Whispering Vaults. Once there, veer to the left, where you’ll find the Sacred Cylinder waiting for you.

Deliver the item to Cardinius, who is located a few rooms up from the exit of the Sacred Cylinder chamber. Cardinius has the ability to play the Sacred Cylinder using his record player.
Bring this to Cardinius, situated a short distance above the Sacred Cylinder room’s exit. Cardinius can play the Sacred Cylinder through his record player.
Play your Needolin at the same time to learn the Vaultkeeper’s Melody.
Step Three: The Conductor’s Melody (GREEN)

In simpler terms, completing “The Conductor’s Melody” is generally considered the most challenging task within the Threefold Melody. To reach this point, you need to navigate to the upper-left corner of the Choral Chambers, utilize the Clawline on a hook to pull yourself up, and then employ your movement abilities to jump or climb your way to the highest points in the Citadel.
In certain areas, such as the spacious chamber on the right in the High Halls, the abilities of Clawline and Drifter’s Cloak are often combined. Here, Hornet must primarily glide and grapple her way down, moving continuously.

In summary, at the end of this space, you’ll find a bench on your right. Use it to access a hidden path leading down to the Choral Chambers. After that, proceed to the left and you’ll encounter the “Conductor’s Melody” boss battle.
In this awesome gaming space, I find myself battling waves upon waves of enemies hailing from the mighty Citadel. By wave five, a formidable, heavily armored boss makes its grand entrance. And
Try to obtain every upgrade for the Needle as possible, retrace your steps to discover additional Masks and boost your HP. Attempt this arena only after you’ve gathered potent Tools such as the Hammer, which is ideal for swiftly damaging larger adversaries.
Upon finishing the challenge, venture into the room on the left to encounter Conductor Ballador. Engage in a conversation with him, and he’ll impart the melody he’s been entrusted with to Hornet.
Coordinate playing your Needolin with the Conductor’s Melody to finish off the Triple Harmony.
Silksong Act 2 Walkthrough – The Cradle & Crown of Pharloom

- New Areas: The Cradle
- Mandatory Bosses: Lace, Grand Mother Silk
Once you have gathered all three components of the Threefold Melody, make your way back to the dance hall where the Cogwork Dancers boss resides. Upon returning, engage with the ancient statues. After they explain their conditions and the locations for the melodies again, Hornet will reveal her Needolin.
Listen to the entire Threefold Melody, and a mysterious elevator will materialize in the center of the room. Step inside and ride it upwards where you’ll encounter a well-known figure.
Penultimate Boss: Lace

In the game’s concluding stages, Lace makes another appearance. Although her fundamental actions don’t undergo substantial alterations, she executes them quicker and with greater panache, earning her a reputation as one of the most challenging bosses in Silksong to date.
Instead of repeatedly attacking at one spot, she’ll dash to multiple locations to unleash a wide-area close-range slice. Rather than merely striking Hornet with a descending diagonal slash, she’ll leave behind trailing area-of-effect explosions, making evasion more challenging.
After losing, Lace will disclose the true essence of herself, urging Hornet to petition for an audience with the mysterious divine being above, which she has rightfully earned.
Final Boss: Grand Mother Silk

Ascend The Cradle, and you’ll come across a lengthy suspension bridge. In the distance, there’s a massive silken sphere. Approach this sphere and then give the “up” command to engage with the ultimate opponent.
Make your way up The Cradle until you reach a long bridge. In the backdrop, there’s a giant silken orb. Get close to this orb and input “up” to confront the final boss.
When the Knight squares off against Radiance, Hornet will produce her well-known weapon – the Needle – and utter a familiar challenge, saying boldly, “GURAMA!
Following a brief moment where the silk ball detonates, the formidable final boss of Silksong emerges: Grand Mother Lace.
In simpler terms, “Grand Mother Lace” is a powerful entity who always carries six large sewing needles hovering near her. You won’t suffer damage by touching her directly, but it can be hard to dodge her swift cutting attacks and the assault of needles that attack Hornet from various directions.
Make sure to select a secure location on your screen when the needles are ready to be launched, as there’s usually a space or gap during both vertical and horizontal assaults.

Defeating Grand Mother Silk results in an awe-inspiring display as Hornet dismantles Grand Mother Silk and incorporates her silk into her own shell. This marks the end of Act 2, granting access to the standard game conclusion. The climactic scene suggests that Hornet is now encased within the massive silk orb that once housed Grand Mother Silk.

In the world of Silksong, your adventure doesn’t have to end after completing Act 2. While reaching this point will allow you to view the credits and technically consider the game completed for record-keeping purposes, there are still several optional areas left to explore, such as the Putrified Ducts and Bilewater, that can offer more experiences within the game.
Additionally, you have the option to unveil Act 3, a fresh chapter offering novel locations, adversaries as bosses, new collectibles, and a plethora of additional activities following Act 2.
Read More
- Trail’s End Quest (Shakra’s Location) In Silksong
- Great Taste of Pharloom Quest In Silksong (Rasher, Crustnut, Muckmaggot, Nectar, Mossberry)
- Far Fields Secret Area Route Guide In Silksong
- ETH PREDICTION. ETH cryptocurrency
- Cogheart & Cogwork Heart Guide (How To Get & Use) In Silksong
- Pinstress Location (Fatal Resolve Quest) In Silksong
- Abyss Map Location (& How To Reach It) In Silksong
- What to Do With the Architect Key in Silksong?
- Heart of The Wild (Hunter’s Heart) In Silksong
- Best Tools in Silksong (Tier List)
2025-09-13 00:38