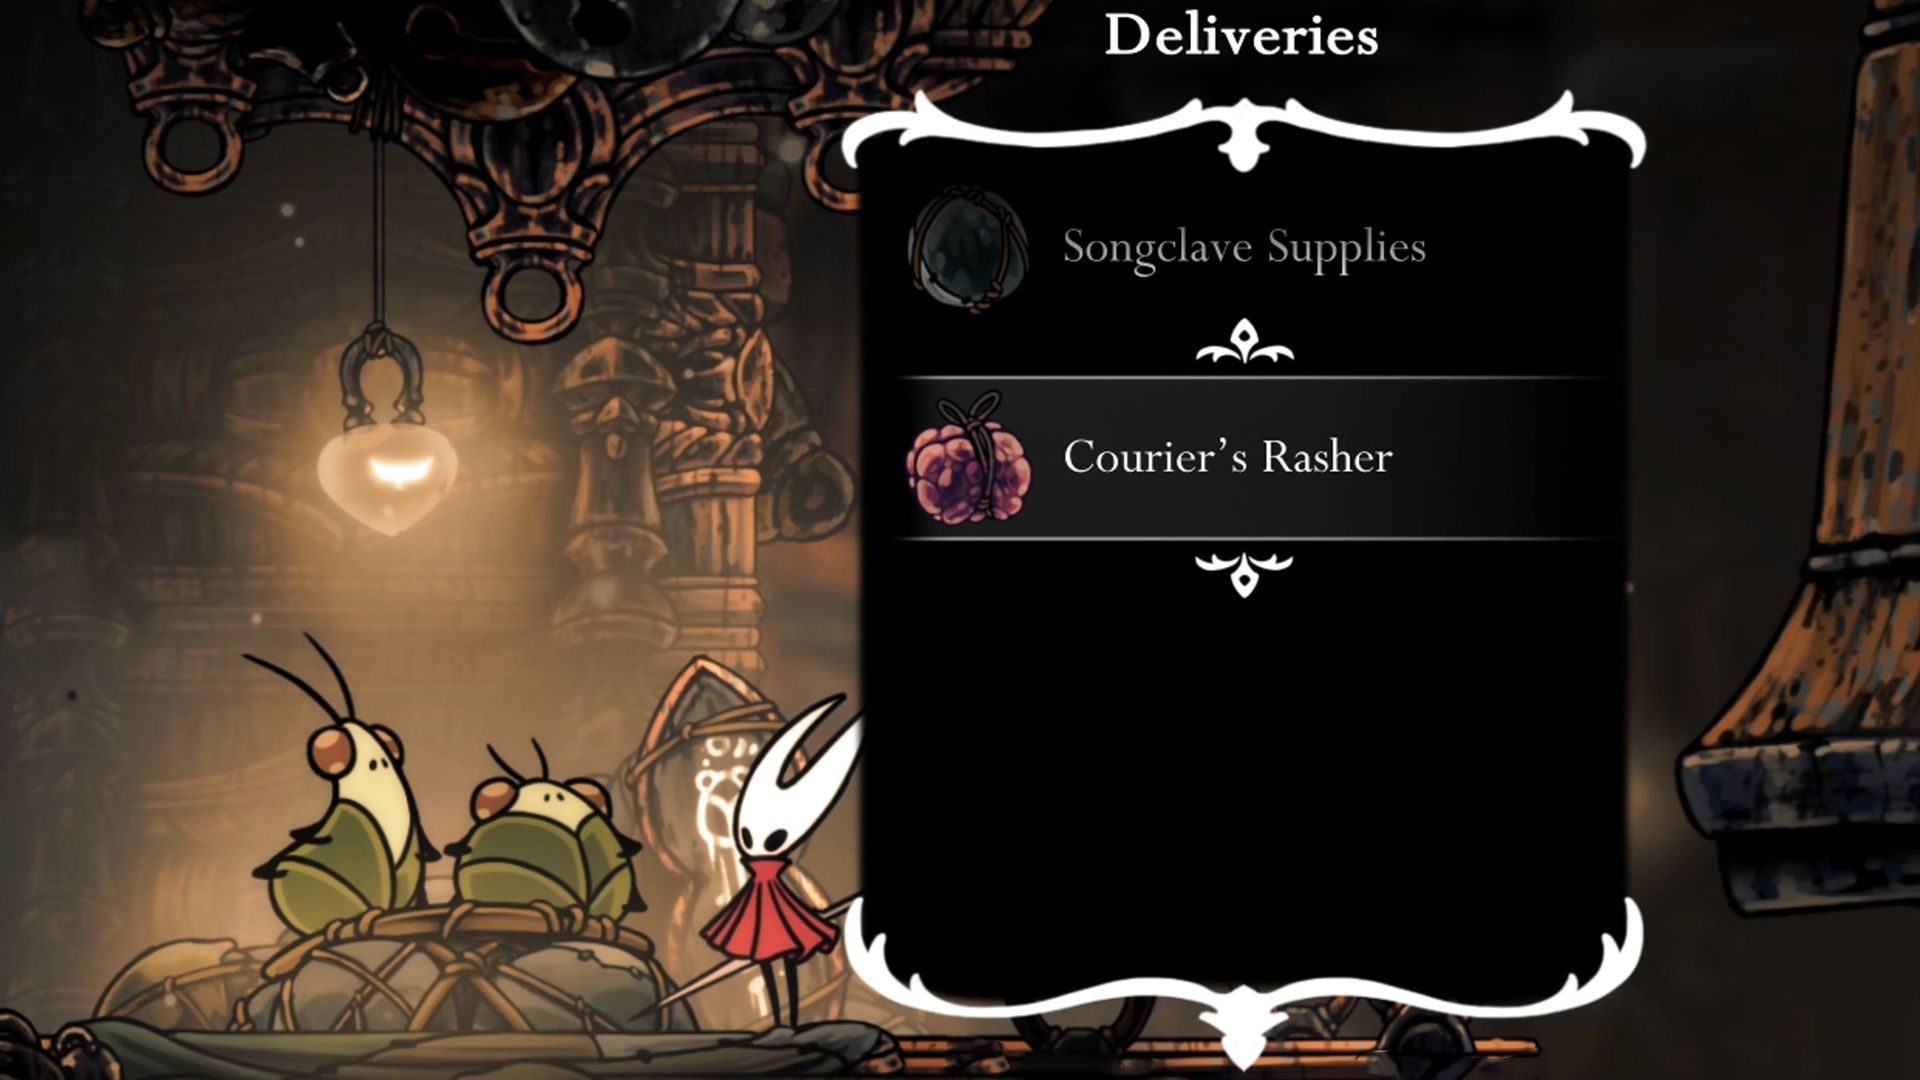
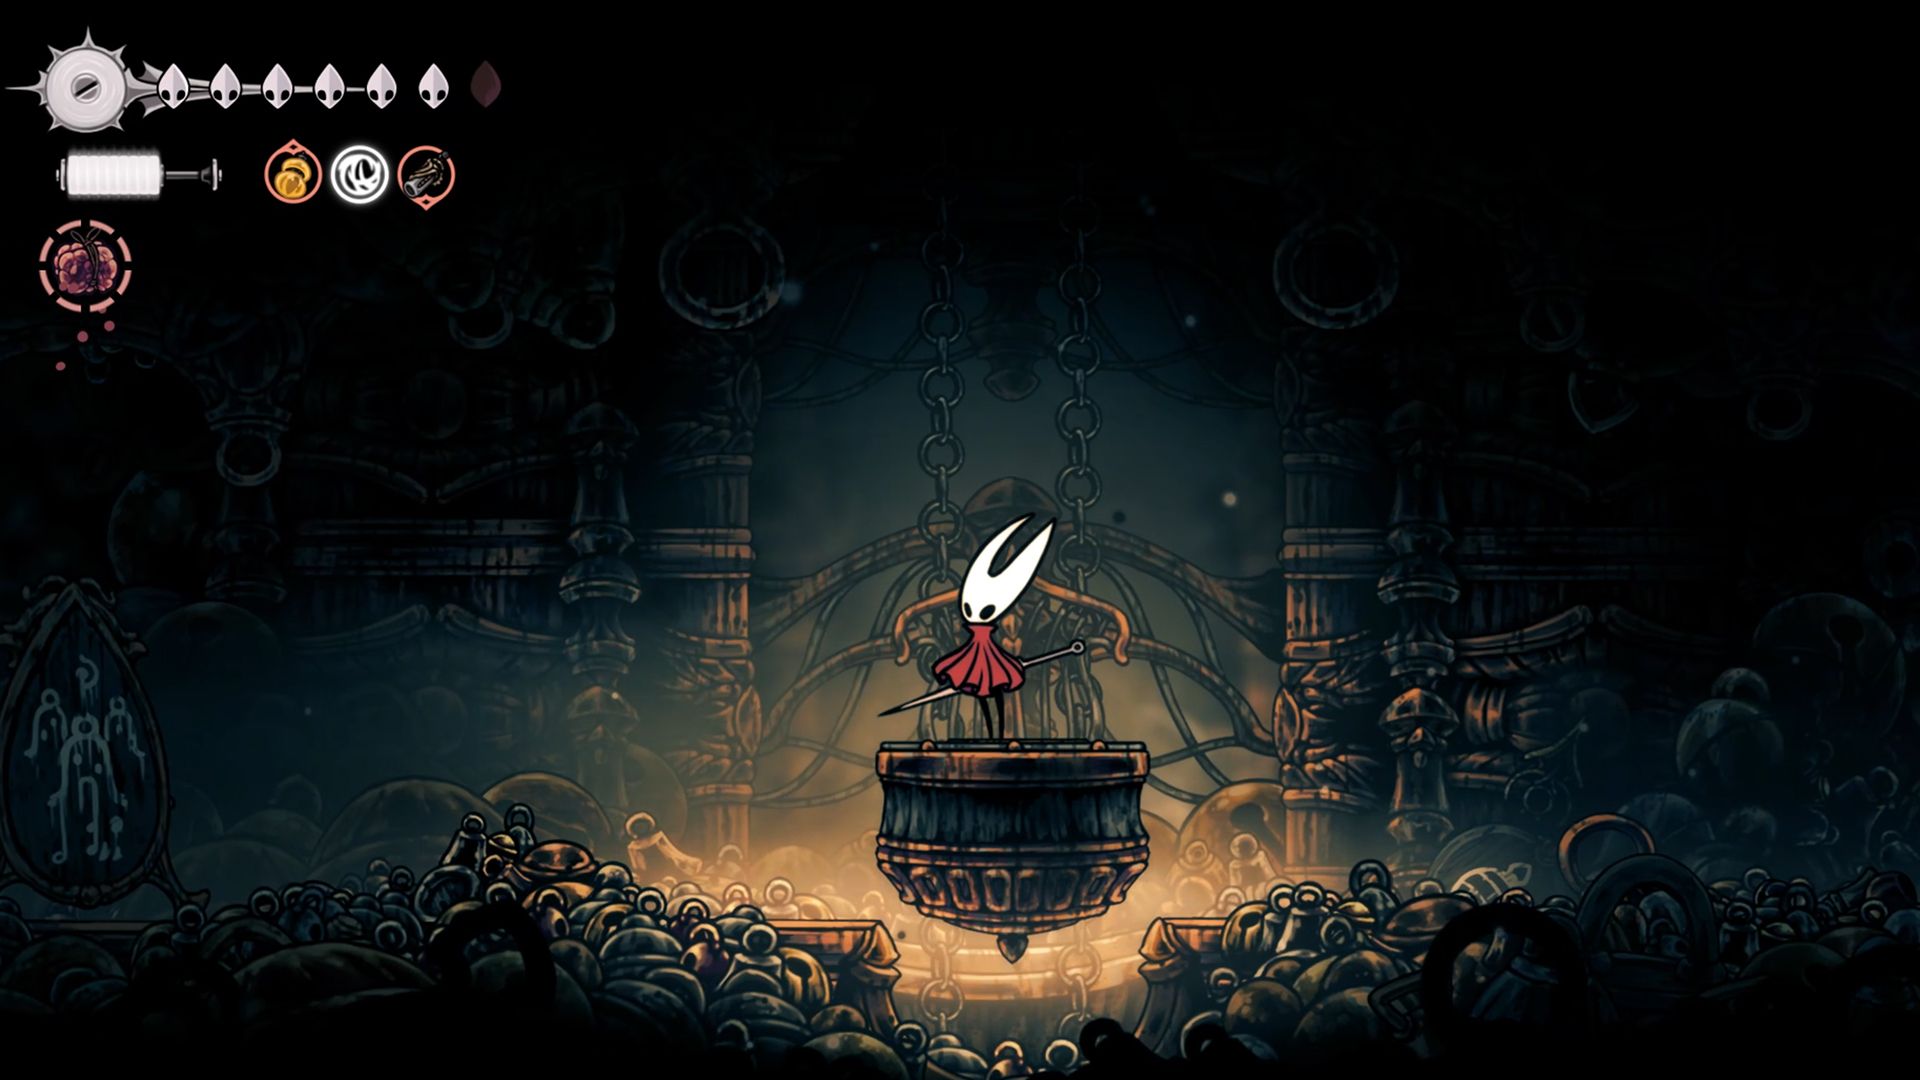
In the game “Hollow Knight: Silksong,” Hornet doesn’t just face tough battles with strong adversaries and bosses, but also encounters diverse challenges during map exploration. One such challenge is a quest for a Courier’s Rasher, which Hornet receives from Bellhart and must deliver to the Choral Chambers as part of the Great Taste of Pharloom quest. Here’s a breakdown of the Courier’s Rasher quest in Silksong, including its location and delivery instructions.
Courier’s Rasher Location In Silksong
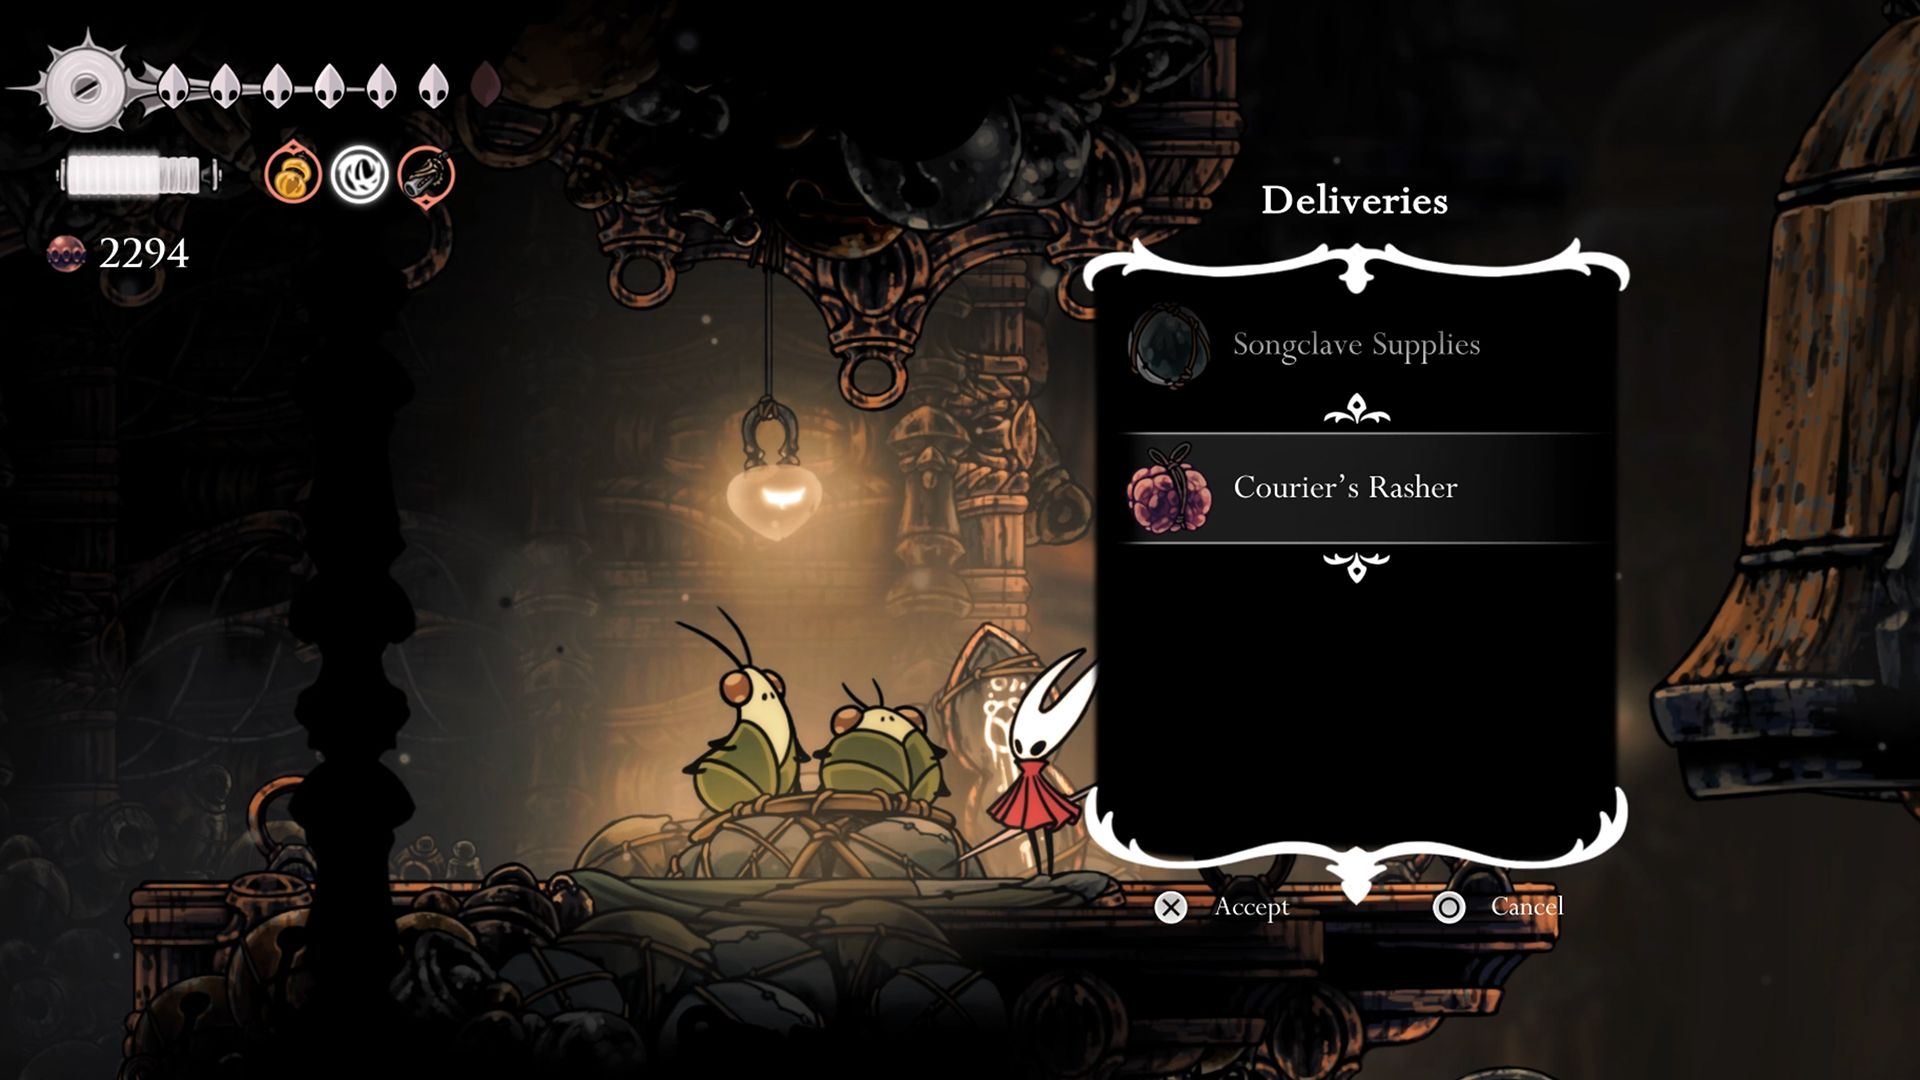
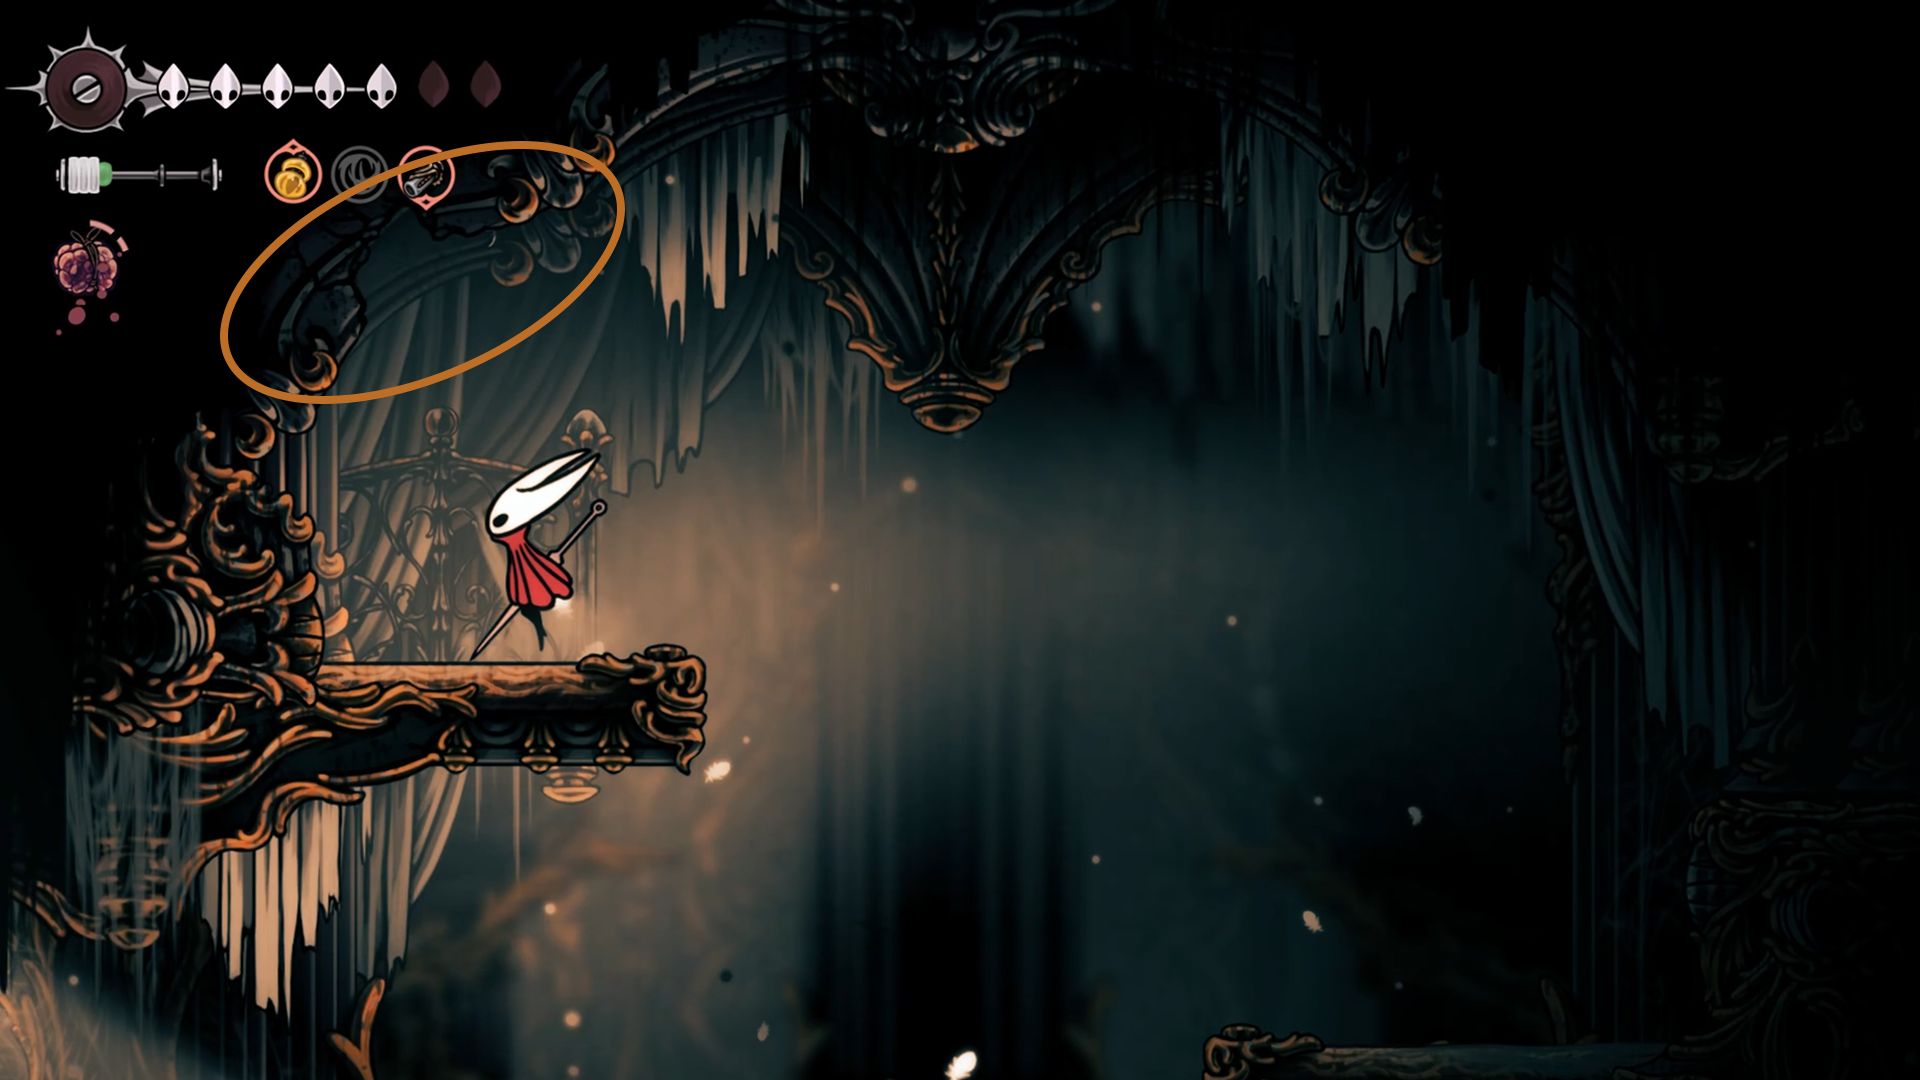
As a devoted Silksong enthusiast, I’d guide you through the journey of locating the elusive “Courier’s Rasher.” Journey to the heart of Bellhart and seek out Tipp and Pill, who typically hang out on top of Frey’s shop. If they’re not there, it implies Hornet hasn’t rescued them yet. To ensure their presence, I’d strongly recommend wrapping up “My Missing Courier” and “My Missing Brother Wayfarer” quests first. You can find these quests posted on Bellhart’s Wishwall in the game of Silksong.
As I, the intrepid movie critic, immerse myself in the captivating world of Silksong, I find myself following Hornet on a mission of great significance. Upon obtaining the elusive Courier’s Rasher in Bellhart, my task becomes clear: I must deliver this precious item to Loyal Mergwin, nestled within the Choral Chambers. Unlike previous assignments entrusted to Hornet by Tipp and Pill, this delivery comes with a clock ticking ominously.
The pressure mounts as I am forbidden to use fast travel or sustain excessive damage during my journey. This combination of constraints promises an exhilarating challenge that will demand meticulous planning before embarking on the arduous task of delivering the Courier’s Rasher in Silksong. The anticipation is palpable, as I prepare to navigate this intricate web of obstacles and deadlines.
How To Deliver Courier’s Rasher In Silksong
To ensure you successfully hand over the Courier’s Rasher to Loyal Mergwin, choose a less perilous route with as few adversaries and parkour challenges as possible. However, keep in mind that every path will be treacherous in Silksong, making it one of its more difficult tasks.
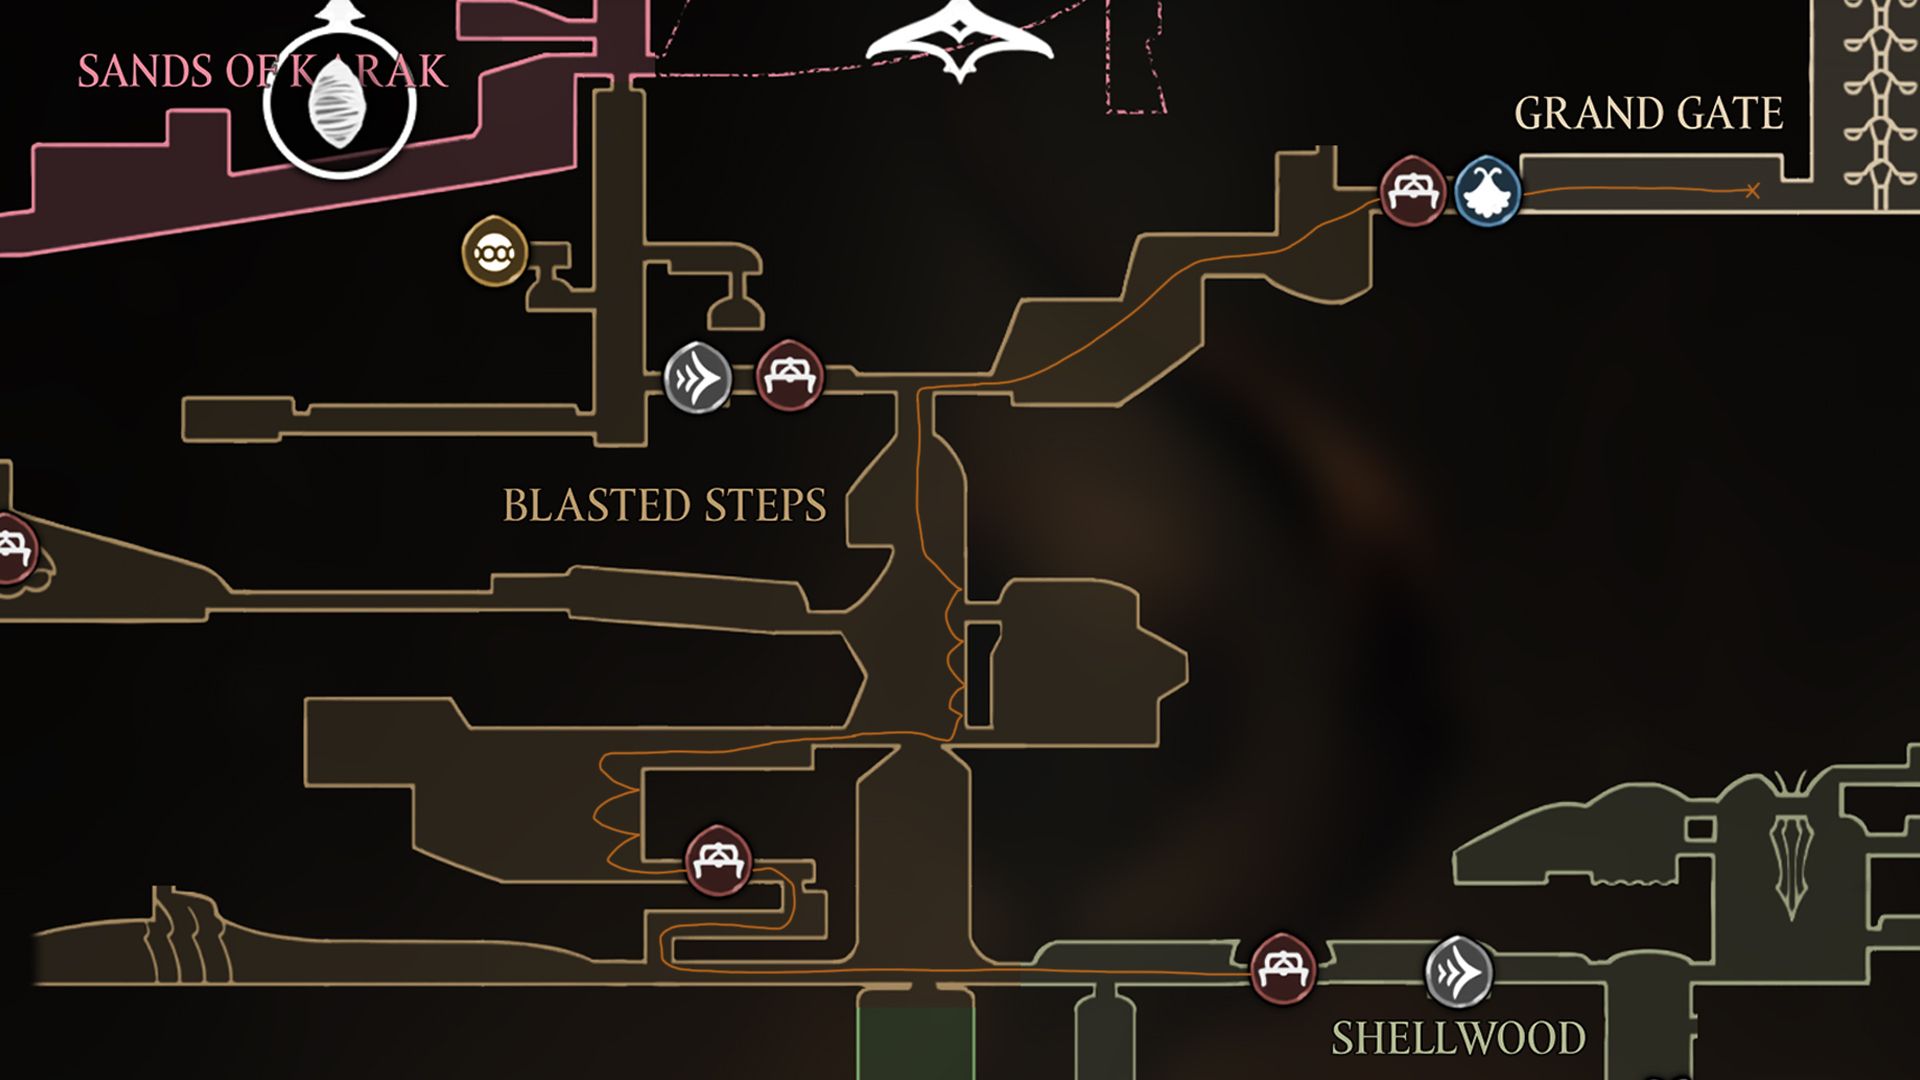
Instead, the most secure route leads you from Bellhart, passing through Shellwood, navigating the challenging landscape of Blasted Steps, and ascending to Choral Chambers. Upon arrival, deliver the Courier’s Rasher to the loyal Mergwin in Silksong.
Given that accomplishing this task might prove challenging all at once, here’s a helpful guide on delivering the Courier’s Rasher:
1. Firstly, ensure you have the correct package labeled as “Courier’s Rasher.”
2. Plan your route to minimize stops and delays.
3. Always double-check the recipient’s address for accuracy.
4. Keep the package safe and secure during transit.
5. Upon arrival at the destination, confirm with the recipient before handing over the parcel.
6. Remember to obtain a signature or proof of delivery when possible.
7. In case of any issues or delays, communicate promptly with the sender for updates.
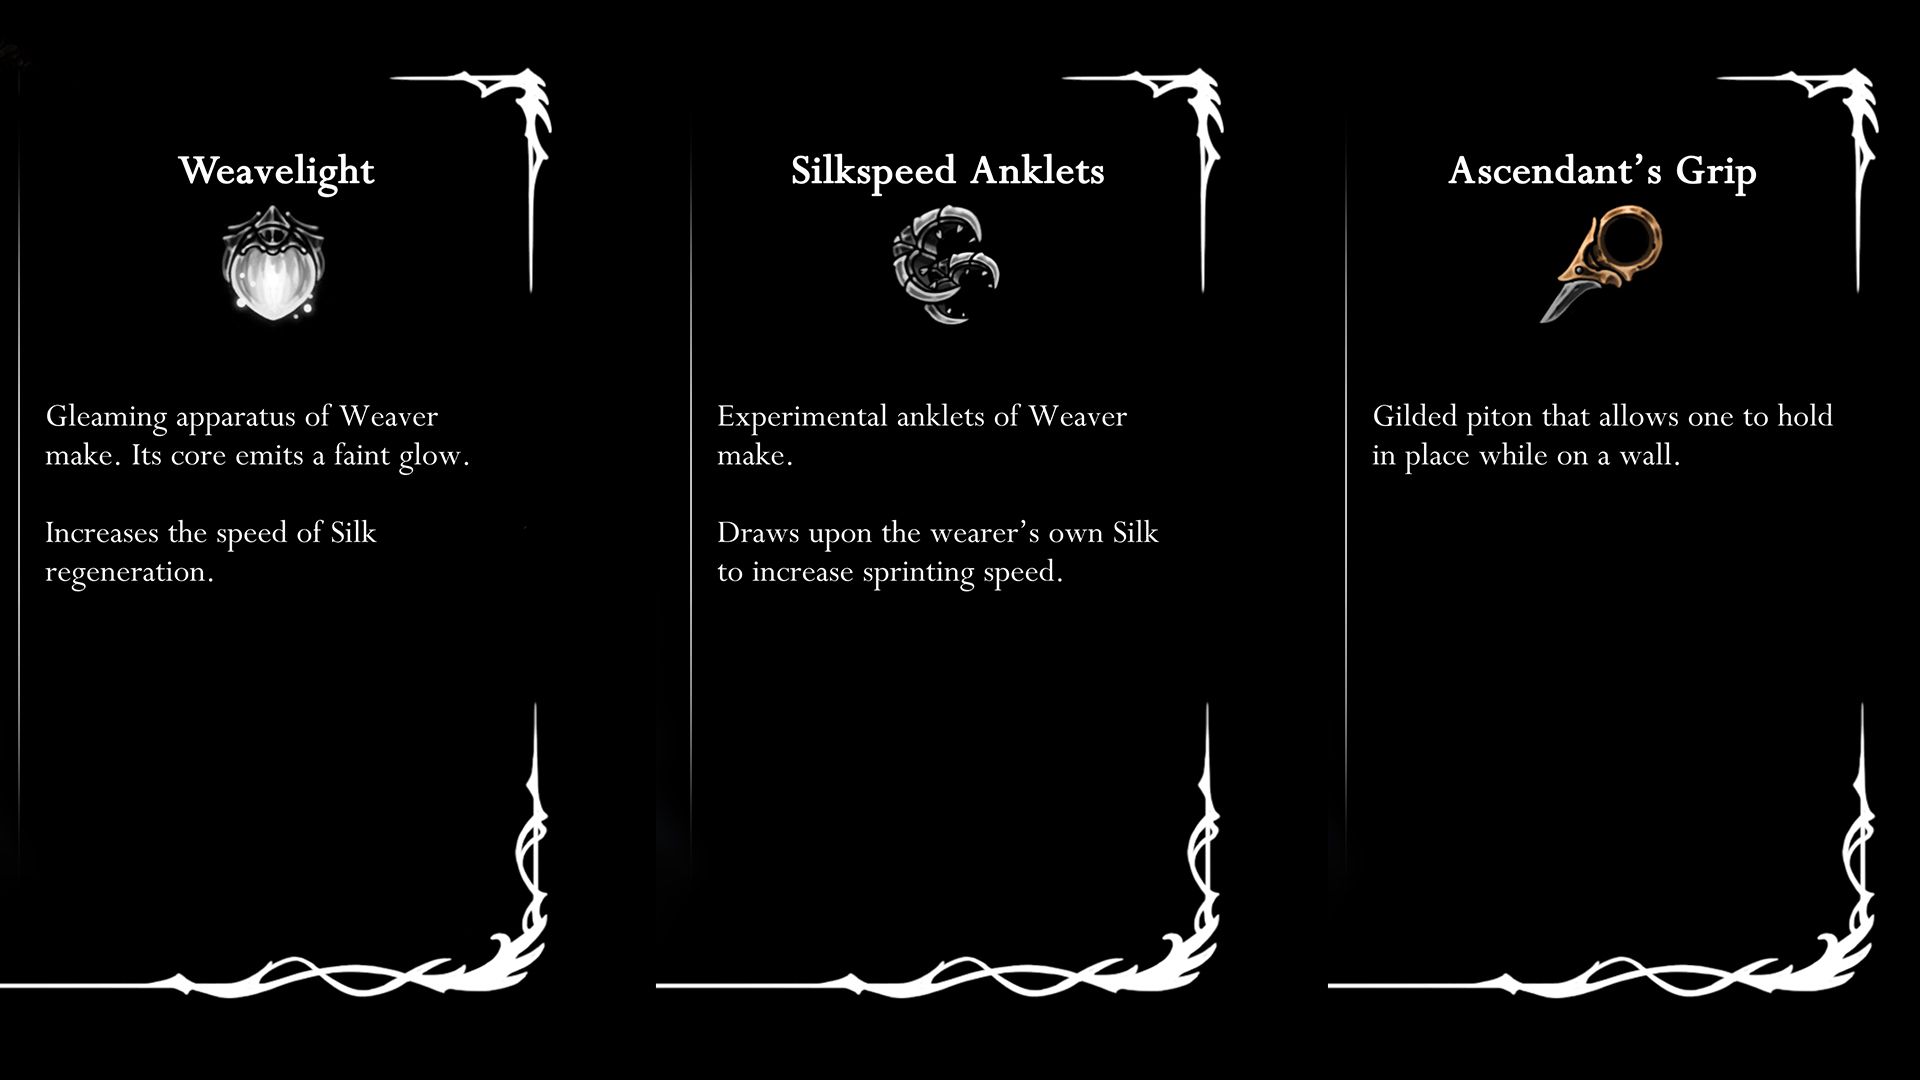
- Equip the tool, as it helps Hornet stick to walls.
- Equip the tool, as it increases Hornet’s running speed.
- Equip the tool, as Hornet will use a lot of Silk during the run.
- Get the Clawline Skill to hook and dash faster.
- Get the Faydown Cloak Skill to double jump.
- Make sure to open all the shortcuts along the way. These are marked in this article; you can scroll down to make sure you’re prepared.
- Enter the menu map instead of checking the mini-map during the delivery. The menu map will pause the game, giving you all the time you need to check it.
- Defeat all the enemies along the way, so they don’t deal any unwanted damage. (Optional. If you do this, don’t rest on the bench when you need a retry)
Bellhart and Shellwood
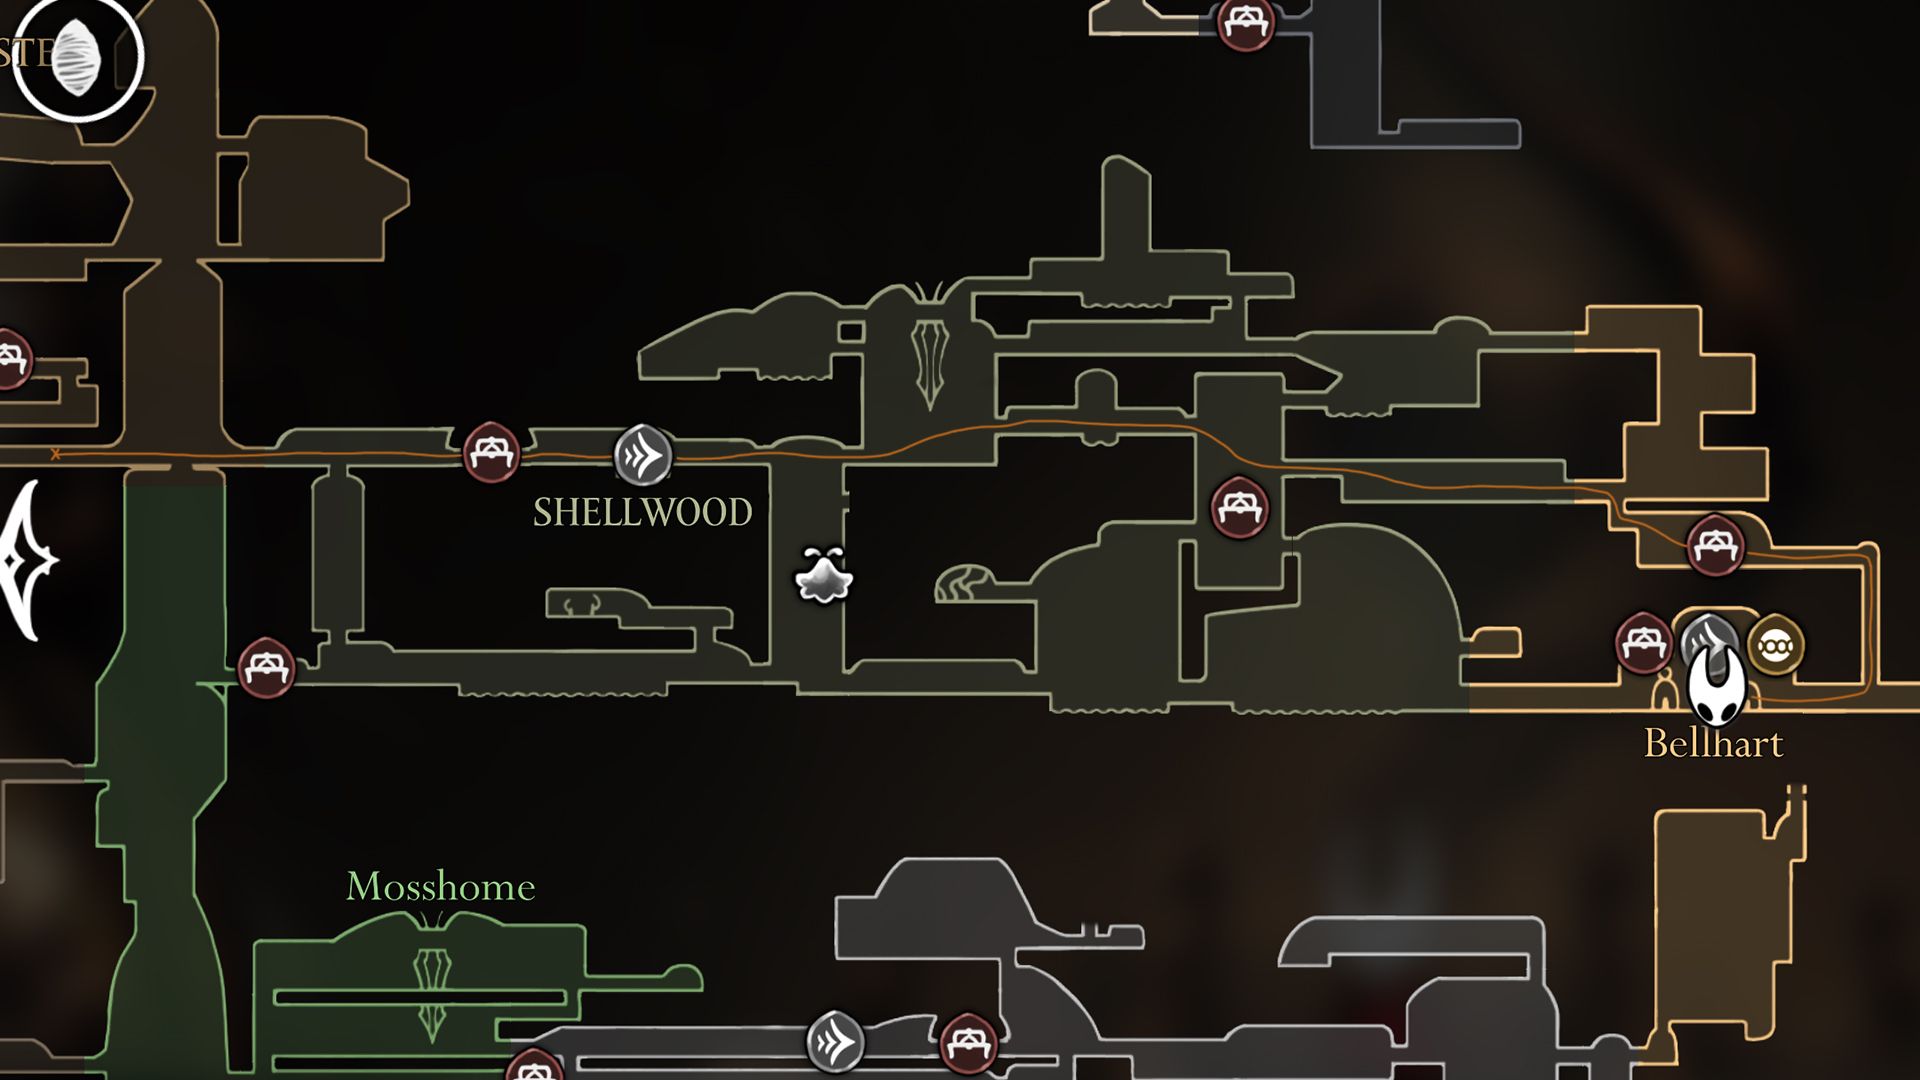
Beginning at the spot where Tipp and Pill are standing, head towards the elevator that ascends to Bellhart’s second level. Once you reach the second floor, take the first exit to find your way to Shellwood.
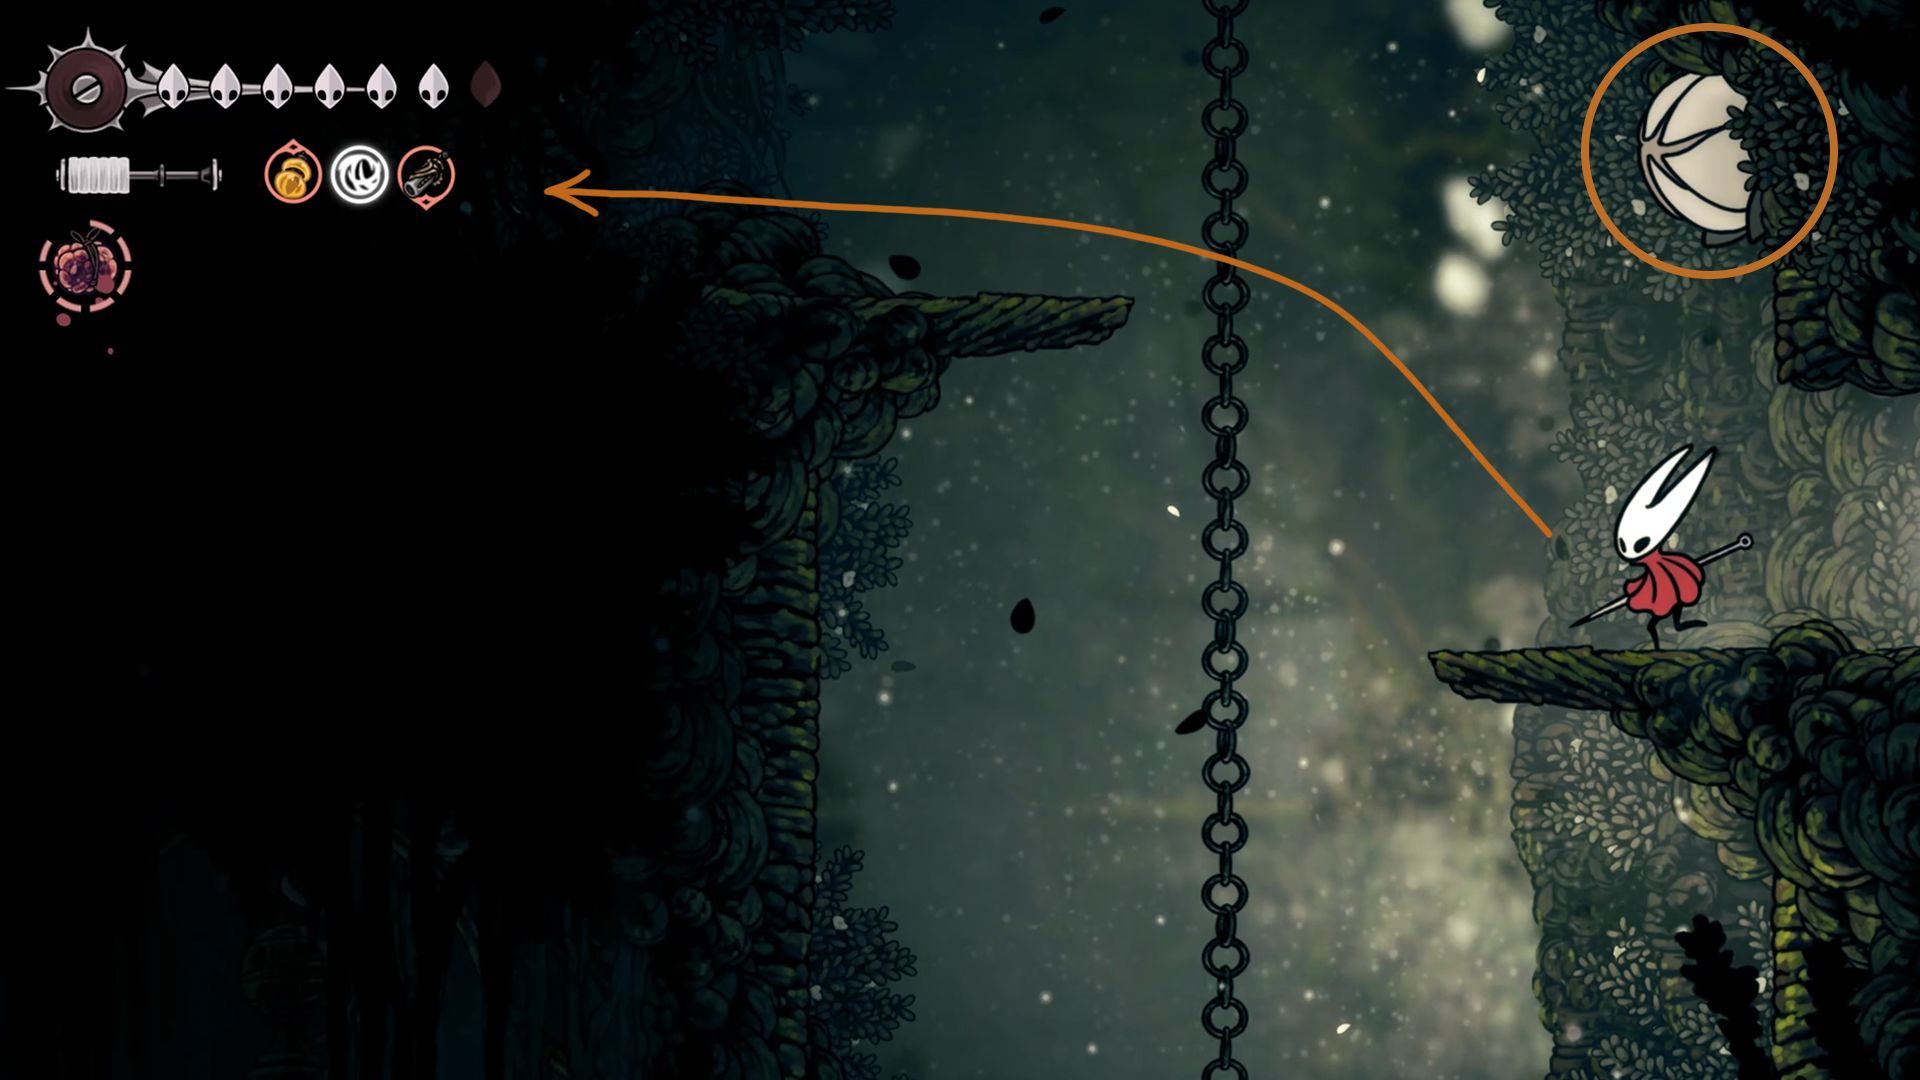
After exiting, watch out for potential threats from the Gahlia above. Head towards the branch on your left and navigate leftward, focusing on eliminating any vines obstructing your path. Continue moving up through the branches until you reach the top, where you’ll find a road to your left.
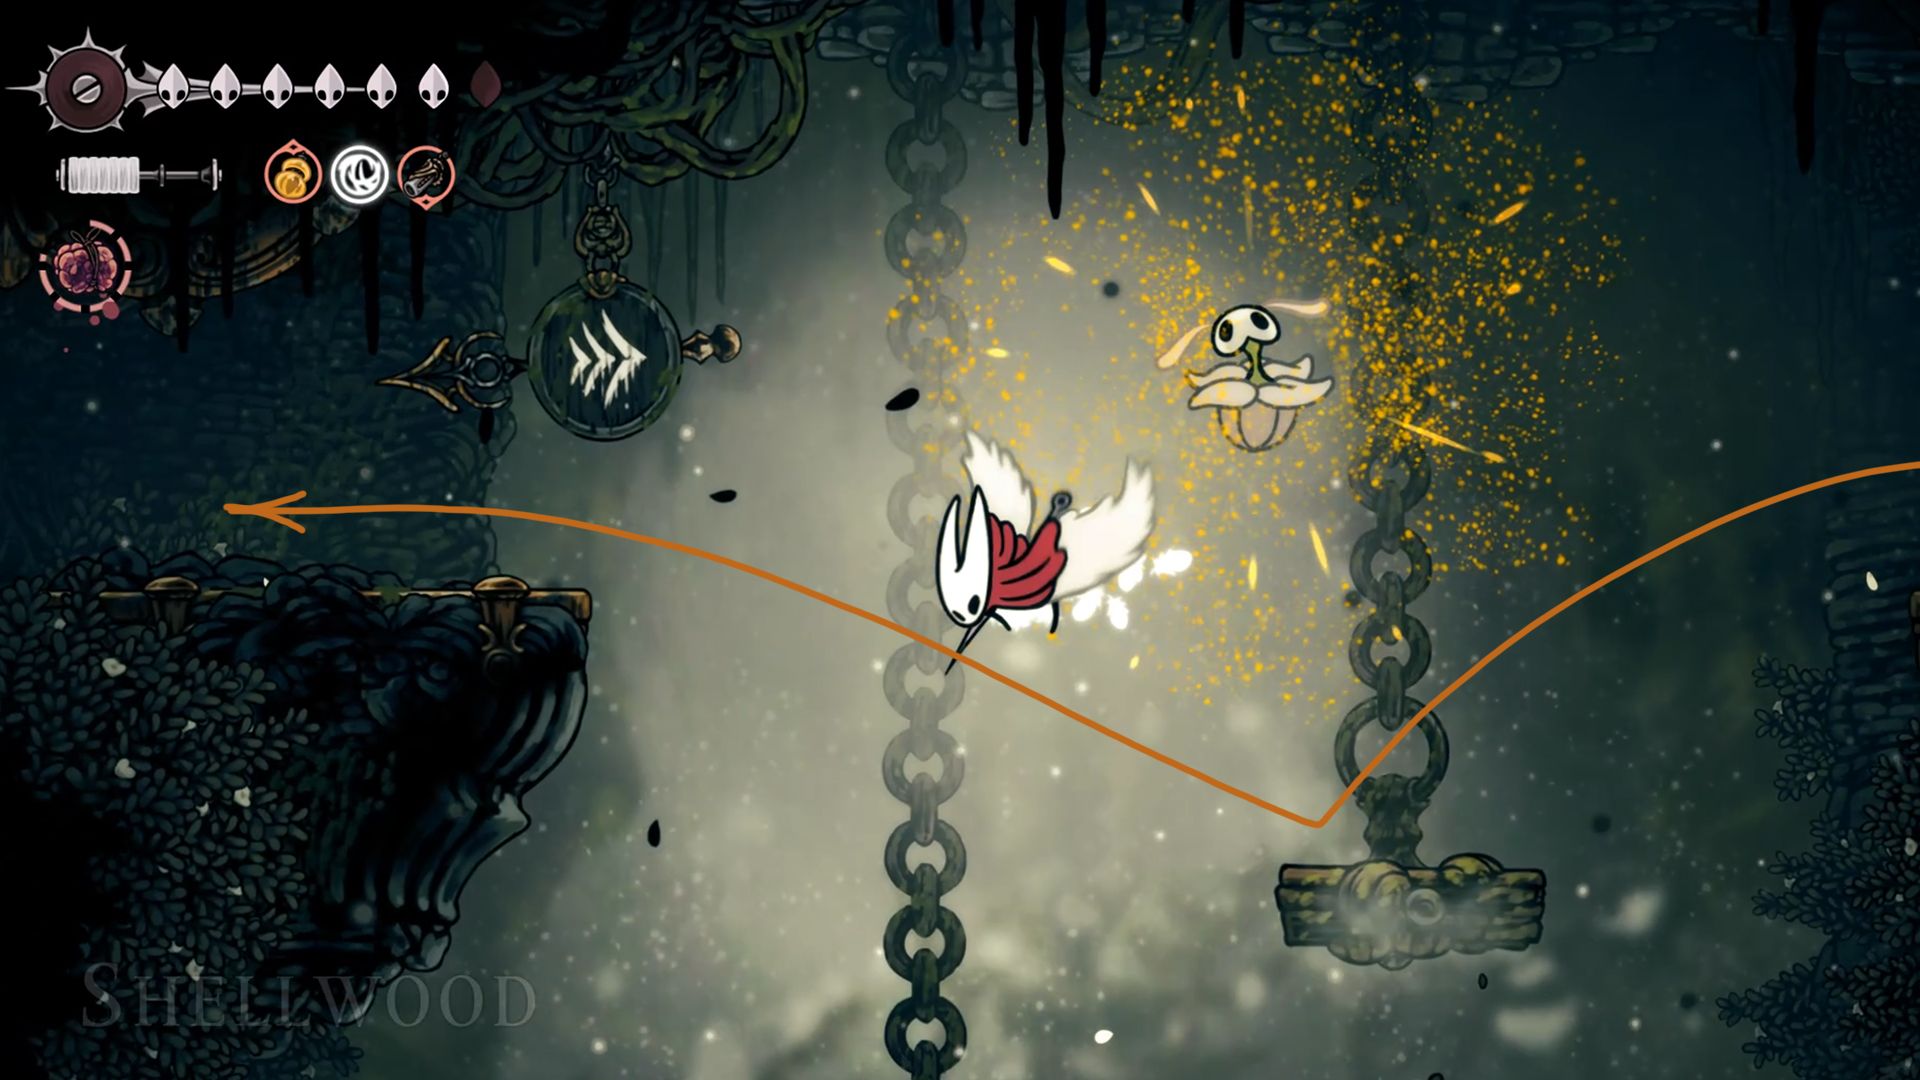
After that, keep running left, avoiding enemies from area to area until you reach Blasted Steps.
Blasted Steps
In the challenging section of this Messenger’s Journey called Blasted Steps, you’ll find a multitude of adversaries and agility tests. Since it’s impossible to bypass them, Hornet must forge ahead. Upon entering Blasted Steps, locate the first hole and ascend it. Continue along this path to reach the initial bench in Blasted Steps.
In a tough part of the Messenger level called Blasted Steps, there are lots of enemies and obstacles. Hornet has to keep moving forward because she can’t avoid them. When you get to Blasted Steps, look for the first hole you see and climb it. Keep going until you reach the first bench in Blasted Steps.
Turn left and leap onto the initial platform as soon as you get there, then ascend to the rock directly above it by jumping upward. Subsequently, make use of the shortcut platform located on the right side to bypass this area’s obstacles quickly and gain access to elevated terrain.
To use this quick access, you need to pull the lever initially. If it hasn’t been activated yet, make sure you unlock the shortcut first.
This version retains the original meaning while using simpler language and providing more context for readers who may not be familiar with terms like “shortcut” or “lever.
From here, go through the hole above Hornet and keep going right to exit the area.
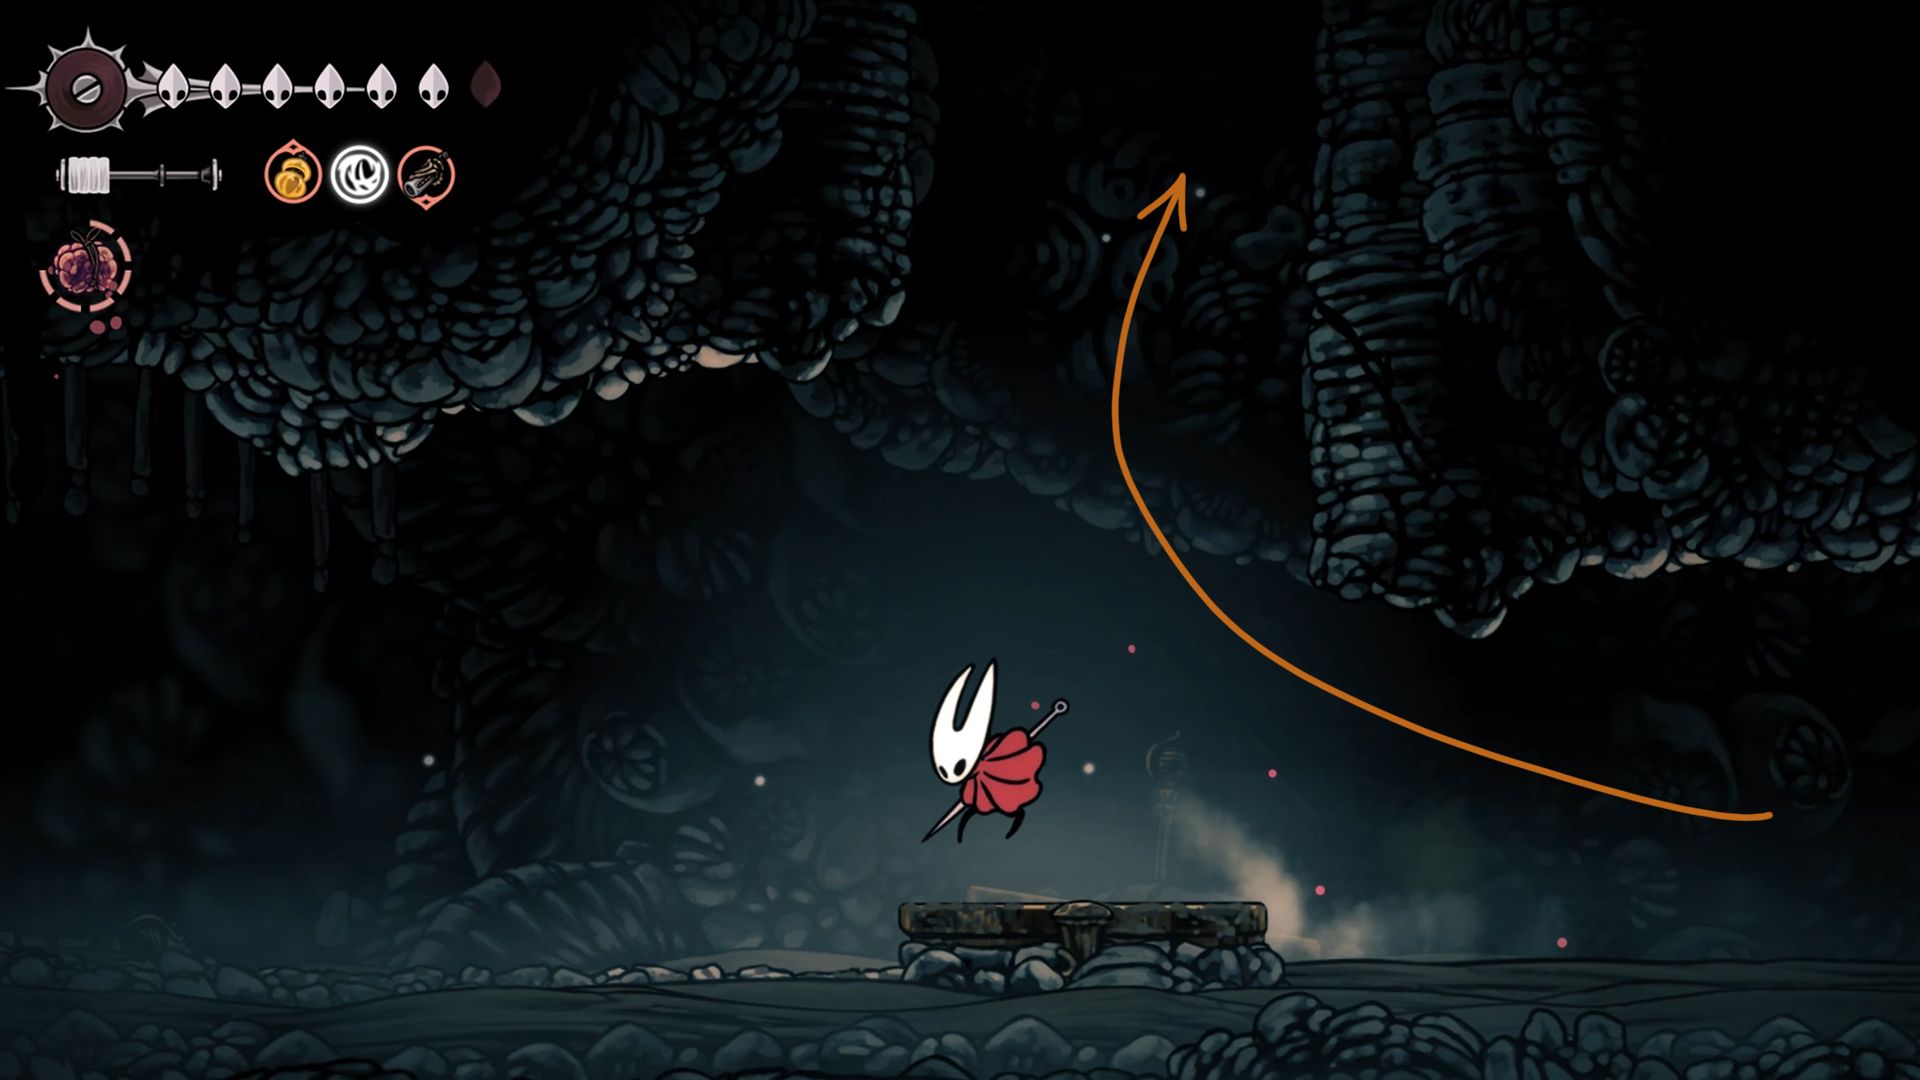
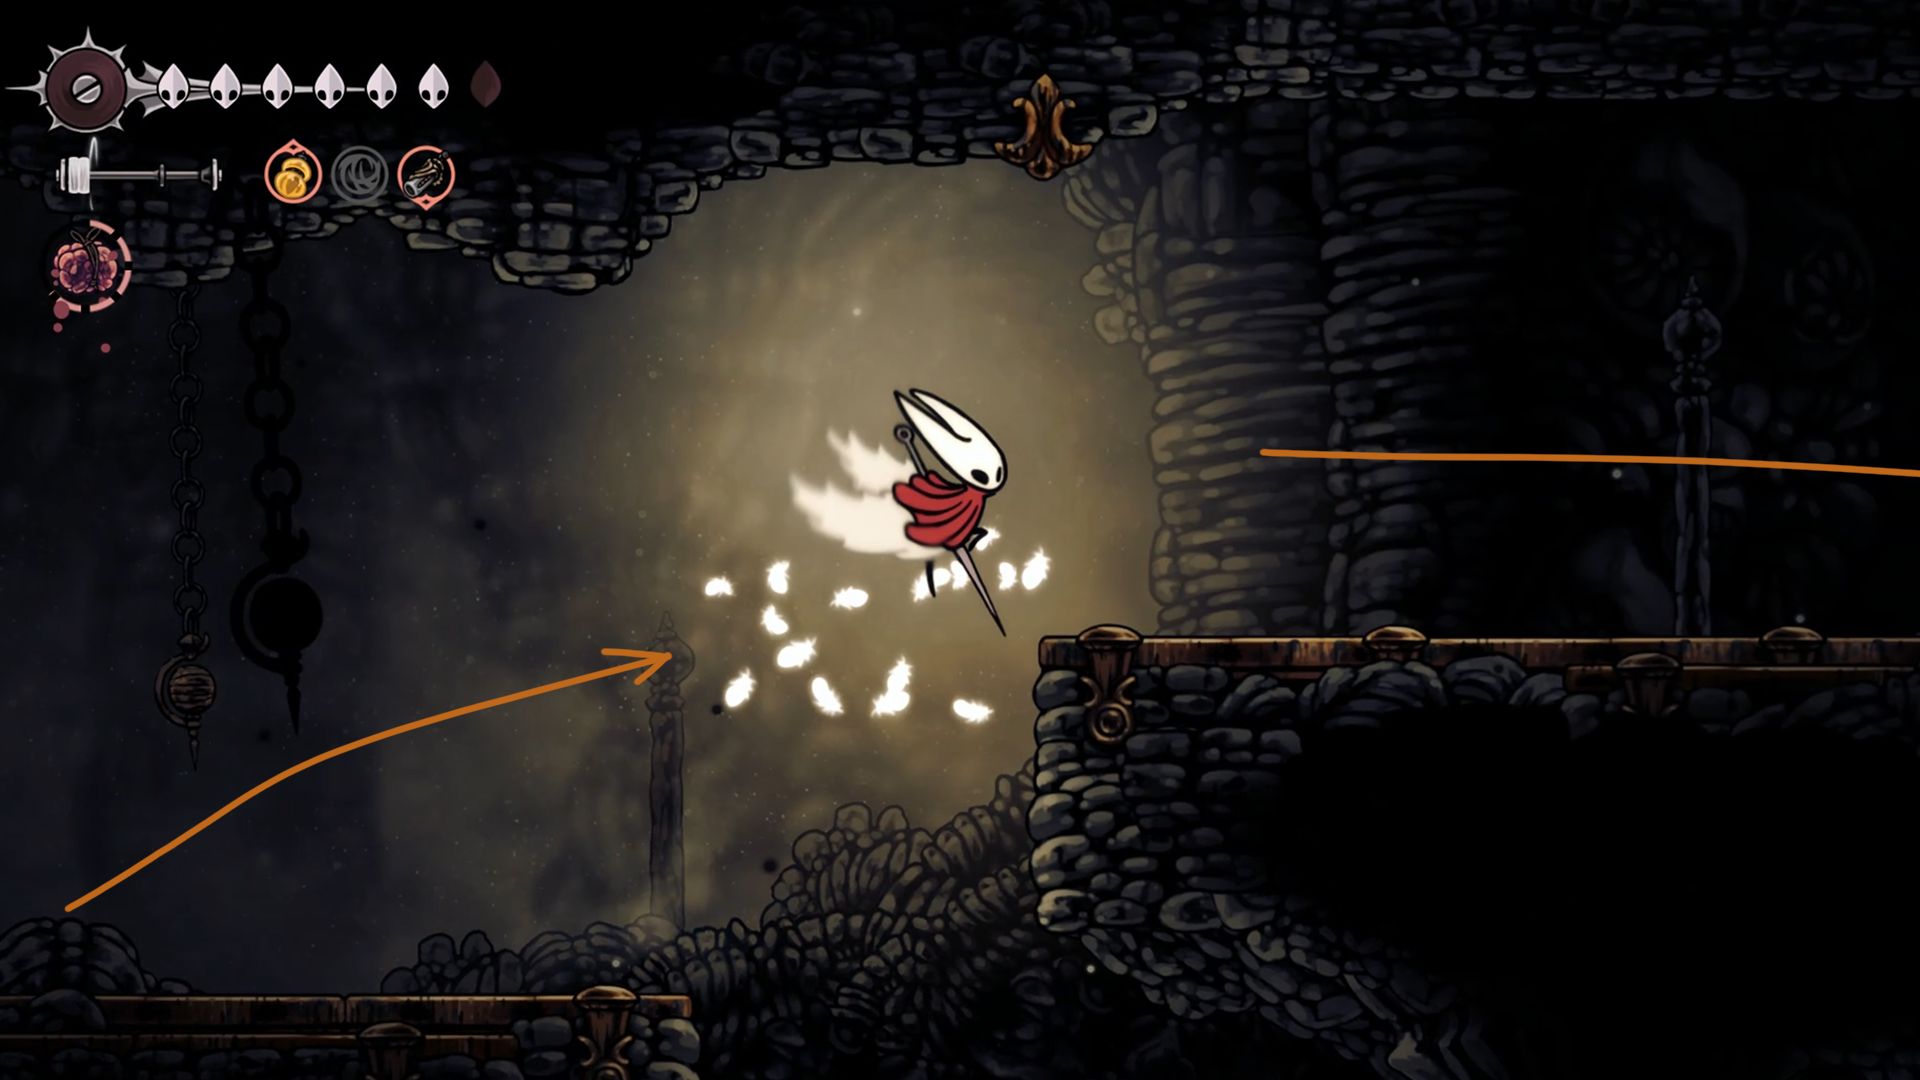
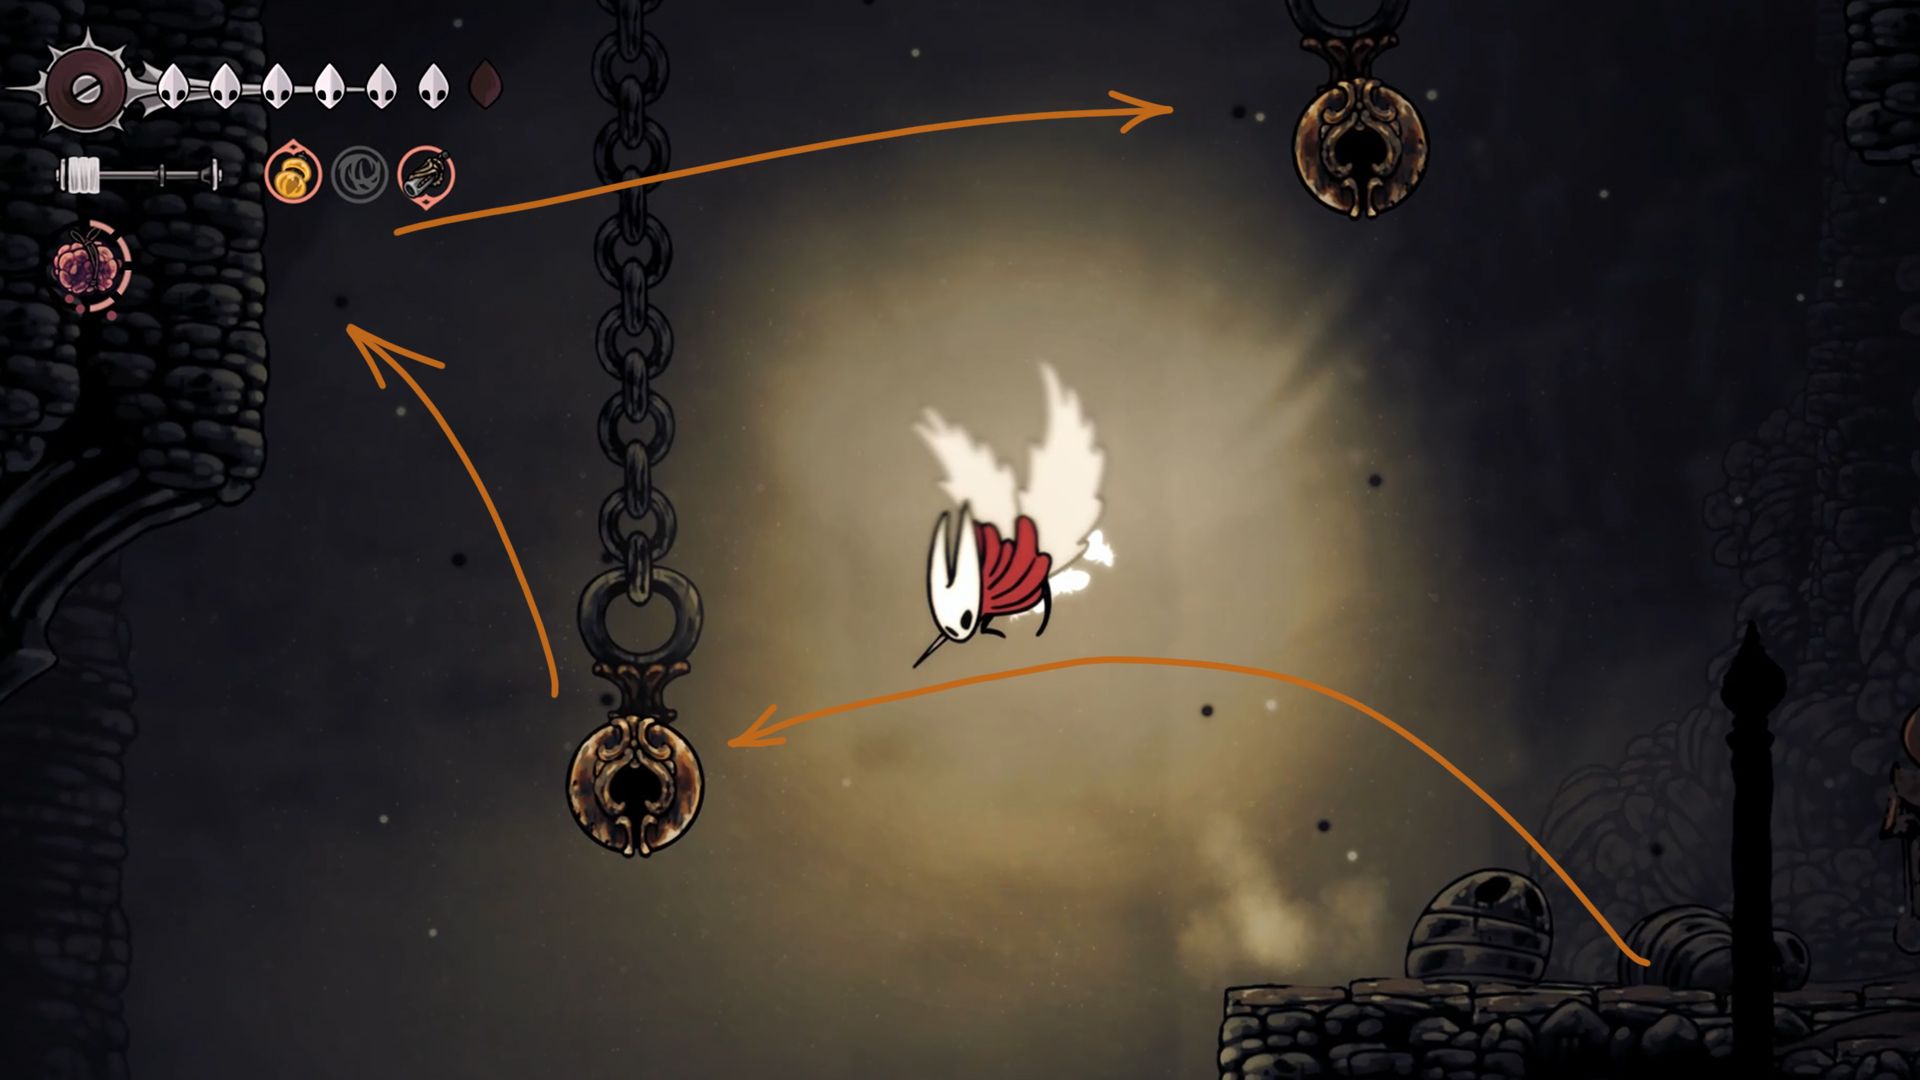
In the upcoming zone, steer clear of the enemies that appear and instead, bound onto the following platform. Afterward, hop while clinging to the wall and the levitating post to ascend to the peak of the post.
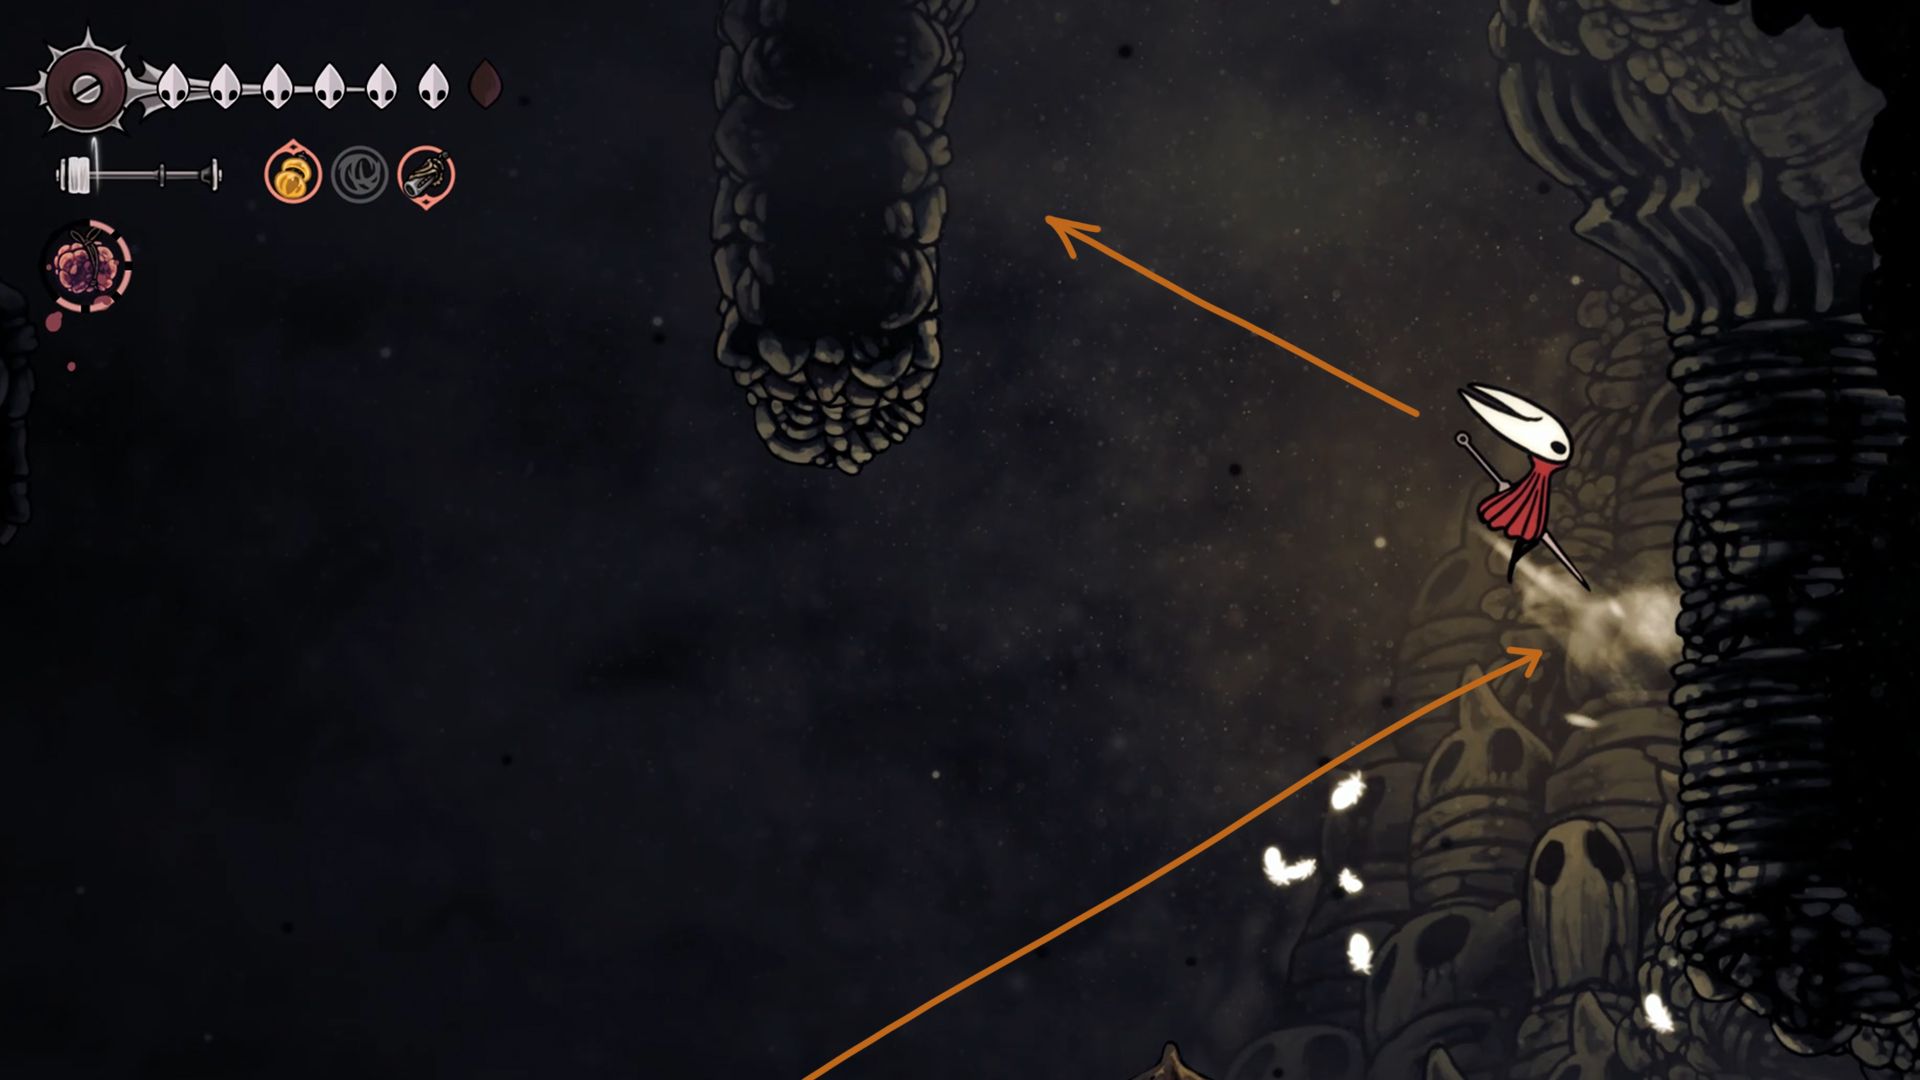
Now jump to the hanging cage in the middle, and keep hopping through all the cages above it.
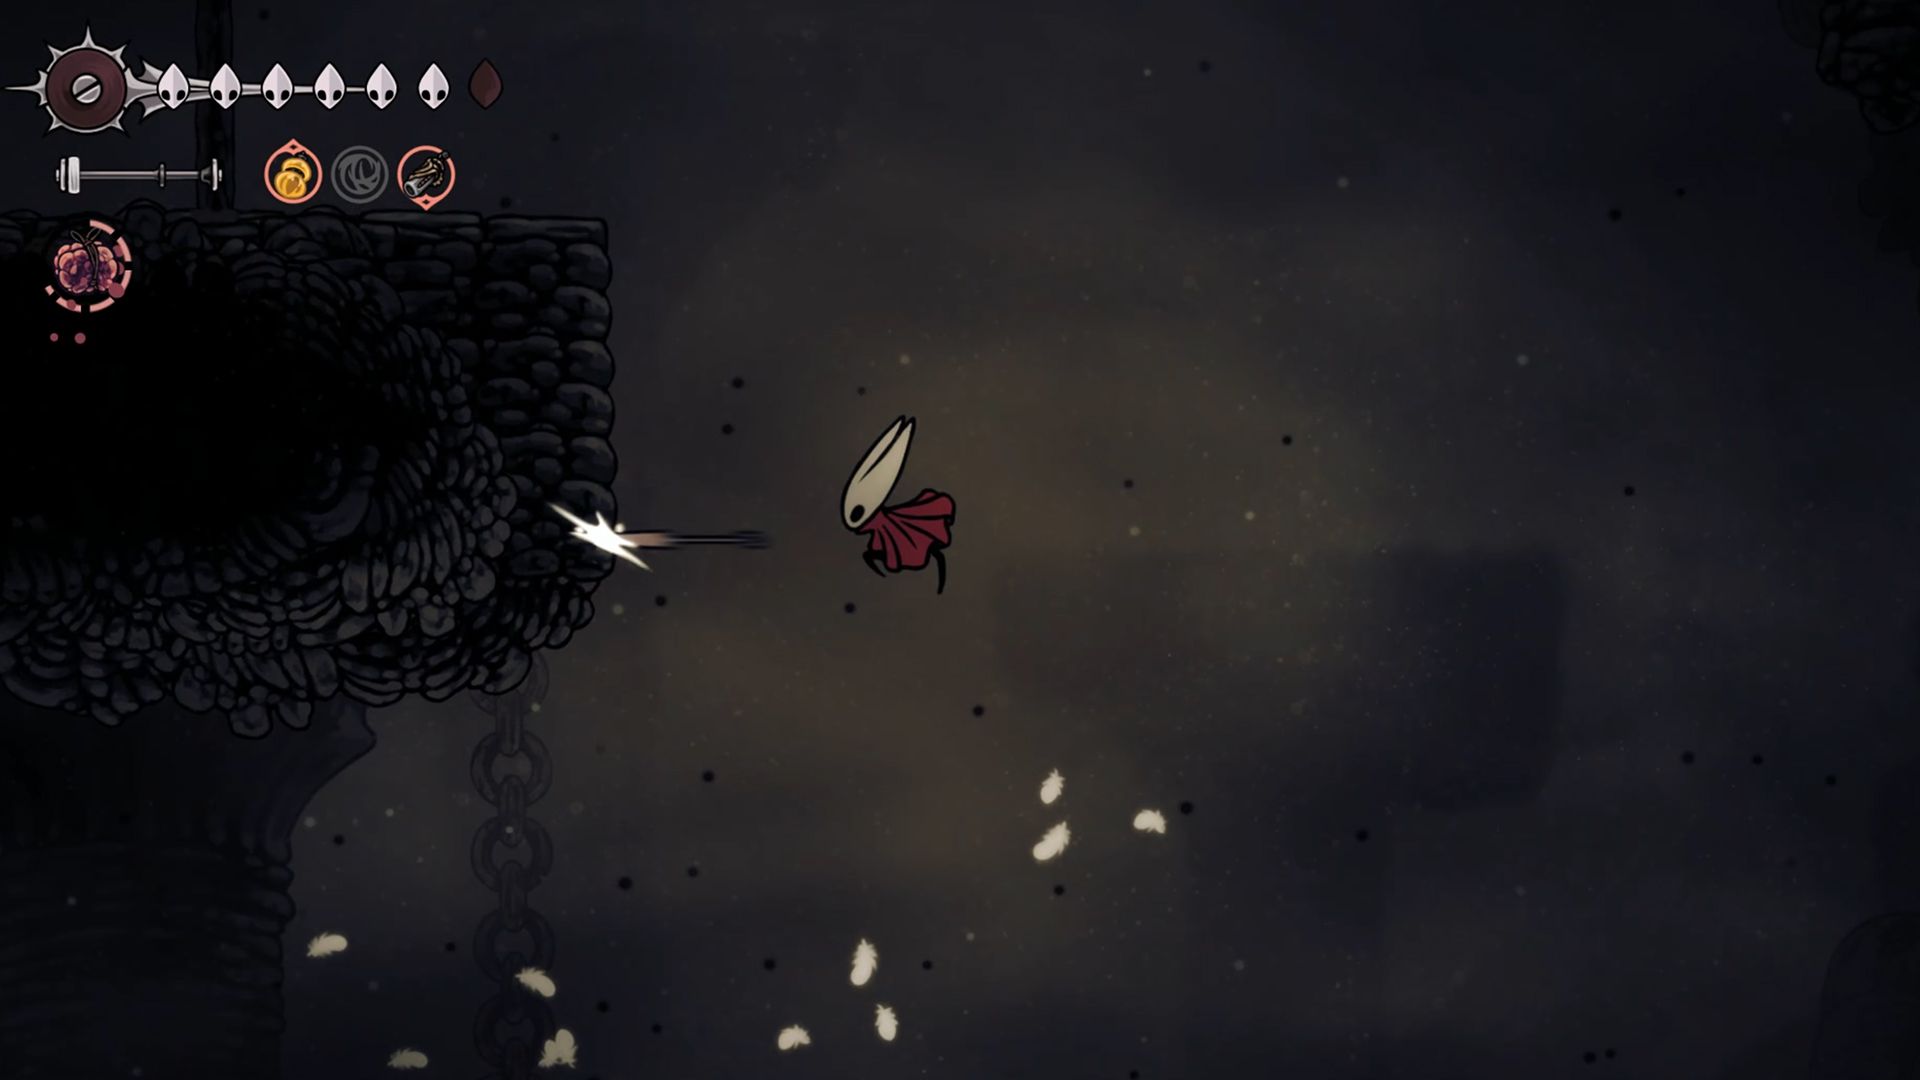
After several steps, you’ll notice a swinging bell on your right; hit it to uncover the wall behind it, then move towards the nearby rock.
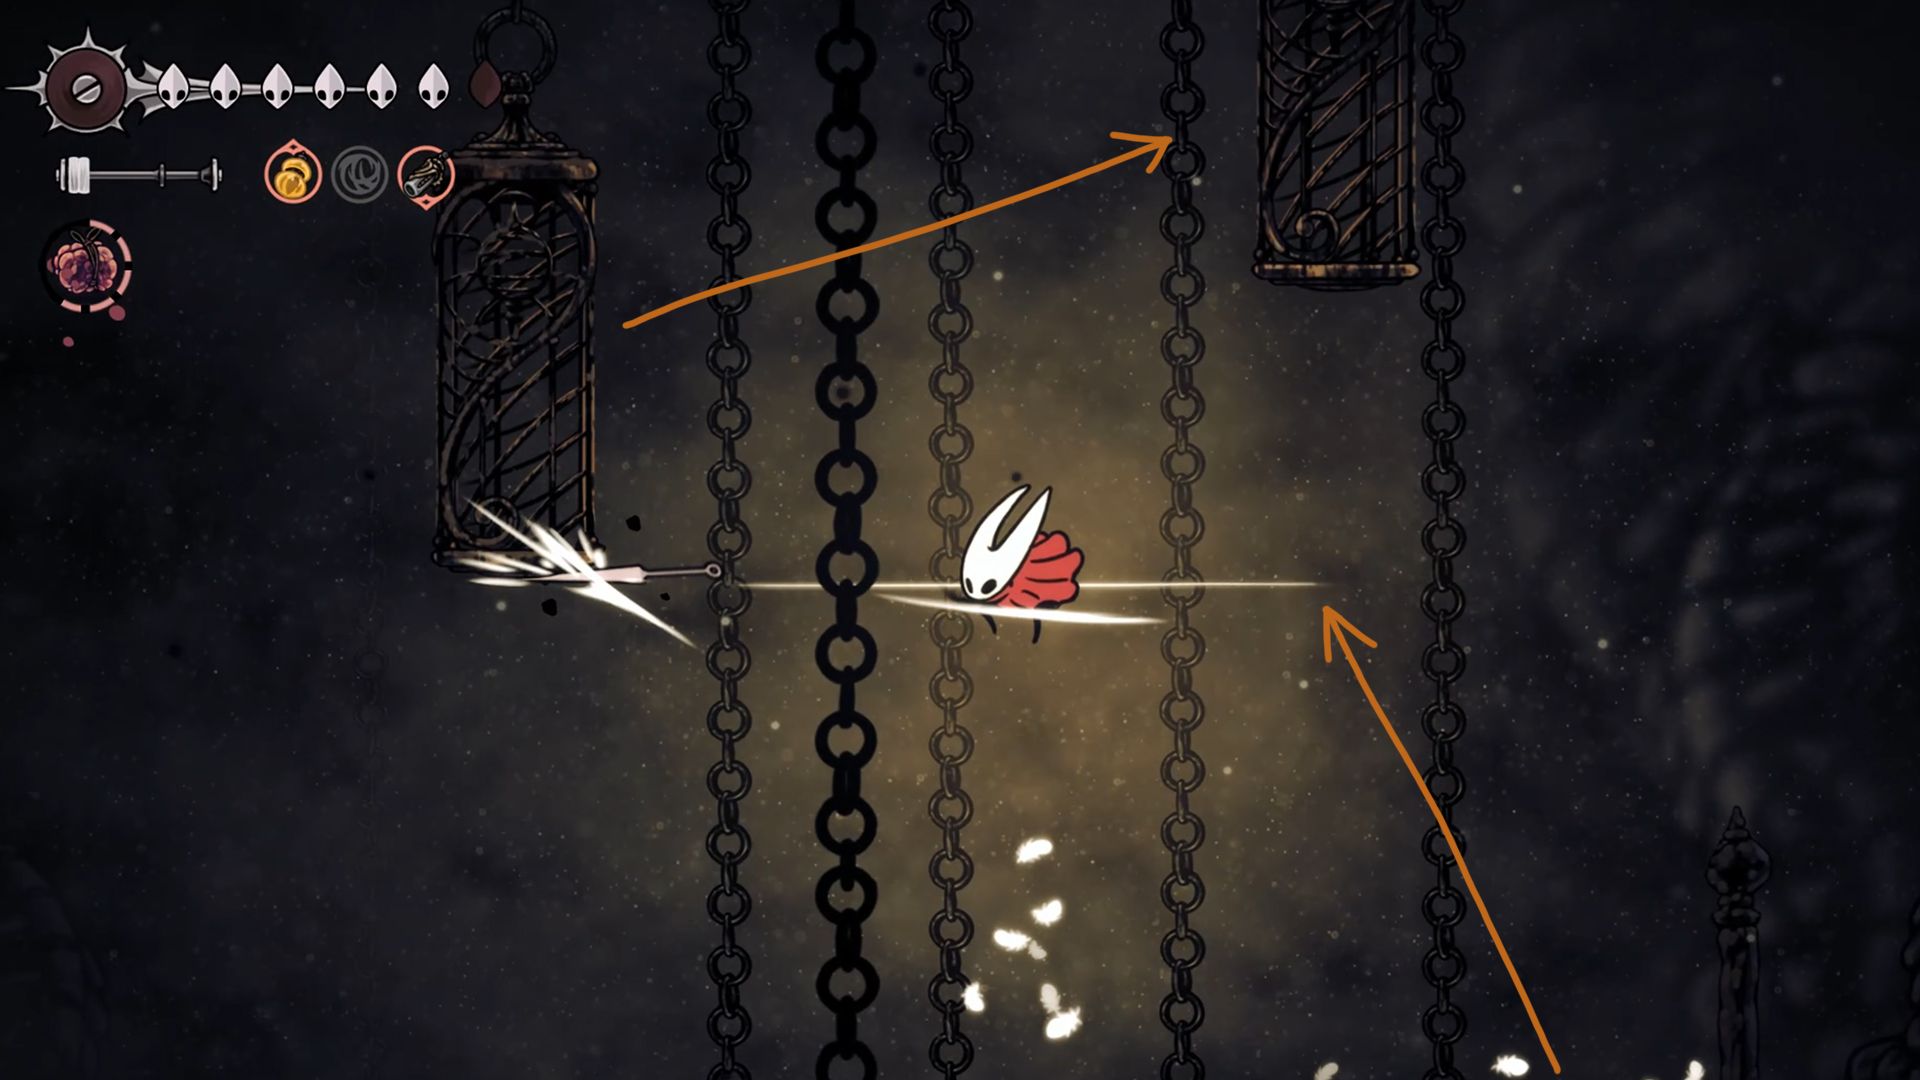
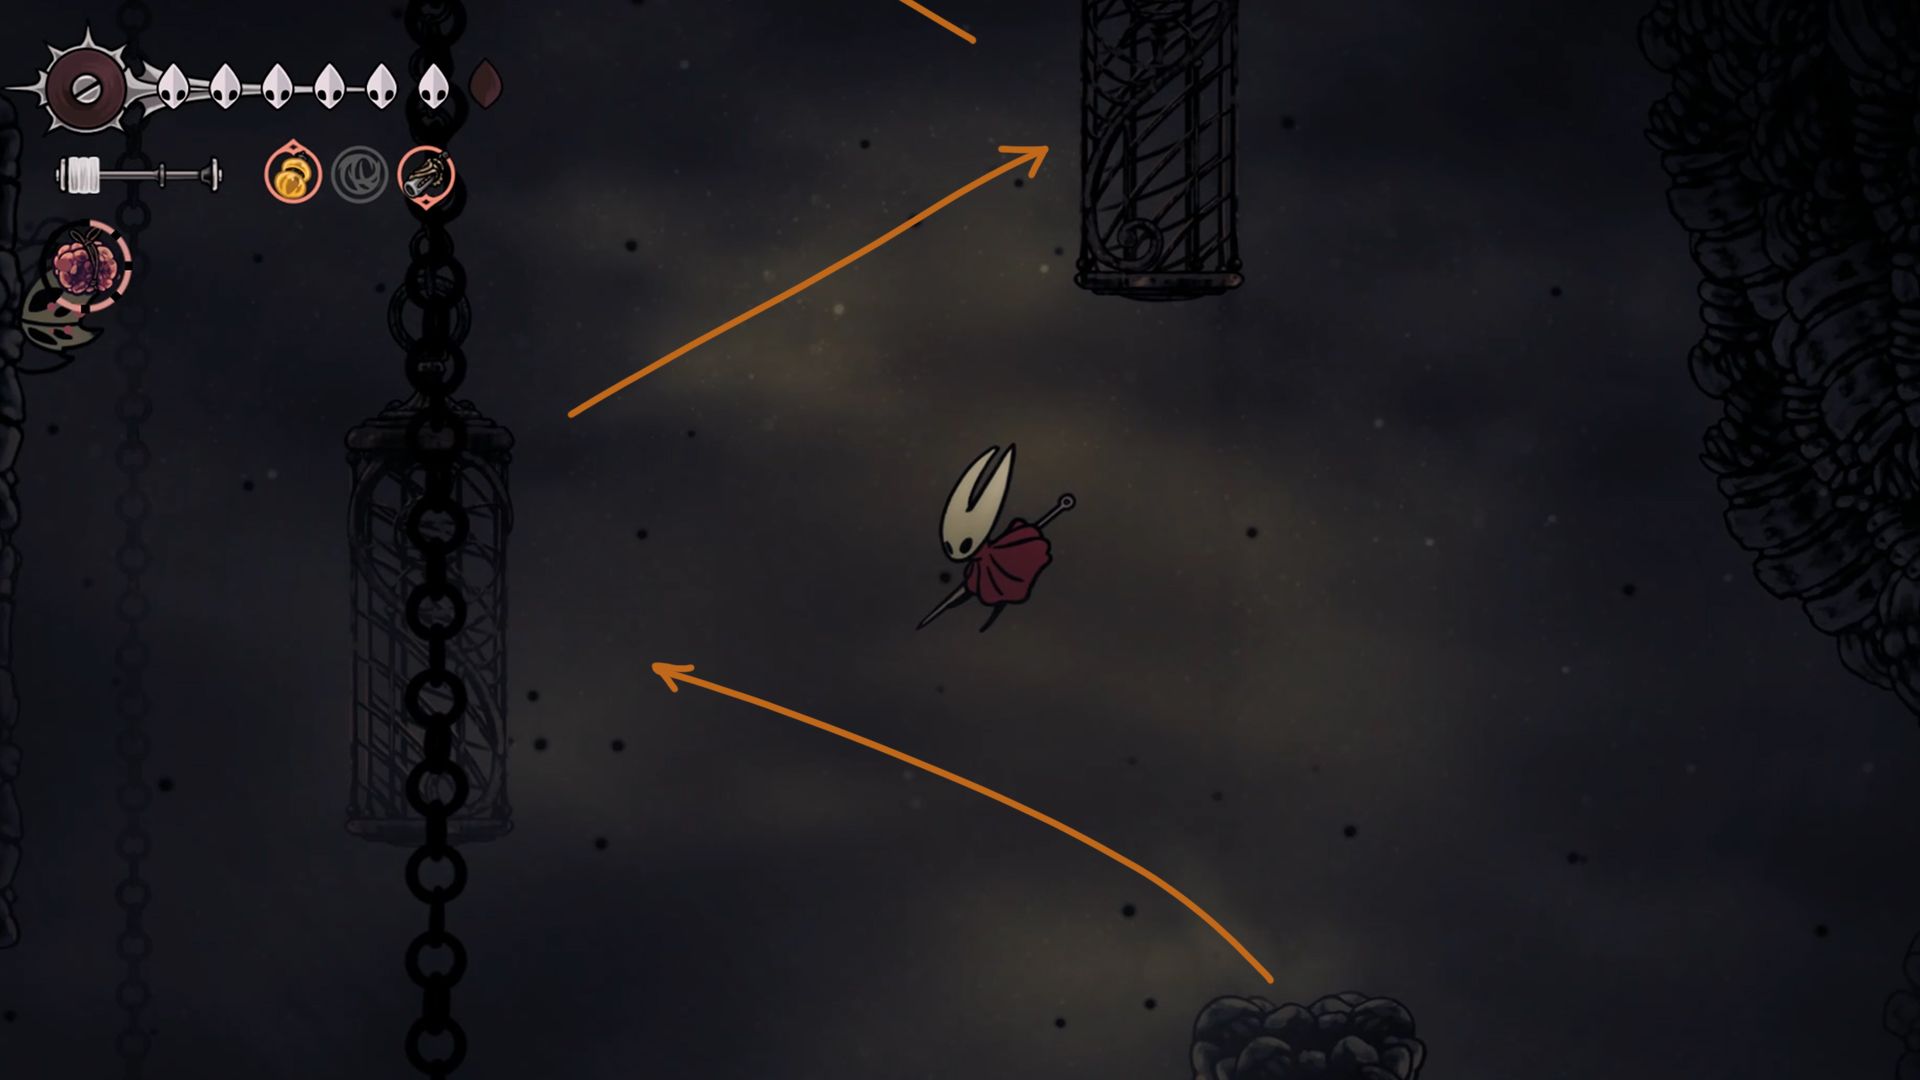
Attempt to leap twice with the aim of reaching as high as Hornet can manage, then fire a hookshot towards the cage situated to your left. If this proves challenging, you always have the option to navigate to the opposite side for an easier ascent. Subsequently, continue moving between cages and obstacles, guiding Hornet upward and closer to her objective.
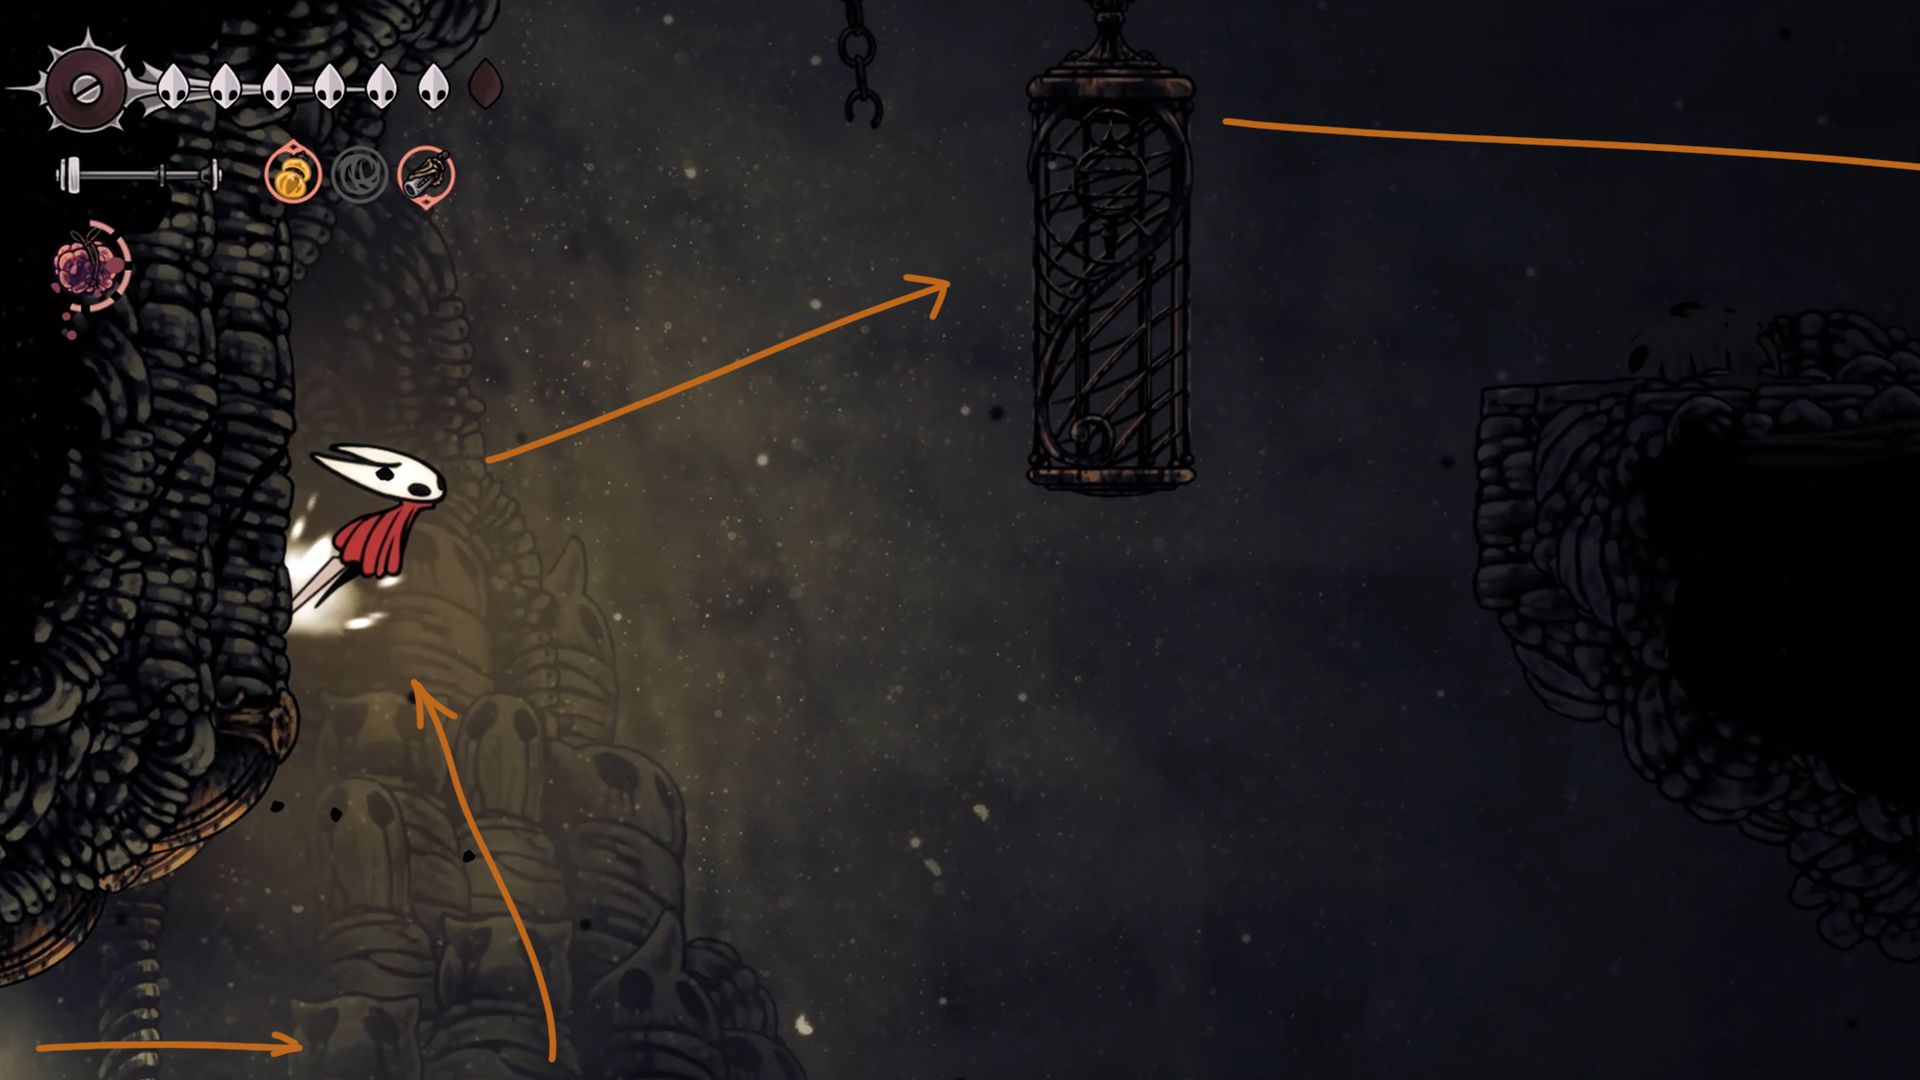
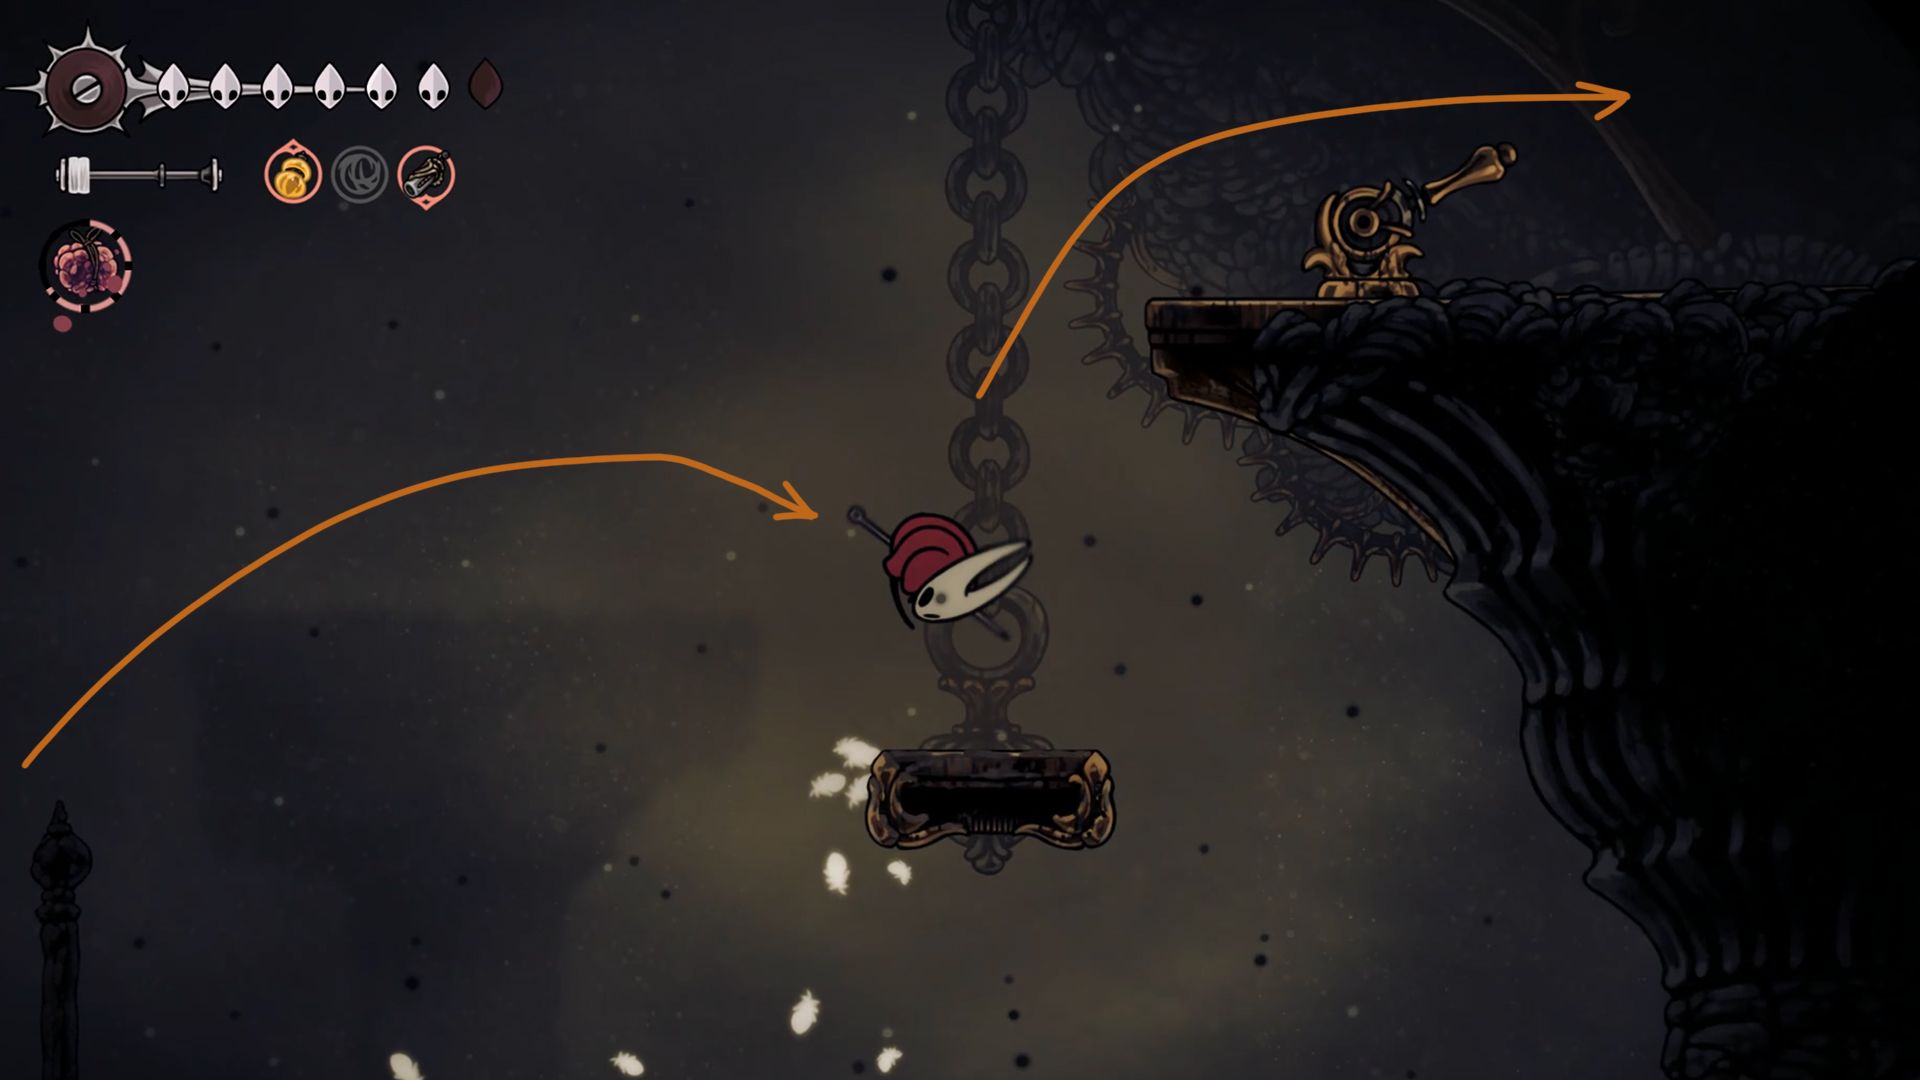
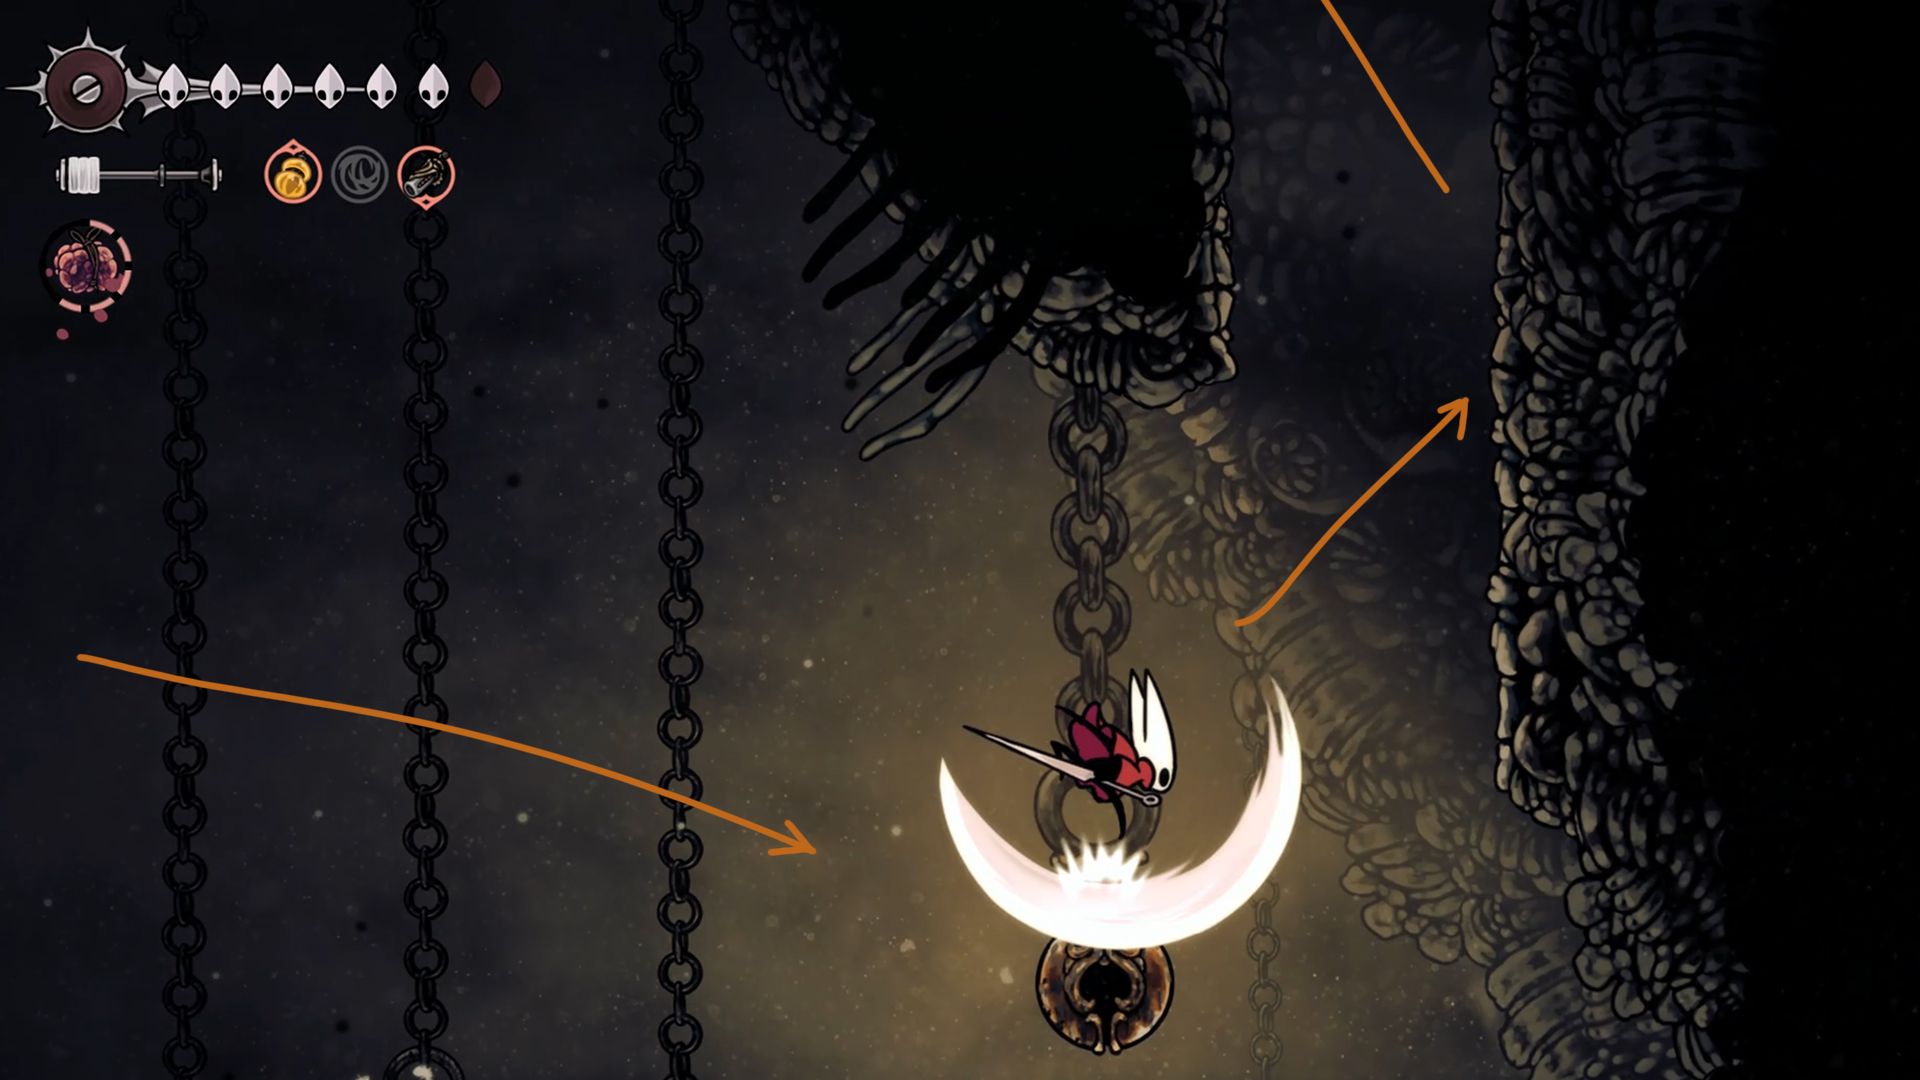
In the final section, skip over some tranquil running spaces, promptly scale the wall near Hornet and aim for the cage above. Continue moving towards the right, jumping from one floating stone to another, until you reach the pair of swinging bells at the end. Strike them to propel yourself onto the wall, then onto the rock next to it.

In this crucial section, Hornet encounters two obstacles preventing him from ringing the bell situated above them. Hornet has two potential strategies to navigate through this barrier.
This rephrased version maintains the original meaning while providing an easier-to-read and more natural flow of information.
- Jump-attack the shielded (Judge) enemy to reach the bell.
- Avoid the enemy by leaping over them and head to the rock on the left. It will provide a safe jump to the bell to reach the upper ledge.
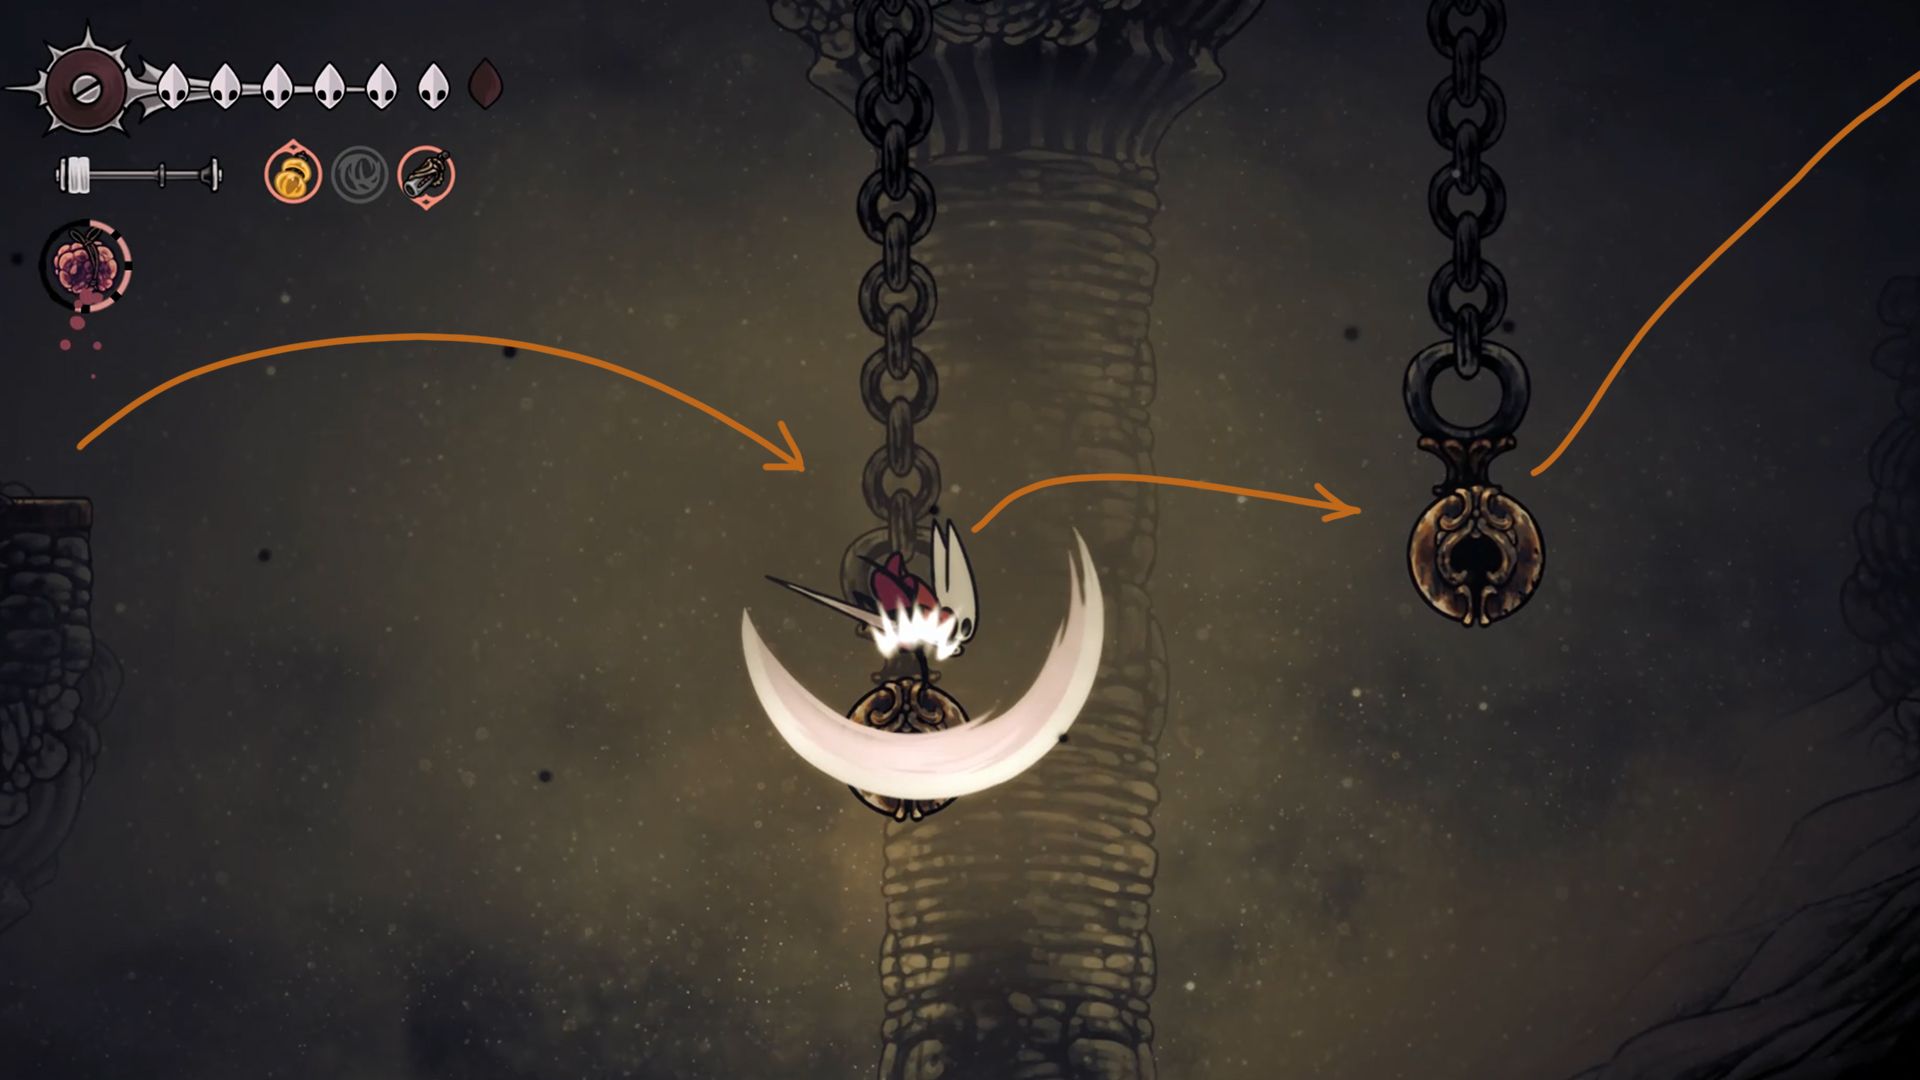
Switching to the opposite side, jump two times, and then grab onto the stone on your right to bypass the majority of this region’s parkour obstacles.
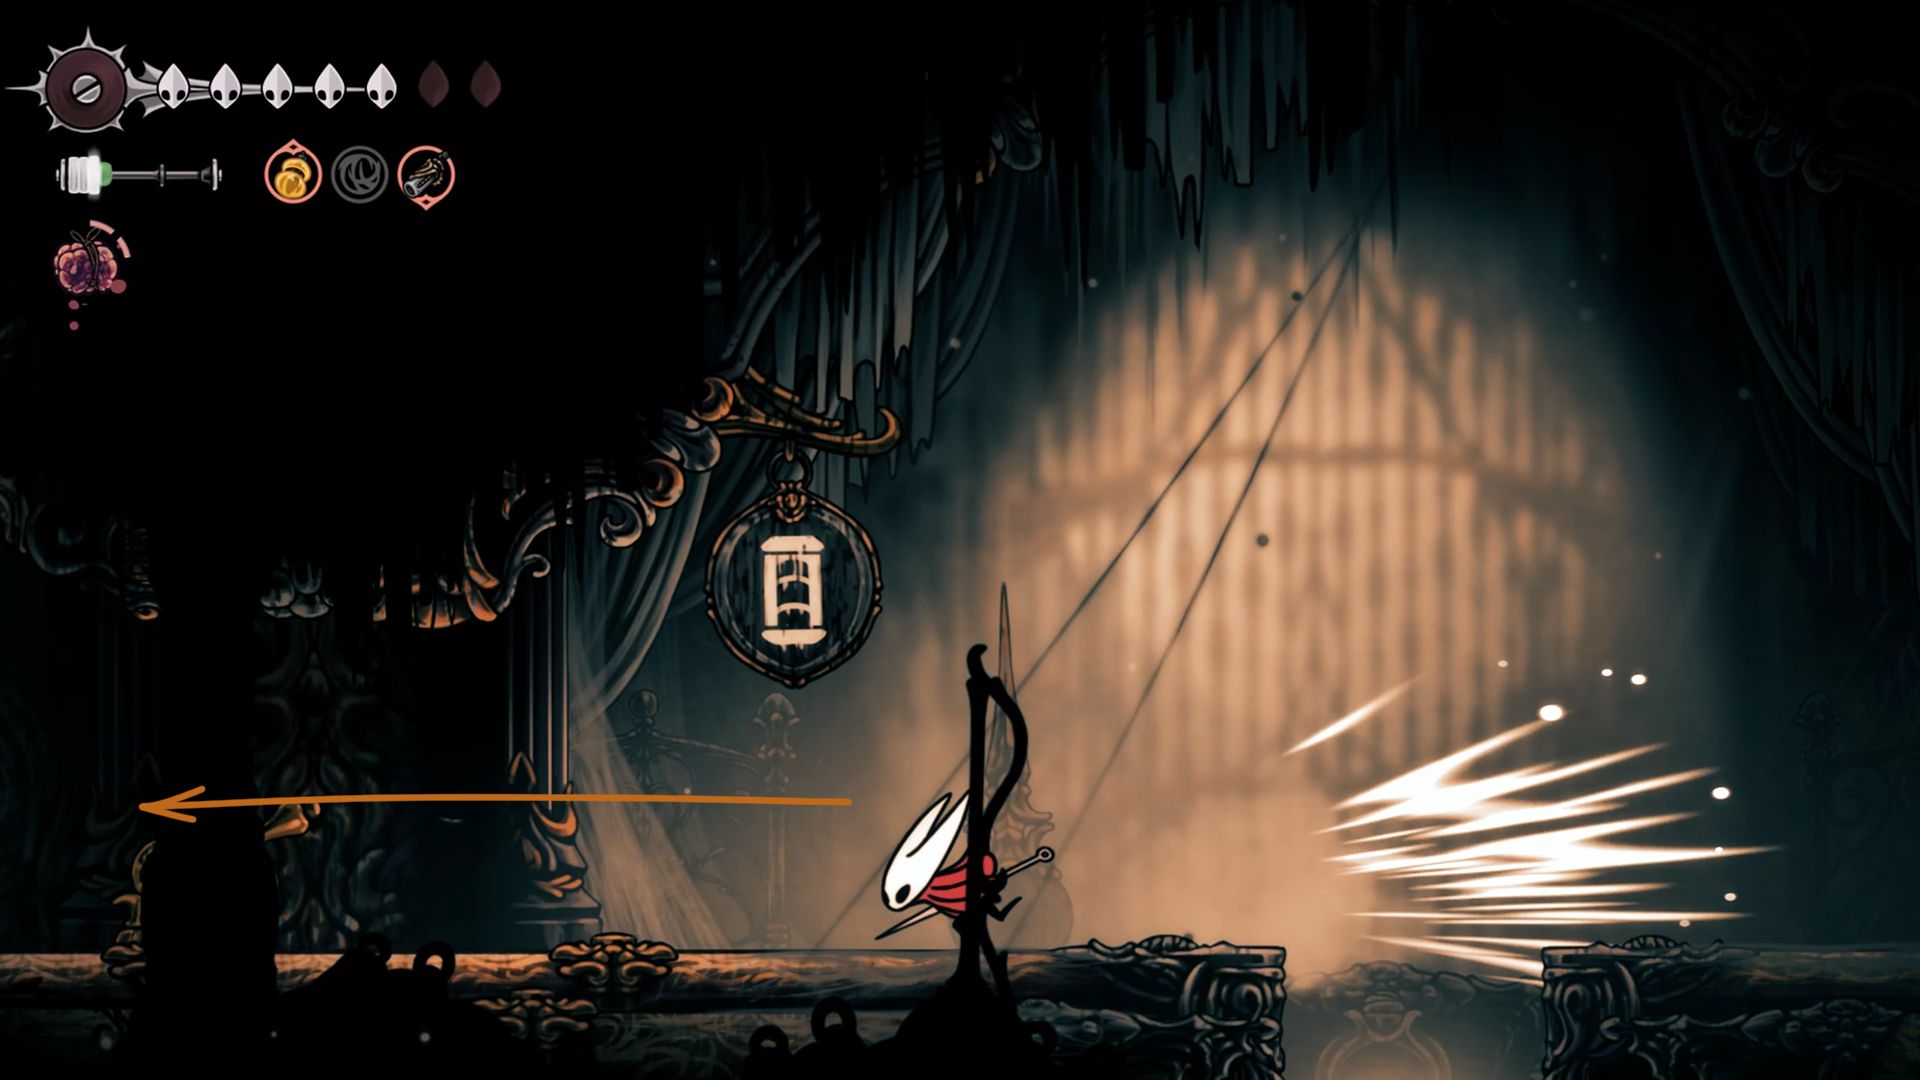
For the last step, aim for the bell on the left to make it hit the wall. Next, focus on the second bell to climb up to the higher platform. Then, you can safely continue your journey towards the Grand Gate while running.
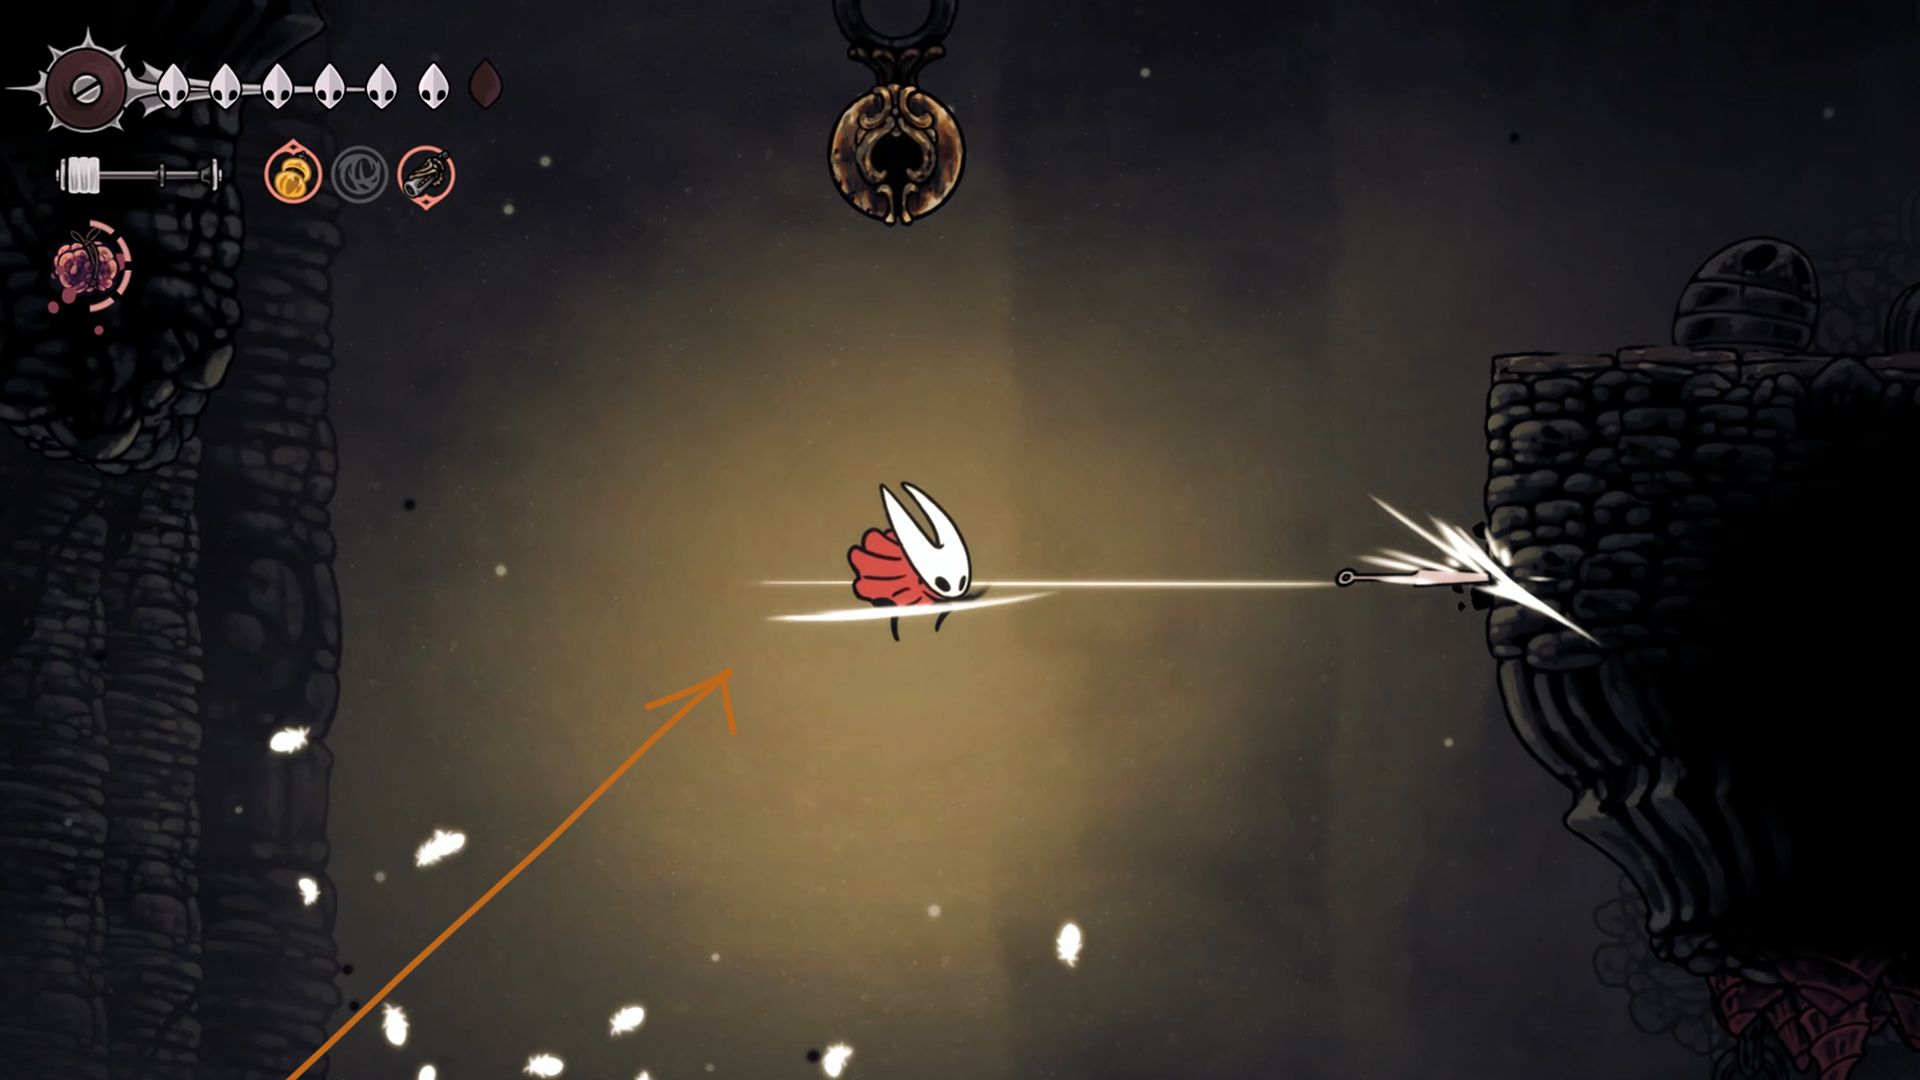
Grand Gate and Choral Chambers
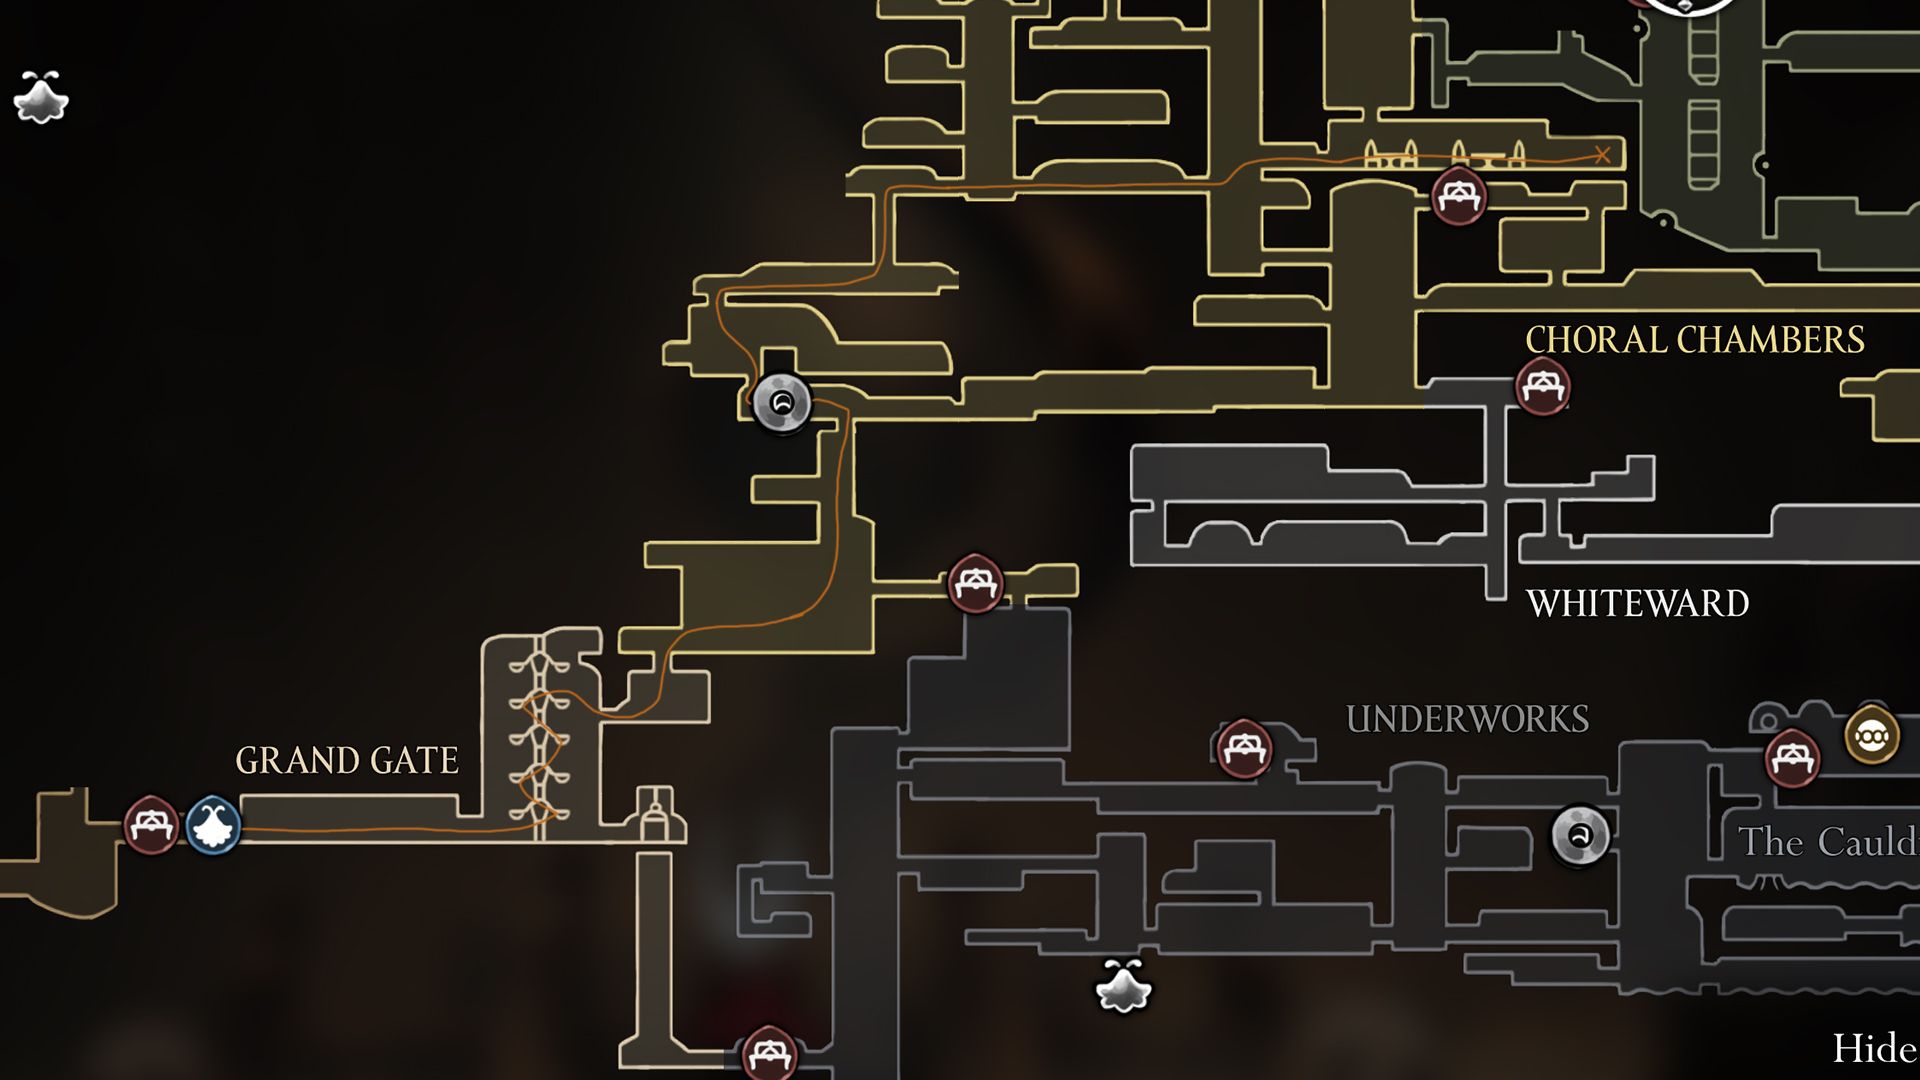
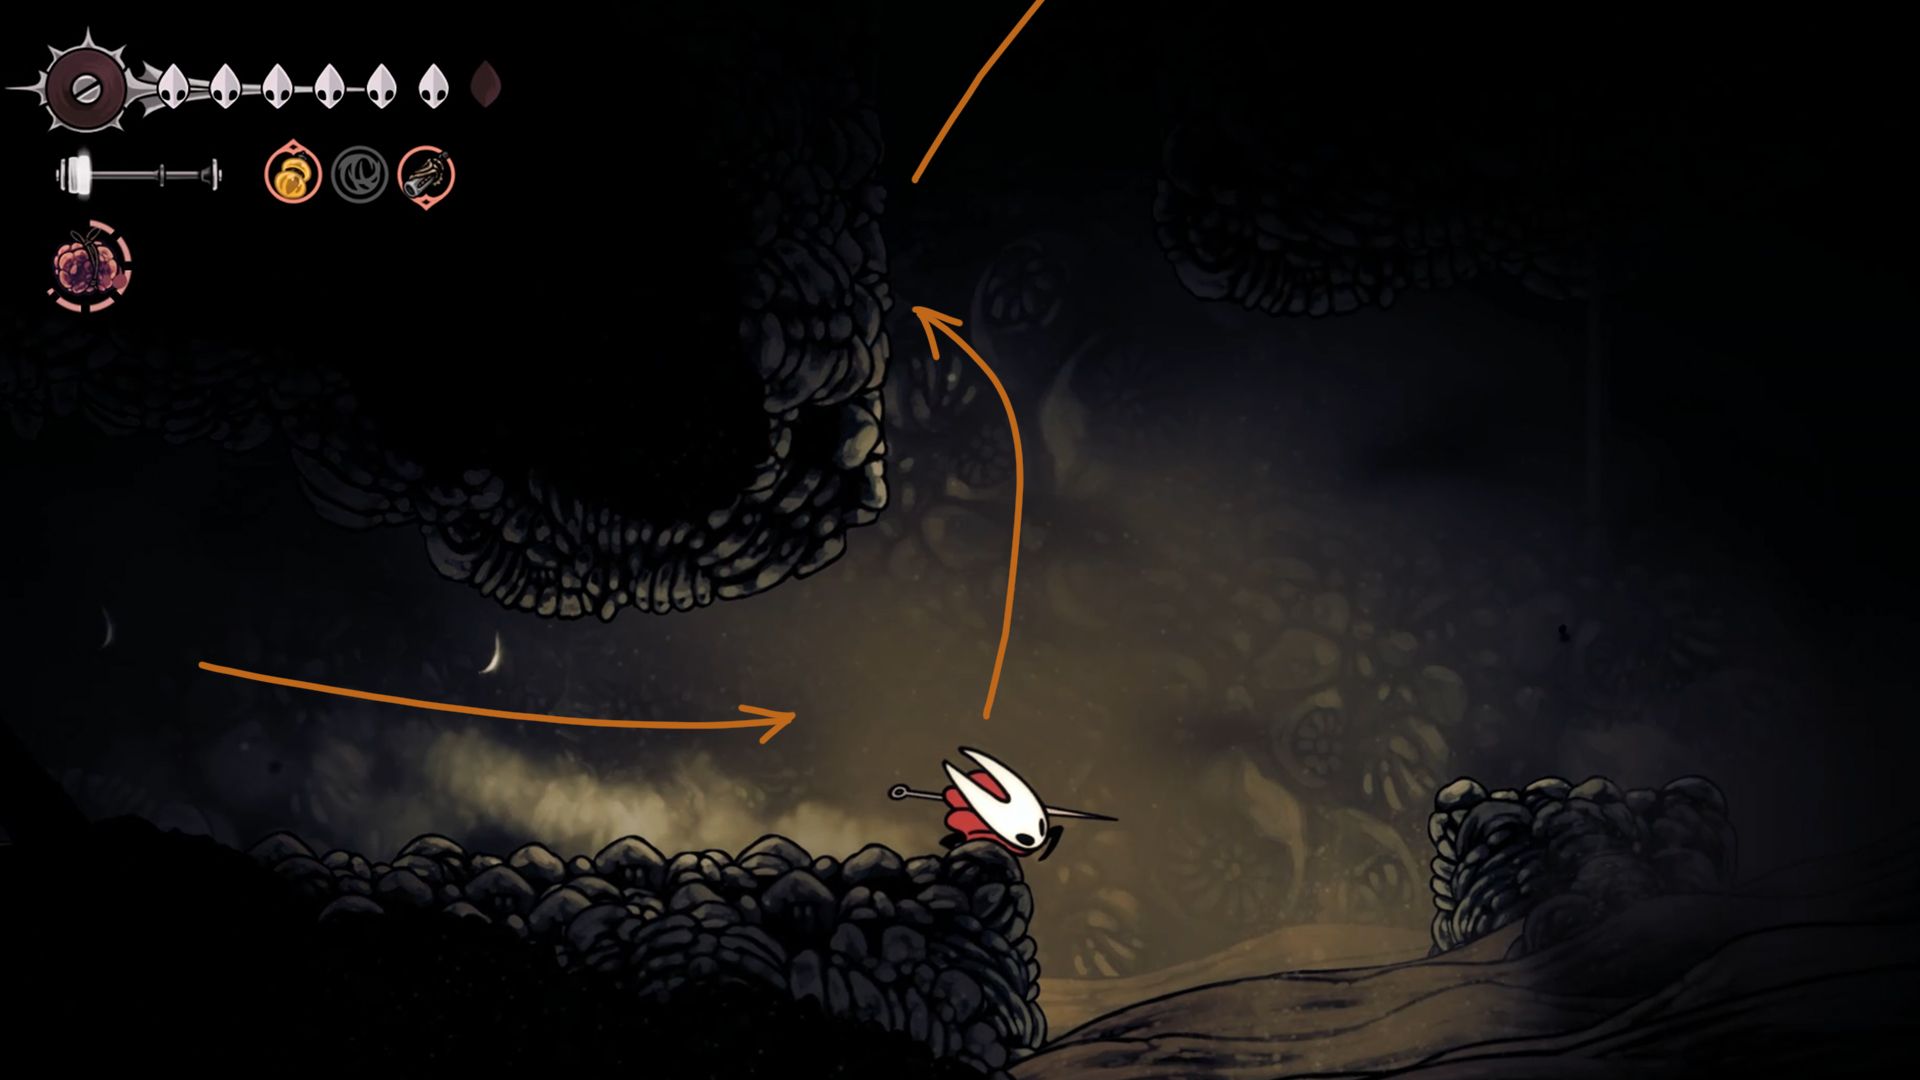
Within the Grand Gate, Hornet can leap and run using parkour to climb a quick path straight to the Choral Chambers, bypassing the Underworks region. Exiting this little room is possible only by going upwards, thus placing Hornet in the Choral Chambers. From here, she can easily navigate the area, intending to reach the Ventrica chamber overhead. It’s advisable to evade enemies as some of them may obstruct her path.
This shortcut from Grand Gate to Choral Chambers must be opened beforehand.
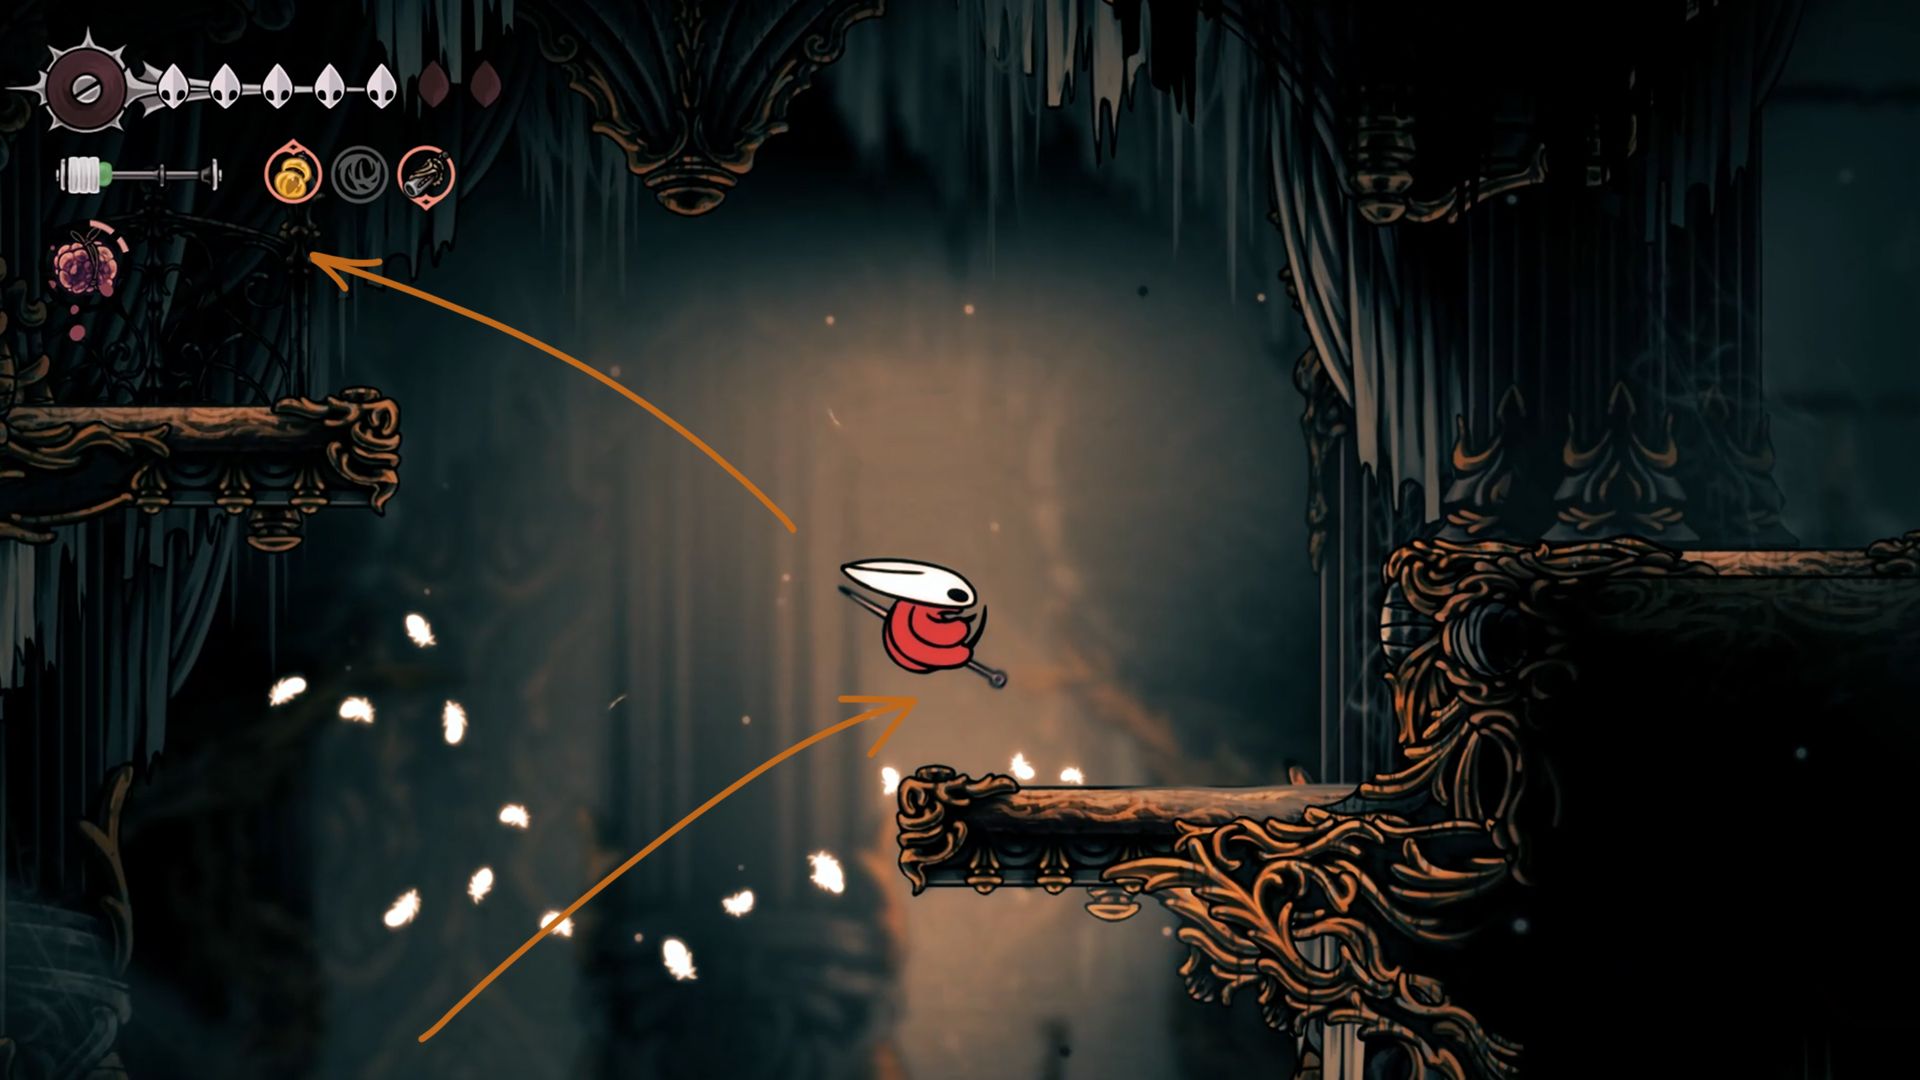
As you arrive at the Ventrica chamber, avoid approaching from the right as it’s packed with adversaries and challenging obstacle courses. Instead, opt for the left side because it conceals a secret shortcut, and there are few obstacles in your way.
This shortcut to the Citadel Spa must be unlocked beforehand.

Persist in overcoming every barrier until Hornet ultimately finds the exit room connecting to The Slab within Silksong. Proceed towards the right from there, avoiding confrontations with enemies as much as possible, so you can eventually get to Loyal Mergwin’s chamber and hand over the Courier’s Rasher.
Read More
- Robinhood’s $75M OpenAI Bet: Retail Access or Legal Minefield?
- All Skyblazer Armor Locations in Crimson Desert
- How to Get the Sunset Reed Armor Set and Hollow Visage Sword in Crimson Desert
- How to Catch All Itzaland Bugs in Infinity Nikki
- All Hauntingham’s Letters & Hidden Page in New Super Lucky’s Tale
- Speedsters Sandbox Roblox Codes
- Who Can You Romance In GreedFall 2: The Dying World?
- Black Sun Shield Location In Crimson Desert (Buried Treasure Quest)
- Invincible: 10 Strongest Viltrumites in Season 4, Ranked
- Top 10 Must-Watch Isekai Anime on Crunchyroll Revealed!
2025-09-13 13:26