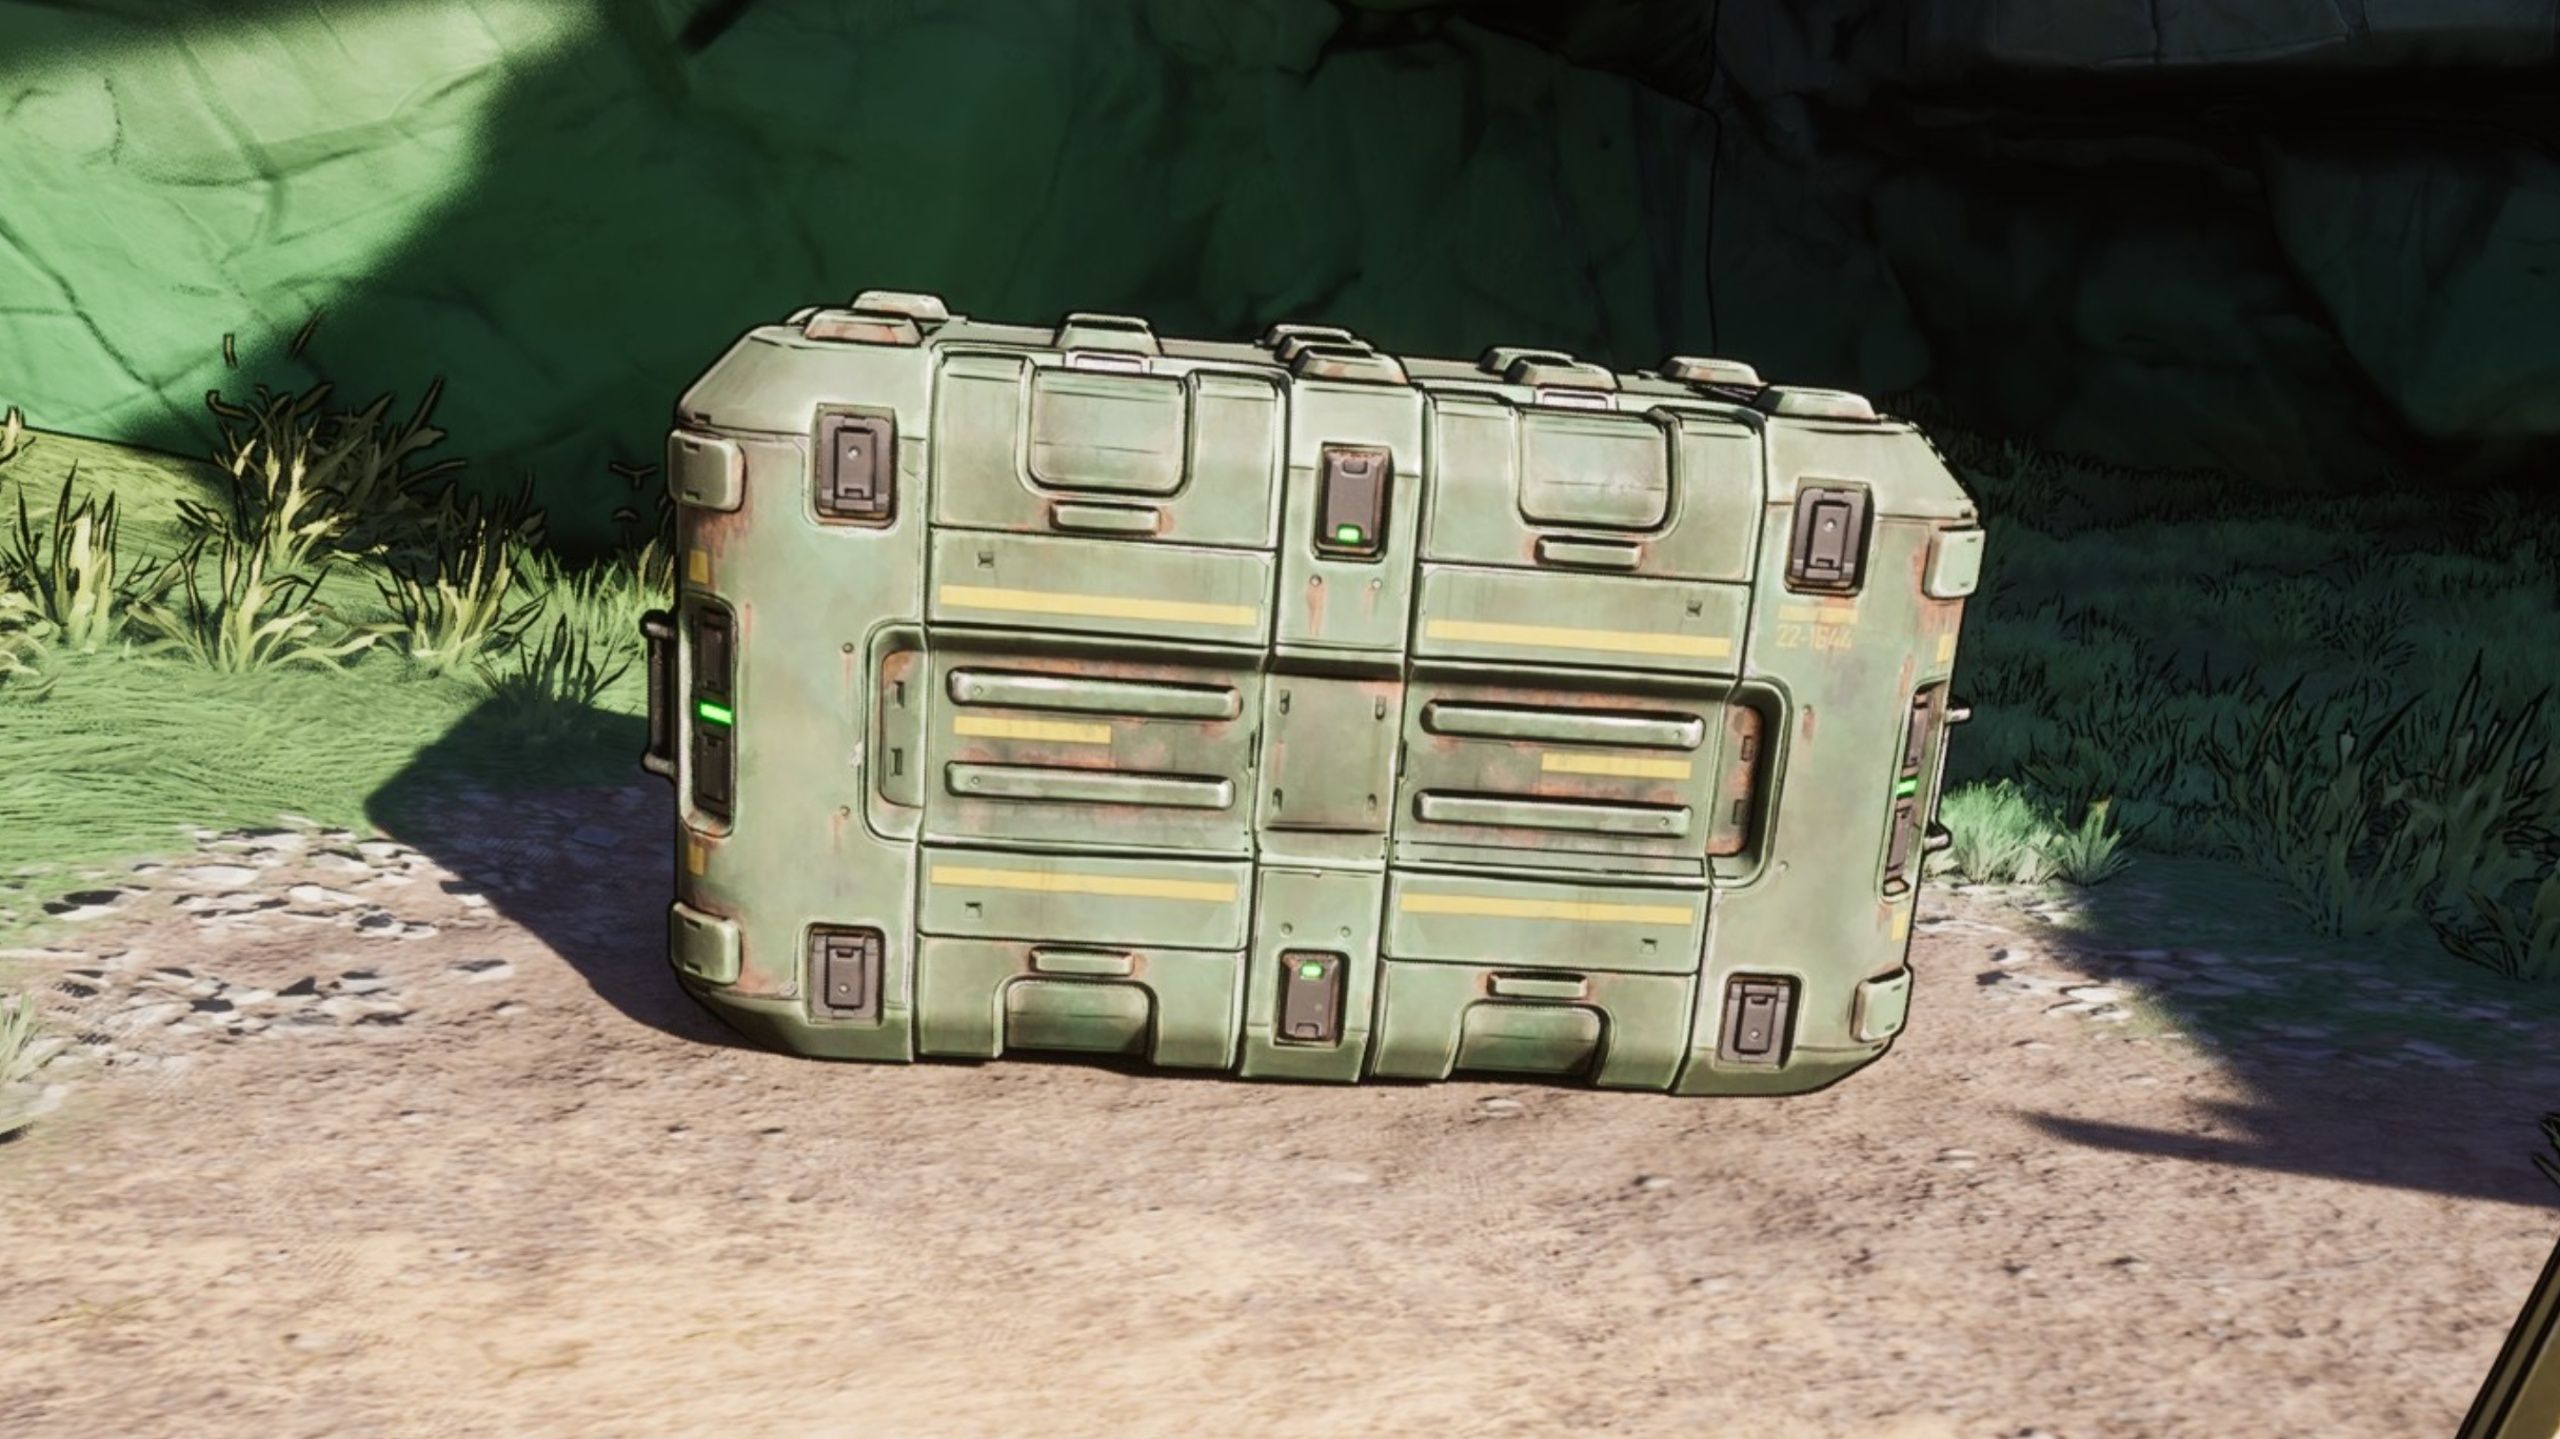
In Borderlands 4, players can start collecting Survivalist Caches, which are hidden throughout the Fadefields. There are 10 of these caches in total. While opening them is easy-just interact with the box-finding them can be tricky. They’re located in various points of interest, but some are well-hidden. This guide provides the locations and walkthroughs to help you find all 10 Survivalist Caches in Borderlands 4.
Finding each Survivalist Cache gives you 10 SDU Tokens. Once you collect all 10 Tokens, you’ll unlock the Never Say DIY Weapon Skin as part of the Cache to Spend Challenge.
How to Find the Coastal Bonescape Survivalist Cache #1 in Borderlands 4
Survivalist Cache #1 Location
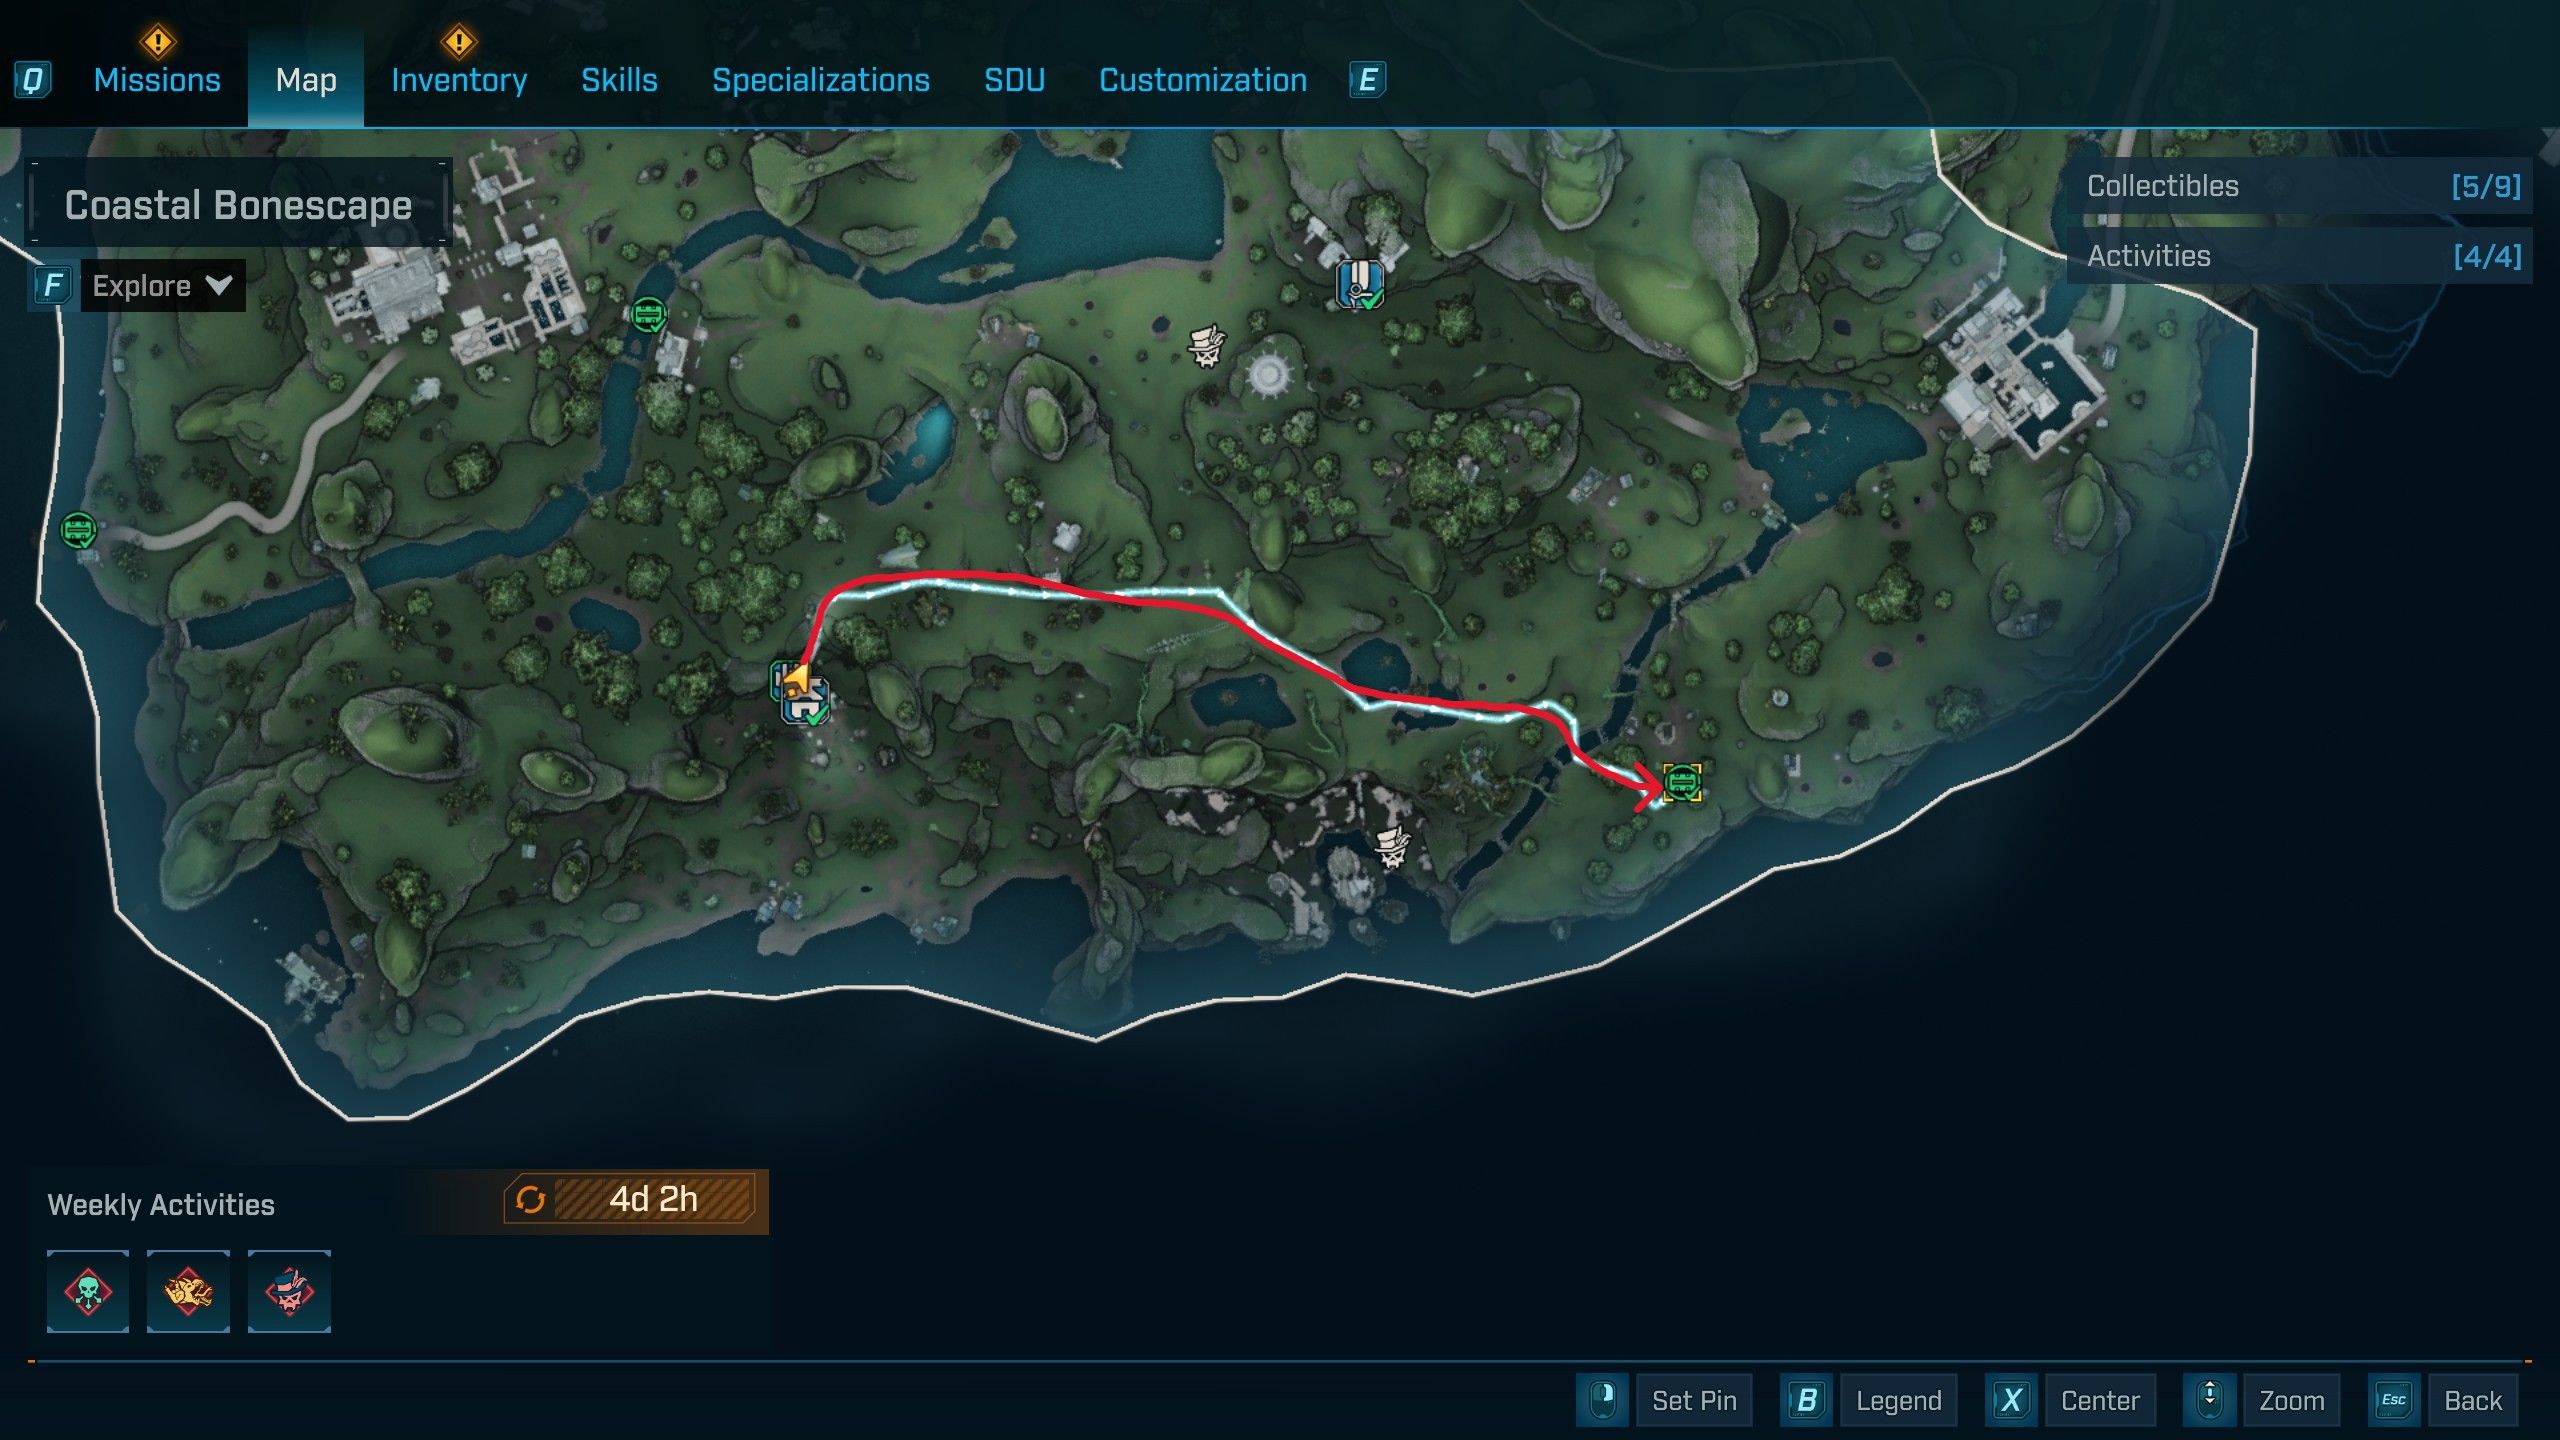

Starting from the first Safehouse – the Abandoned Outpost in the Coastal Bonescape – turn right and head east. Continue east until you reach the Haywire Shire. This campsite has a lot of Rippers, but you can safely pass them by. Go behind the house on the south side, and look for the Survivalist Cache just up the hill.
How to Find the Coastal Bonescape Survivalist Cache #2 in Borderlands 4
Survivalist Cache #2 Location
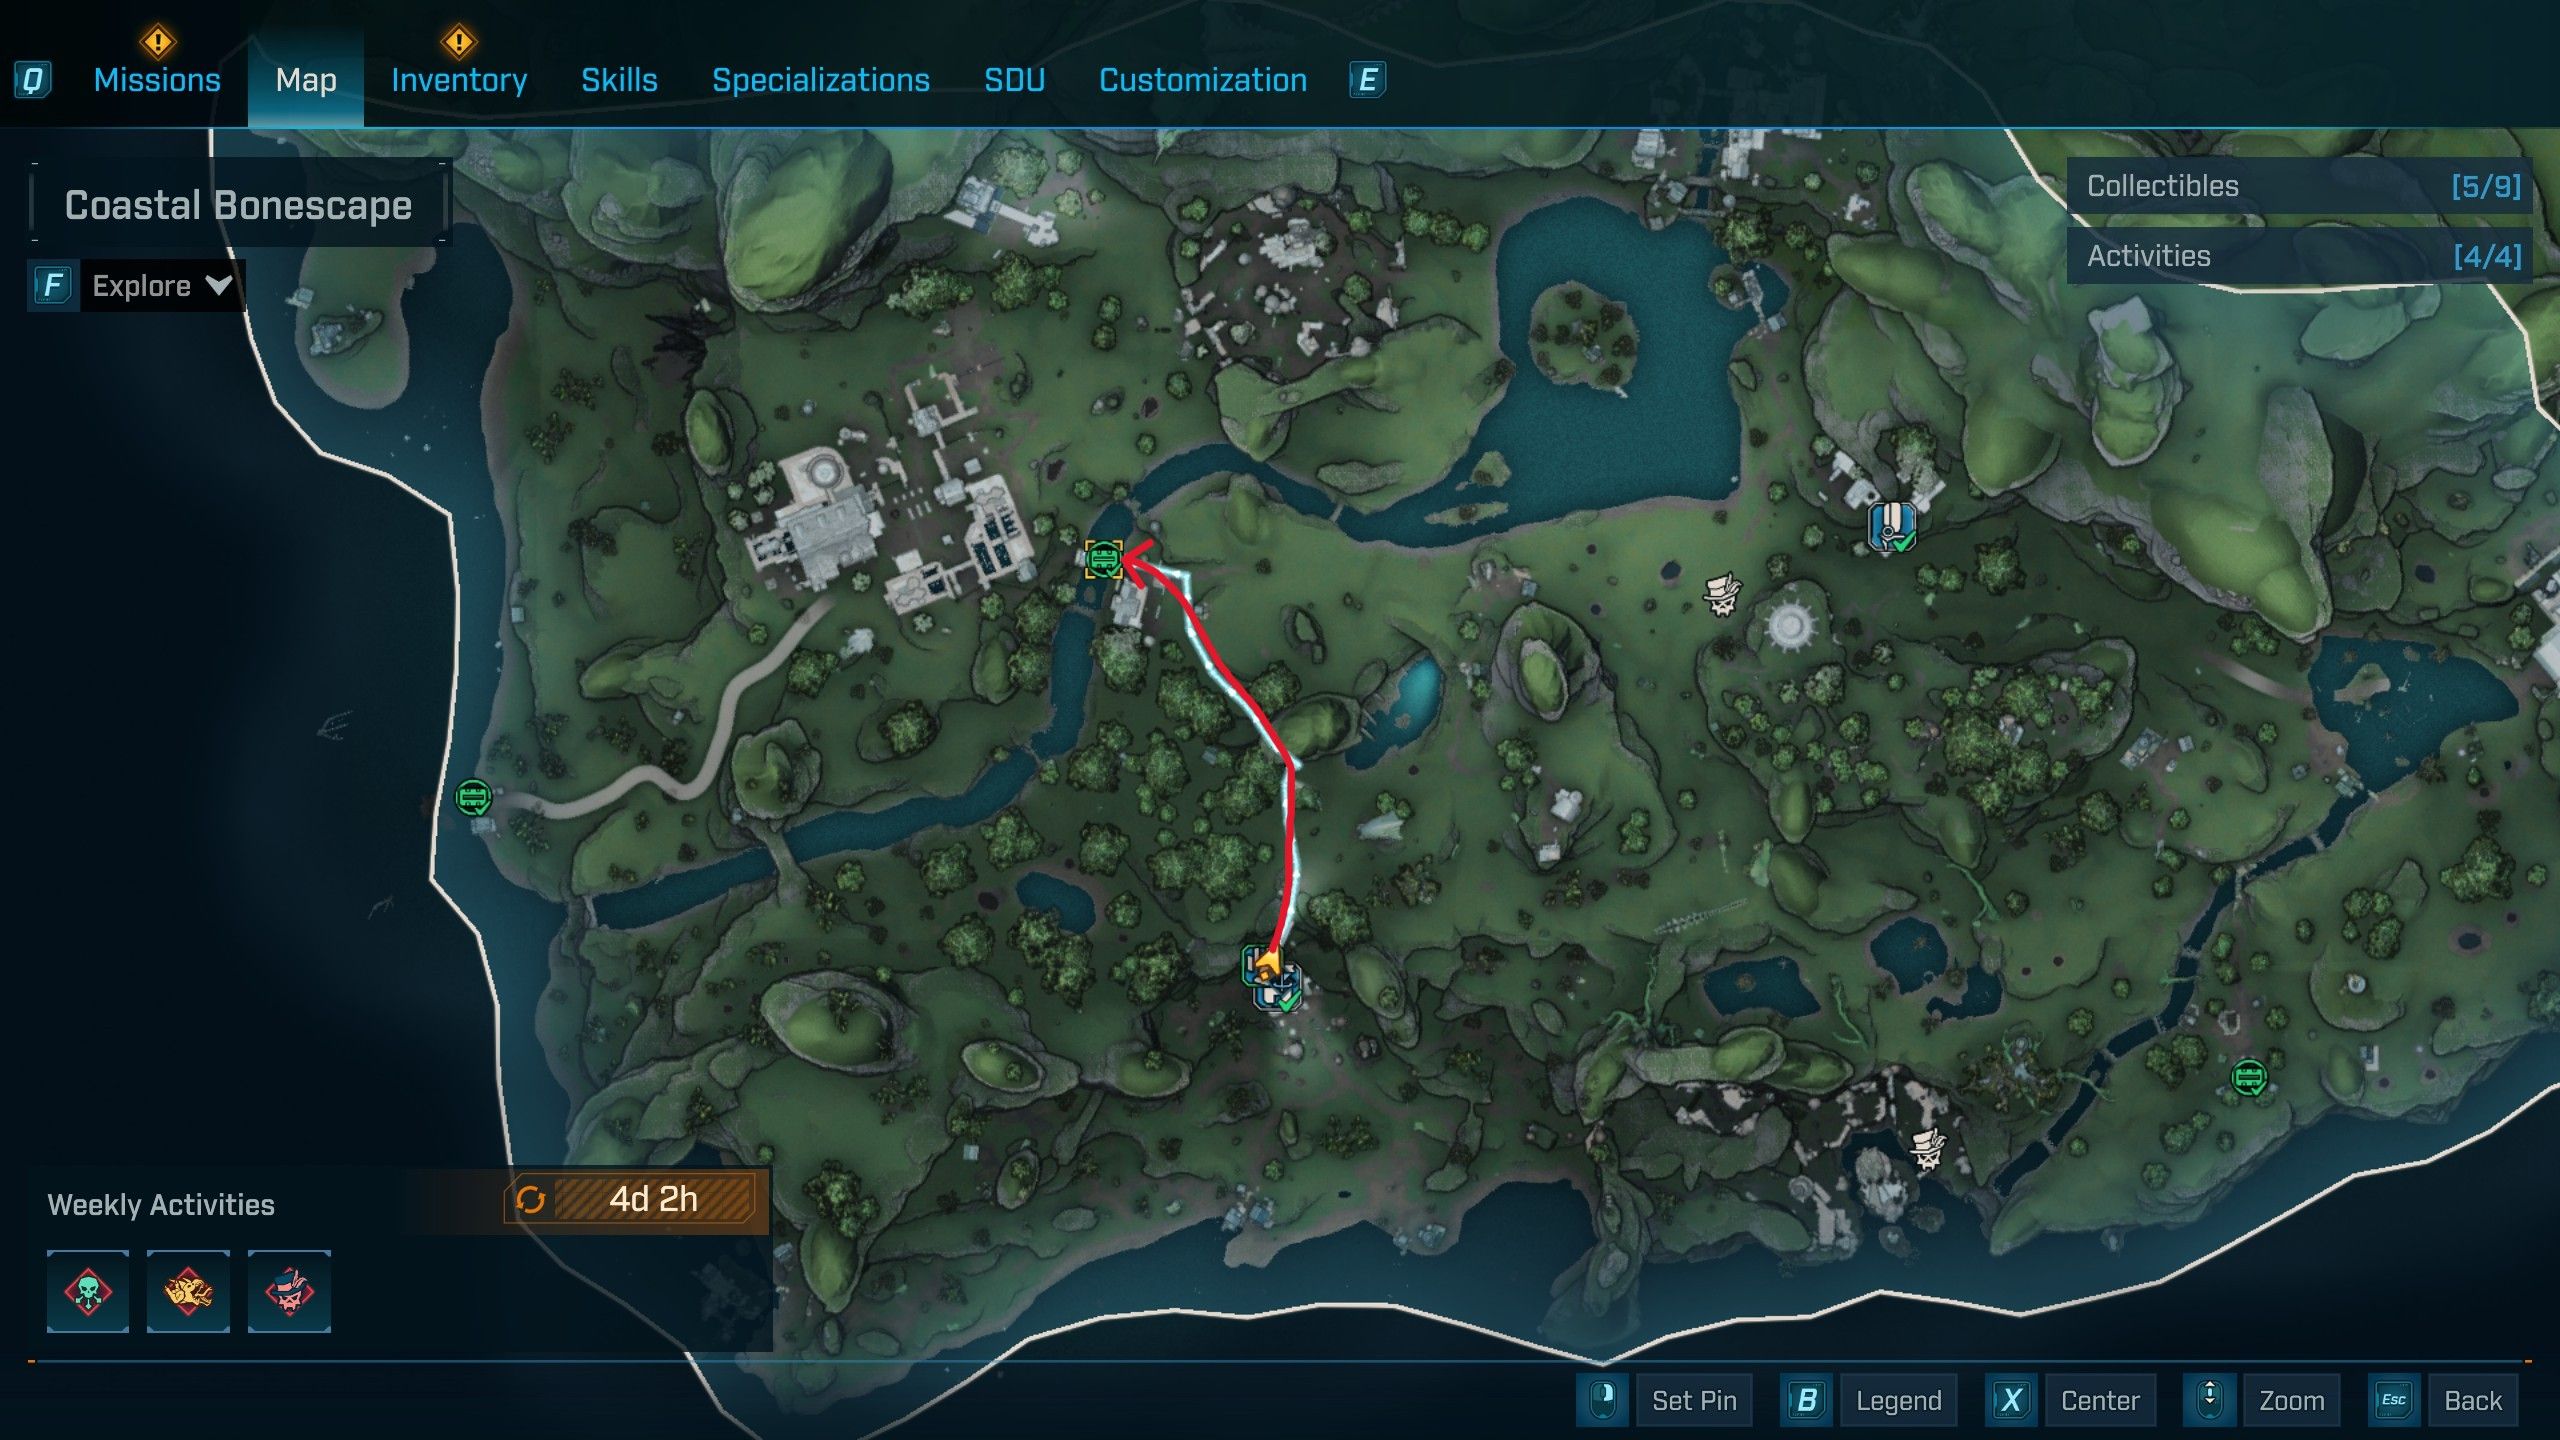
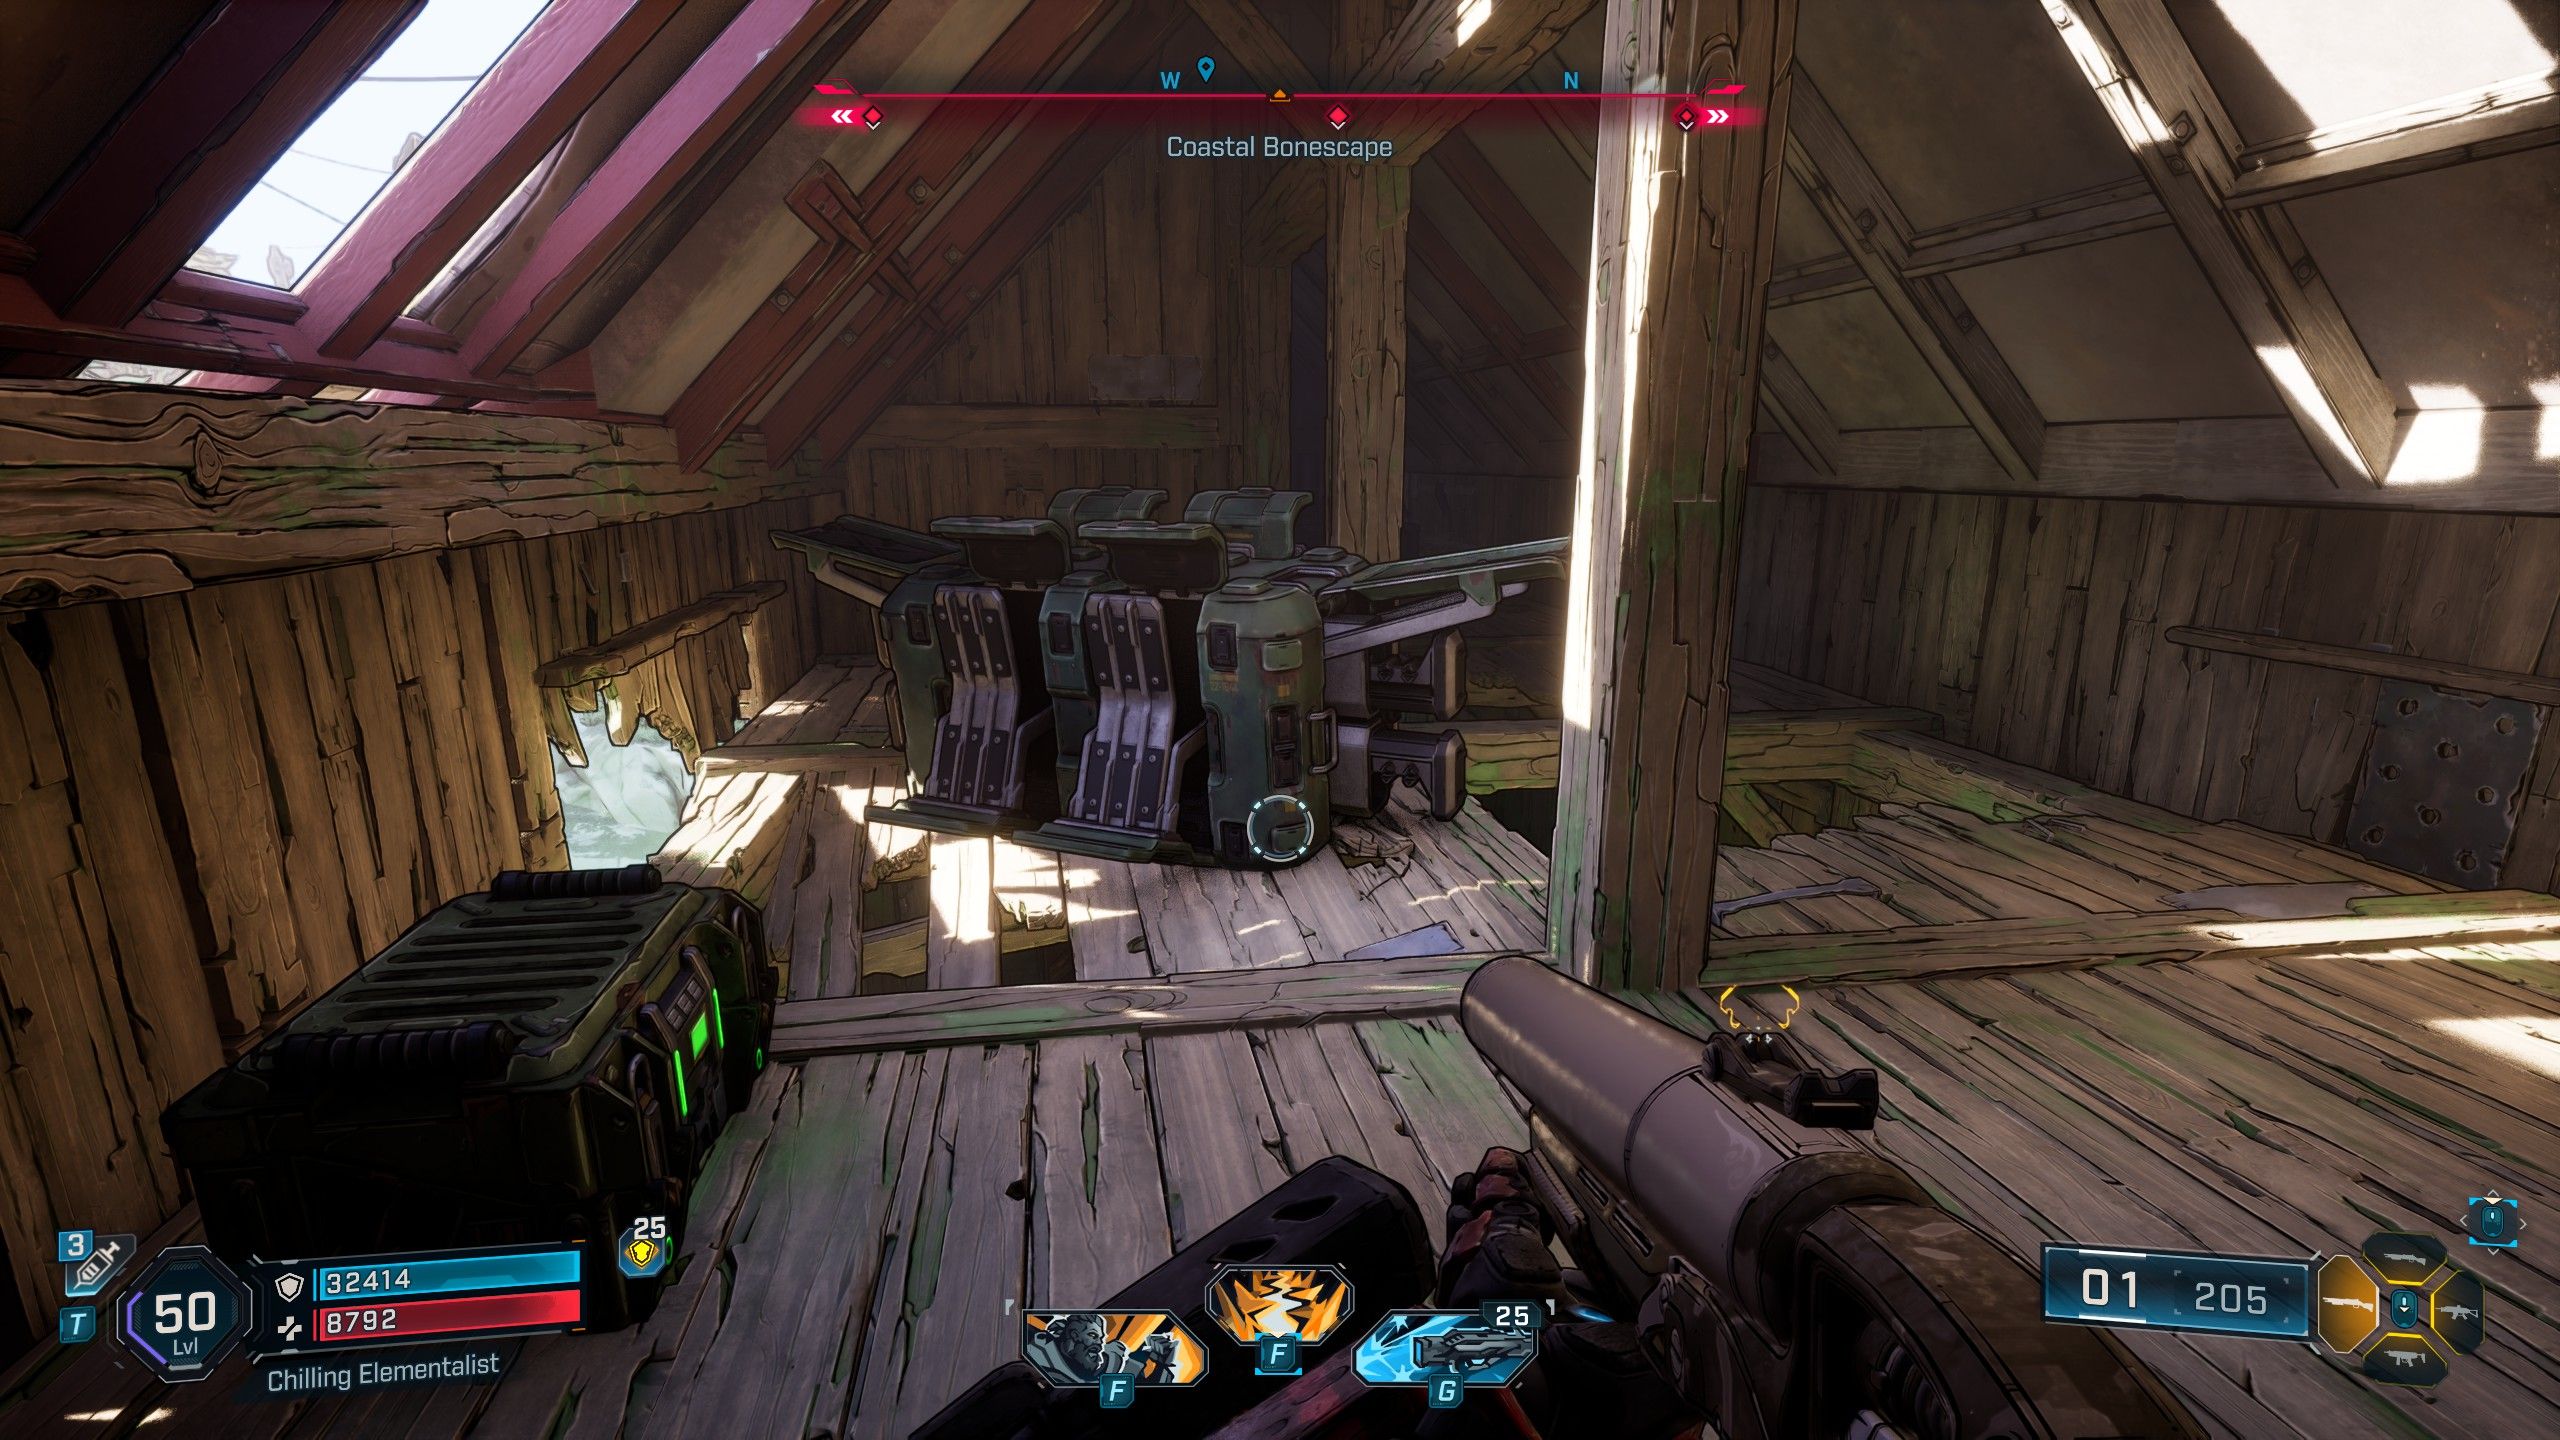
Start at the Abandoned Post Safehouse in Coastal Bonescape – it’s the first place you can reach after the game’s opening. Leave through the main door and walk west into the forest, going past the Pool of Re-Flex-tion. You’ll find another Ripper outpost with a broken-down bridge. The Survivalist Cache is inside this building. To get to it, climb onto the tractor and then up onto the floorboards, which will lead you to the roof and the Cache.
How to Find the Coastal Bonescape Survivalist Cache #3 in Borderlands 4
Survivalist Cache #3 Location
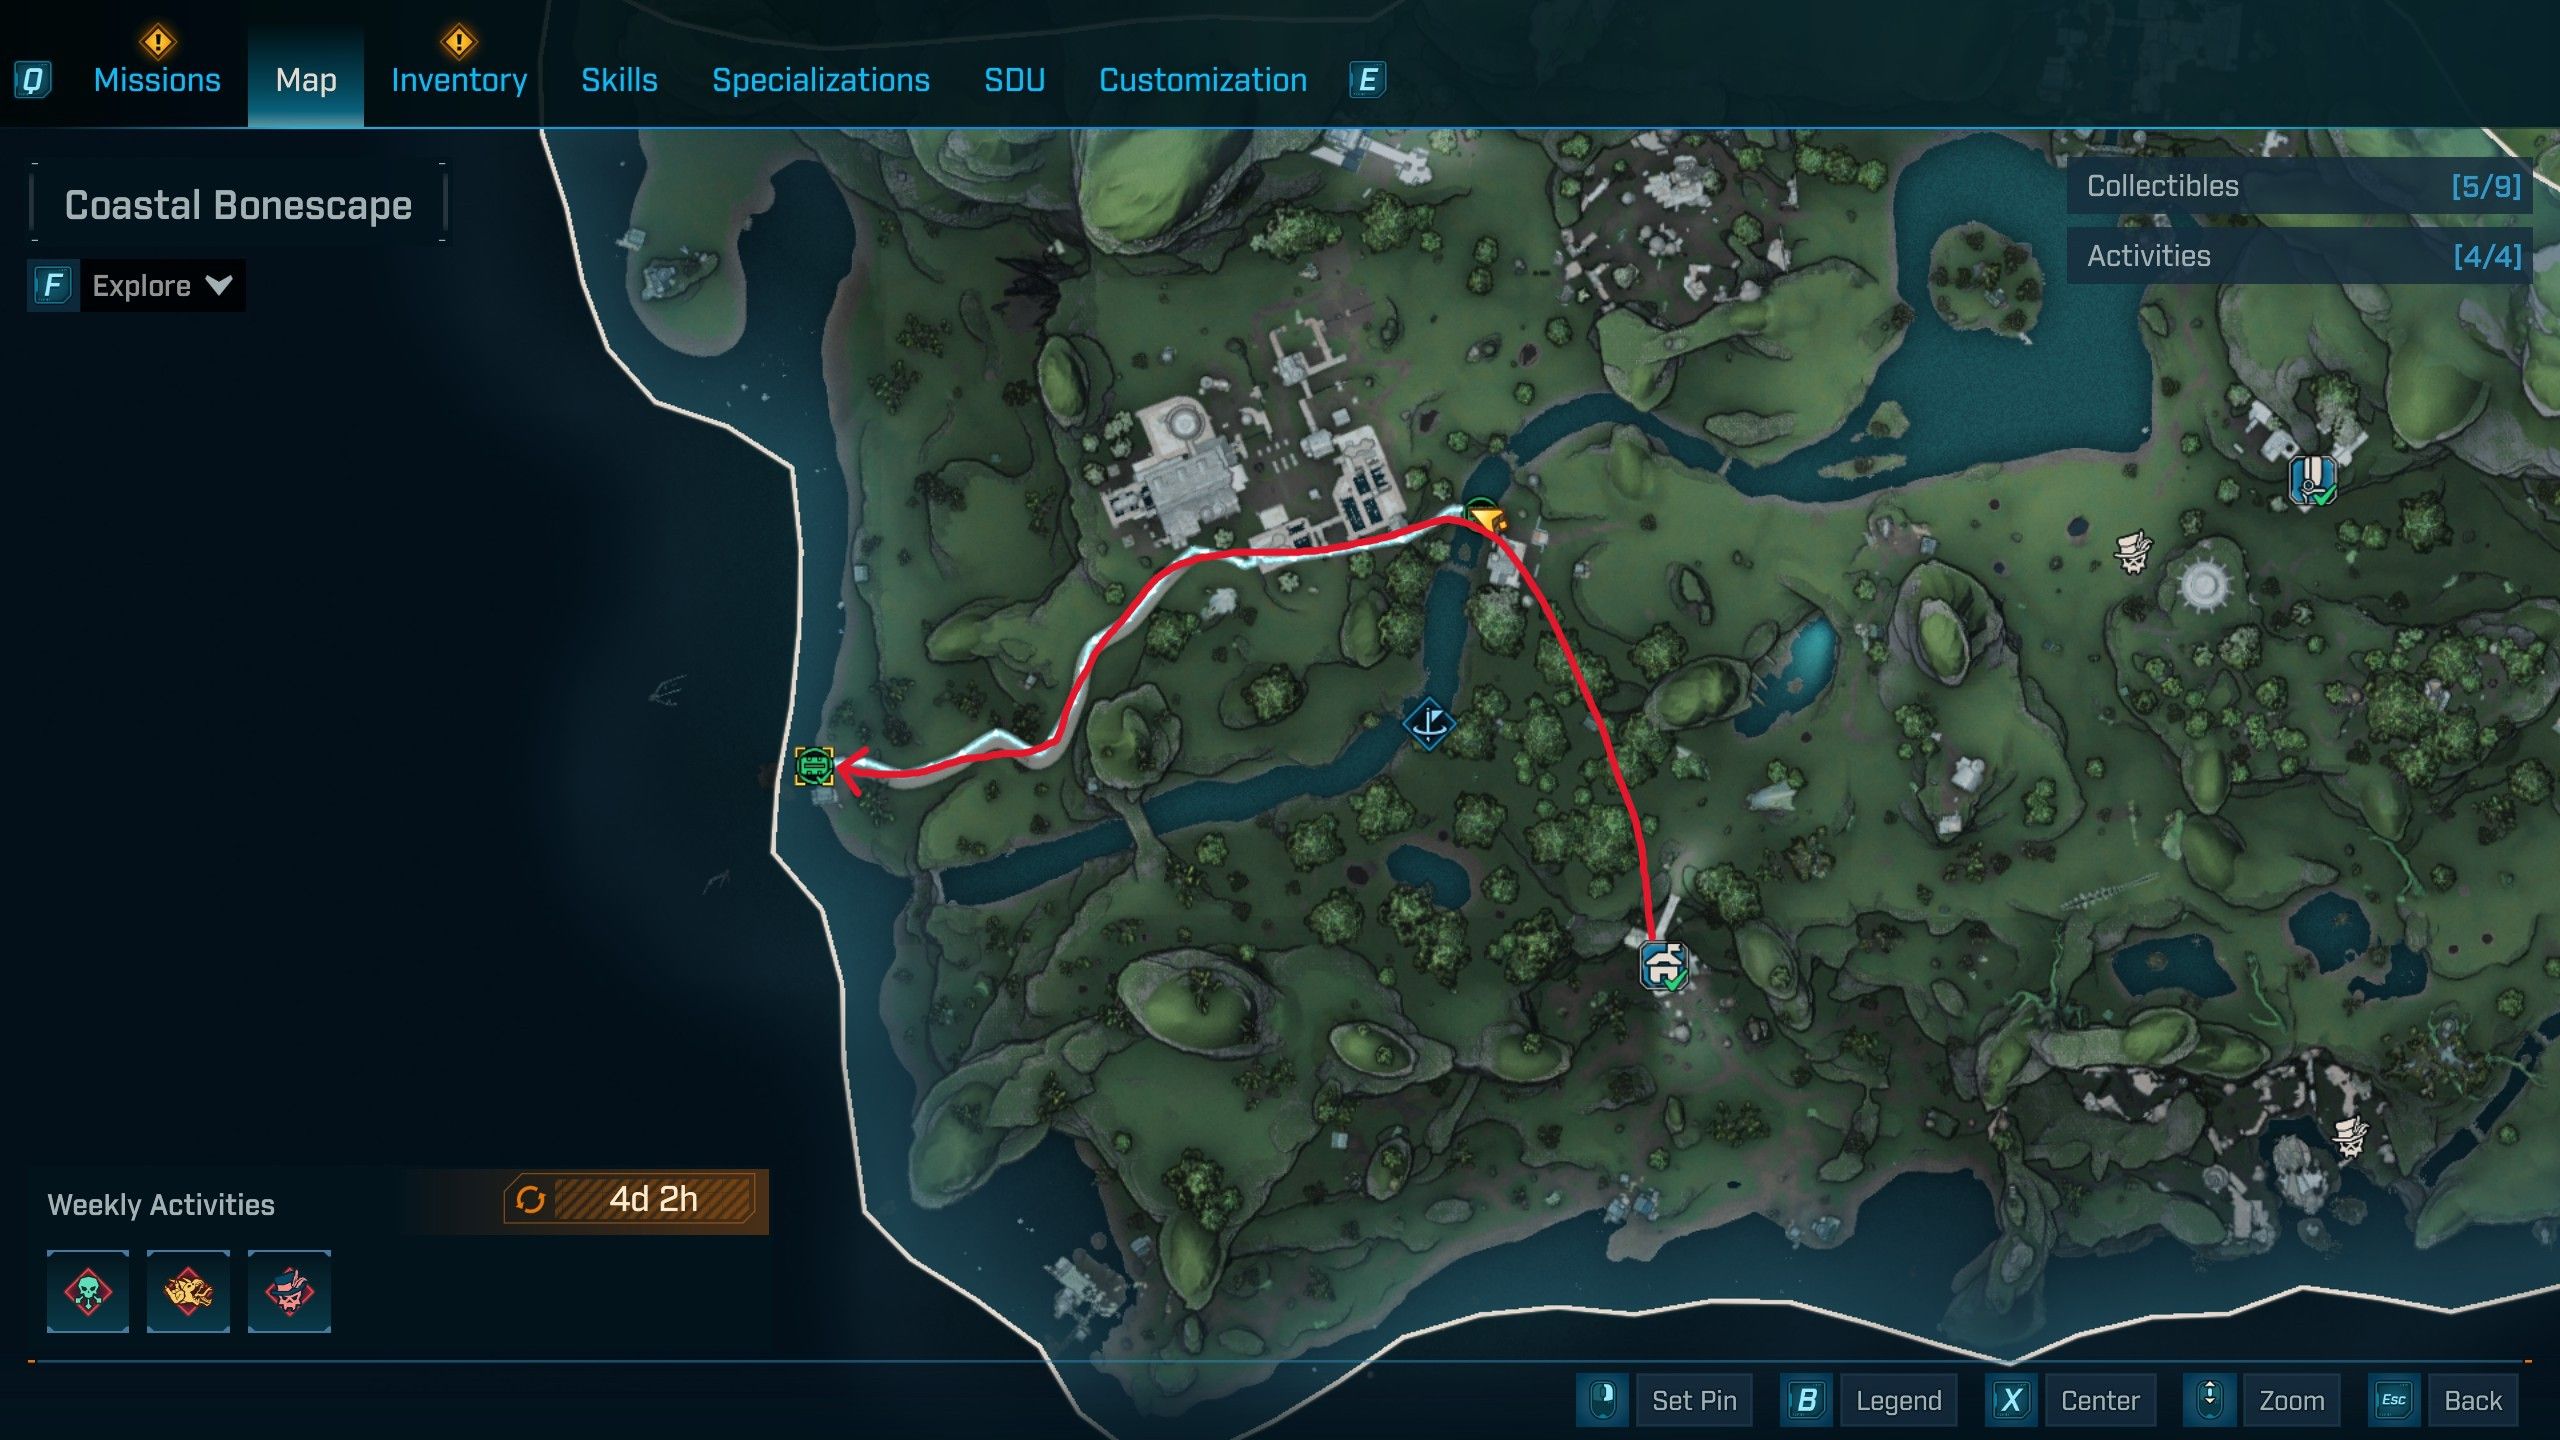
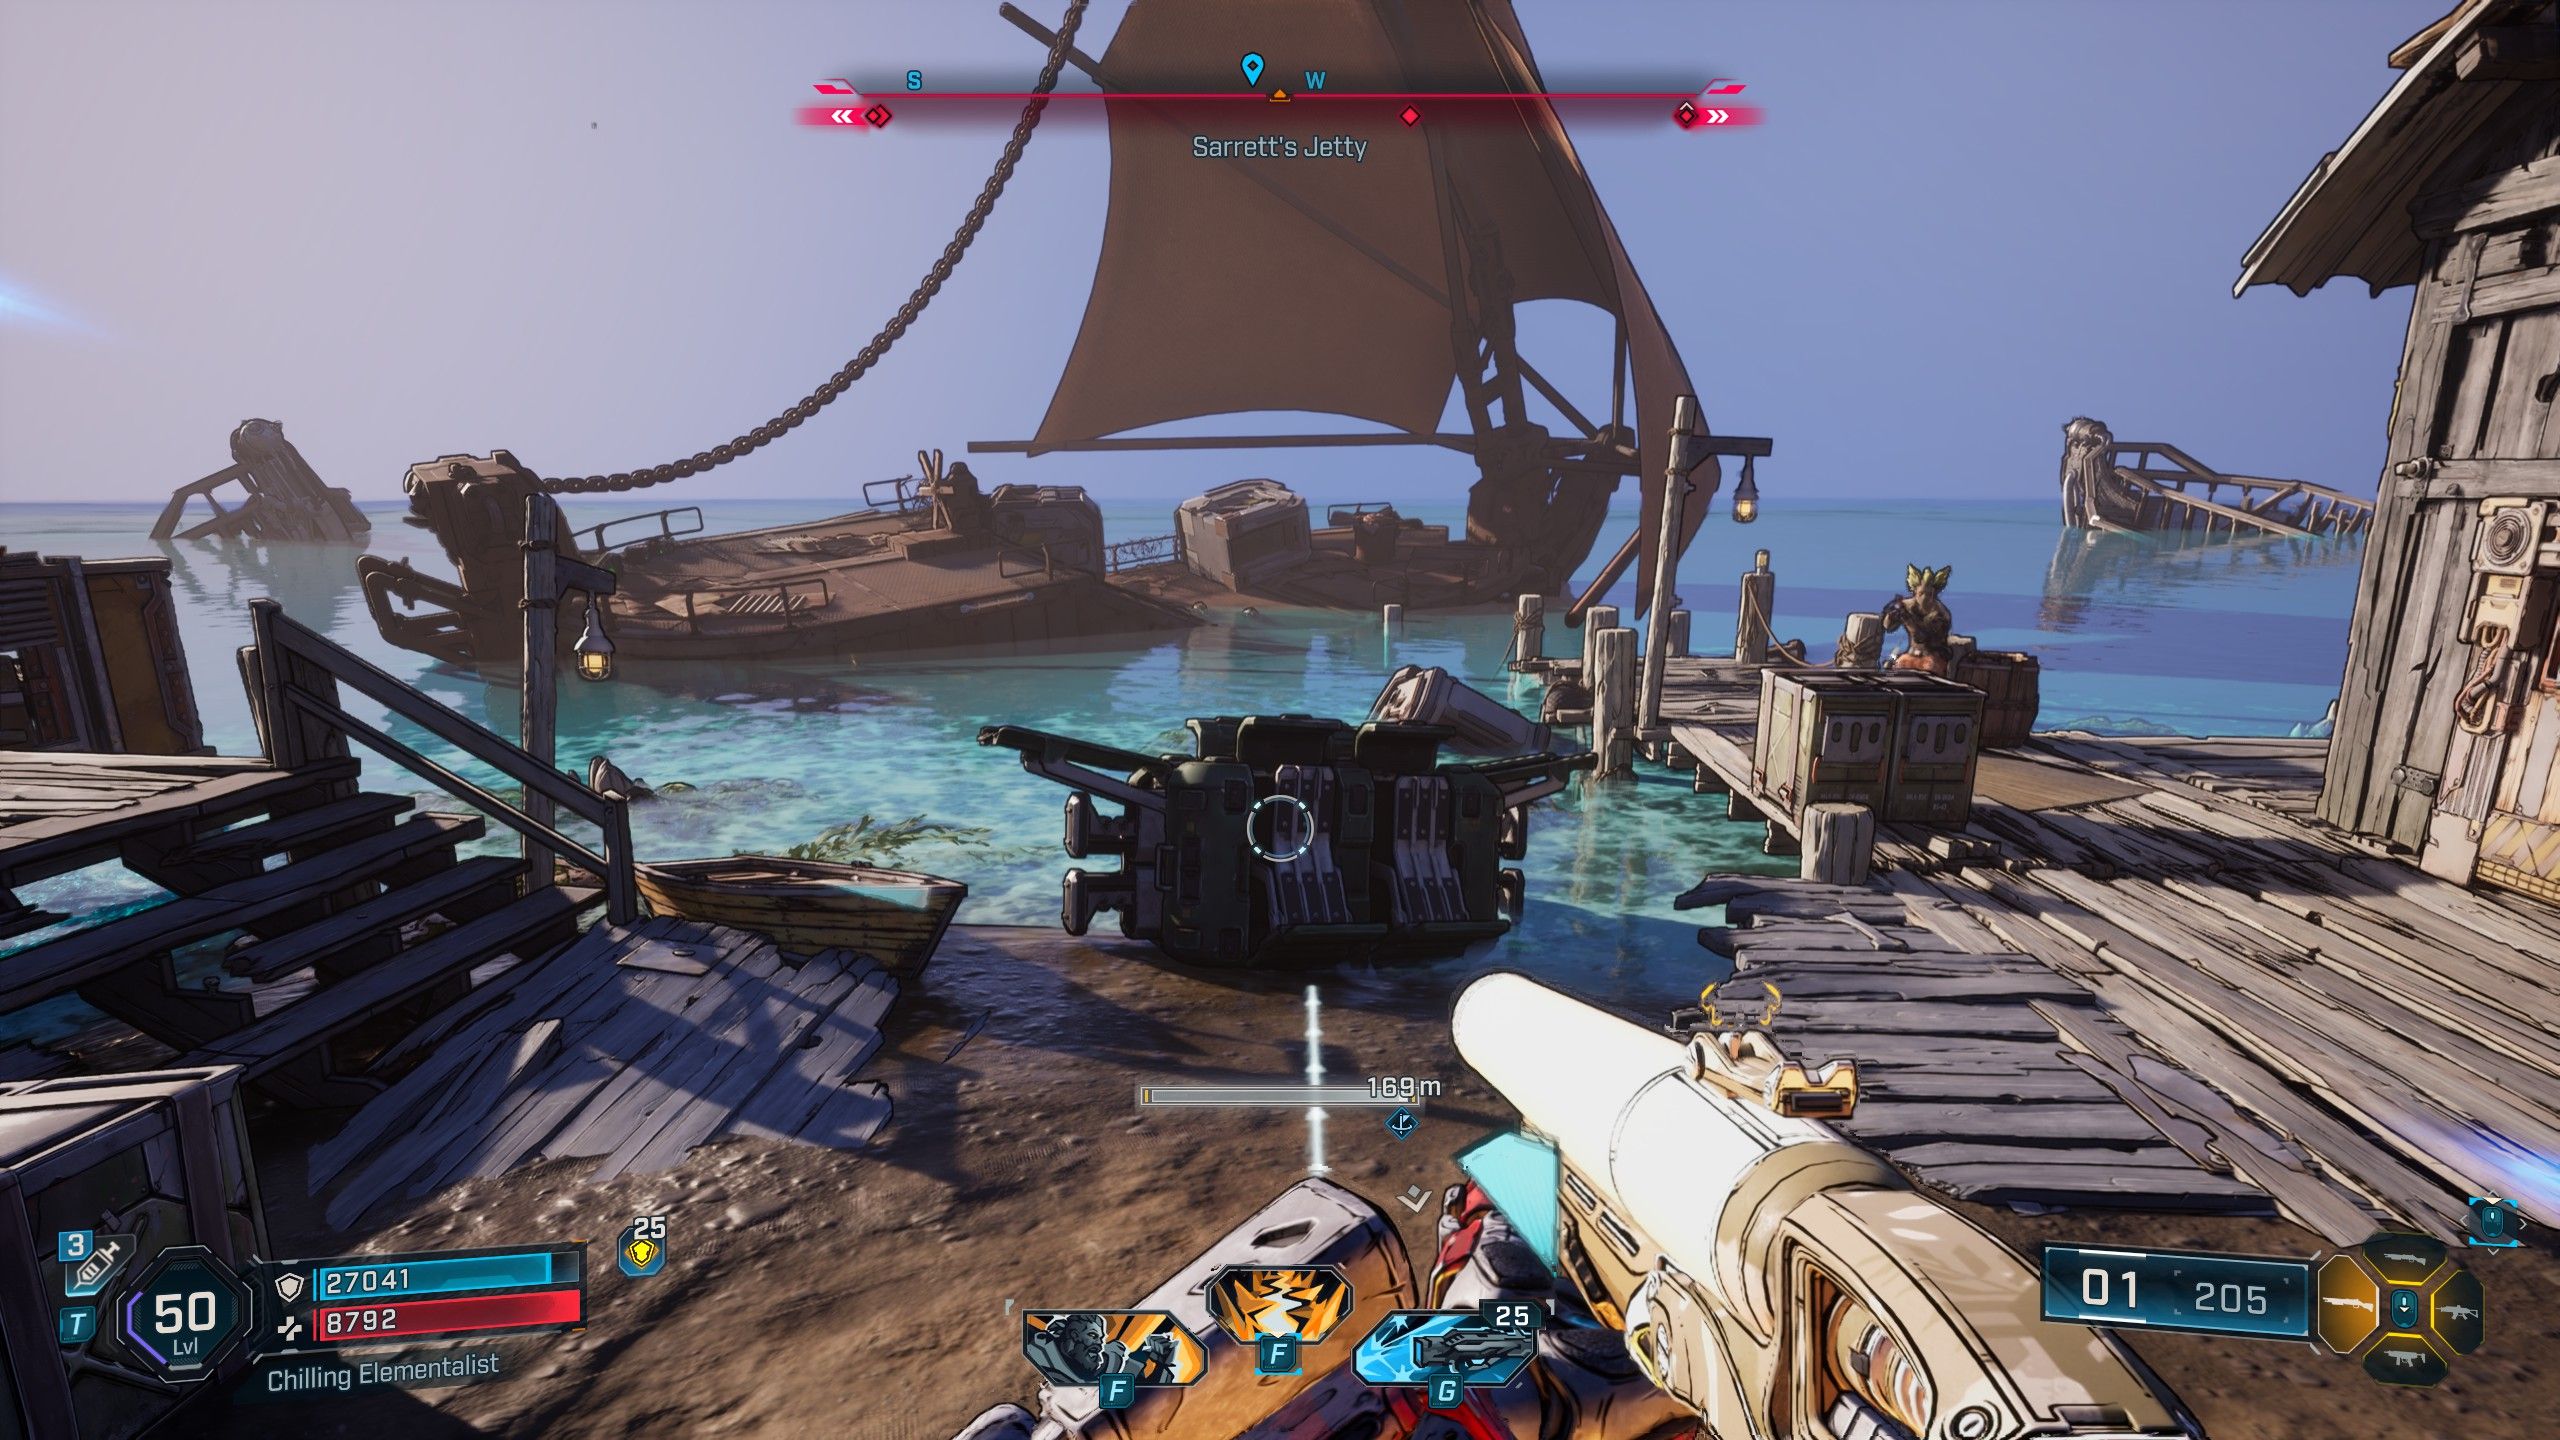
From the Abandoned Post Safehouse in the Coastal Bonescape, follow the west path to Harper’s Hideaway. Then, continue west until you reach the coast – you’ll find Sarrett’s Jetty. The Survivalist Cache is located right in front of the wrecked ship, when you’re facing the sea. You can open the cache, and you can safely ignore the nearby hostile Rippers.
How to Find The Howl Survivalist Cache #1 in Borderlands 4
Survivalist Cache #4 Location

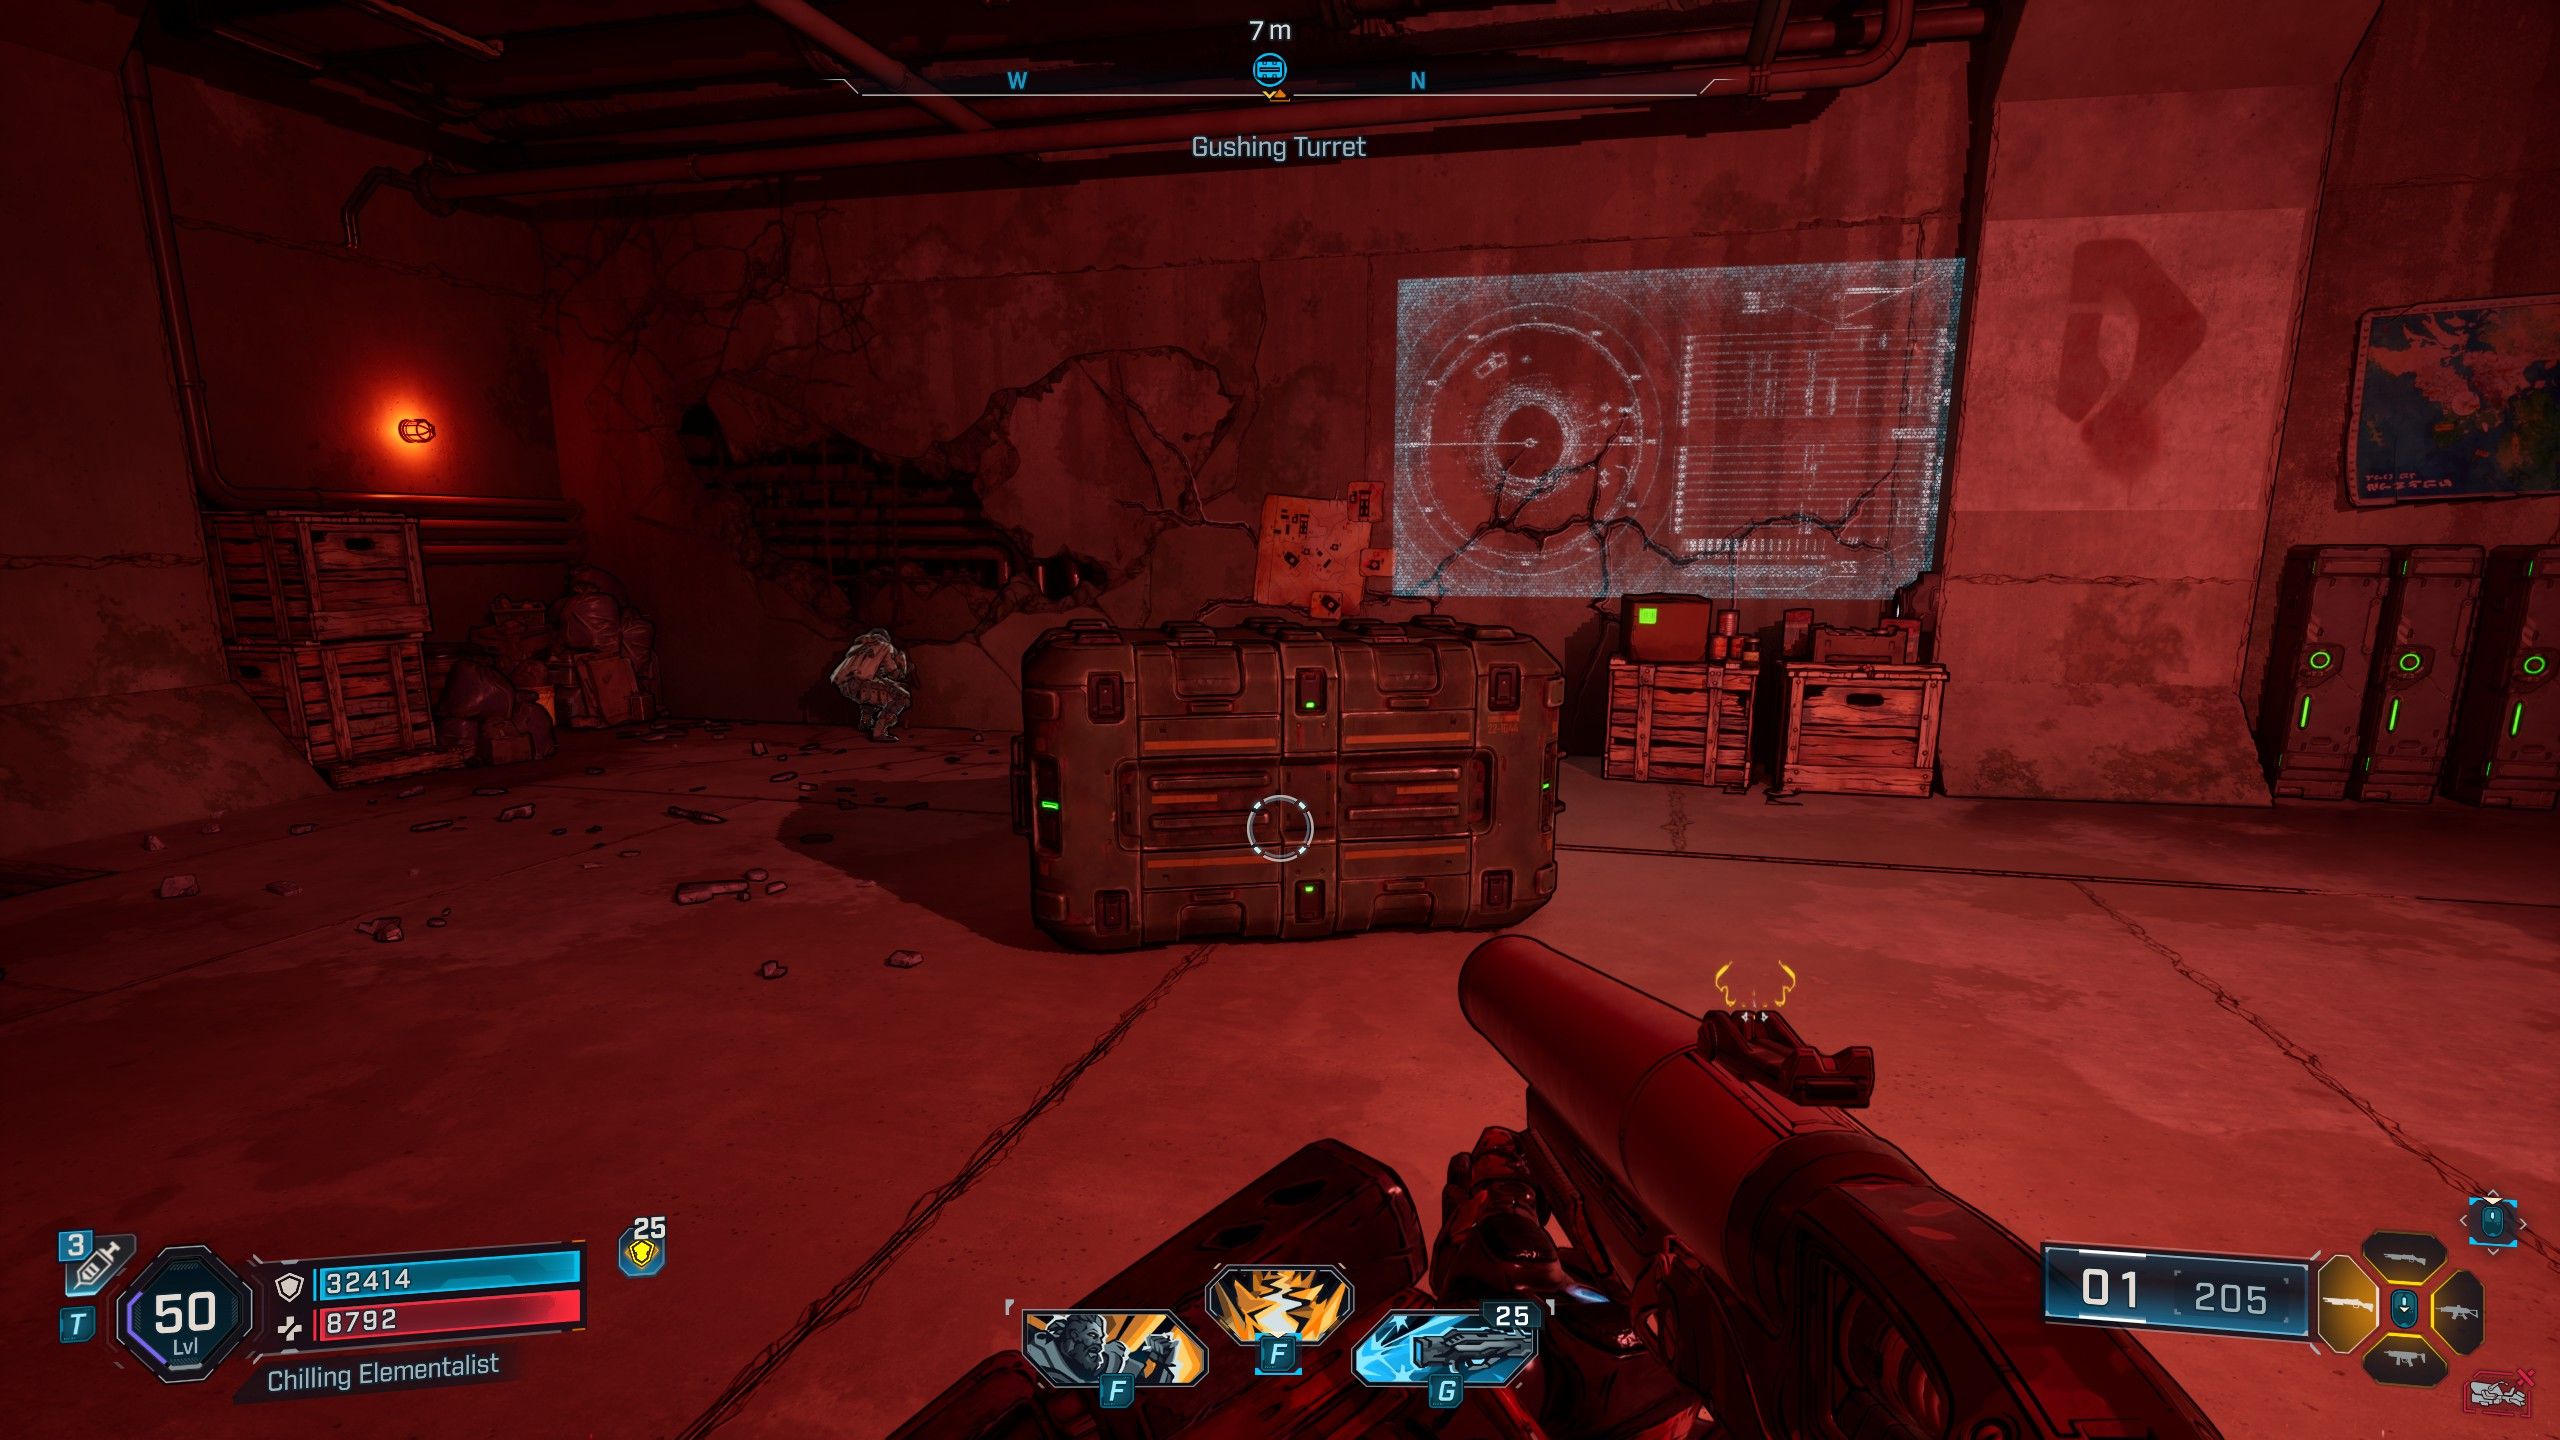
To find this Survivalist Cache, begin at the Launchpad, the town for the Outbounders faction. Leave the fast travel bunker and head immediately west towards the Gushing Turret landmark. Once there, look west of the turret for a stream and two sewer grates. The grate on the right is open, so enter it. Swim through and climb up to the surface. The cache is located in the first room on your right.
How to Find The Howl Survivalist Cache #2 in Borderlands 4
Survivalist Cache #5 Location

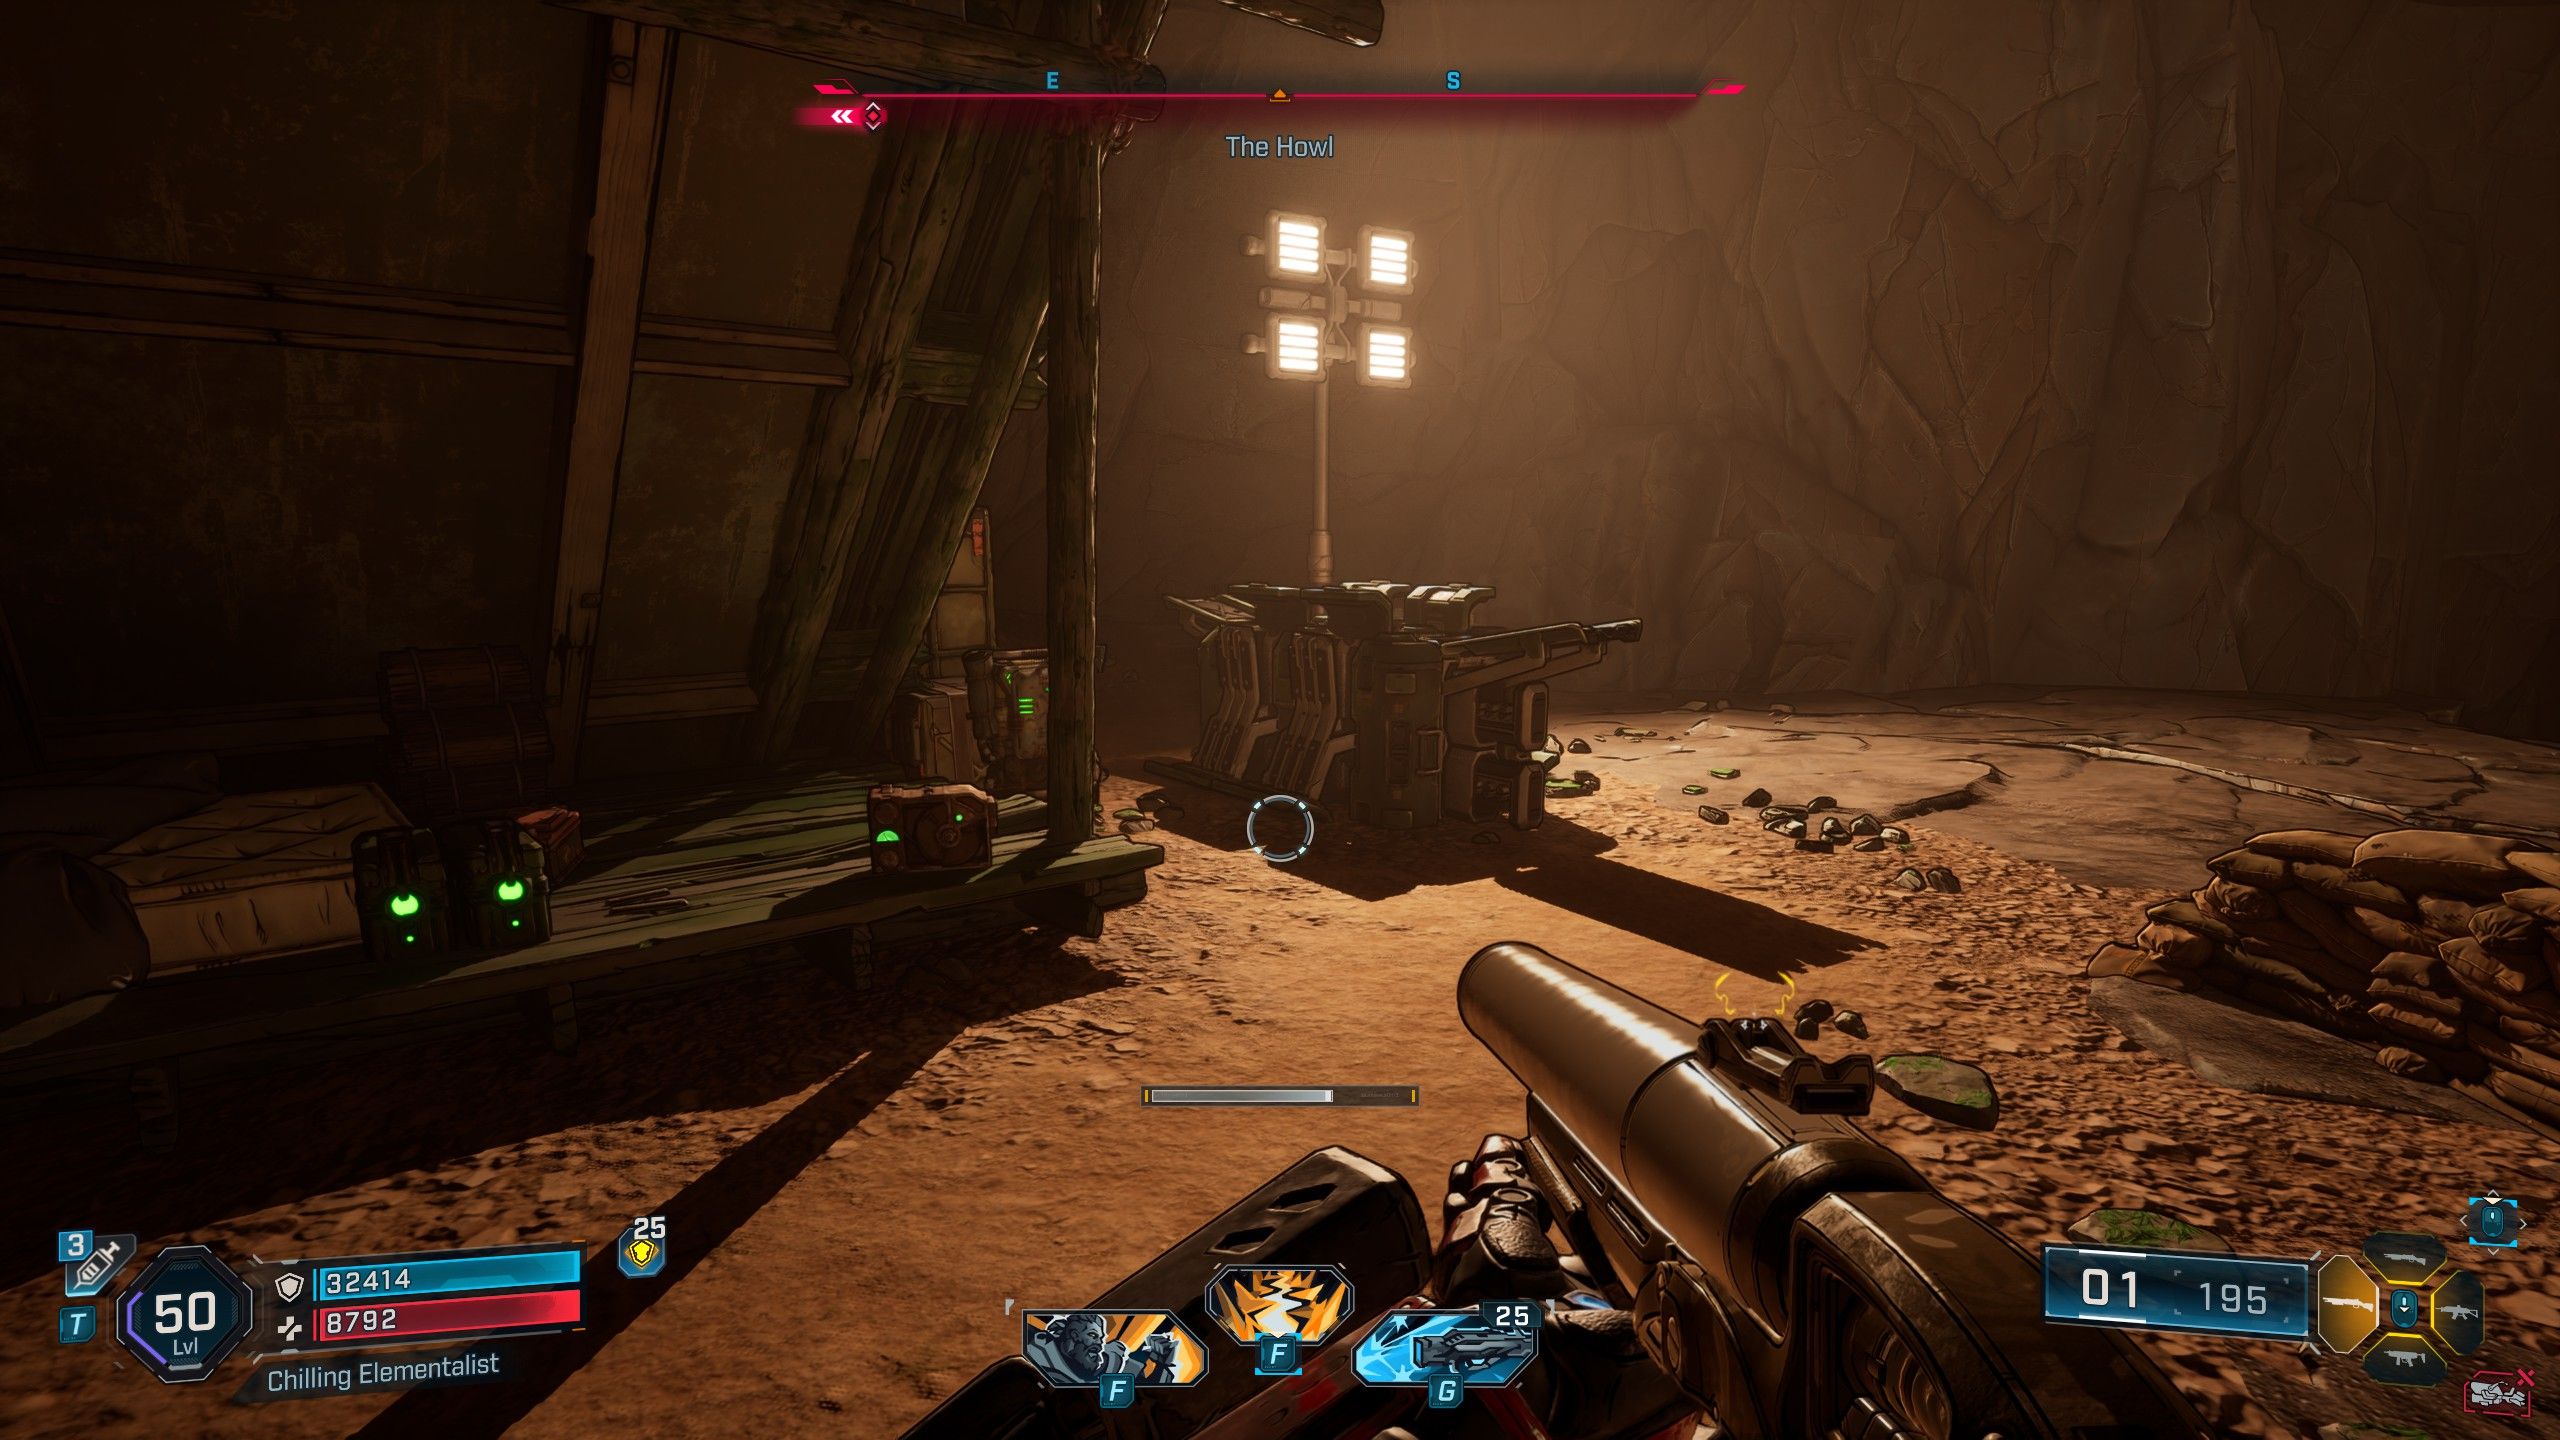
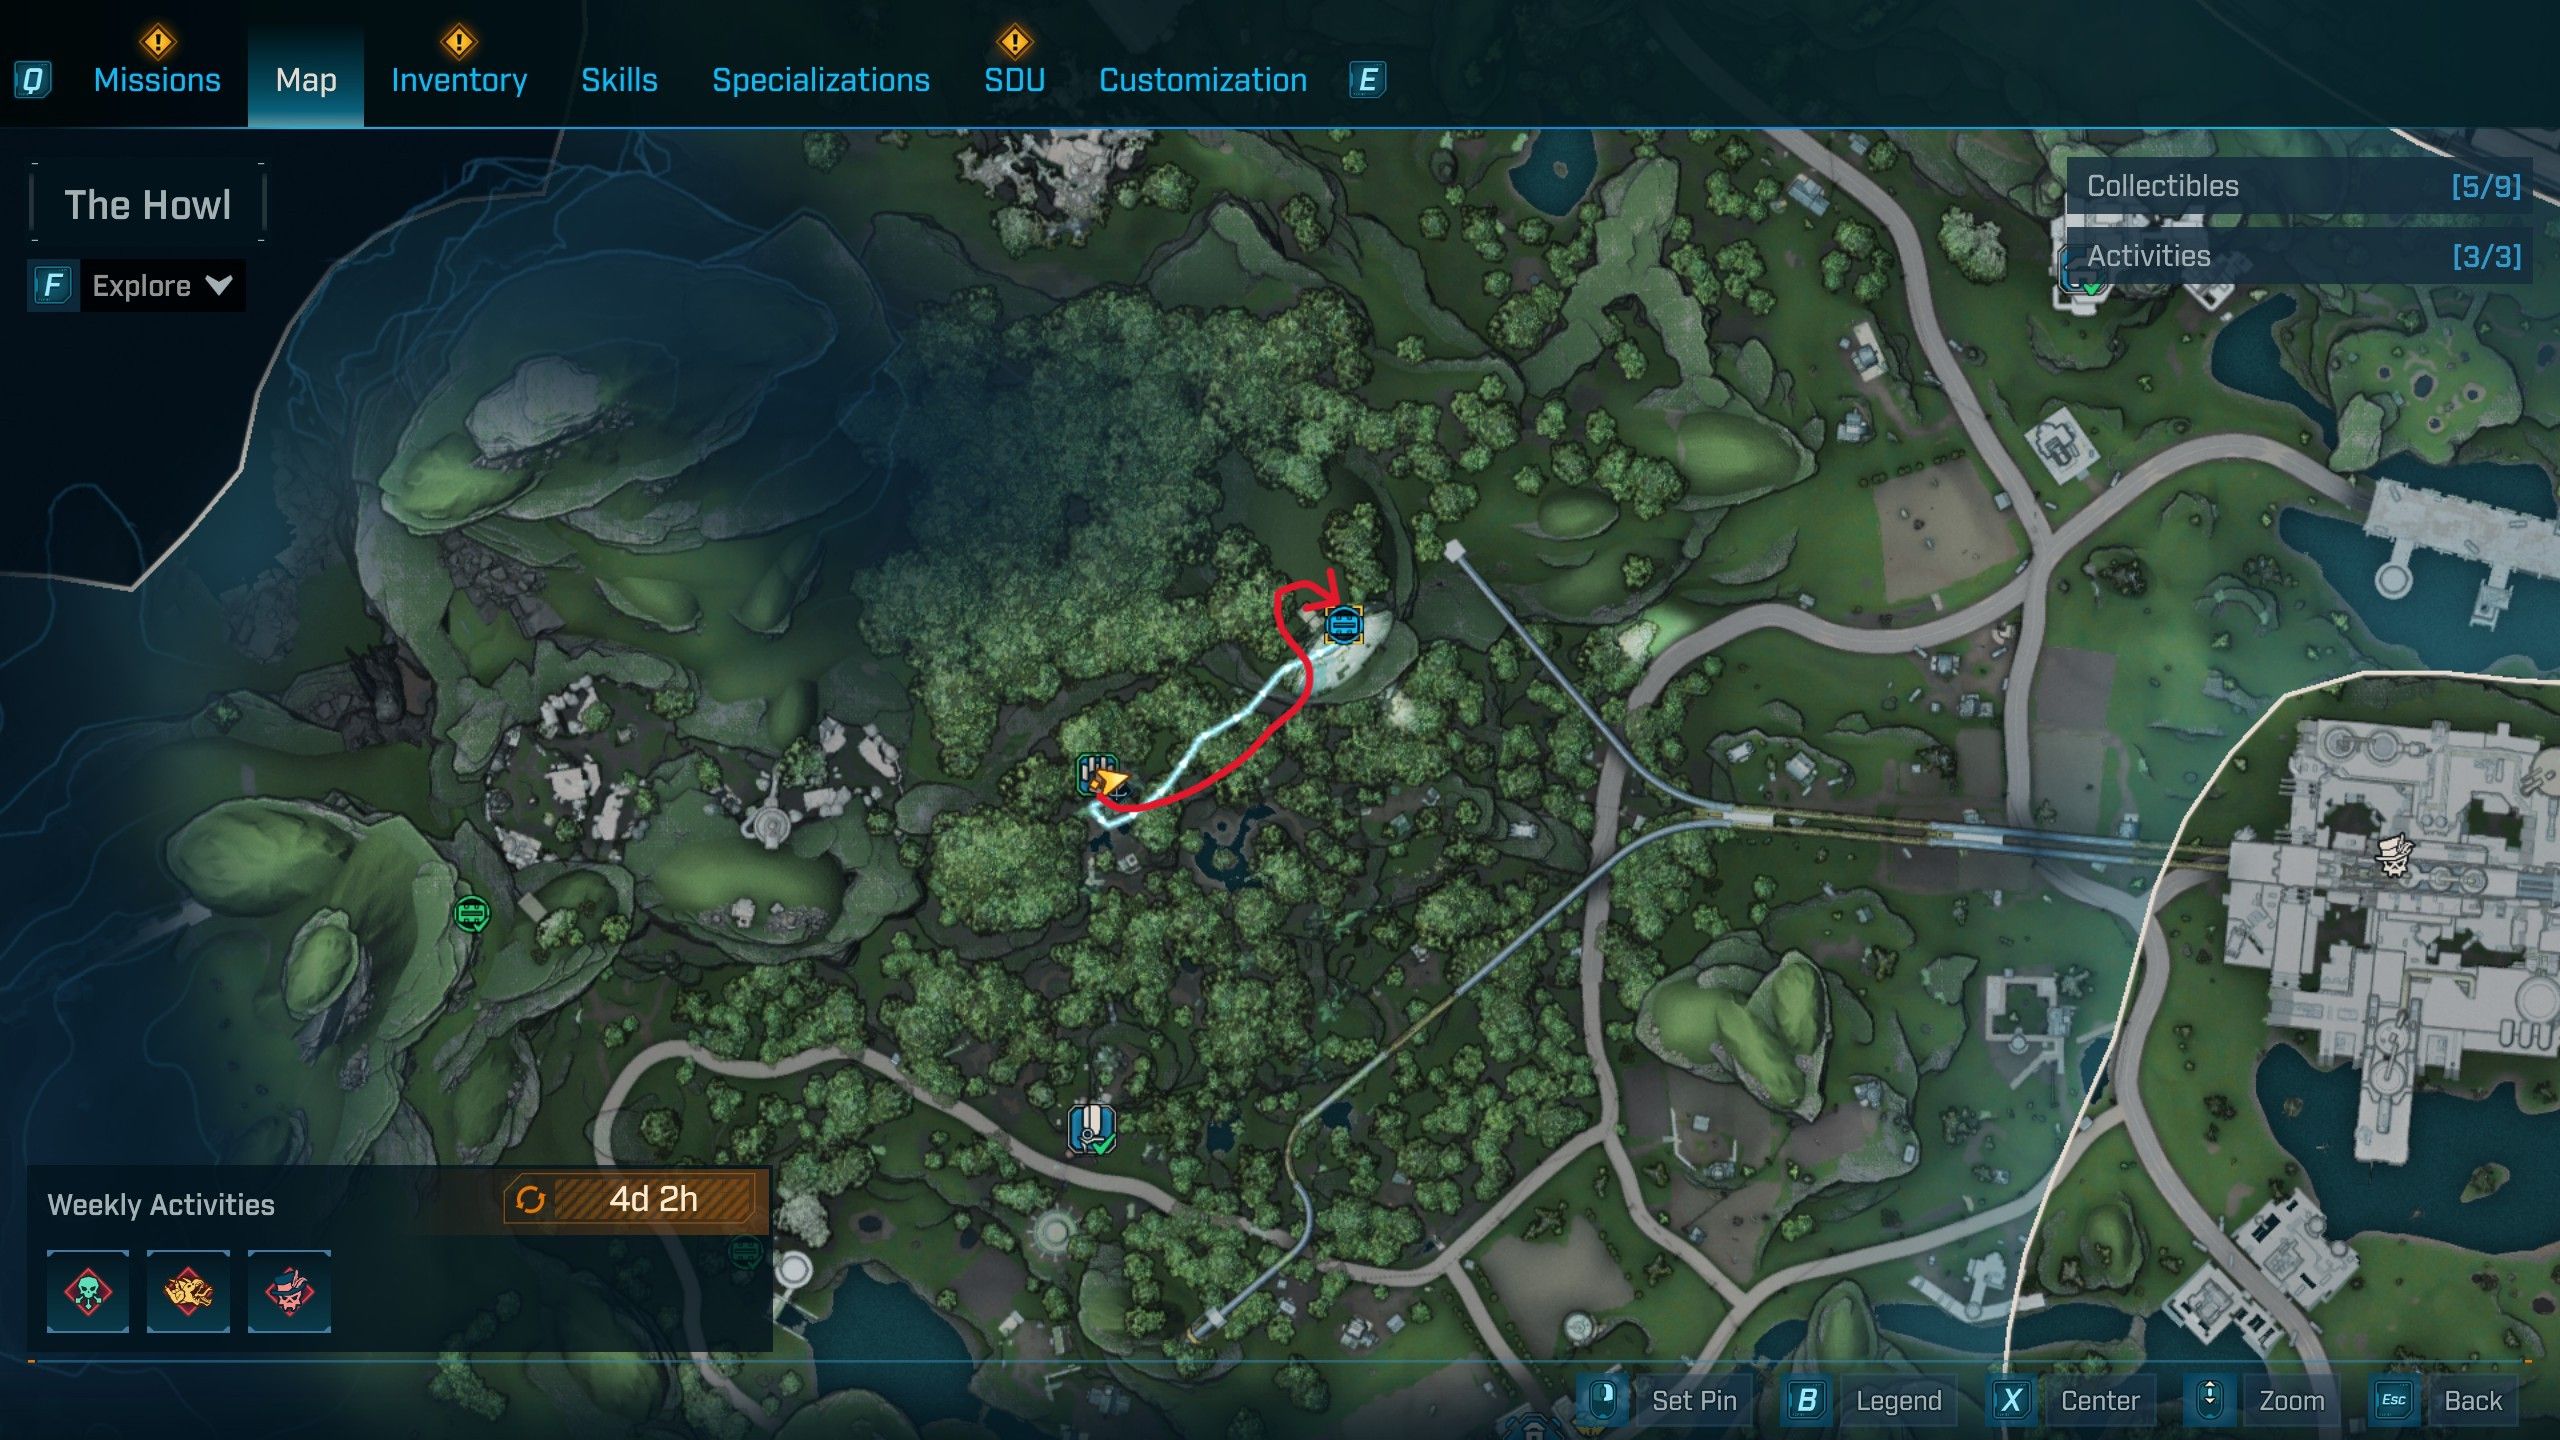
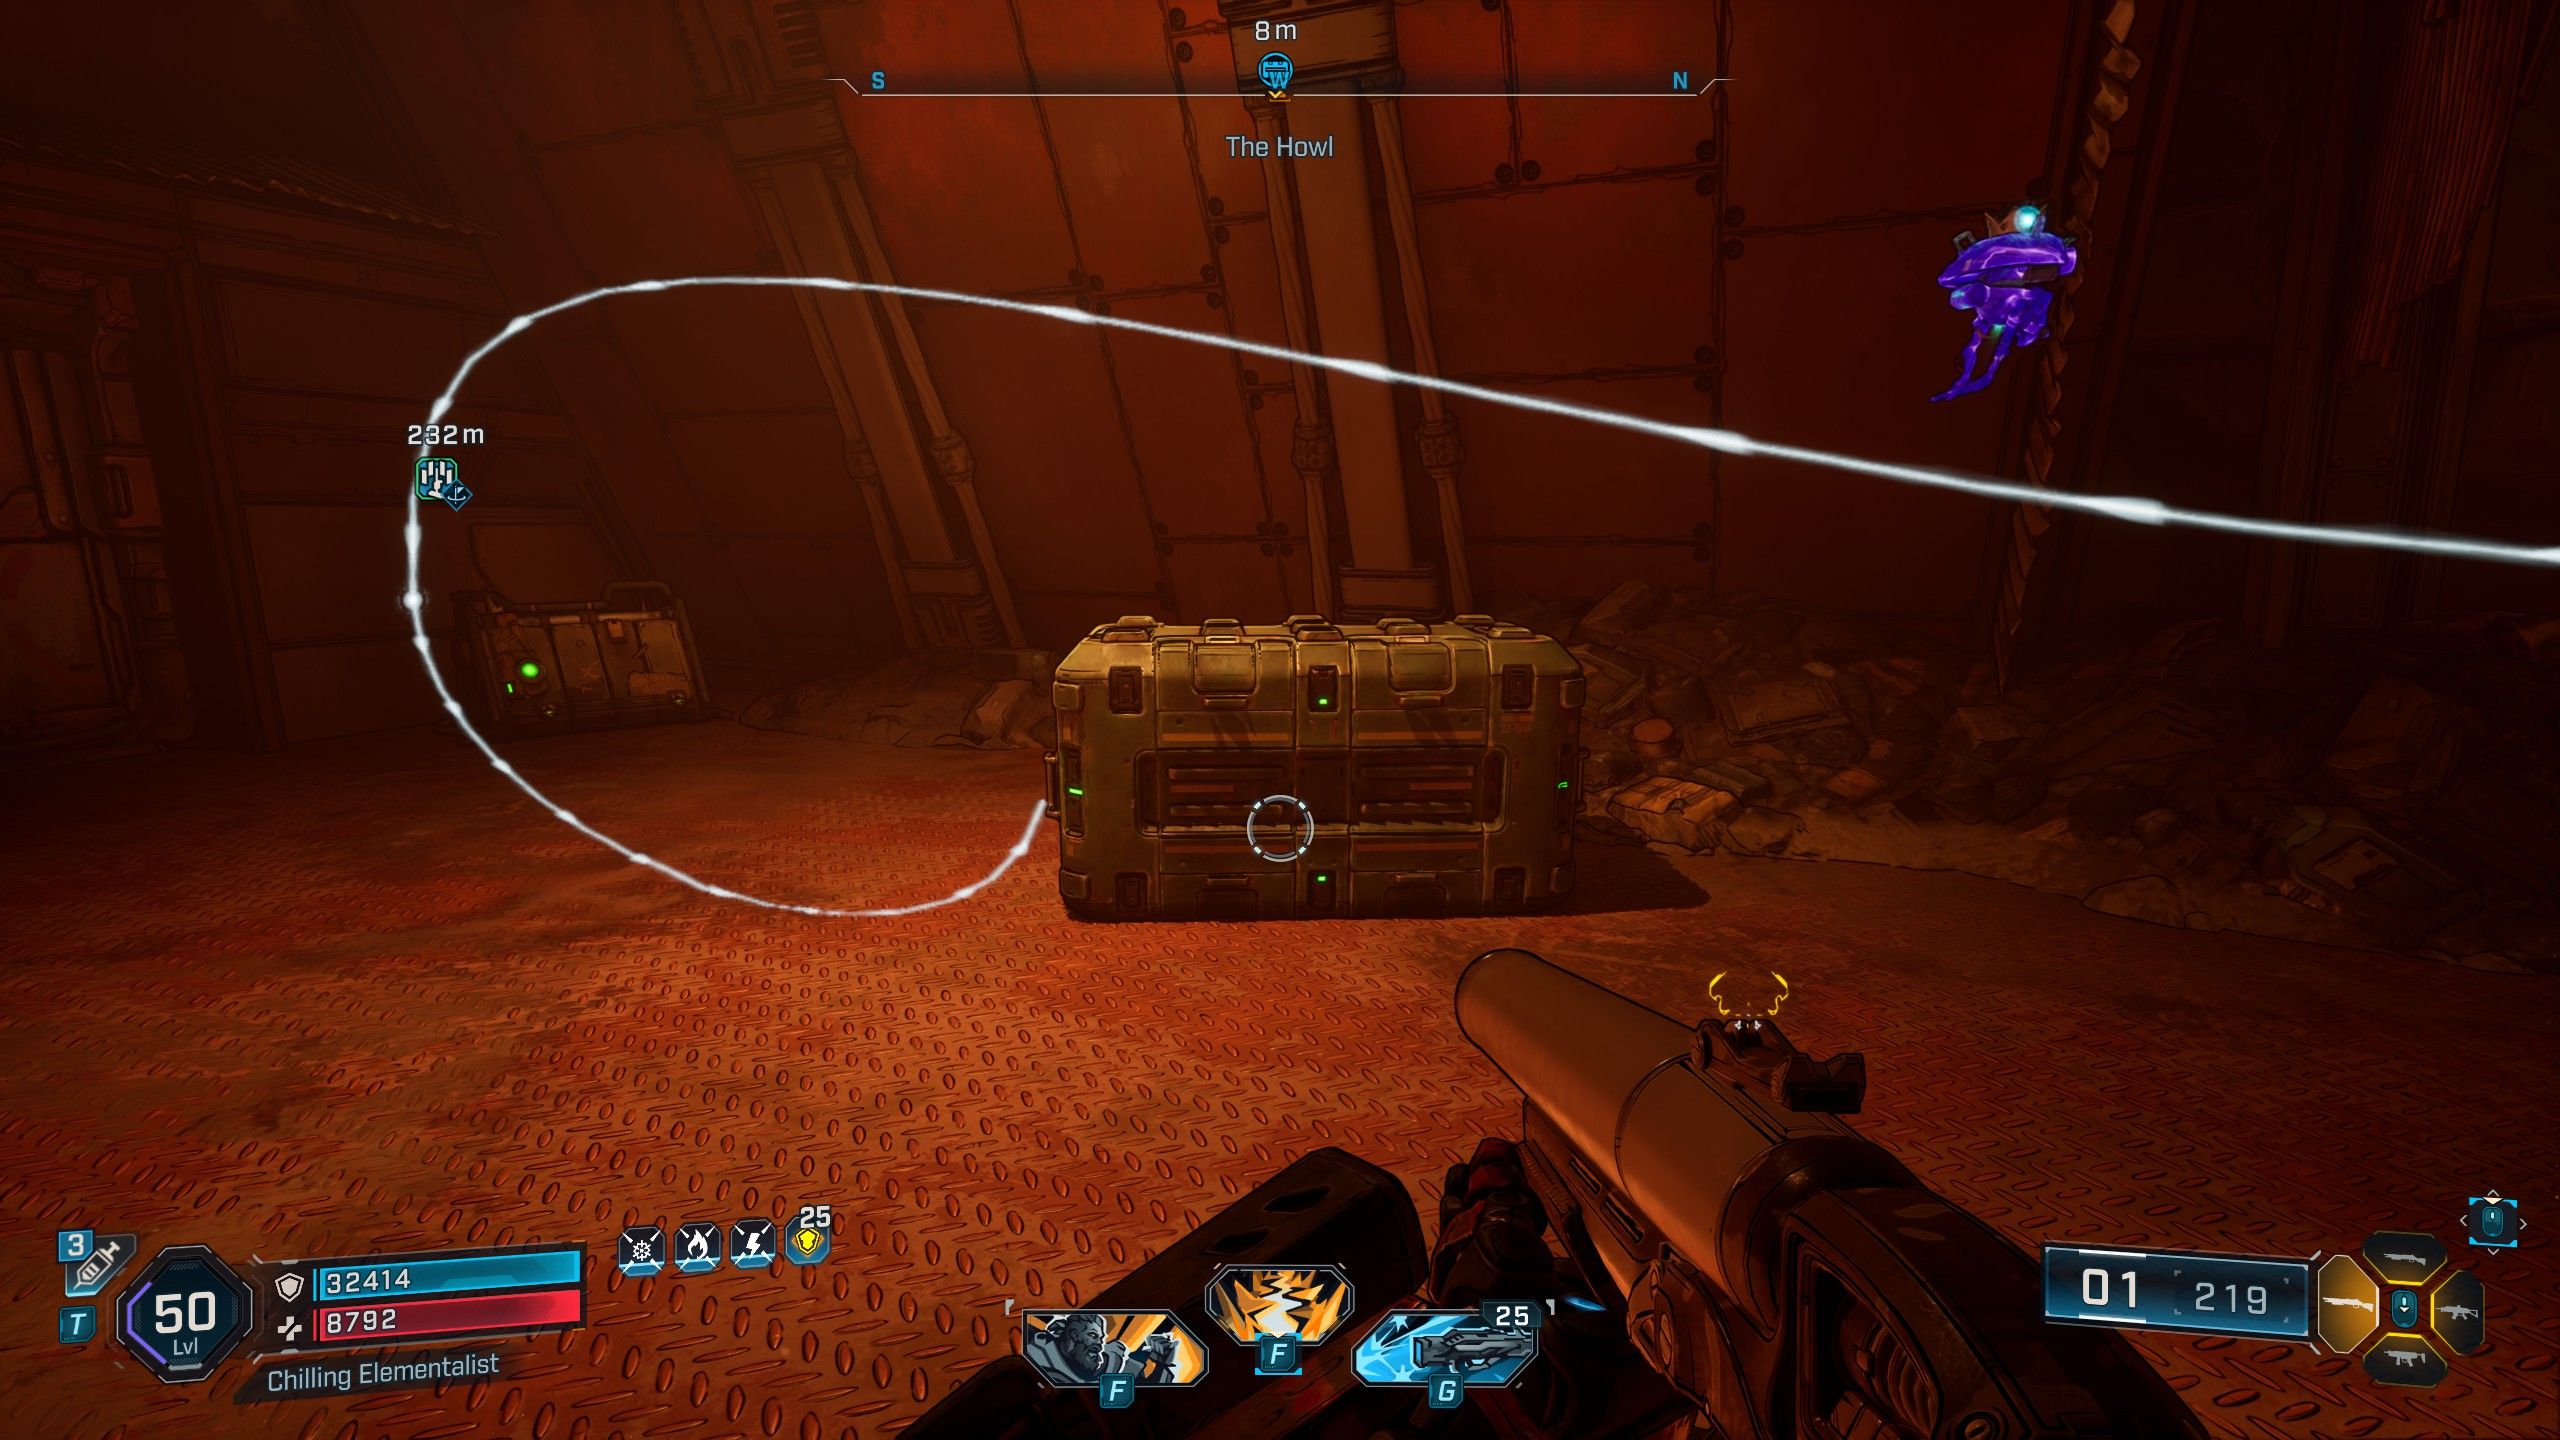
To find the Survivalist Cache, head northwest from either the Launchpad or The Kit Hole Order Silo in The Howl. You’ll reach a forest with a rock wall in your way. Stick to the side of the cliff and go to the northwest corner – there’s an opening you can crawl through (see the picture). This leads to a cave filled with Threshers. Follow the path north, then use the grapple point to go around to the left and up to higher ground. From there, head south to find a Red Chest, and jump to the right of it to reach the Survivalist Cache.
How to Find The Howl Survivalist Cache #3 in Borderlands 4
Survivalist Cache #6 Location
Begin at the Rootdown Estates Fast Travel Station in the Howl. Exit through the opening in the wall and travel northeast to locate Ripper structures near the cave entrance. Climb the wall to the left of these structures to enter the cave and defeat all the Rippers inside. Continue fighting until no more Rippers appear. Once the last Ripper is defeated, a door in the southeastern corner of the cave will open, revealing the Survivalist Cache directly across from the now-accessible Red Chest.
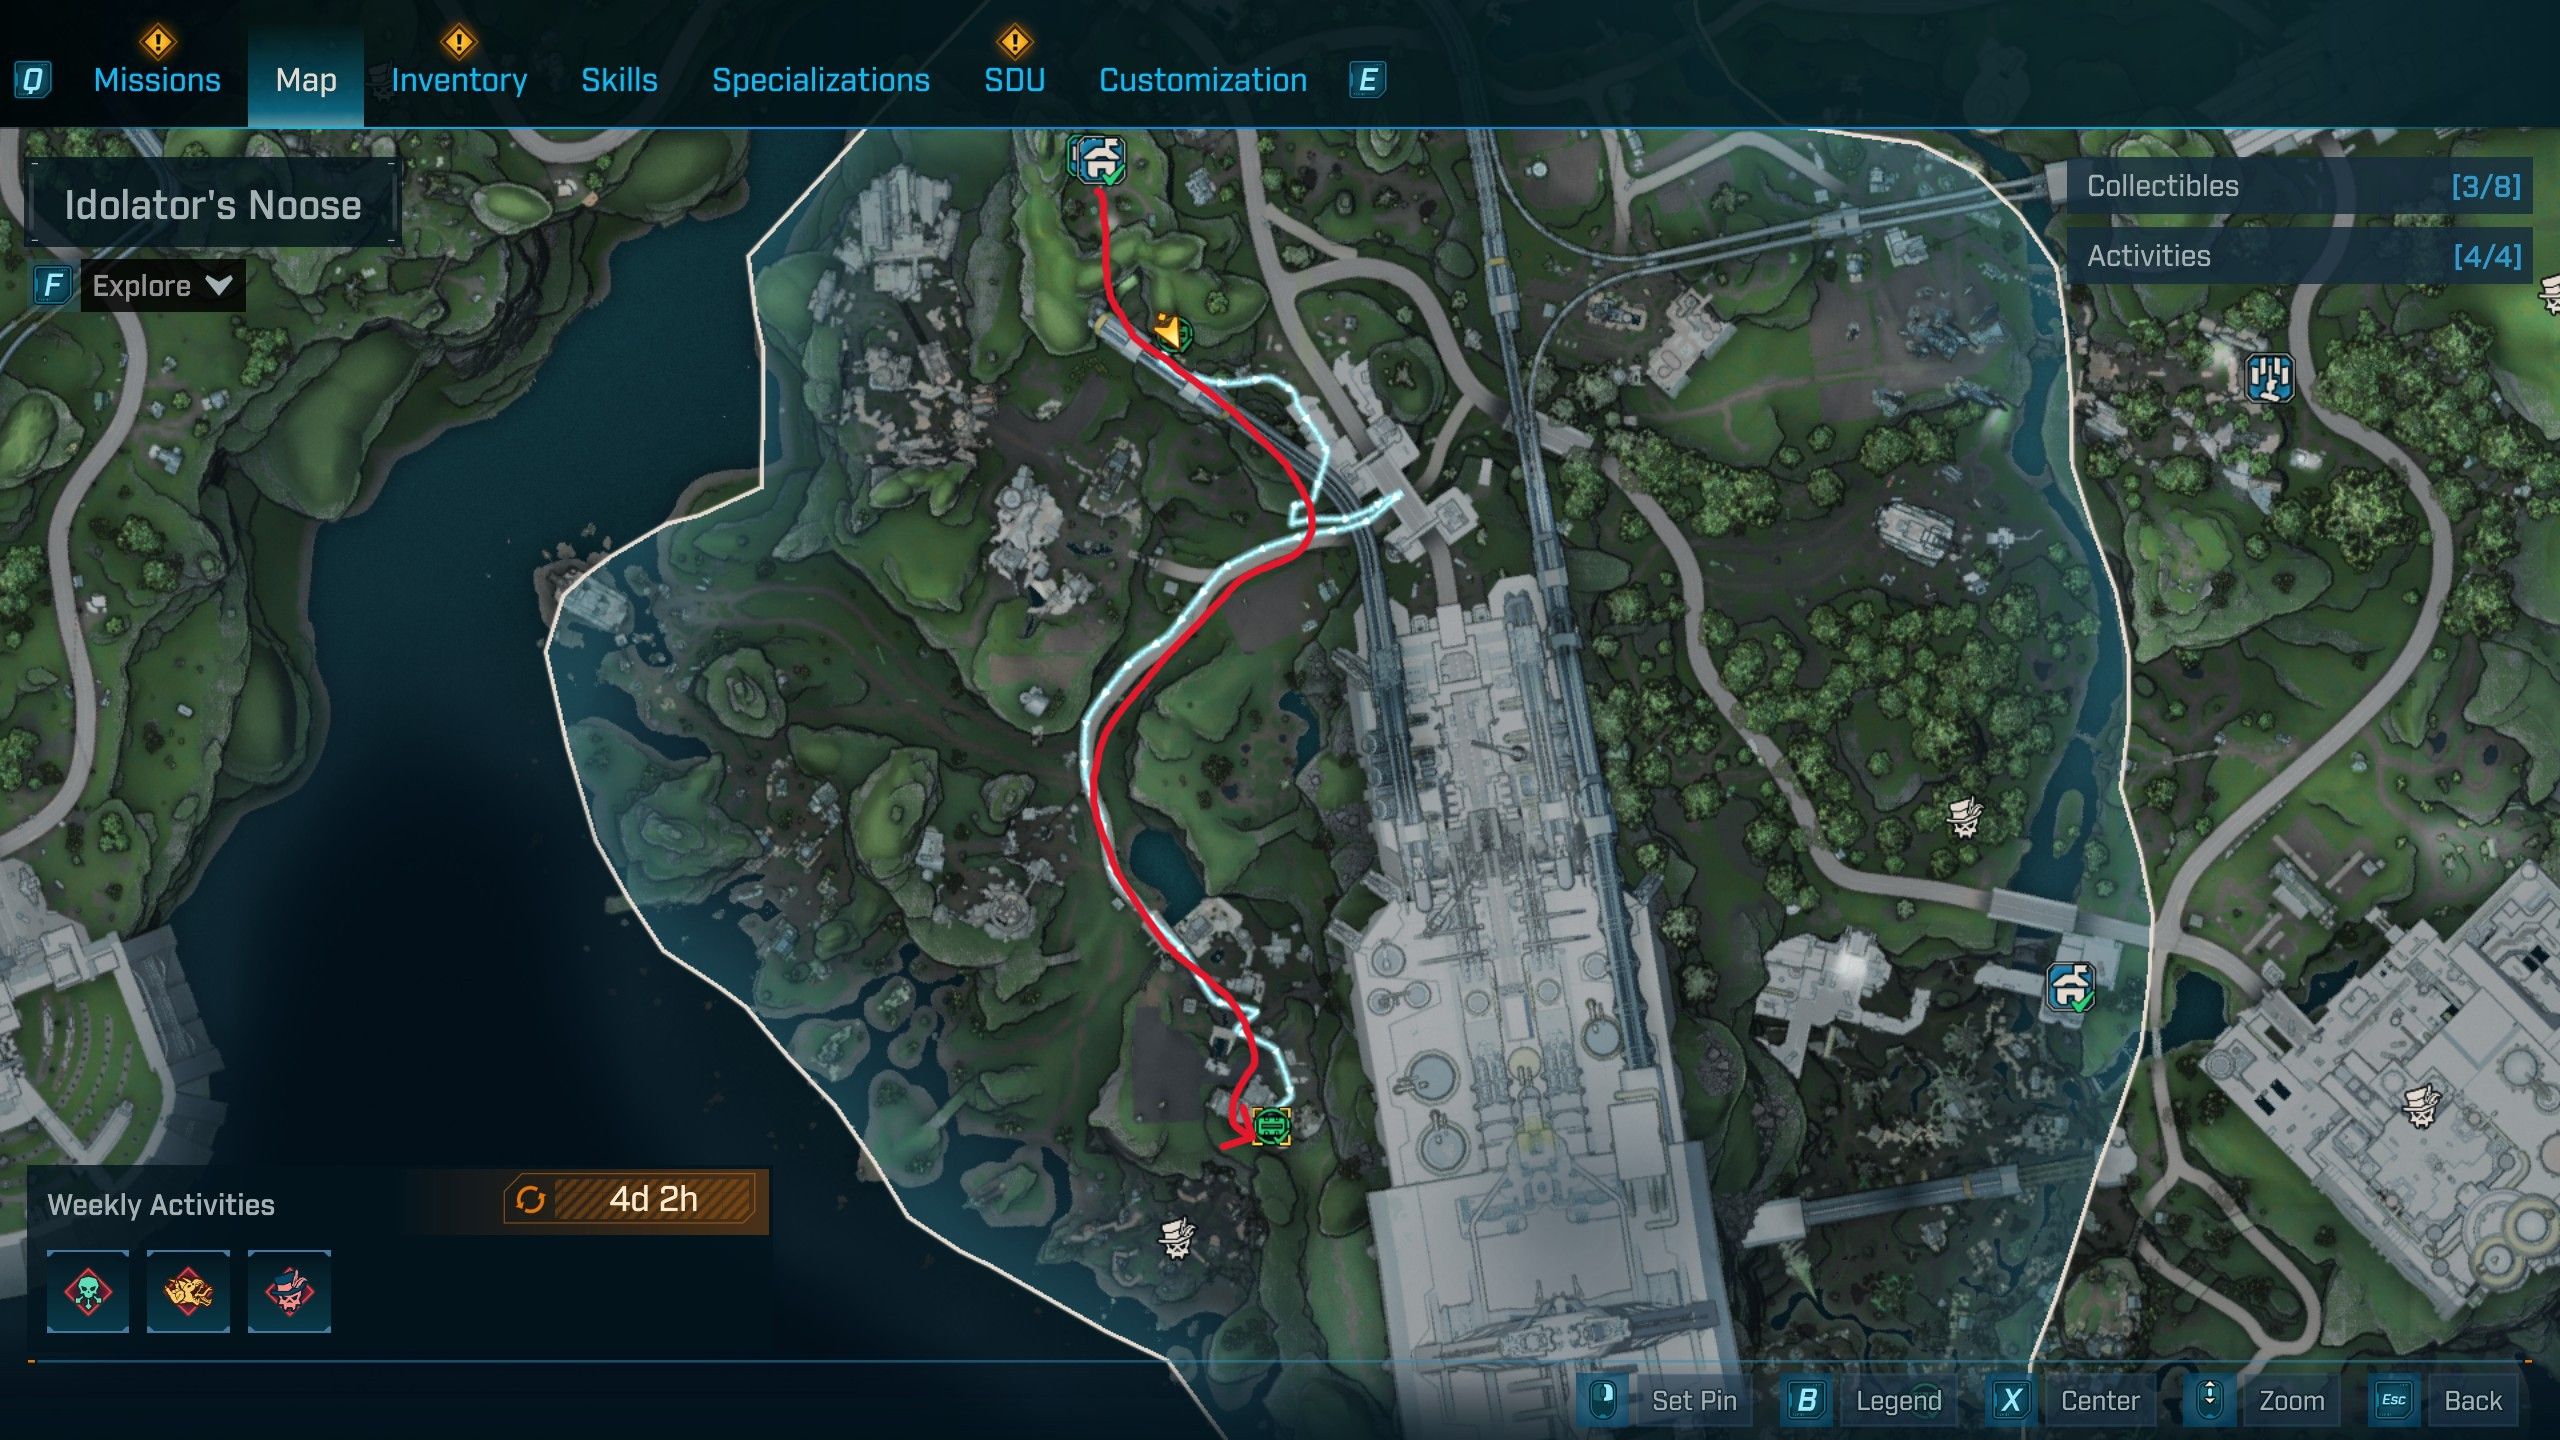
How to Find the Idolato’s Noose Survivalist Cache #1 in Borderlands 4
Survivalist Cache #7 Location
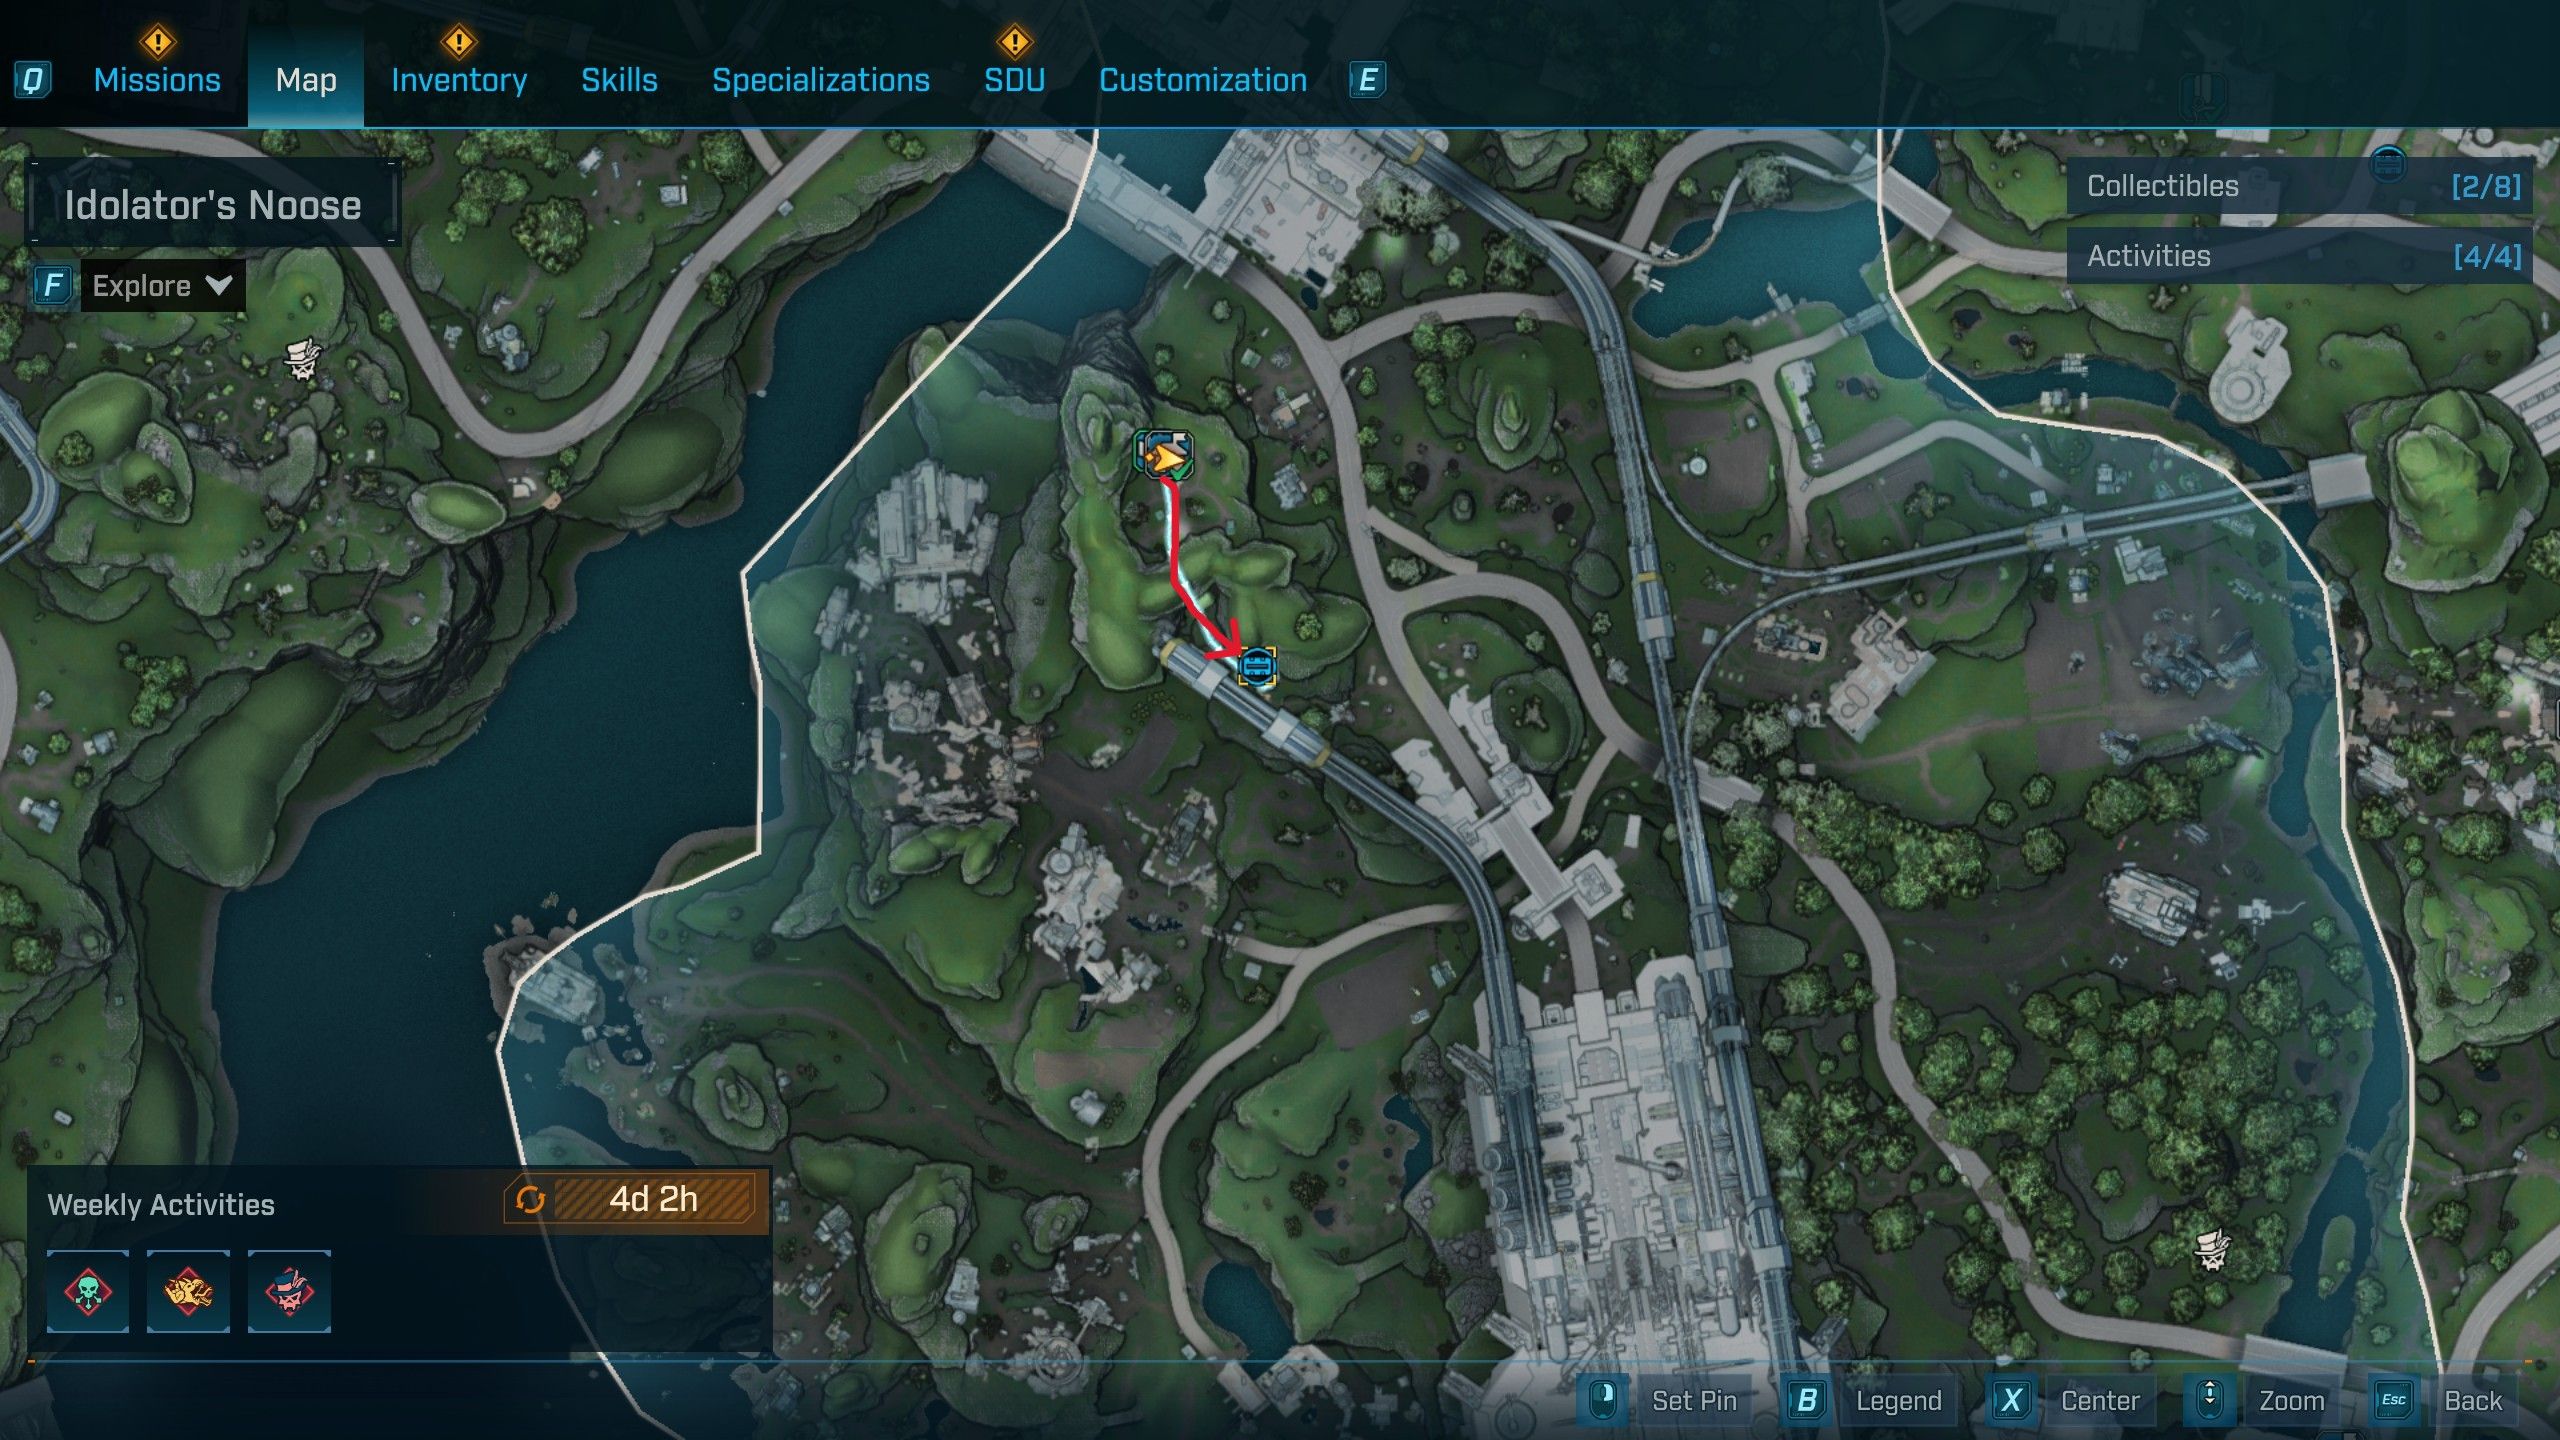
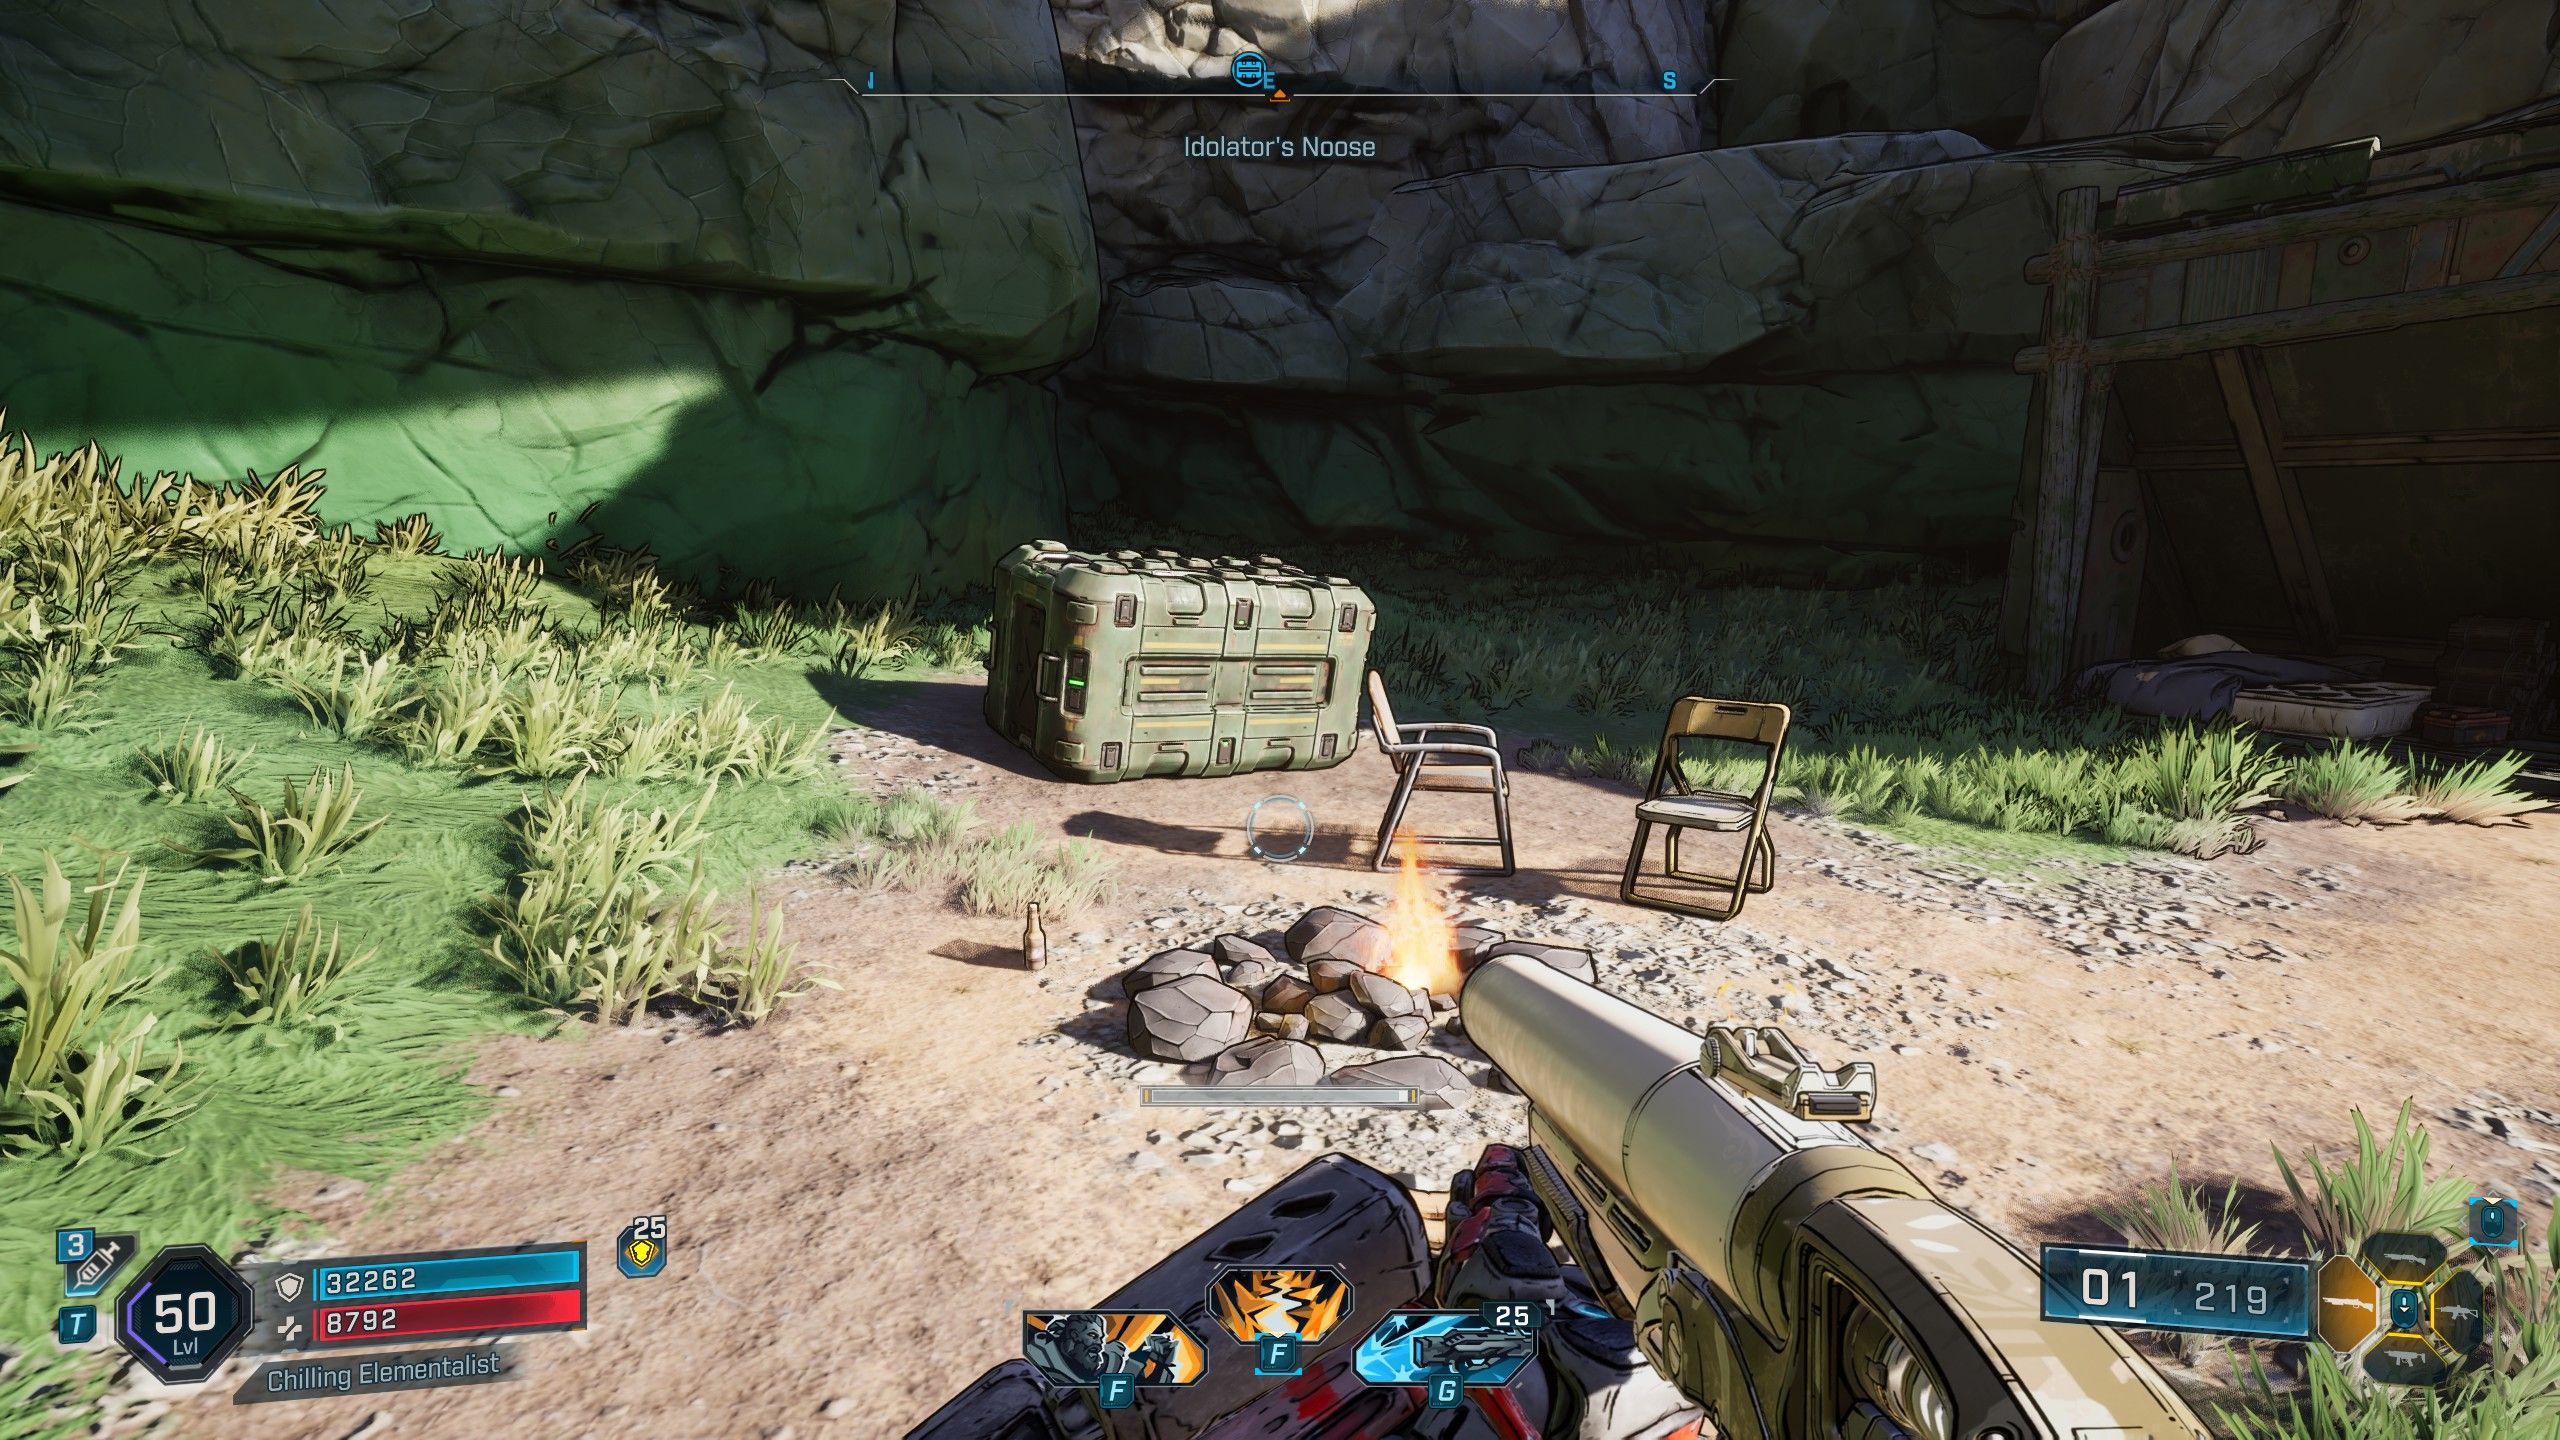
The next Survivalist Cache is located in the Fadefields region, specifically at Idolator’s Noose. To get there, start at the Someday Rise Safehouse and go out the front door, heading south past the grapple point. Follow the path across the mountain, and you’ll find a campsite with the Cache waiting.
How to Find the Idolato’s Noose Survivalist Cache #2 in Borderlands 4
Survivalist Cache #8 Location
If you go to the southwestern part of Idolator’s Noose, you’ll find Racketrun, a location filled with Rippers. Look for a climbable wall at the back of Racketrun, and once you’re at the top, go left into a small shack – the Survivalist Cache is inside.
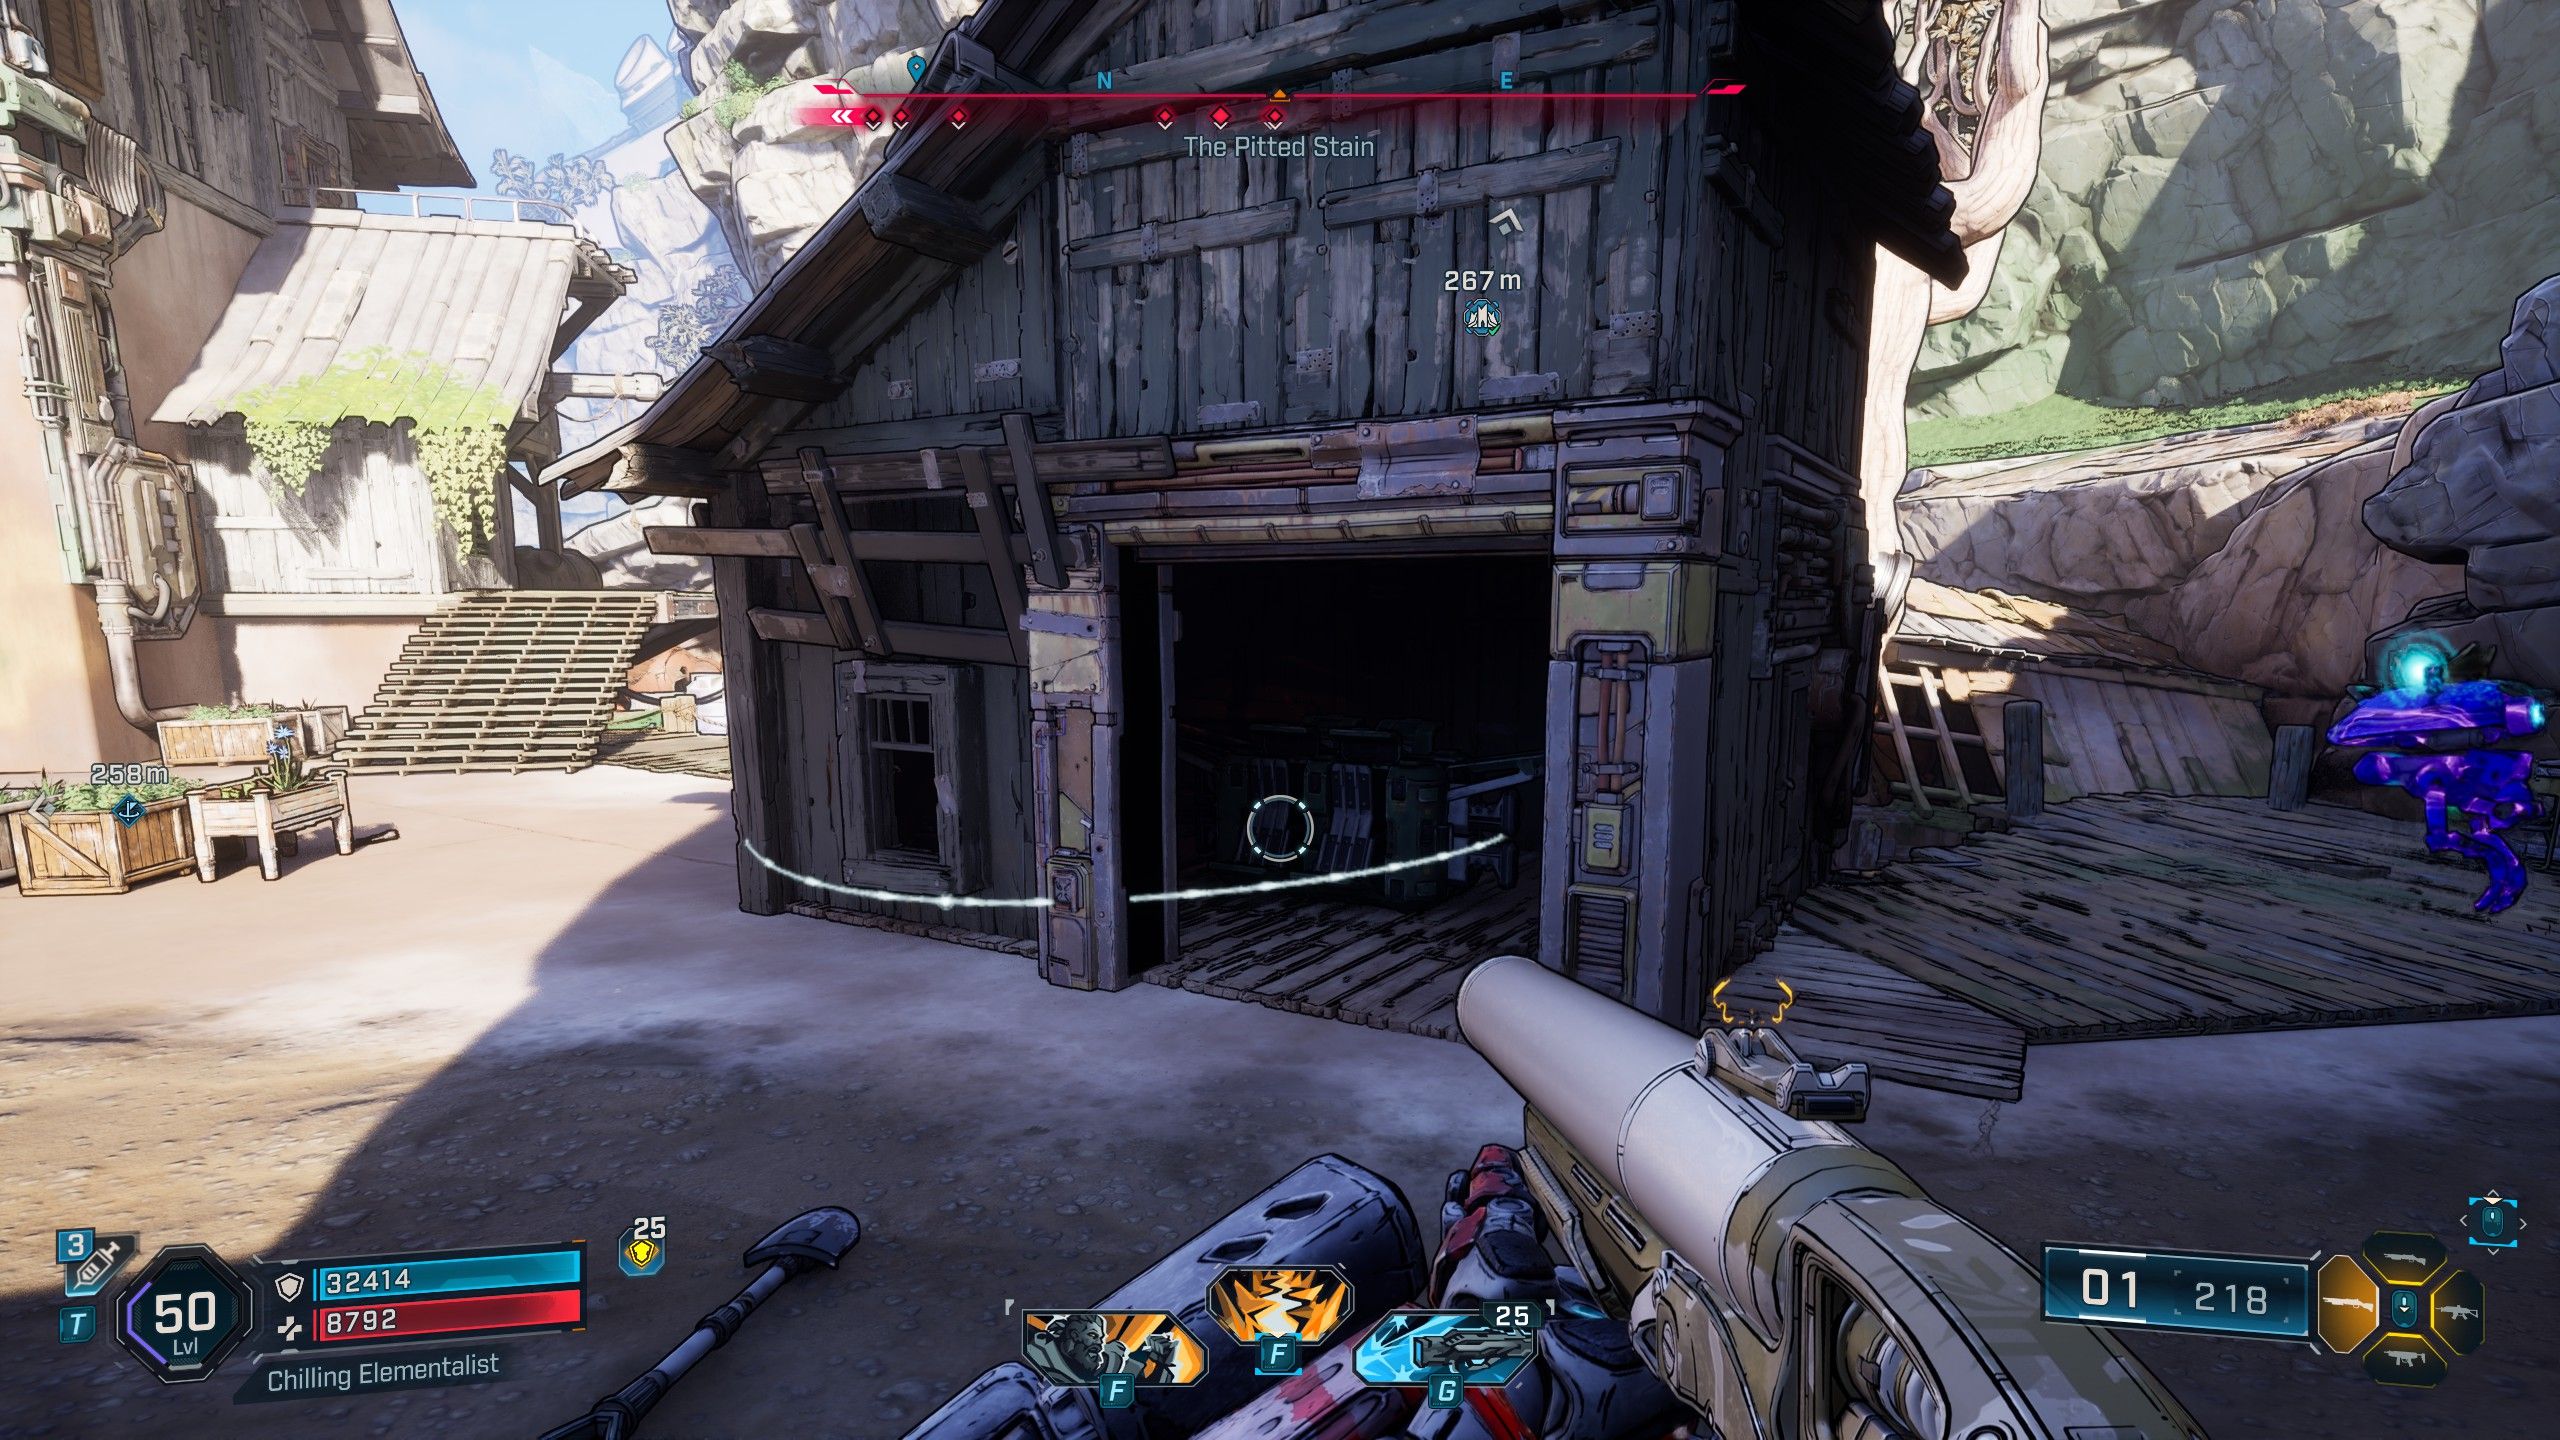
How to Find the Idolato’s Noose Survivalist Cache #3 in Borderlands 4
Survivalist Cache #9 Location

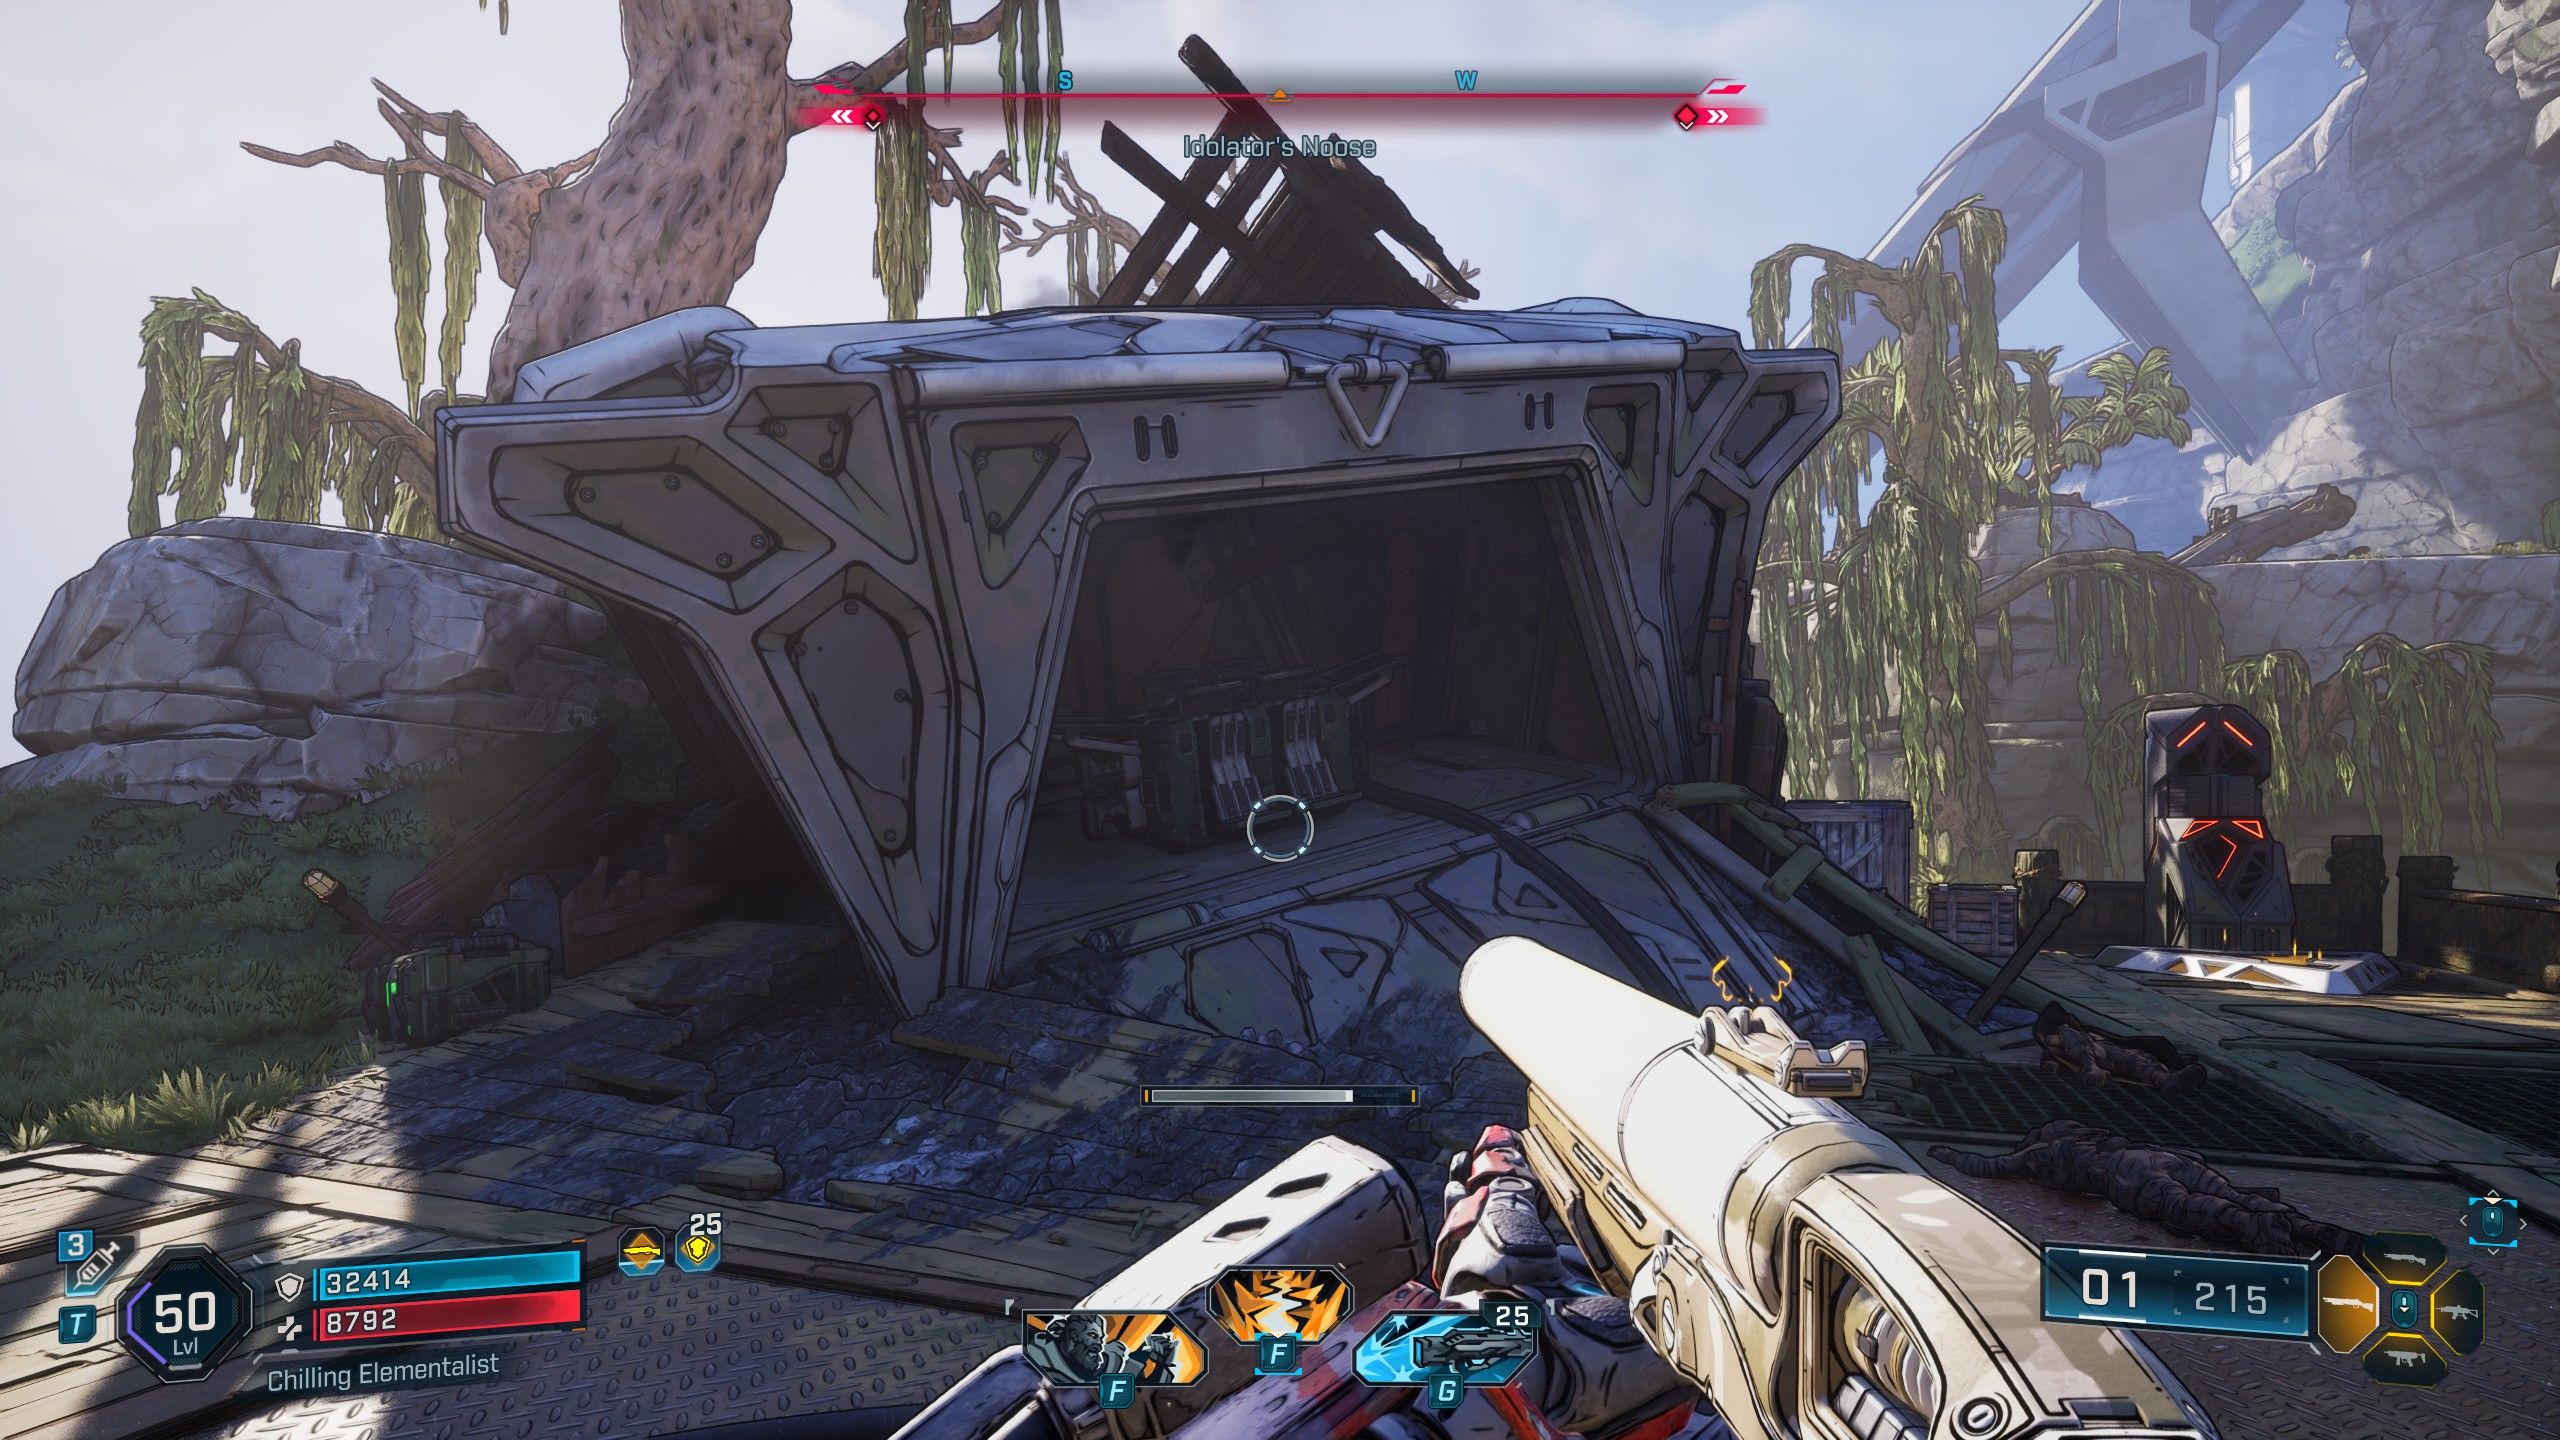
You can find a Survivalist Cache in the southeastern part of Idolator’s Noose. Start at the Wyclef’s Reprise Safehouse, located just outside Dissected Plateau and bordering Idolator’s Noose. Leave through the north doors, quickly circle around to the south, and head down into the swamp. This will lead you to the Boglight Vigilance area. Follow the road and path through Ripper territory to the back of this location. There, you’ll find a crashed Order ship, and the Survivalist Cache is inside.
How to Find the Dissected Plateau Survivalist Cache #1 in Borderlands 4
Survivalist Cache #10 Location
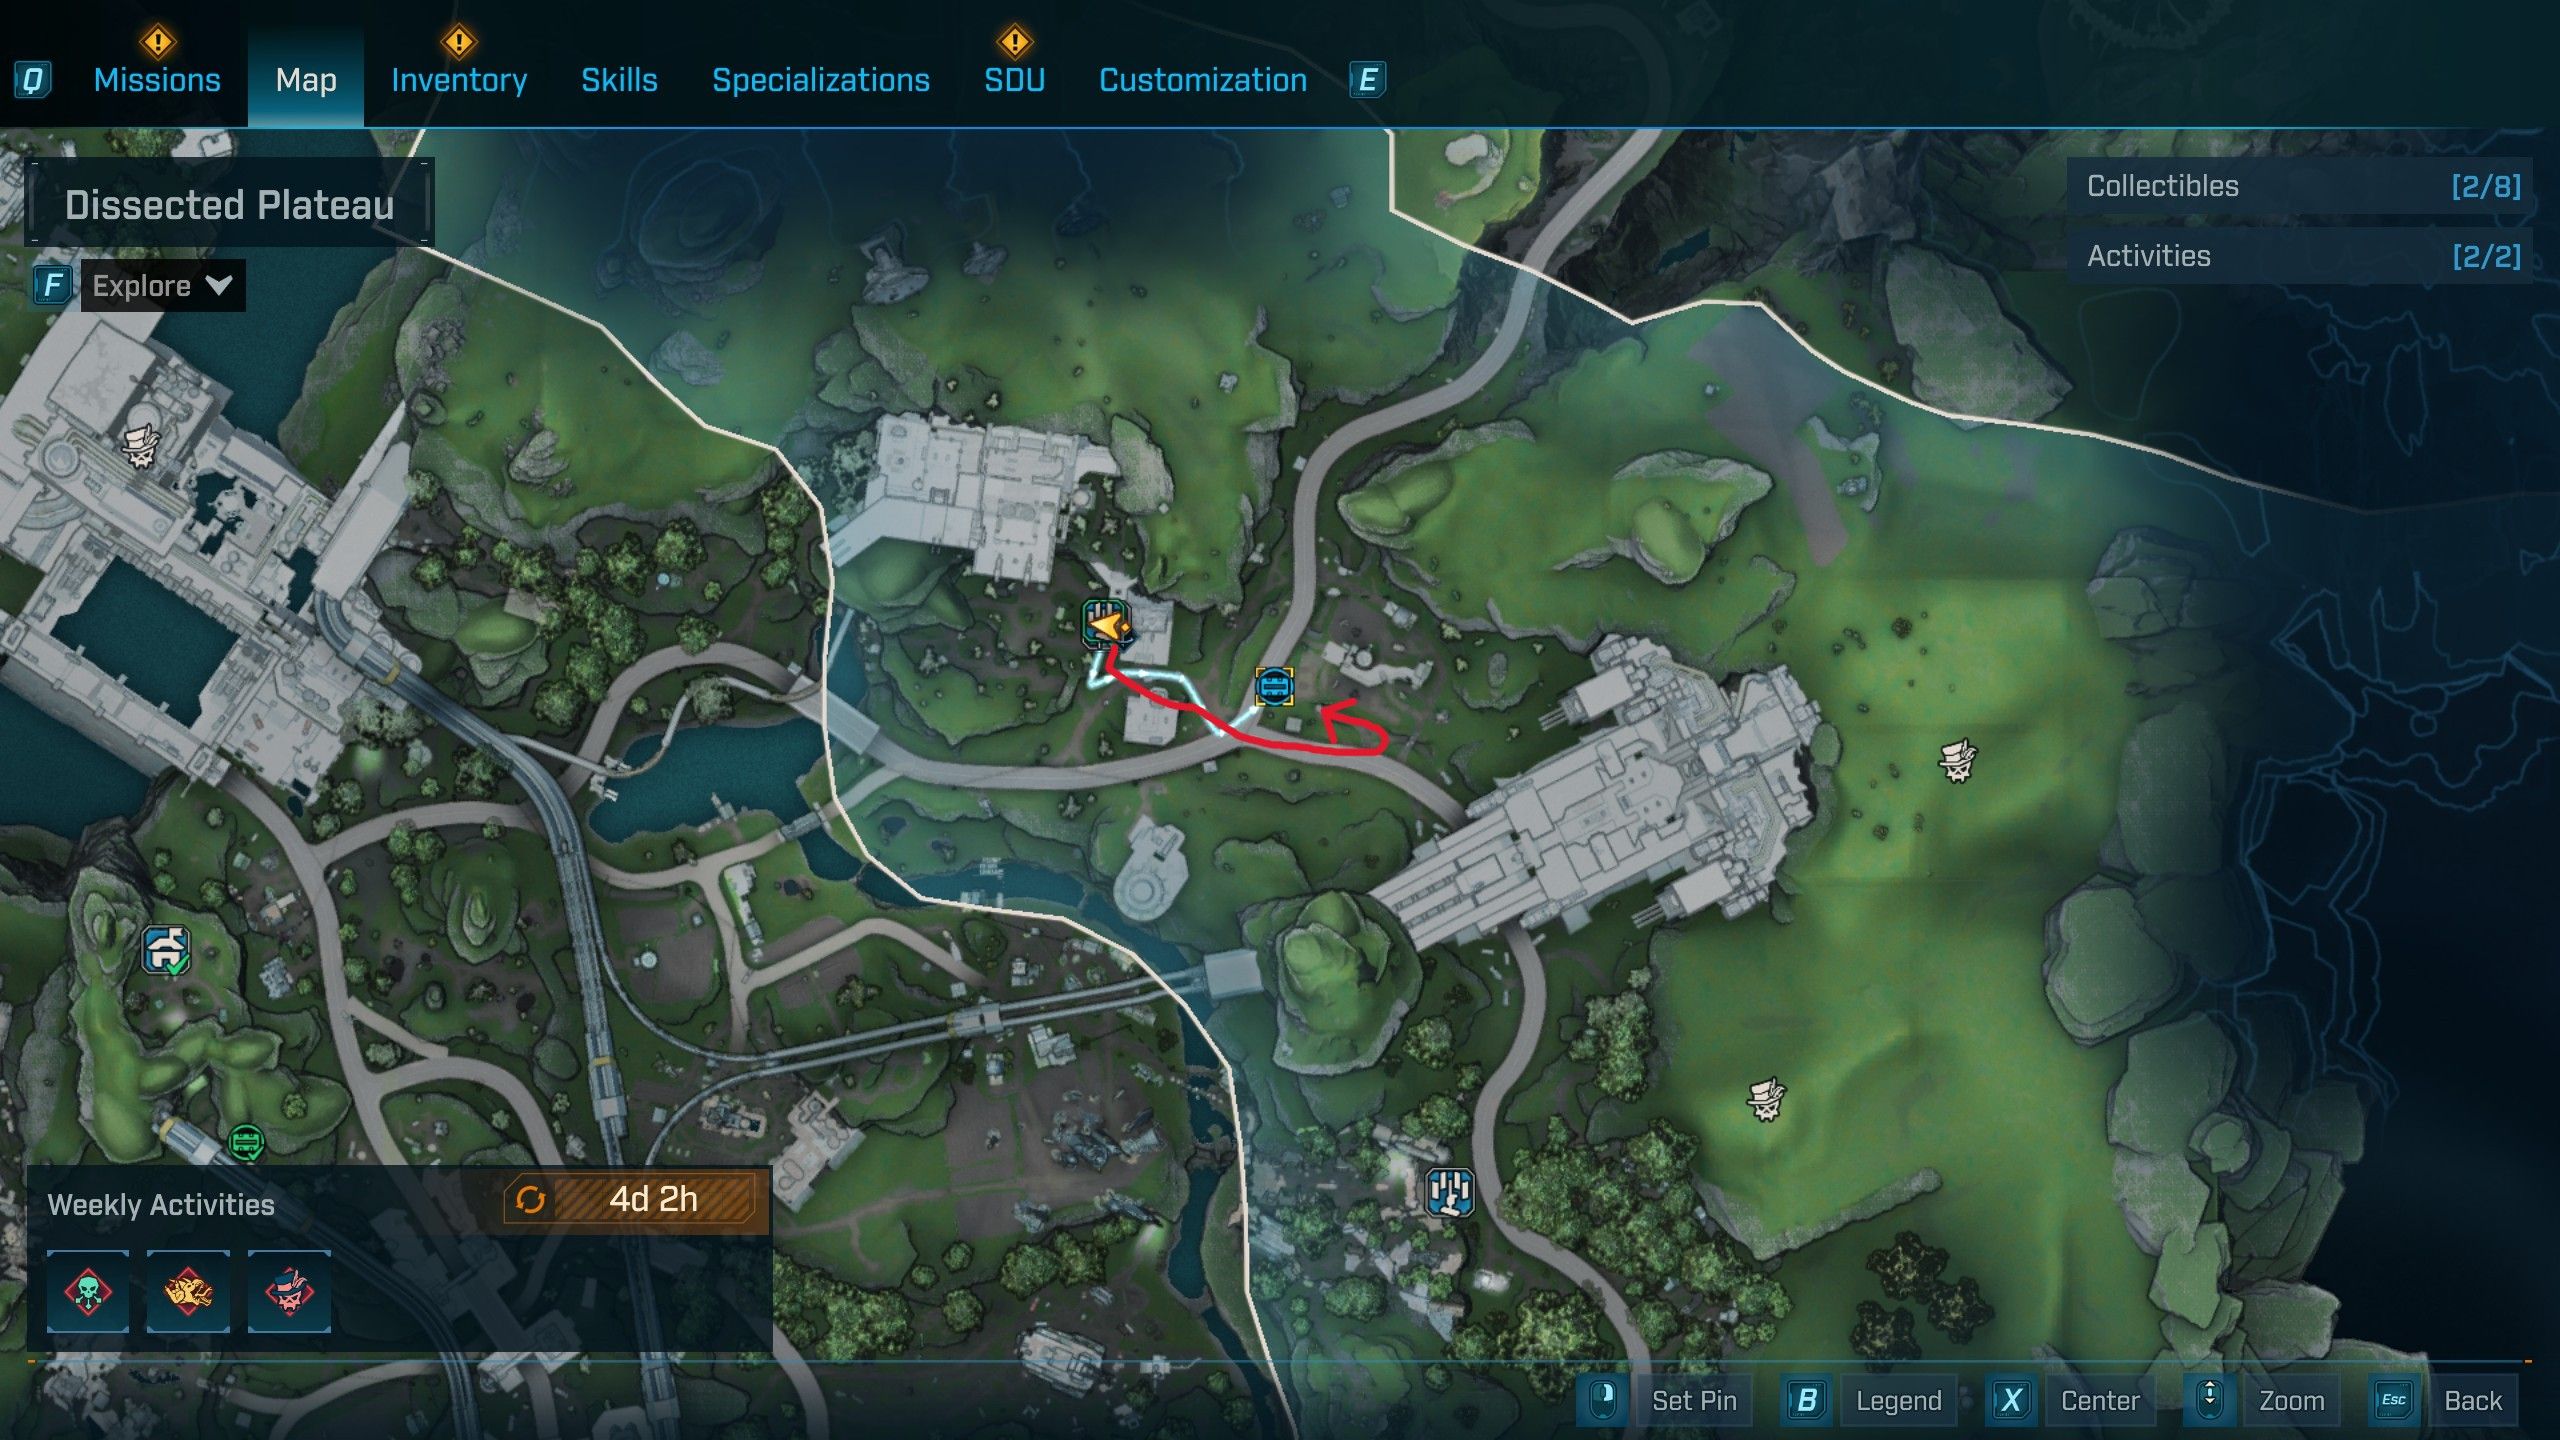
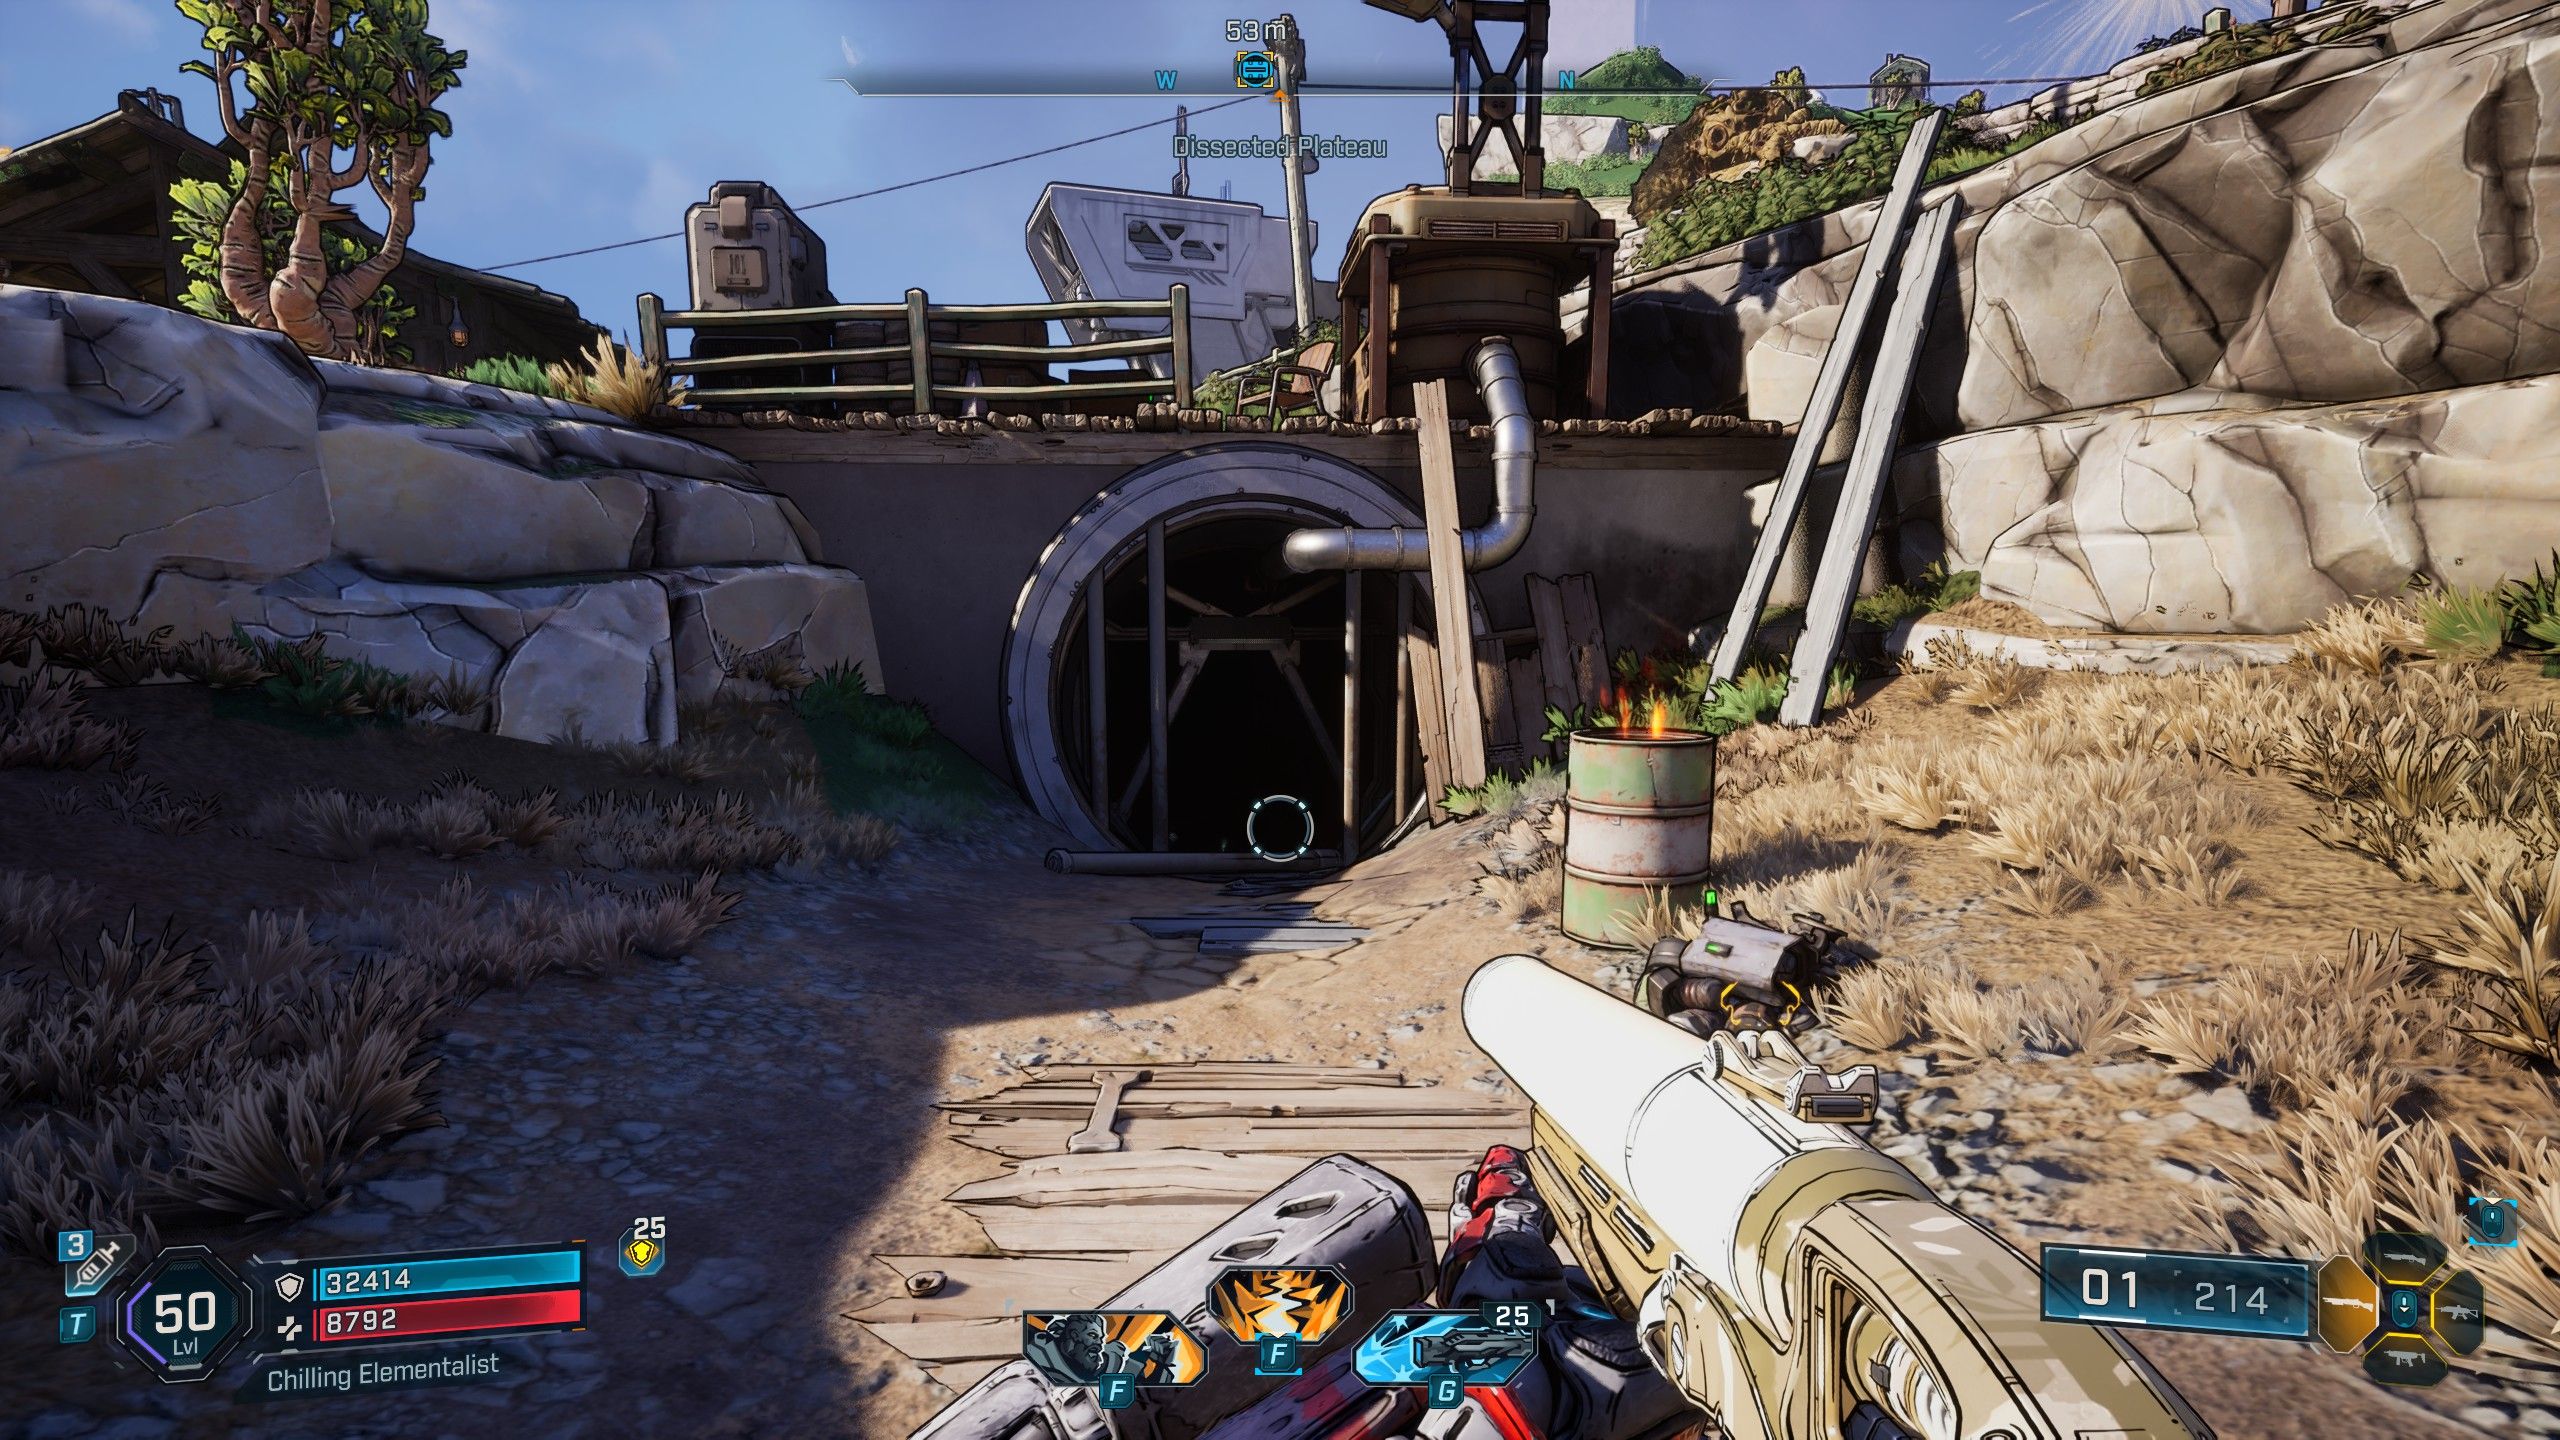
Go to the Deep Seven Order Silo in the Dissected Plateau (you can find instructions on how to get there here). From the south side, drop down and walk east until you reach an abandoned farm. The Survivalist Cache is marked on your map, so head slightly east of that marker. You’ll see a small opening covered by a sewer grate. Crawl through the grate to find the Cache inside.
Read More
- Quantum Agents: Scaling Reinforcement Learning with Distributed Quantum Computing
- All Skyblazer Armor Locations in Crimson Desert
- Every Melee and Ranged Weapon in Windrose
- Boruto: Two Blue Vortex Chapter 33 Preview — The Final Battle Vs Mamushi Begins
- How to Get the Sunset Reed Armor Set and Hollow Visage Sword in Crimson Desert
- Zhuang Fangyi Build In Arknights Endfield
- Windrose Glorious Hunters Quest Guide (Broken Musket)
- One Piece Chapter 1180 Release Date And Where To Read
- Jojo’s Bizarre Adventure Ties Frieren As MyAnimeList’s New #1 Anime
- Best Dual-Wield Swords Build in Crimson Desert
2025-09-28 18:35