The new indie game *Megabonk*, similar to *Vampire Survivors*, has quickly become popular on Steam, selling over a million copies since its release. When you first start playing *Megabonk*, you’ll have access to only two characters and one map, but by continuing to play, you can unlock additional maps and progress through increasingly difficult levels to reach new areas.
Megabonk features just two maps, each offering up to three levels of difficulty, called Tiers. This guide will show you how to unlock both new maps and higher Tiers within each map. It also includes advice on completing the challenging Tier 3.
How to Unlock All Maps in Megabonk
And How to Unlock Tier 2 & Tier 3 in Megabonk
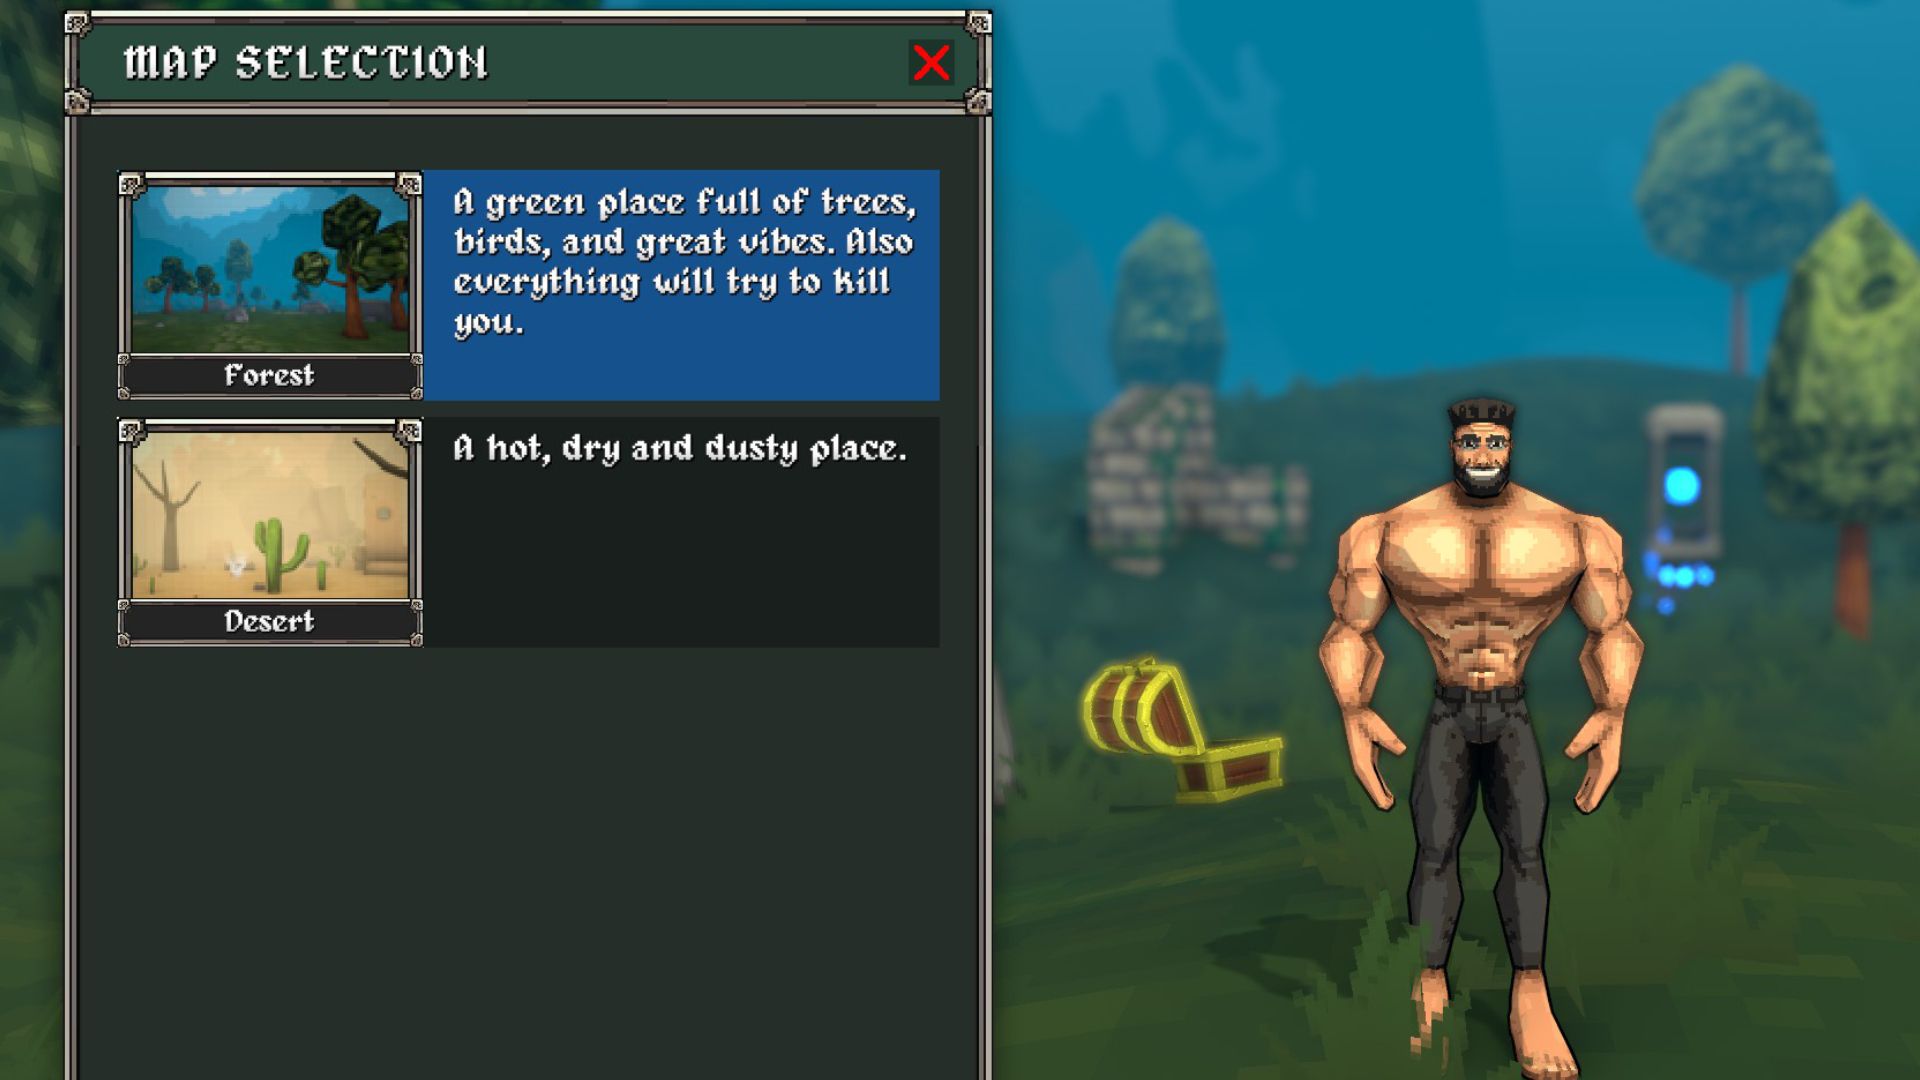
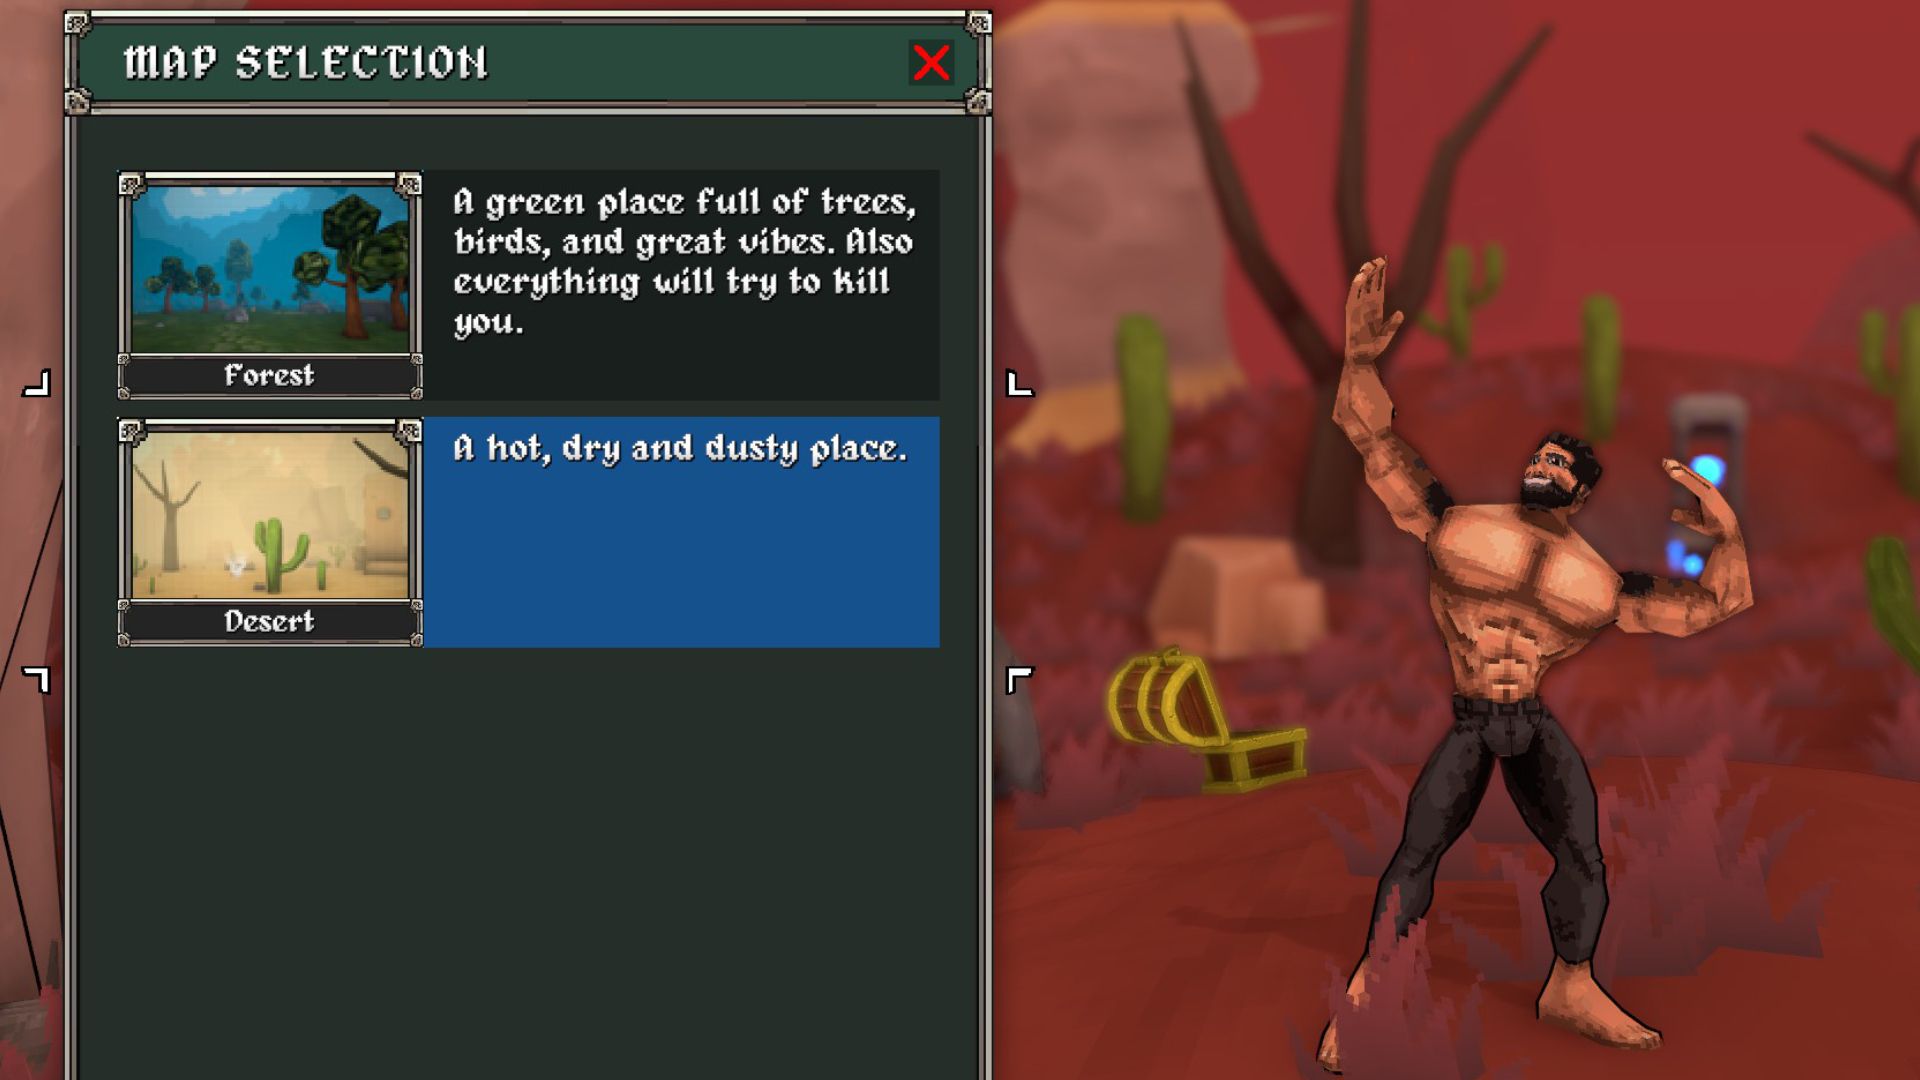
There are a total of two maps in Megabonk: Forest and Desert.
- The Forest map is the default map that is unlocked at the very start of the game, and features numerous hills and valleys in a green landscape filled with Goblins.
- The Desert map is much flatter and is home to Scorpion and Cactus-like enemies. Though you can see Points of Interest from further away, it is much more difficult.
You can unlock the Desert map by defeating the first boss in the Forest map, using any character. Each map has three levels (called Tiers) that get progressively harder. Once you beat the first boss (Tier 1), you can move to Tier 2 and access the second map through a portal. Finally, completing Tier 3 lets you reach the third map and challenge the final boss in a dedicated area.
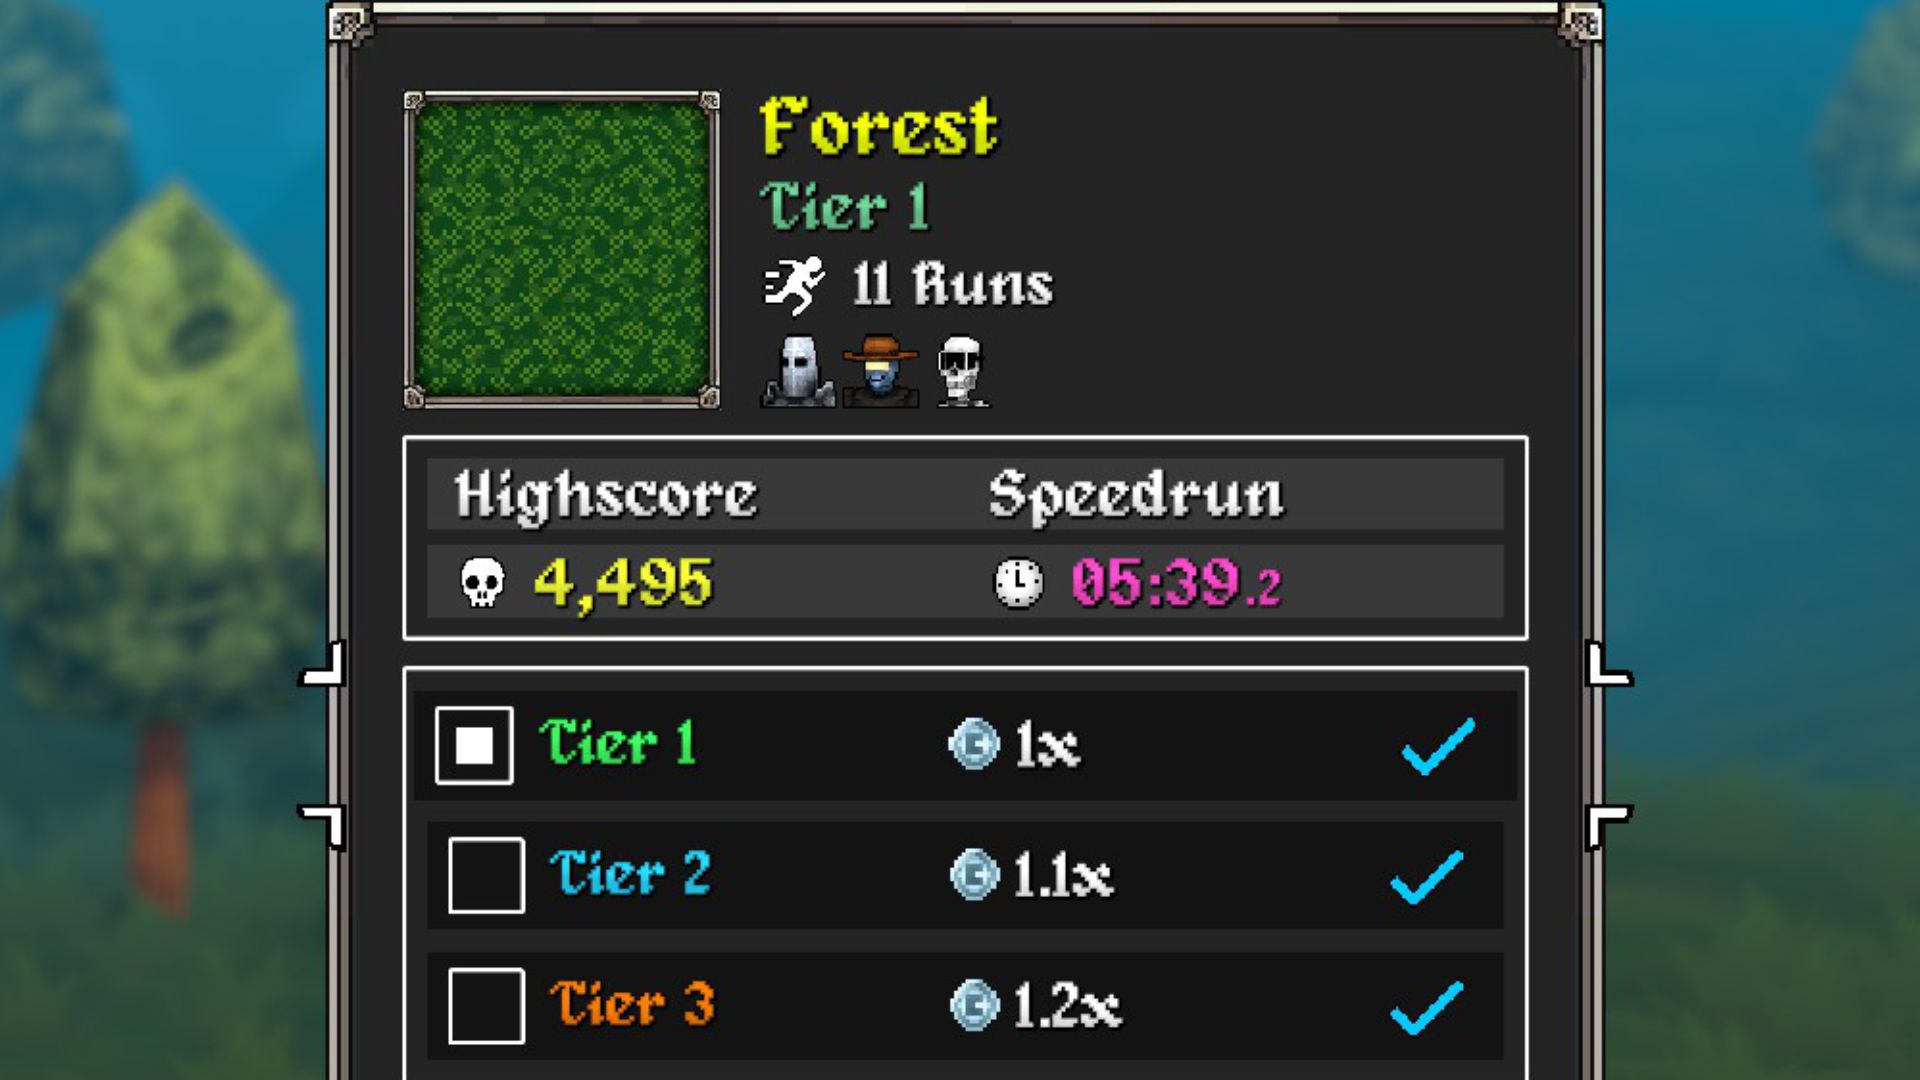
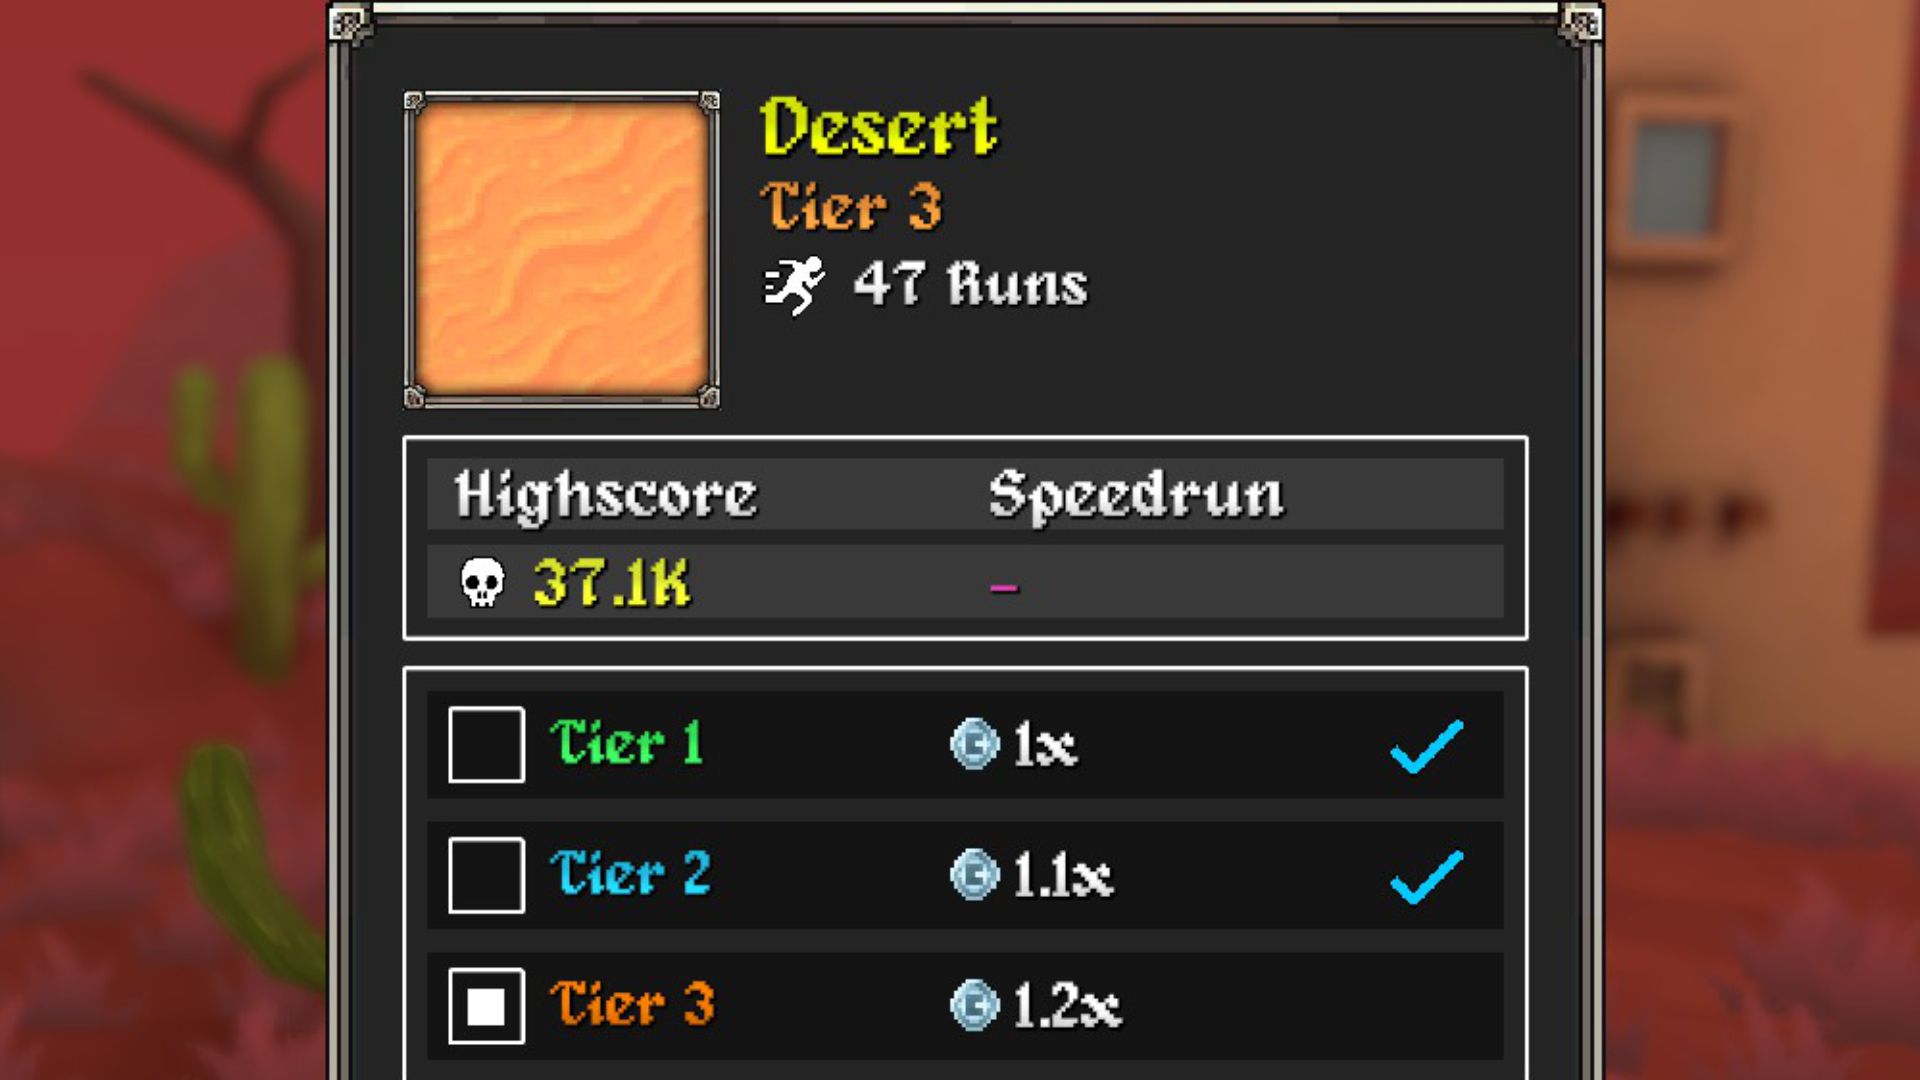
In *Megabonk*, you need to complete each level before you can move on to the next. You start with Tier 1, and once you defeat its boss, you can replay the level as Tier 2 to unlock the path forward. Continue defeating bosses in each Tier—Tier 3 next—to reach new areas of the map.
Best Tips to Beat Tier 3 in Megabonk
How to Beat Tier 3 & Final Bosses in Megabonk
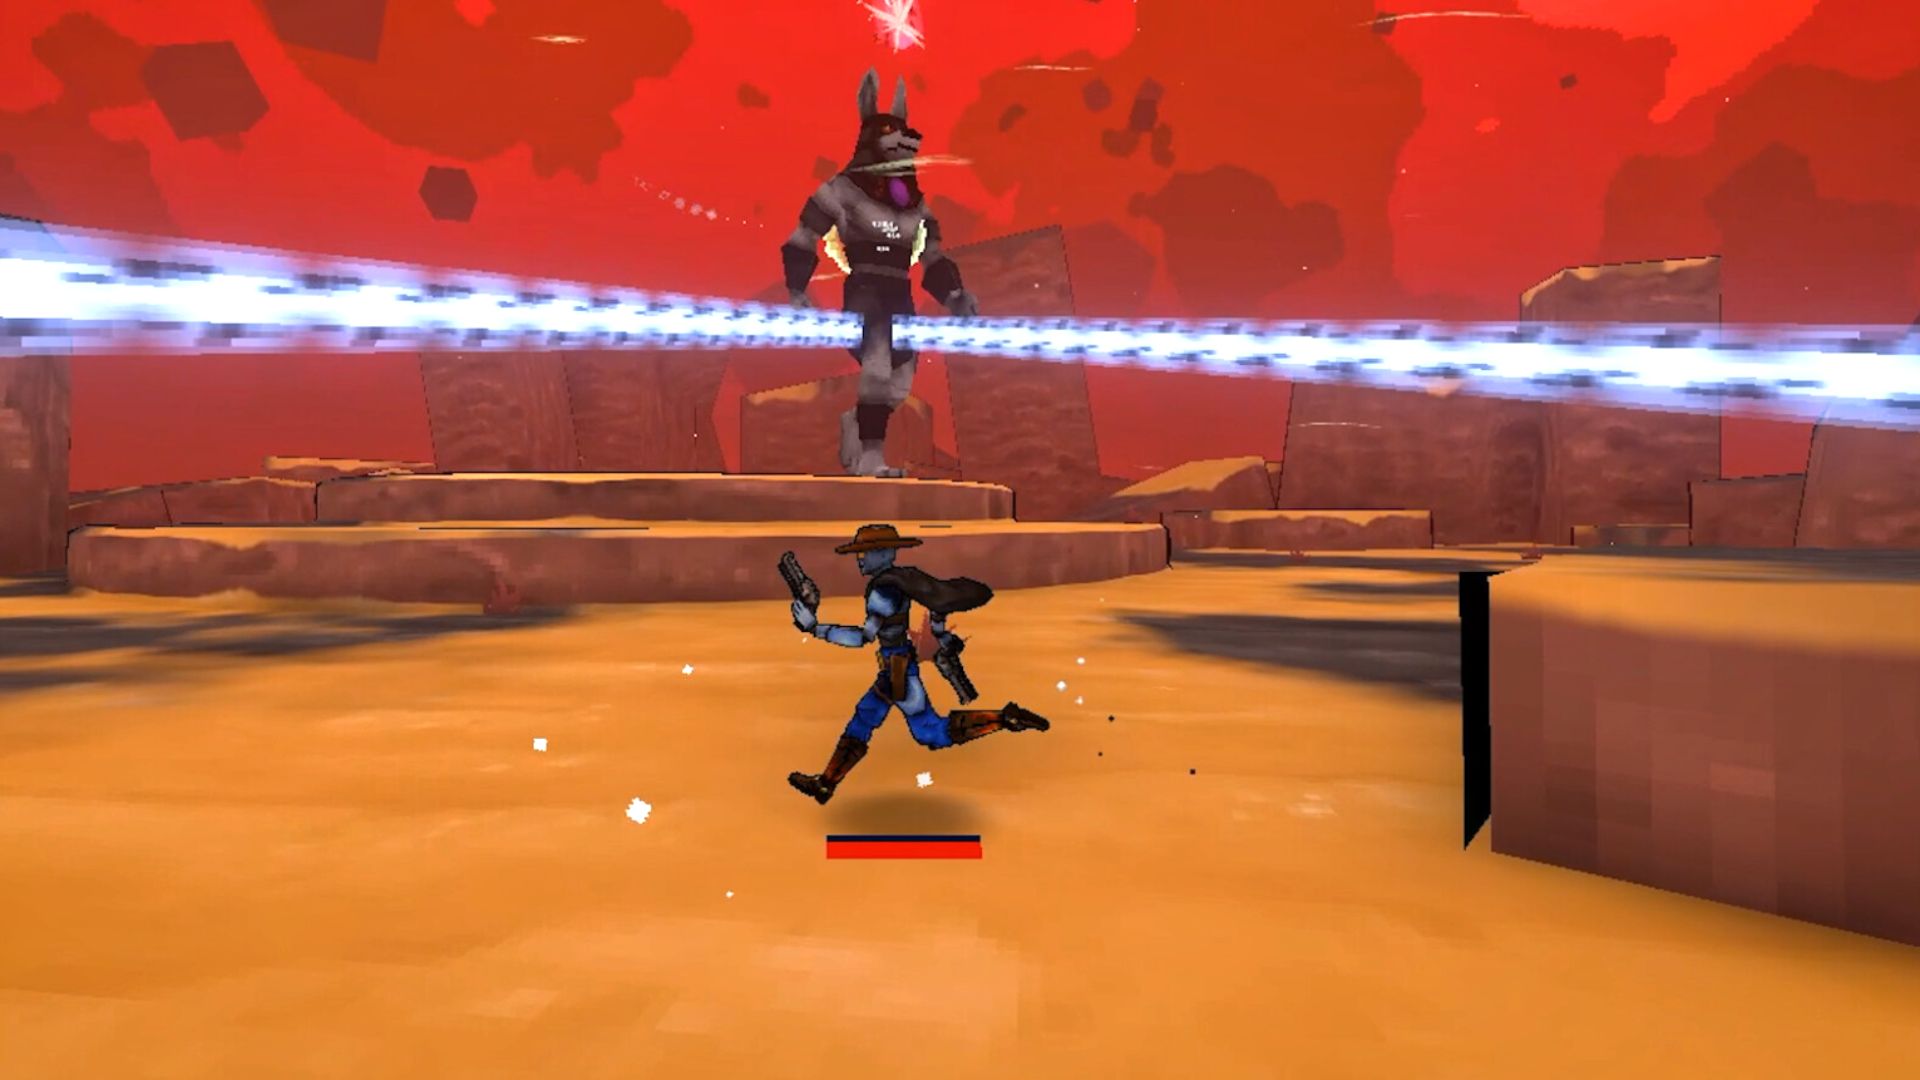
Tier 3 in *Megabonk* is the hardest level. Surviving the stronger enemies in the third region, and actually defeating the final boss, is a huge accomplishment. To succeed, players need to carefully optimize their build during the first two stages to become powerful enough for the final fight. However, it’s important to balance damage with defense – you’ll need some protection to survive each map’s final boss.
Get XP & Luck Tomes Early to Scale Quickly
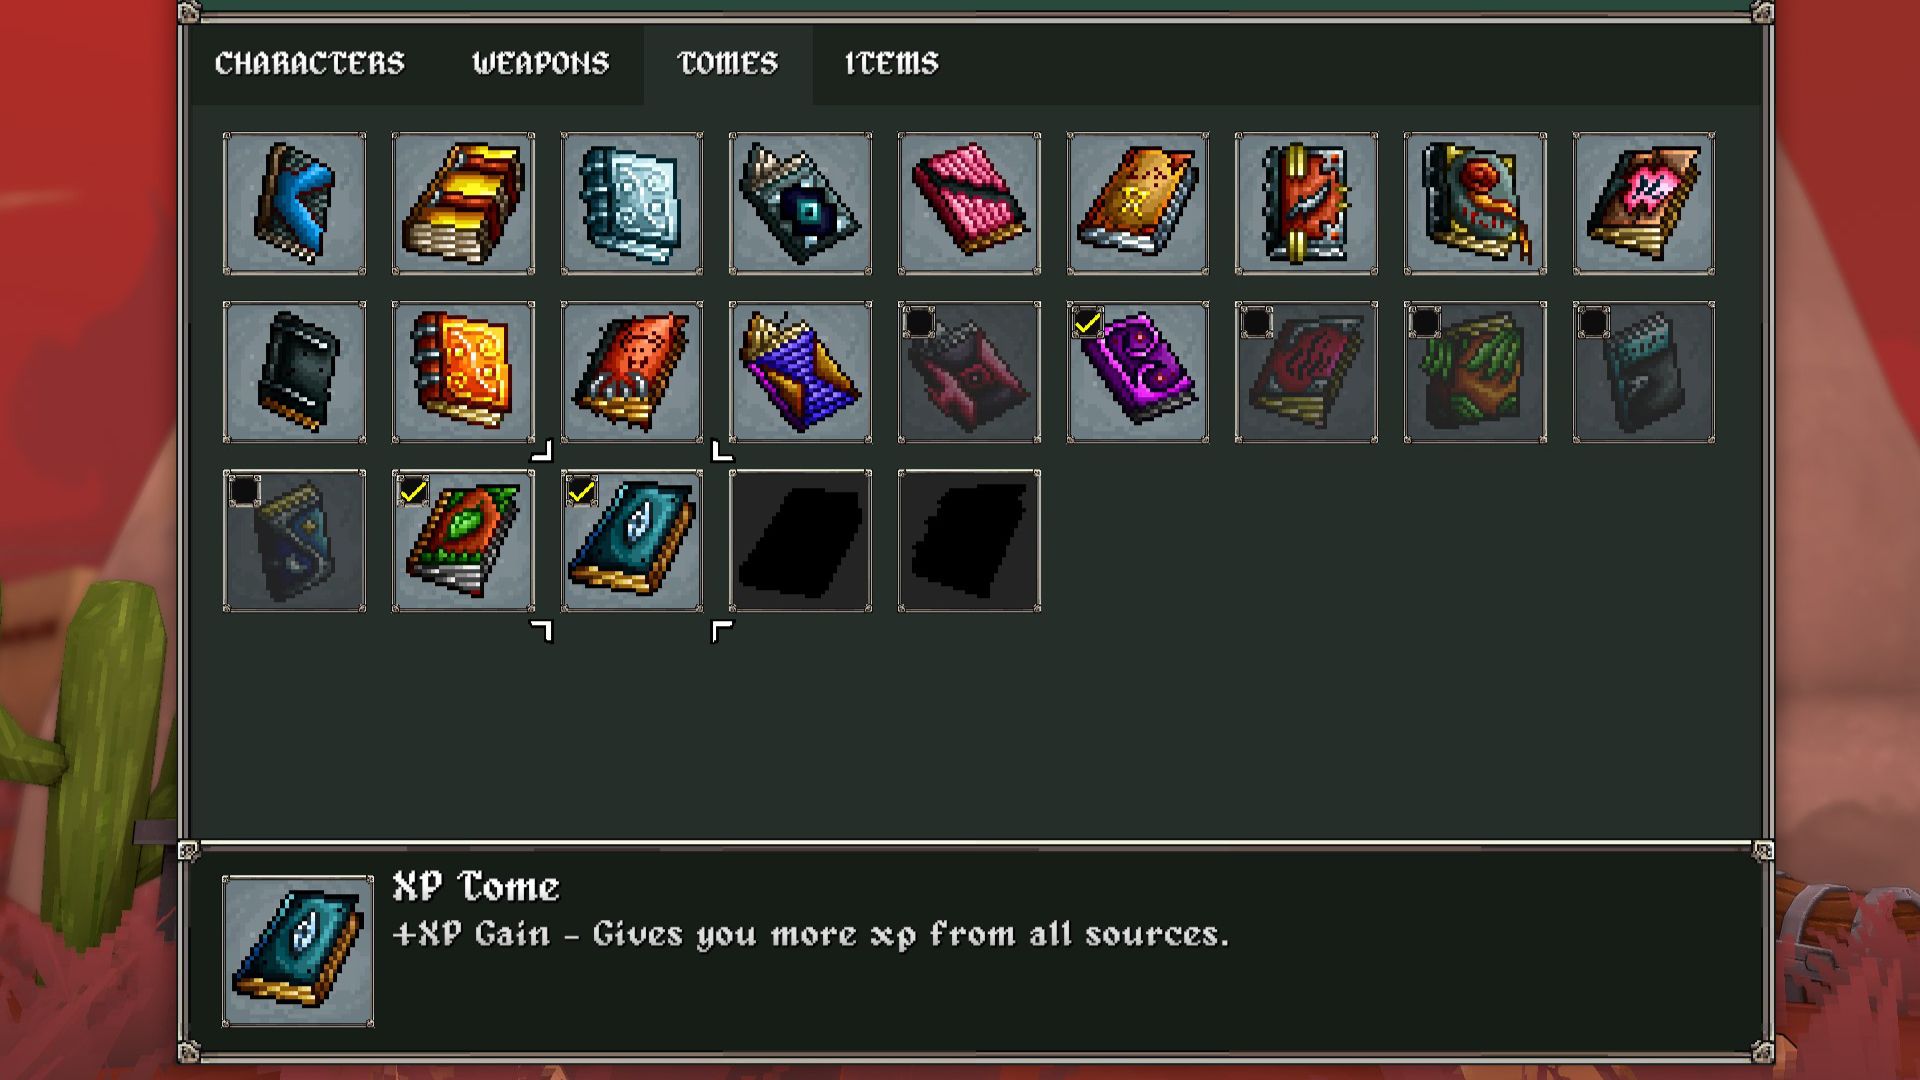
To reach Tier 3 and defeat the final boss in *Megabonk*, the key is to find the XP and Luck Tomes as soon as you can. Getting XP bonuses early will help you level up quickly, and getting Luck bonuses early will improve the rewards you receive when leveling.
Prioritize upgrading these two Tomes whenever you defeat enemies, as they’re more valuable than other rewards. If you don’t get one of these Tomes as a reward, consider rerolling or even starting a new run to increase your chances of making it to the end.
Have Some Way to Regen HP (or Just Take Aegis)
To succeed in Tier 3 of *Megabonk*, you’ll need strong weapons and fighting skills. However, defeating the final bosses on either map also requires solid defenses. These bosses start by significantly weakening your character and present challenges that you must overcome with limited abilities, making the fights feel like puzzles.
Okay, so when you first start fighting either of the final bosses, you *really* need to have some way to heal yourself, reduce the damage you take, or just generally stay alive. Trust me, you’re going to get hit – it’s unavoidable! – and without some kind of protection, you’ll probably get one-shotted. It’s just too risky to go in without a plan for staying alive.
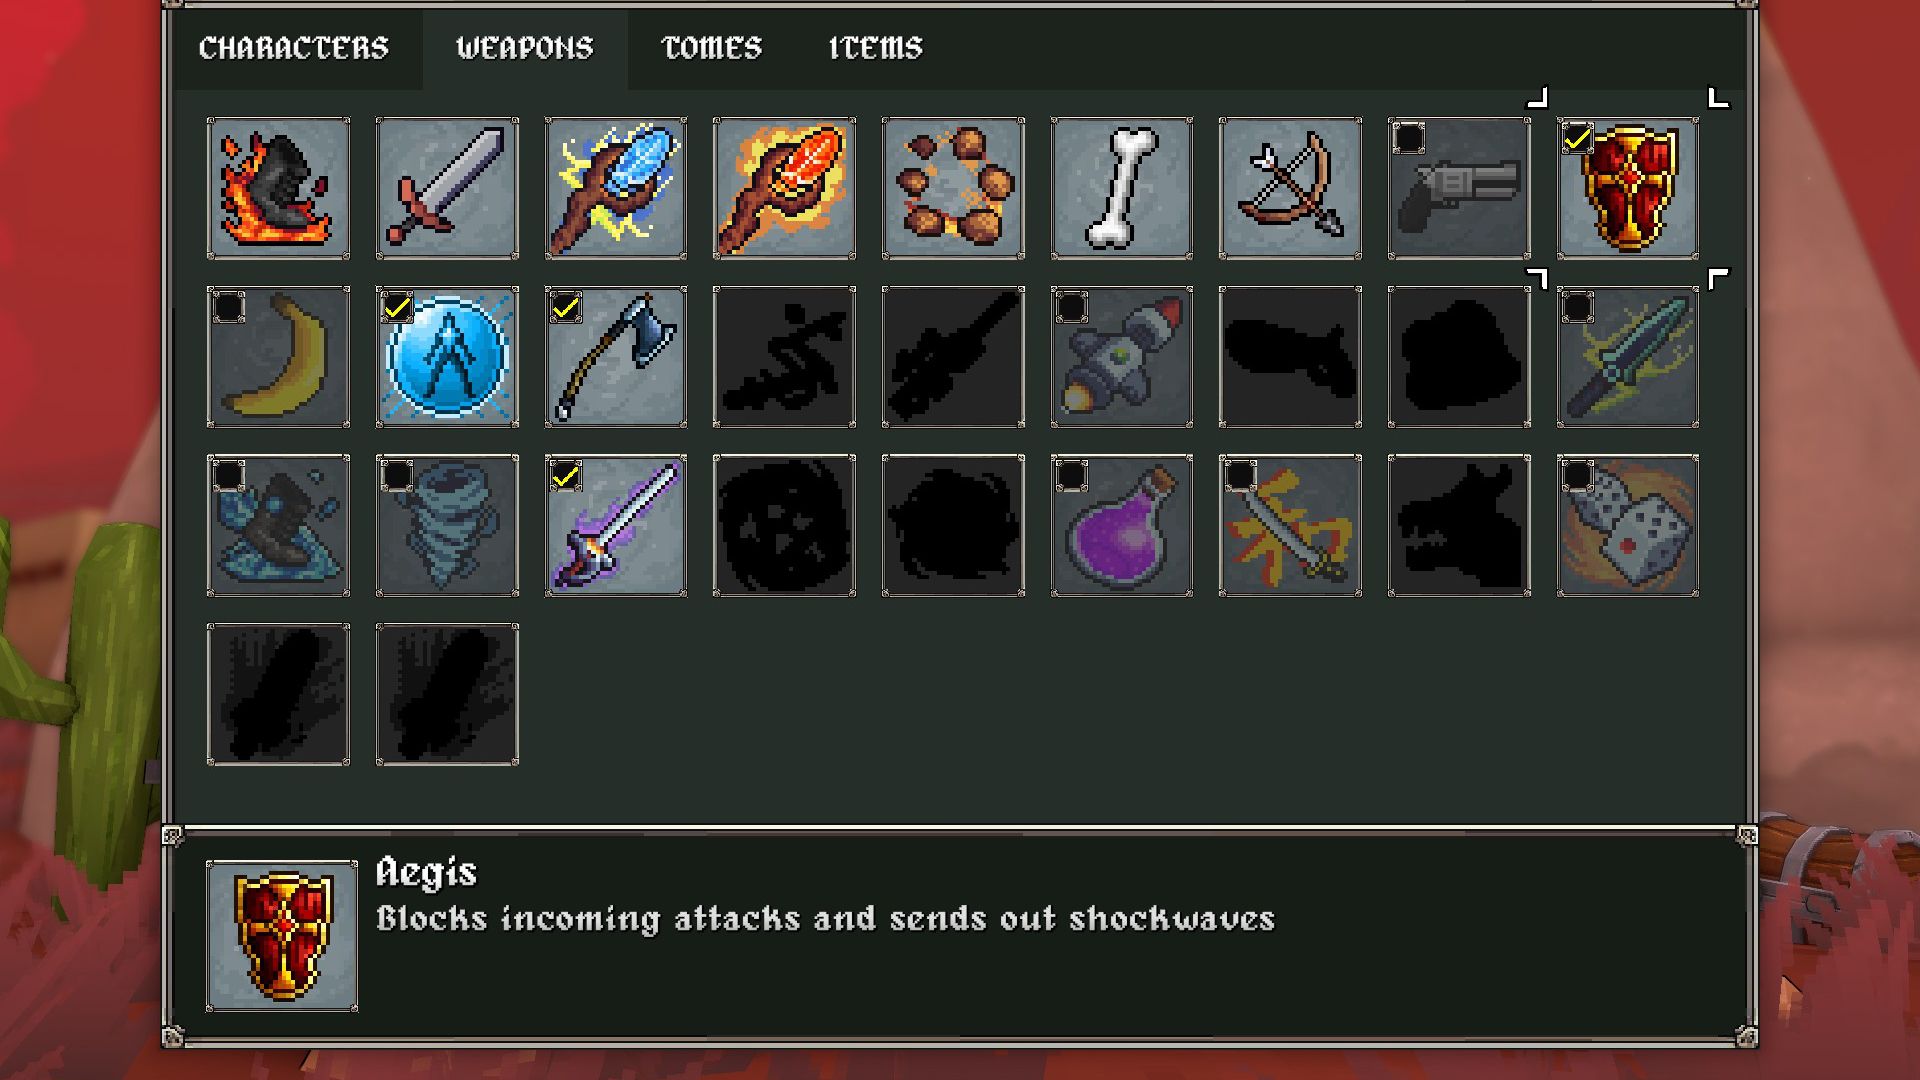
Two of the best solutions here are high HP Regen and the Aegis weapon.
- Because the bosses gain a shield, Lifesteal won’t help you much in these fights, so opt for HP Regen when given the choice if you want to fight the final boss.
- The Aegis prevents most damage when you get hit and recharges over time, and is extremely handy for survivability, especially if you increase its Projectile count.
Increase Difficulty & Boost Boss Spawns For More XP & Chests
It may seem strange, but raising the Difficulty in *Megabonk* is actually a great way to speed up your progress during a run, as long as you can still defeat enemies quickly. Higher Difficulty means enemies have more health and hit harder, and the game throws more of them at you.
Increasing the game’s Difficulty means more enemies will appear, letting you earn more experience points during your playthrough. Think of it as an experience boost, but be careful not to set the Difficulty too high! Before finishing the first stage, aim to raise your Difficulty to about 40% – that’s a good balance for increasing the number of enemies without making things too hard.
Lean Into Your Character’s Starting Weapon & Passive Ability

Each Megabonk character begins with a starting weapon and a special ability. While any character can use any weapon or tome they find, certain combinations of weapons and abilities are more effective for specific characters.
Calcium is a character who begins with the Bone weapon and gets stronger as he moves faster. Since he’s already quick, weapons that slow enemies, like Aura and Frostwalker, aren’t very helpful. Instead, he excels with fast-firing weapons like Electric Daggers and Bananas, and any upgrades you choose will further enhance the Bone’s damage output.
Remember what makes your character special – their unique skill and weapon. Try to choose other weapons and upgrades that work well with those strengths.
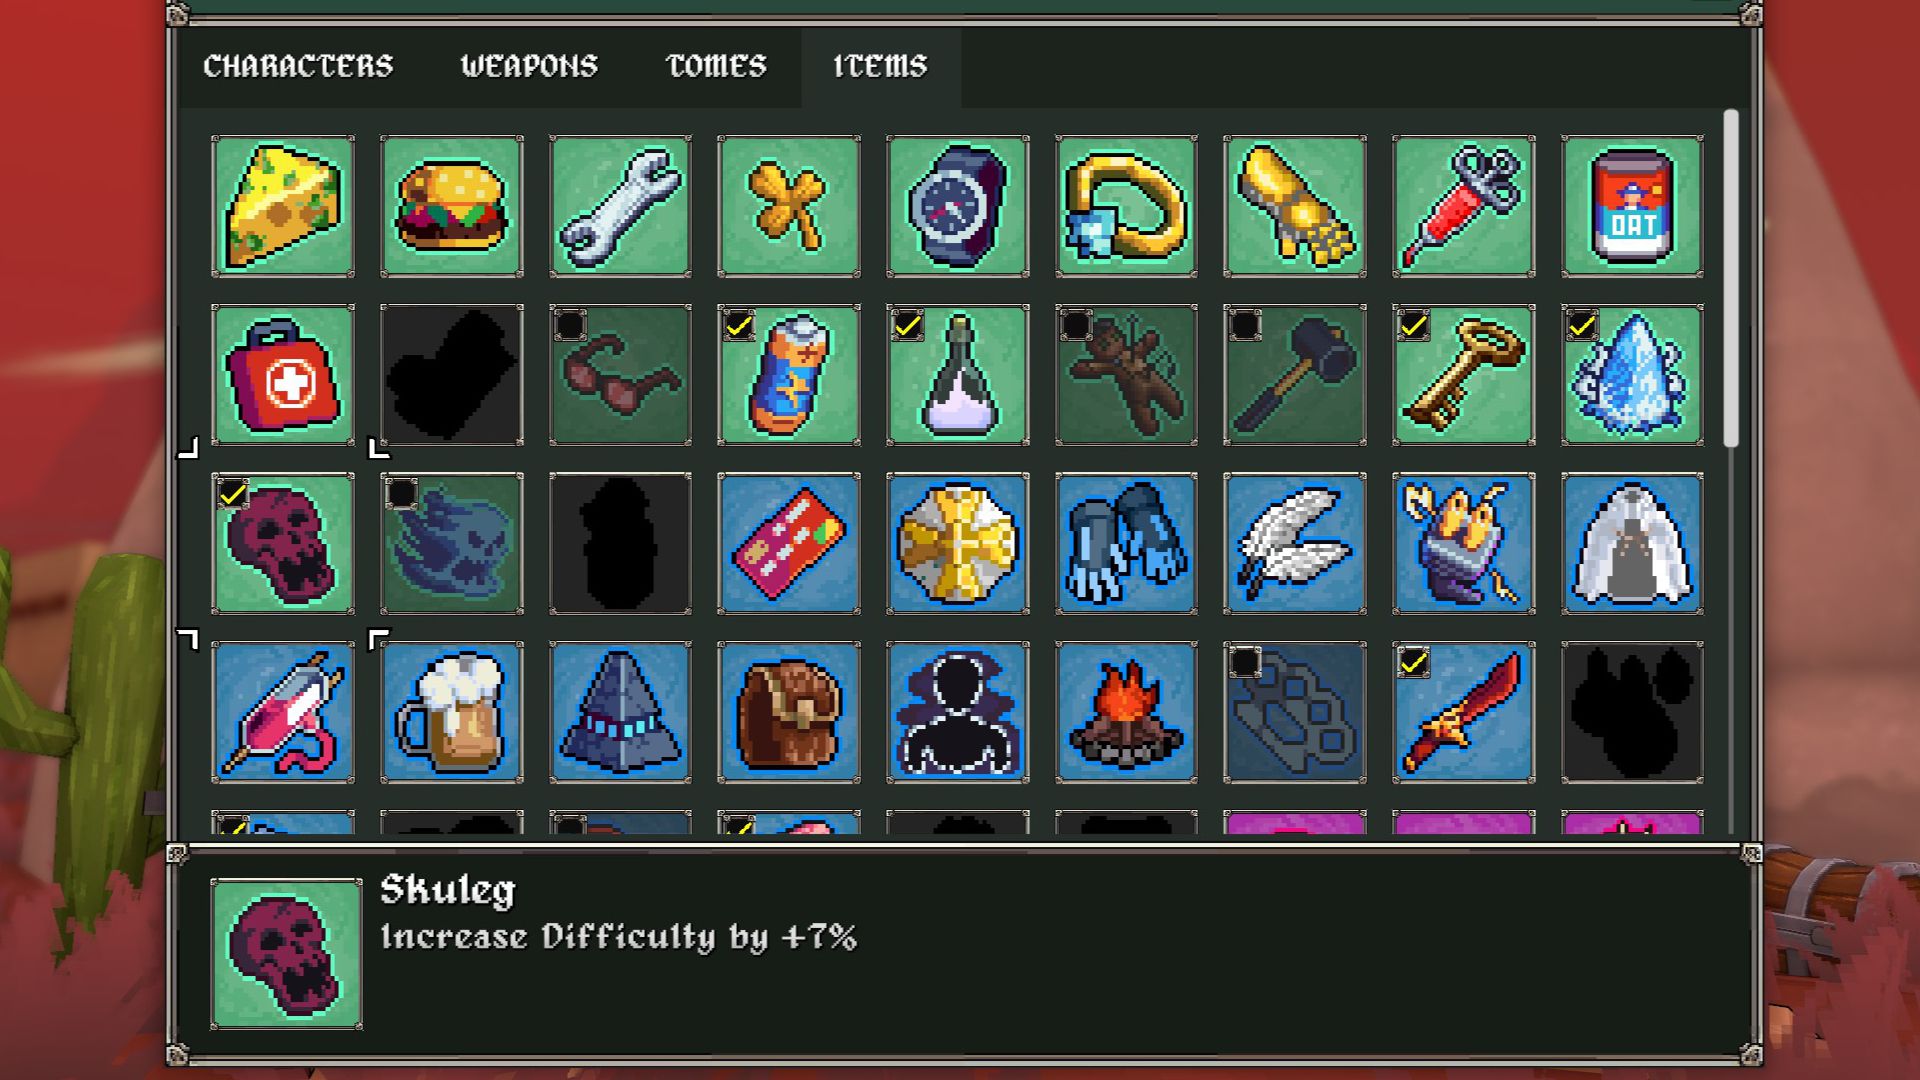
Toggle Unwanted Items Off & Banish Bad Items Early

If you want to successfully complete a difficult run in *Megabonk*, customizing the items that appear can really help. In the Shop, go to the Items, Tomes, and Weapons sections. You’ll see a checkmark next to items you’ve already unlocked. If you unlock the ‘Toggle’ feature, you can prevent unwanted items from showing up during your next run.
This significantly improves your chances of getting the rewards you’re hoping for from chests and leveling up. For example, if a character like Calcium doesn’t need certain weapons, you can disable those weapons to increase the odds of receiving more helpful ones.
When you’re trying to complete a run, avoid using the Banish ability on rewards you earn by leveling up. You can usually finish a run successfully with any weapon or tome, even if some are more helpful than others. Instead, use Banish on items from chests and Moai statues that you don’t need. This will remove those items from future rewards, giving you a better chance of getting something more useful.
Read More
- Re:Zero Season 4, Episode 6 Release Date & Time
- How to Get the Wunderbarrage in Totenreich (BO7 Zombies)
- NTE Drift Guide (& Best Car Mods for Drifting)
- How to Beat Turbines in ARC Raiders
- All Aswang Evidence & Weaknesses in Phasmophobia
- How to Get Necrolei Cyst & Strong Acid in Subnautica 2
- Where to Find Prescription in Where Winds Meet (Raw Leaf Porridge Quest)
- Conduit Crystal Location In Subnautica 2
- Diablo 4 Best Loot Filter Codes
- Best Where Winds Meet Character Customization Codes
2025-10-07 22:11