
Chapter 3 of Ninja Gaiden 4, titled ‘Phantom Pleasure Quarter,’ continues the story immediately after the events of Chapter 2. Yakumo is still traveling through Sky City Tokyo, trying to find the demon that’s causing problems with the surrounding area. Once he destroys the three Pylons, he moves on to the next part of his quest. This guide offers a complete walkthrough for Chapter 3, showing you how to complete it and find every collectible in the Phantom Pleasure Quarter.
Chapter 3 Walkthrough Part 1 – Ninja Gaiden 4
DarkNest Terminal 1 & New Missions:
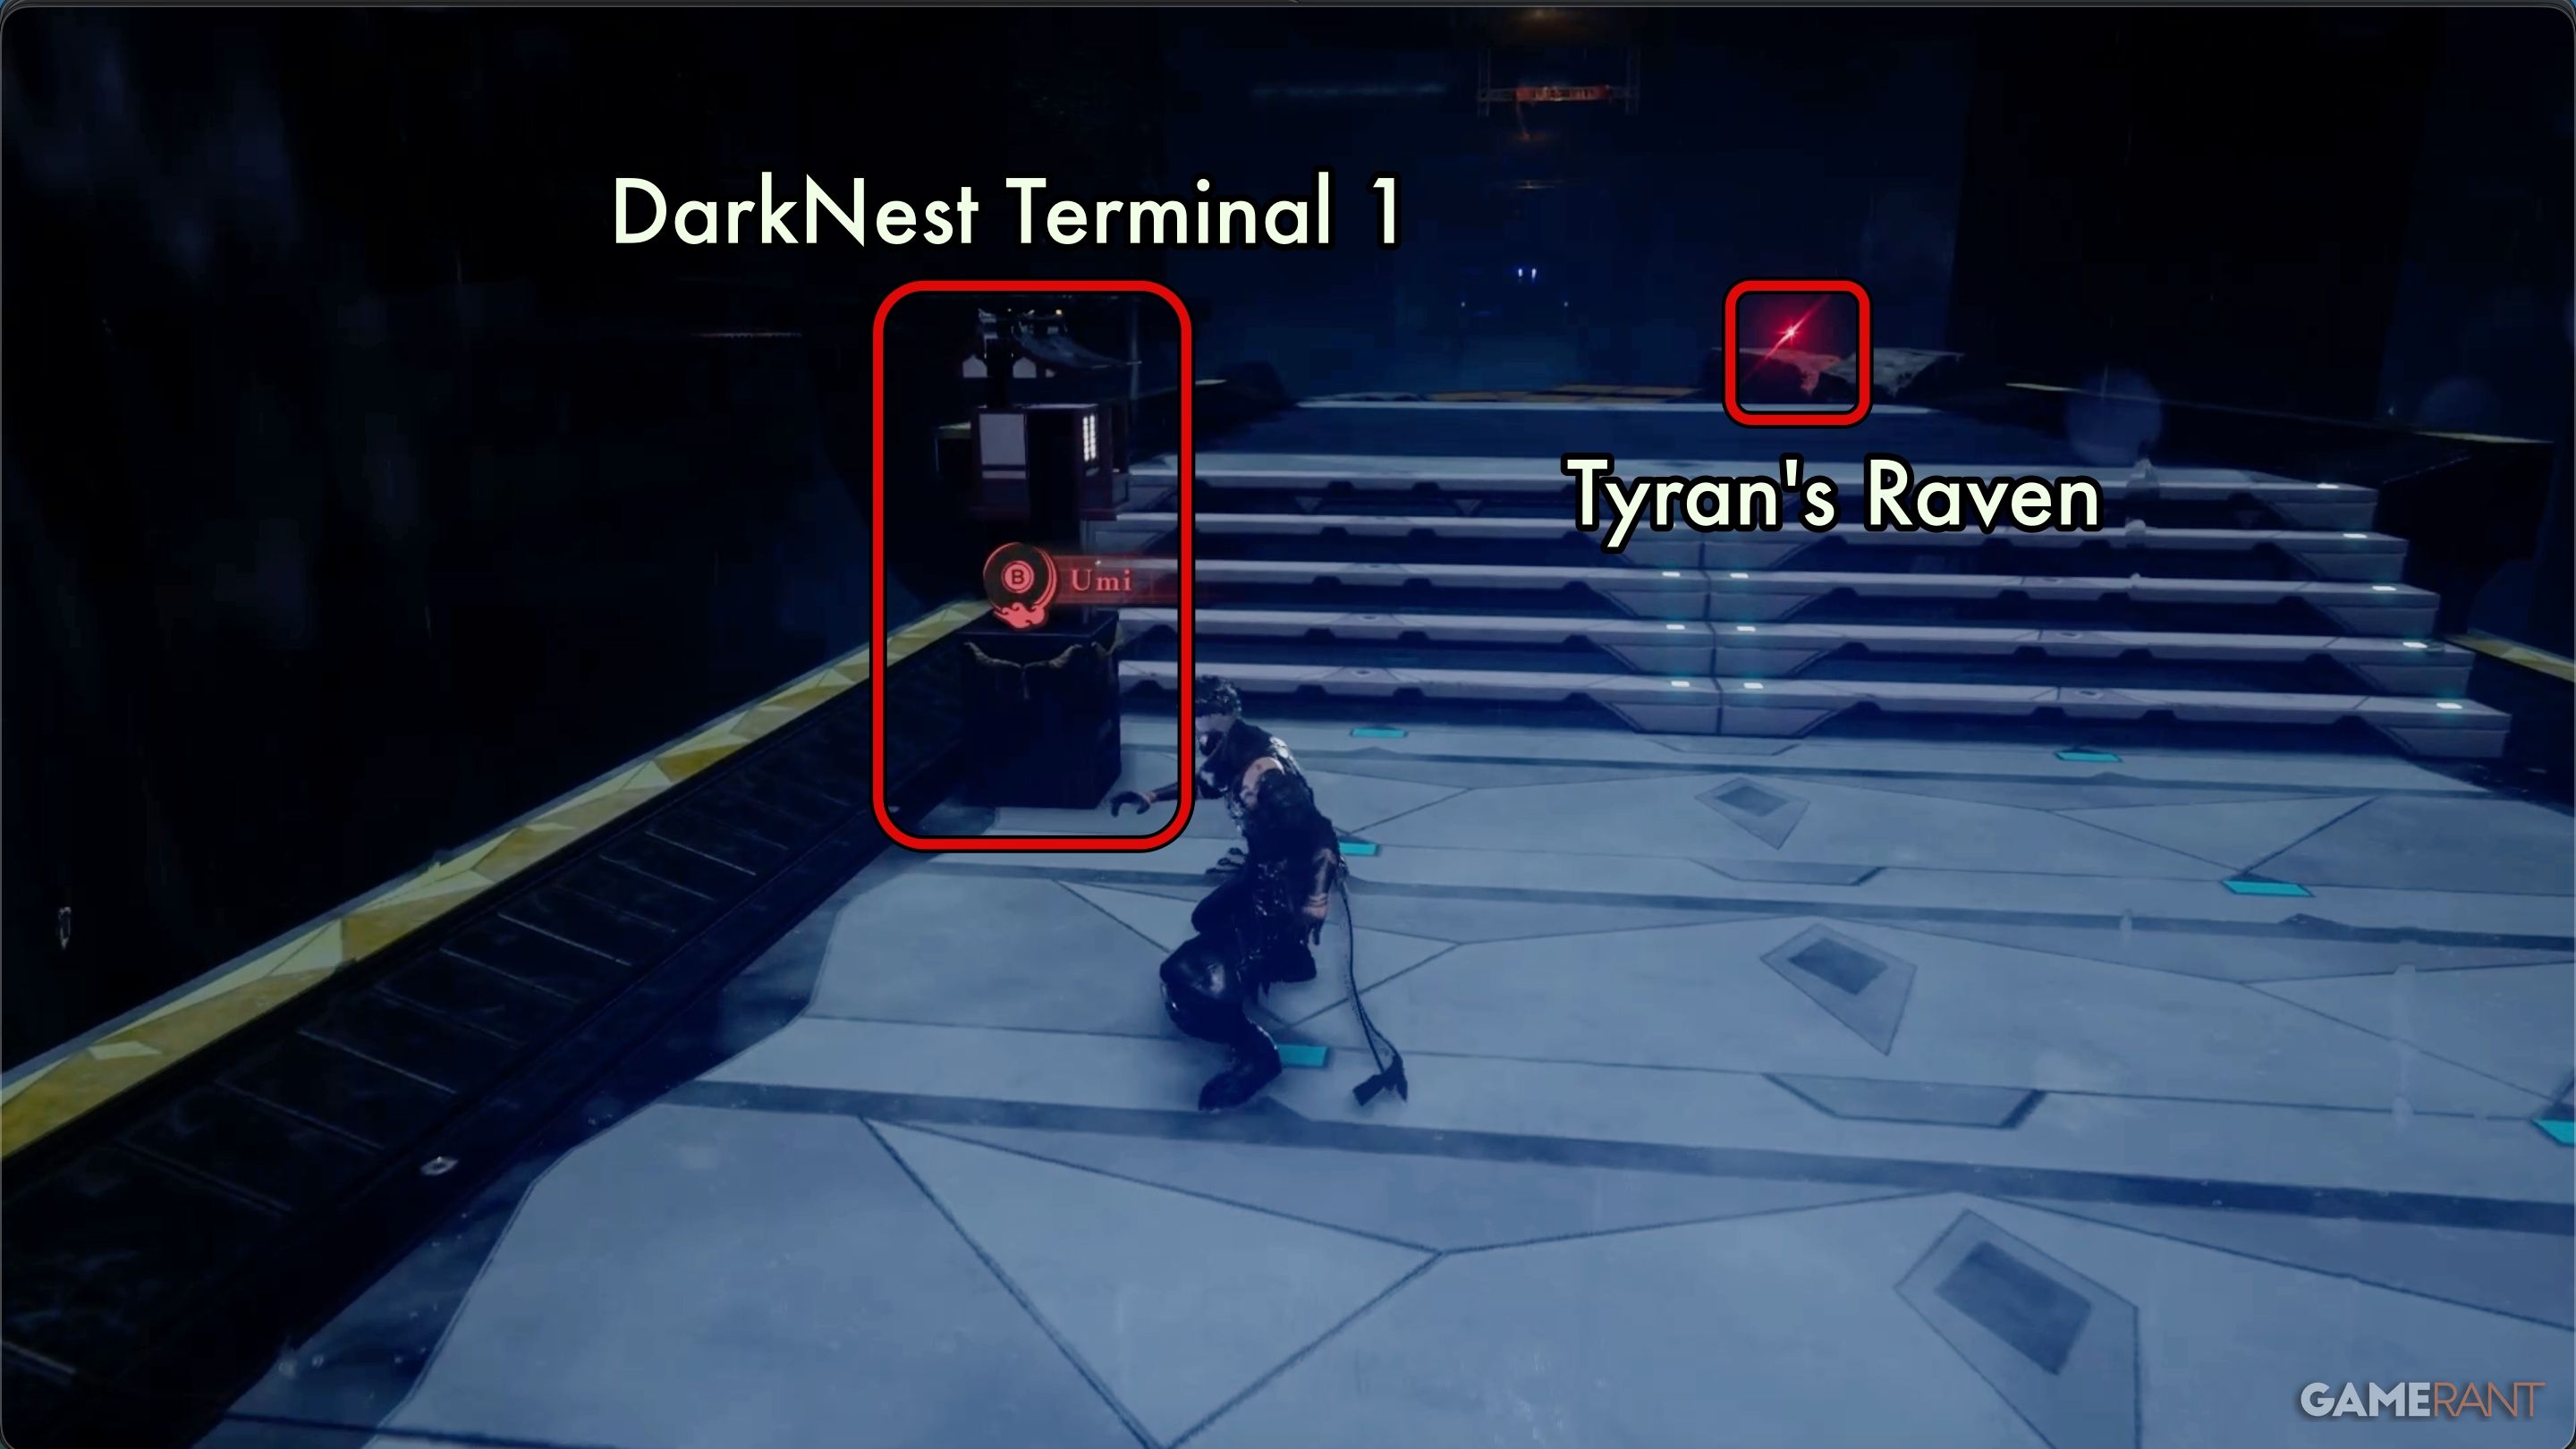
You’ll find the first DarkNest Terminal and Tyran’s Raven early in Chapter 3, almost right away as you begin following the main path. Interacting with the terminal for the first time will likely unlock several new missions for you to take on.
You’ll find Tyran’s Raven shortly after passing the terminal. As you get closer, you’ll notice its red eye glowing.
We’re still figuring out if you need to finish older missions before new ones appear in later chapters. For now, we’ll keep you updated with new missions as we unlock them, and we’ll let you know when we complete previous ones so you can follow our progress. We’ll update this information as soon as we have a clear answer.
New Missions in Chapter 3:
- Execute the Renegade DDO Soldiers – Sky City Tokyo – Reward: NinjaCoin x5500
- Defeat 10 Burabura Lantern Daemons – All Areas – Reward: NinjaCoin x3000, Crimson Blood Balm x1
- Find the Rotting Charm in Sky City Tokyo – Reward: Black Scale x1
- Execute the Food Thief – Sky City Tokyo – Reward: NinjaCoin x5500, Senjin War Brew x1
Chest 1 & DarkNest Terminal 2:
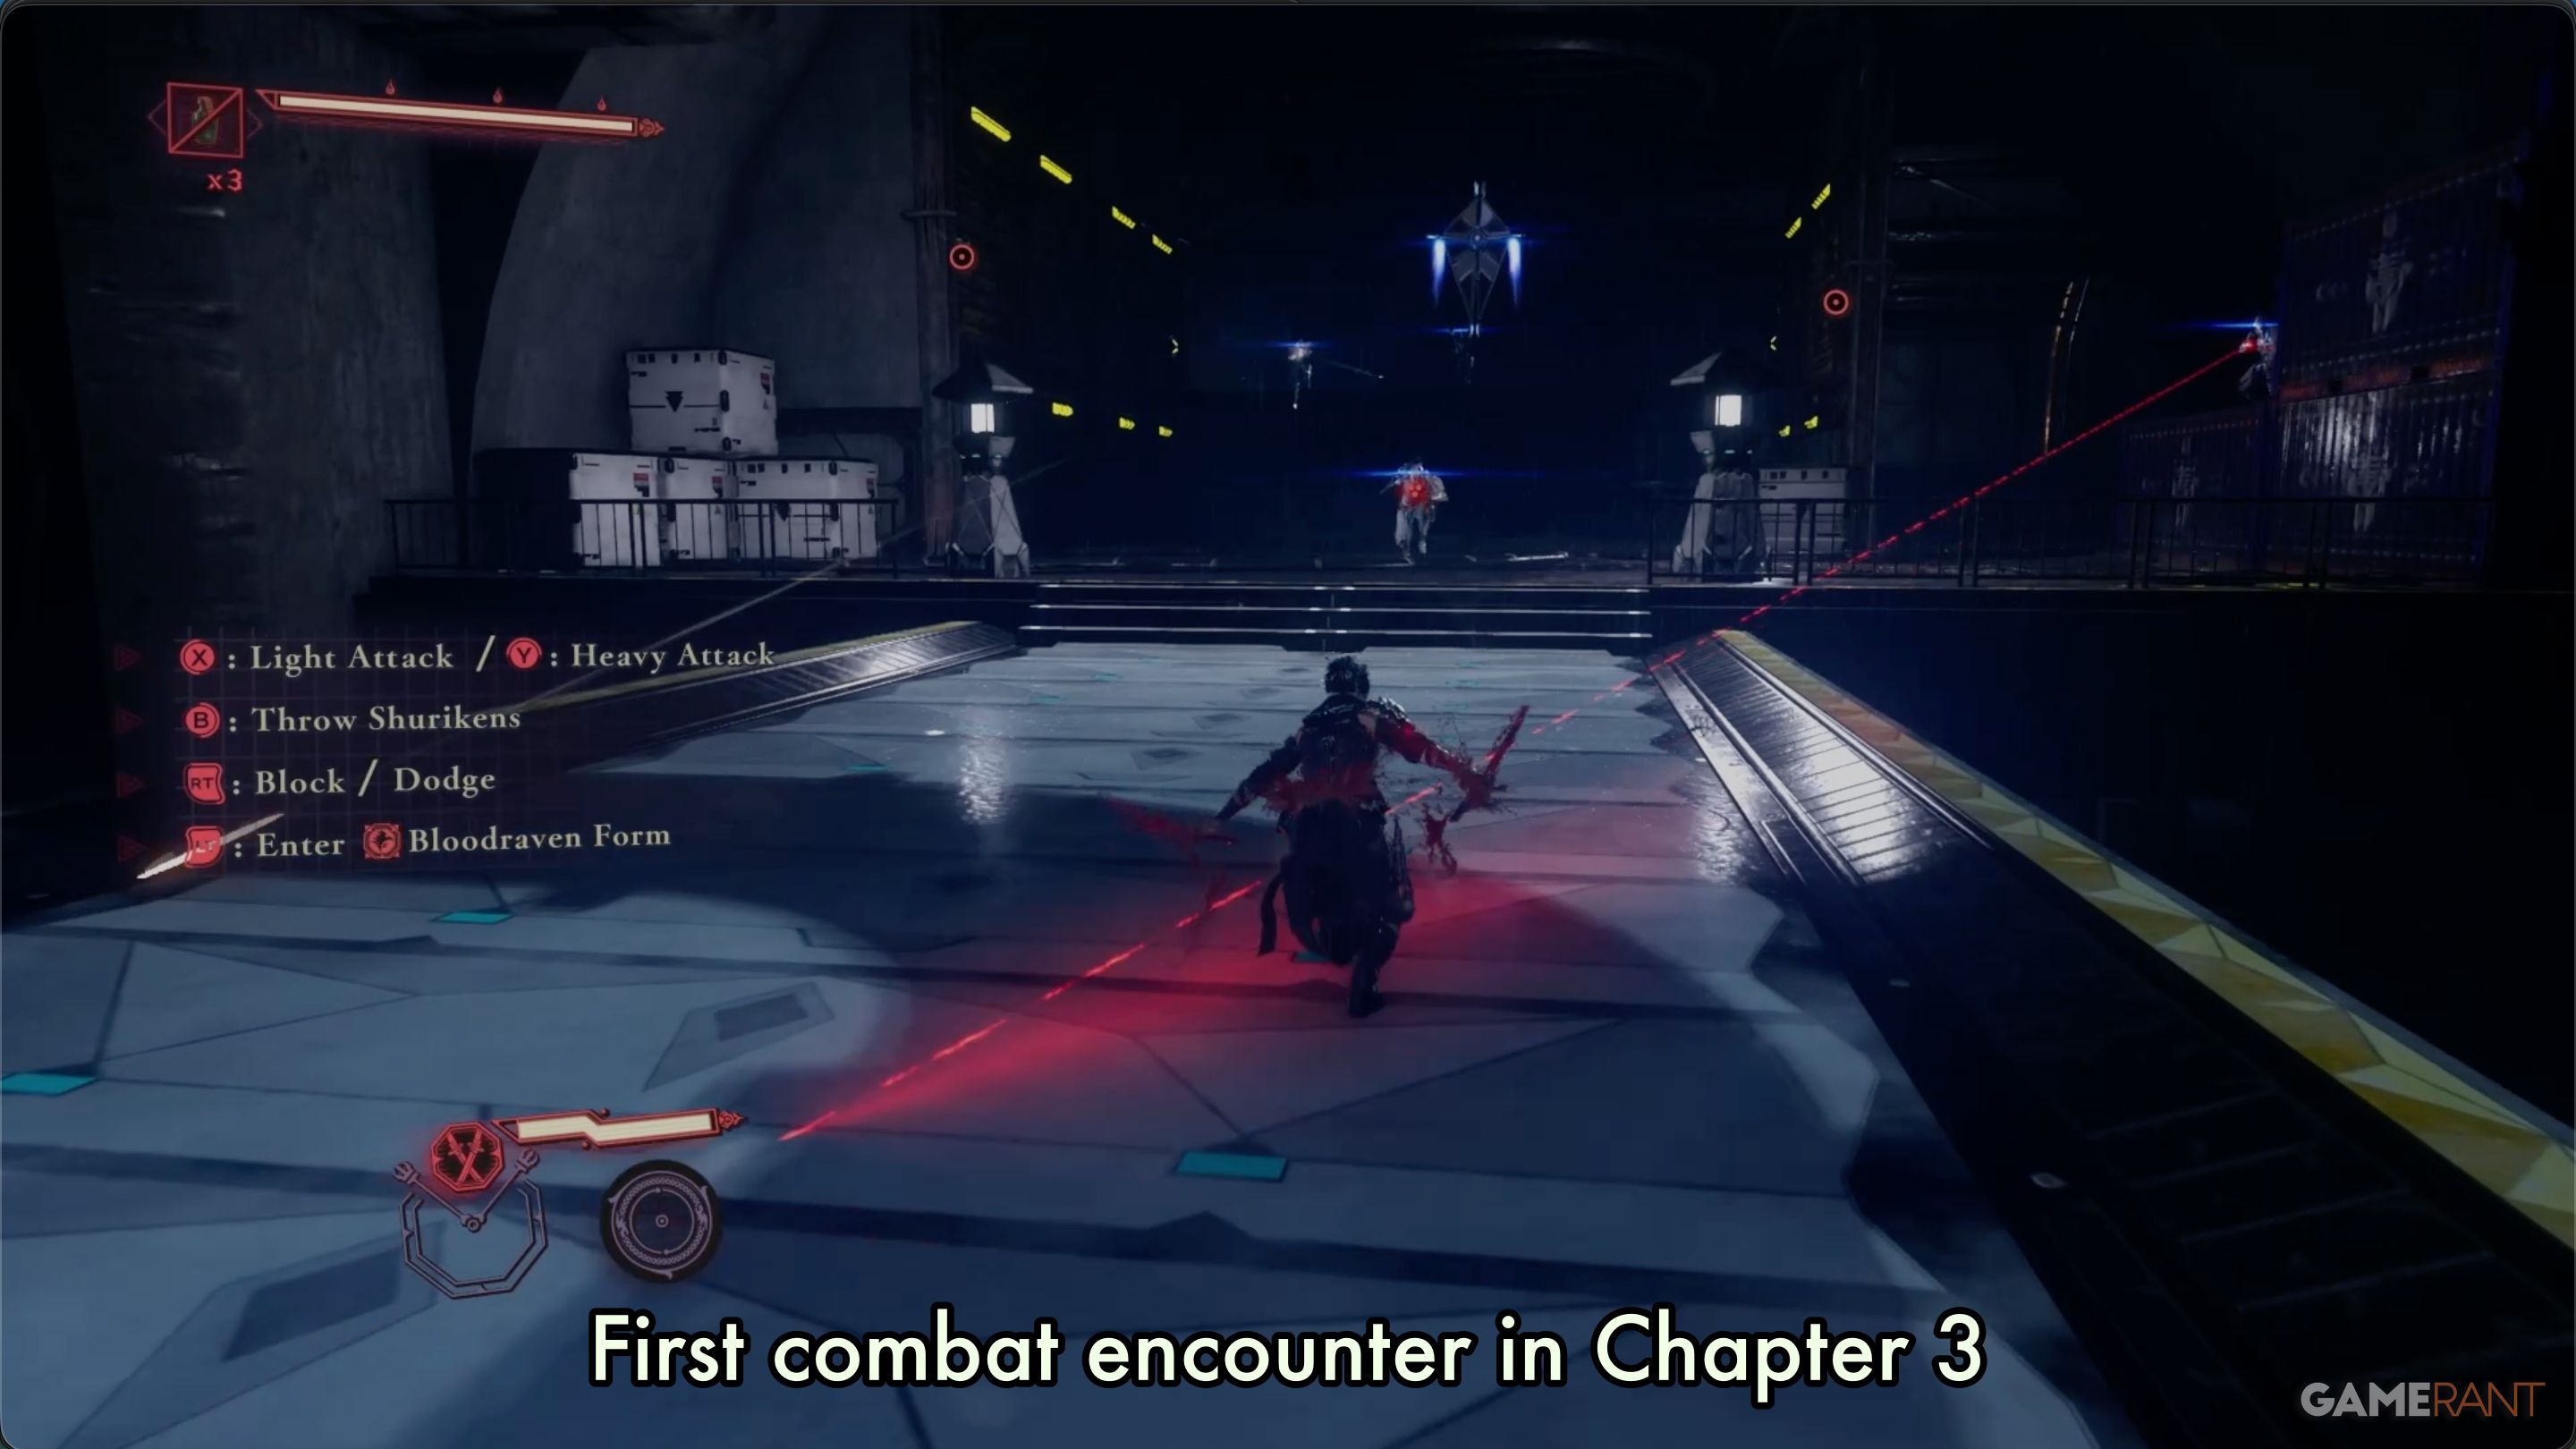
Once you exit the first terminal, you’ll swing over a wide gap and immediately encounter your first enemies in Chapter 3. Don’t worry, it’s just a small group of easy-to-defeat enemies. Use the grapple points to quickly reach any enemies floating in the air.
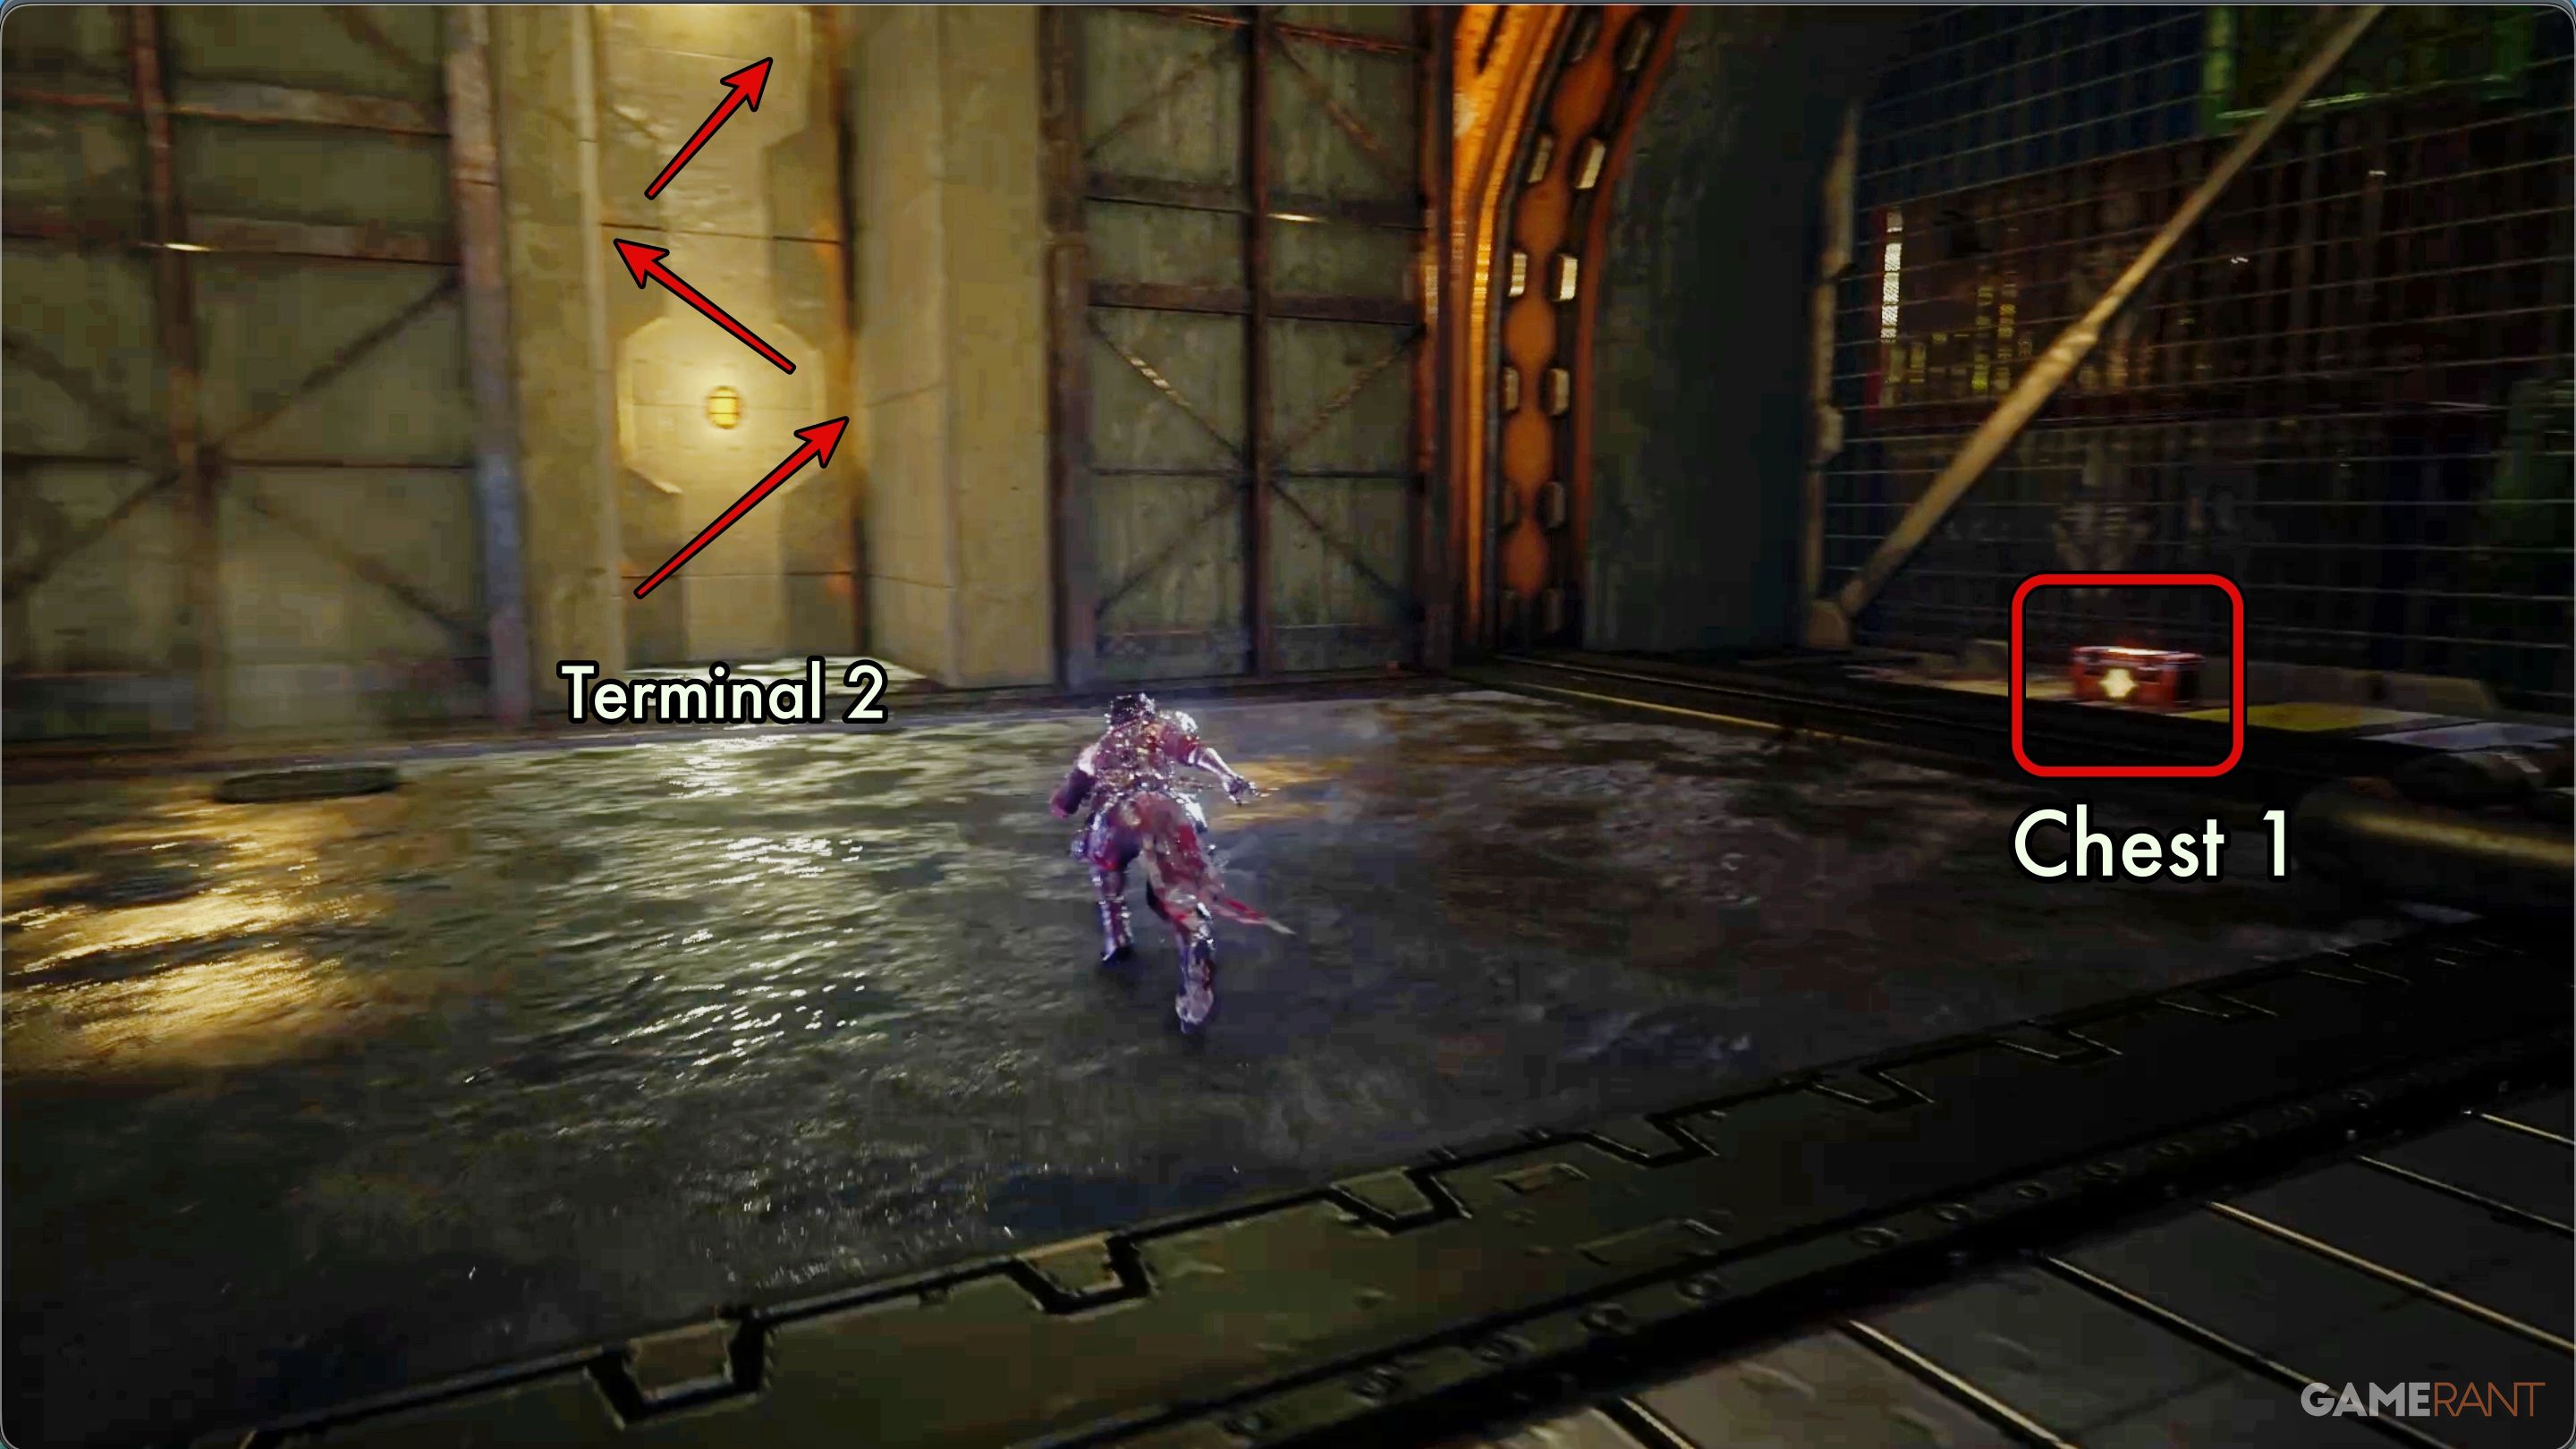
Before heading up the Flying Bird Flip section towards the second terminal, turn right. You’ll find Chest 1 leaning against the wall, which contains one Life Elixir.
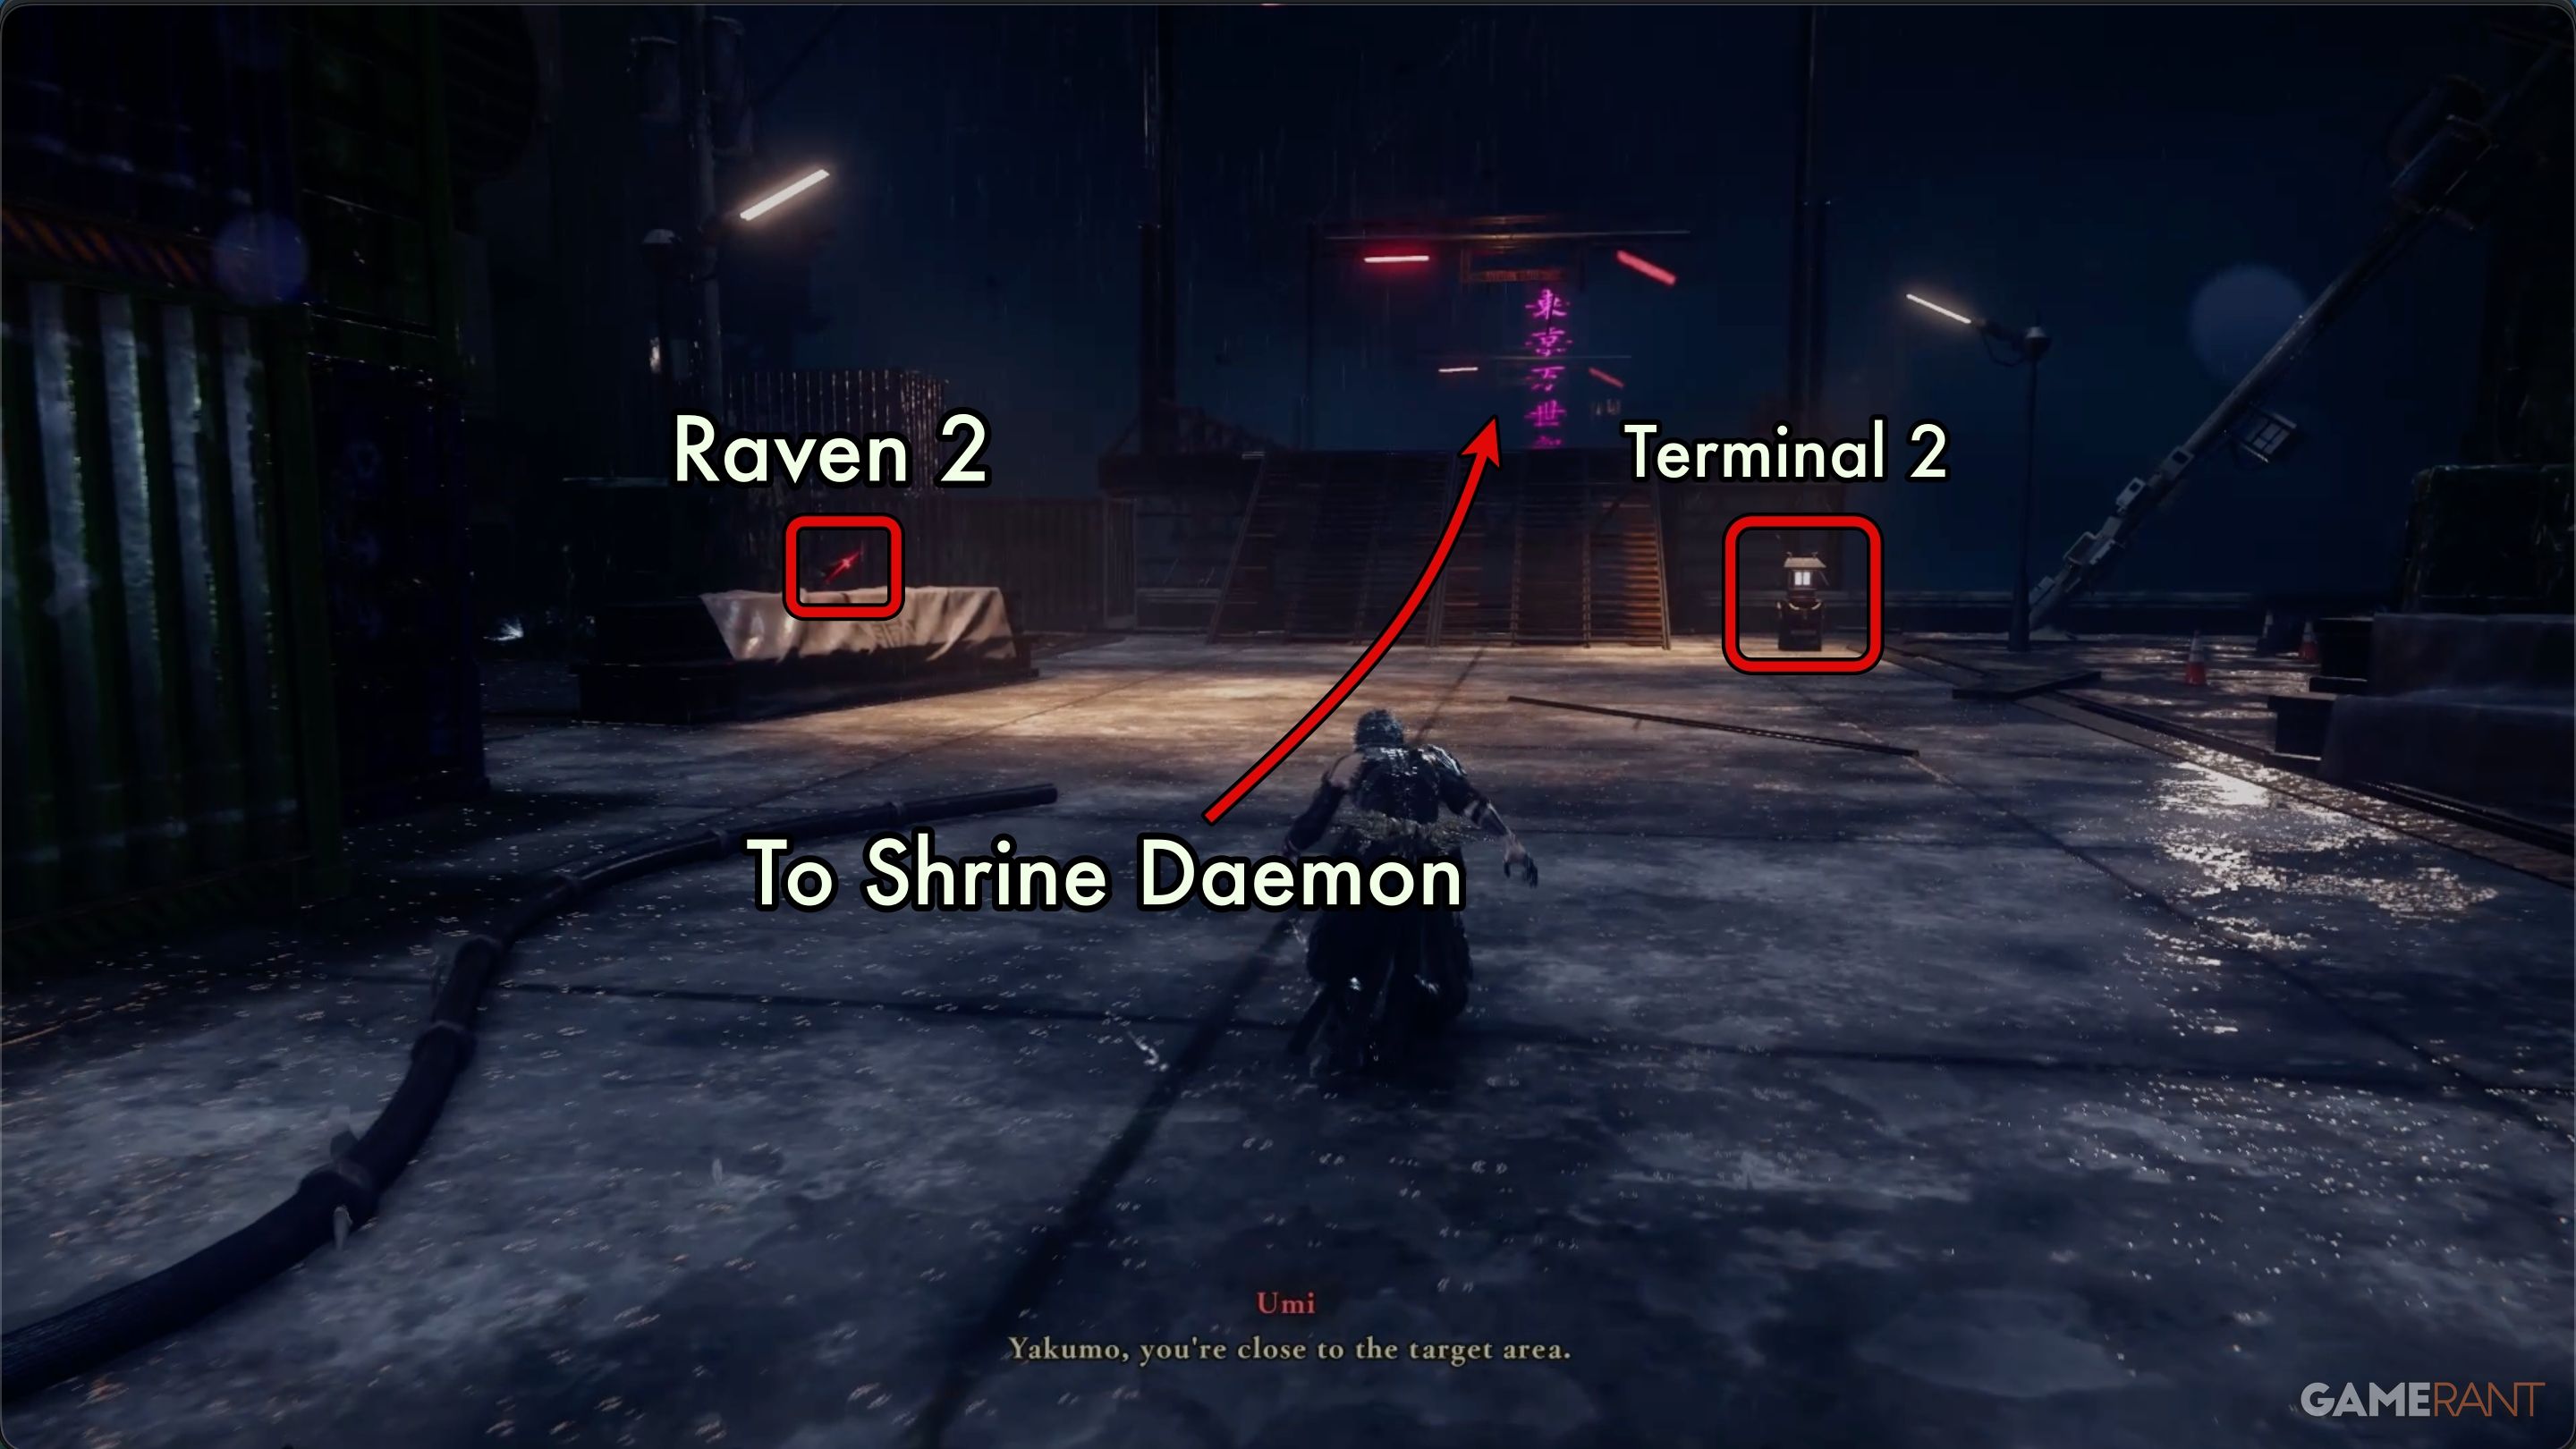
Once the fight concludes, you’ll quickly reach the second terminal and raven.
Chapter 3 Walkthrough: Shrine Daemon Fight 1 – Ninja Gaiden 4

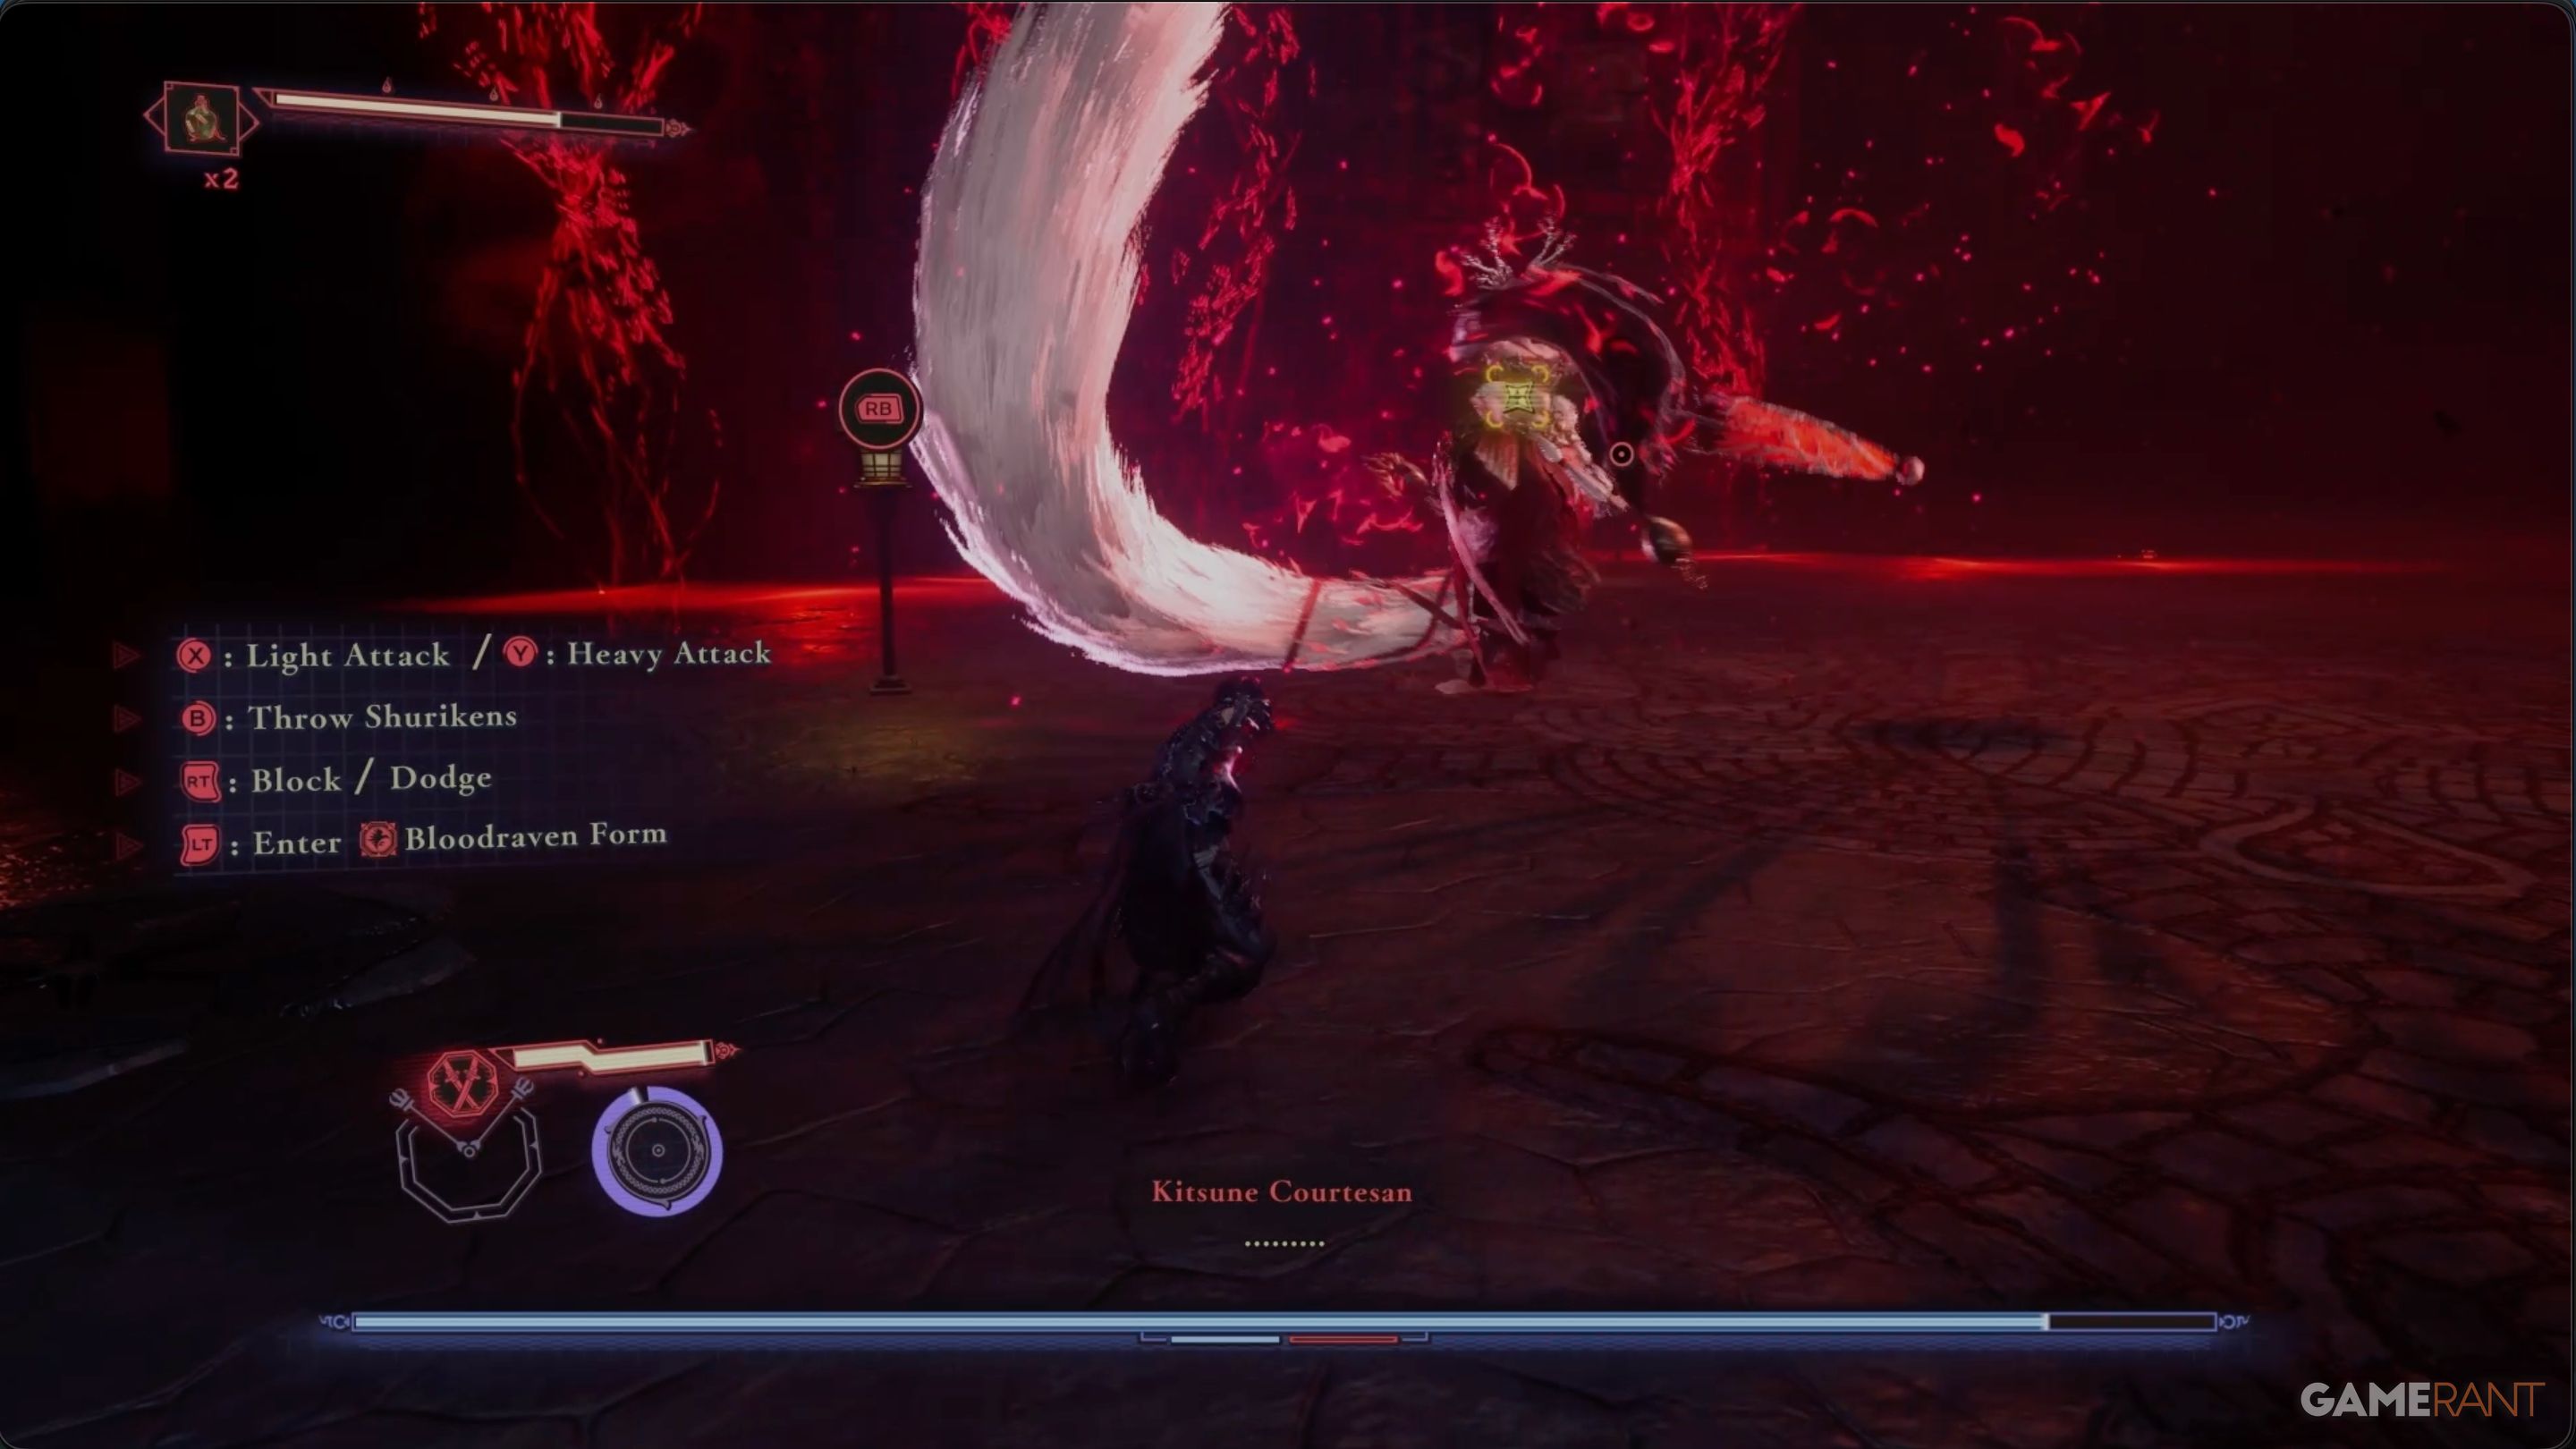
First Shrine Daemon Encounter:
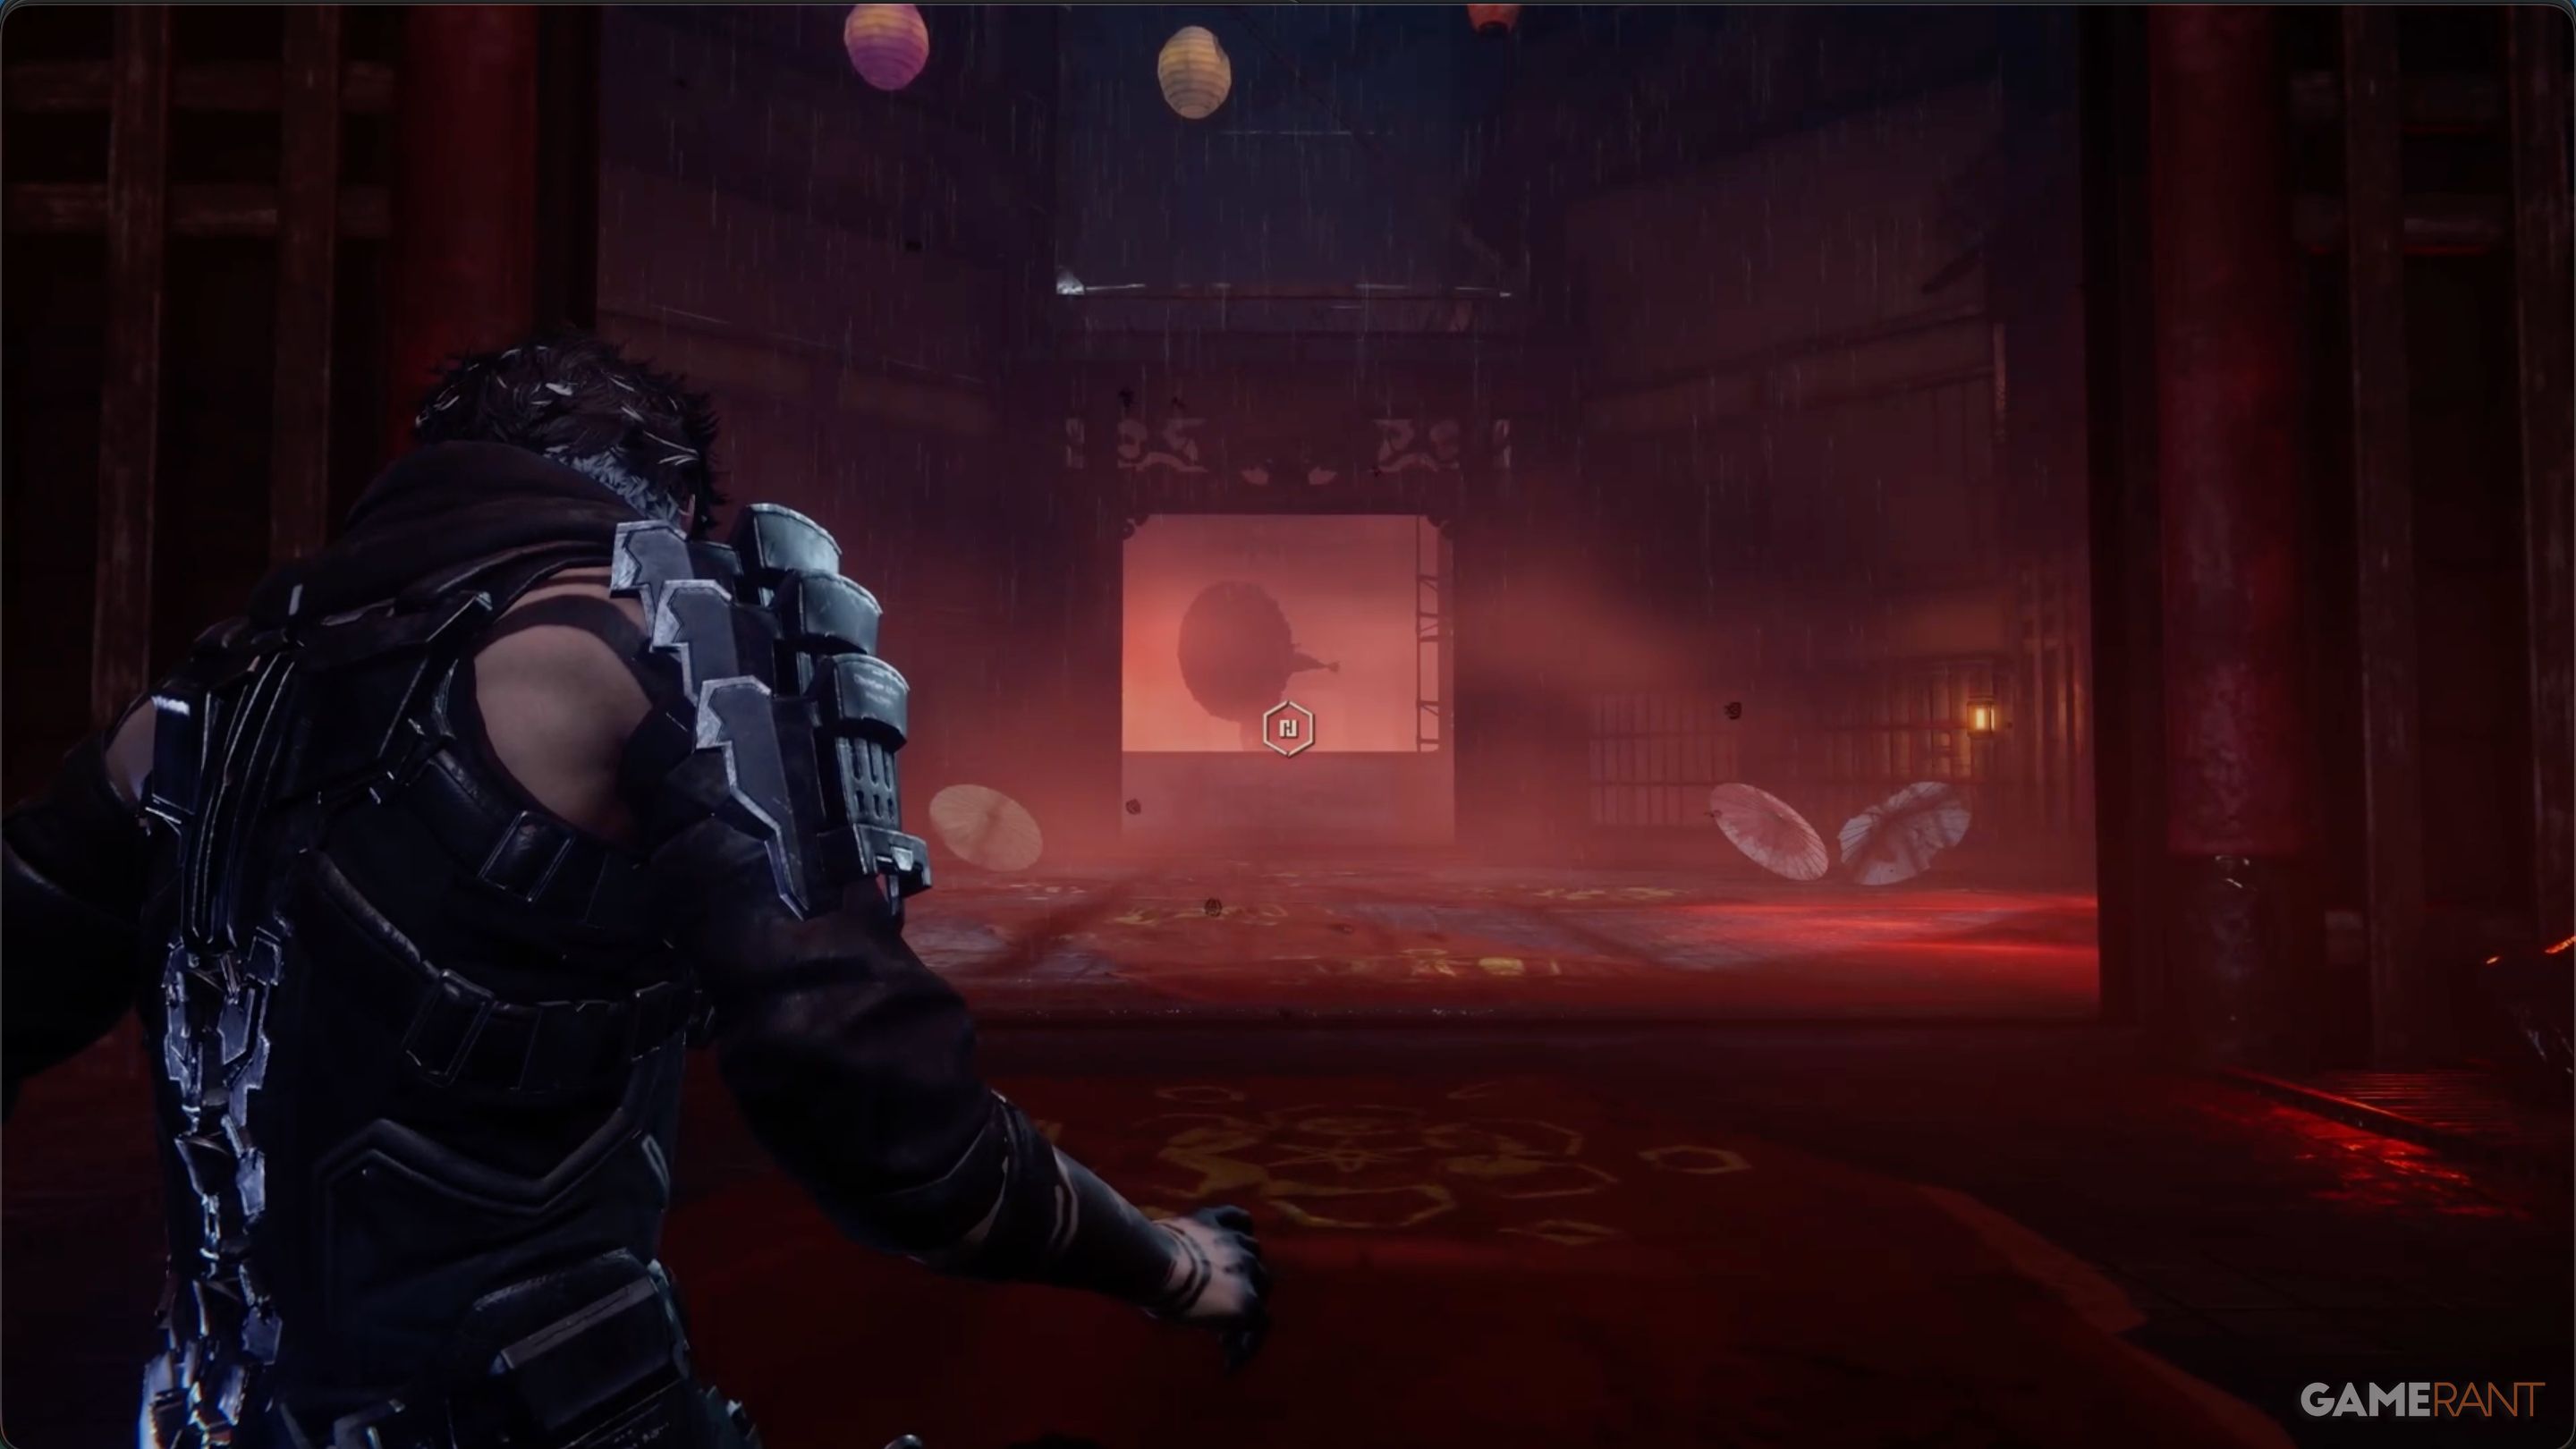
After passing through the second terminal, you’ll face a series of difficult obstacles, eventually leading to a battle with the shrine guardian – it seems this is the demon your team has been talking about.
This fight isn’t very hard. She mainly attacks with her umbrella, using it like a close-combat weapon. The arena has several places you can grab onto to quickly get away if she attacks too aggressively.
The best way to deal with her is to use Parry or Perfect Block. These moves will stop her attacks and let you do a lot of damage. Also, use Bloodraven attacks to interrupt her stronger attacks – switch to Bloodraven form as soon as you see the red warning sign. She’s quick, so it might take some practice to get the timing right.
This is just the first of several challenging battles in Chapter 3, so it’s best not to use your Incense of Rebirth now. Feel free to retry the fight, and save your single revive for a more difficult encounter later.
The enemy has two health bars, which you can see by the segmented sections under the main health bar. Be strategic and don’t waste your powerful abilities too soon in the battle.
Where to Find the Food Thief in Chapter 3 – Ninja Gaiden 4
Execute the Food Thief Mission:
Once you’ve finished the initial battle with the shrine daemon, you’ll move deeper into the shrine itself. You’ll soon discover that defeating the daemon wasn’t the end of the challenge.

In the second big room, where you fight the new demon enemy, you’ll find Chest 2 in the back corner. Inside, you’ll get another Life Elixir.
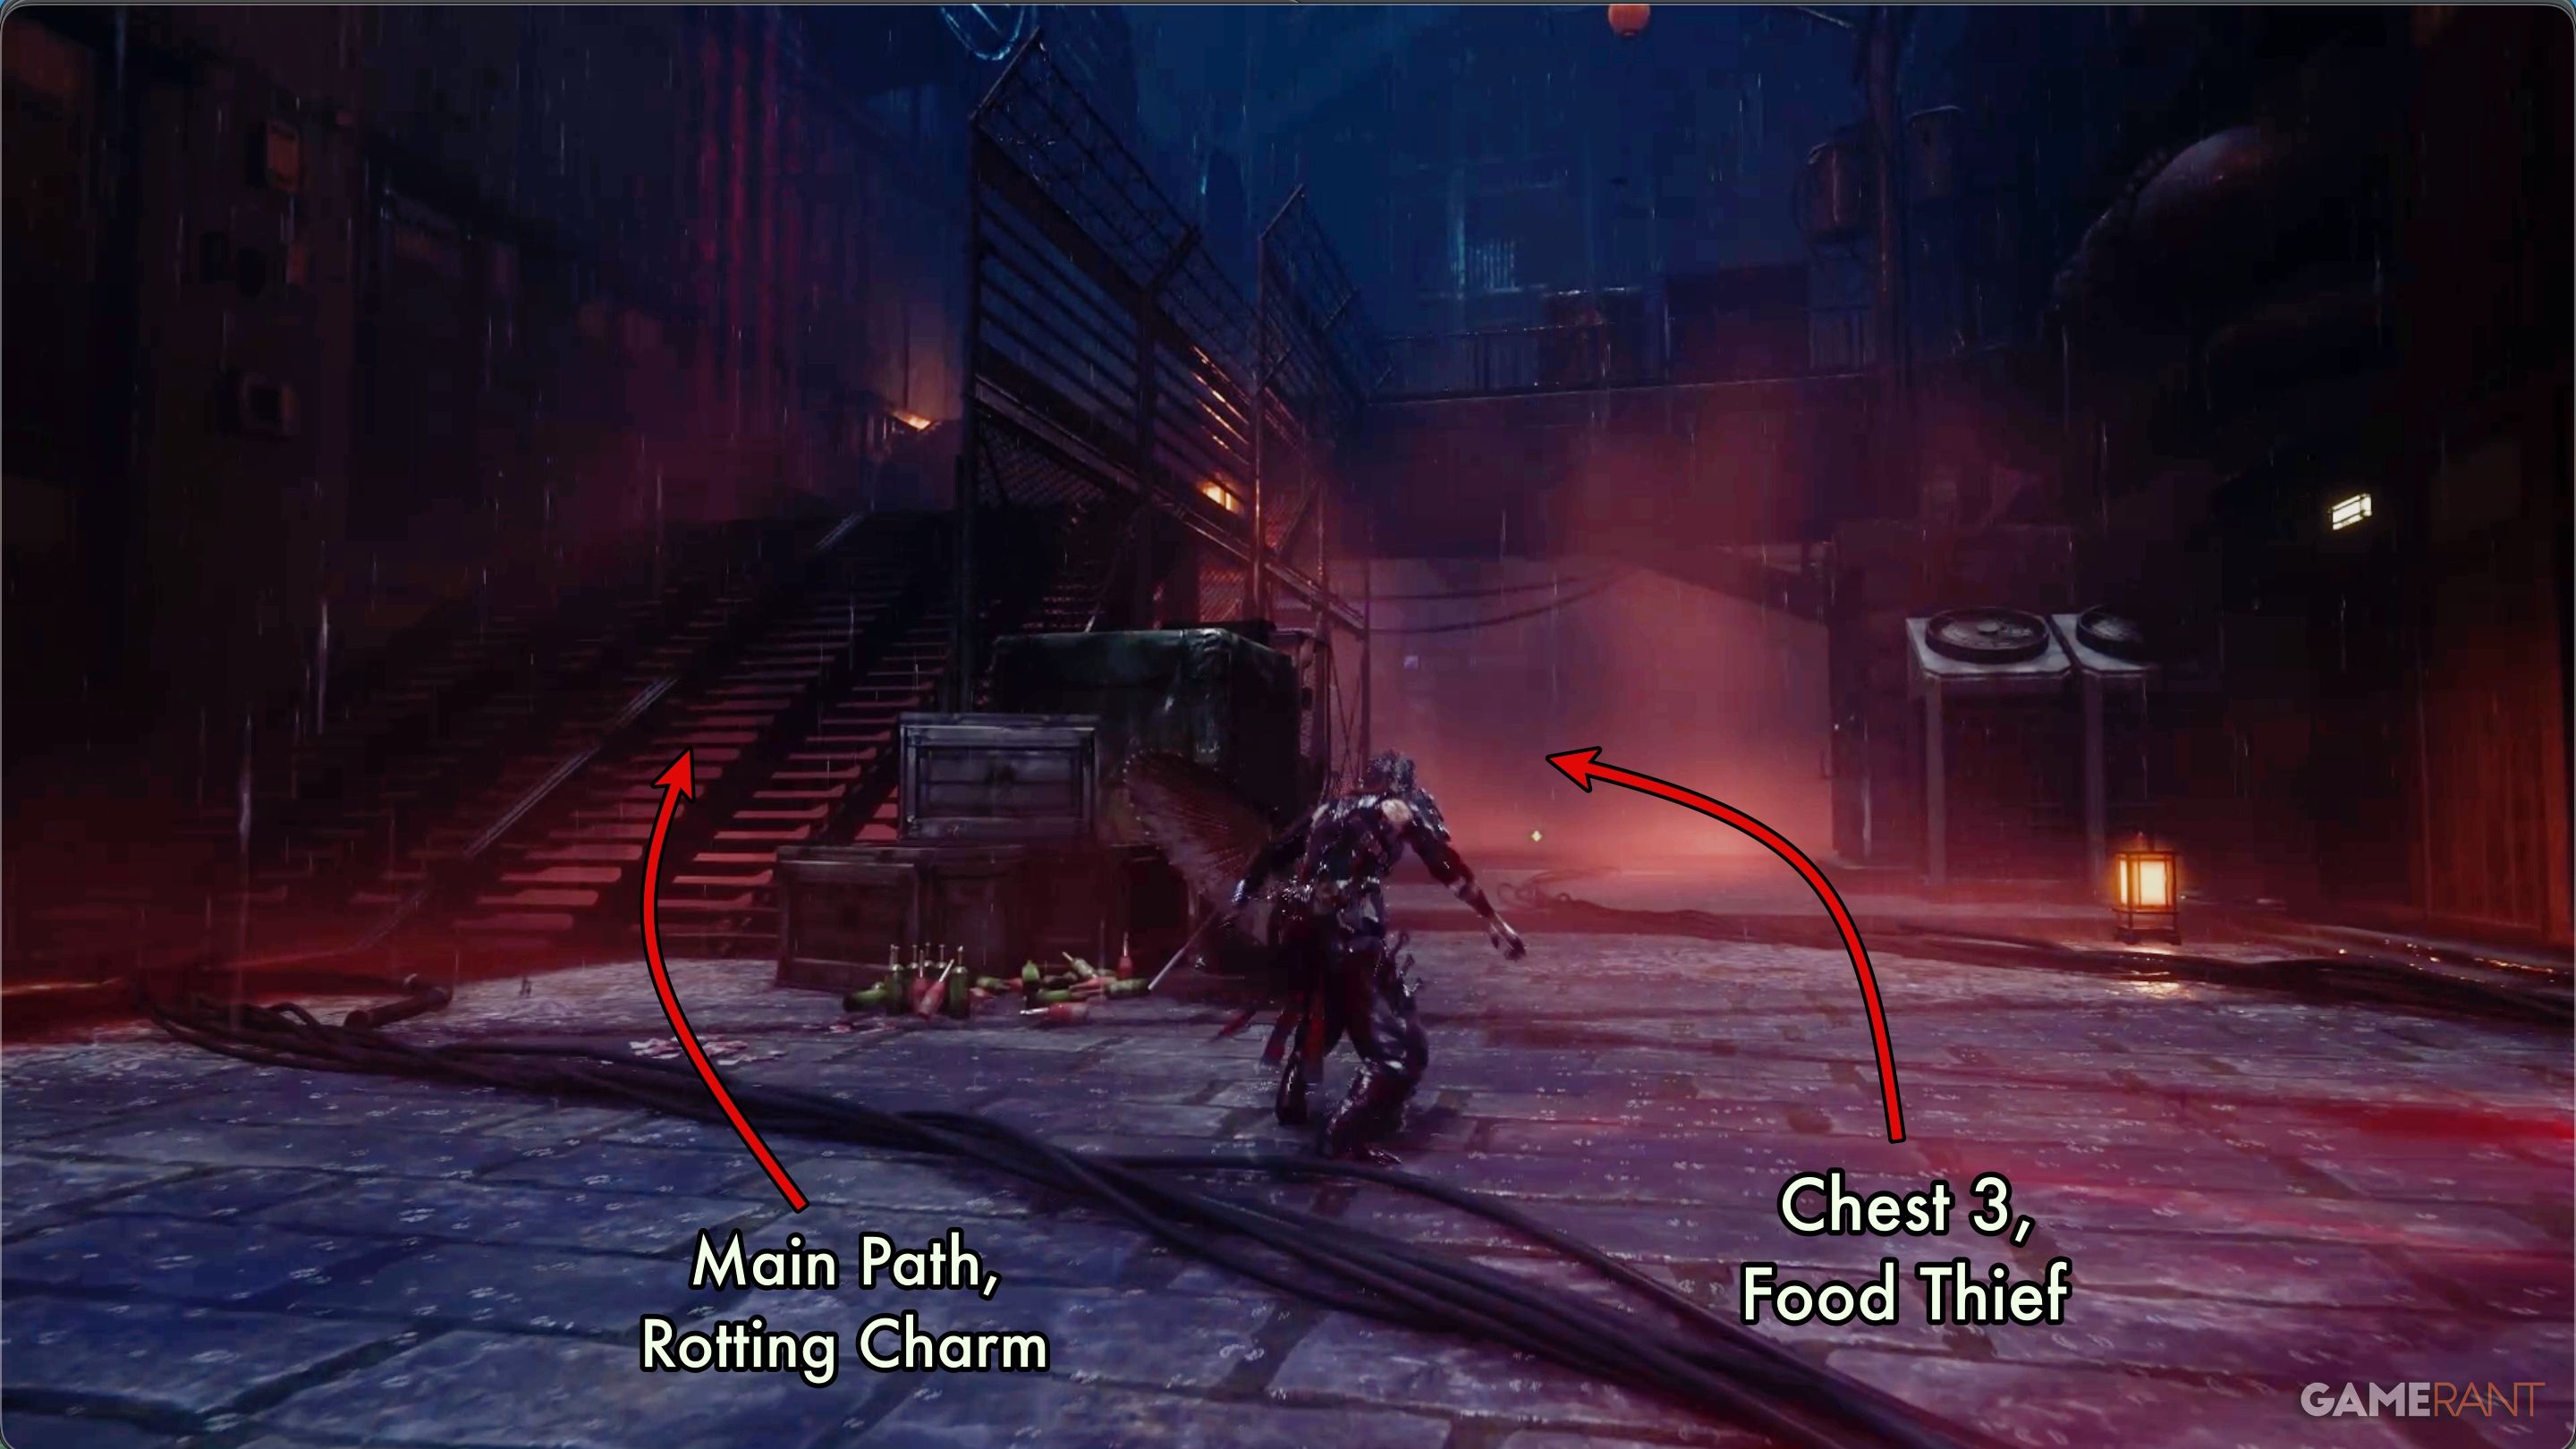
Once you’ve gotten the chest, continue forward on the main path. You’ll notice stairs on your left and the way forward on your right. The stairs lead onward, but for now, stick to the right side of them.
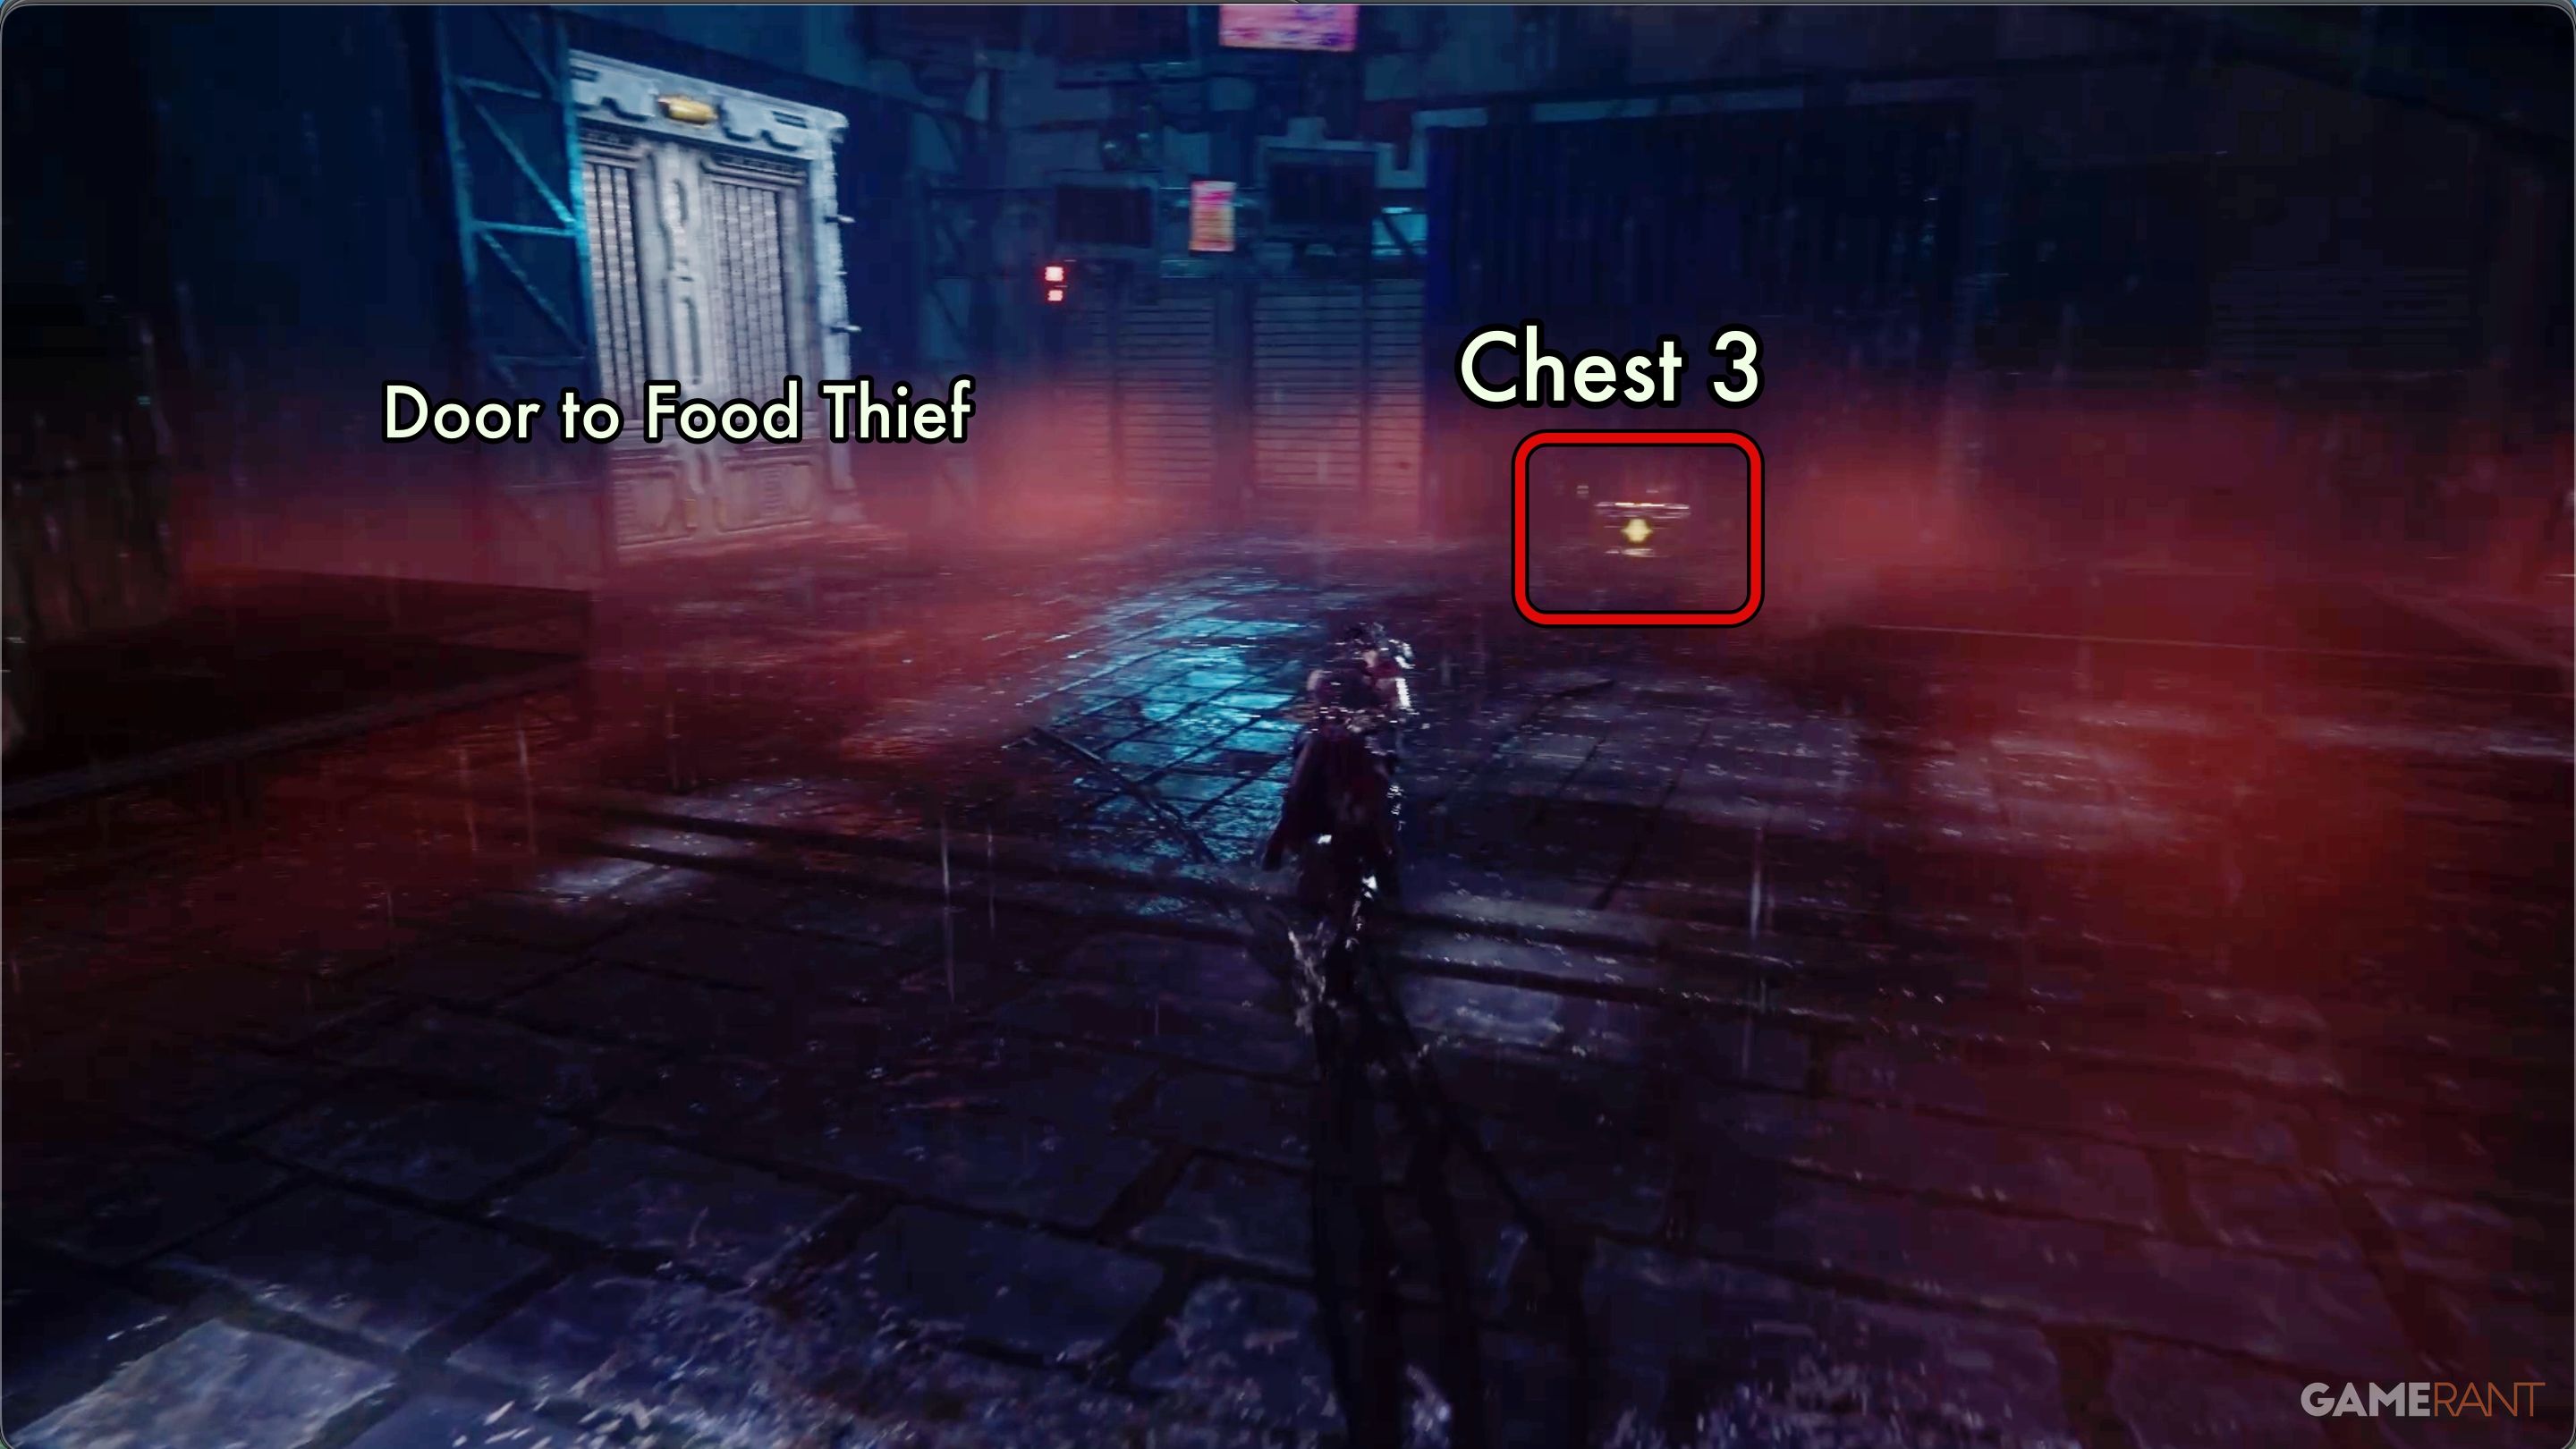
You’ll find Chest 3 against the back wall. Open it to get another Life Elixir.
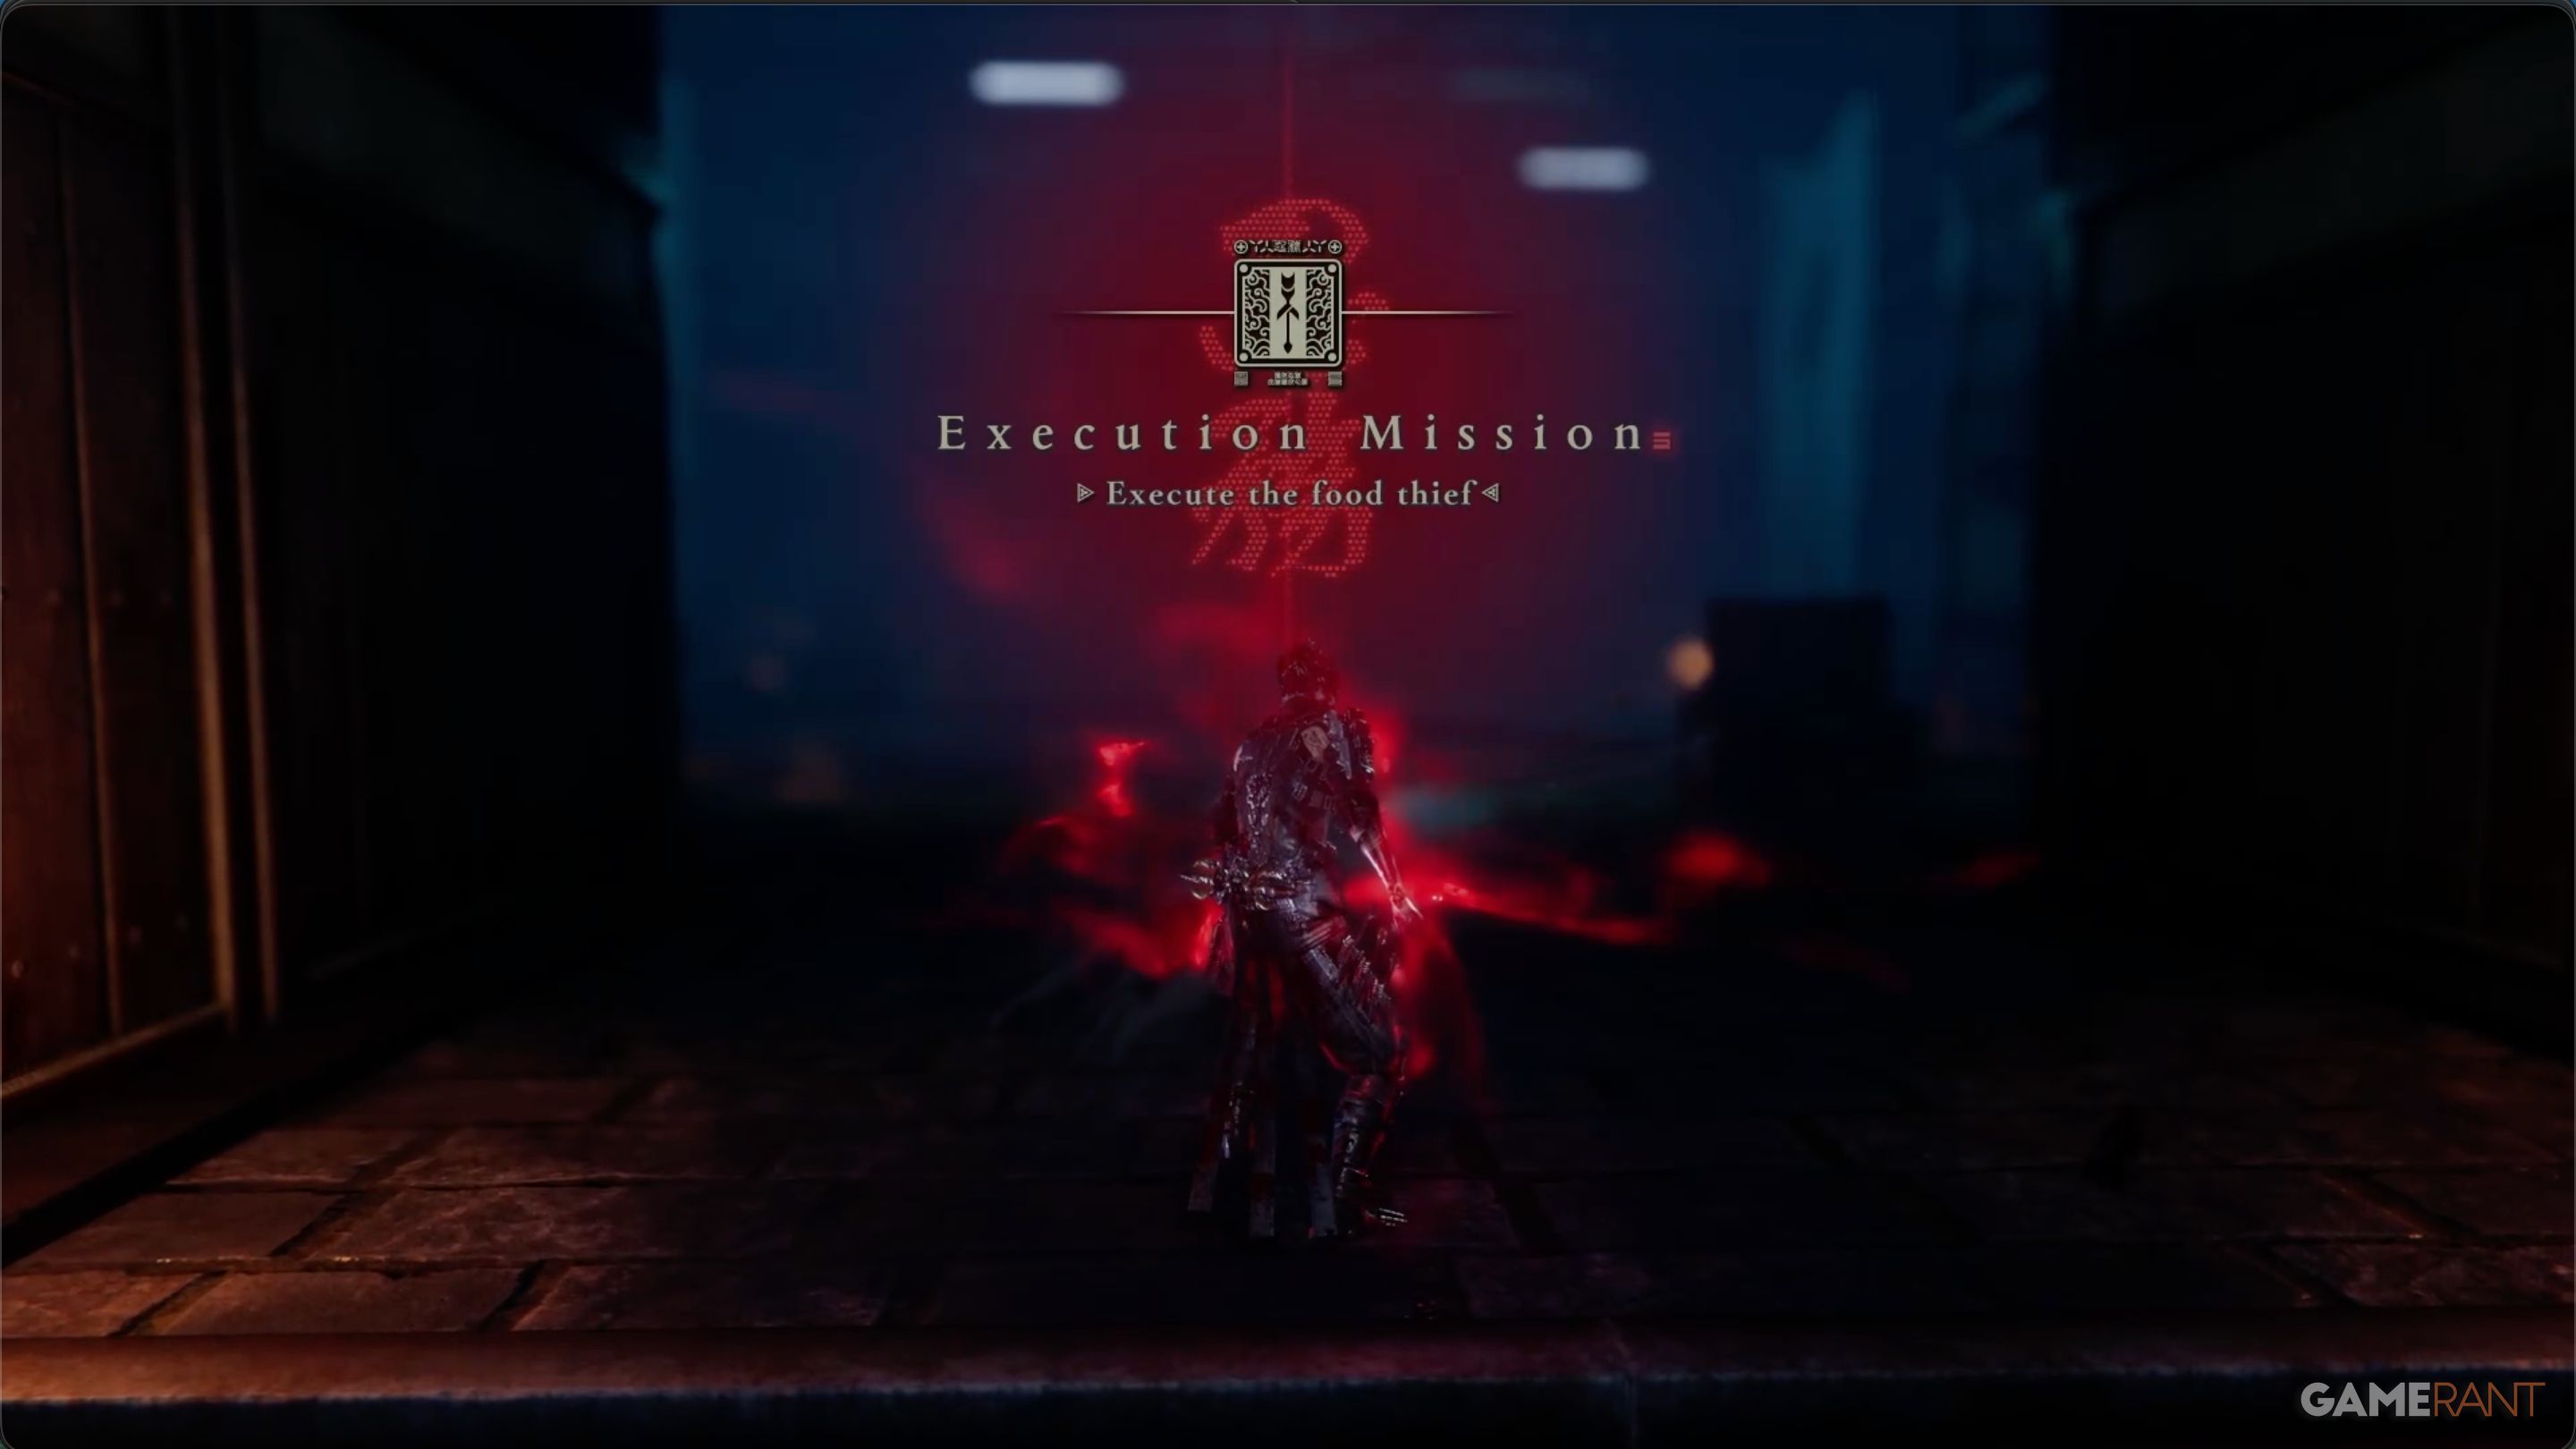
To find the Food Thief, turn left at the chest and then go through the gate. Once you’re inside, you’ll see a message confirming you’re in the right place and starting the mission to defeat the Food Thief. Be warned – this enemy is likely the strongest you’ve encountered so far! While they don’t have many different attacks, each one hits very hard.
Blocking and deflecting attacks are key to winning, as always. But the Food Thief is really quick, so it might take a couple of tries to learn his attack pattern and beat him.
This battle might be the first one where you’ll need to actively use the items you’ve been gathering. The Kongou Iron Brew, which boosts your defense, will be especially useful. Also, be sure to equip the Cobalt Ring instead of the Bulwark God’s Orb. The Food Thief only attacks in close combat. After defeating them, just retrace your steps to continue with the chapter.
Where to Find the Rotting Charm in Chapter 3 – Ninja Gaiden 4
Found in Chest 4:
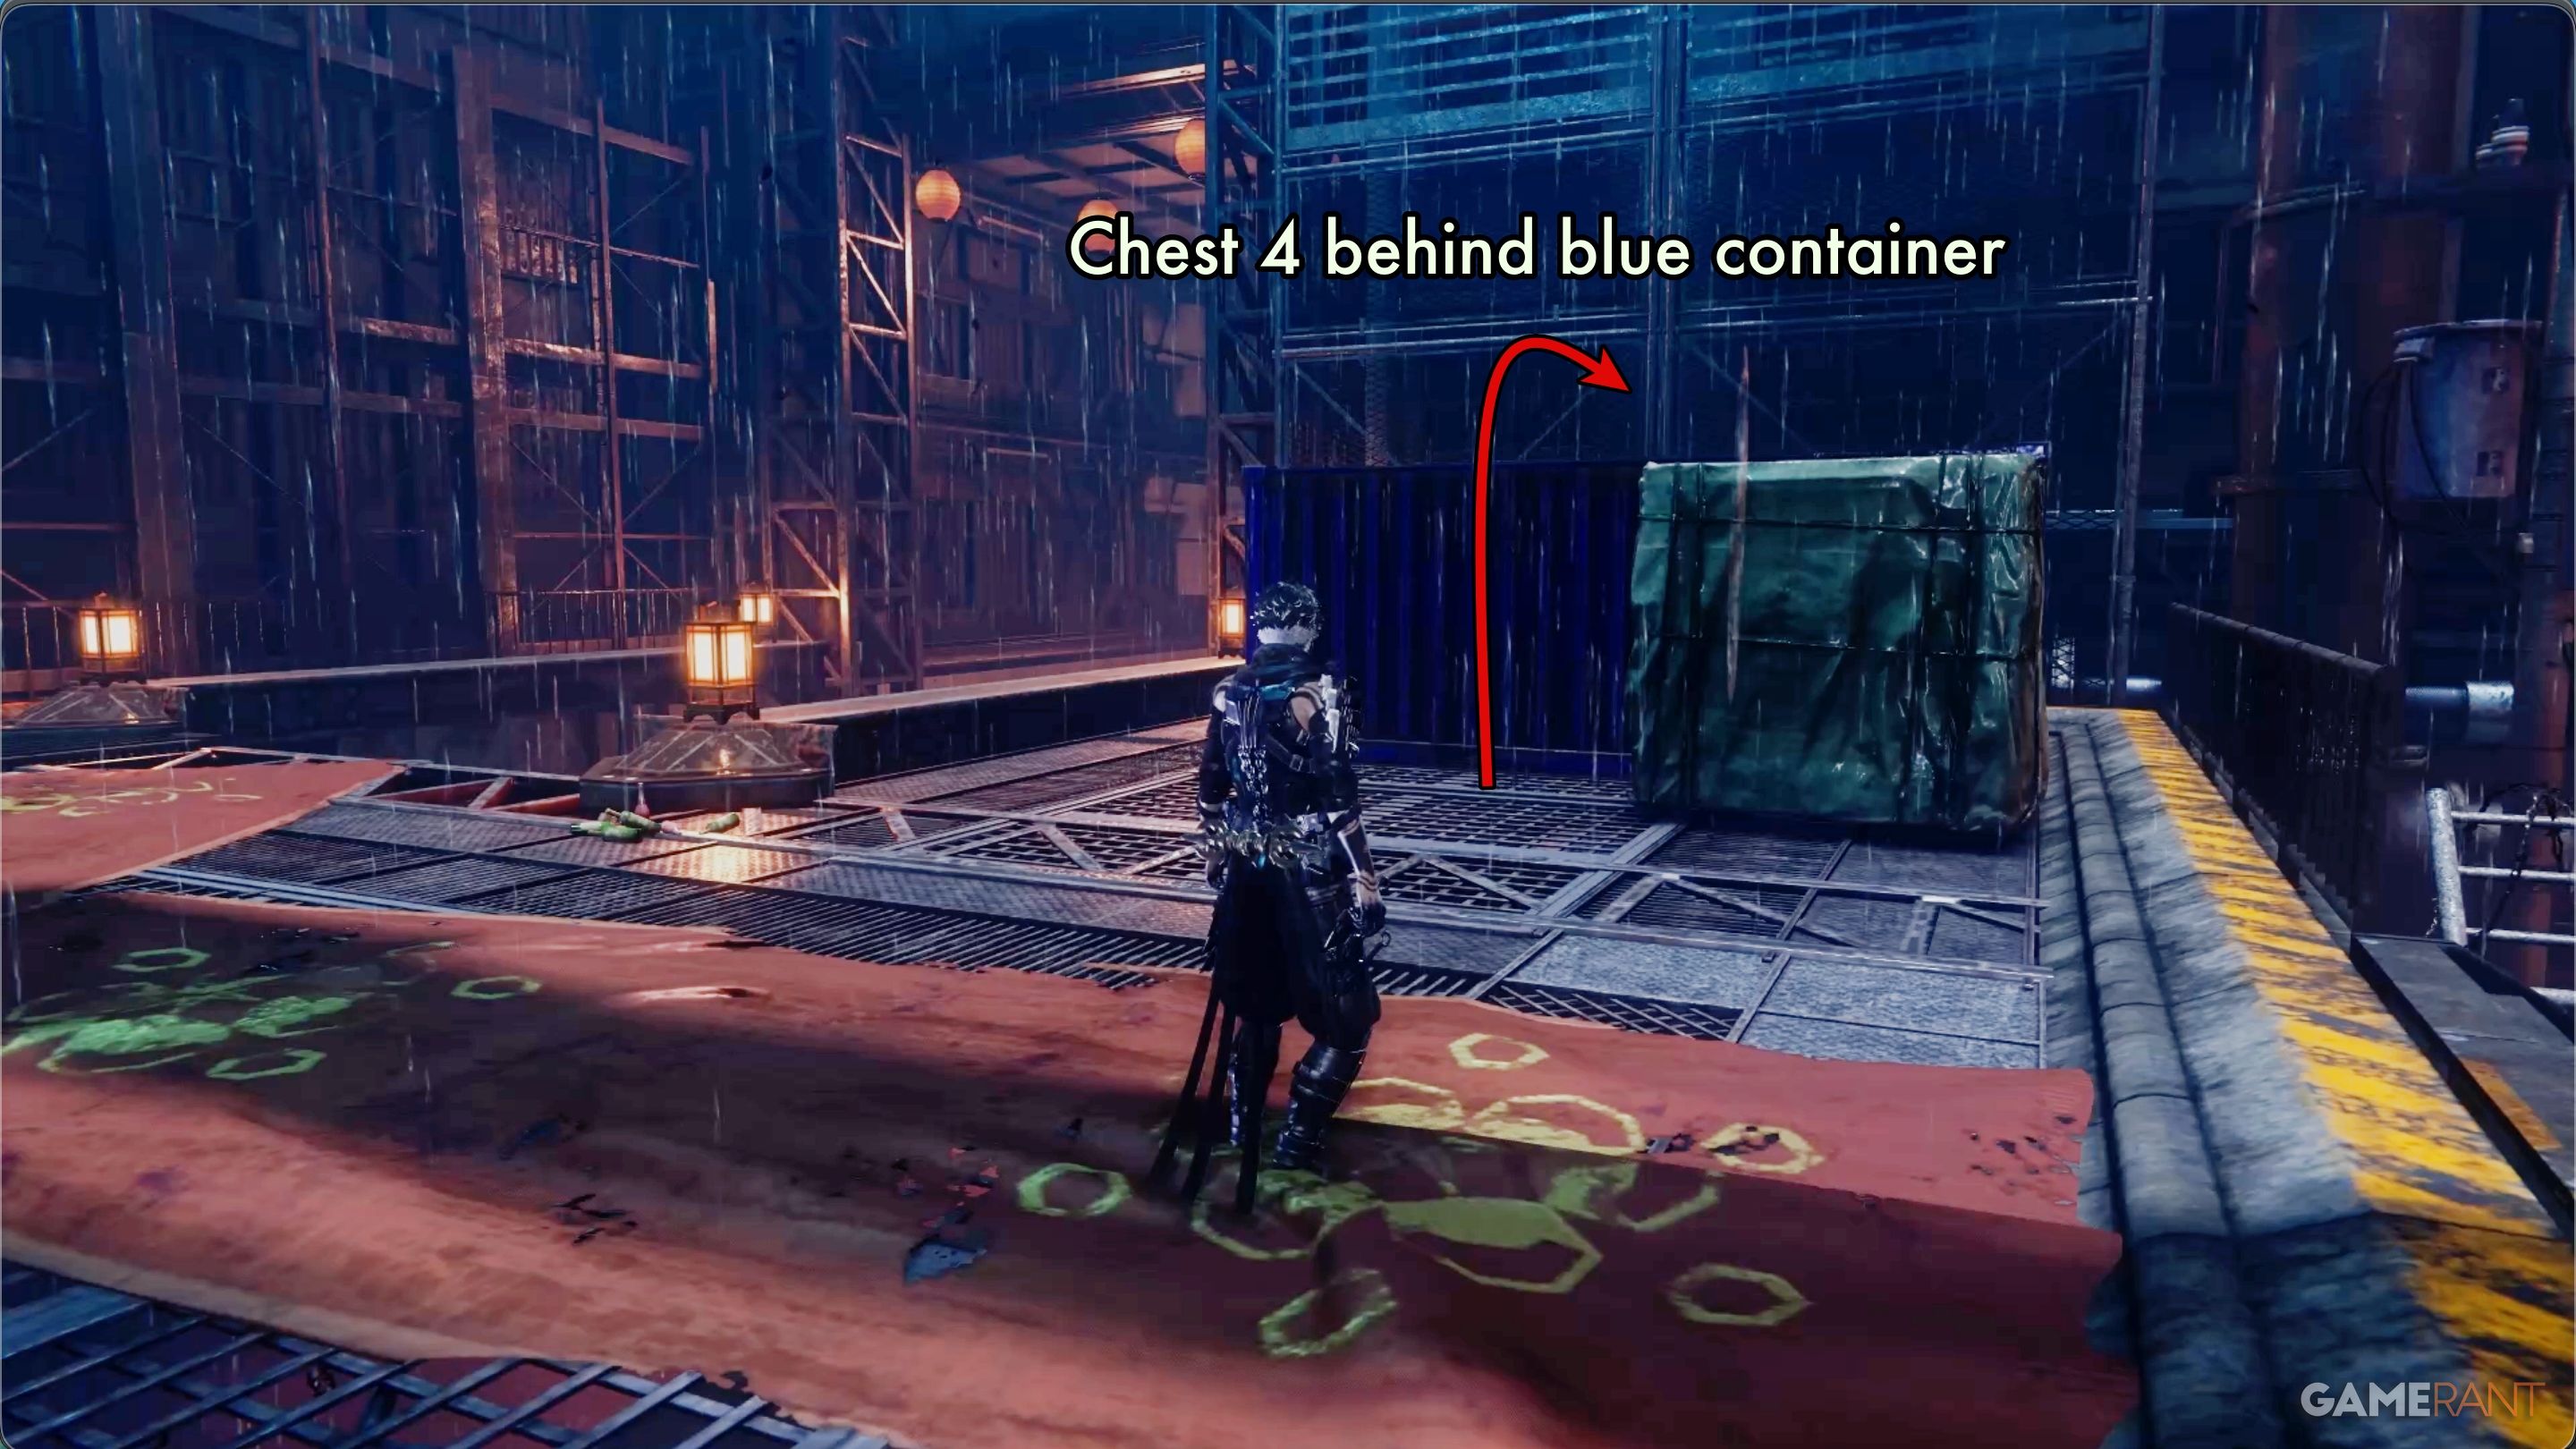
After you defeat the Food Thief in Chapter 3, your next task is nearby. Simply leave the arena and go up the stairs you passed before.
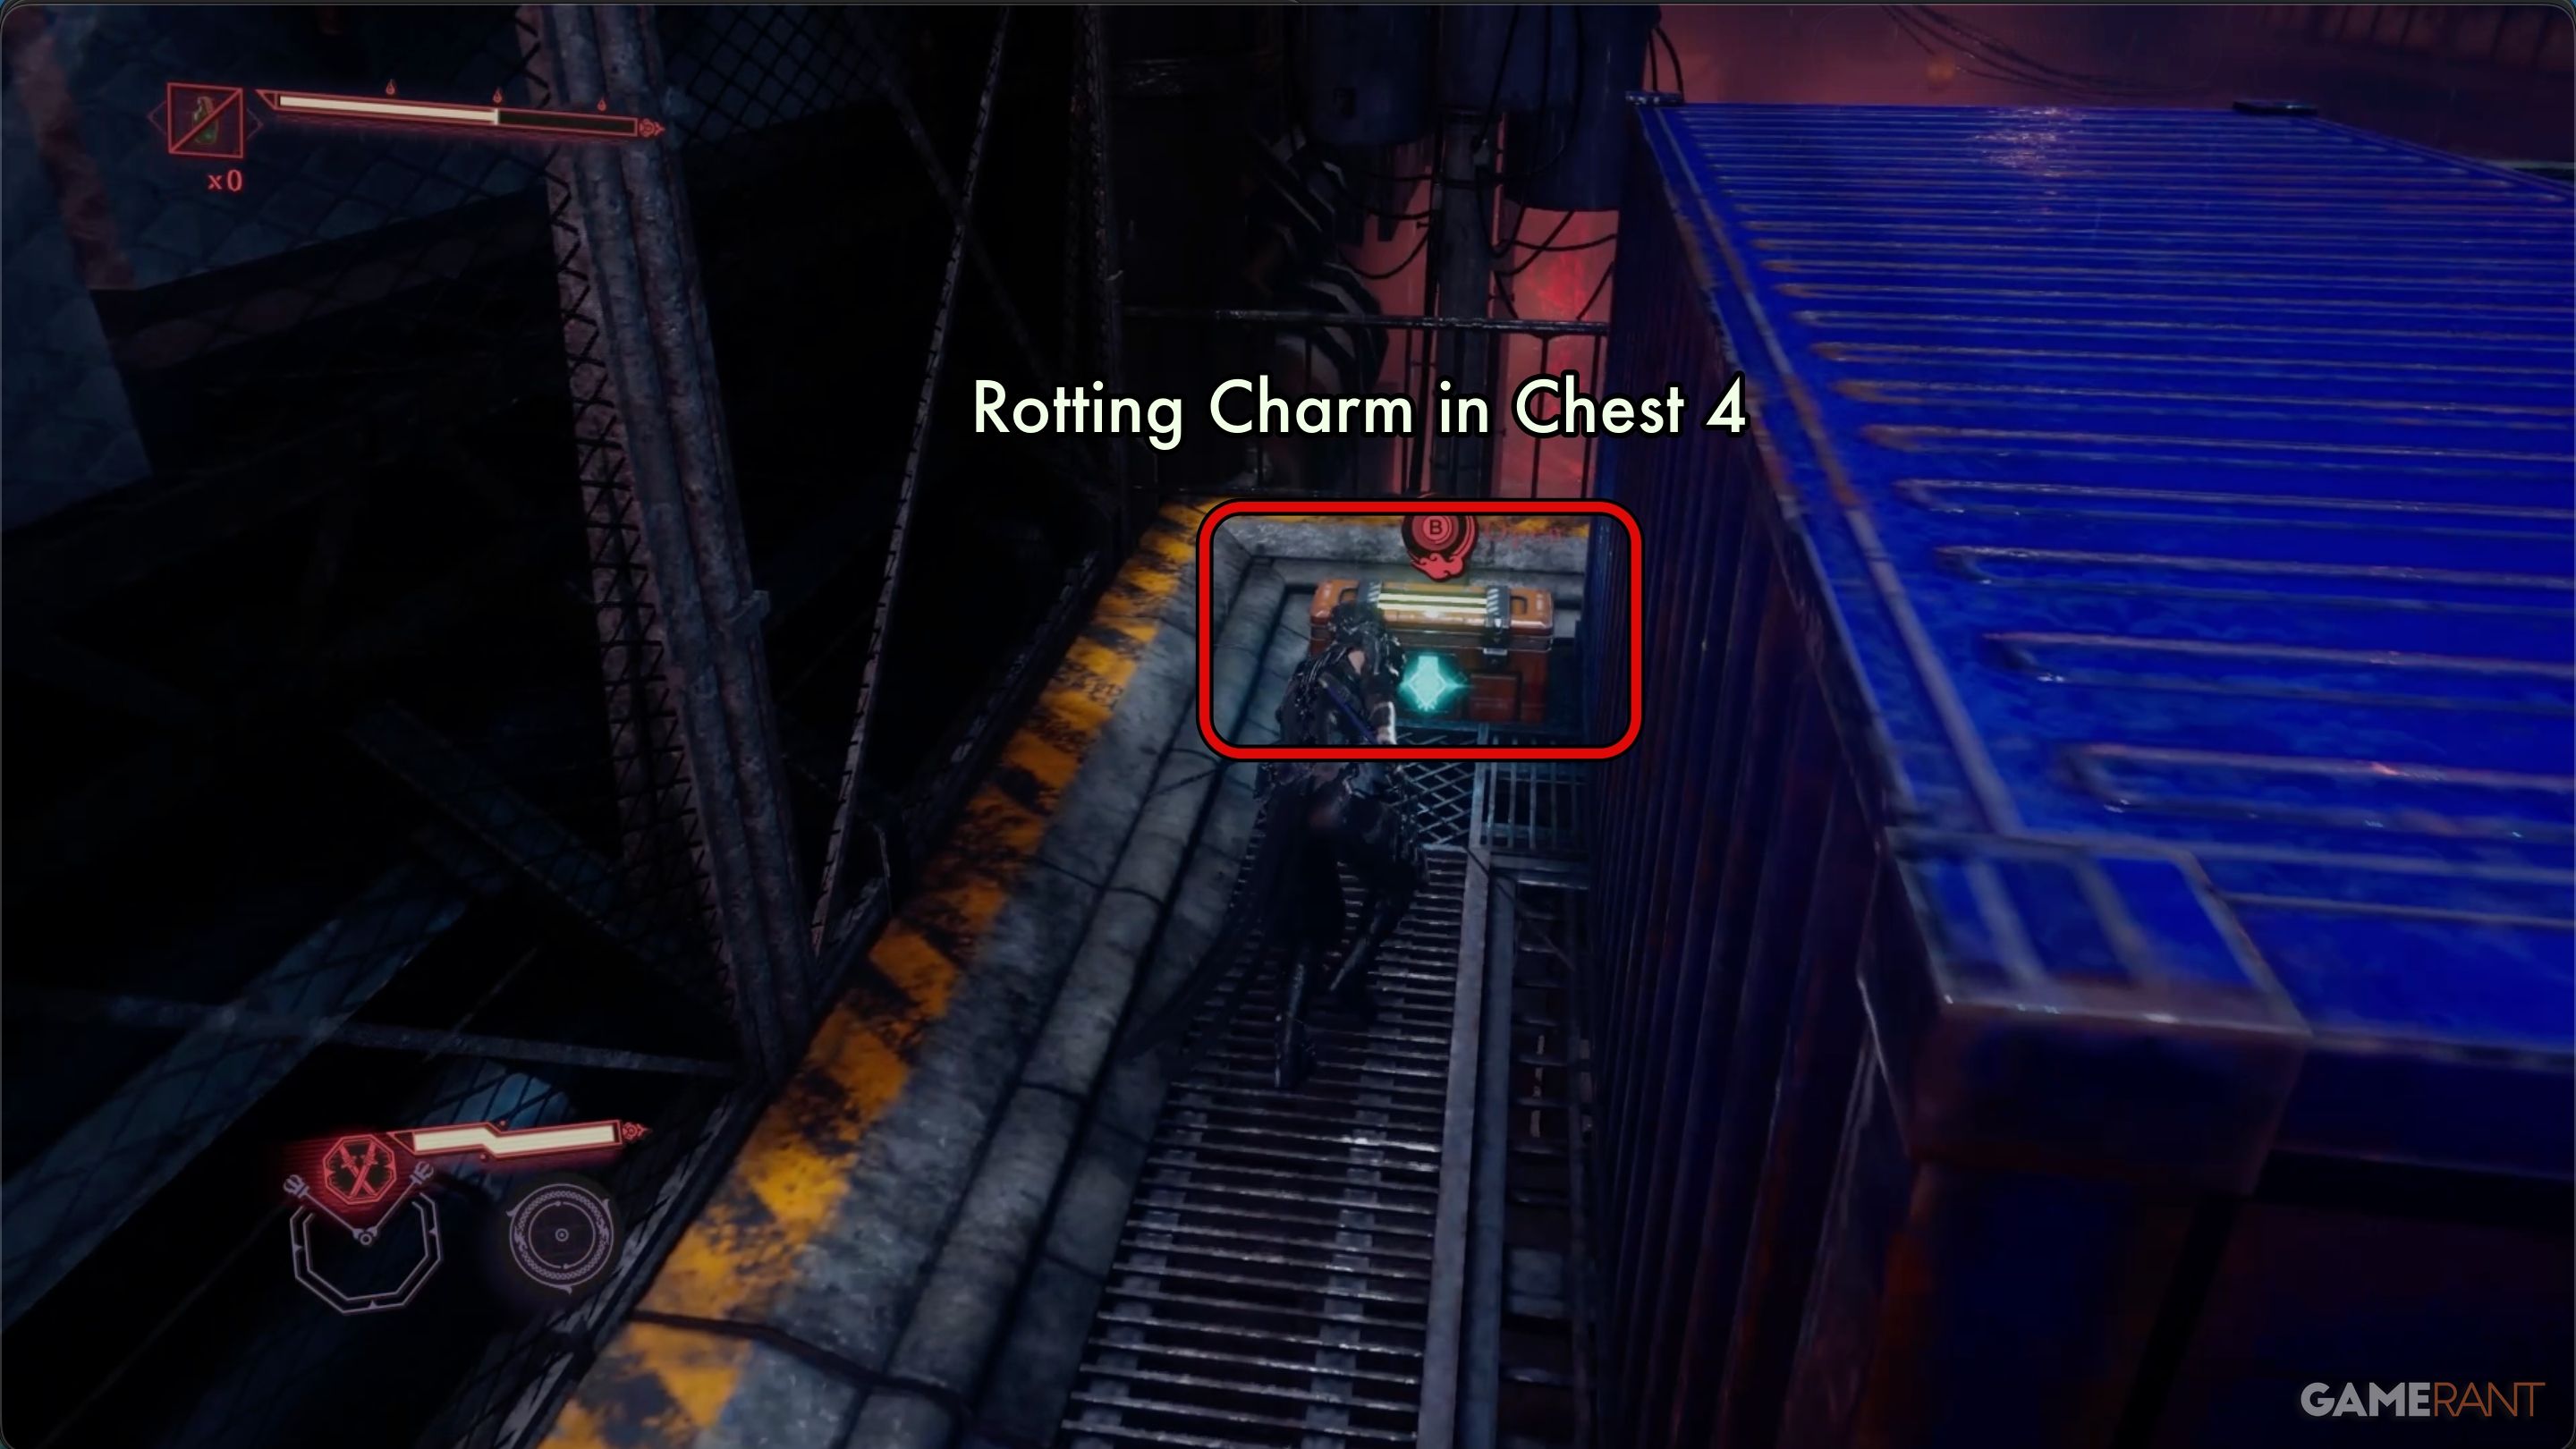
Go up the stairs and look for a blue shipping container on your right. Walk around to the back of it, and you’ll find Chest 4. Inside, you’ll discover the Rotting Charm.
Once you find another DarkNest Terminal, hand in the Rotting Charm to get a Black Scale. This will put you halfway towards increasing your maximum health for the second time.
Chapter 3 Walkthrough Part 2 – Ninja Gaiden 4
Phantasmal Herb & Burabura Lantern Demons:
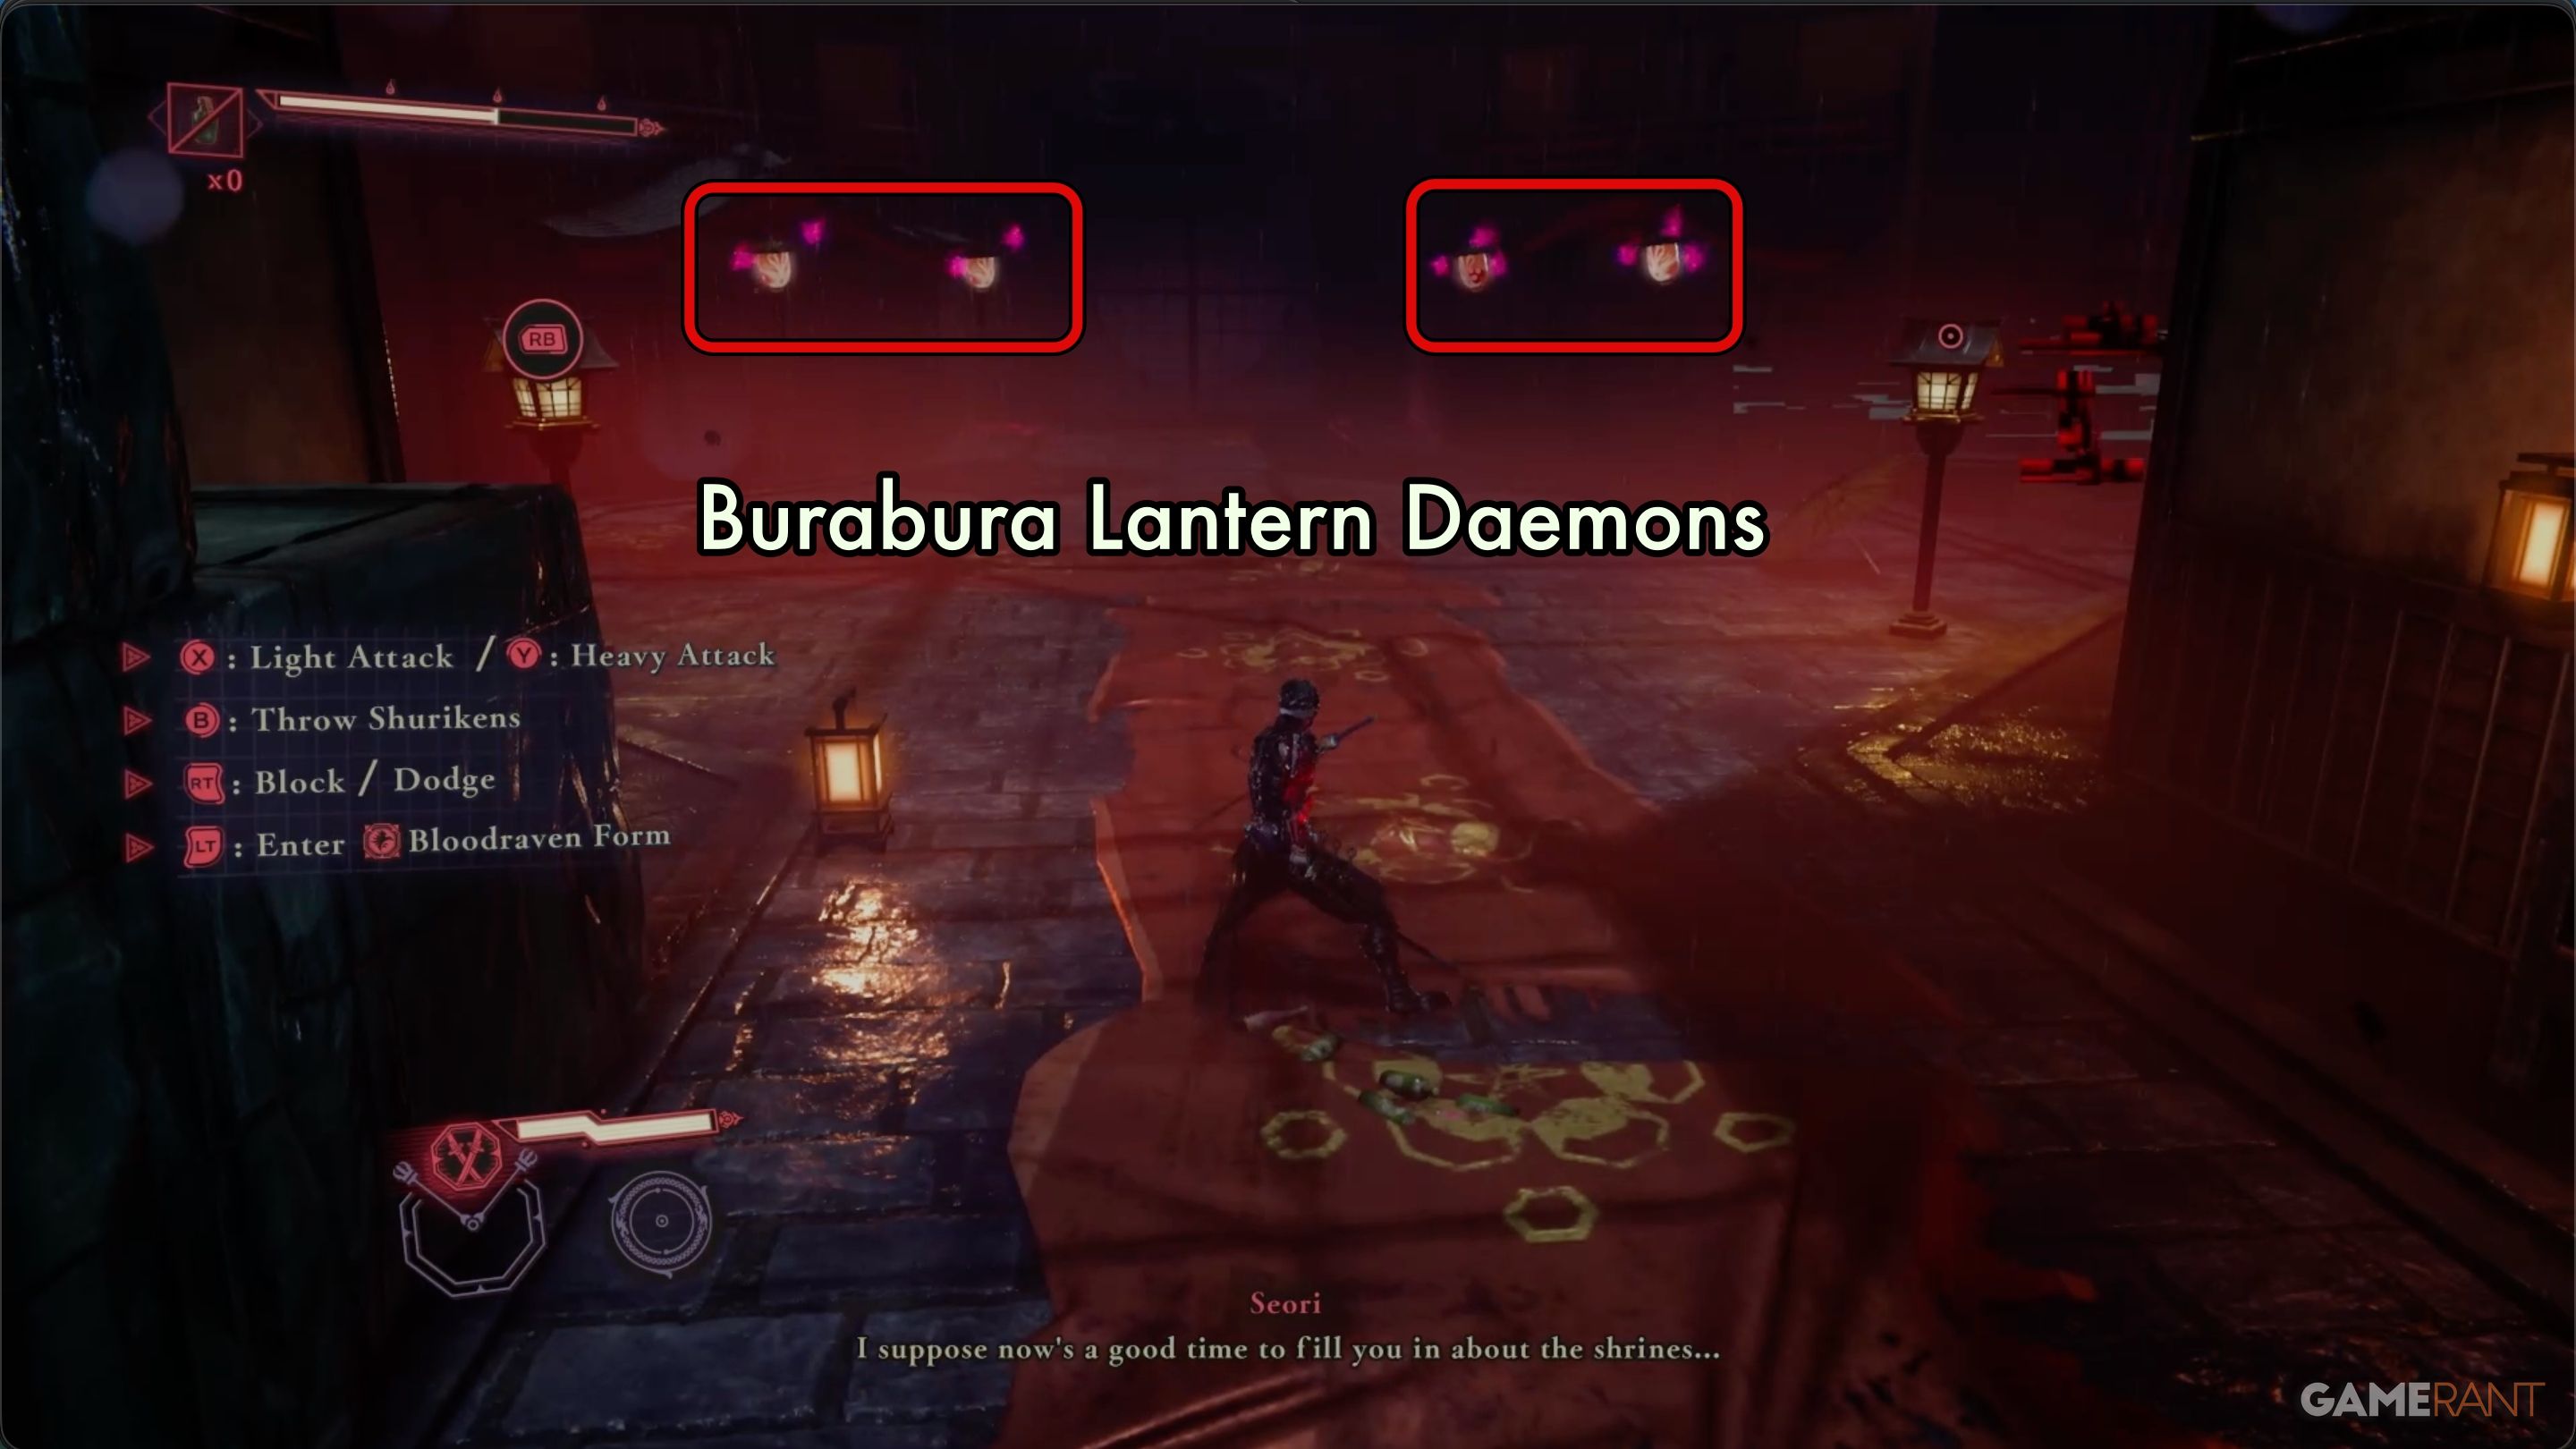
Once you have the Rotting Charm, turn the corner to return to the shrine. After encountering the daemon, turn again and you’ll enter a combat arena where you’ll face the Burabura Lantern Daemons. These daemons are featured in one of the new missions for Chapter 3.
These enemies are dangerous because they explode when defeated. They’ll also actively try to surround you and self-destruct. Your best strategy is to eliminate them quickly, but make sure to move away before they detonate.

Before exiting the first battle area, search for a narrow opening in the walls. You’ll find a staircase leading down to Chest 6, which contains a valuable Phantasmal Herb. After completing the Rotting Charm mission at the next DarkNest Terminal, you’ll receive the second Dragon Lord’s Grace, boosting your maximum health.
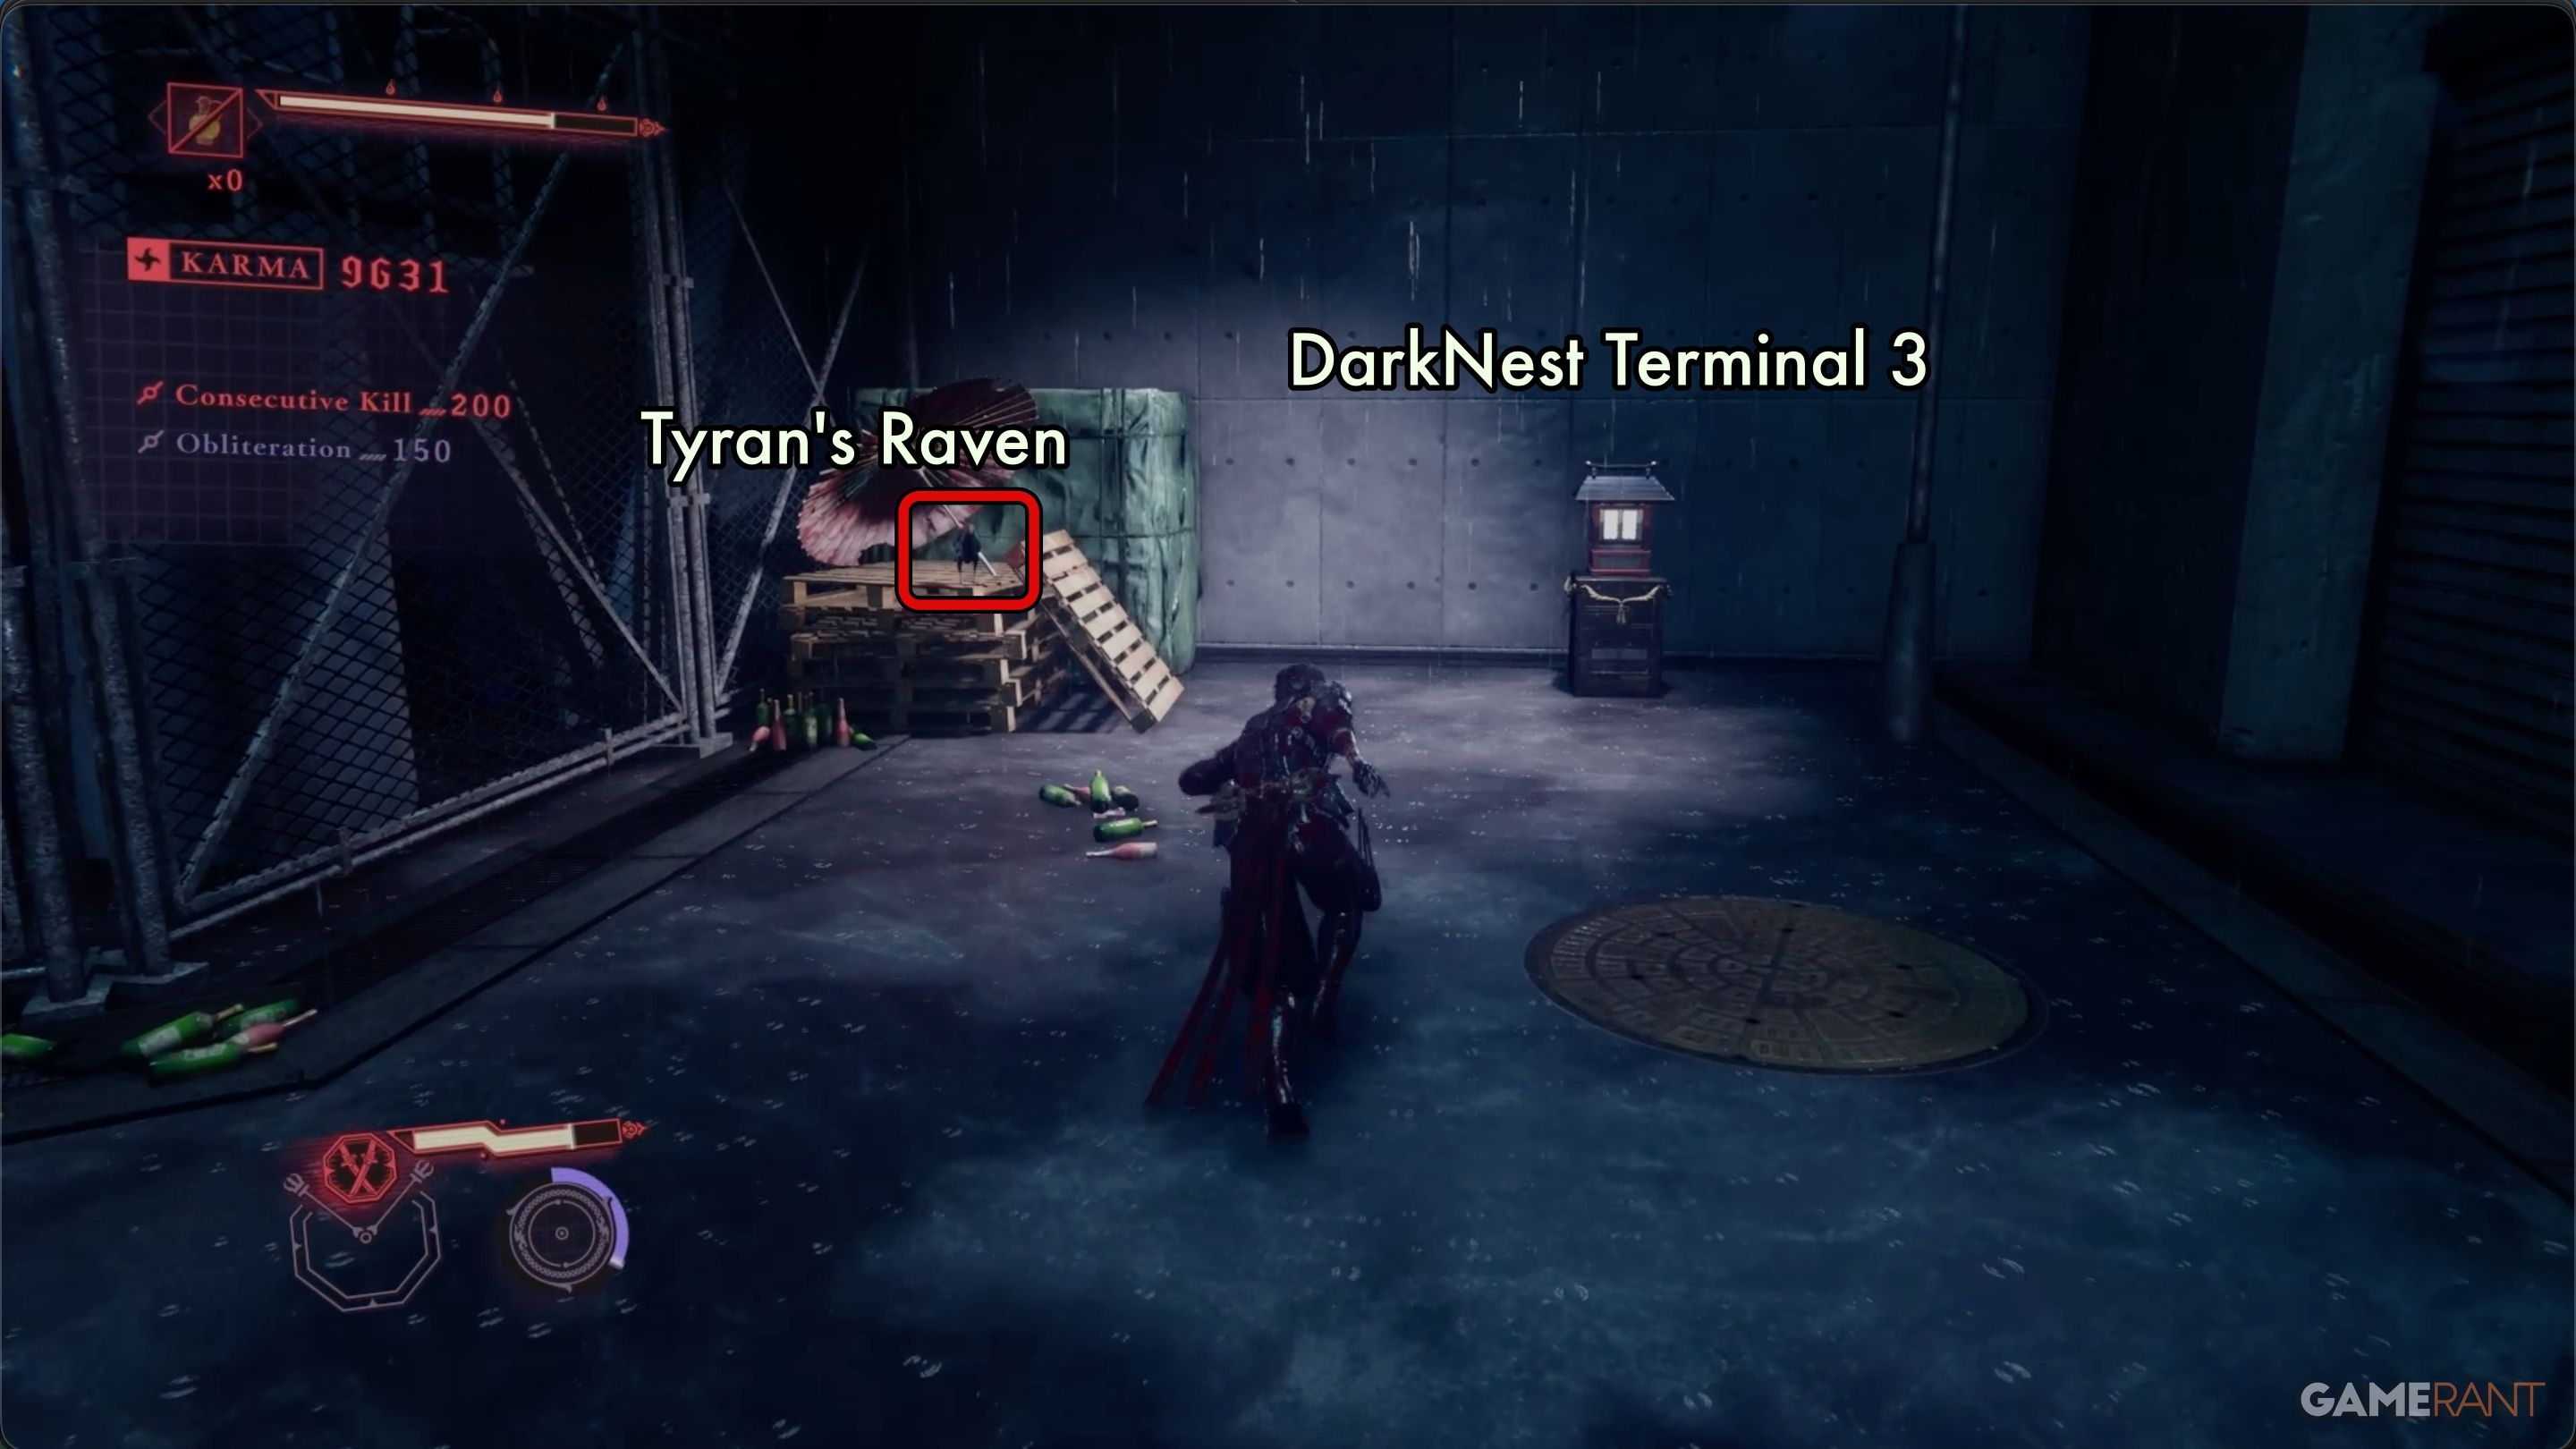
DarkNest Terminal 3:
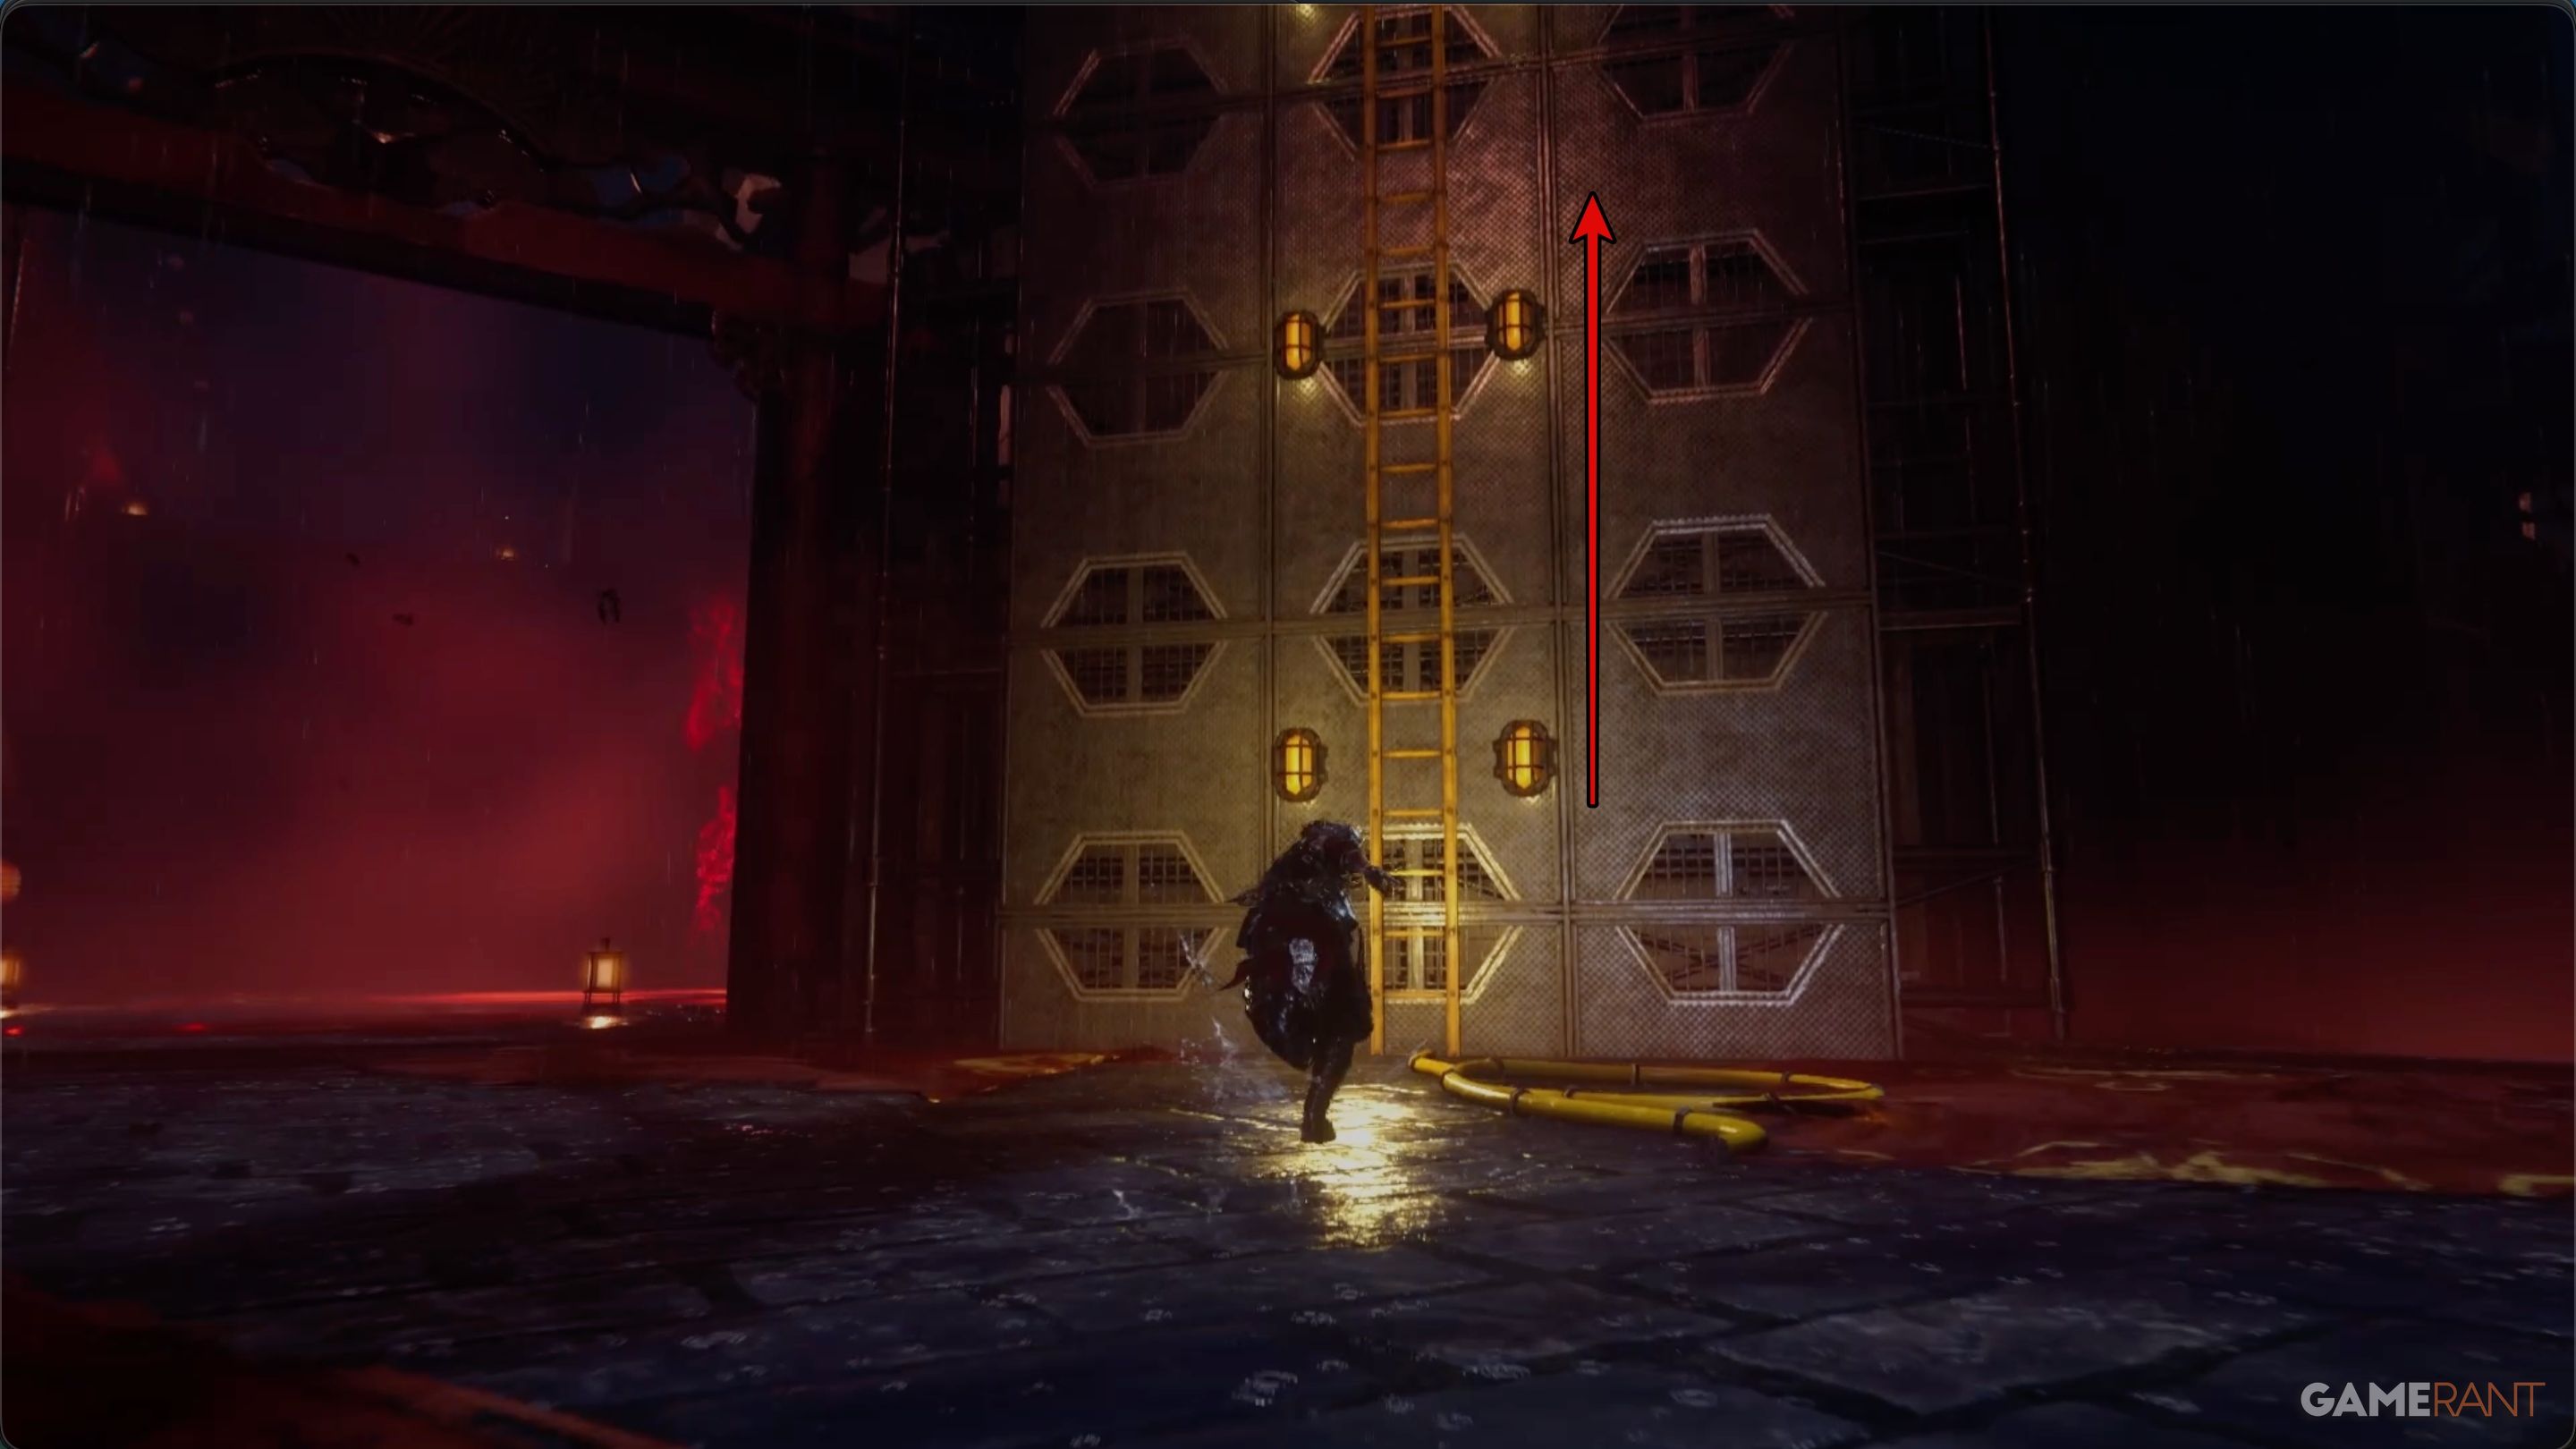
Once you have the herb, proceed to the next battle area. You’ll encounter a powerful daemon and several lanterns. After defeating them, climb the ladder to the upper level. You’ll face more lantern enemies before reaching the next DarkNest Terminal.
Okay, so after finishing those three fights, I should have enough materials to take down 10 of those Burabura Lantern Daemons and finally turn in that quest. Time to get it done!
Where to Find Gourdy & Renegade DDO Soldiers in Chapter 3 – Ninja Gaiden 4
Gourdy & Chest 7:
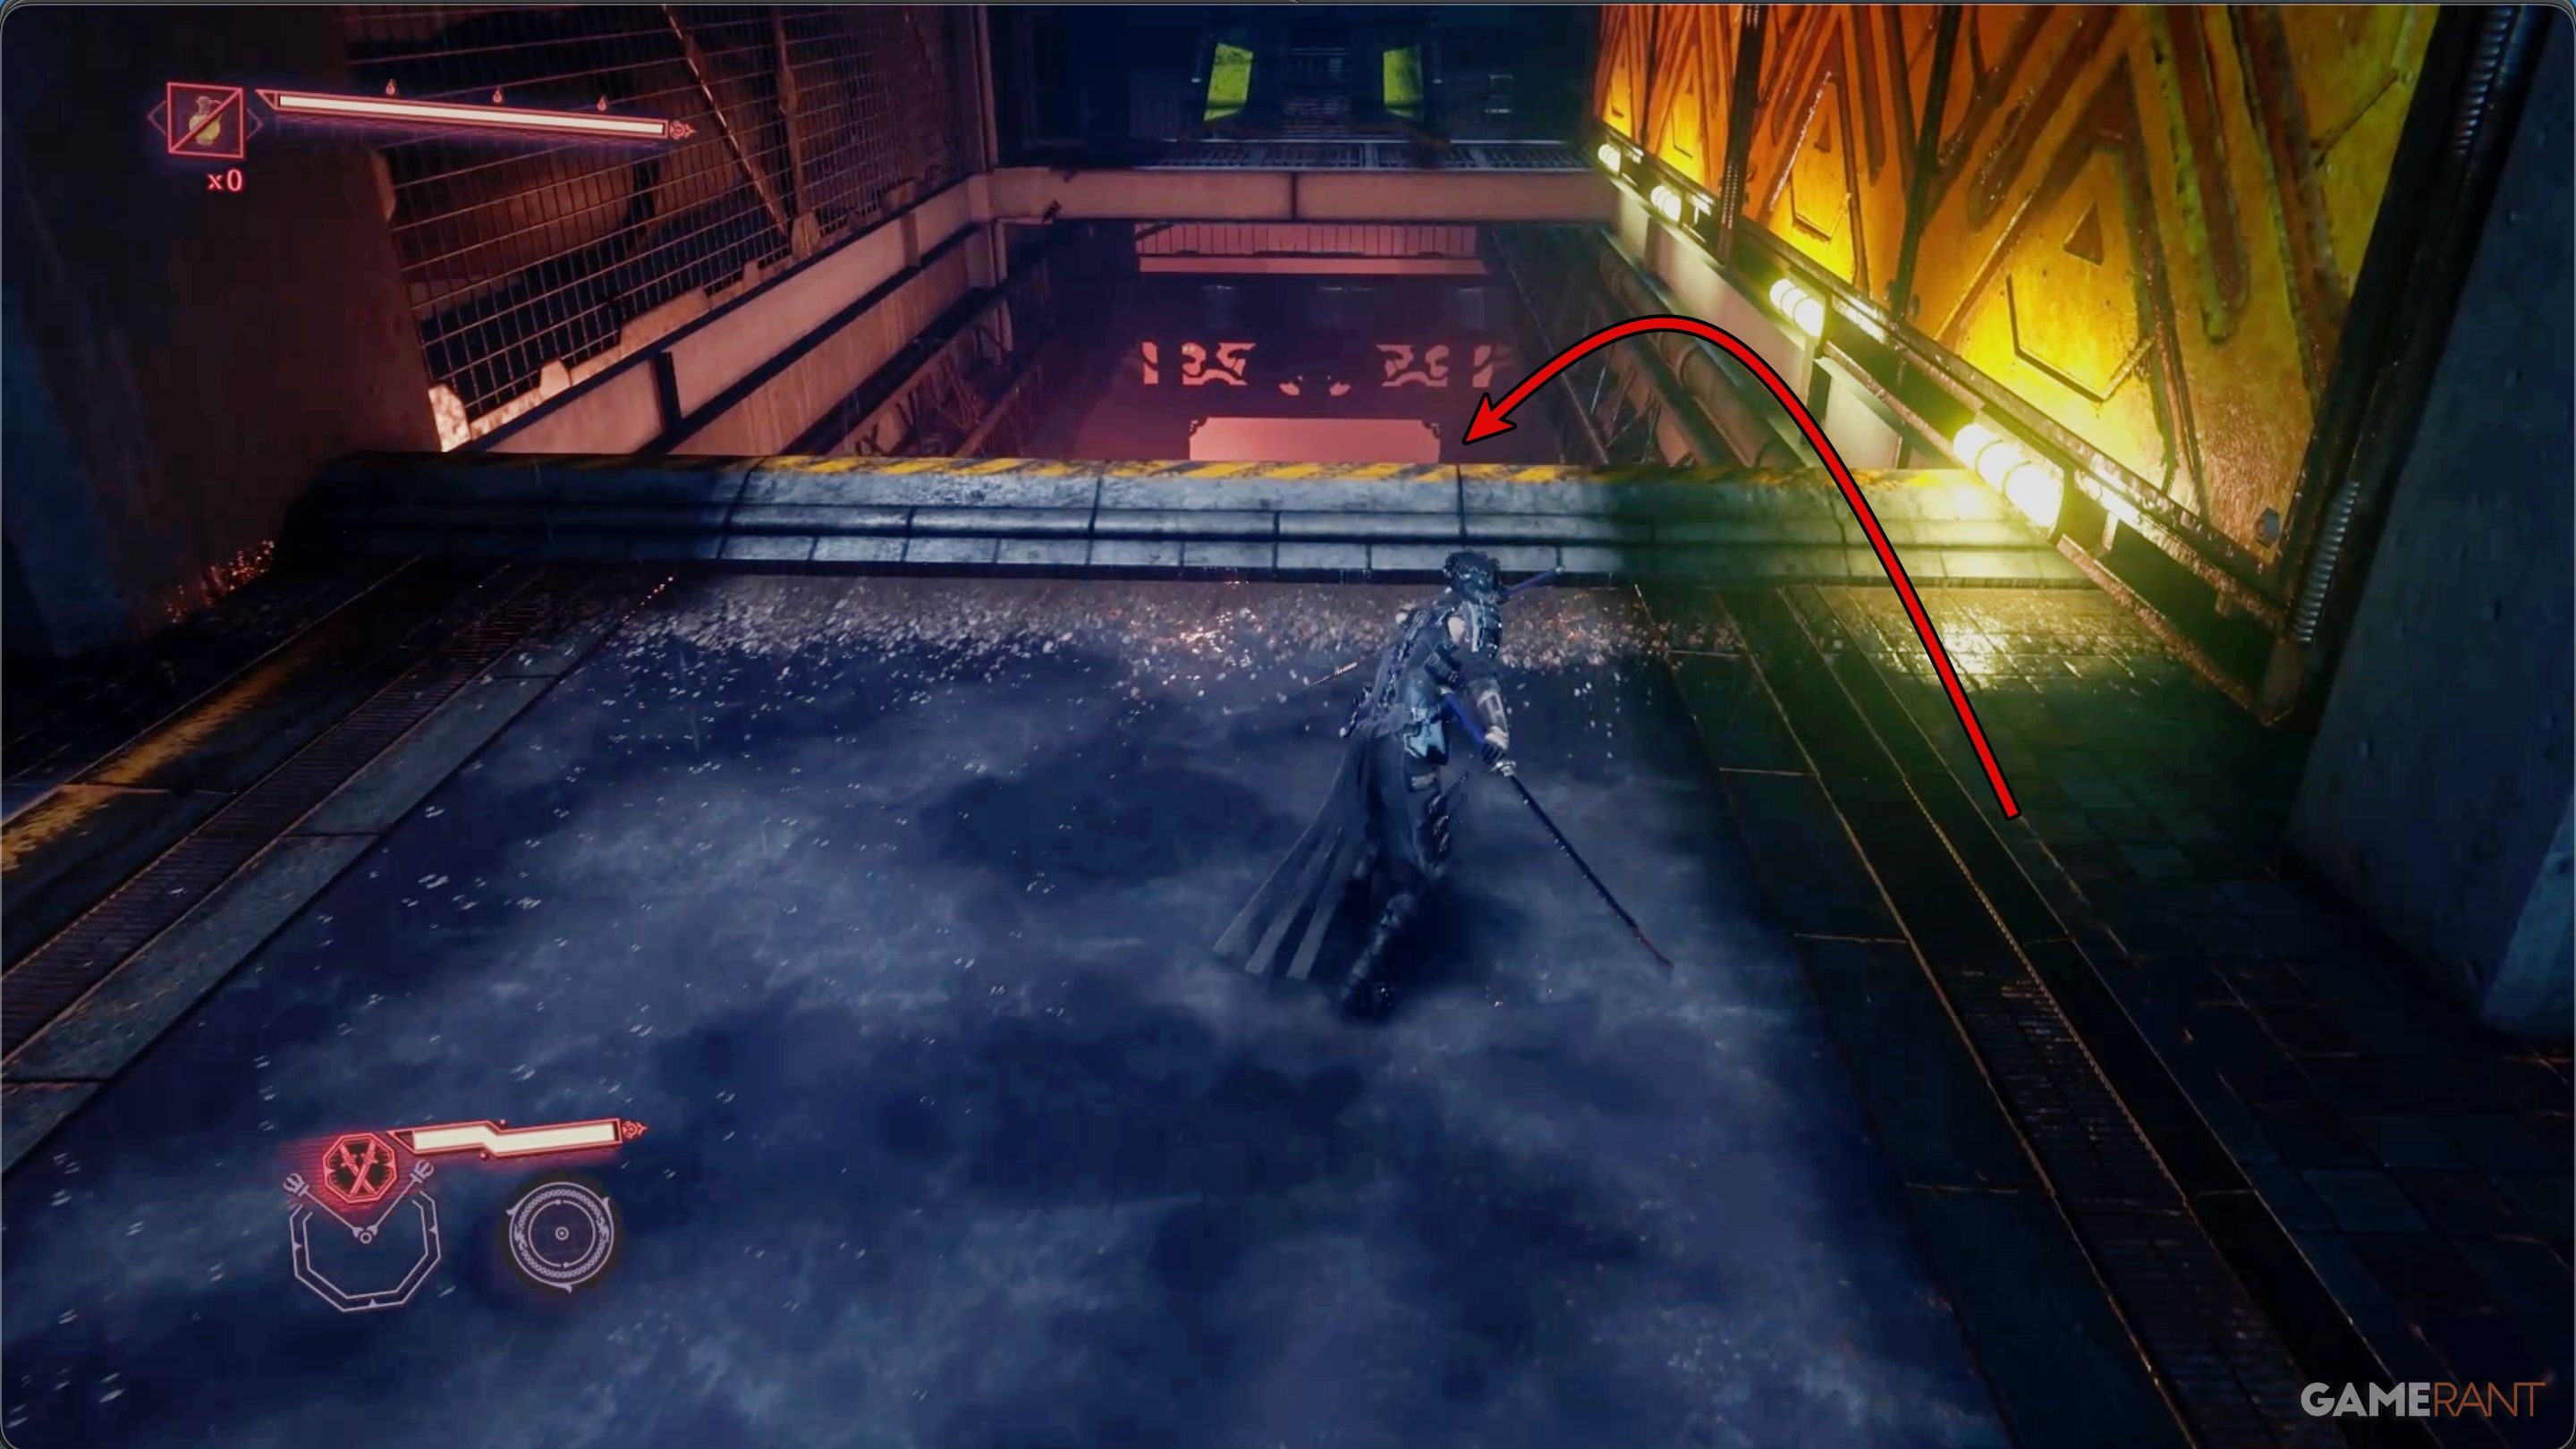
Okay, so finding the Gourdy in Chapter 3… I usually start at the third DarkNest Terminal. From there, you’ll see that wall-run going over the big open area. Don’t take it though! Instead, drop down into the lower section and deal with the first group of enemies you see down there.
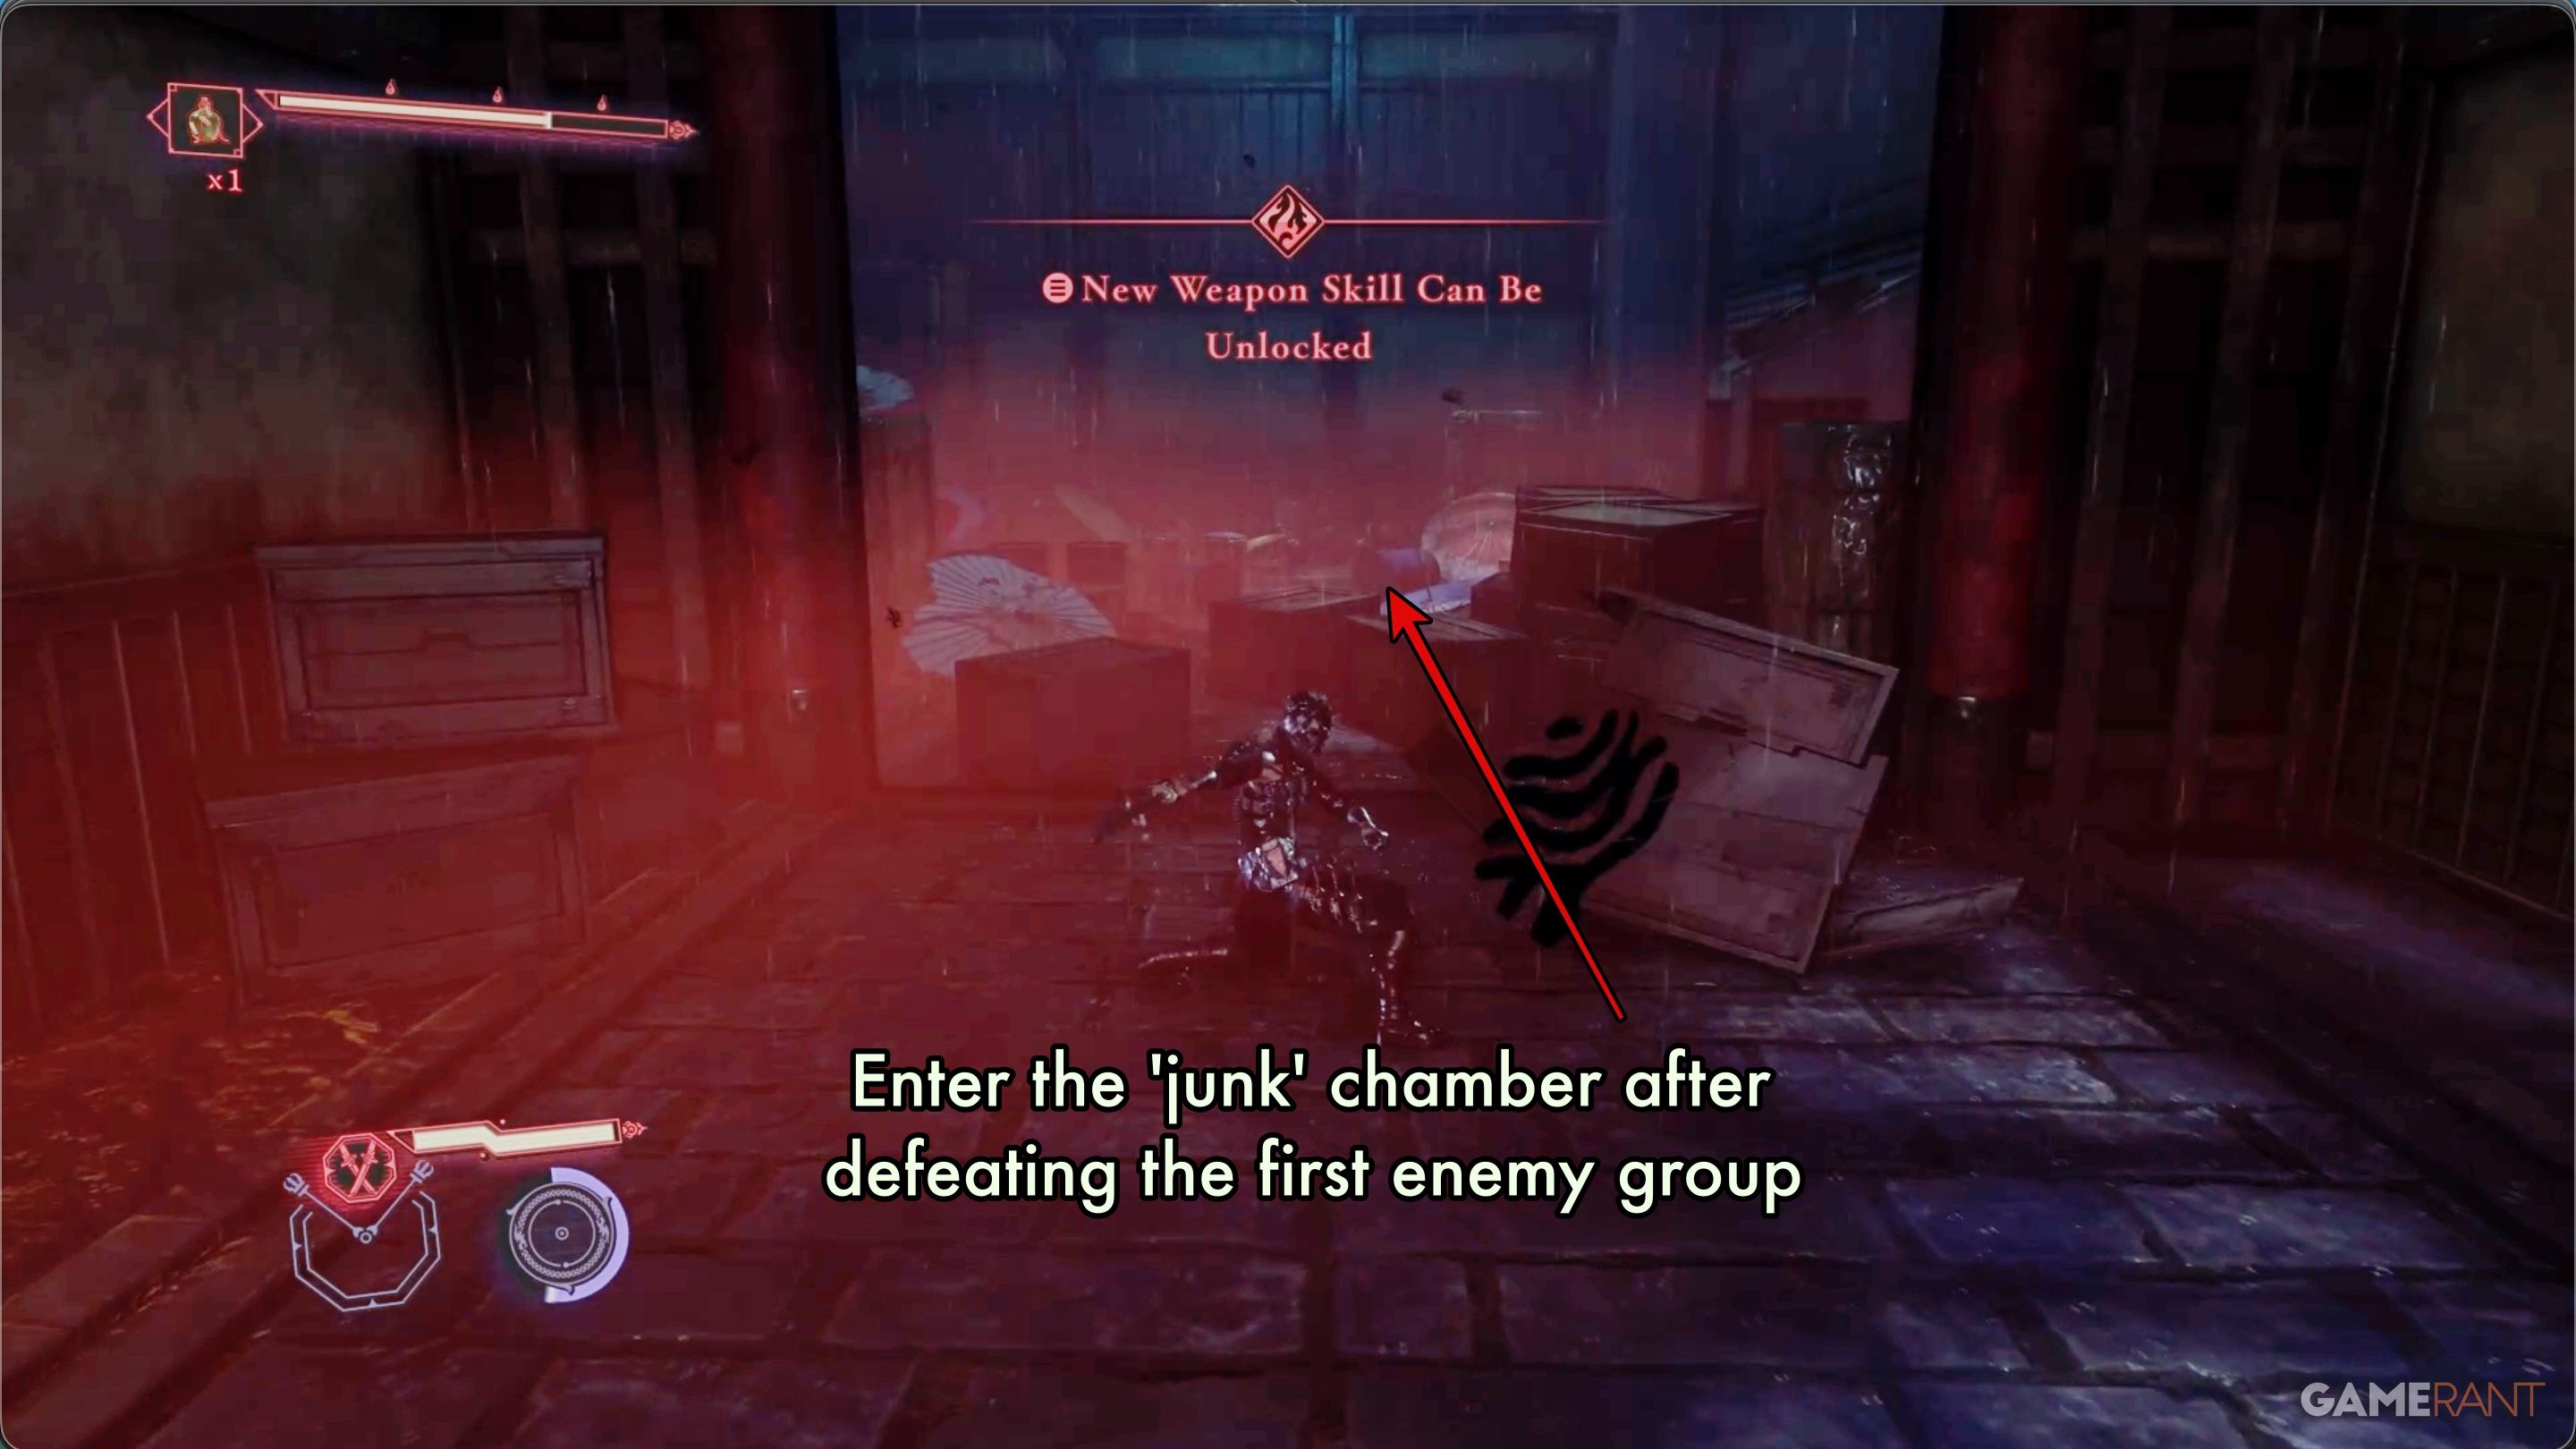
After you’ve finished with the previous task, find a room that’s full of clutter. The doorway is blocked by boxes and crates.
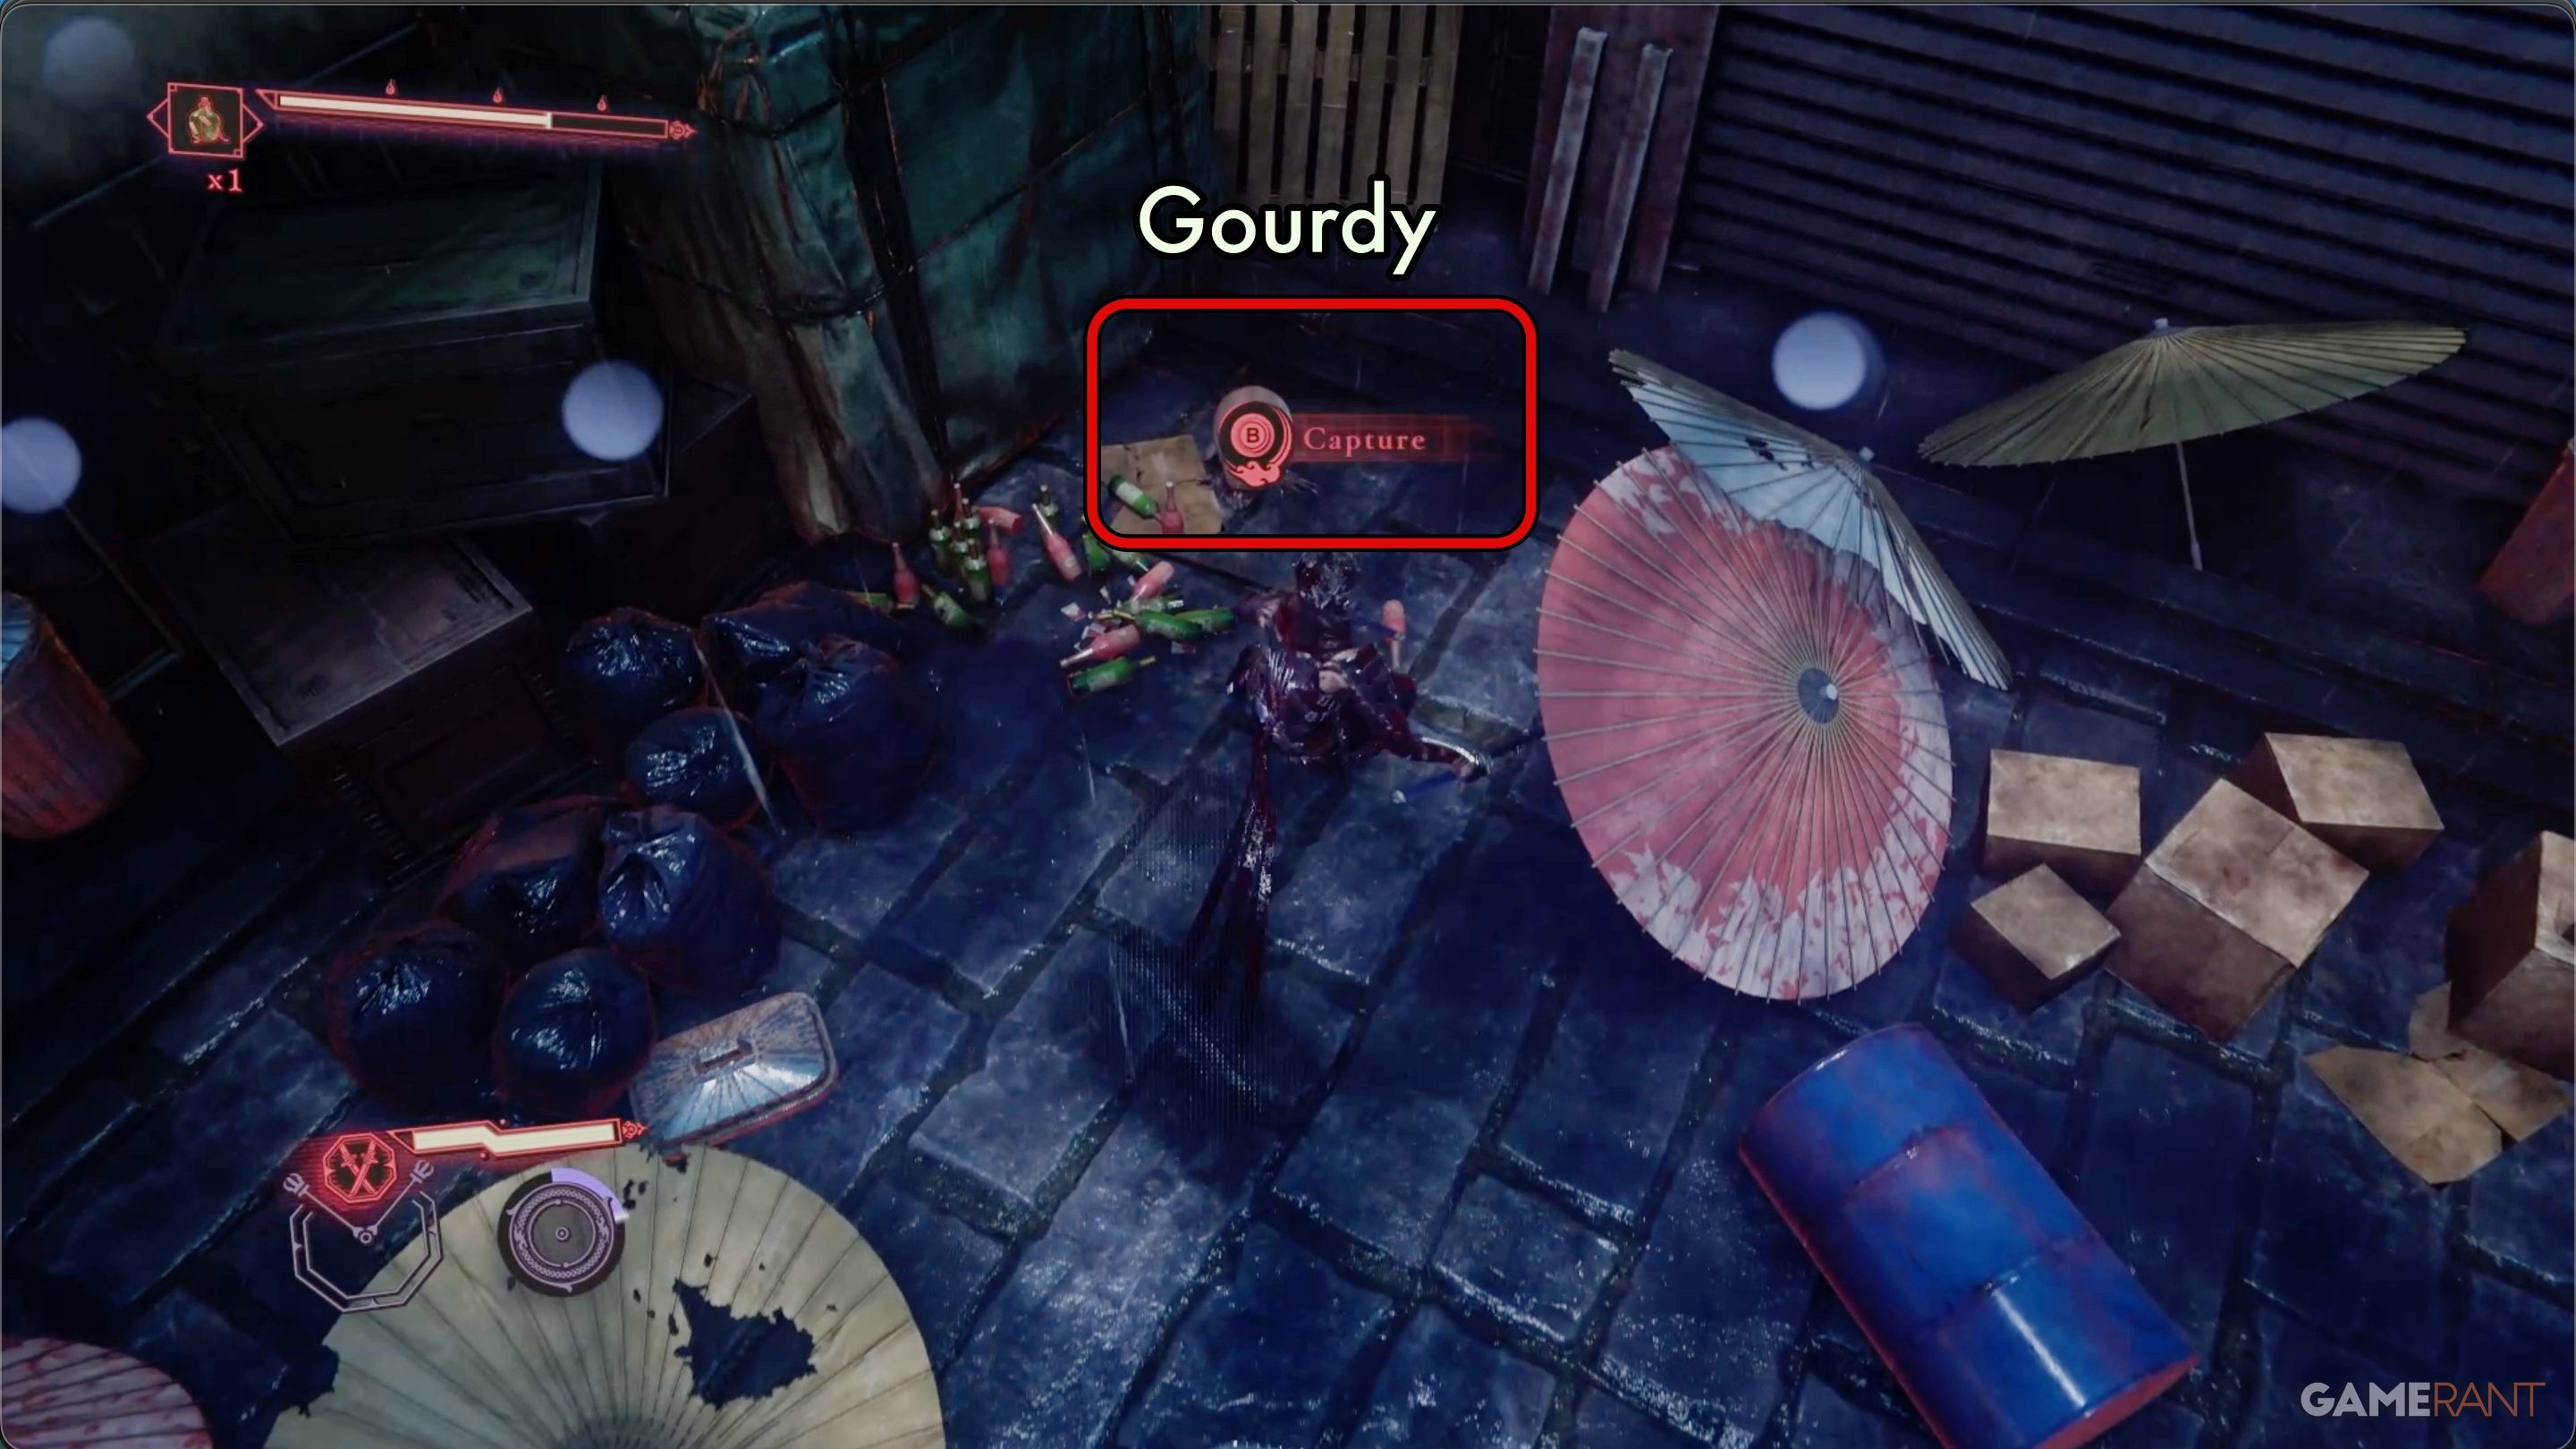
Go inside, and you’ll see a Gourdy in a corner. Play the quick catching game to get it.
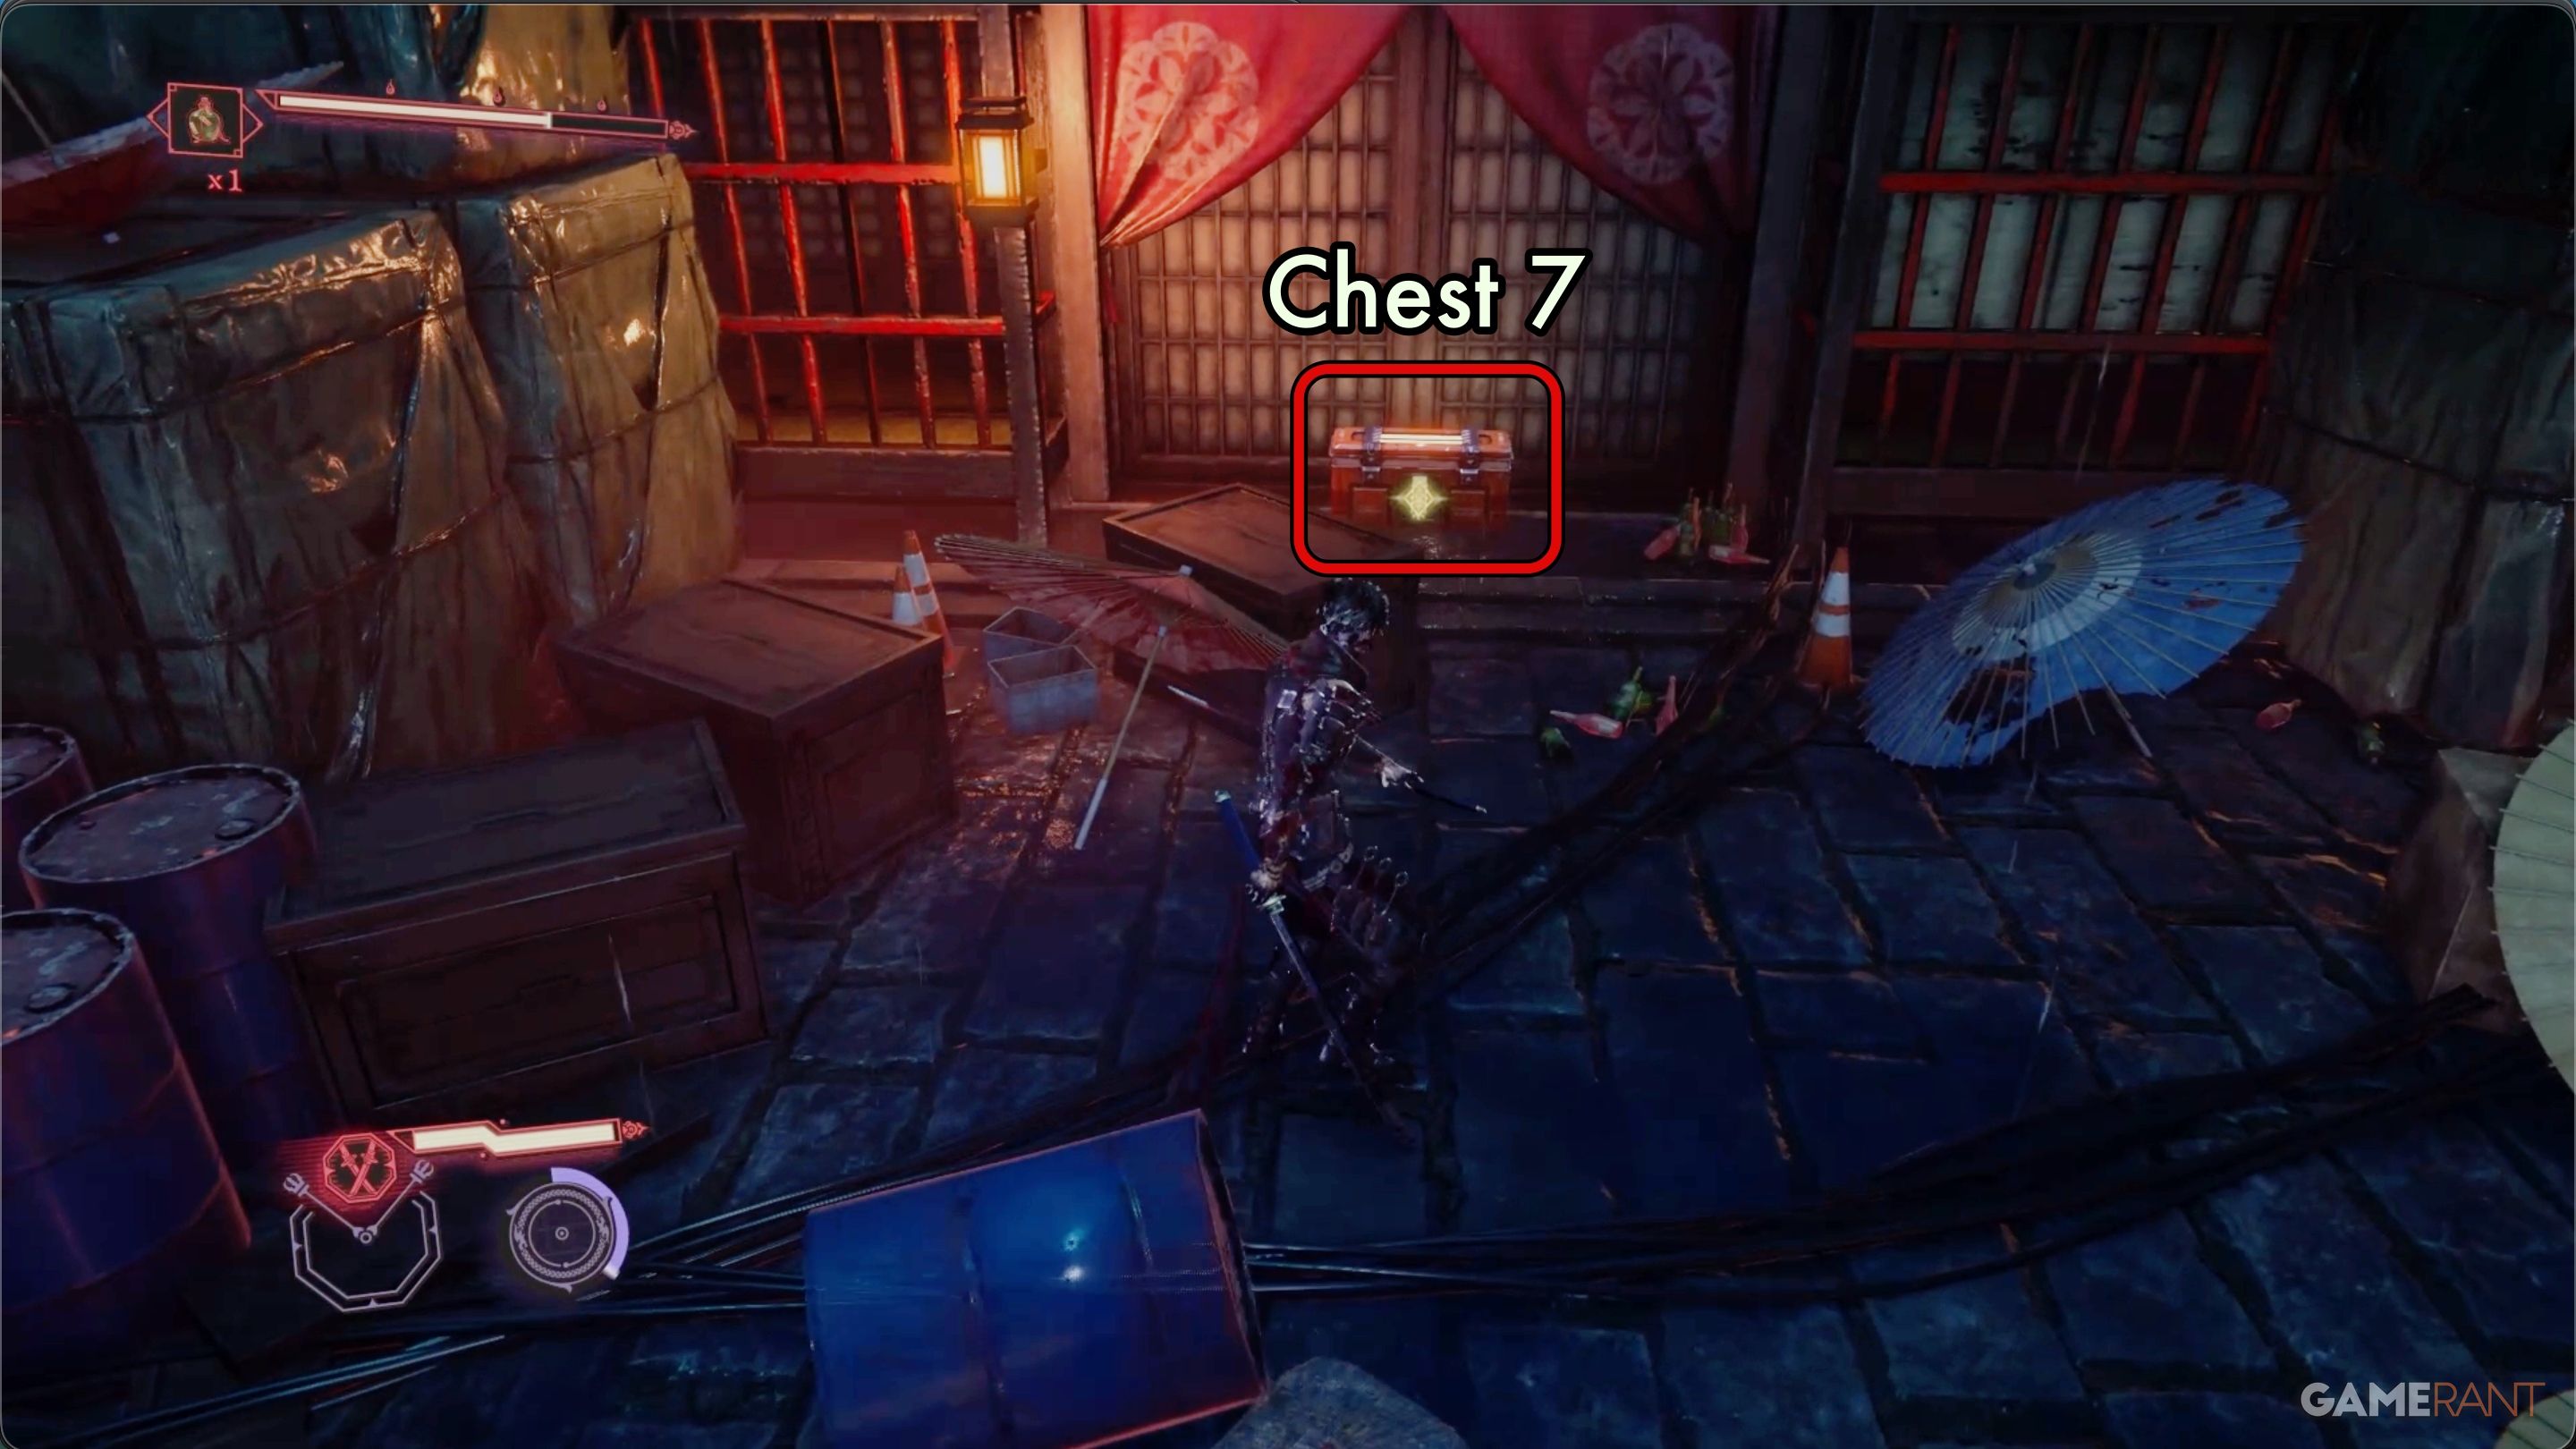
Before continuing, open Chest 7. You’ll find it leaning against a wall in the current room, and it contains one Divine Life Elixir.
Where to Find the Renegade DDO Soldiers:
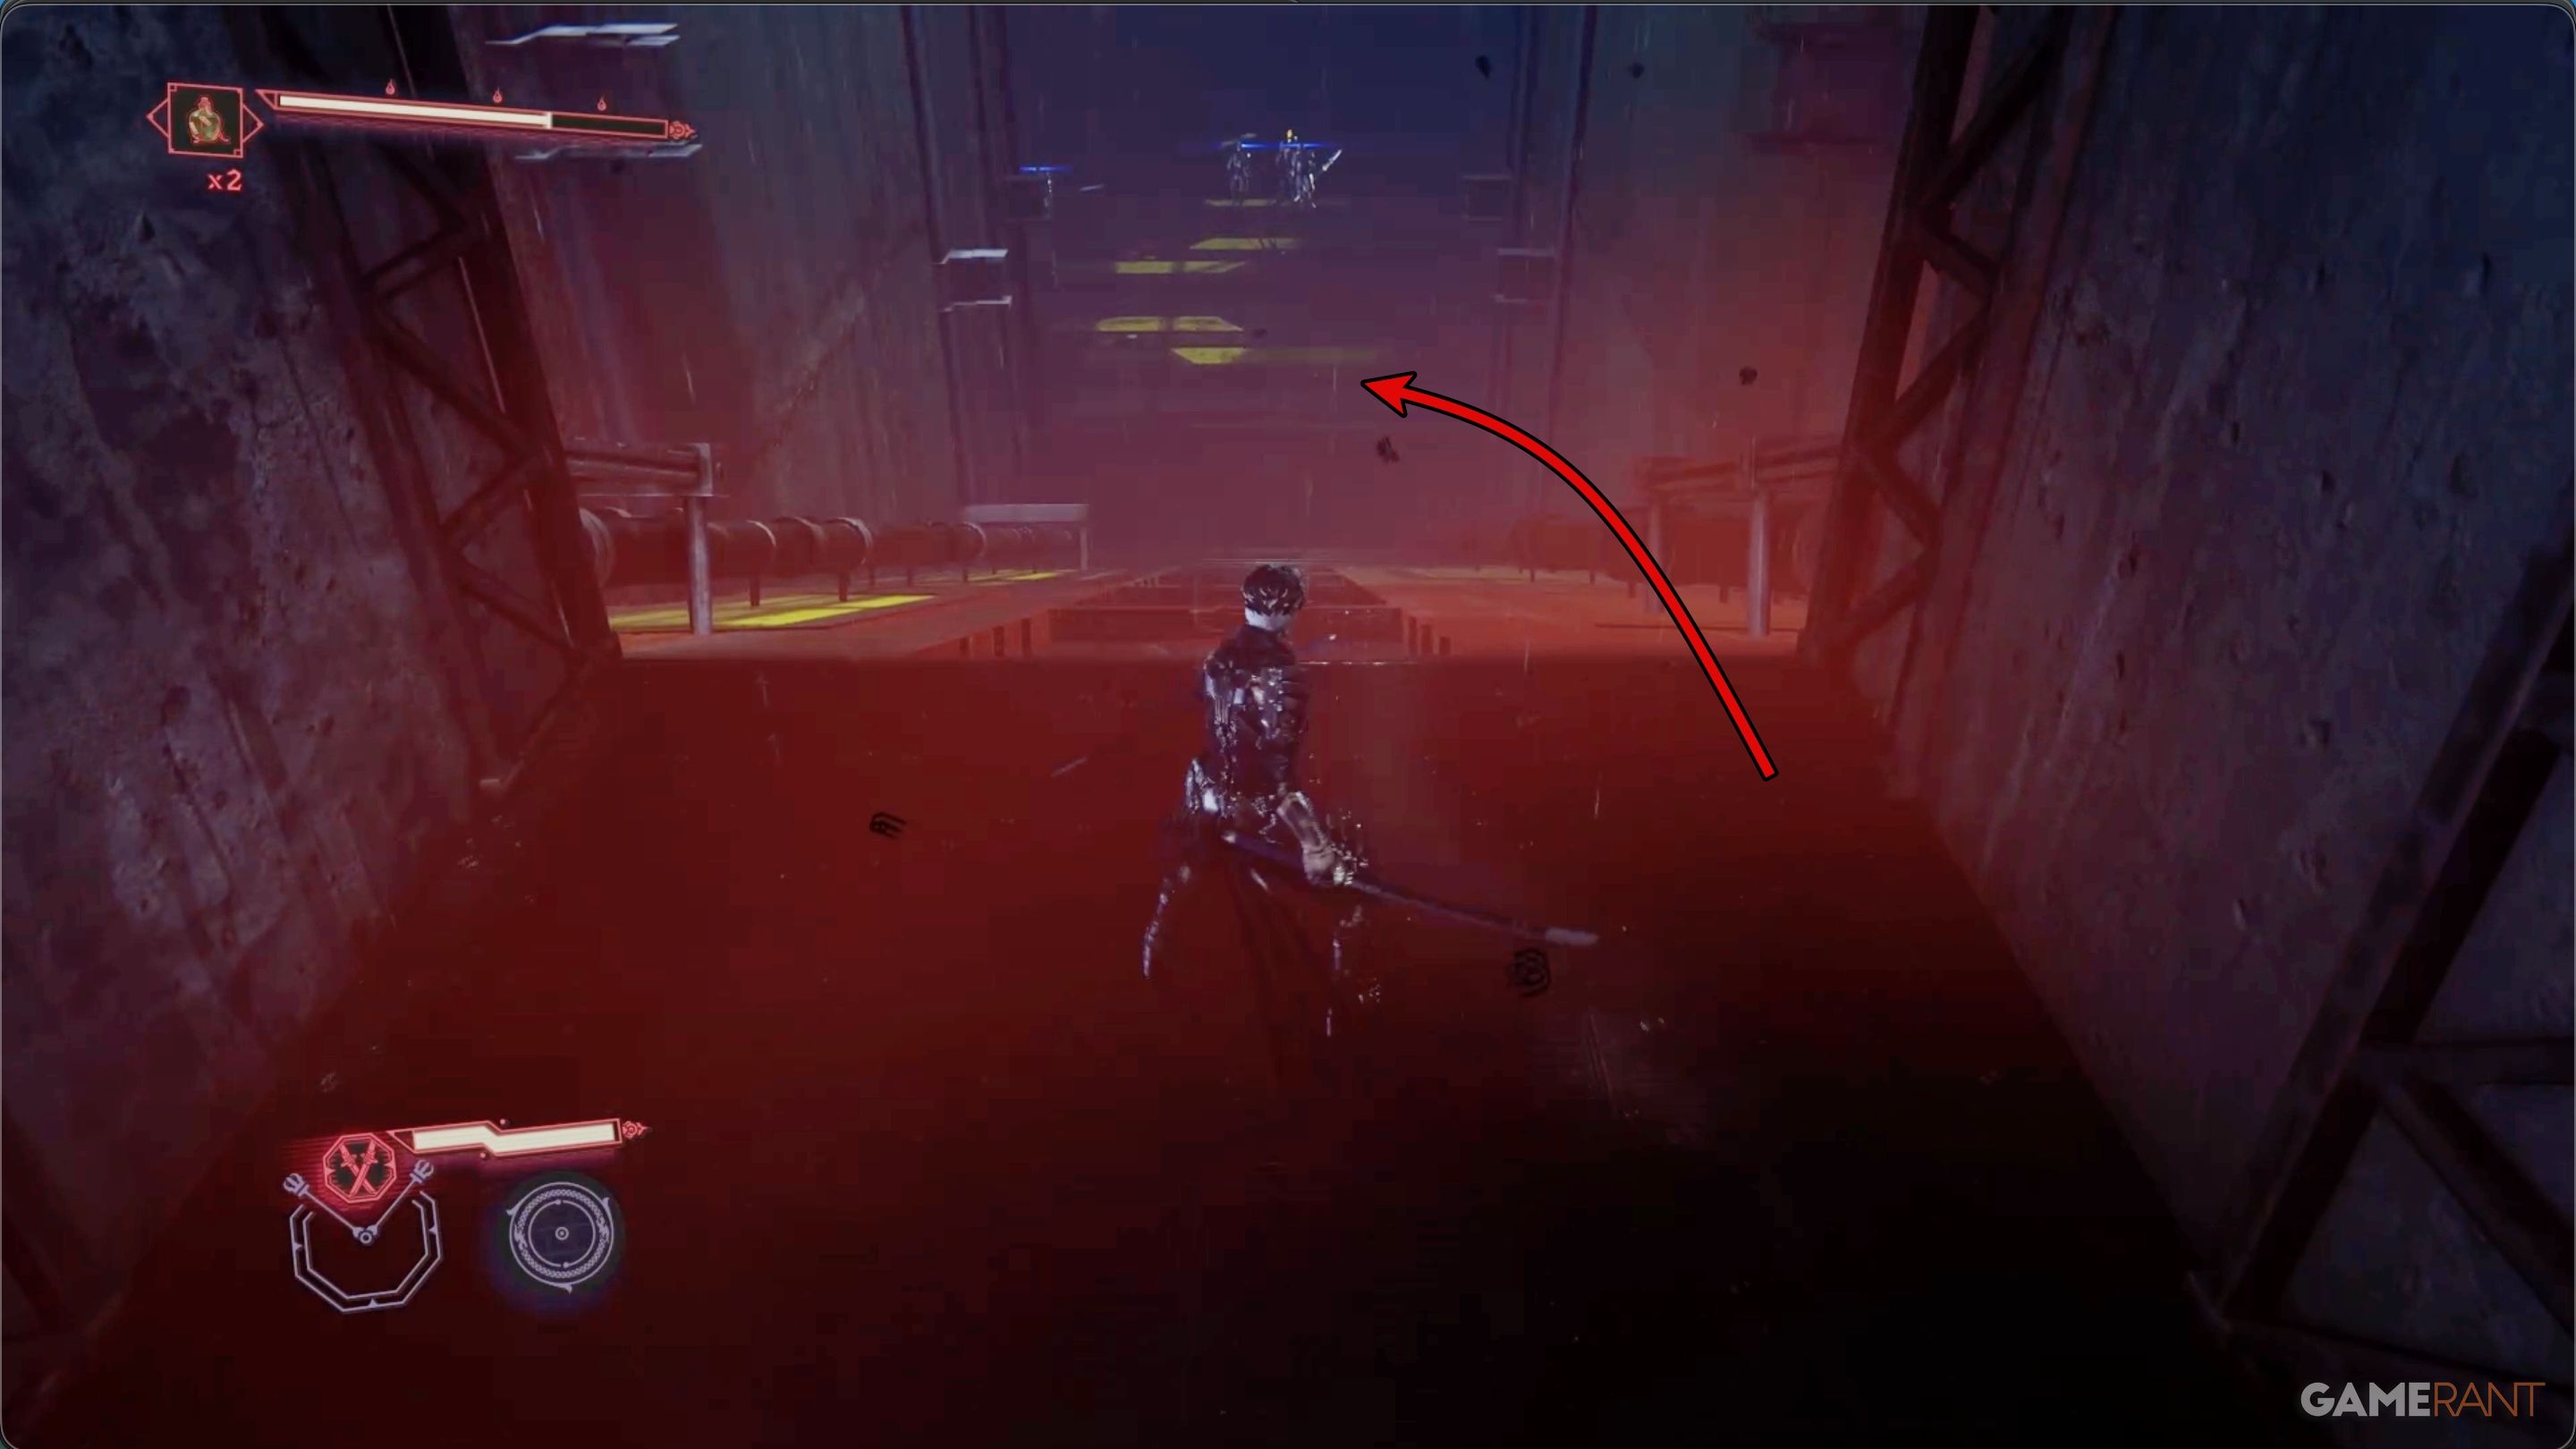
Okay, so I cleared out that messy room and went back to the first area with the fighting. I found another exit – it’s a long hallway leading down to a lower level. That’s where I ran into the Renegade DDO Soldiers. They’re the enemies I need to deal with now!
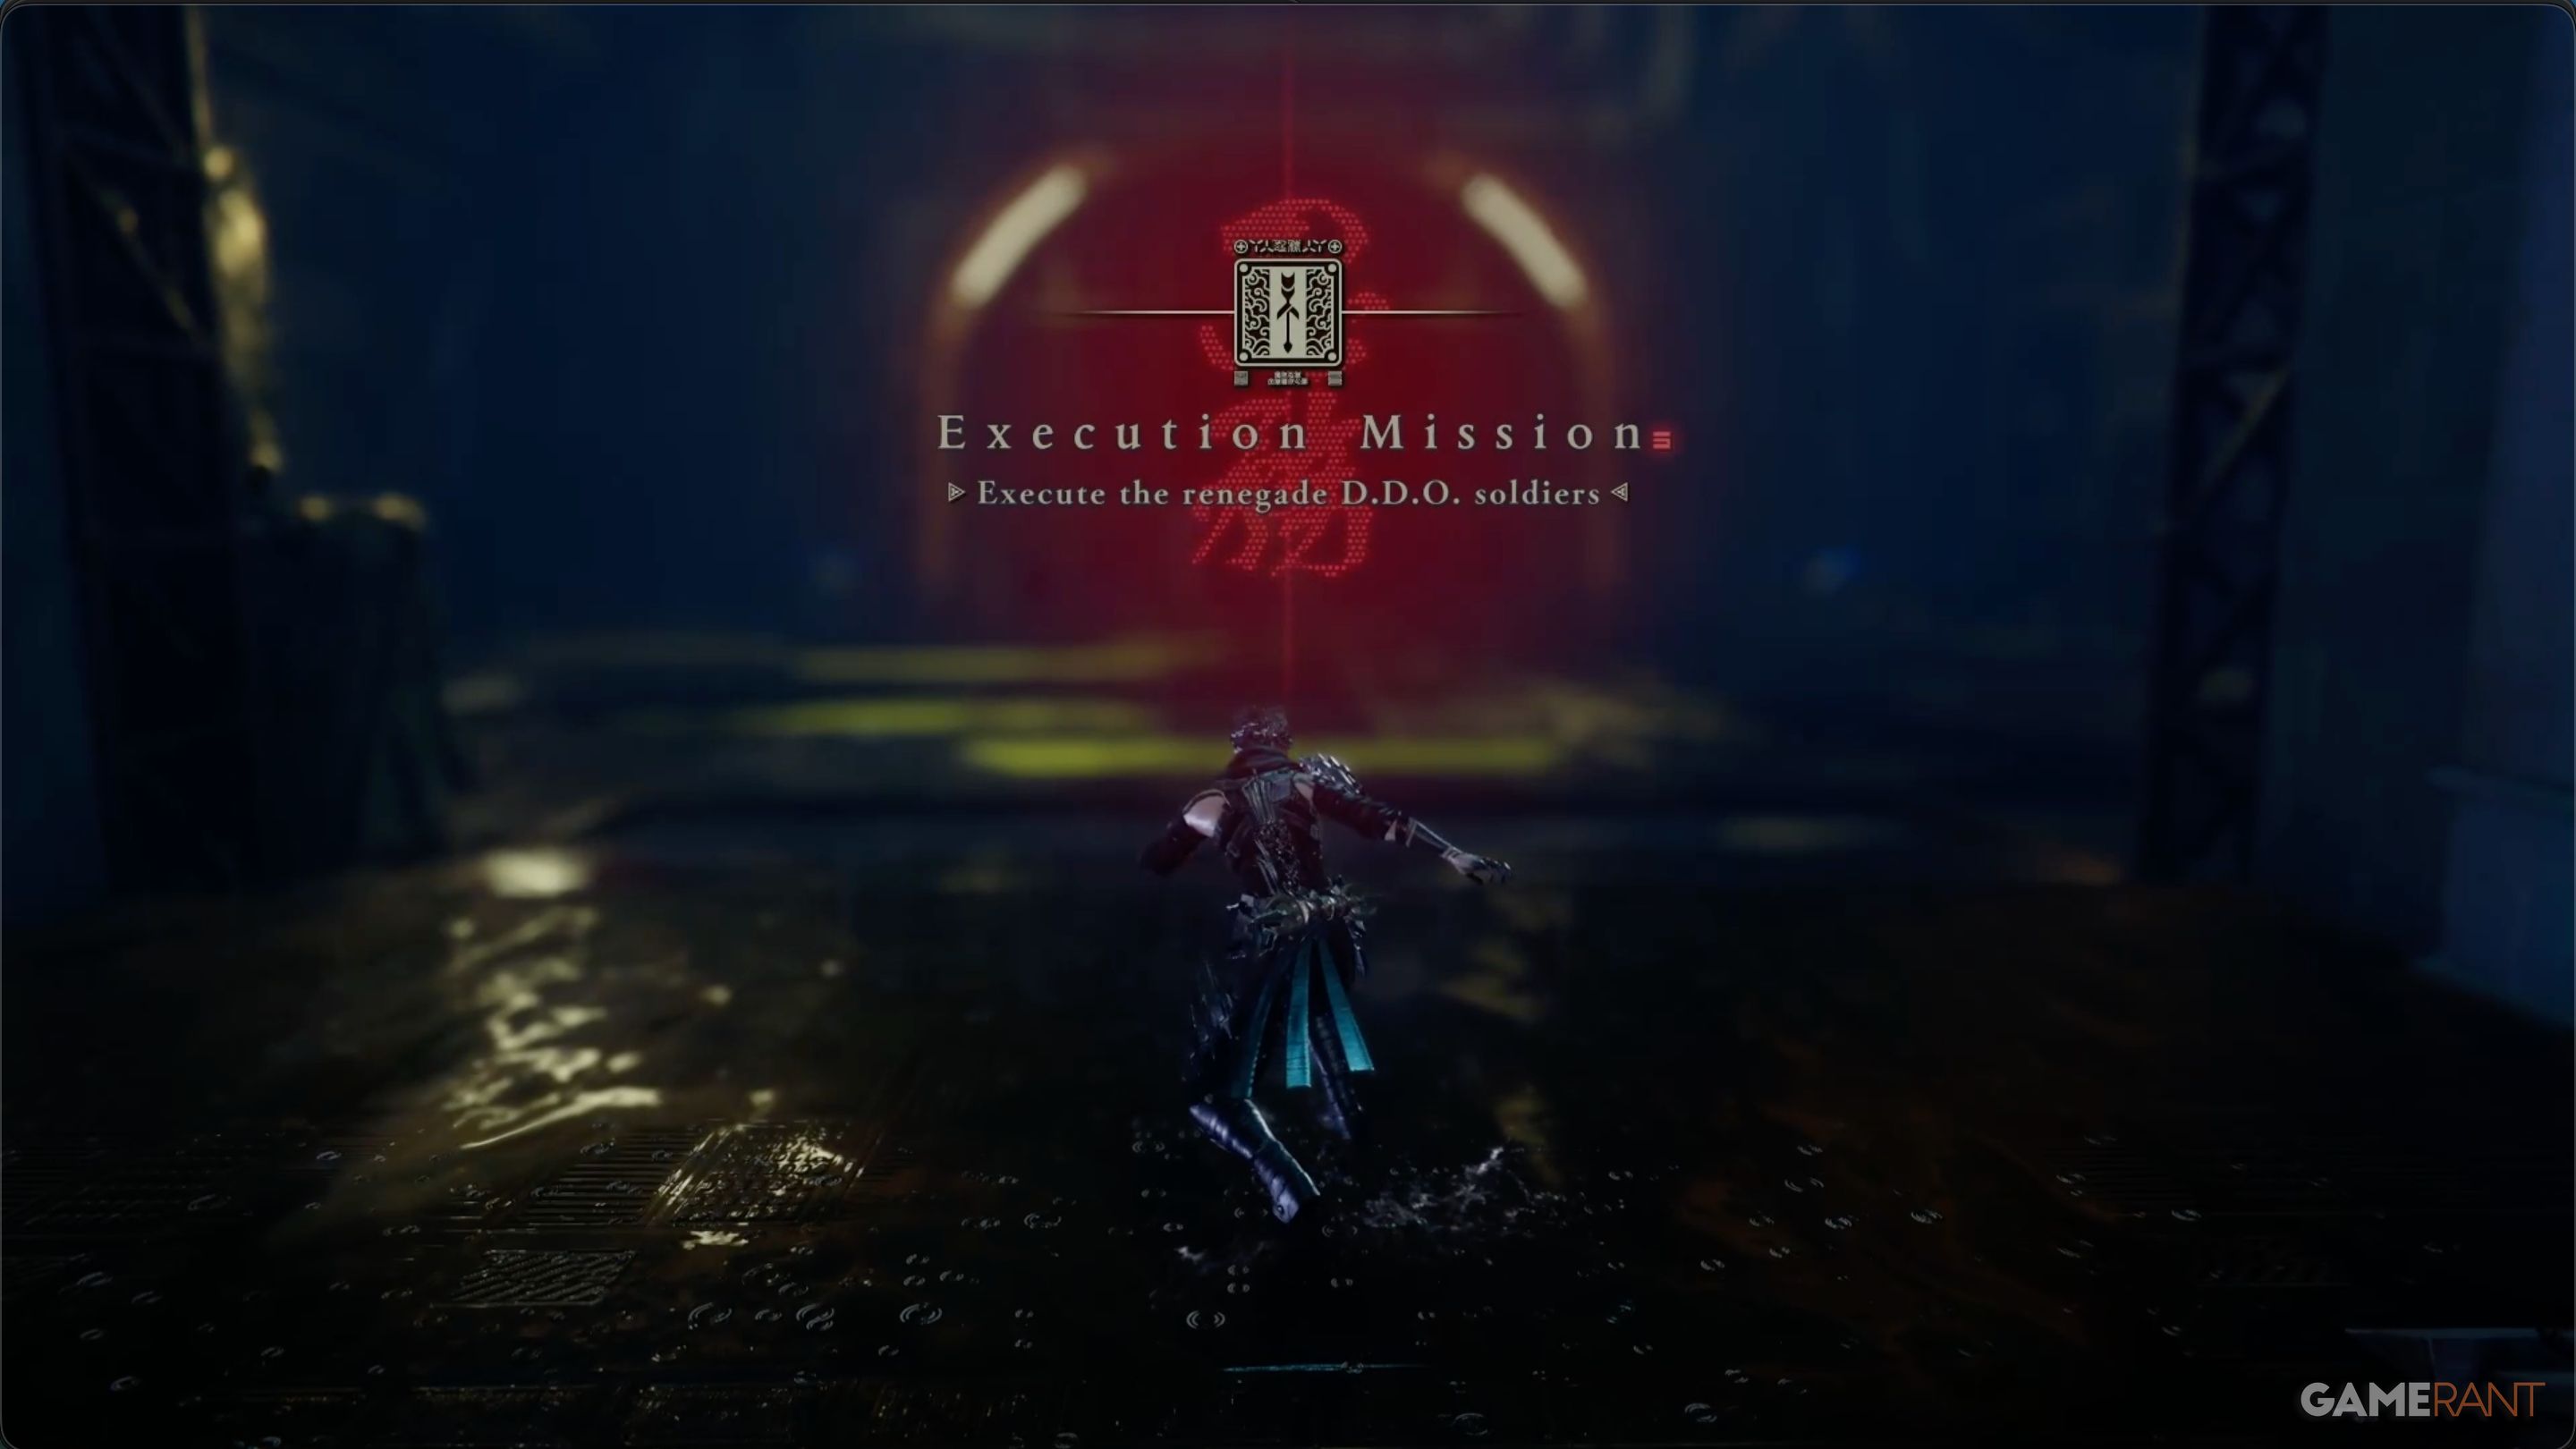
You’ll encounter several standard DDO soldiers, along with one stronger elite soldier. They’re similar to the enemies you’ve been fighting. After you defeat them, head back to the DarkNest Terminal to complete the mission.
Shrine Daemon Final Boss Fight – Ninja Gaiden 4

Chests 8-11:
After finishing up at the DarkNest Terminal, go back and complete the wall-run you skipped earlier while chasing the Gourdy and Renegade Soldiers. Go up the ramp, and you’ll find Chests 8 and 9 against the back wall. Watch out—several Burabura Lantern Daemons will ambush you from behind when you try to open them.
The first chest contains Senjin War Brew x1, and the second chest contains Rejuvenation Elixir x1.
Continue along the main path by following the Caddis Wire until you reach the final chamber. Chest 10 is located against a fence on the far side of the chamber, away from the boss fight exit. Inside, you’ll find one Incense of Rebirth. To the right of the exit, leaning against a wall, is Chest 11, the last chest. It contains one Divine Life Elixir.
Shrine Daemon Fight:
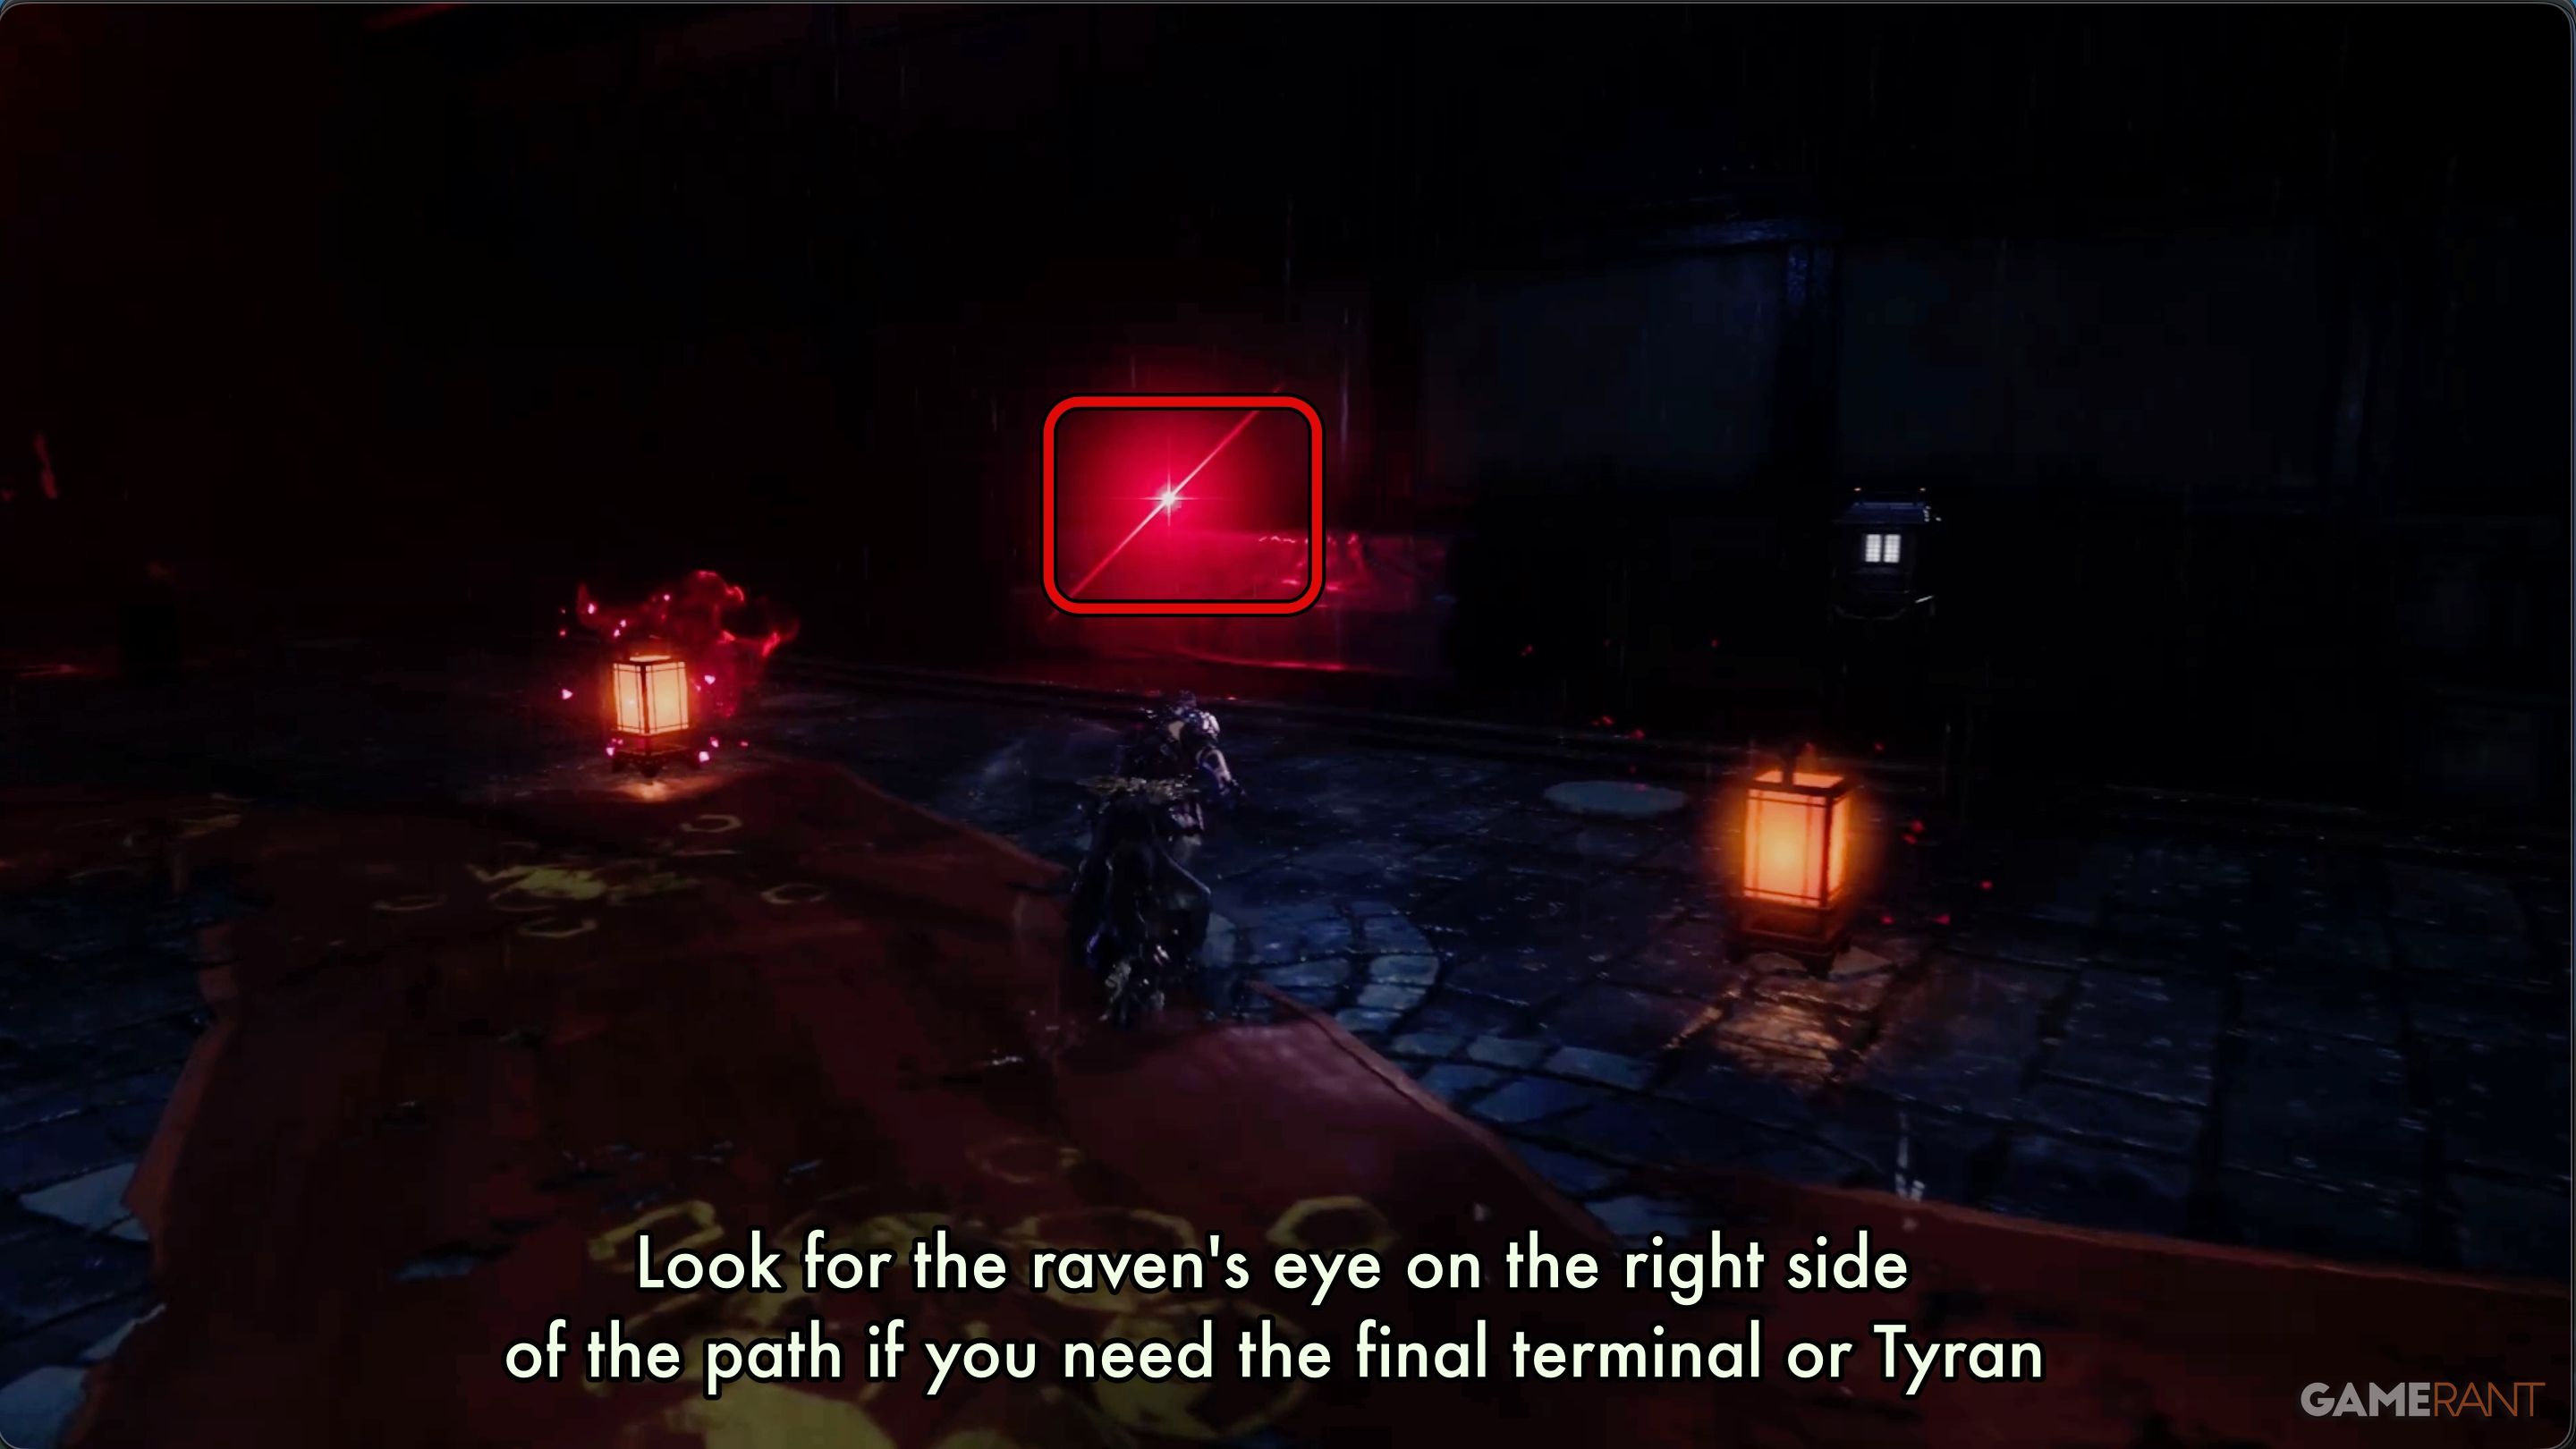
Once you go through the last door, you’ll need to run along a dark path to reach the area where you’ll fight the final boss. Along the way, you can use the last DarkNest Terminal and Tyran, which are both on the right side. In the darkness, look for a glowing red eye – that’s how you’ll find them.
This boss fight happens in two stages, marked by the boss’s two health bars. The first stage is very similar to the fight you just had. In the second stage, the boss adds its powerful tail to its attacks, alongside the Umbrella. These attacks work together and are considerably stronger than before.
Okay, so the boss’s attacks are basically all the same as before, but way more intense! Everything is just faster and much harder to block. She’s spinning her tail around while also attacking with her umbrella, so it gets pretty chaotic. Honestly, I’ve found focusing on dodging the umbrella is more important than worrying about the tail most of the time. And get this – she’s added some new attacks! Now she throws these little lantern demons at you – they’re called Burabura Lantern Daemons, I think. Just keep an eye out for the warning symbol – an exclamation mark – and the red flames, and you should be able to react in time.
A new attack is coming where umbrellas will fly at you from all sides. Watch the floor – lines will show you where each umbrella is heading, so you can dodge them.
If you can effectively use Parries and Perfect Blocks, and then follow up with attacks like Reflect and Mirage, you shouldn’t have much trouble with this fight.
Read More
- Robinhood’s $75M OpenAI Bet: Retail Access or Legal Minefield?
- All Skyblazer Armor Locations in Crimson Desert
- How to Get the Sunset Reed Armor Set and Hollow Visage Sword in Crimson Desert
- How to Catch All Itzaland Bugs in Infinity Nikki
- Speedsters Sandbox Roblox Codes
- Black Sun Shield Location In Crimson Desert (Buried Treasure Quest)
- Invincible: 10 Strongest Viltrumites in Season 4, Ranked
- Who Can You Romance In GreedFall 2: The Dying World?
- Top 10 Must-Watch Isekai Anime on Crunchyroll Revealed!
- USD CNY PREDICTION
2025-10-21 14:06