Jump Links
- Role Expectations
-
Best Support Class Loadouts in Battlefield 6
- I Need A Medic!
- The Quarterback
- Get Some
- The Flametrooper
If you get frustrated when teammates run past you while you’re down and need a revive in Battlefield 6, you probably really appreciate Support players. They risk their lives to get to you and bring you back into the fight with a defibrillator.
You know, I always notice how Support players consistently perform well in every Battlefield mode, even if their kill counts aren’t the highest. That’s because they really get what Battlefield is all about – working as a team. They aren’t about racking up kills, they’re about helping everyone else do it, and that makes a huge difference.
I’ve spent a lot of time in this class, so I’m happy to share the gear setups I use to help my team stay healthy and equipped.
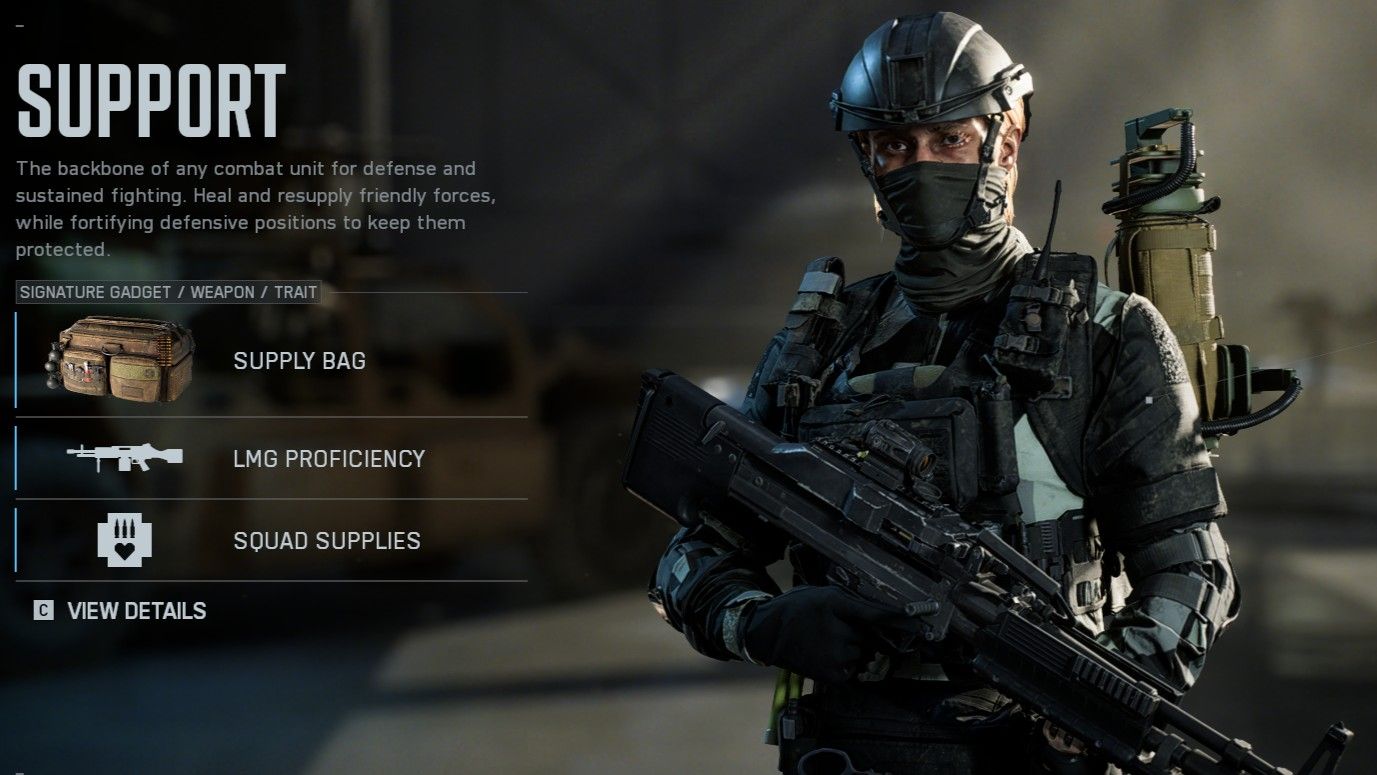
Role Expectations
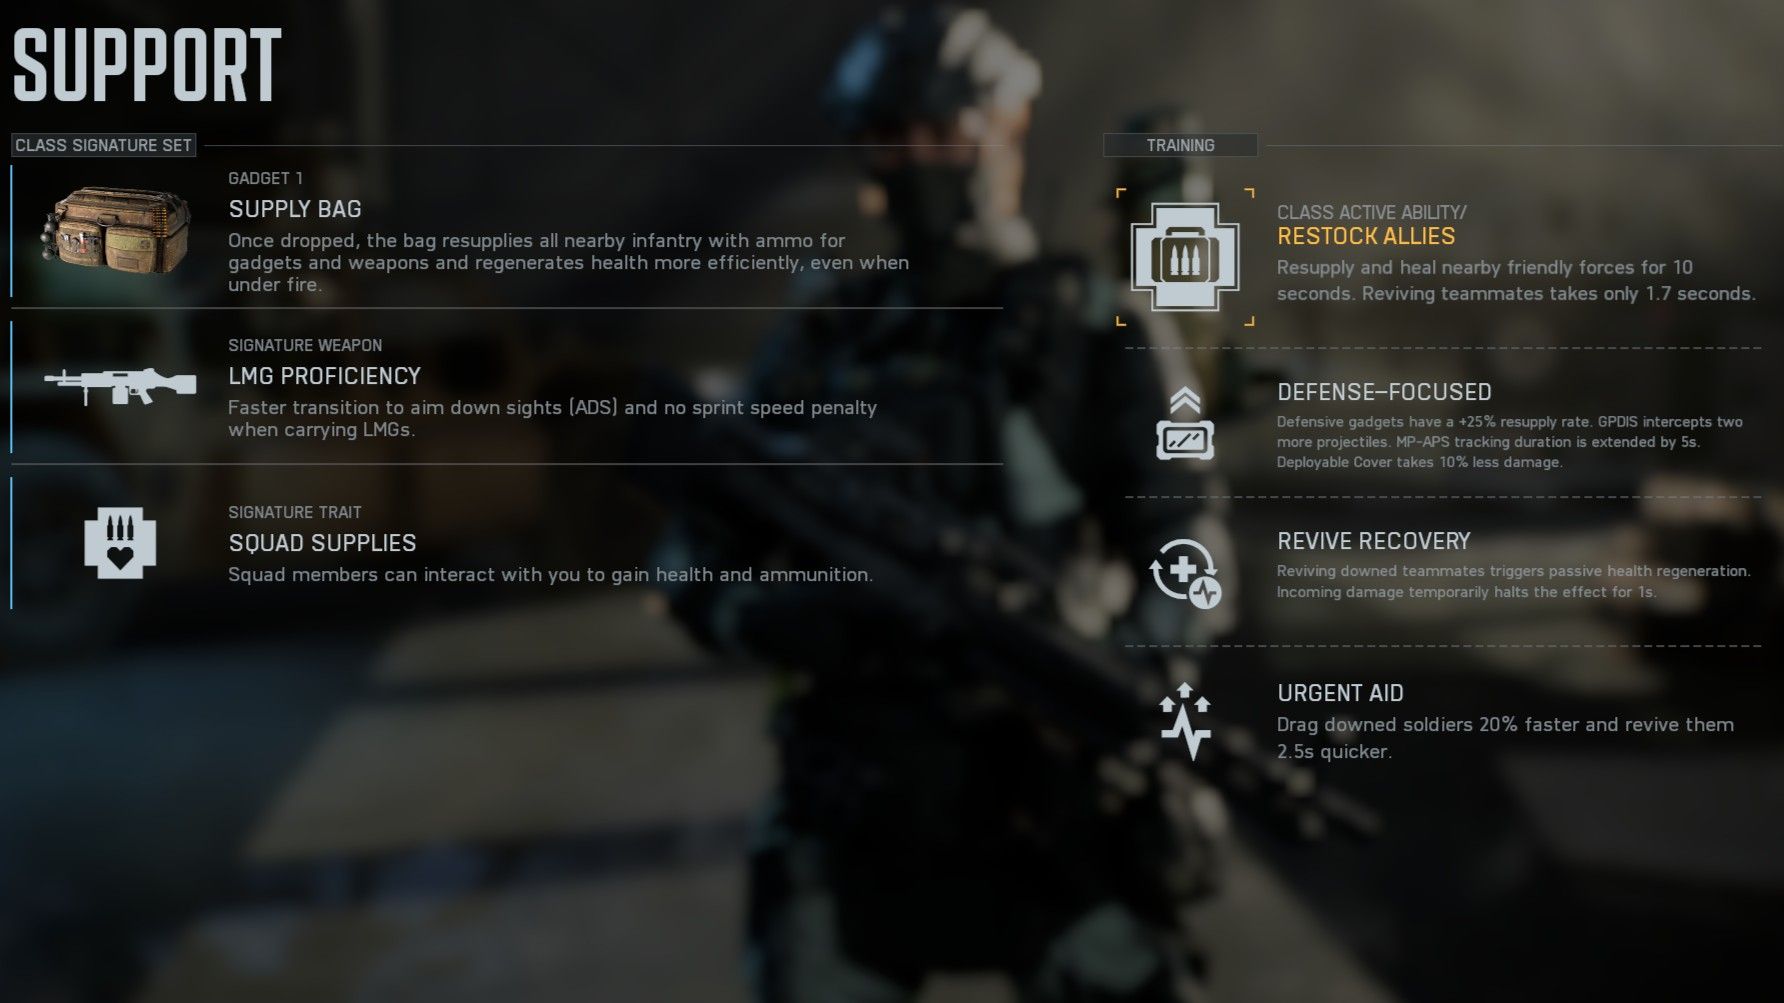
In Battlefield 6, the Support class blends the roles of the classic Medic and Machine Gunner. This means you’re responsible for both keeping your teammates alive and providing heavy firepower – a demanding but rewarding combination.
Luckily, you won’t be the only one handling support, giving you a chance to try out different roles. Since the Assault Class is so good at attacking, you can let them take on some of the fighting, freeing you up to focus on healing and providing essential support – exactly what you excel at.
Best Support Class Loadouts in Battlefield 6
Here are the Support Class kits I prefer to use. While they aren’t perfect for every situation or playstyle, they’re really effective if you prioritize helping your team and rescuing teammates over getting kills.
Your main weapon isn’t the only thing that matters, but certain combinations of gear and guns work better together, and we’ll show you those ideal pairings.
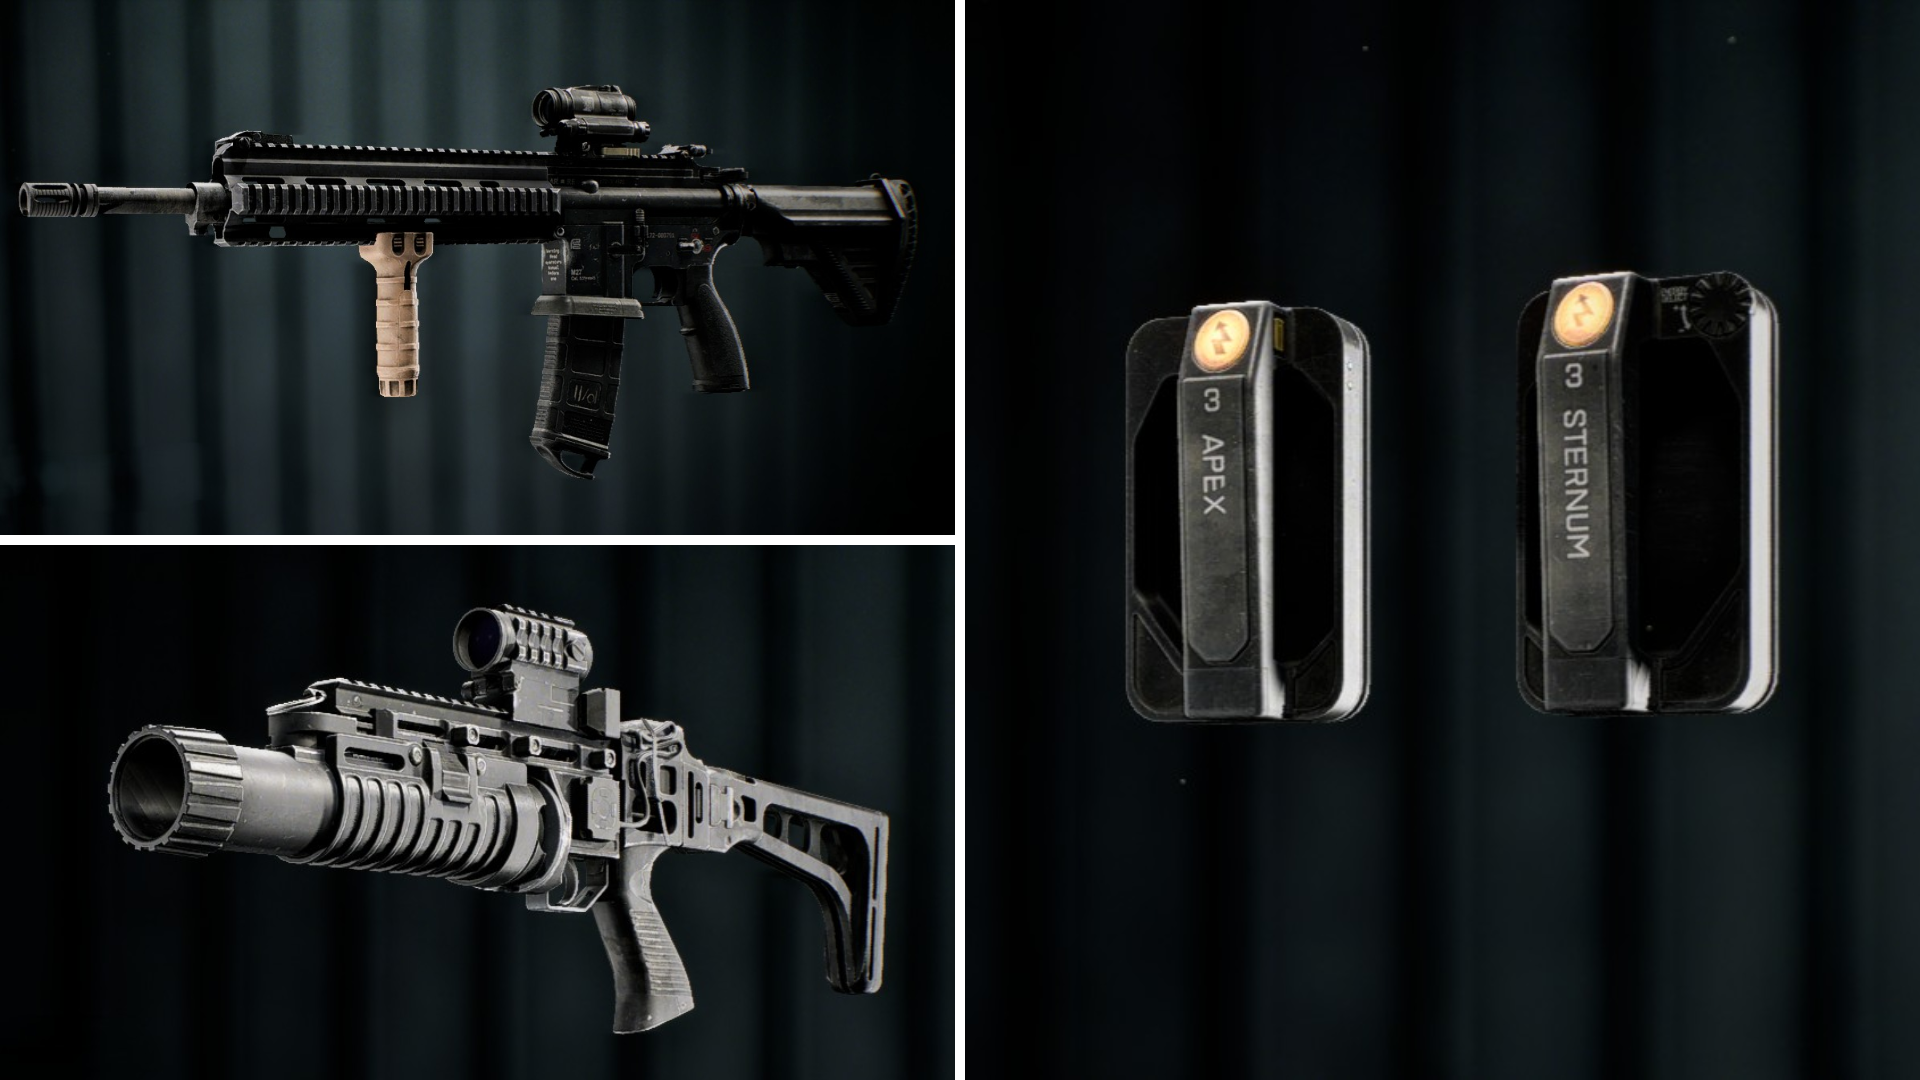
I Need A Medic!
| Primary | LMG |
|---|---|
| Gadget 1 | Defibrillator |
| Gadget 2 | Deployable Cover |
| Throwable | Smoke Grenade |
| Melee | Sledgehammer |
I’m referring to the standard equipment for the Support role. It may not seem flashy, but it’s the most effective way to play as a combat medic in Battlefield 6, and in my opinion, it’s the best setup.
The battle plan is simple: advance, deploy cover, and provide fire support for your team as they move forward. If they make it through, reposition and repeat at the next location. If your team takes heavy fire, return it, create a smokescreen, and prioritize getting the injured to safety.
This setup also works well with a sniper or machine gunner. You can quickly create strong defensive positions by using your deployable cover to turn abandoned buildings into safe havens for your teammates. From there, they can provide covering fire while you either join the attack or protect their backs. If a teammate falls, you can safely revive them from behind your cover.
When playing on city maps, I prefer using either the DRS-IAR (HK416/M27) or the RPKM because being able to move quickly is more important than having a larger magazine.
The Quarterback
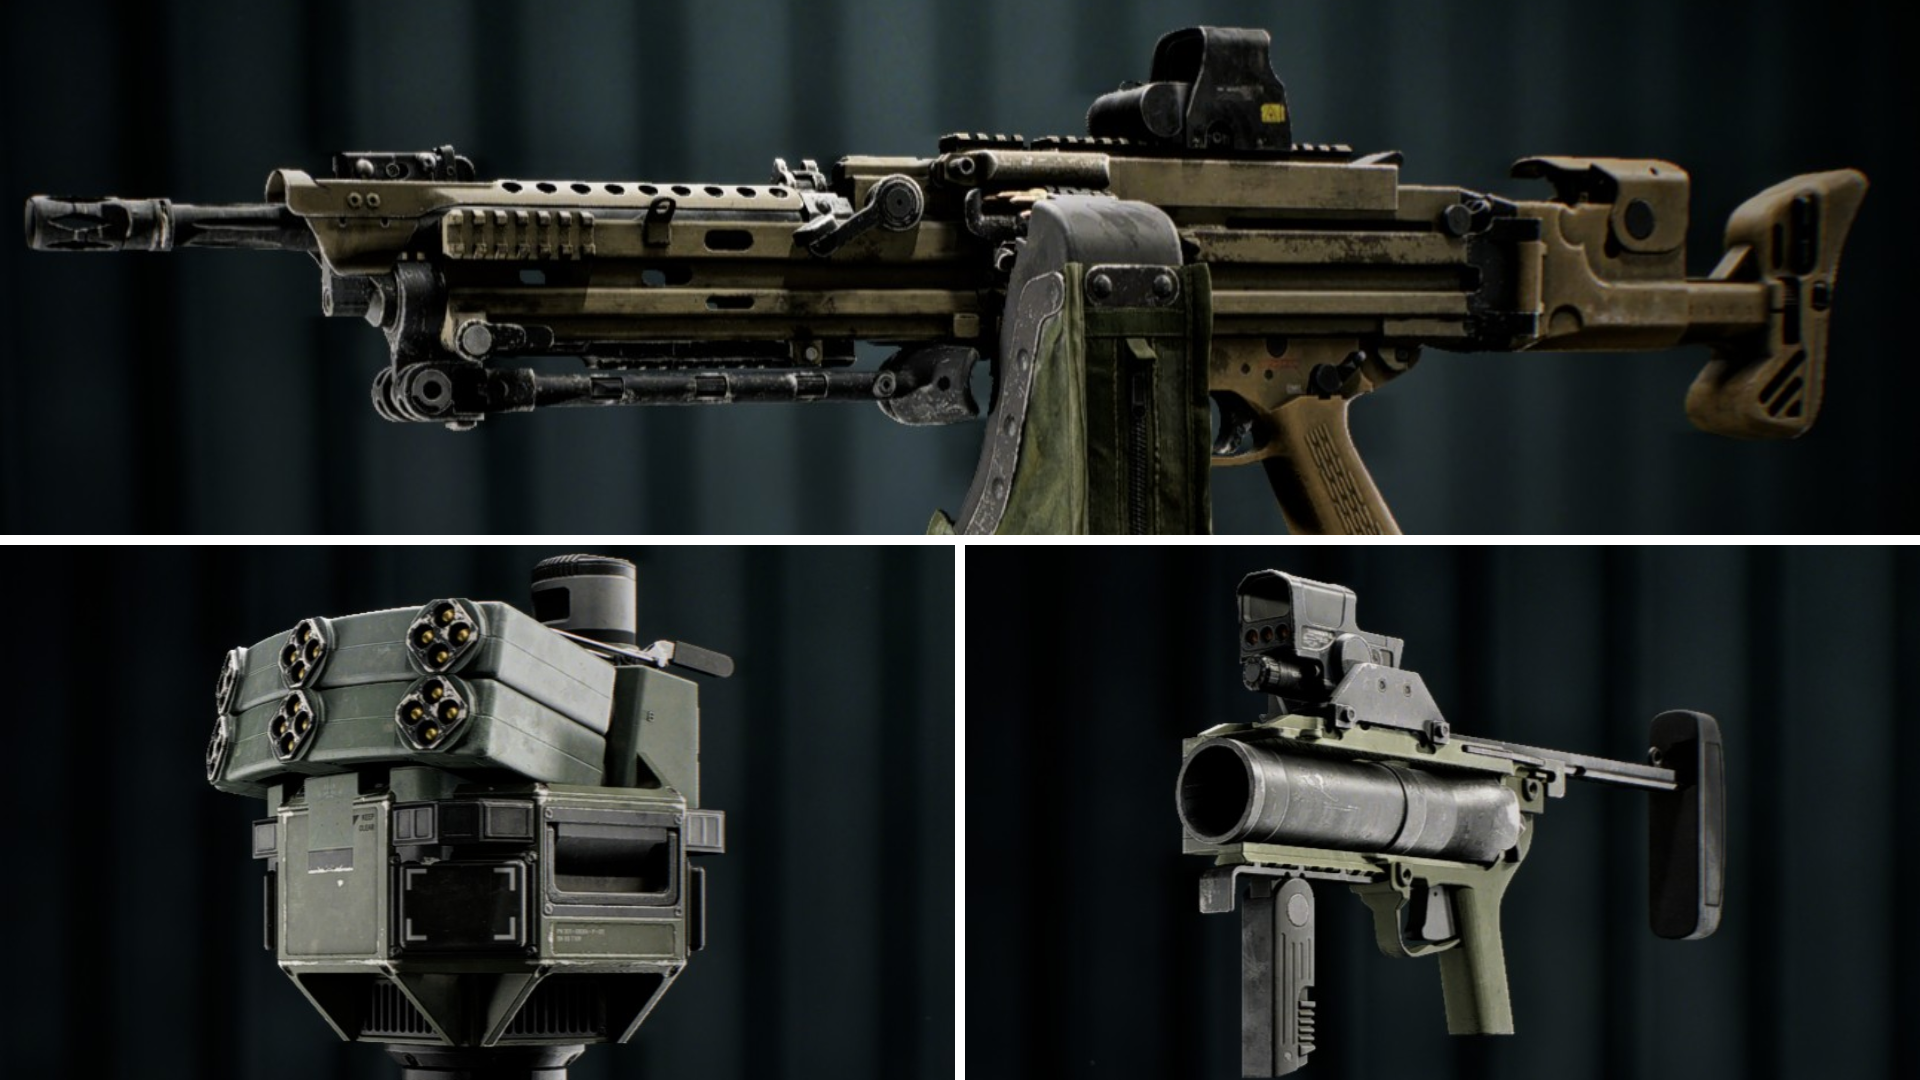
| Primary | LMG |
|---|---|
| Gadget 1 | GPDIS |
| Gadget 2 | M320A1 SMK |
| Throwable | Smoke Grenade |
| Melee | Knife |
There’s almost nothing more frustrating than being stuck in a standoff, particularly in a game like Breakthrough when you’re attacking and running out of time. I learned a valuable lesson during one particularly tense match: having someone consistently provide cover fire from outside the immediate area is crucial for allowing the rest of the team to advance.
Your role is to establish a secure base, support your team from a fixed position, and suppress the enemy with gunfire and smoke, allowing them to advance. This is a slower, more defensive playstyle in Battlefield 6, but it’s effective.
Find a good spot like a building or ditch to set up your grenade interception system, then place an ammo bag. After that, focus on providing covering fire and smoke towards the objective. A light machine gun with a large ammo capacity (100 rounds or more) is ideal because the smoke allows you to fire consistently without needing to hide as much. Plus, since you’re protected by cover, you can safely pull downed teammates to safety instead of relying on the defibrillator.
After capturing a point, immediately move to the next one. While this strategy can also be used for defense, consider replacing the smoke launcher with a deployable shield for better protection.
Get Some
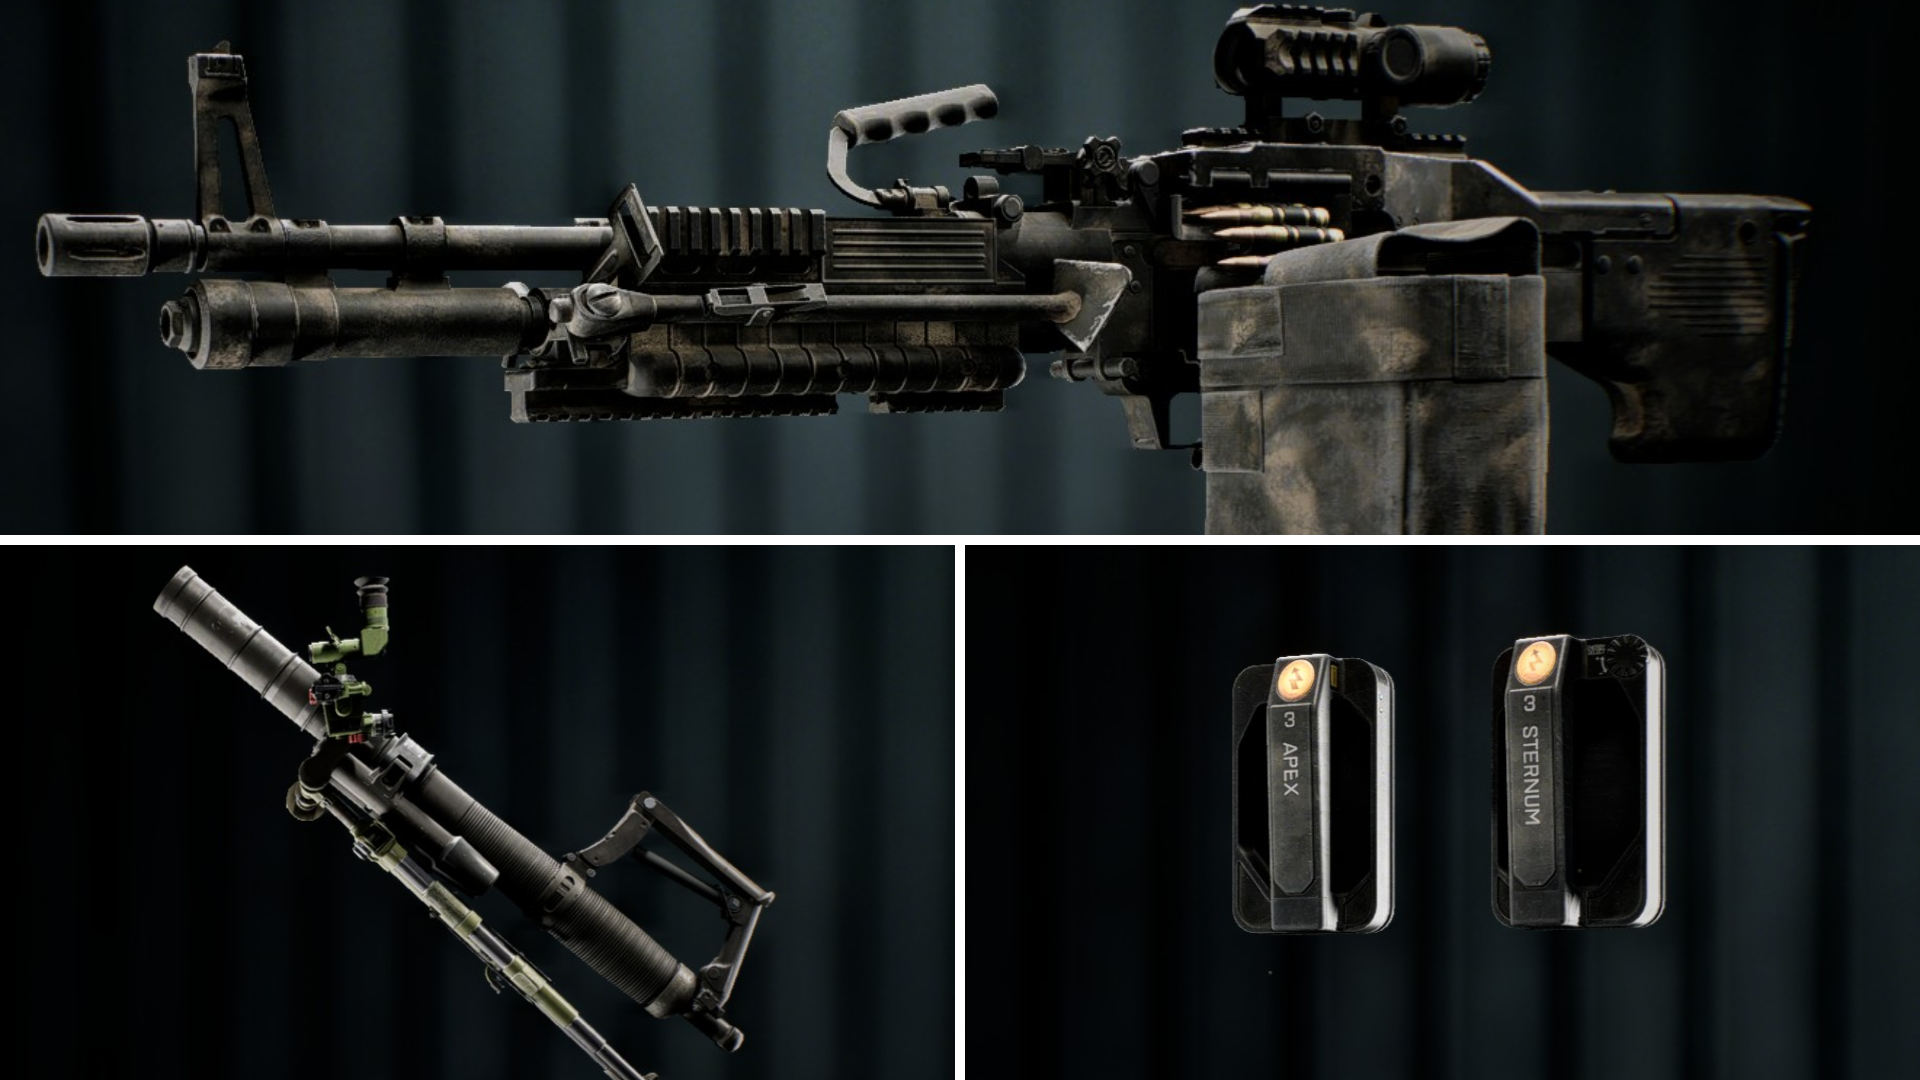
| Primary | M/60 |
|---|---|
| Gadget 1 | Defibrillator |
| Gadget 2 | LWCMS |
| Throwable | Smoke Grenade |
| Melee | Knife |
With bigger maps, two often-overlooked weapons become much more useful: the M/60 machine gun and the compact mortar. These are great for providing fire support to your team.
The M/60 machine gun isn’t as quick-firing or easy to handle as other LMGs, but it makes up for it with superior long-range accuracy and a 32% damage boost over similar, faster weapons. It’s awkward to use while moving, but when set up, it packs a punch similar to a powerful .50 caliber weapon.
The smoke mortars aren’t very effective, but the high-explosive ones are seriously damaging and can quickly disrupt enemy attacks, particularly when combined with accurate reconnaissance. I still remember the terror of being caught in a mortar attack while attempting to reach cover in Mirak Valley – drones consistently located us, and we were immediately bombarded with explosives.
Okay, so I’ve learned the hard way that if you actually get good with certain weapons, the other team will start focusing you – they’ll be hunting you down just to stop you! That’s why I always keep a smoke grenade handy. It’s a lifesaver when you need to quickly escape and break line of sight.
The Flametrooper
| Primary | LMG |
|---|---|
| Gadget 1 | Defibrillator |
| Gadget 2 | SICH G1 WP |
| Throwable | Smoke Grenade |
| Melee | Knife |
After working so hard to unlock the airburst flamethrower, you definitely need to use it – it really encourages a bold, aggressive playstyle. The projectiles detonate about 25 meters in front of you, so it’s most effective when you’re fighting up close.
To really maximize this powerful setup, play as Wish.com Assault, but equip a defibrillator so you can revive teammates who fall in the front lines. While this combination isn’t ideal on open maps, it’s incredibly effective in city environments, especially when combined with a lightweight and versatile carbine like the DRS-IAR to keep you quick and agile.
Okay, so the SICH G1 is designed as an aggressive weapon, but honestly, I’ve found it’s amazing for defense too. When you’re facing a lot of enemies coming from different directions, it lets you quickly block off areas and control where they can come from, even if you don’t have enough firepower to cover everything.
Read More
- Robinhood’s $75M OpenAI Bet: Retail Access or Legal Minefield?
- All Skyblazer Armor Locations in Crimson Desert
- How to Get the Sunset Reed Armor Set and Hollow Visage Sword in Crimson Desert
- How to Catch All Itzaland Bugs in Infinity Nikki
- Speedsters Sandbox Roblox Codes
- Who Can You Romance In GreedFall 2: The Dying World?
- Black Sun Shield Location In Crimson Desert (Buried Treasure Quest)
- Top 10 Must-Watch Isekai Anime on Crunchyroll Revealed!
- All Hauntingham’s Letters & Hidden Page in New Super Lucky’s Tale
- Invincible: 10 Strongest Viltrumites in Season 4, Ranked
2025-10-22 19:43