
As a seasoned Voidrunner who’s faced my fair share of interdimensional horrors, let me tell you, dear reader, that Kel’Roth and Amalgam Relis are no walk in the park. Their moveset is as unpredictable as their slimy, gooey forms. The Charge Attack, with its relentless blasts, has claimed more than one unsuspecting warrior. And let’s not forget about that pesky Black Wave that seems to appear out of nowhere, leaving you drenched in slime and short on health.
In the final stretch before squaring off against Alepsis Taura in the Dark Horizon DLC of Remnant 2, I found myself navigating through the treacherous Mucid Terrarium. This place is a veritable gauntlet, teeming with Corrupted creatures, Parasytes, Specters, and other vicious N’erudian adversaries that are more than ready to end my gaming run prematurely.
As a seasoned gamer, this walkthrough will speed up your journey across the terrain, leading you straight to the boss chamber. It’ll also provide tips on how to take down the two formidable foes of this dungeon: Amalgam Kel’Roth and Amalgam Relis.
How To Reach Mucid Terrarium In Remnant 2
In The Dark Horizon DLC, there are two primary regions to delve into: the first being the Agronomy Sector. Inside this sector, players can discover the Detritus Foundry Section’s dungeon. This sector also links to the Withered Necropolis, which is the second region that players should investigate further.
To get to the second Section dungeon, players initially materialize close to the Gardener within the Withered Necropolis landing zone. From the World Stone there, they need to venture west until they encounter a Glider bot. After taking flight with the Glider, they should search for another landing area a bit further west, where an updraft of warm air can lift them higher.
As a gamer, I’d recommend you navigate to the present location, spin around to face east, and soar down to the platform beneath. Keep following the path until you spot the Dilapidated Auditorium World Stone. Once you find it, do a u-turn and walk past the initial section. Soon enough, you’ll come across an imposing dungeon door that leads into Mucid Terrarium.
Exploring Mucid Terrarium In Withered Necropolis
Zone enemies:
- N’erud Zombie
- Four-Arm Minion
- Decapitated Robot
- Parasyte
- Pink Specter (Elite)
- Amalgam (Elite)
The path is pretty straightforward, and players will soon have to fight their way into the innermost part of the dungeon. The Zombies, Robots, and Parasytes can be quite hard to deal with, especially in closed spaces. Keep following the path until reaching a mid-section separated by strange machinery. Inside you might find world-drop loot like the Momentum Driver ring. There’s also a chance for Tomes of Knowledge and Chests to appear here, so make sure to check the corners of the hall.
In this area, you’ll often encounter Specters and Amalgam Elites lurking, so keep an eye on the overhead walkways and be prepared to swiftly evade Zombies as they emerge from pods. Be vigilant about your surroundings too, as Decapitated Robots might suddenly fall from the ceiling – usually at the most inconvenient moments. It’s safe to say that these pesky enemies are the ones that cause the most frustration in the The Dark Horizons expansion pack.
Pod Chamber And Boss Room Path
Ahead, you’ll find a room called the “Pod Chamber.” It’s where these pesky adversaries tend to burst forth in large groups. To handle them effectively, consider using a mod that inflicts area damage such as the “Firestorm”. However, be cautious about friendly fire.
Stay clear of the corners and lower walkways, since the enemies like to swarm players there.
Moving forward, you’ll encounter another part with a closed door on your left. The right side offers additional pathways and some stairs that players can use to bypass the lower areas brimming with pods. If players aim to avoid unnecessary battles, they should opt for this route instead.
After moving past this point, you’ll find a walkway ascending higher, culminating in a hallway housing an elevator. This elevator ride will carry you to the dungeon’s checkpoint and the boss room, but beware! Before reaching there, players must contend with a pesky Elite Pink Specter – a formidable enemy that can swiftly end the game for careless players.
To avoid encountering trouble, it’s best to maintain a good distance from the Specter. By doing so, when the enemy employs its crowd control ability that spawns a small wormhole, players can attack it safely from afar. After successfully handling this pesky Elite, they will be permitted to ride the elevator and reach the checkpoint before engaging with the boss.
How To Beat Amalgam Kel’Roth & Amalgam Relis

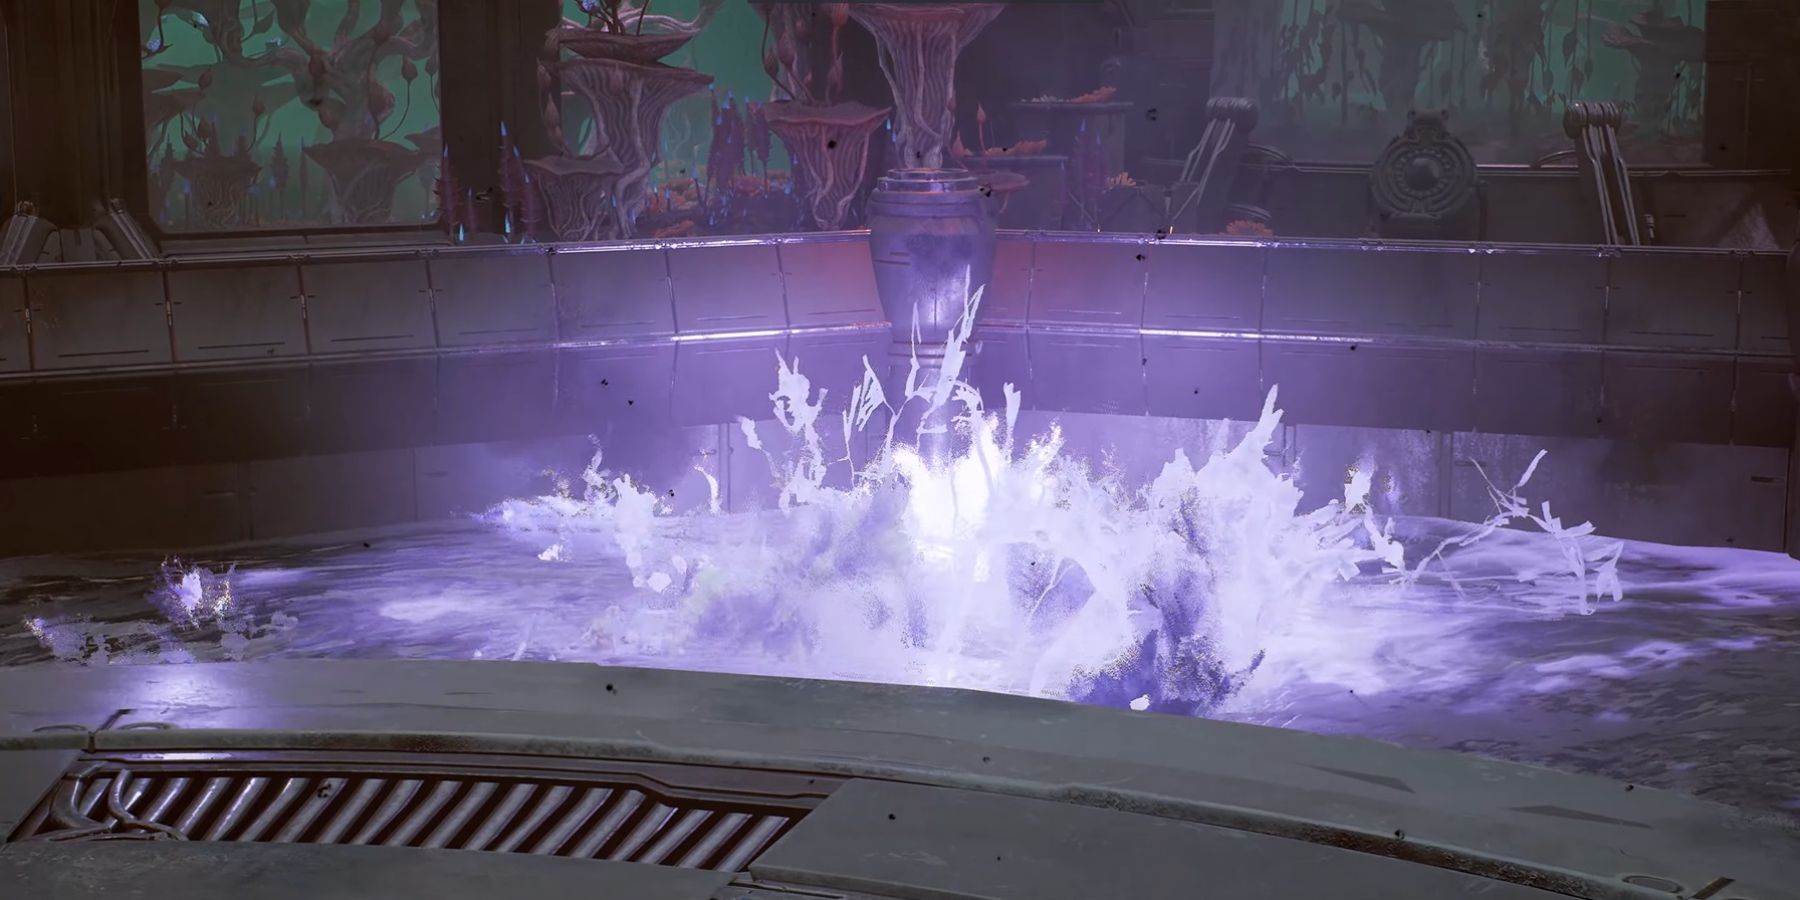
As soon as gamers enter the Boss Chamber, they’ll encounter a cutscene featuring a highly energized Amalgam foe bursting forth from its distinctive N’erudian violet slime. Upon landing on the platform, combat begins, offering a challenging experience.
Amalgam Kel’Roth & Amalgam Relis Attack Moves
Amalgam Kel’Roth has several annoying attacks that players should be aware of:
- Tentacle Strike: Uses the mass of tentacles in its right arm to jump at the player and smash the ground. It can be dodged by a small window of opportunity before it hits the ground. Causes high damage and staggering if not evaded.
- Void Tornado: Throws a gust of void energy forward that can push back the players. It travels fast in a straight line, so it can be avoided by dodging to either side.
- Black Wave: Channels a huge wave of dark goo that covers most of the terrain. Players need to dodge at the right moment, just when the wave is about to strike. Dive into it for the best chance to avoid damage.
- Big Void Tornado: Throws a bigger and more damaging tornado in a straight line. It is similar to the smaller version, so it can be avoided by dodging.
- Levitation: Kel’Roth does this right before using Tentacle Strike or Black Wave, so players should be careful as this might be the signal for another of its annoying moves: the Charge Attack.
- Charge Attack: After distancing from the player, Kel’Roth dashes forward, blasting anything in its path. It can repeat the same attack two to three times.
- Small Blast: Blasts players in melee range with a small wave of energy. Causes moderate damage and pushback.
- Shockwave: Slams the floor in front and causes moderate damage. The auto-dodge should be sufficient to avoid being damaged if in melee range.
- Slash attack: Kel’Roth pushes forward, slashing with its left arm. It can track players, so dodging two or three times in quick succession might be the only way to avoid it.
Boss Fight Mechanics Overview
After discussing some significant attacks, let’s briefly outline the mechanics of the boss fight. Initially, Kel’Roth might attempt to push players towards corners using his Slash attack, followed by unleashing a Black Wave, Tentacle Strike, or Small Blast. If players inflict too much damage on the boss in a short span, it will rise above and retreat, responding with multiple rapid Charge Attacks instead.
When the players inflict enough harm (roughly 75% of Kel’Roth’s health bar), a loud roar echoes as Kel’Roth submerges into the dark sludge. In its place, a new Amalgam Boss, named Amalgam Relis, emerges. Equipped with the same set of abilities as Kel’Roth, Amalgam Relis immediately resumes the battle. Later, Kel’Roth will seize the opportunity and rejoin the fight, forcing players to contend with both bosses simultaneously.
Players should swiftly conclude the battle against Kel’Roth since it tends to overpower them. A successful approach is to dash towards the opposite side, evading the two bosses while unloading everything they have on Kel’Roth. Once it’s defeated, focus on Relis using a similar strategy. Dodge its attacks, look for opportunities, plunge into its “Black Wave” attack, and ensure you dodge its “Charge Attack”.
Mucid Terrarium Boss Loot: Voidlight Mod
In simple terms, when Kel’Roth and Relis are defeated, players receive an item called the Voidlight Core. They can take this item back to McCabe located in Ward 13 to create a new Mod.
Voidlight Projectile Mod: Fires a projectile that emits a Voidlight energy field, which remains inactive for 10 seconds. During this period, it takes in damage from other sources. Once the time elapses, it detonates and launches up to five more projectiles towards enemies within a range of 15 meters. Each enemy hit receives 250 Mod Damage initially, with an additional 150 damage for every 100 Base Damage that was absorbed (maximum effect on up to five targeted enemies). The Voidlight Projectile consumes 850 Mod Power to activate.
As a gamer, I’ve found that the Voidlight Mod is quite versatile, and it seamlessly blends with various character archetypes. With the right mod generation perks, I can unleash devastating damage on my enemies, covering a broad battlefield.
Read More
- LUNC PREDICTION. LUNC cryptocurrency
- SOL PREDICTION. SOL cryptocurrency
- BTC PREDICTION. BTC cryptocurrency
- USD ZAR PREDICTION
- USD CLP PREDICTION
- VANRY PREDICTION. VANRY cryptocurrency
- EUR RUB PREDICTION
- SBR PREDICTION. SBR cryptocurrency
- WQT PREDICTION. WQT cryptocurrency
- MENDI PREDICTION. MENDI cryptocurrency
2024-09-27 22:53