In Quarantine Zone: The Last Check, players must assess the health of each survivor arriving at the checkpoint. They need to determine if the survivor is healthy enough to stay at the camp while waiting for rescue. Often, this isn’t straightforward, and players face tough choices about how to handle those who are sick or whose condition is uncertain.
This guide helps players understand each area in Quarantine Zone: The Last Checkpoint so they can quickly and effectively assign survivors based on their medical condition.
All Distribution Facilities in Quarantine Zone: The Last Checkpoint
Where Should You Send Each Survivor in Quarantine Zone: The Last Checkpoint?
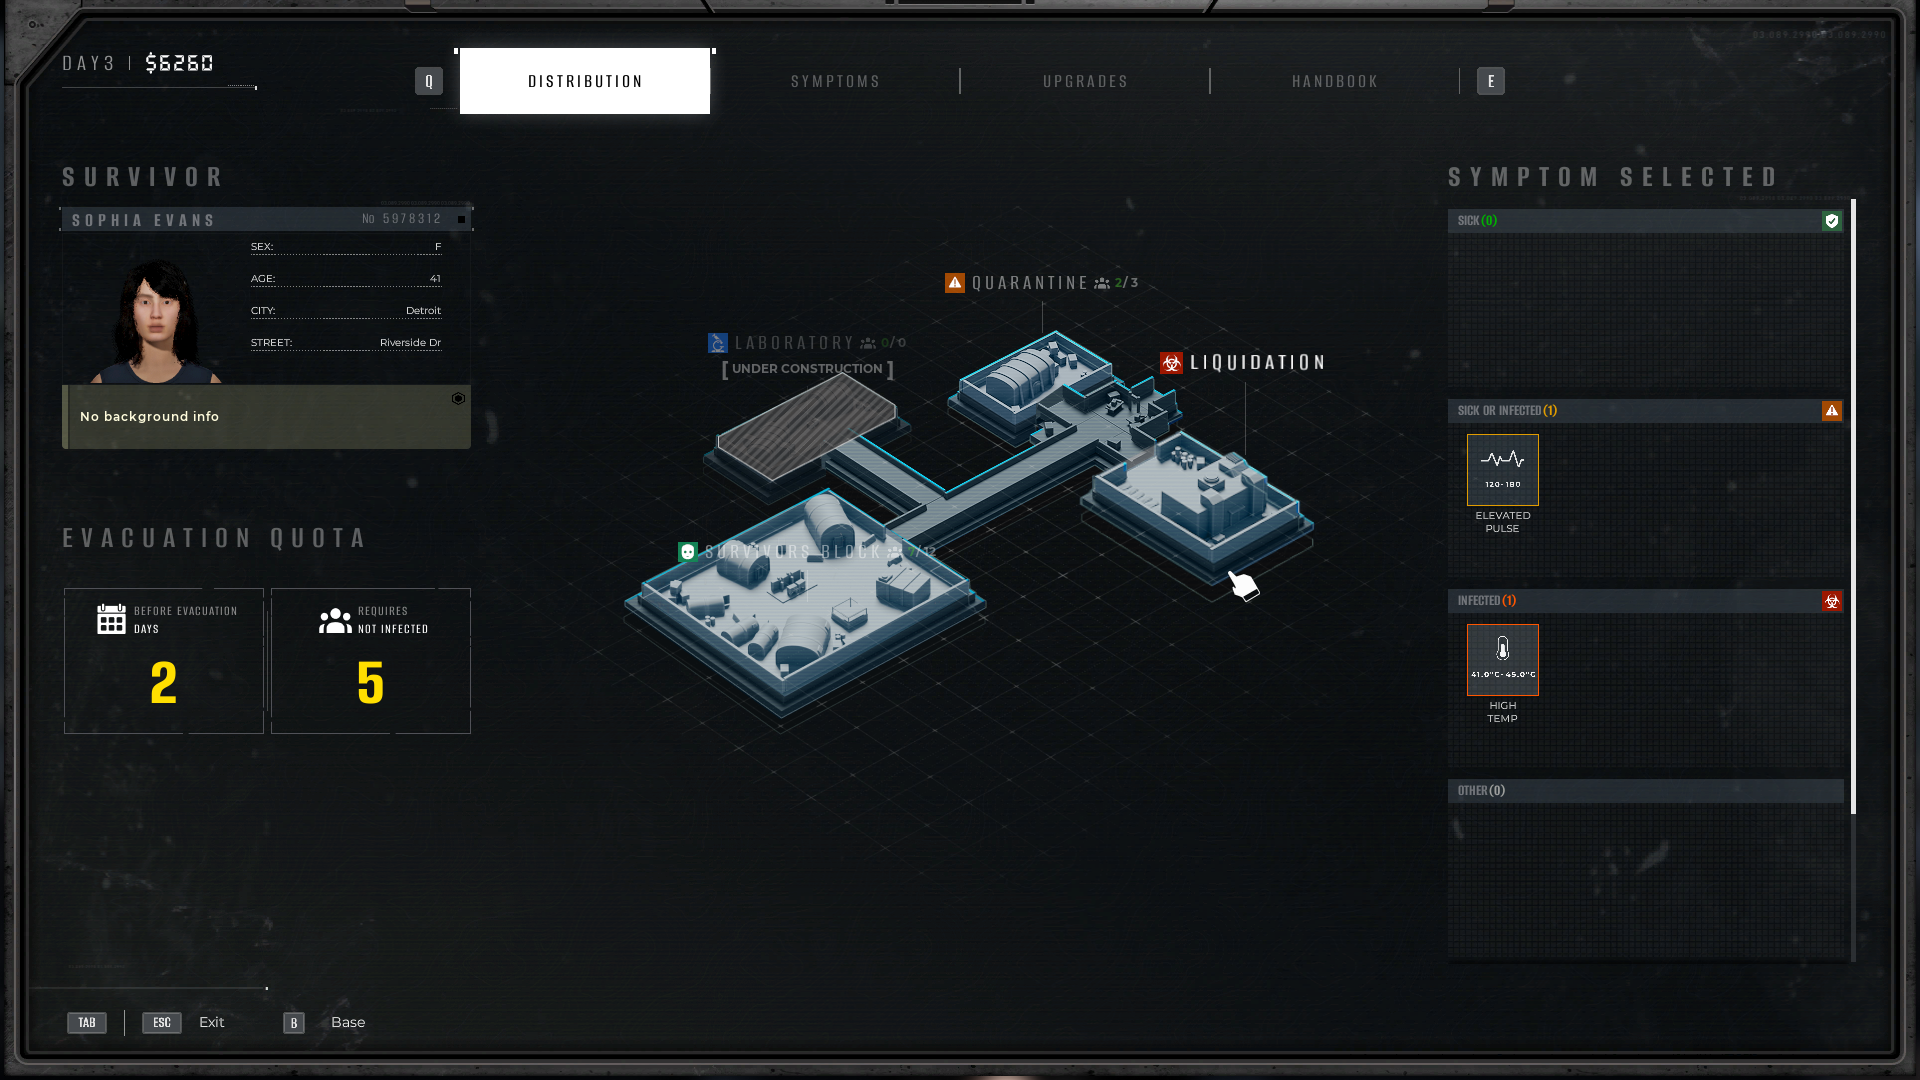
In Quarantine Zone: The Last Checkpoint, there are four distinct areas, each best suited for different kinds of survivors.
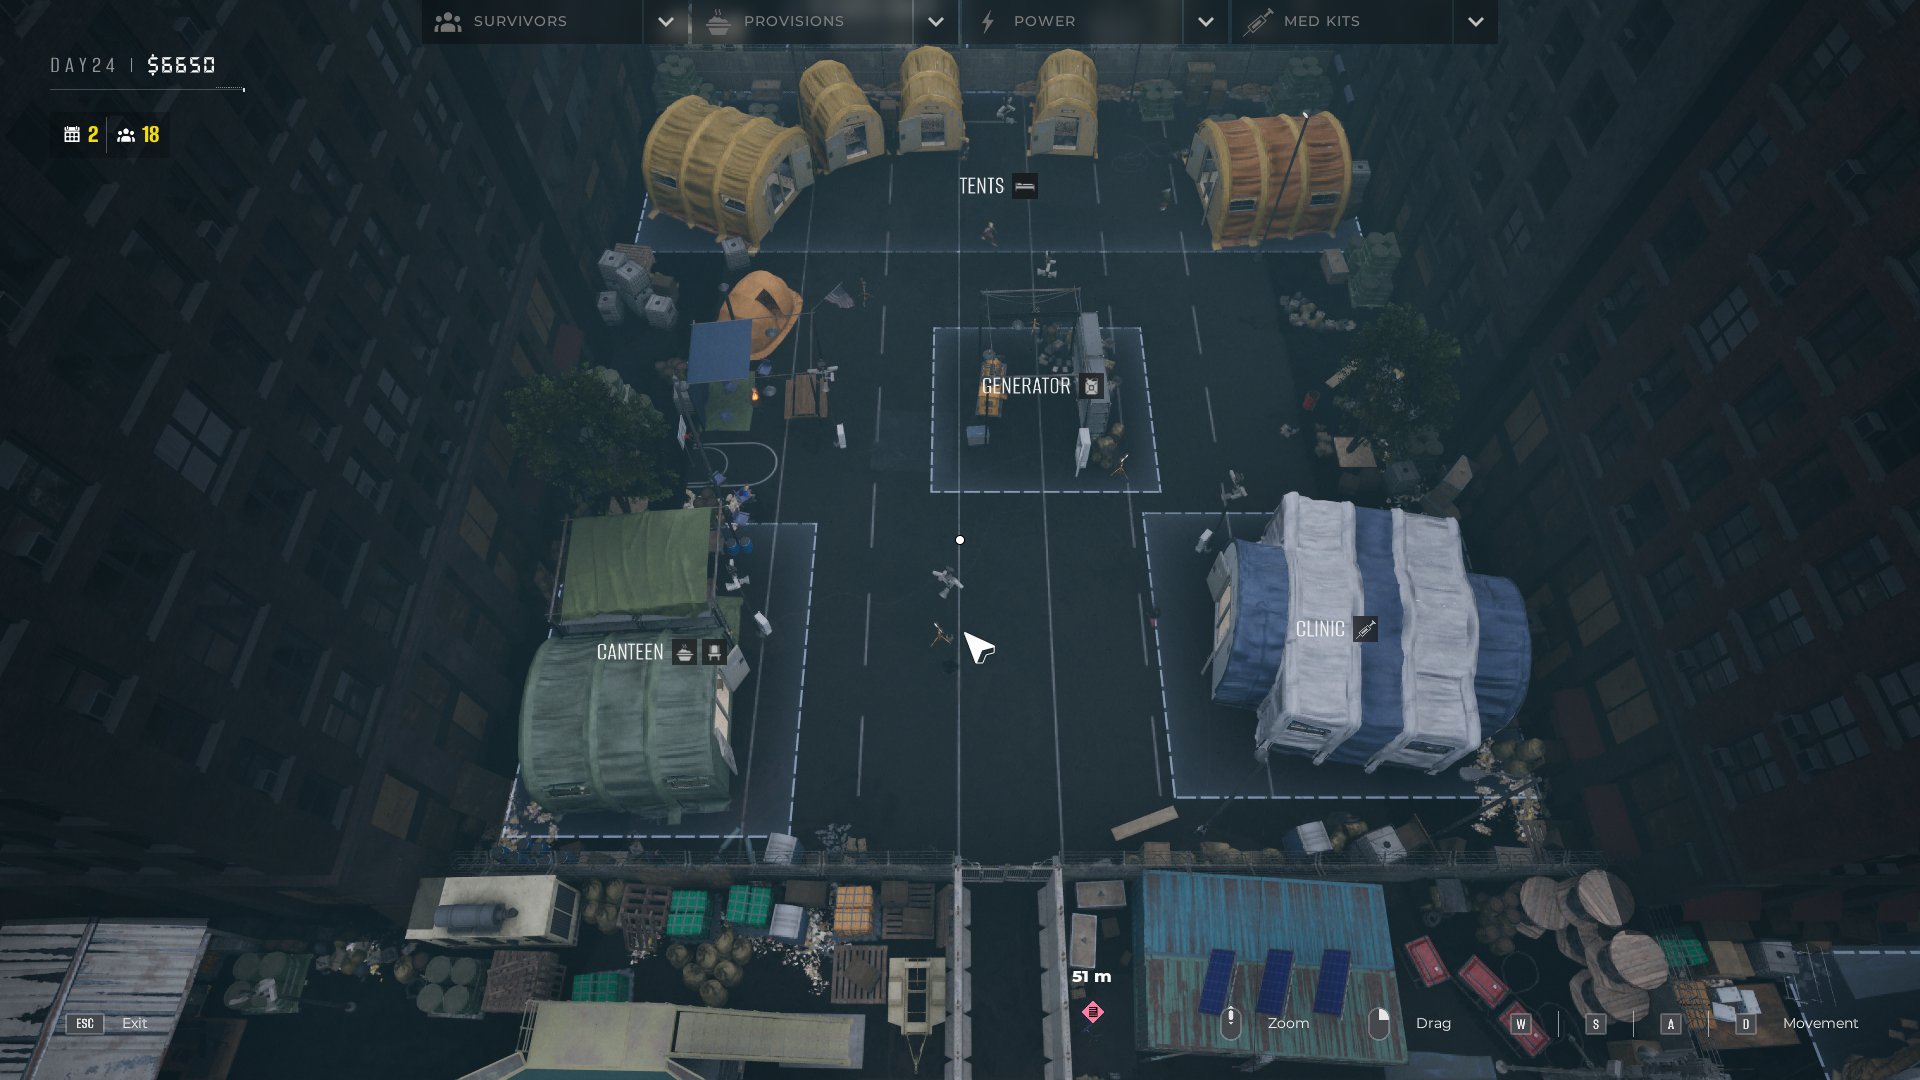
Survivor Block
Players need to carefully examine each survivor for any signs of illness, using all available tools, because symptoms aren’t always obvious. If a survivor appears healthy, they can be sent to the Survivor Block.
Life after the apocalypse is incredibly difficult, and people will get sick from the harsh conditions, not just from infections. These illnesses will be marked in green on the Symptoms Chart to show they aren’t caused by infection. Players can safely place these sick individuals in the designated block.
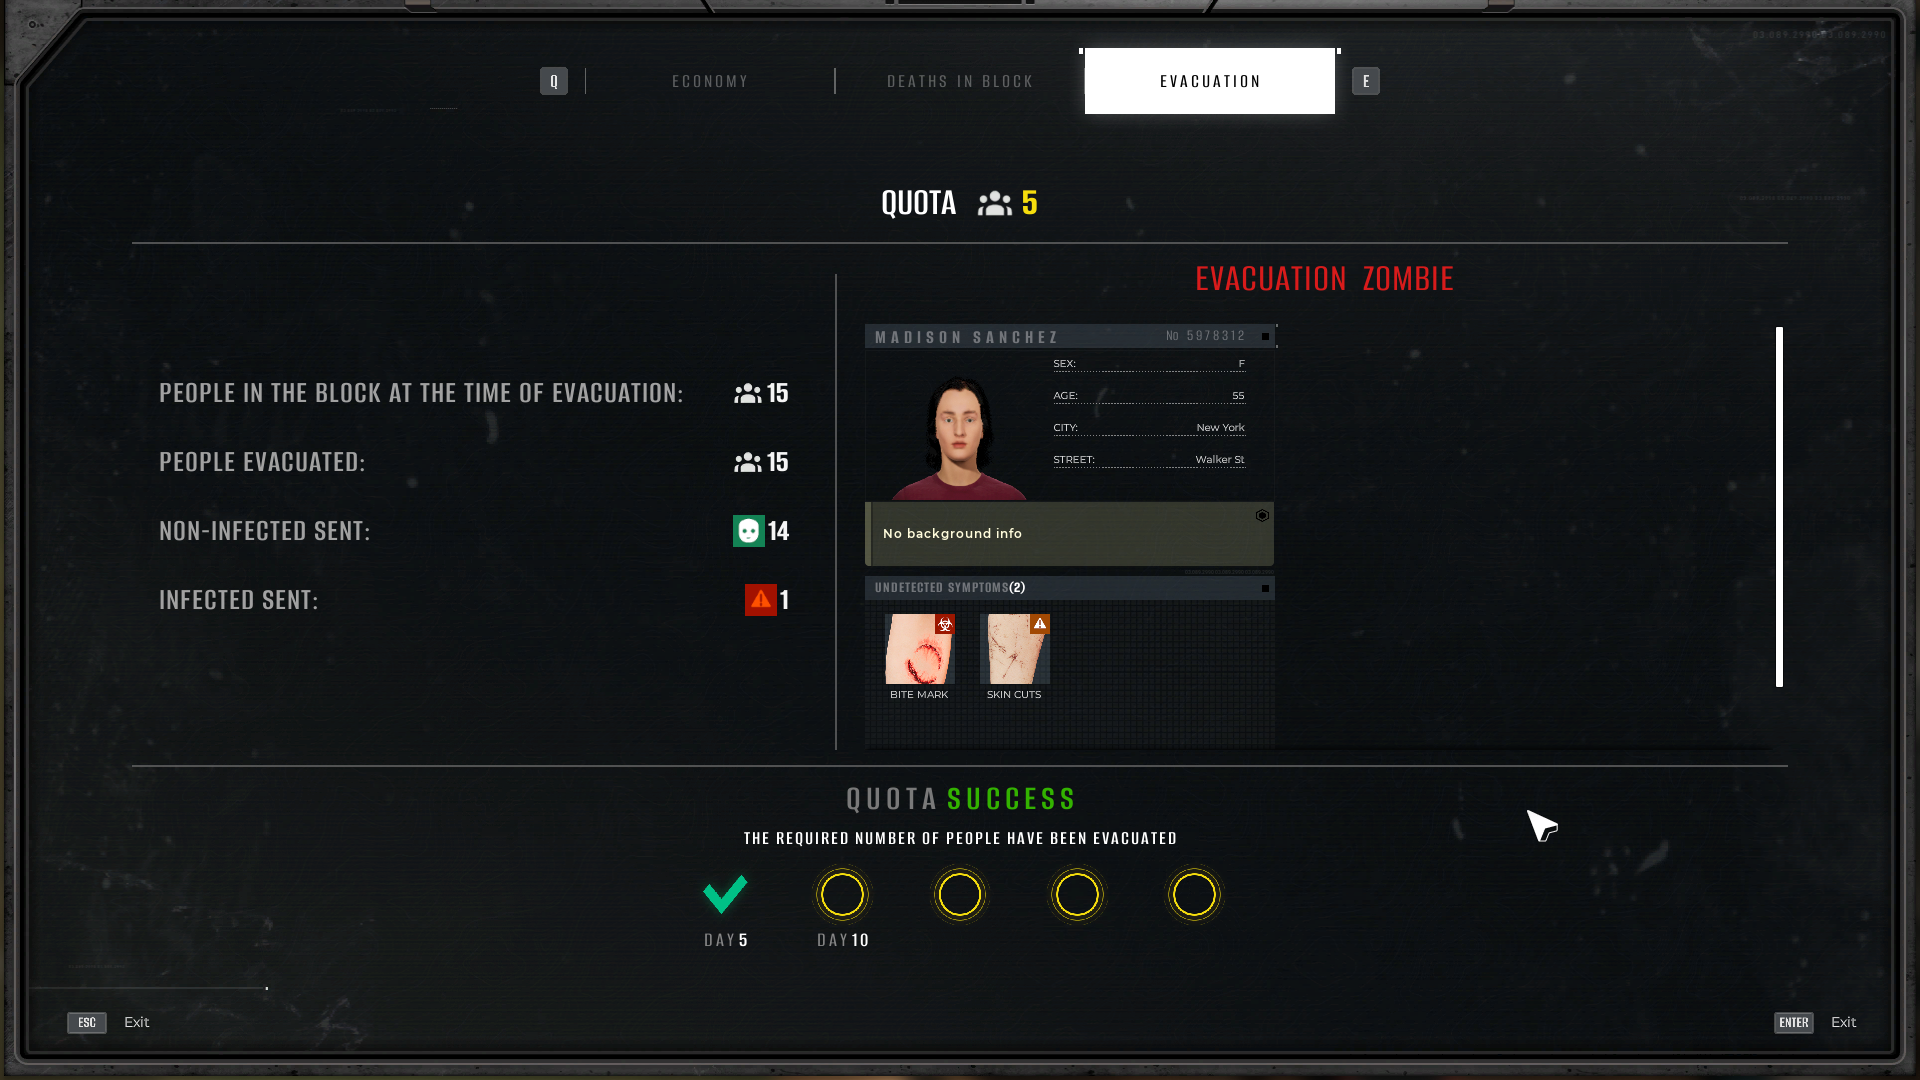
As a big fan of Quarantine Zone, I’ve learned the Survivor Block is super important. It’s where you hang out while waiting for rescue, and you really want to get as many healthy people there as possible! The more survivors you have, the better chance you have of hitting your quota and getting rewards. Those rewards are awesome – we’re talking cash, research points, and even those handy syringe analyzers. Basically, a full Survivor Block means a much easier time and better progress in the game.
Okay, so when you first get the Survivor Block, it can only hold 12 people. But don’t worry, you can upgrade it! If I really grind and get to Zone Level V and save up over $16,000, I can max it out to hold 25 survivors. It’s a bit of a goal, but definitely worth it to have more people safe and sound.
Liquidation
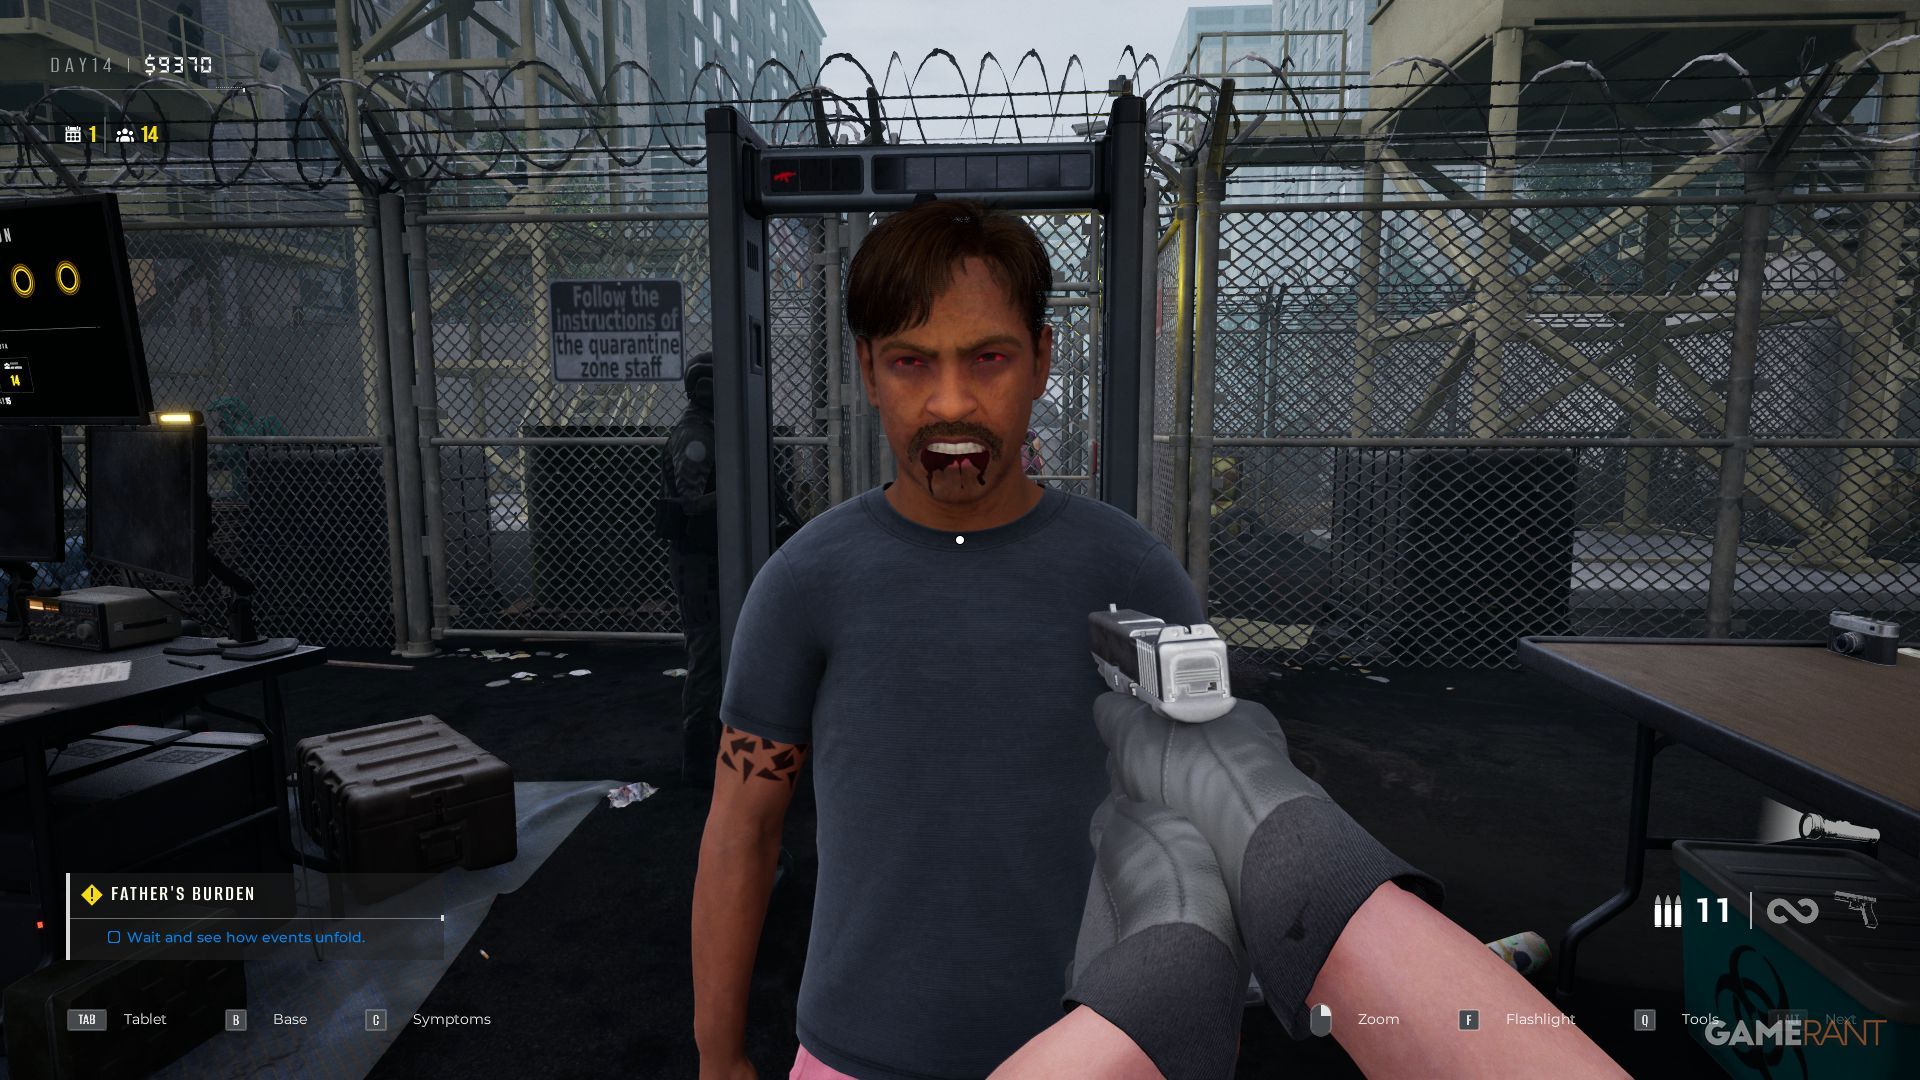
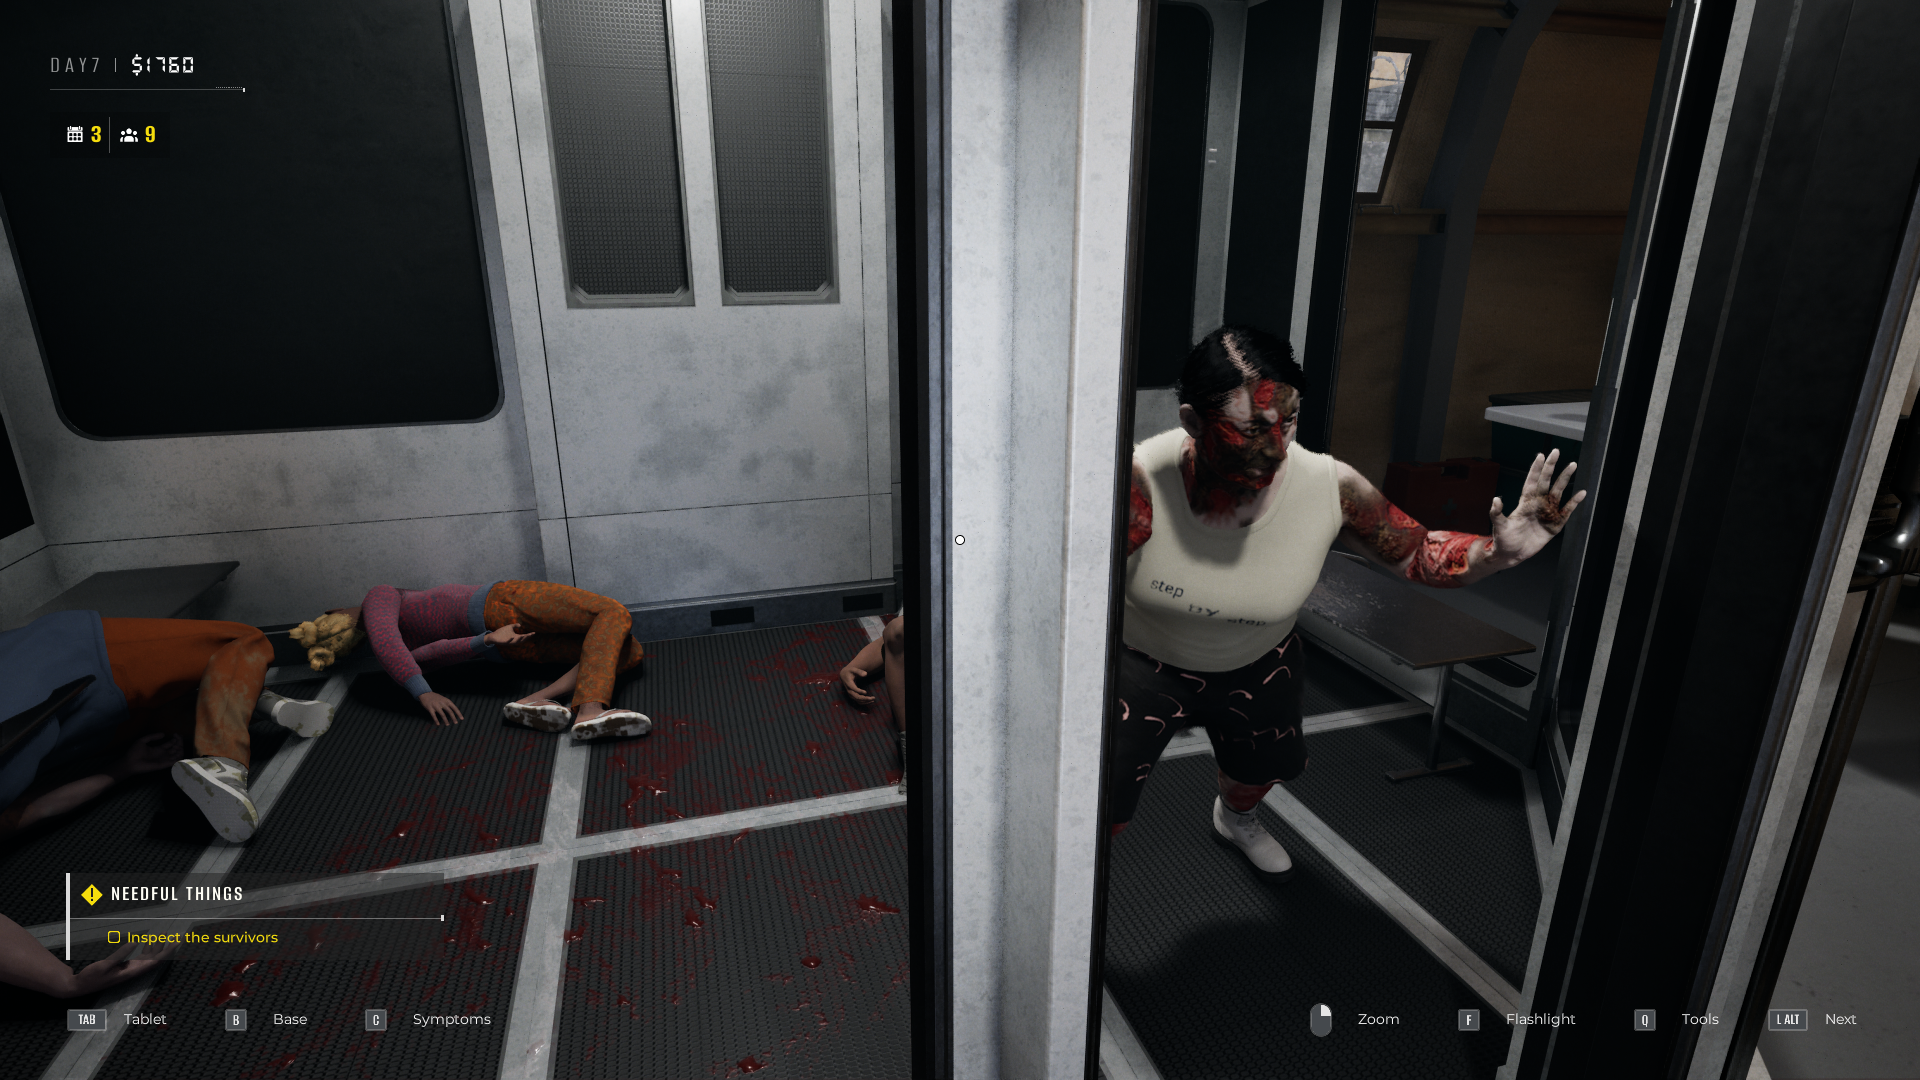
Survivors who are ill or show no symptoms are moved to the Survivor Block to await evacuation safely. However, those confirmed to be infected are sent to Liquidation, where they are eliminated.
If players find a survivor showing red-zone symptoms, that survivor is considered Infected and needs to be eliminated right away. Players should send these individuals to the Liquidation area.
-
Sending crew members to the Survivor Block carries significant risks. They might become infected and attack others, or they could be evacuated with the infection, potentially ruining the mission and endangering the player’s career and life. Placing them in Quarantine isn’t much better, as they will eventually turn and kill the other people being monitored, eliminating any chance of recovery or survival.
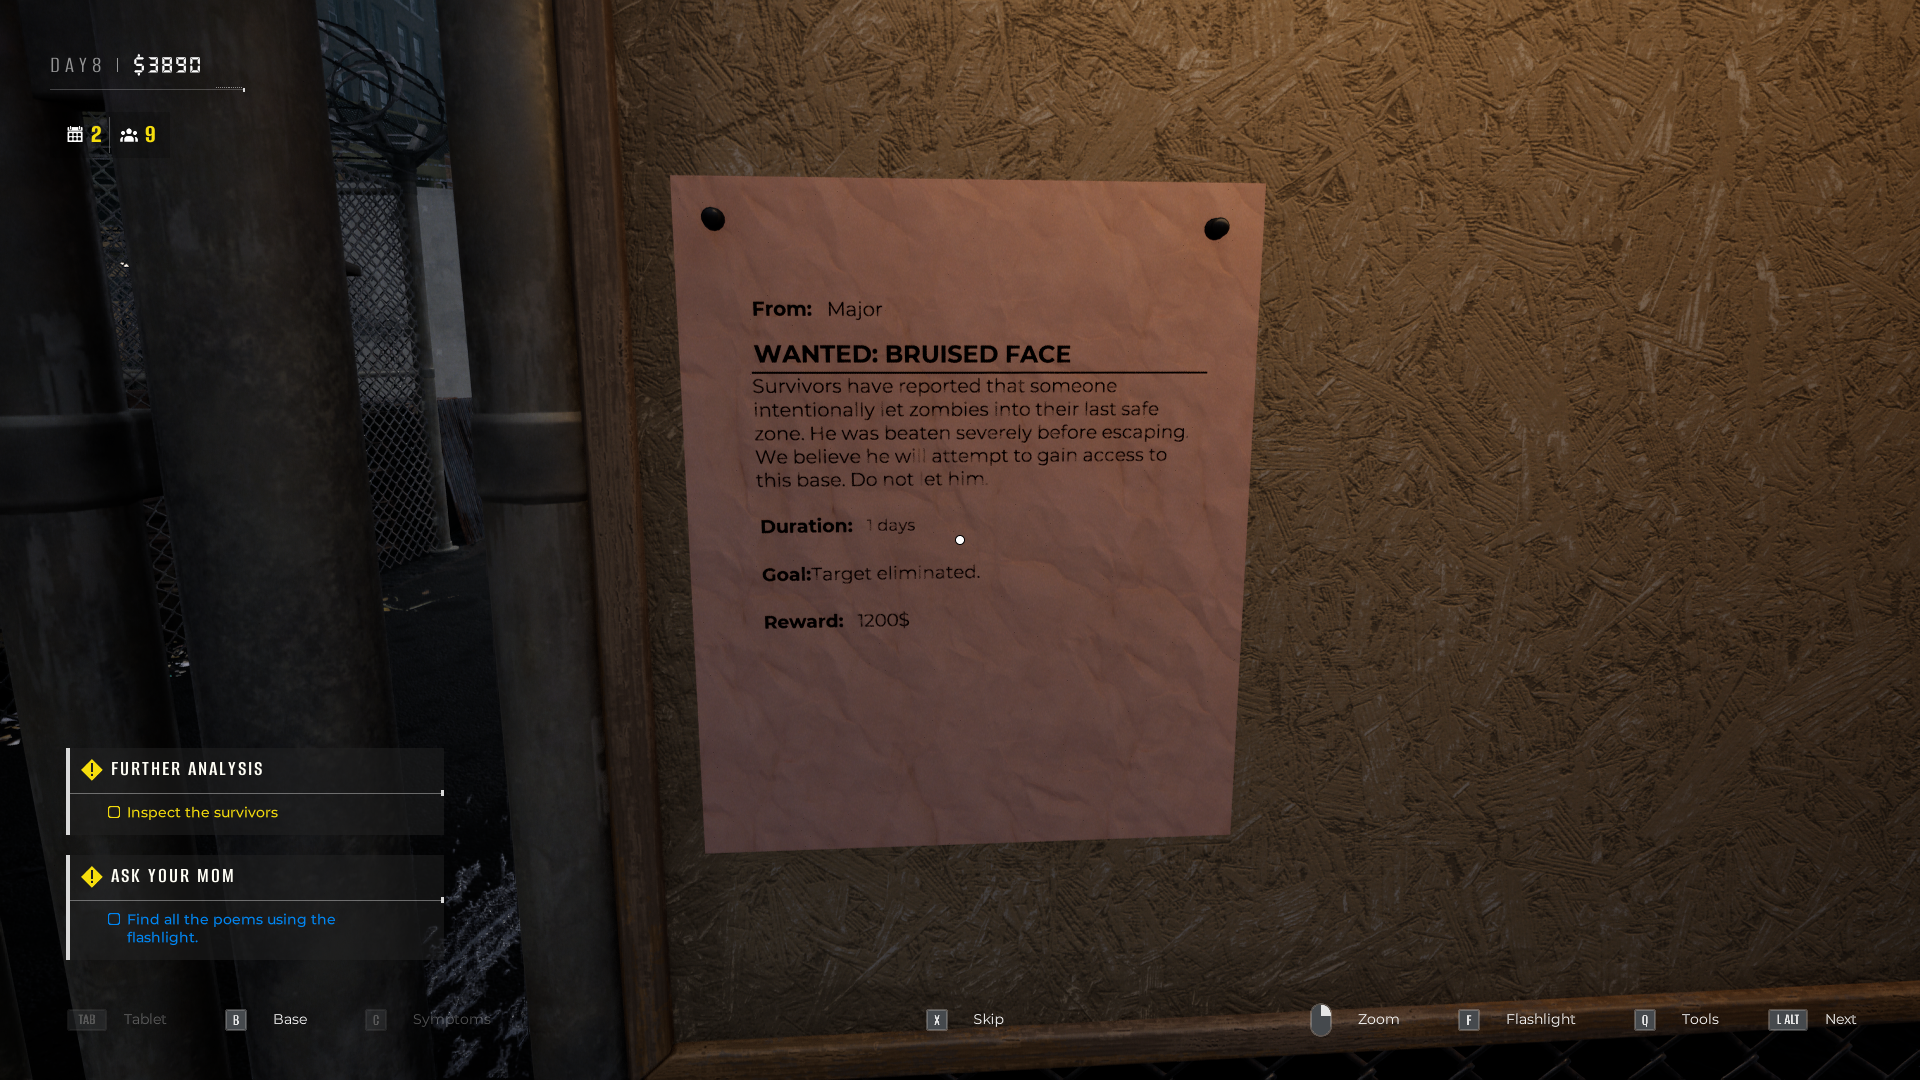
Sometimes, you’ll need to send healthy survivors to Liquidation if the Major requests it. Be sure to check the bulletin board daily for new missions. If a survivor is listed for termination, send them to Liquidation, even if they aren’t infected.
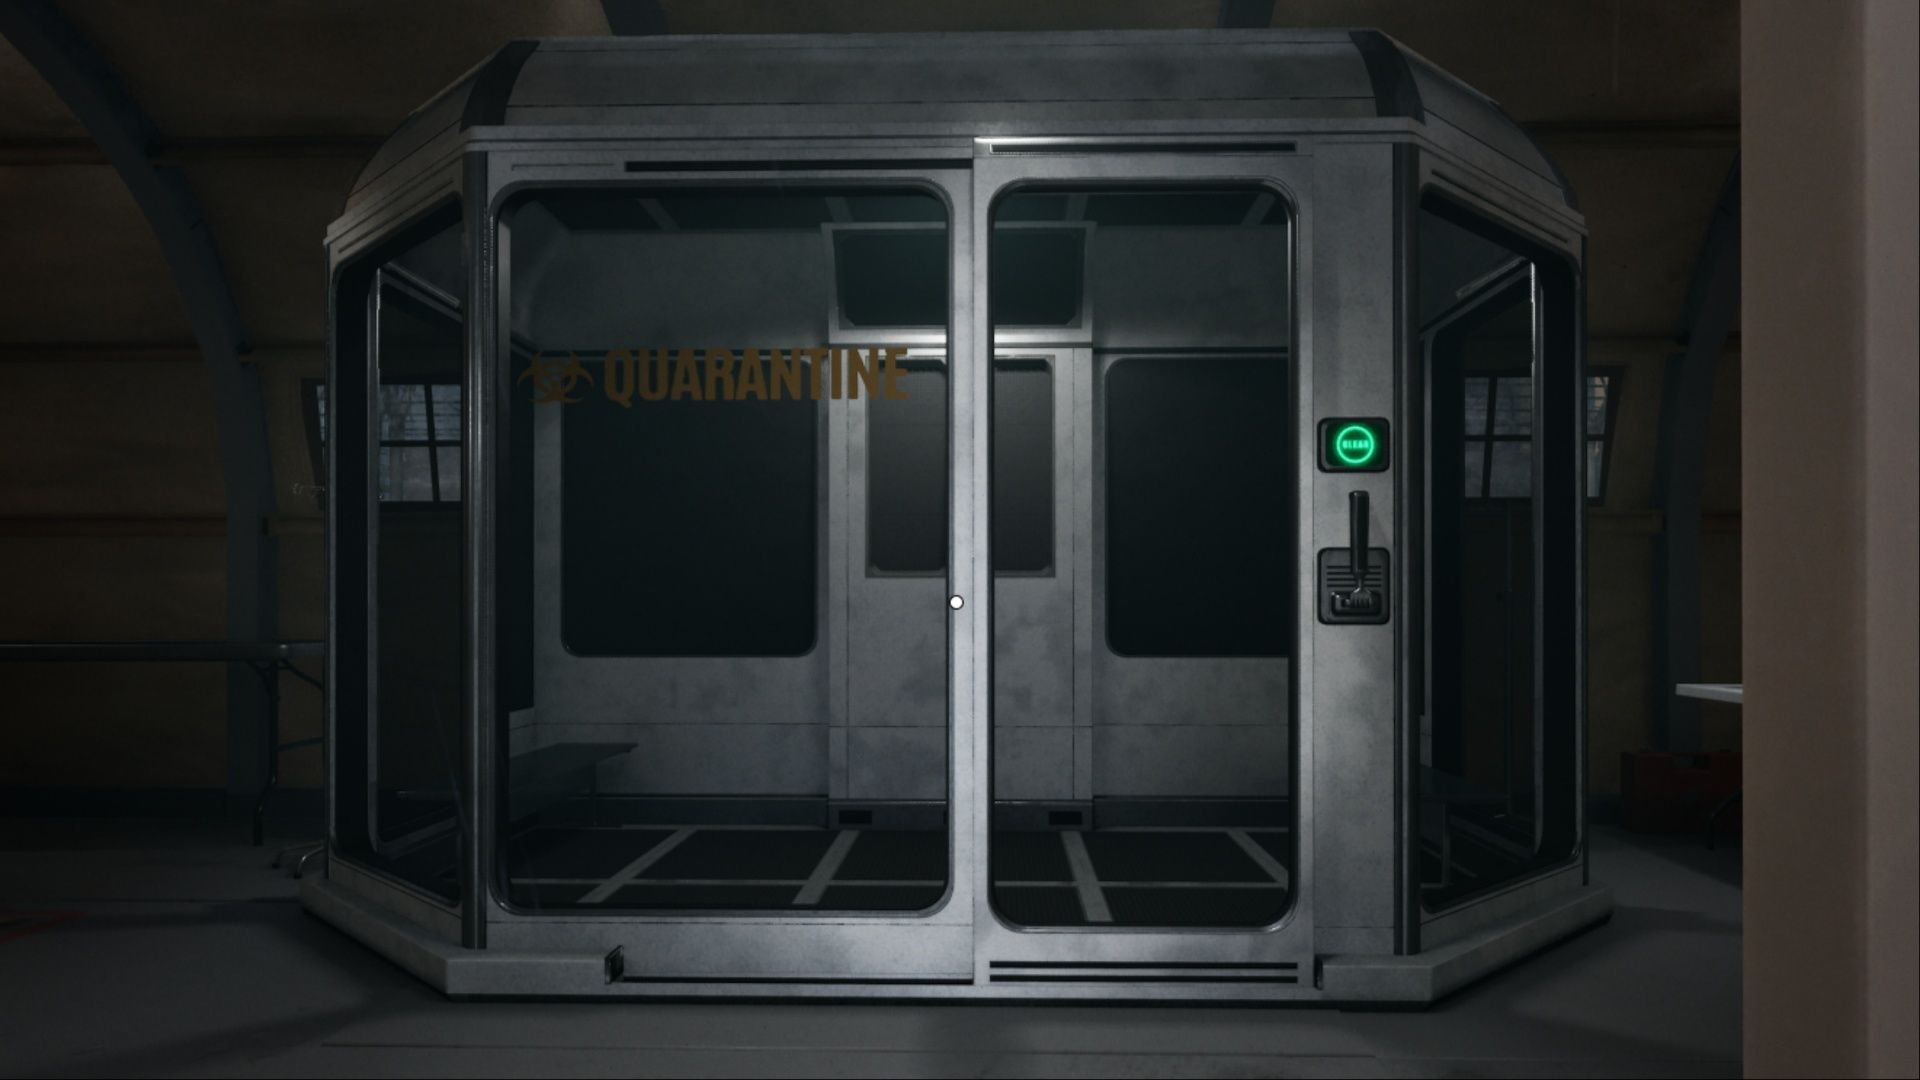
Quarantine
The Quarantine area lets players hold survivors temporarily before deciding what to do with them. When survivors arrive at the checkpoint, they may show symptoms of illness or infection, which will be marked in orange. Players might choose to hold onto those without obvious signs of infection, hoping they just have a treatable sickness instead of immediately getting rid of them.
If someone develops severe symptoms or turns, the chance of them infecting others is lower because they’re usually isolated. Therefore, it’s best to err on the side of caution: if players can’t definitively diagnose someone, they should quarantine them for a day or two.
The next day, players can check on the quarantined survivors to see if their condition has improved, worsened, or if they’ve turned into zombies. Those who recover can be moved to the Survivor Block, while those who are beyond help can be eliminated. If a survivor becomes a zombie, players must activate the incinerator to destroy the infected and anyone else who was with them. As an alternative, infected individuals can be contained for testing before the area is cleaned.
Initially, the Quarantine can only hold three survivors, meaning it can fill up fast. Luckily, you can upgrade it in Build Mode to increase its capacity to seven. A full upgrade costs $13,500 and requires reaching Zone Level V. Keep in mind, though, that a larger Quarantine means more survivors could die if an infected person turns overnight.
Sometimes, players who have survived injuries experience muscle problems. A strong reaction to a reflex test isn’t always a sign of illness or infection; it can also be caused by underlying health conditions that make it difficult to control their reflexes.
If a survivor seems unwell, showing both a slack jaw and slow reflexes, players should check for other signs of infection. However, if a survivor only has trouble with their reflexes, they likely just have a muscle problem and should be sent to the Survivor Block.
Laboratory
The Laboratory won’t open until the initial evacuation is complete, because players need to explore the other areas first. It’s a complicated building, but crucial for discovering new symptoms and learning more about the virus.
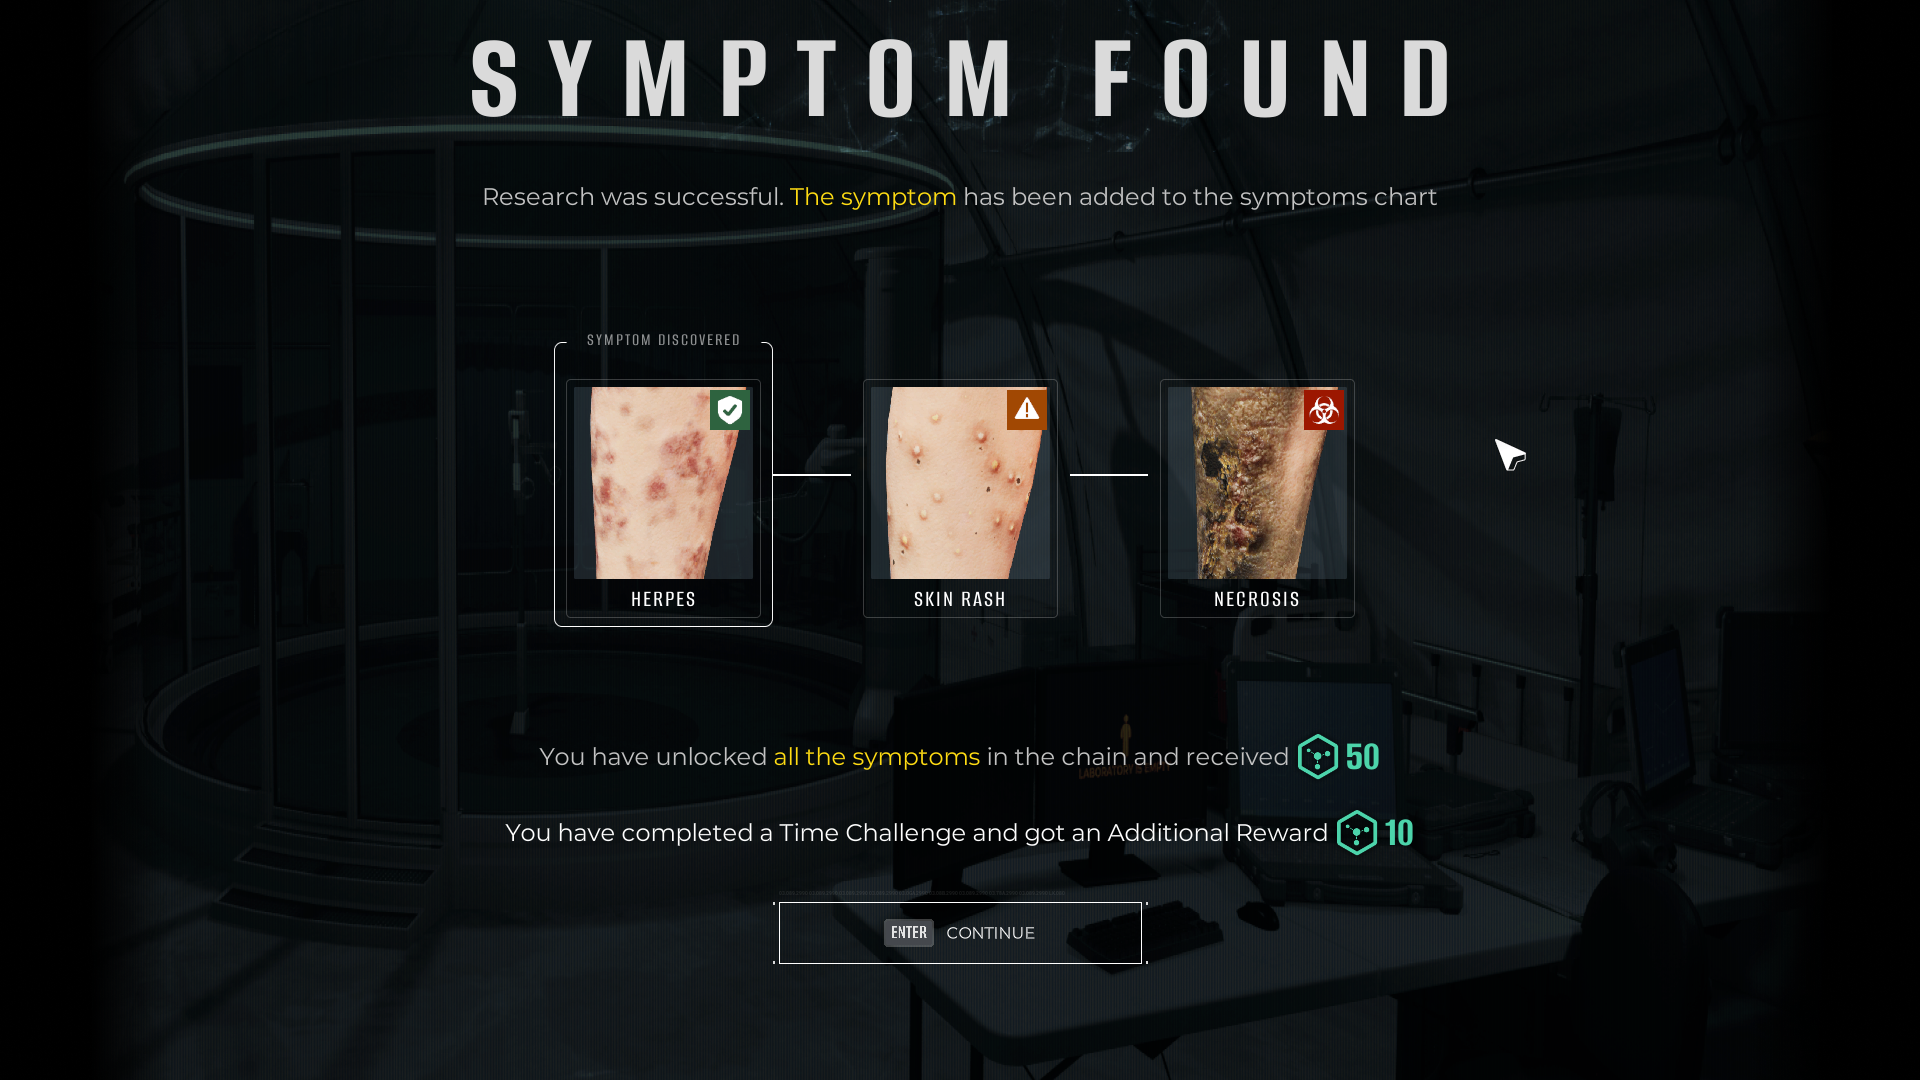
If you find a survivor with an unfamiliar symptom, send them to the Laboratory immediately – even if they seem healthy. A guard will collect the survivor and take them to the lab. There, you’ll use the computer to remove an organ, analyze it, and identify the new symptom. This process is fatal to the survivor, but it provides crucial information to help you understand and diagnose future survivors more effectively.
Players can also send survivors from Quarantine to the Laboratory’s cage. To keep them alive, you’ll need to feed them a corpse each day. If they survive until evacuation, they’ll be automatically loaded onto a truck, and you’ll receive a $2,000 reward.
The first upgrade to your Laboratory costs $40,000 and unlocks the Zombie Cage. After reaching Zone Level III, you can purchase an auto-feeder for $10,000 to automatically keep your zombie alive.
Read More
- The Limits of Thought: Can We Compress Reasoning in AI?
- Genshin Impact Dev Teases New Open-World MMO With Realistic Graphics
- ARC Raiders Boss Defends Controversial AI Usage
- Where to Pack and Sell Trade Goods in Crimson Desert
- Console Gamers Can’t Escape Their Love For Sports Games
- Sega Reveals Official Sonic Timeline: From Prehistoric to Modern Era
- Top 8 UFC 5 Perks Every Fighter Should Use
- Who Can You Romance In GreedFall 2: The Dying World?
- Top 10 Must-Watch Isekai Anime on Crunchyroll Revealed!
- Top 10 Scream-Inducing Forest Horror Games
2026-01-18 21:35