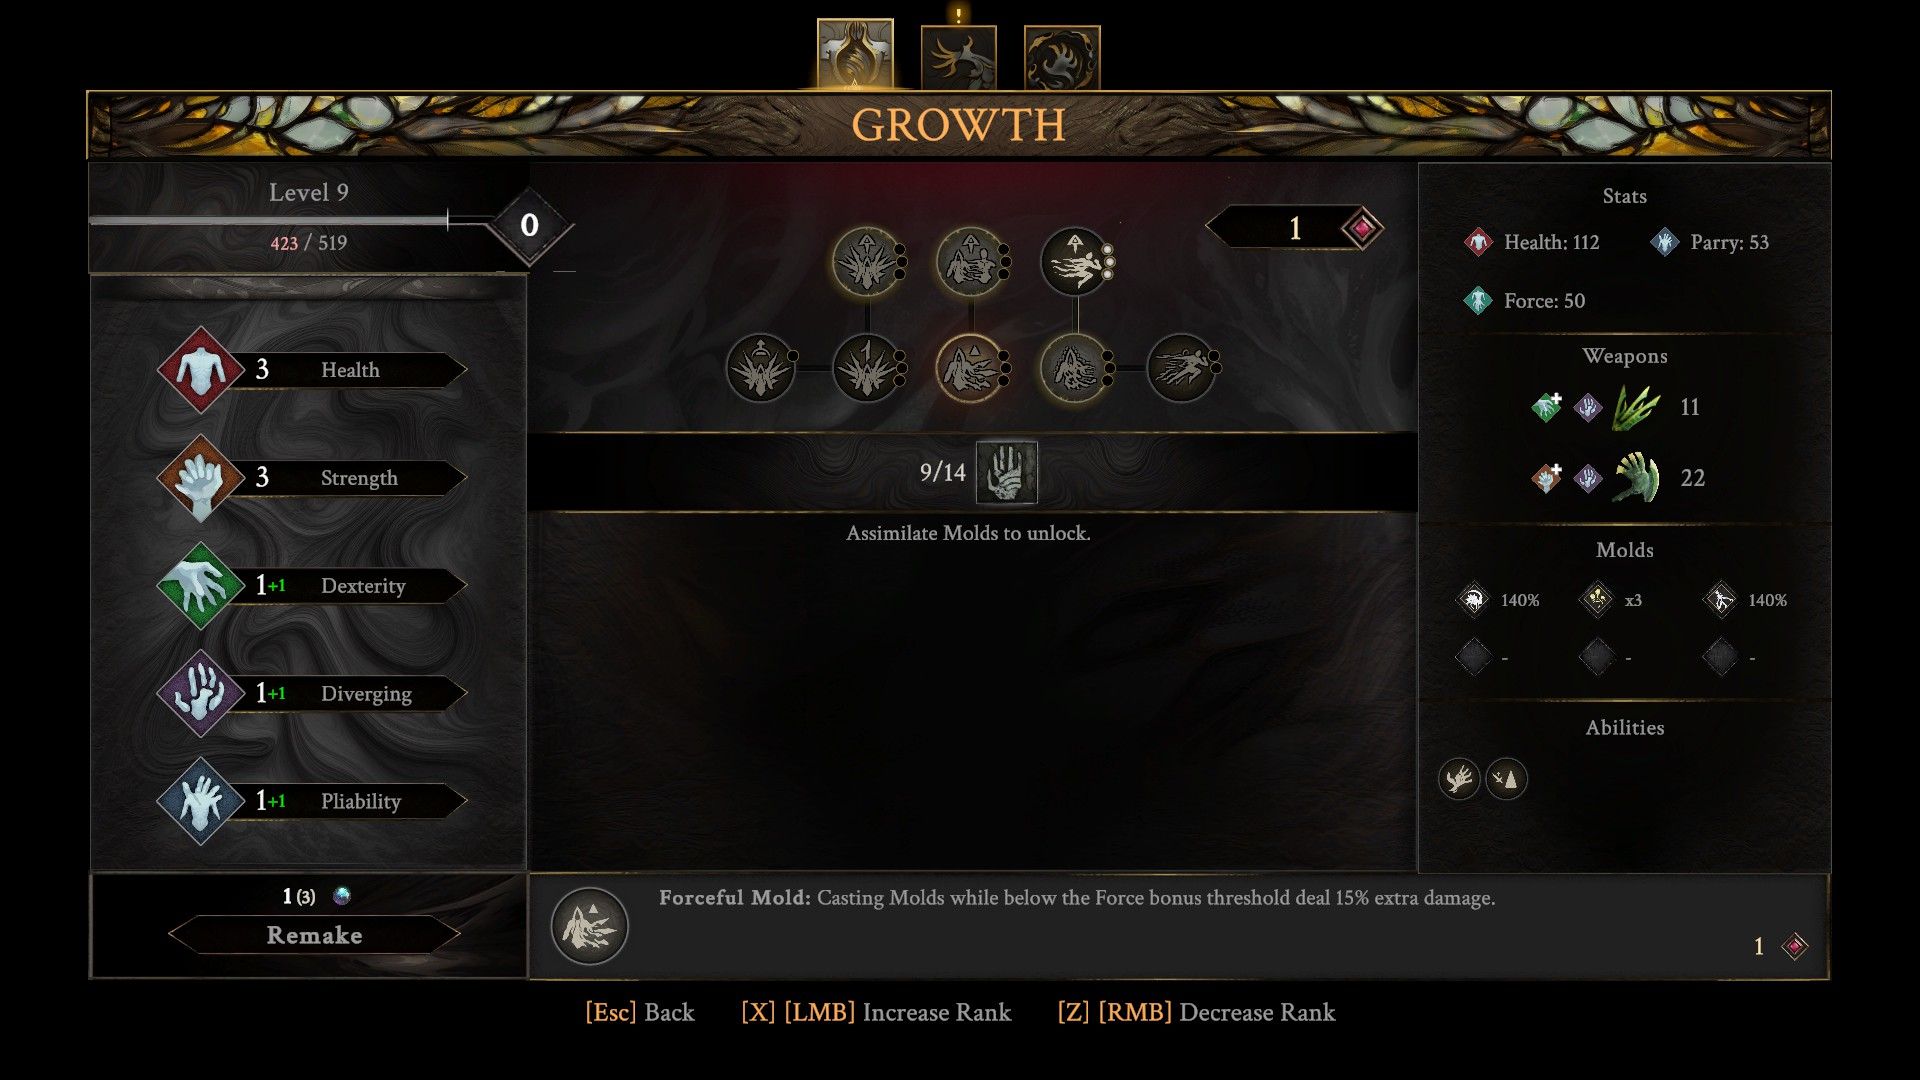
Okay, so in Grime 2, your character’s stats are super important for how you fight. Things like Health, Strength, and Dexterity are pretty straightforward, right? But then you get into stats like Diverging and Pliability, and I’m like, ‘Wait, what do those actually do?’ It’s not always clear how they affect things when you’re battling all those enemies.
The game’s stat system can be complicated, especially since certain equipment needs specific stat combinations to function properly. Players need to understand each stat to make smart choices as their character develops. This guide offers a complete overview of the stat system in Grime 2 to help you choose a combat style that fits your preferences.
All Stats in Grime 2 Explained
To build effective characters in Grime 2, it’s important to understand the game’s stats. Let’s begin with the fundamentals: Health, Strength, and Dexterity. These are three of the five main stats in Grime 2.
- Health is related to Hit Points. The more Health, the more difficult it will be for enemies to destroy our Smithed. And since the world of Grime 2 is filled with many environmental dangers and traps, Health is also important for exploration. A low HP bar will end up becoming our worst enemy mid-game, and having enough Health will save us a lot of trouble. So, invest at least 5 points in Health for starters.
- Strength is related to Red weapons, those that require a lot of force to be wielded. These weapons are slower in comparison to Green weapons, but they cause tons of damage and cover a wide area with their attacks. They also have lots of different effects like knockback and stuns that are extremely useful for a brawler build. The more Strength players have, the more damage they will cause with these weapons, and they will also be able to equip certain heavy armor sets that increase their defensive capabilities.
- Dexterity is related to Green weapons, mostly daggers, bows, and also hybrid weapons that scale with both Dex and Str. Having more Dexterity will logically increase the damage players cause with these weapons. A Dexterity build will result in prioritizing speed over damage, and safely delivering damage from afar, or even backstabbing with precise dagger power attacks.
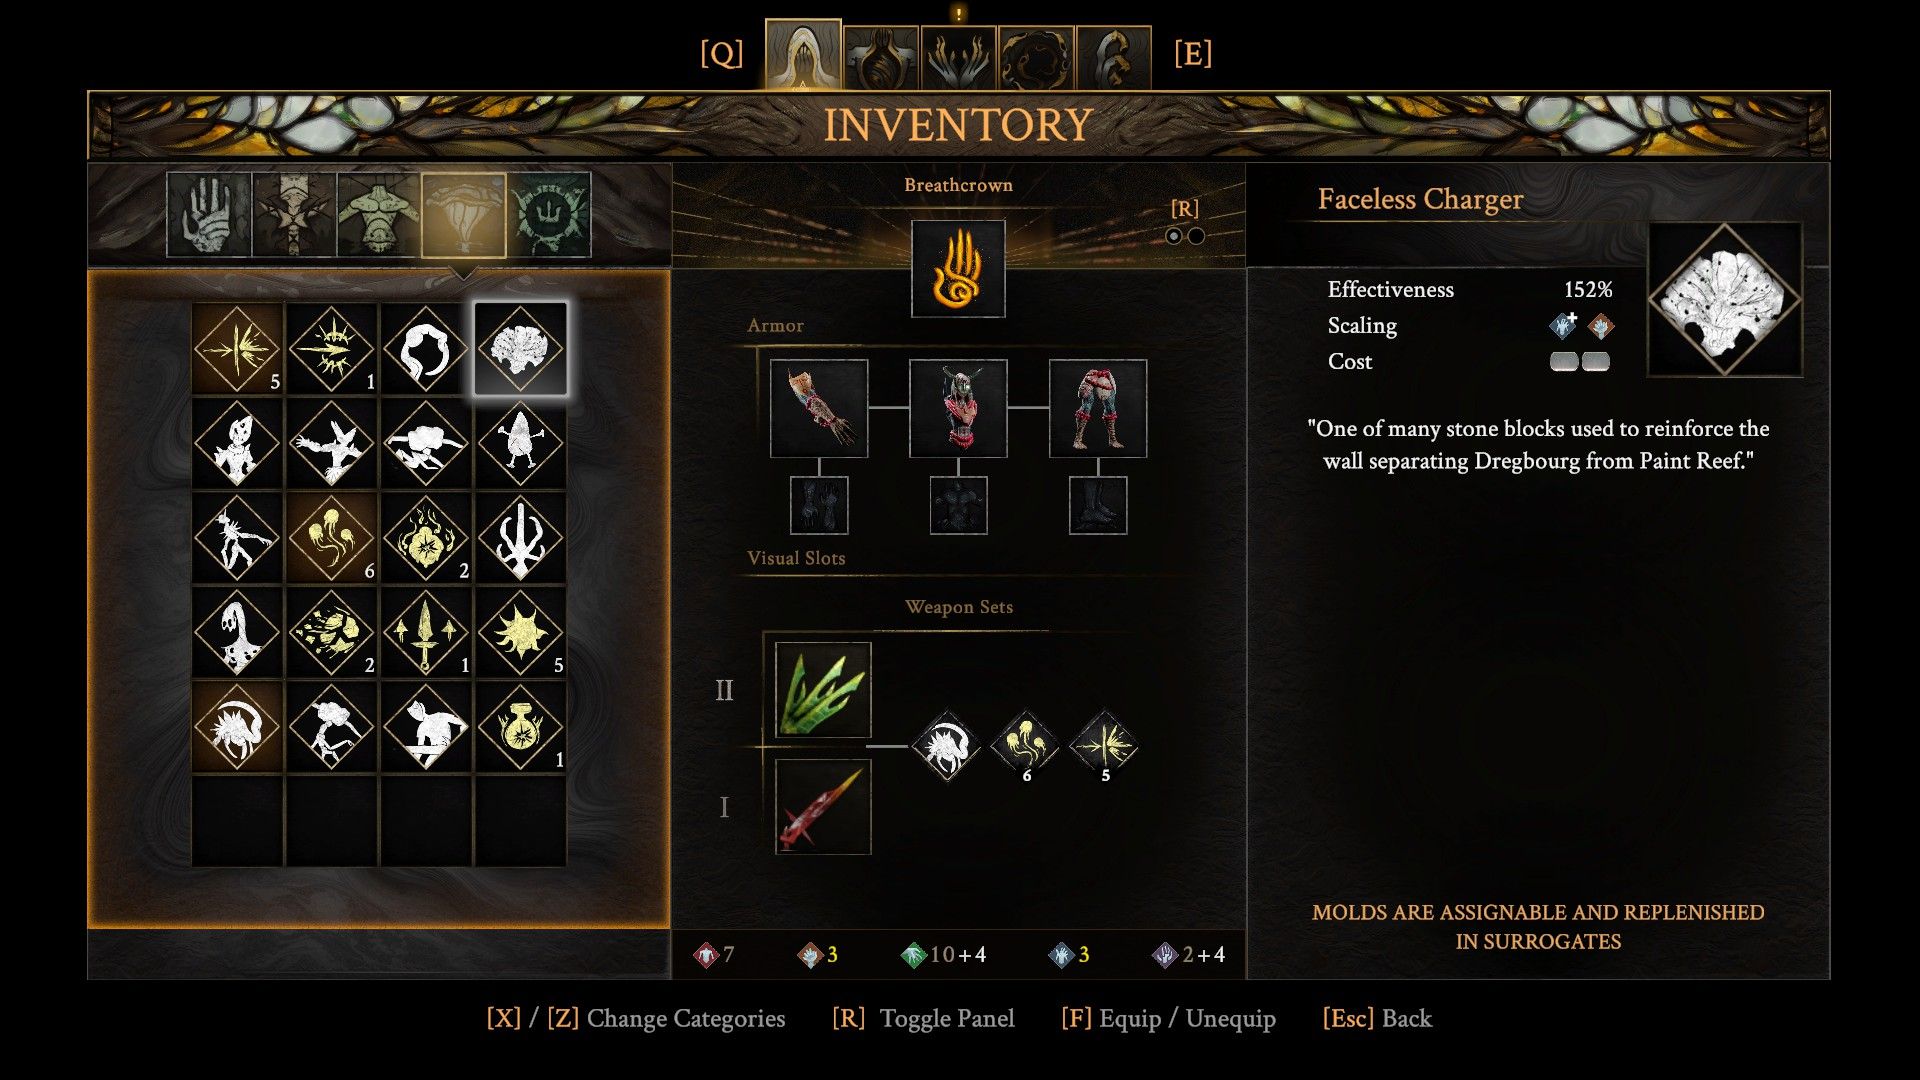
Certain weapons gain benefits from two different stats. One stat is considered the main one – focusing on it will give you a bigger damage boost. The other stat is secondary and provides a smaller benefit. You’ll see a white plus (+) sign next to the stat icon in the weapon’s description if a weapon scales with two stats.
There are just two stats left to cover. But first, players should check the Growth screen in the Surrogate menu. You’ll notice several secondary stats in the upper right corner – Health, Parry, Force, and Burst Dash. These secondary stats increase as your primary stats improve. For example, every 7 points in your primary stats will add 127 to your Health, and so on.
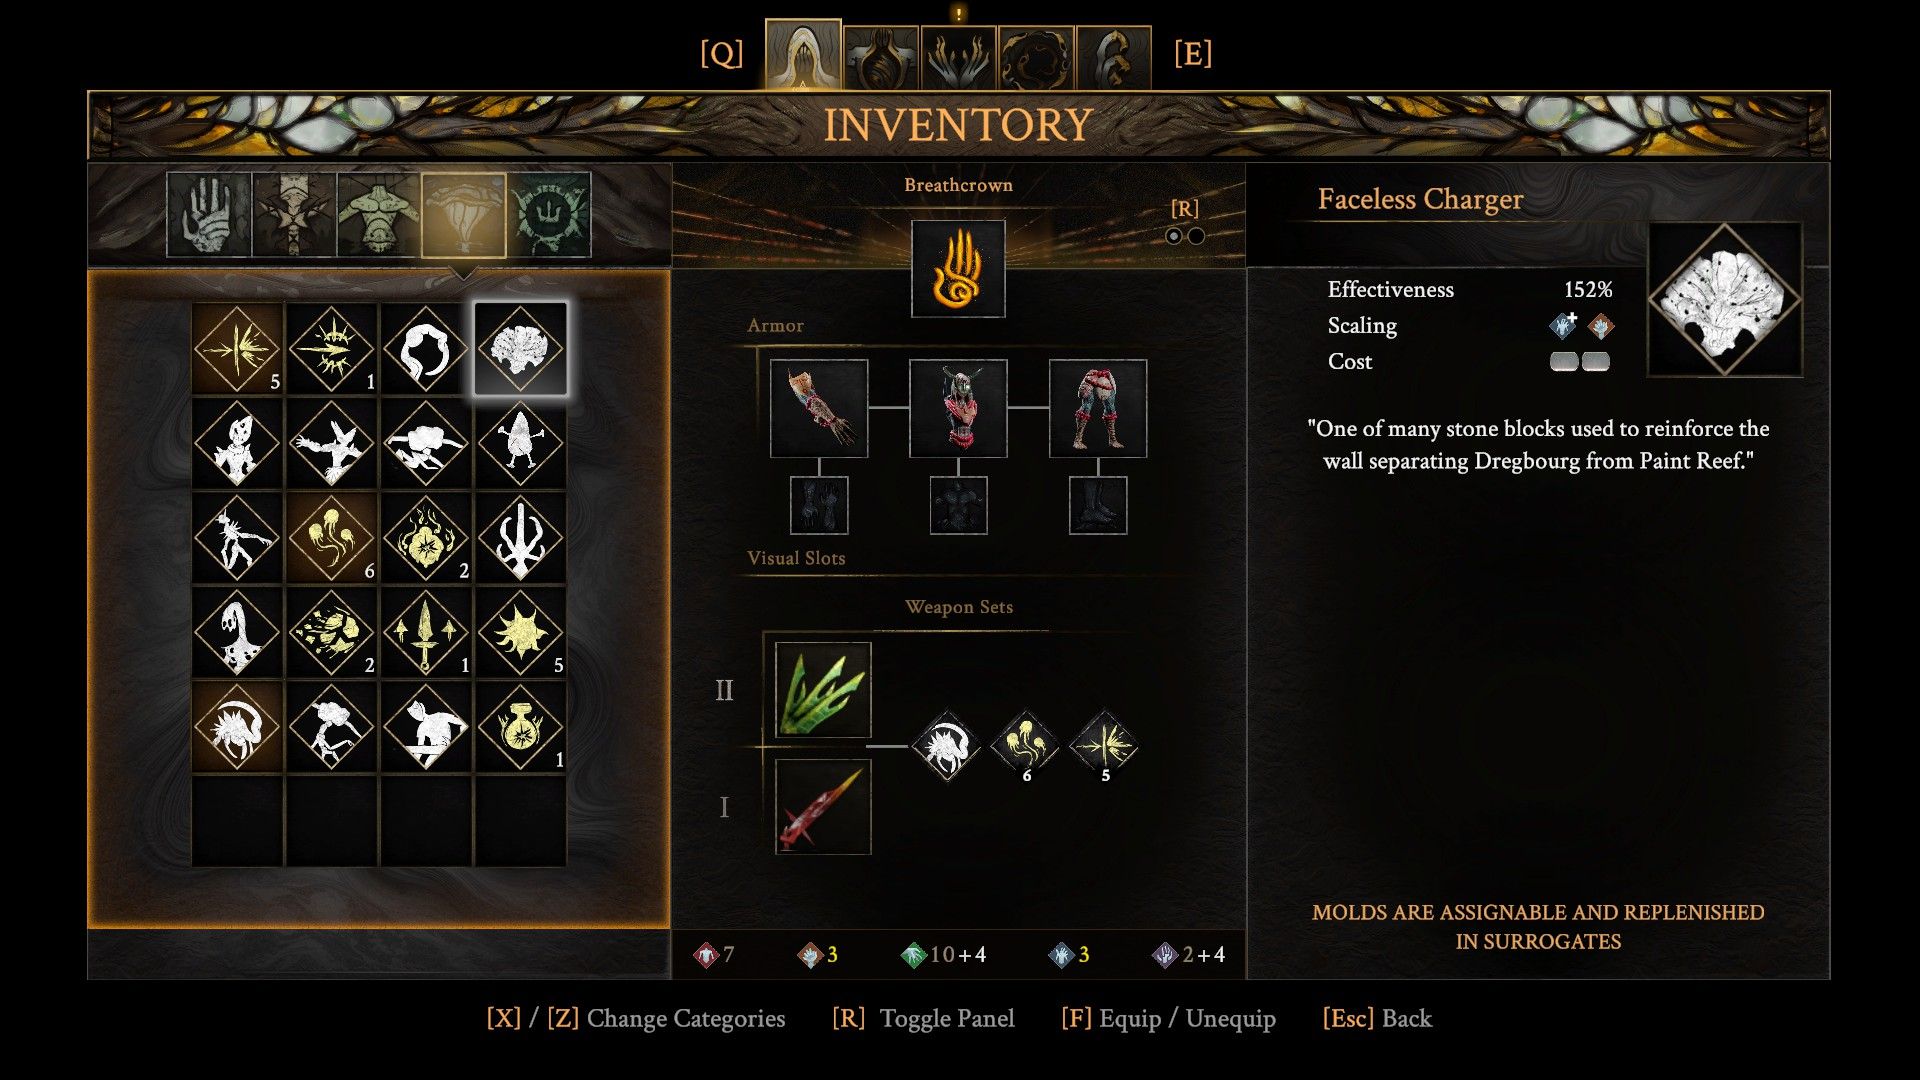
- Diverging (Purple) and Pliability (Blue) are much more complex to understand, so let’s take a look at them step by step. Contrary to the three main Stats, Diverging and Pliability are also related to Mold and Talent effectiveness.
- Increasing Diverging or Pliability will directly increase the damage caused by Molds governed by these two stats, and add an extra percentage of damage to weapons with their corresponding scaling.
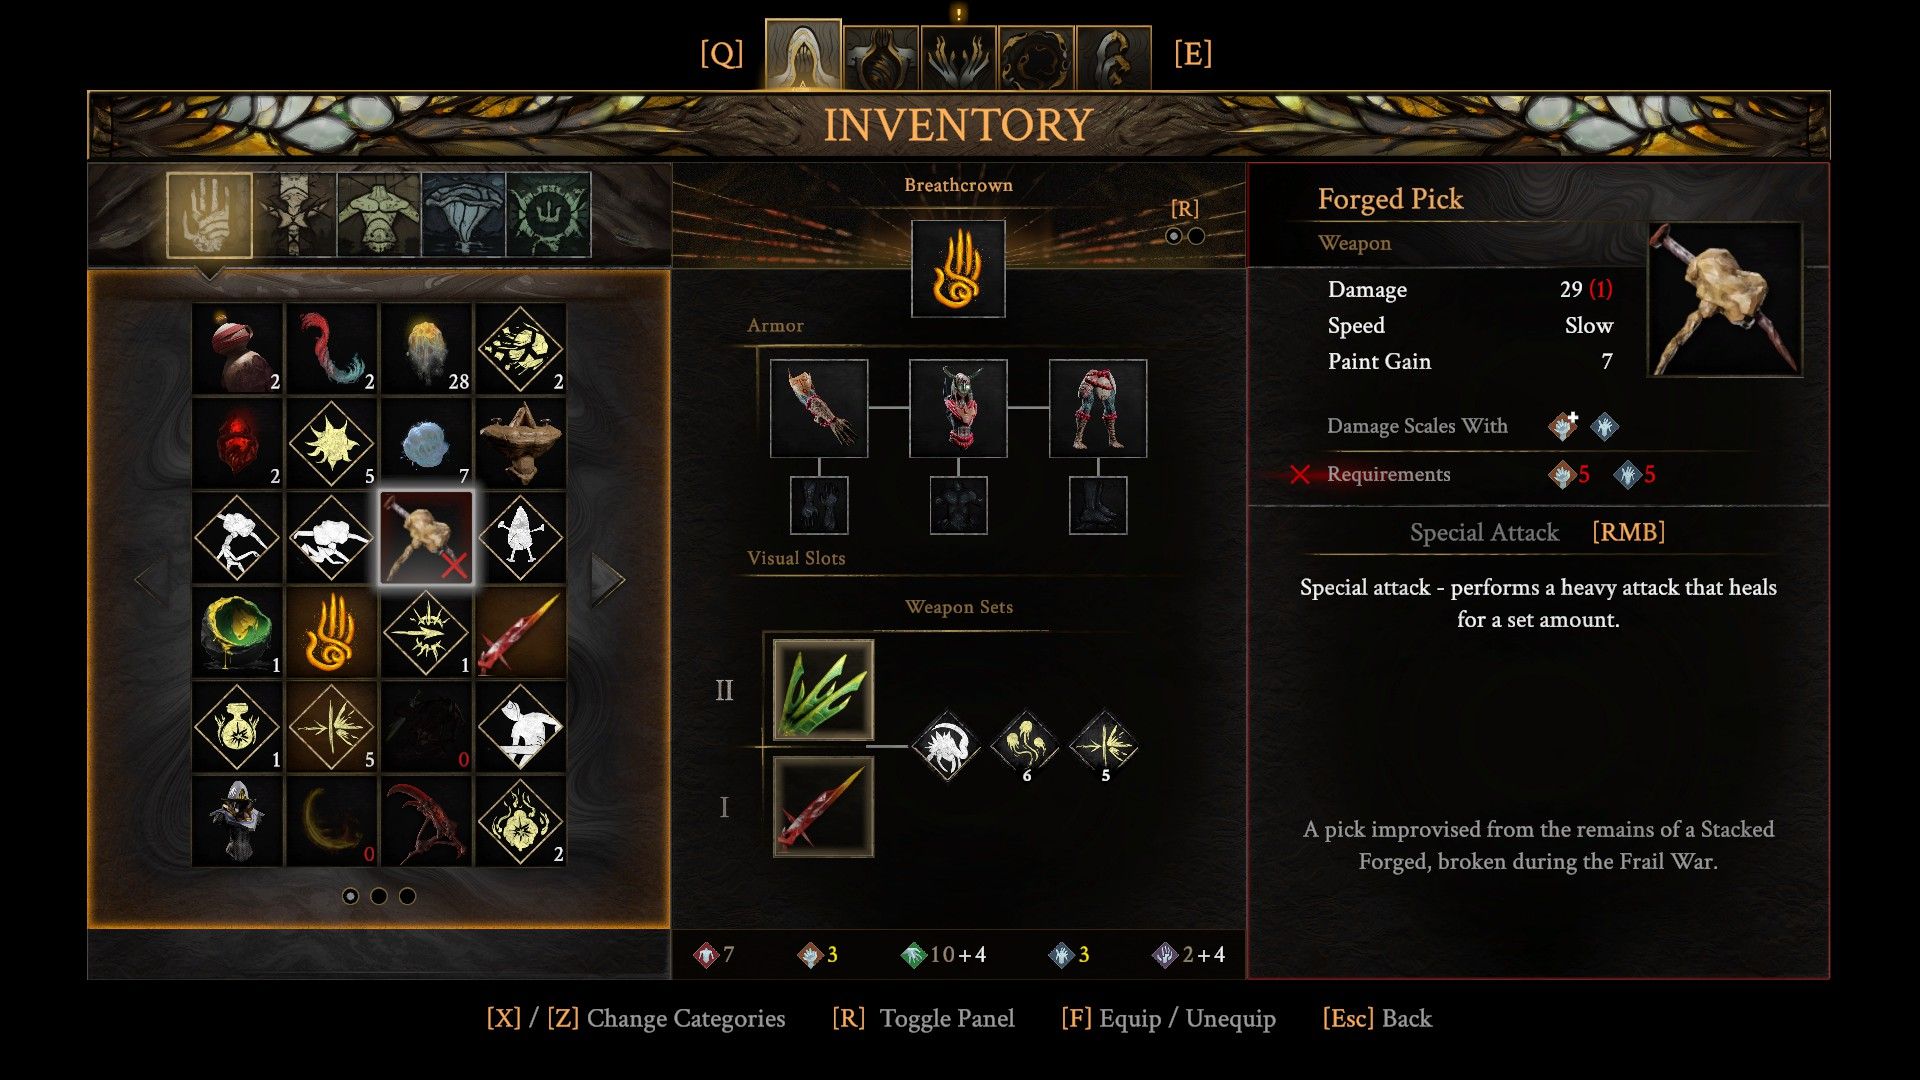
Certain weapons, like those categorized as Diverging or Pliability weapons (which you can identify by checking their description in your inventory), also improve with both Dexterity and Strength. The Bloodmetal Scythe is a good example – it gets better based on all weapon stats, including Strength and Dexterity, and you need to have at least three points in Strength, Dexterity, Diverging, and Pliability to wield it. This makes for a challenging and intricate Metroidvania experience.
Understanding Weapon Stats in Grime 2
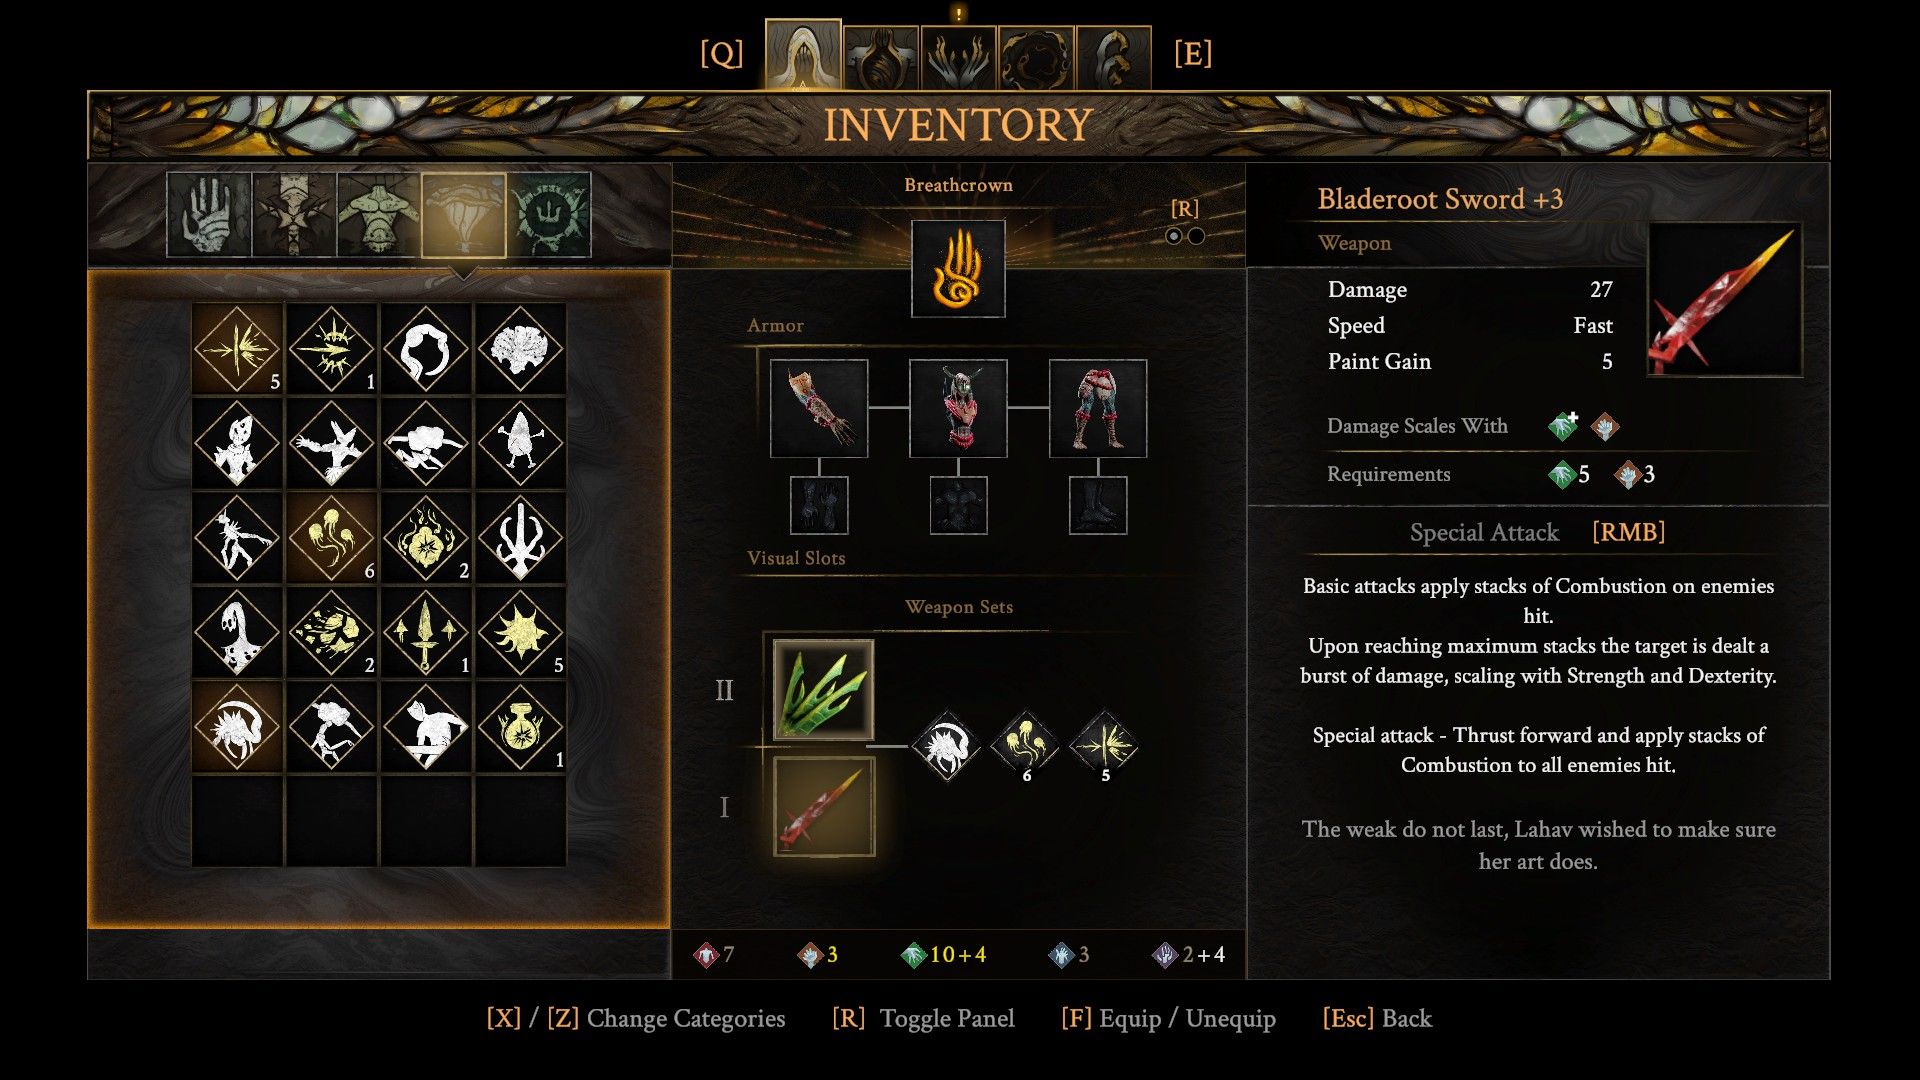
Weapons have three basic stats: Damage, Speed, and Paint Gain.
Damage is straightforward: it goes up as you improve your stats. For instance, each point you put into Dexterity increases the damage from Throwing Thumbs (or daggers) by 0.6.
Speed in this game refers to how quickly players can string together attacks or fire weapons. Higher speed is generally better, but faster weapons often deal less damage than slower ones. Slower weapons usually hit harder and cover a larger area. Weapons with average speed offer a balance between damage and attack rate.
Paint Gain refers to how much Paint you earn with each weapon hit. Paint is essential for using standard Molds. Higher Paint Gain per hit is especially helpful when creating Diverging or Pliability Molds, as it allows you to use them more frequently.
Okay, so I’ve figured out there’s this hidden thing called ‘Paint Cost’ with each Mold. You can spot it by these little grey lines in the Mold’s description – the more lines, the more it costs to actually use the Mold. Basically, the stronger the Mold, the more ‘paint’ you need to cast it, which makes sense, I guess!
All Resources in Grime 2 Explained

In Grime 2, your character uses resource bars to boost abilities, recover health, and utilize molds. These bars – Force, Paint, and Breath Capacity – aren’t traditional stats, but essential resources. Let’s explore each one in more detail.
Your Force (shown as a deep green bar) goes down when you attack or move. Certain talents can help it recharge with specific actions. Staying still while attacking deals extra damage (shown in green), but attacking with no Force left results in weaker damage (shown in grey). Special attacks use more Force but are more powerful, so consider that during combat. You can also refill your Force by finding and interacting with special objects on the map using the Grasp ability.
As a player, I’ve learned that ‘Paint’ – it looks like a grey bar on screen – is basically our energy source. It’s what powers up our ‘Molds,’ which let us use the abilities of the bosses we’ve defeated in battle. Seriously, if you run out of Paint, you can’t use your Molds, period! The good news is you get more Paint by defeating those really tough ‘Strong Bosses’ – you’ll find most of them as you progress through the main story.
Your Breath Capacity, shown by the yellow bar, represents your character’s health and how they regain it by pressing ‘E’. You can only heal when this bar is full. Finding and interacting with Alveoli – special hidden objects on the maps – increases your Breath Capacity, effectively giving you an extra healing charge. This is the main way to heal both in and out of combat. While you can reset your progress using the Surrogate, this also resets the entire area and all enemies, similar to other ‘Souls-like’ games.
Read More
- All Shadow Armor Locations in Crimson Desert
- Dark Marksman Armor Locations in Crimson Desert
- Jujutsu Kaisen Season 3 Episode 12 Release Date
- How to Get the Sunset Reed Armor Set and Hollow Visage Sword in Crimson Desert
- Best Bows in Crimson Desert
- Wings of Iron Walkthrough in Crimson Desert
- All Golden Greed Armor Locations in Crimson Desert
- How To Beat Ator Archon of Antumbra In Crimson Desert
- Keeping AI Agents on Track: A New Approach to Reliable Action
- Top 5 Militaristic Civs in Civilization 7
2026-03-30 17:08