
In Crimson Desert, Critical Rate is essential for maximizing your damage, particularly when facing bosses. It gives your attacks a chance to deal double damage, and when combined with powerful Abyss Gear, you can potentially defeat bosses with a single hit or quickly knock them off balance.
Let me tell you about the build I used to absolutely crush bosses in Crimson Desert – they can be really tough! I used this setup to take down all 75+ bosses in the game, and I’m sharing it so you can feel confident facing even the hardest challenges. It really made a difference for me, and I think it will for you too!
How Does the Critical Rate Build Work in Crimson Desert?
- Critical Rate has the potential to double the damage of every attack, so the higher the Critical Rate, the higher the chance.
- This build has been designed to manipulate Critical Rate to the best it can be, along with useful Abyss Gears that work to quickly kill bosses by eating away at their heatlh and stun them so they’re locked into place while you attack.
- The pattern of this build is repeating the same attacks: Turning Slash (R1+R2) followed by Fire Elemental Imbuement (L2+R2).
- This pattern will stop bosses from their attacks and build both the damage and stun meters until they die.
Best Weapon & Gears for the Critical Rate Build in Crimson Desert
Vow of the Dead King
- We recommend the Vow of the Dead King as your Two-Handed Weapon.
- Vow of the Dead King can be found inside the Frostveiled Castle Ruins.
- When fully upgraded, the Vow of the Dead King has Attack +35 and Critical Rate Lv 4.
- For Abyss Gears, we recommend the following 5:
| Abyss Gear | Why It’s Useful | How to Get |
|---|---|---|
| Ator’s Orb | Press R2 to fire deadly orbs. | Obtained from the Darkbringer Sword in northwest Pailune (guide here). |
| Crow’s Pursuit | Press R2 to fire deadly crows. | Obtained by defeating Crowcaller in the Main Quest. |
| Shadow Claw | Press R2 to fire deadly claws. | Obtained by defeating Black Fang, the Legendary Wolf (guide here). |
| Relentless | Damage increases with consecutive attacks. | Obtained from the Combat God’s Plate Gloves, which are rewarded by defeating Muskan at the Bonepit (guide found here). |
| Malicebane III | +12% damage against bosses. | Acquired through synthesizing Abyss Gears at the Witches. |
Best Shield & Abyss Gears for the Critical Rate Build in Crimson Desert
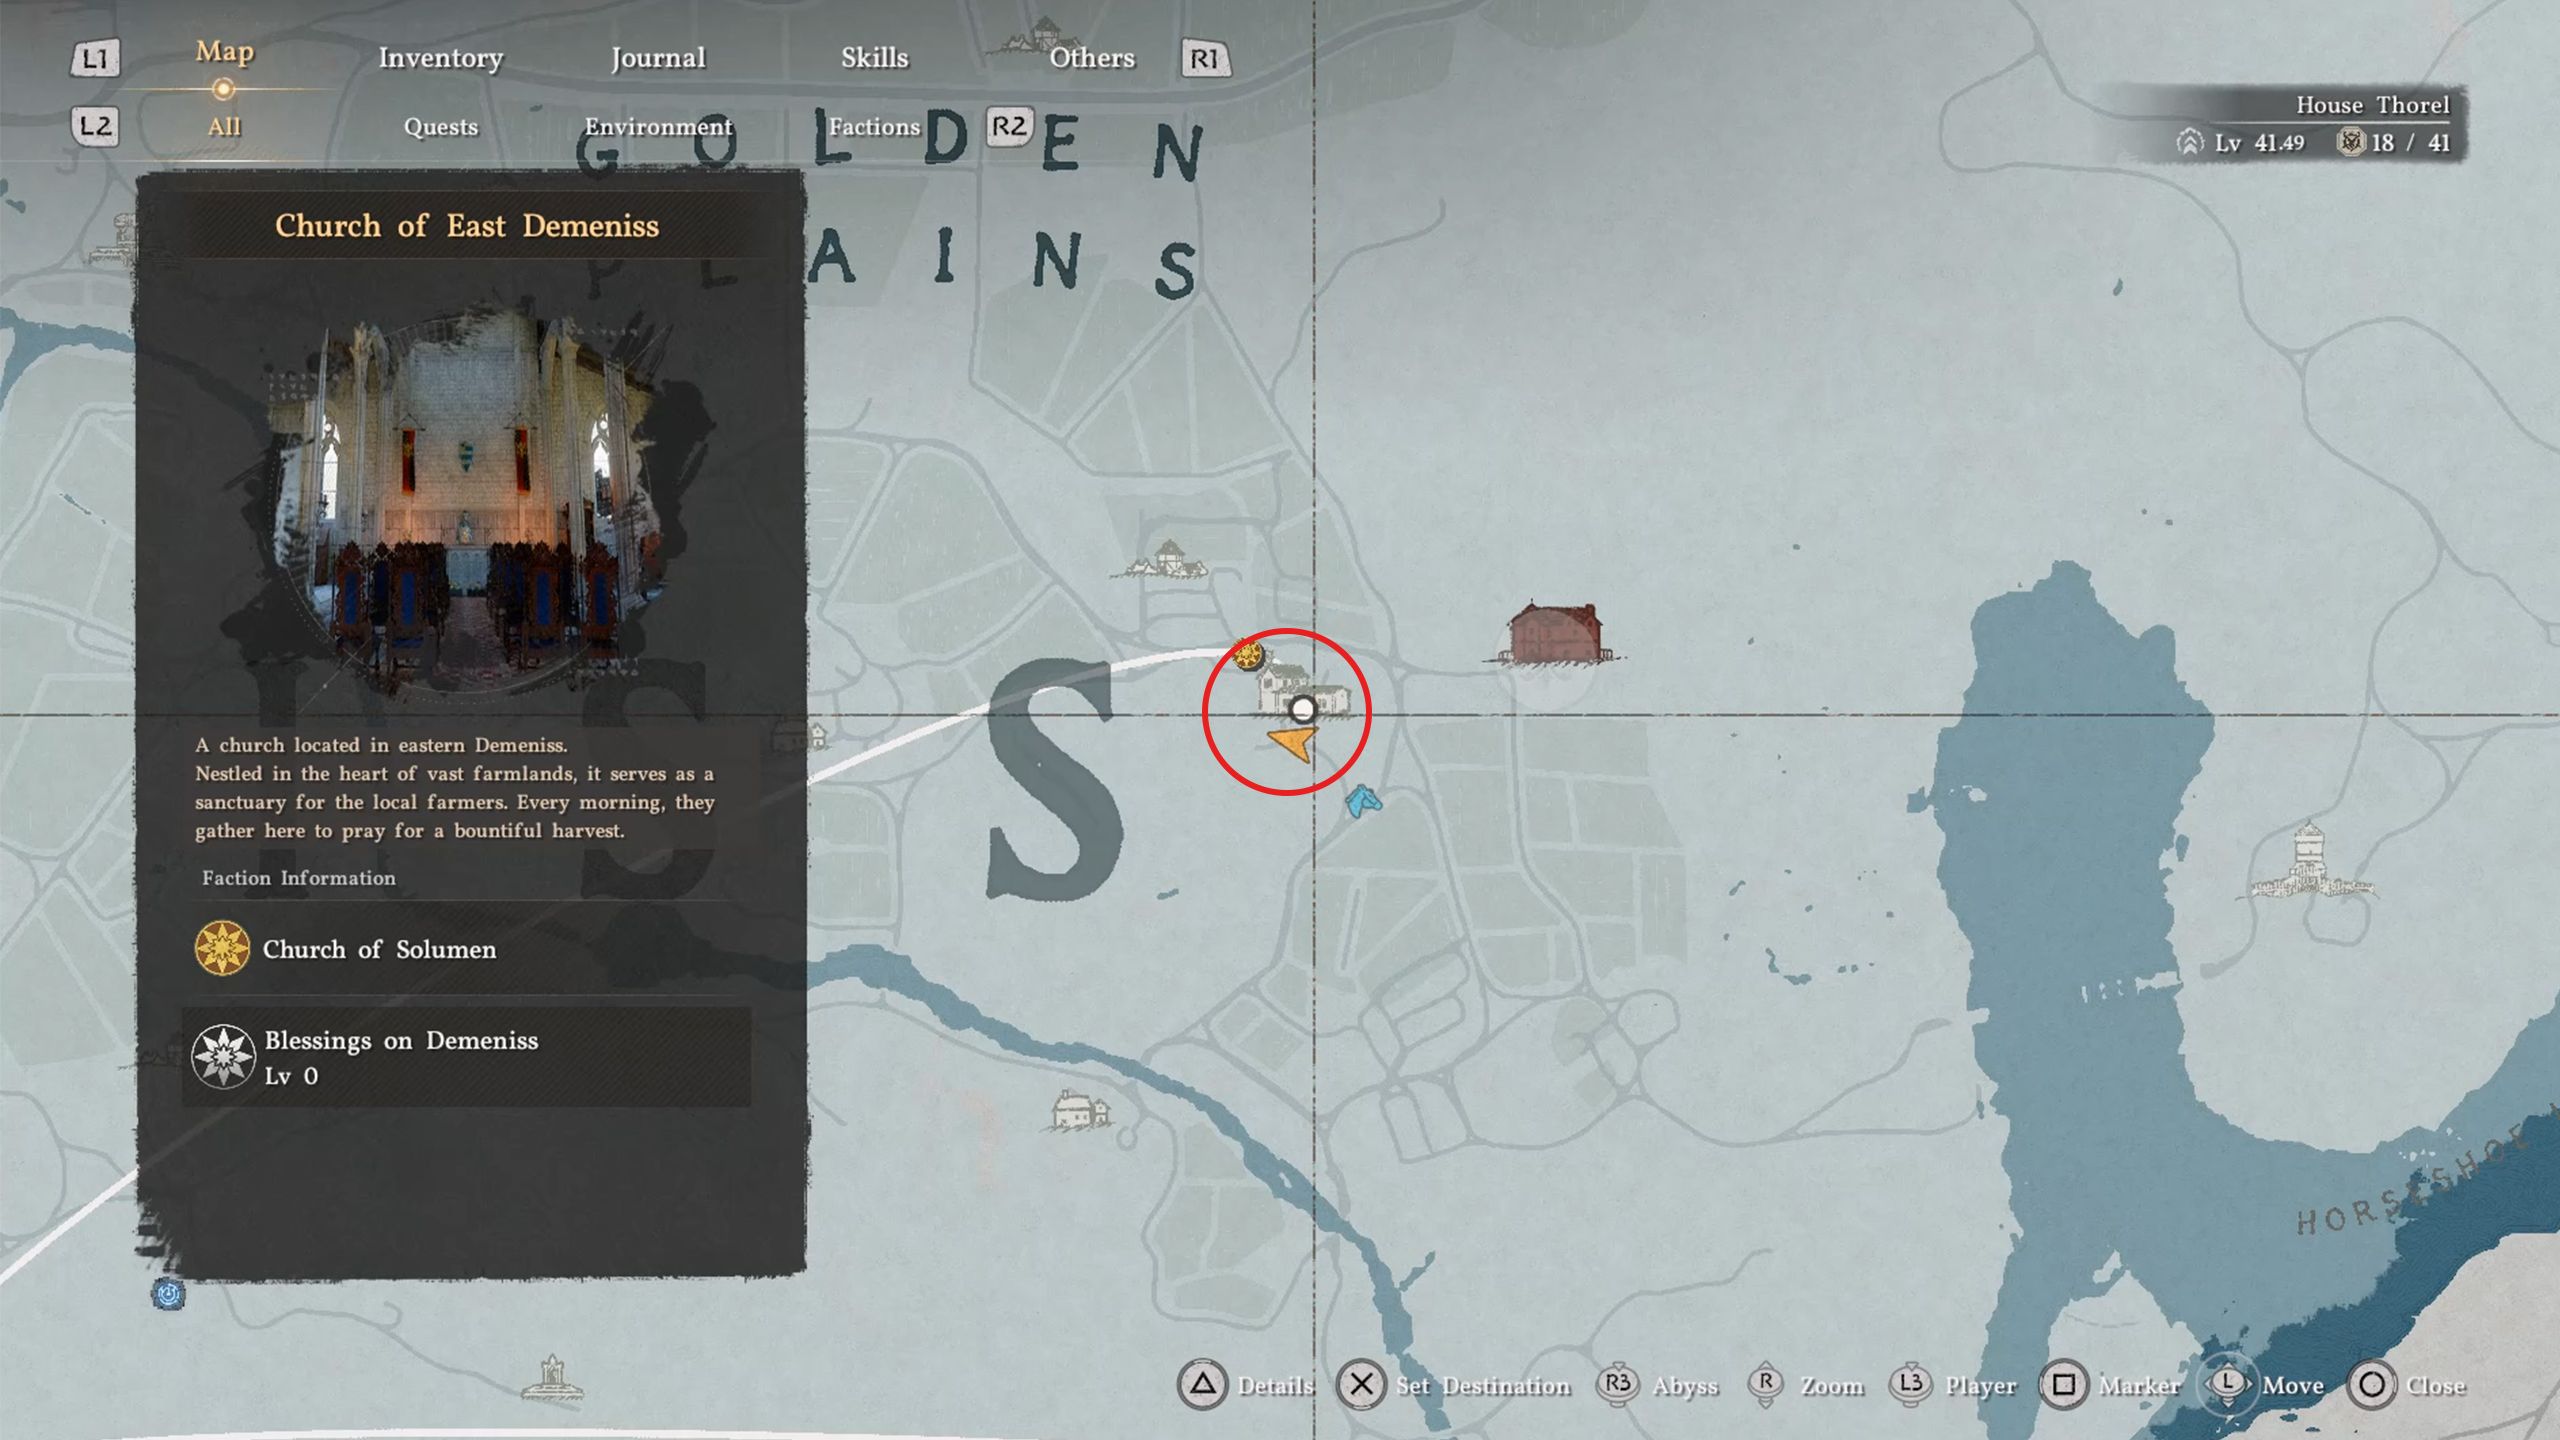
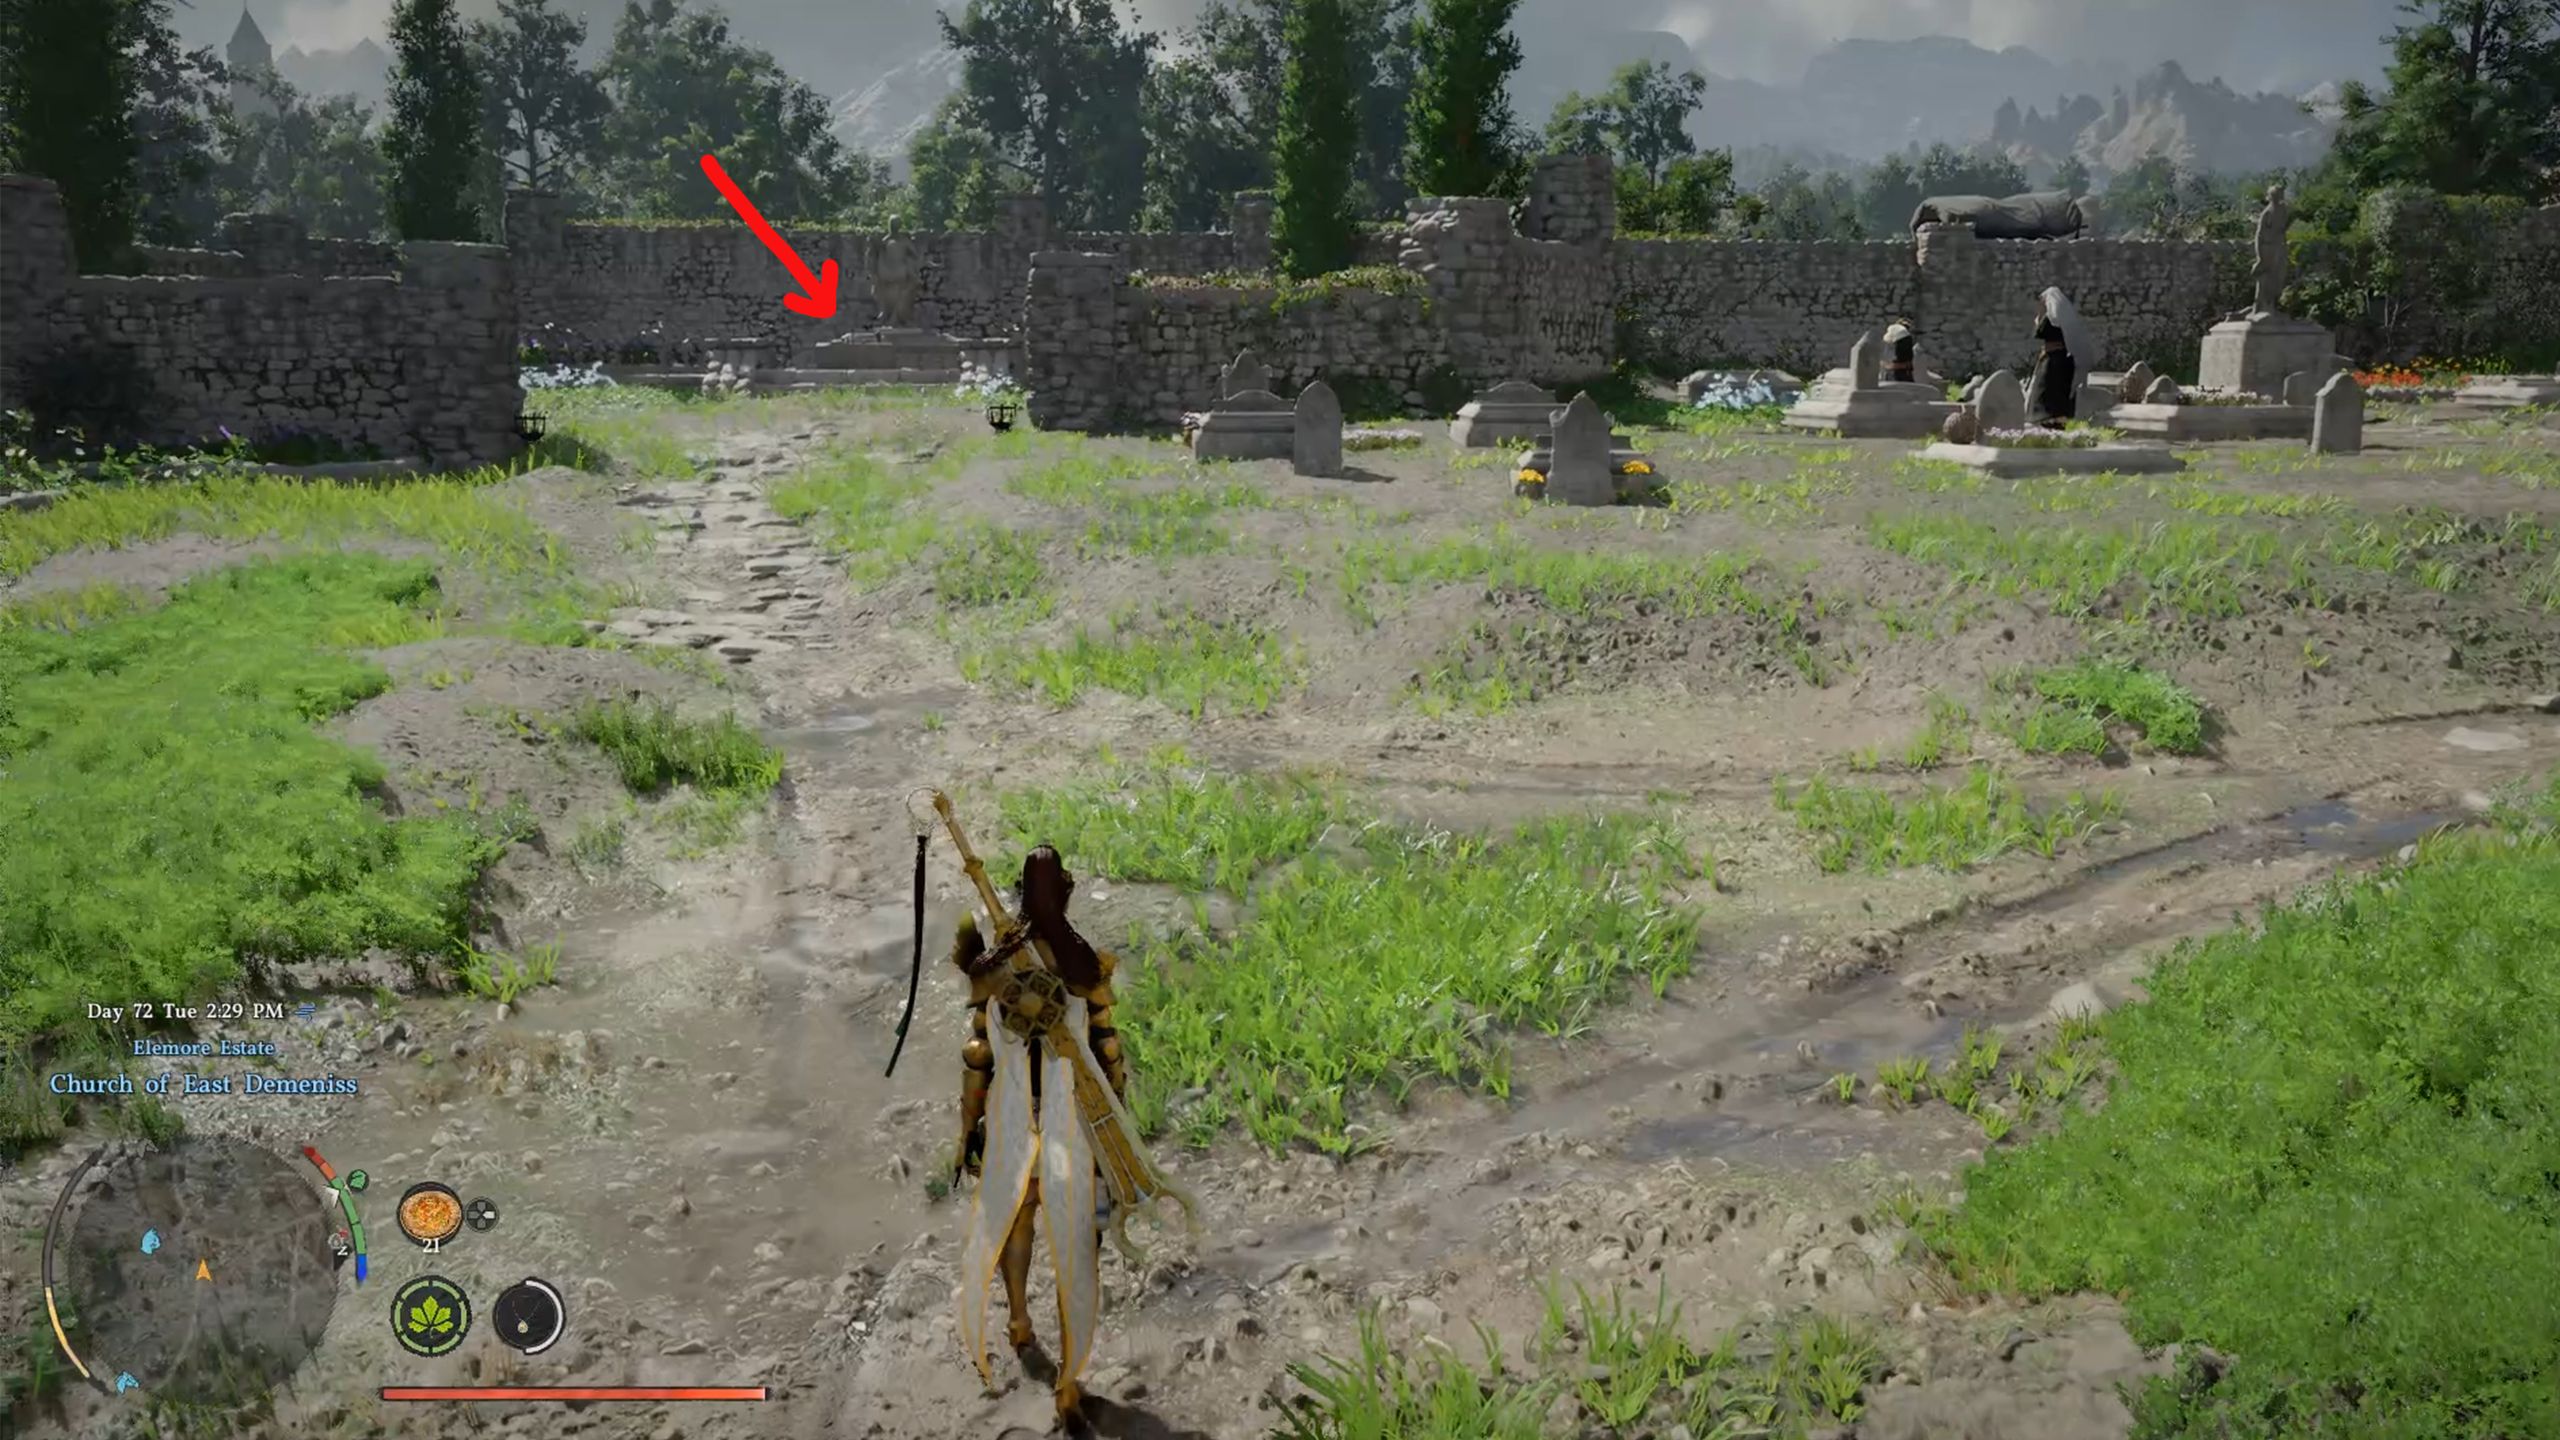
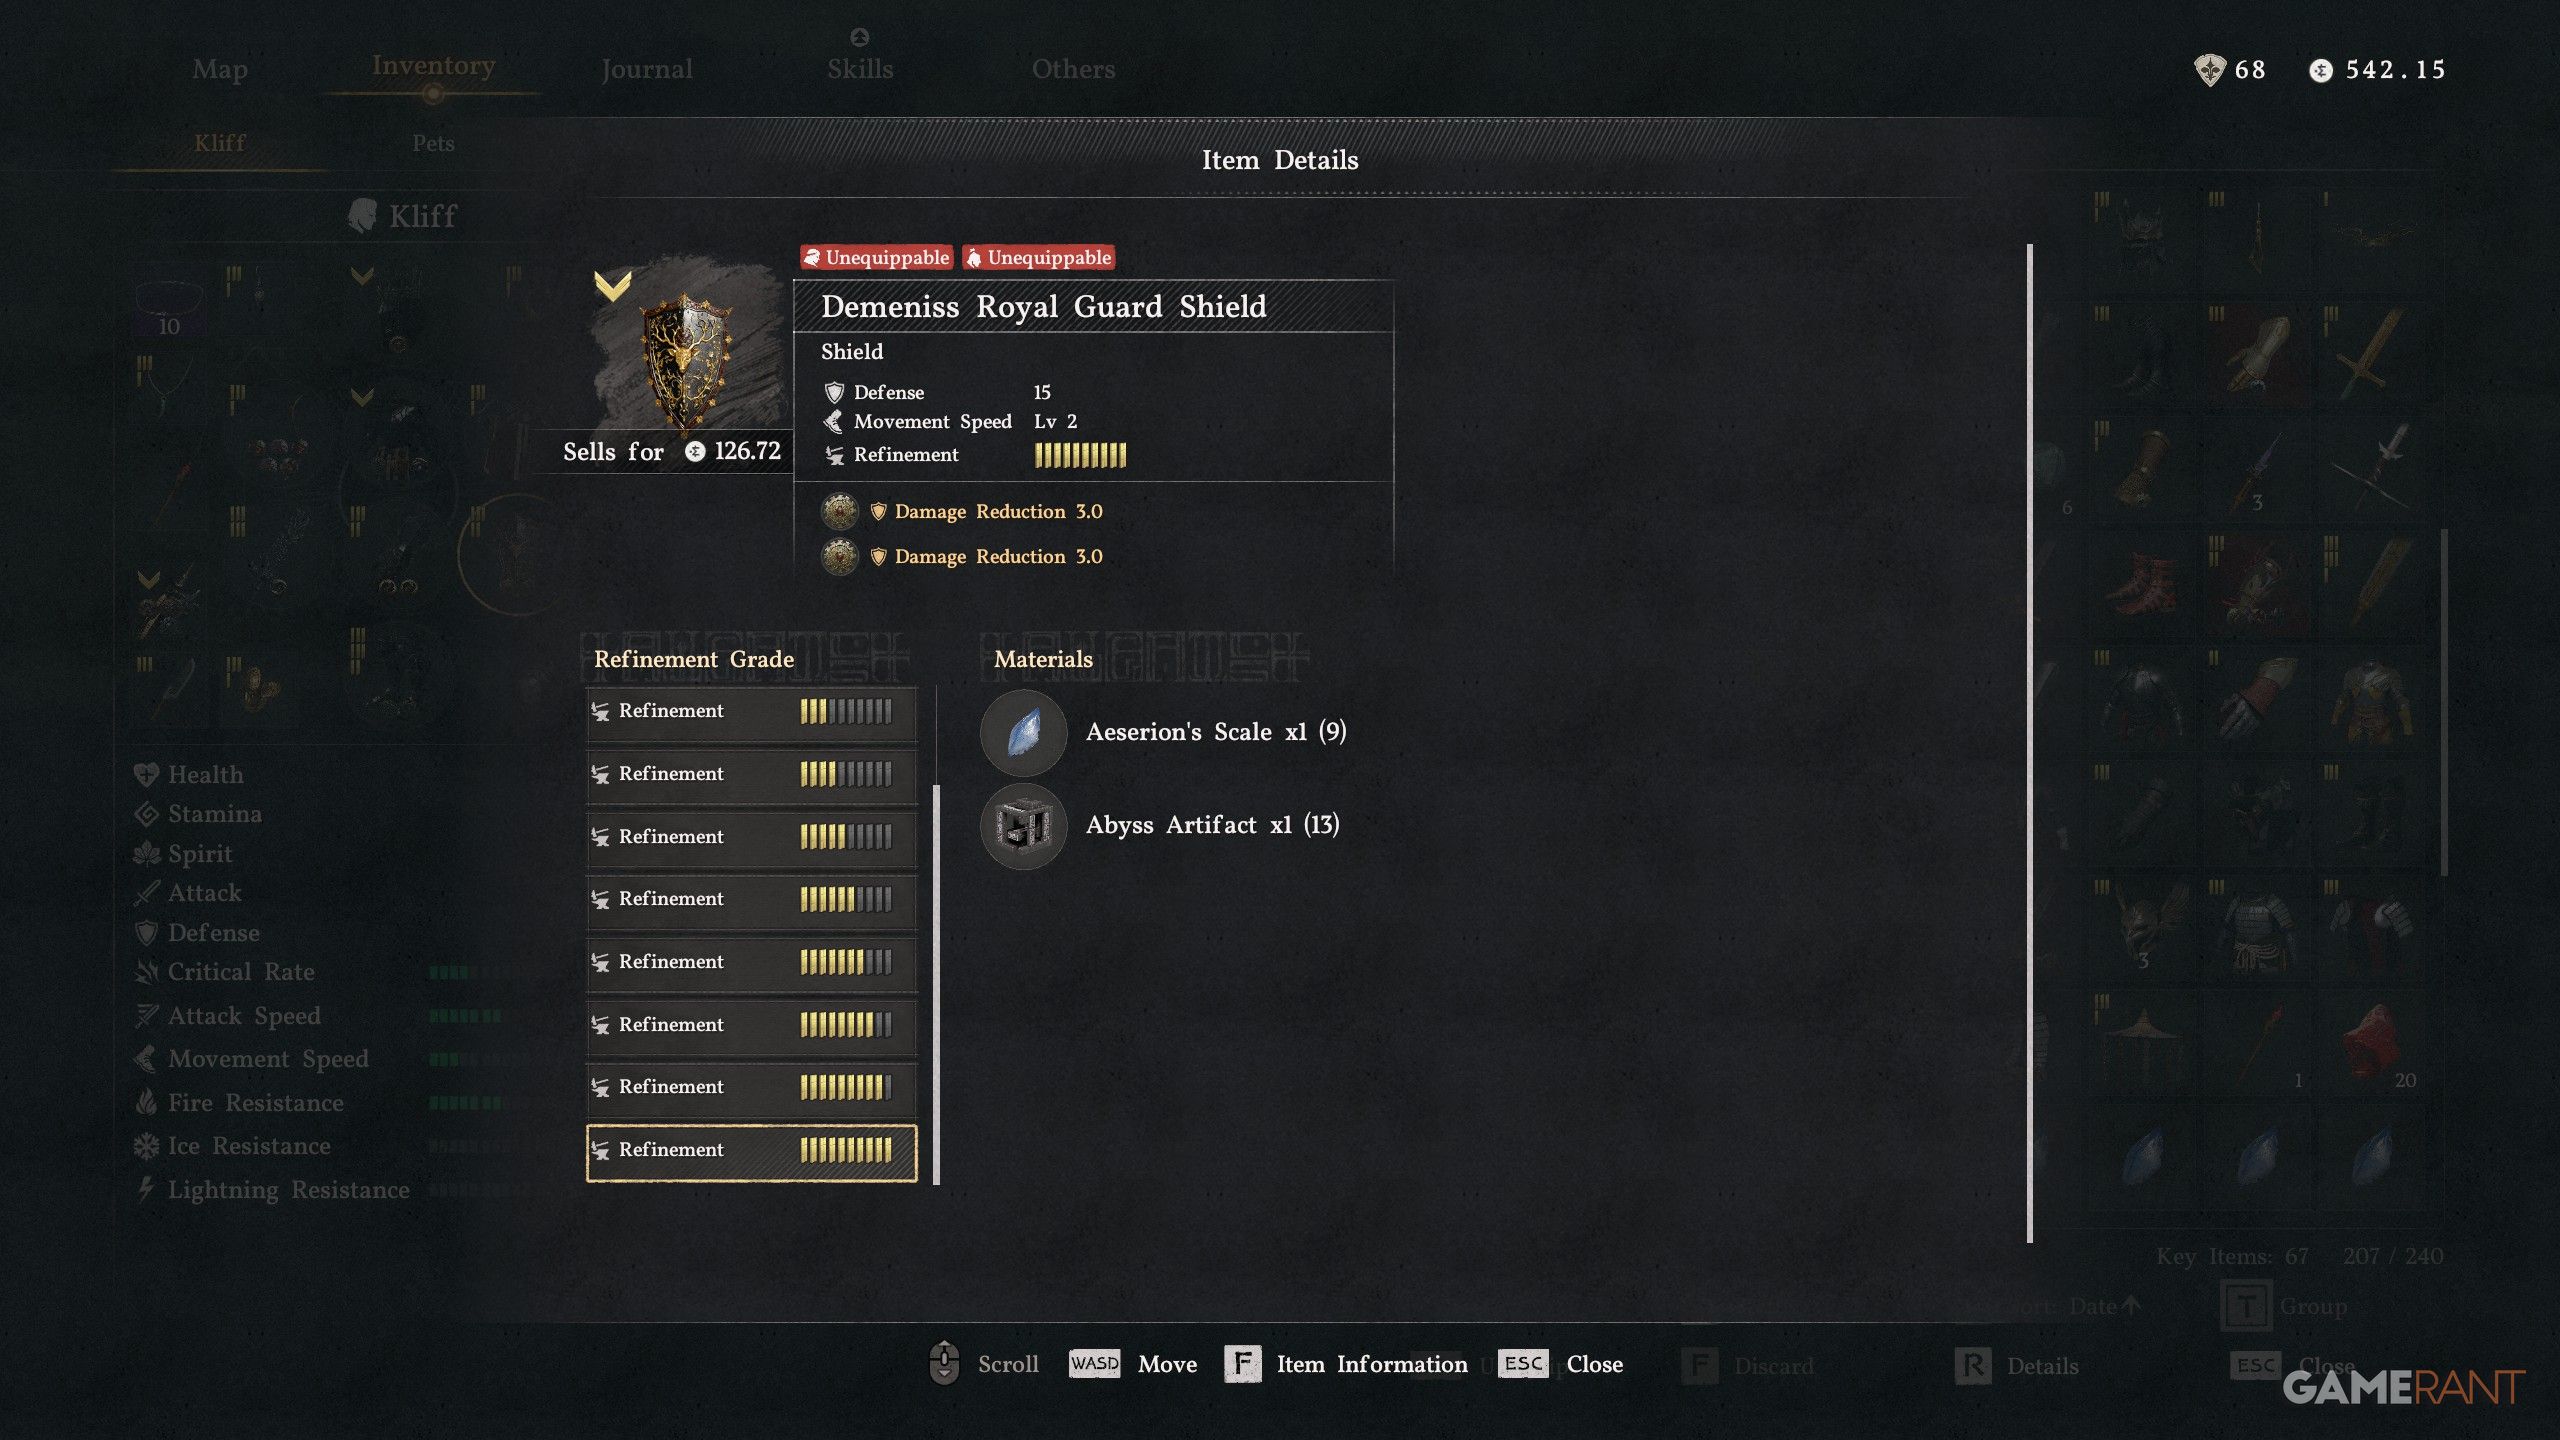
- The Demeniss Royal Guard Shield can be found at the open grave at the Church of East Demeniss, just east of the last “S” in “Demeniss”.
- The Demeniss Royal Guard Shield is great for its Defense and Movement Speed buffs.
- Even when on your back, the Demeniss Royal Guard Shield still provides passive buffs.
- These are the Abyss Gears we recommend for this shield:
| Abyss Gear | Why It’s Useful | How to Get |
|---|---|---|
| Aegis III | Provides a 3% Damage Reduction buff. | Blueprint purchased from Lyselia, the Witch in Serpent Marsh, Demeniss. |
| Aegis III | Provides a 3% Damage Reduction buff. | Blueprint purchased from Lyselia, the Witch in Serpent Marsh, Demeniss. |
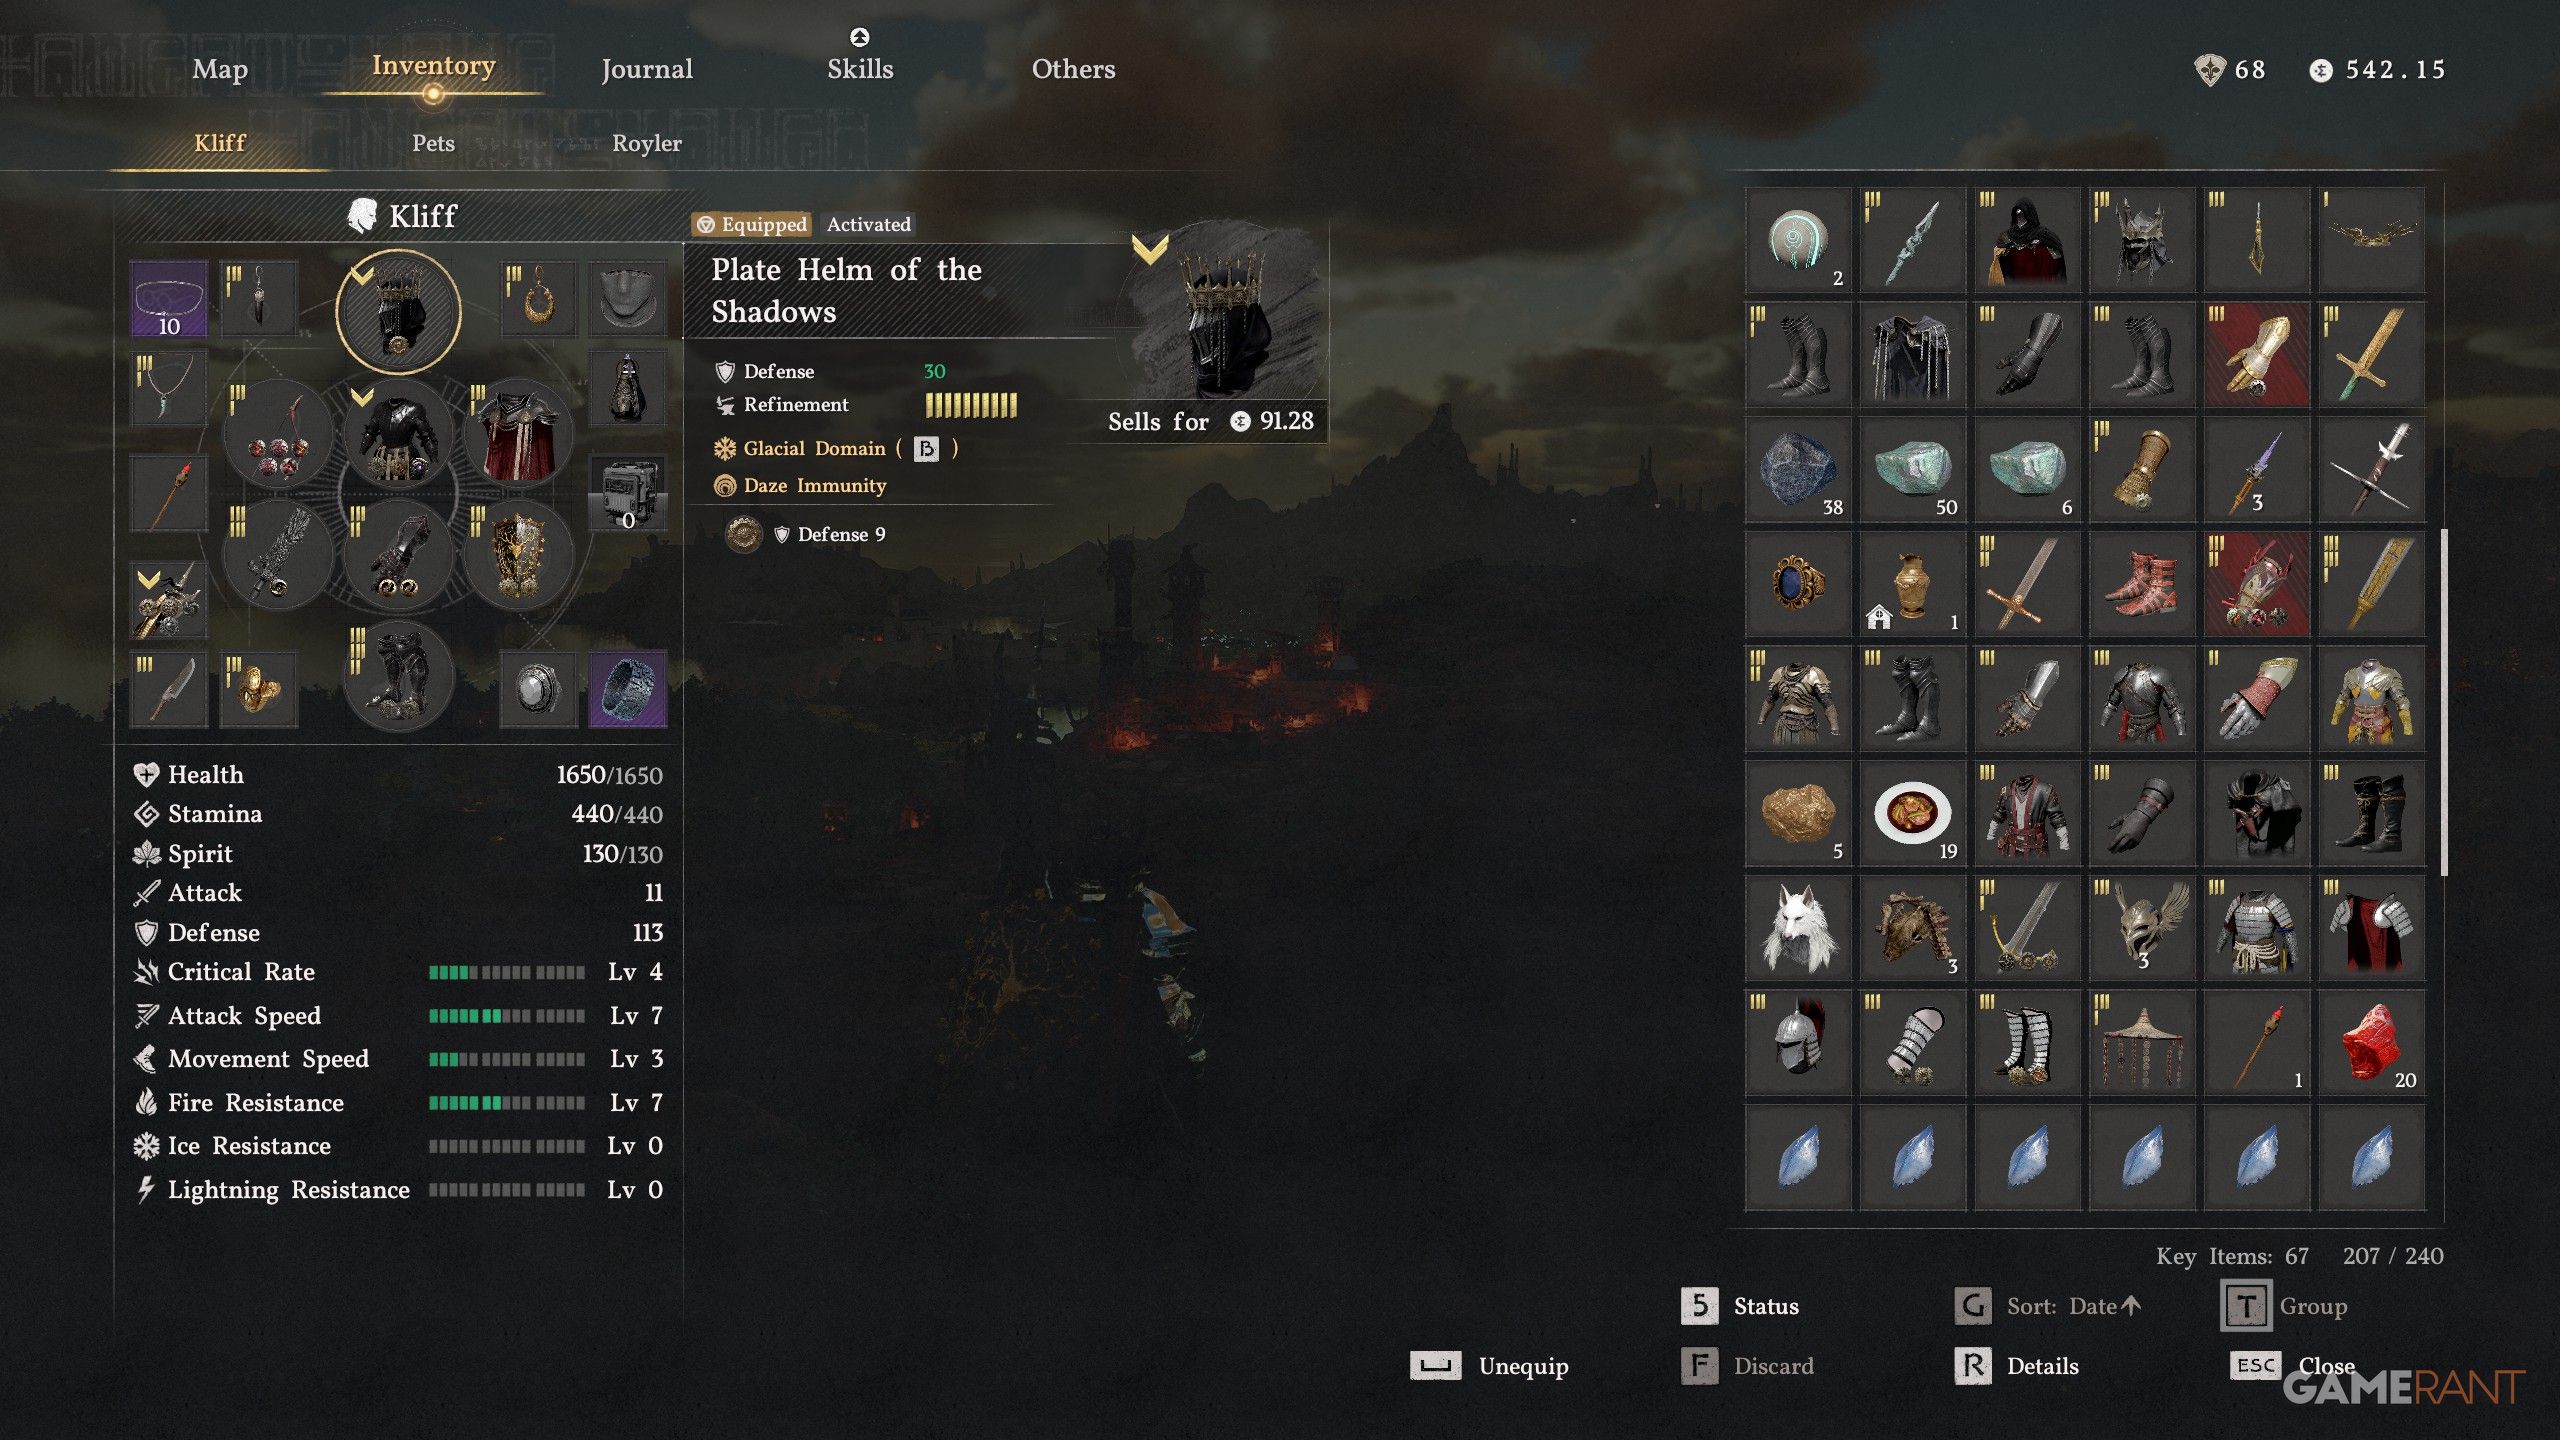
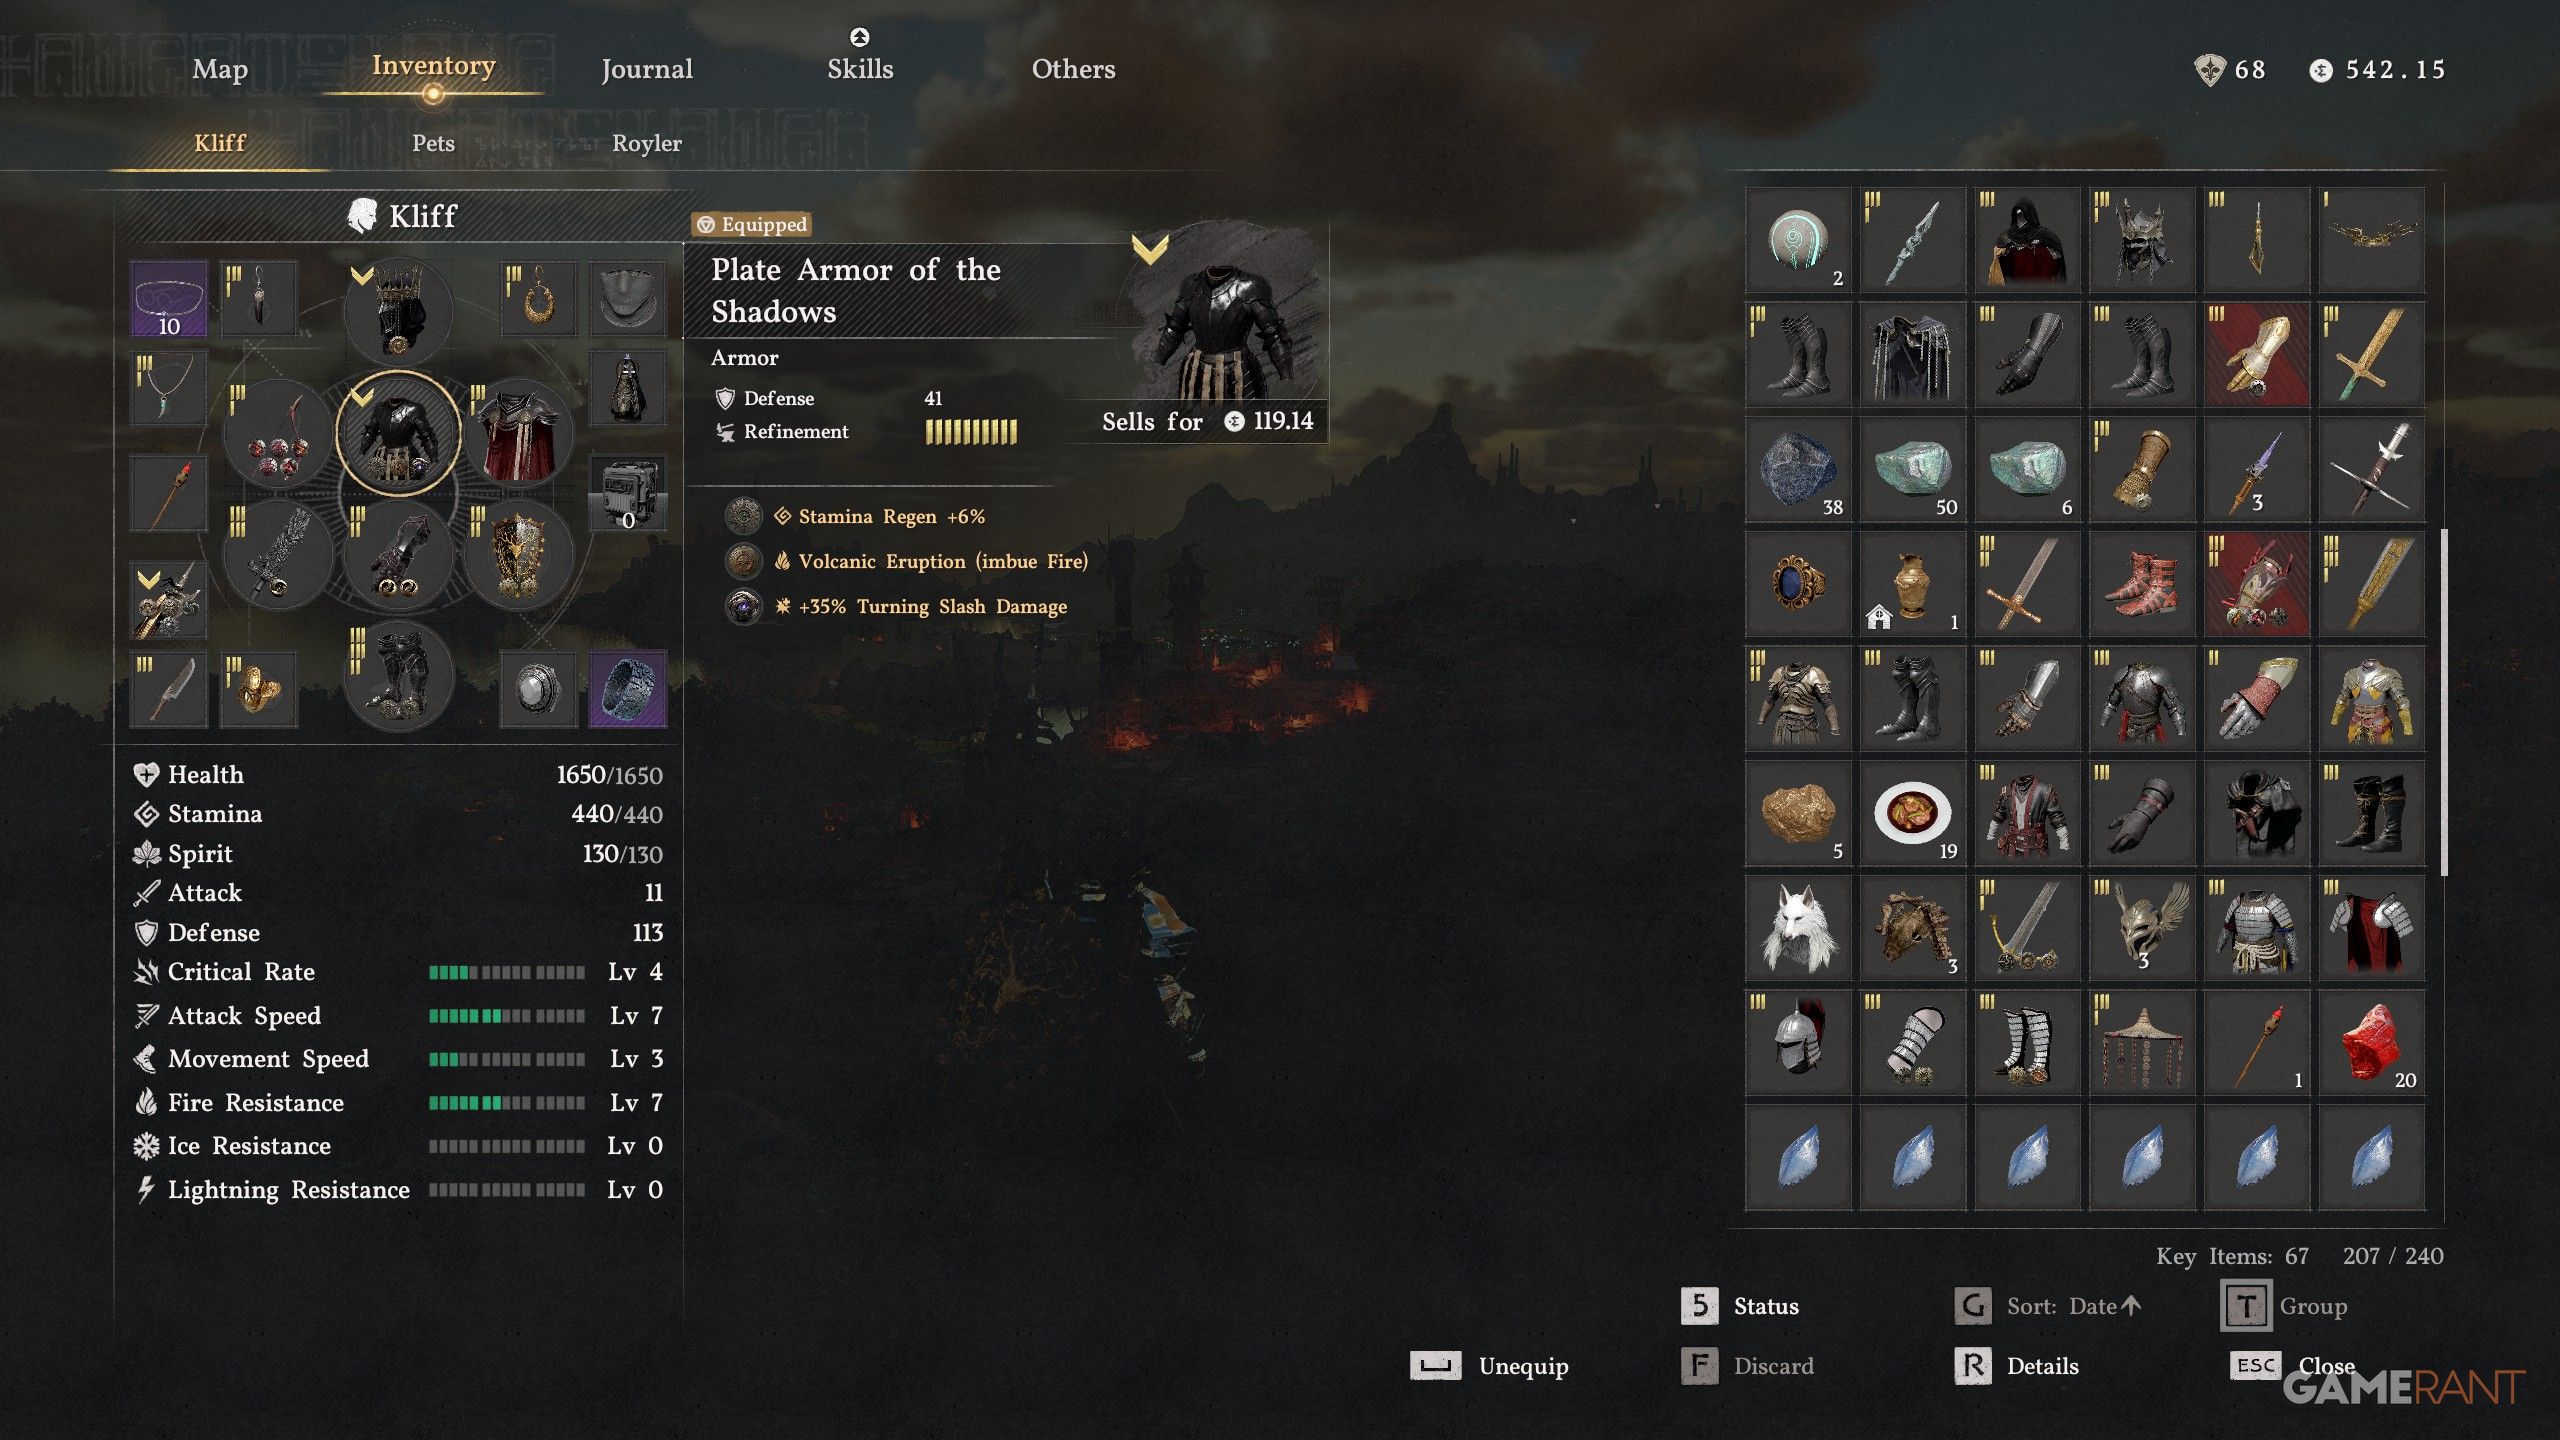
Best Armor & Abyss Gears for the Critical Rate Build in Crimson Desert
Upgrading armor sets doesn’t make a huge difference, so we chose the Armor of the Shadows. This guide has details on all the pieces, and we’ll also list the specific Abyss Gears we used below.
Helmet Abyss Gears
| Abyss Gear | Why It’s Useful | How to Get |
|---|---|---|
| Fortification III | Having extra defense helps absorb more damage. | Blueprint purchased from Lyselia, the Witch in Serpent Marsh, Demeniss. |
Chest Armor Abyss Gears
| Abyss Gear | Why It’s Useful | How to Get |
|---|---|---|
| Vigor III | Increases Stamina Regen so you can use heavy attacks and rolls faster. | Blueprint purchased from Elowen, the Witch in the Witchwoods, Hernand. |
| Volcanic Eruption | Allows you to add hard-hitting imbue Fire attacks after Turning Slash (L2+R2) | Obtained from the Scorchflame Plate Gloves, which can be found at Twilight Grotto, north of the Denn River (guide here). |
| Momentum | Adds +35% Turning Slash Damage, which is extremely important for the build. | Obtained from the Leather Helm of the Fallen Kingdom, which is inside the Sanctum of Benediction, south of the “E” in “Hernand” (guide here). |
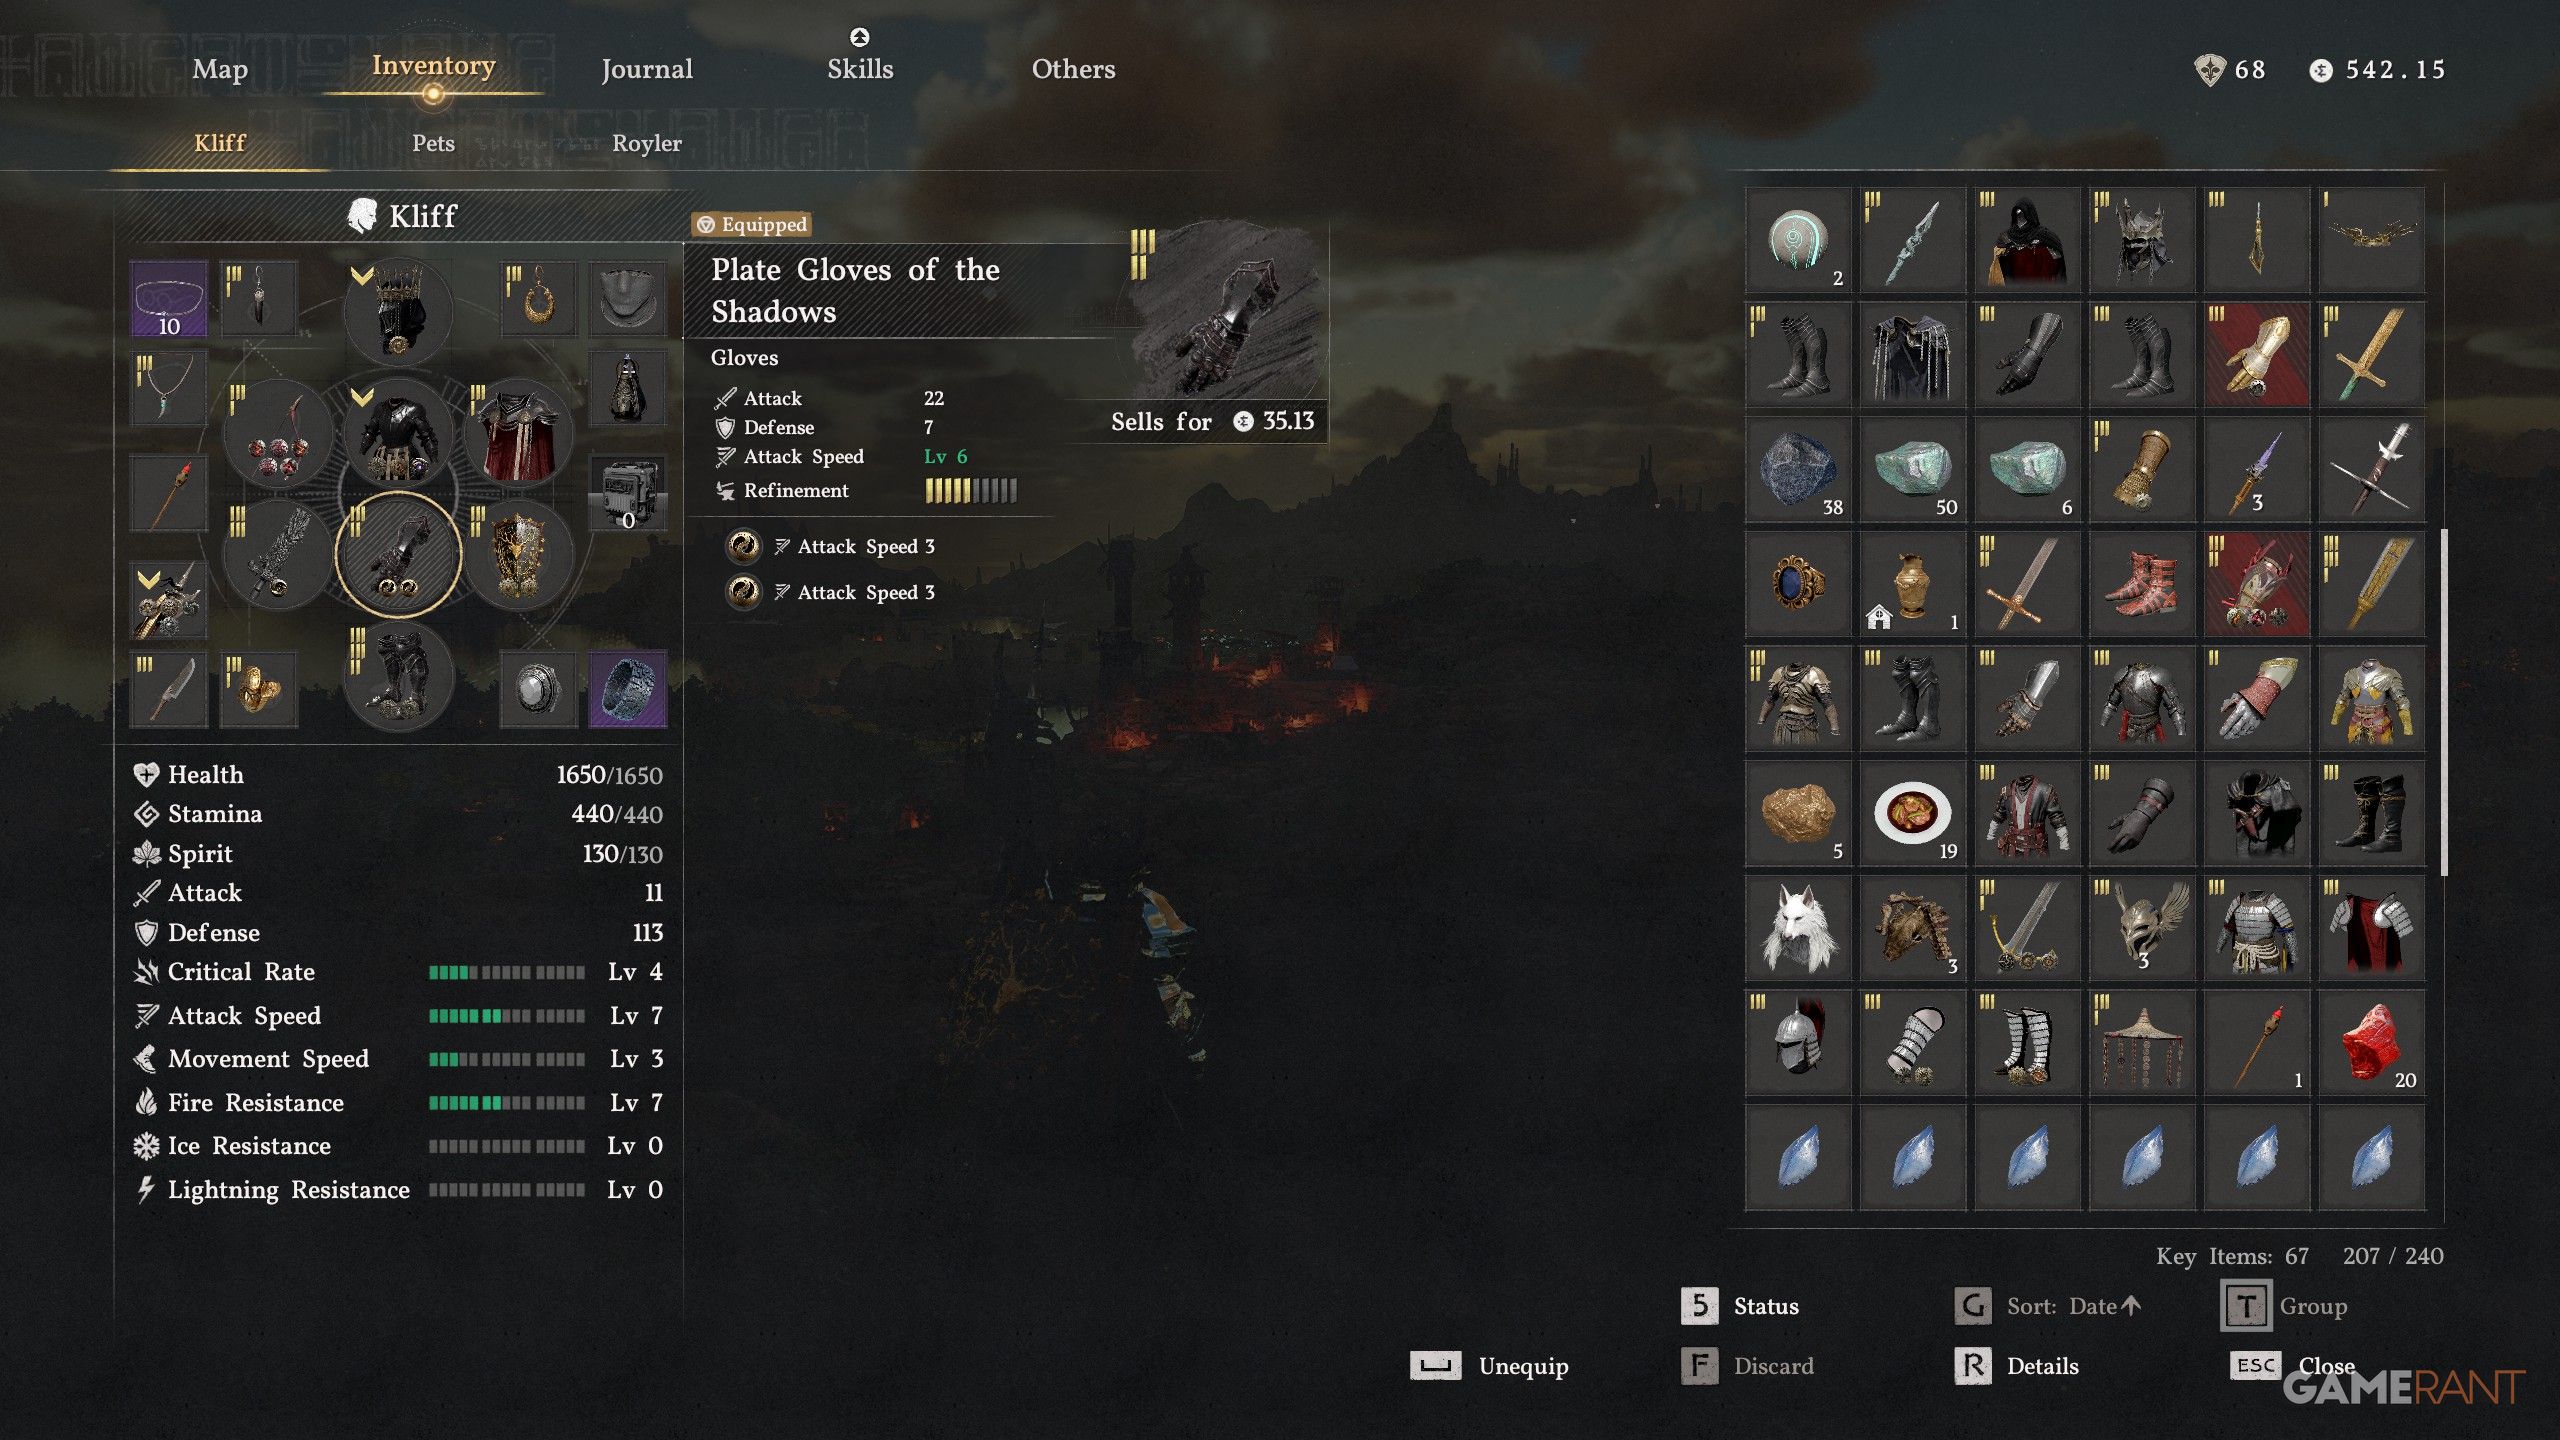
Glove Abyss Gears
| Abyss Gear | Why It’s Useful | How to Get |
|---|---|---|
| Swift III | Increases total Attack Speed. | Blueprint purchased from Bari, the Witch in Crimson Lake, Pailune. |
| Swift III | Increases total Attack Speed. | Blueprint purchased from Bari, the Witch in Crimson Lake, Pailune. |
Boots Abyss Gears

| Abyss Gear | Why It’s Useful | How to Get |
|---|---|---|
| Vigor III | Increases Stamina Regen. | Blueprint purchased from Elowen, the Witch in the Witchwoods, Hernand. |
| Vigor III | Increases Stamina Regen. | Blueprint purchased from Elowen, the Witch in the Witchwoods, Hernand. |
We chose these particular Abyss Gear for the Gloves and Boots because they provide constant benefits, even when you’re not actively attacking. Other gear types only activate when you attack with the Gloves or Boots, making these a better choice.
Best Accessories for the Critical Rate Build in Crimson Desert
White Lion Necklace for Critical Rate
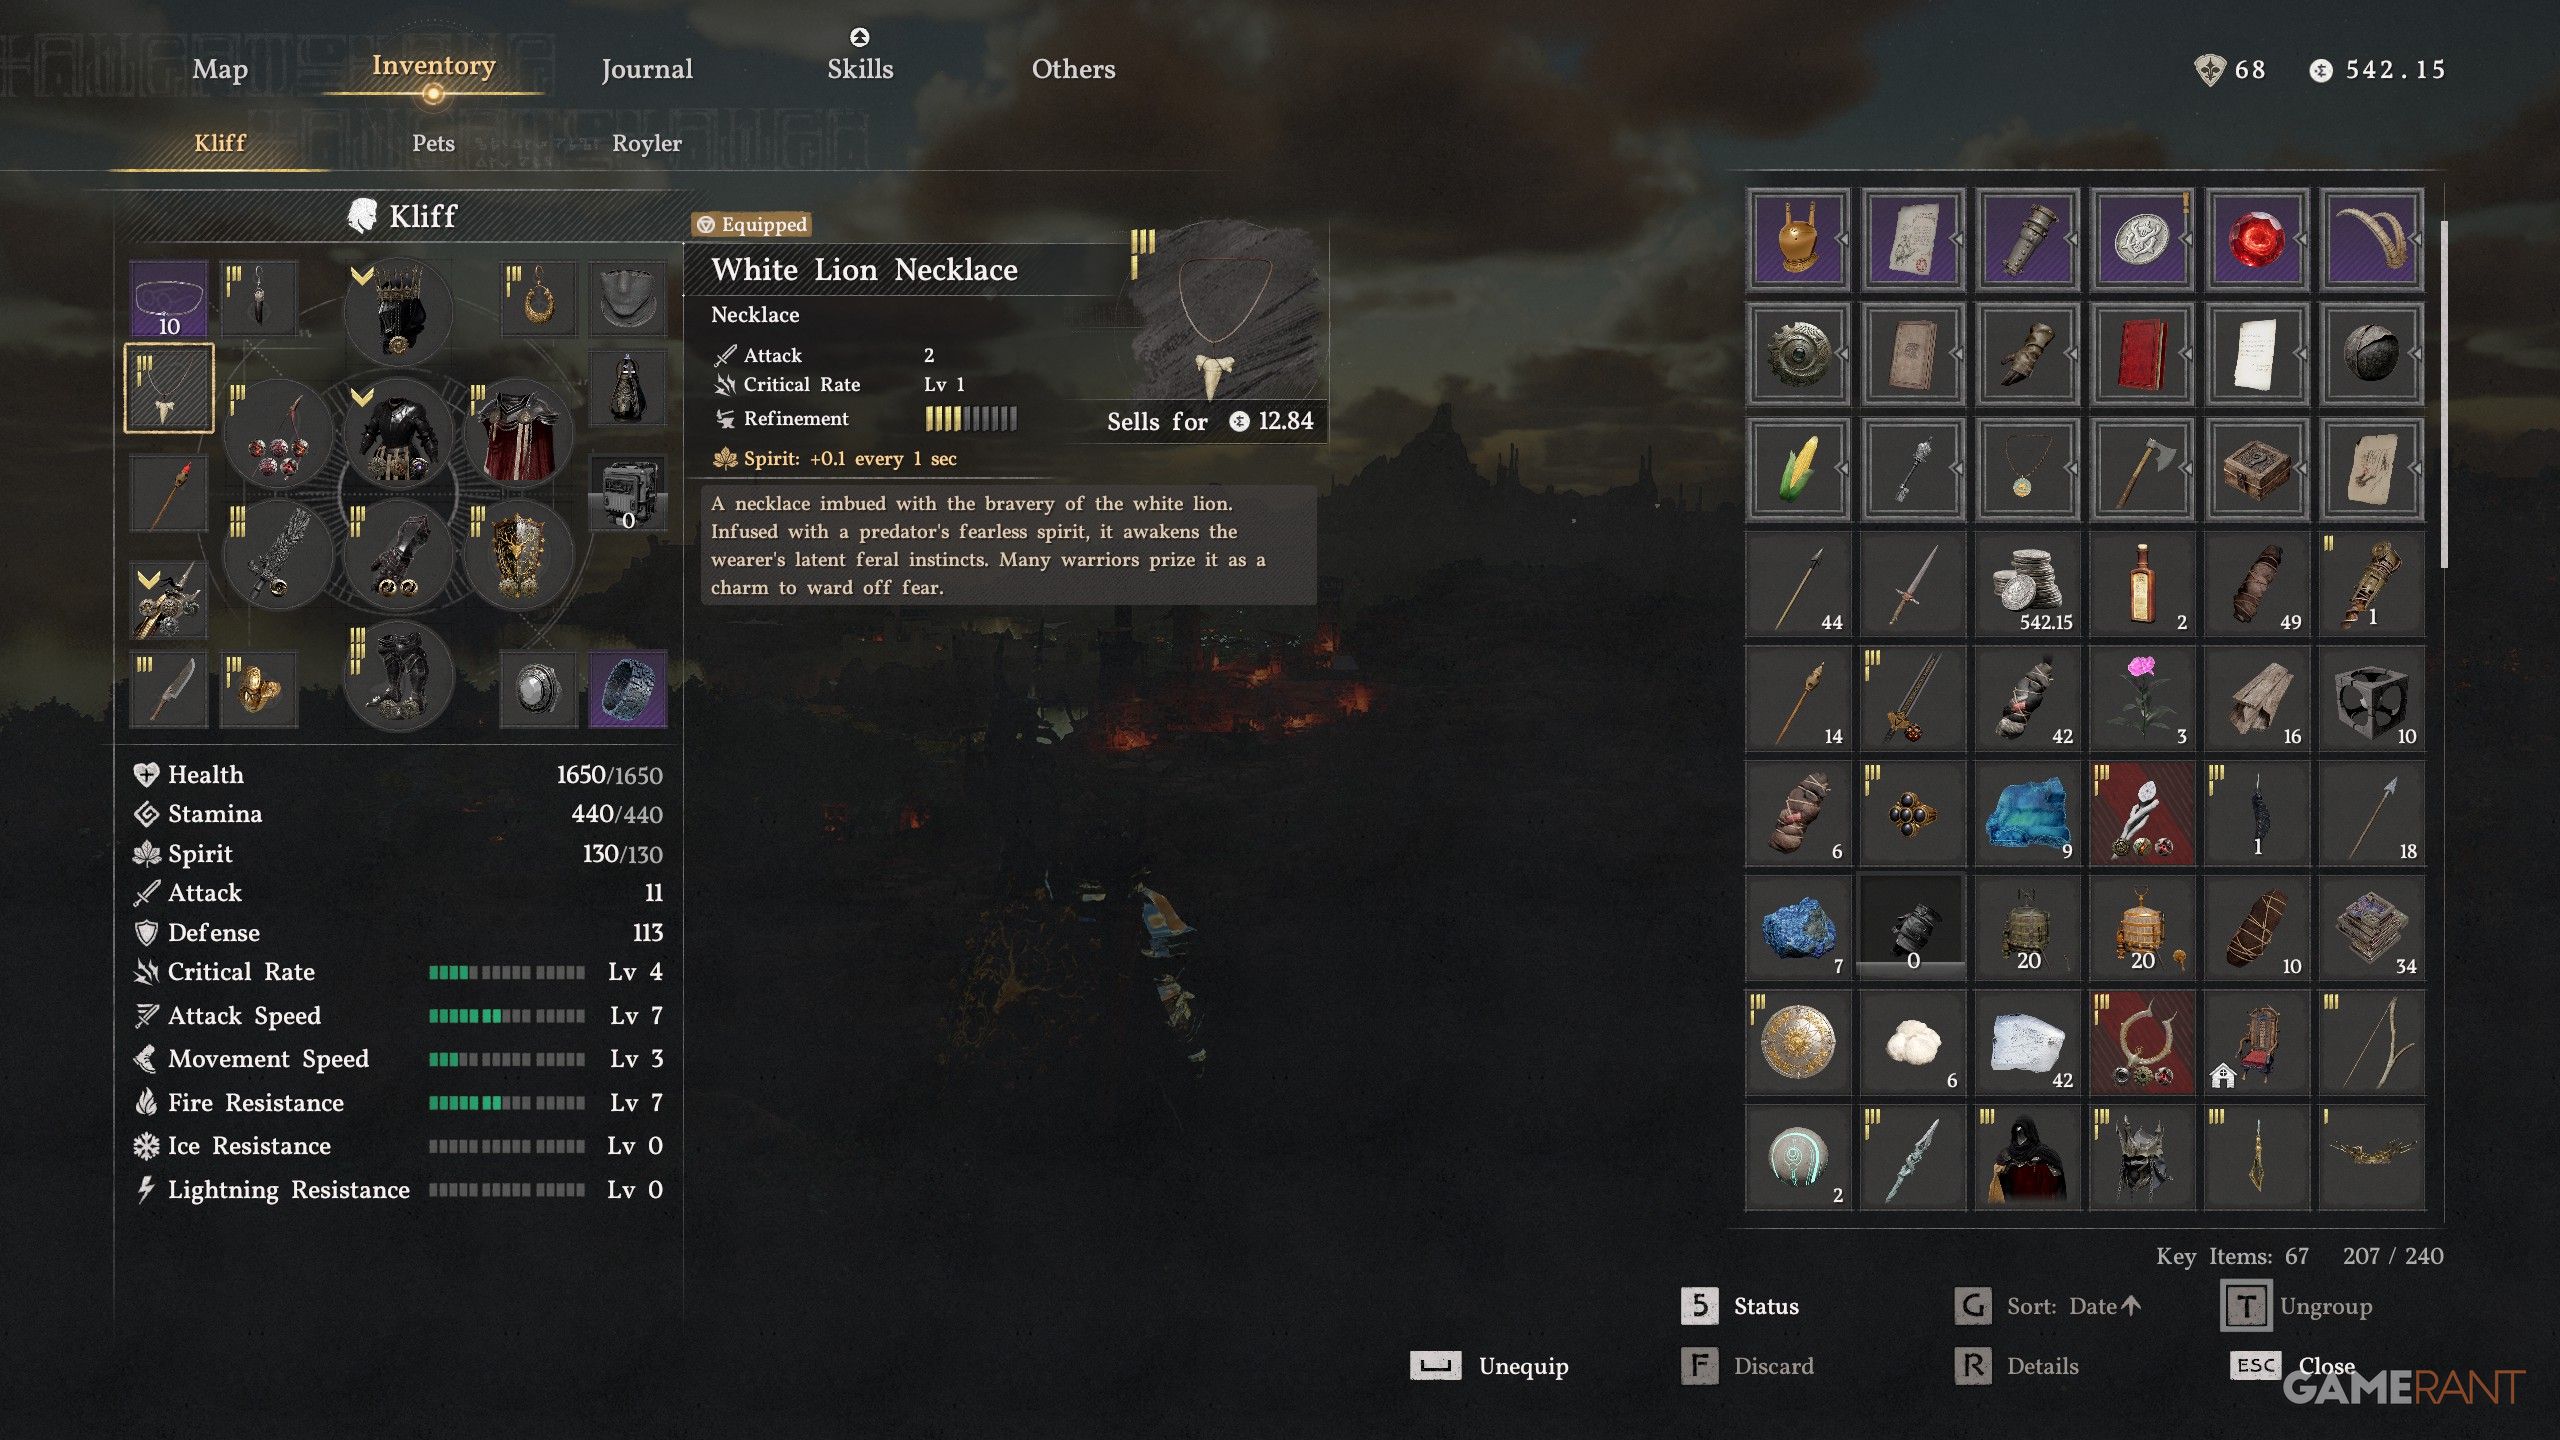
- The White Lion Necklace can be acquired from the Legendary White Lion, which we have a guide on here.
- This necklace can be upgraded to provide even more increases to Critical Rate.
Pailunese Signet Ring & Witch’s Ring for Critical Rate & Attack Speed
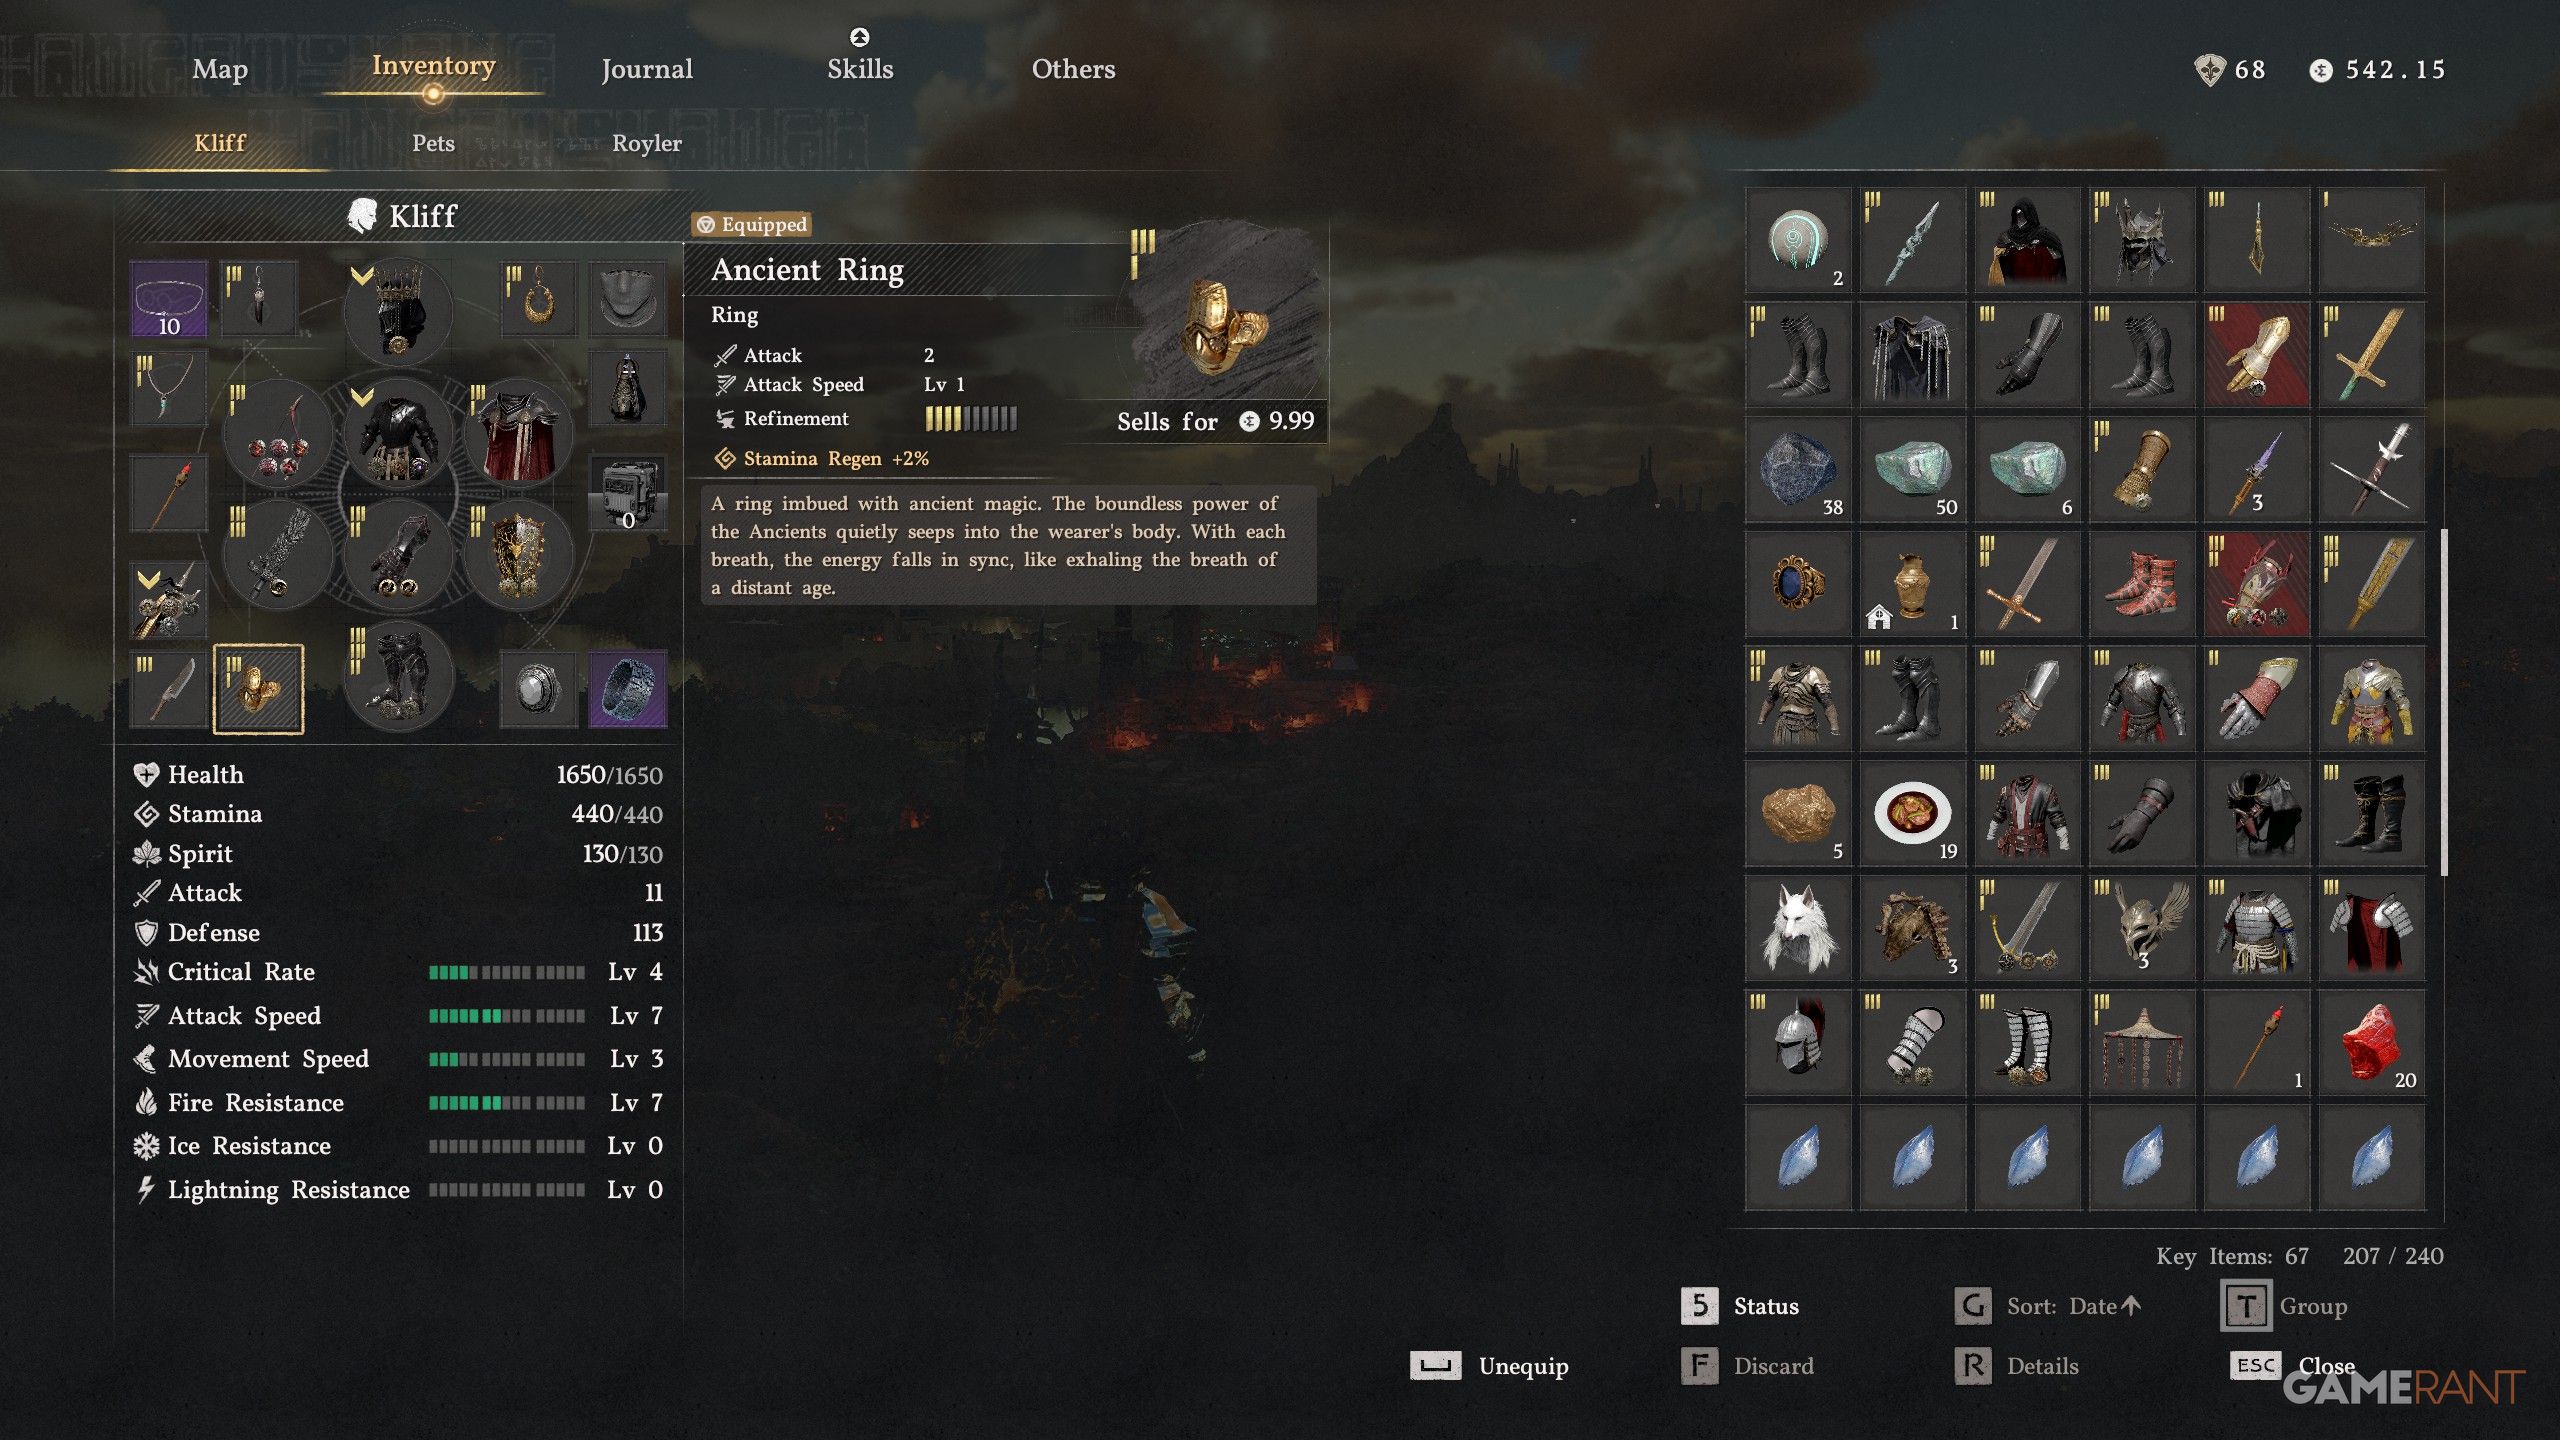
- The Pailunese Signet Ring can be acquired from the Contribution Shop in Pailune.
- The Witch’s Ring is earned by defeating Hexe Marie in the MaiN Quest.
- These rings provide Critical Rate and Attack Speed bonuses.
White Horn Earring & Witch’s Earrings for Movement Speed

- The White Horn Earring is earned by defeating White Horn, Shepherd of Souls (which we have a guide for here).
- The Witch’s Earring is in the Southern Court mansion, south of the first “E” in “Demeniss”.
- These Earrings are perfect, as they grant Movement Speed and Defense buffs.
Accessories have a hidden benefit: their stats are actually doubled in the game. For example, a necklace that says it has 2% Critical Rate actually gives you 4%.
Best Skills for the Critical Rate Build in Crimson Desert
Forward Slash (Lv 3)
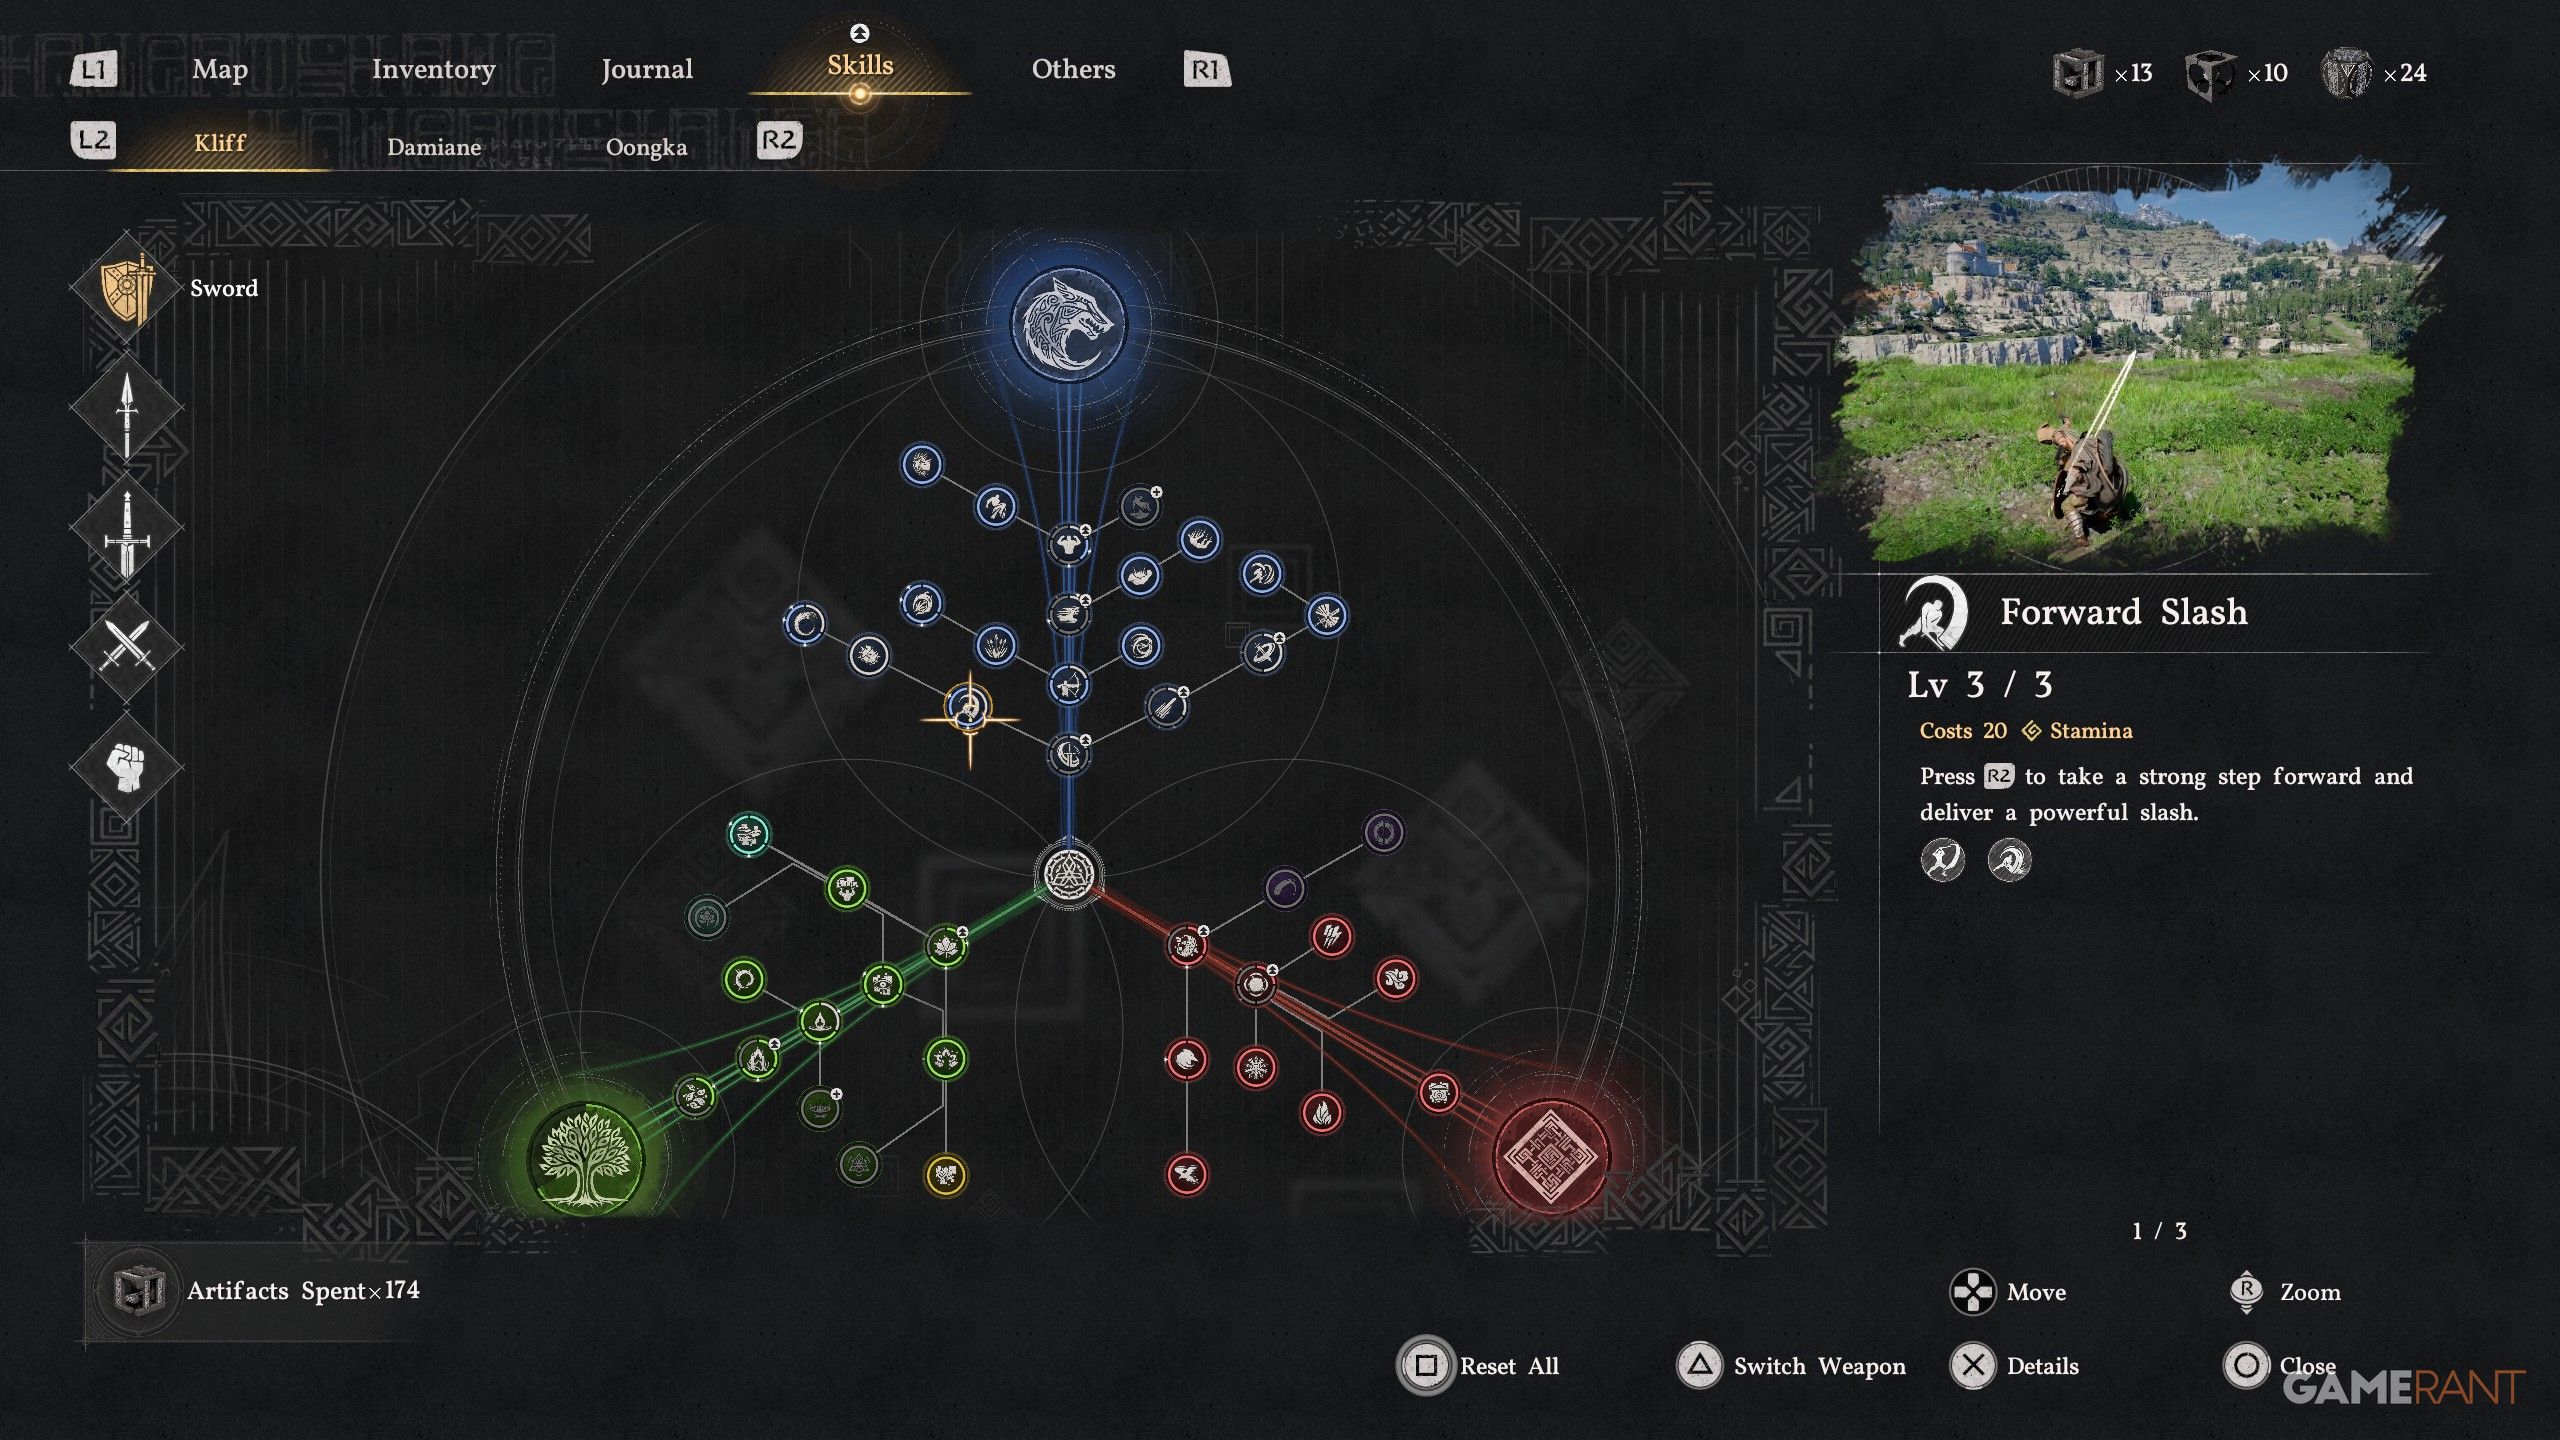
- Press R2 to take a strong step forward and deliver a powerful slash.
- This skill works wonderfully with the Abyss Gears you have on the Vow of the Dead King, as R2 attacks will deal even more damage, and they’re assisted by the special effect Abyss Gears.
Nature’s Echo (Lv 1)
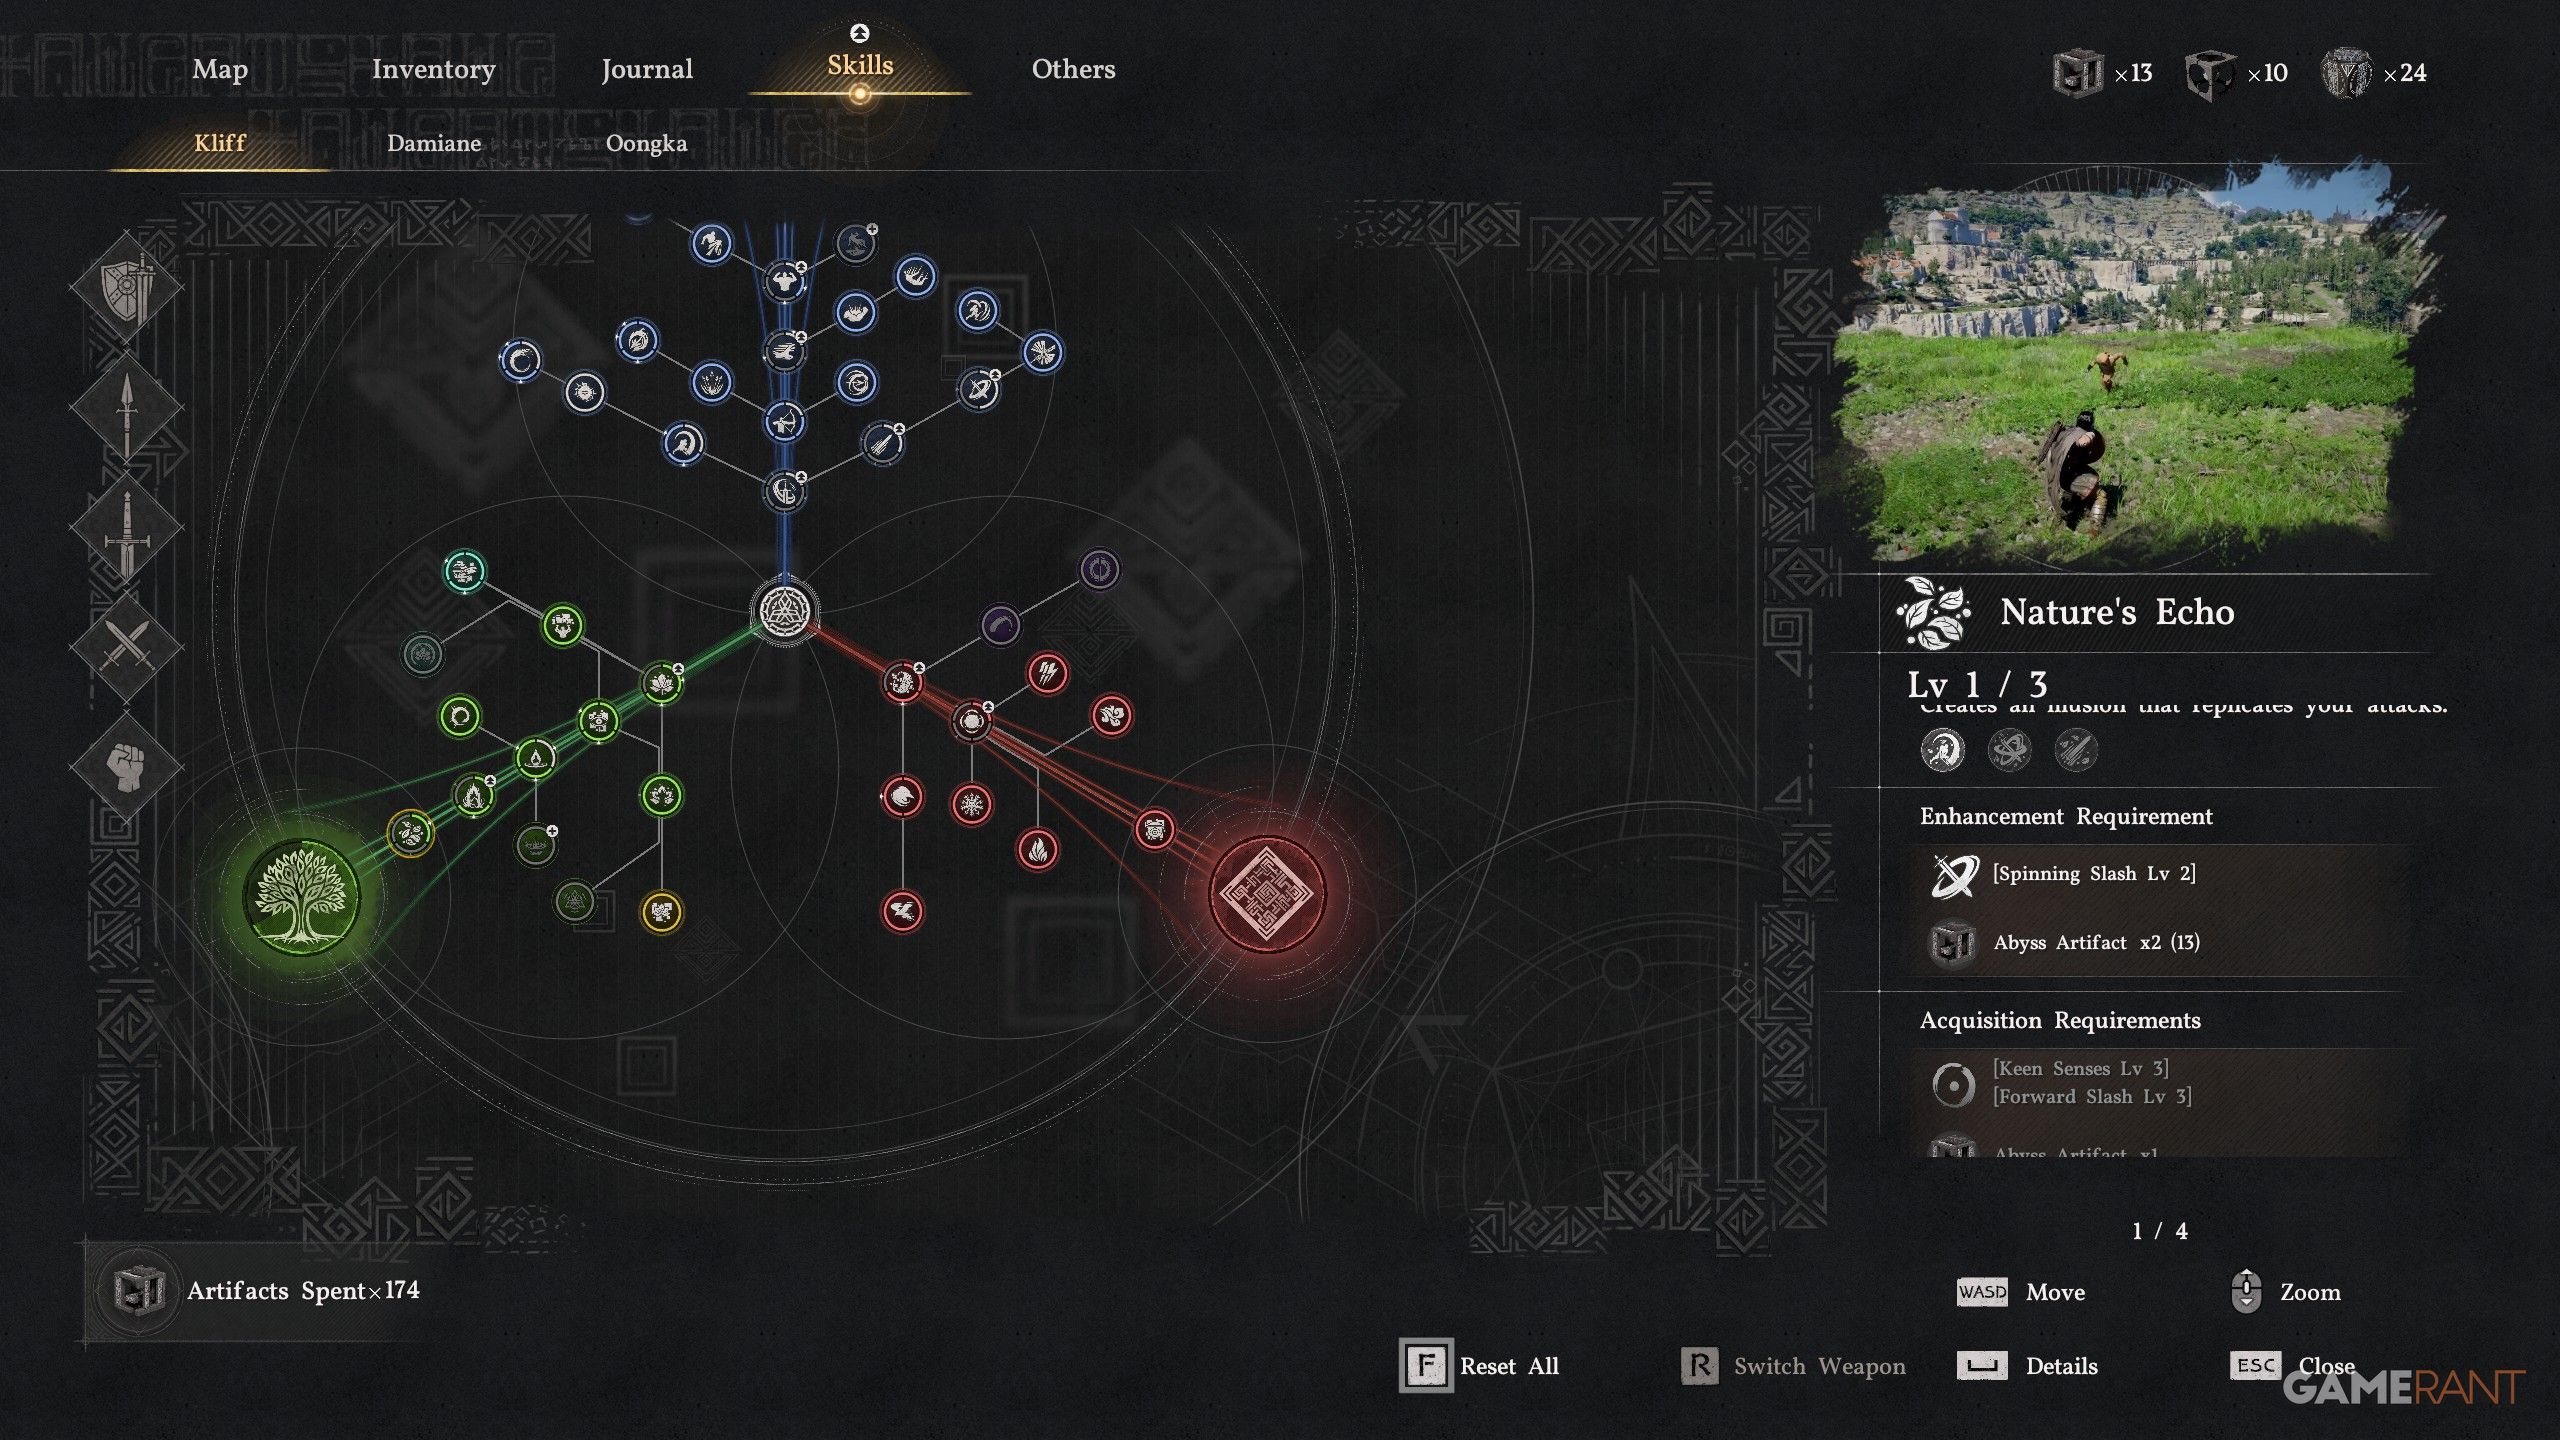
- Creates an illusion that replicates your attacks.
- Lv 1 provides Echoing Forward Slash, which sees an illusion copy your attack, which means even more R2 damage.
Turning Slash (Lv 3)
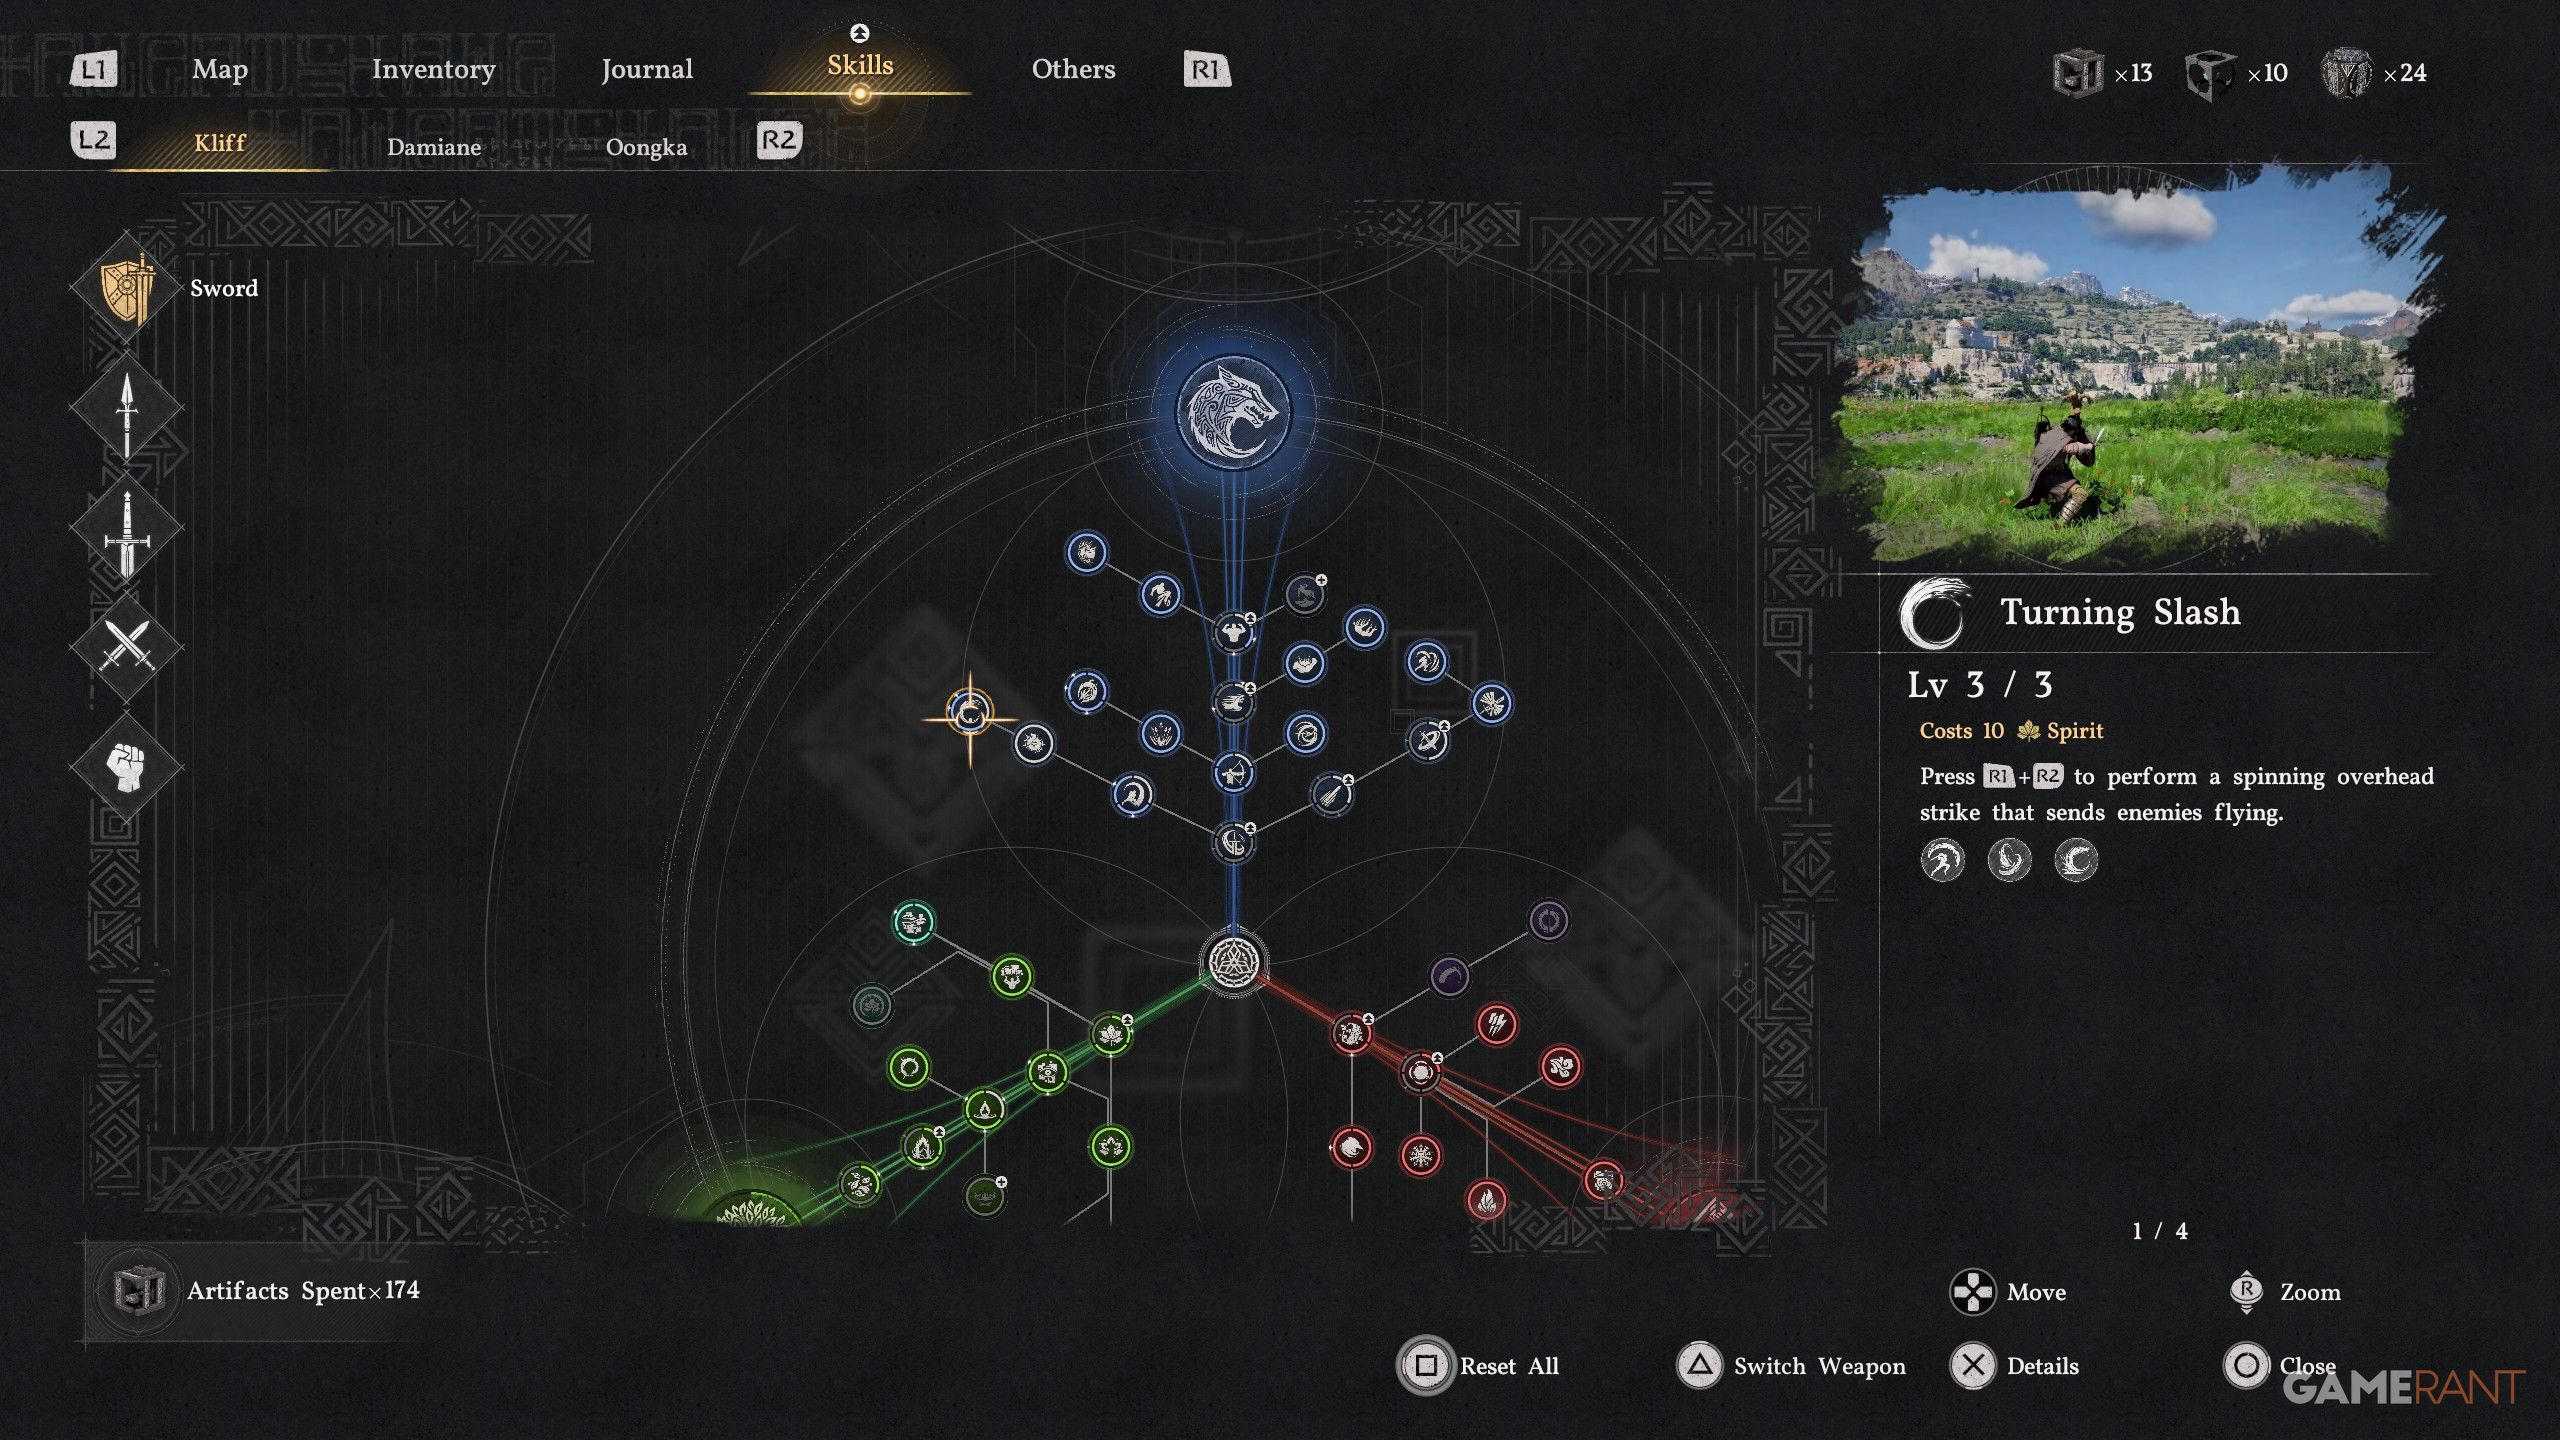
- Press R1+R2 to perform a spinning overhead strike that sends enemies flying.
- When upgraded to Level 3, Turning Slash ignores super armor, allowing it to deal even more damage.
- You’re immune while using Turning Slash, and you have an Abyss Gear slotted that adds an additional +35% damage.
Imbue Element (Lv 1)
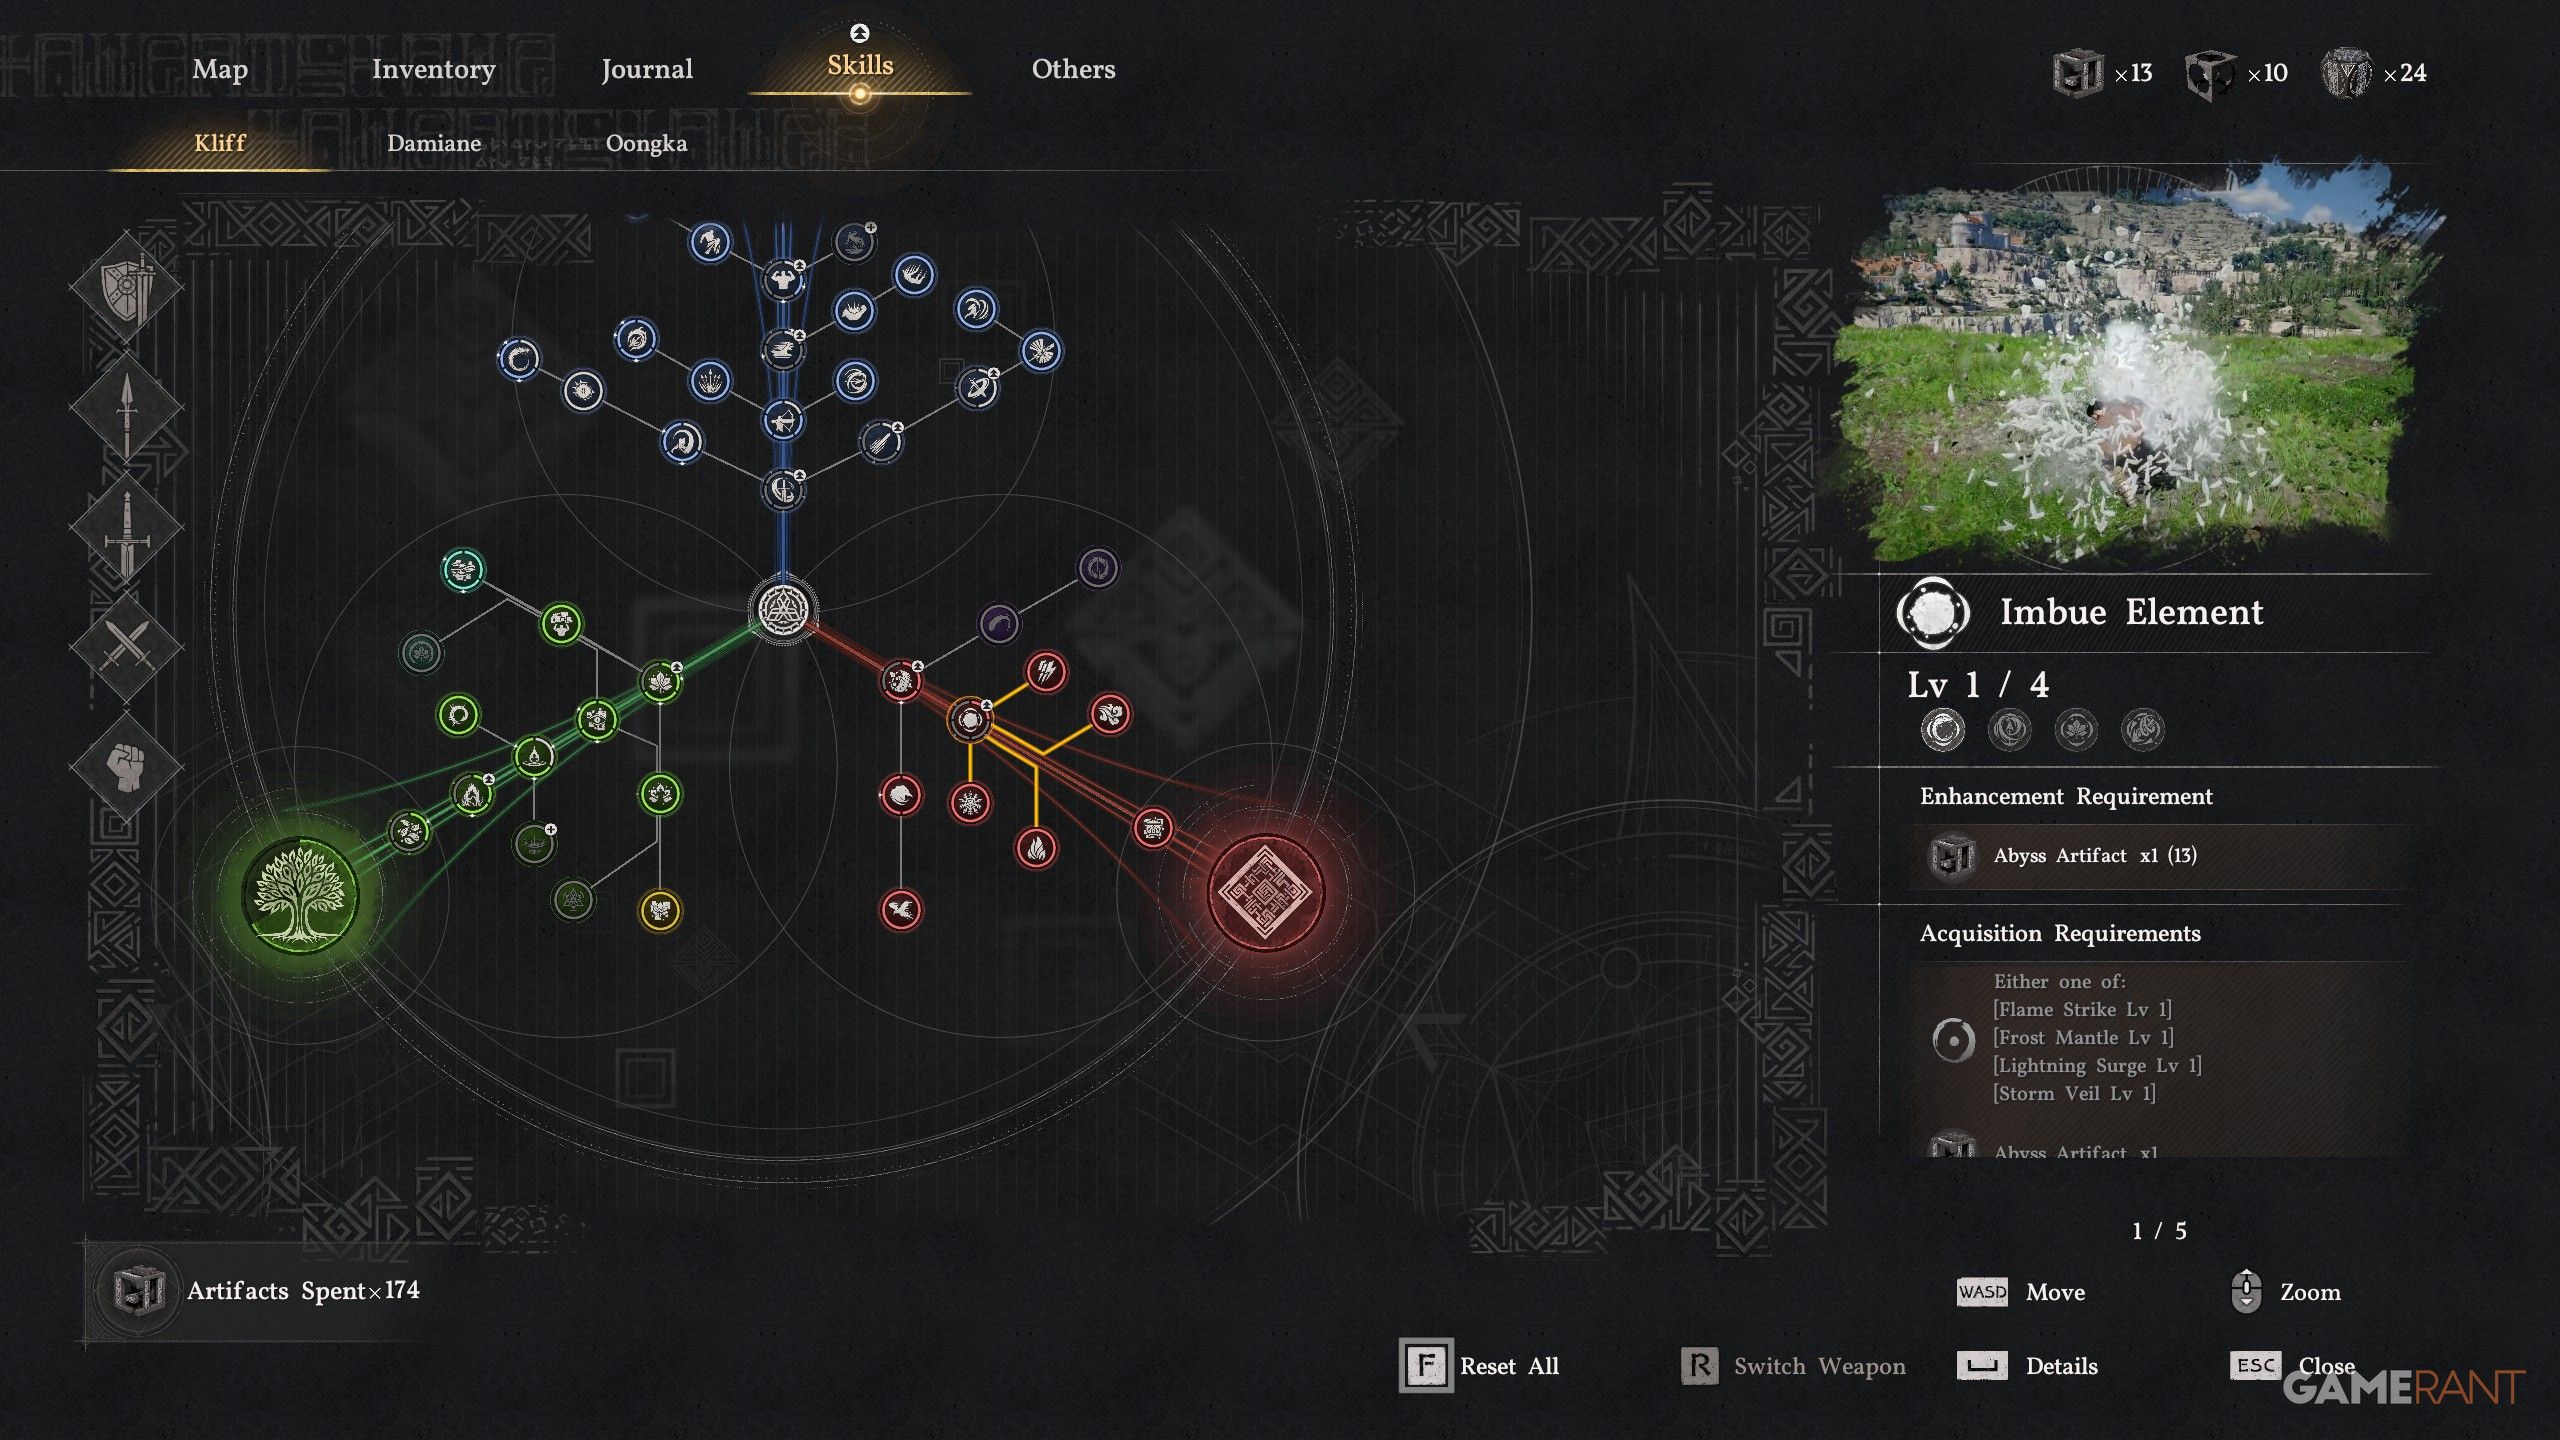
- Imbue Element allows you to use Fire Attacks during Turning Slash. Paired with the Volcanic Eruption Abyss Gear, your attacks will be as fiery as they are deadly.
You will need the Flame Lv 1 skill, which is obtained specifically with this guide.
Keen Senses (Lv 3)
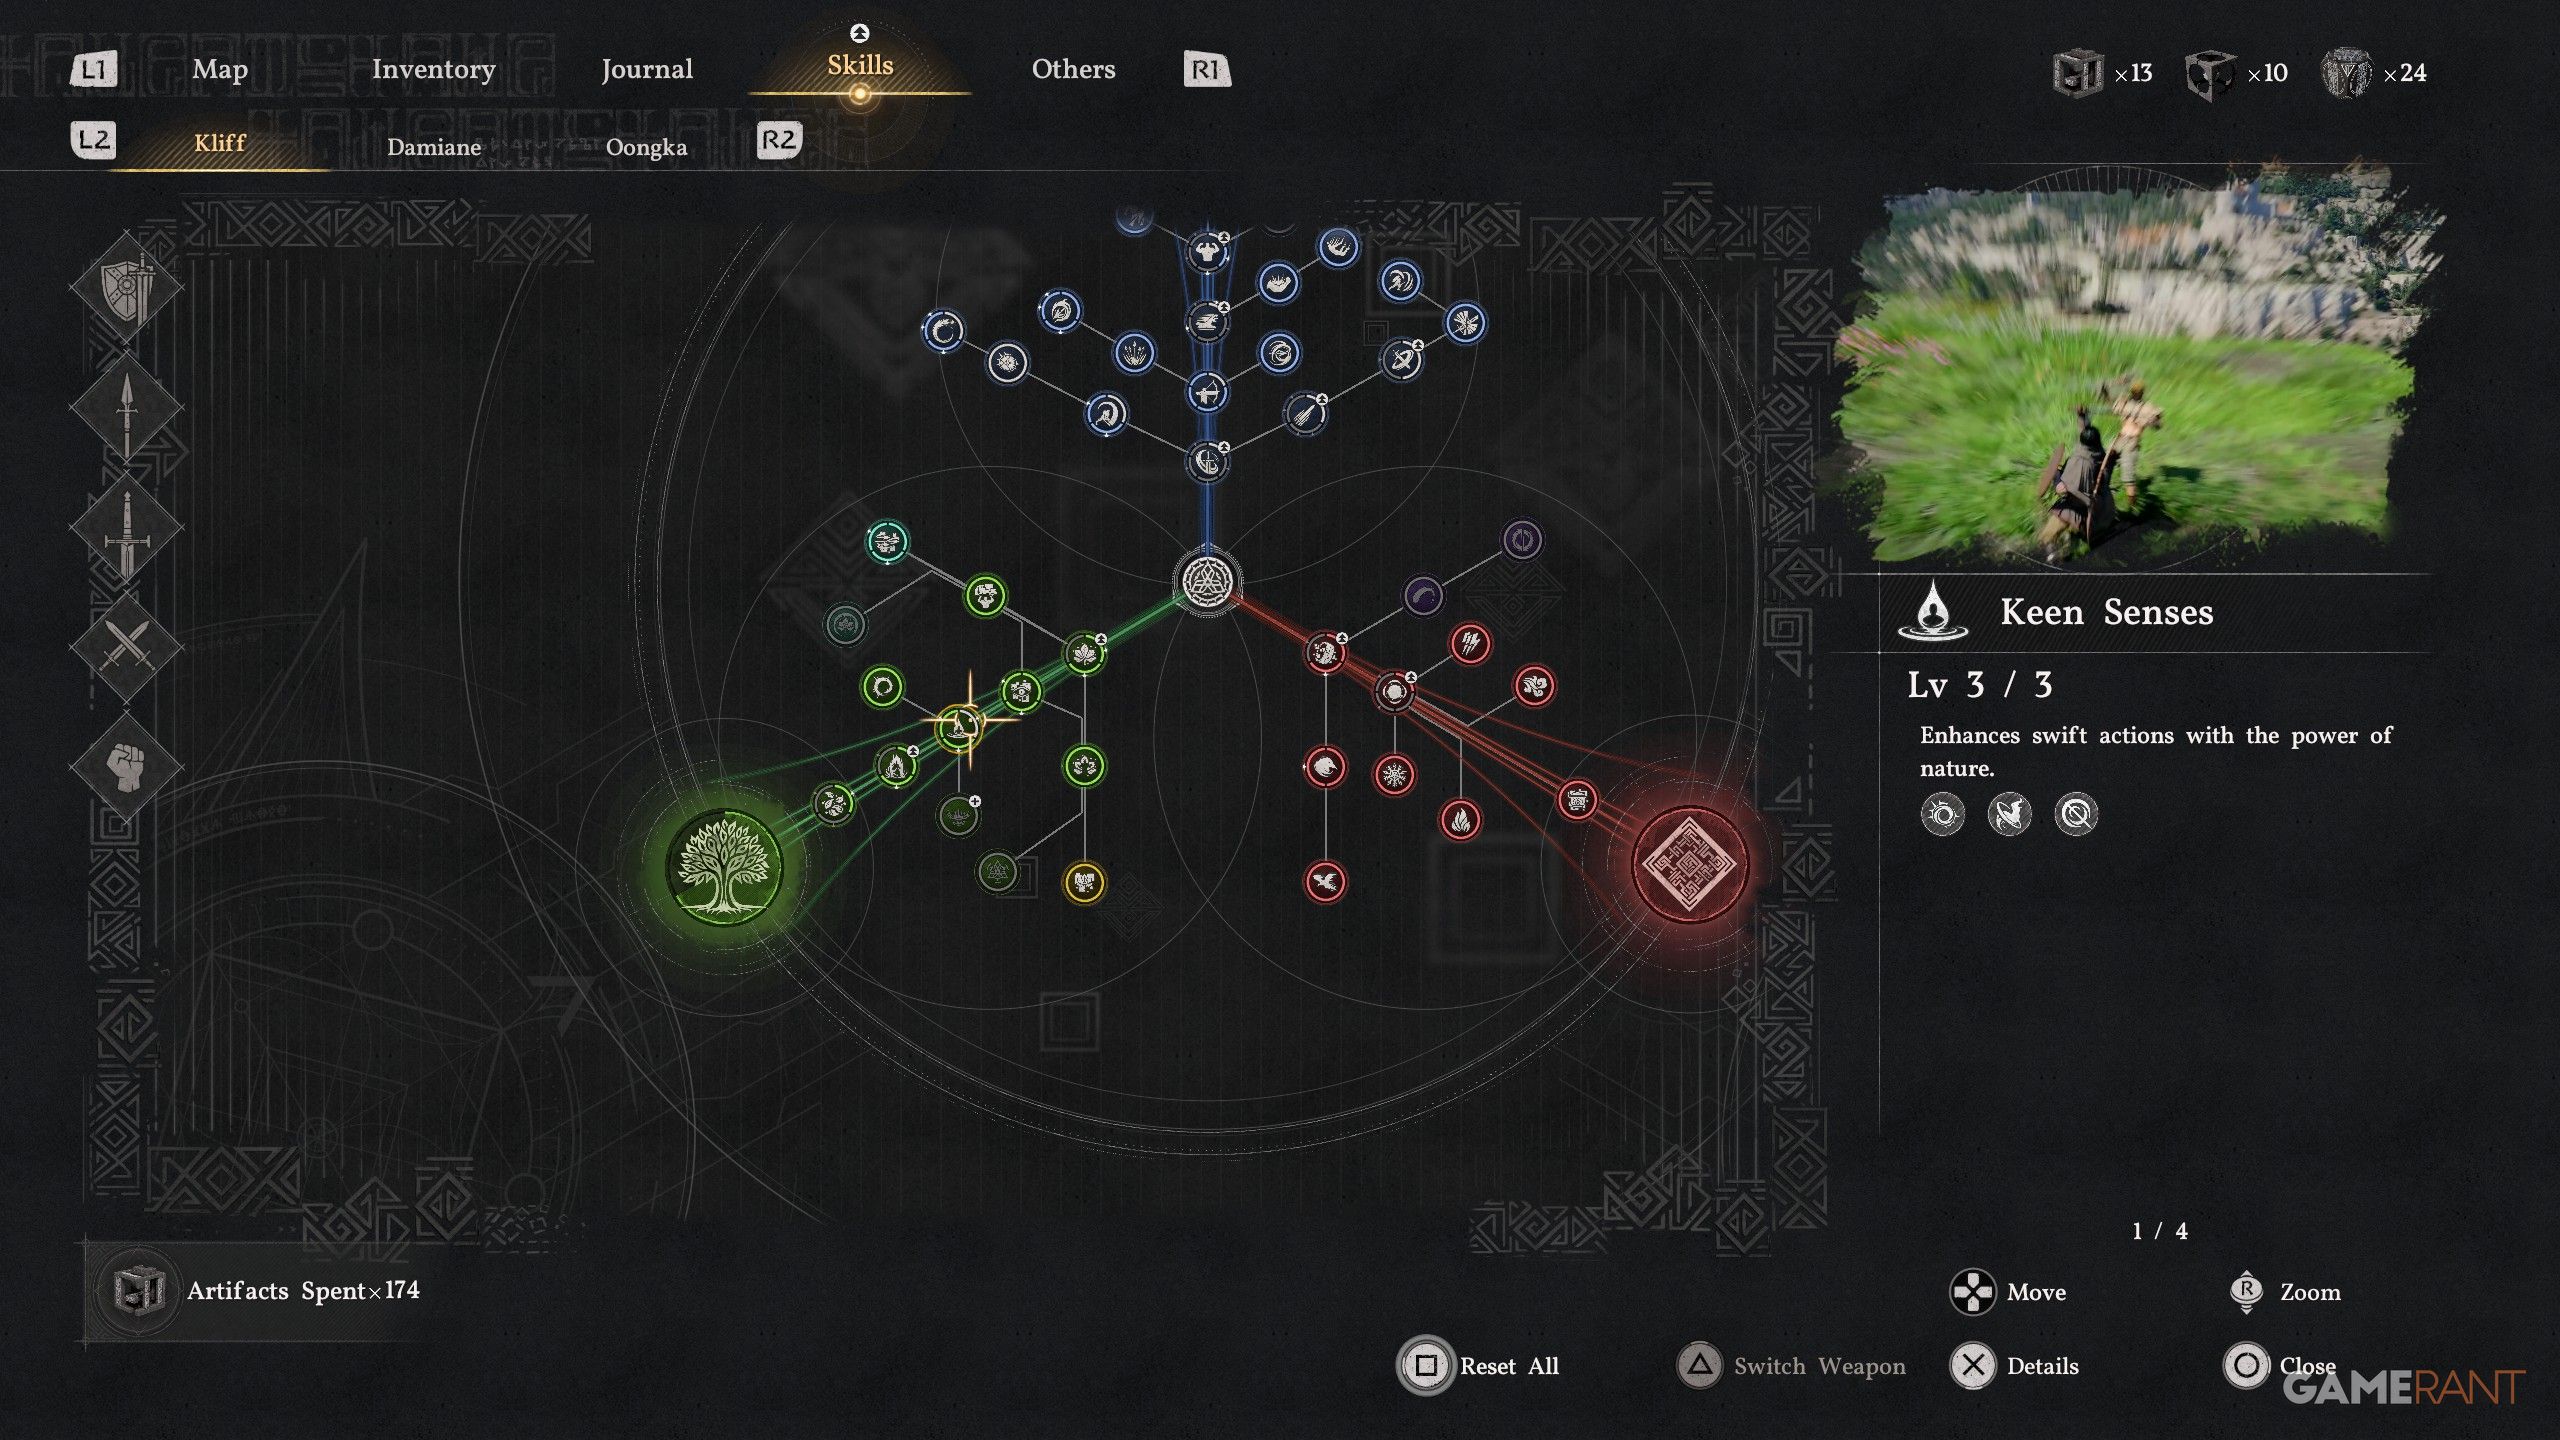
- Enhance swift actions with the power of nature.
- Since you can’t parry as reliably with a Two-Handed Weapon, perfect dodges will help to ensure you avoid attacks, and so that you get Spirit back for doing so.
Prioritize increasing your Health, Stamina, and Focus as much as possible. While you can choose Skills based on your preference, we recommend focusing on the core Skills listed – along with Health, Stamina, and Focus – as they are the most effective.
Read More
- All Shadow Armor Locations in Crimson Desert
- All Skyblazer Armor Locations in Crimson Desert
- How to Get the Sunset Reed Armor Set and Hollow Visage Sword in Crimson Desert
- Marni Laser Helm Location & Upgrade in Crimson Desert
- Best Bows in Crimson Desert
- All Helfryn Armor Locations in Crimson Desert
- All Golden Greed Armor Locations in Crimson Desert
- How to Craft the Elegant Carmine Armor in Crimson Desert
- Wings of Iron Walkthrough in Crimson Desert
- Keeping Large AI Models Connected Through Network Chaos
2026-04-05 00:11