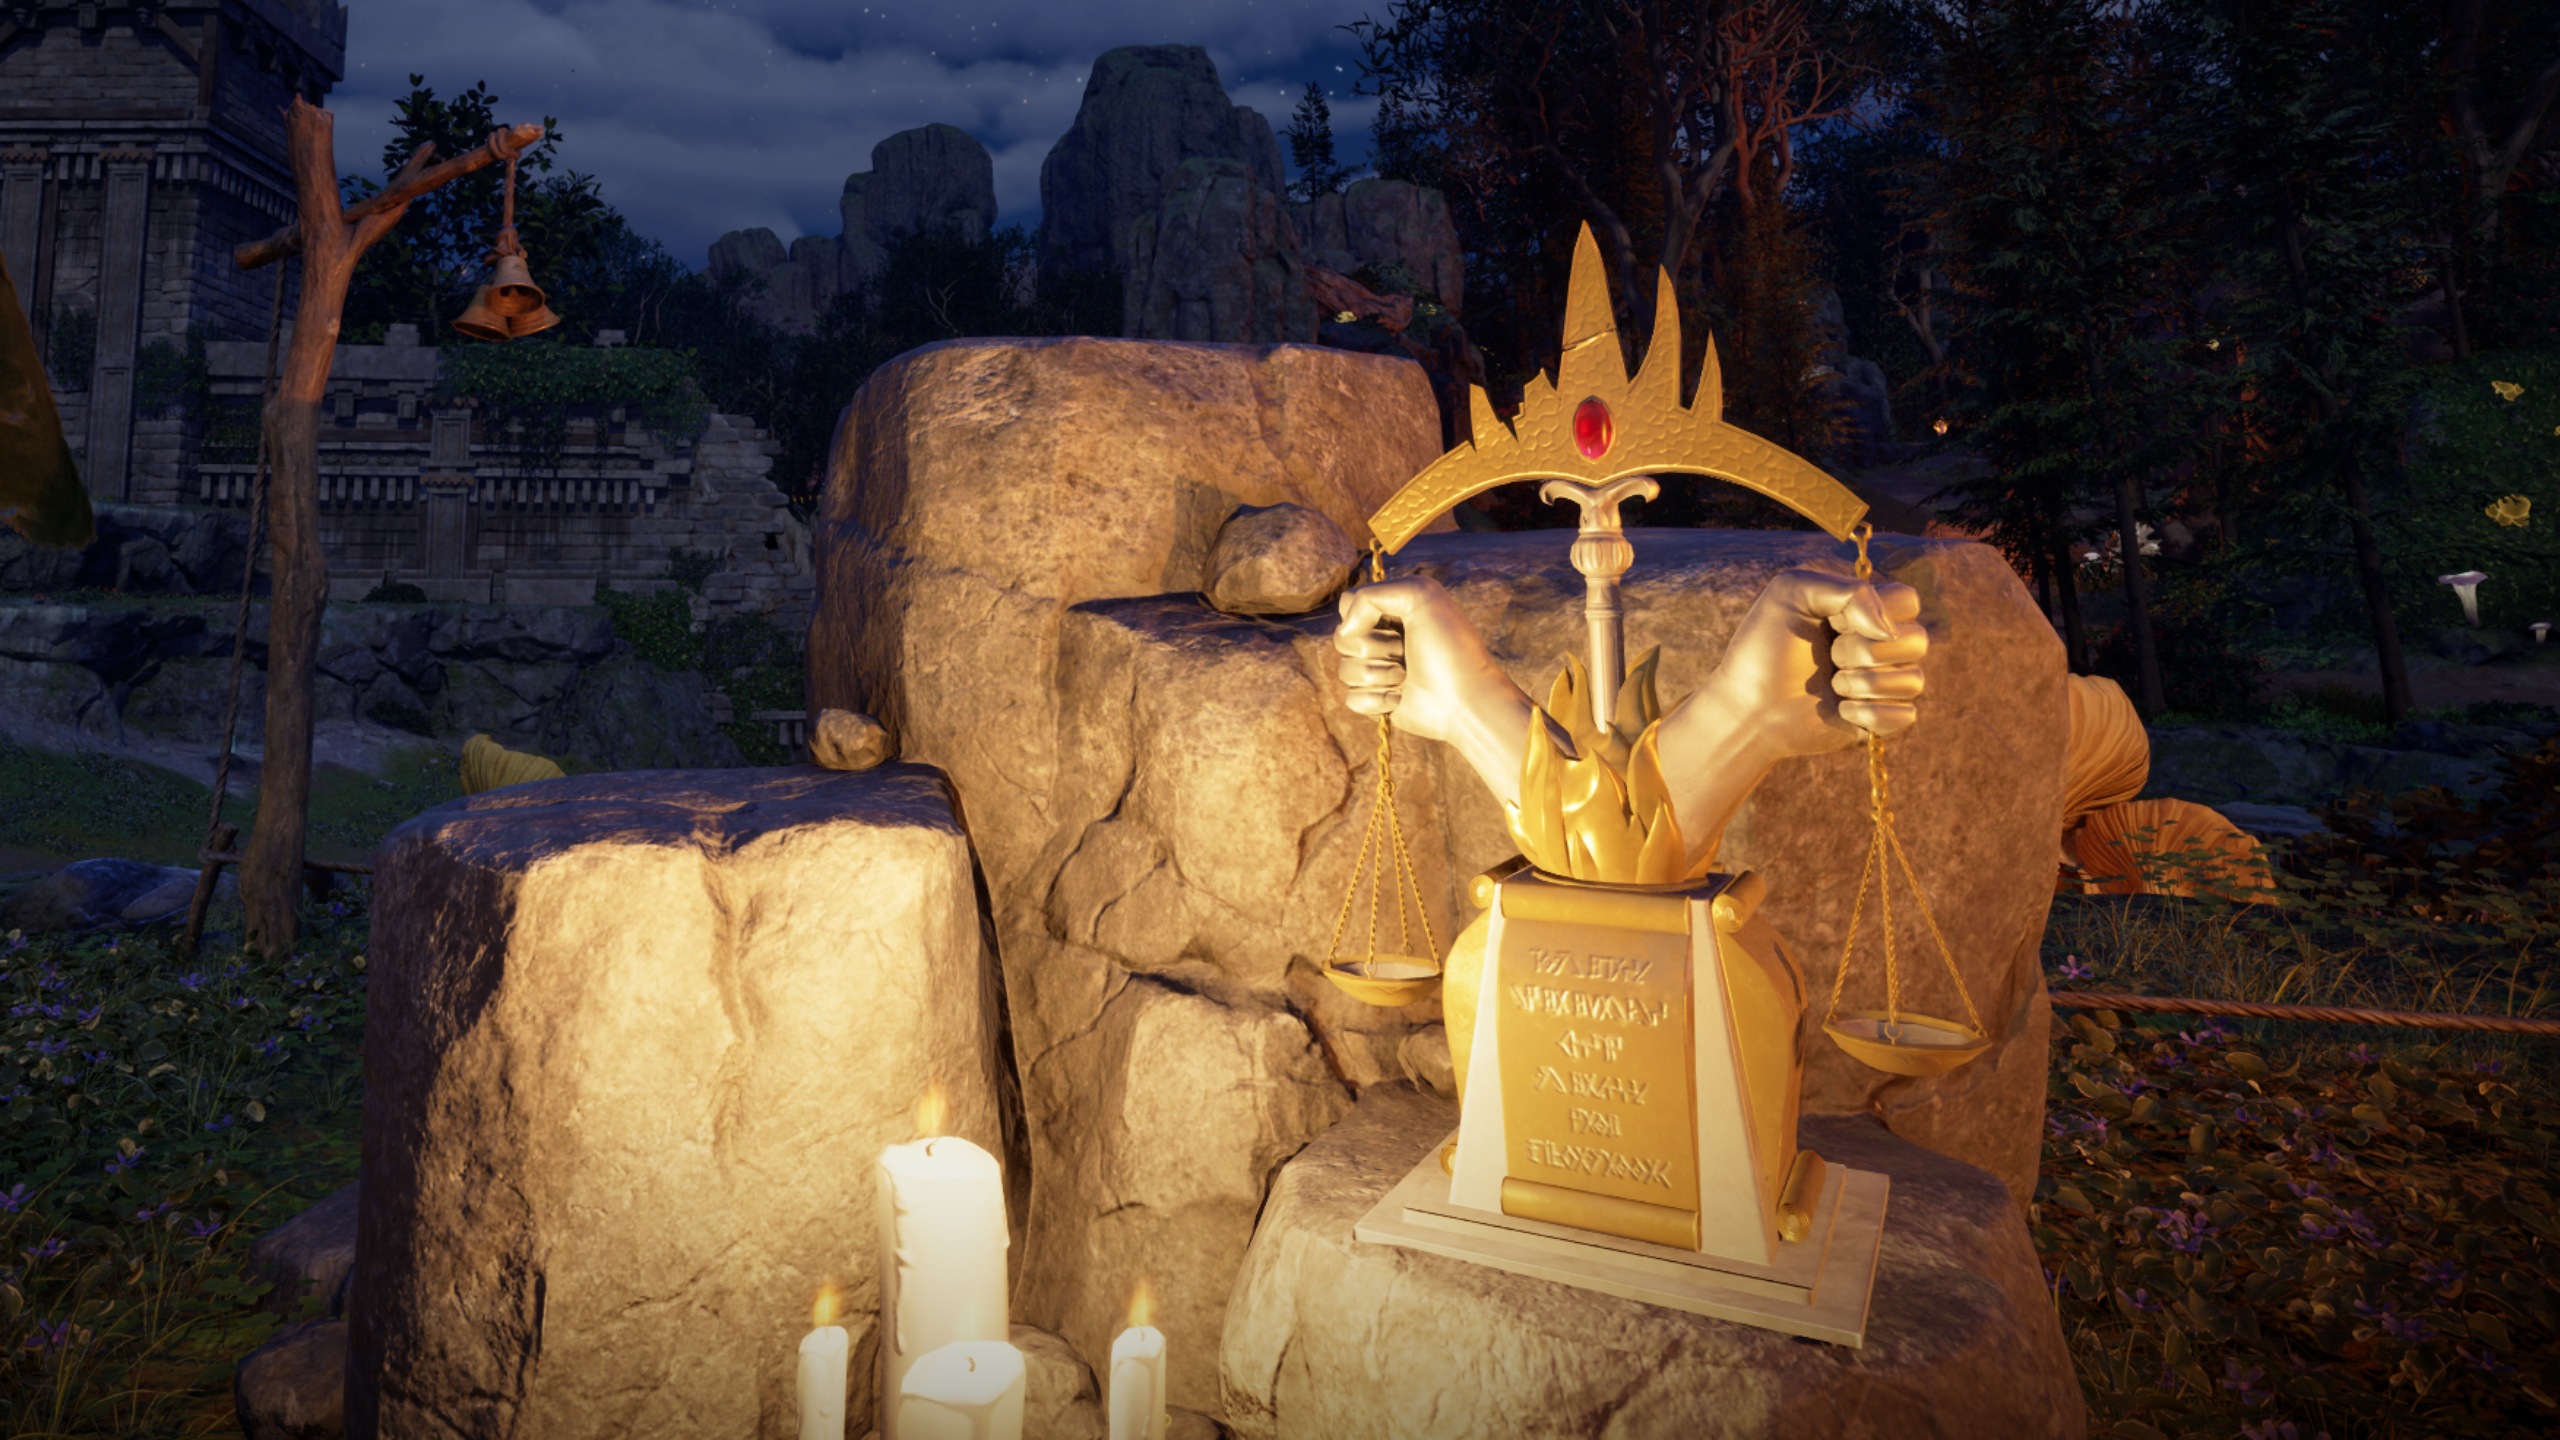
In the game Avowed, each region features a distinct totem that needs to be discovered and mended. This quest will lead you on an exciting journey across the entire landscape, searching every hidden corner for fragments to complete the totems. It’s advisable to do this as quickly as you can because they grant permanent bonuses upon completion.
In your journey, you’ll find some totem fragments are easier to discover during your adventures, but most are skillfully concealed and will take a bit more effort to uncover. Fear not if you’re here primarily for the rewards, as I’ve meticulously explored the Living Lands and found every Woedica totem fragment in Dawnshore. I’ve also outlined what each one offers so you can complete the Totem of Rightful Rulership quest instantly.
All Totem of Rightful Rulership fragment locations
To repair the Totem of Rightful Leadership completely, you’ll need to discover its six scattered fragments throughout Dawnshore. Each piece offers a distinct advantage once inserted. If you’re reading this, it’s probable that you’ve already secured the Woedica god totem foundation to initiate your quest, but if not, journey to the Shrine of Woedica in The Rise, which is north-east of Paradis. There, you can acquire the foundation essential for setting up at your campsite.
Instead of searching for the Fragments of Scales by yourself, you might prefer to buy a map from Sanza’s Emporium in Paradis, which includes clues or riddles to guide you more interactively on your quest.
After gathering all six pieces and properly inserting them, the item will undergo a complete upgrade and restoration, resulting in a brief, narrative-like flashback that sheds light on its history.
Golden Scale of Order

The secret location of the Golden Scale of Order is concealed within a bird’s nest perched high atop Pargrun Cache. To reach it, you must first destroy a section of castle wall near the bridge connecting this area with The Strangleroot. Fortunately, explosive barrels have been thoughtfully placed there to aid in your task.
As shown in the video above, once inside Paragrun Cache you need to:
- Continue up the structure and pass through the hallway with the blade traps
- Climb the stairs in the patio area and look through the large doorway blocked by tree trunks
- Use a projectile weapon like a wand or bow to break the rock wall inside
- Turn left and continue along the dirt path before entering the castle tower through the now-broken wall
- Climb the various boxes and platforms to reach the ledge directly above where you entered the room
- Jump across the rocks and you’ll see the Golden Scale of Order in a bird’s nest on the ground
When placed on the Woedica pedestal, the Golden Scale of Order triggers an effect where using a companion’s ability boosts your damage for five seconds. This is a beneficial enhancement in battle, and it becomes even more useful when you have two companions fighting with you. If you equip your companions with skills that recharge quickly, you can maintain this passive effect almost all the time.
Golden Plaque of Promises
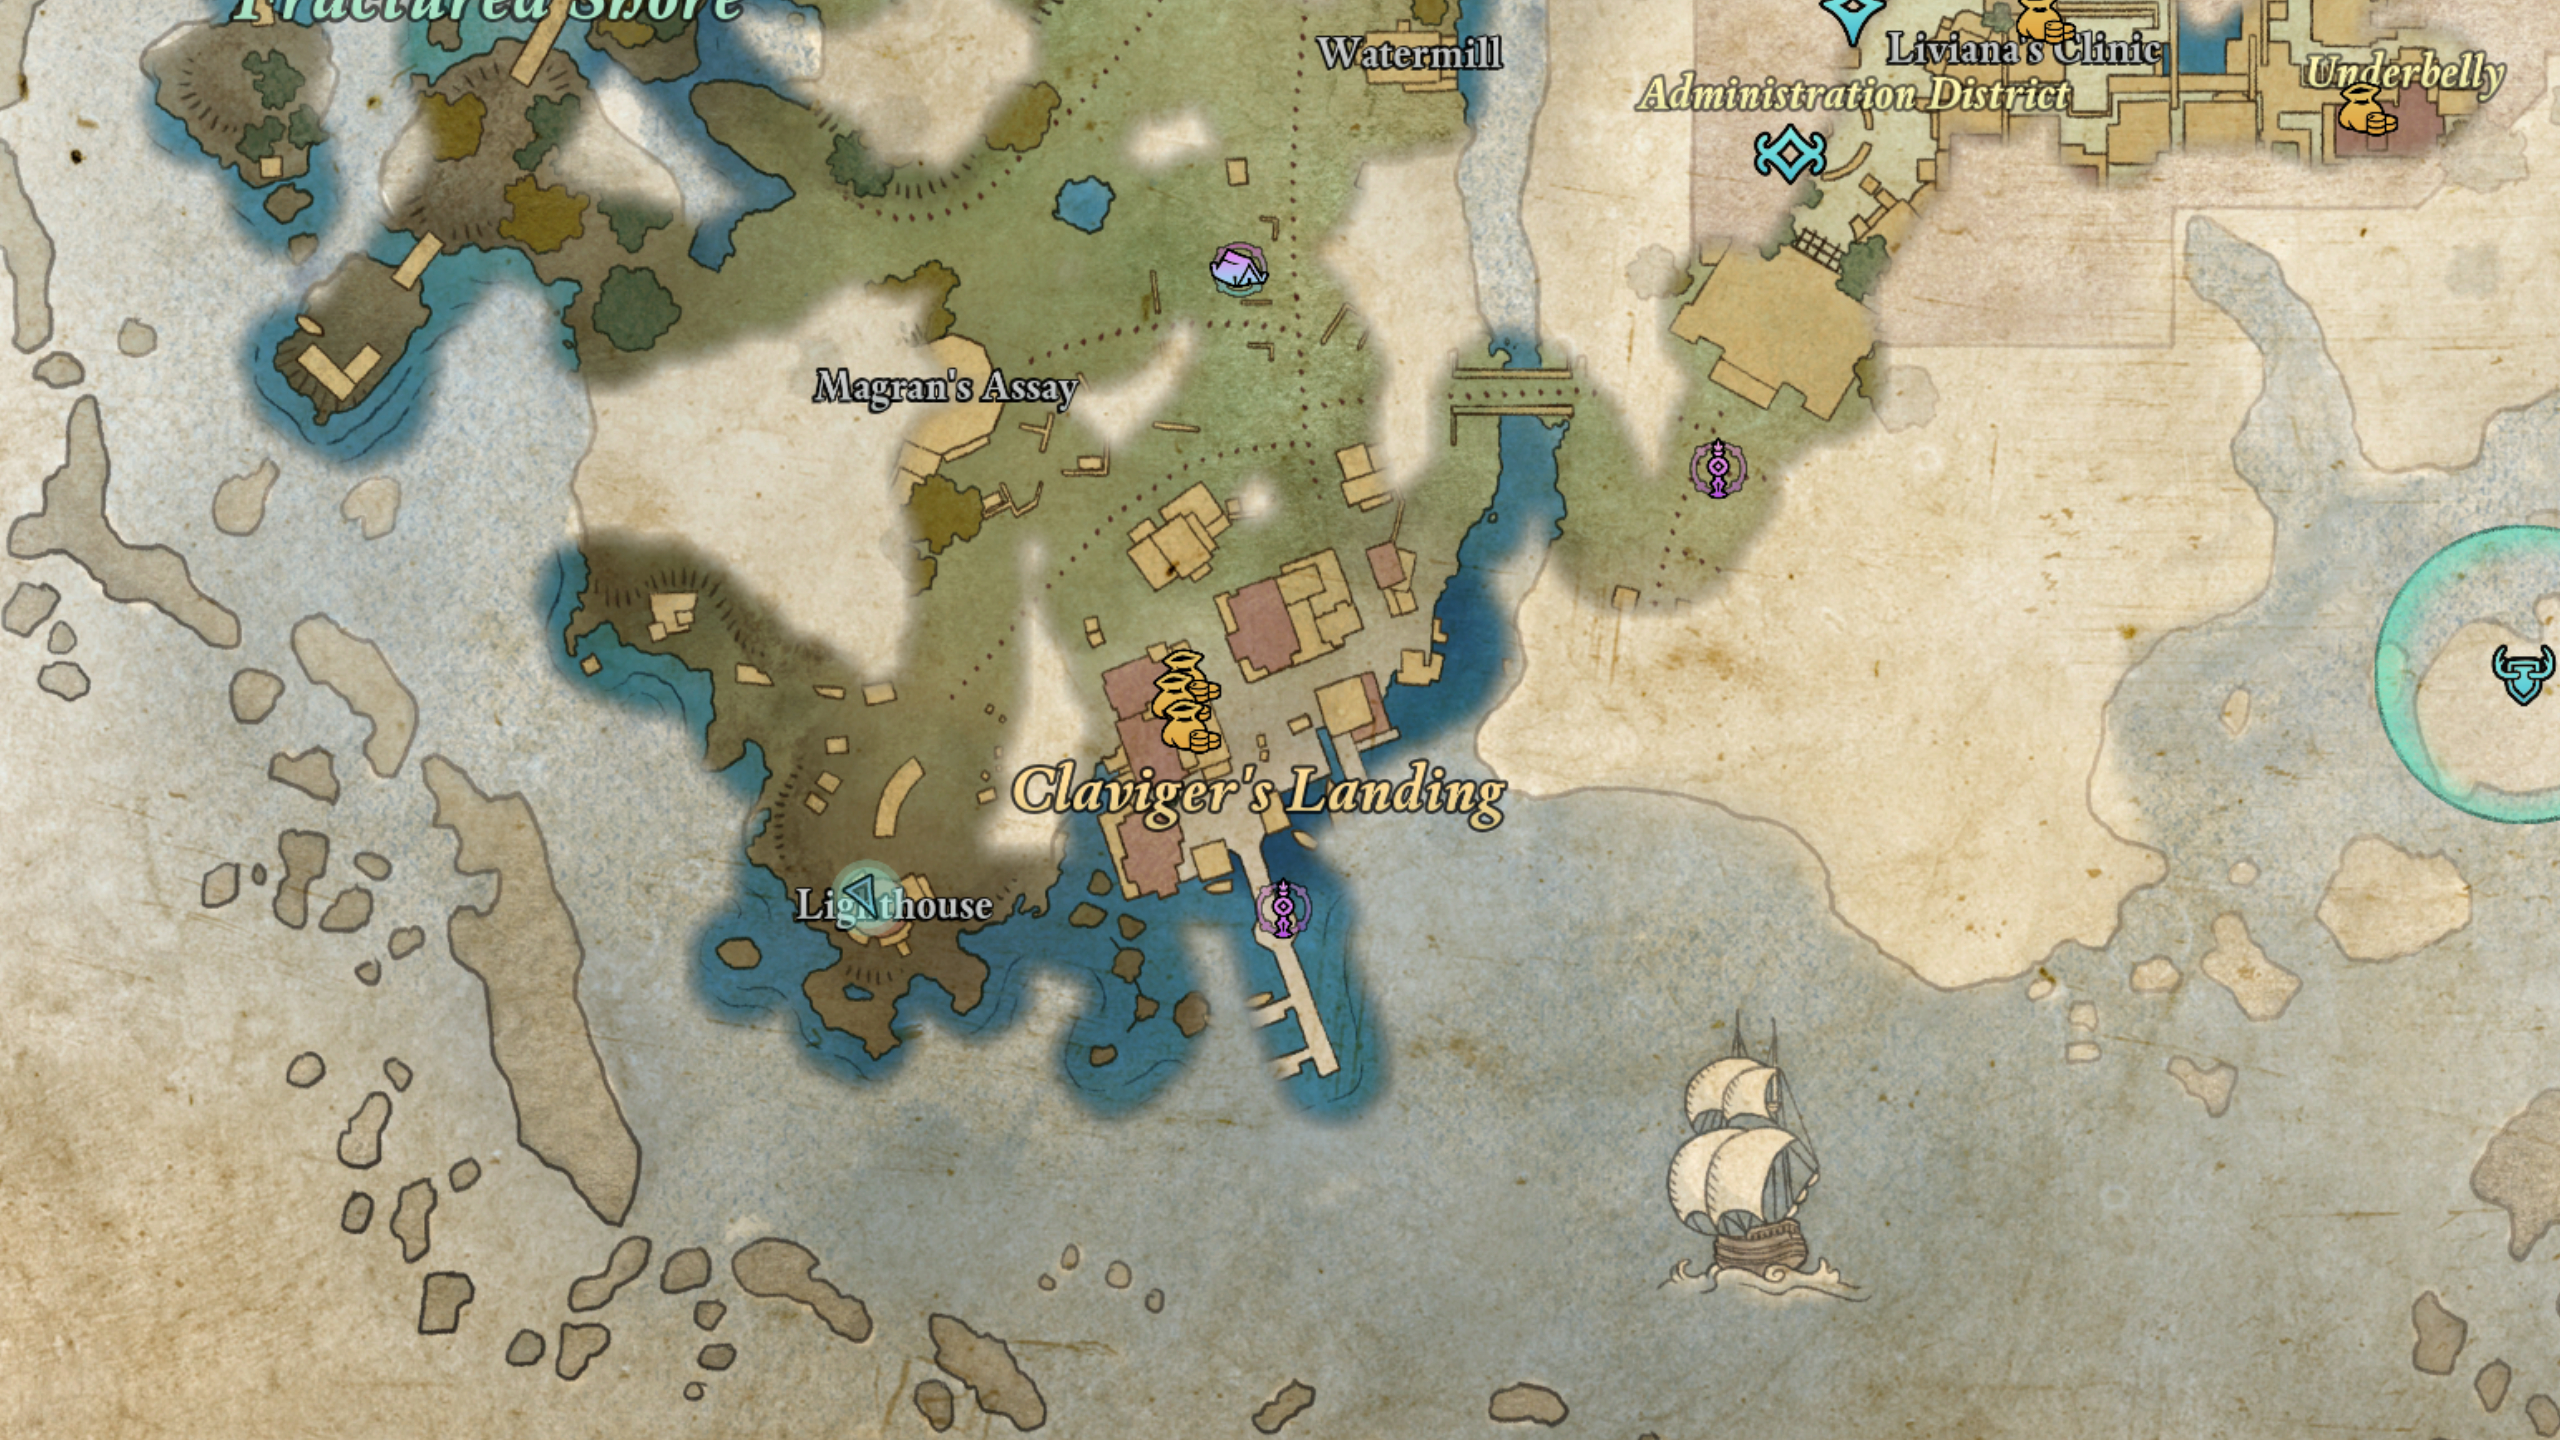
The Gold-Embossed Pledge Plaque is positioned atop the western lighthouse, close to Claviger’s Landing. This particular Woedica relic is relatively easy to locate – just ascend the spiraling platforms encircling the lighthouse. Approximately midway up, look for a sizable gap in the bricks to your right; inside this opening, you will discover the fragment nestled upon a crate.
The Gold Plaque of Promises is situated on top of the lighthouse near Claviger’s Landing. To find it, climb up the stairs that wind around the tower. Halfway up, look for a big hole in the bricks to your right side, and inside this opening, you will see the fragment sitting on a box.
As you’ve ascended, take note not to overlook Captain Henqua’s Treasure Map, located on the collapsed corpse of a skeleton on the following landing area.
Inserting the Gold Token of Pledges into the statue’s pedestal will grant you a residual benefit, enhancing your health and energy restoration upon resuscitating an ally.
Broken Crown Jewel
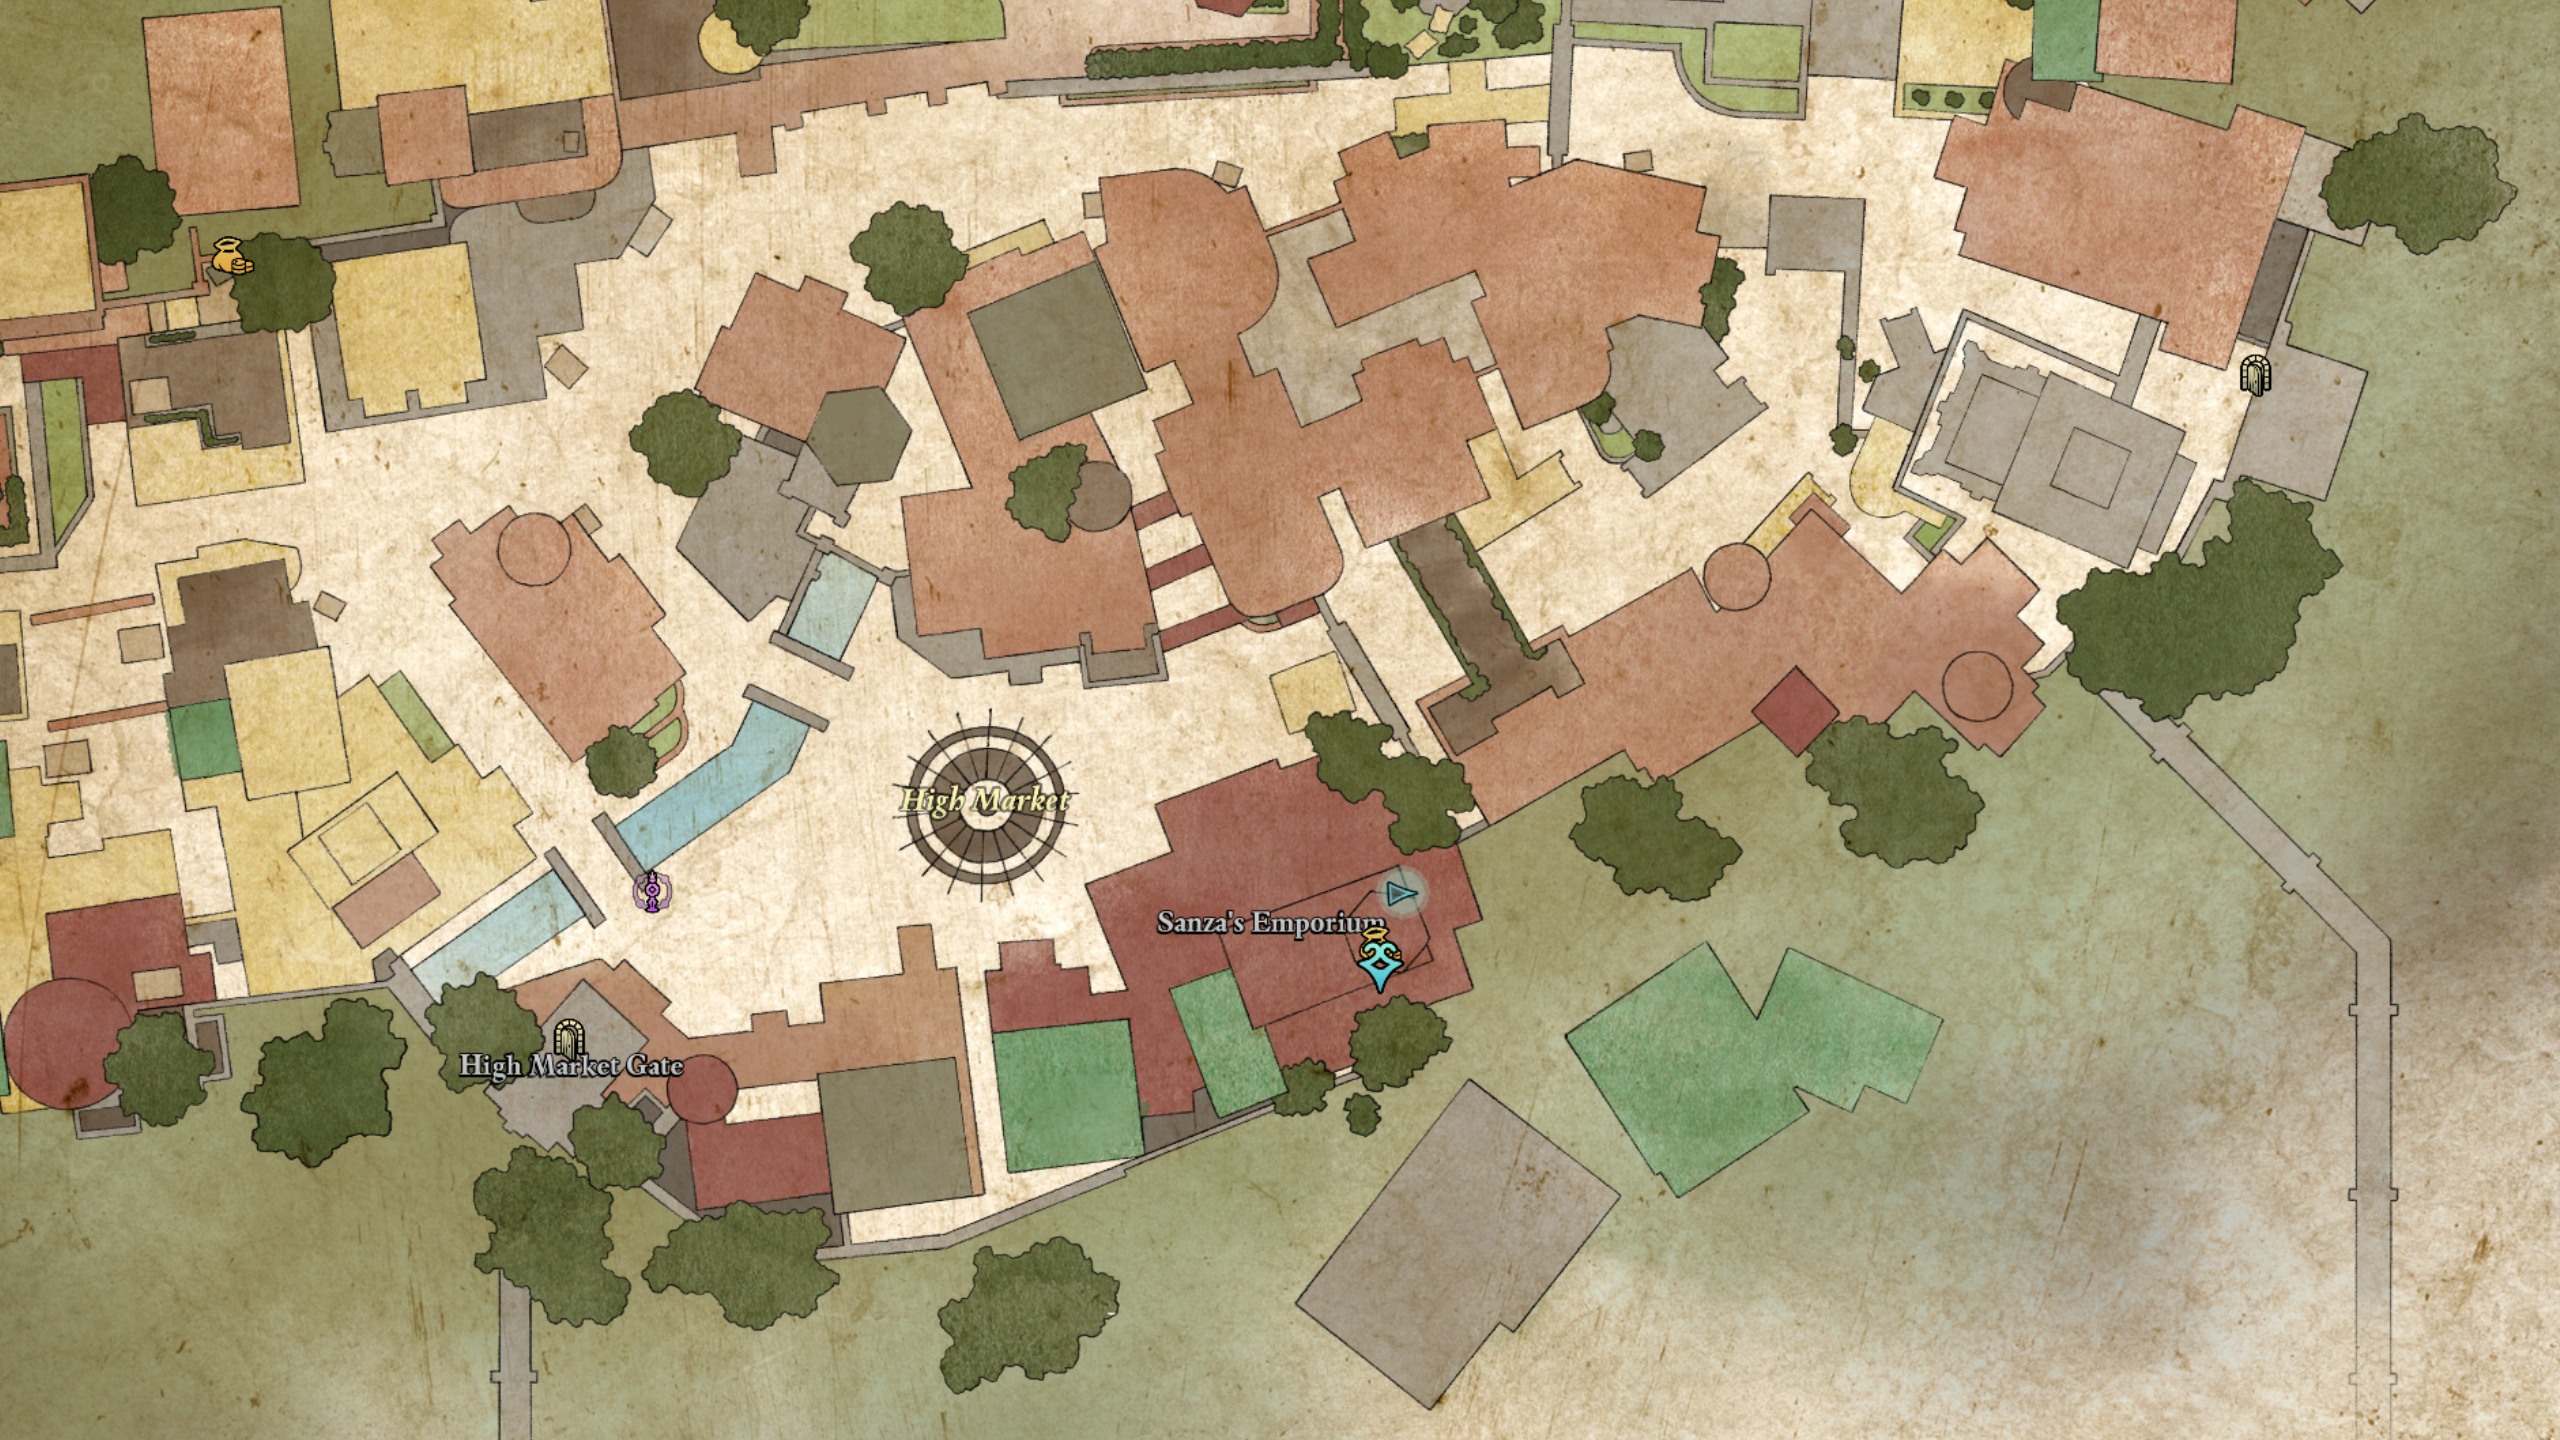
You can find the Broken Crown Jewel on a desk located in the rear section of Sanza’s Emporium. This particular piece is quite simple to obtain as Sanza’s Emporium is a conflict-free zone, meaning you won’t encounter any combat there. Additionally, there’s no need for jumping to collect it either.
If you’ve finished the “Mapping the Living Lands” side quest at Dawnshore, it means you’ve previously stopped by Sanza’s shop. In case you haven’t, you can find her stall in the Northern section of Paradis High Market, which is where the Emporium is located.
You might find it beneficial to chat with Sanza during your visit, since he’s the vendor who supplies the crucial adra crystals needed for upgrading your equipment.
The Broken Crown Jewel reduces companion ability cooldowns by 15%.
Golden Scale of Justice
The Mysterious Balance of Justice, concealed behind a secure door with a view of the bustling market district in Paradis, can be reached from a balcony close to the pharmacy. This part, however, might be the trickiest to locate since it’s surprisingly distant from your usual path. I found myself wandering aimlessly through the market for quite some time, feeling like a chicken without its head.
As shown in the video above, here’s what you’ll need to do:
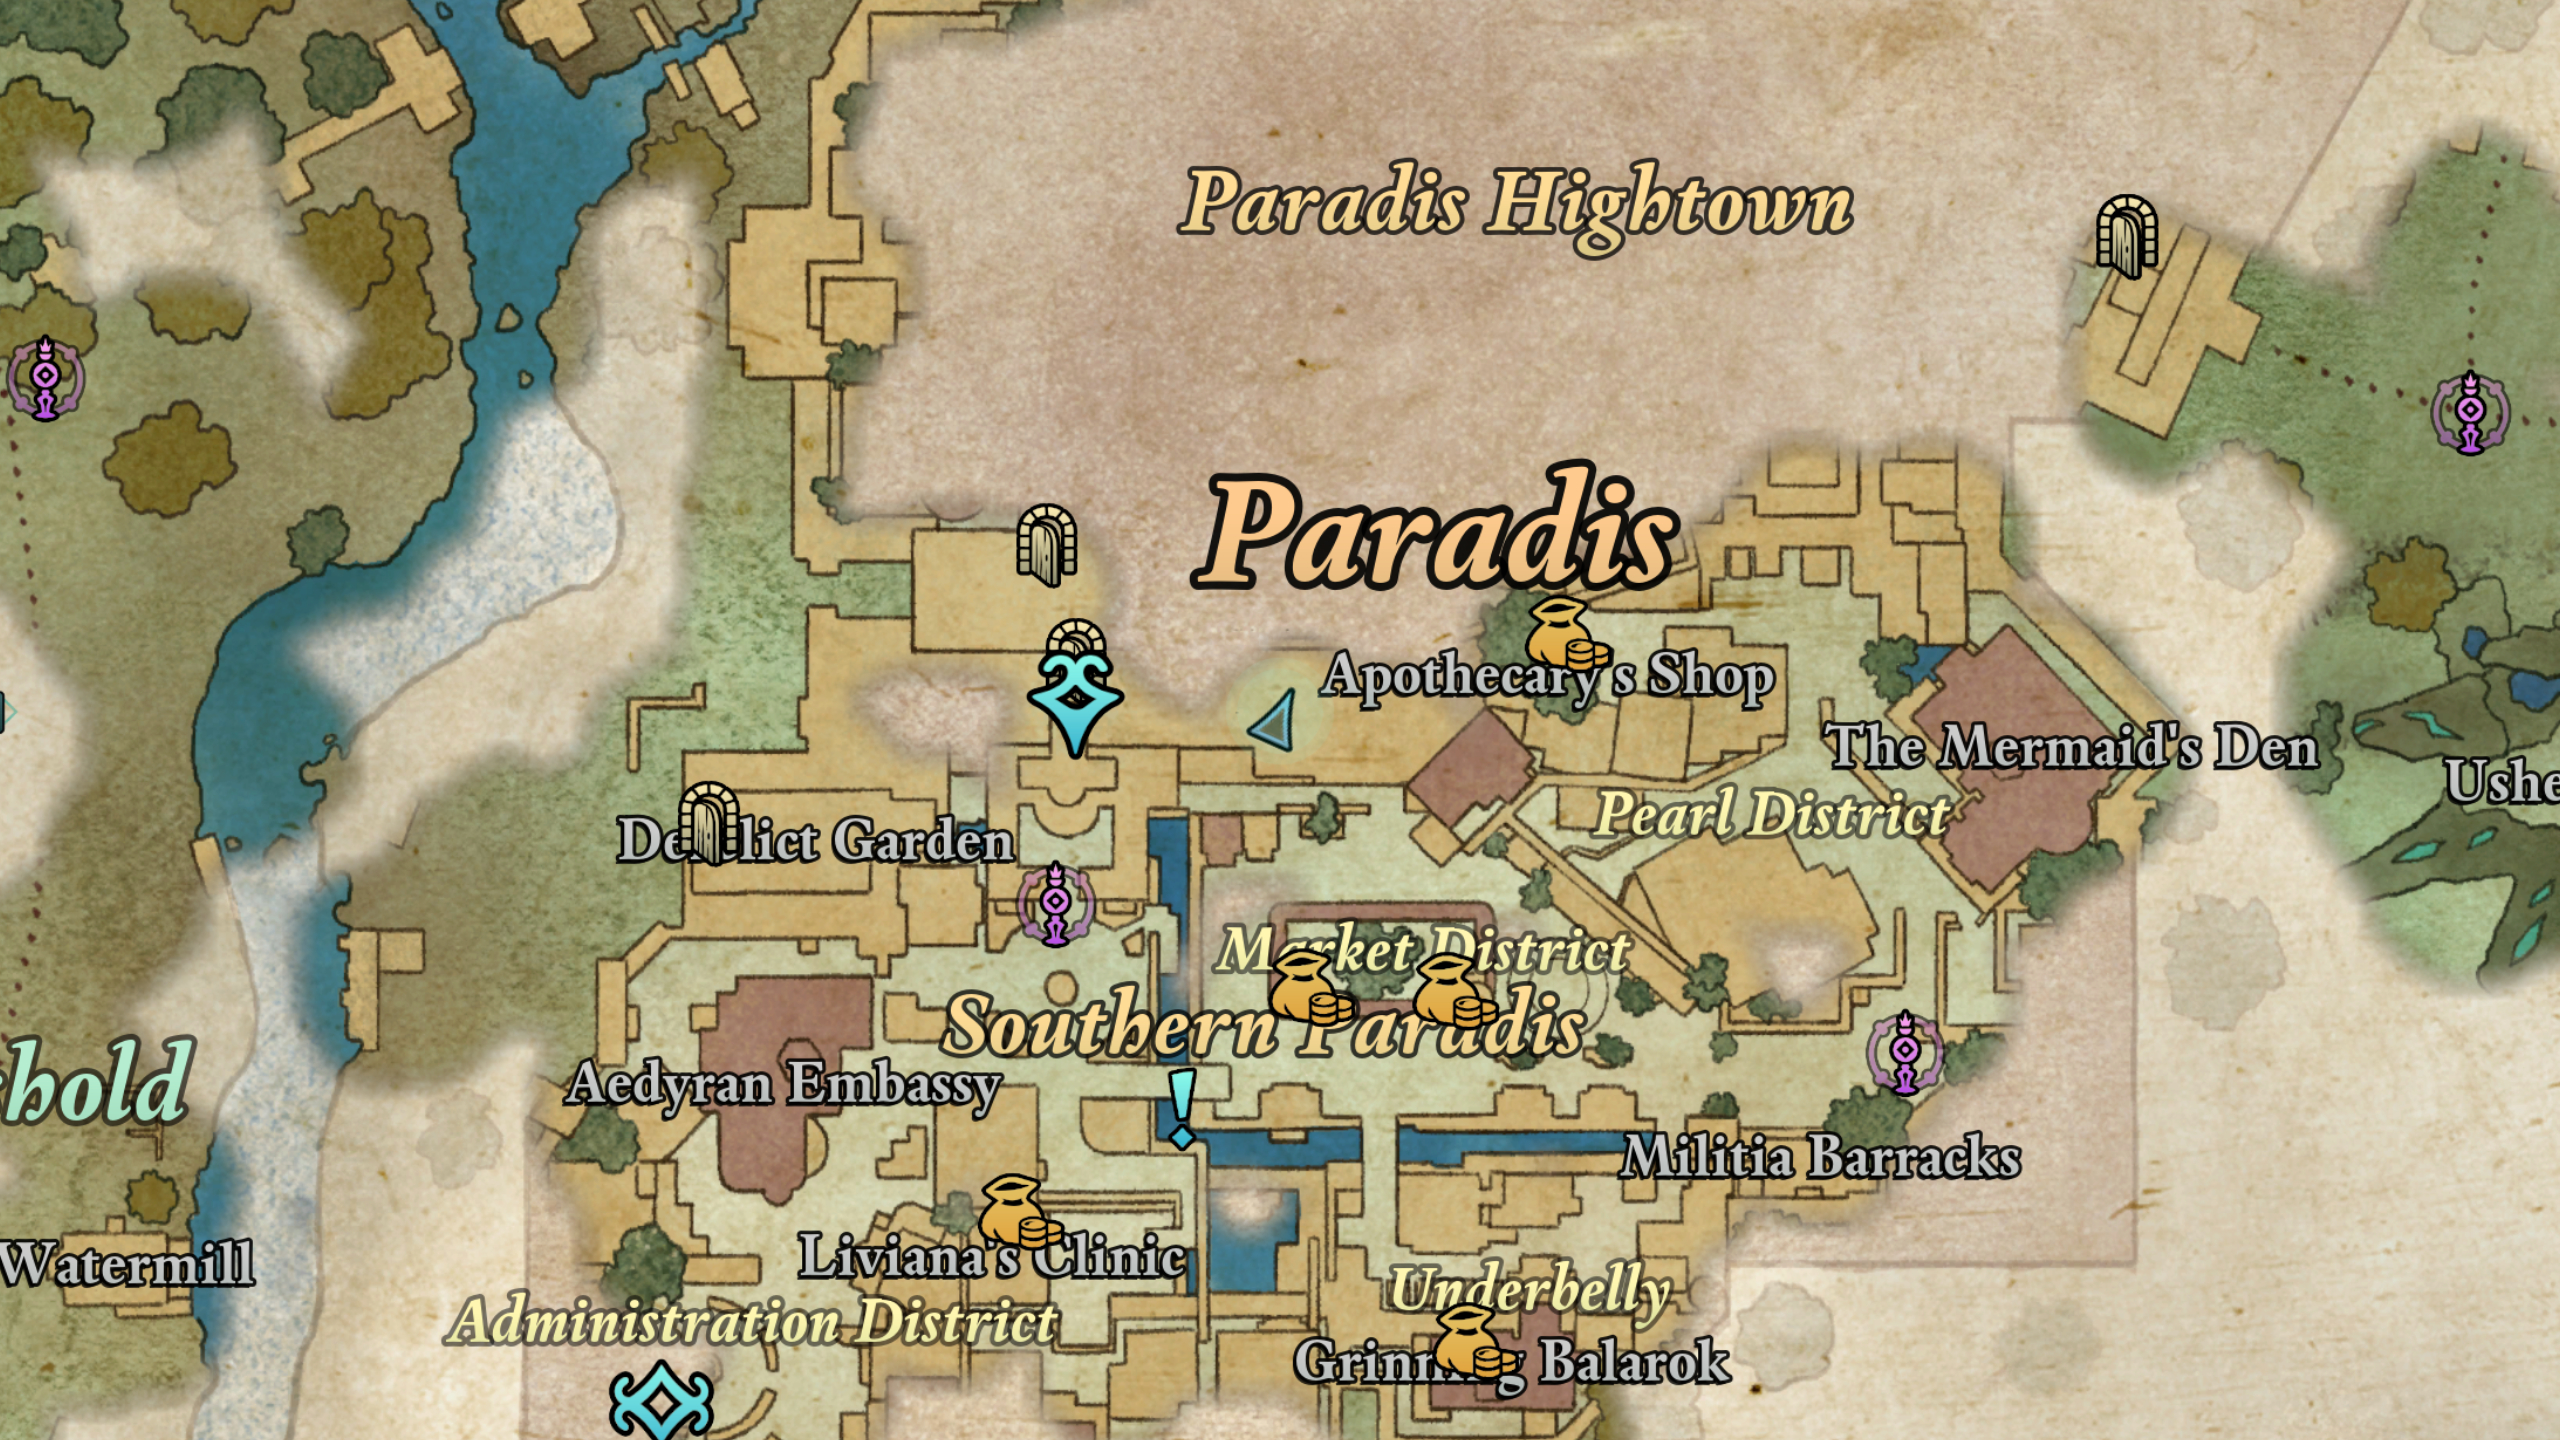
- Head to the Apothecary Shop in the Pearl District, opposite The Mermaid’s Den
- Take the stairs behind the stall and follow the path until you can drop down below the scaffolding
- Continue along this ledge before leaping across to the balcony ahead of you
- Enter the room, turn left, and burn the spiderwebs blocking the ladder. This can be done using Kai’s ability, a weapon with a burn passive, or even a fire grenade
- Climb down the ladder where you’ll have to fight a group of phantoms
- Pick up the fragment from the floor, surrounded by books
- You can then leave this room by unbarring the door back to the market
The Golden Scale of Justice triggers significant fire damage accumulation when it lands as a critical hit, making it an excellent enhancement for any character setup. However, it shines particularly brightly in the hands of high crit-rate marksmen.
Golden Plaque of Oaths
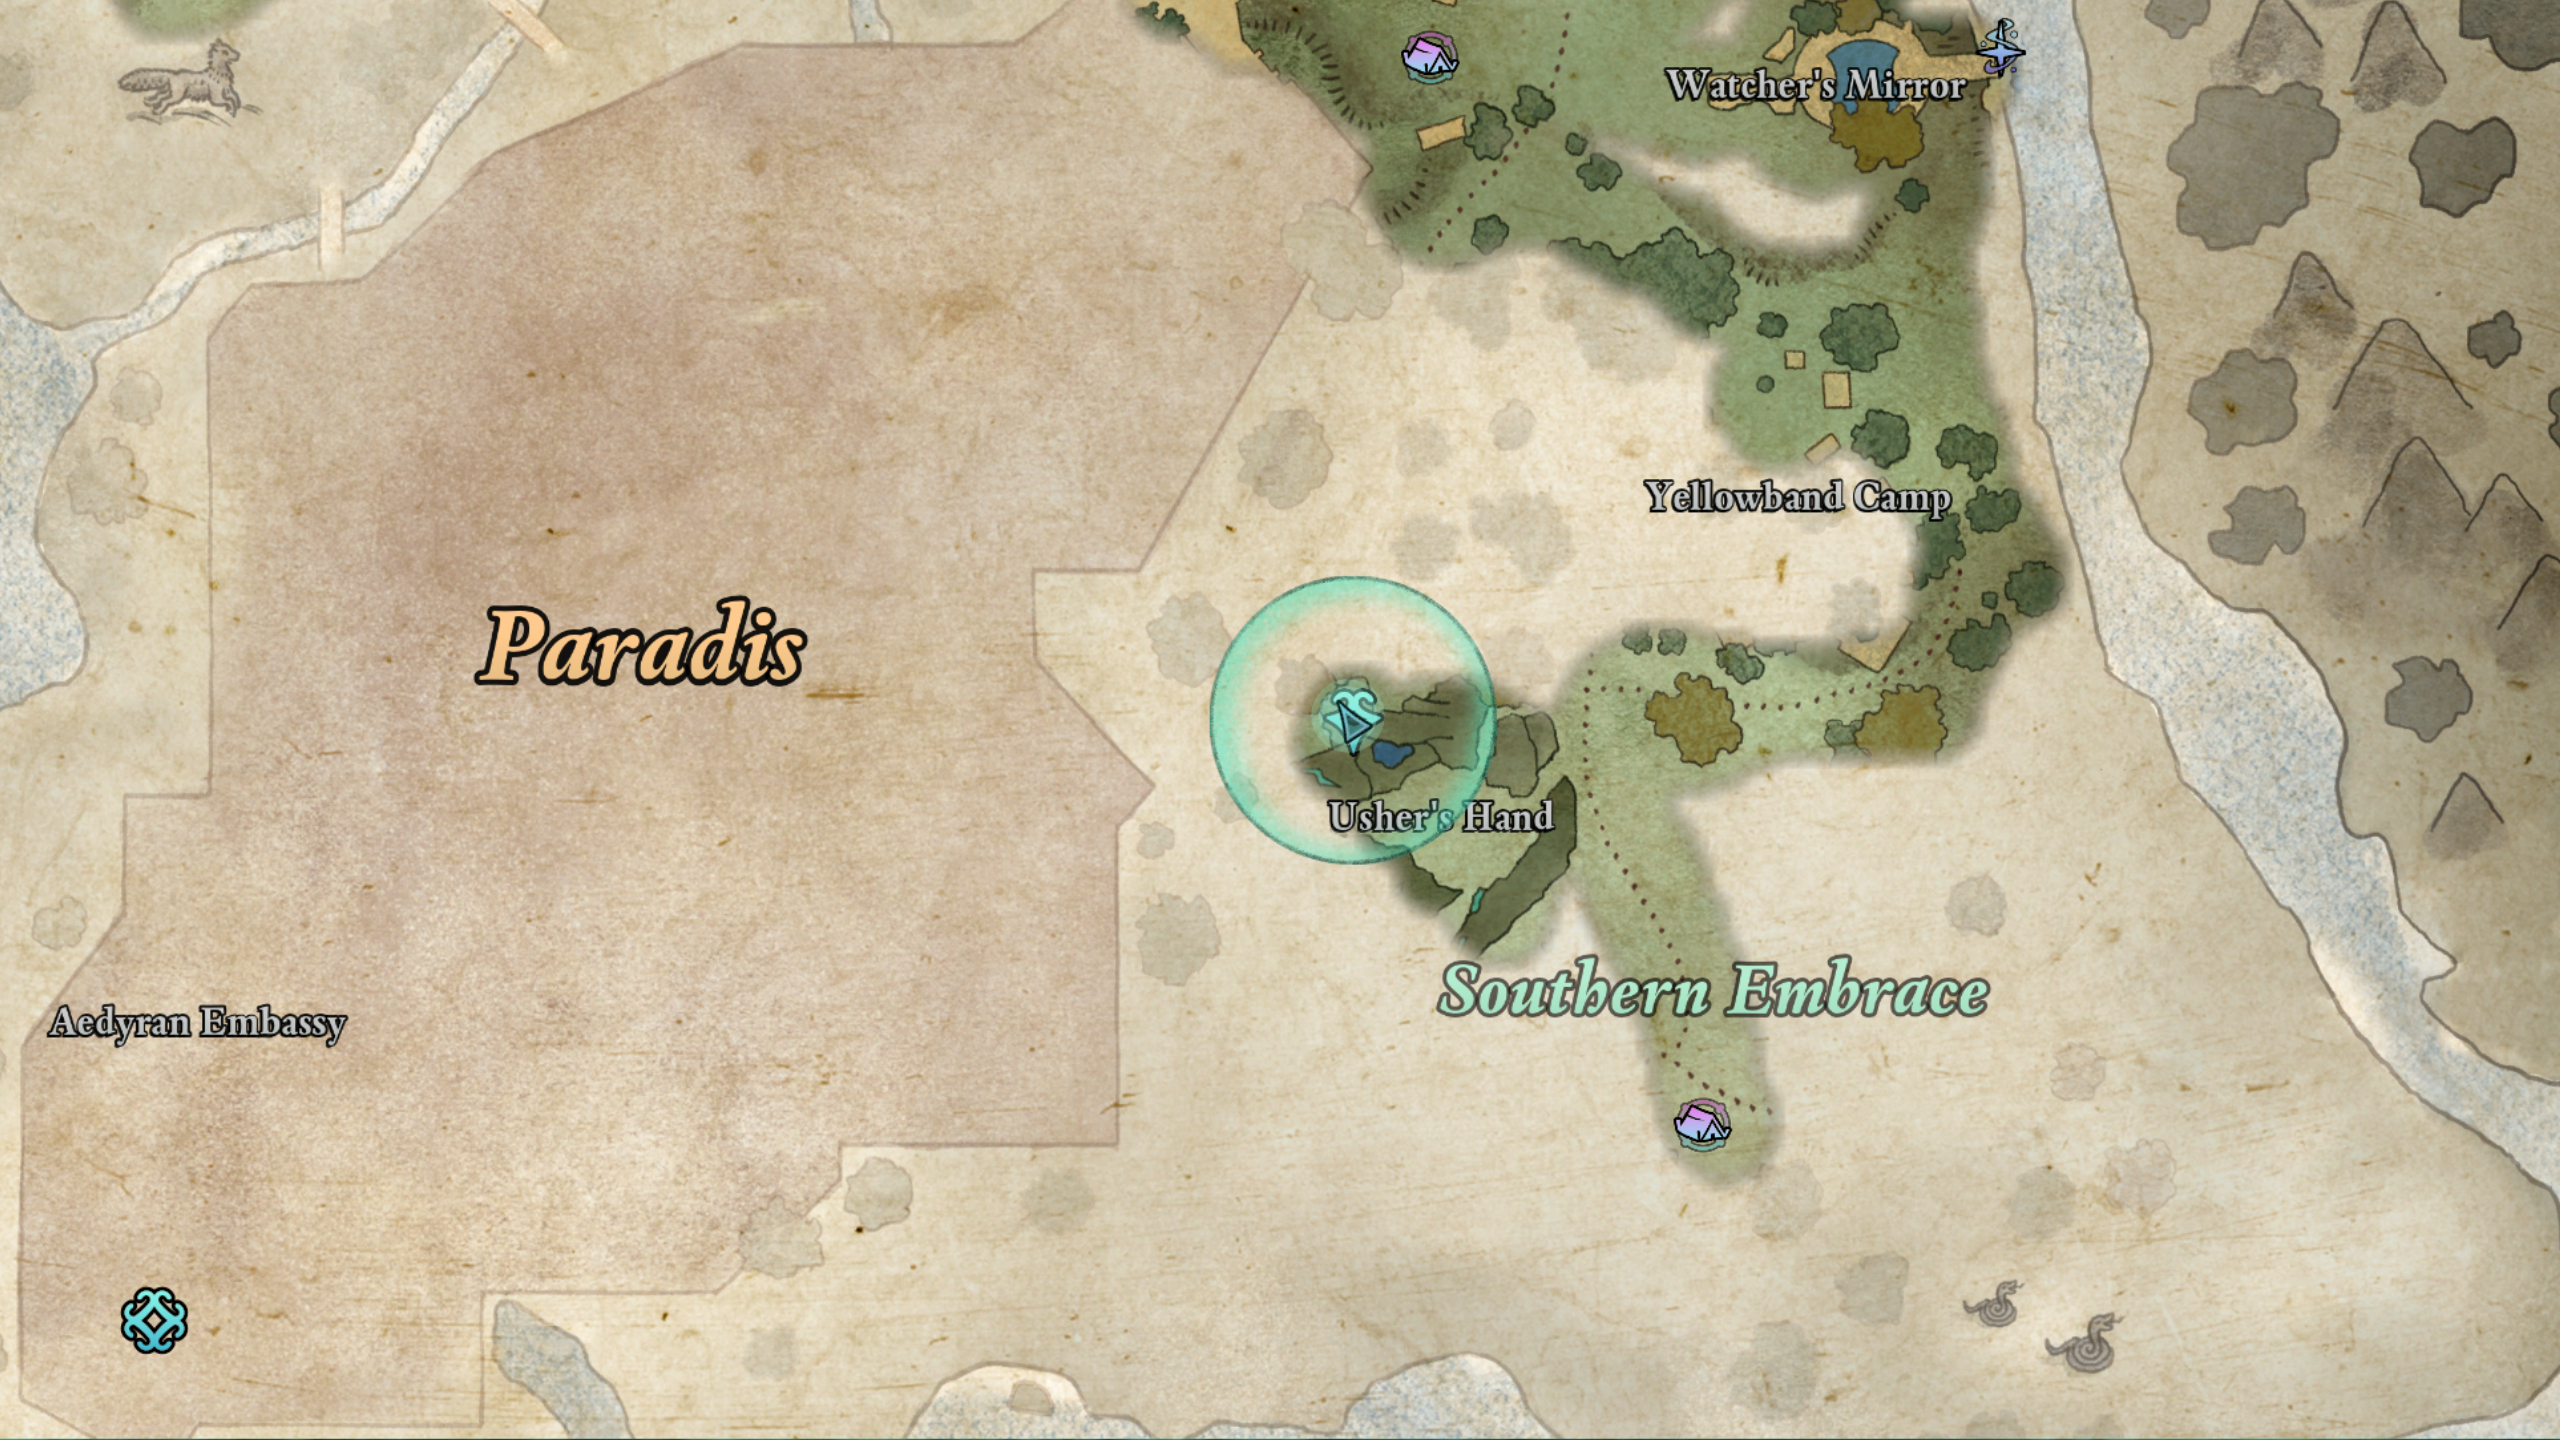
In the hidden depths of Usher’s Hand, you will discover a fragment of The Golden Plaque of Oaths tucked away within a cave. However, to access this secretive spot, you must submerge yourself beneath the water and swim until you find a narrow underwater opening.
In the video displayed, notice that there are various means to access this cave. The most straightforward option is by walking through the opening in the cave located along the road connecting Yellowband Camp and Paradis’ eastern entrance. Yet, you can also choose to descend from above, or even forcefully break the metal grate using ice tools or magic to plummet directly onto its fragment.
Although it’s useful, the Golden Plaque of Oaths isn’t particularly exciting as an enhancement for the Woedica totem. It unfortunately only provides a fixed boost of 2 to Intellect and Resolve. This enhancement will aid in skill checks during dialogues and also enhance the relevant stats.
Golden Flames
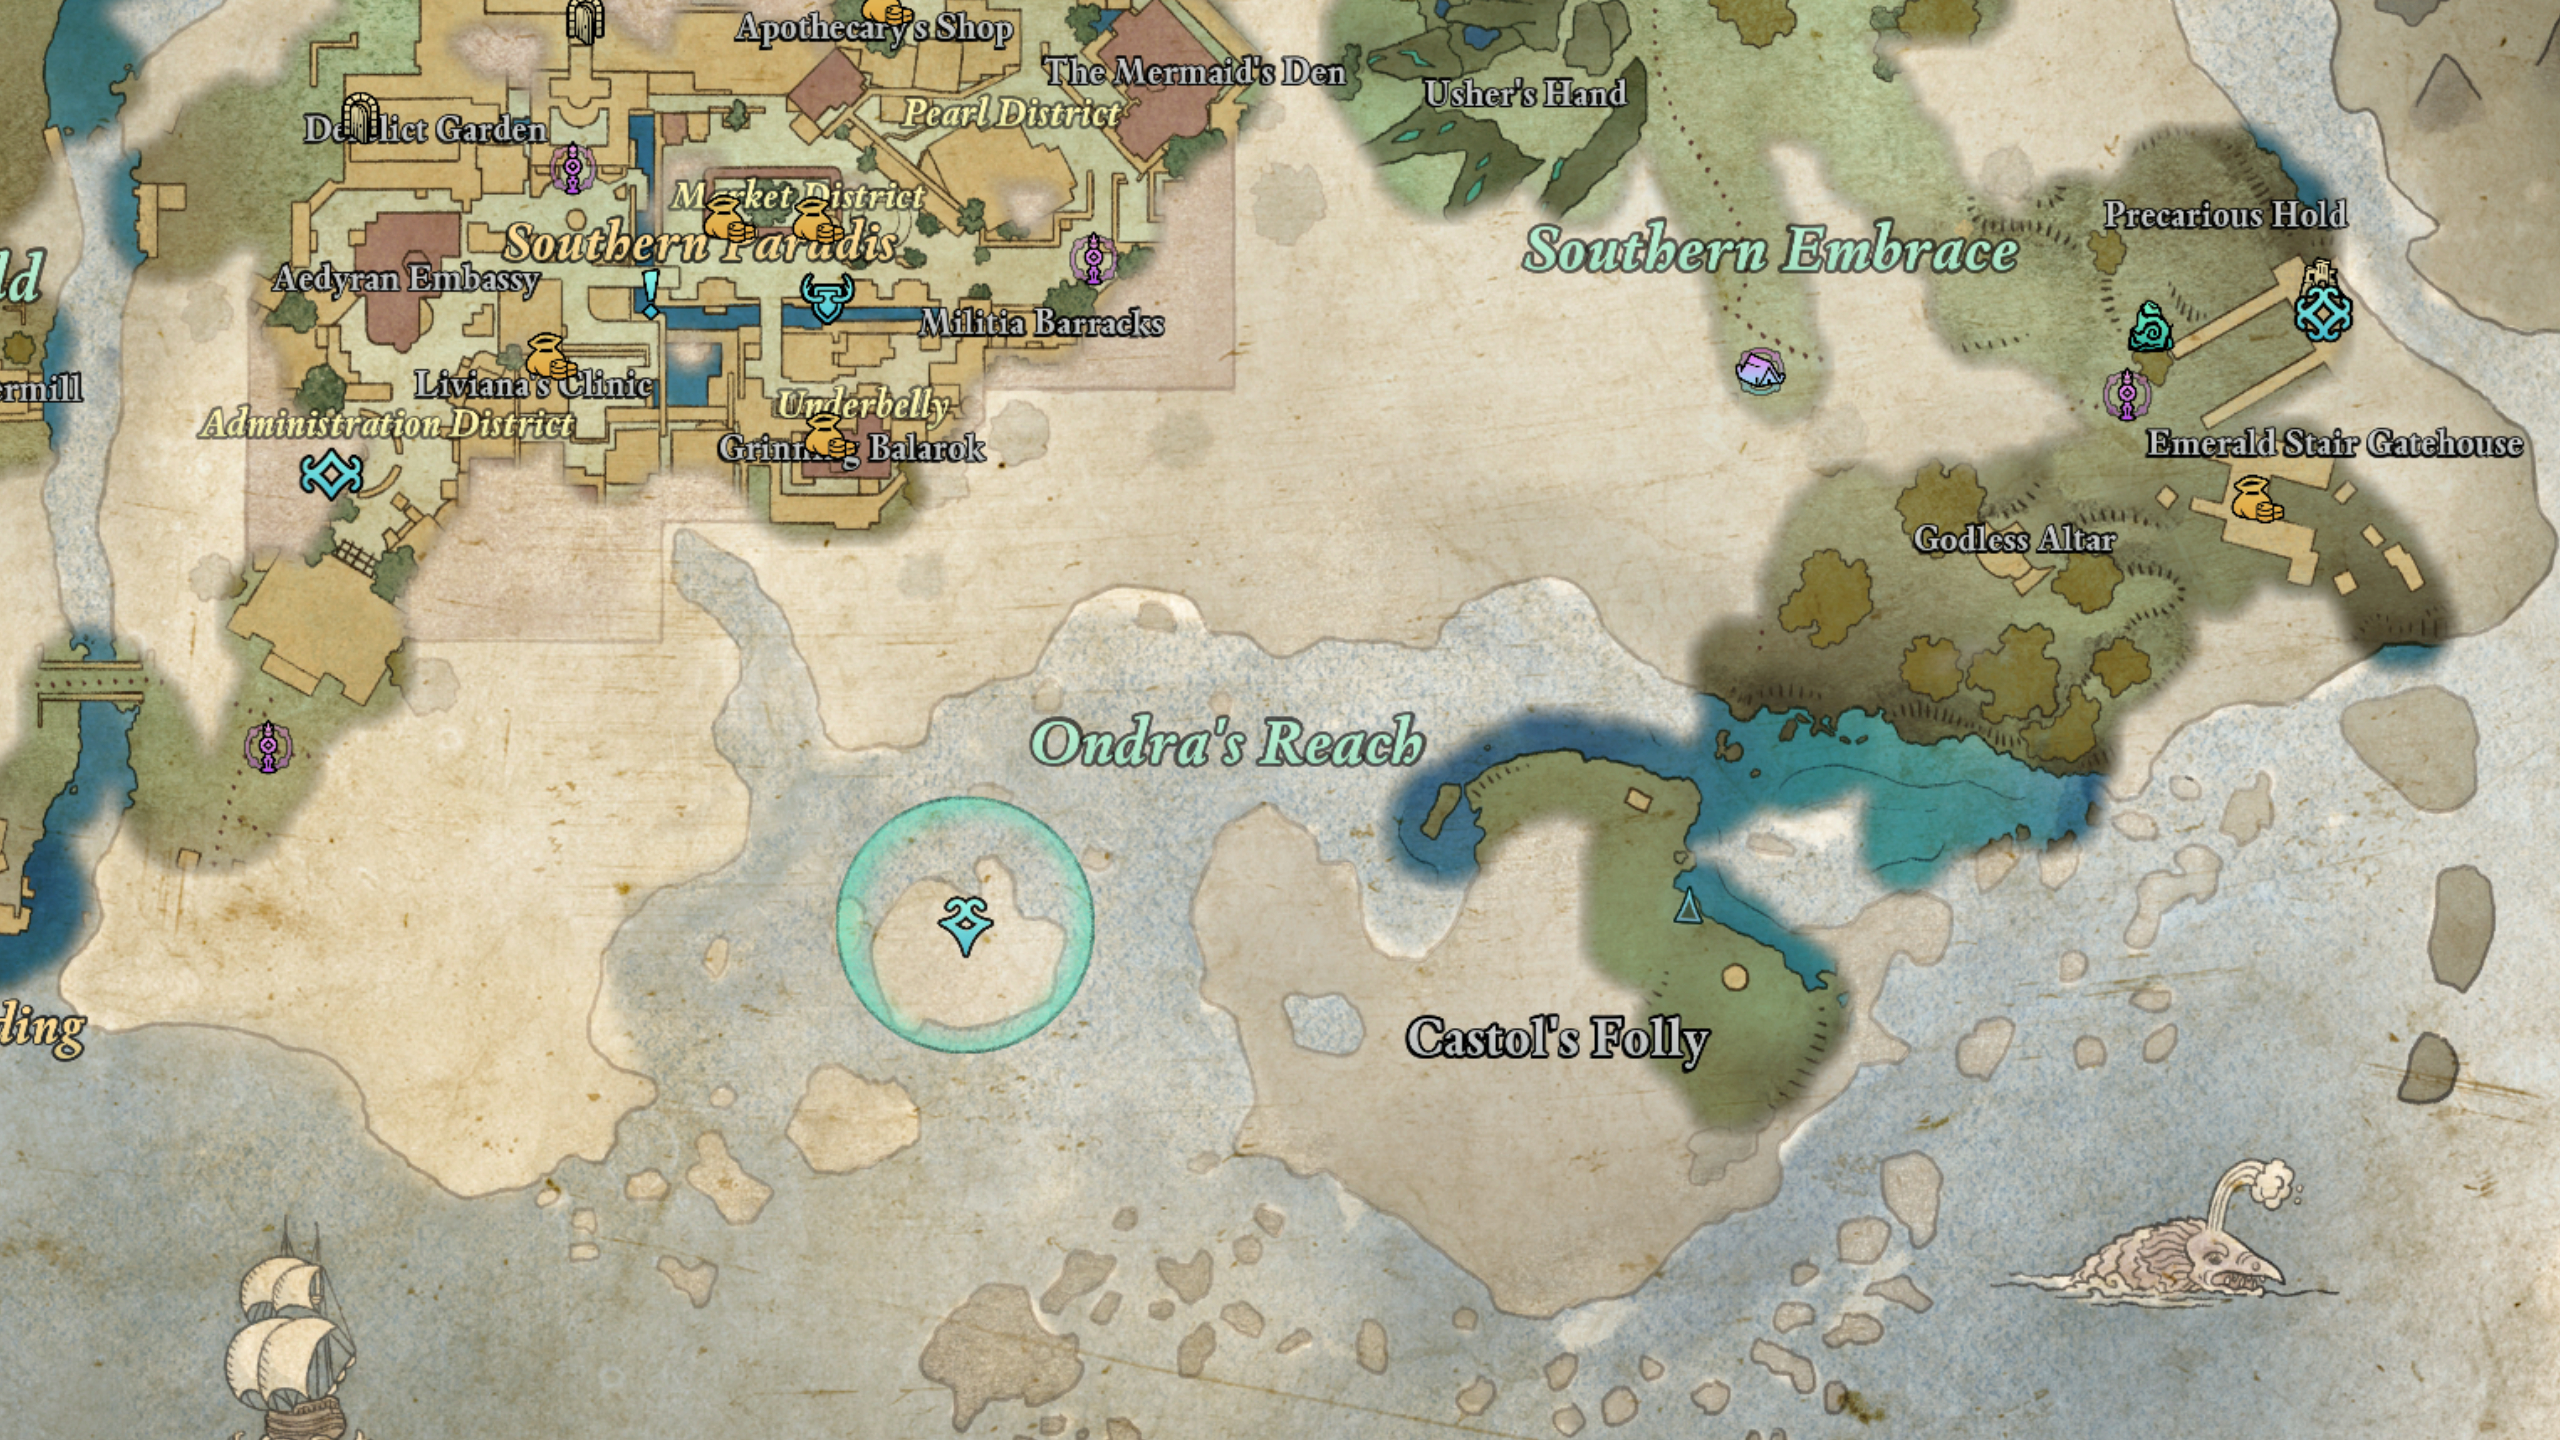
The Golden Flames can be found on a cliff edge, offering a panoramic view of the northeastern entryway to Castol’s Folly – an island situated south-east of Dawnshore.
If you approach Castol’s Folly from Usher’s Hand campsite, similar to what I demonstrate in the video, you’ll find it swiftly accessible. Upon entering the pirate camp, which you’ll need to clear first, you’ll notice the specific ledge immediately. Here’s an easy way to grab it:
1. Approach the ledge.
2. Carefully position yourself for a jump.
3. Leap towards the ledge.
4. Grab hold as soon as you reach it.
- Head straight from the entrance to the camp and break the wooden barricade hidden in a small tunnel in the rock
- Climb the ledges to make your way up the cliff to another group of pirates
- Jump across the gap to your right, past the collapsed tower
- Collect the fragment from the blanket on the ground
Appropriately, activating the Ring of Fire becomes an option with the Golden Flames ability when you’ve equipped it. However, it’s best to steer clear of using Second Wind during combat, as I prefer to maintain some distance from danger. Yet, this passive skill can be beneficial in turning a difficult battle into your advantage.
Read More
- Top 8 UFC 5 Perks Every Fighter Should Use
- Unlock the Magic: New Arcane Blind Box Collection from POP MART and Riot Games!
- Unaware Atelier Master: New Trailer Reveals April 2025 Fantasy Adventure!
- Unlock the Best Ending in Lost Records: Bloom & Rage by Calming Autumn’s Breakdown!
- How to Reach 80,000M in Dead Rails
- Unlock Roslit Bay’s Bestiary: Fisch Fishing Guide
- Unleash Hell: Top10 Most Demanding Bosses in The First Berserker: Khazan
- REPO: How To Fix Client Timeout
- How to Unlock the Mines in Cookie Run: Kingdom
- Reverse: 1999 – Don’t Miss These Rare Character Banners and Future Upcoming Updates!
2025-02-18 17:53