
Winter Warrior and Sniper Elite: Resistance are more like spin-offs than direct sequels, with the latter particularly resembling Sniper Elite 5. Although not the first outstanding game in the series, Sniper Elite 5 made significant strides forward, enhancing key aspects that led to a more enjoyable gaming experience overall.
As a gamer, I can’t deny that the slow-motion bullet cam is what initially drew me into Sniper Elite 5. But let’s not overlook the importance of Workbenches – they’re more than just collectibles; they’re vital tools that allow us to enhance our arsenal. The hunt for these 24 Workbenches scattered throughout the game isn’t just a side quest, it’s a necessity if we want to maximize our gaming experience. Finding them all is a challenge, but one that every sniper worth their salt will relish.
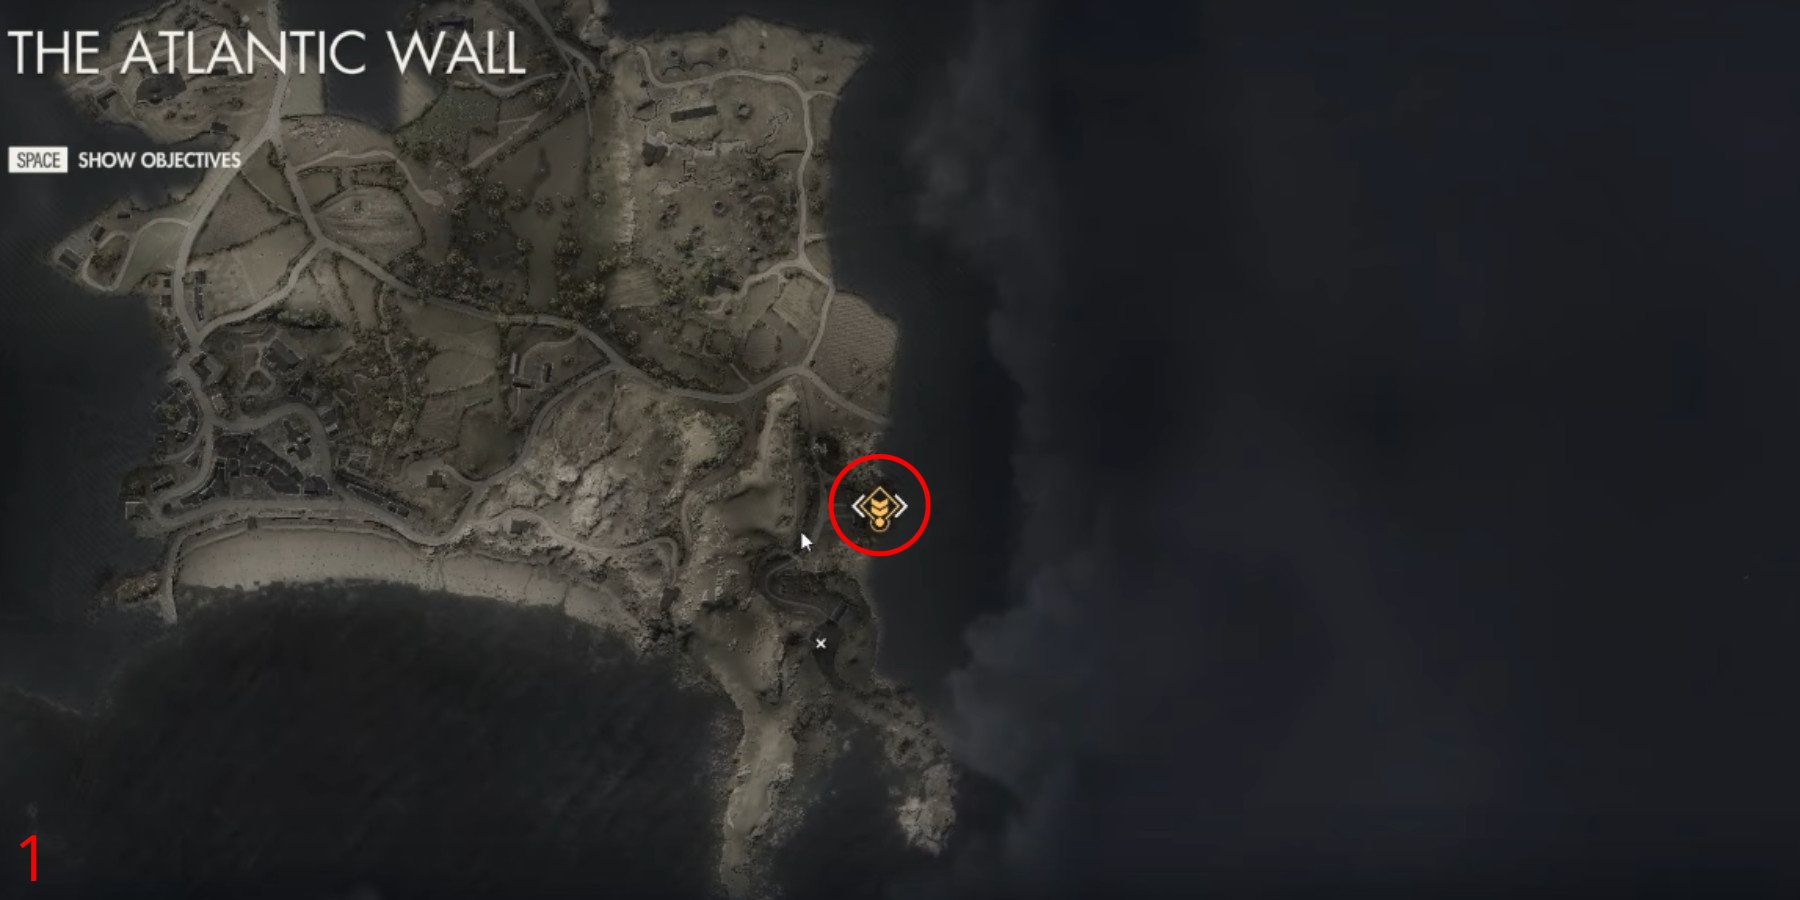
Mission 1 – The Atlantic Wall
There are 3 Workbenches in Mission 1: The Atlantic Wall.
The Atlantic Wall Workbench 1/3
In the opening section of Chapter 1, you’ll discover the first Workbench. Once you manage to enter the room, defeat the adversary unit, and the Workbench will be located on one side of the room, specifically behind the guard.
The Atlantic Wall Workbench 2/3
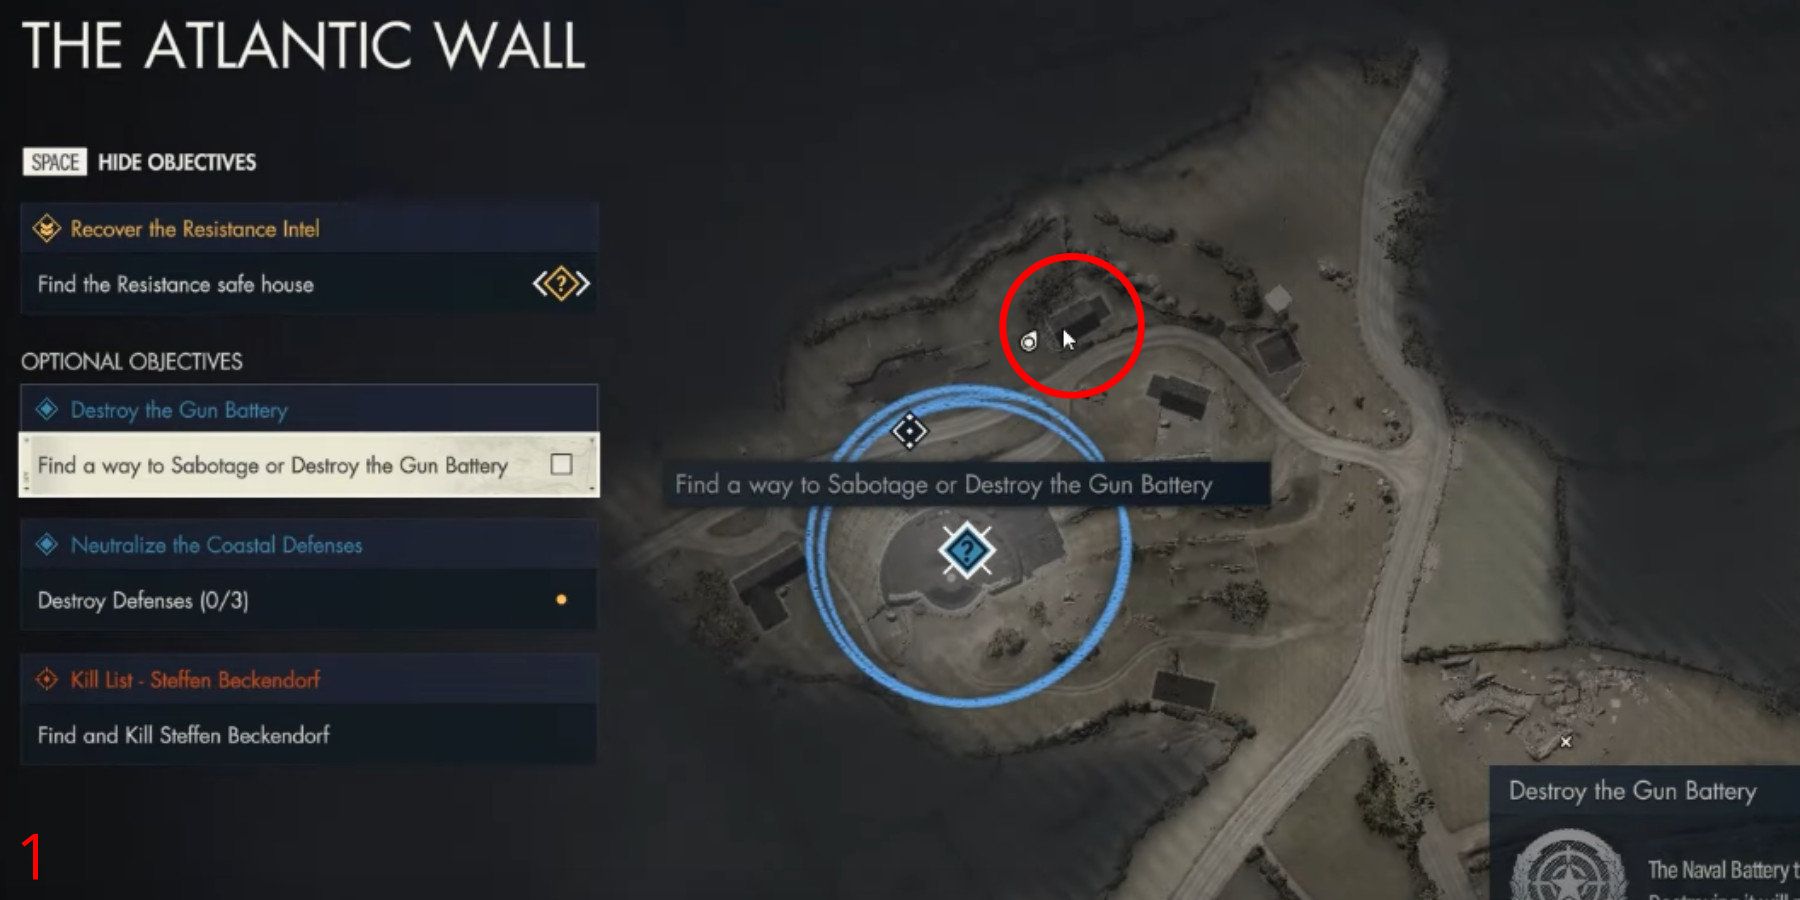
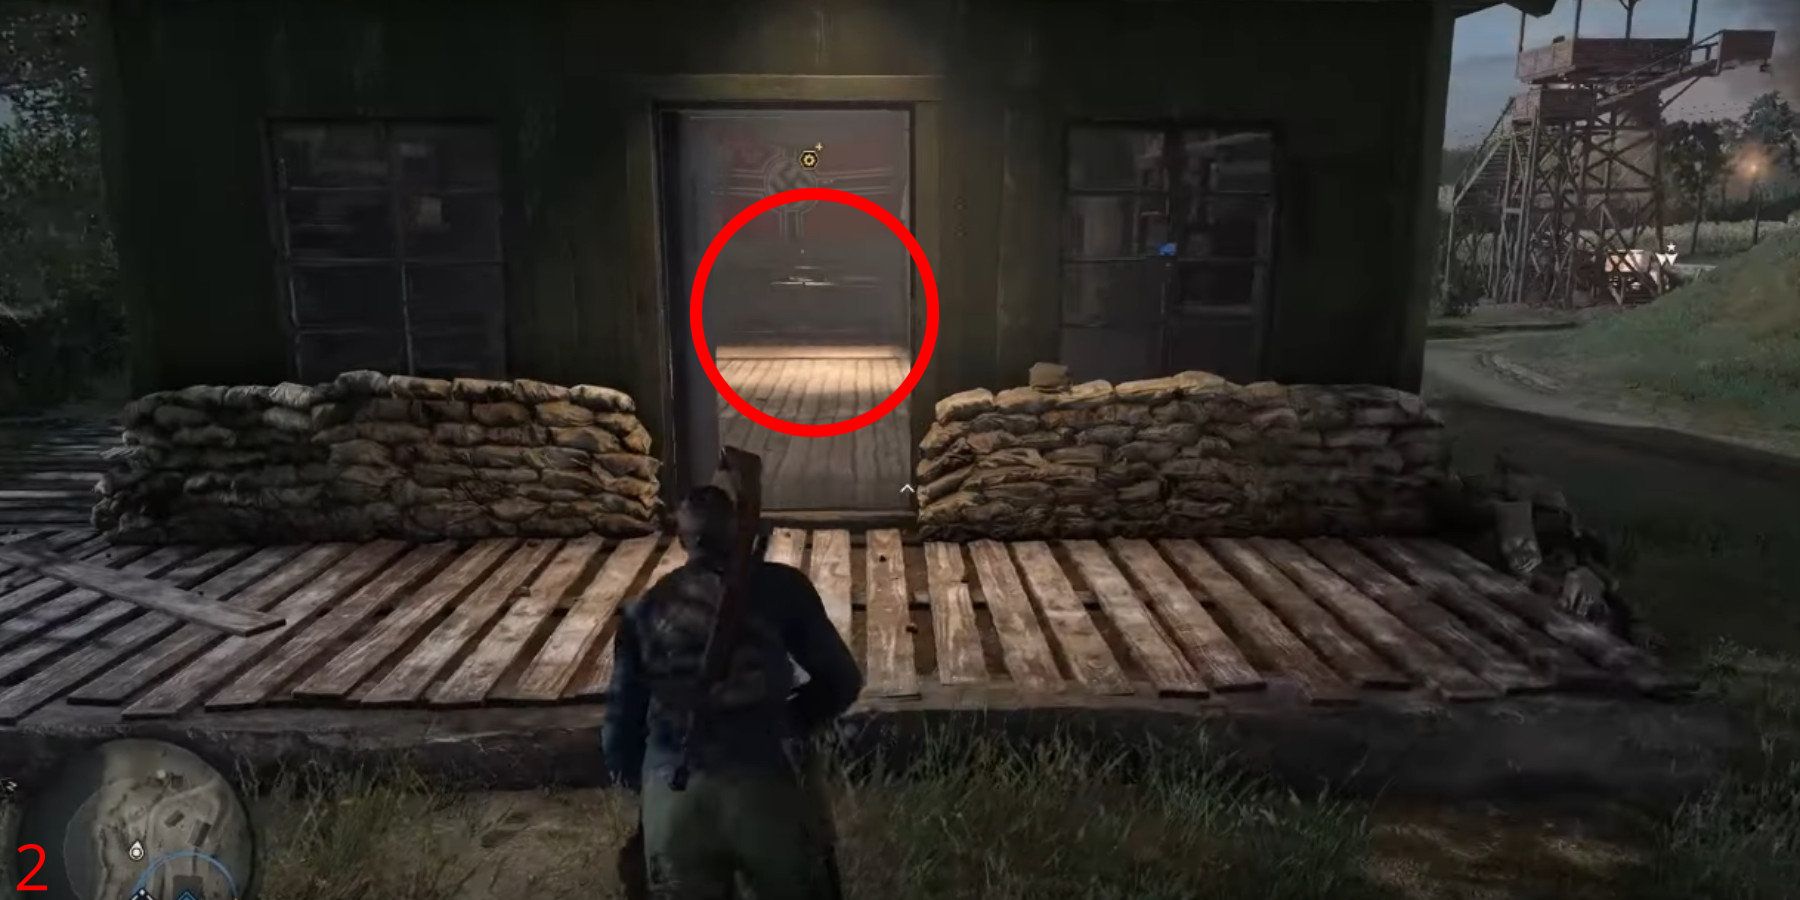
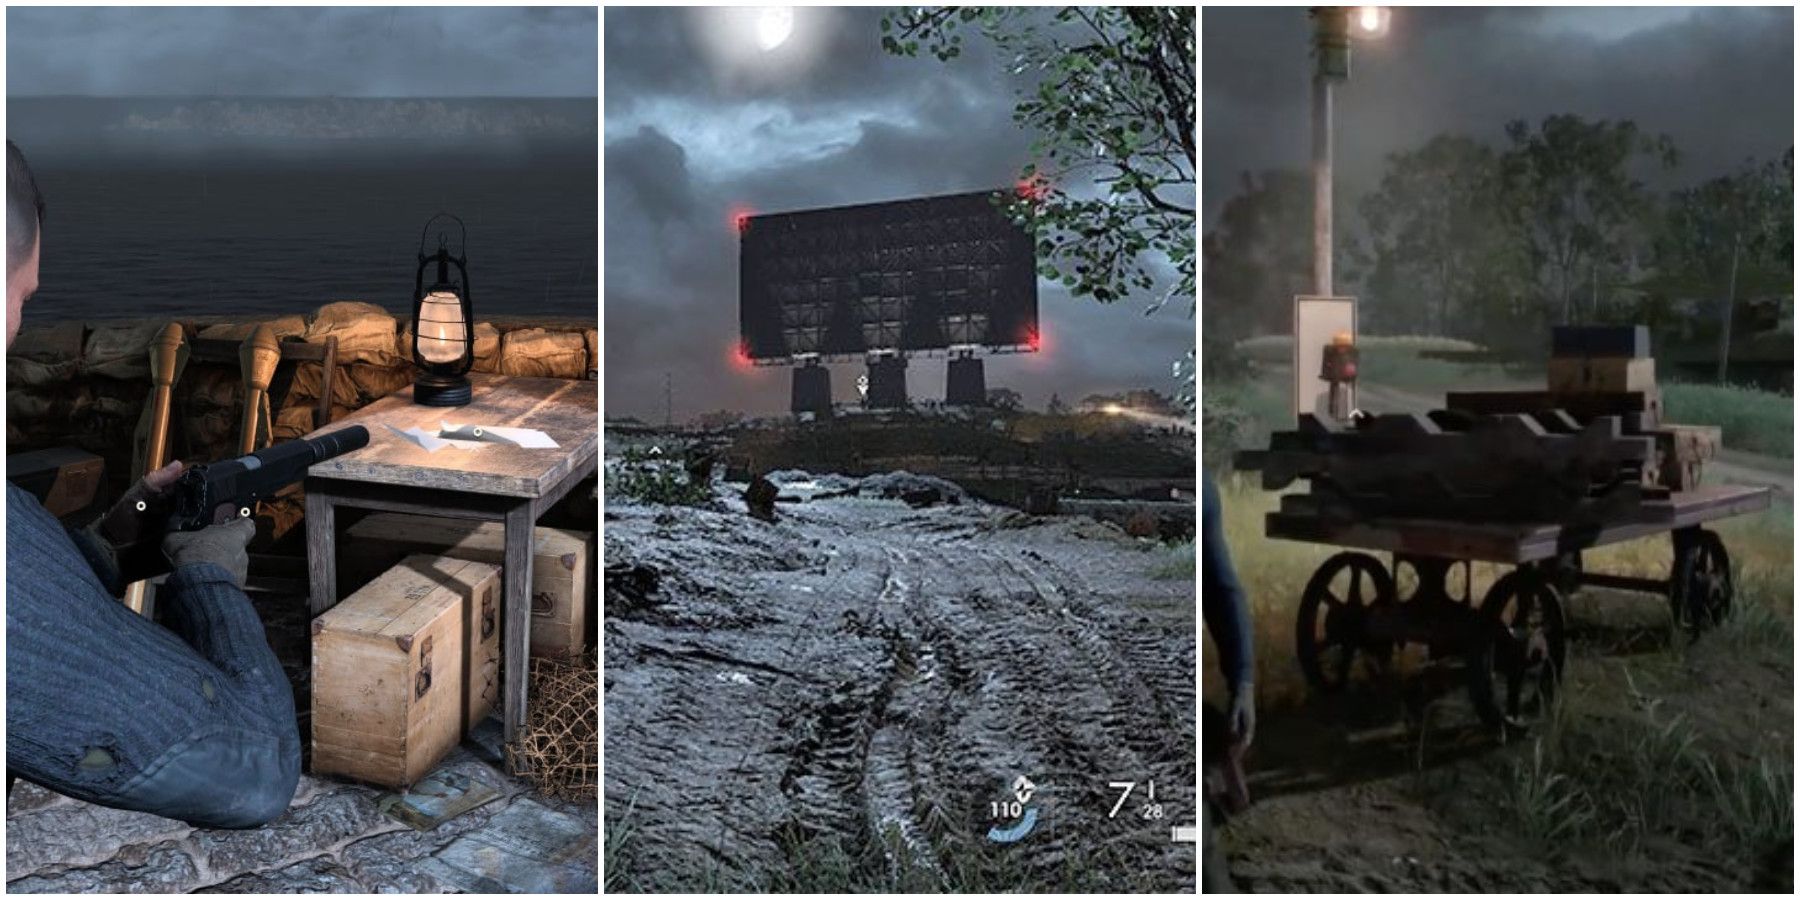
Near the objective to destroy the Gun Battery, you’ll find the second workbench. After completing the gun battery task, move northwest and look for a small building. Upon entering this structure, you’ll spot the Pistol Workbench – an ideal location to upgrade some of the game’s powerful pistols.
The Atlantic Wall Workbench 3/3
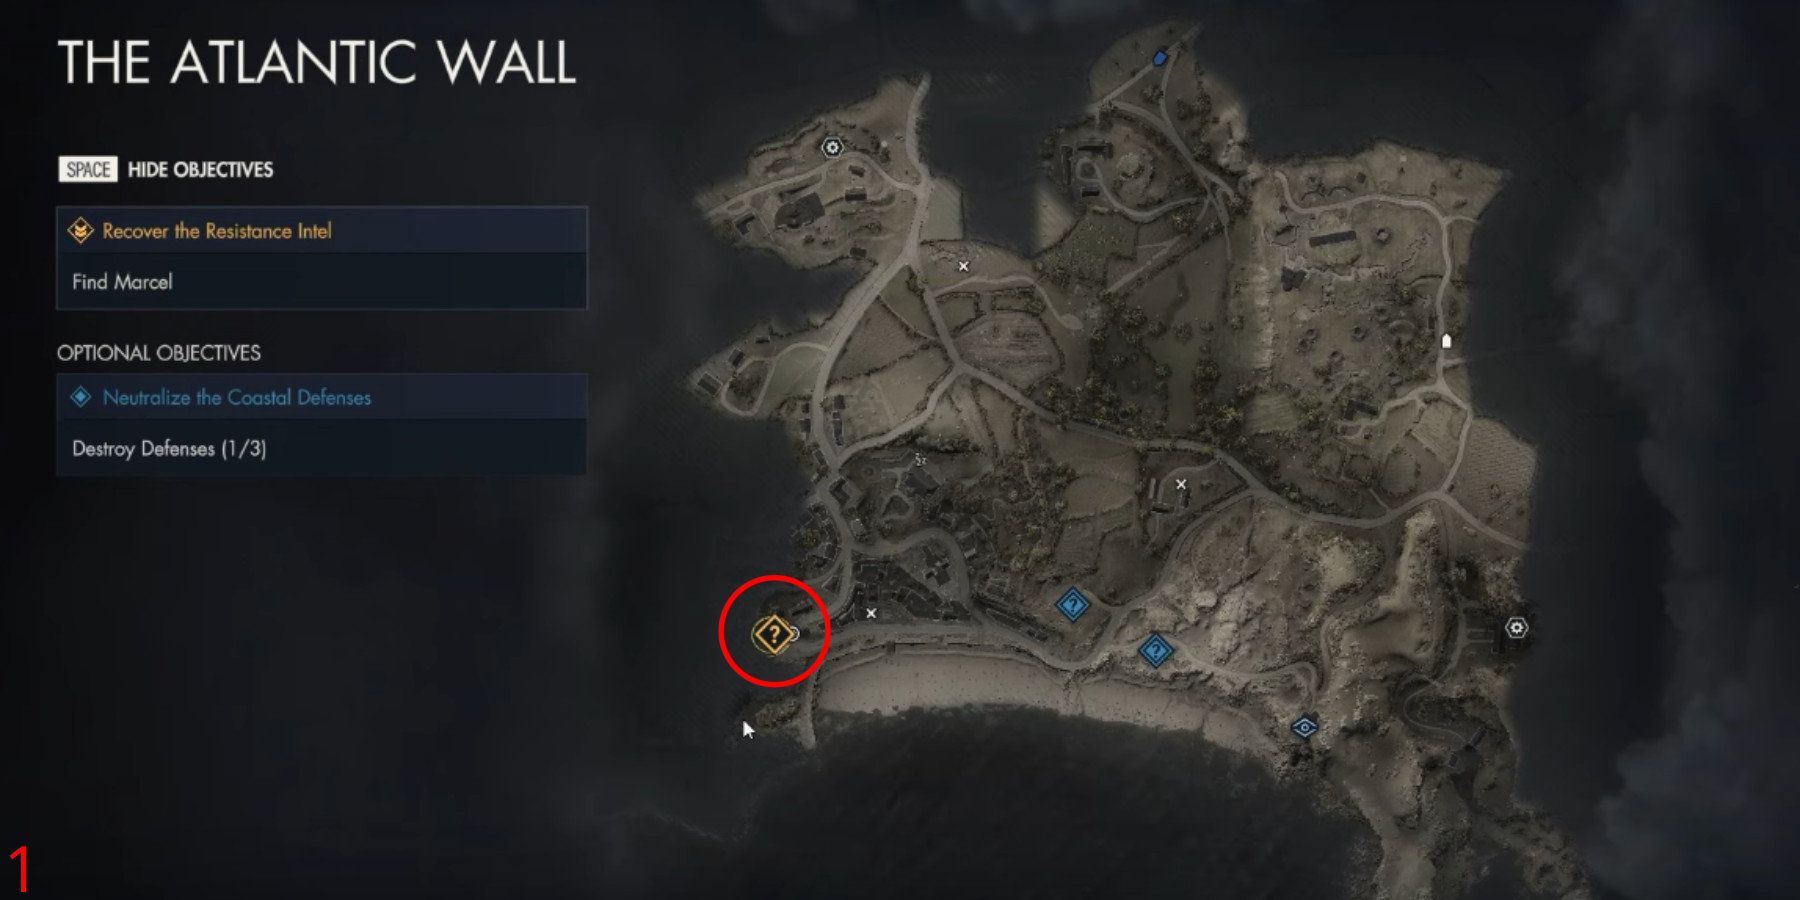
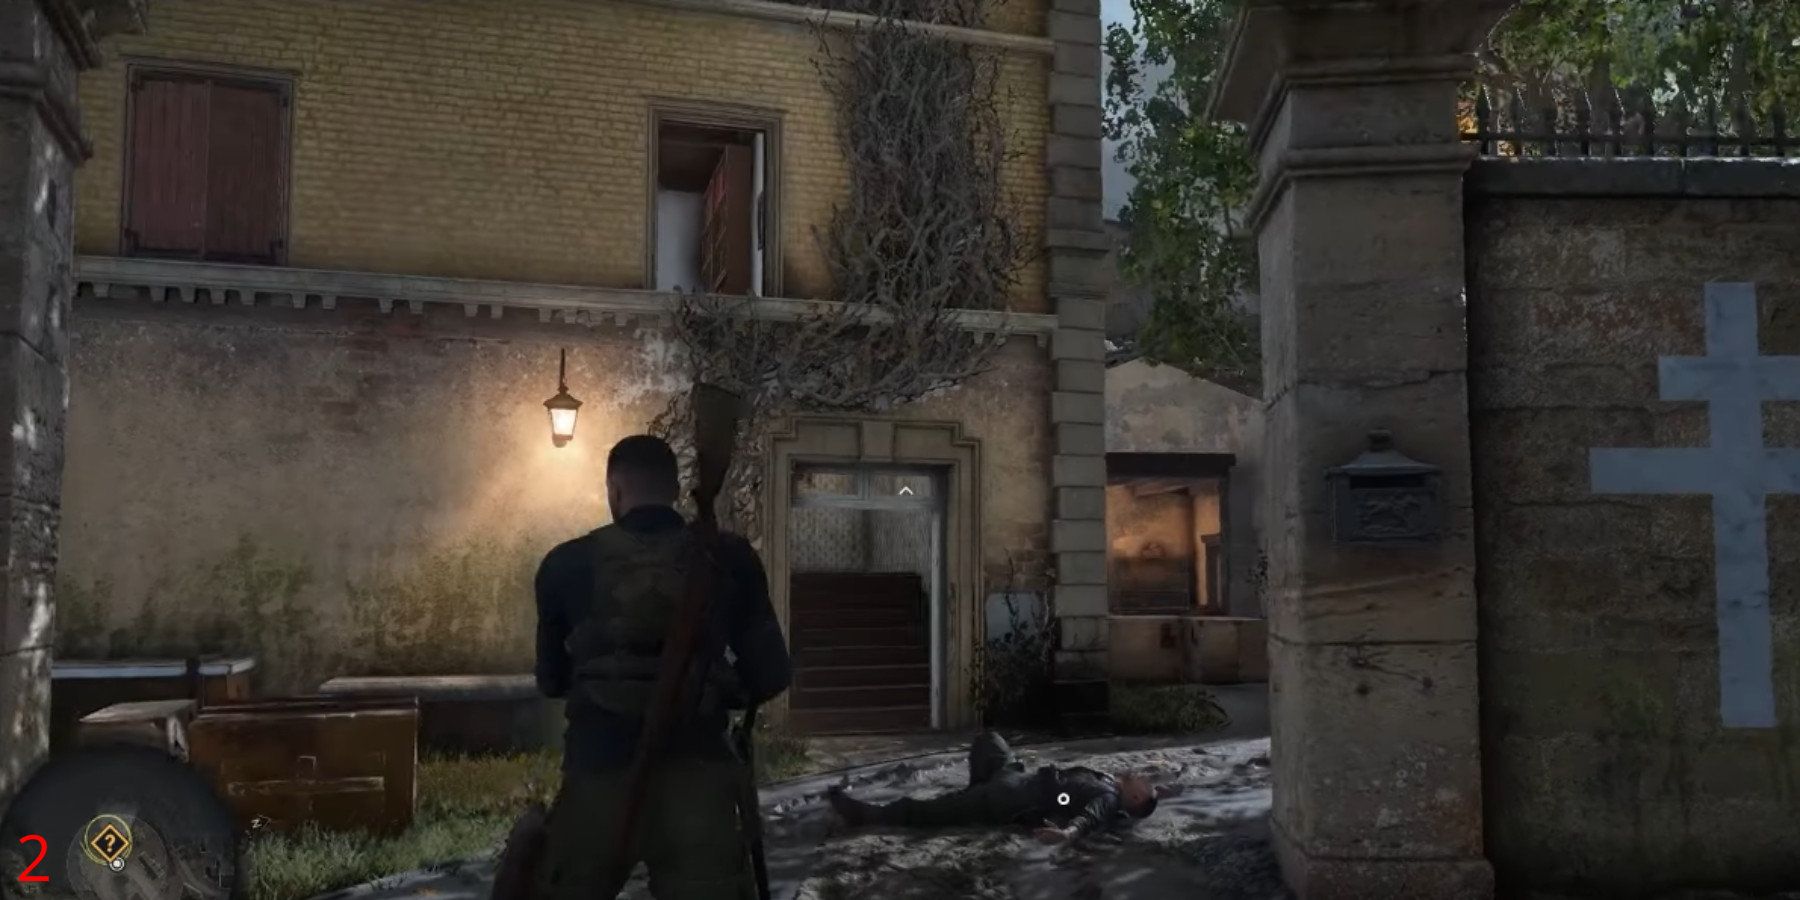
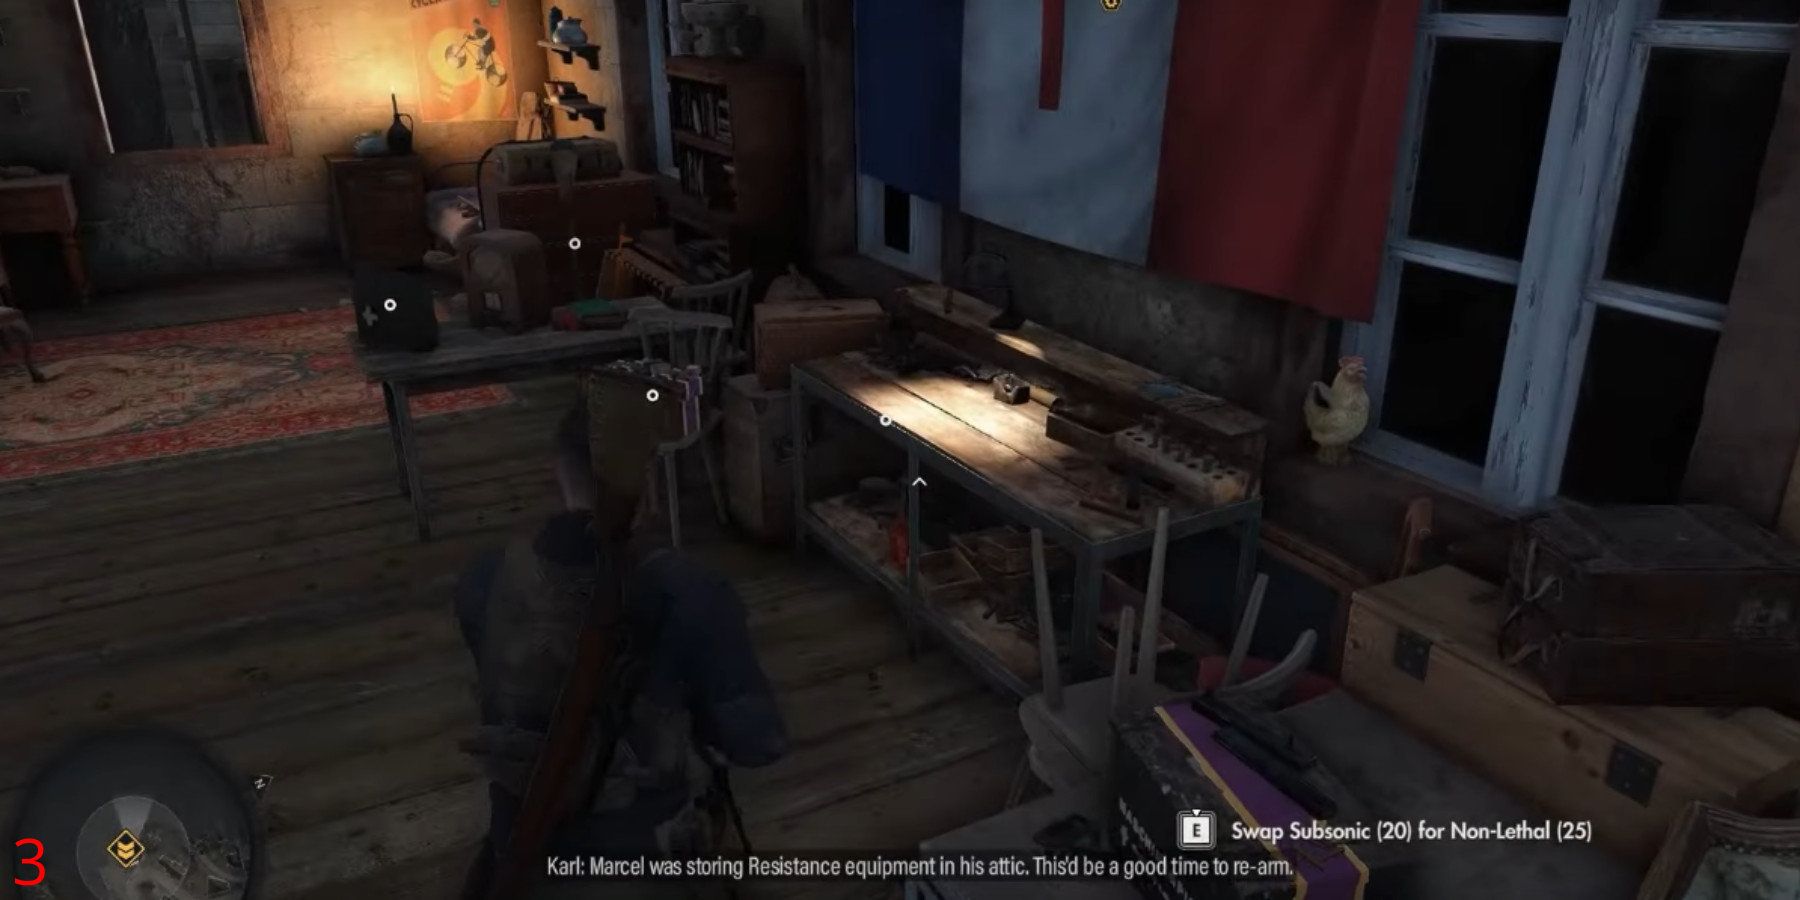
In Marcel’s residence, you can locate the third workbench, specifically the one for crafting SMGs. This workbench is situated beneath a French Resistance flag, on the uppermost level.
Mission 2 – Occupied Residence
There are 3 Workbenches in Mission 2: Occupied Residence.
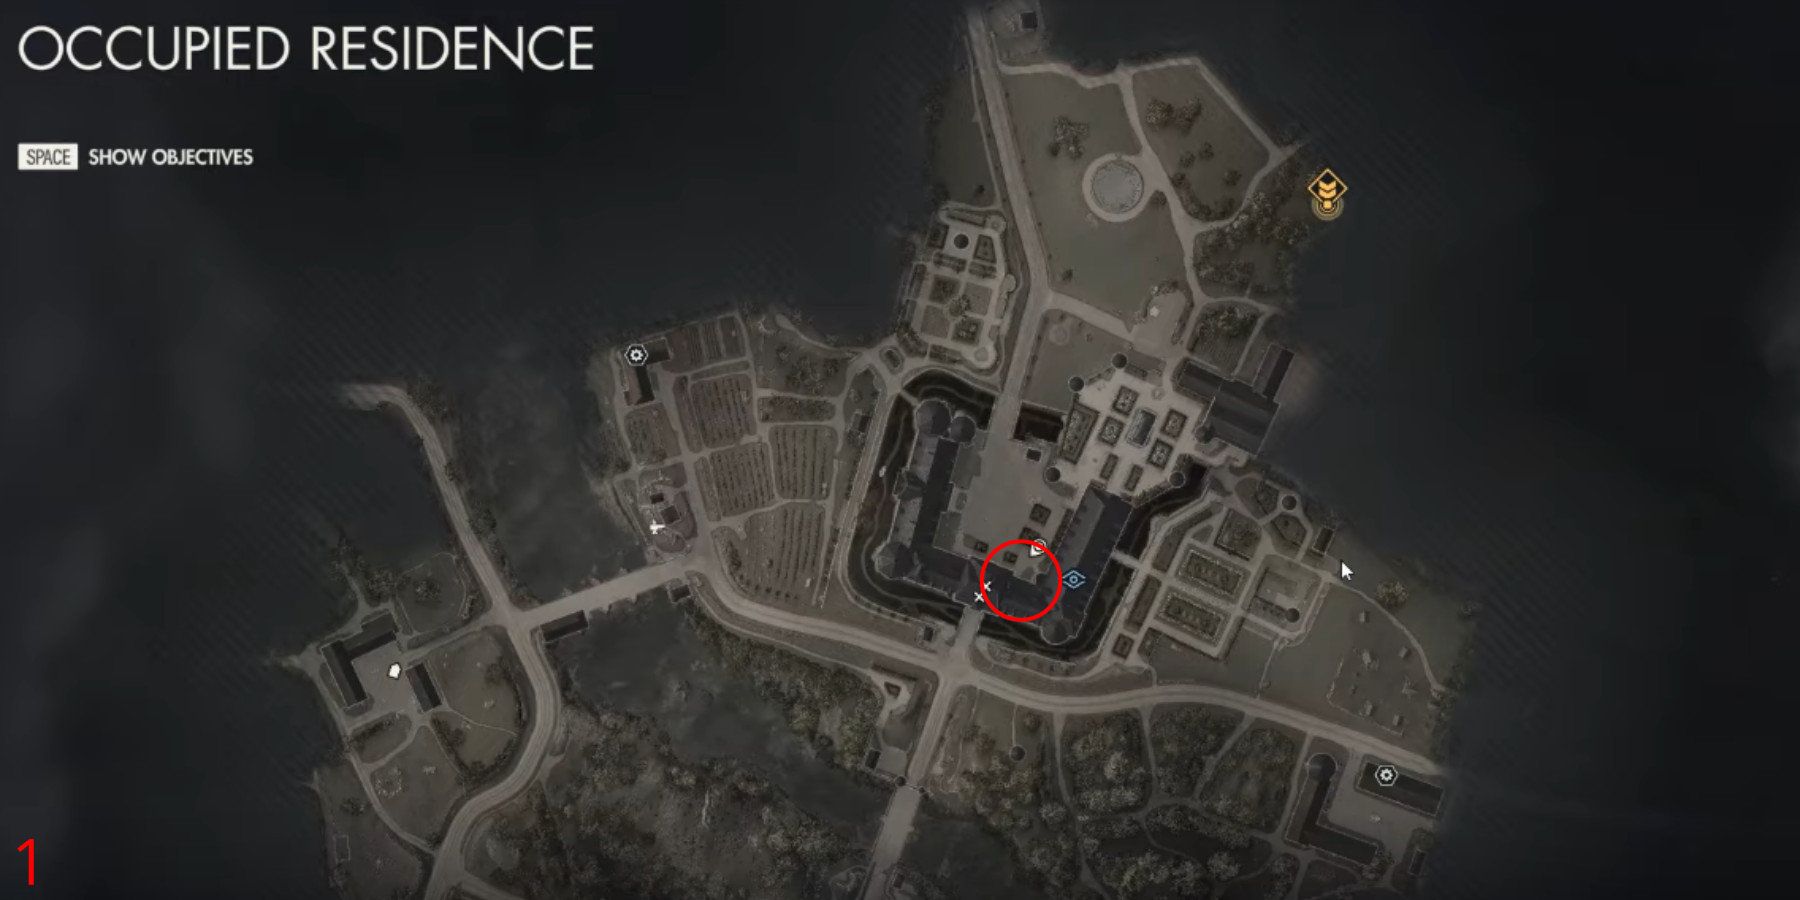
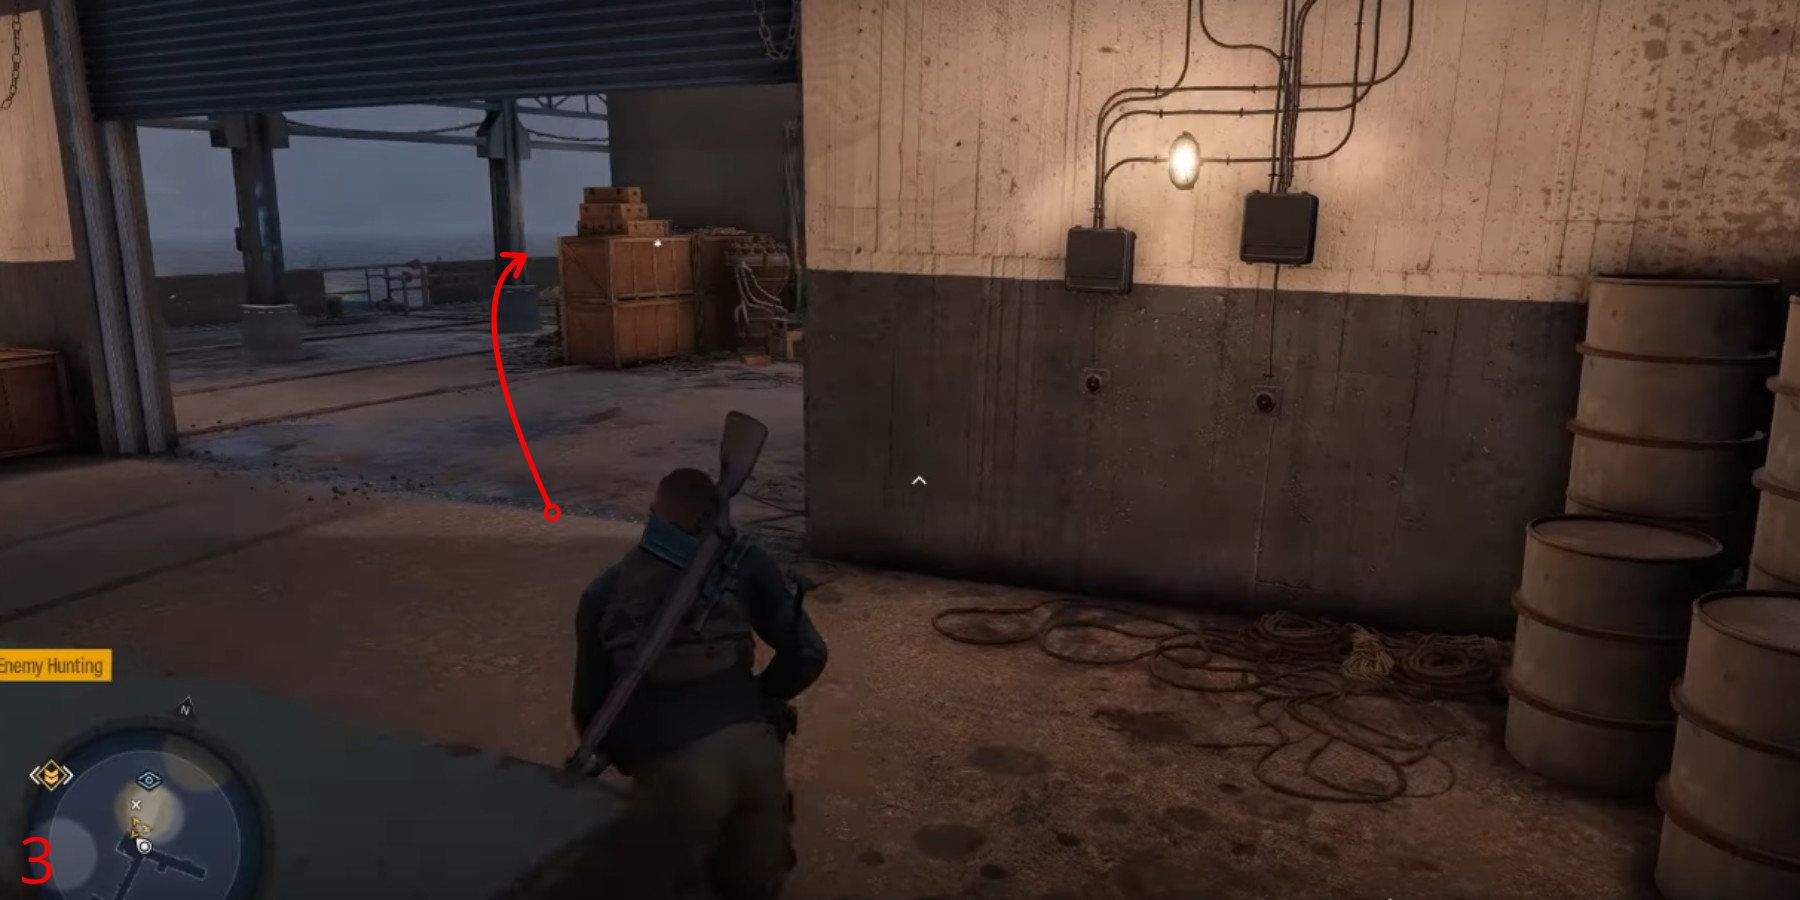
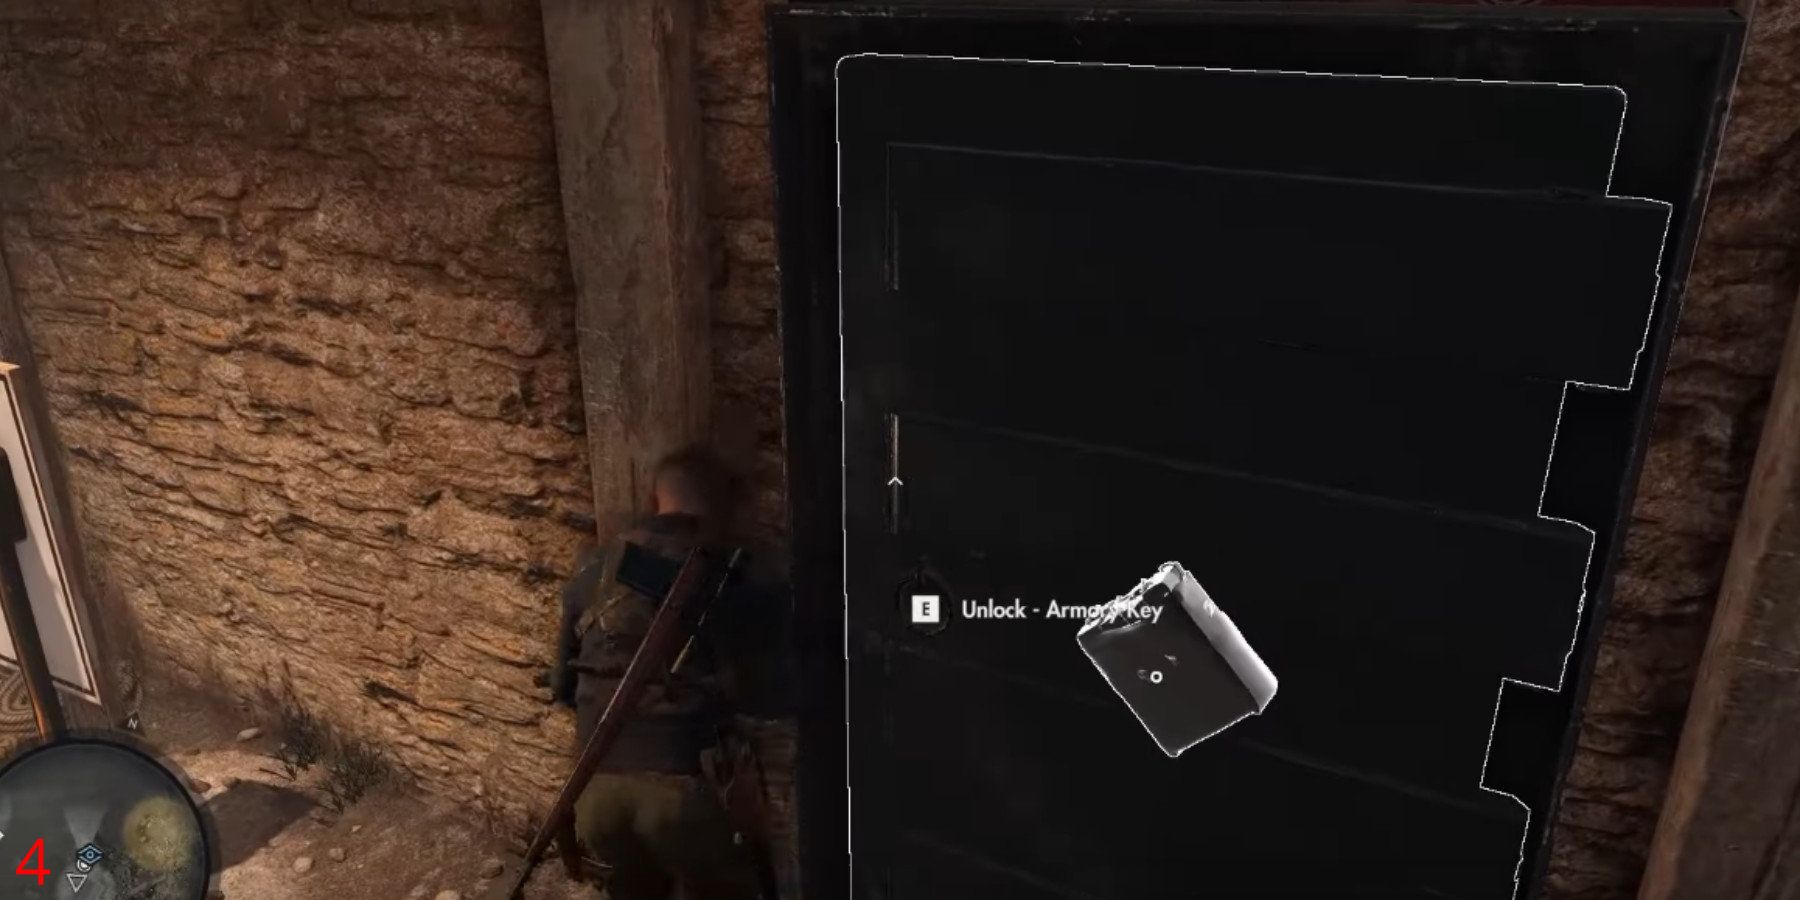
Occupied Residence Workbench 1/3
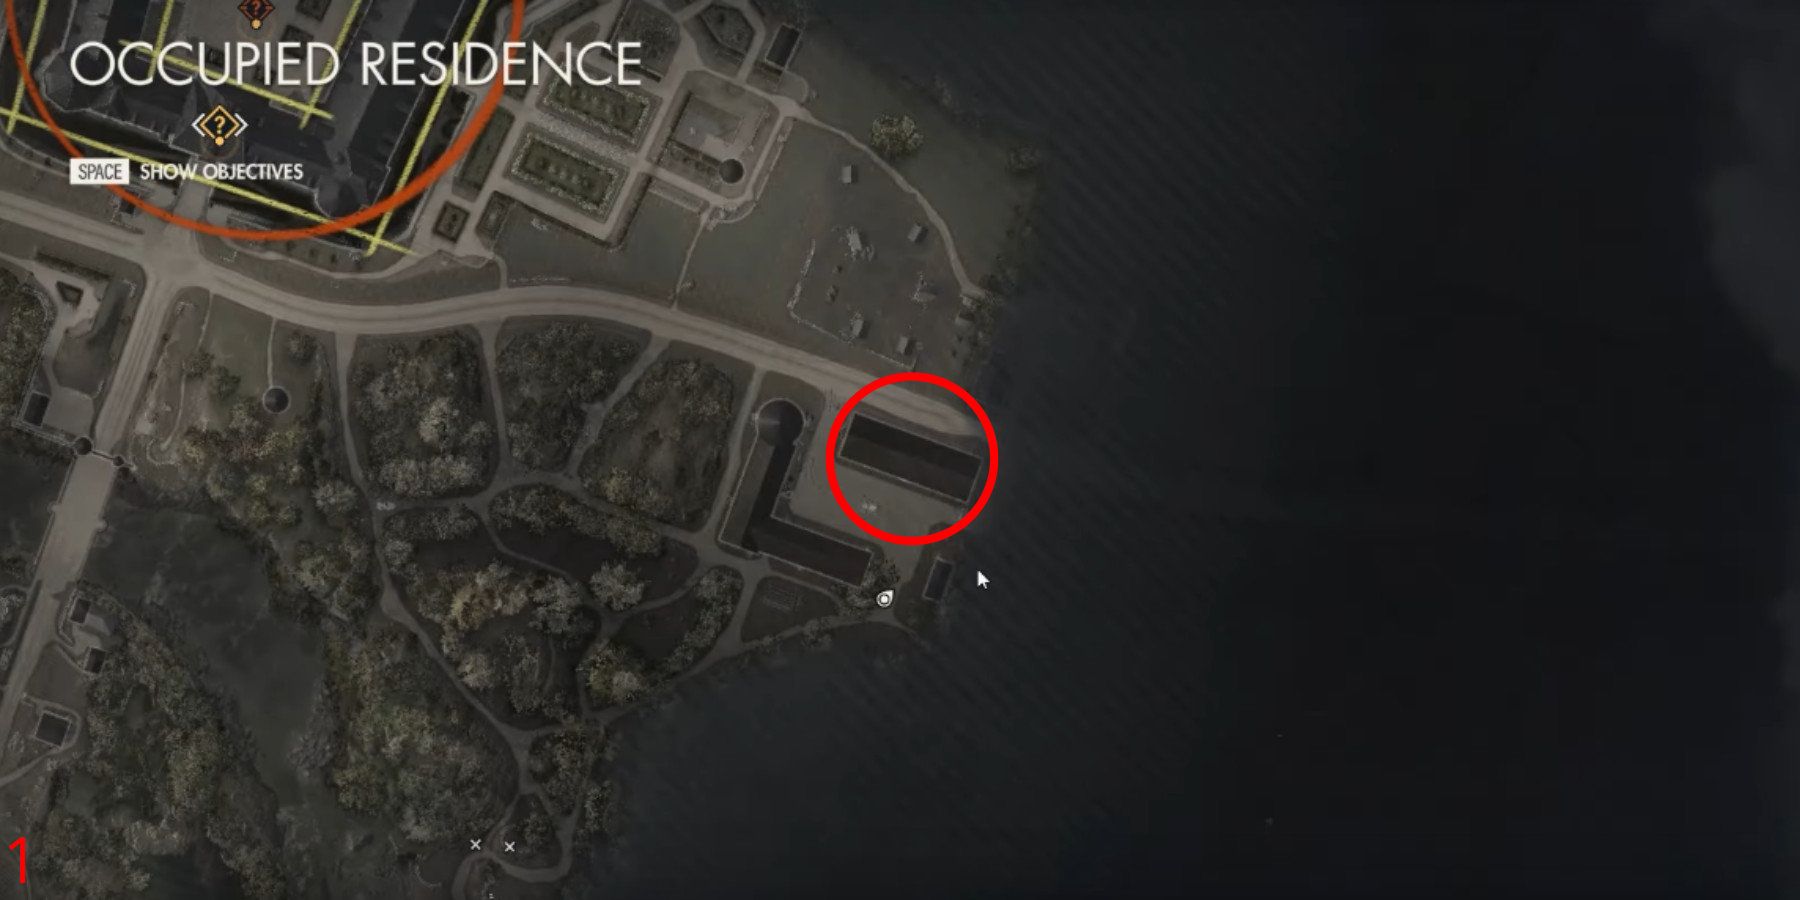
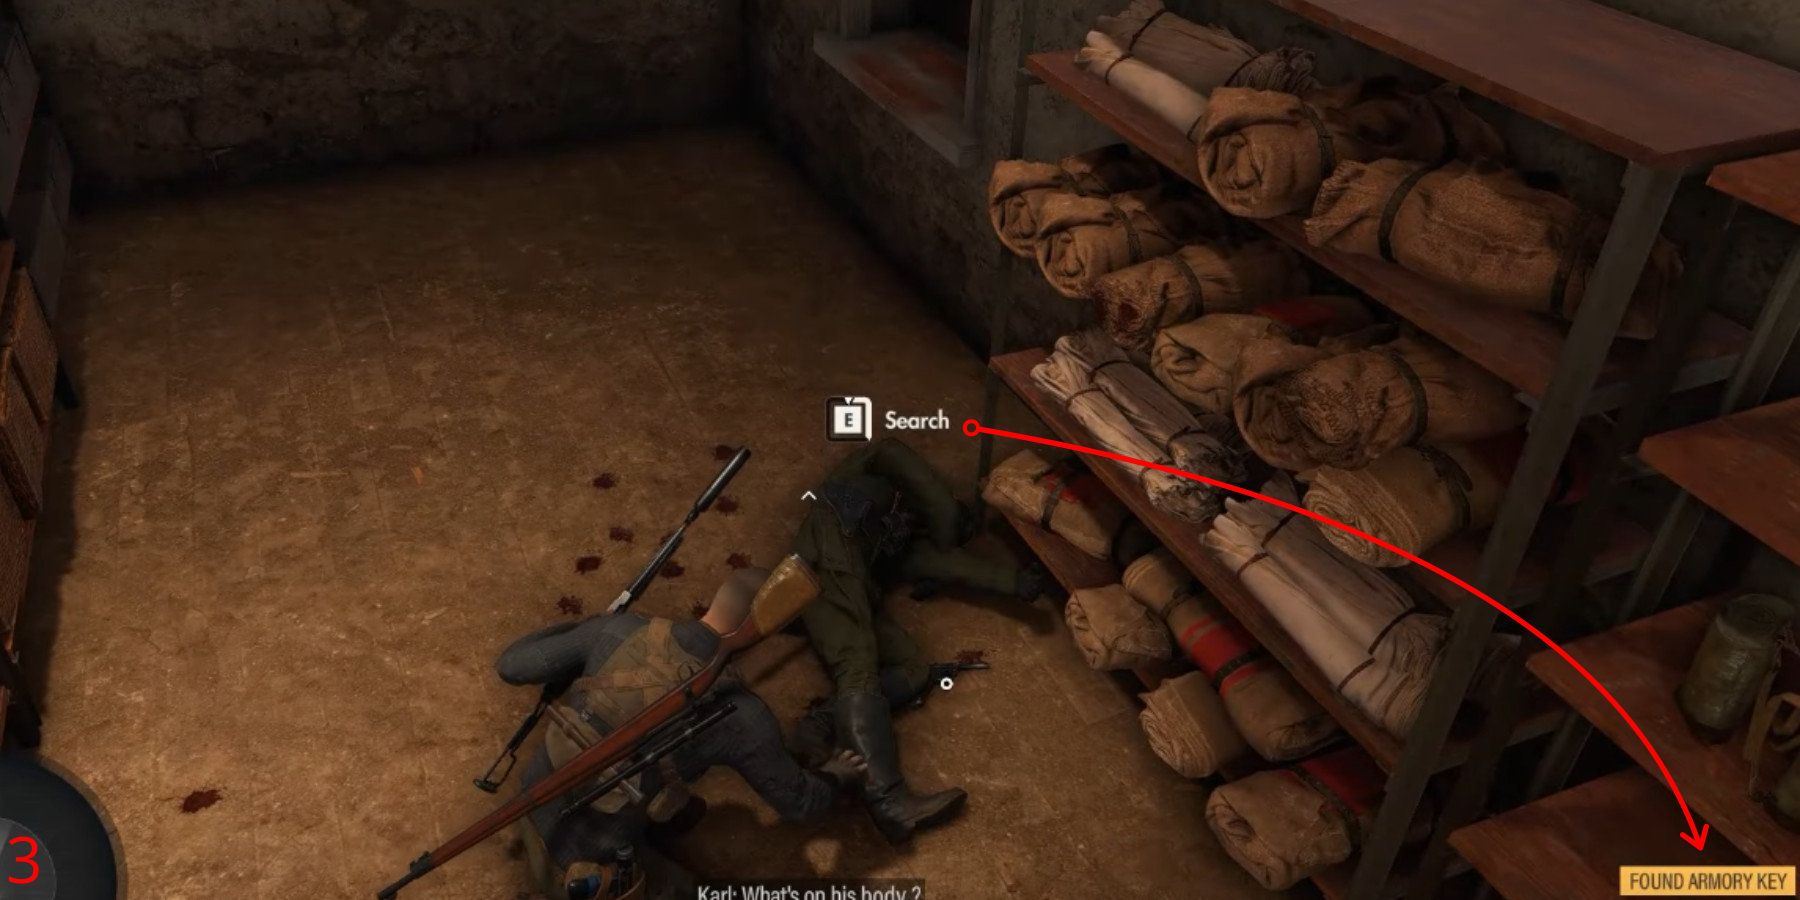
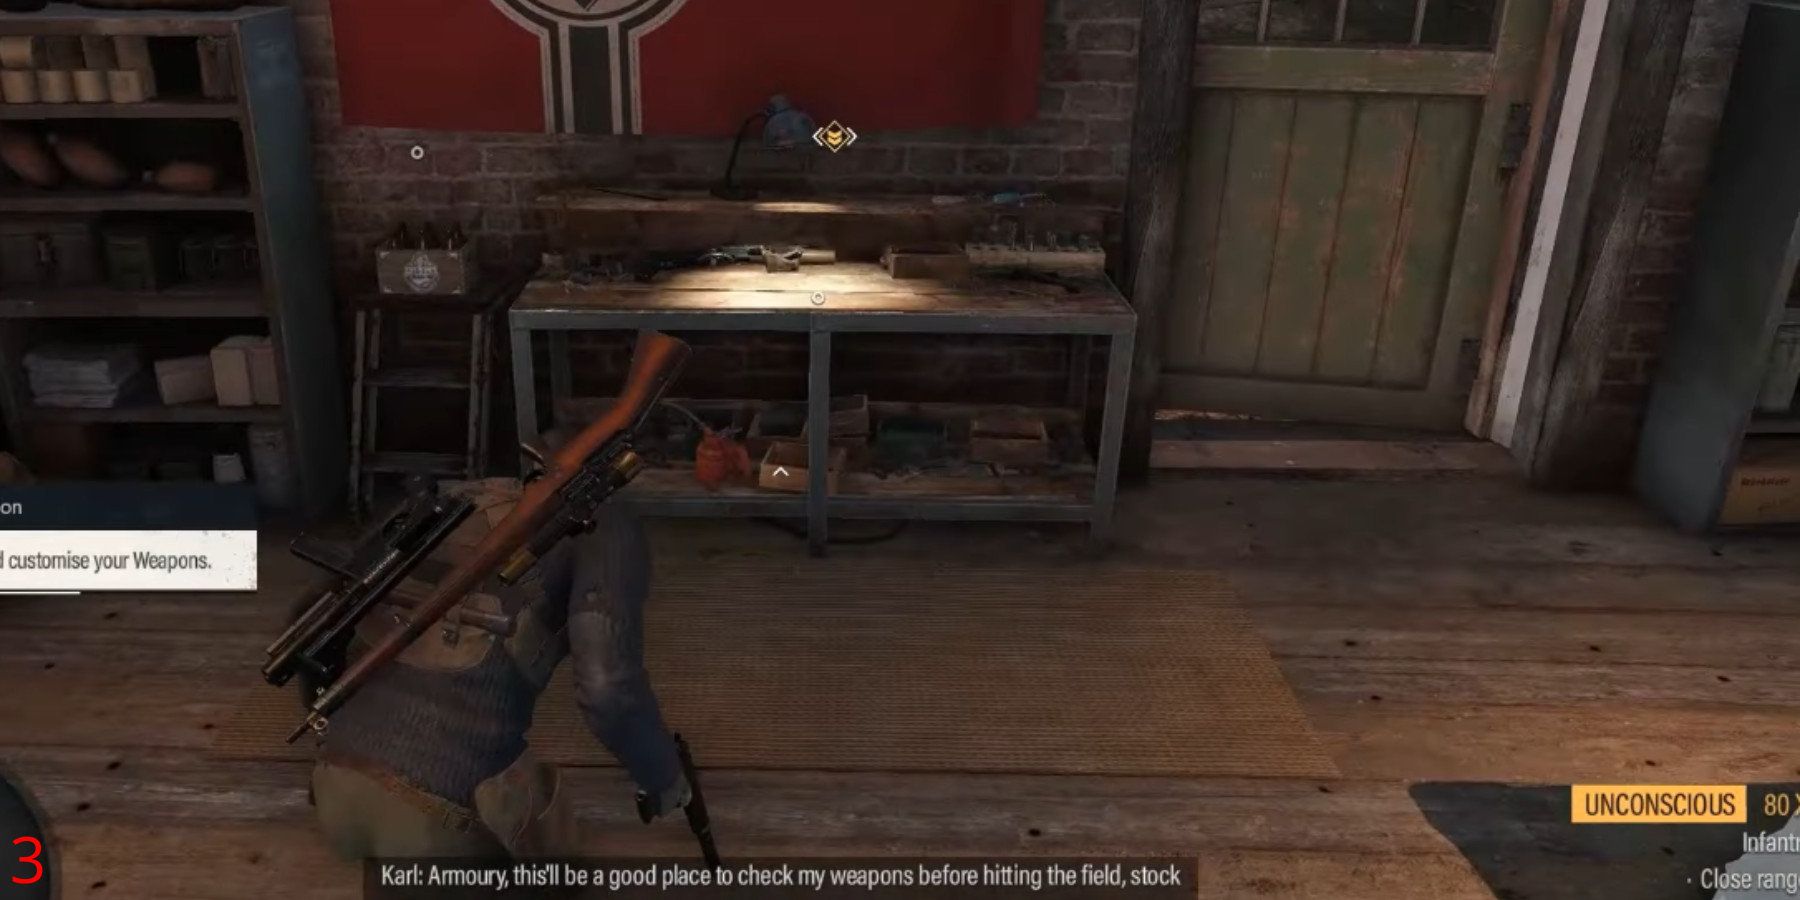
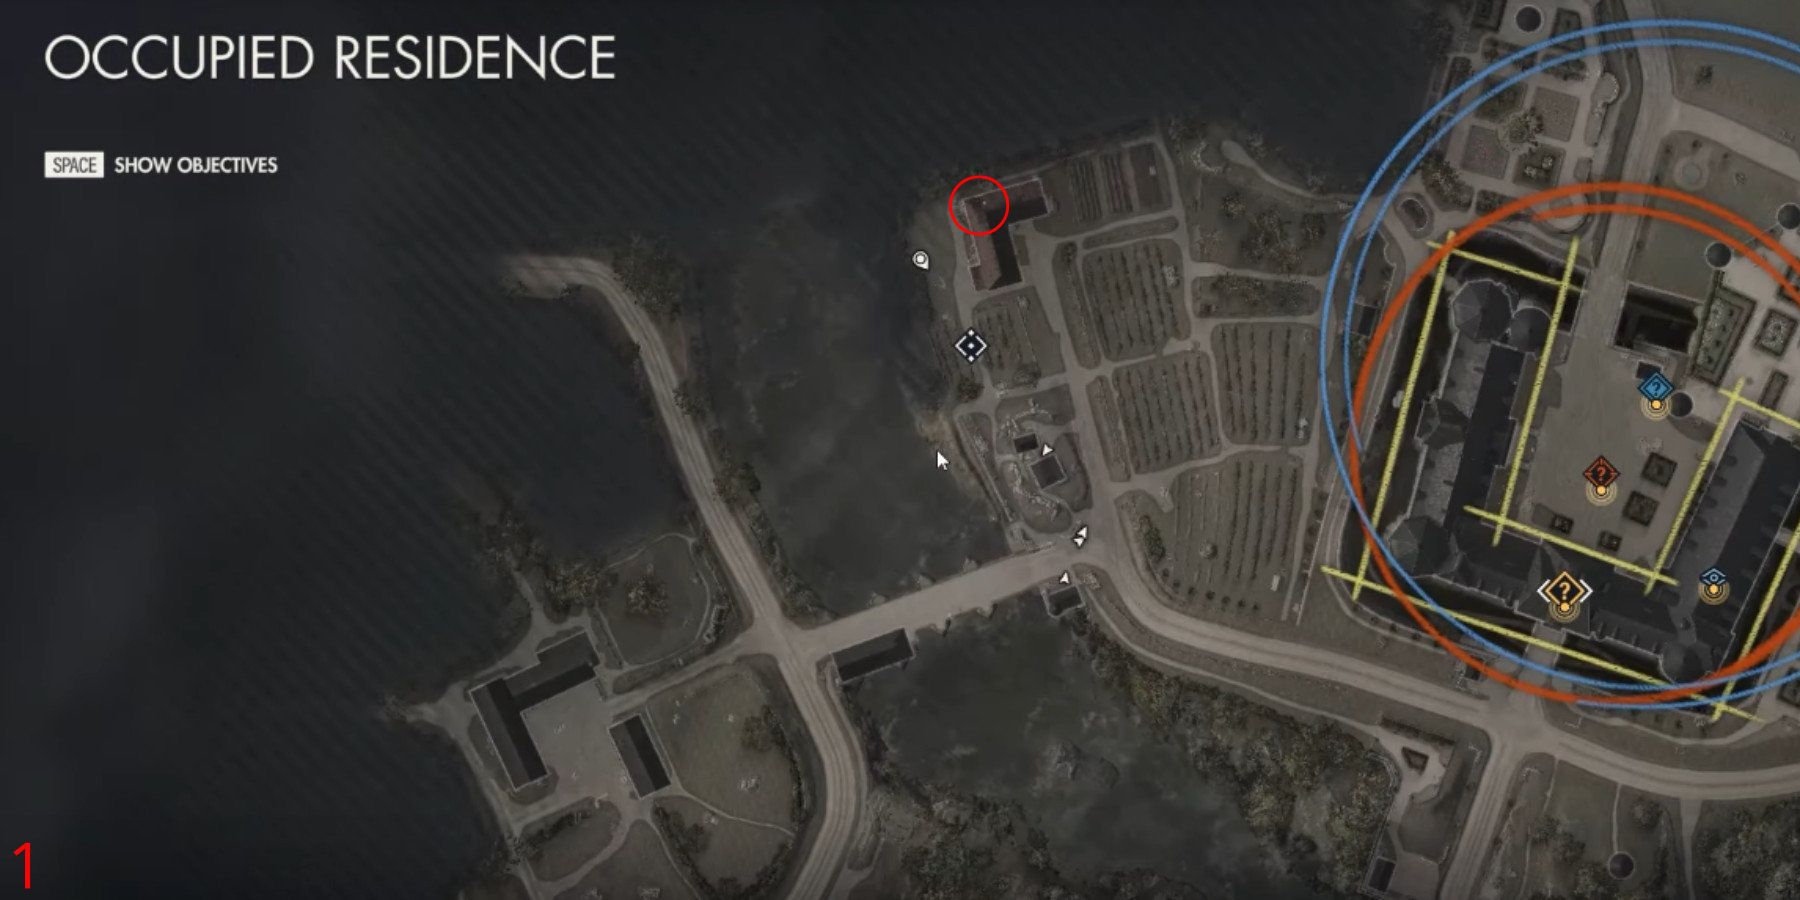
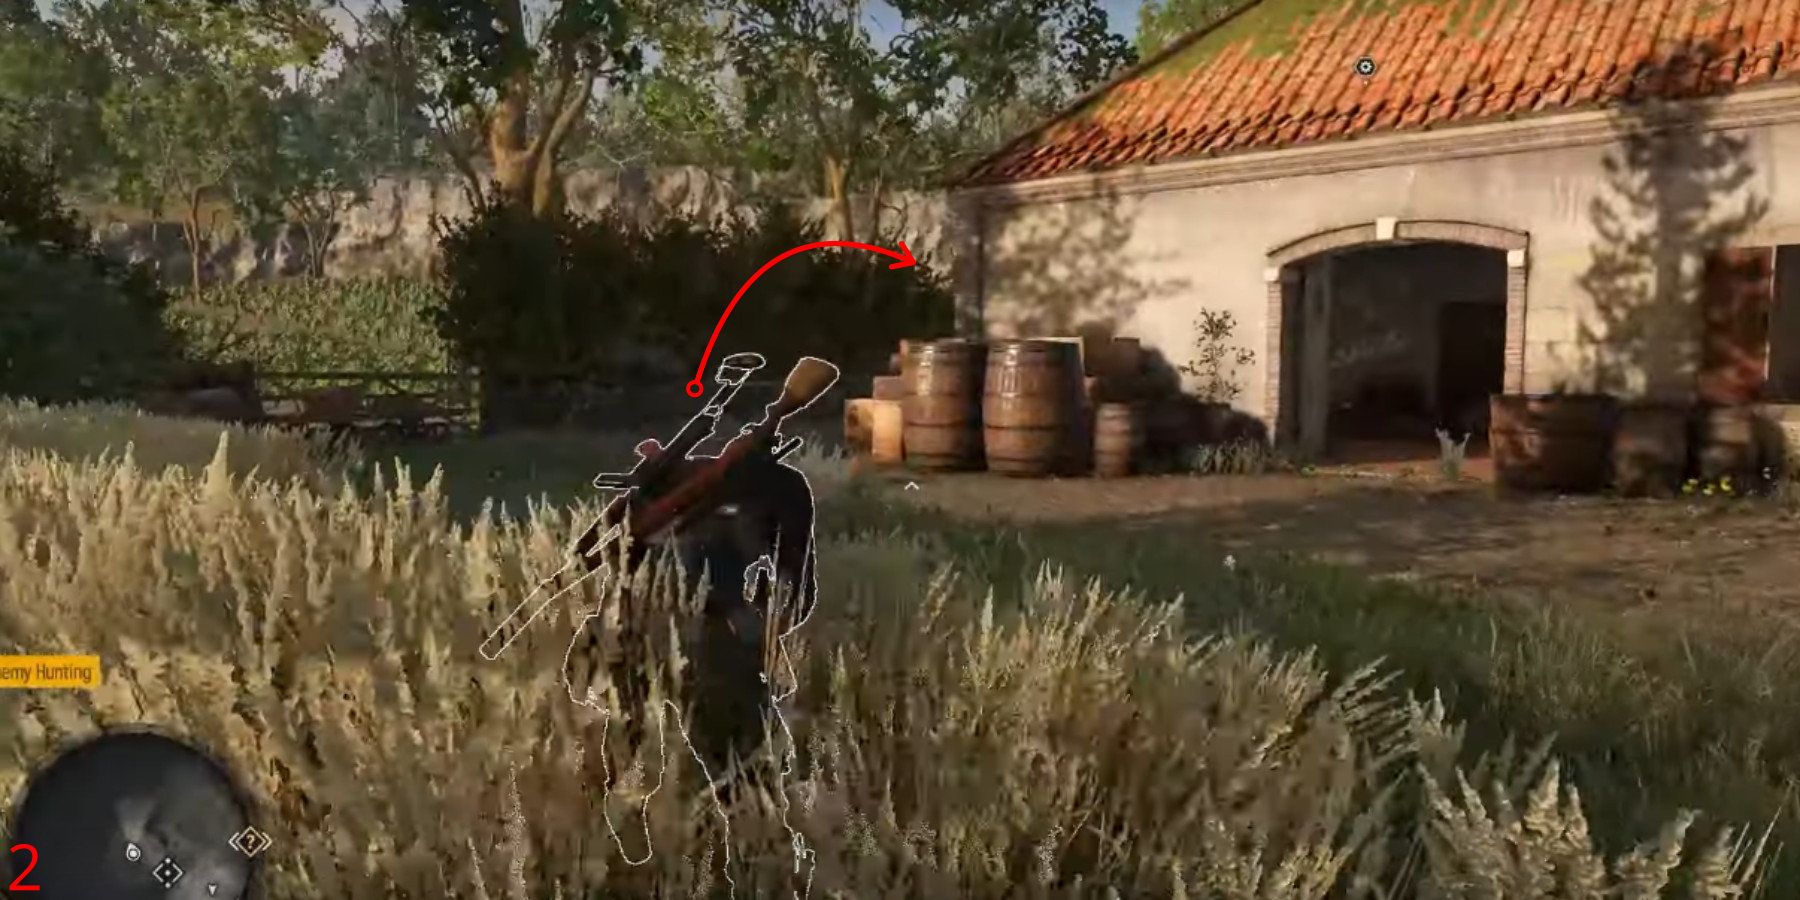
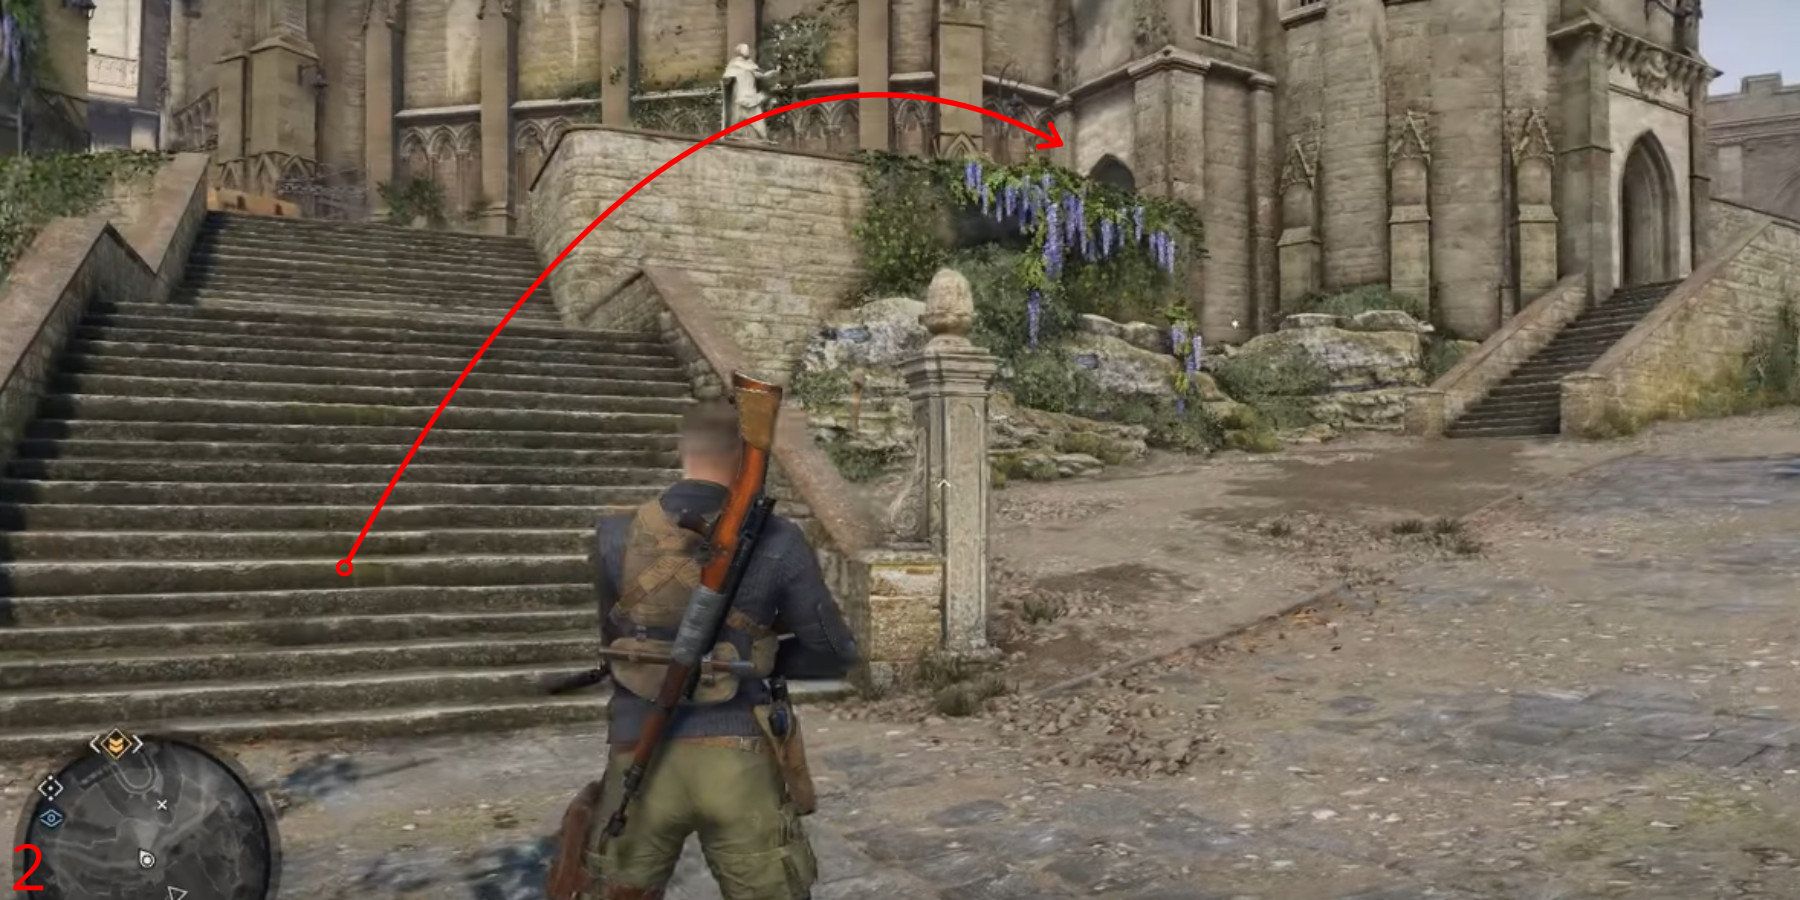
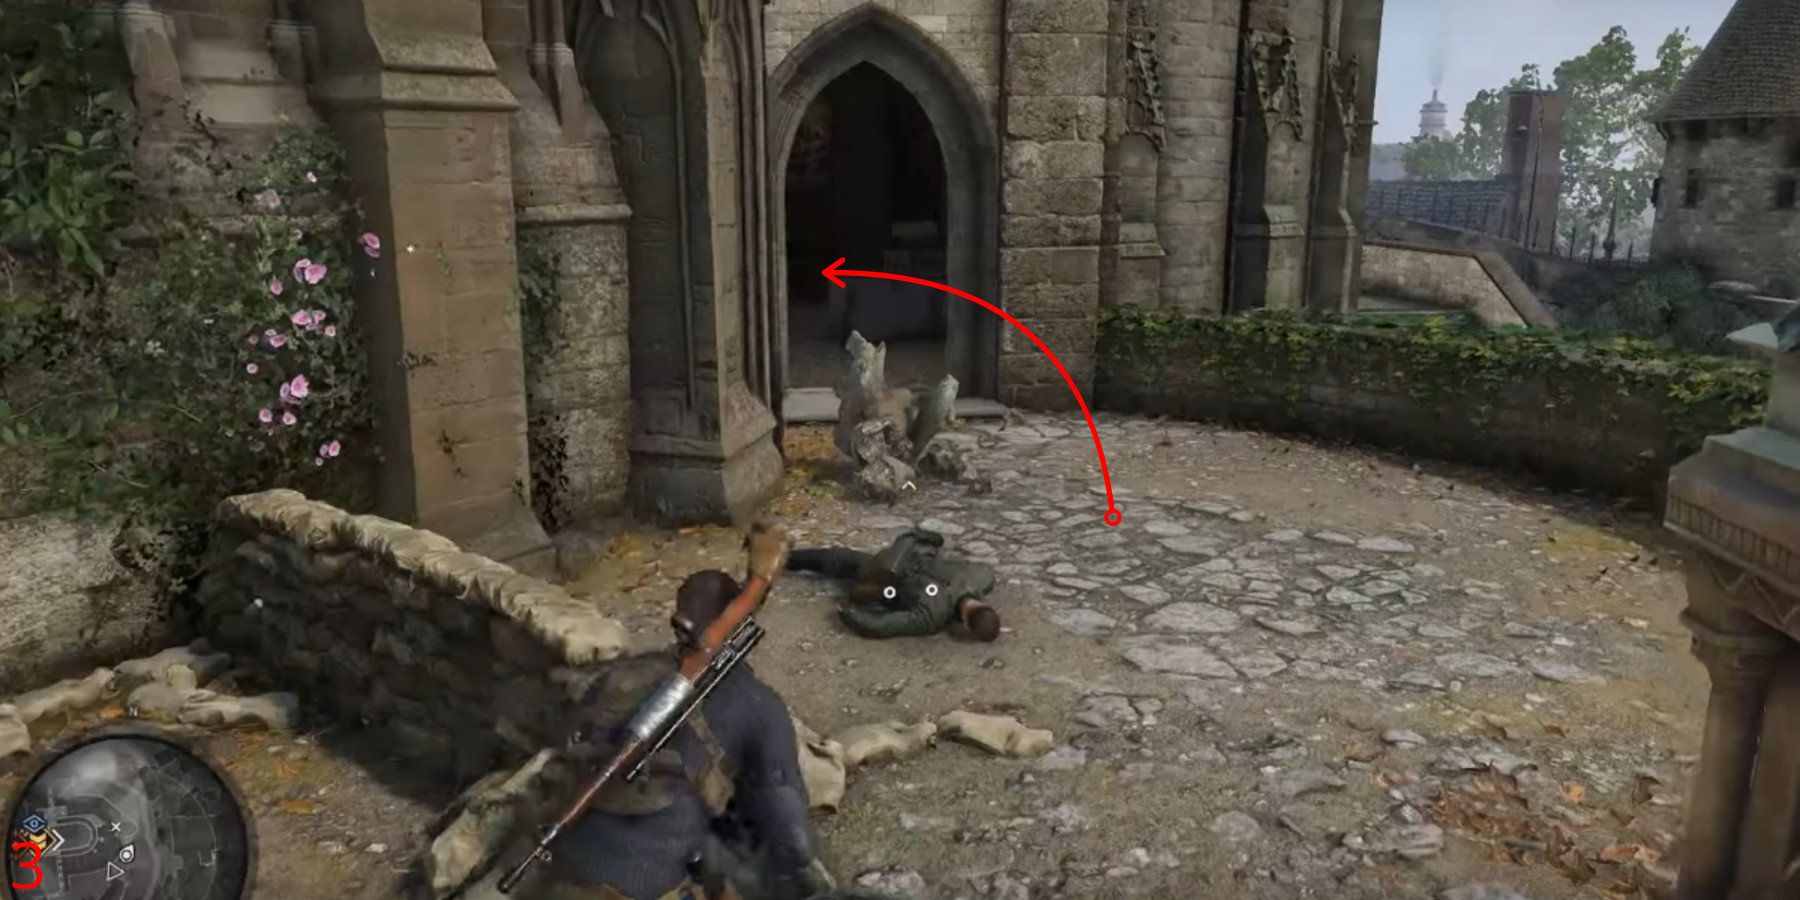
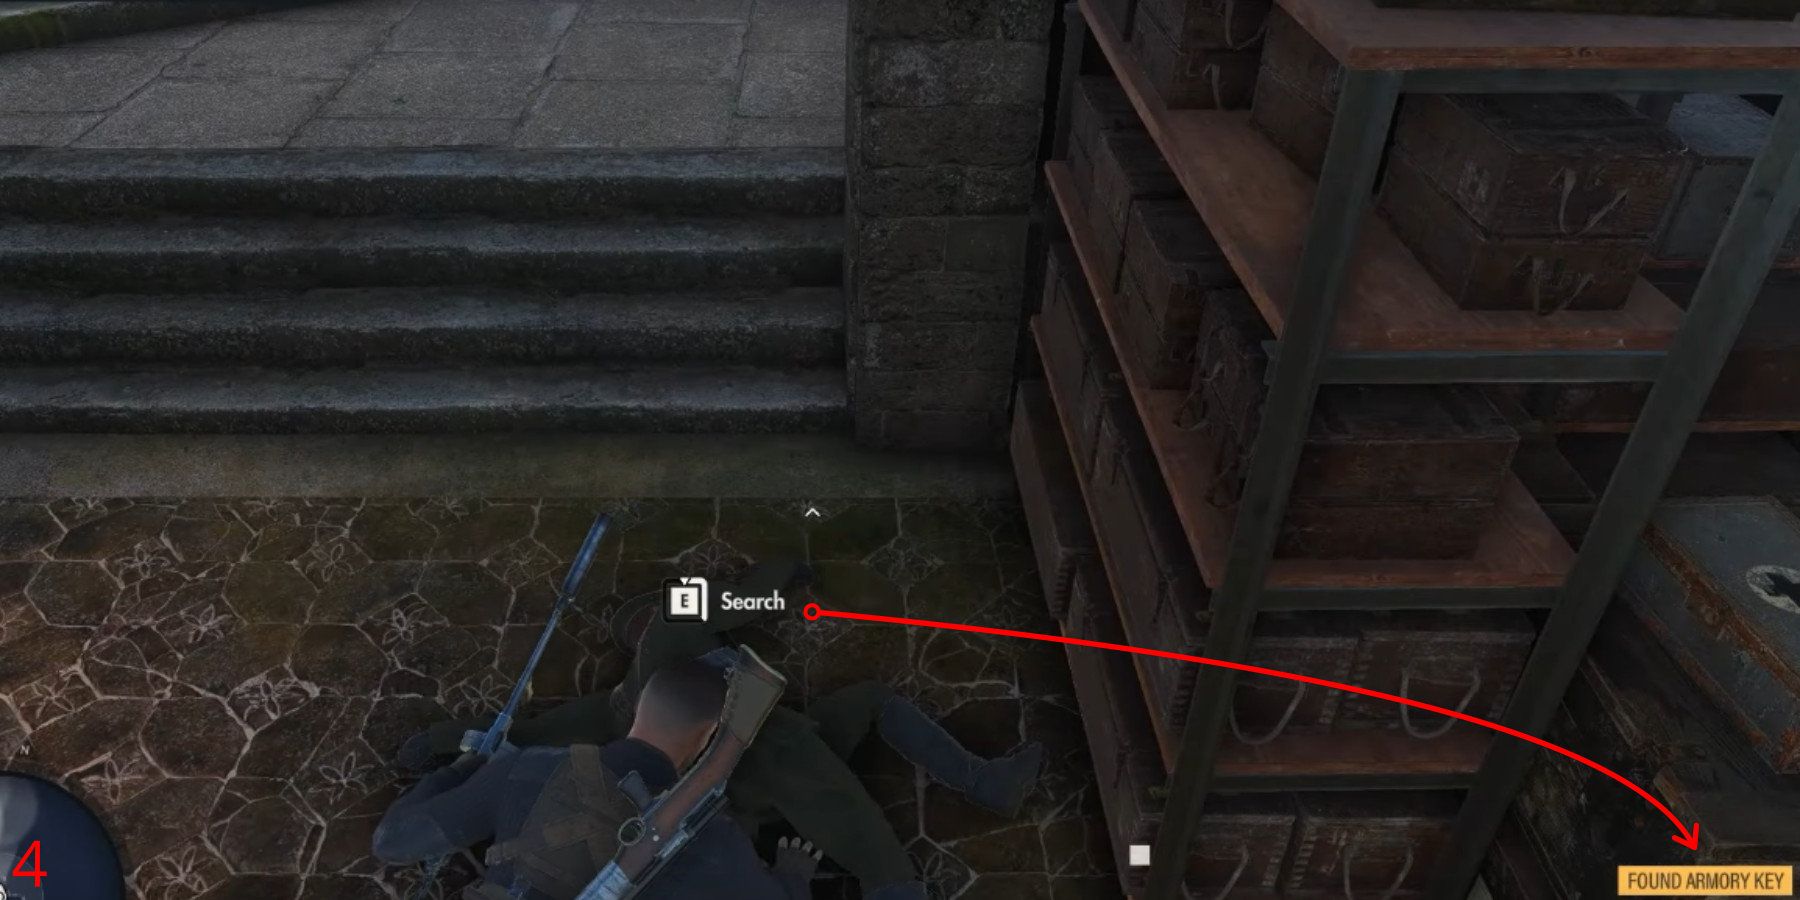
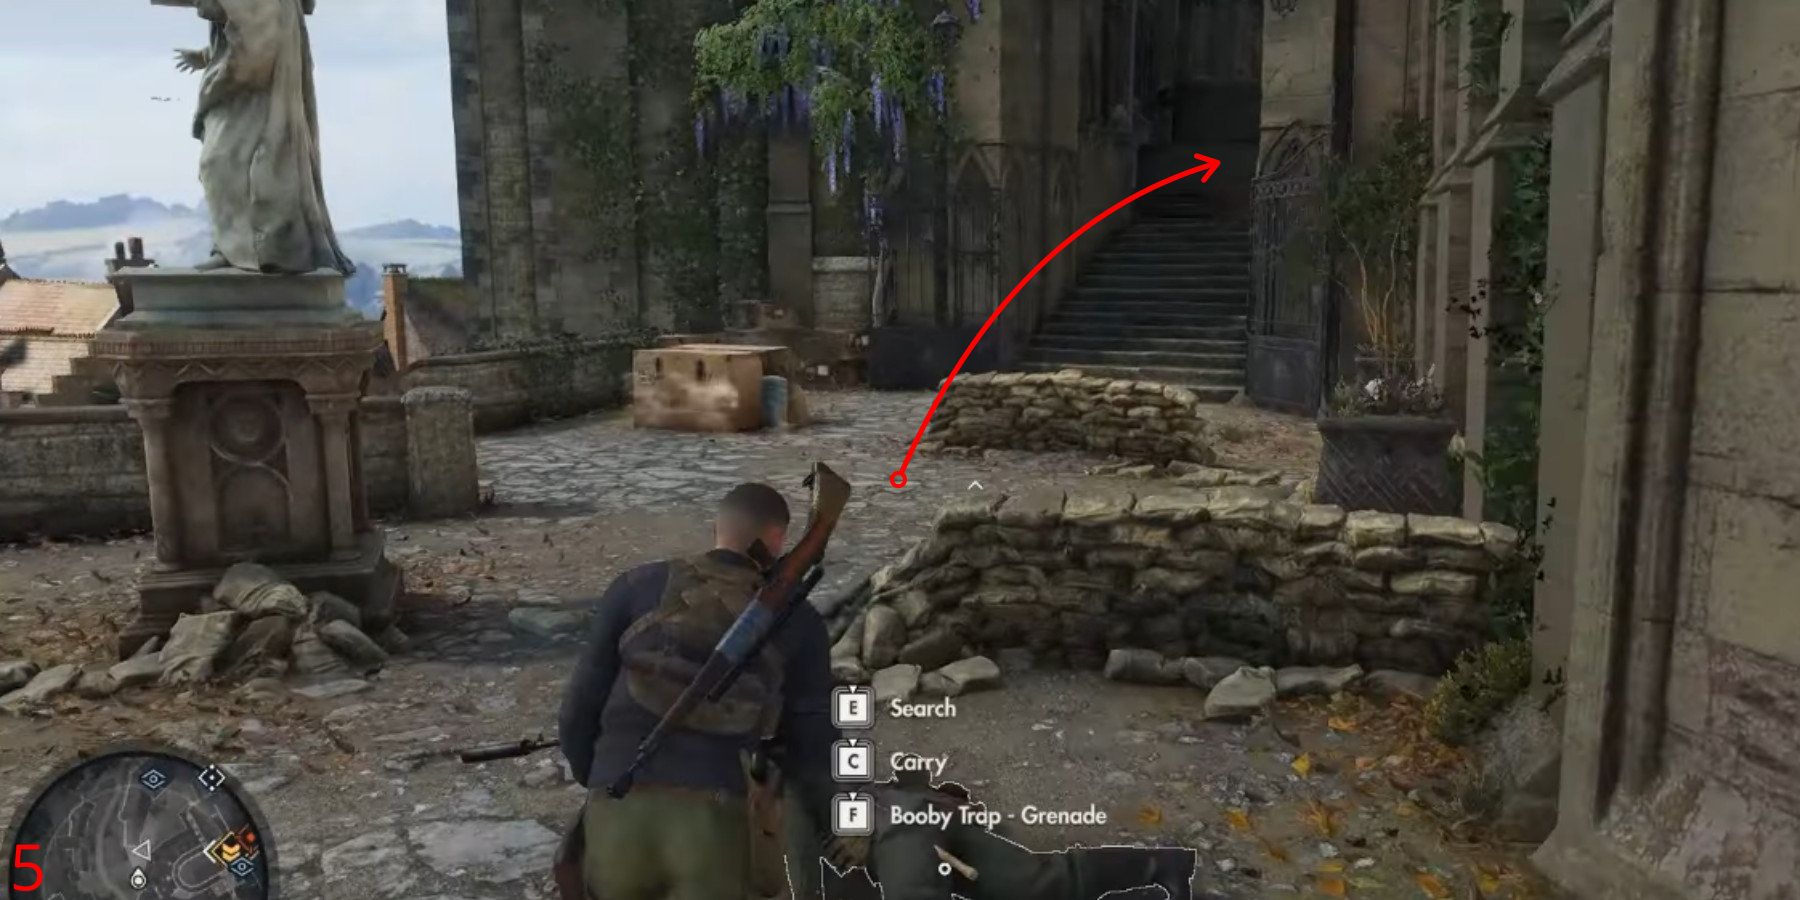
1st Workbench is situated on the right side of the map, more precisely to the east of the main residence. To access it, players should enter the building with a rectangular shape, which is closest to the road and defeat an enemy unit inside. Upon defeating the enemy, search his body for an Armory Key. The Armory Key unlocks the Armory, where you’ll find the Pistol Workbench. With this workbench, players can utilize the powerful Welrod Pistol in Sniper Elite 5.
Occupied Residence Workbench 2/3
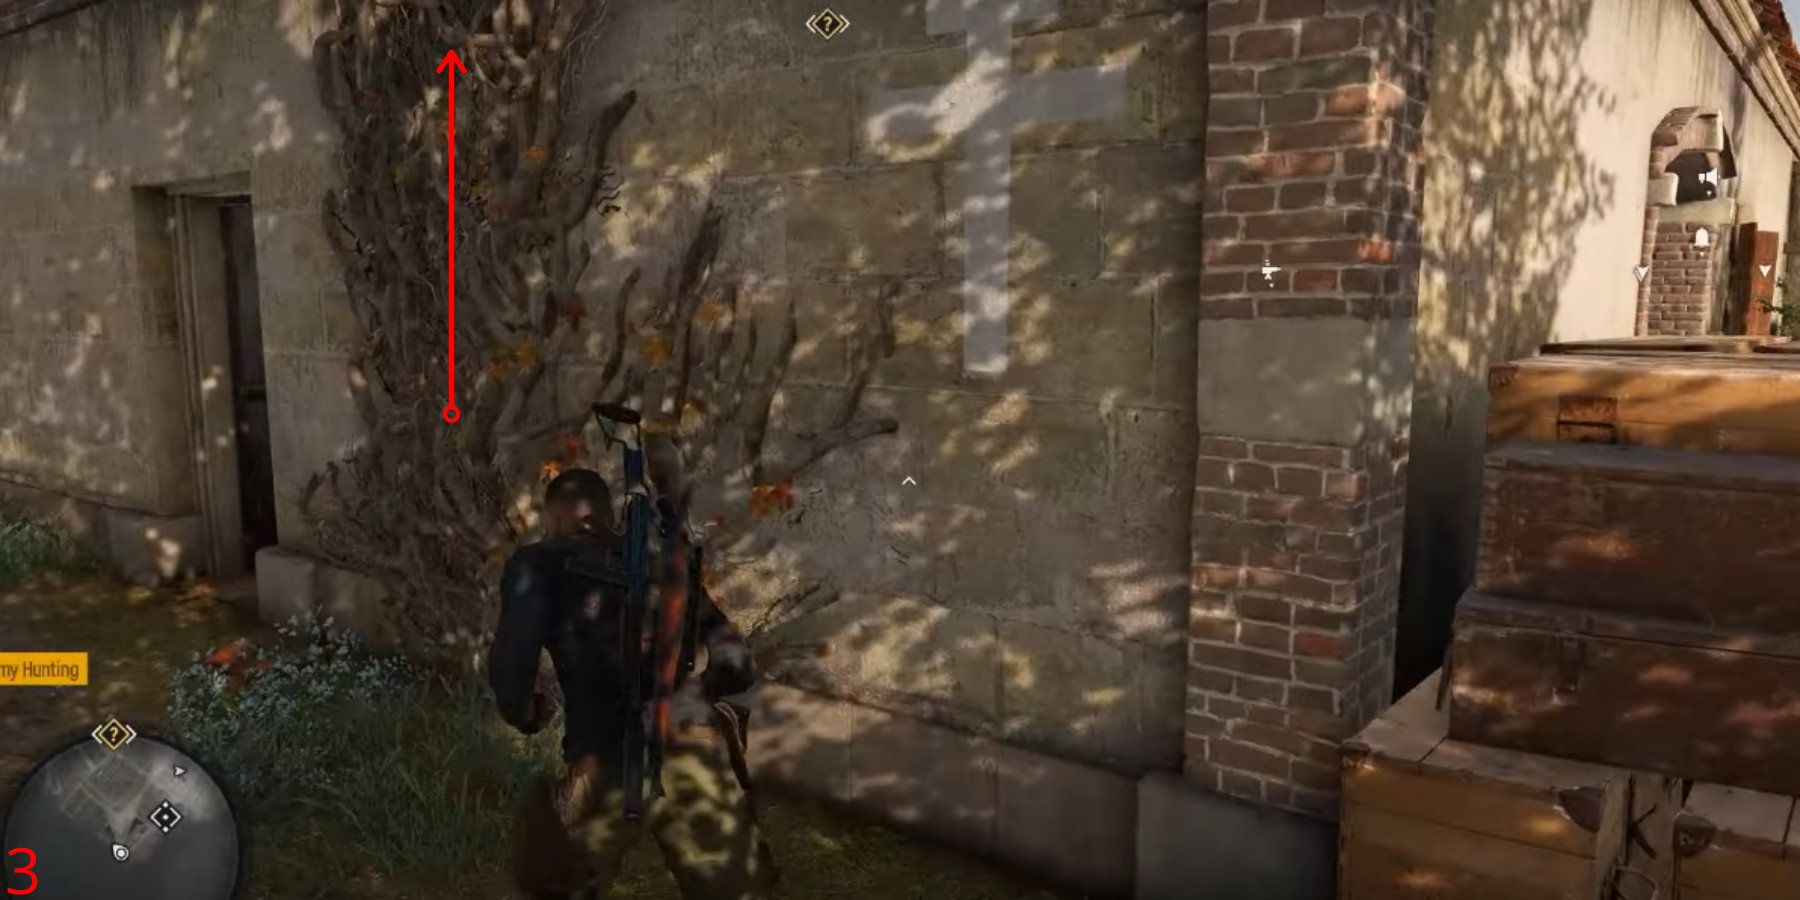
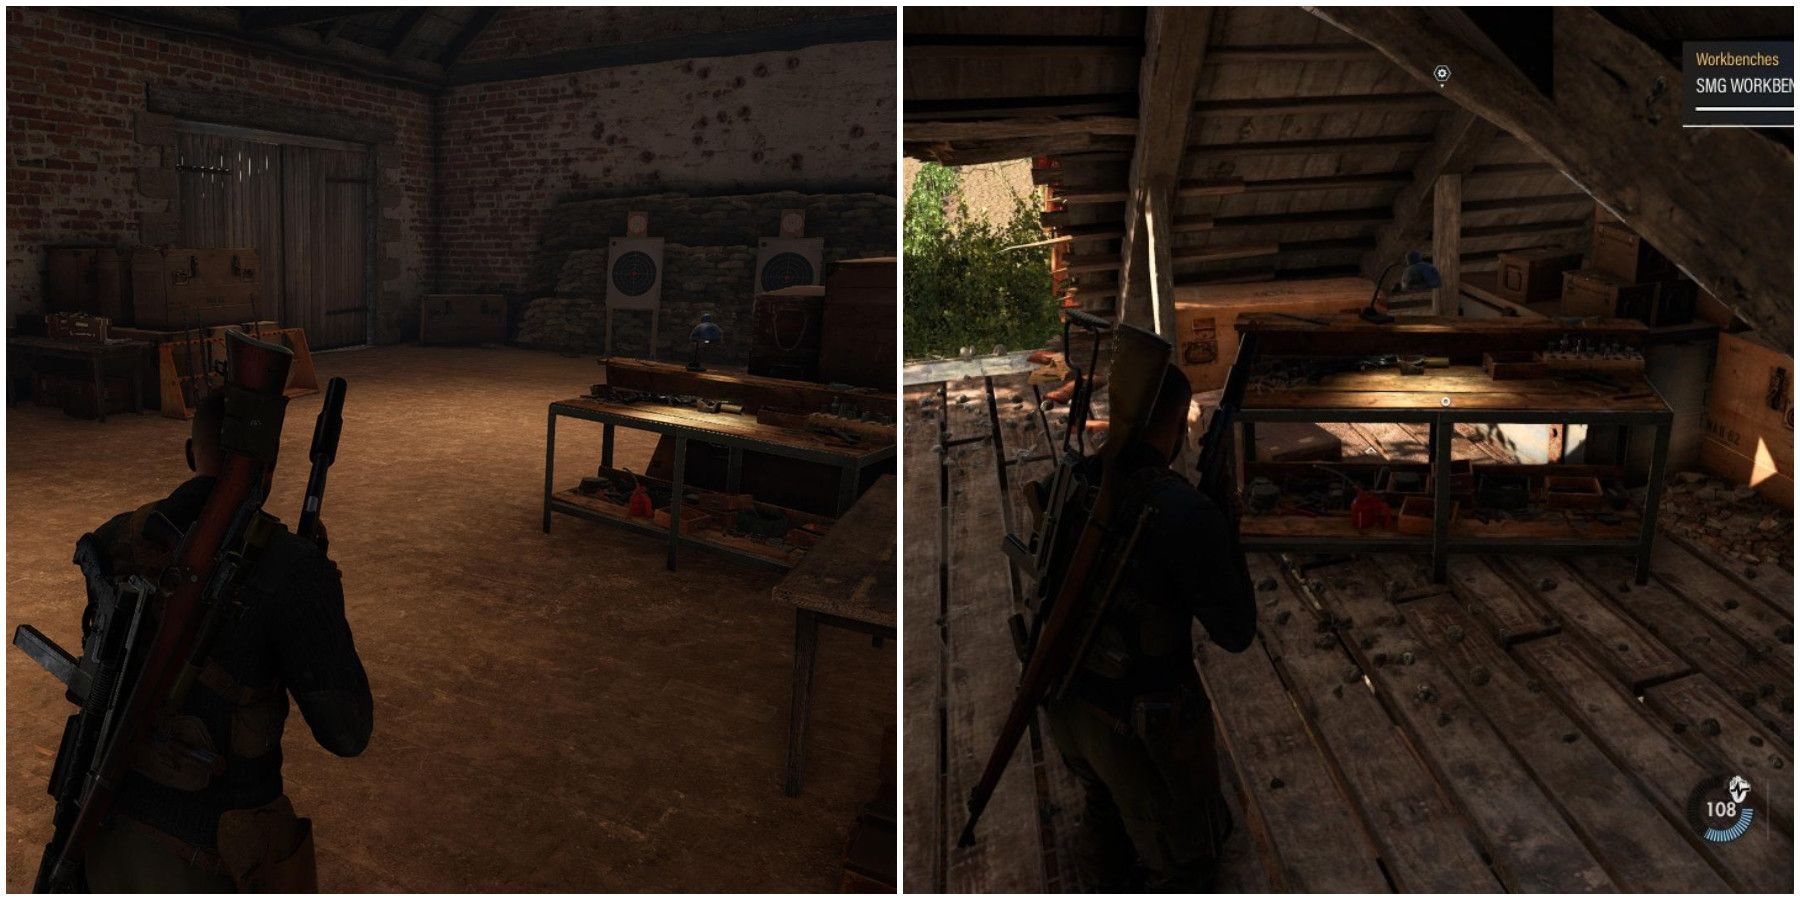
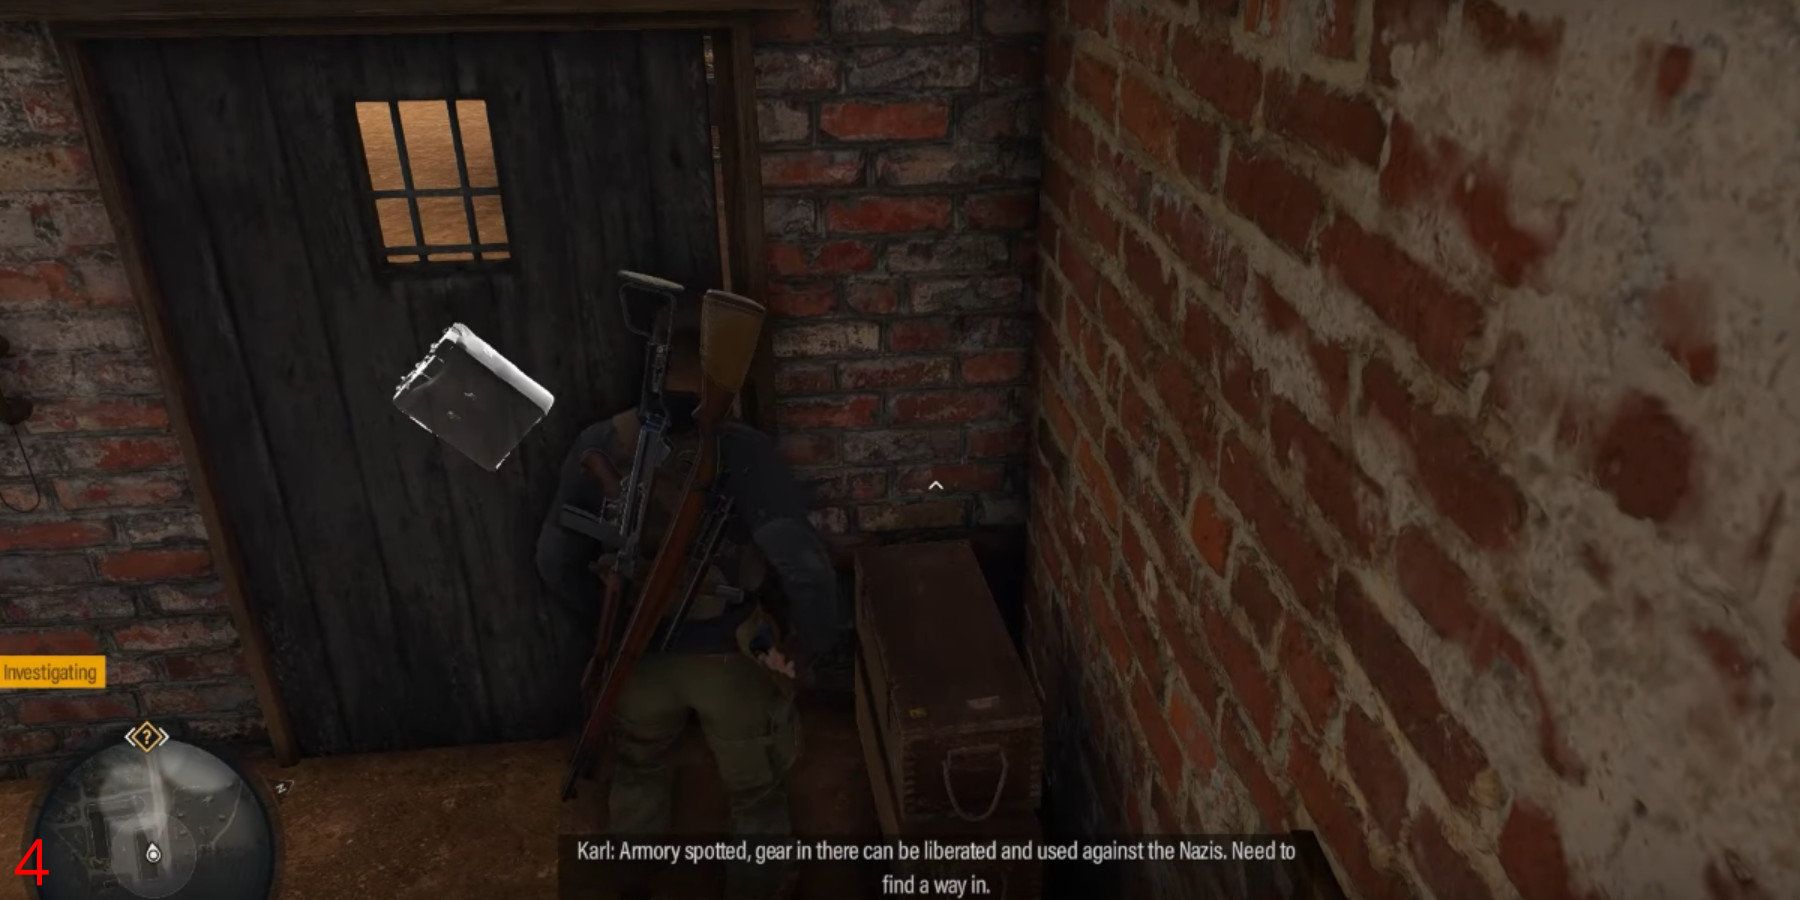
In Sniper Elite 5, players can locate the second workbench by moving westward from the main house, towards some wheat fields. As they approach, they should focus on the backside of the L-shaped building (Chateau Stables). Upon reaching this point, they’ll notice some vines to climb. Once at the top, players will discover an SMG Workbench nestled next to a French Resistance flag.
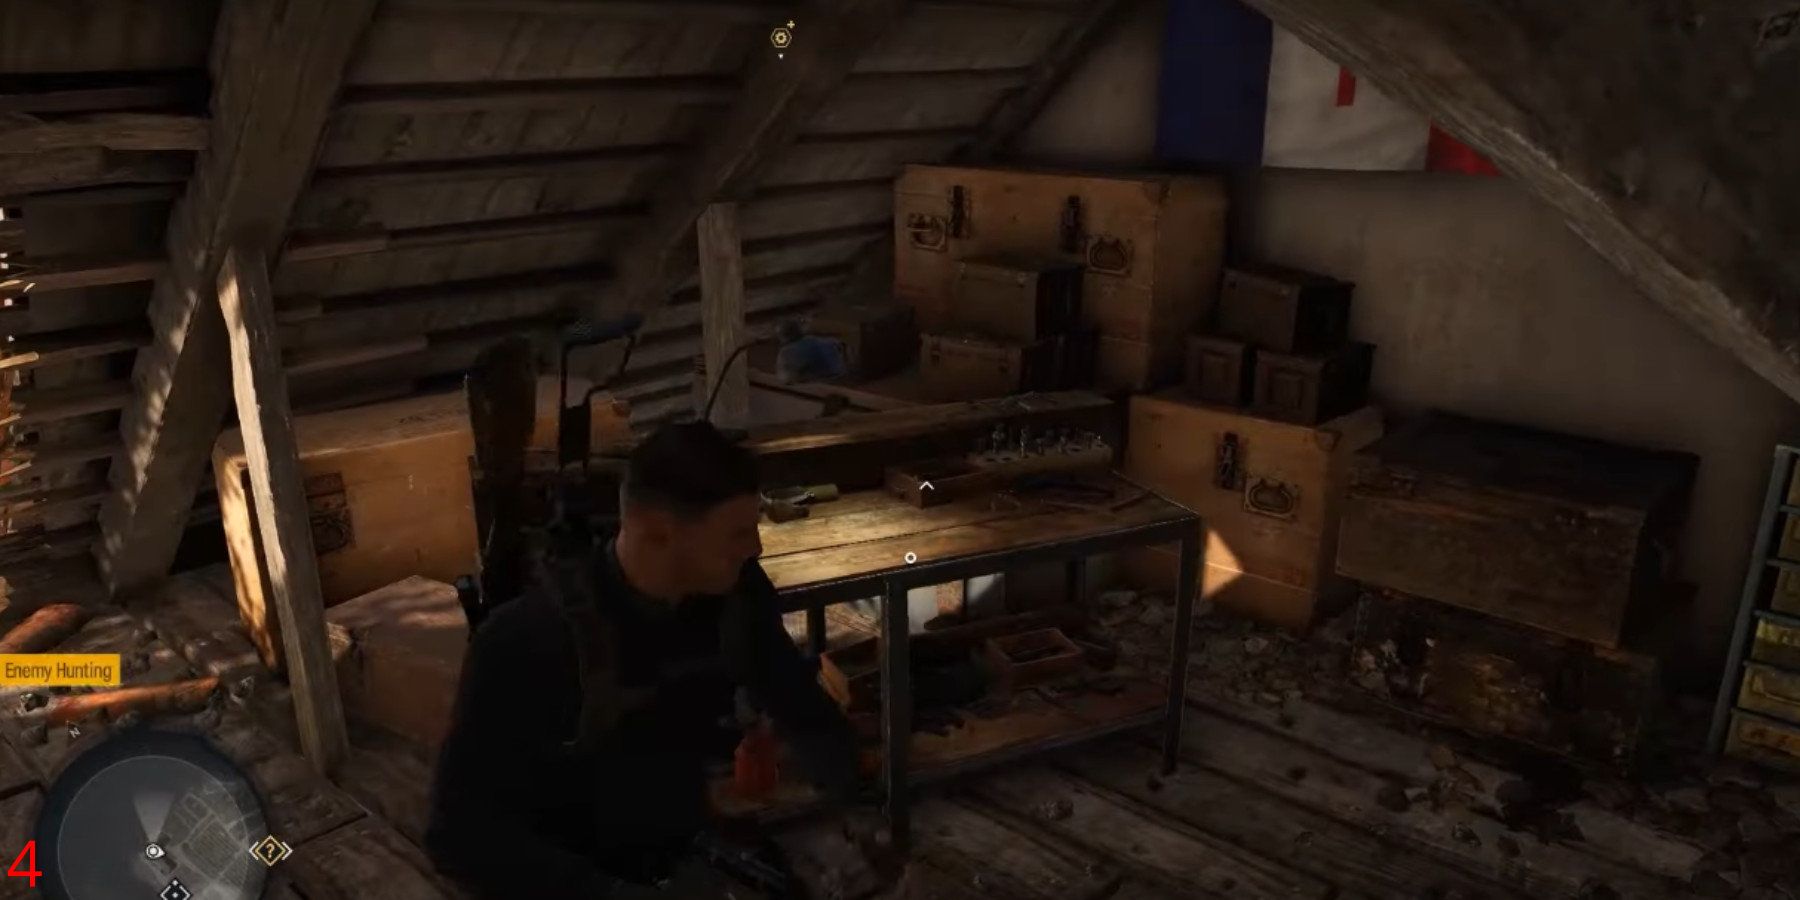
Occupied Residence Workbench 3/3
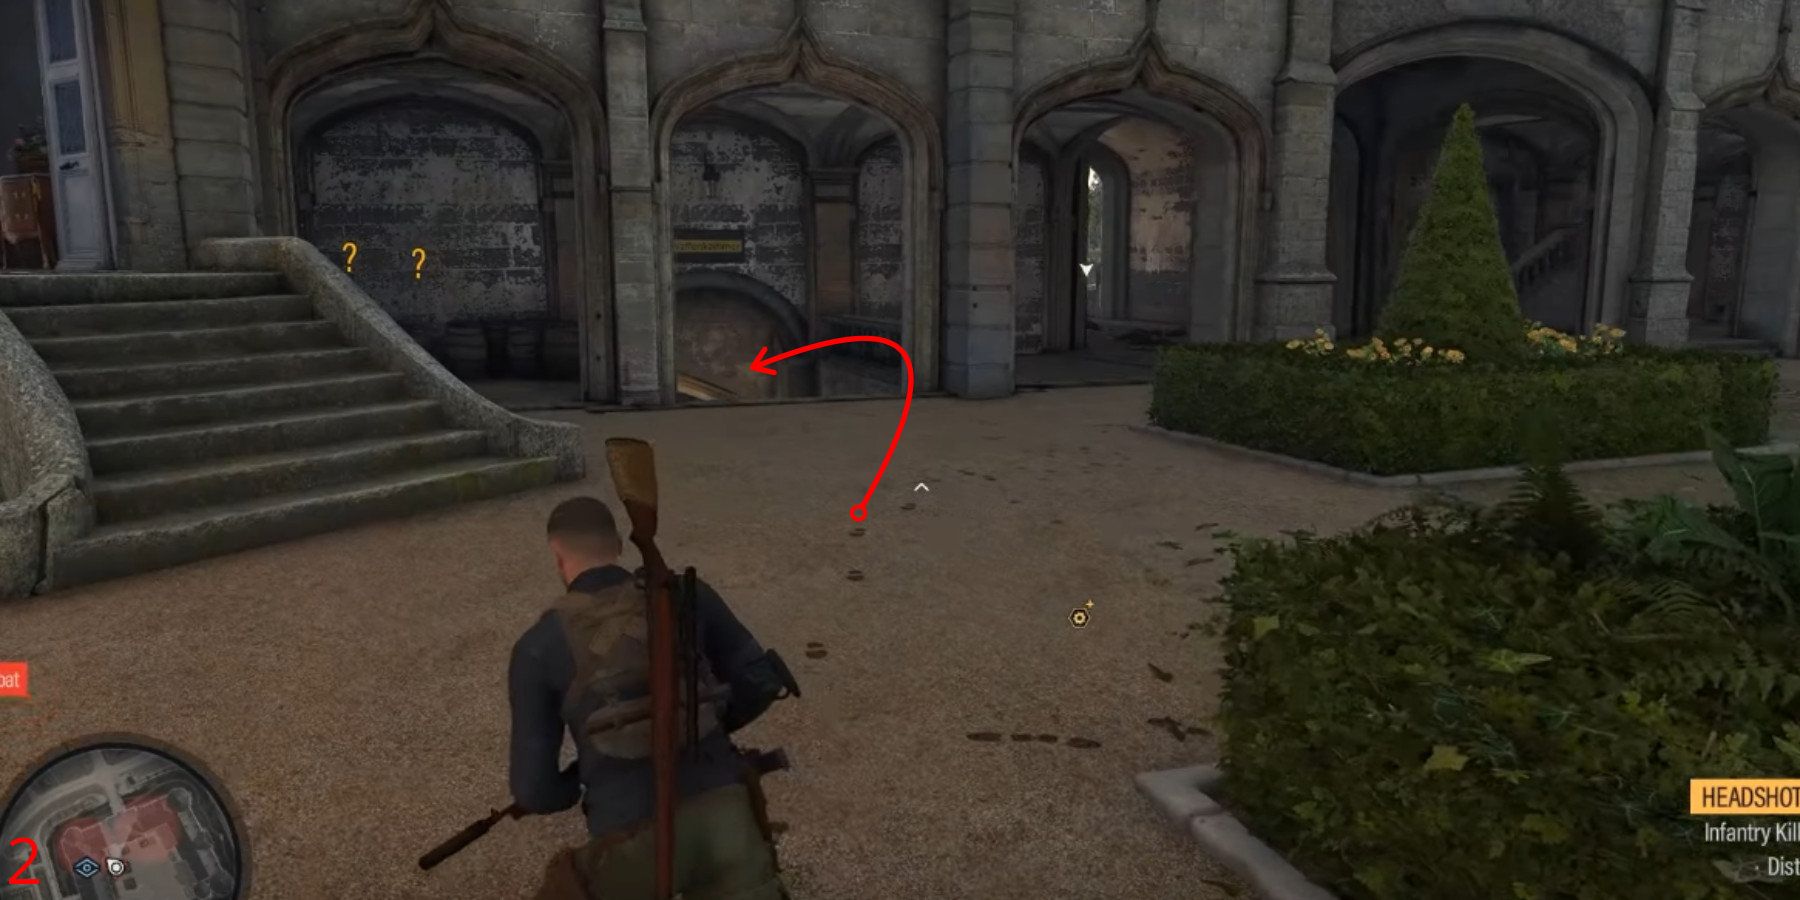
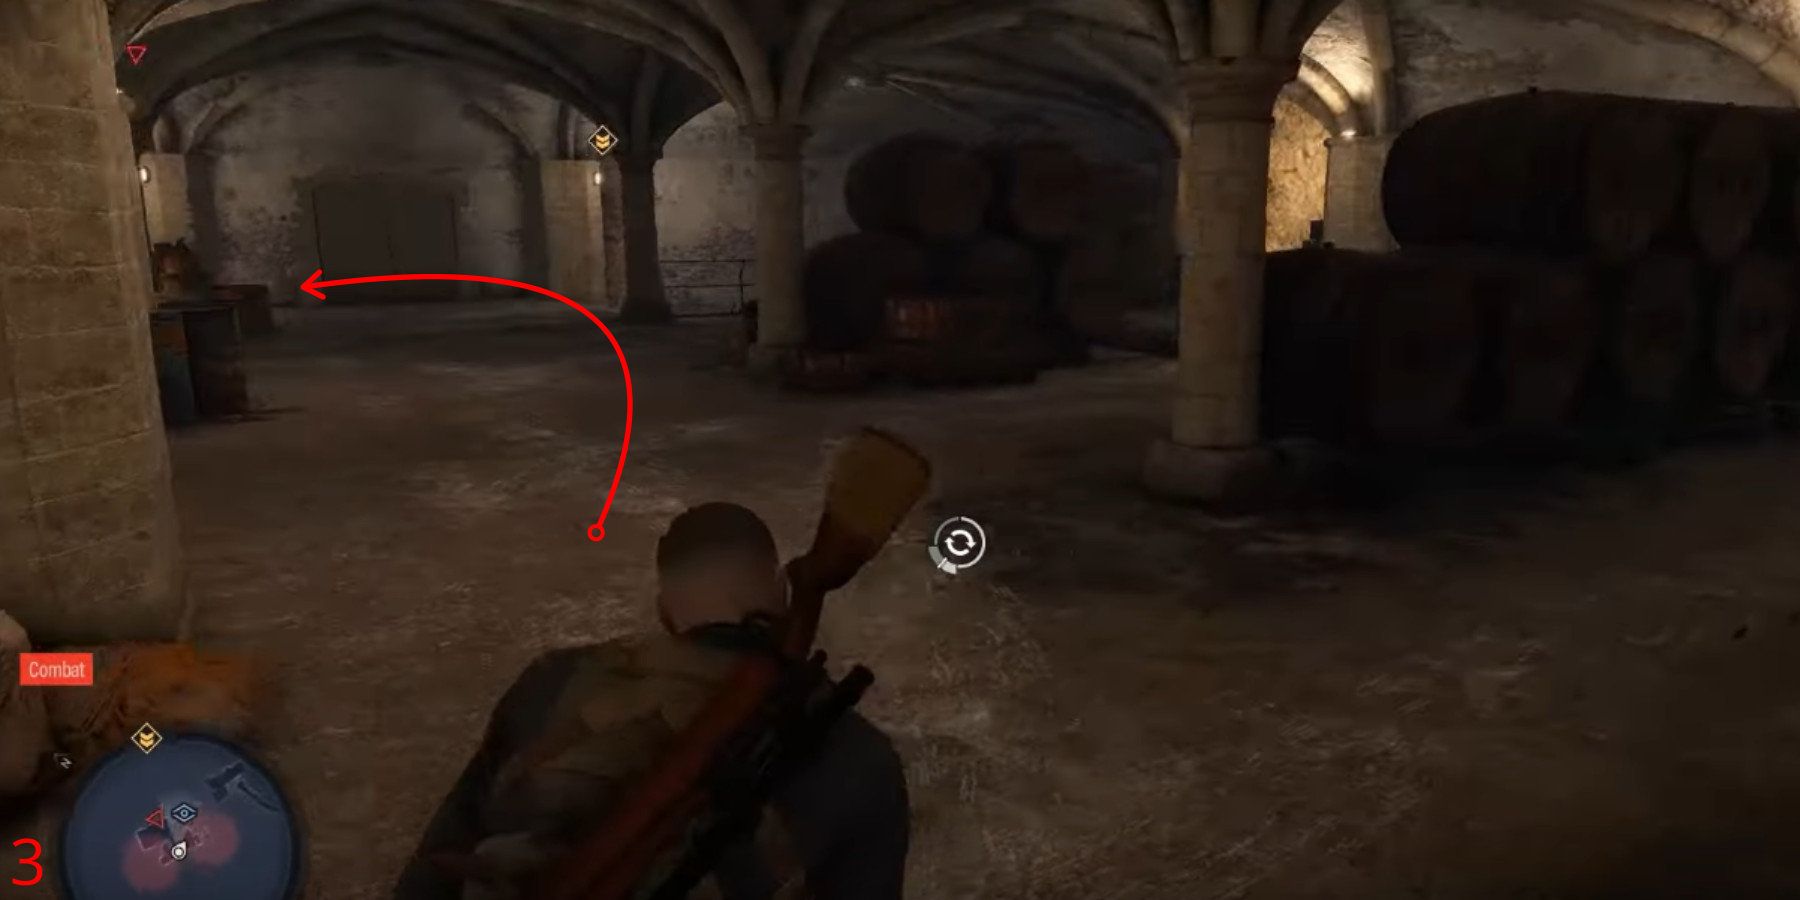
In the heart of Mission 2, you’ll stumble upon my hidden workshop, nestled within the grand Residence. From the main courtyard, keep an eye out for a ramp that descends towards the cellar below. That’s where you’ll find my Rifle Workbench, tucked under a Nazi flag and surrounded by some questionably acquired antiques.
Mission 3 – Spy Academy

There are 3 Workbenches in Mission 3: Spy Academy.
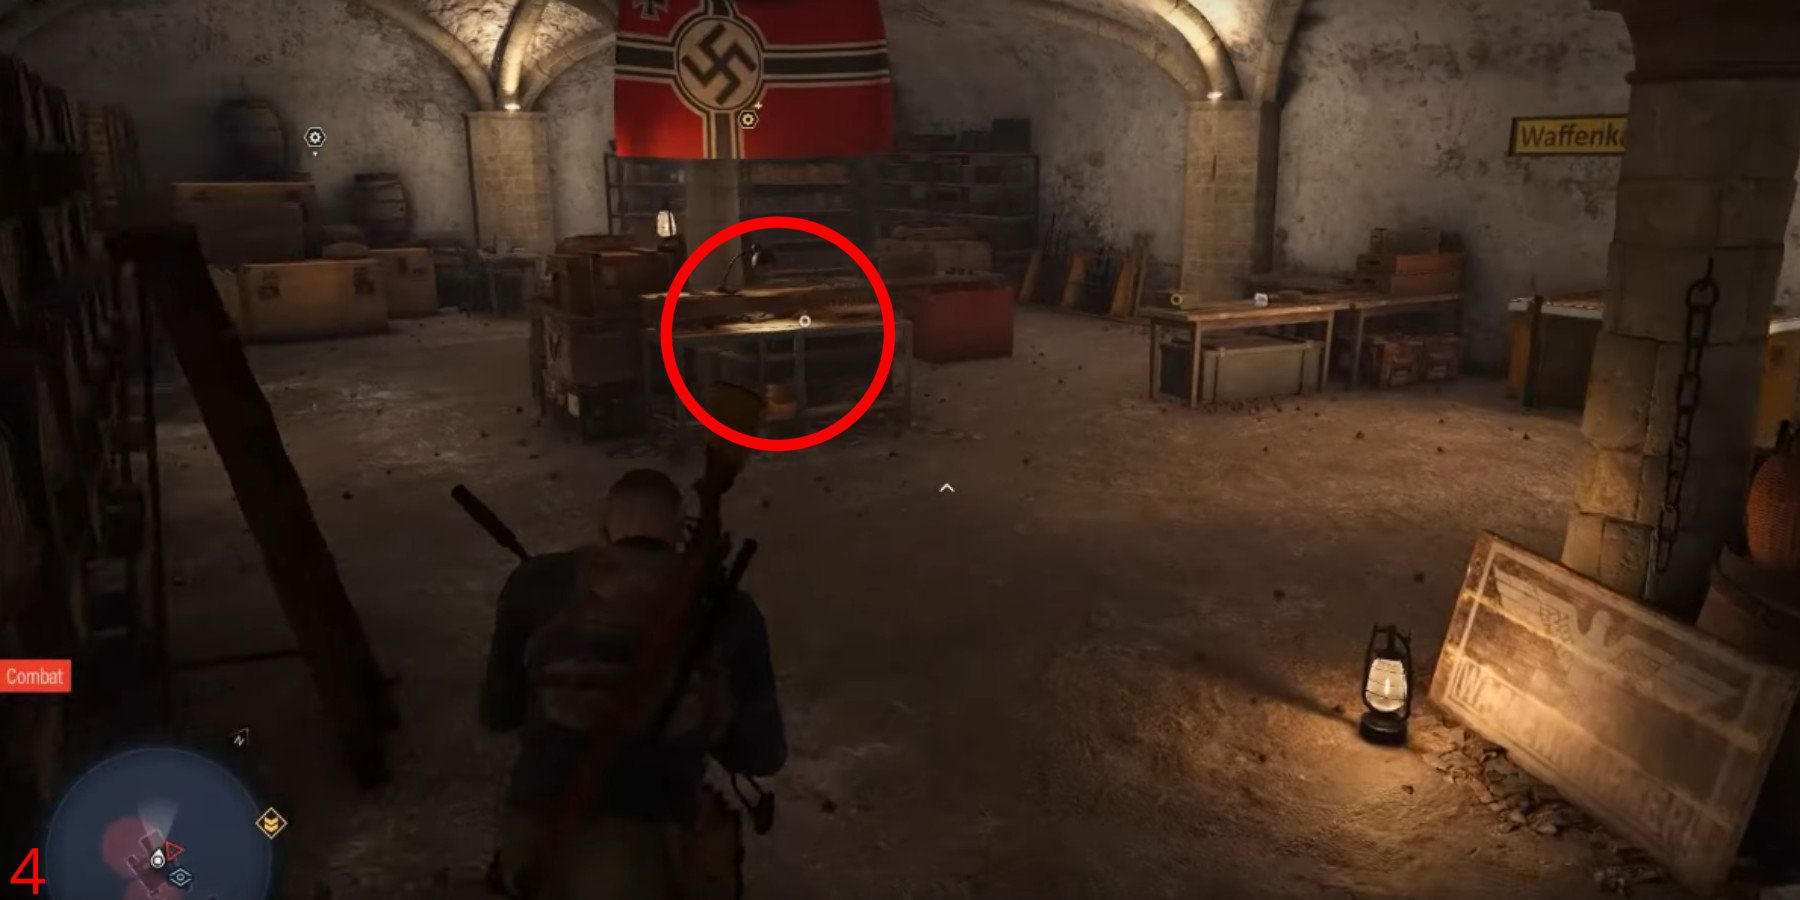
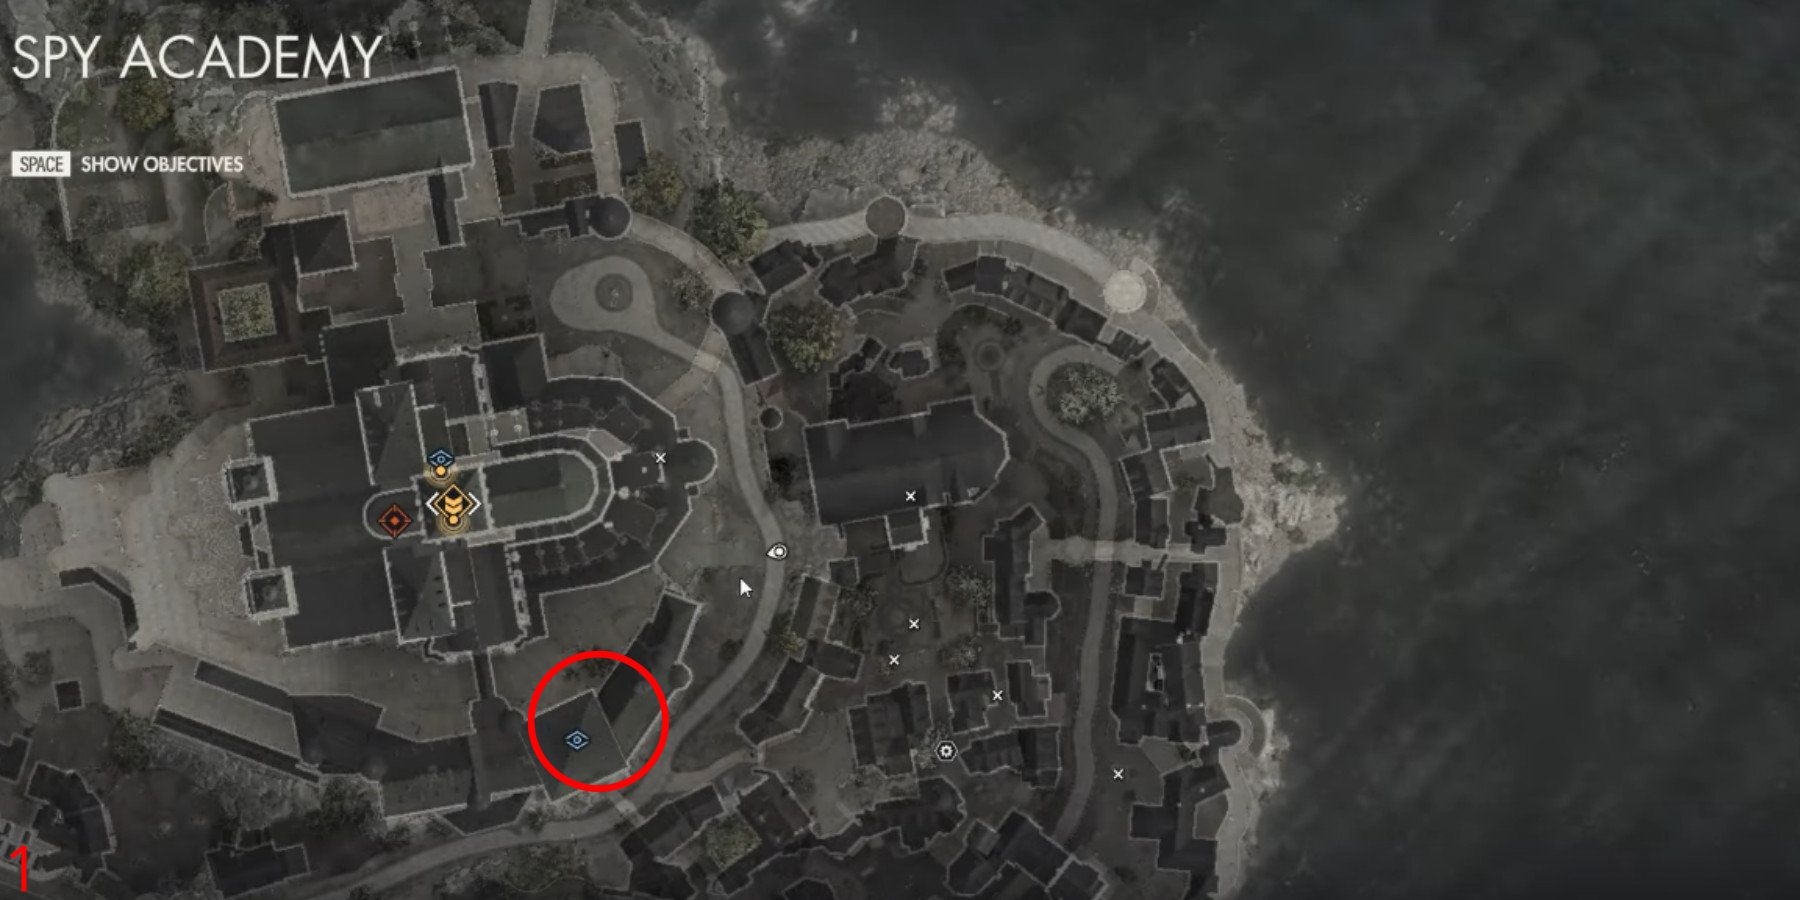
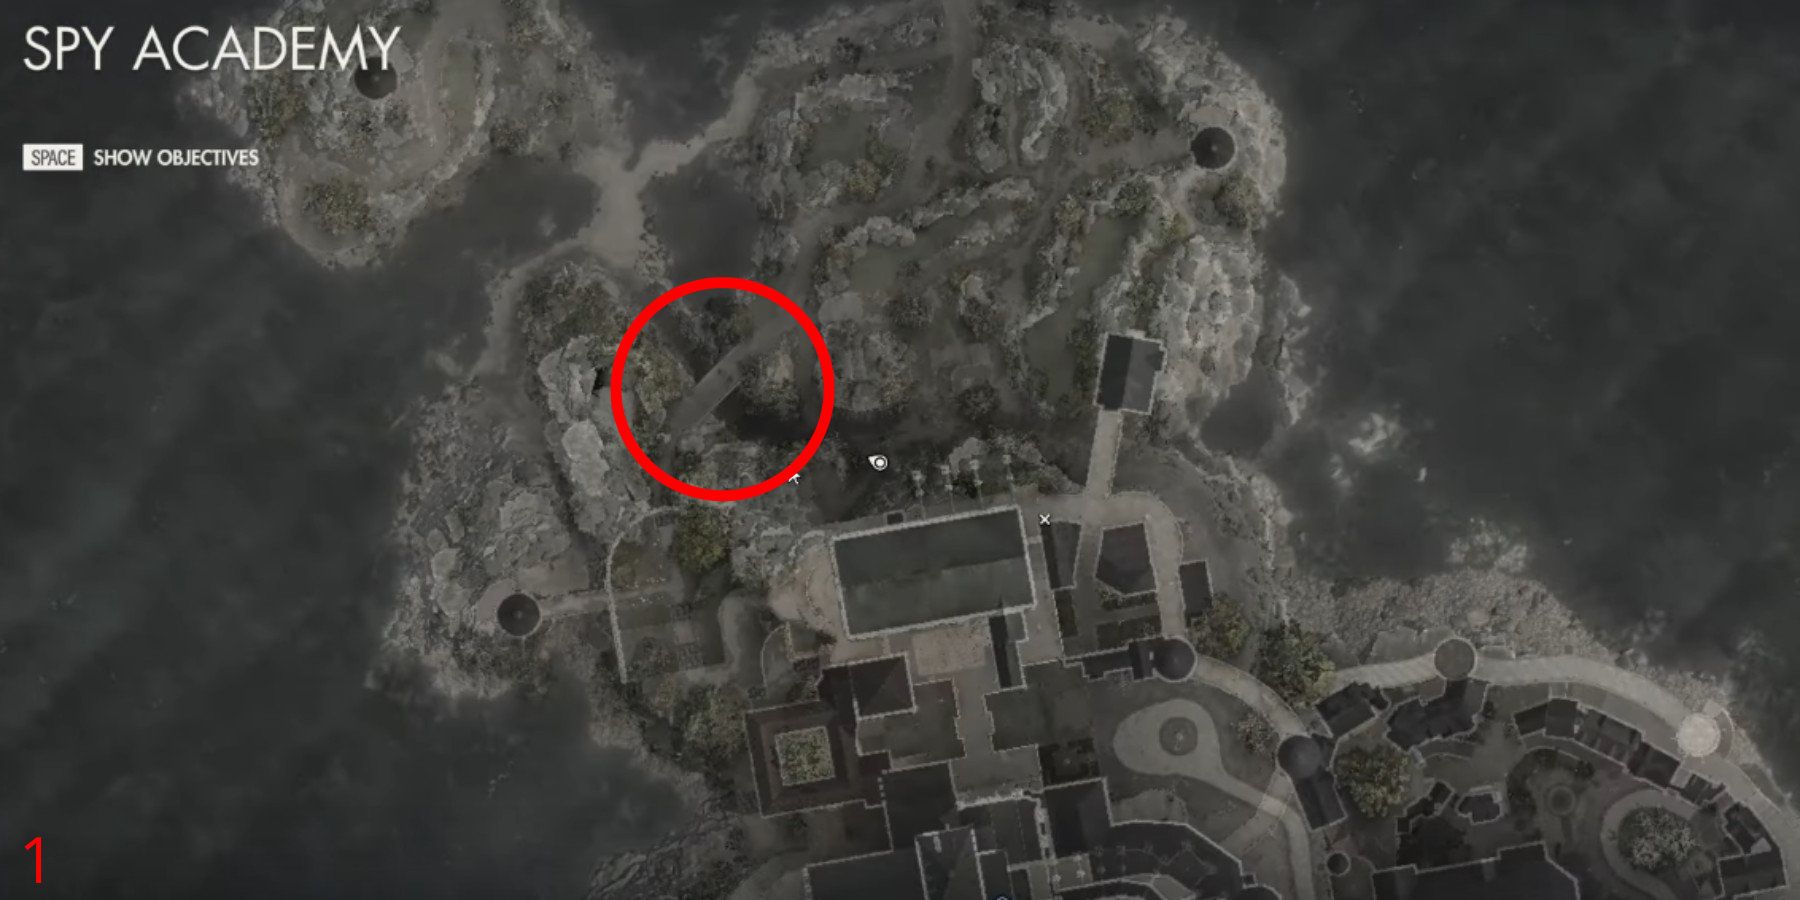
Spy Academy Workbench 1/3
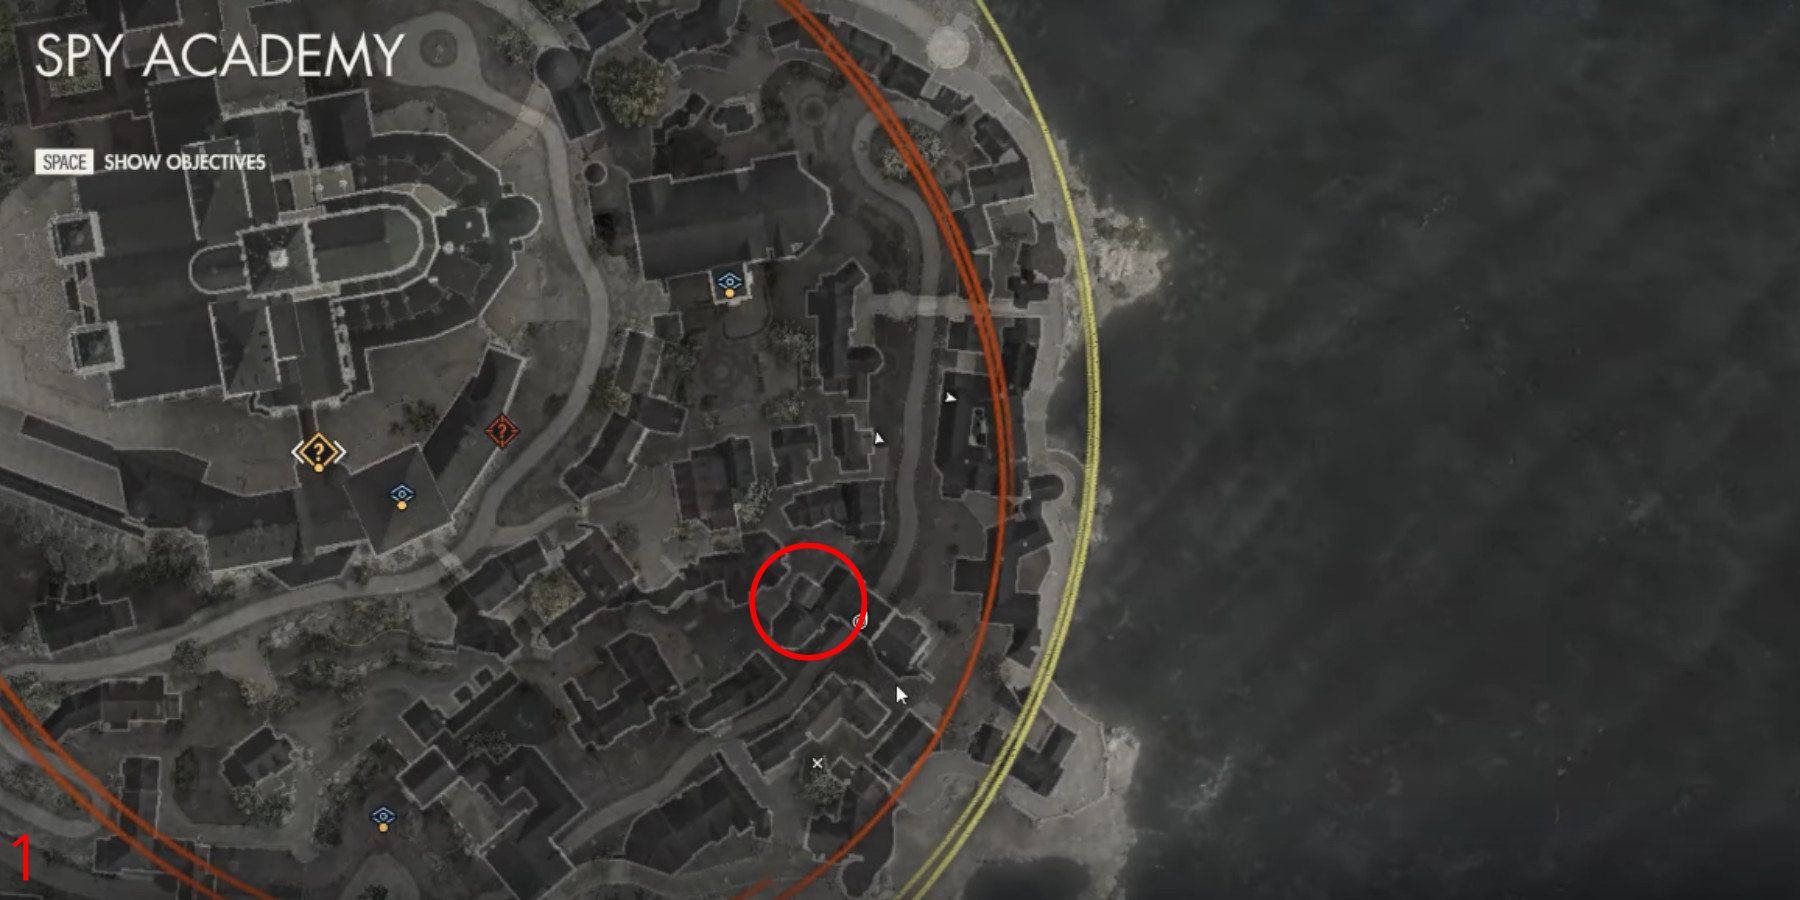
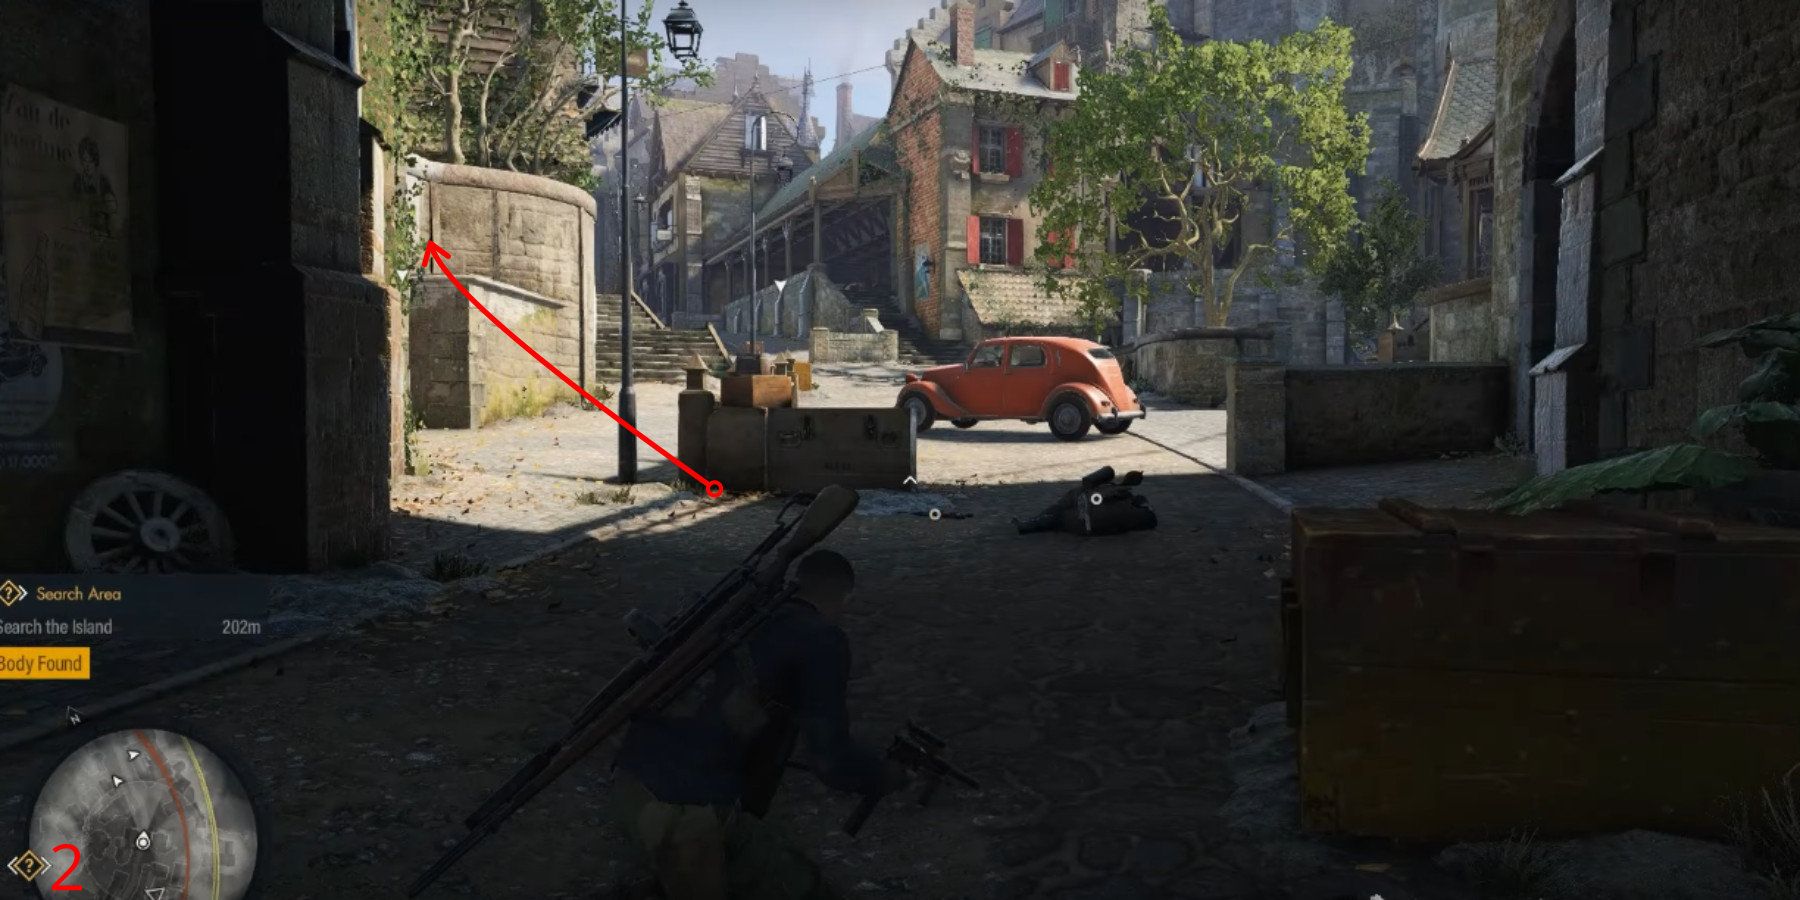
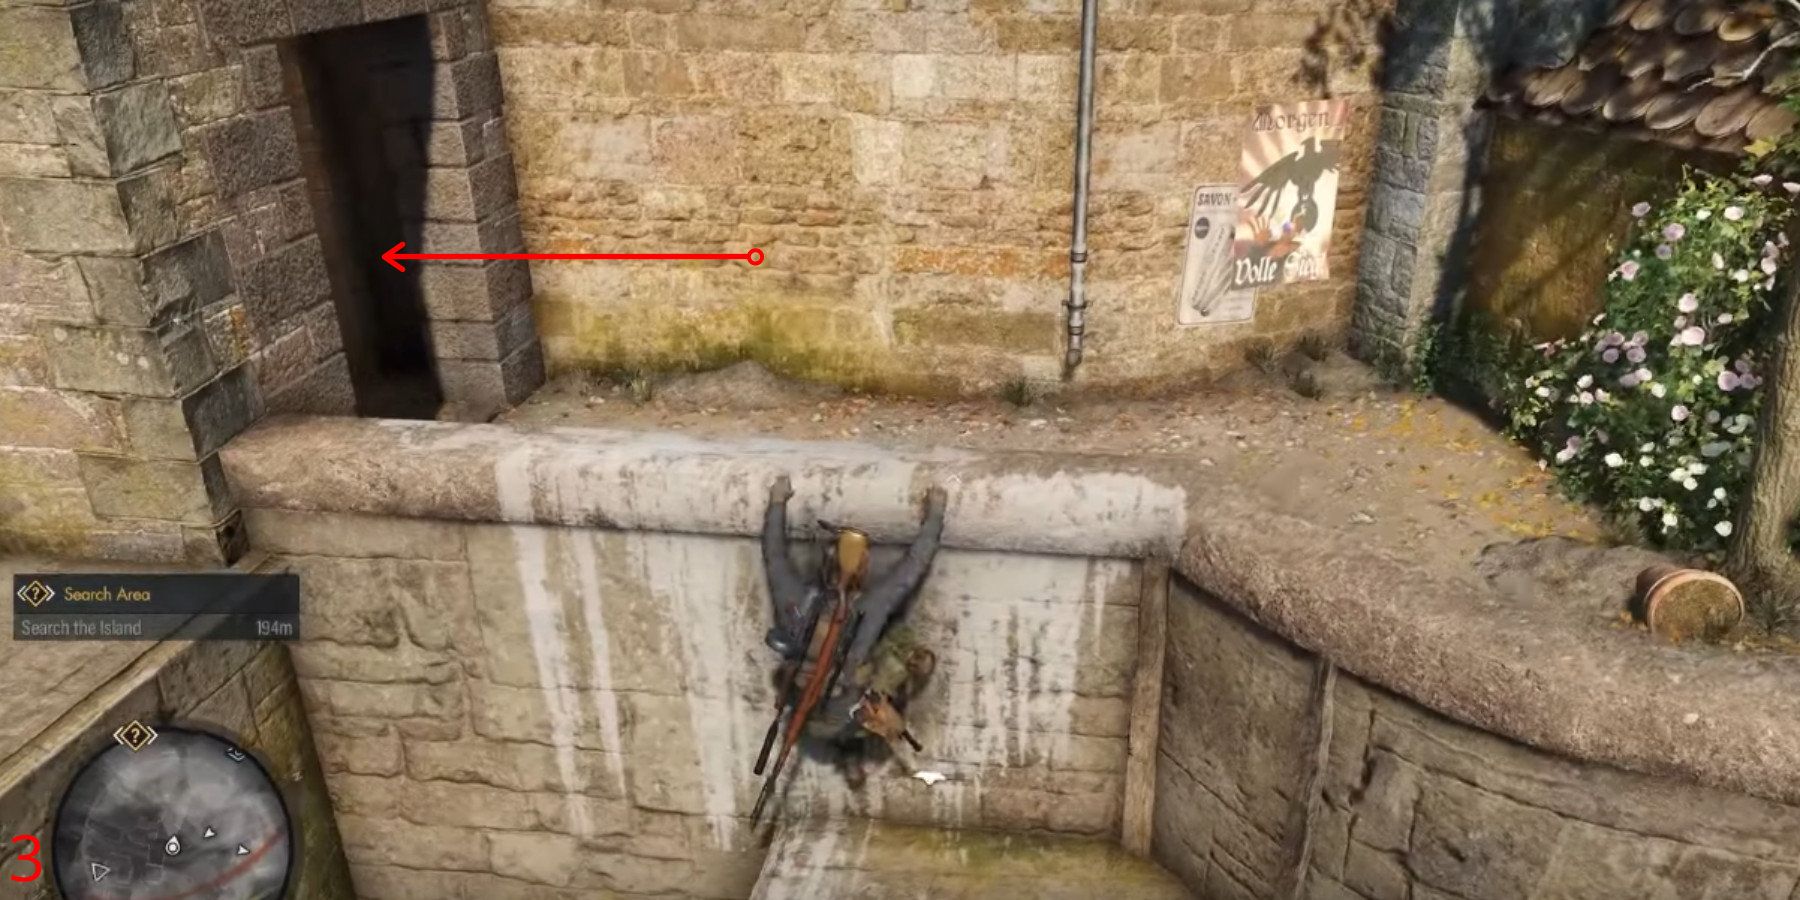
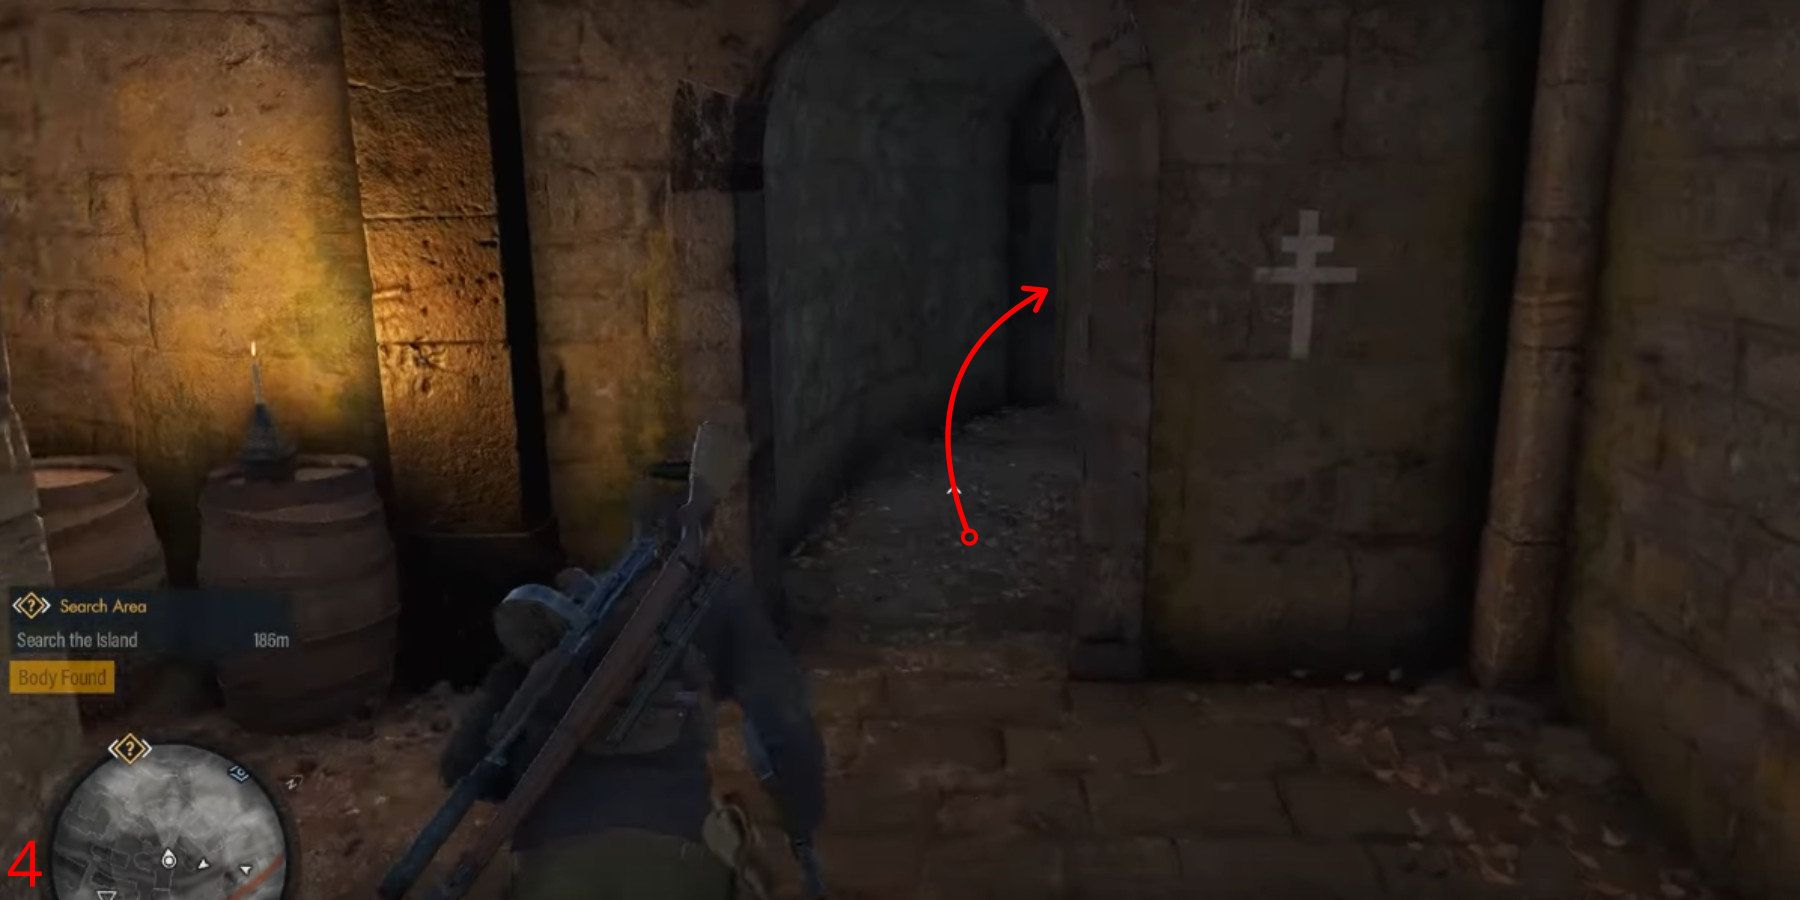
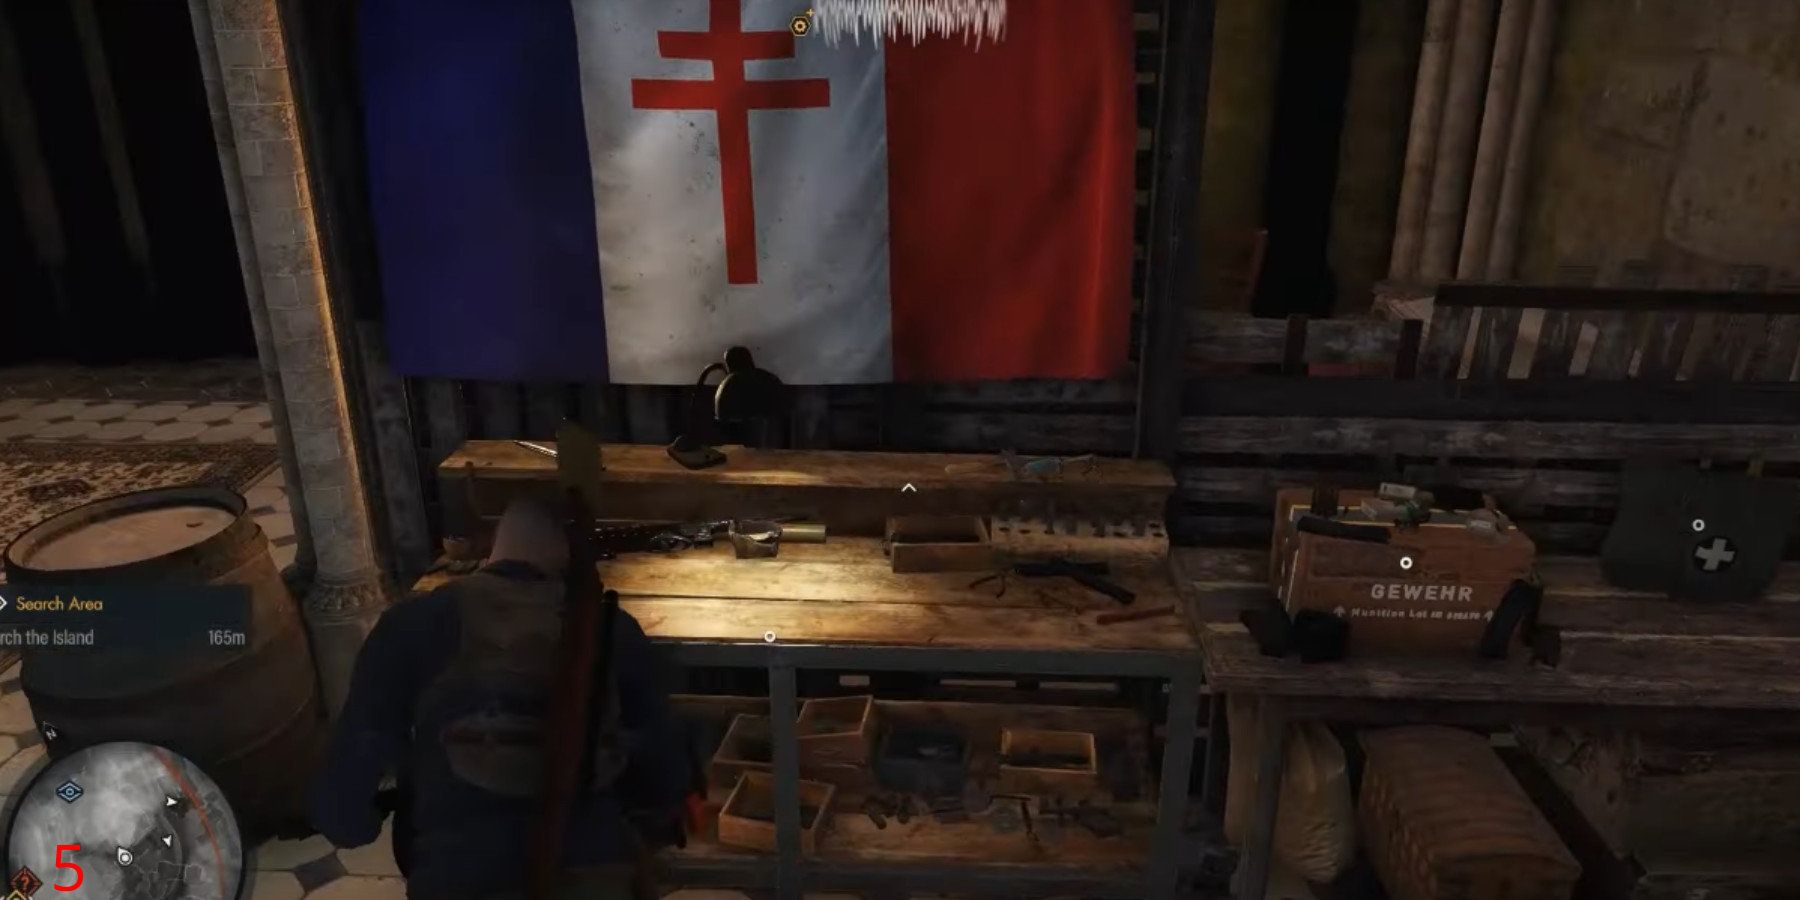
Players can locate the initial Workbench to the southeast of the Academy, a place frequently targeted by Invasions. As players search for the Workbench, they should be on guard for possible invasions at the Academy. Upon reaching the southeastern part of the Academy, players will find a ledge nearby that leads to an open chamber. Deep within this room, under a French Resistance flag, you’ll discover an SMG Workbench.
Spy Academy Workbench 2/3
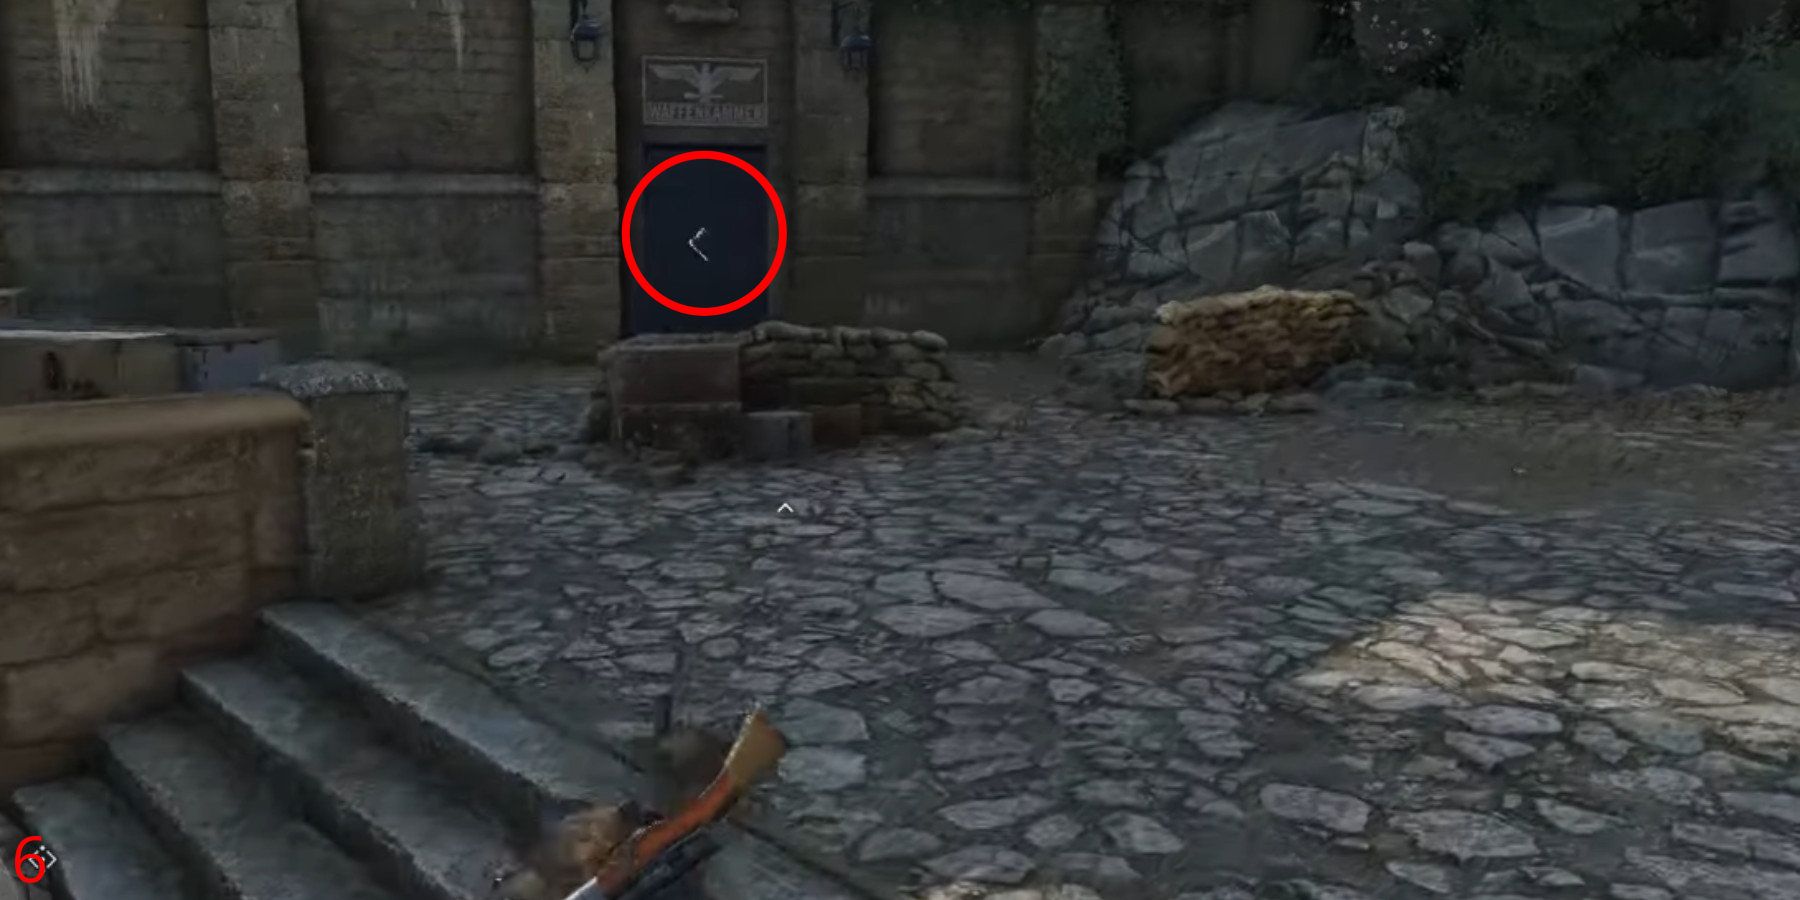
To reach the 2nd Workbench located on the Academy premises, players must first secure an Armory Key. From the Academy’s southern side, climb the stairs and make a right turn into a room guarded by some personnel. After finding and picking up the Armory Key from one of the guards, exit the room but instead of going down the same set of stairs, locate the nearby set of stairs and ascend them. At the top of these stairs, players will encounter the Armory (marked with a blue door) which houses a Pistol Workbench.
Spy Academy Workbench 3/3
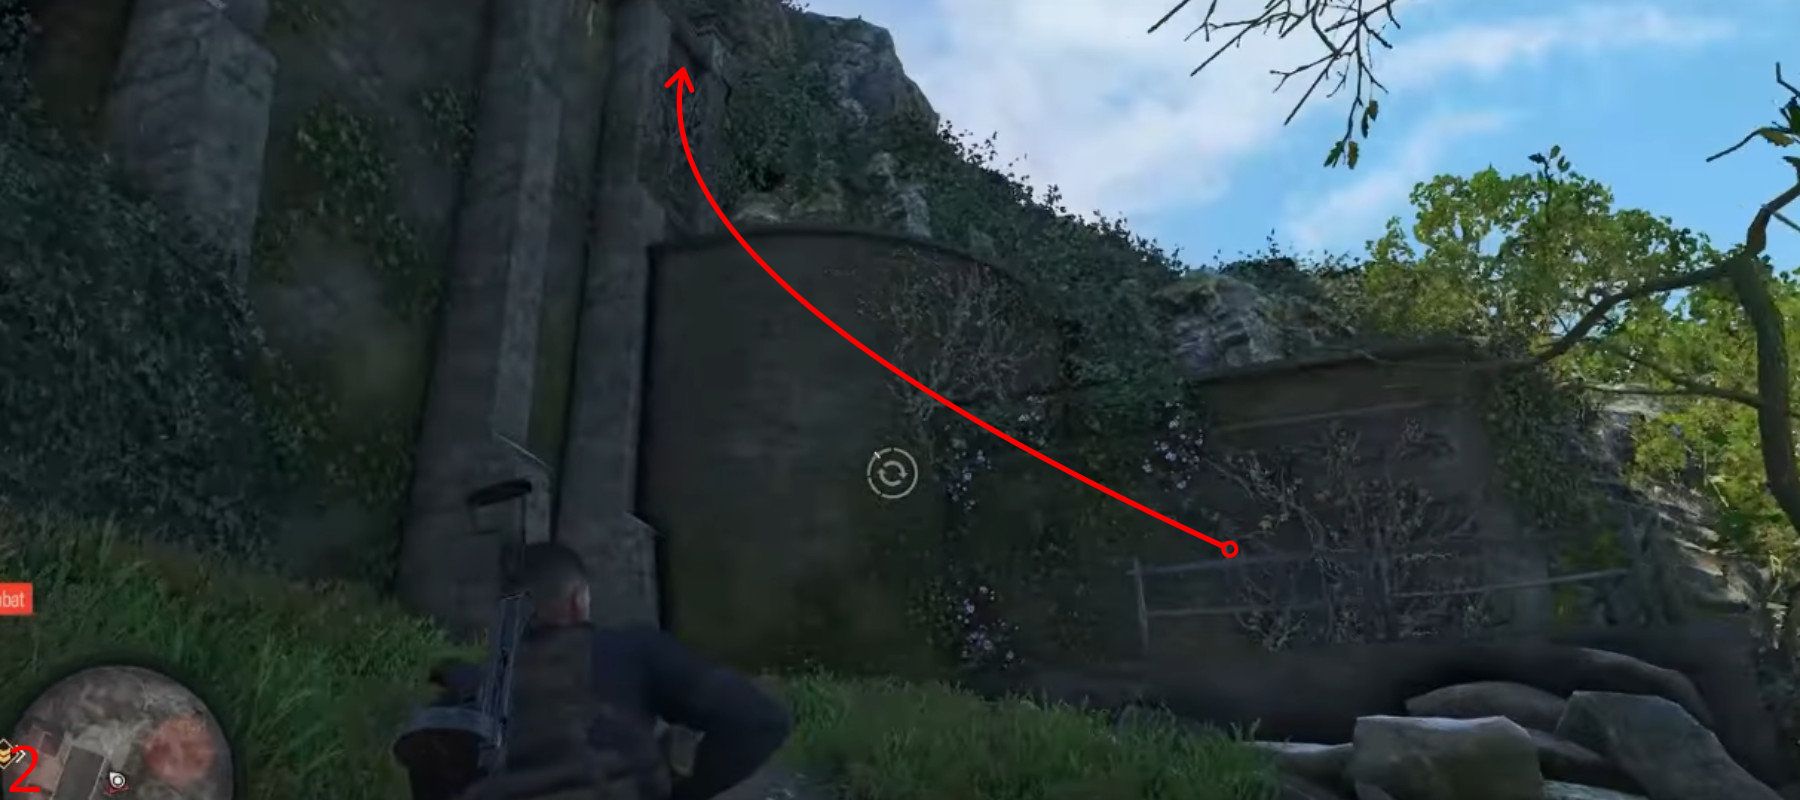
In Mission 3’s finale, you’ll discover the last Workbench tucked away on the outskirts of the Academy, specifically northwest of the main structure. To reach it, you’ll need to ascend a portion of a wall followed by a tower. Upon reaching the summit, you’ll find a compact room housing the Rifle Workbench. Be cautious as there are guards patrolling this area. You’ll have to weigh the consequences and choose whether to eliminate them or let them live – a captivating gameplay feature that many players appreciate in Sniper Elite 5.
Mission 4 – War Factory

There are 3 Workbenches in Mission 4: War Factory.
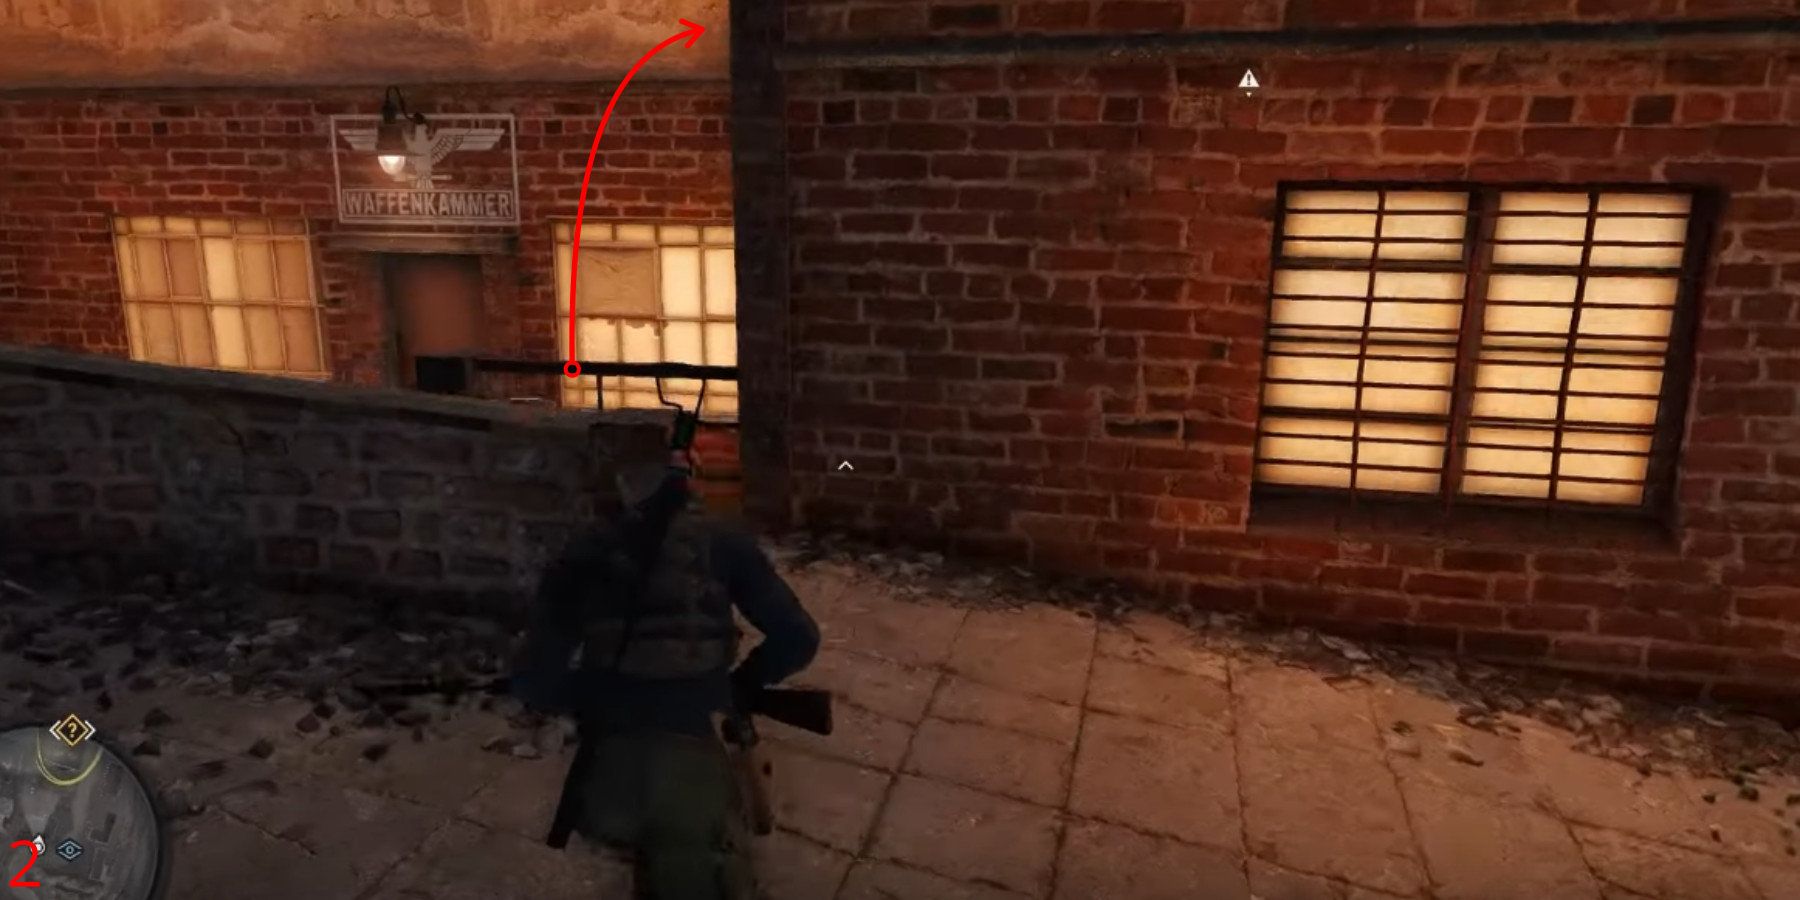
War Factory Workbench 1/3
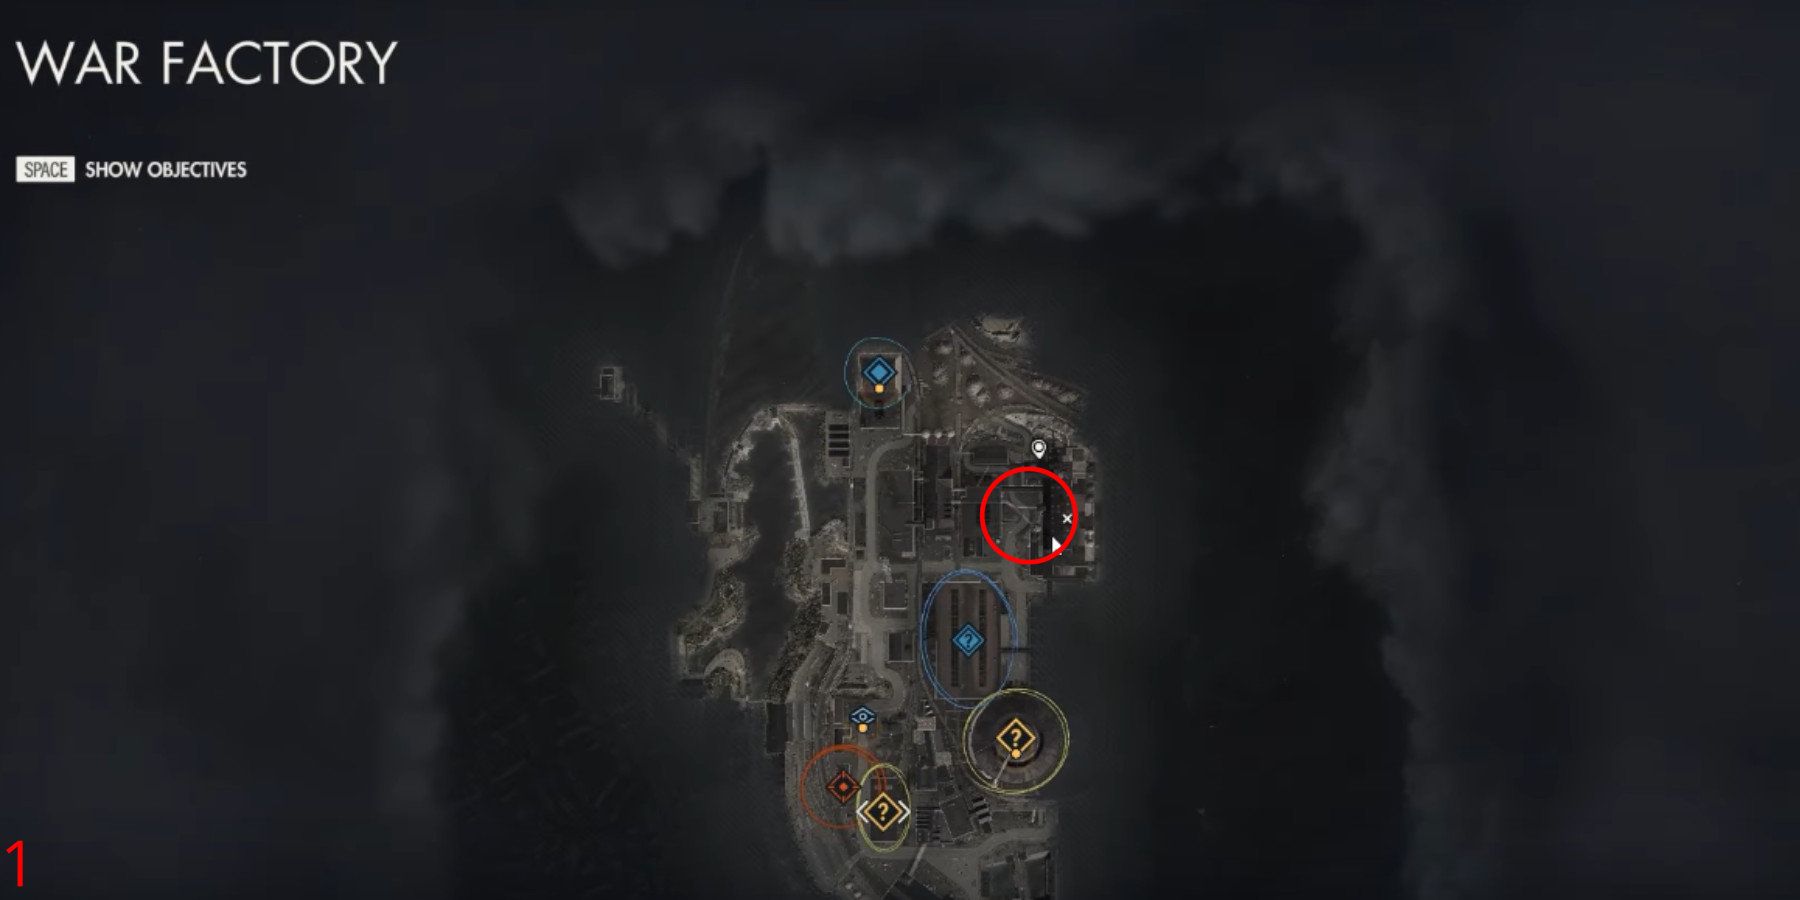
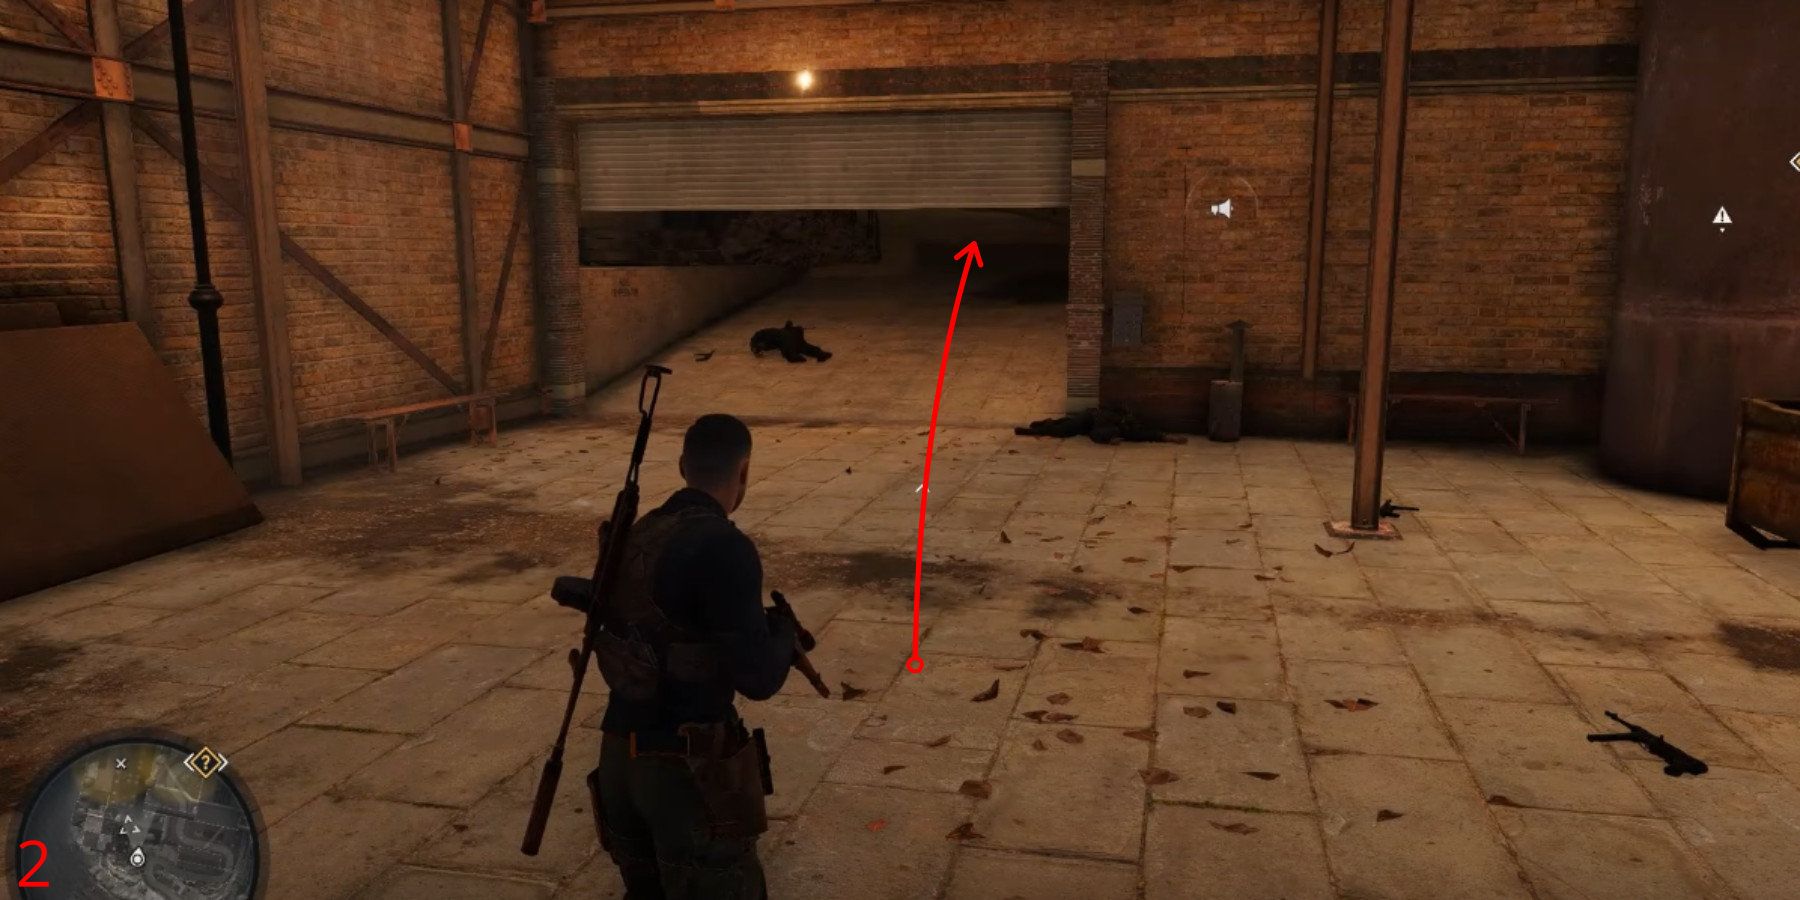
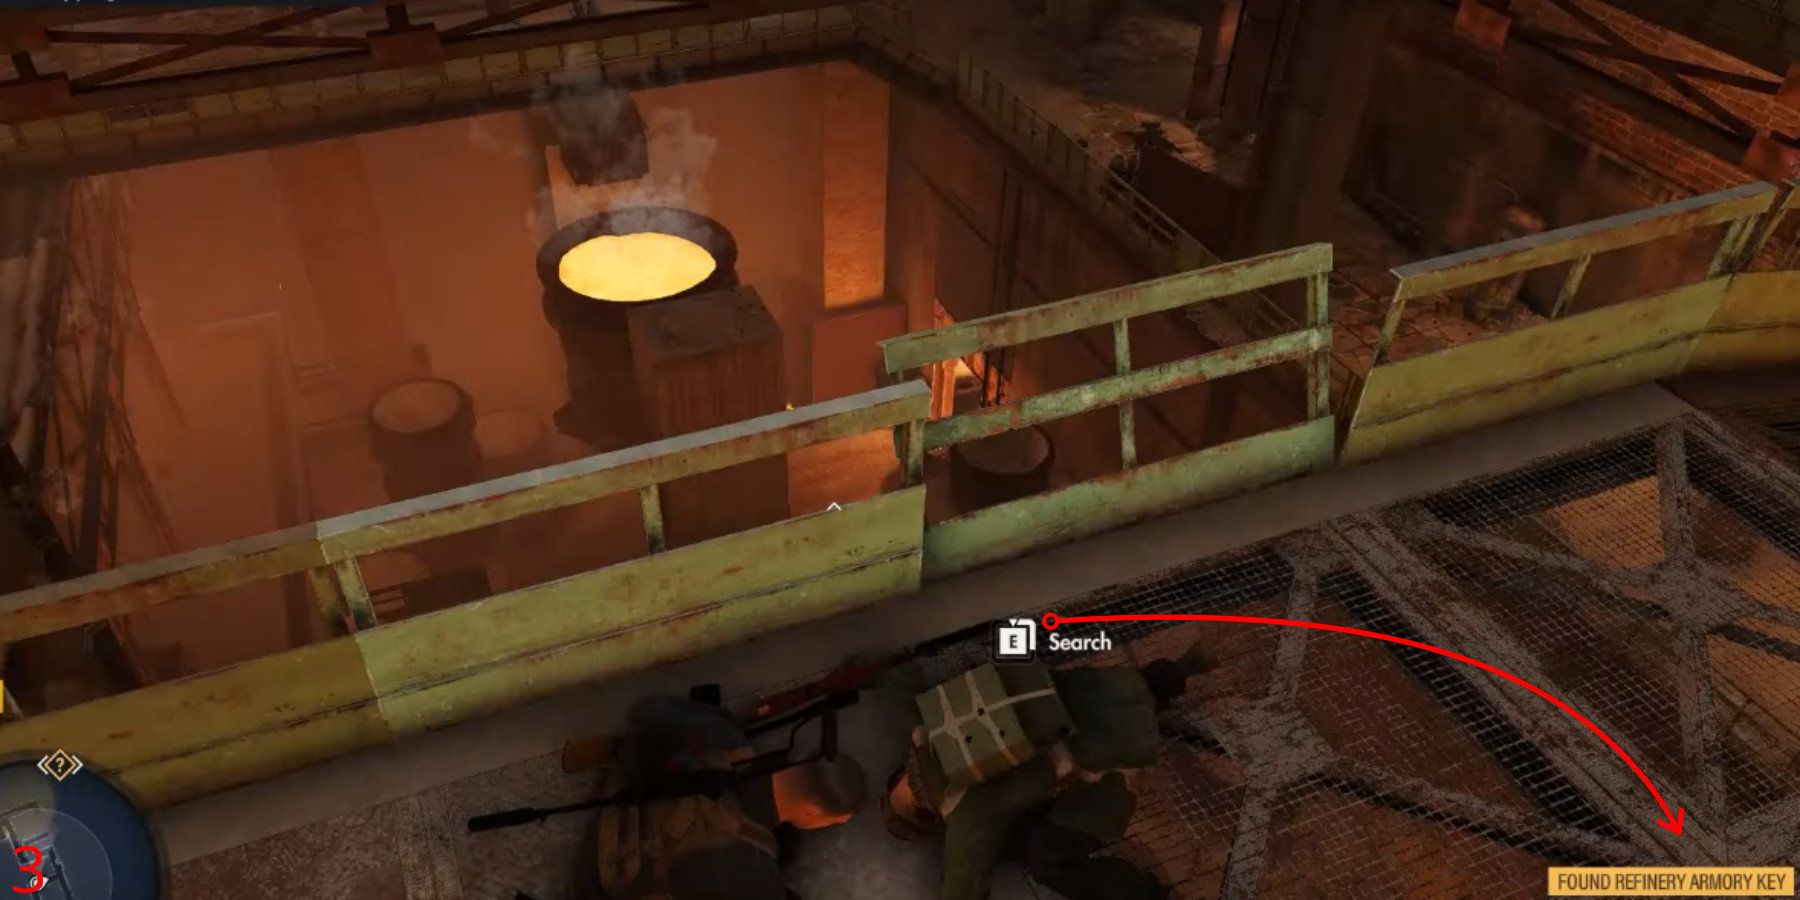
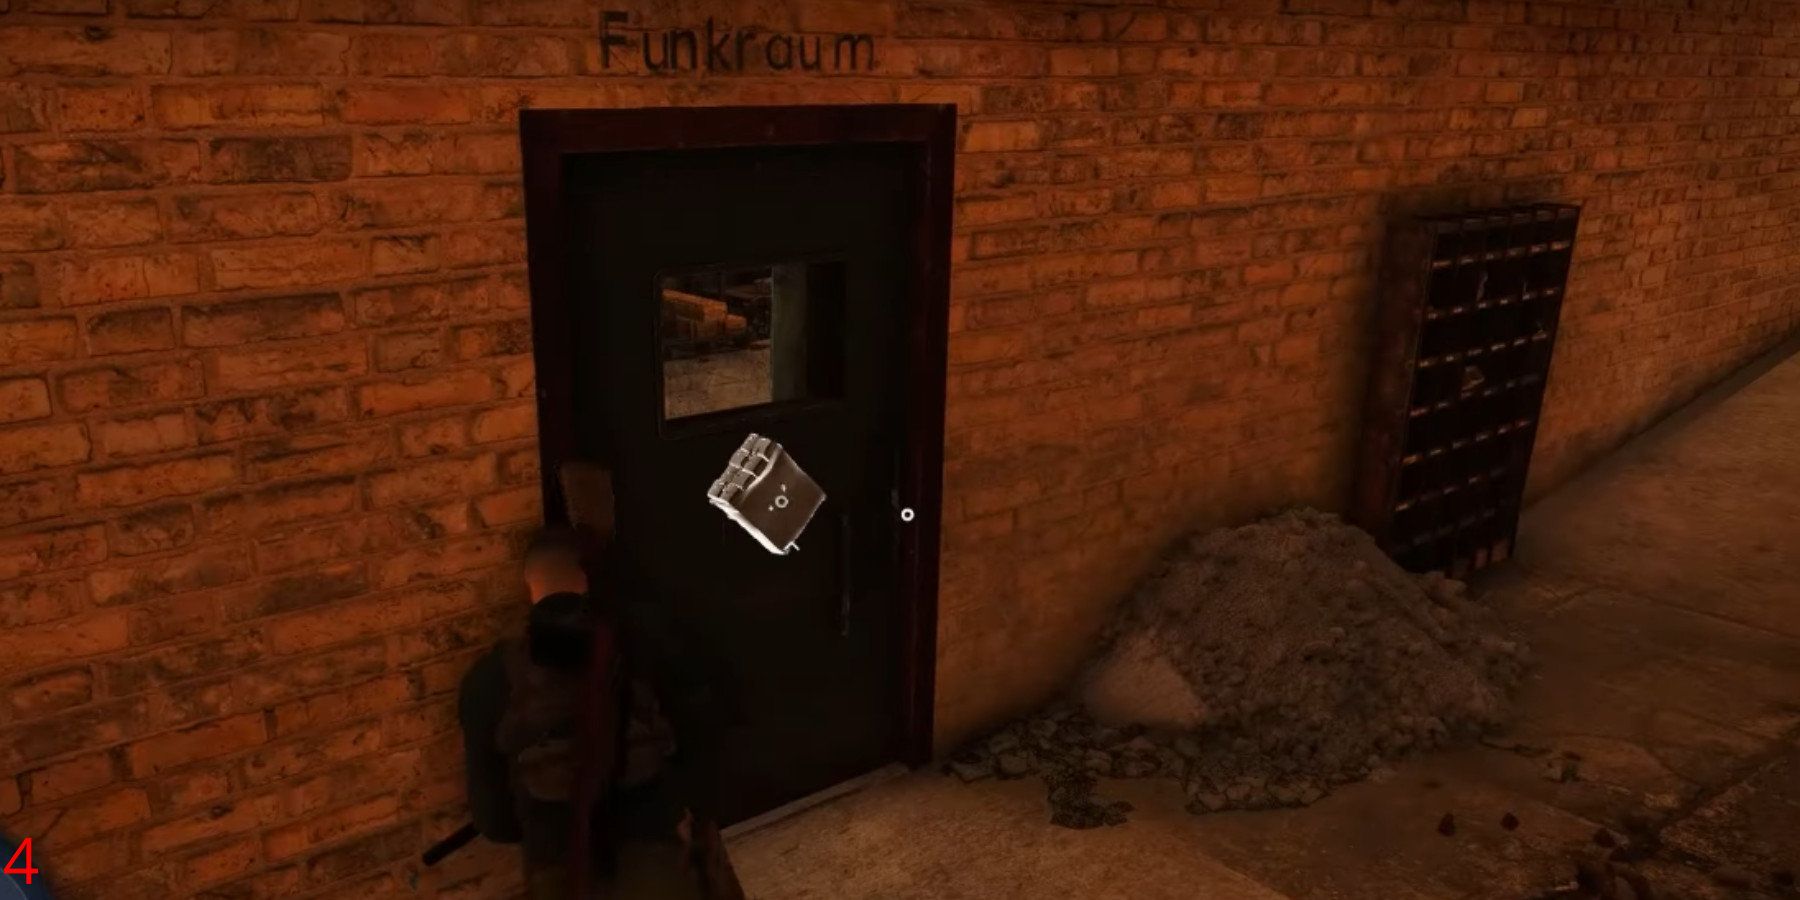
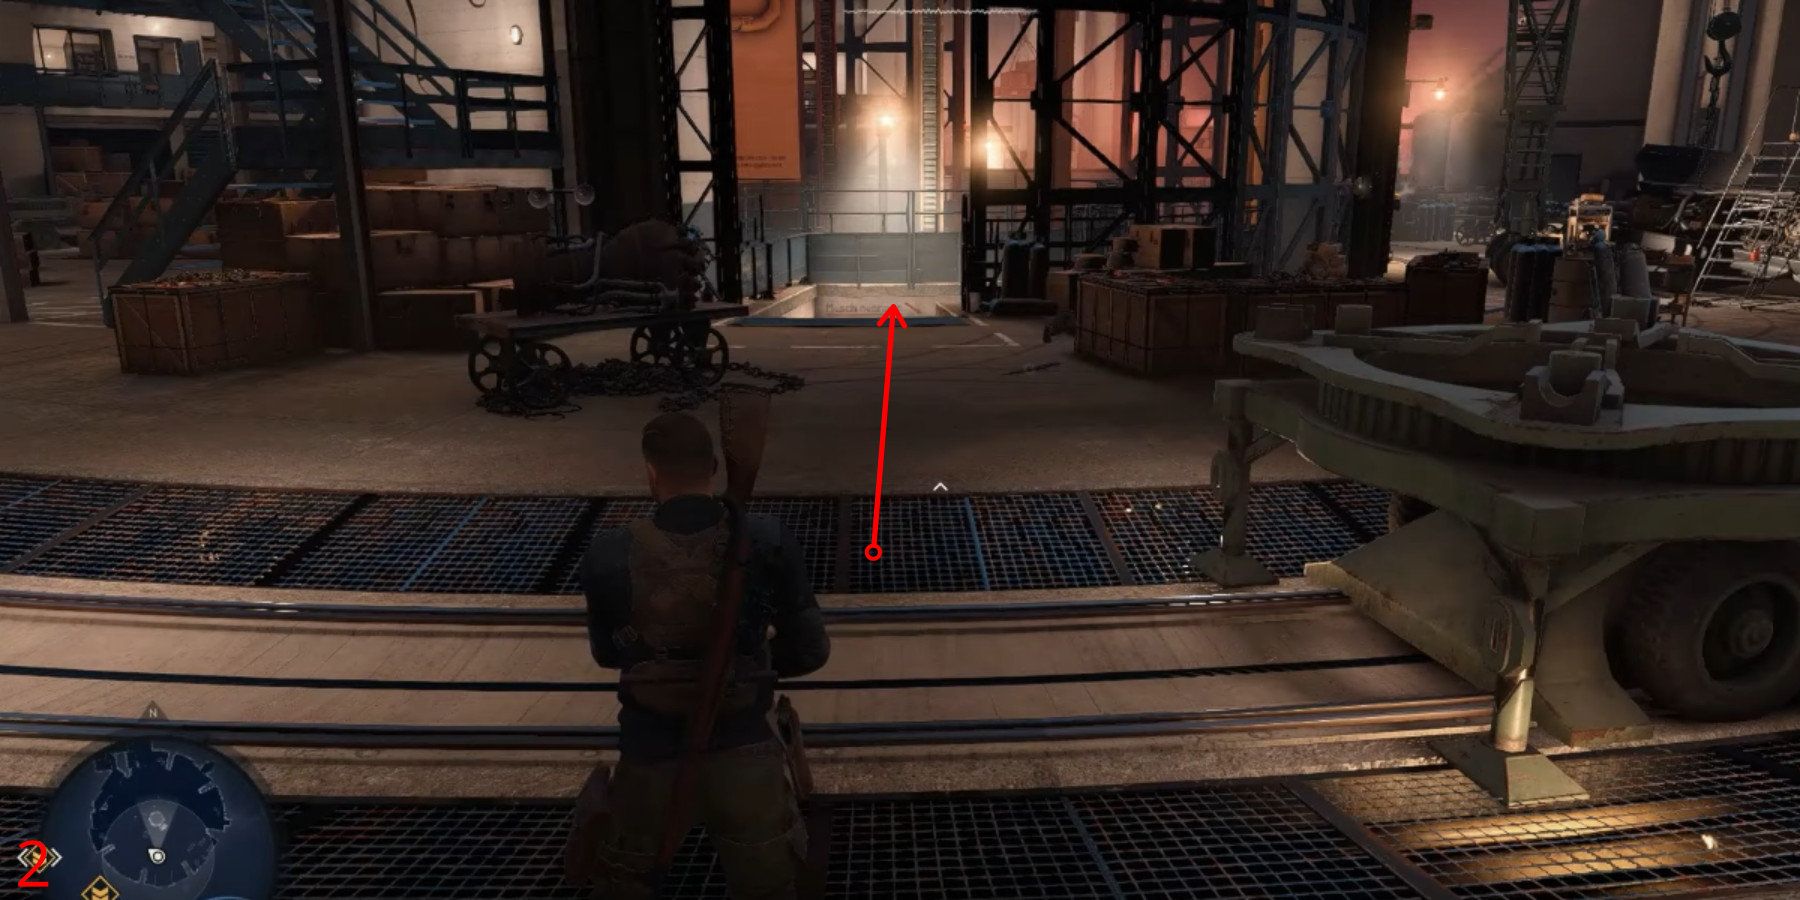
As a dedicated gamer, I stumbled upon the First Workbench in Mission 4, nestled within the Smelting Vat structure. This particular workbench, specialized for Pistols, was hidden inside an Armory on the second floor. To gain access, I had to take down or neutralize the guards stationed nearby, securing the key to the Armory first.
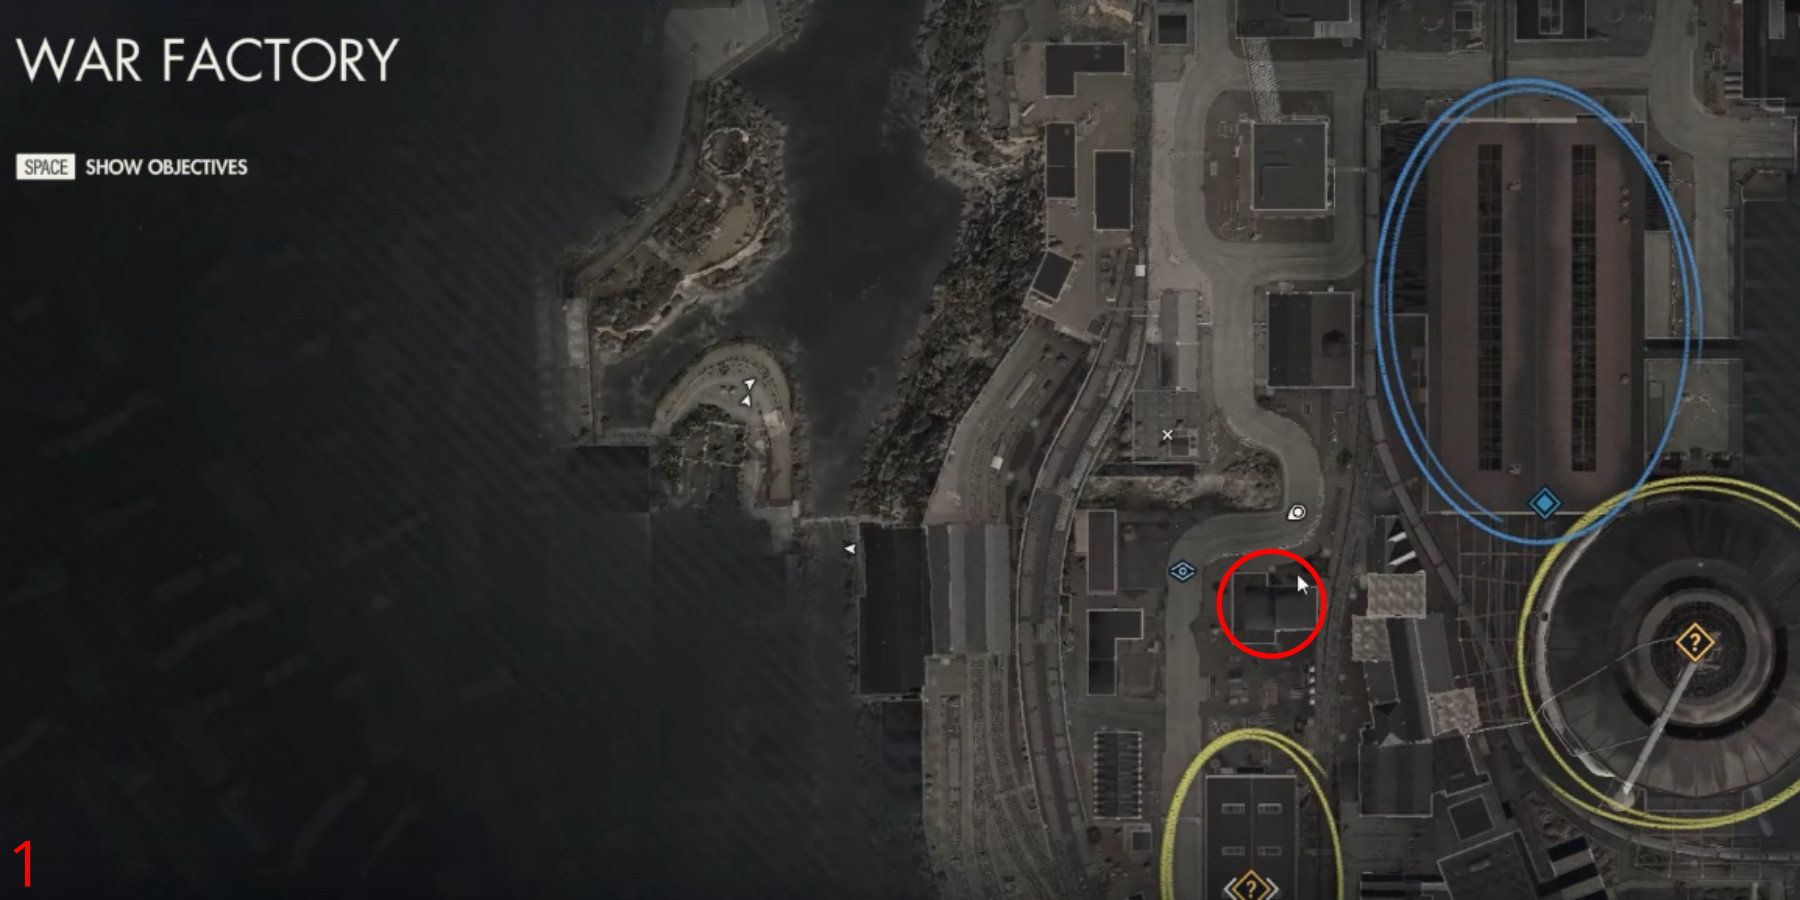
War Factory Workbench 2/3
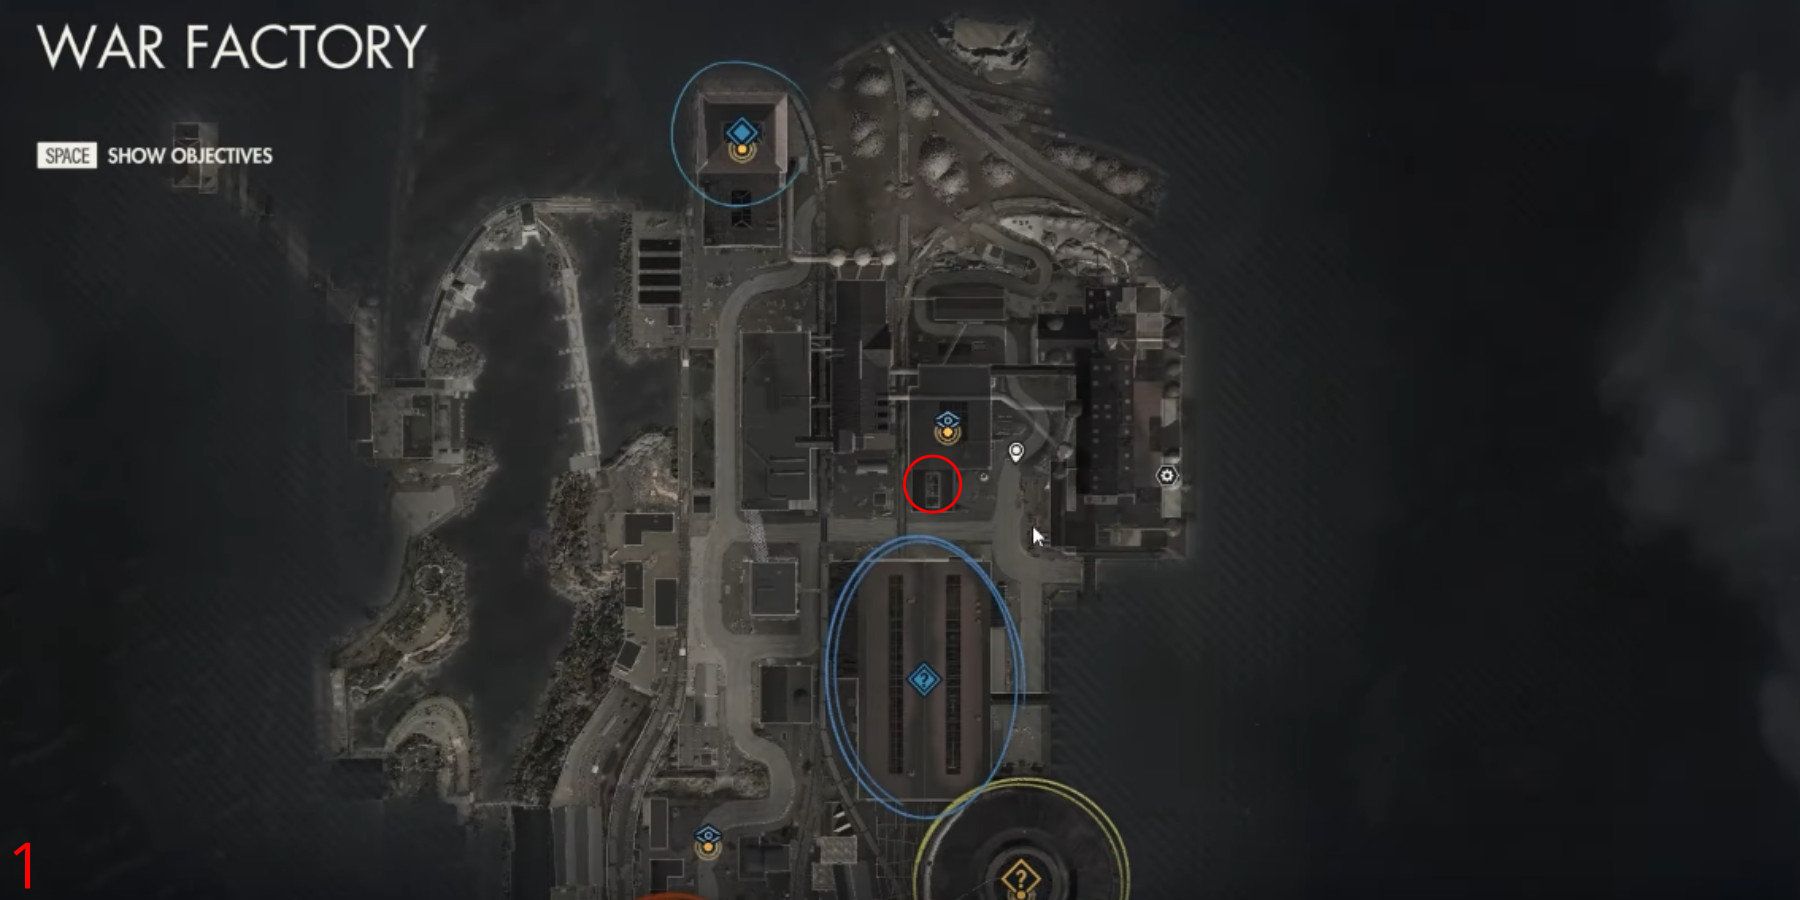
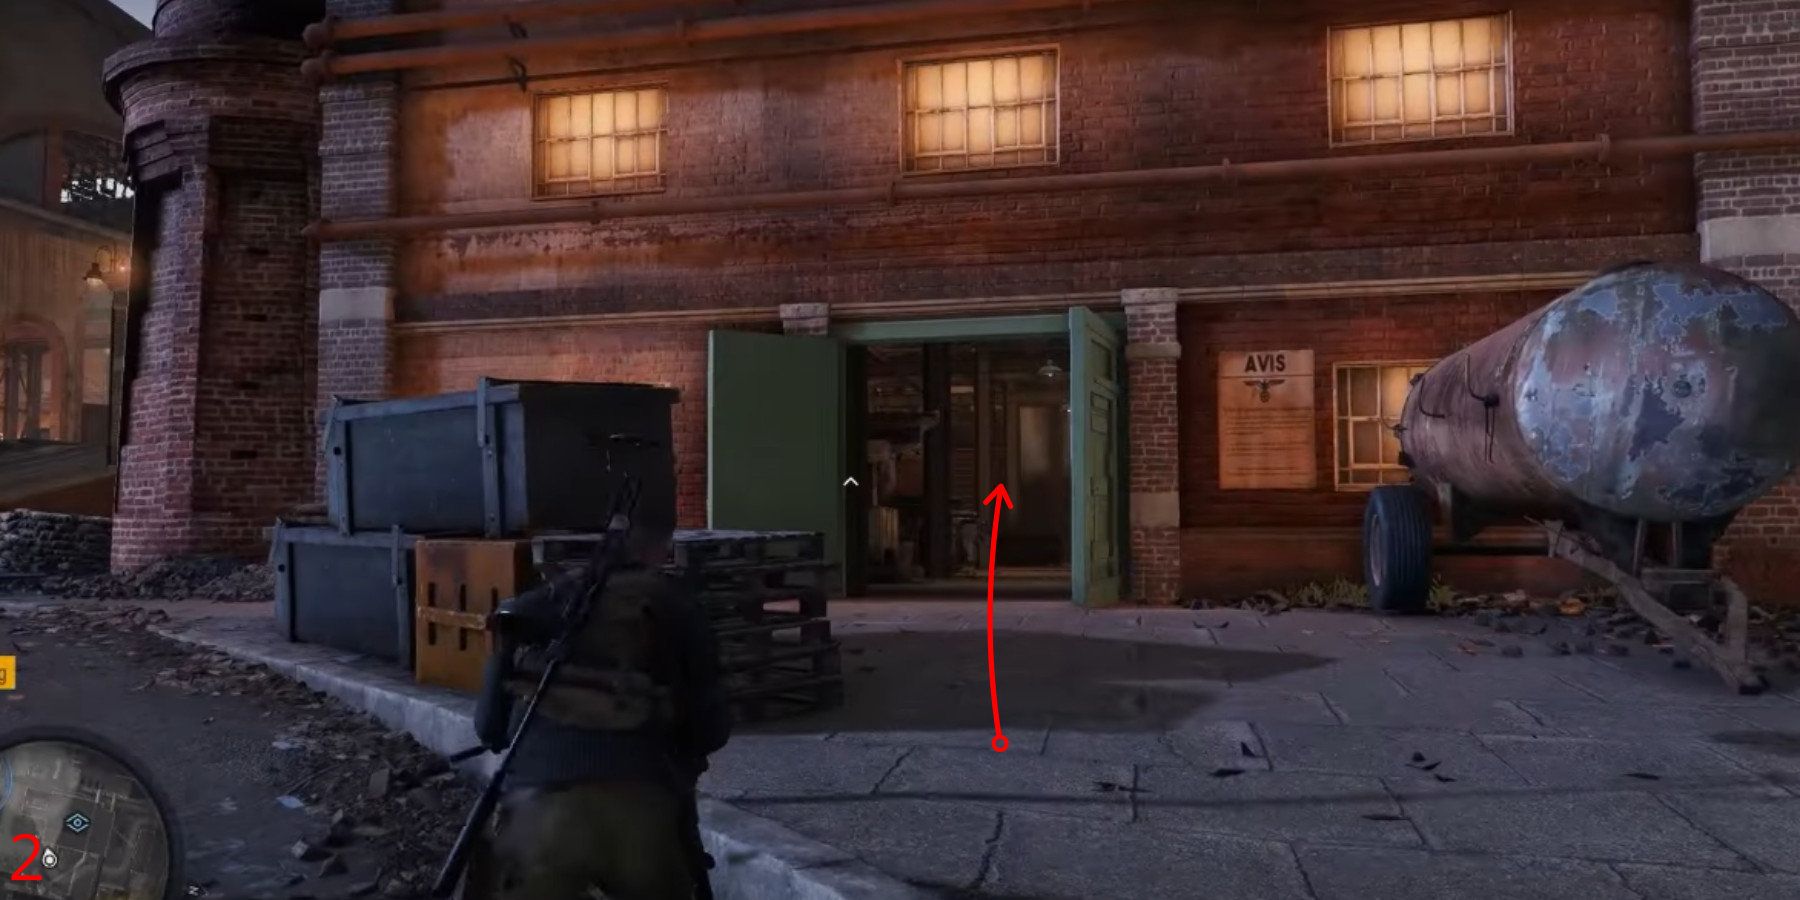
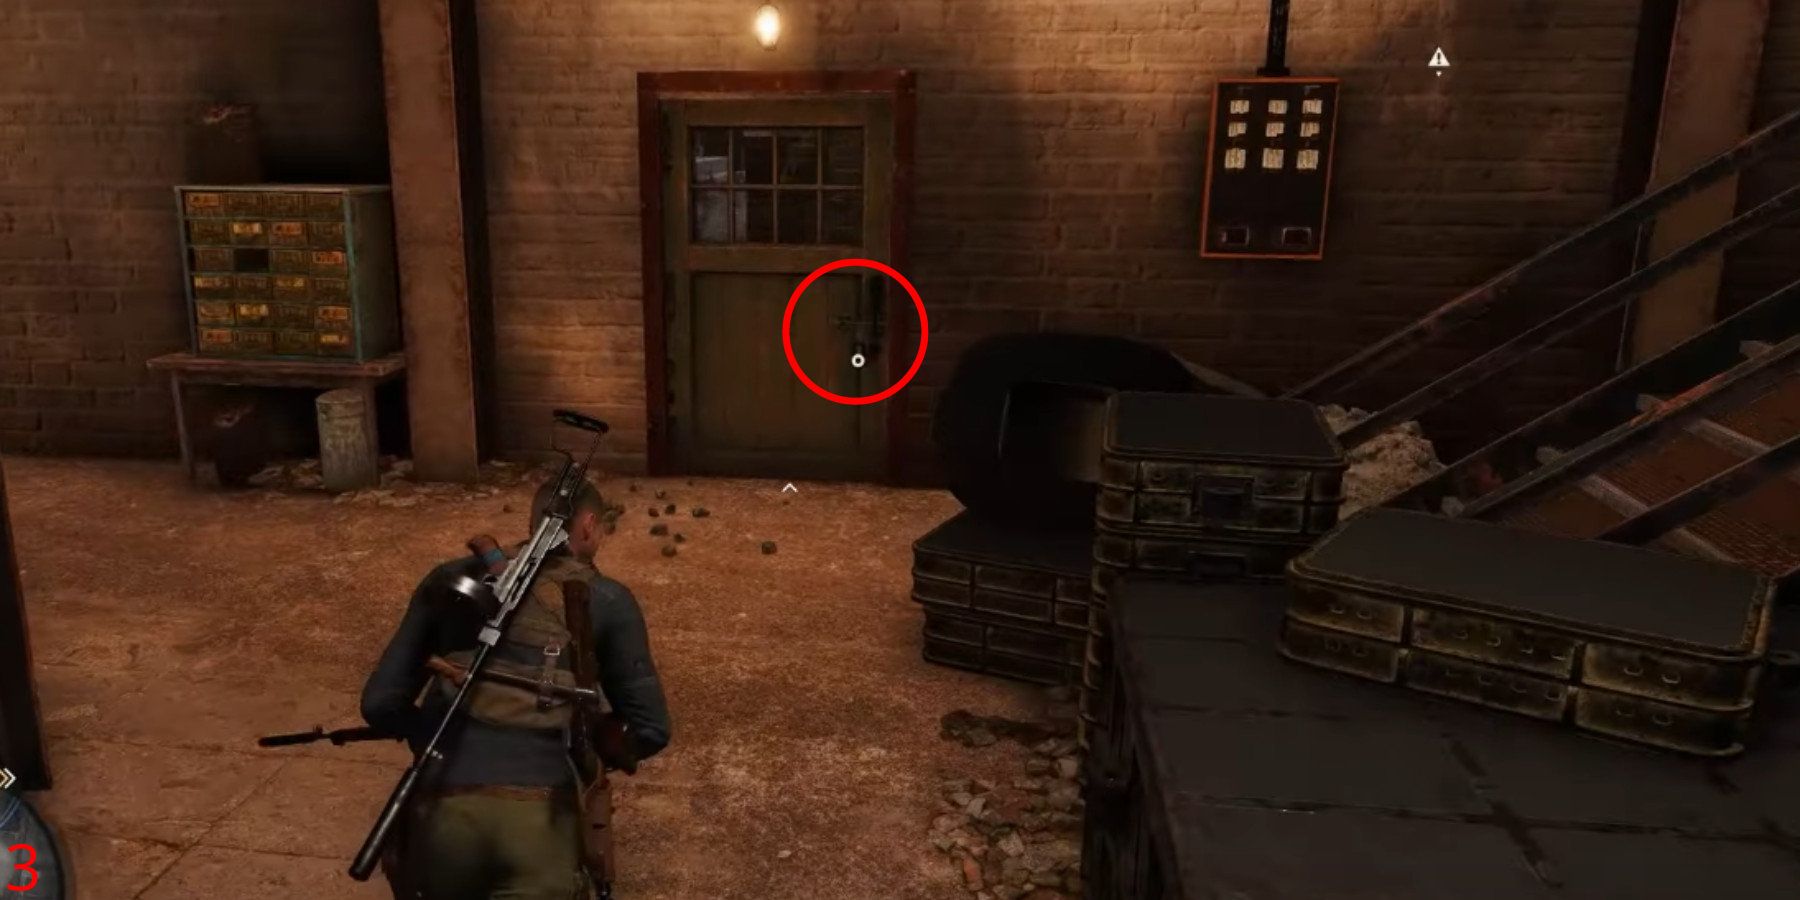
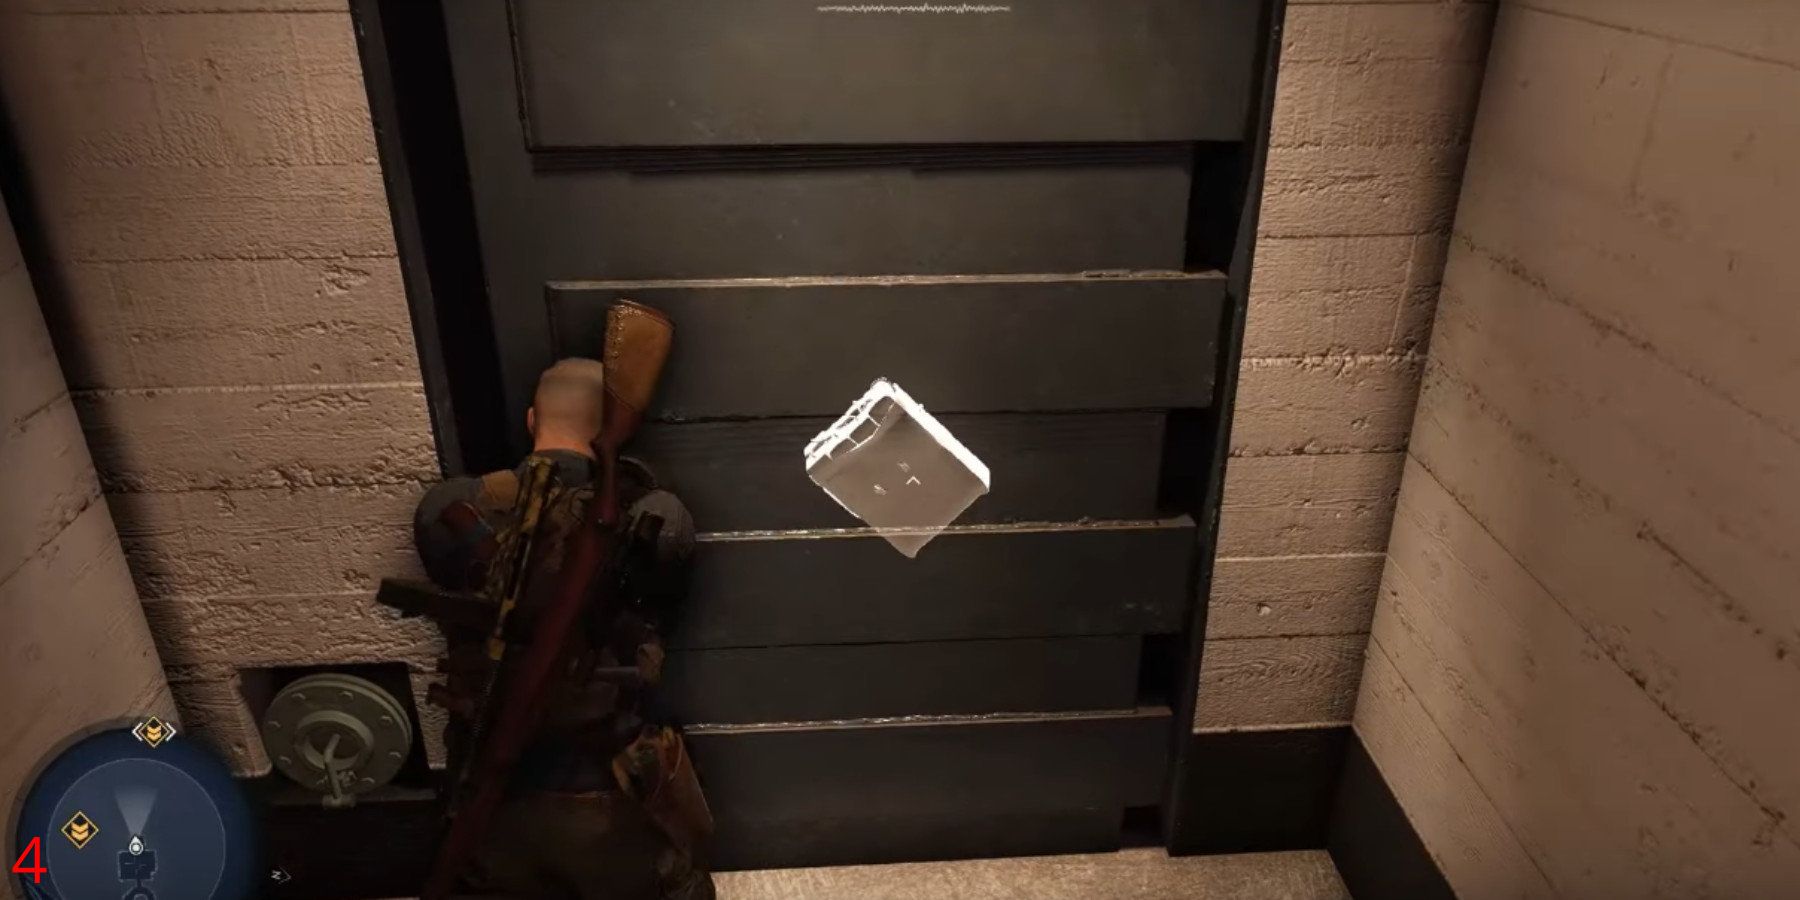
Inside a structure close to the Scrapyard, which has two big green doors, you’ll discover the 2nd Workbench. Upon entering, search for a padlocked green door that opens into a room containing a stairway. At the top of the stairs, players will uncover a Rifle Workbench.
The 2nd Workbench is situated in a structure near the Scrapyard, characterized by two large green doors. Upon entering, seek out a locked green door that leads to a room with a staircase. At the end of this stairway, players will come across a Rifle Workbench.
War Factory Workbench 3/3
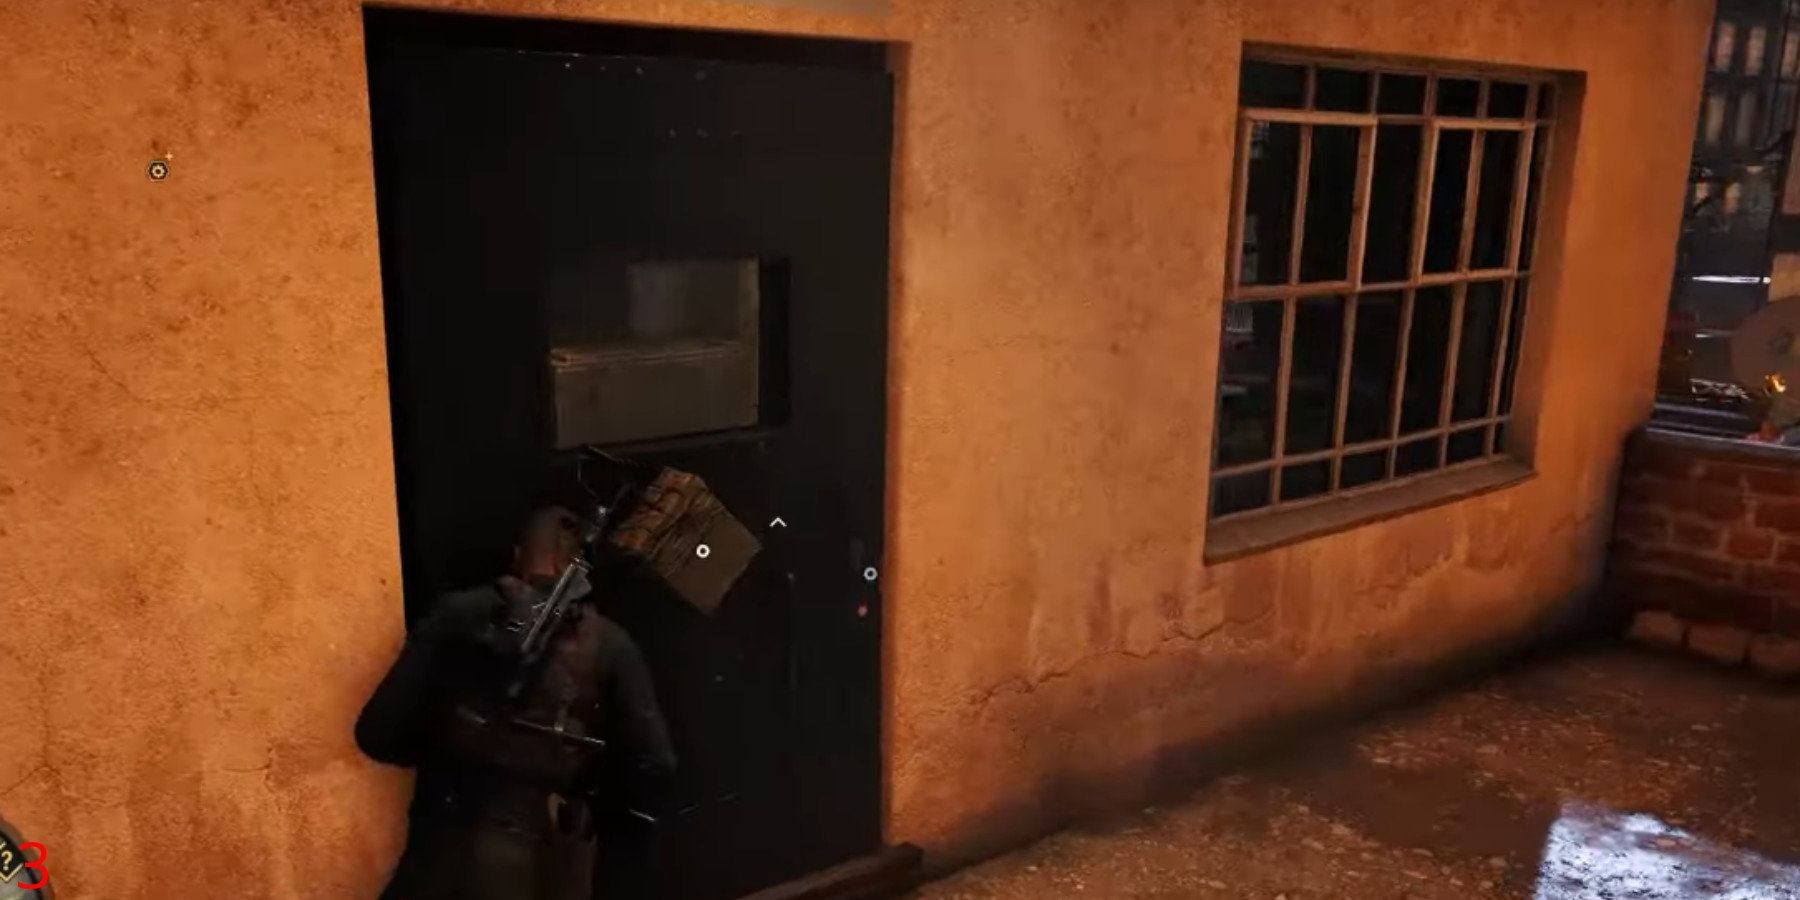
From my perspective as an enthusiastic player,
Mission 5 – Festung Guernsey
There are 3 Workbenches in Mission 5: Festung Guernsey.
Festung Guernsey Workbench 1/3
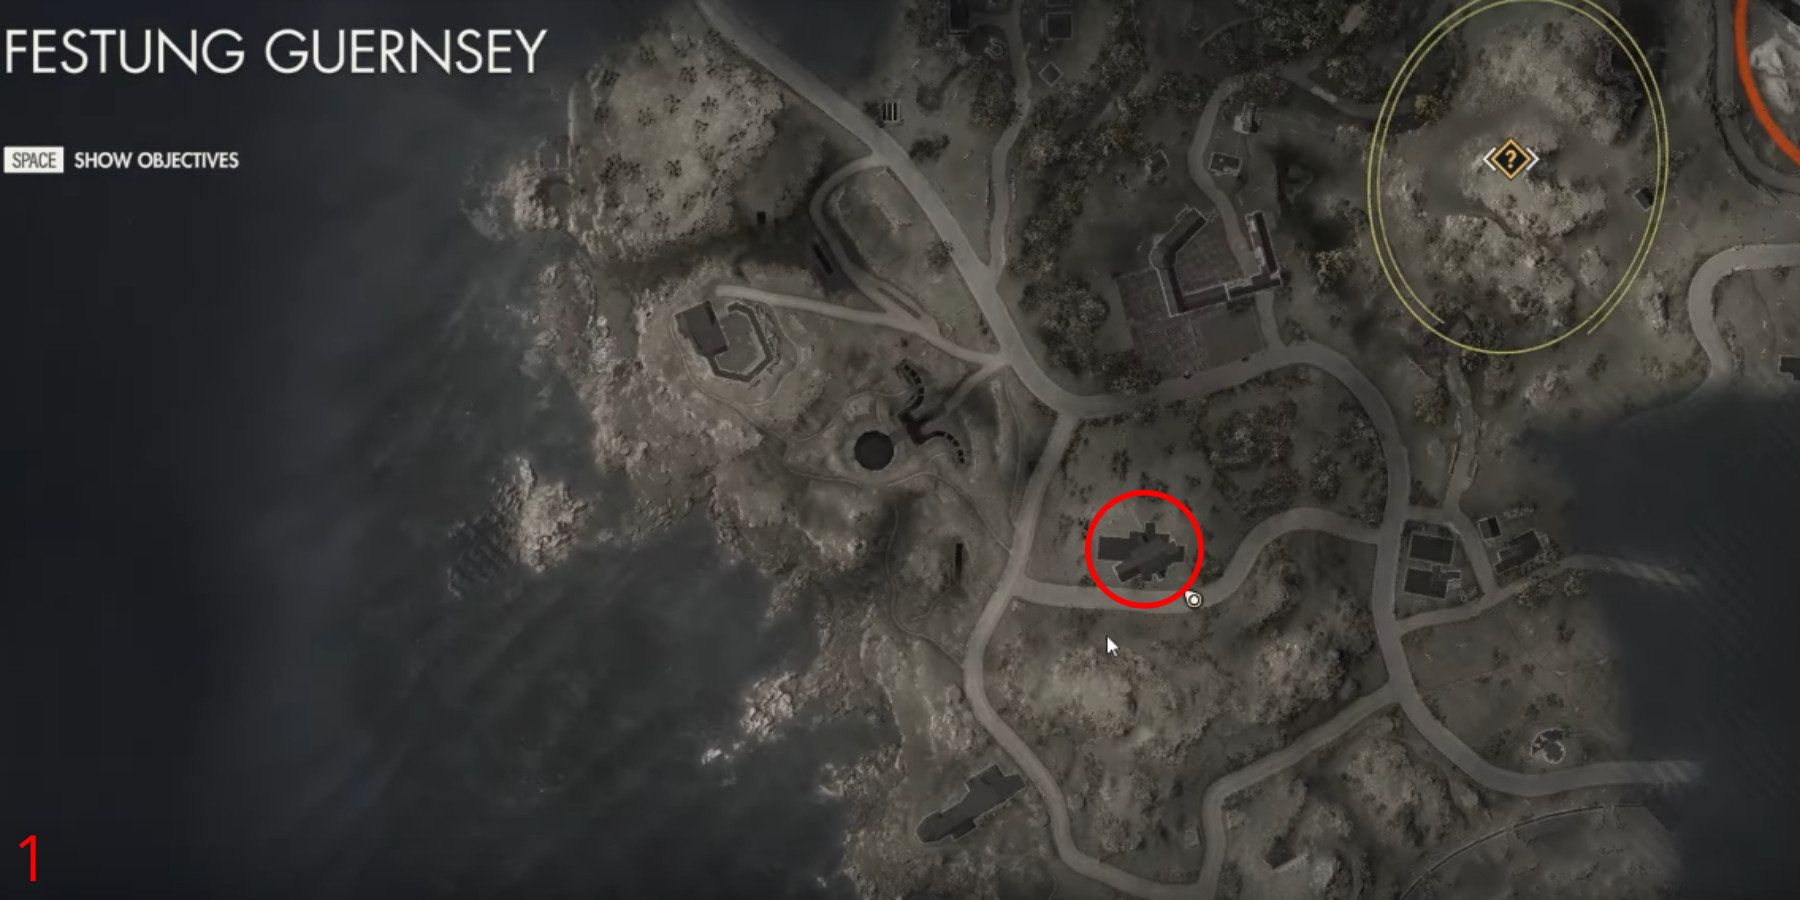
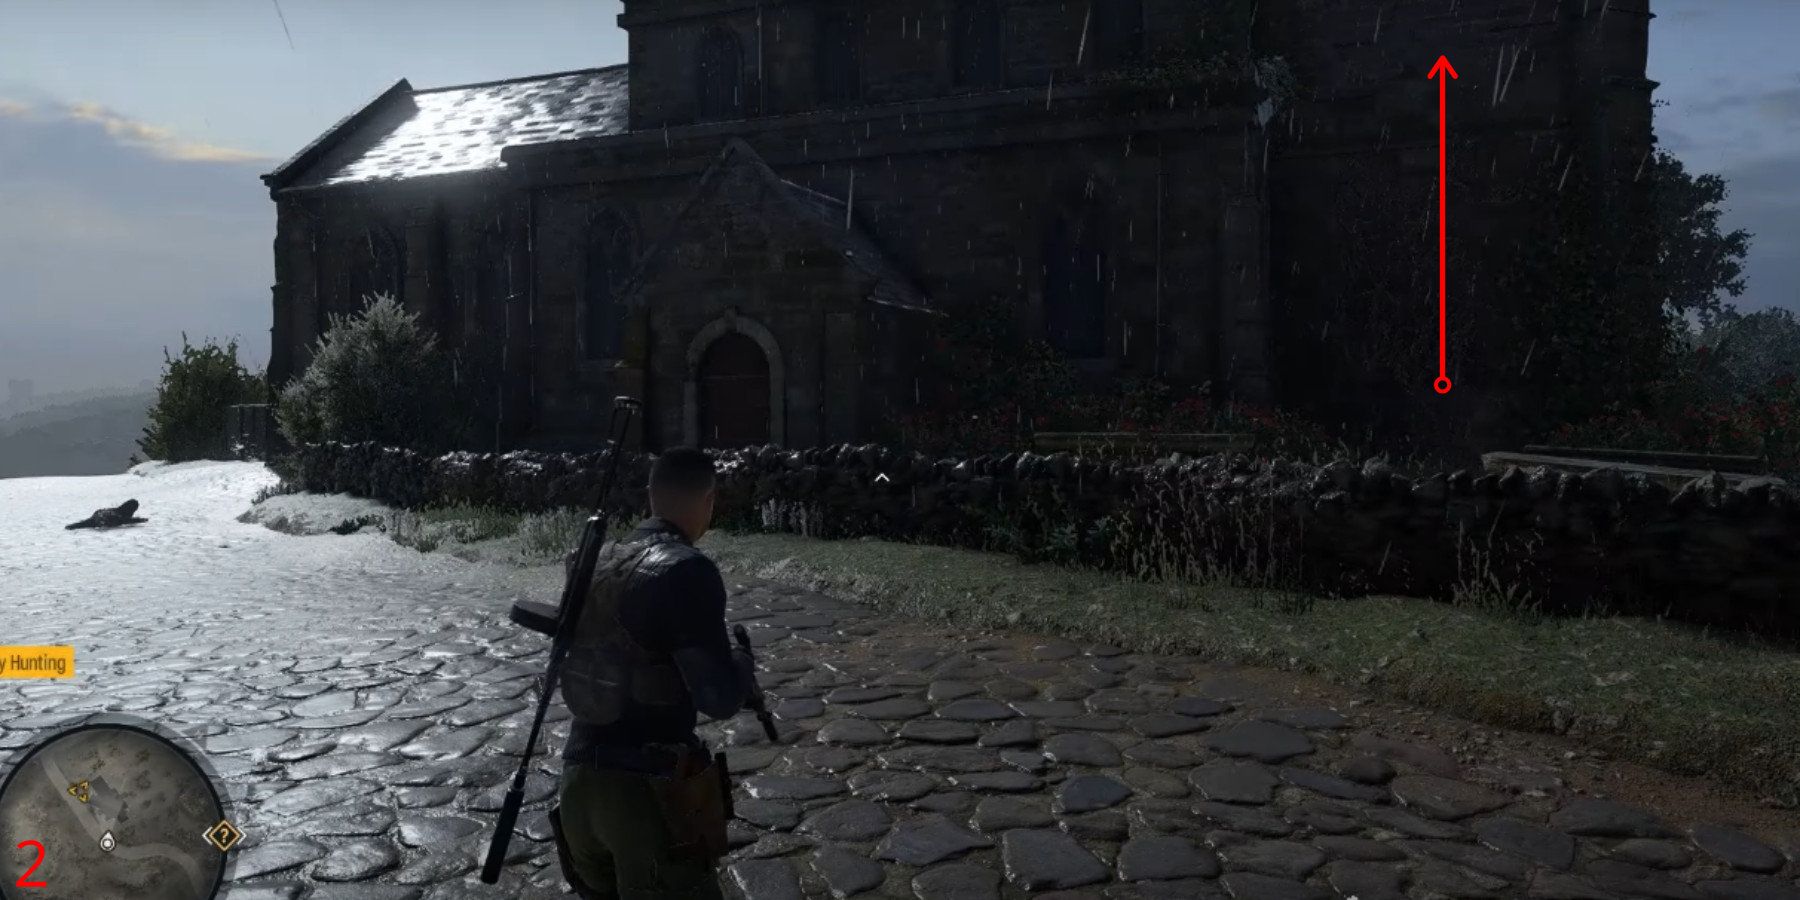
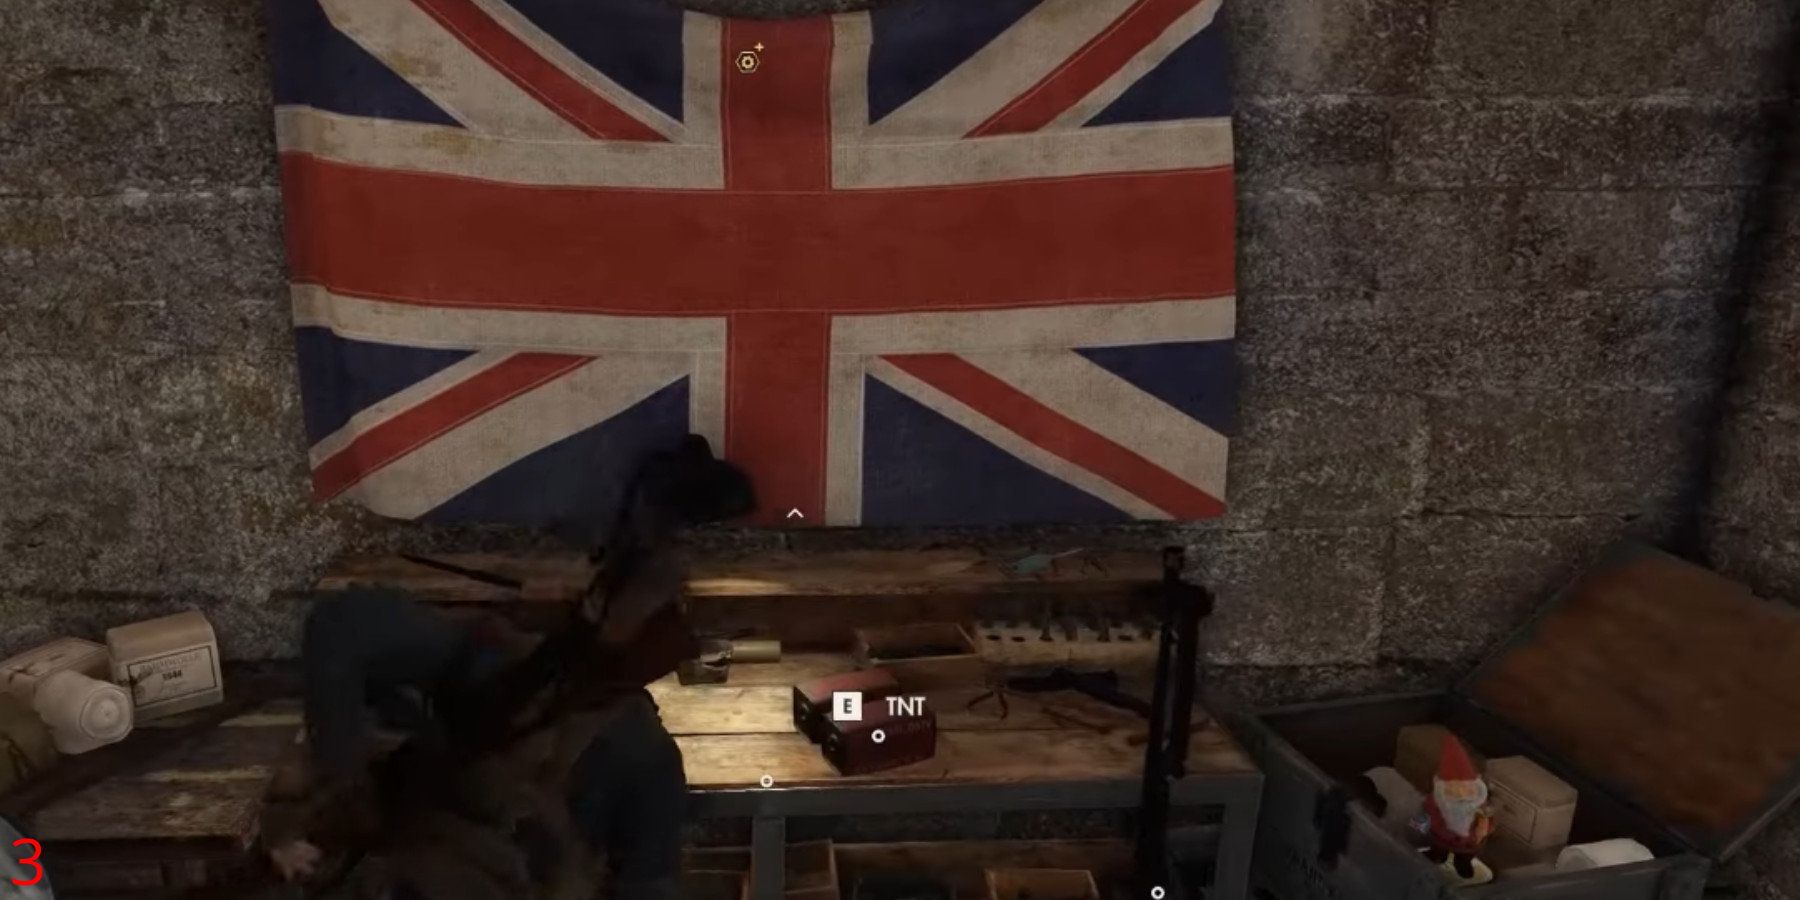
1st Workbench, which players encounter in Mission 5, is nestled within the bell tower of a church. To reach the bell tower, players must ascend a vine that wraps around the church’s side. The Rifle Workbench empowers players to craft more lethal rifles.
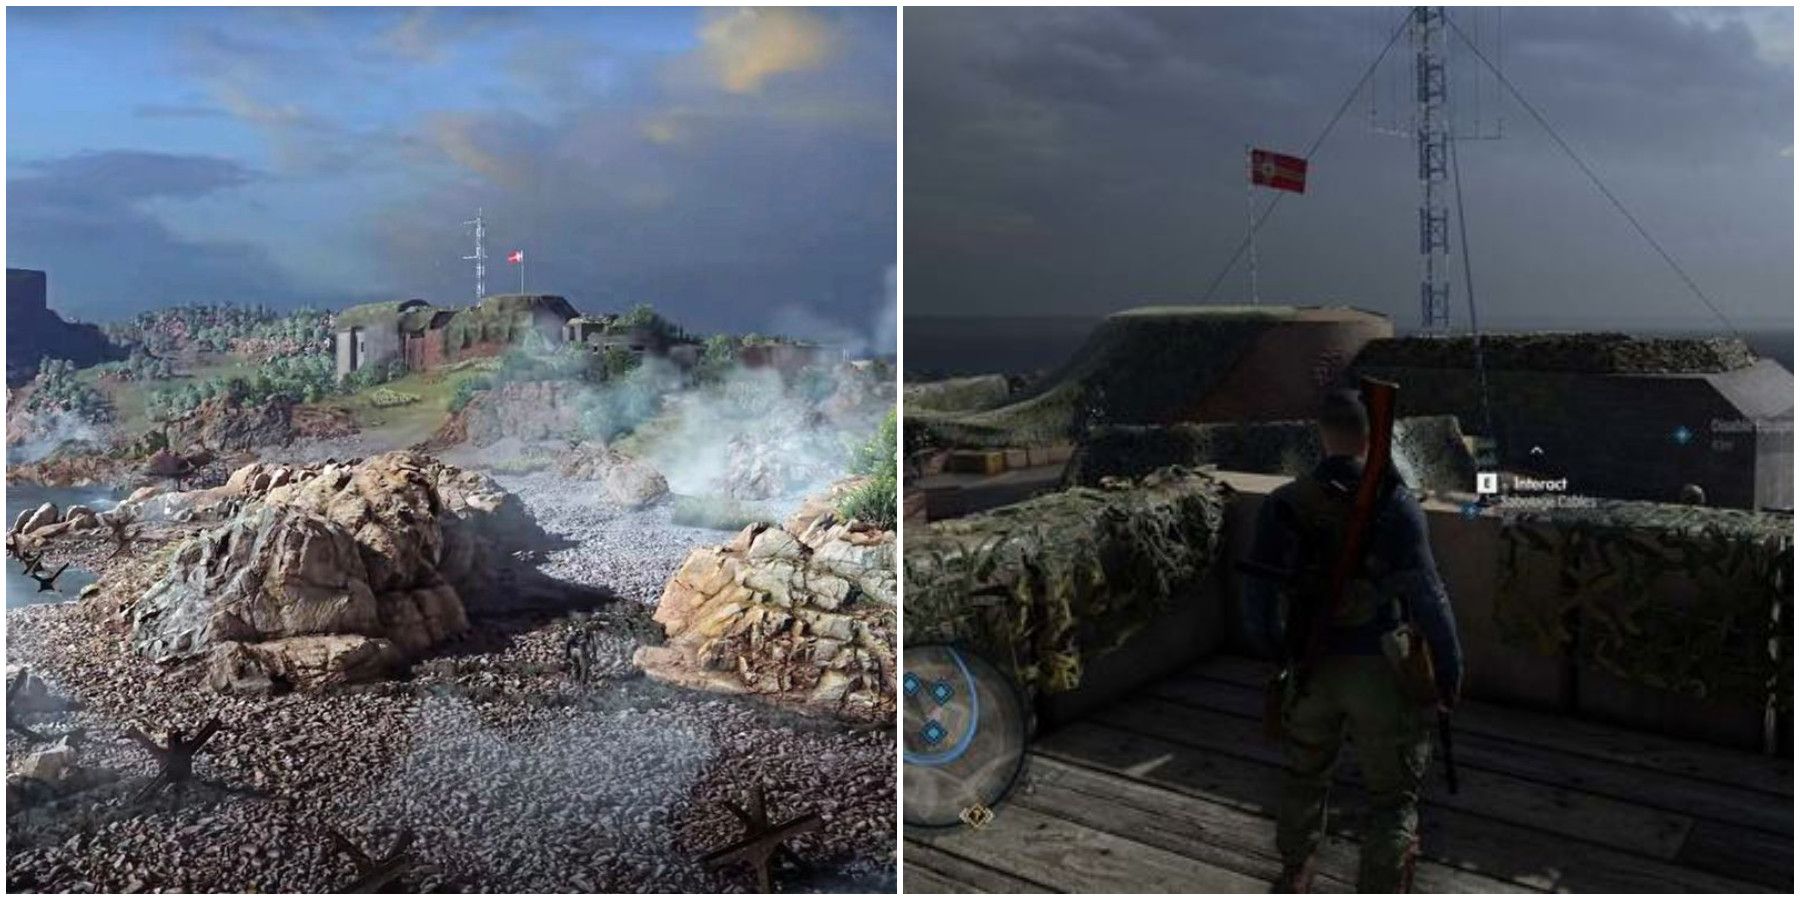
Festung Guernsey Workbench 2/3
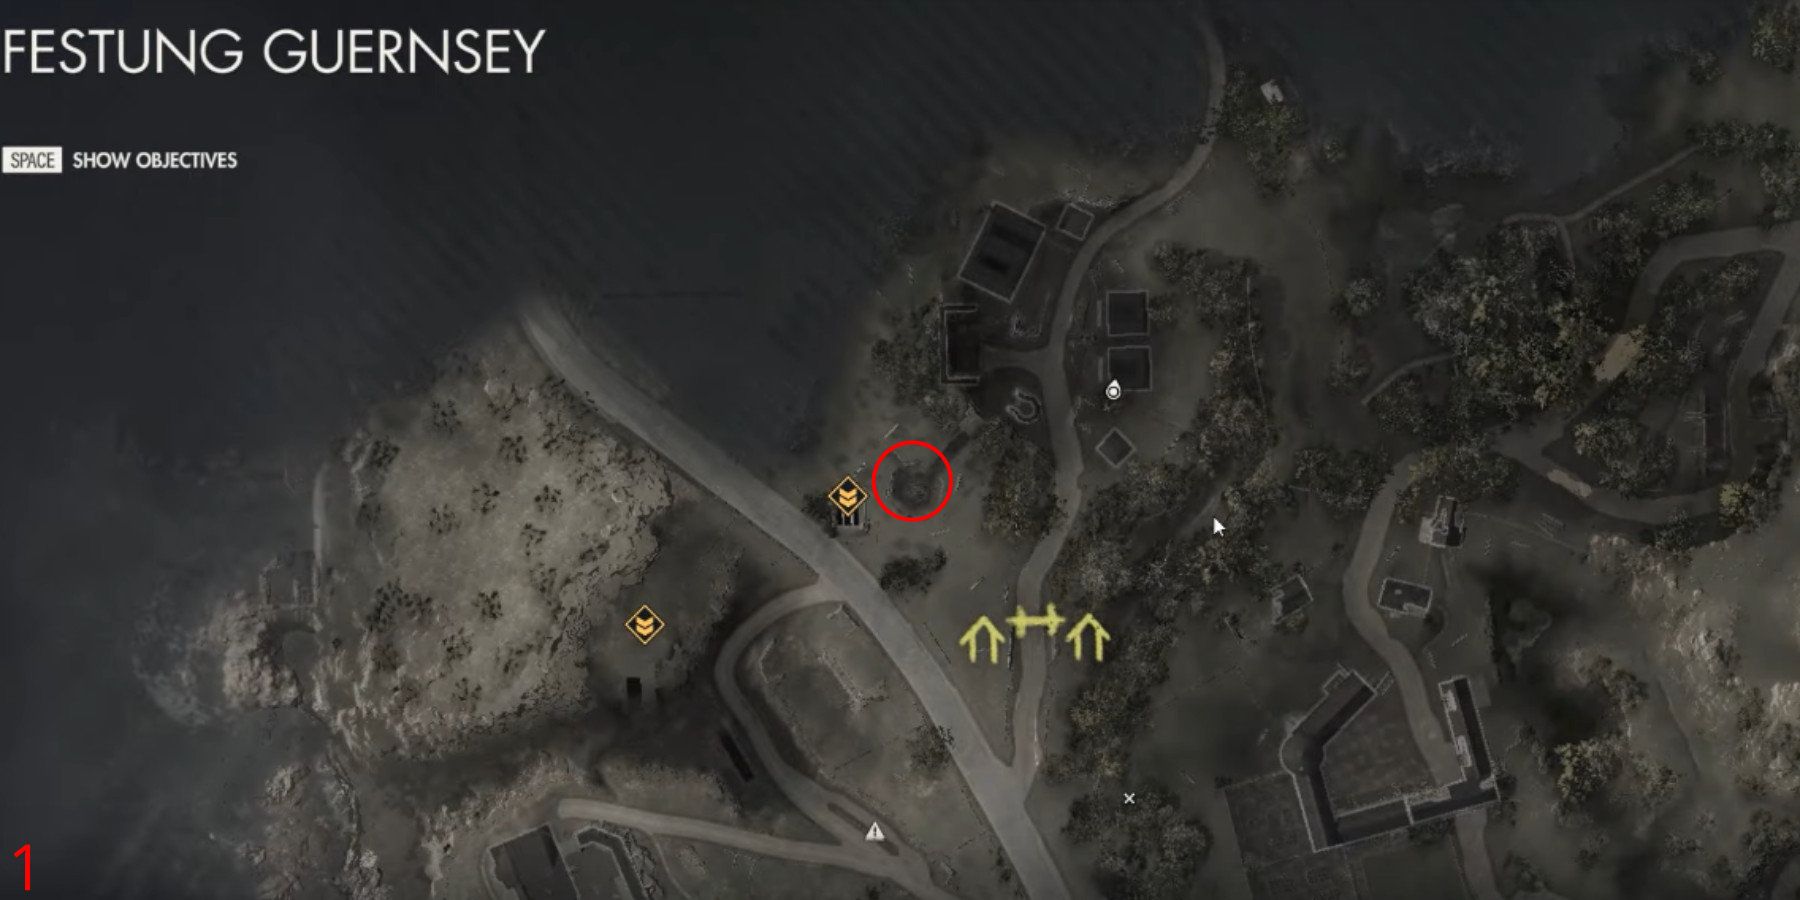
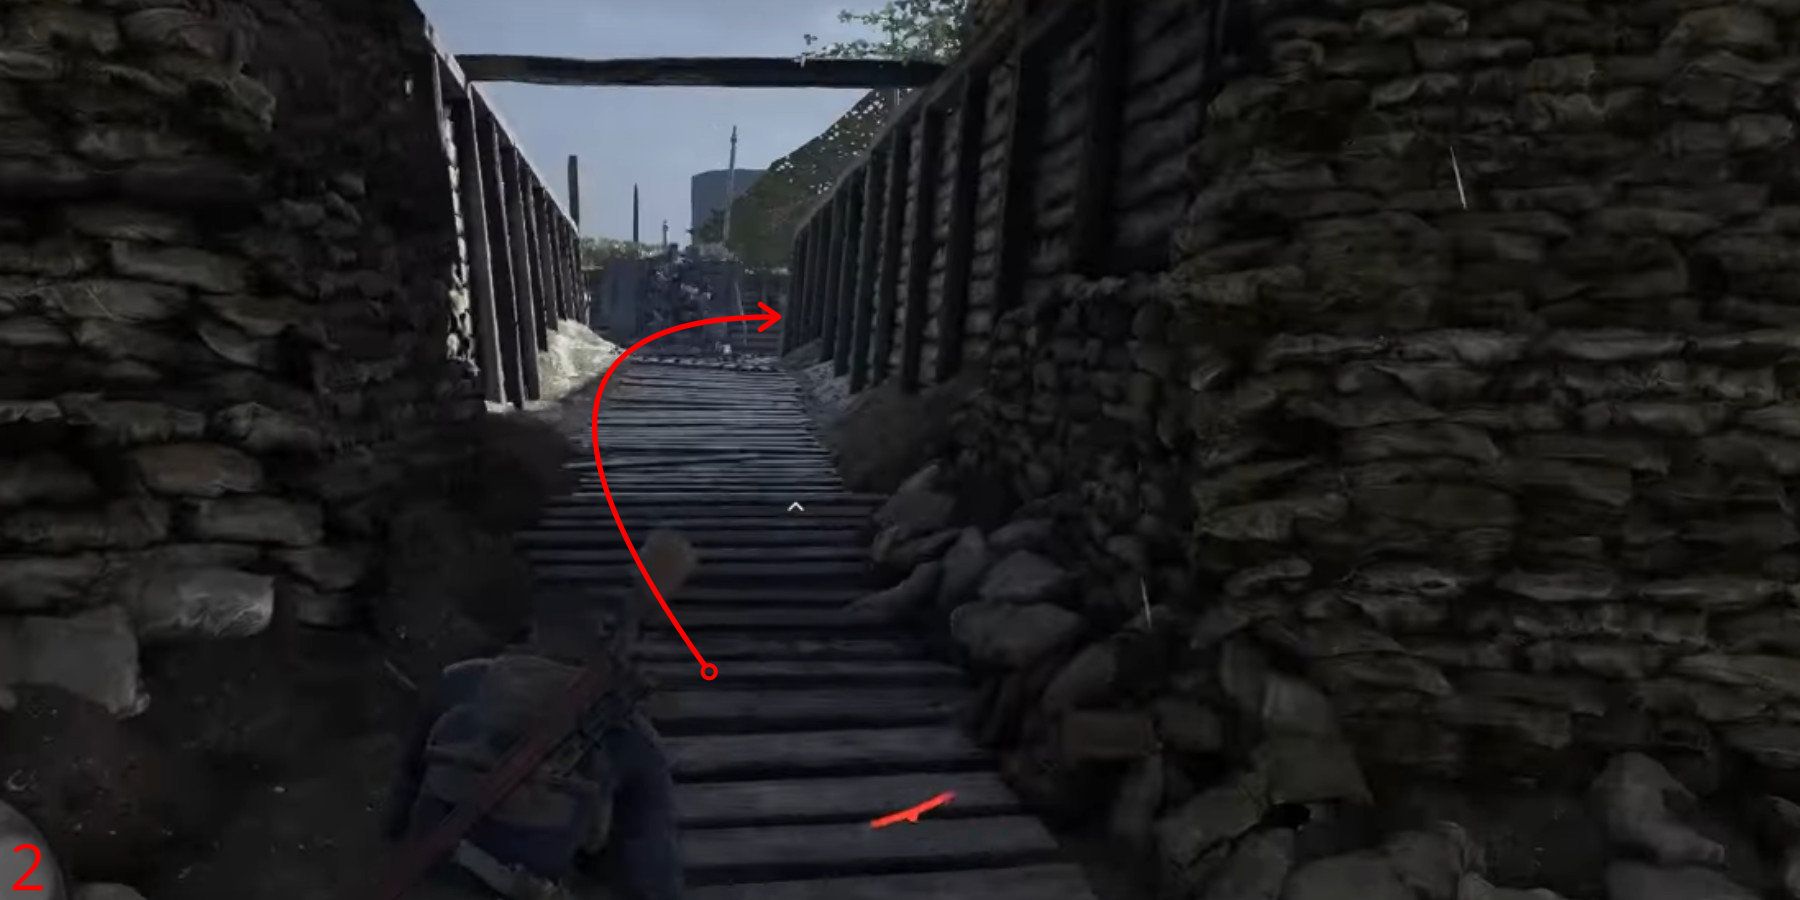
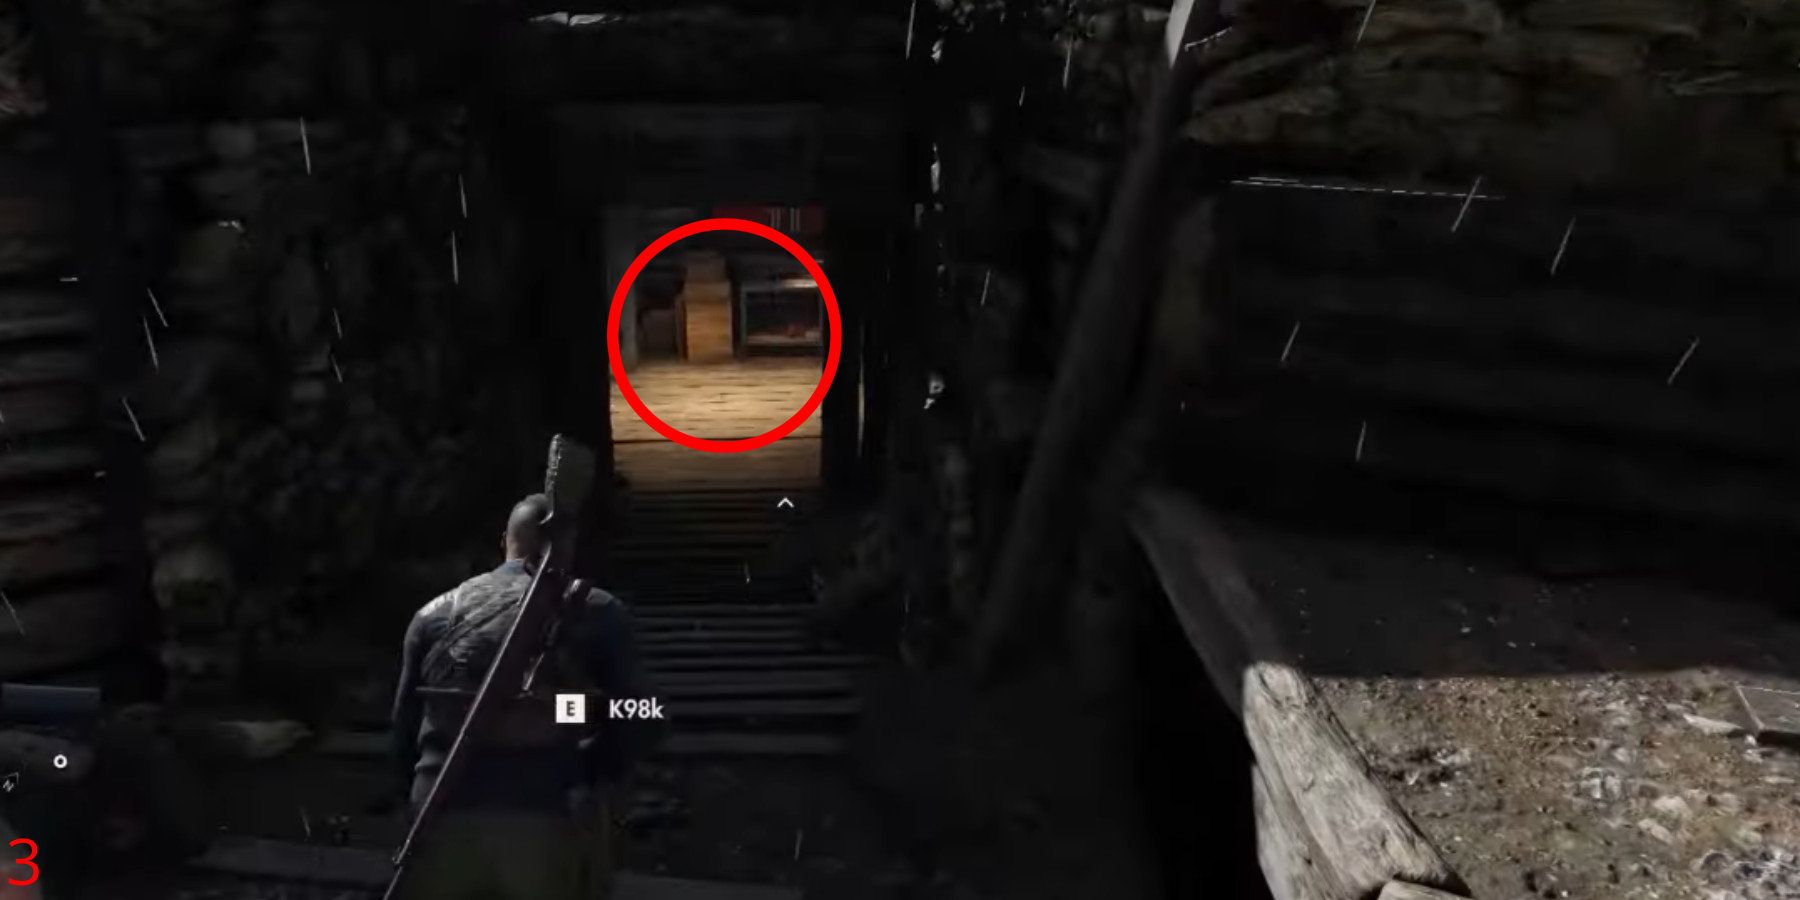
On your map, you’ll discover the next workshop located in the northern region, close to some trenches. To find it, venture into the trenches and take a right when you spot a Flak 18 Anti-Air Gun. Hidden inside a dugout, you’ll see the Pistol Workbench, which is positioned in front of a Nazi flag.
Festung Guernsey Workbench 3/3
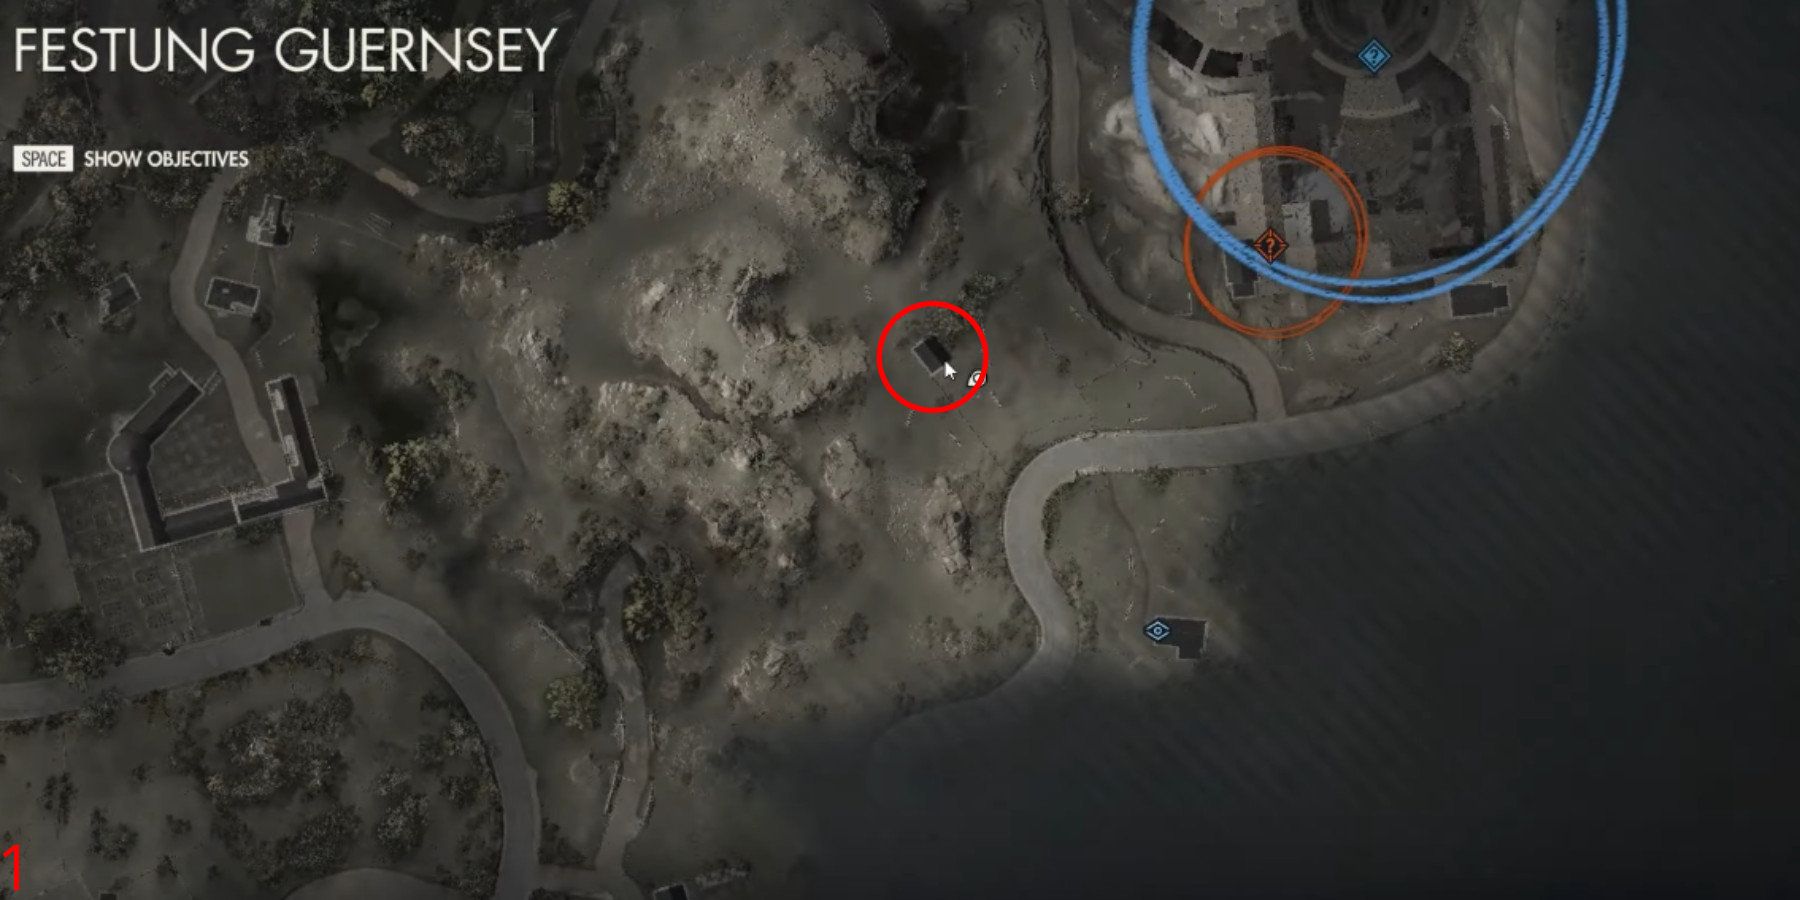
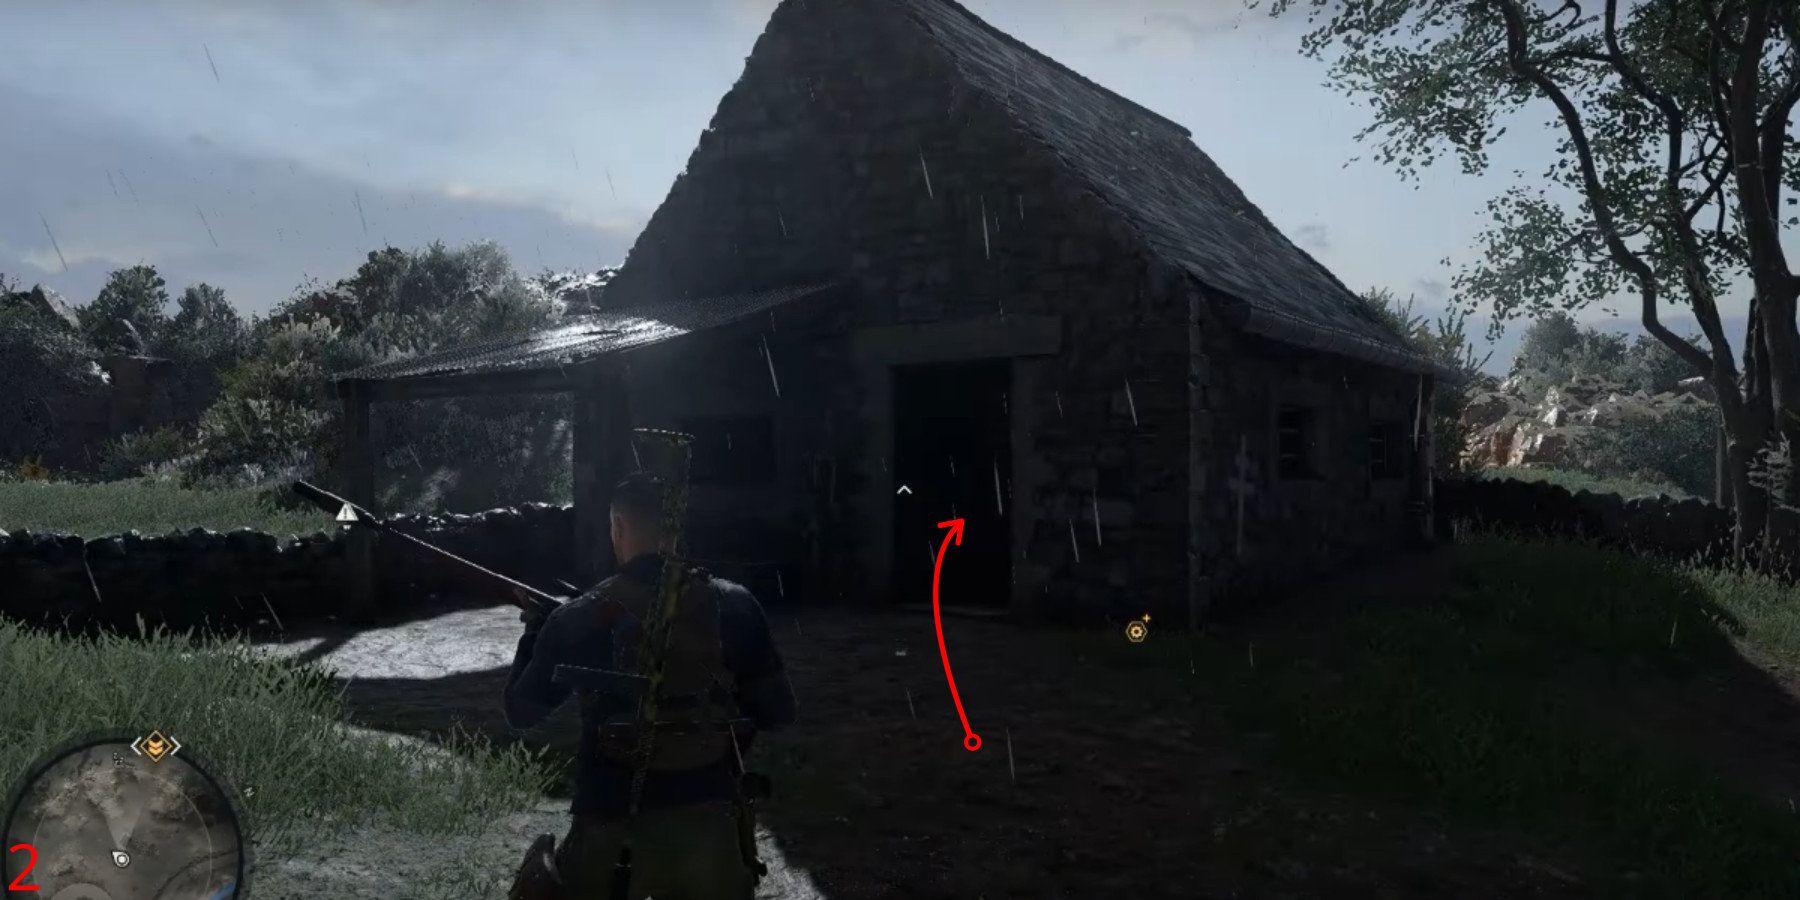
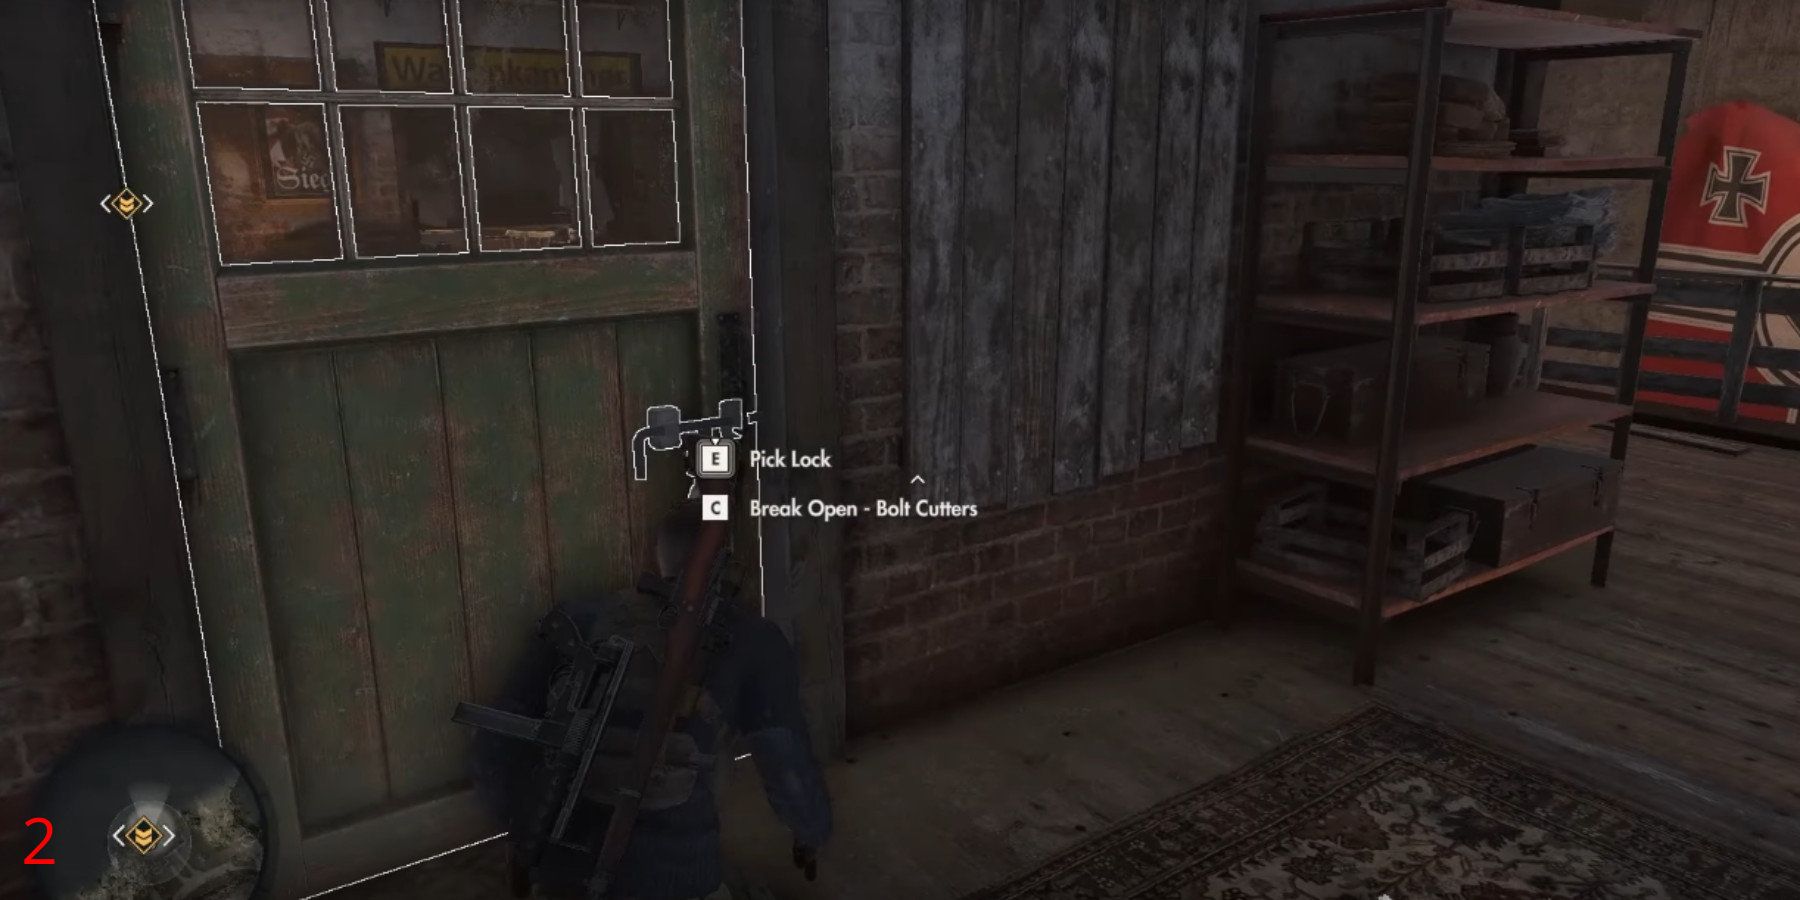
Inside a residence located southwest of the building site, where optional tasks are available for players, you can discover the third Workbench. To gain entry, players might either pick the lock or use bolt cutters. Once inside, players should crawl beneath a table and descend a ladder; it’s there they’ll come across an SMG Workbench.
Mission 6 – Liberation
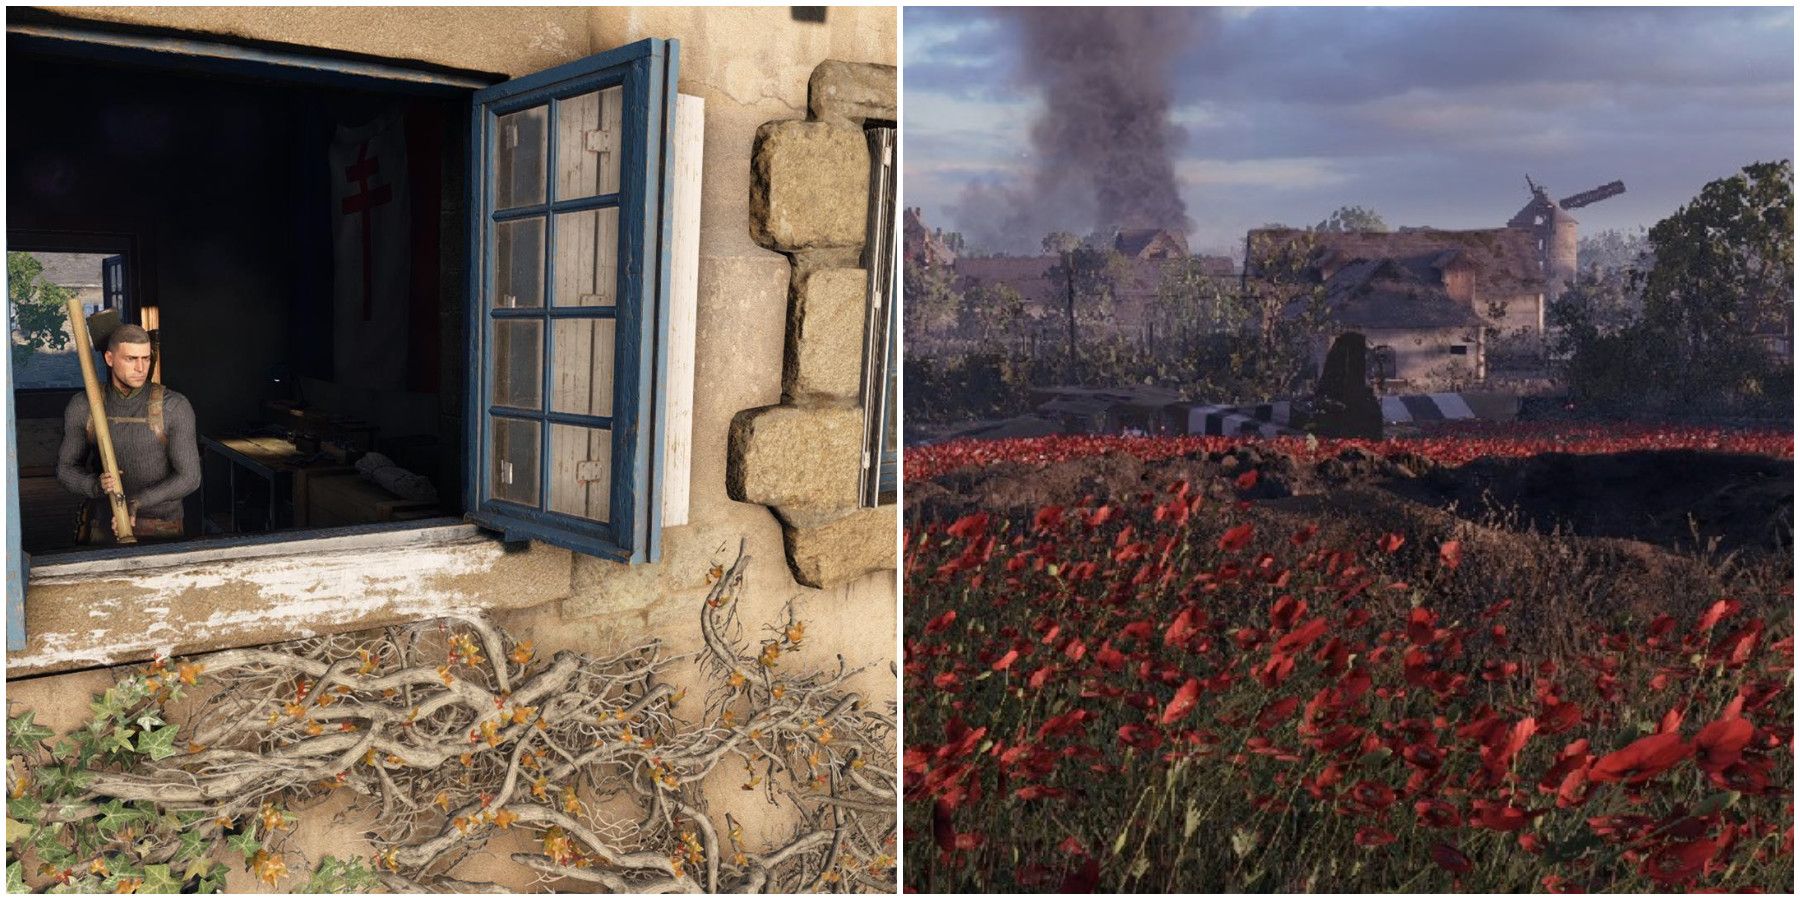
There are 3 Workbenches in Mission 6: Liberation.
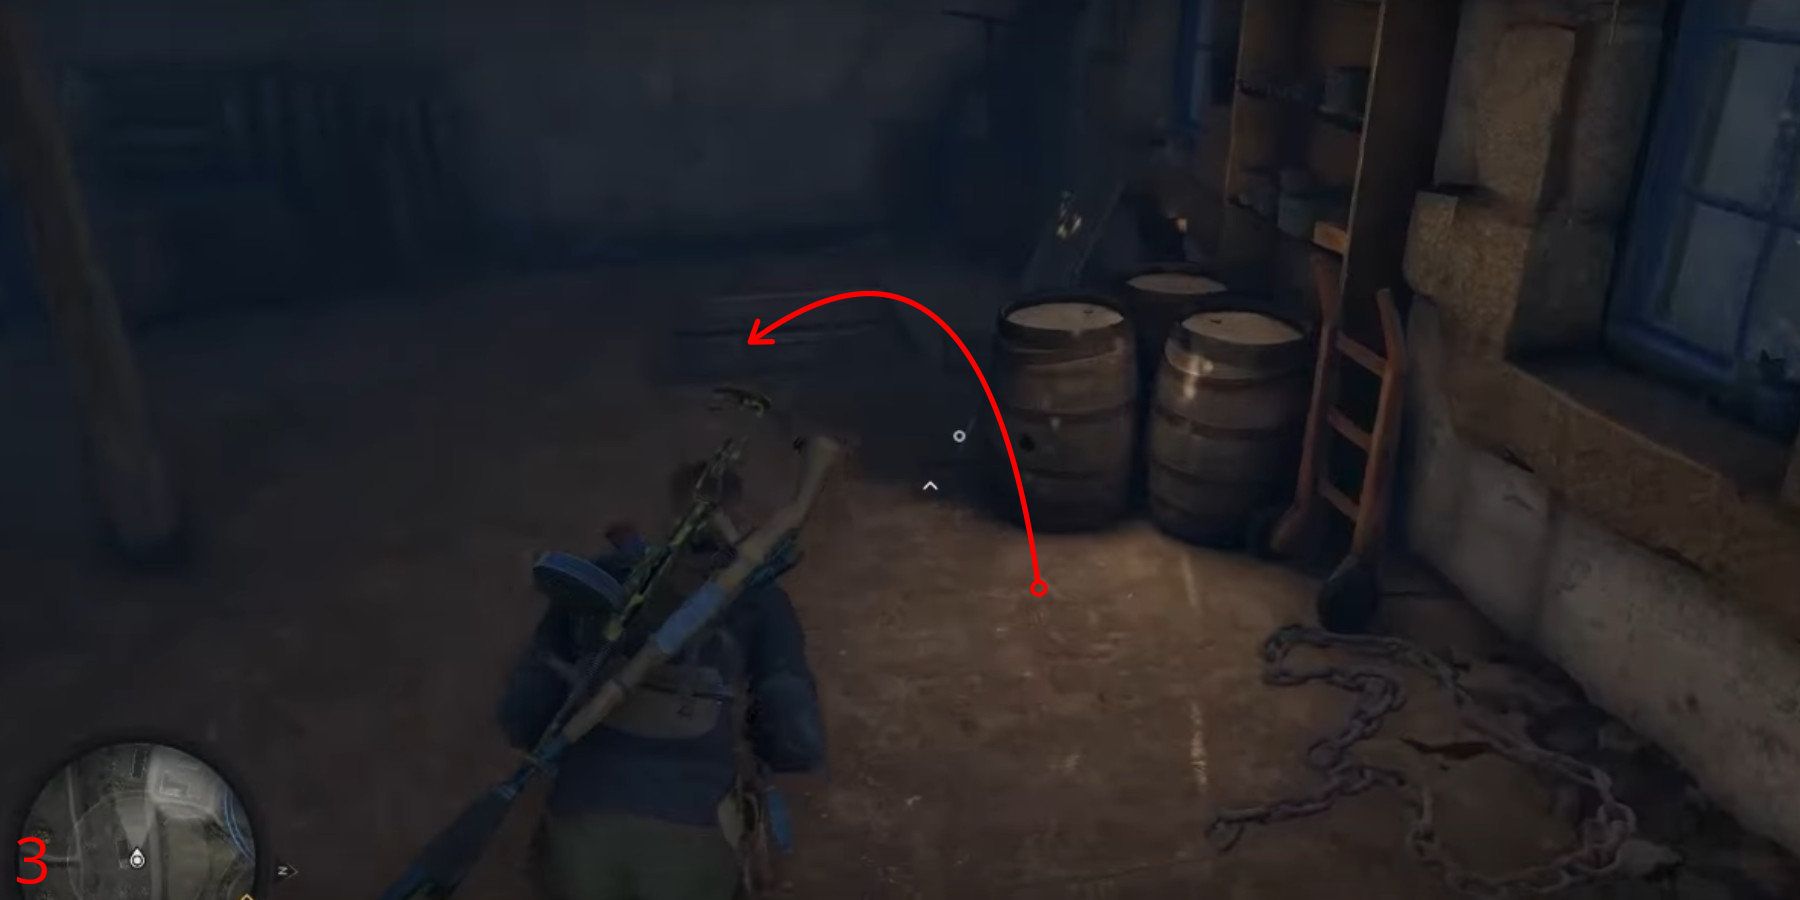
Liberation Workbench 1/3
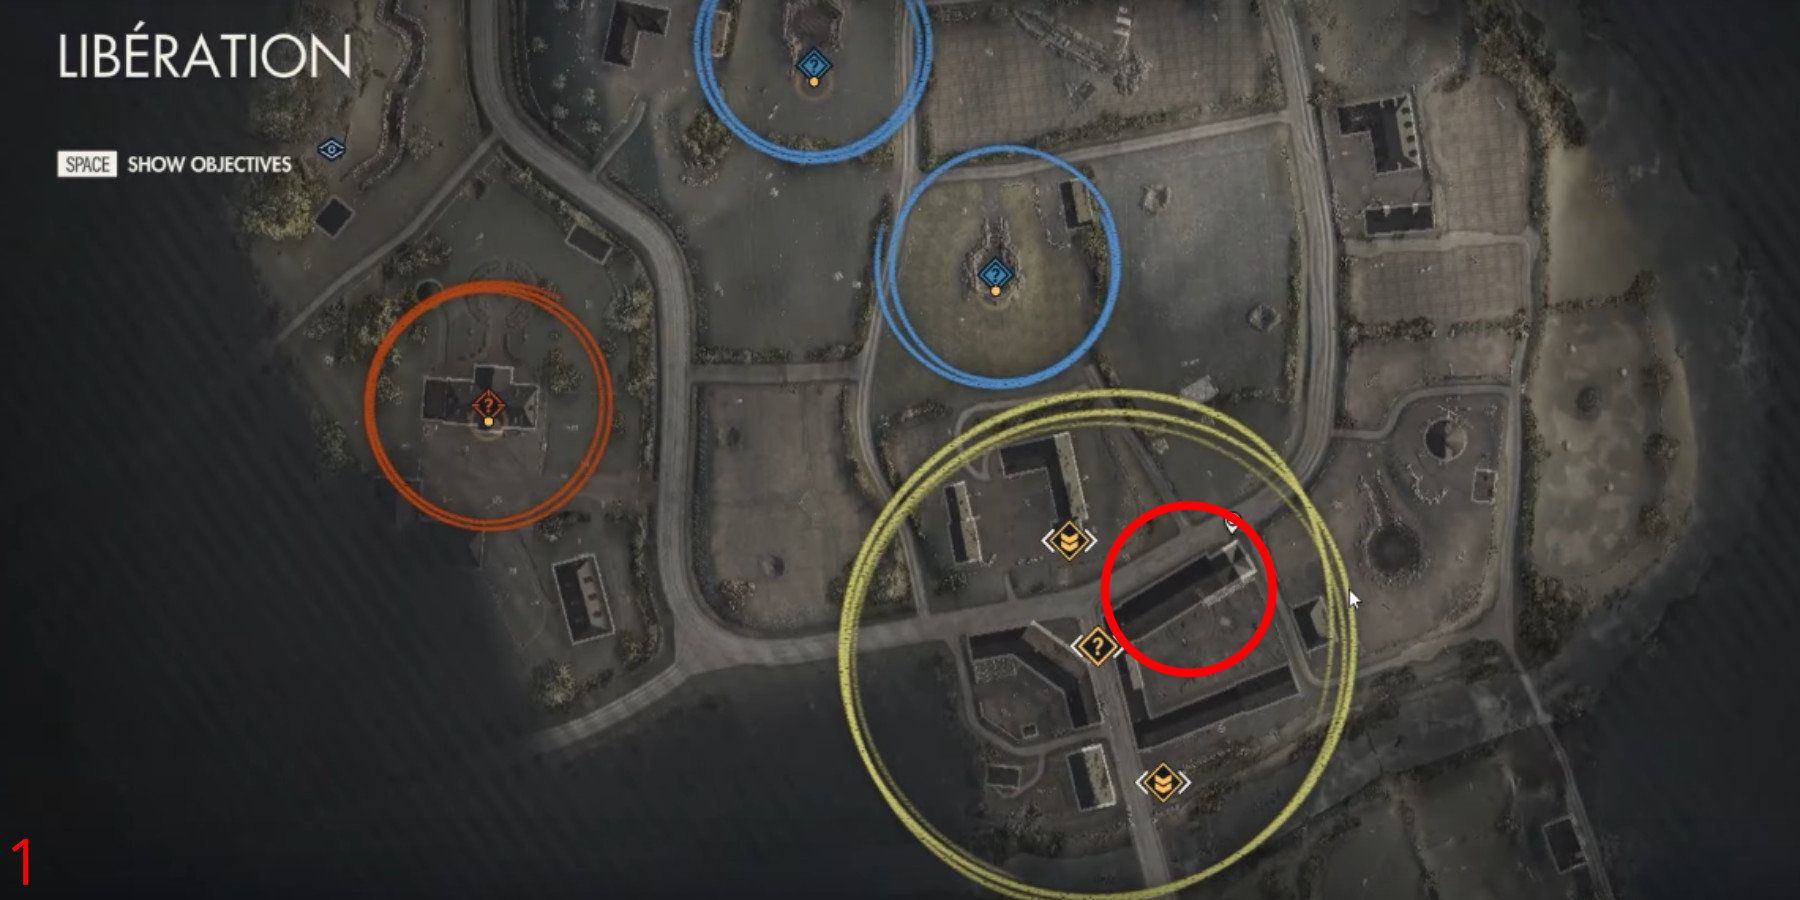
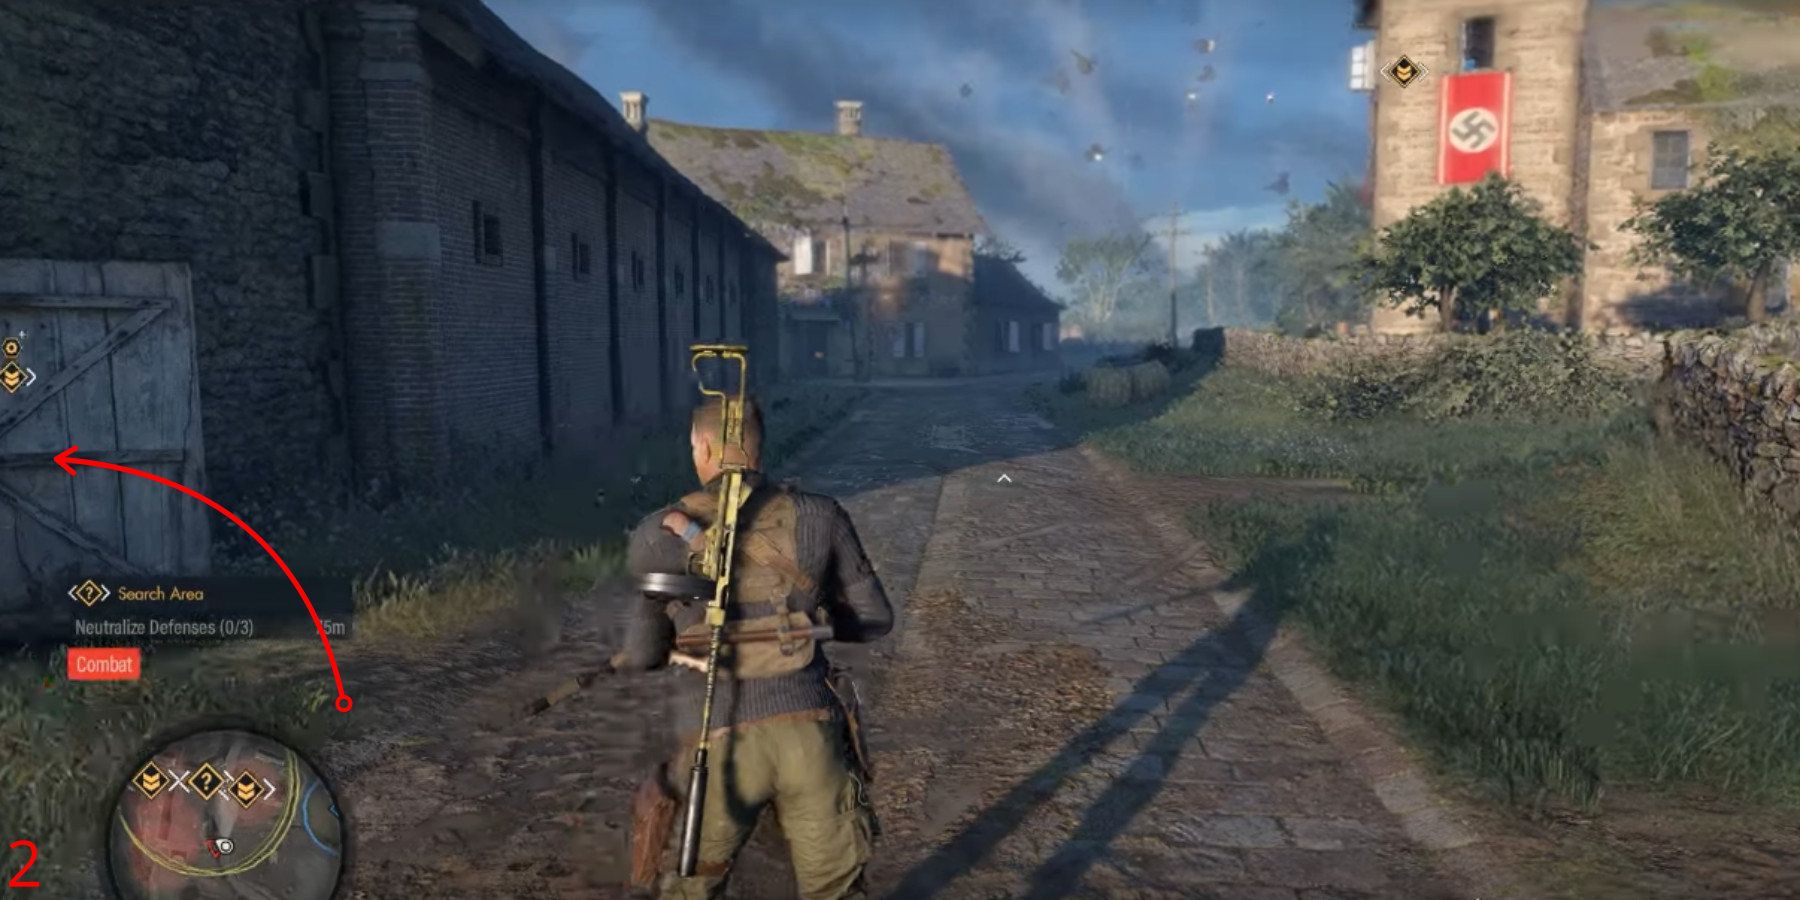
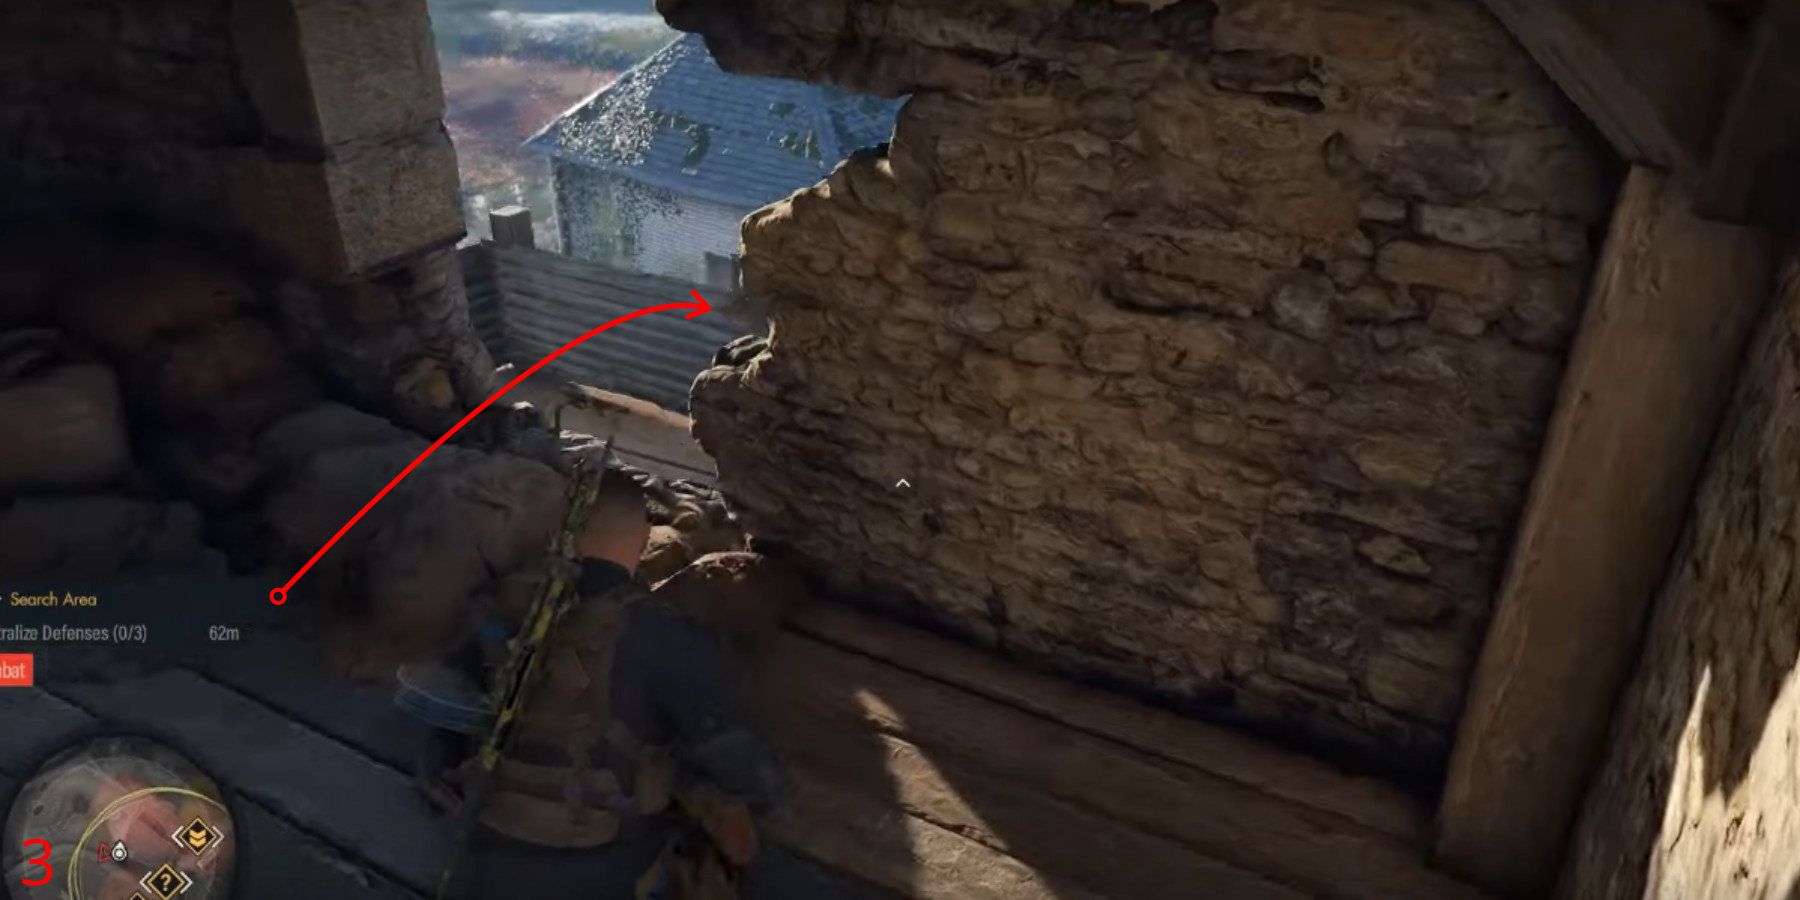
In Sniper Elite 5, players can discover the initial Workbench close by the barns positioned southward on the map. To access it, gamers need to enter the first barn situated to the left of the road and climb some stairs. This will lead them to a wall with a gap. Players should pass through the gap and follow the scaffolding until they come across another hole where they’ll uncover the Pistol Workbench.
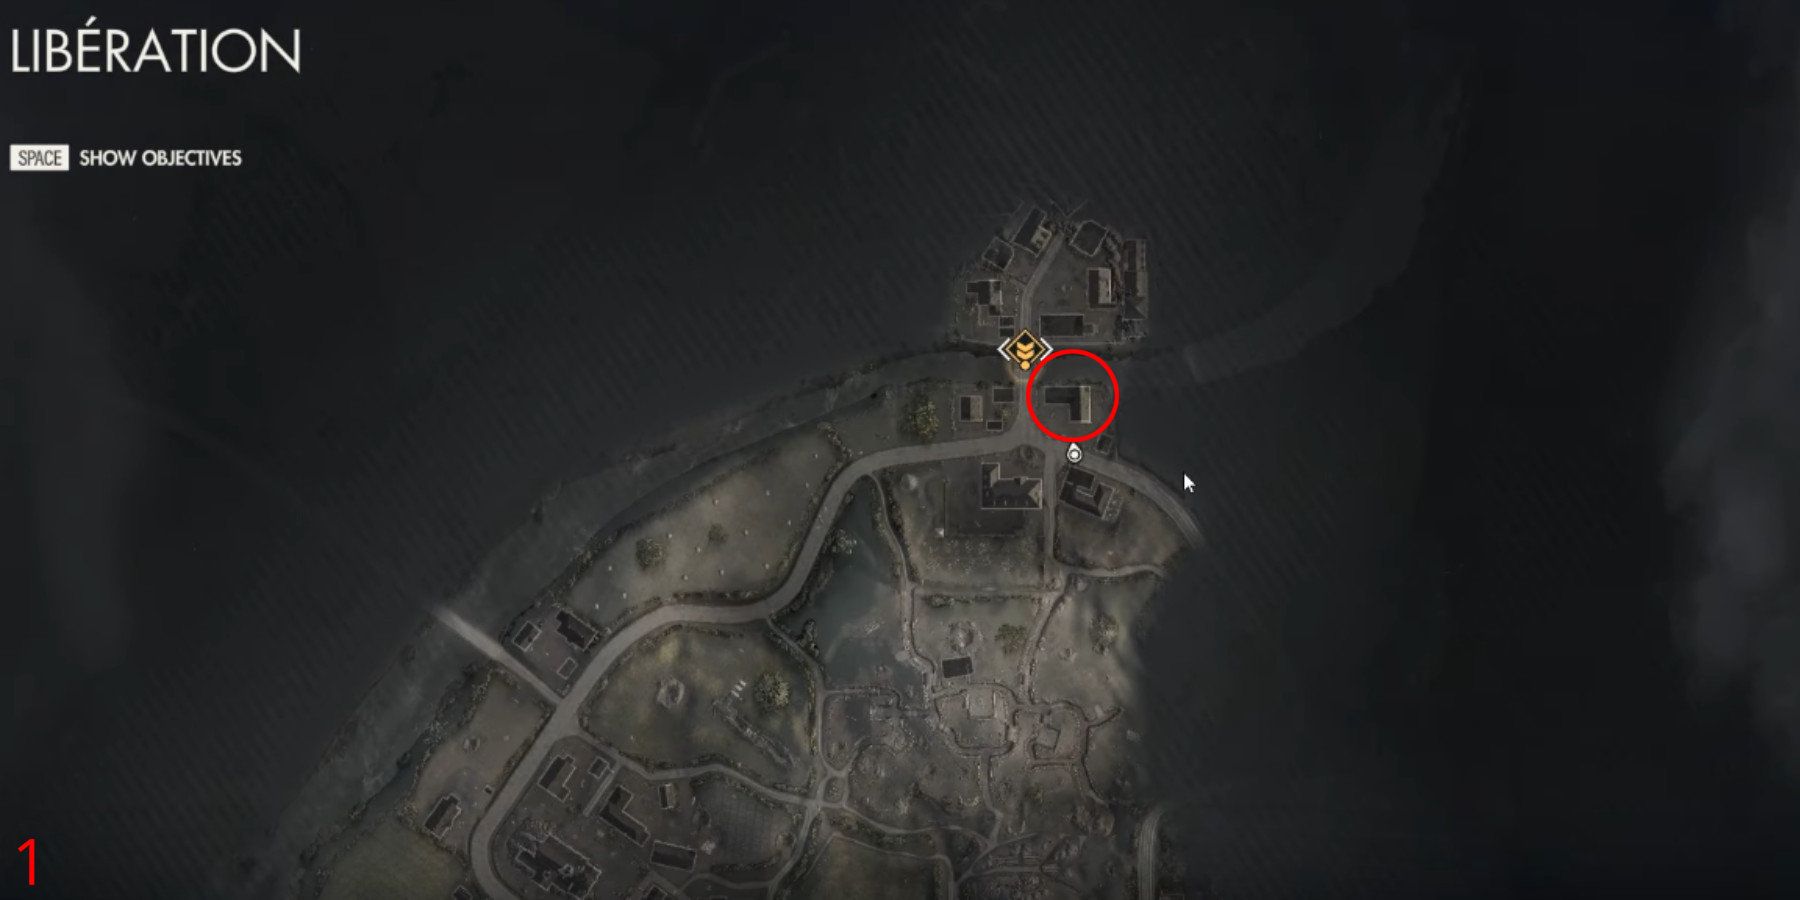
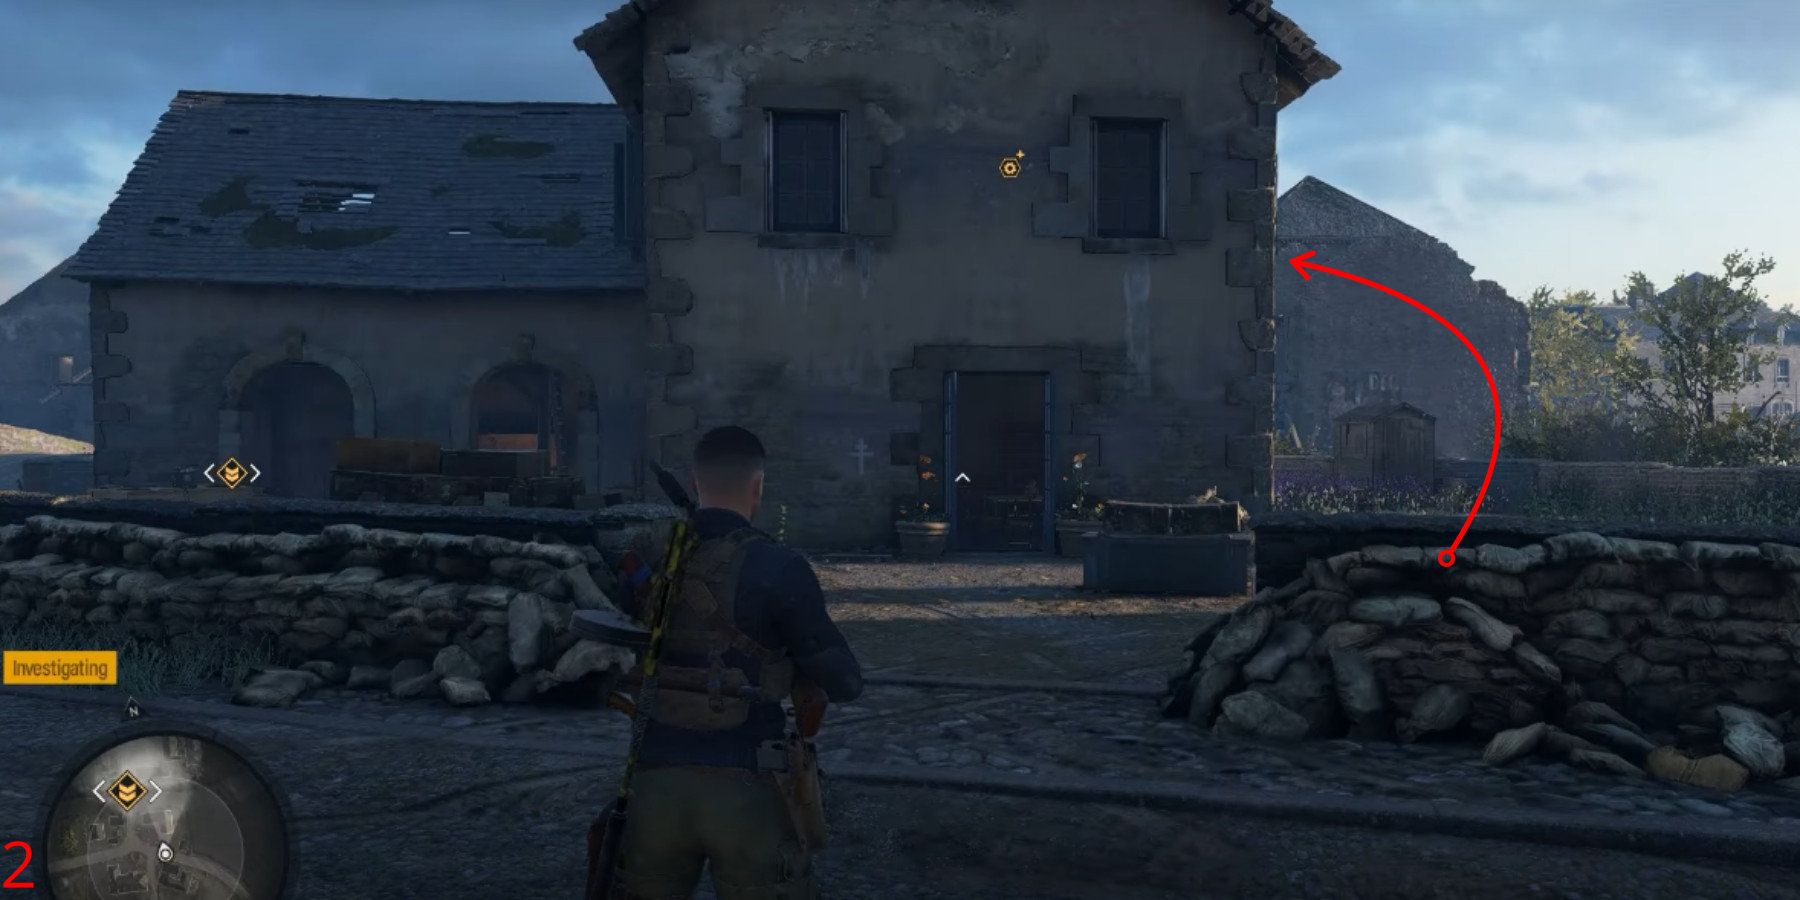
Liberation Workbench 2/3
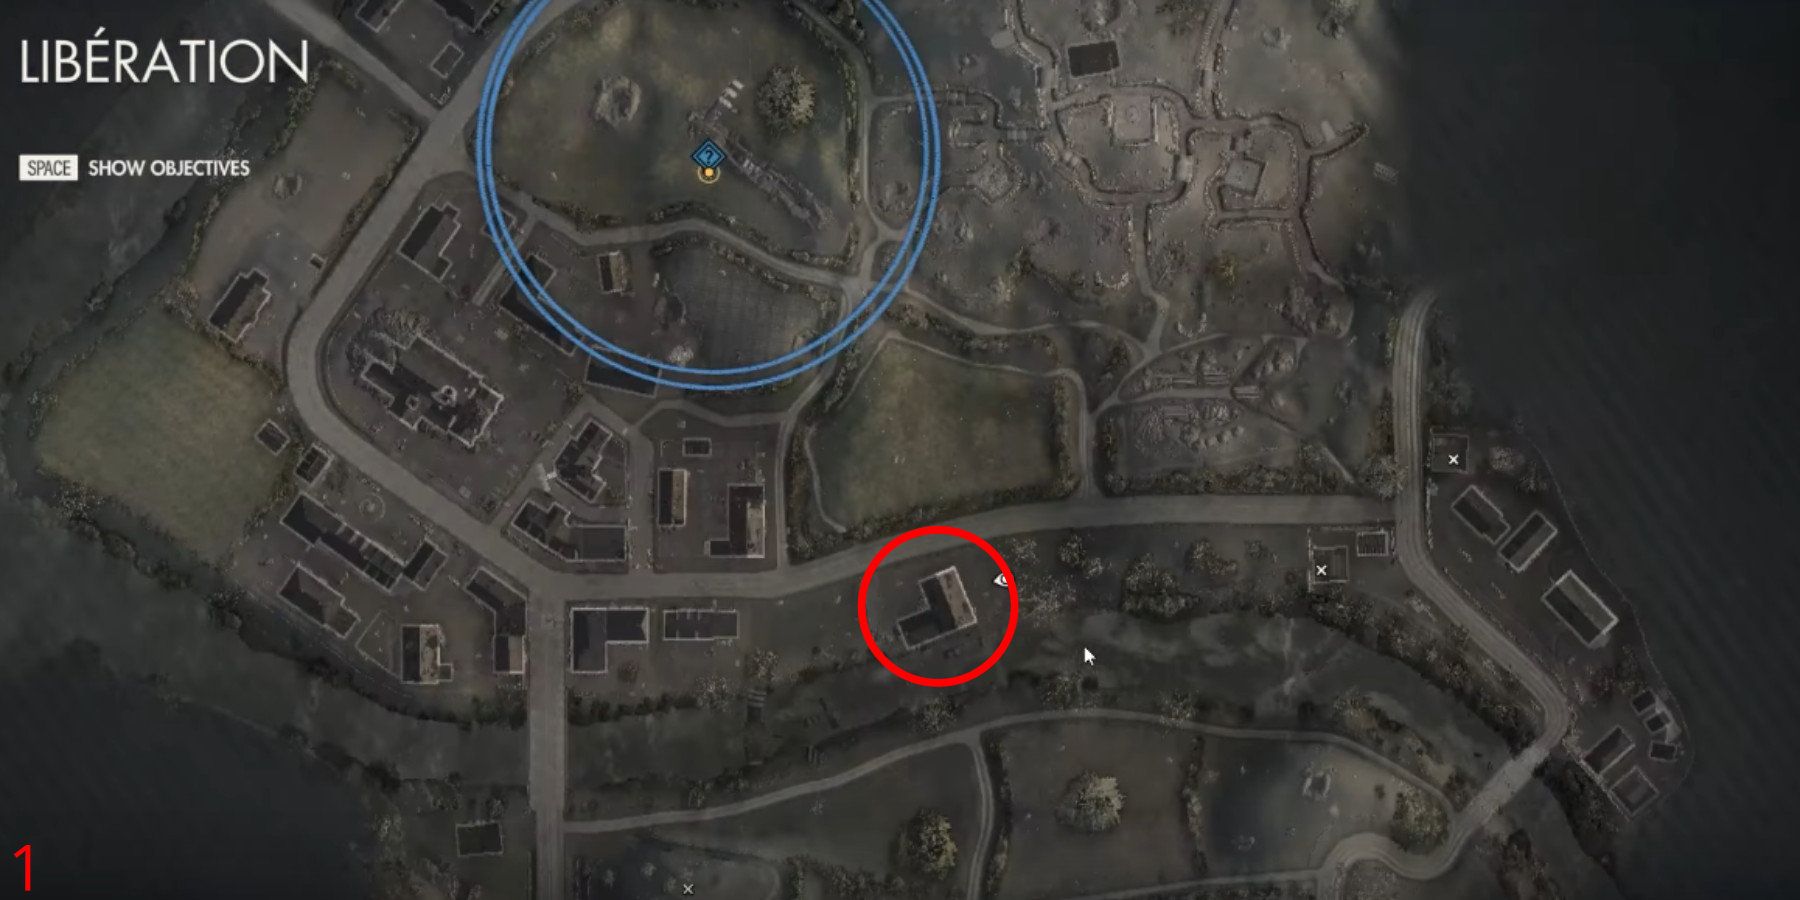
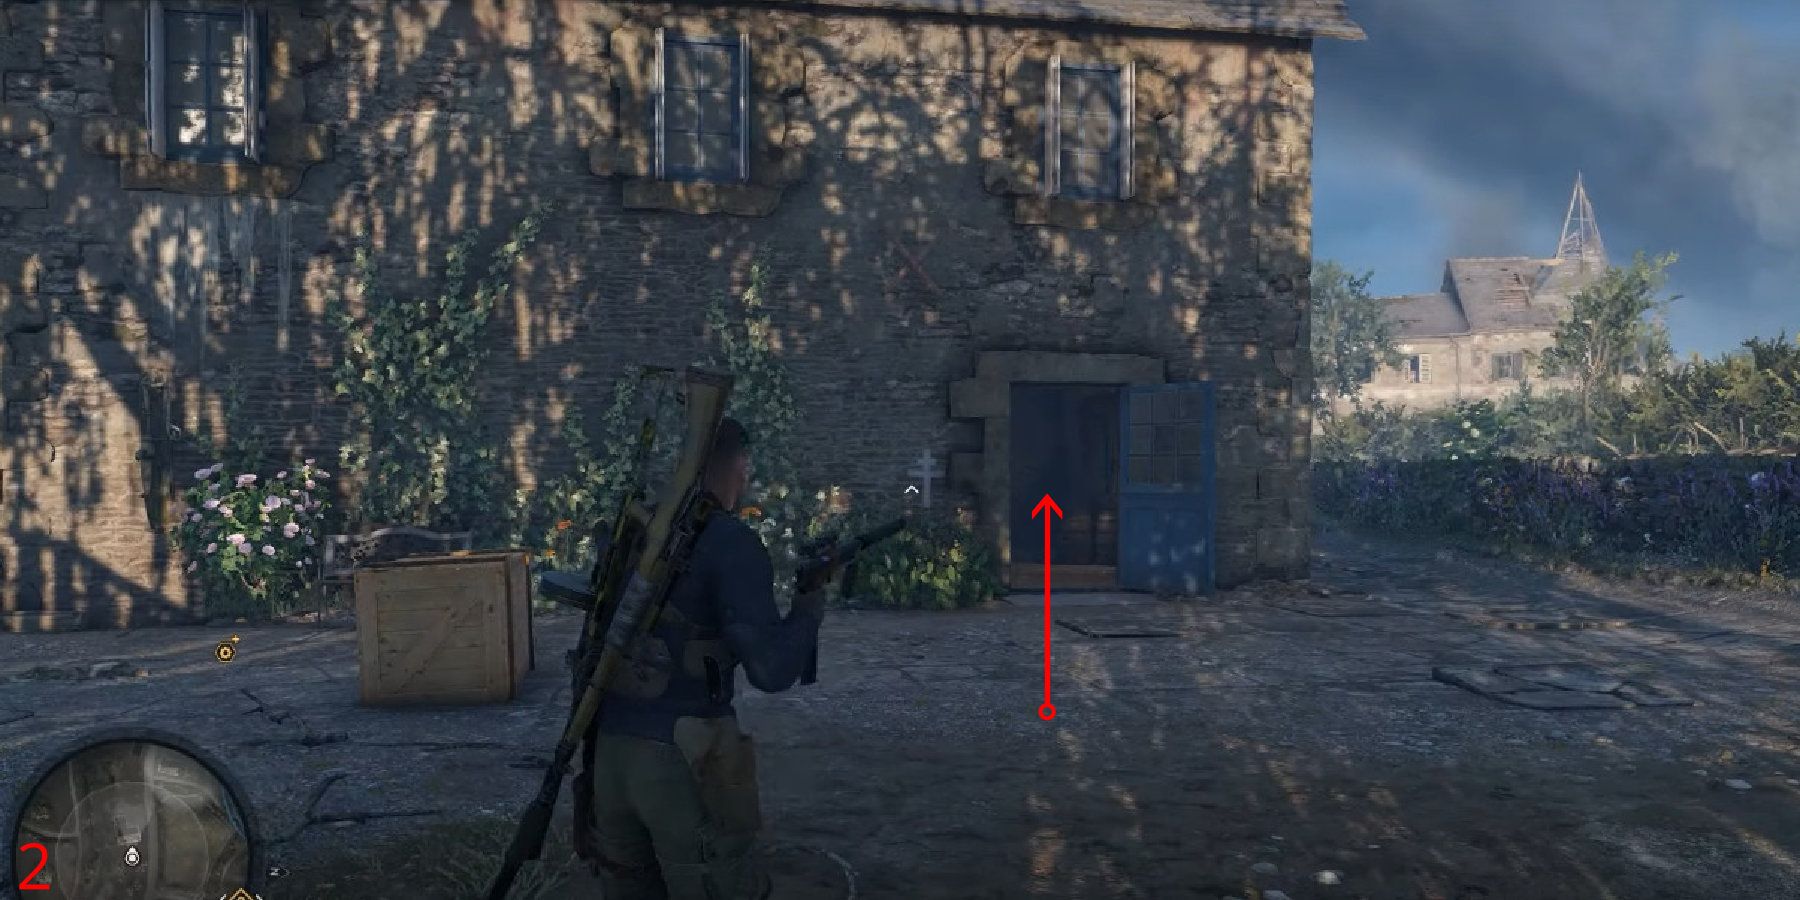
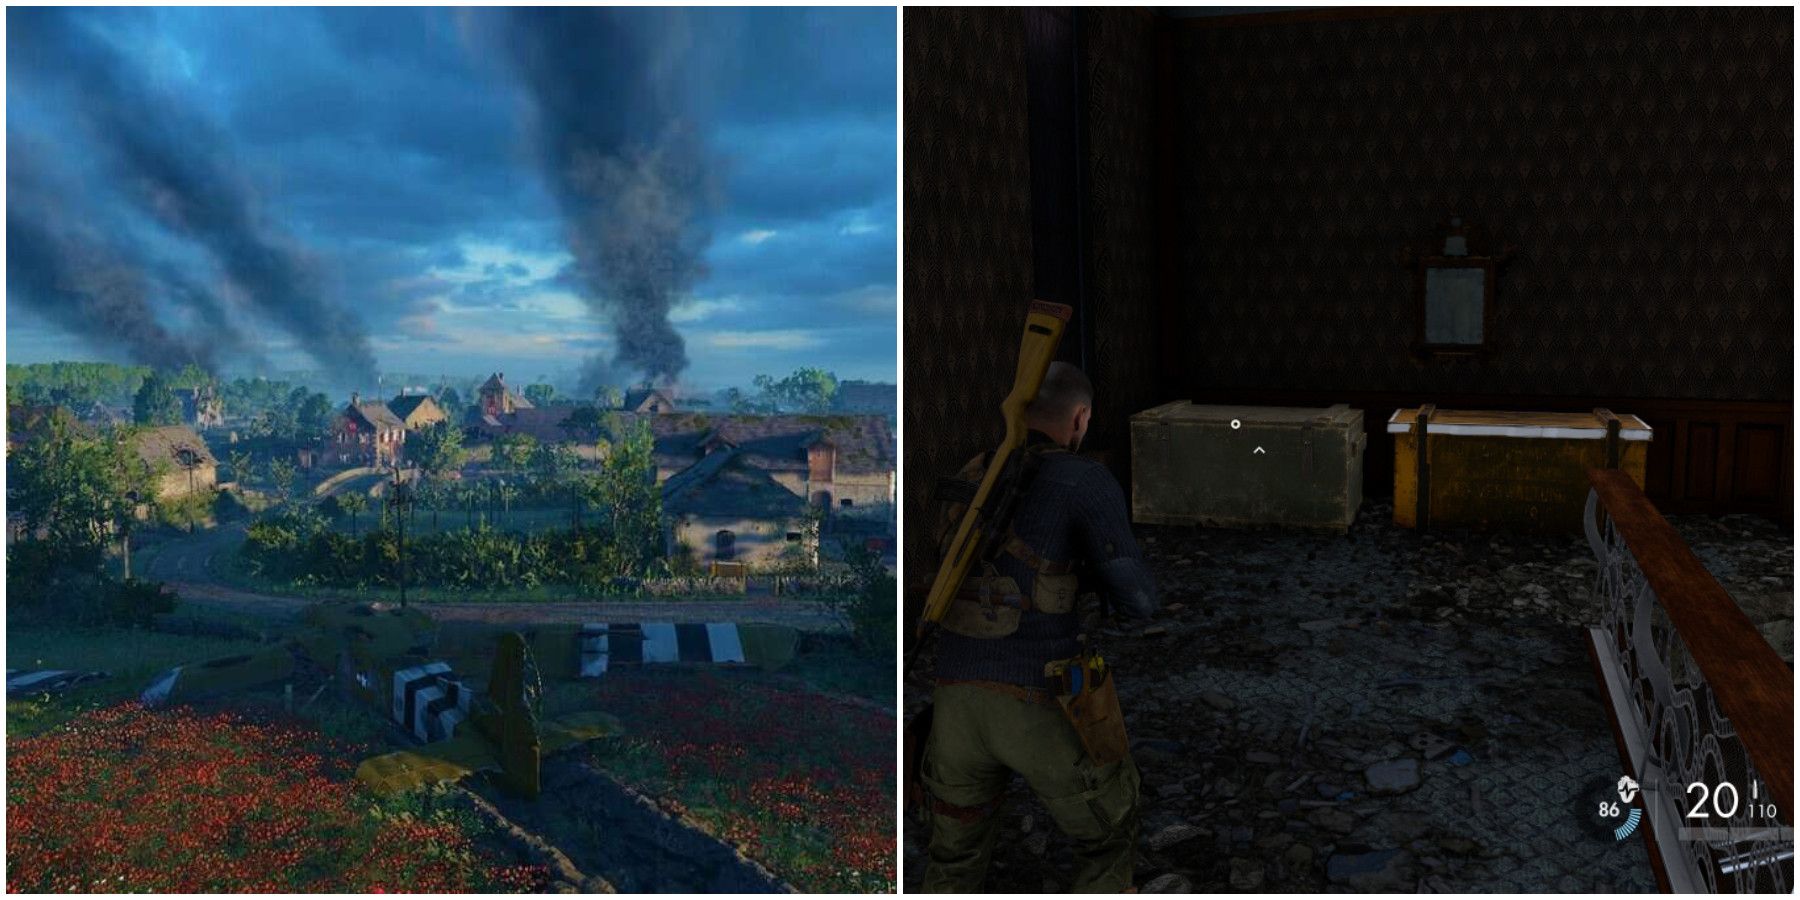
Inside a spacious home, nestled between town limits and barns, you’ll find the second workbench. To access it, players should carefully navigate their way inside (avoiding the mistake of forcing entry which might alarm adversaries). Once inside, they will need to clear some accumulated rubble concealing a hole in the floor. Descending into this hidden chamber uncovers a Resistance SMG Workbench.
Or more concisely:
The second workbench is found within a large house positioned between town and barns. Players should enter stealthily (avoiding breaking in, as it might alert enemies) to discover debris concealing a hole in the floor. Clearing away this obstruction reveals a Resistance SMG Workbench beneath.
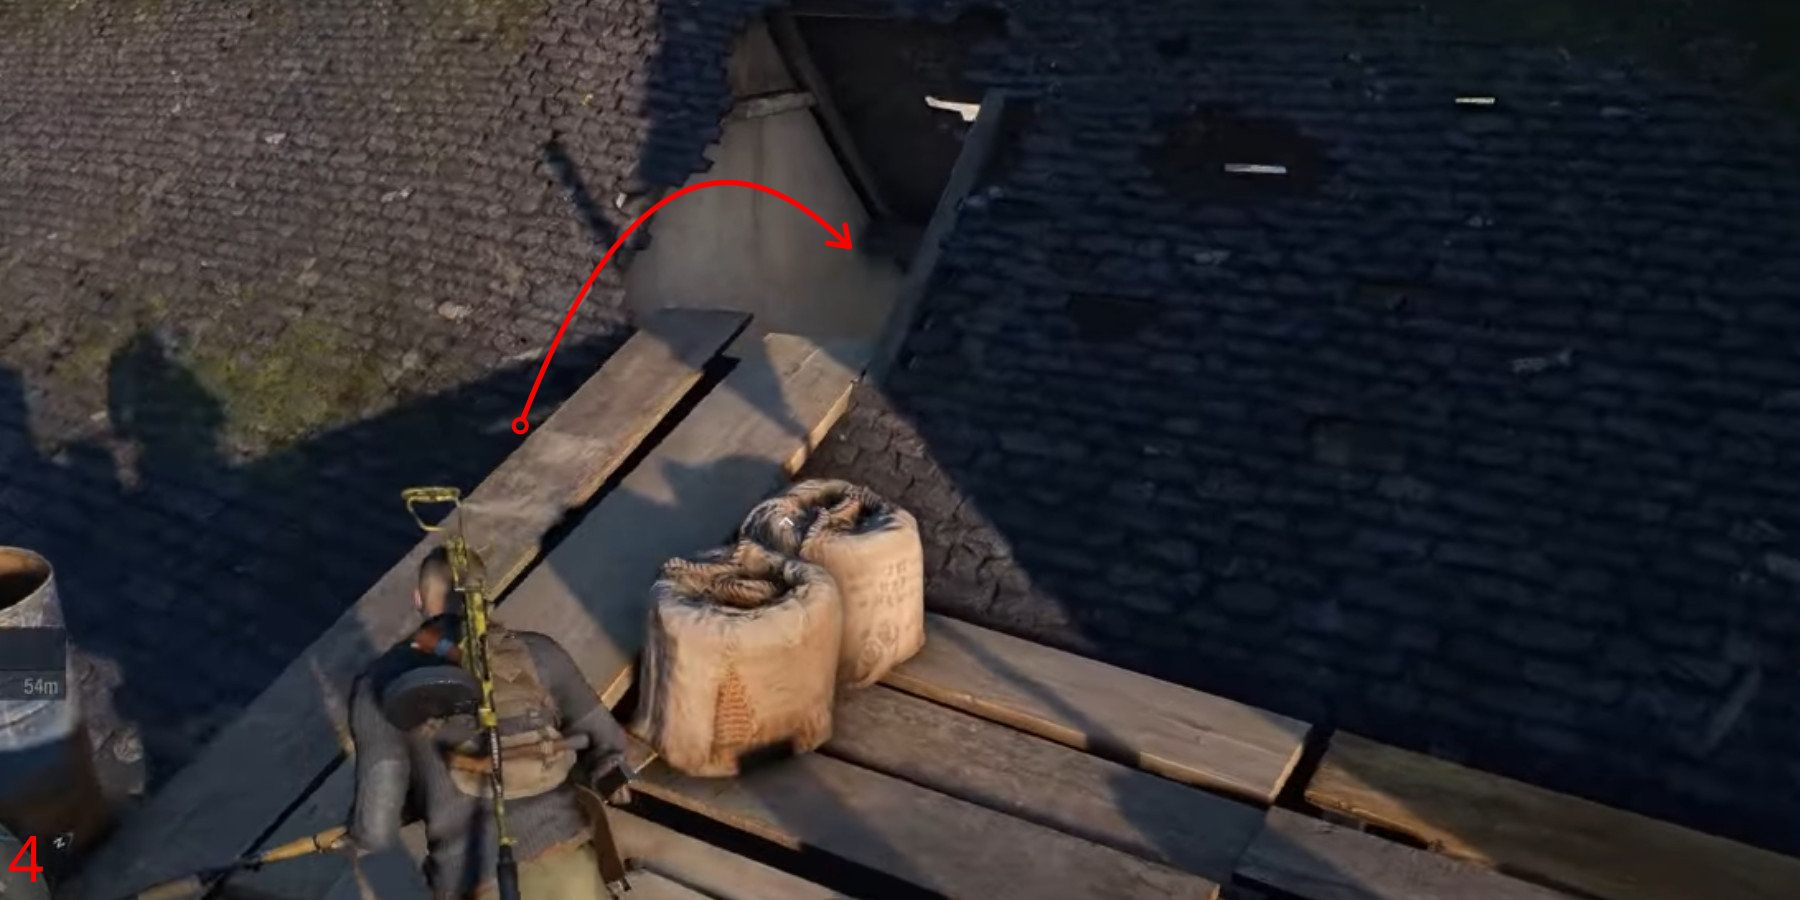
Liberation Workbench 3/3
Before you cross the northern bridge, you’ll find the ultimate Workbench. To obtain a Rifle Workbench, players should scale the vines located on the right side of the house.
Mission 7 – Secret Weapons
There are 3 Workbenches in Mission 7: Secret Weapons.
Secret Weapons Workbench 1/3
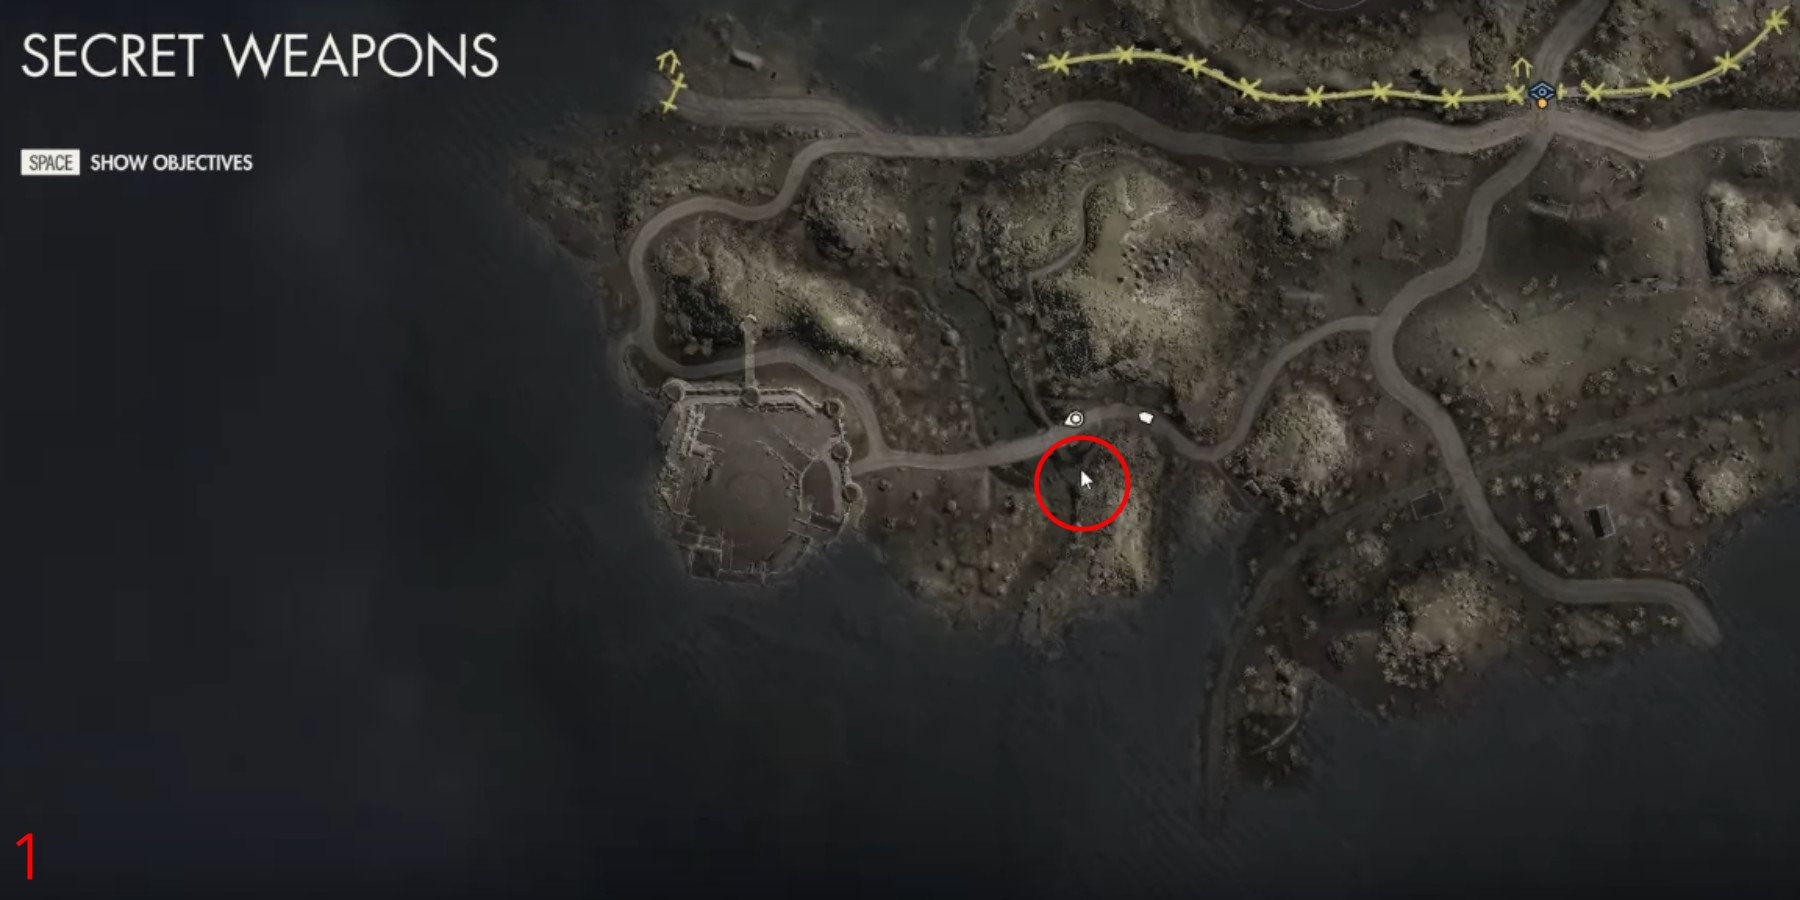
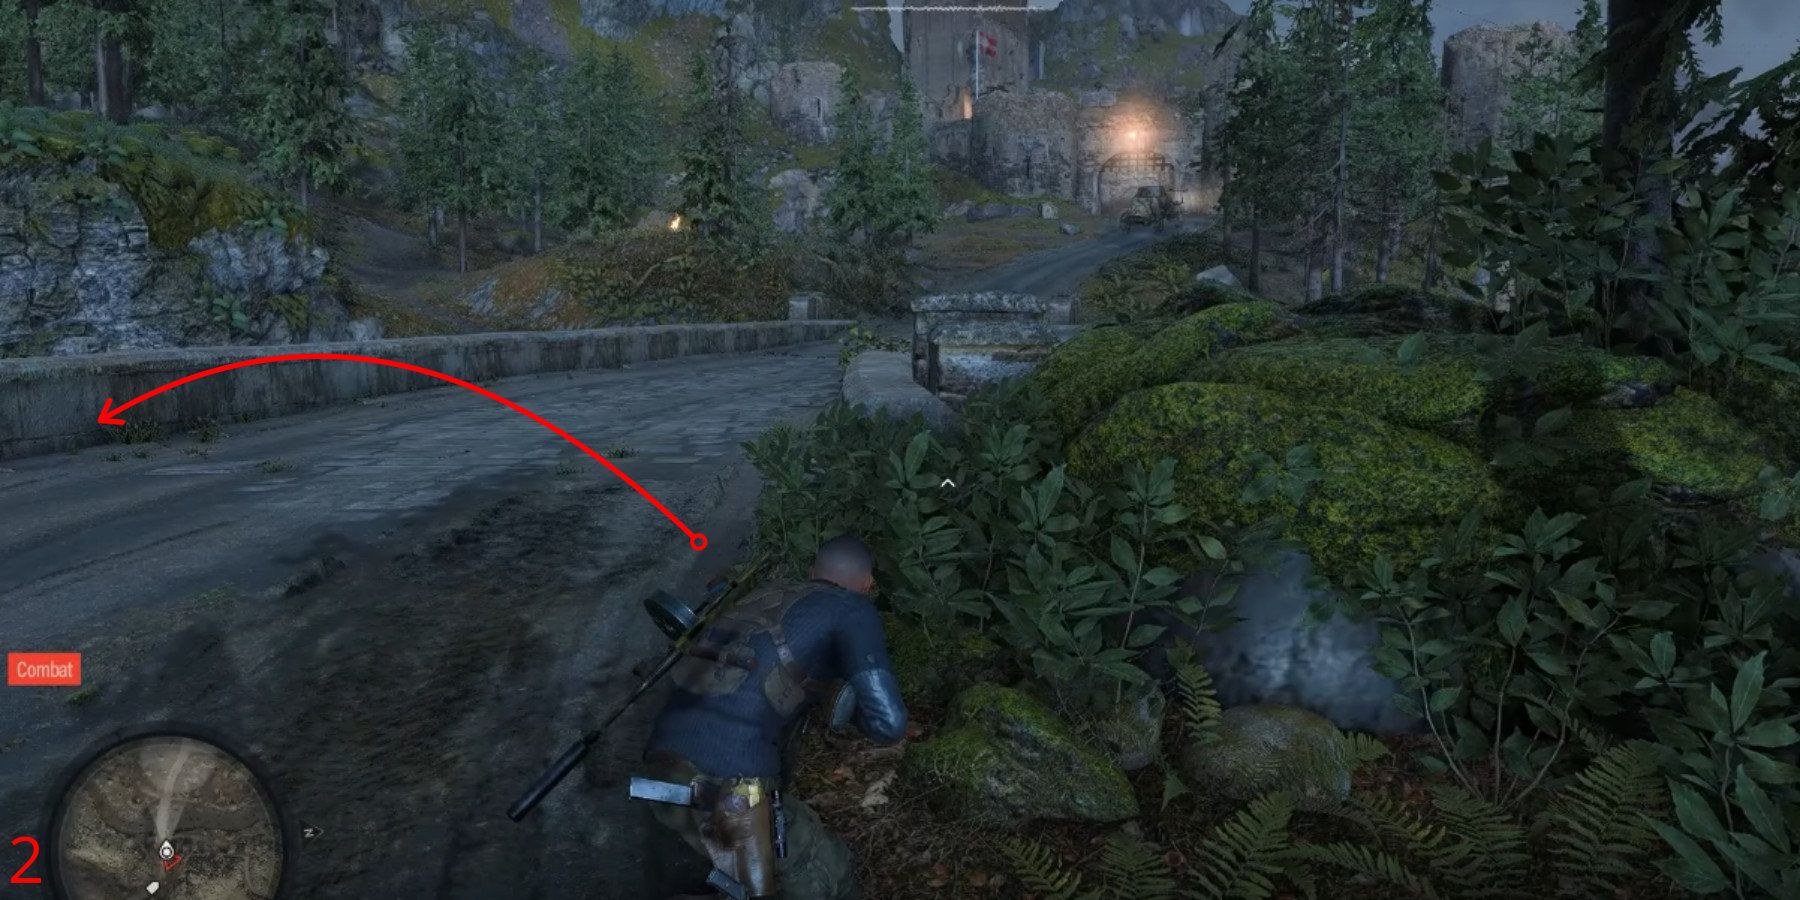
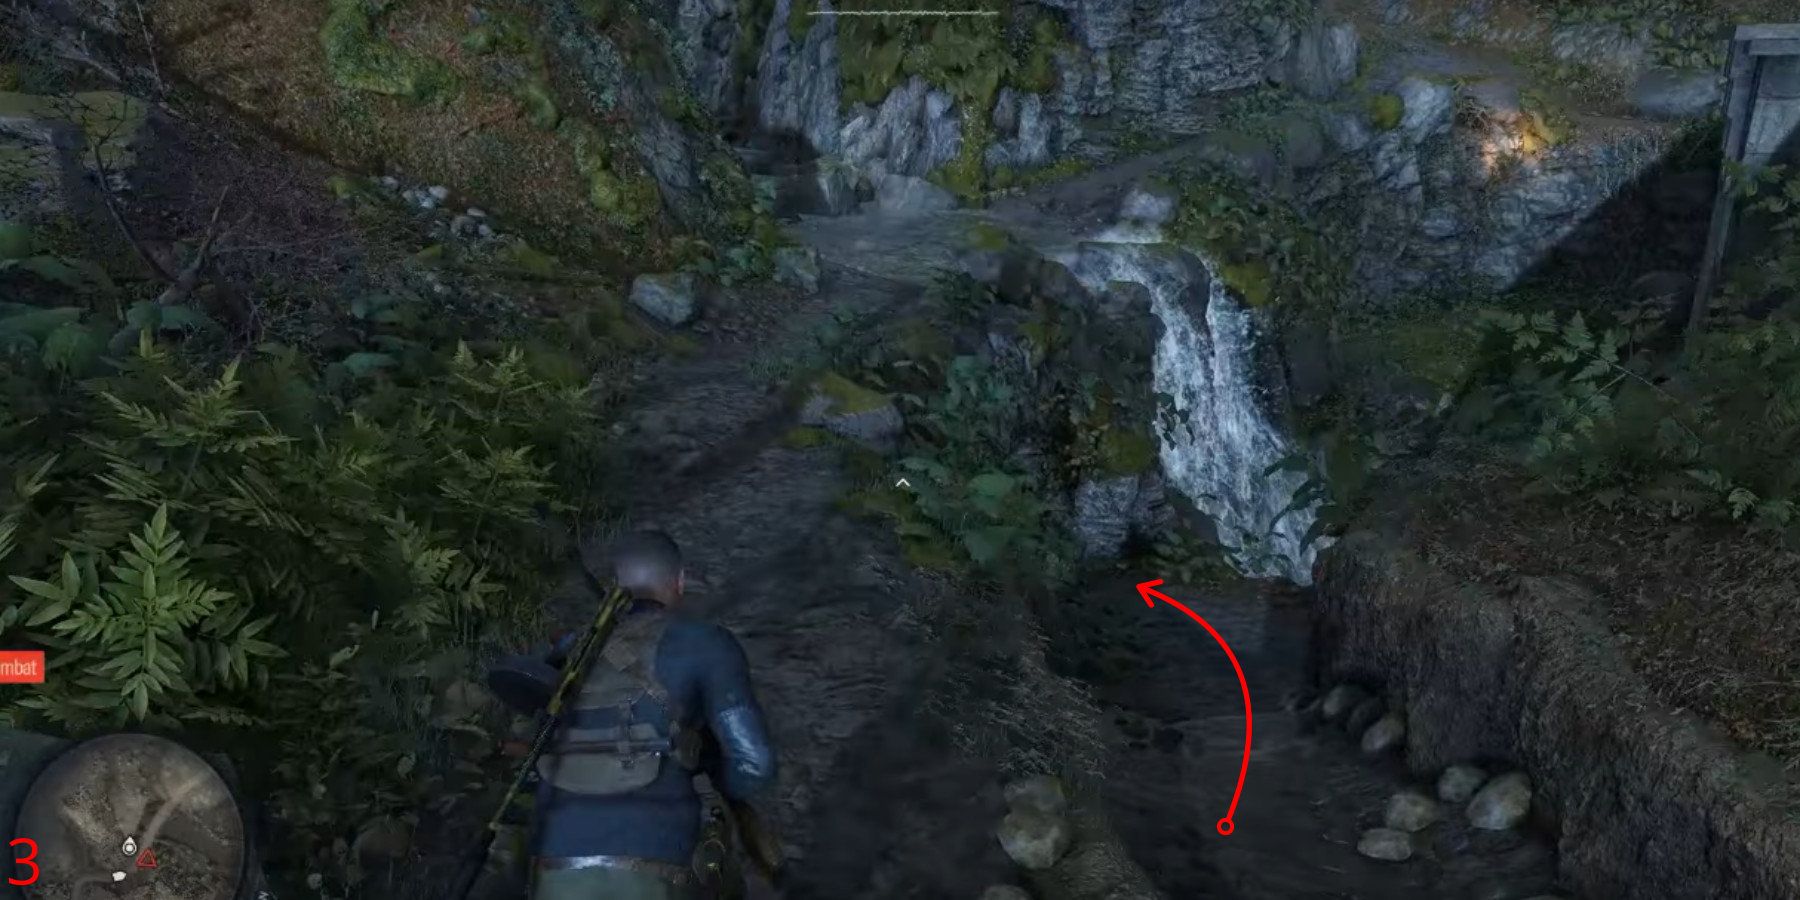
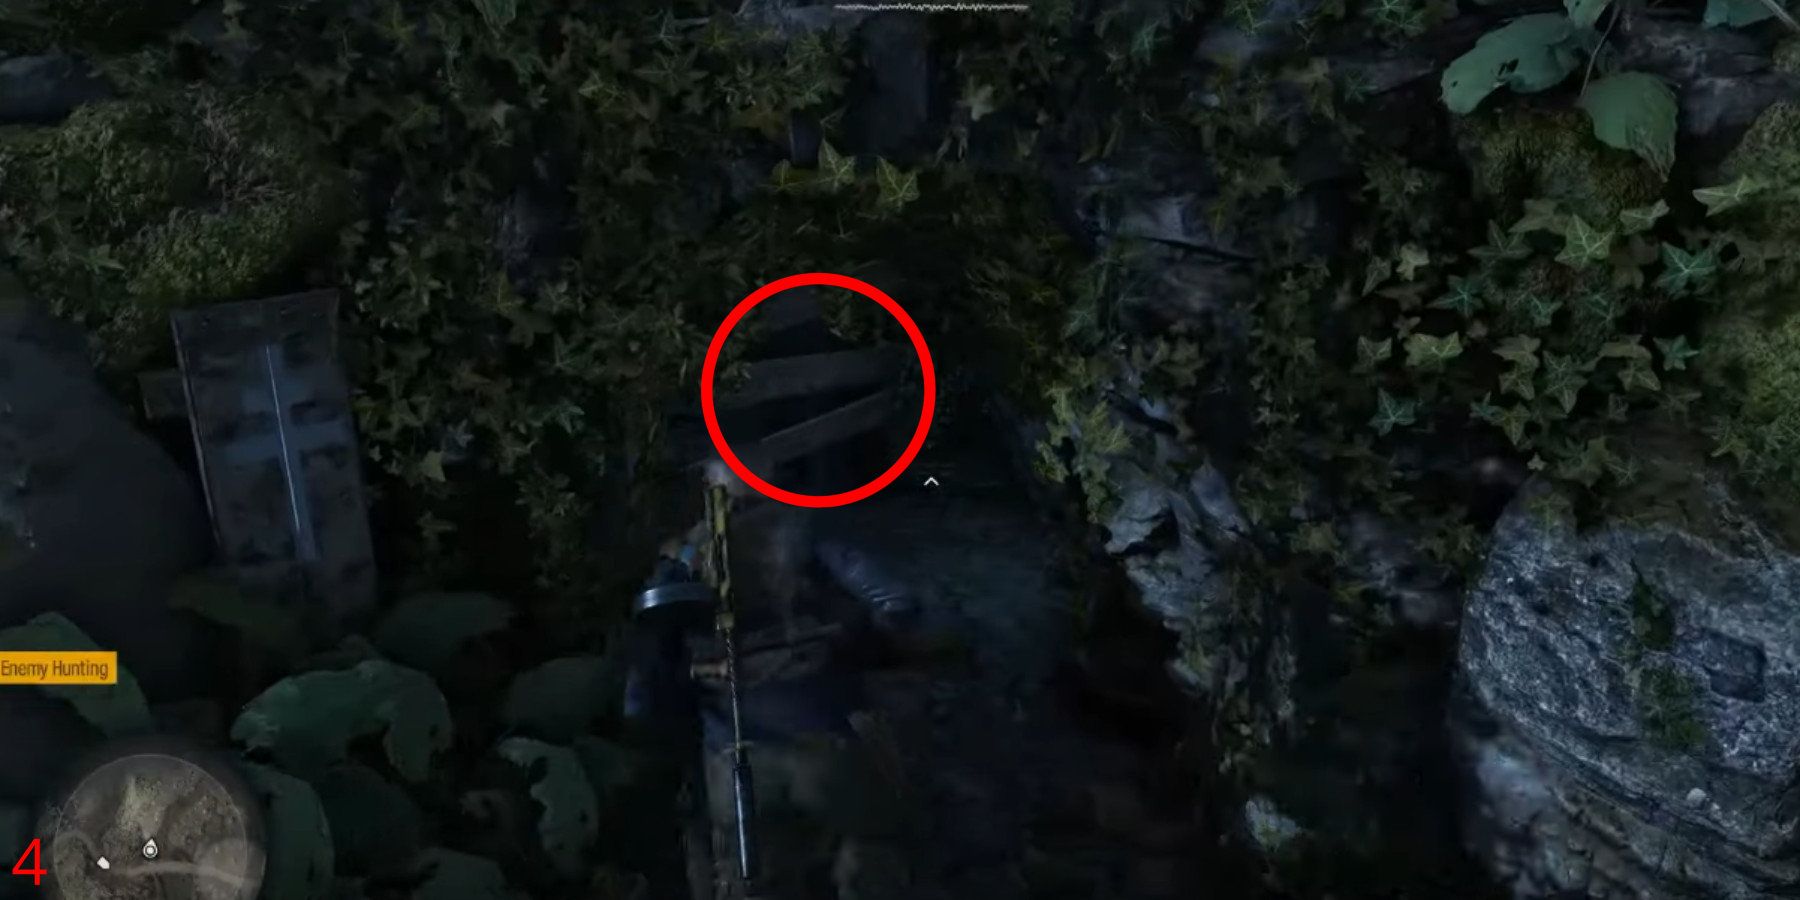
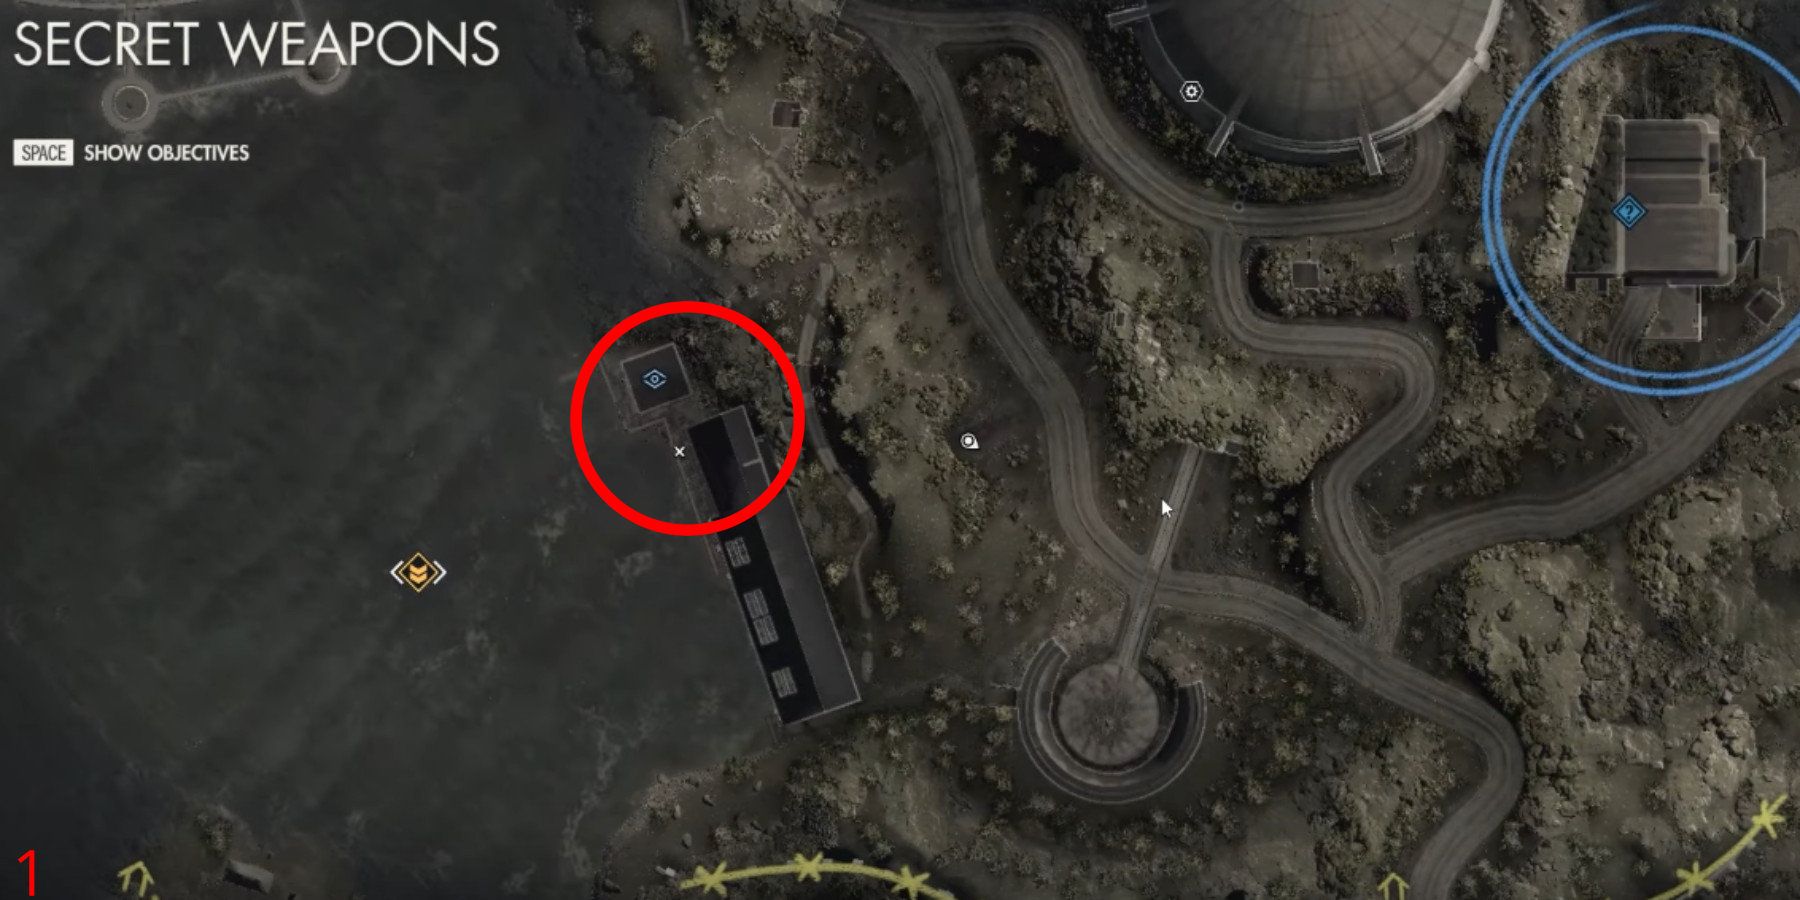
You can discover the First Workbench (resembling a pistol) hidden within a cave situated southwest from the map’s outline. To locate it, players should veer left past the depicted bridge, then continue towards the waterfall. Right beside the cascading waterfall, they will stumble upon a cave, and within that cave lies the Workbench.
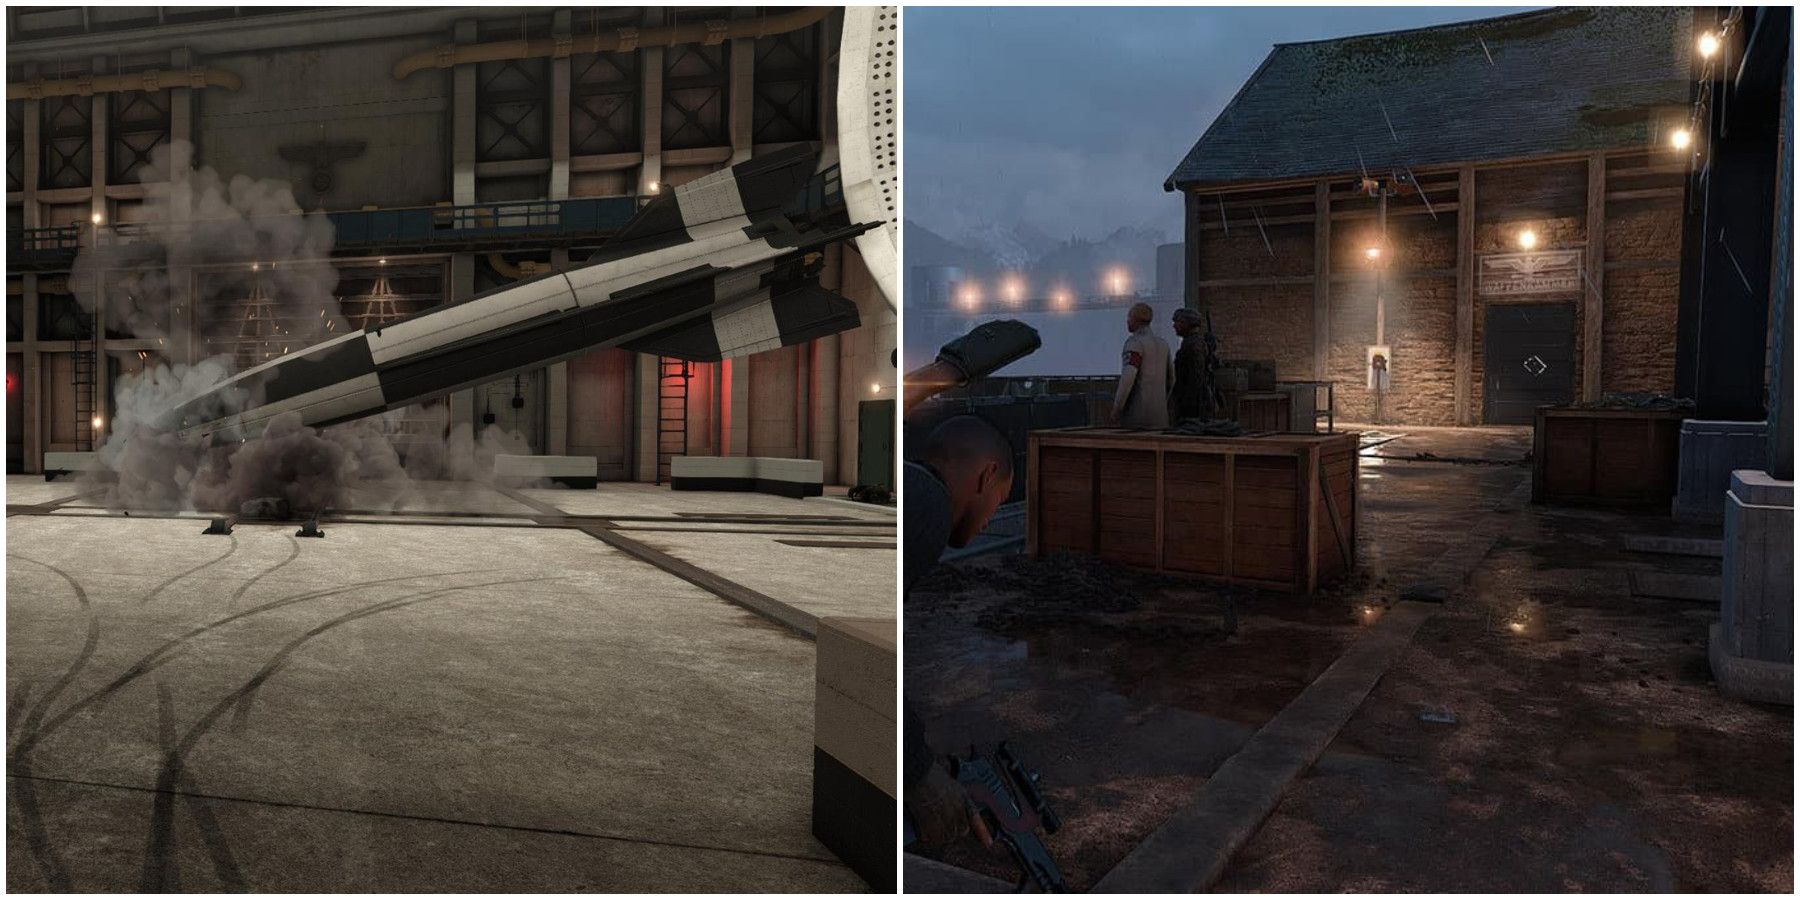
Secret Weapons Workbench 2/3
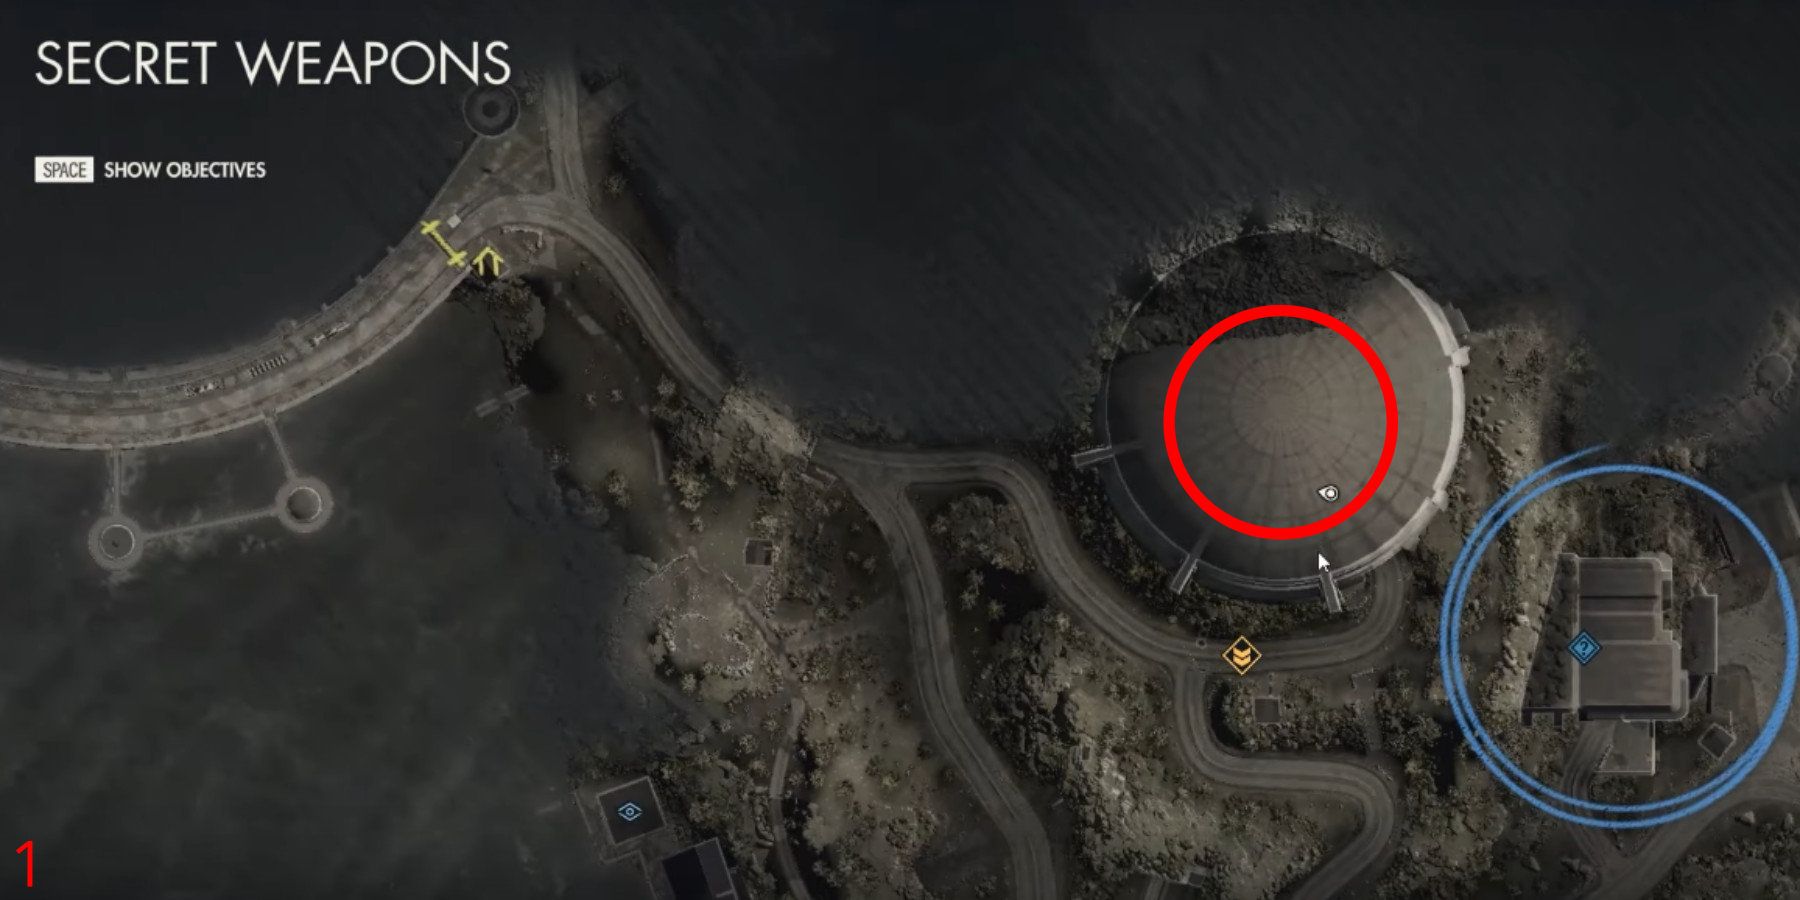

After successfully breaching the massive dome on the map’s northern edge, players will find the second workbench located within. Inside this dome, players are advised to navigate downwards where they will encounter several guards and an Armory. Once these guards have been subdued or defeated, players can retrieve an Armory Key from them. With the key in hand, players can then unlock and access the Armory which contains an SMG Workbench positioned inside.
Secret Weapons Workbench 3/3
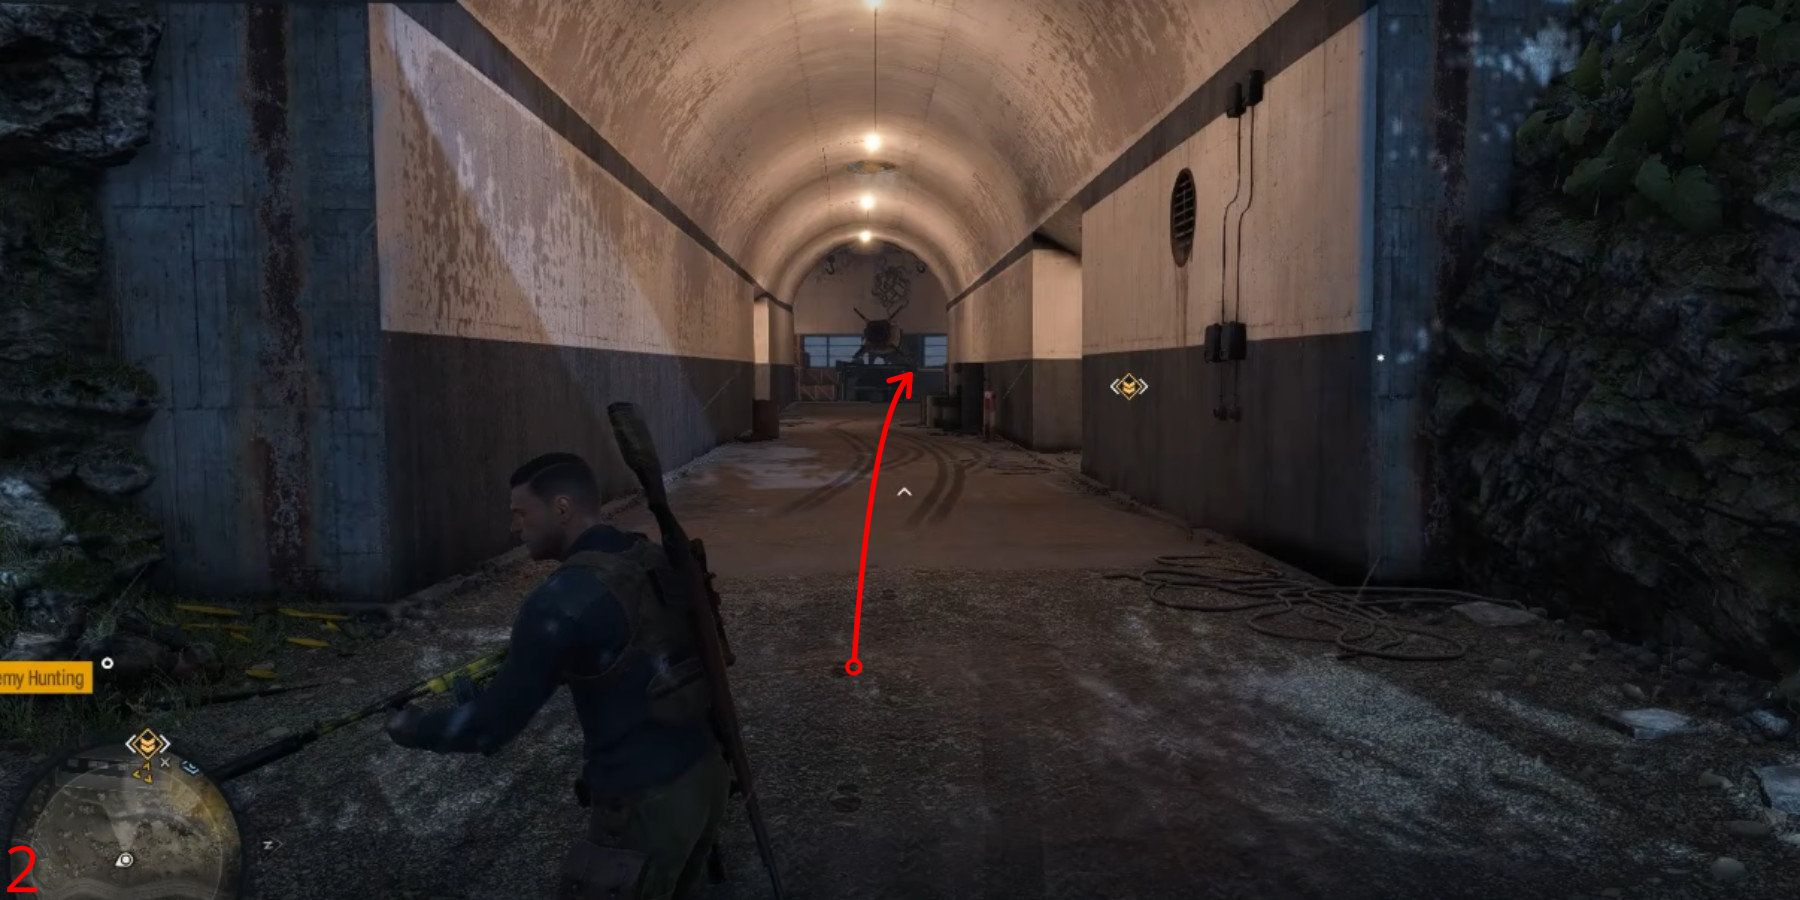
In Mission 7, you’ll find the last Workstation tucked away close to where the players delved into the Lake Compound. Your objective is to proceed inside and at the end of the hallway, take a right turn. To gain access to the Armory housing the Rifle Workbench, you’ll either need to locate an Armory Key or utilize a Satchel.
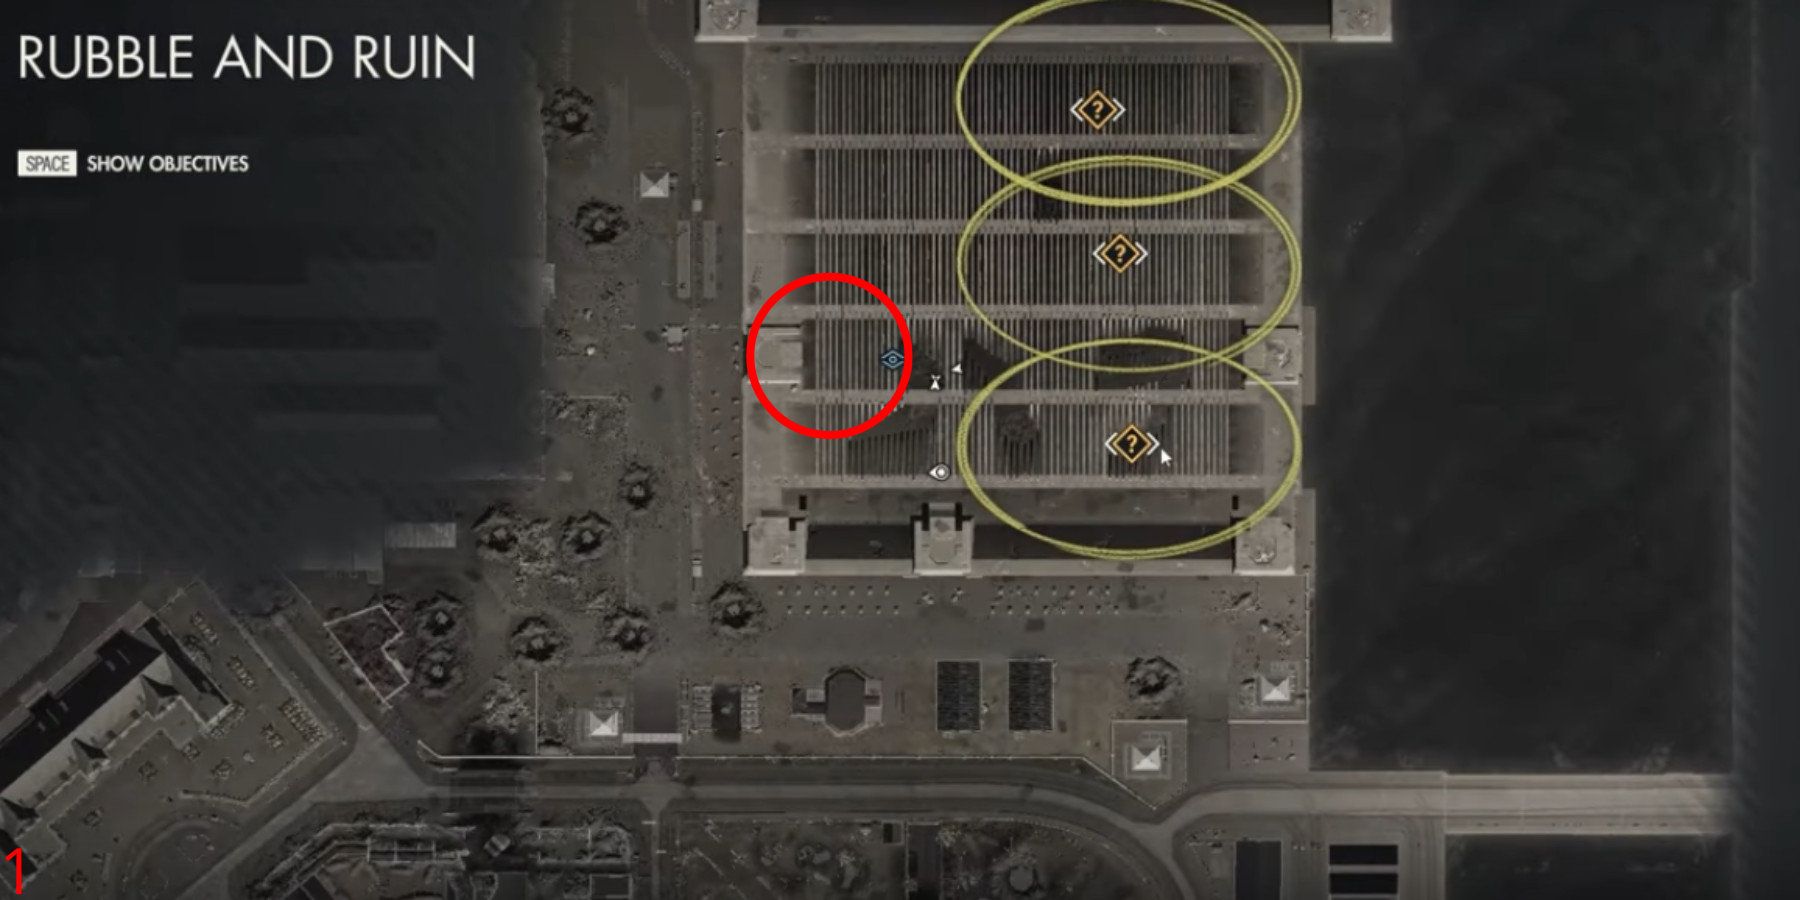
Mission 8 – Rubble and Ruin
There are 3 Workbenches in Mission 8: Rubble and Ruin.
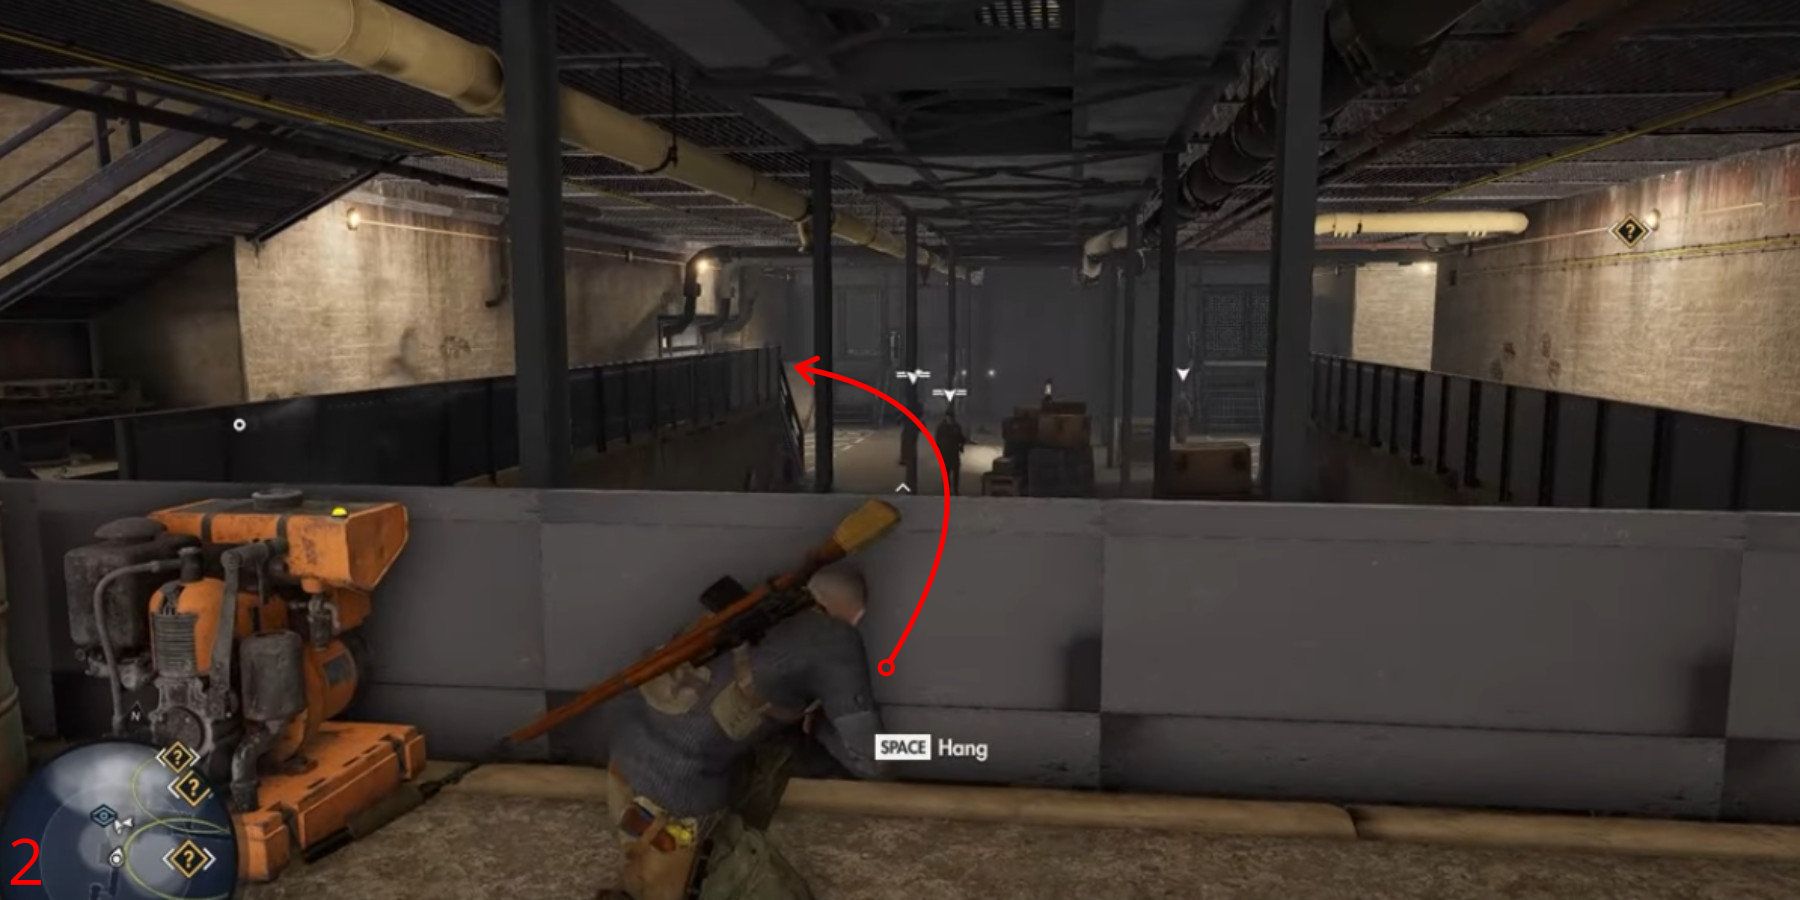
Rubble and Ruin Workbench 1/3

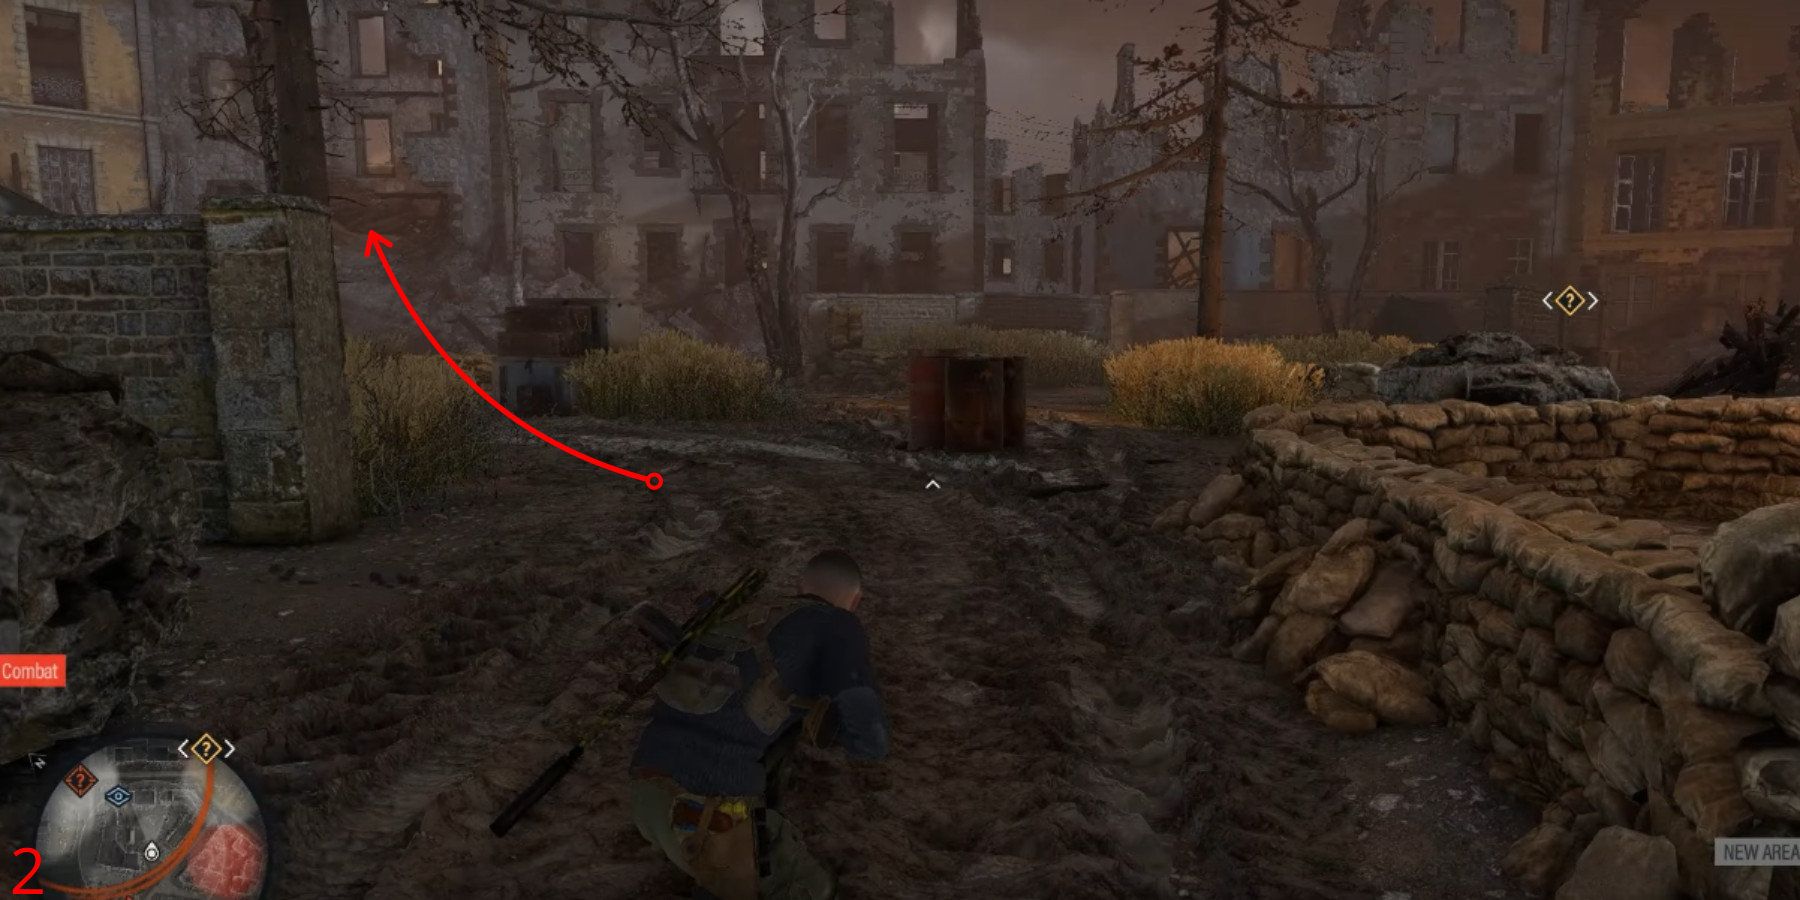

In the initial zone of Mission 8 (the briefest mission in Sniper Elite 5), you’ll discover the first workbench. To get there, make your way up a slope that opens into a damaged house. Within this house, you’ll come across a climbable area which will lead you to an SMG Workbench.
Rubble and Ruin Workbench 2/3
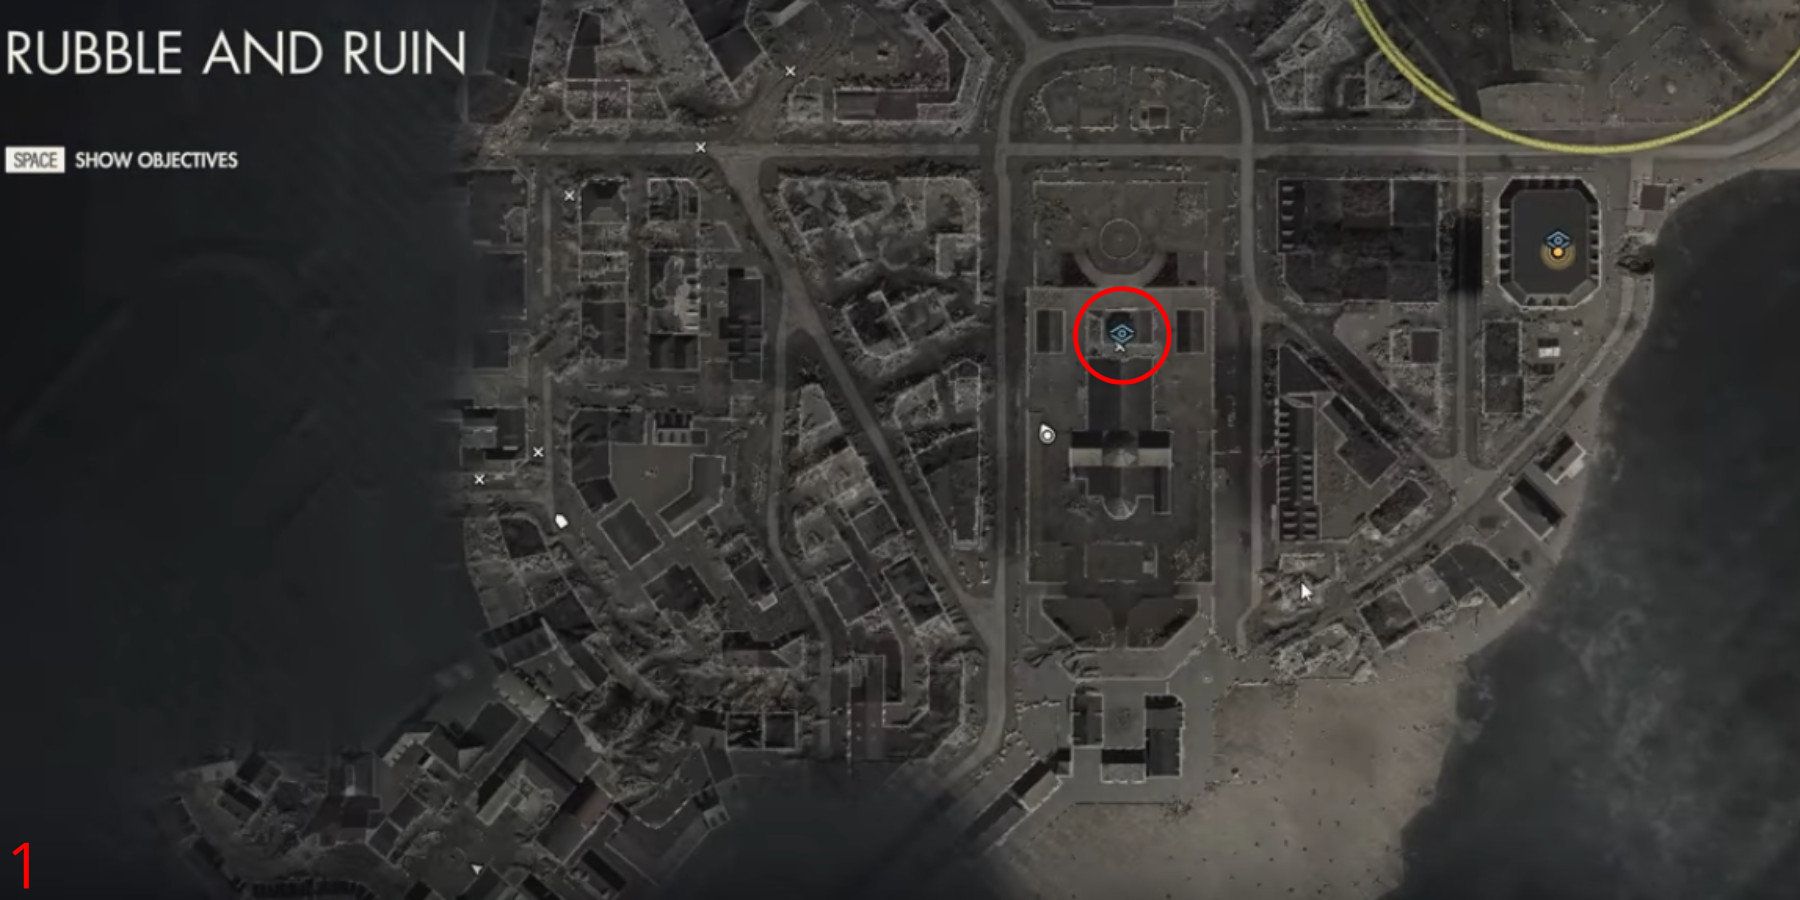
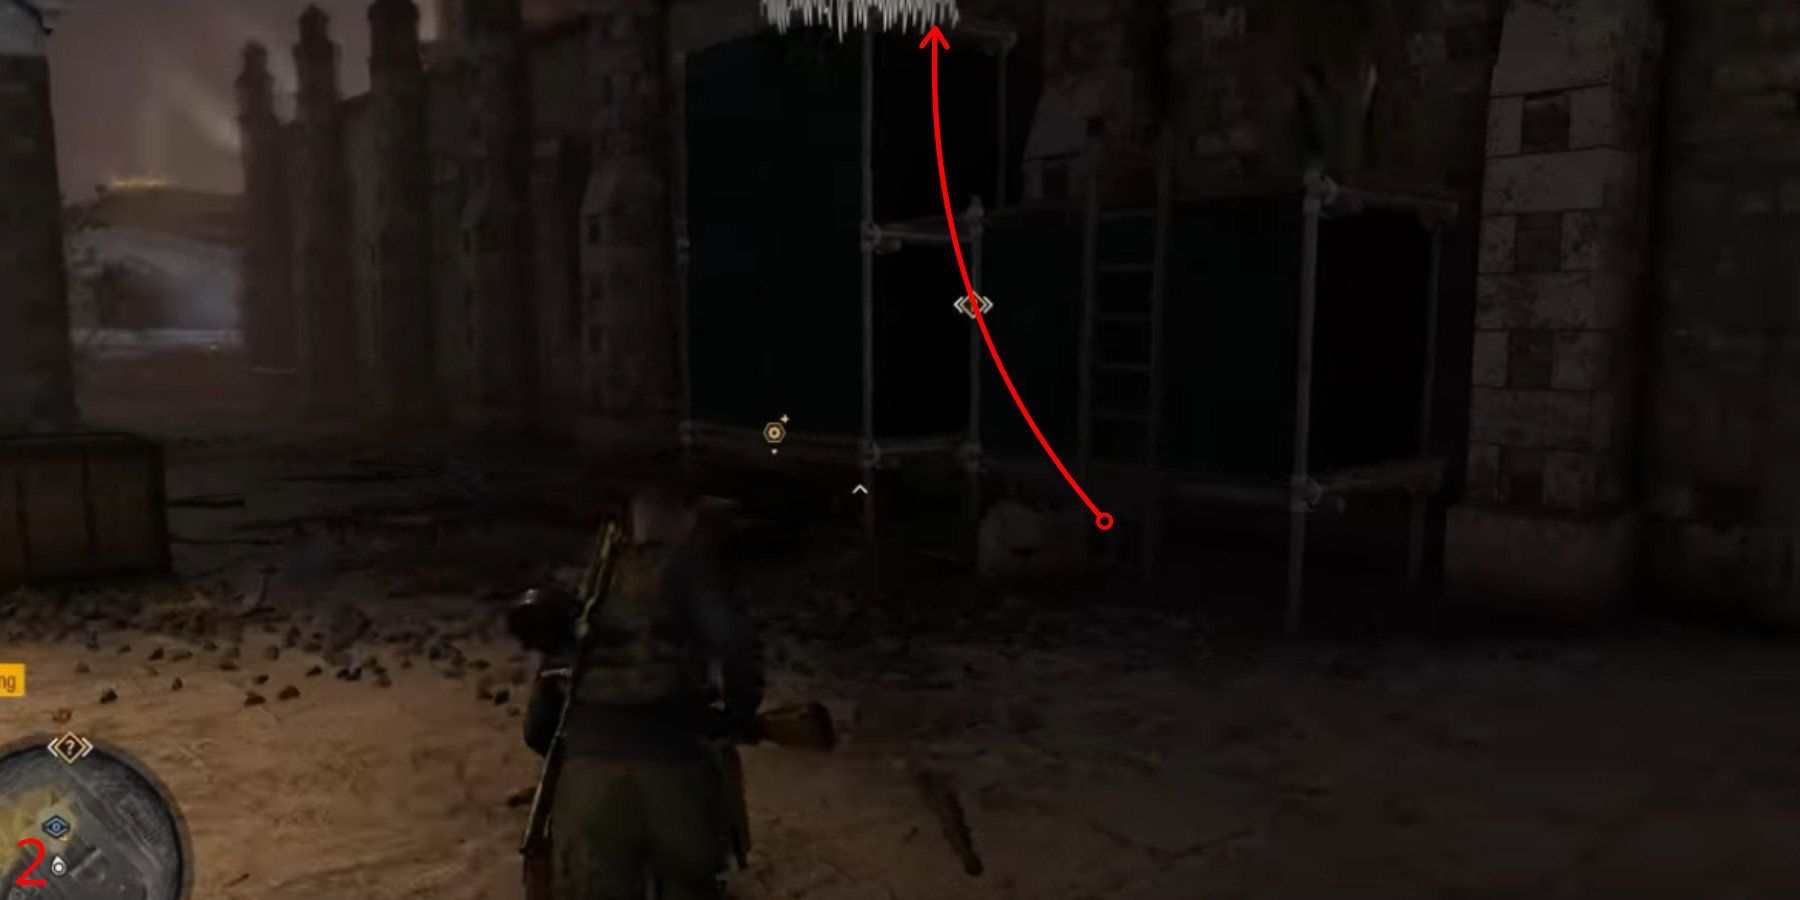
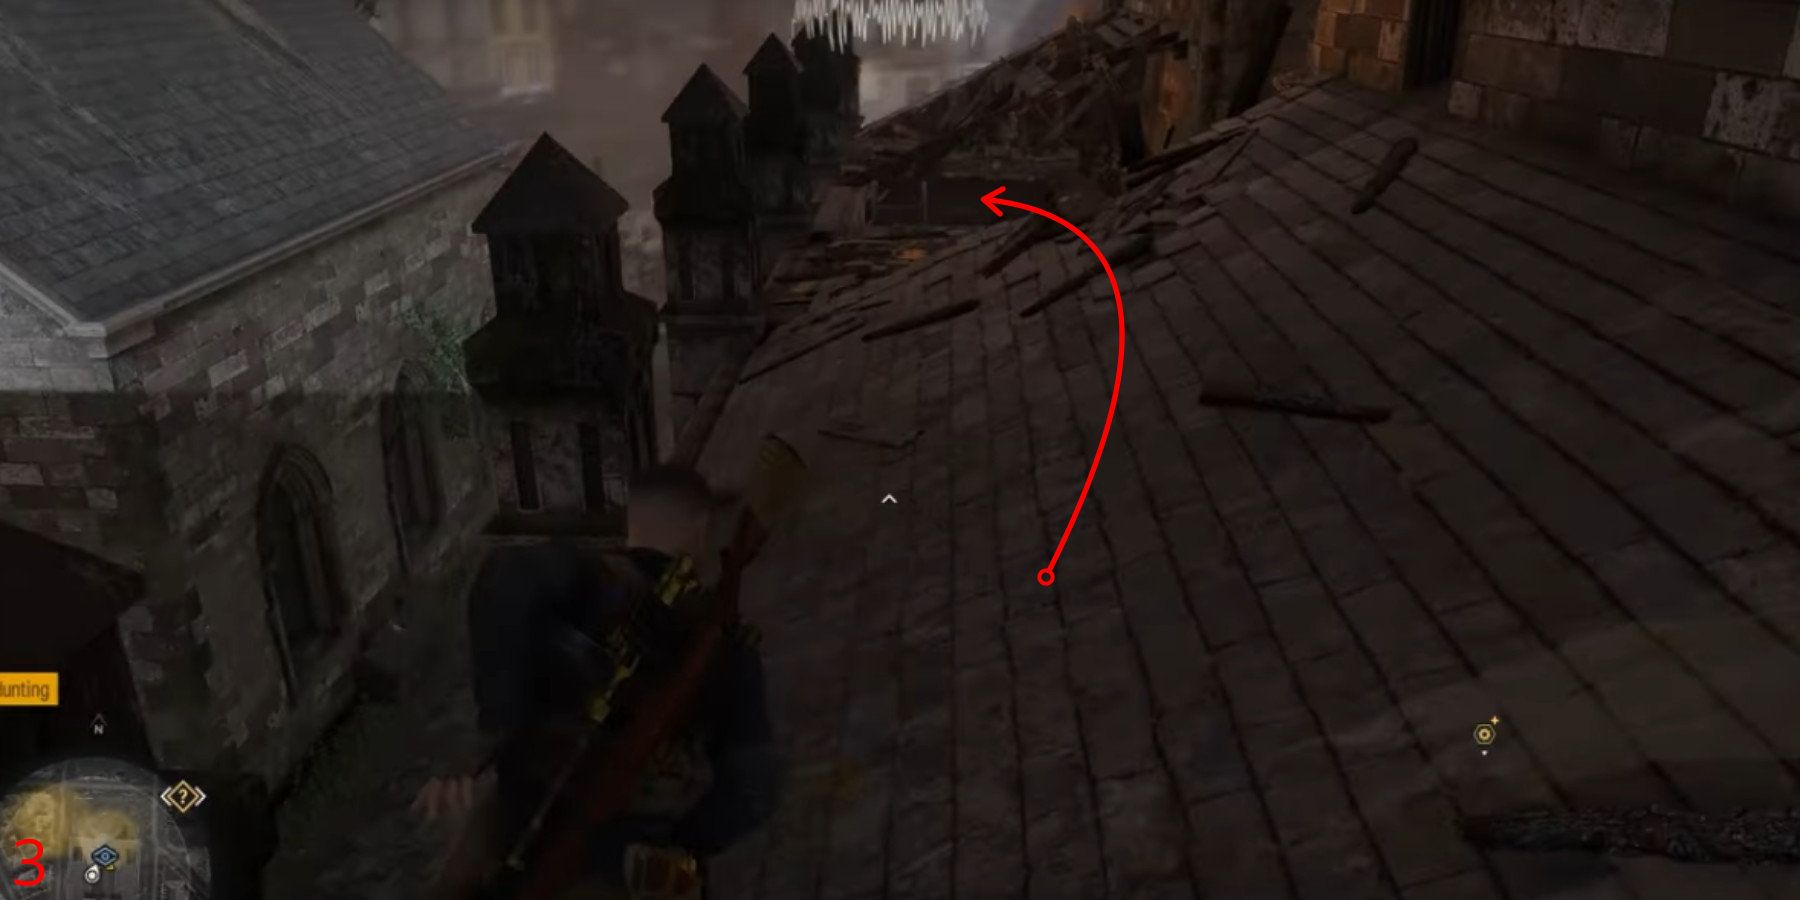
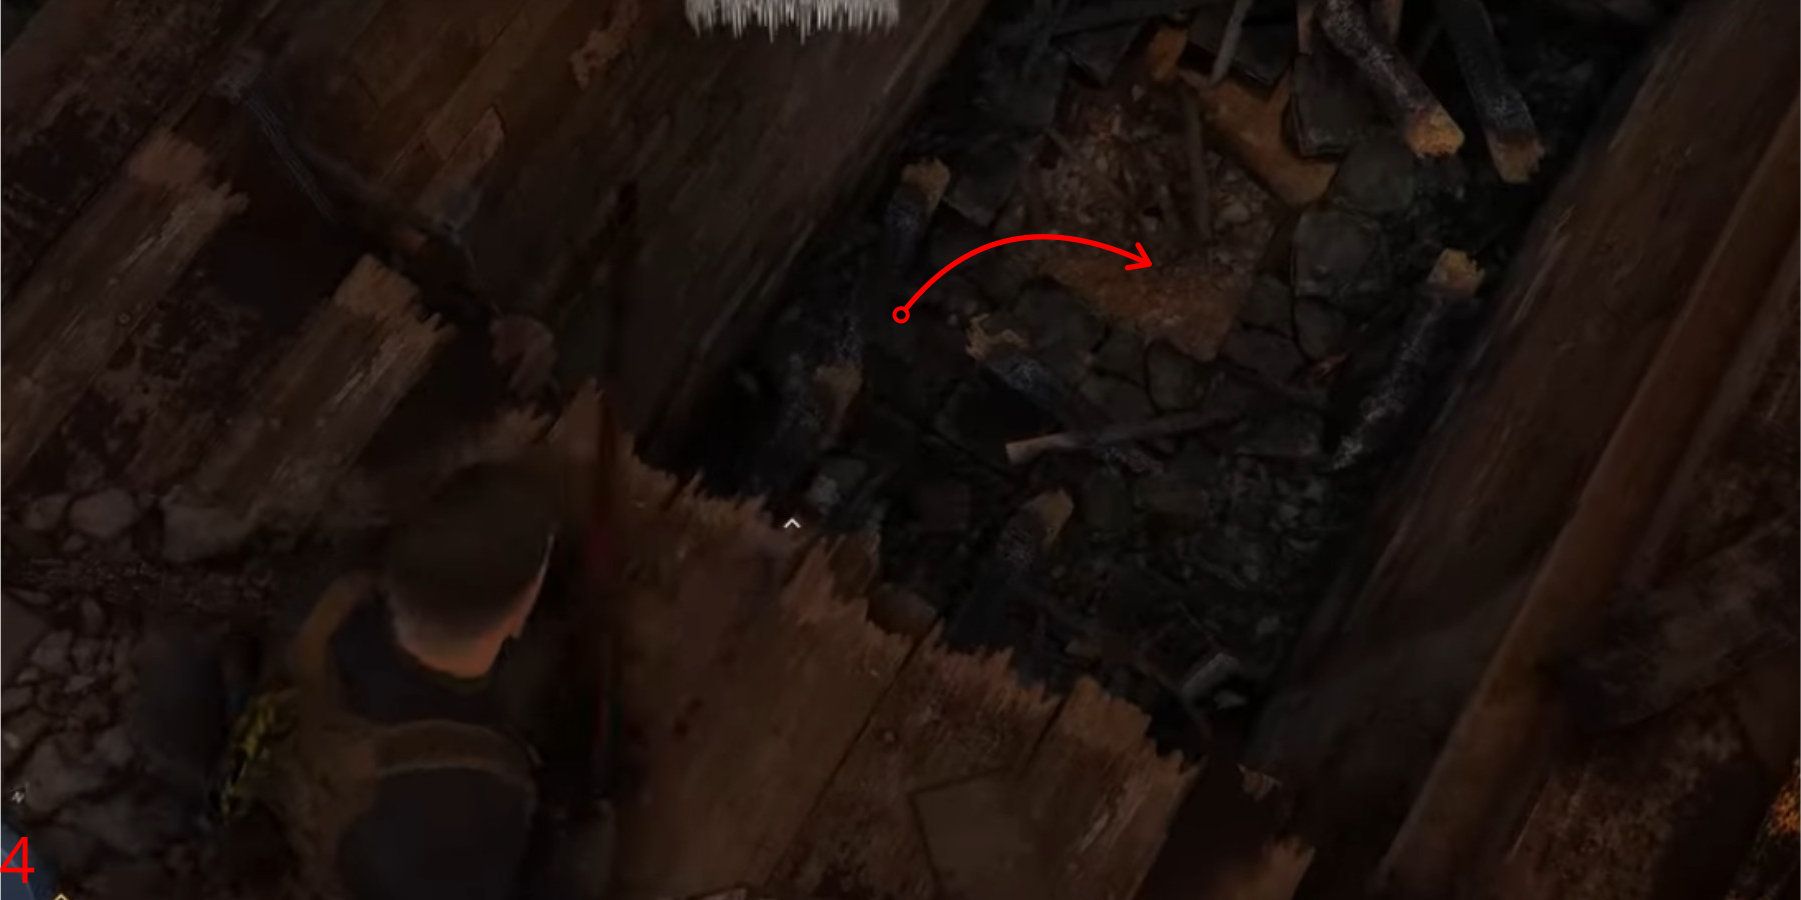
The second workbench can be found right in the heart of the map, specifically inside the cathedral. To reach it, players must ascend a ladder and locate an opening in the roof. Inside this rooftop opening, they’ll discover a spot where they can set up a Pistol Workbench.
Rubble and Ruin Workbench 3/3

The last Workbench can be found in the U-Boat base. To access it, players must acquire an Armory Key as it is kept within the Armory. Inside this Armory, they will discover a Rifle Workbench.
Read More
- Top 8 UFC 5 Perks Every Fighter Should Use
- Unlock the Magic: New Arcane Blind Box Collection from POP MART and Riot Games!
- Unaware Atelier Master: New Trailer Reveals April 2025 Fantasy Adventure!
- How to Reach 80,000M in Dead Rails
- How to Unlock the Mines in Cookie Run: Kingdom
- Unlock Roslit Bay’s Bestiary: Fisch Fishing Guide
- Unlock the Best Ending in Lost Records: Bloom & Rage by Calming Autumn’s Breakdown!
- Toei Animation’s Controversial Change to Sanji’s Fight in One Piece Episode 1124
- REPO: How To Fix Client Timeout
- Unleash Hell: Top10 Most Demanding Bosses in The First Berserker: Khazan
2025-02-20 16:28