Apart from boasting superior graphics in the life simulation genre, InZOI stands out by offering a variety of contemporary features that empower players to express creativity at its fullest extent during customization. This is evident through capabilities such as uploading personal textures or leveraging the game’s AI technology to create textures for them on-the-fly.
Among its many features, InZOI stands out for enabling users to design personalized 3D items directly within the game by uploading images. This process is facilitated using AI technology, often referred to as InZOI’s own 3D printer. These user-generated items function as both decorative pieces in the game’s construction mode or wearable accessories. Additionally, these 3D-printed objects can be shared and utilized by other players through Canvas, allowing for the exchange of unique creations.
How To Use The 3D Printer In InZOI
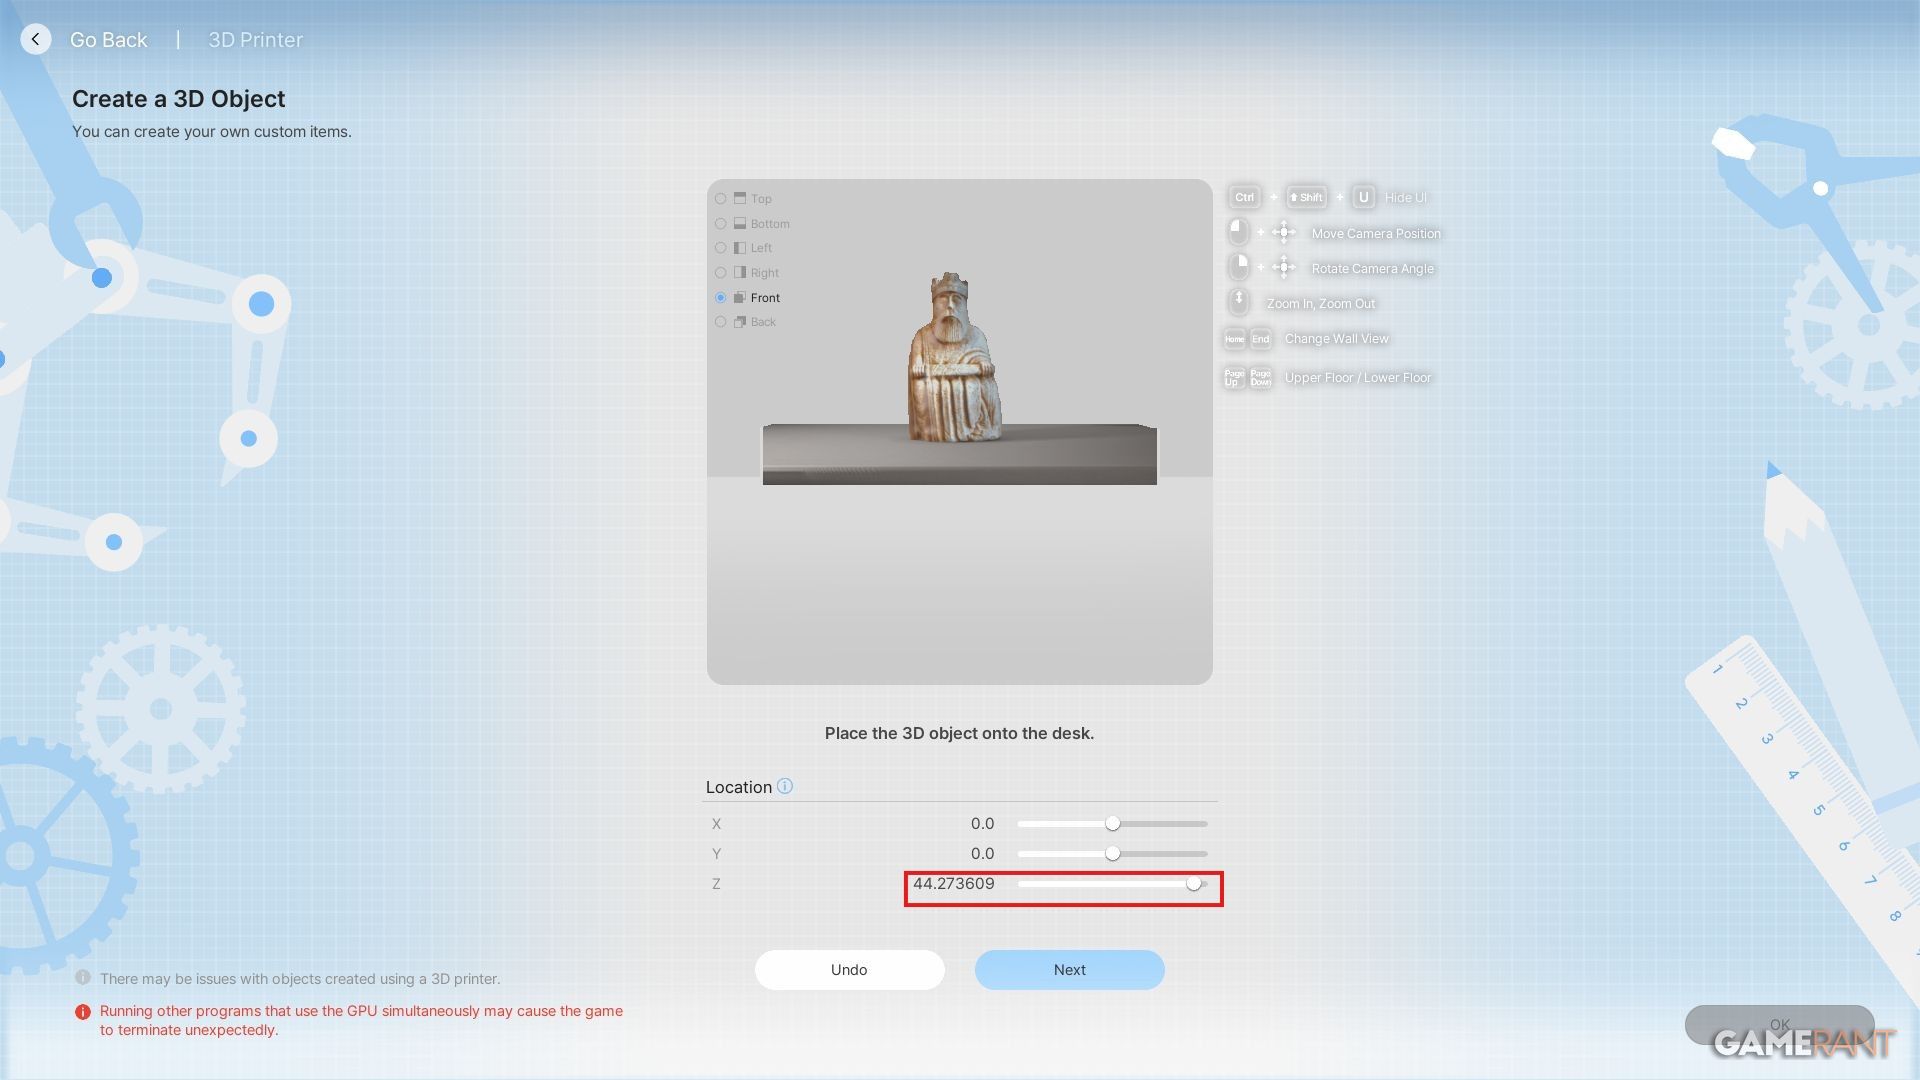
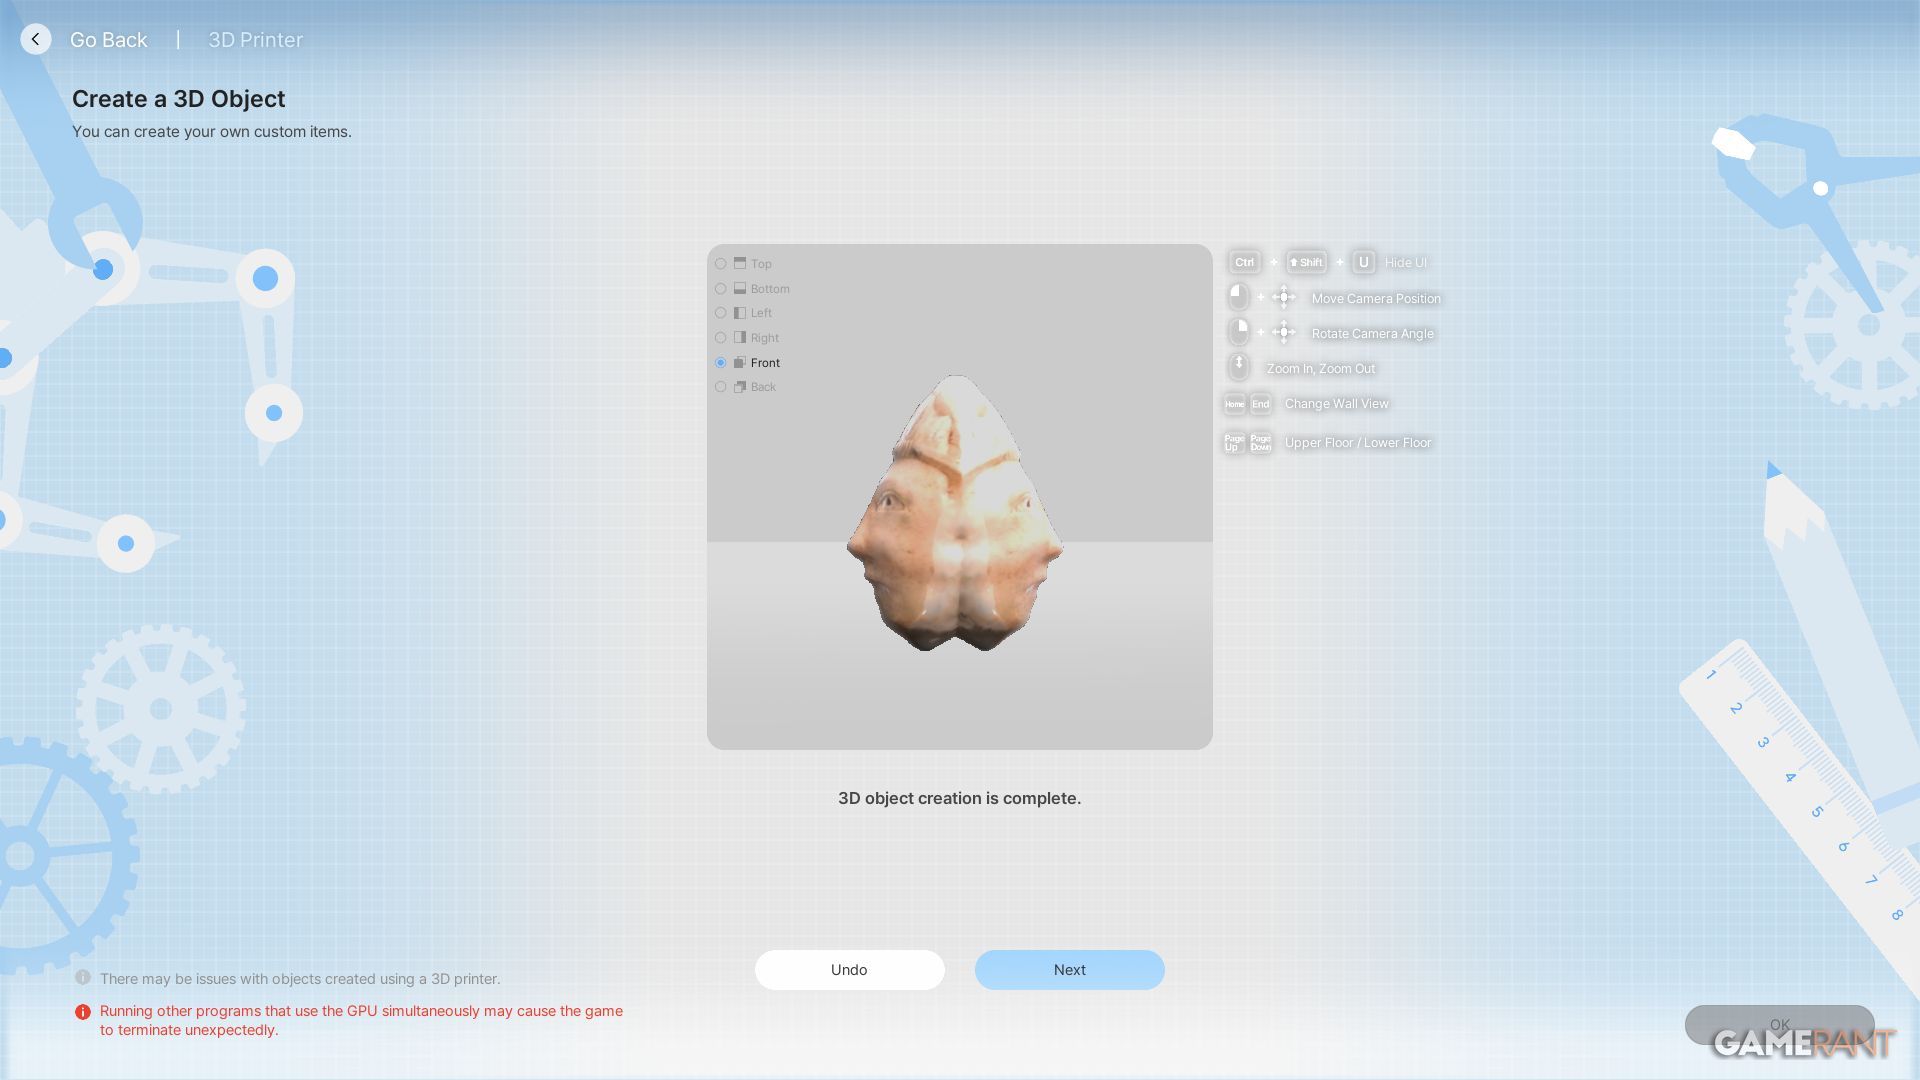
To use the 3D printer in InZOI during gameplay, locate and click on the fourth tab situated on the left side of your screen. After that, you can upload an image from your computer. Once selected, allow about 20 seconds for the AI to process it. If you’re looking for a slightly different result, you can always opt to regenerate the output instead.
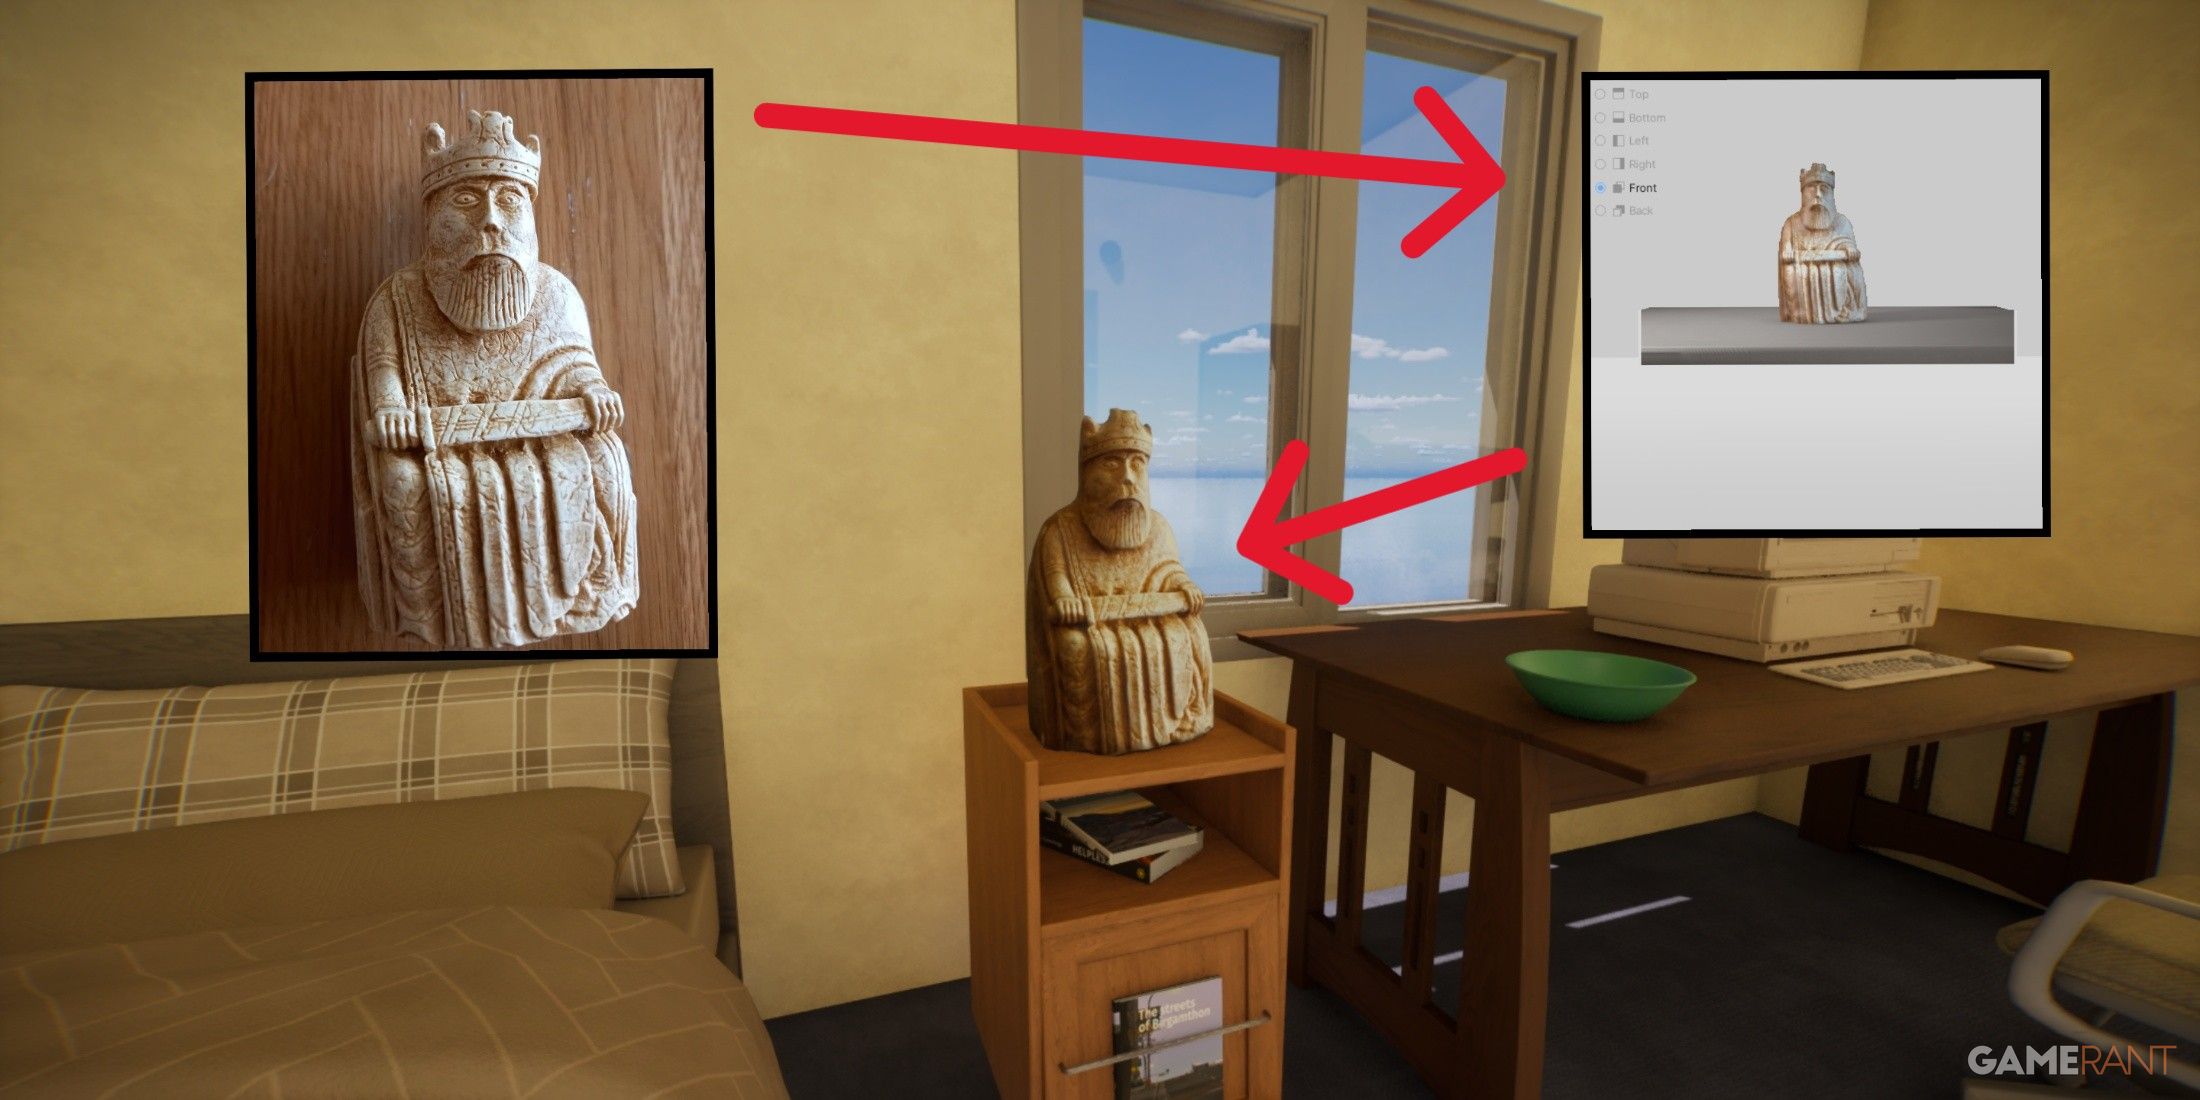
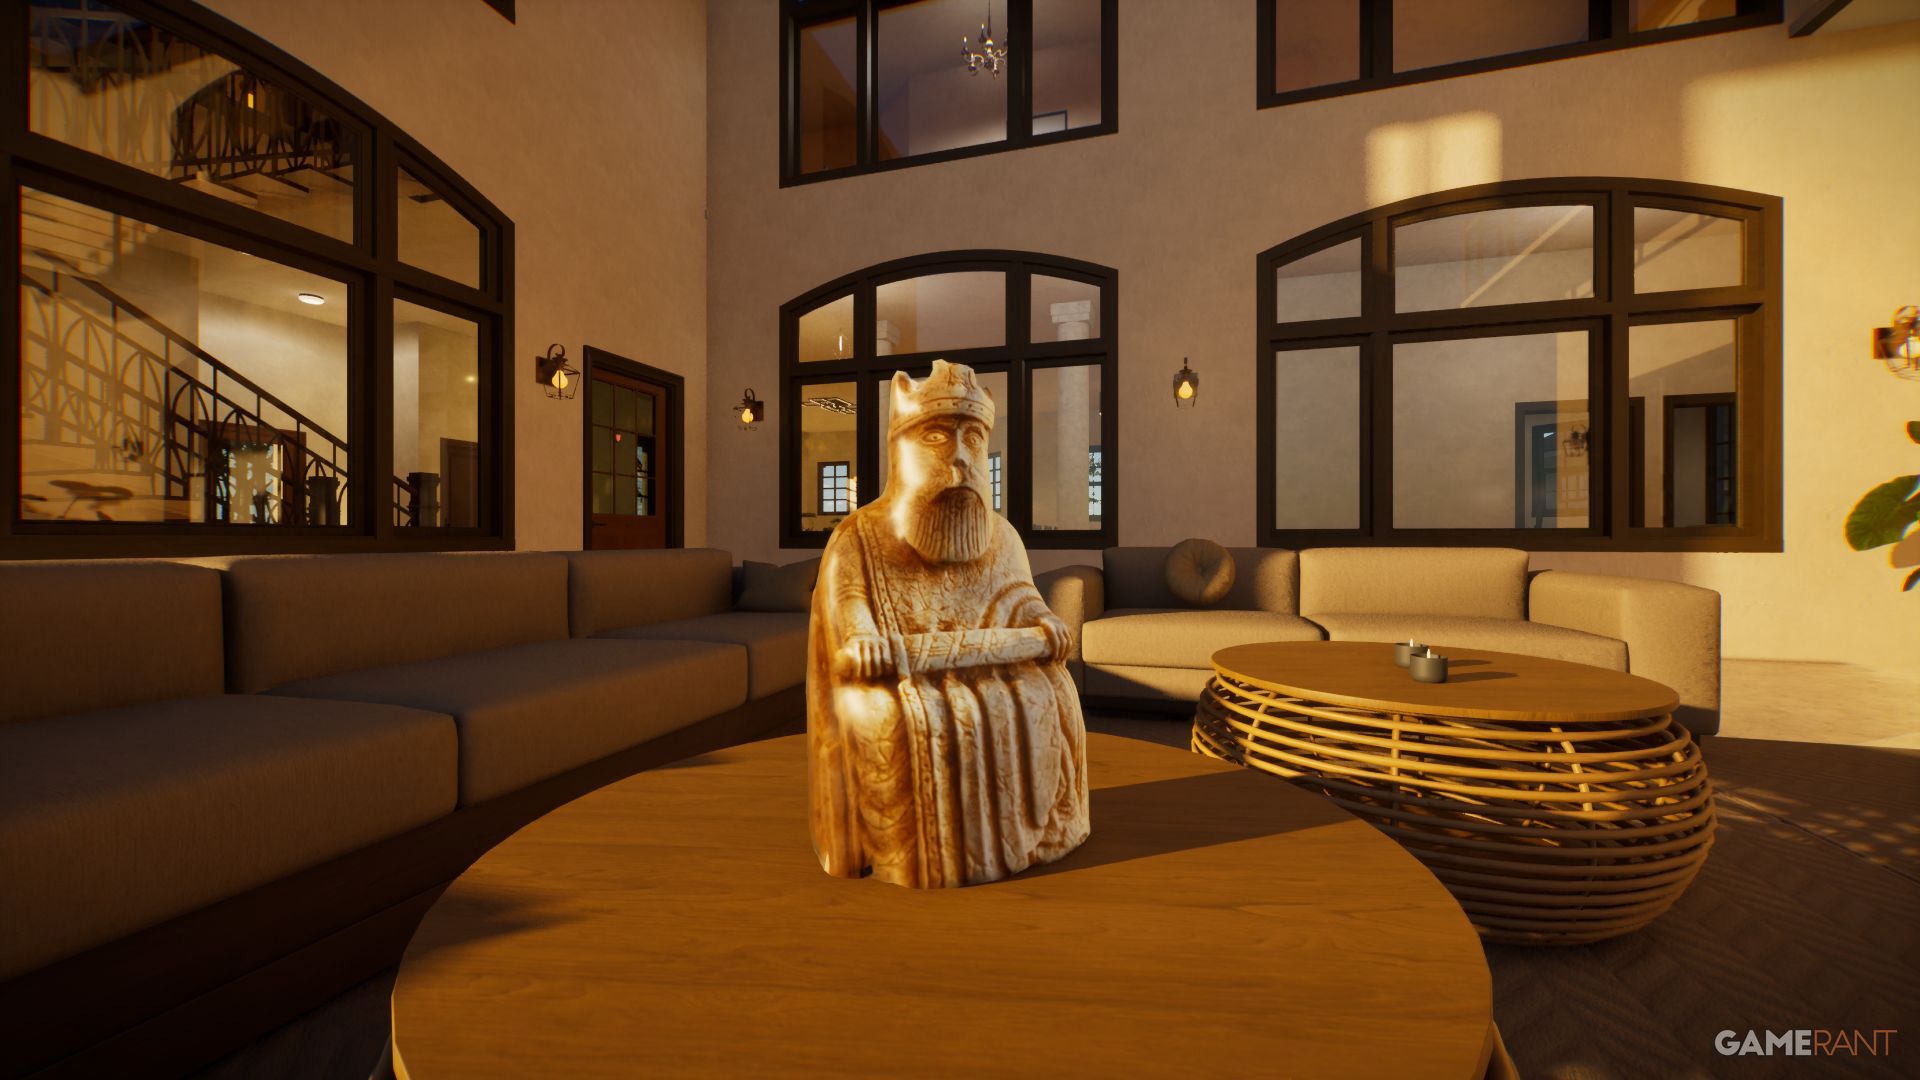
Once the item is produced, its angle and movement become essential considerations. Visualize the gray surface as a shelf. To make your object rest flat on this shelf, adjust its orientation so that it does. If you desire it to stand upright, arrange it similar to the chess piece depicted above.
Which Images Are Best For 3D Printing In InZOI?
In ZOI, the main factor contributing to the effectiveness of 3D printing is largely dependent on the quality of the uploaded image. However, since the game is still in its developmental phase (Early Access), this feature is expected to grow more advanced over time.
A PNG image with a transparent backdrop might be suitable for relatively two-dimensional items like a shield. However, it’s not essential. What’s crucial is that the background should be empty or white. As an example, consider the chess piece image shown earlier, which was taken on a tabletop.
To ensure optimal performance, please avoid using images with gaps or holes, as the AI has difficulties accurately processing these areas and may fill them with surrounding content. For instance, an AI might perceive a donut as problematic due to its hole.
To ensure that the 3D assets appear visually appealing from all perspectives, JPEGs can be a suitable choice, but it’s advisable to incorporate some sense of depth in your images. This means trying not to photograph solely from head-on as this can make the final product seem flat. Additionally, it’s best to minimize glare and shoot during periods with less direct sunlight, as it tends to create unwanted reflections that may detract from the overall quality of your images.
Using Symmetry Mode For 3D Objects
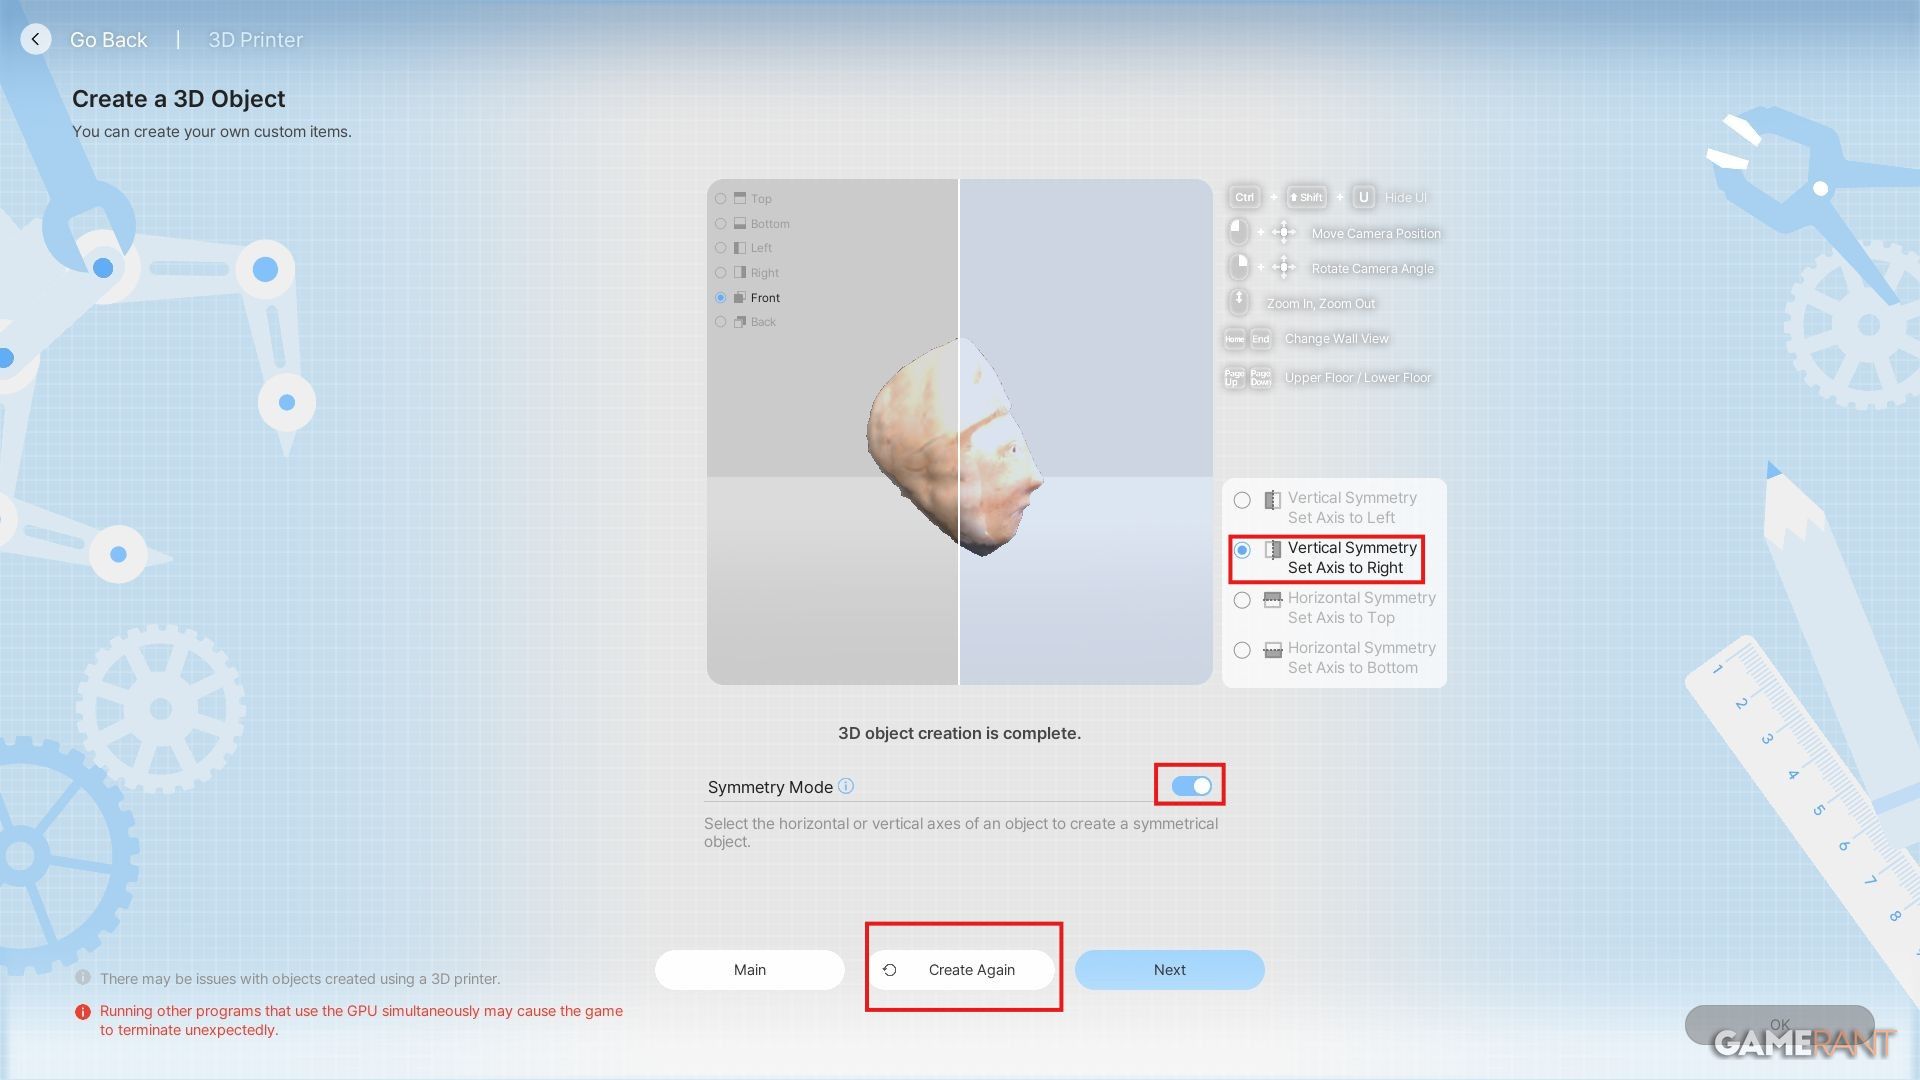
Once an item is initially produced, users are given the flexibility to impose symmetry (if they so choose), though it’s often not essential. To achieve this, players can opt to flip their object either vertically or horizontally, with the choice of mirroring the top and bottom or left and right sides. The area designated for symmetry is referred to as the “blue zone.
A useful application of symmetry involves creating flat items. By ensuring a specific cut on the item is symmetrically placed, the resulting object will have a slim profile.
To achieve symmetry, please ensure the rotation and movement feature is activated for your object. This allows you to adjust it to figure out precisely what gets replicated. Once everything is set up, go ahead and click on “Replicate Again” when you’re ready.
How To Place 3D-Printed Objects In InZOI
After creating their own personalized models, players might find themselves questioning what’s the next step for utilizing them. Fortunately, there are several methods available.
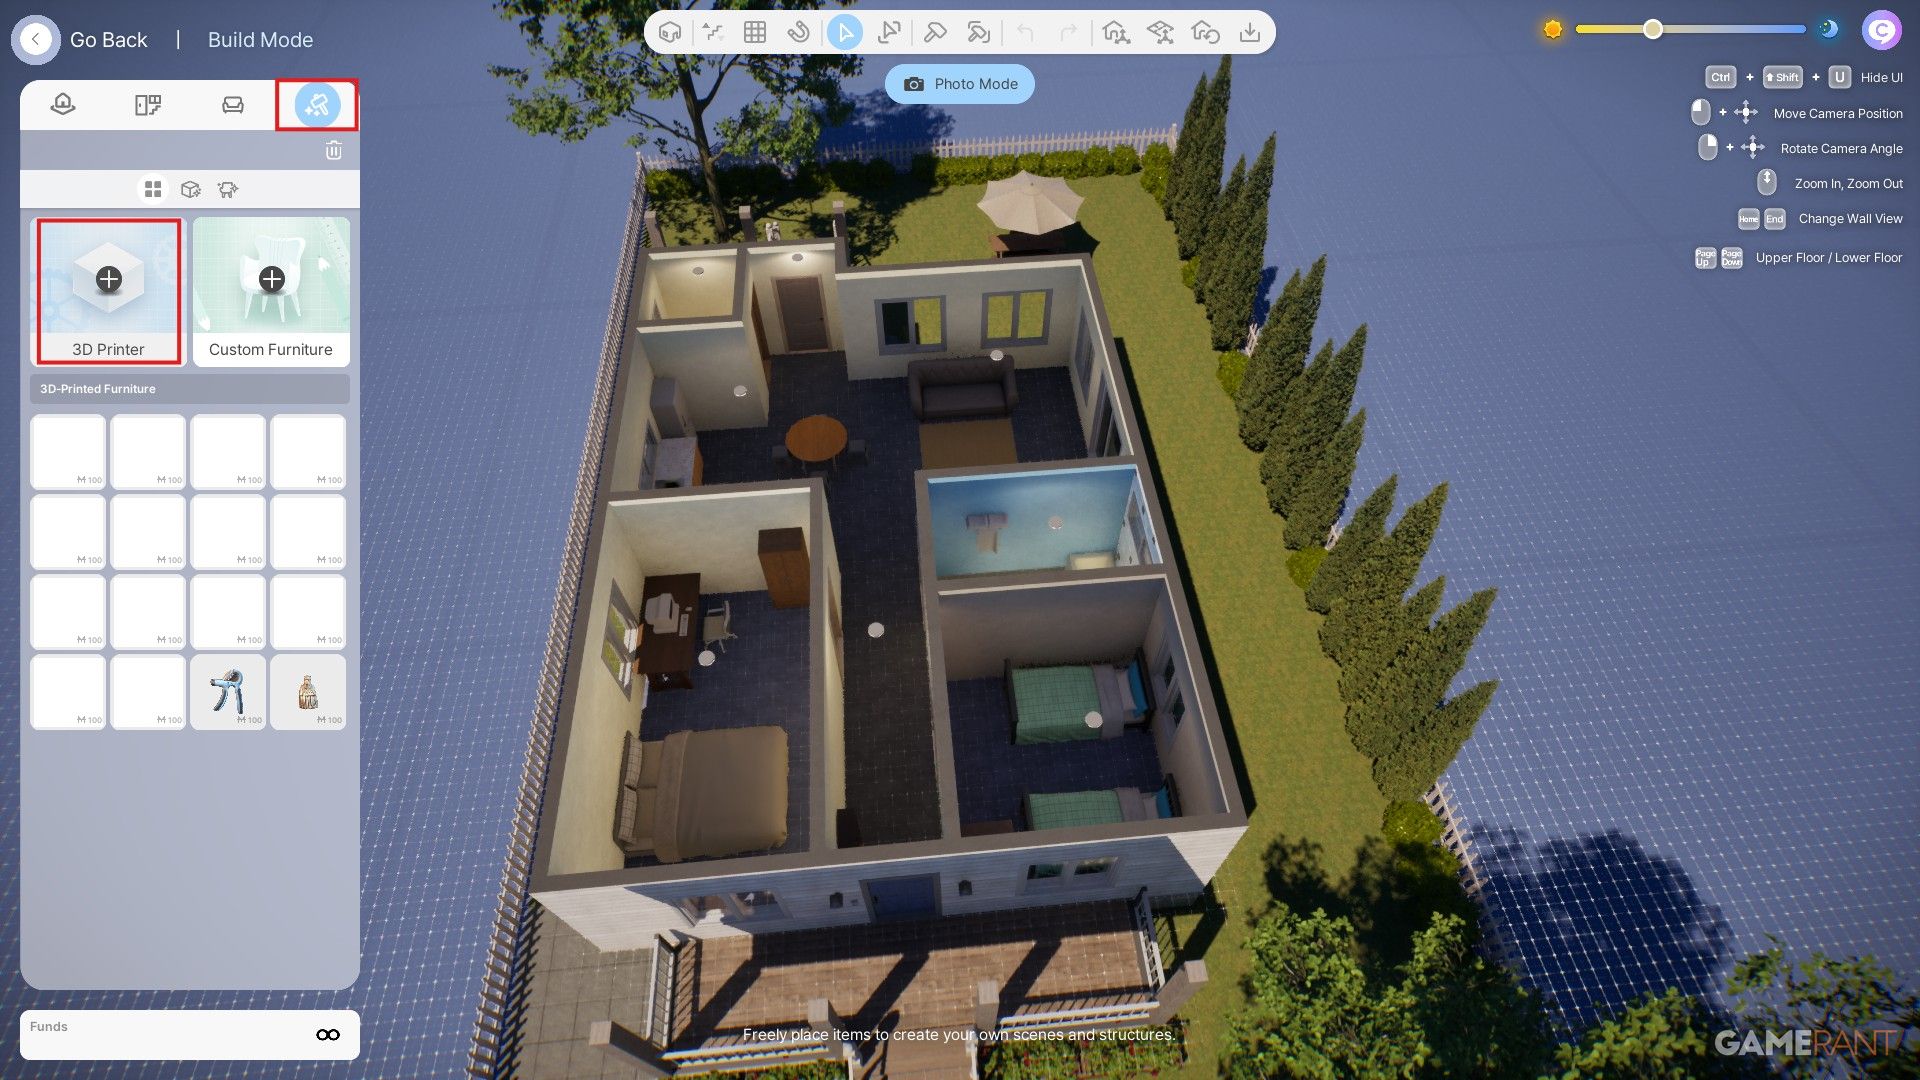
Placing 3D Objects In Houses
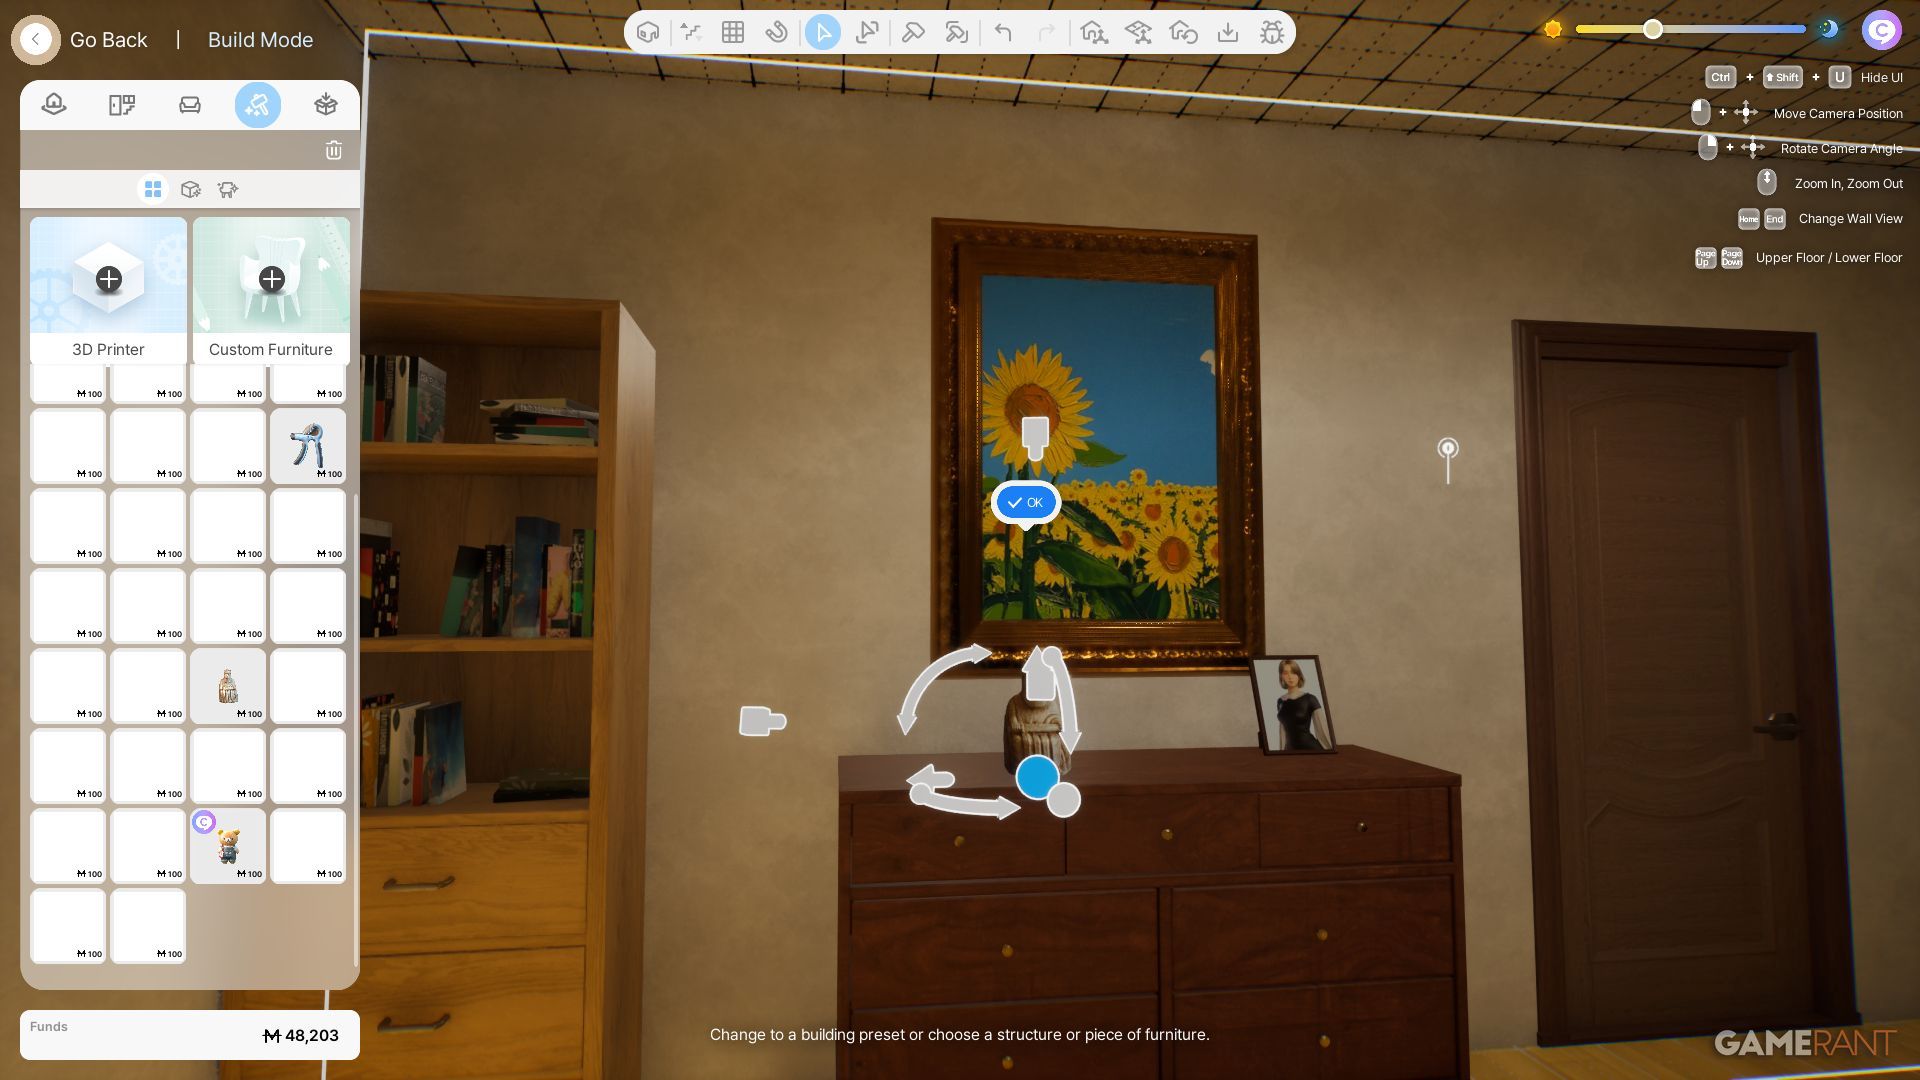
To set up these personalized items as furnishings, navigate to the Create section in building mode. This is also where you’ll find your printer. Once there, you’ll notice your own designs displayed, which you can select and move into a dwelling, say. Similar to other furniture, they can be repositioned and rotated as needed.
Additionally, you have the option to acquire custom 3D printable assets created by other users directly through Canvas, a feature conveniently placed in the upper-right corner of your screen.
Players might find difficulty in positioning these personalized items at higher levels on walls or other pieces of furniture like shelves and small tables. To avoid such challenges, it’s often more practical to first set smaller items such as a dish or stack of books onto a flat surface. These can later be altered to mimic the shape of any 3D printed object.
Using 3D Decorations As Clothing Accessories
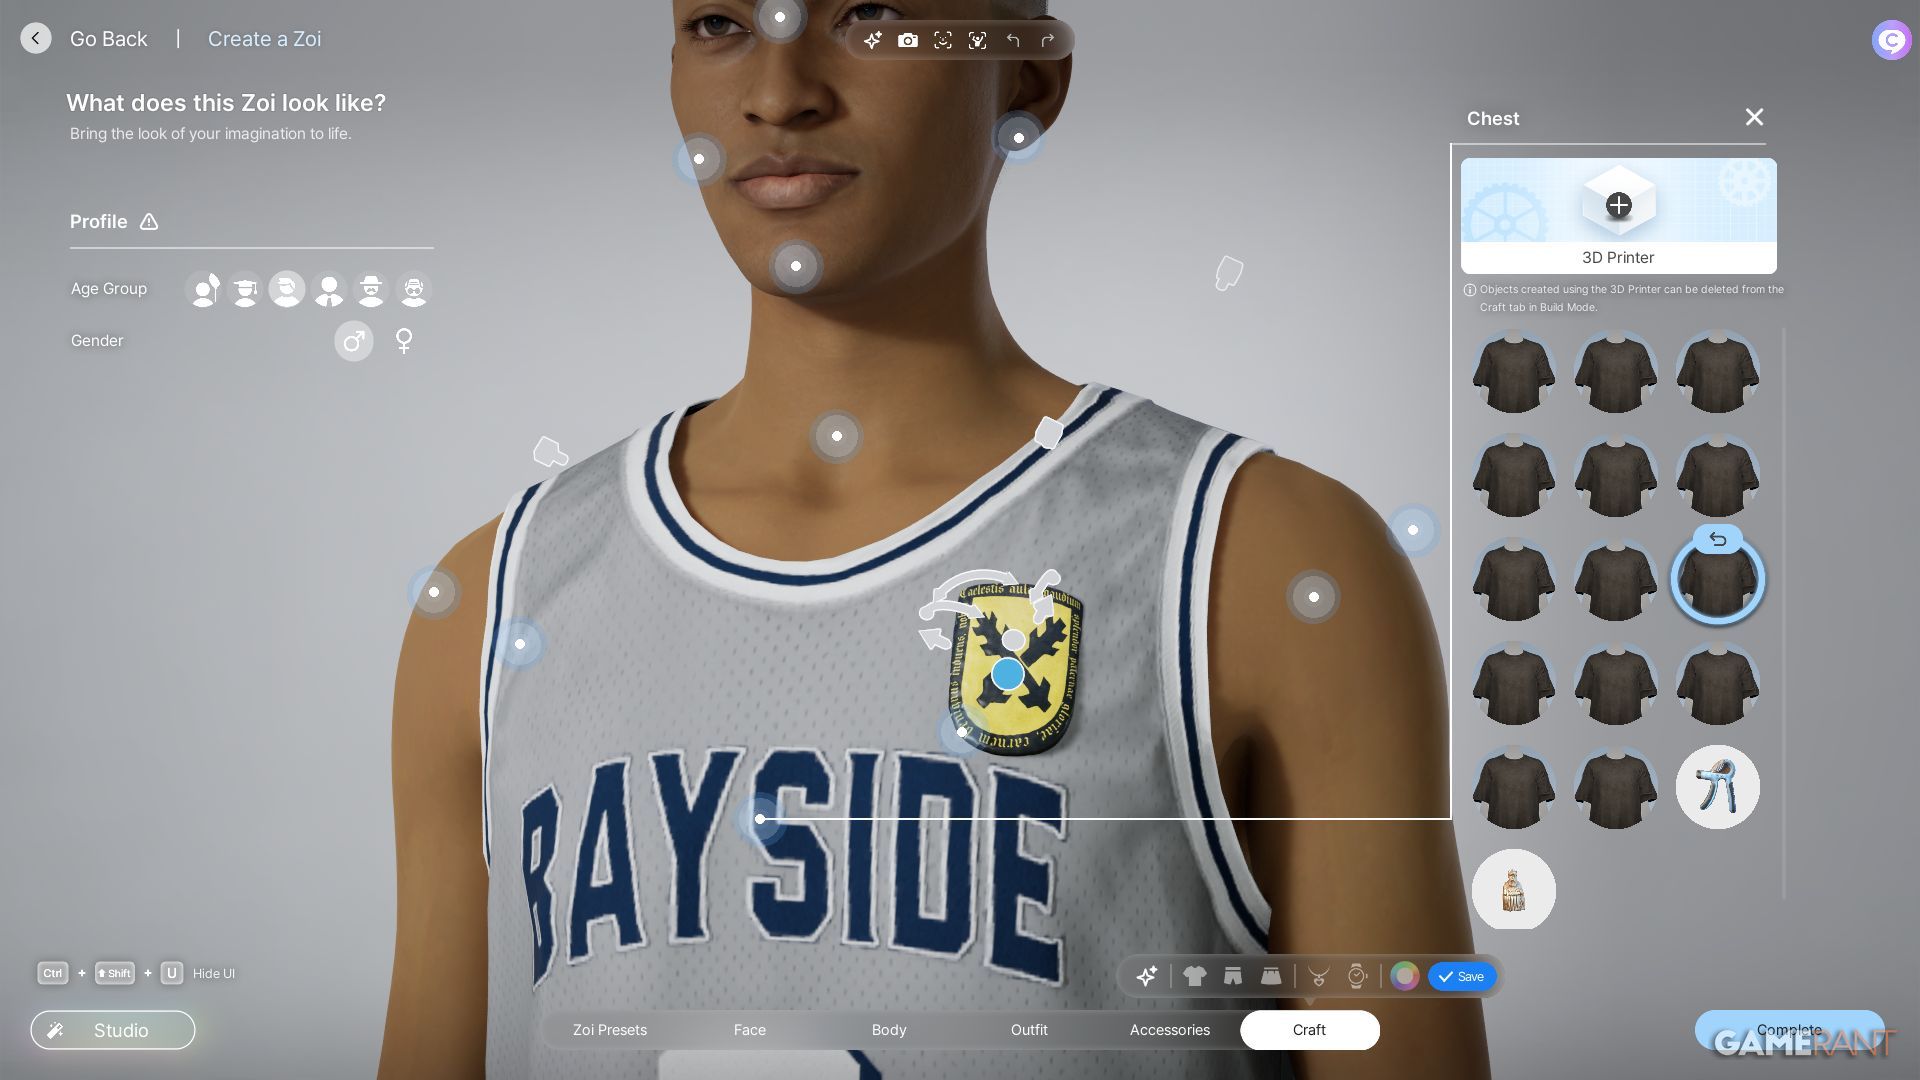
One unexpected application for these models is incorporating them into a comprehensive prop system. In the Character Studio, navigate to the final tab labeled ‘Craft’. In the drop-down menu that appears, you’ll find the first option on the far left is designated as ‘3D Print Decorations’.
Click here to select a particular body part where you’d like to apply the decoration, along with a 3D-printed item. These elements can be made incredibly tiny and rotated with greater convenience compared to build mode. Players have the freedom to attach horns onto their Zoi, create quirky timepieces, or even display a shield from _Kingdom Come: Deliverance 2_ as a crest (as illustrated above).
To locate these items you’ve previously saved, navigate to the tab labeled “Accessories”. At the bottom, you’ll find an option called “Custom”. Once selected, you can include these items in any ensemble. As an illustration, the crest could be paired with any t-shirt.
Read More
- Delta Force: K437 Guide (Best Build & How to Unlock)
- Top 8 UFC 5 Perks Every Fighter Should Use
- USD ILS PREDICTION
- Slormancer Huntress: God-Tier Builds REVEALED!
- Tainted Grail: The Fall of Avalon – Everything You Need to Know
- AI16Z PREDICTION. AI16Z cryptocurrency
- Invincible’s Strongest Female Characters
- How to Unlock the Mines in Cookie Run: Kingdom
- Nine Sols: 6 Best Jin Farming Methods
- REPO’s Cart Cannon: Prepare for Mayhem!
2025-03-28 12:54