
In contrast to many contemporary video games, the size of the Schedule 1 map is relatively compact. However, finding your way around it can sometimes be a bit perplexing. The absence of a mini-map complicates matters, and the inability to view the entire Schedule 1 map on the in-game smartphone without scrolling adds to the confusion as well.
This guide encompasses a comprehensive layout of Hyland Point, designed to simplify your journey from one point to another for players. Important places such as properties and businesses are highlighted in distinct colors to facilitate easier navigation. Toward the lower part of the page, you’ll discover another map called “Schedule 1,” which only showcases these key locations.
Complete Schedule 1 Map
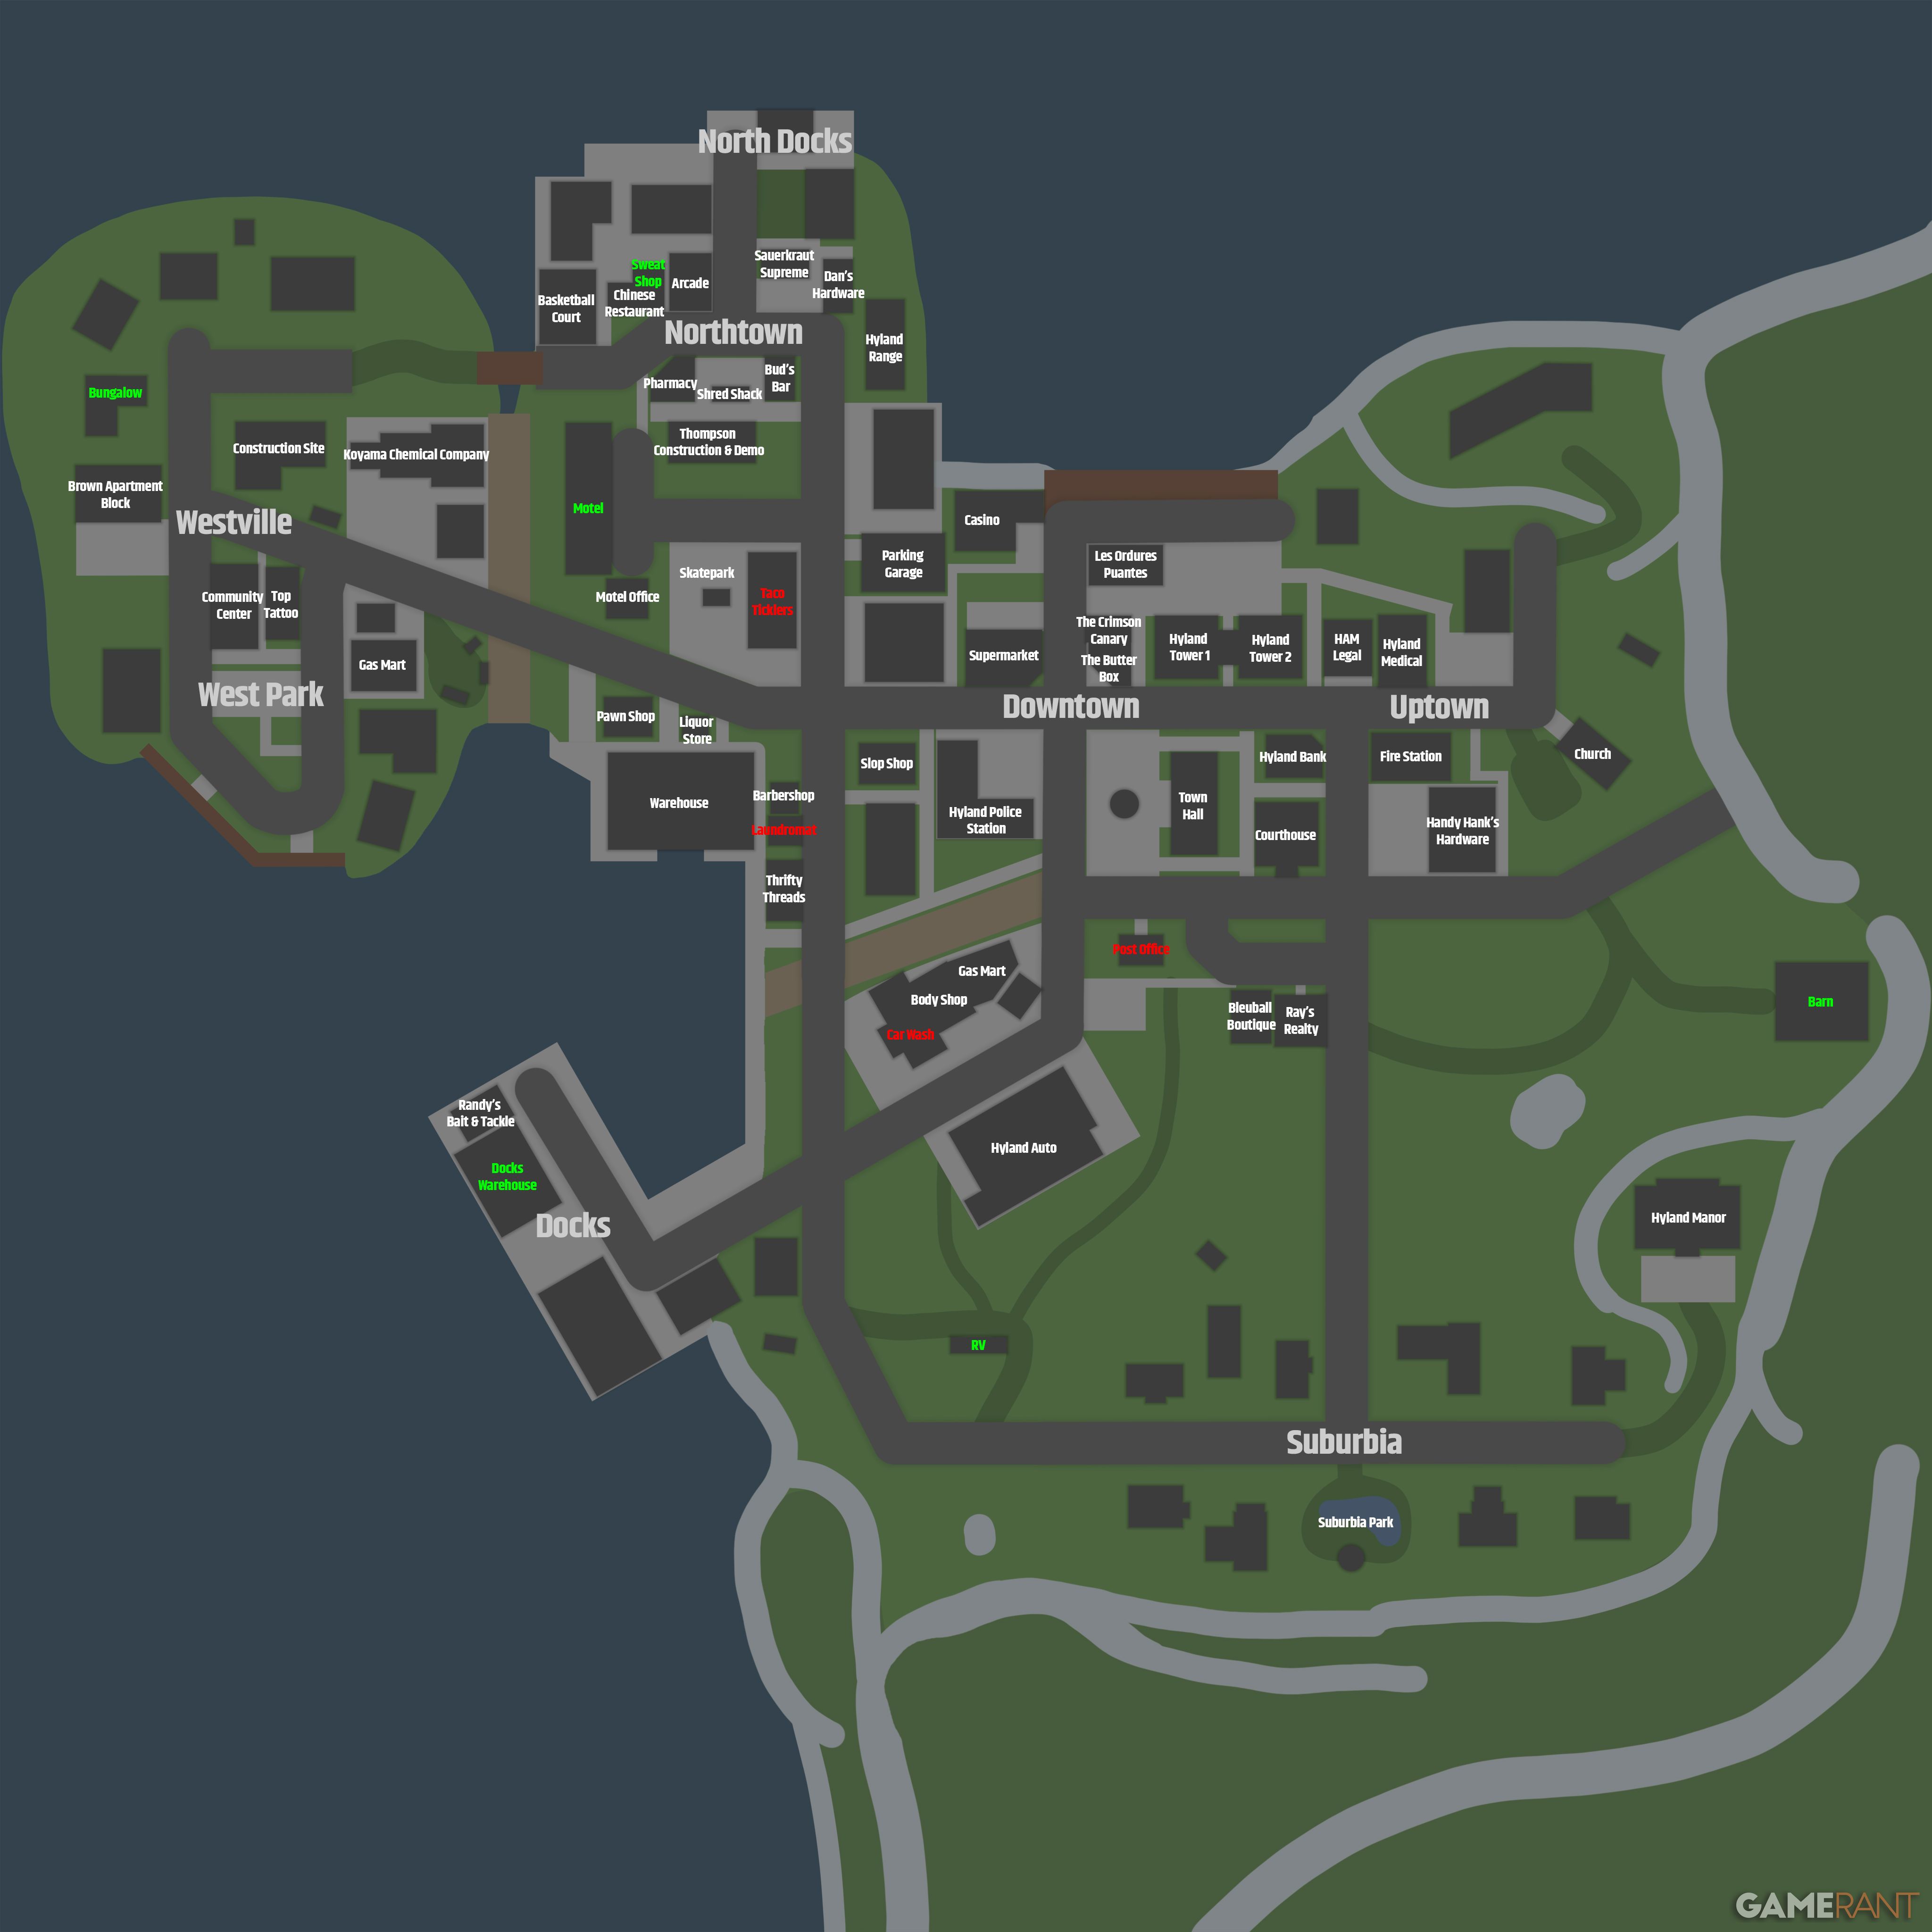
On the map displayed earlier (labeled as ‘Schedule 1’), buildings that the player can acquire are marked with either green for properties or red for businesses. Any other structures on the map have their names written in white.
All Properties and Businesses in Schedule 1
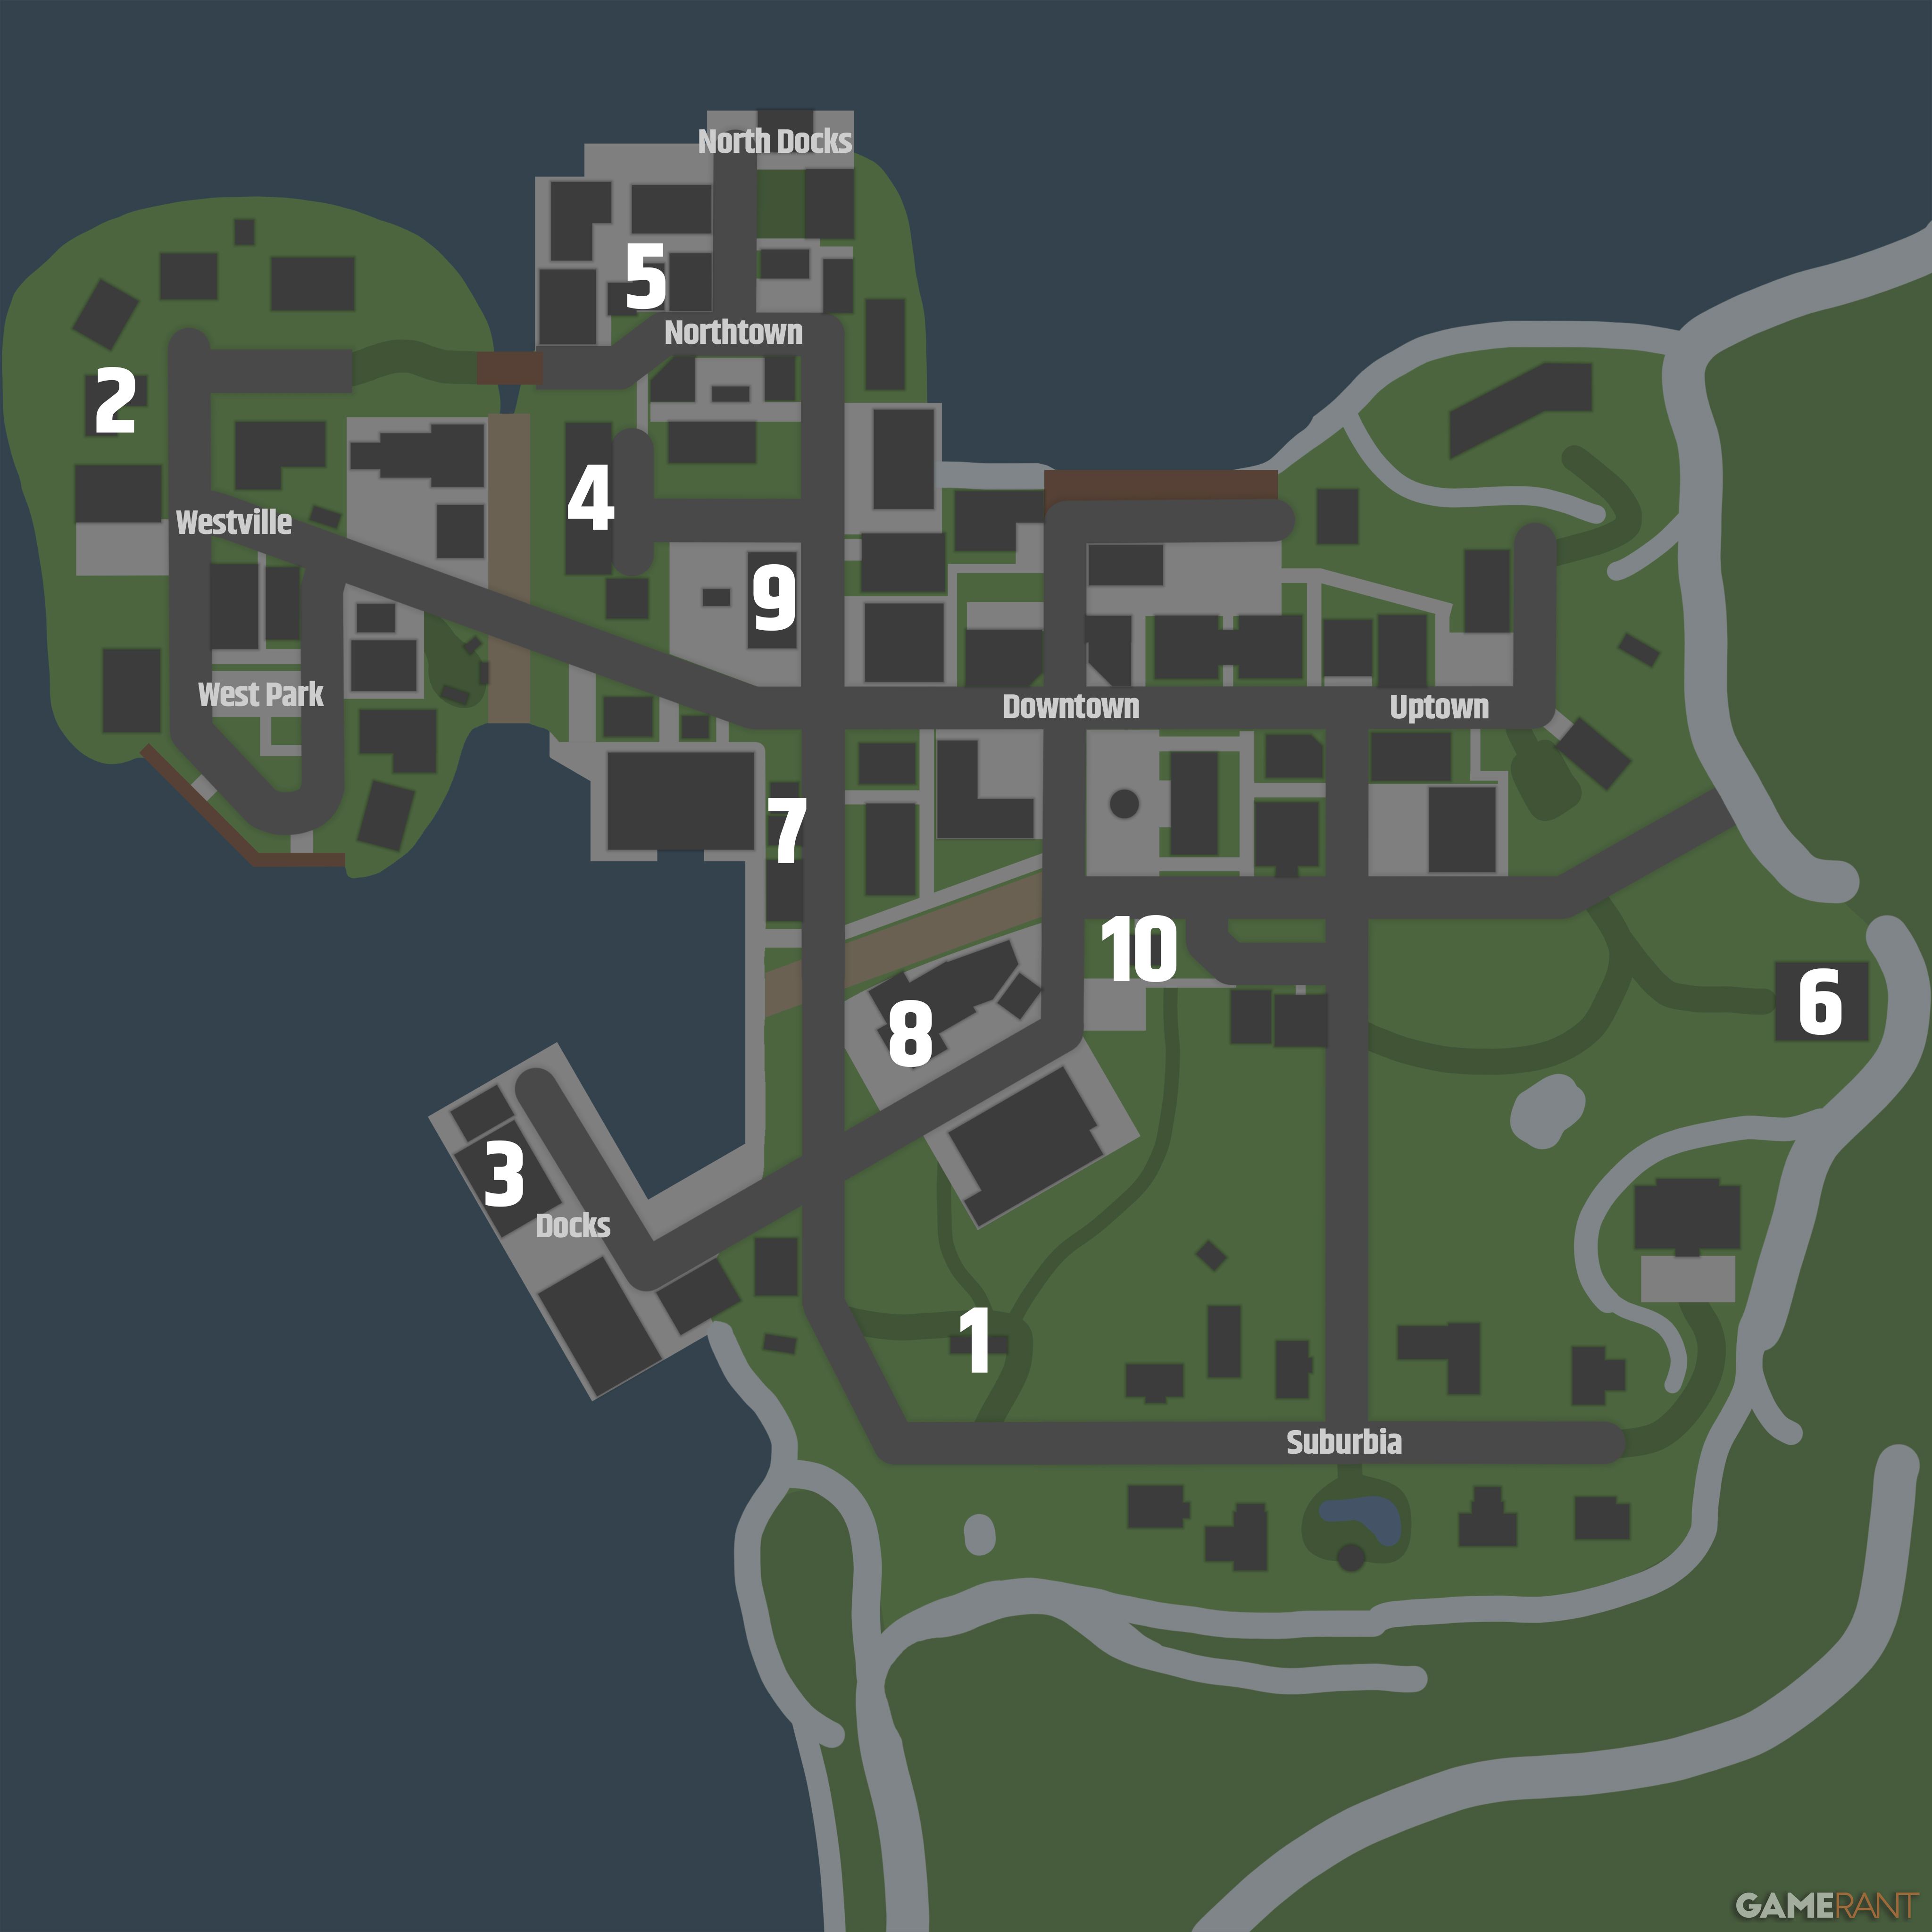
- RV
- Bungalow
- Docks Warehouse
- Motel
- Sweat Shop
- Barn
- Laundromat
- Car Wash
- Taco Ticklers
- Post Office
Users can quickly navigate to a game’s purchasable properties or businesses using console commands found in Schedule 1, regardless of ownership. To achieve this, they should merely type “teleport ” followed by the desired location’s name (without spaces), such as “teleport dockswarehouse” or “teleport tacoticklers”.
Read More
- Best Awakened Hollyberry Build In Cookie Run Kingdom
- Nintendo Offers Higher Margins to Japanese Retailers in Switch 2 Push
- Nintendo May Be Struggling to Meet Switch 2 Demand in Japan
- Nintendo Dismisses Report On Switch 2 Retailer Profit Margins
- Top 8 UFC 5 Perks Every Fighter Should Use
- Hollow Knight: Silksong is Cutting It Close on a 2025 Release Window
- Nintendo Switch 2 Confirms Important Child Safety Feature
- Tainted Grail the Fall of Avalon: Should You Turn in Vidar?
- Nvidia Reports Record Q1 Revenue
- Best Mage Skills in Tainted Grail: The Fall of Avalon
2025-04-07 20:25