It seems you bought the enhanced edition of Oblivion Remastered but find yourself puzzled about how to obtain your in-game bonuses. Unlike many other games, there’s no guidance on where to go to claim these rewards. Upon exploring Cyrodiil, I found that these unique items are actually earned by completing new questlines: Burning Trail and A Wound in Time.
In many games, it’s common for exclusive deluxe edition quests to automatically appear in your quest log. However, in this game, things work differently. These quests can be elusive, and you might spend hours upon hours without encountering them, if you manage to find them at all. I’ll guide you through each of the questlines required for your bonus items, as even starting and finishing these quests can be quite challenging.
How to get the Oblivion Remastered deluxe edition content
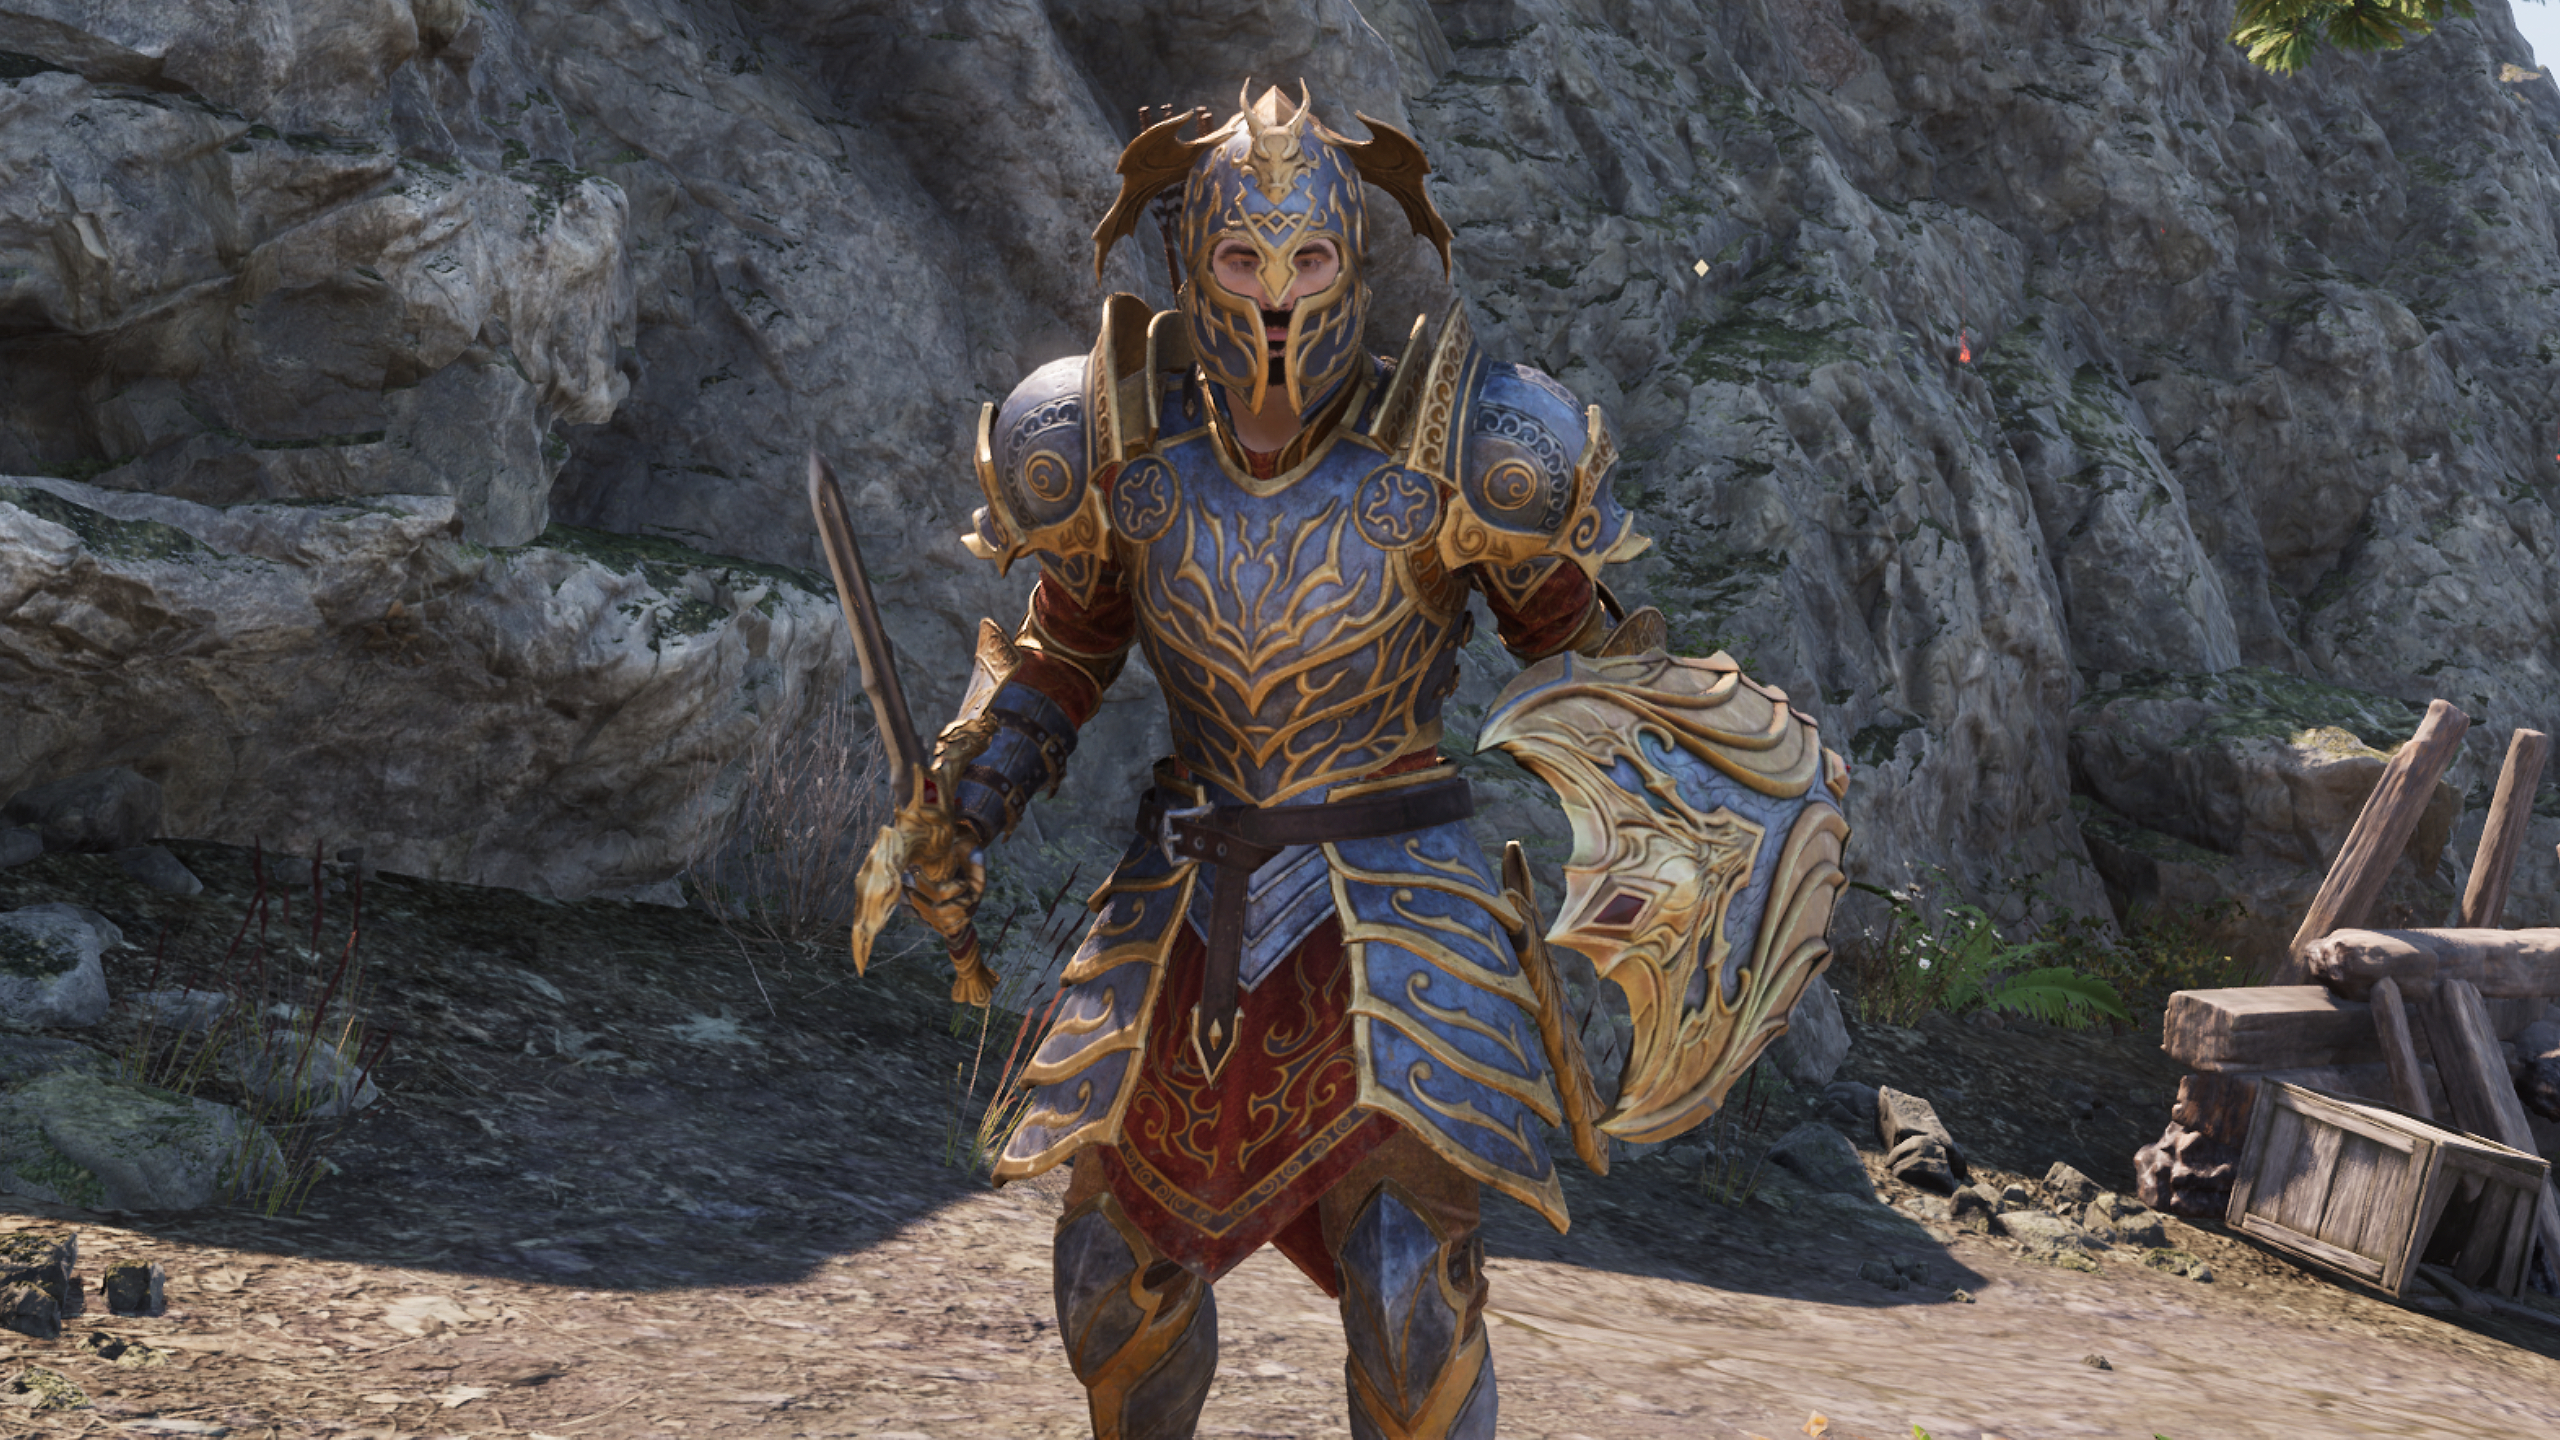
As a gamer, diving back into Oblivion just got more enticing! The Deluxe Edition of the remastered game offers me four fresh quests that unlock unique armor sets for Akatosh and Mehrunes Dagon, not to mention some wicked weapons and horse armor. I can’t wait to equip myself with these exclusive goodies!
- The Akatosh gear is earned from the A Wound in Time questline
- The Mehrunes Dagon gear is earned from the Burning Trail questline
As you exit the Imperial City Sewers, which marks the start of your journey, you’ll find that you can immediately embark on these quests. It would be advantageous for you to complete these new missions early in your adventure, as doing so will provide you with stylish weapons and armor to aid you in your mission to protect Cyrodiil.
Oblivion Remastered: A Wound in Time walkthrough
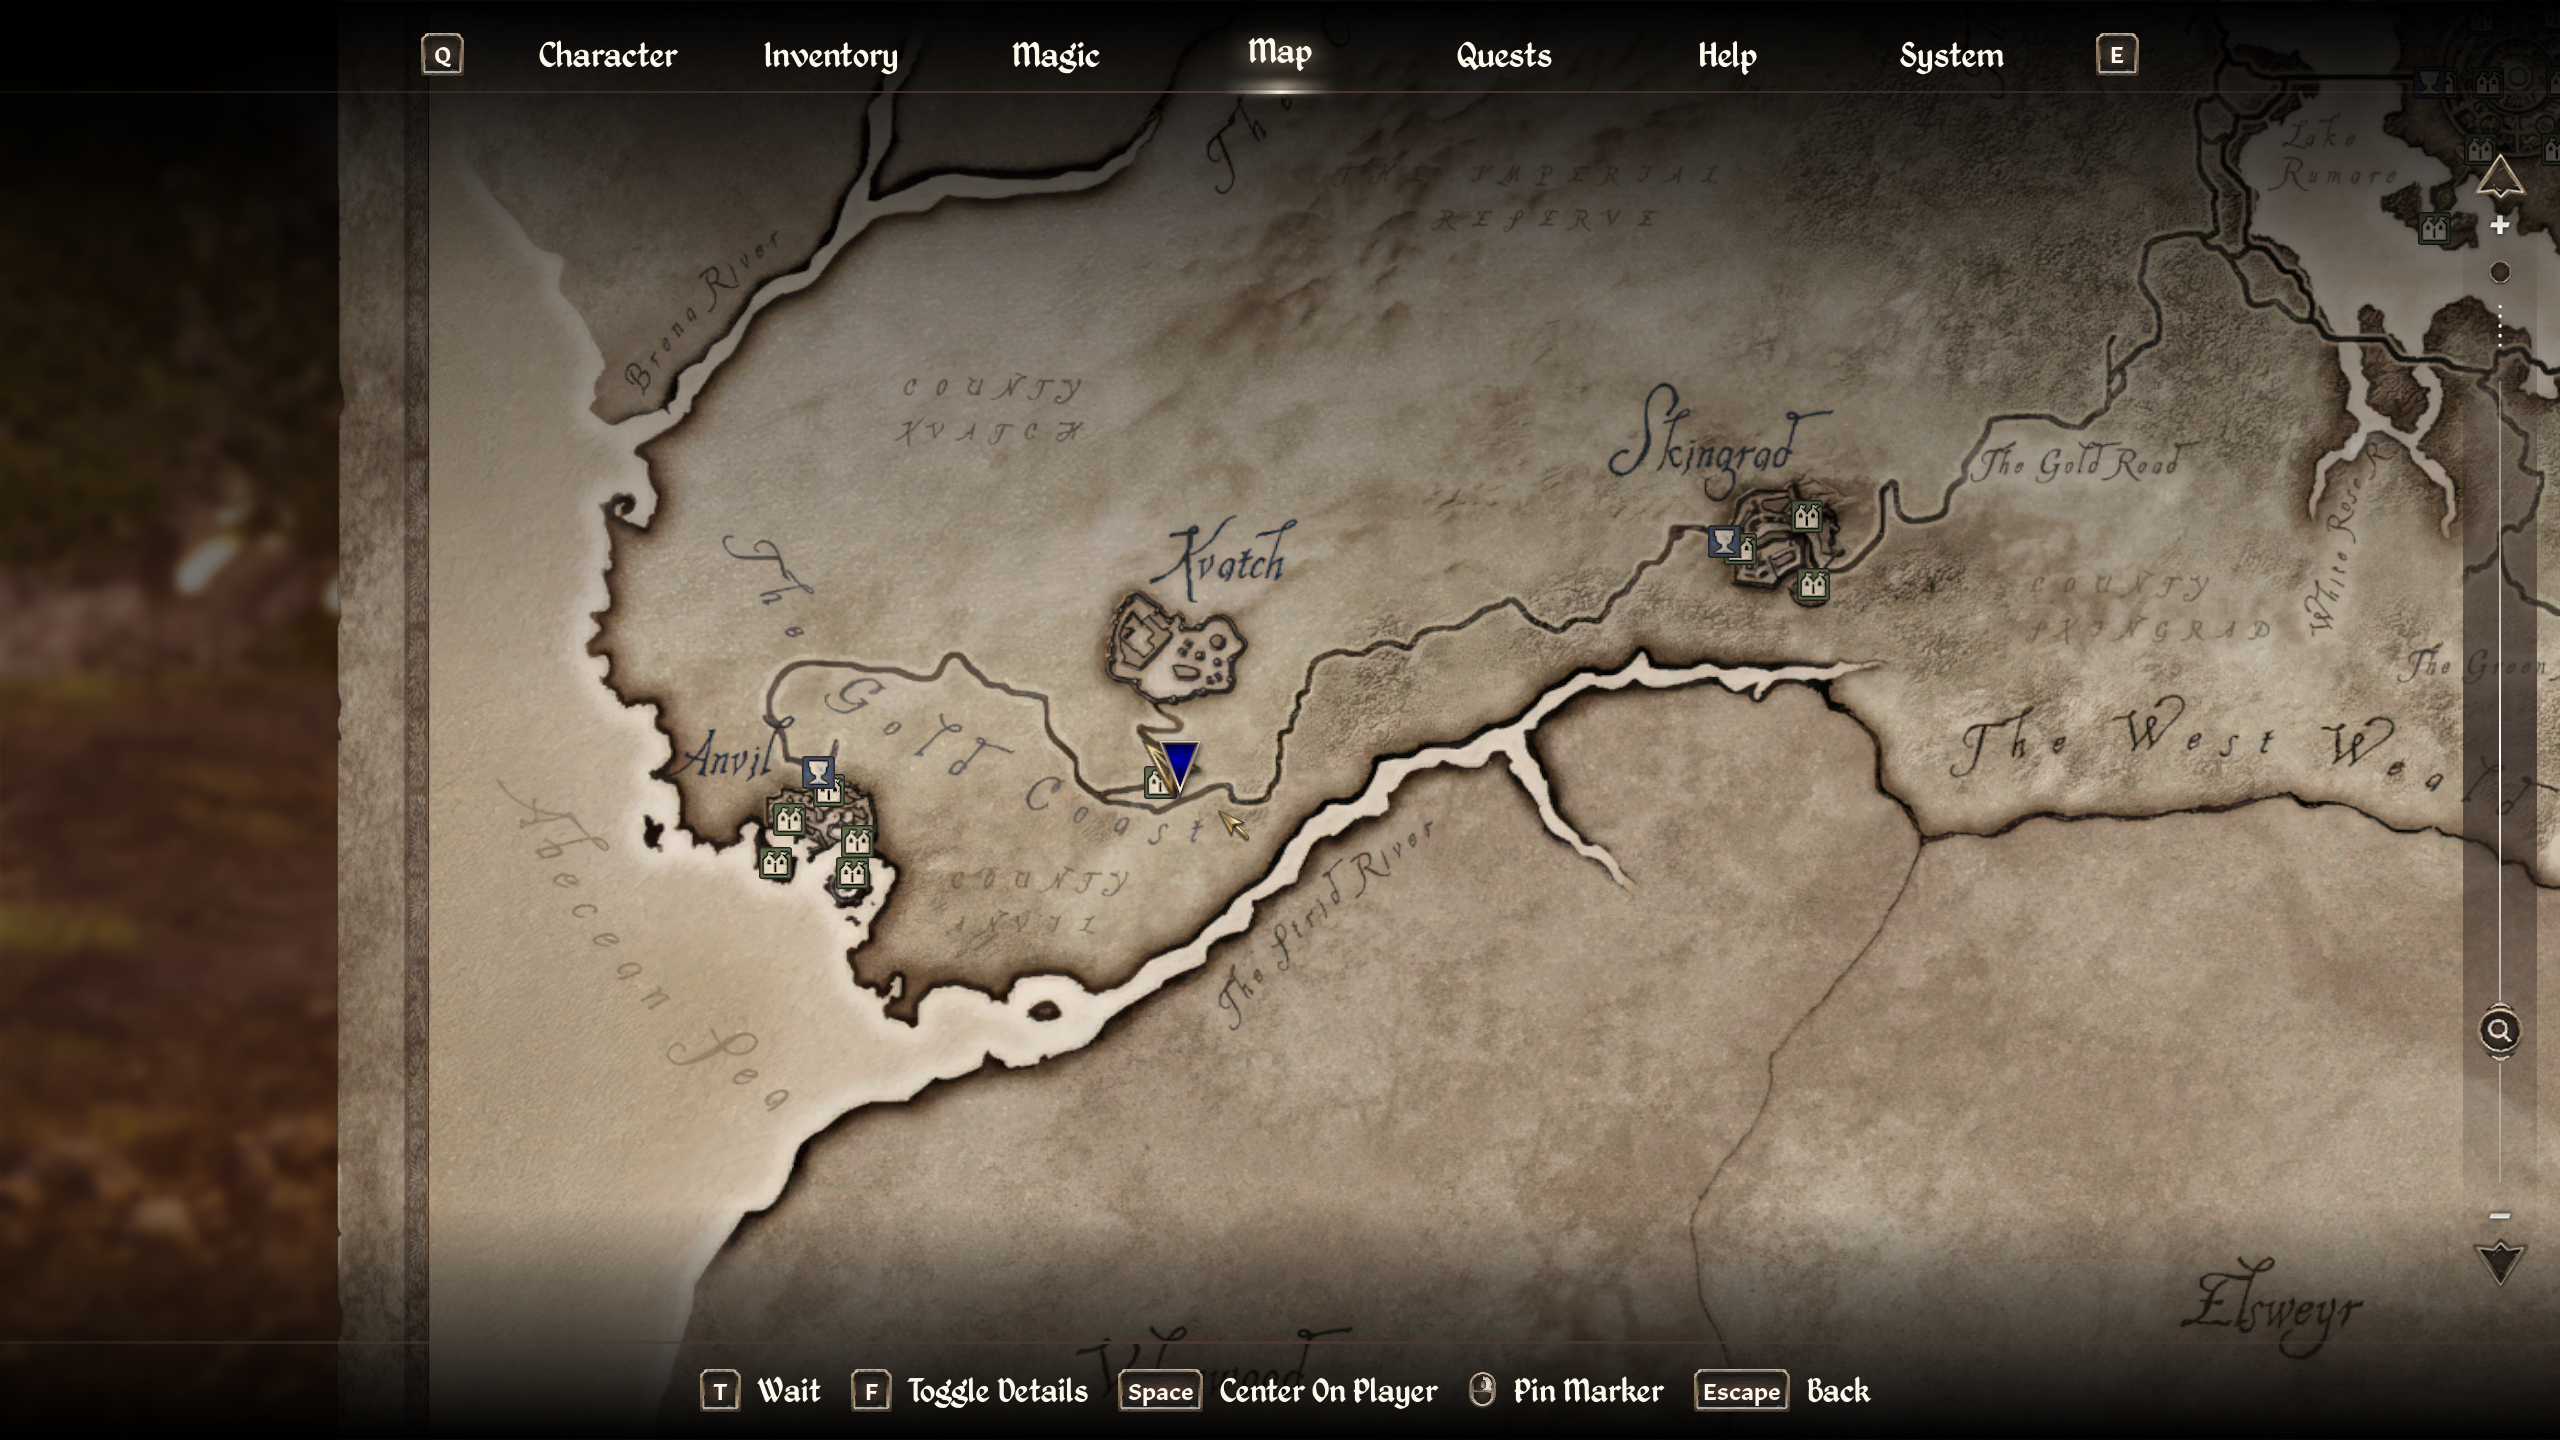
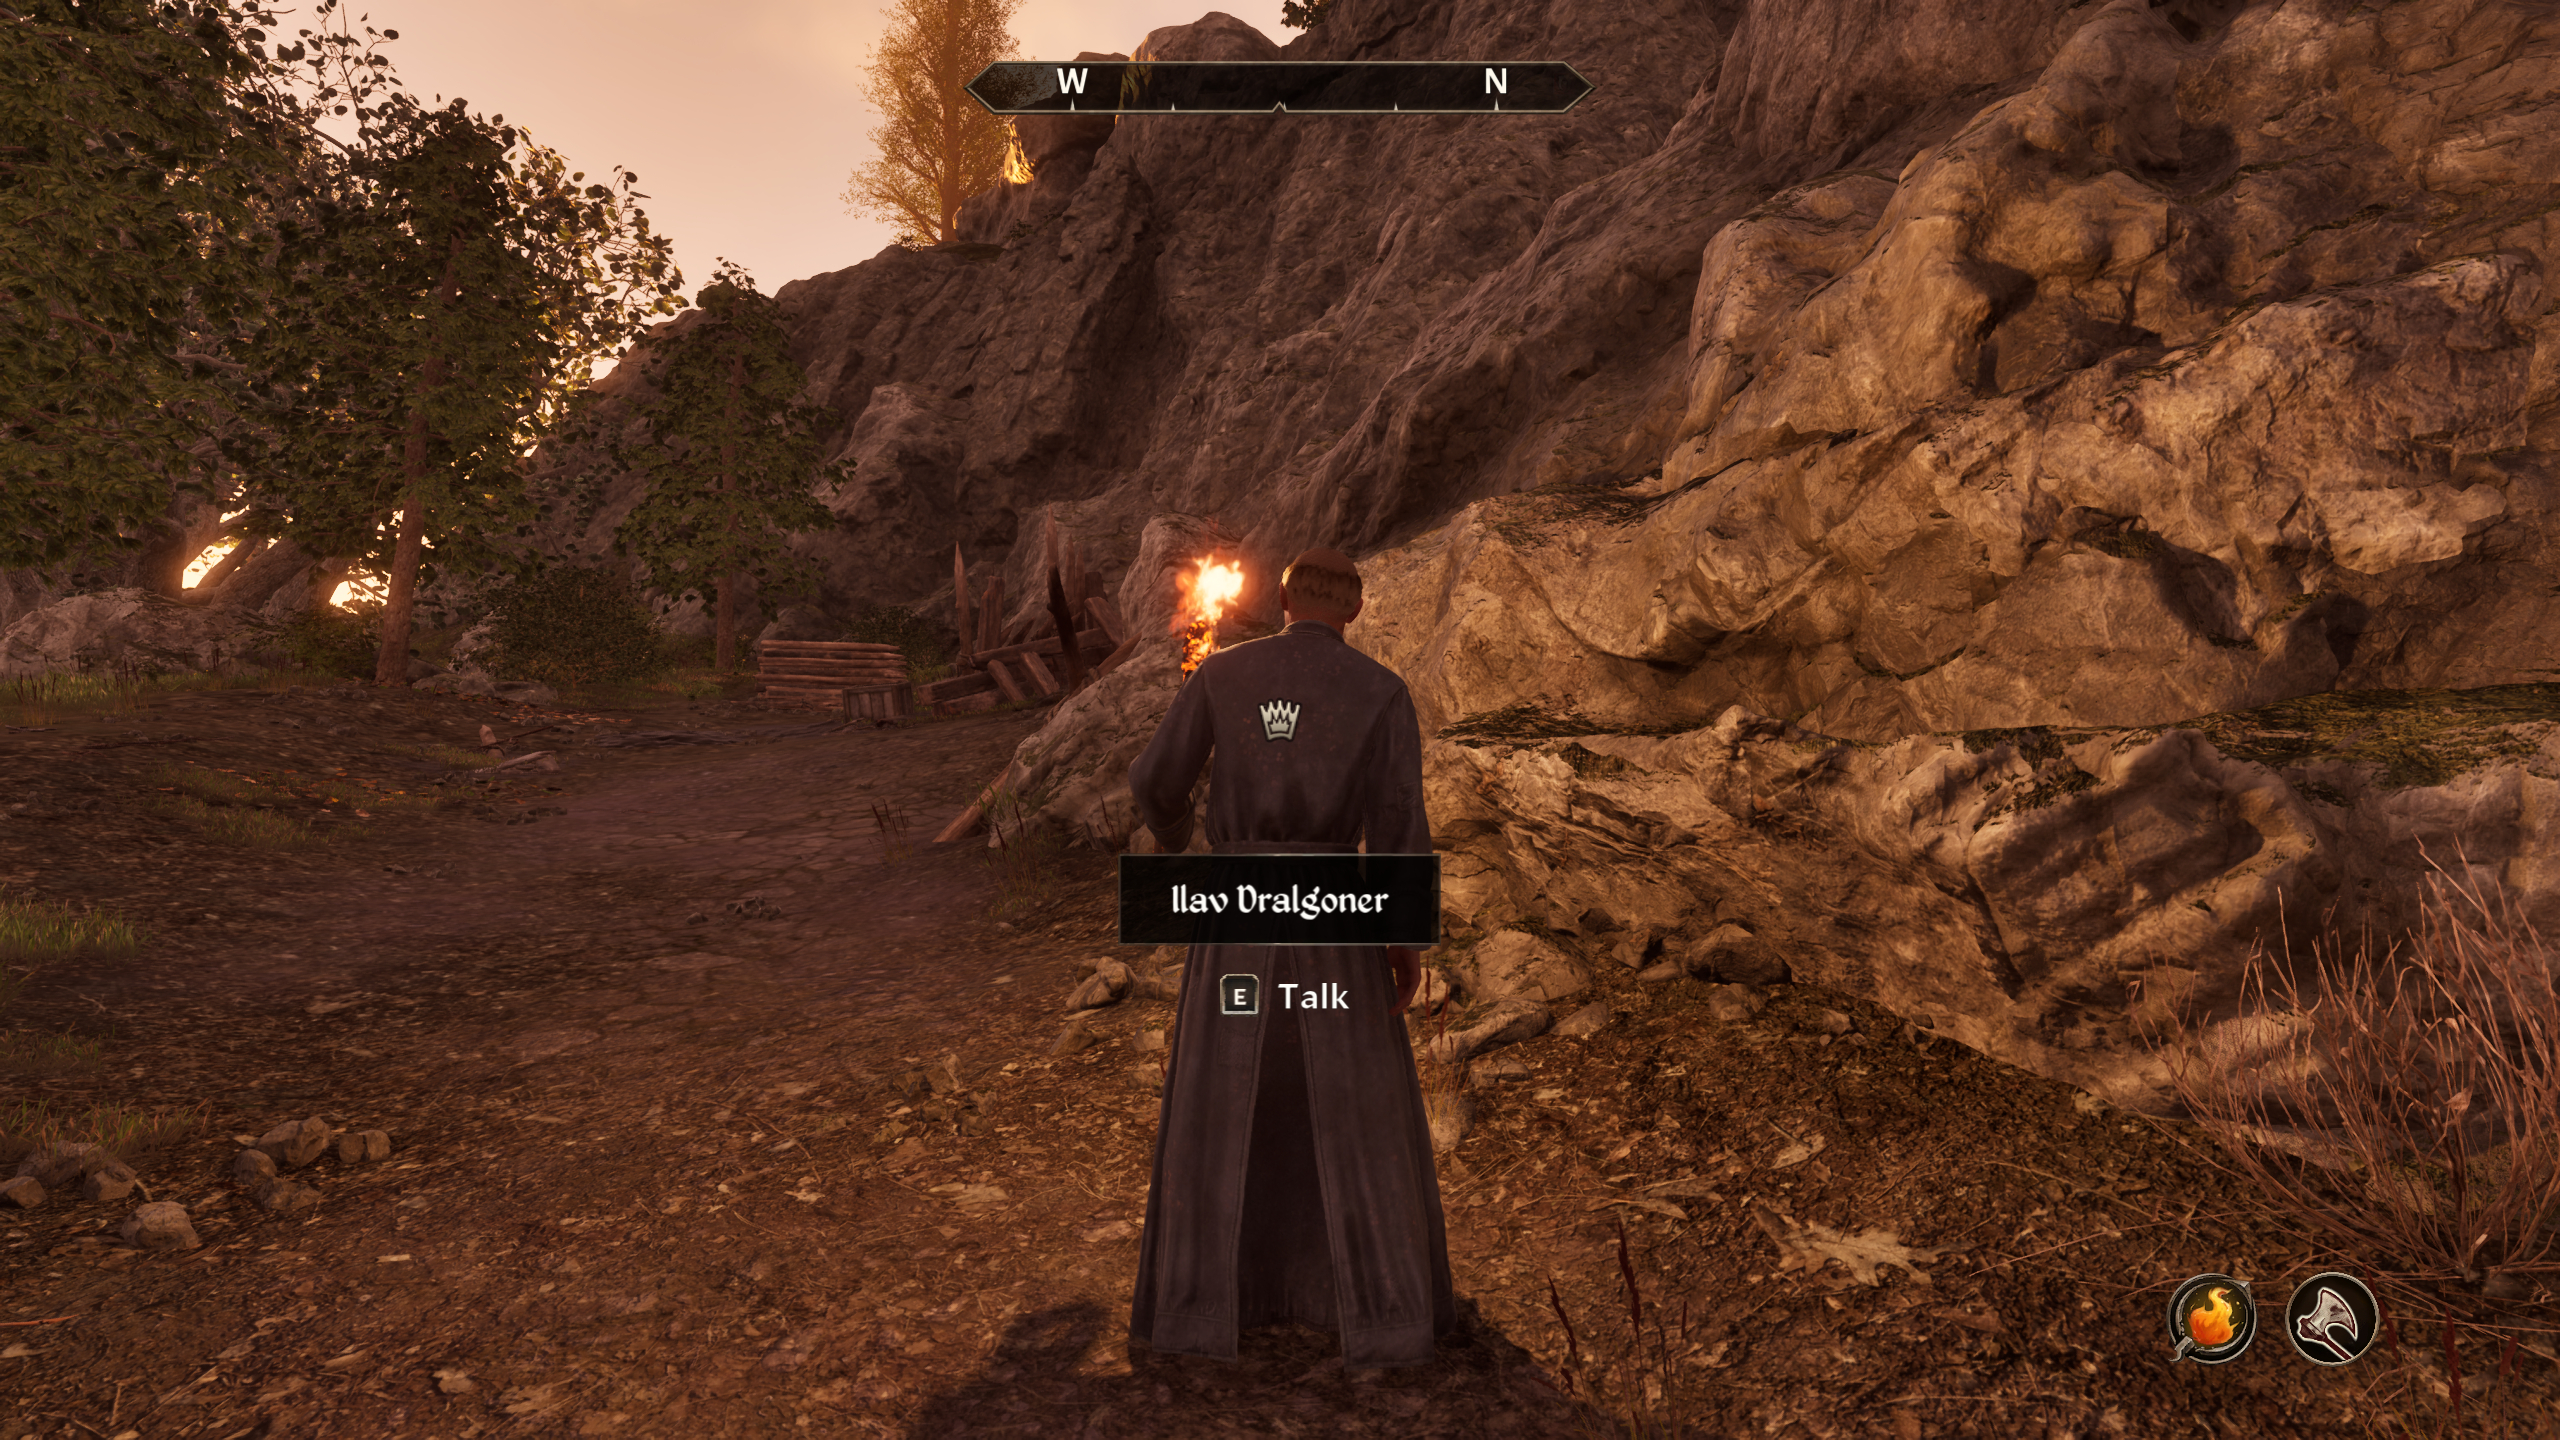
To acquire the Akatosh gear, you should finish the A Wound in Time quest and its subsequent mission, Saving Time Itself. To initiate A Wound in Time, converse with Ilav Dralgonon, a priest located outside the Kvatch refugee camp on the road heading towards the city.
Instead of the non-linear, heavily marked Mehrunes Dagon quest, this one follows a straight path. Here’s a sequential guide to help you finish it:
1. Start at point A…
2. Proceed to point B…
3. Then head to point C…
4. After that, go to point D…
5. Finally, reach the end point E…
This way, you can easily complete the quest without getting lost or confused!
- Speak to Ilav and exhaust his dialogue. Eventually, you’ll be able to ask about disappearances, which begins the A Wound in Time quest.
- Head to the Ayleid ruin Beldaburo to the west of Kvatch and go inside.
- Progress through this linear dungeon until you reach a door blocked by magic, at which point the quest will update.
- Return to Ilav and say “powerful magic”. He’ll then bless you, which completes the A Would in Time and automatically kicks off Saving Time Itself.
- Return to Beldaburo, where you can now pass the door blocked by magic to enter a new part of the ruin.
- Beat the Corelian Lich boss and loot the Elder Scroll from its body.
- Return to Ilav to complete Saving Time Itself, where you’ll then be made a Paladin of the Hour.
After finishing both your tasks, you might be curious about where your rewards are. To collect the loot, you need to talk to Ilav once more and say “equipment”. This gives you the option to select specific equipment pieces or claim all of them in each category (you can repeat the conversation for each category to get every item).
Based on past situations, it’s important to realize that your current load might not be sufficient for all the items. Therefore, select only those you plan to utilize at this moment. Should you need additional equipment, feel free to revisit Ilav later.
These are all the items you can get:
- Battle-Axe of Order
- Bow of Order
- Claymore of Order
- Dagger of Order
- Longsword of Order
- Mace of Order
- Shortsword of Order
- War Axe of Order
- Warhammer of Order
- Order armour set (available in heavy and light versions)
- Order horse armour set (available from Snak Gra-Bura at the Chestnut Handy Stables at the western exit of the Imperial City or any other stable)
Oblivion Remastered: Burning Trail walkthrough
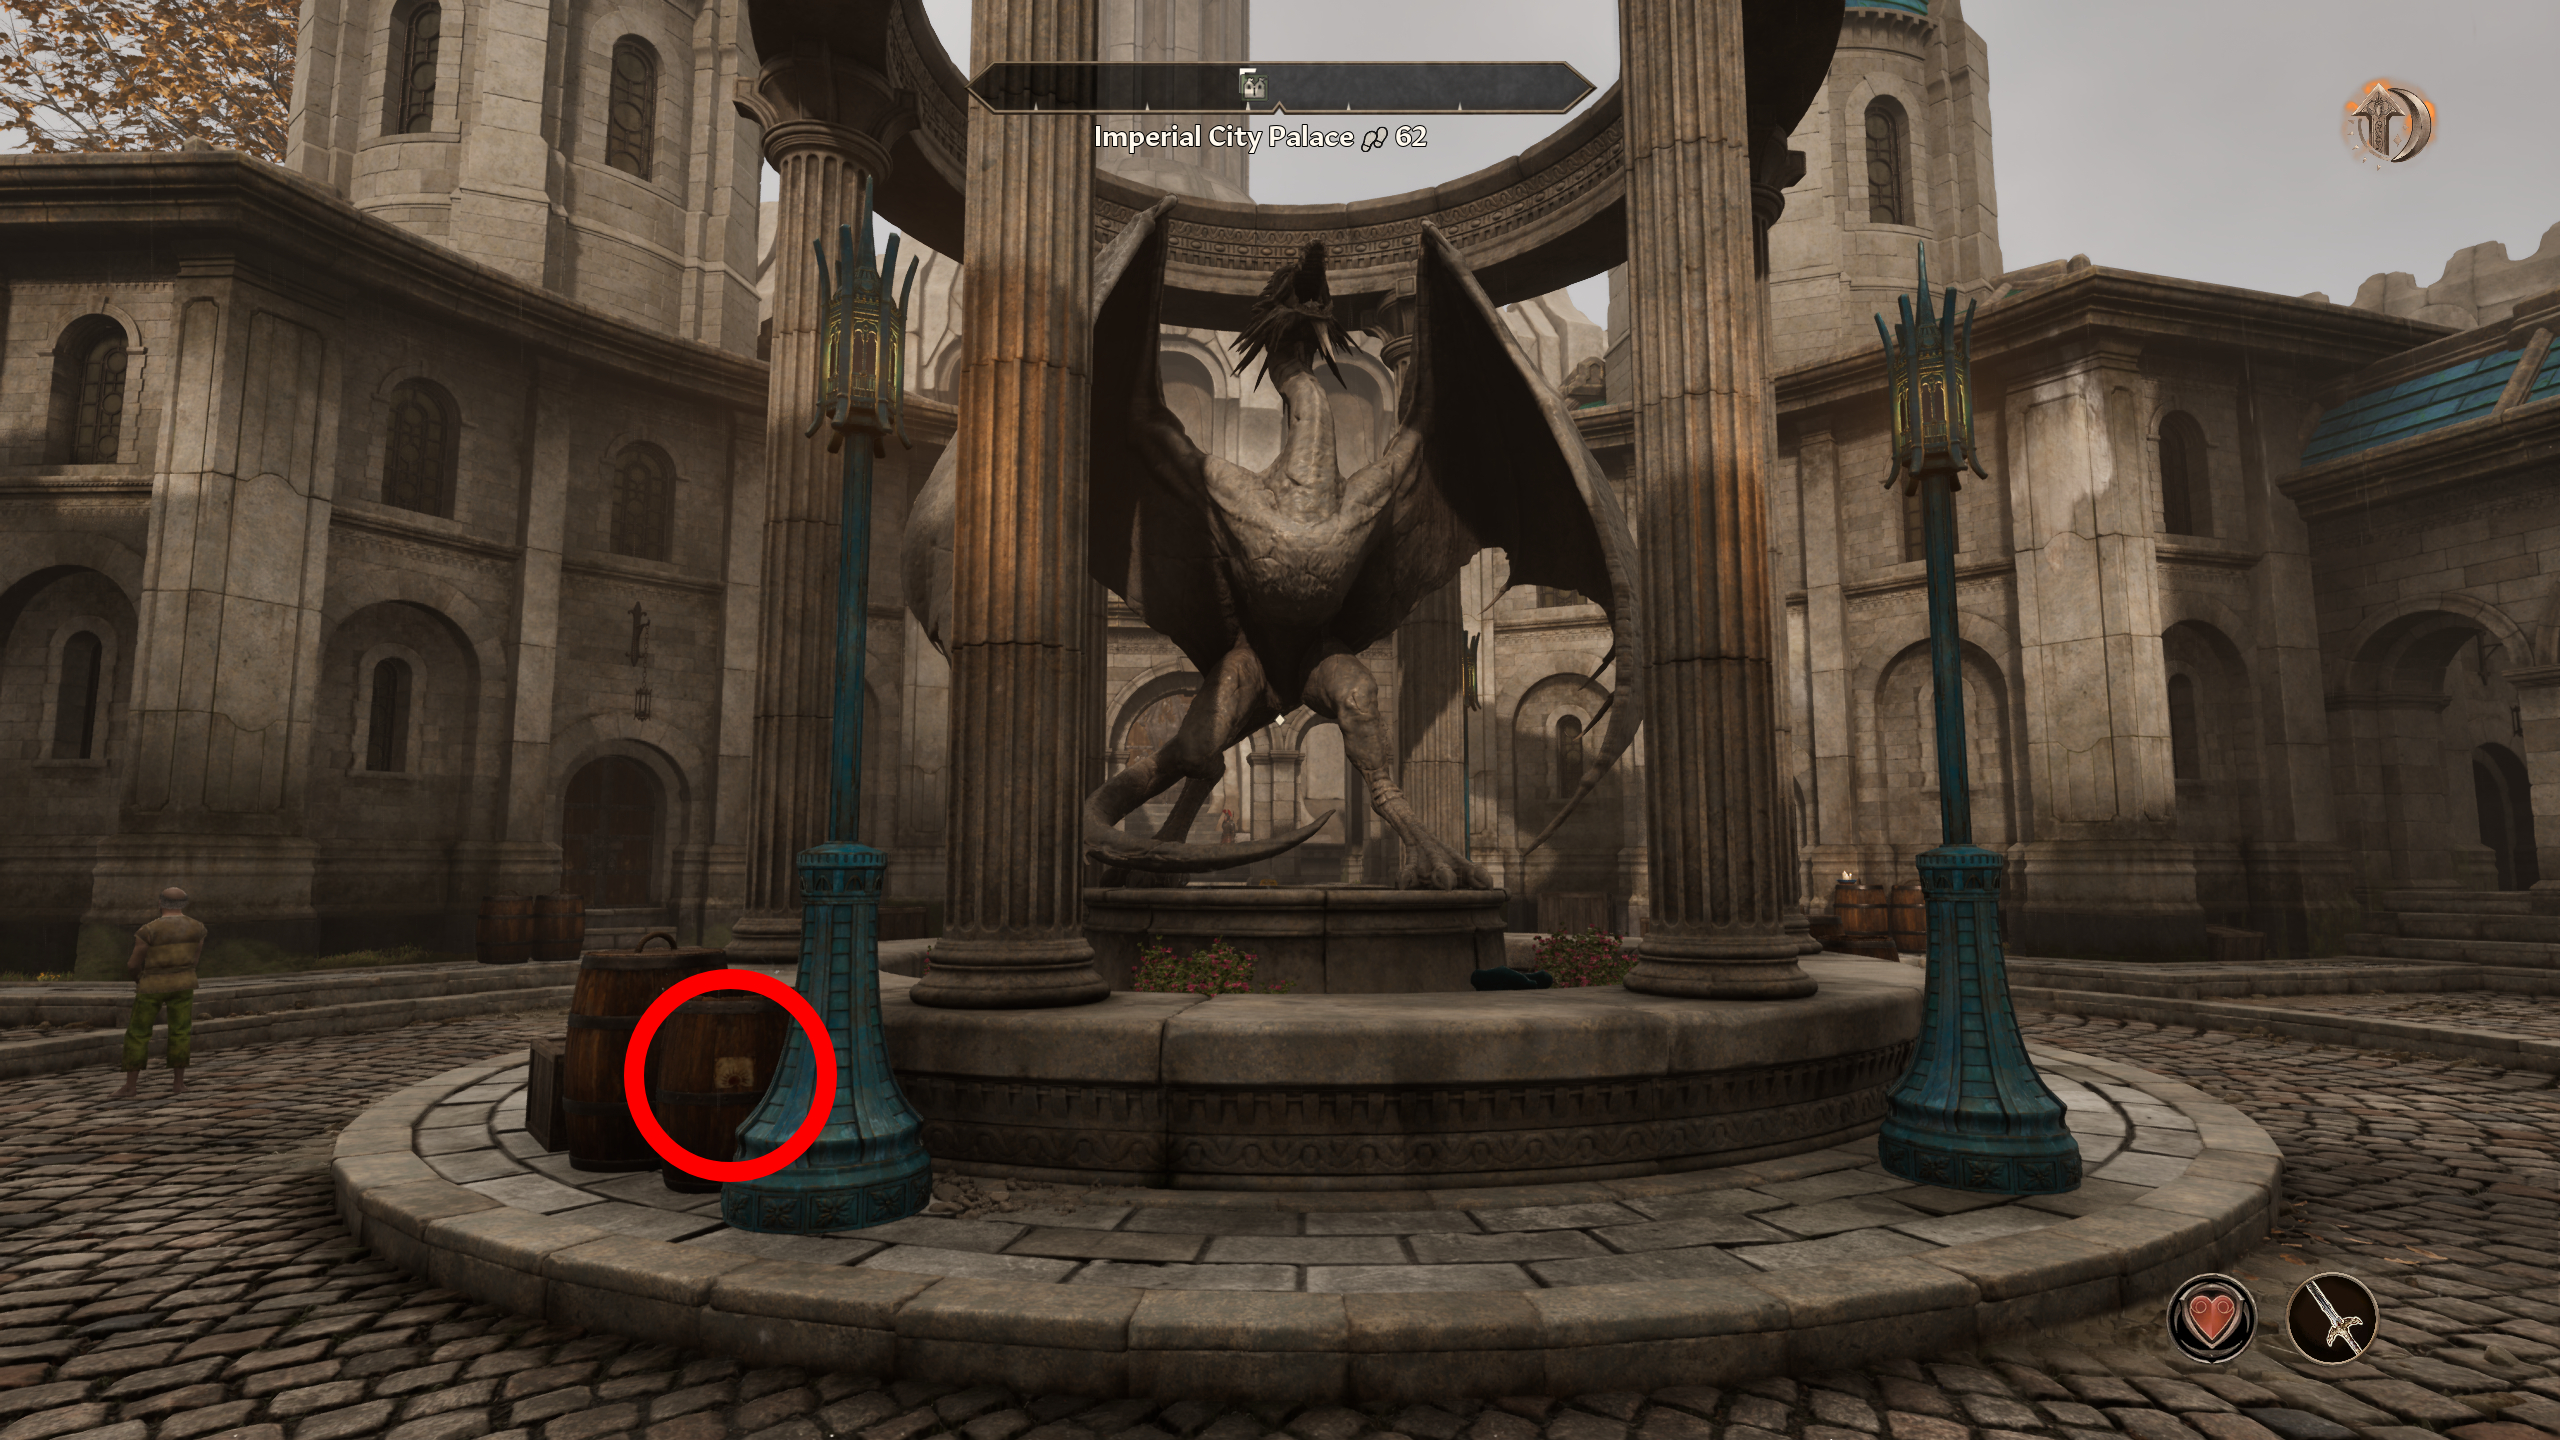
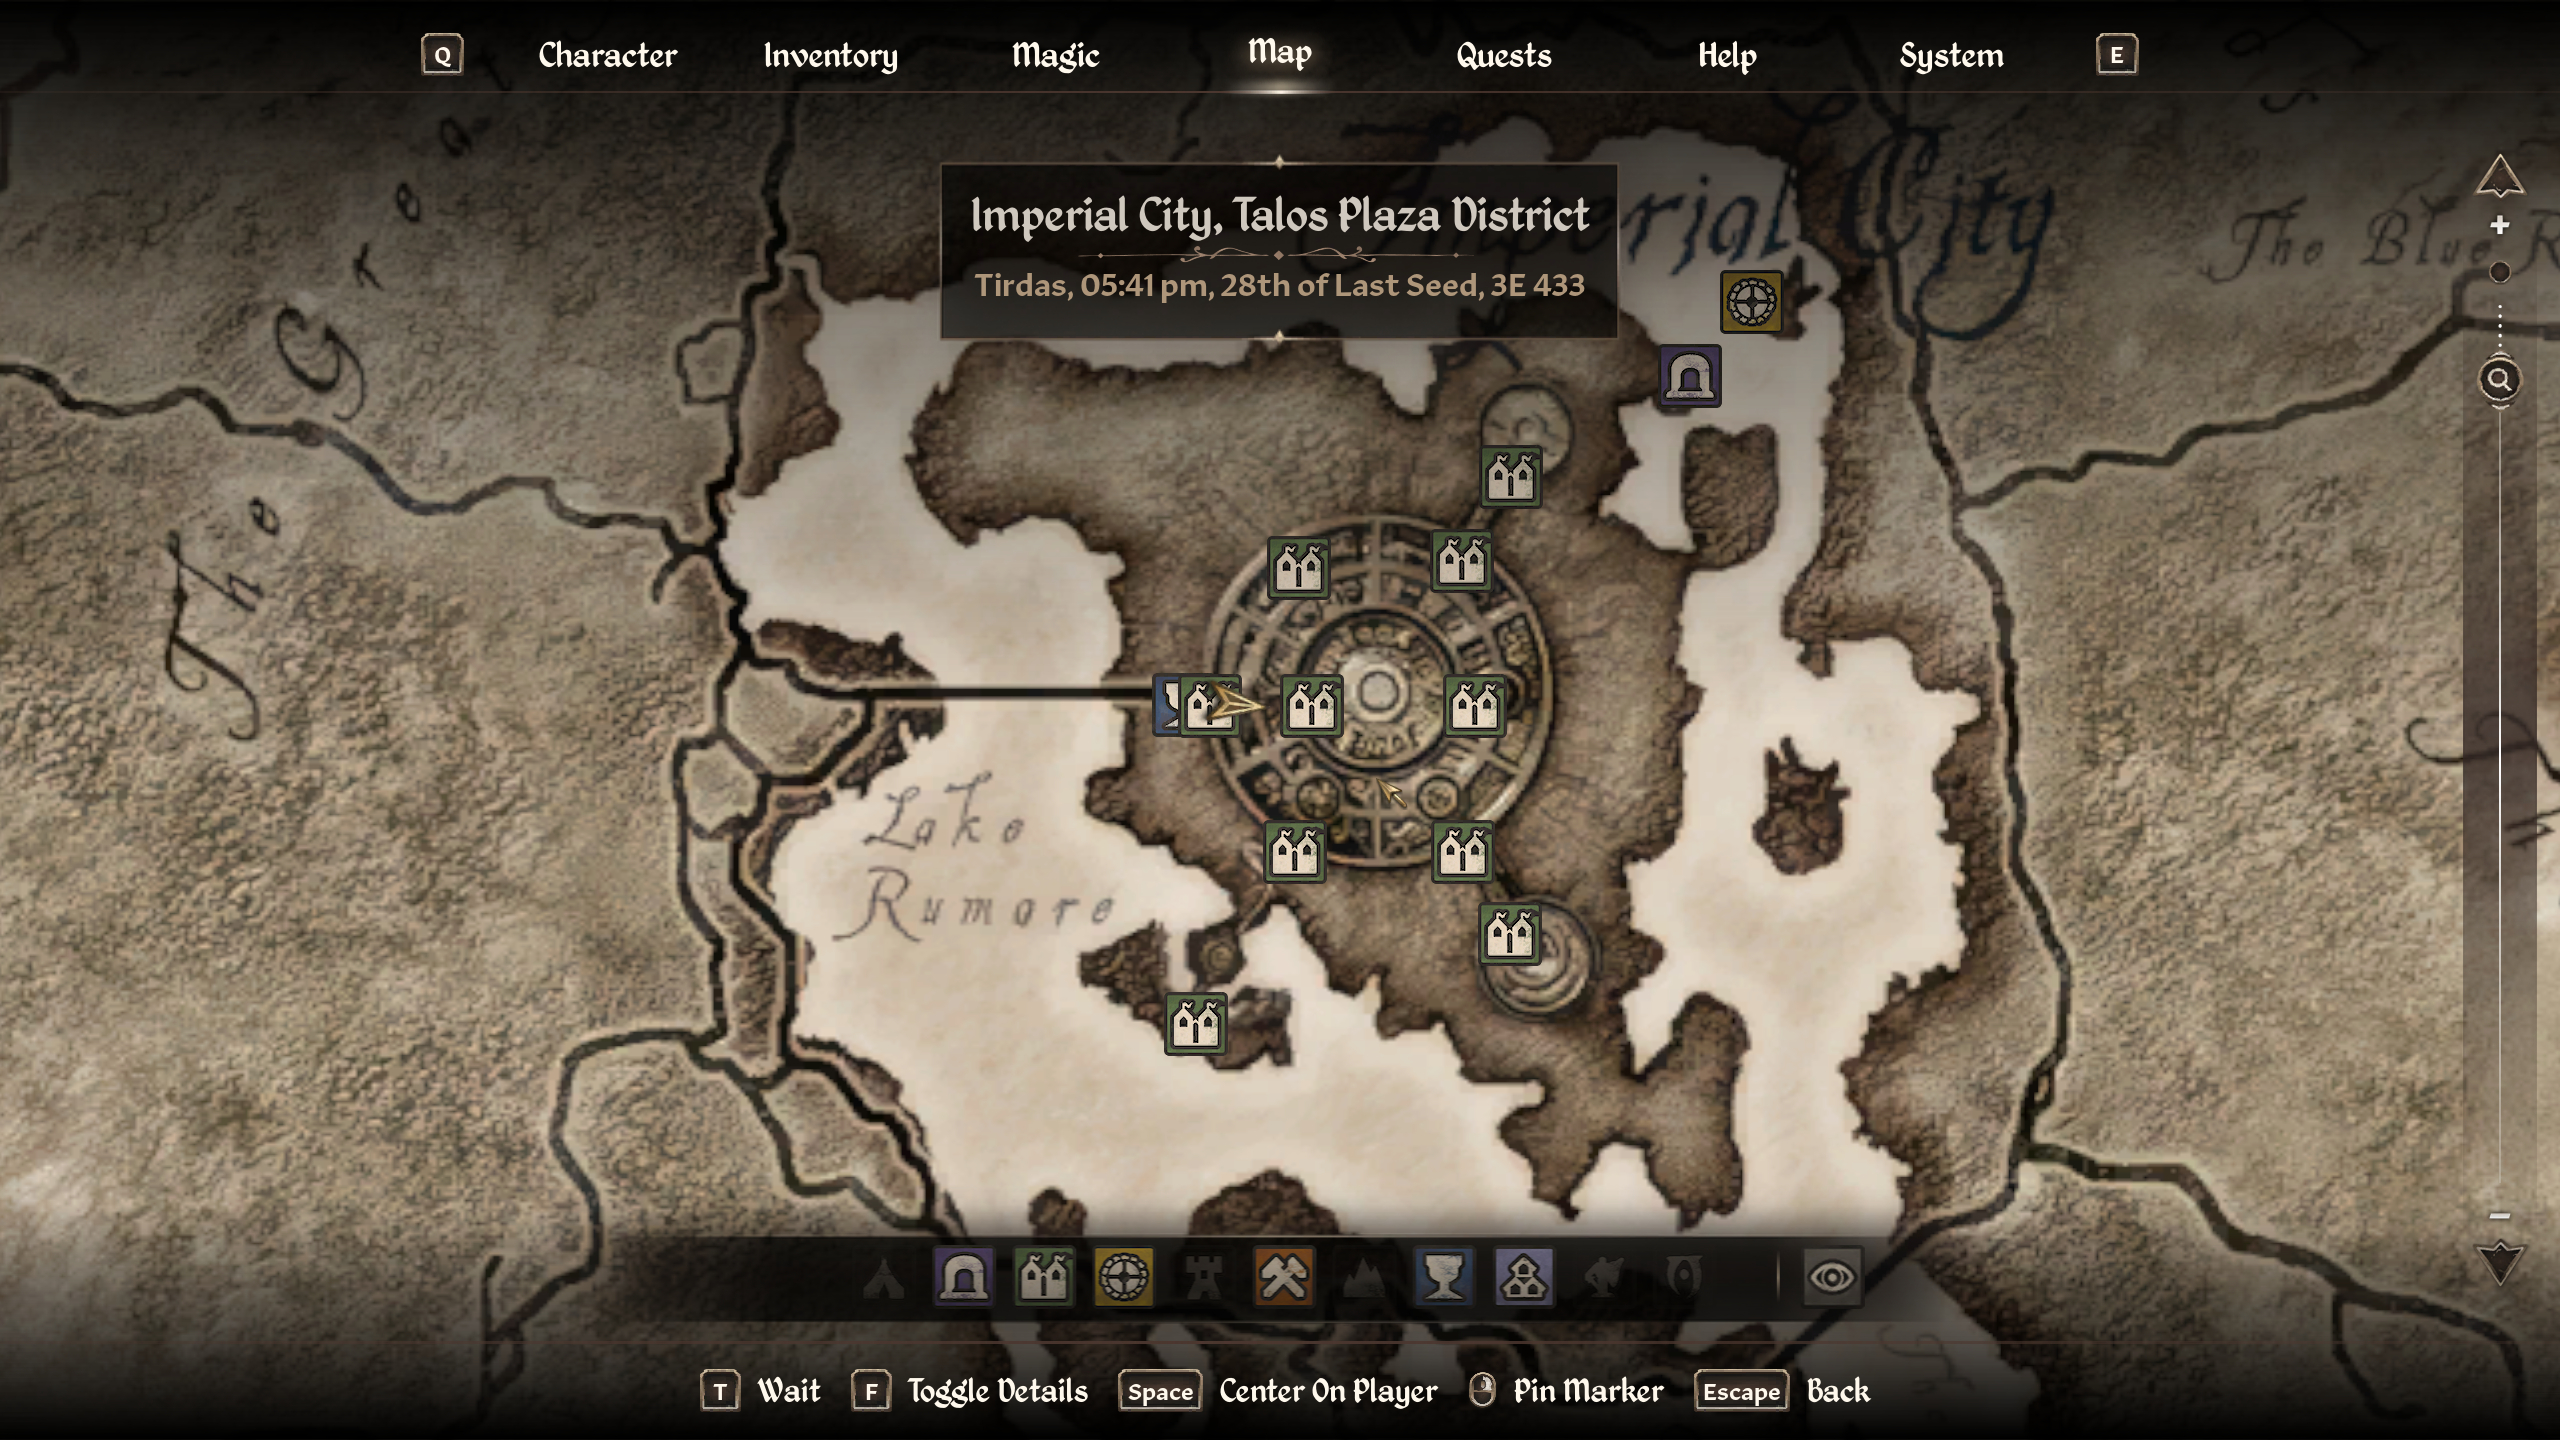
As a passionate player, here’s how I would put it: “To get your hands on the awesome Mehrunes Dagon-themed loot, you’ve got two missions to tackle first – Burning Trail and its sequel The Crimson Cave. To kick off Burning Trail, keep an eye out for a Mythic Dawn pamphlet sitting neatly on a barrel, which is located to the left of the dragon statue in the Talos Plaza District of the Imperial City.
Instead of going there, I suggest you visit Chestnut Handy Stables first, then pass through the grand entrance that leads into the Imperial City. You’ll end up in the Talos Plaza District. From that point, just climb the stairs and grab the note from the barrel near the blue post next to it. It’s as easy as pie!
The “Burning Trail” quest is noticeably more intricate than other content from the deluxe edition, so I’ll provide a step-by-step walkthrough with greater detail. After gathering the initial note, initiate the quest, and you’ll be directed towards Hircine’s Shrine, located south of the Imperial City, where you’ll find another note.
Second Mythic Dawn pamphlet location
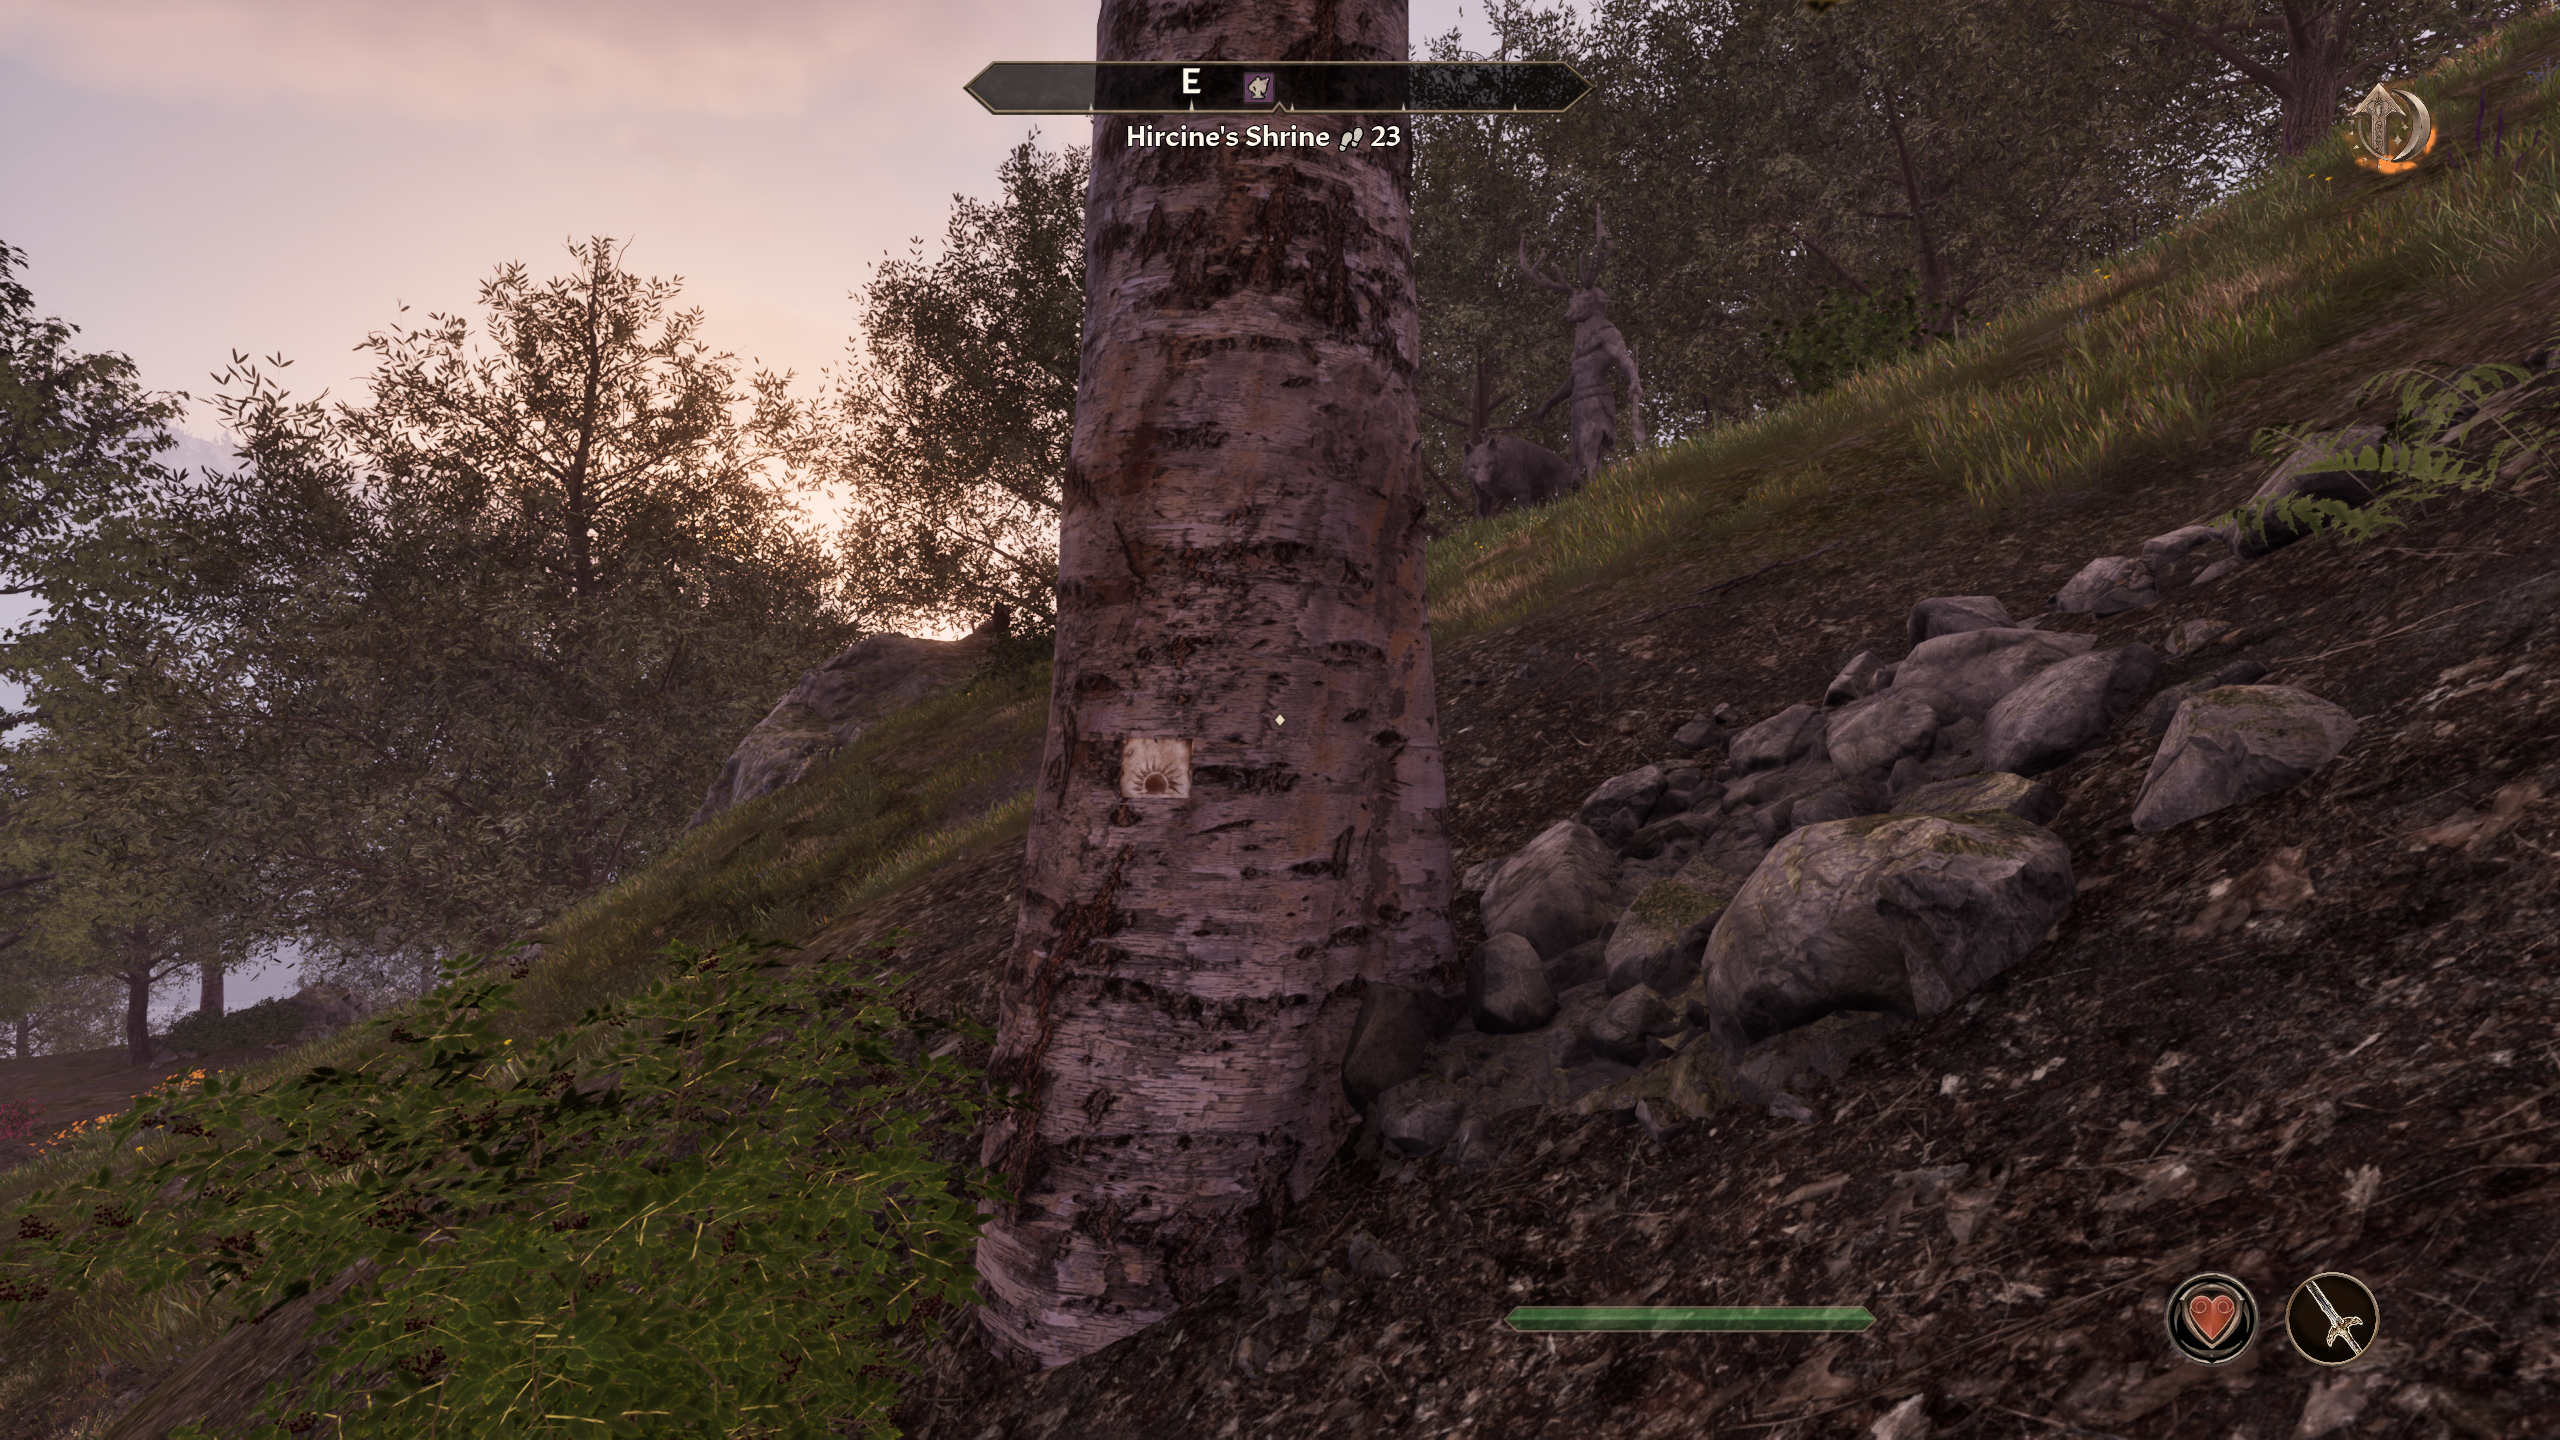
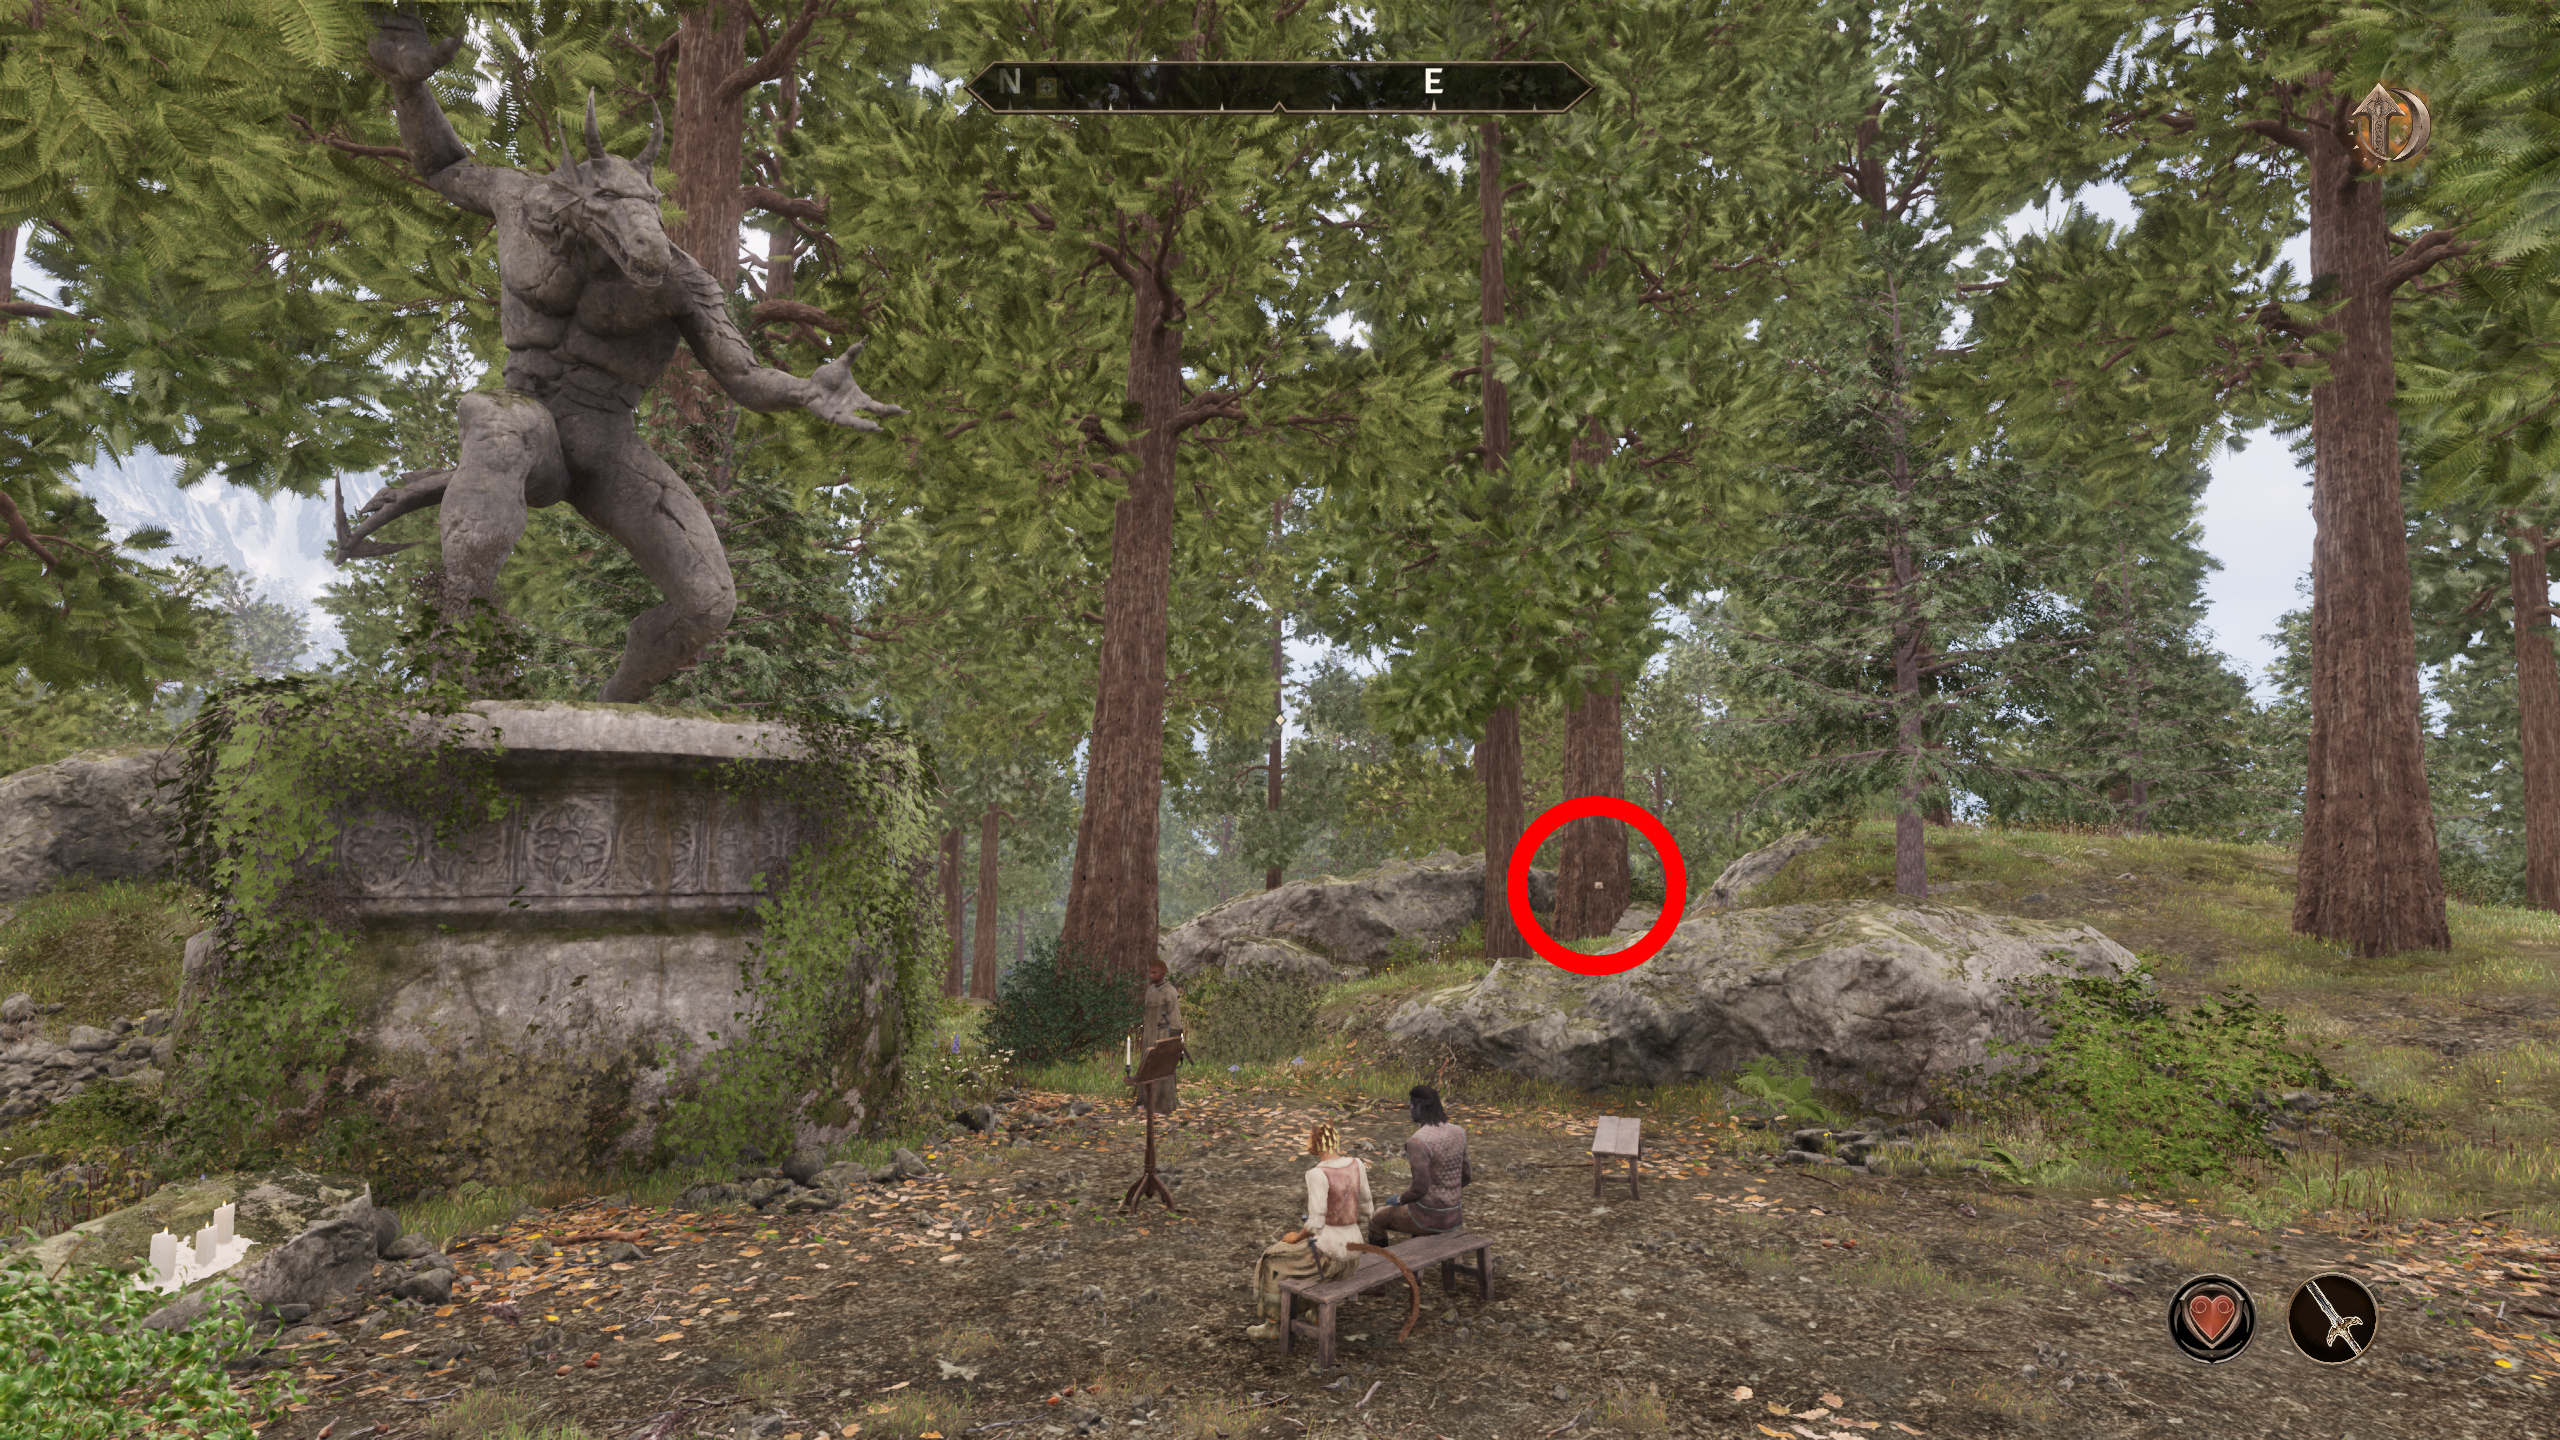
As a gamer, I found myself drawn mysteriously towards Hircine’s Sanctum, with an uncanny feeling that I should follow the watchful eyes of his stonewolf sculpture. The subtle hint was clear – the wolf statue seemed to be gazing in the direction where the next clue might be hidden.
To locate it, stand with your back towards Hircine’s Shrine, then rotate nearly 140 degrees to your right. You’ll find a birch tree that points towards the wolf, further down the slope. The note is actually on the other side of the tree, so make sure to check there once you spot it.
Third Mythic Dawn pamphlet location
After retrieving the note from Hircine’s Sanctuary, your journey will lead you to Molag Bal’s Sanctuary, guided by “the Dawn’s Light”. Initially, this mysterious tip left me puzzled, but upon closer observation of my surroundings, it turned out to be quite straightforward.
To locate the third note, position yourself in front of Molag Bal’s Shrine and spin around to your right. You’ll spot the note fastened on a sturdy tree there. As it’s pinned to the front side of the tree, it should be visible from where you stand.
Fourth Mythic Dawn pamphlet location
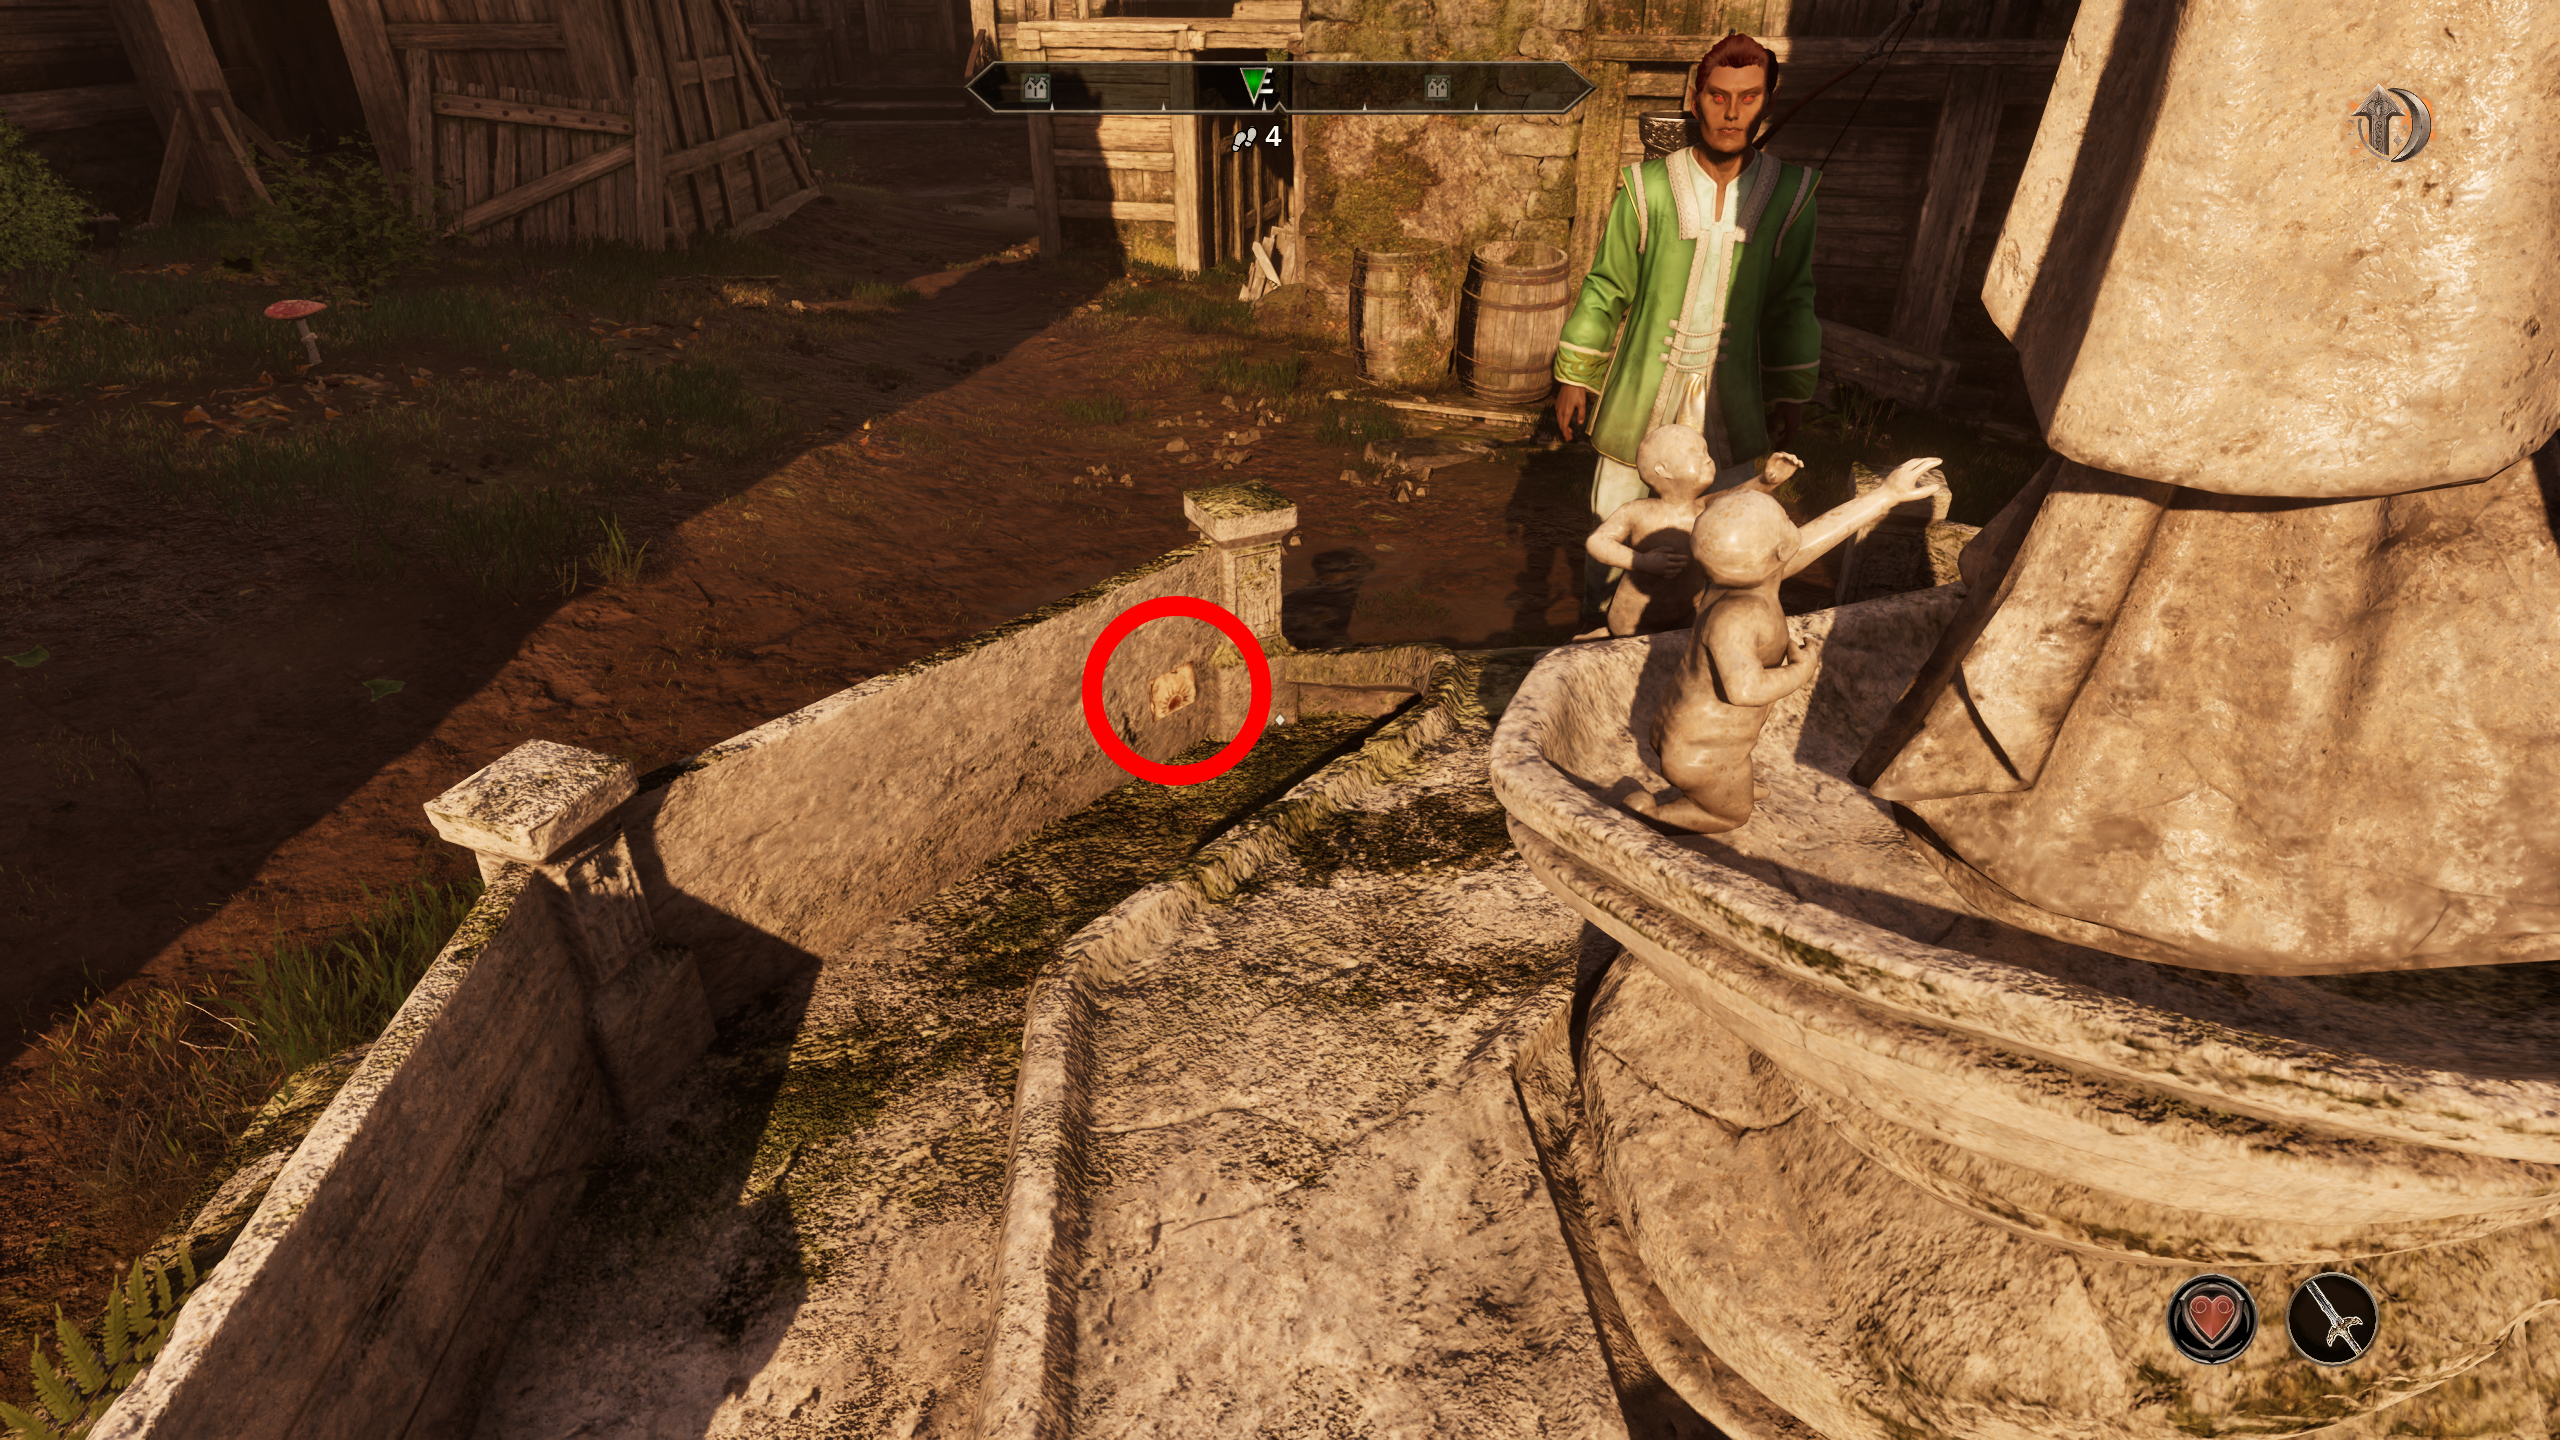
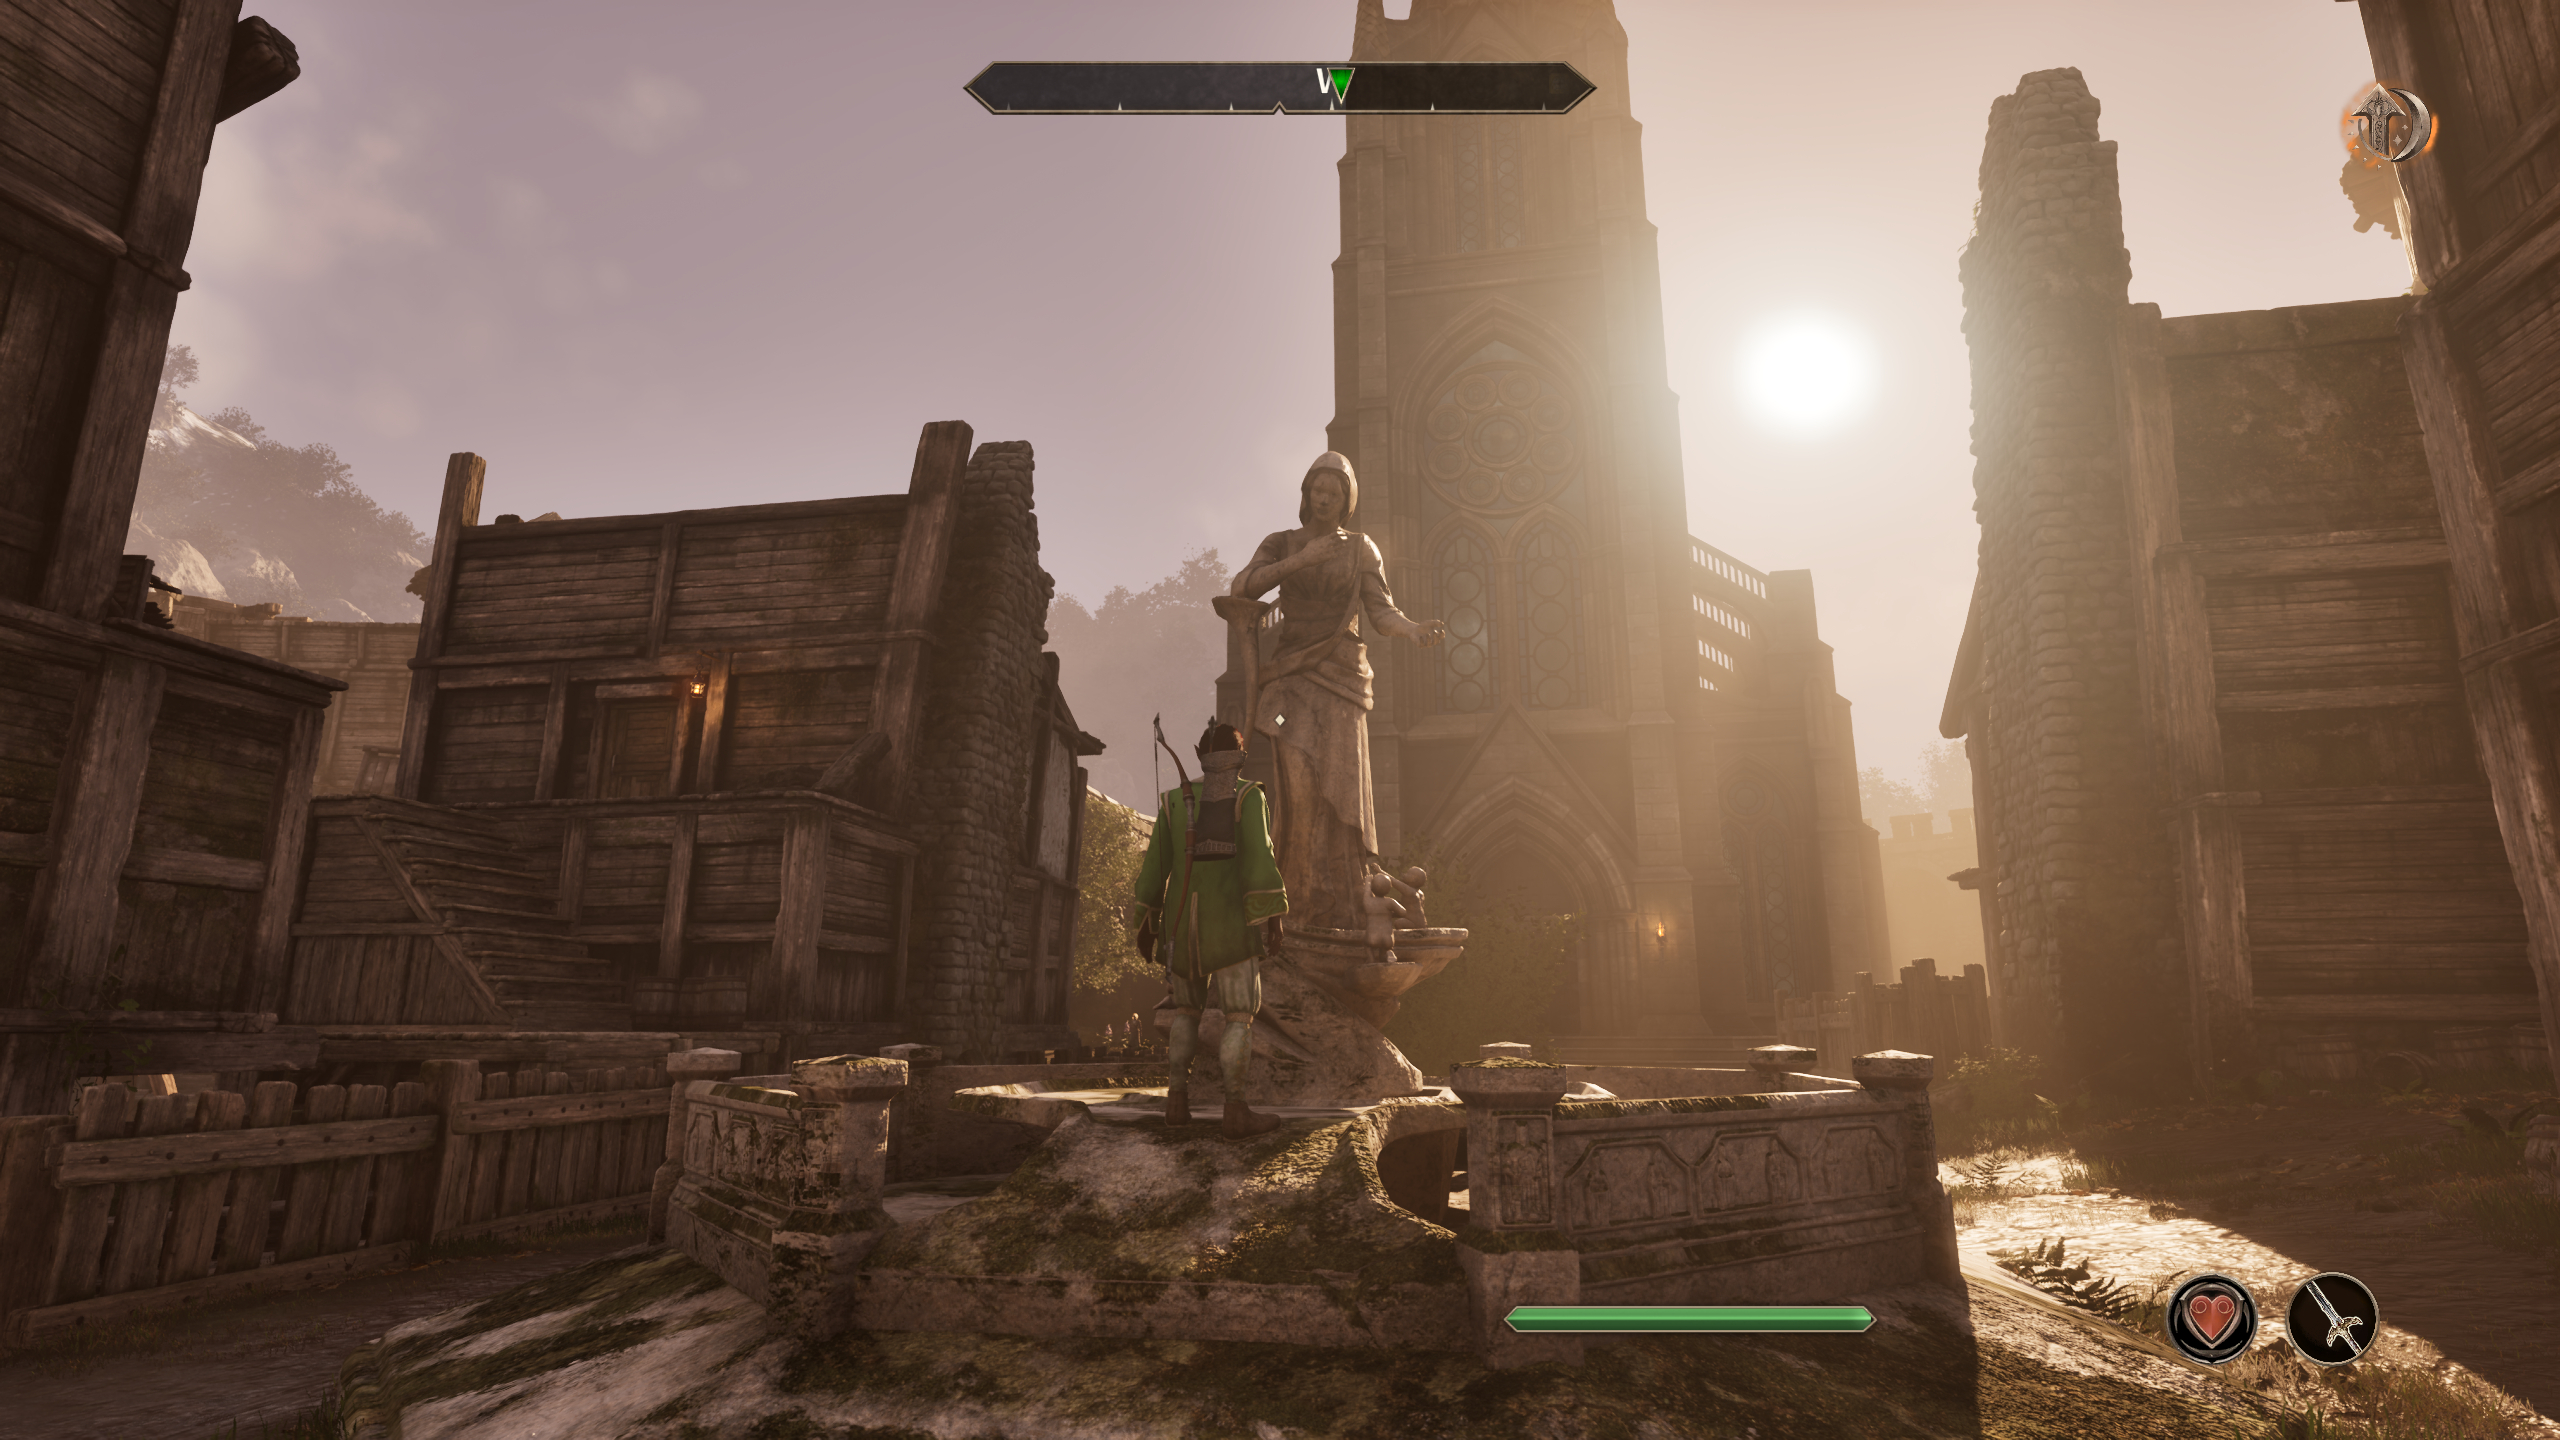
Based on the previous clue, the last note can be found at the statue of the elderly lady considered lucky, which is located in Bravil. To reach it, make your way to Bay Roan Stables outside Bravil, enter through the main entrance and take the second right. You’ll spot the statue outside the church there. I must confess, locating this pamphlet took some time, but it was hidden subtly in broad daylight.
Look towards the statue and gaze to your right, you’ll spot the note affixed to the lower part of the wall encircling the statue.
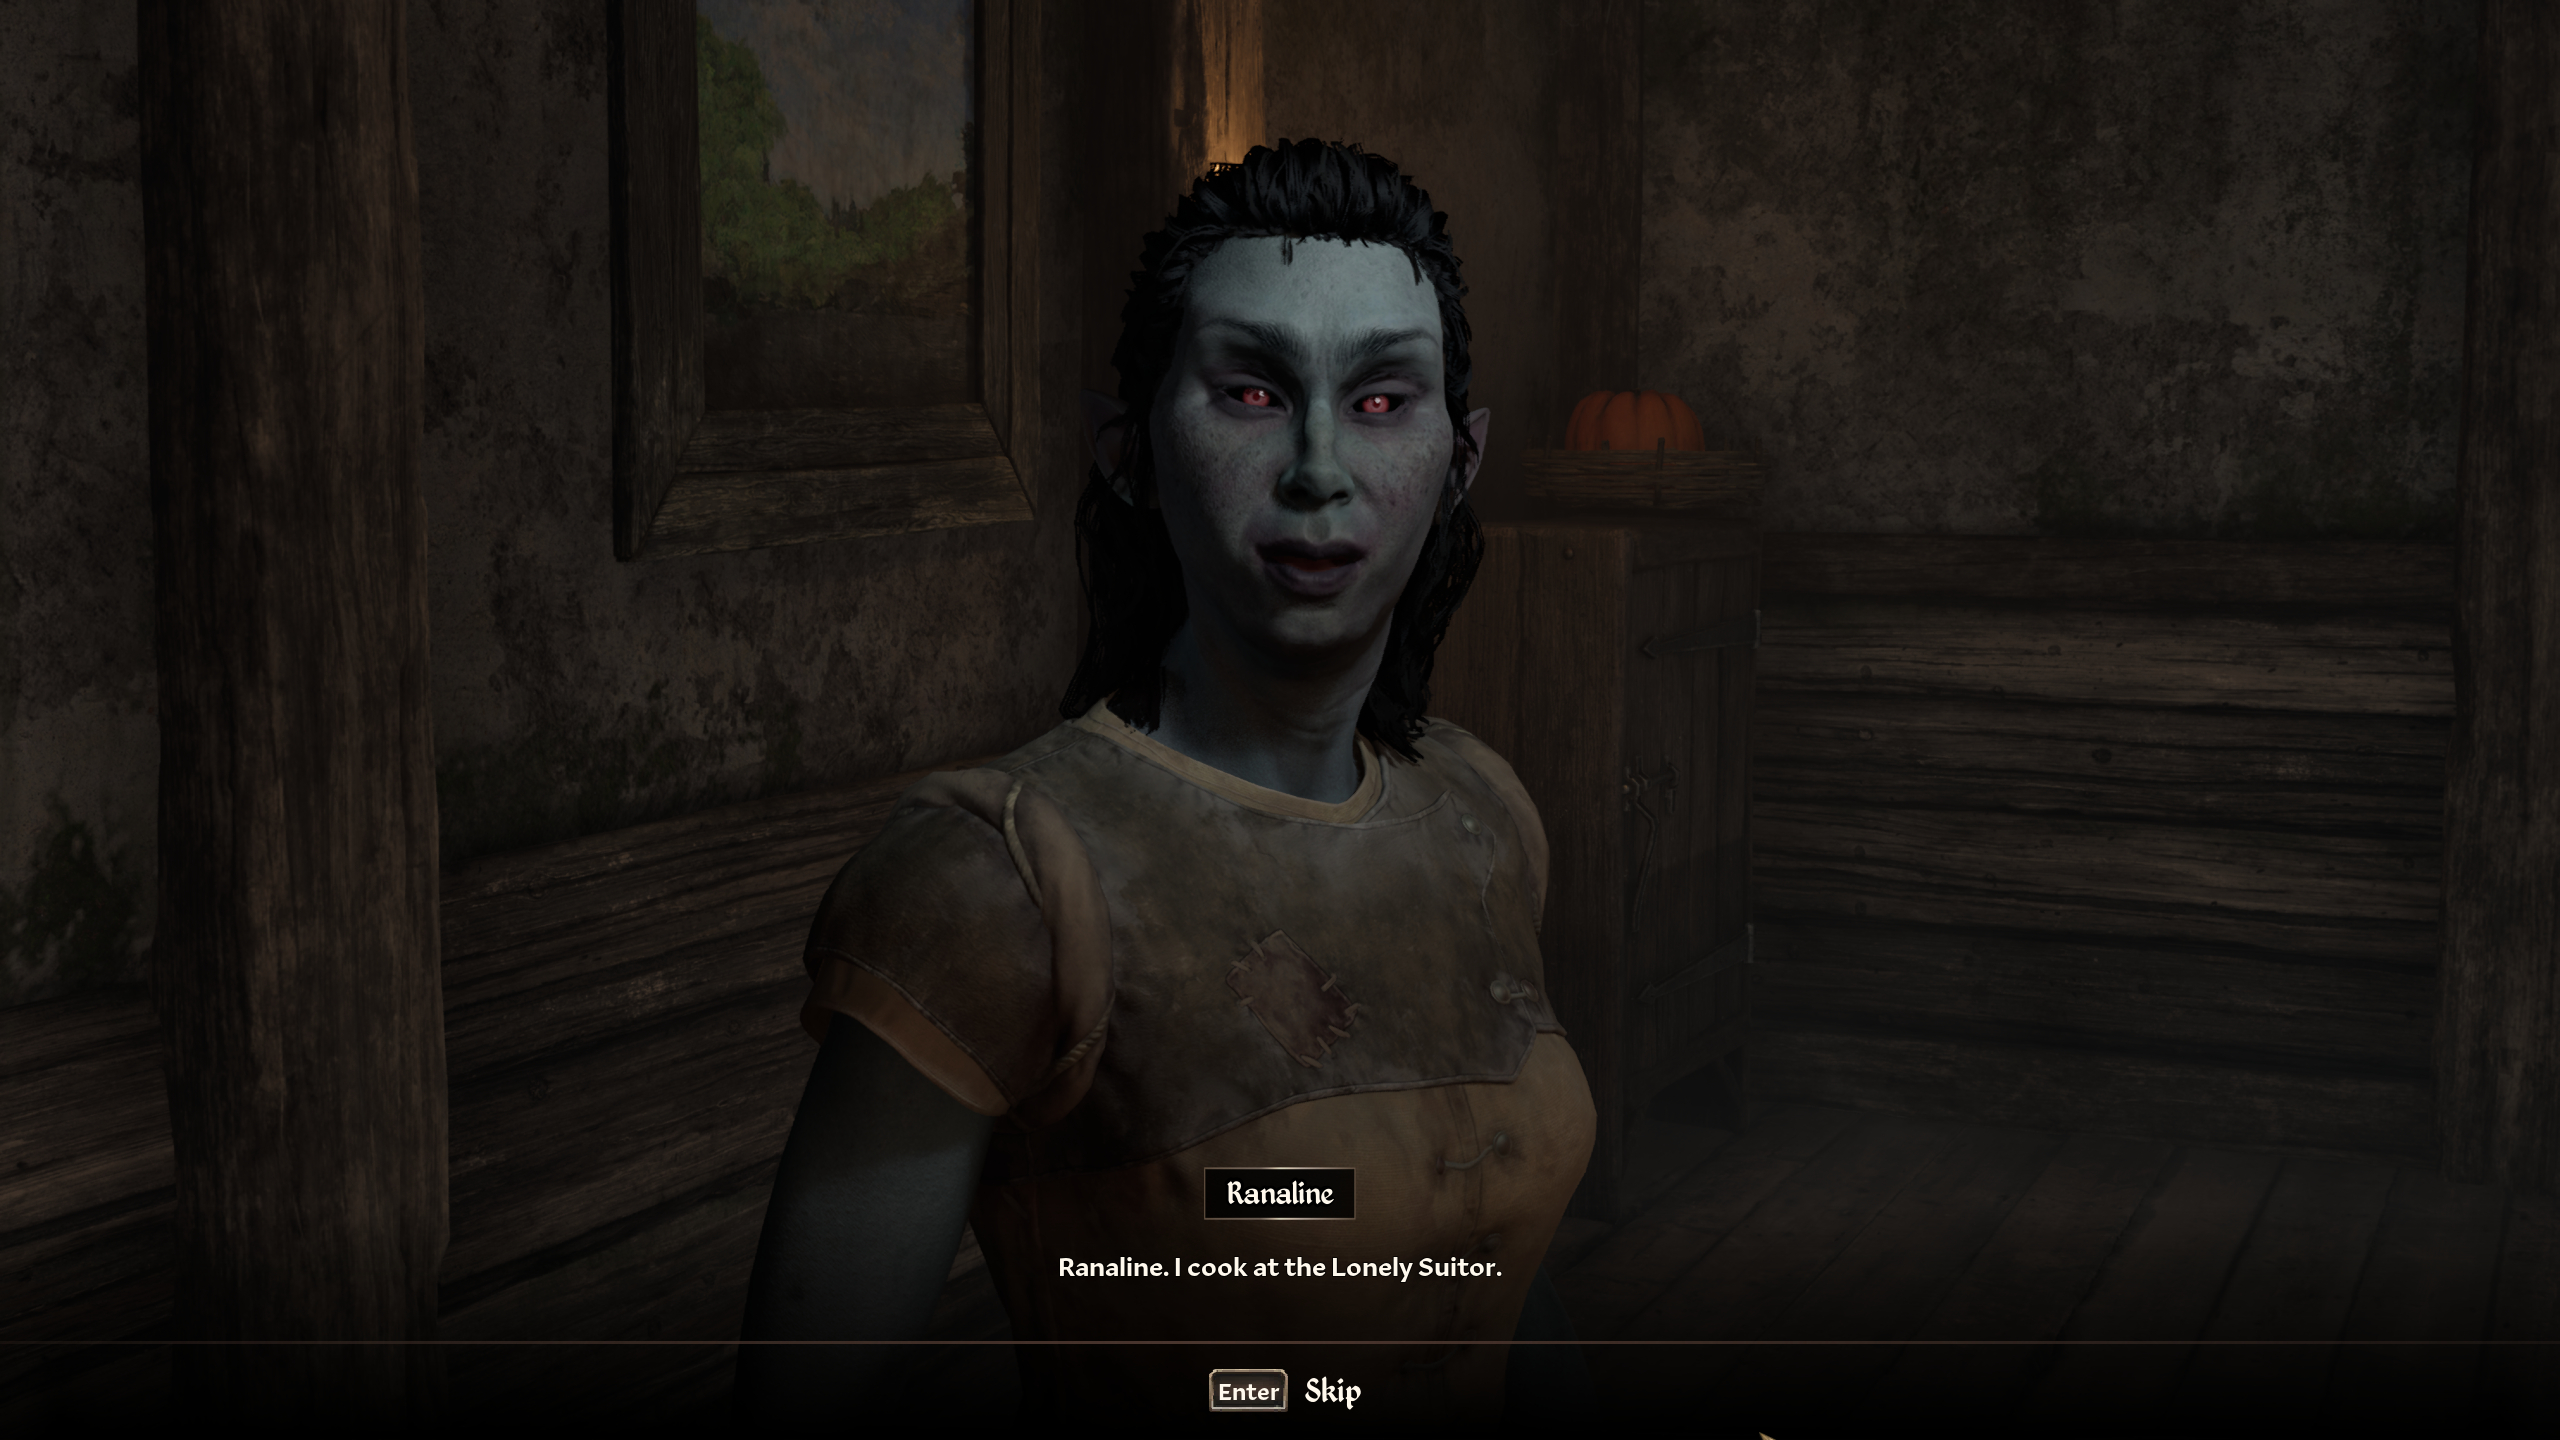
Once you locate the last note, your next destination will be the Secluded Suitor Inn in Bravil, where you’ll need to seek out a reticent Dunmer named Ranaline. She is the one you are searching for.
As a gamer, here’s how I might rephrase it:
“Talk to her and tap on the persuasion mini-game icon located at the bottom left corner of the screen. You can either convince or offer her something to boost our relationship. Once you’ve done that, say ‘Mythic Dawn notes’ to finish Burning Trail. Afterward, you’ll automatically receive your next quest, The Crimson Cave, which leads you to Mingo Cave.
To complete The Crimson Cave:
- Travel to Mingo Cave near Hircine’s Shrine and equip the Mythic Dawn hood and robes that Ranaline gave you before you enter.
- Proceed down into the cave until you reach Mehrunes’ Harbinger sacrificing someone.
- Activate the pyre under the sacrifice.
- Speak to the Harbinger again to complete the quest and earn the Summon Mehrunes’ Harbinger conjuration spell.
Similar to the A Wound in Time mission, your rewards aren’t instantly handed over to you. To collect your prize, you must cast the Summon Mehrunes’ Harbinger spell to bring this NPC back. Once they appear, you’ll find a variety of rewards which you can sort through. However, you won’t be able to take everything at once, so carefully select what suits you best. Should you desire more items, simply cast the spell again.

These are all the items you can get:
- Battle-Axe of Cataclysm
- Bow of Cataclysm
- Claymore of Cataclysm
- Dagger of Cataclysm
- Longsword of Cataclysm
- Mace of Cataclysm
- Shortsword of Cataclysm
- War Axe of Cataclysm
- Warhammer of Cataclysm
- Cataclysm armour set (available in heavy and light versions)
- Cataclysm horse armour set (available from Snak Gra-Bura at the Chestnut Handy Stables at the western exit of the Imperial City or any other stable)
Read More
- Mr. Ring-a-Ding: Doctor Who’s Most Memorable Villain in Years
- How to Get the Cataclysm Armor & Weapons in Oblivion Remastered Deluxe Edition
- Black Clover Reveals Chapter 379 Cover Sparks Noelle Fan Rage
- Nine Sols: 6 Best Jin Farming Methods
- Luffy DESTROYS Kizaru? One Piece Episode 1127 Release Date Revealed!
- Invincible’s Strongest Female Characters
- Top 8 UFC 5 Perks Every Fighter Should Use
- Unlock the Secrets: Khans of the Steppe DLC Release Time for Crusader Kings 3 Revealed!
- Eiichiro Oda: One Piece Creator Ranks 7th Among Best-Selling Authors Ever
- How to Reach 80,000M in Dead Rails
2025-04-23 18:18