Quick Links
-
How to Start the Breaker Box Puzzle?
This one turned out to be quite a brainteaser, as you might not suspect it’s a riddle until well into the game. Unraveling The Enigma of the Fuse Box in Blue Prince took me aback when I discovered that the Fuse Box held a deeper mystery than merely managing power supplies.
If you find yourself in a similar predicament as I once did, don’t worry! My past errors can serve as your compass along this path. To successfully navigate, focus on making both the Laundry Room and the Mail Room appear, along with the Office.
This conundrum shares similar complexity in its workings, akin to the Pump Room puzzle. The secret lies in determining the proper sequence for your button presses to solve it effectively.
How to Start the Breaker Box Puzzle?
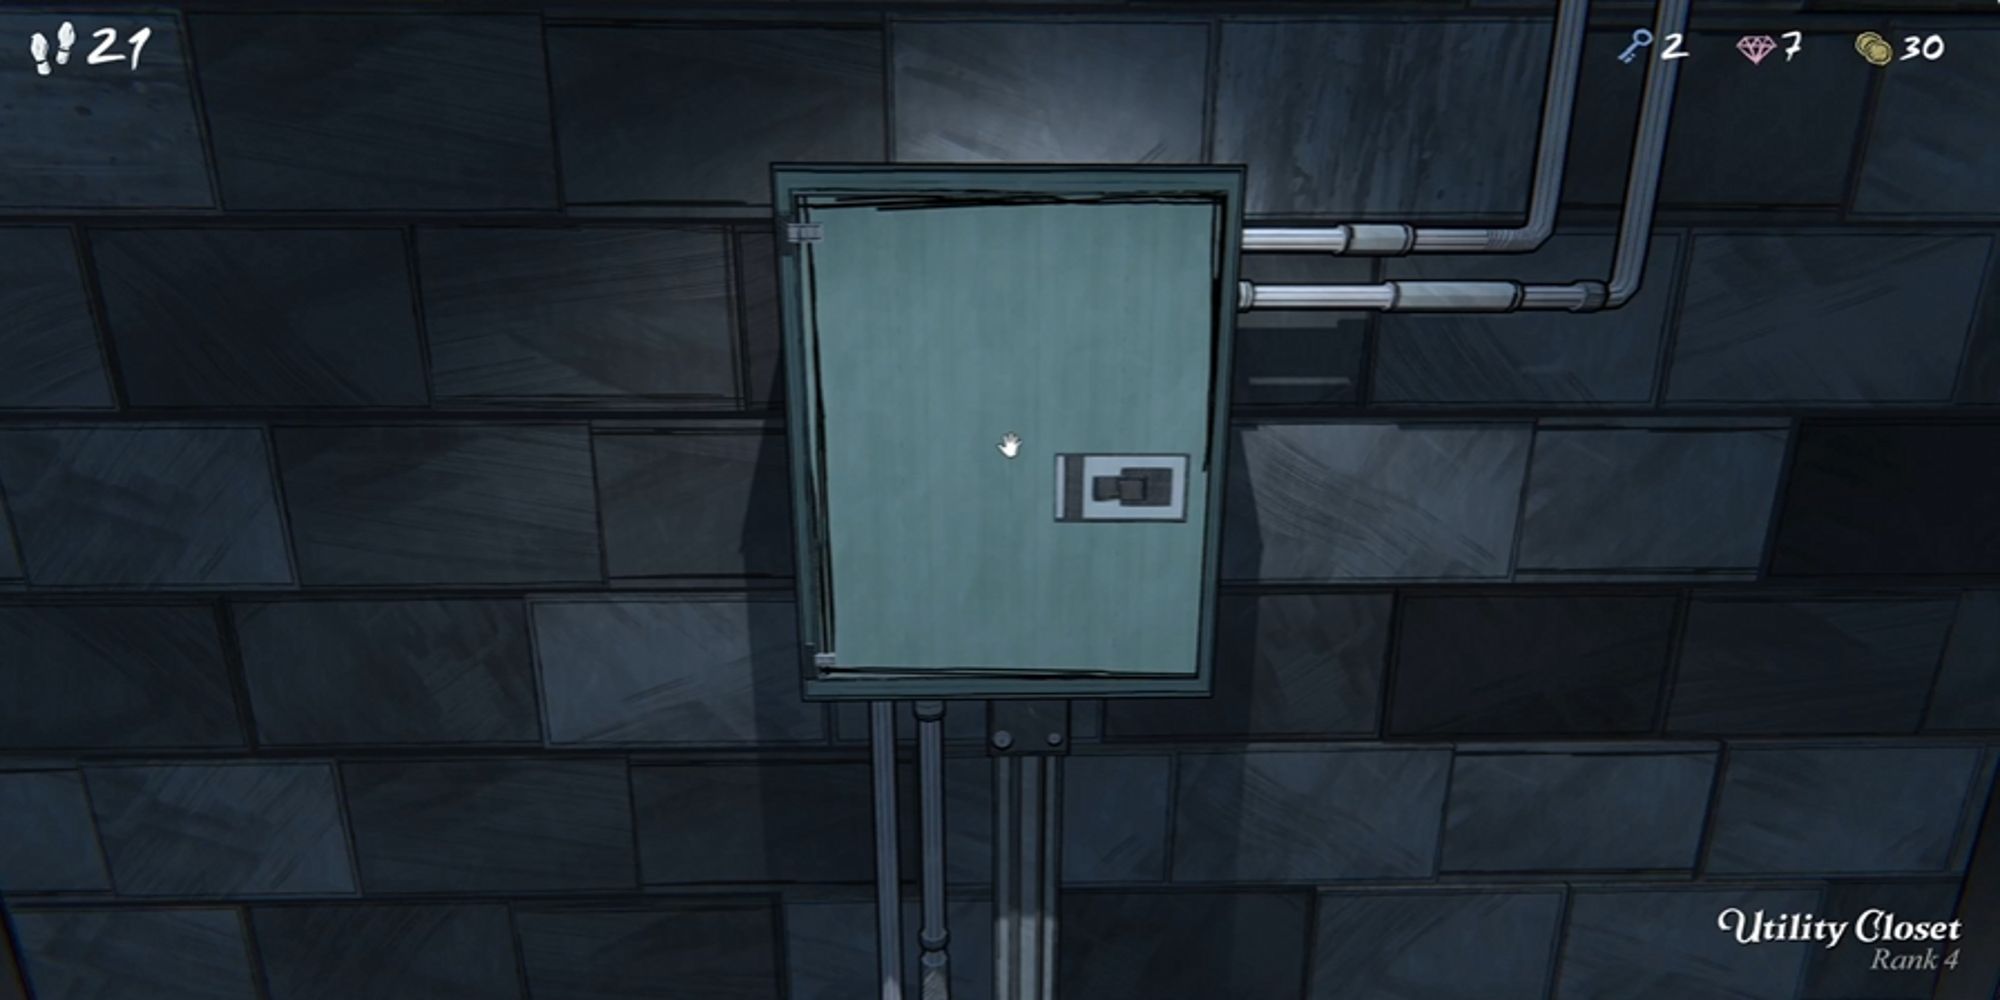
To get started with this puzzle, simply sketch out the Utility Room and flip the switch on the Breaker Box. If your goal is to complete the puzzle as fast as possible, here’s a guide for the correct sequence of moves you should follow.
To gather all necessary details, it’s important to prepare both the Utility Area and the Mail Area. The sequence doesn’t particularly matter, however, you’ll find it easier to access the Utility Area over the Mail Area, particularly when starting at lower levels.
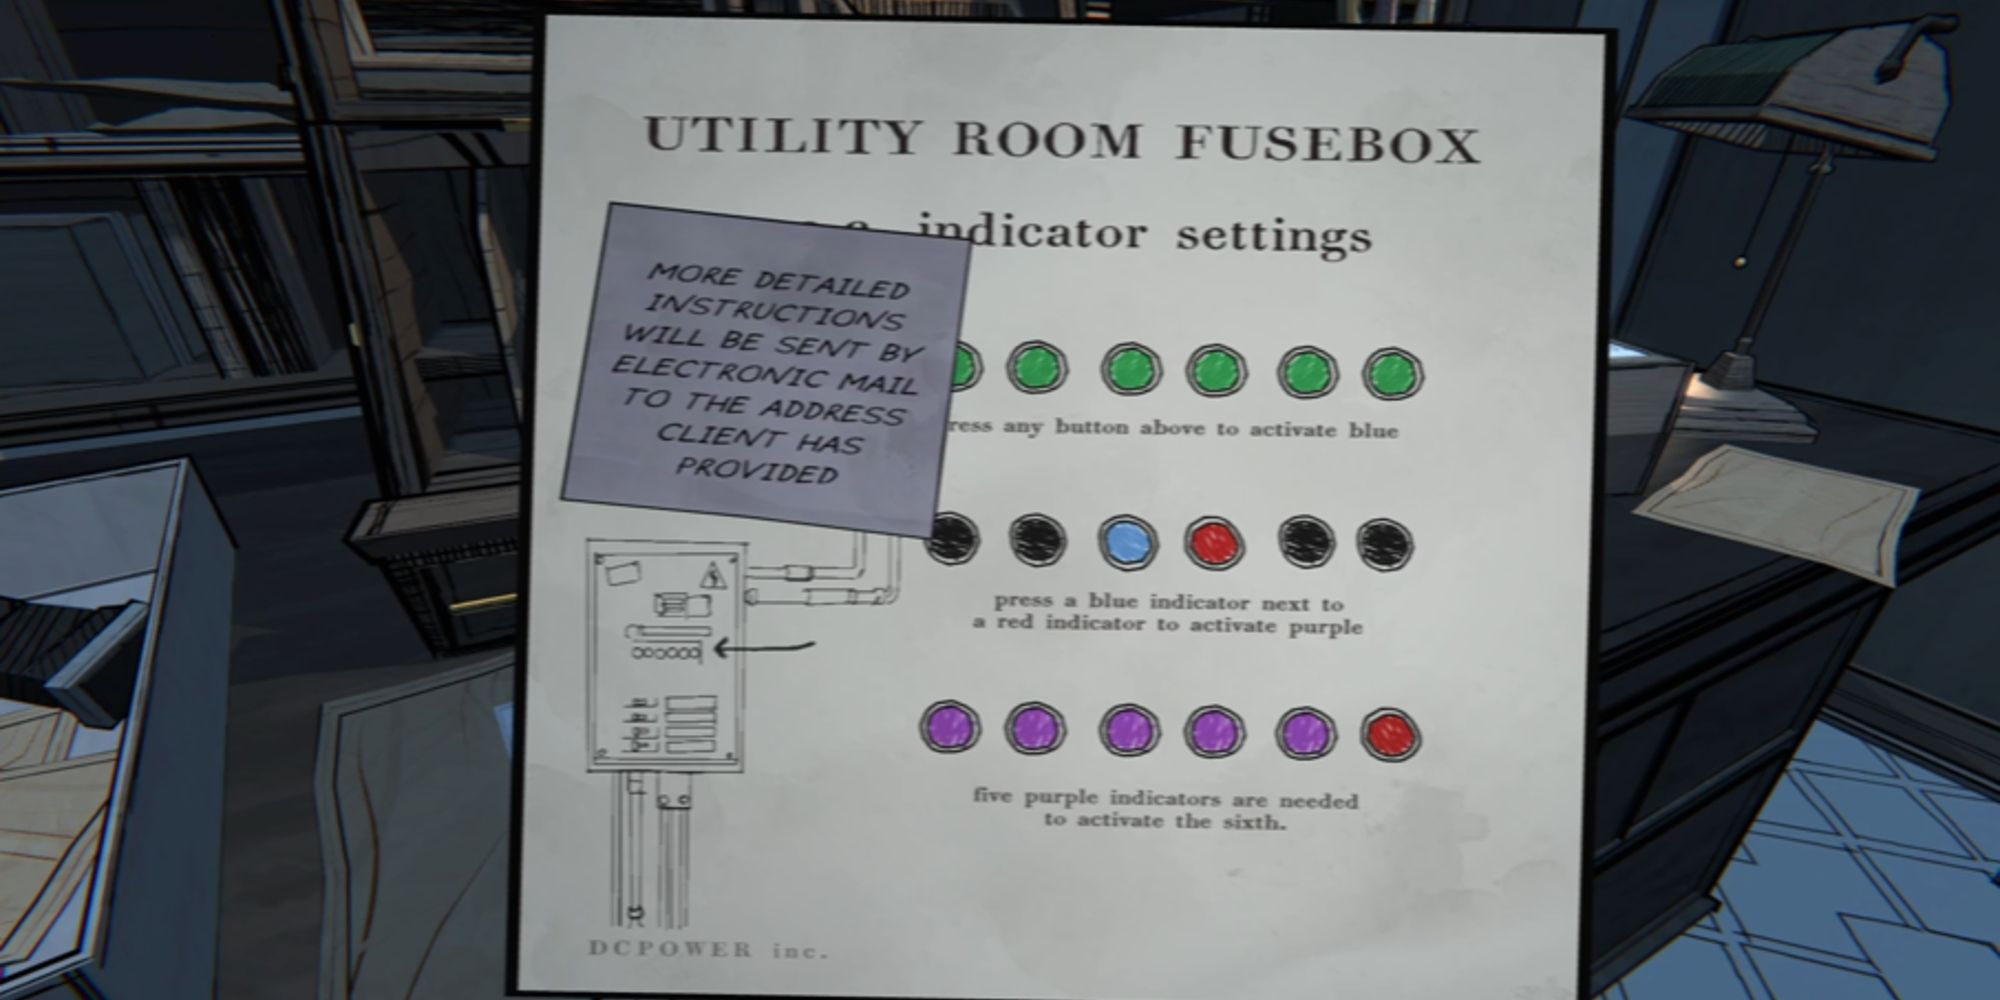
You’ll discover a note on the table in the Mail Room explaining the mechanics of the puzzle, and it will direct you to examine your electronic mail for further instructions.
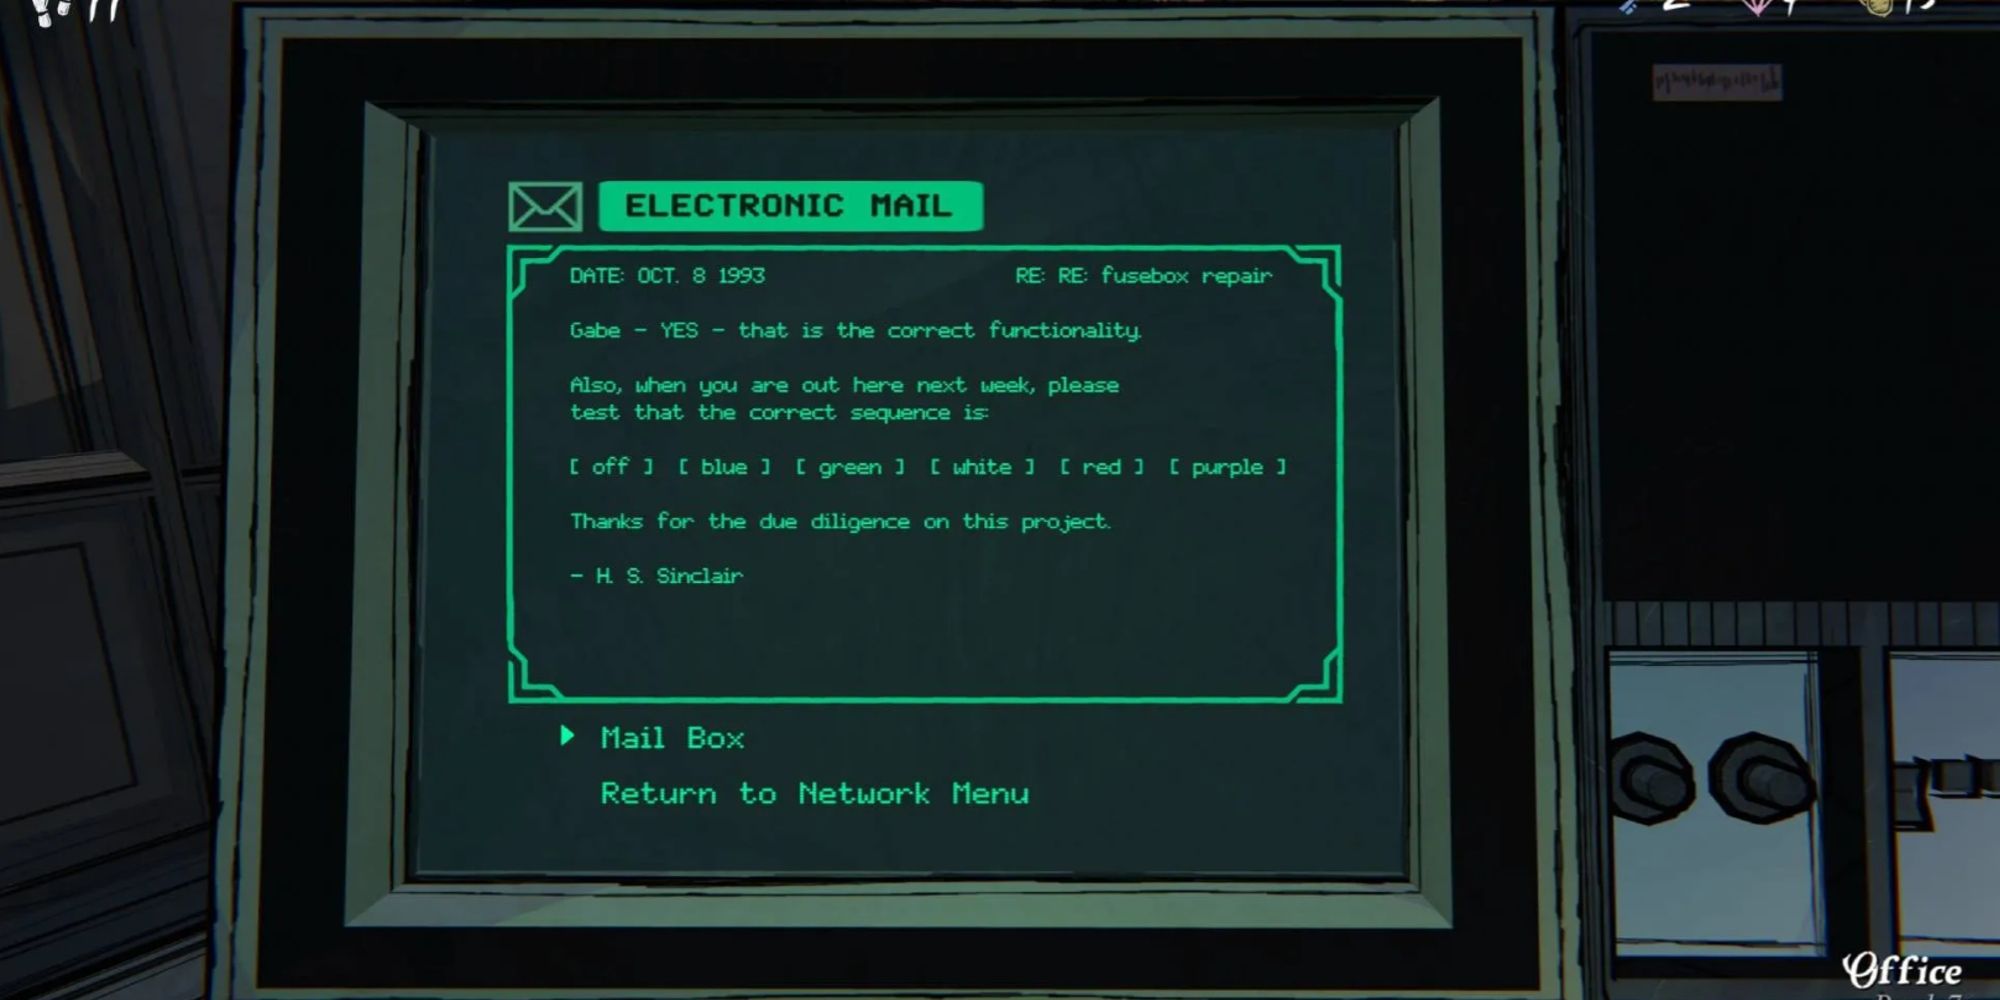
In that location, you’ll find it helpful to have Microsoft Office at hand, as it will guide you on the sequence of colors required to solve the puzzle, by displaying a message with the necessary color order.
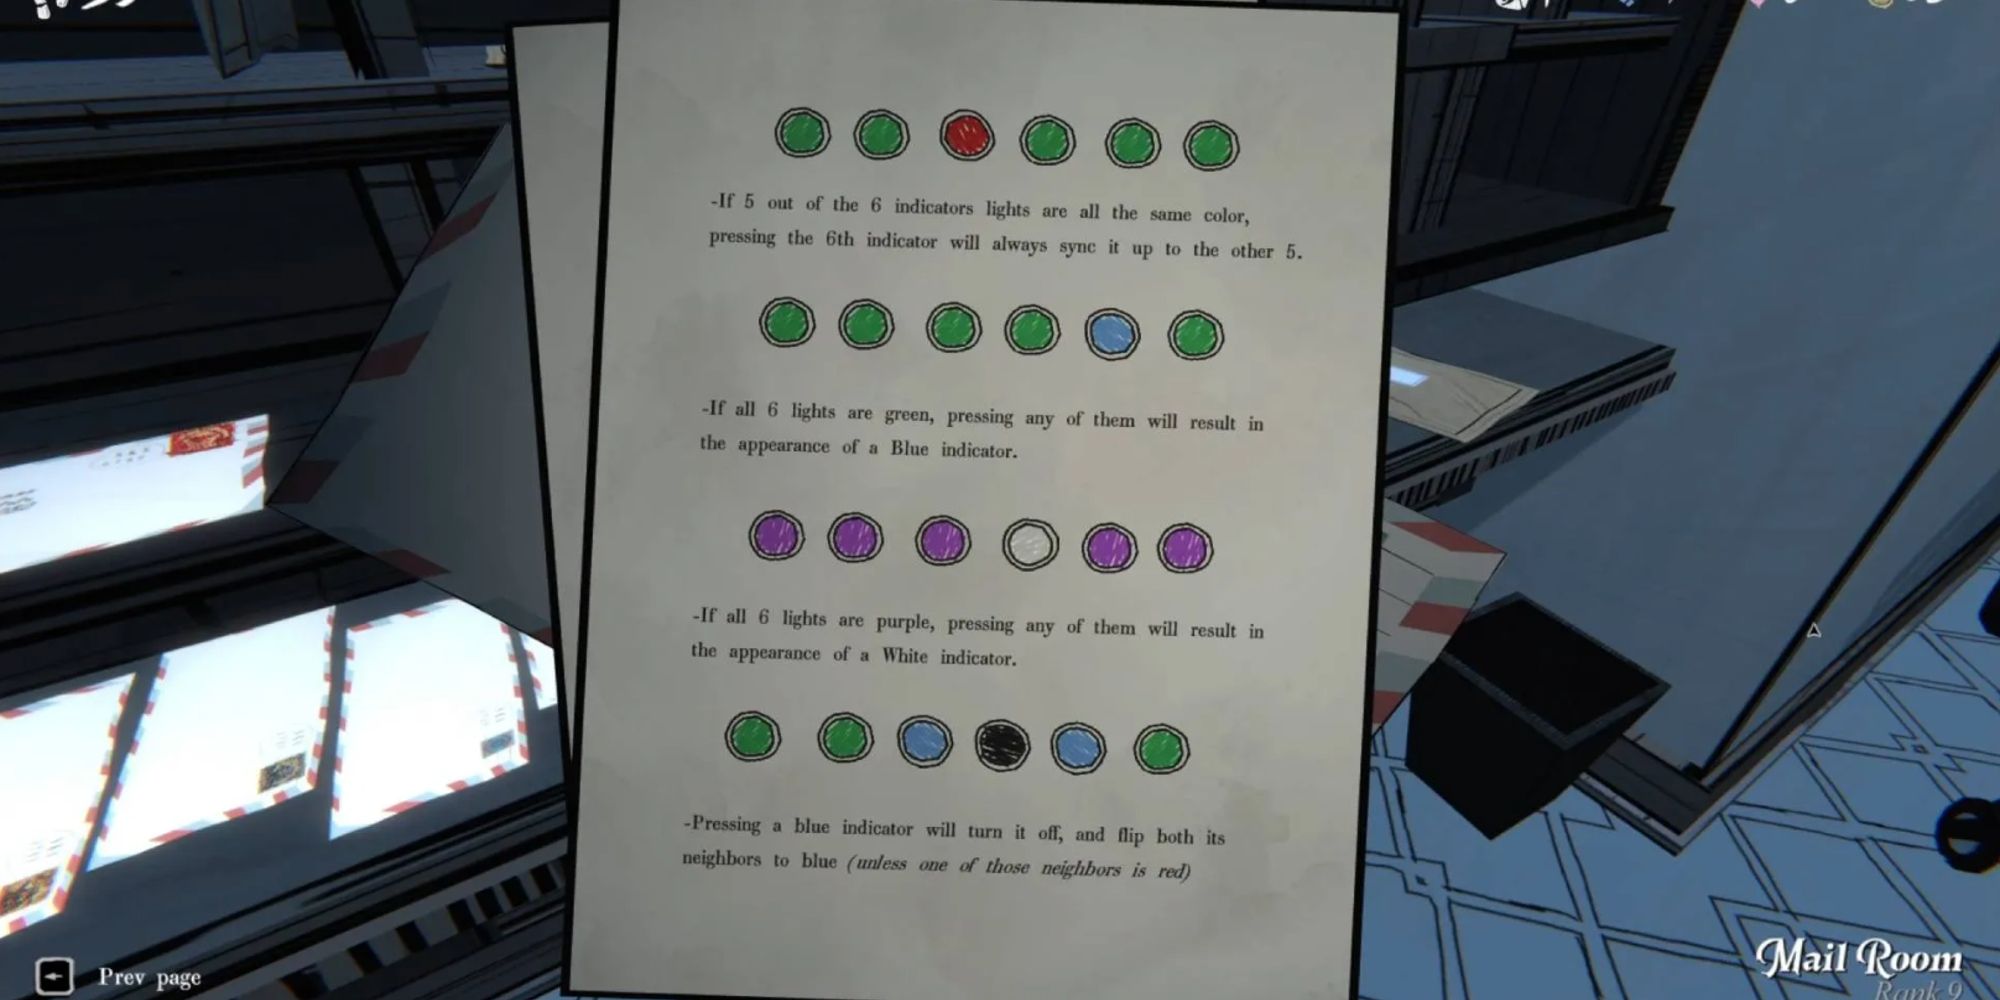
To receive the next set of tips, please design the Lab setup and initiate an experiment. Remember, your goal is to discover combinations that contain characters destined for the Mail Room.
After collecting all necessary details, return to the Control Panel where you can tackle the mystery. The sequence of actions may seem intricate, but with focused attention, it should be manageable!
How to Solve the Breaker Box Puzzle?
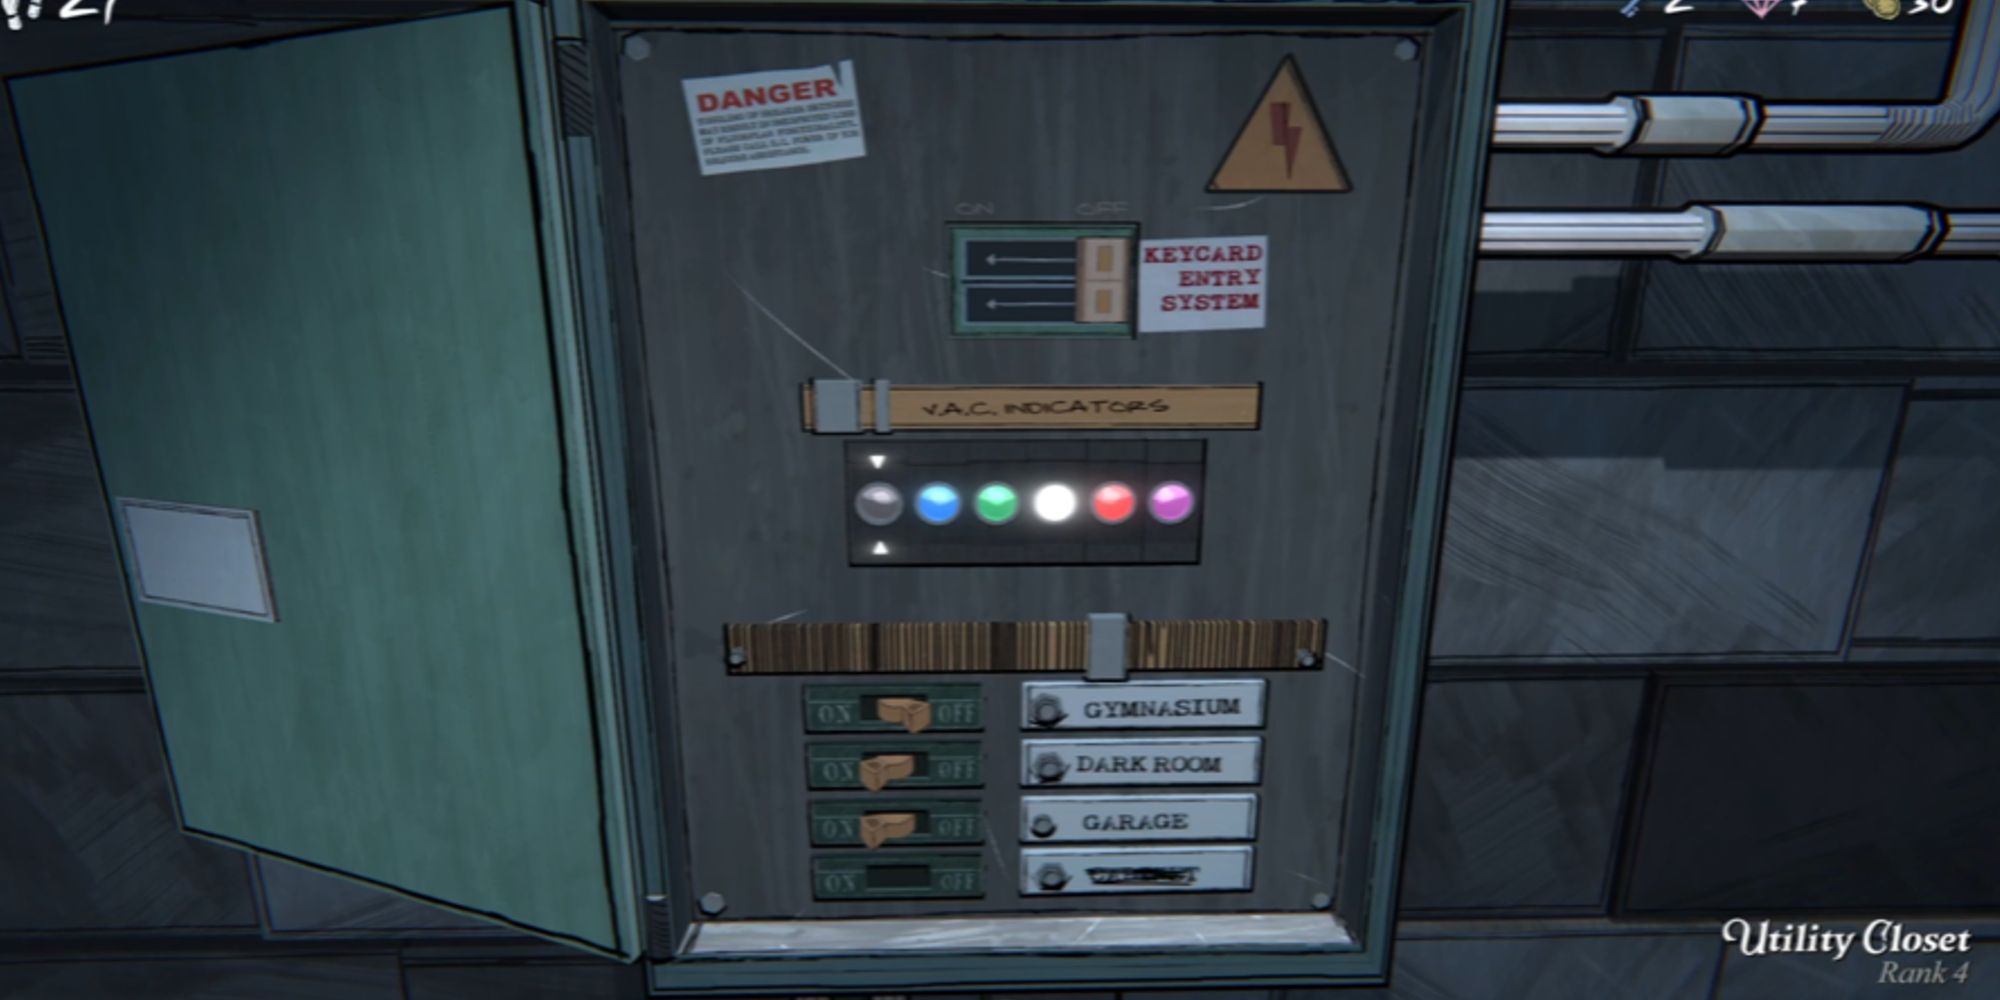
The Breaker Box solution involves having an indicator for each color, including black. However, it’s important to note that there might be alternative methods to solve the puzzle. Here, I’d like to present a solution I discovered.
If you prefer visual guidance over written instructions, feel free to watch my video instead. Please note that it starts with some of the buttons appearing purple due to a previous error in setup.
Essentially, provided you’re keeping up with the video instructions, you’ll commence at step number 10. The initial transformation to purple is quite straightforward, but the real challenge lies ahead.
For user convenience, the buttons are labeled sequentially from left to right, numbered 1 through 6. If an error occurs, simply reset the buttons by changing them all to their default black state.
- Make every button green with one push for each one.
- Click button one to turn it blue.
- Select the green button next to the blue button to make it red.
- Click the blue button to make the red button purple.
- Click the purple button to turn it blue.
- Repeat until five out of six buttons are blue.
- Click the blue button to move it over one spot.
- Click the black button twice to make it red.
- Click the blue button beside the red button to create a purple button.
- Repeat until five out of the six buttons are purple.
- Click the black button three times to make it purple.
- Click button four once to make it white.
- Click button five to make it blue.
- Click button six until it’s red.
- Click on button five to make button six purple.
- Click on button five until it’s red.
- Click on button three twice, making button three black and button two blue.
- Click on button three once to make it green.
- Click on button one until it turns black.
Upon doing so, the wall concealing the lever behind the Breaker Box will ascend, allowing you to grab hold and yank it. This action grants you one of the long-term enhancements, specifically the Gemstone Cavern.
Starting each day with two treasures rather than none can significantly transform things, particularly as you navigate towards the Antechamber to unravel the enigmas hidden within the house.
Continue your quest for answers regarding its origin, as there are still many secrets hidden about it. Persistently gather every piece of data available to unlock the enigmatic Room 46. A sharp focus and strategic reasoning will undoubtedly guide you through this intricate puzzle.
Read More
- Mr. Ring-a-Ding: Doctor Who’s Most Memorable Villain in Years
- Nine Sols: 6 Best Jin Farming Methods
- Top 8 UFC 5 Perks Every Fighter Should Use
- How to Get the Cataclysm Armor & Weapons in Oblivion Remastered Deluxe Edition
- Luffy DESTROYS Kizaru? One Piece Episode 1127 Release Date Revealed!
- Invincible’s Strongest Female Characters
- Unlock the Secrets: Khans of the Steppe DLC Release Time for Crusader Kings 3 Revealed!
- Eiichiro Oda: One Piece Creator Ranks 7th Among Best-Selling Authors Ever
- Unlock Roslit Bay’s Bestiary: Fisch Fishing Guide
- Sigourney Weaver Reveals Key Information About Her Role In The Mandalorian & Grogu
2025-04-28 18:12