Quick Links
-
Opening Portion – Light And Dark Motes
-
First Encounter – Phalanx Echo
- Walkthrough
- Recommended Loadout
-
Traversal – Wasteland
- Walkthrough
- Secret Chest
-
Second Encounter – The Hexahedron
- Walkthrough
- Recommended Loadout
-
Traversal – Singularity
- Secret Chest
-
Third Encounter – Kell Echo
- Walkthrough
- Recommended Loadout
The climactic content in Destiny 2 consistently satisfies, boasting meticulously designed dungeons and raids that offer an engaging challenge for any player eager to invest time and effort to secure the exclusive loot.
As a gamer, I can’t help but marvel at the Prophecy Dungeon, often considered one of the first challenges and surprisingly achievable with a solo-flawless run. This nine-themed adventure feels like a surreal rollercoaster ride, where these mysterious beings known as Nine challenge you to ponder the fine line between Light and Darkness.
This underground complex, known as the “dungeon,” was launched during Season of Arrivals on June 9th, 2020. Although initially featured in a guide for the Rite of the Nine, this tutorial will focus on the standard version’s mechanics, as the Rite of the Nine guide elaborates on the variations. Normally, you can find and enter this dungeon by navigating to the “Legends” section in your Director menu when not participating in the event.
In the Rite of the Nine adaptation, the fundamental workings of the dungeon essentially stay the same. Let’s delve into an overview of the dungeon’s mechanics and hidden chests, which could spark your curiosity while you traverse this peculiar pocket universe. Additionally, we’ll discuss equipment options that can significantly simplify your journey through this dungeon.
Opening Portion – Light And Dark Motes
In this dungeon, you’ll find yourself facing off against ‘Taken’ entities multiple times. This particular dungeon is known for its ease due to a consistent mechanic across all encounters, although there are minor adjustments to keep things interesting.
Initially, you’ll find yourself materializing within the Drifter’s vessel, following the appearance of a portal that leads your way. This passage will transport you into the realm belonging to The Nine, where you may come across some Taken Thralls and Knights.
A thick, impassable door lies before you, and it can only be opened by solving a riddle. To solve the riddle, you must first understand the fundamental principles of this labyrinth, which involve two elements: Luminous (white health bar) and Obsidian (black health bar) particles that are dropped by the Knights of Taken (orange health bar).
A solid door stands in your way, but you can only open it by figuring out a secret. To figure this secret out, you need to grasp the essential rules of this maze, which revolve around two types of particles – Glowing and Dark ones – that are dropped by the orange-barred knights.
Your objective is to gather five identical particles, which combine into an item you hold, causing your viewpoint to shift to a third-person perspective.
To cause the Knights to release the required modes, position yourself either in a well-lit or shadowy location. In essence, when you’re in a bright place, the Knights will drop Light orbs, and when you’re in the dark, they will drop Dark orbs.
Your HUD will indicate Light/Dark by showing a bright or shaded hue in the corners of your screen.
To gather at least one large mote, you need to defeat a pair of Knights since they each drop three smaller motes. Keep in mind that these motes only persist for 30 seconds before vanishing. Holding an opposing type of mote while carrying another will instantly refresh them.
After grabbing five samples, place each one on the matching dish by pressing the “shoot” button next to or on the circle with the tower of the corresponding type.
Activating a mid-air melee by pressing the specified button when you’re holding the motes will not only execute an attack but also provide a minor speed increase.
Finish both dishes, and the door will automatically open. Move forward to the next room and repeat the process once more.
Finish both trays, and the door will magically open. Advance to the following room and perform this action again.
Lastly:
Get both plates done, and the door will swing open on its own. Proceed to the next space and do it once more.
As a fan, I find myself drawn to the seamless beginning experience, so let me assure you, there’s no need for me to delve into specific loadouts. Instead, feel free to equip yourself with any weapon or ability that can swiftly dispose of tougher opponents. Whether it’s a heavy or special weapon, whatever you choose will serve its purpose admirably.
Once you finish both chambers, continue on your journey, and you’ll get a sneak peek at the Kell Echo, the last adversary in this labyrinth. It will vanish, creating an opportunity for you to ascend the passageway.
Leap across the stones and up to a round stage. That’s where you’ve just reached your initial meeting point.
First Encounter – Phalanx Echo
Walkthrough
Engage and move towards the guarded ball to initiate the interaction. The enemy, a bulky Taken Phalanx, sports an oversized and indestructible shield, constantly harassing you with its gunfire and physical attacks as you navigate through a confined battleground.
In the pre-DPS phase, you’ll face Taken Knights and Taken Psions.
You’ll observe two sets of floating plates labeled Light and Dark. To weaken the boss, place the matching orbs (which drop from Taken Knights) onto their respective plates.
Stand in the light for Light motes, and the shadow for Dark motes. It’s that simple.
As I meticulously clean each plate, removing every speck, the rings encircling the arena will adapt, altering the way light and shadows dance across their surfaces.
To make this meeting more efficient, it’s beneficial to understand that your mote’s “attack” has a wide area of effect (AOE). This means you can reduce the effort required by strategically placing yourself midway between the two pillars. The third-person camera view is quite helpful in this situation, but mastering this technique needs practice, good timing, and precise positioning.
After depositing both Light and Dark, the boss will be vulnerable.
In the DPS stage, Taken Goblins are likely to emerge shielding the boss using protective energy beams. To avoid this, ensure you eliminate them prior to activating their defense mechanism.
The boss will also possess an annoying protective barrier that seems indestructible, so you’ll have to figure out ways to bypass it. However, if we manage to remove or damage the shield, the boss becomes quite vulnerable, so focus on attacking its body as effectively as possible to deplete its health.
Recommended Loadout

For this boss fight, consider using powerful melee weapons that excel in close quarters as the battle involves a great deal of hand-to-hand combat. Despite its broad shield, the boss possesses less overall health.
In line with my last two guides, I’ll offer you two builds that I’ve successfully utilized for each class. One of these builds is specifically tailored for Guardians who only use Light subclasses (free-to-play), while the other requires access to Darkness and Prismatic subclasses, which are available through game expansions.
| Titan | Warlock | Hunter | |
|---|---|---|---|
| Free-To-Play |
Arc Titan with An Insurmountable Skullfort and/or Cuirass of the Falling Star. Aspects: Roaring Flames and Sol Invictus. Super: Thundercrash |
Solar Warlock with Sunbracers or Speaker’s Sight. Aspects: Electrostatic Mind and Ionic Sentry Super: Well of Radiance |
Void Hunter with Gyrfalcon’s Hauberk. Aspects: Stylish Executioner and Vanishing Step Super: Deadfall Shadowshot |
| Expansion |
Prismatic Consecration Titan with either Synthoceps or Stoicism with Assassin/Syntho perk combo. Aspects: Consecration and Knockout. Super: Thundercrash |
Prismatic Arc Buddy Warlock with Getaway Artist. Aspects: Bleakwatcher and Feed the Void. Super: Nova Bomb, Chaos Reach, or Song of Fire. |
Prismatic Melee Hunter with Relativism with Caliban/Liar perk combo. (with any One-Two Punch shotgun) Aspects: Stylish Executioner and Winter’s Shroud Super: Shadowshot |
In times of harm, a Titan can set up a defensive barrier called Storm’s Keep as a shelter for everyone. You can then attack from behind this barrier while it provides protection.
Regarding weapons, Thunderlord not only increases but also decreases the boss’s health, particularly when used alongside Bolt Charge from Storm’s Keep. On the other hand, swords and One-Two Punch shotguns are effective in this situation; however, keep in mind that the boss has the ability to counterattack and defend itself.
Traversal – Wasteland
Walkthrough
Once you’ve conquered Phalanx Echo, a gateway will appear beneath your feet, transporting you to the Barrens. Here, feel free to retrieve your ride and explore as you hunt down and eliminate the three Blights.
After overcoming Phalanx Echo, an entrance will materialize on the ground, whisking you away to the Desolate Plains. You’ll have the chance to grab your vehicle for a smoother journey as you track down and annihilate the three Blights that reside there.
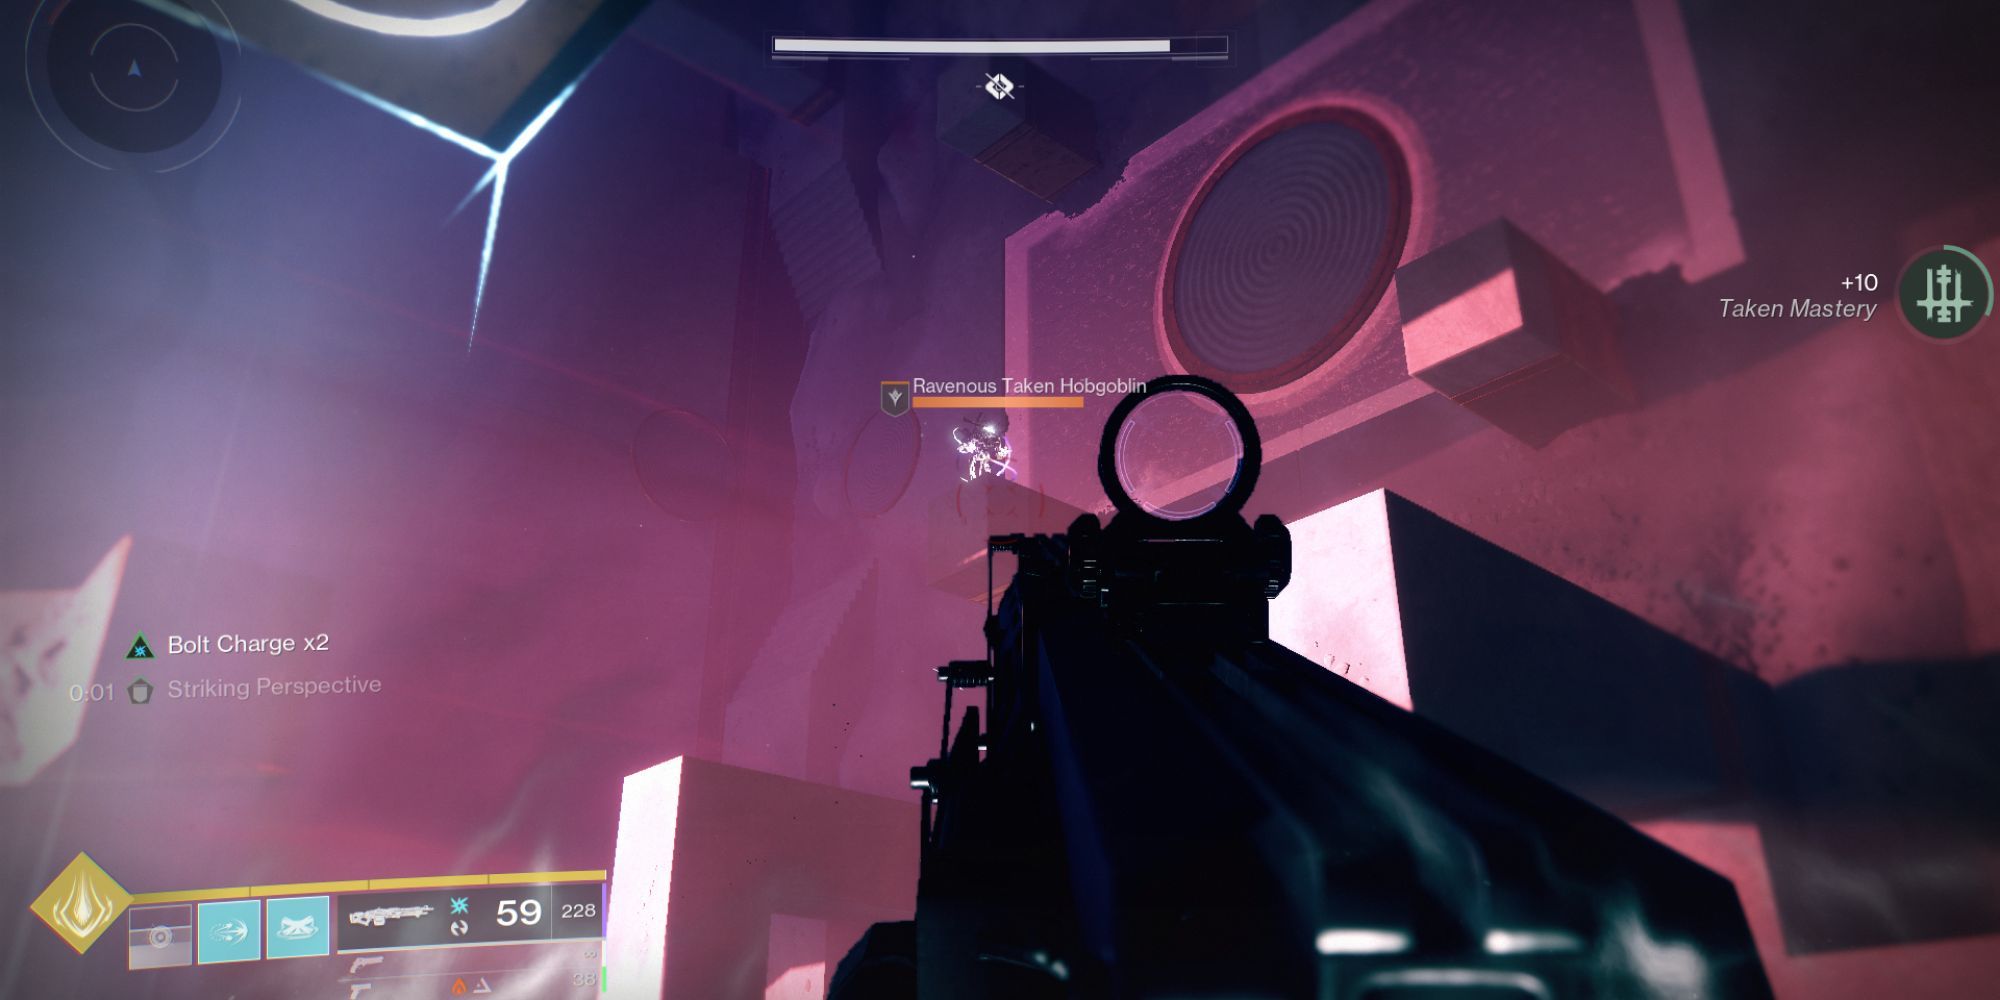
Here, you might run into some Encountered Thralls that have been taken, and Taken Hobgoblin sharpshooters may perch on pillars to fire down at you.
In this region, you’ll find some Captured Thralls along with Taken Hobgoblin snipers who like to hide on pillars and take potshots at you.
As you travel to every Blight, you could encounter some elusive, colossal Taken Minotaurs that have the potential to wreck your vehicle and endanger your life with their flaming hammer-like torches.
During each journey to a Blight, there’s a chance you may stumble upon some massive, unseen Taken Minotaurs wielding deadly torch hammers that can both demolish your vehicle and potentially harm you.
By eliminating a captured Blight, you’ll summon a Taken entity, often referred to as Toland or a ball. Getting near this entity will make it dash towards the location of the following Blight. Keep tracking it and obliterate the subsequent entity when found.
After destroying all three Blights, a pop-up message will say “The Way is Open.”
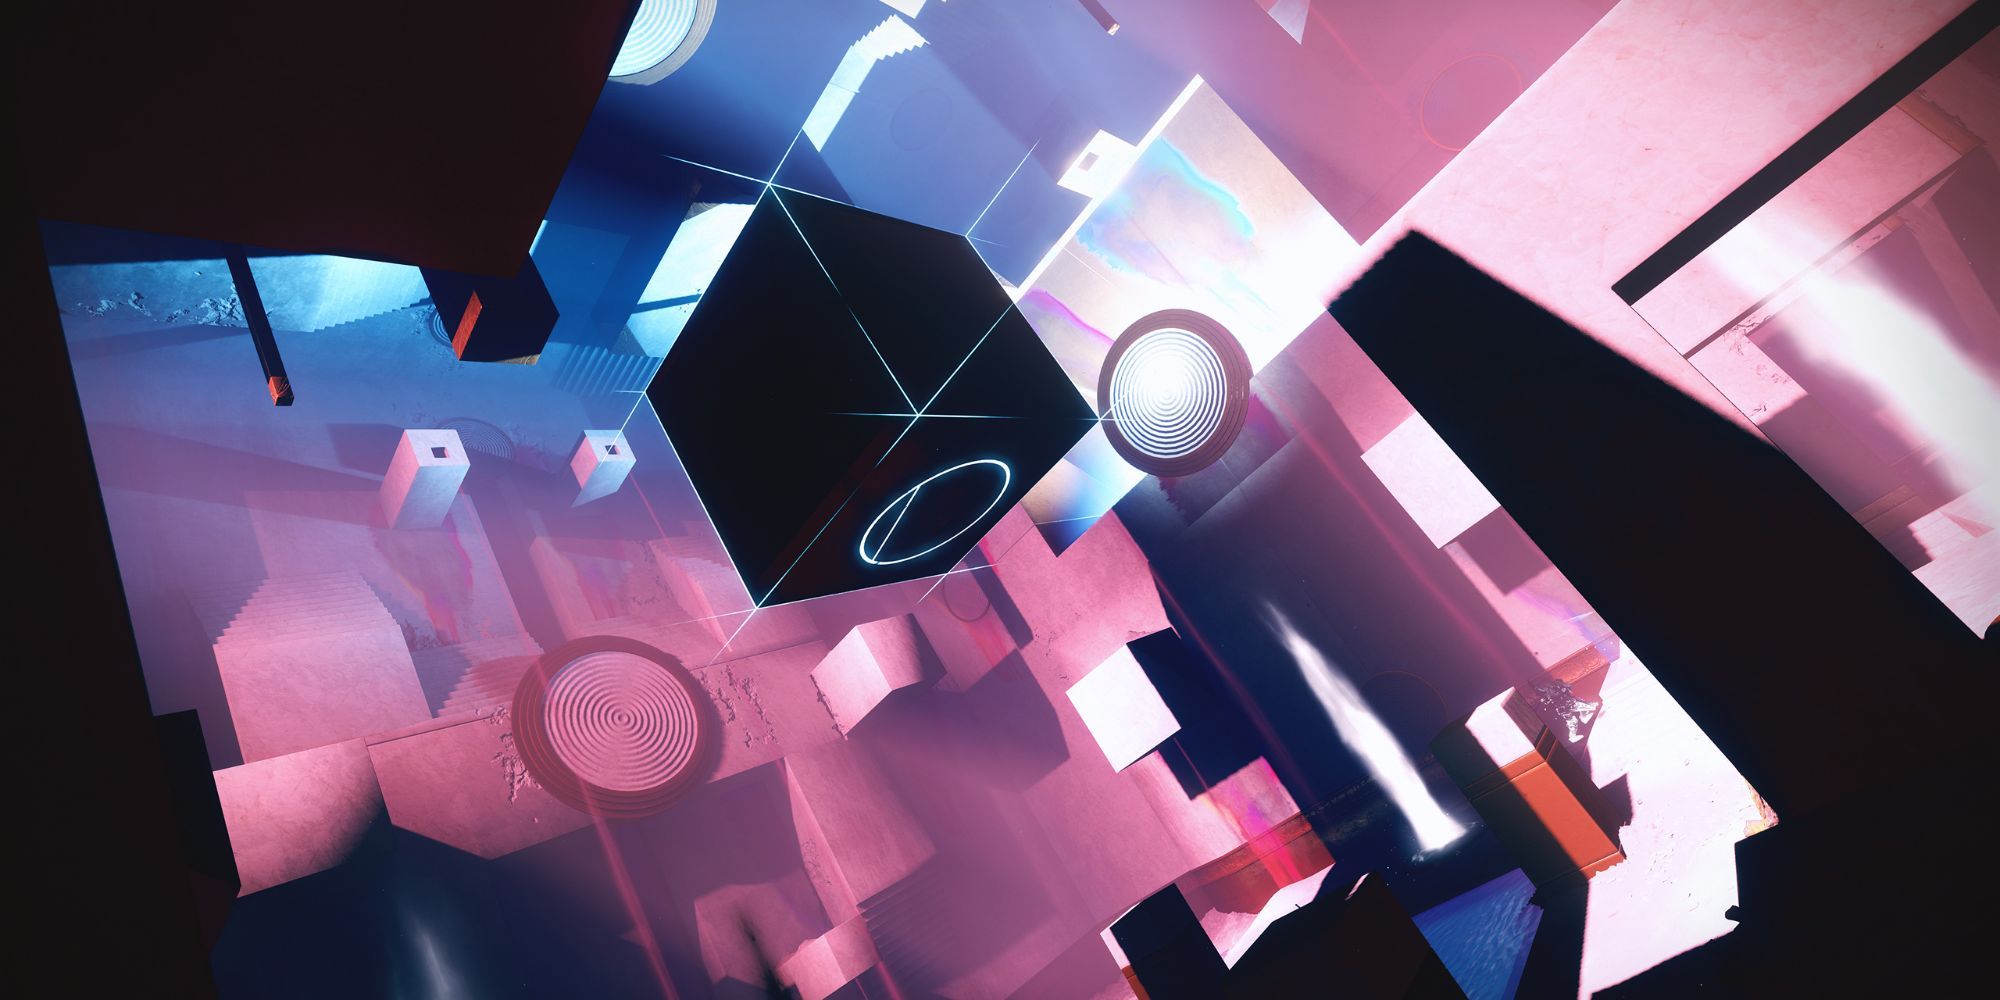
The next step is open for exploration, so please proceed along the probe towards a massive cube featuring a slim, elongated passageway, that will enclose you within the Hexahedron.
Secret Chest
You’ll discover the initial hidden treasure chest in the Wastelands, immediately following your victory against the Phalanx Echo.
As you journey through the barren landscape, you may discover peculiar rock structures capped with gold. These structures have a hidden tunnel running through their center. Enter this tunnel to find your treasure.
Whenever I stumble upon a hidden treasure chest in my gaming adventures, it usually contains items I’ve seen before. If it’s my first time opening it, chances are I’ll end up with a duplicate of something familiar from my initial encounter.
Second Encounter – The Hexahedron

In this situation, you’ll find yourself confined within a massive shape known as the Hexahedron, and the objective is to manage an exit from it. The same mechanisms involving Light and Dark motes will be employed in this encounter.
Walkthrough
Once you’ve rallied, move towards the vanishing Taken probe. A message box will then appear, stating “The Realm reacts to your Actions,” thus initiating the encounter.
Enemies like Acolytes, Hobgoblin snippers, and a pair of Knight Echoes will appear as reinforcements. Additionally, columns of Light and Dark can be observed on either side of the chamber.
Your task is to place particles on columns that are positioned at a 90-degree angle to the floating Taken sphere. Take some time to survey the area and carefully scan for the probe before you proceed with depositing them, as the correct column should be directly beneath it.
Collect the corresponding motes and deposit them into the plate perpendicular to the probe.
Should the probe find itself positioned above a Light column, go ahead and collect some Light particles and immerse them in the given dish instead.
Every time, I gotta take down Knight Echoes only when I’m in a well-lit spot, and gather five glowing orbs to put them into their designated plate. Easy peasy!
Instead of finding the probe on the walls, you may discover it on the ceiling. As a result, you’re free to place your particles on any tray for deposition.
As I place my motes, I’ll find myself standing in awe as the heart of the chamber begins to radiate a warm, captivating glow. Upon stepping onto the central pad, I am elevated gracefully and the room spins magically, transporting me to the next exhilarating stage.
As a gamer, I’d advise taking out every opponent before moving forward. That’s because when you’re up in the air, they can zero in on you and deal some serious damage.
After that, you’ll be left off at the location where the probe is, and you’ll have to follow the probe to finish the interaction or meeting.
Do this a few more times, and a couple of Centurion Echoes will spawn.
Kill them, and you’ll complete the encounter, which will allow you to leave the Hexahedron.
Recommended Loadout

In essence, there’s not much more to discuss regarding this interaction except that it’s straightforward to navigate. Ensure you are equipped with the most effective cleaning tools for debris and have a keen focus on maintaining your survival.
A weapon with a medium to extended range could assist you in handling the Hobgoblin snipers perched on nearby overhangs.
Instead, consider using a heavy machine gun like Thunderlord, Commemoration, or any similar weapon with a large ammunition supply for this fight. It’s highly effective!
Traversal – Singularity
Gather all your treasures, then exit the Hexahedron via the gap in the wall, which will transport you back to either Heaven or Hell.
Drive your vehicle again and explore the barren landscape, steer towards the right until you encounter the final boss.
If the Kell Echo appears, you’ll be on track as he’ll teleport to two additional locations subsequently.
Step into the following large, colorful cube, often called “Rainbow Road” by Guardians. Follow the vibrant ribbons and be careful not to get ambushed by rogue Taken Vandals.
In this version, I tried to make it more conversational while keeping the original intent clear.
A handy approach for tackling this part could be to employ a Skimmer and thoroughly hover over the majority of the space. Occasionally, you may have to dismount from your Skimmer and summon it again, but having one definitely simplifies this task.
Keep in mind, repeatedly calling forth the Skimmer may gradually reduce the boost power available for grinding.
You’ll encounter a broad stage populated by enemies you’ve already captured. You have the option to ignore them or eliminate them. Regardless of your decision, make your way onto the platform and ascend using the tractor beam.
Fight through some Taken Thrall and proceed to the final encounter.
Secret Chest
The concealed treasure box can be found within the last octahedron, close to the platform preceding your entry into the colossal pyramid, nestled inside the construction at the terminus of the winding pathway.
As soon as you step inside, swiftly move towards the corner on your right, and there you’ll discover an opening leading you below.
Follow the path and jump across the chasm, which will take you to the secret chest.
Third Encounter – Kell Echo
Walkthrough
In the culmination of Prophecy, the ultimate adversary will scrutinize all knowledge you’ve gathered during your journey through the labyrinth. Fortunately, this battle isn’t overly powerful, and its mechanics are quite straightforward.
The structure of the battleground resembles a pyramid with platforms at each peak. In due course, the main adversary will create three copies of itself in close proximity, firing projectiles from its shrapnel launcher towards you. Additionally, Knight Echoes and Taken Psions will appear, serving as minor distractions or cannon fodder.
As a fervent enthusiast, I’d gather those specks and dip them into the designated dish. This action will summon a formidable Ultra Taken Ogre, which must be vanquished to progress further. Be wary, for it possesses an overpowering eye blast that could easily swamp you.
For each corner of the arena, perform the action, which will subsequently open a portal leading you to the end of a lengthy corridor filled with levitating stages.
On the screen’s upper part, you’ll spot a debuff called Dark Entropy. This effect accumulates up to ten times, and if it does so completely, it results in your character’s death. Additionally, there’s an aura encircling the boss that you must remain within to decrease the stack count.
The boss will occasionally move along the hallway as Taken Hobgoblins attack from a distance. Additionally, it may hurl Taken Captain blobs that teleport you away instead of causing blindness. This action can increase your Dark Entropy stacks unless you quickly return to the boss.
Maintain advancement and inflict damage simultaneously, and try to maintain a position near the boss that feels safe for you.
To minimize getting hit, it would be wise to move left and right while attacking (DPS), as the boss’s attacks have quite a large area of impact.
In time, your supervisor will find themselves across the hallway. Keep inflicting damage until it develops immunity, at which point a portal back to the central arena should appear.
Or more informally:
Eventually, your boss will be on the other side of the hall. Keep hitting it until it stops responding, and then a way back to the main fight should open up.
Following each damage phase, the arena’s configuration will be adjusted, resulting in a new arrangement of lighted and shadowed zones.

Rinse and repeat until you defeat the boss.
Recommended Loadout
In this situation, clarity and survival prove simpler than expected. Your main concerns should be employing specific weapons against the Knight Echoes and swiftly inflicting burst damage on the Taken Ogres. If left unattended, these creatures can pose a significant danger.
Linear fusion rifles, such as the linear fusion rifle, are excellent choices for dealing damage against this boss, and the Queenbreaker or Sleeper Simulant (although it uses ammo less efficiently) is particularly effective. Even without modifications from Episode Heresy’s artifact mods, this weapon would still be incredibly powerful.
| Titan | Warlock | Hunter | |
|---|---|---|---|
| Free-To-Play | Arc Titan with Cuirass of the Falling Star and/or Insurmountable Skullfort. Aspects: Storm’s Keep and Knockout Super: Thundercrash | Solar Warlock with Sunbracers or Speaker’s Sight. Aspects: Hellion and Touch of Flame Super: Well of Radiance | Solar Hunter with Celestial Nighthawk. Aspects: Knock ‘Em Down and Gunpowder Gamble. Super: Marksman Golden Gun |
| Expansion | Prismatic Consecration Titan with either Synthoceps or Stoicism with Assassin/Syntho perk combo. Aspects: Consecration and Knockout. Super: Twilight Arsenal | Prismatic Arc Buddy Warlock with Getaway Artist. Aspects: Bleakwatcher and Feed the Void. Super: Nova Bomb | Prismatic Decoy Hunter with Radiant Dance Machines. Aspects: Threaded Specter and Ascension Super: Marksman Golden Gun |
Finishing this dungeon will give you exclusive weapons and armor as a prize. Defeating the boss will also yield a stylish Moonfang armor piece, notably the Titan helmet, making it a rewarding experience, particularly for those seeking that distinctive headgear.
In contrast to many modern dungeons, Prophecy does not yield an individual Exotic weapon. However, its legendary weapons remain valuable, and they can be obtained through farming in Rite of the Nine too.
Read More
- Delta Force: K437 Guide (Best Build & How to Unlock)
- One Piece Episode 1129 Release Date and Secrets Revealed
- USD ILS PREDICTION
- Top 8 UFC 5 Perks Every Fighter Should Use
- Slormancer Huntress: God-Tier Builds REVEALED!
- AI16Z PREDICTION. AI16Z cryptocurrency
- Tainted Grail: The Fall of Avalon – Everything You Need to Know
- How to Unlock the Mines in Cookie Run: Kingdom
- REPO’s Cart Cannon: Prepare for Mayhem!
- Nine Sols: 6 Best Jin Farming Methods
2025-05-23 16:42