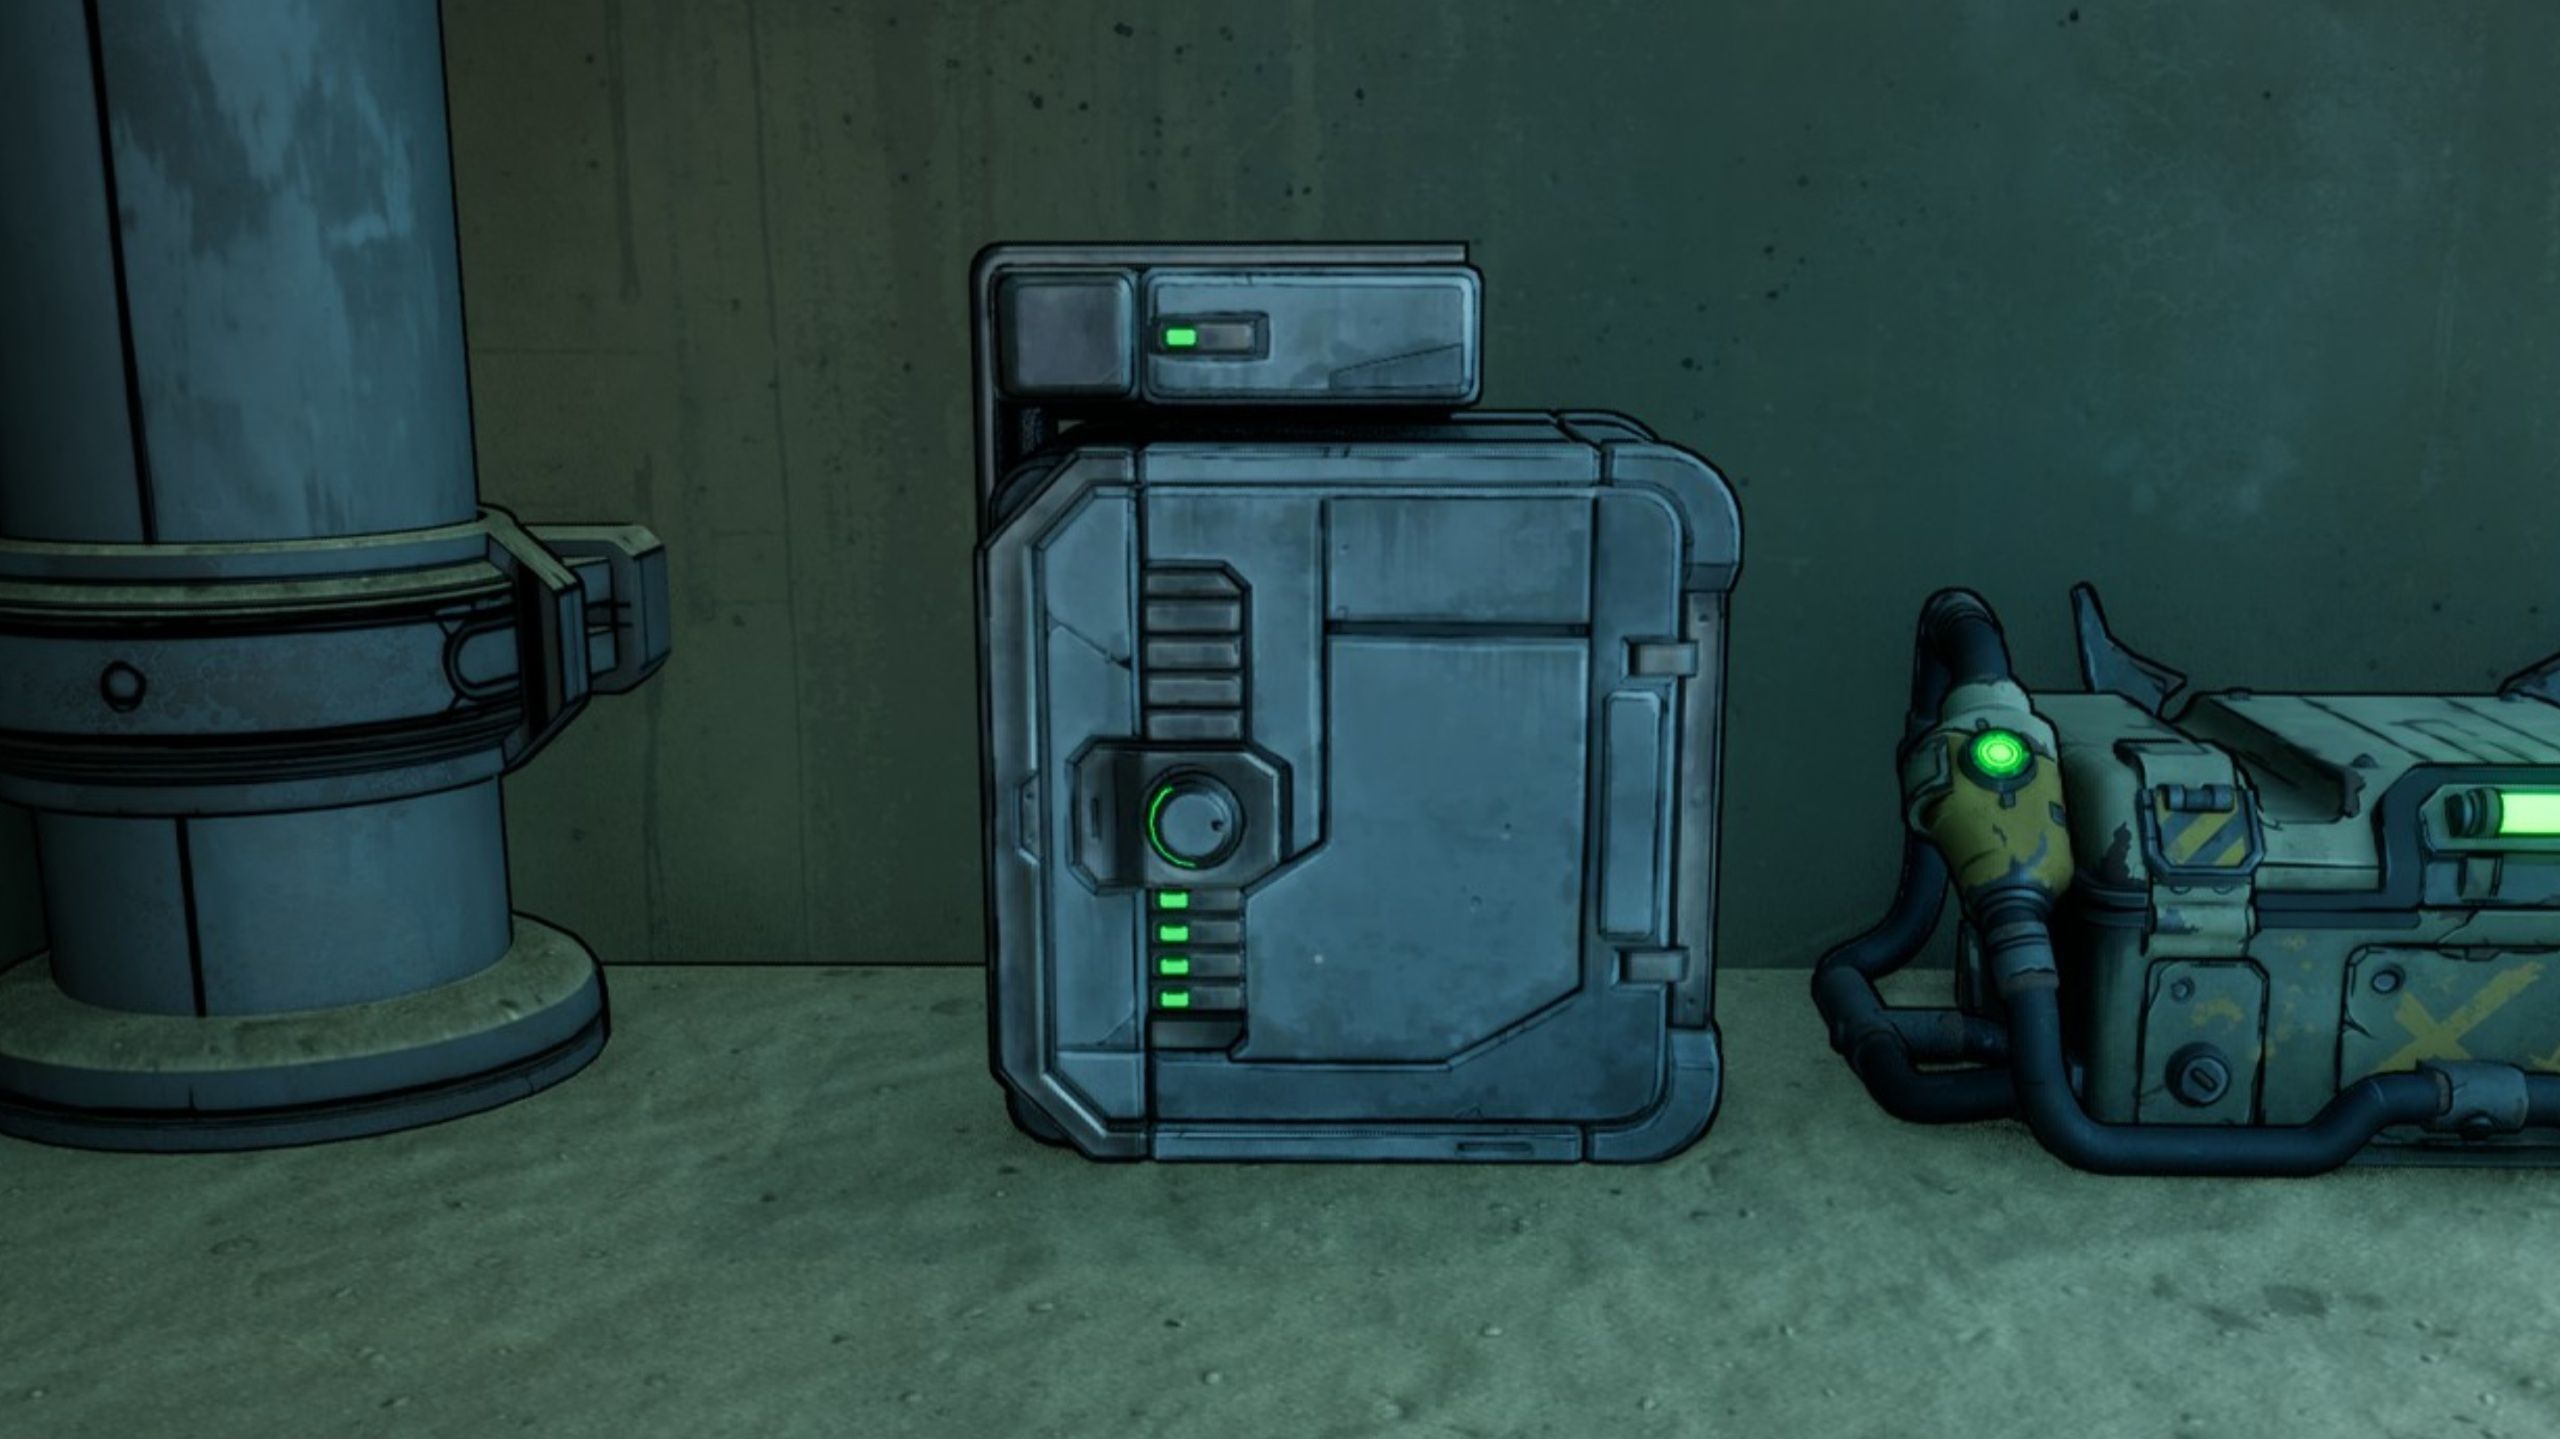
In Borderlands 4, the Electi are a wealthy and exclusive group. Even though the moon Elpis crashed into Carcadia, their valuables remain hidden in safes scattered throughout the Carcadia Burn region of Kairos. We’ve compiled a list of all 13 Electi Safe locations to help you find and easily open them – all it takes is a kick! Claim the SDU Tokens and awesome gear inside!
After collecting all 13 Electi Safes, players will earn the Sugar Coated Vault Hunter Skin.
How to Find the Lopside Electi Safe #1 in Borderlands 4
Electi Safe #1 Location
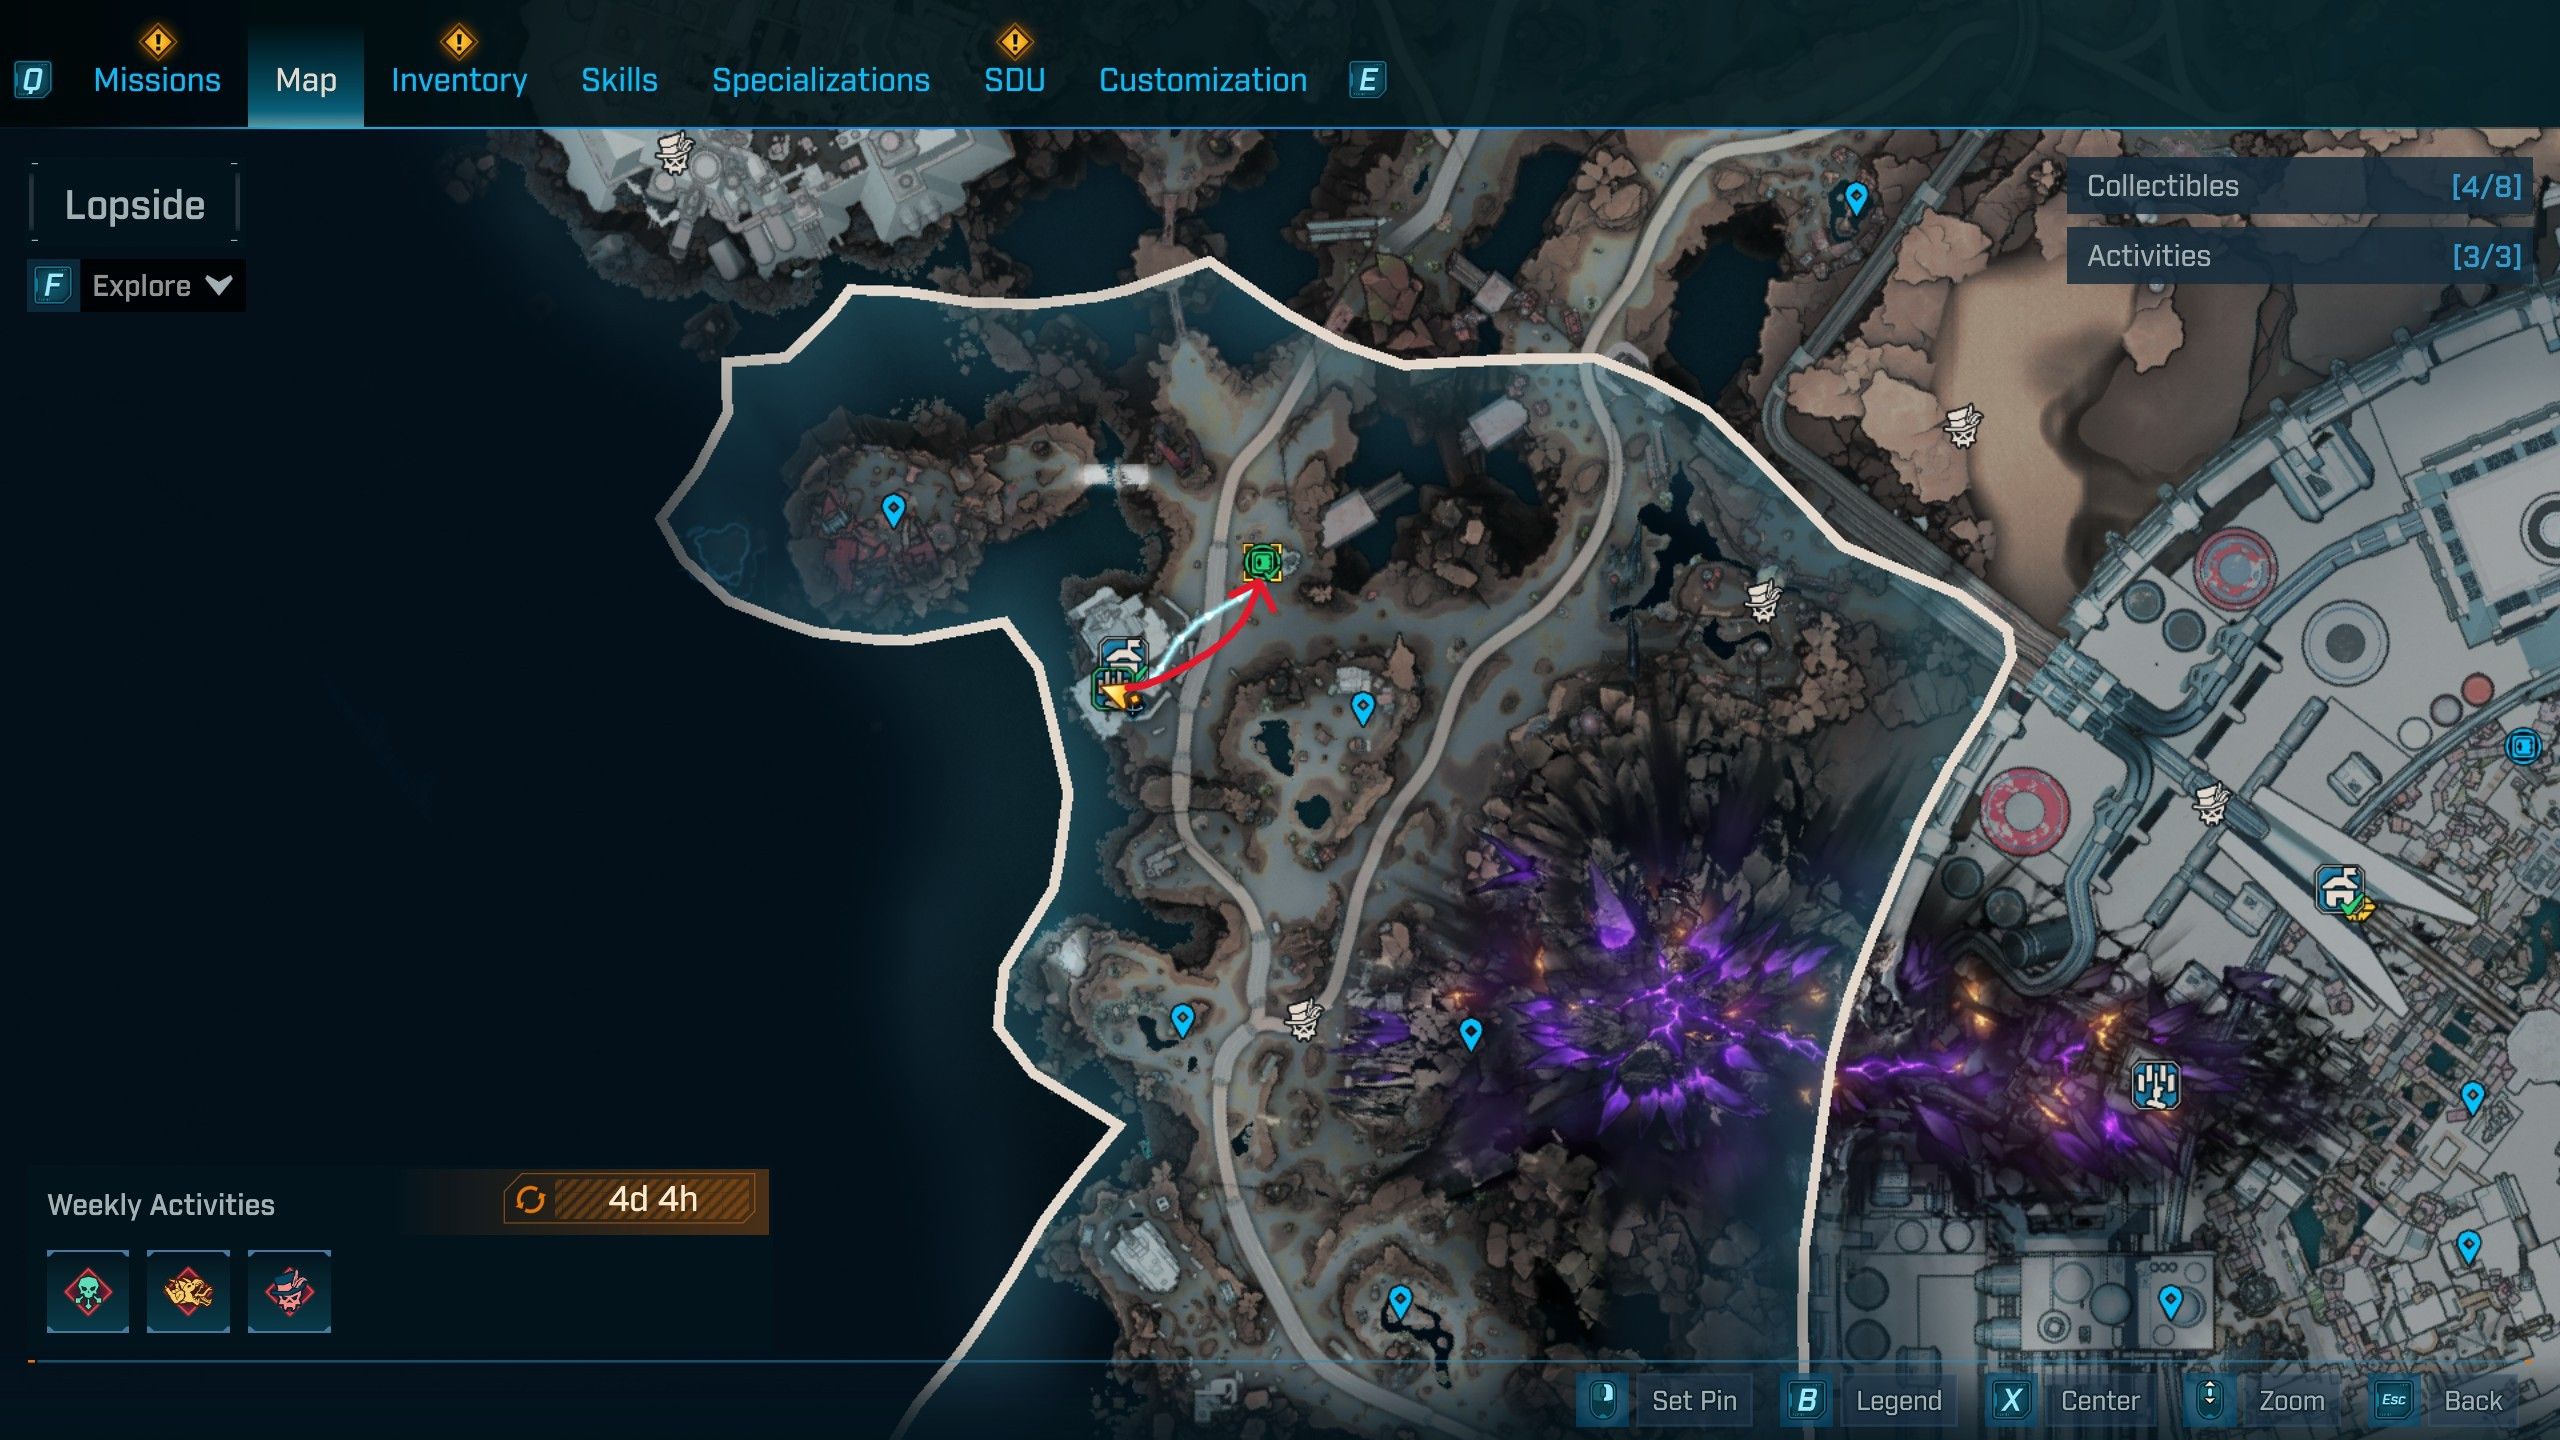
You can find the first Electi Safe near the Makeshift Chalet Safehouse in Lopside, Carcadia Burn. From the east entrance of the chalet, look north for an abandoned building. Use the grapple point to reach the roof, and you’ll find the safe right next to the railing.
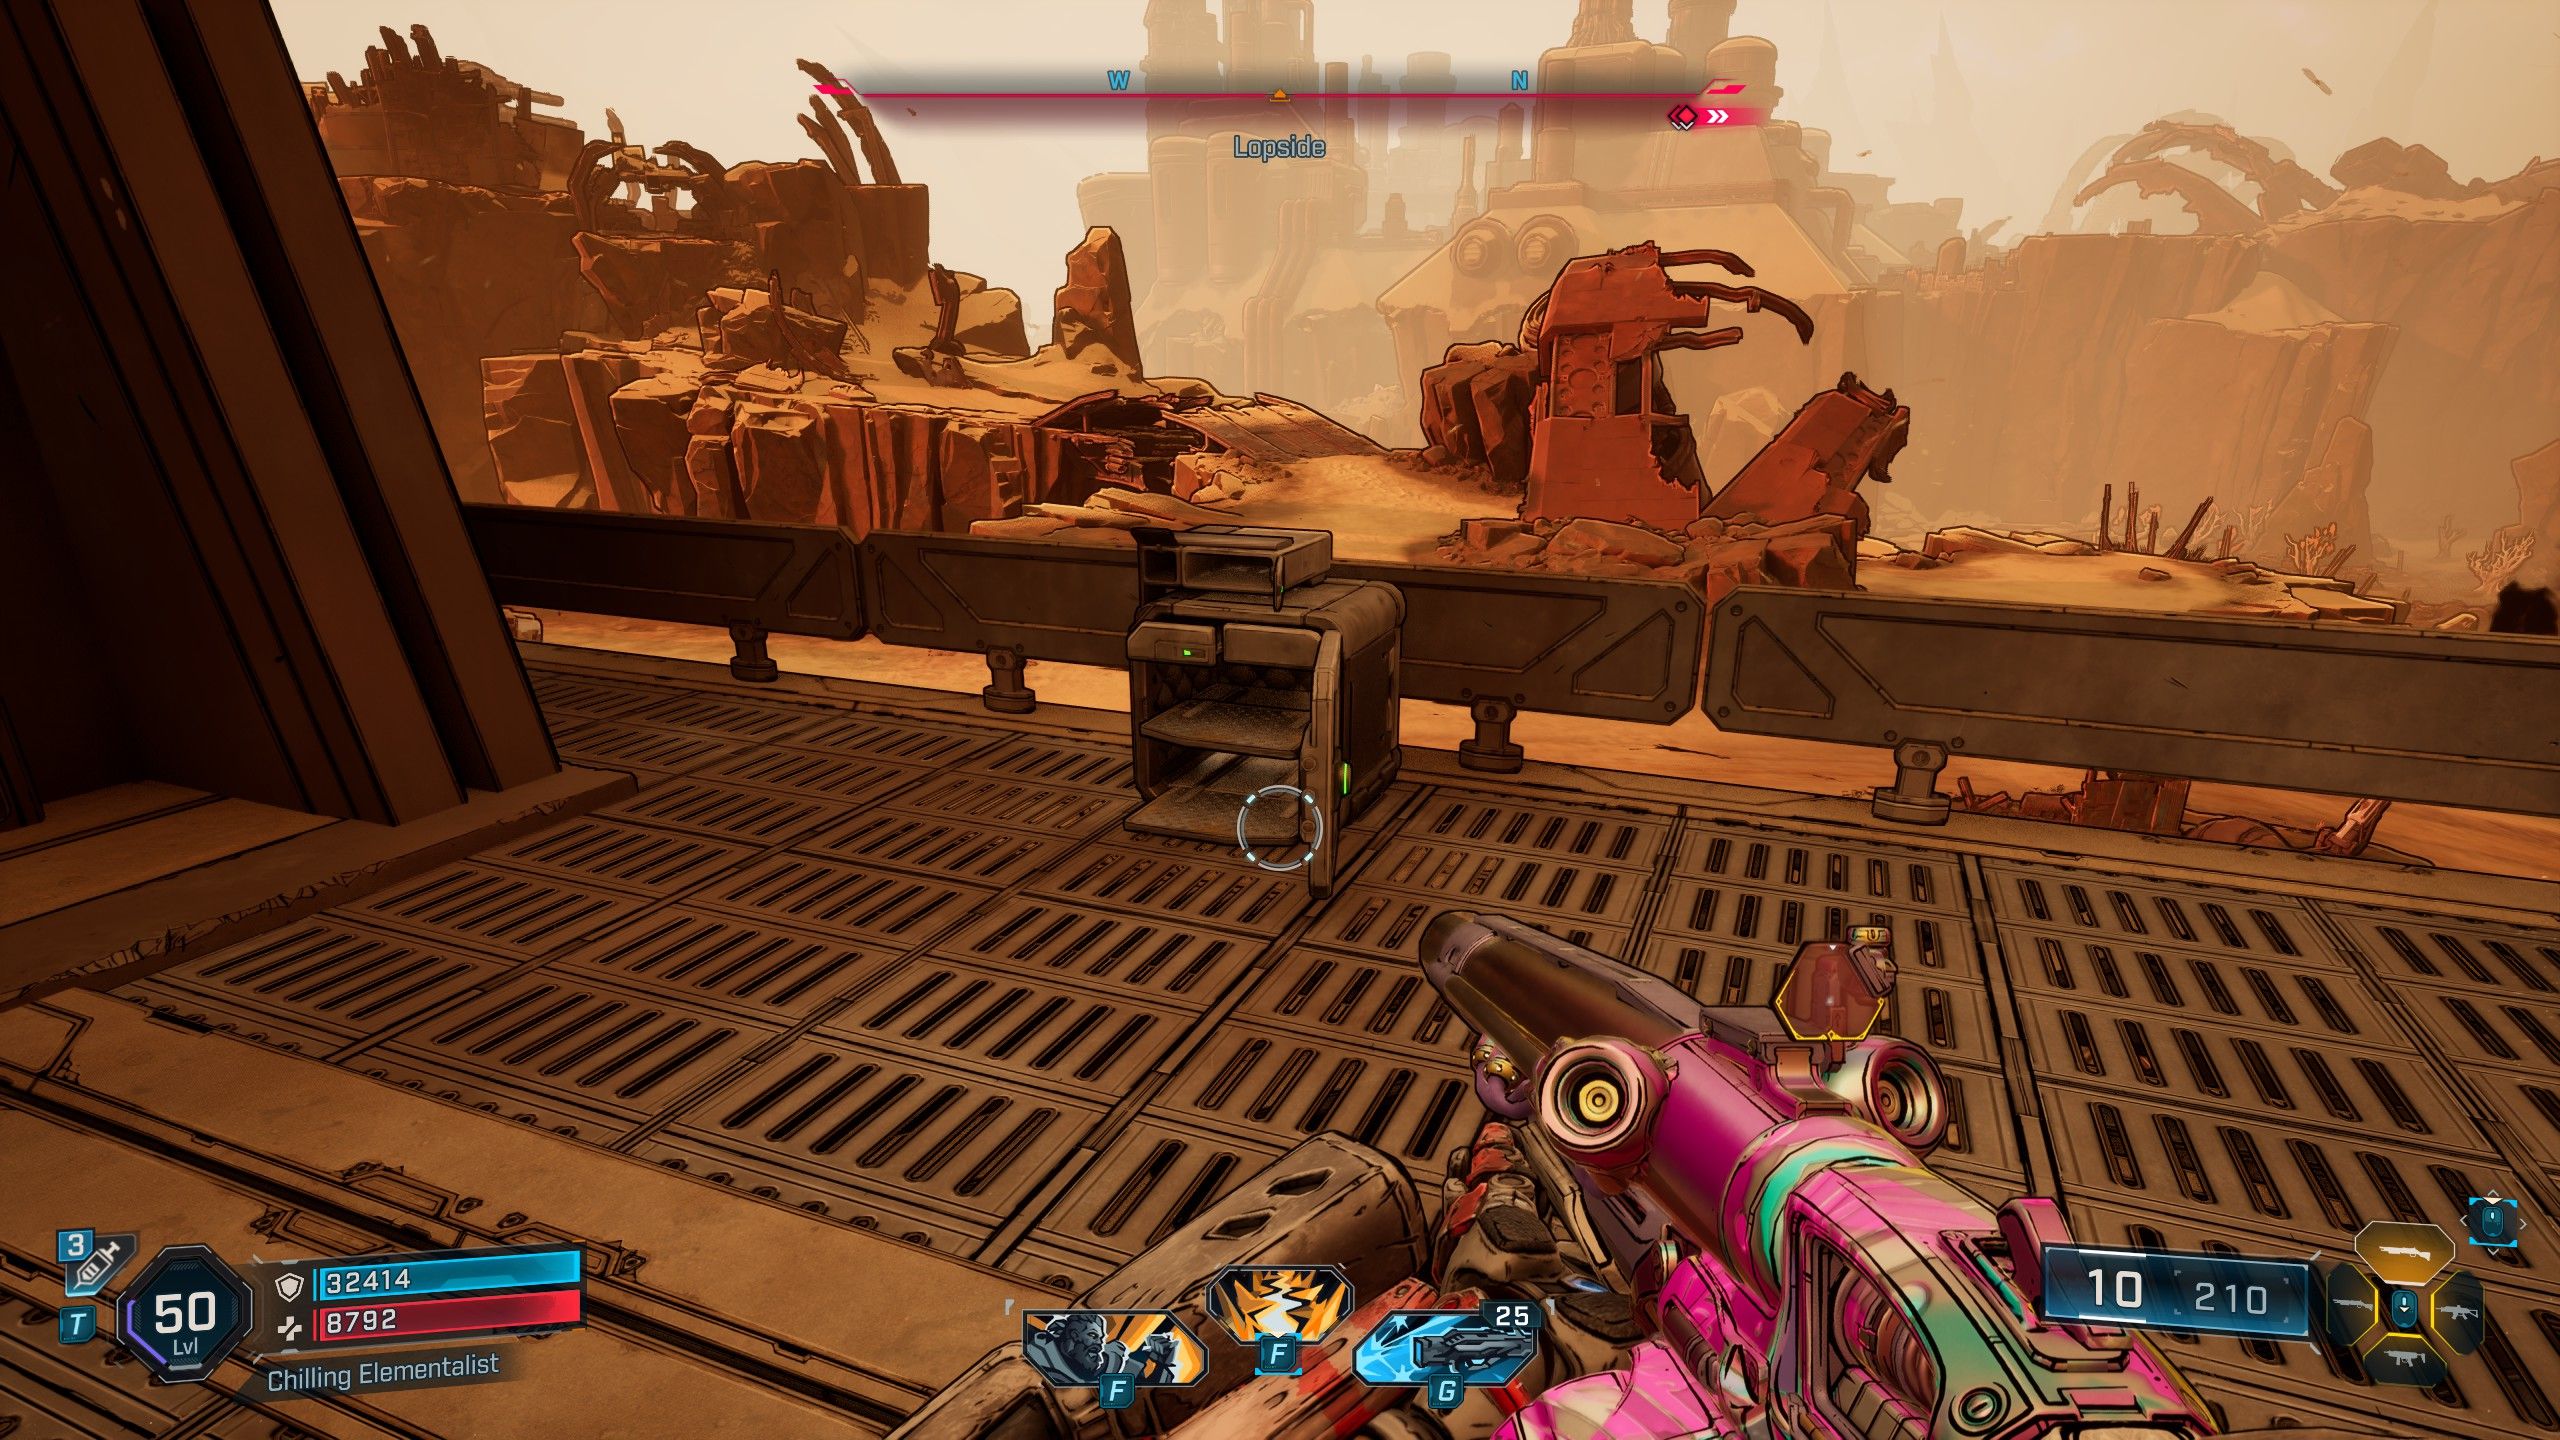
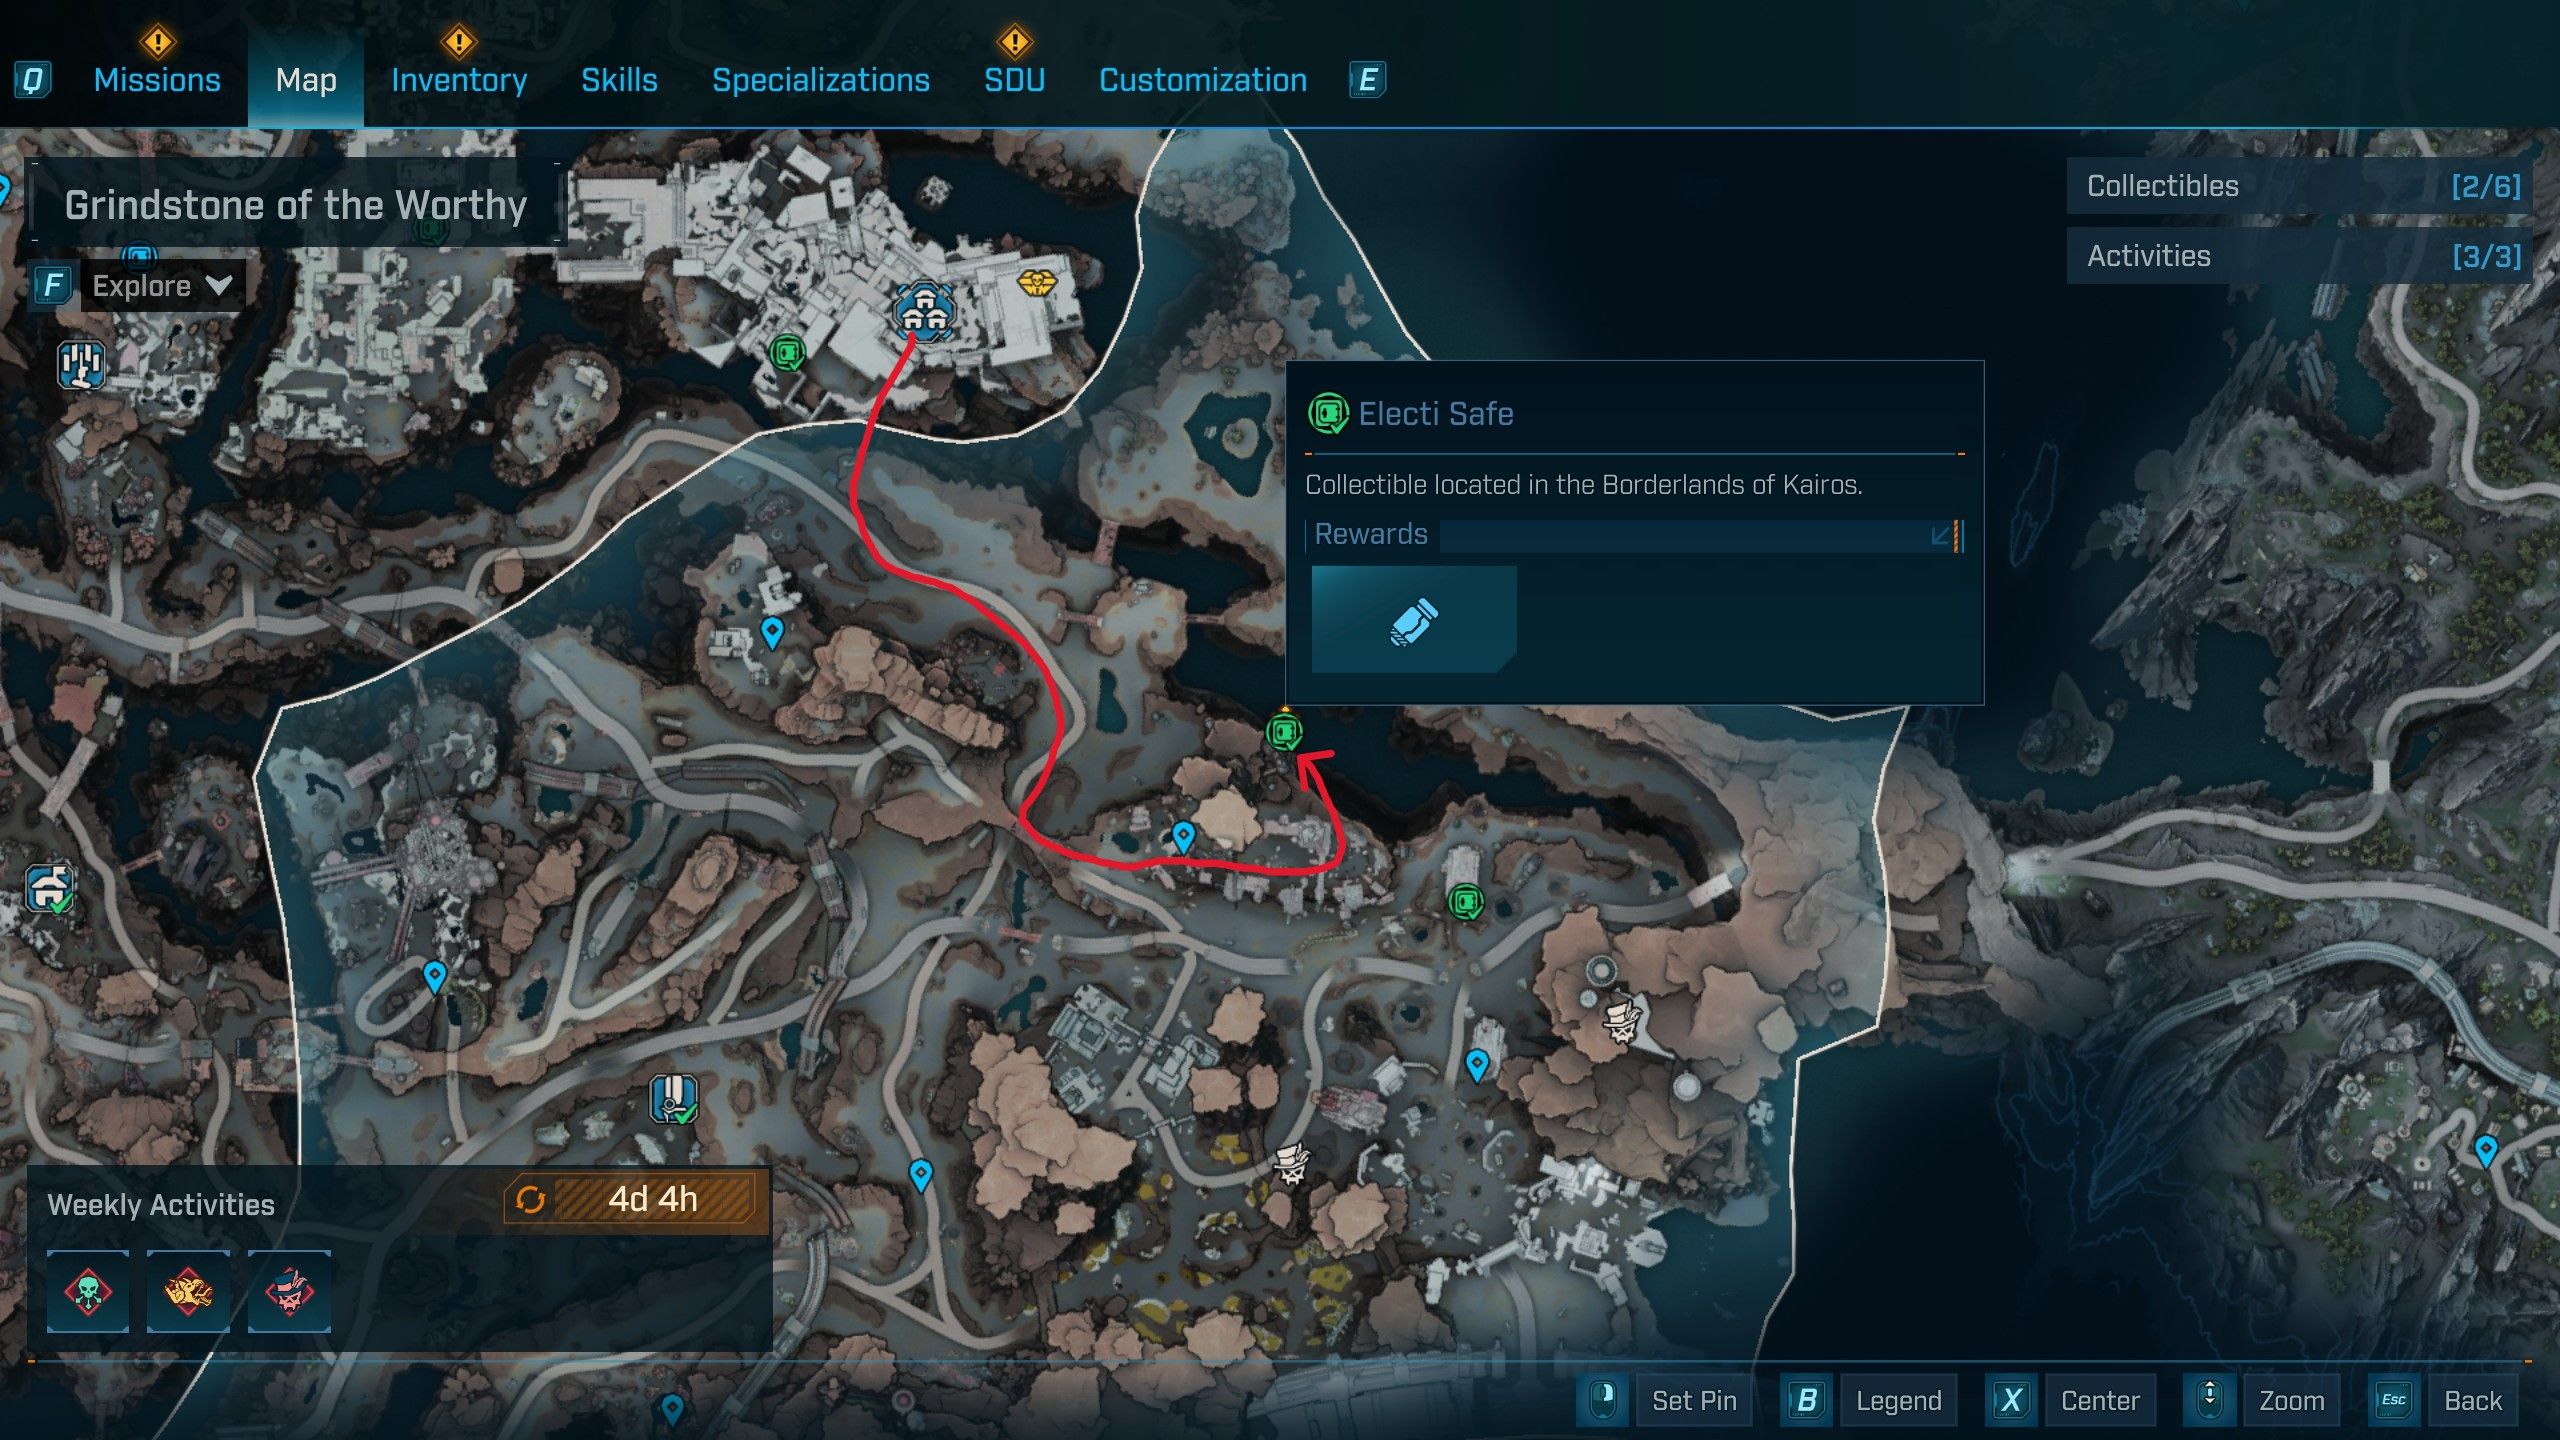
How to Find the Grindstone of the Worthy Electi Safe #1 in Borderlands 4
Electi Safe #2 Location
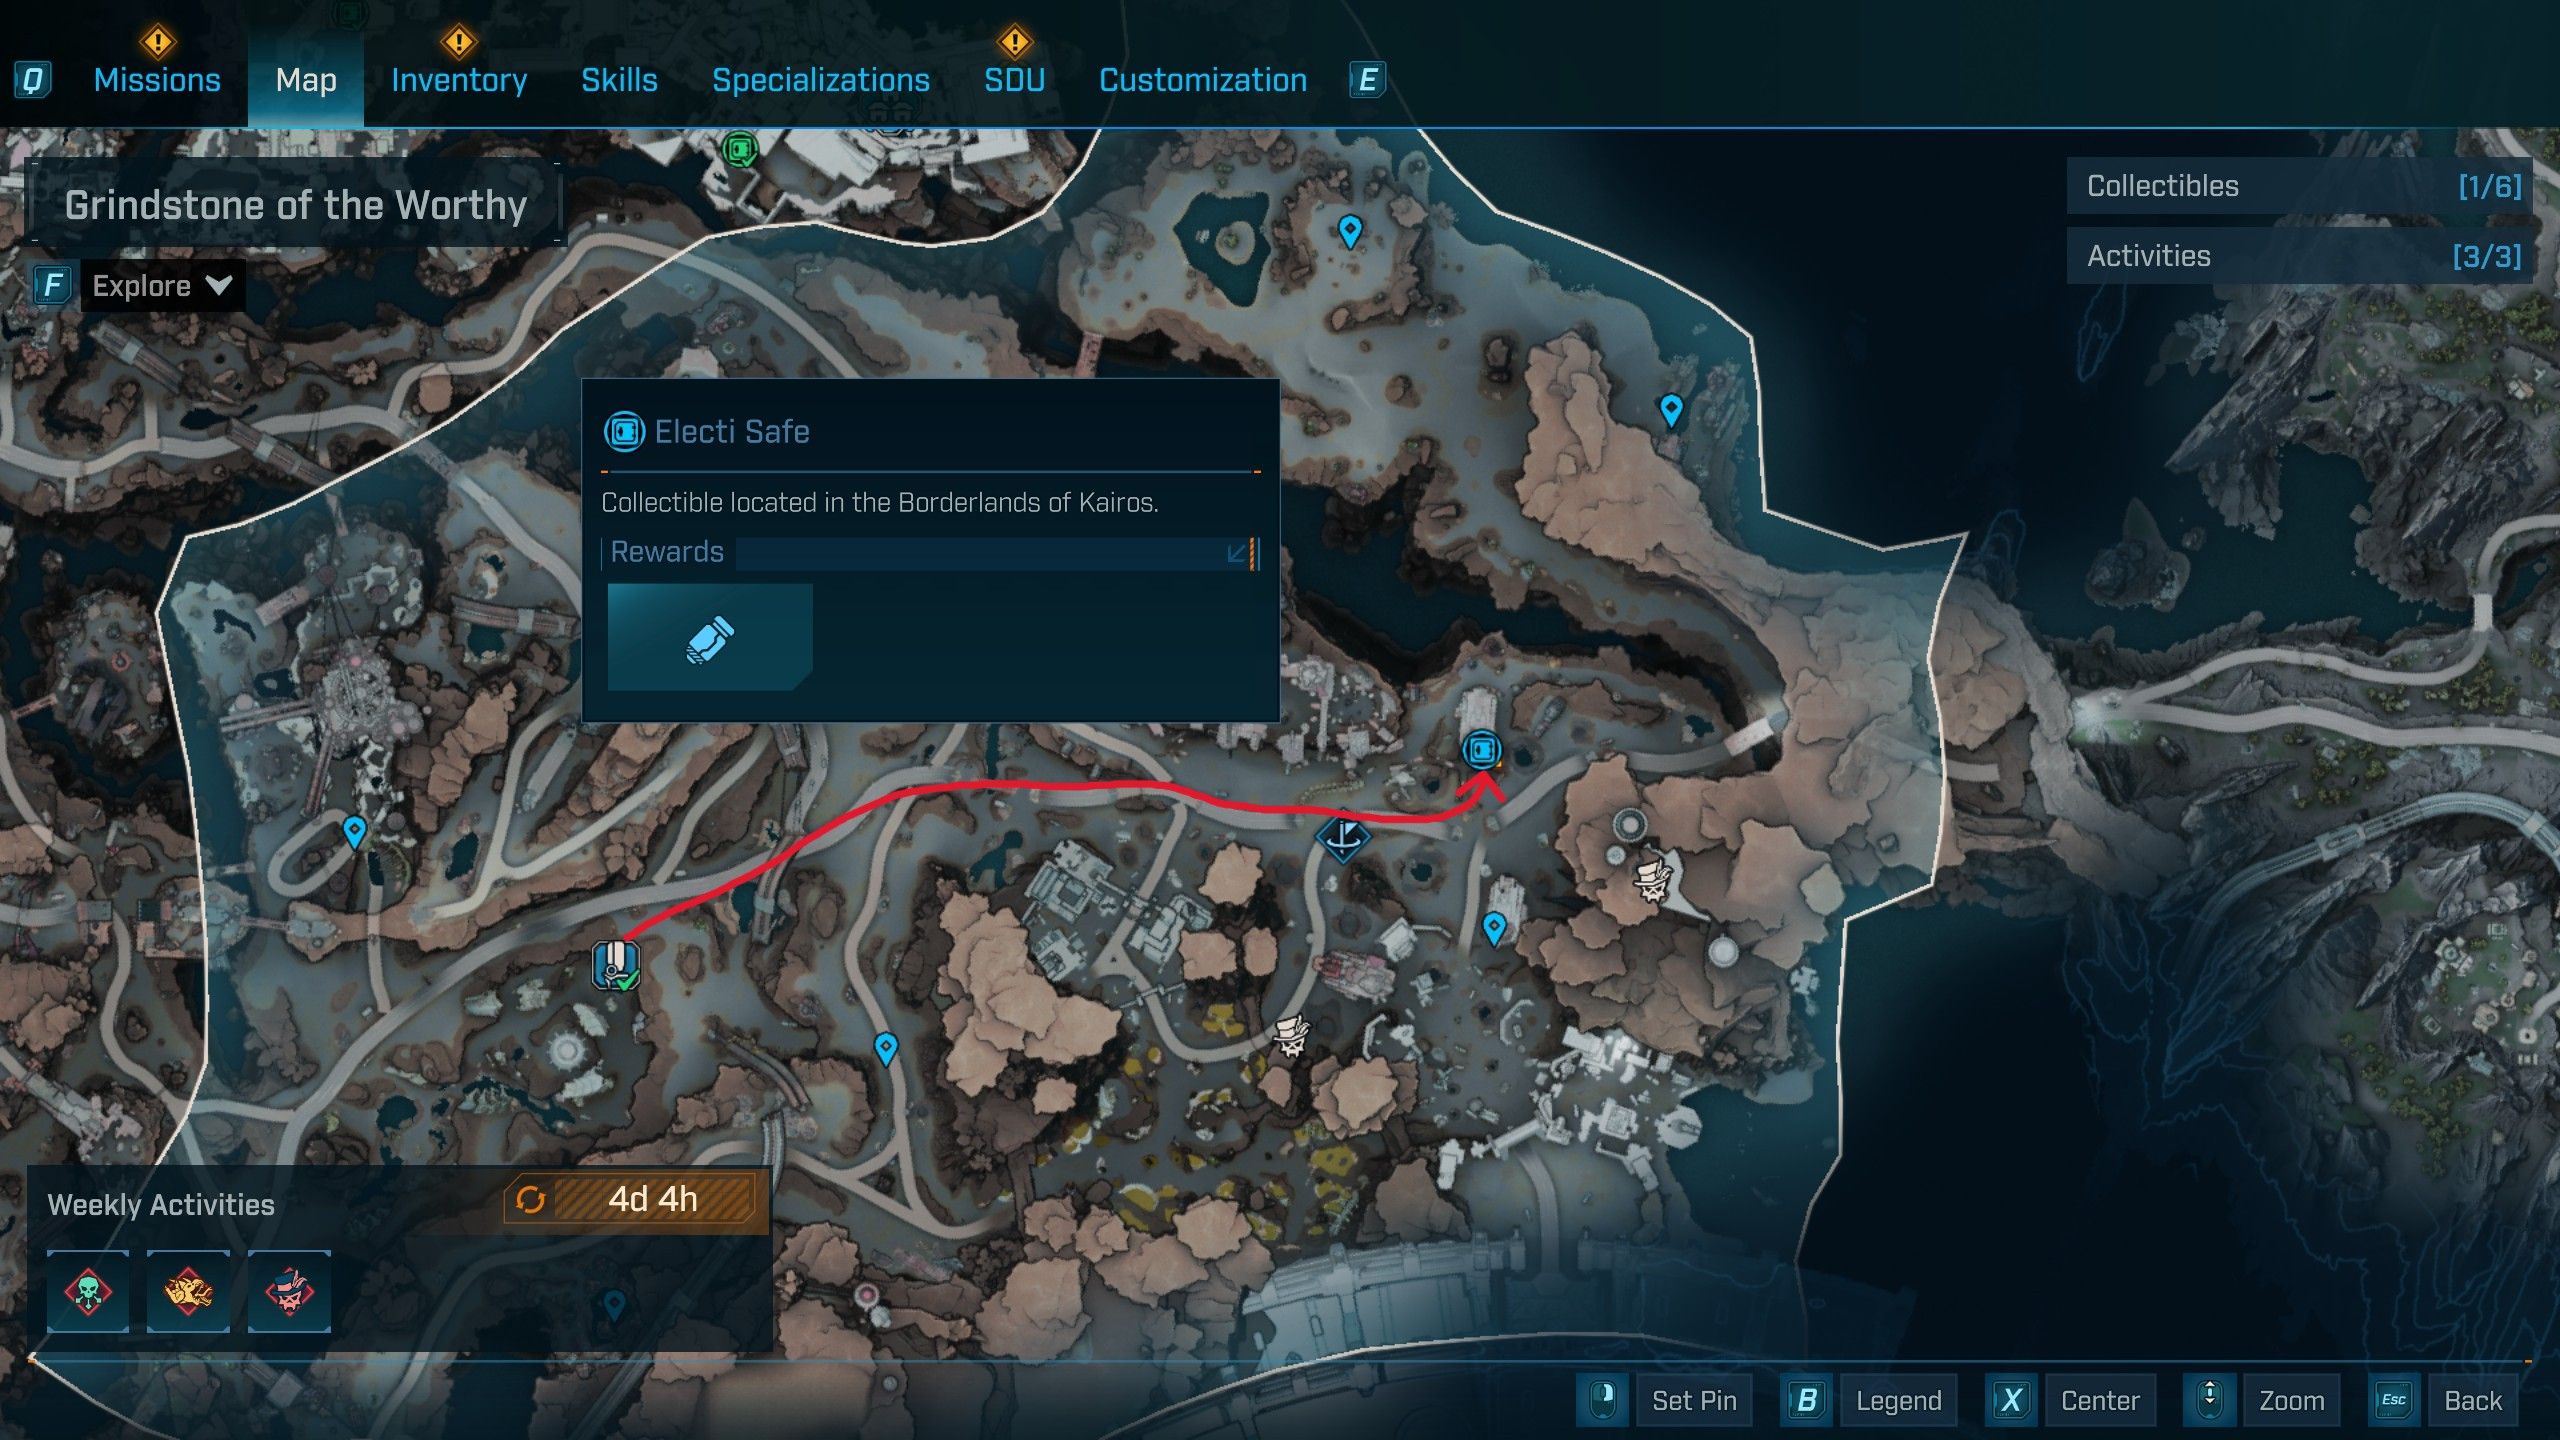
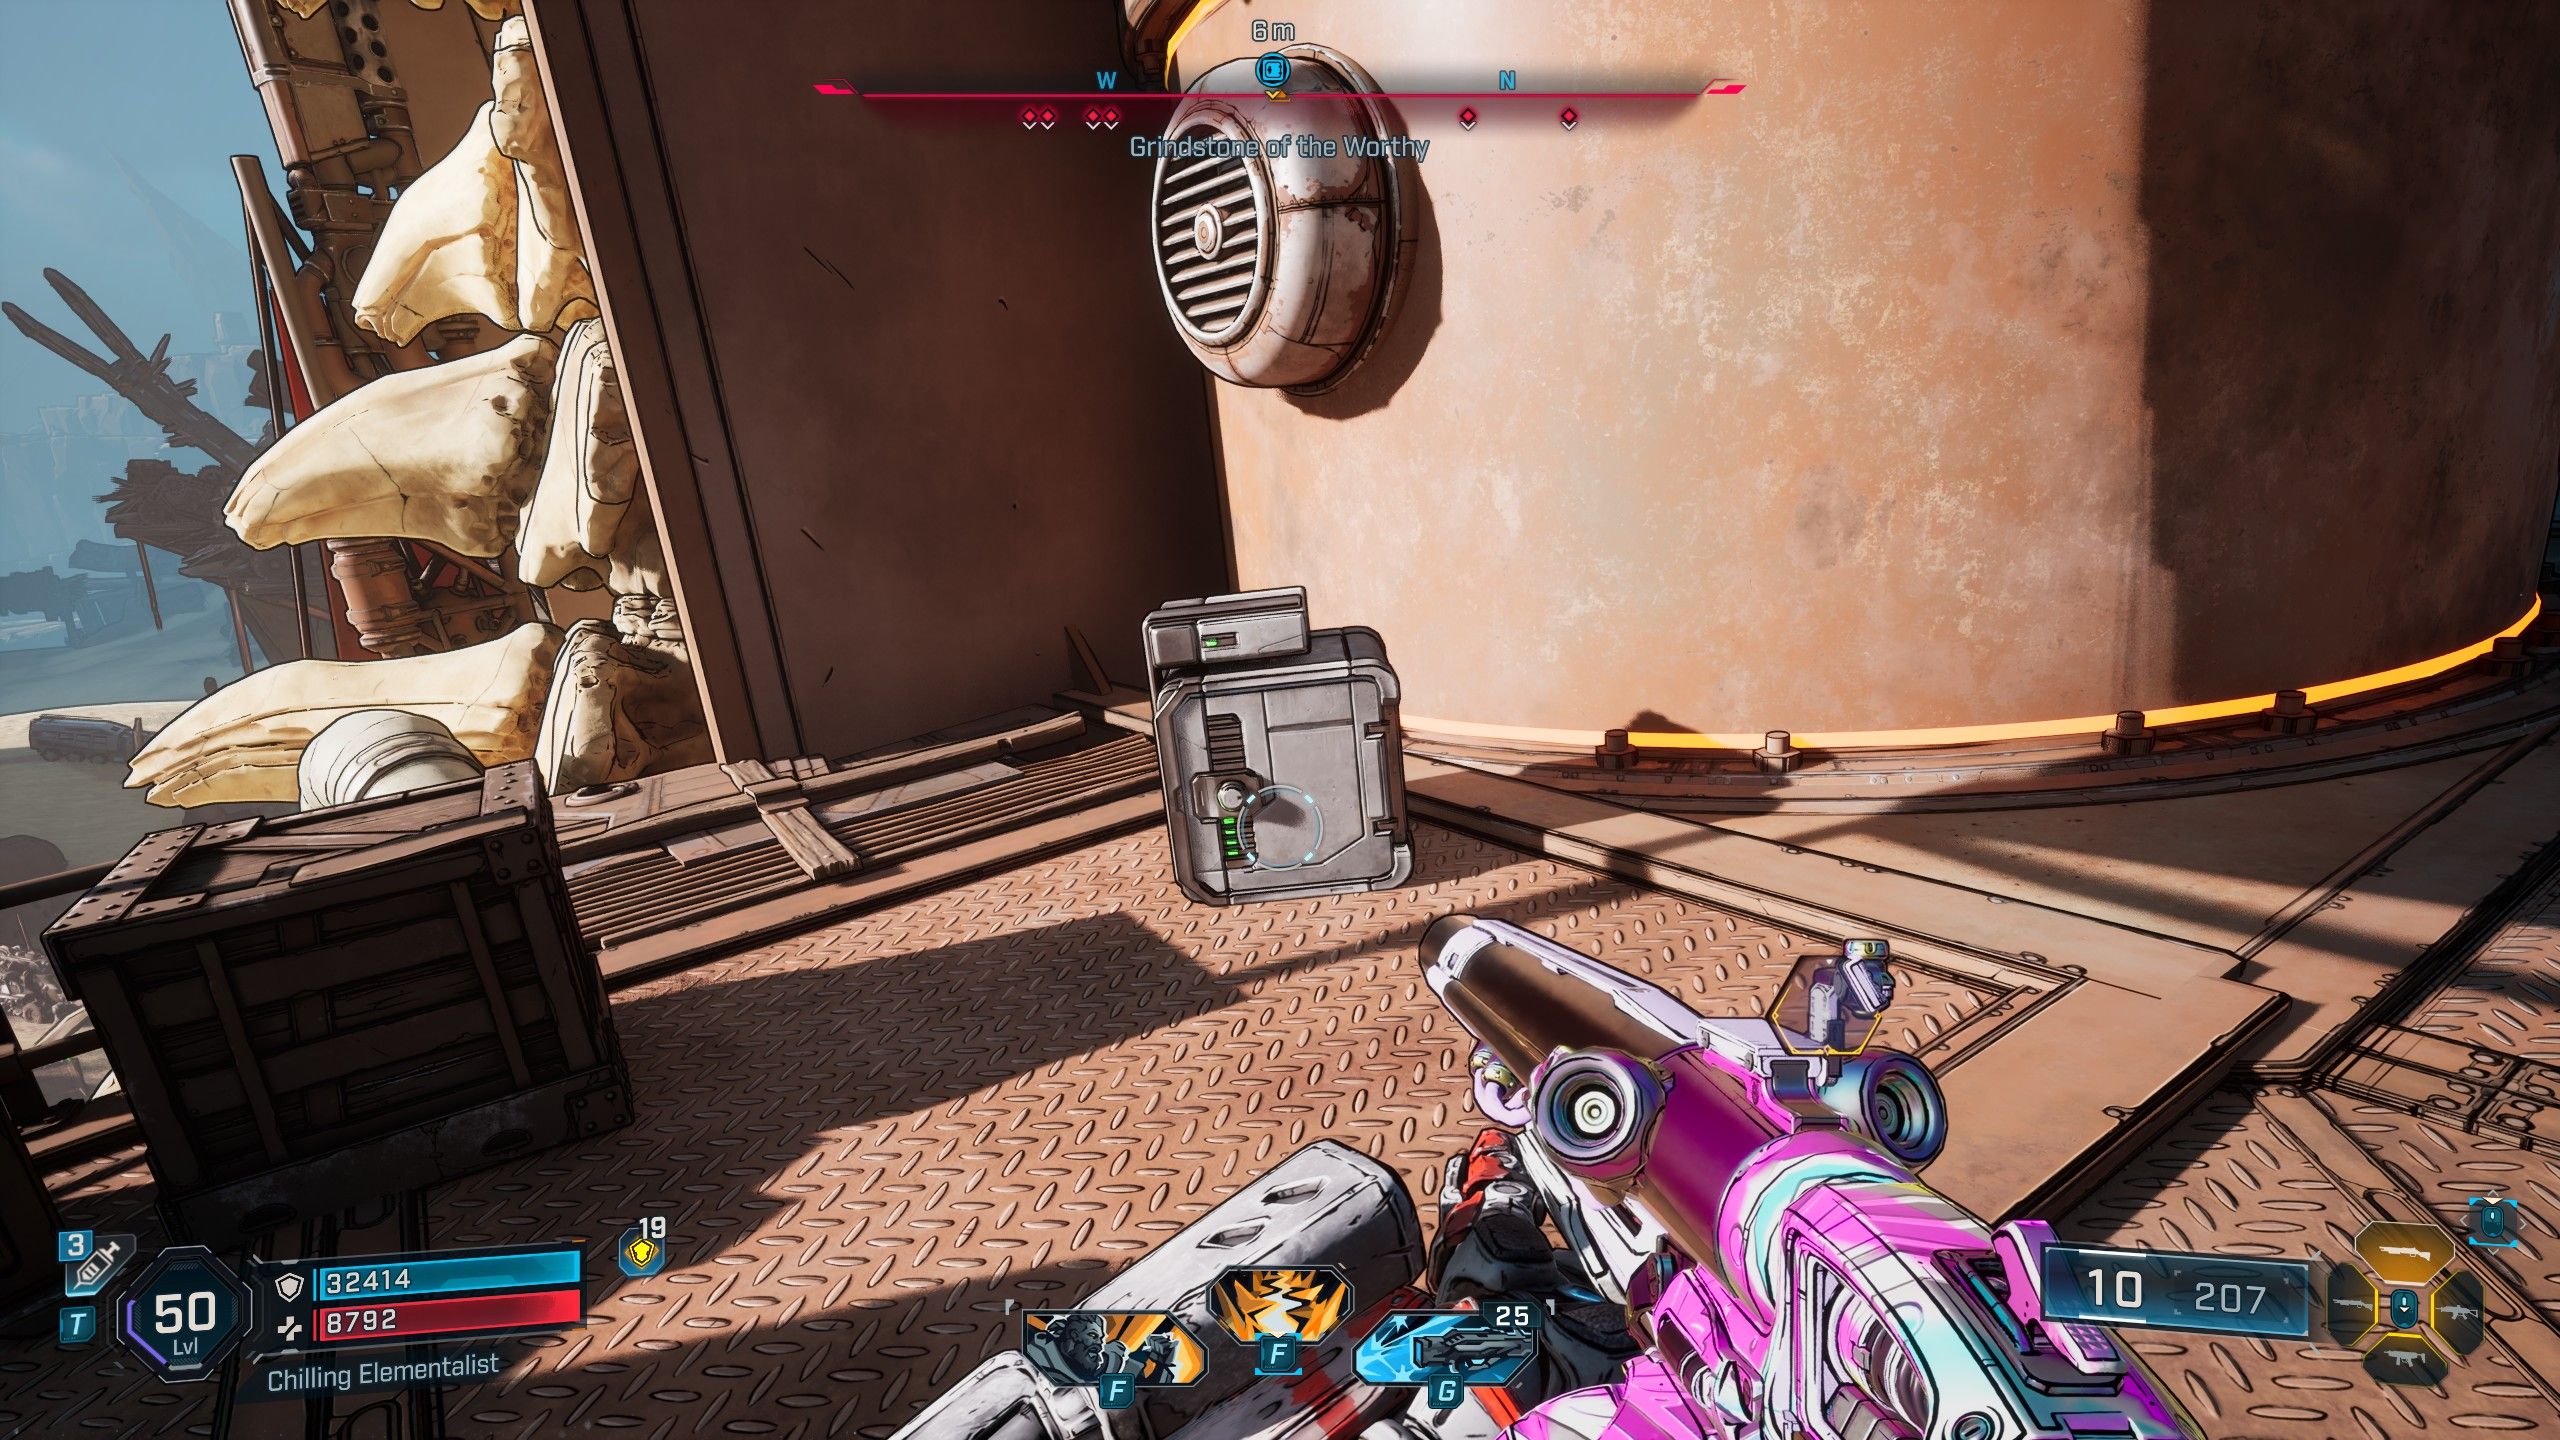
Start at the Grindstone of the Worthy, specifically the Rustical Hurl Order Silo. Use the grapple point at Rustic Hurl to launch yourself northeast, then follow the eastern road to the Deckled Sprawl. Continue along the path, past the skeletons and Ripper enemies, until you find a large, abandoned sand crawler. Climb the stairs on the right side of the crawler, look up, and use the grapple point to pull yourself onto the top. From there, follow the path to find the Electi Safe at the back of the crawler.
How to Find the Grindstone of the Worthy Electi Safe #2 in Borderlands 4
Electi Safe #3 Location
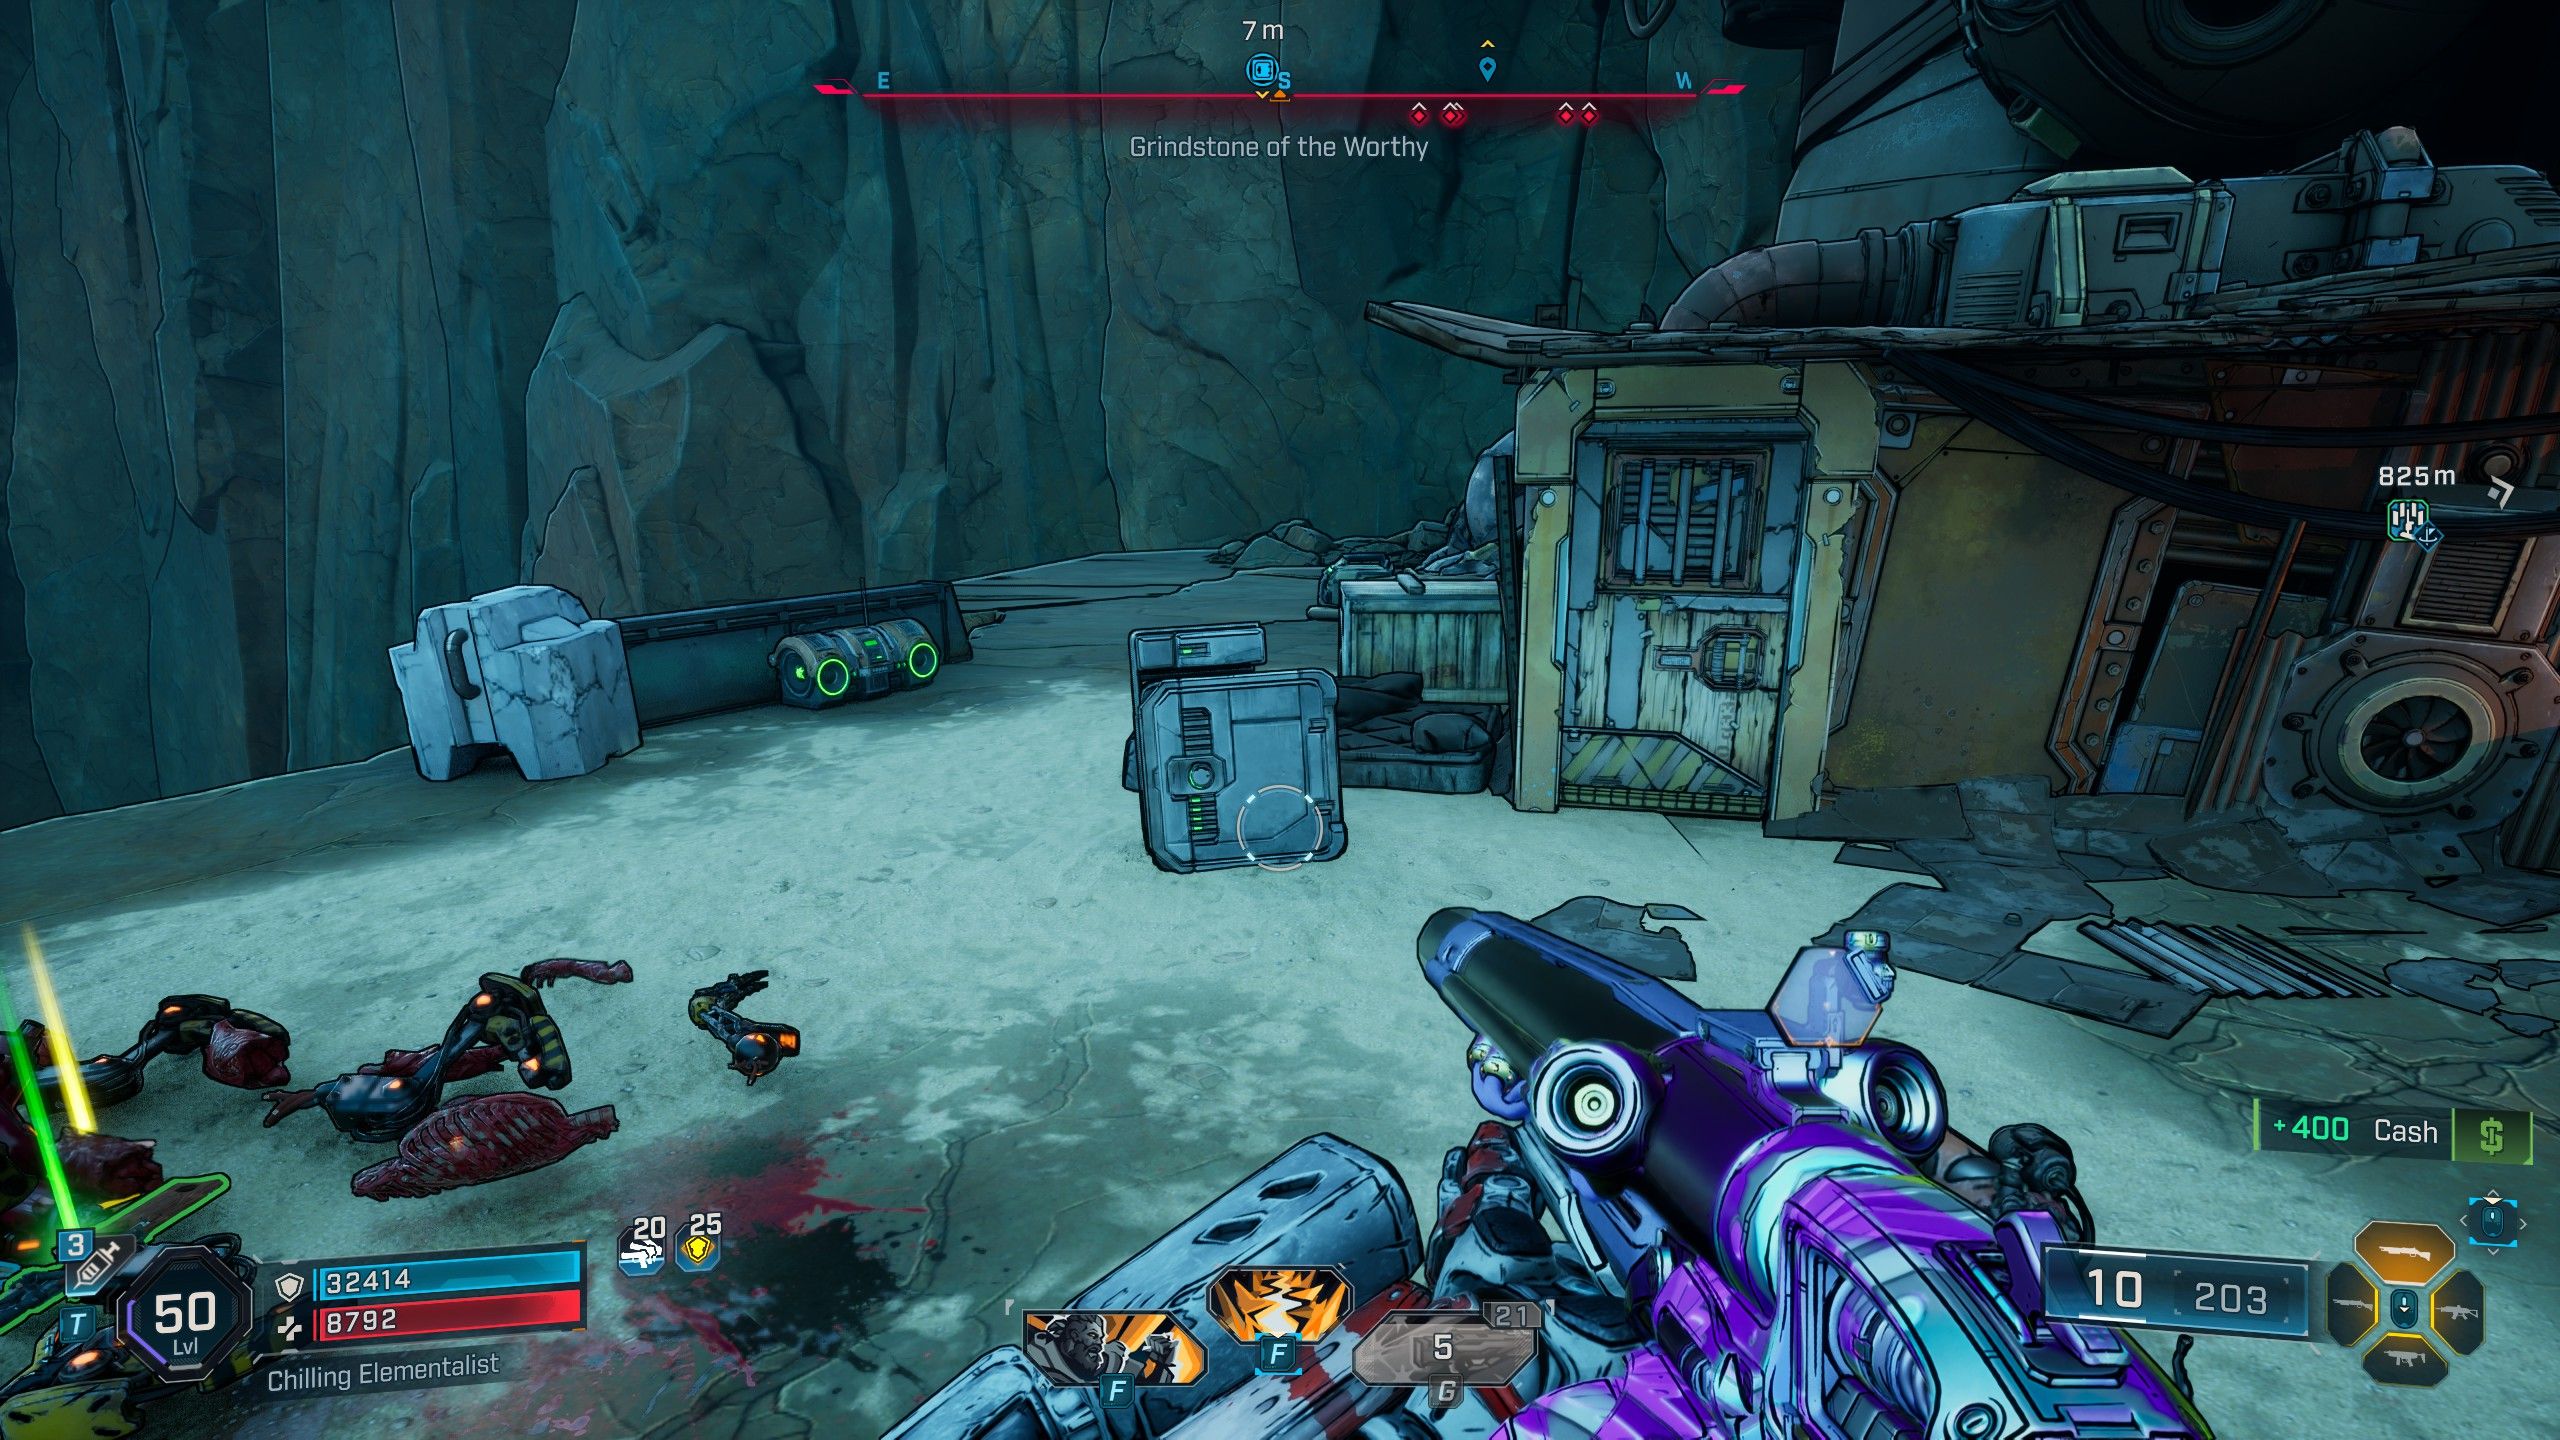
To find this Electi Safe, begin at the Rustic Hurl Order Silo in Grindstone of the Worthy. From there, use the grapple point to climb up and head northeast along the road. Continue east on this road until you reach the Deckled Sprawl. Turn left inside the Sprawl and carefully navigate through the area, which is full of Rippers. Once you’re at the back of the Sprawl, loop around the large mountain to the north and drop down the cliff. You’ll find a small shack with the Electi Safe right by its front door.
How to Find the Tonnage Peel Electi Safe #1 in Borderlands 4
Electi Safe #4 Location
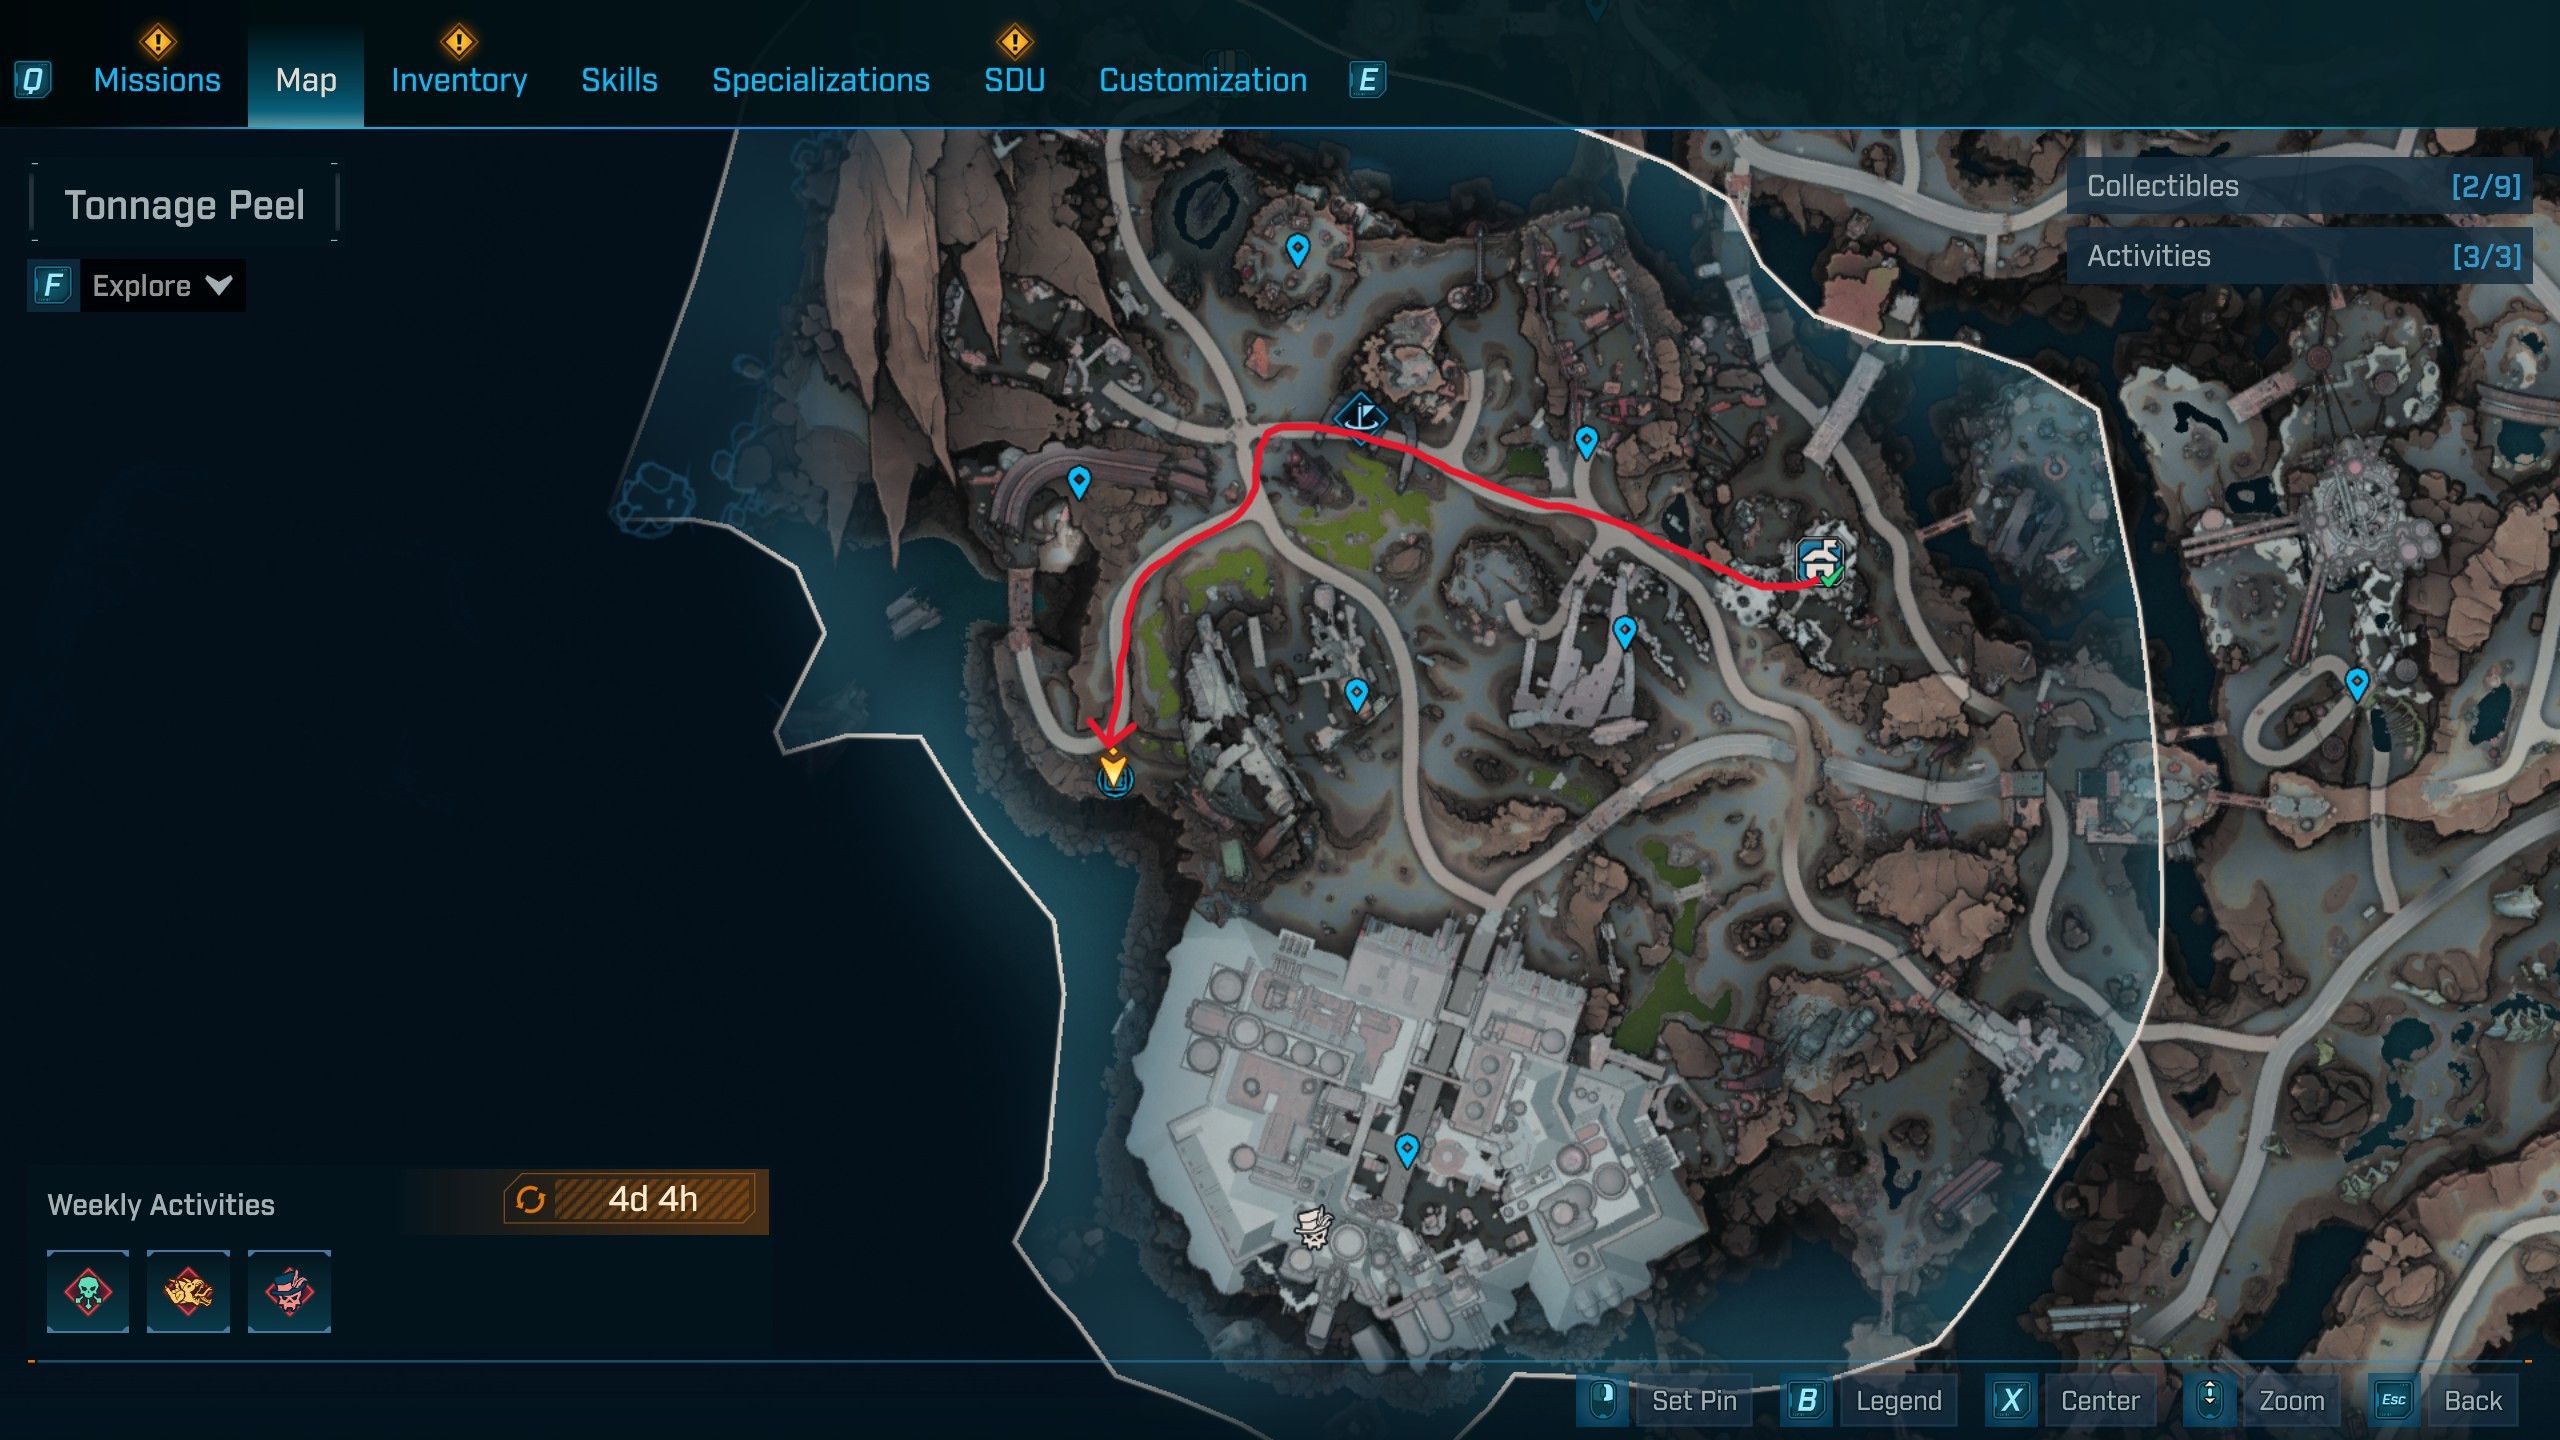
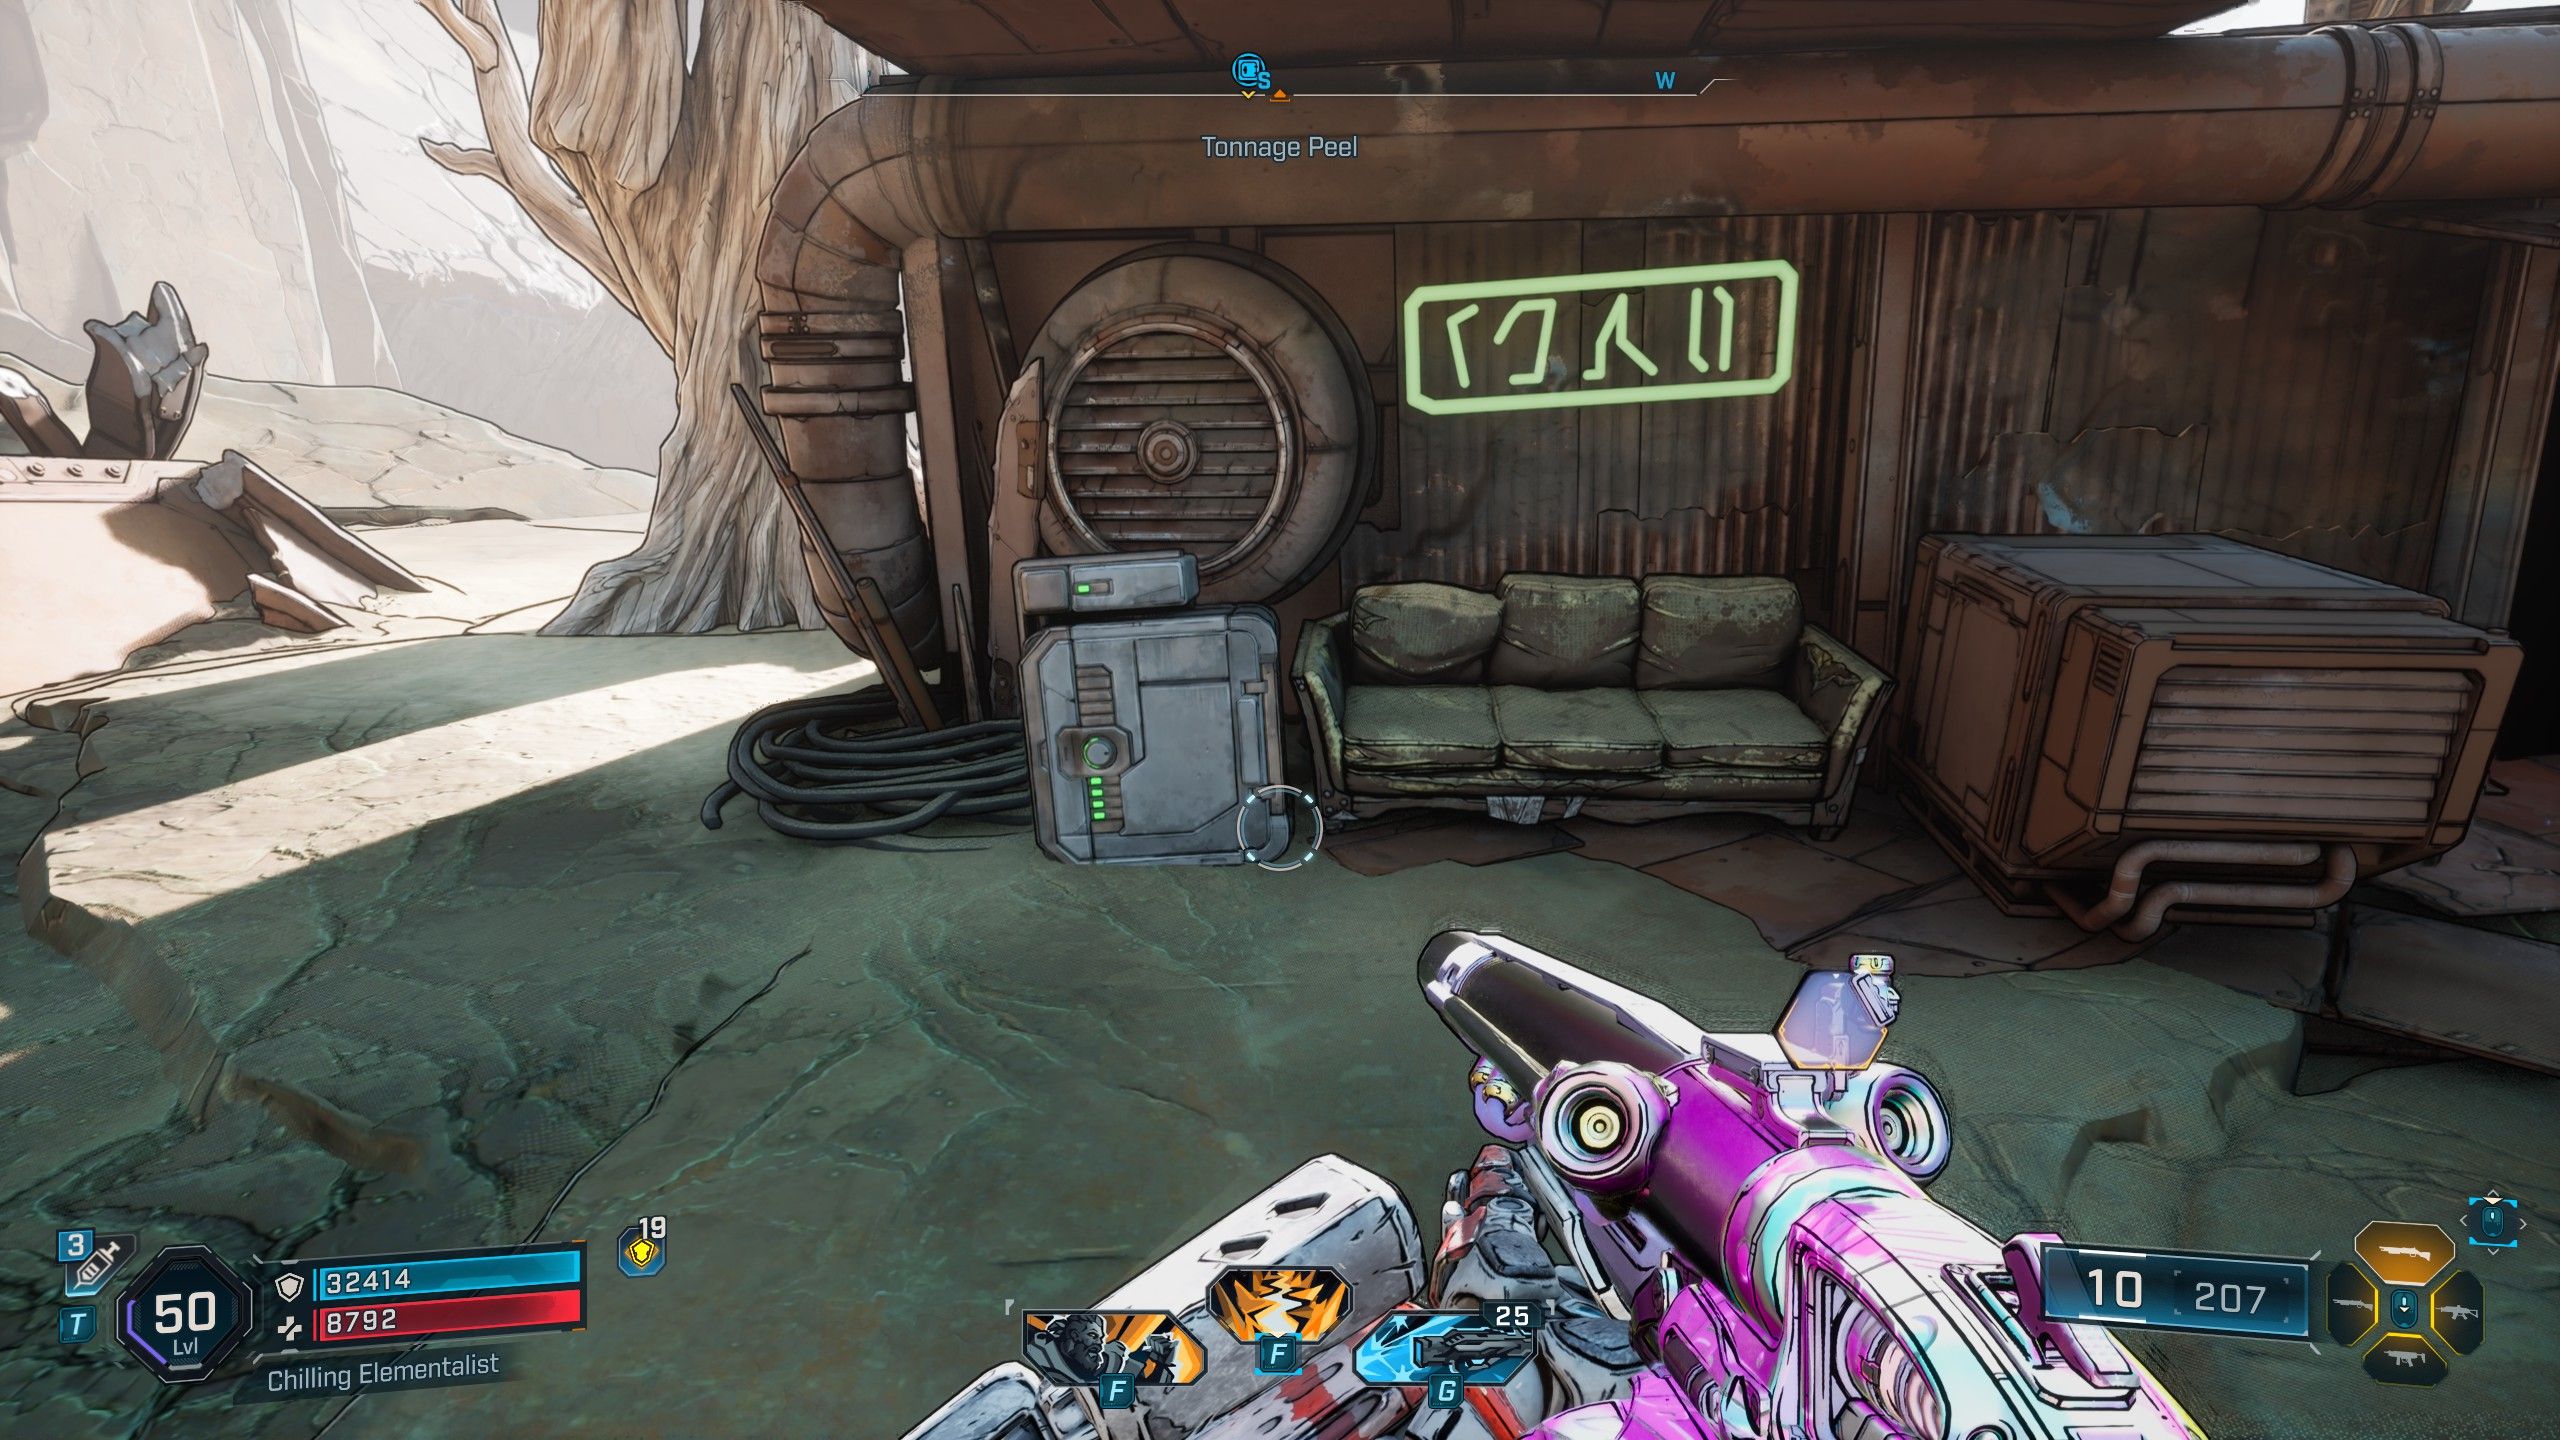
To reach the Tonnage Peel Electi Safe, travel to the Lowrise Safehouse in Tonnage Peel and head west. Follow the road past the Wreck of the Last Great Hope and towards Quisling’s Cave. Keep going until you find an abandoned shack surrounded by dead trees in the southwest part of Tonnage Peel. The Electi Safe is located right outside the shack, next to a couch.
How to Find the Ruined Sumplands Electi Safe #1 in Borderlands 4
Electi Safe #5 Location

Start at Moxxi’s Bottoms Up, a fast travel point in the Ruined Sumplands. Leave through the front doors and go straight north. You’ll find a crumbling, roofless building – drop down to reach it. The Electi Safe is located on the second floor inside.
How to Find the Ruined Sumplands Electi Safe #2 in Borderlands 4
Electi Safe #6 Location
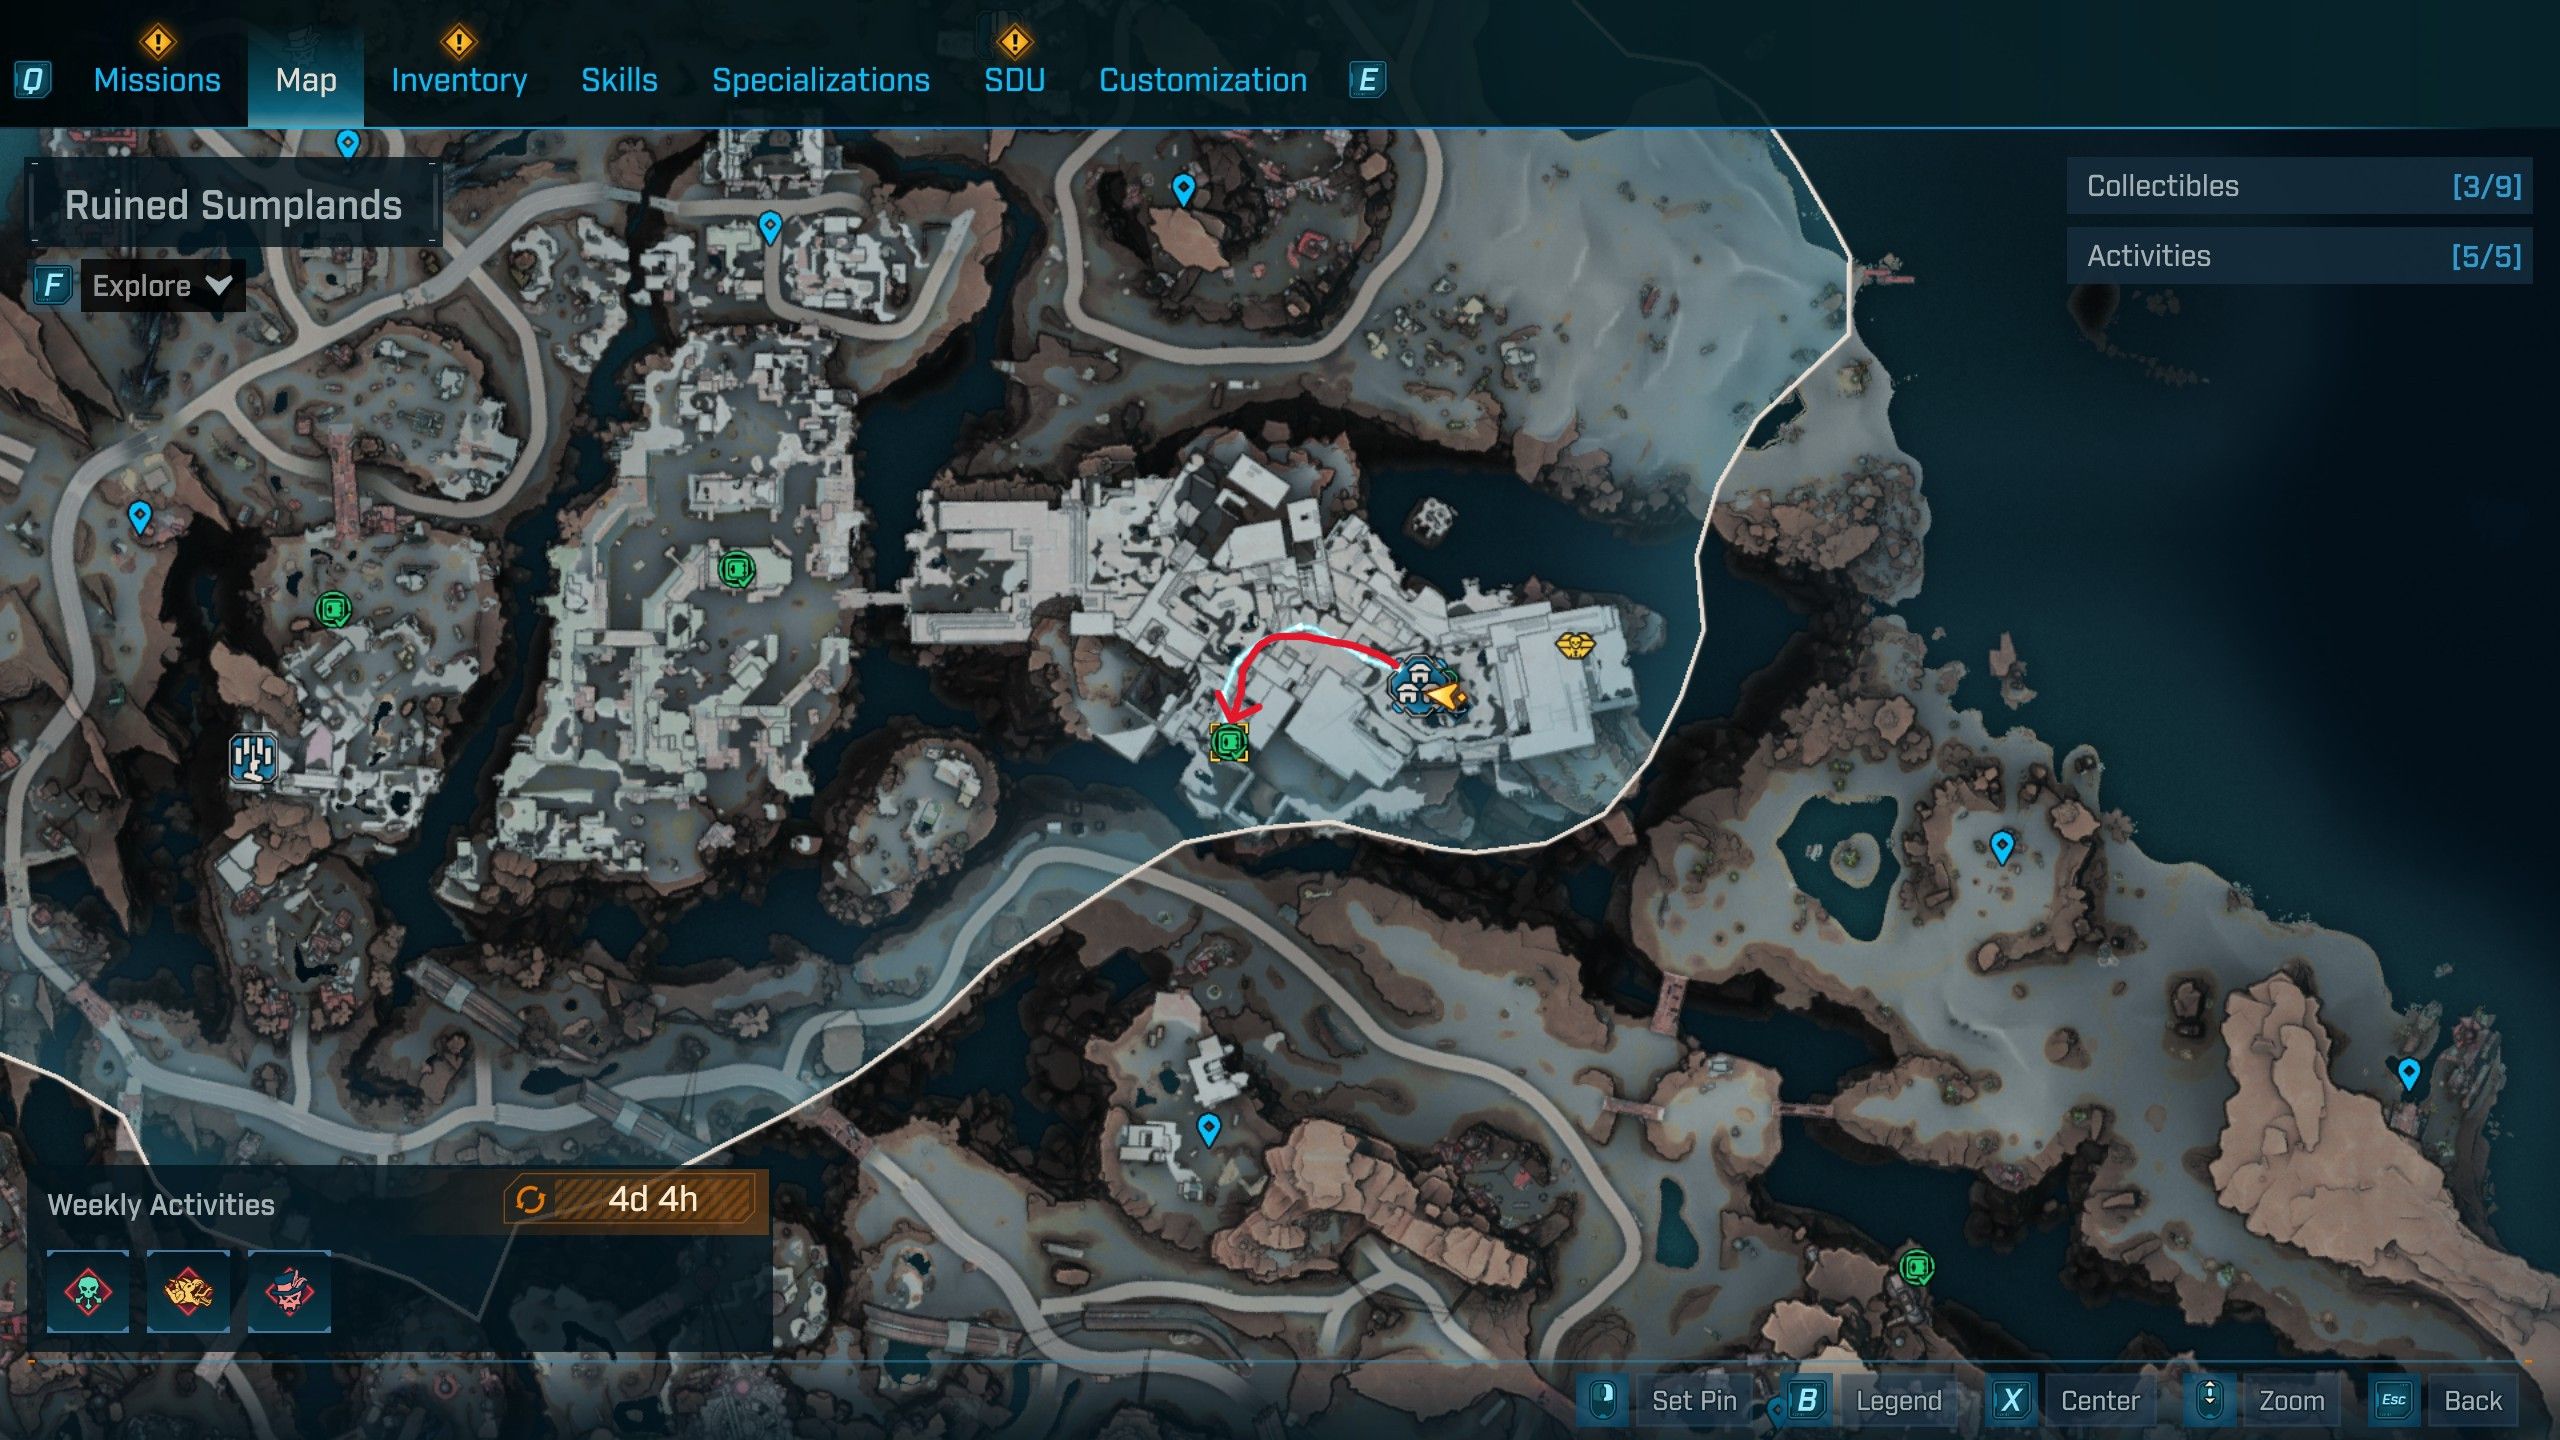

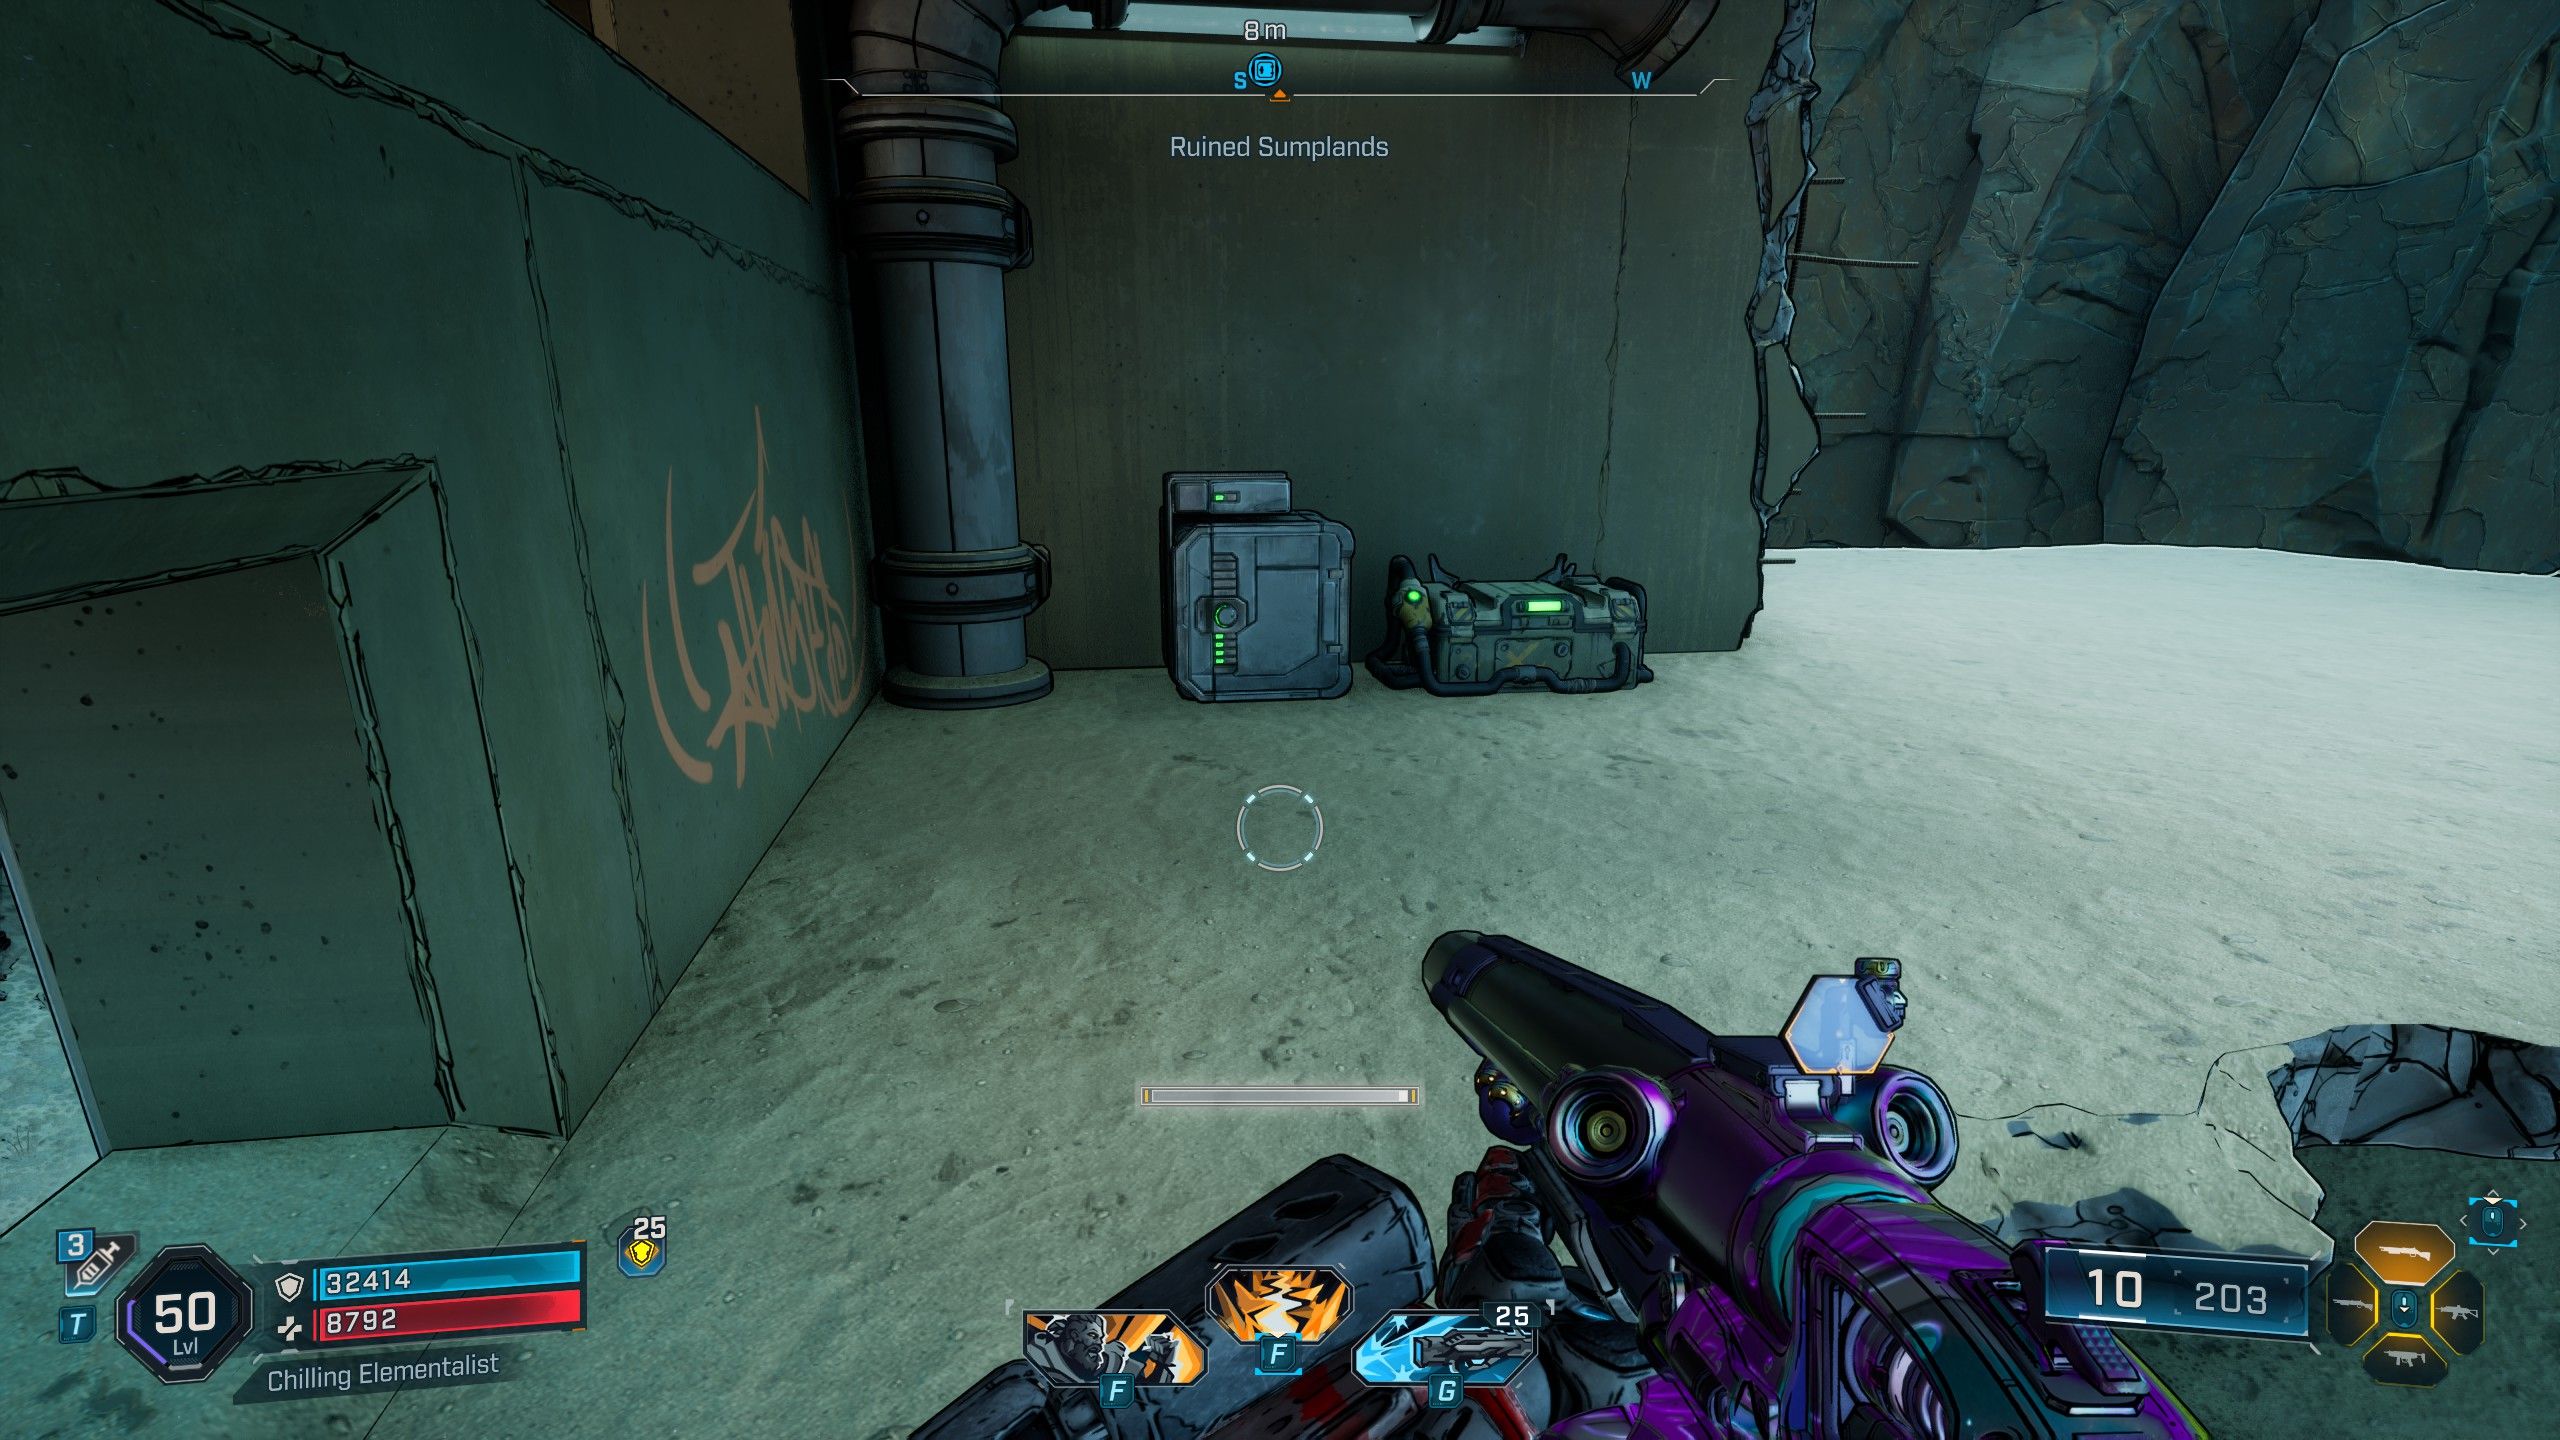
How to Find Ruined Sumplands Electi Safe #3 in Borderlands 4
Electi Safe #7 Location
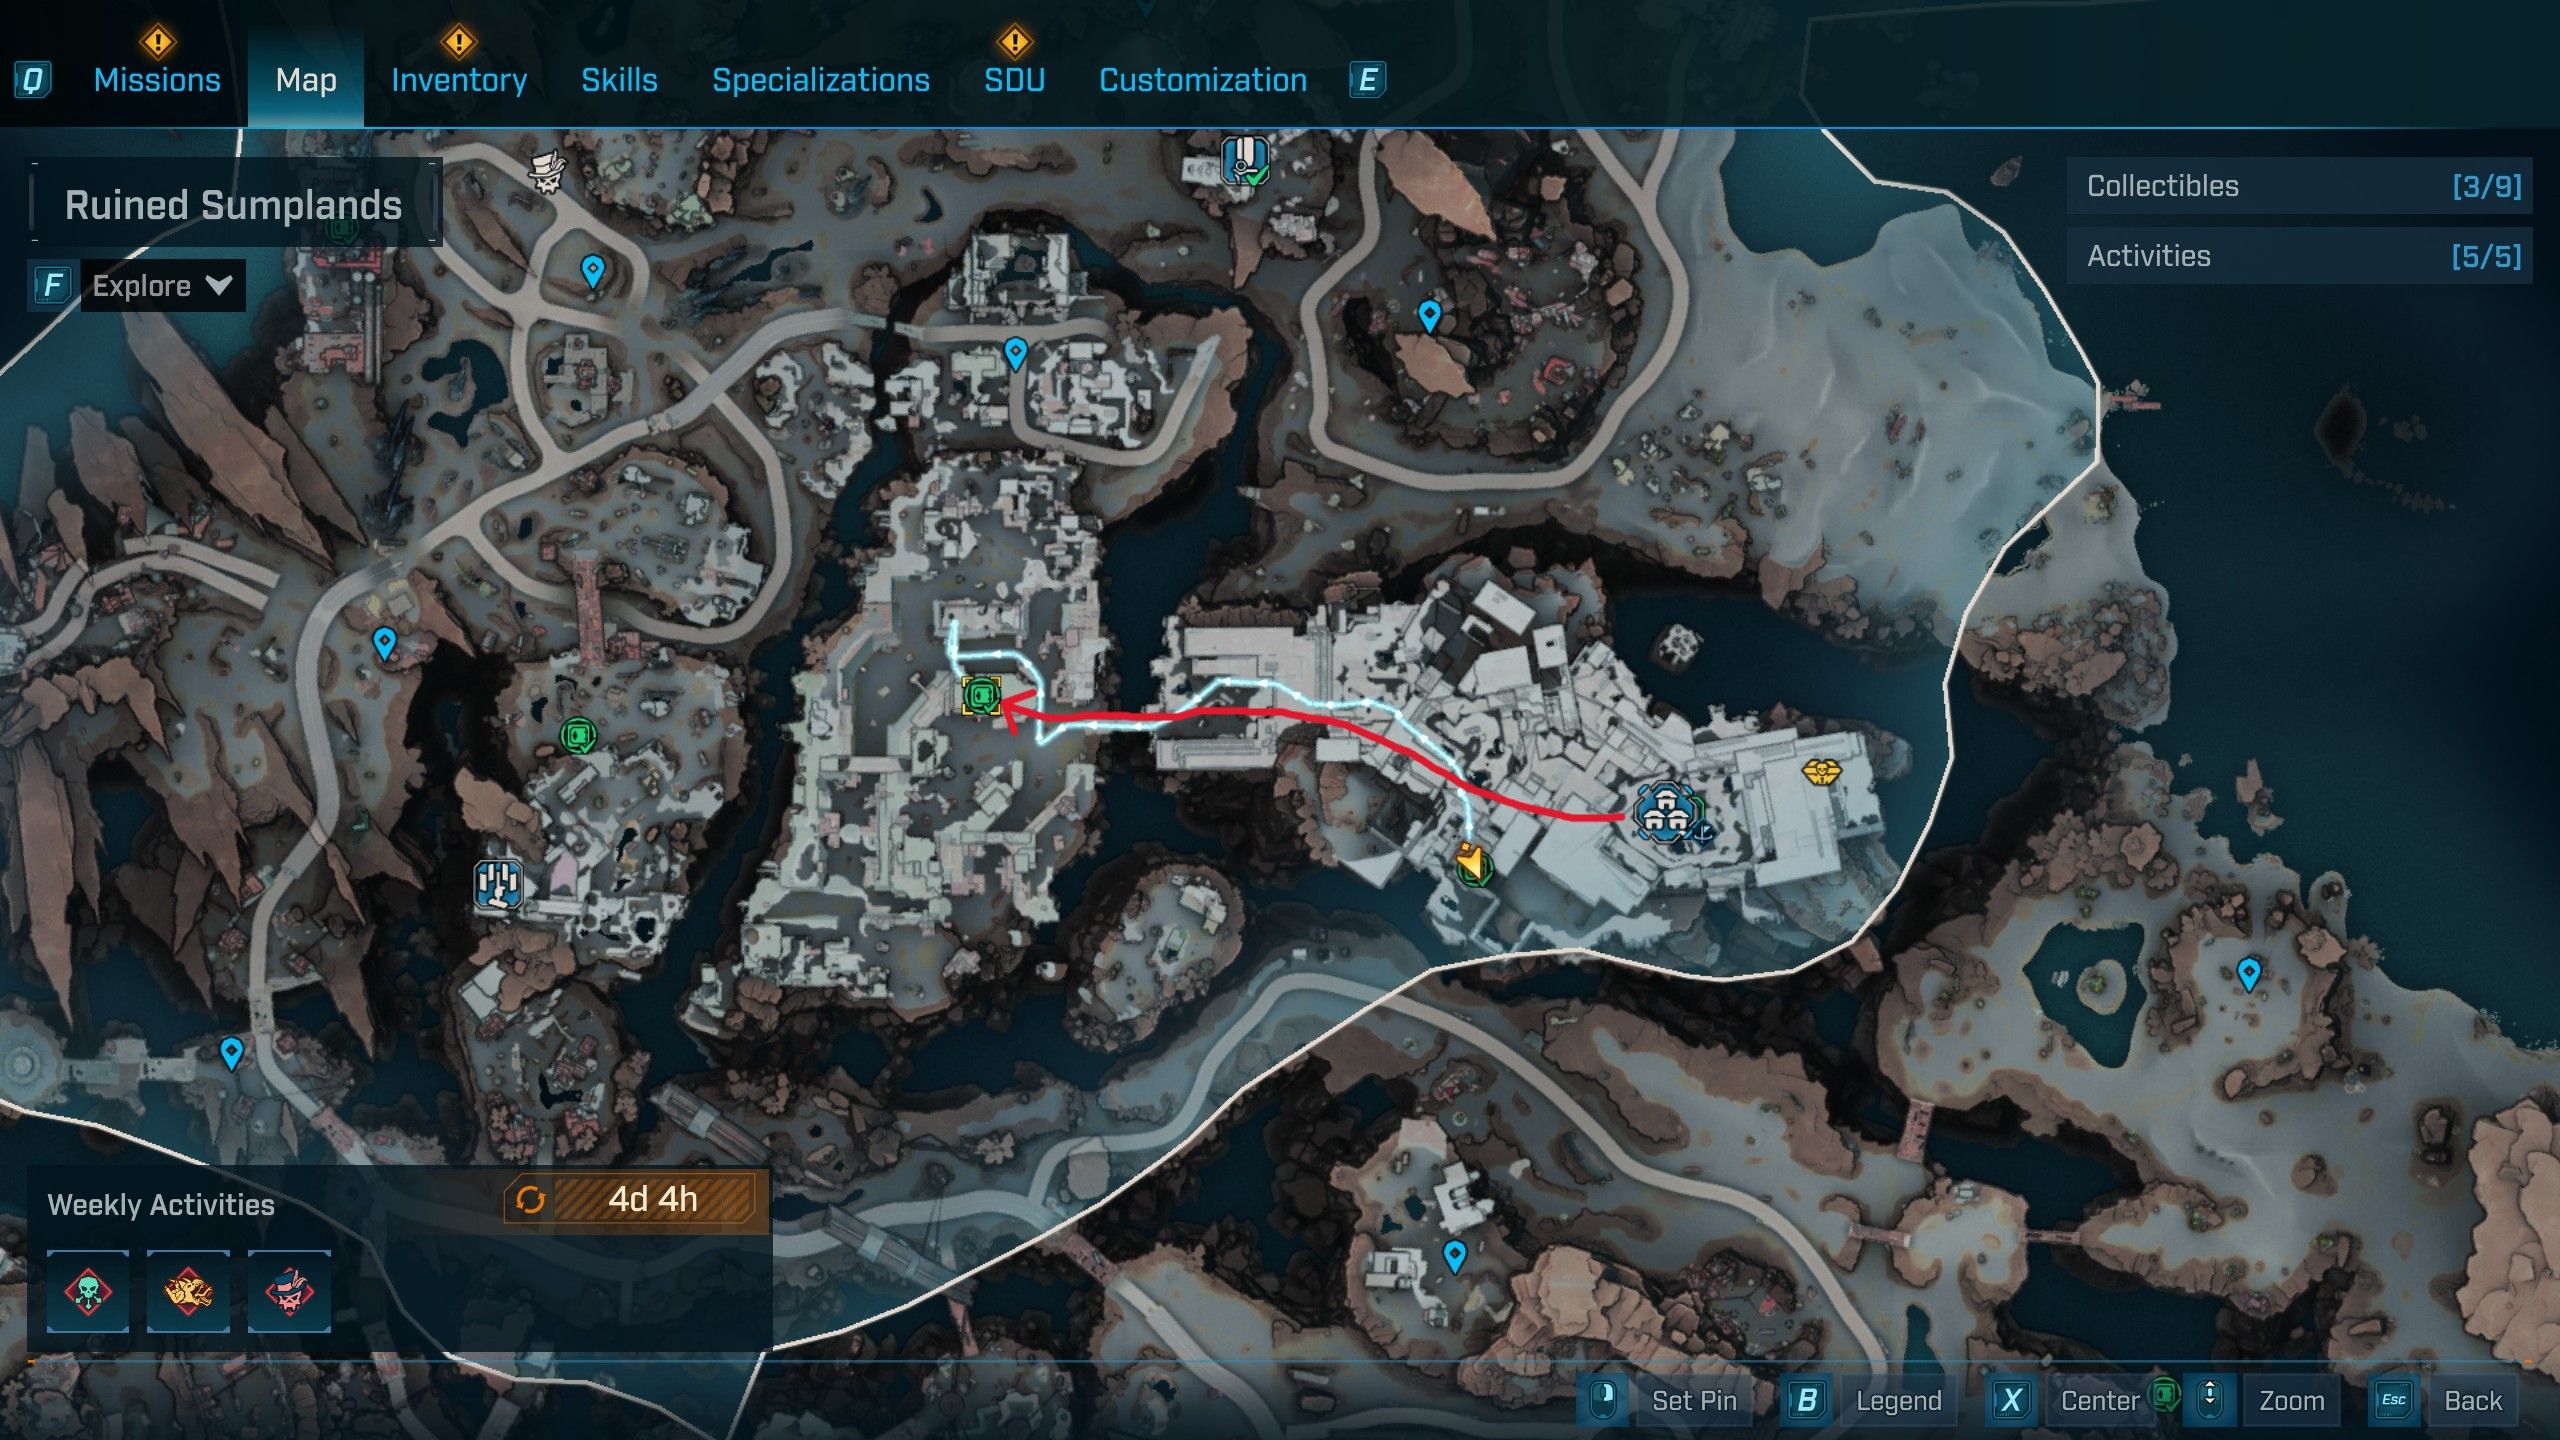
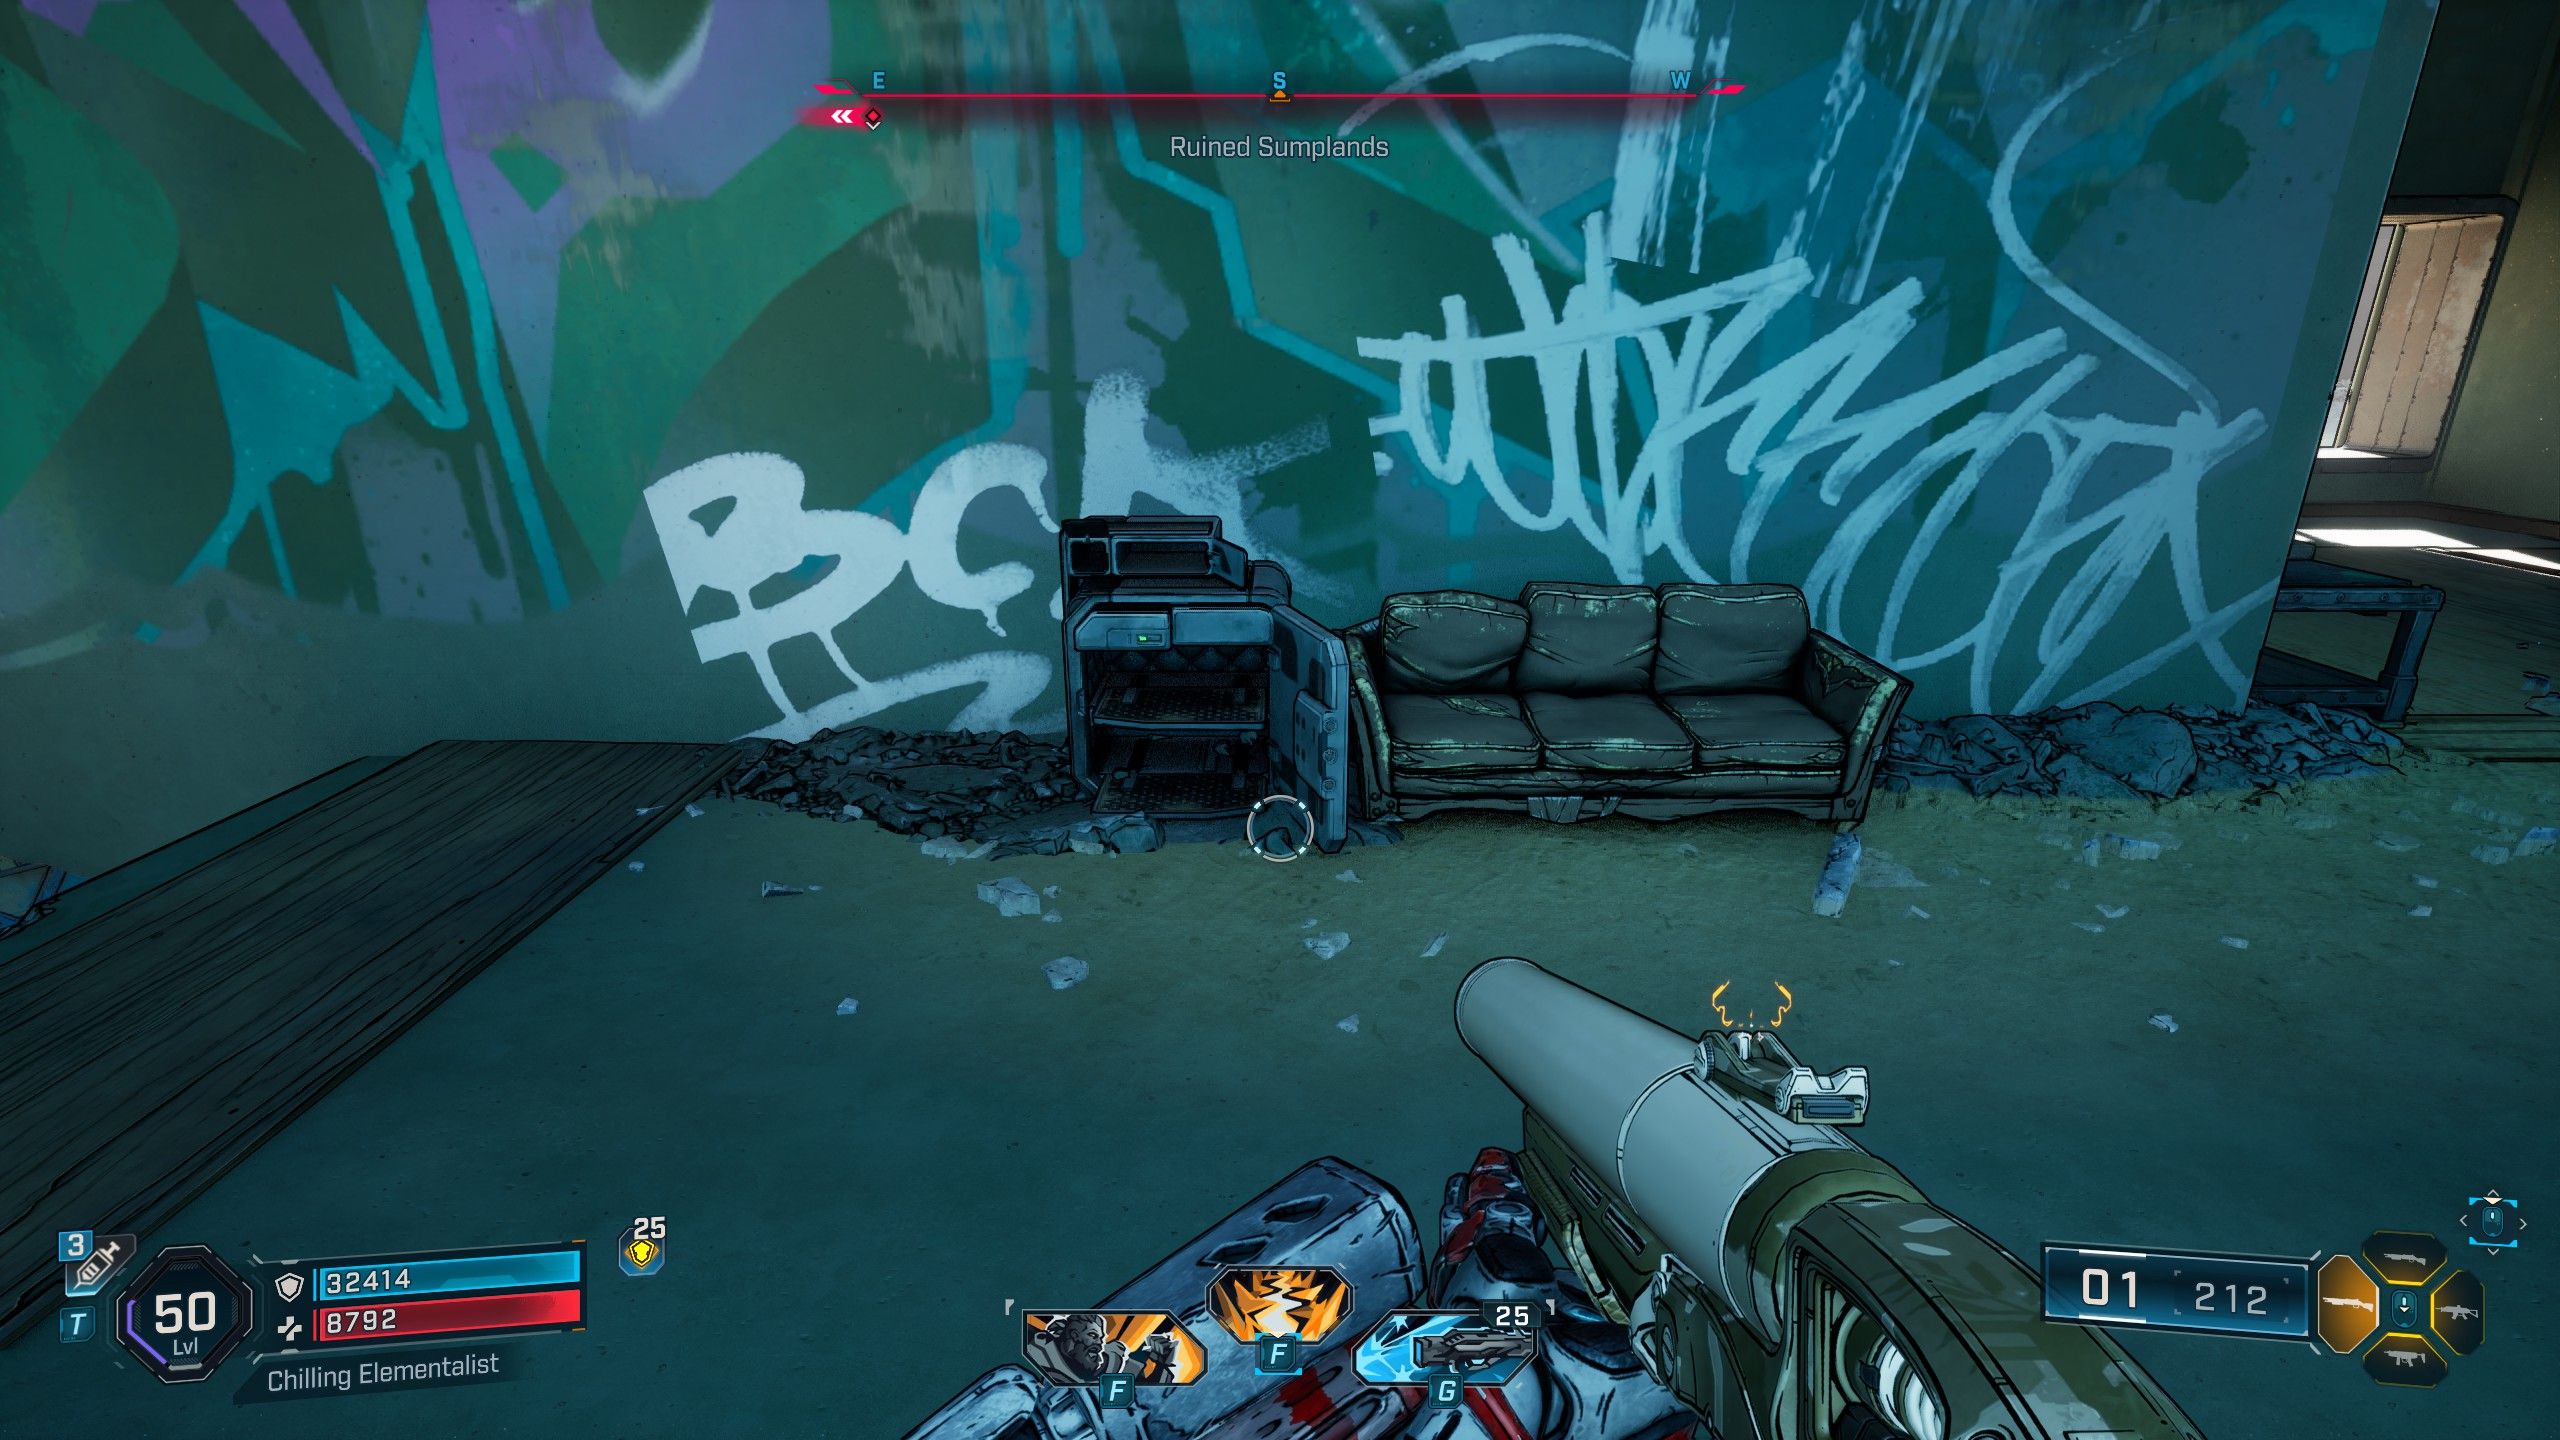
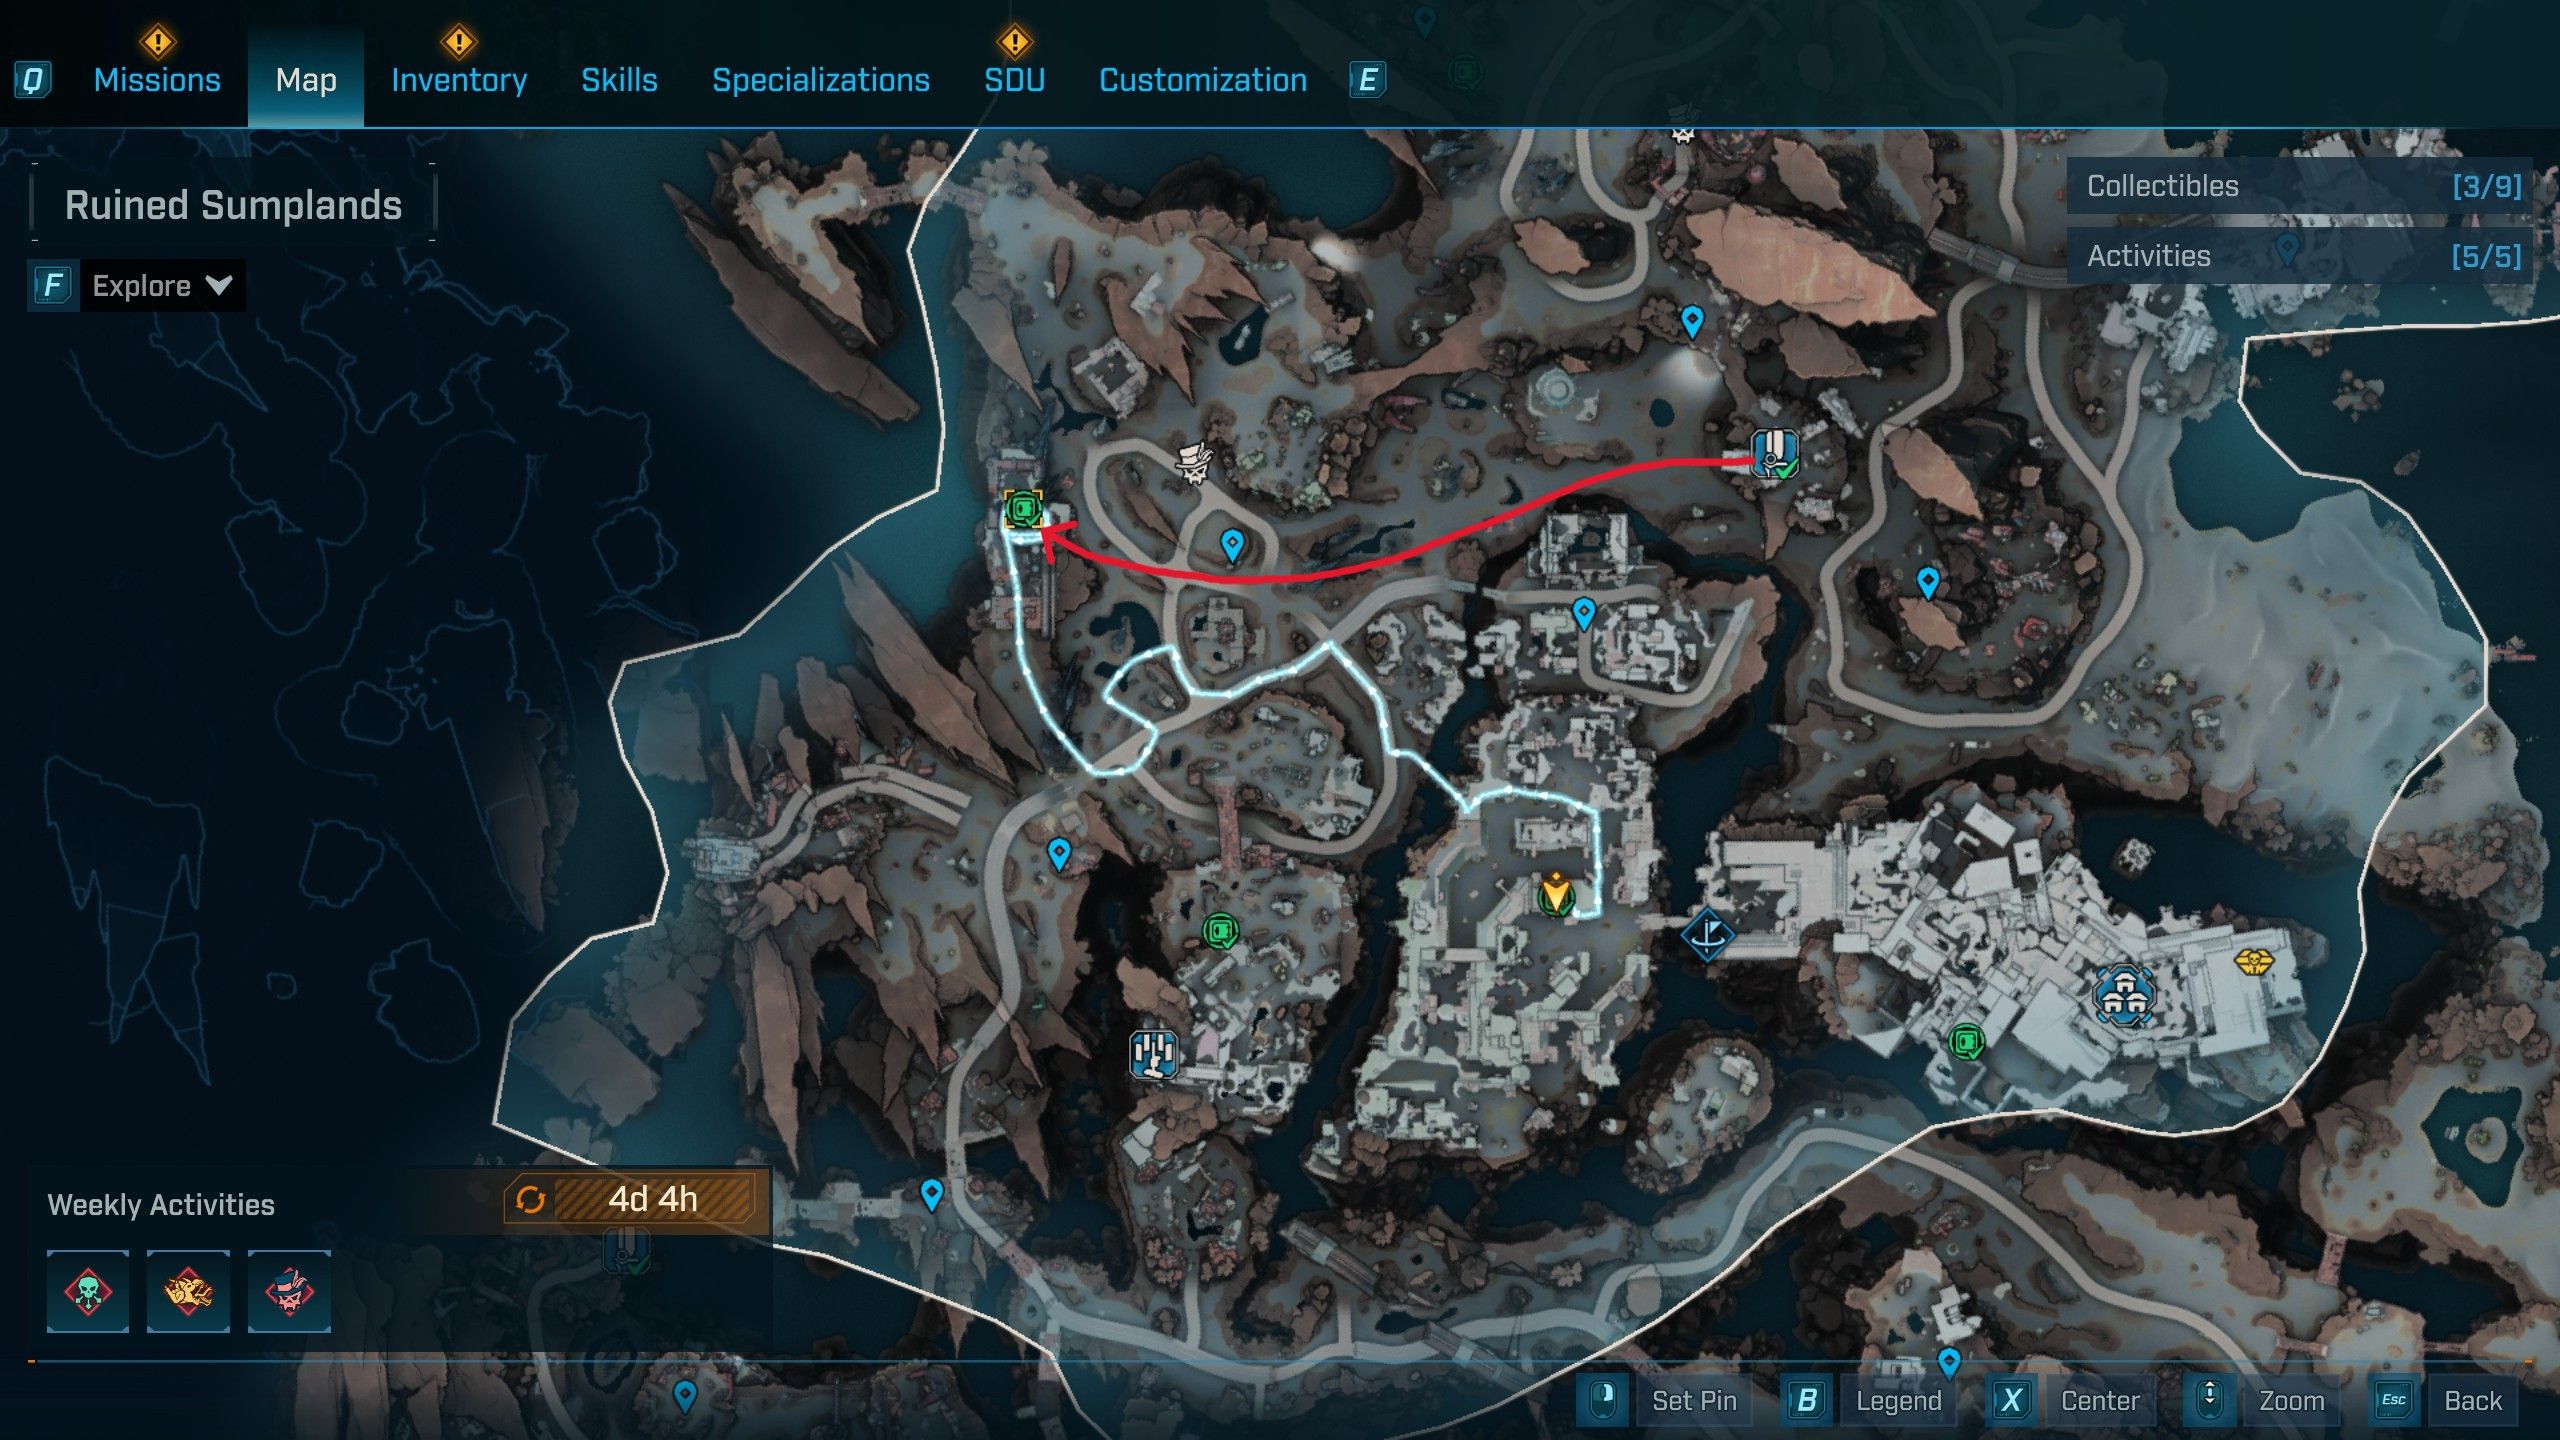
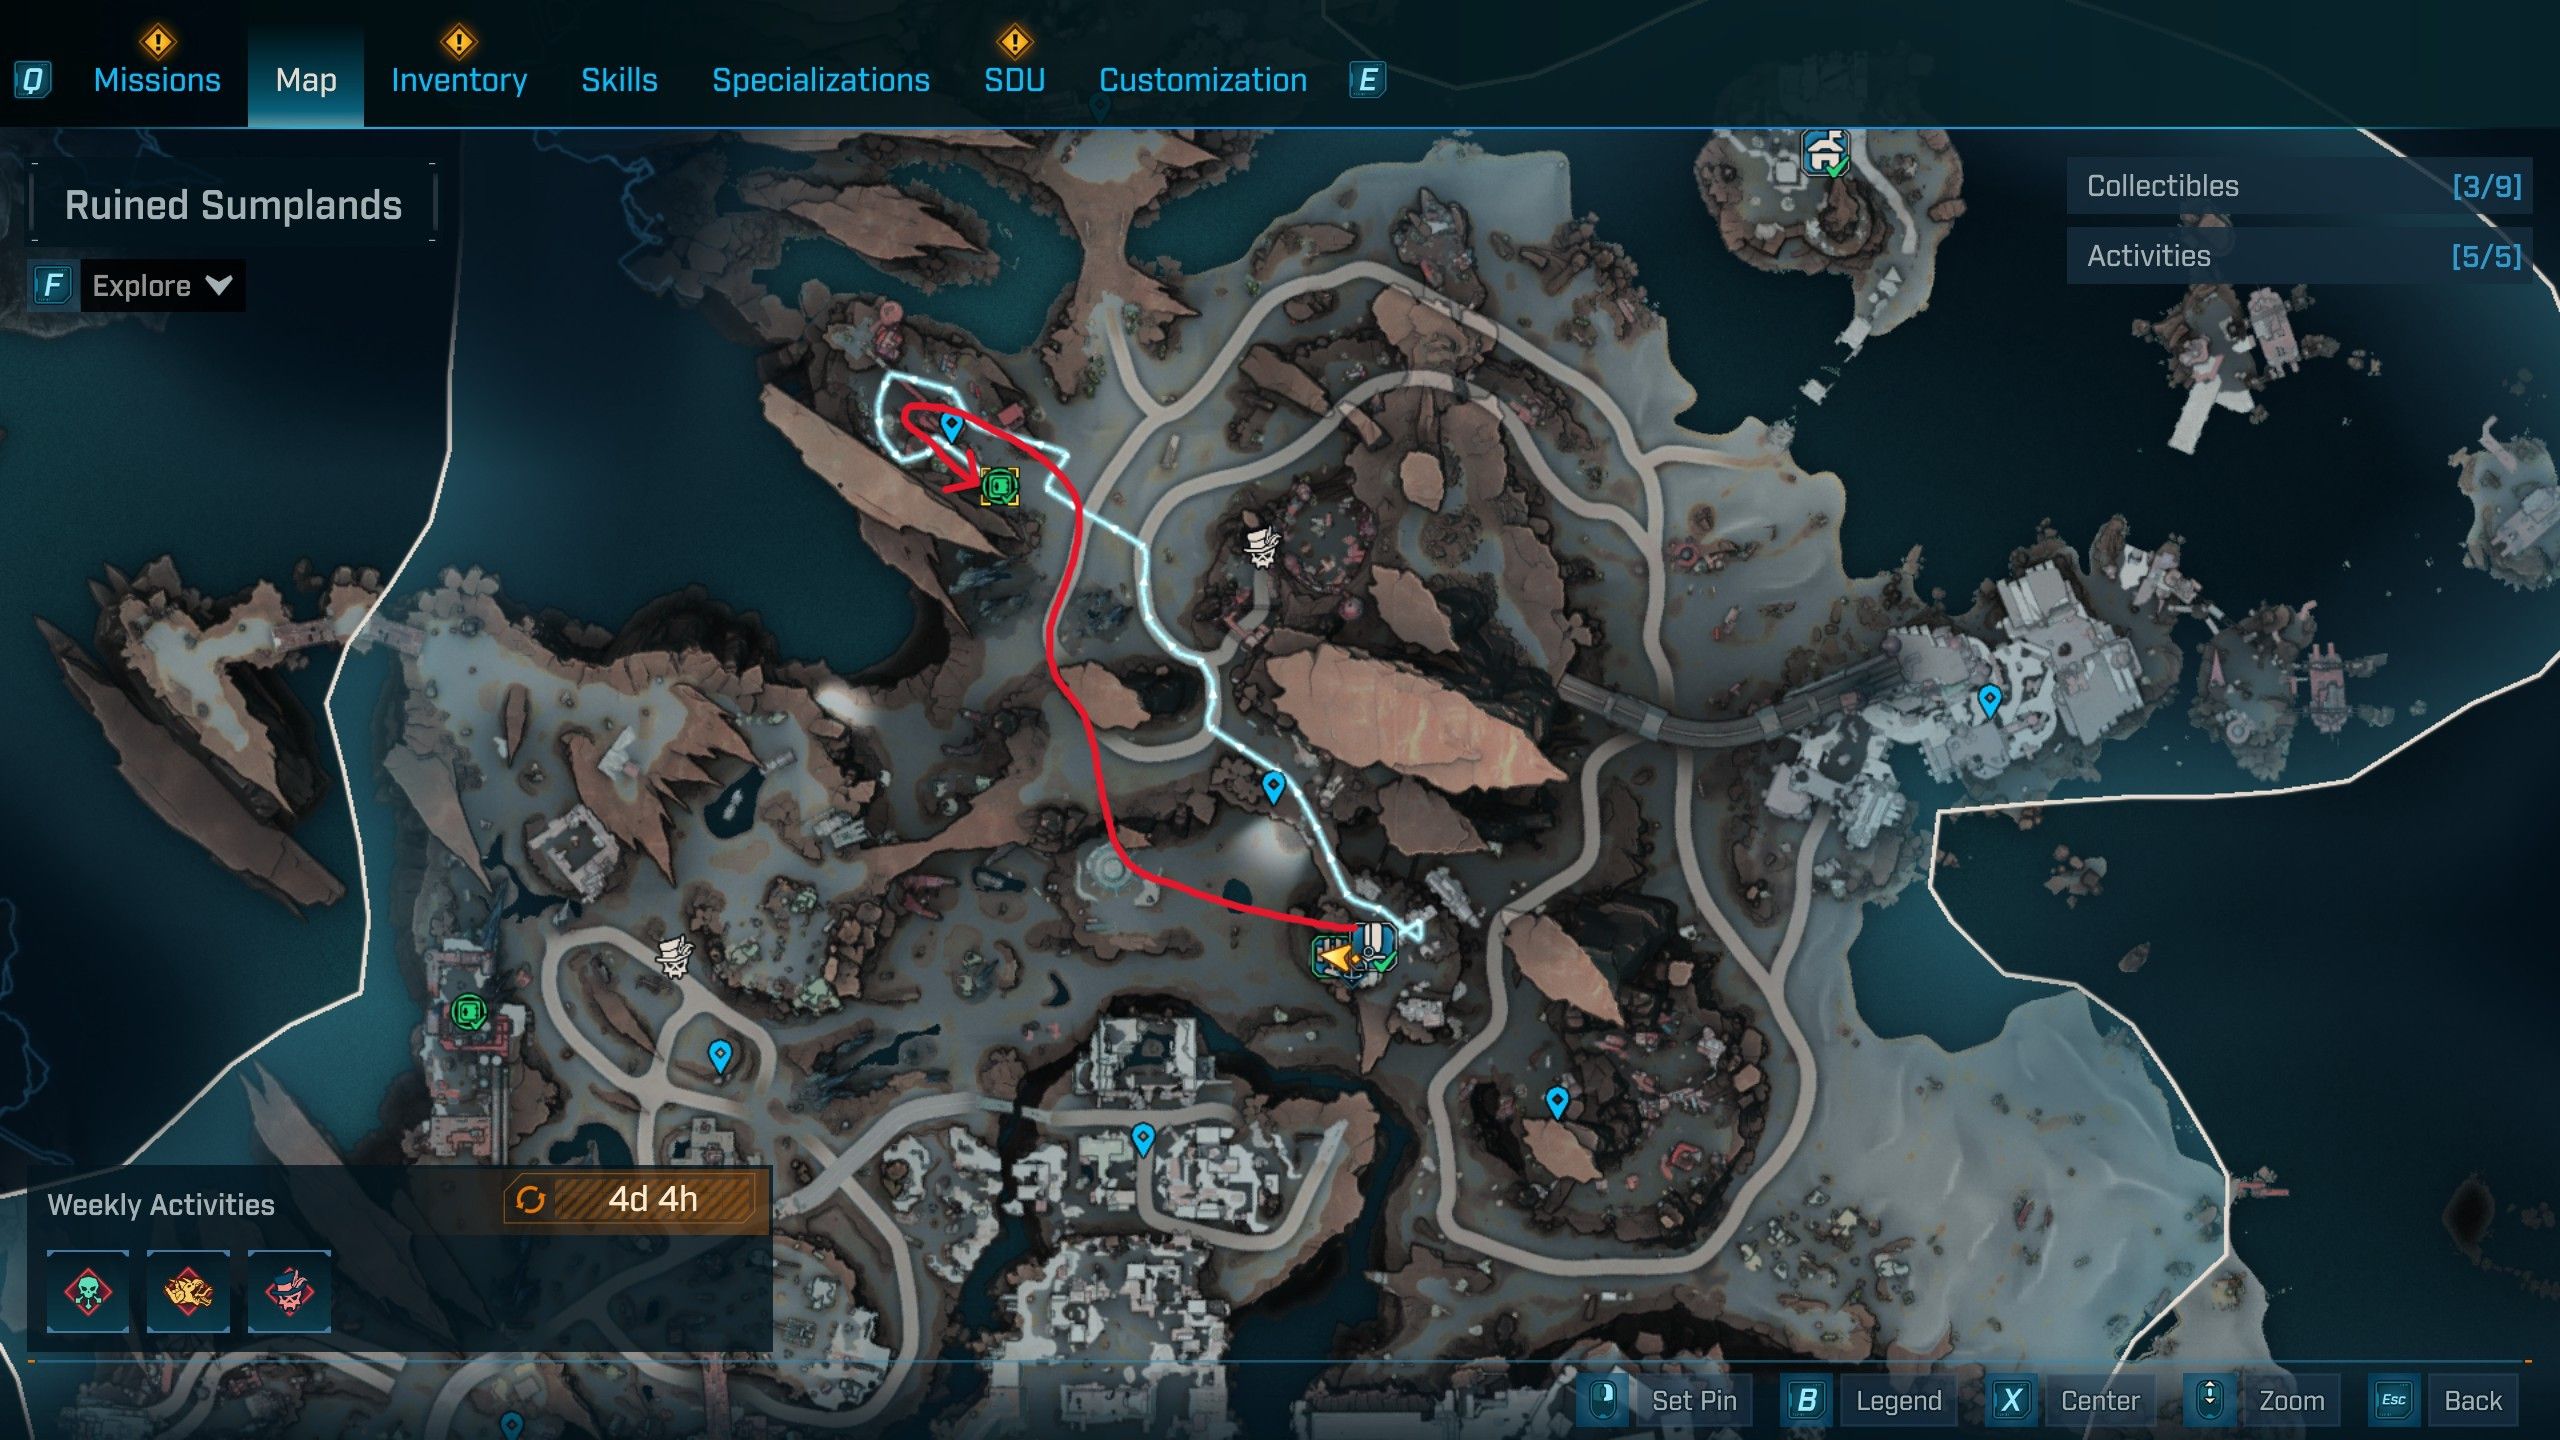
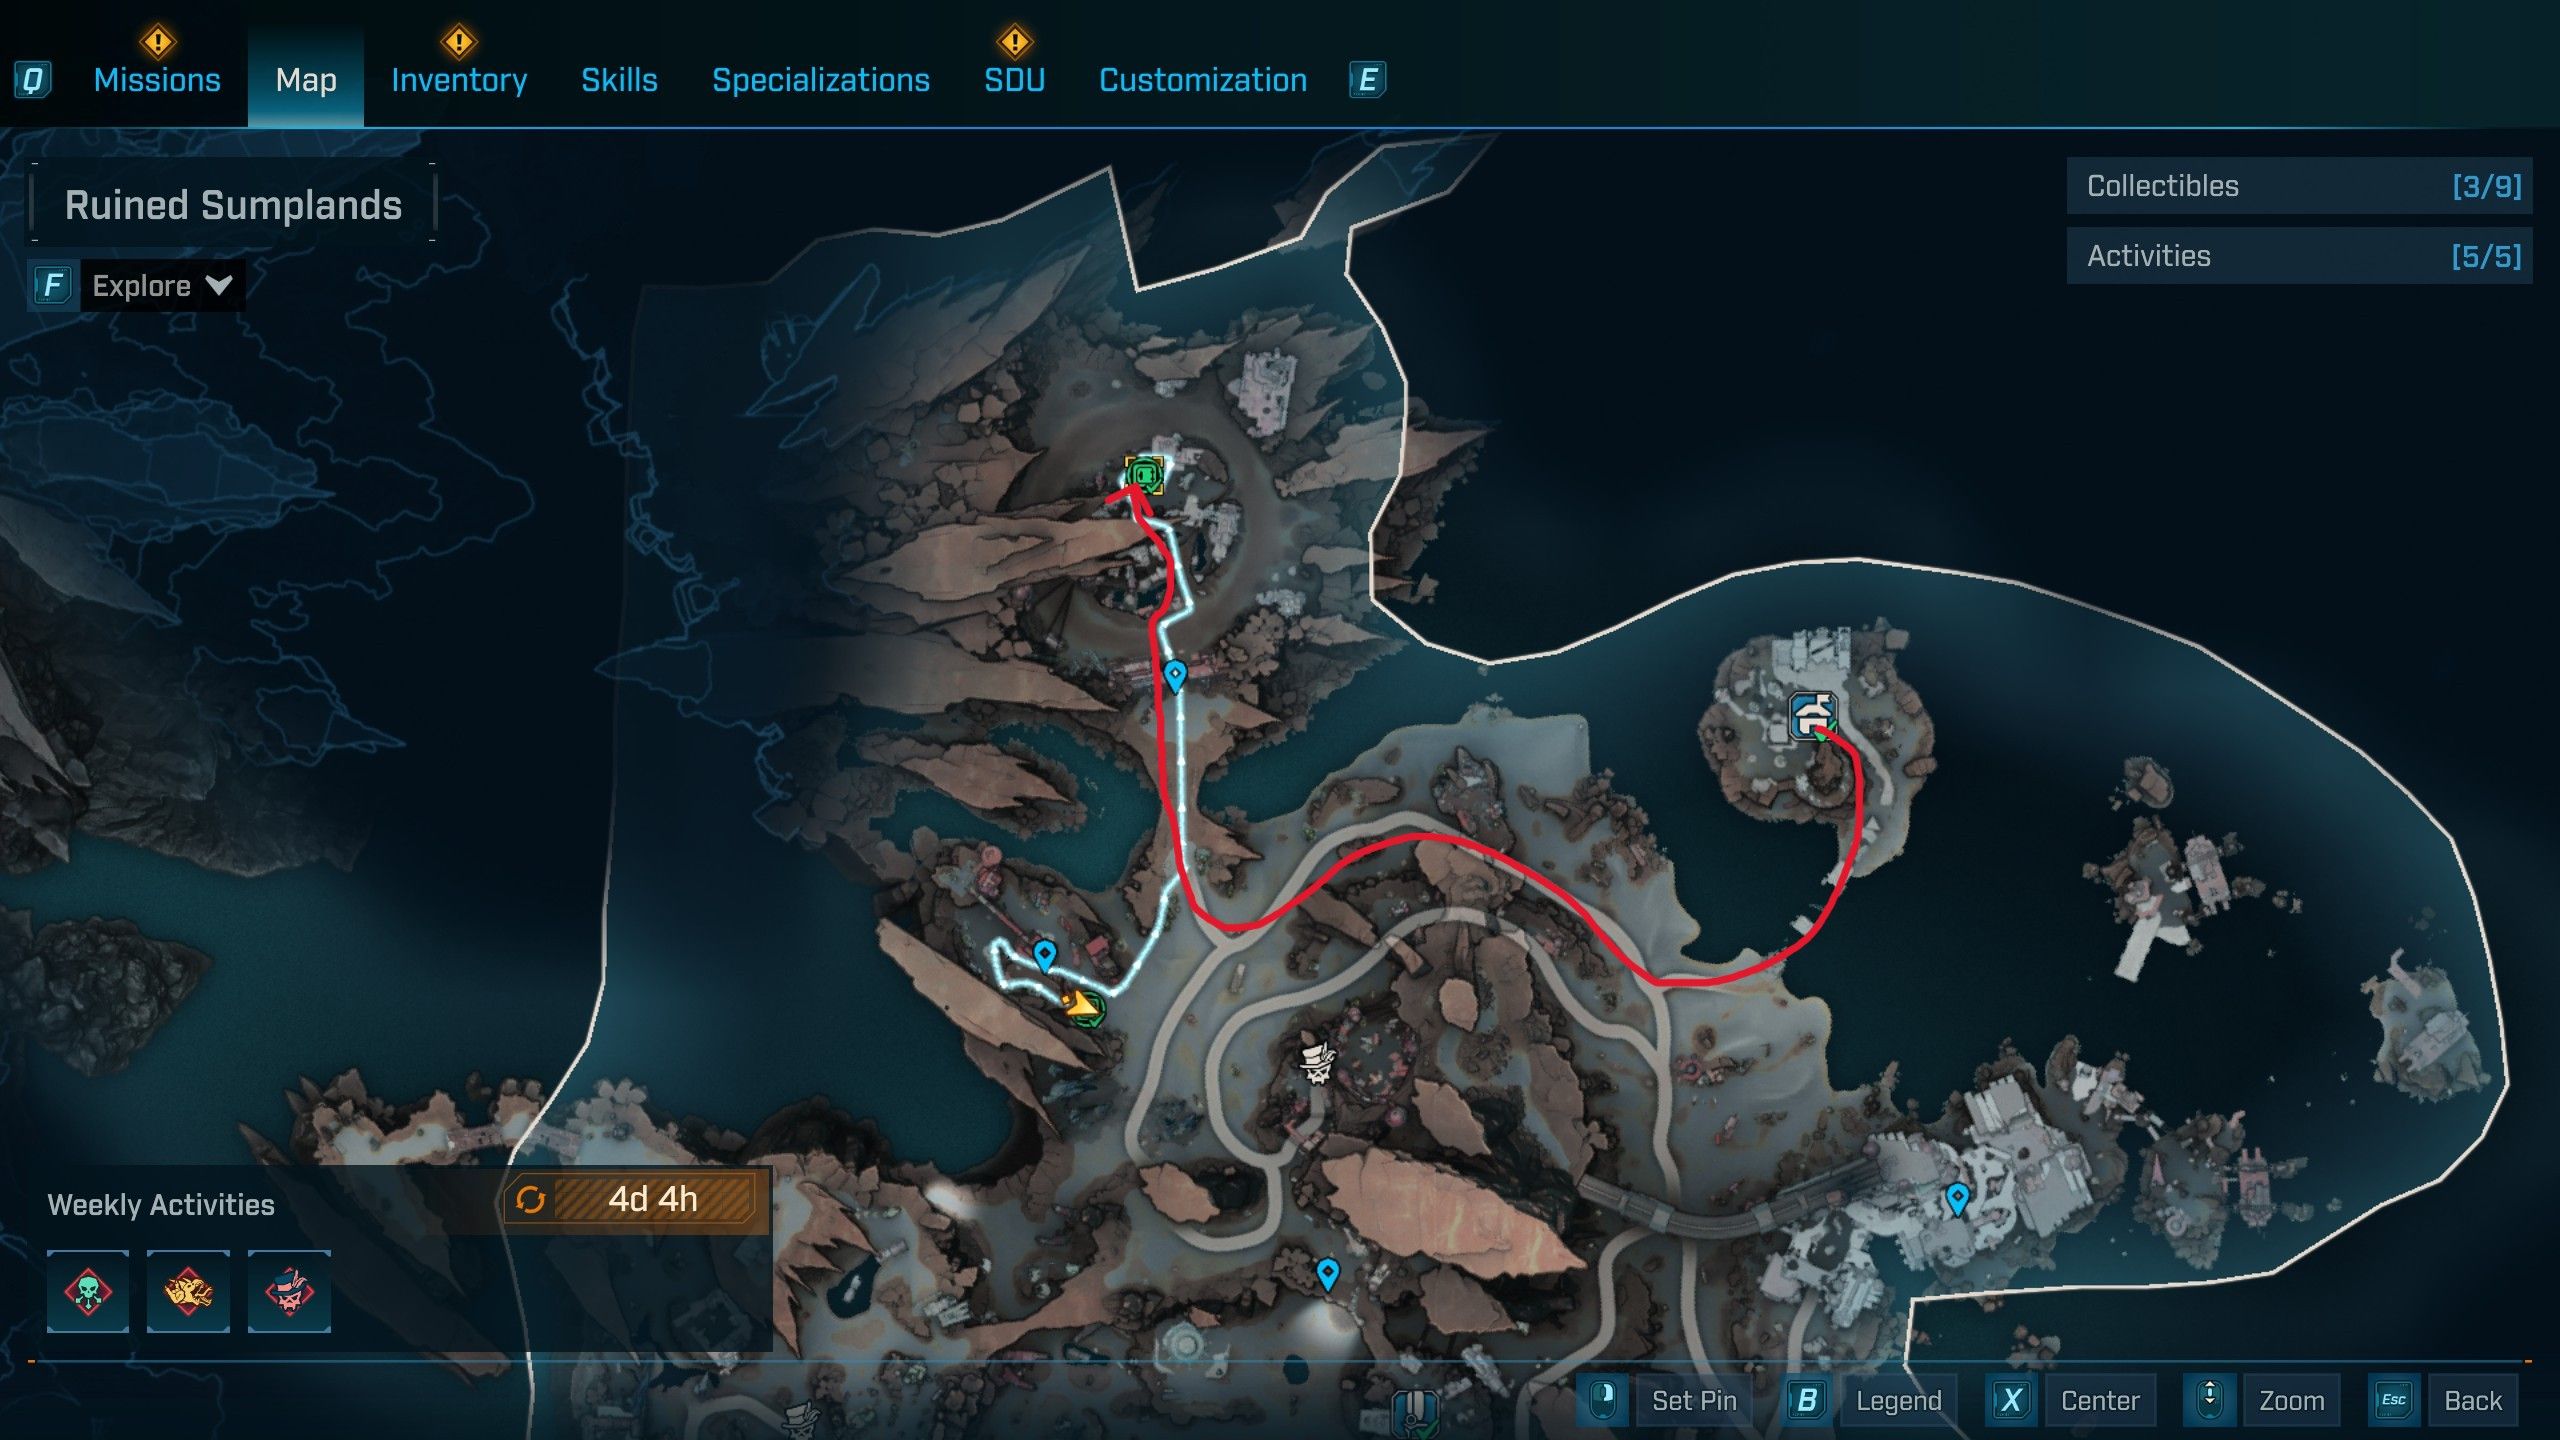
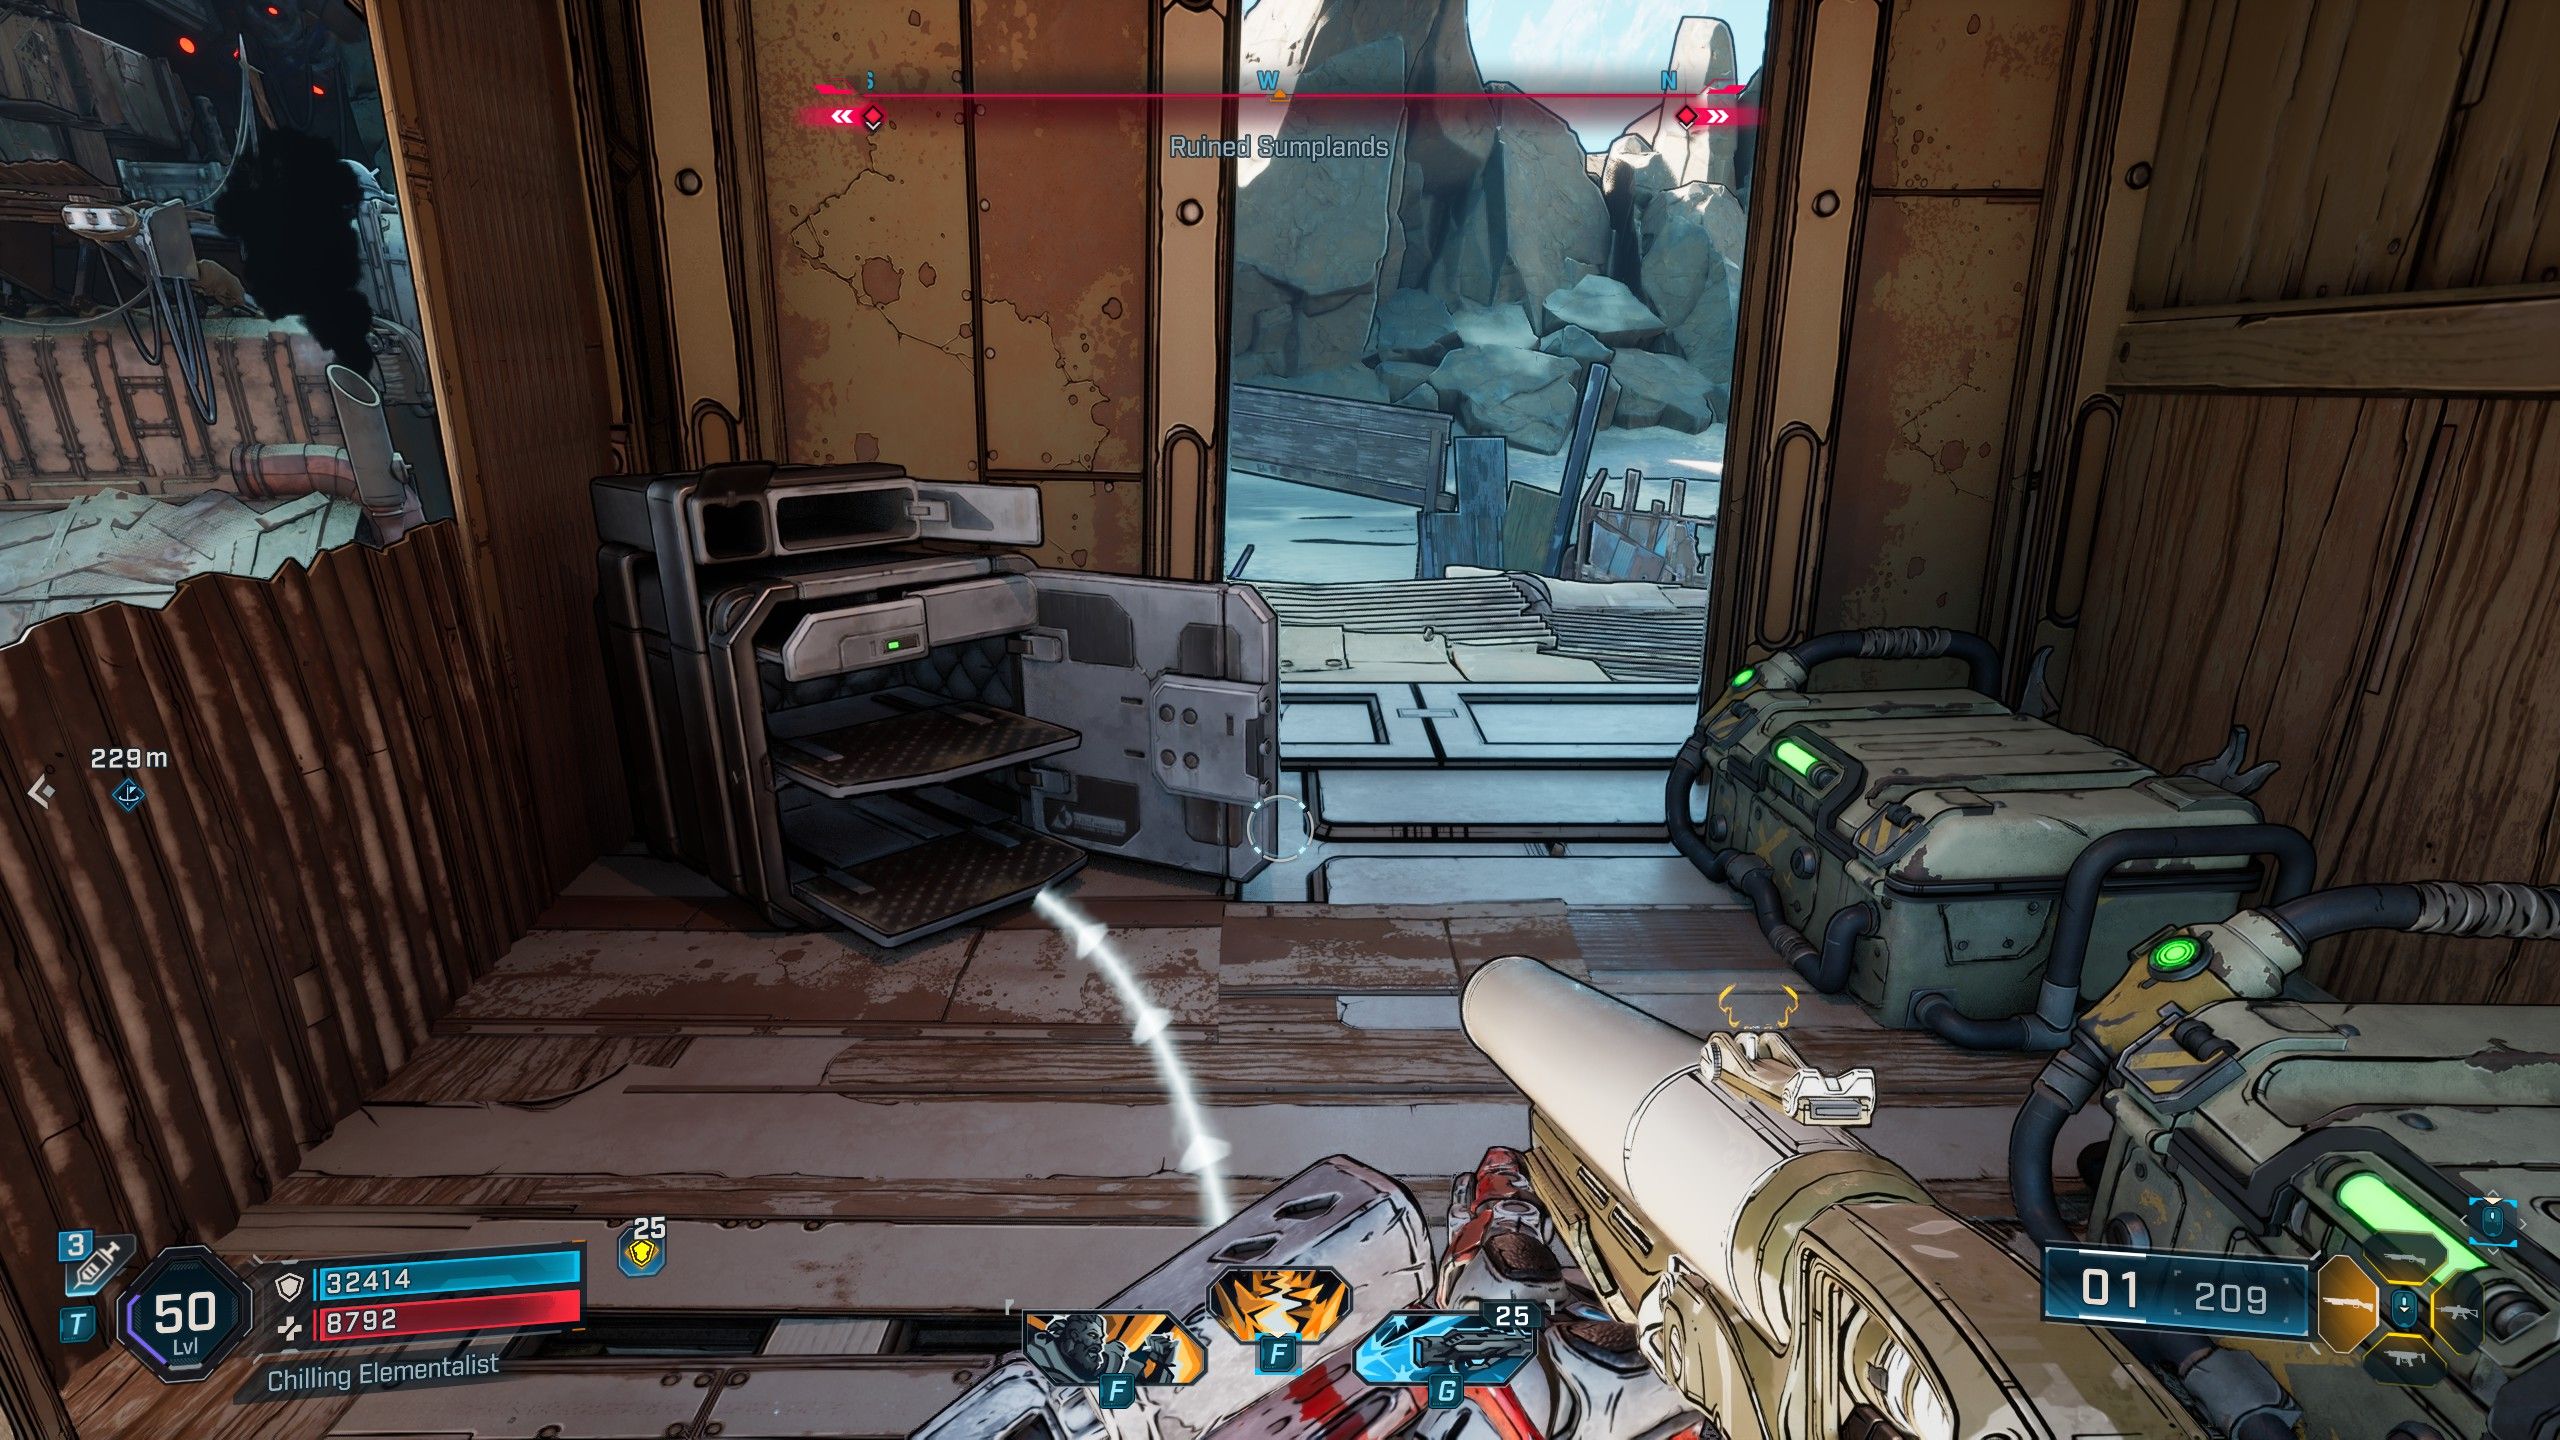
Start in Carcadia, in the Ruined Sumplands, and exit to the west. Follow this path until you come to an abandoned town. The Electi Safe is located inside the tallest building. To get there, look south for a grapple point and use it to reach the building. Once inside, you’ll find the Electi Safe leaning against a wall near a damaged couch.
How to Find the Ruined Sumplands Electi Safe #4 in Borderlands 4
Electi Safe #8 Location

Stay in the Ruined Sumplands and go to the Judgement’s Lapse Order Silo. Use the grapple to launch yourself southwest, going past the Society for Amateur Seismology Enthusiasts. Continue southwest until you reach Woncewas Townhouse, and go through it to find a large, rusty station. At the back of the station, you’ll find a grapple point. Follow the stairs and scaffolding upwards, staying to the right to spiral around the structure, until you reach the top – that’s where the Electi Safe is located.
How to Find the Ruined Sumplands Electi Safe #5 in Borderlands 4
Electi Safe #9 Location

Return to the Judgement’s Lapse Order Silo and leave through the main entrance. Then, head northwest through the Rumbling Cleft and continue in that direction through the Ruined Sumplands until you reach Hull’s Handbasket. Inside Hull’s Handbasket, climb the rocky hill at the back. You’ll find an abandoned vehicle with the Electi Safe located on the cliff ledge.
How to Find the Ruined Sumplands Electi Safe #6 in Borderlands 4
Electi Safe #10 Location
To get to the Gunkworks, travel far north into the Ruined Sumplands of Carcadia. Once you’re inside, go through the main Ripper camp. You’ll find the Electi Safe in the central outpost.
How to Find the Carcadia District Electi Safe #1 in Borderlands 4
Electi Safe #11 Location
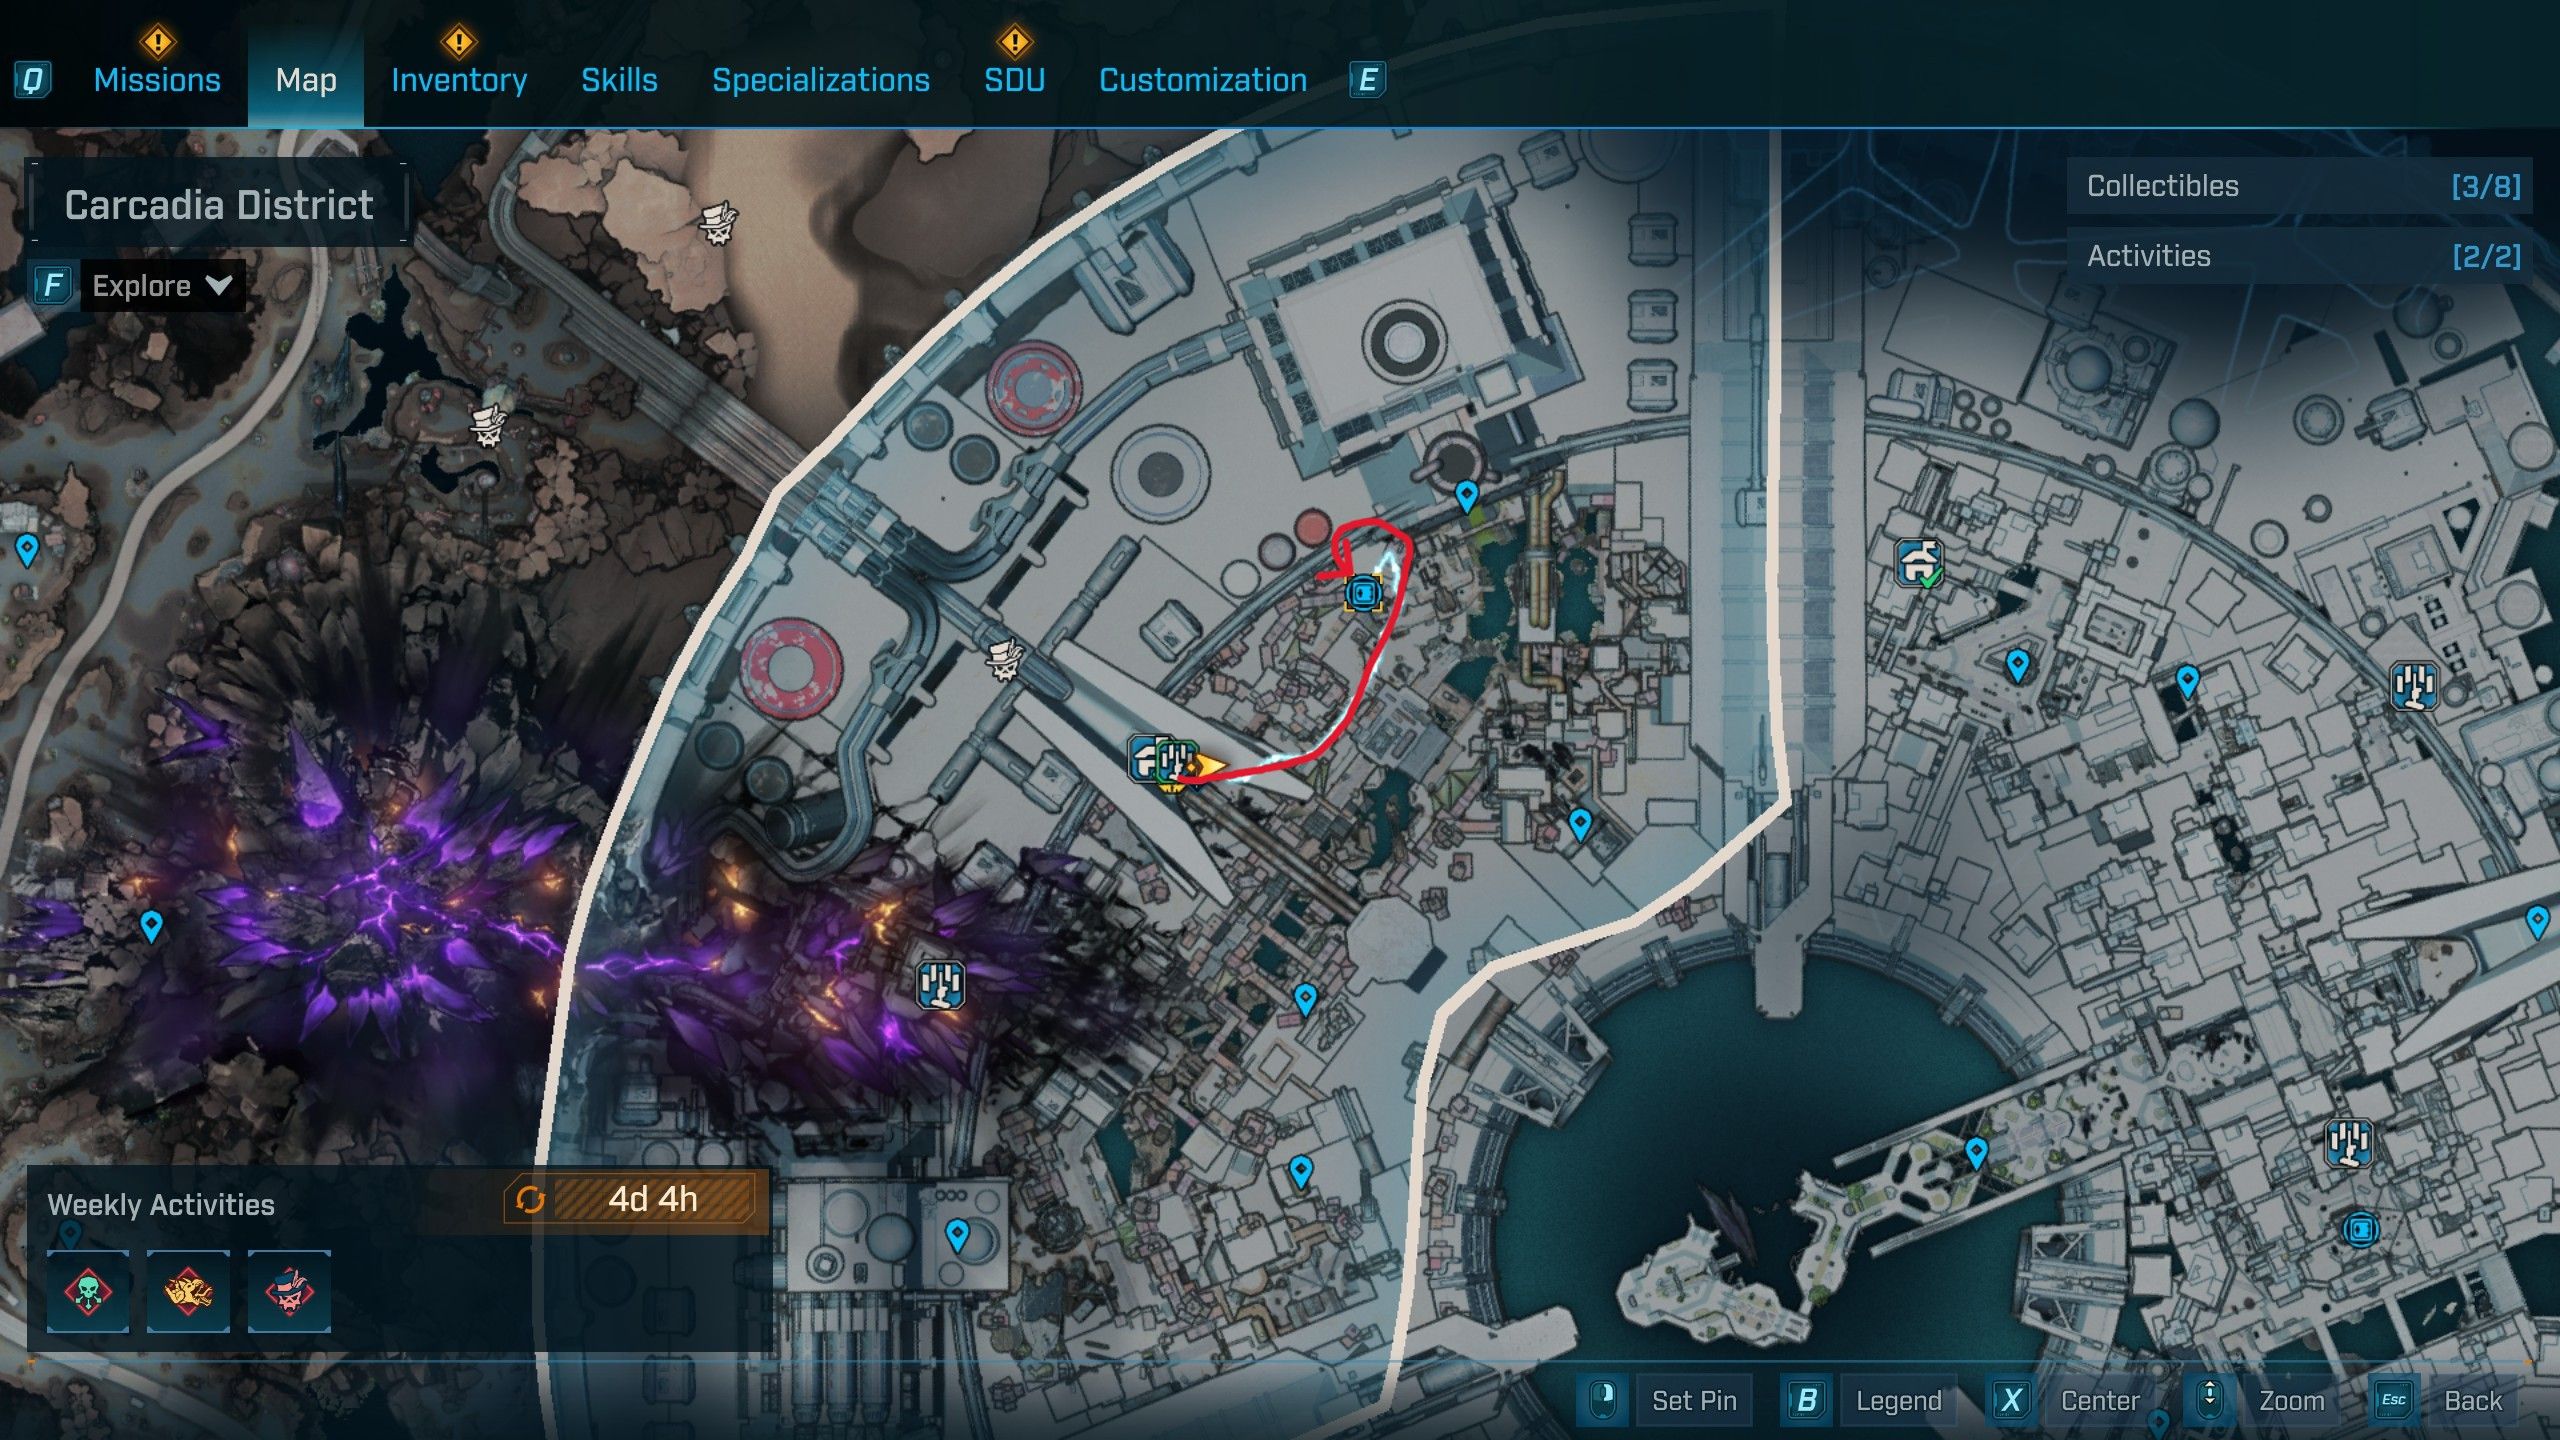
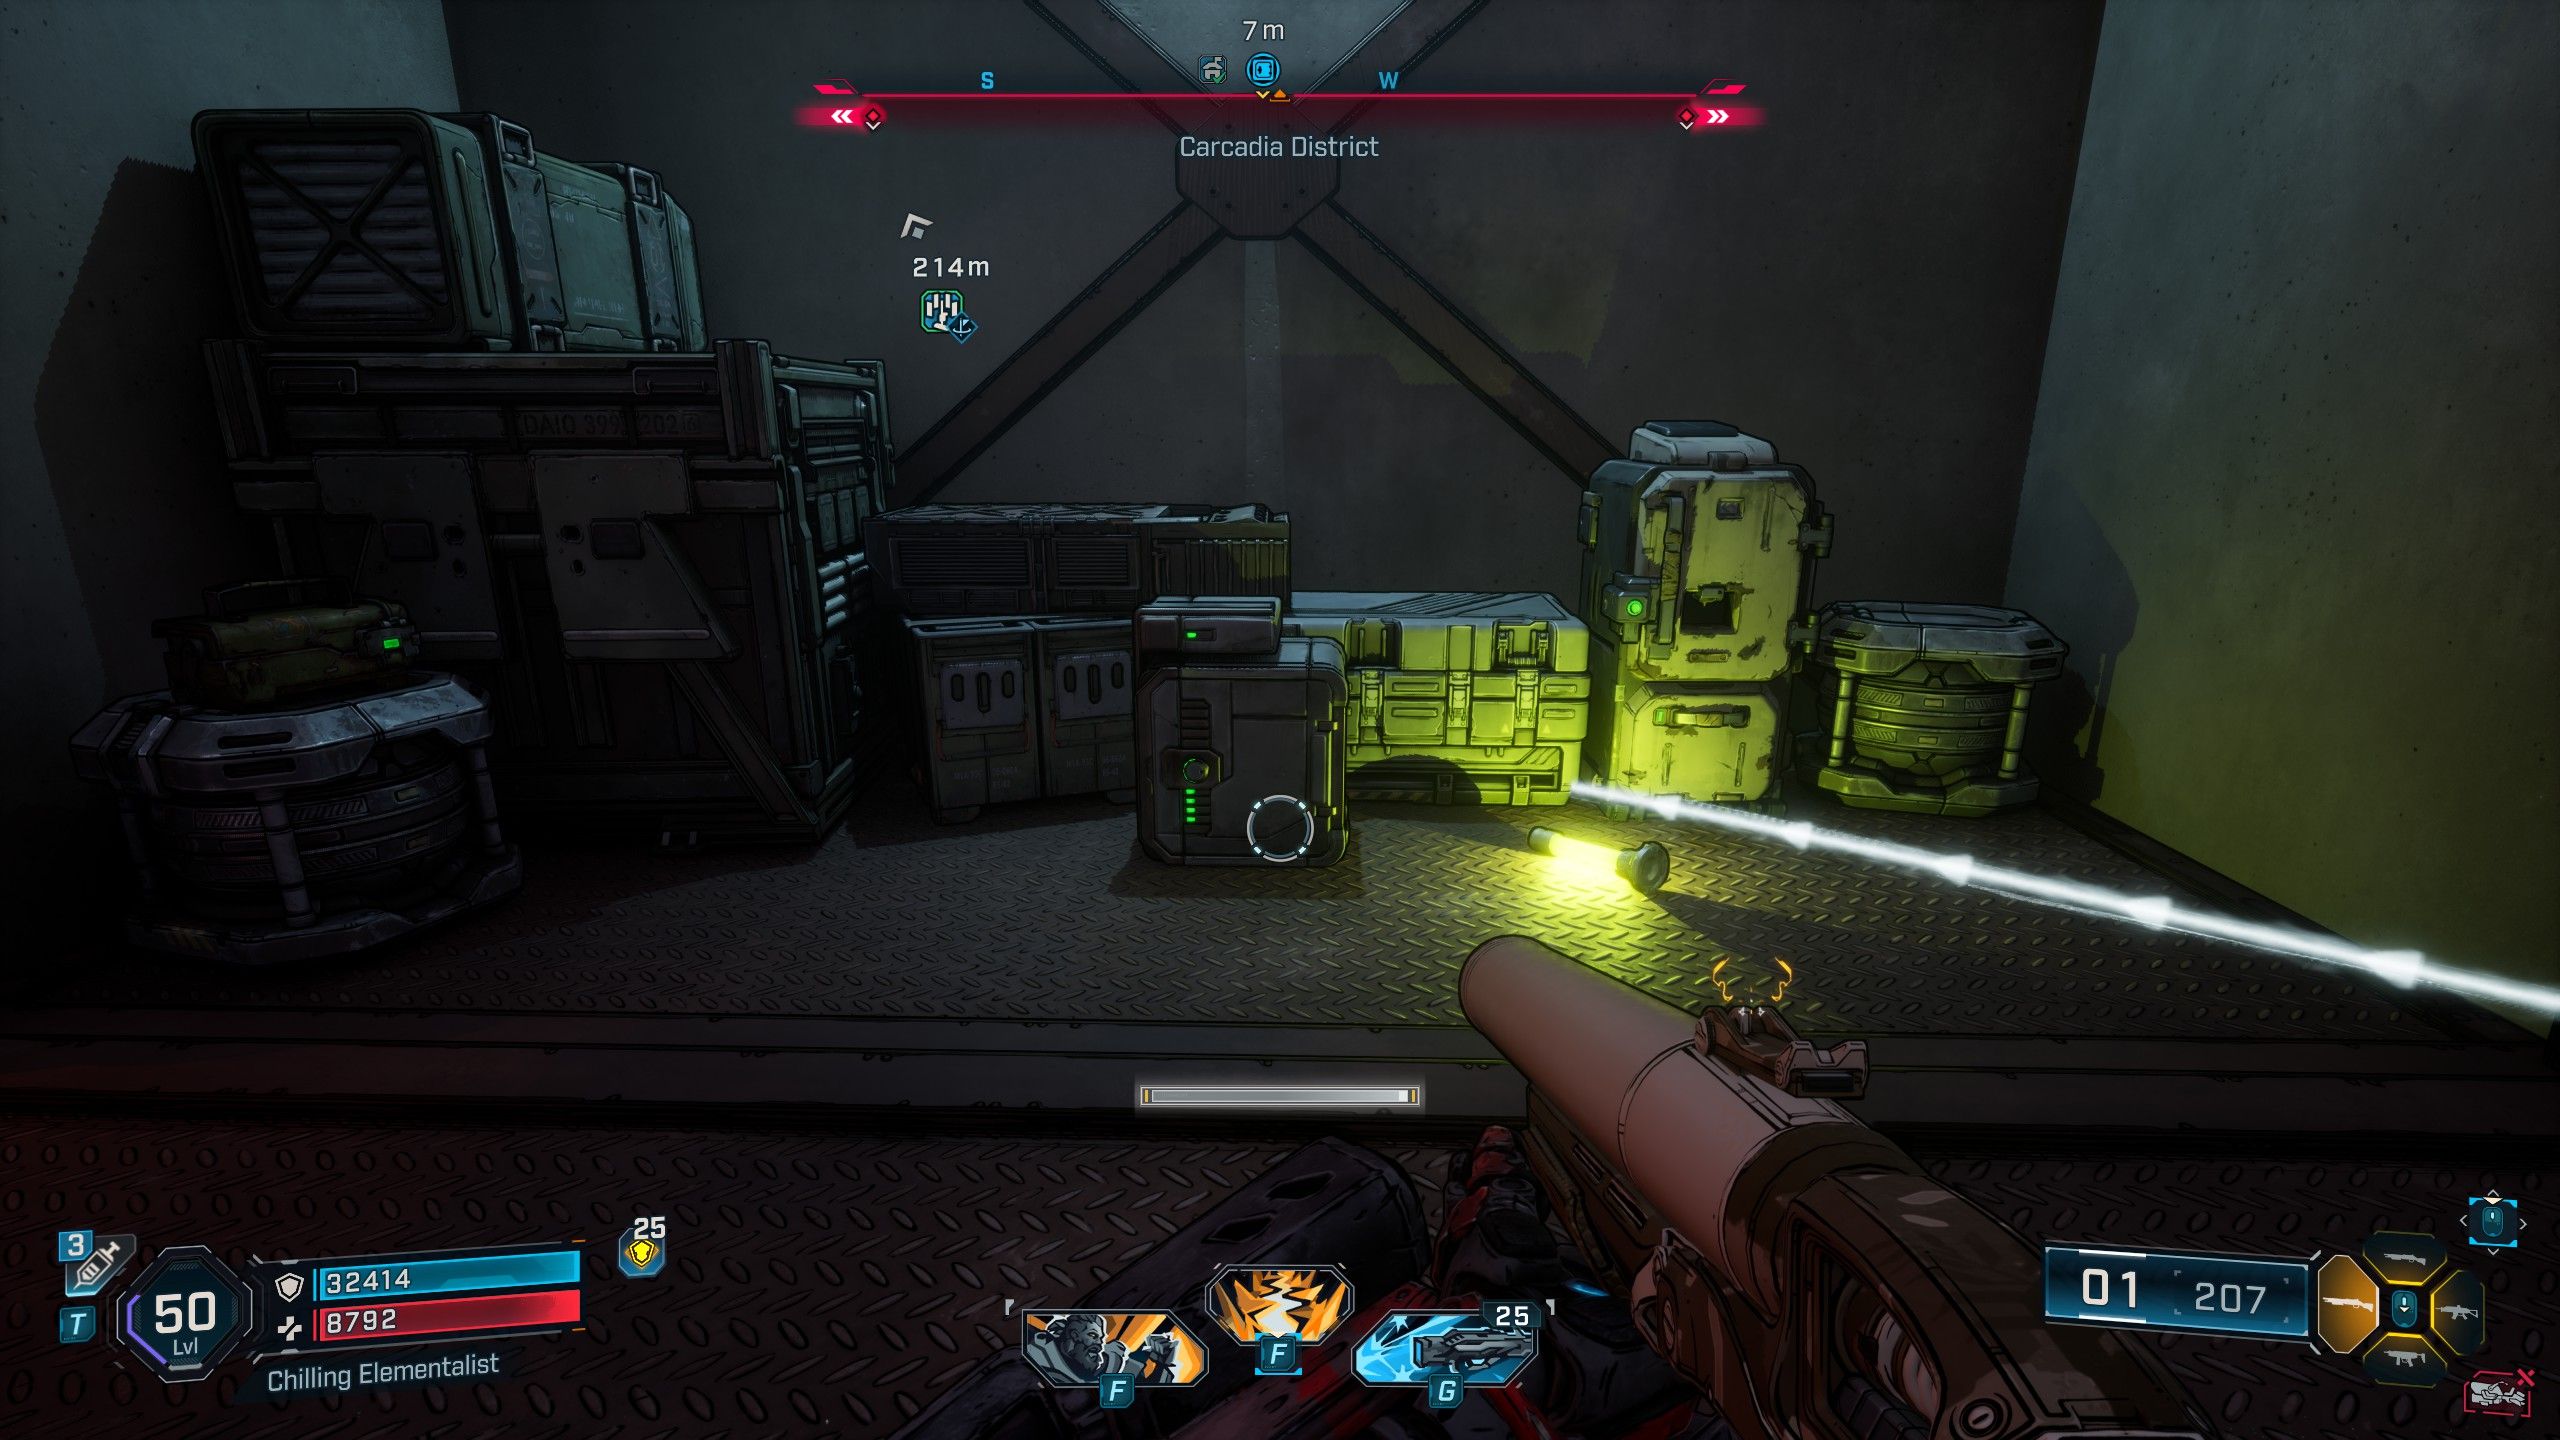
Go to the Lockaway Safehouse in Dominion City’s Carcadia District. From there, climb down and head northeast until you reach the Groaning Core. Look for stairs on the left and follow them through a crack in the wall. You’ll find the Electi Safe in that room, next to a glowing yellow light.
How to Find the Terminus District Electi Safe #1 in Borderlands 4
Electi Safe #12 Location
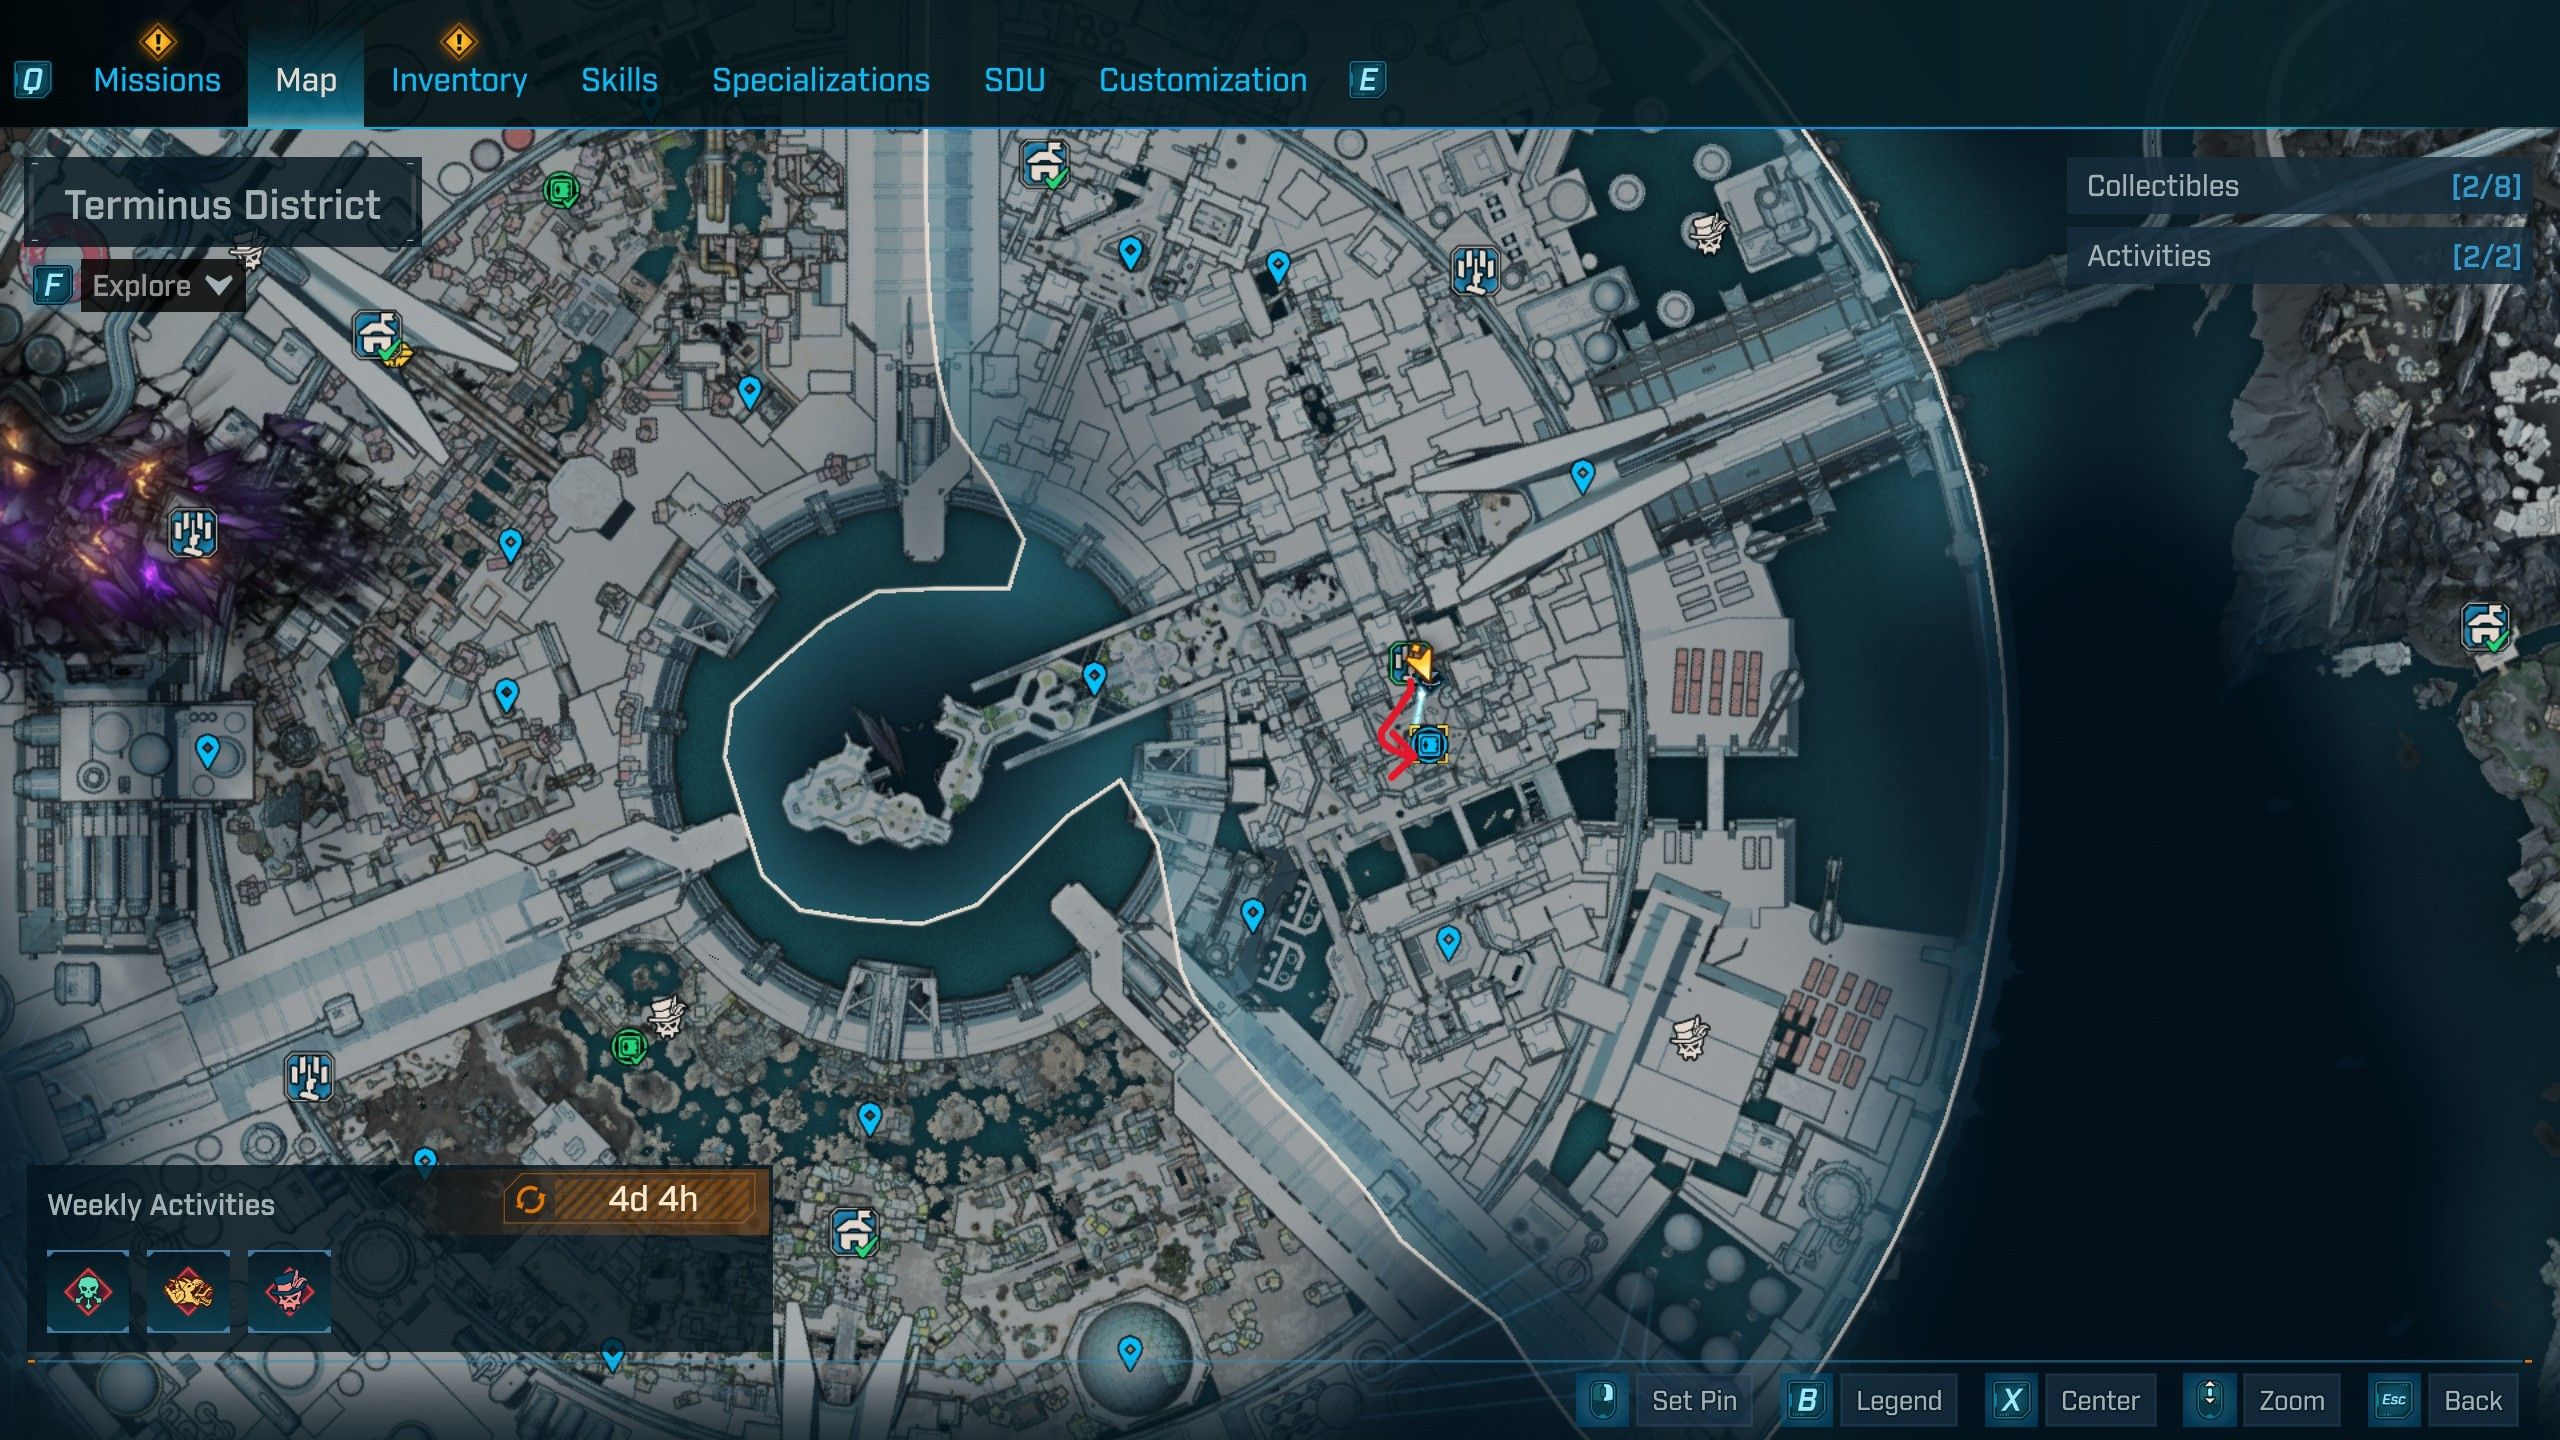

To find the Electi Safe, fast travel to the Frantic Scrawl in Dominion City’s Terminus District. Once you arrive, look for a tall radio tower right in front of the spawn point. You can climb it using the yellow-marked ledges and ladders. Ascend the platforms and structure until you reach the top, then check the southeast corner – the Electi Safe is located there.
How to Find the Fades District Electi Safe #1 in Borderlands 4
Electi Safe #13 Location
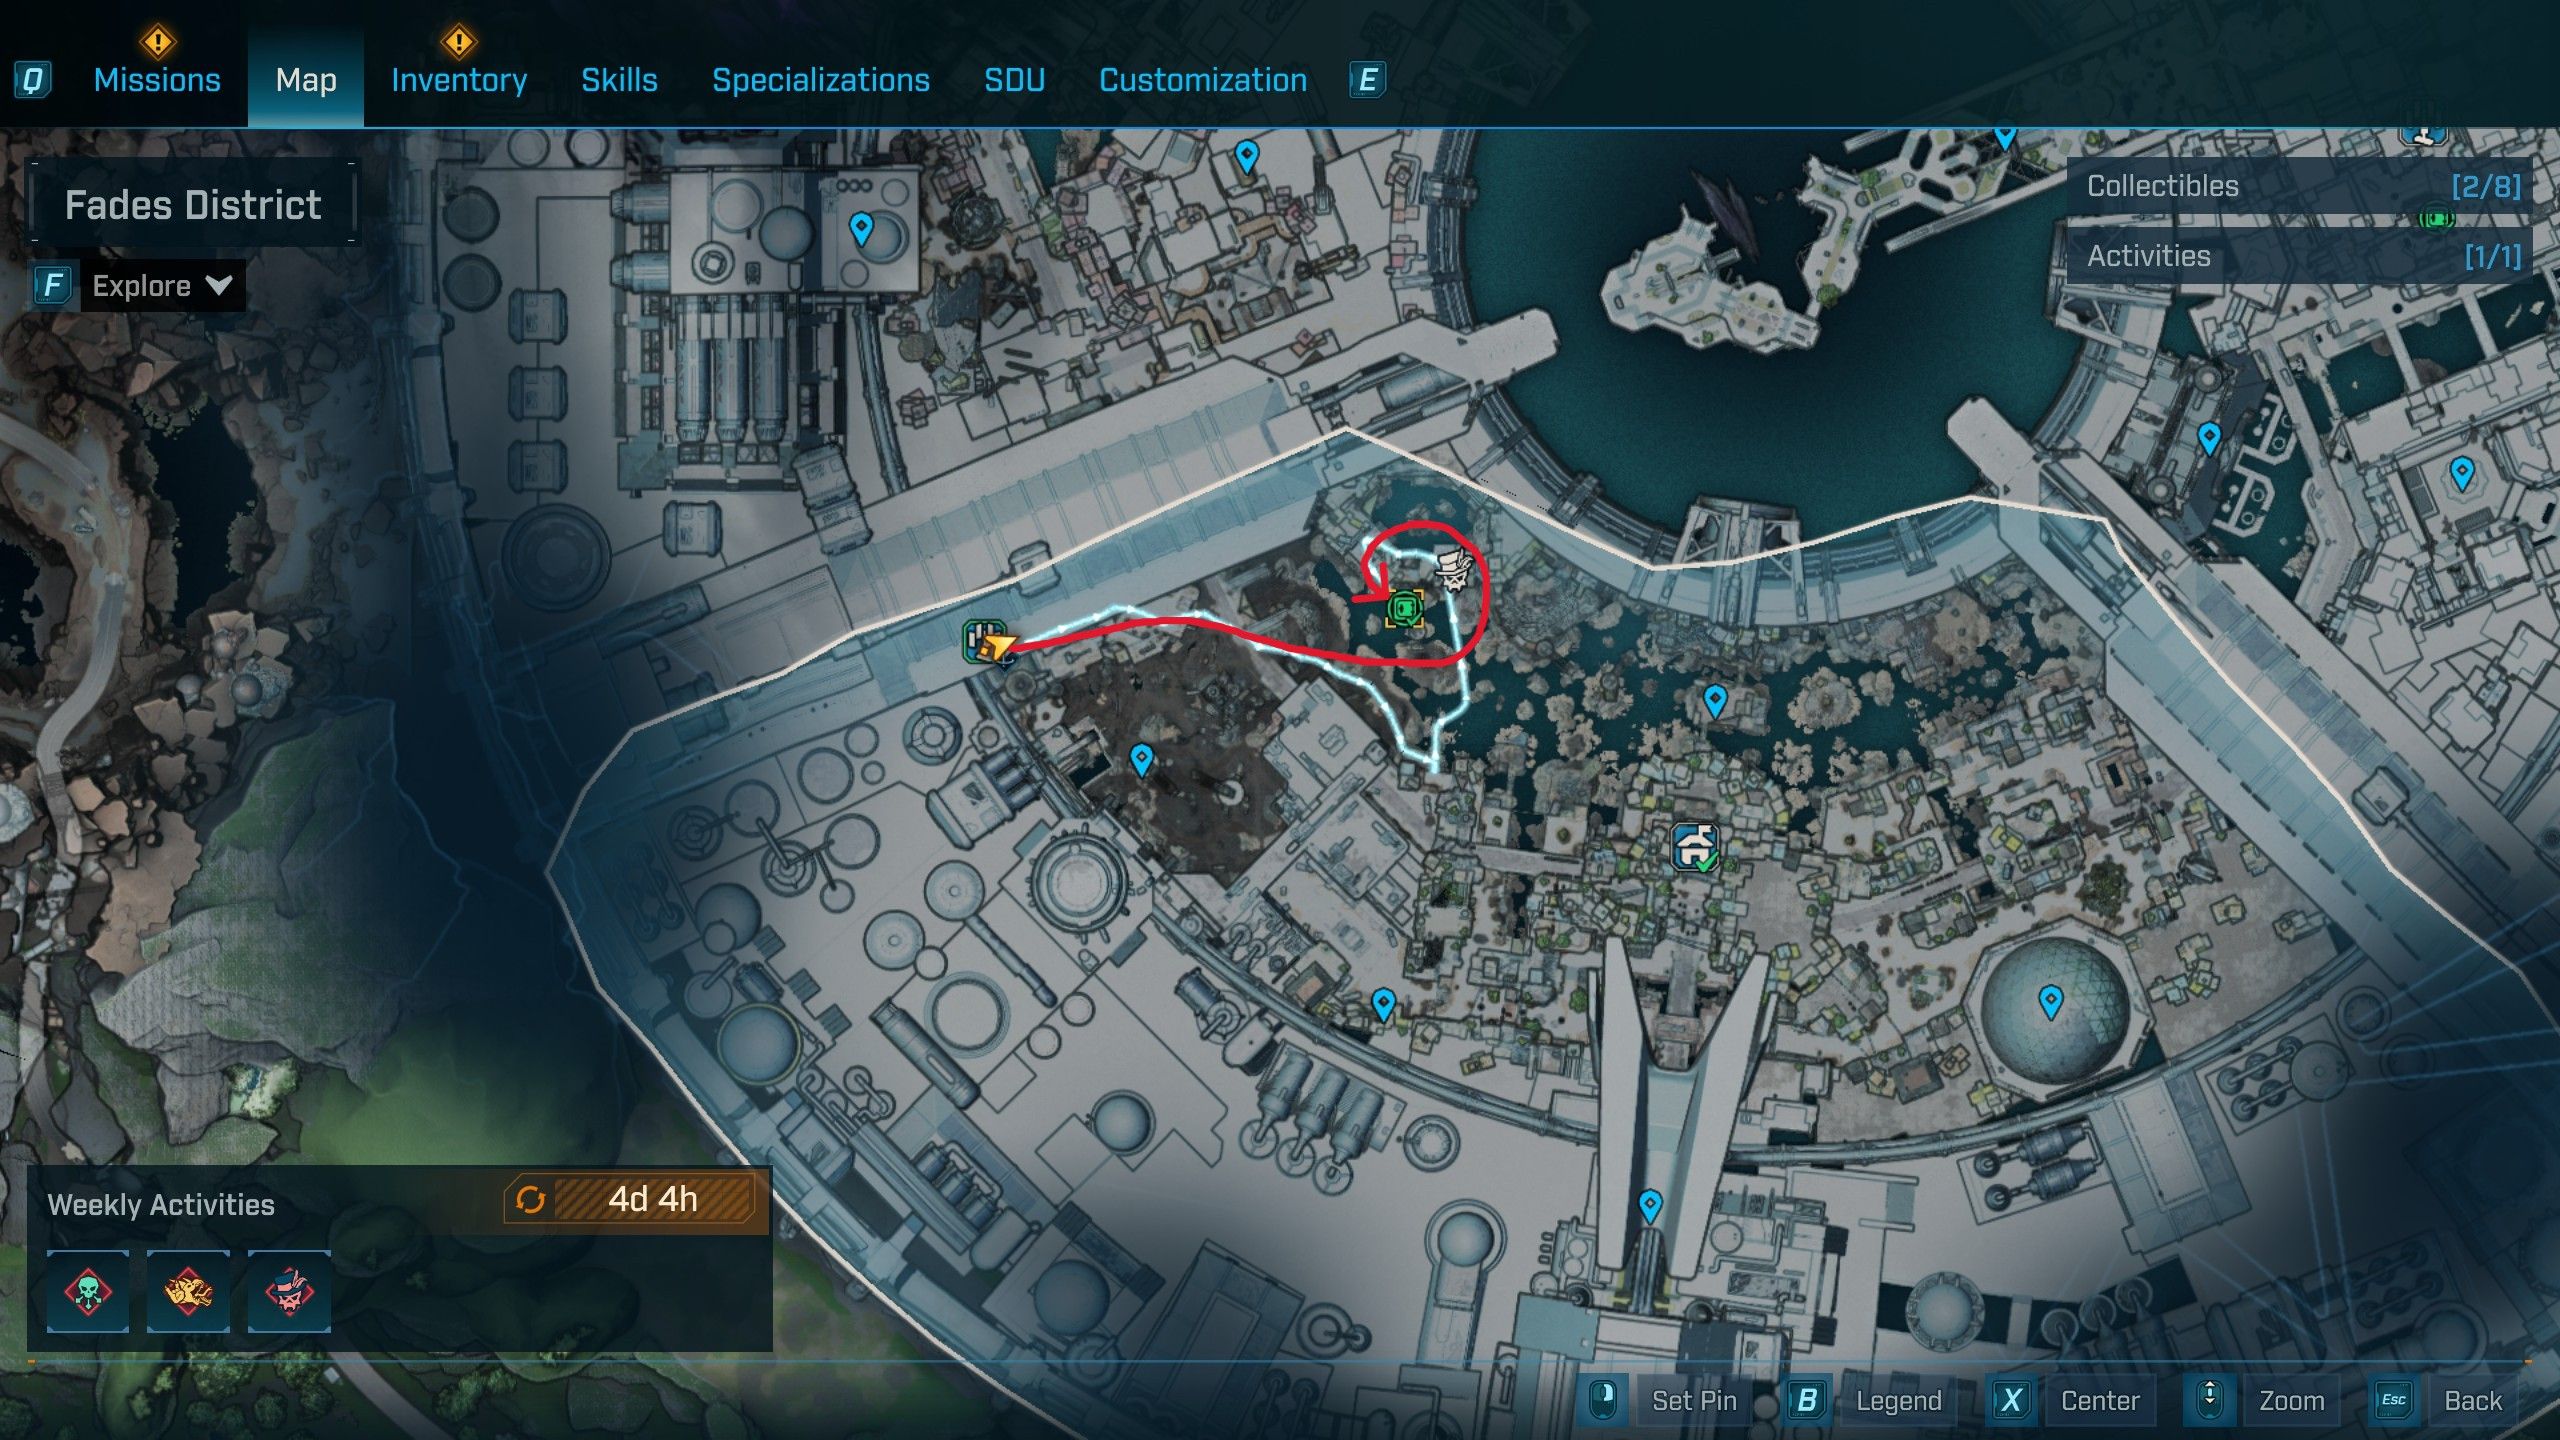

You can find an Electi Safe in Dominion City’s Fades District. Check either the Sumpview Falls Safehouse or Zadra’s Lab Fast Travel station to start. Once in the Fades District, go northeast to a junkyard – you can reach it by using a grapple point. This is the same area where you battled Bio-Thresher Omega during the ‘One Slimy Issue’ side mission. Inside the junkyard, head left and climb up, then follow the path to the left to find the scaffolding holding the Electi Safe.
Read More
- All Shadow Armor Locations in Crimson Desert
- Dark Marksman Armor Locations in Crimson Desert
- Jujutsu Kaisen Season 3 Episode 12 Release Date
- How to Get the Sunset Reed Armor Set and Hollow Visage Sword in Crimson Desert
- Keeping AI Agents on Track: A New Approach to Reliable Action
- Top 5 Militaristic Civs in Civilization 7
- Best Bows in Crimson Desert
- How to Beat Antumbra’s Sword (Sanctum of Absolution) in Crimson Desert
- How To Beat Ator Archon of Antumbra In Crimson Desert
- Sakuga: The Hidden Art Driving Anime’s Stunning Visual Revolution!
2025-09-28 16:05