
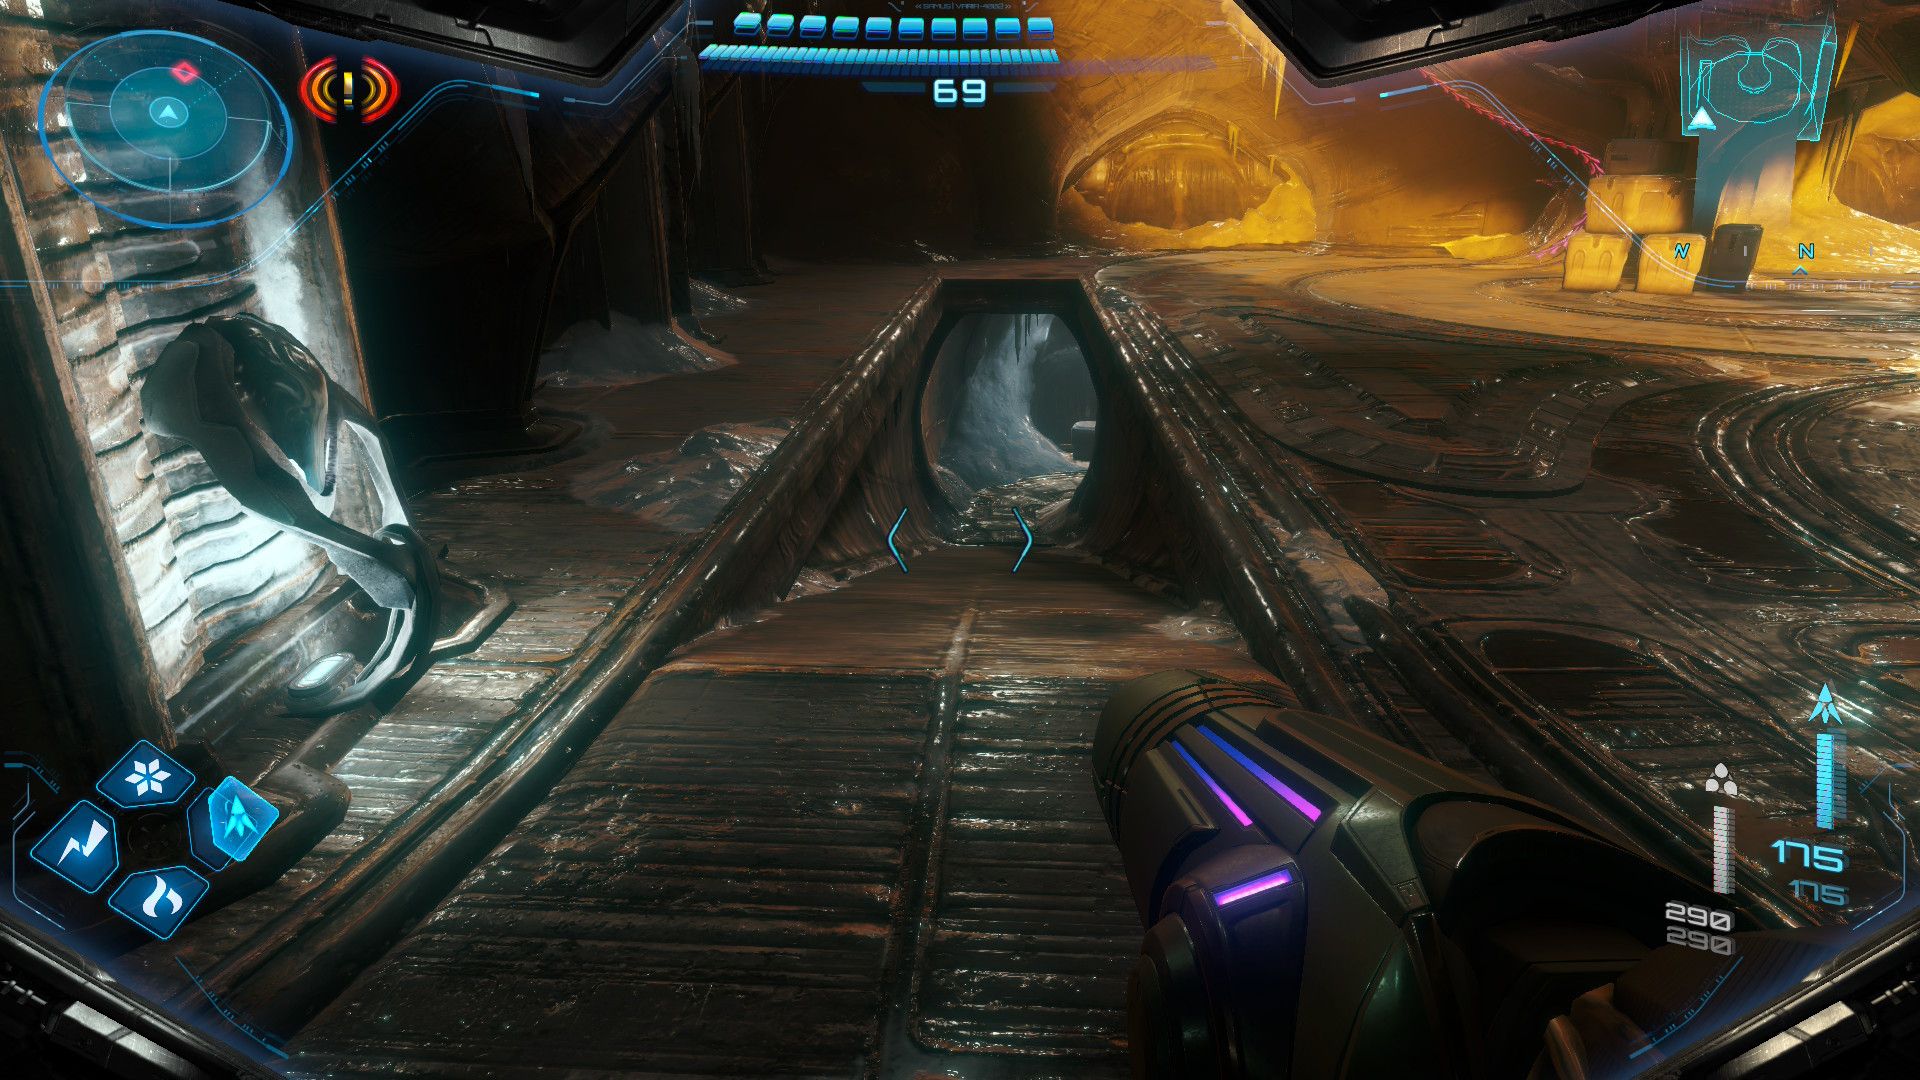
Okay, so I’m a completionist, and in Metroid Prime 4, there are 14 Energy Tanks to find. Each one boosts Samus’ health, which is obviously super important. You’ll definitely get a few just by playing through the story, but if you want all of them, you’re gonna have to do some serious exploring. That’s why I put together this guide – it’s got the exact location of every single Energy Tank in the game, so you don’t miss a single one!
You don’t have to collect the Energy Tanks in a specific order, but you’ll need certain abilities to reach some of them. This guide suggests an order that lines up with the main storyline, making it easier to find everything as you progress.
All Energy Tank Locations in Metroid Prime 4
Energy Tank #1
- Location: UTO Research Center
You’ll definitely find your first Energy Tank early in the game, while navigating a Morph Ball section in the UTO Research Center during the prologue.
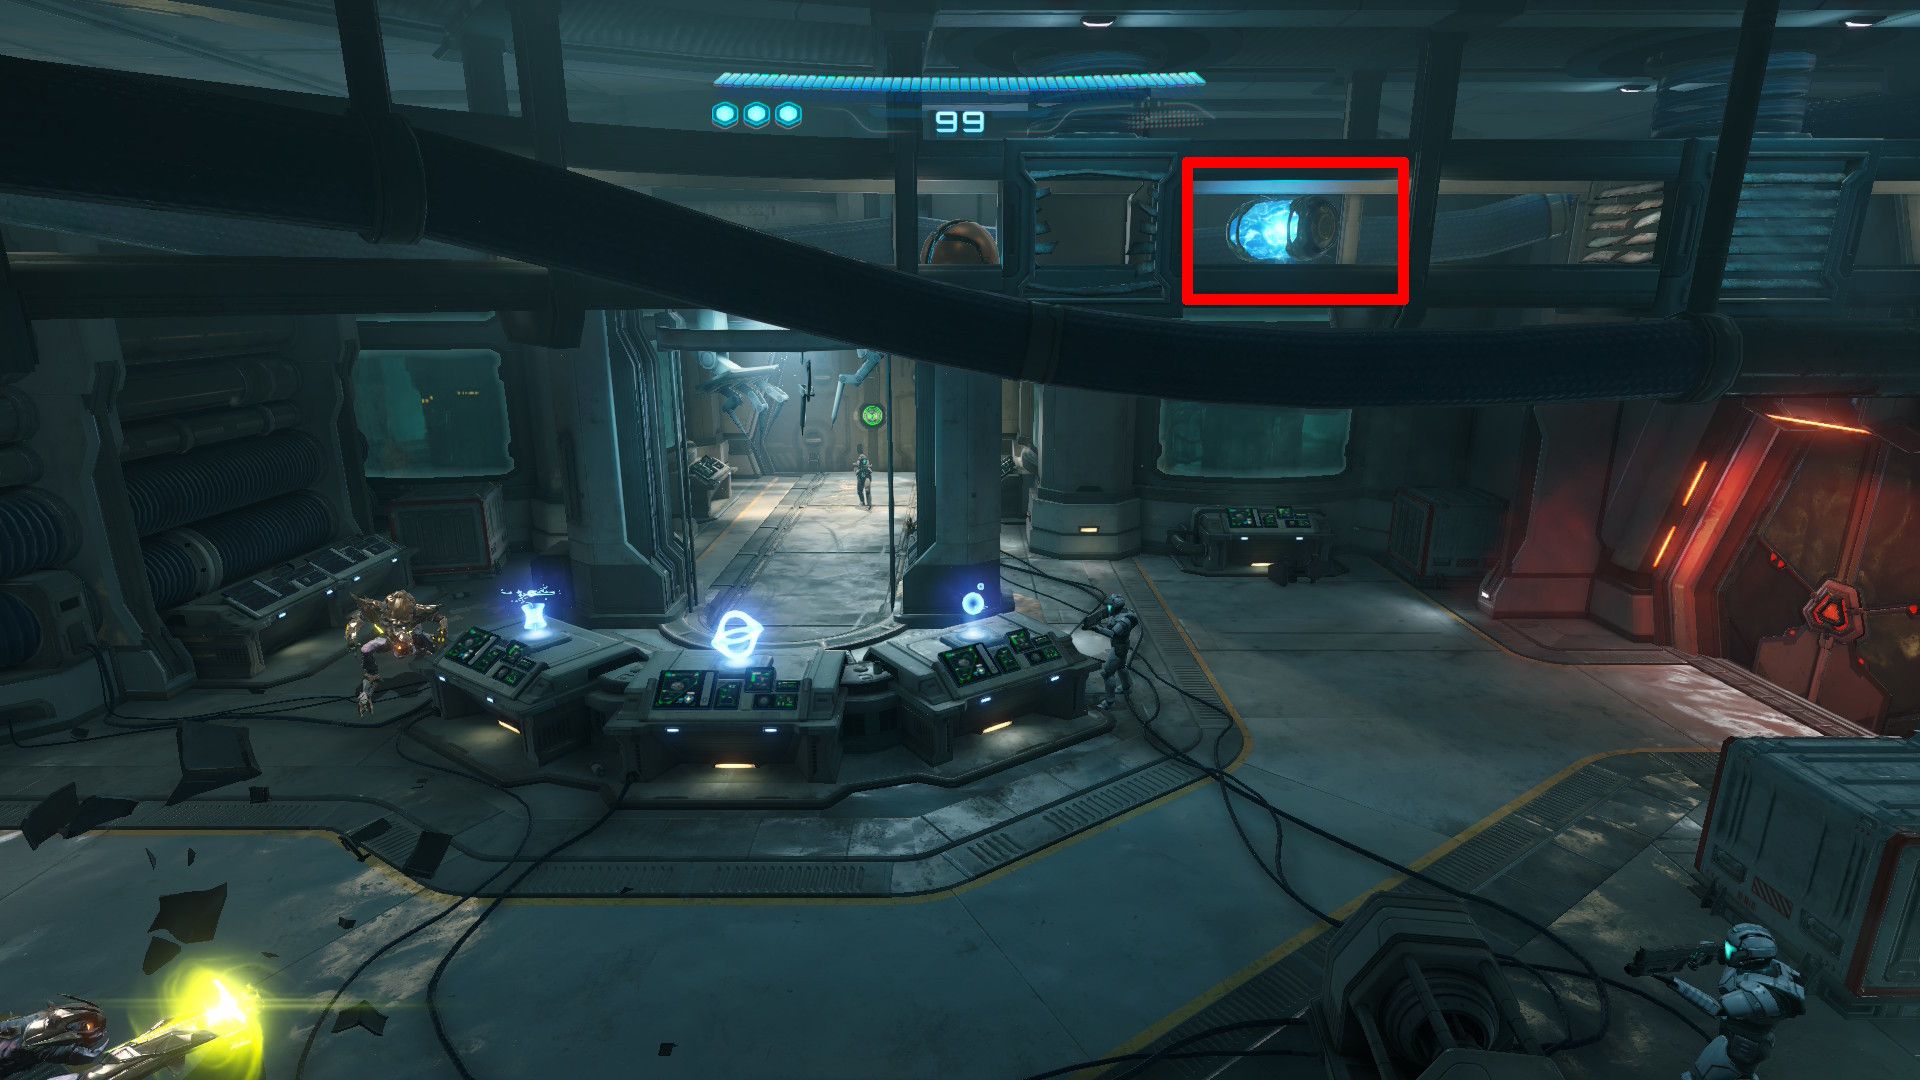
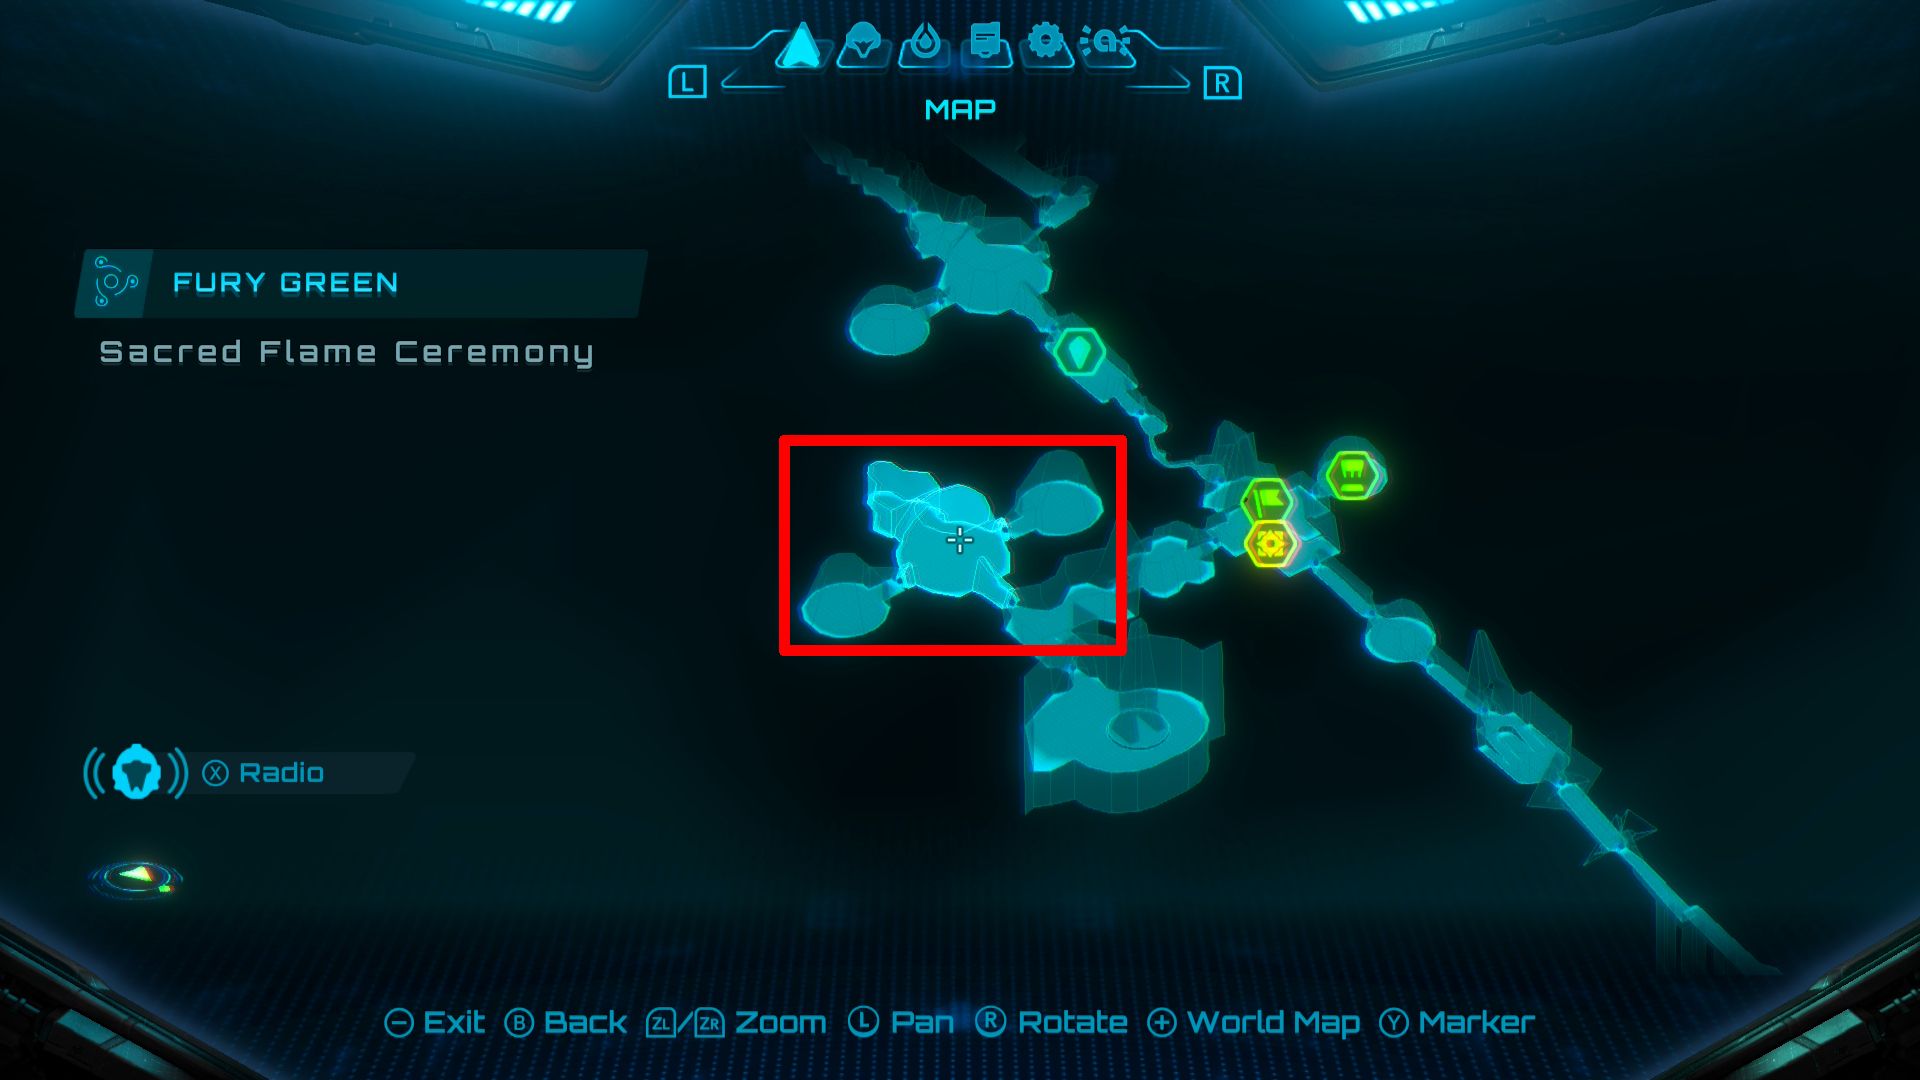
Energy Tank #2
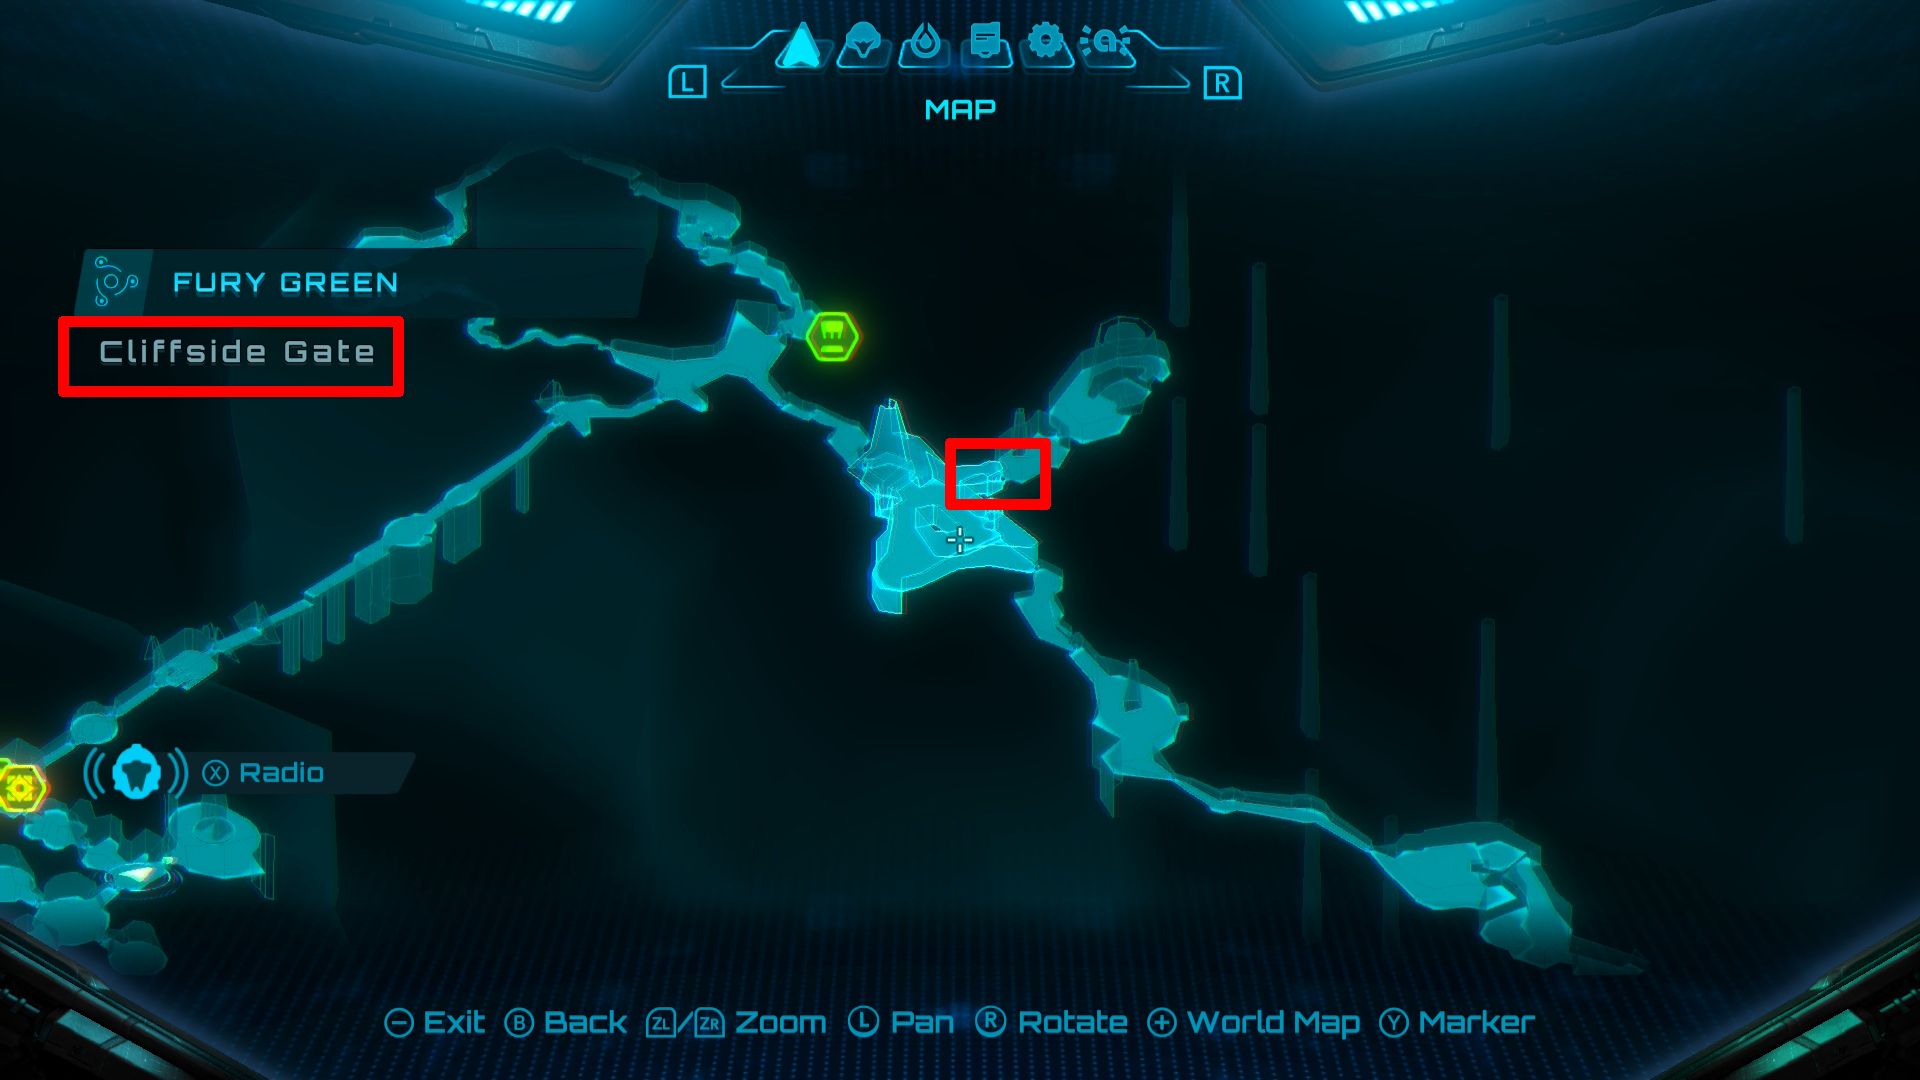
- Location: Fury Green – Cliffside Gate
Once you get the Psychic Glove in Fury Green, you’ll find a door that needs two motes to open. Behind that door is a container you can open with the Psychic Visor by tracing a specific pattern. Inside, you’ll discover an Energy Tank.
Energy Tank #3

- Location: Volt Forge
As players progress through Volt Forge, they’ll fight Sylux. Defeating him rewards them with an Energy Tank.
Energy Tank #4
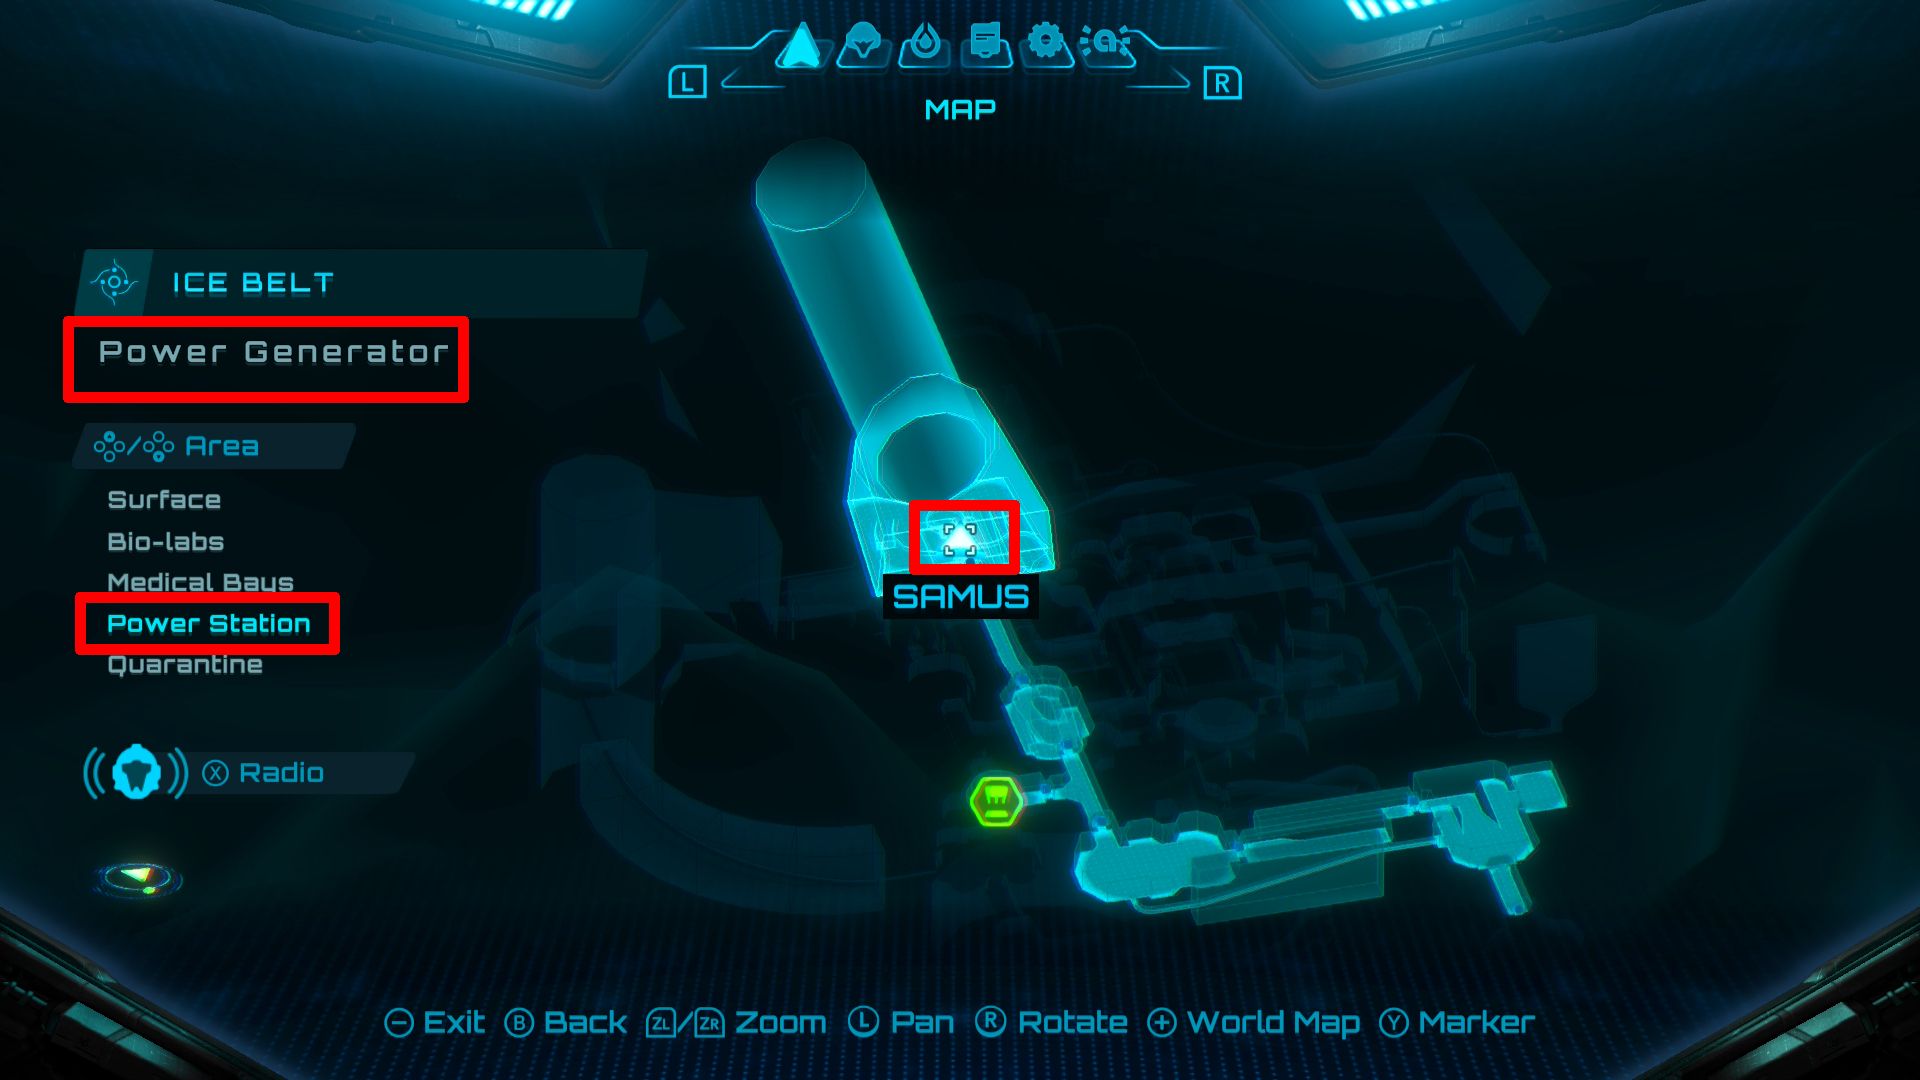
- Location: Ice Belt – Power Generator
Head to the Power Generator room in the Ice Belt and activate the generator using the Control Beam. Then, use the terminal right in front of the generator to reveal a hidden passage in the floor. Follow this new path, and use bombs to navigate a small Morph Ball area, which will lead you to an Energy Tank.
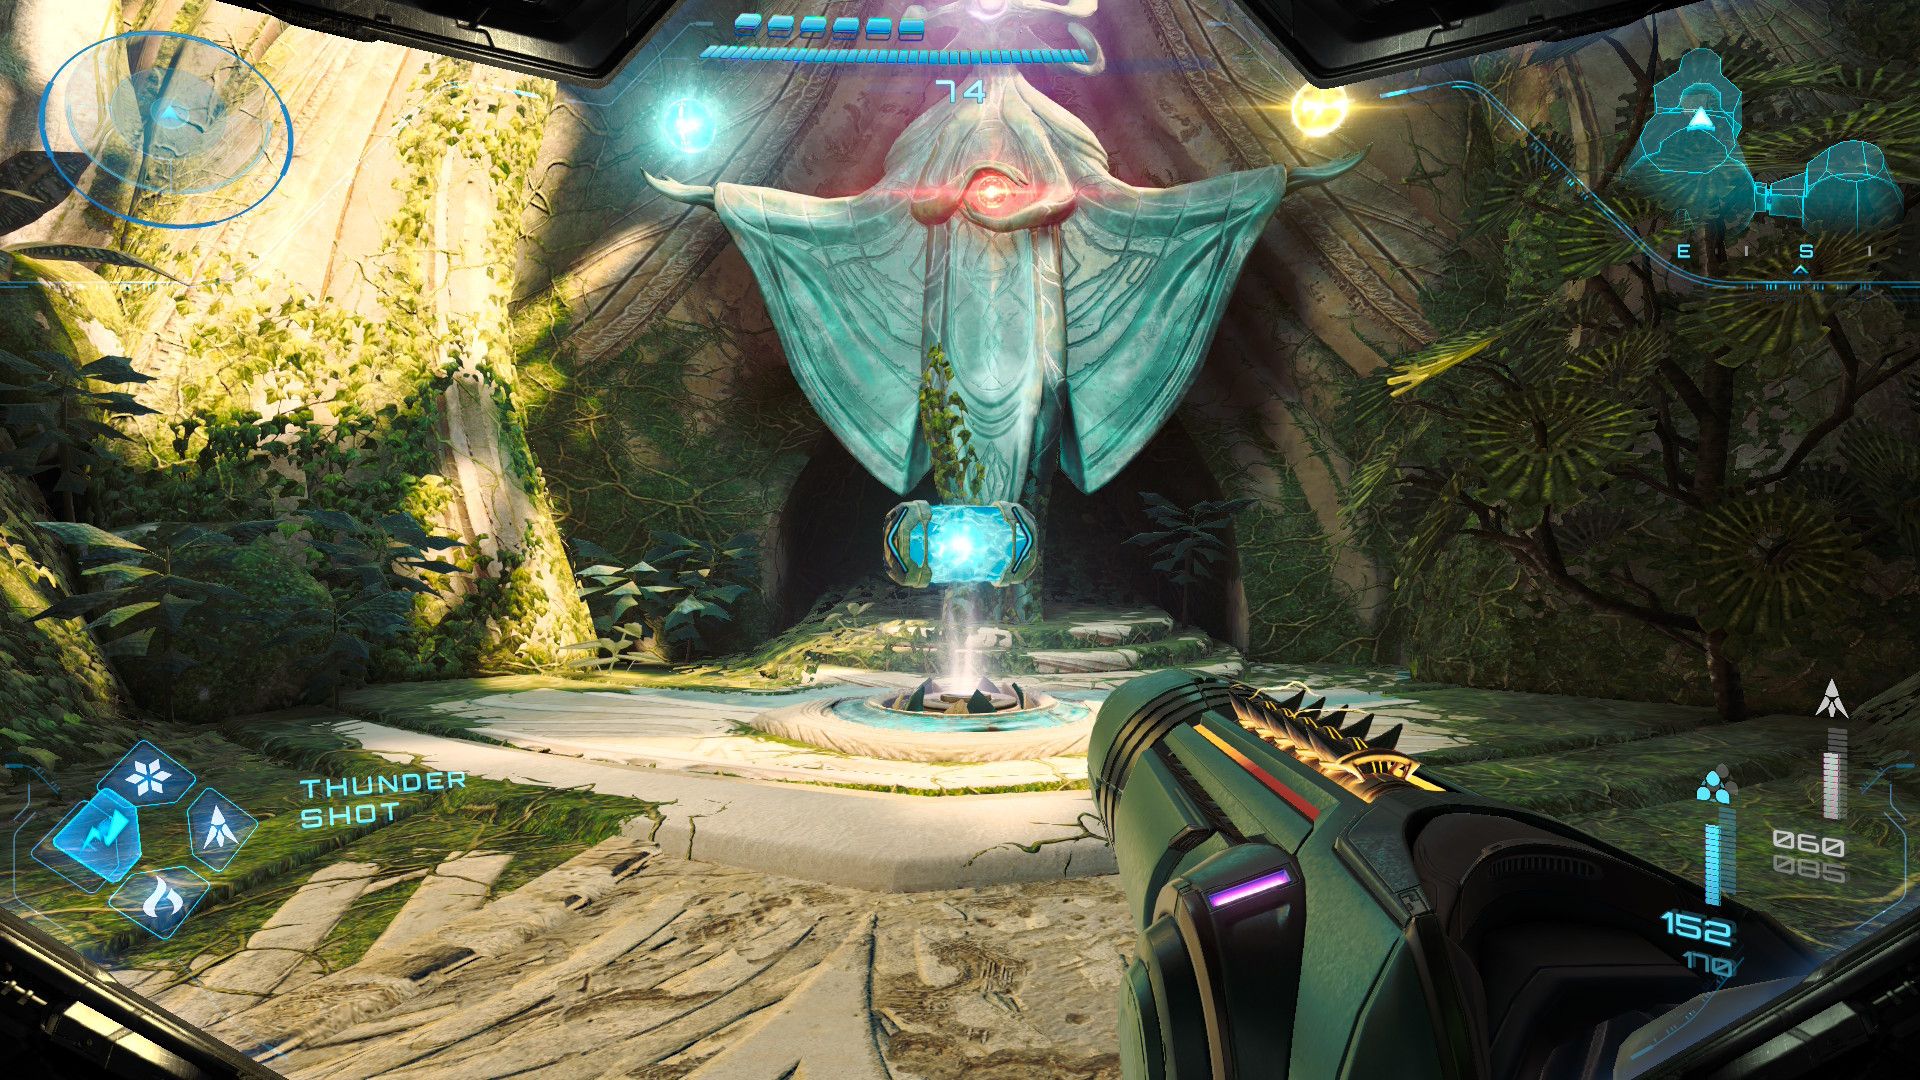
Energy Tank #5
- Location: Ladder of Thought Shrine
Okay, so as a big fan, let me tell you how to get that Energy Tank! You need to head to the Ladder of Thought Shrine – it’s on the west side of Sol Valley, just south of Ice Belt. Once you’re inside and get through the platforming part, use Fire Shot to burn away the web to the right of the door. Then, you’ll want to do a double bomb jump to get into this tiny Morph Ball tunnel – that’s where the Energy Tank is hidden! It’s a little tricky, but totally worth it.
To do a double bomb jump, curl into a Morph Ball and press X to jump, then quickly place a bomb at the peak of your arc. Right before the bomb explodes, jump again to get an extra boost and reach the tunnel.
Energy Tank #6
- Location: Sol Valley
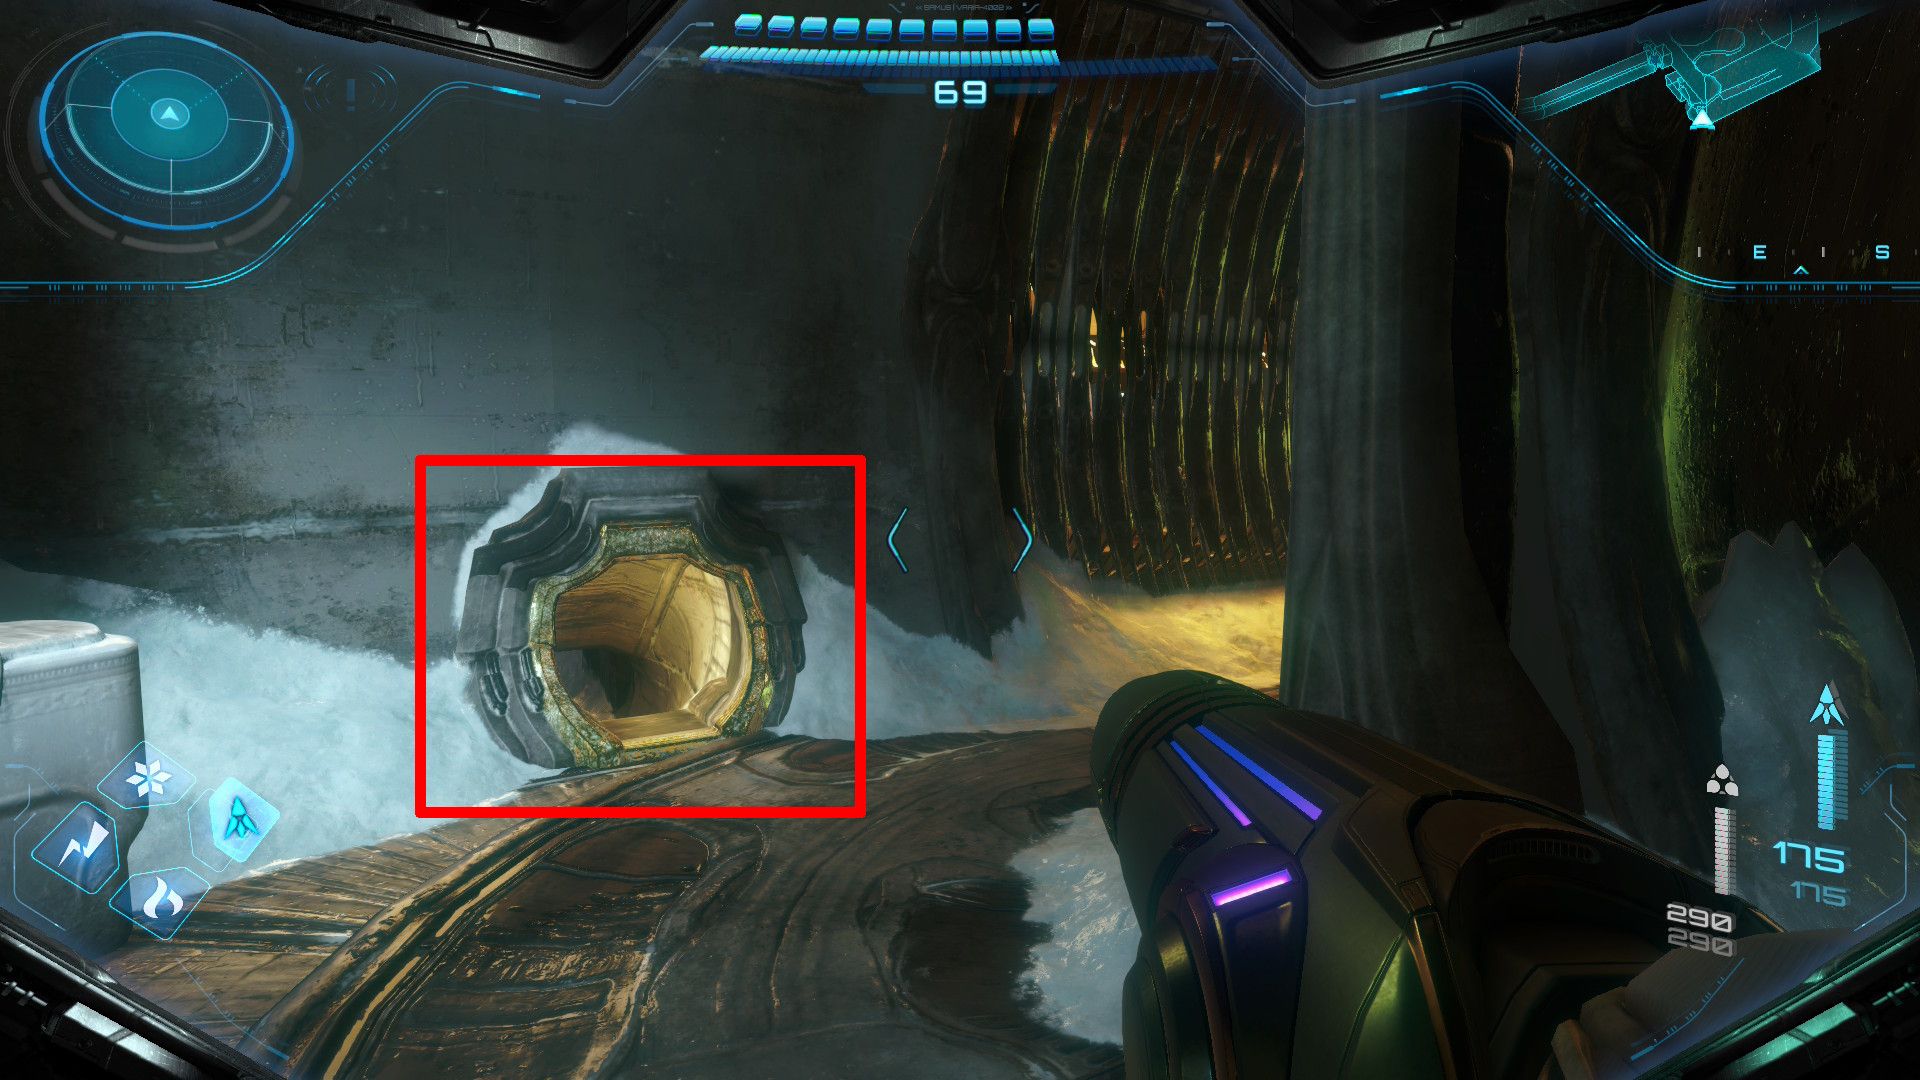
Head to the Ring of Thunder Shrine, which is northwest of Flare Pool, but don’t go inside. Use the Psychic Glove to open the hidden compartment on the back of the statue – you’ll find an Energy Tank inside.
Energy Tank #7
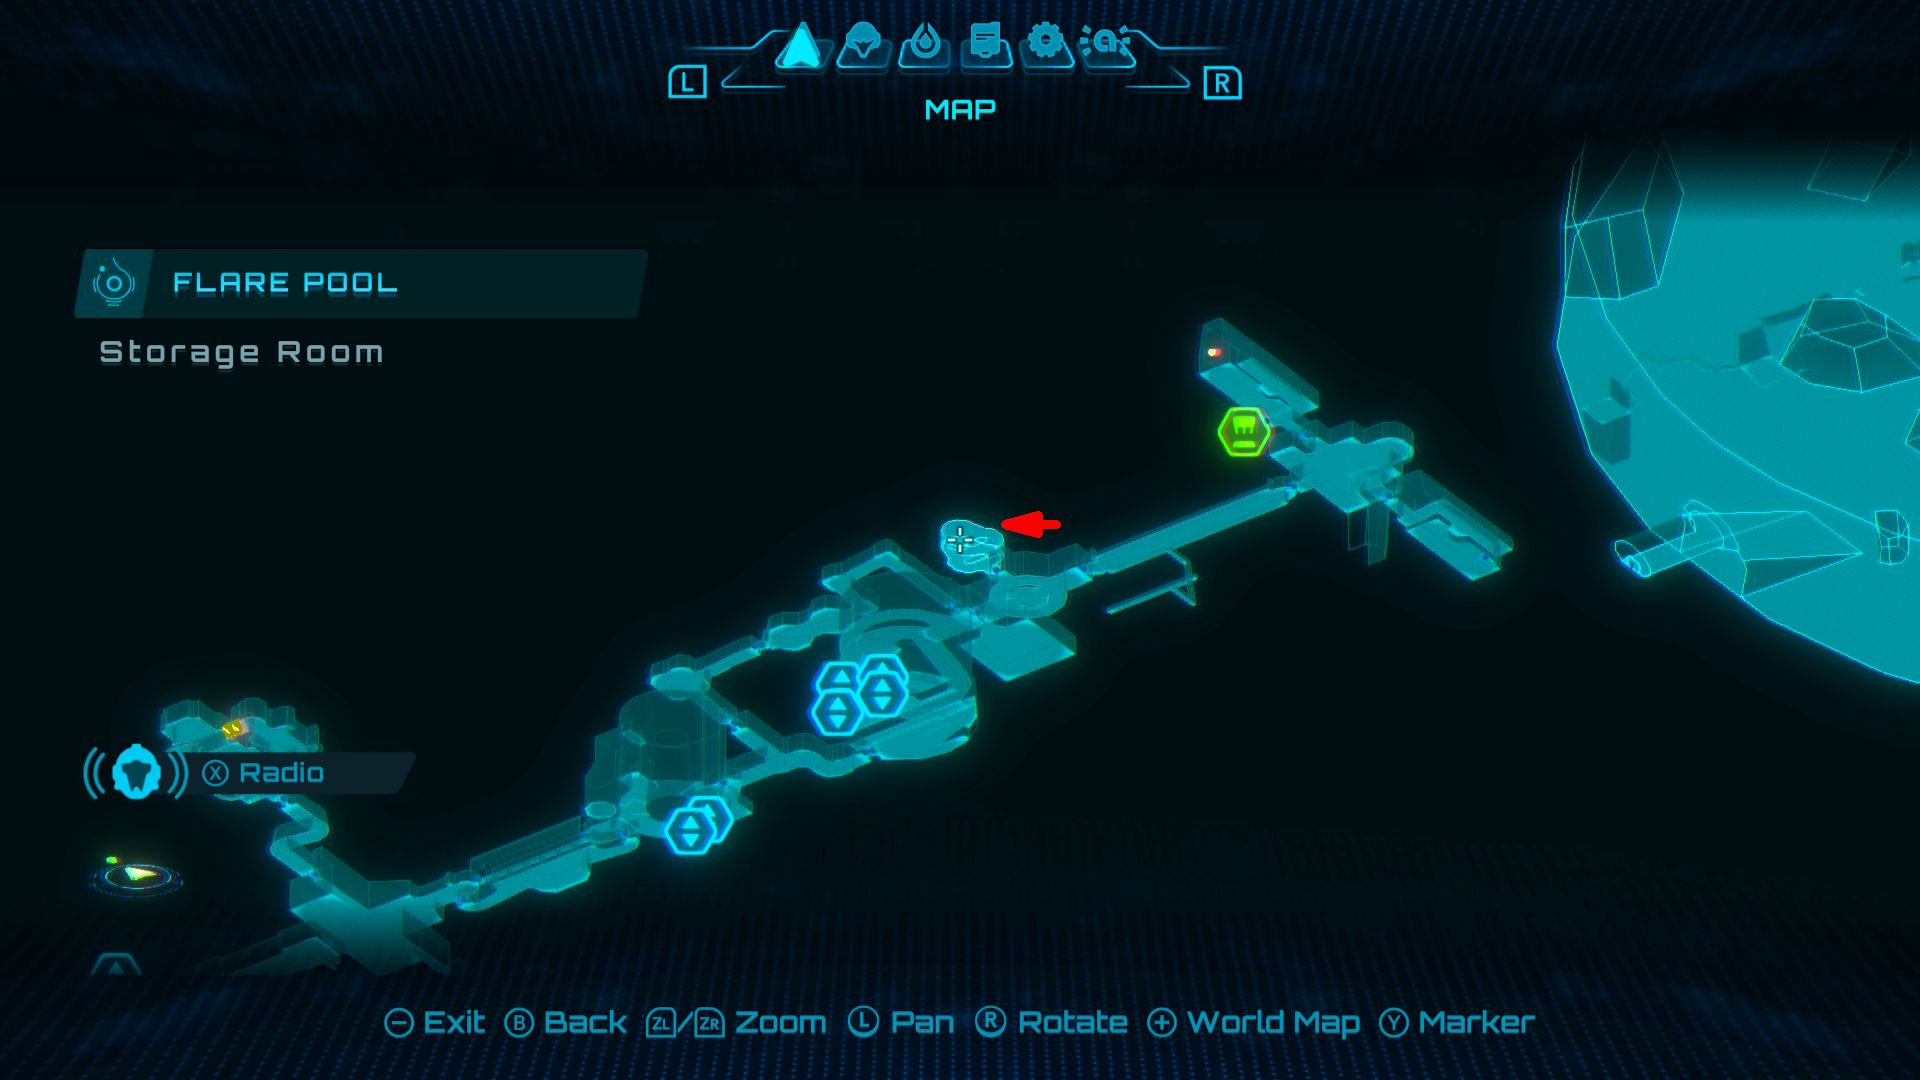
- Location: Flare Pool – Storage Room
A large, glowing orb is floating in the Storage Room near Flare Pool. Put on the Psychic Visor and follow the pattern on the orb to find an Energy Tank.
Energy Tank #8
- Location: Volt Forge
You’ll fight Sylux again when you revisit Volt Forge after getting the Psychic Grapple ability. If you beat him, you’ll earn another Energy Tank.
Energy Tank #9
- Location: Fury Green – Rods of Transference
Once players obtain the Fire, Ice, and Thunder Shots, they can tackle three puzzles located in Fury Green’s Rods of Transference, close to the base camp. Successfully completing all three puzzles will cause an Energy Tank to materialize before the statue nearby.
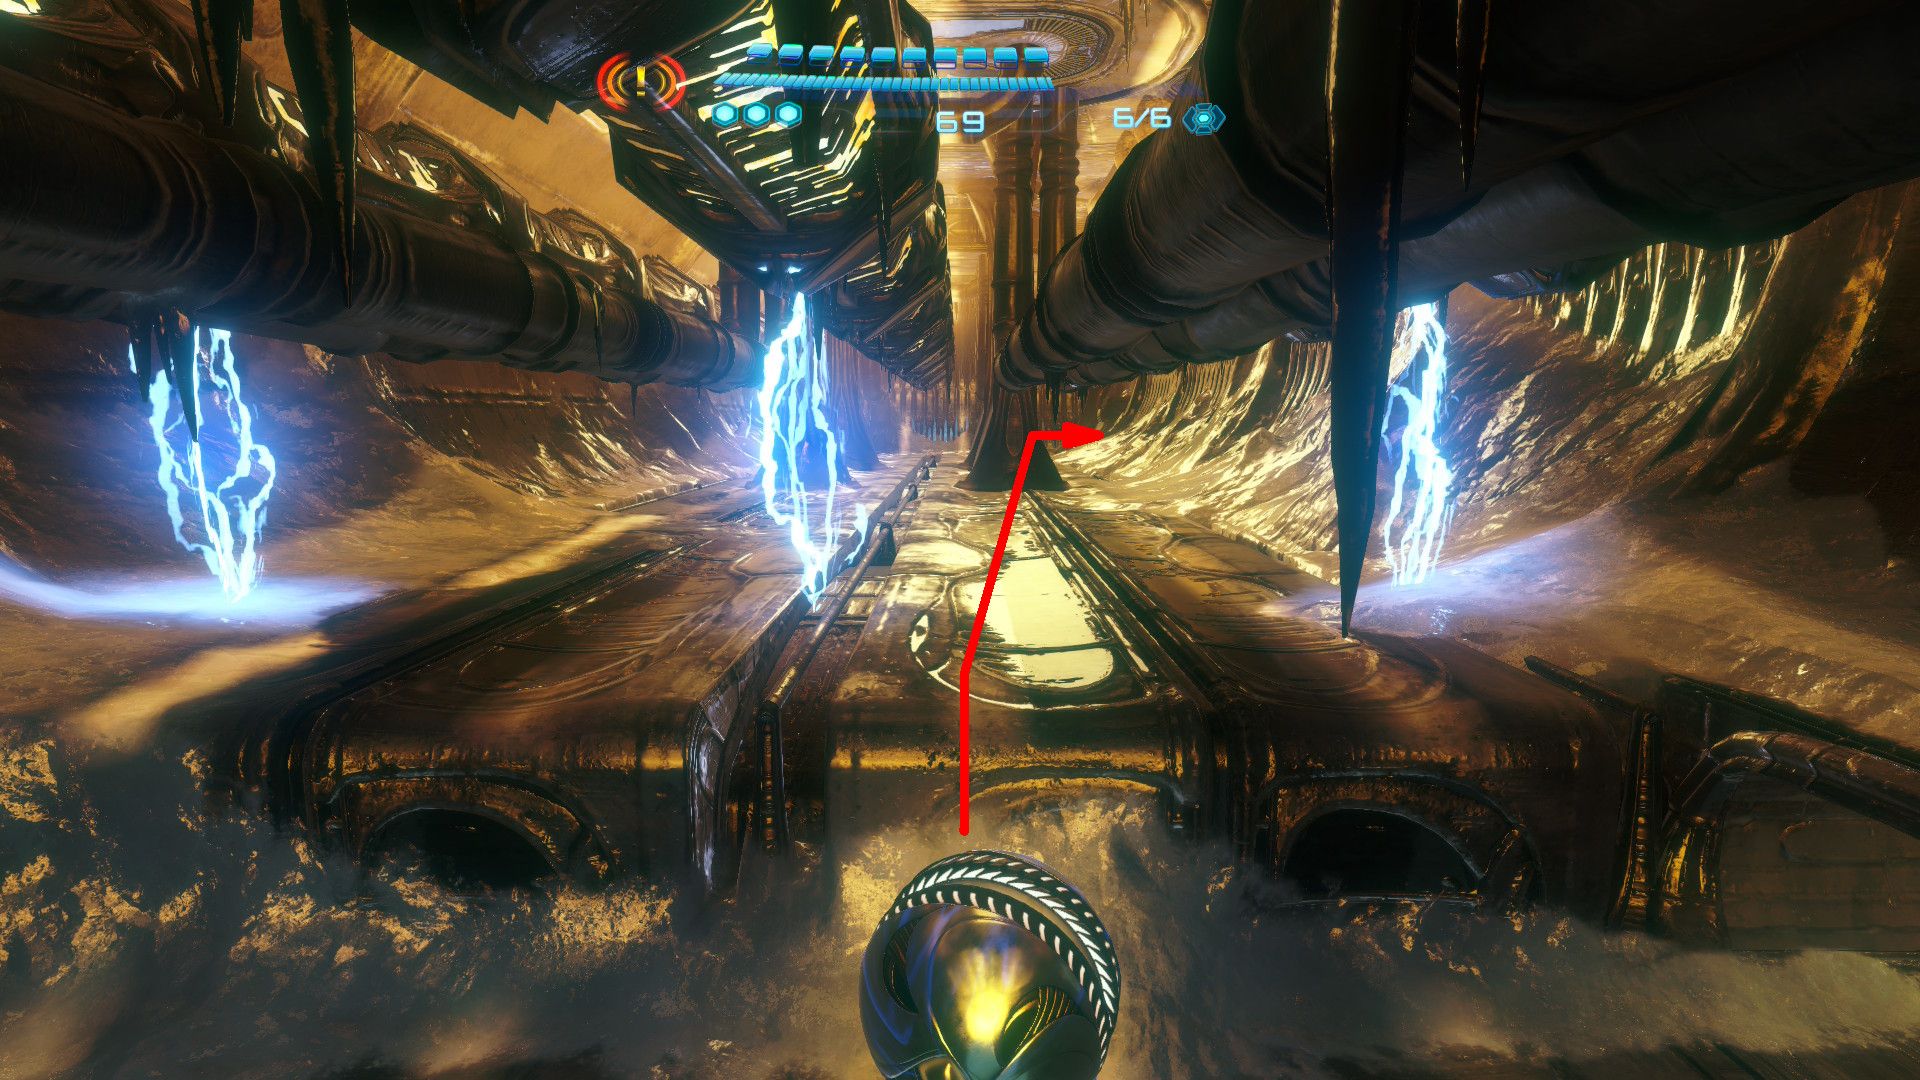
Energy Tank #10
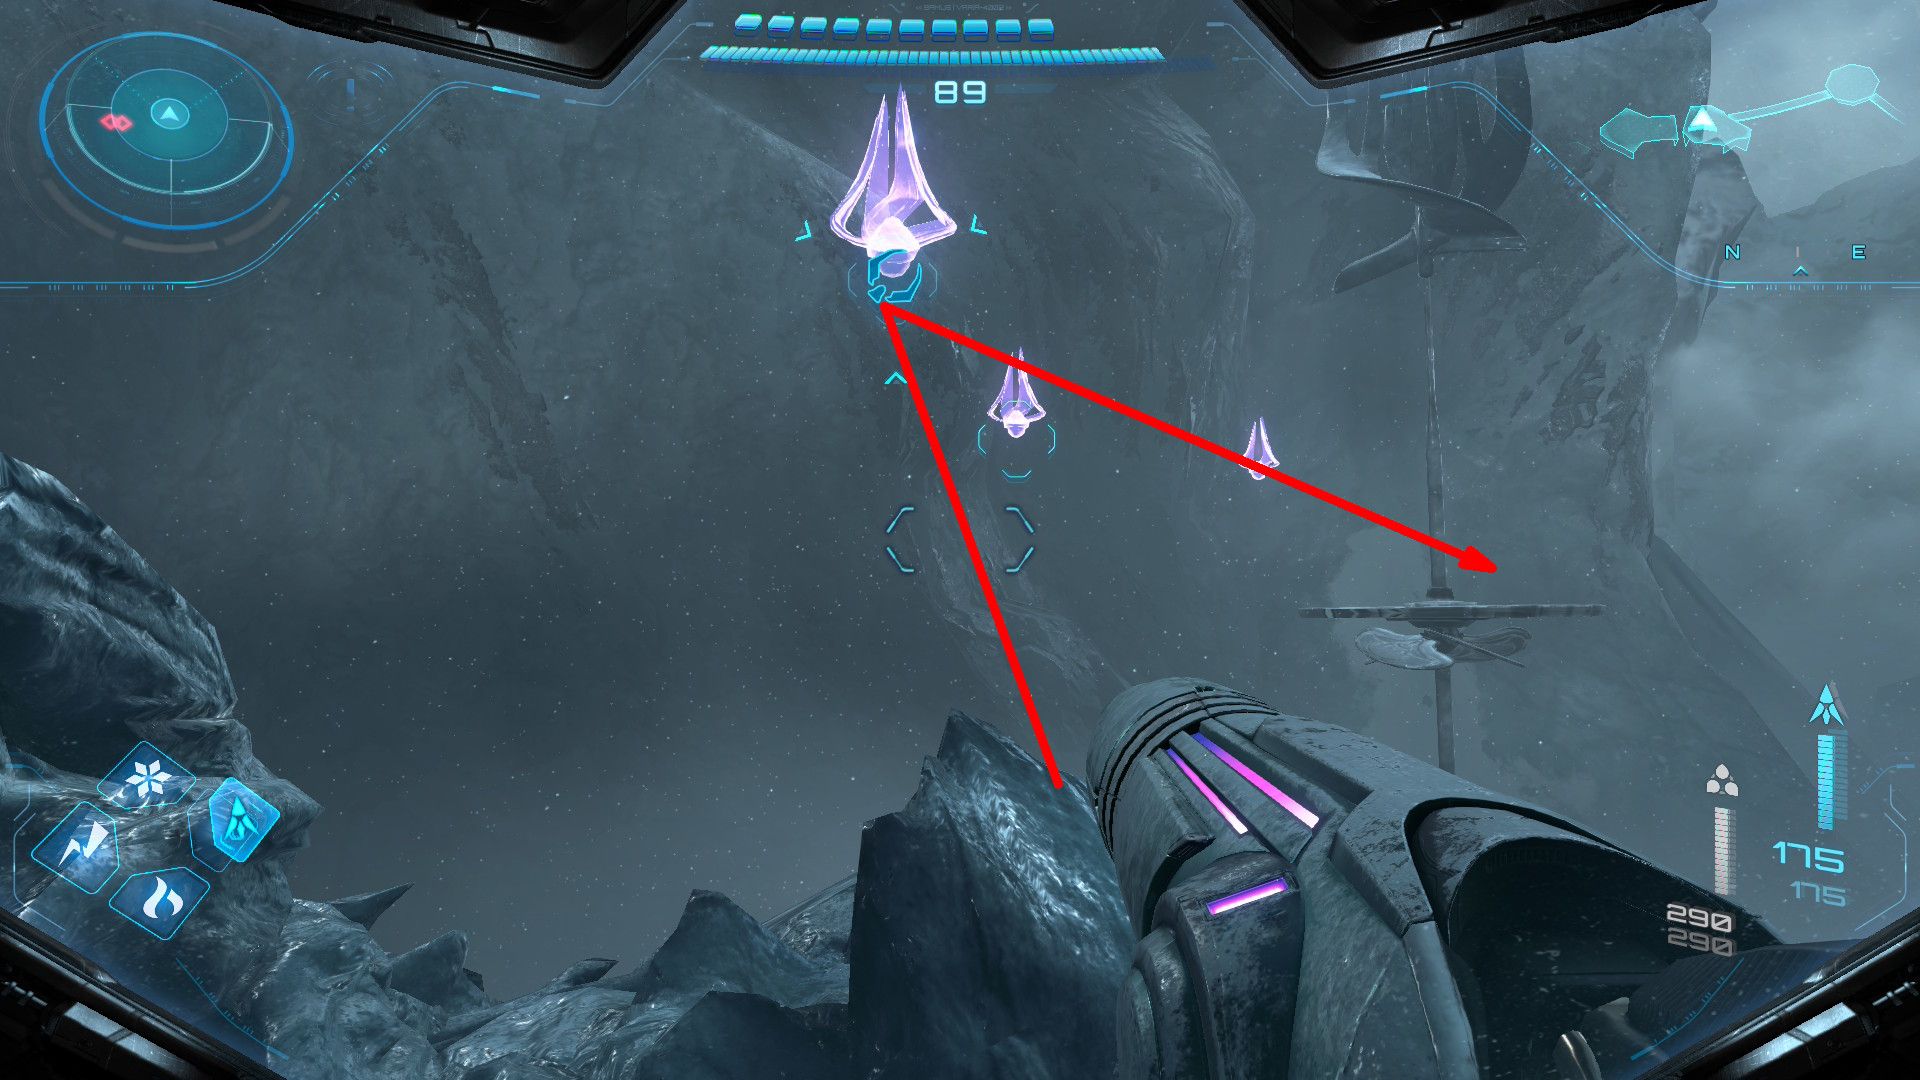
- Location: Sol Valley
Right in front of the entrance to Volt Forge, you’ll see a tower with an Energy Tank inside. To get to it, fire a Thunder Shot at the opening near the base of the tower.
Energy Tank #11
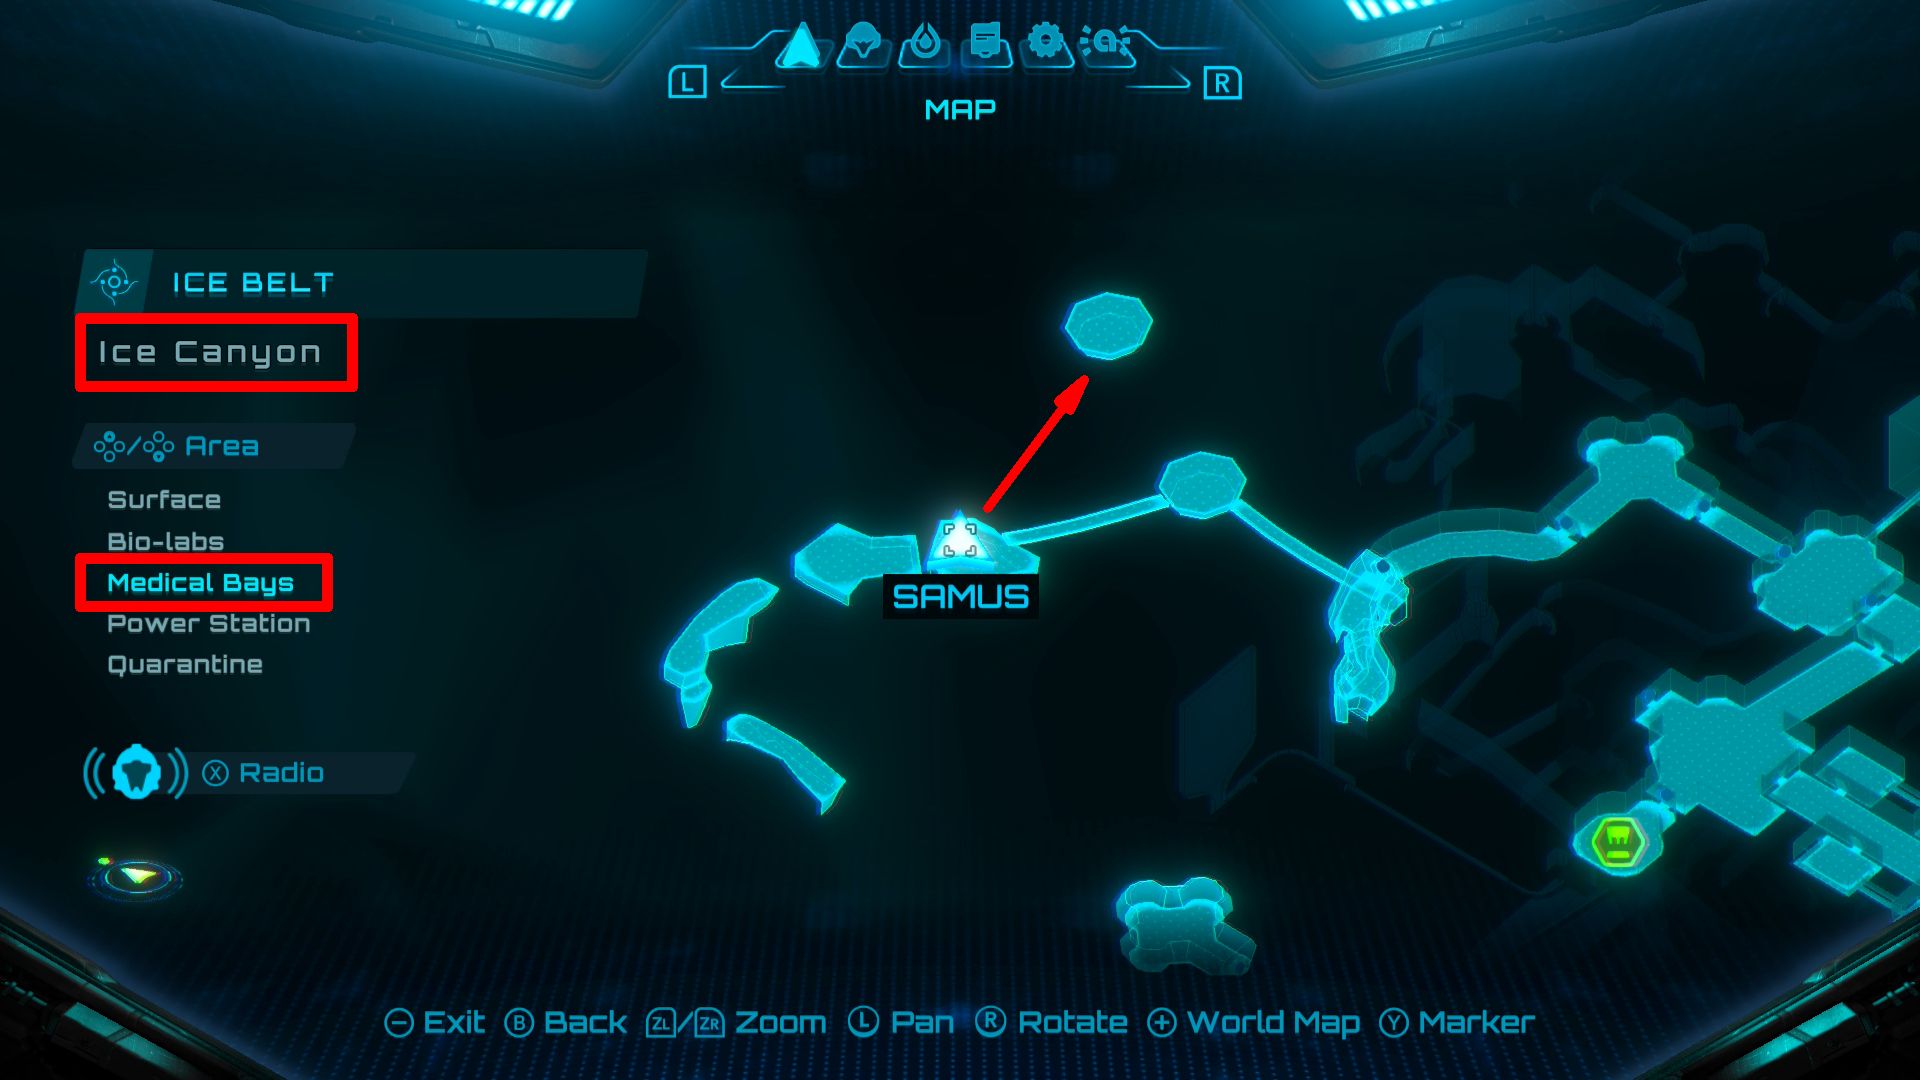
- Location: Ice Belt – Ice Canyon
After you’ve learned Psychic Grapple and are back in the Ice Belt, head to Ice Canyon – the area with strong winds, chains, and platforms. Use your Psychic Visor to reveal and activate the special grapple points, then swing across the gap to find an Energy Tank on the platform ahead.
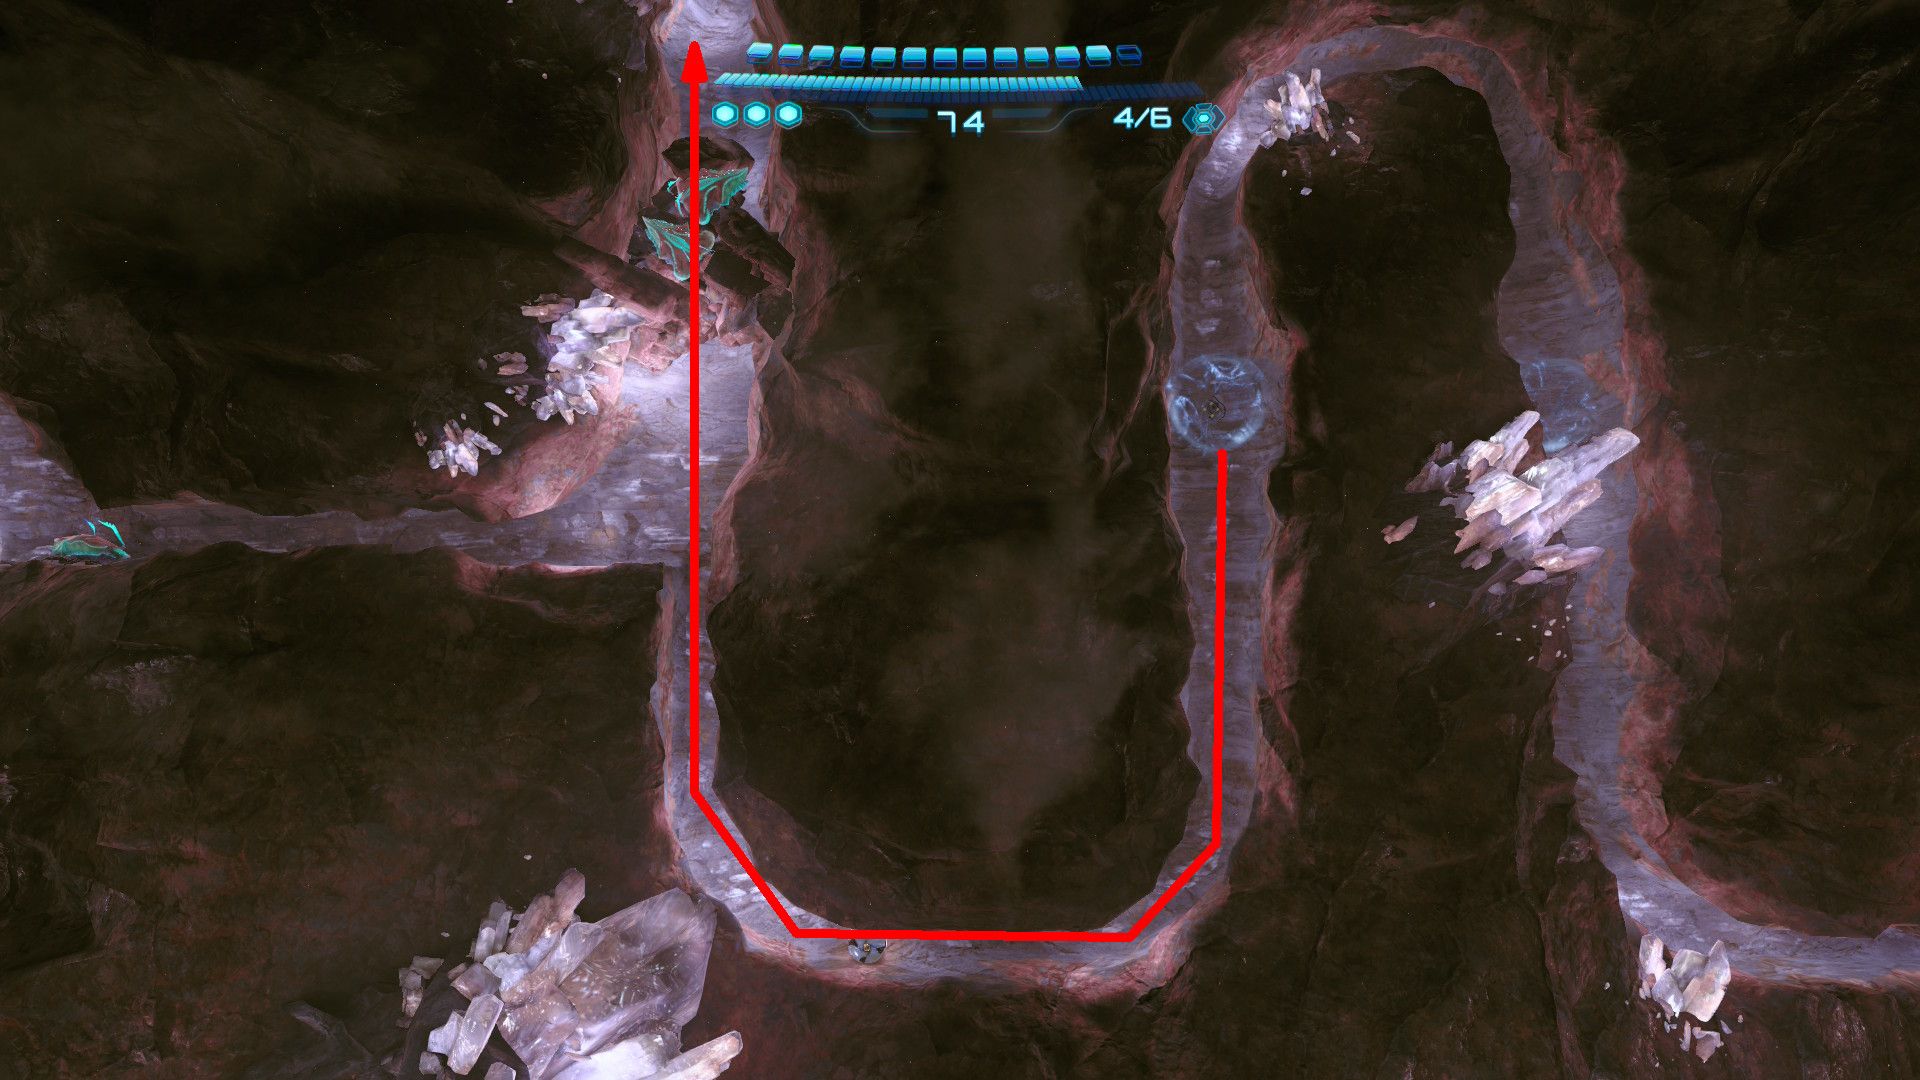
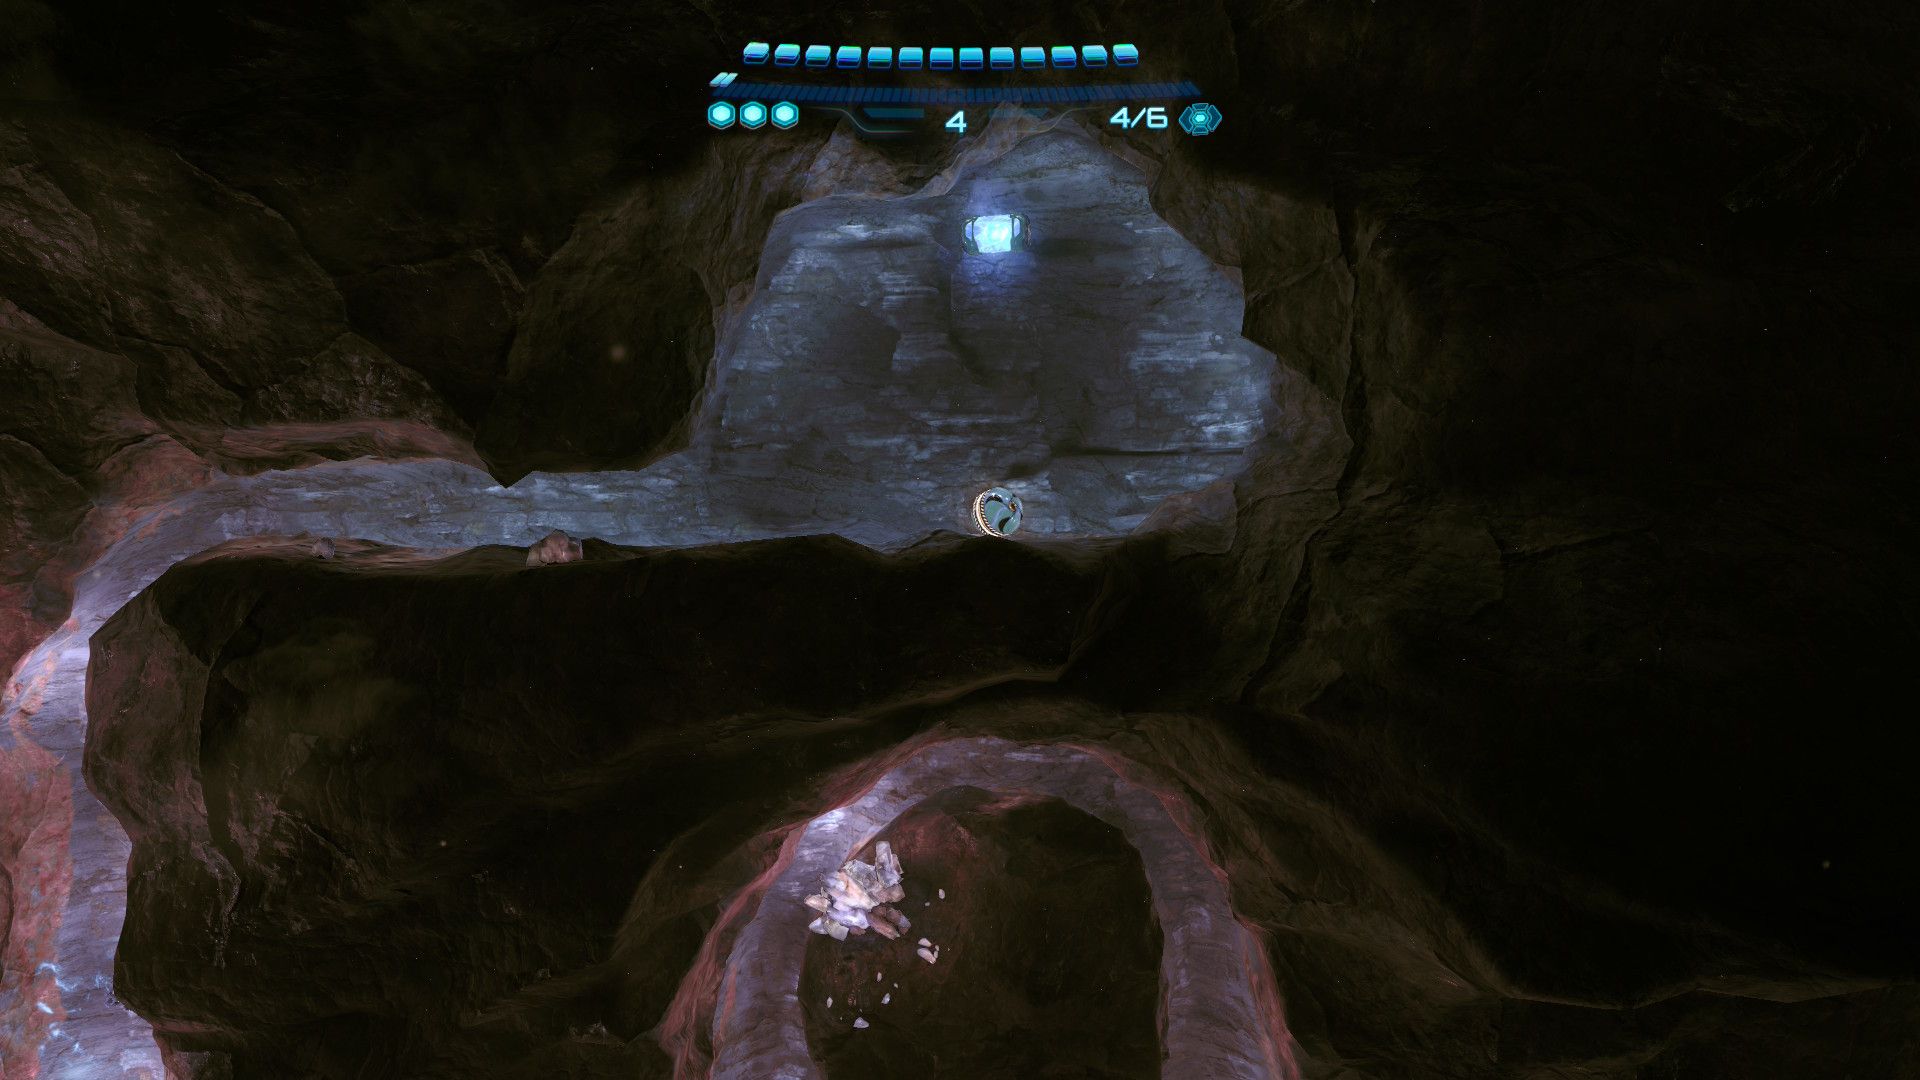
Energy Tank #12
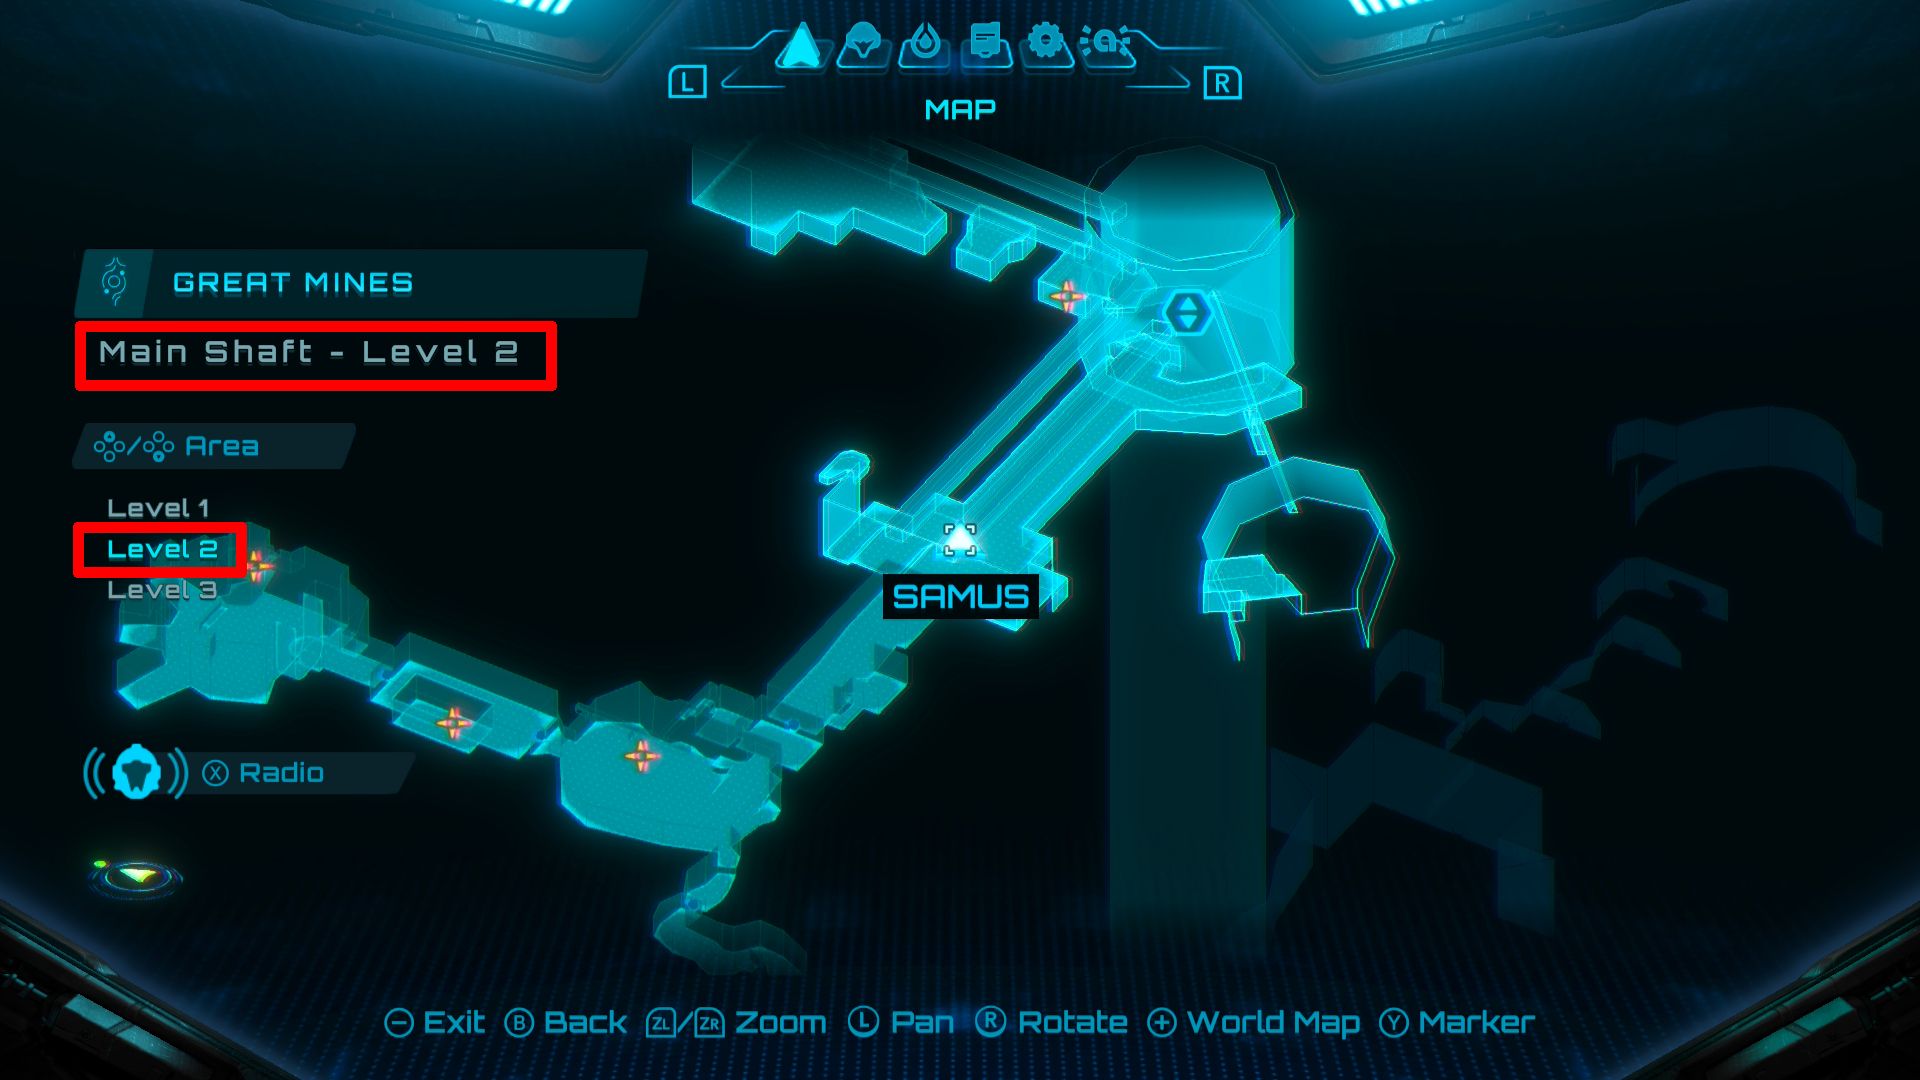
- Location: Great Mines – Mine Shaft Level 2
Once you’ve used the Boost Ball to raise the bridge in Mine Shaft – Level 2, switch to the Psychic Visor to make the Psychic Platforms appear beside it. Then, jump across these platforms to reach an Energy Tank.
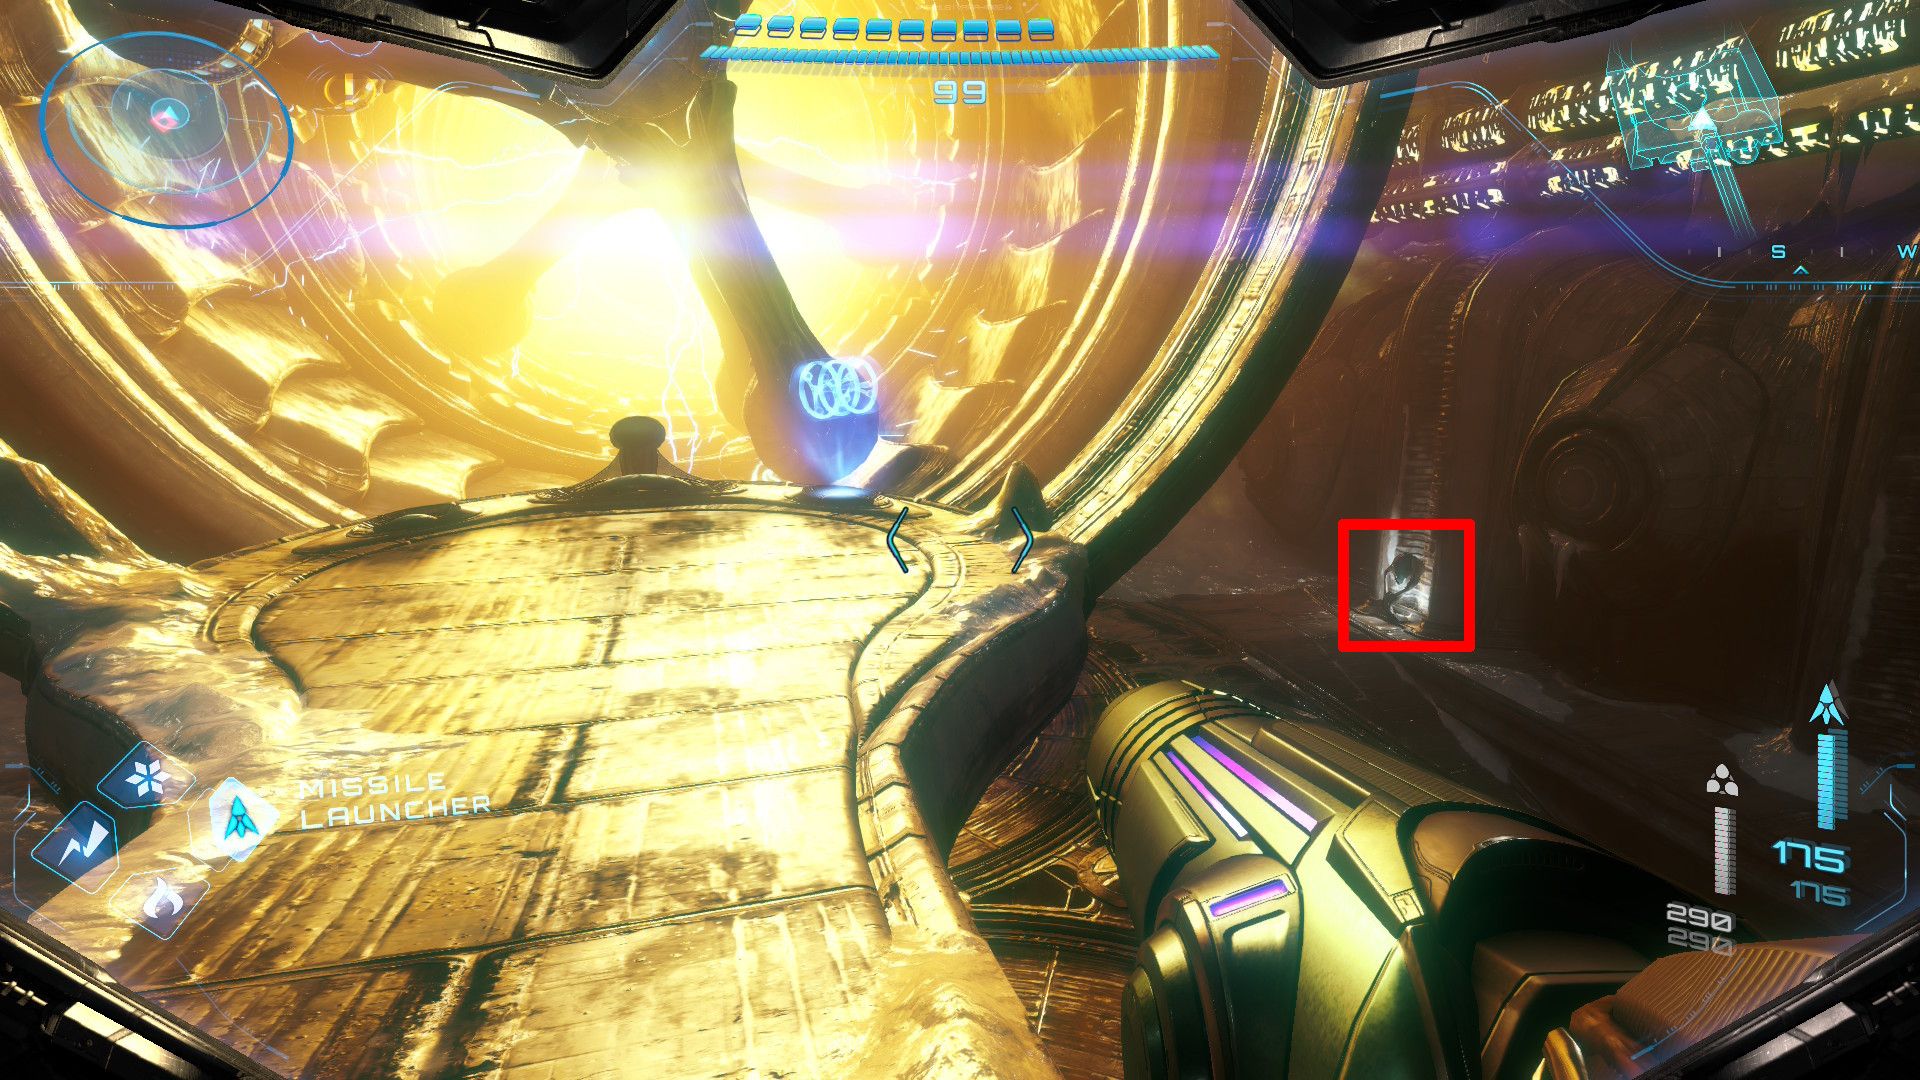
Energy Tank #13
- Location: Flare Pool – Volcano Heart
Return to the Volcano Heart arena in Flare Pool – where you battled Phenoros before. Look for a small container on a rock near the entrance and shoot it to uncover an Energy Tank. Then, defeat the creature that grabs the tank to get it for yourself.
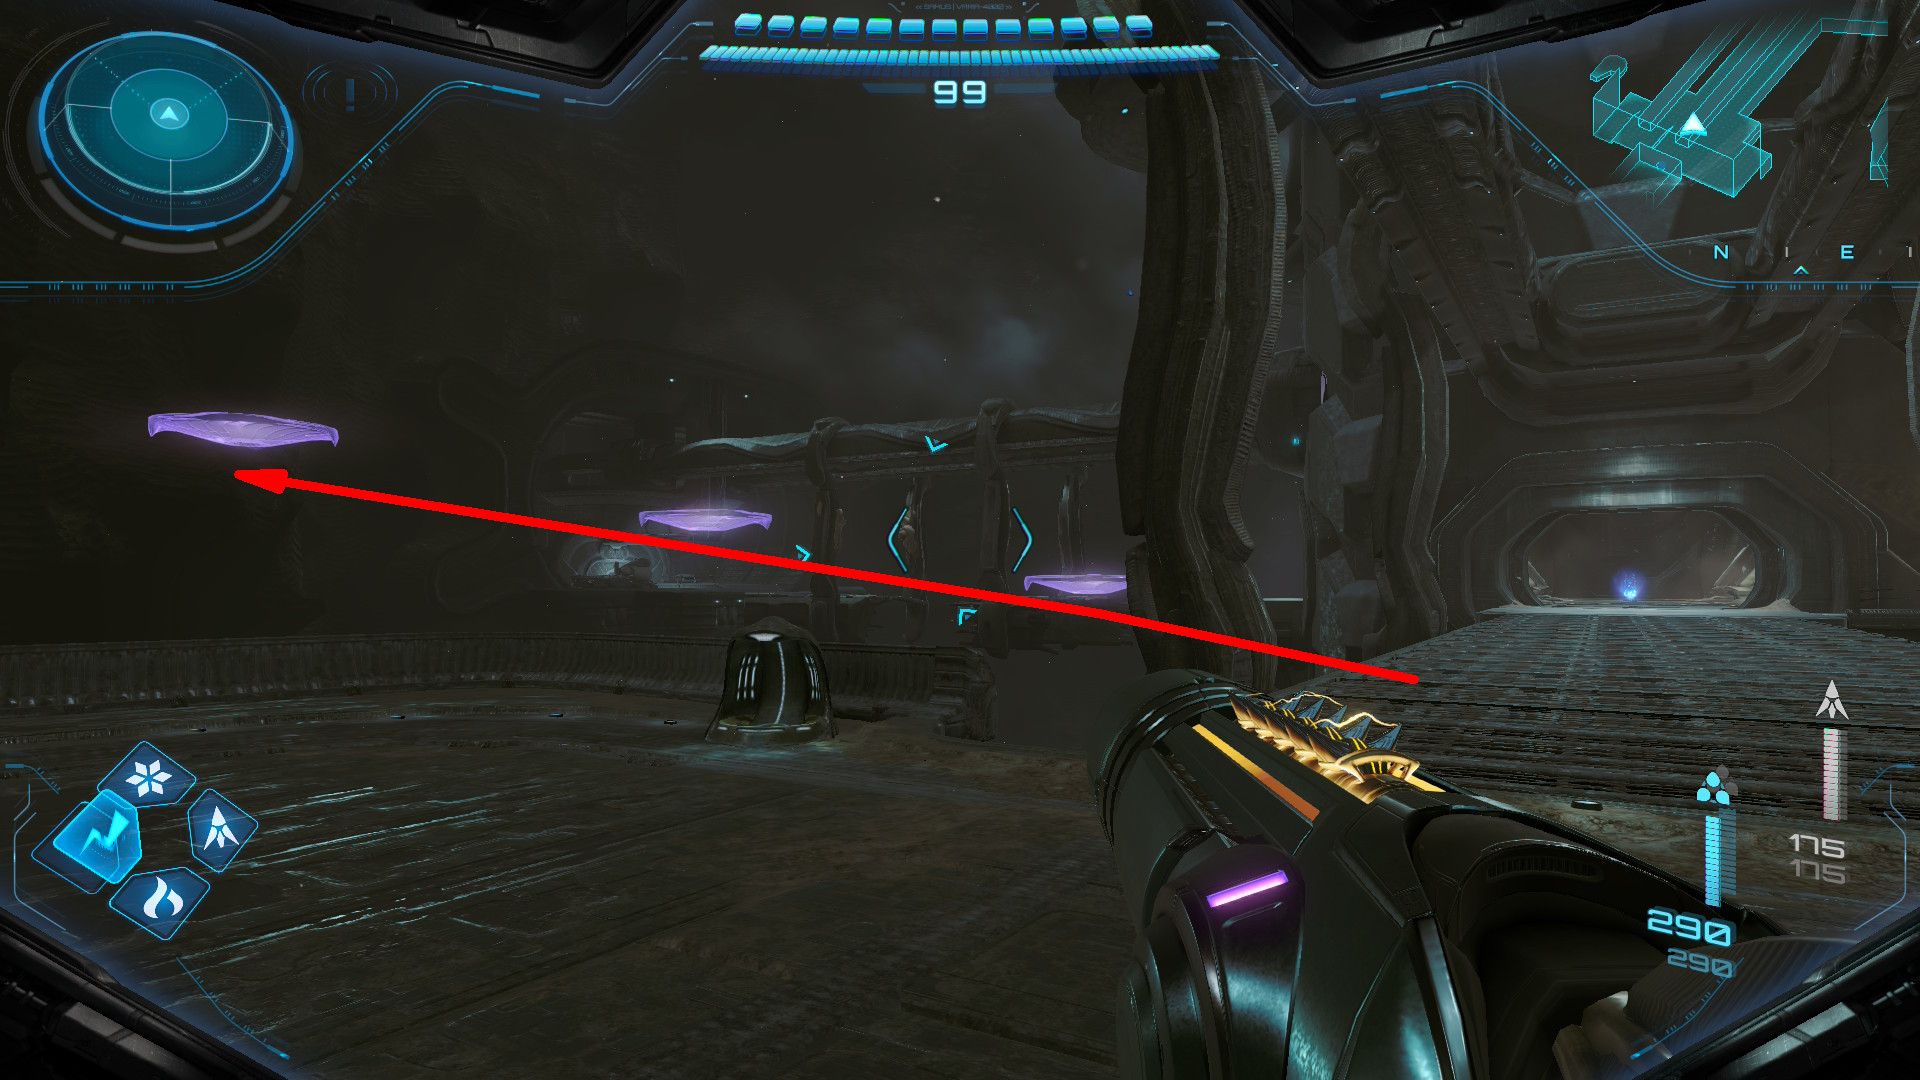
Energy Tank #14
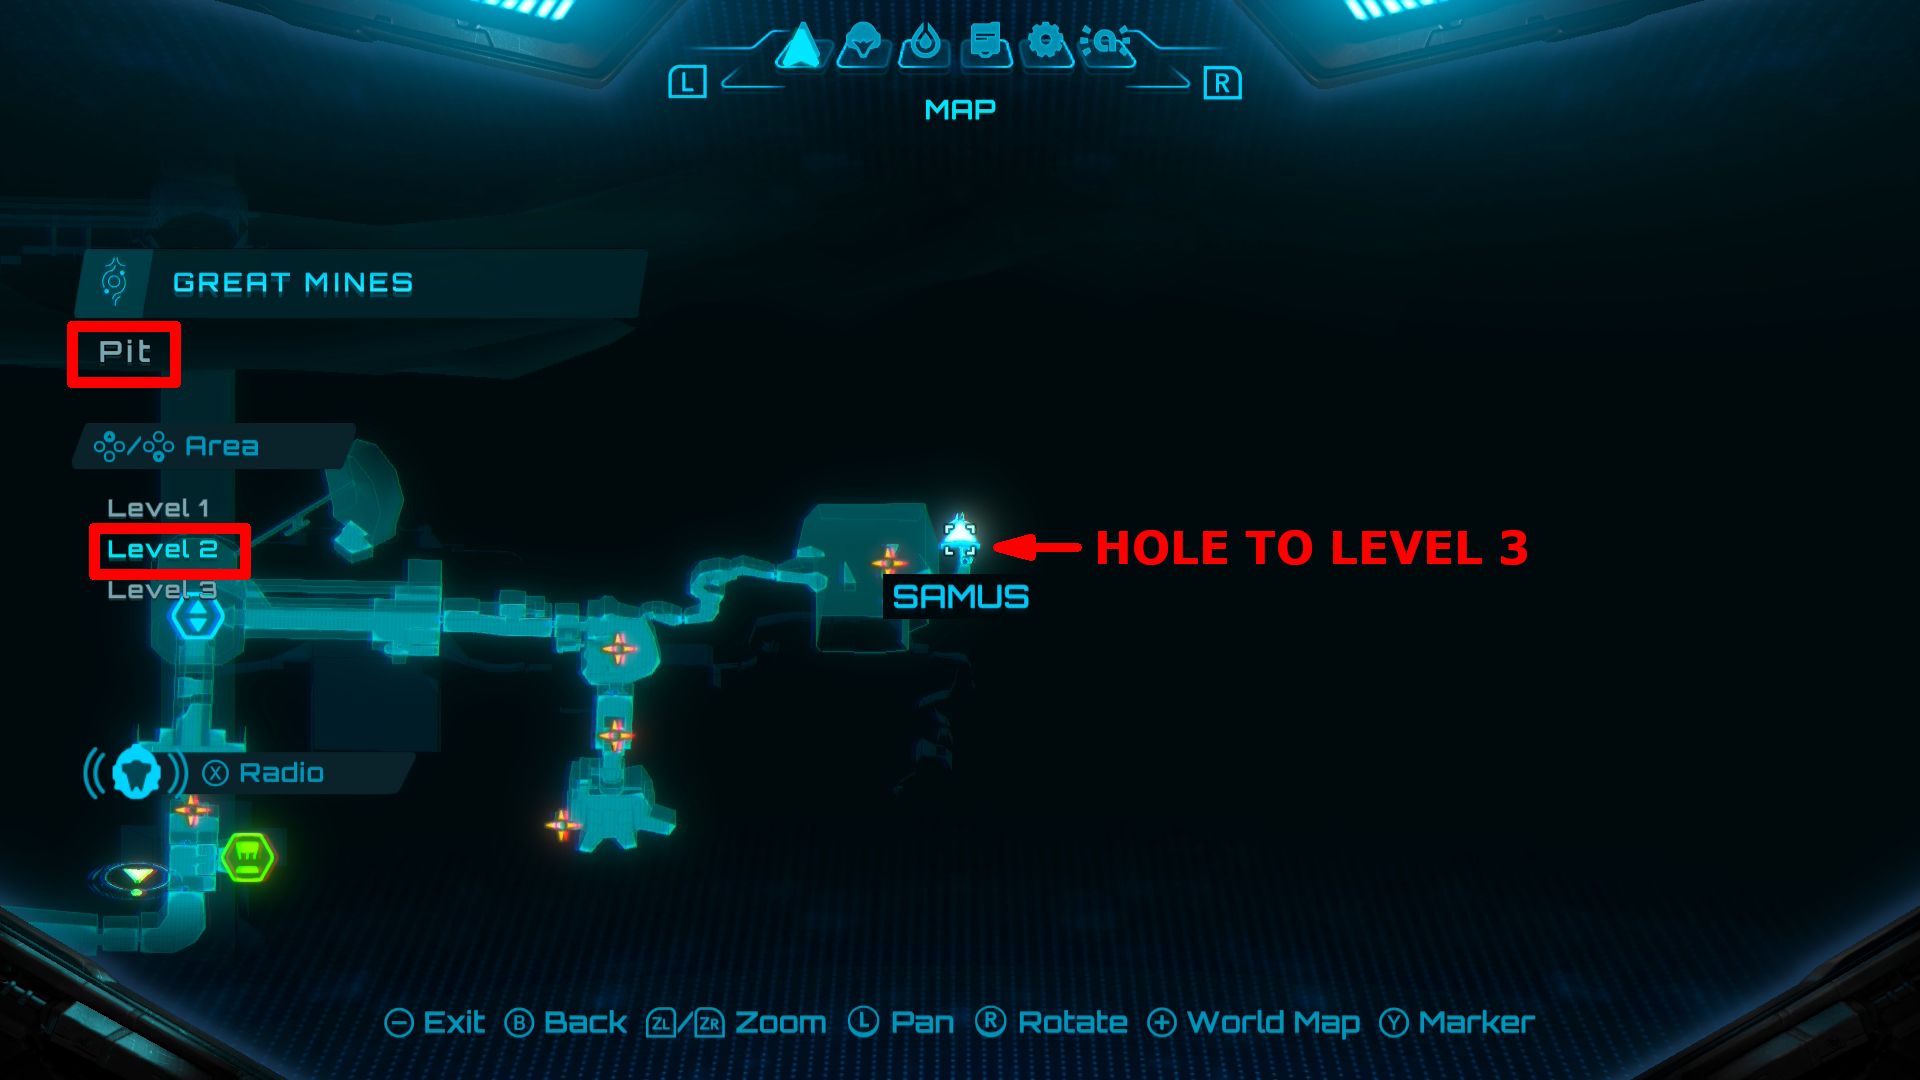
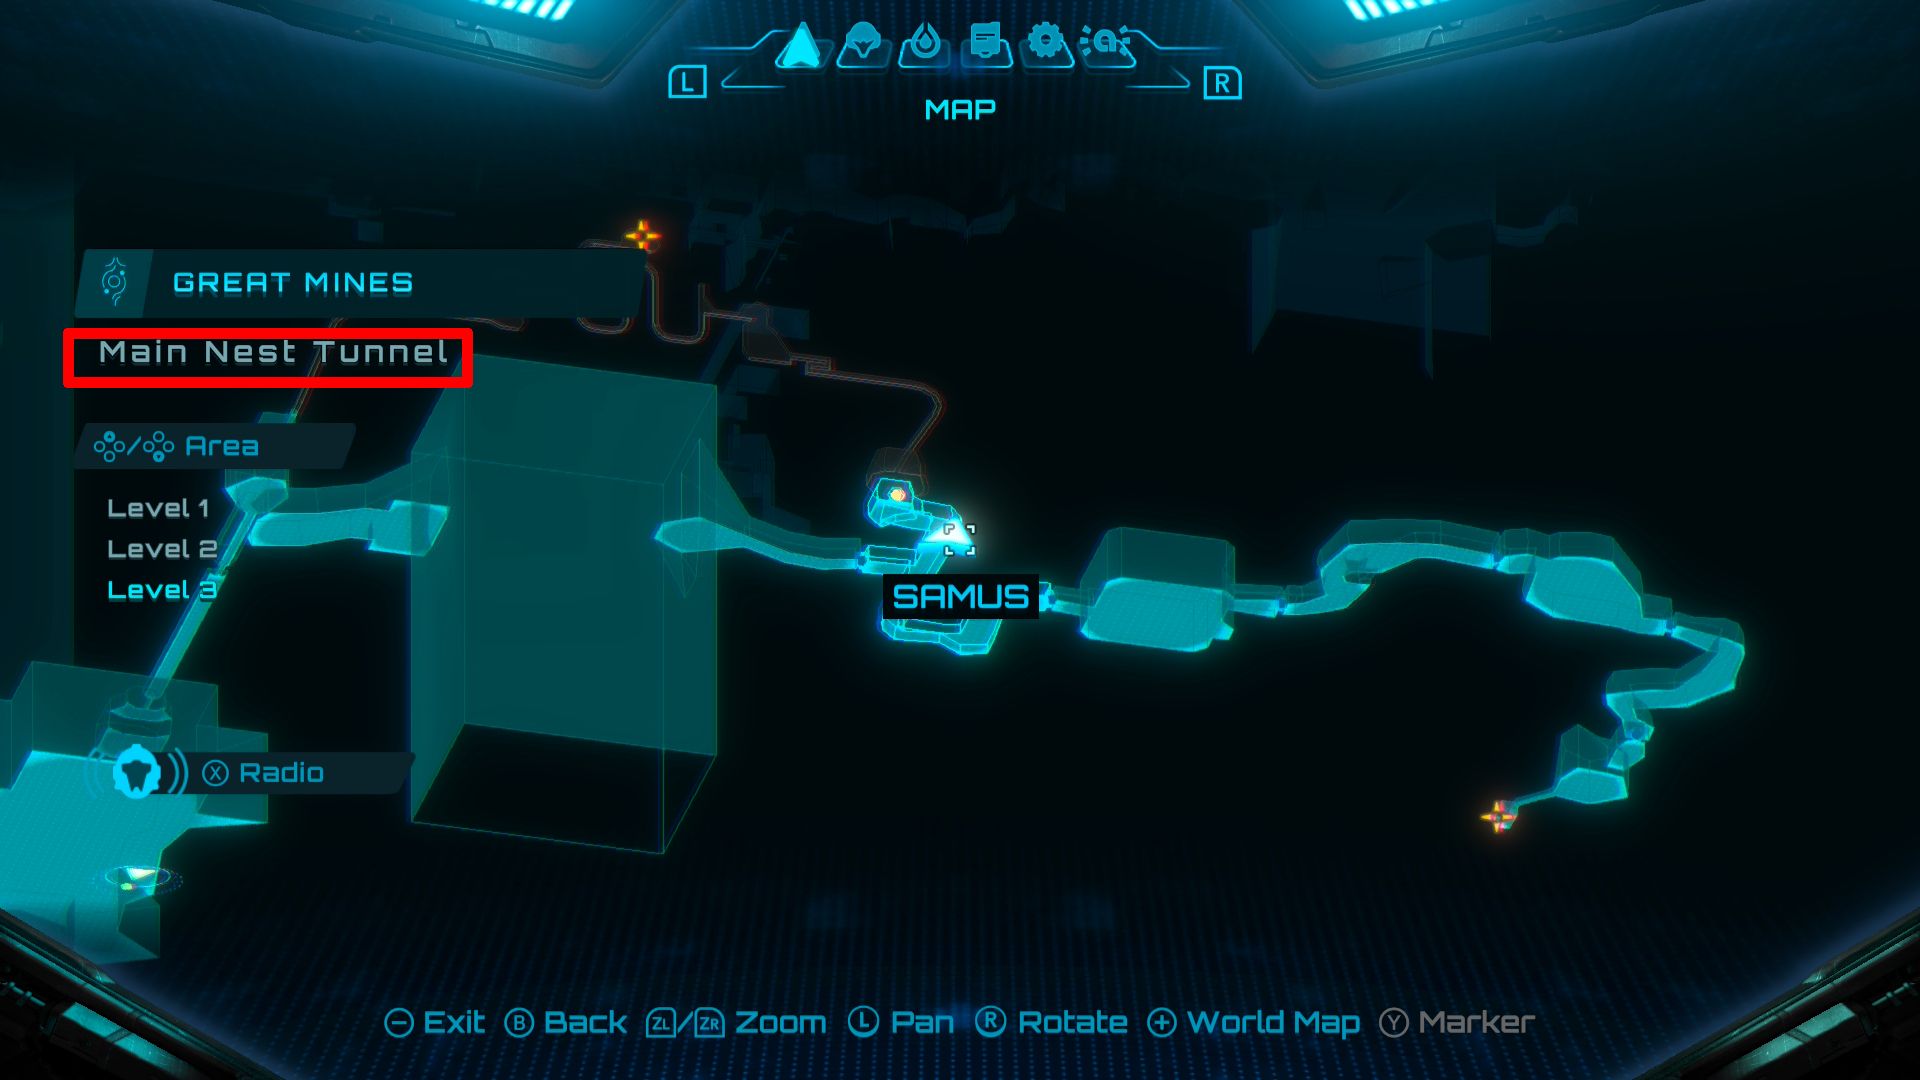
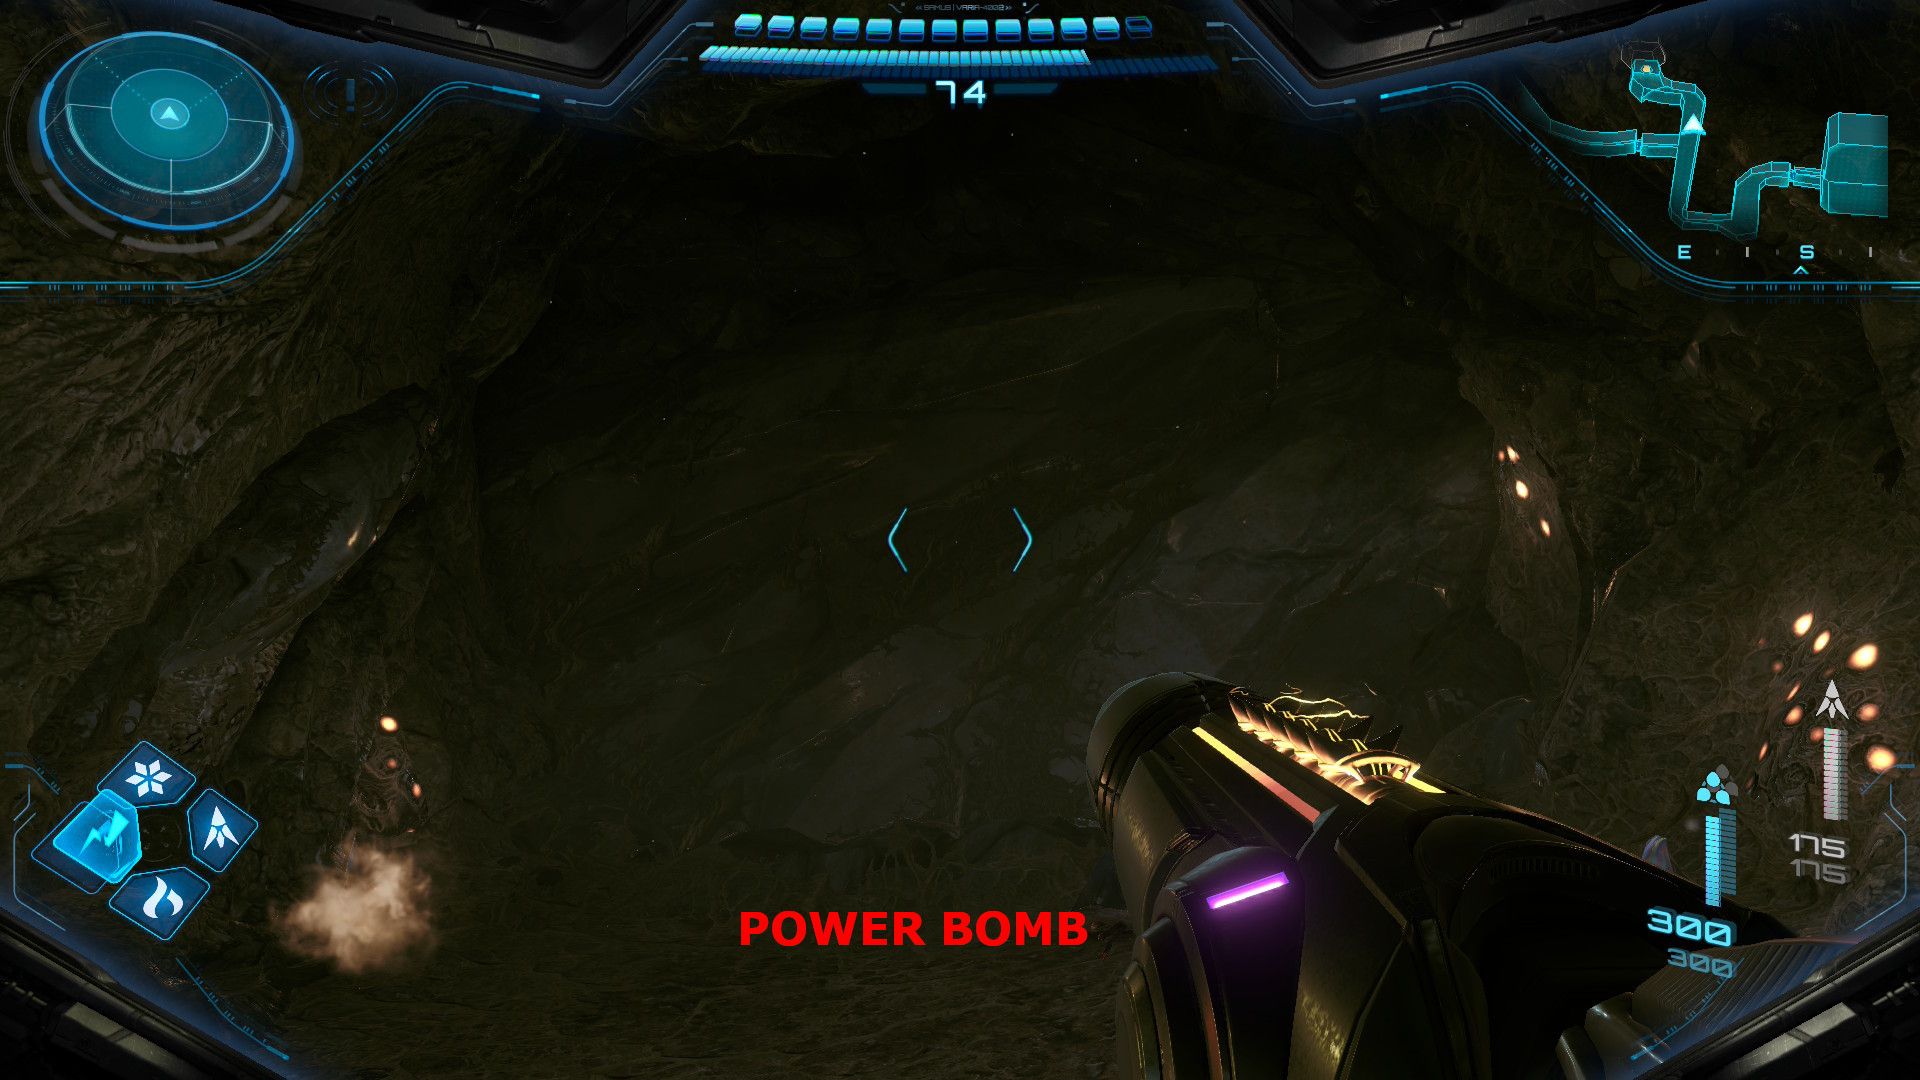
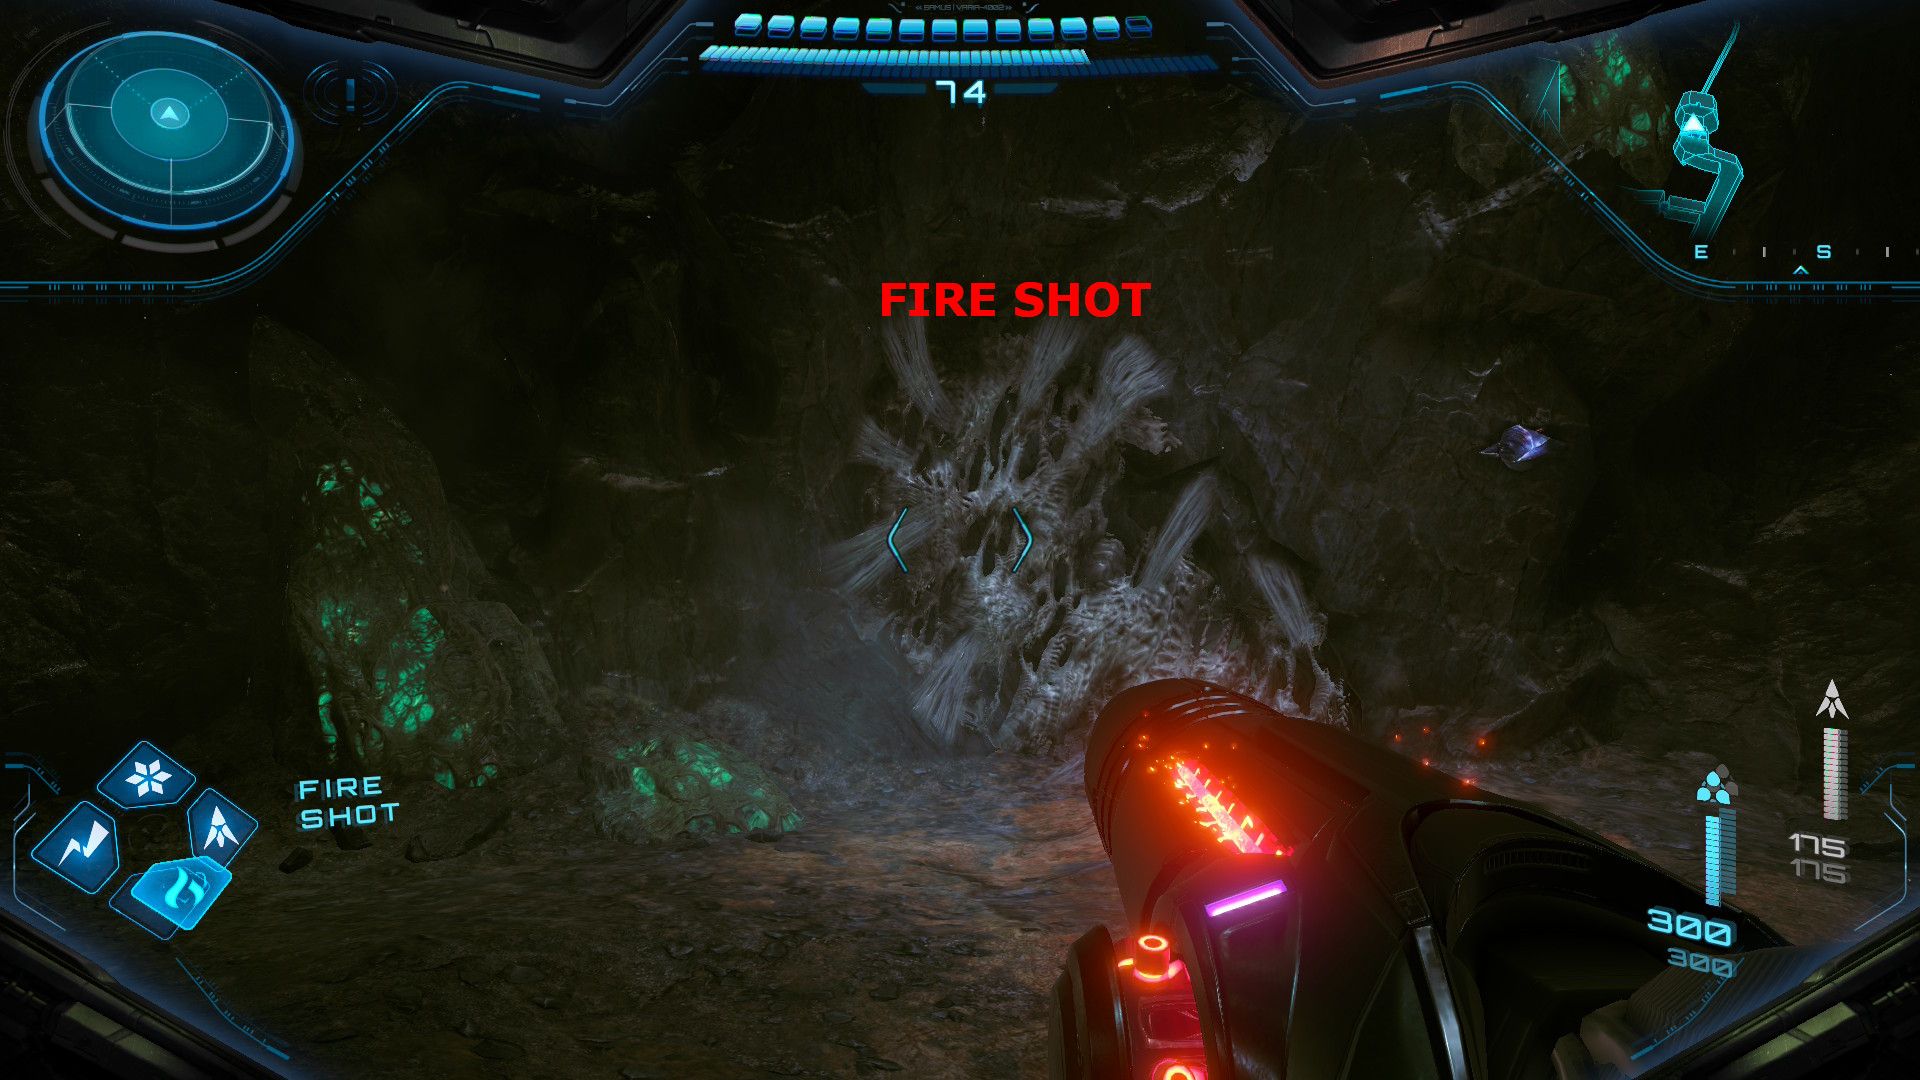
- Location: Great Mines – Chasm Tunnel (Level 3)
Once you have the Psychic Power Bomb, go to Mines Level 2 and drop down the pit to Level 3. Continue forward to the Main Nest Tunnel, then use a Power Bomb to break the Gibardaum Ore wall. Follow the new path and use a Fire Shot to burn away a web, revealing a small tunnel. Inside, you’ll find a large half pipe. If you’re familiar with Metroid Prime 4, you can use the Boost Ball and Tether Nodes to reach the Energy Tank at the top, grabbing it with a double jump and a bomb.
Read More
- All Shadow Armor Locations in Crimson Desert
- Dark Marksman Armor Locations in Crimson Desert
- Sega Reveals Official Sonic Timeline: From Prehistoric to Modern Era
- Genshin Impact Dev Teases New Open-World MMO With Realistic Graphics
- How to Beat Antumbra’s Sword (Sanctum of Absolution) in Crimson Desert
- The Limits of Thought: Can We Compress Reasoning in AI?
- Where to Pack and Sell Trade Goods in Crimson Desert
- Enshrouded: Giant Critter Scales Location
- Who Can You Romance In GreedFall 2: The Dying World?
- Keeping AI Agents on Track: A New Approach to Reliable Action
2025-12-10 18:06