In the game “Wuchang: Fallen Feathers,” the initial region you’ll encounter is called Worship’s Rise, which is divided into several smaller zones. The first two zones are referred to as the “Reverent Temple” and the “Buddha Cliffs.” The Reverent Temple serves as a tutorial area, while the Buddha Cliffs offer your first taste of exploration. The third zone, however, revolves around the Lightzen Temple, which is the primary location outside the starting area and is the focus of this guide.
In our exploration of the Lightzen Temple, we’ll be sure to highlight significant spots within the temple as well as the open spaces outside that Wuchang can traverse. This will encompass Narrow Stretch, a path connecting Lightzen Temple to Shu Sanctum, the next major region. In essence, this guide aims to offer a thorough walkthrough of Wuchang’s journey through Lightzen Temple and a comprehensive list of all collectibles and non-player characters (NPCs) found in the area.
Lightzen Temple Complete Walkthrough Part 1 – Wuchang: Fallen Feathers
How to Reach Lightzen Temple:
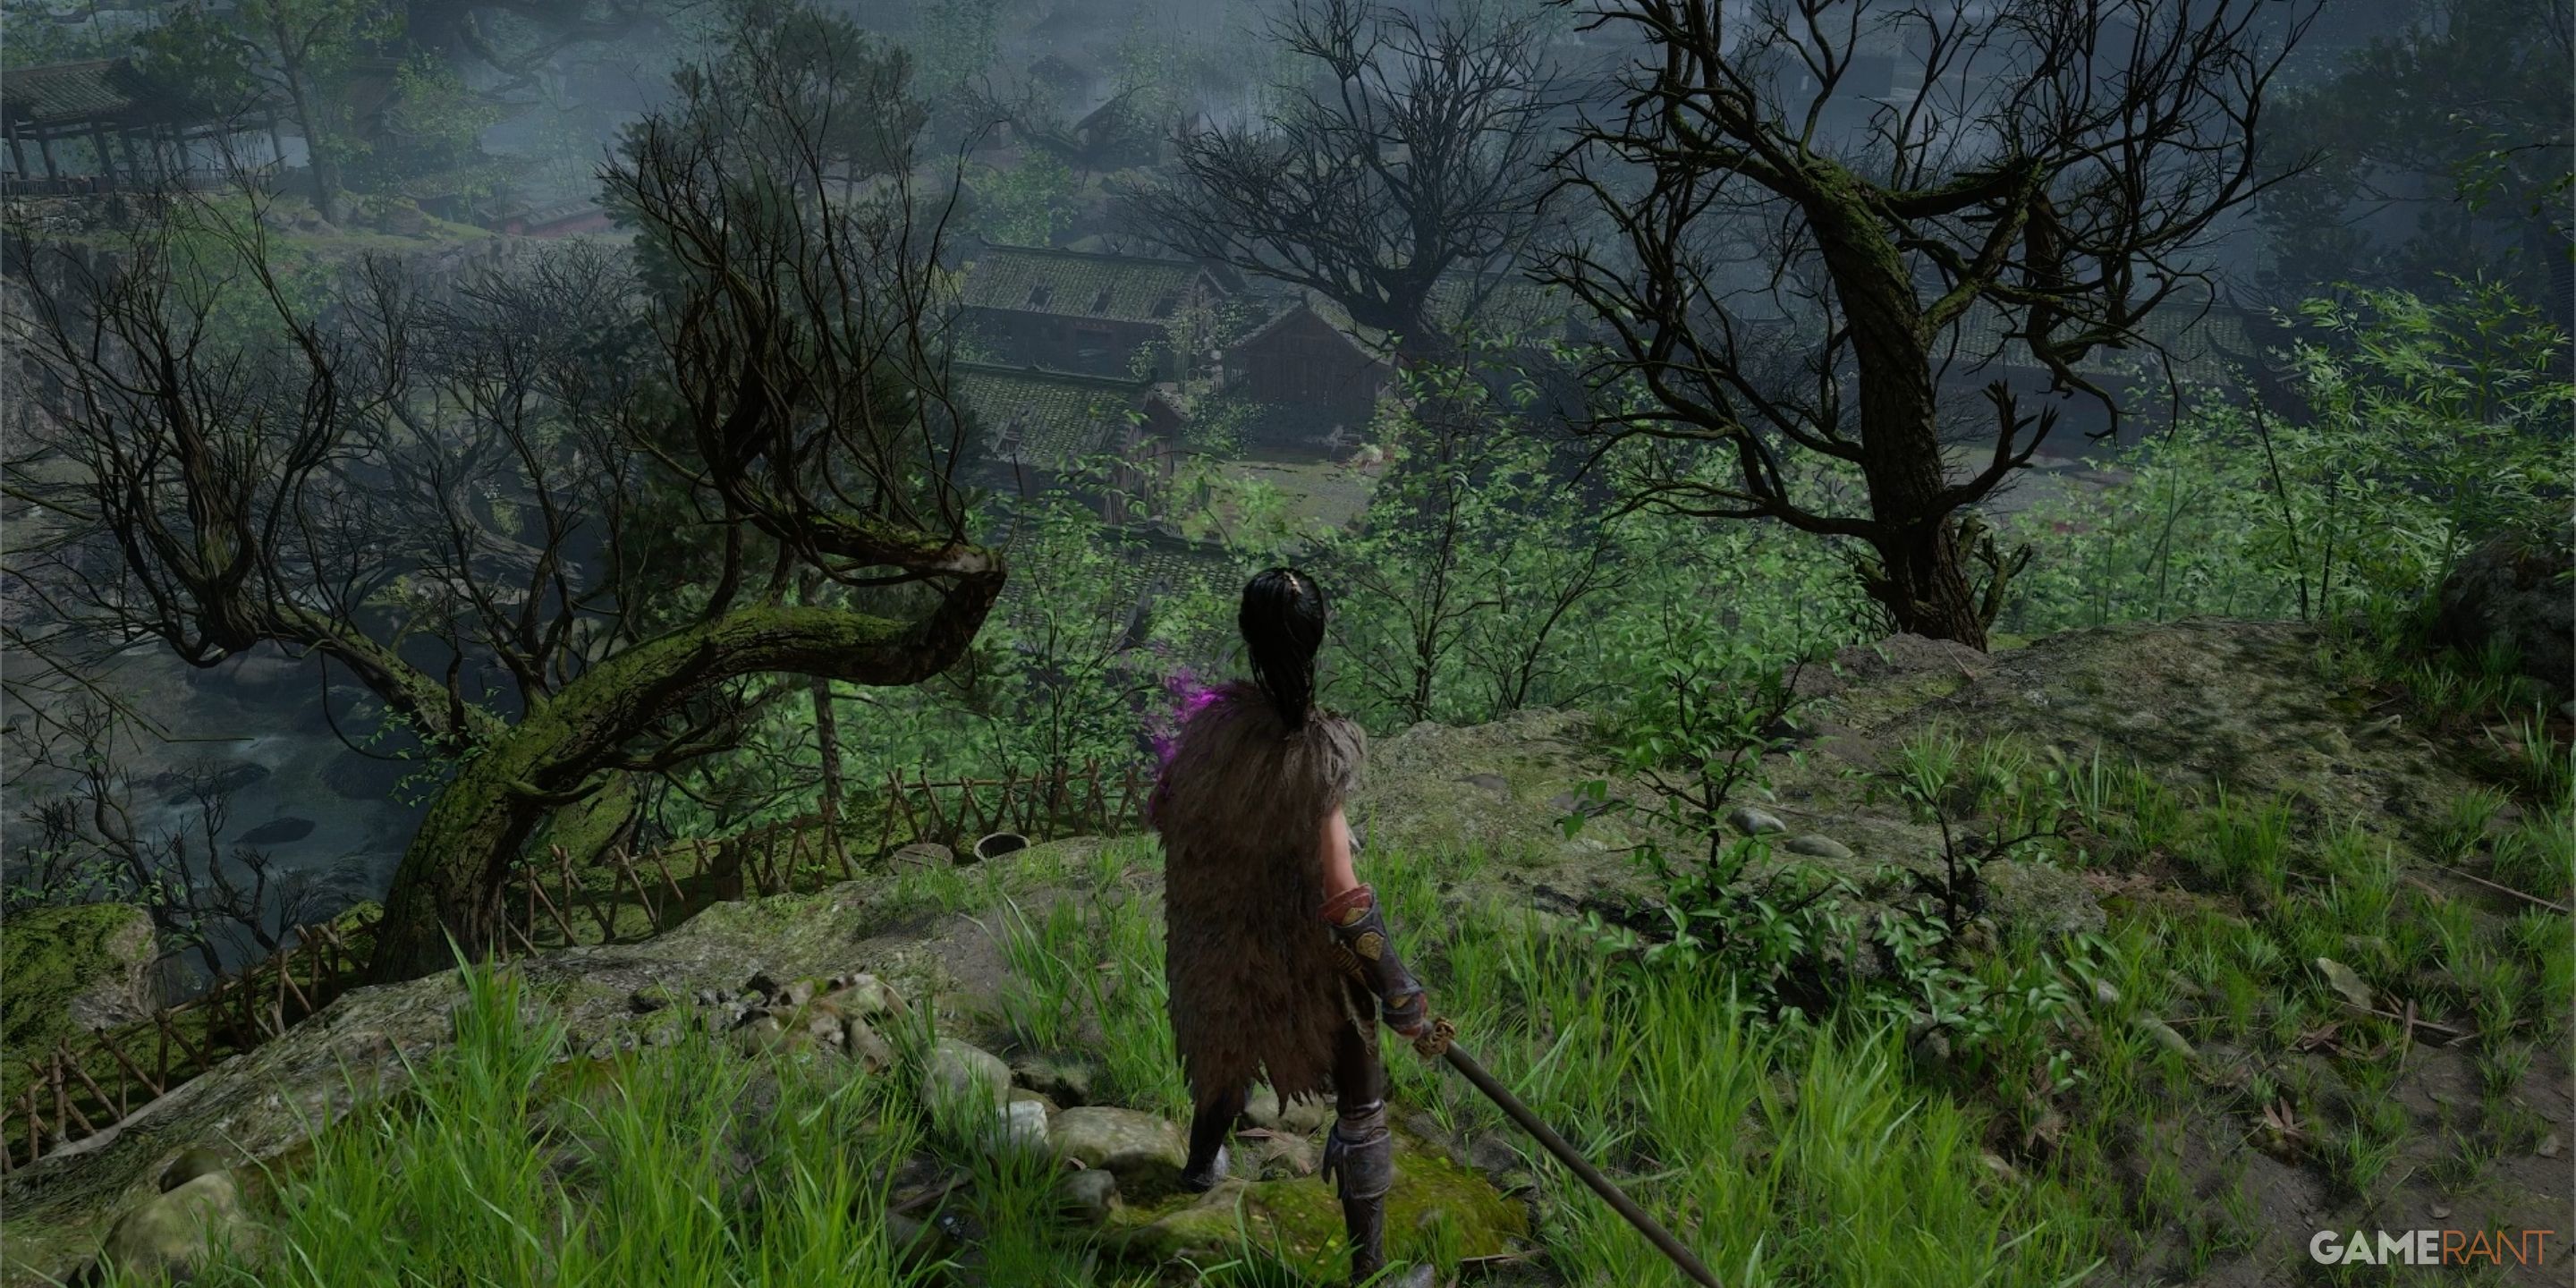
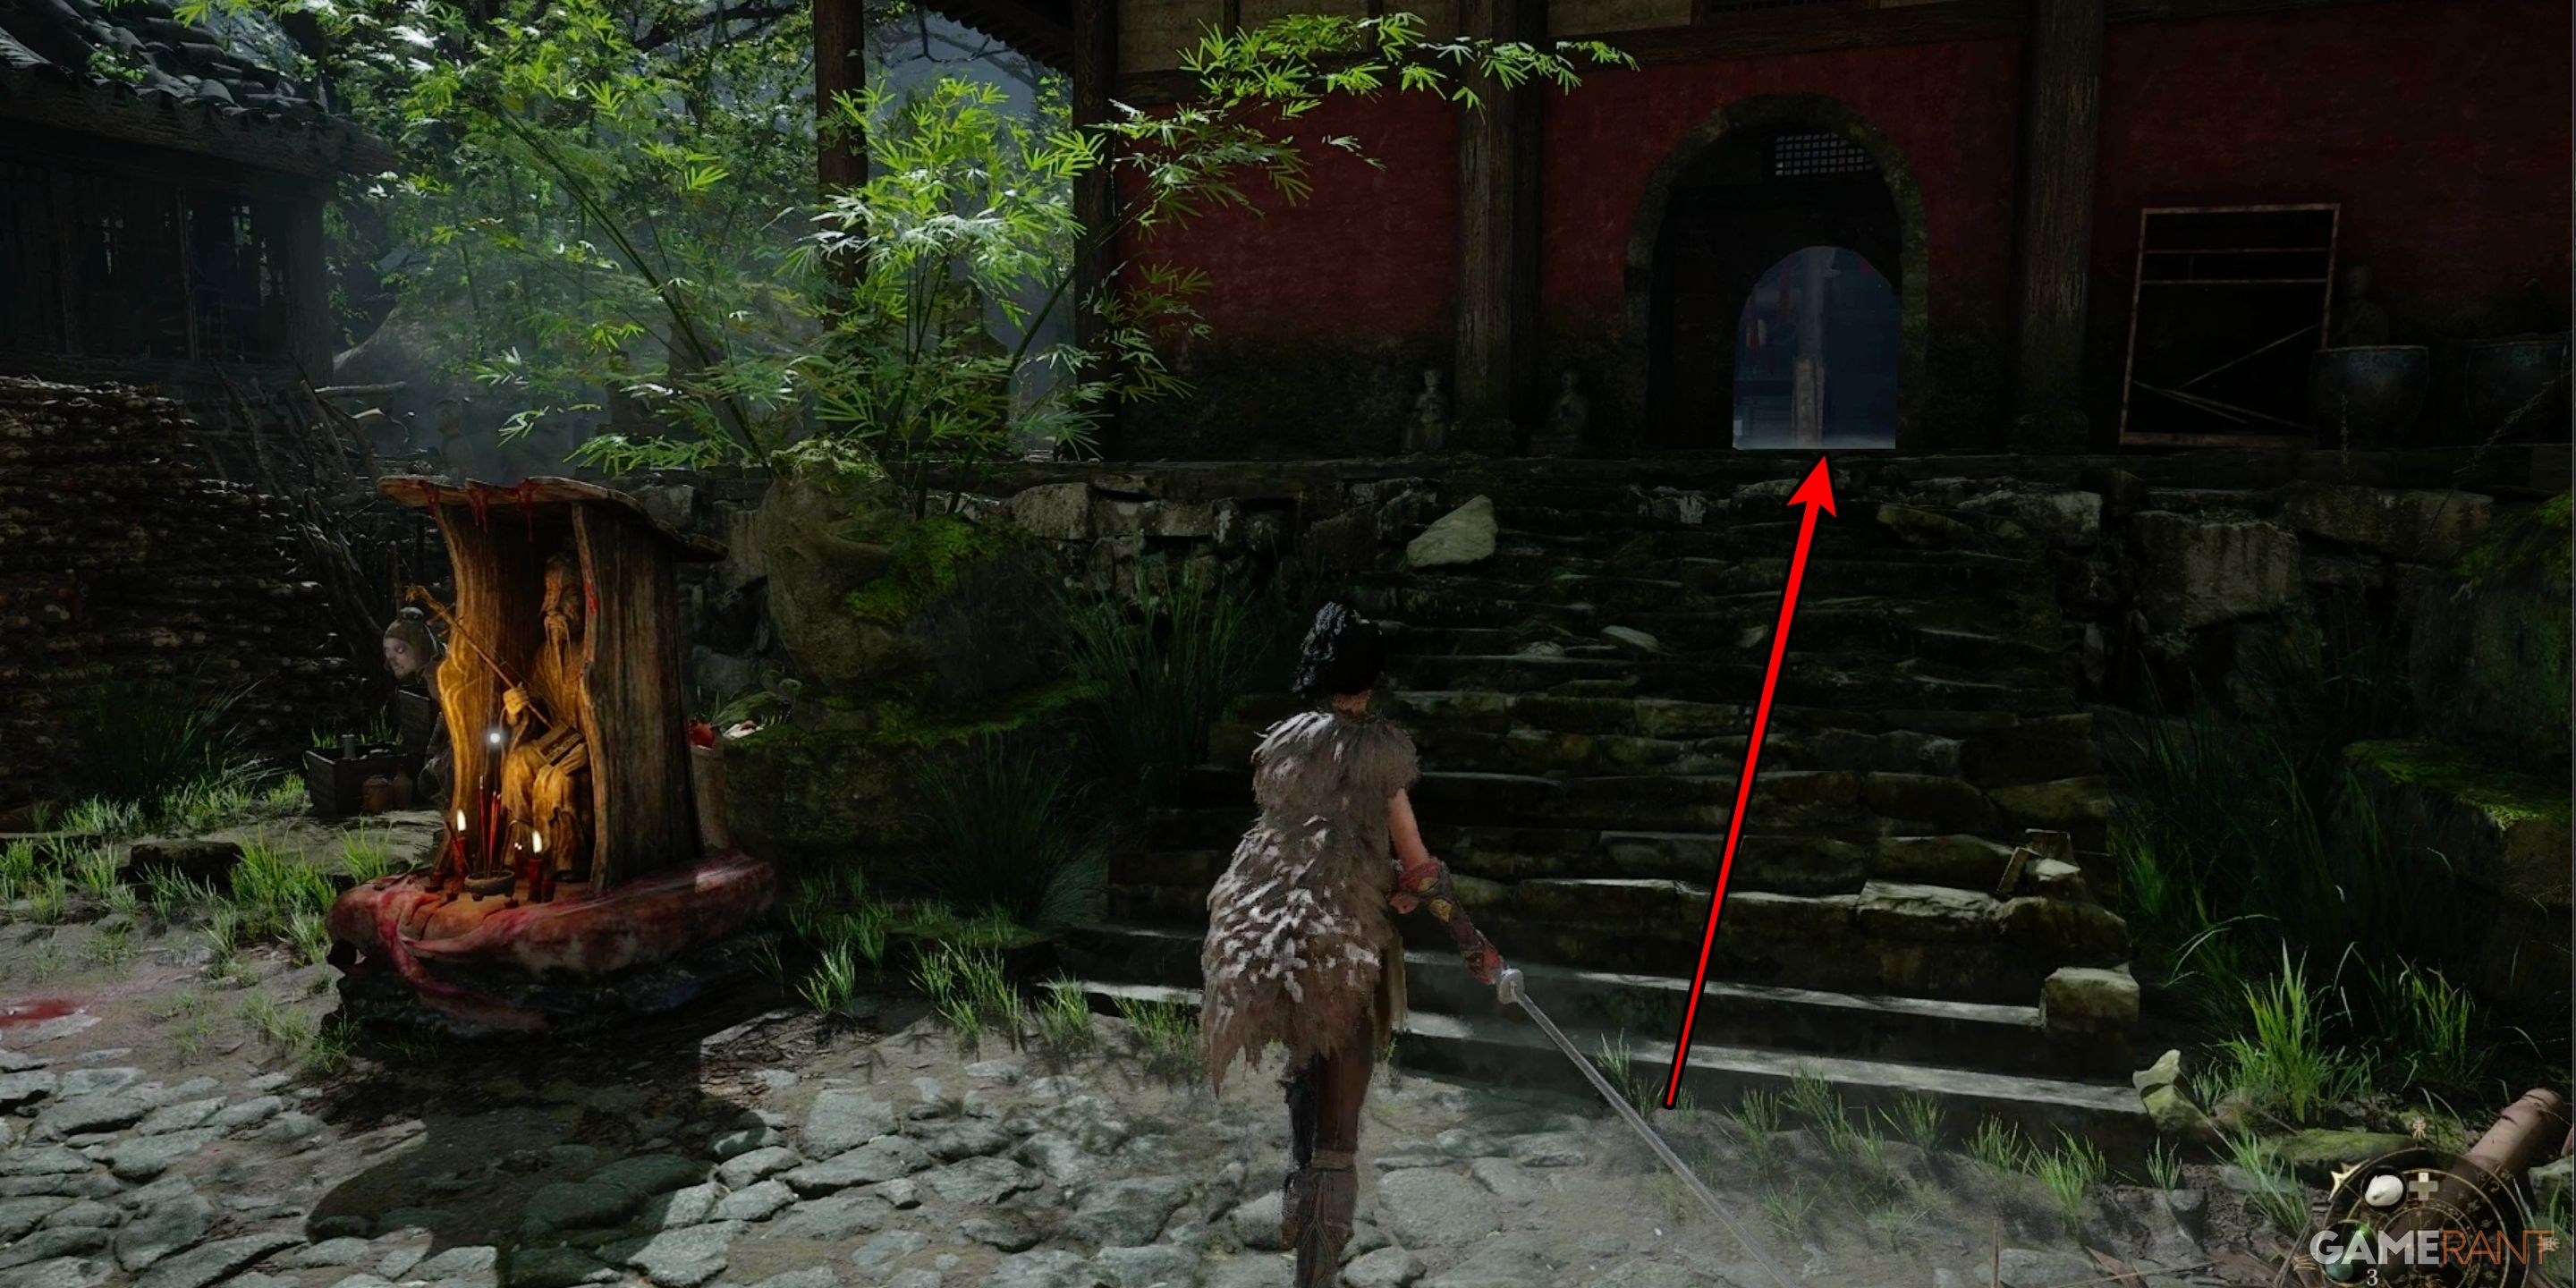
The first significant place you’ll find after departing from the Reverent Temple is the Lightzen Temple. Prior to reaching it, you’ll need to navigate through the Buddha Cliffs region, home to the game’s second shrine. After traversing the caves, you’ll arrive at a cliff area where you can observe Shu Sanctum and the village nestled around it from above. The Lightzen Temple is situated at the foot of this hill.
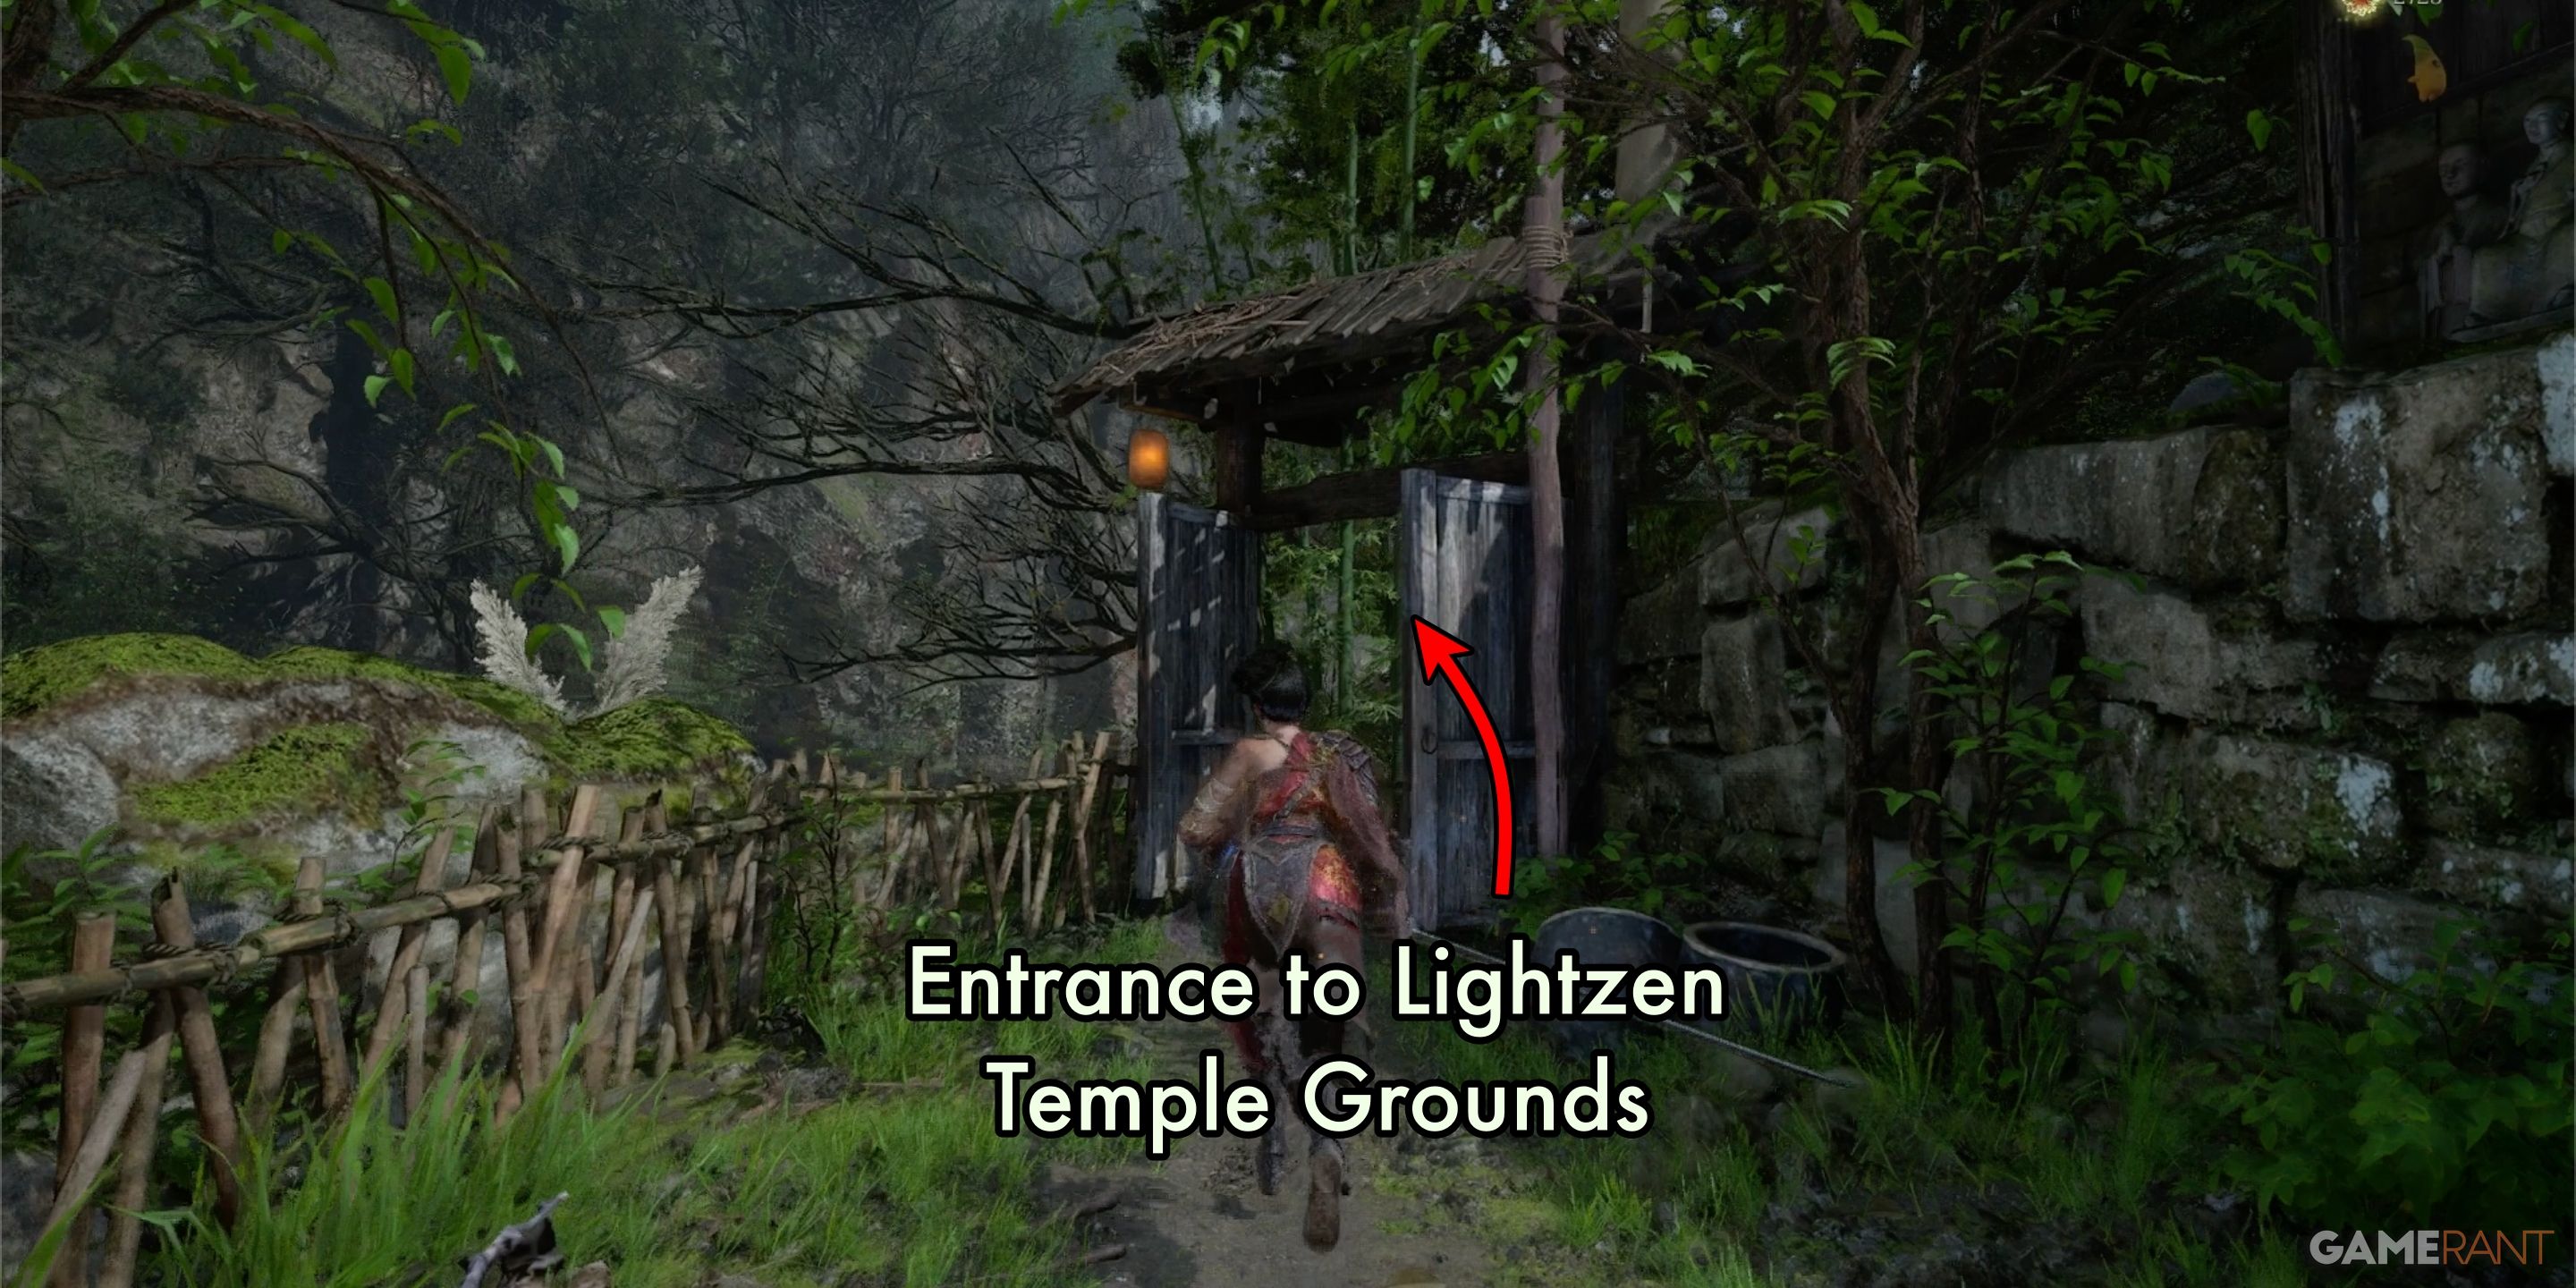
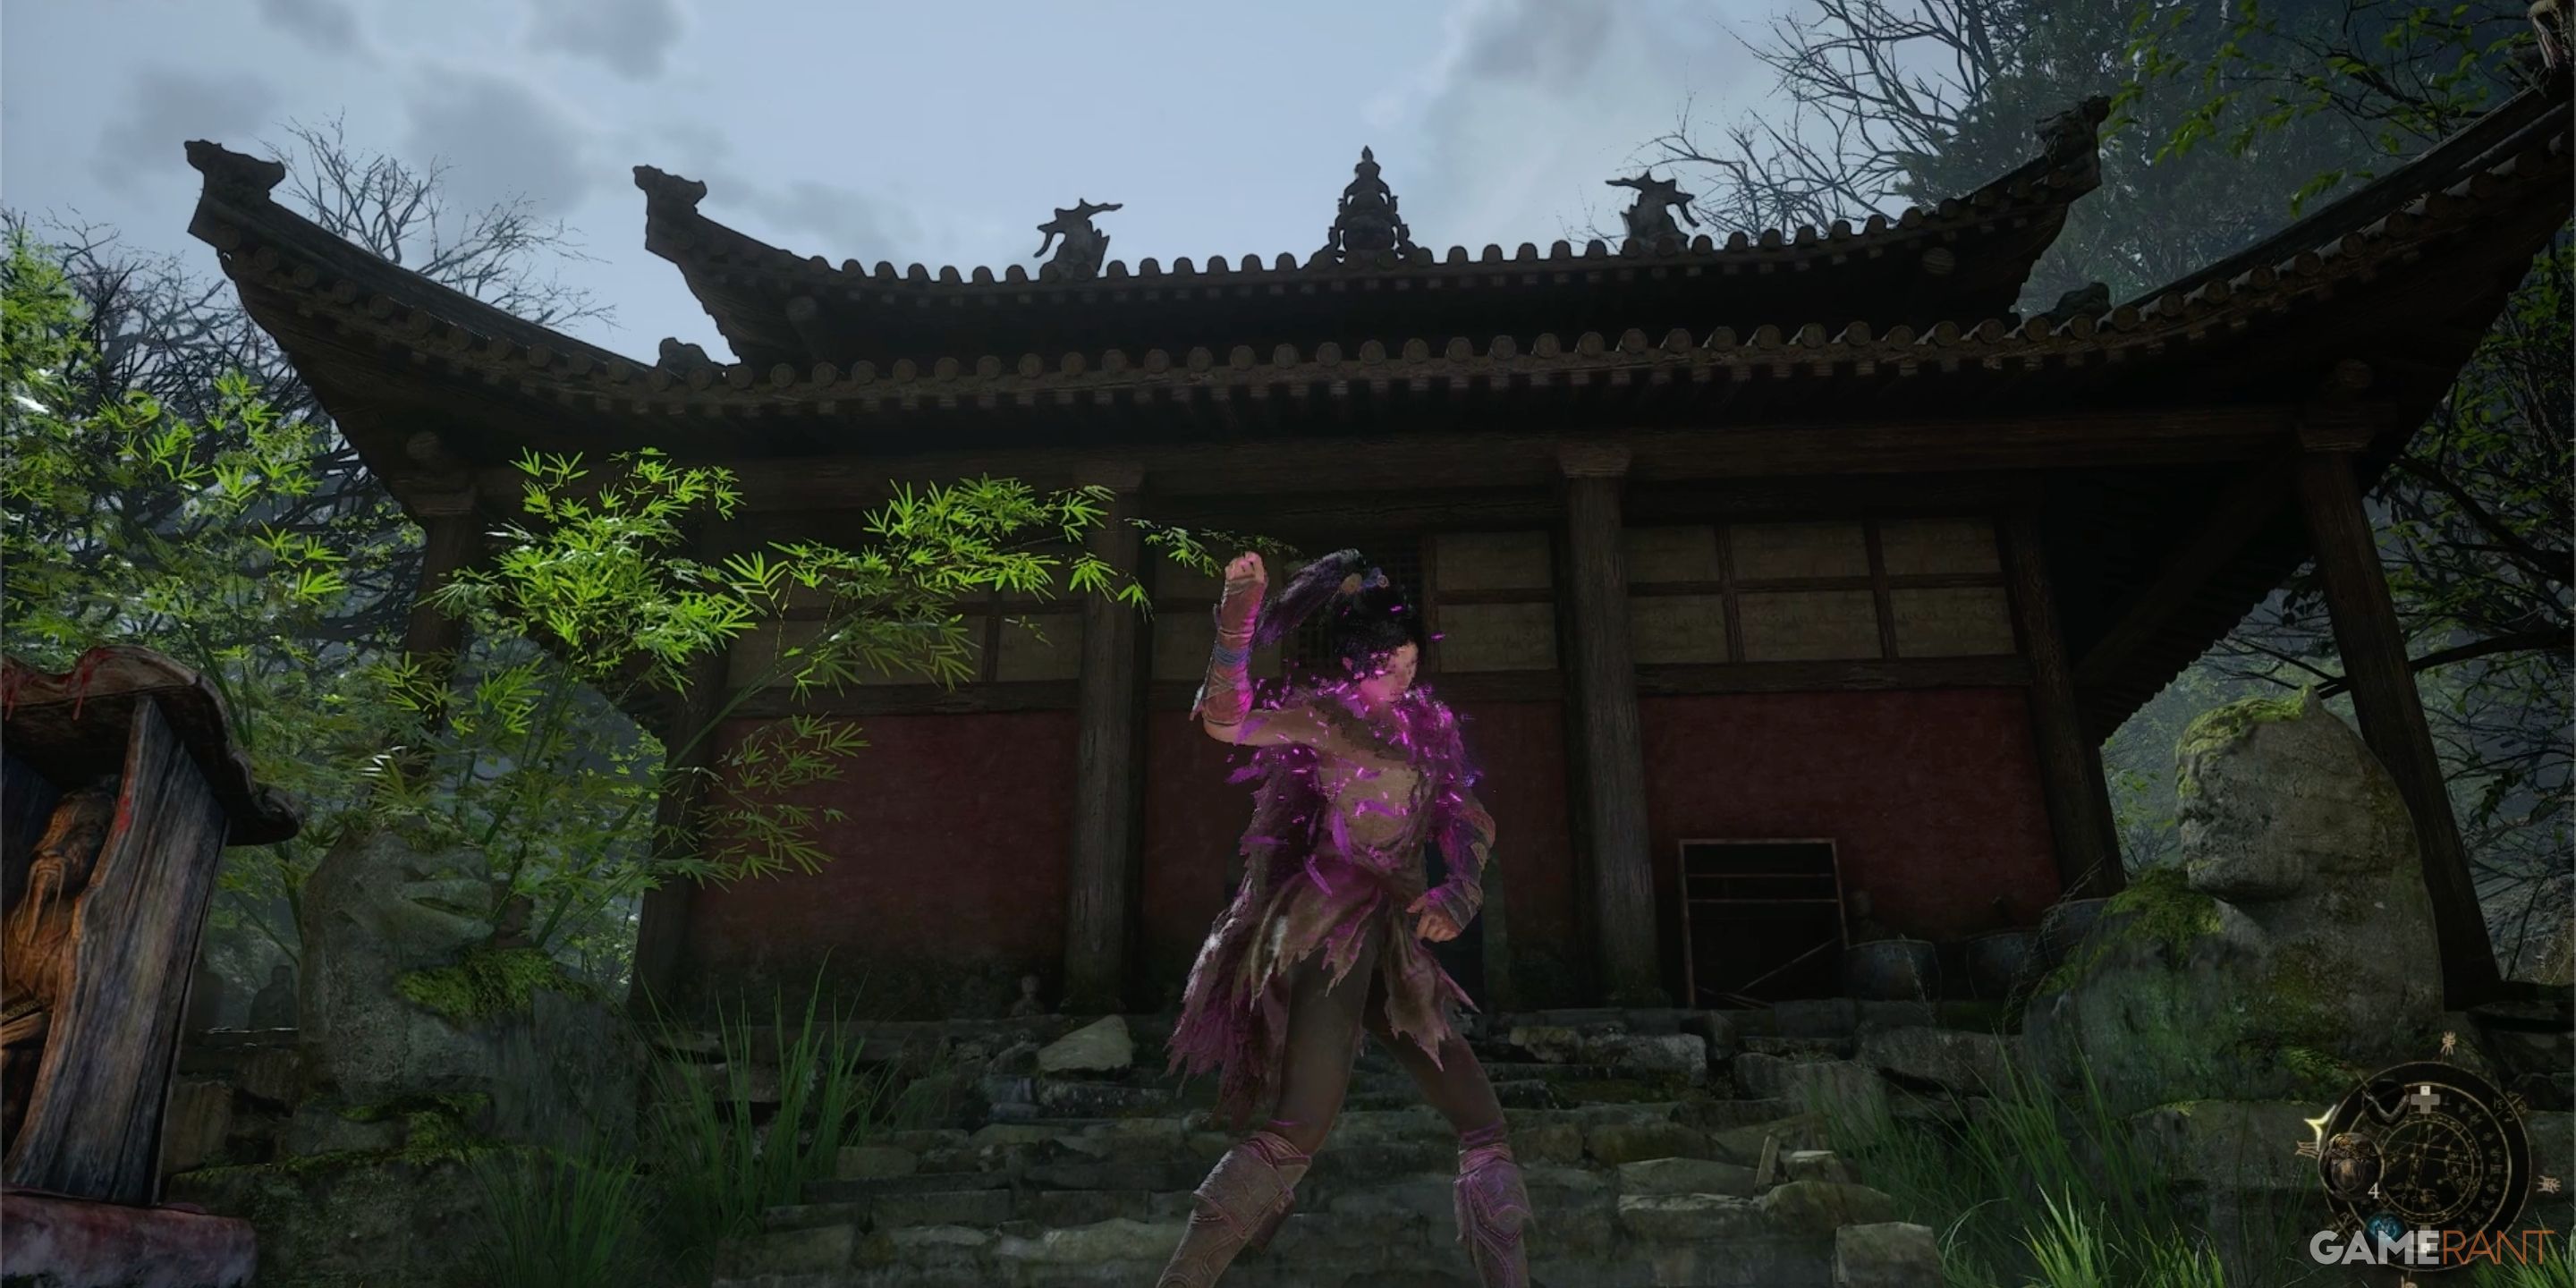
As I make my way down from the hilltop, I’ll be certain to have reached Lightzen Temple once the grand archway above comes into view.
Entering Lightzen Temple:
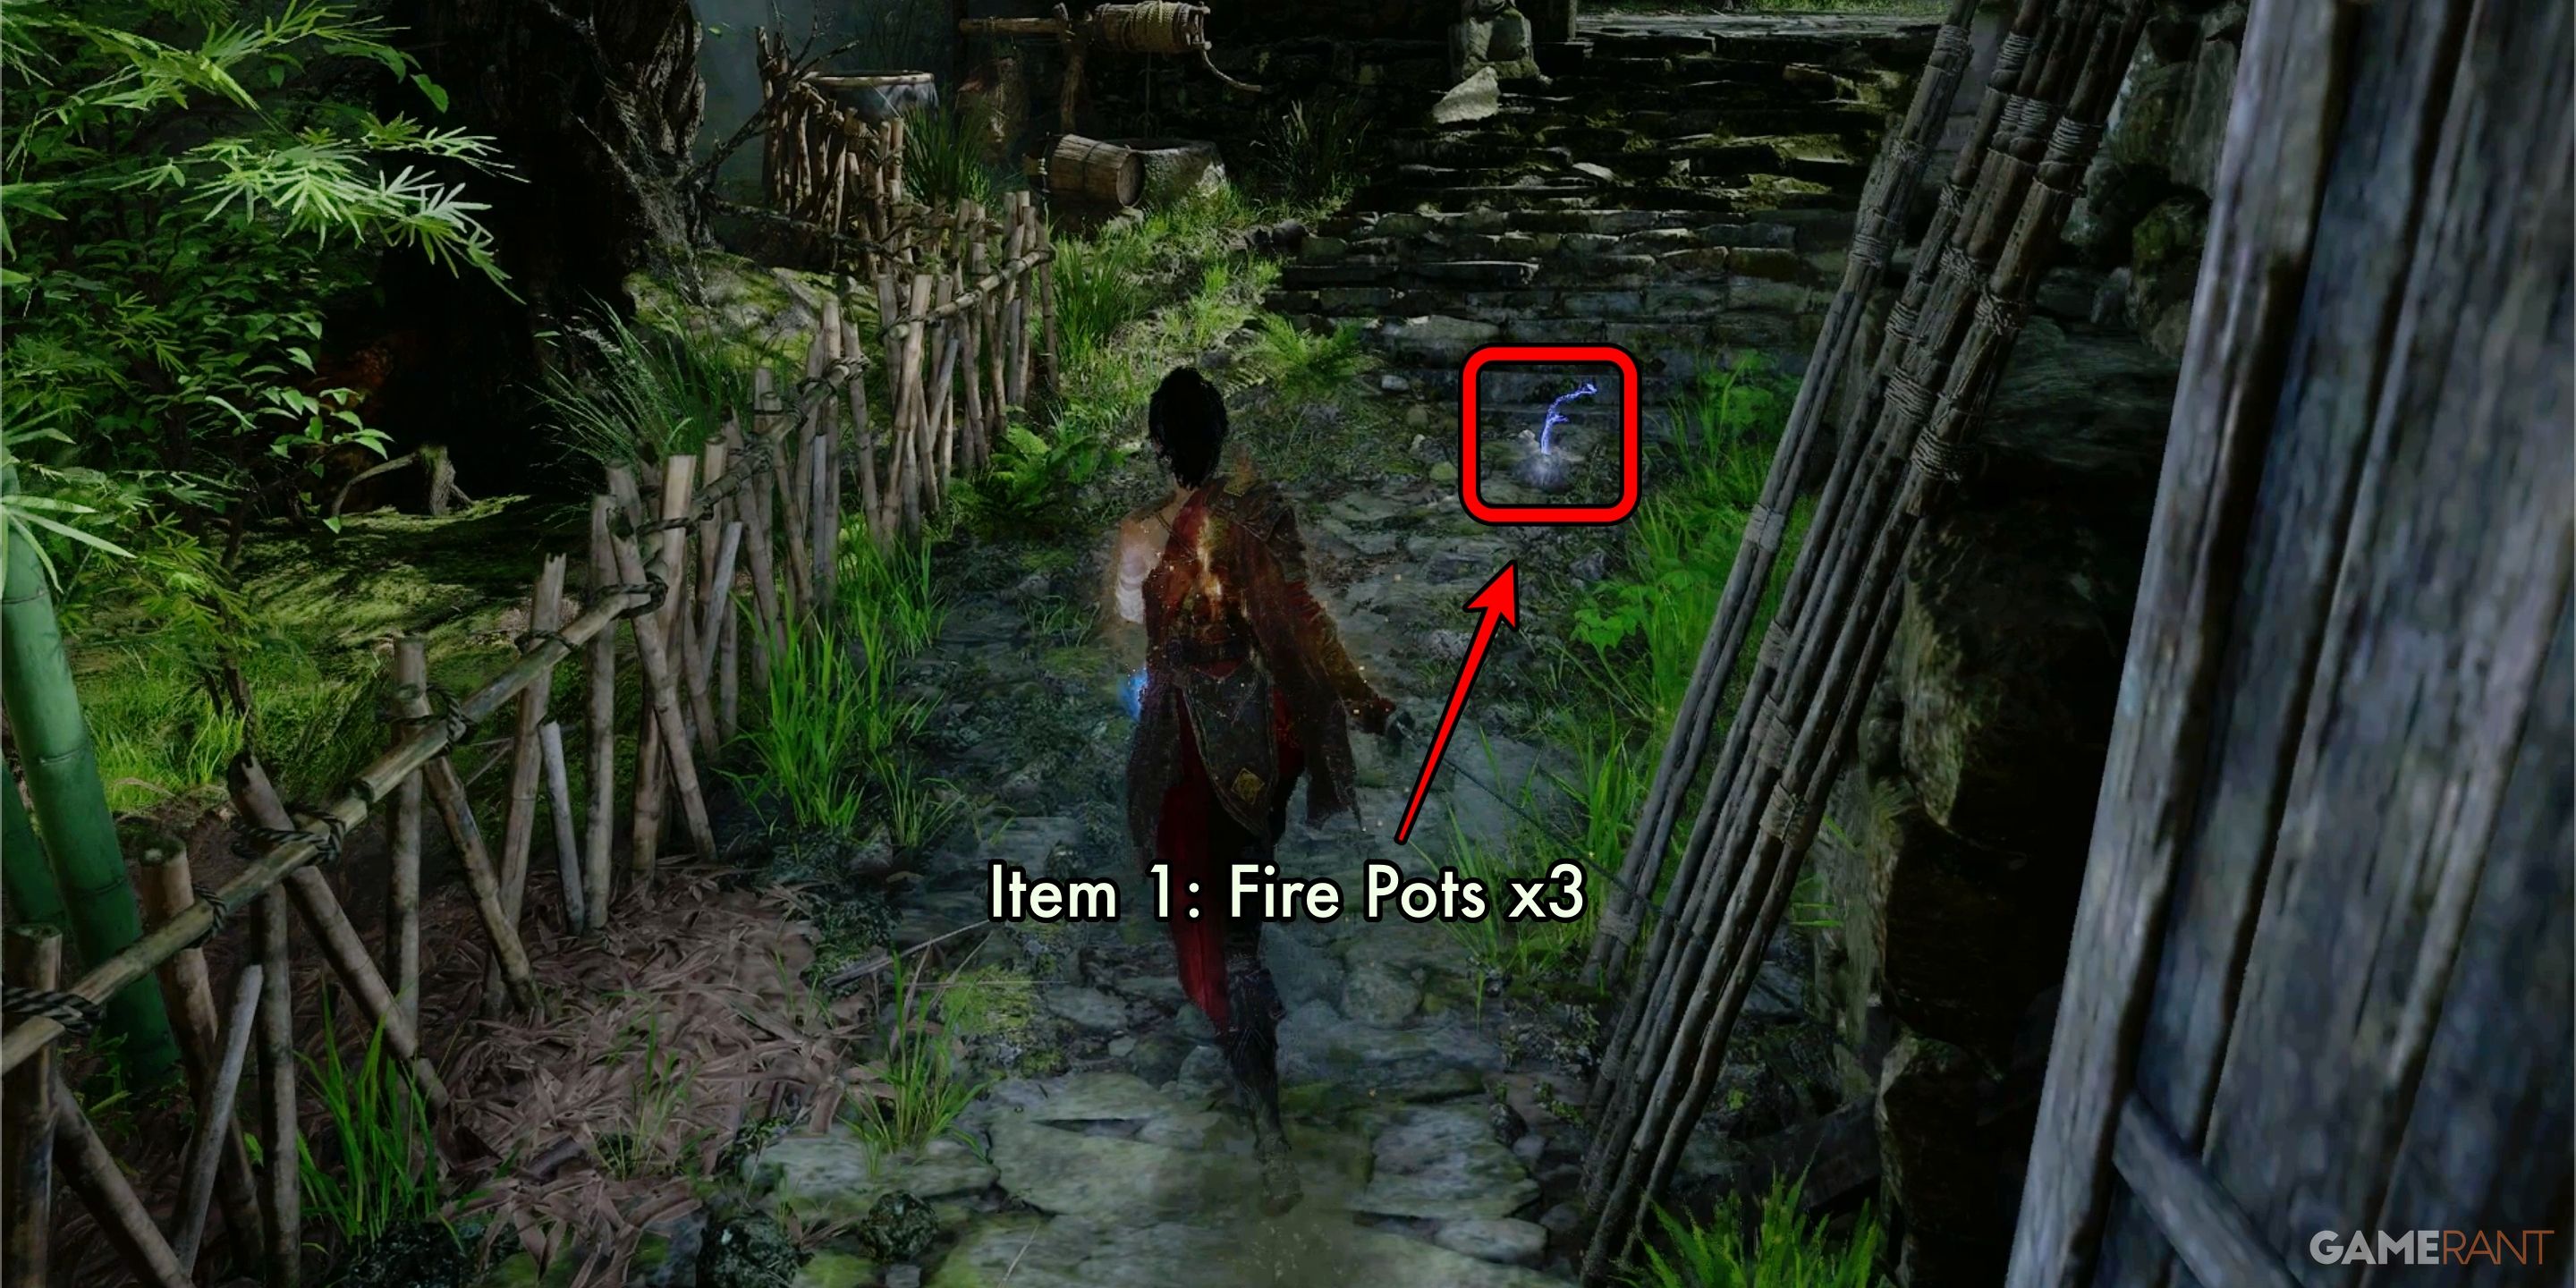

Upon entering the Lightzen Temple, you’ll spot an indicator on the floor marking the location of three Fire Pots. Be sure to grab these, as they will come in handy immediately. In fact, once you collect them, a tutorial pop-up will appear on the right side of your screen explaining ‘Special Items’. These are items that aid in overcoming challenging combat situations where success would otherwise be much harder to achieve.
Should you carry on up the stairs and glance to your right, you’ll come across a cluster of adversaries huddled near some volatile pots. If you manage to toss a Fire Pot at one of these enemies while maintaining lock-on, the ensuing chain reaction will wipe out the entire group.
Collect Darkfrost Edge – One-Handed Sword:
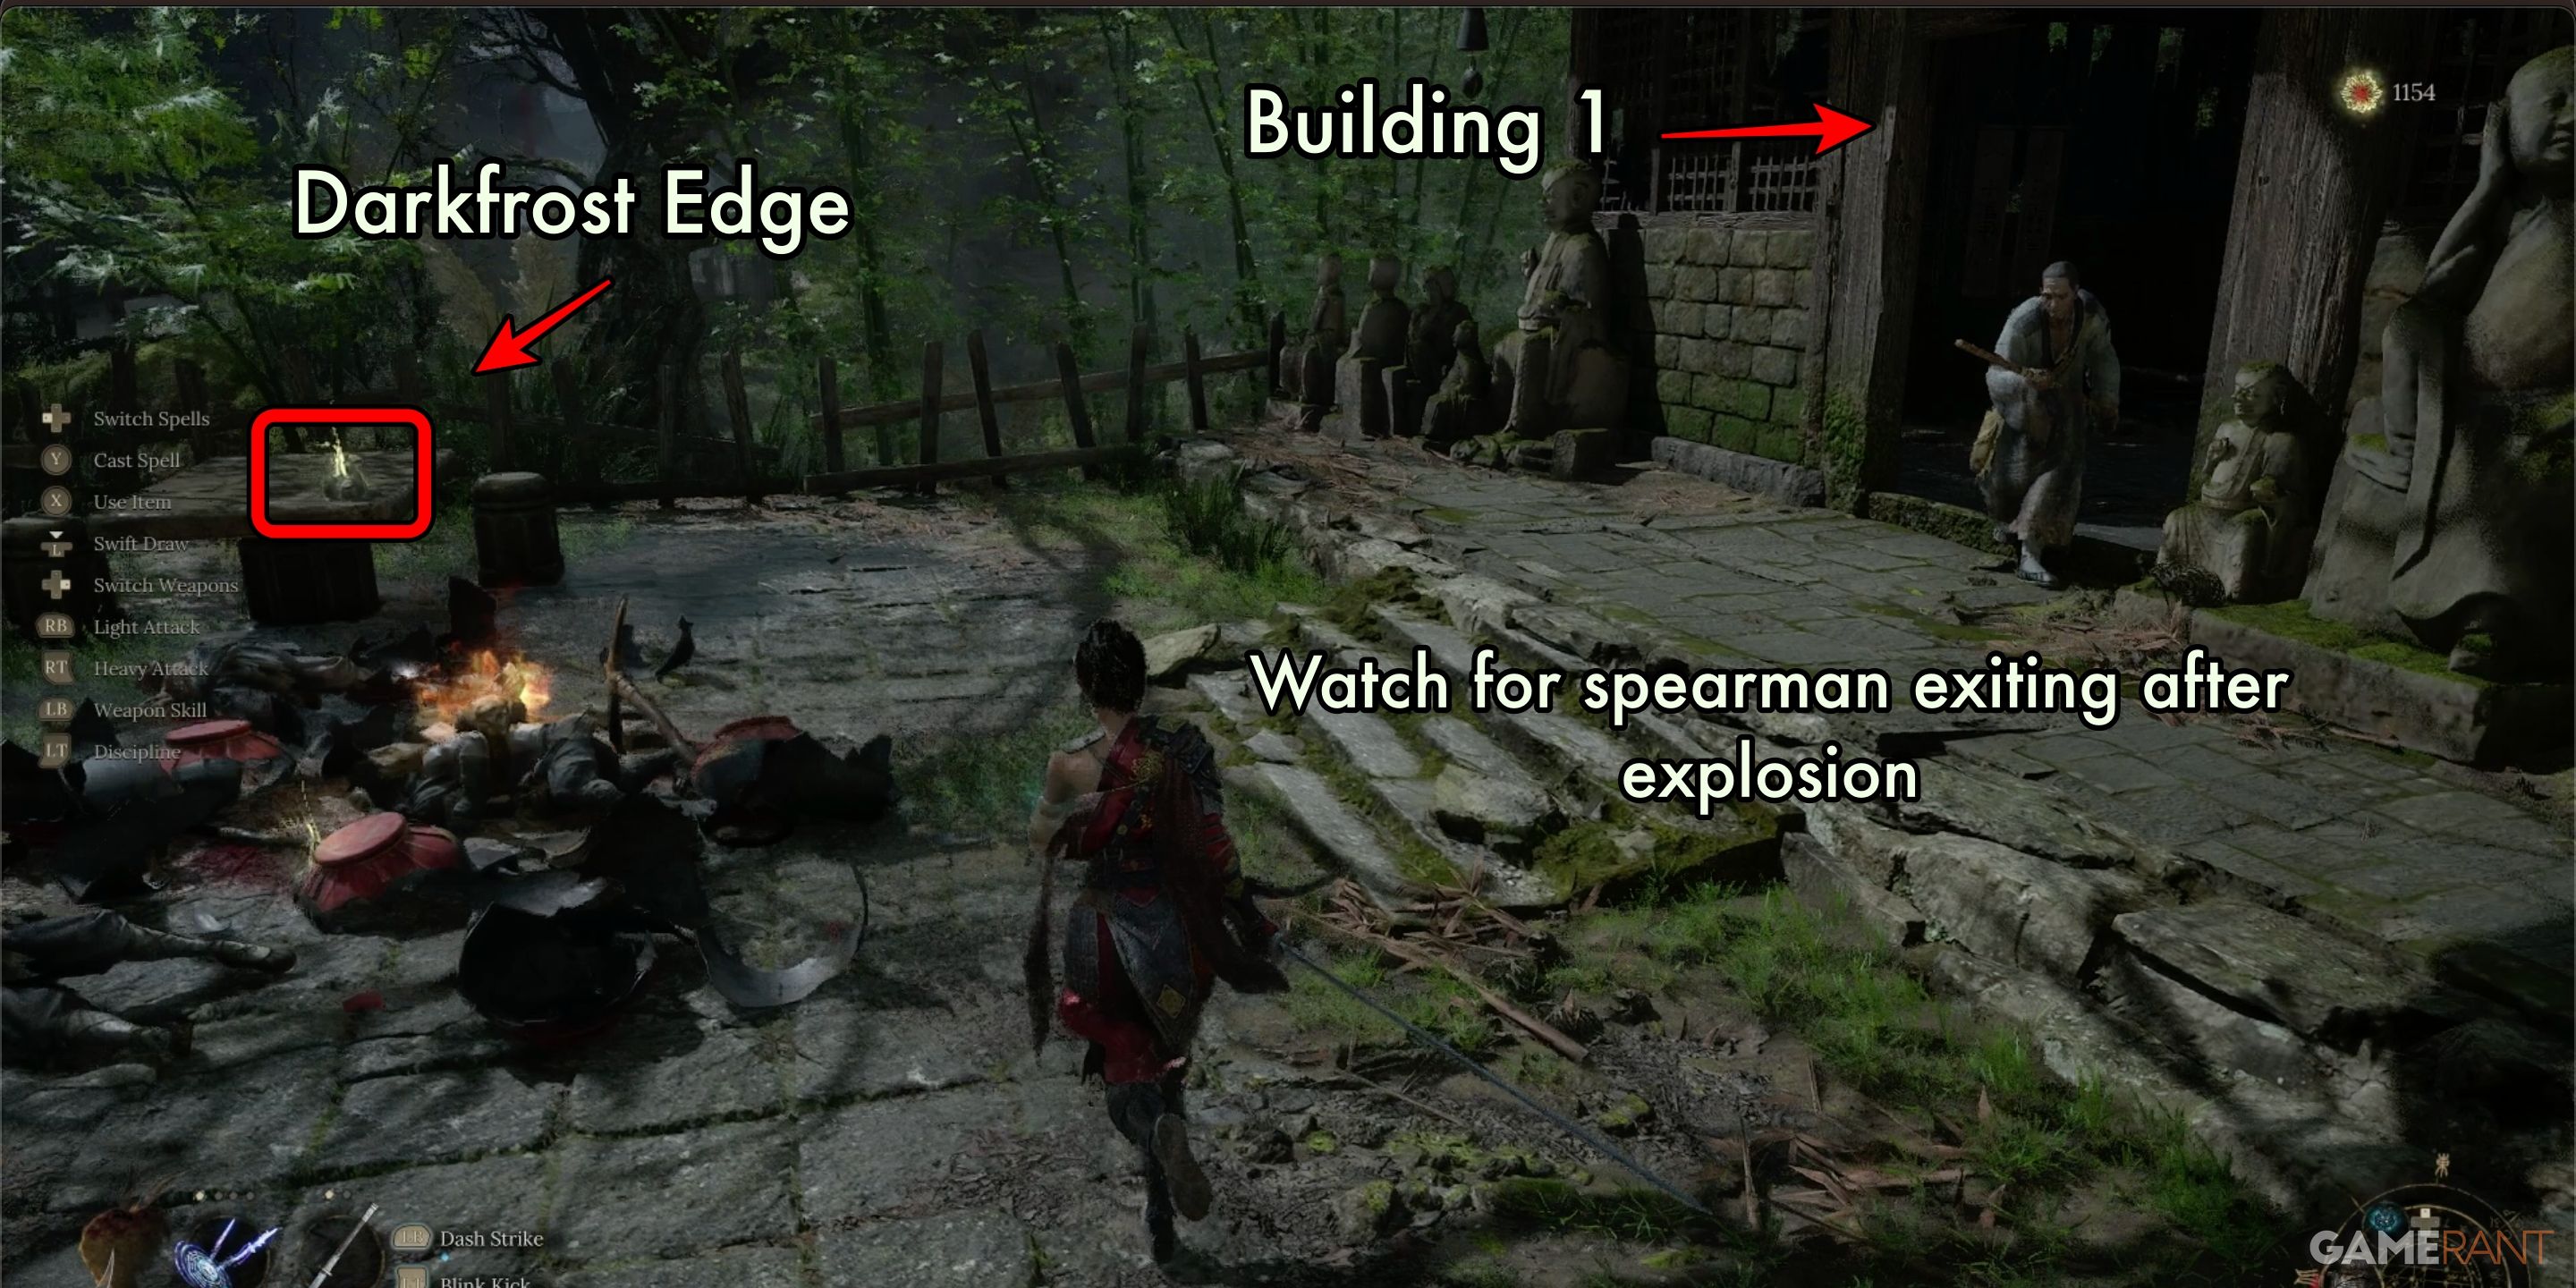
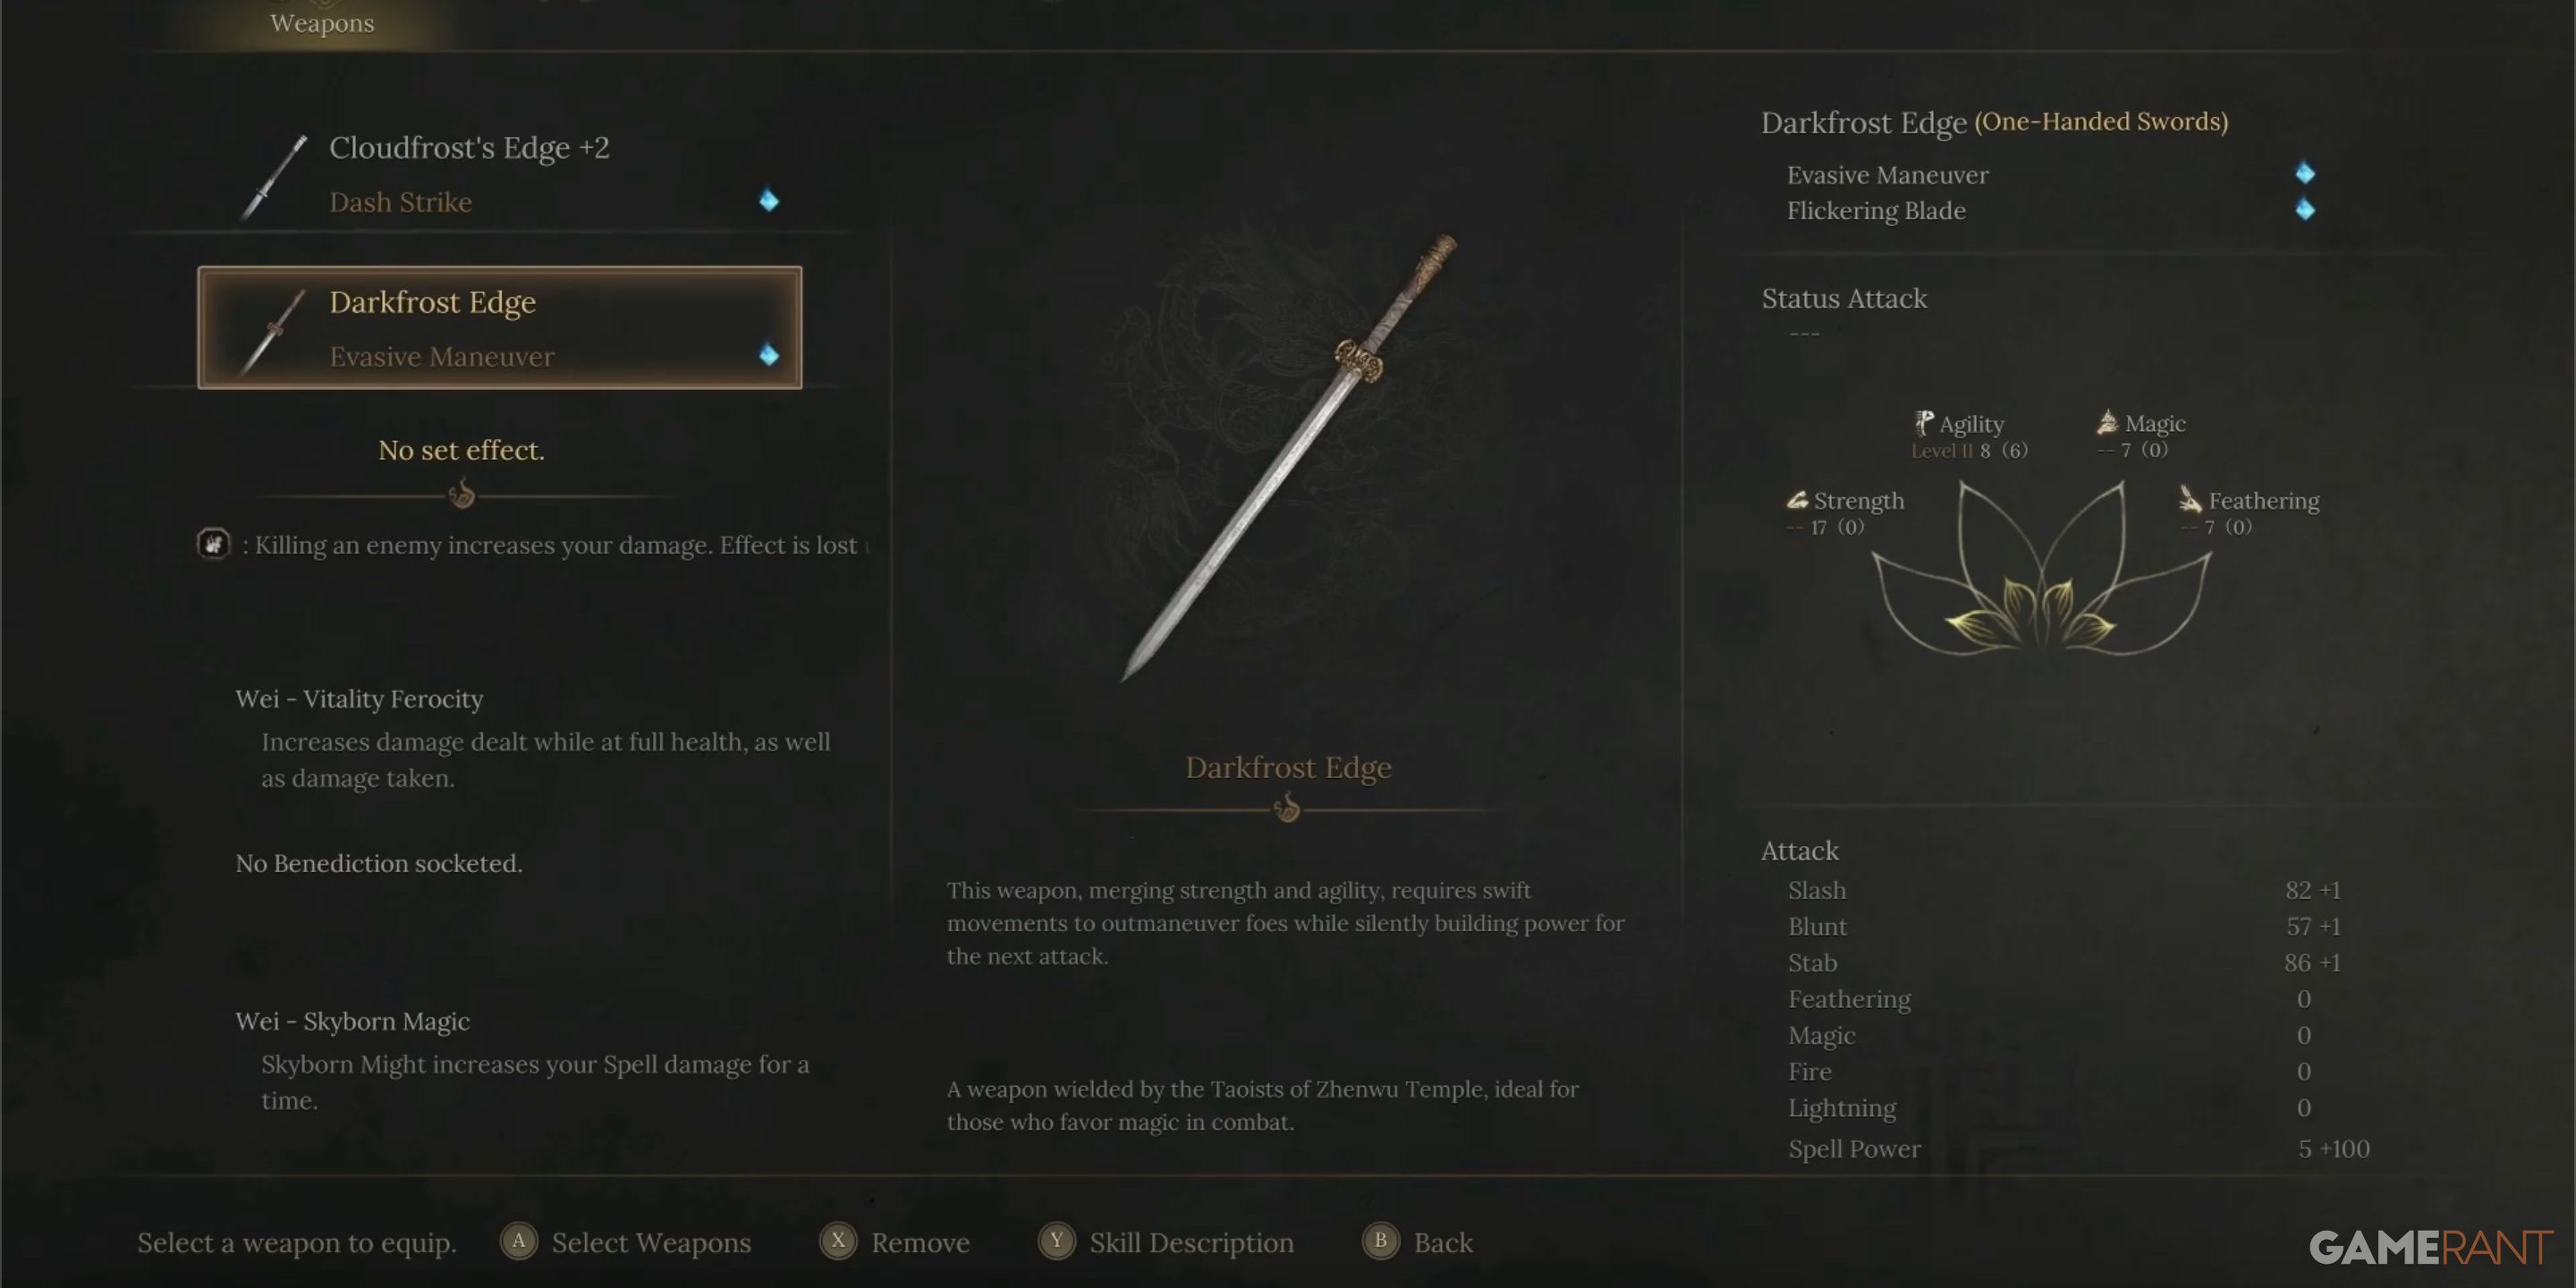
Once you’ve handled the band of foes, you’ll notice a yellow indicator symbol on a table among the enemy wreckage. Make your way over there to pick up this item, which turns out to be the initial one-handed blade for Wuchang: Fallen Feather – the Darkfrost Edge.
Lightzen Temple Building 1:
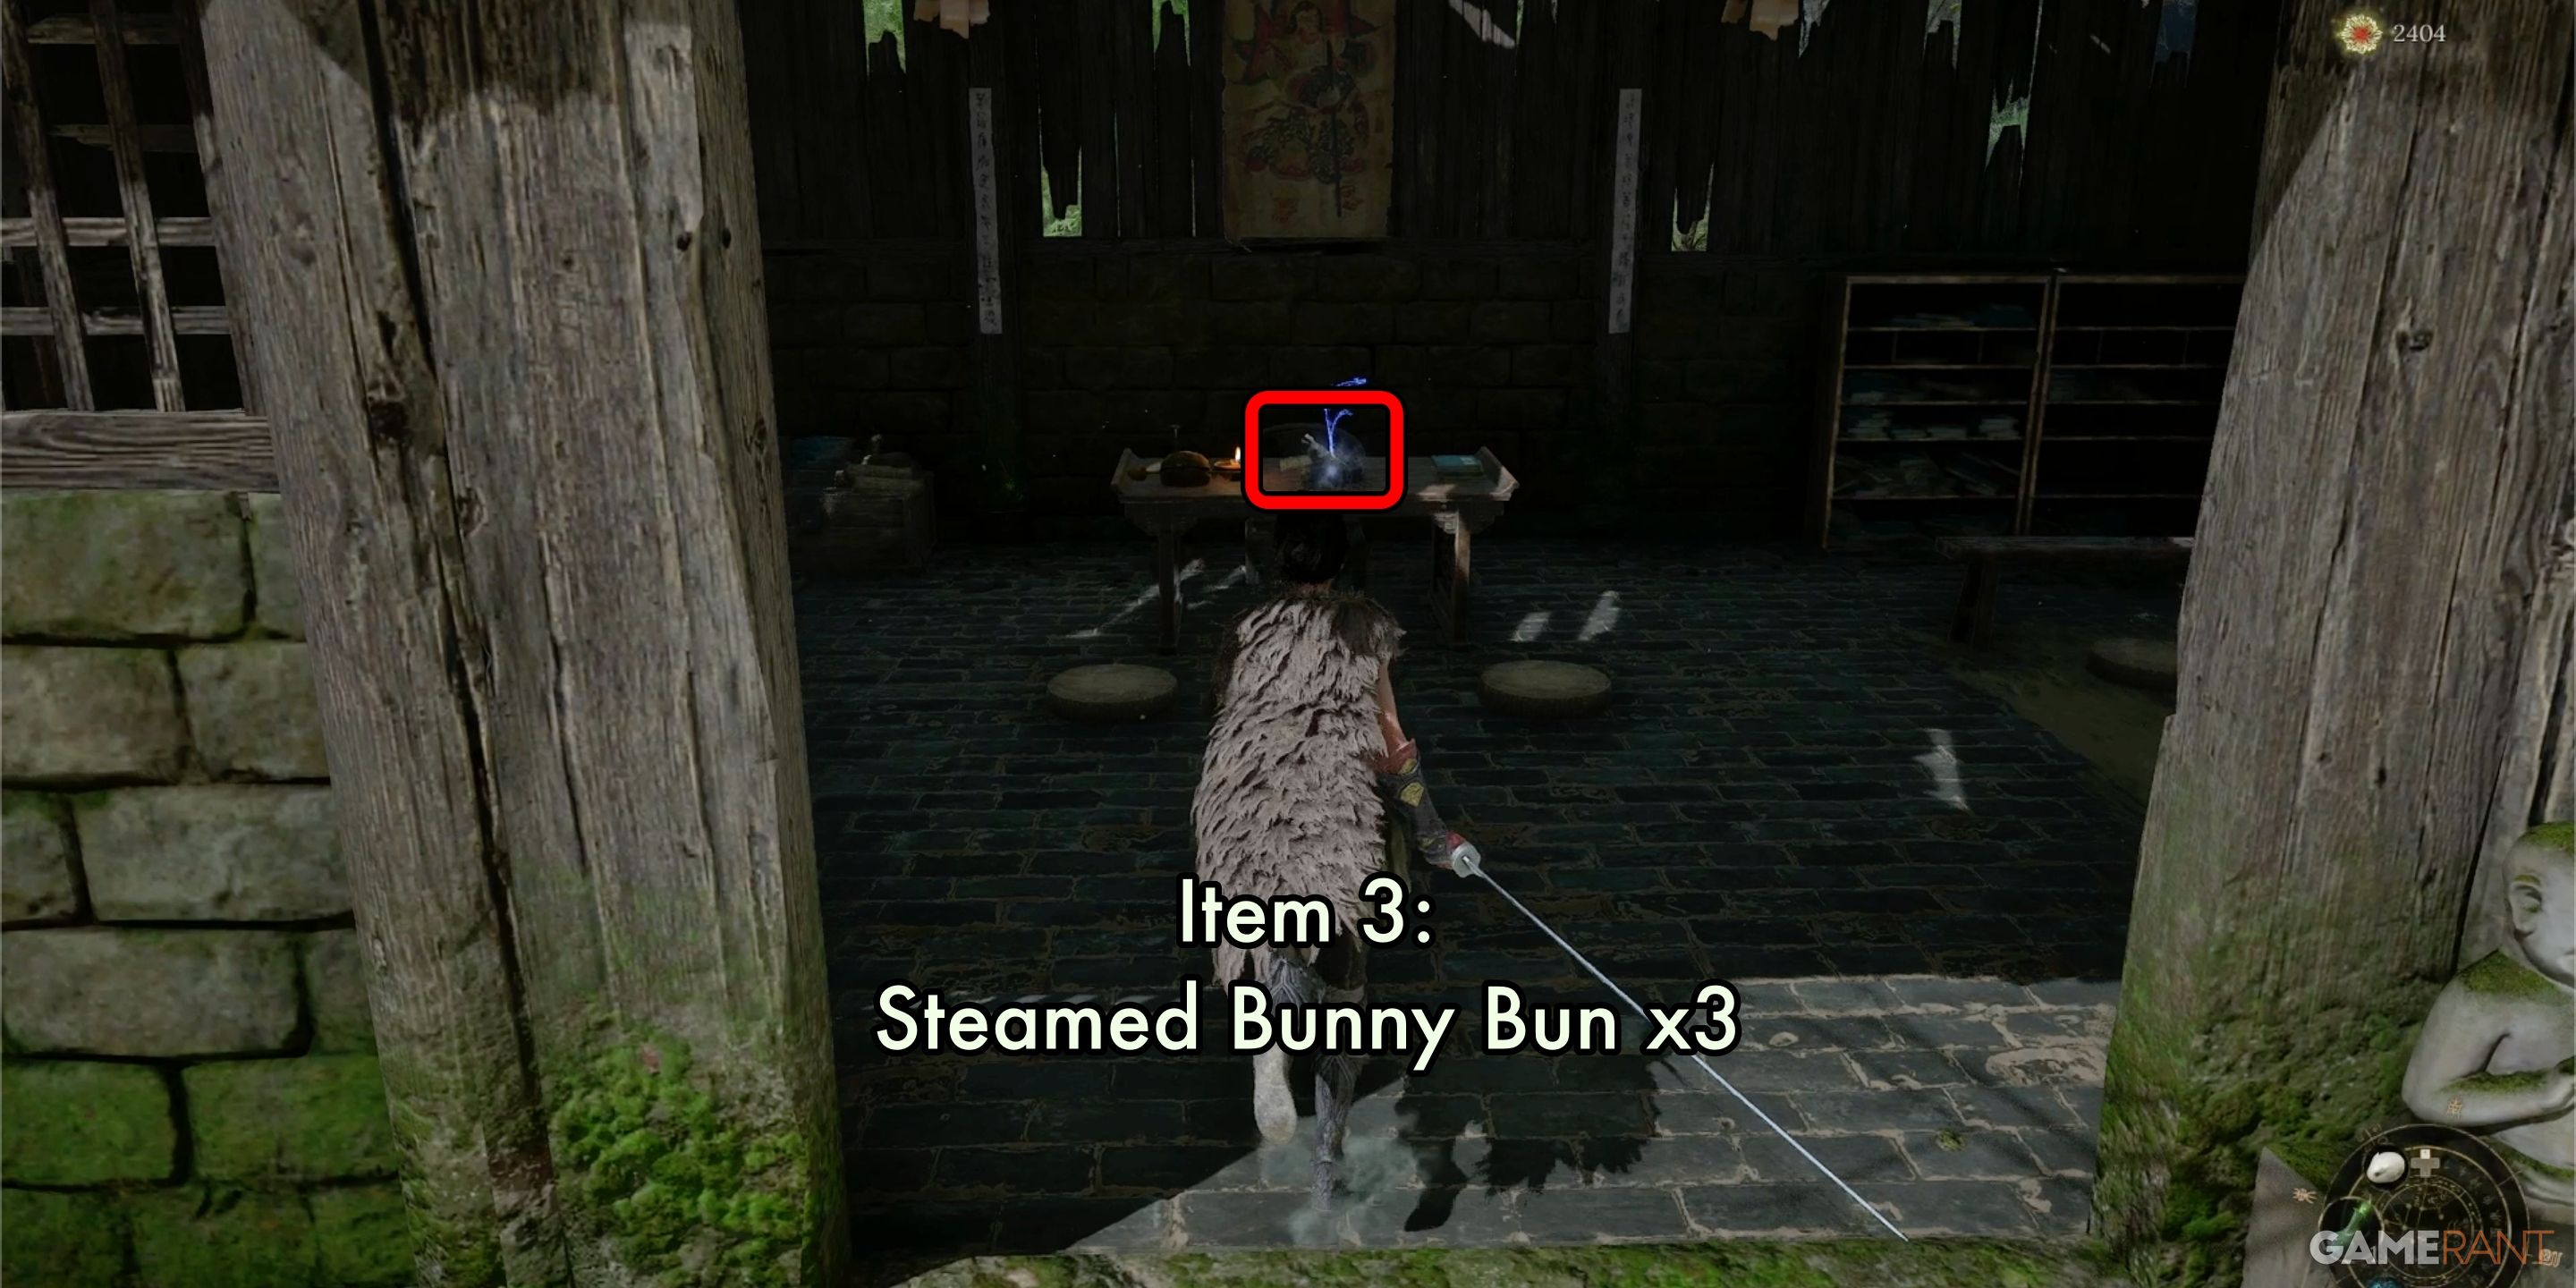
Following your defeat of the enemy group and acquisition of Darkfrost Edge, you’ll spot three buildings nearby. Let’s label the first one as Building 1. You can find its entrance close to where some enemies were resting. After an explosion, a sole spear-carrying adversary will appear from this building post-blast. Take care of them, then proceed to enter a small structure.
Within Building 1, there’s a blue indicator positioned on a table. It signifies Three Steamed Bunny Buns.
Lightzen Temple Building 2:
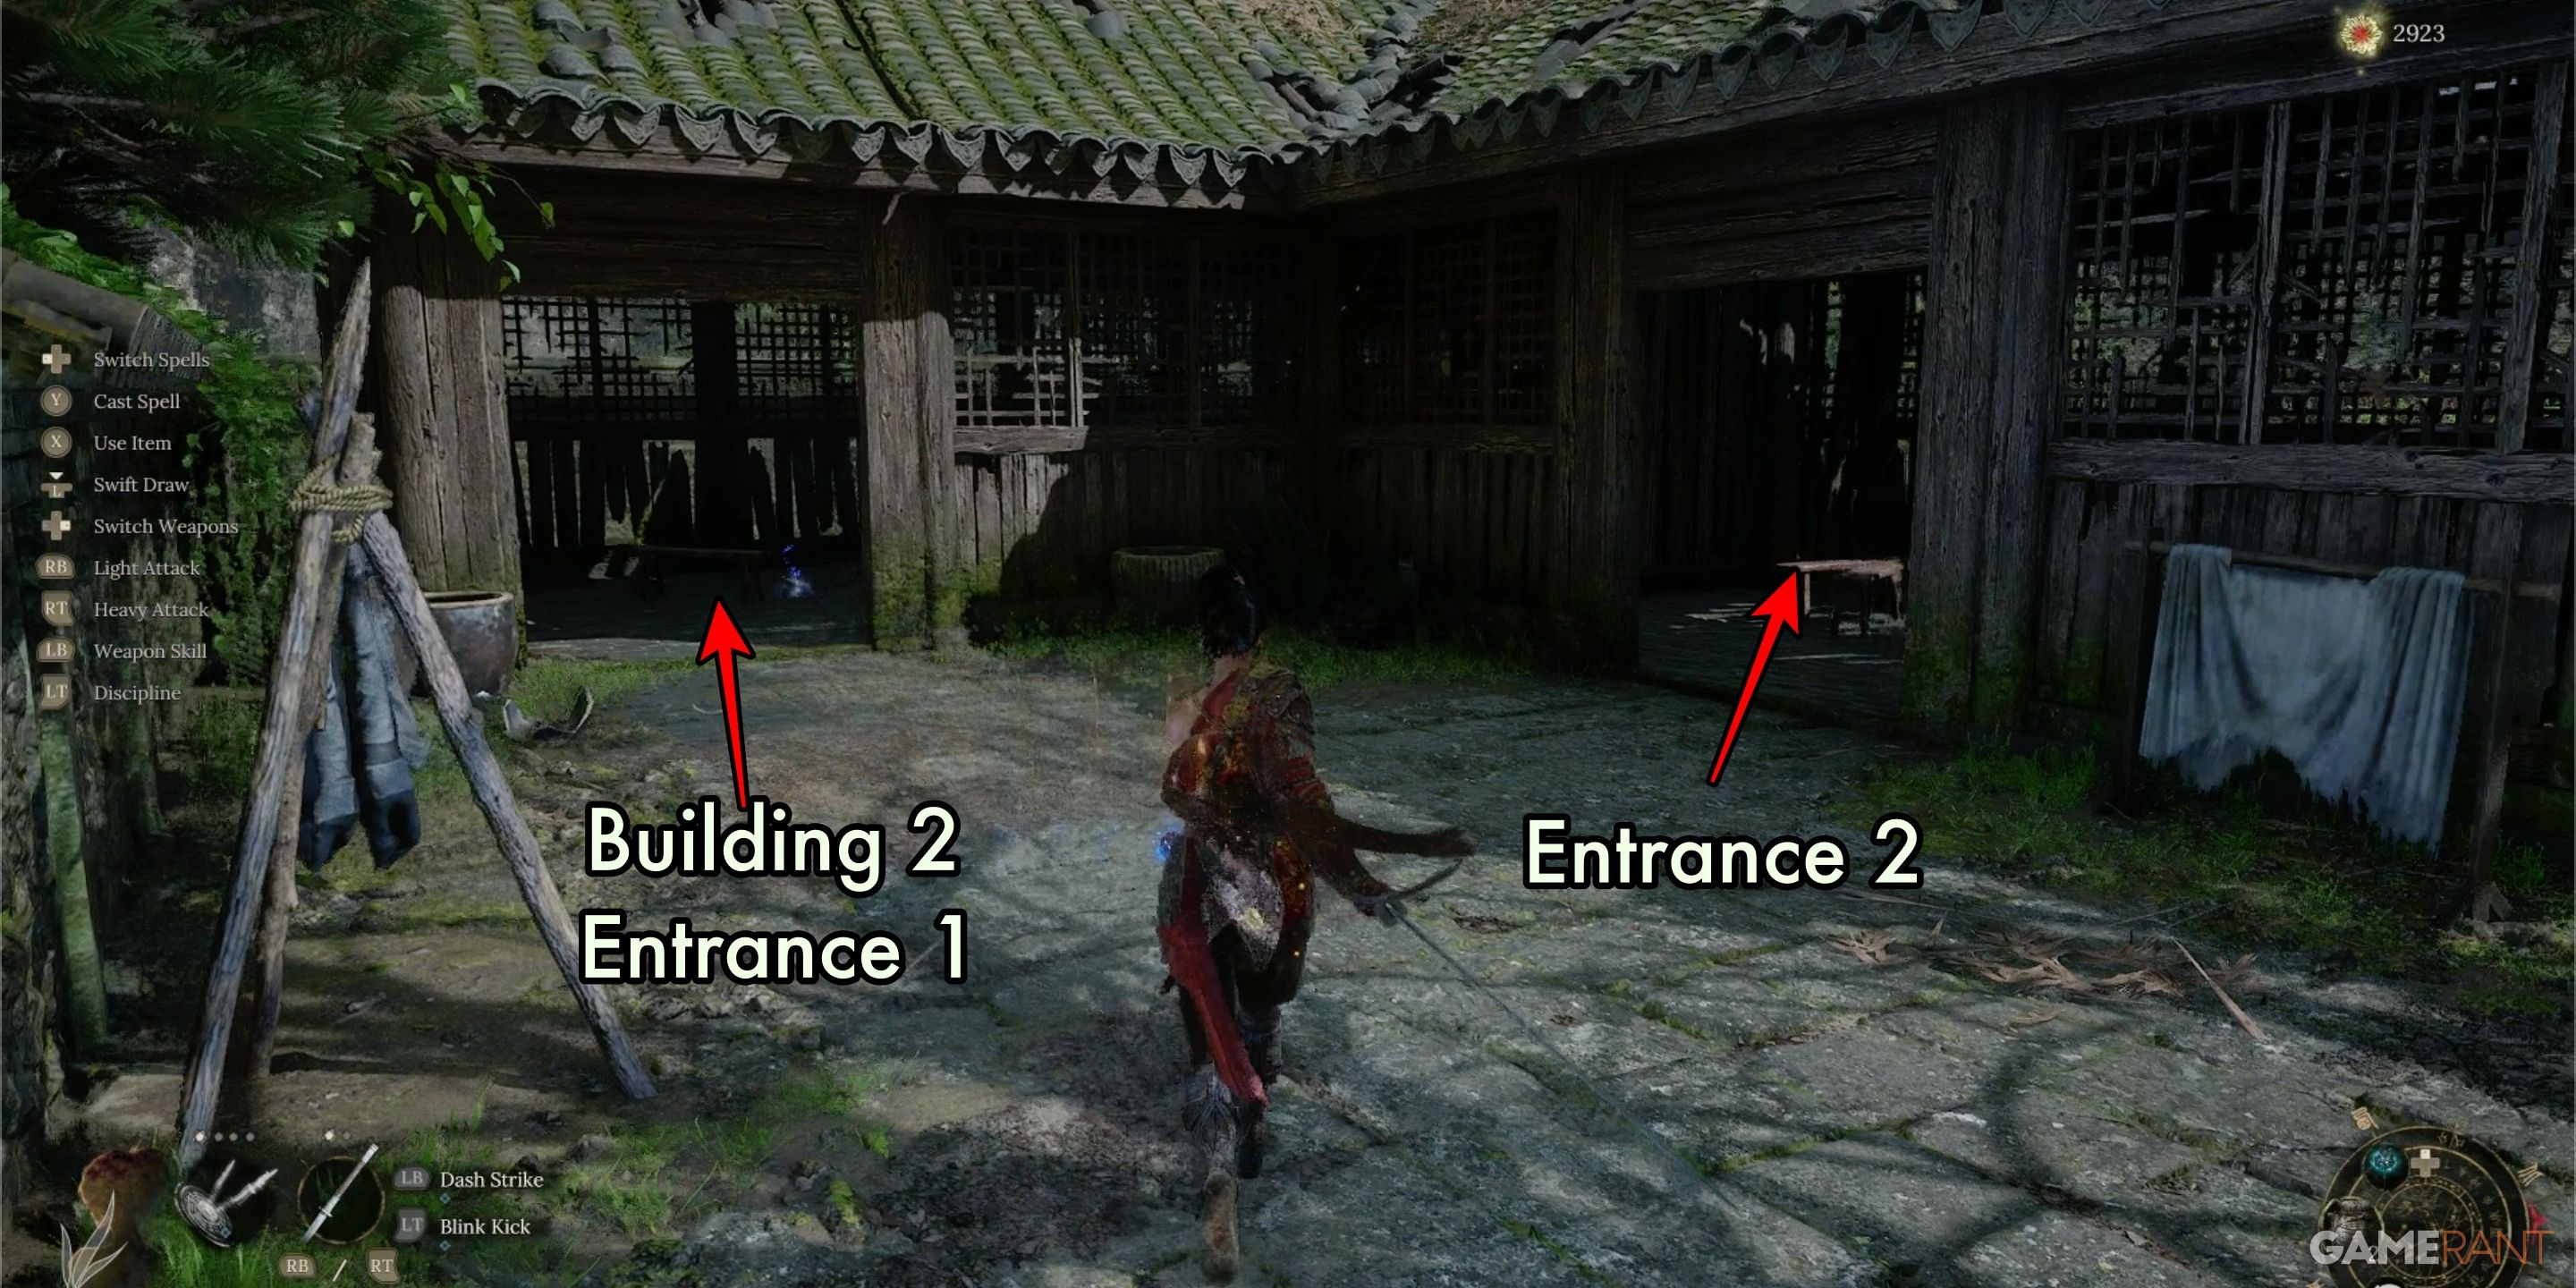
To reach Building 2, take a left at the top of the stairway leading into the temple compound. The main entrances to this structure are on your left side. Upon entering through the first door, look for a blue item marker on the floor inside. There are no adversaries near this entrance, but exercise caution as there might be two minor enemies concealed in the rafters of the other parts of the building.
Should you choose to access via Entrance 2, you’ll spot a yellow symbol on the floor, however, beware! If you attempt to seize it, two hidden adversaries in the ceiling will pounce. To handle this predicament, employ a spell or an item such as Flying Daggers to entice them down and neutralize them before claiming your loot. The yellow symbol signifies the Monkey Pendant, which amplifies the might of projectile items.
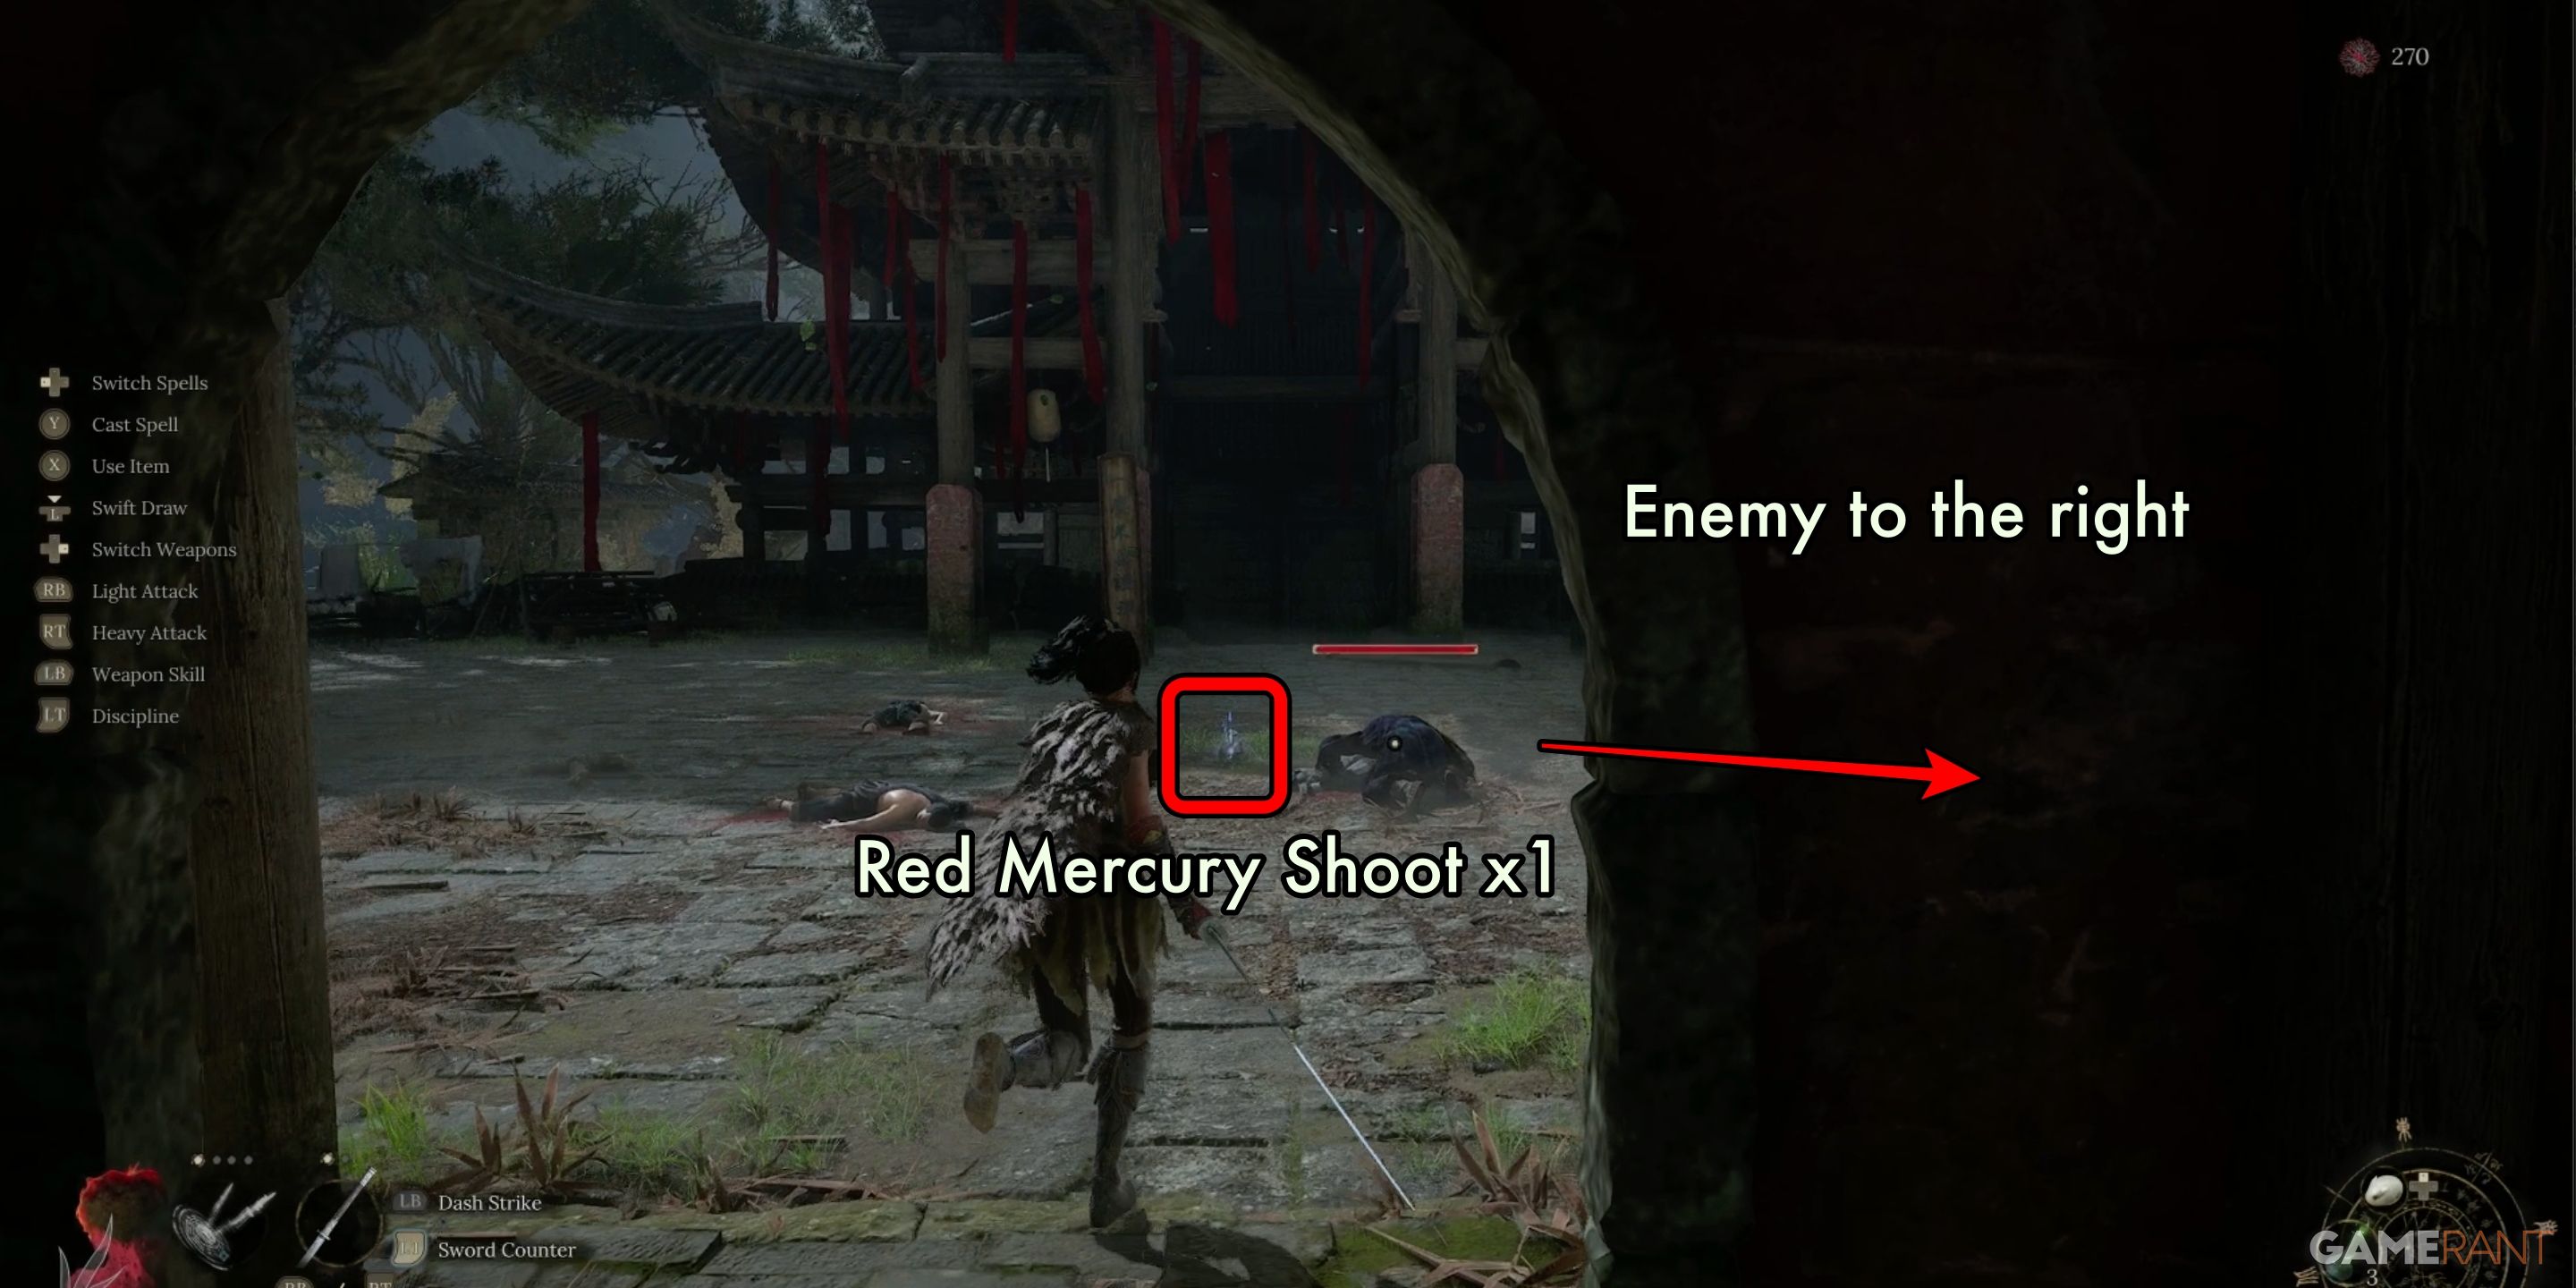
Items inside Building 2:
- Blue Item Marker: Red Mercury Shoot x1
- Yellow item Marker: Monkey Pendant
Locate the Lightzen Temple Shrine:
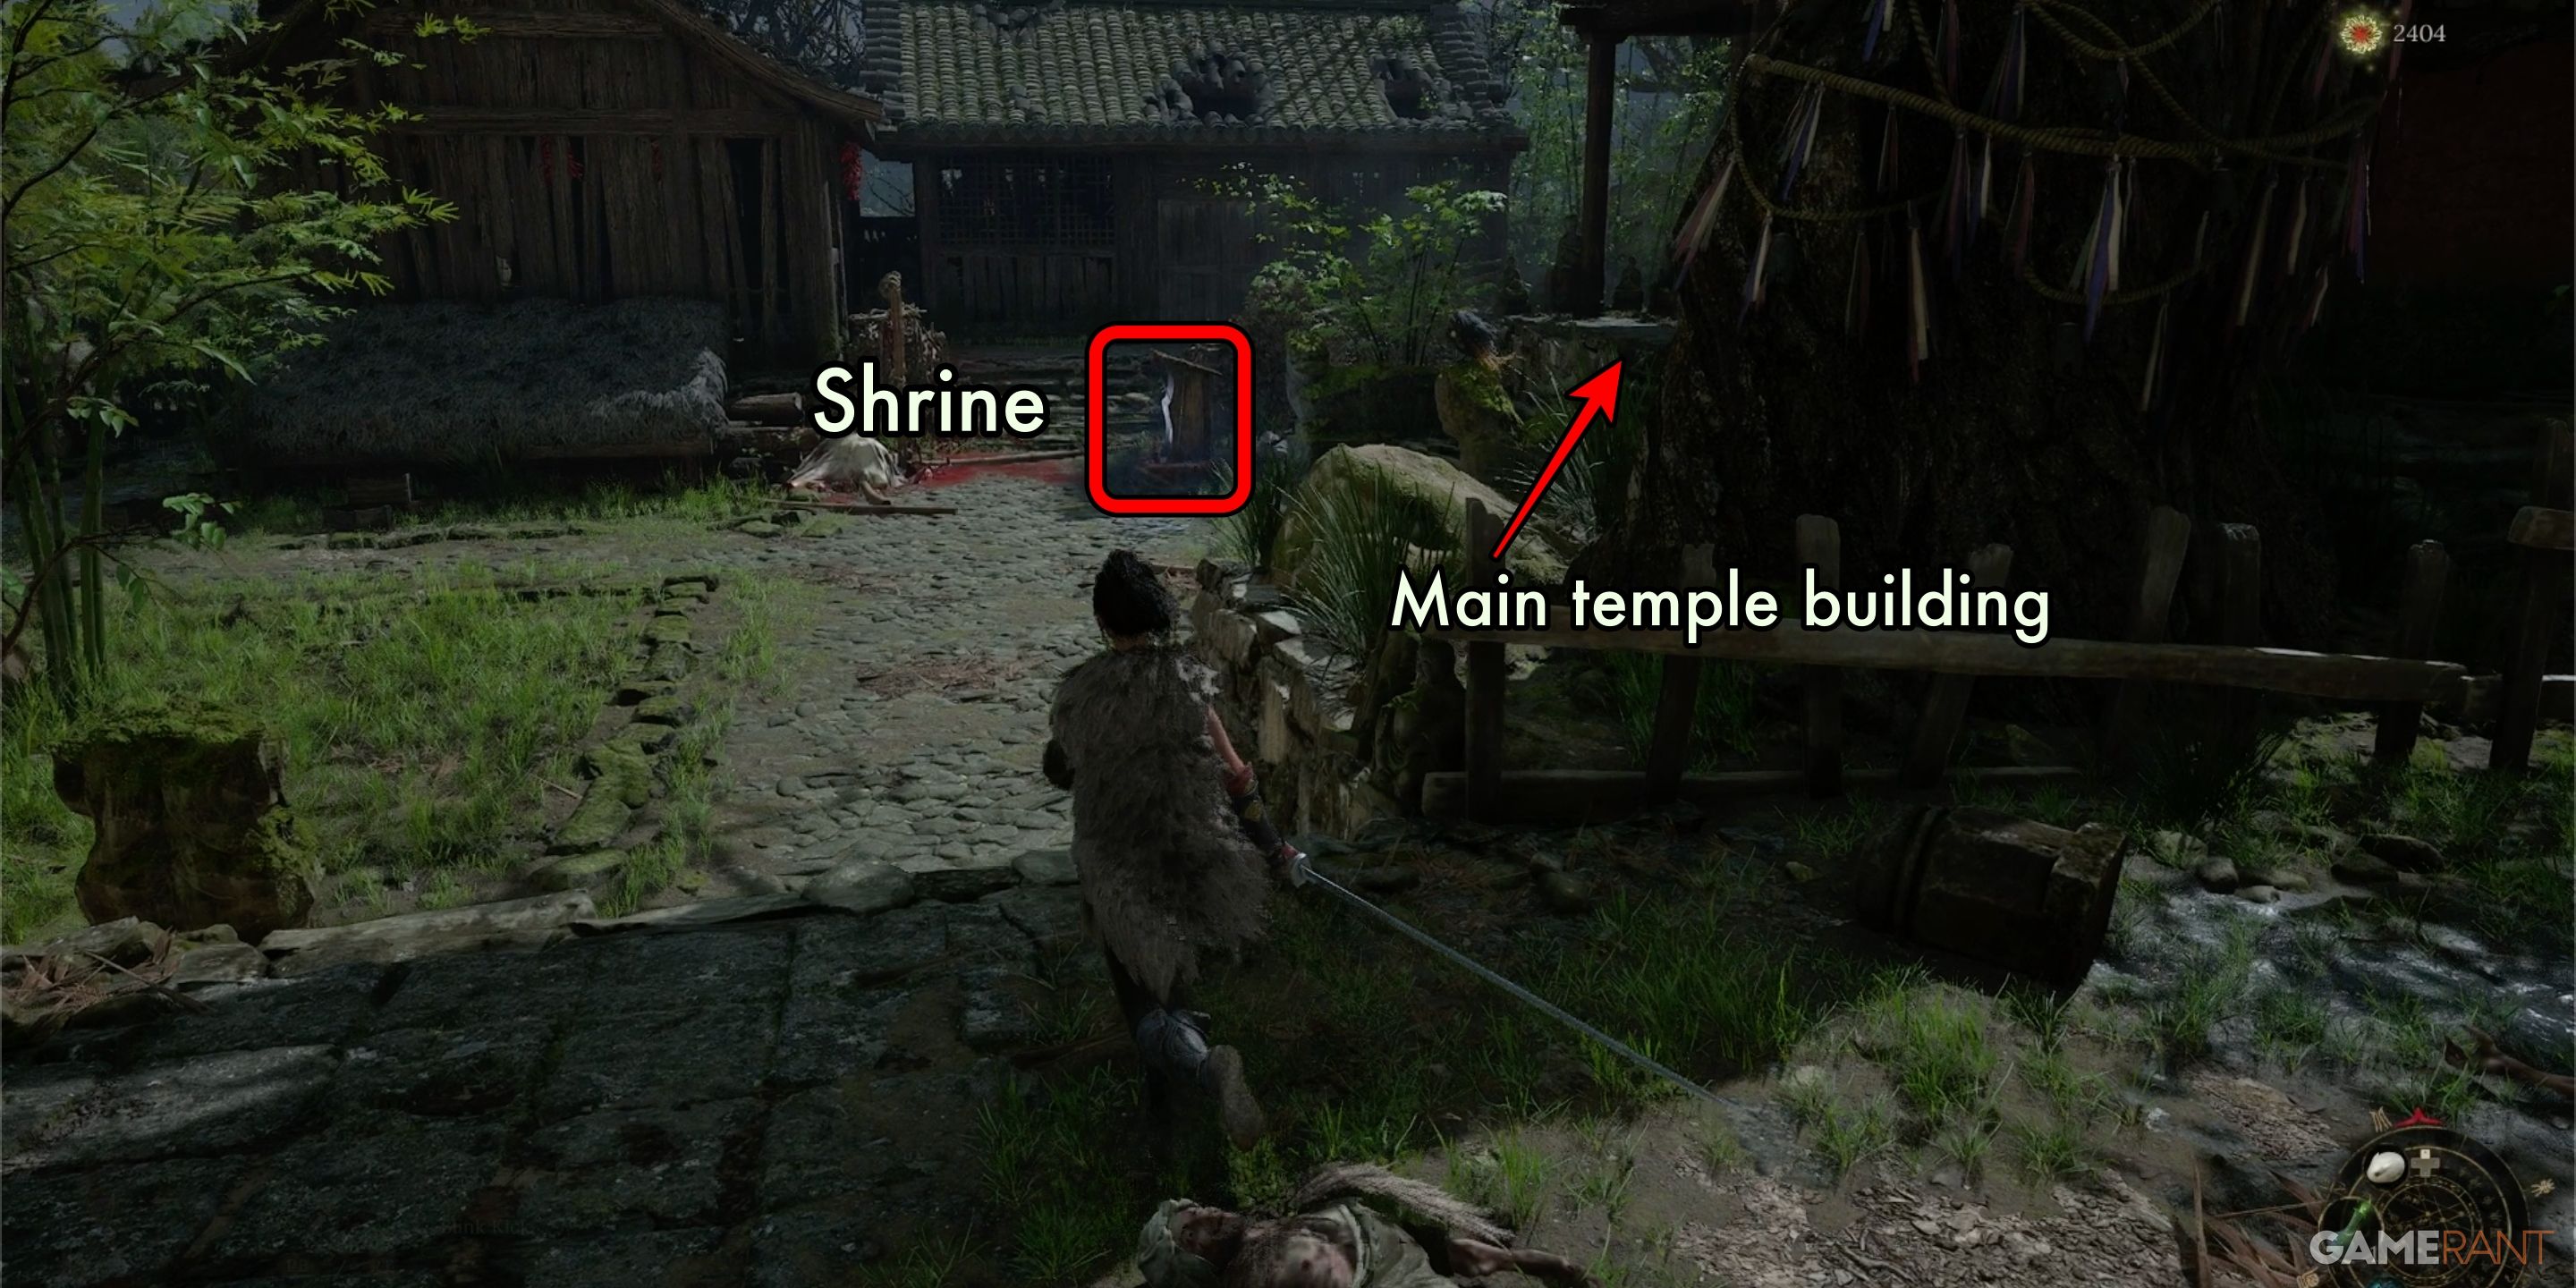
Once you’ve emptied the treasure from the initial set of structures, feel free to make your way to the Lightsen Temple Shrine next. If you find yourself running low on manna, you might want to stop by the shrine before looting for a refill of the Manna Vase.
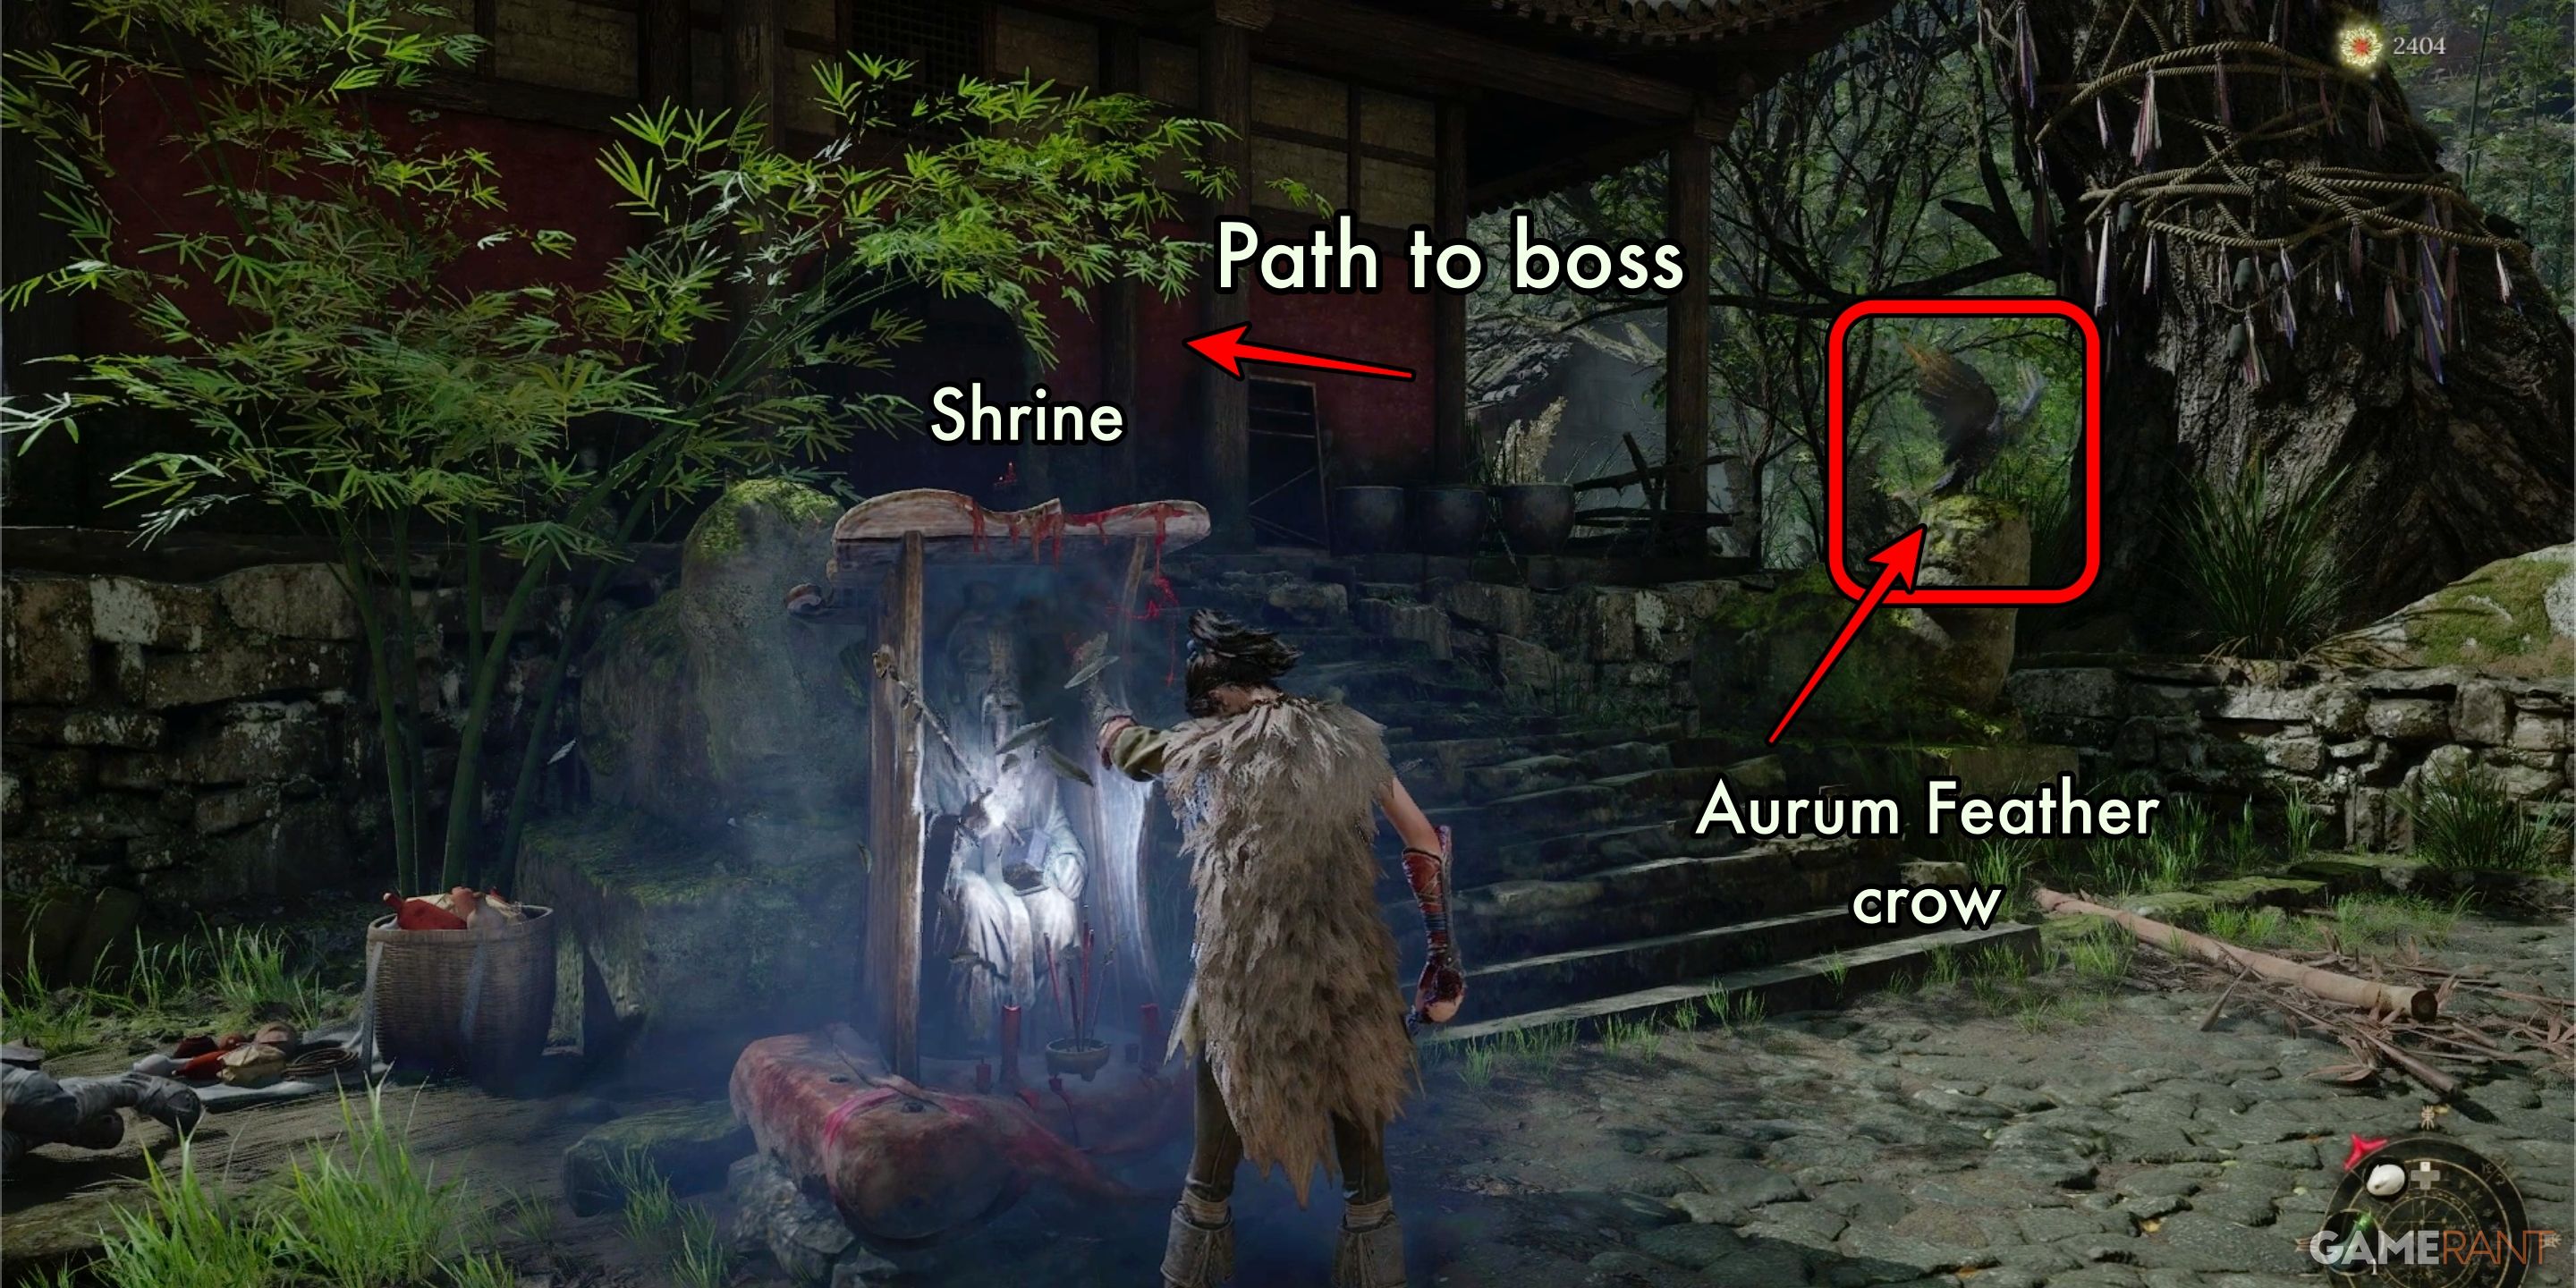
As I ascend the stairway leading into the temple compound, I stride past a band of idlers lounging about, then traverse the petite courtyard ahead. The tranquil Lightzen Temple Shrine is nestled squarely before the colossal temple edifice.
Should you glance at the set of steps ascending to the temple, positioned to the right of the sanctuary, you’ll notice a raven resting on one of the stone sculptures. If you eliminate the raven, either with a magical incantation or by hurling an object, you’ll obtain one Aurum Feather.
To reach the initial main boss quickly, proceed by climbing the steps from the sanctuary, passing through the courtyard, and moving on past the gate beyond the upcoming building. Later, we’ll explore this area again once we’ve gathered all the remaining treasures on our list.
Lightzen Temple Walkthrough Part 2 – Wuchang: Fallen Feathers
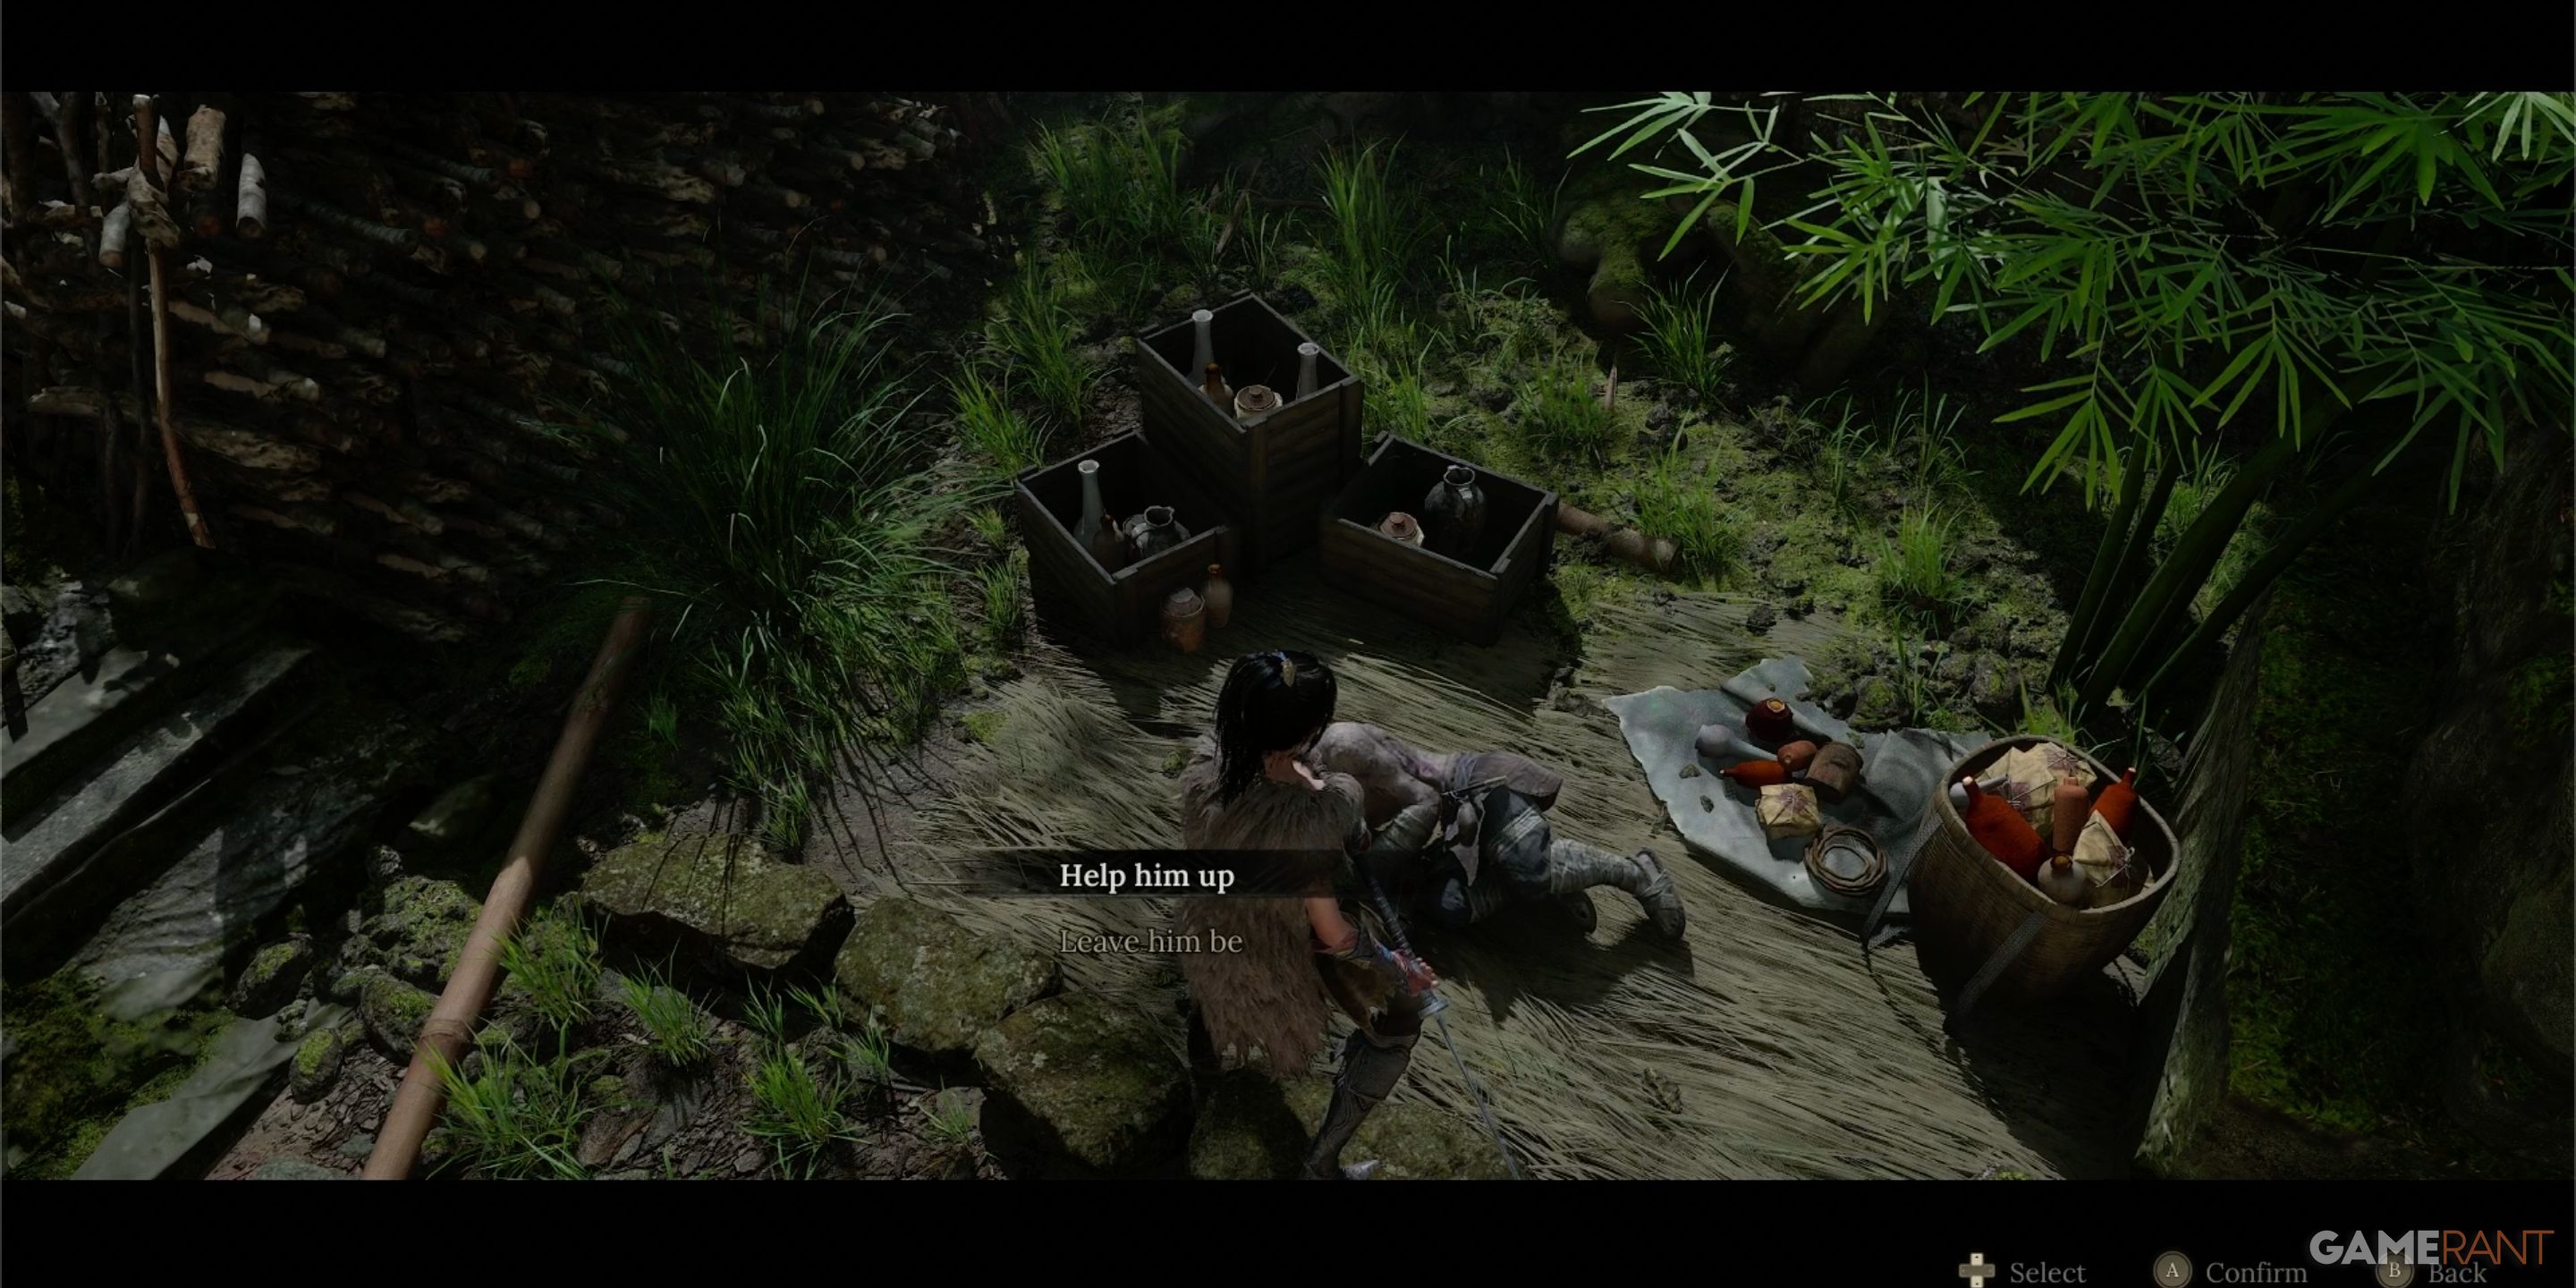
Should You Help Wu Gang?
To the left of the Lightzen Temple Shrine, you’ll find a small NPC lying in agony on the ground. If you engage with this character, a dialog box will pop up offering you two choices: ‘Assist him‘ or ‘Ignore him.’ Choosing to ignore him will cause him to keep rolling around on the ground. Helping him, however, initiates the questline for Wu Gang’s NPC. There’s no disadvantage to helping him. As the story unfolds, you’ll be tasked with collecting items such as Wuchang‘s Golden Bowl.
Lightzen Temple Building 3:
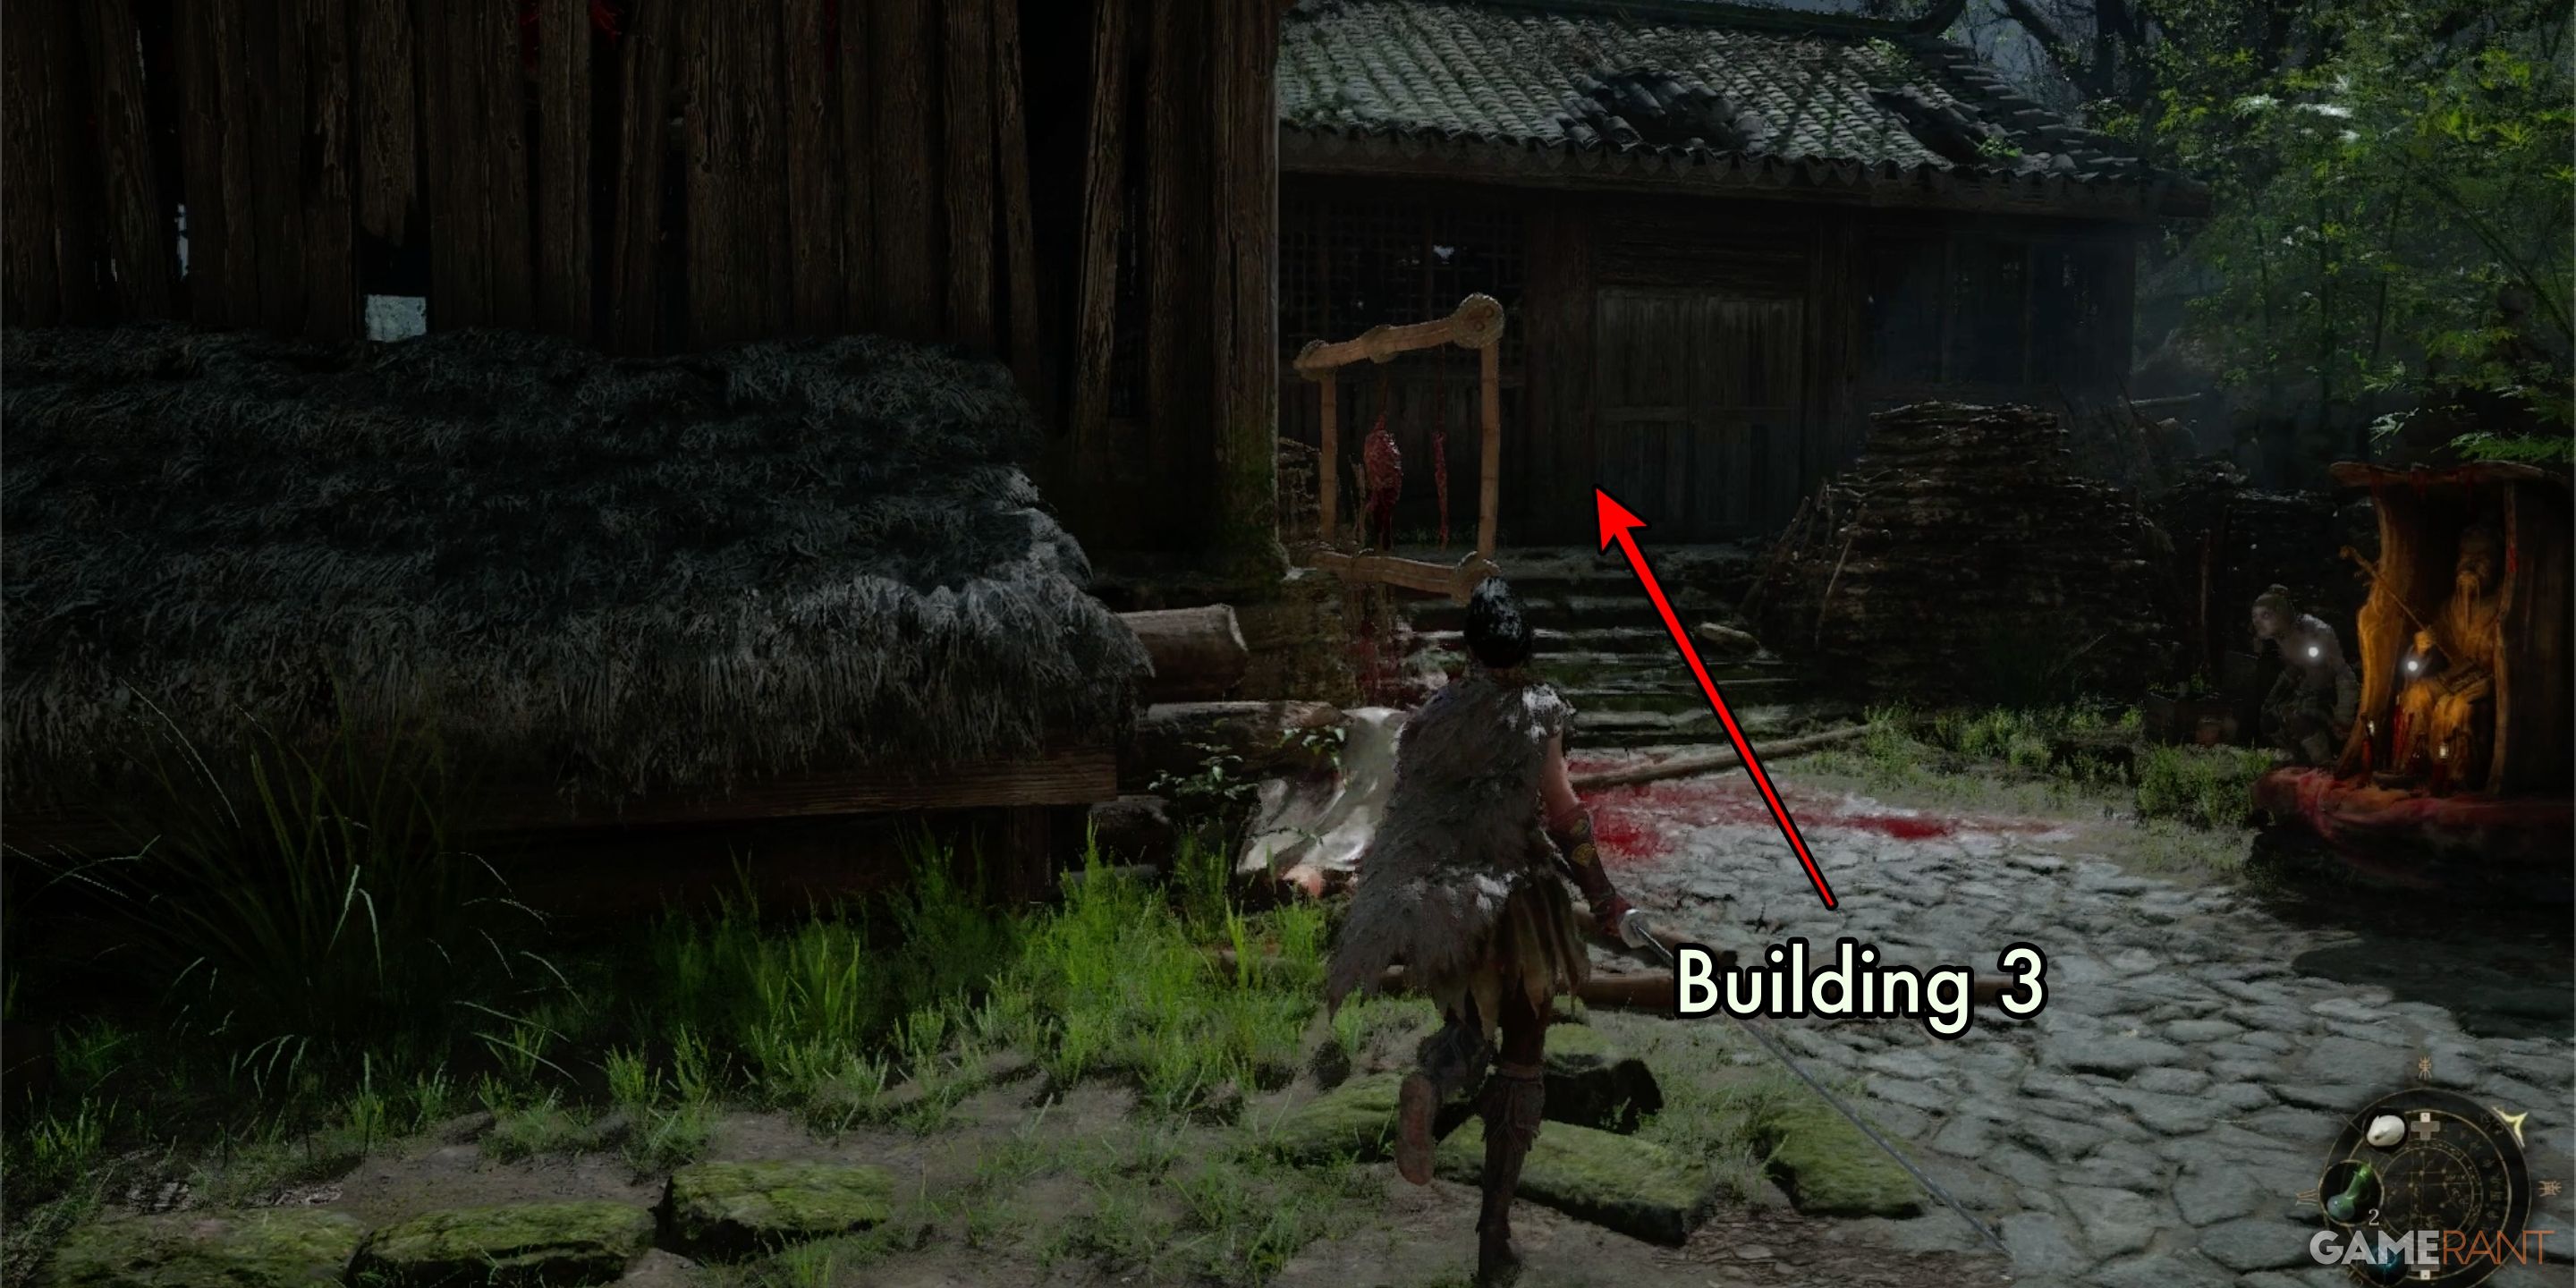
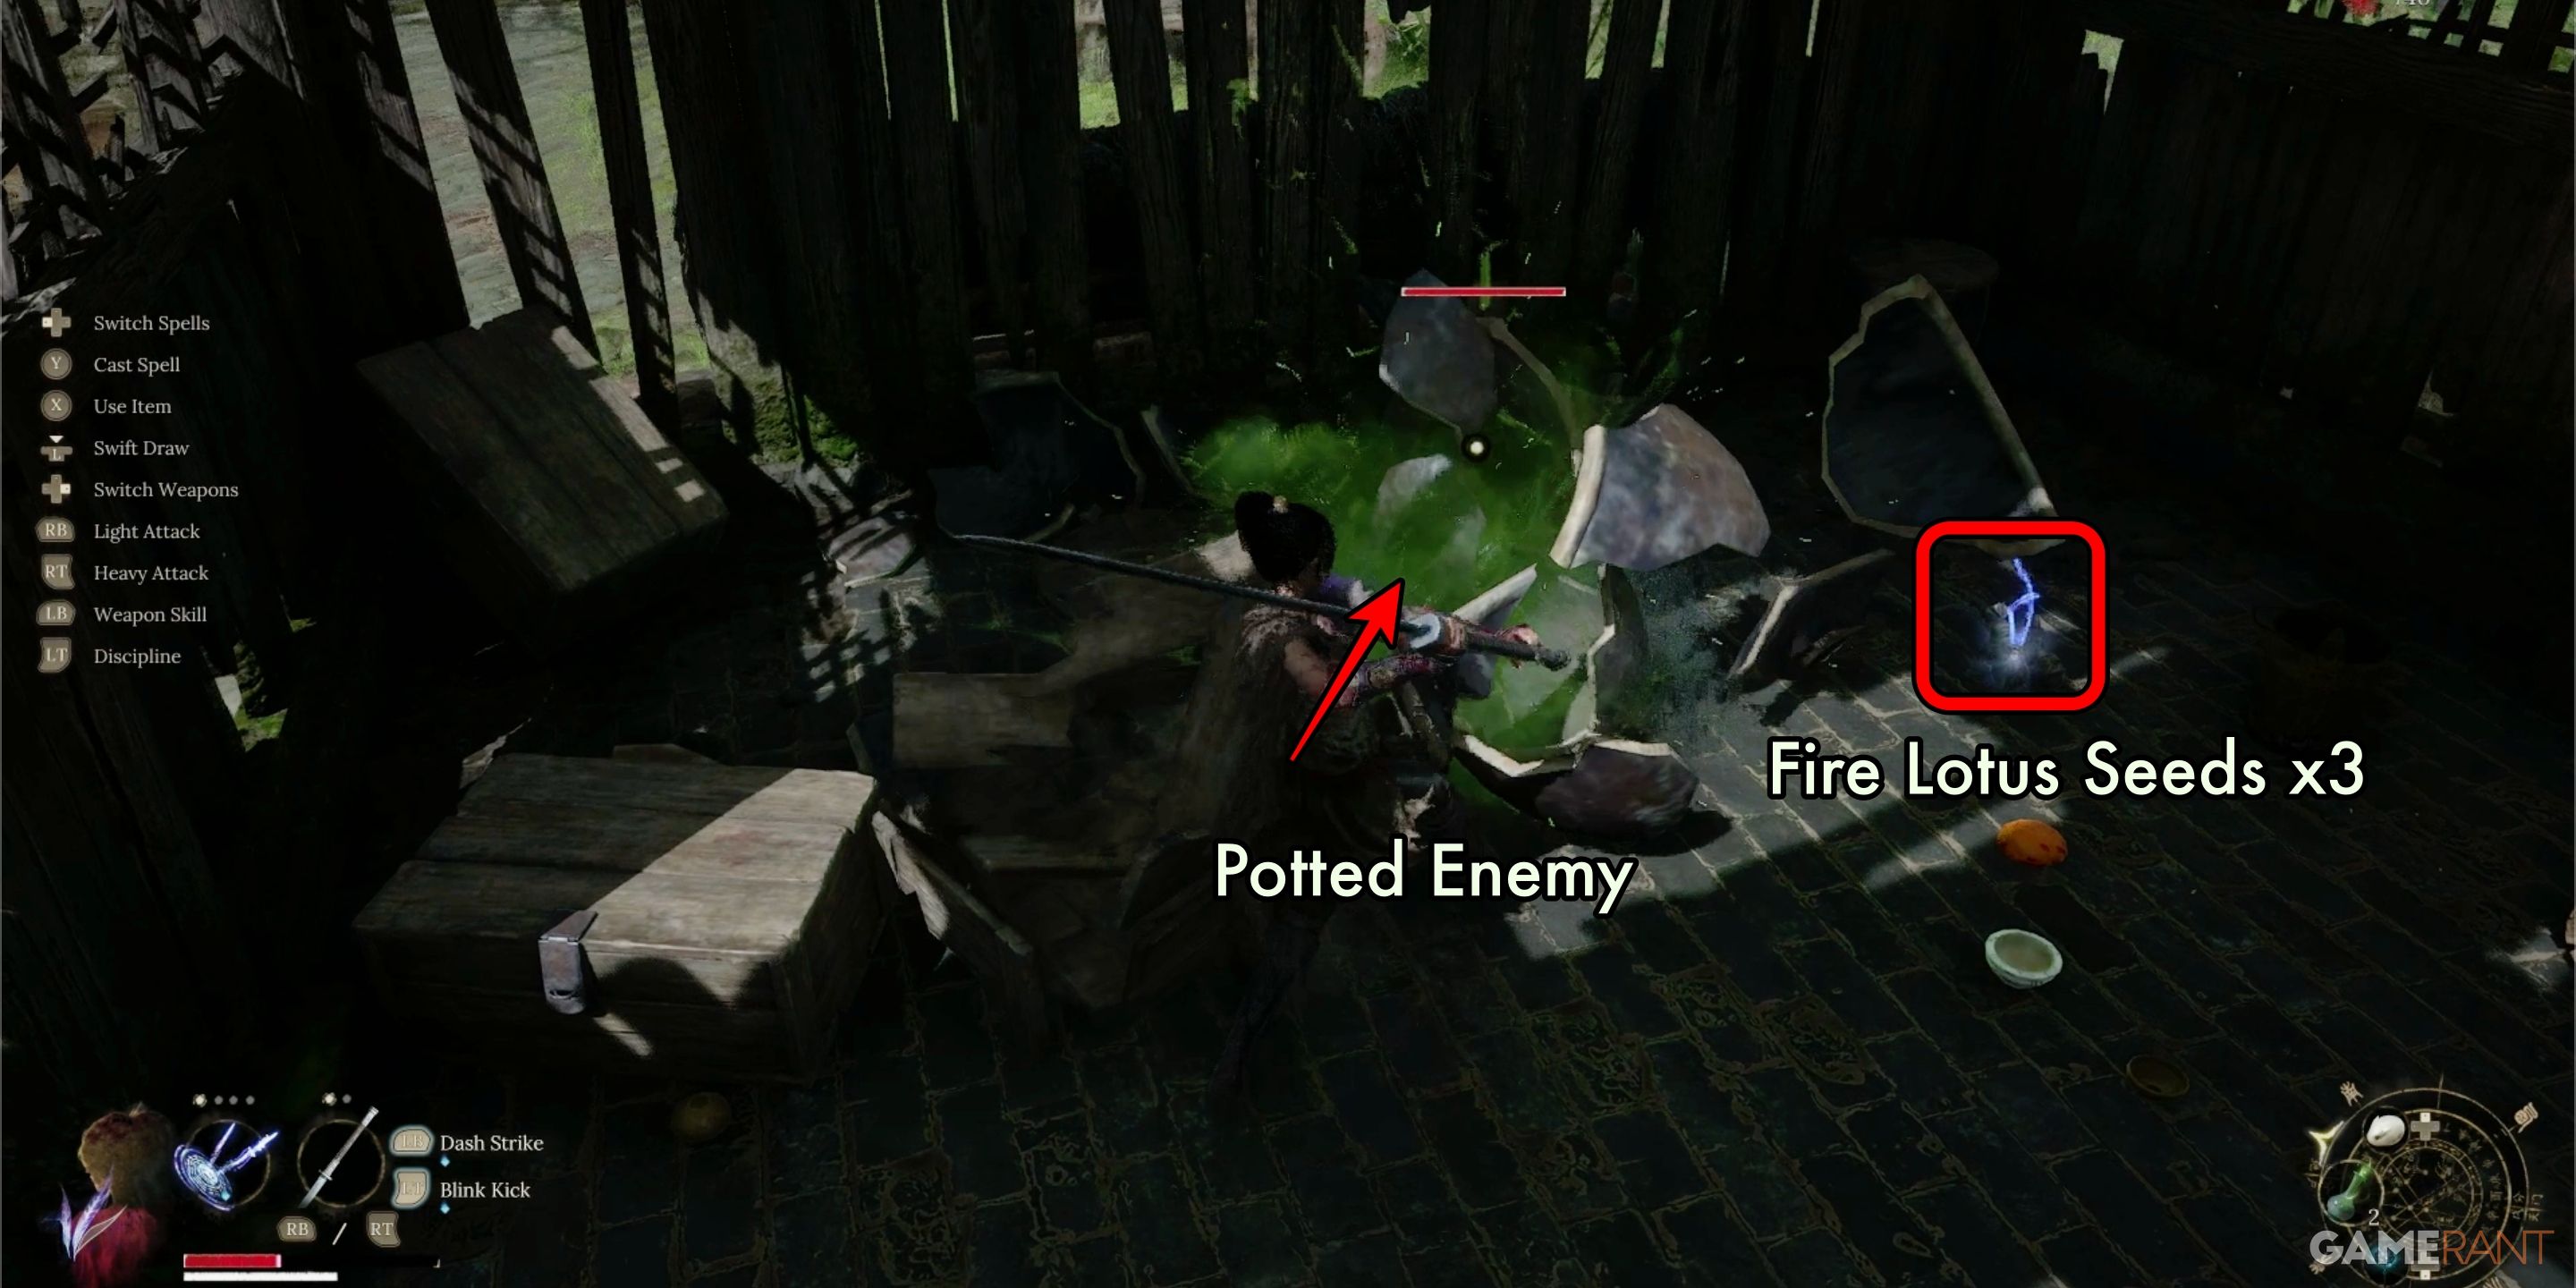
Following assistance given to Wu Gang, take a left turn to locate the third structure within the Lightzen Temple complex. Inside this building, you’ll encounter a potentially hazardous foe resembling a potted plant. These enemies are known for their ability to spit corrosive green acid. Defeating them will grant Wuchang with these specific items upon destruction:
- Faint Red Feather
- Red Murcury Sprout x1
- Emerald Lotus Seed x1
- Plumed Branch x1
There is also a basic blue item marker that contains Fire Lotus Seeds x3.
Lightzen Temple Building 4:
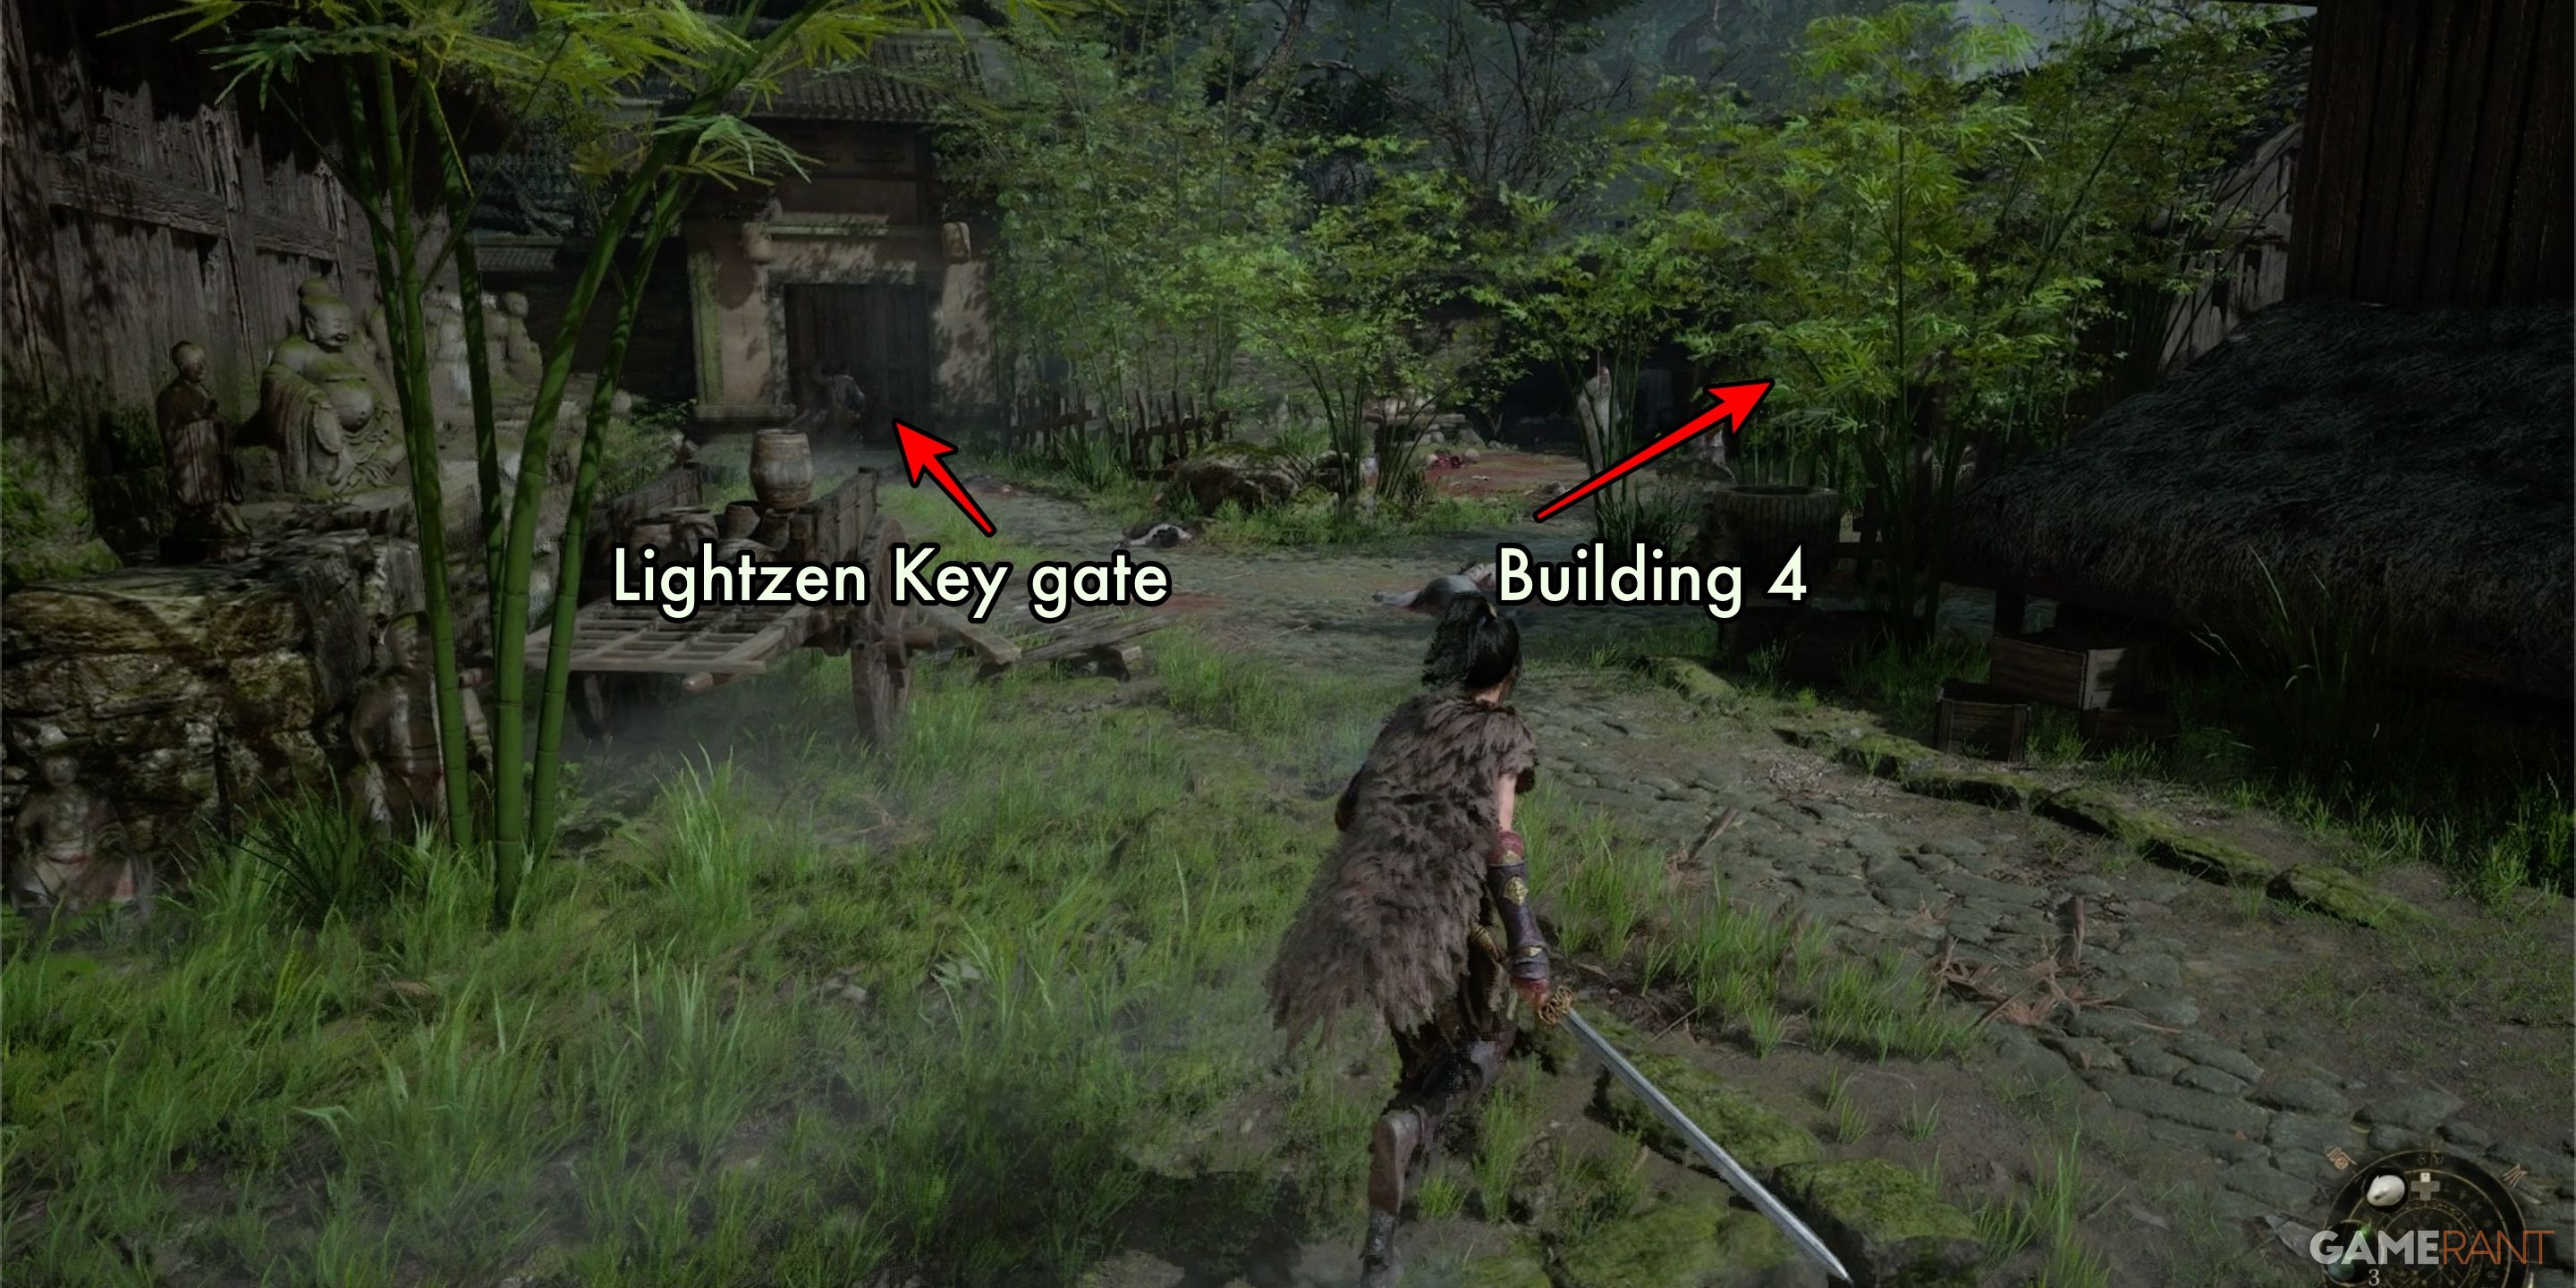
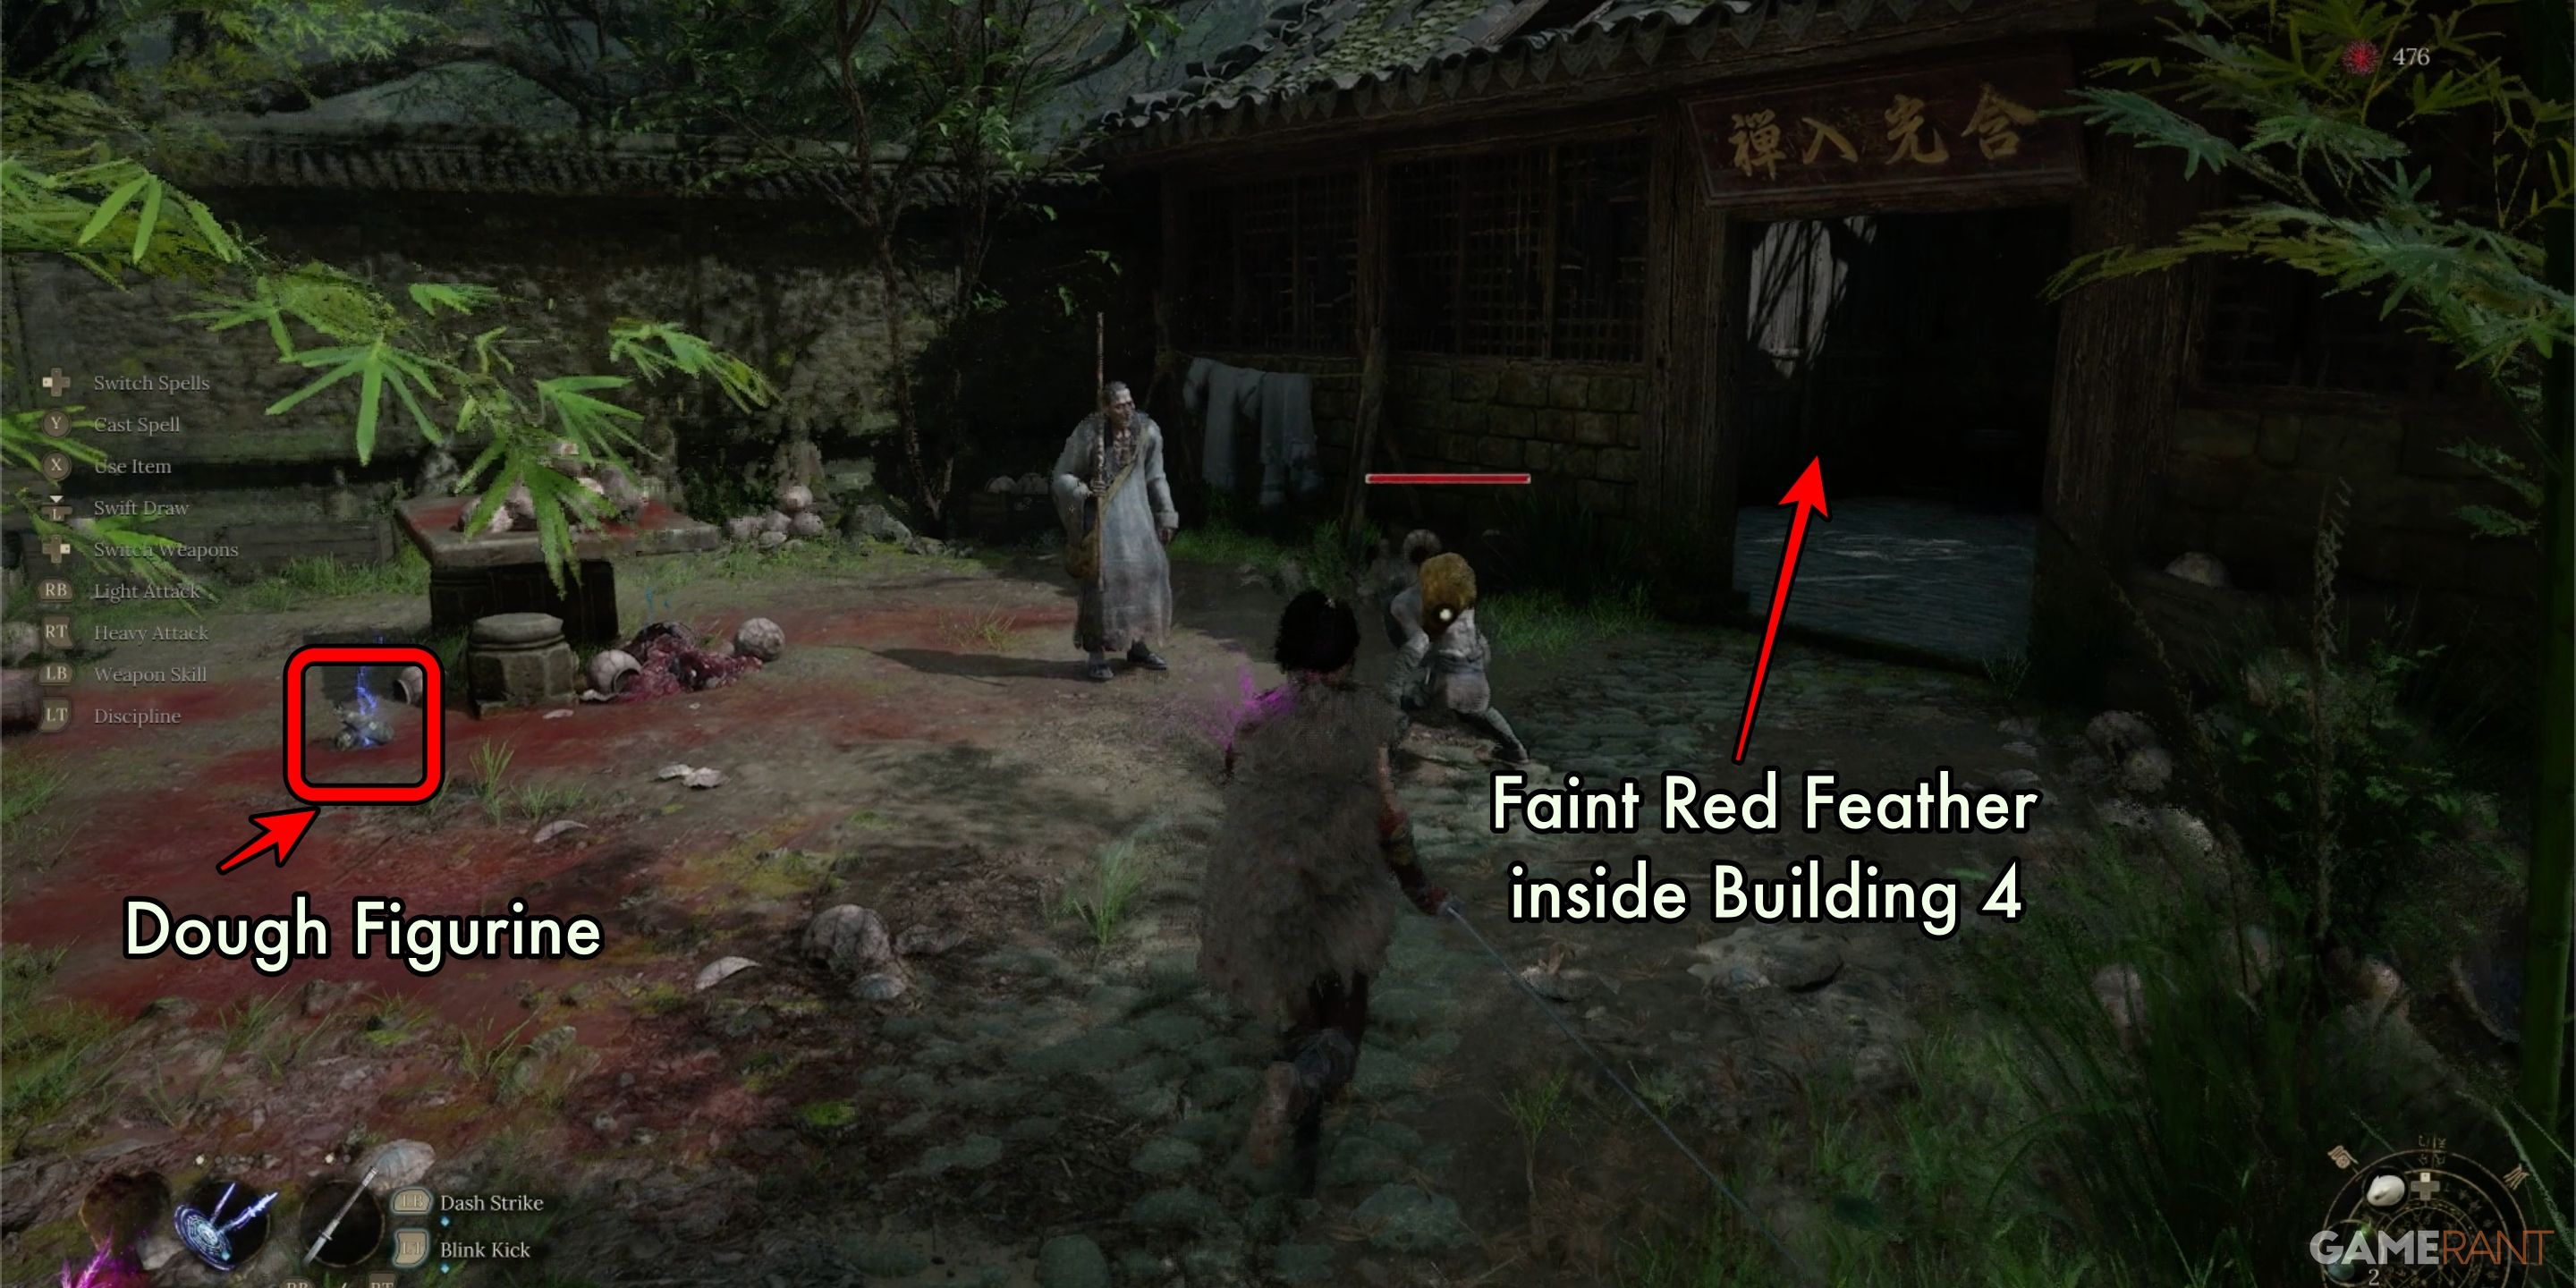
If you face away from the glimmer, you’ll notice a trail that descends to a secured gate, and Building 4. Follow the path, and you’ll come across two adversaries stationed outside Building 4. Overcome these foes, then seek a Blue Item Indicator on the ground next to a table filled with smashed jars. The item in question is a Dough Statue of Mu Guiying.
Upon entering Building 4, be cautious of potential threats lurking to your left near the entrance. Inside, you’ll discover a Purple Item Marker marked with a Slightly Glowing Red Feather. Despite the dimness within the building, this item should be relatively easy to spot.
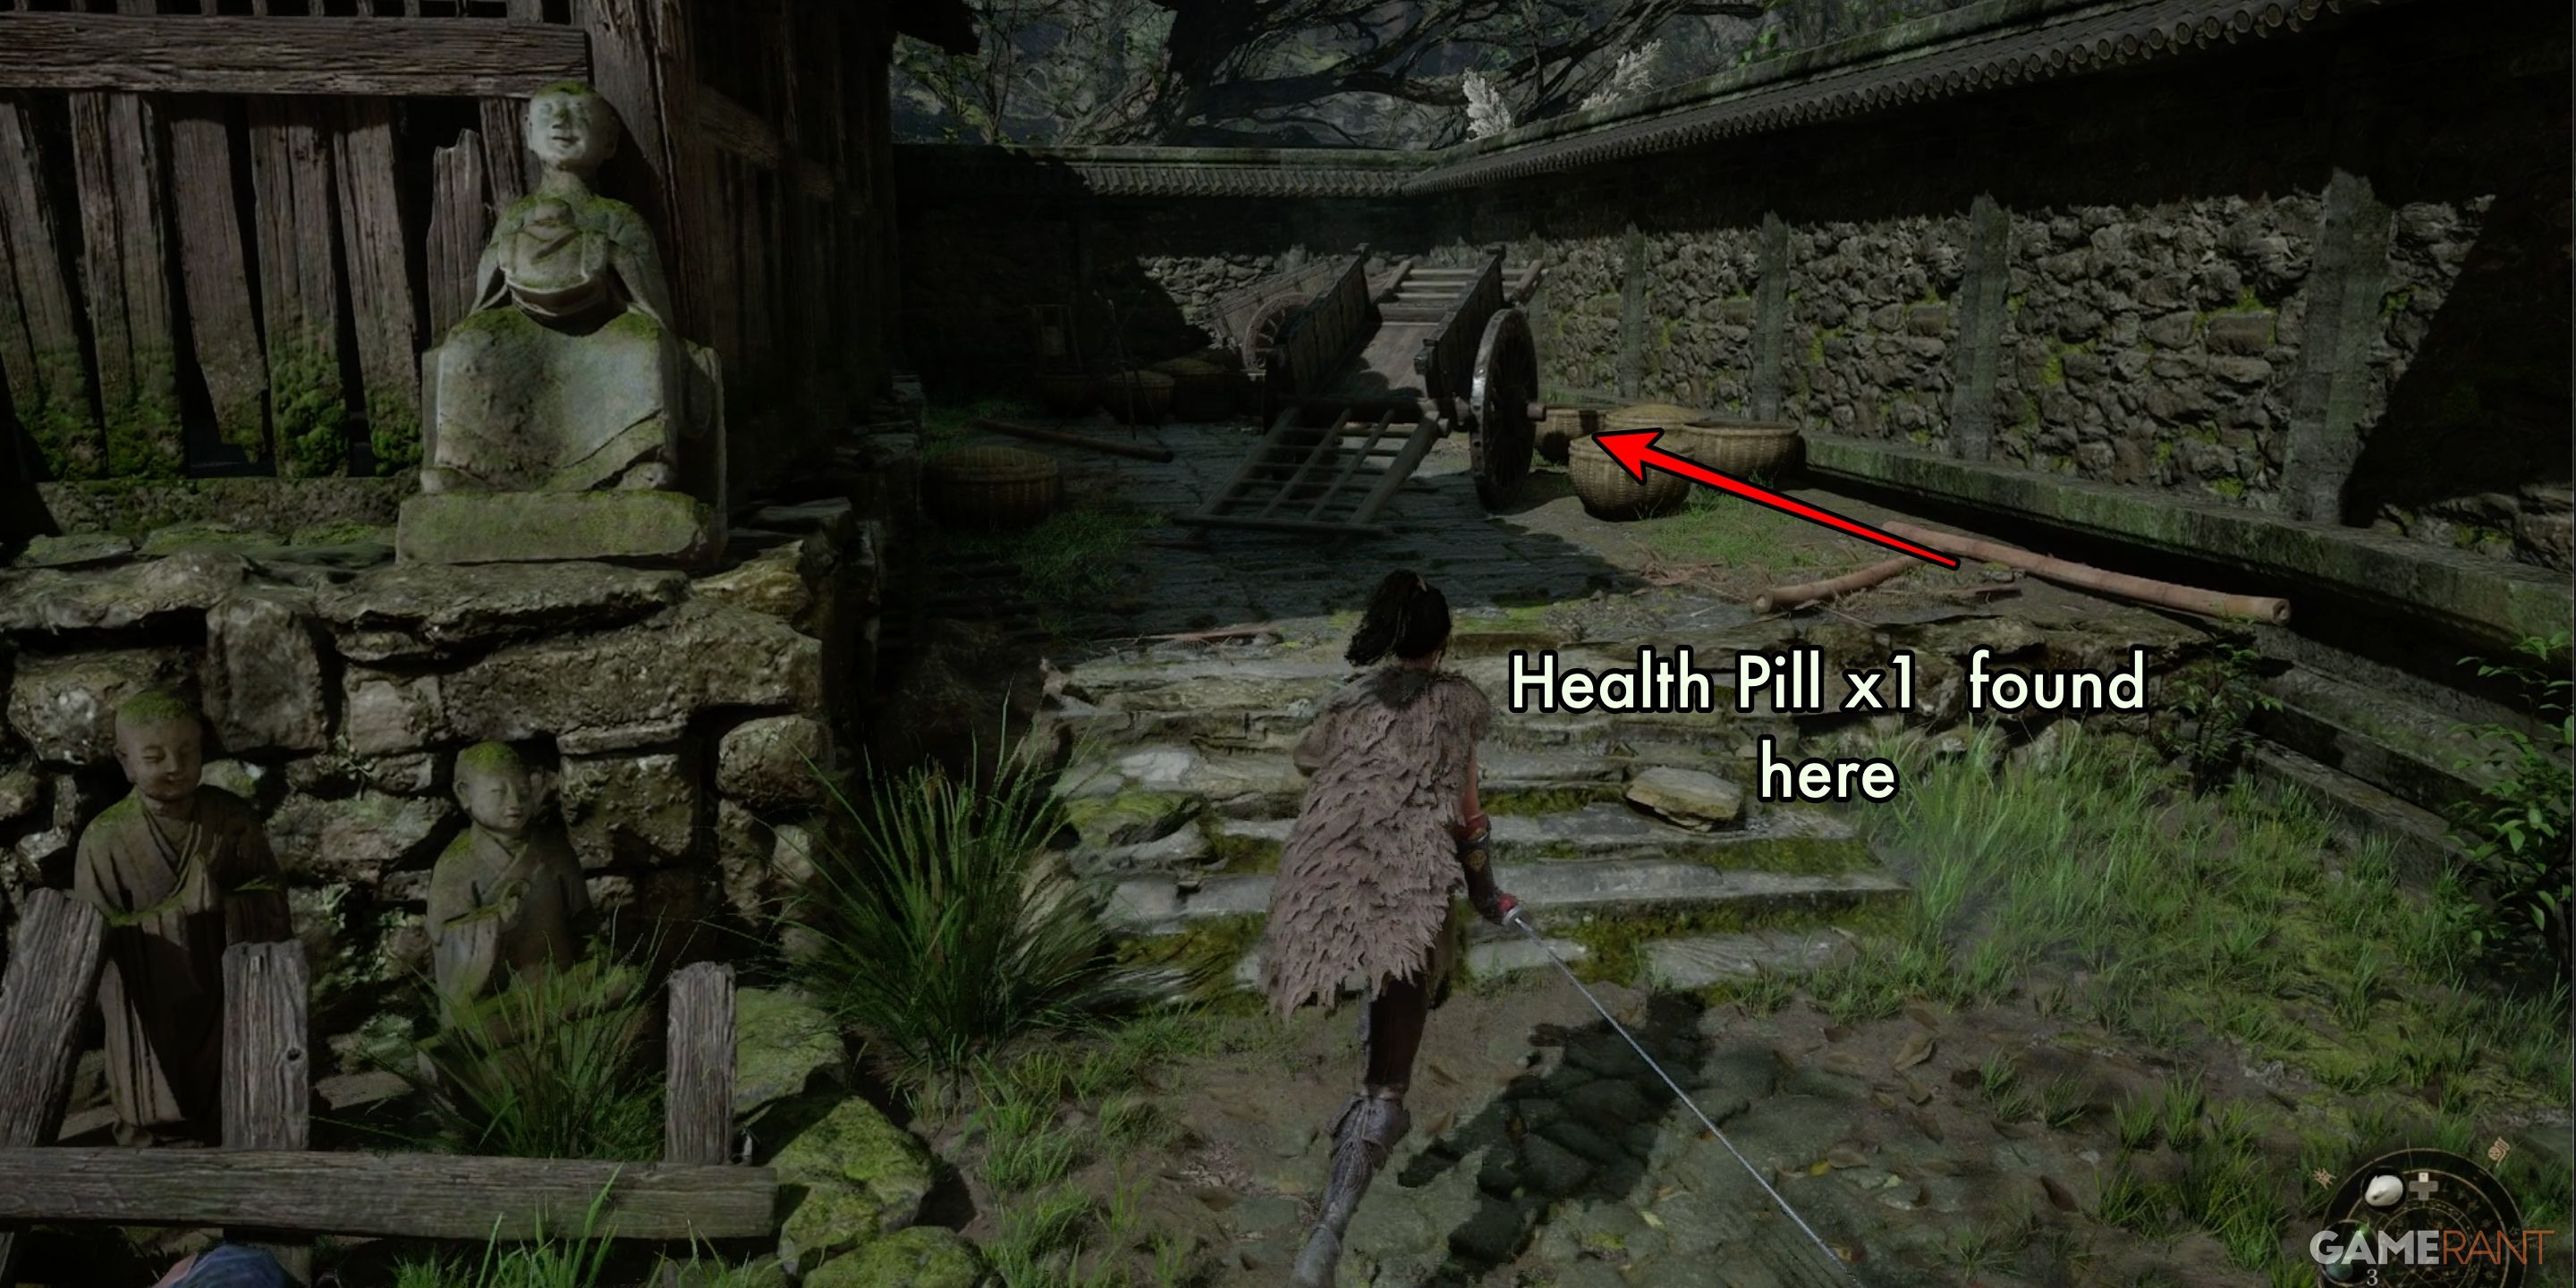
Heading towards the gate at the path’s end, you’ll discover it’s secured and require the Lightzen Key to unlock it. Taking a left turn from the gate, you’ll stumble upon a hidden Health Pill among other objects.
Lightzen Temple Courtyard:
After gathering all items in the temple’s external area, proceed back to the shrine. Ascend the stairs, then traverse through the tunnel made of concrete. Upon exiting, you’ll find yourself in a sizable courtyard with structures on both sides. In the center, notice an adversary crouching, and a blue item marker is on the ground beside it. Approach with caution as there’s another foe to your right, ready to ambush from behind.
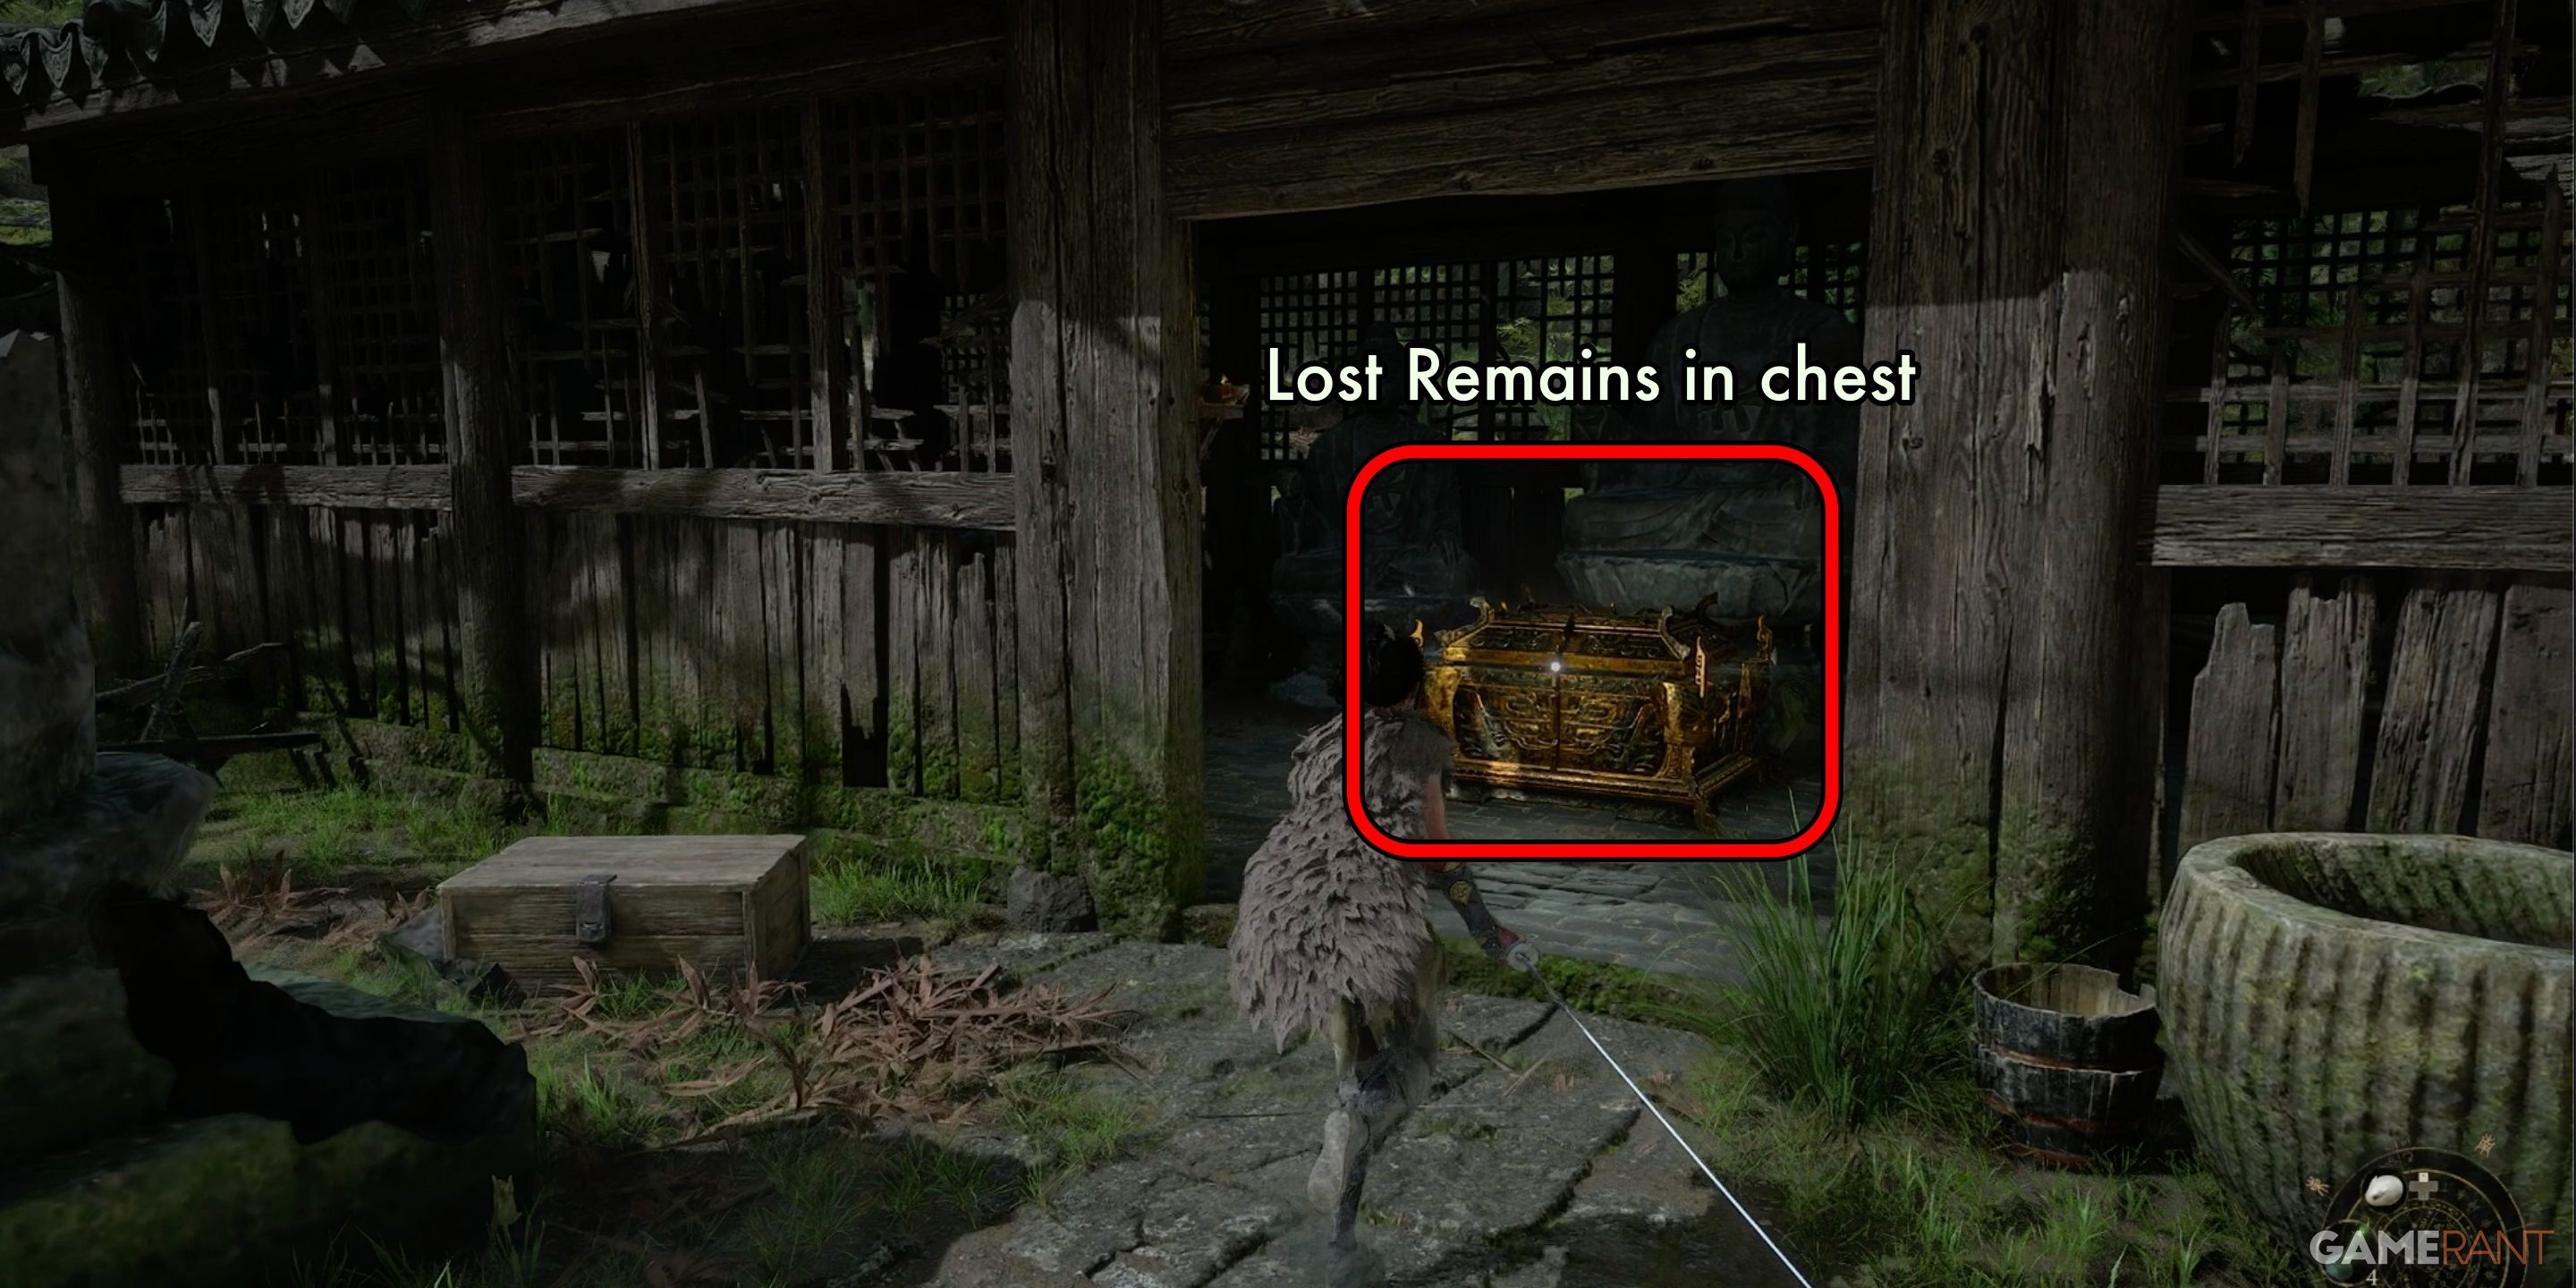
As a gamer, I see a Red Mercury Shoot lying on the ground – grab it! Then, make a beeline for the building on your right that’s glowing ominously with a treasure chest inside. Inside that chest, you’ll score some Lost Remains, which can boost the power of my Manna Vase at the shrine. Once I step out of the building, watch out – an enemy will creep up from the shadows and come after me!
Here’s your next step: Enter the building located on the left side. Be wary, as two adversaries will rush to attack upon your entry. Once they have retreated, proceed inside and secure the Lantern Fruits (1) that are resting on the bed. After you’ve gathered them, you can continue forward.
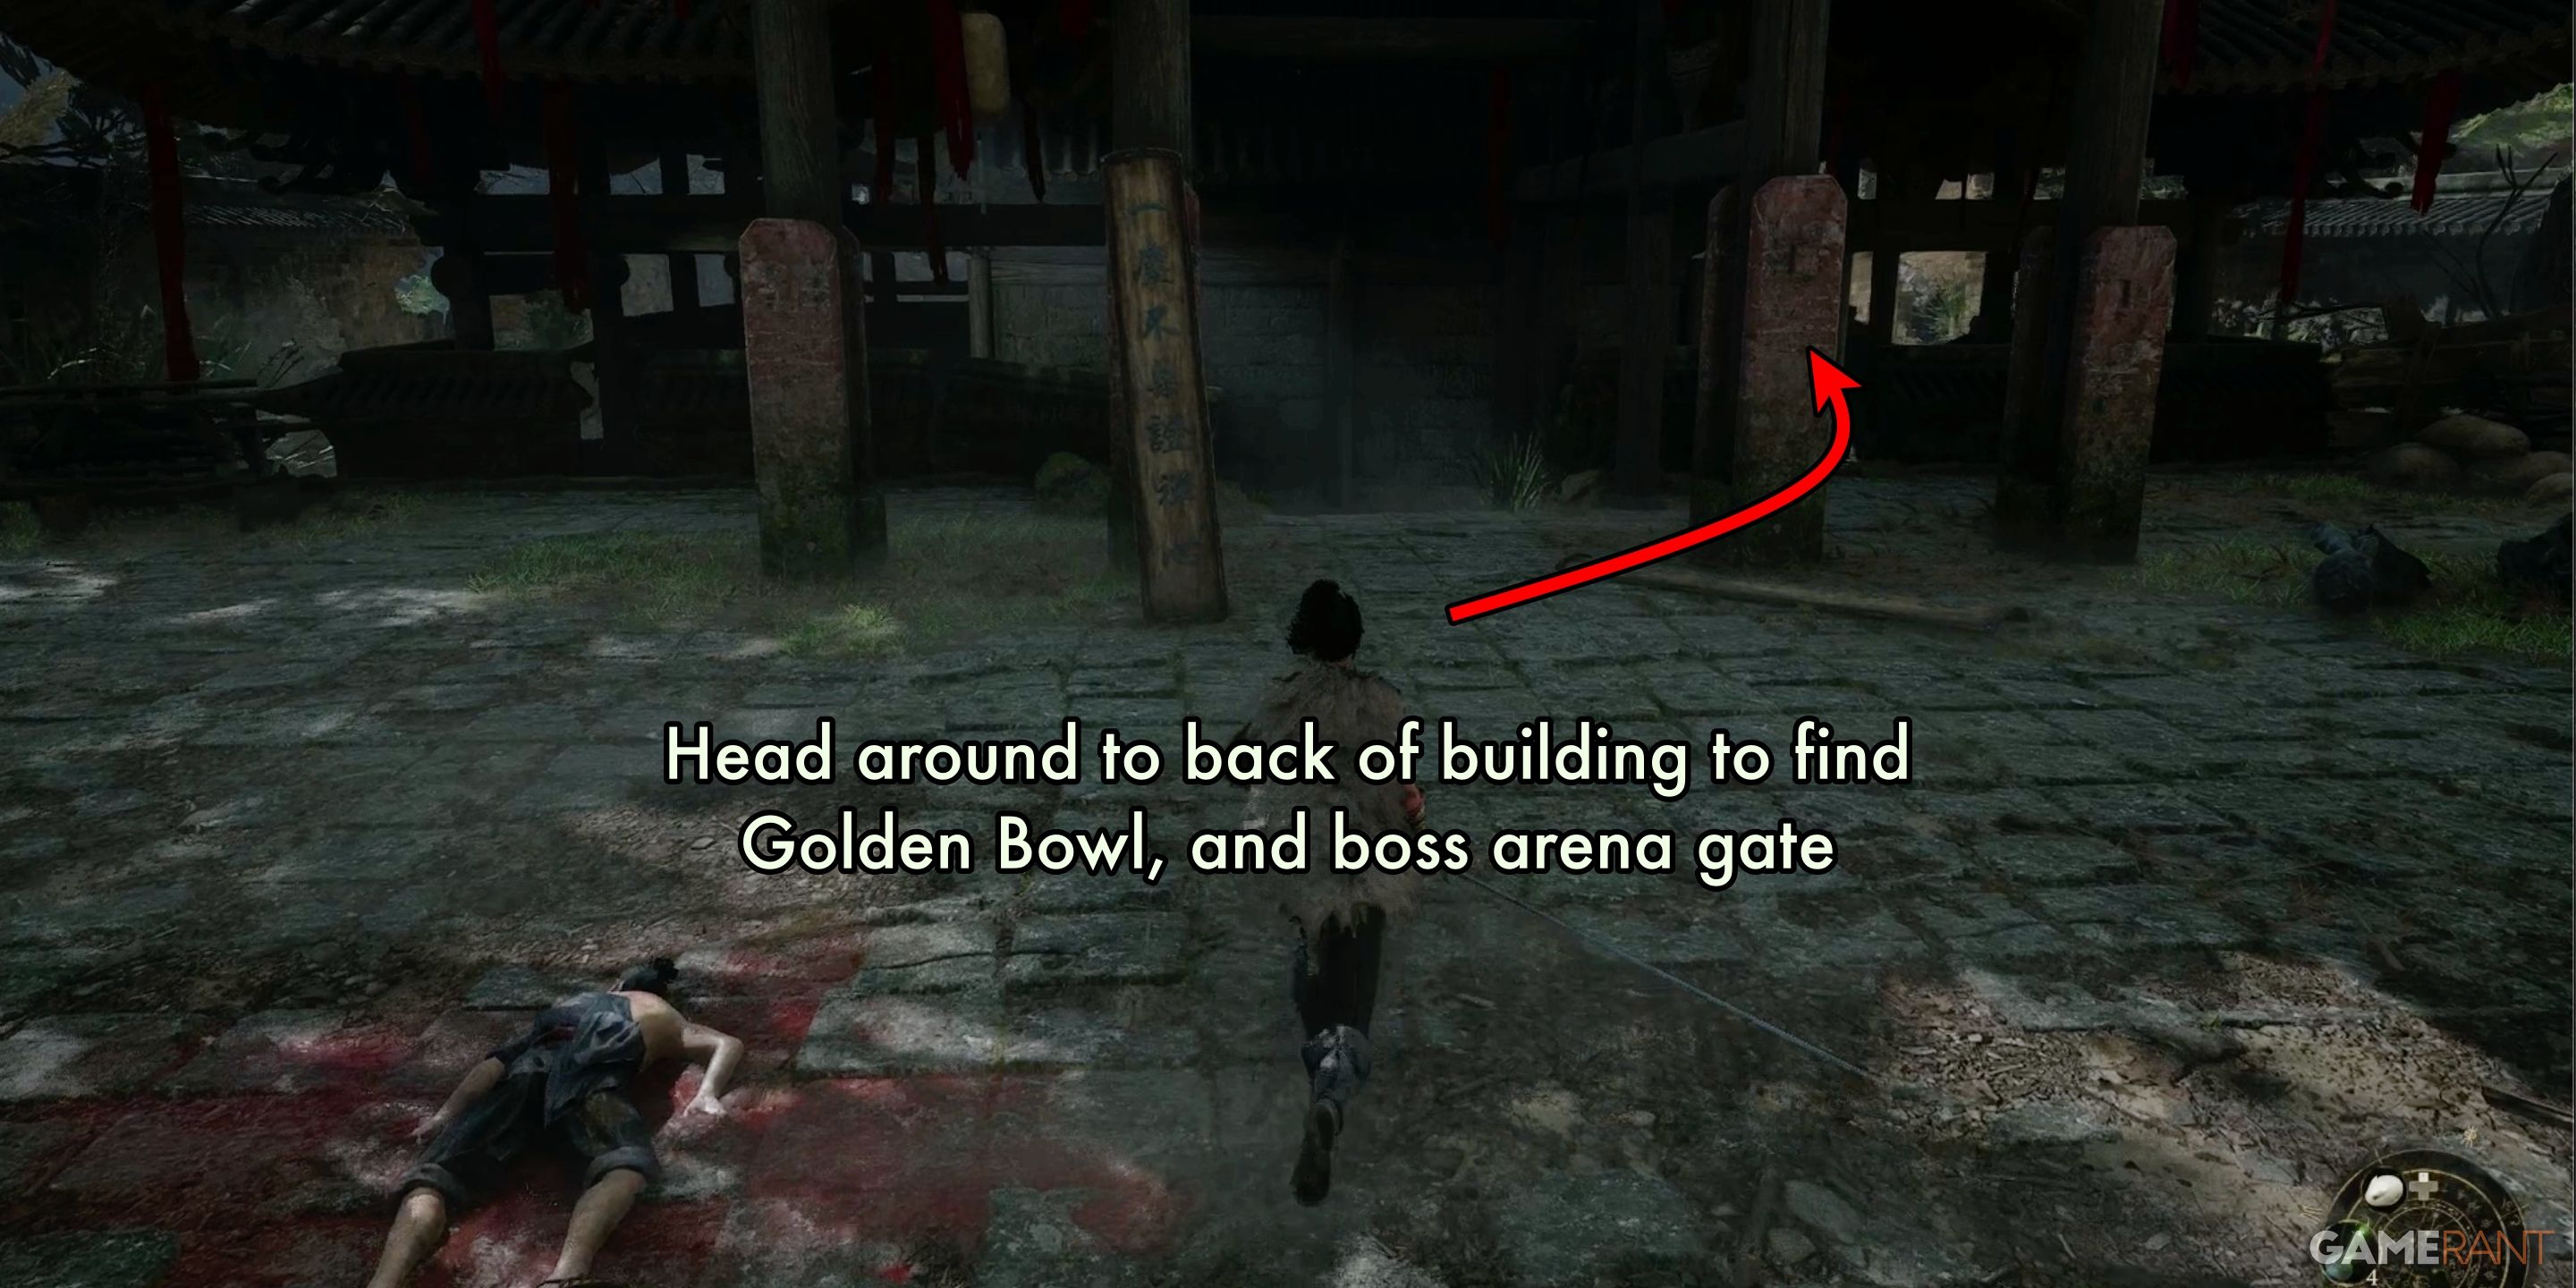
Next, make your way towards the backside of the substantial building opposite the tunnel which led you into the courtyard. In a secluded room there, you’ll discover the treasured Golden Bowl. Retain it and present it to Wu Gang when you next meet him at Shu Sanctum.
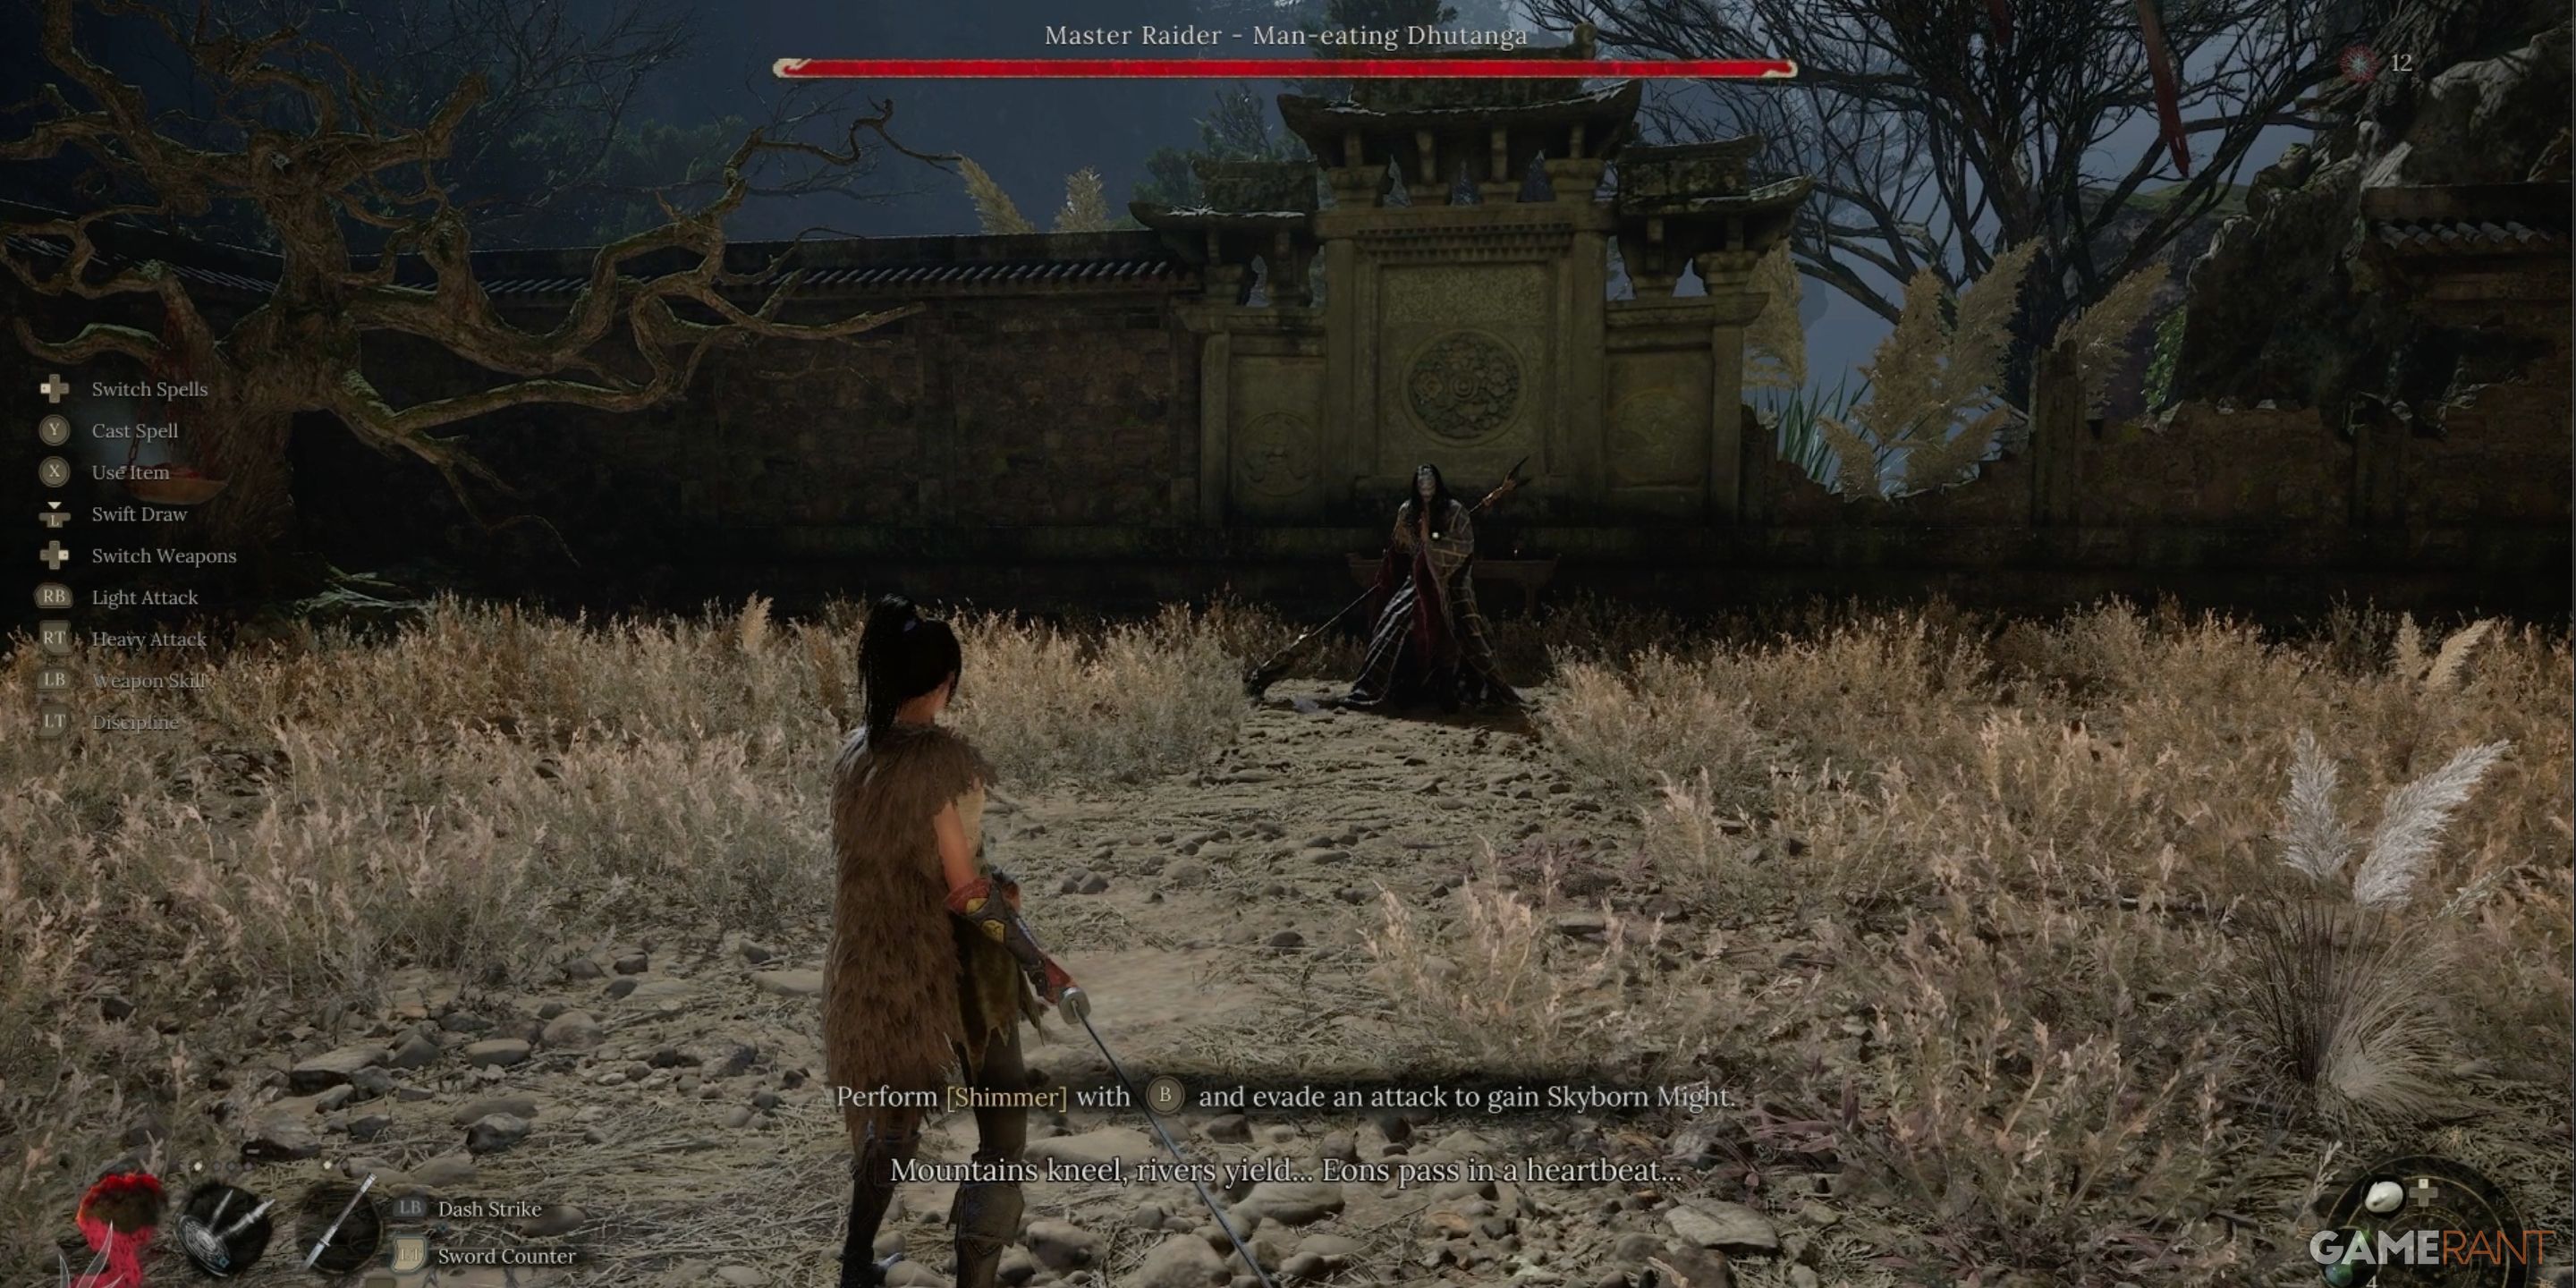
Leave the compact room, then move on through the entrance. There, you’ll encounter the initial significant adversary of the game: Master Raider – Carnivorous Dhutanga. Fortunately, this enemy is among the simpler ones to defeat. He is particularly vulnerable to Powerful Heavy Attacks with the Longsword. Utilize this strategy, and you’ll conquer him swiftly.
As a gamer, I’ll conquer Dhutanga to get my hands on Wuchang’s Tempering system. Plus, I’ll snag these cool items afterwards!
- Copper Jug (Turn in to merchant at Shu Sanctum)
- Lightzen Key
- Echo of Dhutanga(Spell)
Narrow Stretch Walkthrough – Wuchang:Fallen Feathers
Exit Lightzen Temple:
Upon conquering the boss, head back to the gate that previously needed the Lightzen Key. Remember to eliminate the Aurum Feather crow positioned above the gate. After departing through the gate, follow the path until it forks into a T-shape. Take the right turn. Continuing along the path, you’ll notice a small, green and yellow creature emerging from the ground. If you manage to slay it before it burrows away at the end of the path, you’ll acquire one Bamboo Shoot, a valuable item that can be traded with the Panda located near the Shu Sanctum.
If you miss the bamboo creature, return to the shrine and enter the dream to get another chance.
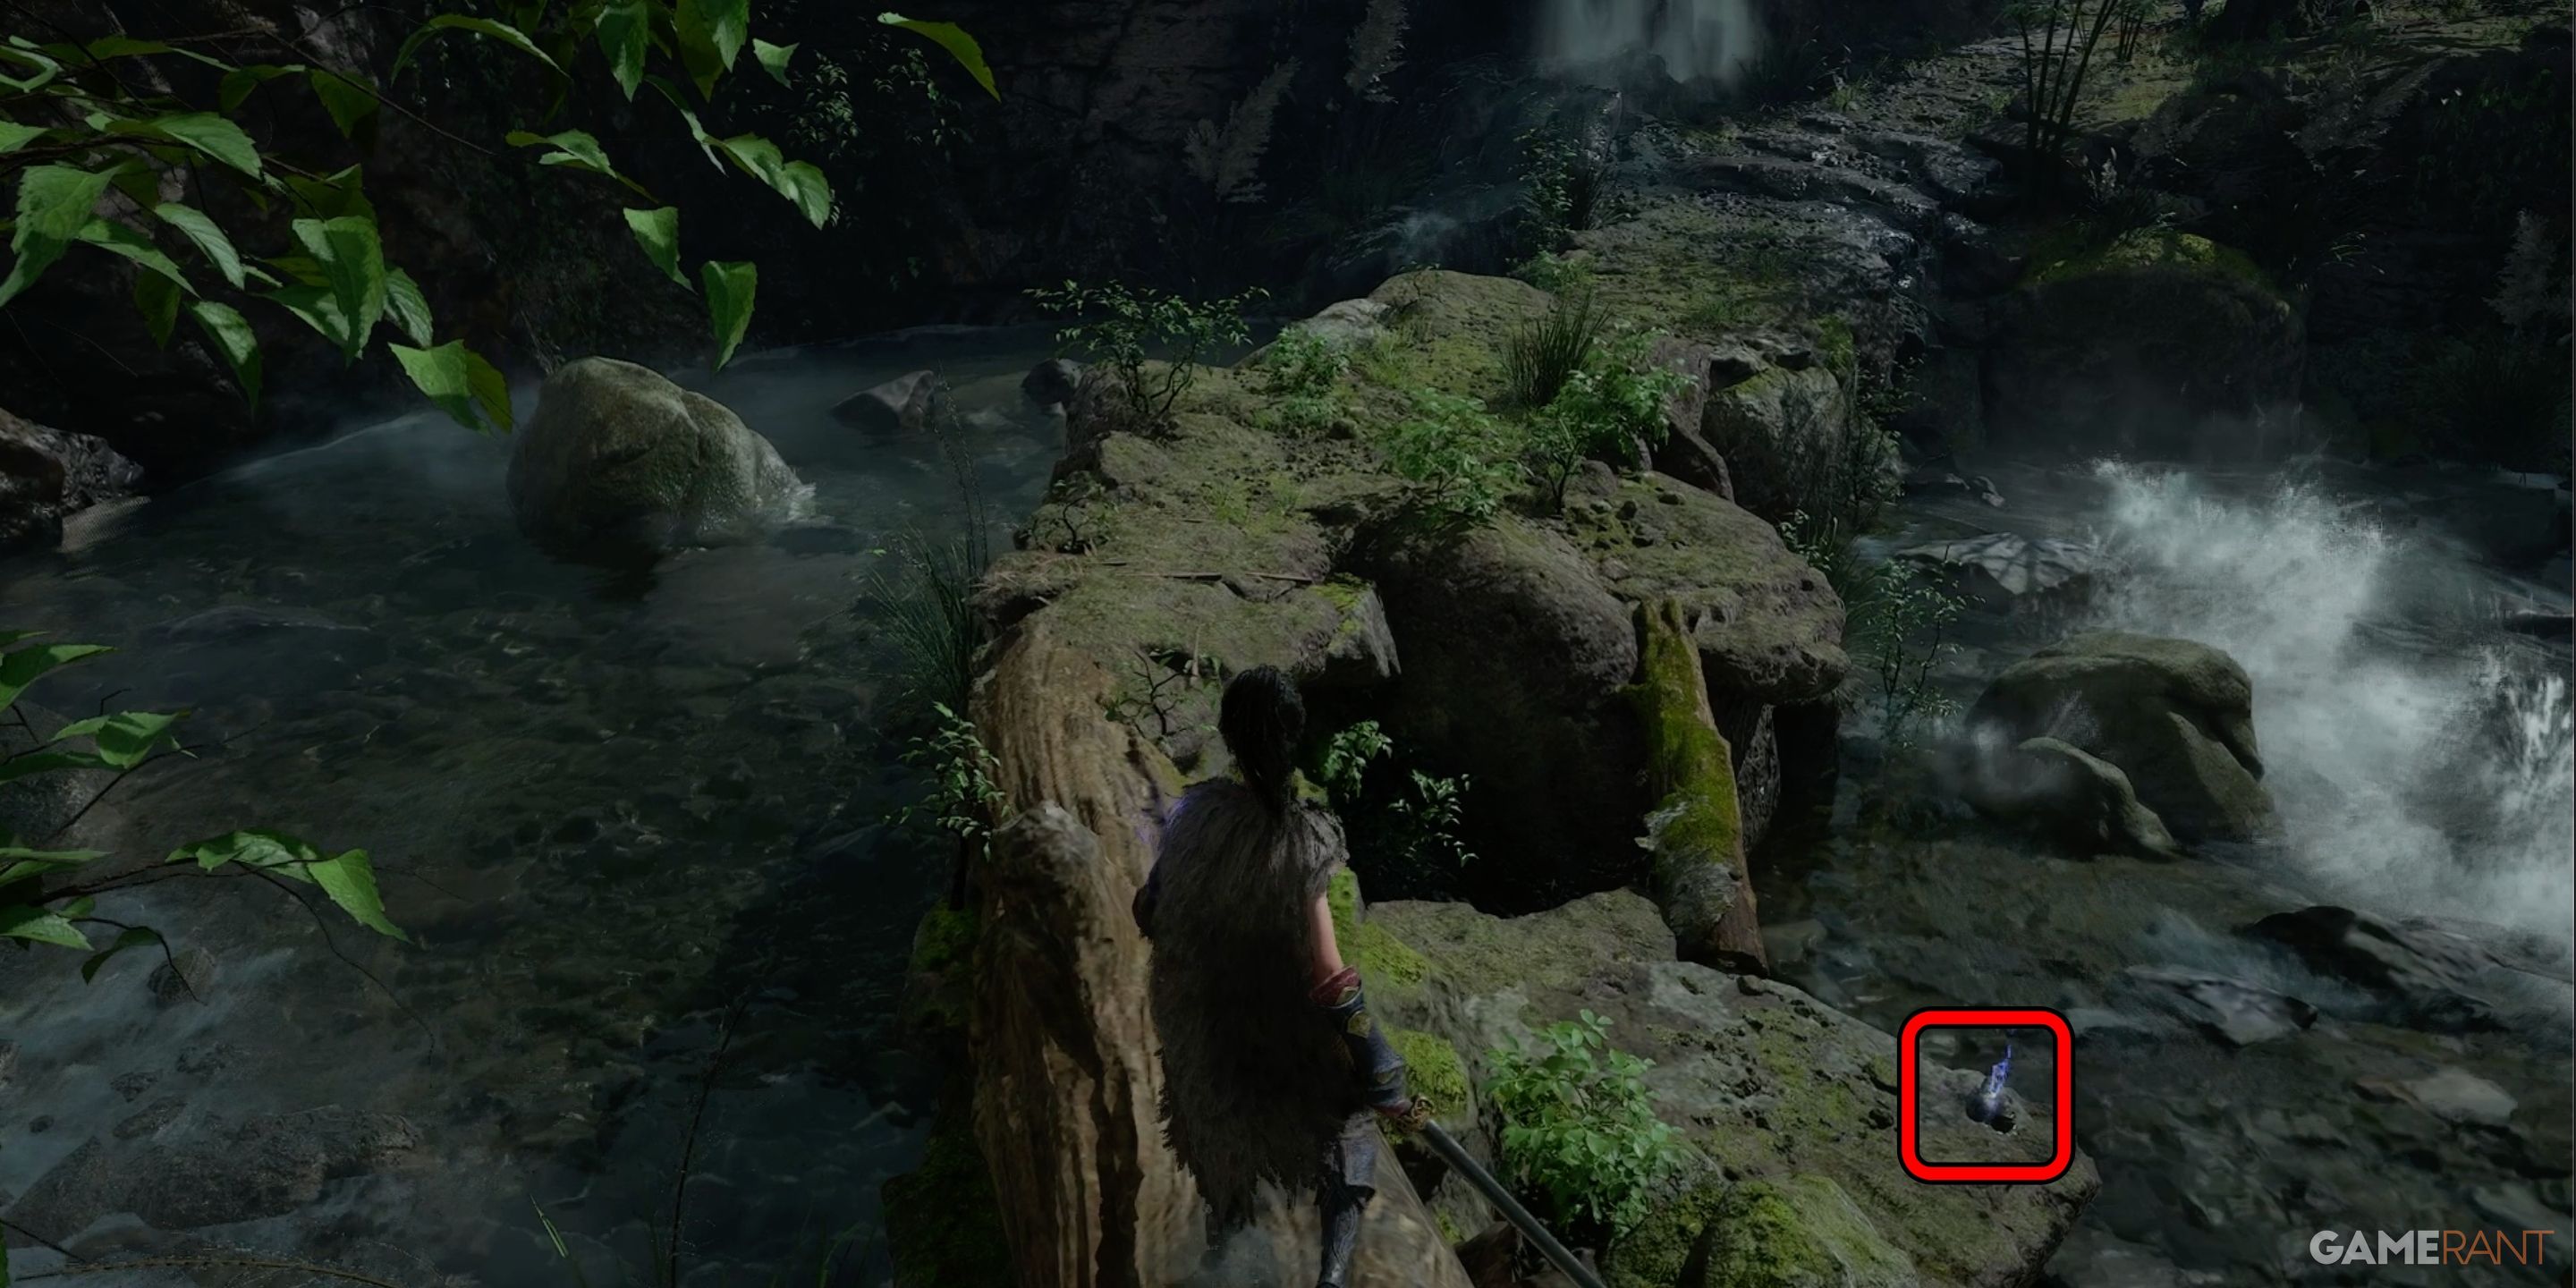
Moving forward, as there’s nothing behind us, proceed along the primary trail after defeating the bamboo monster. Upon reaching the stone archway, glance down to your right, and you’ll spot an object on a big rock. Grab the Budding Red Mercury x1, then traverse the bridge and climb up the slope.
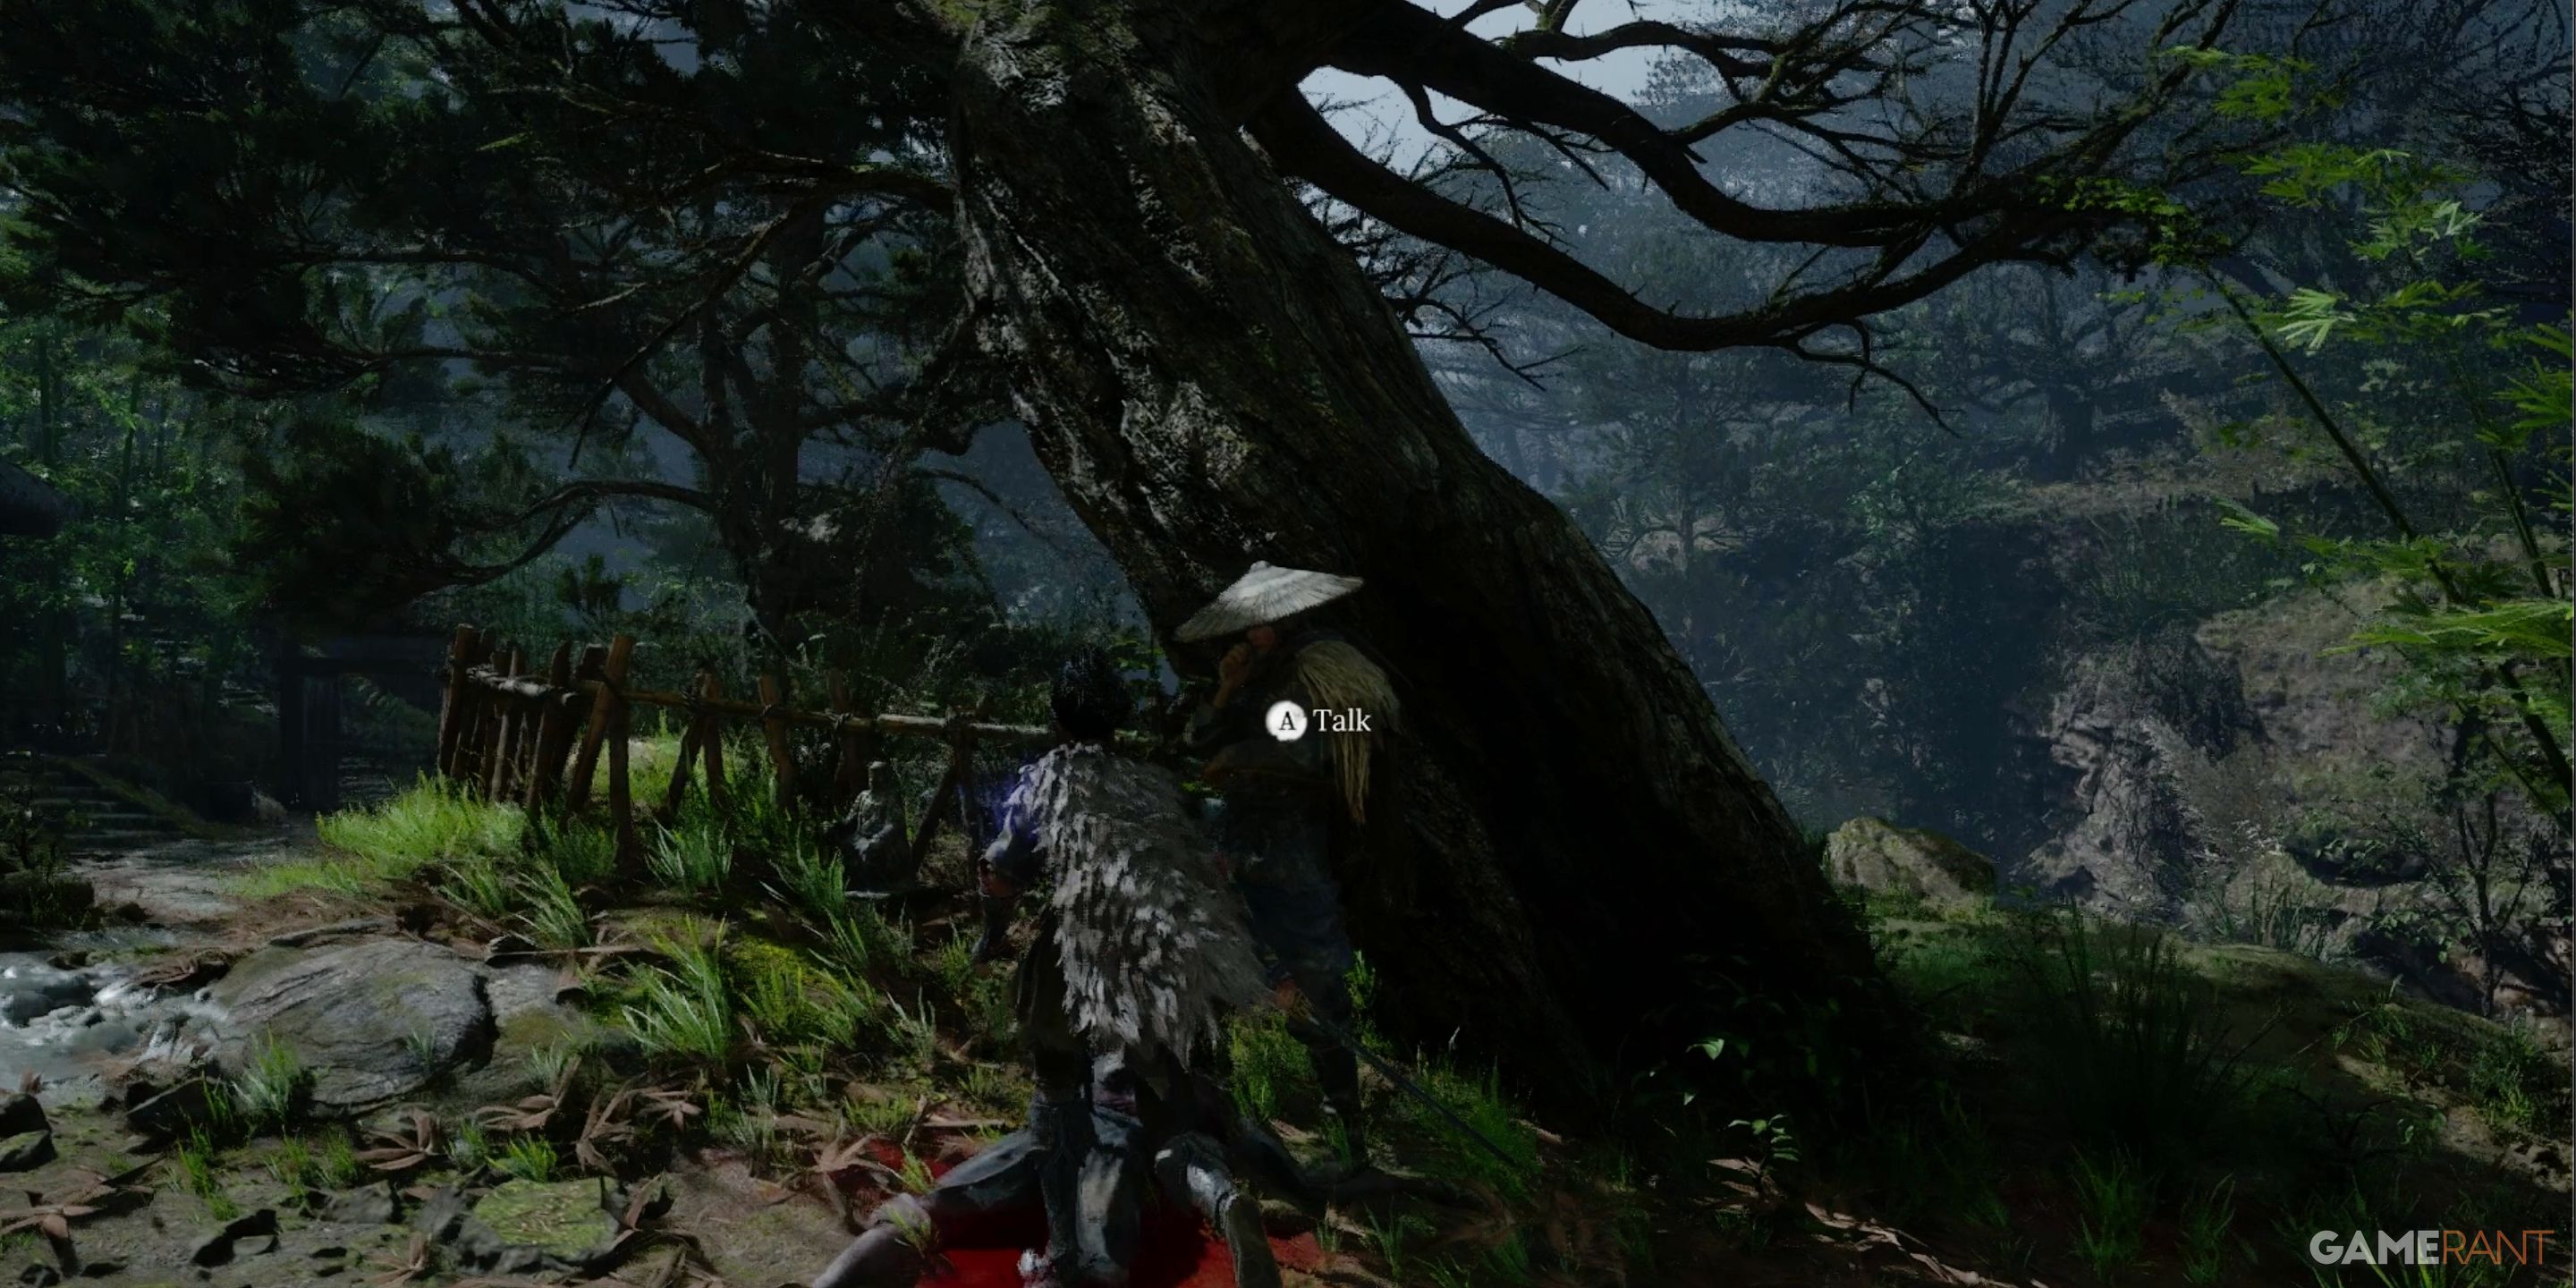
At the summit of the hill, you’ll come across an NPC named Nian Suichang, leaning against a tree. If you engage him in conversation, ask for some local news. Upon your request, decide to aid him. In response, Nian Suichang will demonstrate the “Well Met” gesture and provide you with a “Bone Whistle.” This item will enable you to summon him during battles when you require assistance. Subsequently, he’ll relocate to Shu Sanctum, located higher up the hill. This signifies the conclusion of the Narrow Stretch section and the beginning of the area encompassing Shu Sanctum.
Read More
- All Shadow Armor Locations in Crimson Desert
- Dark Marksman Armor Locations in Crimson Desert
- How to Beat Antumbra’s Sword (Sanctum of Absolution) in Crimson Desert
- Genshin Impact Dev Teases New Open-World MMO With Realistic Graphics
- Sega Reveals Official Sonic Timeline: From Prehistoric to Modern Era
- Where to Pack and Sell Trade Goods in Crimson Desert
- Top 5 Militaristic Civs in Civilization 7
- The Limits of Thought: Can We Compress Reasoning in AI?
- Enshrouded: Giant Critter Scales Location
- Best Weapons, Armor, and Accessories to Get Early in Crimson Desert
2025-07-29 22:03