In the game REPO, players aim to discover valuable items at each level to meet their targets and potentially earn additional income. As you progress deeper, however, encounters with increasingly perilous monsters become more frequent. Some of these creatures can be evaded, but others may require using specific items for protection or defeat.
At this shop, there’s a wide variety of goods available for your selection, including weapons and enhancements. Keep in mind that the inventory and pricing of these items may change, so make your decisions thoughtfully. Here’s a quick guide on every item in REPO and their respective uses.
Why REPO Items Are Important
Initially, while you’re getting the hang of things, you might not give much thought to the items within the REPO. Yet, their significance is far greater than it appears at first glance. Enhancements that improve your characters are incredibly valuable, and other items can be surprisingly effective. These items can be categorized into various groups:
- Weapons
- Drones
- Upgrades
- Healing items
- Tools
- Throwables
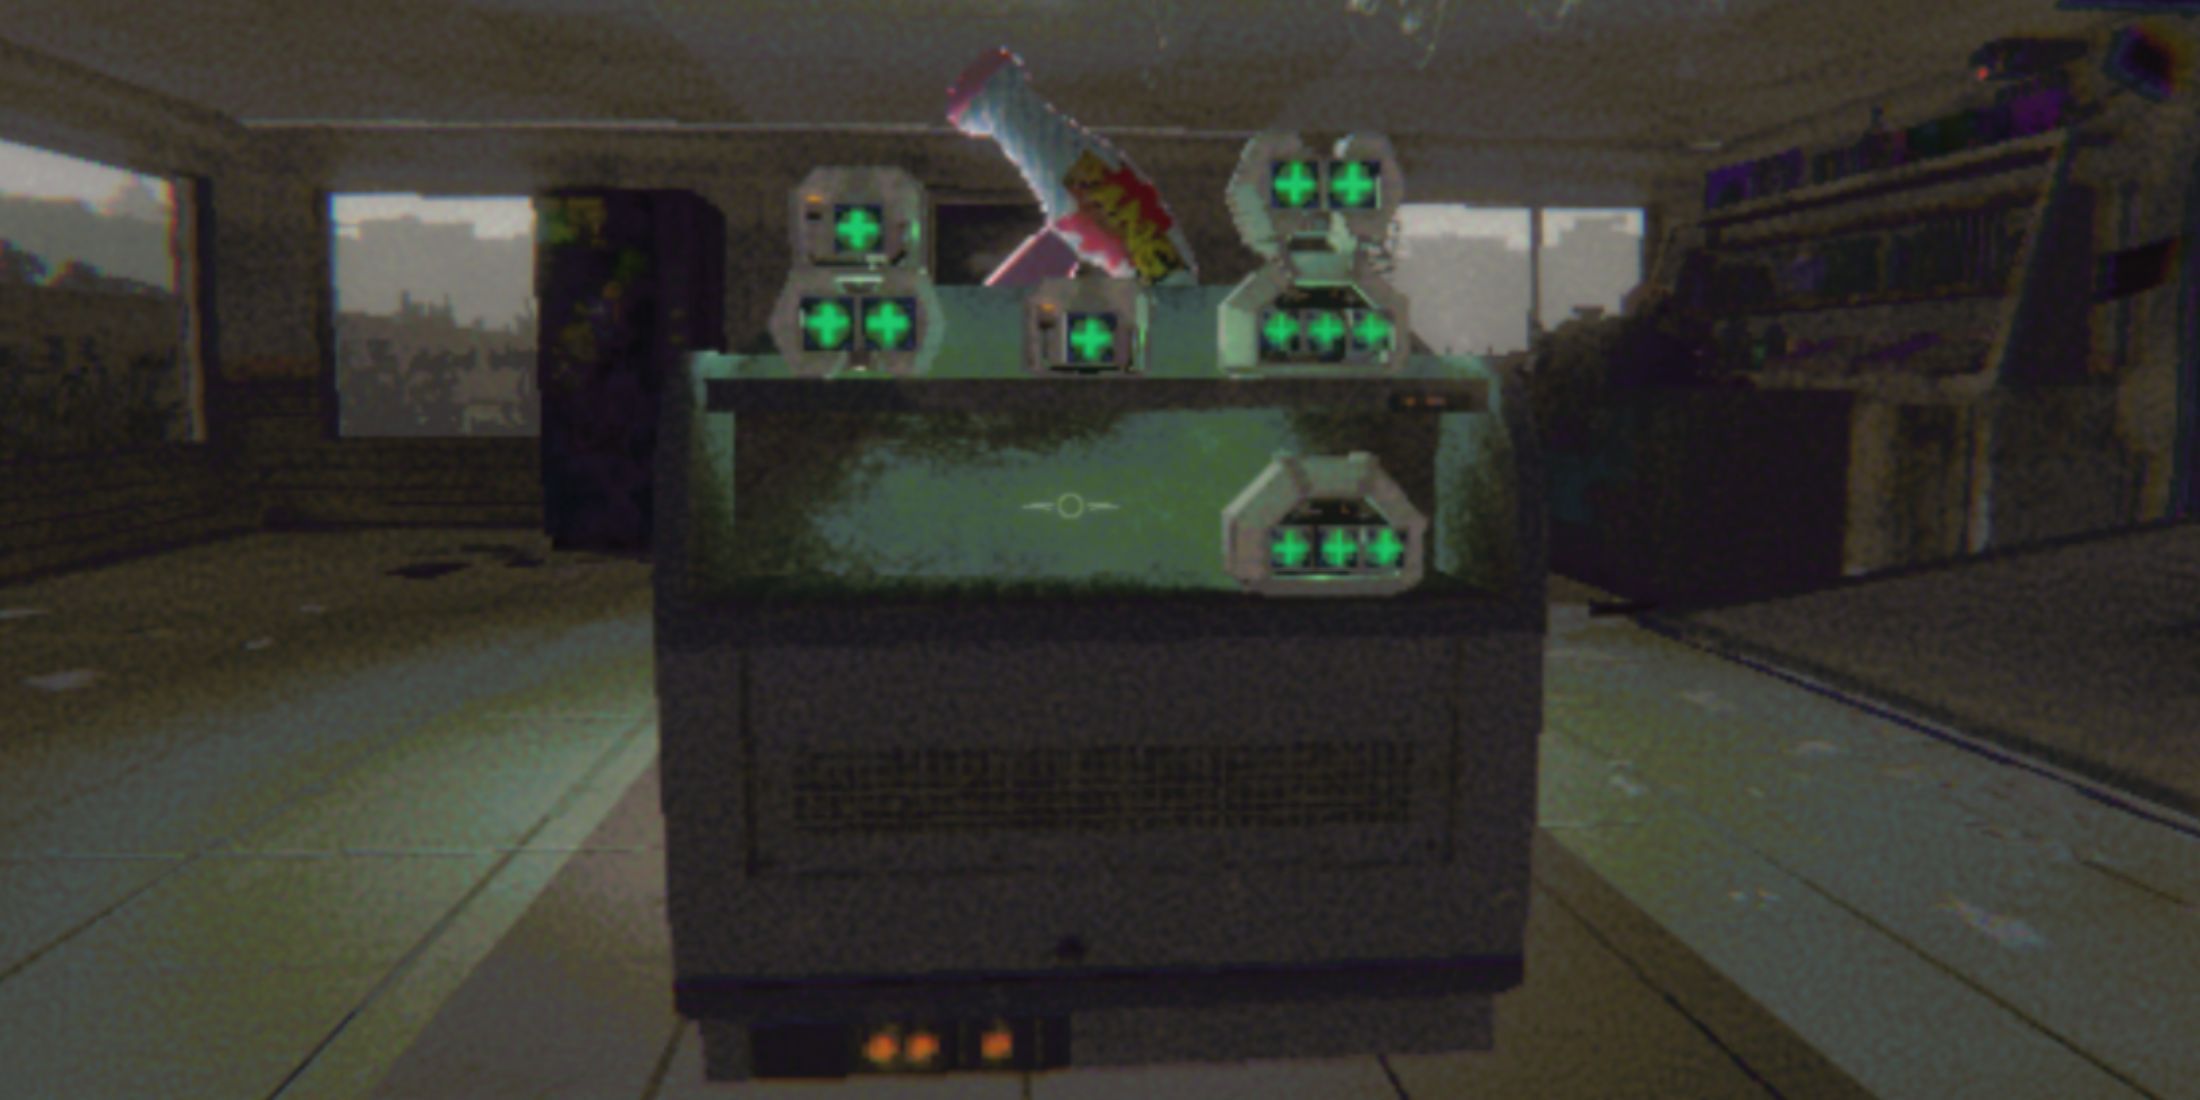
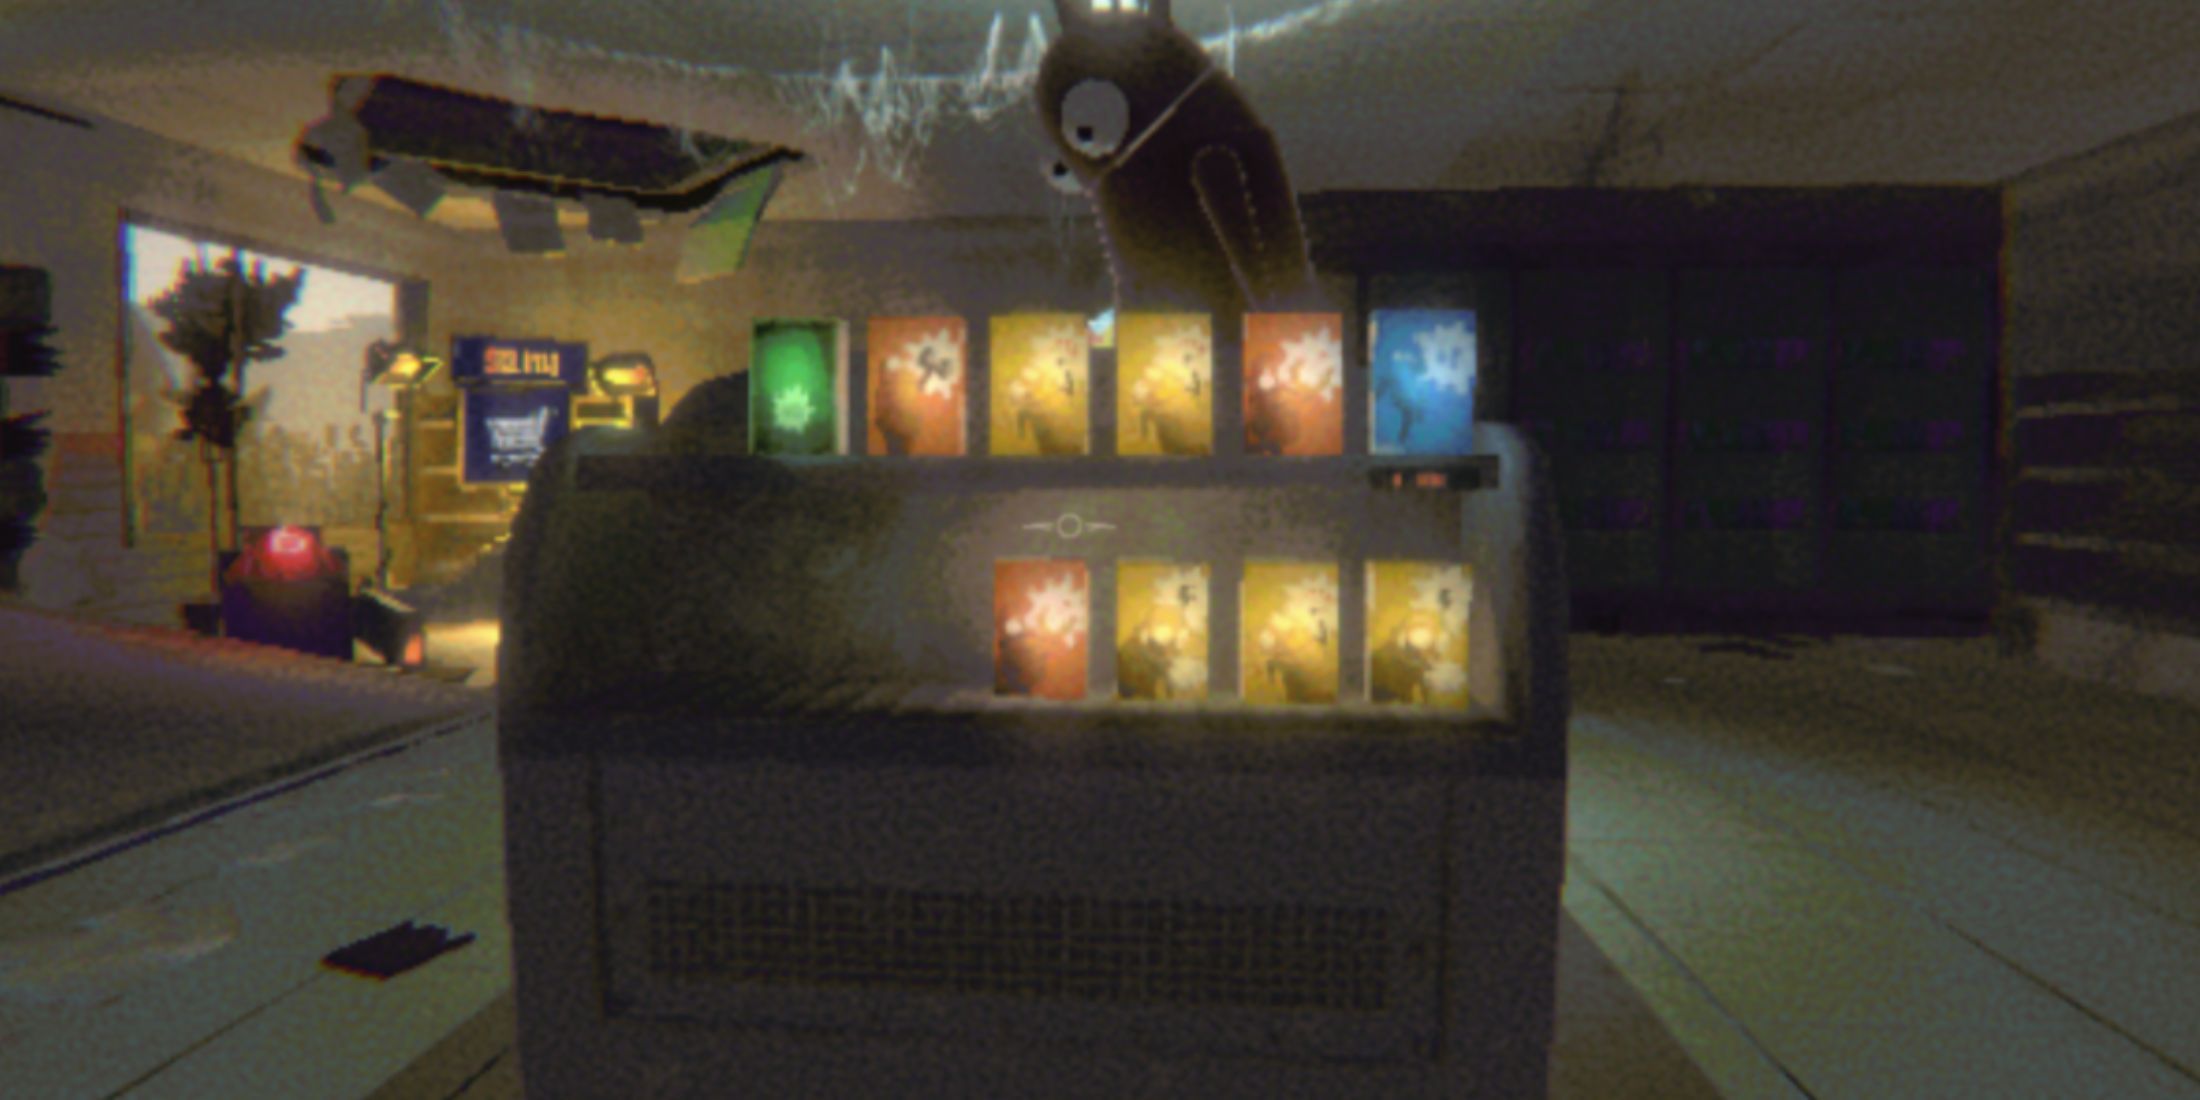
At the Service Station, every visit results in an unpredictable mix of goods within the REPO container. However, healing items and upgrades are consistently available, as they aren’t subject to the Random Number Generator (RNG). The specific items obtained will depend on the luck of the draw with RNG.
To acquire these items, simply move them into a region resembling the Extractor and click the large red button. Once done, just drive off with your truck to pick up your bought goods.
Additionally, you might want to experiment with using REPO items directly to understand their functionality. Notably, regardless of whether you or a teammate are eliminated, your Health Points (HP) will reset to the same amount that they were at the conclusion of the prior level.
All REPO Items List
How to Use Weapons
| Weapons | Description | Average Cost |
|---|---|---|
| Inflatable Hammer | Swing it to deal damage, but it explodes when it hits a flat surface. | $9K |
| Sword | Swing it to damage enemies near you. | $25K |
| Frying Pan | Swing your weapon from side to side to deal damage. | $25K |
| Baseball Bat | Swing it to damage enemies near you. | $26K |
| Sledge Hammer | Swing your weapon from side to side to deal damage. | $45K |
| Tranq Gun | Shoot at an enemy to put them to sleep temporarily. | $16K |
| Gun | Shoot at the enemy to deal damage. | $45K |
| Shotgun | Works like the Gun but deals much more damage at close range. | $94K |
How to Use Drones
| Upgrade Pack | Description | Average Cost |
|---|---|---|
| Strength | Use a pack to increase your strength and hold heavier items, including monsters. | $7K |
| Stamina | Use a pack to increase your Stamina by 10 points. | $2K |
| Health | Use a pack to increase your Health by 20HP. | $7K |
| Sprint | Use a pack to increase your Sprint speed by 20%. | $8K |
| Extra Jump | Use a pack to get a double jump. | $11K |
| Map Player Count | Use a pack to see a counter of live teammates on the map. | $11K |
| Tumble Launch | Use a pack to increase your tumble launch distance. | $5K |
| Radar | Use a pack to see teammates on the map. | $10K |
| Range | Use a pack to increase your pick-up range. | $7K |
How to Use Healing Items
| Healing Pack | Description | Average Cost |
|---|---|---|
| Small Health Pack | Use a pack to heal 25HP. | $4K |
| Medium Health Pack | Use a pack to heal 50HP. | $7K |
| Large Health Pack | Use a pack to heal 100HP. | $10K |
How to Use Tools
| Tools | Description | Average Cost |
|---|---|---|
| Valuable Tracker | Use it to locate the nearest valuables. | $15K |
| Extraction Tracker | Use it to locate the next Extractor. | $6K |
| Pocket C.A.R.T. | Spawn a small cart. | $17K |
| C.A.R.T. | Spawn an extra cart. | $42K |
| Energy Crystal | Used as batteries for the Energy Container to recharge items. | $8K |
How to Use Throwables
| Throwables | Description | Average Cost |
|---|---|---|
| Stun Grenade | Throw it at an enemy to stun them, but it won’t deal any damage. | $3K |
| Grenade | Throw it at an enemy to damage them. | $3K |
| Human Grenade | Same as a the Grenade, but it deals less damage. | $2K |
| Duct Taped Grenades | Throw at an enemy to explode them with the first blast, after which several Human Grenades will fly in different directions and explode. It is recommended to use it in narrow corridors or small rooms. | $2K |
| Shockwave Grenade | Throw it at an enemy to stun them and also damage them. | $3K |
| Zero Gravity Orb | Throw this at an enemy to create a dome of zero gravity. | 45K |
| Rubber Duck | Throw as far away from you as possible and hide; the Duck will start to bounce off surfaces, dealing damage to everything. It can also explode during one of the bounces. | $16K |
| Stun Mine | Activate and throw it on the floor, after which the mine will stun anything that steps on it. | $3K |
| Explosive Mine | Activate and throw it on the floor, after which the mine will explode if anyone steps on it. | $3K |
| Shockwave Mine | Activate and throw it on the floor, after which the mine will stun and damage anyone who steps on it. | $3K |
Read More
- All Skyblazer Armor Locations in Crimson Desert
- How to Get the Sunset Reed Armor Set and Hollow Visage Sword in Crimson Desert
- All Shadow Armor Locations in Crimson Desert
- Marni Laser Helm Location & Upgrade in Crimson Desert
- All Helfryn Armor Locations in Crimson Desert
- All Golden Greed Armor Locations in Crimson Desert
- One Piece Chapter 1180 Release Date And Where To Read
- Best Bows in Crimson Desert
- All Icewing Armor Locations in Crimson Desert
- How to Beat Stonewalker Antiquum at the Gate of Truth in Crimson Desert
2025-03-19 12:05