
Metroid Prime 4 features 48 Missile Expansions, which allow players to carry a maximum of 250 Missiles when all are collected. While many of these expansions are easy to find, some are cleverly hidden. This guide will help you locate every single Missile Expansion in the game.
You won’t be able to find all the Missile Expansions in the game on your first trip to each area. You’ll need to come back later with specific abilities unlocked to reach them all, and this guide tells you exactly which abilities you need for each one.
All Fury Green Missile Expansions in Metroid Prime 4
There are six Missile Expansions in Metroid Prime 4‘s Fury Green:
Missile Expansion #1
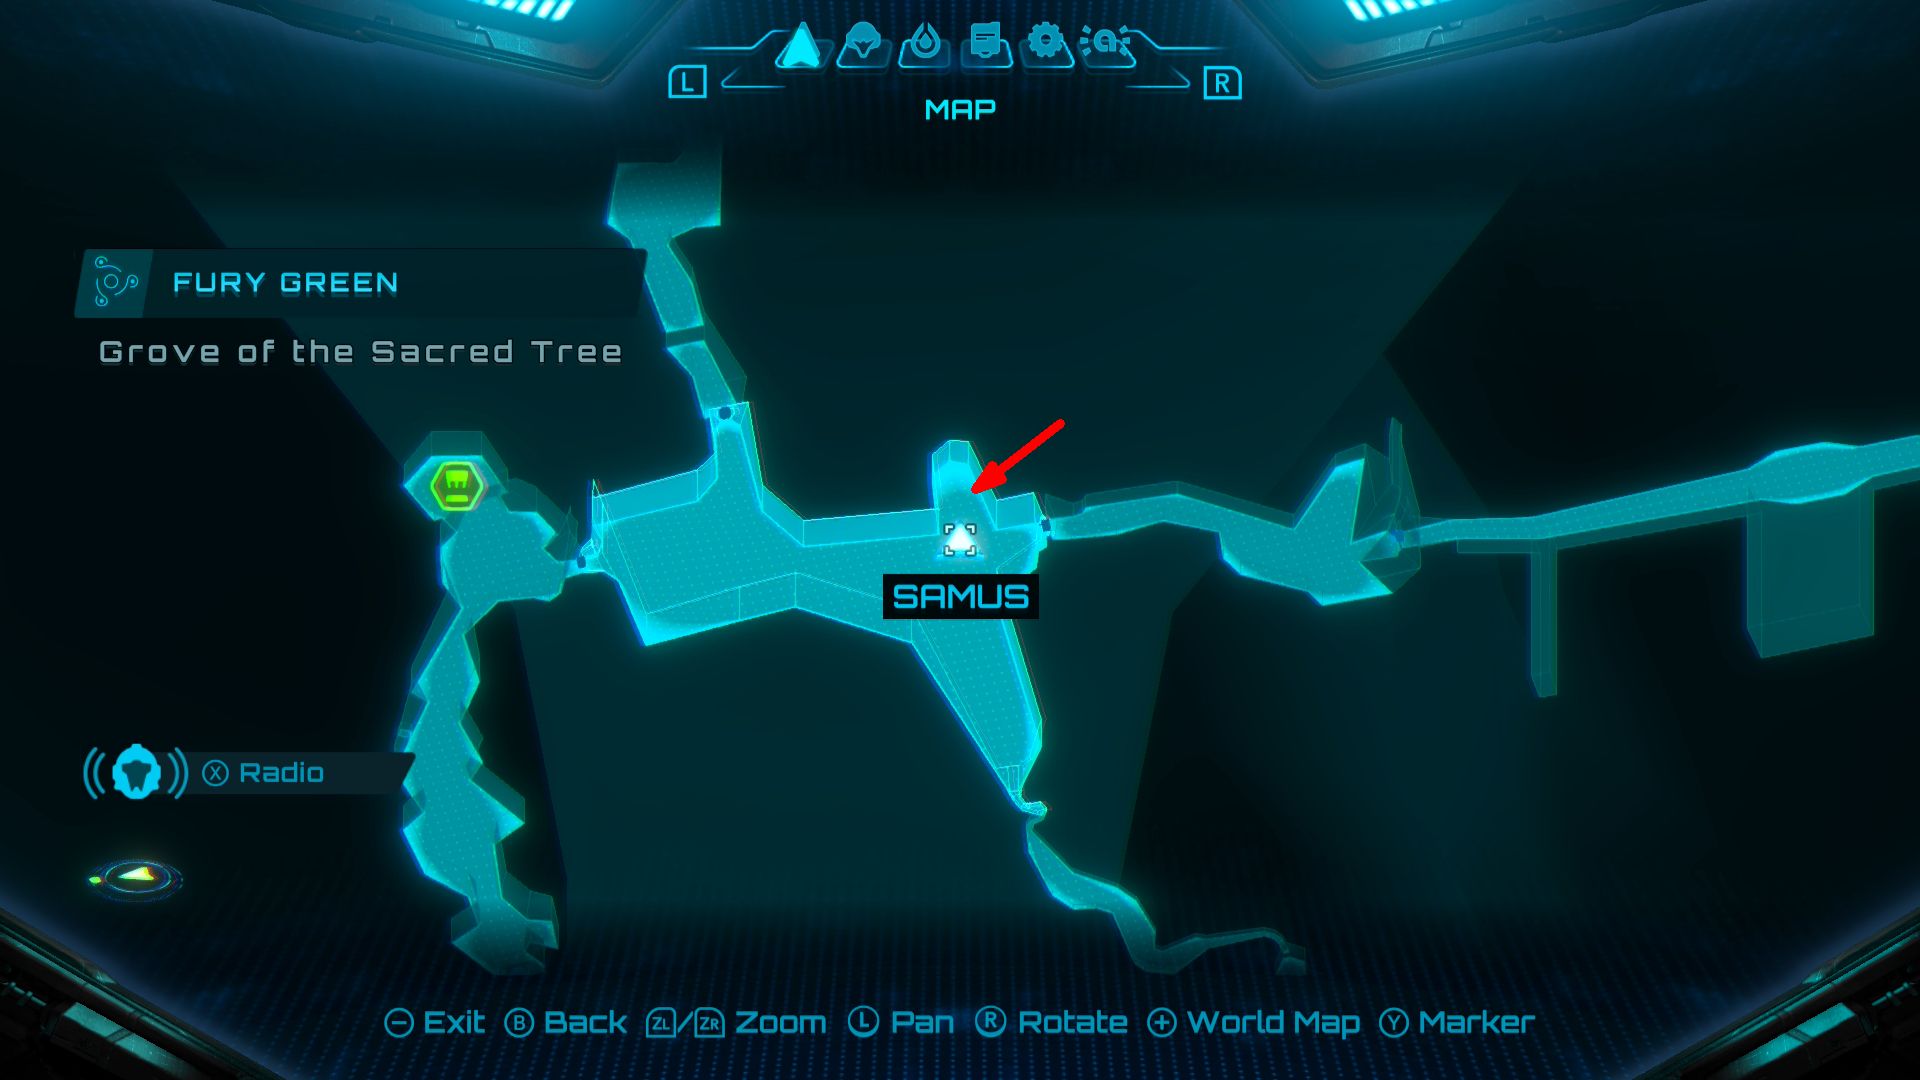
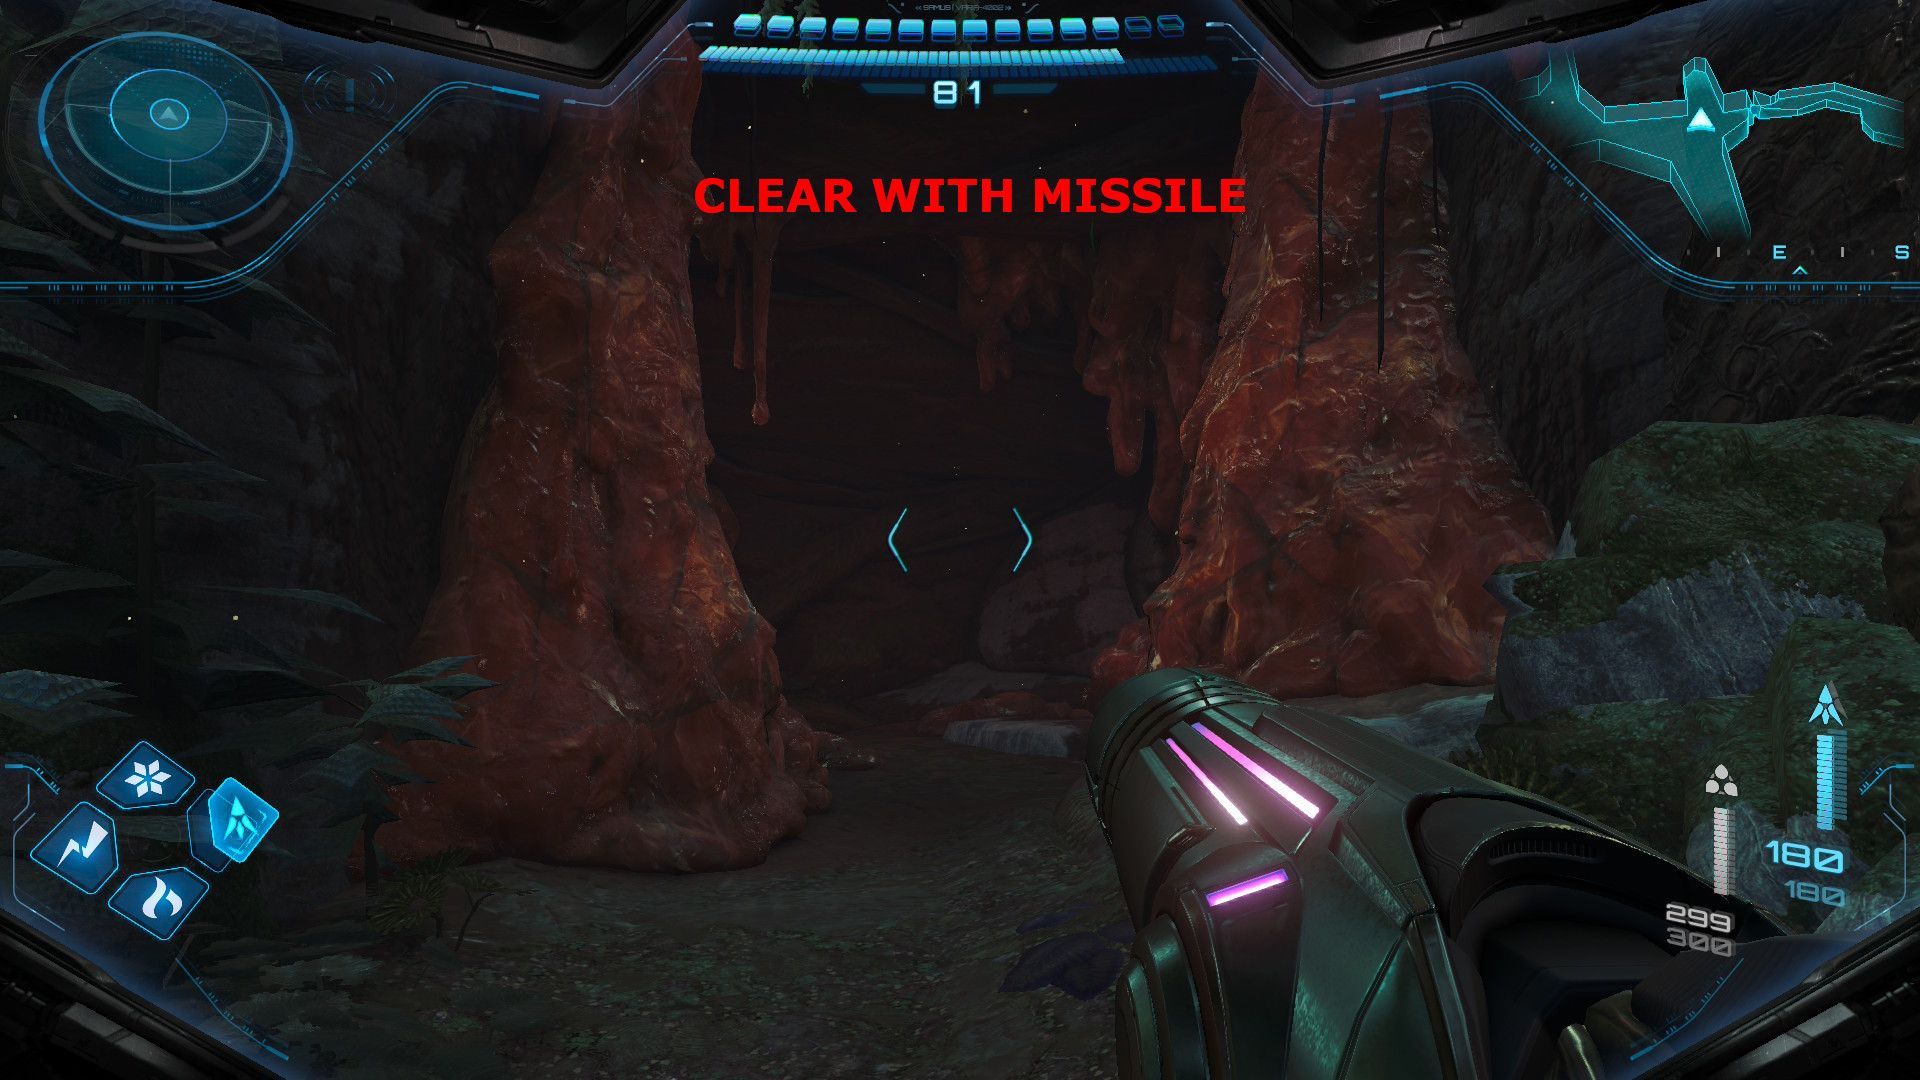
- Location: Grove the Sacred Tree
Blast through the brick wall blocking the hidden area with a missile. You’ll find an upgrade for your missiles inside.
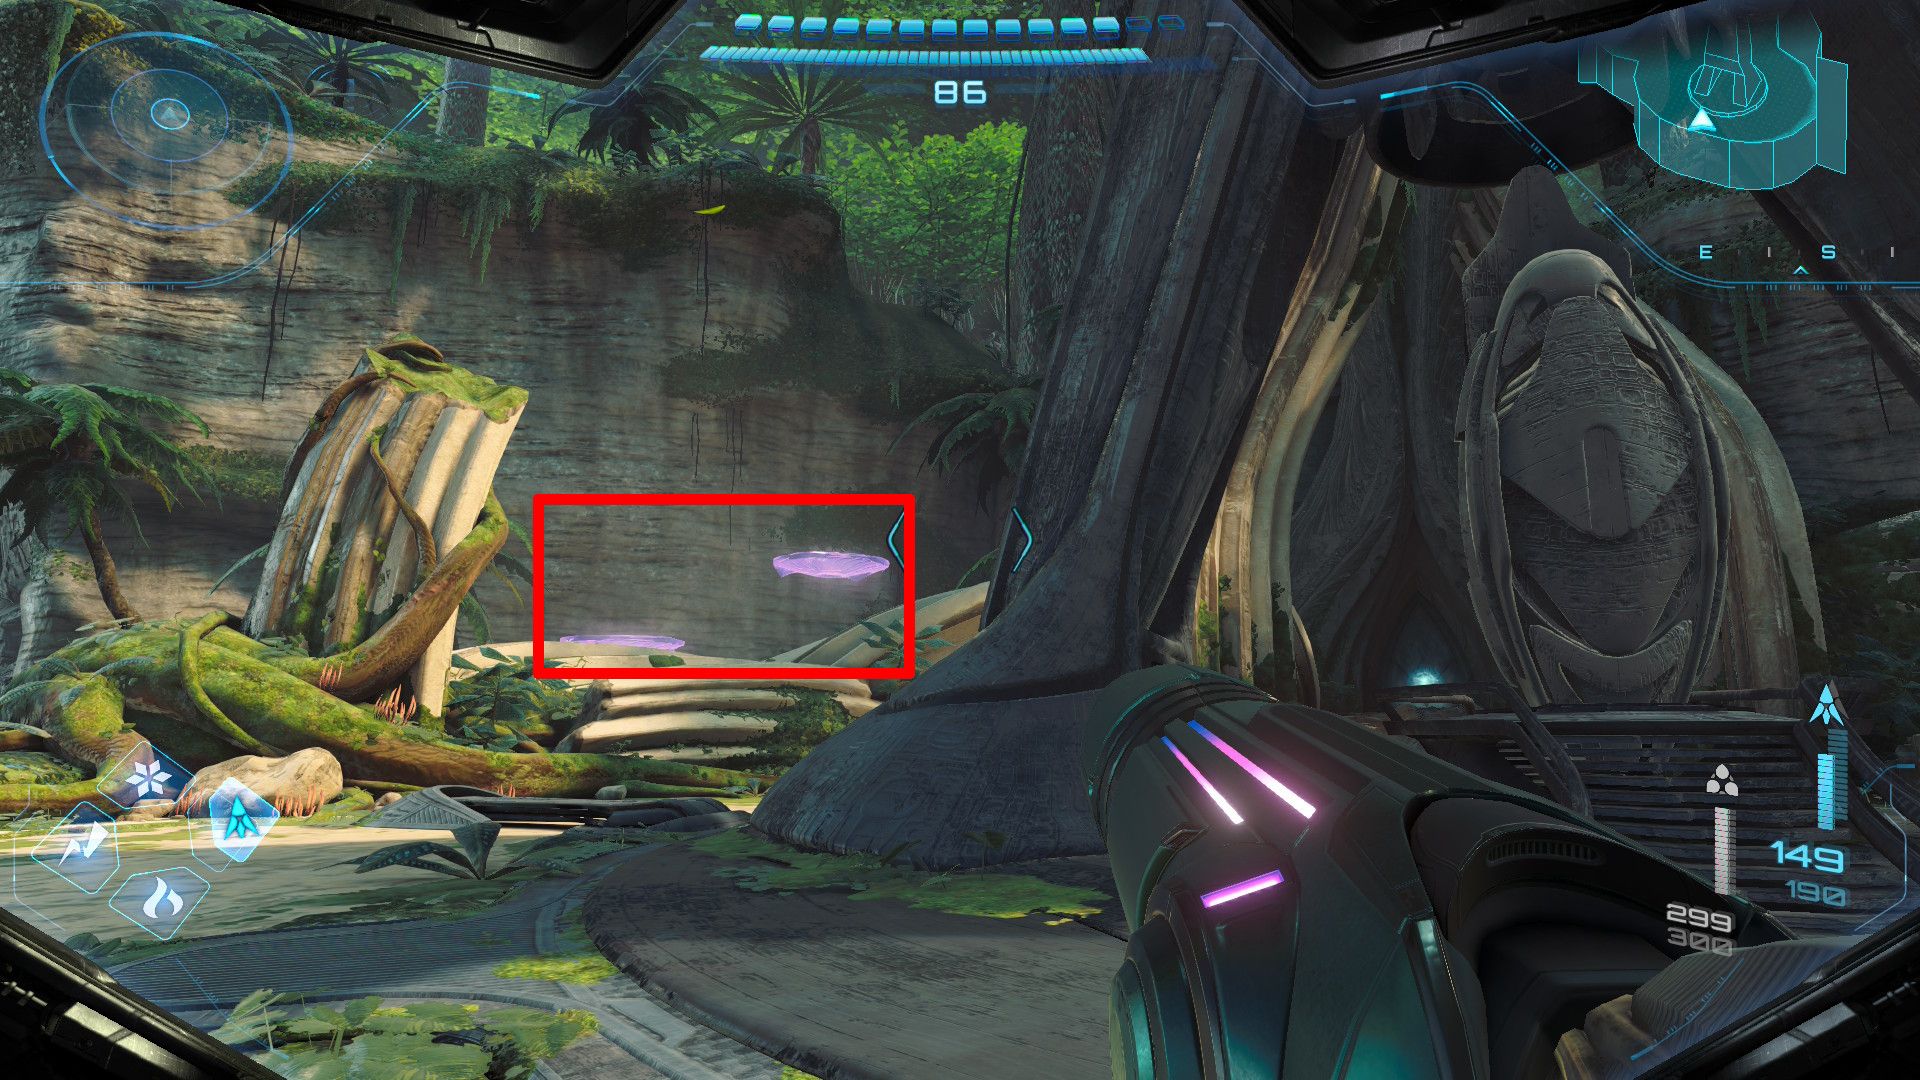
Missile Expansion #2
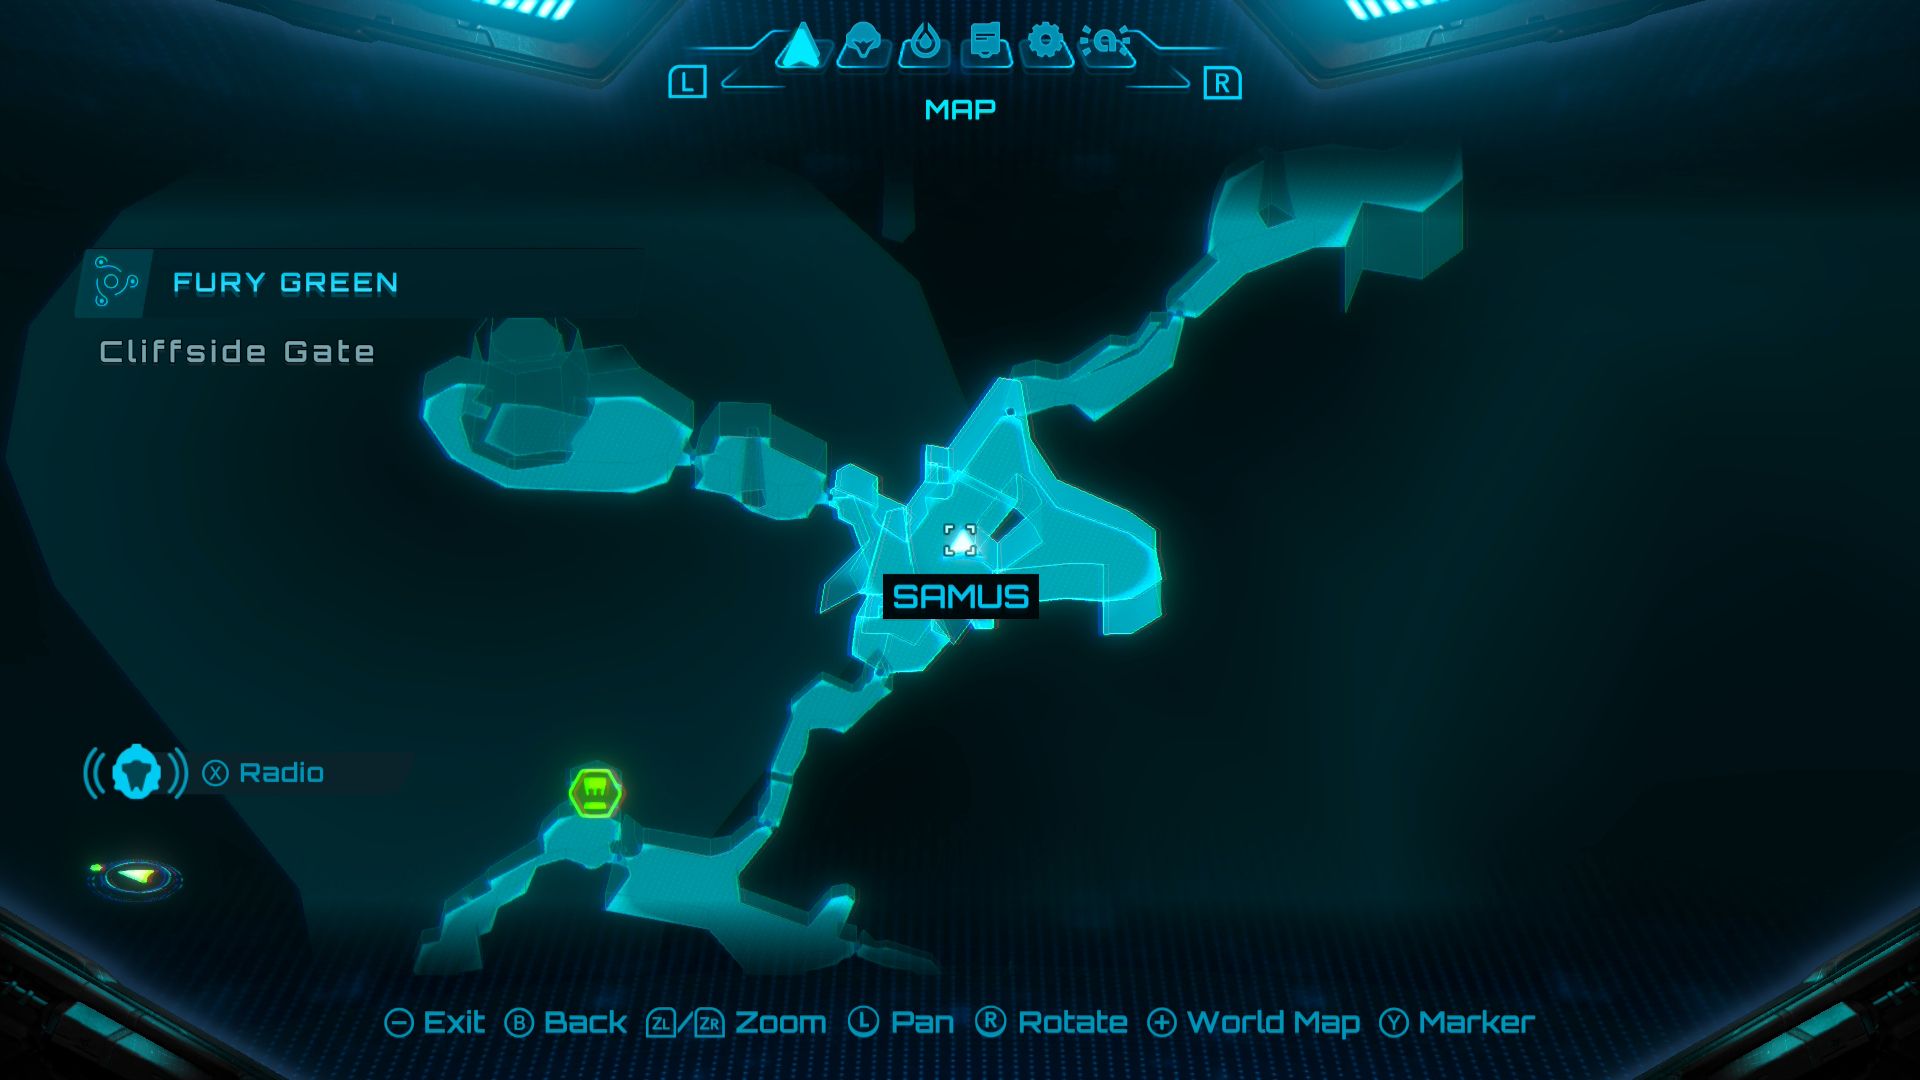
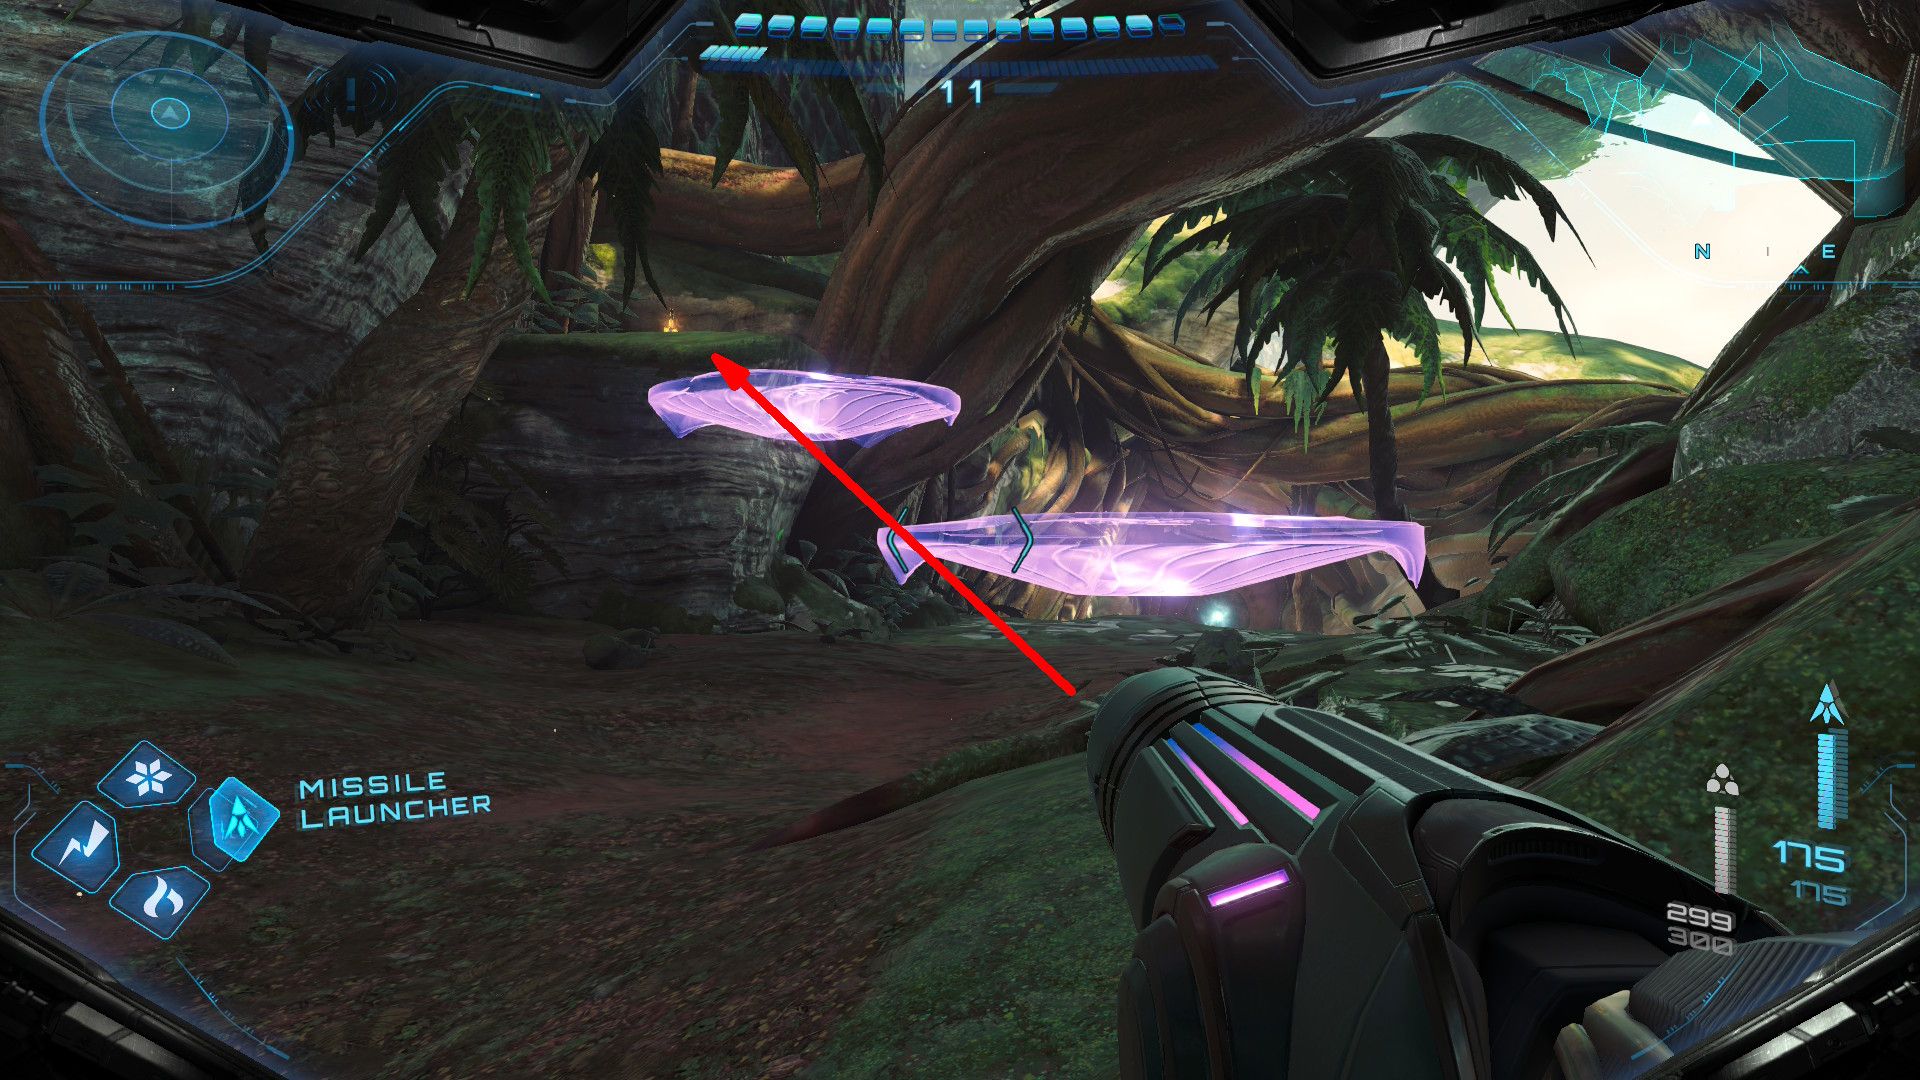
- Location: Cliffside Gate
Once you’ve gotten the Psychic Boots, use the Psychic Visor to make the platforms at Cliffside Gate appear. Then, jump across those platforms to reach a ledge where you’ll find a Missile Expansion.
Missile Expansion #3
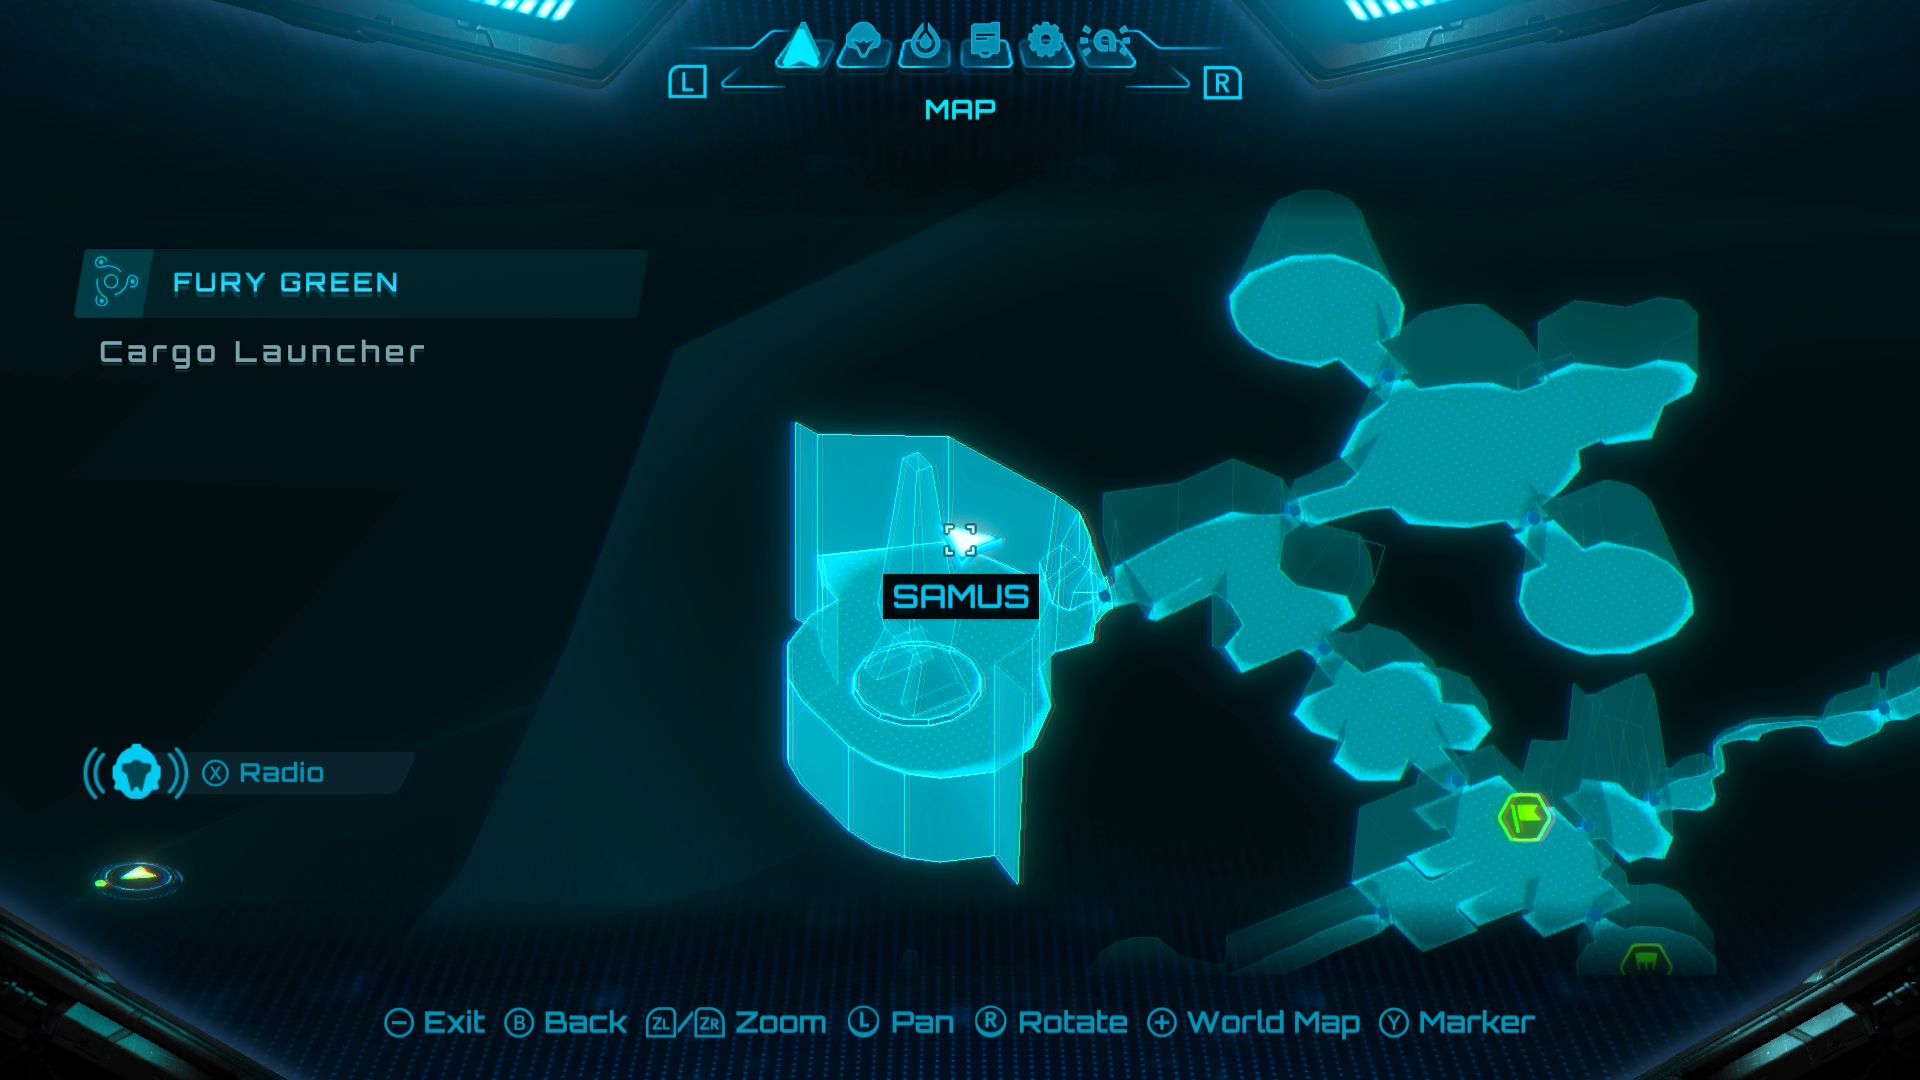
- Location: Cargo Launcher
Once you unlock the Psychic Boots, you can activate more Psychic Platforms in the room with the Cargo Launcher. These platforms will let you access the Missile Expansion.
Missile Expansion #4
- Location: Resin Creek
Okay, so I was exploring Resin Creek and found this weird red growth stuck in the north wall. Turns out, if you switch to Morph Ball and plant a bomb right next to it, you can blow it up! And guess what? It hides a Missile Expansion, which is awesome for getting more firepower!
Missile Expansion #5
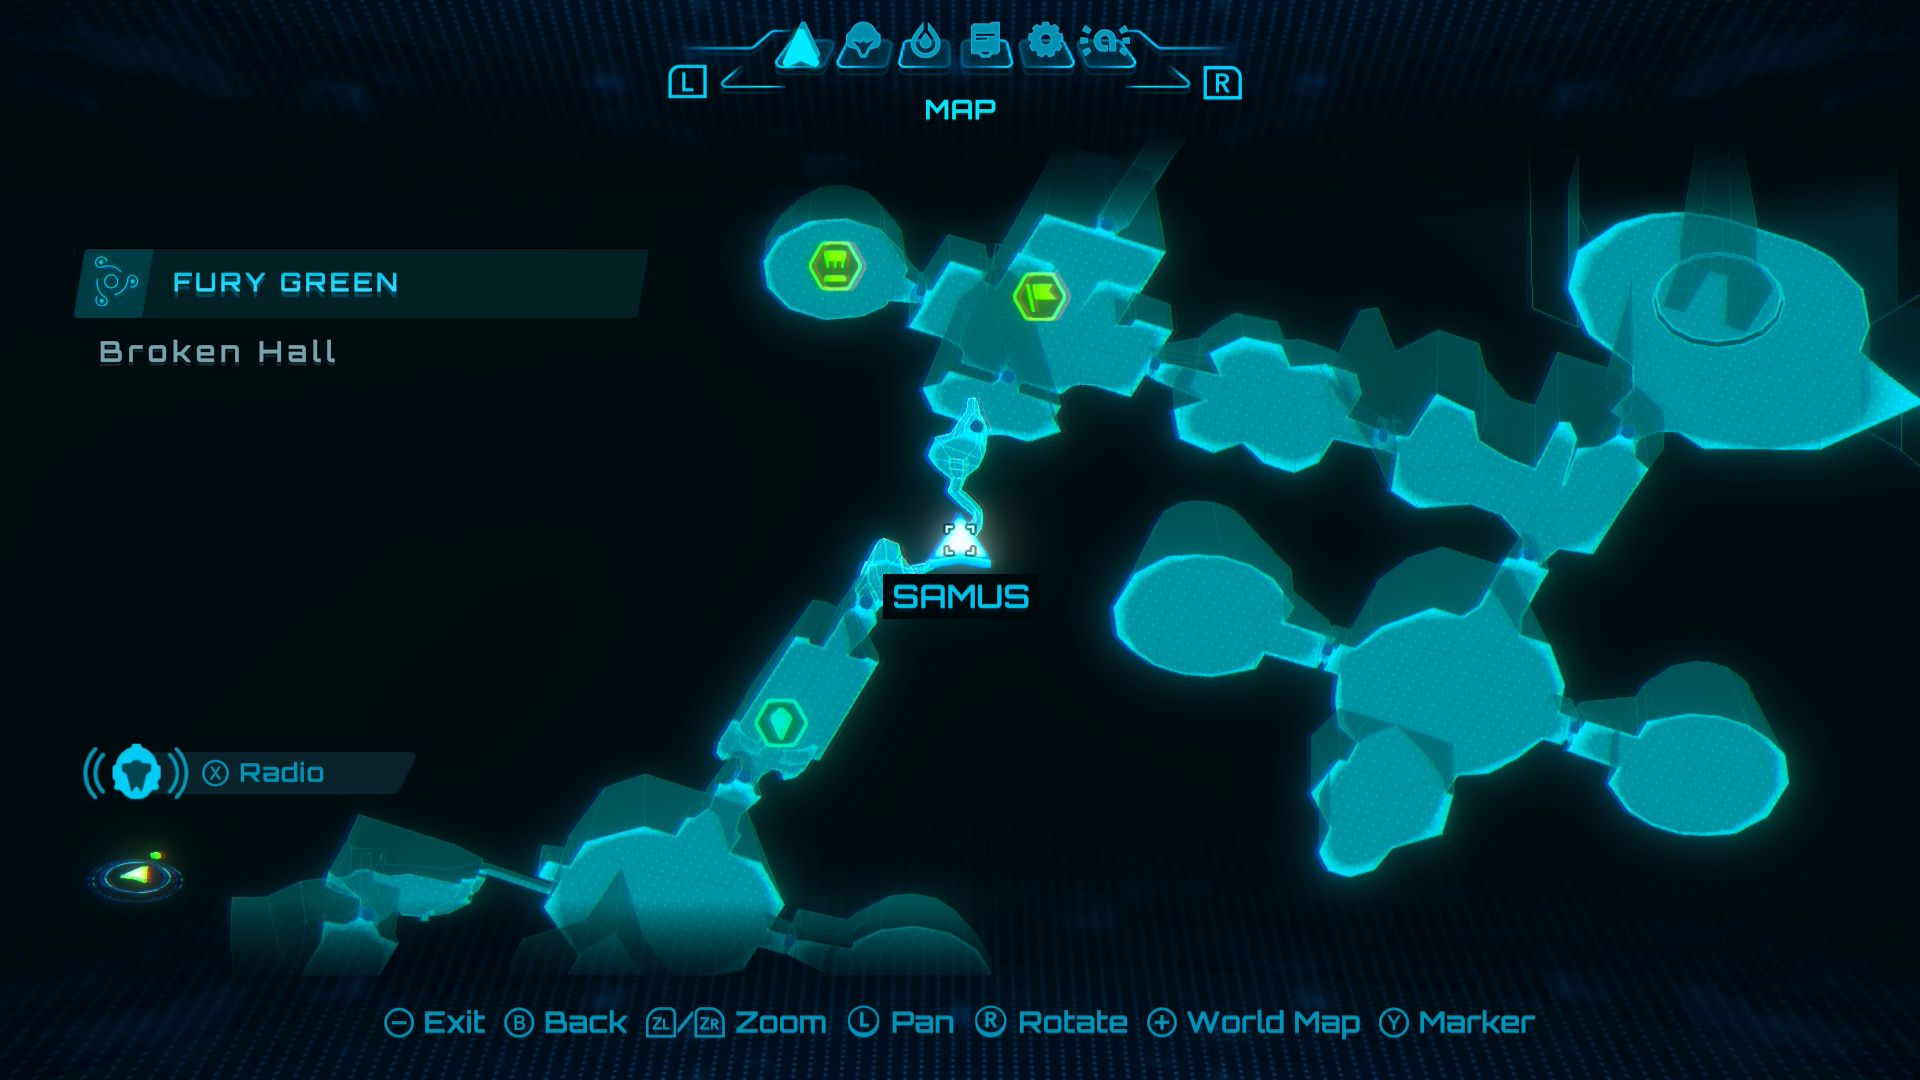
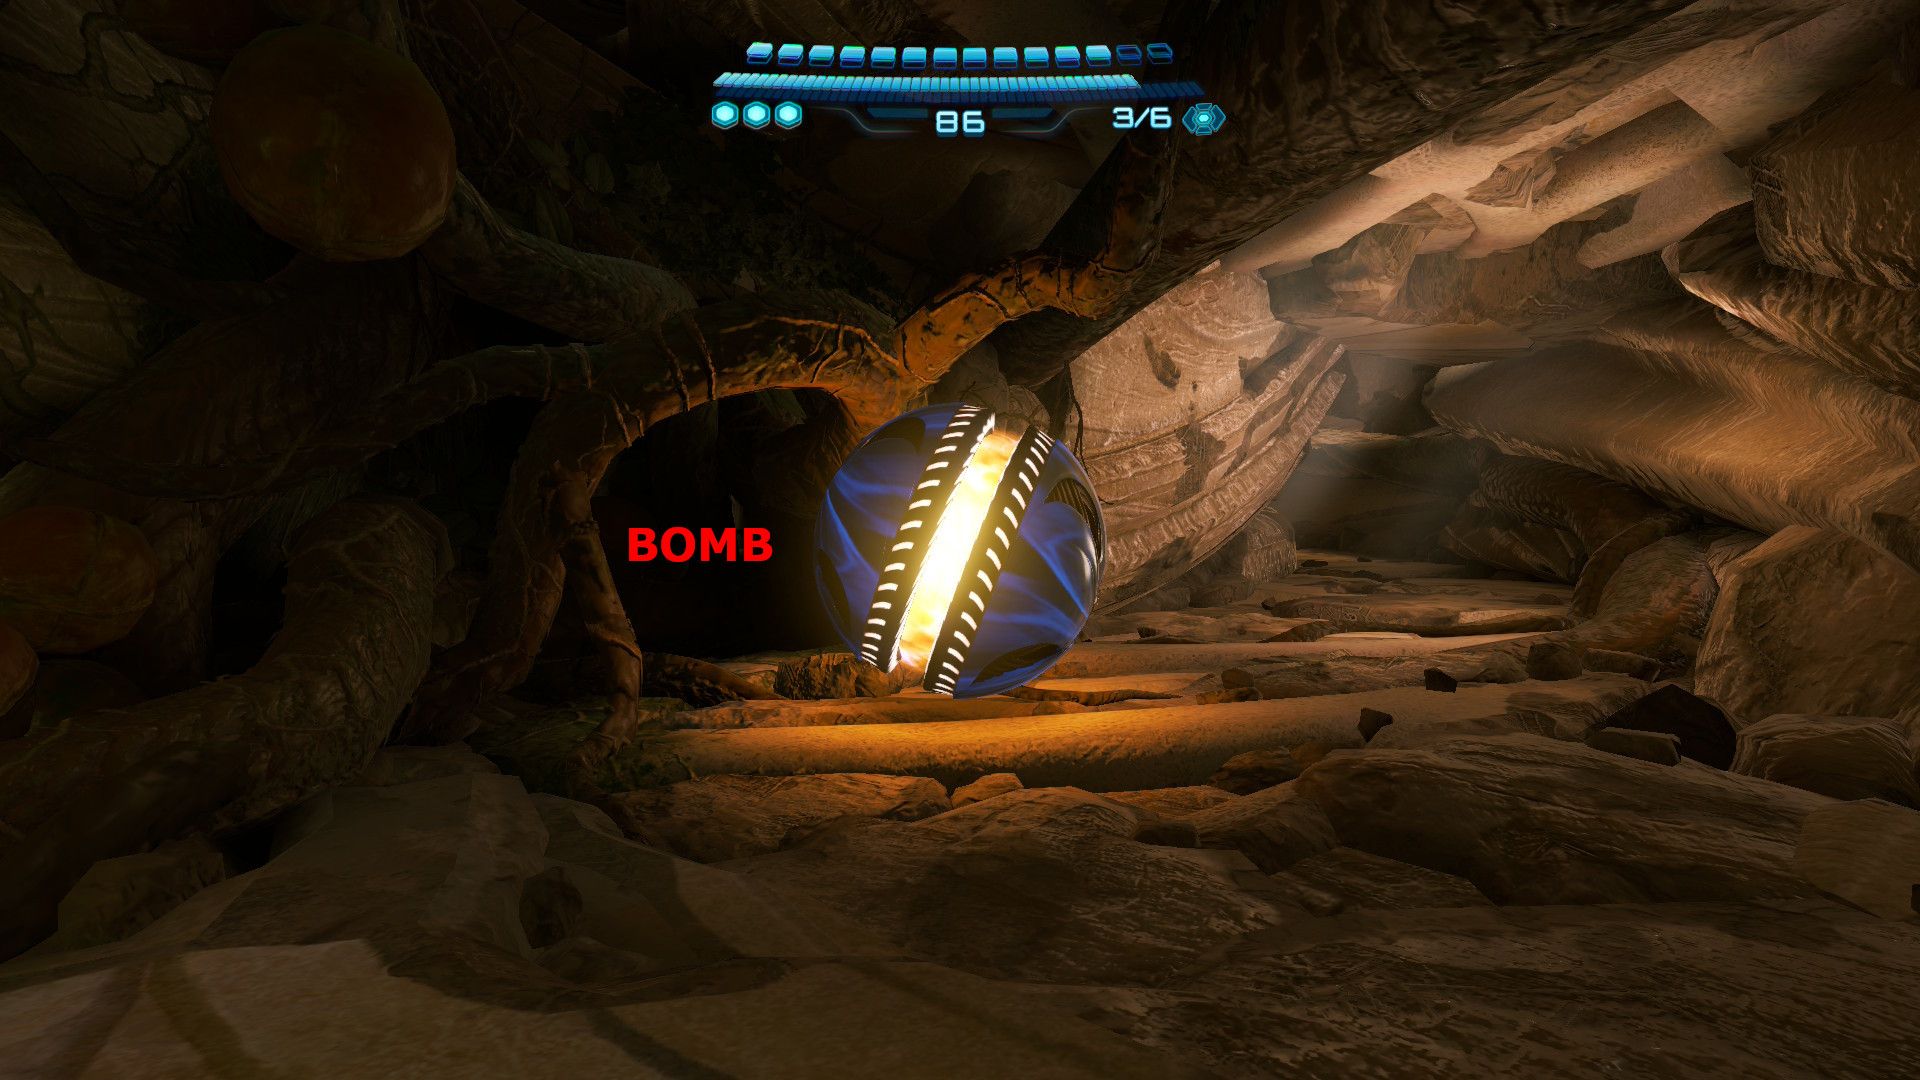
- Location: Broken Hall
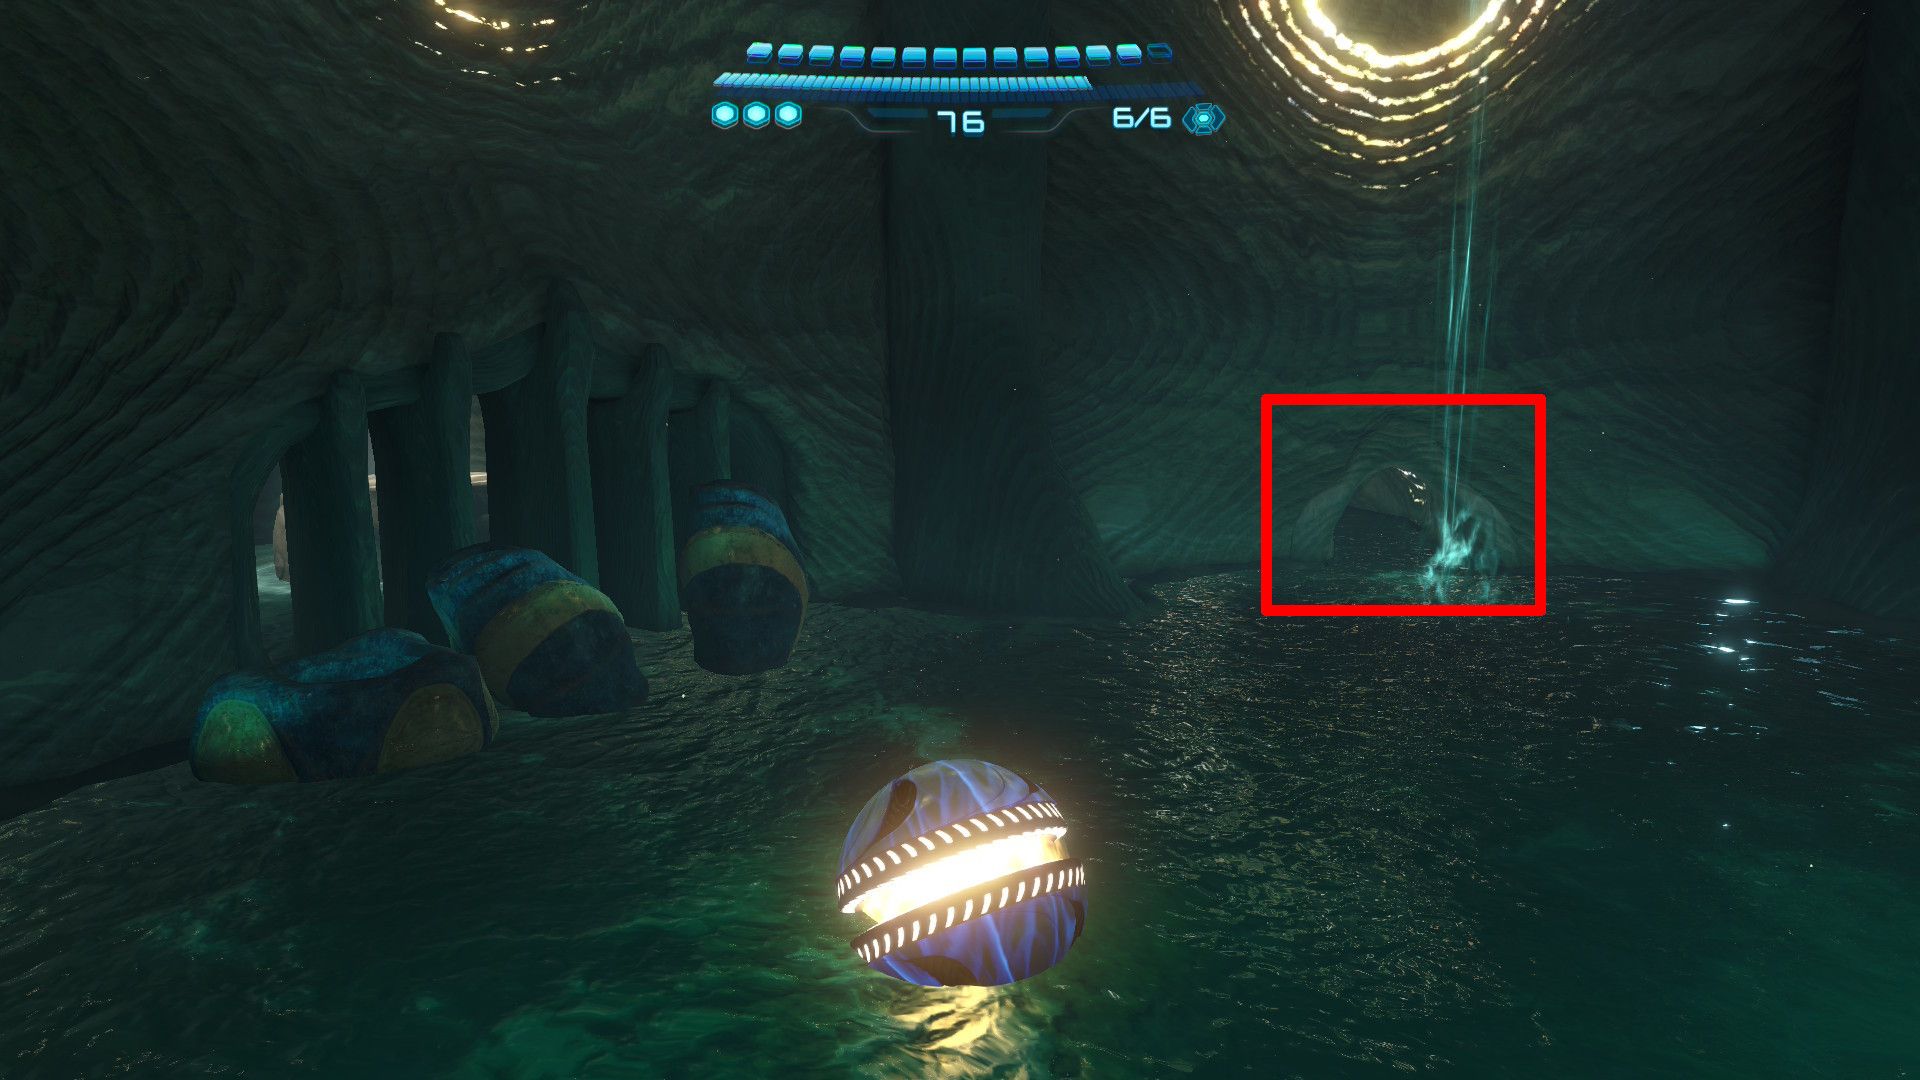
You’ll find another red growth inside the Morph Ball tunnel in Broken Hall. Blow it up with a bomb to get the Missile Expansion that appears afterwards.
Missile Expansion #6

- Location: Reflection Chamber
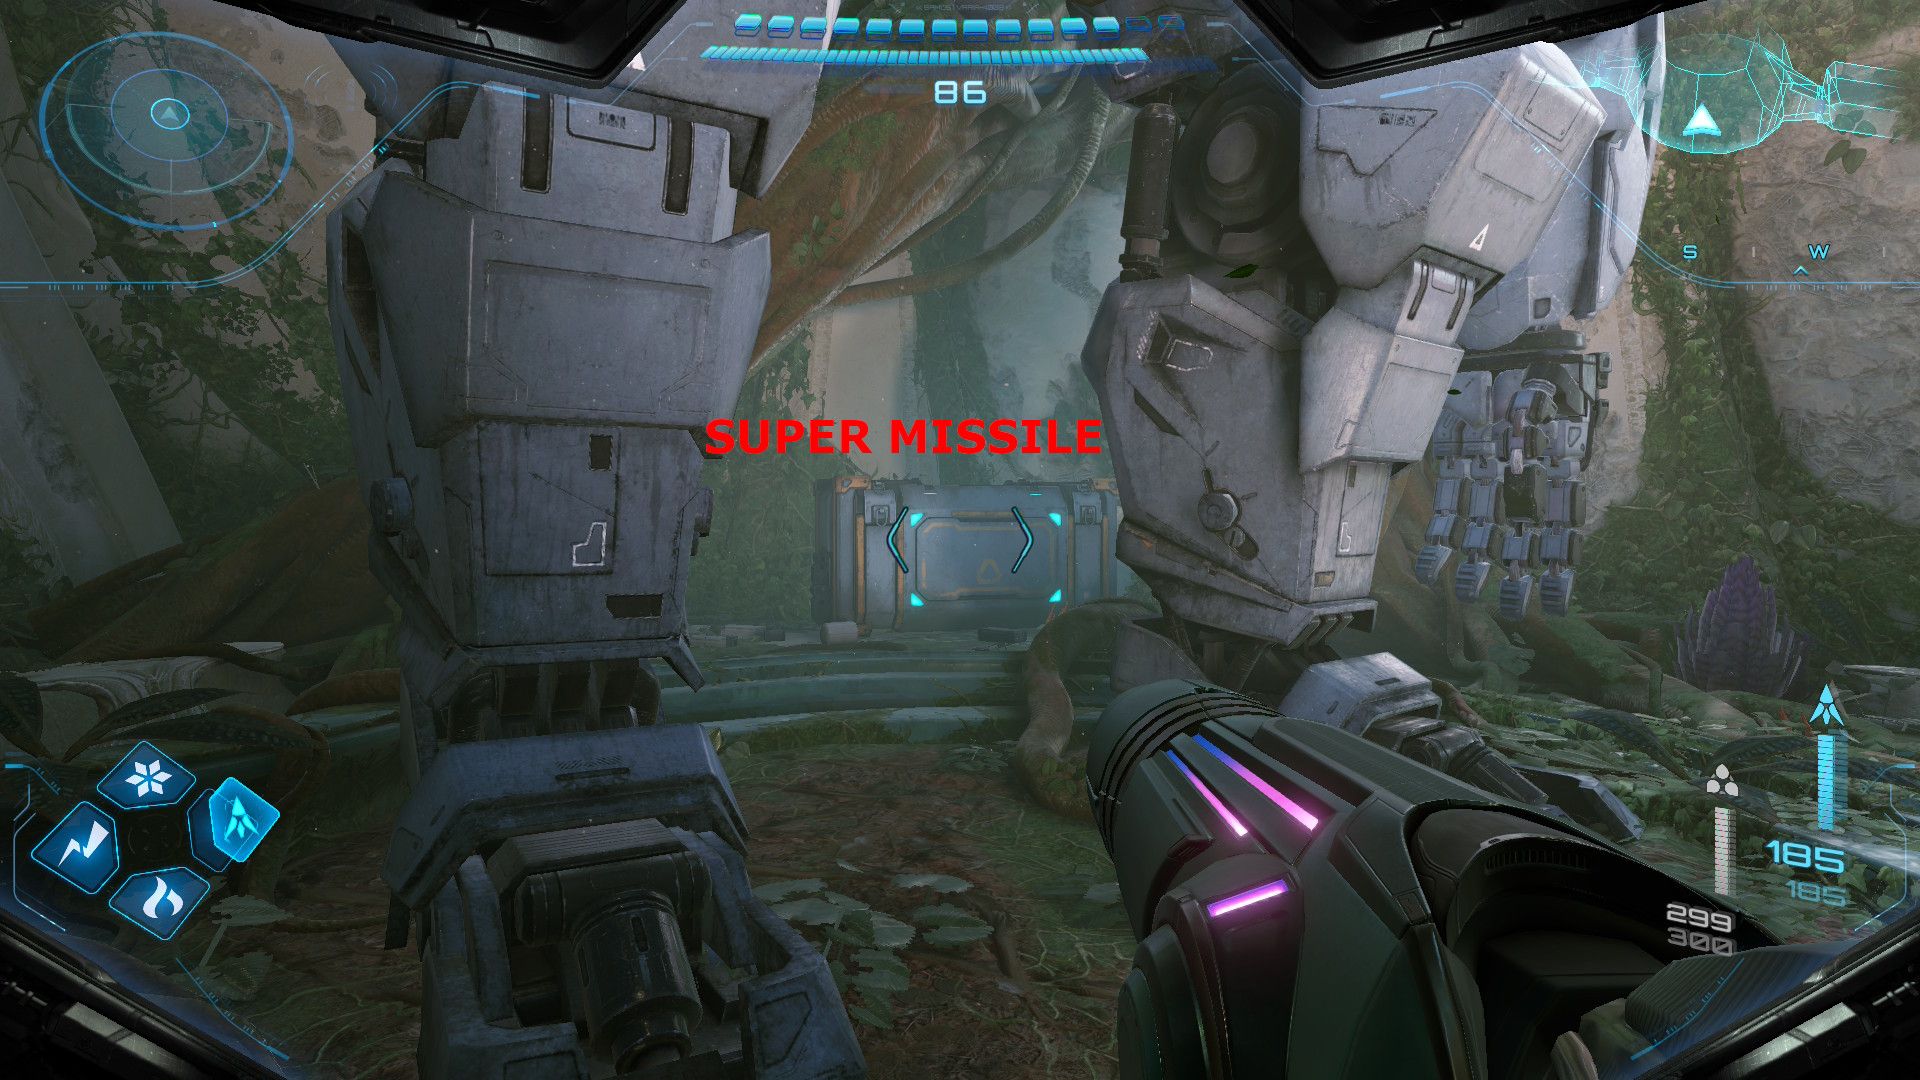
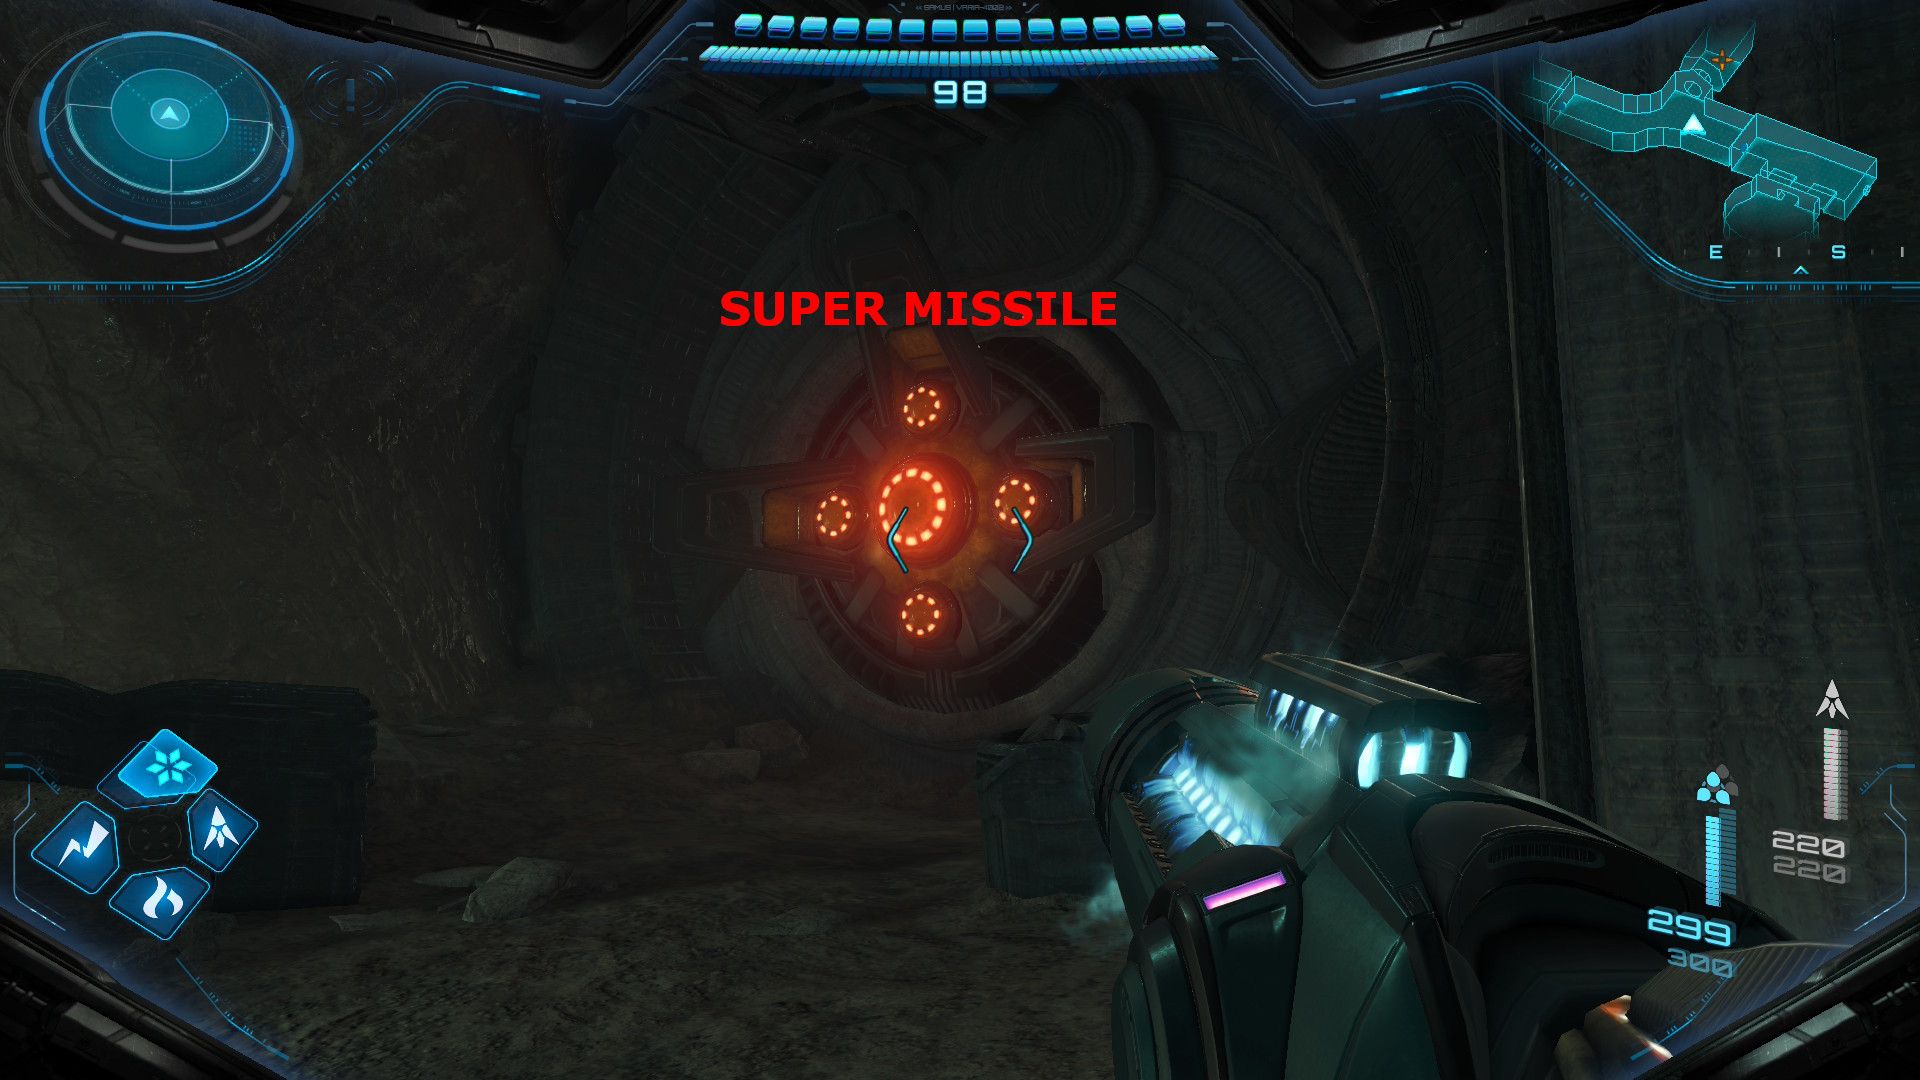
After you get the Super Missiles, use them to blow up the large container inside the Reflection Chamber.
All Volt Forge Missile Expansions in Metroid Prime 4
There are eight Missile Expansions in Metroid Prime 4‘s Volt Forge:
Missile Expansion #1
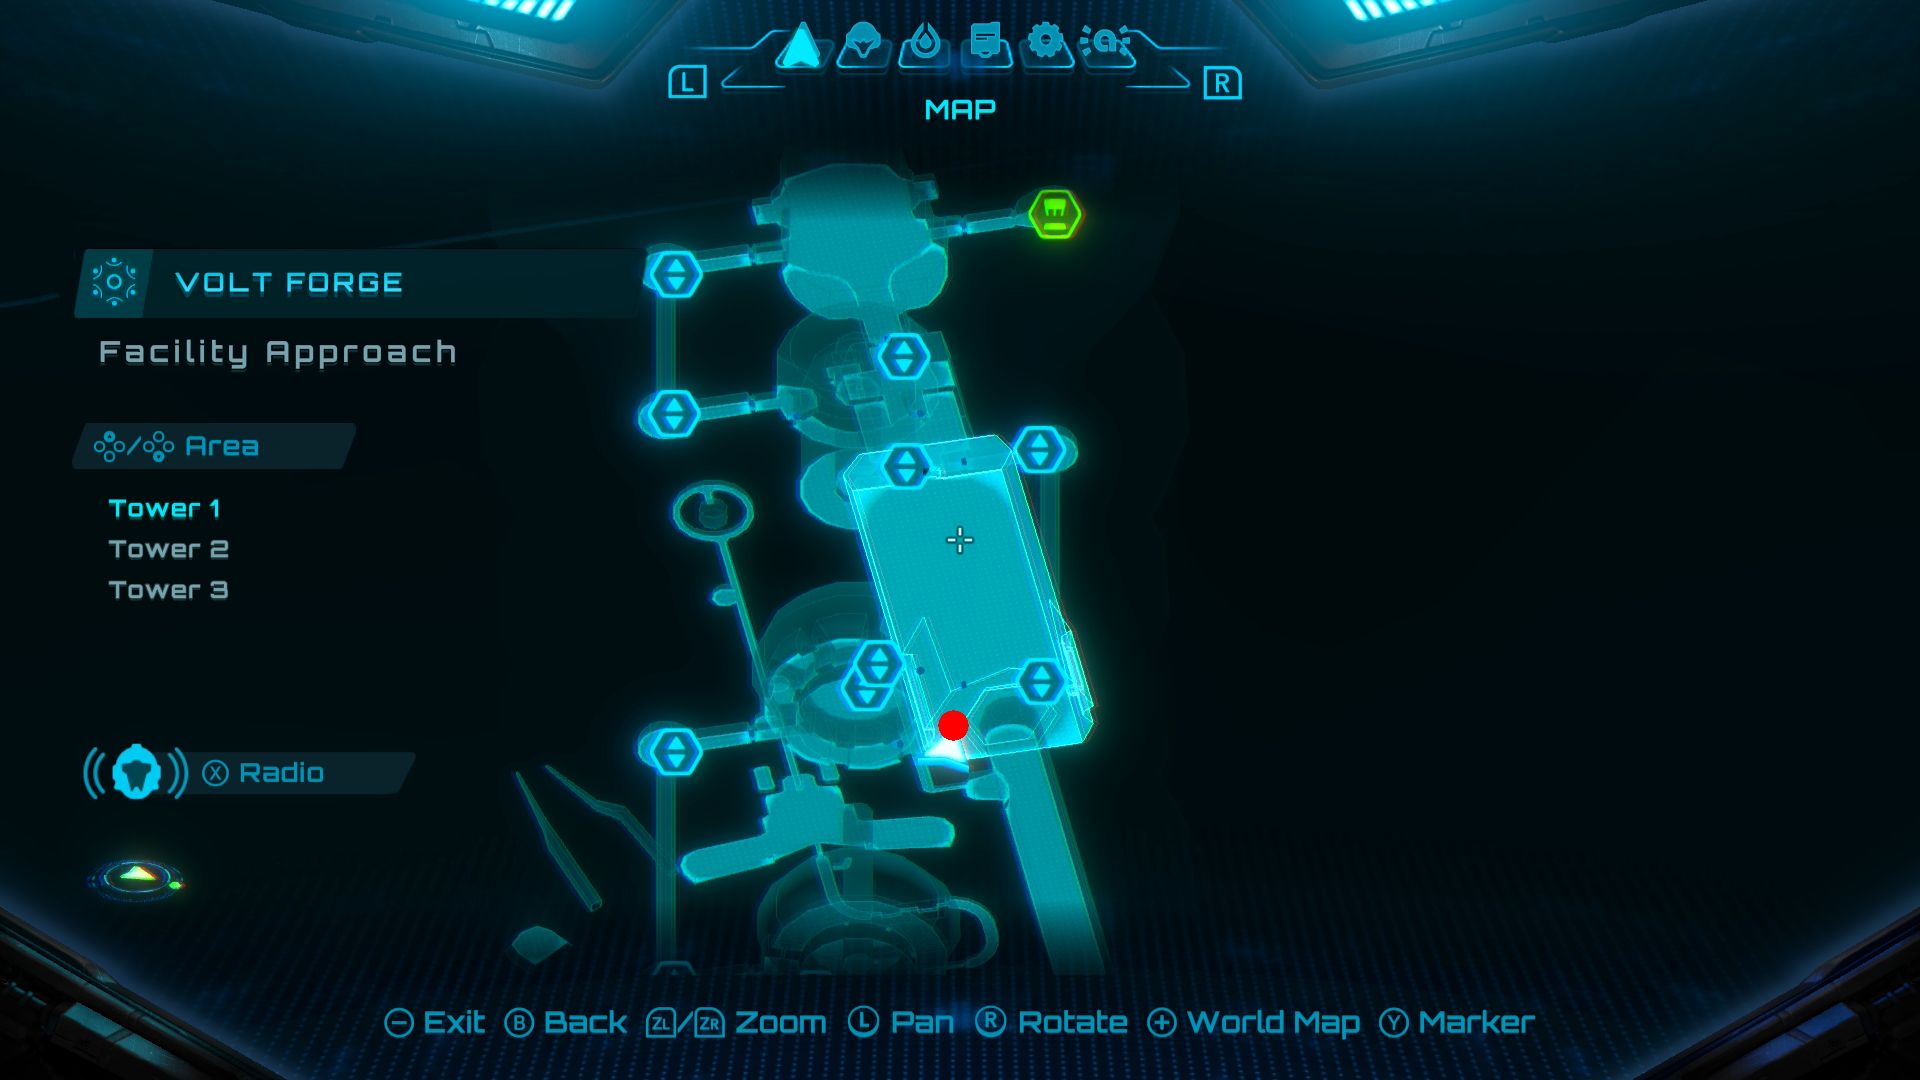
- Location: Facility Approach (Tower 1)
You can find the Missile Expansion hidden inside a container located in the bottom-left corner of the Facility Approach room. This room is where you reappear when you use Vi-O-La to return to Volt Forge after your initial visit.
Missile Expansion #2
- Location: Receiving Lobby (Tower 2)
Switch to Morph Ball mode to crawl through the opening in the floor. Carefully move along the path, dodging the electricity, until you reach the Missile Expansion in the middle.
Missile Expansion #3
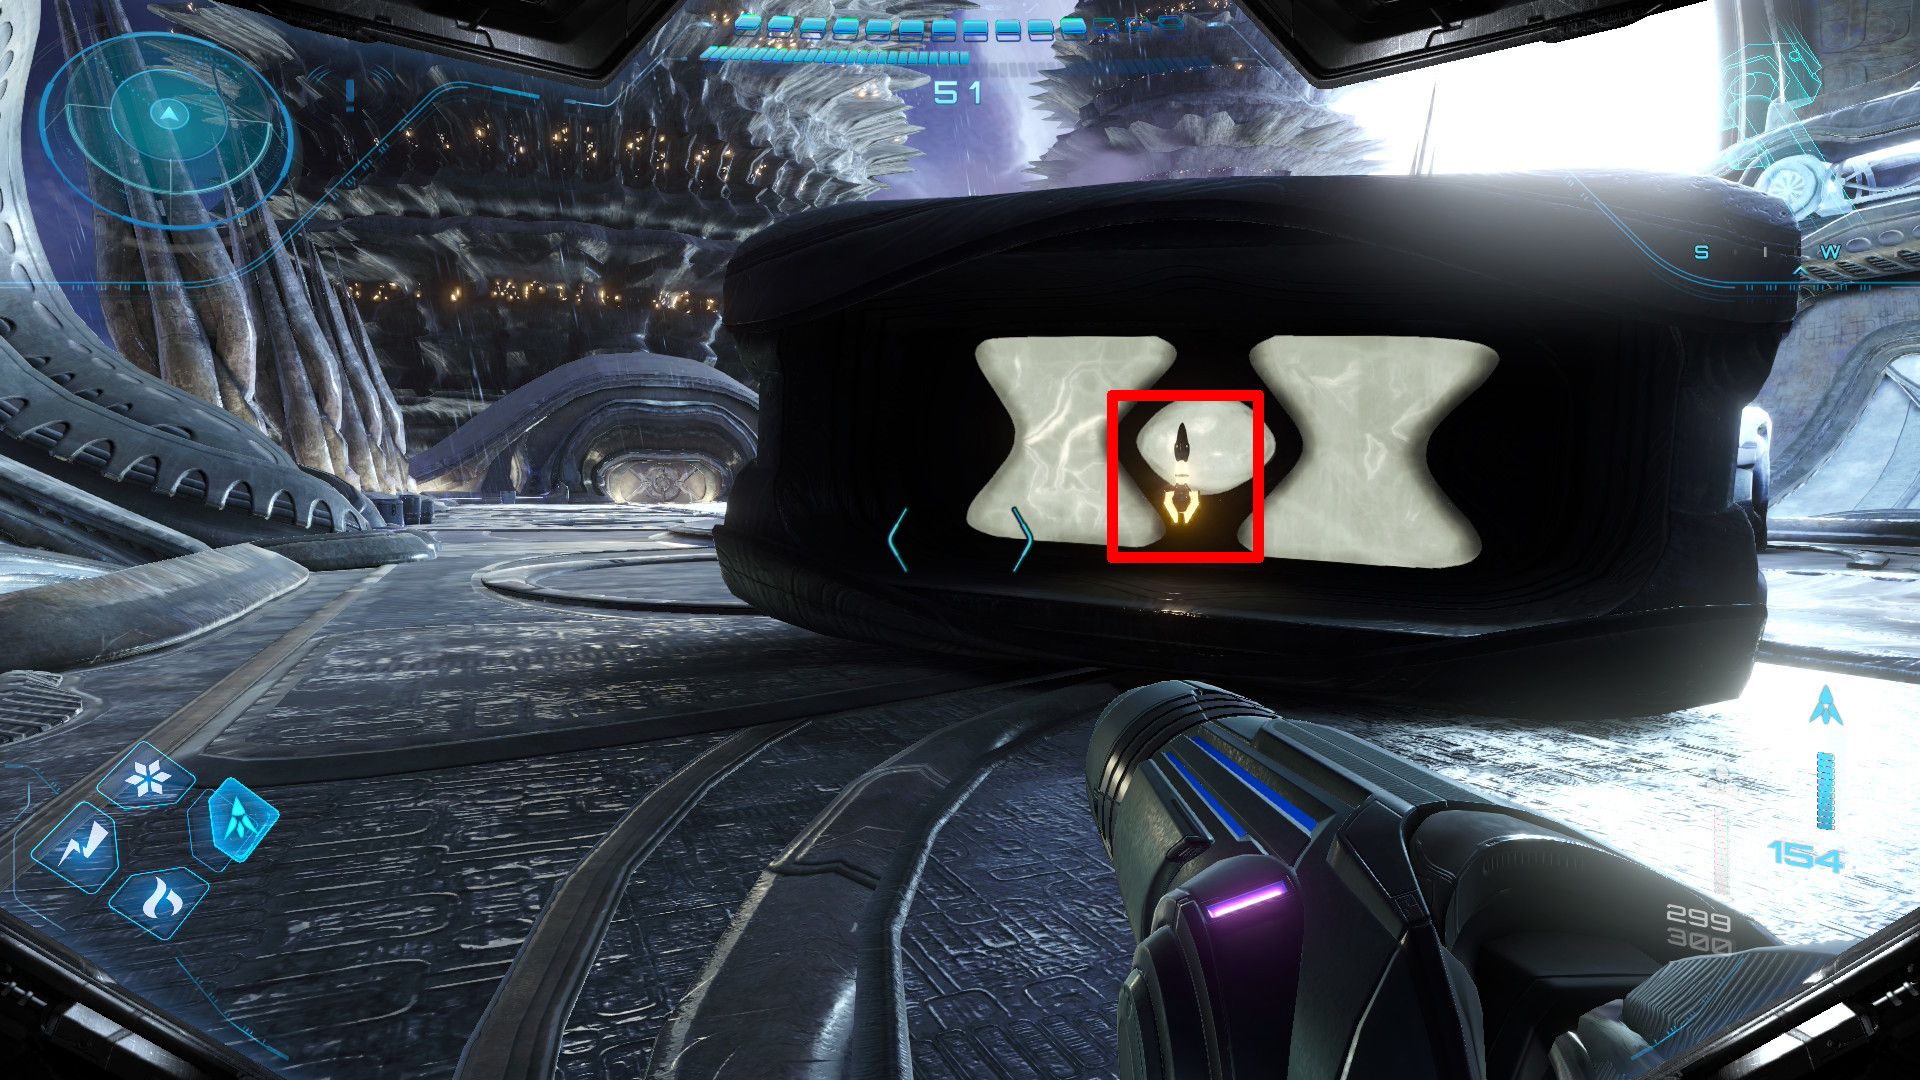
- Location: Certification (Tower 3)
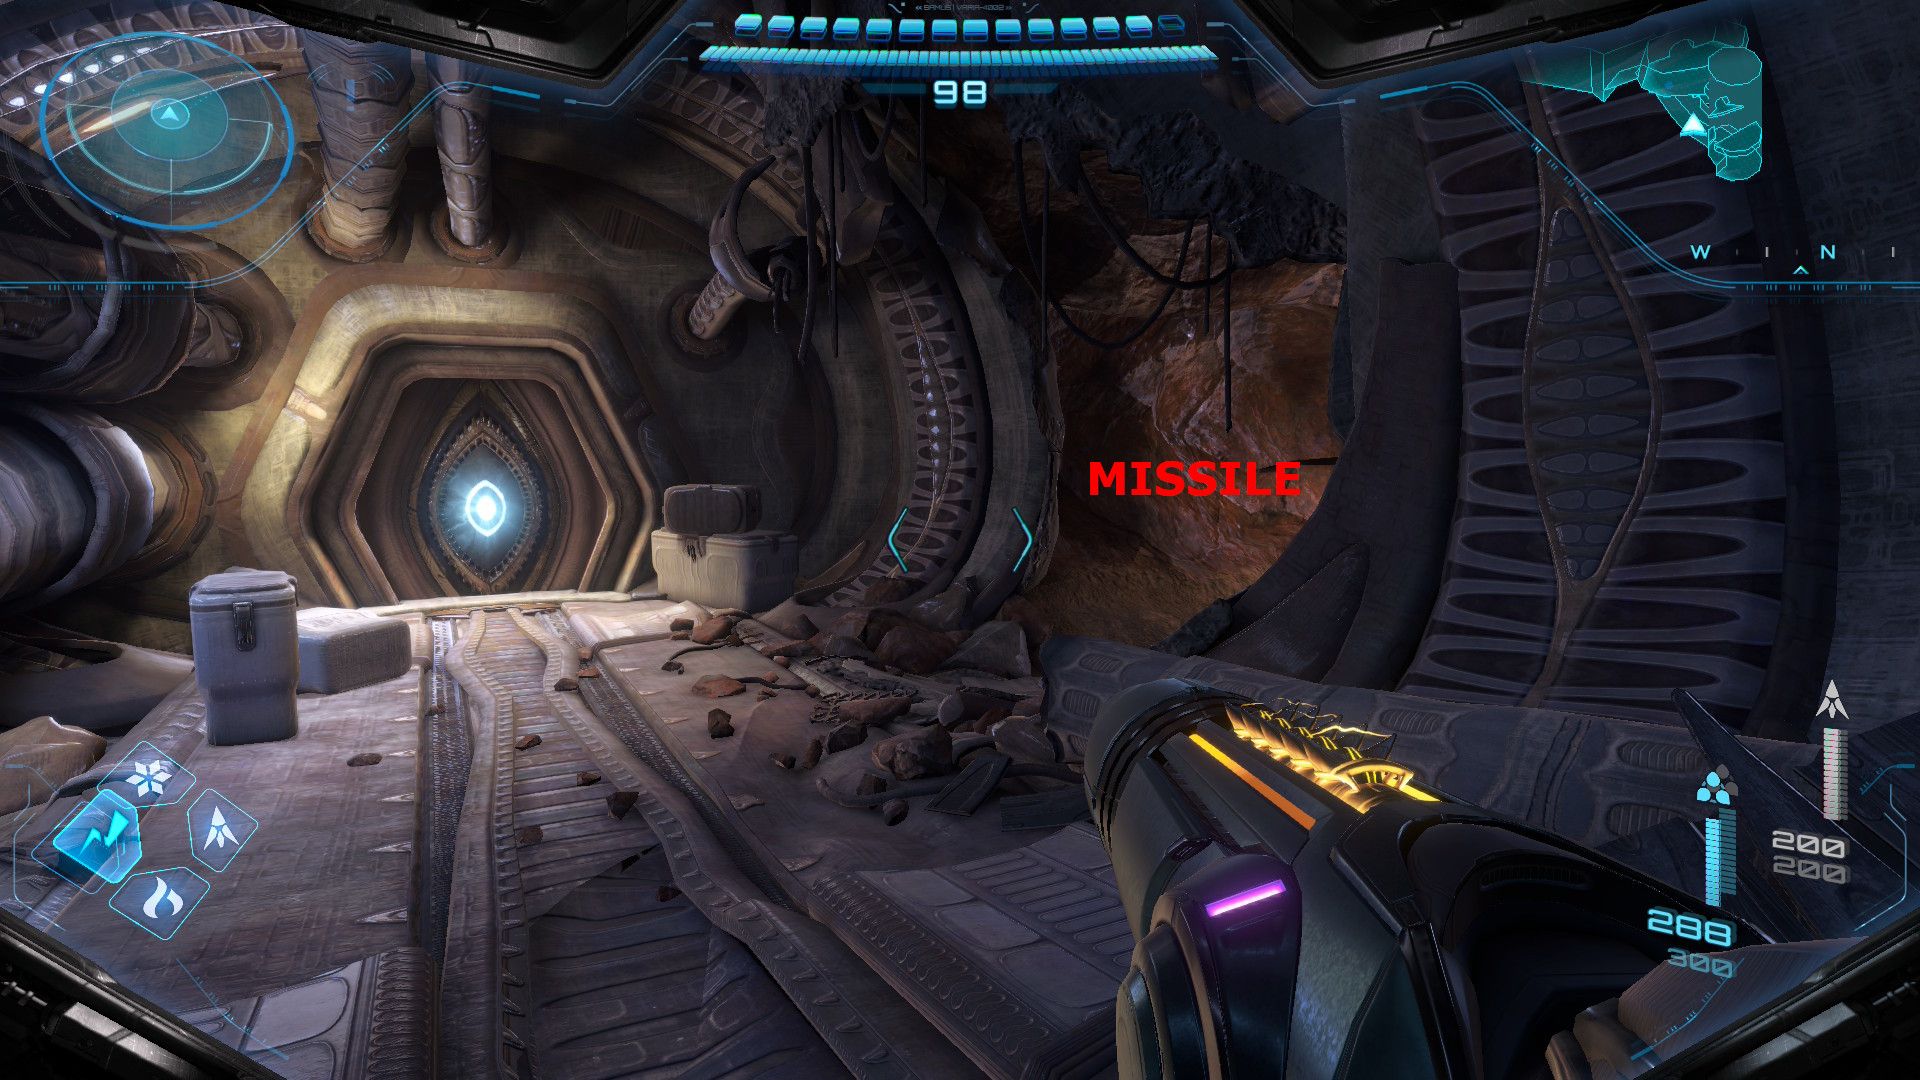
Fire a missile at the debris blocking the doorway to the Facility Core. Then, put on your Psychic Visor to follow the design on the floating container – this will unlock an upgrade for your missiles.
Missile Expansion #4
- Location: Speed Tunnel C
There’s a raised tunnel in this hallway. Shine a Control Beam into the tunnel and hit the target at the far end to uncover a Missile Expansion. Then, double jump into the newly opened space to grab it.
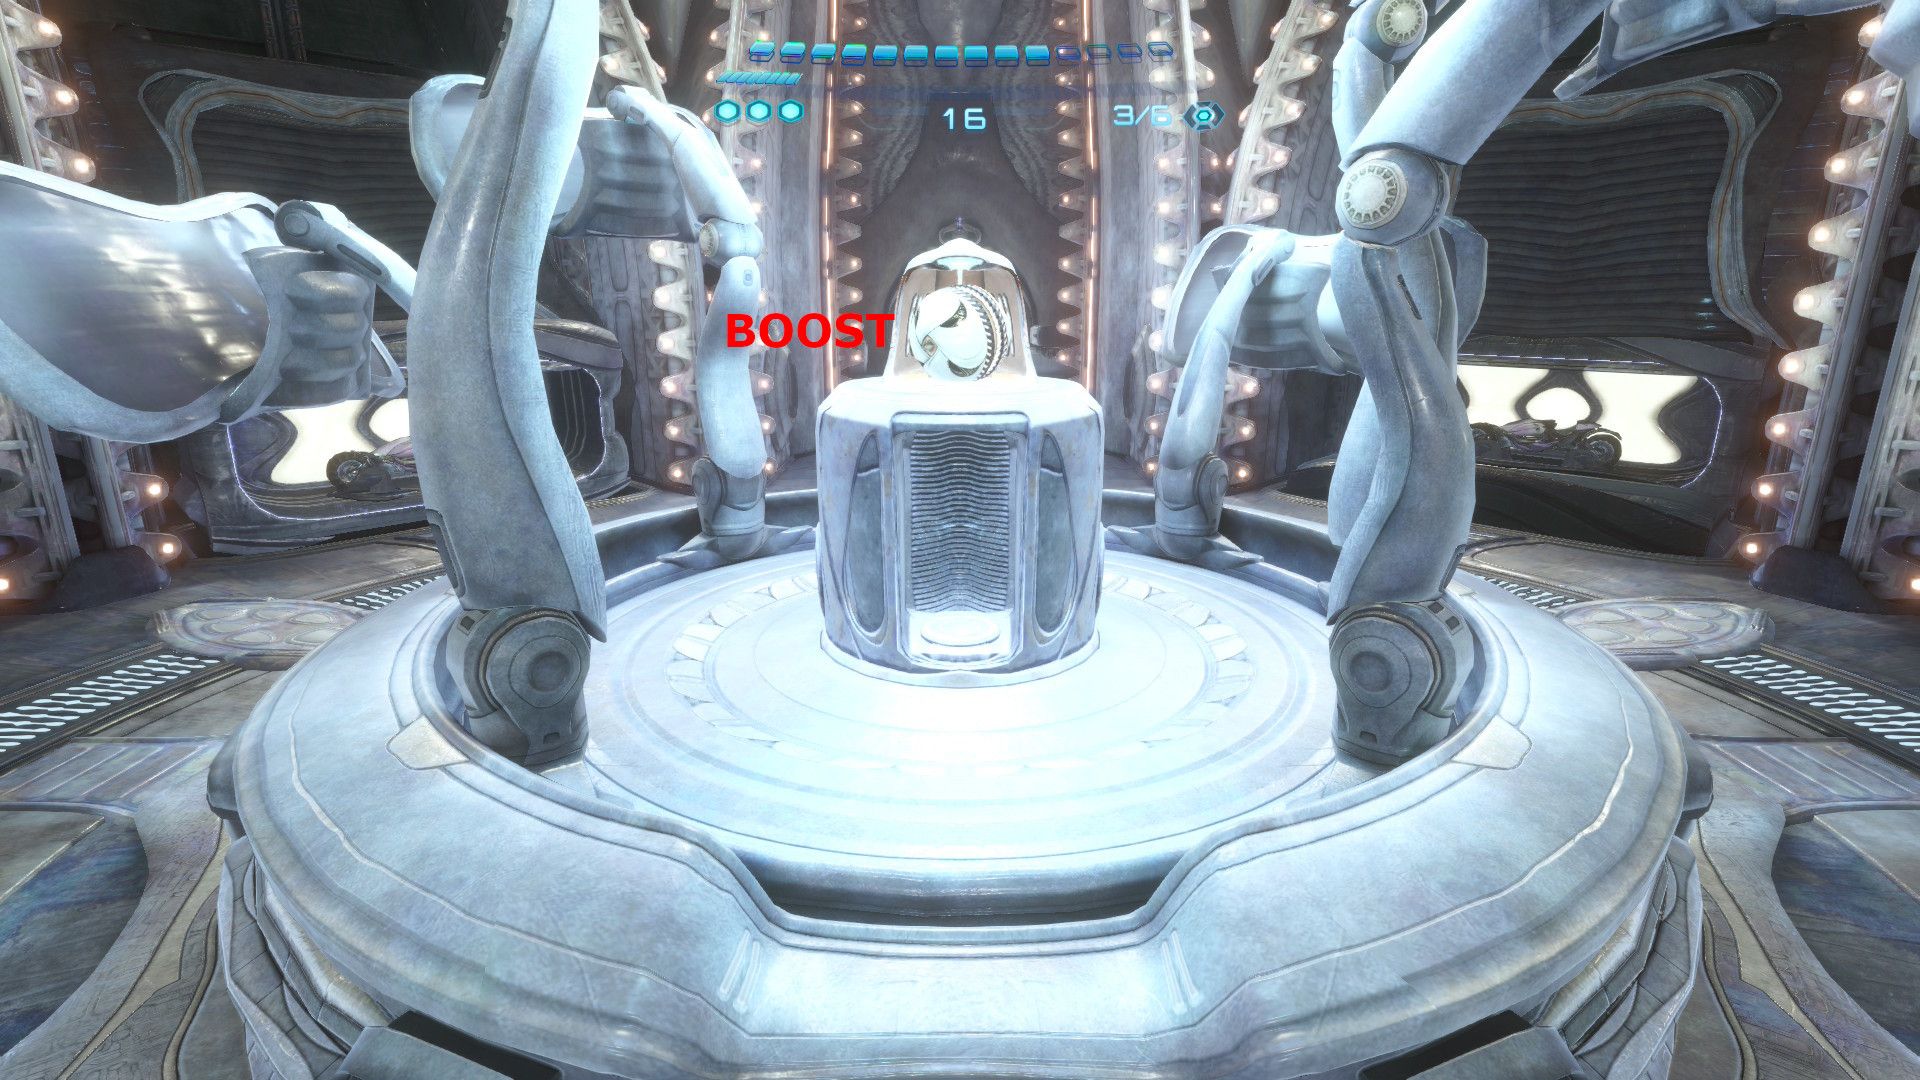
Missile Expansion #5
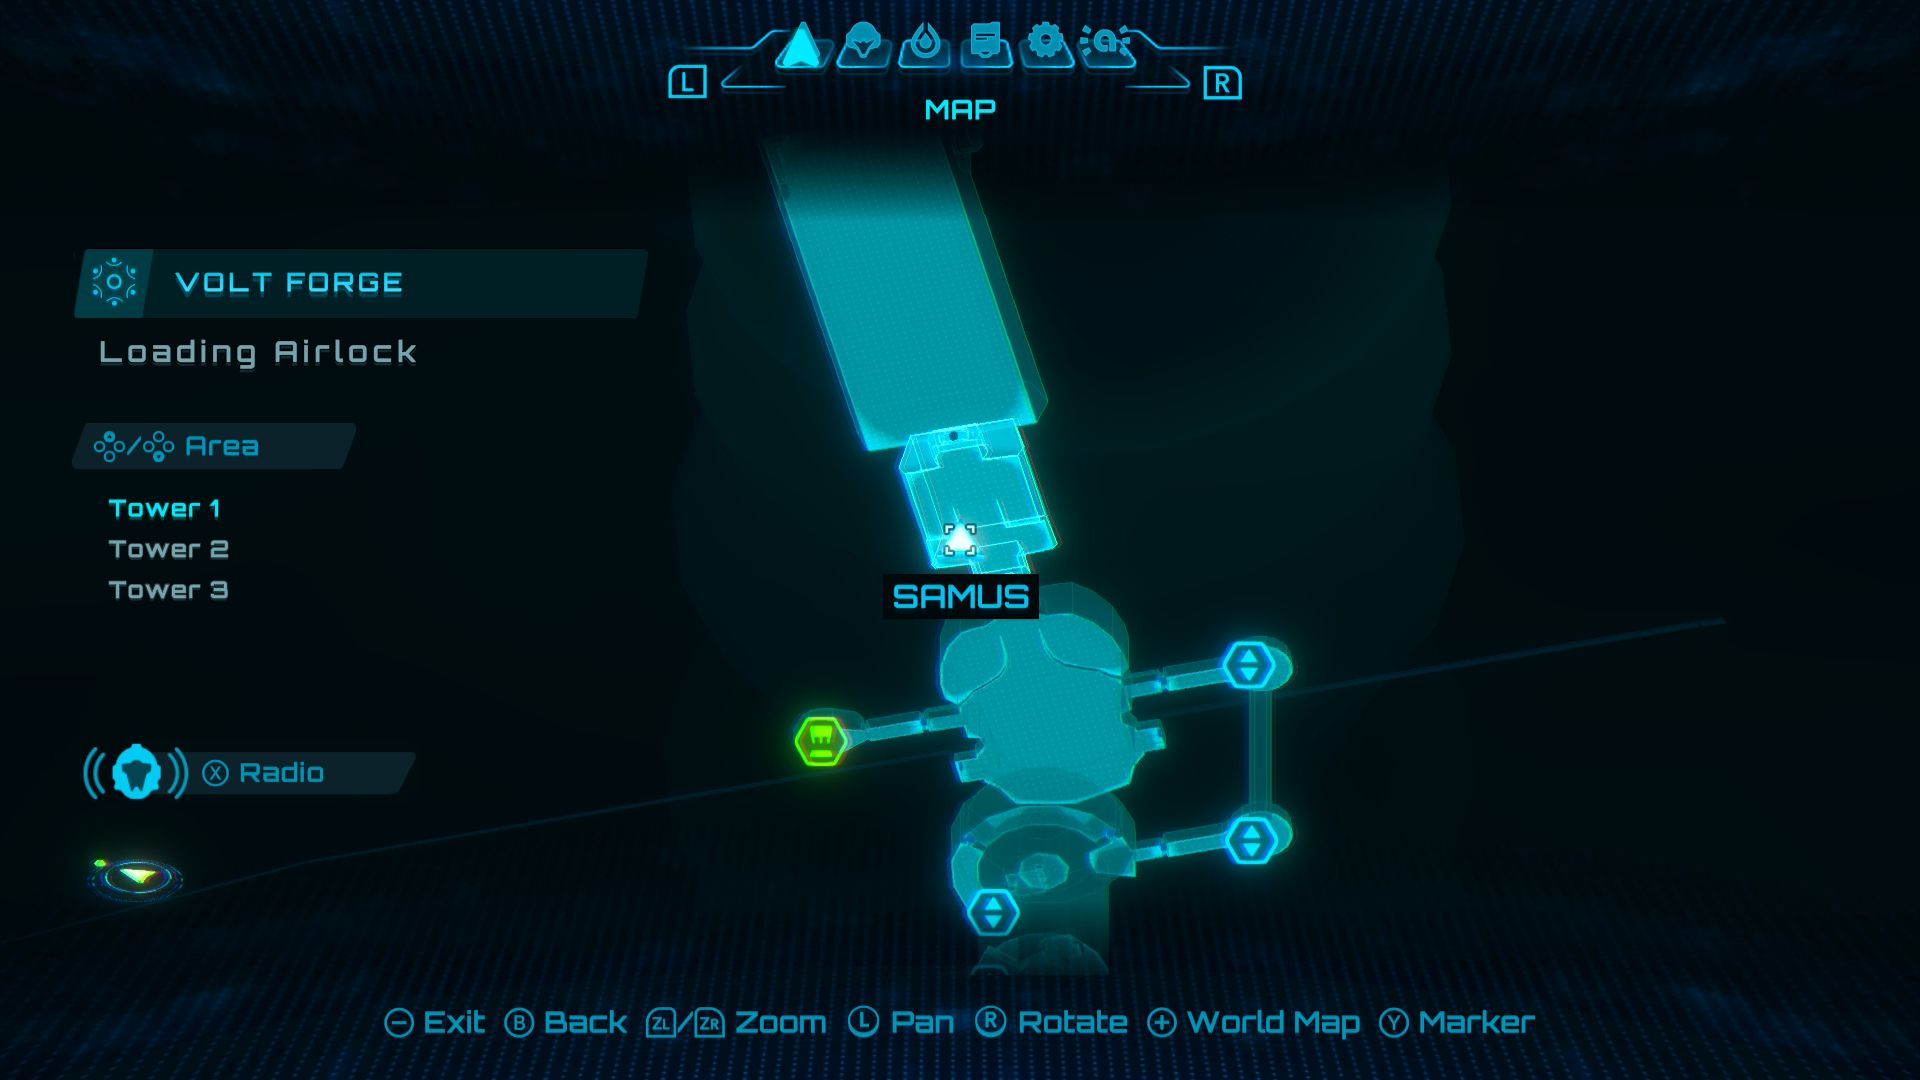
- Location: Loading Airlock (Tower 1)
There’s a Spinner in the room. If you use a Boost Ball on it, it will swing a hanging container. Hit that container repeatedly against another one until it breaks and reveals a Missile Expansion.
Missile Expansion #6
- Location: Irradiation Floor (Tower 1)
Once you get the Boost Ball, switch to Morph Ball and go inside the base of the central structure. Then, use the Boost Ball within the half-pipes to travel upwards through the structure and collect the Missile Expansion at the very top.
Missile Expansion #7
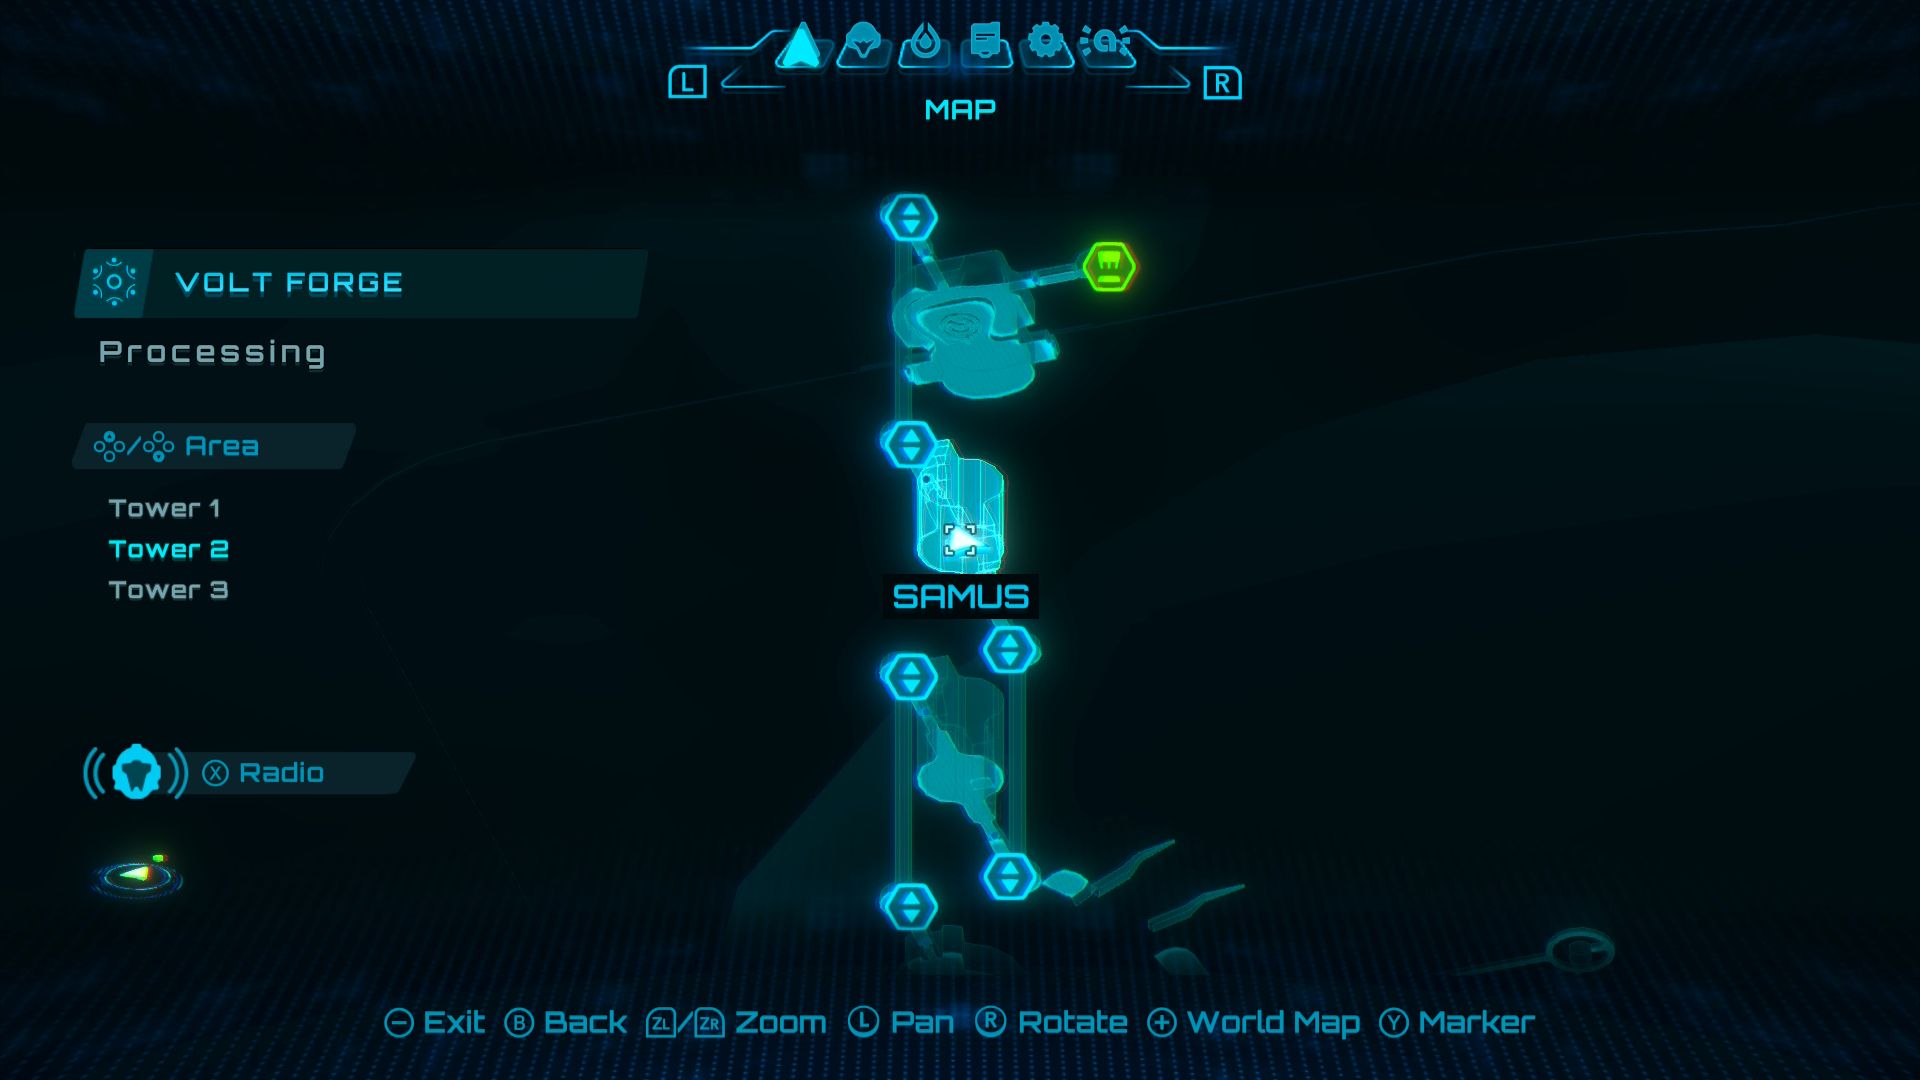
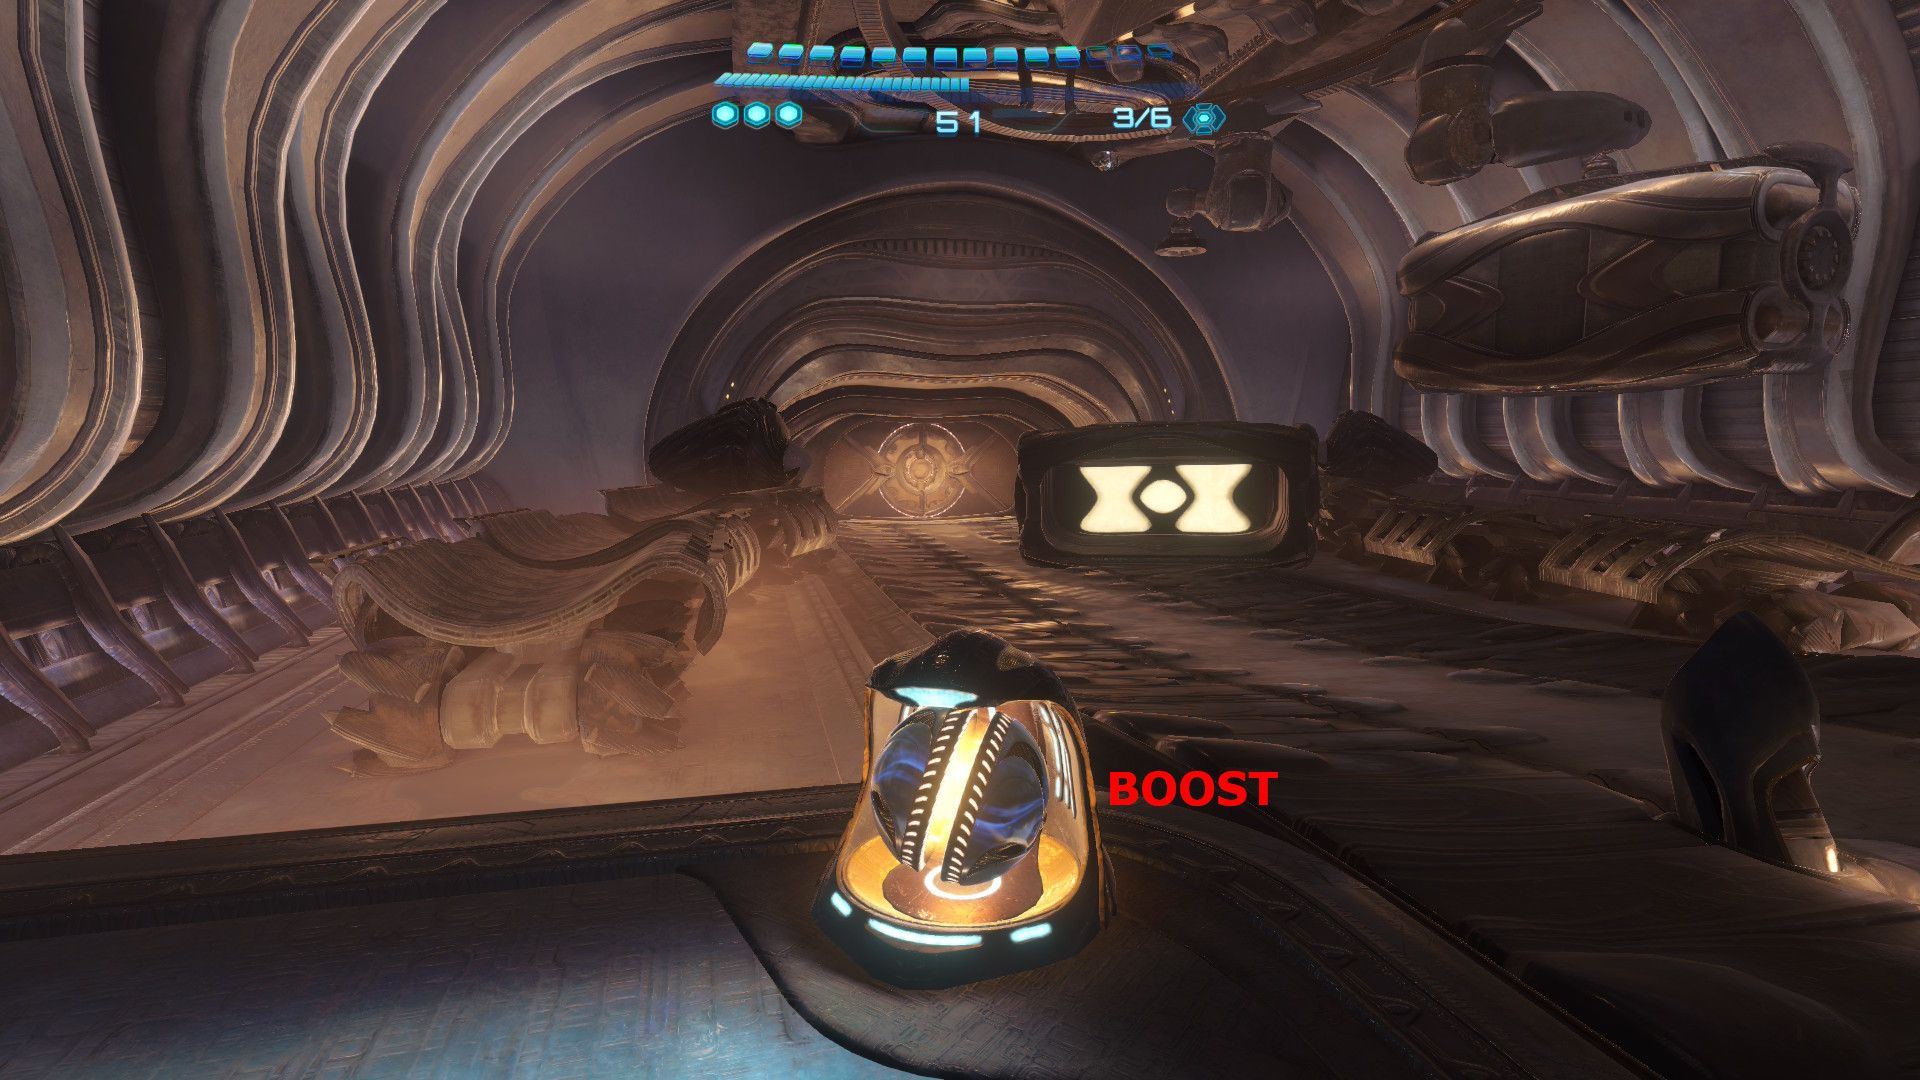
- Location: Processing (Tower 2)
In the center of the room, you’ll find a Spinner surrounded by robotic arms. Use a Boost Ball inside the Spinner to unlock a Missile Expansion.
Missile Expansion #8
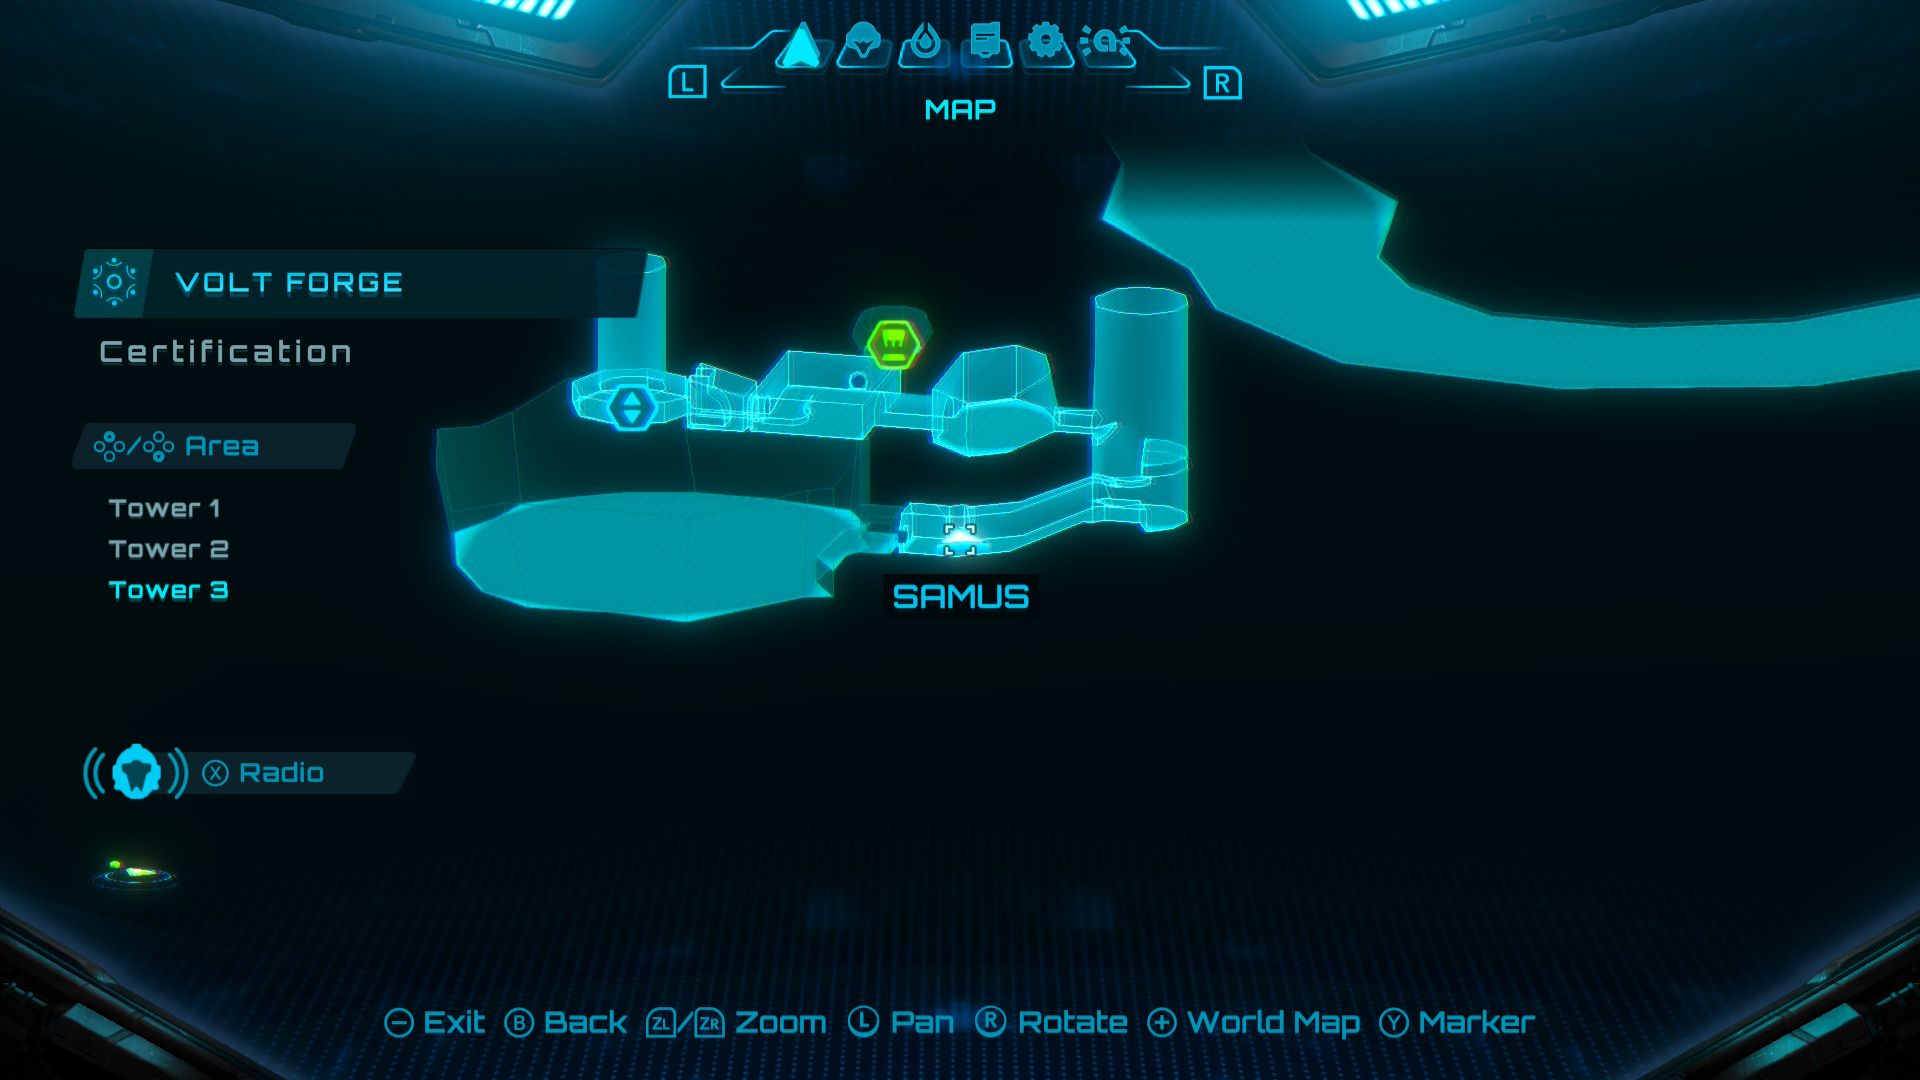
- Location: Certification (Tower 3)
Okay, so I used my Psychic Lasso to yank the cover off this machine hidden in the upper corner of the room. Then, I just kept blasting the core of the machine with Thunder Shots until this container popped open nearby. Inside? A sweet Missile Expansion! Definitely worth the effort.
All Ice Belt Missile Expansions in Metroid Prime 4
There are eight Missile Expansions in Metroid Prime 4‘s Ice Belt:
Missile Expansion #1
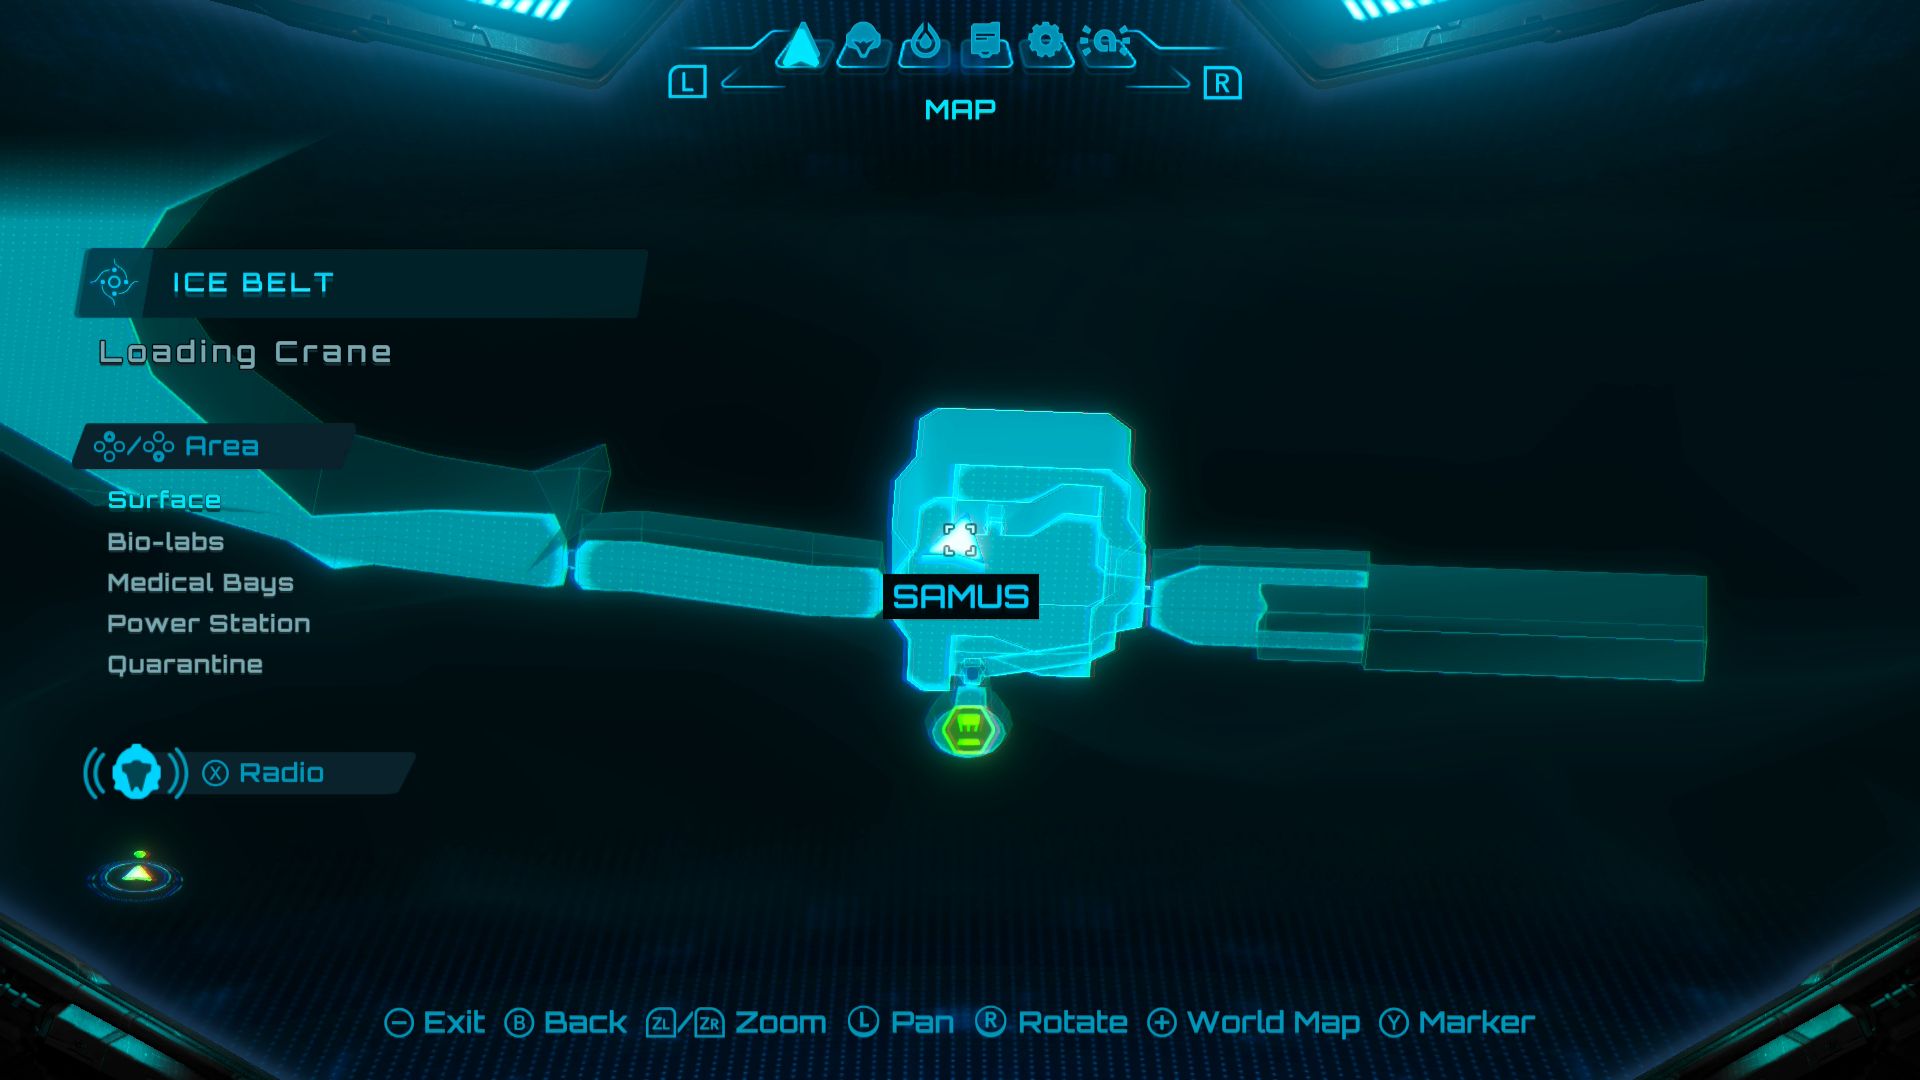
- Location: Loading Crane
Transform into a Morph Ball and roll into the corner of the room. Place a bomb there to blow open the gate and unlock the Missile Expansion.
Missile Expansion #2
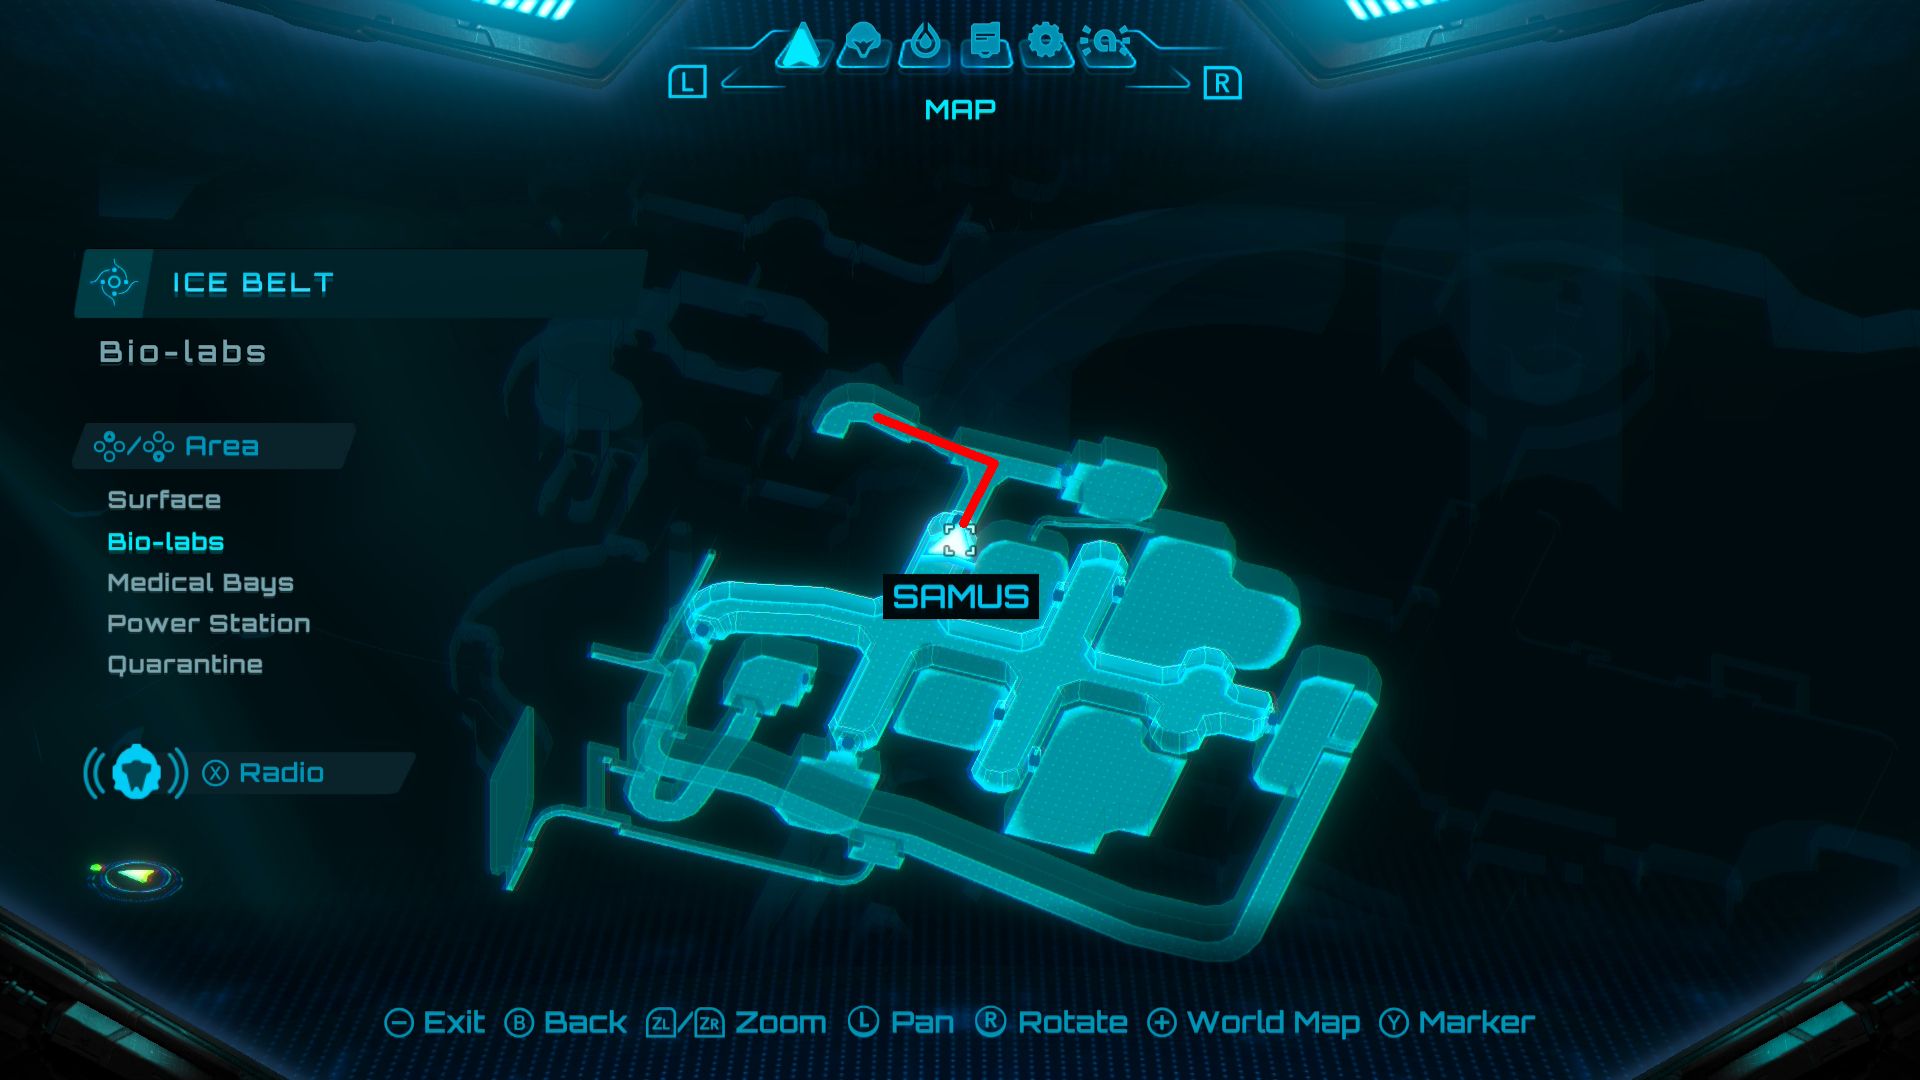
- Location: Bio-labs Access
Use your Psychic Lasso to unlock the door in the Bio-labs. Then, follow the path and use the Lasso to clear the debris on the left. Enter the Morph Ball tunnel and, once inside, use a Fire Shot to destroy the ice wall, revealing a Missile Expansion.
Missile Expansion #3
- Location: Surgery Corridor
Break the ice wall in this room with a Fire Shot, then use Psychic Lasso to open the newly accessible Morph Ball tunnel. This tunnel loops around a Missile Expansion, which you can reach by using a bomb to destroy the metal barrier blocking it.
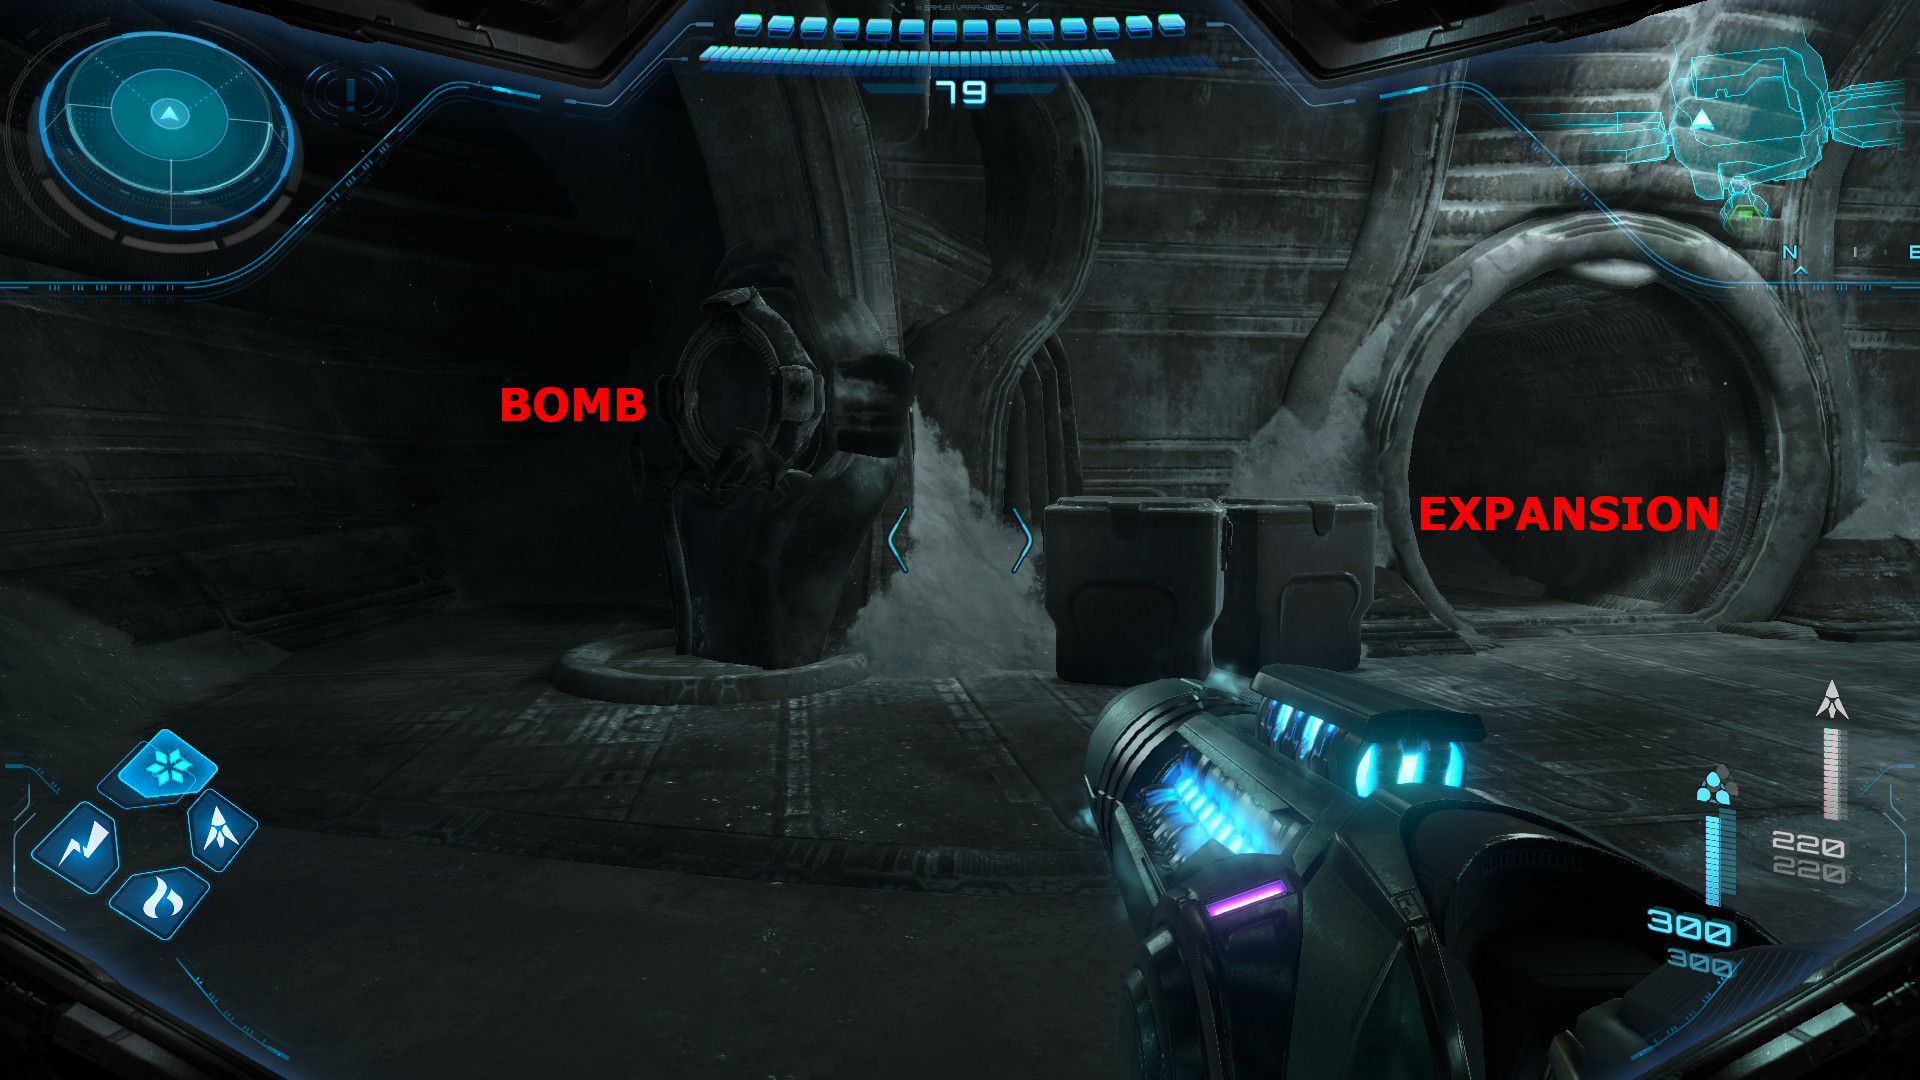
Missile Expansion #4

- Location: Staging Corridor
Use bombs to clear a Morph Ball tunnel that leads from one small room to another.
Missile Expansion #5

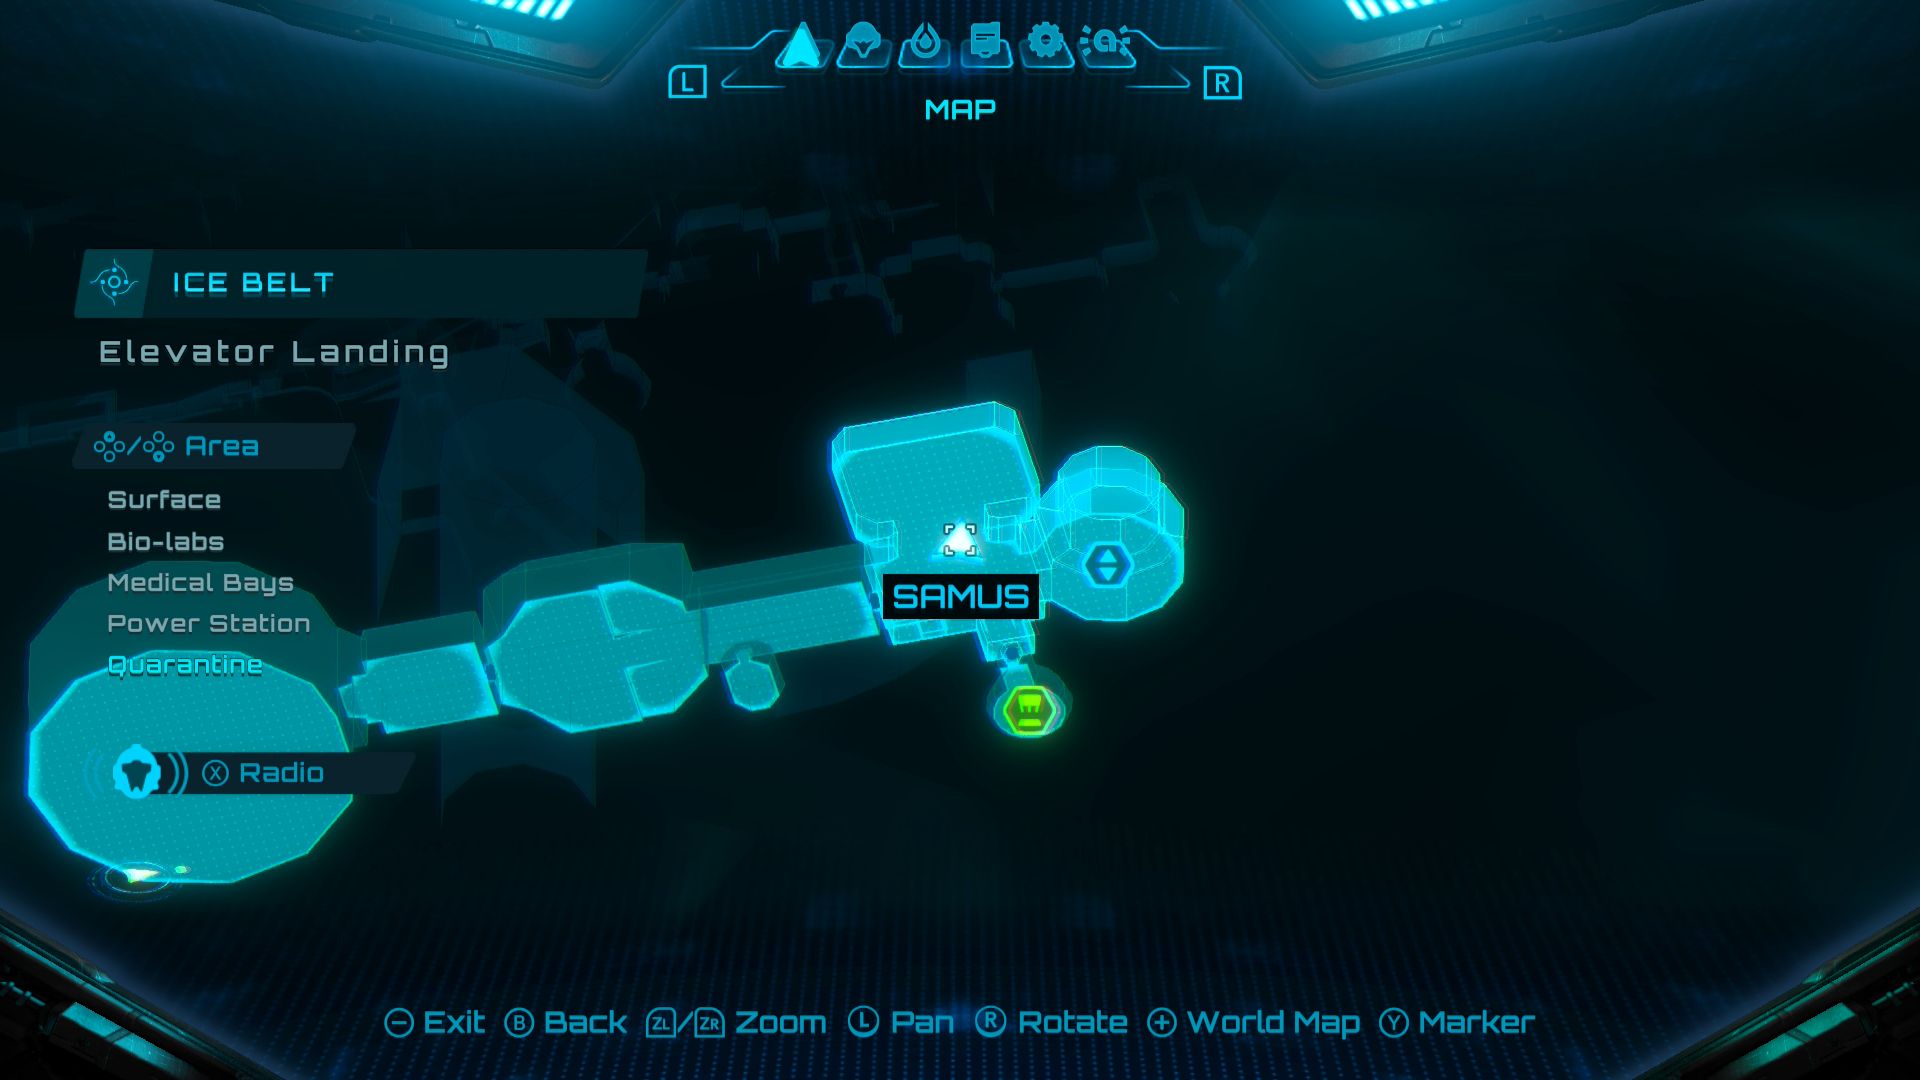
- Location: Elevator Landing
After you get Thunder Shot, take the Lobby elevator back to the Elevator Landing. Then, use Thunder Shot to open the big door in that room and grab the Missile Expansion on the other side.
Missile Expansion #6
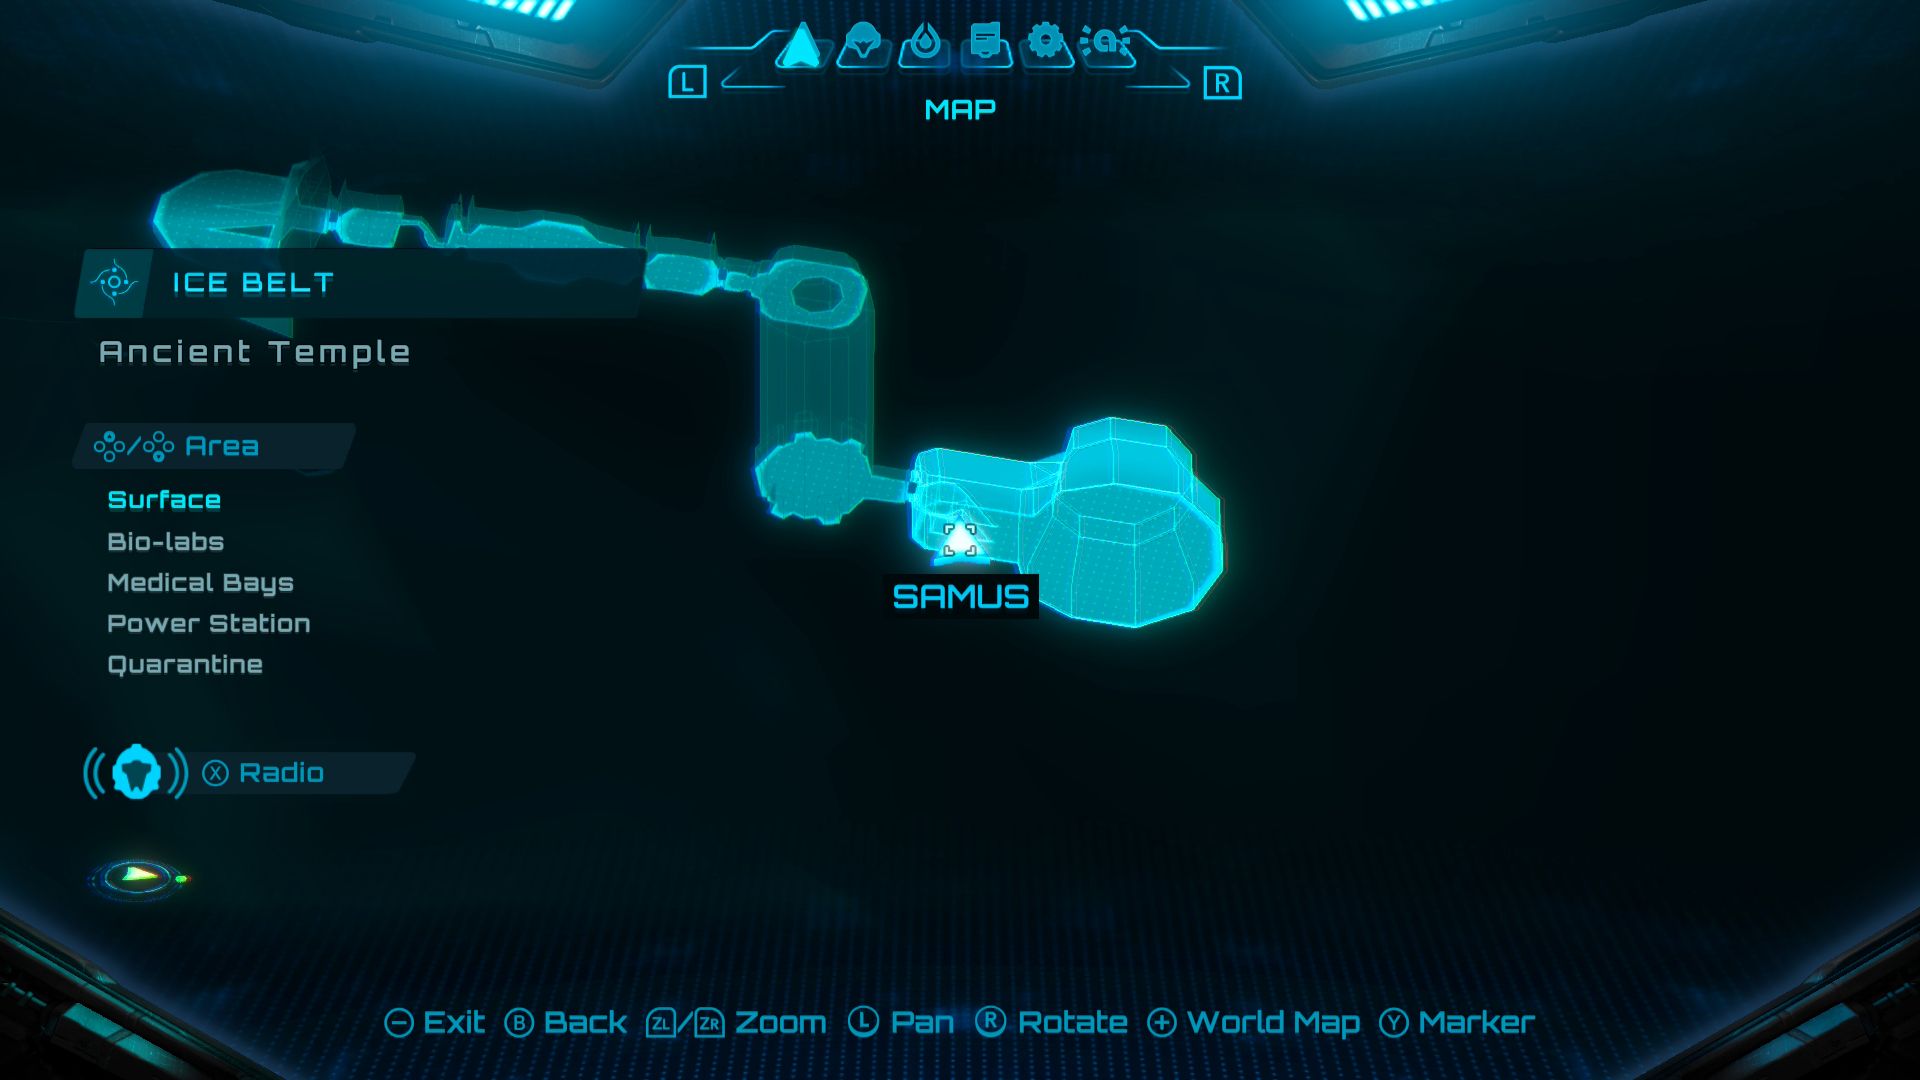
- Location: Ancient Temple
There is a Missile Expansion beneath the ramp that is used to enter the room.
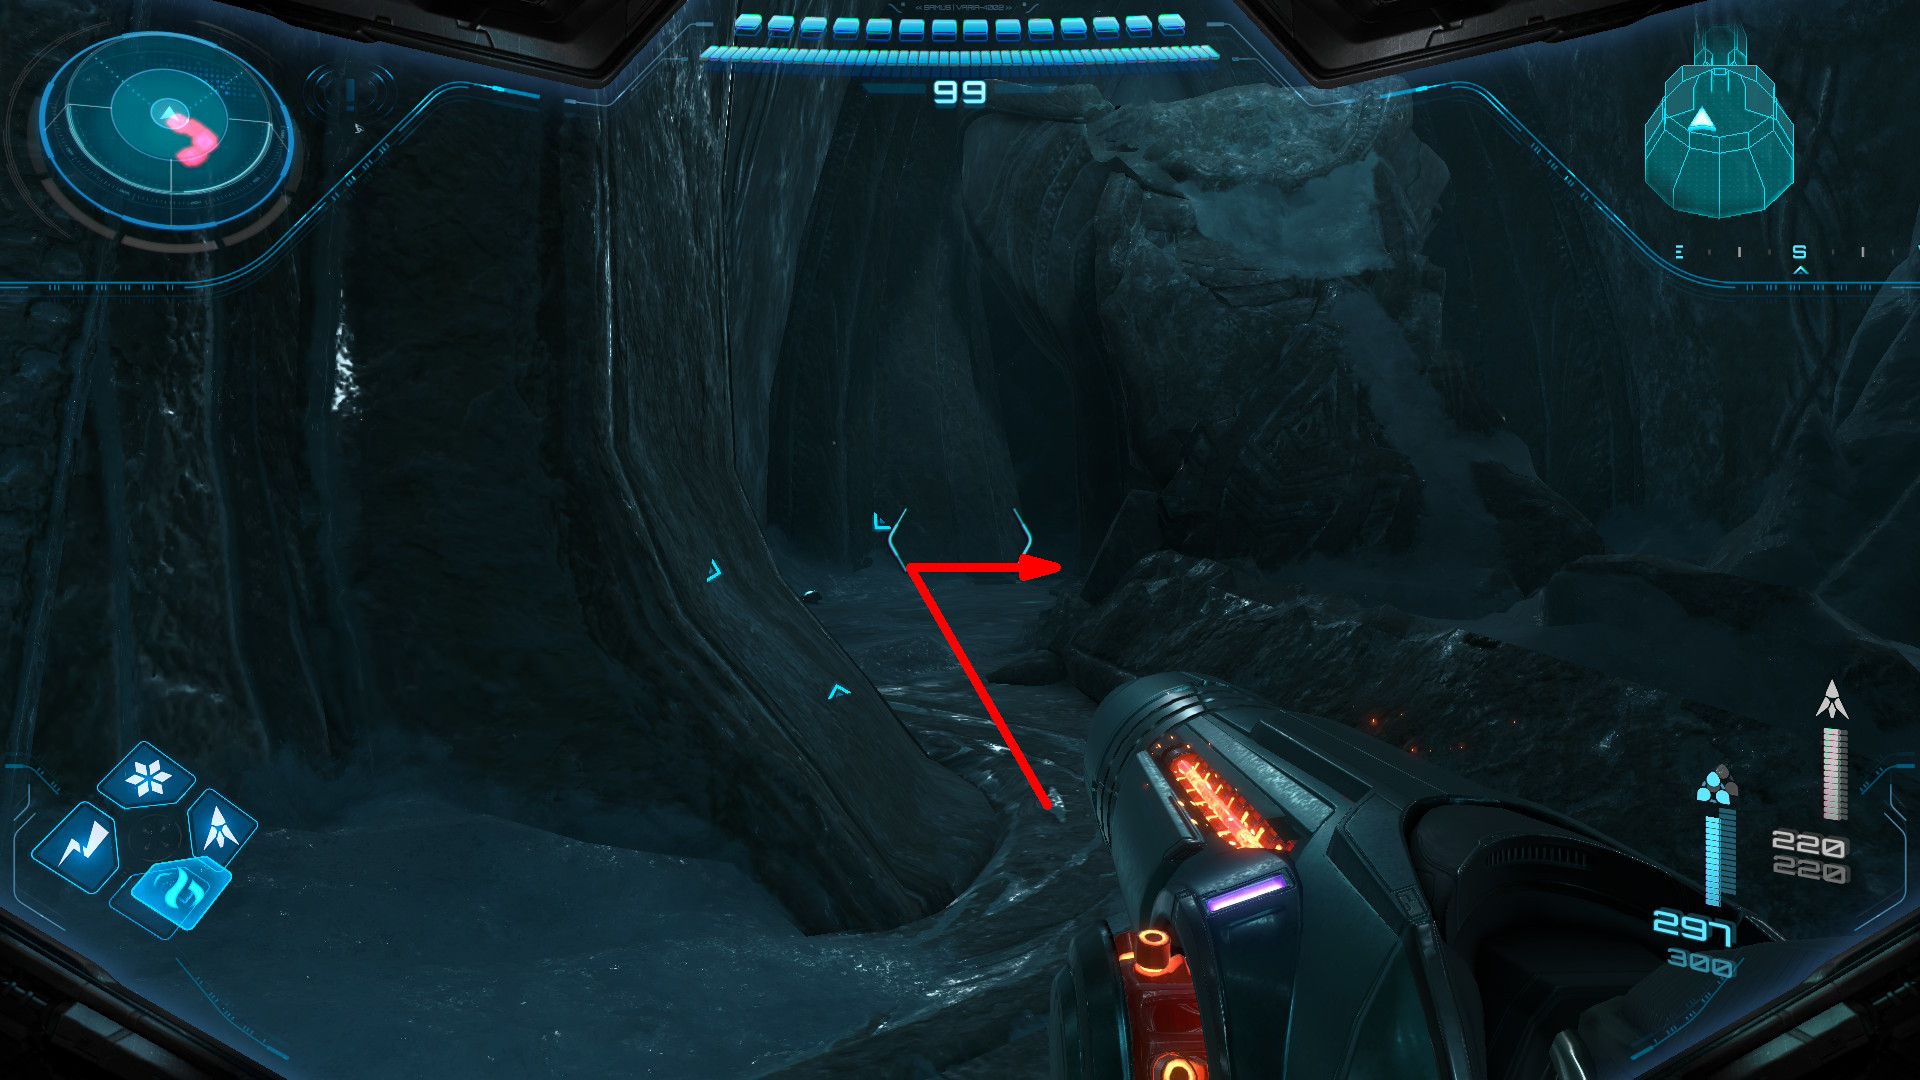
Missile Expansion #7
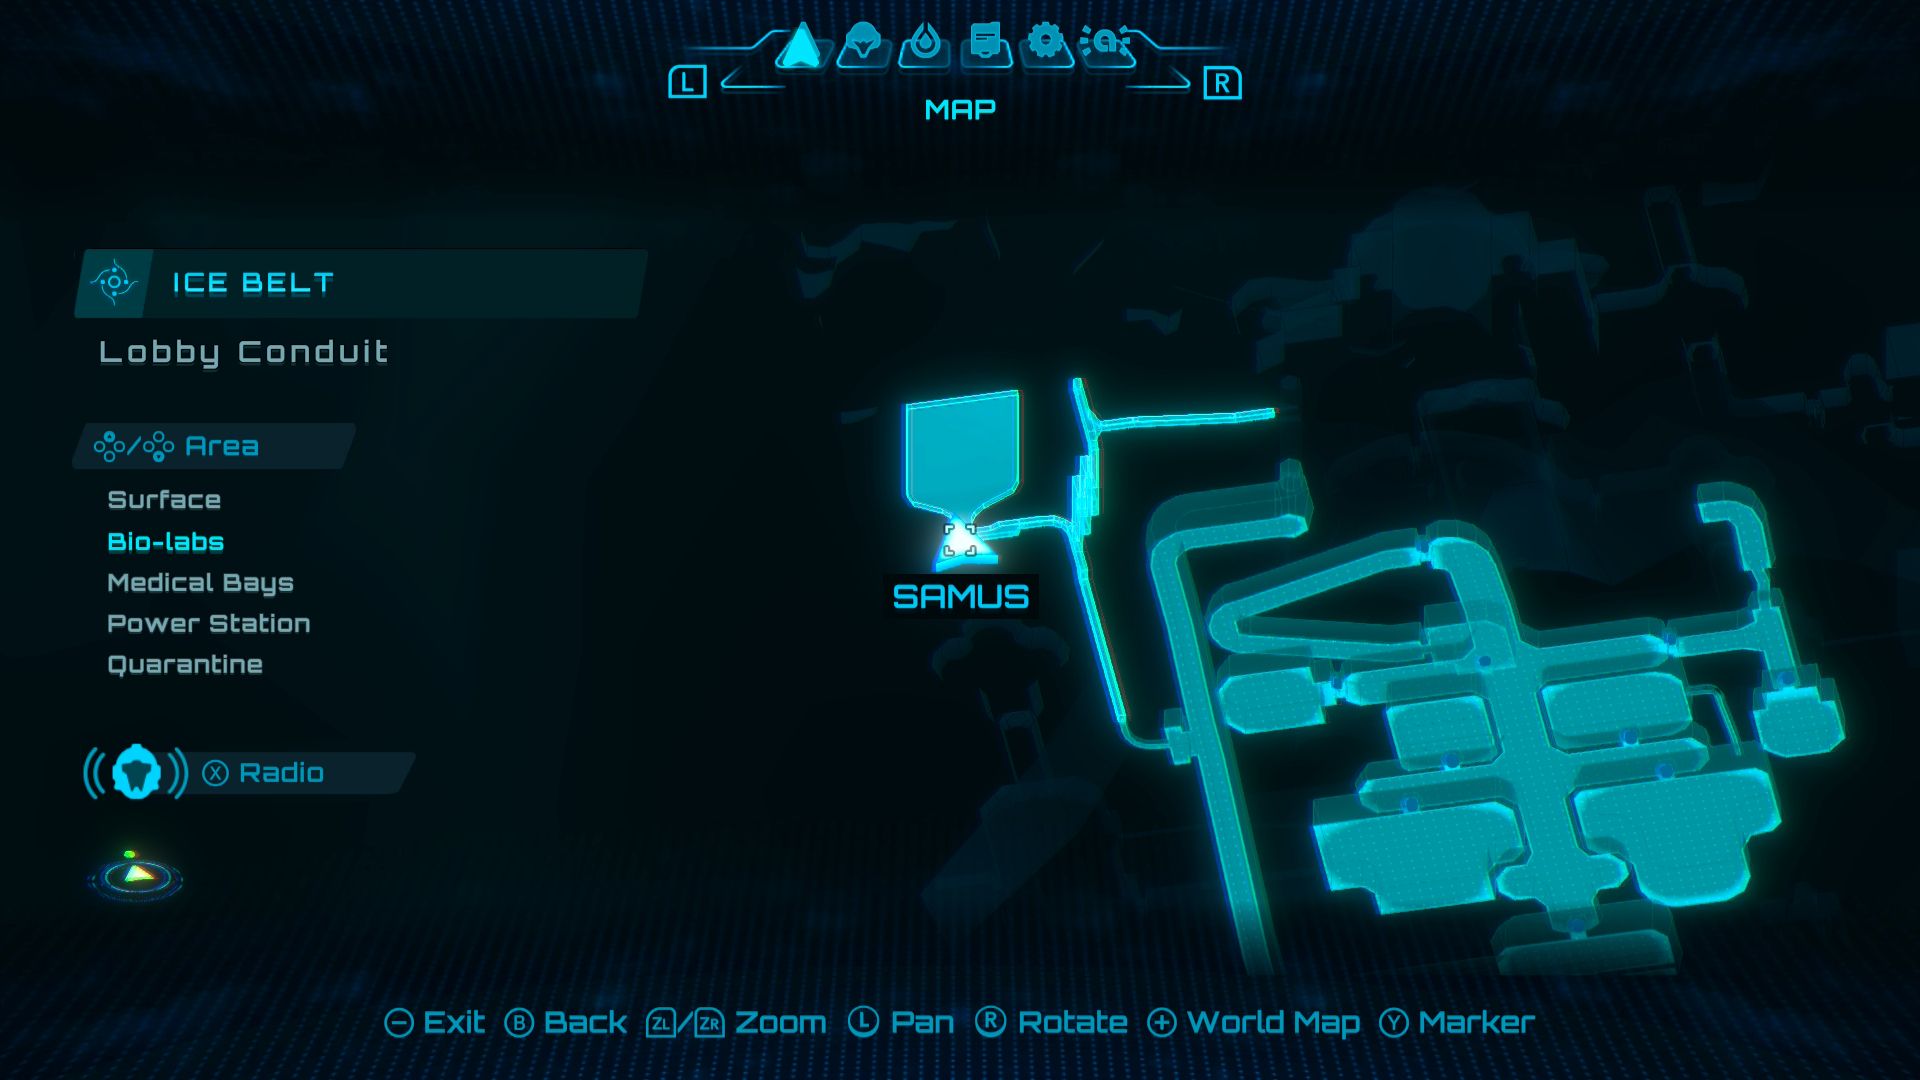
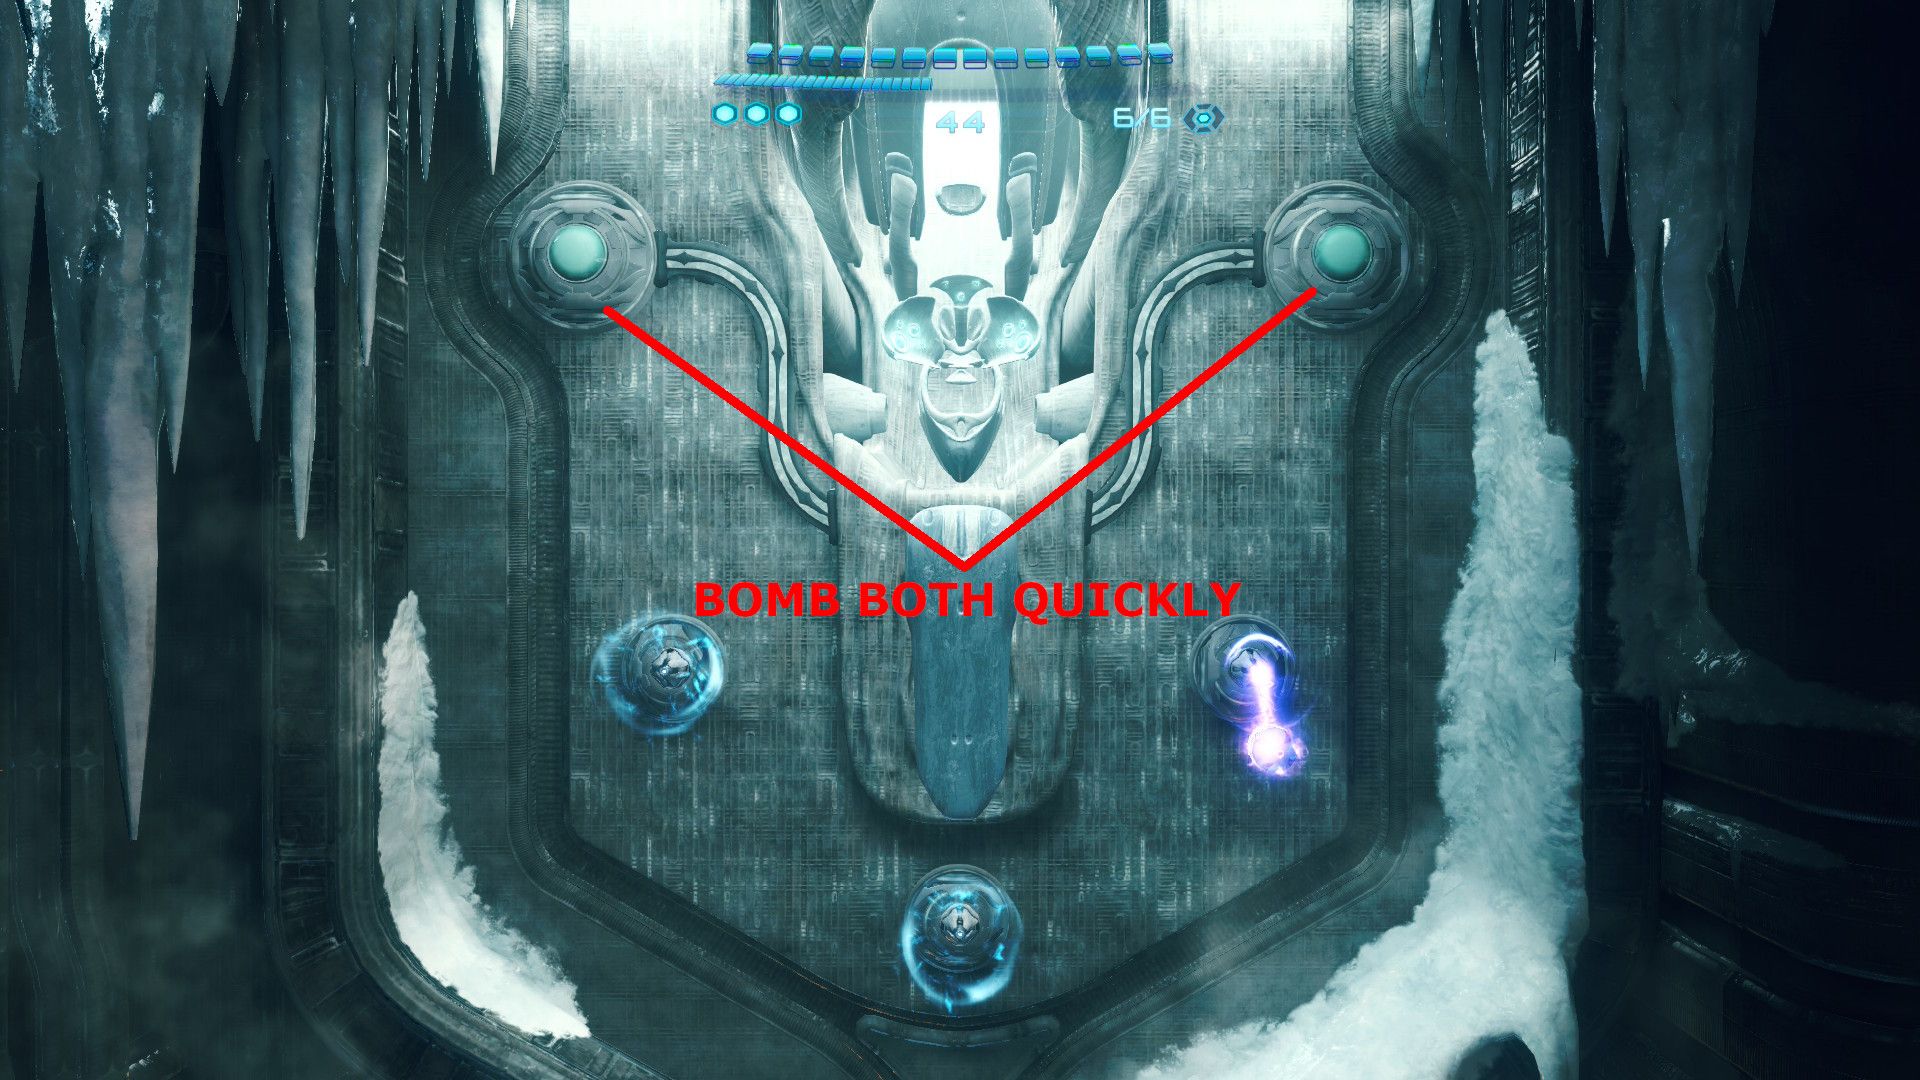
- Location: Lobby Conduit
Once you get the Spider Ball, go to the bottom-left area of the Morph Ball section. Then, use the Psychic Tethers to fling Samus towards the two red lights. Place bombs beside both lights quickly to turn them off and unlock the Missile Expansion.
Missile Expansion #8
- Location: Storage Bay
At the center of the area, go into the opening for the Morph Ball. Then, use the Spider Ball tracks on the left side to get to a Missile Expansion. You’ll need to use a double bomb jump to reach it.
To do a double jump, start by placing one bomb on the track, then quickly place another. After the first bomb goes off, place a third bomb at the height you’d reach with a boost. Let the second track bomb explode, then boost into the third bomb, which will launch you towards the Missile Expansion.
All Flare Pool Missile Expansions in Metroid Prime 4
There are nine Missile Expansions in Metroid Prime 4‘s Flare Pool:
Missile Expansion #1
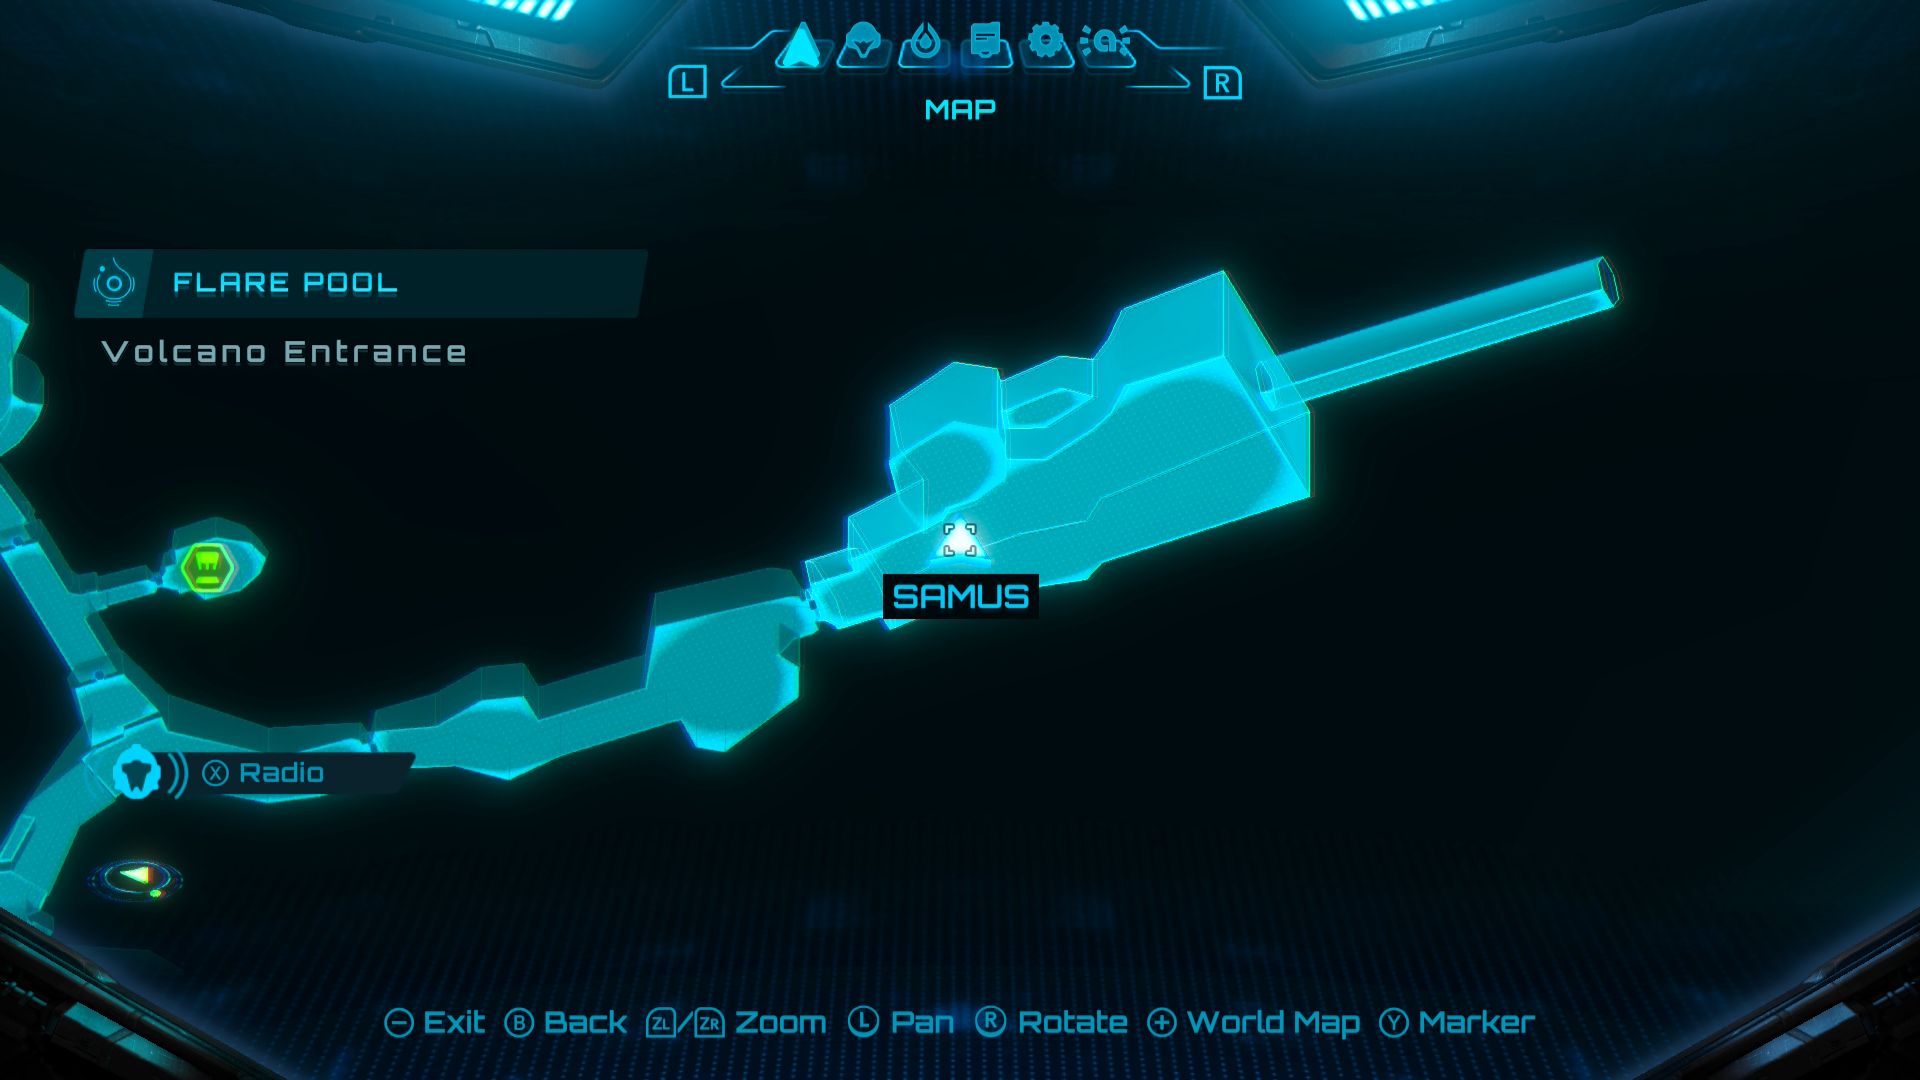
- Location: Volcano Entrance
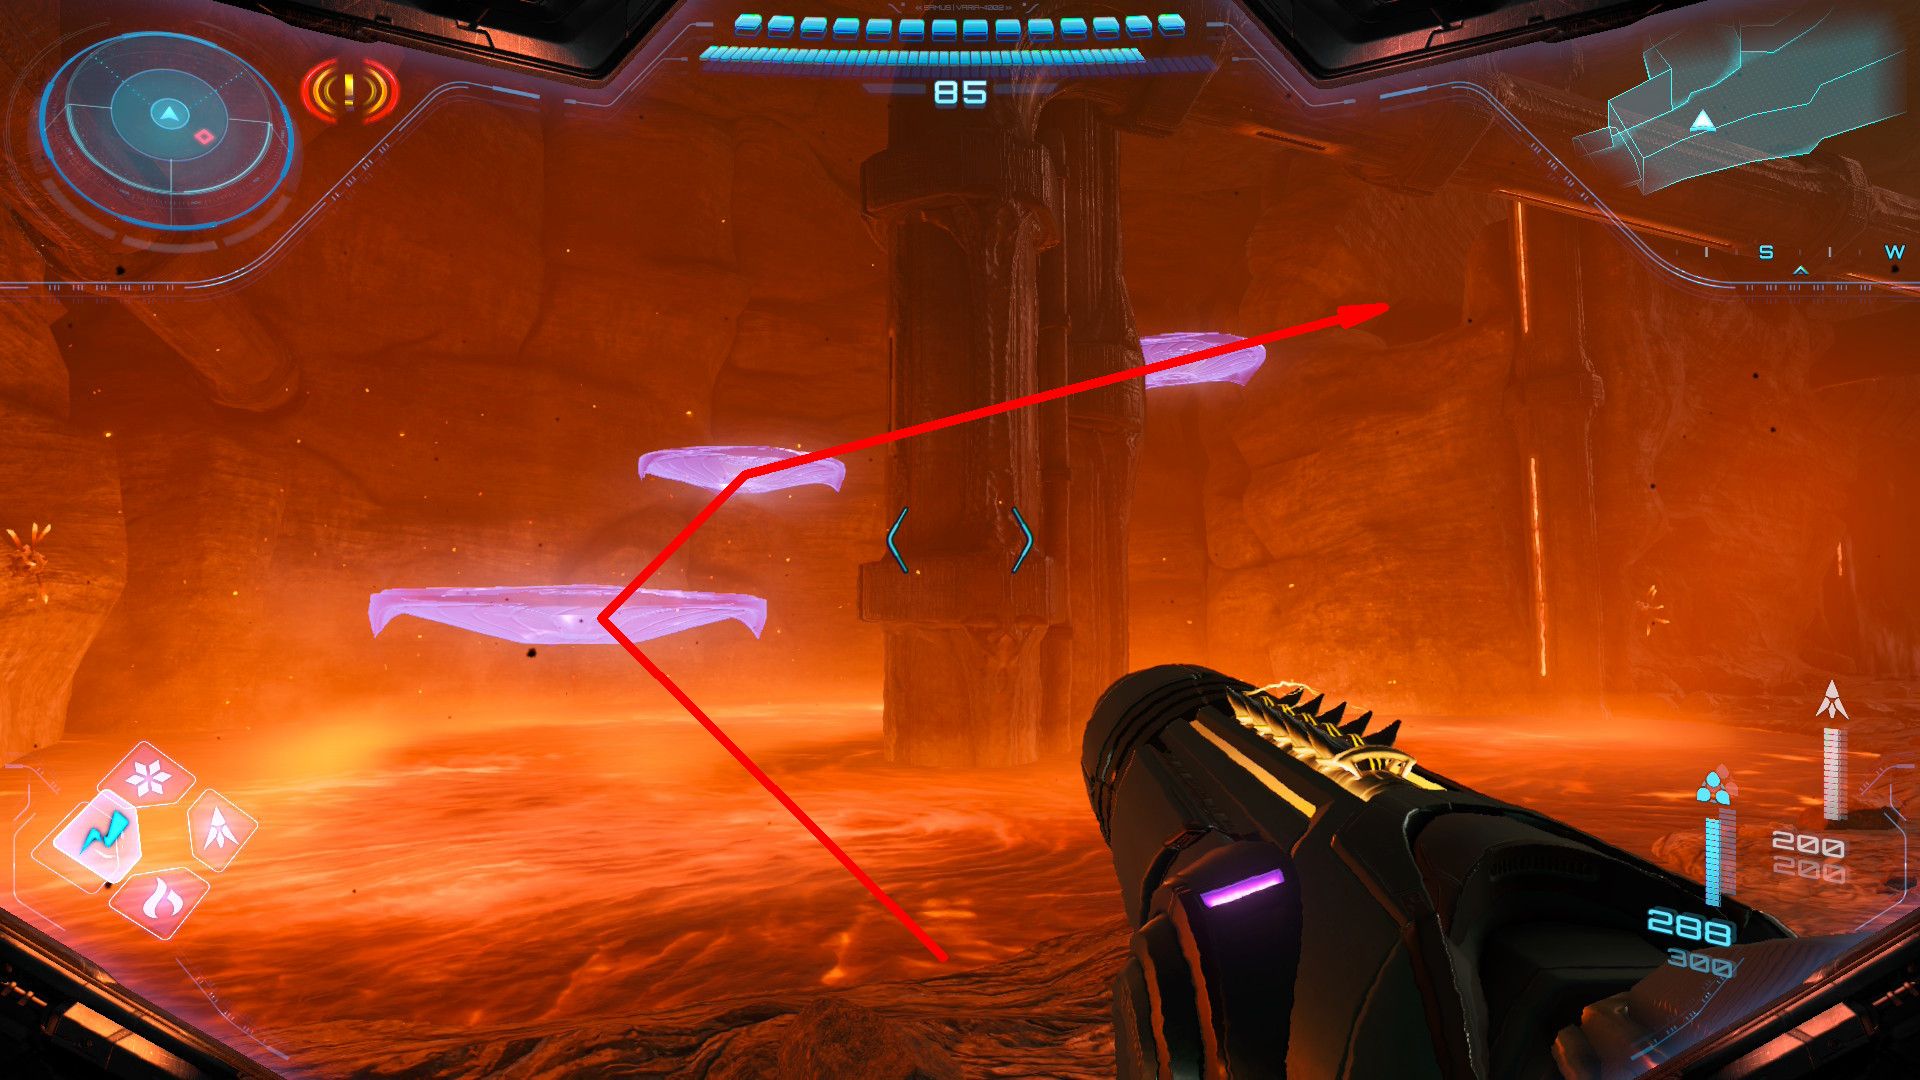
Put on the Psychic Visor to power up the platforms over the lava. If you’ve unlocked the Psychic Boots, you can then use these platforms to get to the Missile Tank.
Missile Expansion #2
- Location: Shoreline Access
First, freeze the falling lava by hitting it with an Ice Shot. Then, blast the frozen lava with a Missile to open a hidden alcove containing a Missile Expansion.
Missile Expansion #3
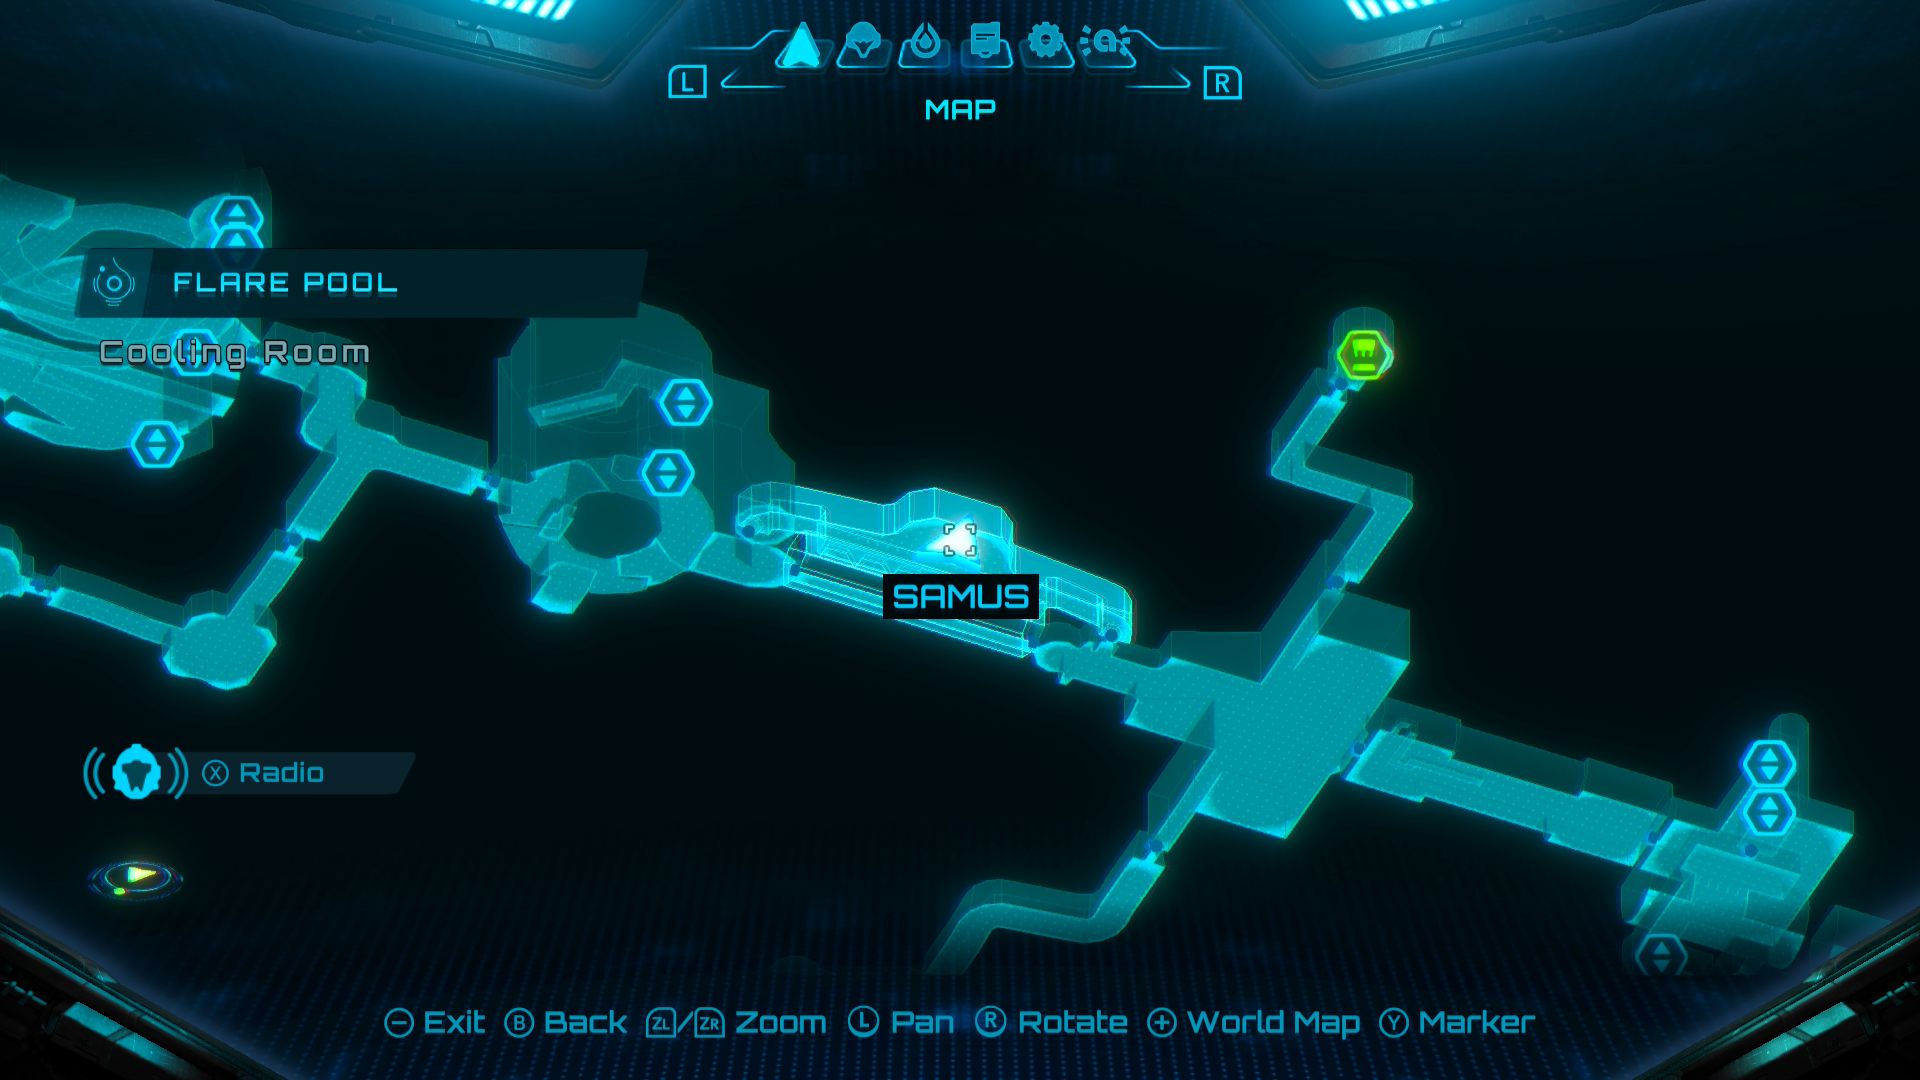
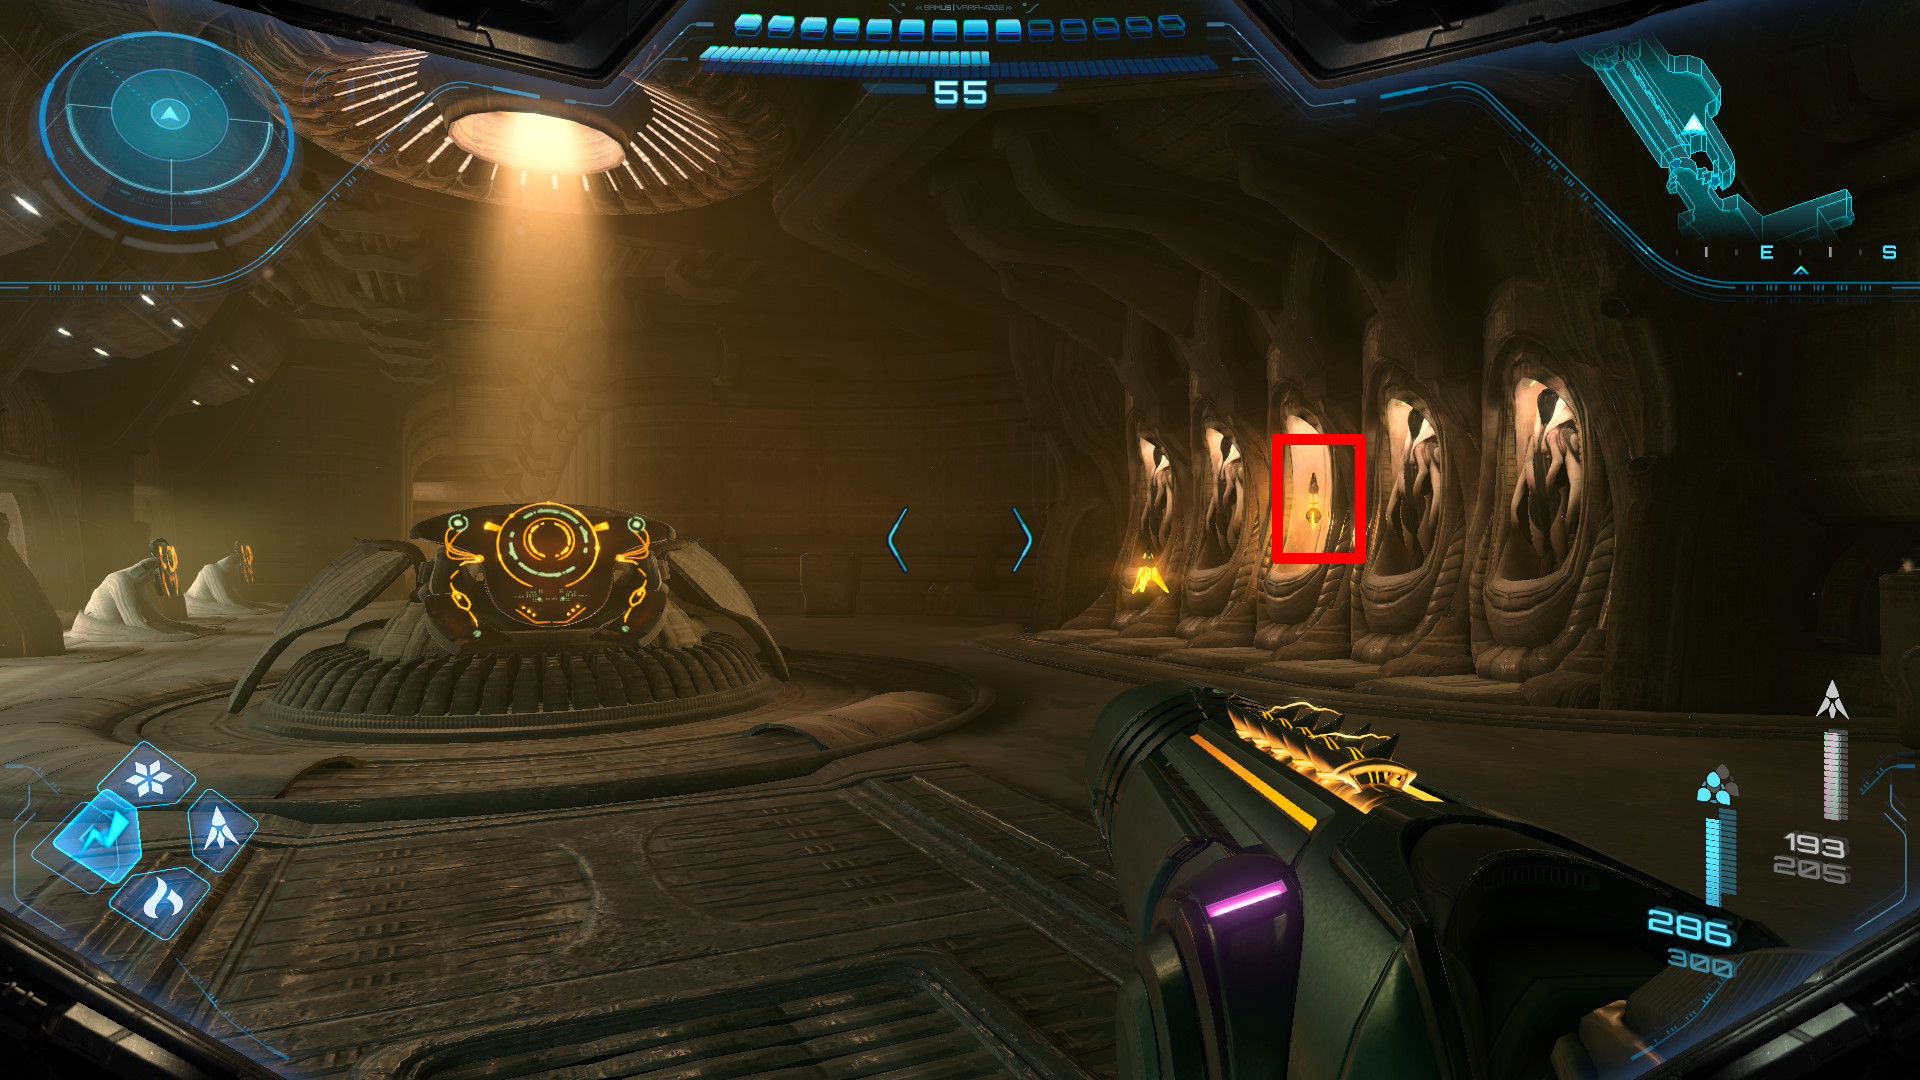
- Location: Cooling Room
There is a Missile Expansion in a pod in the Cooling Room.
Missile Expansion #4
- Location: Subobservation Room
Fire a Missile at the metal wall to uncover a hidden bracket. Use Psychic Lasso to pull the bracket towards you, which will open the way past the fence using Morph Ball. Once inside, perform a double bomb jump at the top to find a Missile Expansion.
To do a double bomb jump, first curl into a Morph Ball and jump, then quickly place a bomb at the peak of your arc. Right before the bomb detonates, jump again to use the explosion as a boost and reach the tunnel.
Missile Expansion #5
- Location: Overseer Room
Look for a panel close to the ceiling. You can open it using the Psychic Lasso. Once it’s open, toss a bomb inside. Then, use a single Control Beam to hit all three glowing points that appear on the device.
Missile Expansion #6
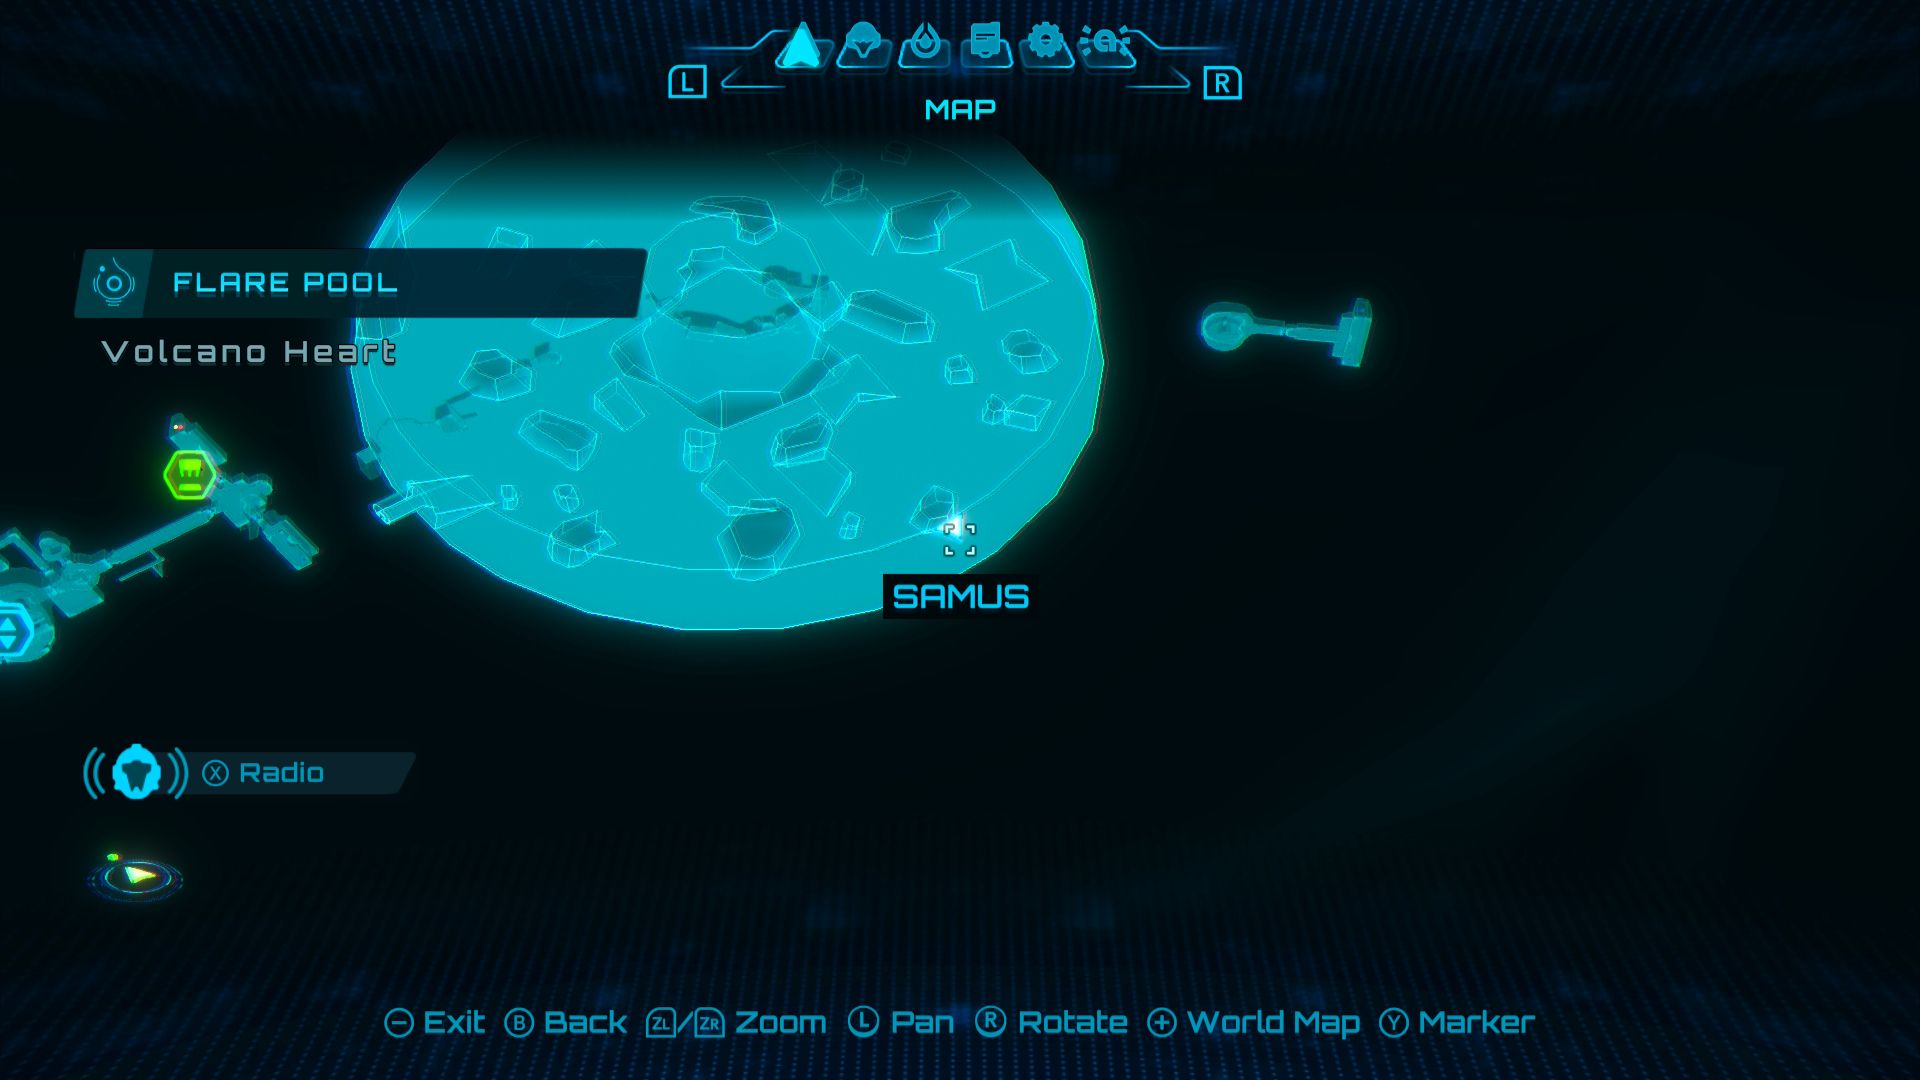
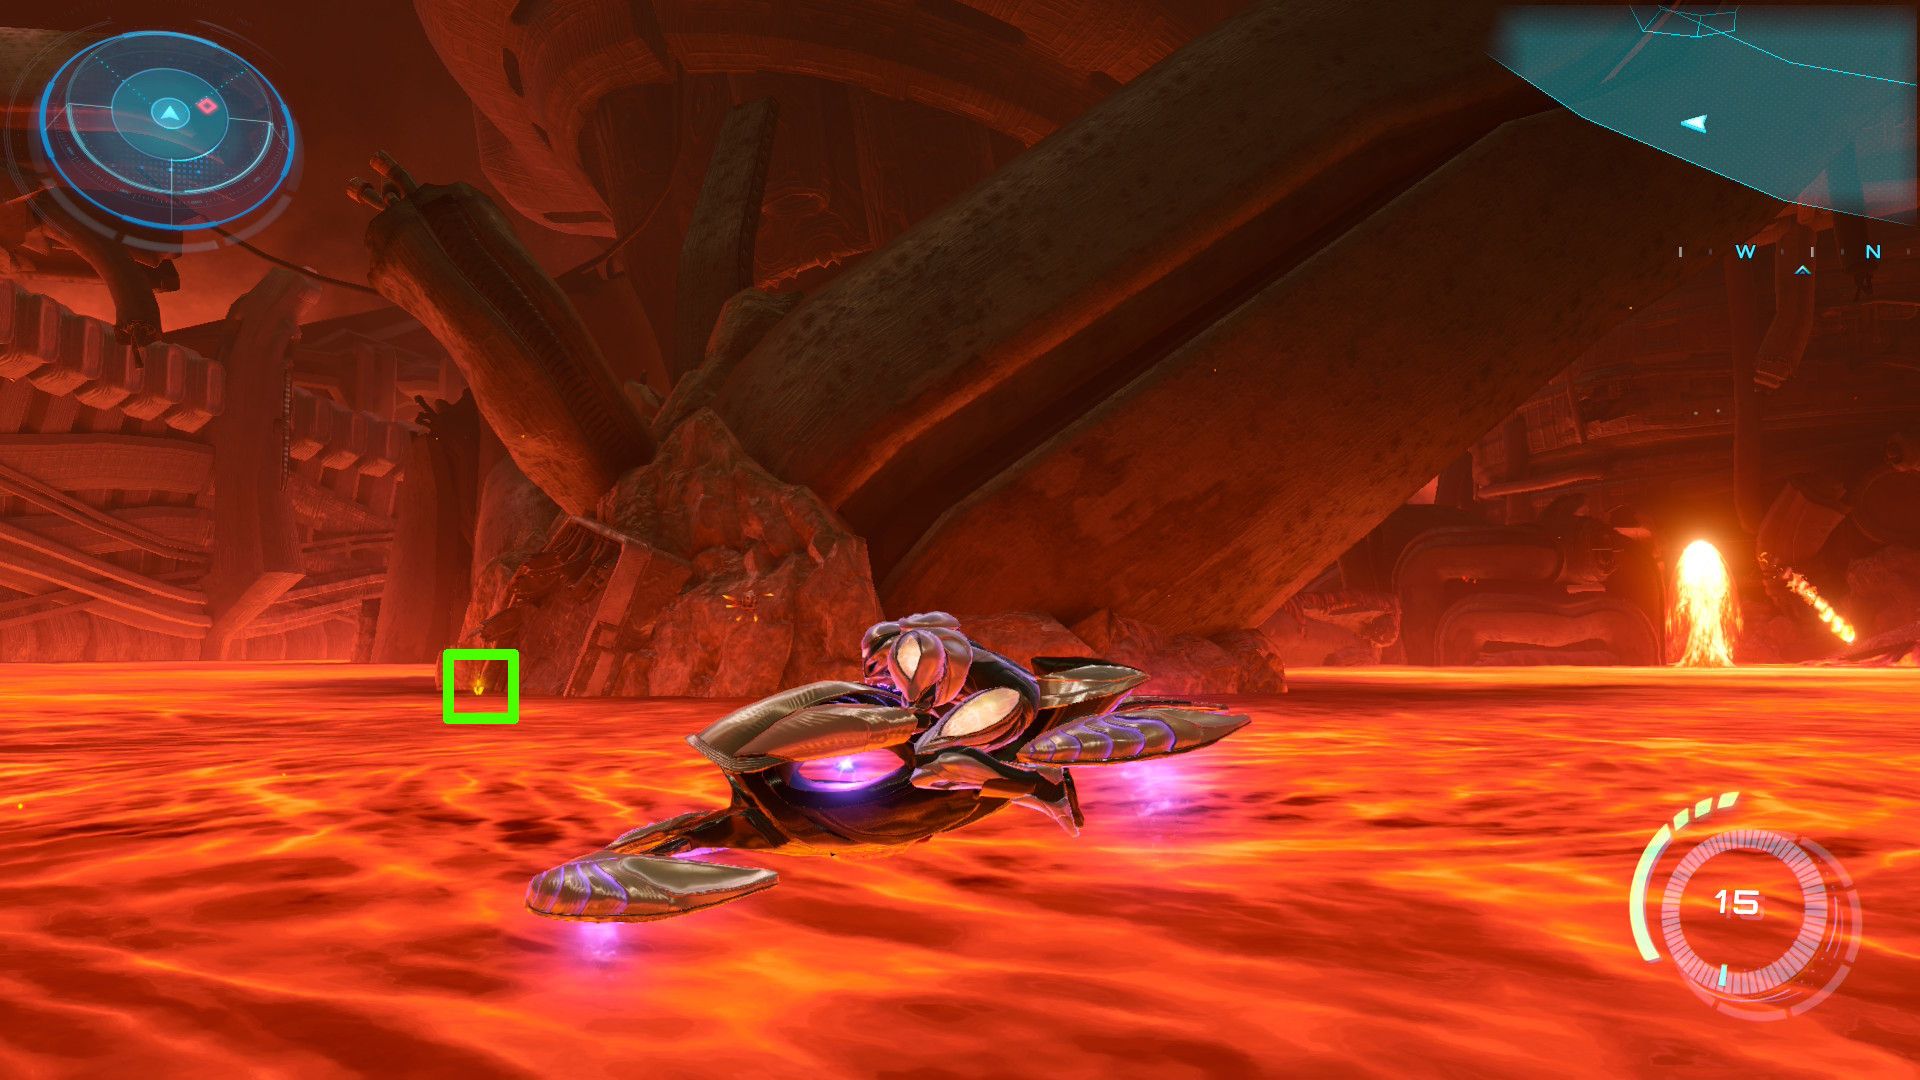
- Location: Volcano Heart
Above the lava on the right side of the arena where you fought Phenoros, you’ll notice something new has appeared.
Missile Expansion #7
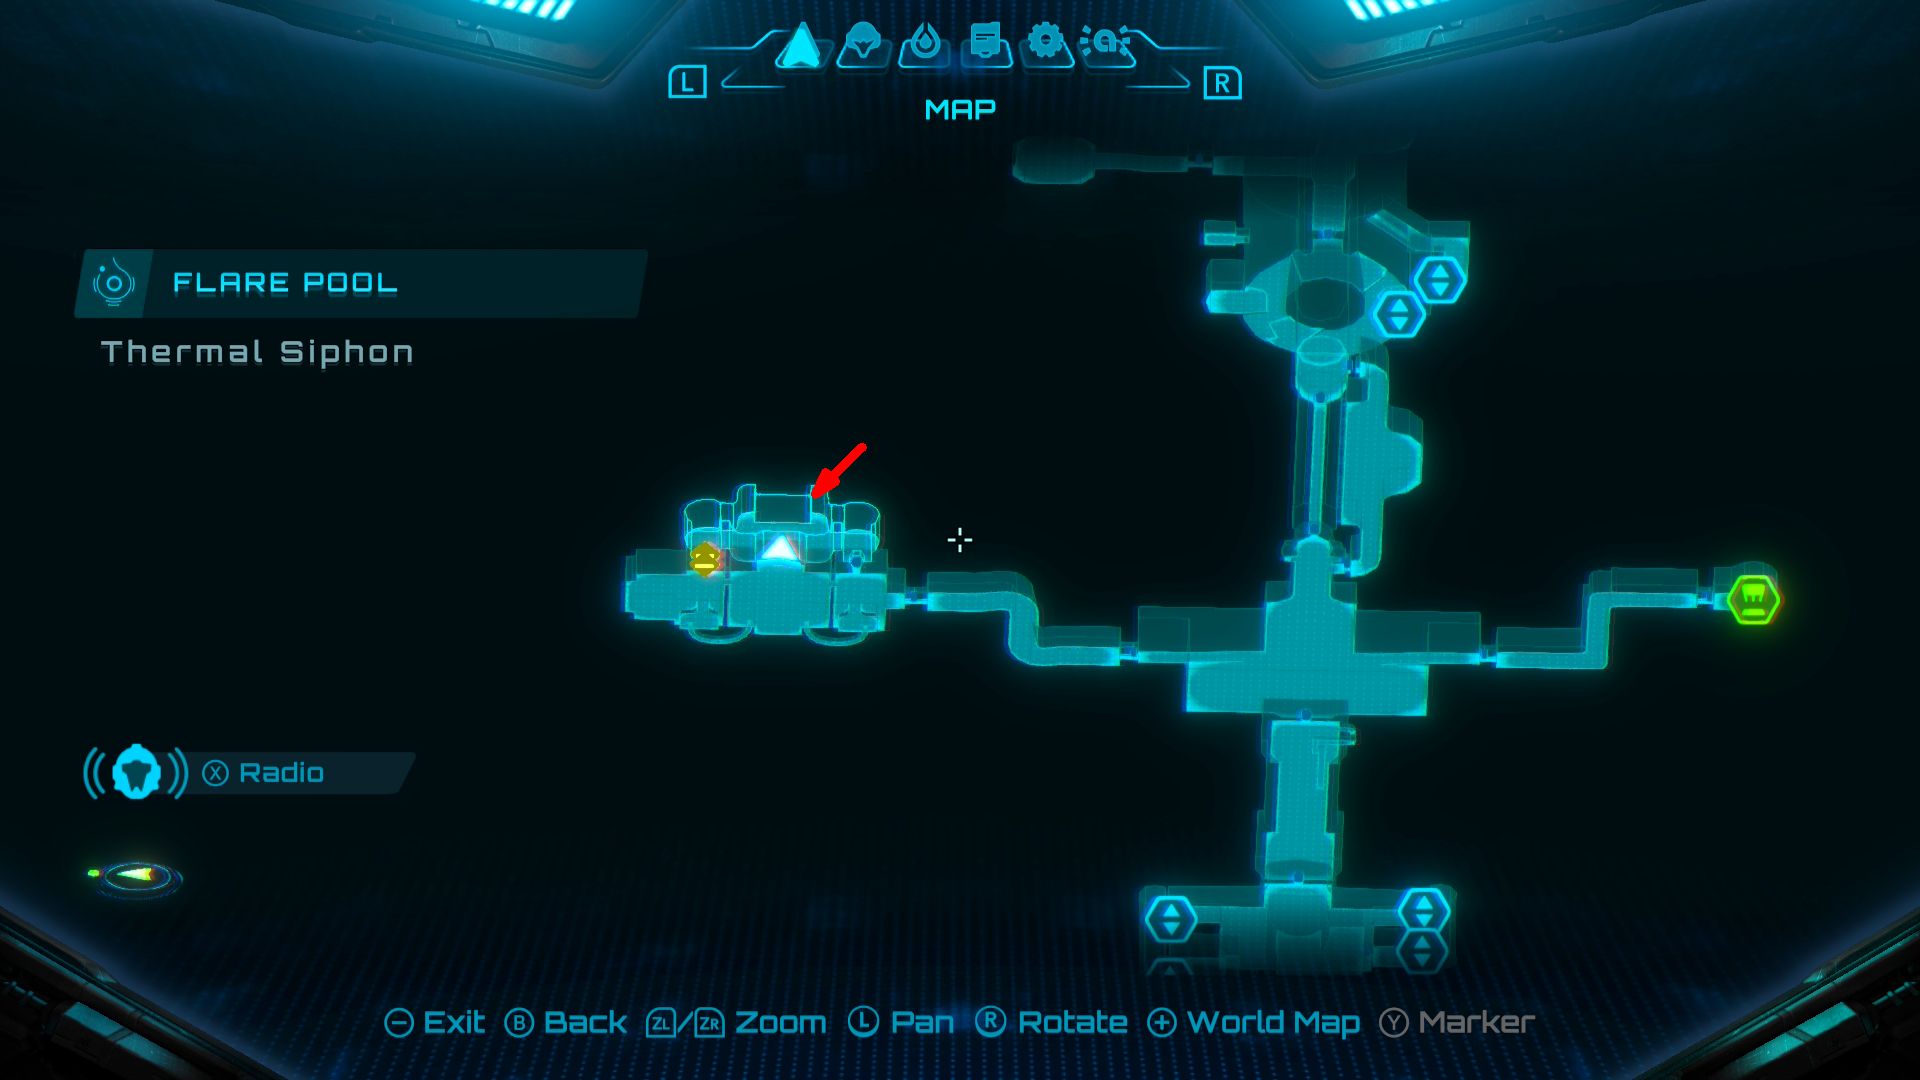
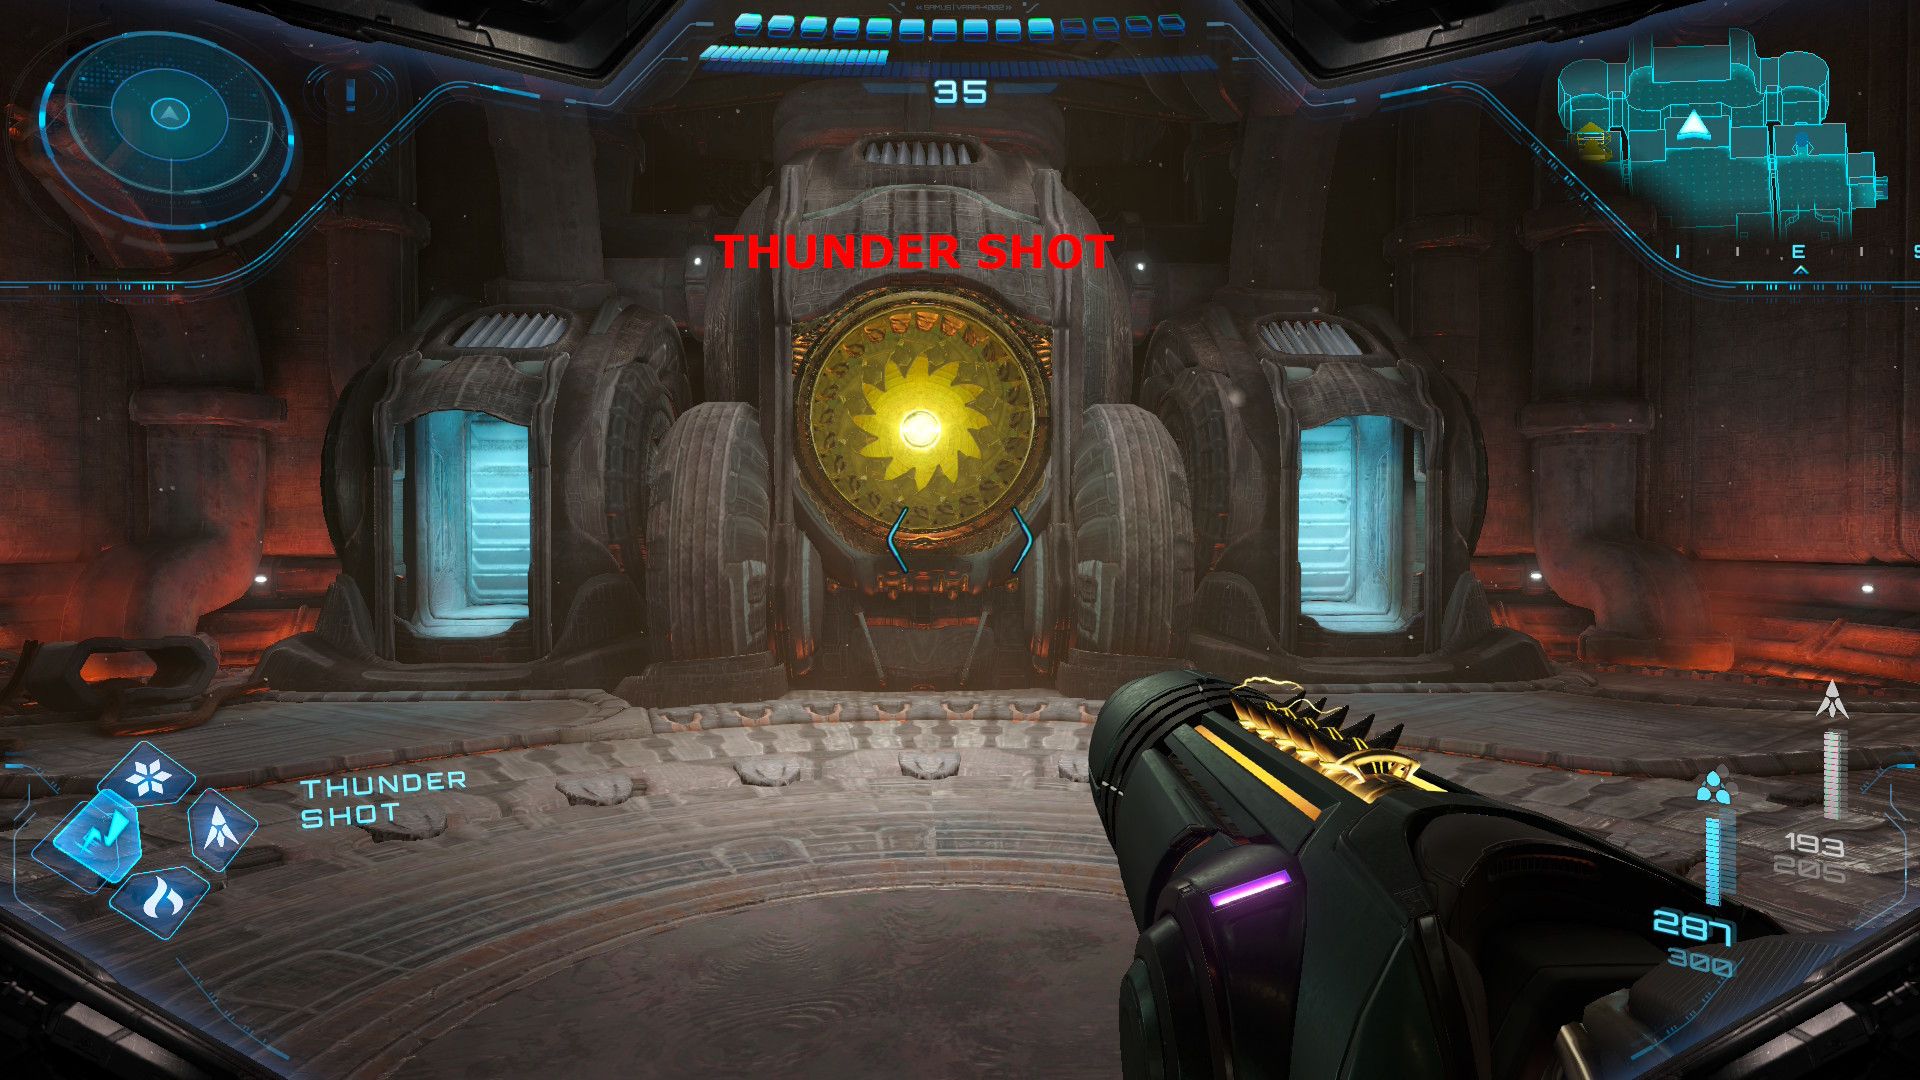
- Location: Pressure Monitoring
Use your Psychic Lasso to remove the cover from the generator. Then, keep firing Thunder Shots at the generator’s core until two containers open. One of these containers will give you a Missile Expansion.
Missile Expansion #8
- Location: Ventilation Works
Use Boost Ball on the half pipe to reach a Spider Ball track that leads to a Missile Expansion.
Missile Expansion #9
- Location: Energy Extraction
Once you get the Spider Ball ability, look for tracks on the walls. These will lead you to a Missile Expansion. Be careful to avoid the electricity, and use bombs to help you jump across any broken sections of the track.
All Great Mines Missile Expansions in Metroid Prime 4
There are seven Missile Expansions in Metroid Prime 4‘s Great Mines:
Missile Expansion #1
- Location: Mine Shaft – Level 1
Climb the Spider Ball track on the exterior of the elevator shaft. Continue along the path, bypassing the initial Spider Ball track, and then jump across the gap. Go down the next Spider Ball track, jump to the left, and climb another track to find a Missile Expansion.
Missile Expansion #2
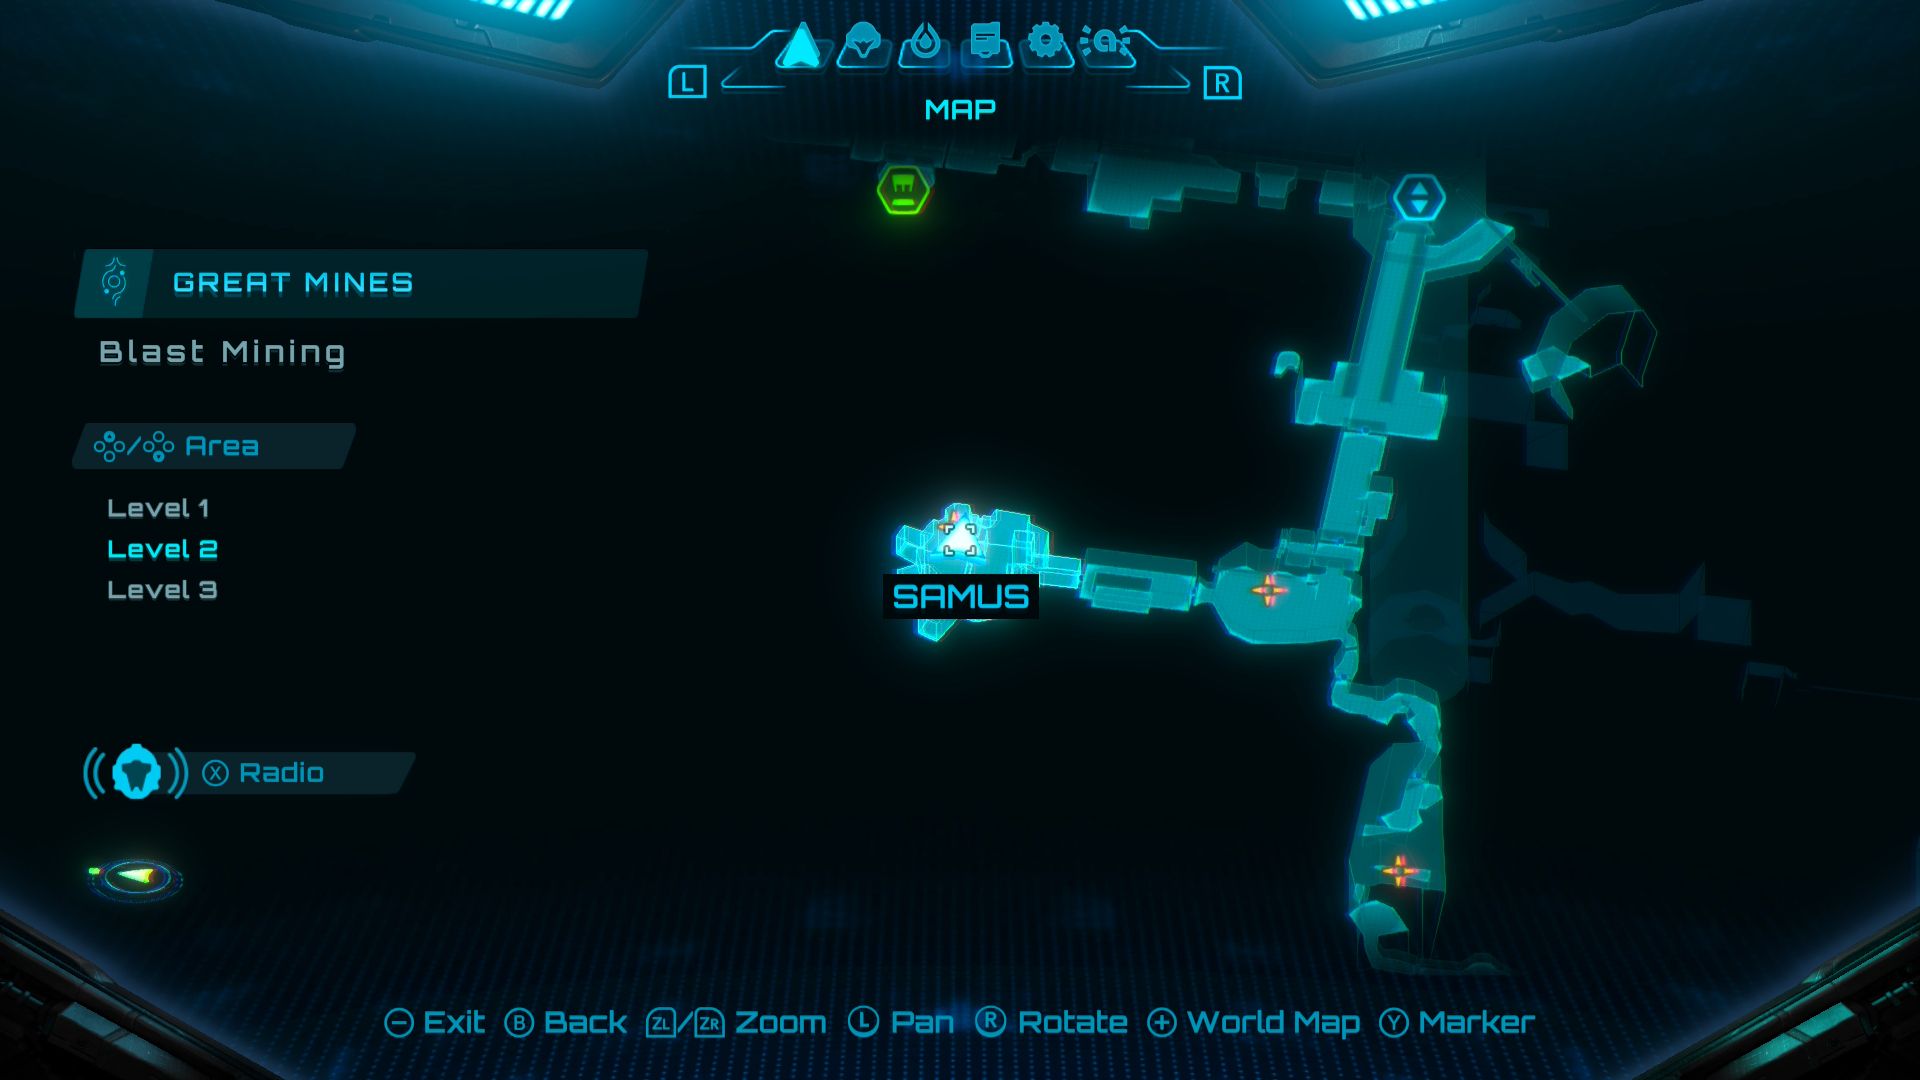
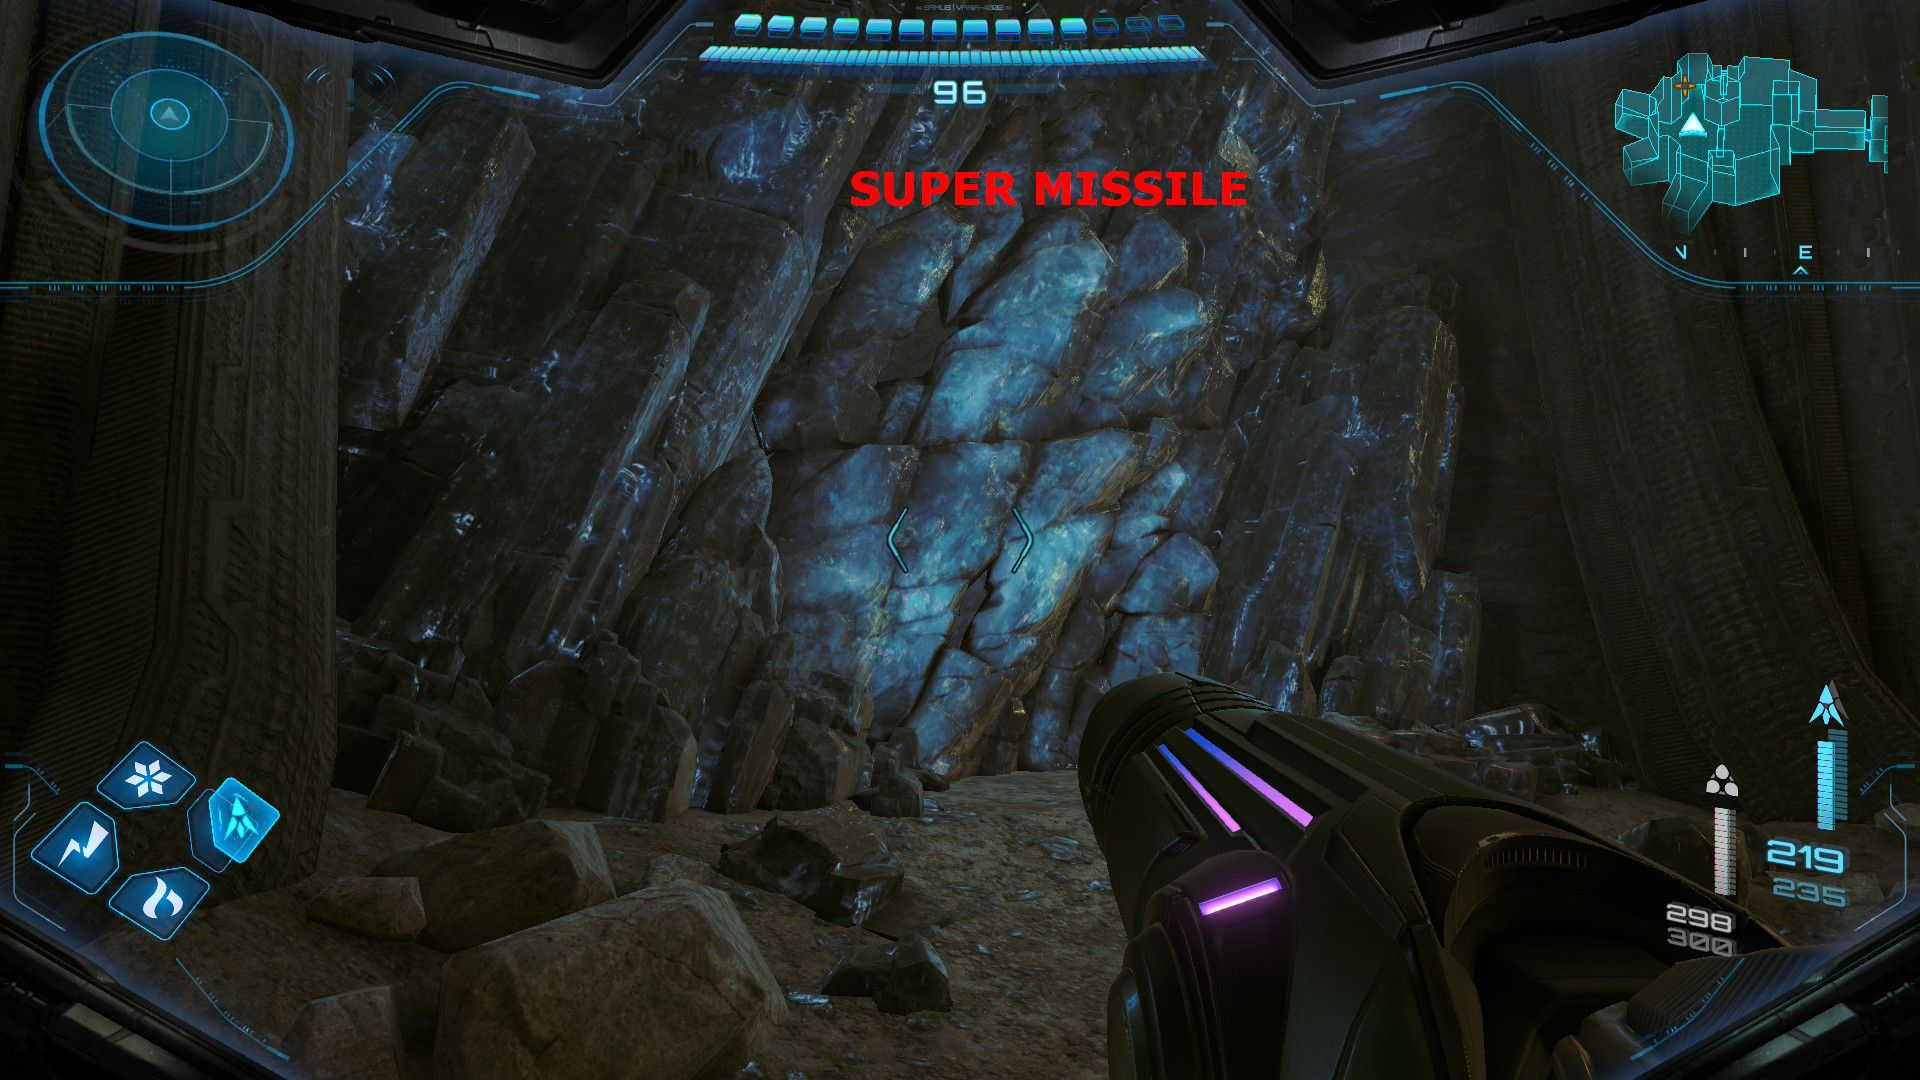
- Location: Blast Mining (Level 2)
Use a Super Missile to destroy a rock wall and reveal a Missile Expansion.
Missile Expansion #3
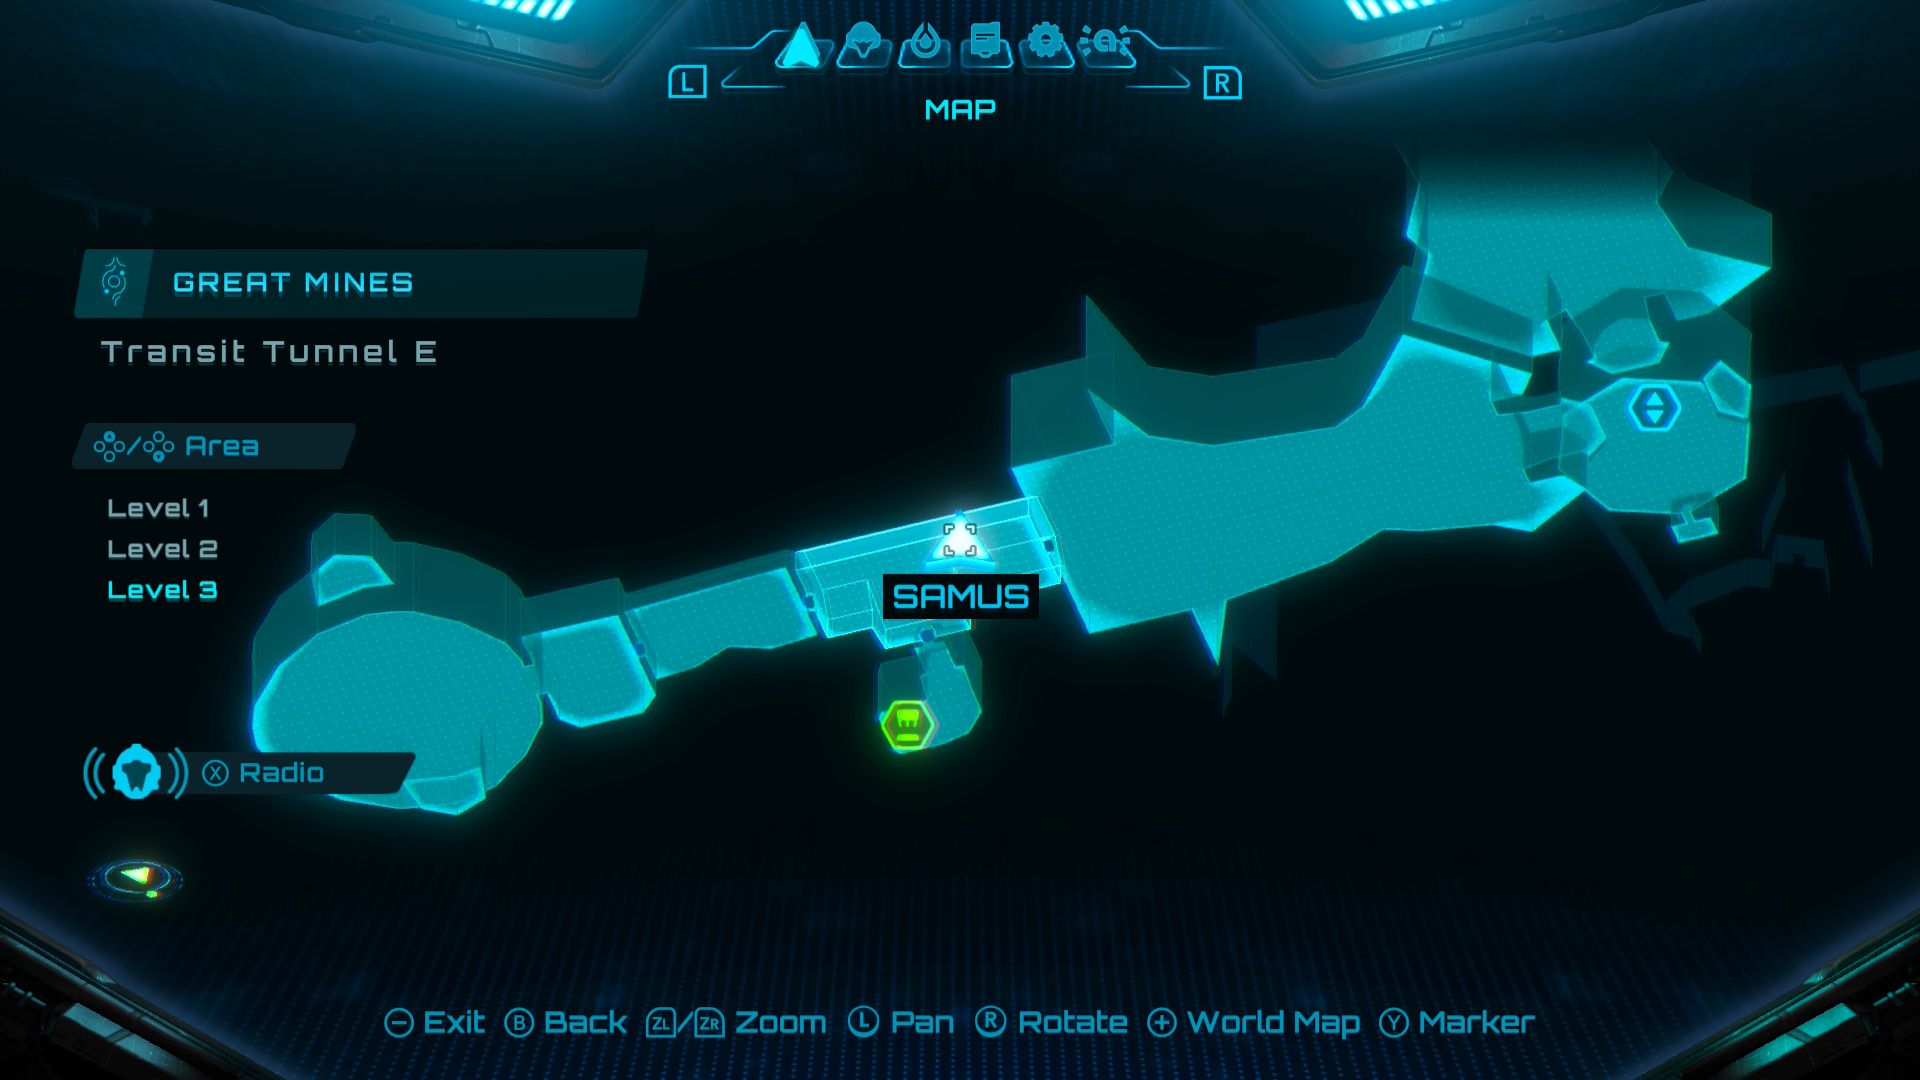
- Location: Tunnel E (Level 3)
In this room, you’ll find a door on a tube that can be opened using the Psychic Lasso. Once inside the tunnel, head to the left to locate a Missile Expansion.
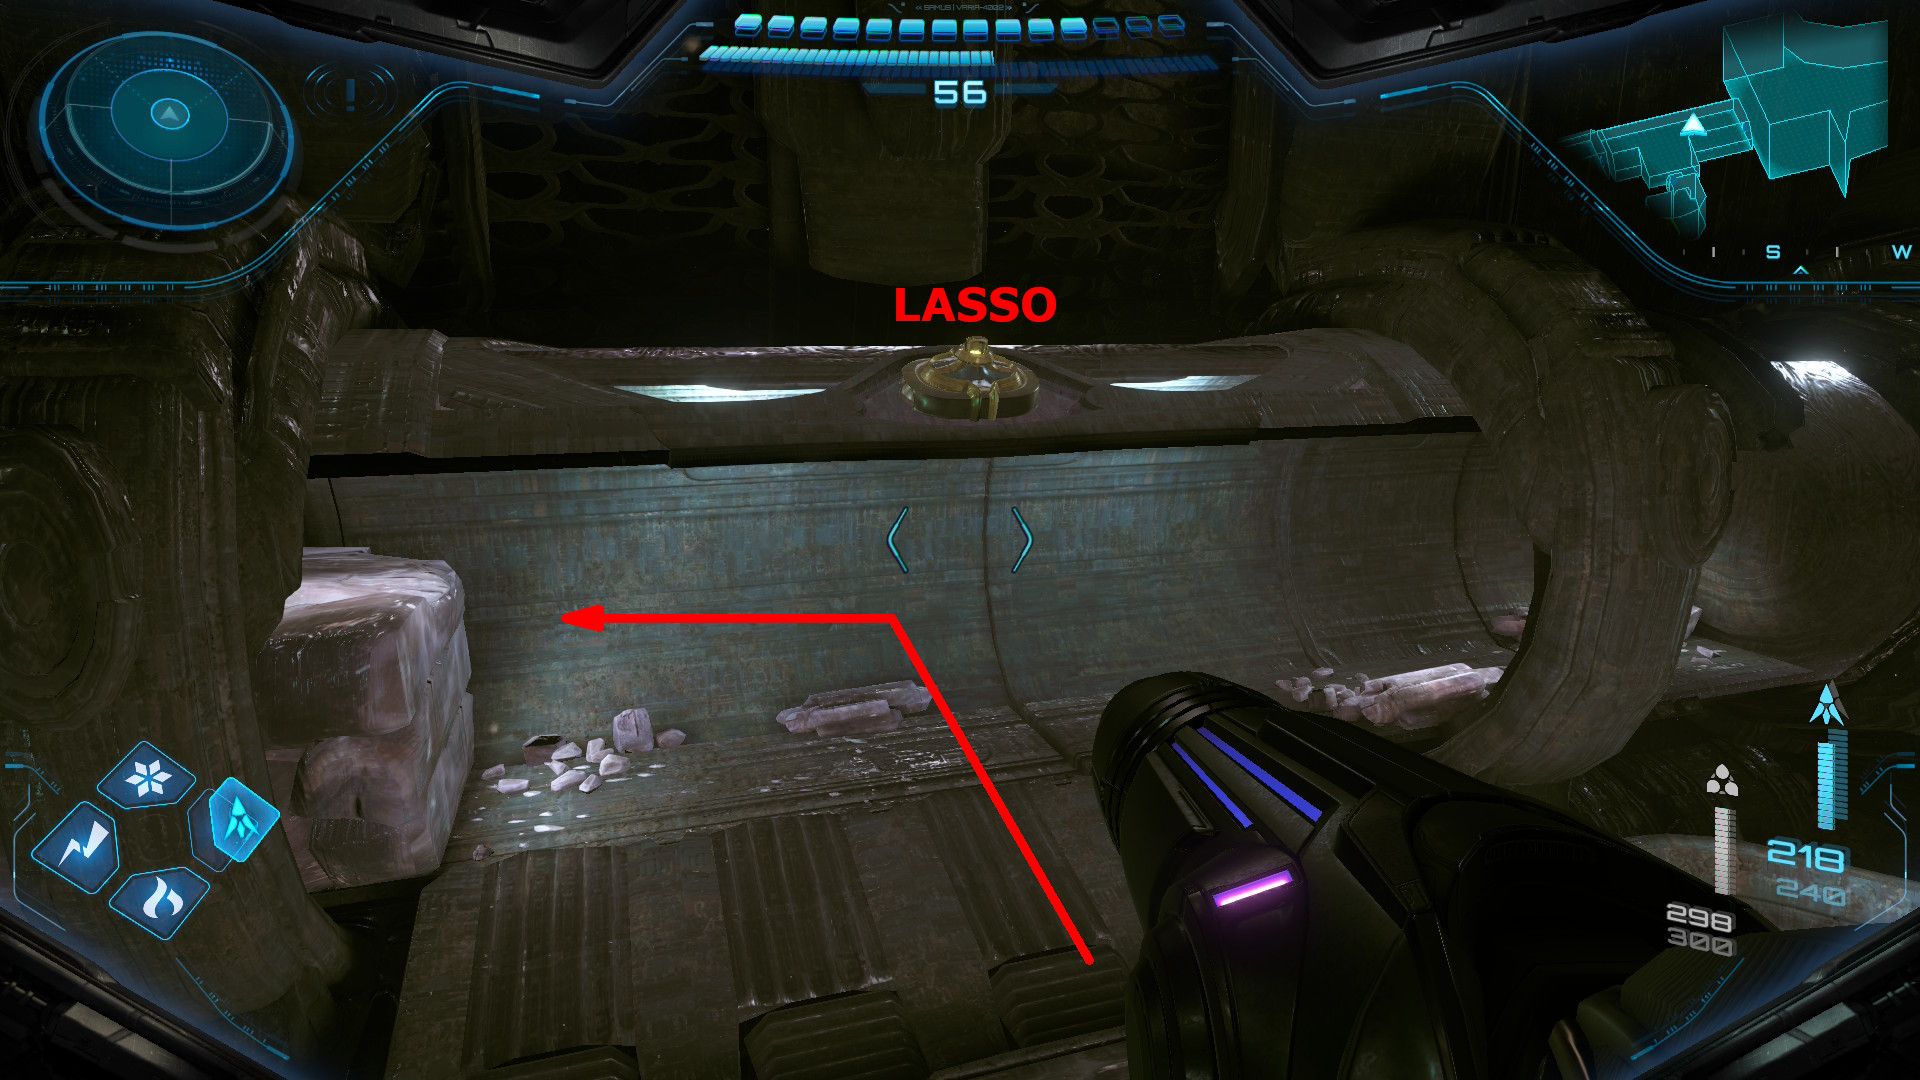
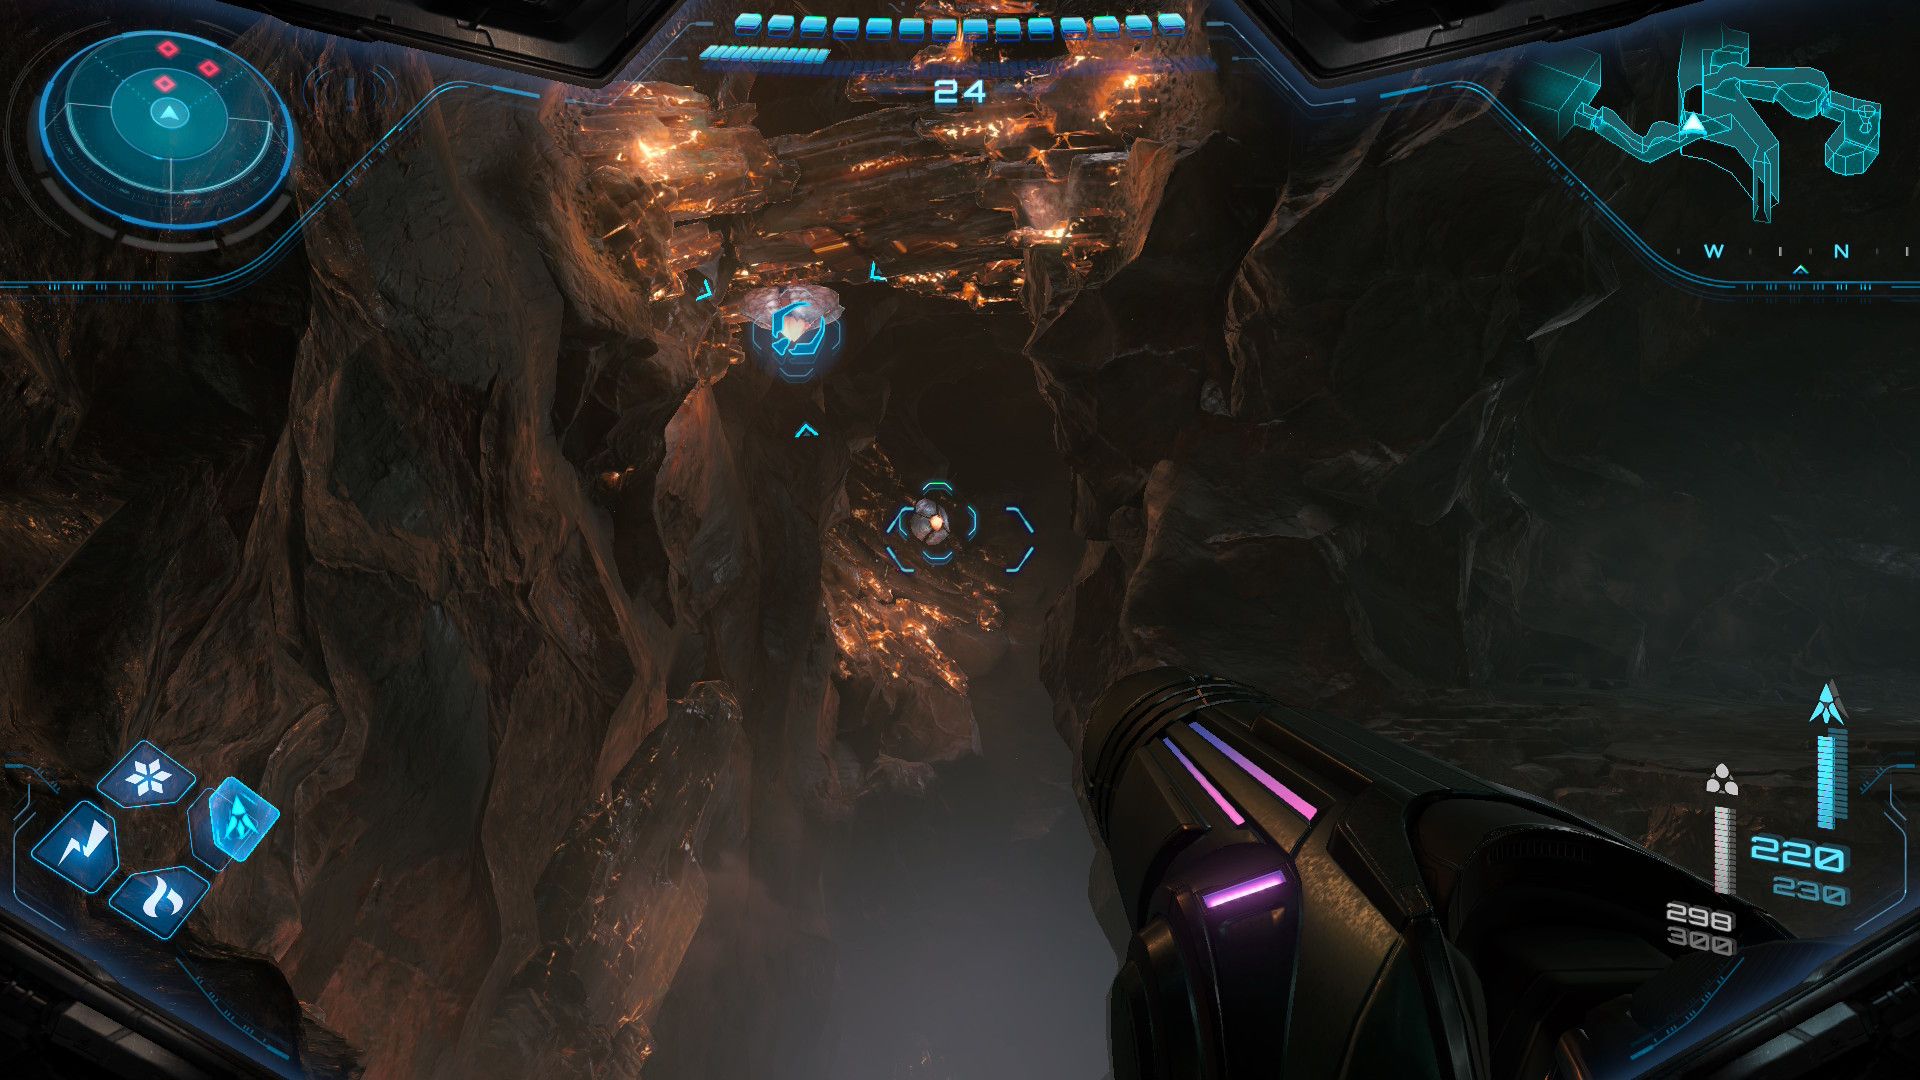
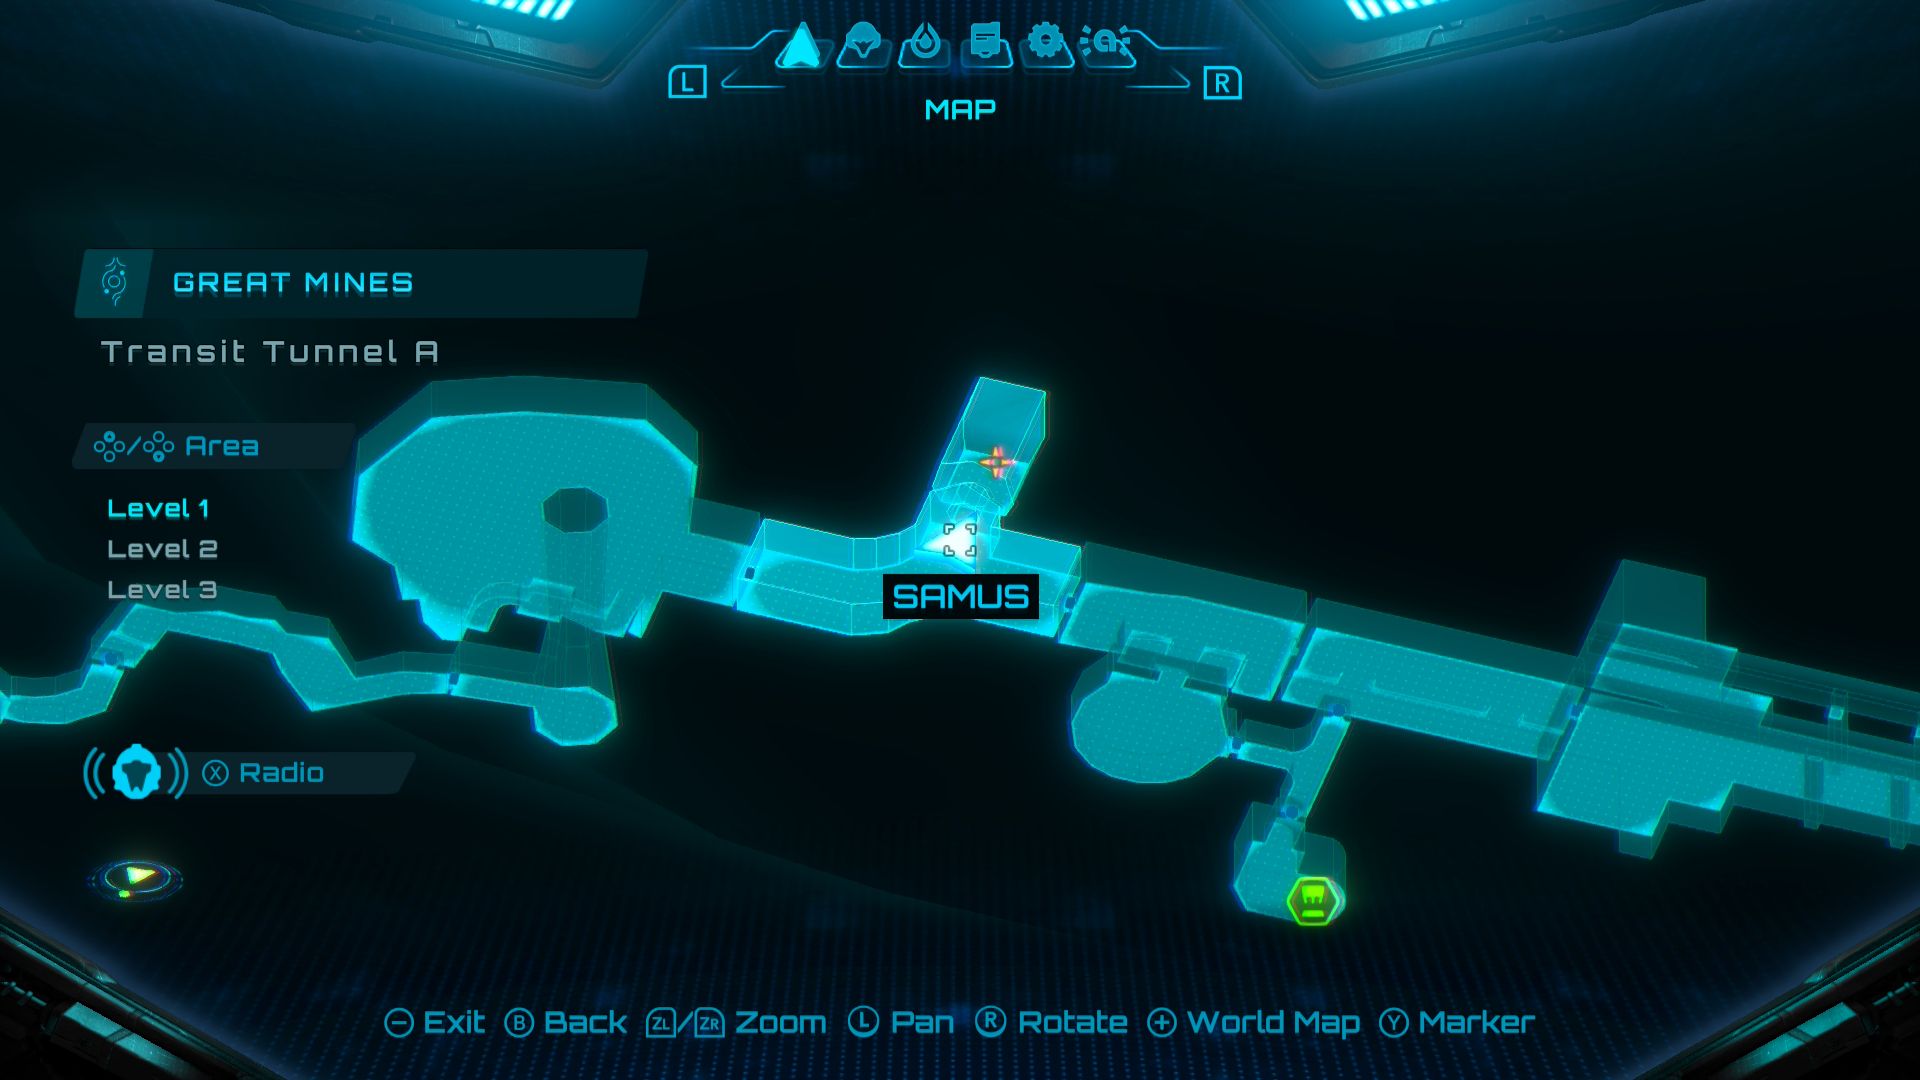
Missile Expansion #4
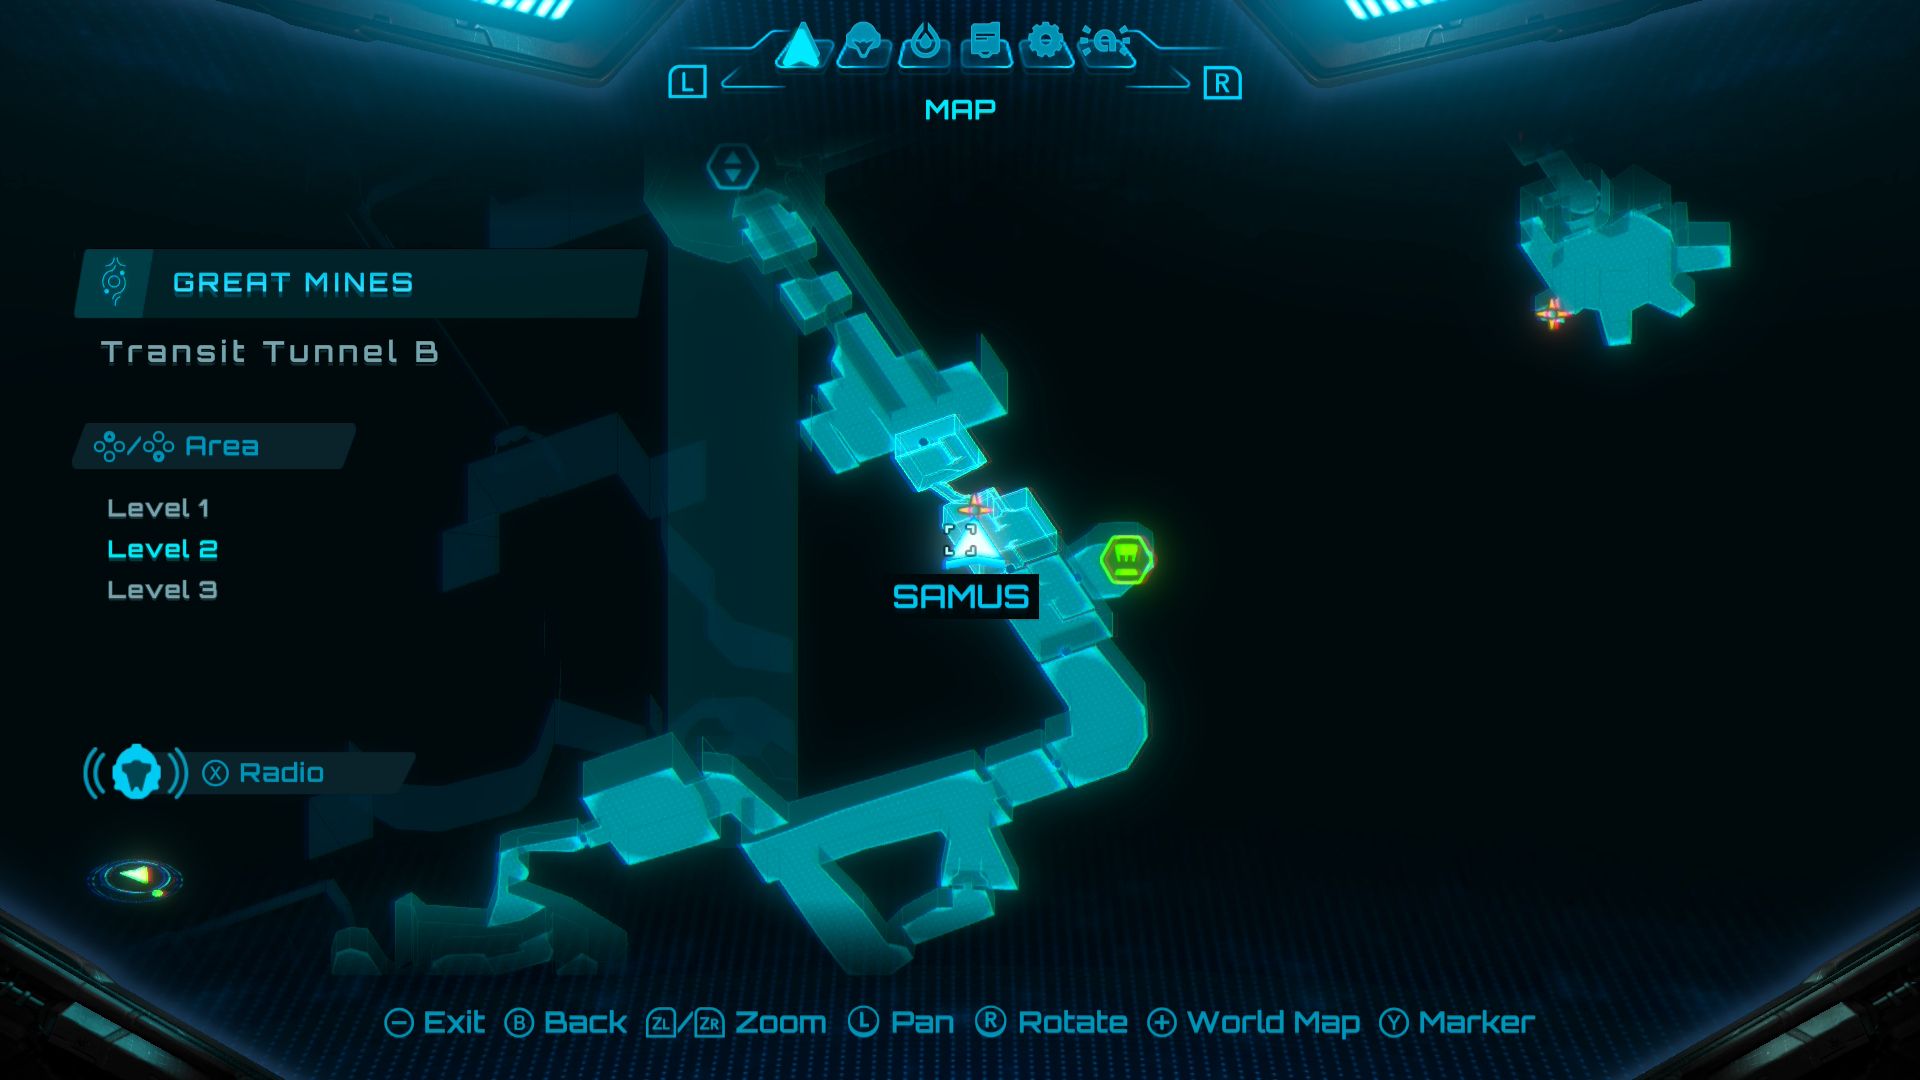
- Location: Transit Tunnel B (Level 2)
Use a Super Missile to destroy the container on the cart that is crashed into the wall.
Missile Expansion #5
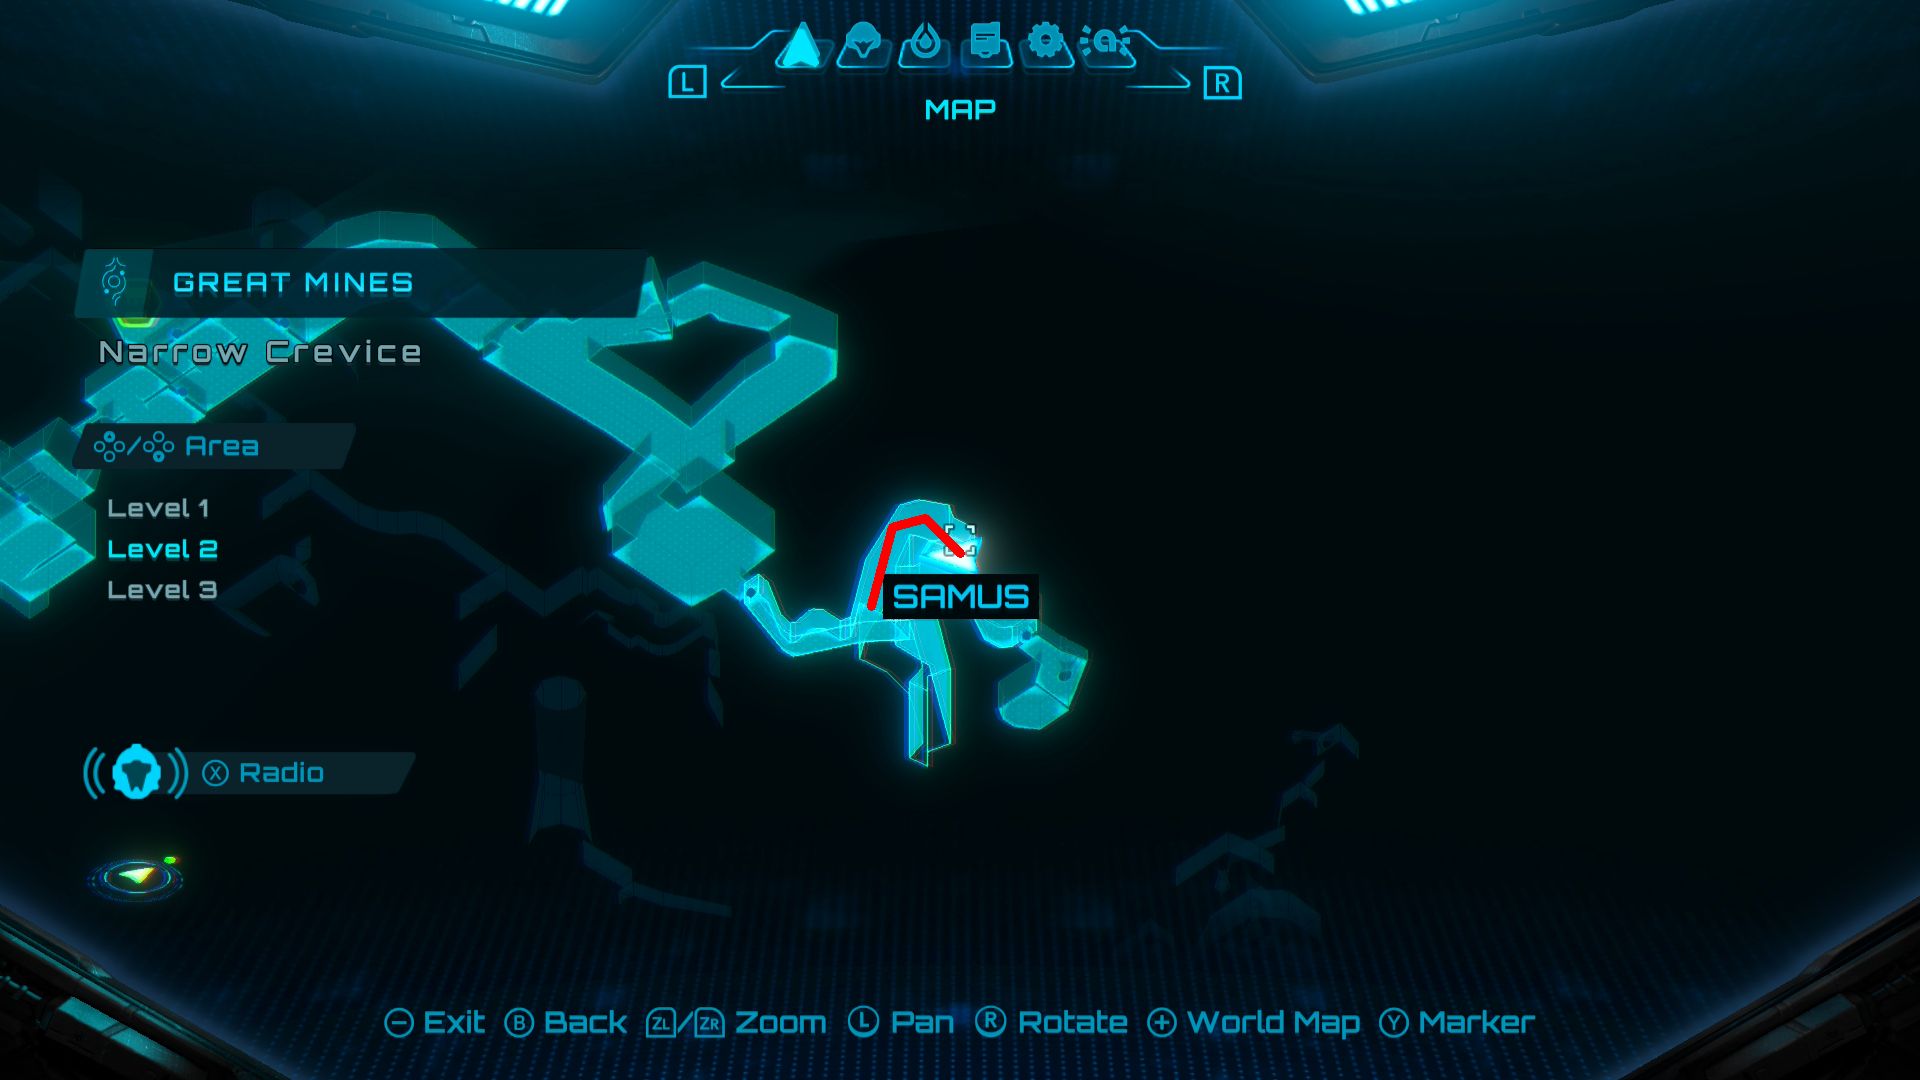
- Location: Narrow Crevice (Level 2)
Use Psychic Grapple to swing from the creatures on the ceiling and walls. This will take you to a ledge where you can find a Missile Expansion.
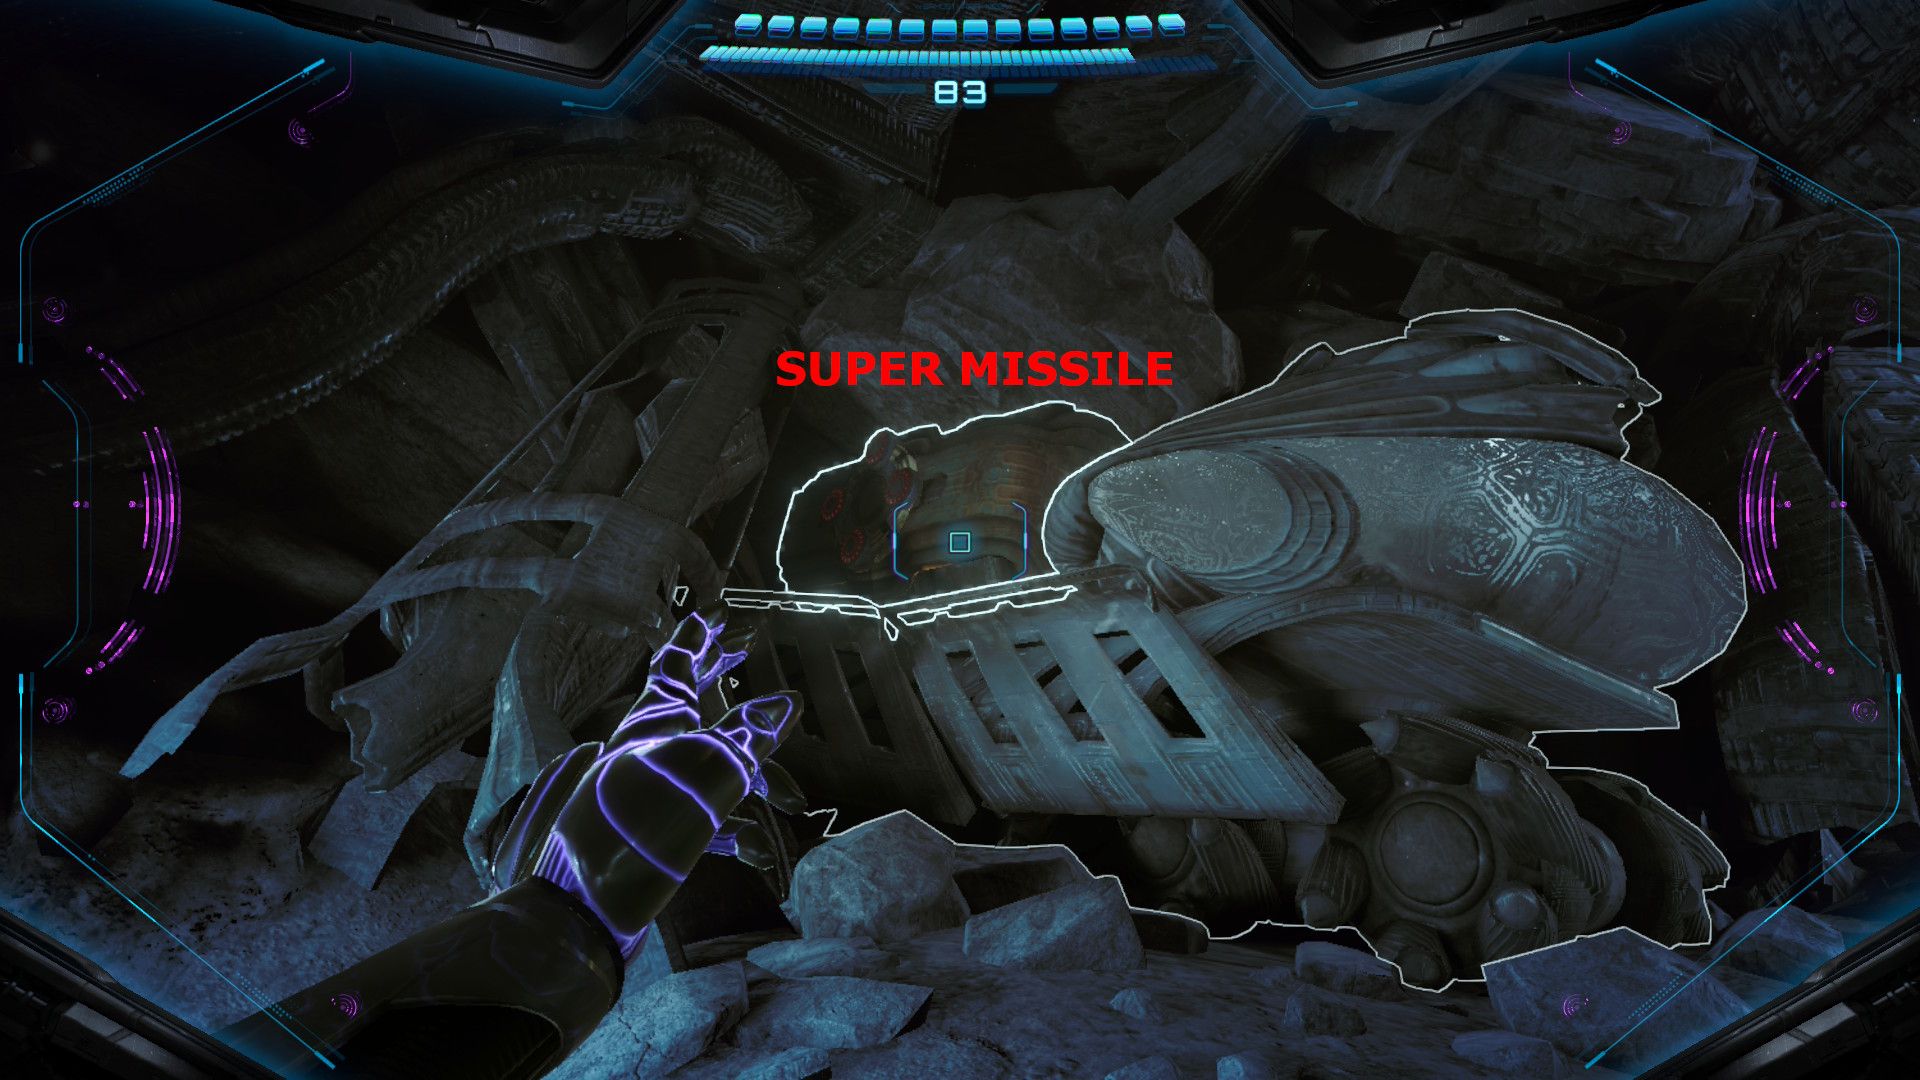
Missile Expansion #6
- Location: Transit Tunnel A (Level 1)
Okay, so I figured out you need to use a Super Missile on that really tough-looking latch in this room. It’ll open up a new area where you can find an upgrade that lets you carry even more missiles – seriously helpful!
Missile Expansion #7
- Location: Easing Tunnel (Level 2)
Place the Power Bomb in the designated slot in this room. Afterwards, use the Super Missile to break the crystals on the cart that shows up.
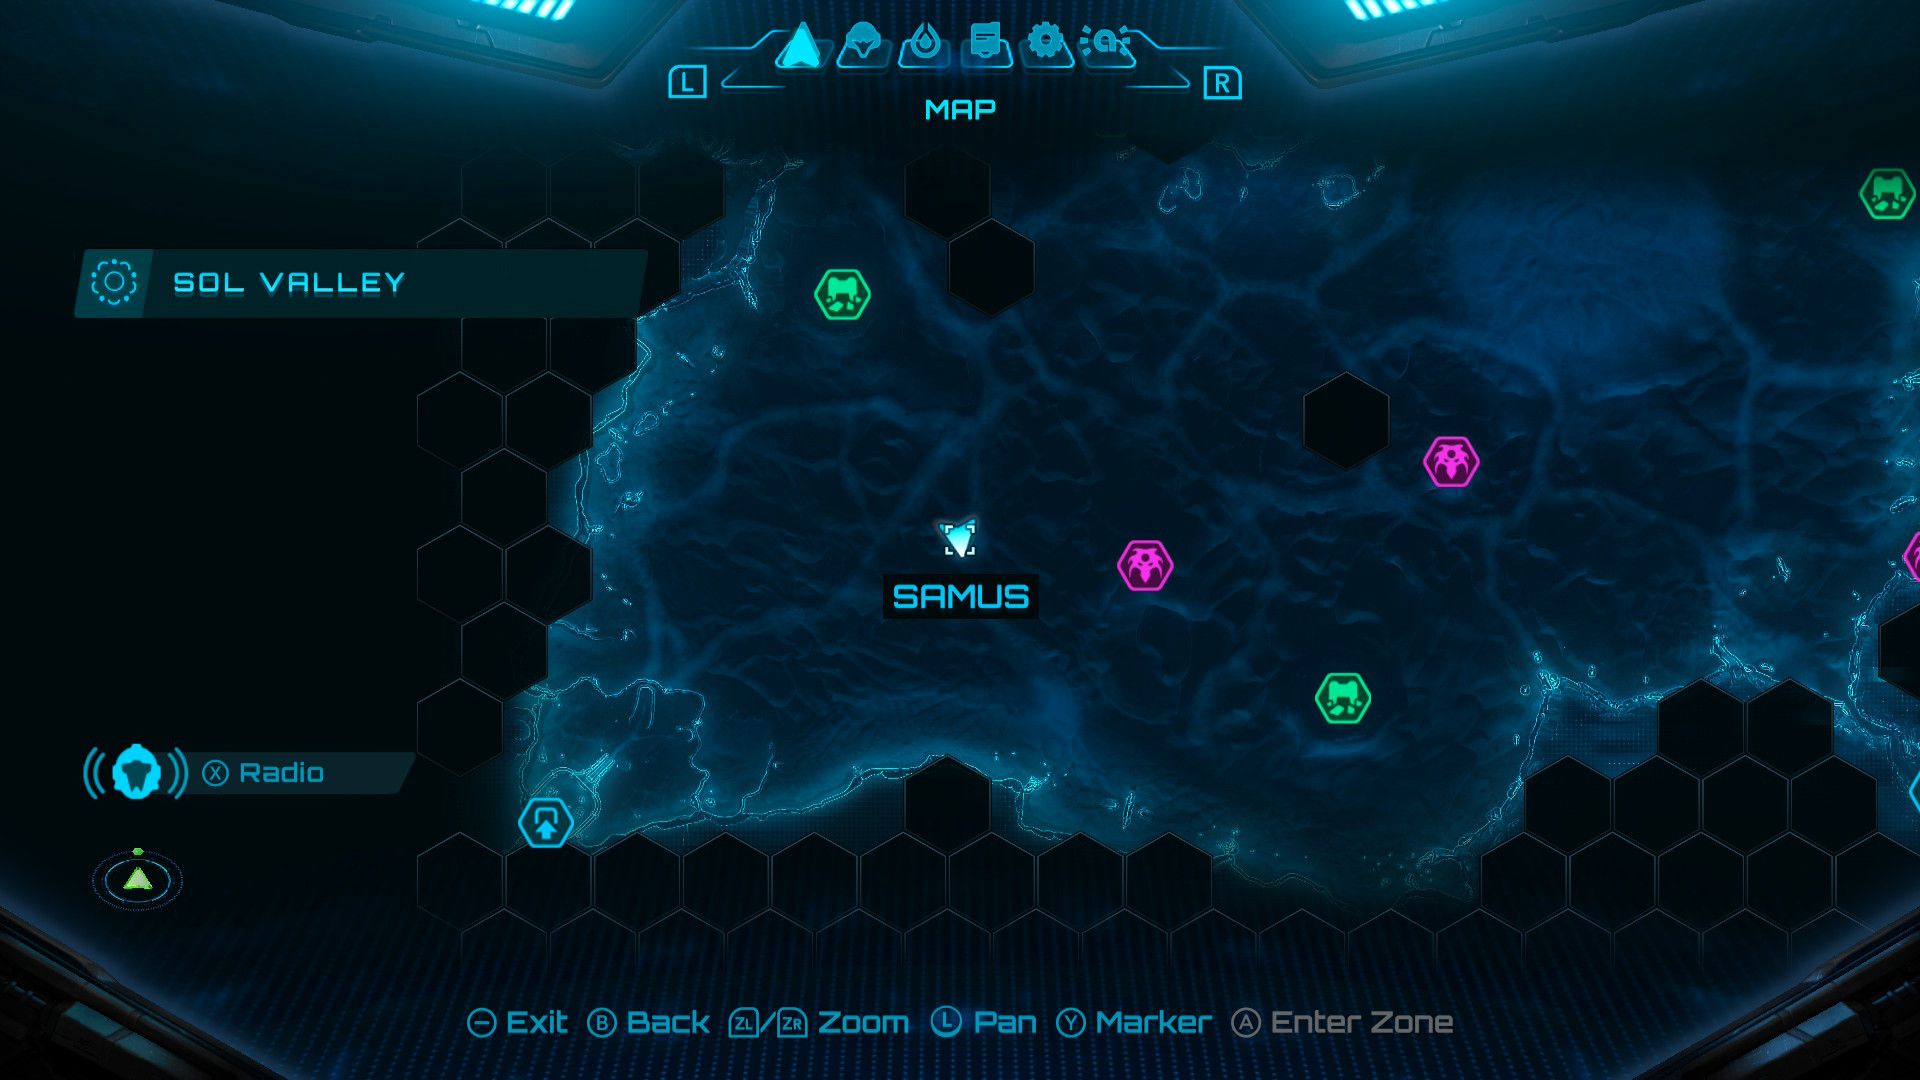
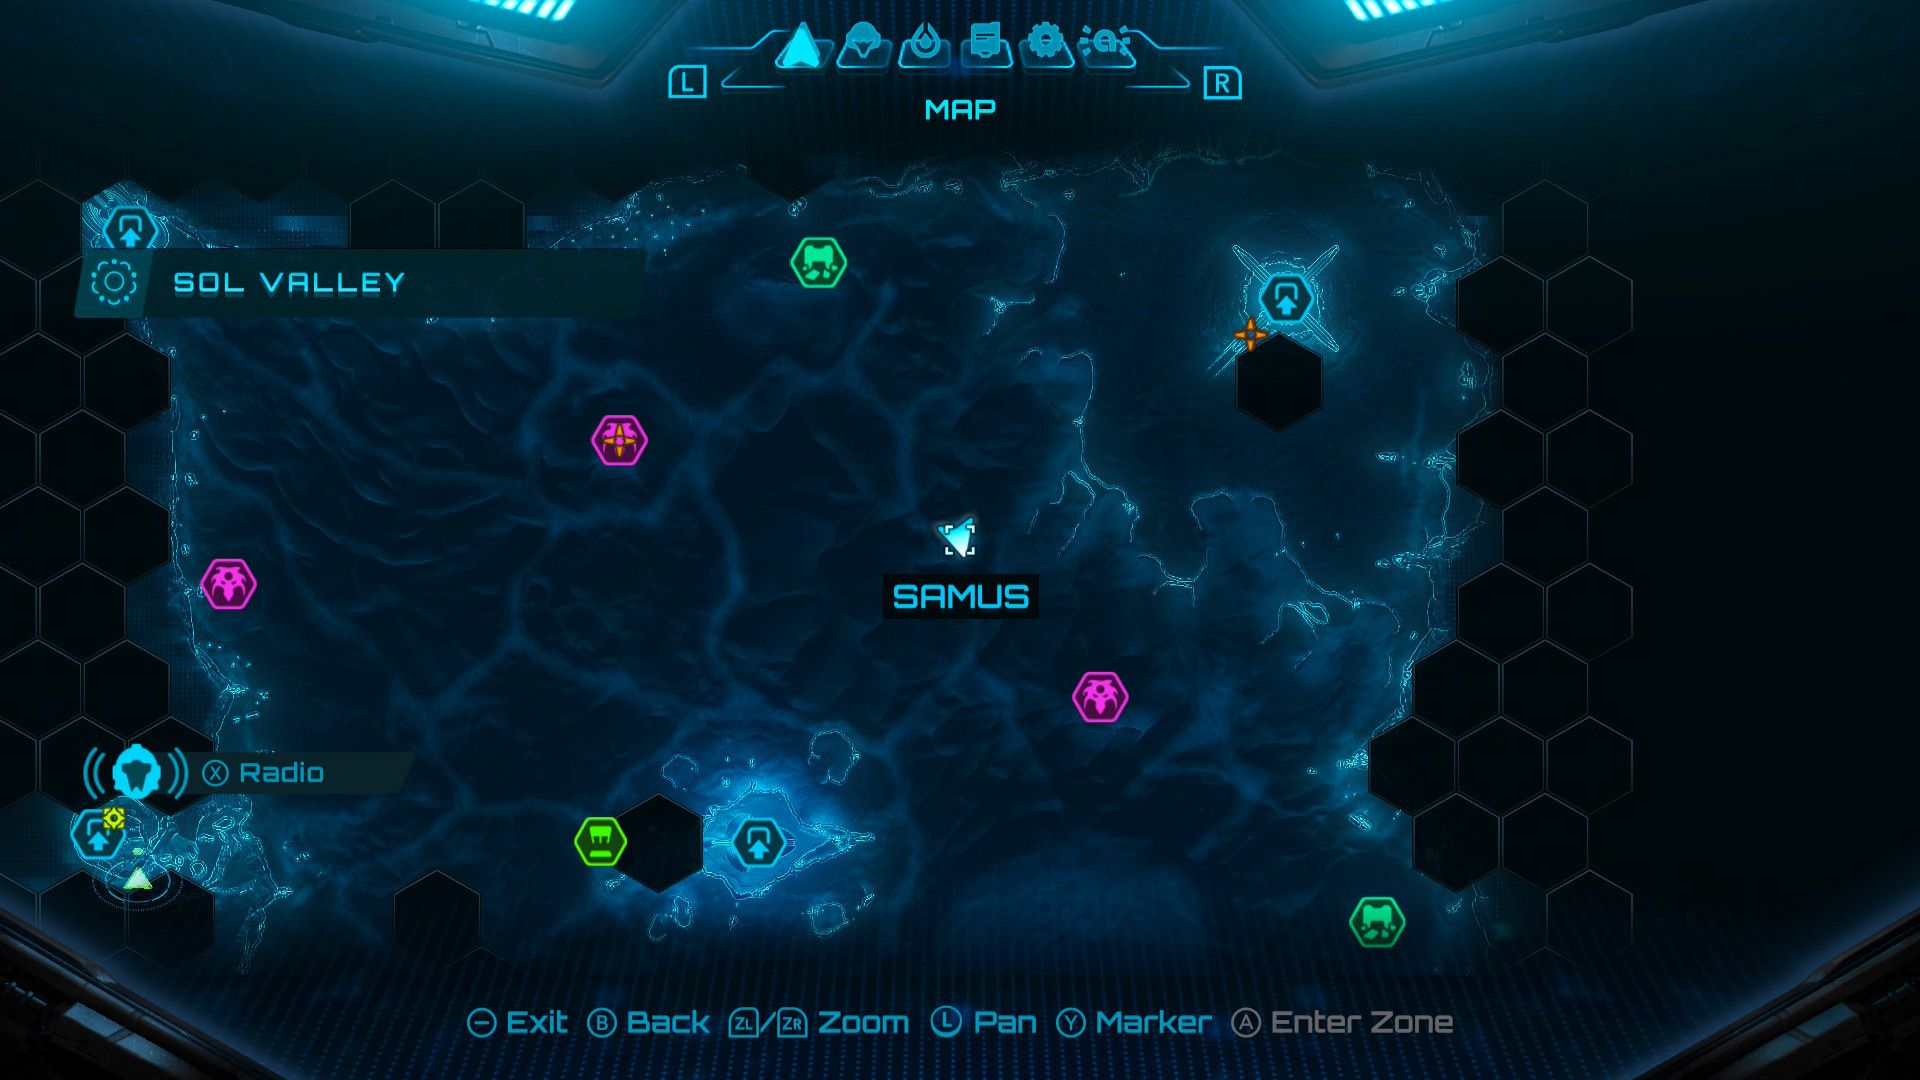
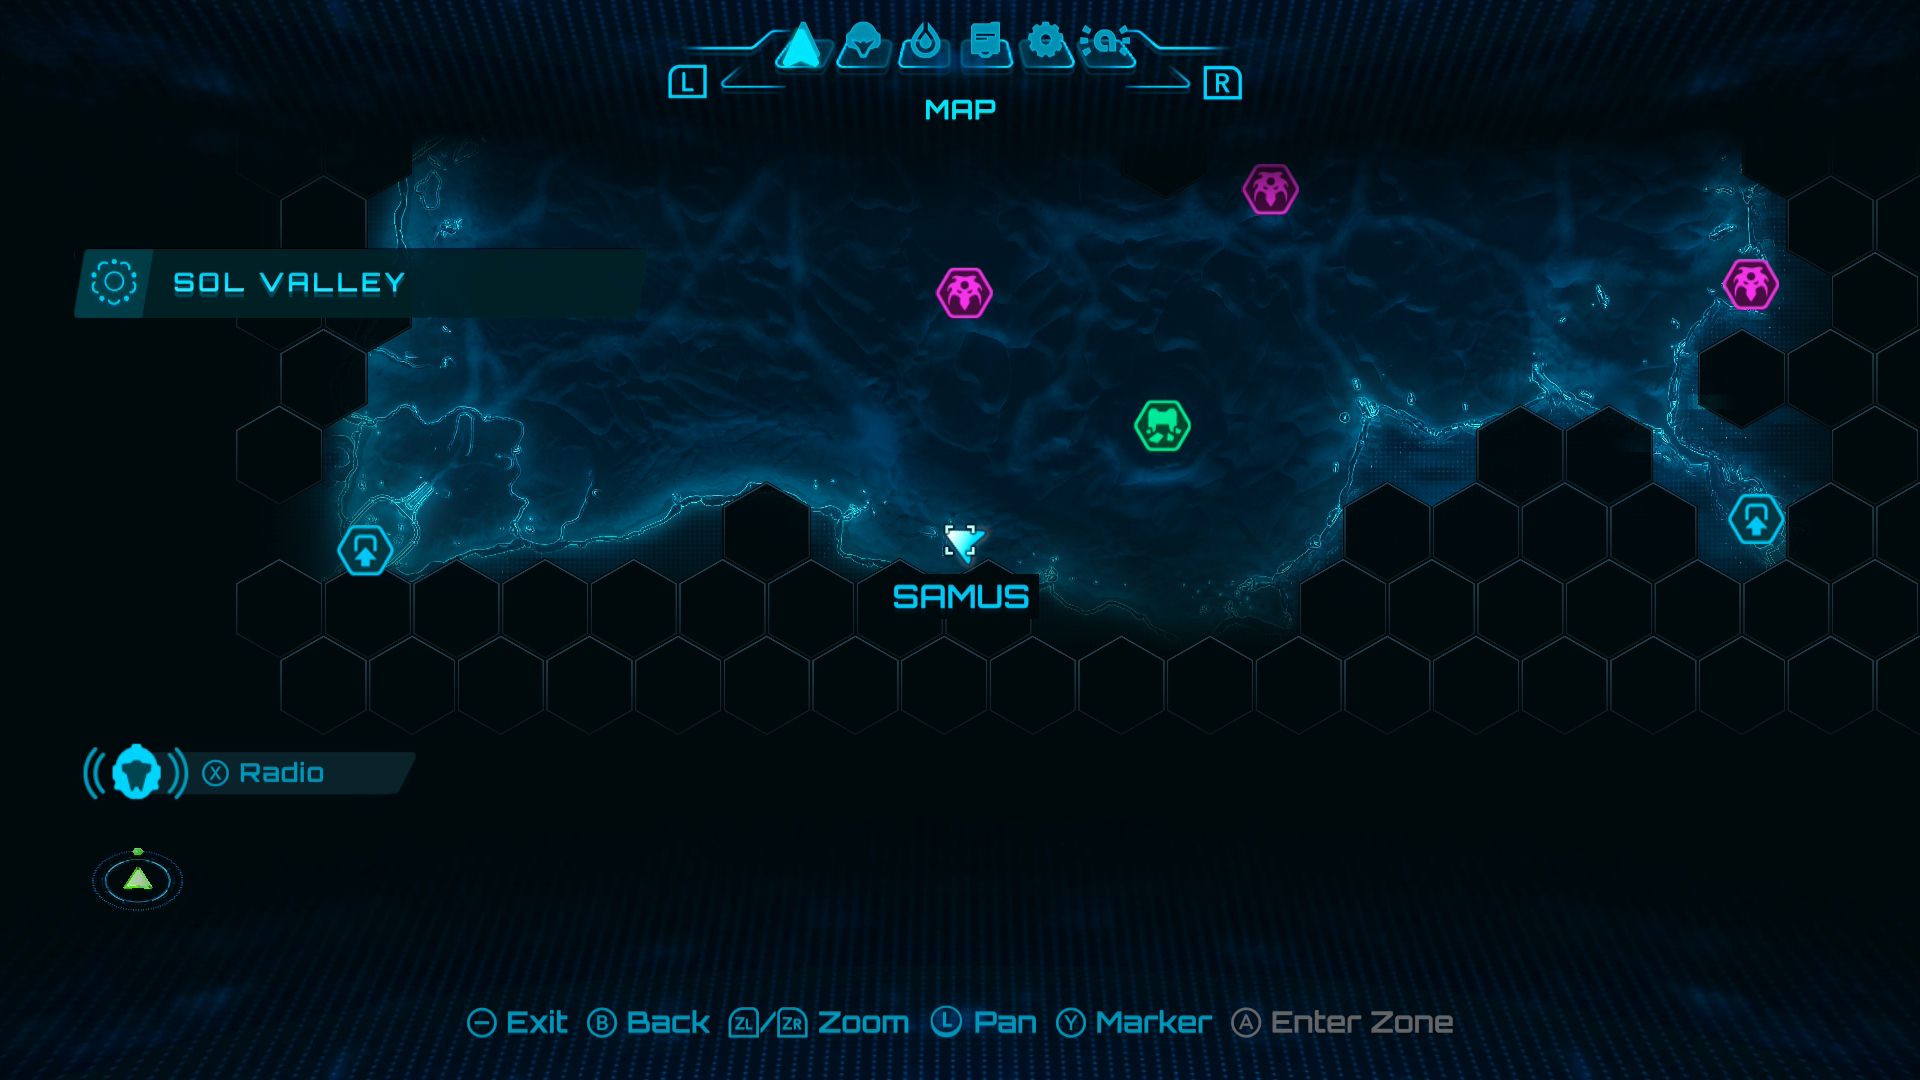
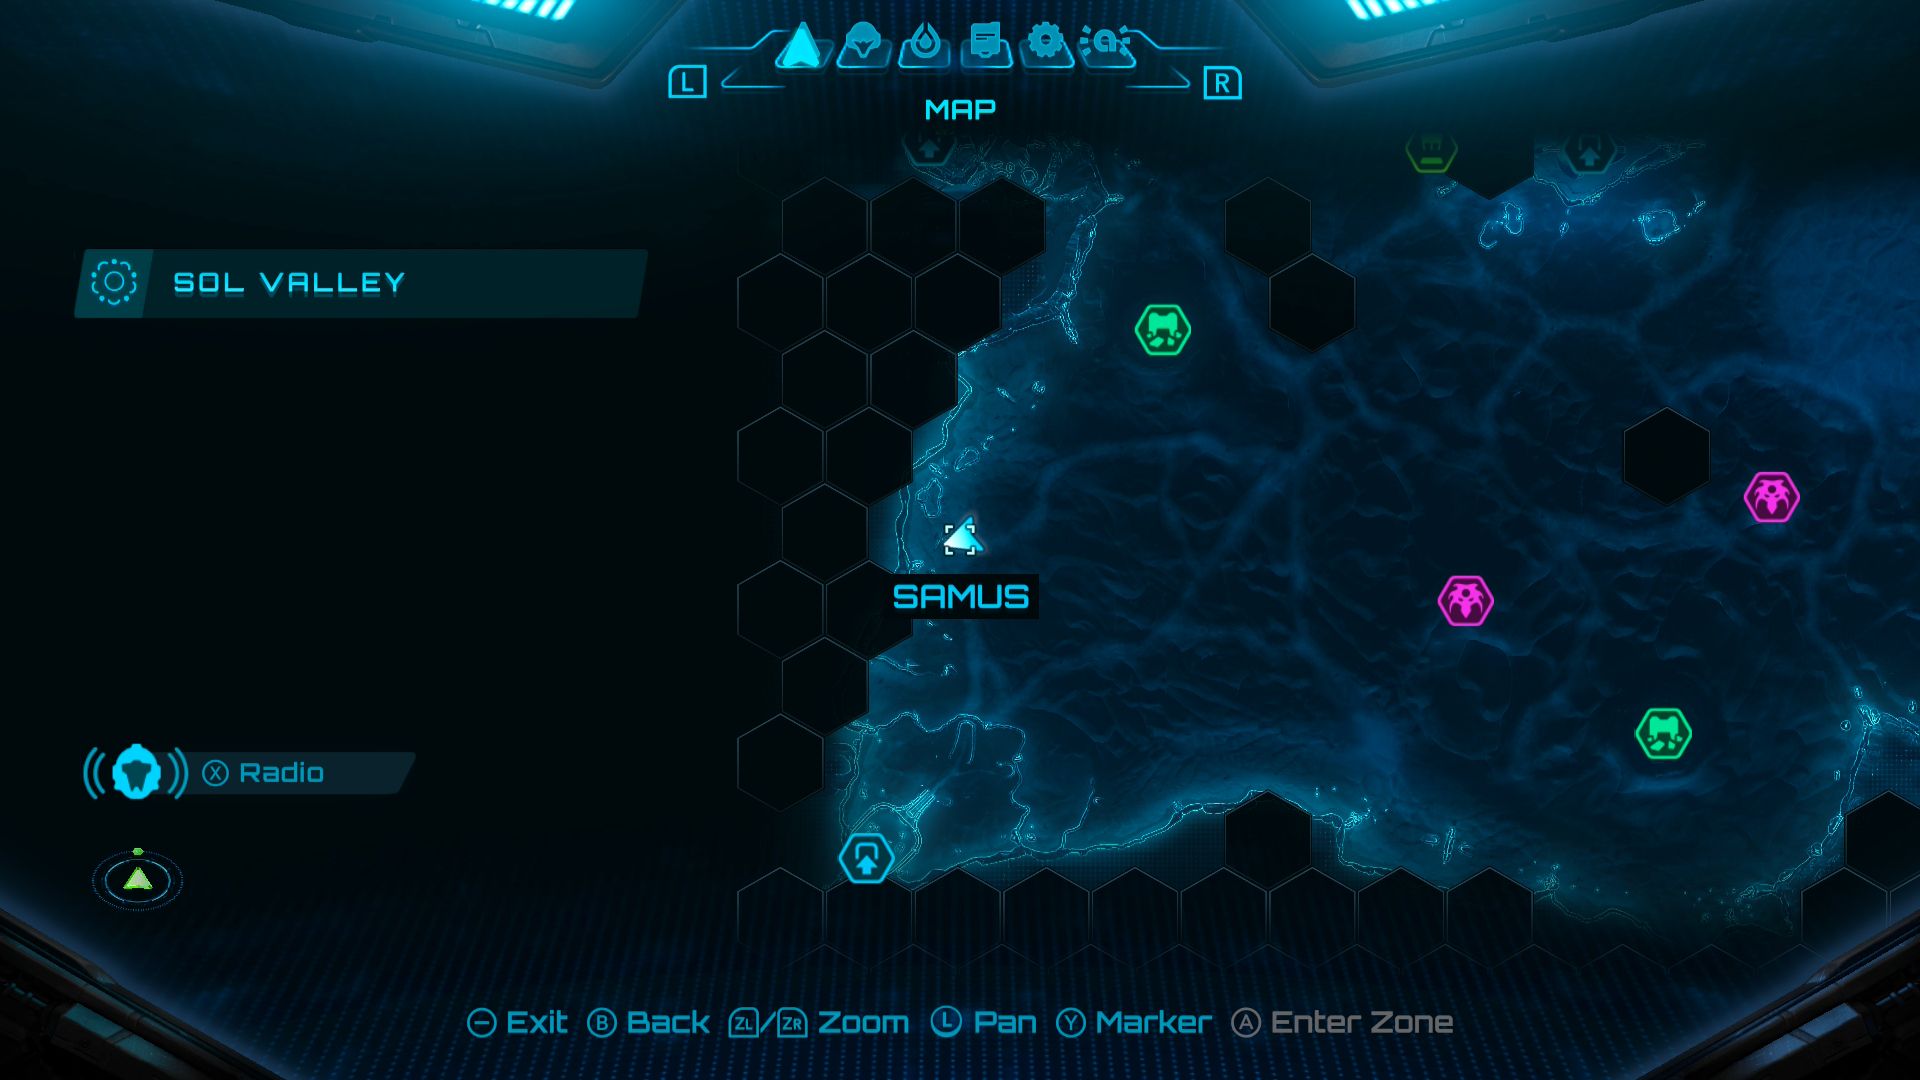
All Sol Valley Missile Expansions in Metroid Prime 4
There are 10 Missile Expansions in Metroid Prime 4‘s Sol Valley:
Missile Expansion #1
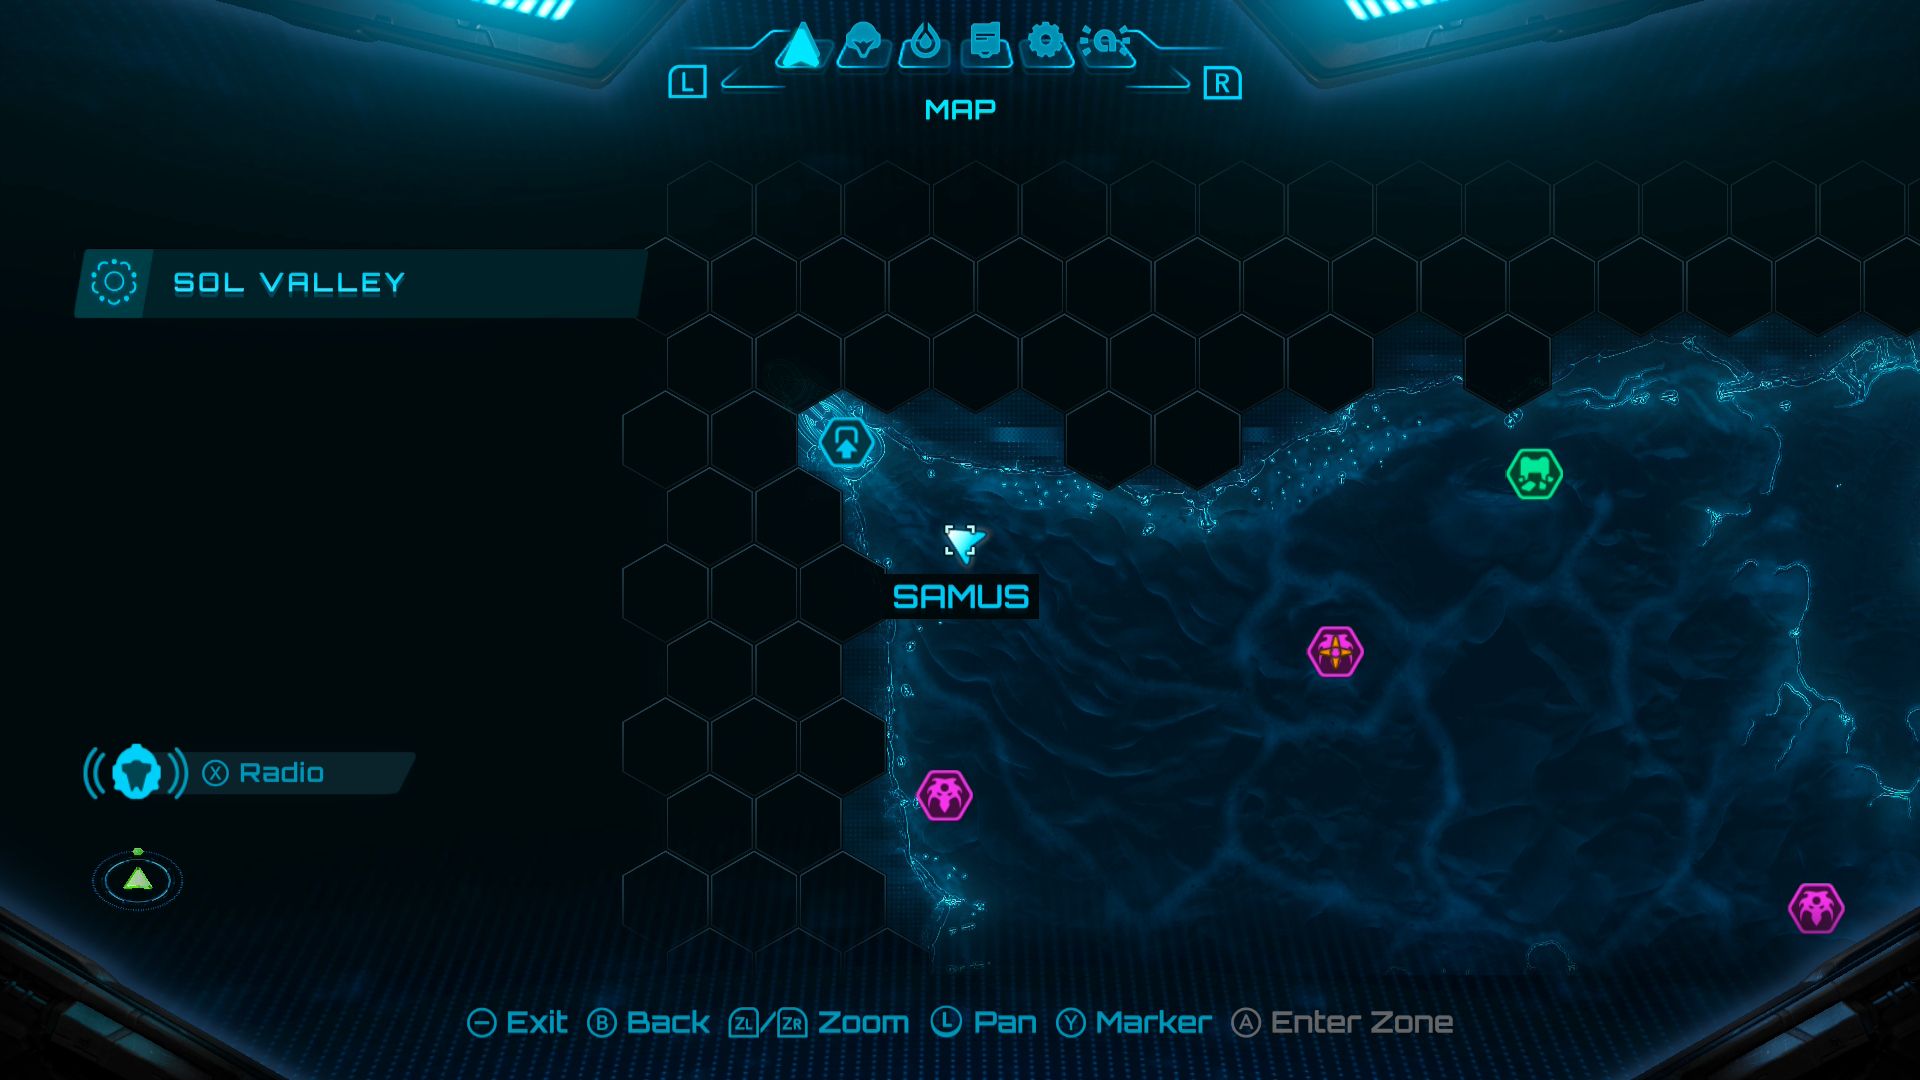
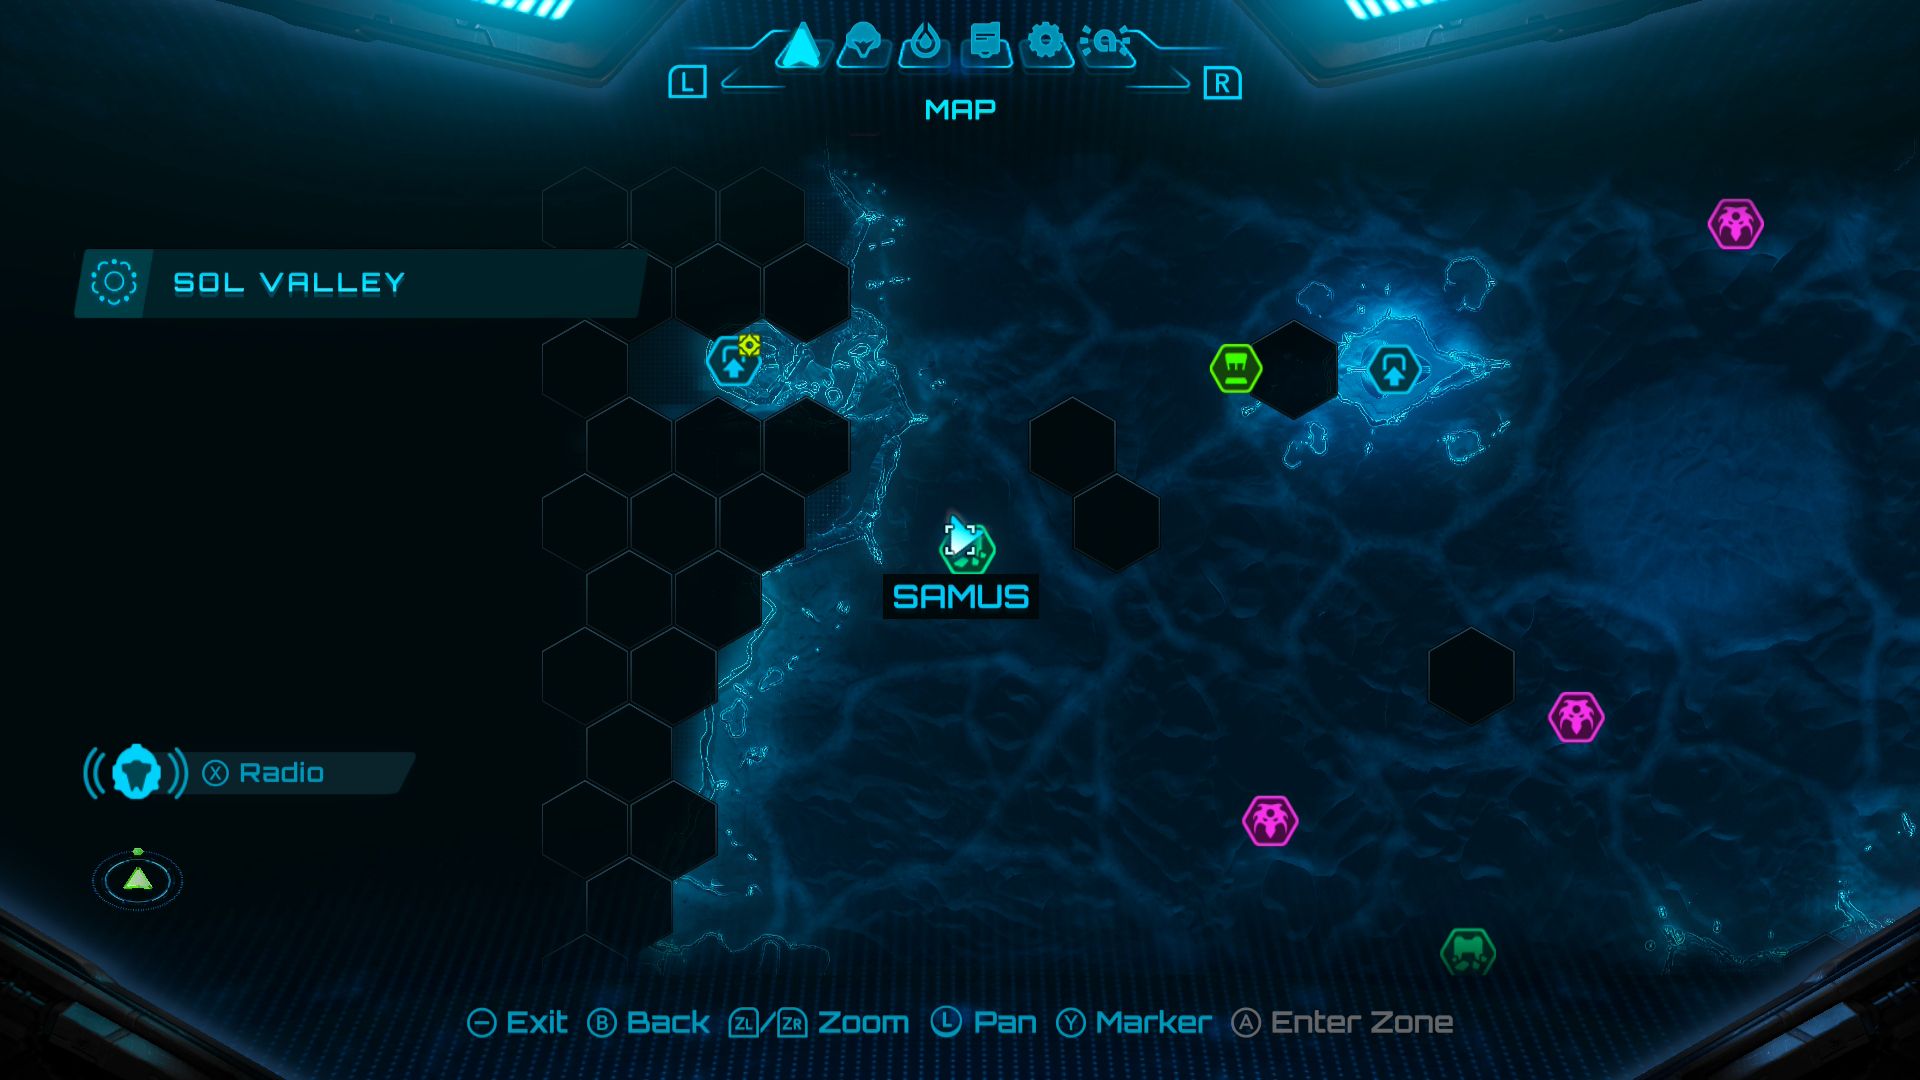
Use Psychic Lasso to pull a container out of the sand just southeast of Ice Belt.
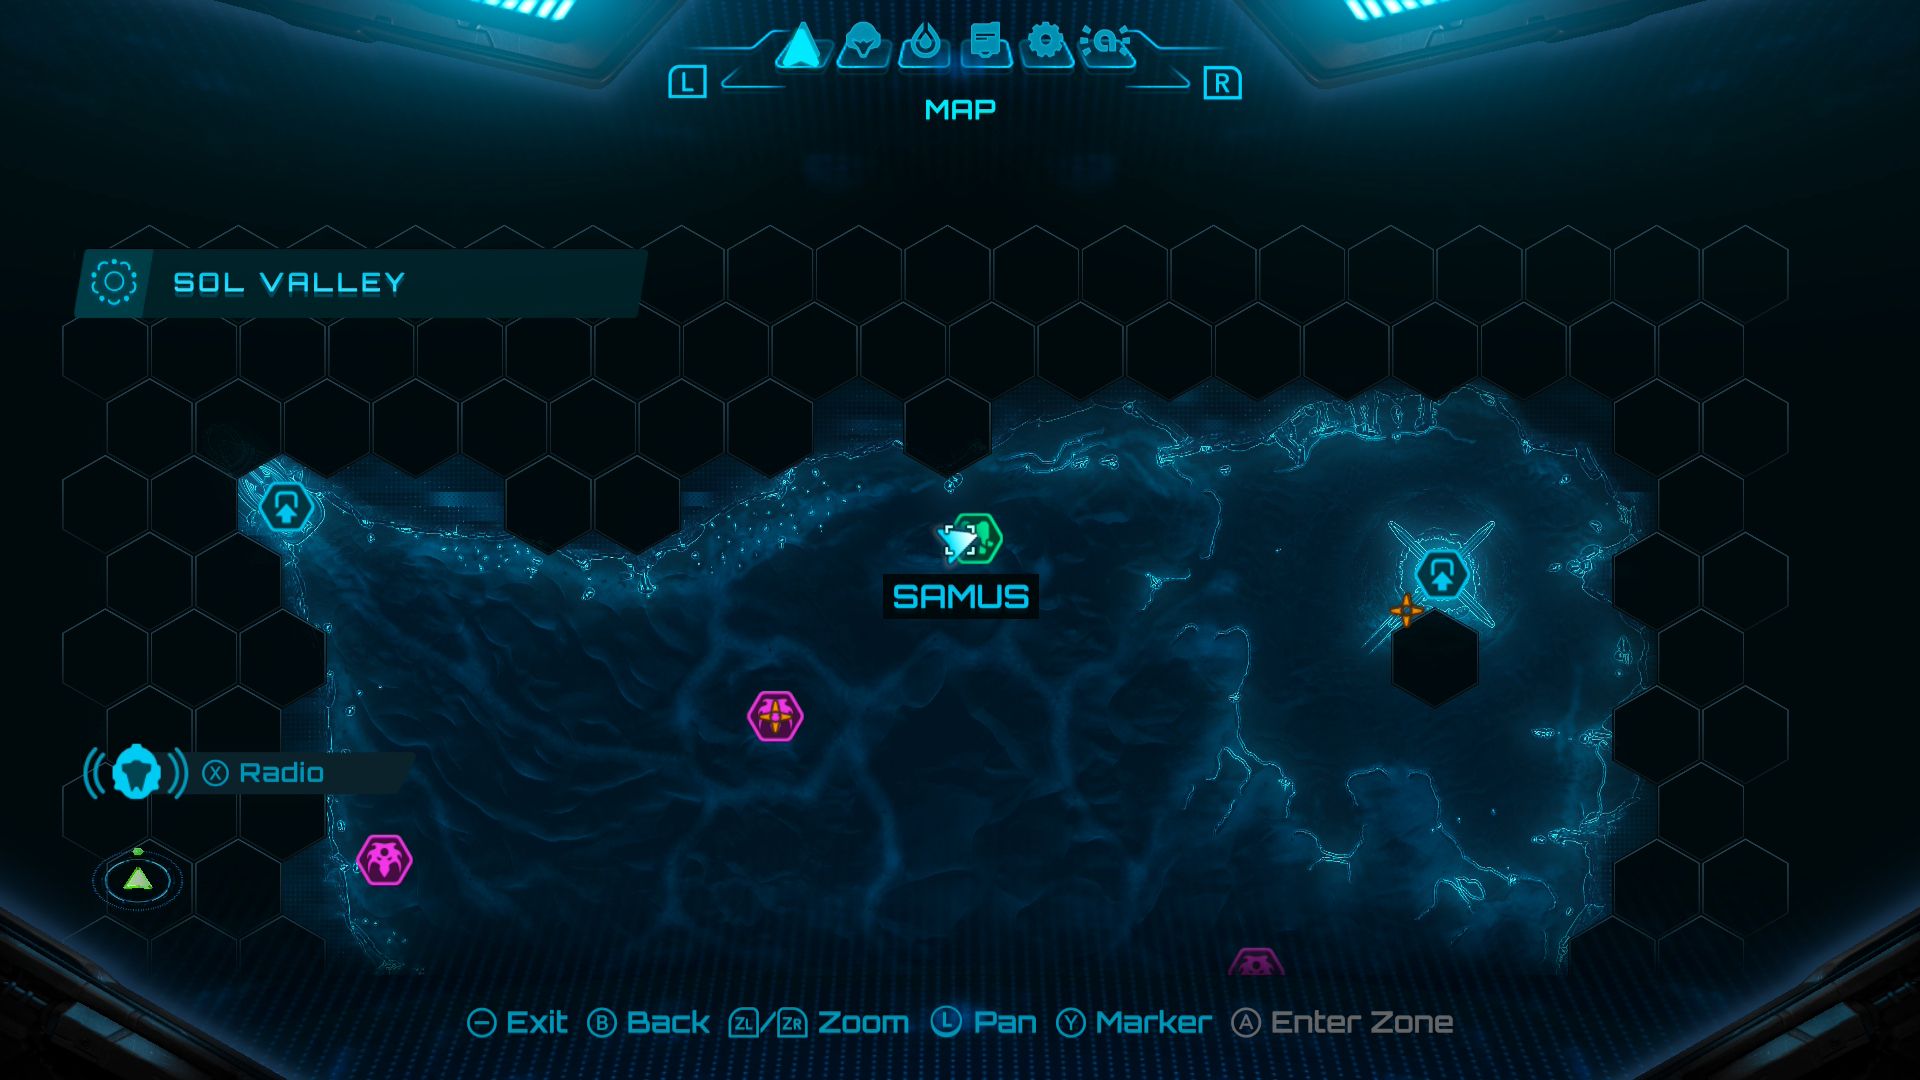
Missile Expansion #2
Use Psychic Lasso to pull a container out of the sand just west of Floating Path Shrine.
Missile Expansion #3
Use Psychic Lasso to pull a container out of the sand just northwest of Falling Labyrinth Shrine.
Missile Expansion #4

Use a ramp to launch yourself into a Missile Expansion located in a gap within a large rock formation.
Missile Expansion #5
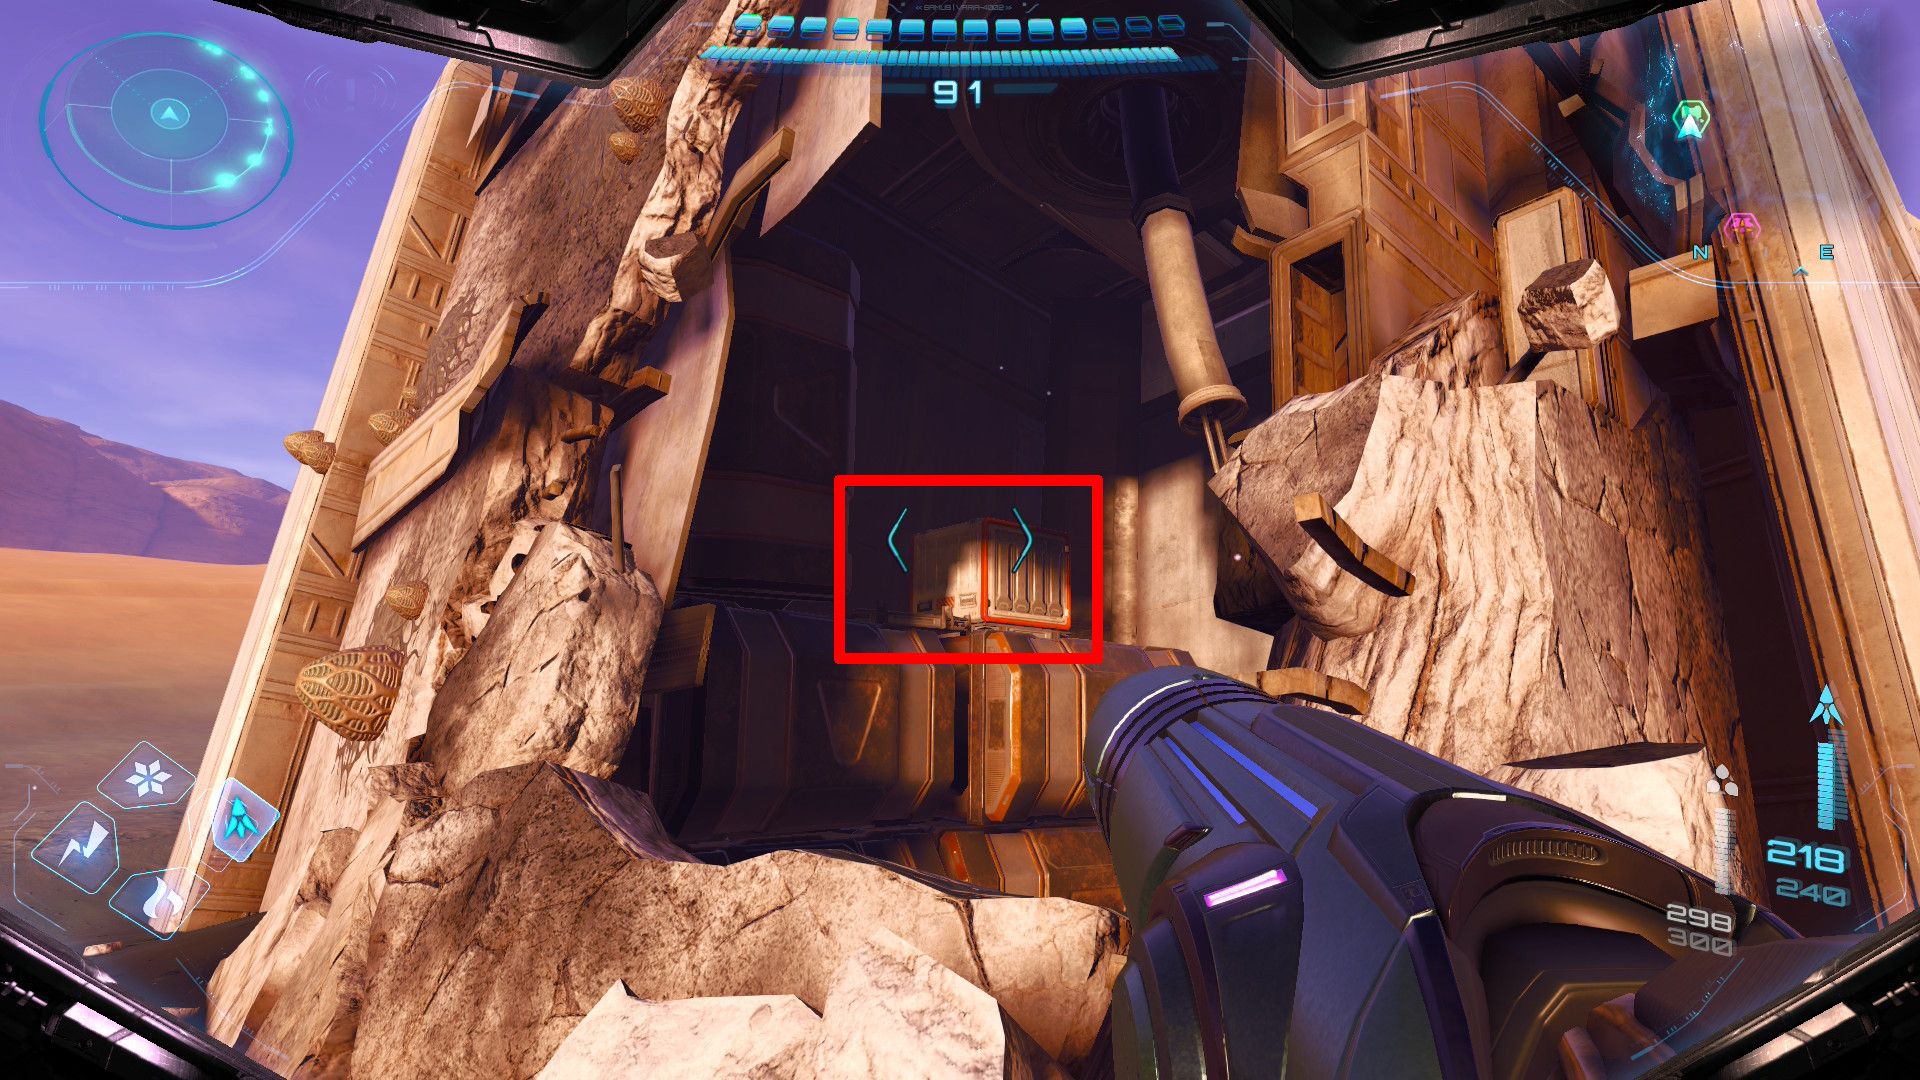
Break the crates inside the building at the northern G.F. Debris site to reveal a Missile Expansion.
Missile Expansion #6
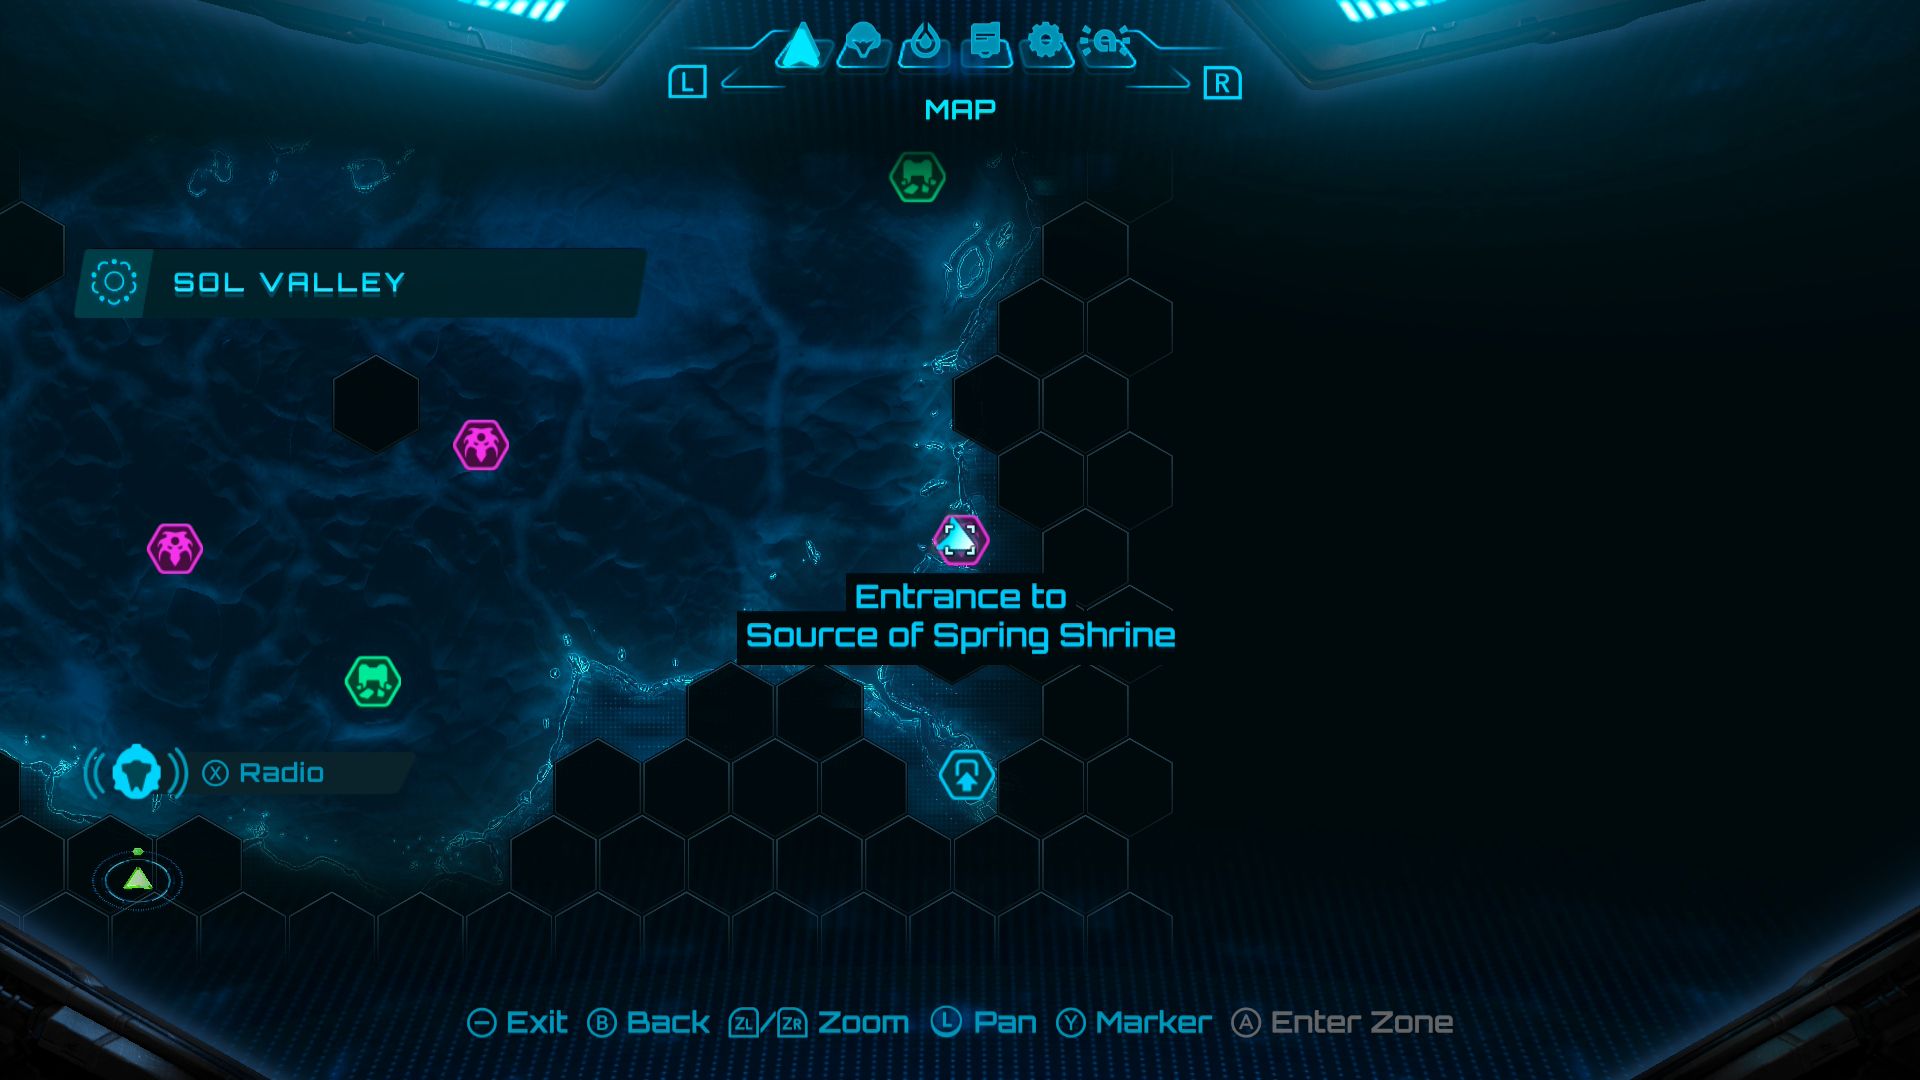
Go north from Flare Pool to the Source of Spring Shrine. Then, at the bottom, use your Morph Ball to roll through the tunnel and find a Missile Expansion.
Missile Expansion #7
Go through Ice Belt and past the elevator. Then, use Psychic Grapple to get to a path that opens up to an outside platform. On that platform, use Psychic Boost Ball on the rail to find a Missile Expansion.
Missile Expansion #8
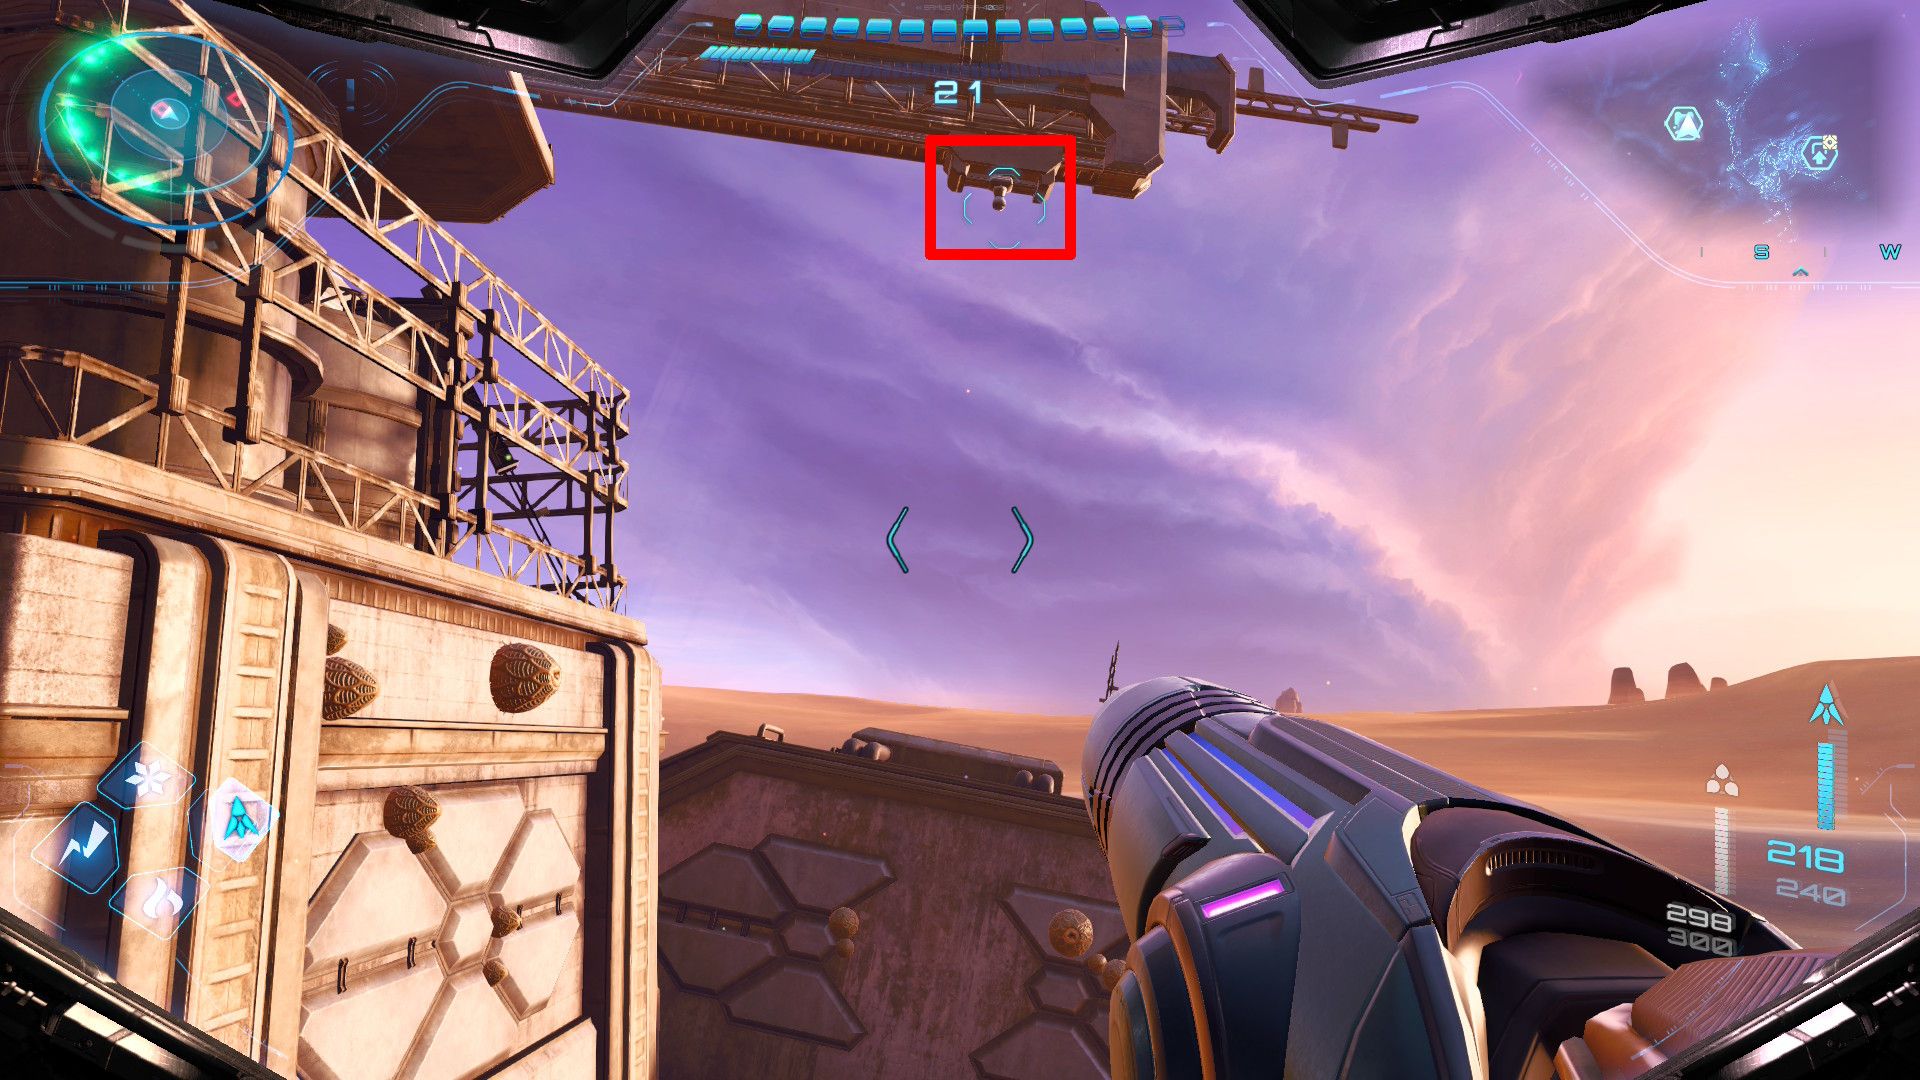
Head to the G.F. Debris location southeast of Fury Green. Fire a Control Beam at the tube connected to the antenna. Once the antenna falls, use Psychic Grapple to swing to it and grab a Missile Expansion.
Missile Expansion #9
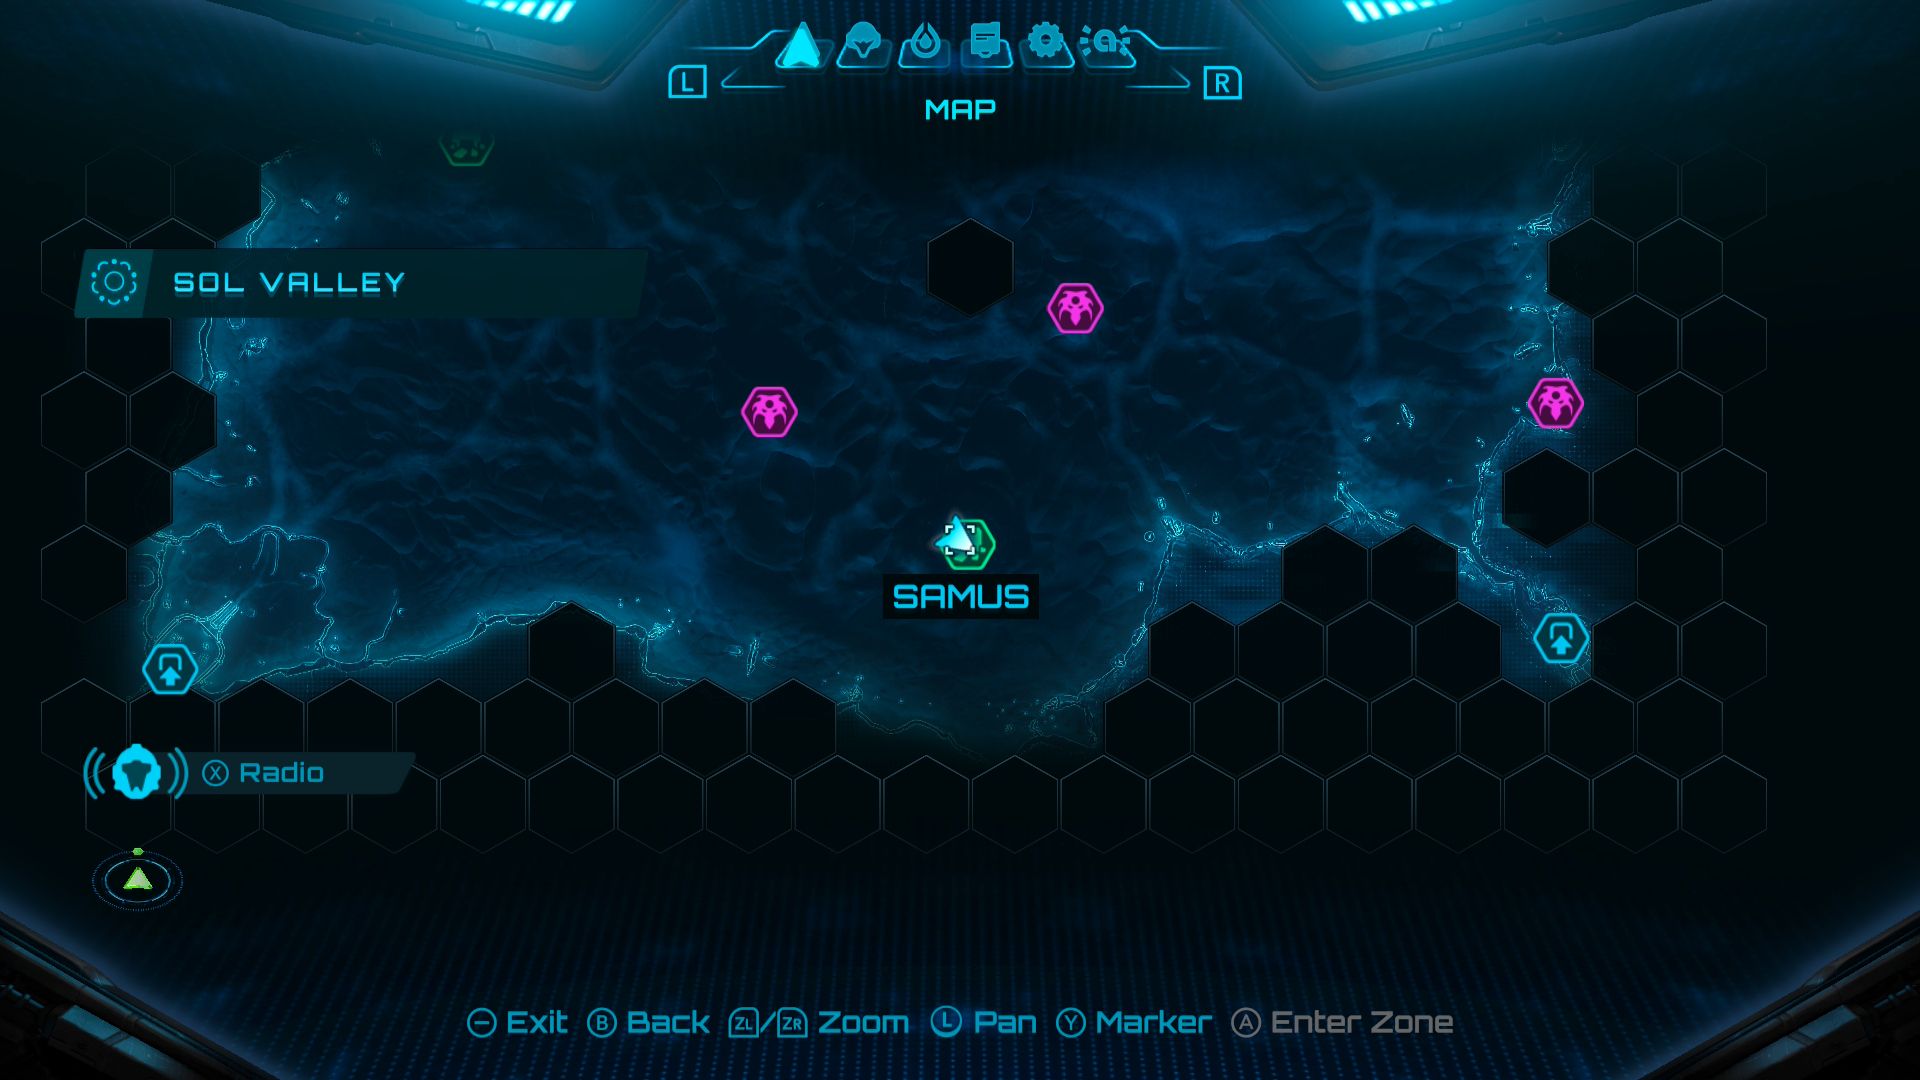
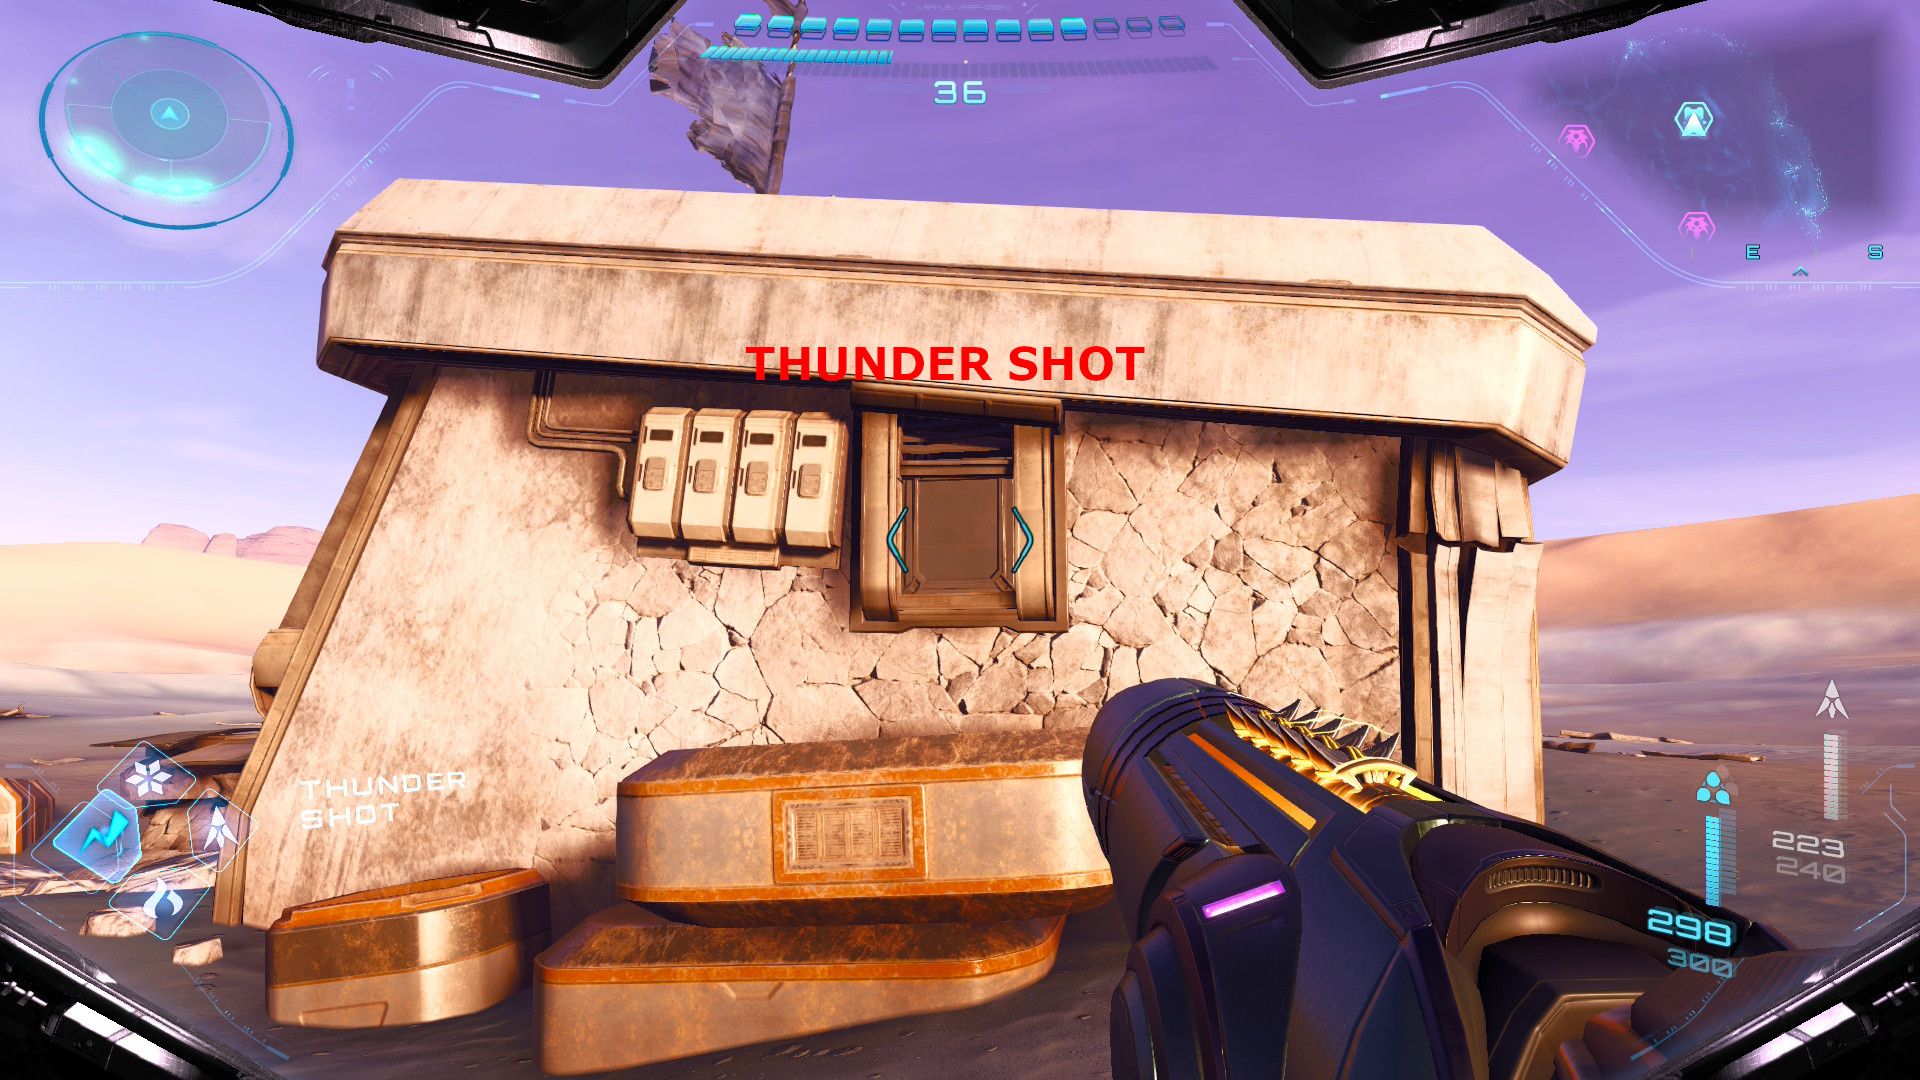
Okay, so to get that Missile Expansion, you gotta head over to the G.F. Debris site – it’s on the south side of the map. There’s a metal shutter on the building, and you need to blast it open with a Thunder Shot. Once you do, a Morph Ball tunnel will appear, letting you crawl your way inside and snag the upgrade!
Missile Expansion #10
Once you’ve finished the Great Mines, look for Tokabi and his campfire in different parts of Sol Valley. He’ll eventually show up and offer you a Missile Expansion.
Read More
- All Shadow Armor Locations in Crimson Desert
- Sega Reveals Official Sonic Timeline: From Prehistoric to Modern Era
- Dark Marksman Armor Locations in Crimson Desert
- Genshin Impact Dev Teases New Open-World MMO With Realistic Graphics
- The Limits of Thought: Can We Compress Reasoning in AI?
- Where to Pack and Sell Trade Goods in Crimson Desert
- How to Beat Antumbra’s Sword (Sanctum of Absolution) in Crimson Desert
- Who Can You Romance In GreedFall 2: The Dying World?
- Enshrouded: Giant Critter Scales Location
- Best Weapons, Armor, and Accessories to Get Early in Crimson Desert
2025-12-11 21:39