In NBA 2K26, badges are like the heart and soul of every player’s build – they make all the difference! To rock the top-tier badges, you gotta ensure your player’s attributes are on point. Each badge in NBA 2K26 has its own stat prerequisite, so if you mess up your character building during MyCareer creation, you might find yourself missing out on the meta gameplay style.
In NBA 2K26, you can acquire some decent Badges regardless, but strategically choosing your preferred Badges and constructing your player around them is crucial for outshining on the court. While you might possess the necessary attributes to equip a particular Badge, upgrading it to Hall of Fame or Legend status without prior planning may not be possible. To prevent this oversight, here’s a rundown of all Badge requirements in NBA 2K26.
All NBA 2K26 Badge Attribute Requirements
In NBA 2K26, I’ve found that every Badge comes with specific attribute prerequisites for each upgrade tier. Moreover, there are certain Badges that have height limitations as well.
| Badge | Bronze | Silver | Gold | Hall of Fame | Legend | Height Requirements |
|---|---|---|---|---|---|---|
| Deadeye | 73 Mid-Range Shot/Three-Point Shot | 85 Mid-Range Shot/73 Three-Point Shot | 92 Mid-Range Shot/Three-Point Shot | 95 Mid-Range Shot/Three-Point Shot | 73 Mid-Range Shot/Three-Point Shot | – |
| Limitless Range | 83 Three-Point Shot | 89 Three-Point Shot | 93 Three-Point Shot | 96 Three-Point Shot | 99 Three-Point Shot | – |
| Mini Marksman | 71 Mid-Range Shot/Three-Point Shot | 82 Mid-Range Shot/Three-Point Shot | 94 Mid-Range Shot/Three-Point Shot | 97 Mid-Range Shot/Three-Point Shot | 99 Mid-Range Shot/Three-Point Shot | Under 6’3 |
| Set Shot Specialist | 65 Mid-Range Shot/Three-Point Shot | 78 Mid-Range Shot/Three-Point Shot | 89 Mid-Range Shot/Three-Point Shot | 93 Mid-Range Shot/Three-Point Shot | 98 Mid-Range Shot/Three-Point Shot | – |
| Shifty Shooter | 76 Mid-Range Shot/Three-Point Shot | 89 Mid-Range Shot/Three-Point Shot | 91 Mid-Range Shot/Three-Point Shot | 96 Mid-Range Shot/Three-Point Shot | 99 Mid-Range Shot/Three-Point Shot | Under 6’11 |
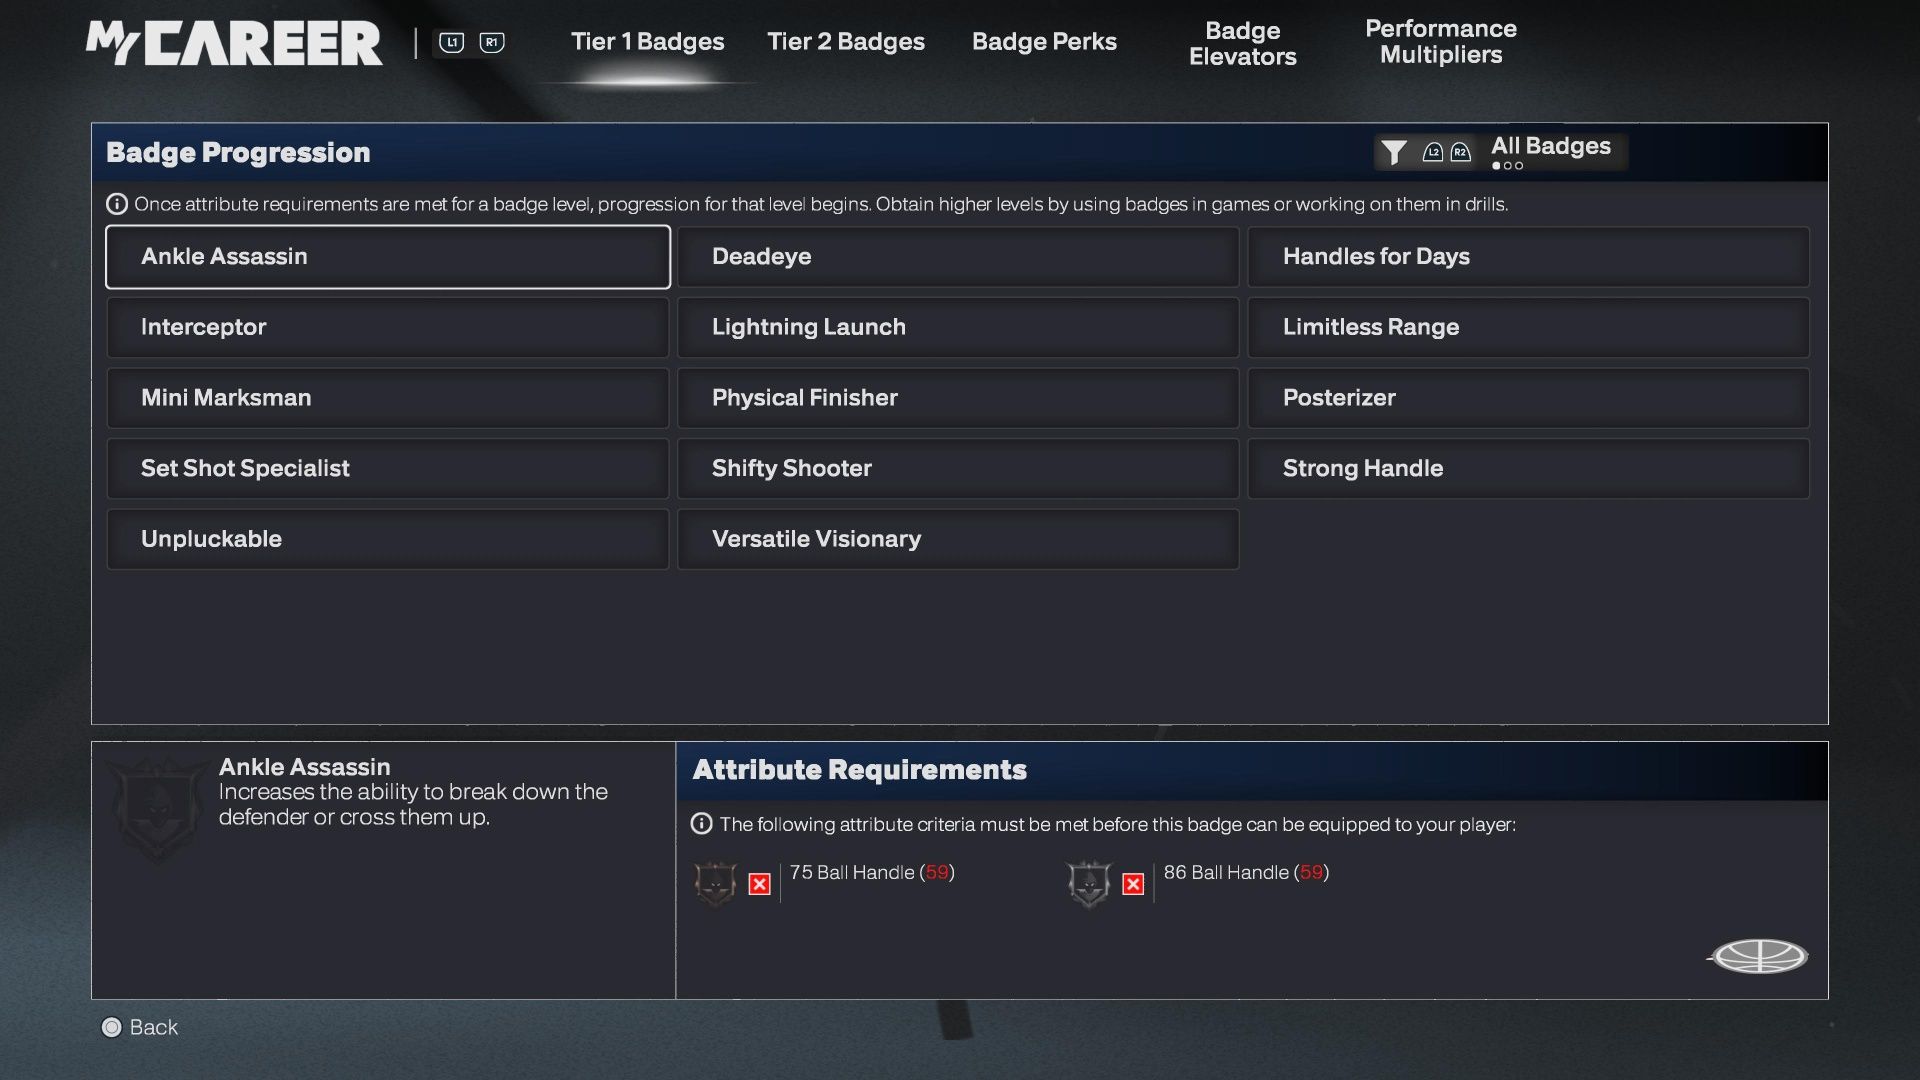
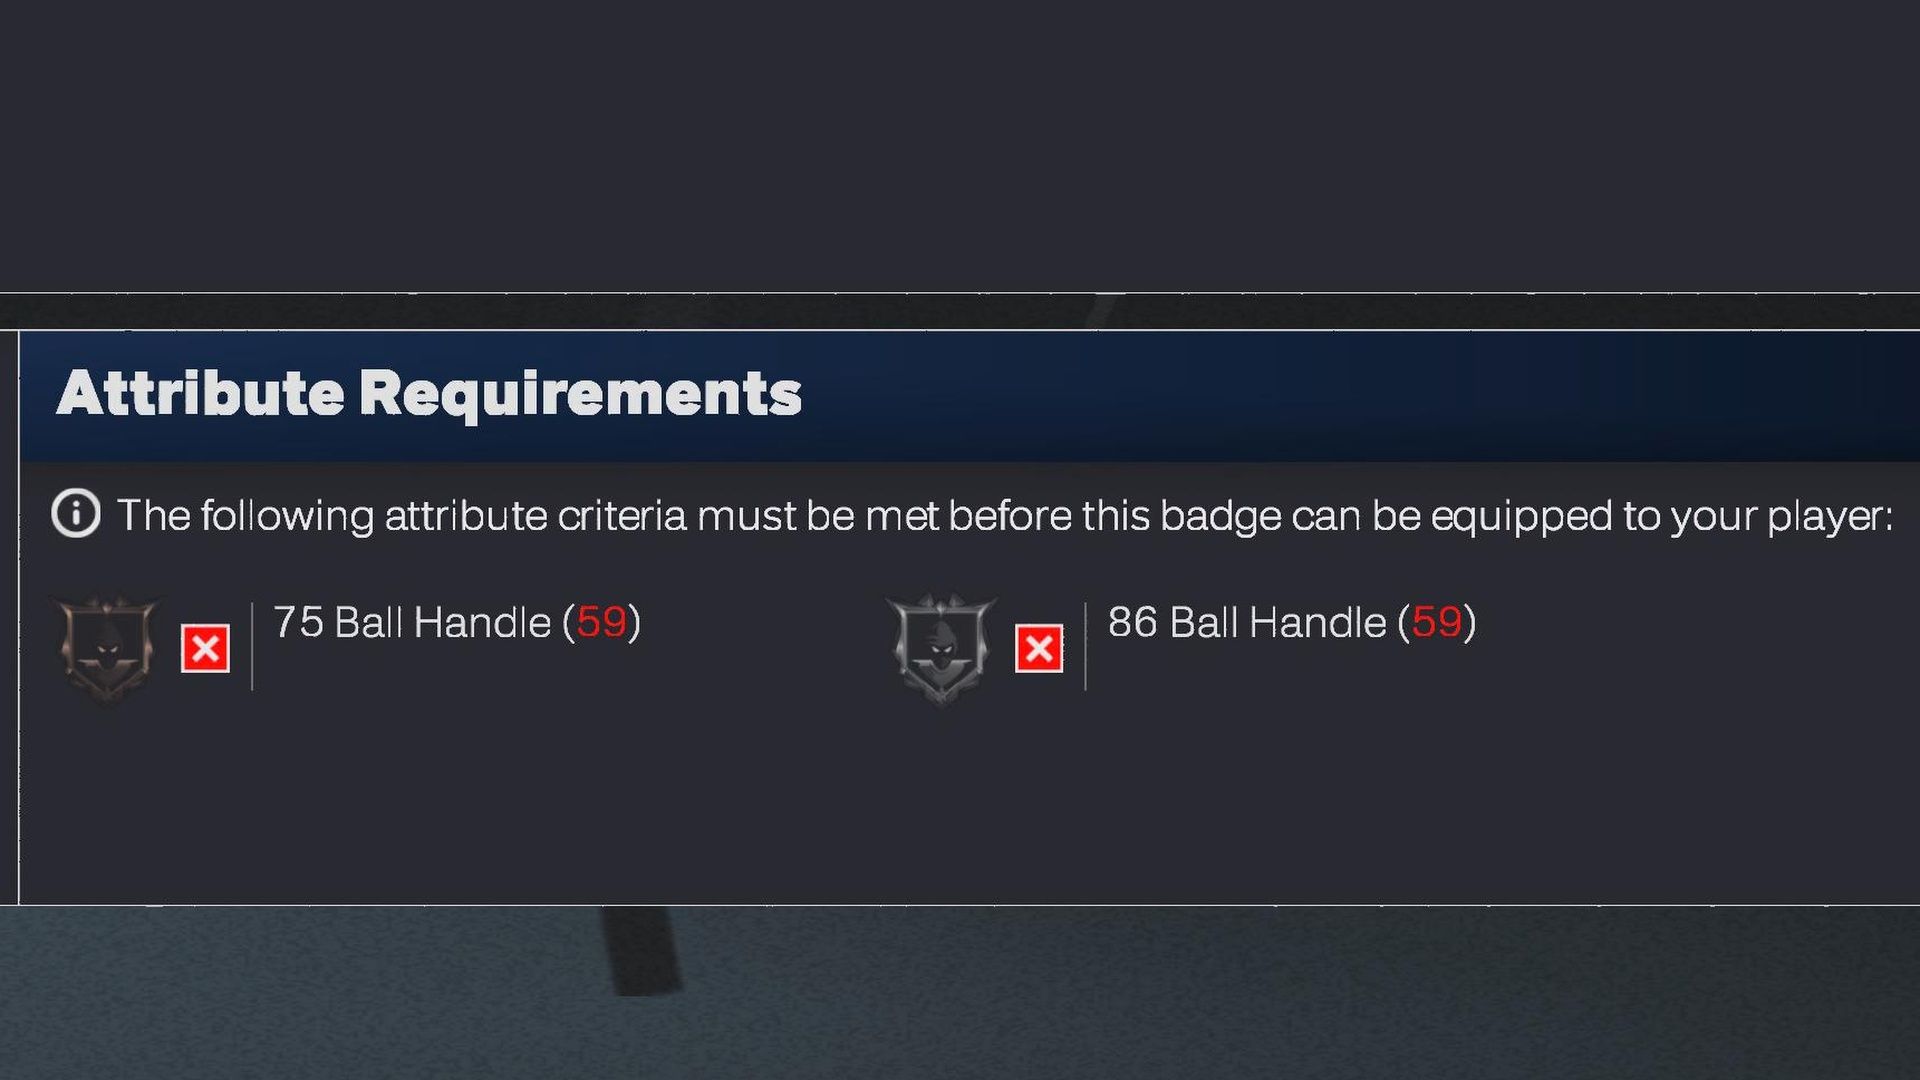
| Ankle Assassin | 75 Ball Handle | 86 Ball Handle | 93 Ball Handle | 95 Ball Handle | 98 Ball Handle | Under 6’10 |
| Bail Out | 85 Pass Accuracy | 91 Pass Accuracy | 94 Pass Accuracy | 96 Pass Accuracy | 99 Pass Accuracy | – |
| Break Starter | 65 Pass Accuracy | 75 Pass Accuracy | 87 Pass Accuracy | 93 Pass Accuracy | 98 Pass Accuracy | – |
| Dimer | 55 Pass Accuracy | 71 Pass Accuracy | 82 Pass Accuracy | 92 Pass Accuracy | 98 Pass Accuracy | – |
| Handles for Days | 71 Ball Handle | 81 Ball Handle | 90 Ball Handle | 94 Ball Handle | 97 Ball Handle | Under 7’0 |
| Lightning Launch | 68 Speed With Ball | 75 Speed With Ball | 86 Speed With Ball | 91 Speed With Ball | 94 Speed With Ball | Under 6’11 |
| Strong Handle | 60 Ball Handle + 60 Strength | 67 Ball Handle + 65 Strength | 73 Ball Handle + 73 Strength | 77 Ball Handle + 84 Strength | 80 Ball Handle + 93 Strength | Under 6’11 |
| Unpluckable | 70 Ball Handle/75 Post Control | 80 Ball Handle/86 Post Control | 92 Ball Handle/96 Post Control | 96 Ball Handle | 99 Ball Handle | – |
| Versatile Visionary | 70 Pass Accuracy | 76 Pass Accuracy | 84 Pass Accuracy | 95 Pass Accuracy | 99 Pass Accuracy | – |
| Aerial Wizard | 64 Driving Dunk/60 Standing Dunk | 70 Driving Dunk/75 Standing Dunk | 80 Driving Dunk/84 Standing Dunk | 89 Driving Dunk/92 Standing Dunk | 97 Driving Dunk/98 Standing Dunk | – |
| Float Game | 68 Close Shot/65 Layup | 78 Close Shot/78 Layup | 86 Close Shot/88 Layup | 92 Close Shot/95 Layup | 98 Close Shot/98 Layup | – |
| Hook Specialist | 60 Close Shot + 61 Post Control | 75 Close Shot + 65 Post Control | 86 Close Shot + 88 Post Control | 95 Close Shot + 94 Post Control | 99 Close Shot + 97 Post Control | – |
| Layup Mixmaster | 75 Driving Layup | 85 Driving Layup | 93 Driving Layup | 97 Driving Layup | 99 Driving Layup | Under 6’11 |
| Paint Prodigy | 73 Close Shot | 84 Close Shot | 92 Close Shot | 96 Close Shot | 99 Close Shot | Above 6’3 |
| Physical Finisher | 70 Driving Layup + 60 Strength | 80 Driving Layup + 67 Strength | 90 Driving Layup + 75 Strength | 96 Driving Layup + 83 Strength | 97 Driving Layup + 97 Strength | – |
| Post Fade Phenom | 60 Post Control + 61 Mid-Range Shot | 70 Post Control + 71 Mid-Range Shot | 79 Post Control + 80 Mid-Range Shot | 84 Post Control + 90 Mid-Range Shot | 90 Post Control + 94 Mid-Range Shot | – |
| Post Powerhouse | 64 Post Control + 70 Strength | 75 Post Control+ 79 Strength | 85 Post Control + 86 Strength | 93 Post Control + 95 Strength | 98 Post Control + 96 Strength | Above 6’4 |
| Post-Up Poet | 67 Post Control | 77 Post Control | 87 Post Control | 95 Post Control | 99 Post Control | Above 6’0 |
| Posterizer | 65 Vertical | 75 Vertical | 80 Vertical | 85 Vertical | 90 Vertical | – |
| Rise Up | 72 Standing Dunk + 60 Vertical | 81 Standing Dunk + 62 Vertical | 90 Standing Dunk + 66 Vertical | 95 Standing Dunk + 69 Vertical | 99 Standing Dunk + 71 Vertical | Above 6’6 |
| Challenger | 71 Perimeter Defense | 82 Perimeter Defense | 92 Perimeter Defense | 95 Perimeter Defense | 99 Perimeter Defense | Under 6’11 |
| Glove | 67 Steal | 79 Steal | 91 Steal | 96 Steal | 99 Steal | Under 7’0 |
| High-Flying Denier | 68 Block + 60 Vertical | 78 Block + 74 Vertical | 88 Block + 80 Vertical | 92 Block + 83 Vertical | 99 Block + 85 Vertical | Above 6’3 |
| Immovable Enforcer | 62 Perimeter Defense + 71 Strength | 72 Perimeter Defense + 82 Strength | 84 Perimeter Defense + 85 Strength | 89 Perimeter Defense + 91 Strength | 94 Perimeter Defense + 92 Strength | – |
| Interceptor | 60 Steal | 73 Steal | 85 Steal | 94 Steal | 98 Steal | – |
| Off-Ball Pest | 69 Interior Defense/58 Perimeter Defense | 76 Interior Defense/68 Perimeter Defense | 85 Interior Defense/80 Perimeter Defense | 94 Interior Defense/87 Perimeter Defense | 97 Interior Defense/98 Perimeter Defense | – |
| On-Ball Menace | 74 Perimeter Defense + 70 Agility | 85 Perimeter Defense + 76 Agility | 91 Perimeter Defense + 80 Agility | 96 Perimeter Defense + 80 Agility | 99 Perimeter Defense + 86 Agility | Under 6’9 |
| Paint Patroller | 60 Interior Defense + 74 Block | 70 Interior Defense + 84 Block | 77 Interior Defense + 93 Block | 84 Interior Defense + 97 Block | 89 Interior Defense + 99 Block | Above 6’6 |
| Pick Dodger | 73 Perimeter Defense + 71 Agility | 83 Perimeter Defense + 75 Agility | 90 Perimeter Defense + 79 Agility | 97 Perimeter Defense + 85 Agility | 99 Perimeter Defense + 92 Agility | Under 6’10 |
| Post Lockdown | 74 Interior Defense + 70 Strength | 82 Interior Defense + 78 Strength | 88 Interior Defense + 84 Strength | 93 Interior Defense + 92 Strength | 99 Interior Defense + 97 Strength | Above 6’5 |
| Boxout Beast | 55 Offensive Rebound/55 Defensive Rebound | 70 Offensive Rebound/70 Defensive Rebound | 85 Offensive Rebound/85 Defensive Rebound | 94 Offensive Rebound/94 Defensive Rebound | 98 Offensive Rebound/98 Defensive Rebound | Above 6’3 |
| Rebound Chaser | 60 Offensive Rebound/60 Defensive Rebound | 80 Offensive Rebound/80 Defensive Rebound | 92 Offensive Rebound/92 Defensive Rebound | 96 Offensive Rebound/96 Defensive Rebound | 99 Offensive Rebound/99 Defensive Rebound | – |
| Brick Wall | 72 Strength | 83 Strength | 91 Strength | 95 Strength | 99 Strength | Above 6’5 |
| Slippery Off-Ball | 57 Speed + 57 Agility | 73 Speed + 64 Agility | 85 Speed + 77 Agility | 92 Speed + 88 Agility | 99 Speed + 96 Agility | Under 6’9 |
| Pogo Stick | 63 Vertical | 70 Vertical | 77 Vertical | 83 Vertical | 88 Vertical | Above 6’4 |
To use the NBA 2K26 player efficiently, ensure they meet certain attribute requirements, as this will allow them to access and upgrade specific Badges. These Badges significantly enhance their court performance, enabling them to either lock down opposing shooters on defense or speed past defenders during offense. Please note that your character’s maximum attributes are set during character creation, so it’s essential to strategize ahead if you aim to use high-level Badges.
Read More
- All Skyblazer Armor Locations in Crimson Desert
- One Piece Chapter 1180 Release Date And Where To Read
- How to Get the Sunset Reed Armor Set and Hollow Visage Sword in Crimson Desert
- All Shadow Armor Locations in Crimson Desert
- All Golden Greed Armor Locations in Crimson Desert
- How to Beat Stonewalker Antiquum at the Gate of Truth in Crimson Desert
- Cassius Morten Armor Set Locations in Crimson Desert
- Grime 2 Map Unlock Guide: Find Seals & Fast Travel
- Amber Alert Secrets & CDs In Crime Scene Cleaner Act 2
- USD RUB PREDICTION
2025-09-03 10:47