Beyond the main storyline in Borderlands 4, players can find and unlock 12 Safehouses. Each Safehouse acts as a secure base and HUB, offering a place to buy items, recover, and pick up new missions. You’ll need to find a Datapad and Console in each location to activate it. Importantly, Safehouses also serve as Fast Travel points, making it easier to get around the world of Kairos. Below is a complete guide to every Safehouse location in Borderlands 4, including where to find the necessary Datapad and Console to claim it as your own.
Shut-Eye Keep Safehouse & Datapad Location
How to Get the Shut-Eye Keep Safehouse
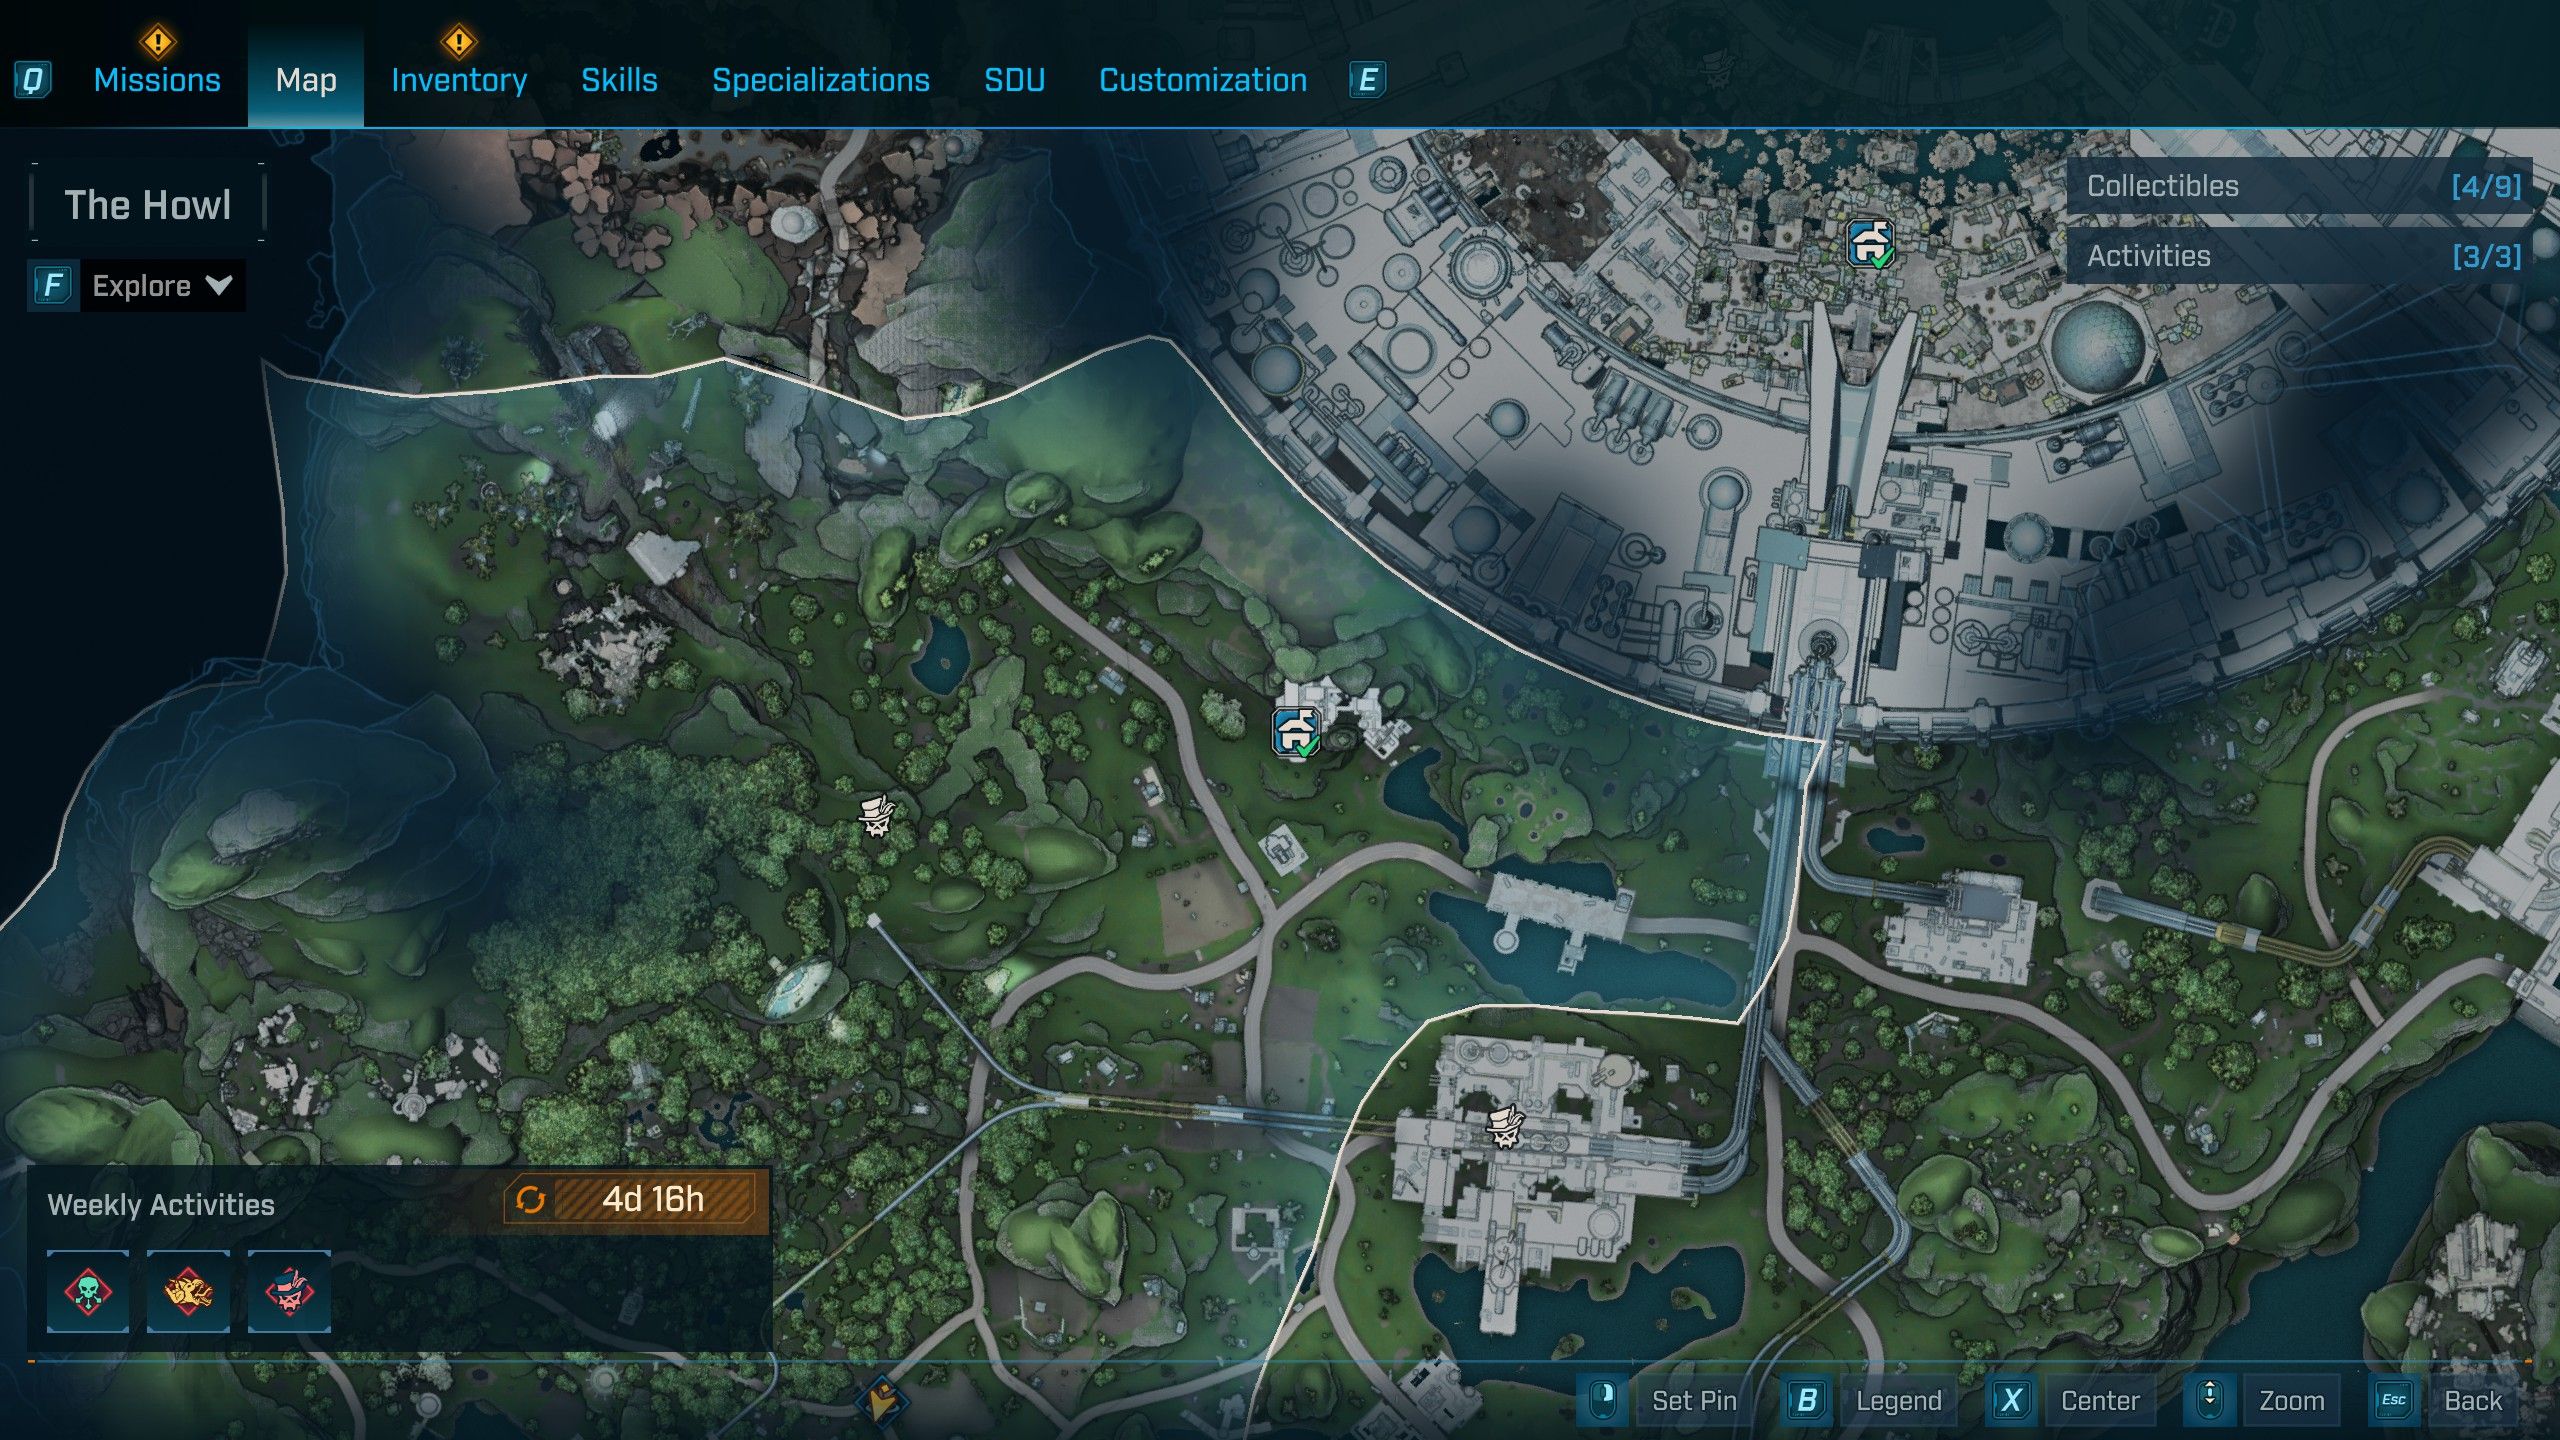
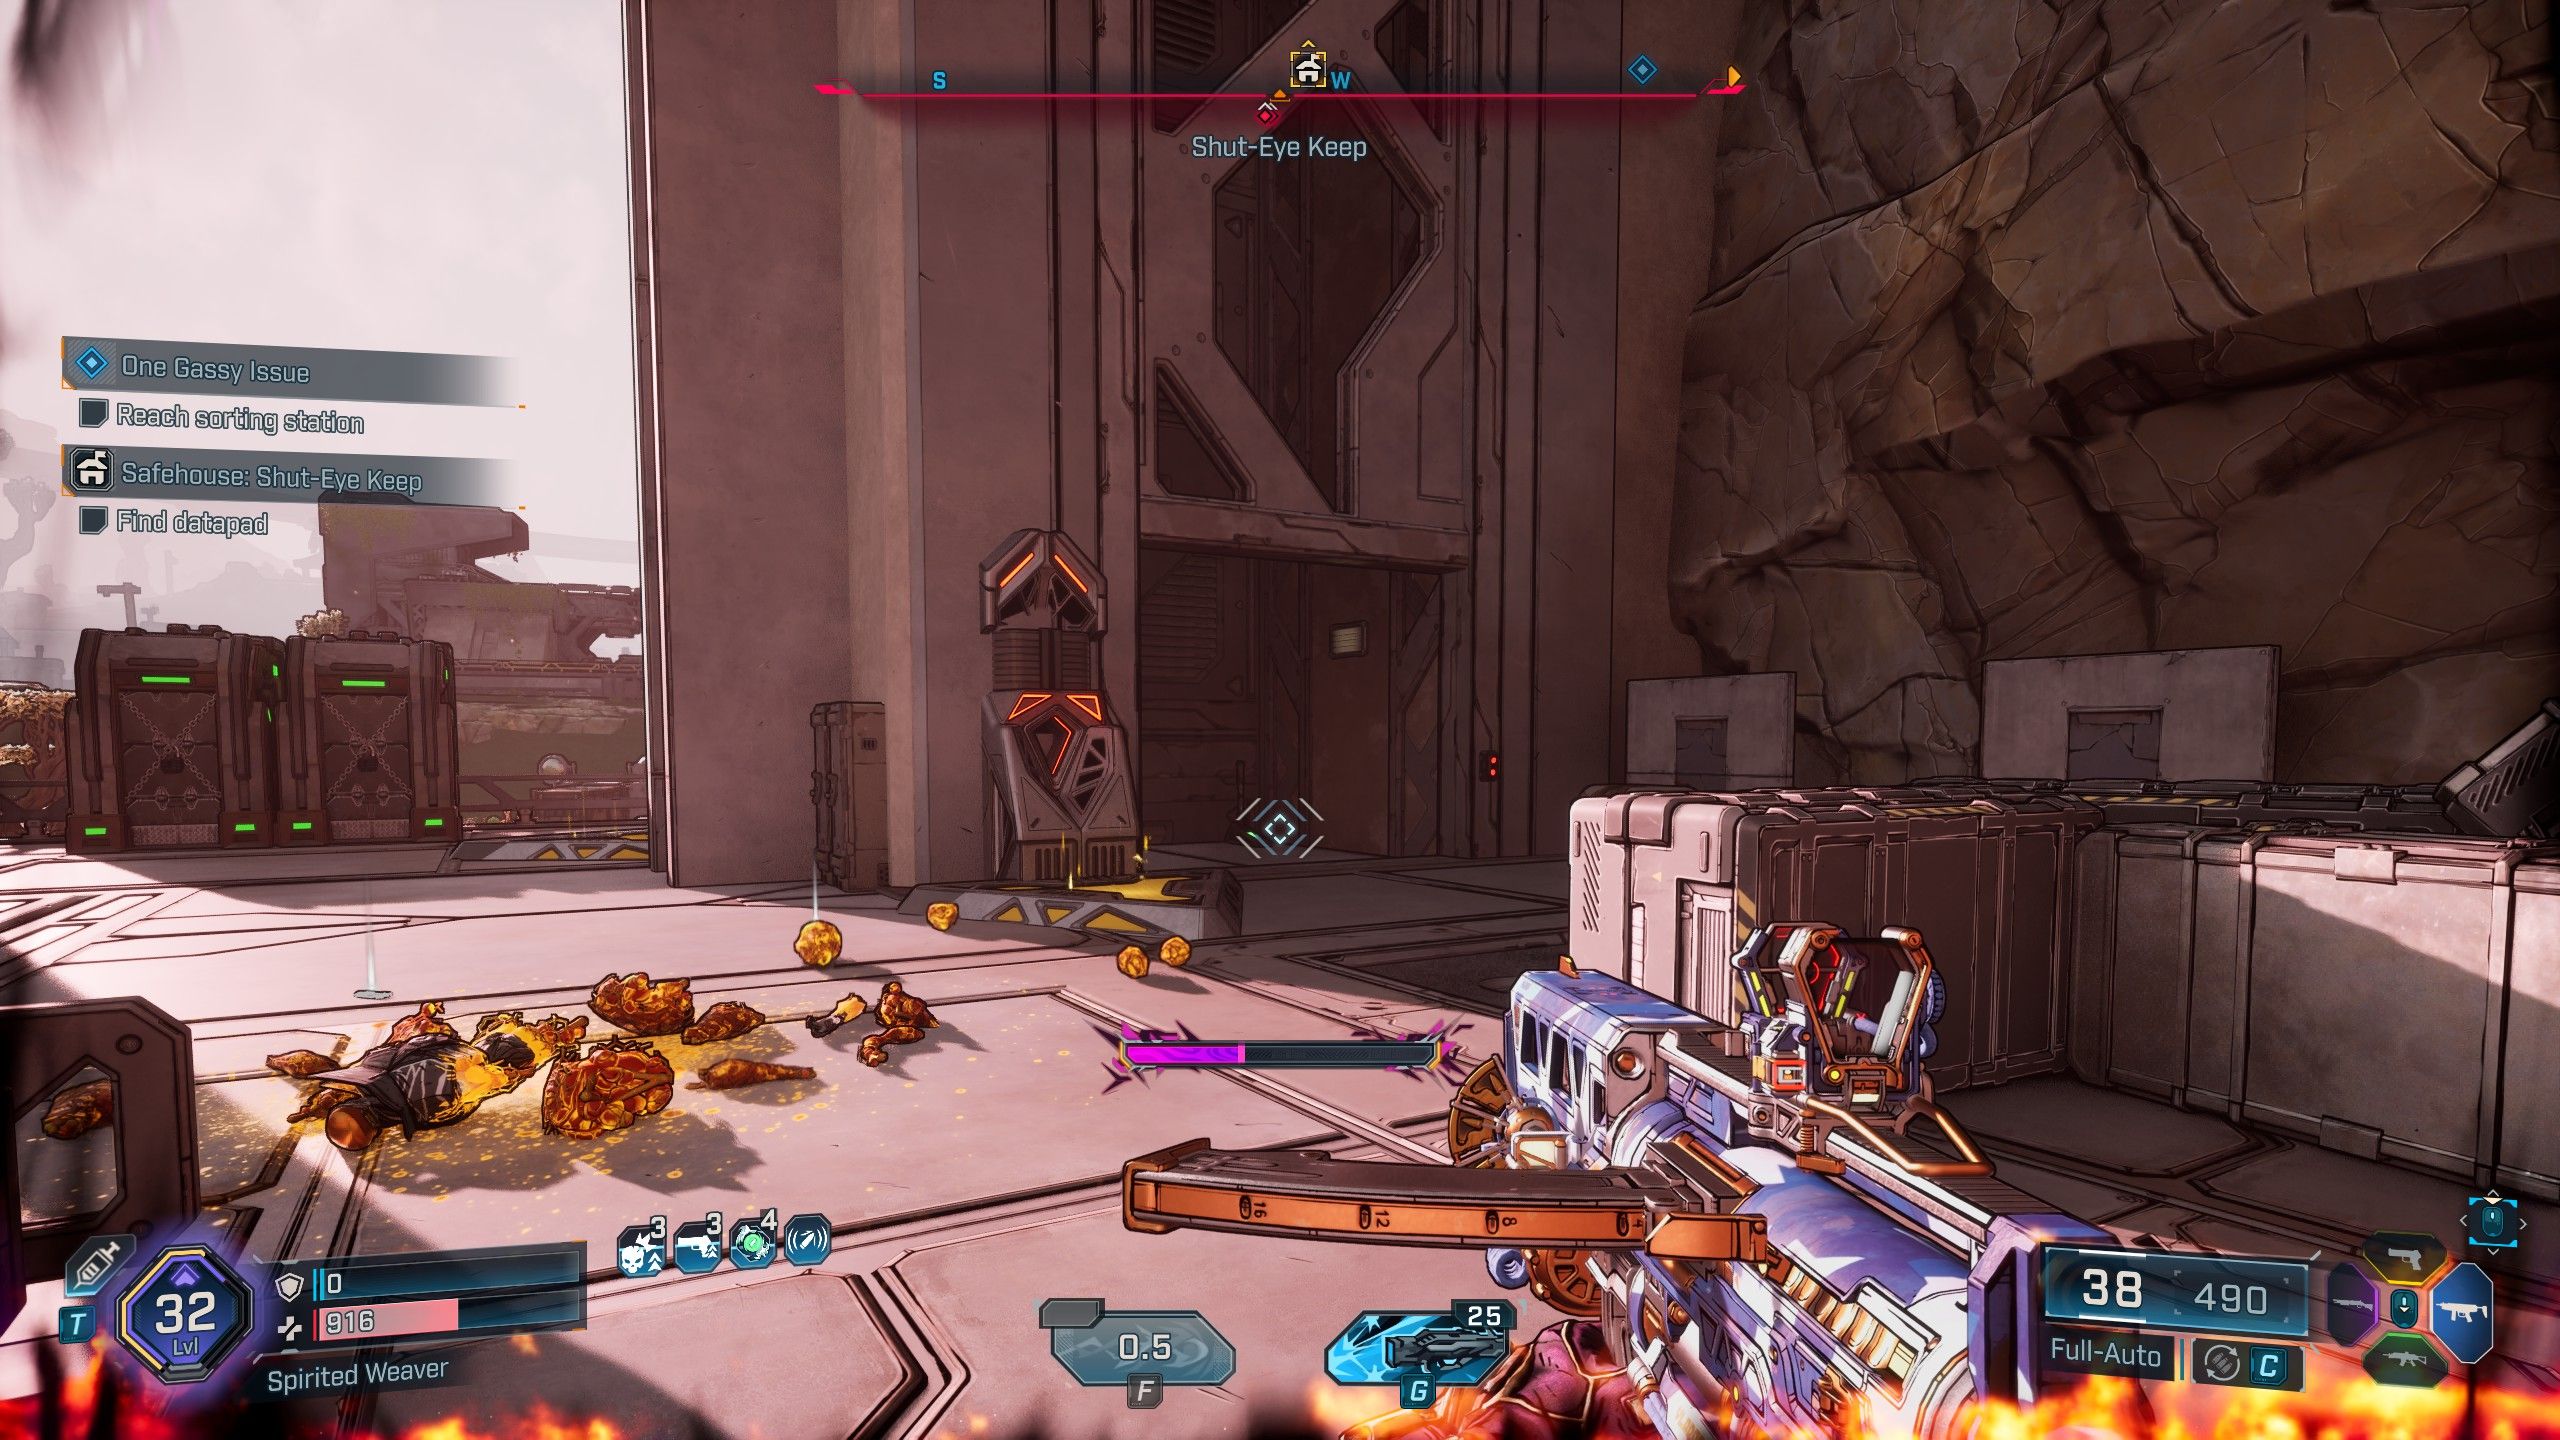

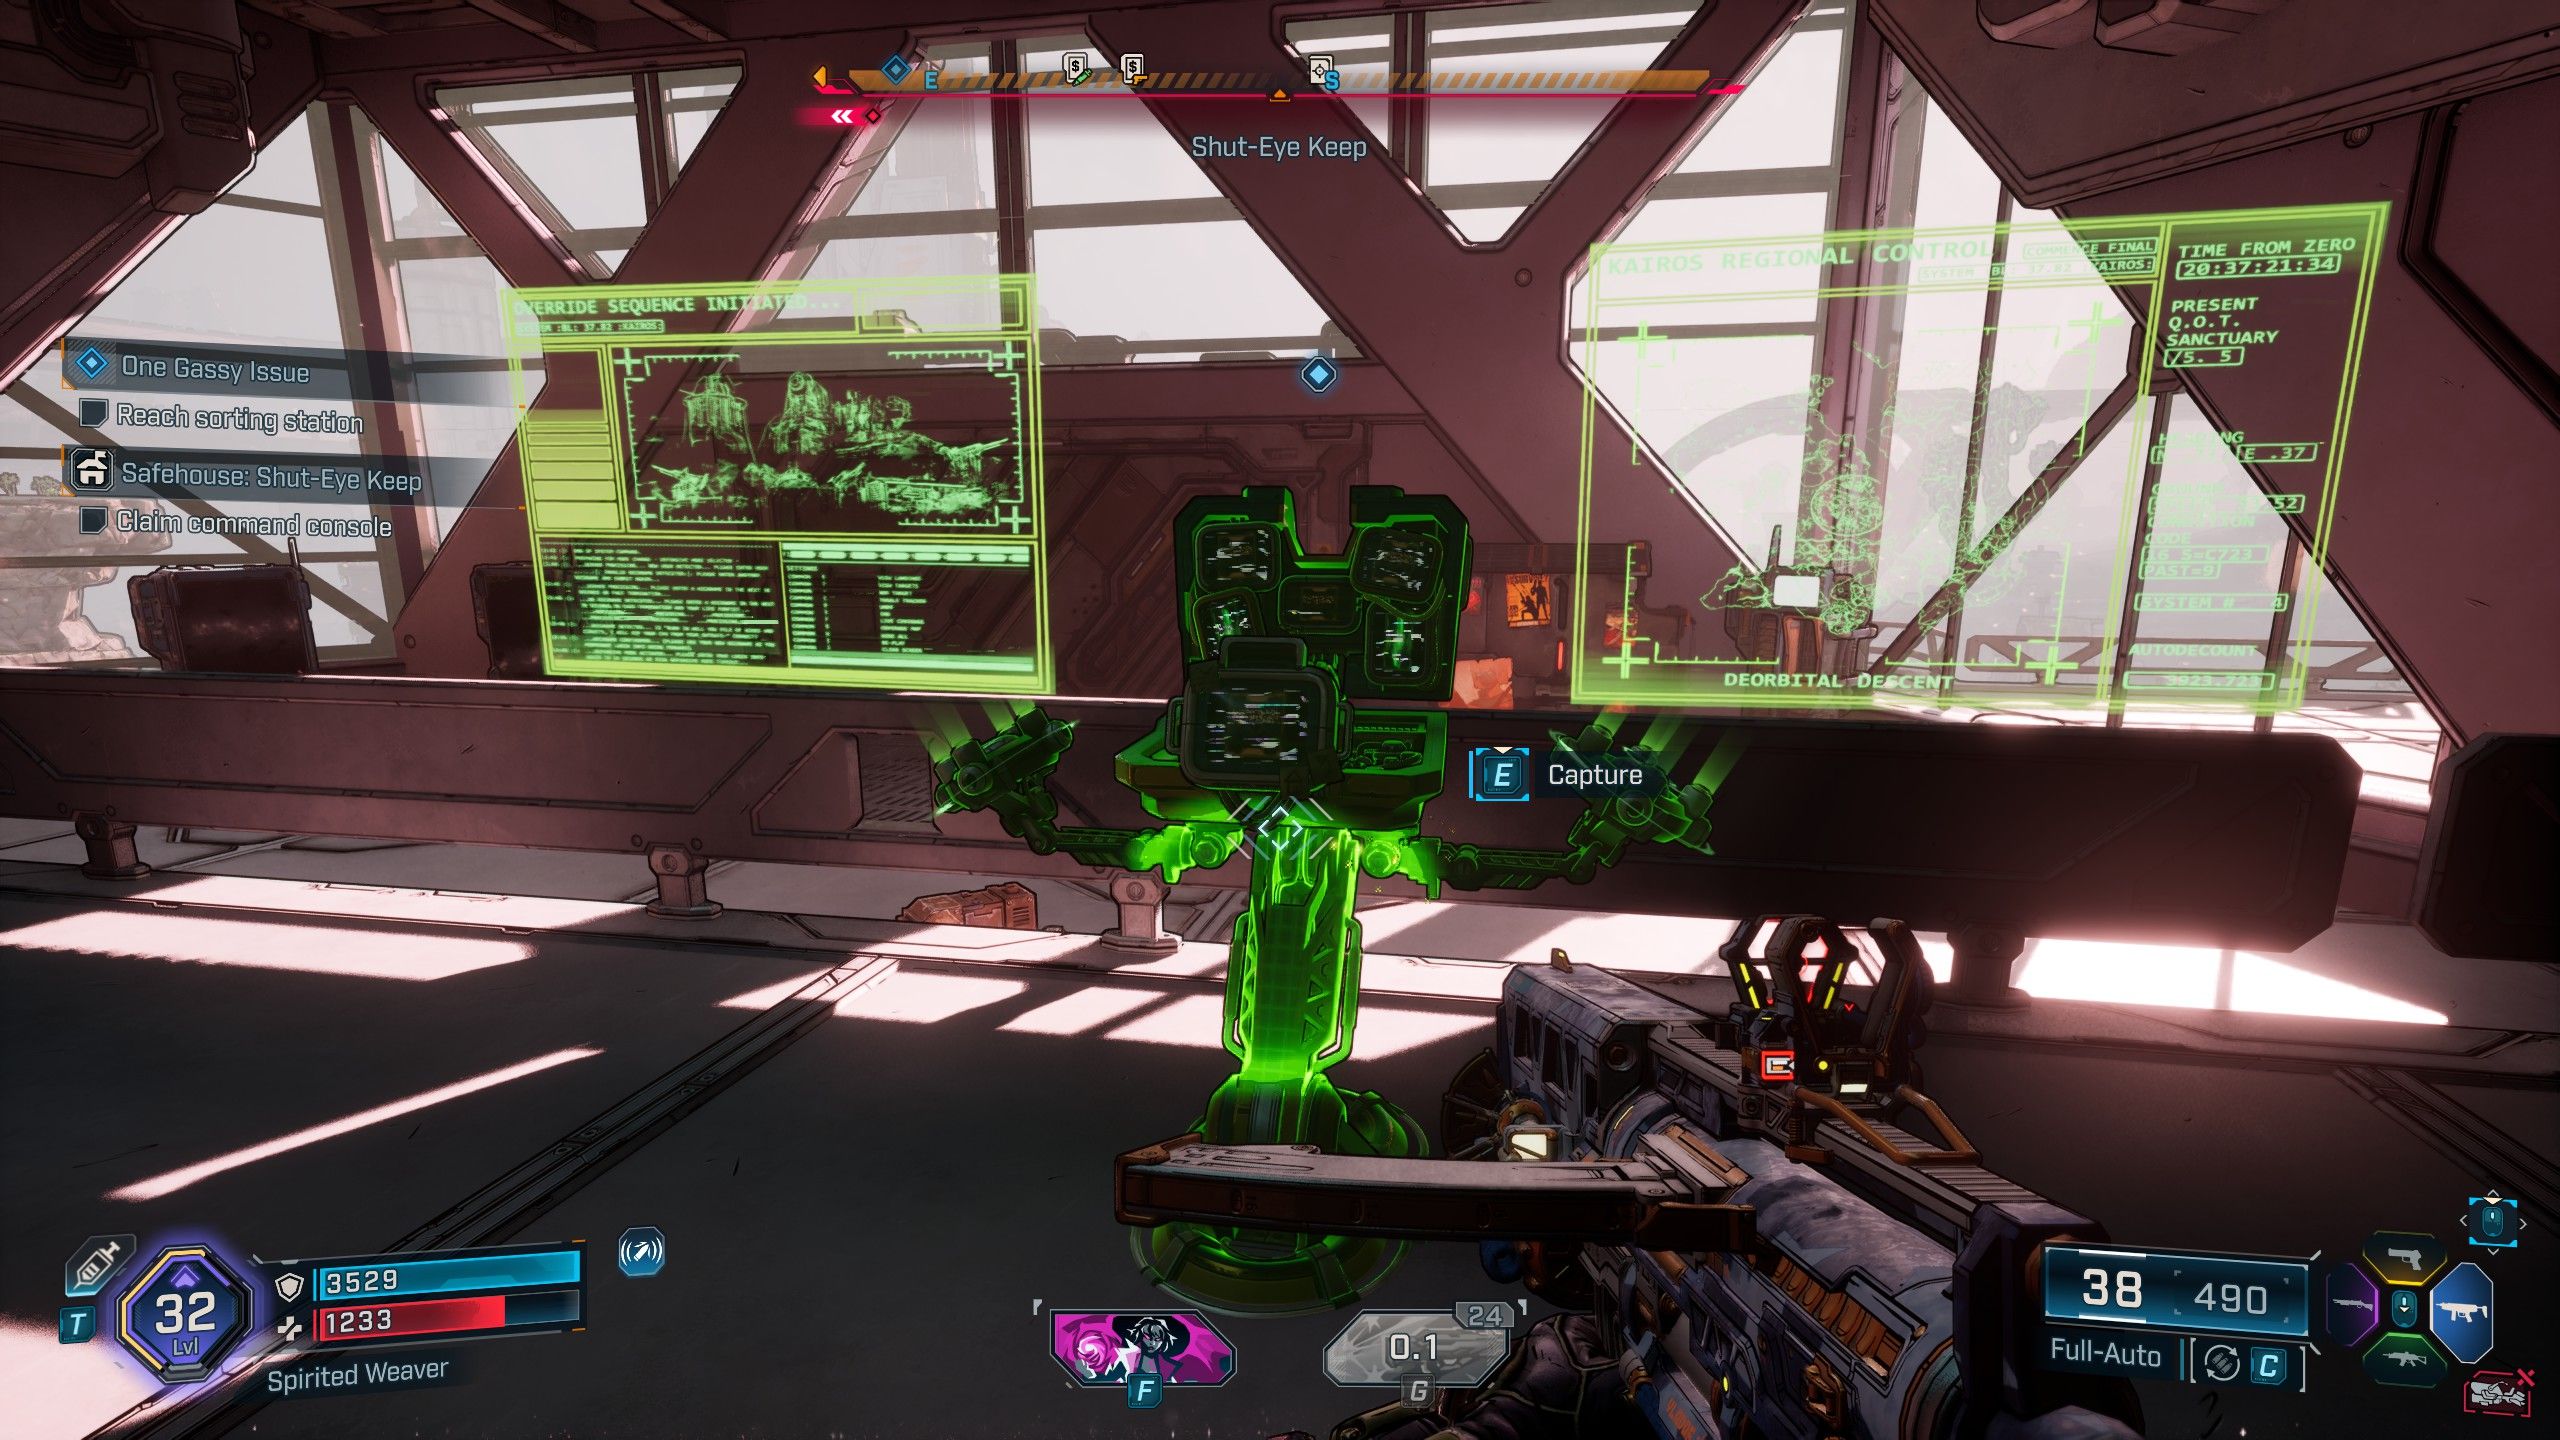
- Location: The Howl, The Fadefields
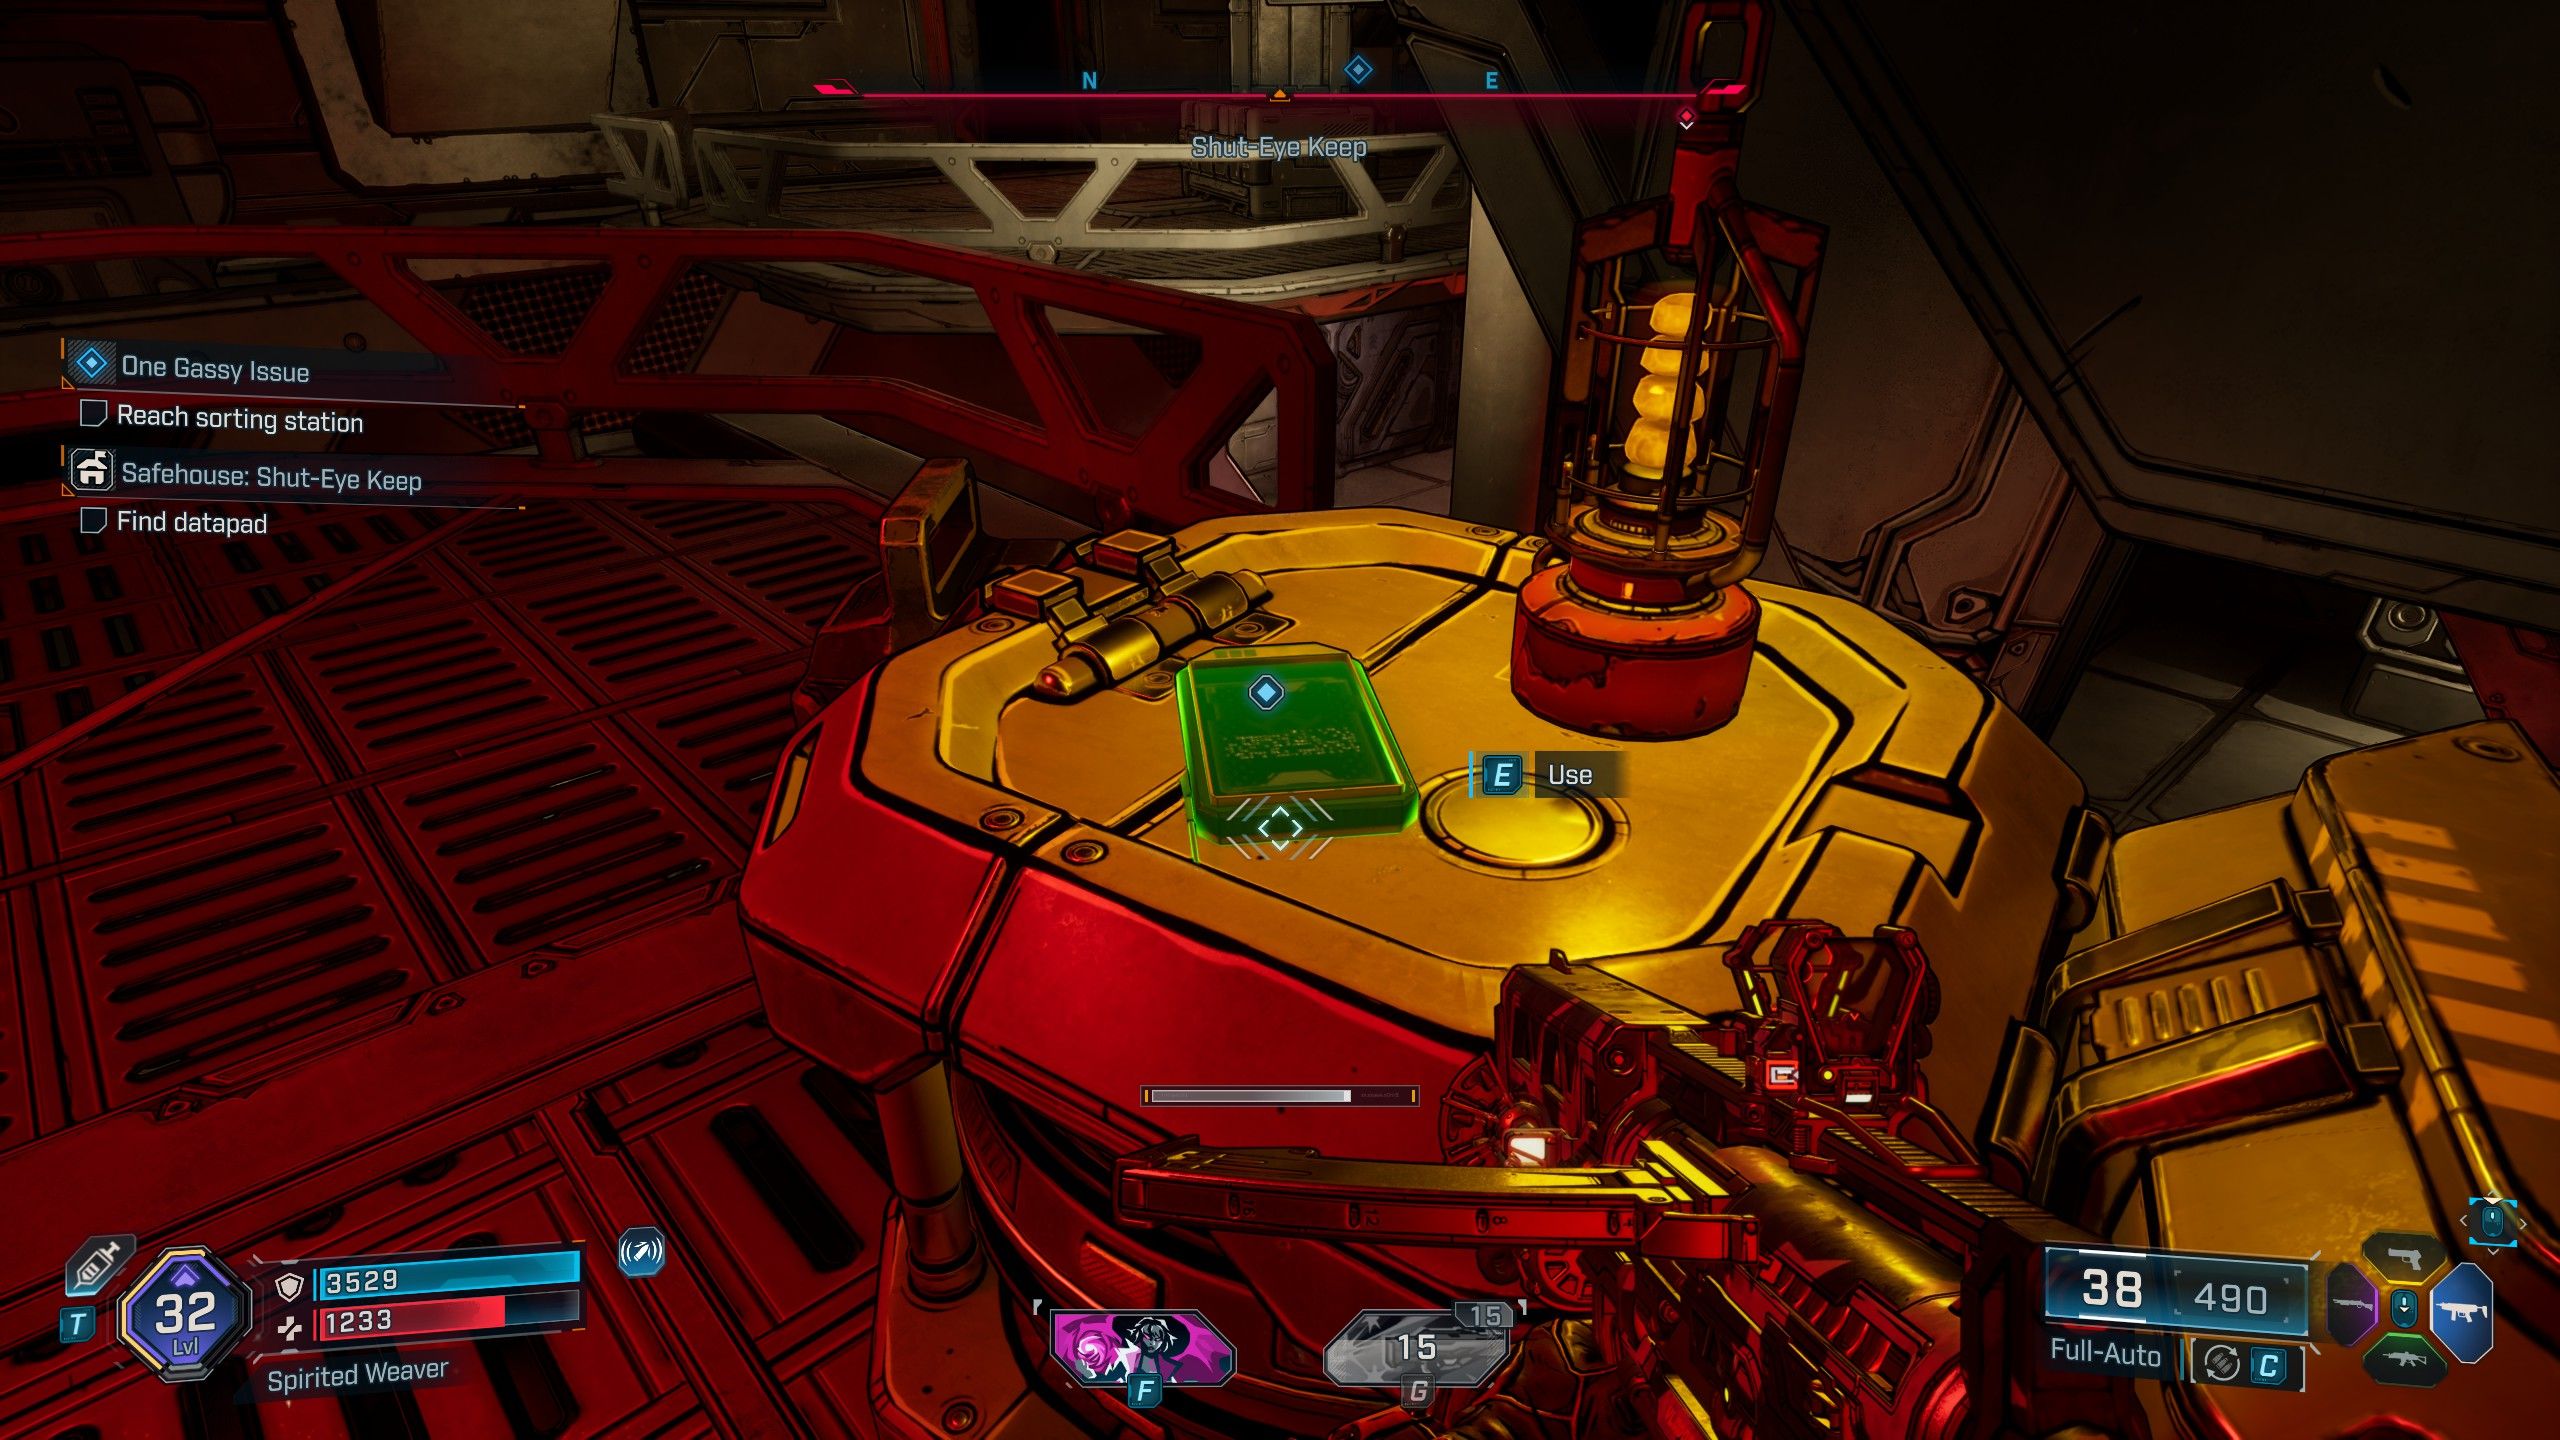
Okay, so when you get to Shut-Eye Keep, the first thing I did was head to the right of the Safehouse to find this Order station. There’s a lever there that lifts you up into the Safehouse itself. From there, it’s pretty straightforward – just follow the path through the garden and inside. Once you’re in, look to the left side of the north wall and look *up* – you’ll see a place to use your grapple hook. Grapple up there and you’ll find a Datapad. Grab that, then head over to the Command Console on the south wall and activate the Safehouse! It’s a little tricky, but totally worth it.
Someday Rise Safehouse & Datapad Location
How to Get the Someday Rise Safehouse
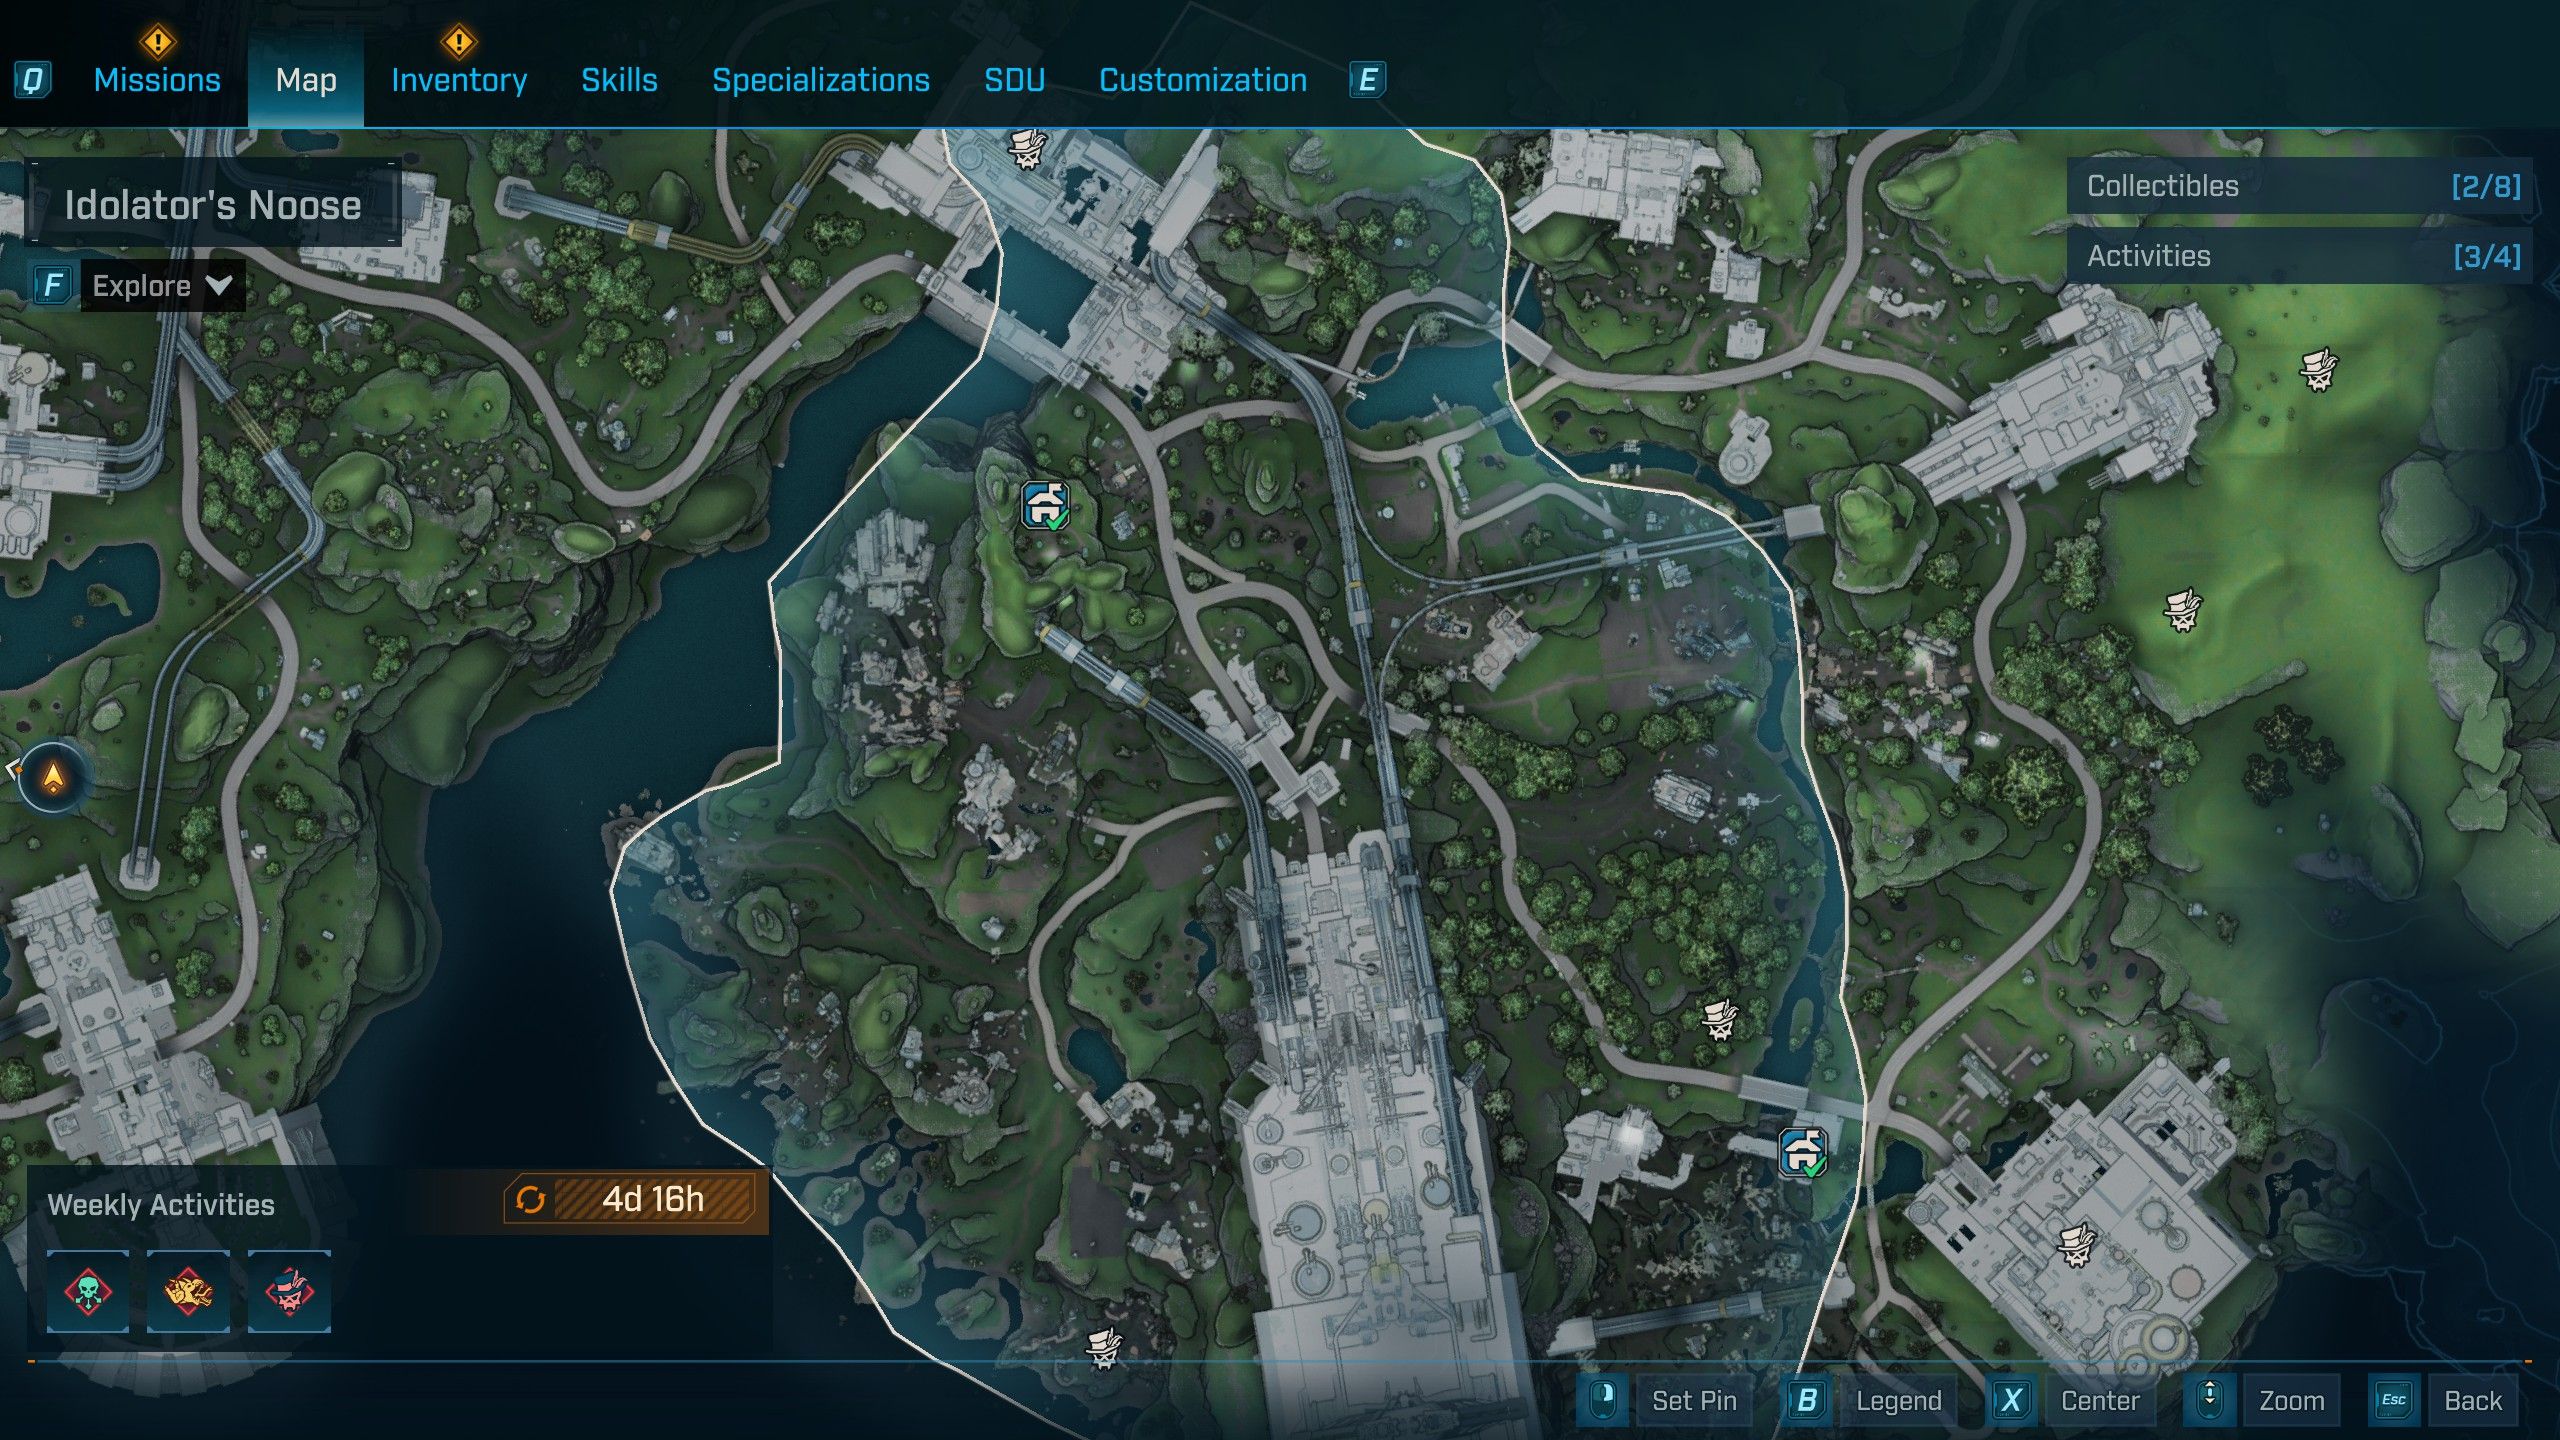
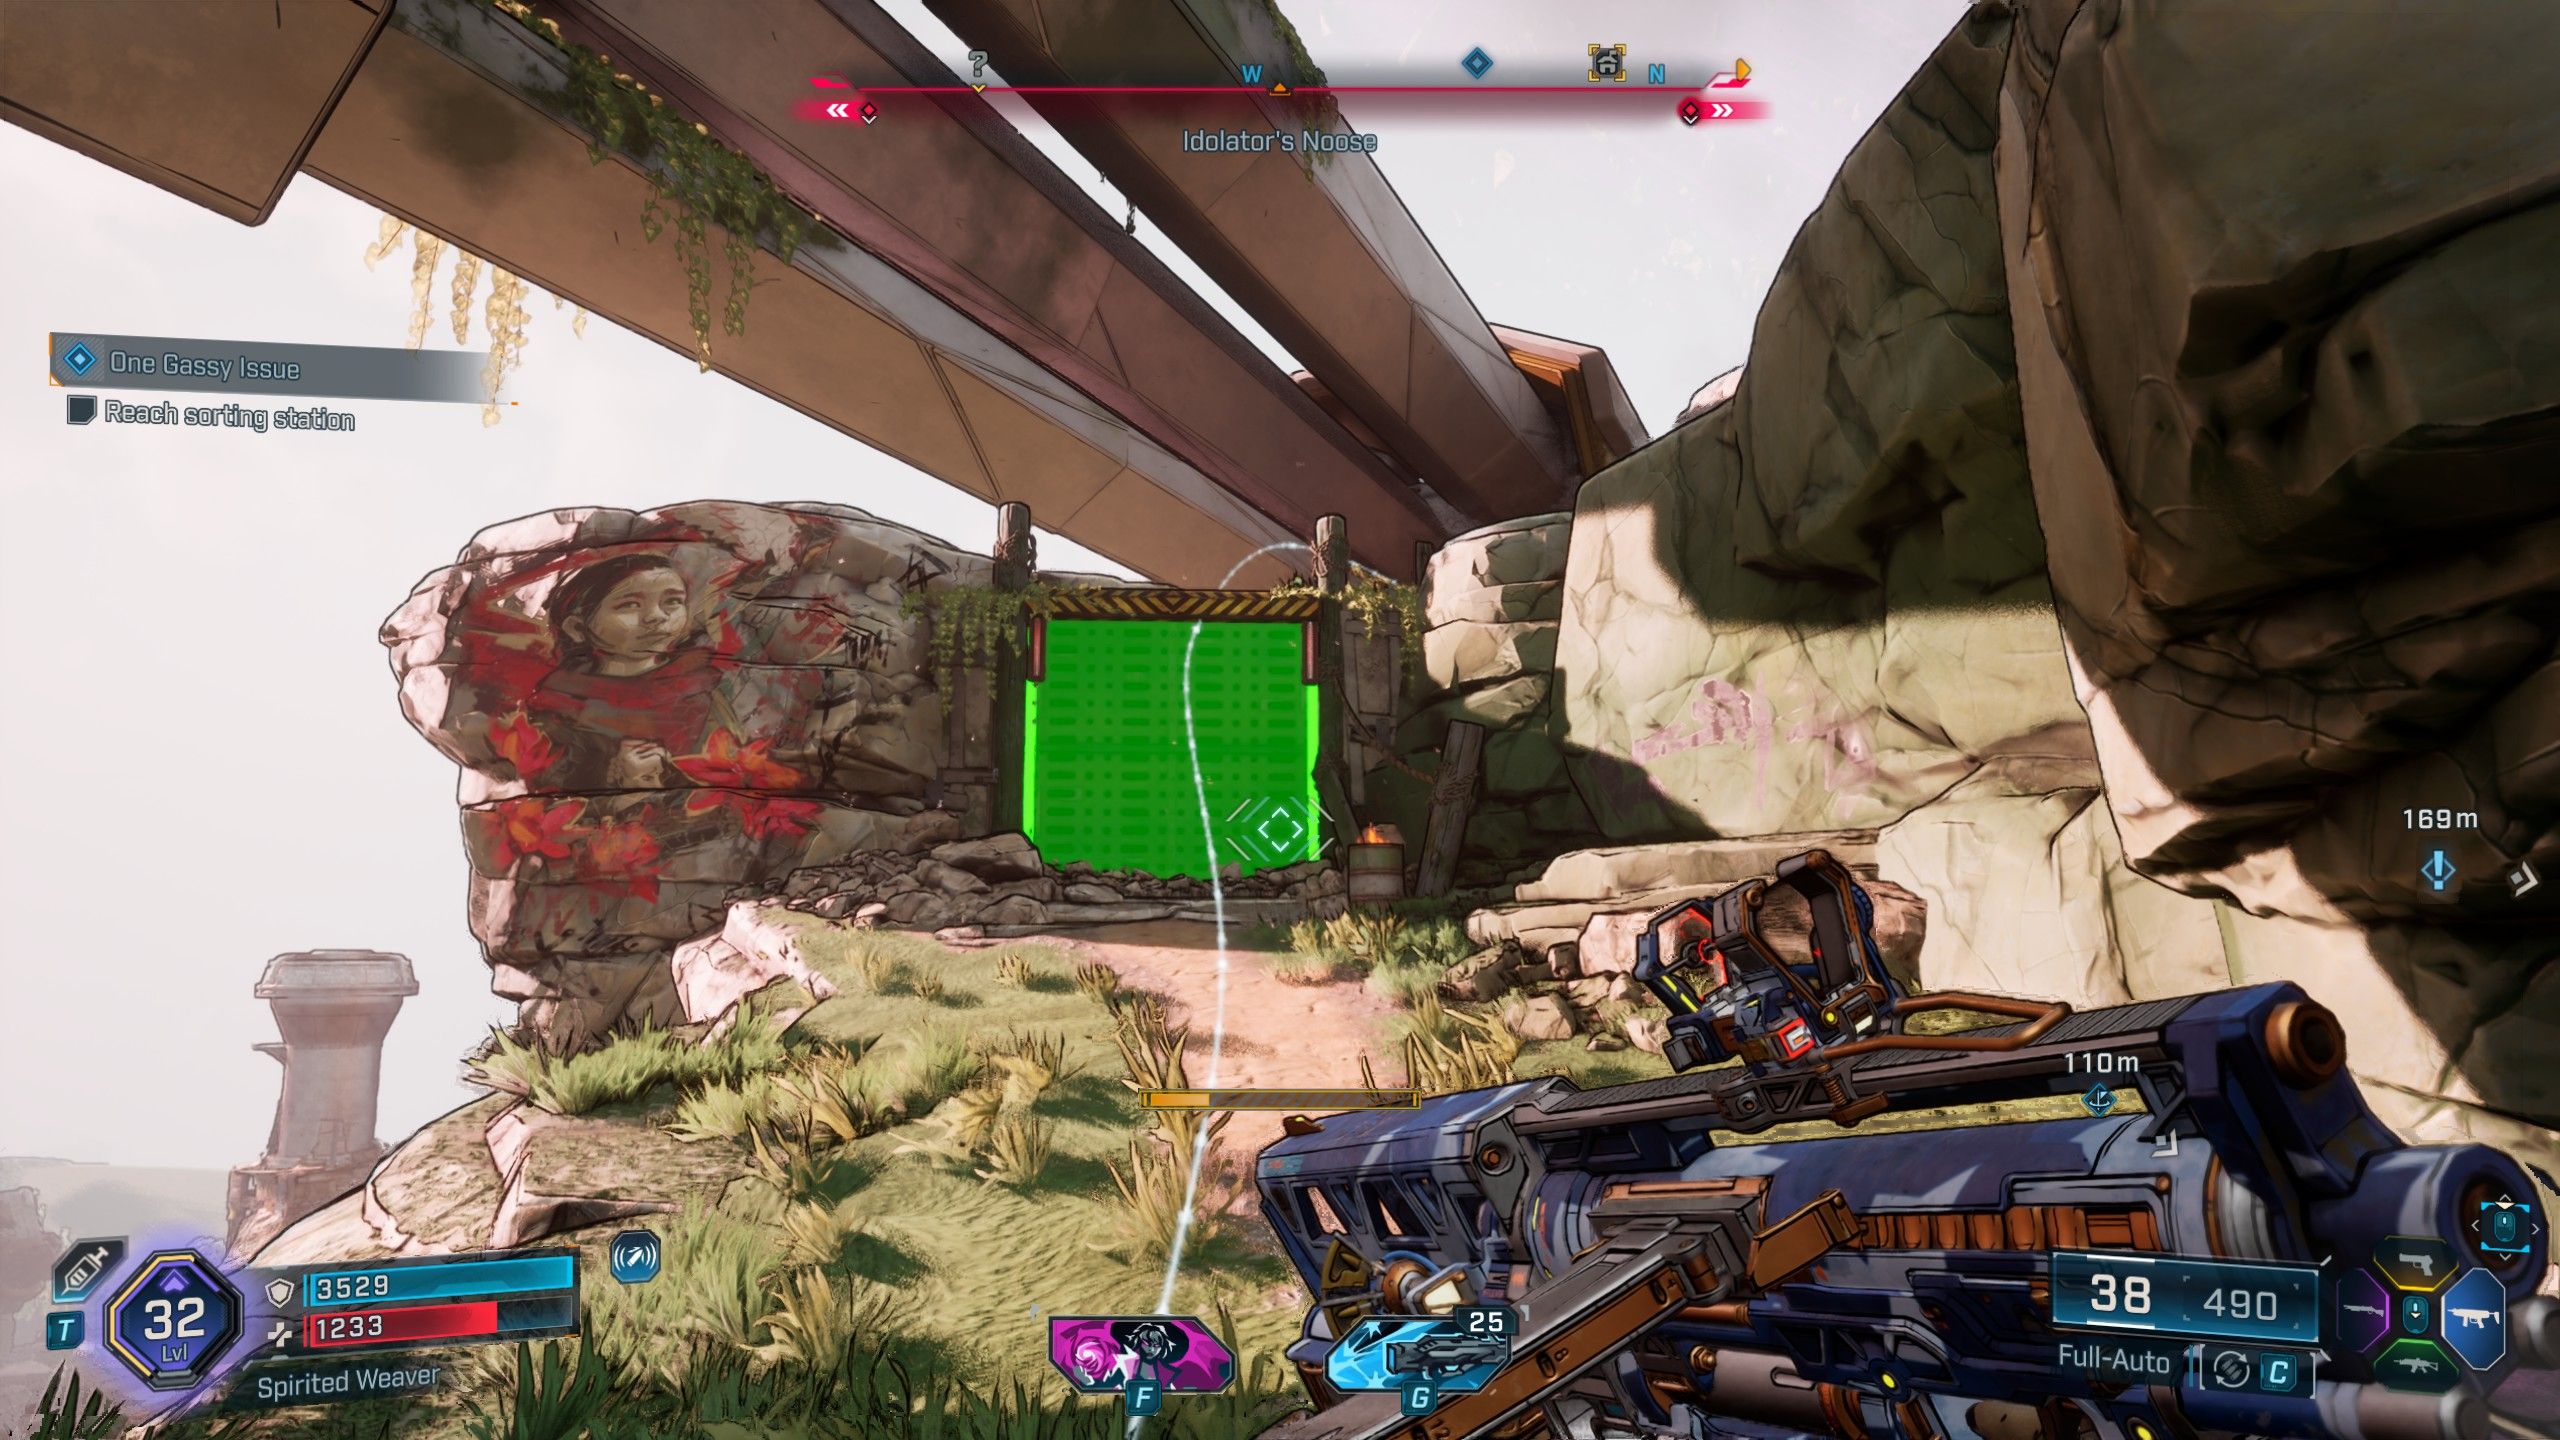
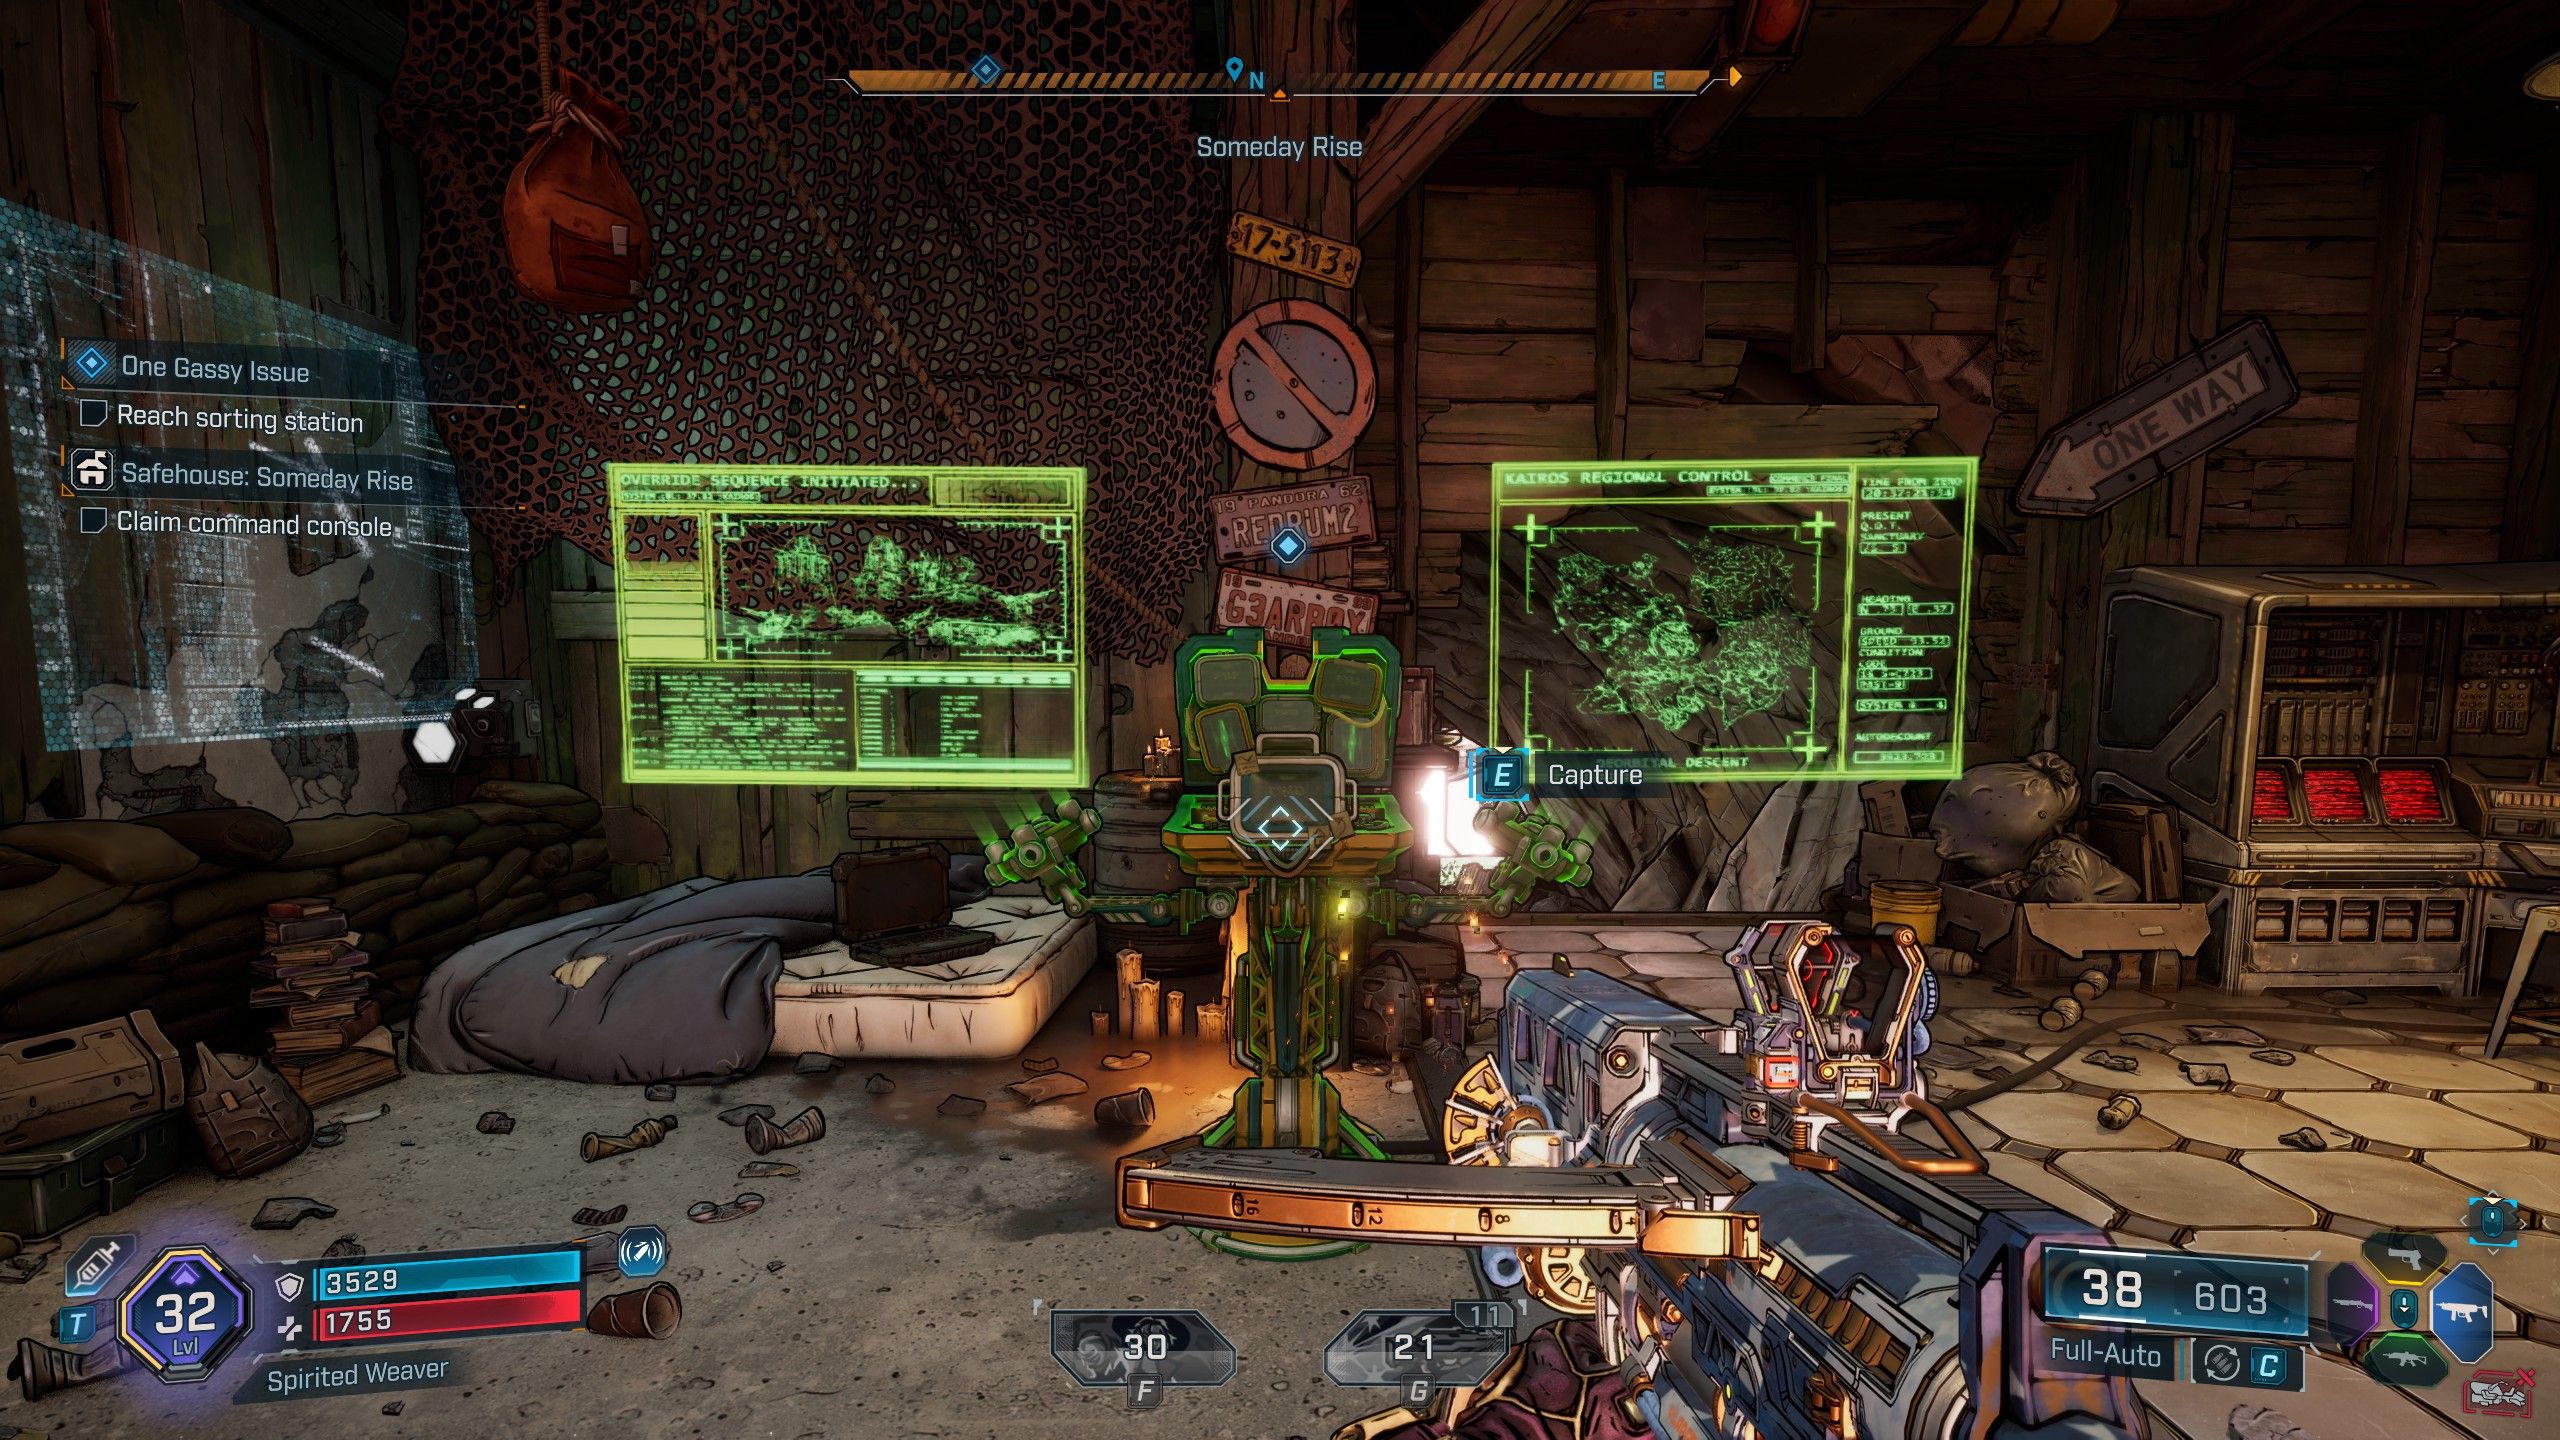
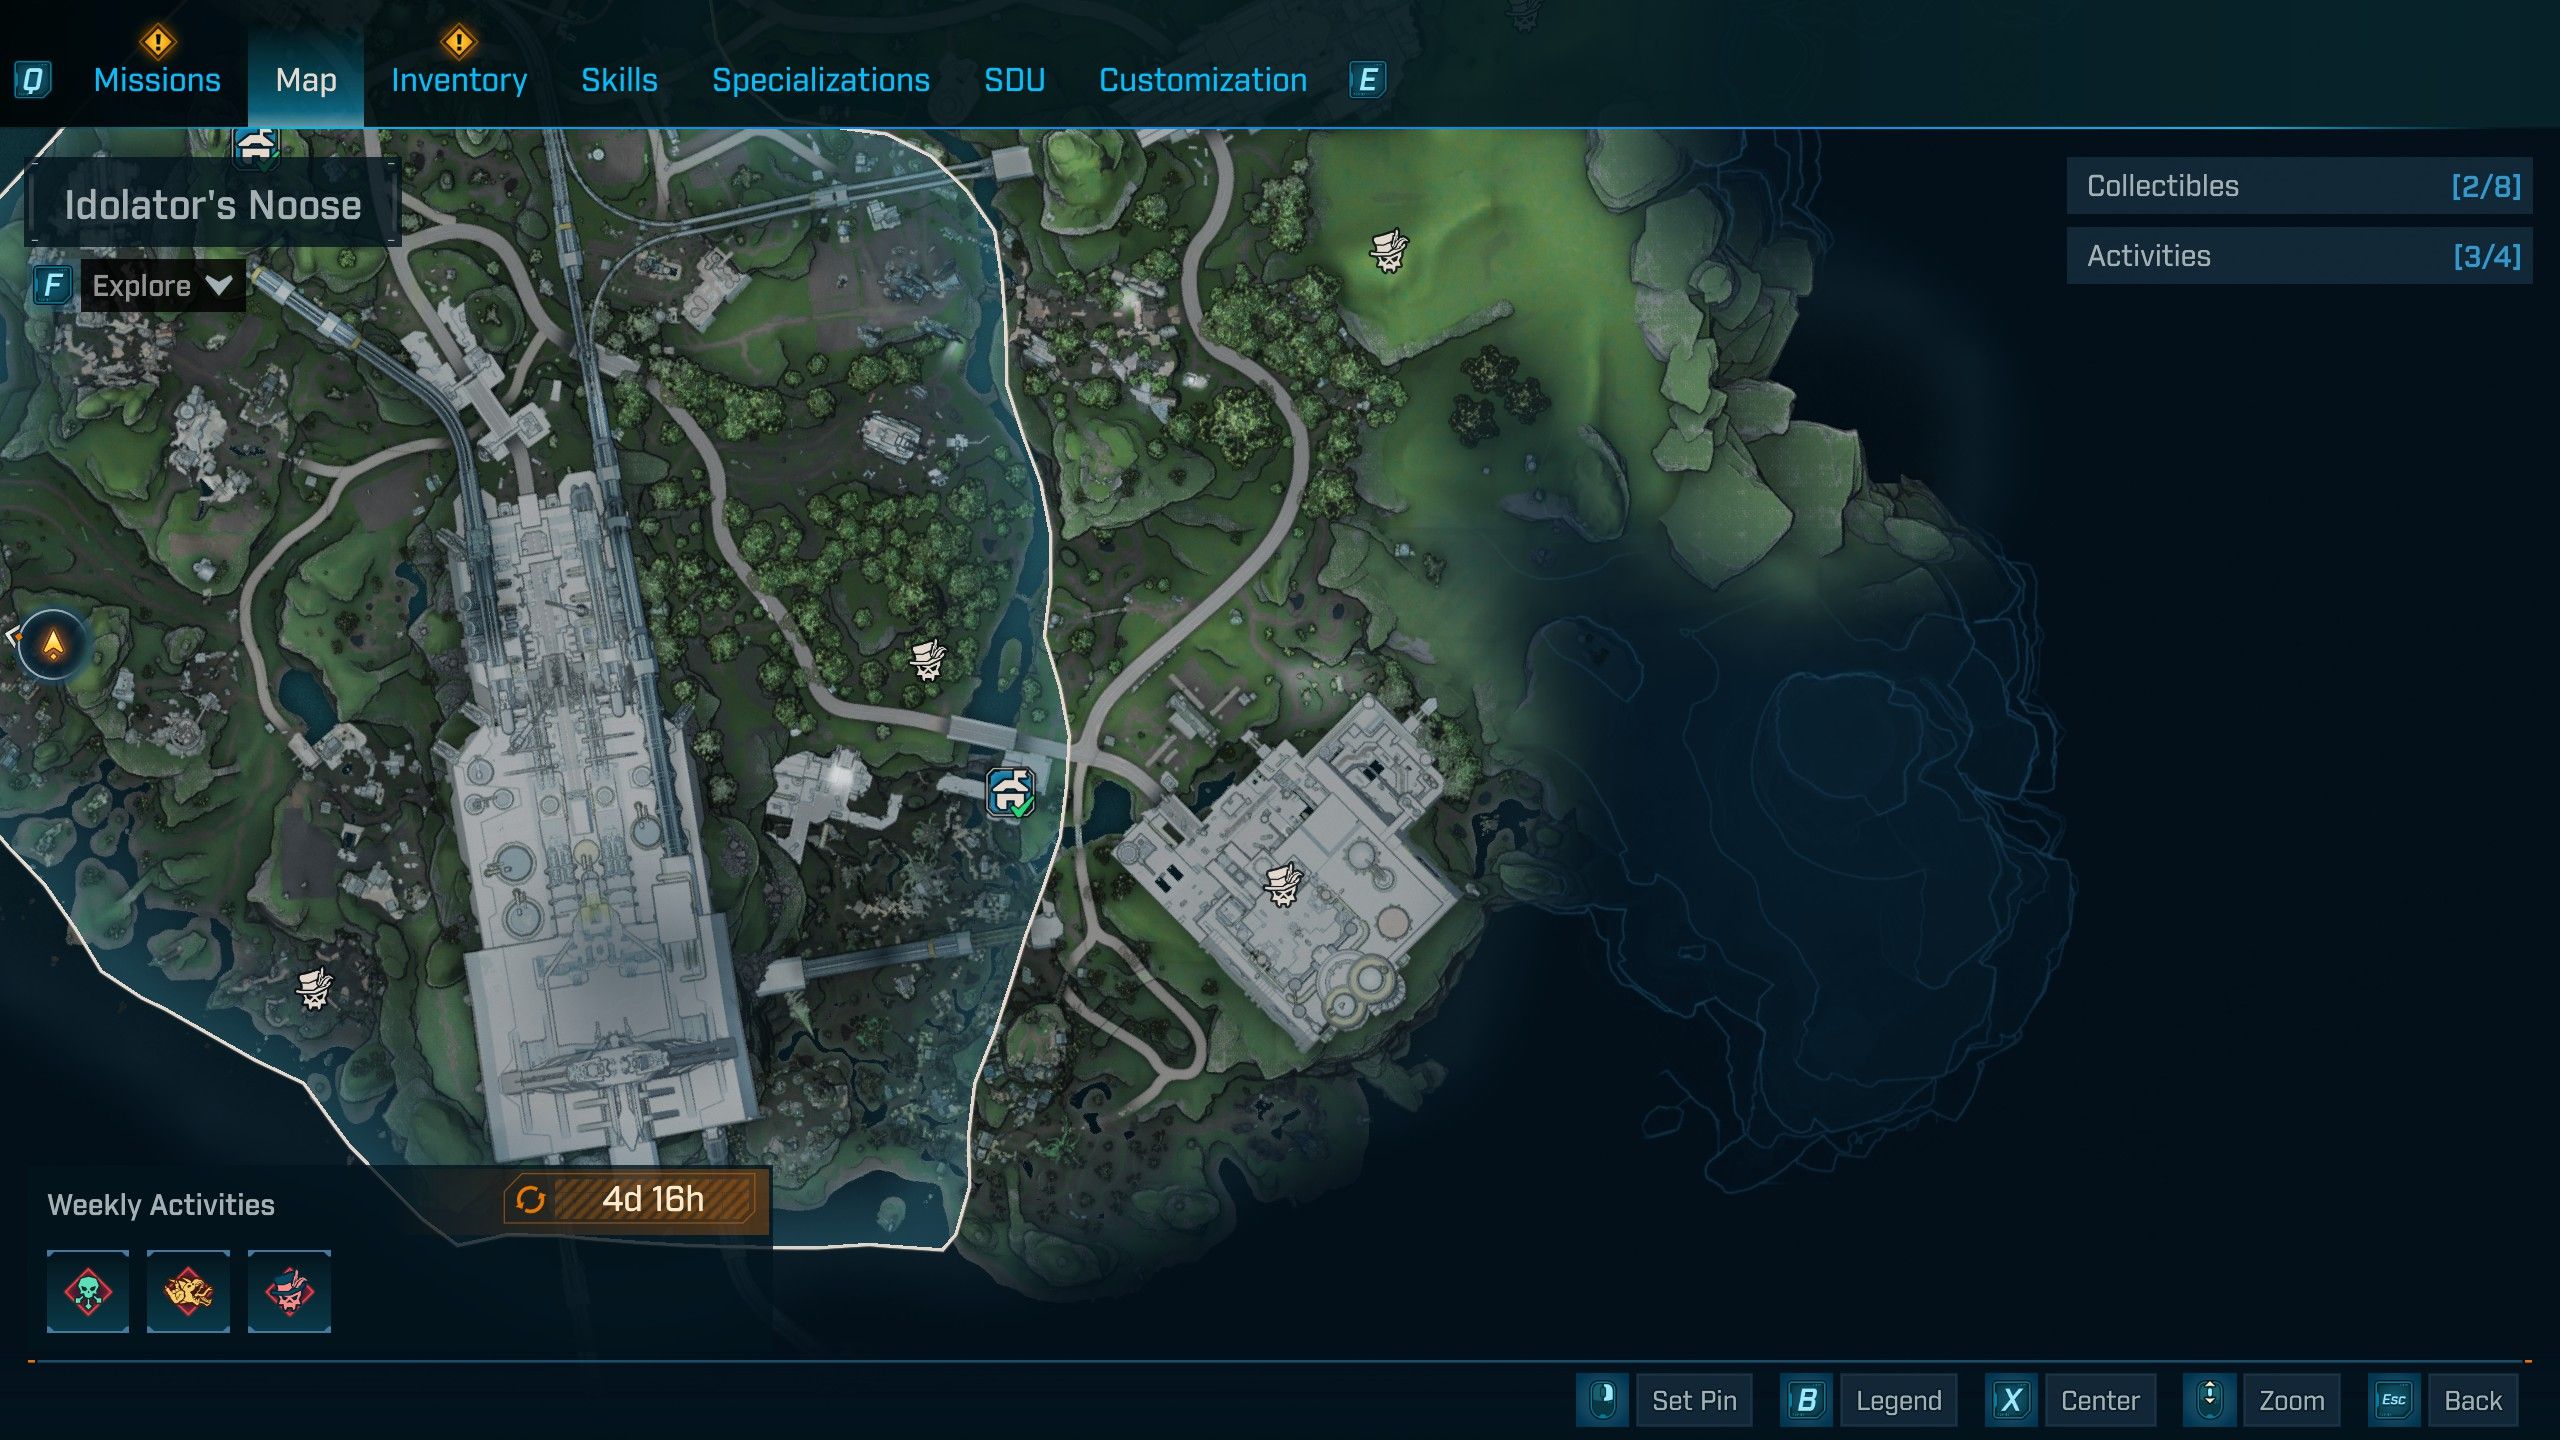
- Location: Idolator’s Noose, The Fadefields
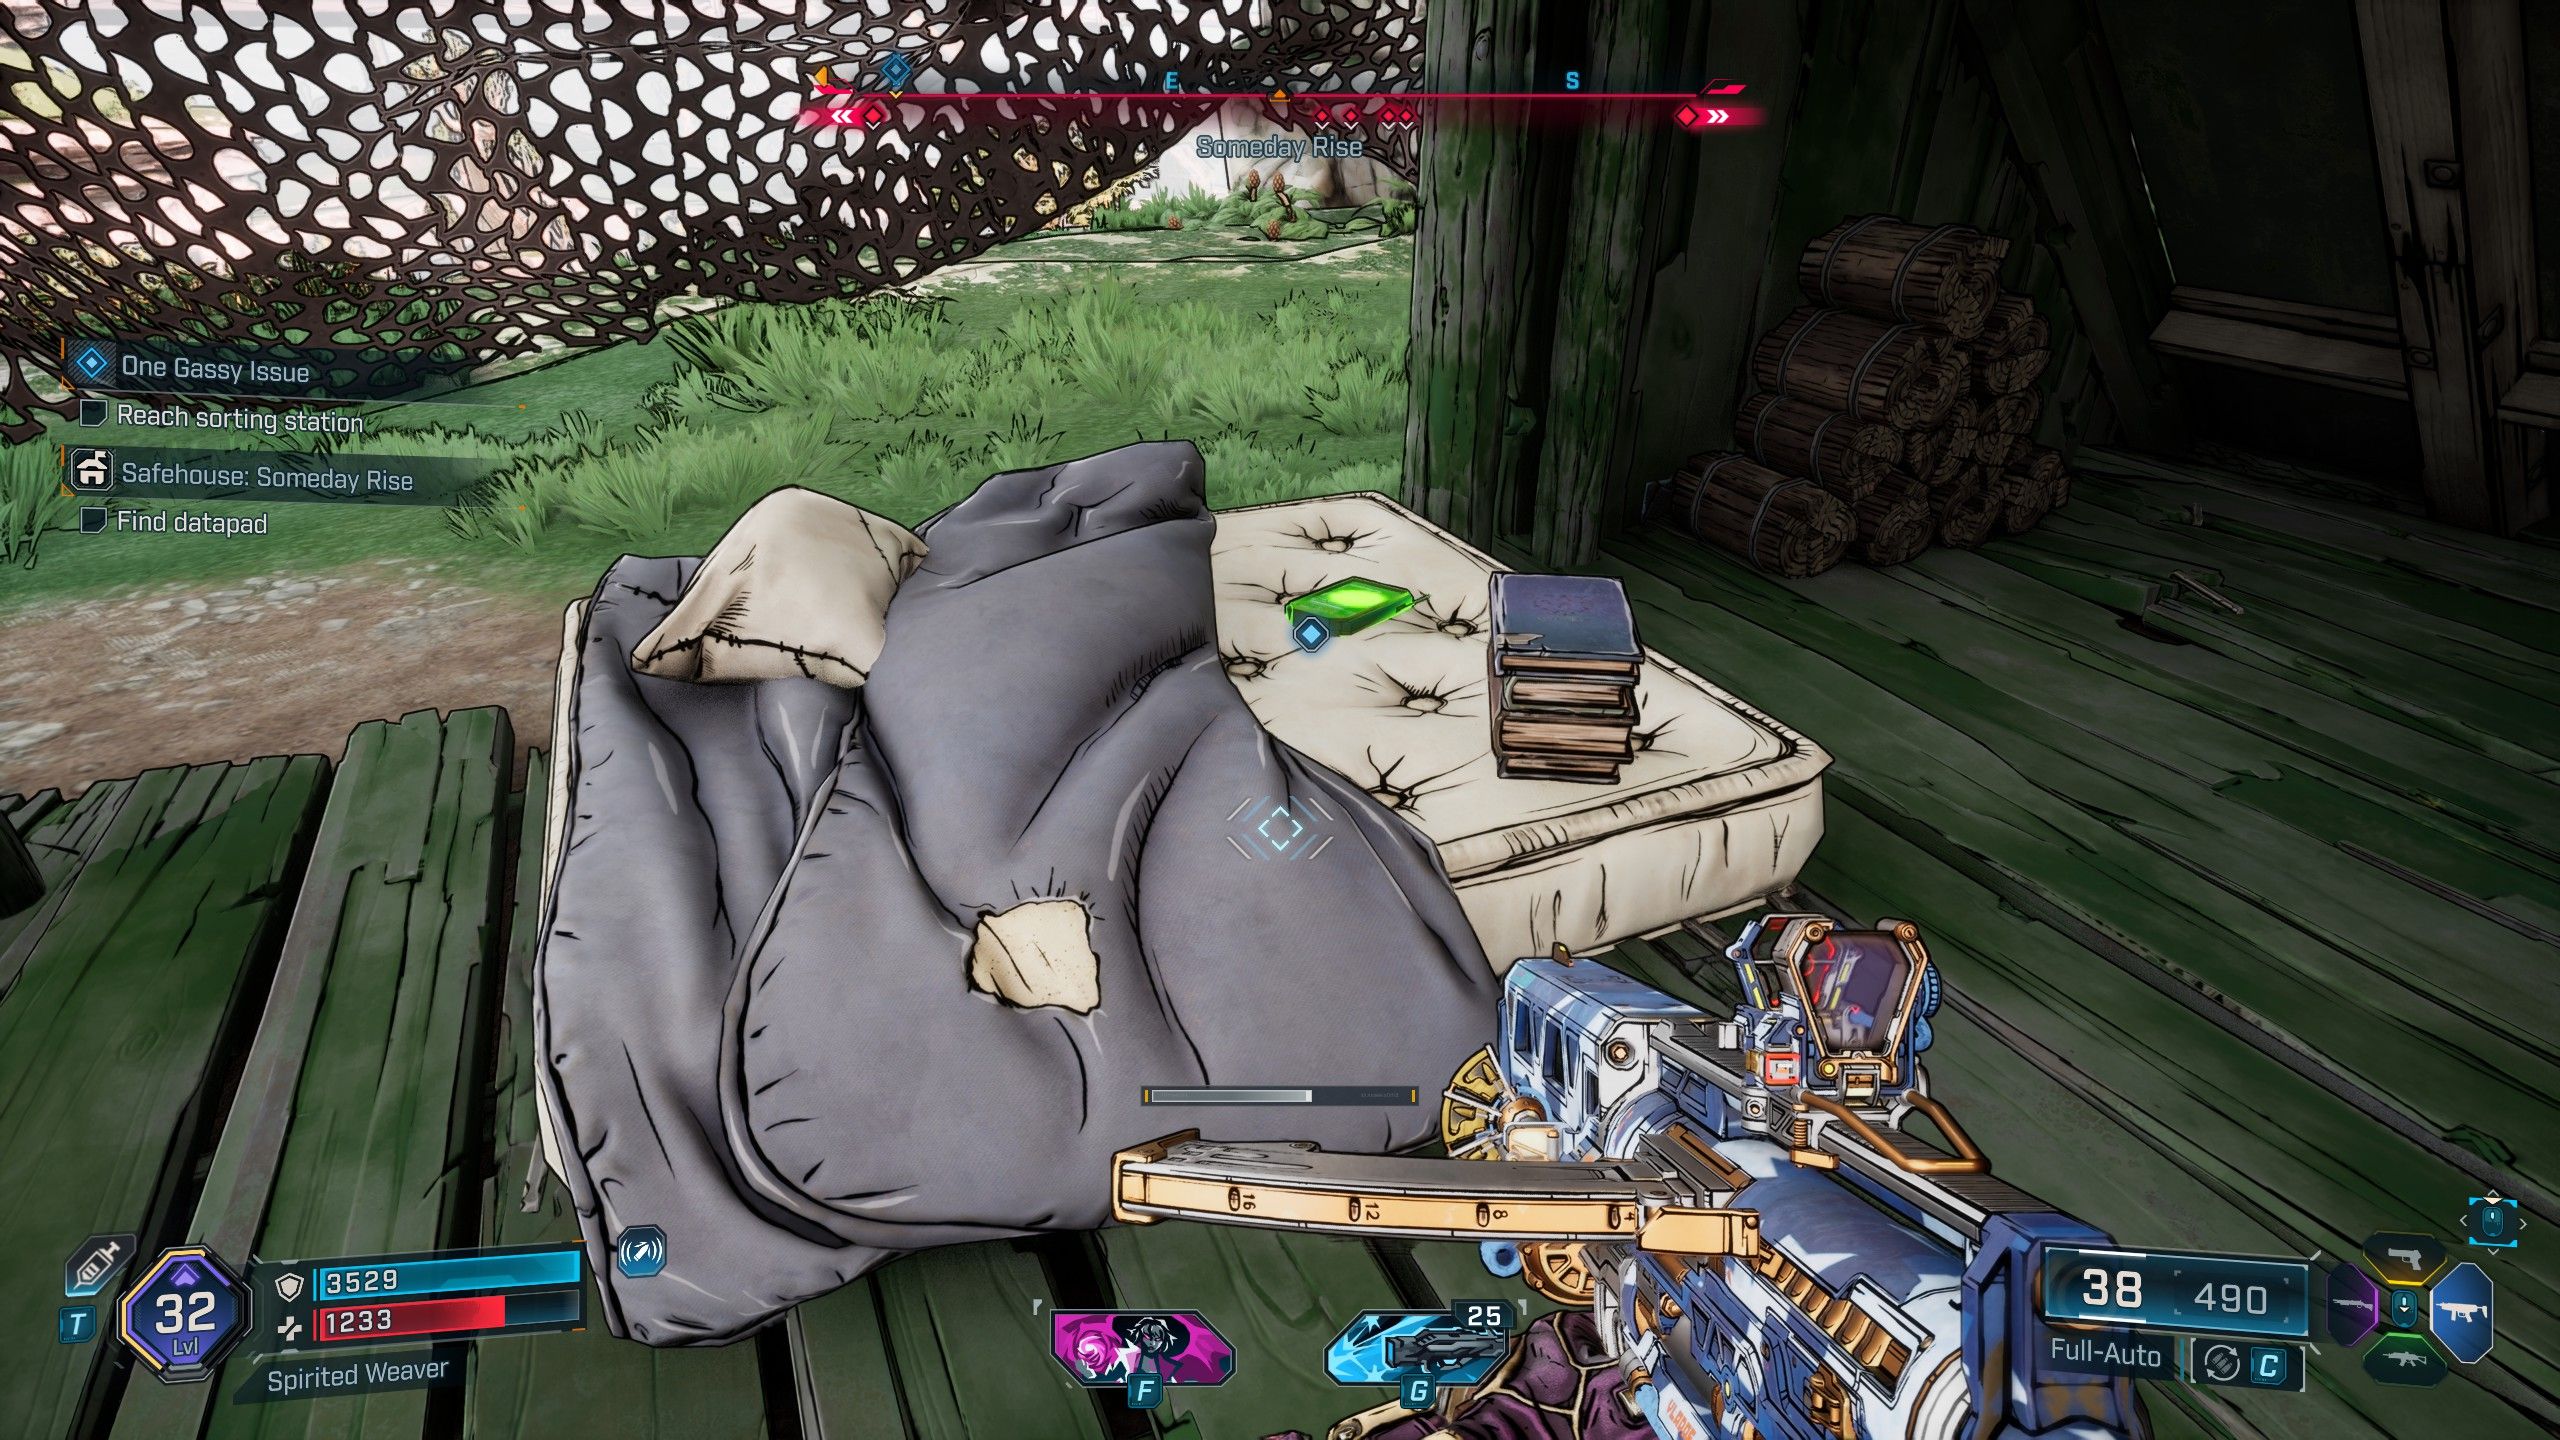
To find the Safehouse, track Someday Rise until you discover a path leading up the mountainside. You’ll be able to climb a ledge and use a grapple to reach it. Be careful, as hostile Manglers are present in the area. Across from the Safehouse, to the left, you’ll find a small campsite with a Datapad resting on a mattress. Collect the Datapad, return to the now-unlocked Safehouse, and activate the Command Console located on the north wall.
Wyclef’s Reprieve Safehouse & Datapad Location
How to Get the Wyclef’s Reprieve Safehouse
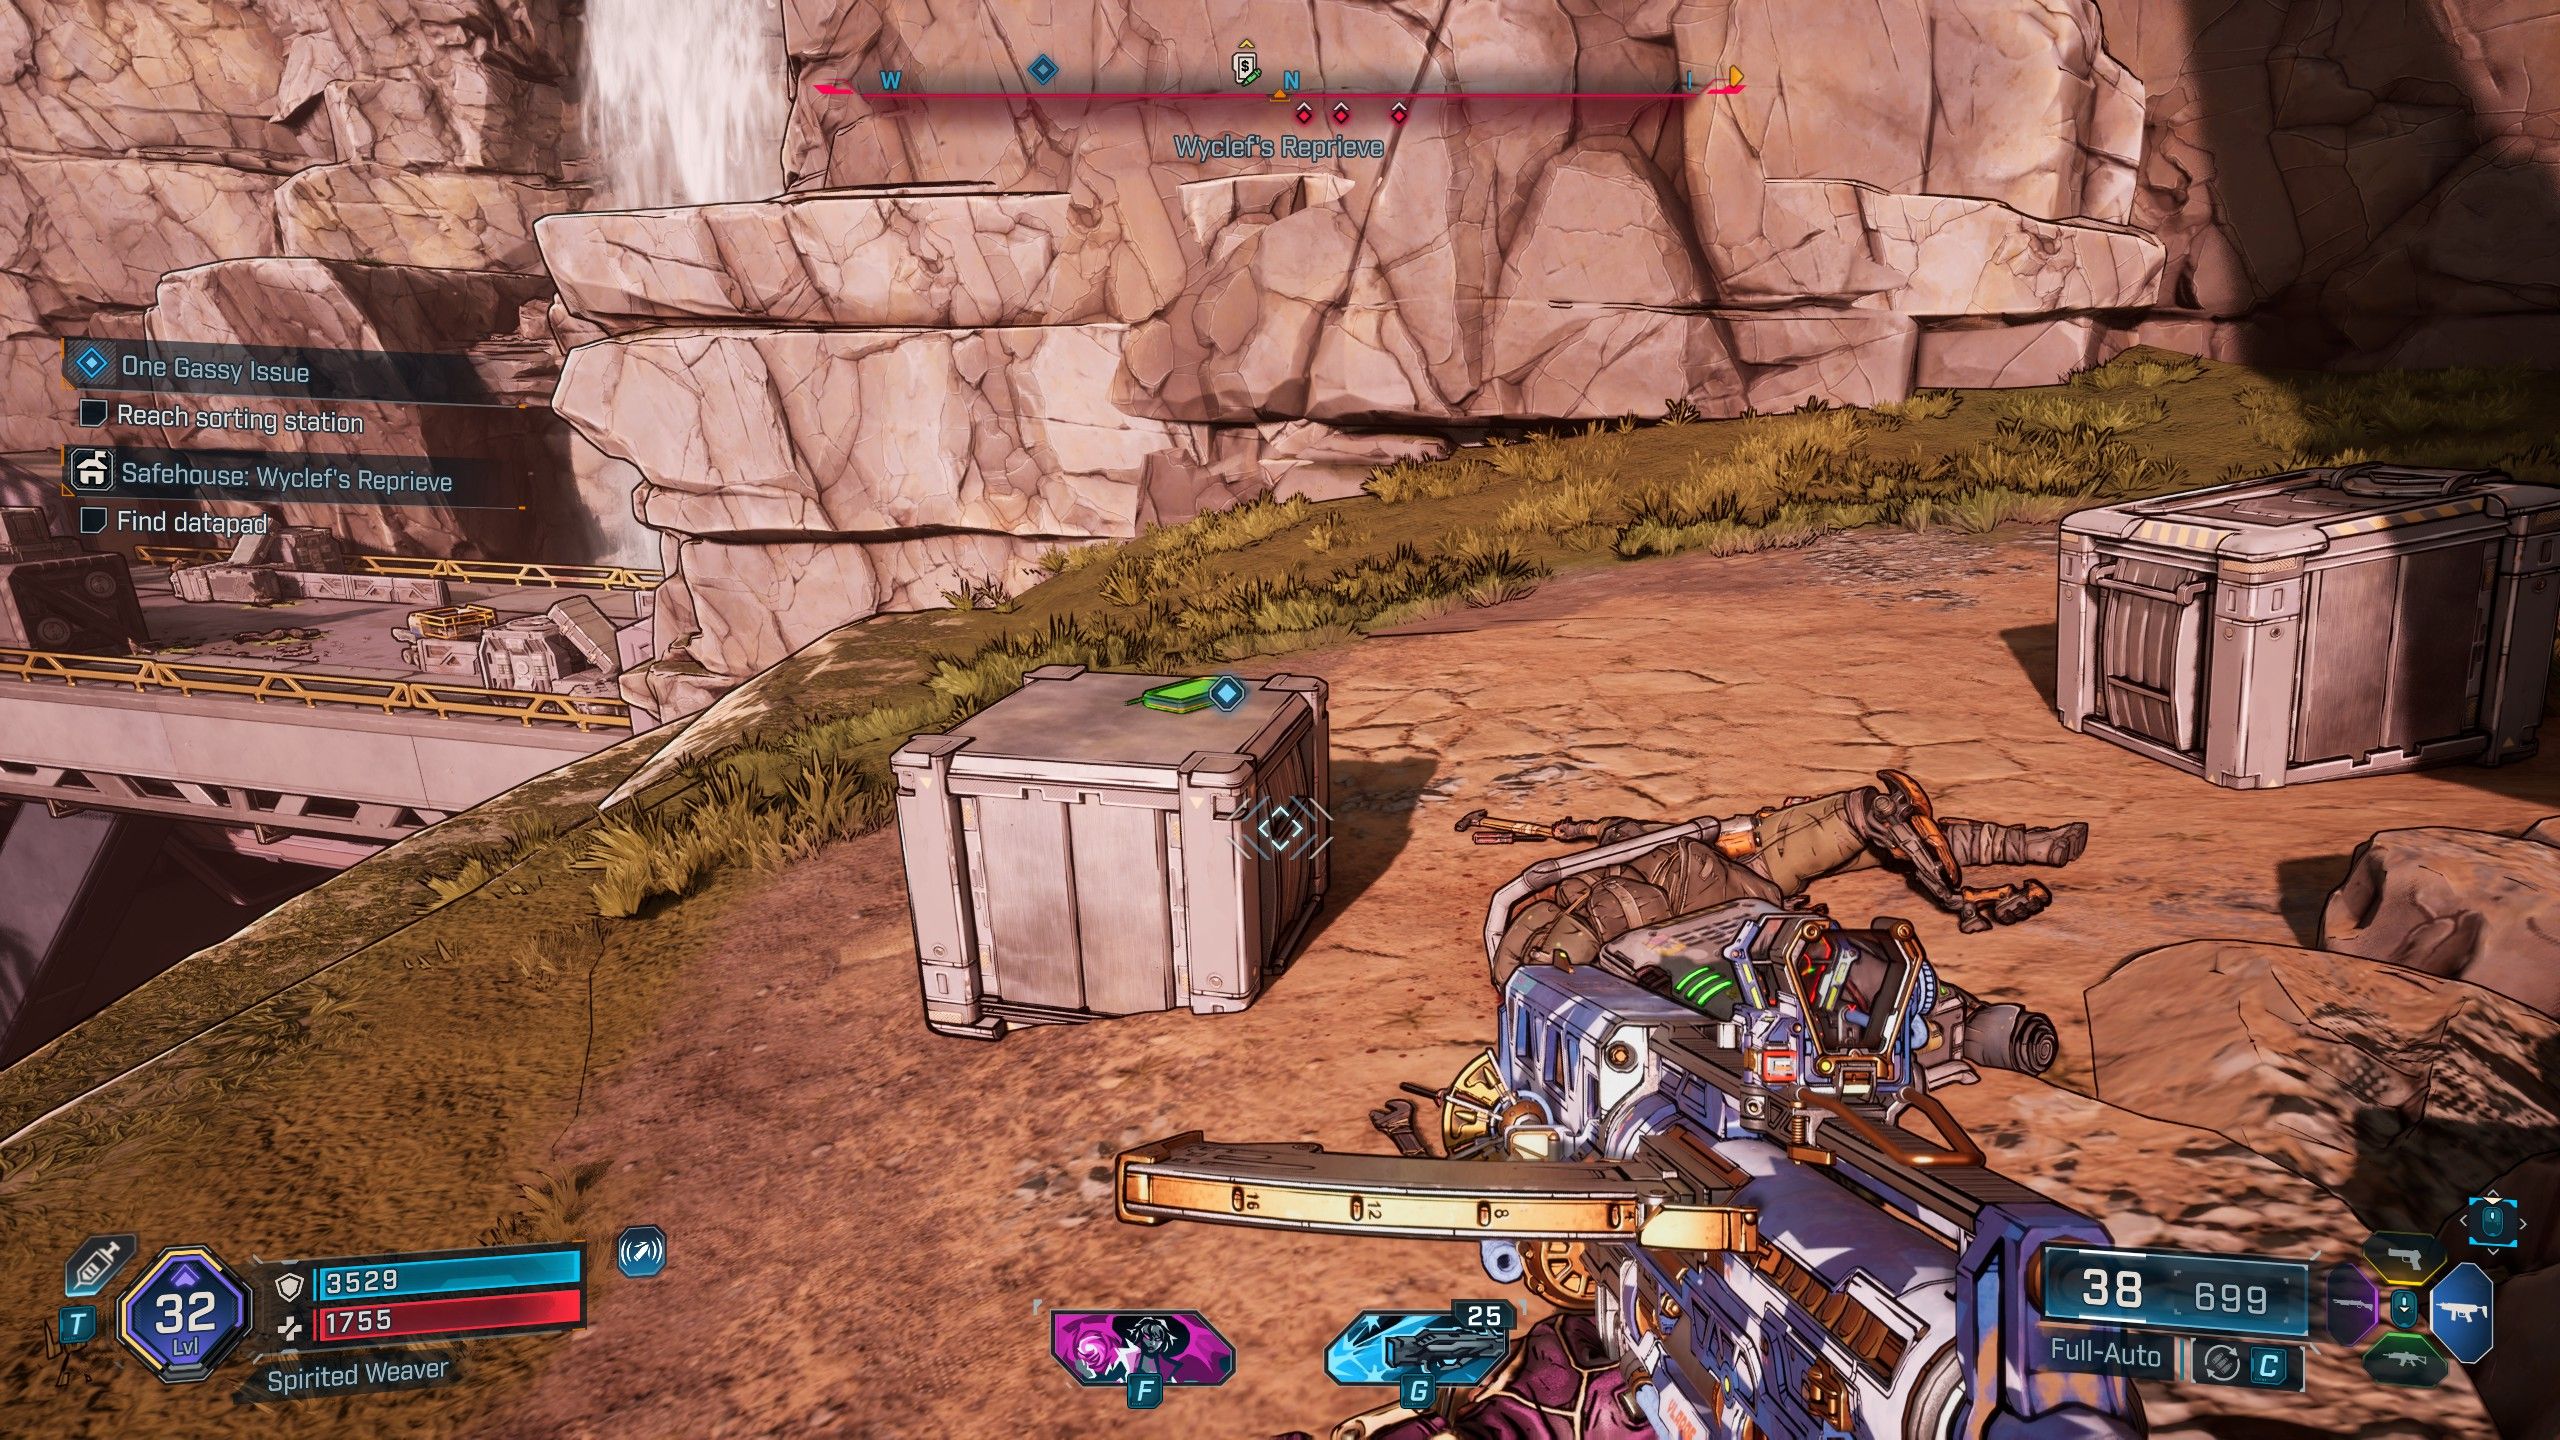
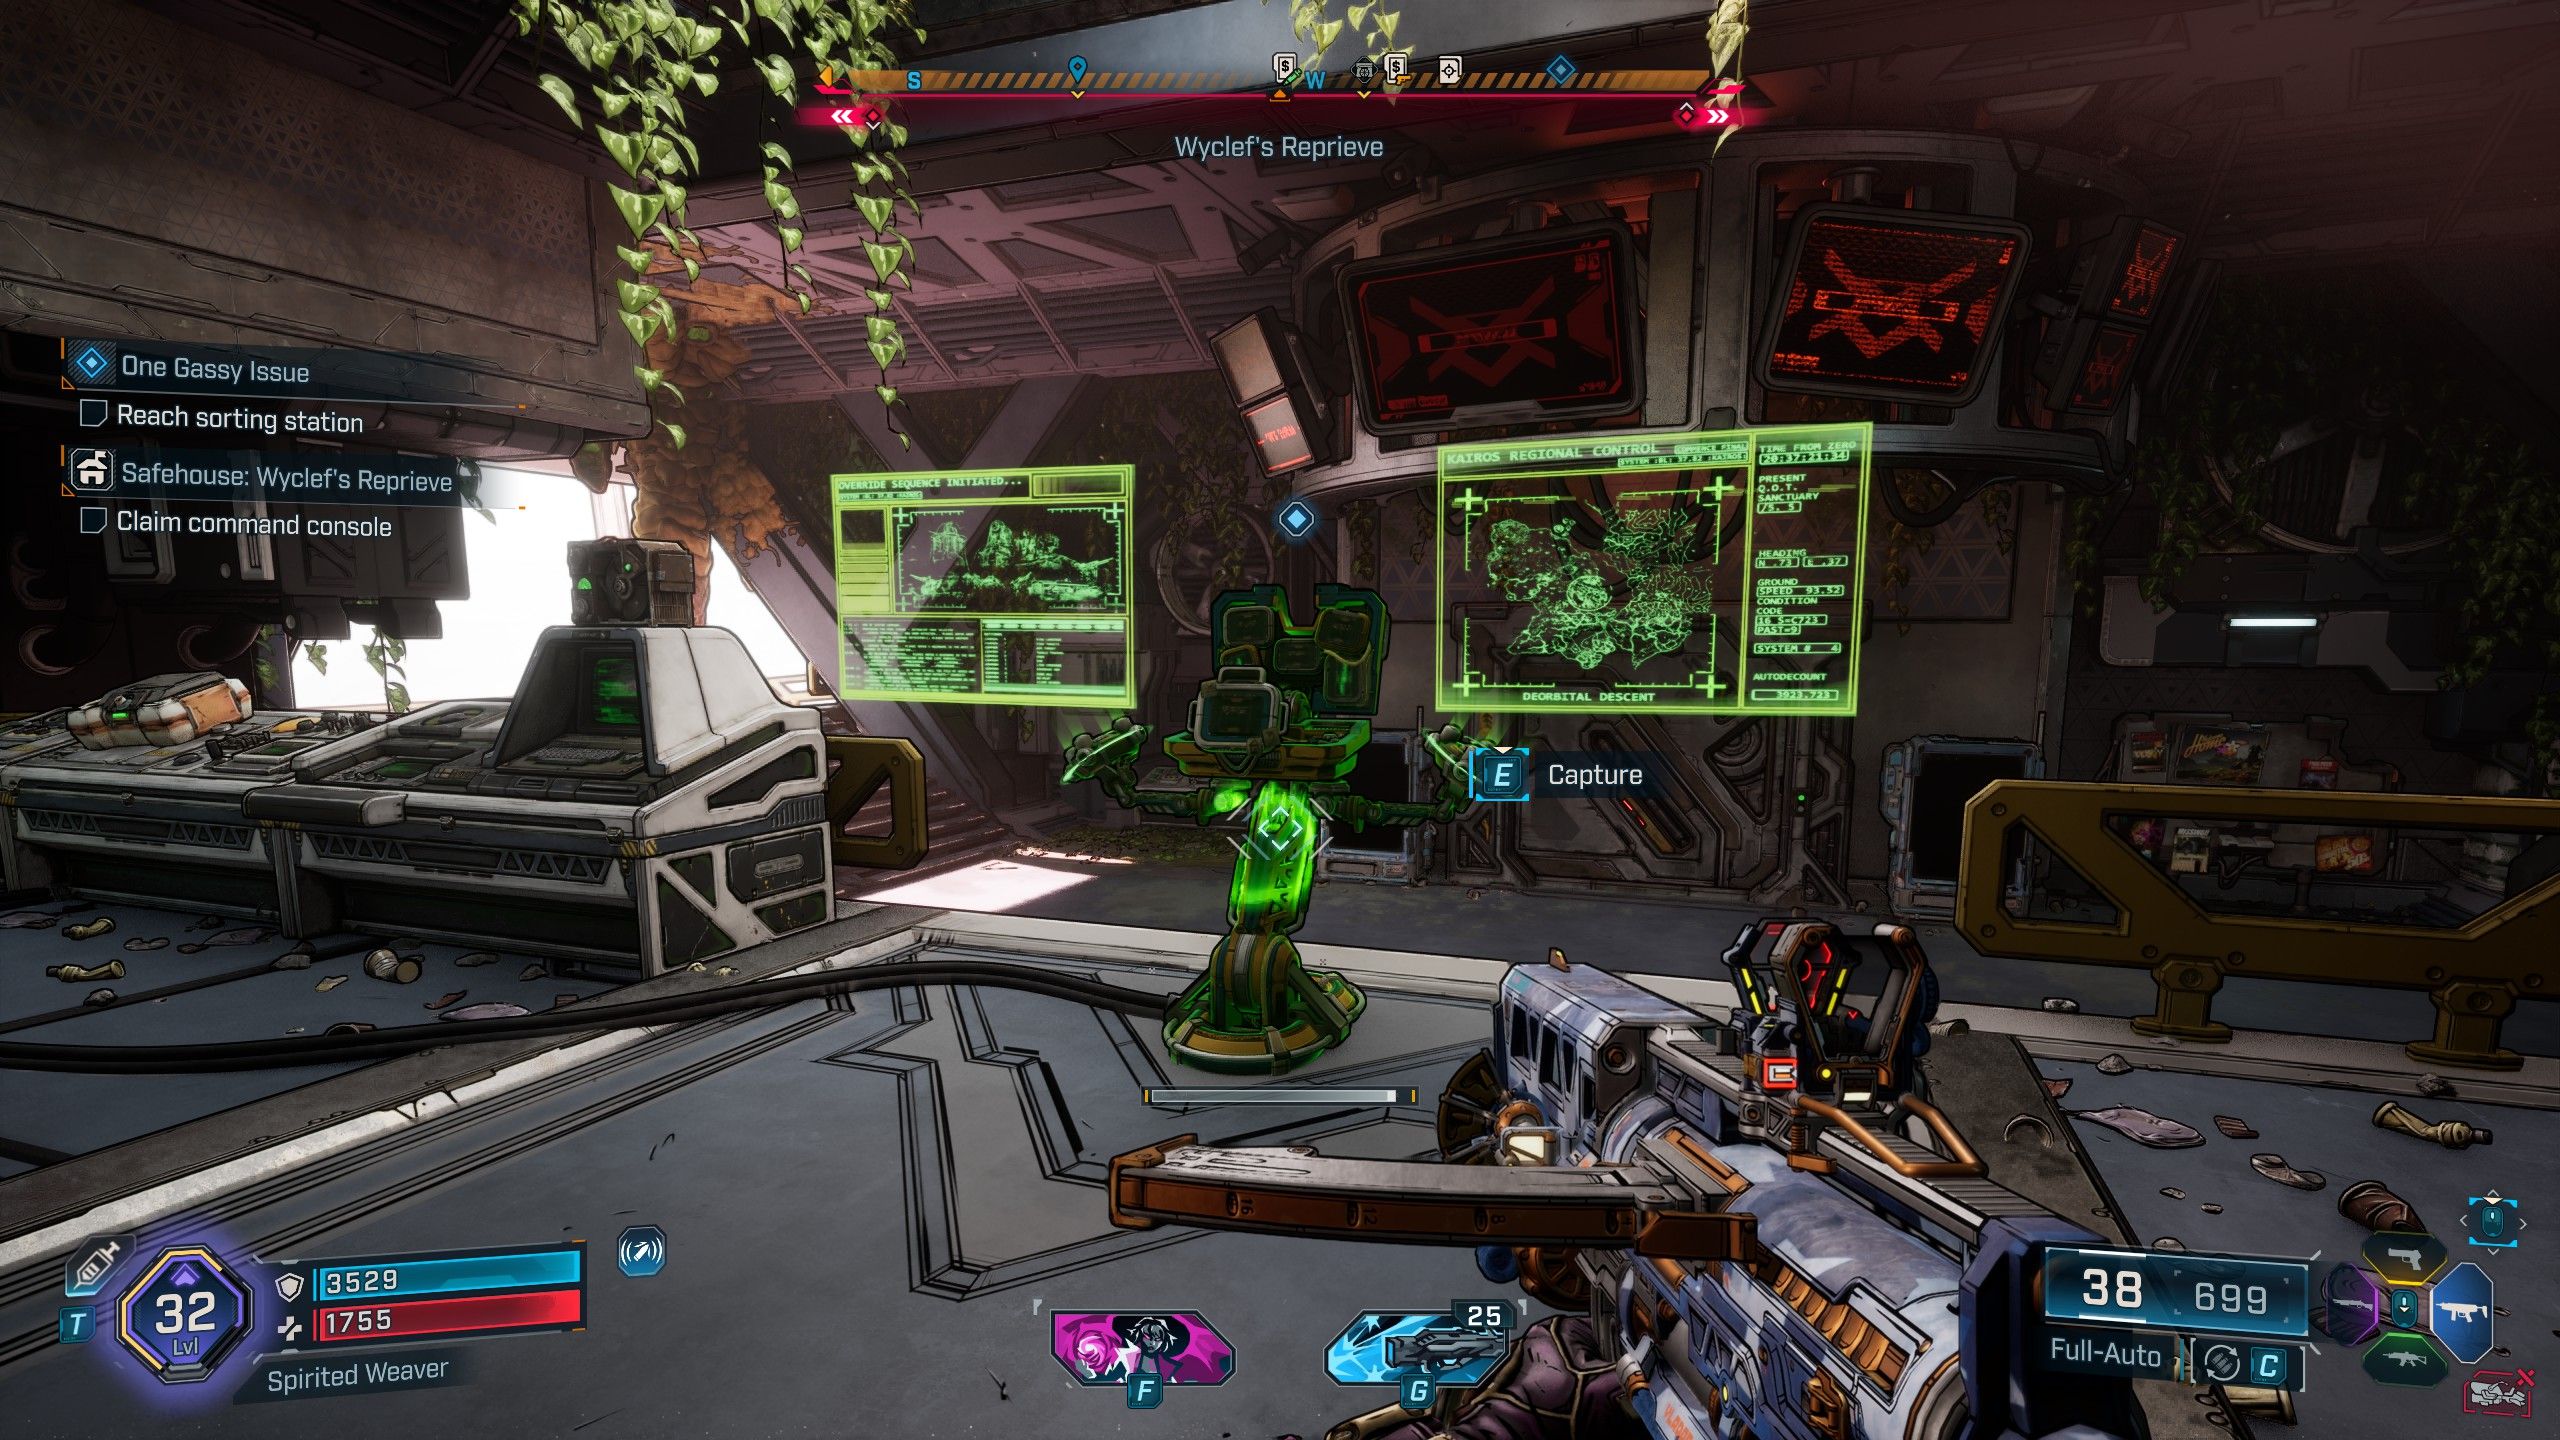
- Location: Idolator’s Noose, The Fadefields
To get inside Wyclef’s Reprieve, the door should open automatically. If it doesn’t, take the path to the left and follow it down. Once inside, jump down to the cliffside where you’ll find a crashed moon rock. The Datapad is on a metal box near the moon rock. After getting the Datapad, head back up to Wyclef’s Reprieve using the eastern path. You’ll find the Command Console on the south wall of the Safehouse and can activate it there.
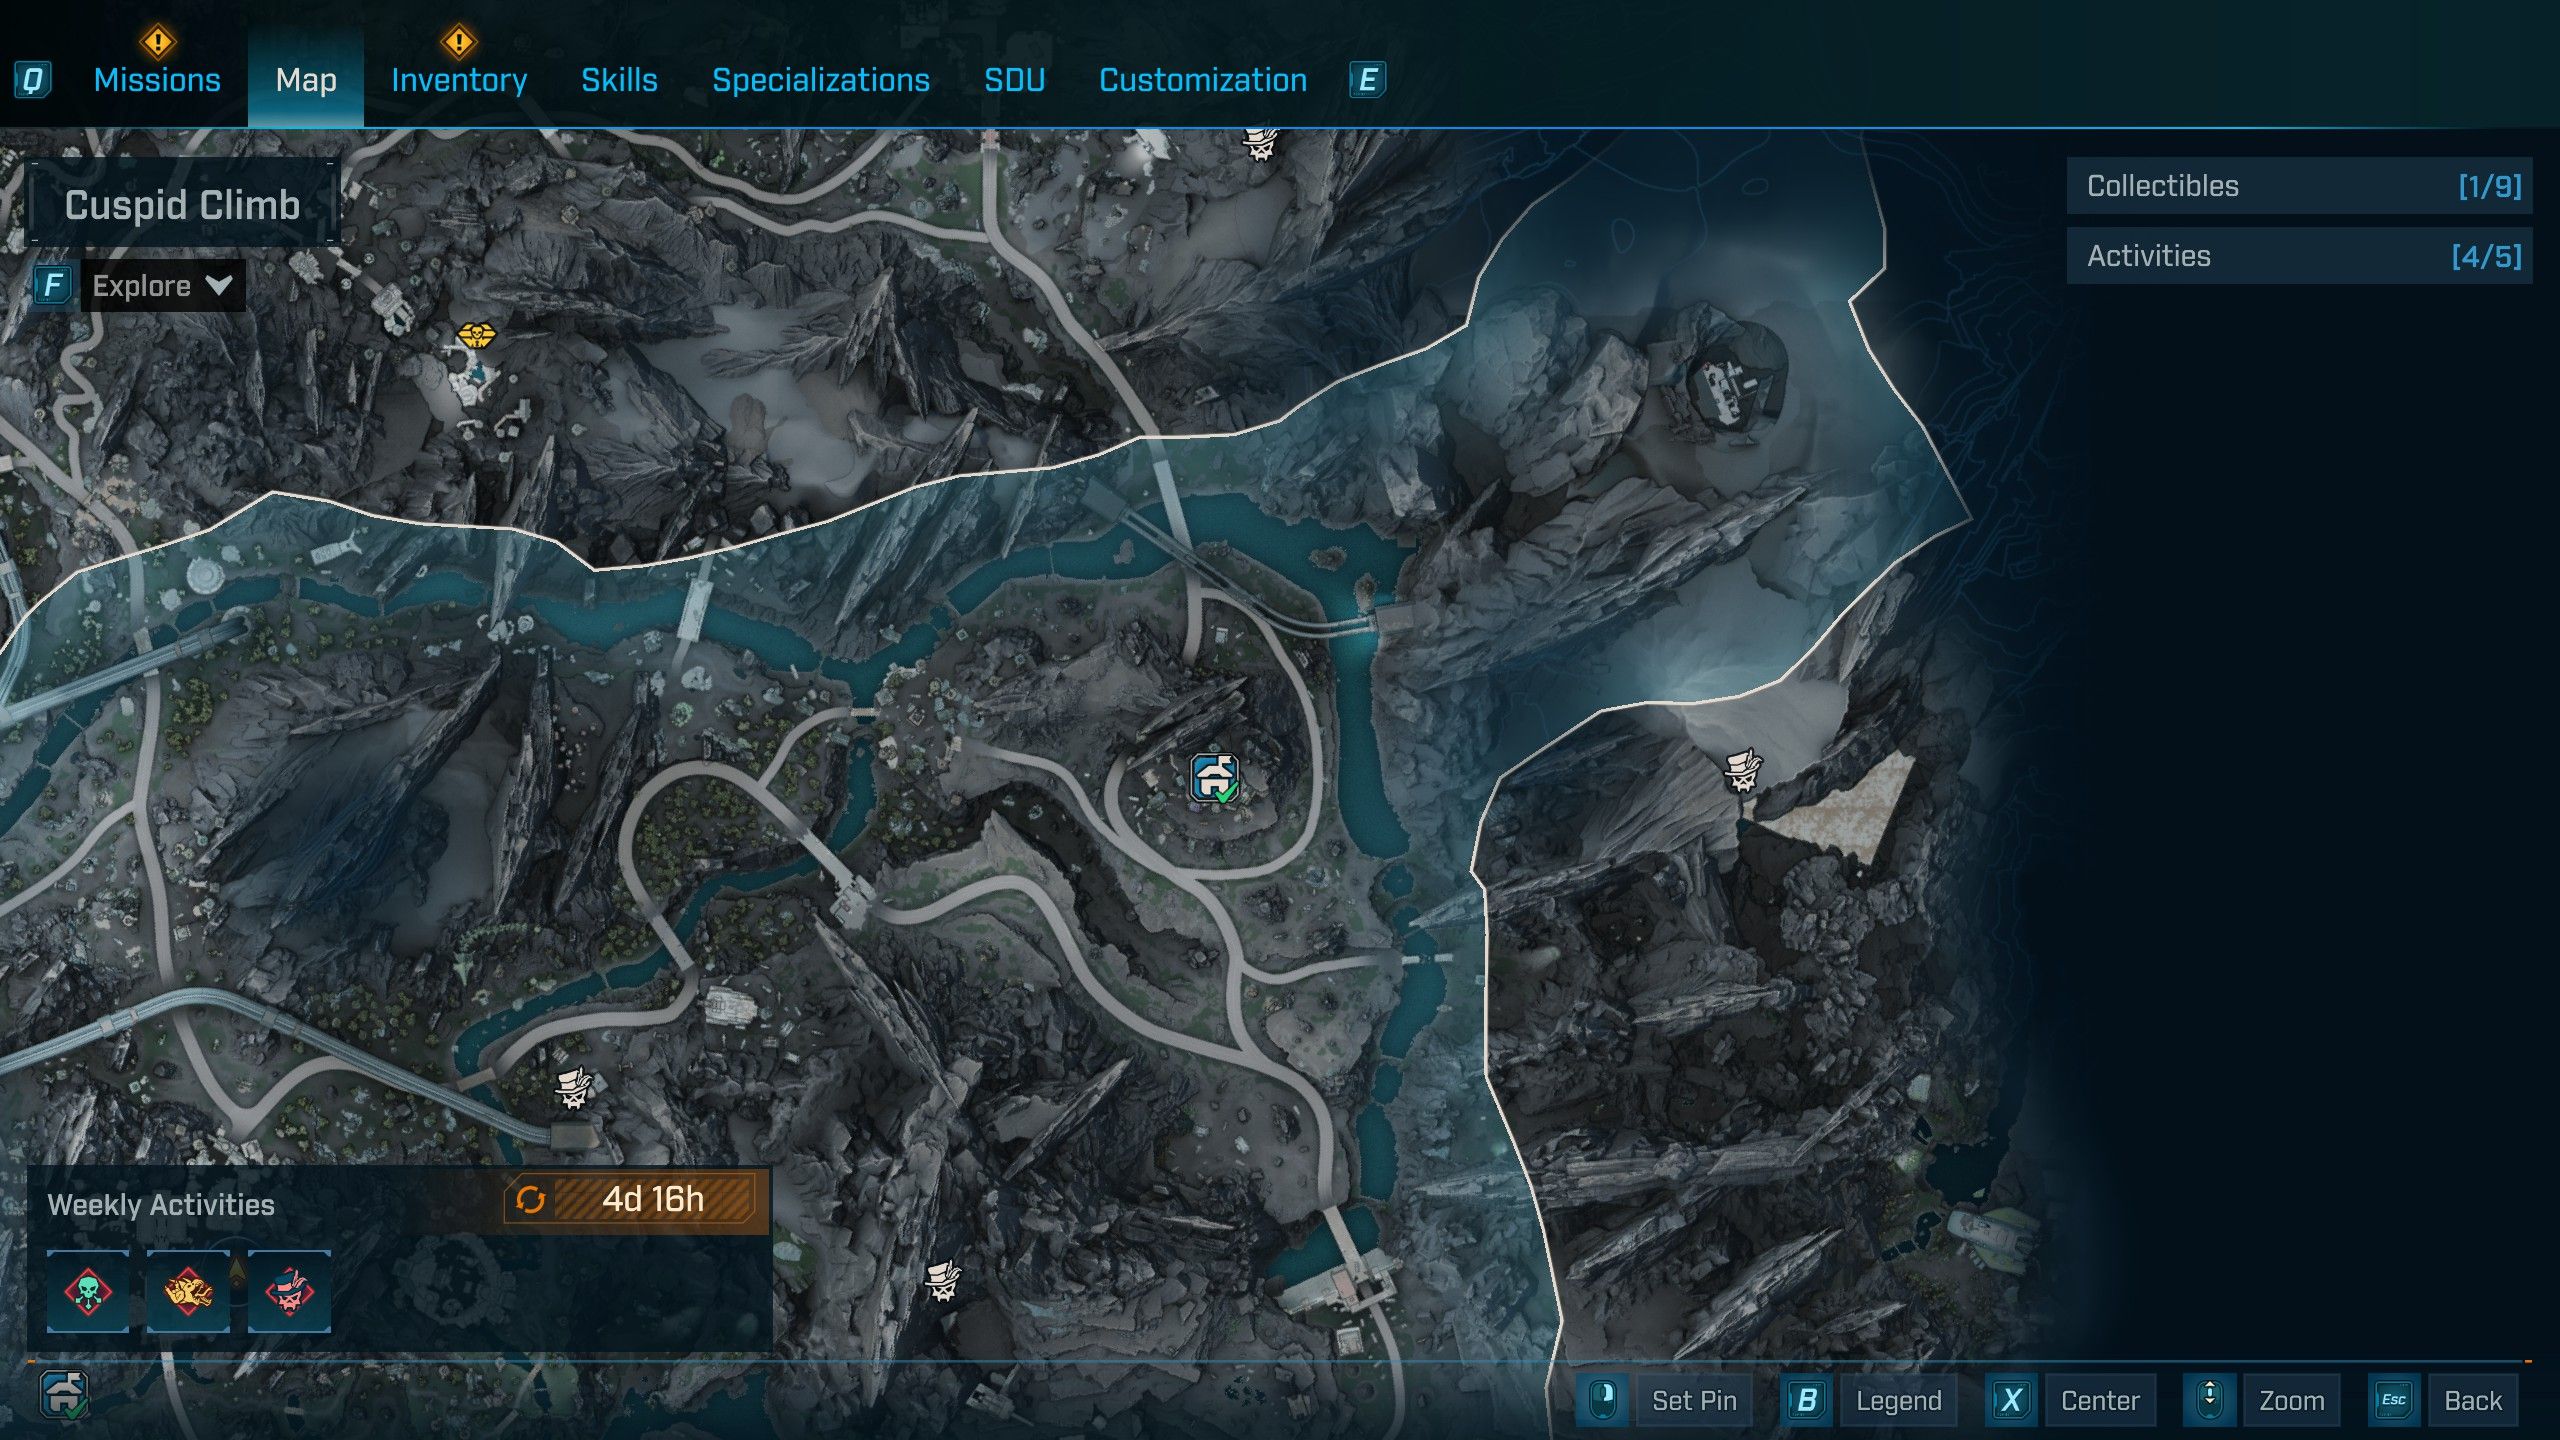
Grey Havenage Safehouse & Datapad Location
How to Get the Grey Havenage Safehouse
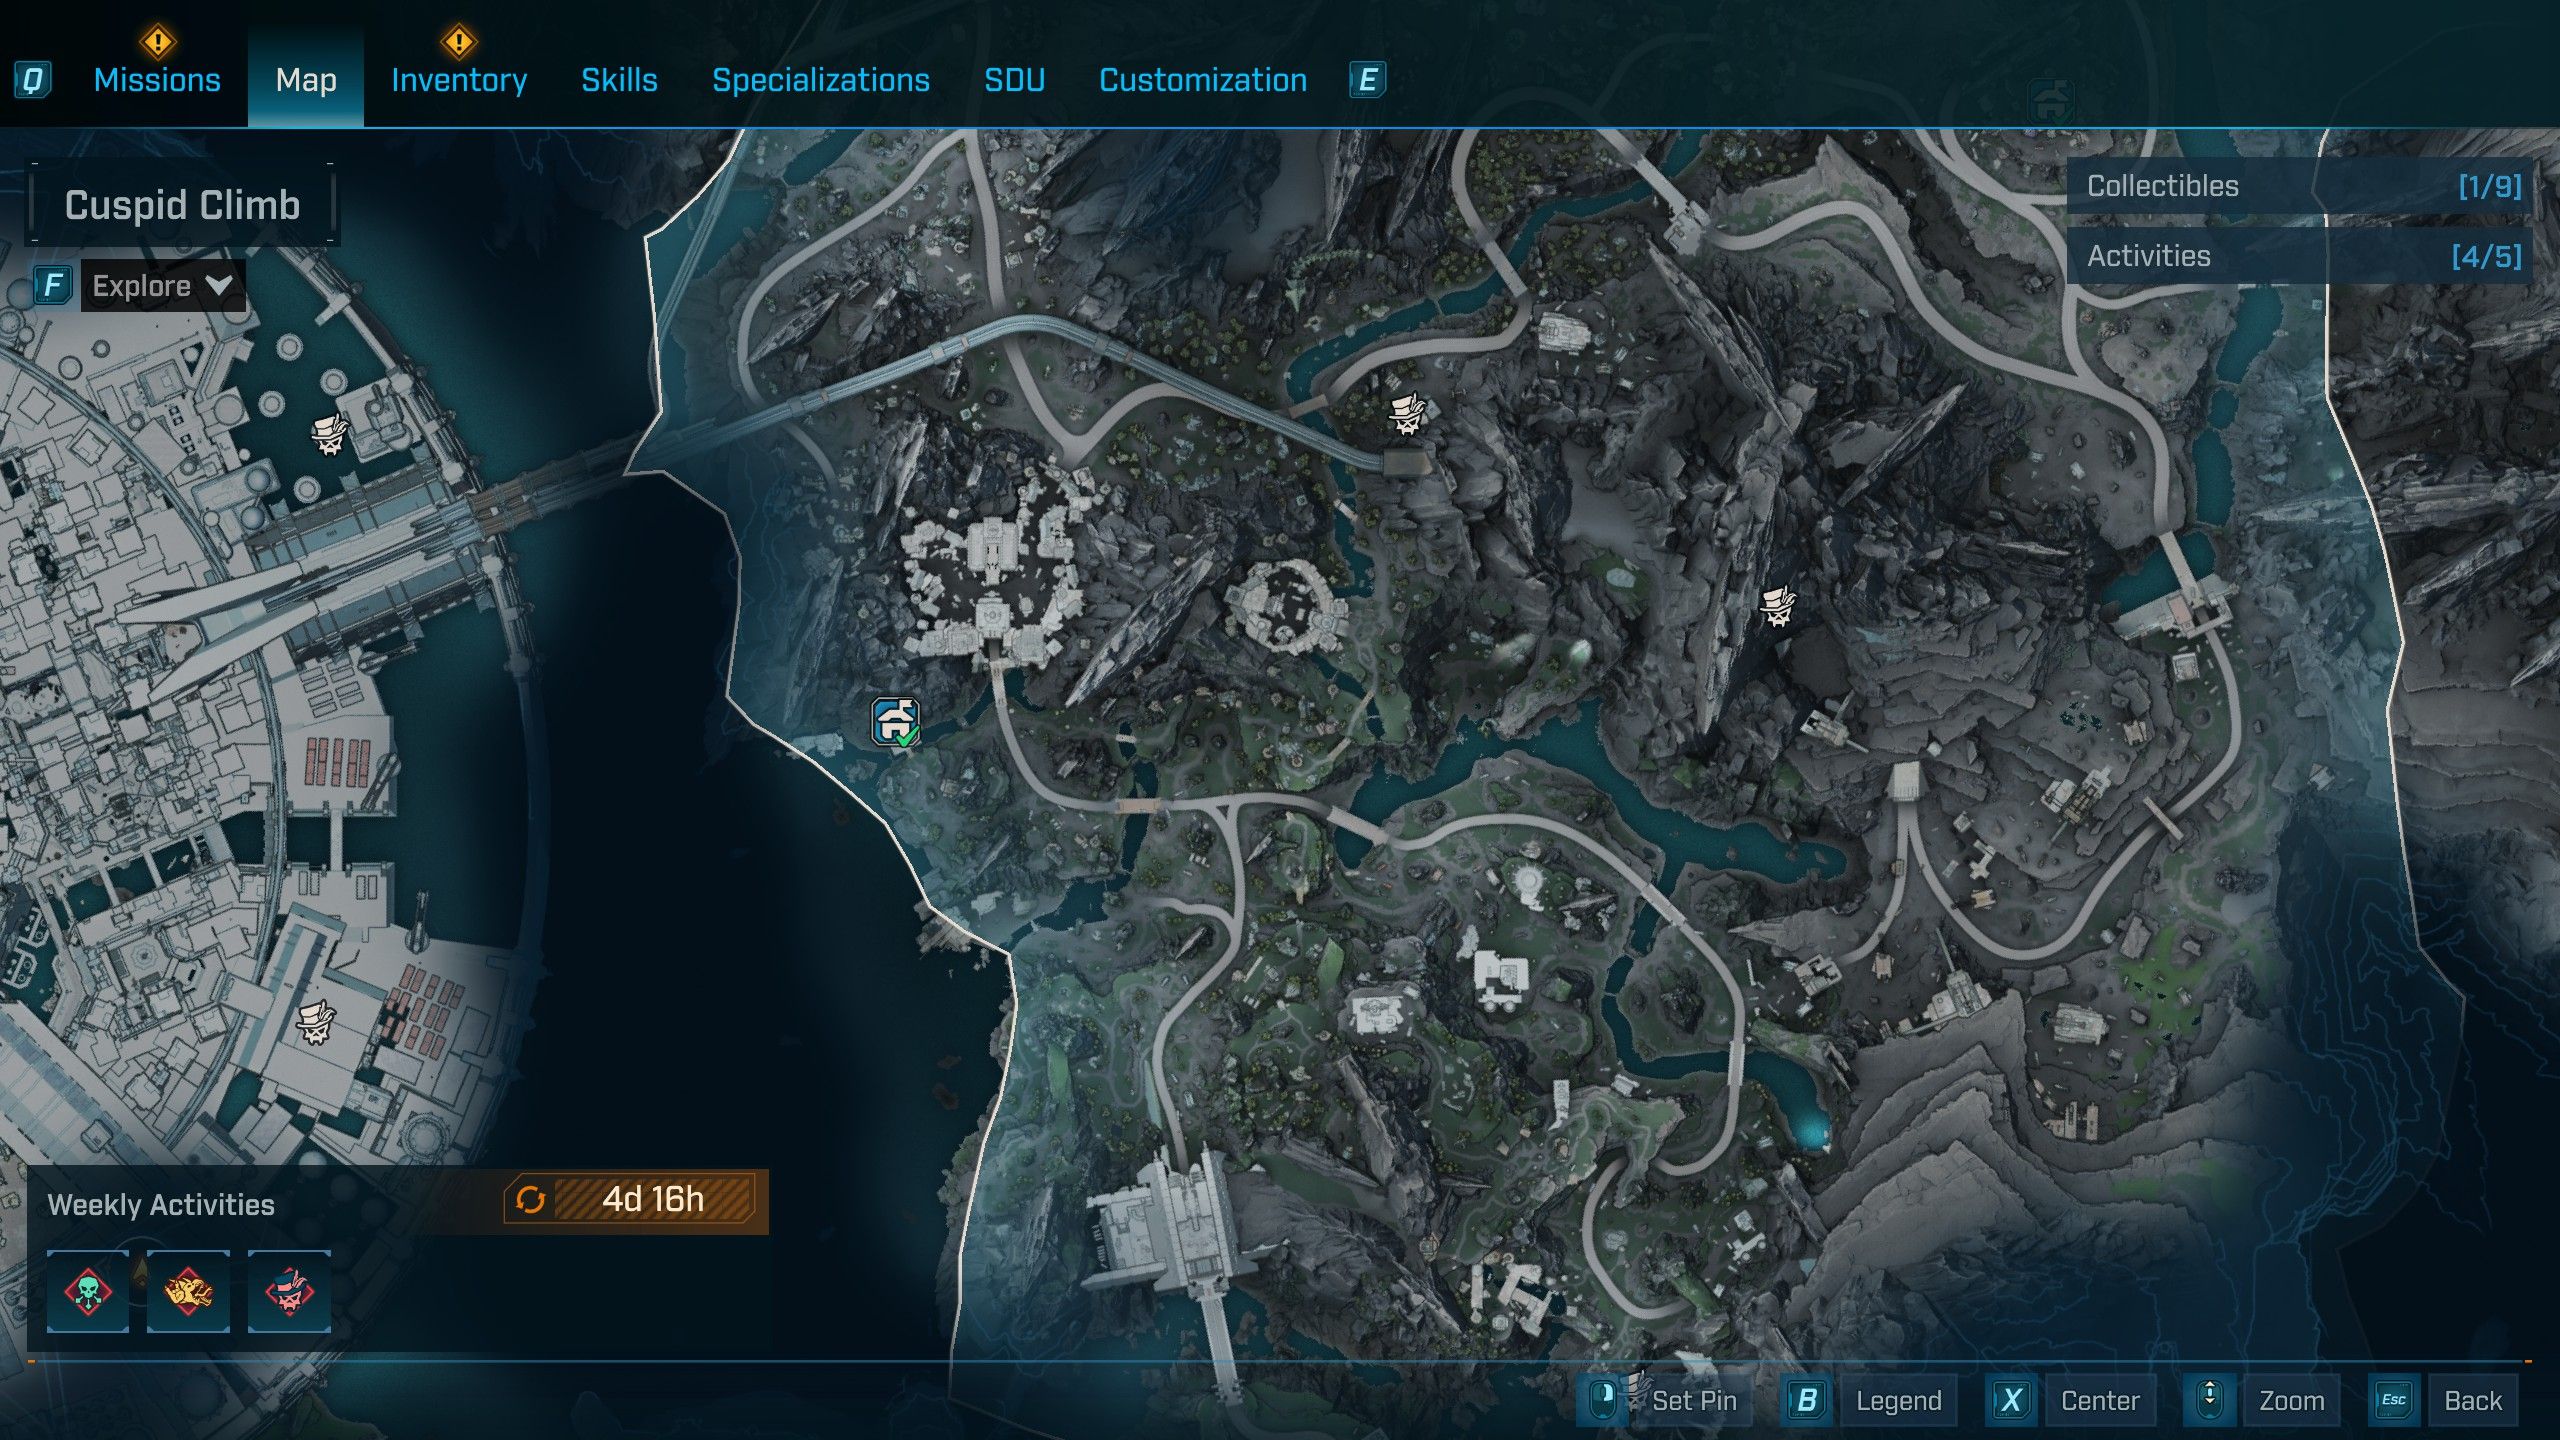
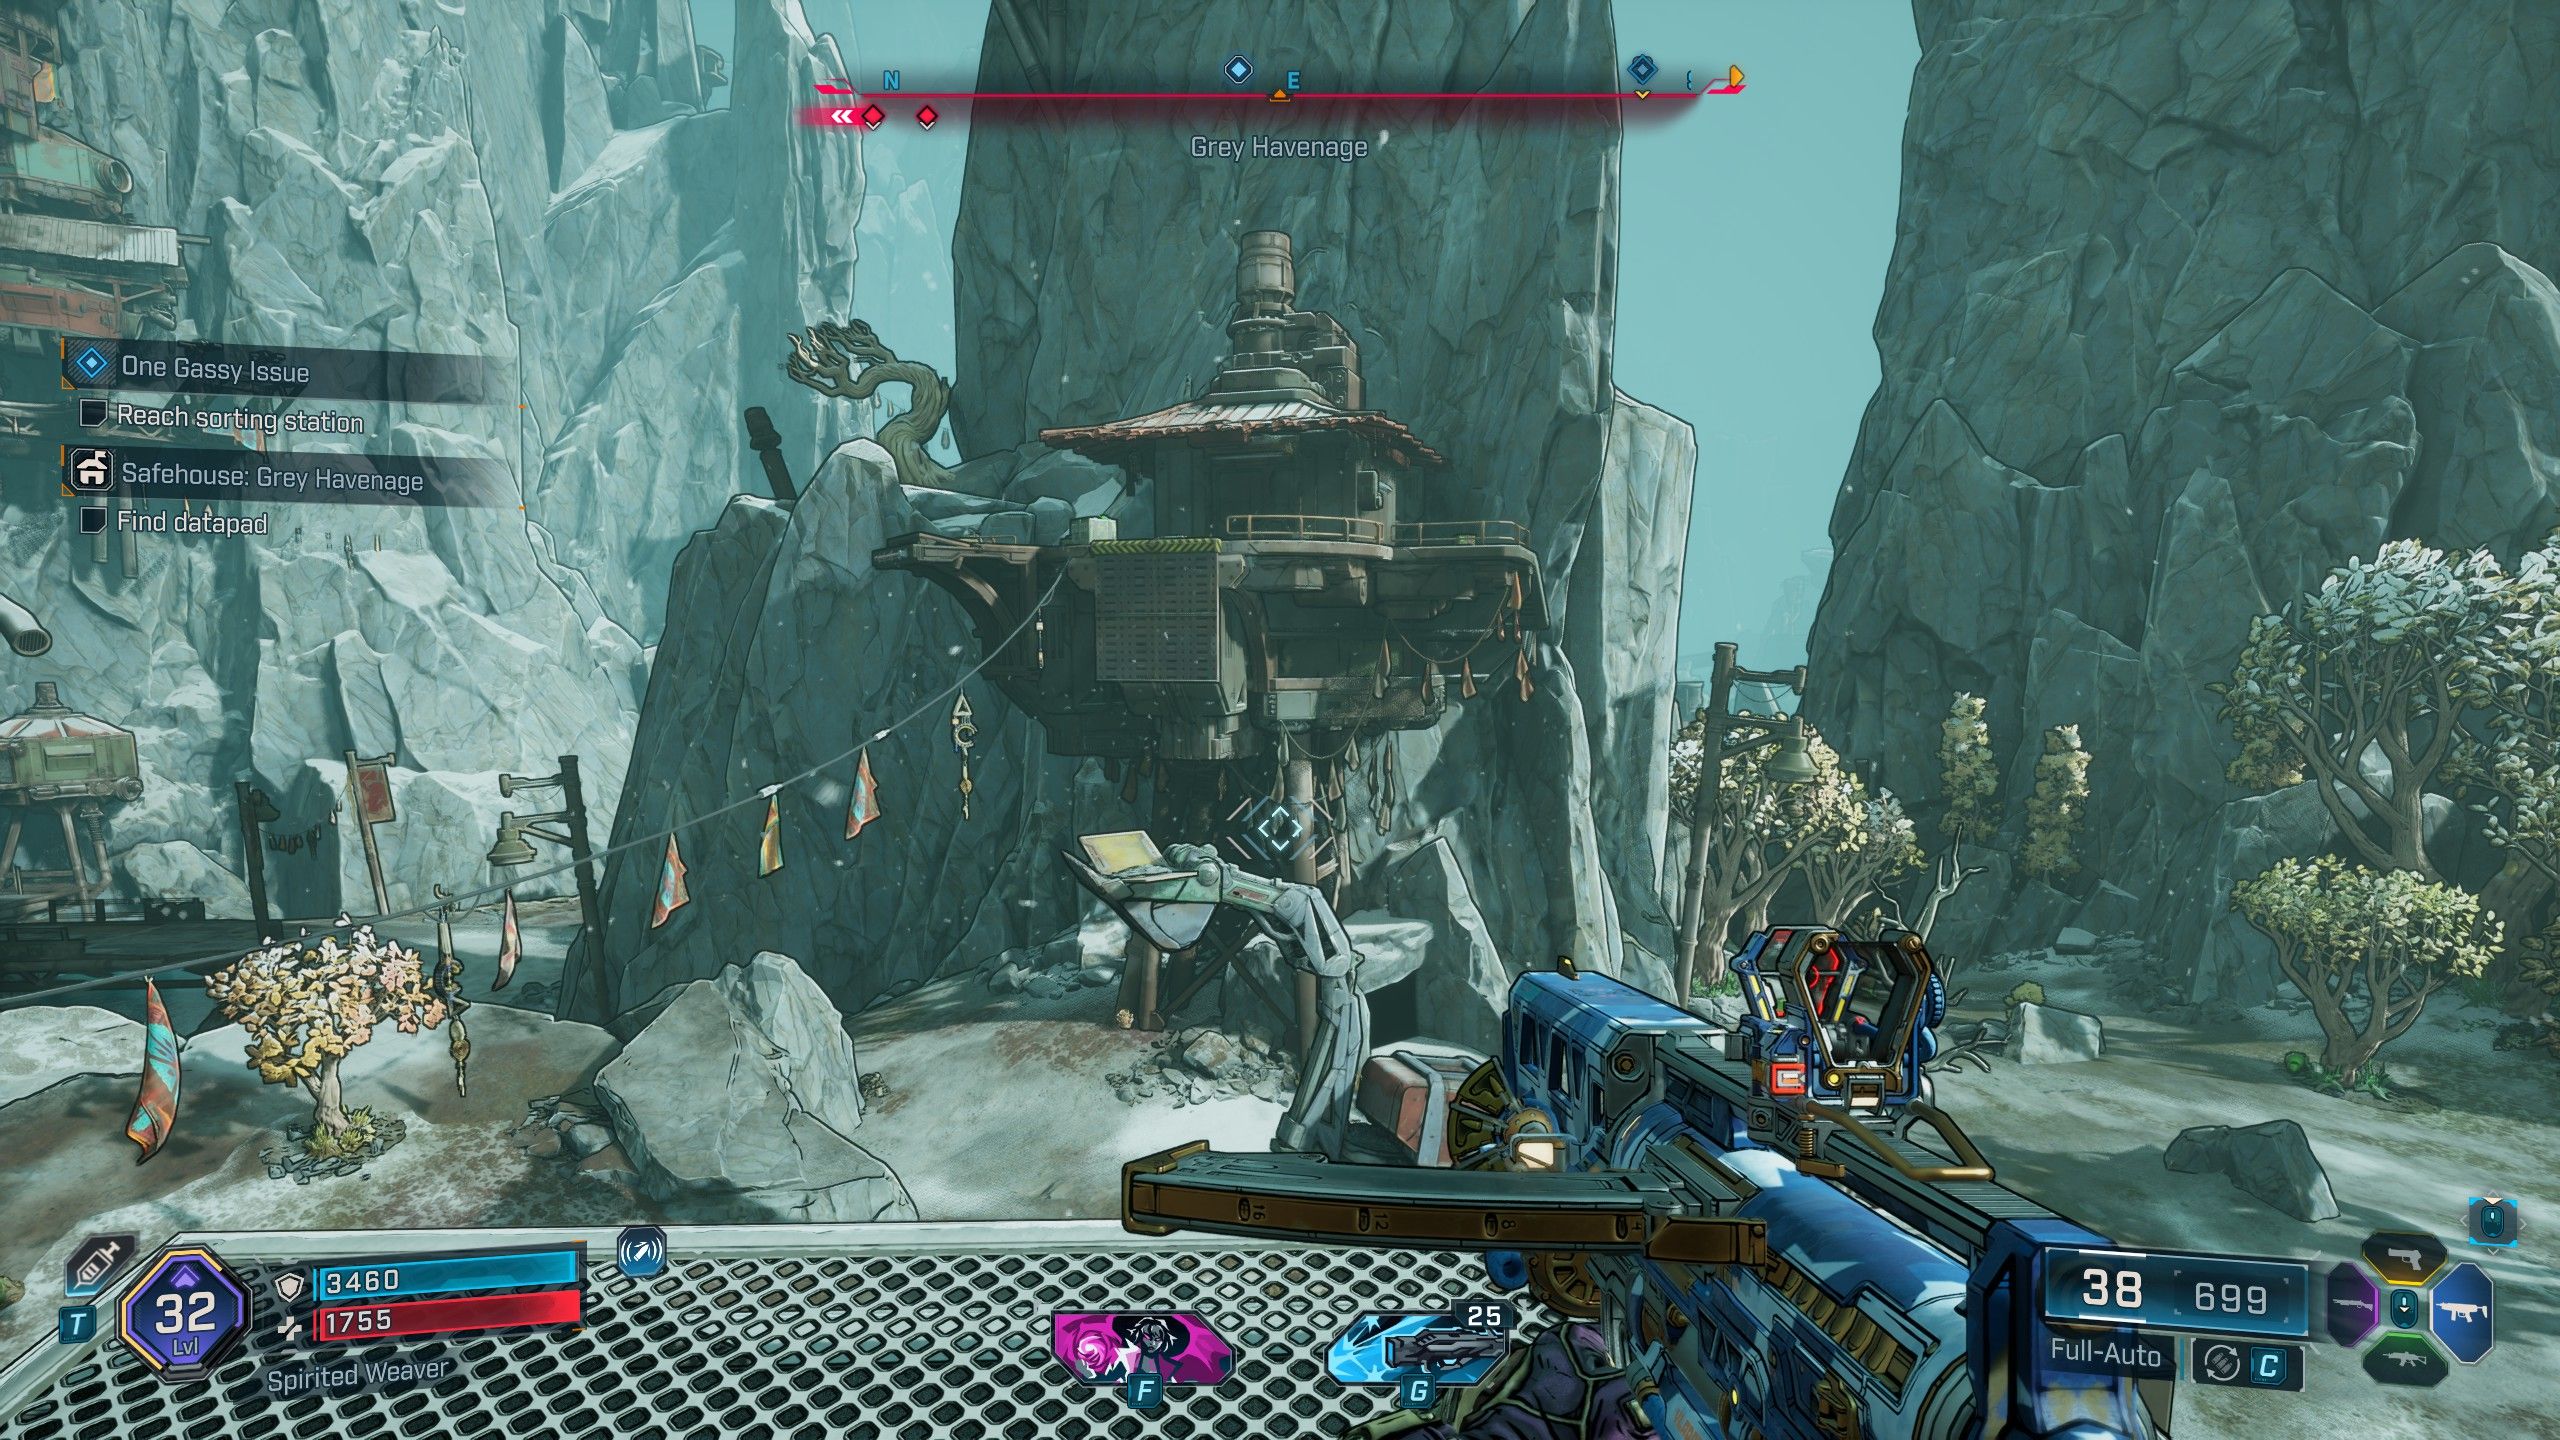
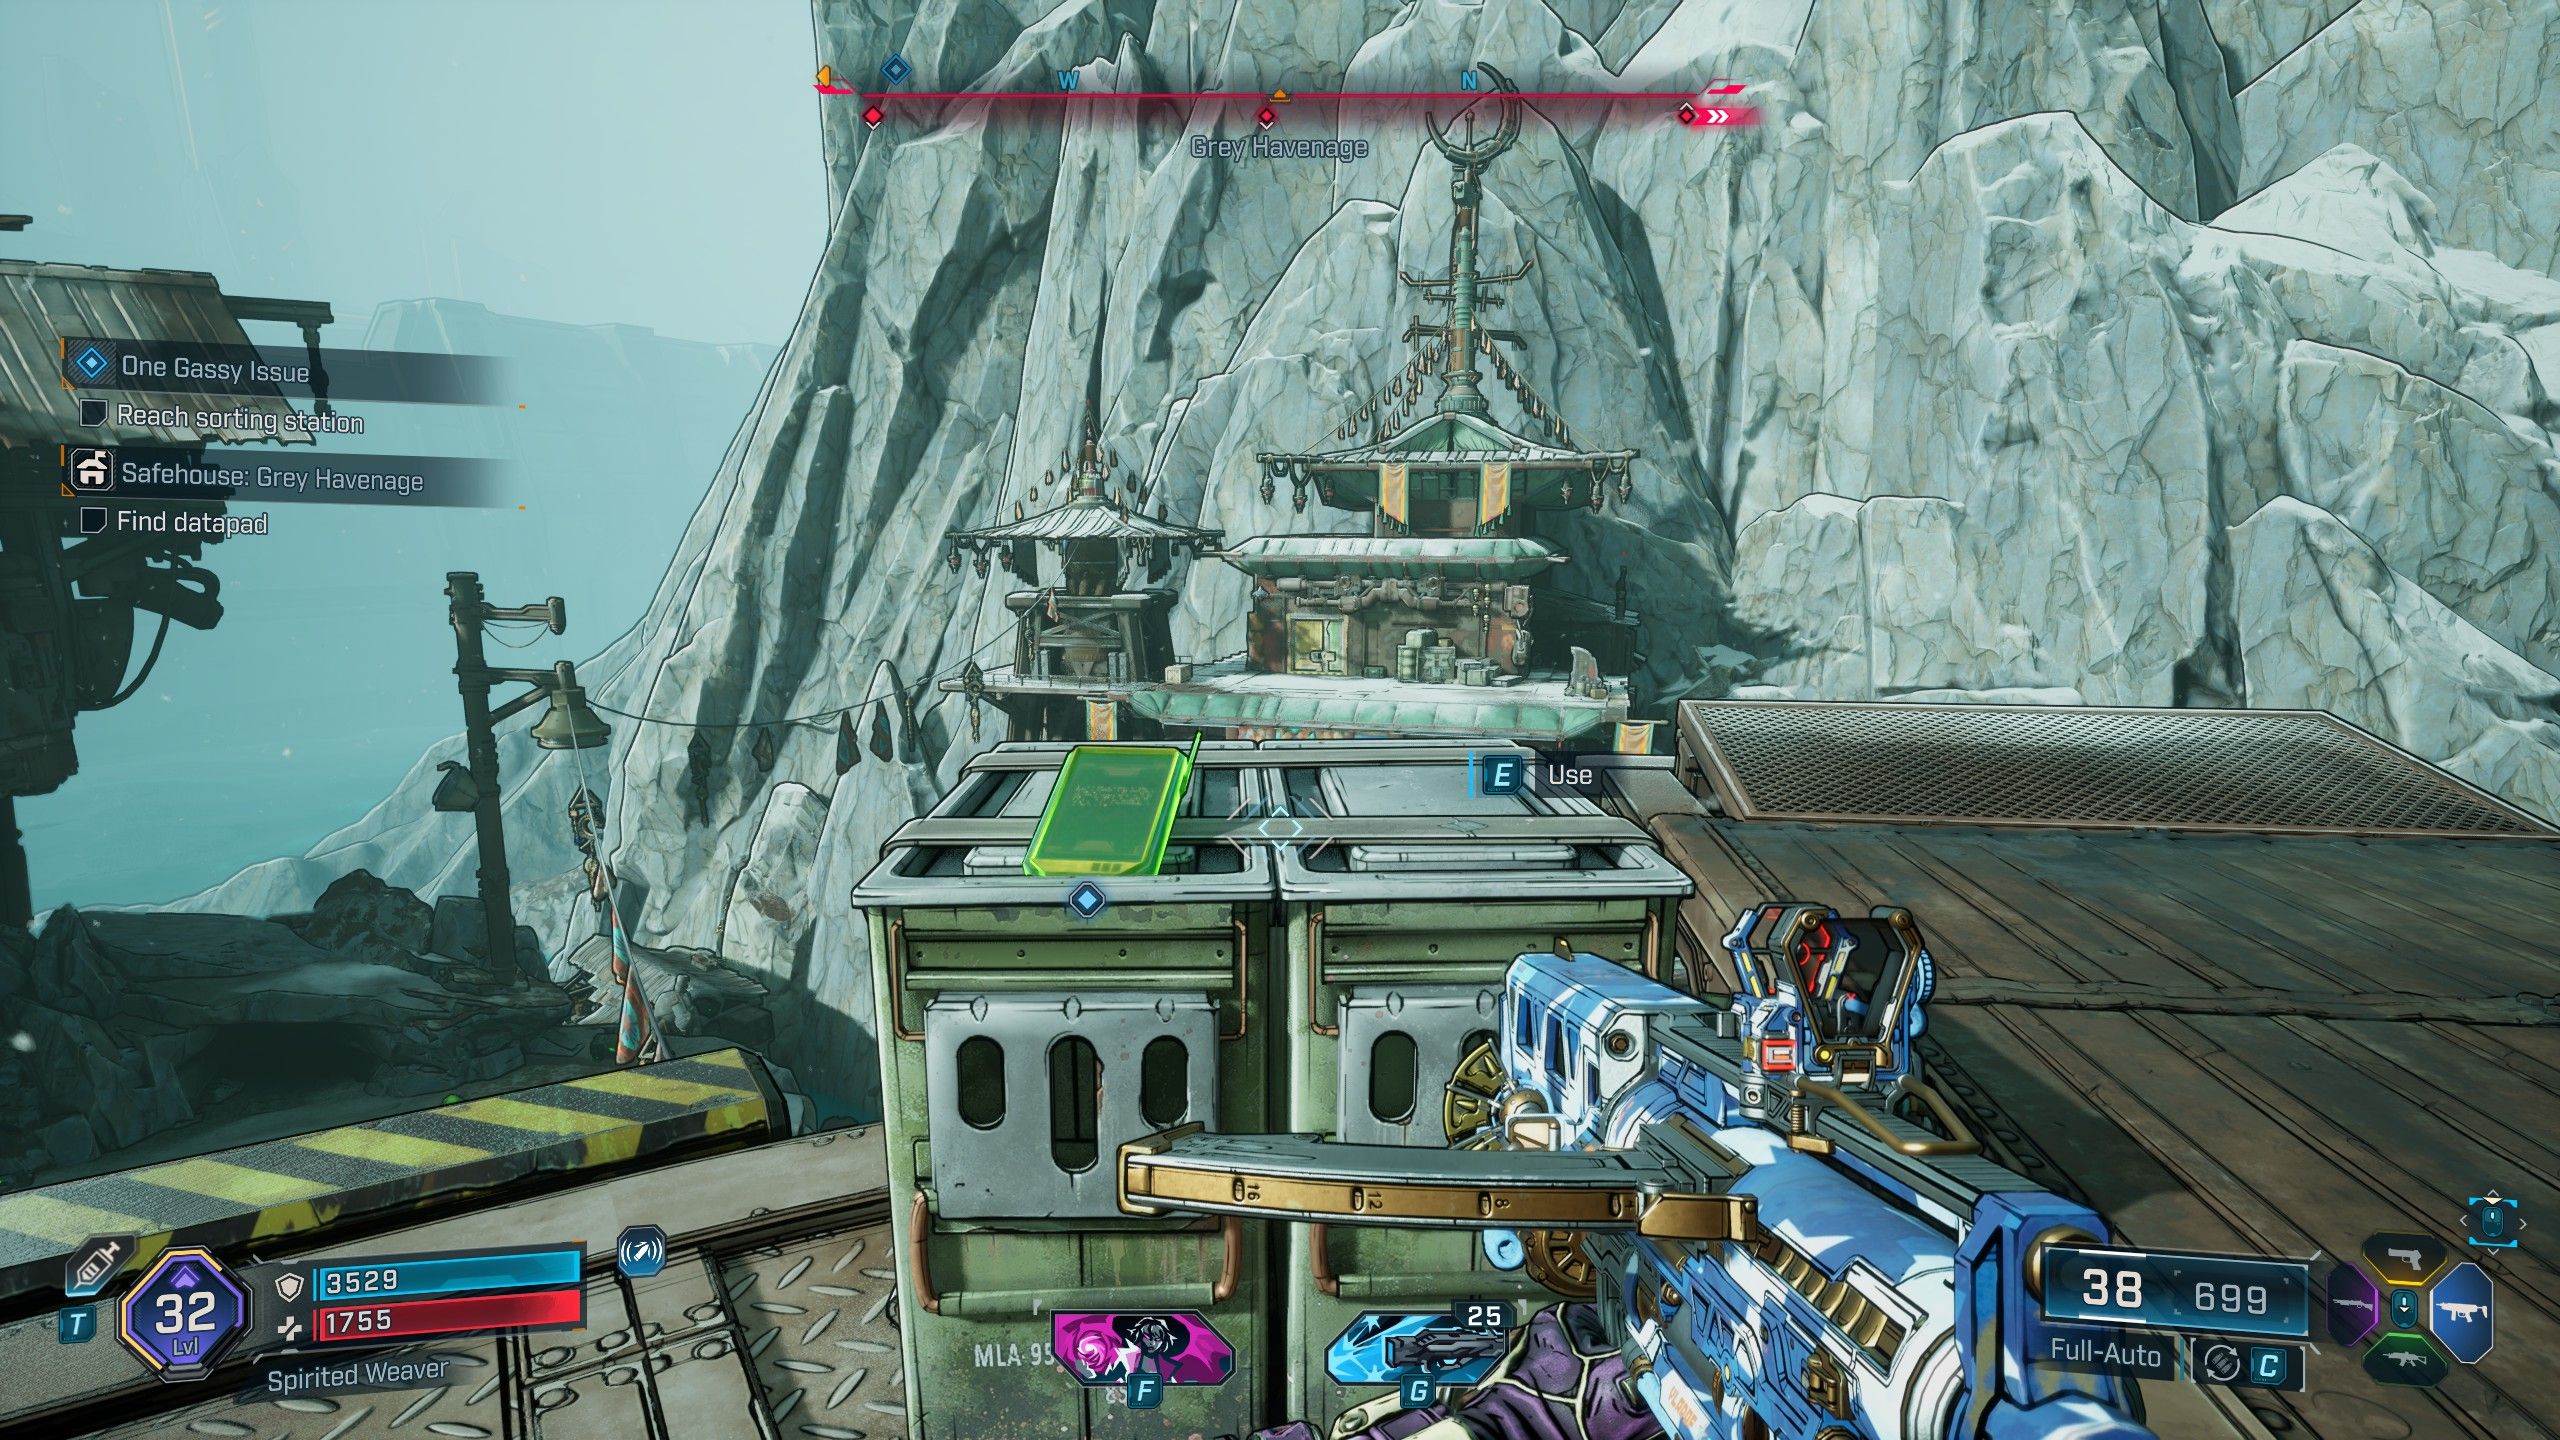

- Location: Cuspid Climb, Terminus Range
When you reach Grey Havenage, look southwest for a platform you can grapple onto. From there, use your jetpack to fly to a platform in the middle, then boost again to reach a wall you can climb. At the top, you’ll find a Datapad. Use the ramp just north of the Datapad to glide over to the Grey Havenage Safehouse. You’ll find the Command Console inside the newly opened Safehouse.
Heritage Opus Safehouse & Datapad Location
How to Get the Heritage Opus Safehouse
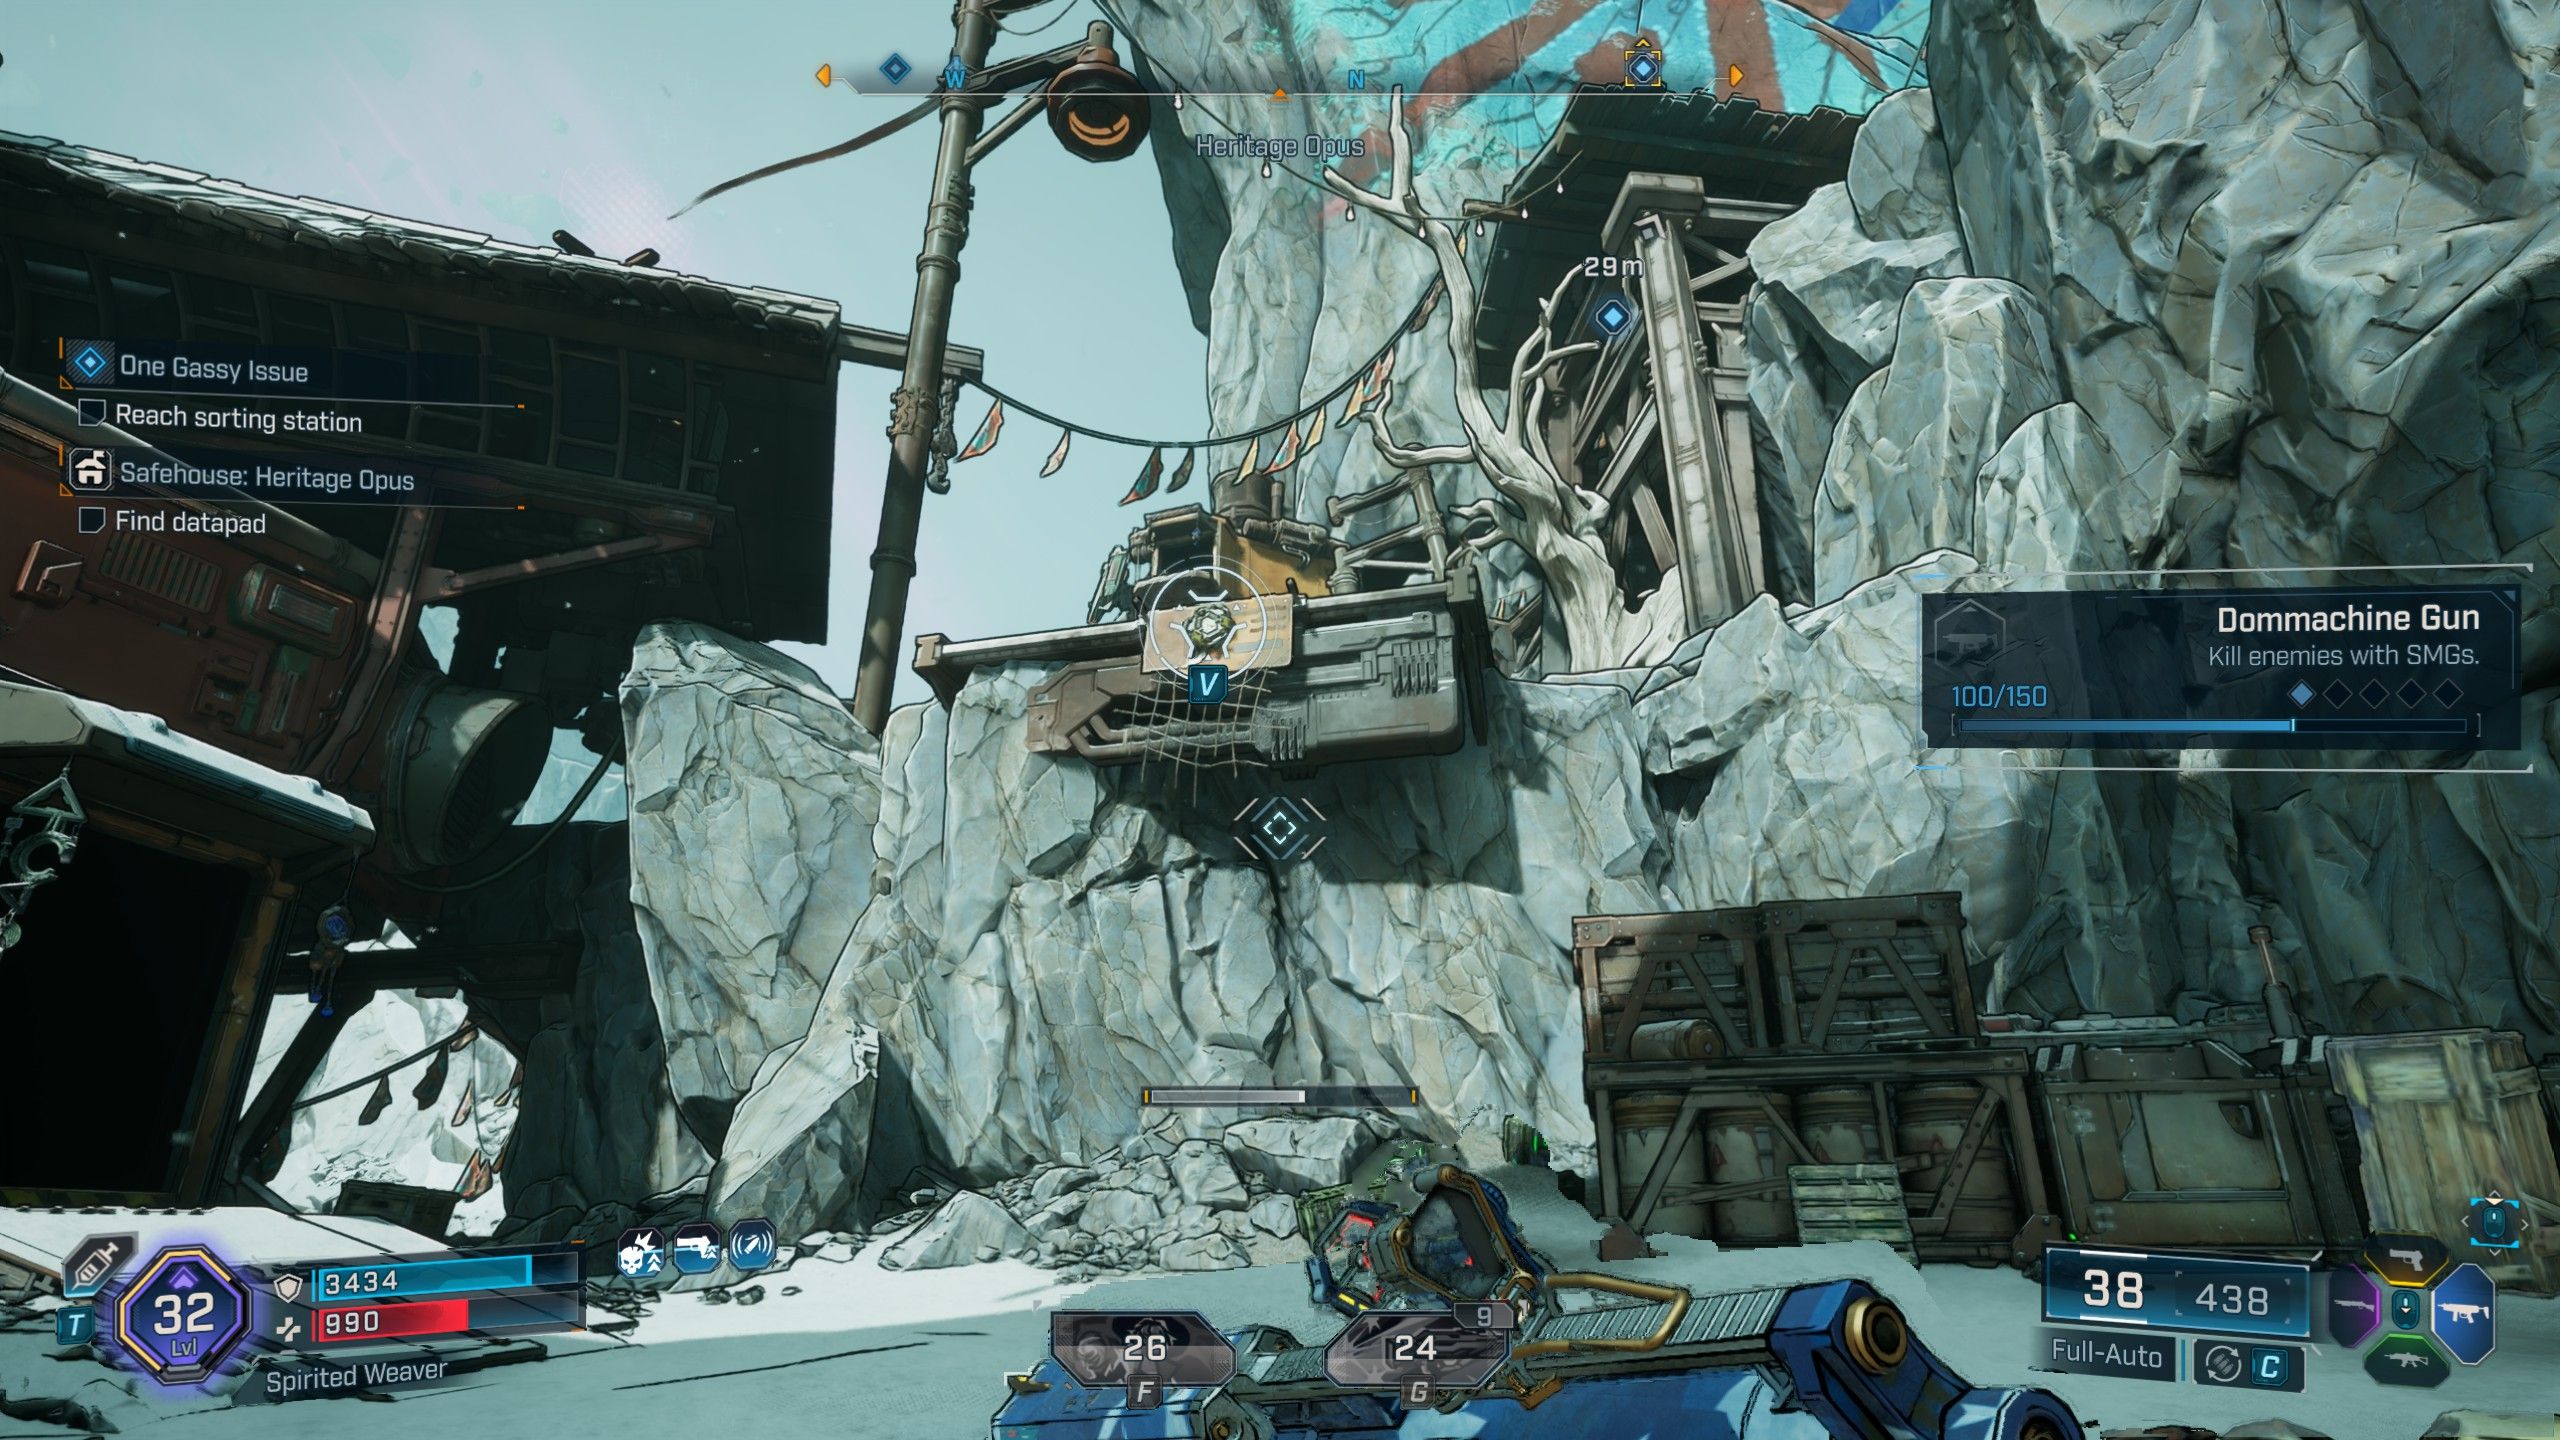
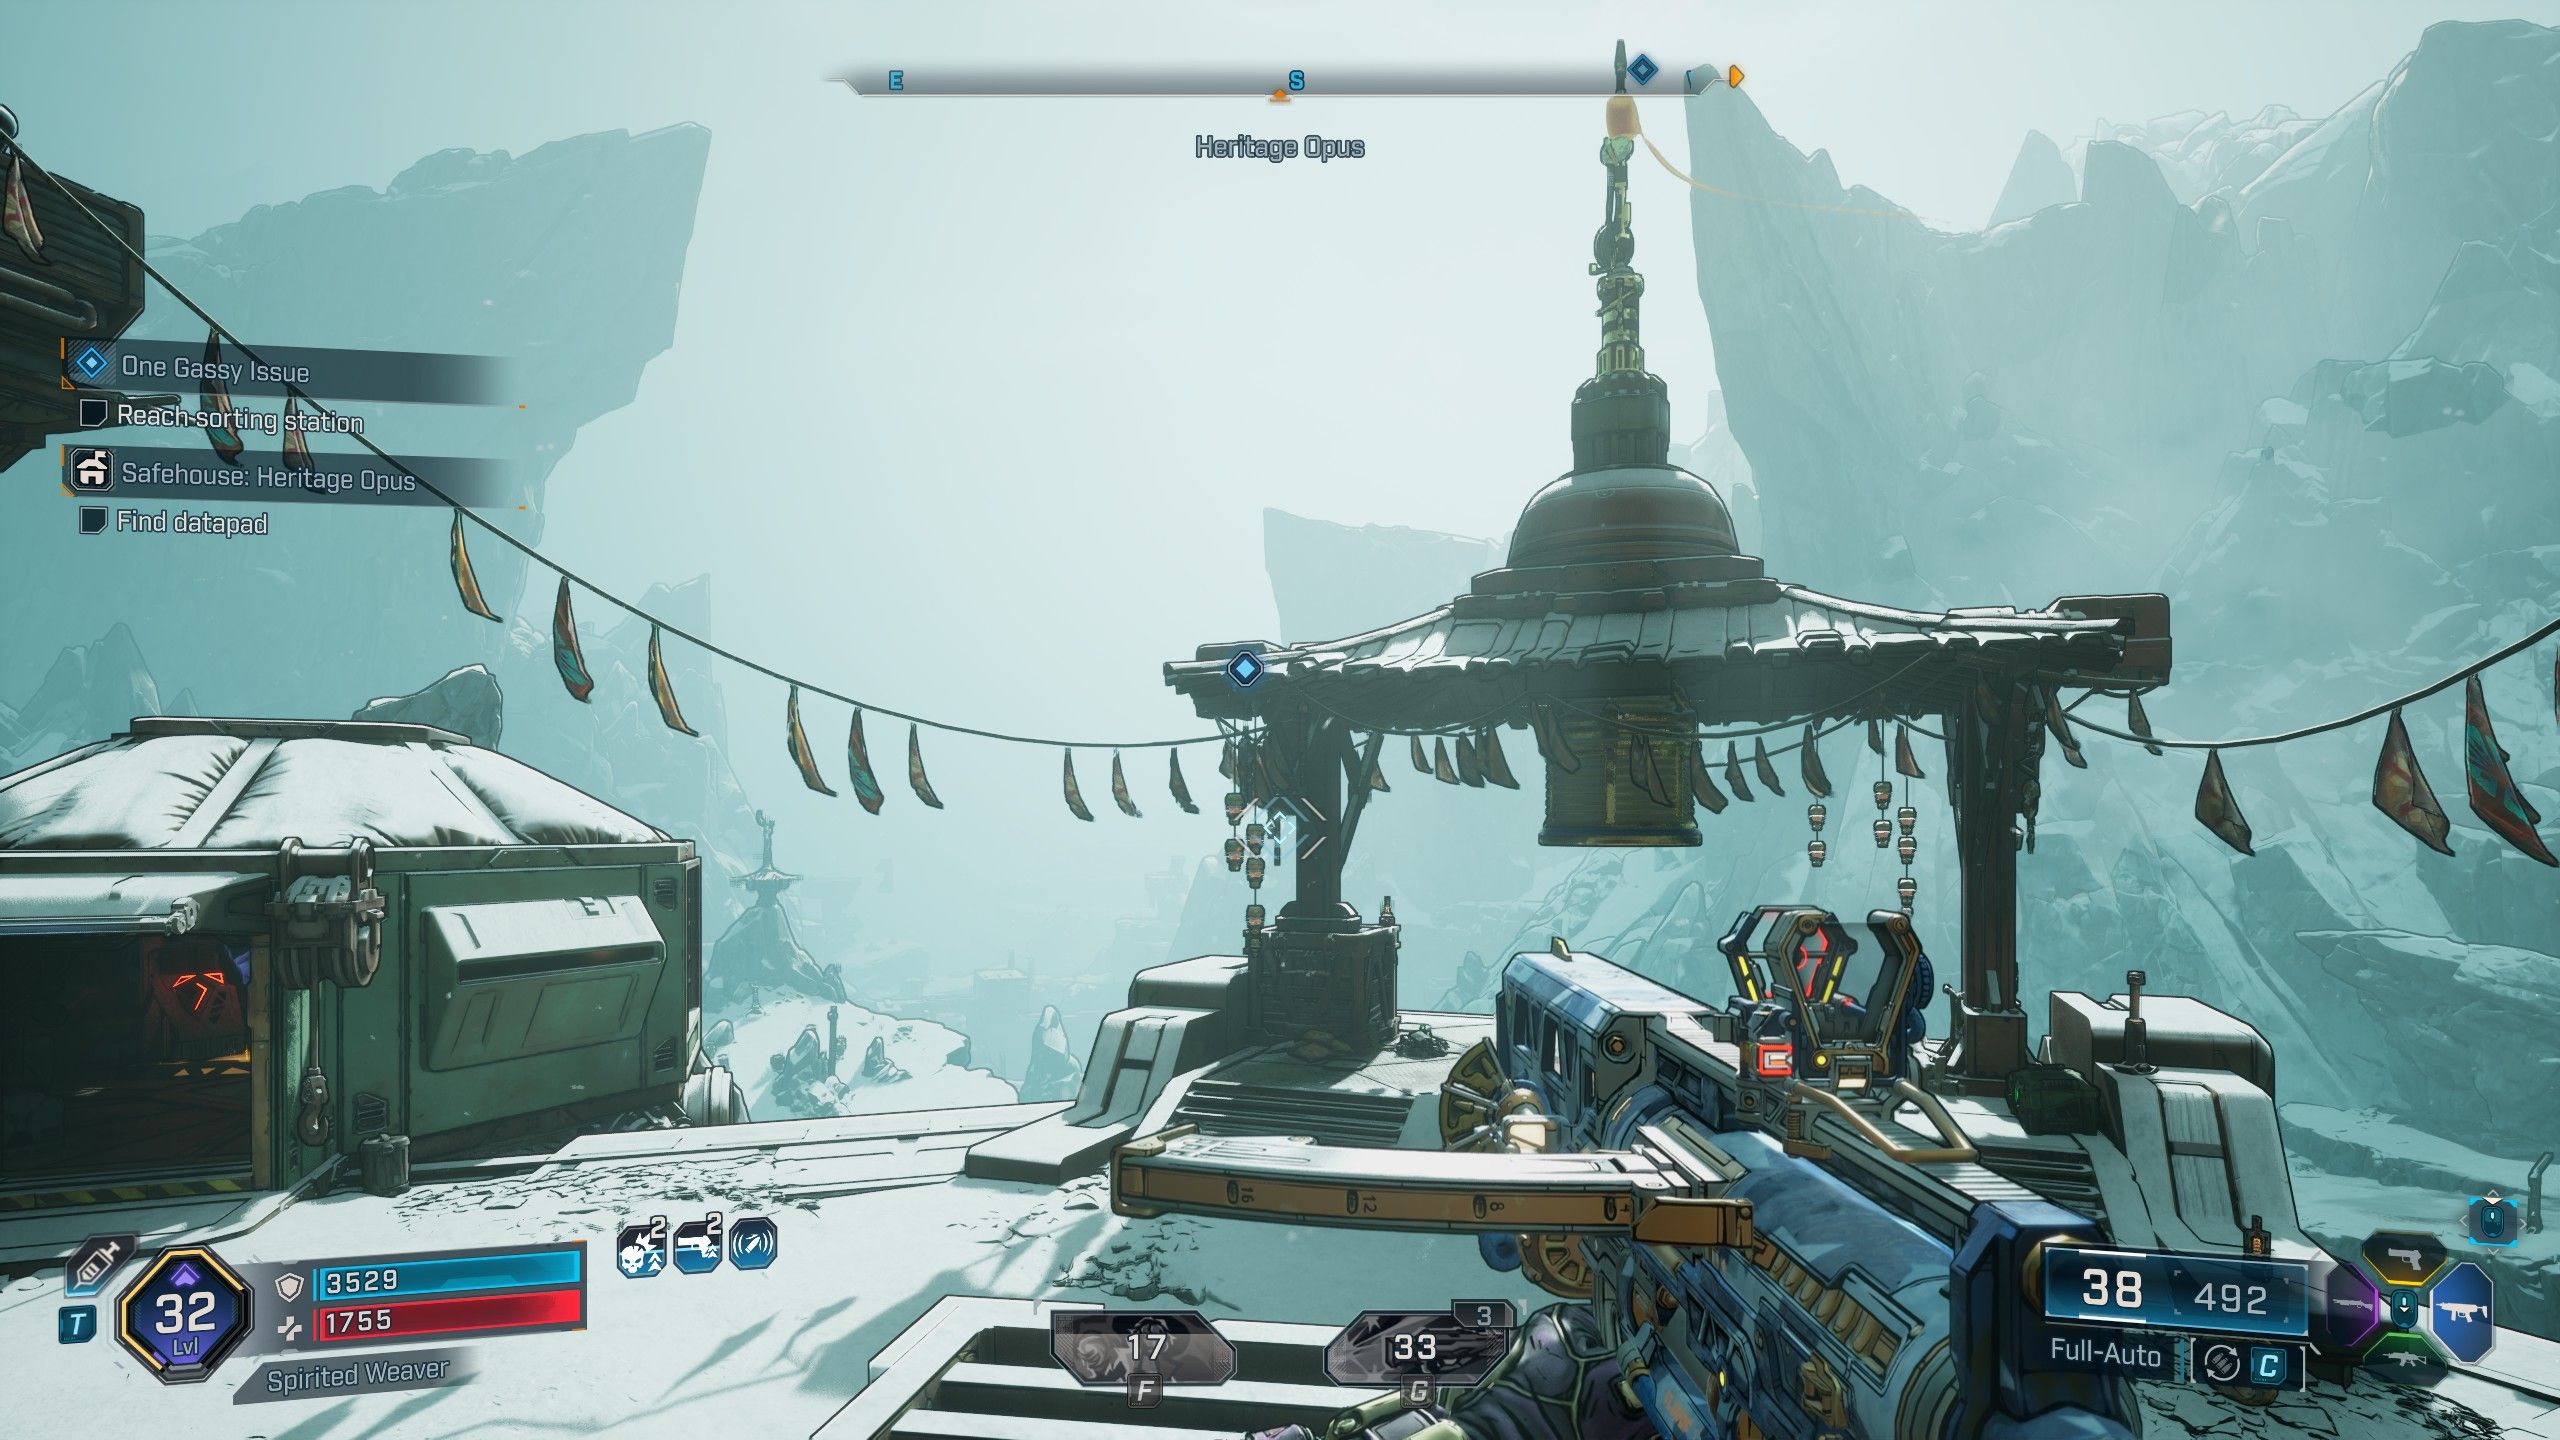

- Location: Cuspid Climb, Terminus Range
In Heritage Outpost, players need to head right until they find a climbable wall. Then, they should turn left and fight through enemy forces while circling the area. Using a grapple hook, players can ascend the spiraling Safehouse to reach a bell tower. To get the Datapad, they’ll need to stand on some boxes near the tower, then double jump and glide onto the roof. After grabbing the Datapad, the building to the left of the bell tower will be accessible – players can go inside and climb the stairs to find the Command Console.
The Nightcap Safehouse & Datapad Location
How to Get the Nightcap Safehouse
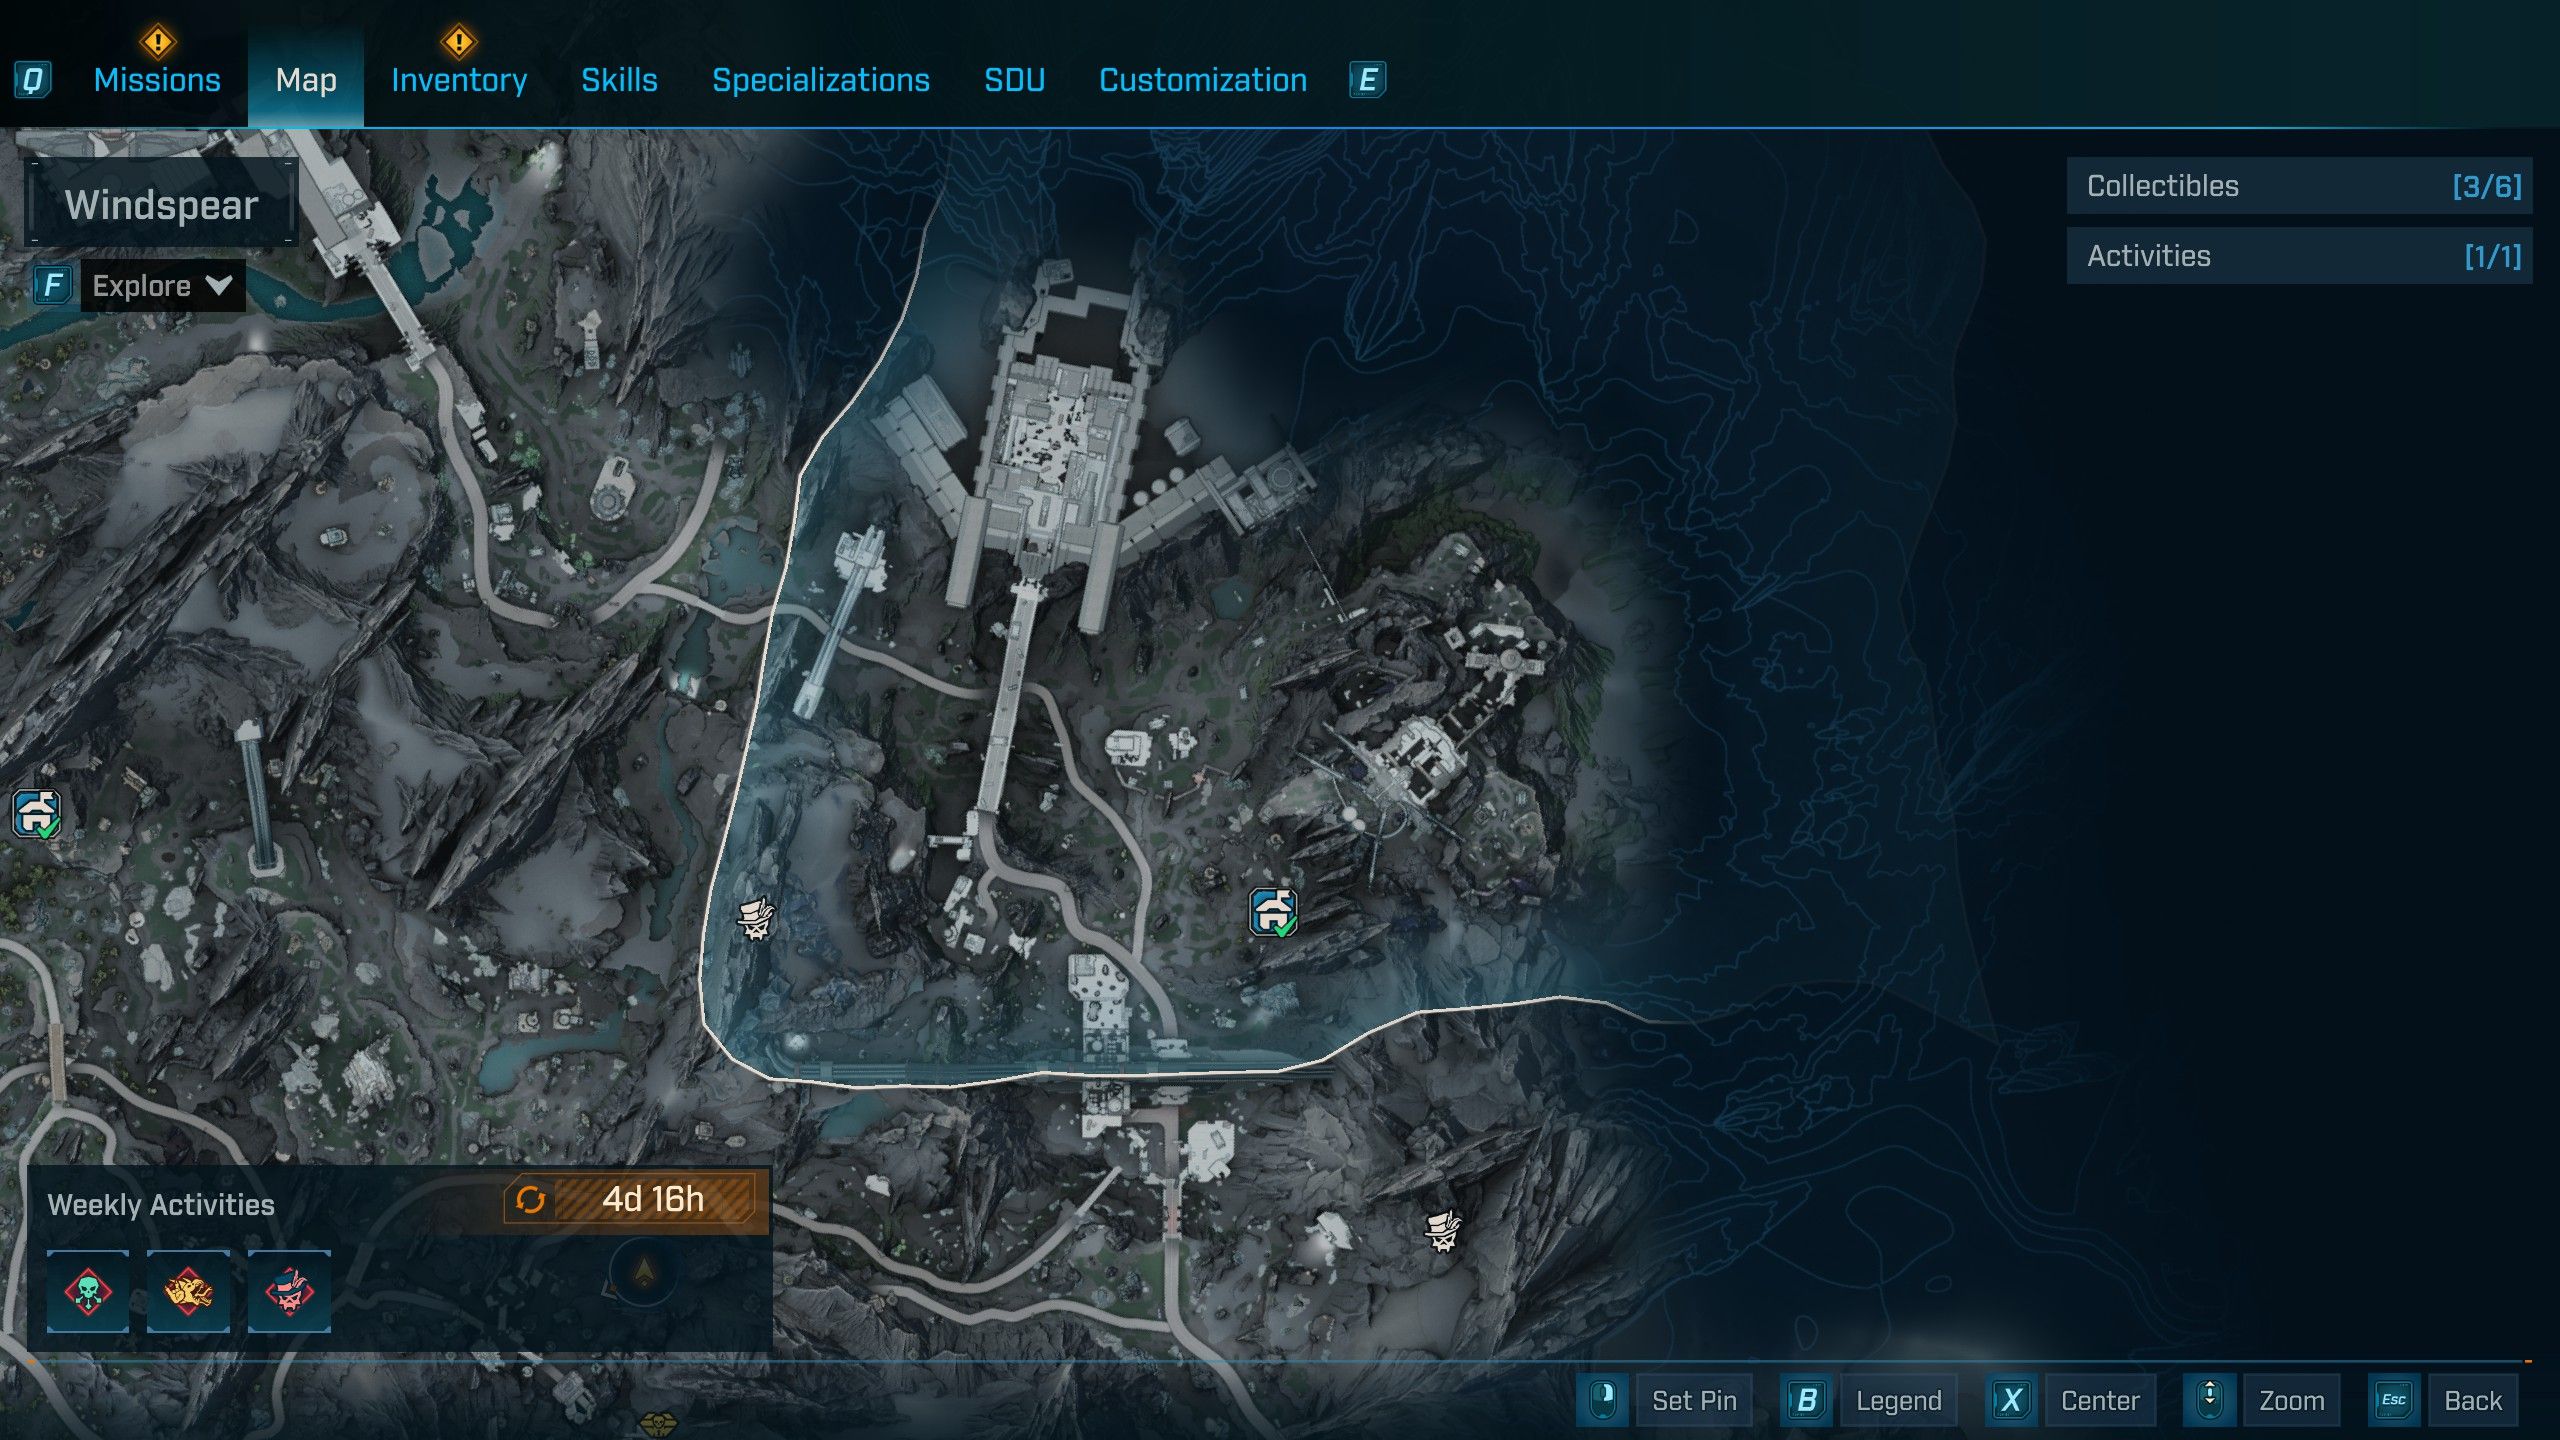
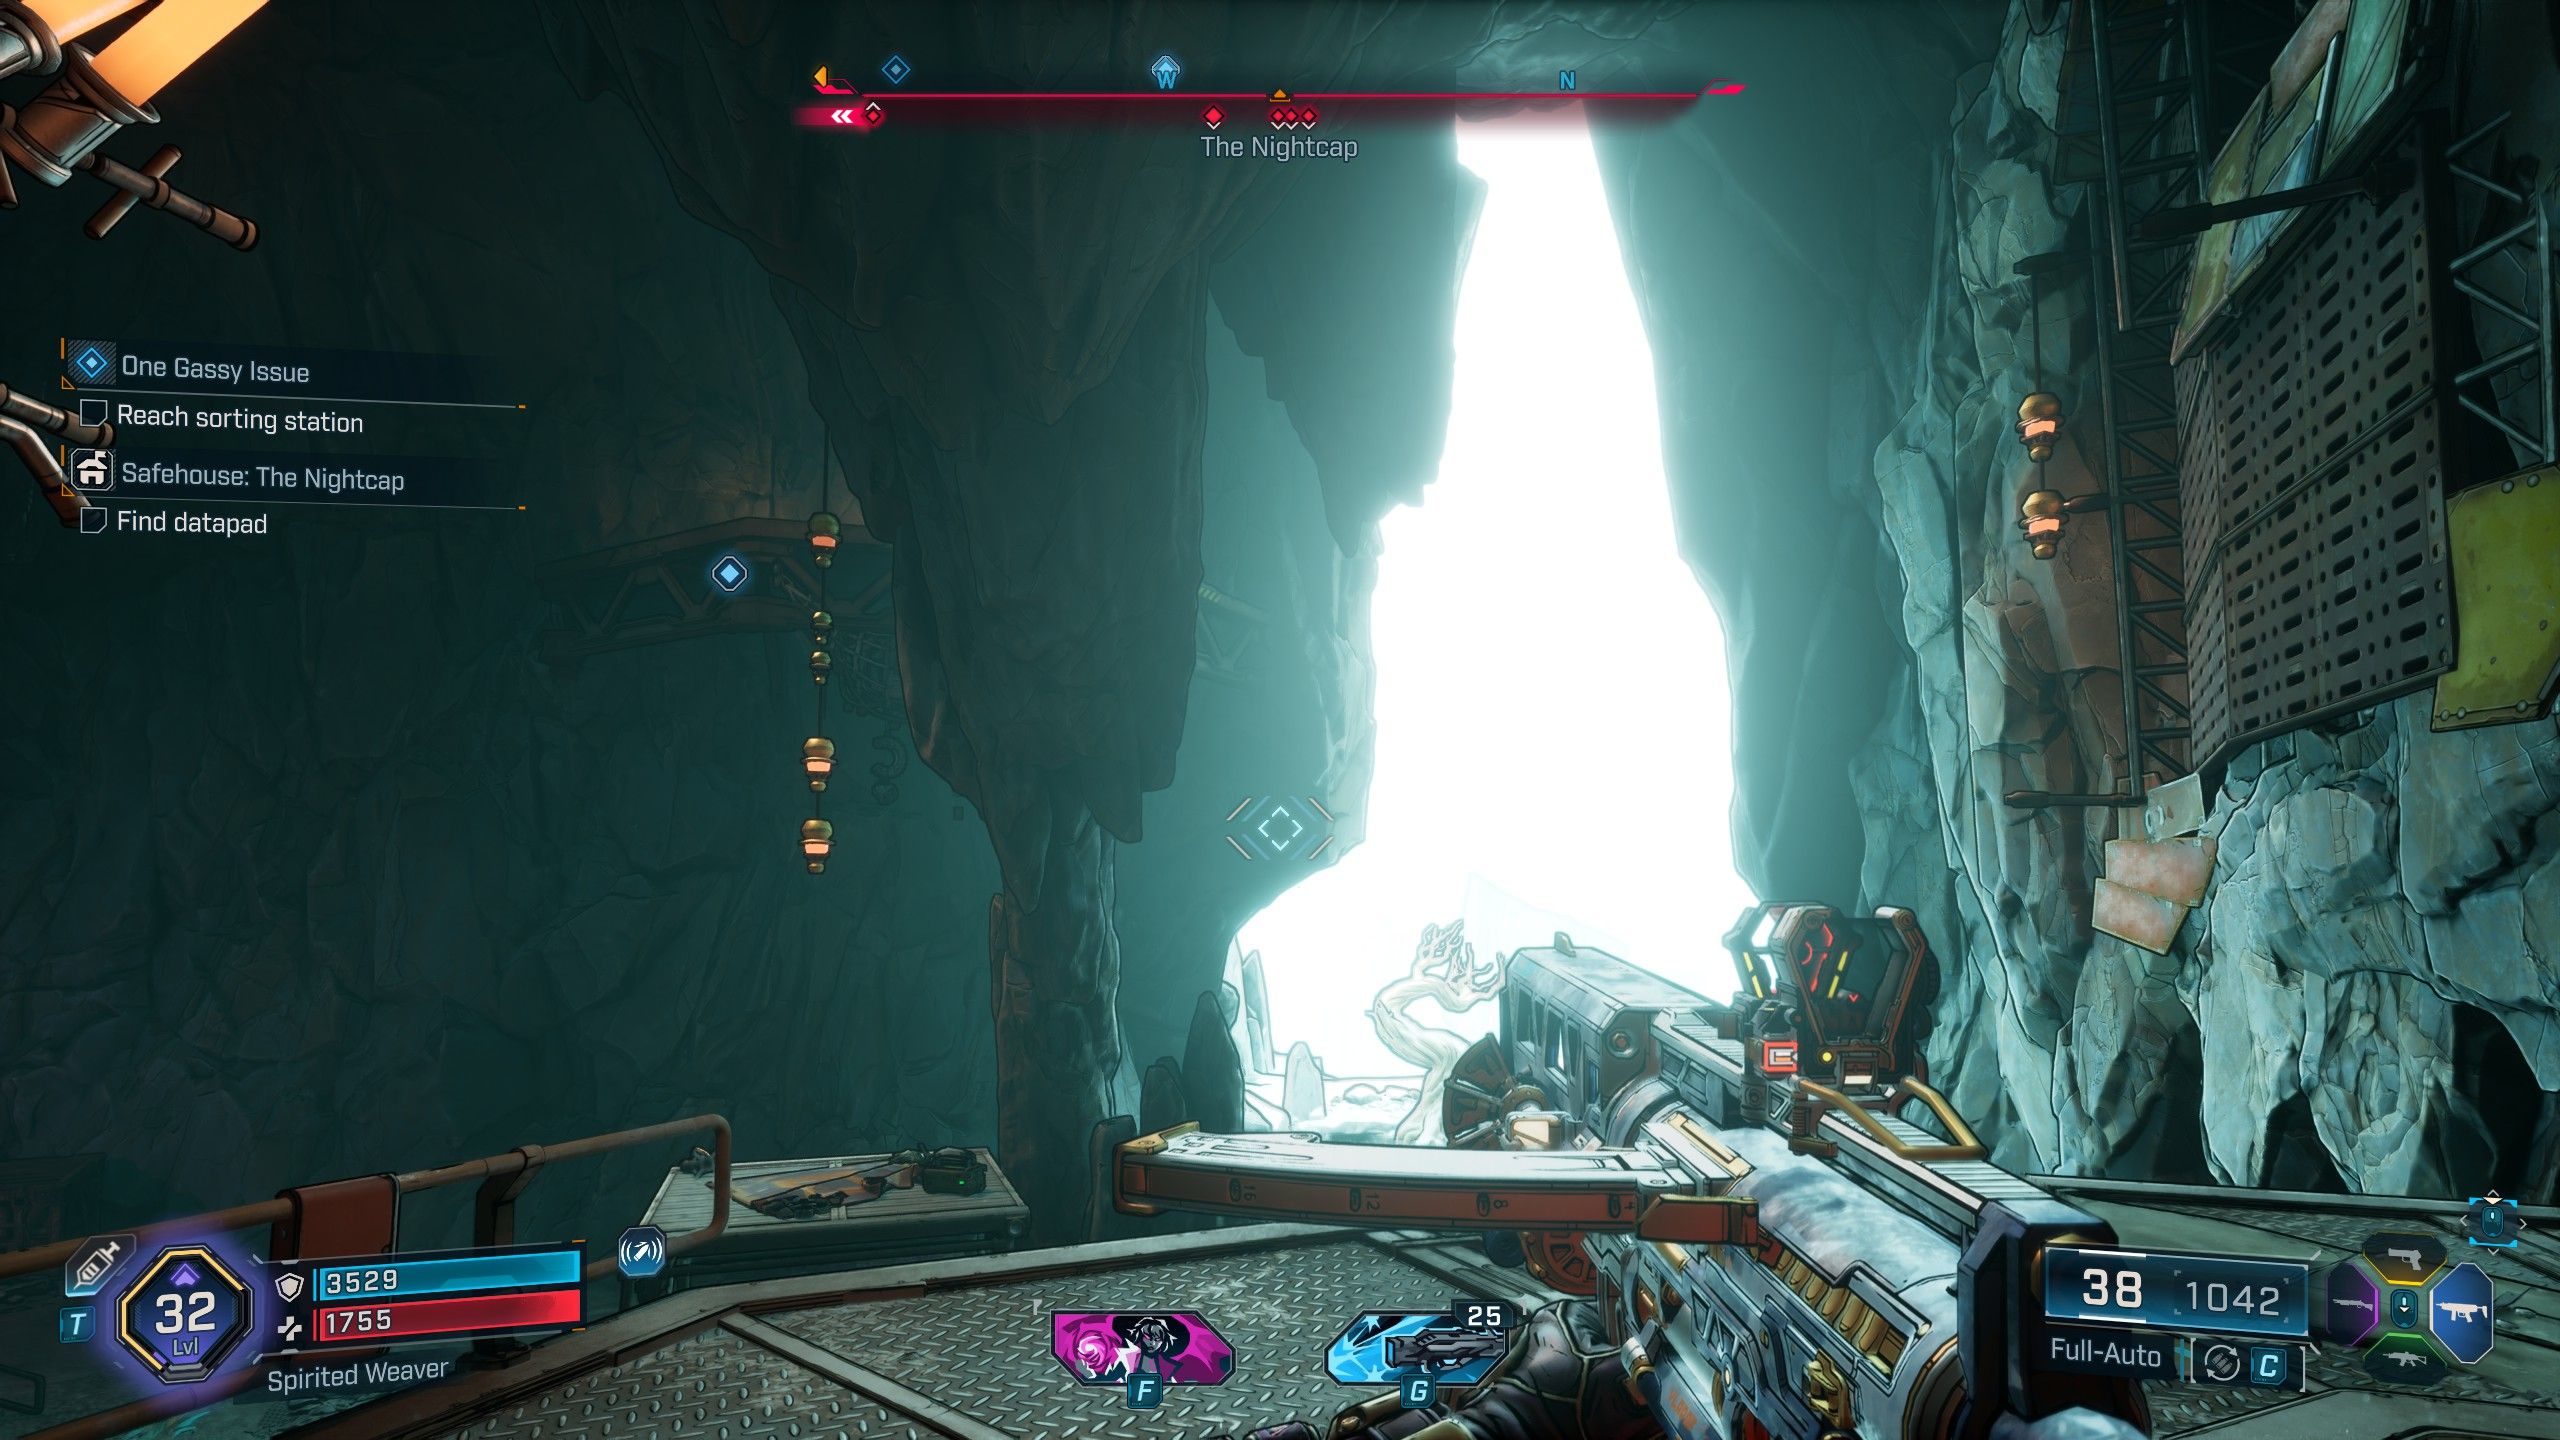
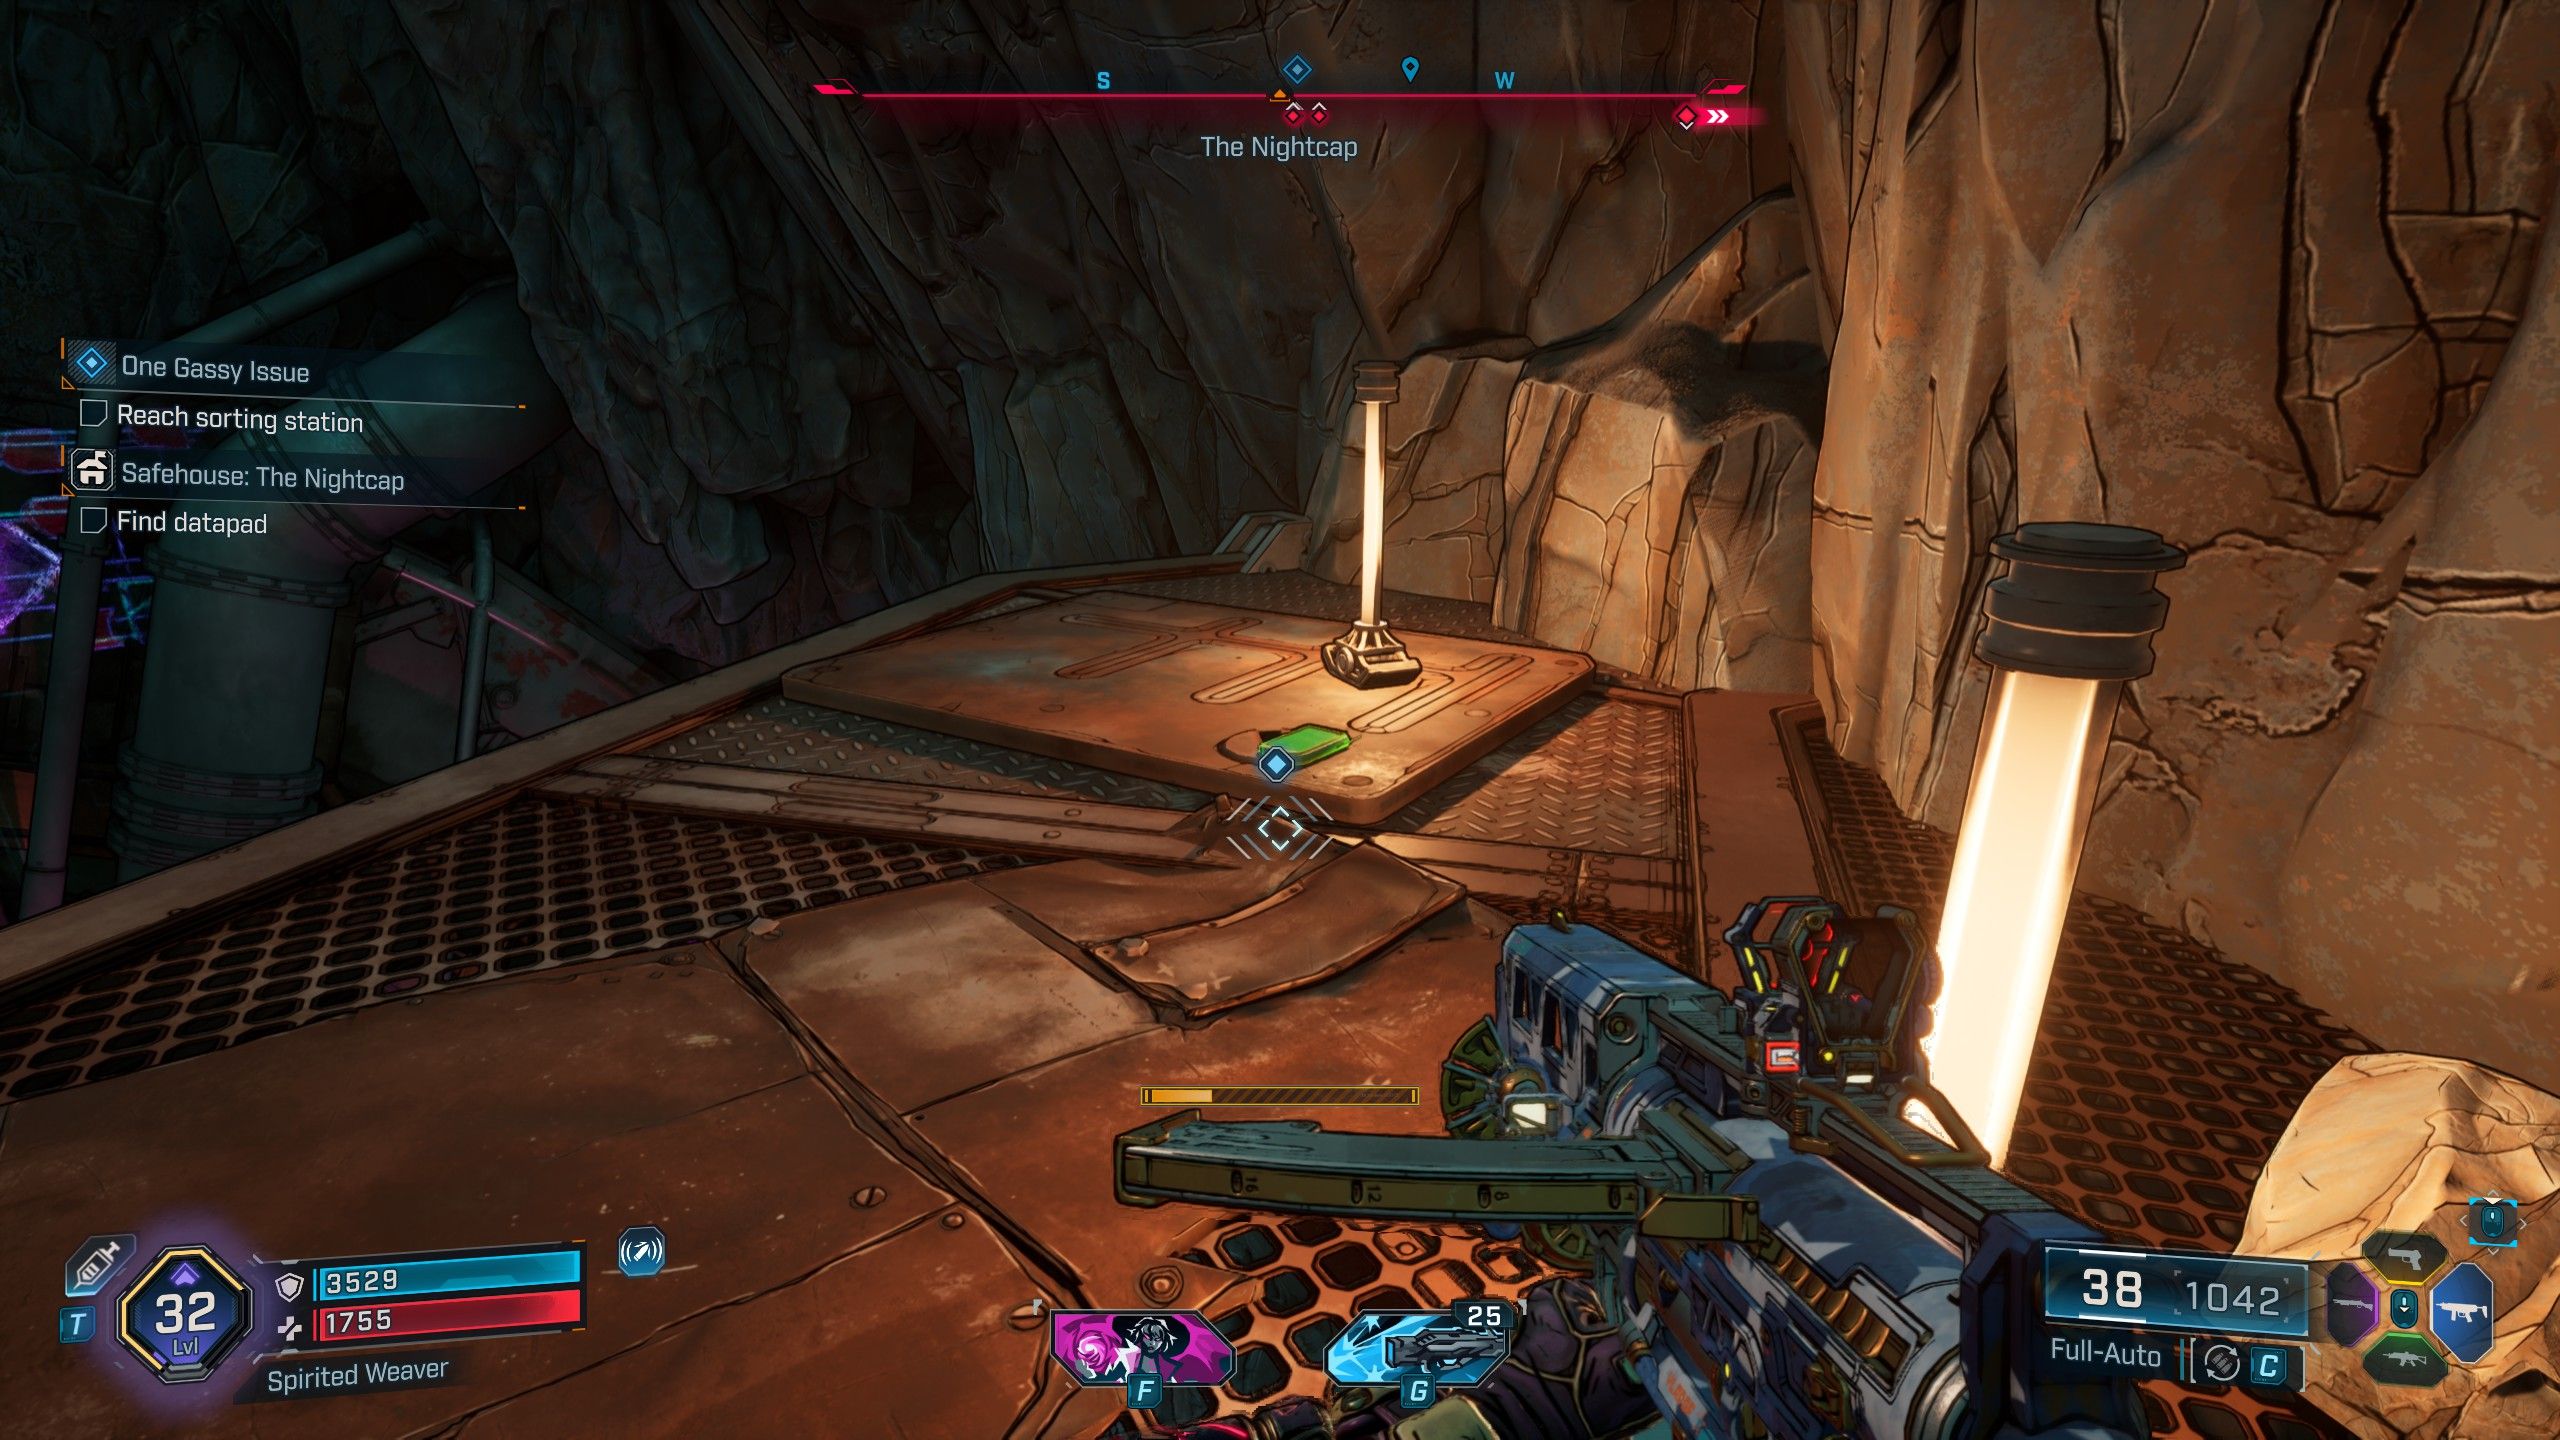
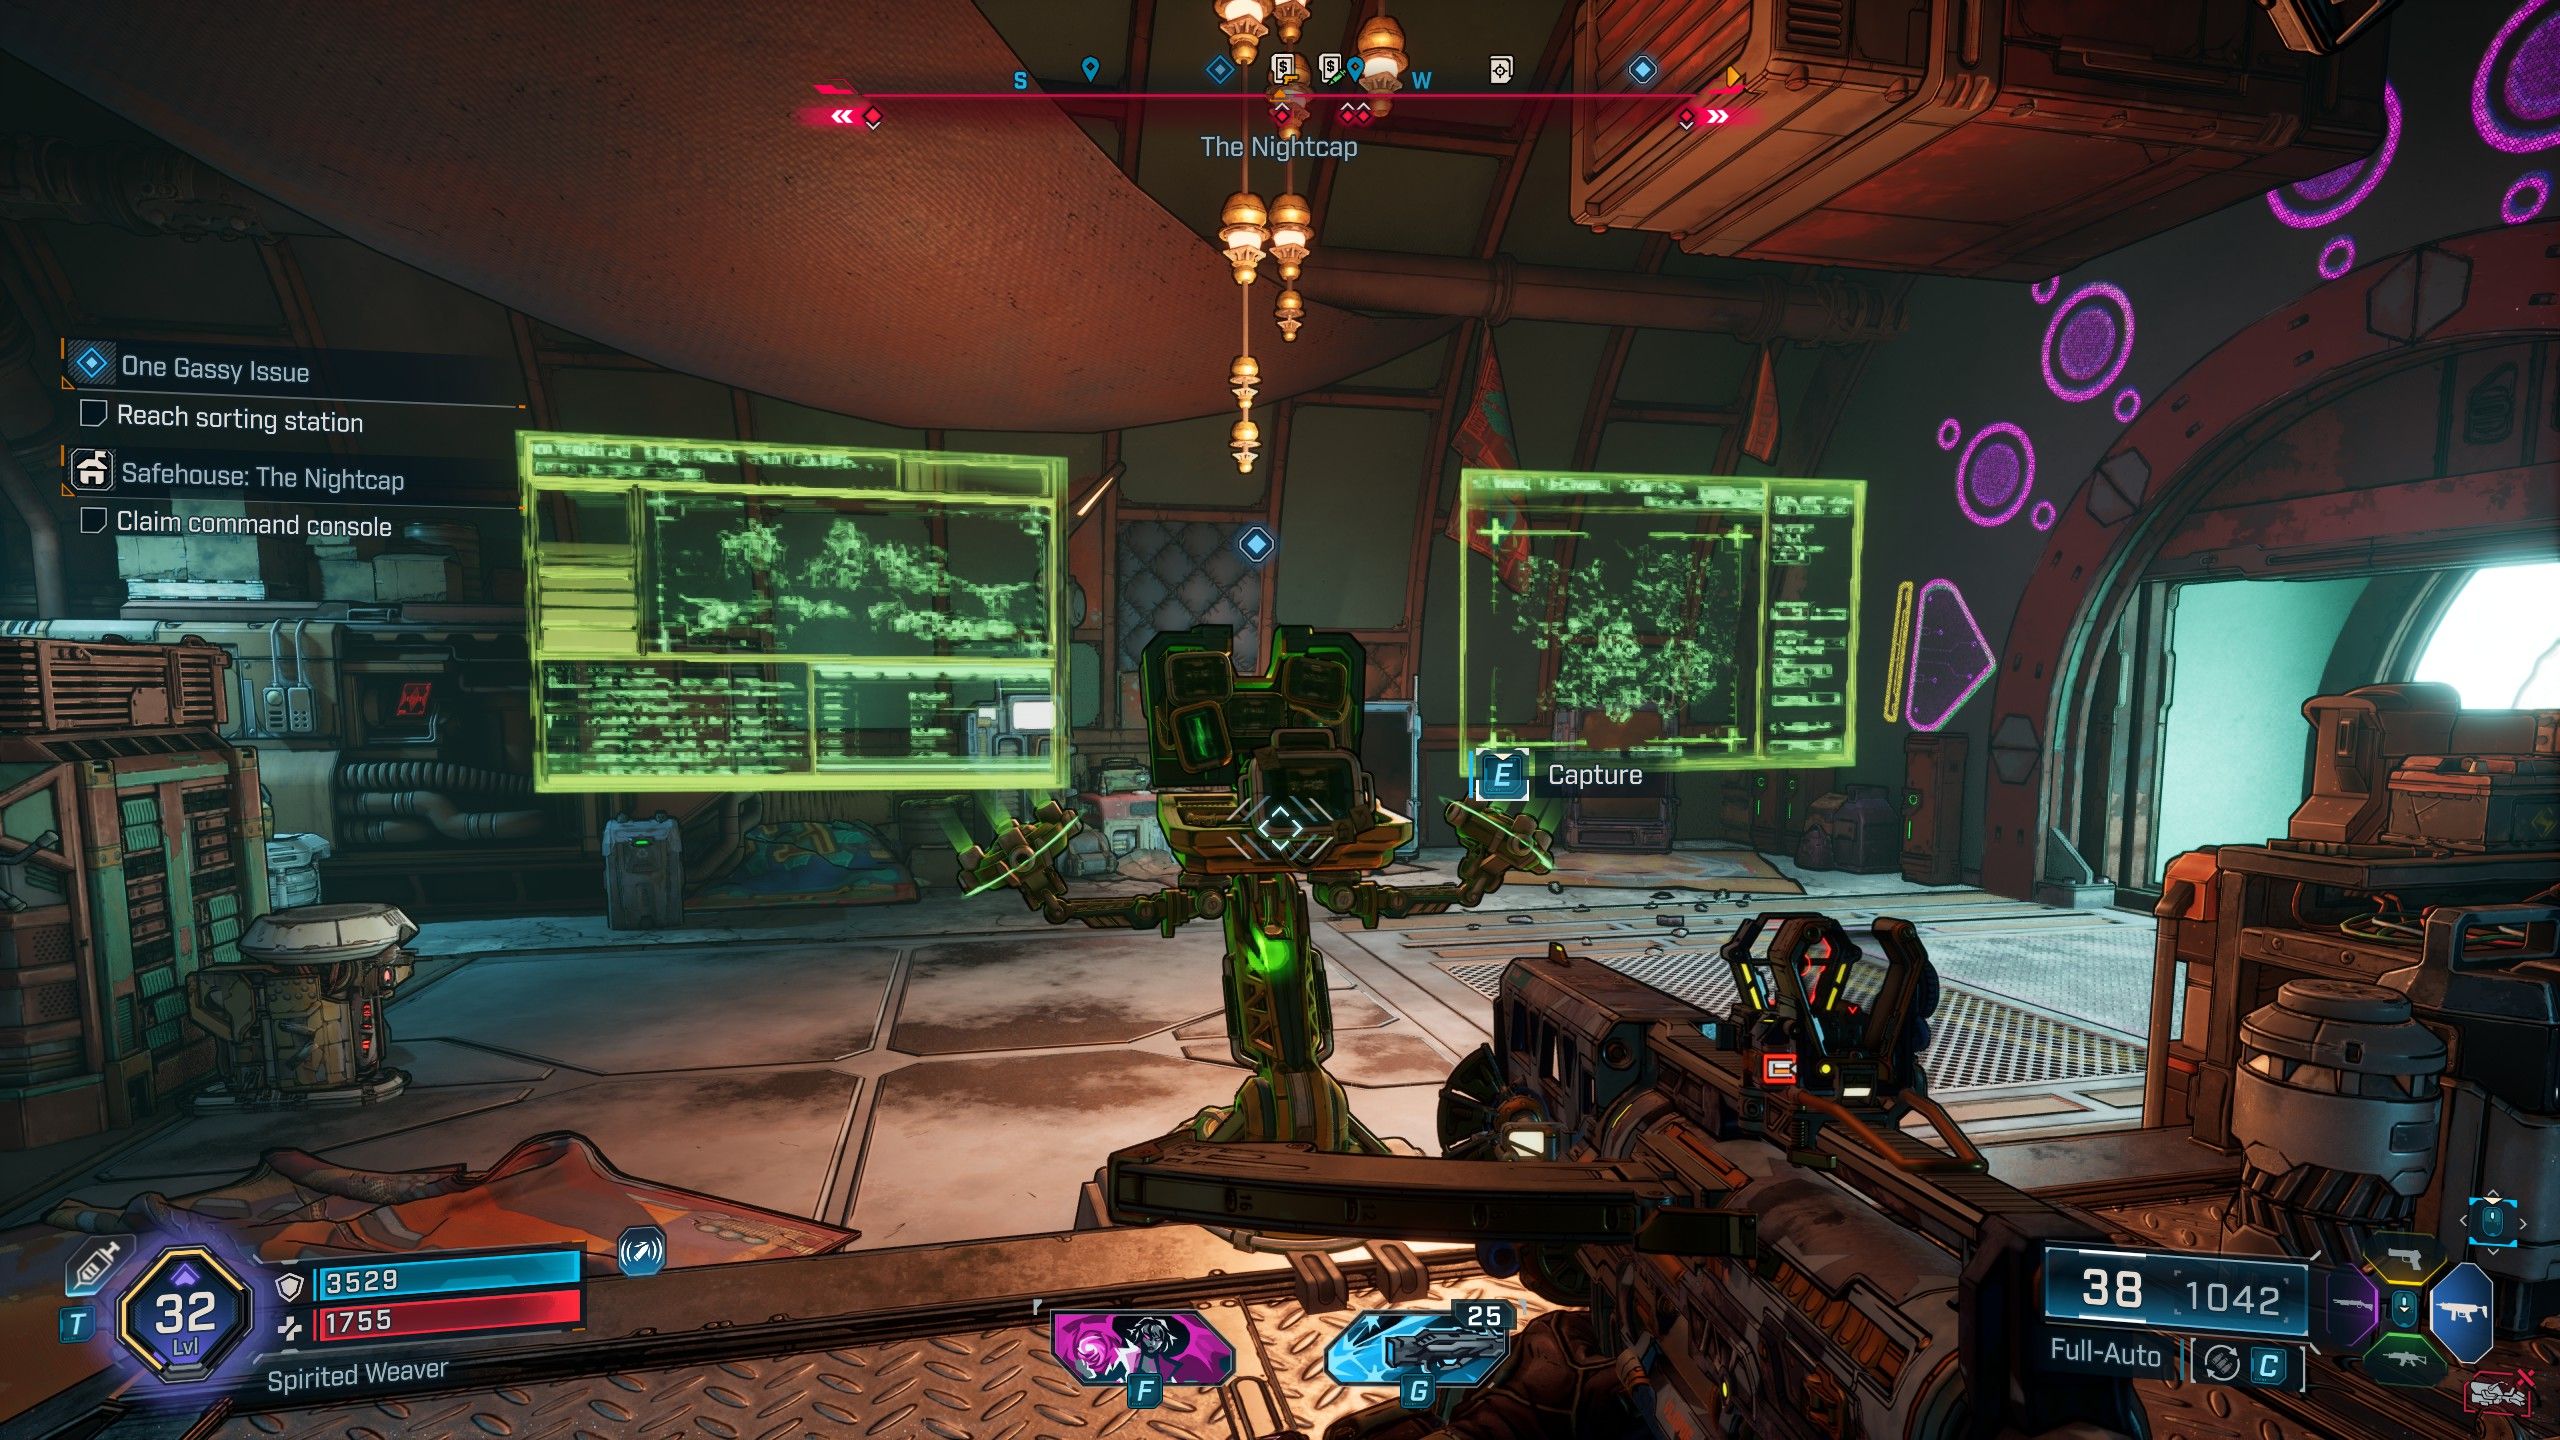
- Location: Windspear, Terminus Range
Okay, so I found The Nightcap inside a big crack in the mountain. Once I was in, I jumped up to this platform, and there was a climbable wall on the right. I scaled that wall, then used my jetpack to glide over to another platform where the Datapad was. Grabbing that Datapad unlocked the Safehouse, and I was finally able to go inside and snag the Command Console!
Snowy Wells Safehouse & Datapad Location
How to Get the Snowy Wells Keep Safehouse
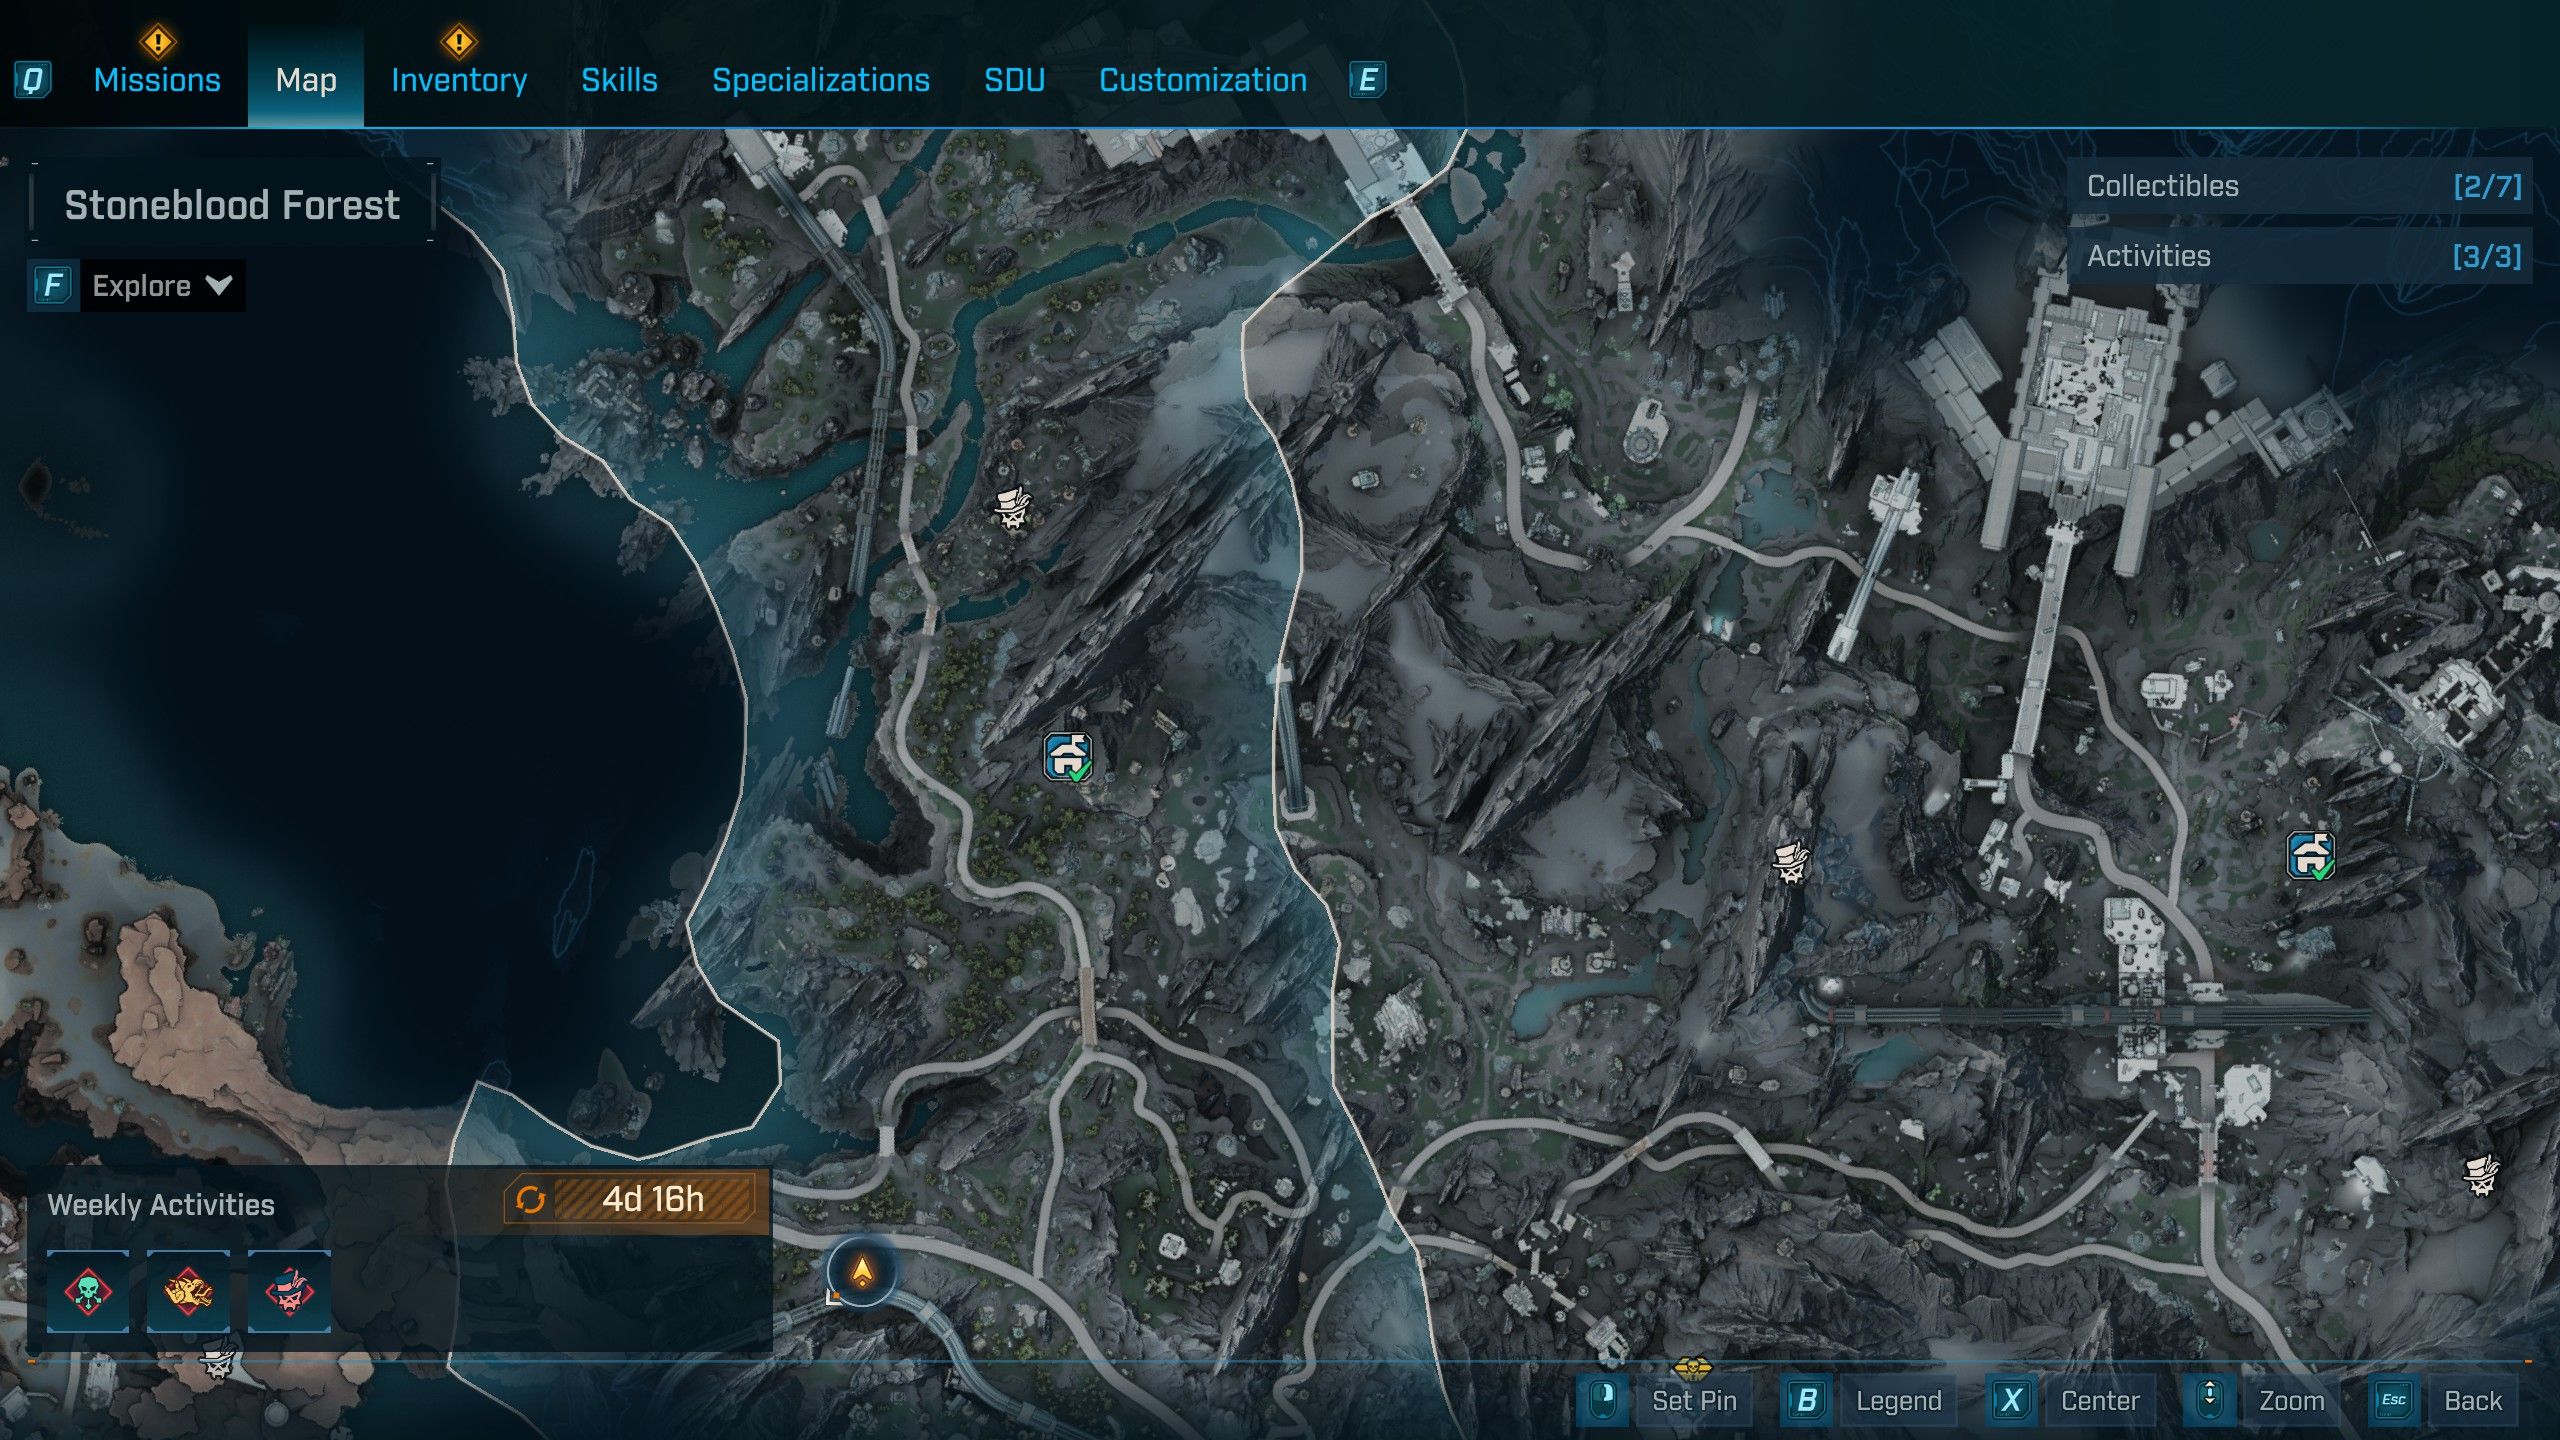
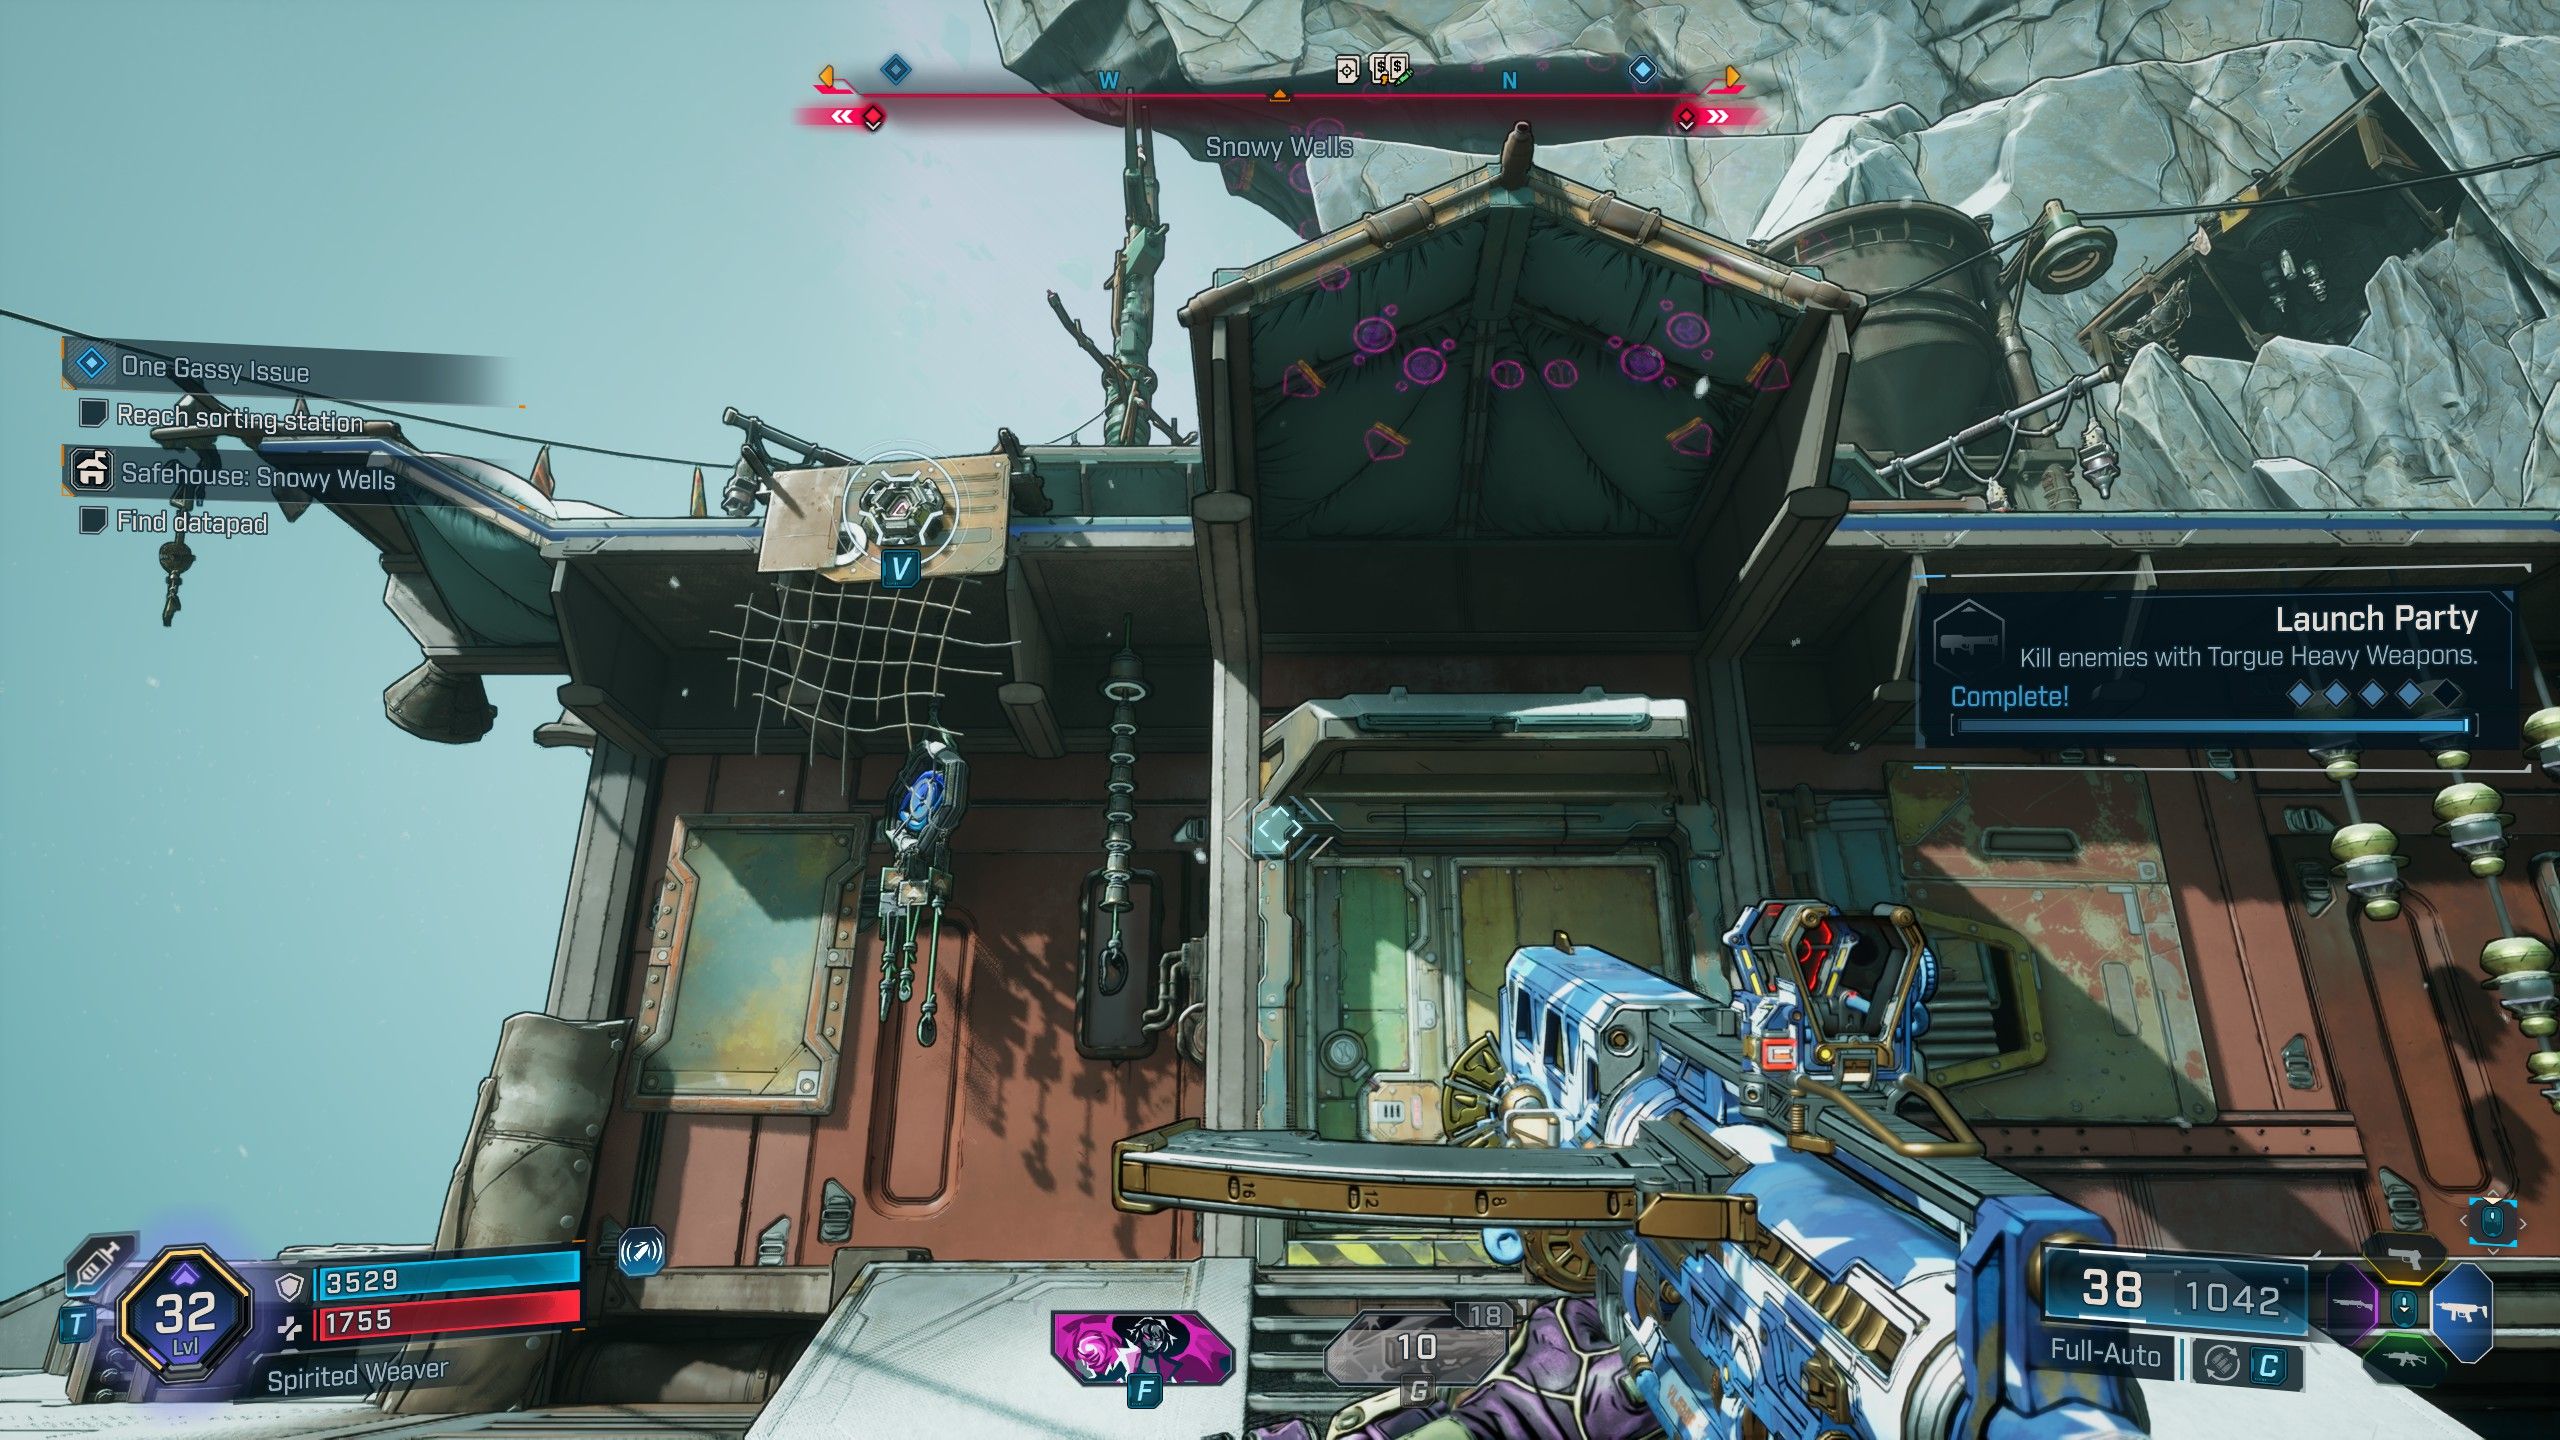

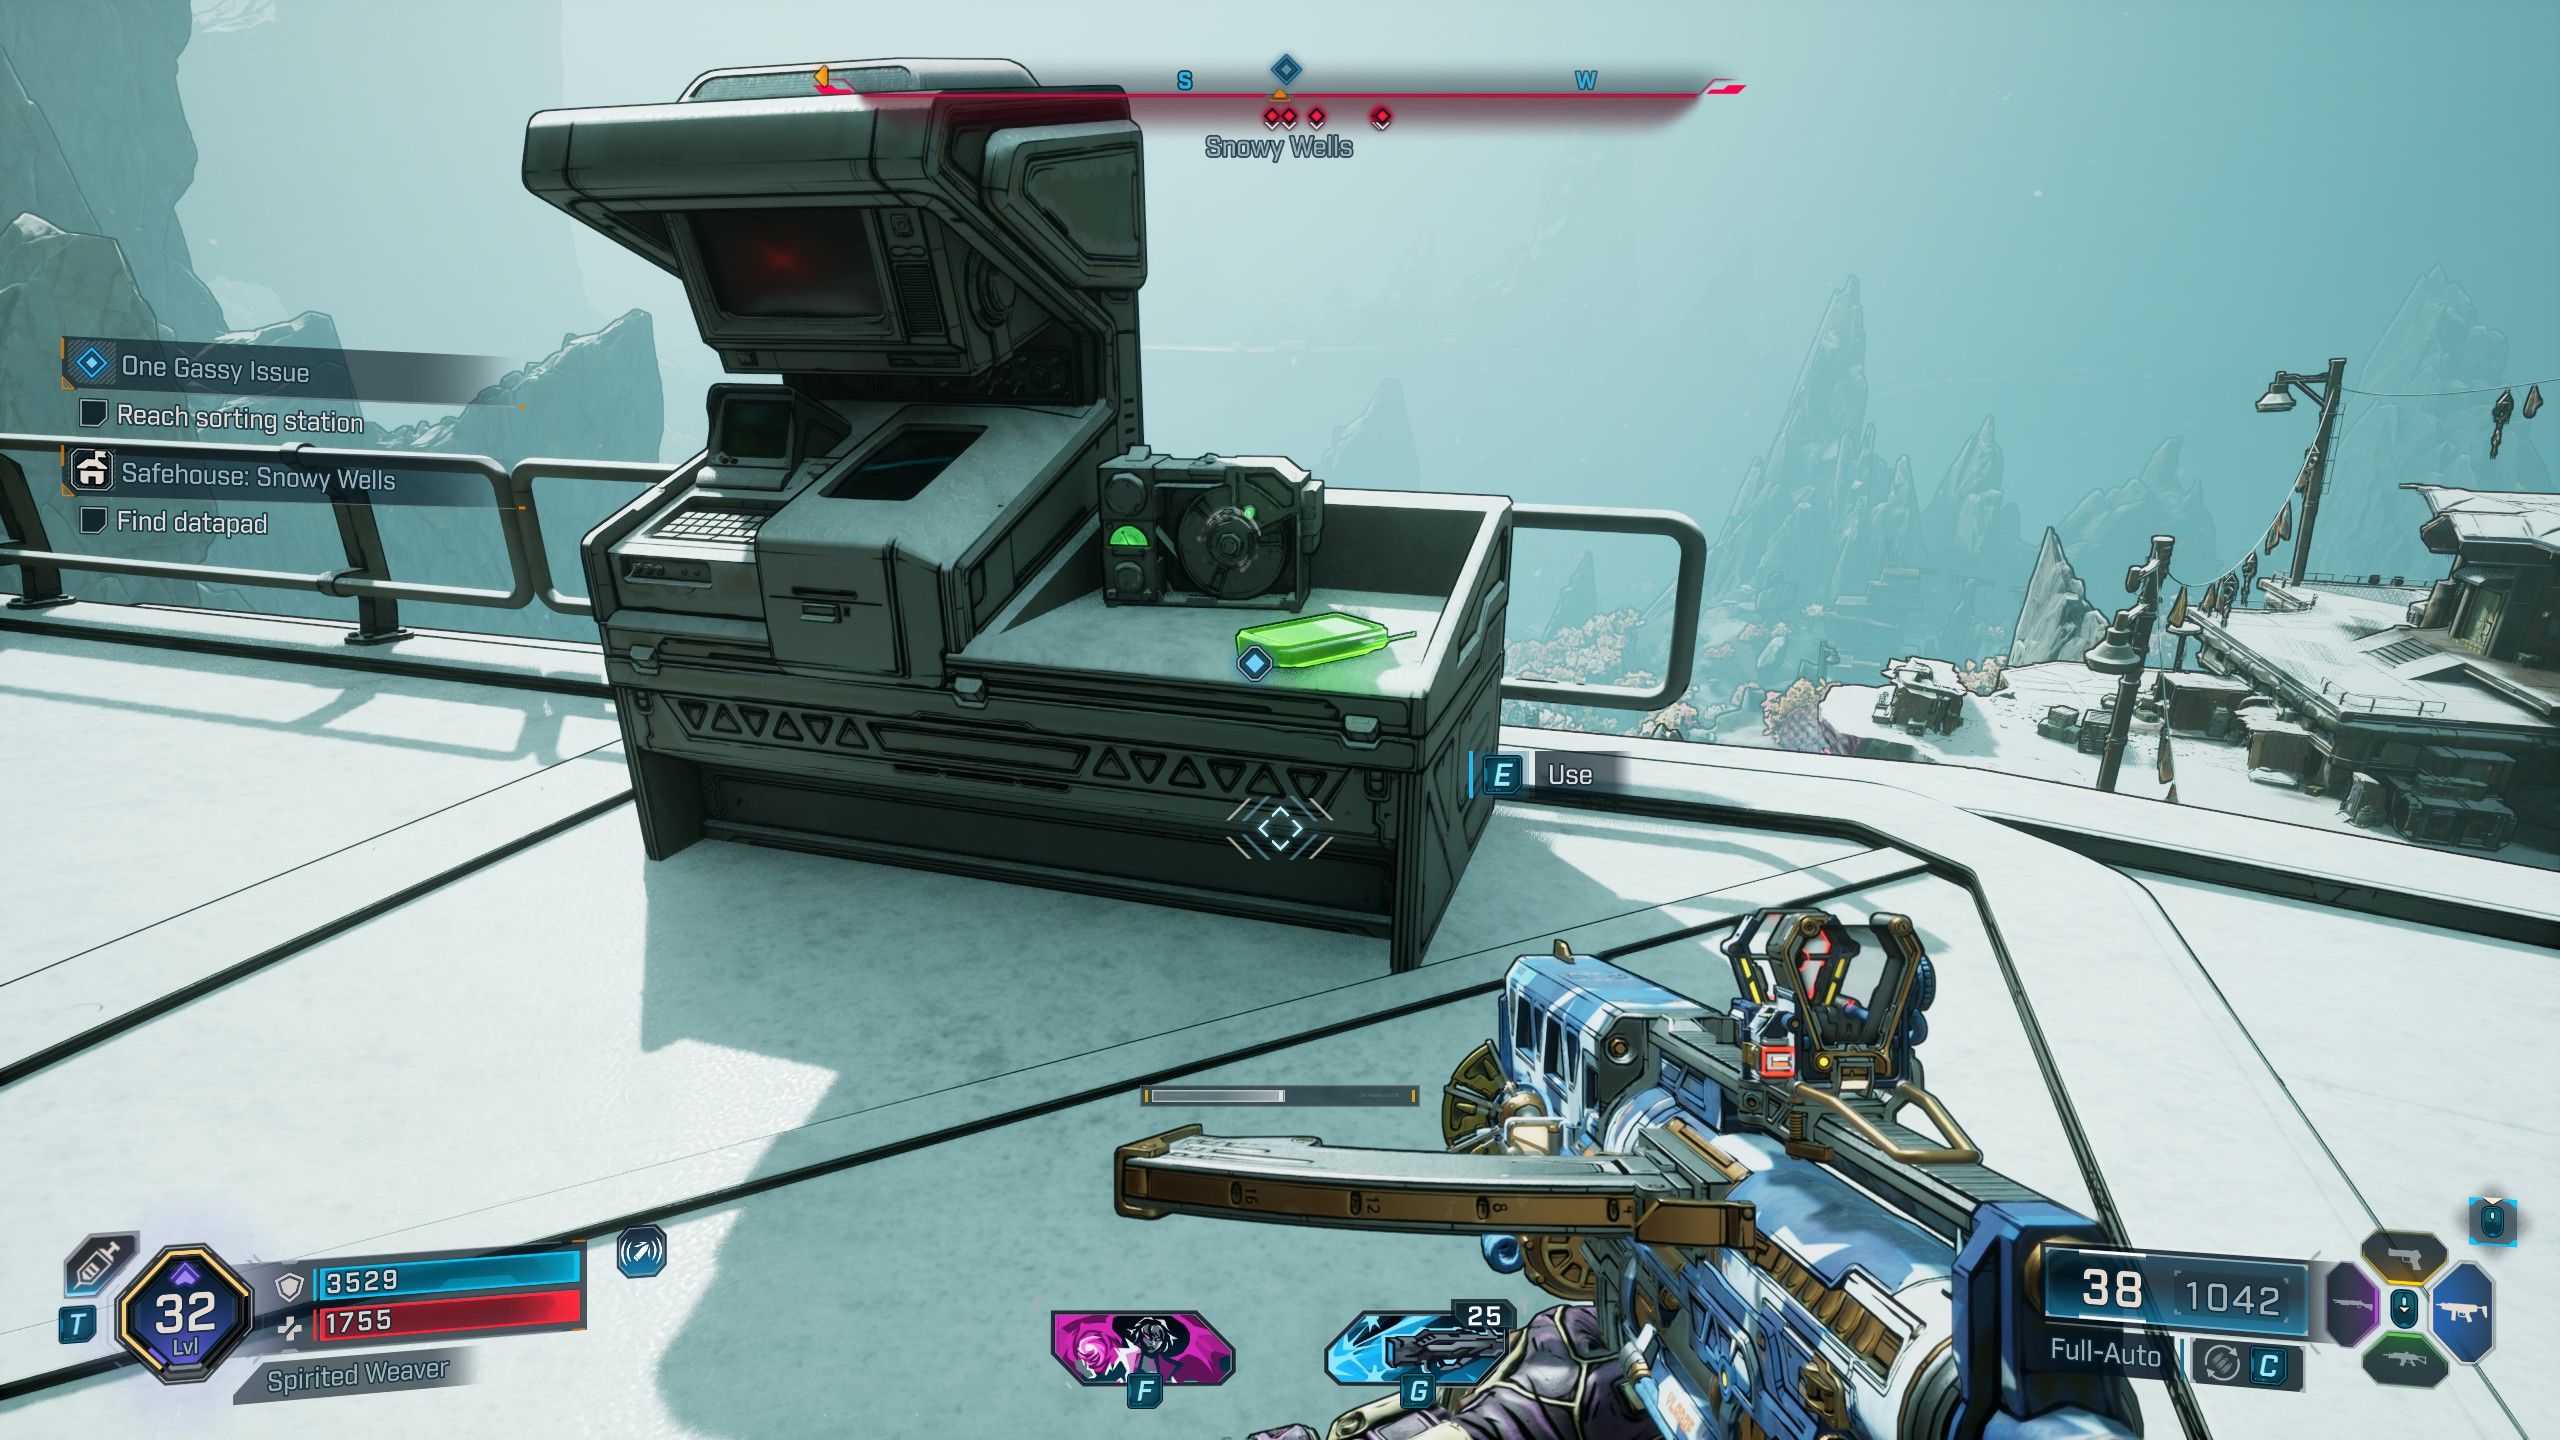
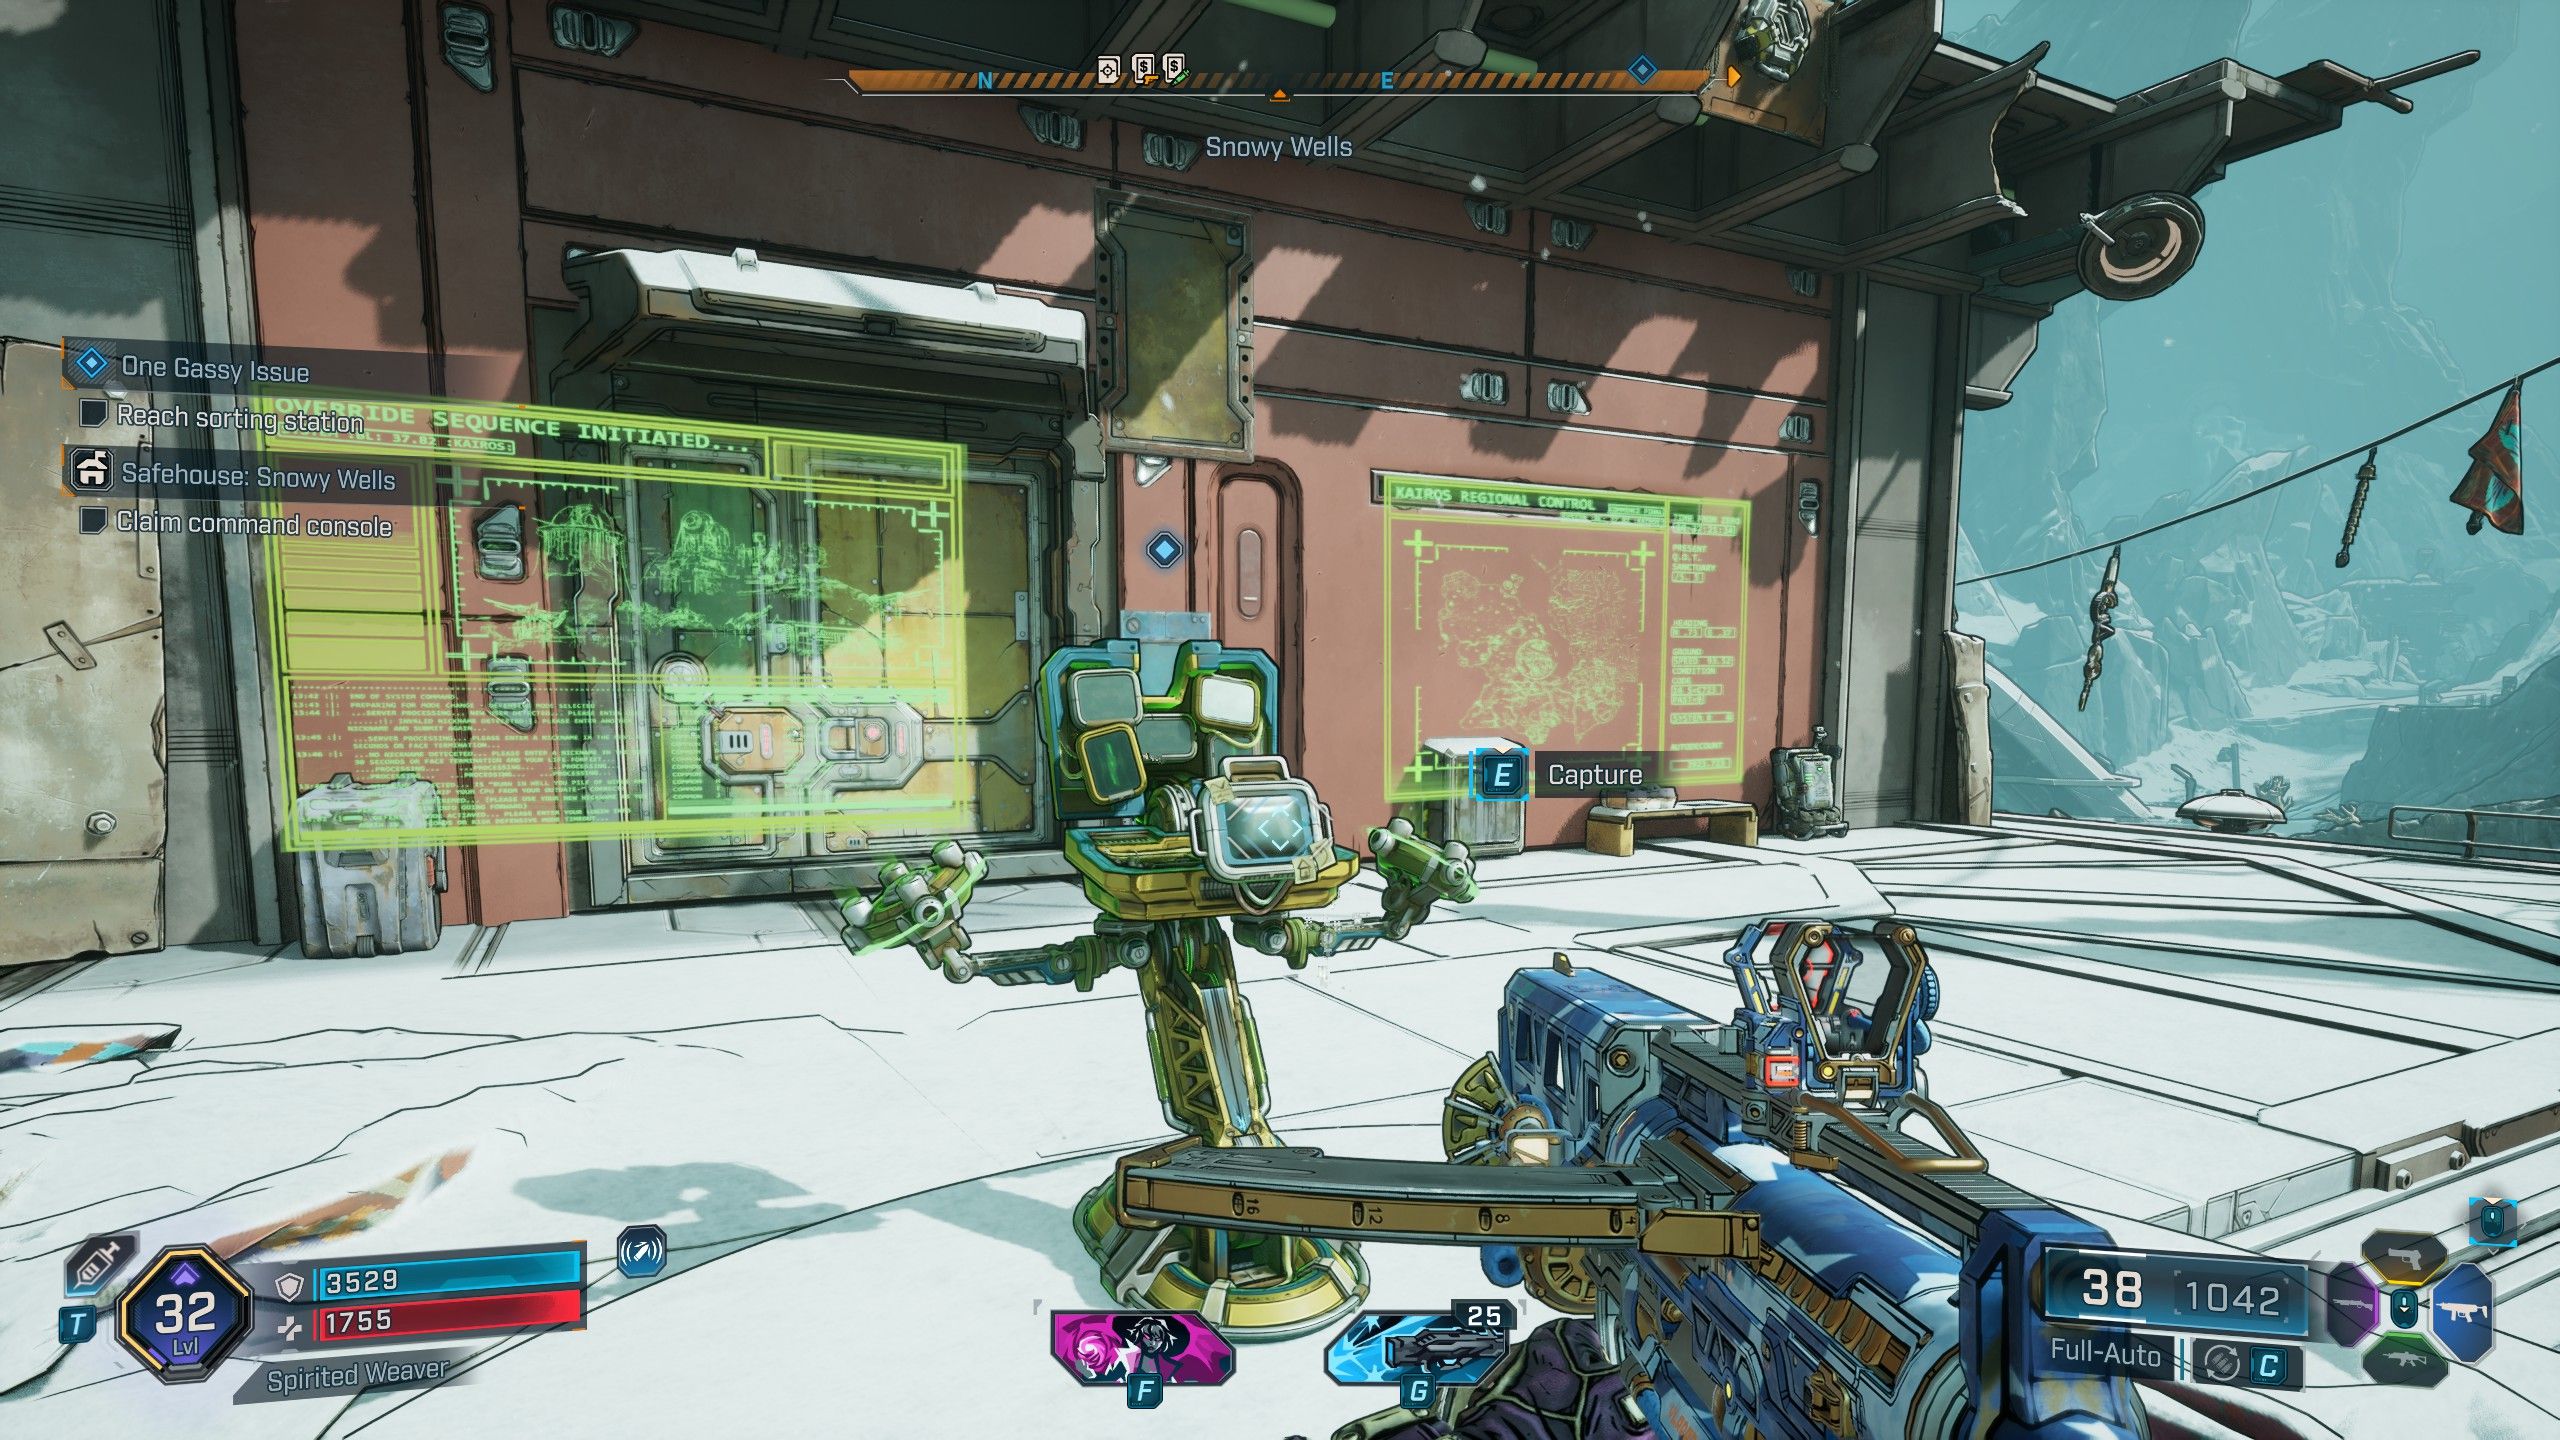
- Location: Stoneblood Forest, Terminus Range
Okay, so getting into Snowy Wells takes a little work. You’ll want to head to the west side of the mountains and use your grapple to climb up. Just keep following the path and using those grapple points until you reach the locked Safehouse. Once there, grapple to the left of the door, then to the water tower. From the water tower, you can glide over to a building with a Datapad on it. After grabbing that, glide back to the Safehouse doors and follow them around to the left – you’ll find a Command Console outside. Use that console, and it’ll unlock the Safehouse for you to use!
Makeshift Chalet Safehouse & Datapad Location
How to Get the Makeshift Chalet Safehouse
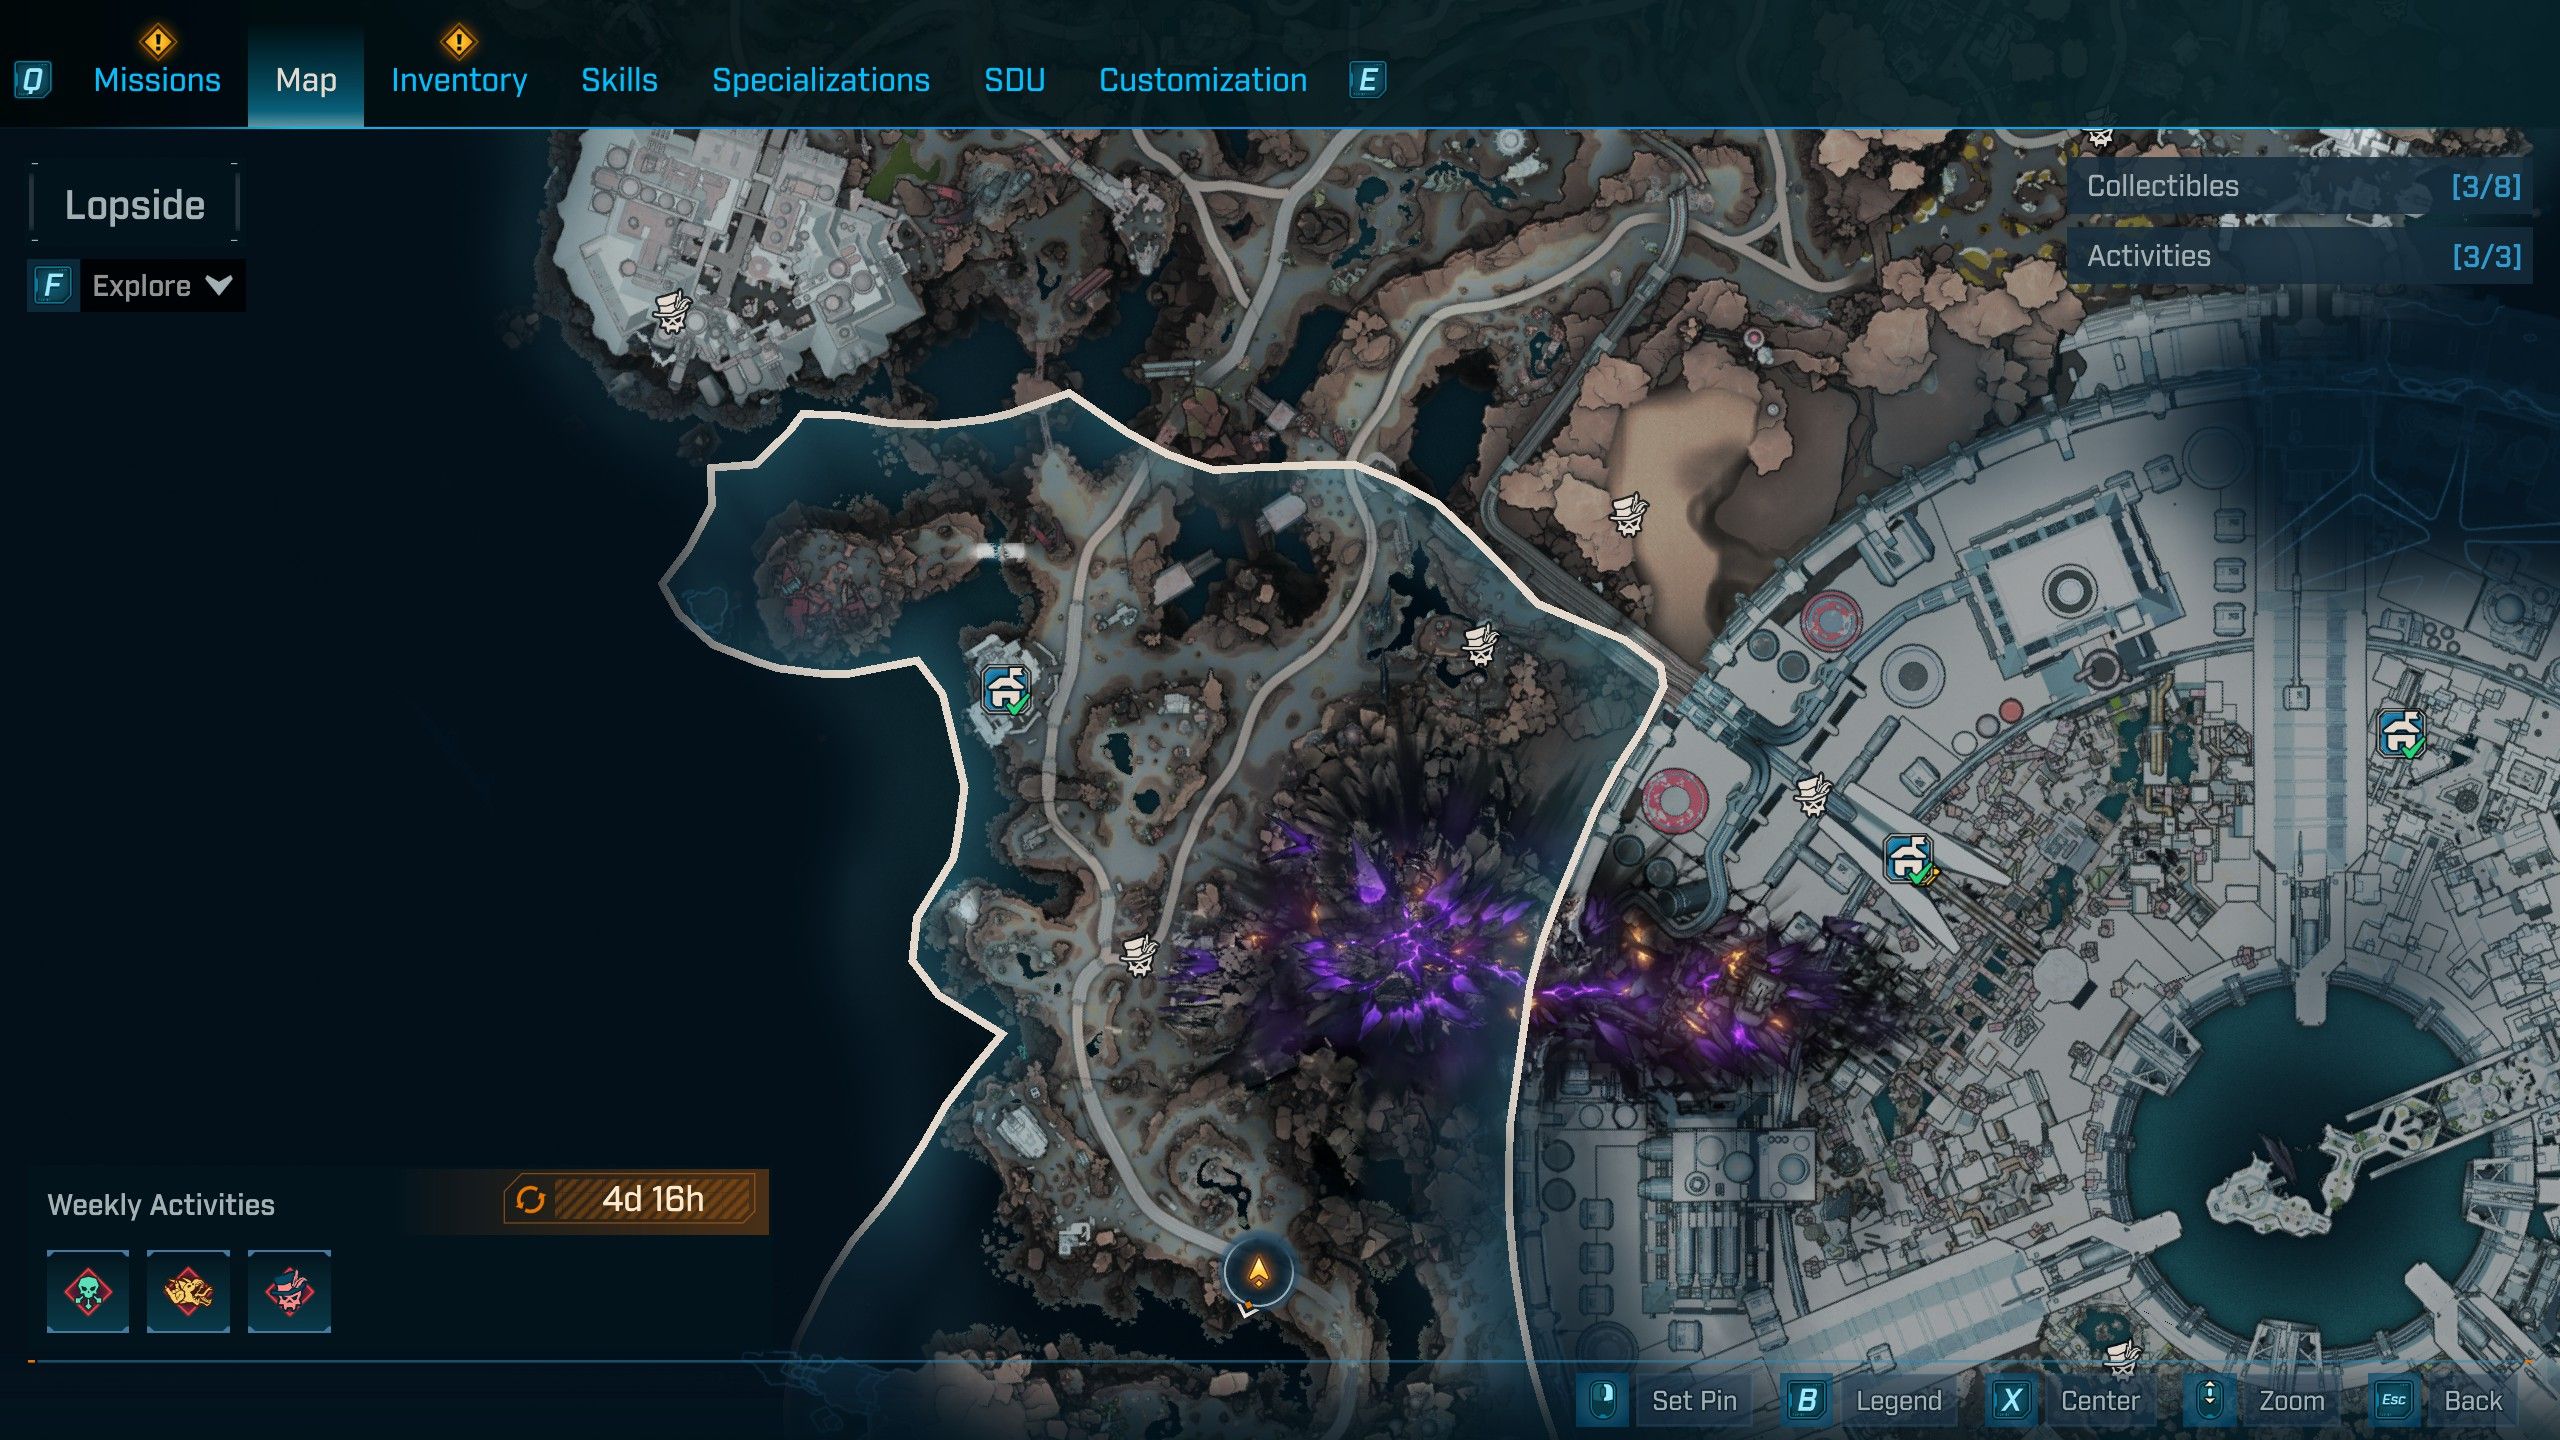
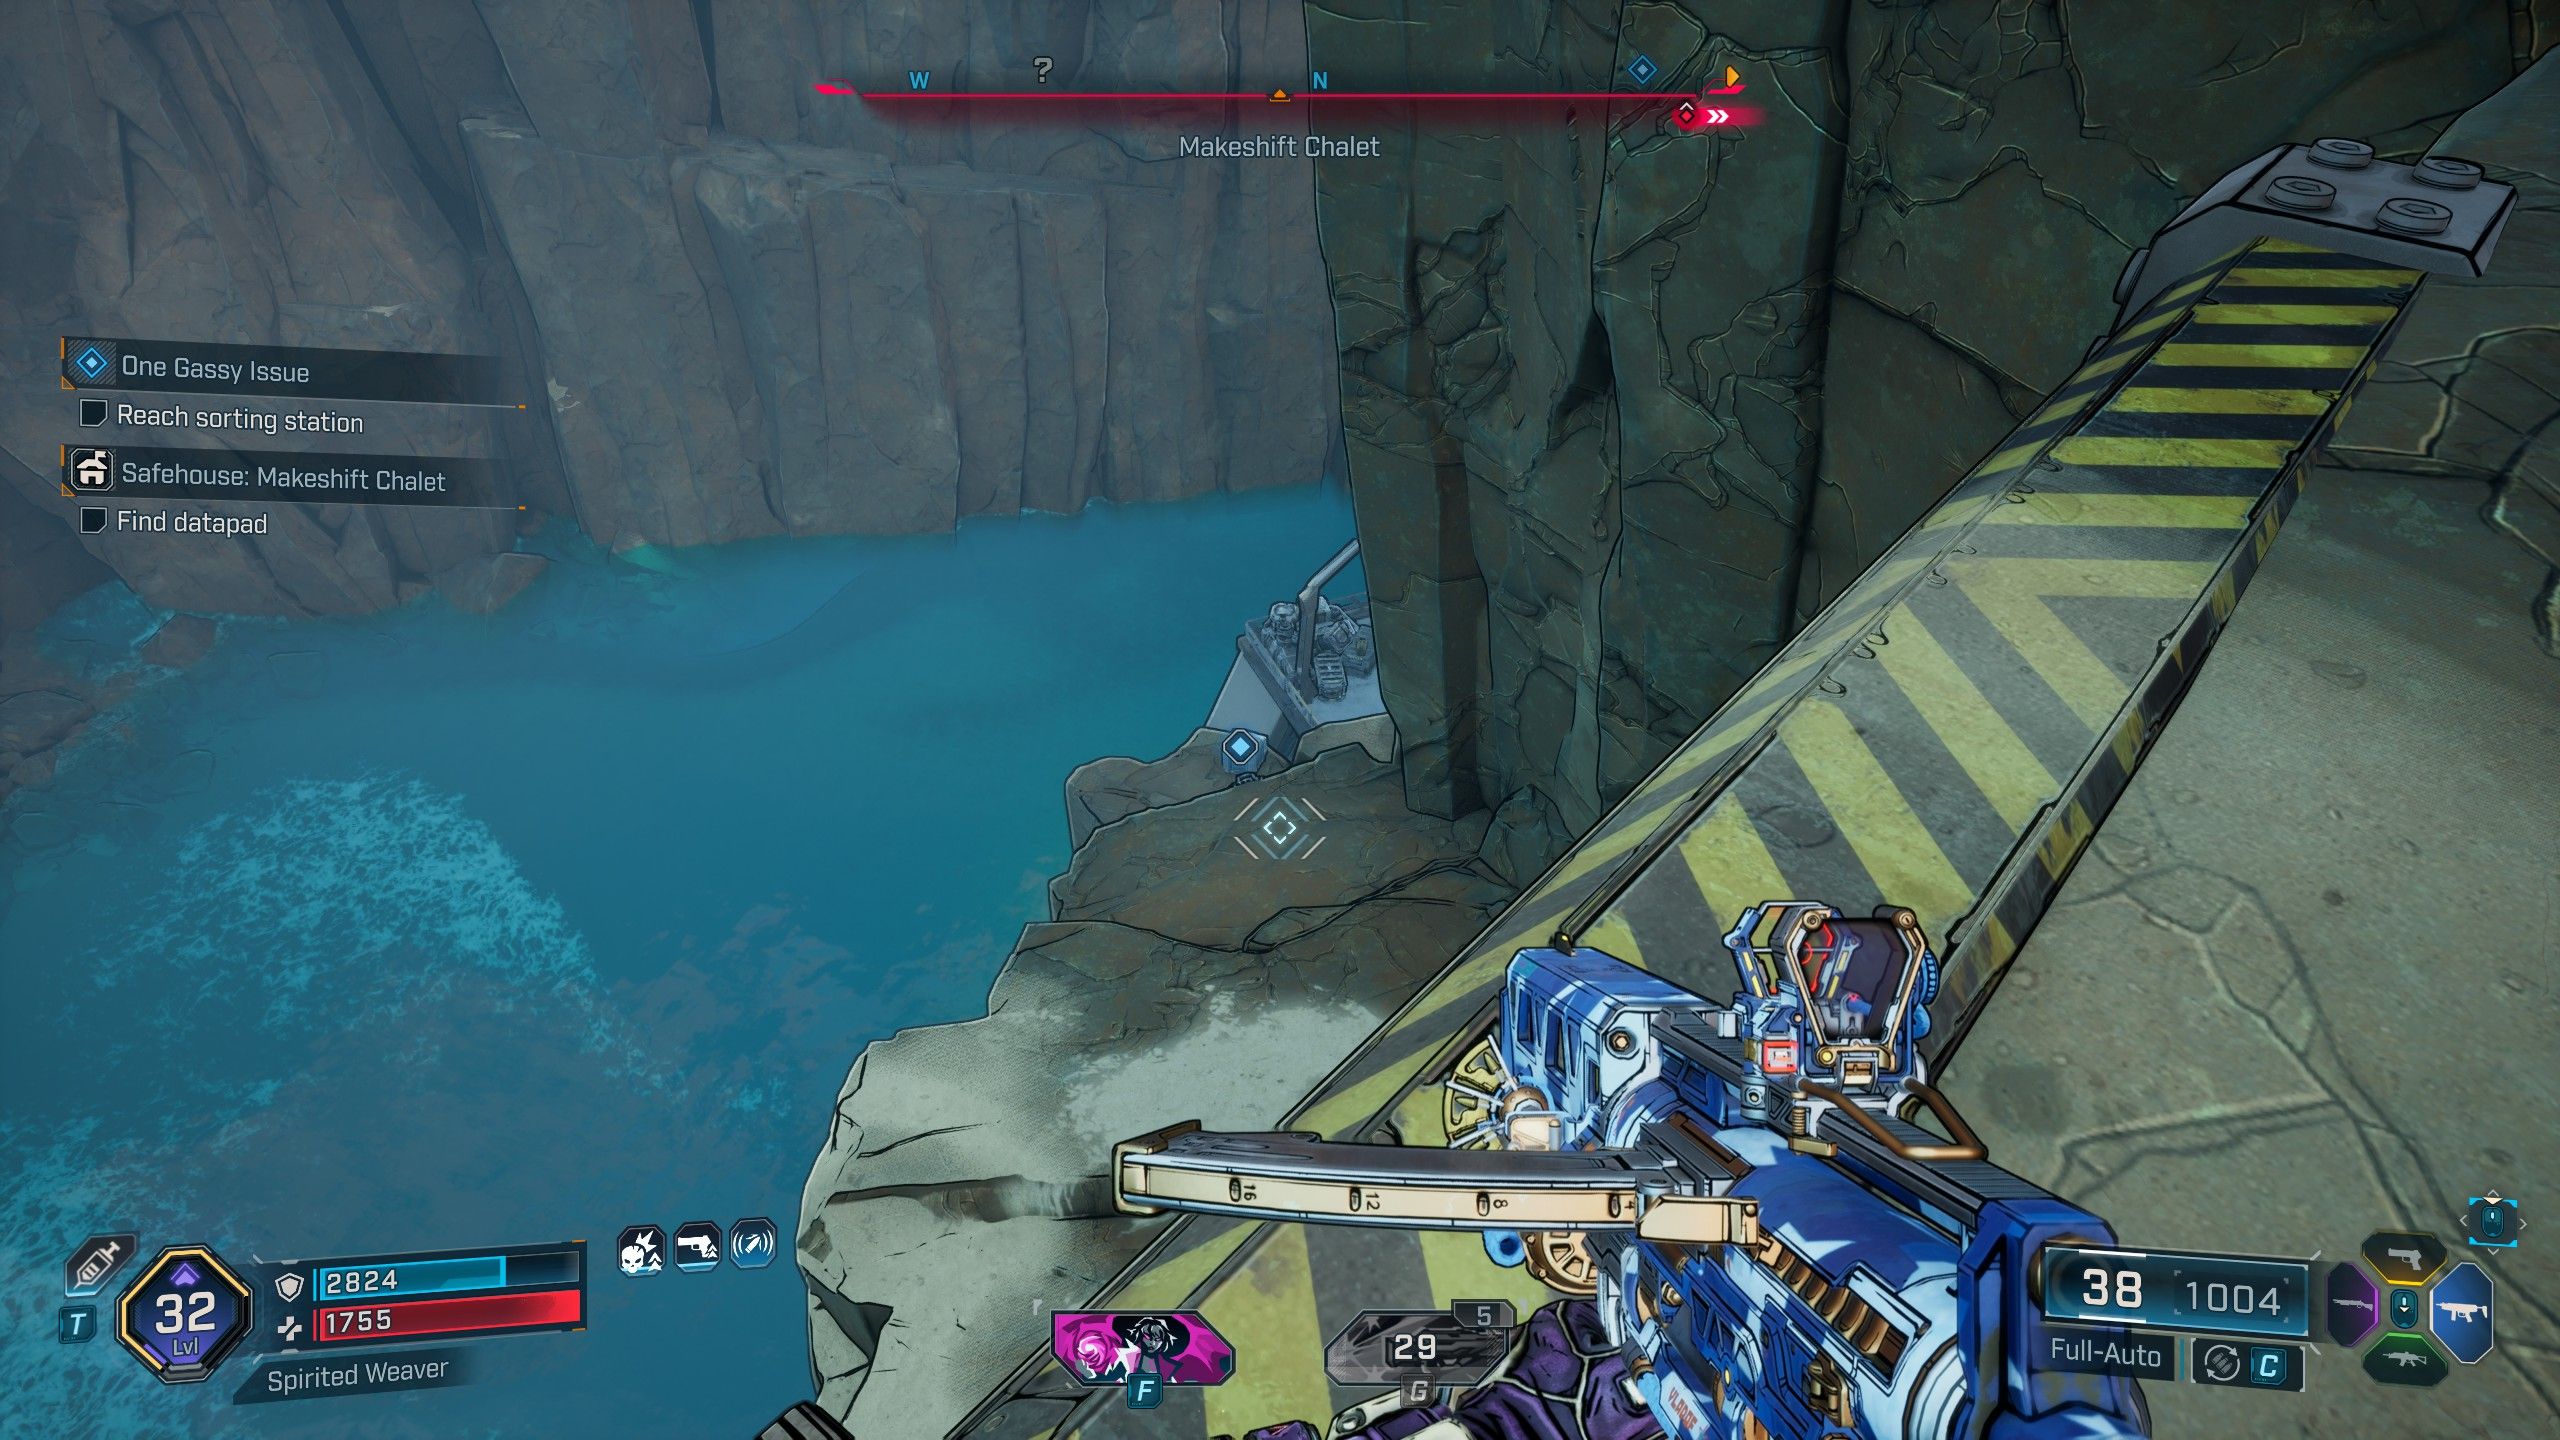
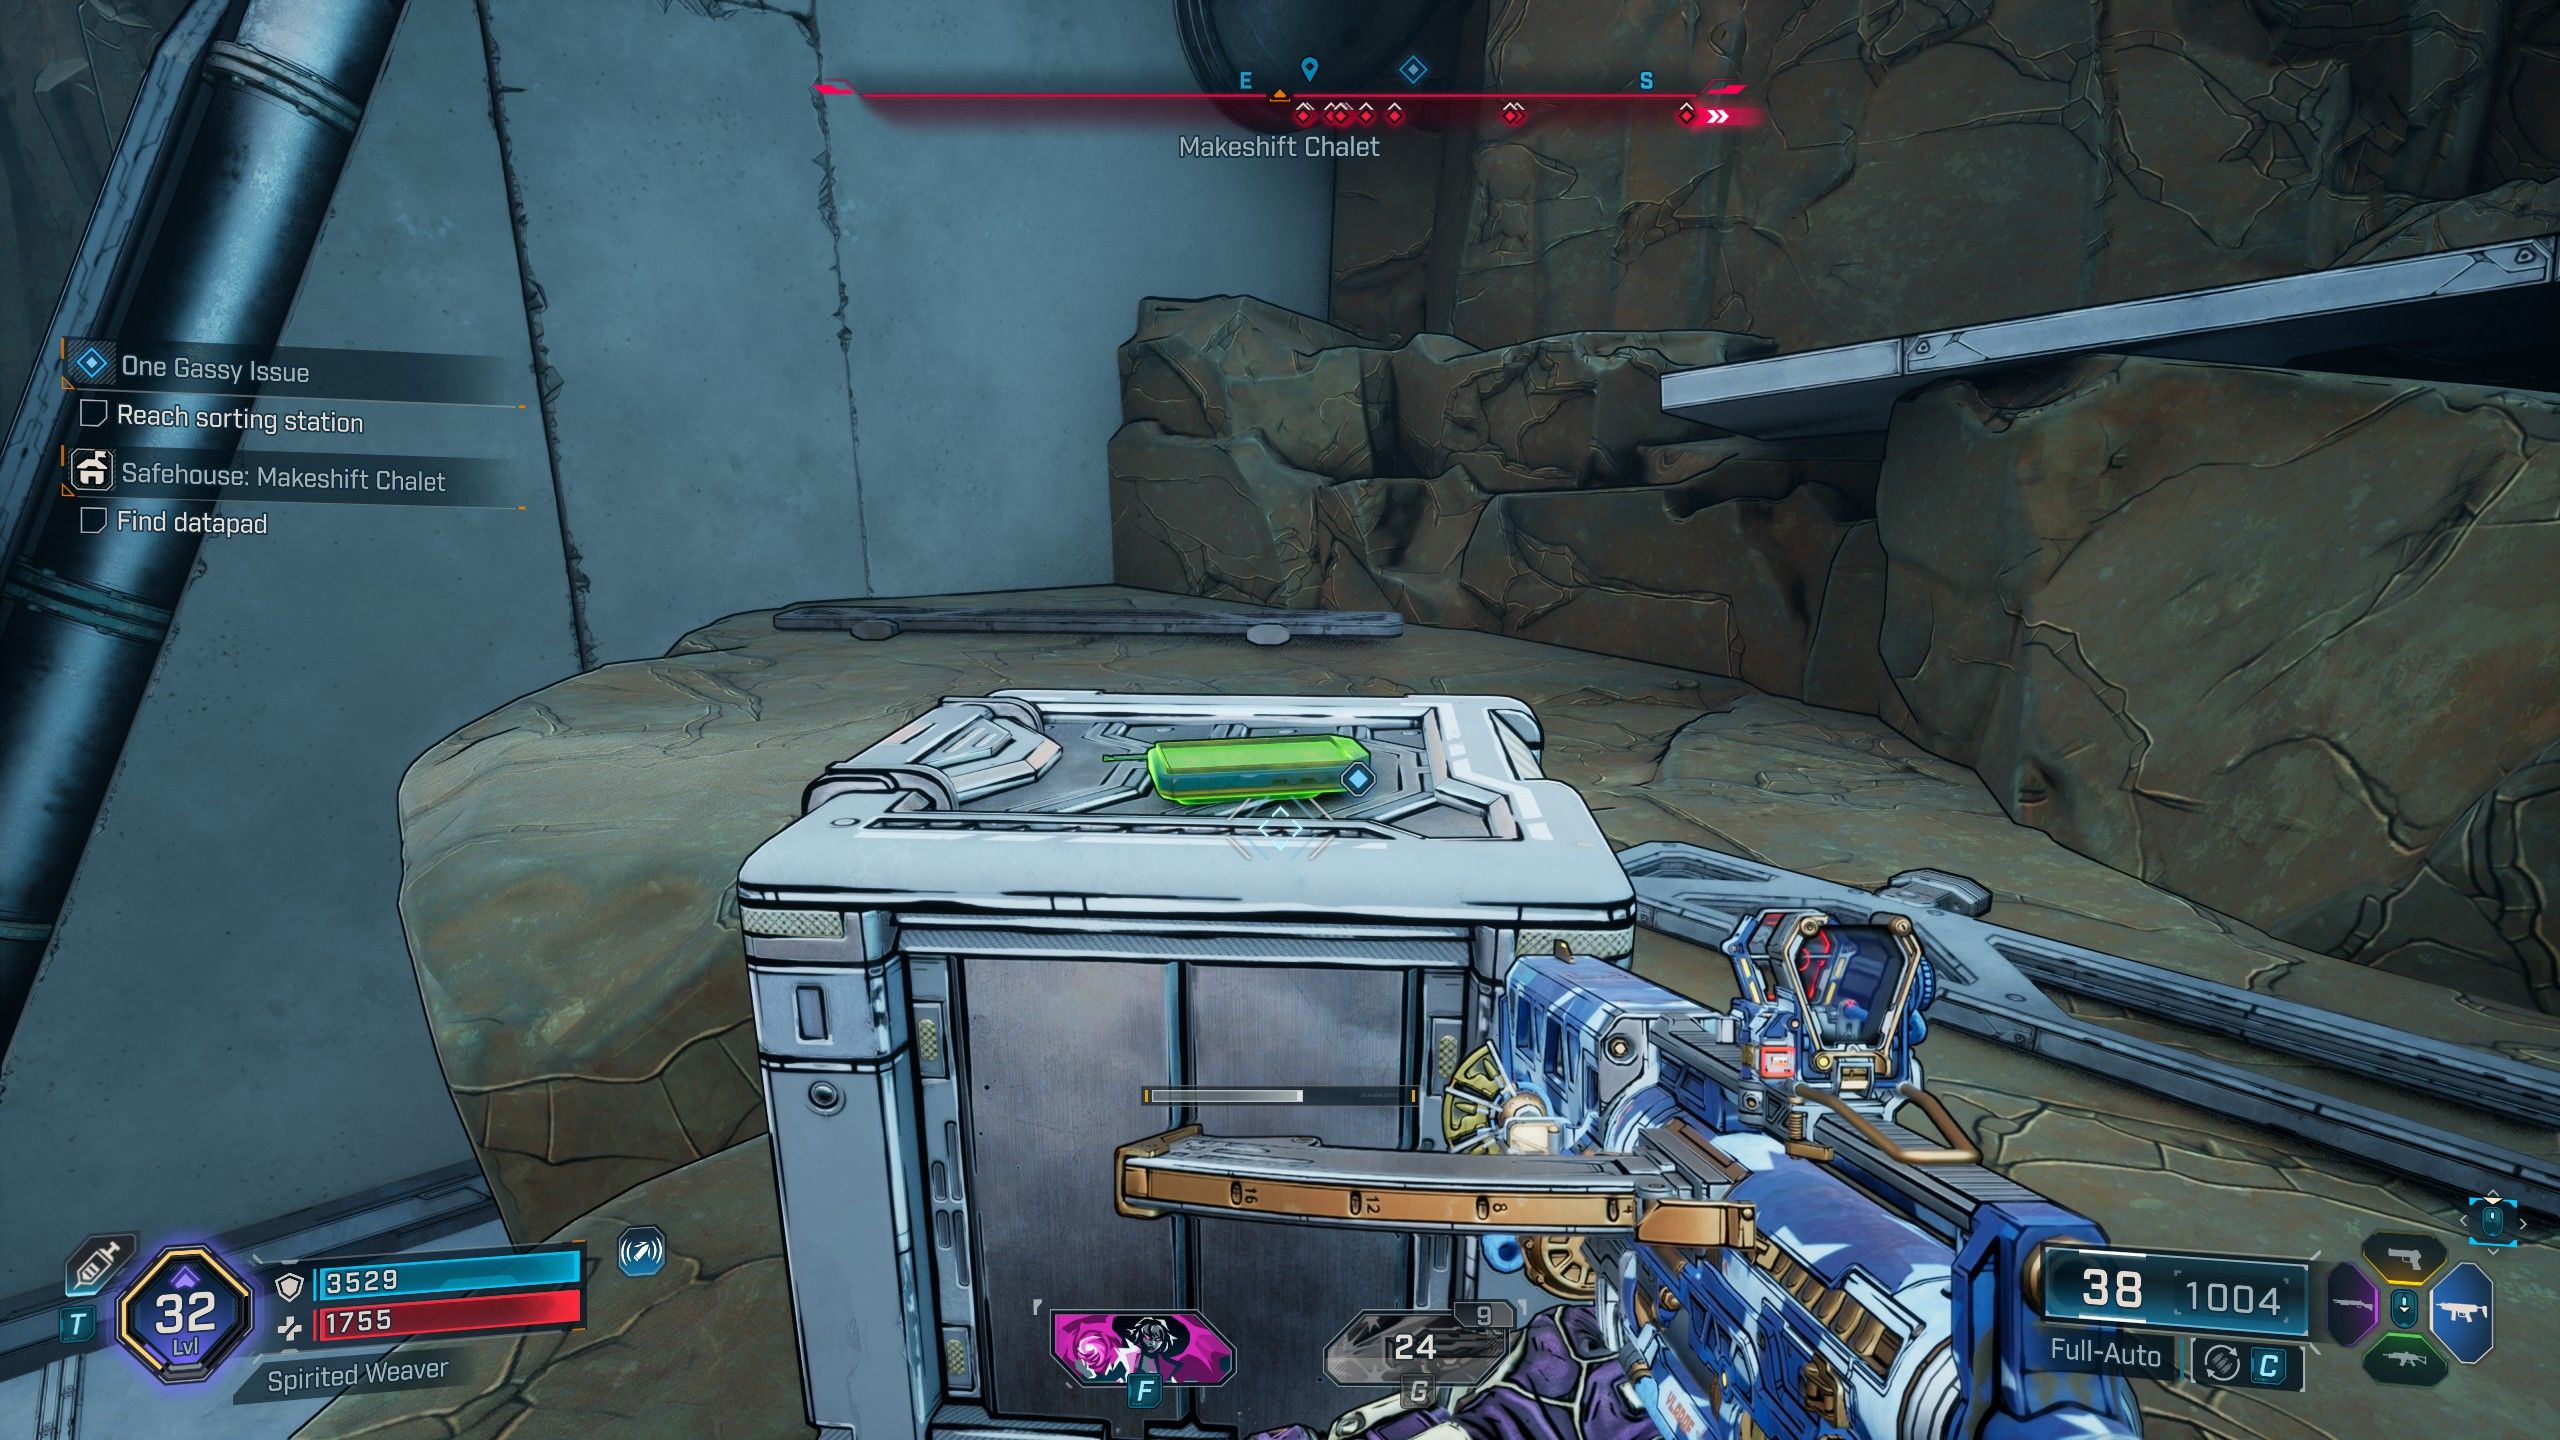
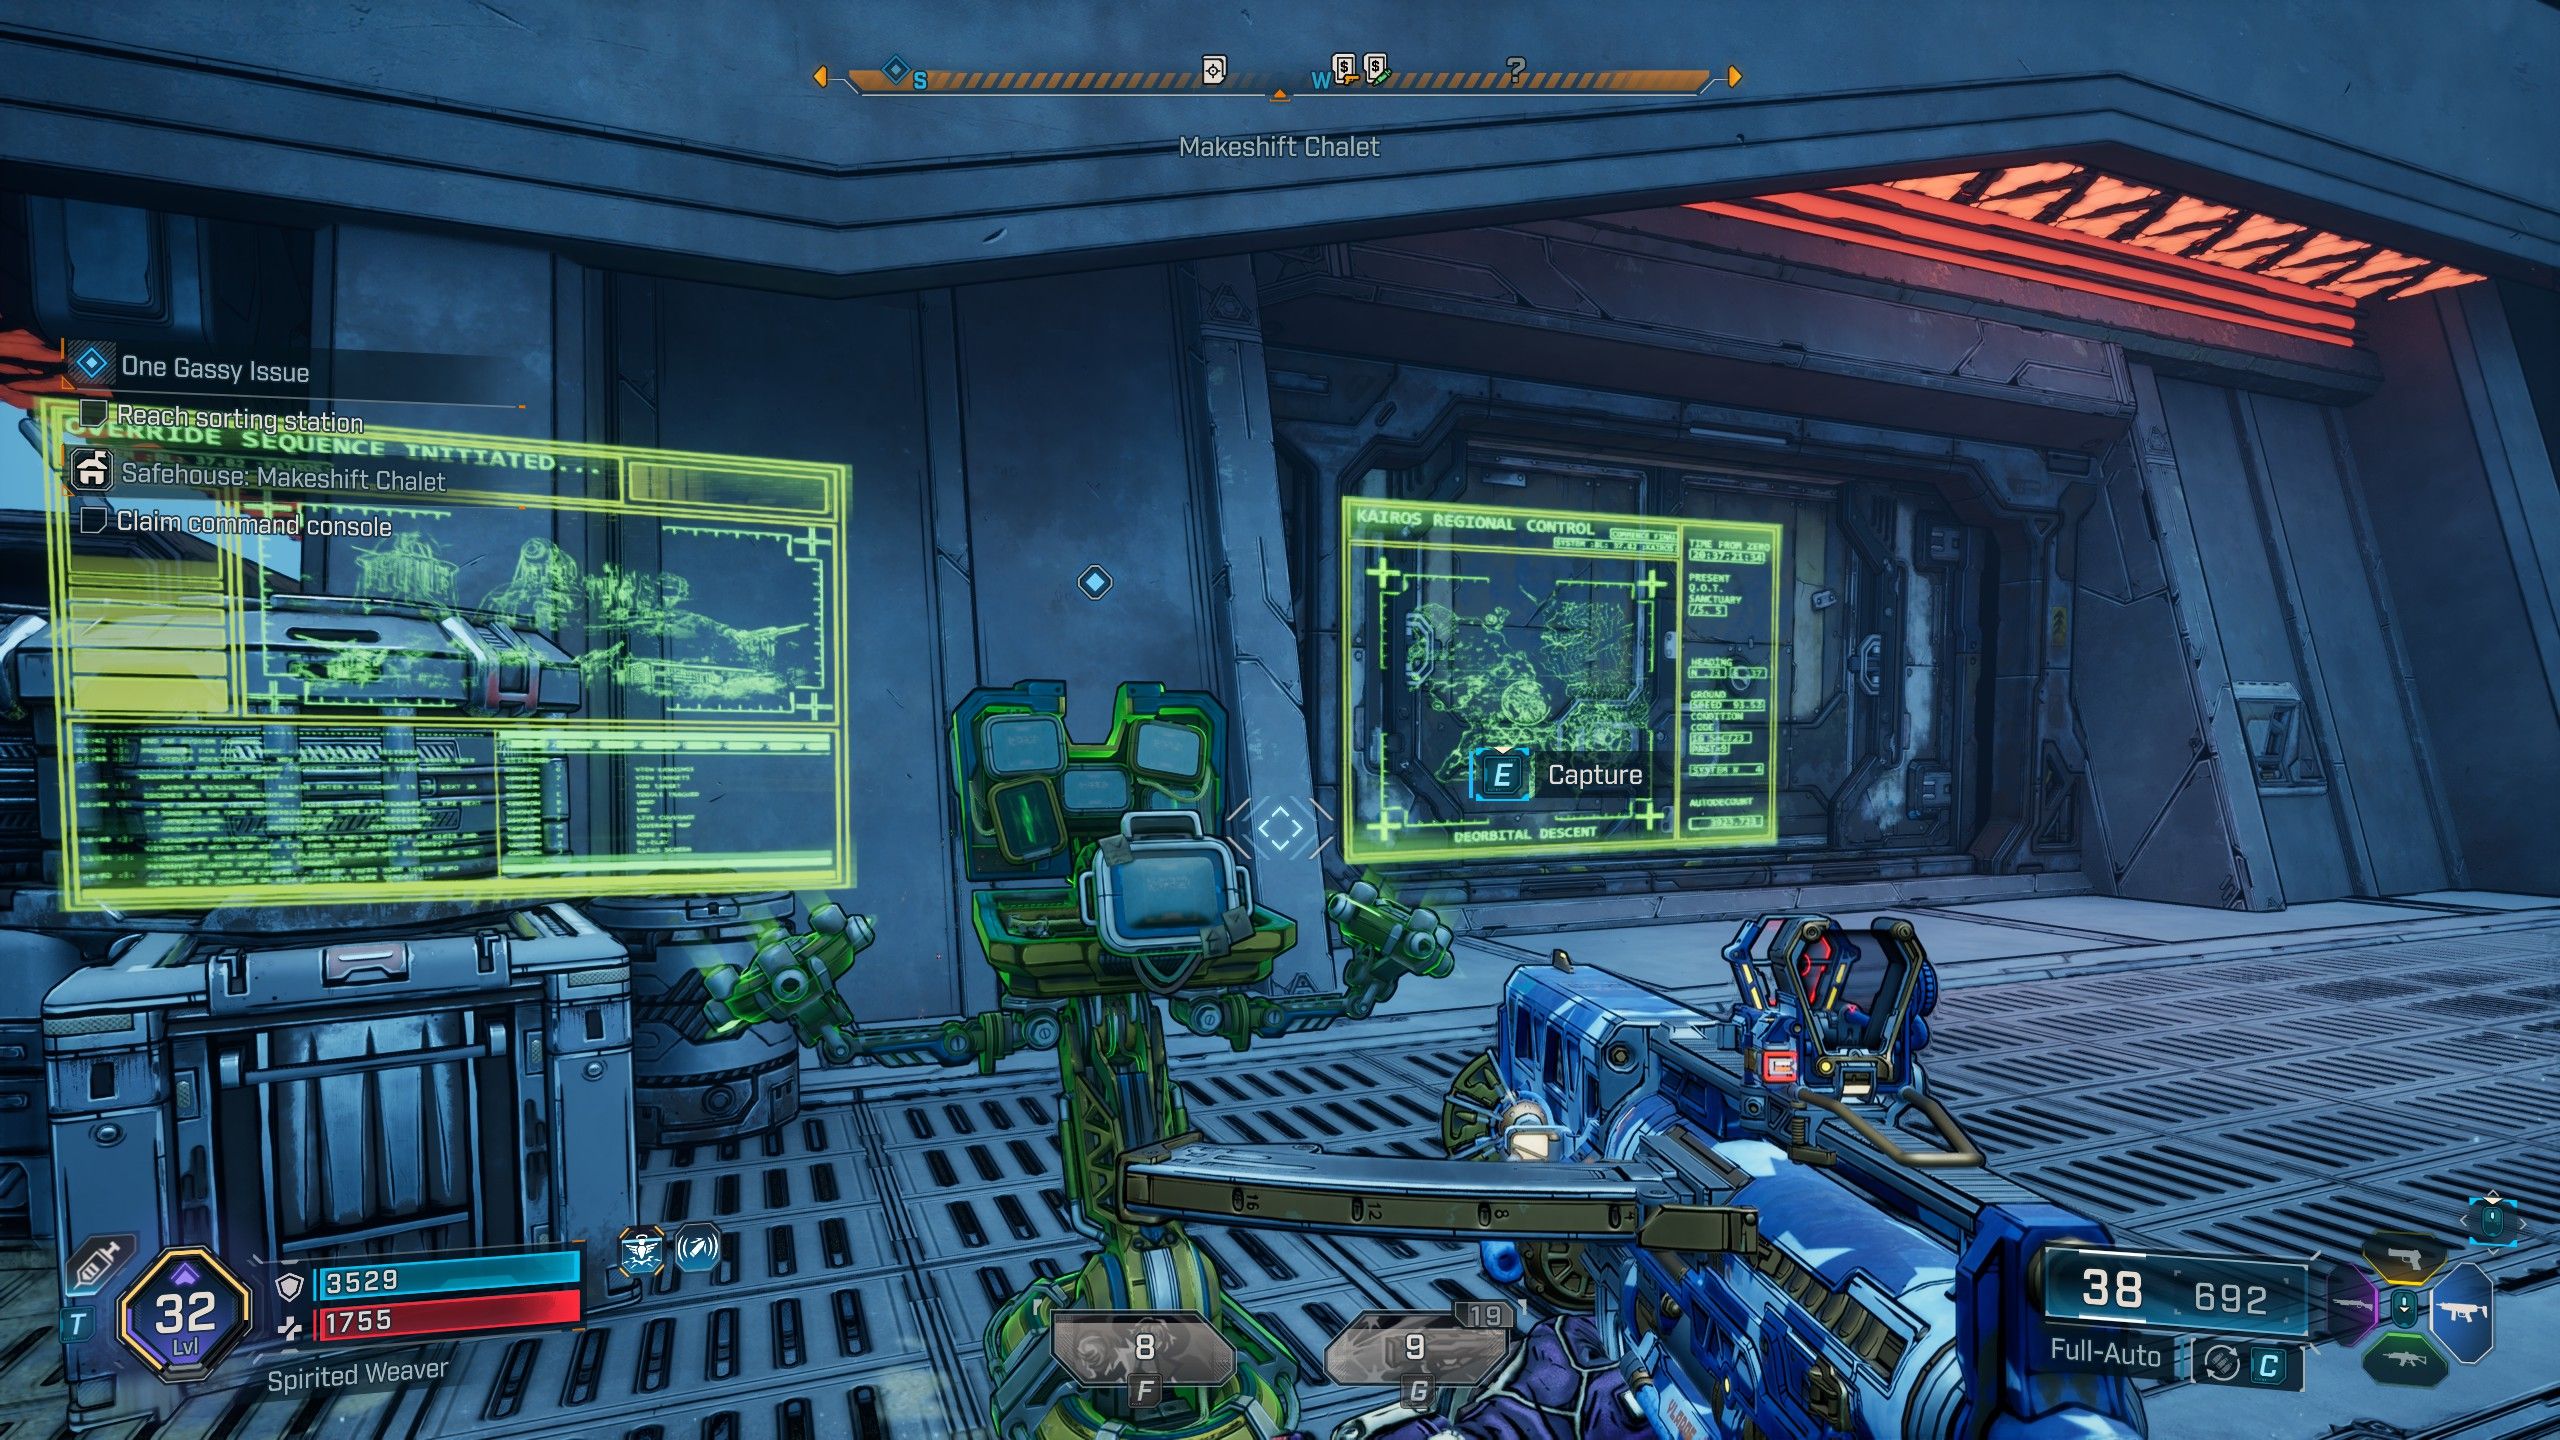
- Location: Lopside, Carcadia Burn
After arriving at the Makeshift Chalet, head to the left. You’ll see a steep cliff face; the Datapad is at the bottom. You can use your grapple to climb back up. To find the Command Console, go to the southwest wall of the Makeshift Chalet, just outside the Safehouse.
The Lowrise Safehouse & Datapad Location
How to Get the Lowrise Safehouse
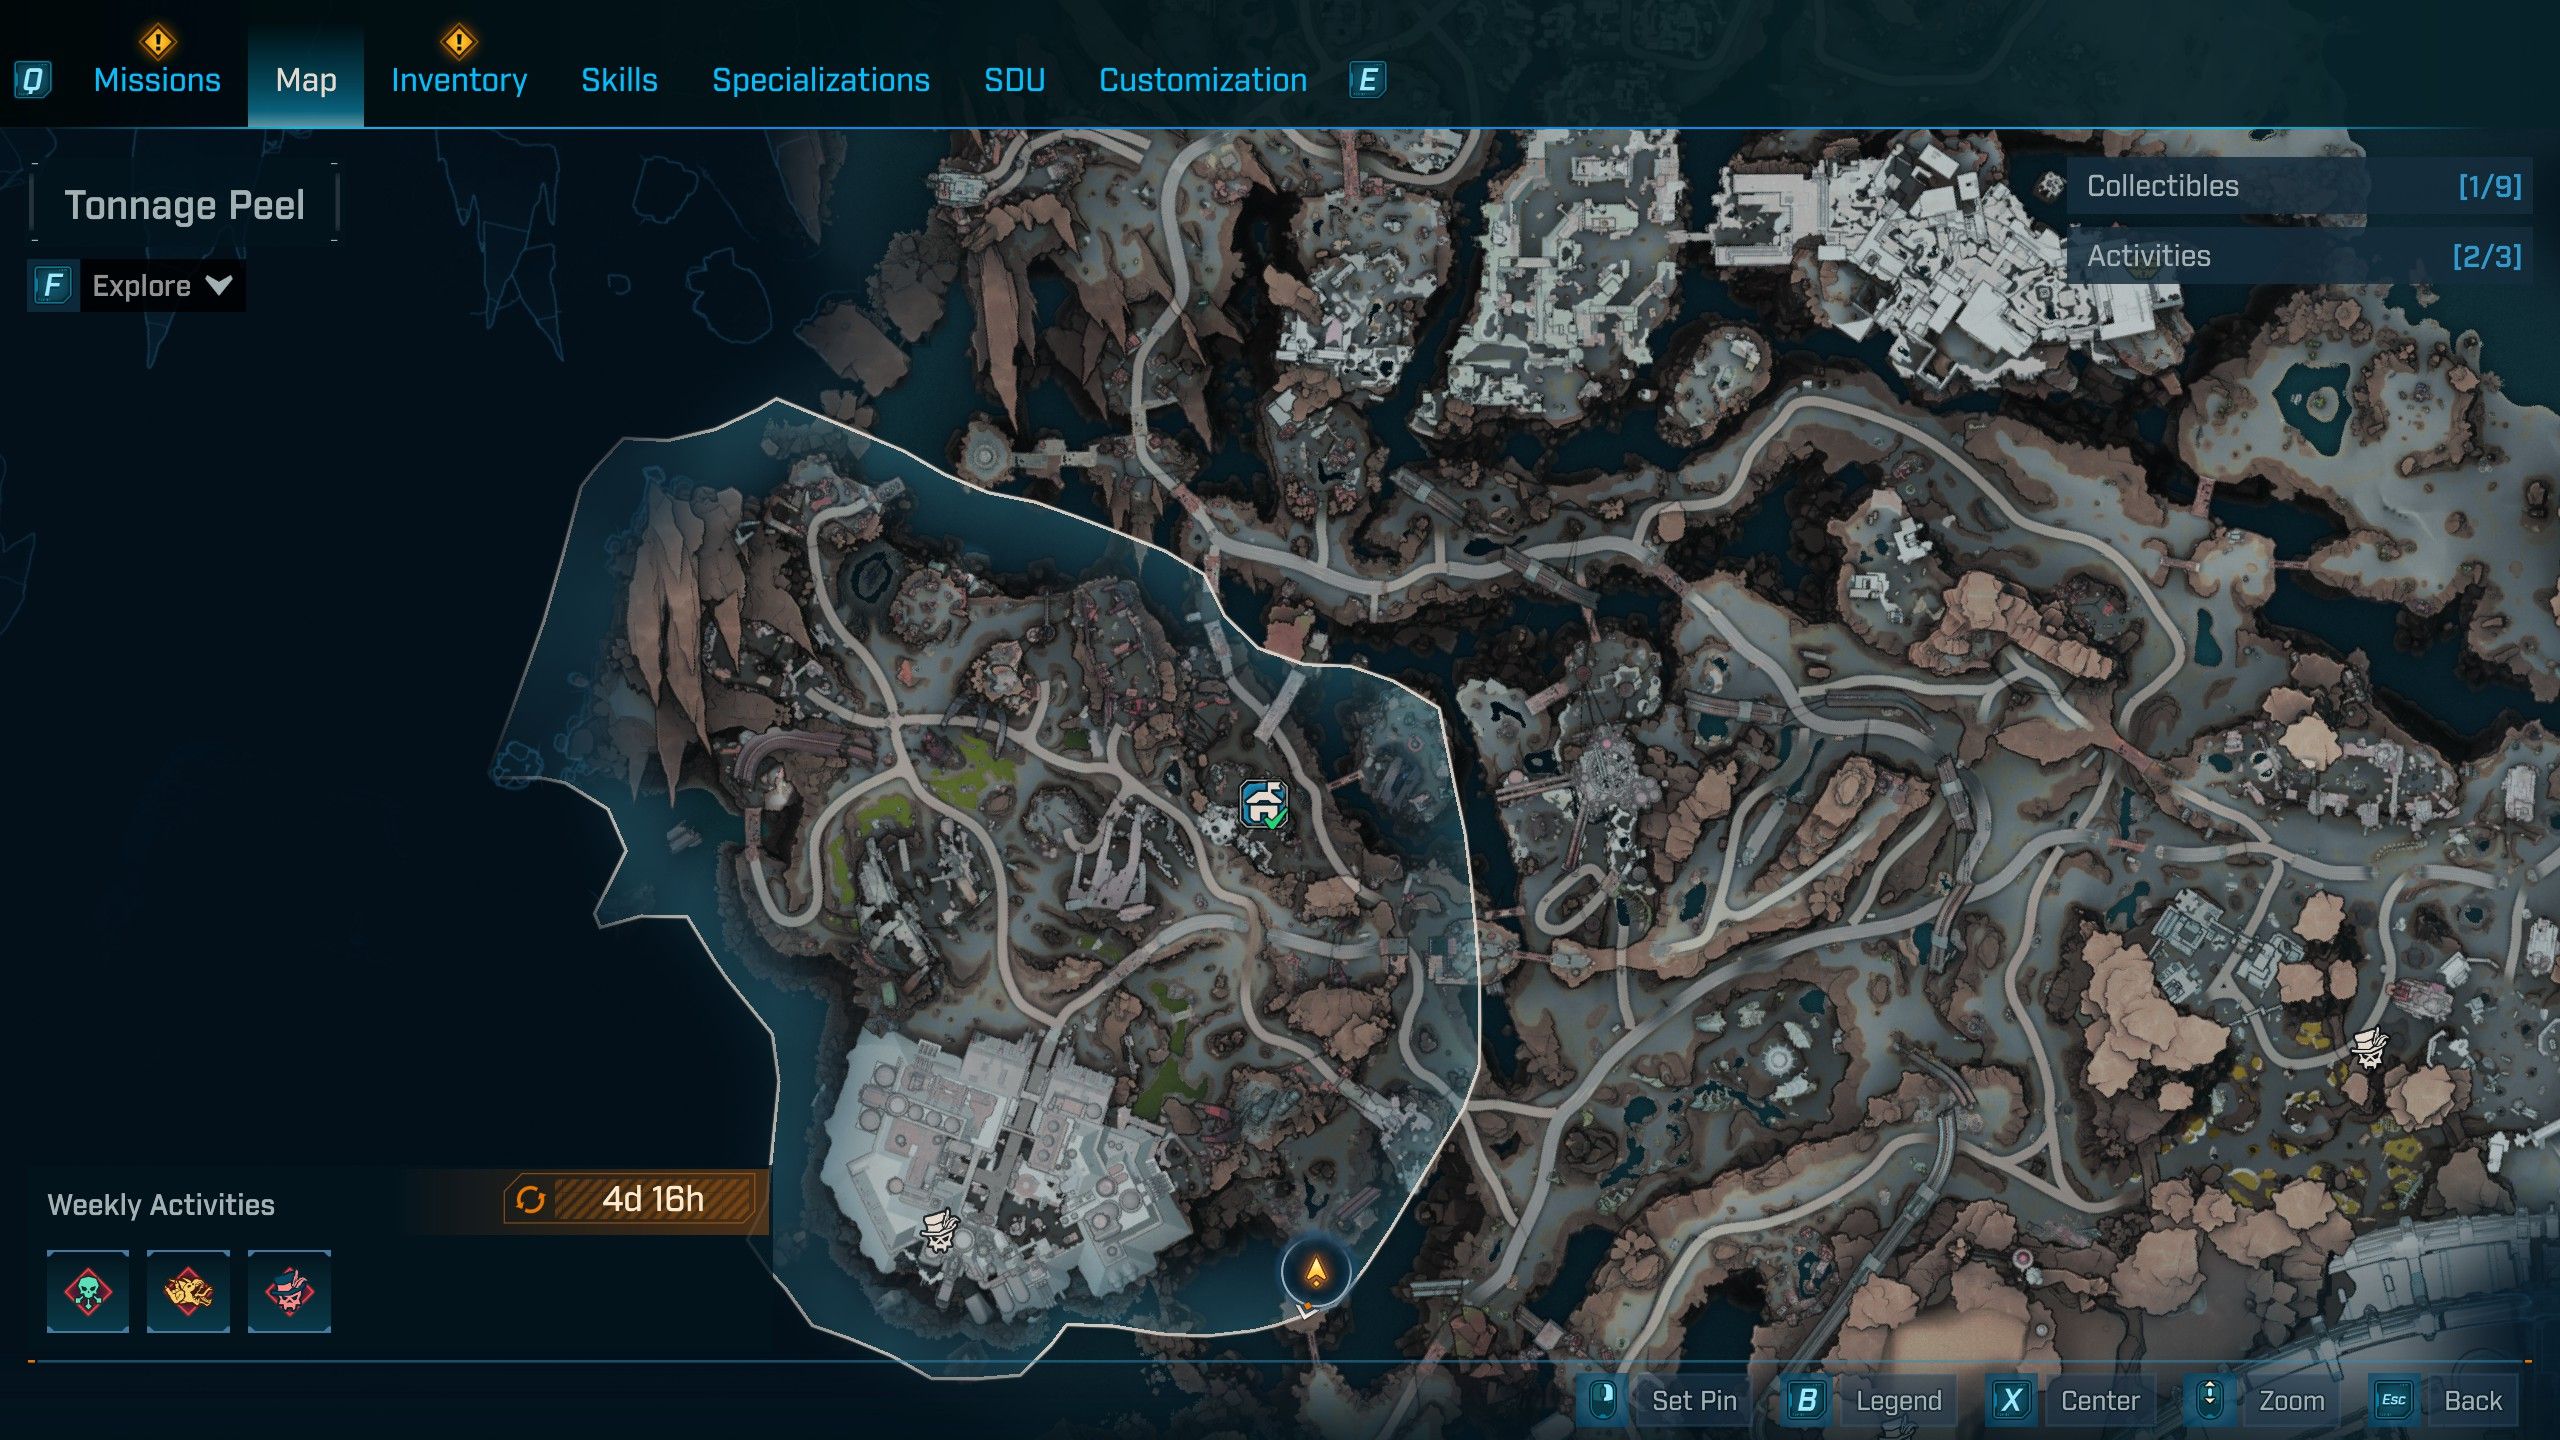
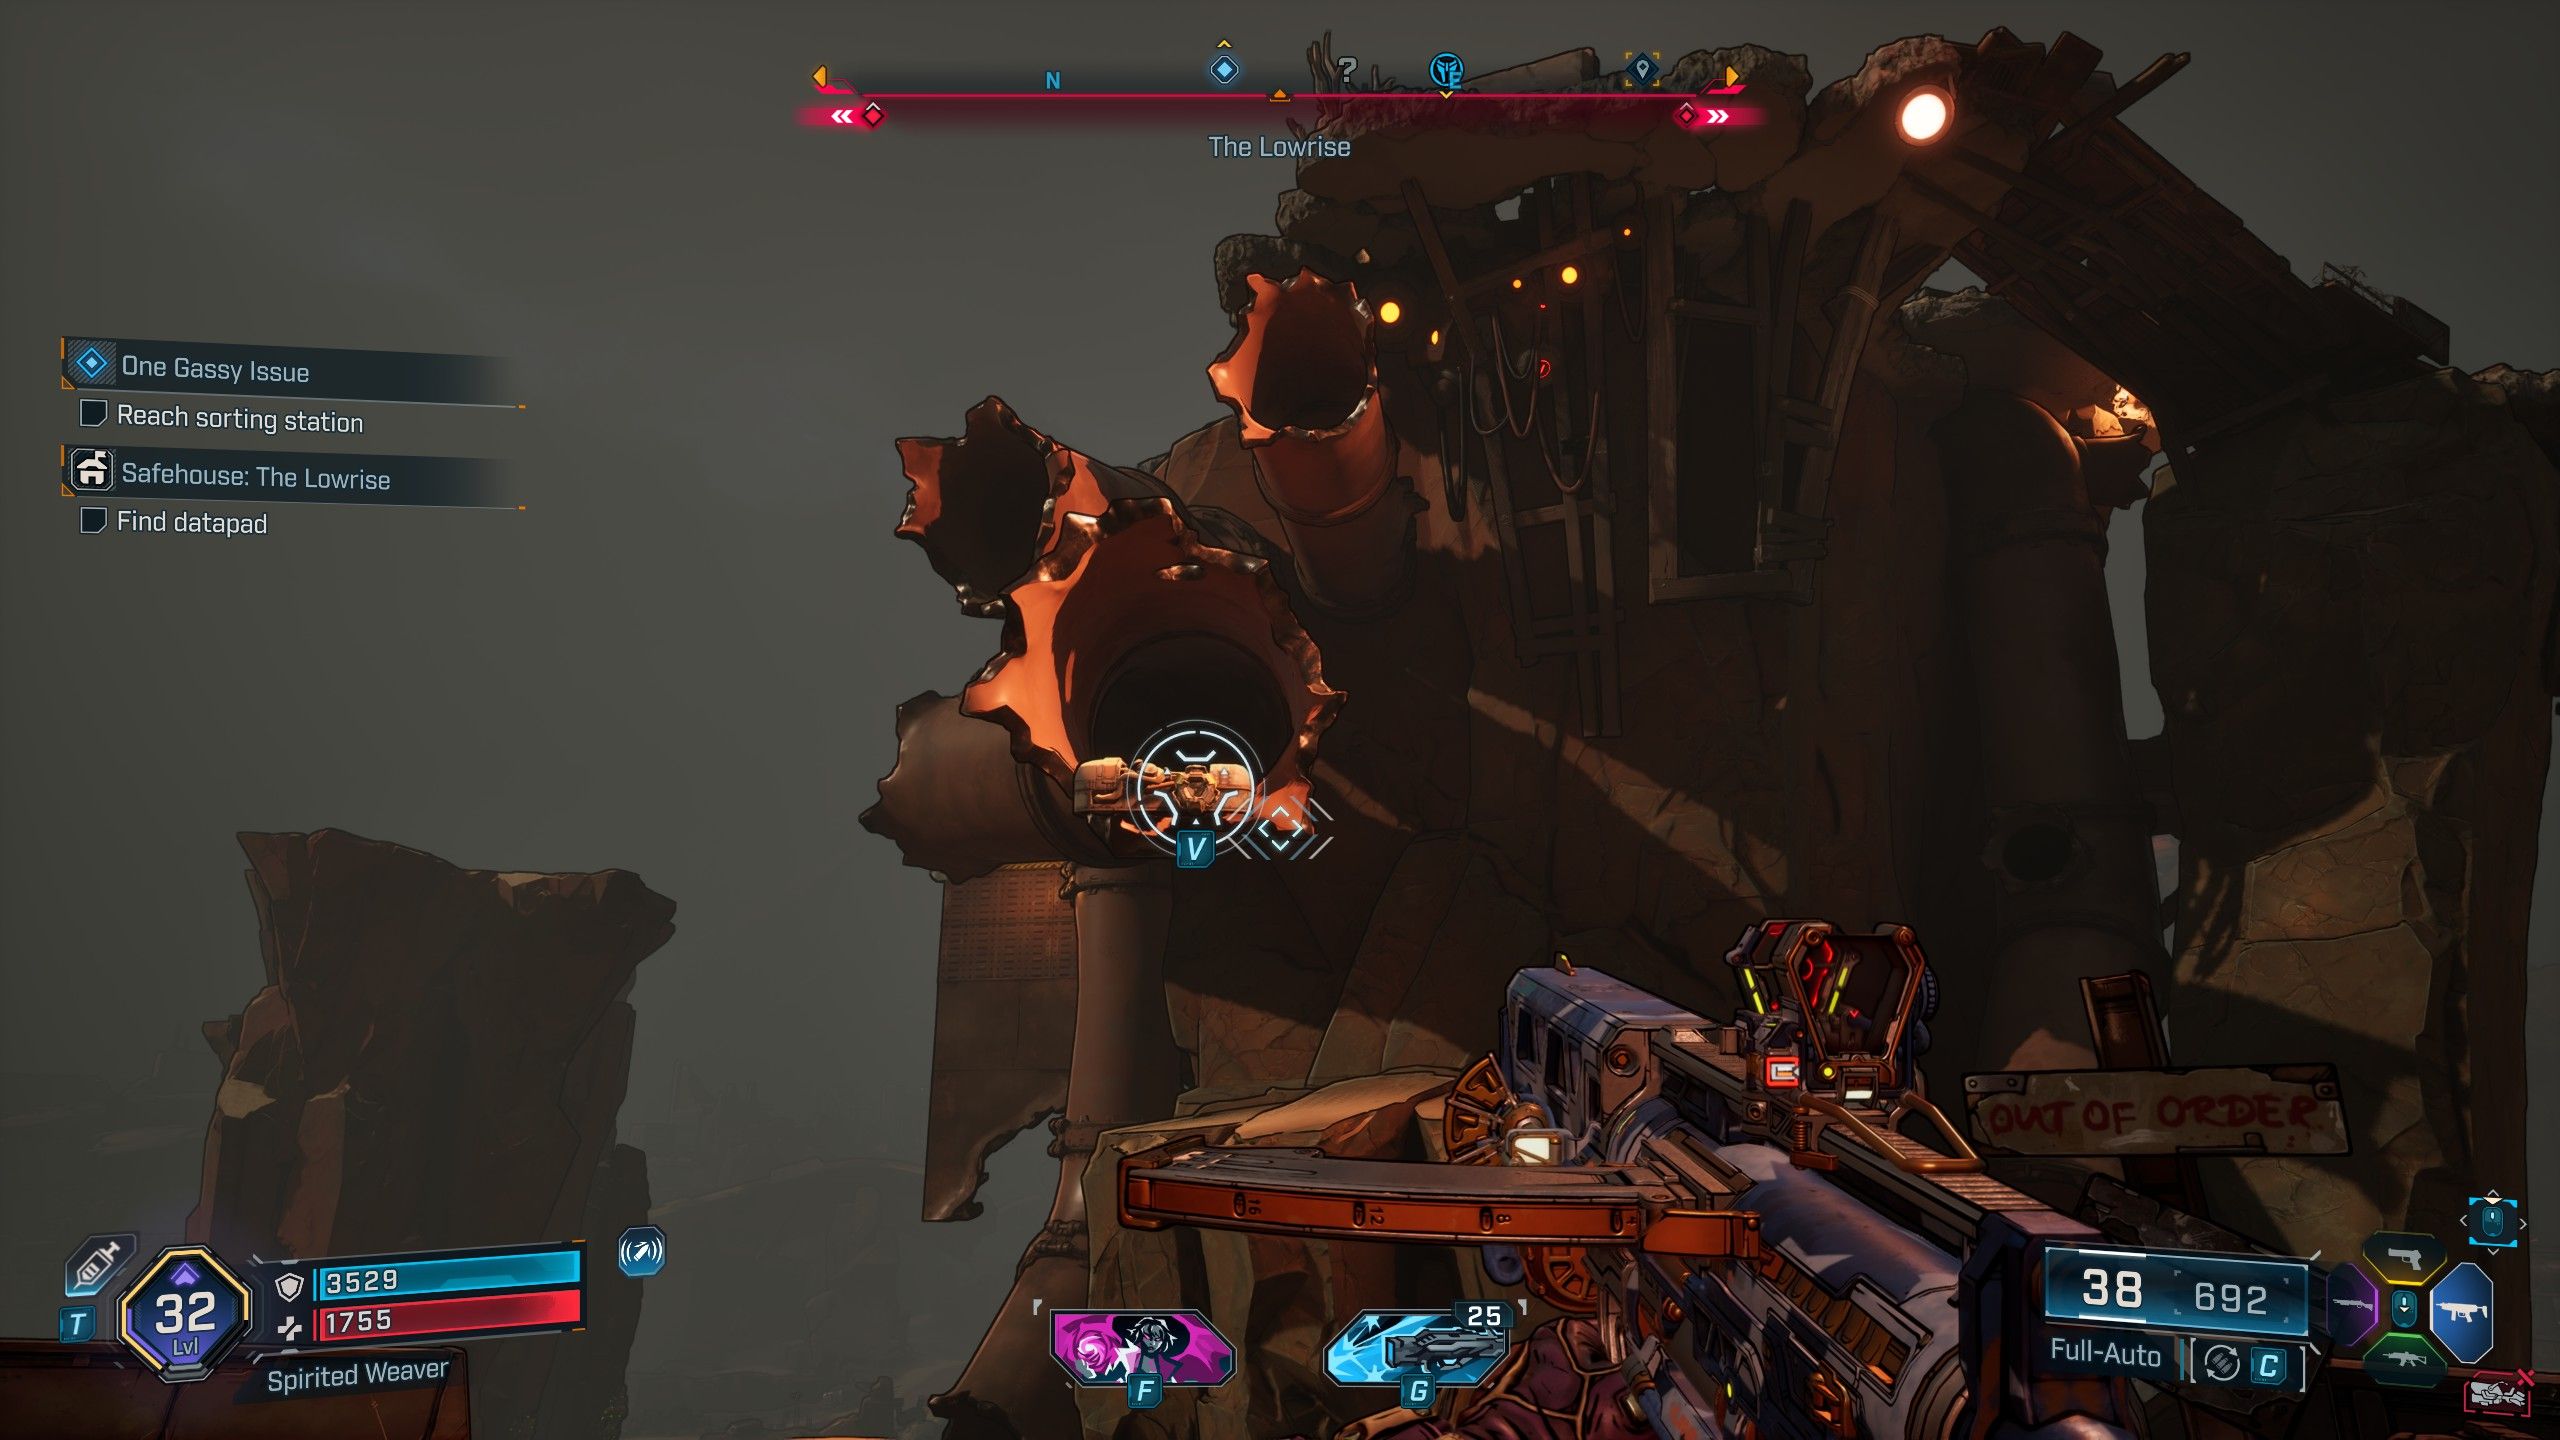
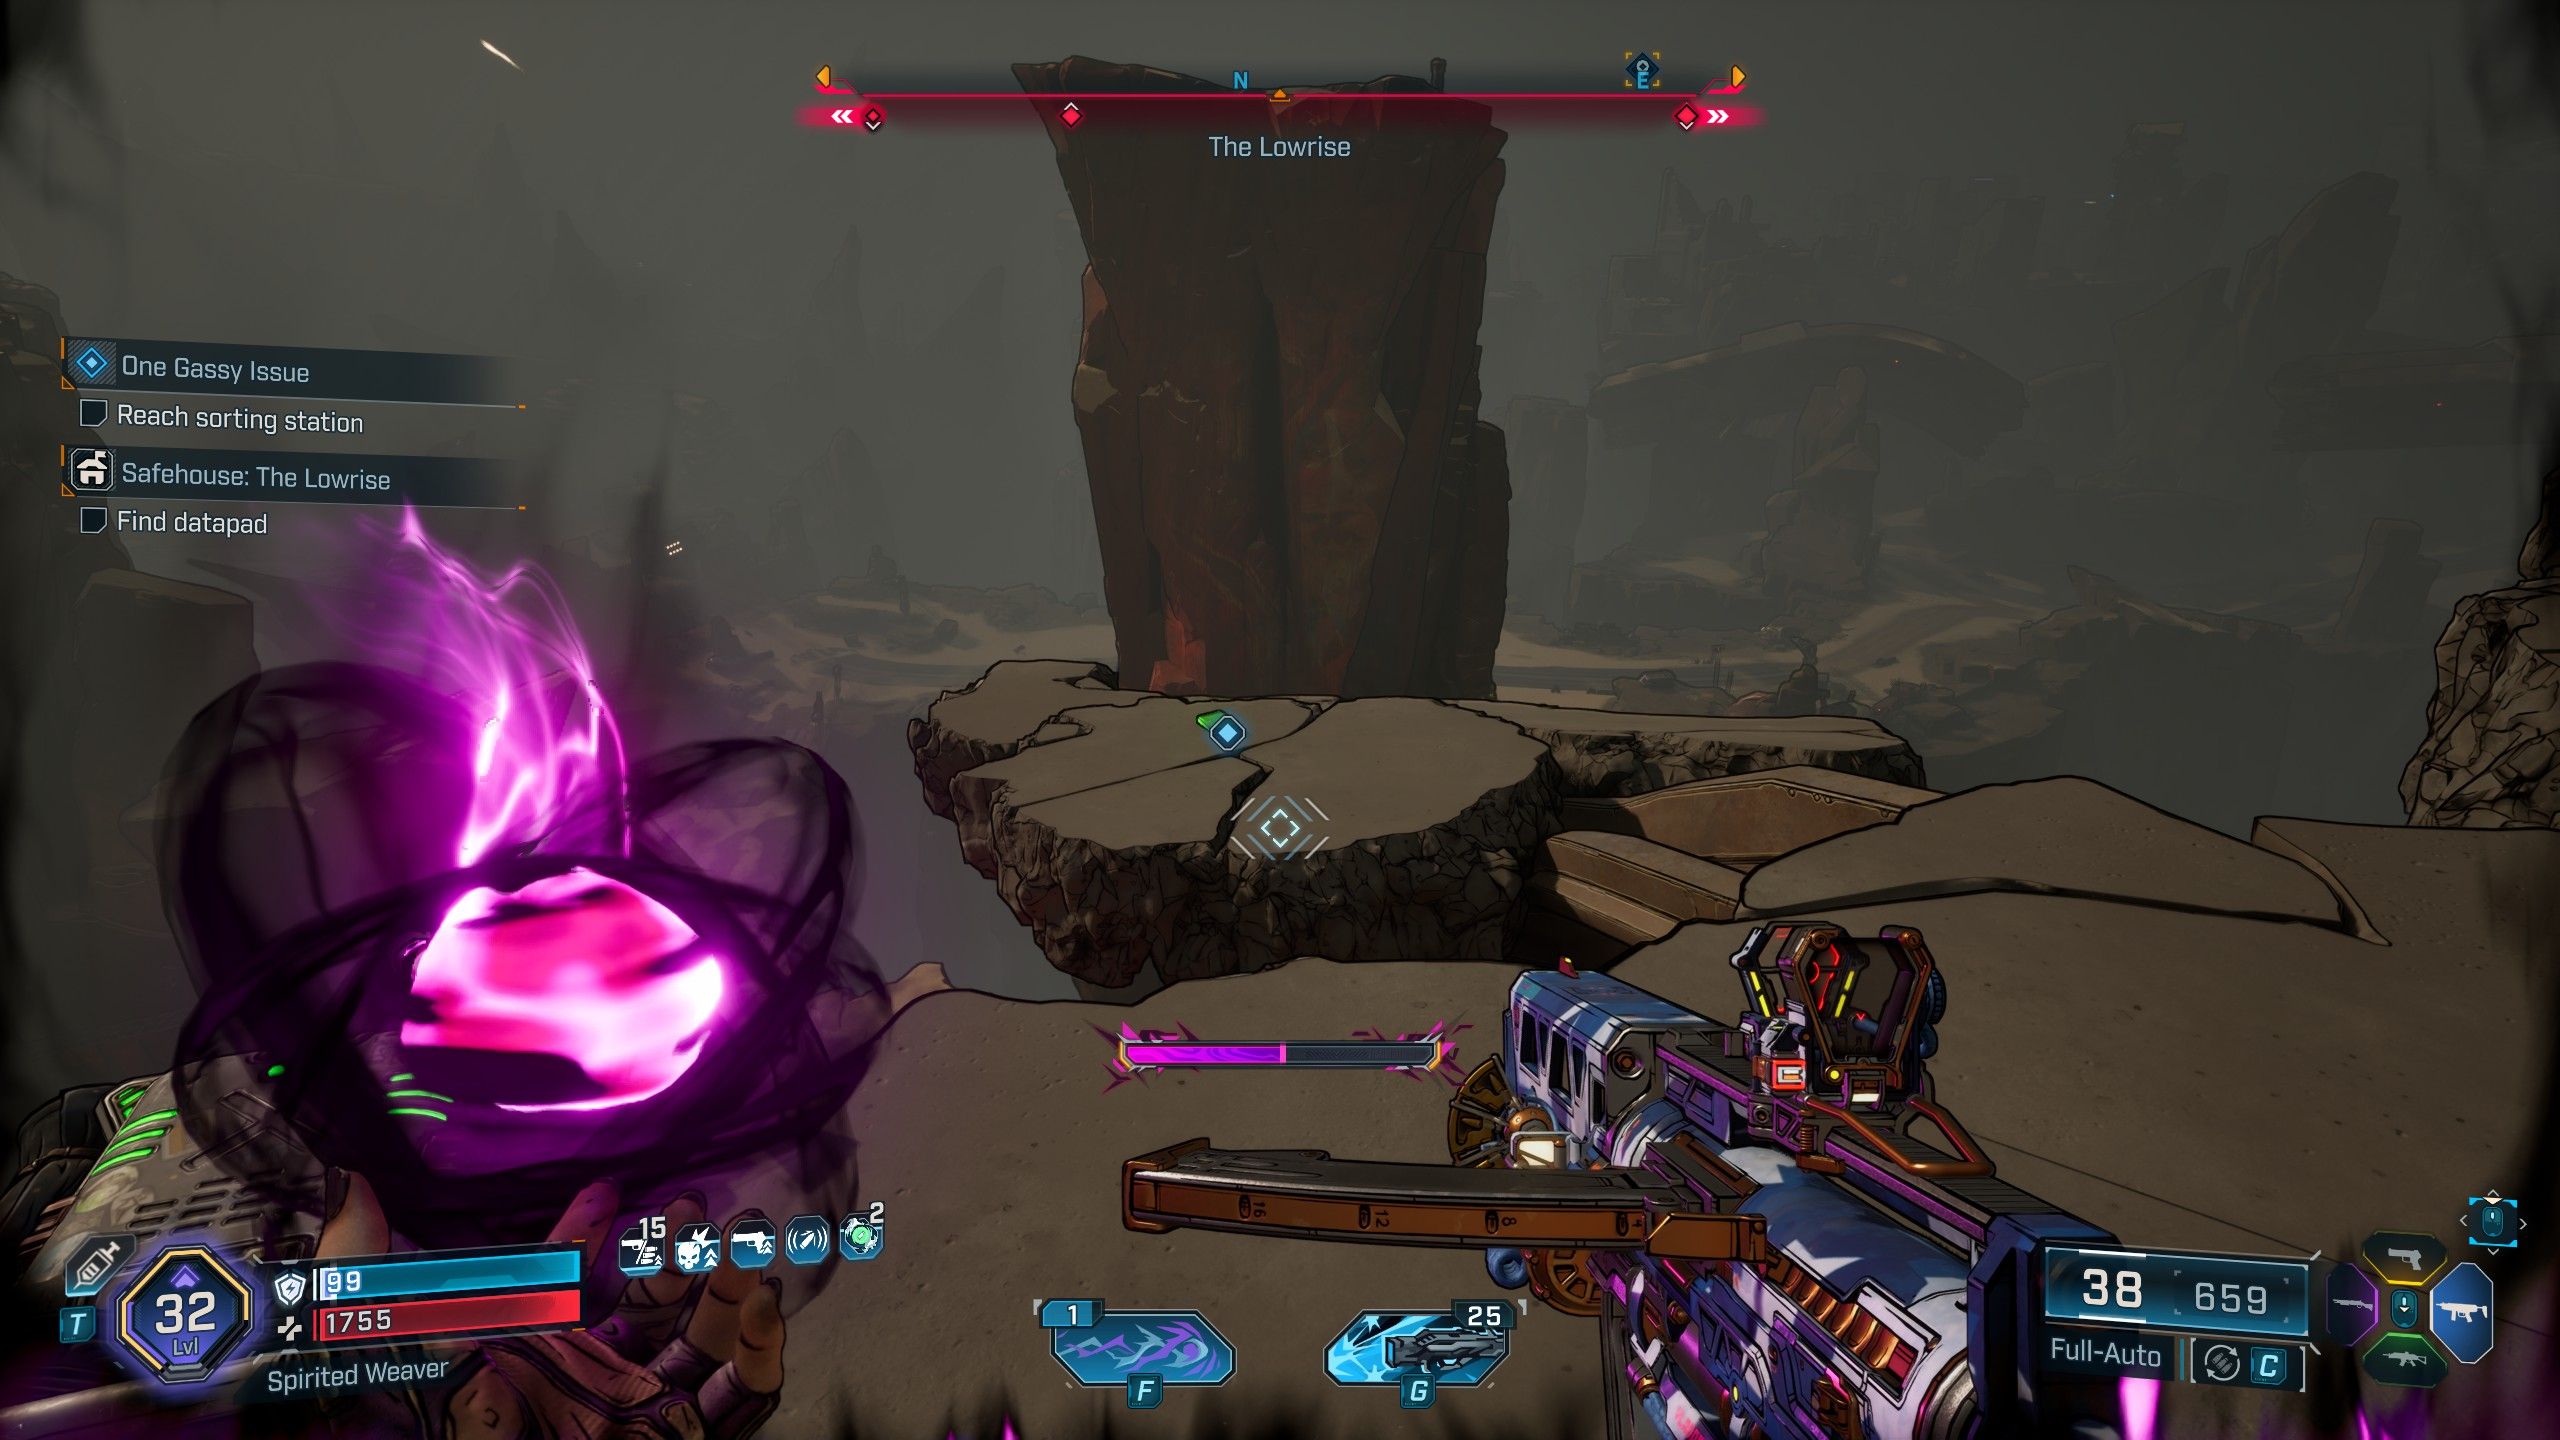
- Location: Tonnage Peel, Carcadia Burn
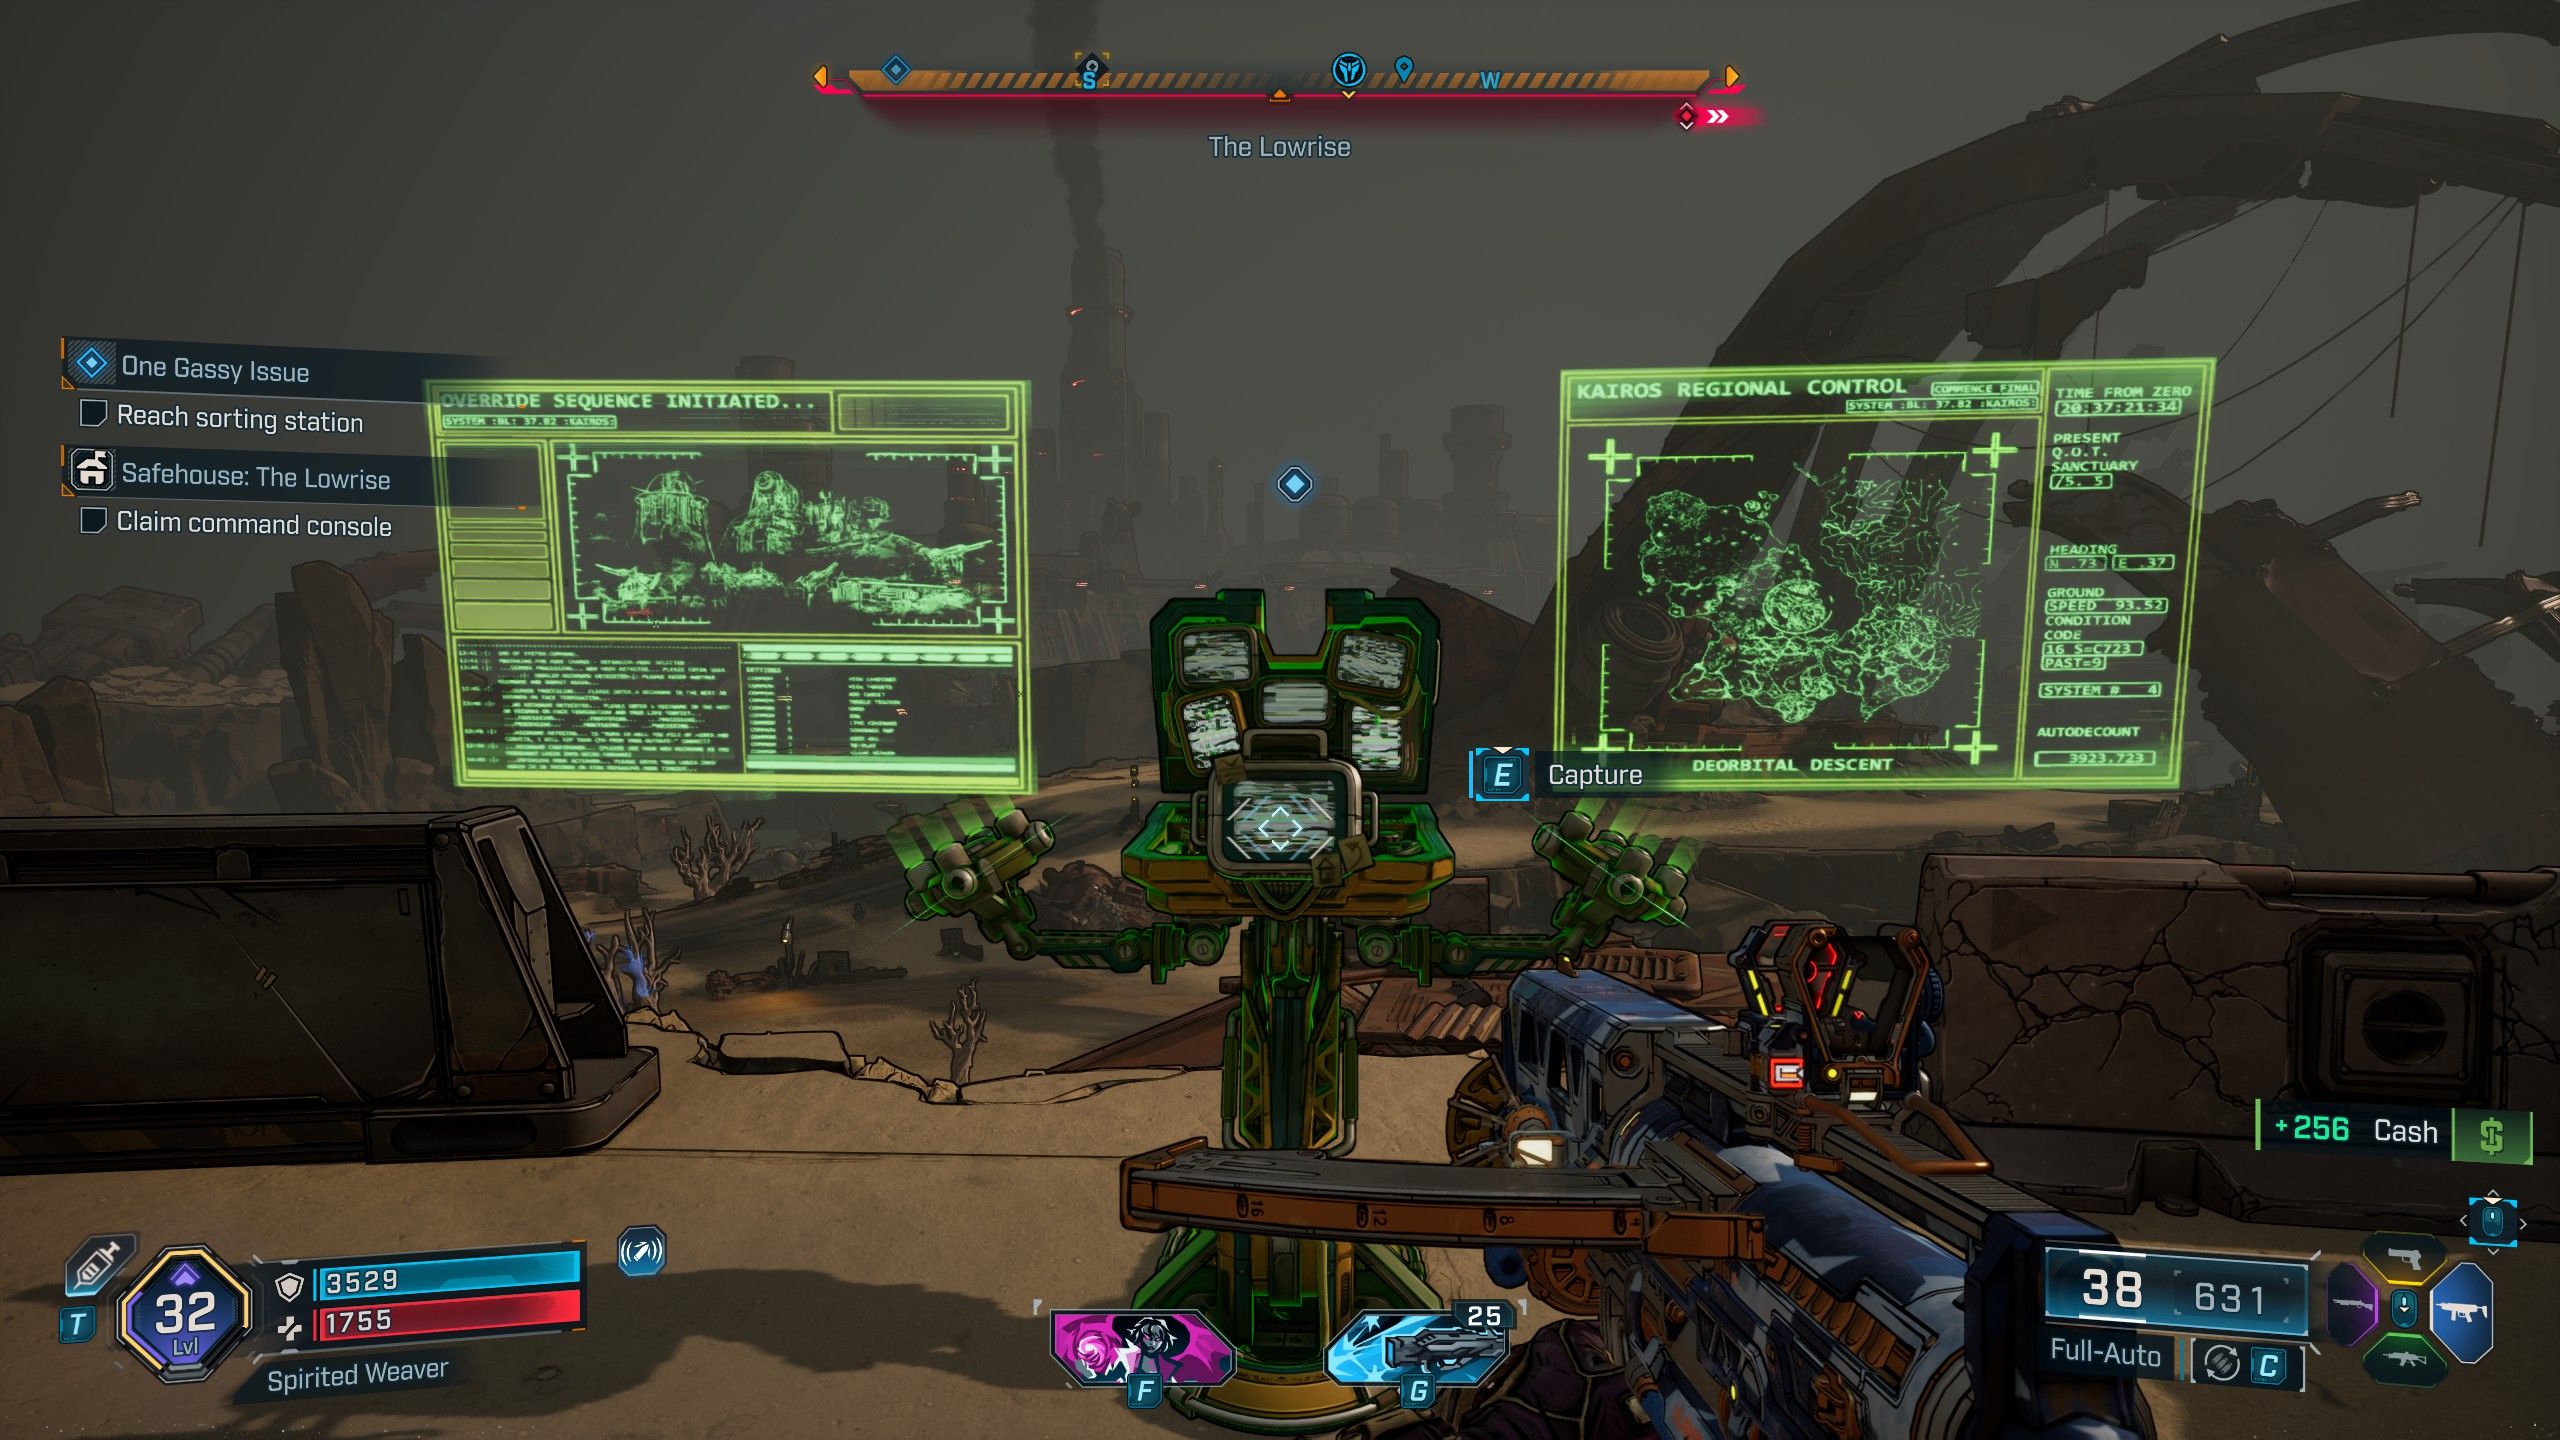
After reaching the Lowrise, use your grapple hook on the broken pipe to get on top of it. Then, move to the right, continuing to use the grapple hook until you reach the top of the rock. Once there, head north to find the Datapad. With the Datapad in hand, go to the southwest side of the platform to find the Command Console and establish this area as a Safehouse.
Wildhorn’s Beard Safehouse & Datapad Location
How to Get the Wildhorn’s Beard Safehouse
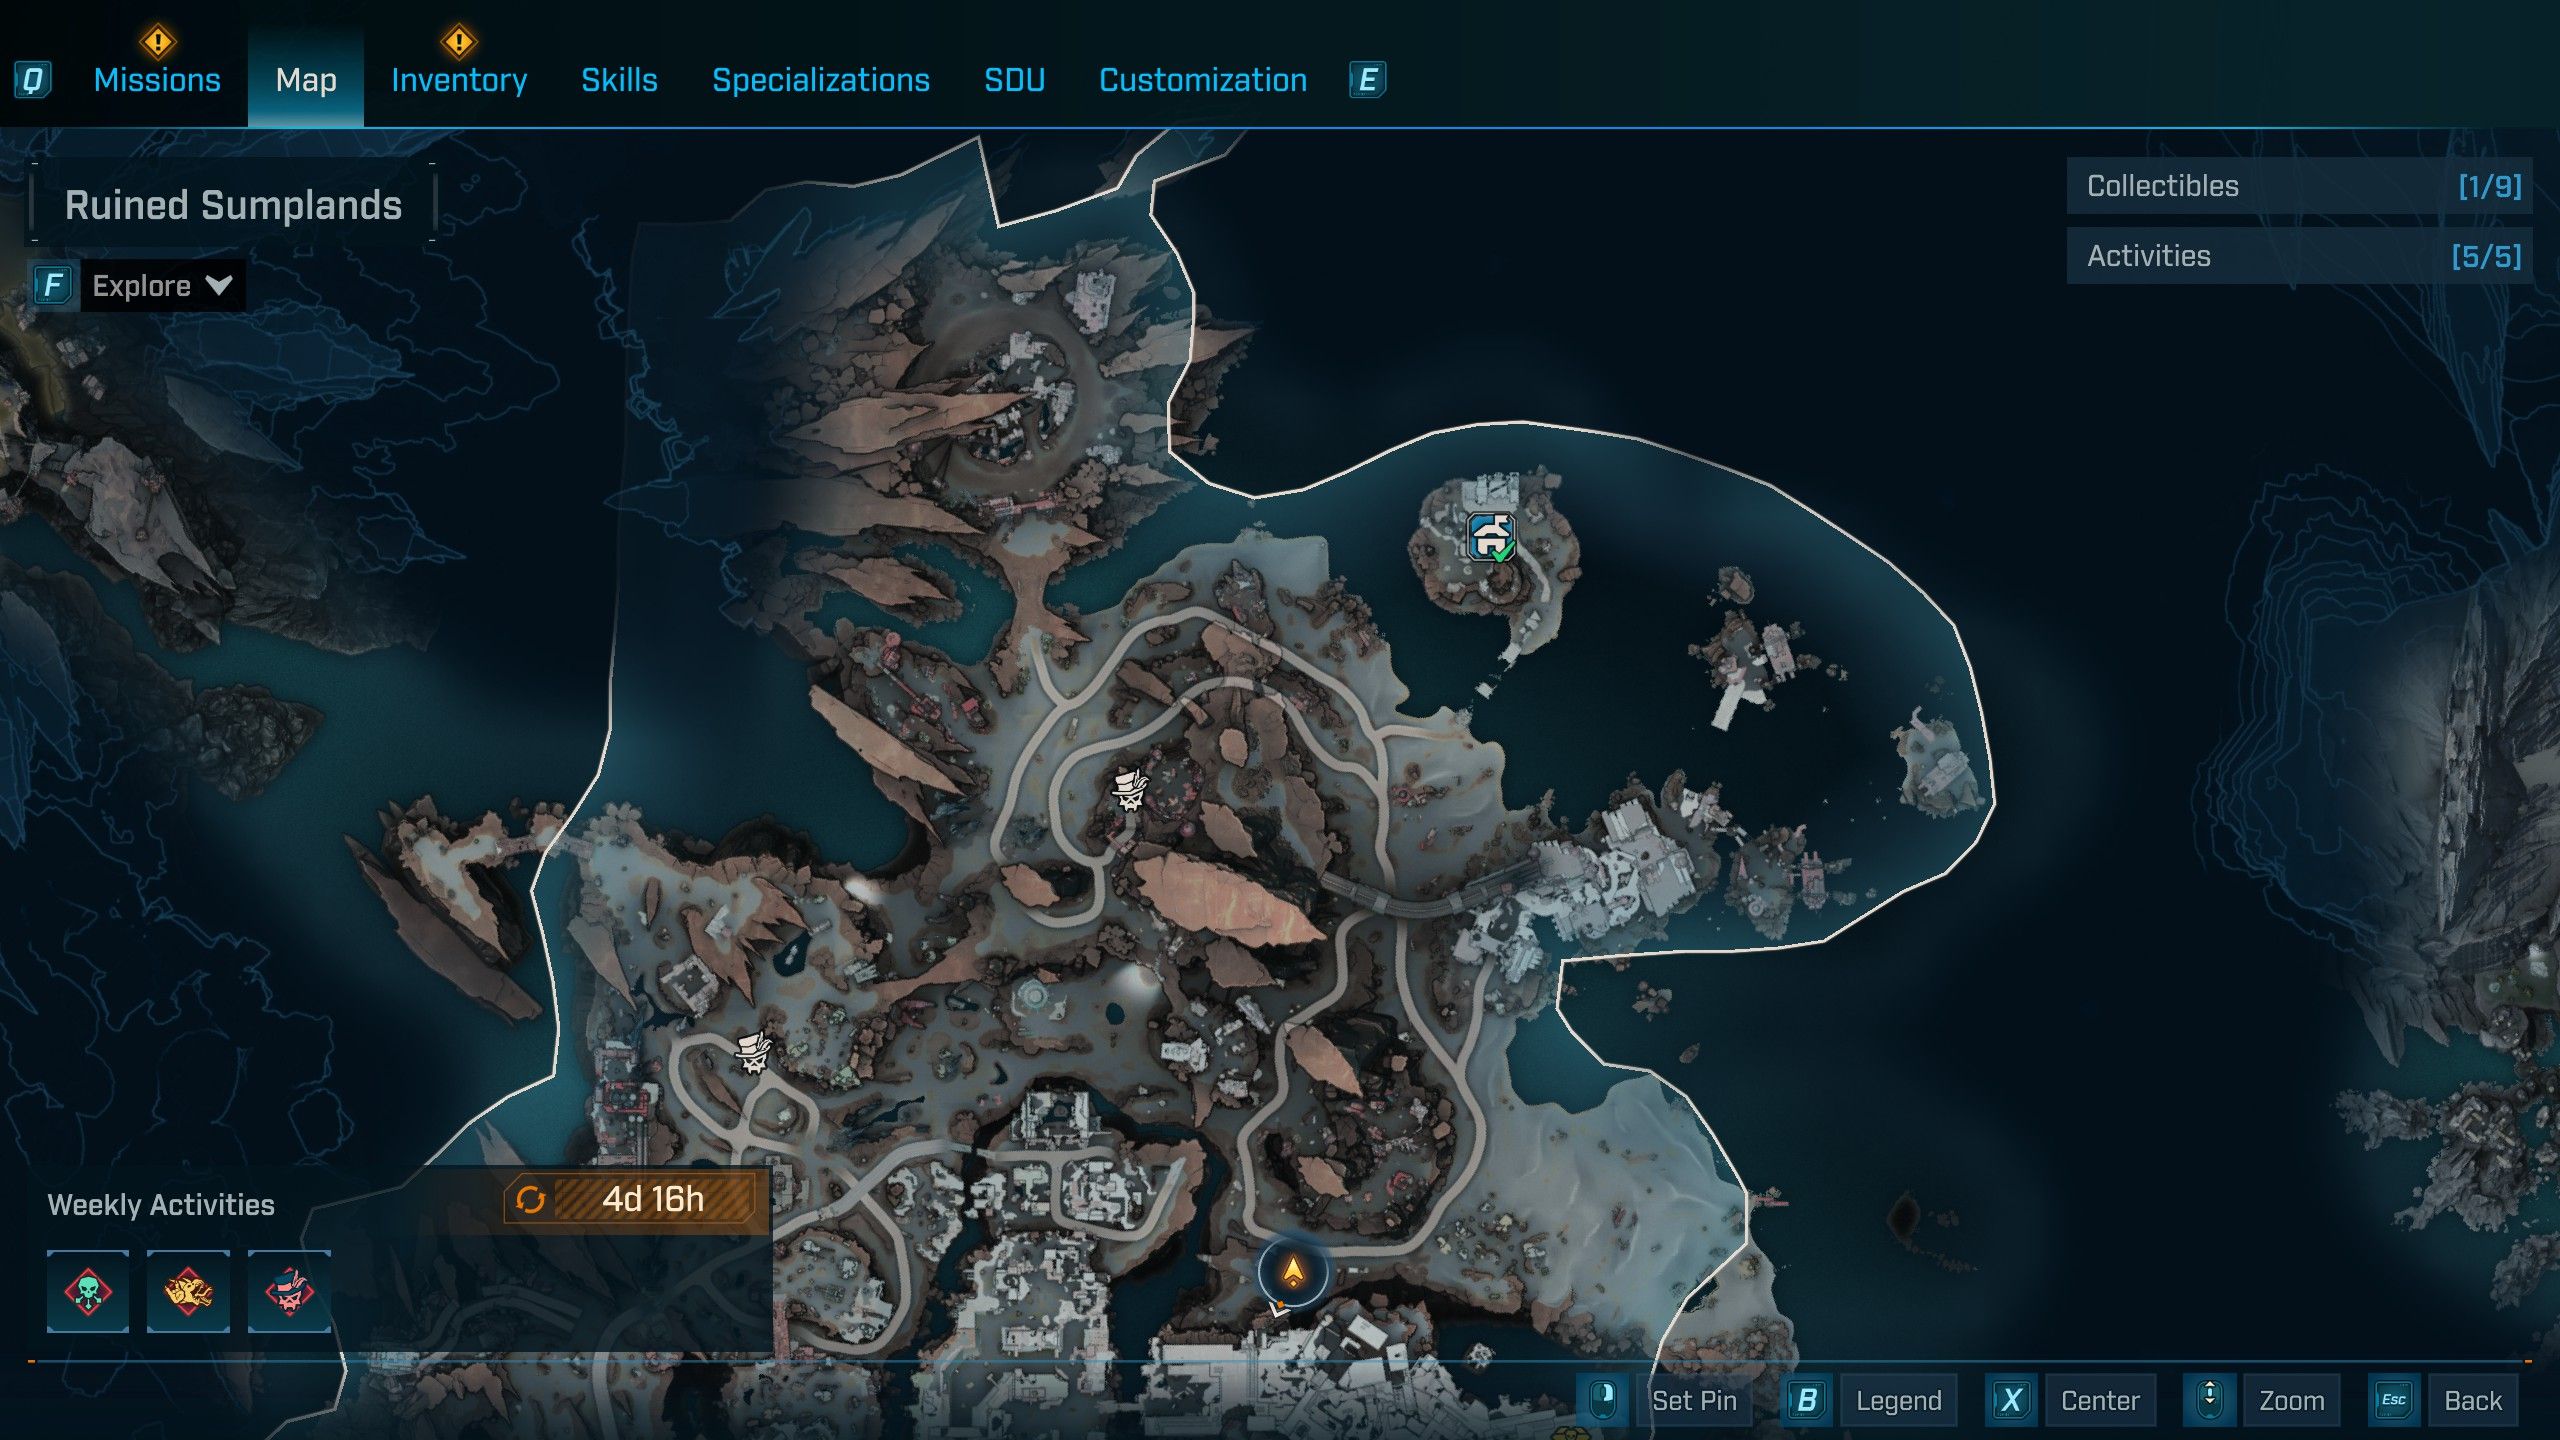
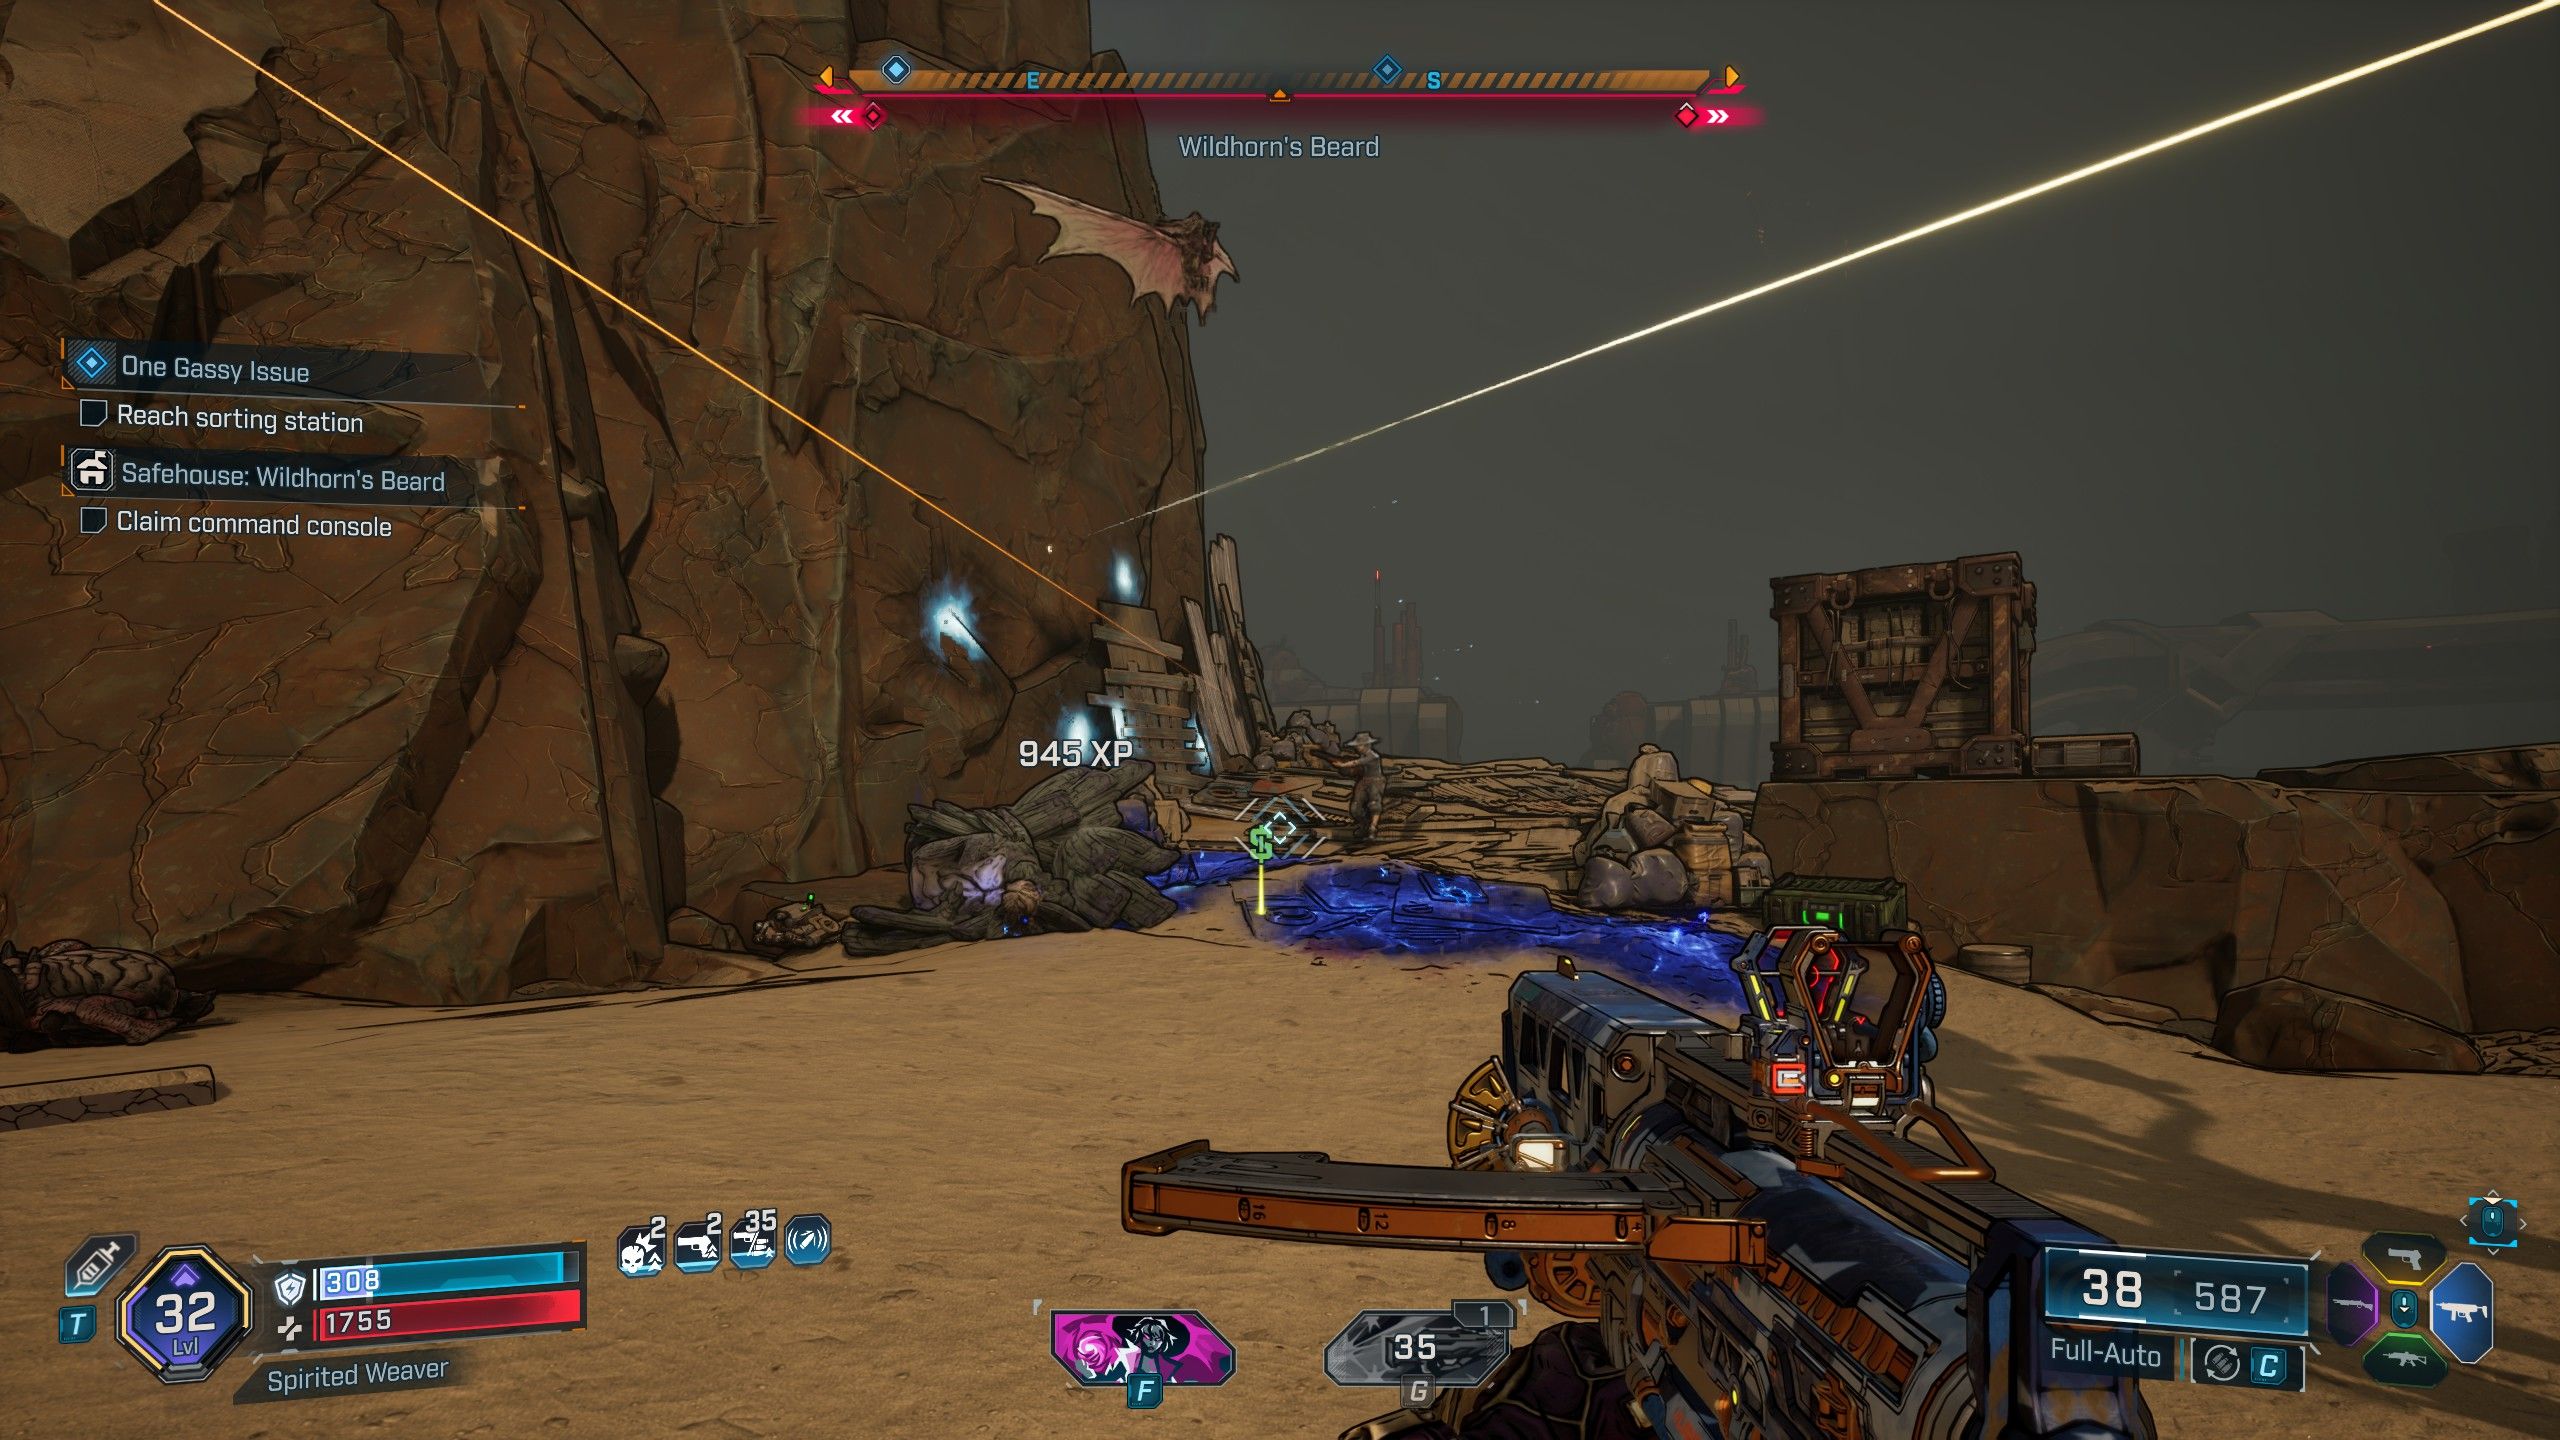
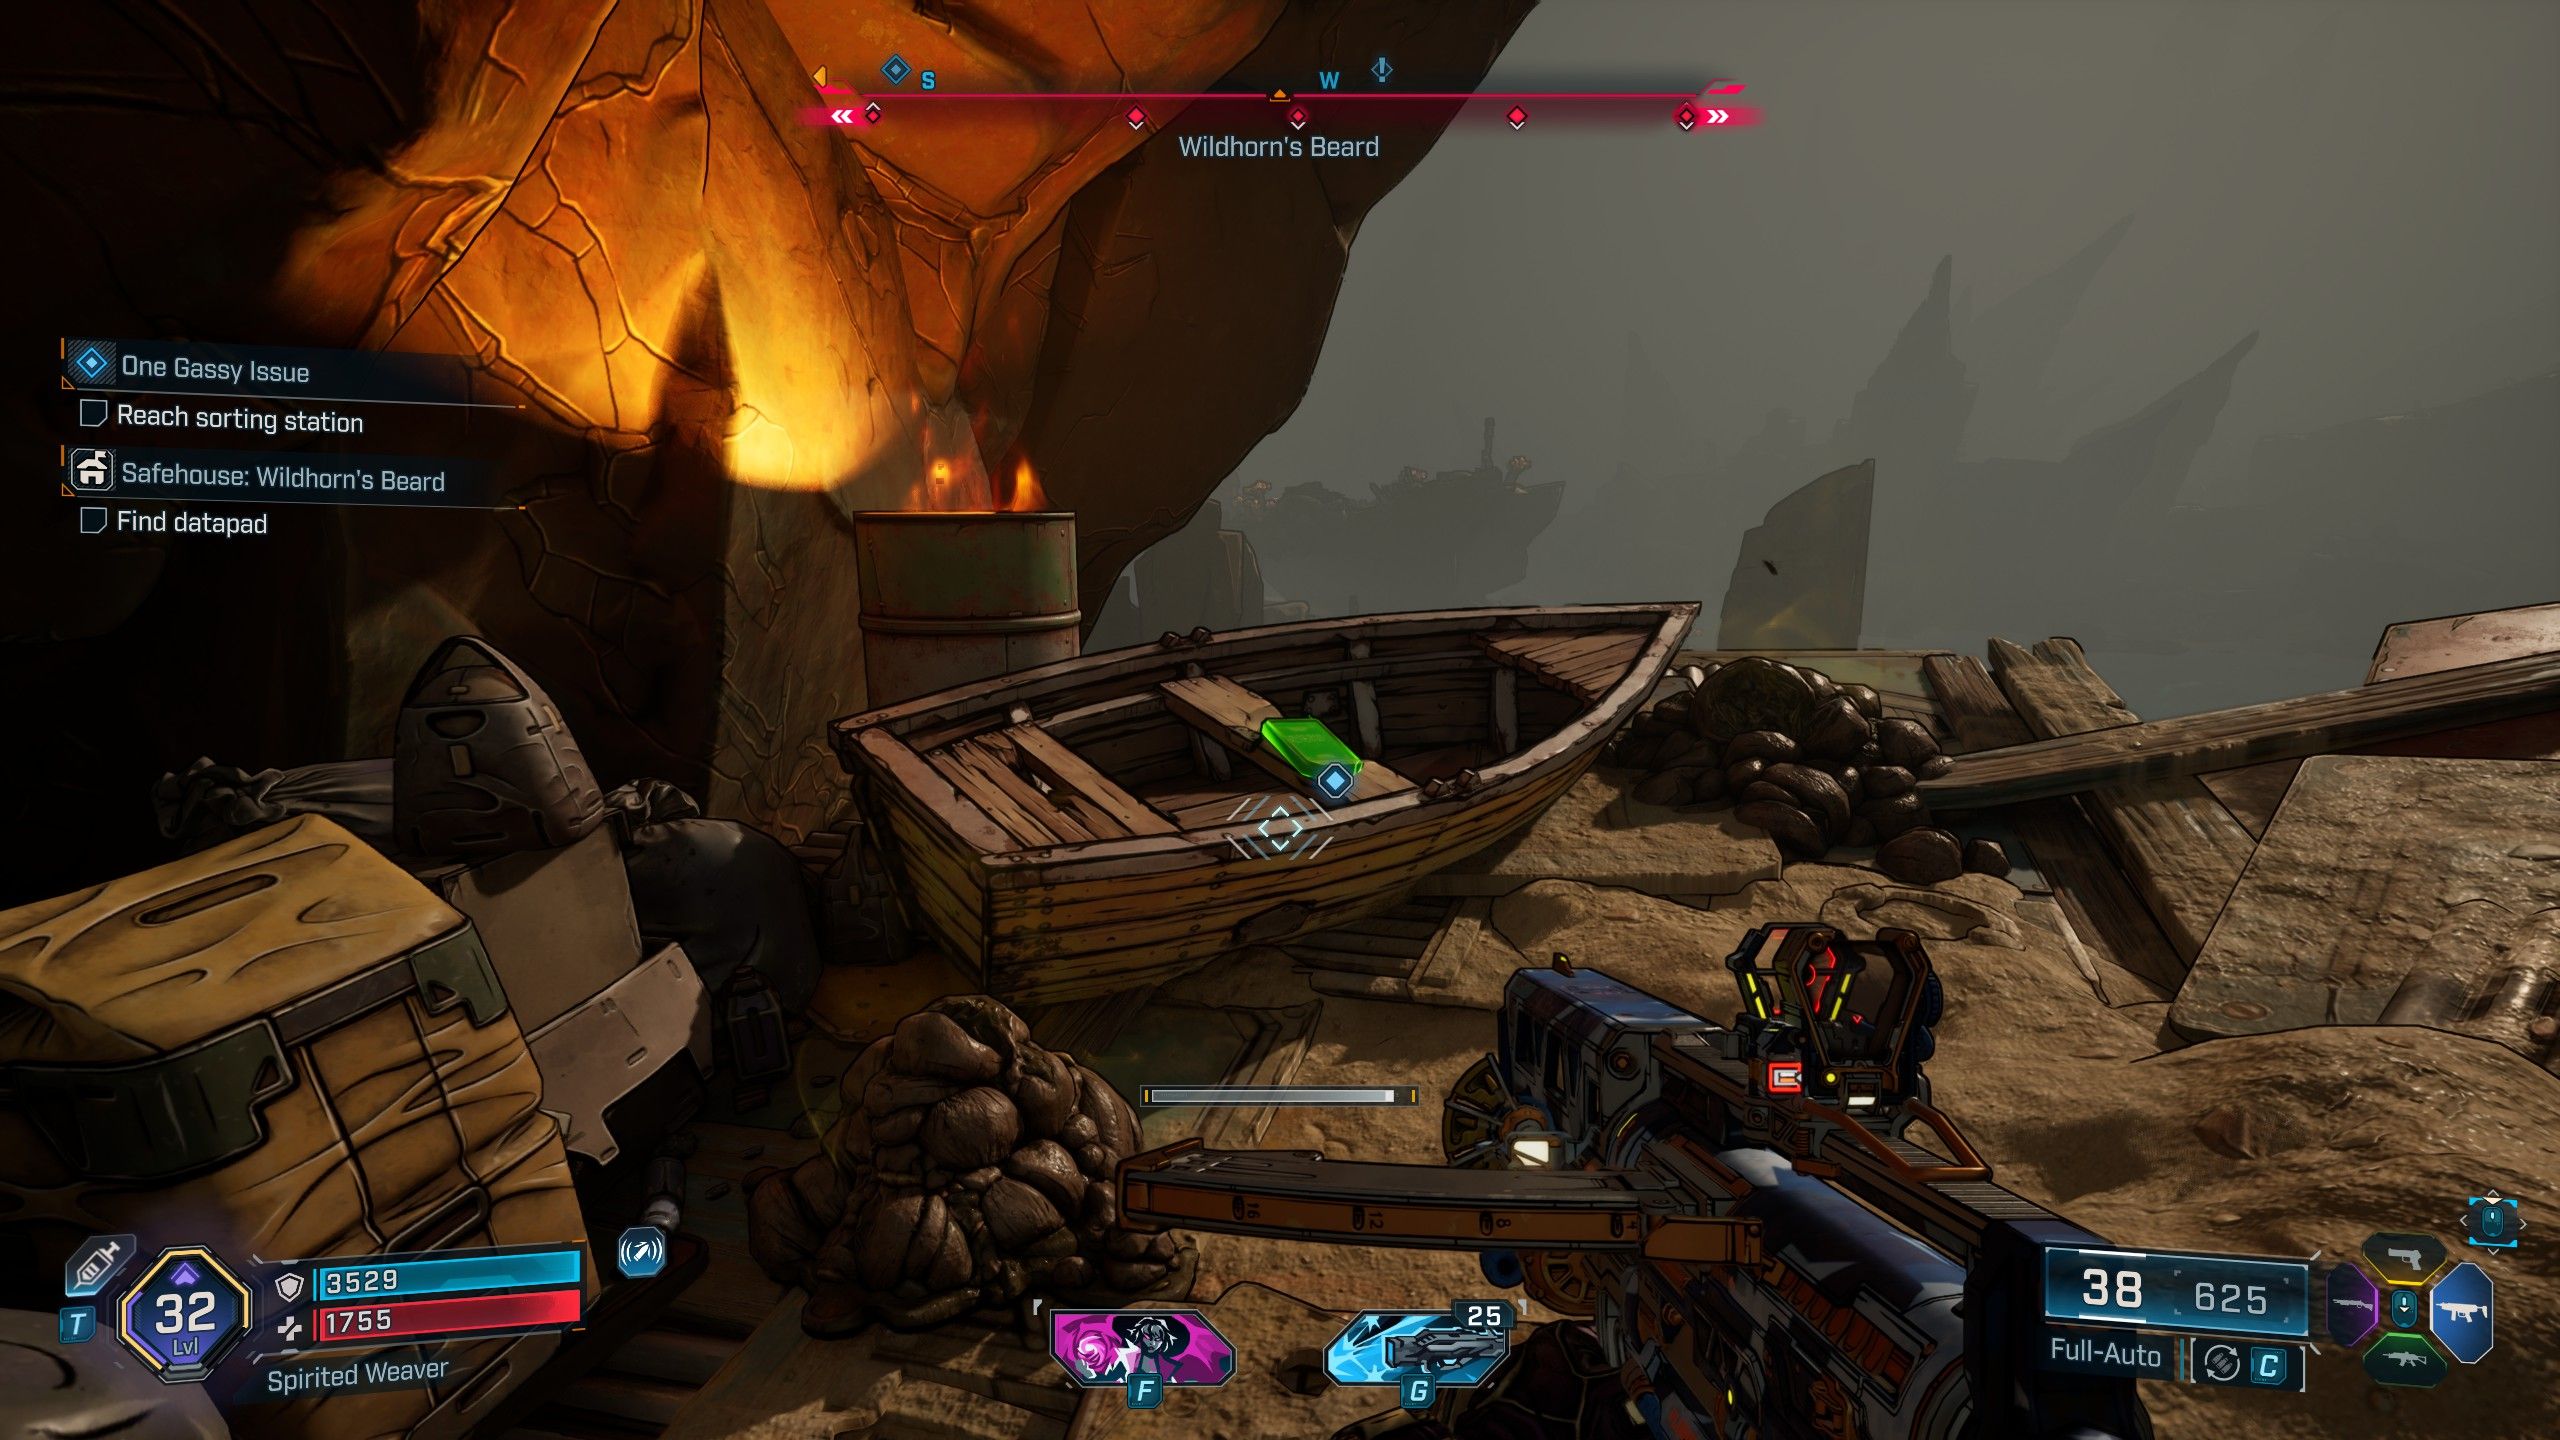
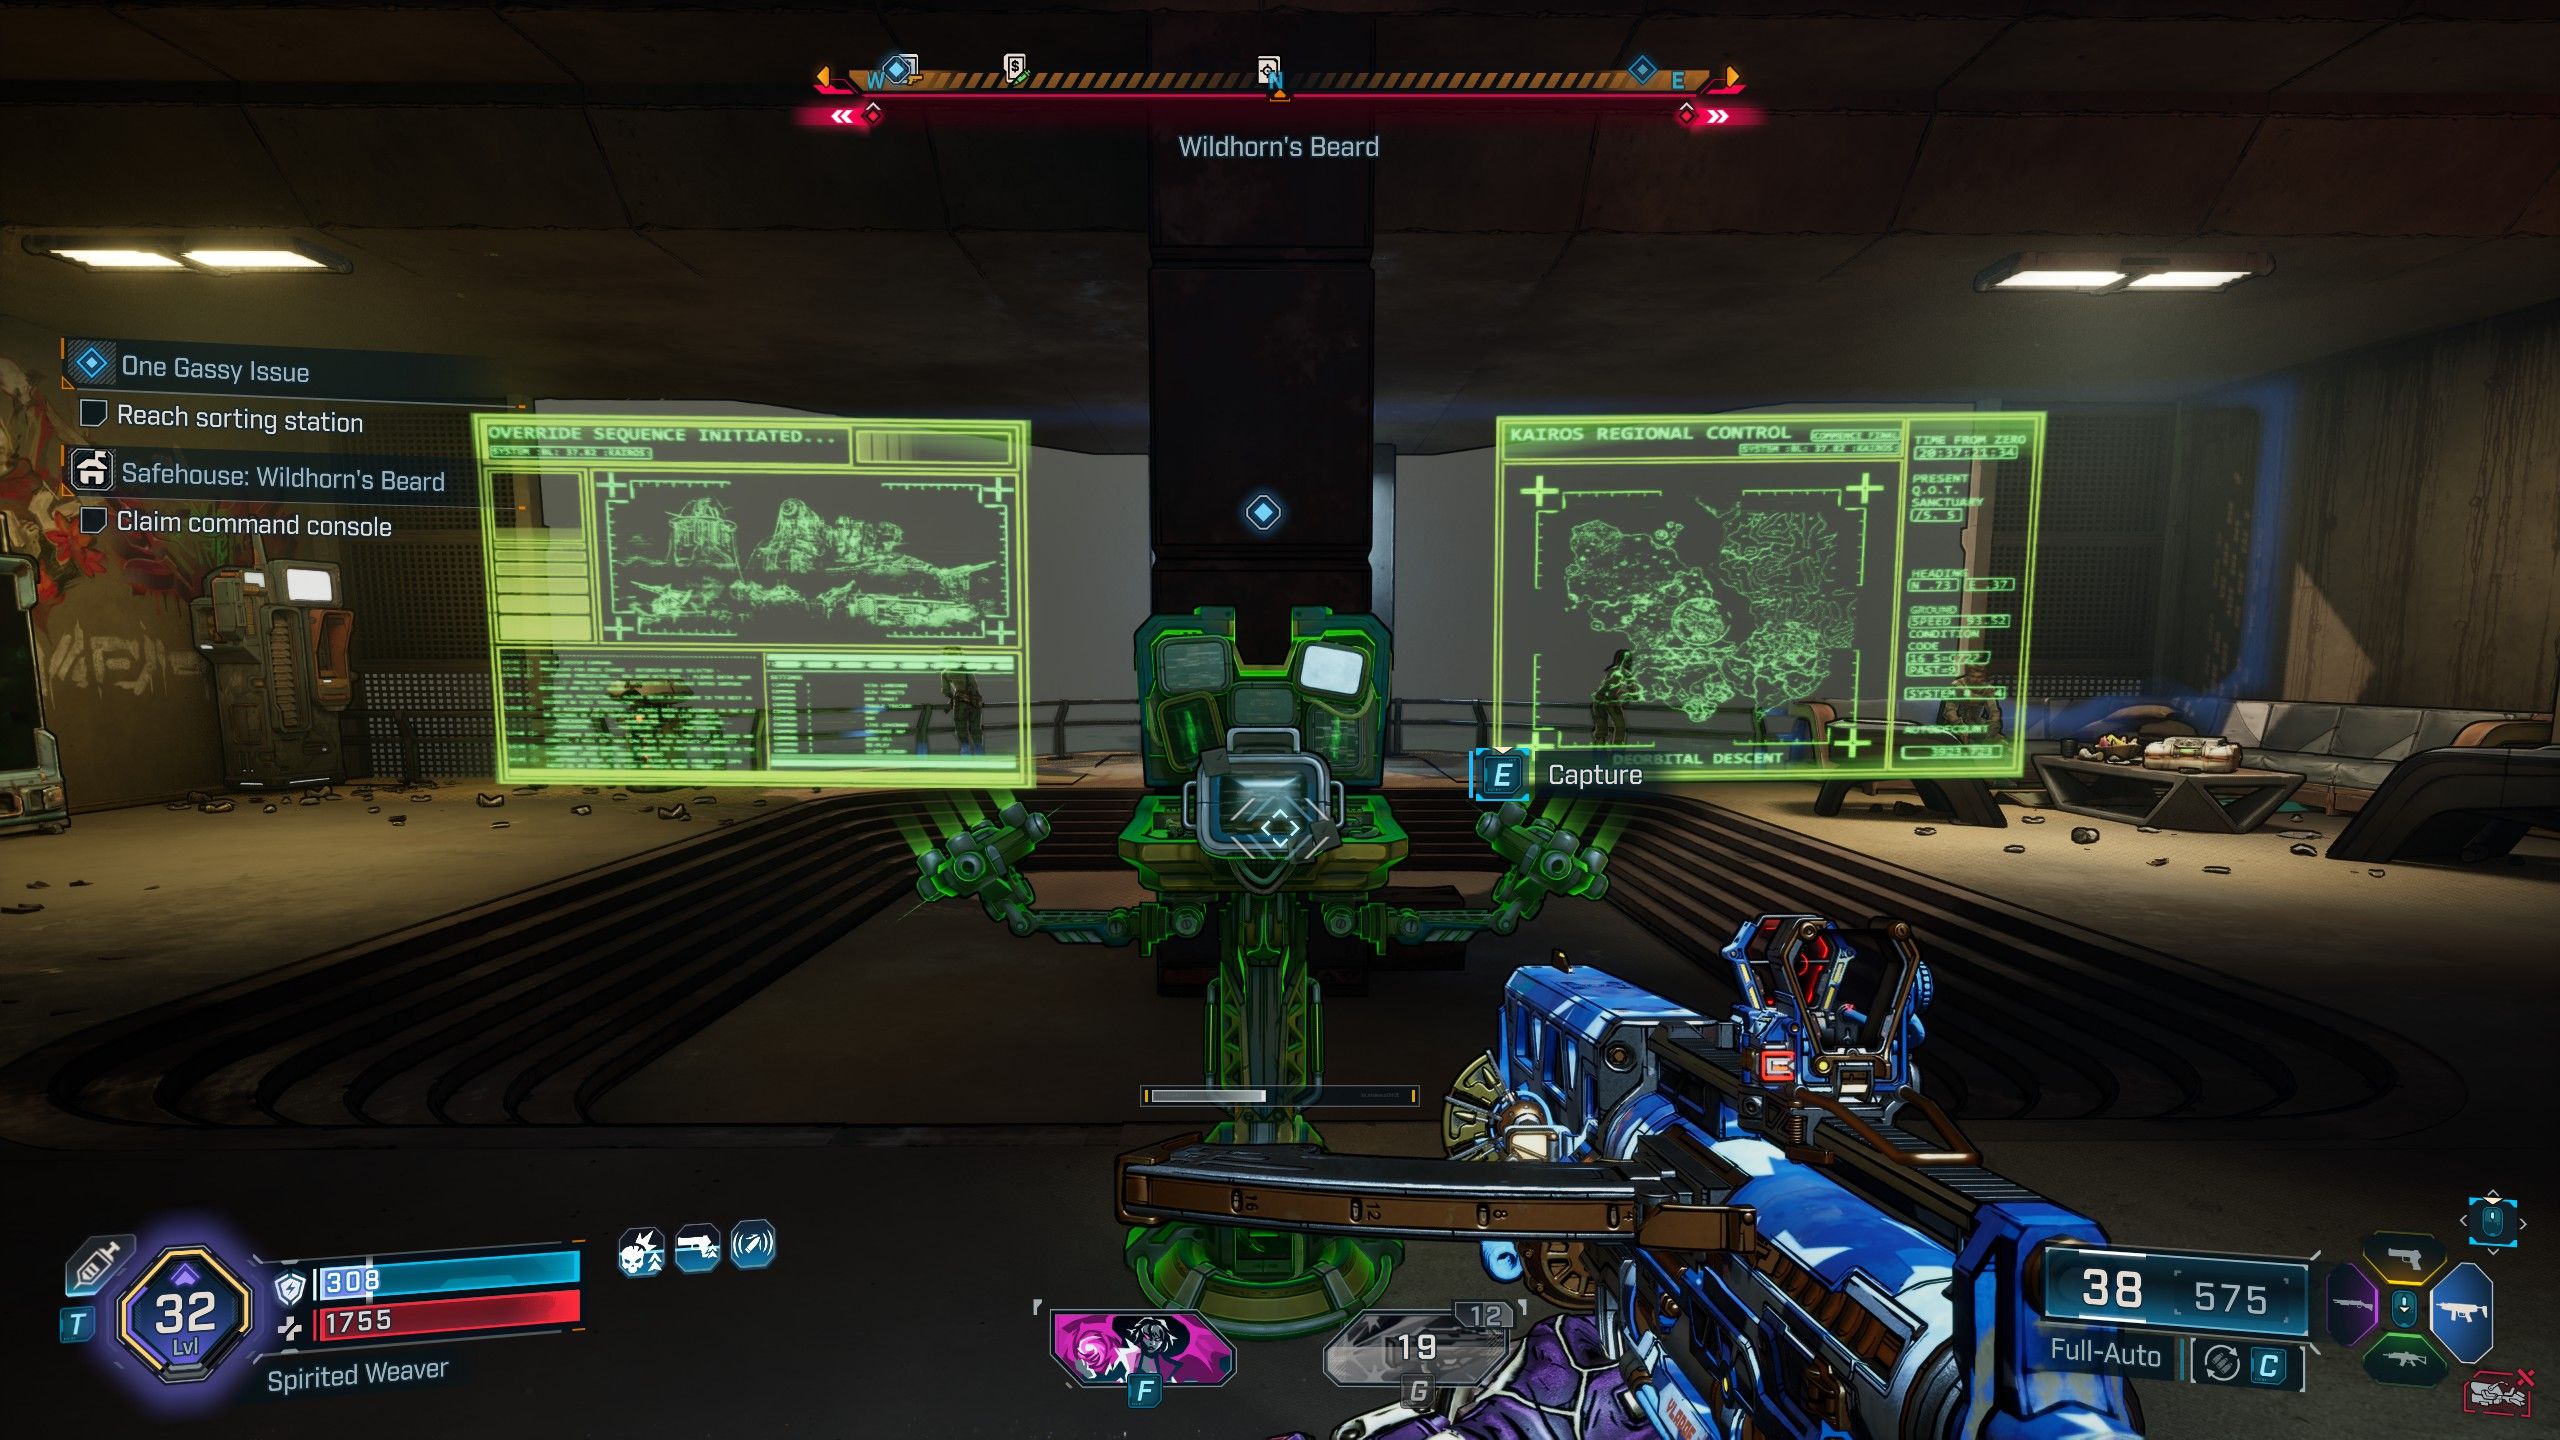
- Location: Ruined Sumplands, Carcadia Burn
After arriving at Wildhorn’s Beard, go around the big rock and climb the stairs. You’ll find a boat with the Datapad on it, but be careful – there are dangerous Kratch creatures nearby. Once you have the Datapad, head north from Wildhorn’s Beard to the Command Console, which is located inside the main Safehouse.
The Food Court Safehouse & Datapad Location
How to Get the Food Court Safehouse
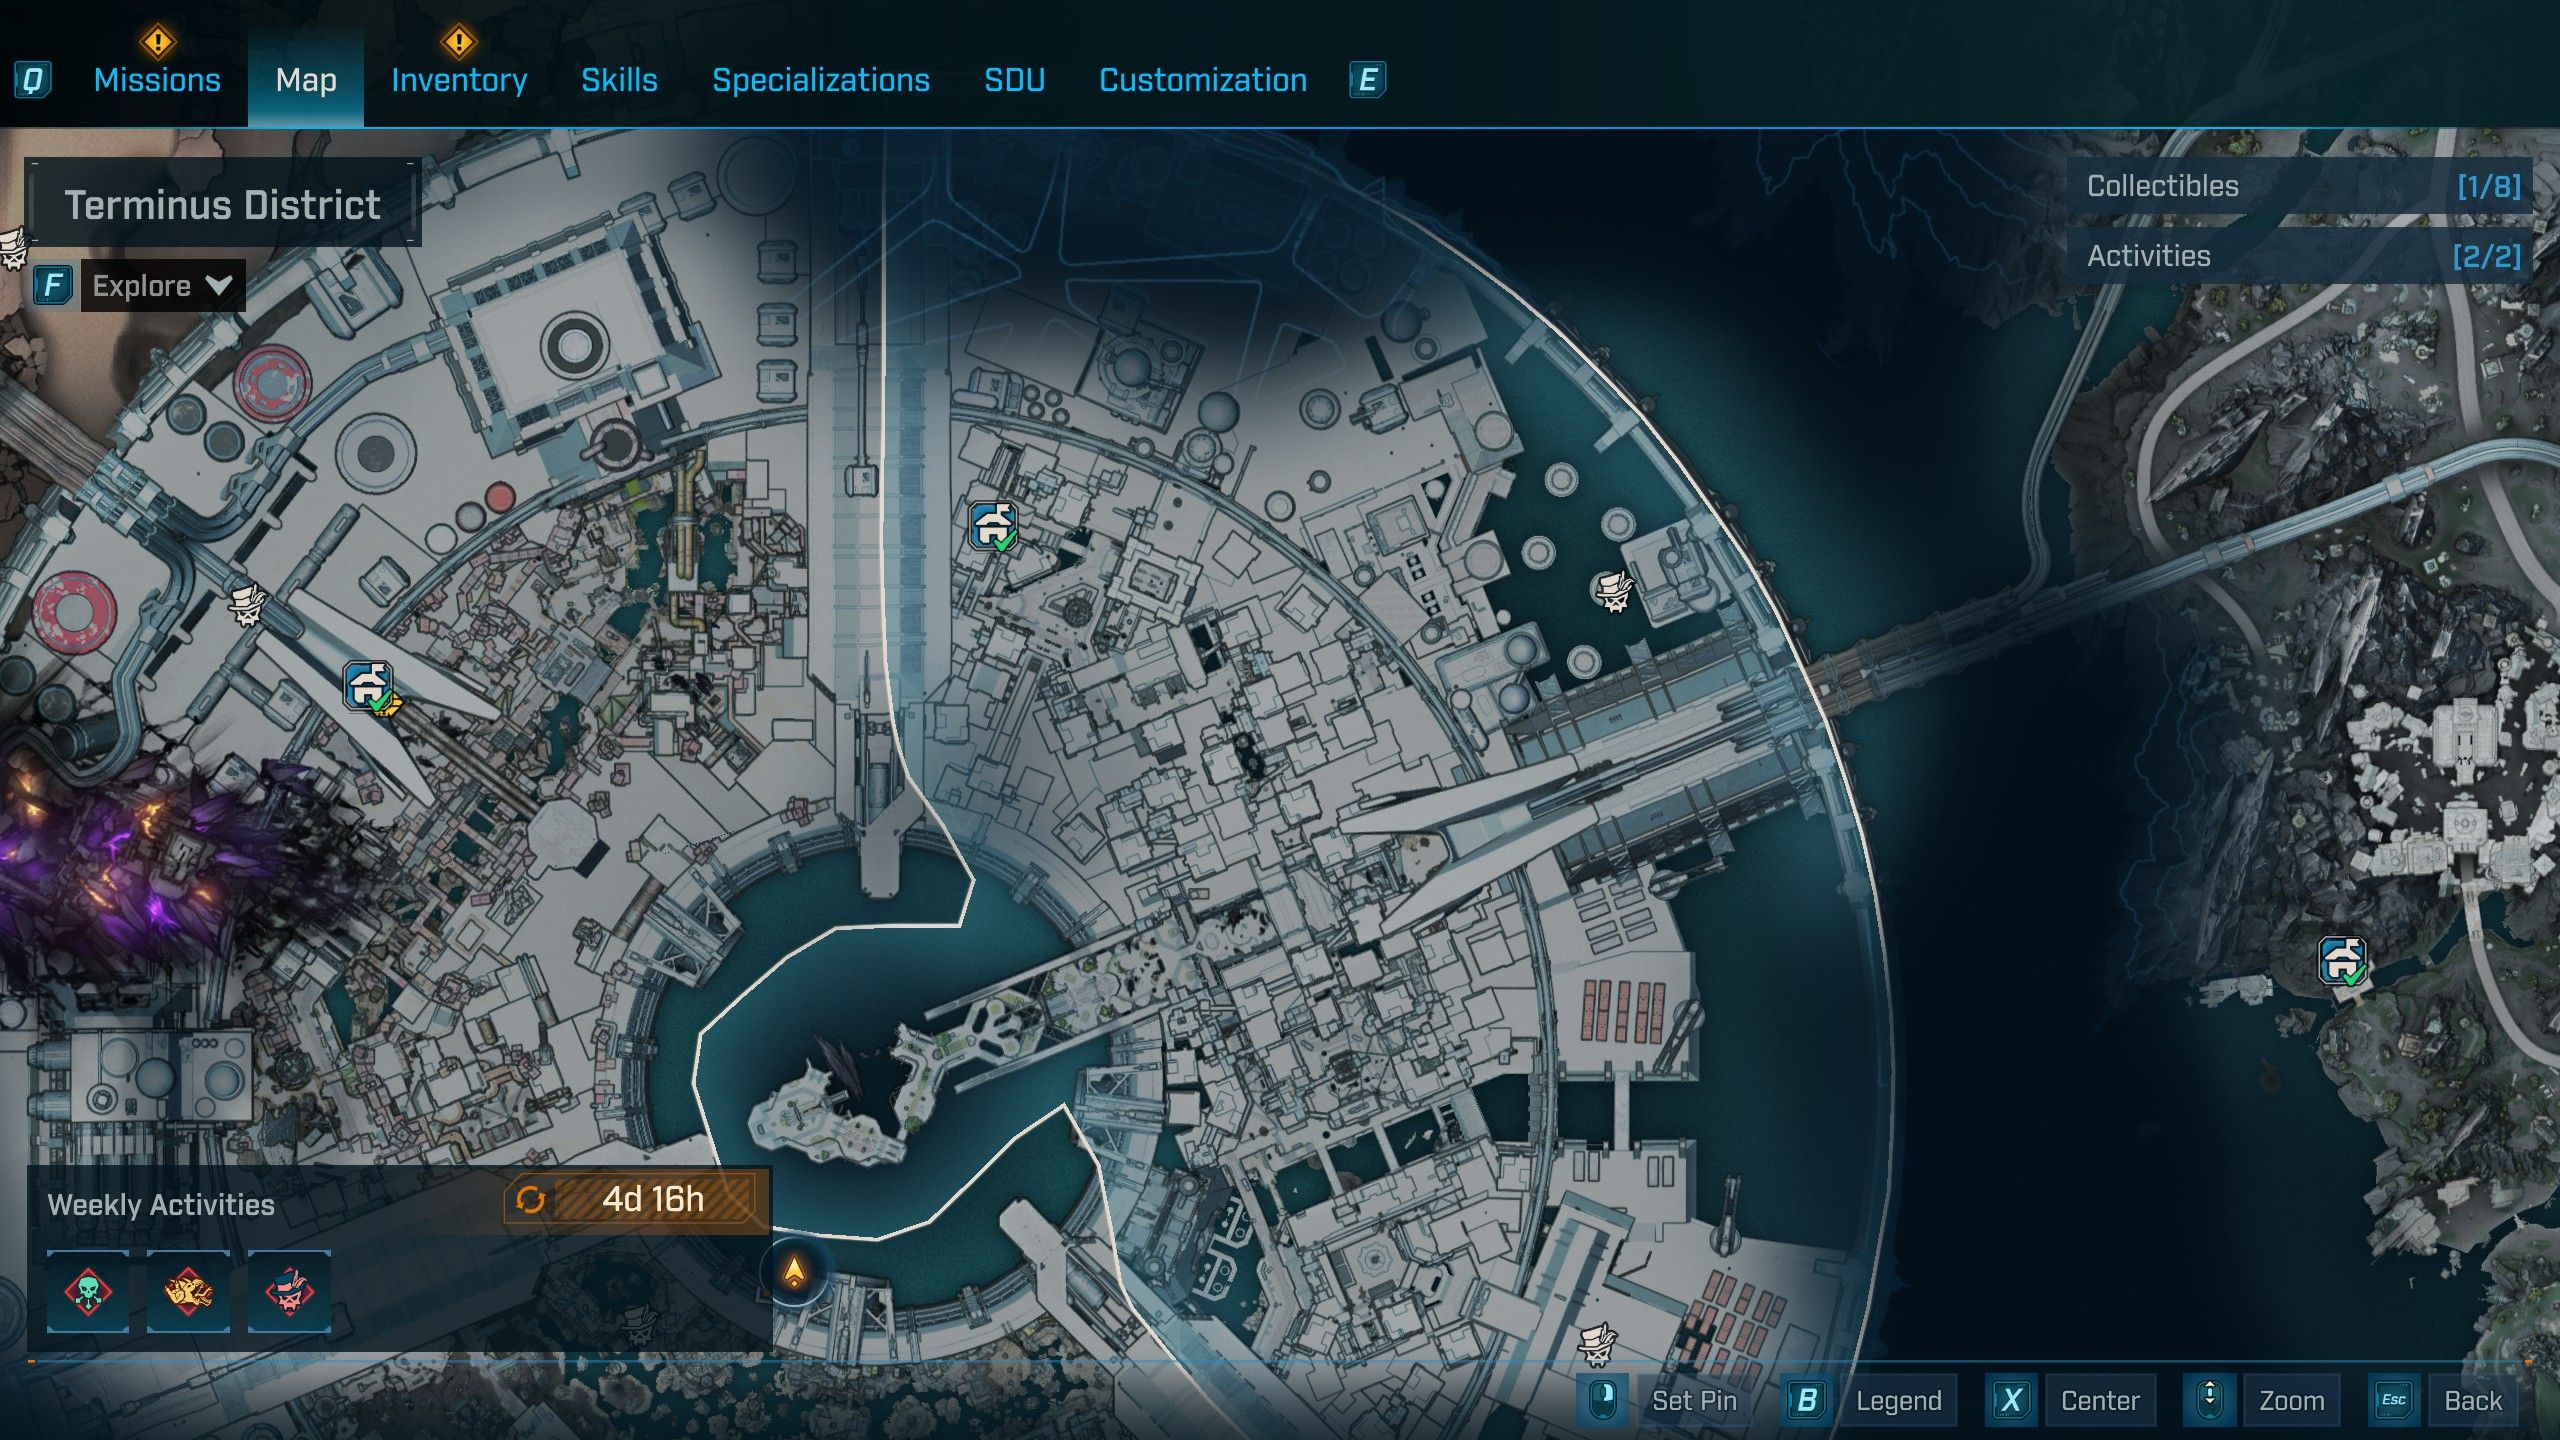
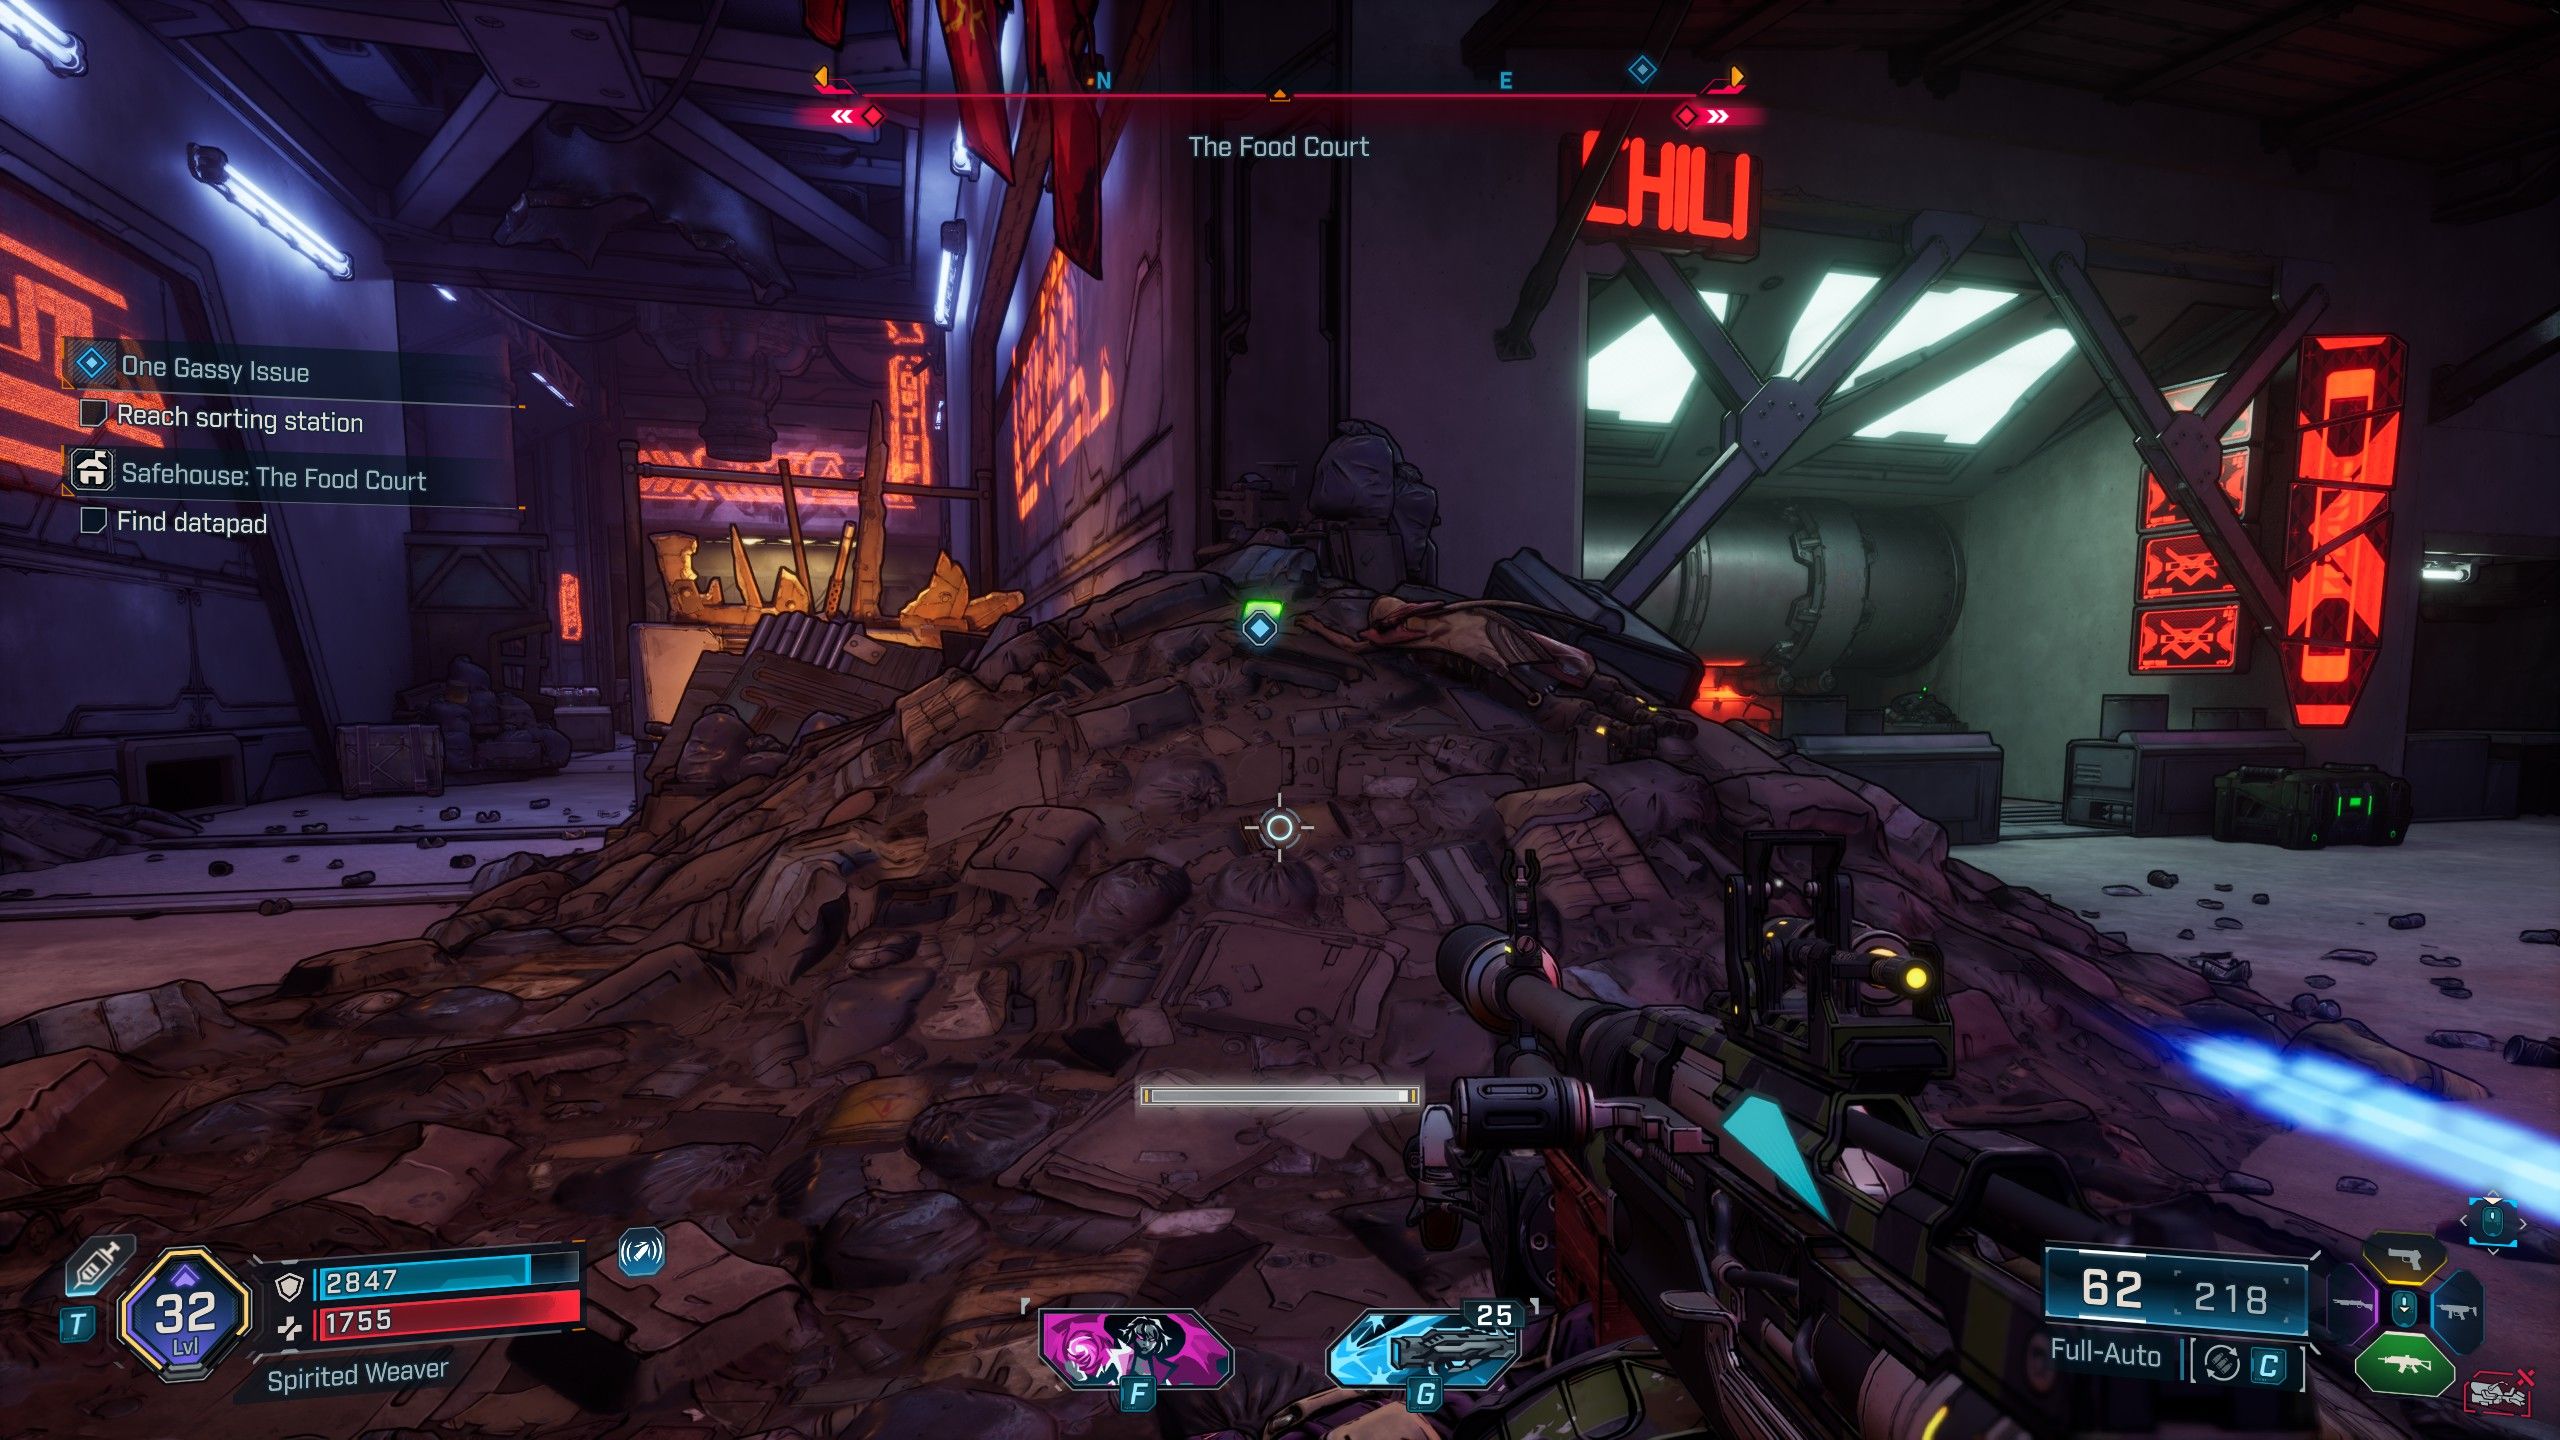
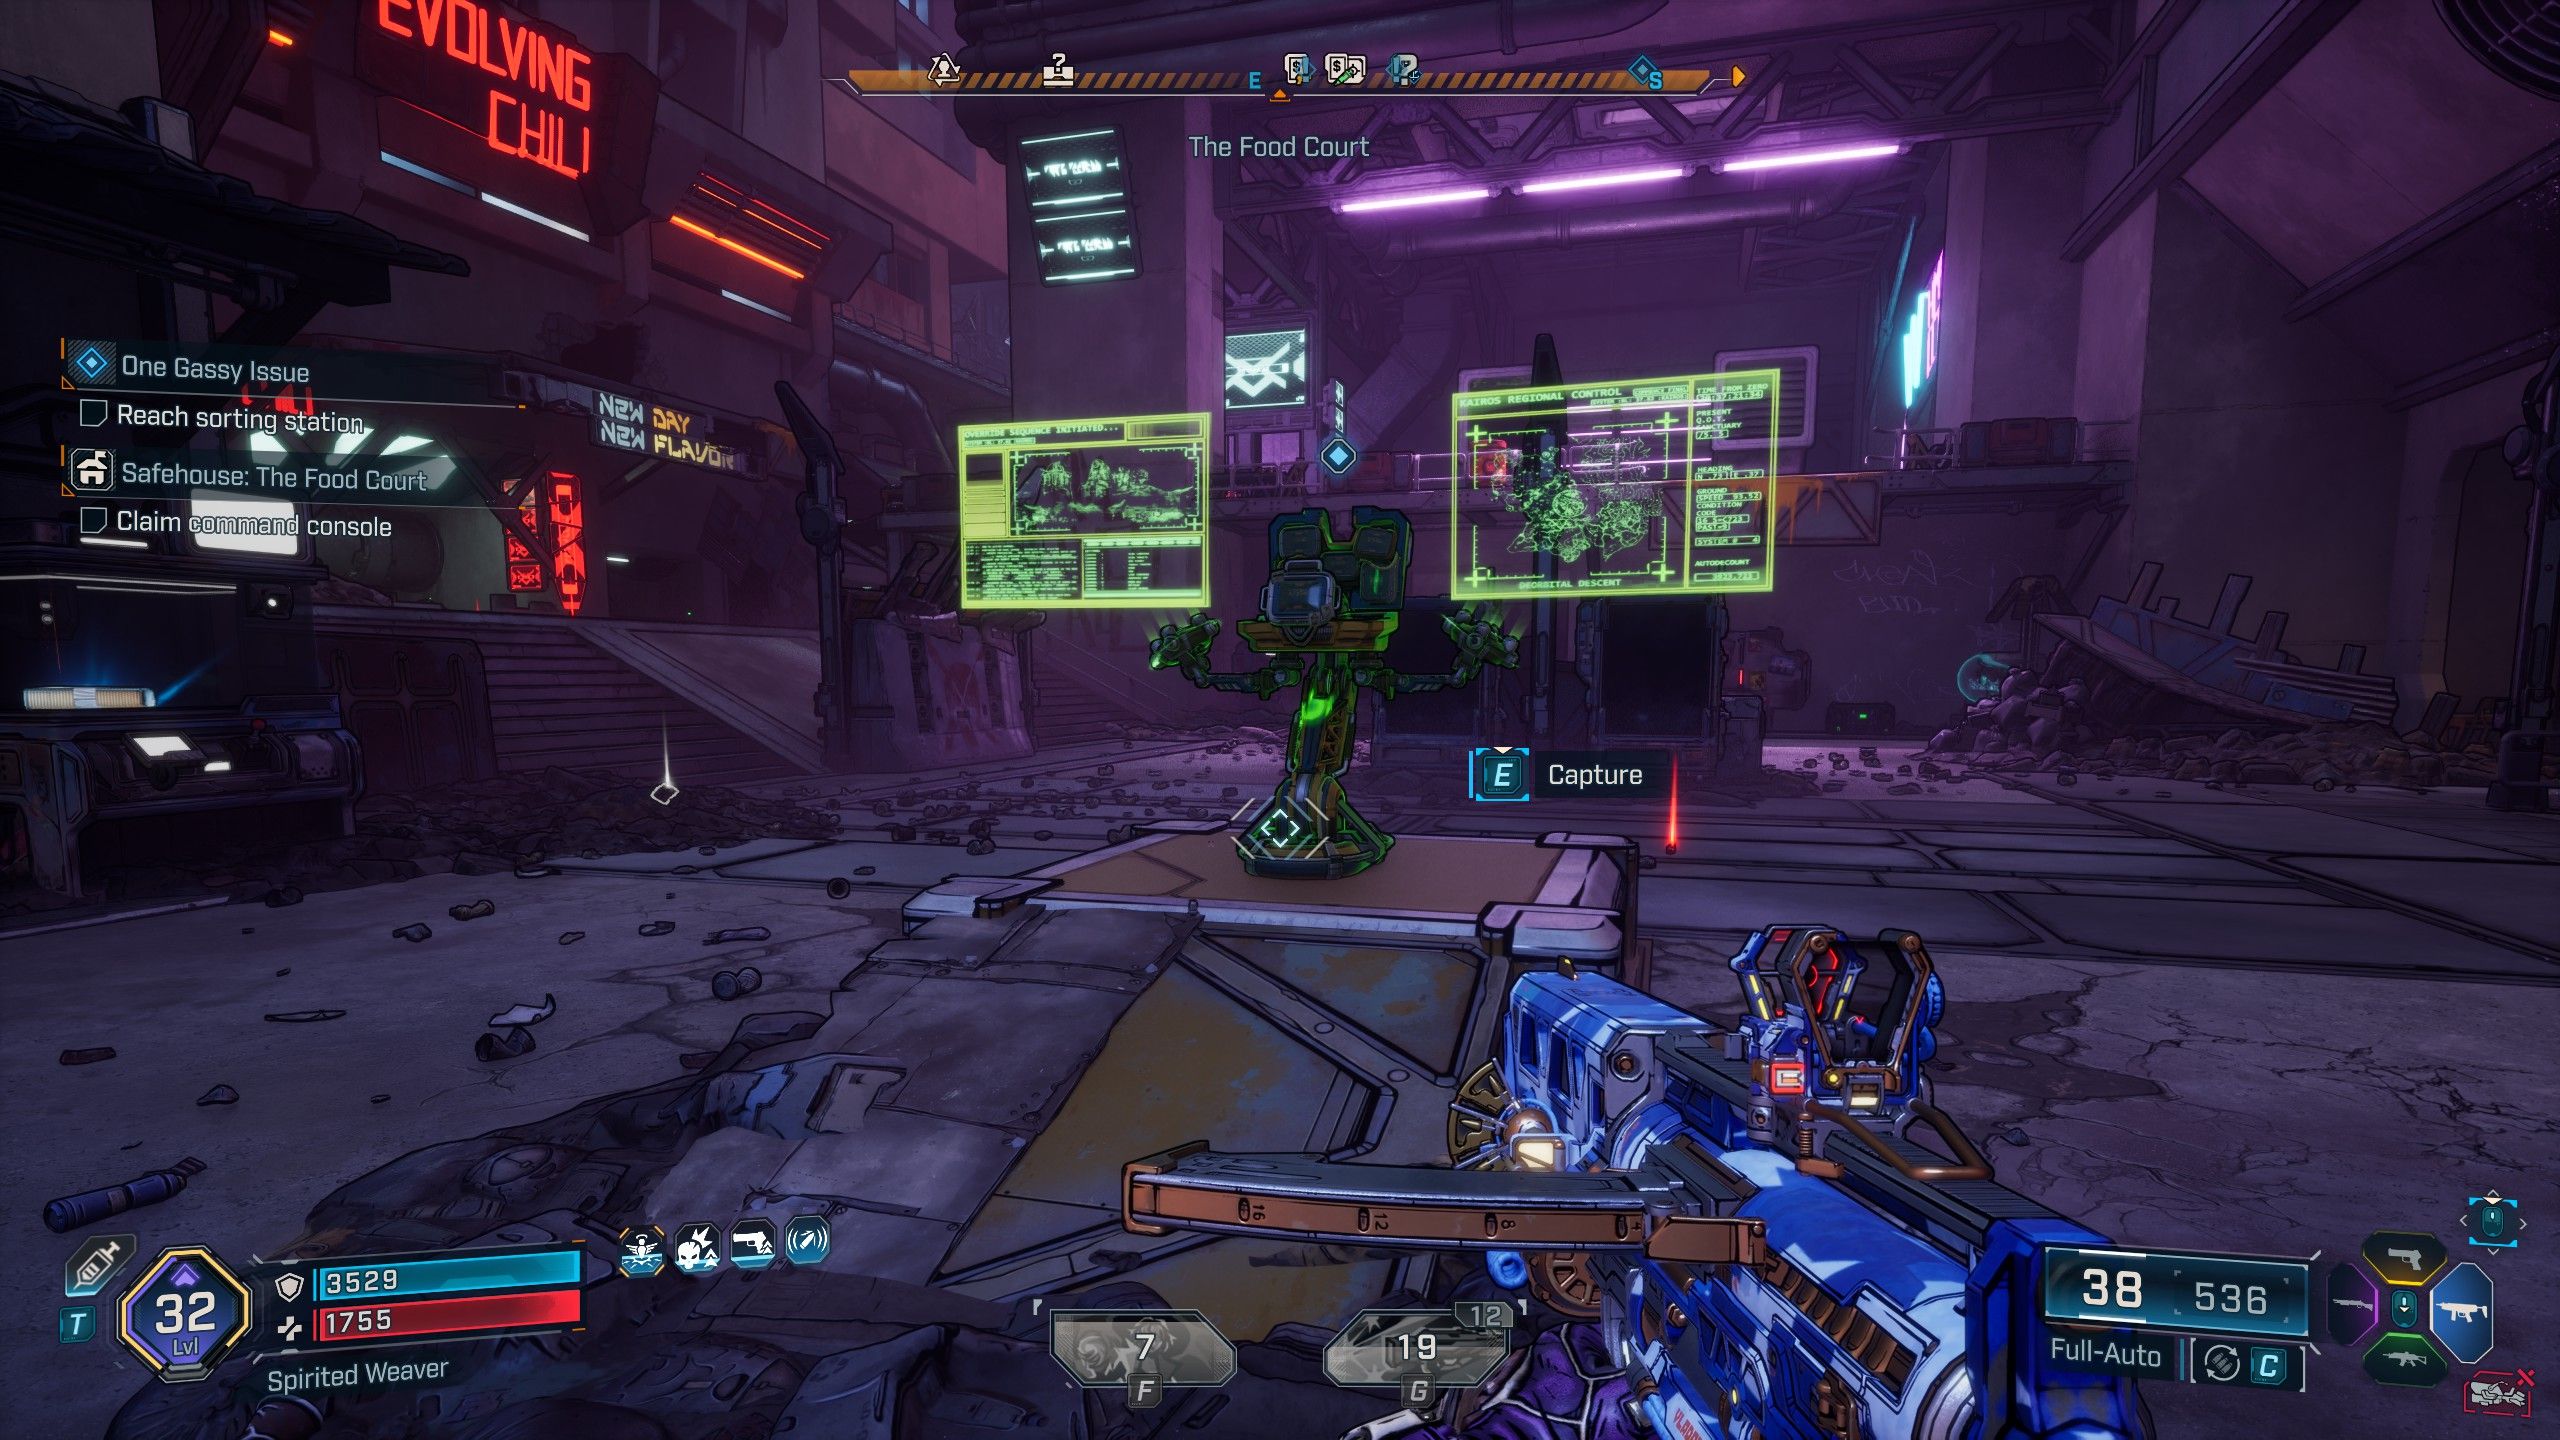
- Location: Terminus District, Dominion City
When you reach the Terminus District in Dominion City, go to The Food Court. The Datapad you’re looking for is near a trash heap in the northeast corner, next to a corpse. Facing the trash heap, you’ll find the Command Console to your right, but be careful – Rippers are patrolling the area.
Sumpview Falls Safehouse & Datapad Location
How to Get the Sumpview Falls Safehouse
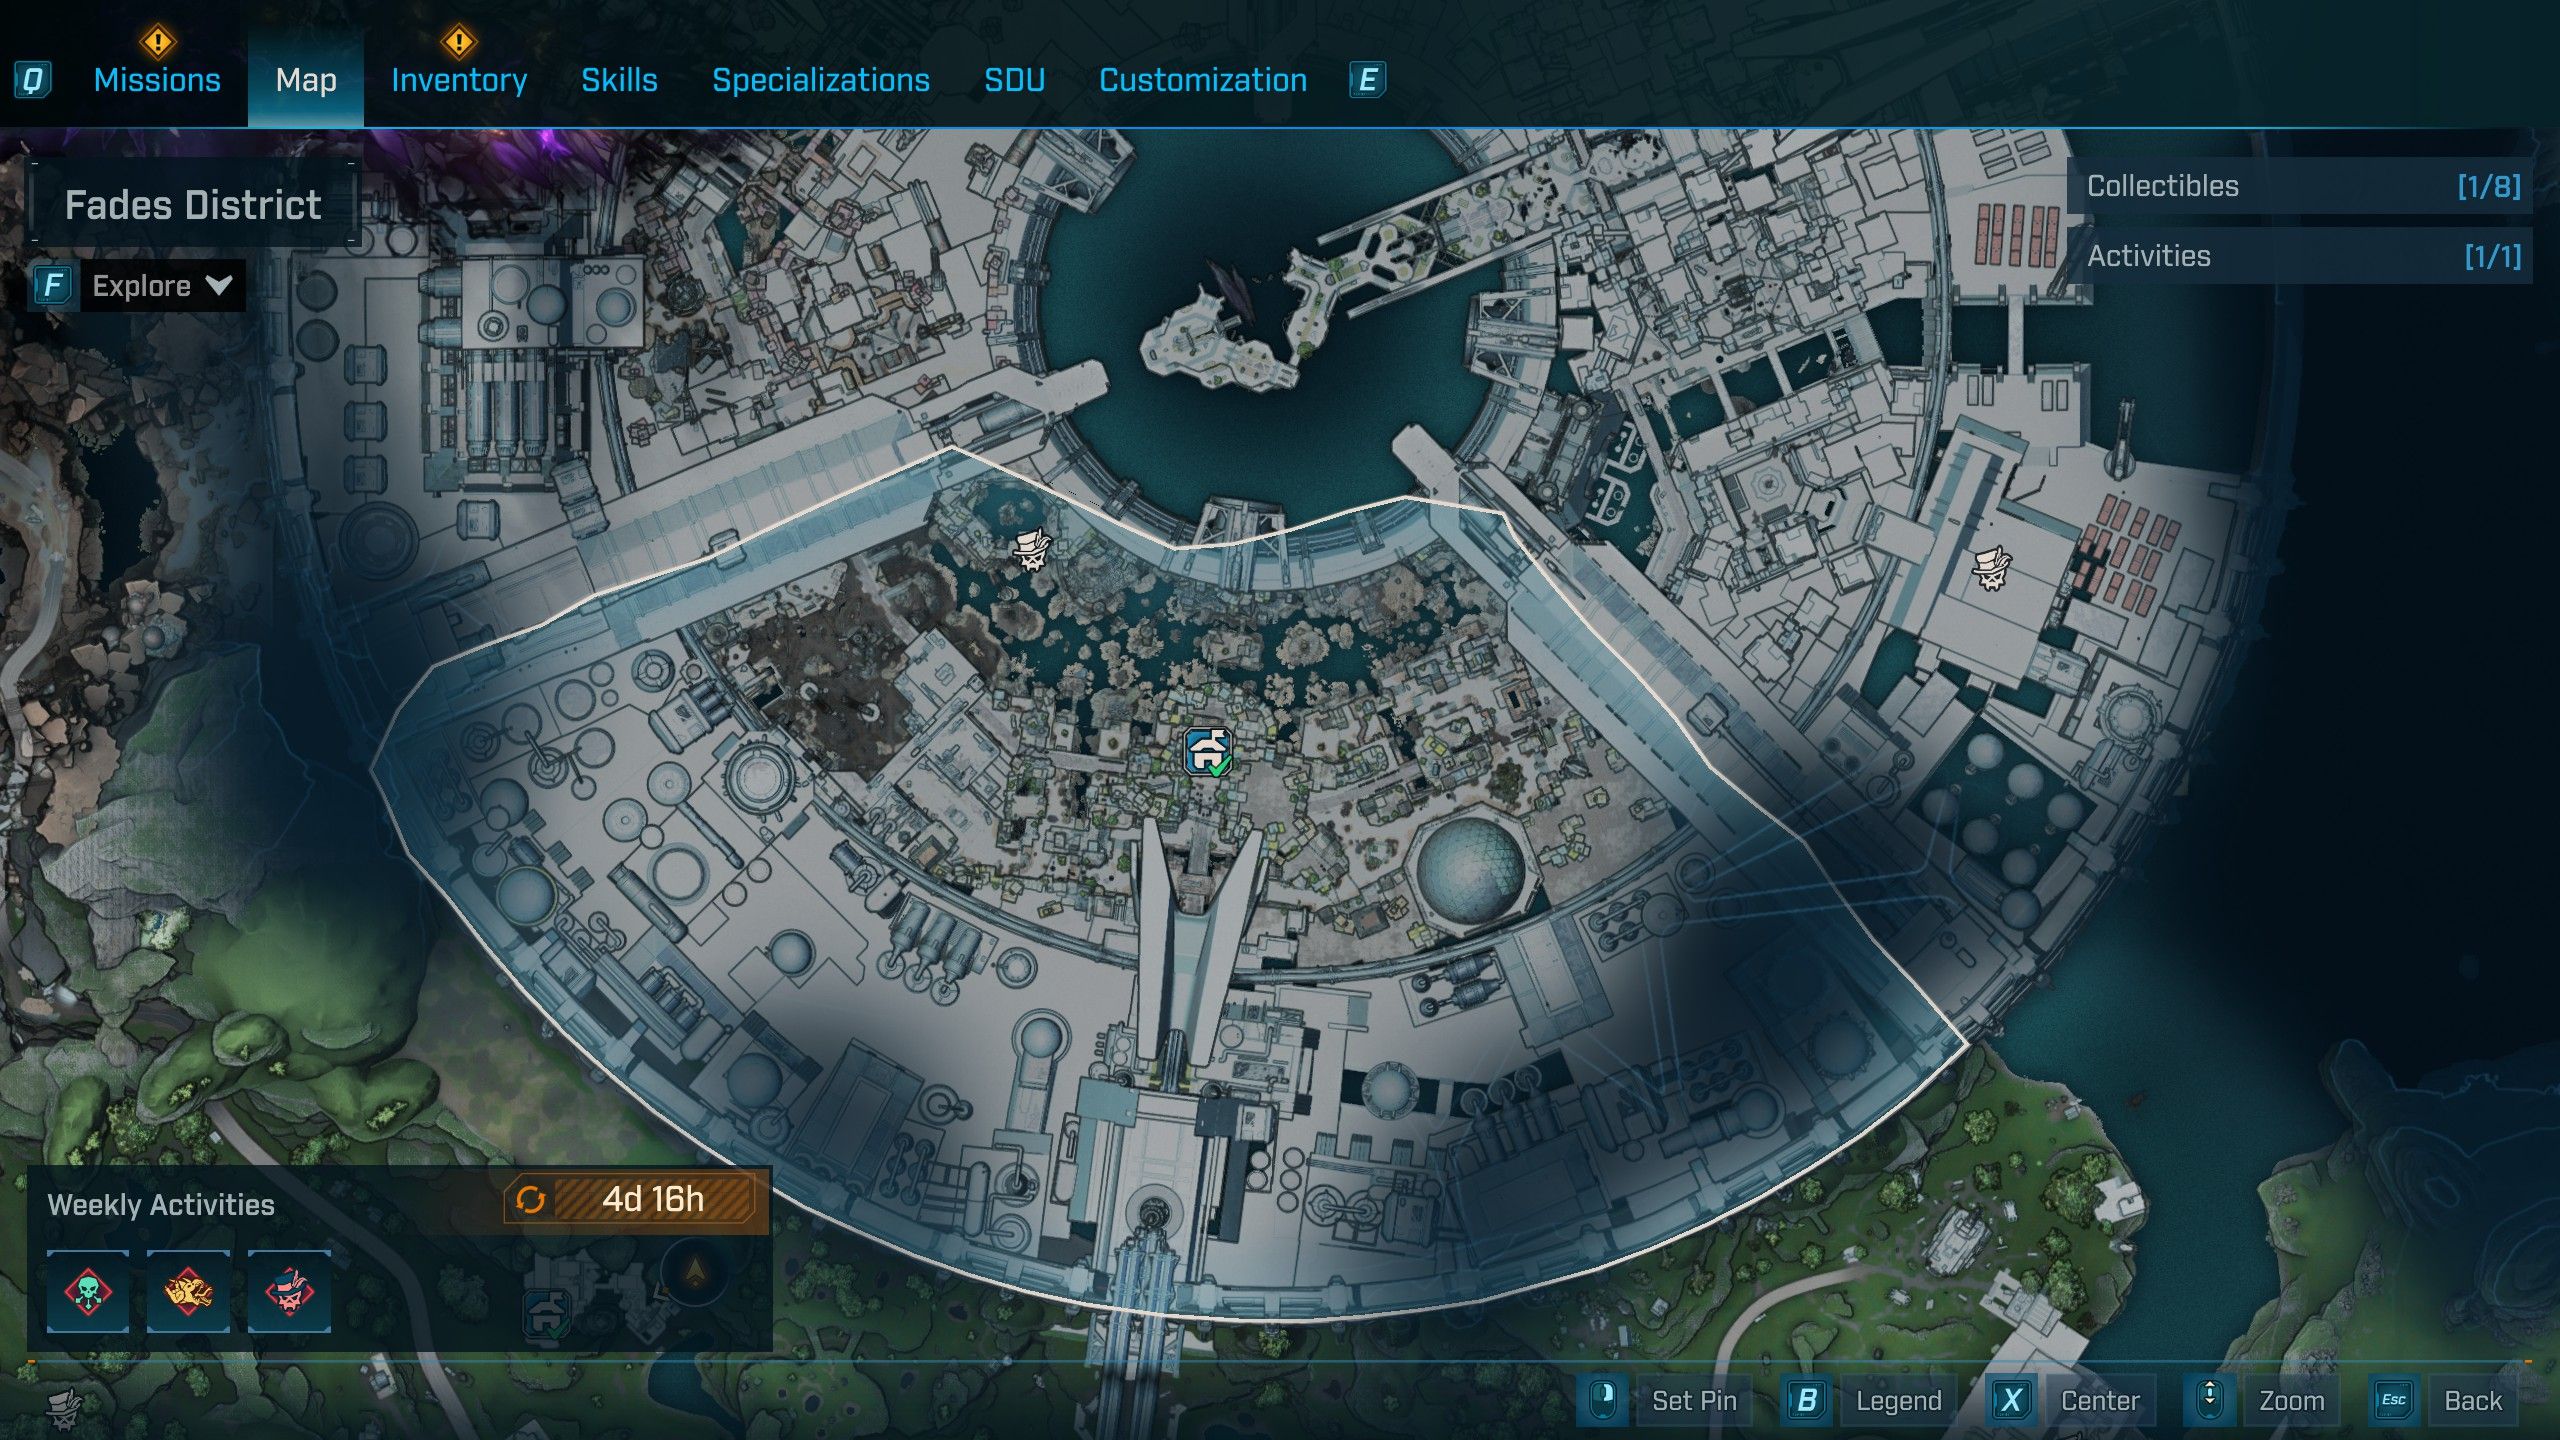
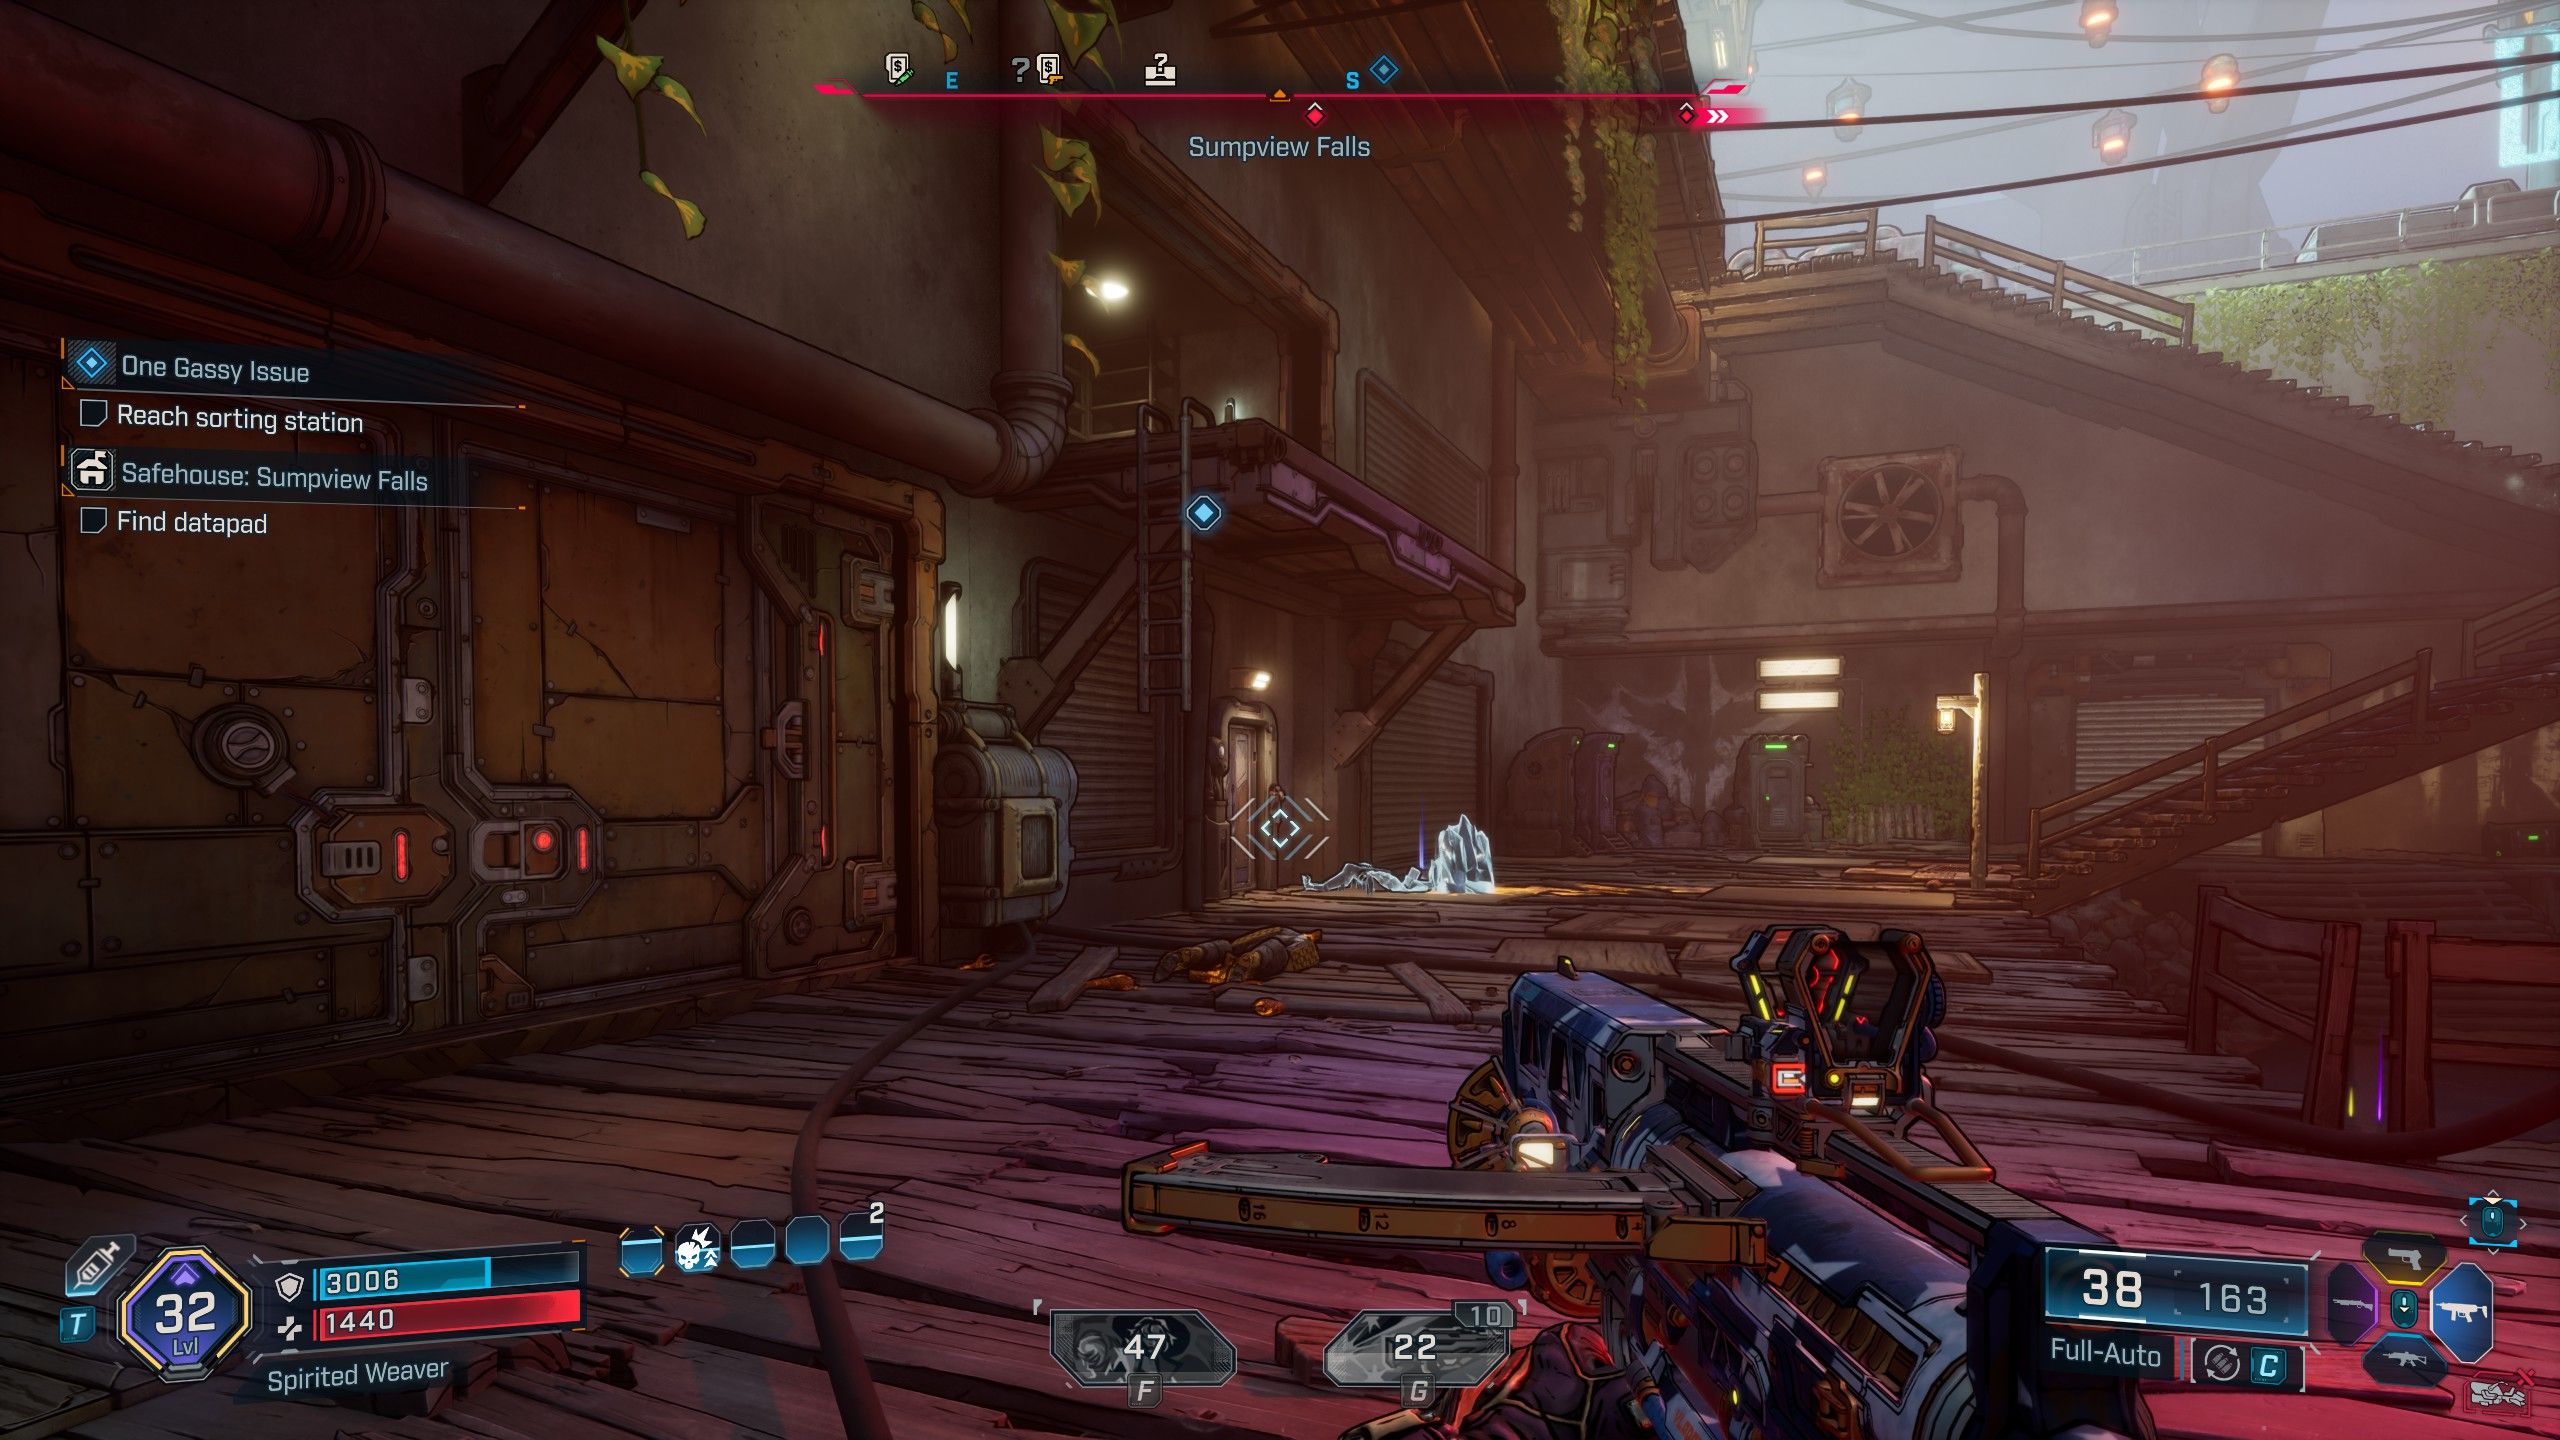
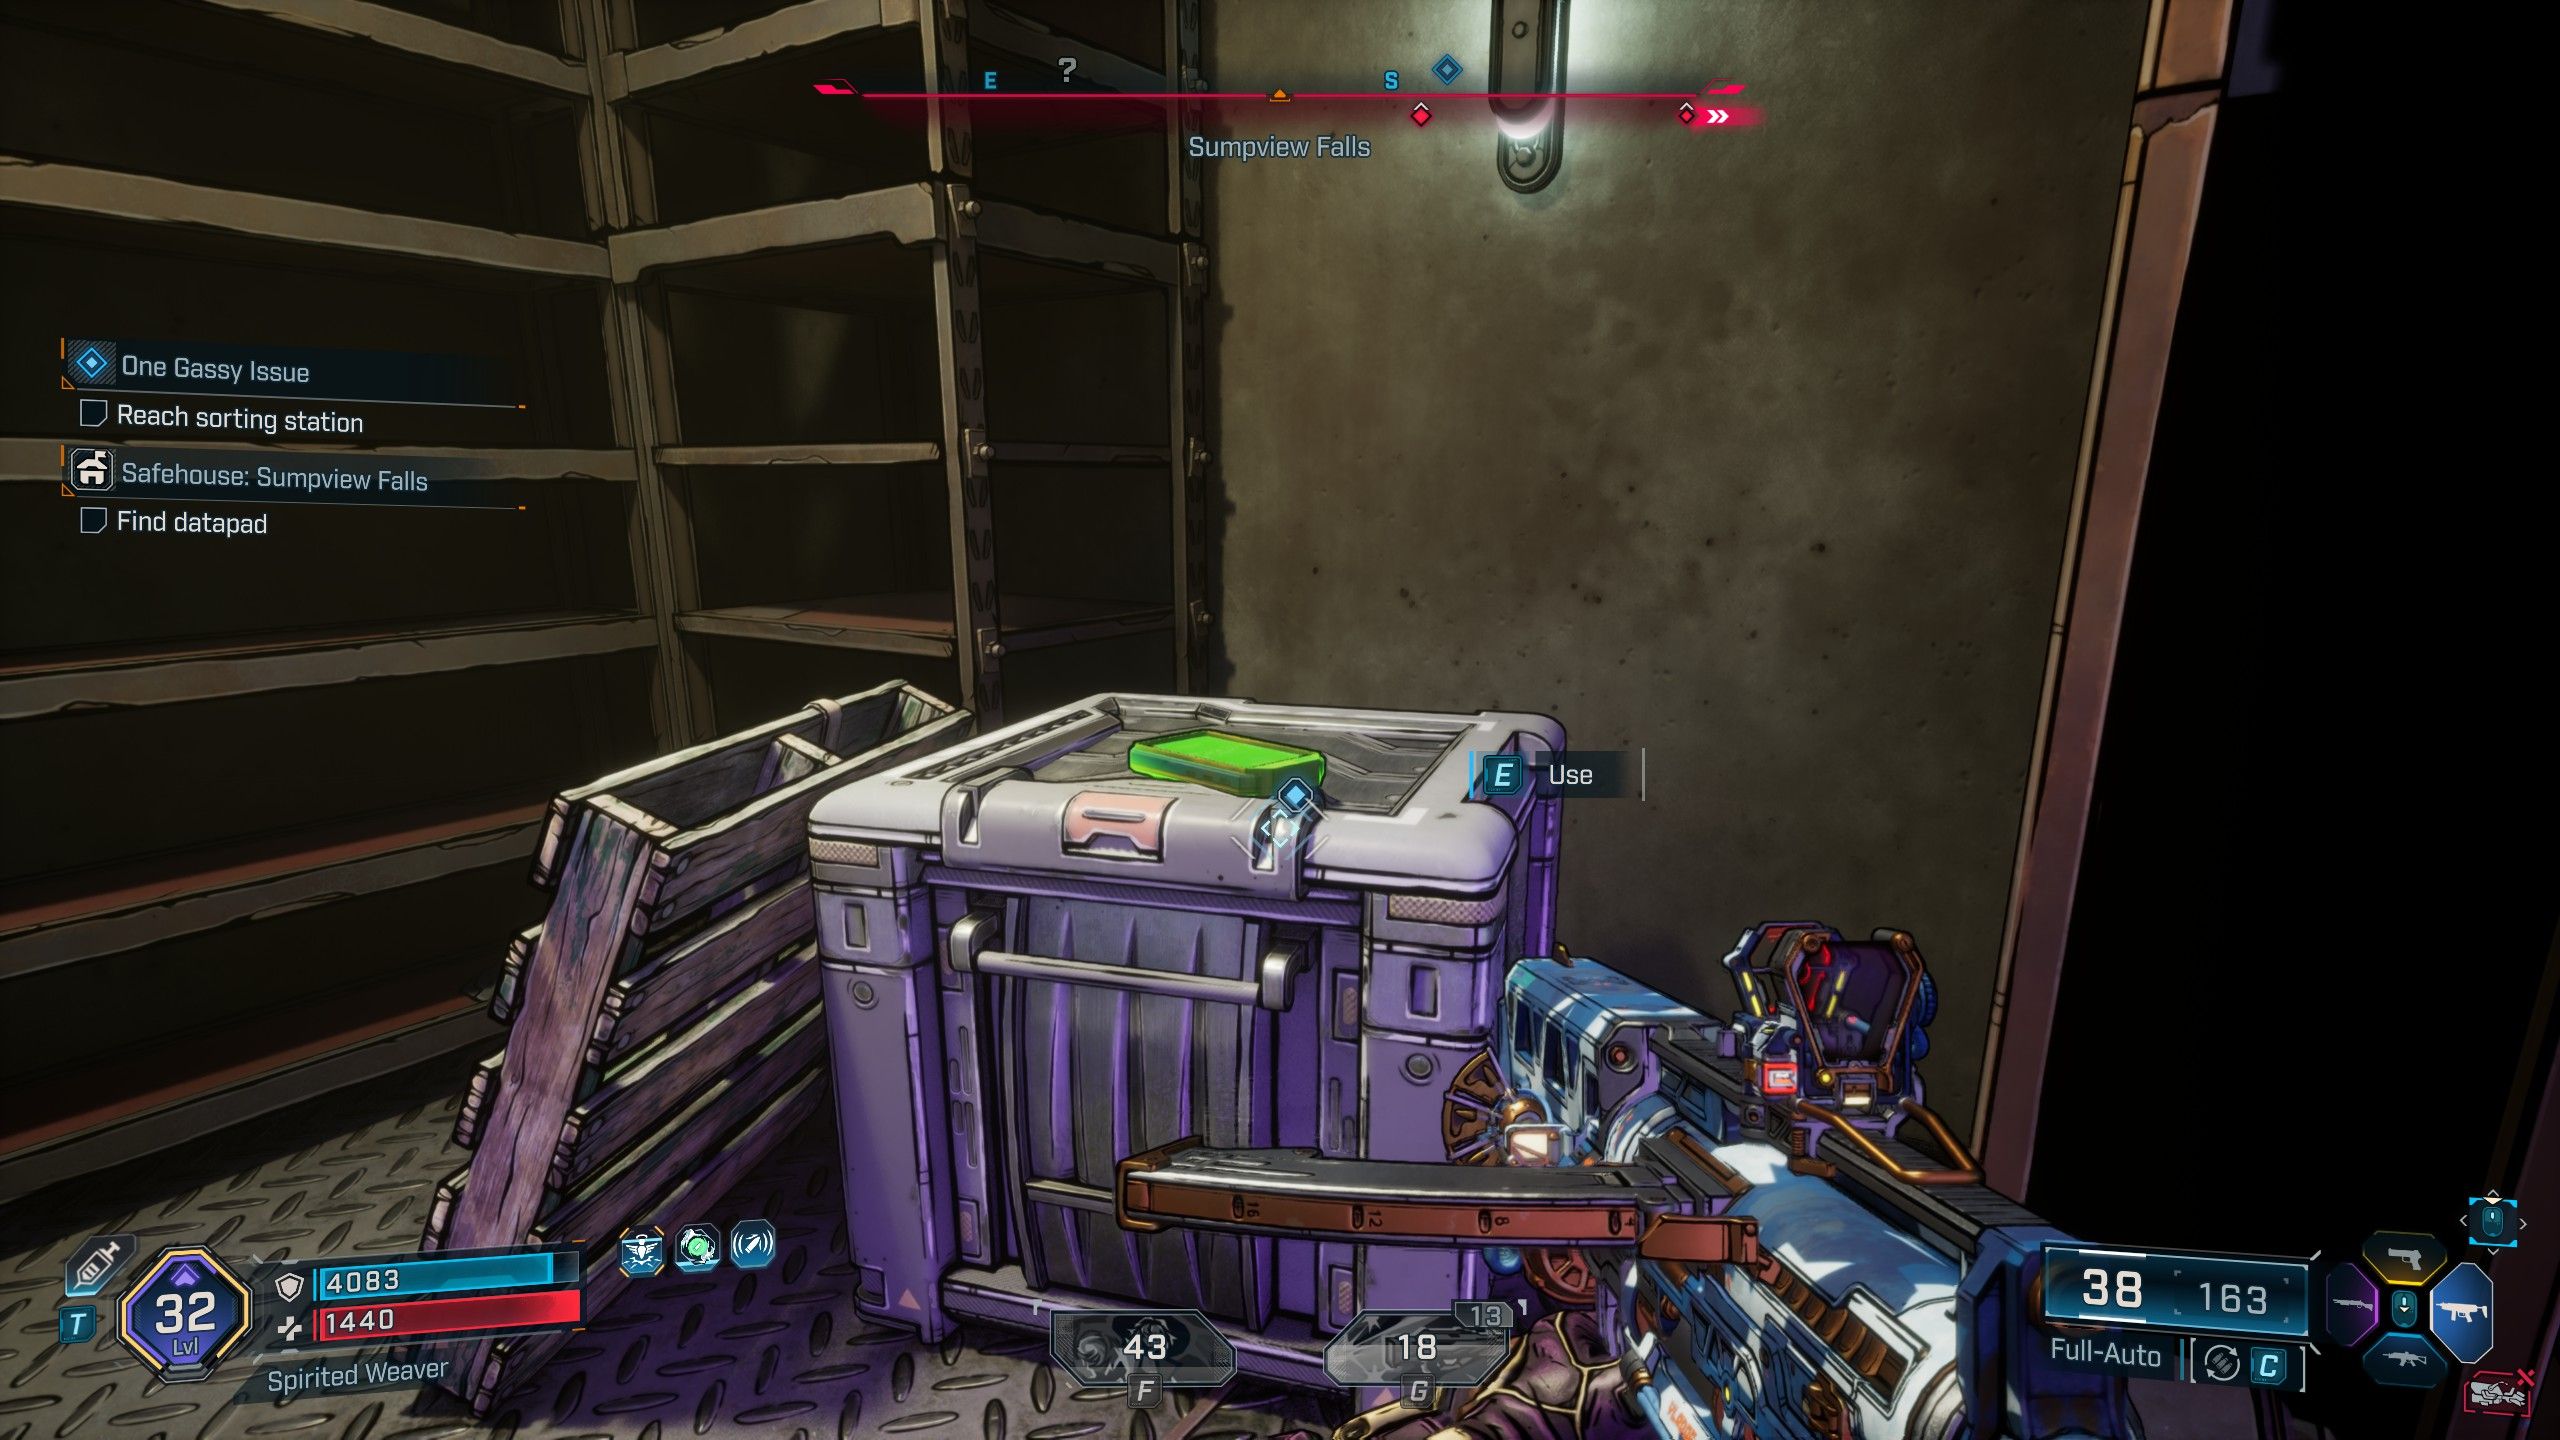
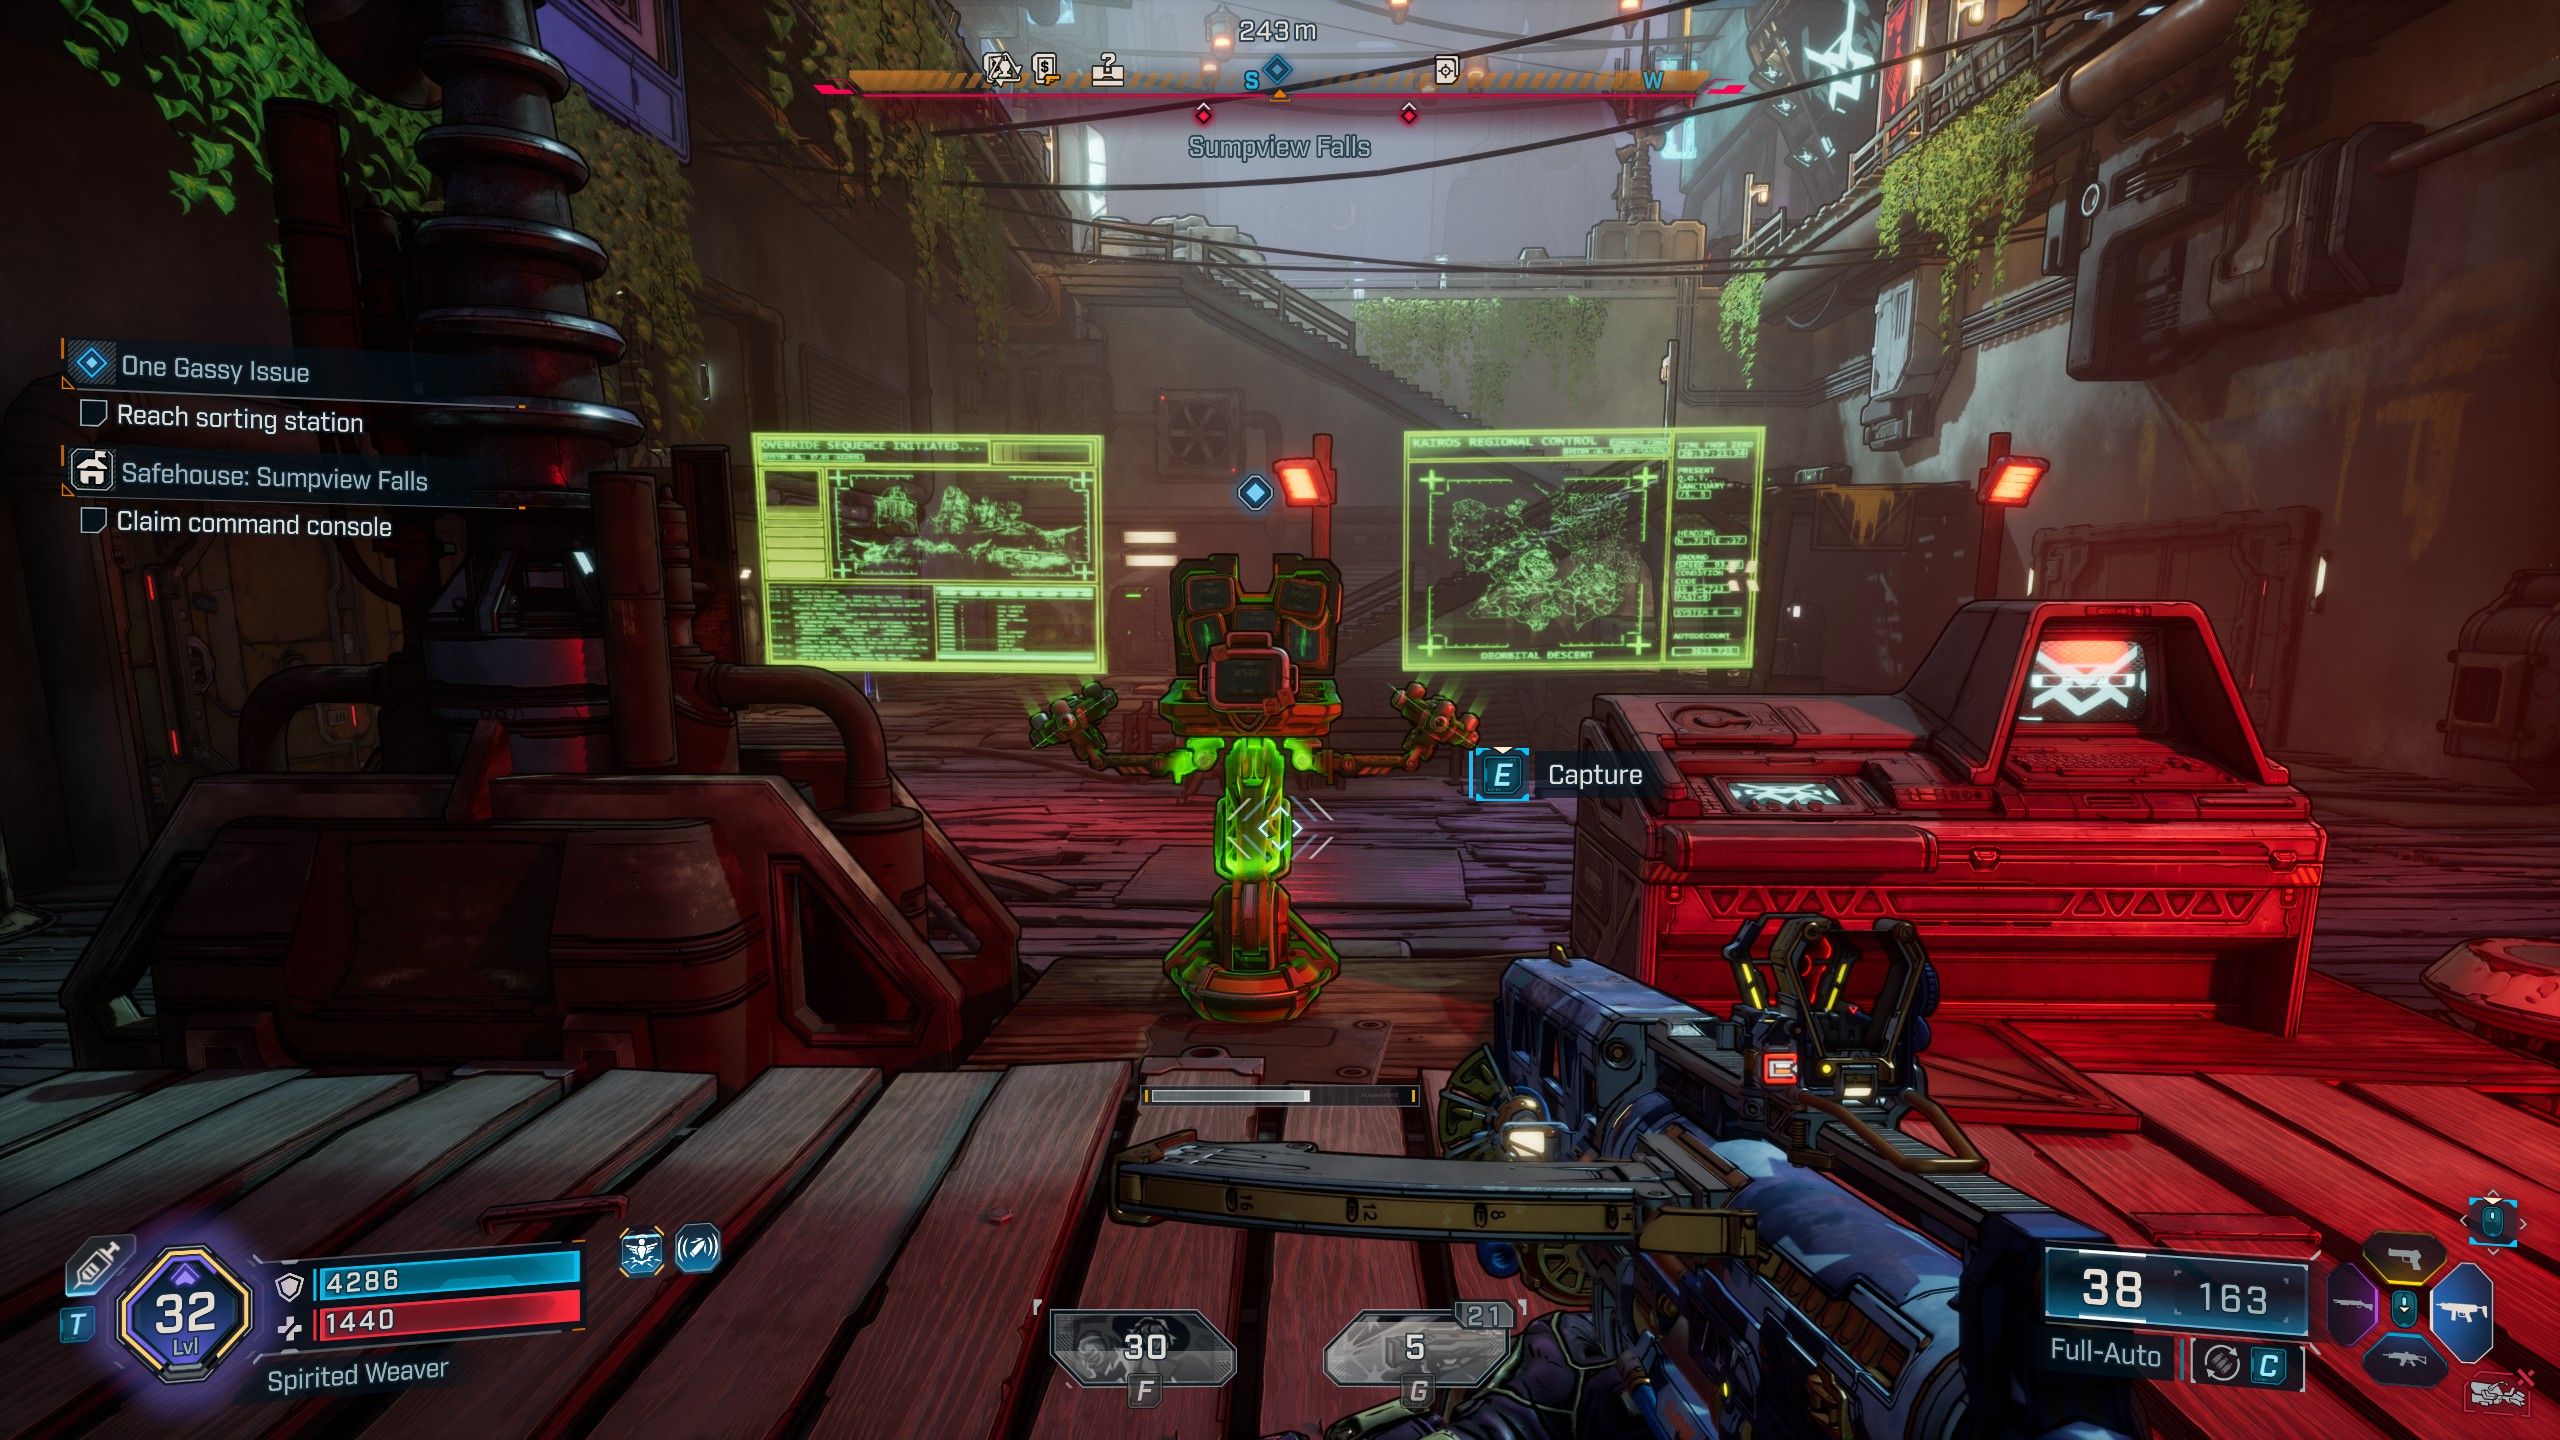
- Location: Fades District, Dominion City
In the Fades District, you’ll find a Safehouse right in the middle. To get a Datapad, head to Sumpview Falls and climb the ladder on the eastern wall. Once you have it, turn north to locate the Command Console. Be careful – Ripper and Order soldiers are fighting nearby!
Read More
- All Skyblazer Armor Locations in Crimson Desert
- How to Get the Sunset Reed Armor Set and Hollow Visage Sword in Crimson Desert
- All Shadow Armor Locations in Crimson Desert
- Marni Laser Helm Location & Upgrade in Crimson Desert
- One Piece Chapter 1180 Release Date And Where To Read
- All Helfryn Armor Locations in Crimson Desert
- All Golden Greed Armor Locations in Crimson Desert
- All Icewing Armor Locations in Crimson Desert
- How to Beat Stonewalker Antiquum at the Gate of Truth in Crimson Desert
- Legendary White Lion Necklace Location in Crimson Desert
2025-09-14 20:35