![]()
After finishing the main story of Borderlands 4, players can start working towards Ultimate Vault Hunter Mode, which increases enemy difficulty but also boosts the quality of loot. This offers a challenging but rewarding experience, and you can turn it on or off at any time through the pause menu if you prefer an easier game. However, it’s a key part of Borderlands 4‘s post-game content. If you’re aiming to unlock Ultimate Vault Hunter Mode 2 (UVHM2), we can help. Below, you’ll find a complete list of the challenges needed to unlock UVHM 2 in Borderlands 4, including their locations and tips for completing them quickly.
These challenges need to be tackled in Ultimate Vault Hunter Mode 1. To make sure you’re at UVH Rank 1, go to the Options menu and choose “Session Settings”. Then, find the “Ultimate Vault Hunter Level” tab and select UVH Rank 1. Keep in mind, these challenges won’t be completed if you aren’t in UVH Rank 1.
How to Complete Song’s Over in Borderlands 4
Bramblesong Location & How to Beat Him
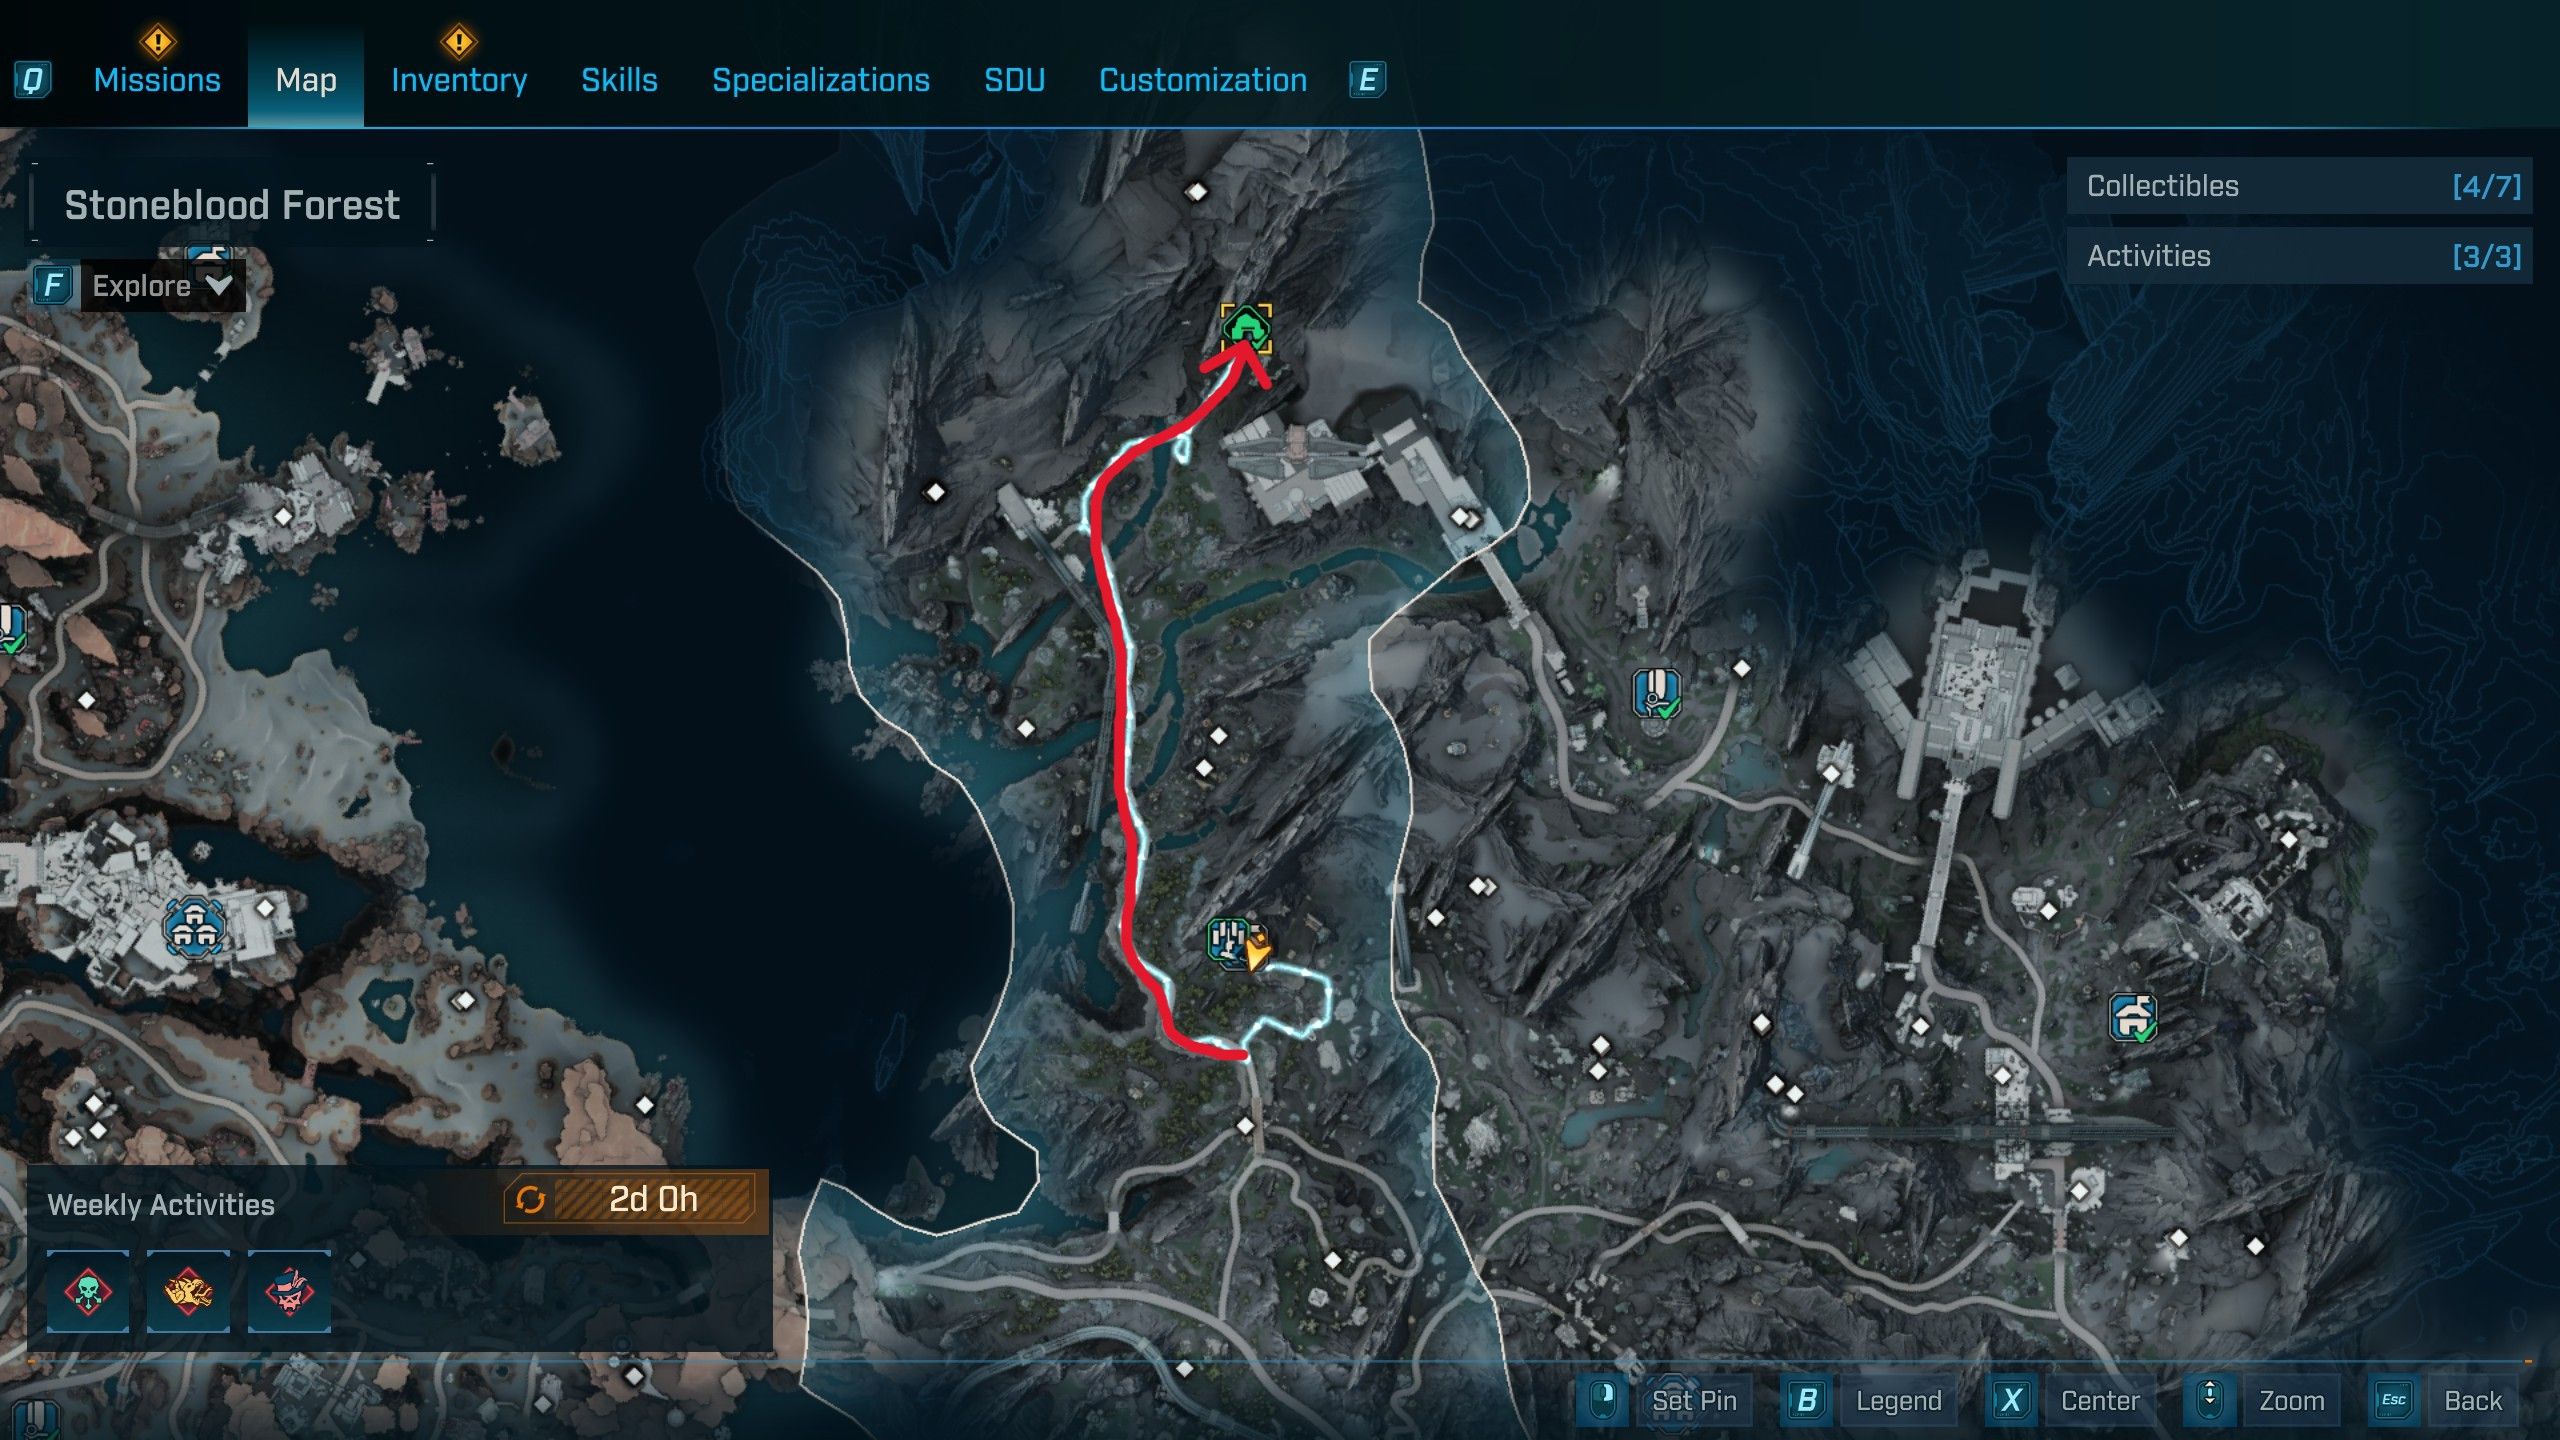
So, for the Song’s Over quest, you gotta take down Bramblesong in UVH 1. You’ll find Bramblesong in Bittervein, which is an Abandoned Auger Mine in Stoneblood Forest, Terminus Range. Basically, this mine is way up north in Stoneblood Forest. I’ve included a video below to help you navigate the Bittervein Auger Mine and find Bramblesong quickly!
At the northern side of the mountain, you’ll find the entrance to the Auger Mine. Simply follow the straightforward path and break the crate that’s blocking a hole in the wall. Continue forward and find the ladder located on the right side of the open cave. Next, jump onto the metal crate and then perform a double jump to glide north, clearing the gap. From this point, look for a hole in the wall at the north-east corner – you’ll need to crouch to enter. Once you can stand up again, look upwards to find some scaffolding you can grapple onto, and keep following the path heading north. You’ll come to an open cave with no floor, so look to the crate on your right and pull it to create a platform. Repeat this process with the next crate. The last crate will be on your left, after which you can safely navigate through the cave system to reach the Vending Machines before facing Bramblesong.
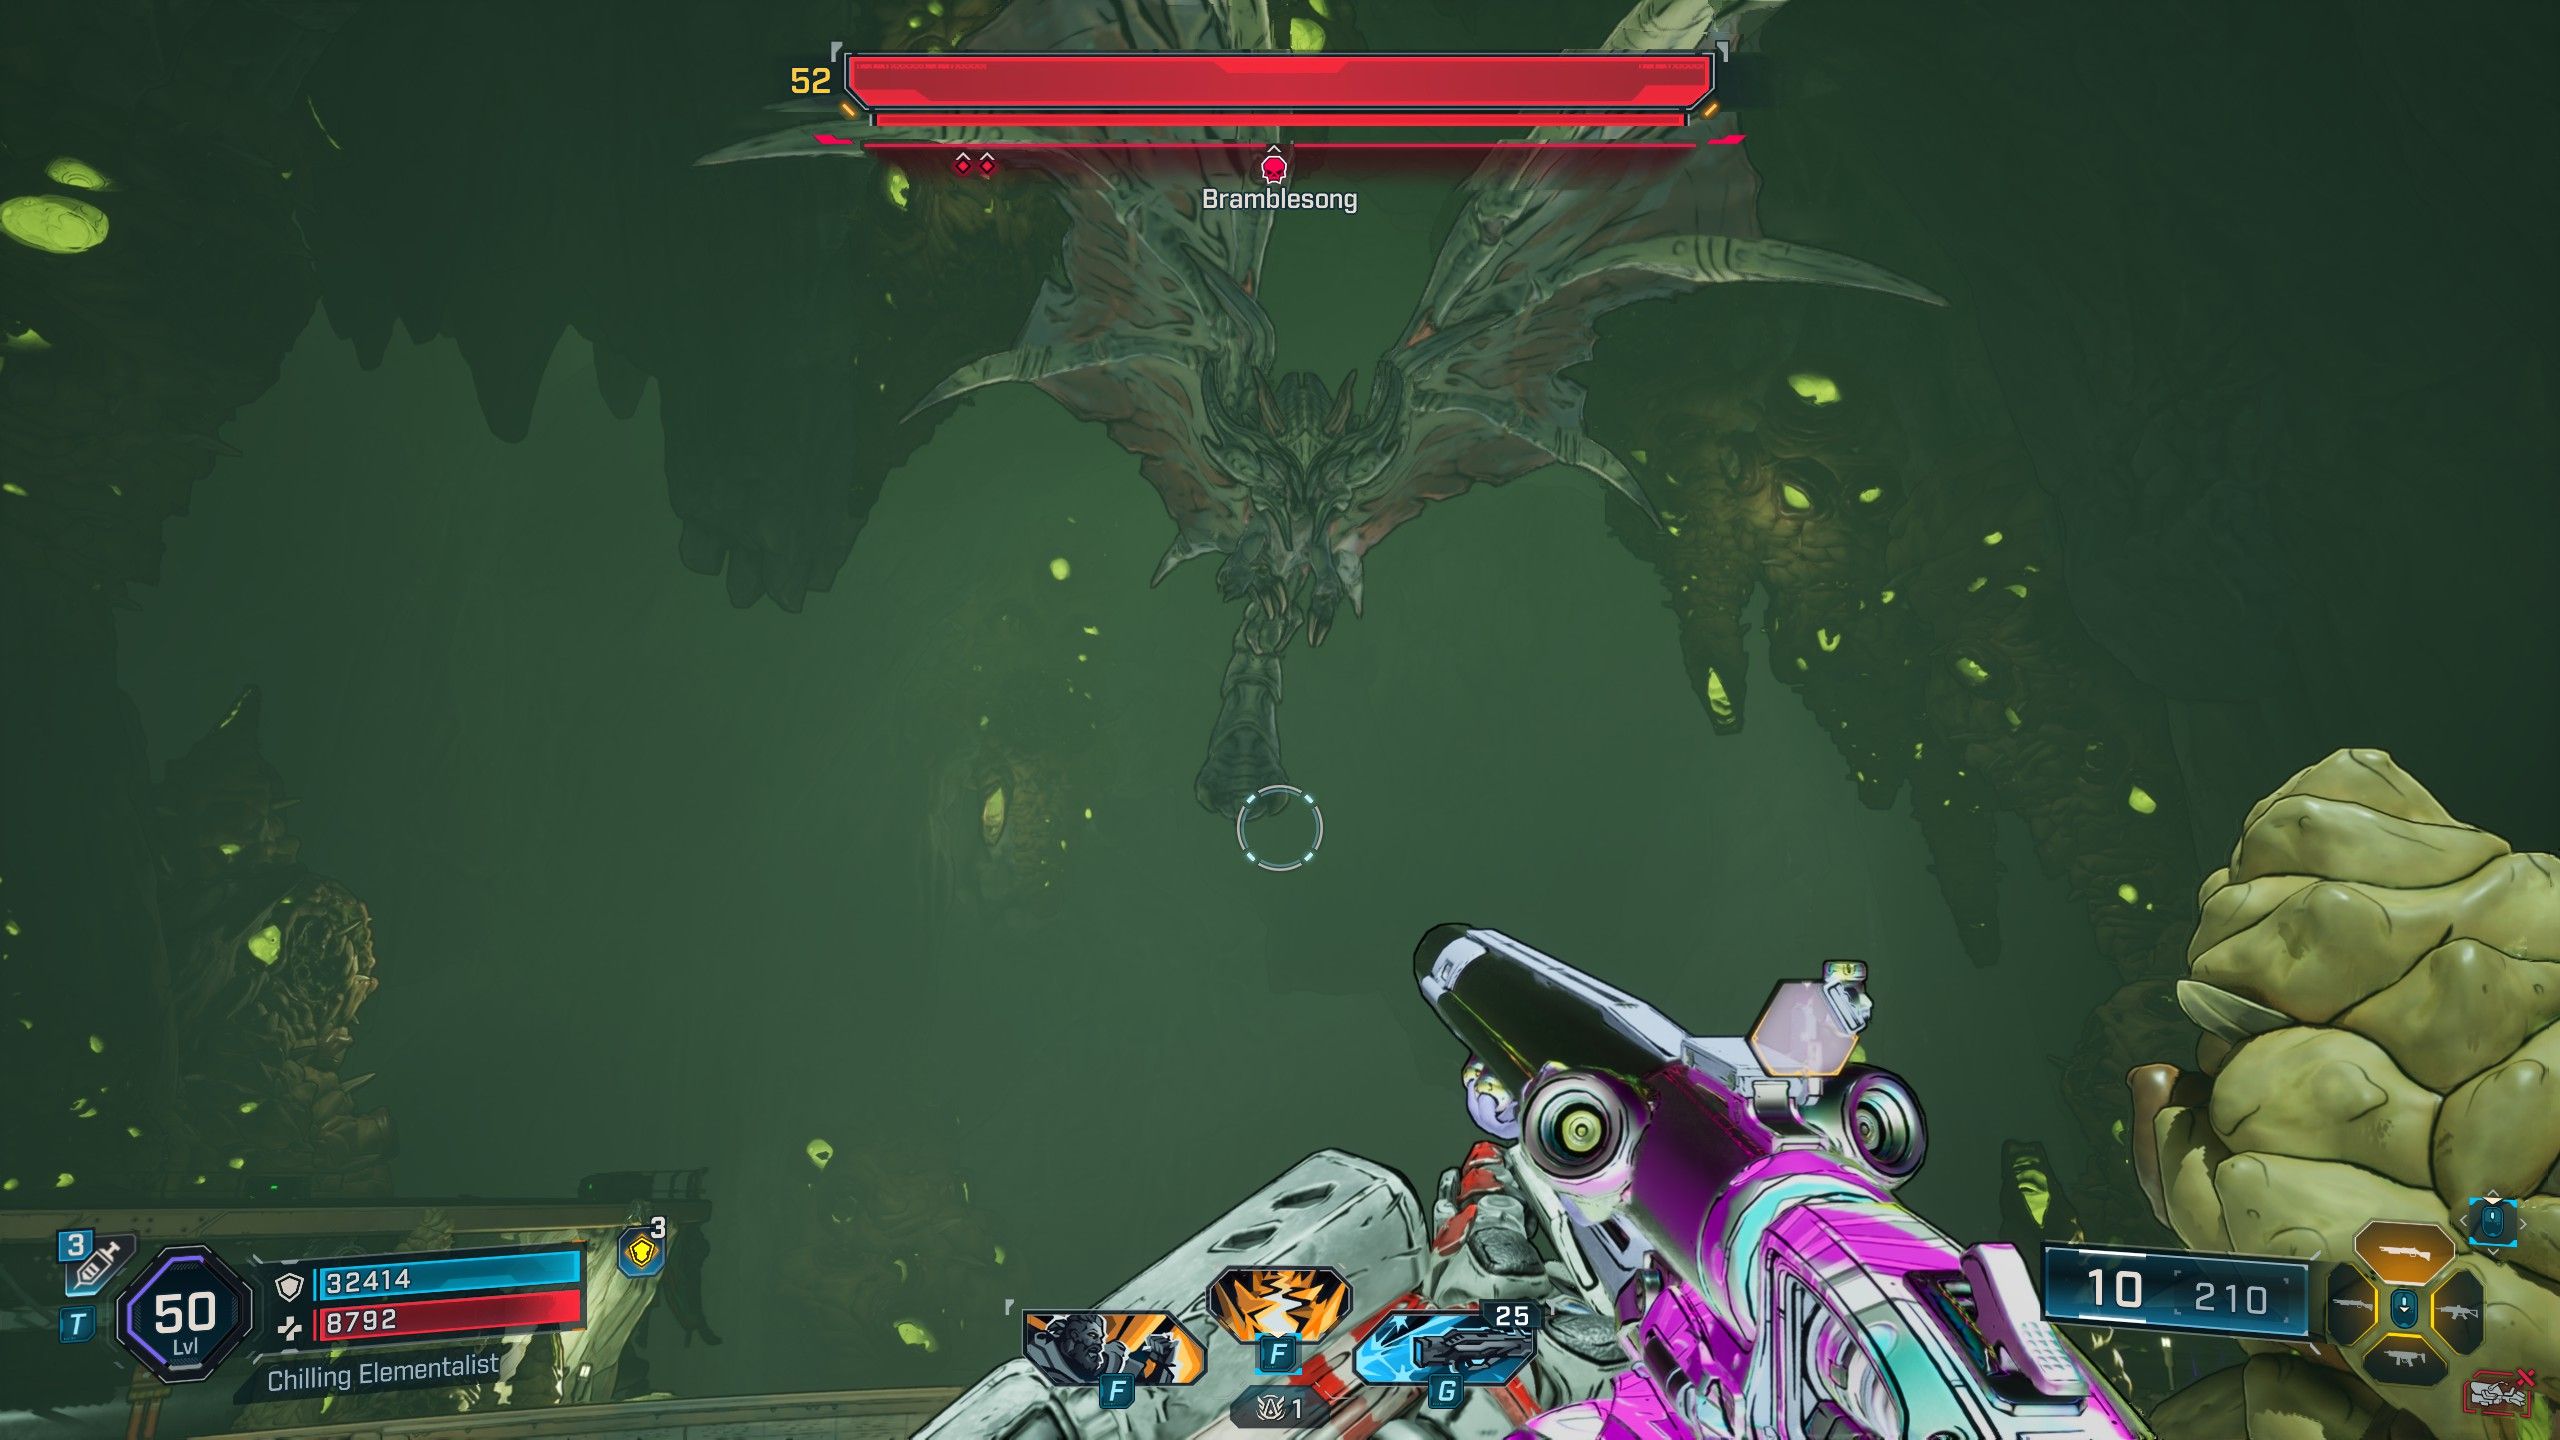
Bramblesong is a large and tough enemy, a Kratch, with two health bars representing its Flesh (shown in red). Because of this, it’s particularly vulnerable to Incendiary weapons. Bramblesong consistently flies, so it’s best to avoid close-combat or shotgun-focused builds. Instead, opt for weapons with greater range. Heavy Weapon Ordnance is very effective against it. Defeating this winged creature will finish the Song’s Over challenge.
How to Complete Omega 86’d in Borderlands 4
Bio Armored Omega Thresher Location & How to Beat Him
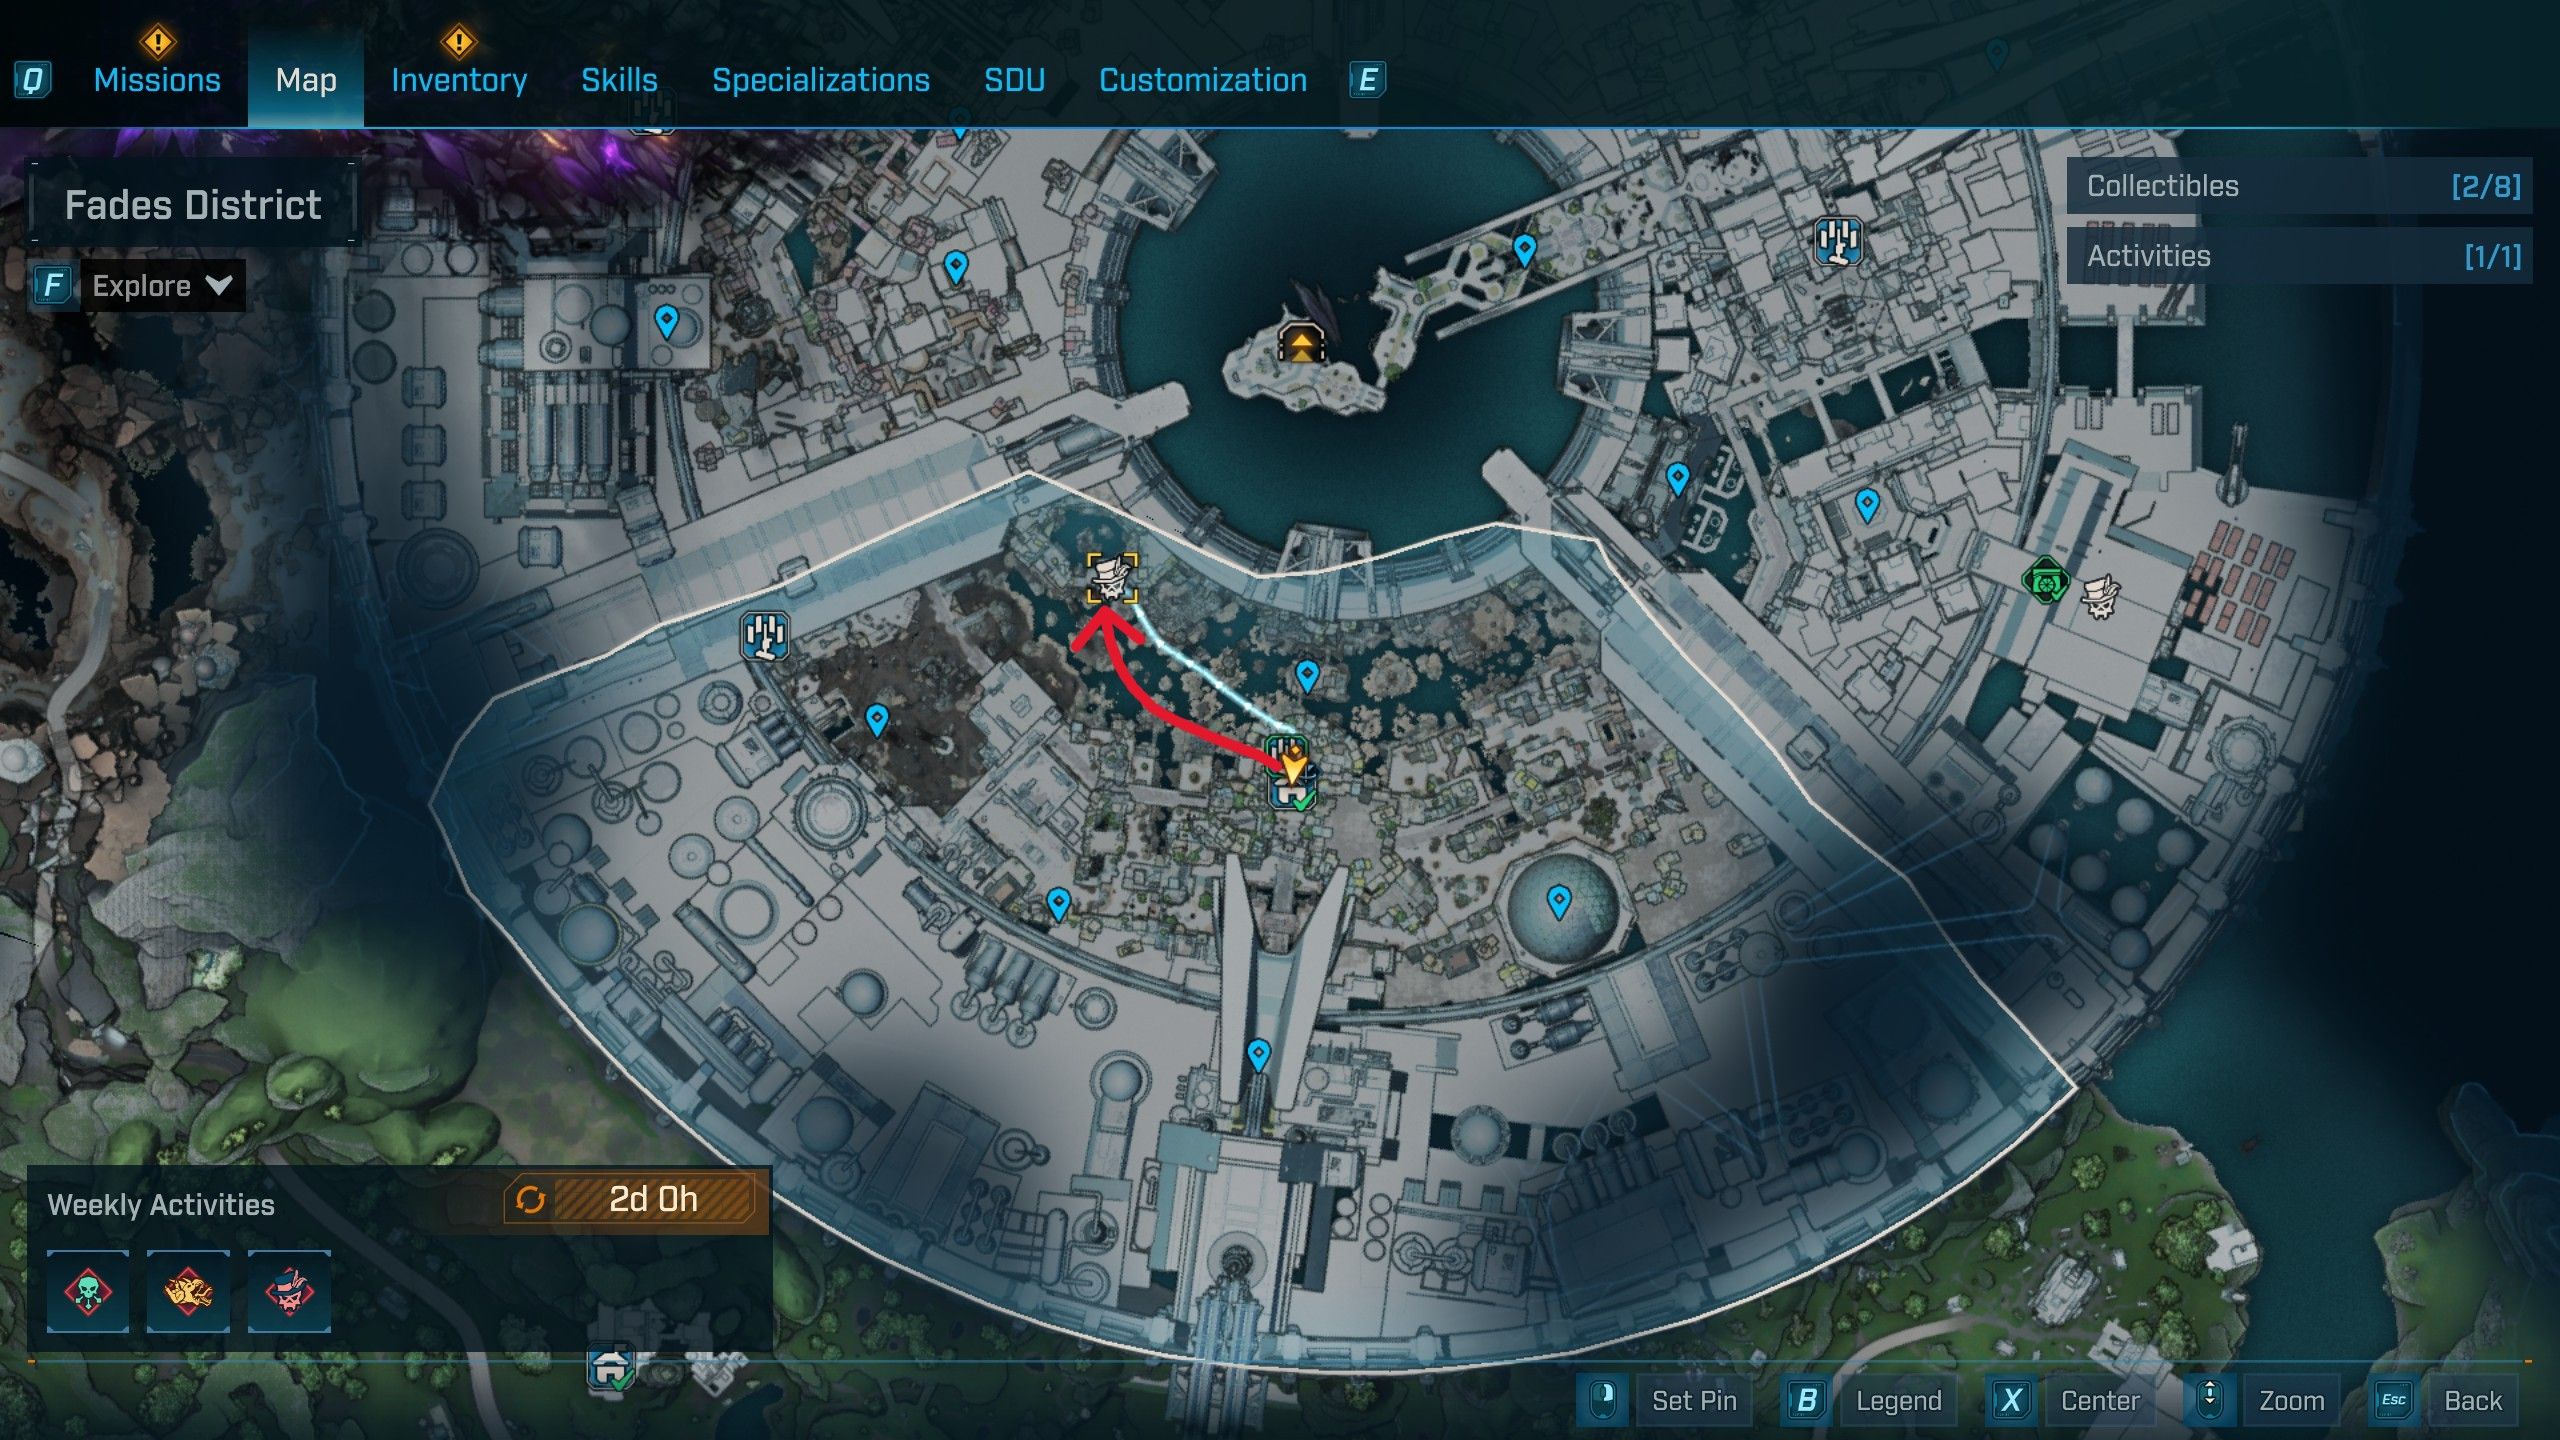
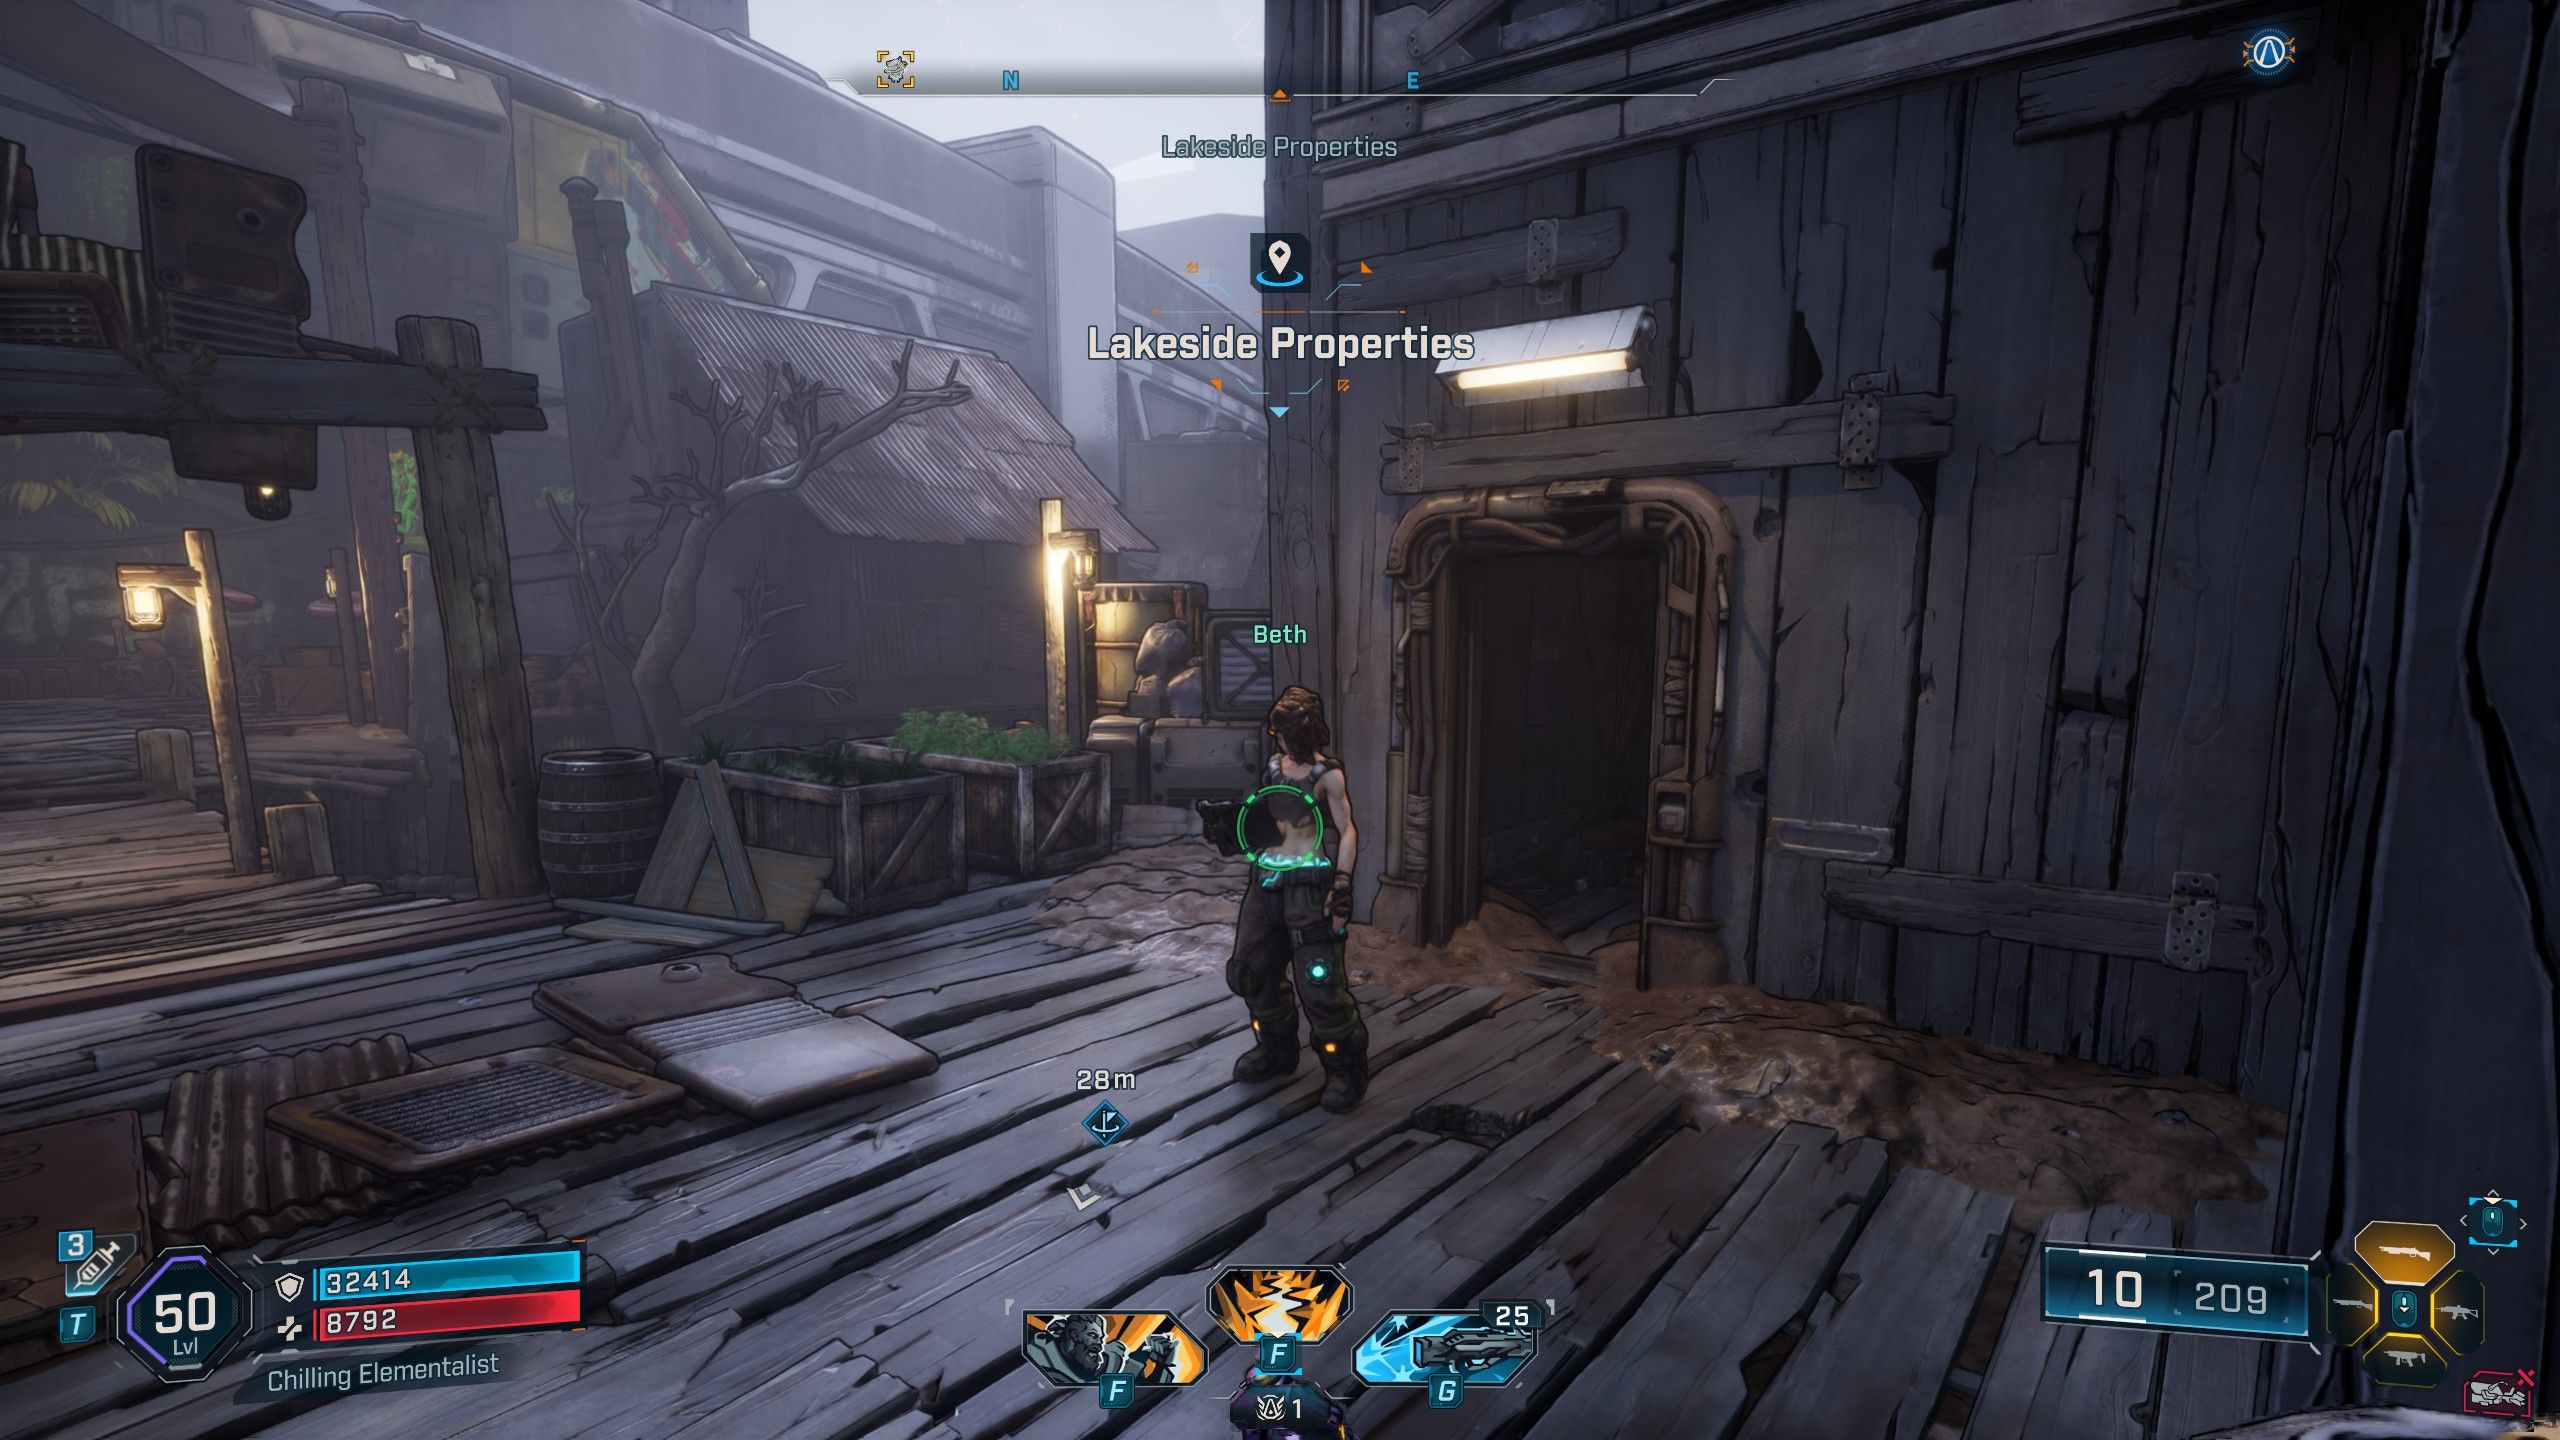
You can only get the Bio Armored Omega Thresher after finishing the “One Slimey Issue” side quest. To start this, you’ll need to go to the Lakeside Properties in the Fades District of Dominion and talk to Beth. She’ll give you the “One Gassy Issue” side quest first. Once you’ve completed that, return to Beth to begin “One Slimey Issue”. This new quest requires you to get into Beth’s basement using a Locust Canister, which is located right across from the basement door. Then, just continue following the quest steps until you reach the Bio Armored Omega Thresher boss fight. You can replay this fight at the north-west part of the Fades District.
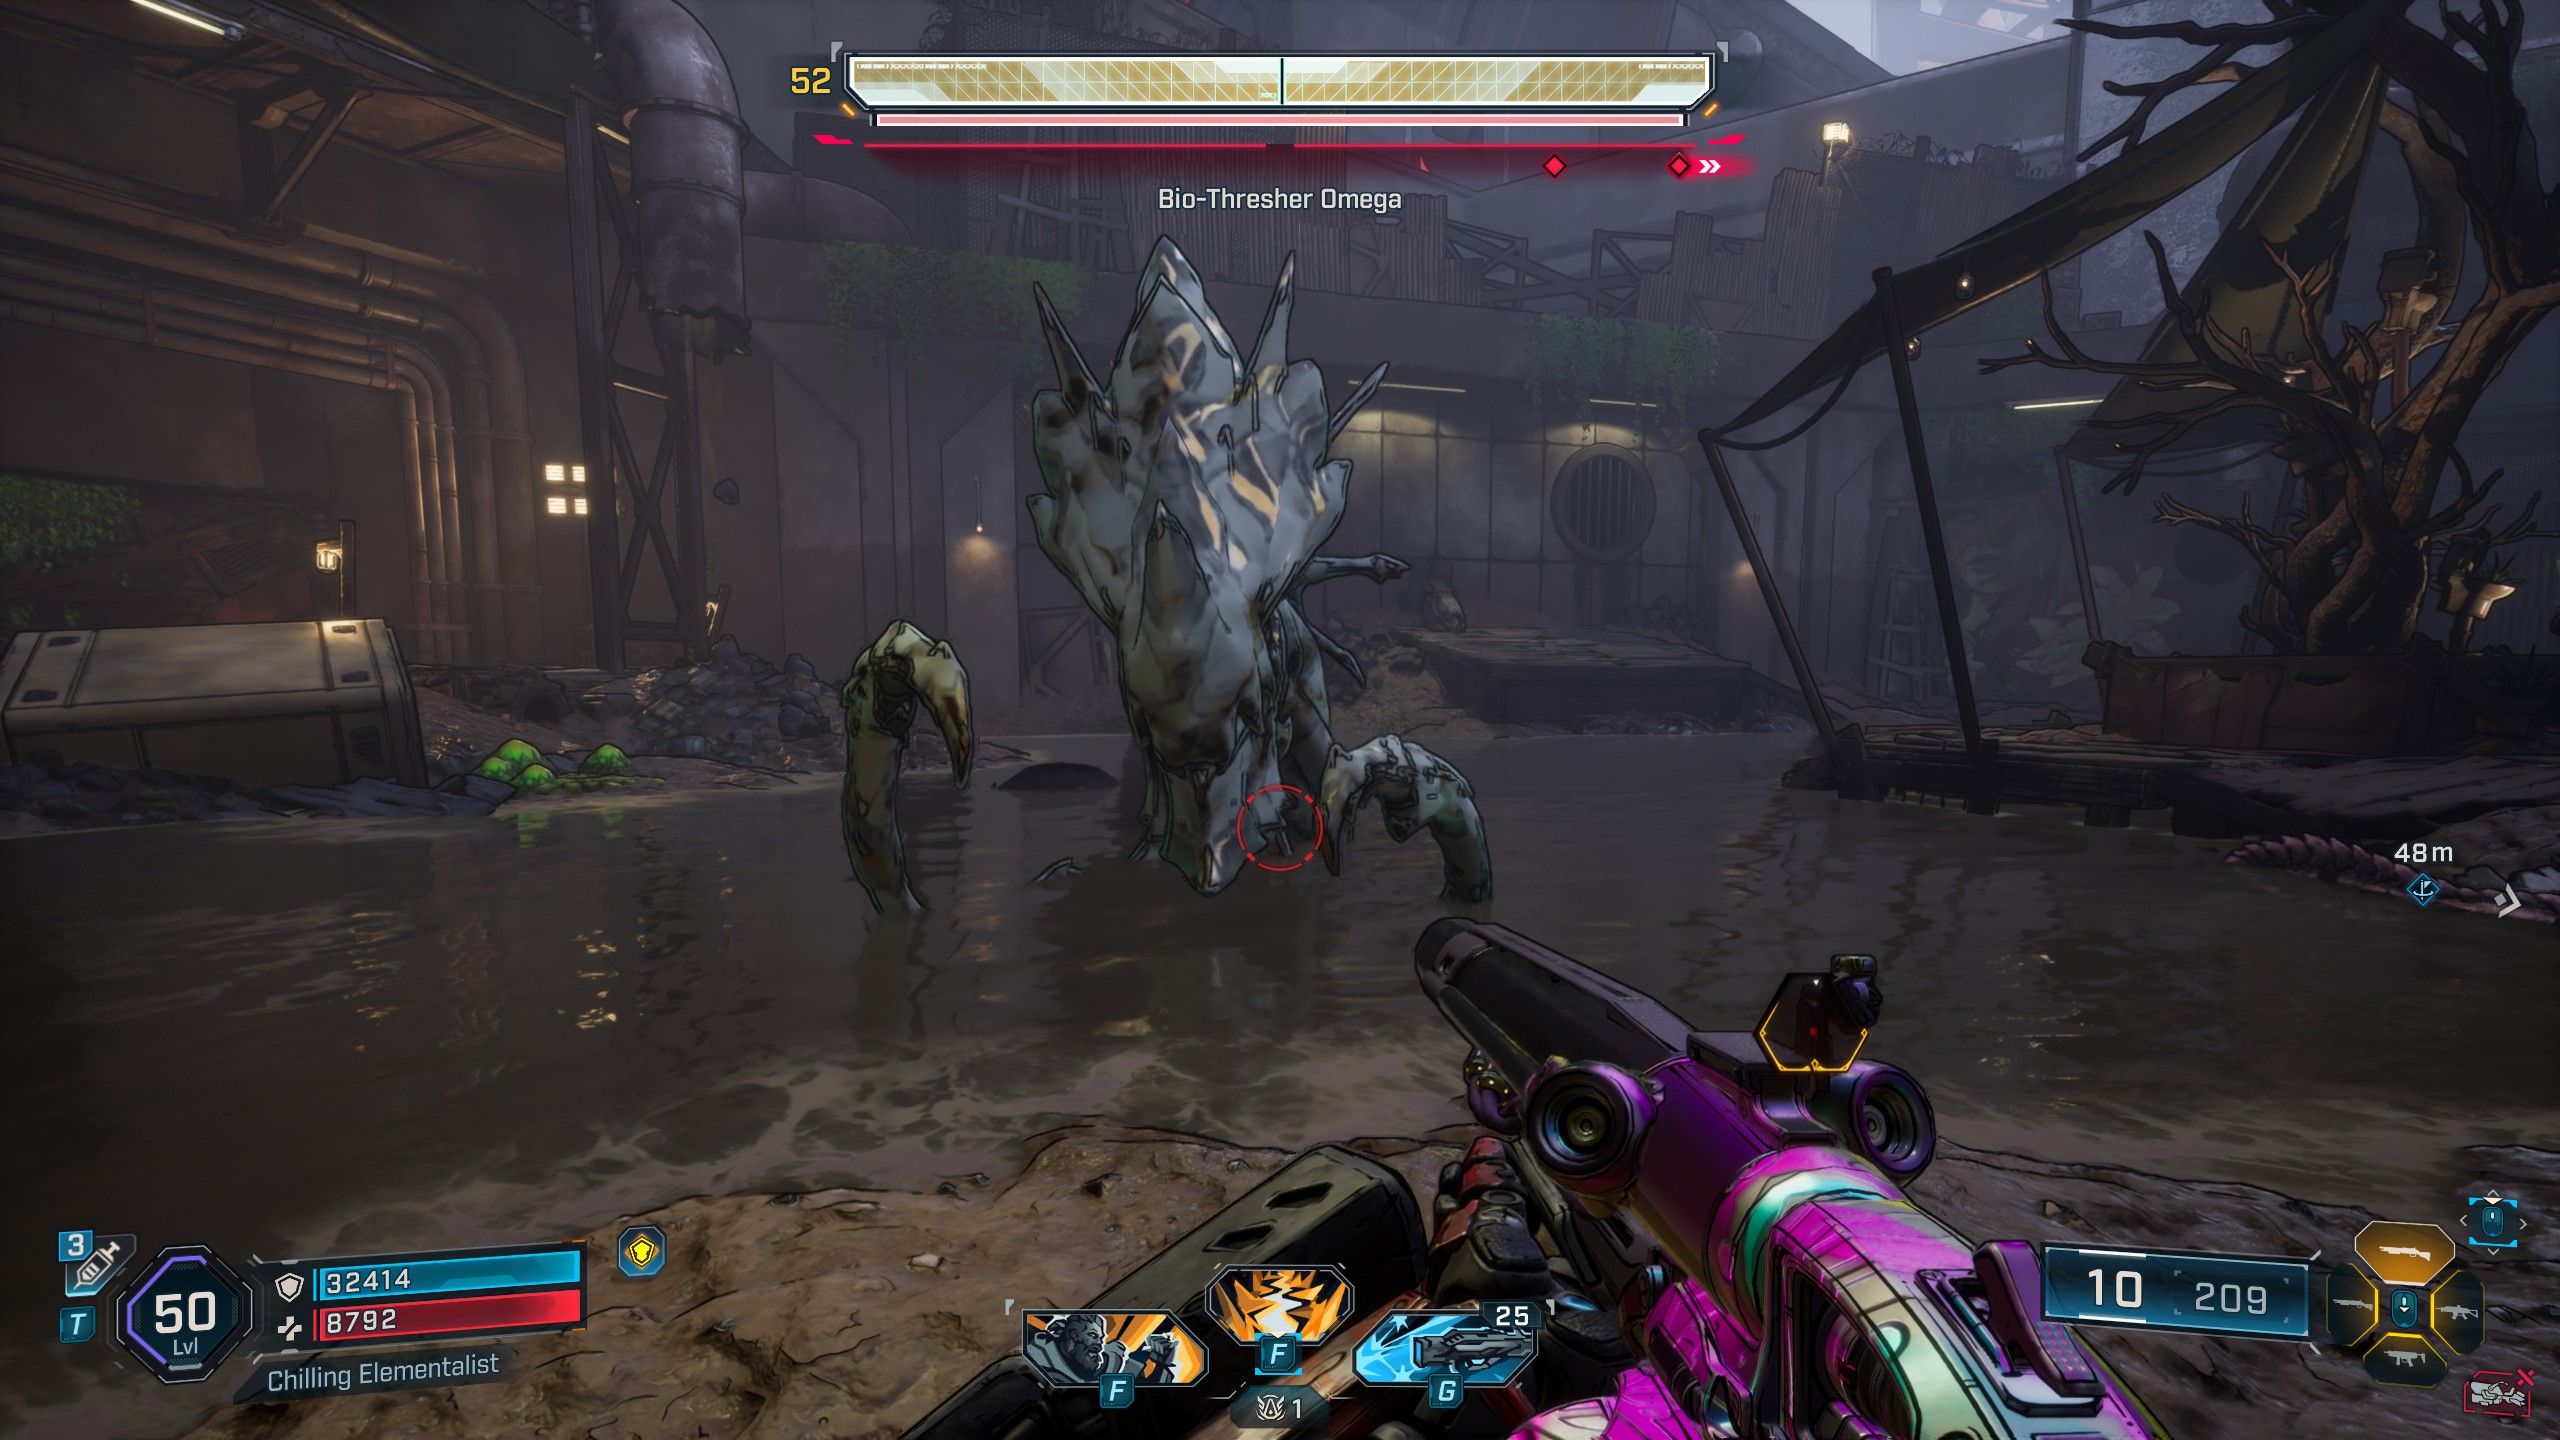
The Bio Armored Omega Thresher fights in several stages, but each one follows a similar pattern. Players can find a Locust Canister station on the north wall of the arena. Activate it with your grapple hook to throw a canister at the Bio-Thresher Omega, which will lower its armor and make it vulnerable to attack. This boss has an Armor health bar (yellow), so weapons dealing Corrosive and Cryo damage are the most effective. Keep in mind that the armor will regenerate between each phase of the split health bar. After dealing with the armor, the boss reveals a Flesh health bar (red), at which point you should use Incendiary weapons after throwing the Locust Canisters. This Flesh bar is divided into three phases, and the Bio Armored Omega Thresher frequently burrows underground, so patience is key. Once you’ve defeated it, you’ll complete the Omega 86’d challenge.
How to Complete Bio Break in Borderlands 4
Bio-Bulkhead Location & How to Beat Him
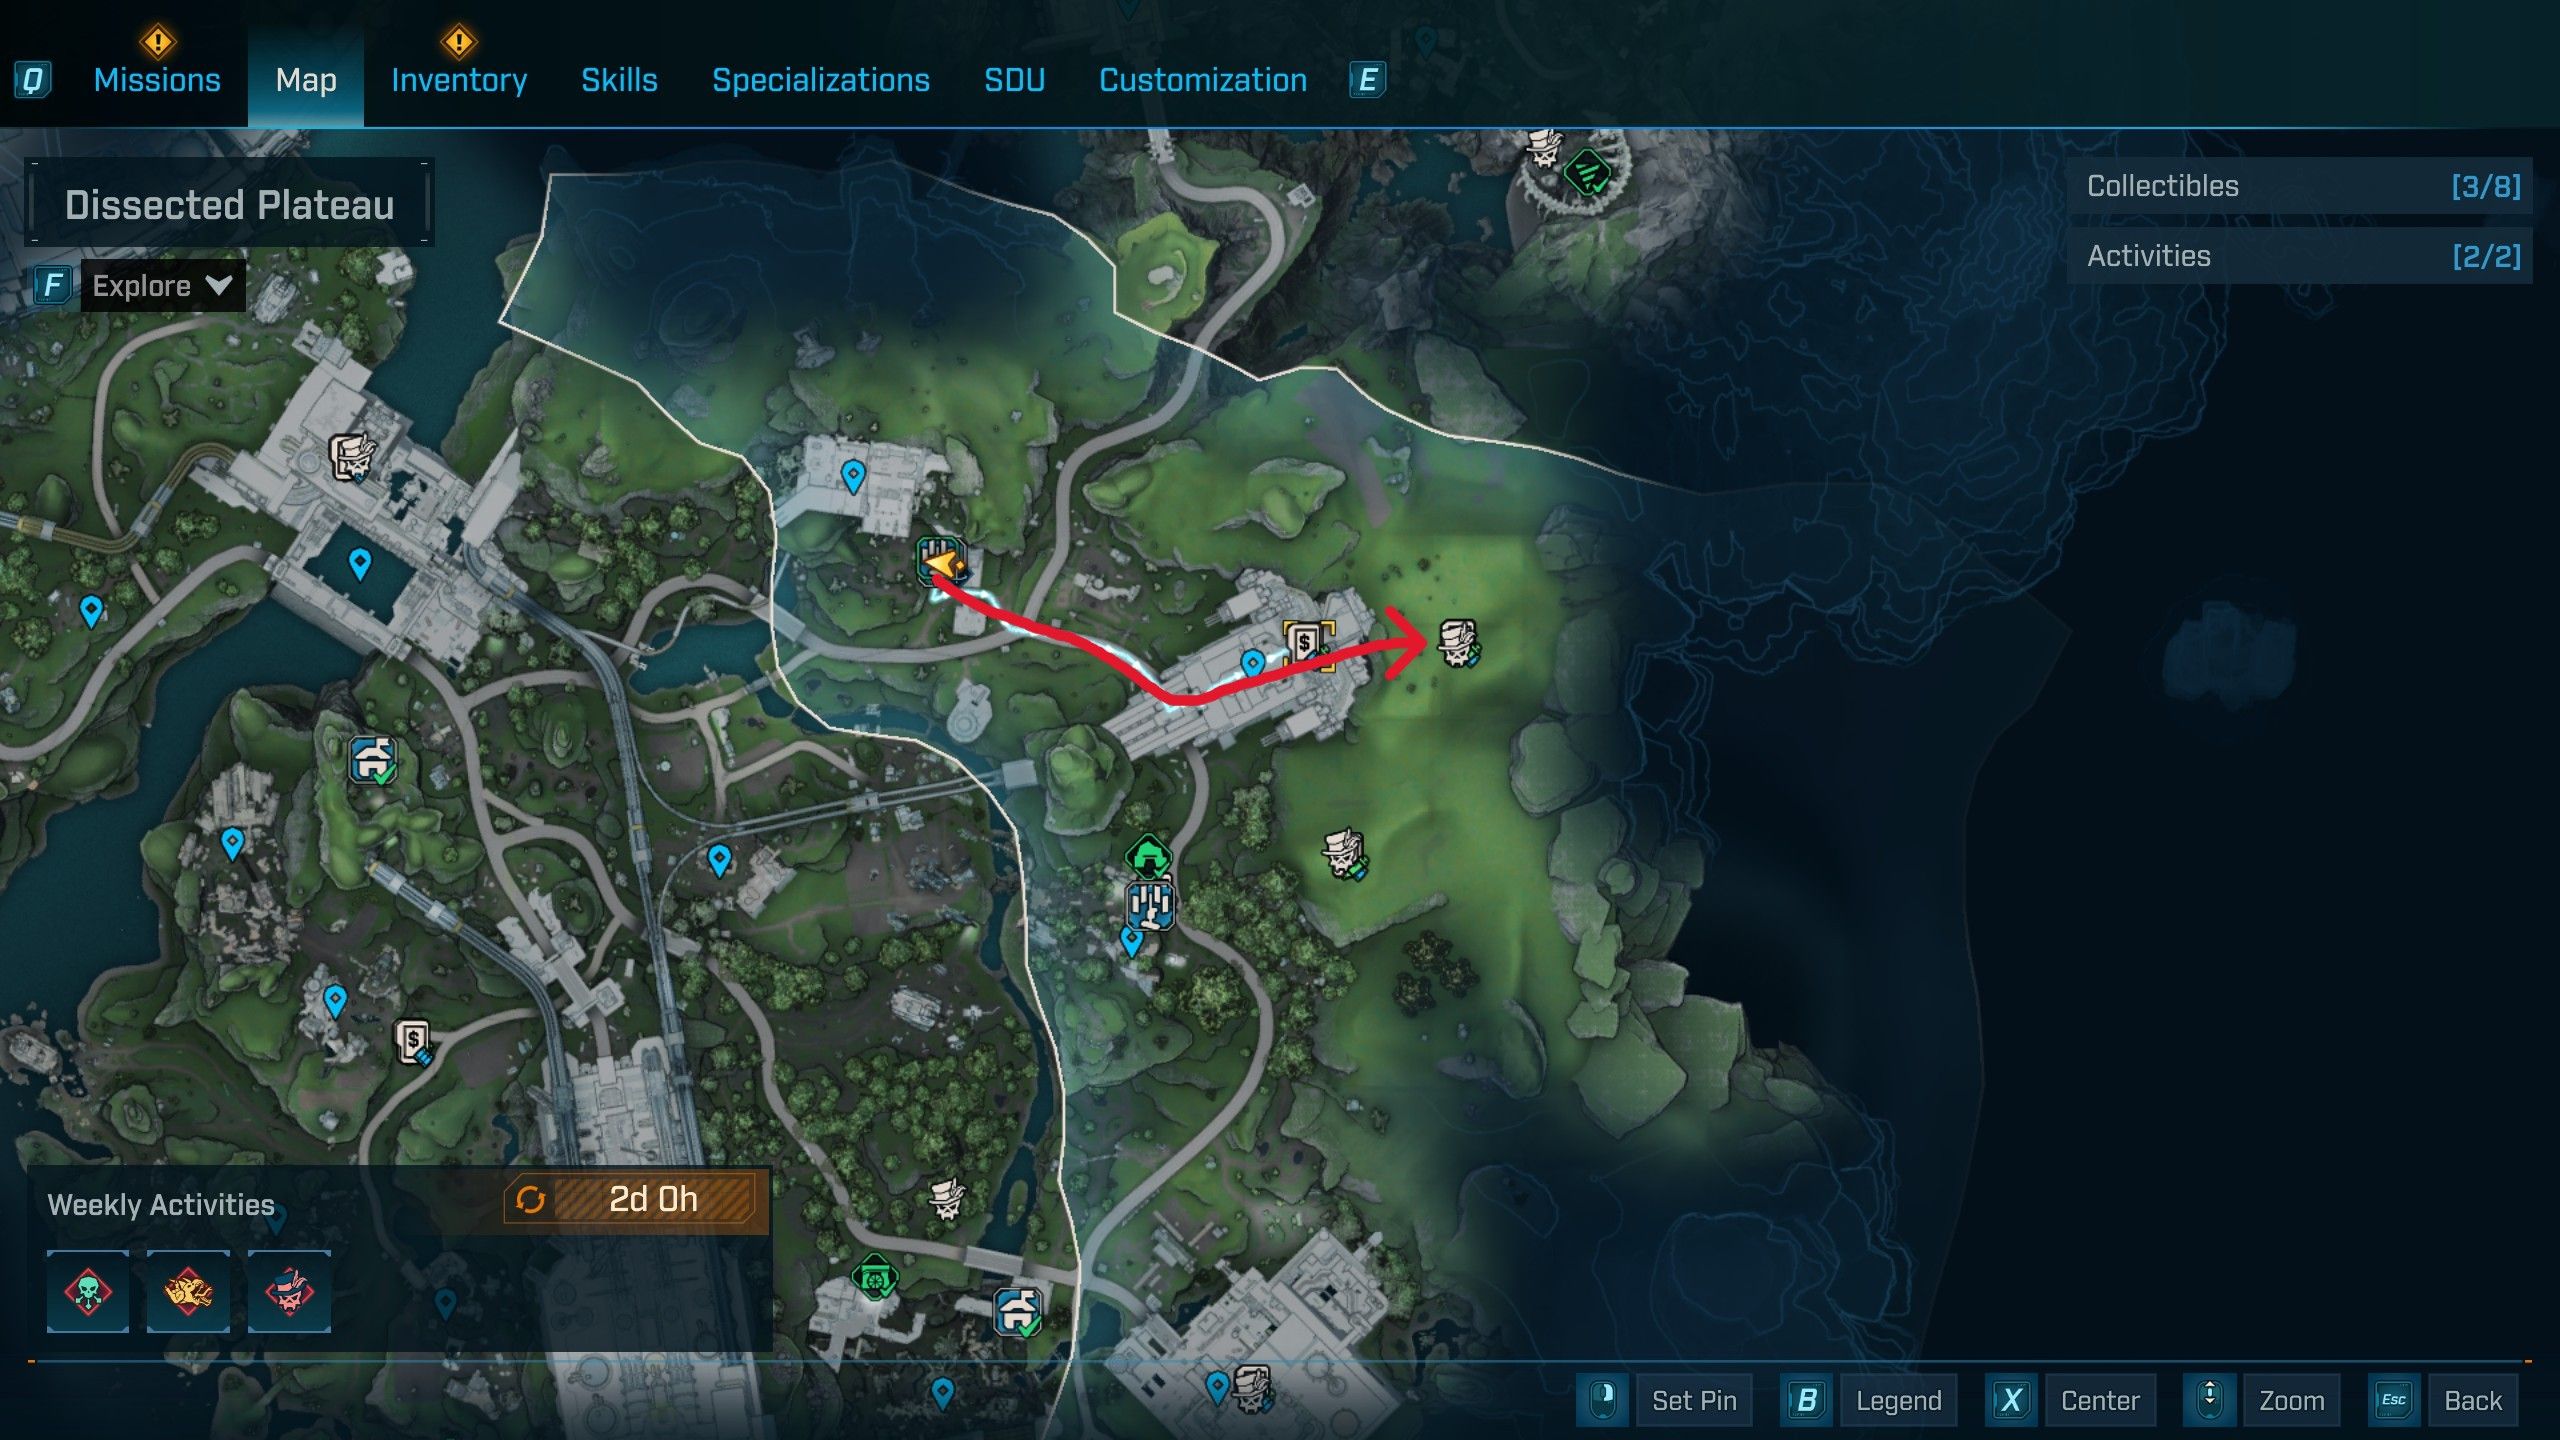
The Bio-Bulkhead boss is found in the Synthetic Nave POI within the Dissected Plateau in the Fadefields. You can locate this boss in the eastern part of the Dissected Plateau; we began our journey at the Deep Seven Order Silo. Place a map marker at the Vending Machine within the Synthetic Nave, because ECHO-4 can’t automatically navigate to the Bio-Bulkhead. After entering the Synthetic Nave, proceed straight ahead until you find an elevator. Use the button on the left to go up. When the elevator reaches the top, go through the doorway on the right to enter the Bio-Bulkhead boss room.
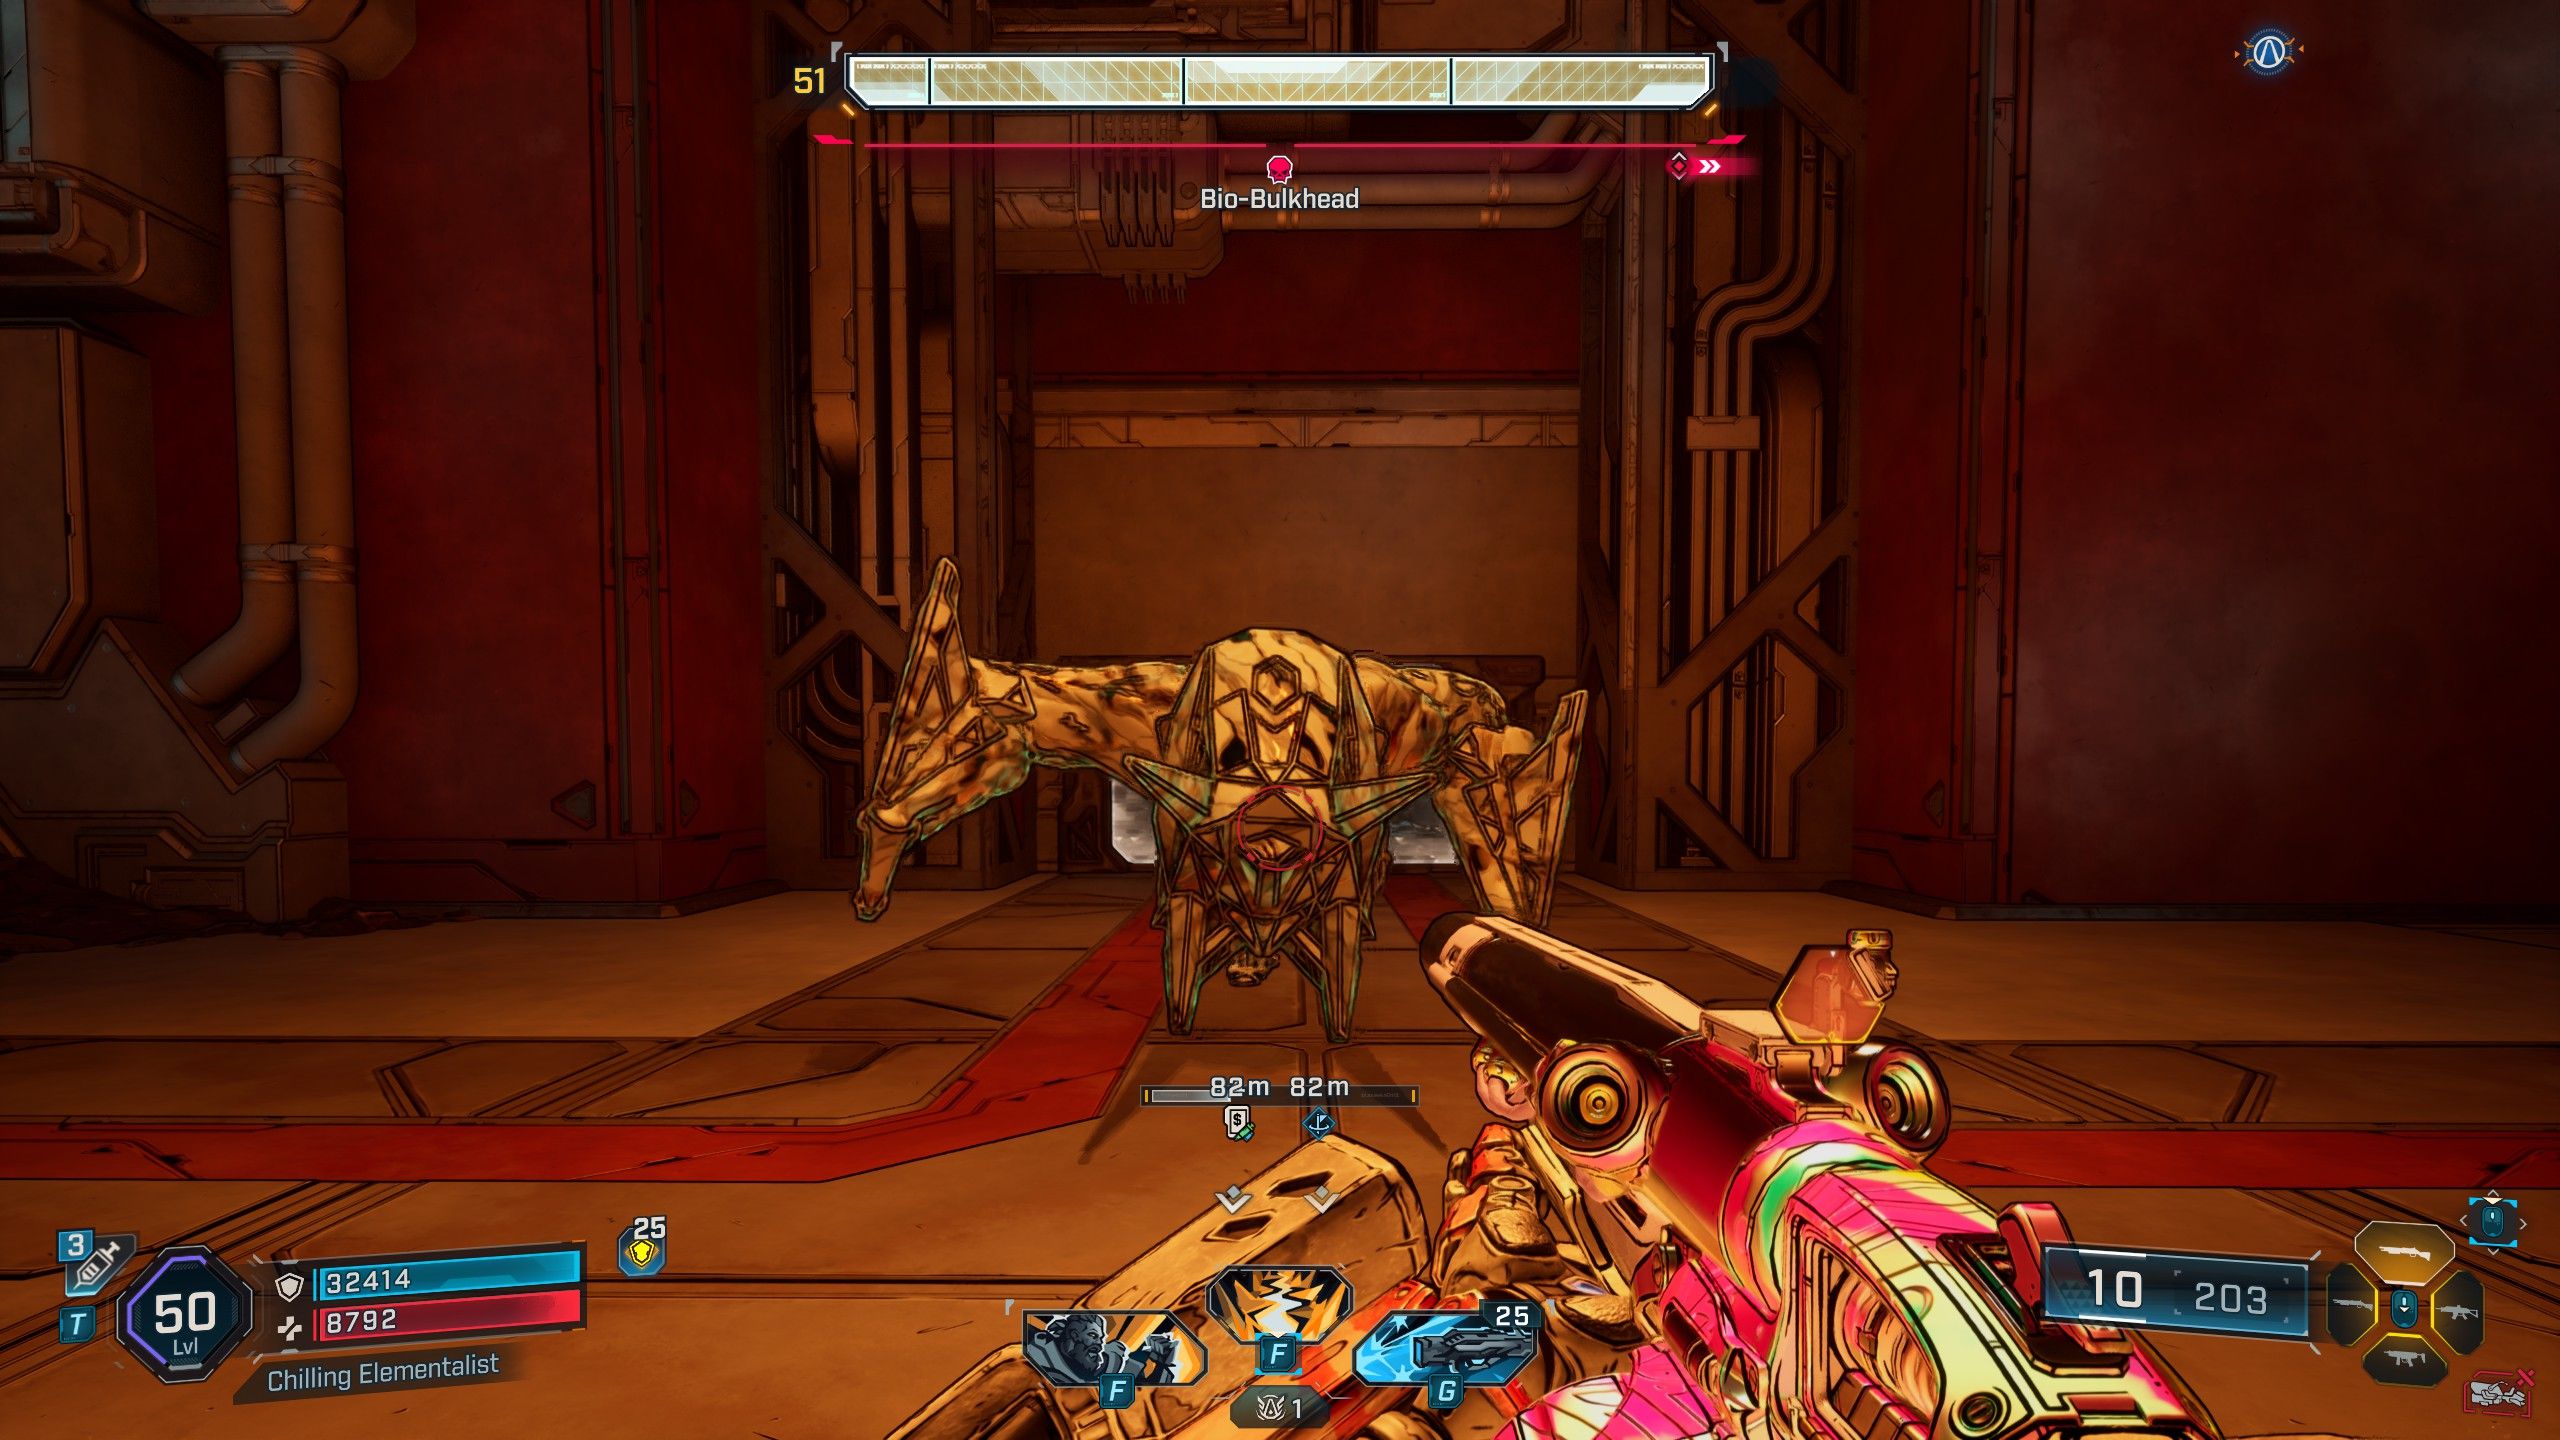
To win this boss fight, players need to grab the Locust Canisters located on the right side of the arena and throw them at the boss. The Bio-Bulkhead has only one Armor health bar (shown in yellow), making it vulnerable to Corrosive and Cryo damage. The Bio-Bulkhead will reactivate its armor four times throughout the fight, so consistently grab canisters and be ready to inflict heavy damage to succeed.
How to Complete No Points Awarded in Borderlands 4
Sydney Pointylegs Location & How to Beat Him
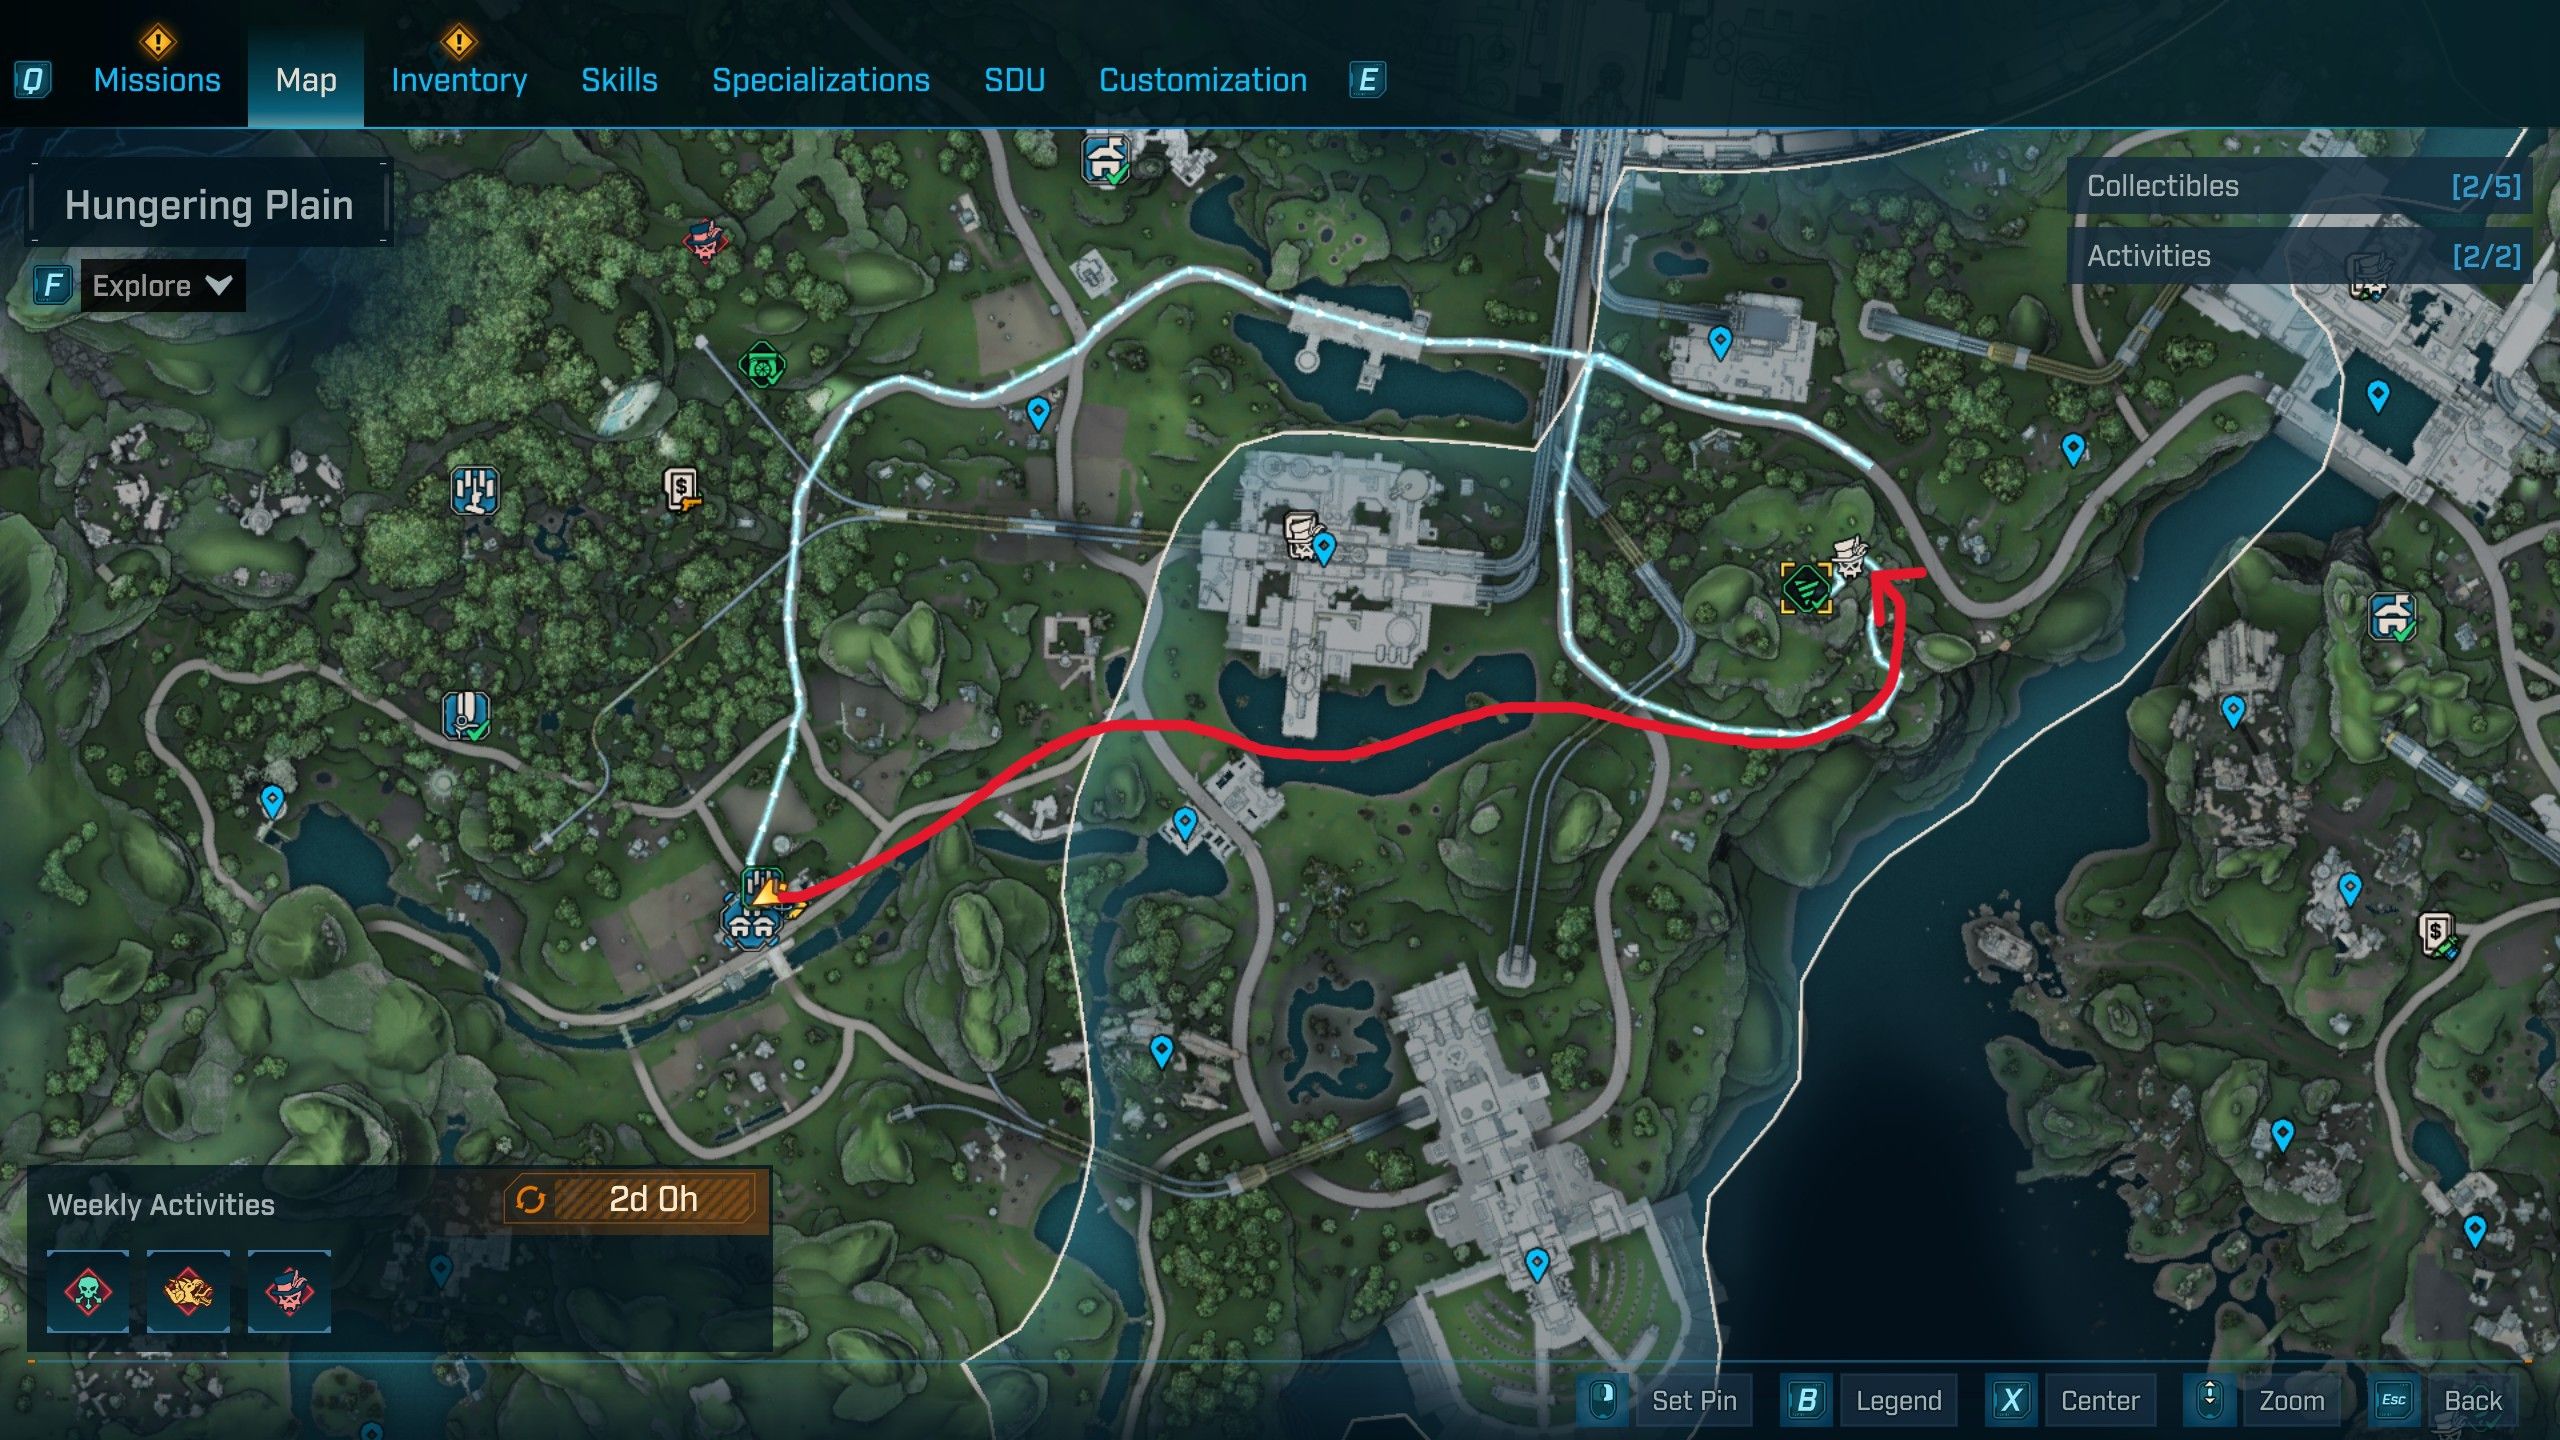
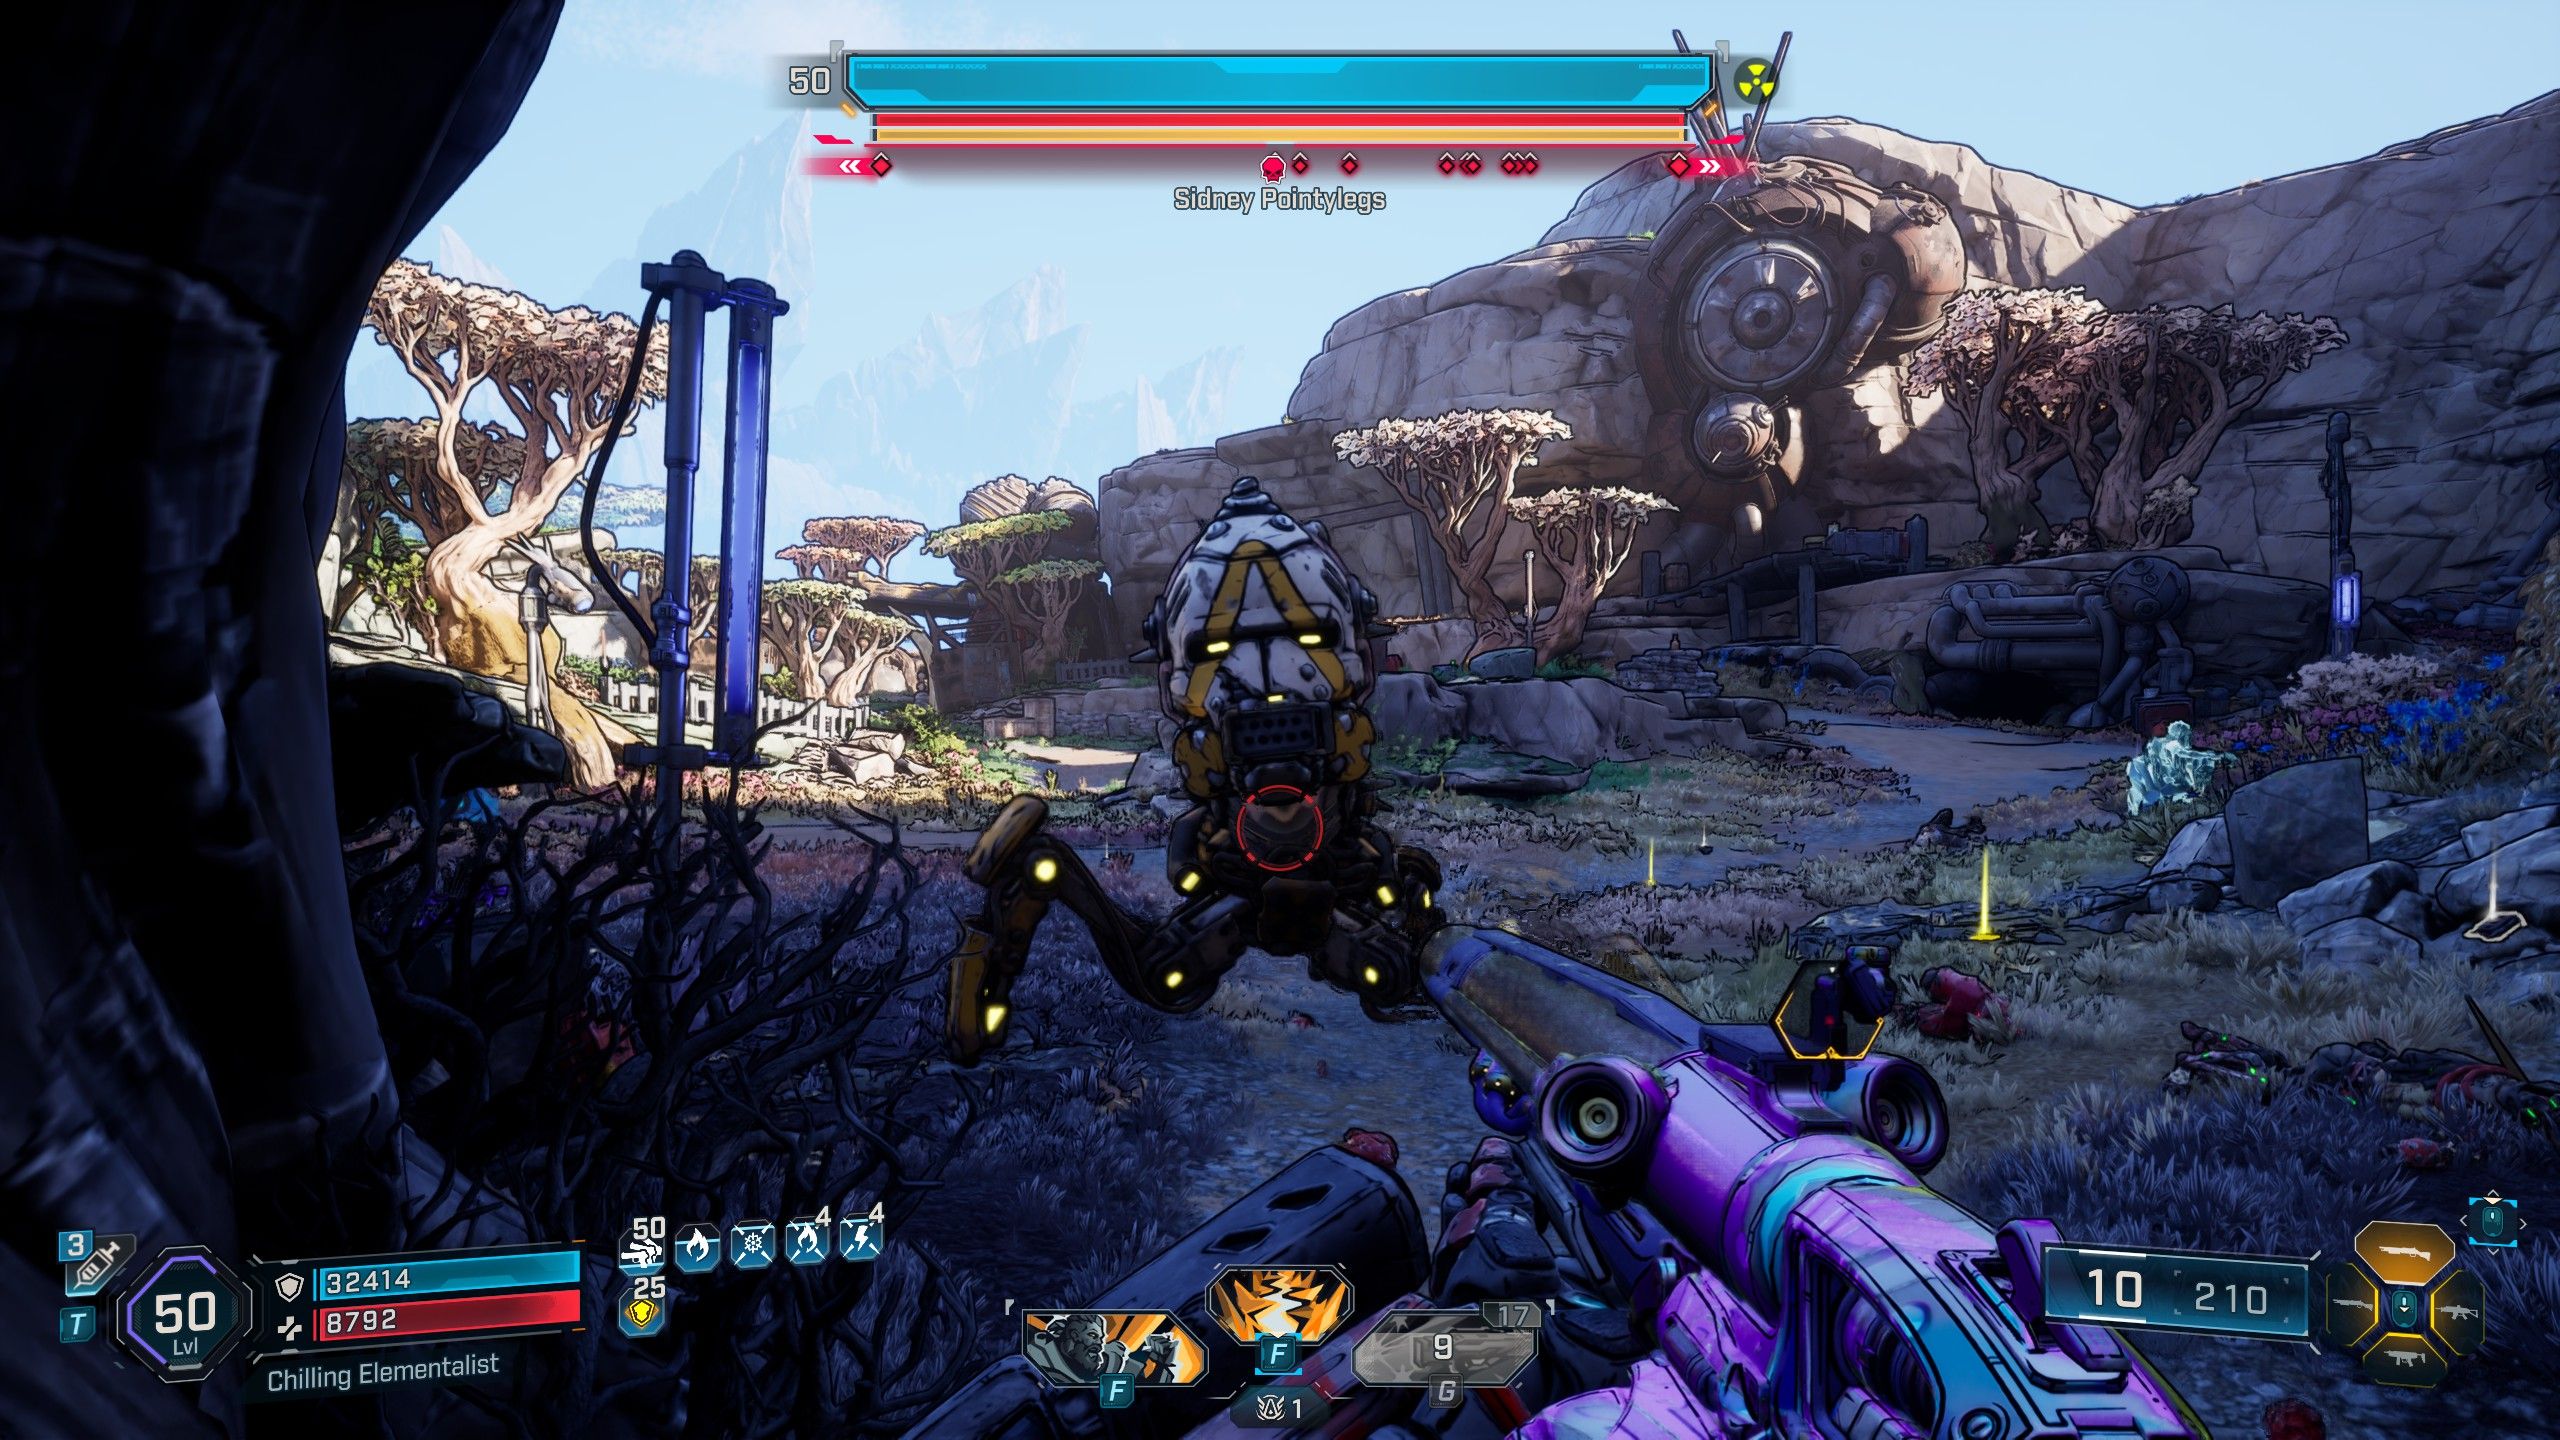
The “No Points Awarded” quest asks players to defeat Sydney Pointylegs. Sydney Pointylegs is the boss character located in The Prospects, which is a Ripper Drill Site in the Hungering Plain of the Fadefields. To get to The Prospects, we traveled east from The Launchpad in The Howl, driving across the lake. We then went through the Ripper camp to find the arena where Sydney appears. Sydney Pointylegs won’t show up until you’ve defeated a certain number of Rippers, so be prepared to fight a lot of enemies to make Sydney spawn.
Sydney Pointylegs prefers fighting up close, meaning he’ll relentlessly pursue you and attack with spinning moves both on the ground and in the air. His initial health bar is a Shield, making Shock damage the most effective. Once that’s down, he switches to Flesh, vulnerable to Incendiary damage. Finally, his last health bar is Armor, which you can break apart with Corrosive and Cryo damage to defeat this mechanical enemy and complete the No Points Awarded challenge.
How to Complete Ultimate Vault Hunter in Borderlands 4
Lilith’s “Rush the Gate” Wildcard Mission Location
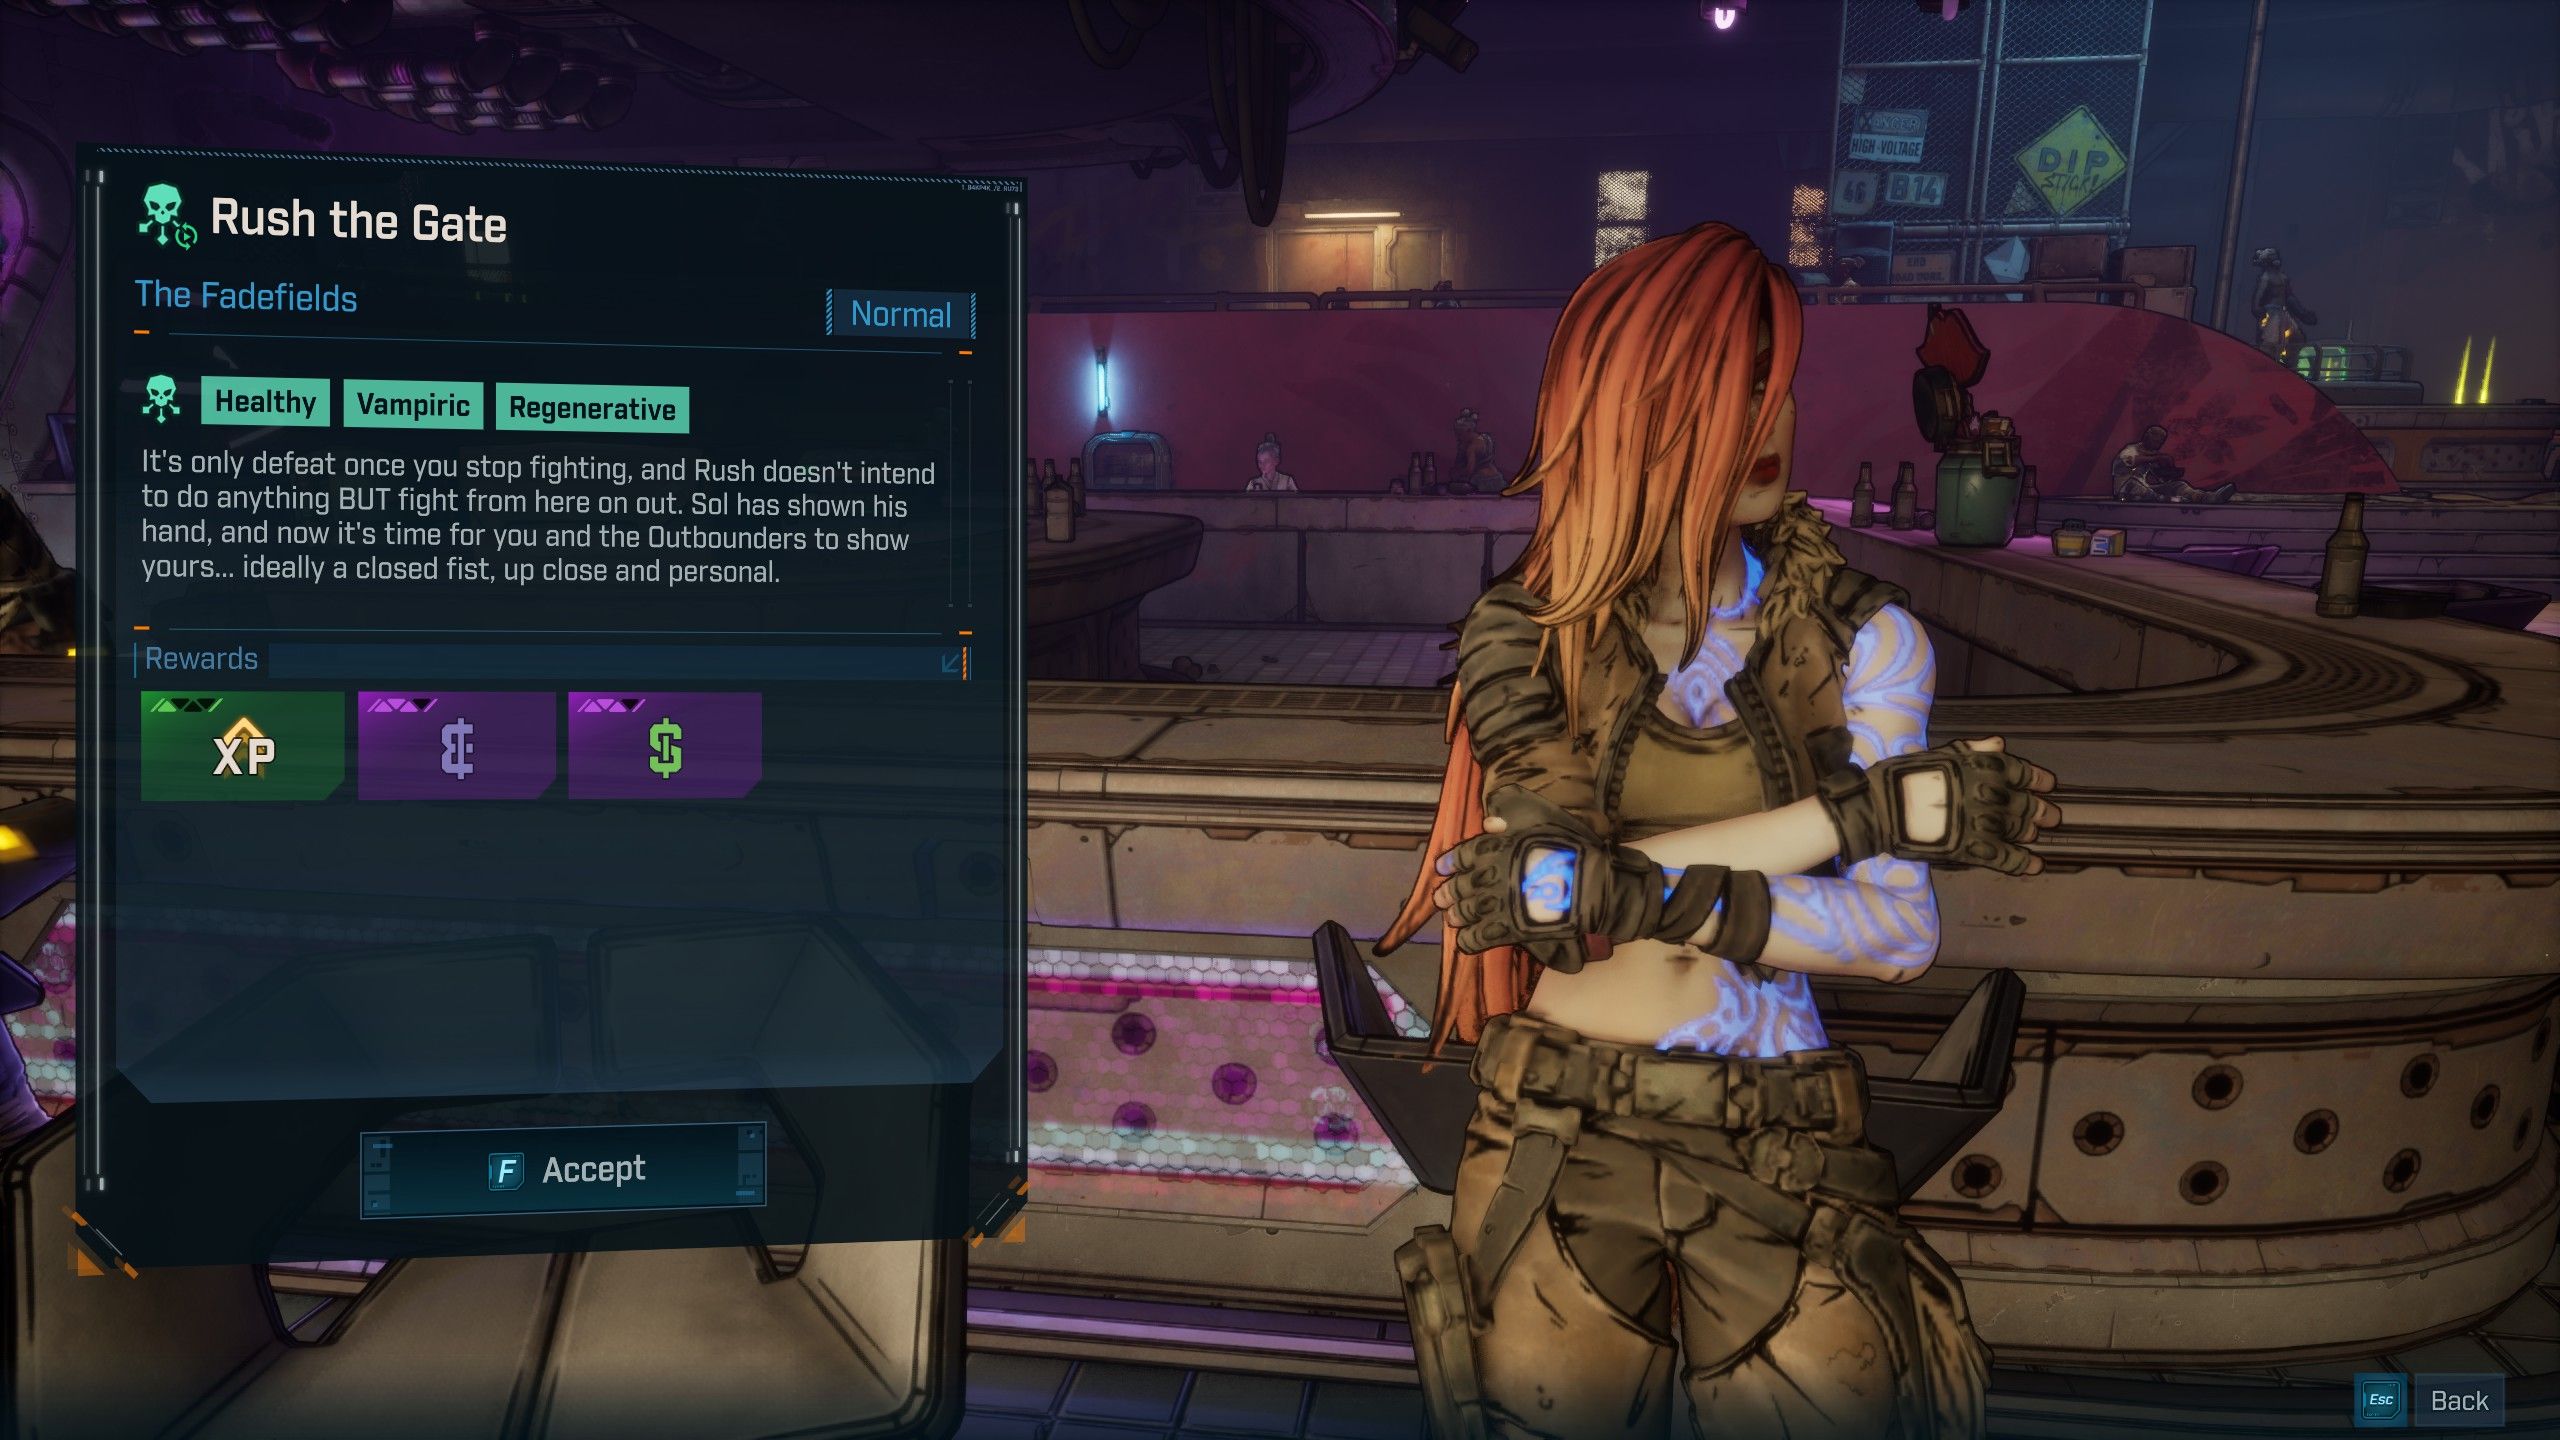
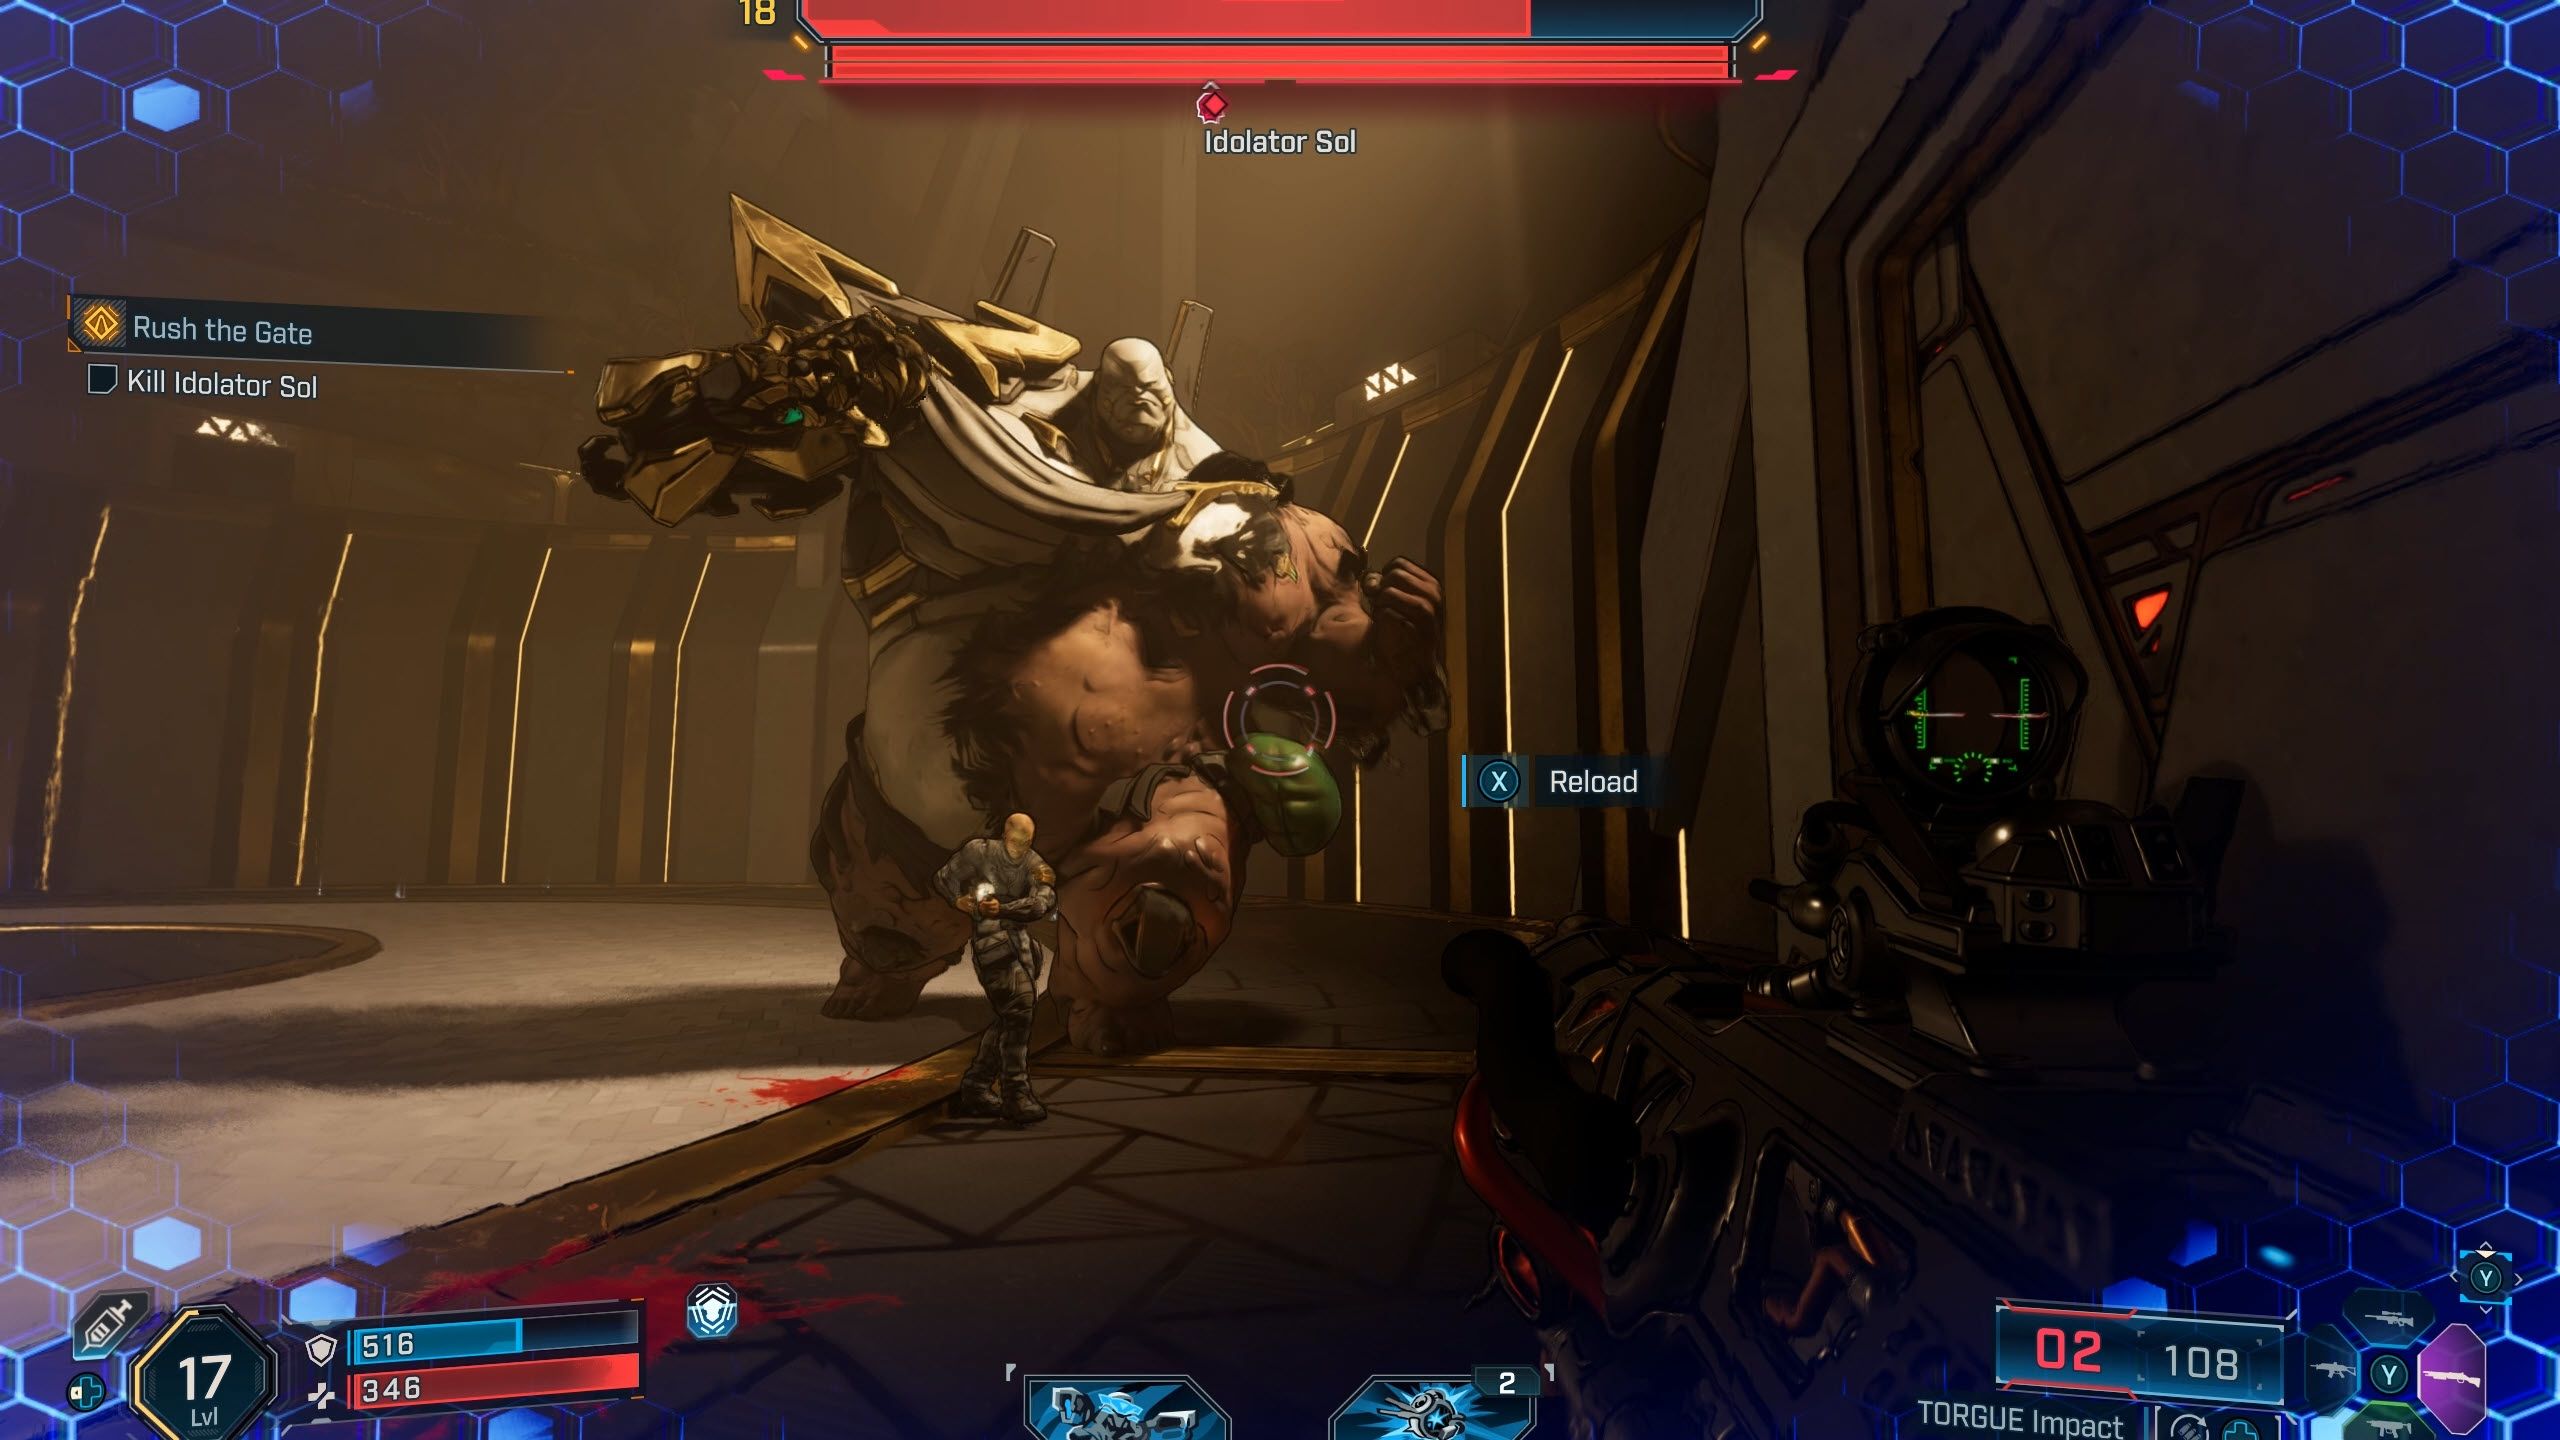
After finishing all 4 challenges mentioned earlier, head back to Moxxi’s Bottoms Up in the Ruined Sumplands of Carcadia Burn. Look for Lilith on the left side of the bar, and talk to her to start the Rush the Gate mission. This mission is the same one where you fought Idolator Sol, but the enemies will be a little tougher because you’re playing on UVH1. Keep an eye out for Wildcard effects like Healthy, Vampiric, and Regenerative – these just mean enemies can heal, so focus your fire on them one at a time. Once you defeat Idolator Sol, you’ll return to Moxxi’s Bottoms Up and advance to Ultimate Vault Hunter Rank 2, allowing you to start working towards Ultimate Vault Hunter Rank 3.
Read More
- All Shadow Armor Locations in Crimson Desert
- Dark Marksman Armor Locations in Crimson Desert
- How to Beat Antumbra’s Sword (Sanctum of Absolution) in Crimson Desert
- Sega Reveals Official Sonic Timeline: From Prehistoric to Modern Era
- Genshin Impact Dev Teases New Open-World MMO With Realistic Graphics
- Where to Pack and Sell Trade Goods in Crimson Desert
- Keeping AI Agents on Track: A New Approach to Reliable Action
- Top 5 Militaristic Civs in Civilization 7
- Best Weapons, Armor, and Accessories to Get Early in Crimson Desert
- The Limits of Thought: Can We Compress Reasoning in AI?
2025-09-30 19:40