Having come of age amidst the legendary Assassin’s Creed series, I can’t help but feel a warm nostalgia when I recall my time spent as Ezio Auditore, gradually rebuilding Monteriggioni back to its past splendor.
After a day filled with conflict in various parts of Italy, it was delightful to find a cozy spot that felt like home. Despite the allure of Venice and the beauty of Tuscany, there was an undeniable charm to your humble refuge.
Assassin’s Creed: Shadow’s objective is mirrored in its feature allowing players to customize their hideout extensively. This includes distinctive structures, scouts, ornamental pieces, and even animals that inhabit the area, enabling players to personalize it thoroughly.
However, the query persists: Which among these buildings is superior? In essence, our aim is to evaluate and list them, so that you can focus on the most beneficial structures initially.
10. Jinja
Pray For Perks
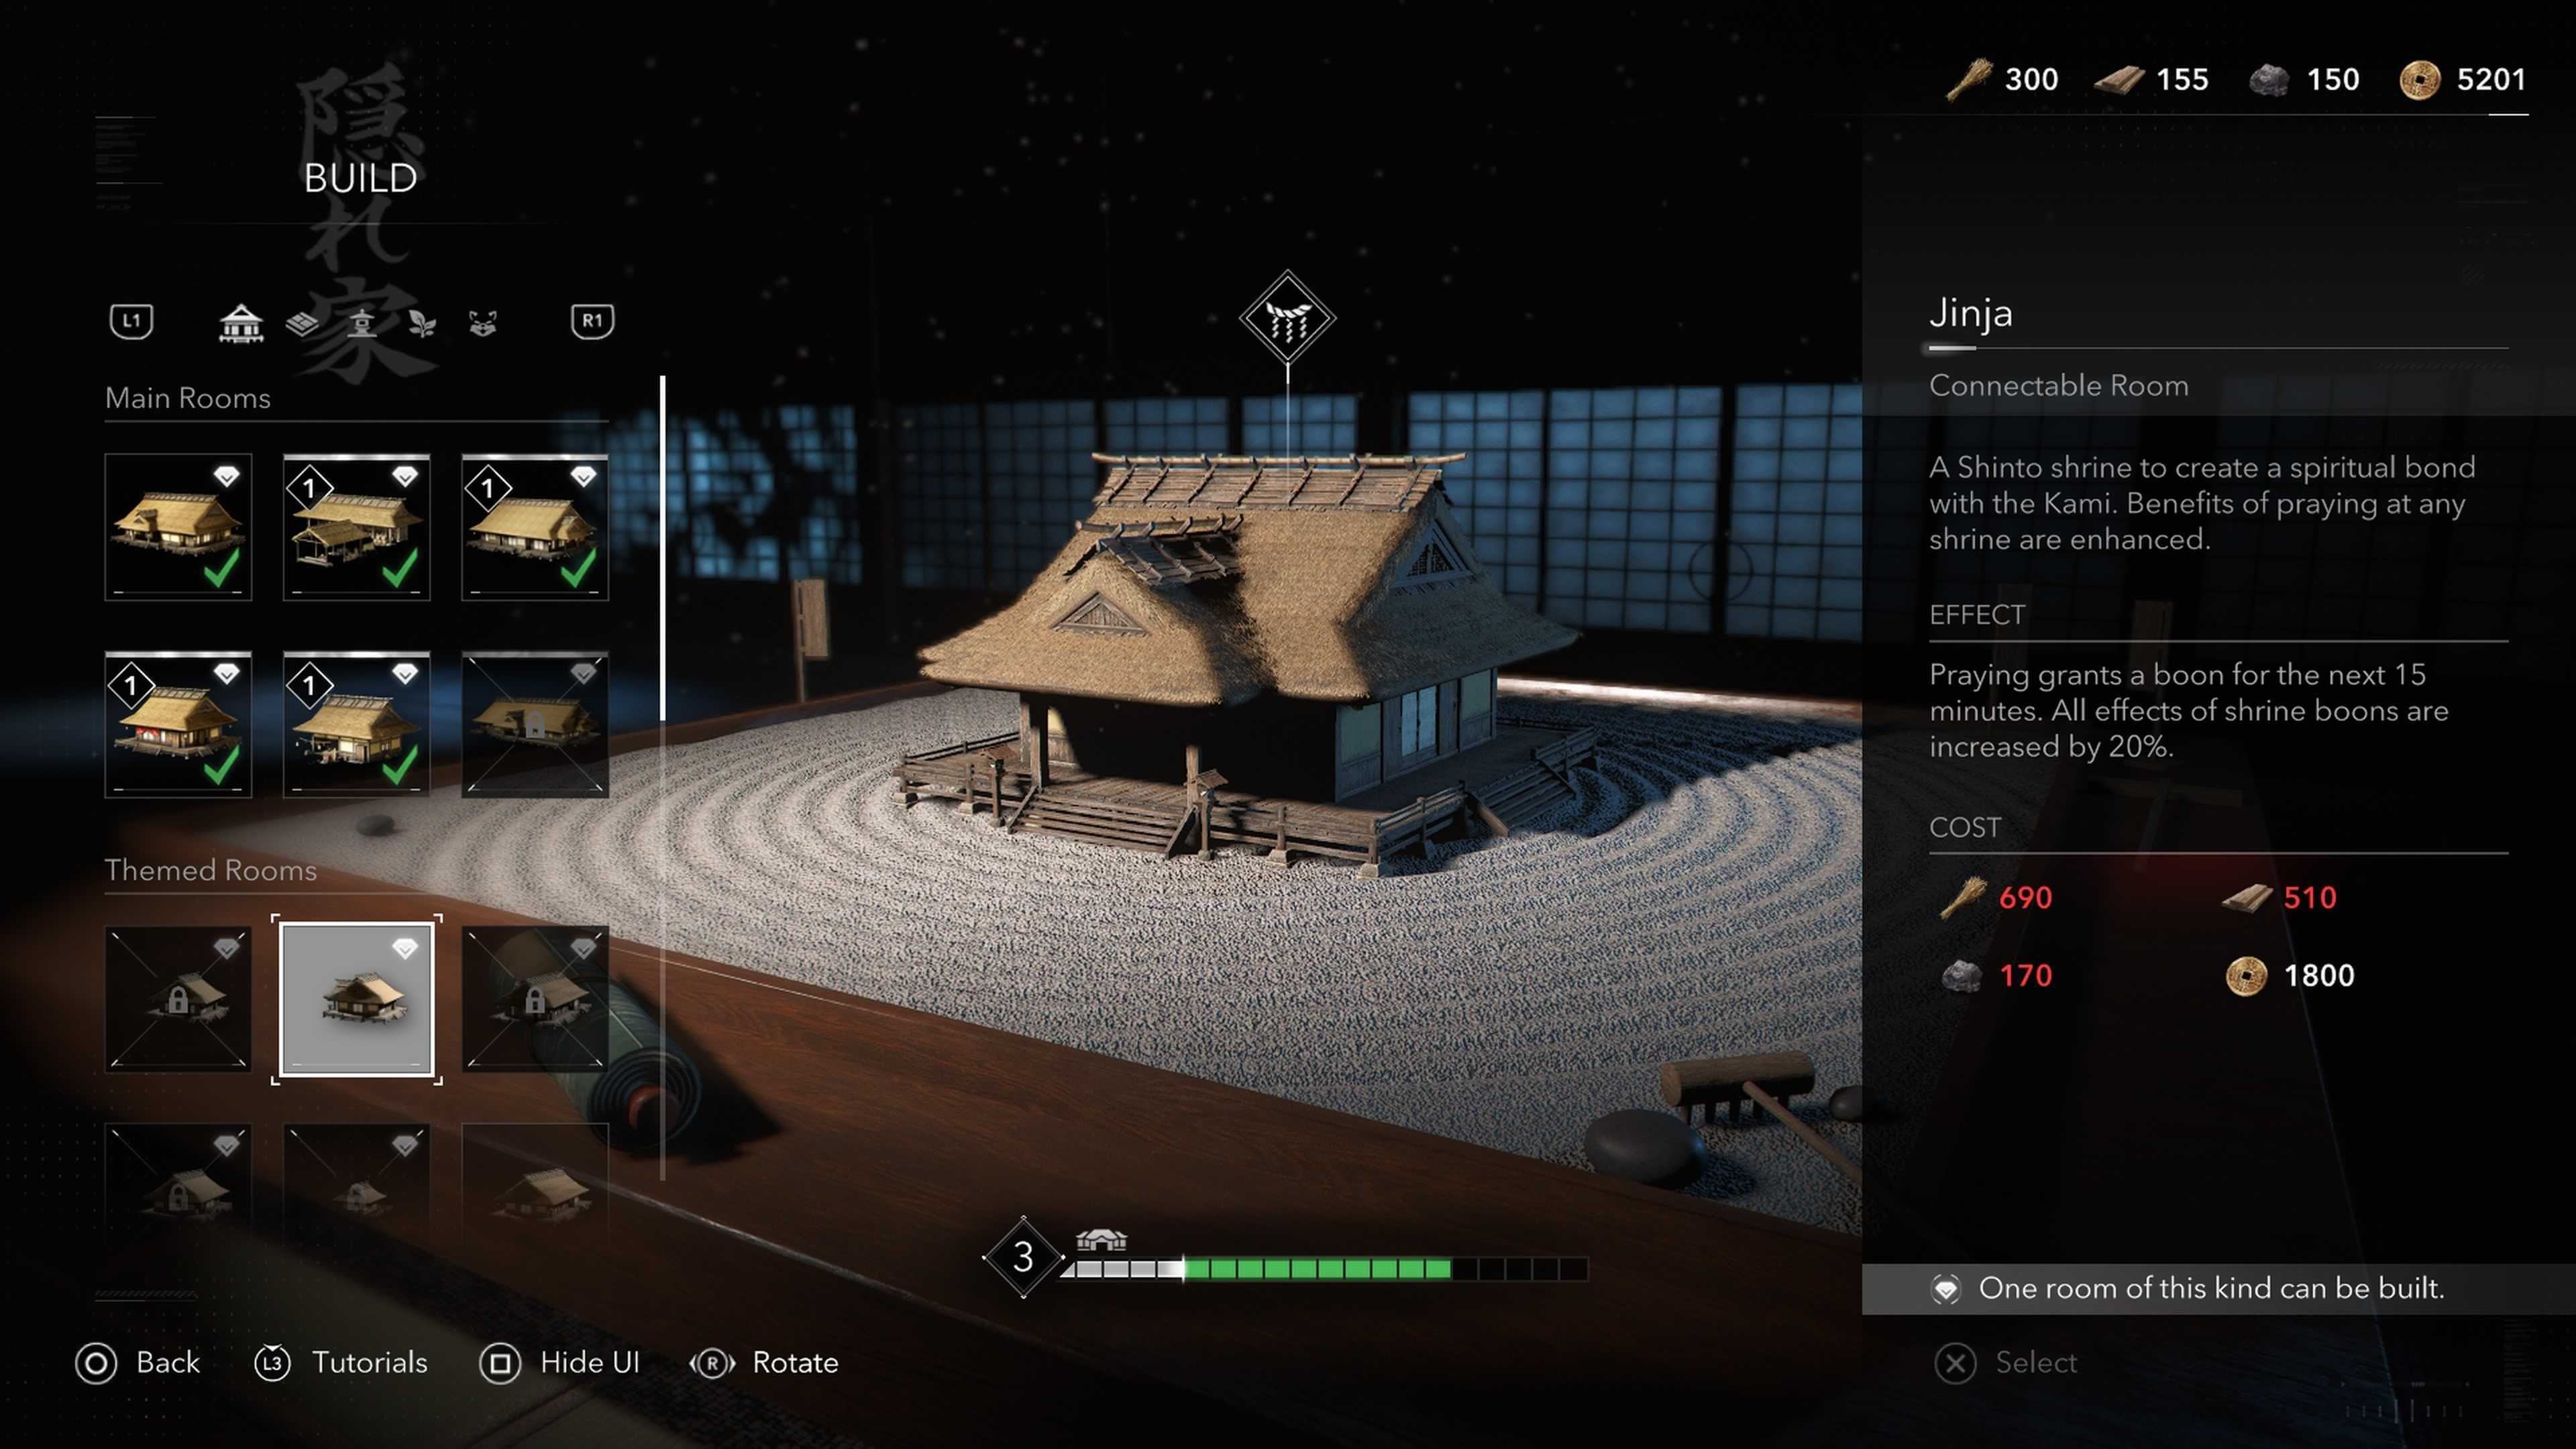
| Effect | Praying grants a boon for 15 minutes, and effects are given a 20% buff |
|---|---|
| Cost | 690x Crops |
| 510x Wood | |
| 170x Stone | |
| 1800x Mon |
In my viewpoint, among all the structures presented, the Jinja seems to be the least potent. This is not only due to its effect not being particularly beneficial to players, but also because opportunities to utilize this feature within the game are scarce.
Occasionally, players may encounter sanctuaries where they can offer prayers. This action grants them a bonus that speeds up their adrenaline build-up, a perk particularly beneficial for individuals who utilize weapon-based special skills.
To be honest, I find myself questioning the significance of this structure in the game. On one hand, its abilities seem beneficial, but they aren’t exactly essential for players, especially if you’re proficient in combat encounters. The adrenaline fills up fast enough on its own.
Moreover, it’s quite uncommon to stumble upon a shrine to pray at, which significantly reduces the potential benefits from this building.
I would save your materials and swerve this one unless you want to complete the set.
9. Stables
Free, But Far From Exciting
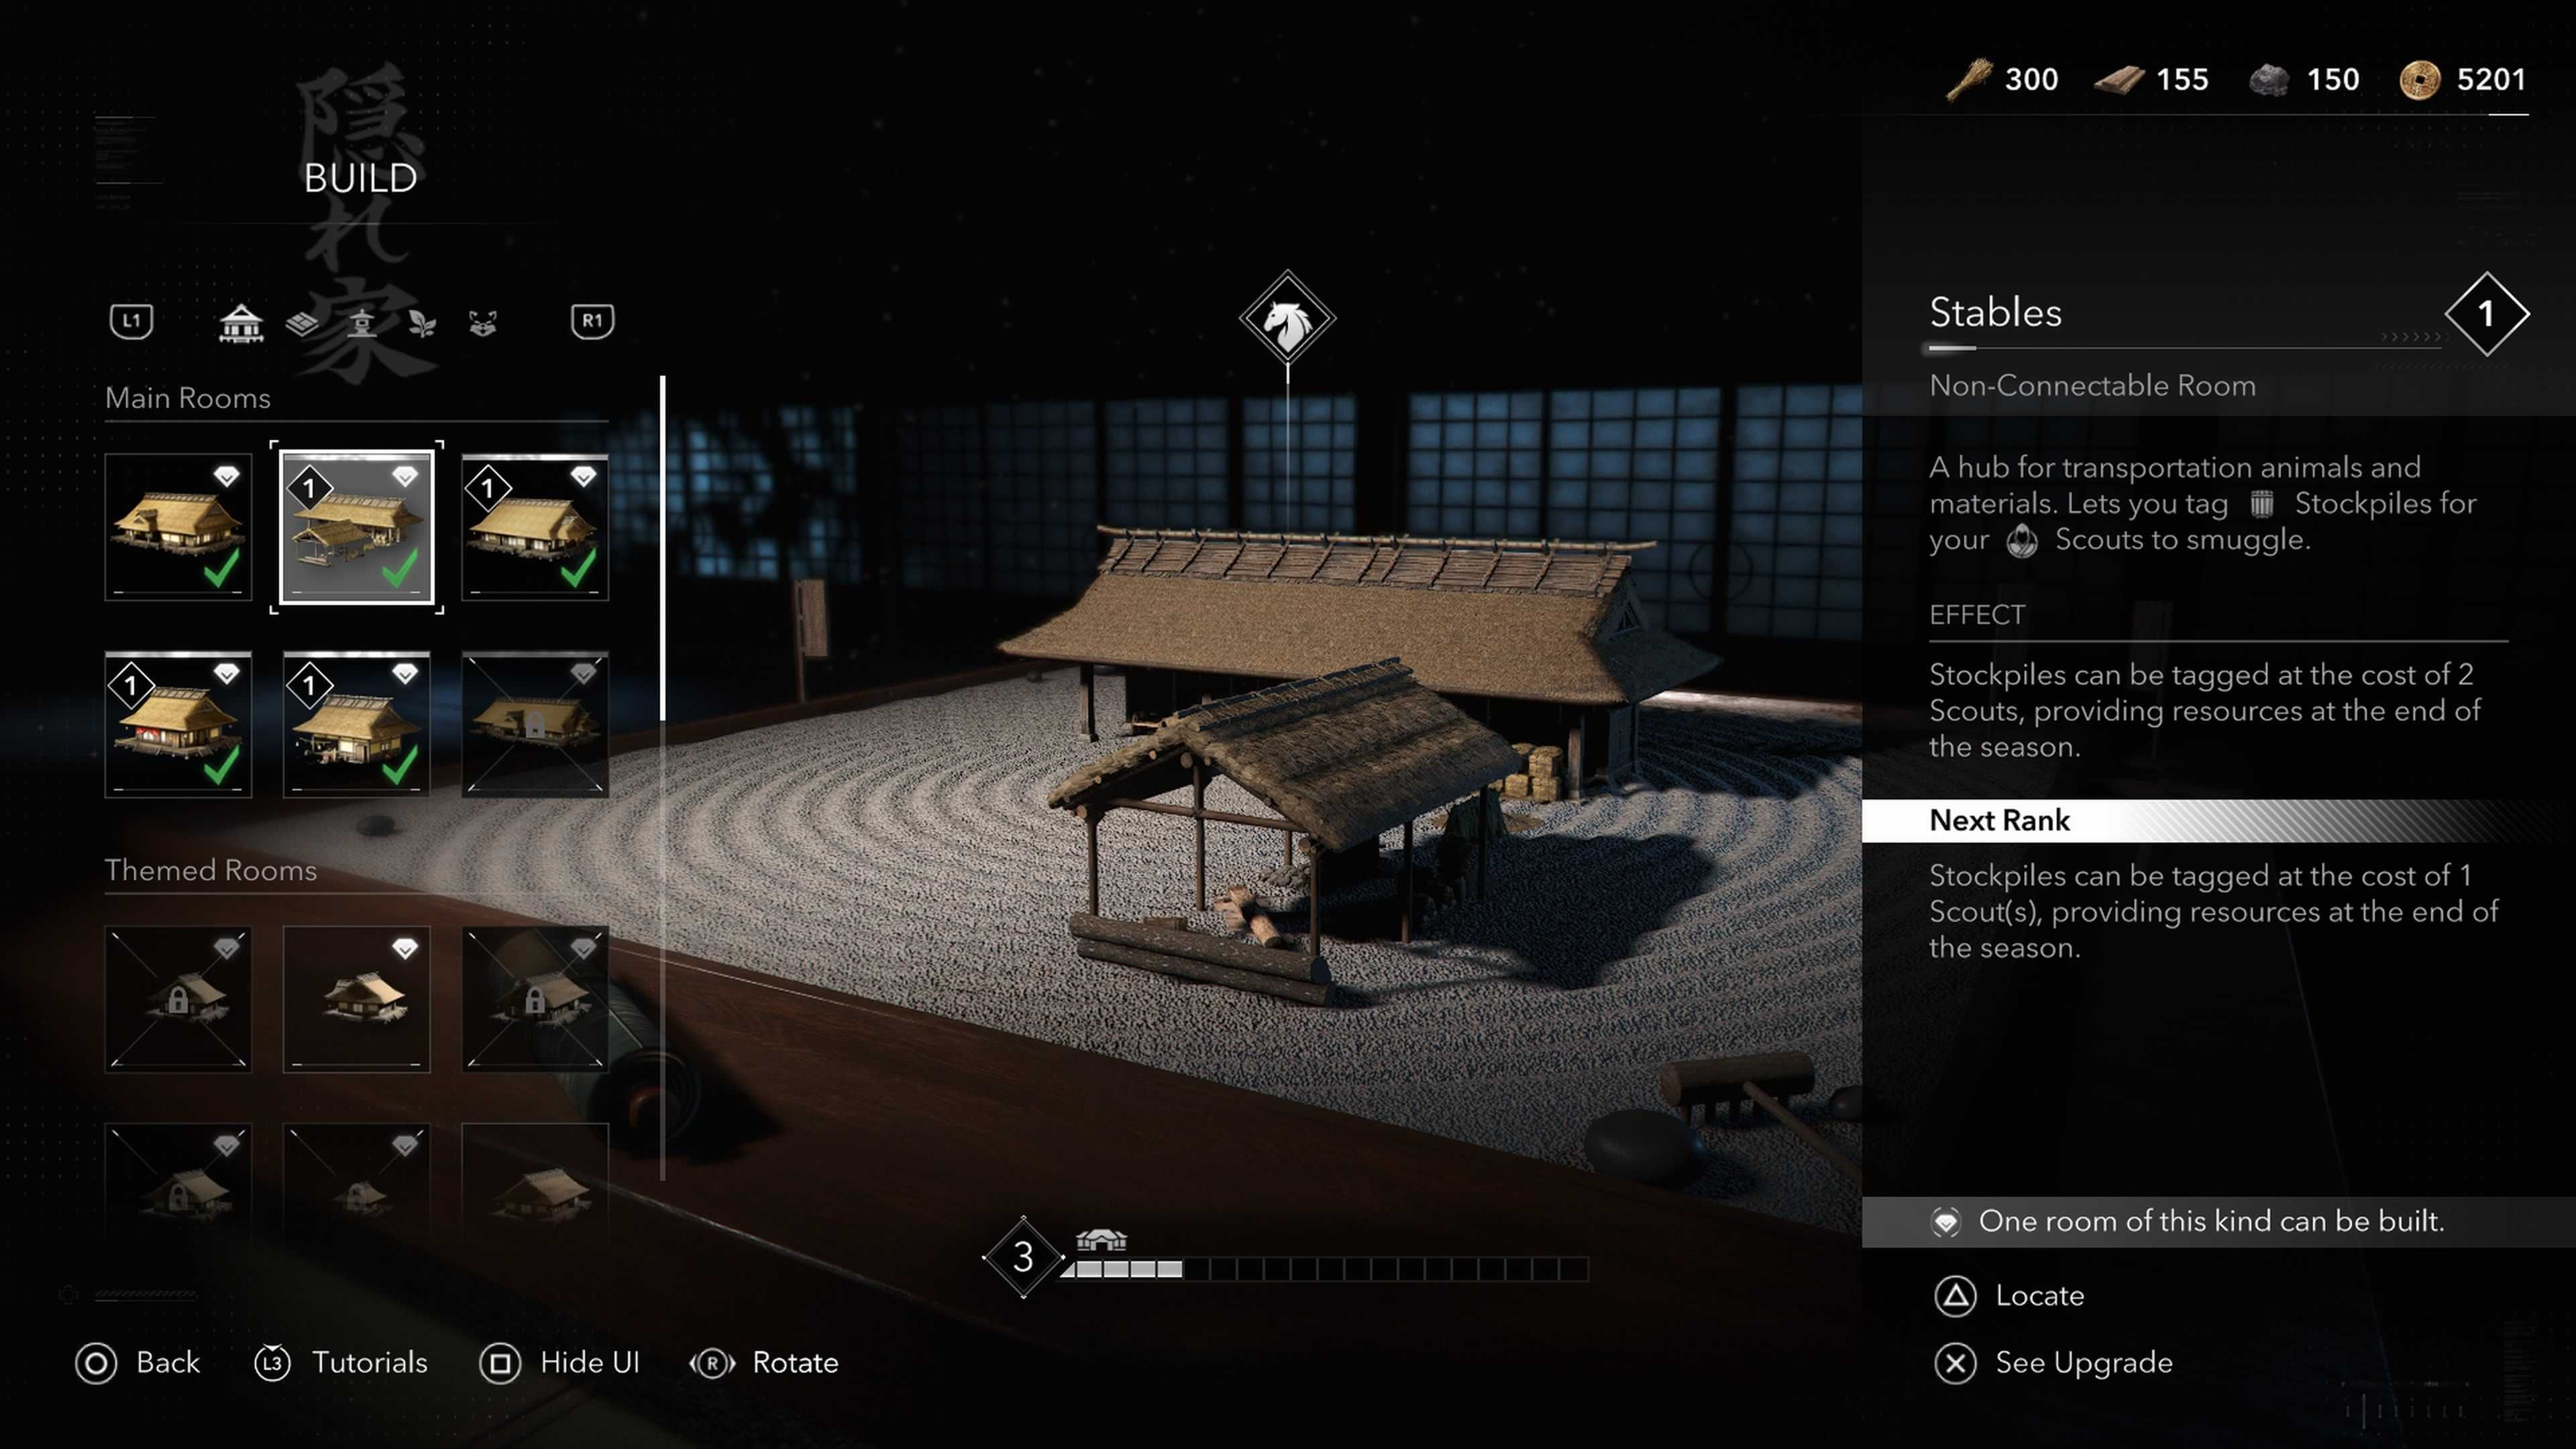
| Effect | Stockpiles can be tagged and provide resources by the end of the season. |
|---|---|
| Cost | |
| N/A |
As a gaming enthusiast, I must say that the Hideout in Assassin’s Creed Shadows is a standard building unlocked upon achieving it, yet it doesn’t automatically qualify as a top choice just because it’s free and requires no materials for construction.
This structure primarily serves the purpose of facilitating the transportation of heavy supplies when you discover large quantities of them on the map.
Theoretically, using Scouts could be beneficial by ensuring a steady supply of materials, but due to their high price, they tend to cause more hassle than benefit. Moreover, the inability to manually adjust the seasons means you can’t predict exactly when you’ll harvest the benefits.
This is a structure that you’re bound to acquire, and it’s pleasant to possess. However, it’s not the kind we’d deeply mourn if it were to disappear.
8. Dojo
Stick That Up Your Dojo
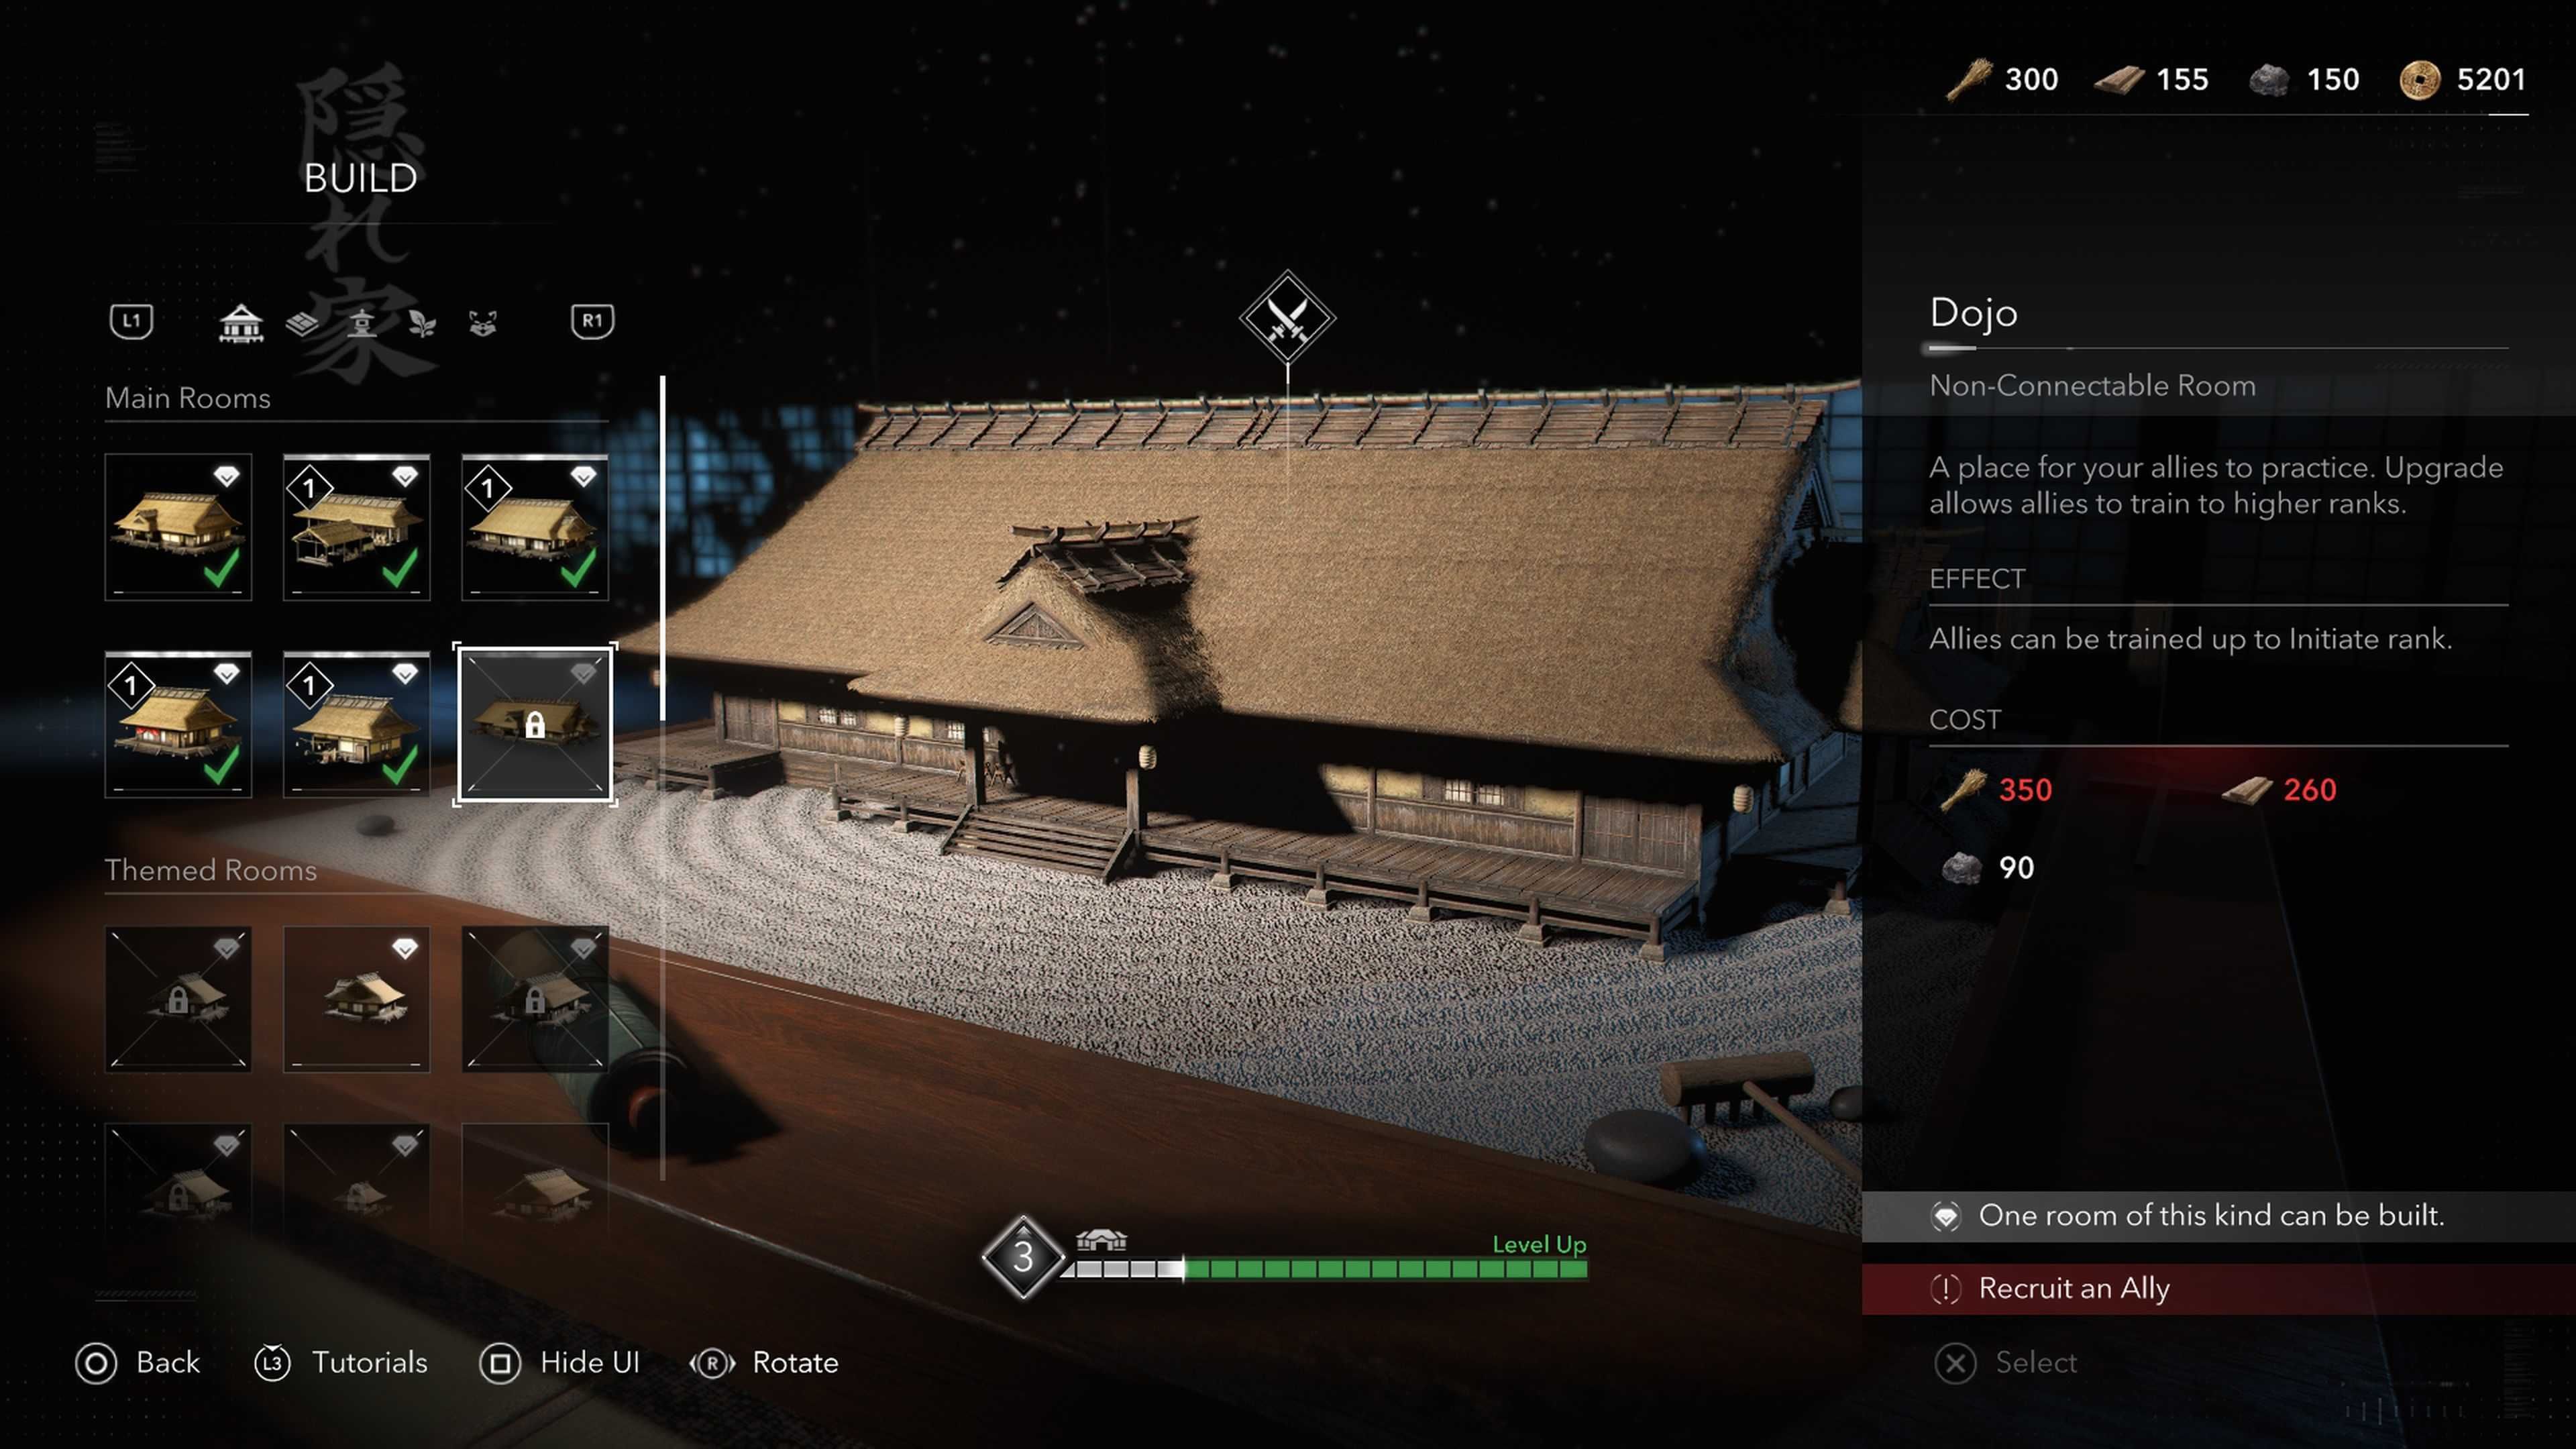
| Effect | Unlocks Allies and gives you the ability to upgrade Allies to higher ranks. |
|---|---|
| Cost | 350x Crops |
| 260x Wood | |
| 90x Stone |
If you enjoy the thrill of a lively JRPG summoning mechanism, Action-Adventure Shadows offers a comparable experience using the feature called Allies.
In your Dojo, you can accommodate allies that you gather from finishing missions and open-world tasks. At times of combat or stealth operations, you can summon their aid whenever required, taking advantage of their special skills.
This fun feature also has specific applications, but it’s seldom necessary to utilize it to perform effectively. Consequently, enhancing your allies with upgrades might not be the most productive way to spend your time.
This structure is undeniably valuable for specific instances, yet it serves as a lavish amenity rather than an essential necessity.
7. Gallery
A Walk-in Wardrobe
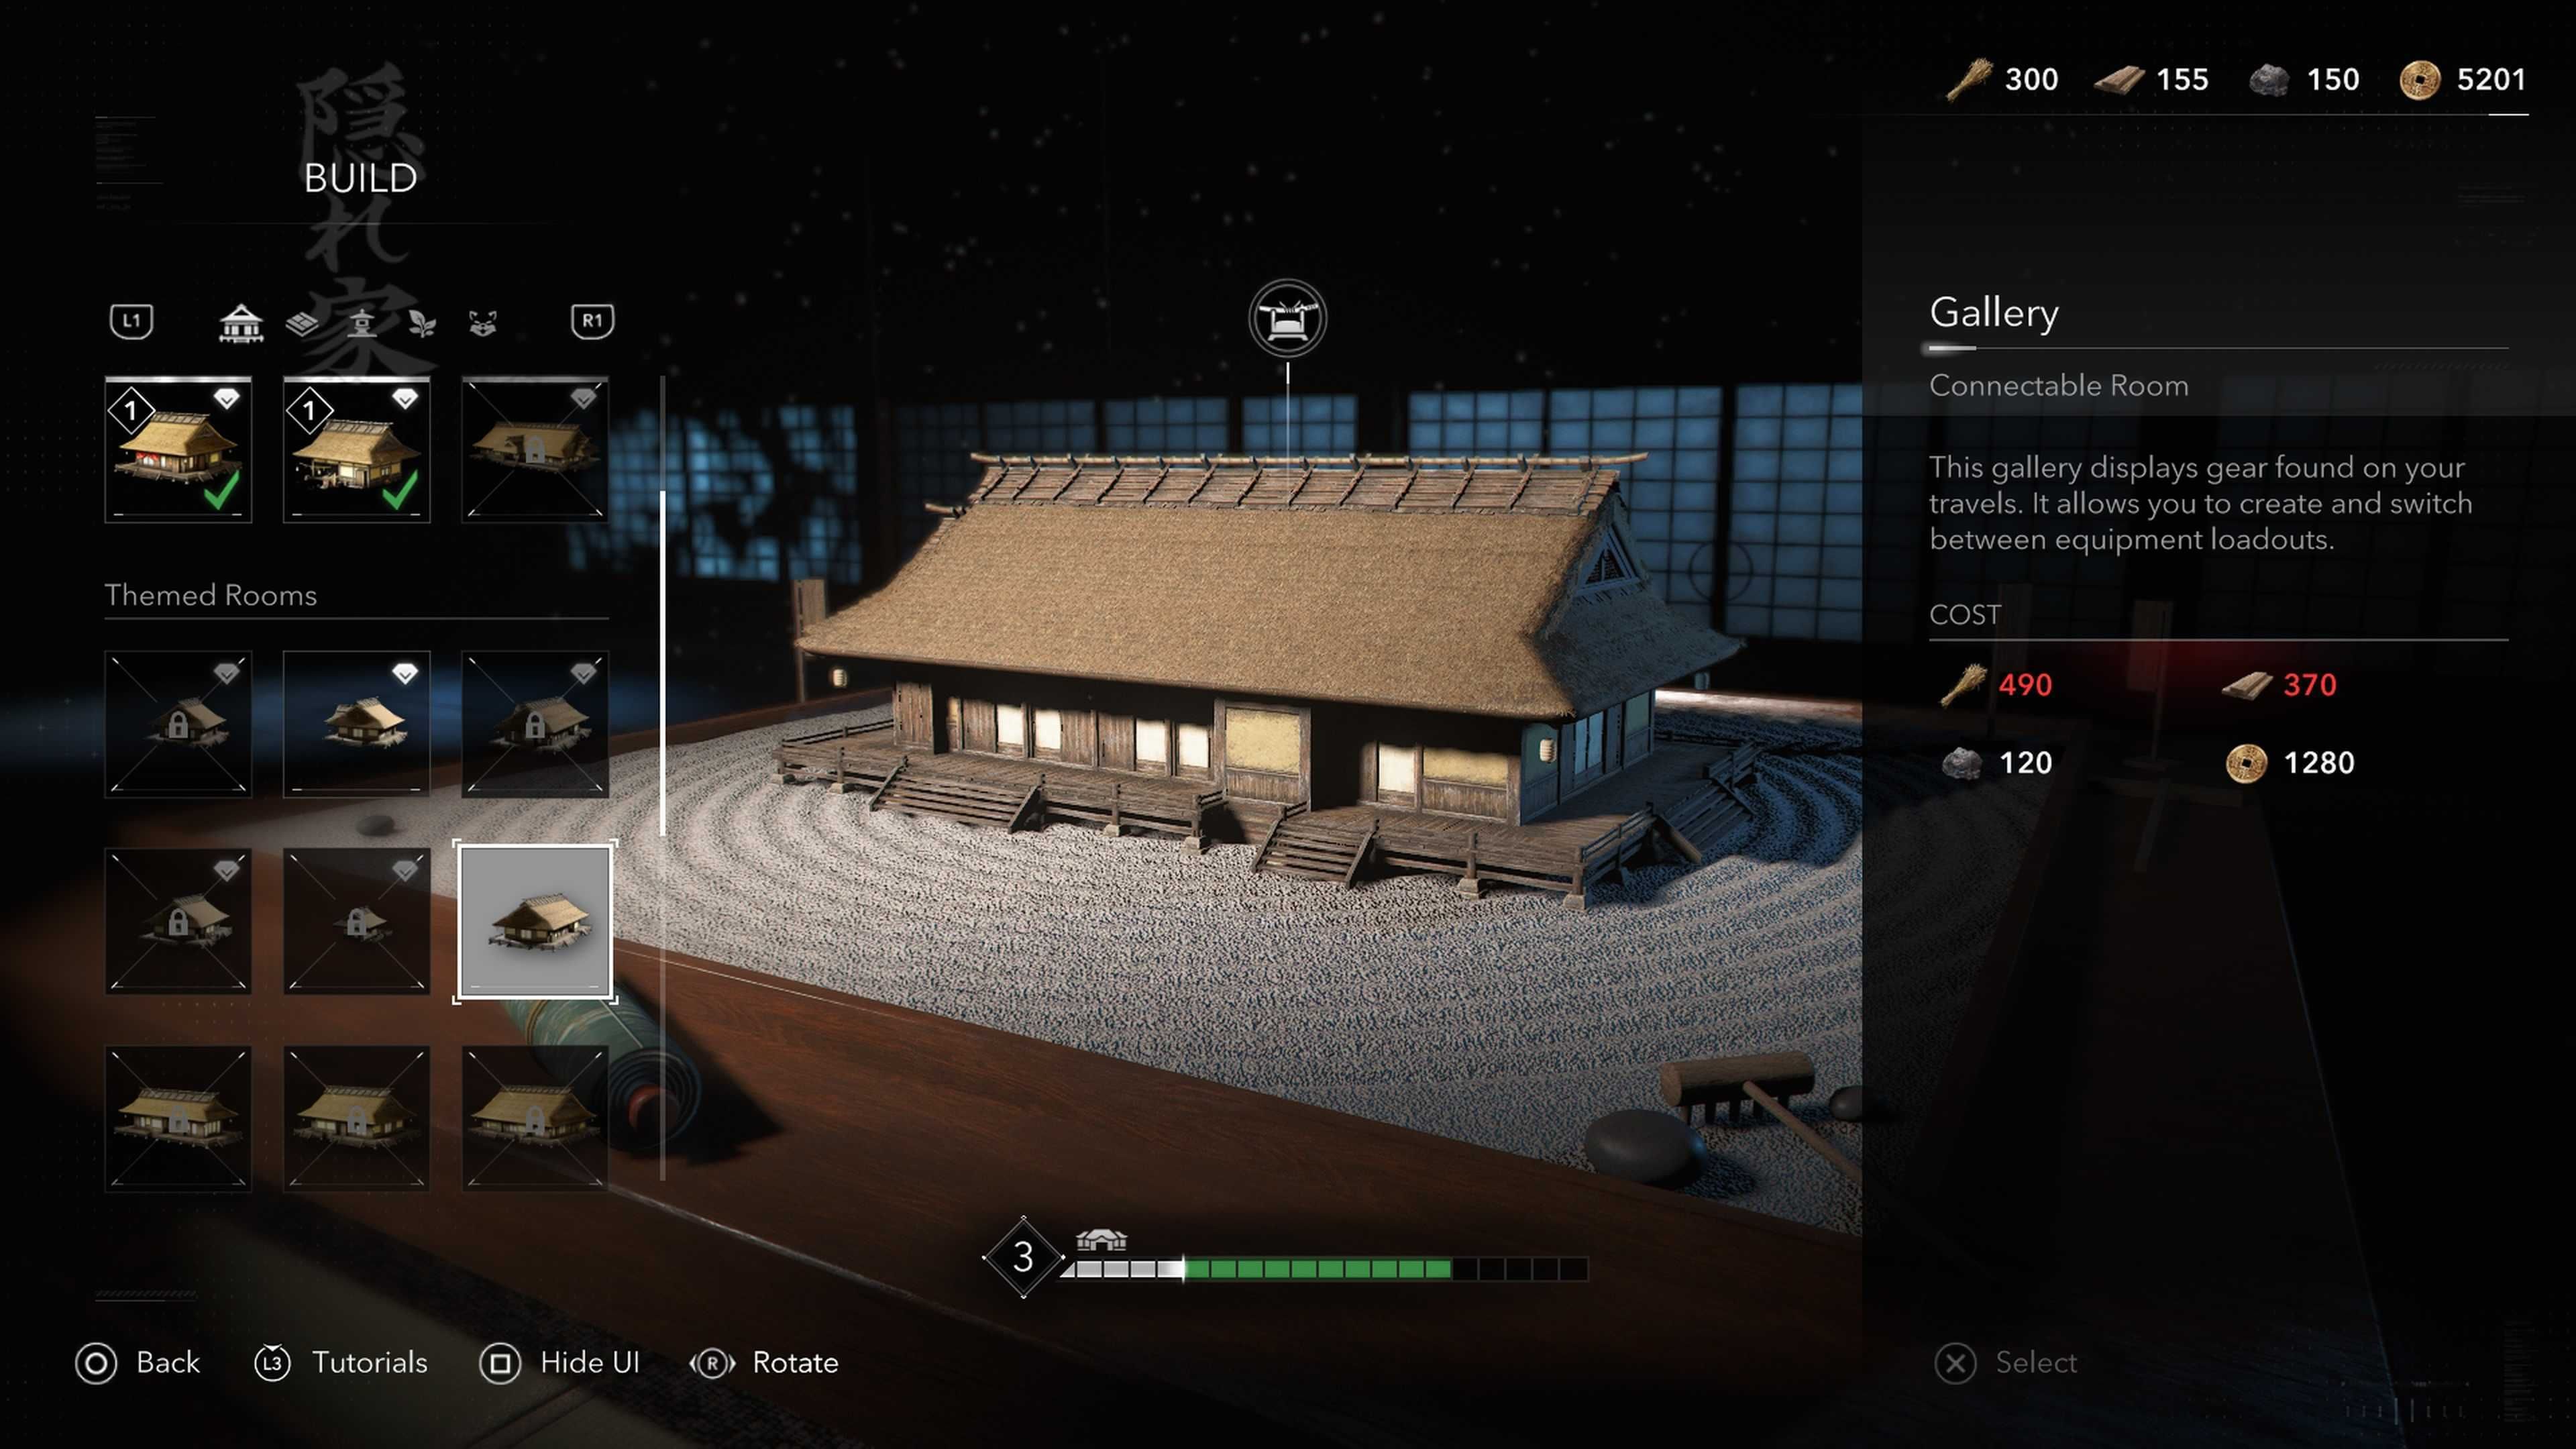
| Effect | Allows you to create preset loadouts and switch gear on the fly |
|---|---|
| Cost | 490x Crops |
| 370x Wood | |
| 120x Stone | |
| 1280x Mon |
If you’ve always yearned for a spacious walk-in closet, then perhaps the Hideout building by AC Shadows might appeal to your taste.
Essentially, the Gallery serves as a personal storage space for crafting unique equipment combinations, or “loadouts.” This means that whenever you wish, you can quickly swap between your current setup and a custom one you’ve previously saved.
In the initial stages of play, you won’t find this structure particularly useful. However, once you start gaining access to various weapons and armor types, each with unique advantages that complement each other, having this item can be quite beneficial. It eliminates the need for constant menu navigation while you’re swapping your gear frequently.
However, this structure seems more about opulence than groundbreaking innovation, which is why we can’t move it higher in our rankings.
6. Nando
Less Chicken, More Scouts
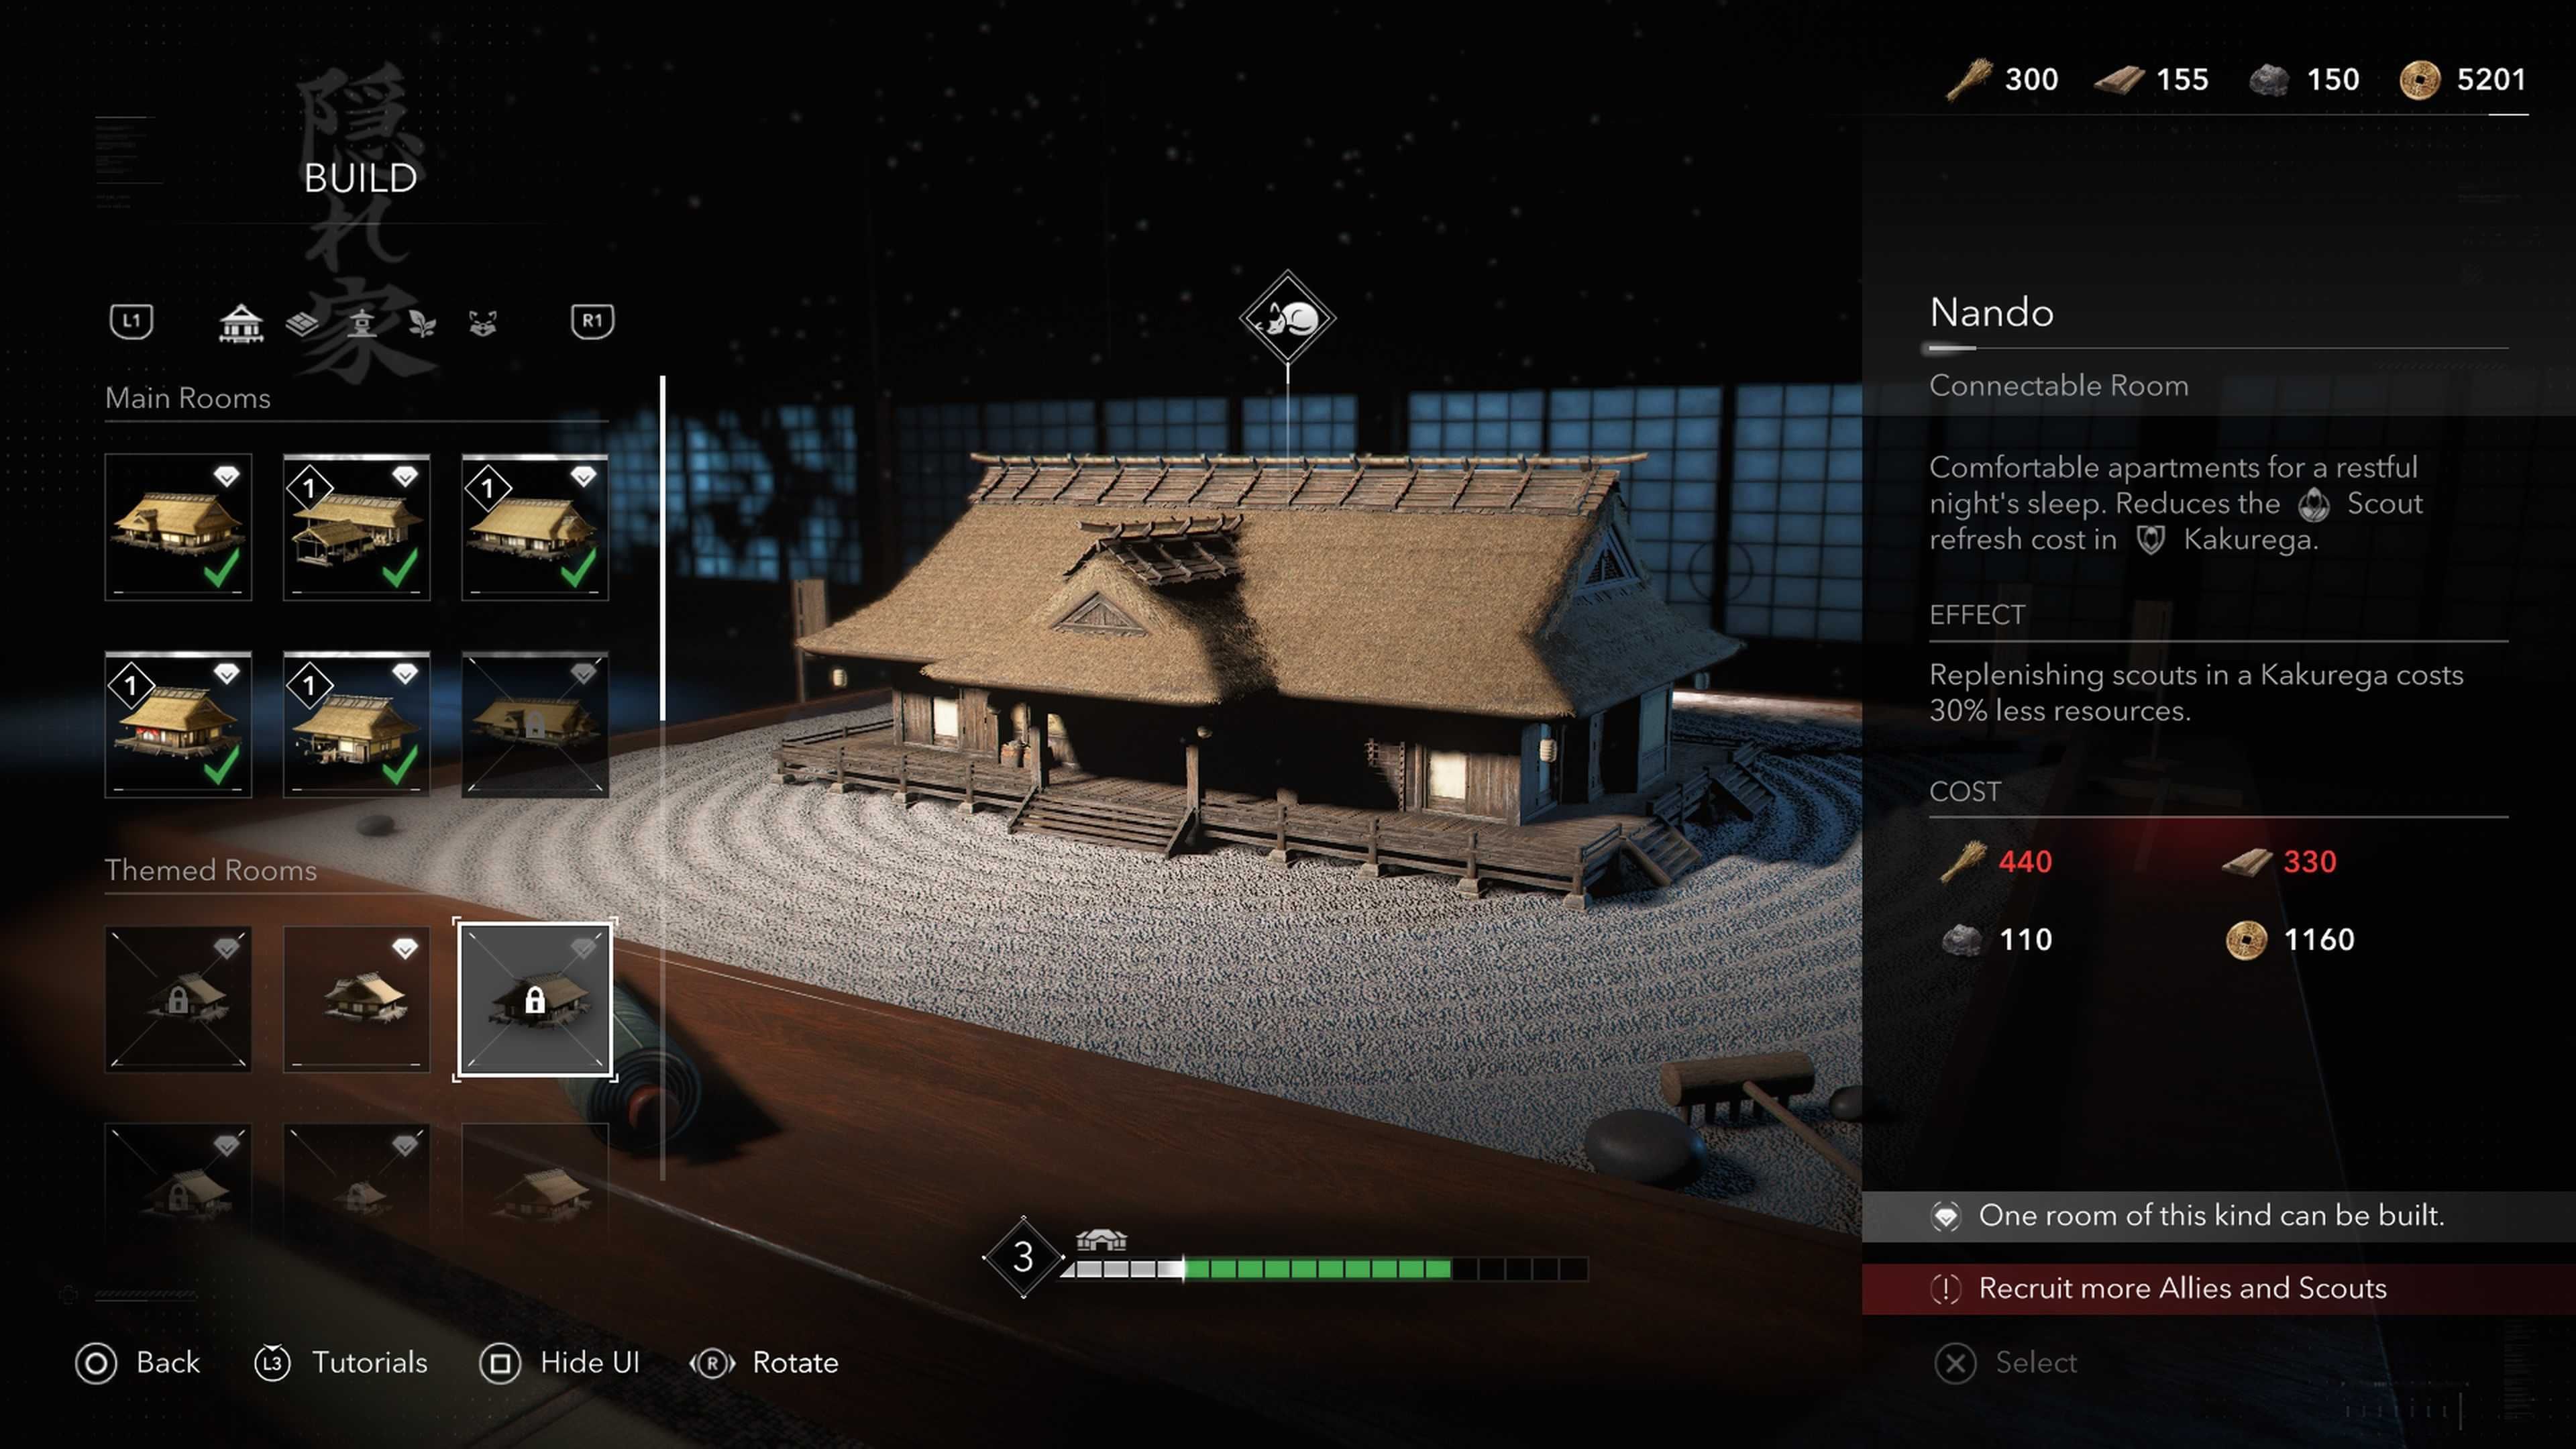
| Effect | Reduces Scout Refill costs by 30% |
|---|---|
| Cost | 440x Crops |
| 330x Wood | |
| 110x Stone | |
| 1160x Mon |
Instead of confusing it with a well-known chicken restaurant, Nando’s in AC Shadows refers to a compact complex of comfortable living spaces for your scouts. Constructing these dwellings would result in reciprocal benefits from your scouts.
Refreshing your Scouts will become less expensive, saving you money. Instead of paying 200 Mon each time, it will now only cost 140 Mon. This decrease in price allows you a bit more flexibility when considering the financial impact on your budget.
Given that the game heavily emphasizes the Scout network aspect, it’s advisable to unlock it early, which is why we place it quite highly in our ranking.
5. Tea Room/Zashiki
Patch Yourself Up Better
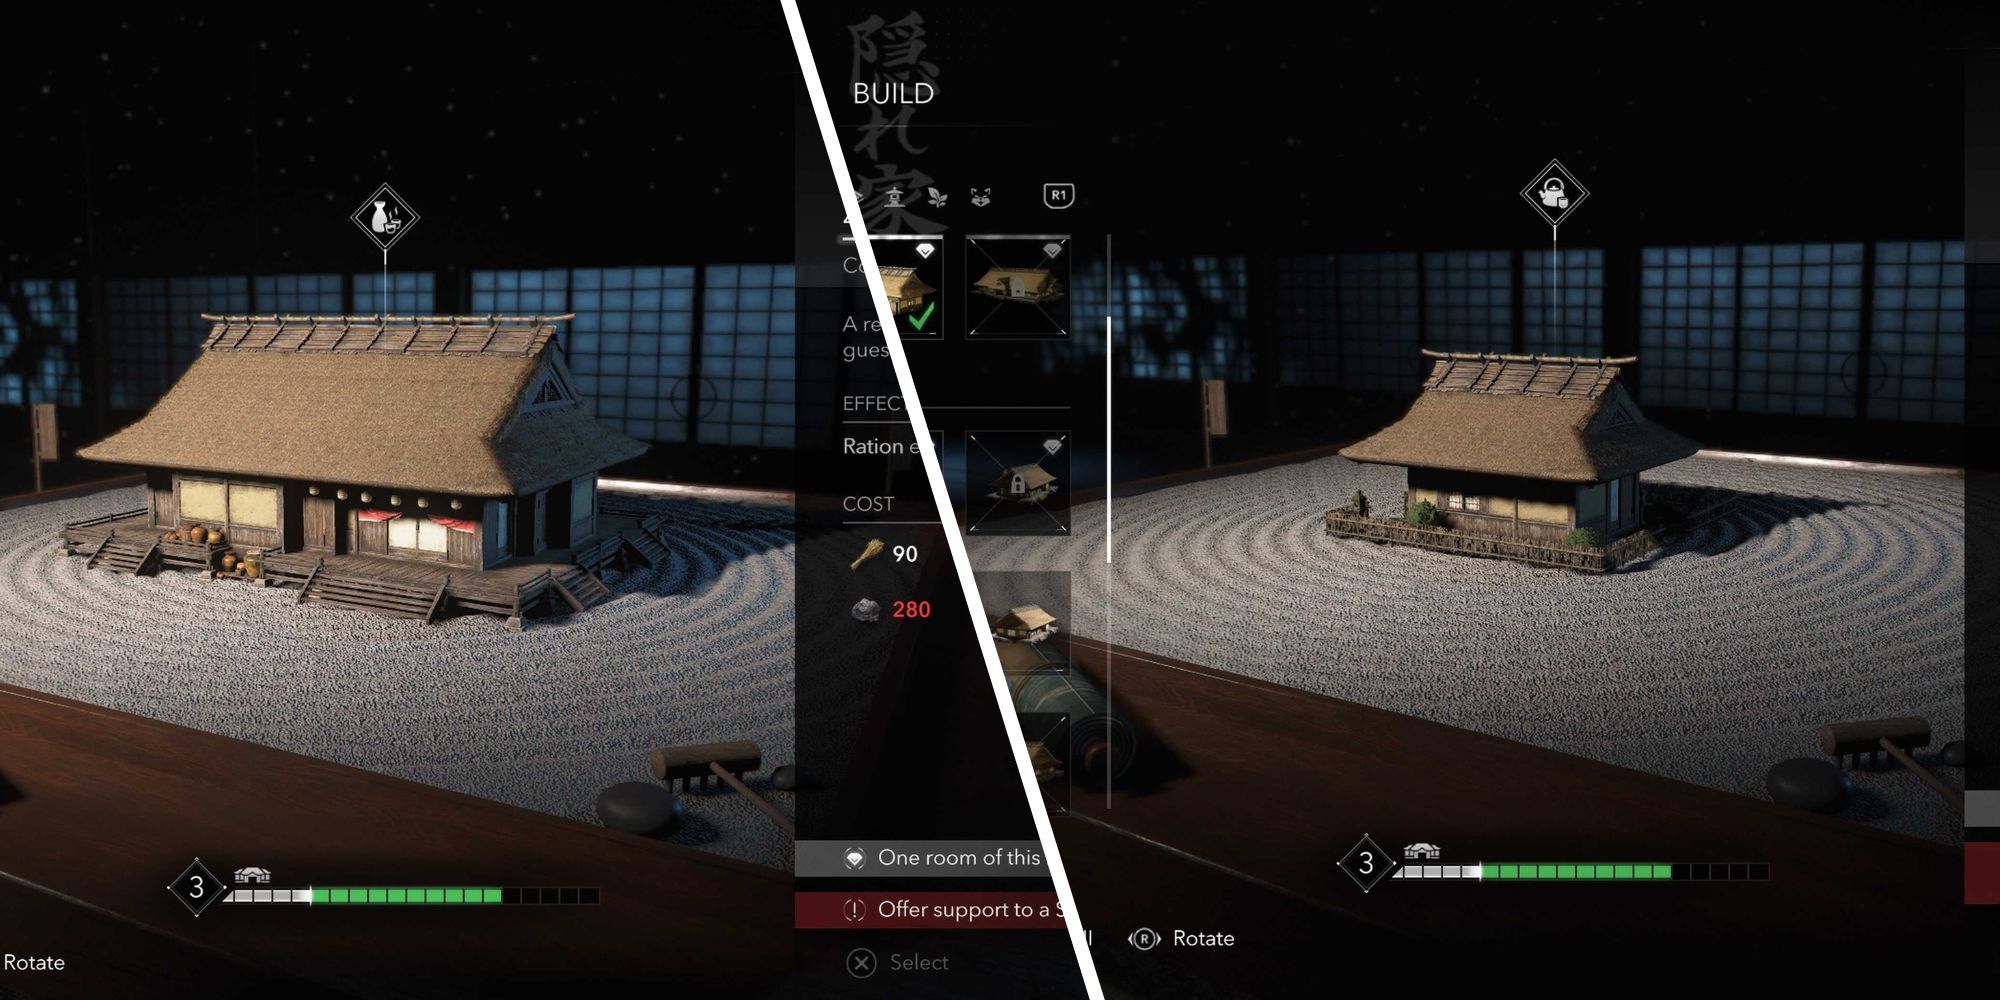
| Effect | Increases Ration efficiency by 20% | |
|---|---|---|
| Cost | 640x Crops | 90x Crops |
| 480x Wood | 370 Wood | |
| 160x Stone | 280x Stone | |
| 1670x Mon | 960x Mon | |
As a gamer, when I’m battling it out on the ‘Normal’ mode, these structures can prove to be quite useful indeed. On easier or harder settings, they might not be as crucial, but in the middle ground, they can really make a difference!
These structures are clustered because they share the same beneficial impact, boosting your ration efficiency by 20%. It’s essential to note that only one of each structure can be constructed, so it’s recommended to build both for maximum advantage.
In the game AC Shadows, these passive effects optimize your healing process, ensuring that each ration you use yields maximum benefits. Since it’s uncertain when you’ll encounter another Ration Box or Trader for a refill, making the most of every ration is crucial.
A more practical solution would be to invest your resources in constructing durable buildings since it’s challenging, if not impossible, to always excel in combat without taking any damage at all.
4. Forge
Upgrade Your Blade
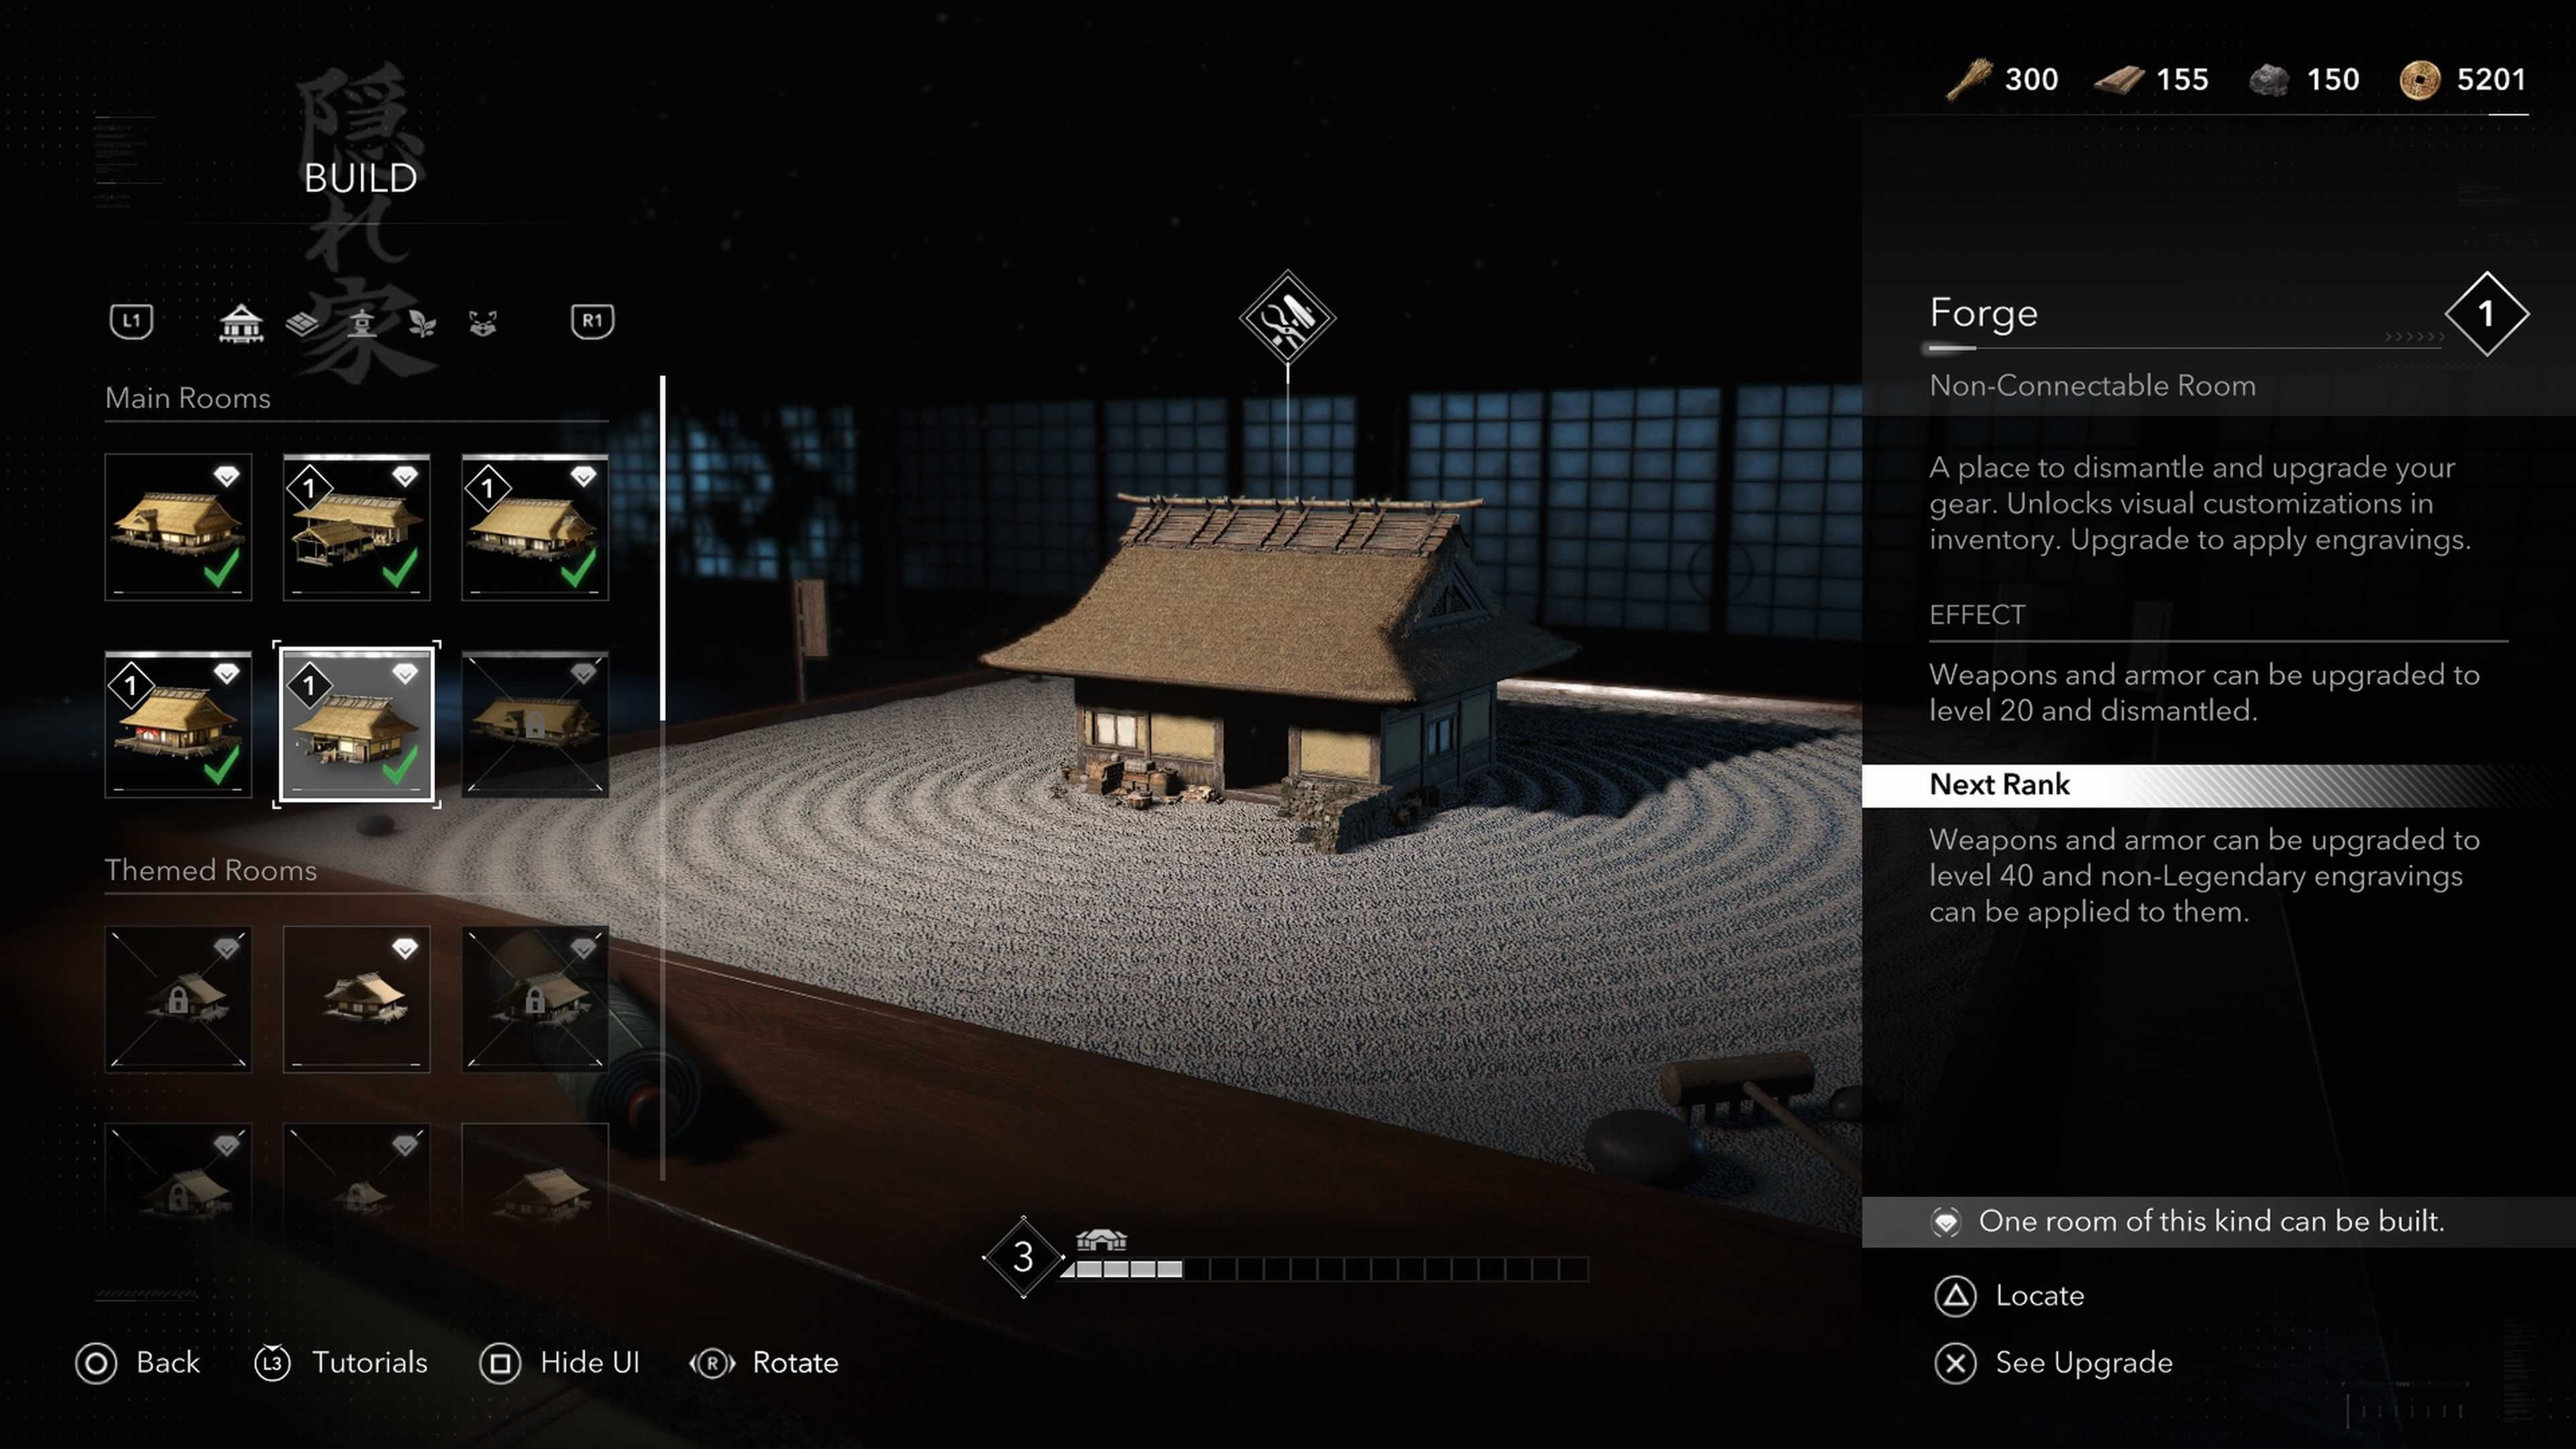
| Effect | Allows players to upgrade and dismantle weapons and armor |
|---|---|
| Cost | 40x Crops |
| 30x Wood | |
| 10x Stone |
In the course of playing Assassin’s Creed: Shadows, you’re likely to construct The Forge rather early on, since it plays a significant role in a key early storyline.
Though it might feel like you’re being forced to construct one, the forge is a tool you won’t later wish you hadn’t built. It significantly improves your ability to organize and manage your equipment efficiently.
As a player, I can personally upgrade any weapon I come across with an on-site blacksmith, ensuring my arsenal matches my skill level. Plus, I have the option to break down weapons I no longer require for convenience.
You acknowledge that frequent interaction with this specific feature might not be essential since the loot acquired in the open world automatically adjusts to the player’s level. However, should you discover an item that particularly appeals to you, it becomes a method of personalizing your equipment and making it your preferred choice throughout your journey.
3. Kakurega
A Base Of Operations
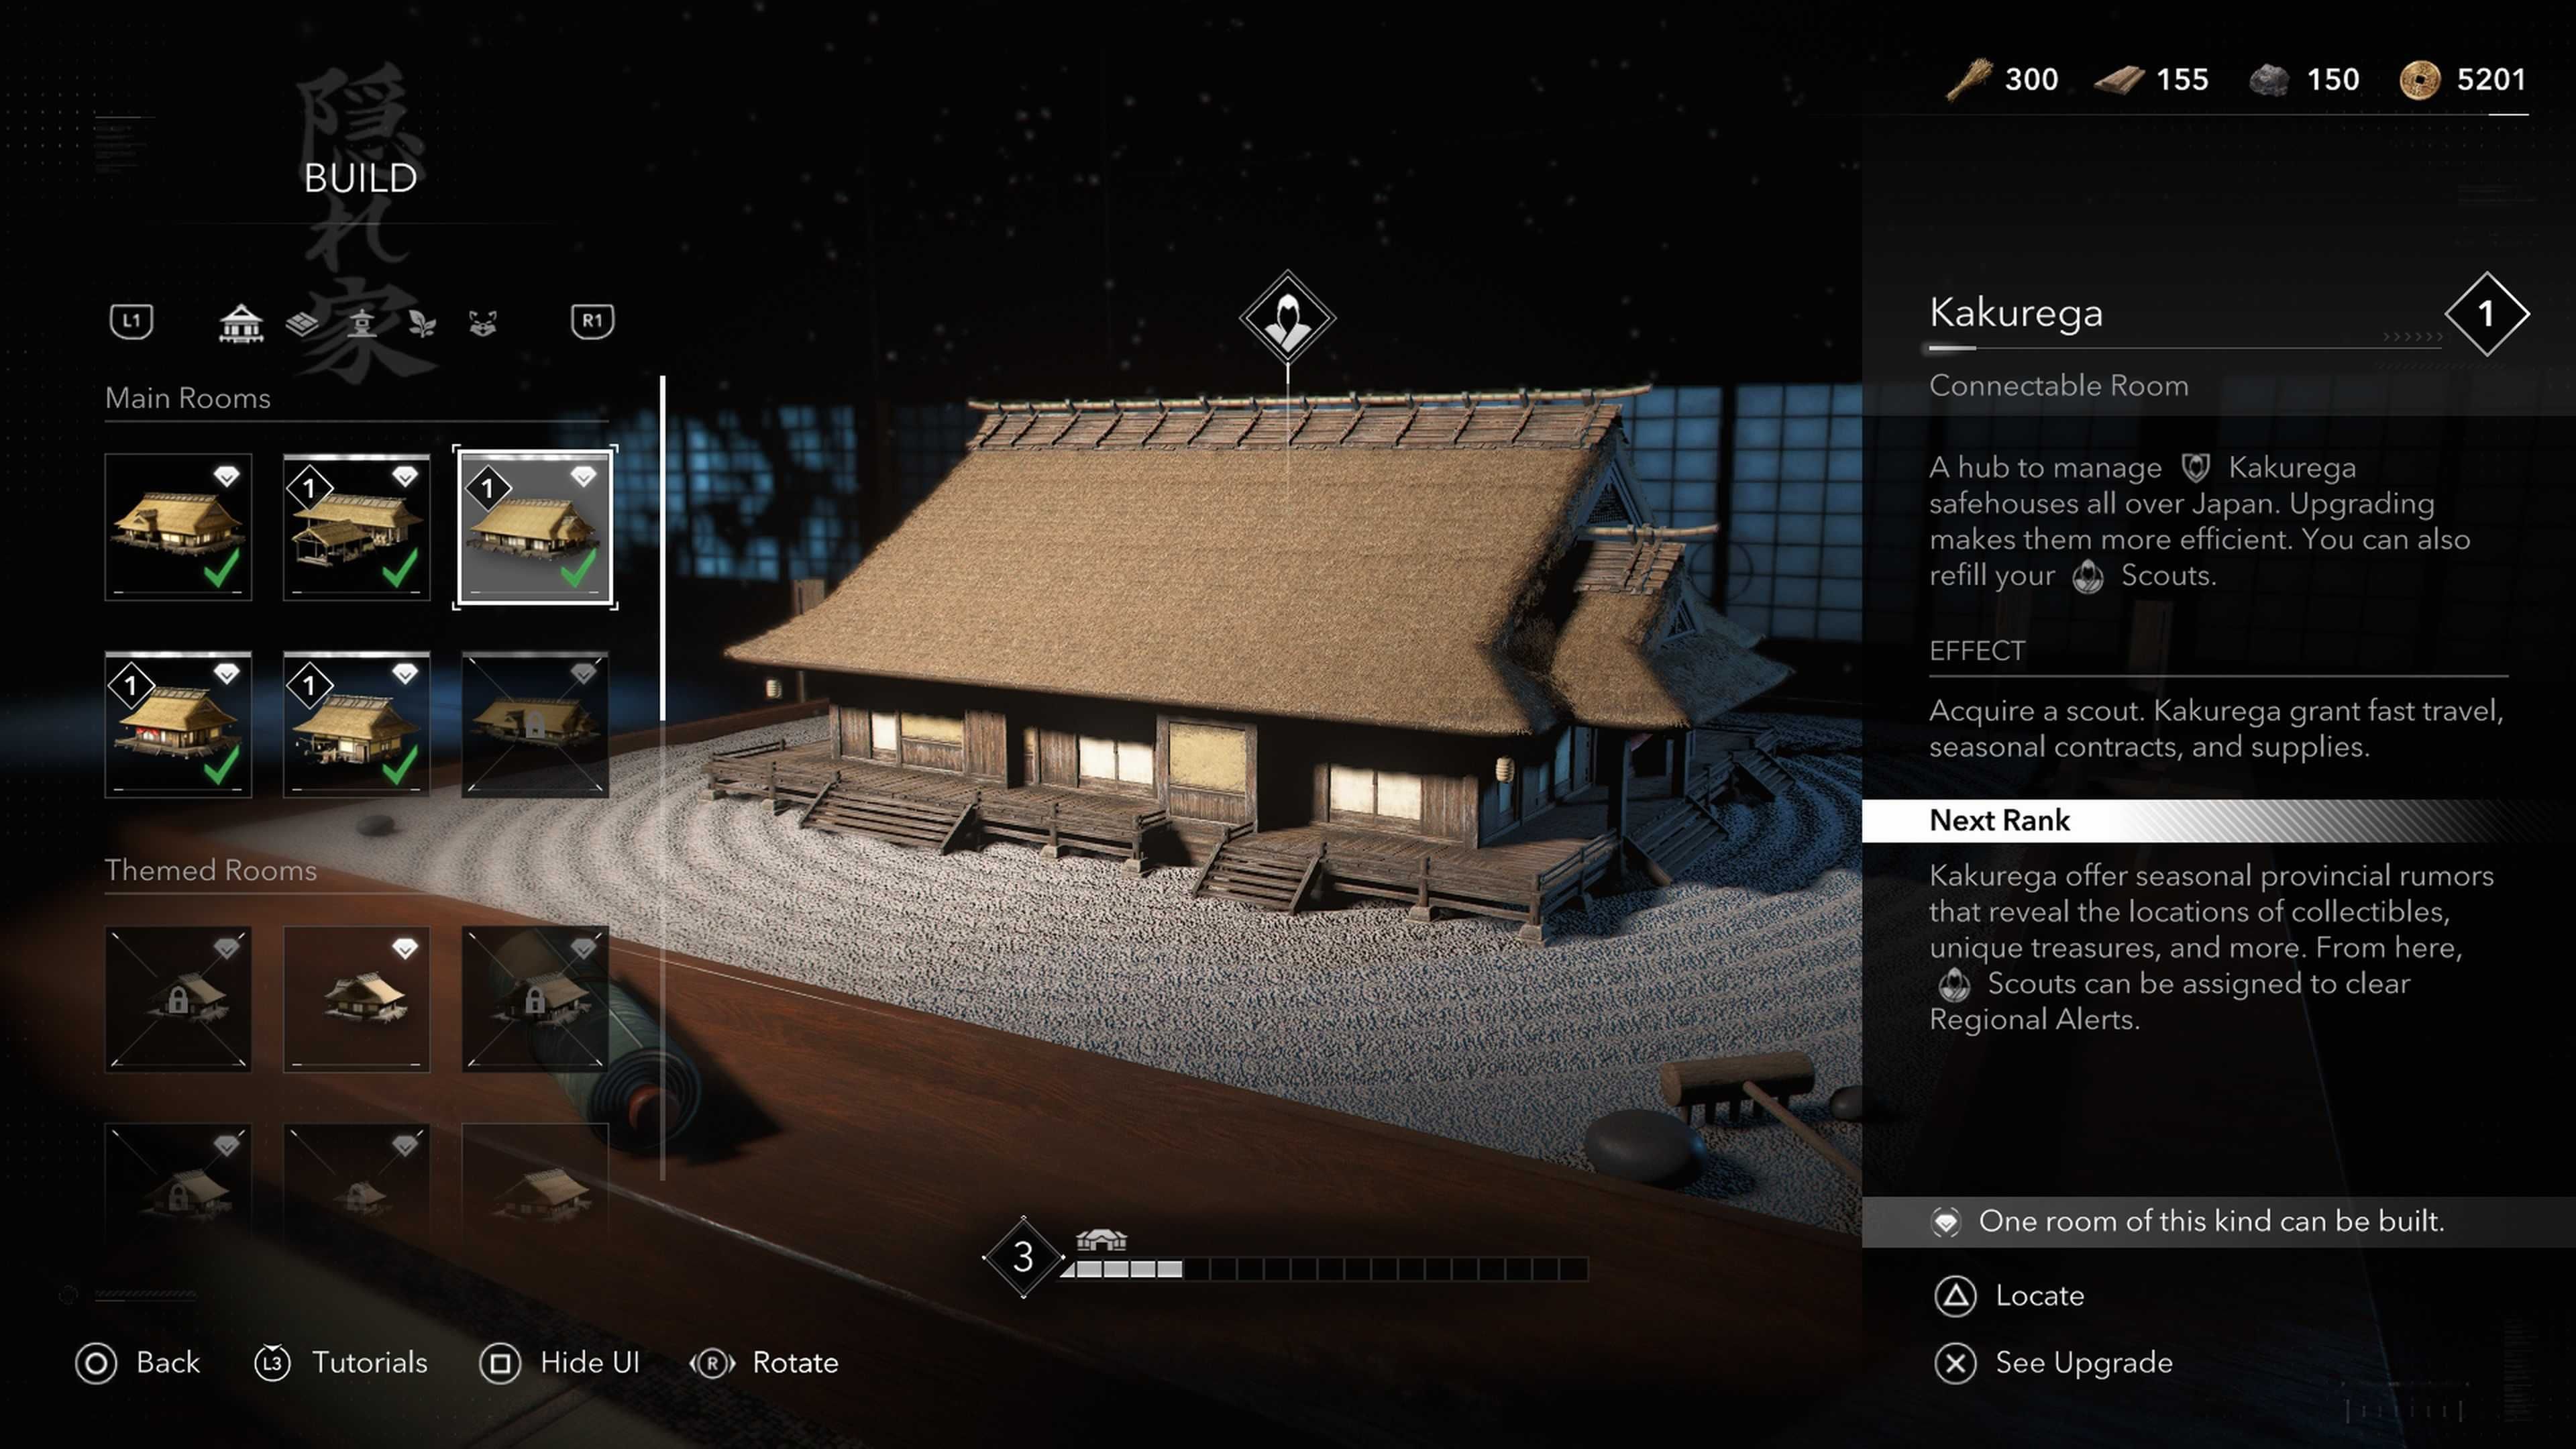
| Effect | A safehouse to manage contracts, supplies, and Scouts |
|---|---|
| Cost | 60x Crops |
| 30x Wood | |
| 5x Stone |
As a passionate gamer, I must express my admiration for the Kakurega, a structure that, though often acquired without cost, certainly doesn’t skimp on the value it brings to the gameplay experience.
At this location, you can obtain contracts for additional construction supplies, store your equipment, and recharge your Scouts, a crucial aspect of the game as they are needed to discover nearly every quest marker on the map.
This structure serves as a small strategic hub, and it allows you to discover hidden Kakuregas scattered throughout the map, which function as convenient hideaways. It’s a multi-purpose building that we consider very valuable.
2. Tera
Cut Down on Grinding
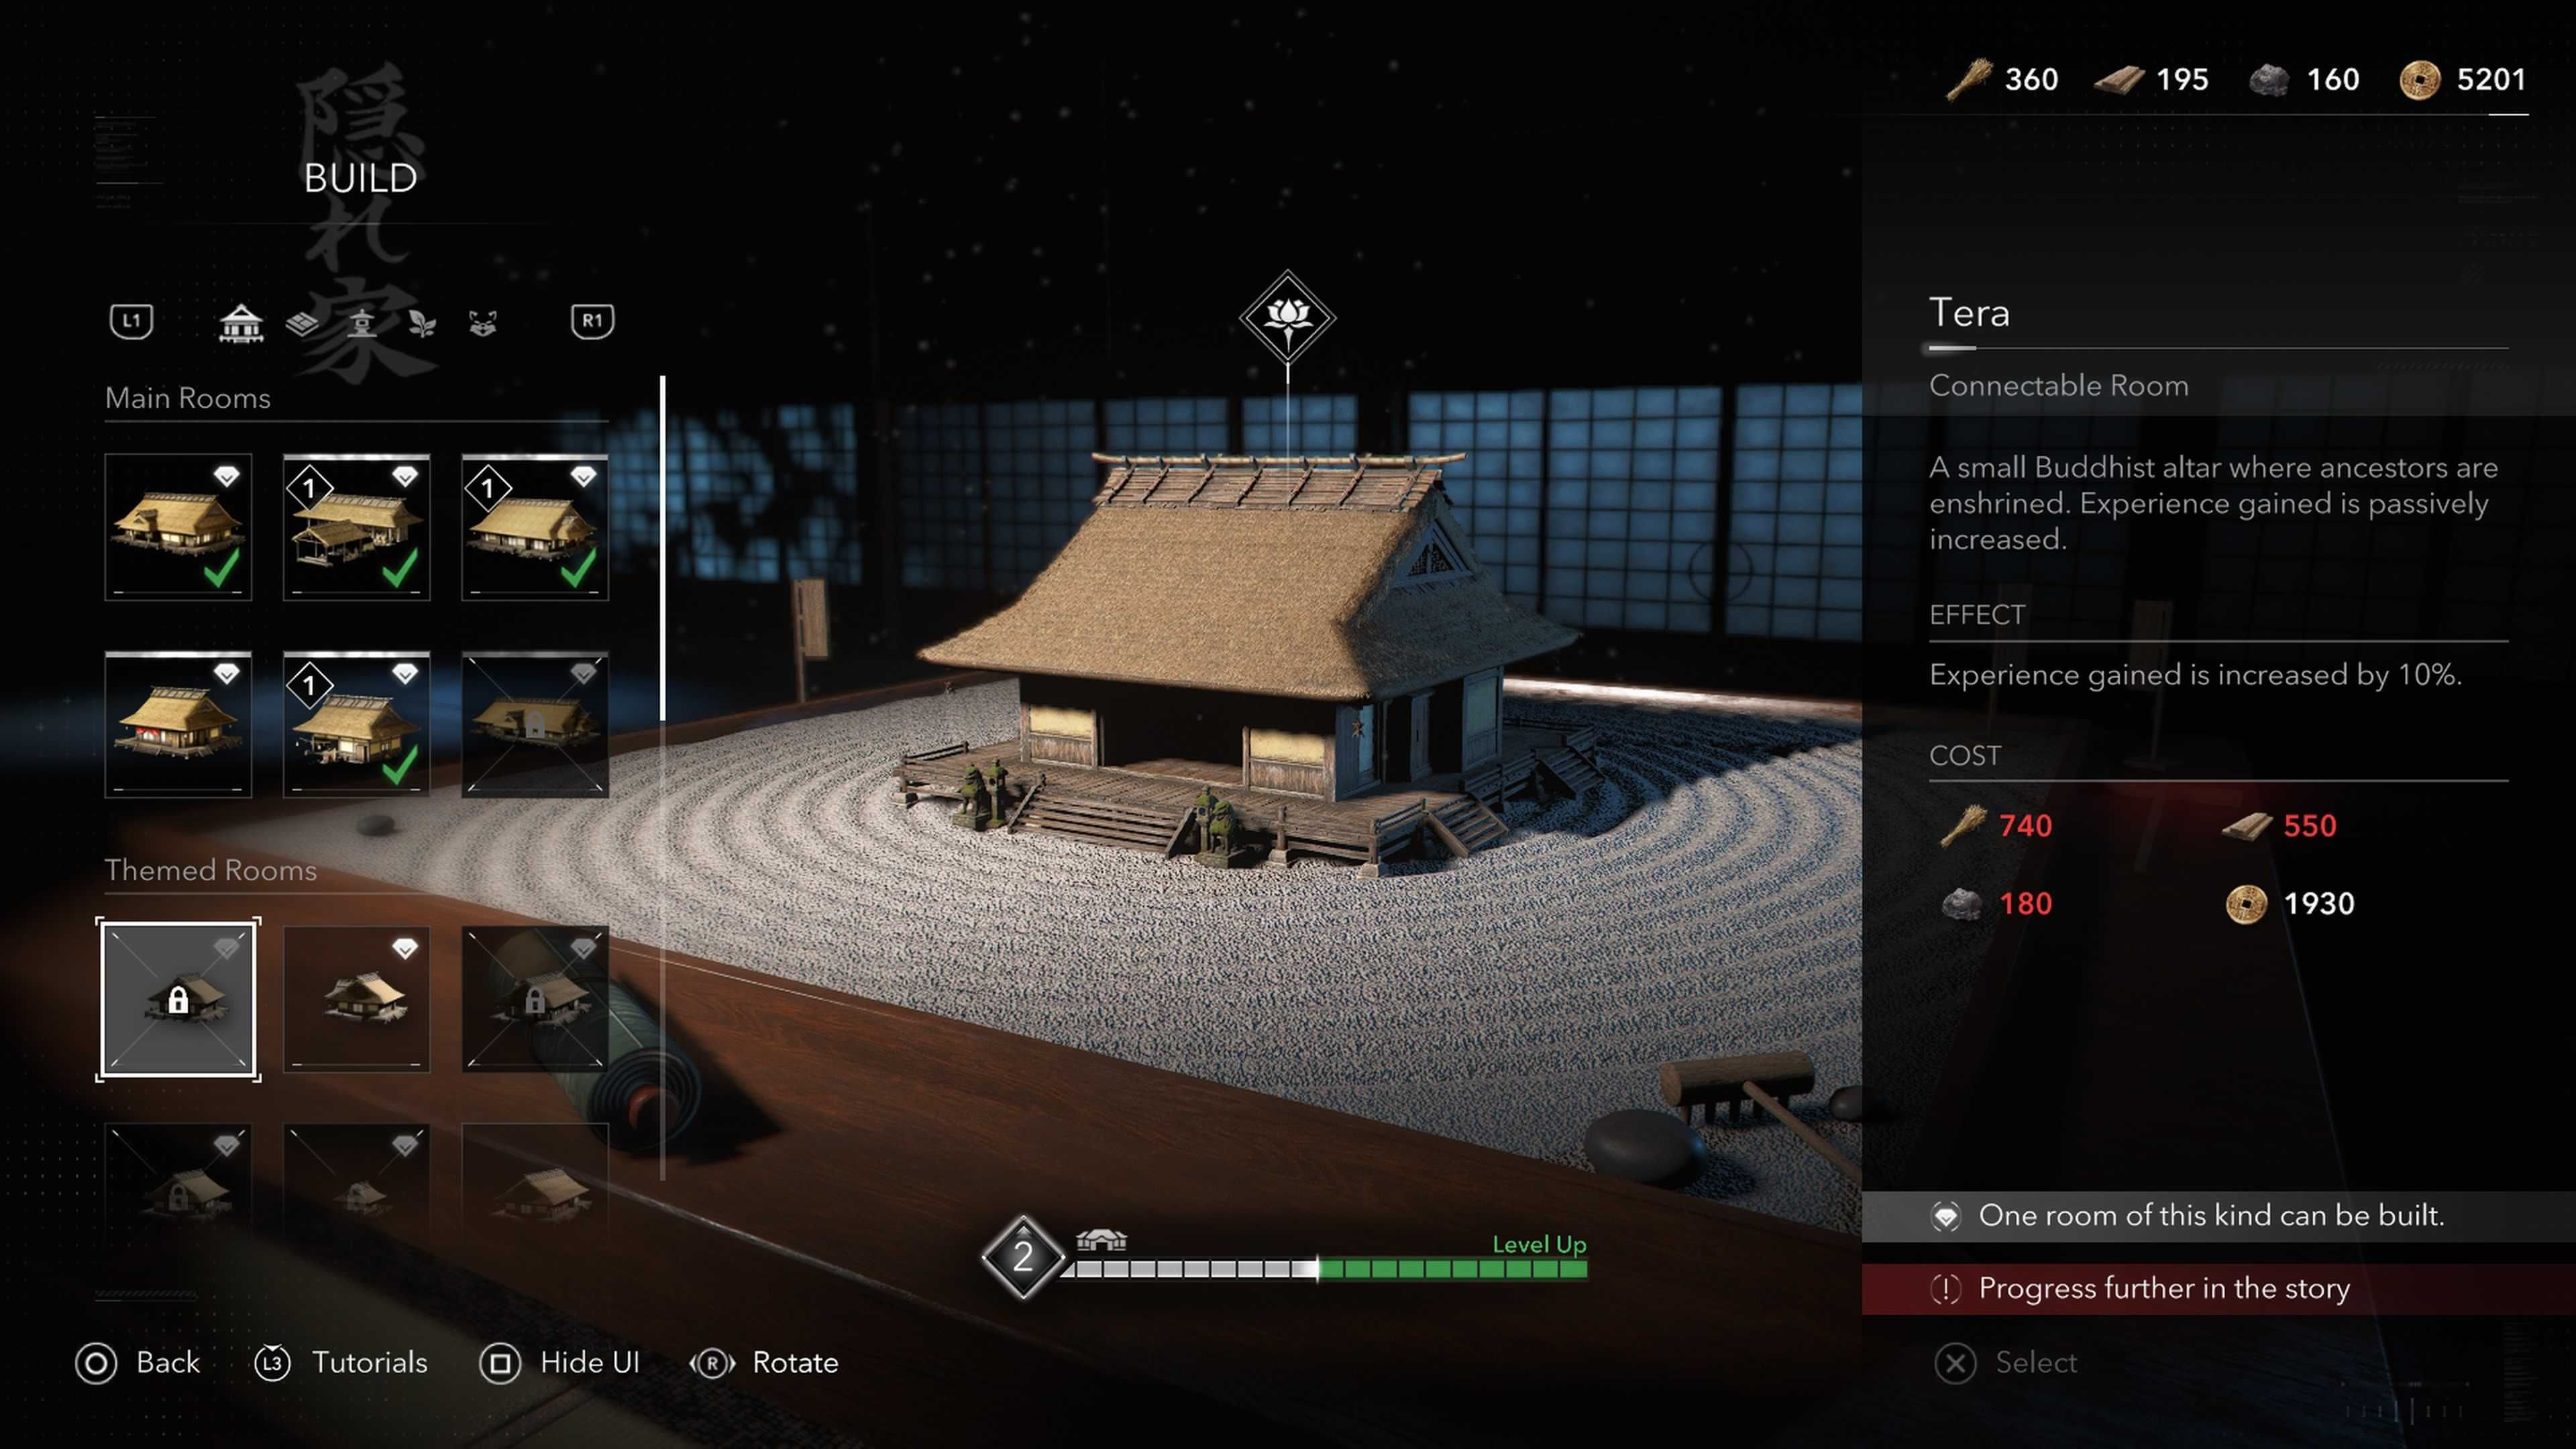
| Effect | Grants players a passive 10% buff to all XP gain |
|---|---|
| Cost | 740x Crops |
| 550x Wood | |
| 180x Stone | |
| 1930x Mon |
As you progress through Assassin’s Creed Shadows, you might encounter a challenge due to its approach of limiting access to certain content based on character level. At some stage in the game, you may find yourself lagging behind in terms of your character’s level, and you’ll have to spend time improving your stats by replaying levels or completing additional tasks.
In simpler terms, navigating through this game may feel tedious at times since you might end up doing routine tasks in an open world or accepting quests that don’t necessitate higher levels. But, you can reduce the need for such tasks significantly by creating your own ‘Tera’ (implying a personalized and optimized gameplay experience).
This structure, upon its completion, provides a player with an automatic 10% boost to all experience points earned. This means that regardless of the activities you engage in within the game, you’ll receive more experience points from each one.
Among a small number of structures, it’s one that seems more like a necessity than an option. If you’re trying to avoid lengthy grinding sessions, a Tera might just be the perfect solution for you.
1. Study
Extra Scouts Are A Godsend
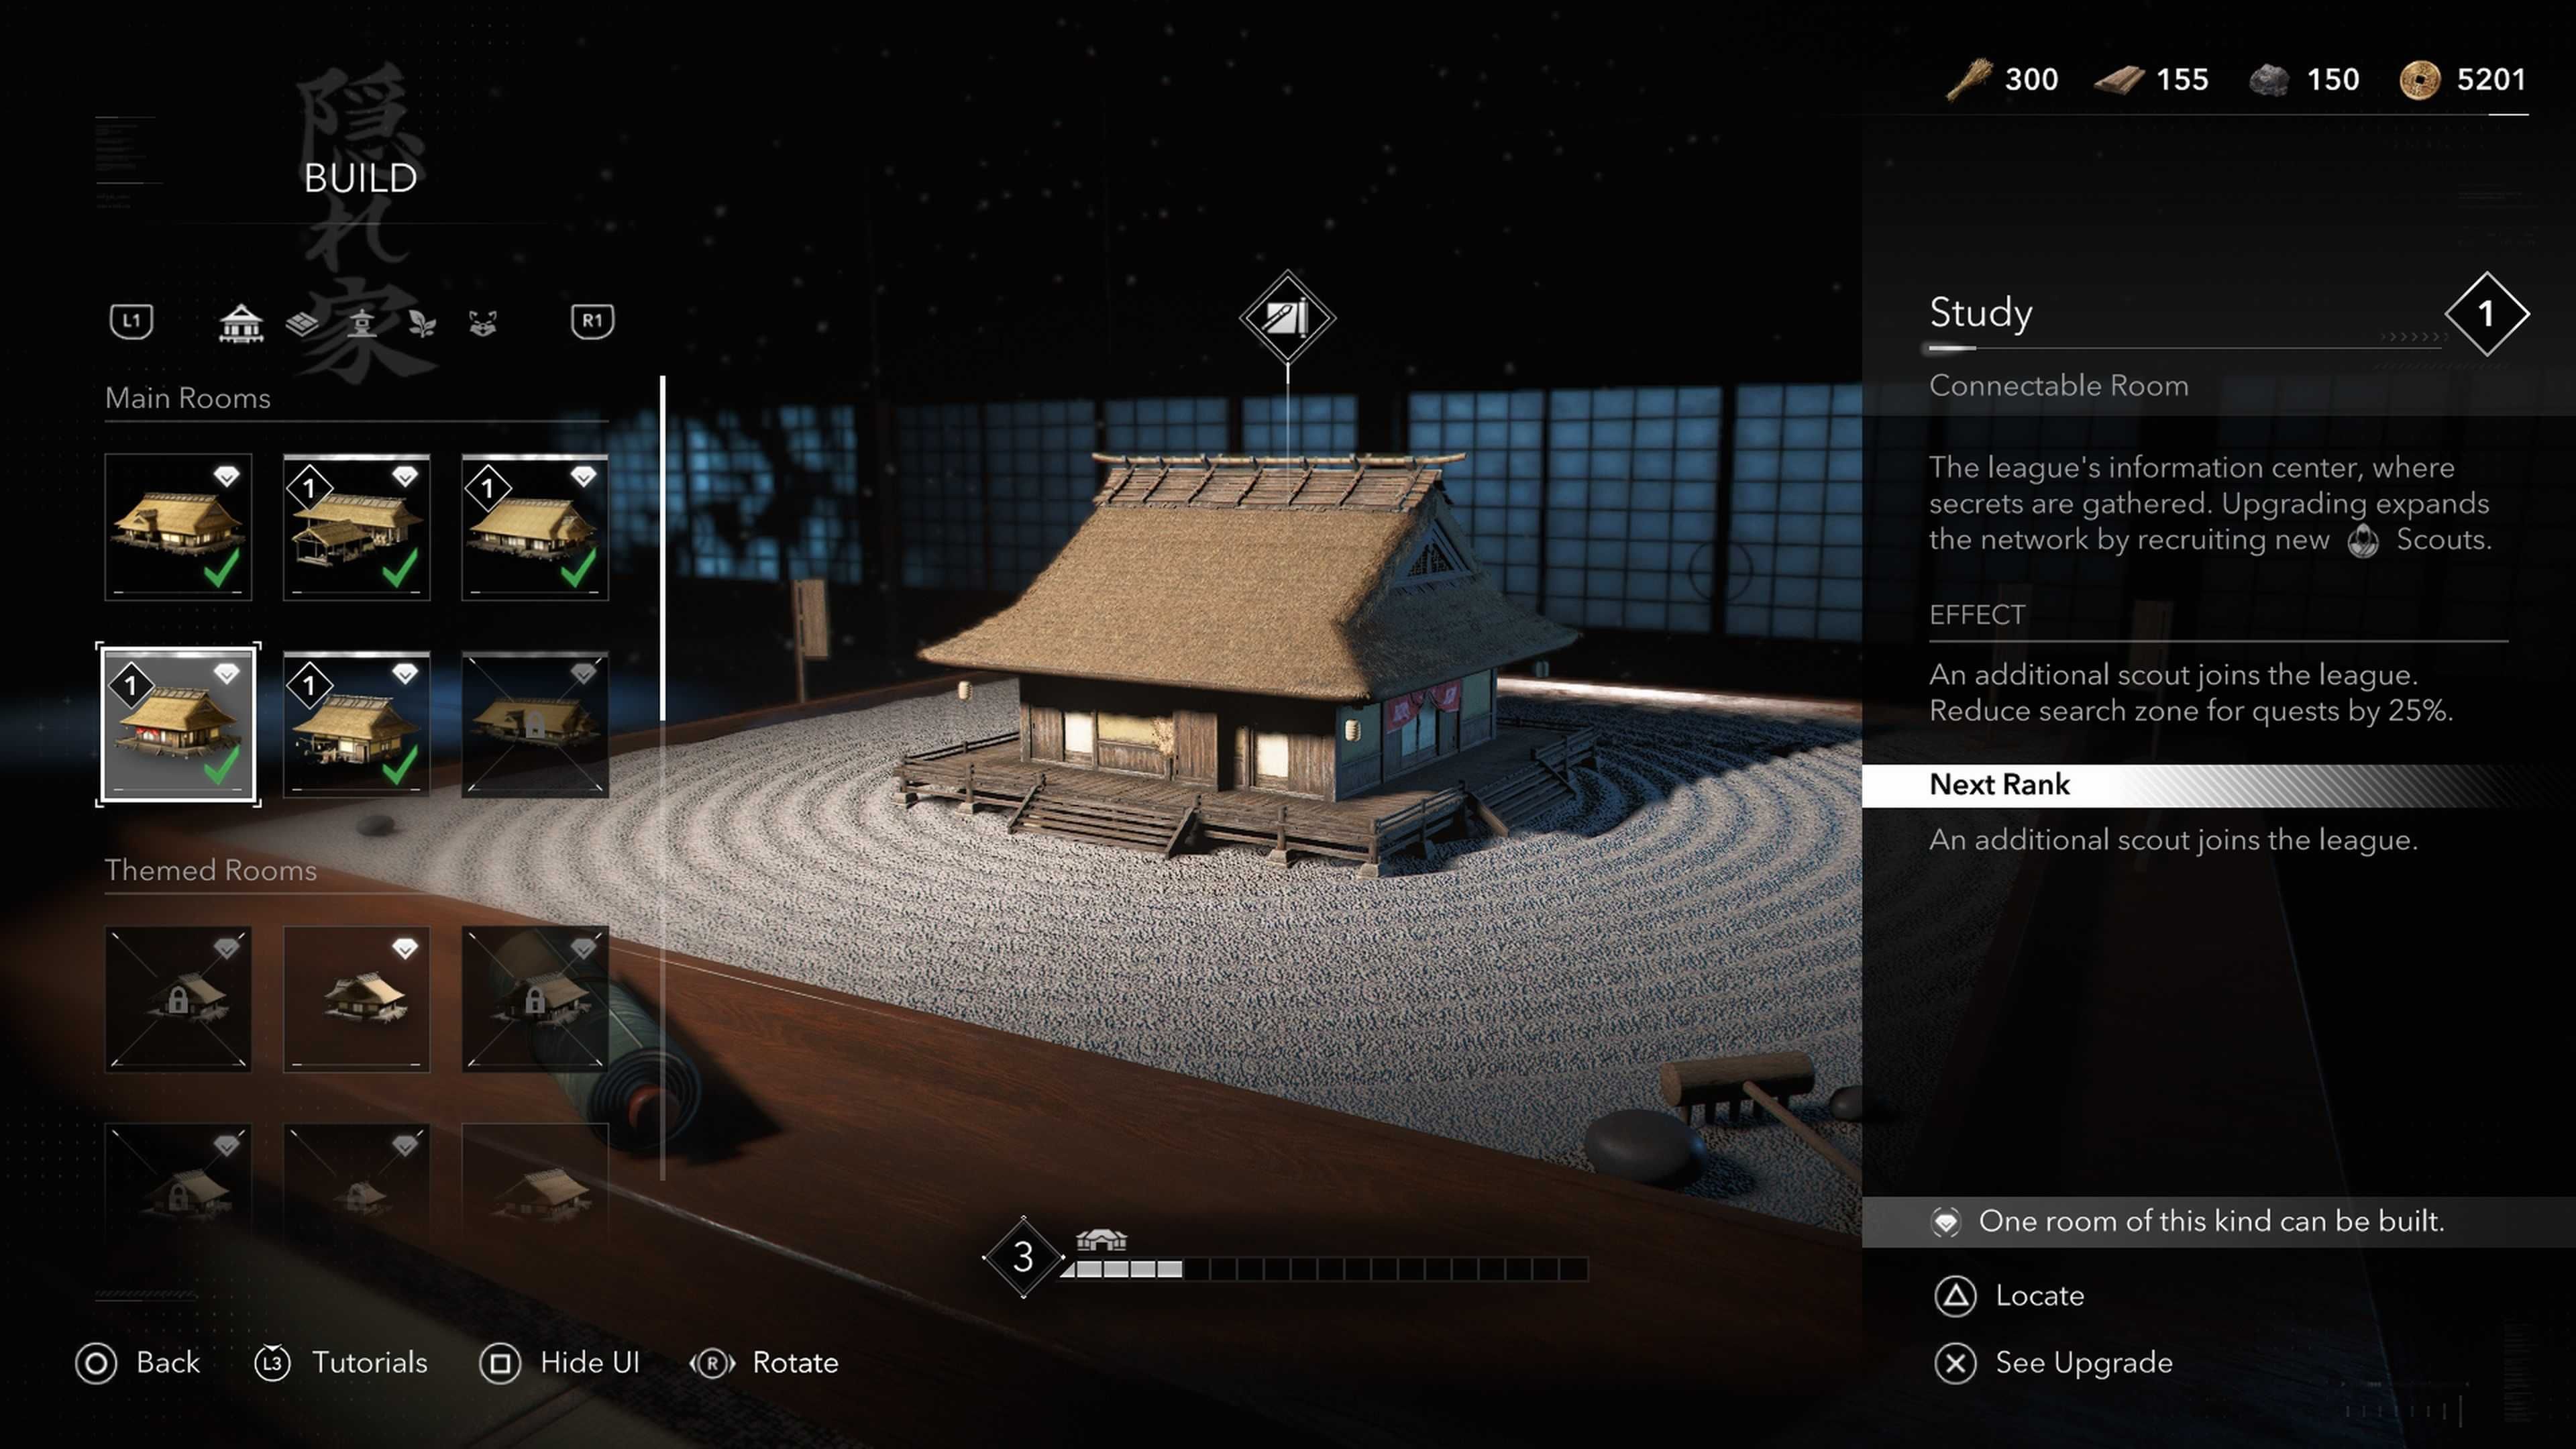
| Effect | Adds another Scout and reduces the quest marker search zone by 25% |
|---|---|
| Cost | 60x Crops |
| 40x Wood | |
| 10x Stone |
Among the initial structures to construct in your hideout, the Study stands out as particularly beneficial since the game emphasizes using Scouts to uncover most elements within it, and the Study subtly lessens that task.
This structure not only provides an extra scout position, enabling you to summon up to four scouts initially without having to replenish them prematurely, but it also narrows down the search zone for quests once you locate the area on the map. Consequently, you’ll spend less time wandering aimlessly in search of your destination.
It’s unfortunate that we can’t construct more of these structures, because they could have significantly simplified the challenging scouting feature and made the game’s advancement less grueling for players who are willing to gather more resources.
Even though we currently have some Scouts, having more is beneficial because it’s preferable to have something rather than nothing. Plus, if we already have some, we can always improve or add to our current team, making them even better.
Read More
- Robinhood’s $75M OpenAI Bet: Retail Access or Legal Minefield?
- Change Your Perspective Anomaly Commission Guide In NTE (Neverness to Everness)
- Lonely Player Anomaly Commission Guide In NTE (Wandering Puppet Locations)
- All Nameless Hospital Endings Full Guide In NTE
- All Skyblazer Armor Locations in Crimson Desert
- How to Complete Funny Blocks Game in Infinity Nikki
- Midas Tower ReroRero Phone Booth Location in NTE
- All Hauntingham’s Letters & Hidden Page in New Super Lucky’s Tale
- Riven Tides Classified Records Keycard Door Location in ARC Raiders
- Jujutsu Kaisen Modulo Gets An Official Anime Trailer By Studio MAPPA
2025-03-19 22:21