Quick Links
- The Bad Brother
-
Missing Missive
-
Inside Help
-
The Rising Tide
-
Lost Honor
- The Outer Courtyard As Yasuke
- The Inner Courtyard As Naoe
-
How To Defeat Ise Sadaoki
In the second part of “Assassin’s Creed Shadows,” you gain more freedom to manage and alternate between Yasuke and Naoe as your playable characters, truly expanding the game world.
As a fan, I can tell you that this place is where you’ll find the remaining Shinbakufu objectives, such as the Fool – a character whose identity will become clearer once you meet him.
Today, I’ve put together a comprehensive guide that delves into each sub-quest and vital aspects related to The Fool character in Assassin’s Creed Shadows. This walkthrough is designed to help you efficiently navigate through the assassination quest line for this character, making it simpler than ever before.
For this series of missions, it’s suggested that you’re at least level 18. Additionally, during the playthrough, the game selected dialogues based on the story in Canon Mode, which is a setting where the game makes these selections for you.
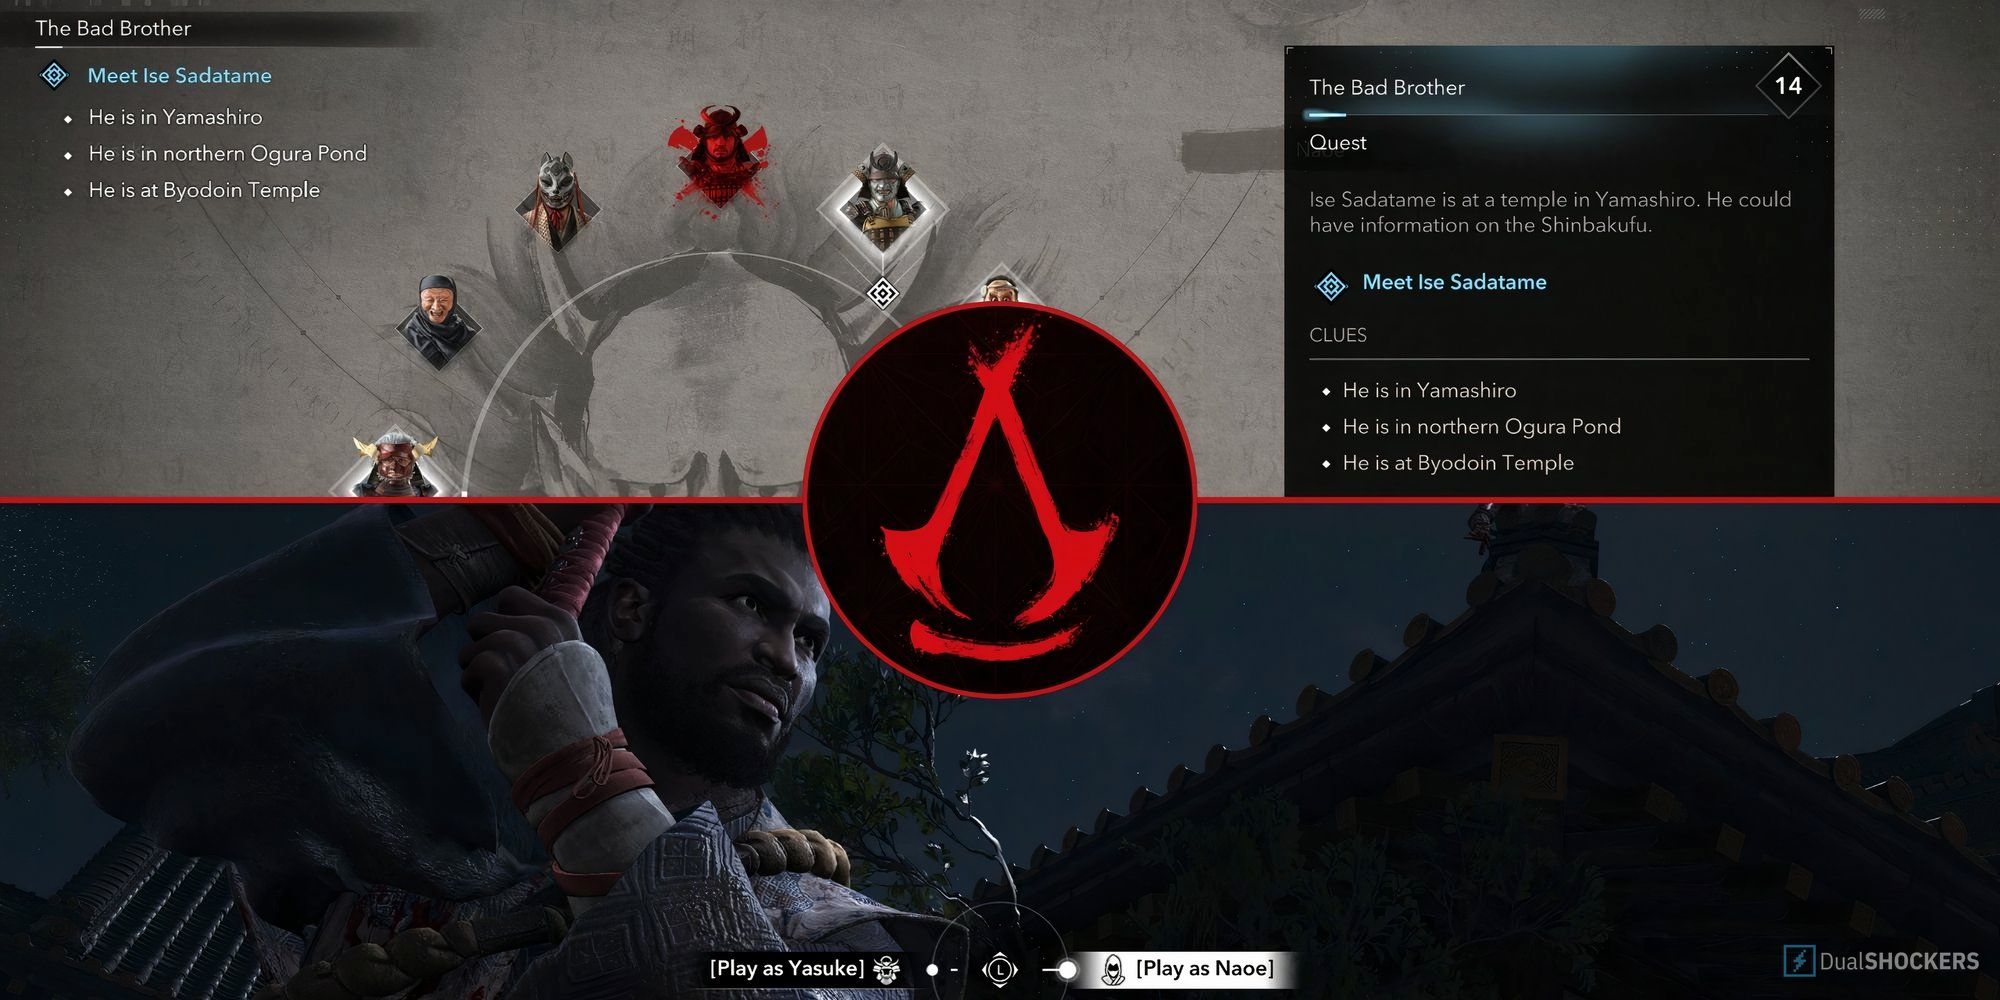
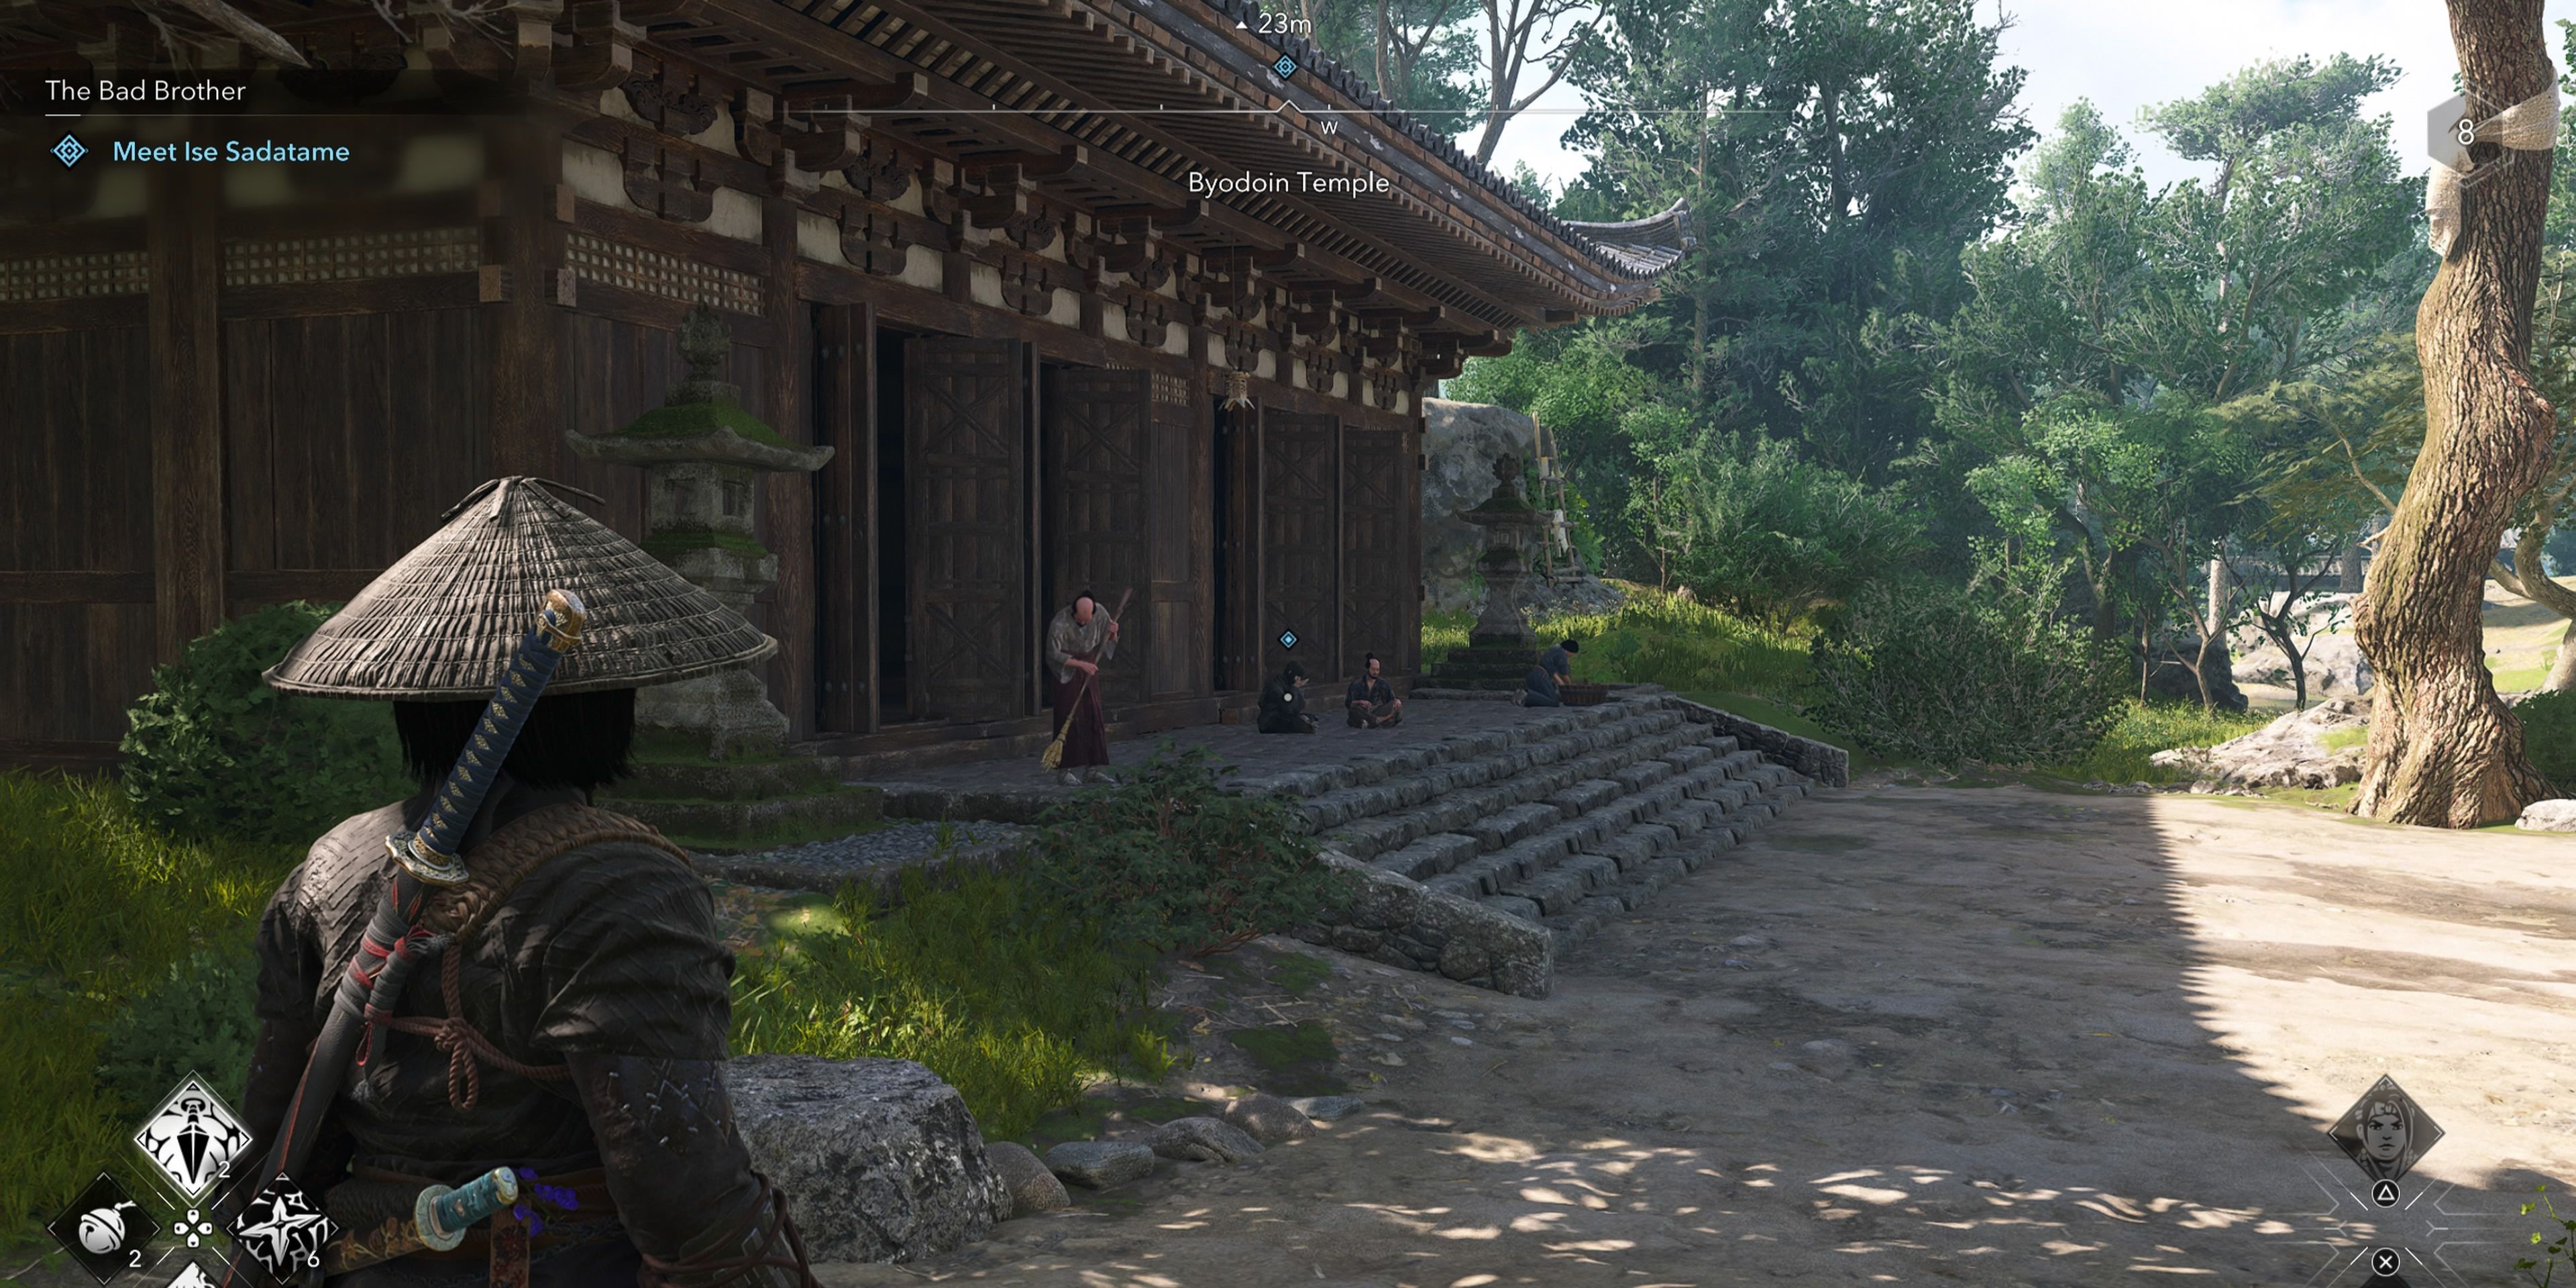
The Bad Brother
Initially, locate the Byodoin Temple, which is situated to the north of Ogura Pond. I’ve marked its position on the map for you to make it easier.
In no time at all, I uncover a surprising revelation: He’s none other than the brother of the very same Ise Sadaoki, the haughty fellow we crossed paths with during our adventures in The Belly of the Beast and Temple of the Horseman, alongside Lord Mitsuhide.
According to Sadatame, it was his own brother who poisoned him, seizing power over the Ise clan in the process, leaving him significantly weakened. Meanwhile, Sadaoki and his followers carry out any underhanded tasks assigned to them by Lord Mitsuhide.
It is revealed that he is the intended victim of this assassination. Our subsequent investigations following this prelude will focus on the Missing Letters and Inside Assistance.
Missing Missive
It appears that Sadaoki’s persuasive letters, intended for his brother, were secretly taken from Sadatame’s courier. Now, the task of retrieving these letters falls either on Naoe or Yasuke.
The messenger can be found situated to the southeast of Arashiyama, specifically on a bridge spanning a river. As you can see from the pictures provided, there’s no need to dispatch your scouts to find him.
It turns out that a mischievous creature from folklore made off with those letters in the woodland just over yonder.
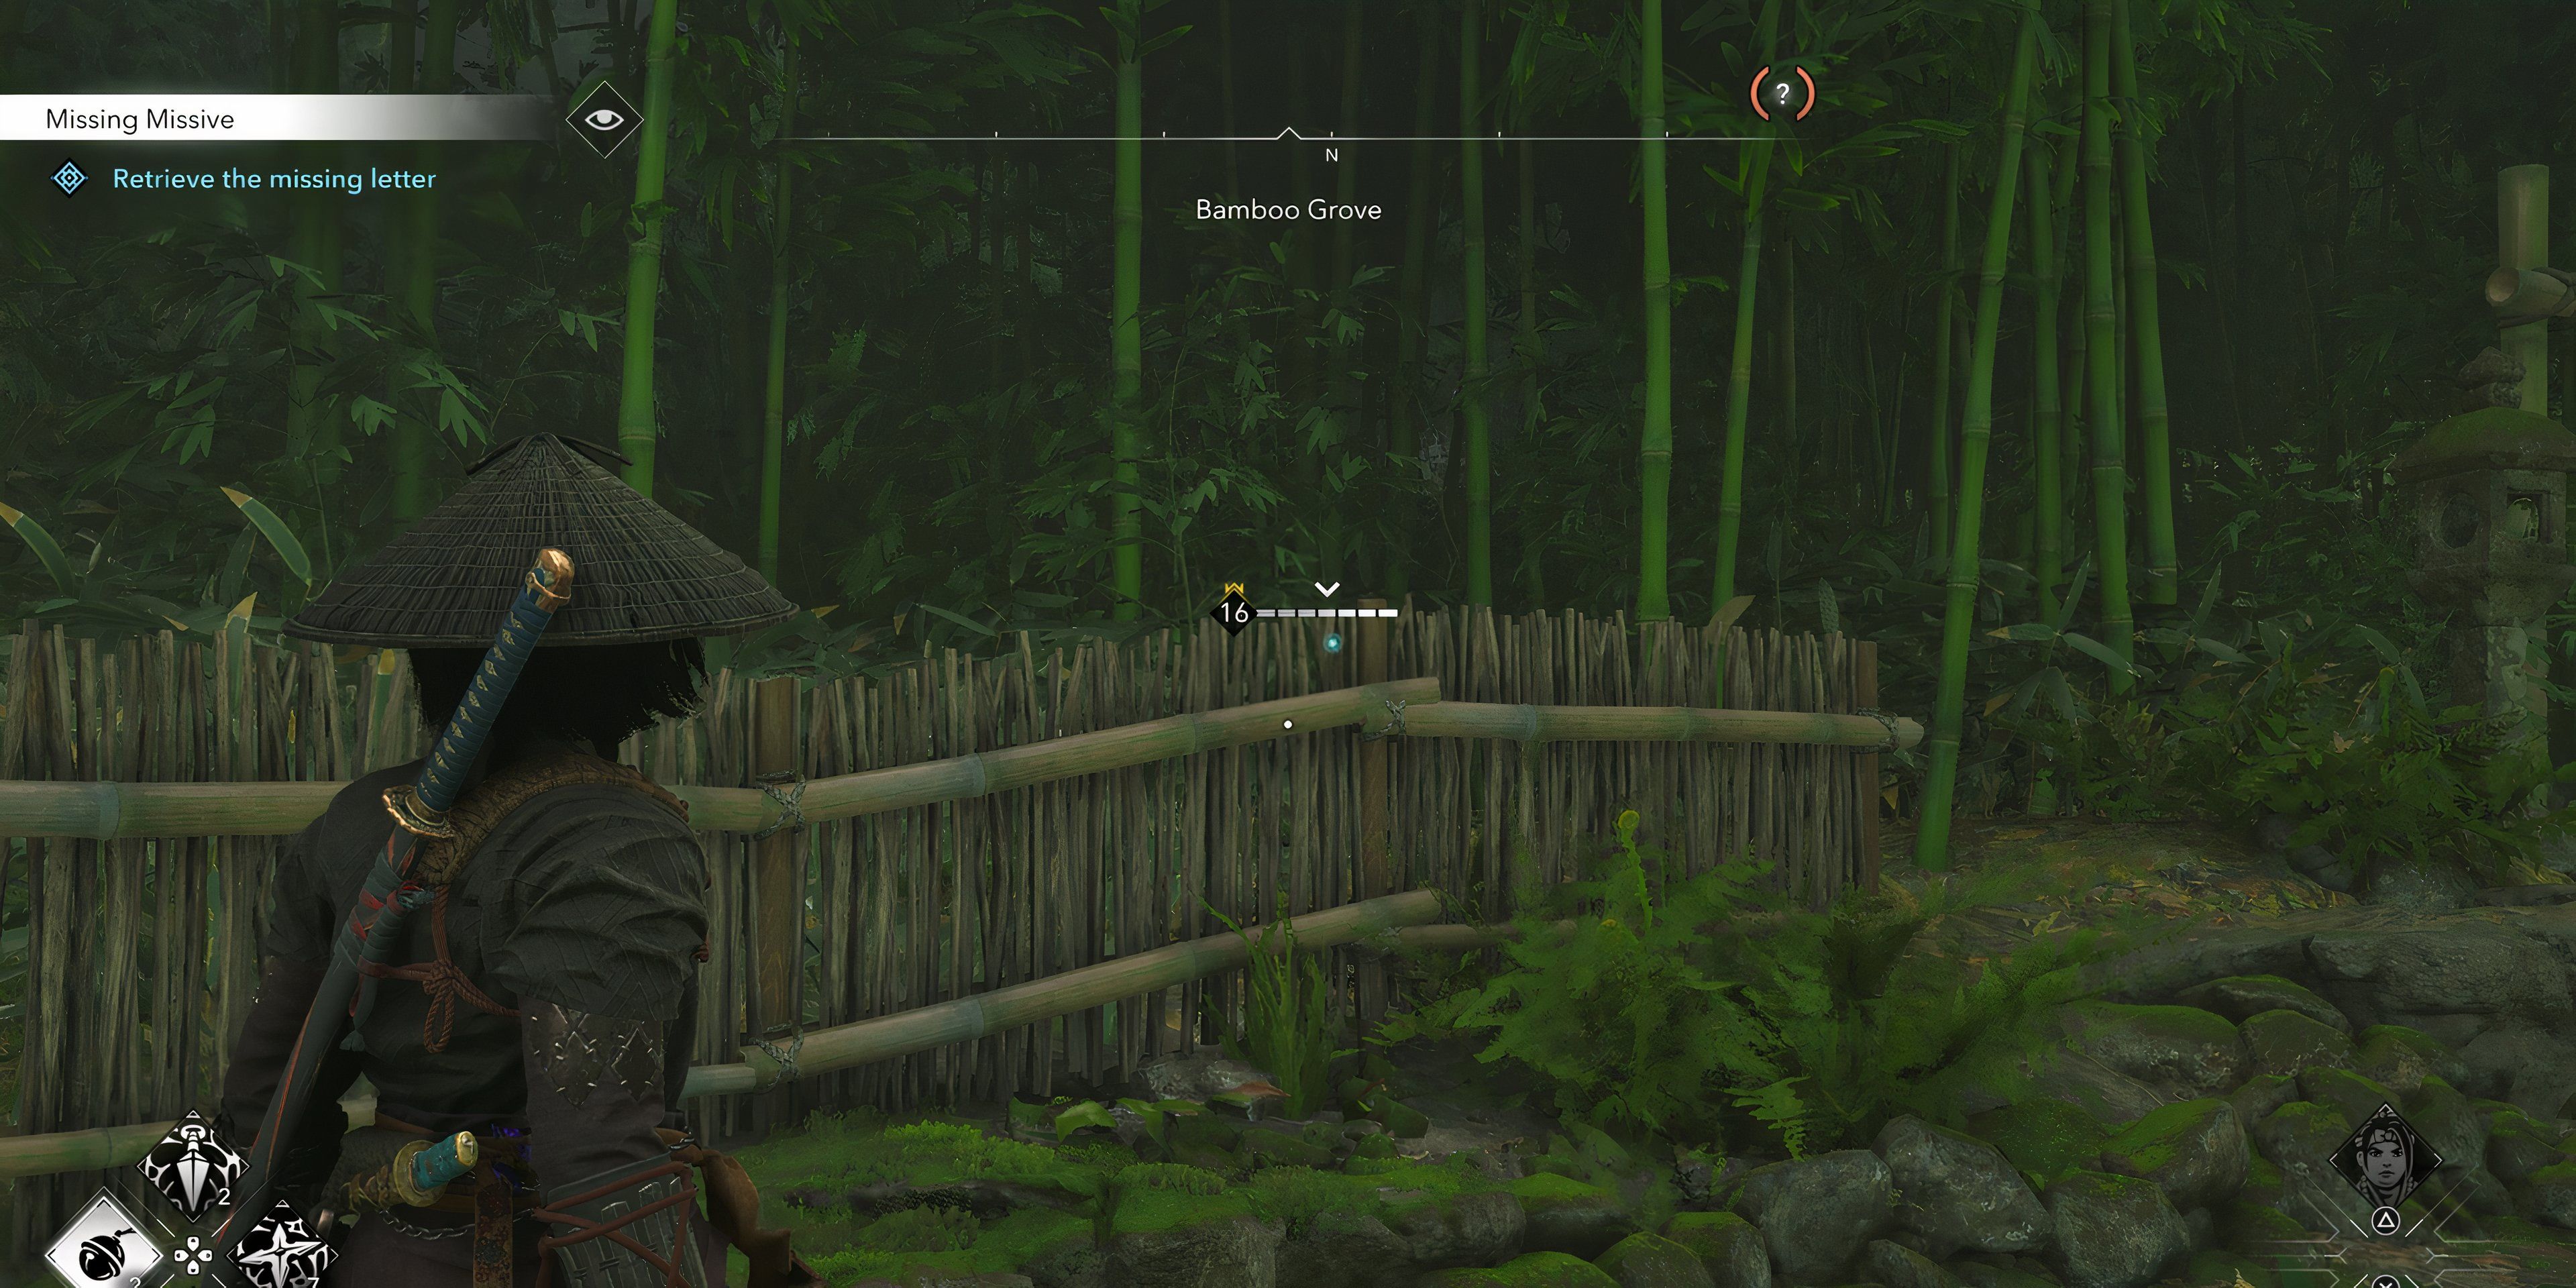
Follow the path deeper into the Bamboo Forest, located beyond Tenryuji Temple, as indicated on your map. Soon enough, you’ll find yourself in a position where you can utilize your Observation skill.
It turns out that the character we call “Oni” is actually a suspected thief and one of the possible romantic options for you within the game, named Gennojo.

Don’t land a backstab assassination here. Let the dialogue between Naoe and Gennojo play out.
In a short skirmish, challenge Gennojo first. He will eventually surrender the letter to you and disappear mysteriously, using his flash bombs as an escape. However, don’t be too quick to open it; you’ll get a chance to uncover more about him later, once you complete your ongoing assassination missions.
Return to the individual standing by the Bamboo Grove, as he patiently waits, to inform him that I have found the letters.
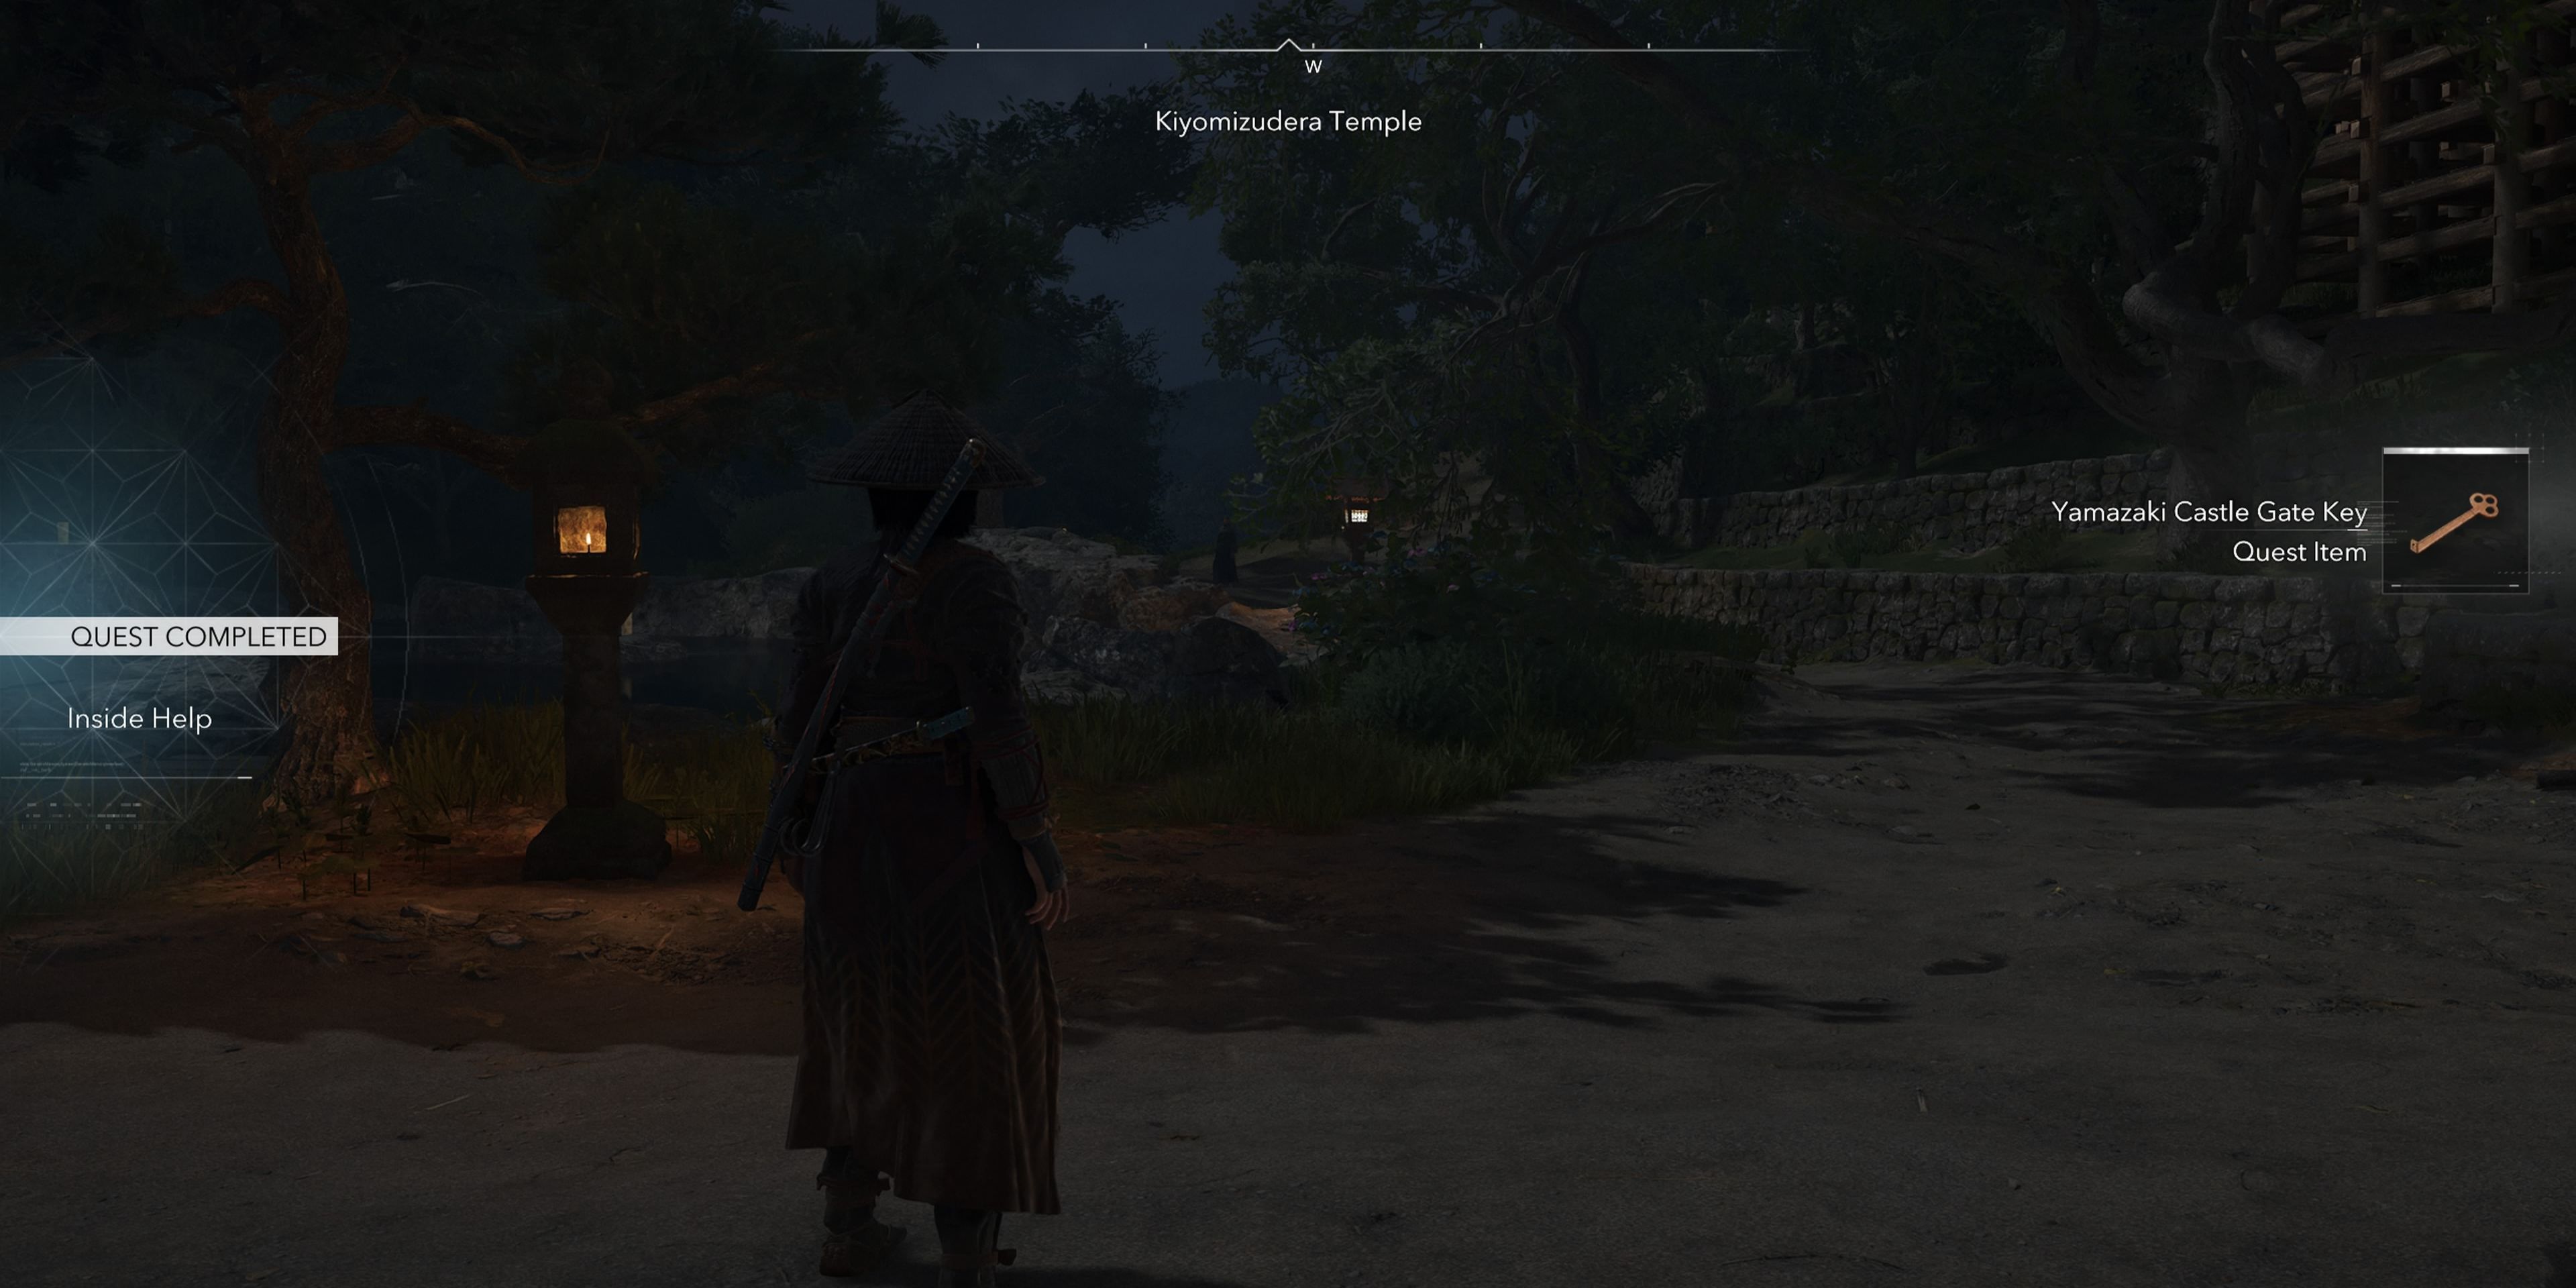
Inside Help
To secure an upper hand for infiltrating Yamazaki Castle, Sadatame has a confidant within the castle guards, Ujimasa, who is secretly residing at Kiyomizudera Temple.
Above, you’ll find the temple marked, nestled beneath the Hills of Gathering. Once we’ve quenched our thirst with the sacred waters and conversed with Ujimasa, it will be crucial for us to earn his confidence so he can grant us access to his hidden advantage.
The main point is: You need to eliminate the entire group known as the Twisted Tree, a band of rebellious samurai causing chaos in Kyoto. Each one has their individual locations indicated on your mission map, with separate hints for finding them.
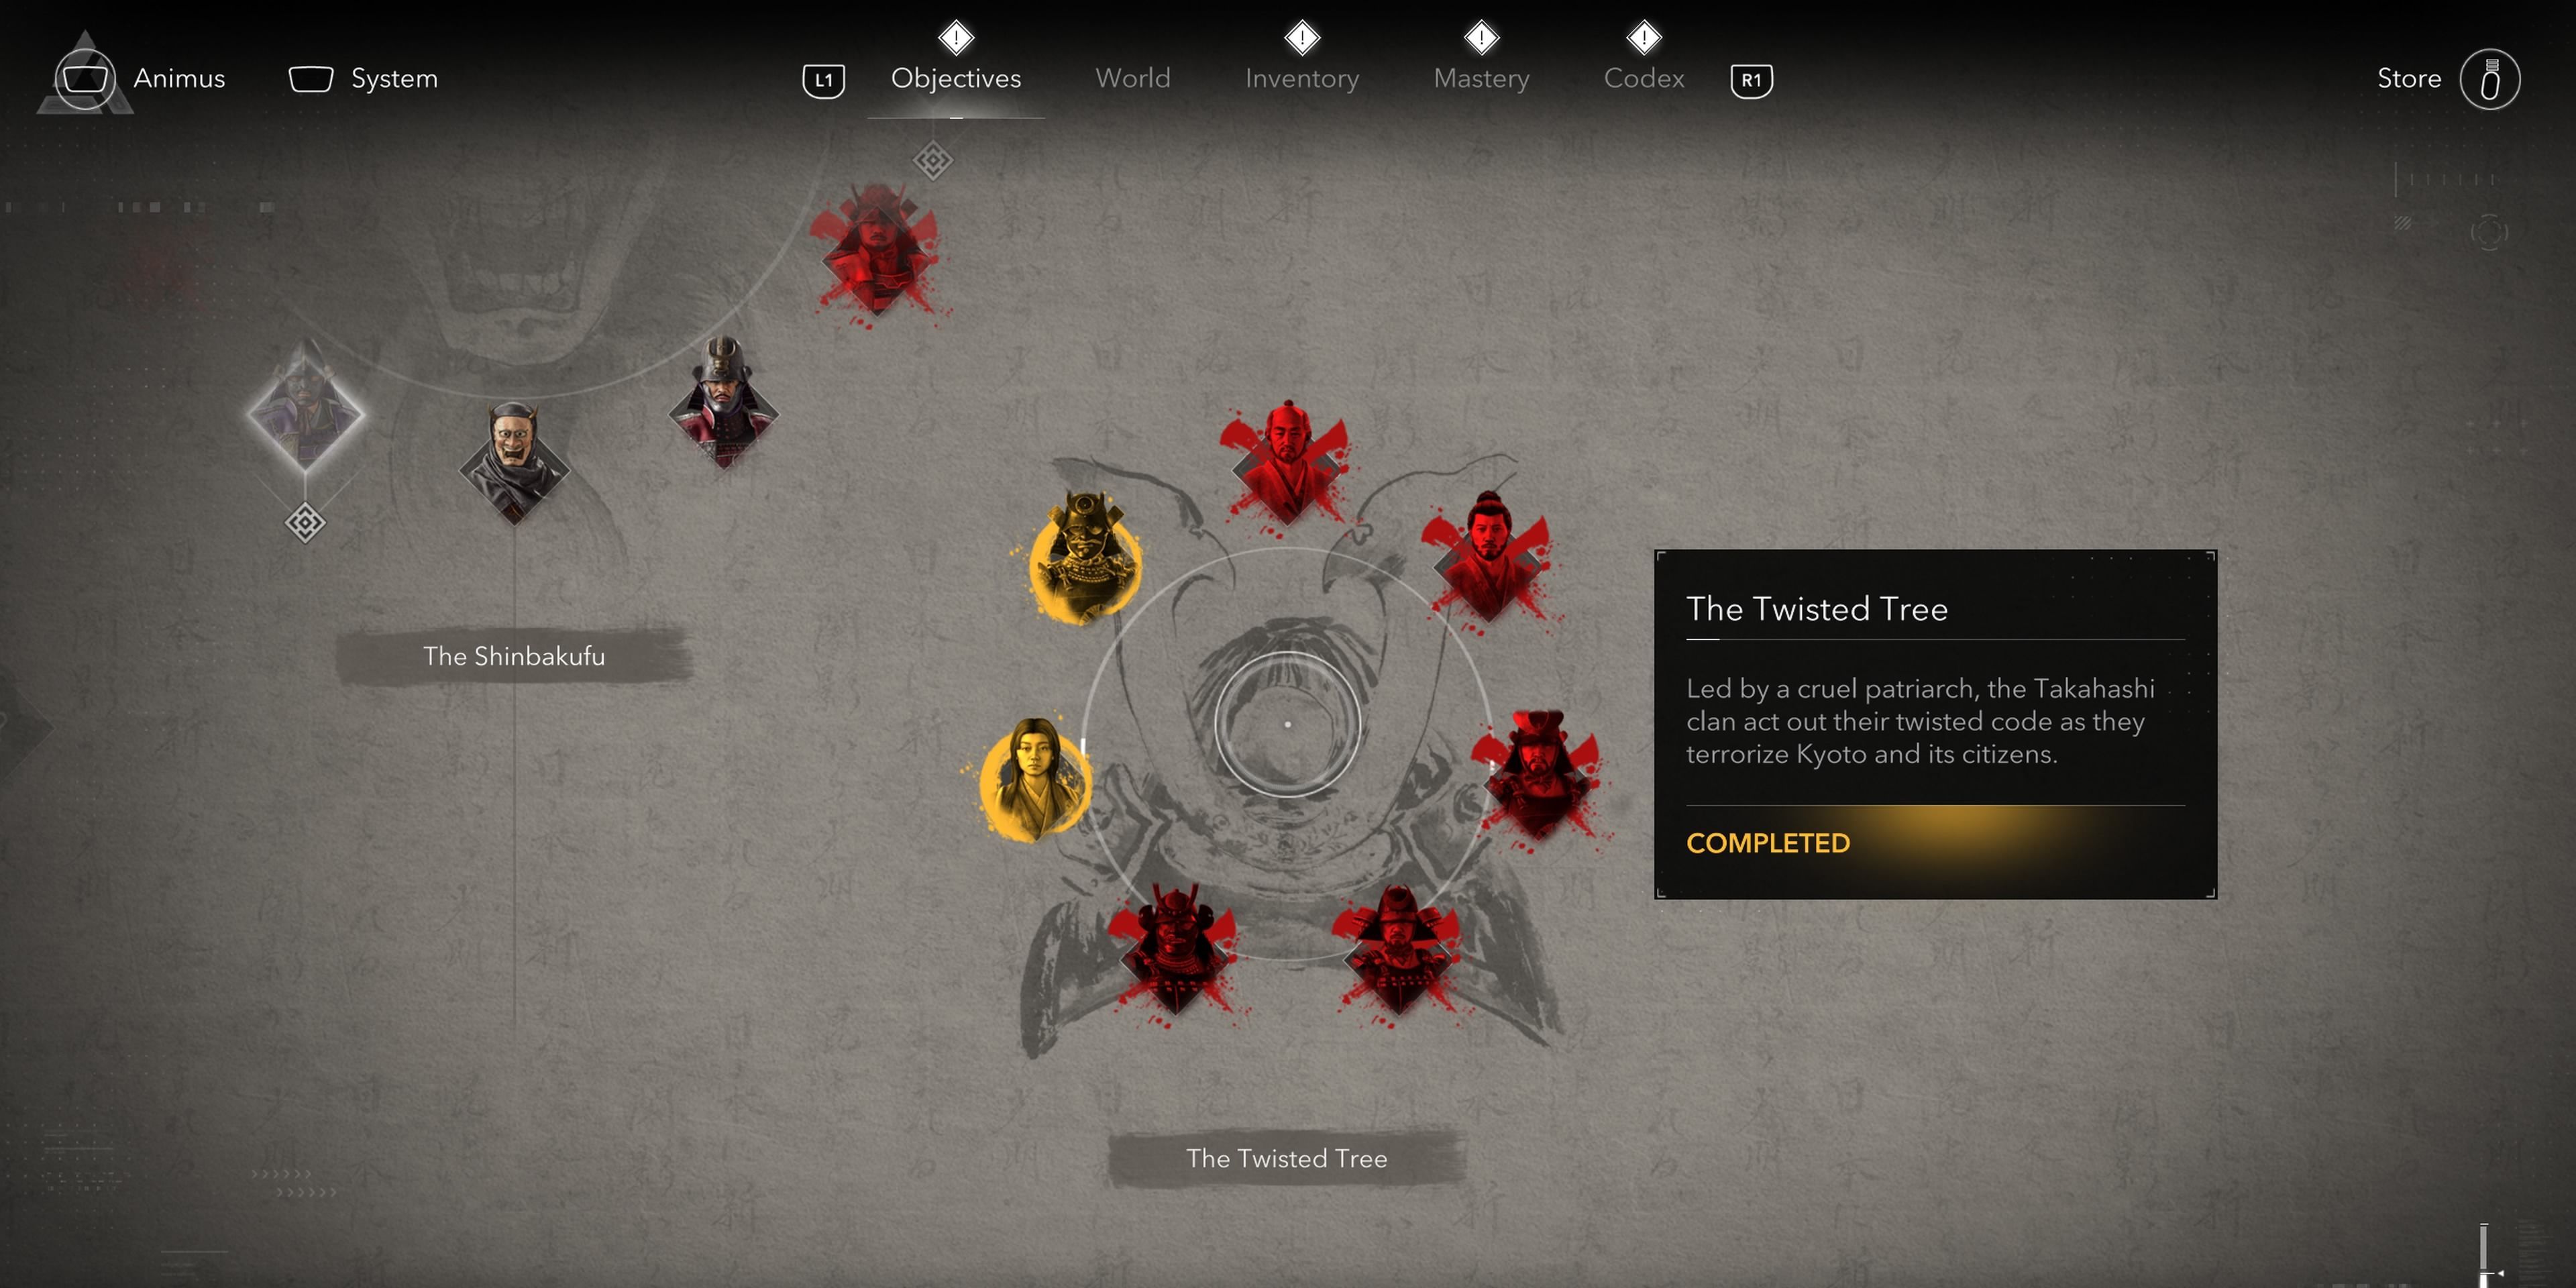
If you’ve found yourself completing all the extra tasks, just like I do, then it’s quite probable that you’ve finished the majority of them already, and you’ll merely need to discover a few more.
As a fan, I’d suggest you have the option to bypass a few challenges when encountering these objectives, thus skipping the battle and still gaining their rewards.
If you haven’t, I would really recommend taking on every single one of these, since many of them are typical tough opponents that can be encountered throughout the area. In fact, a few of them offer quite significant rewards.
Although it might seem like more work initially, you’ll have to tackle each of these objectives to advance in the quest. Fortunately, most of these samurais aren’t particularly hard to locate or defeat.
After vanquishing all the Twisted Tree samurai, make your way back to Lord Ujimasa, and he will reward you with the Yamazaki Castle Gate Key, concluding this side mission.
The Rising Tide
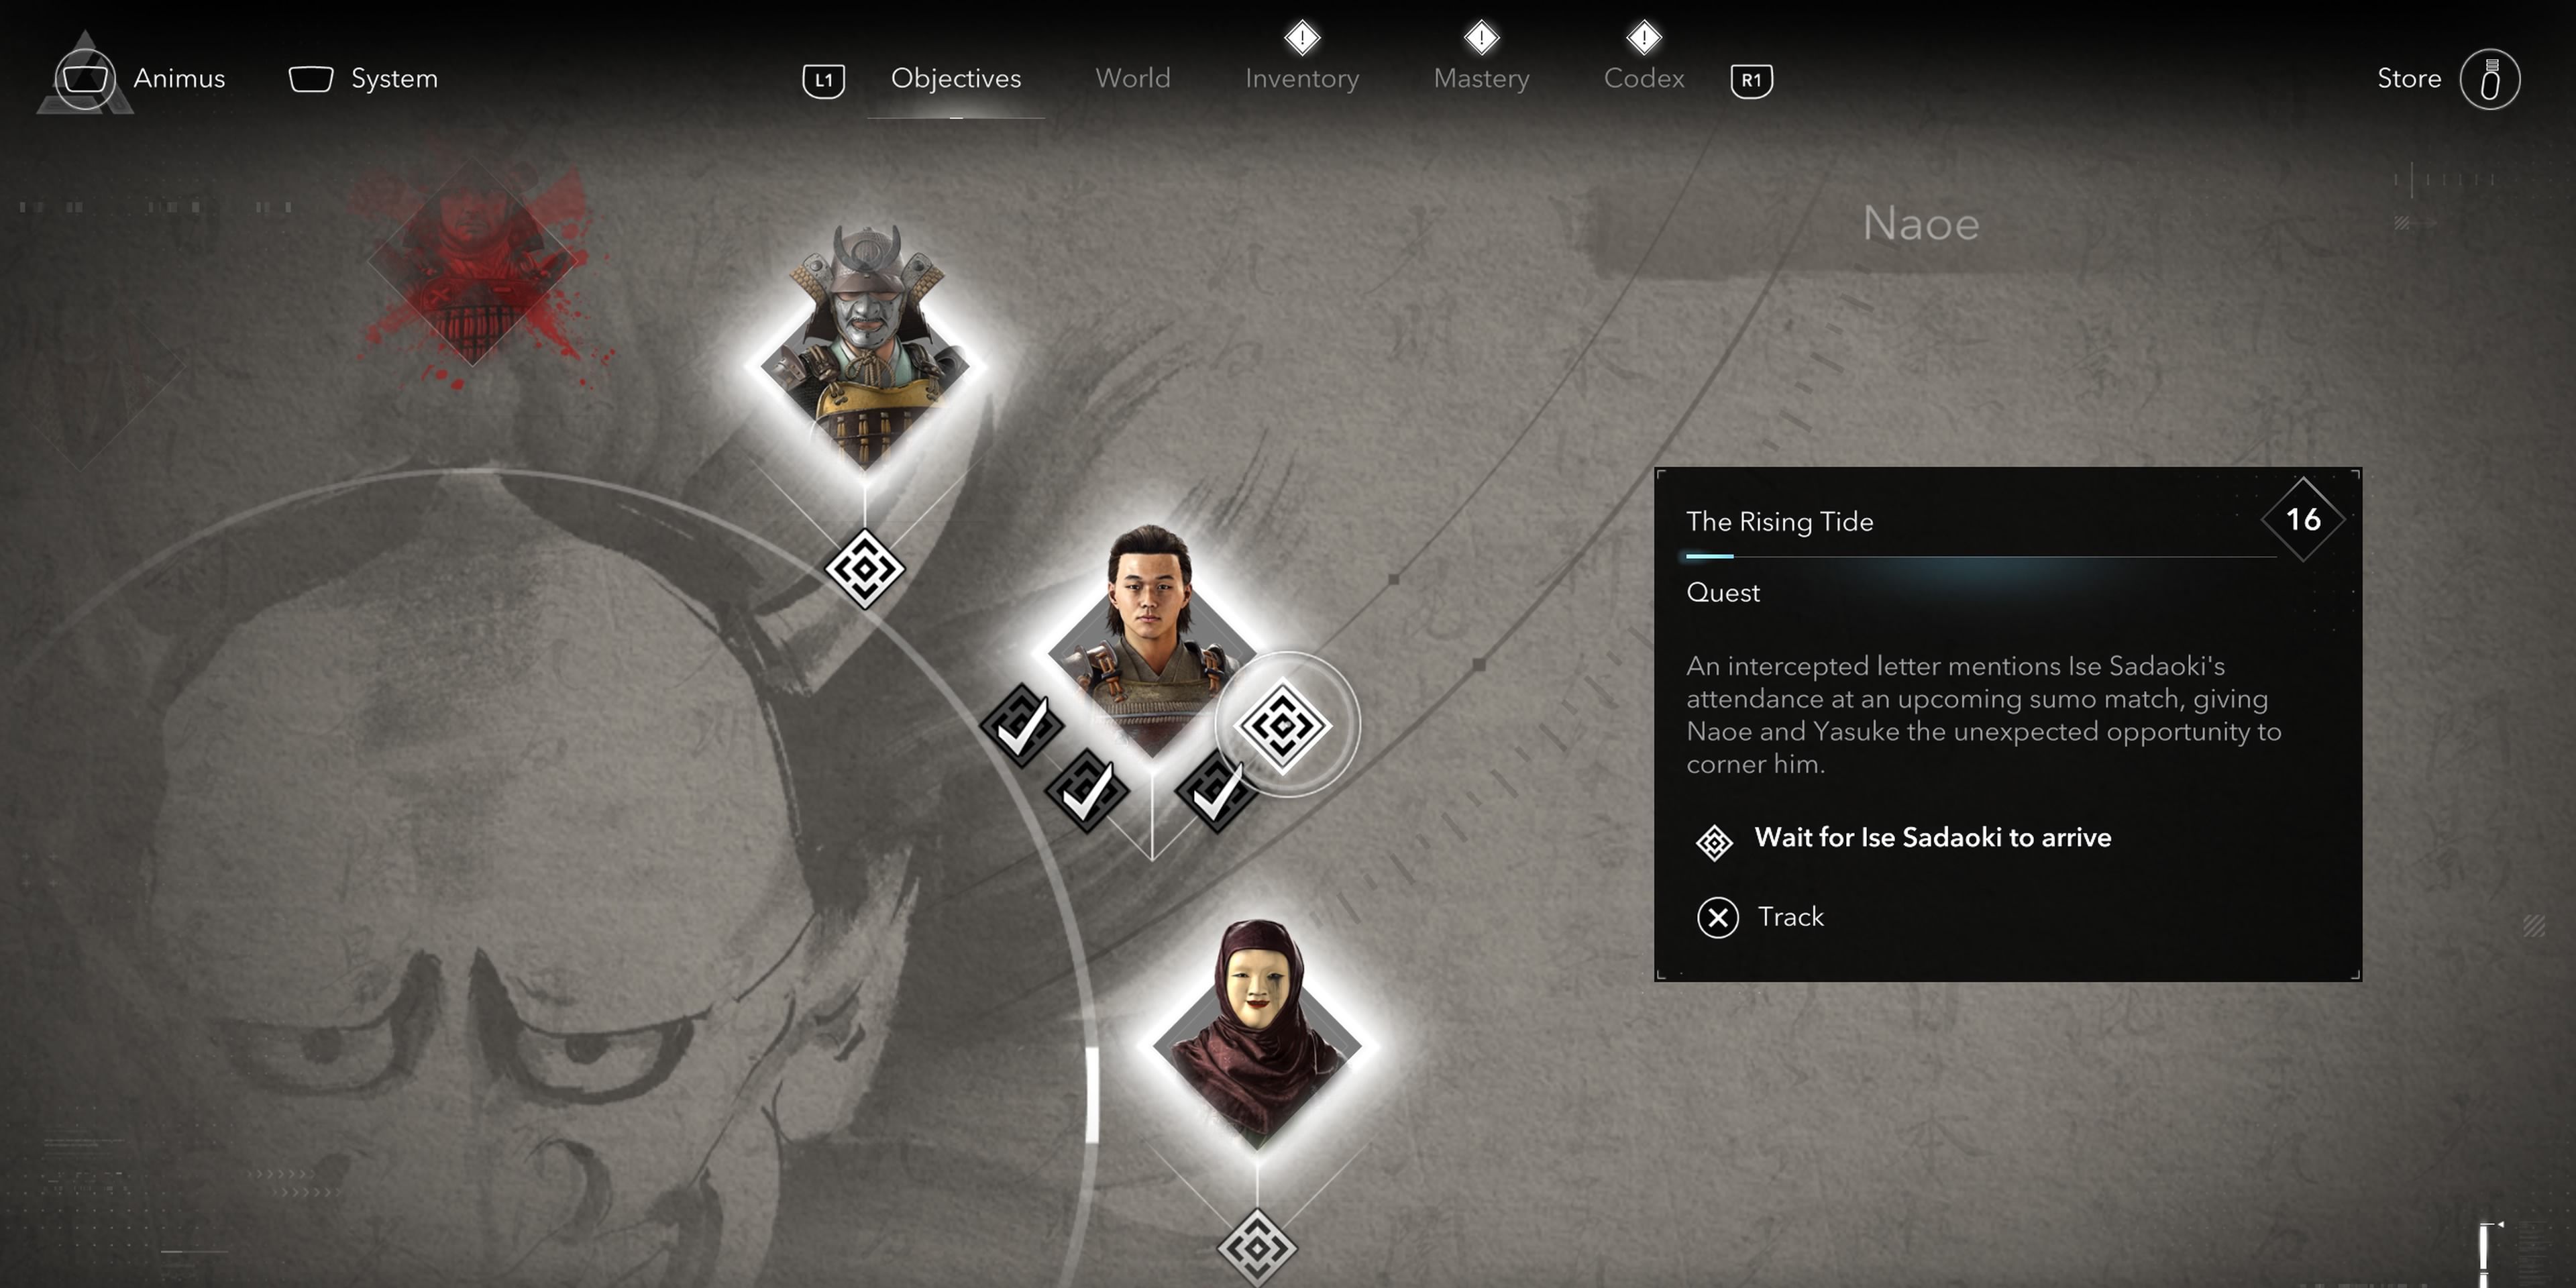
Among the correspondence, it’s indicated that Sadaoki might go to a Sumo wrestling event. As a result, Naoe and Yasuke decide to go to the same location with the aim of potentially encountering him.
In this area, there aren’t any specific game goals set; instead, you should navigate towards the spot indicated on your map close to Ogura Pond for a brief cutscene.
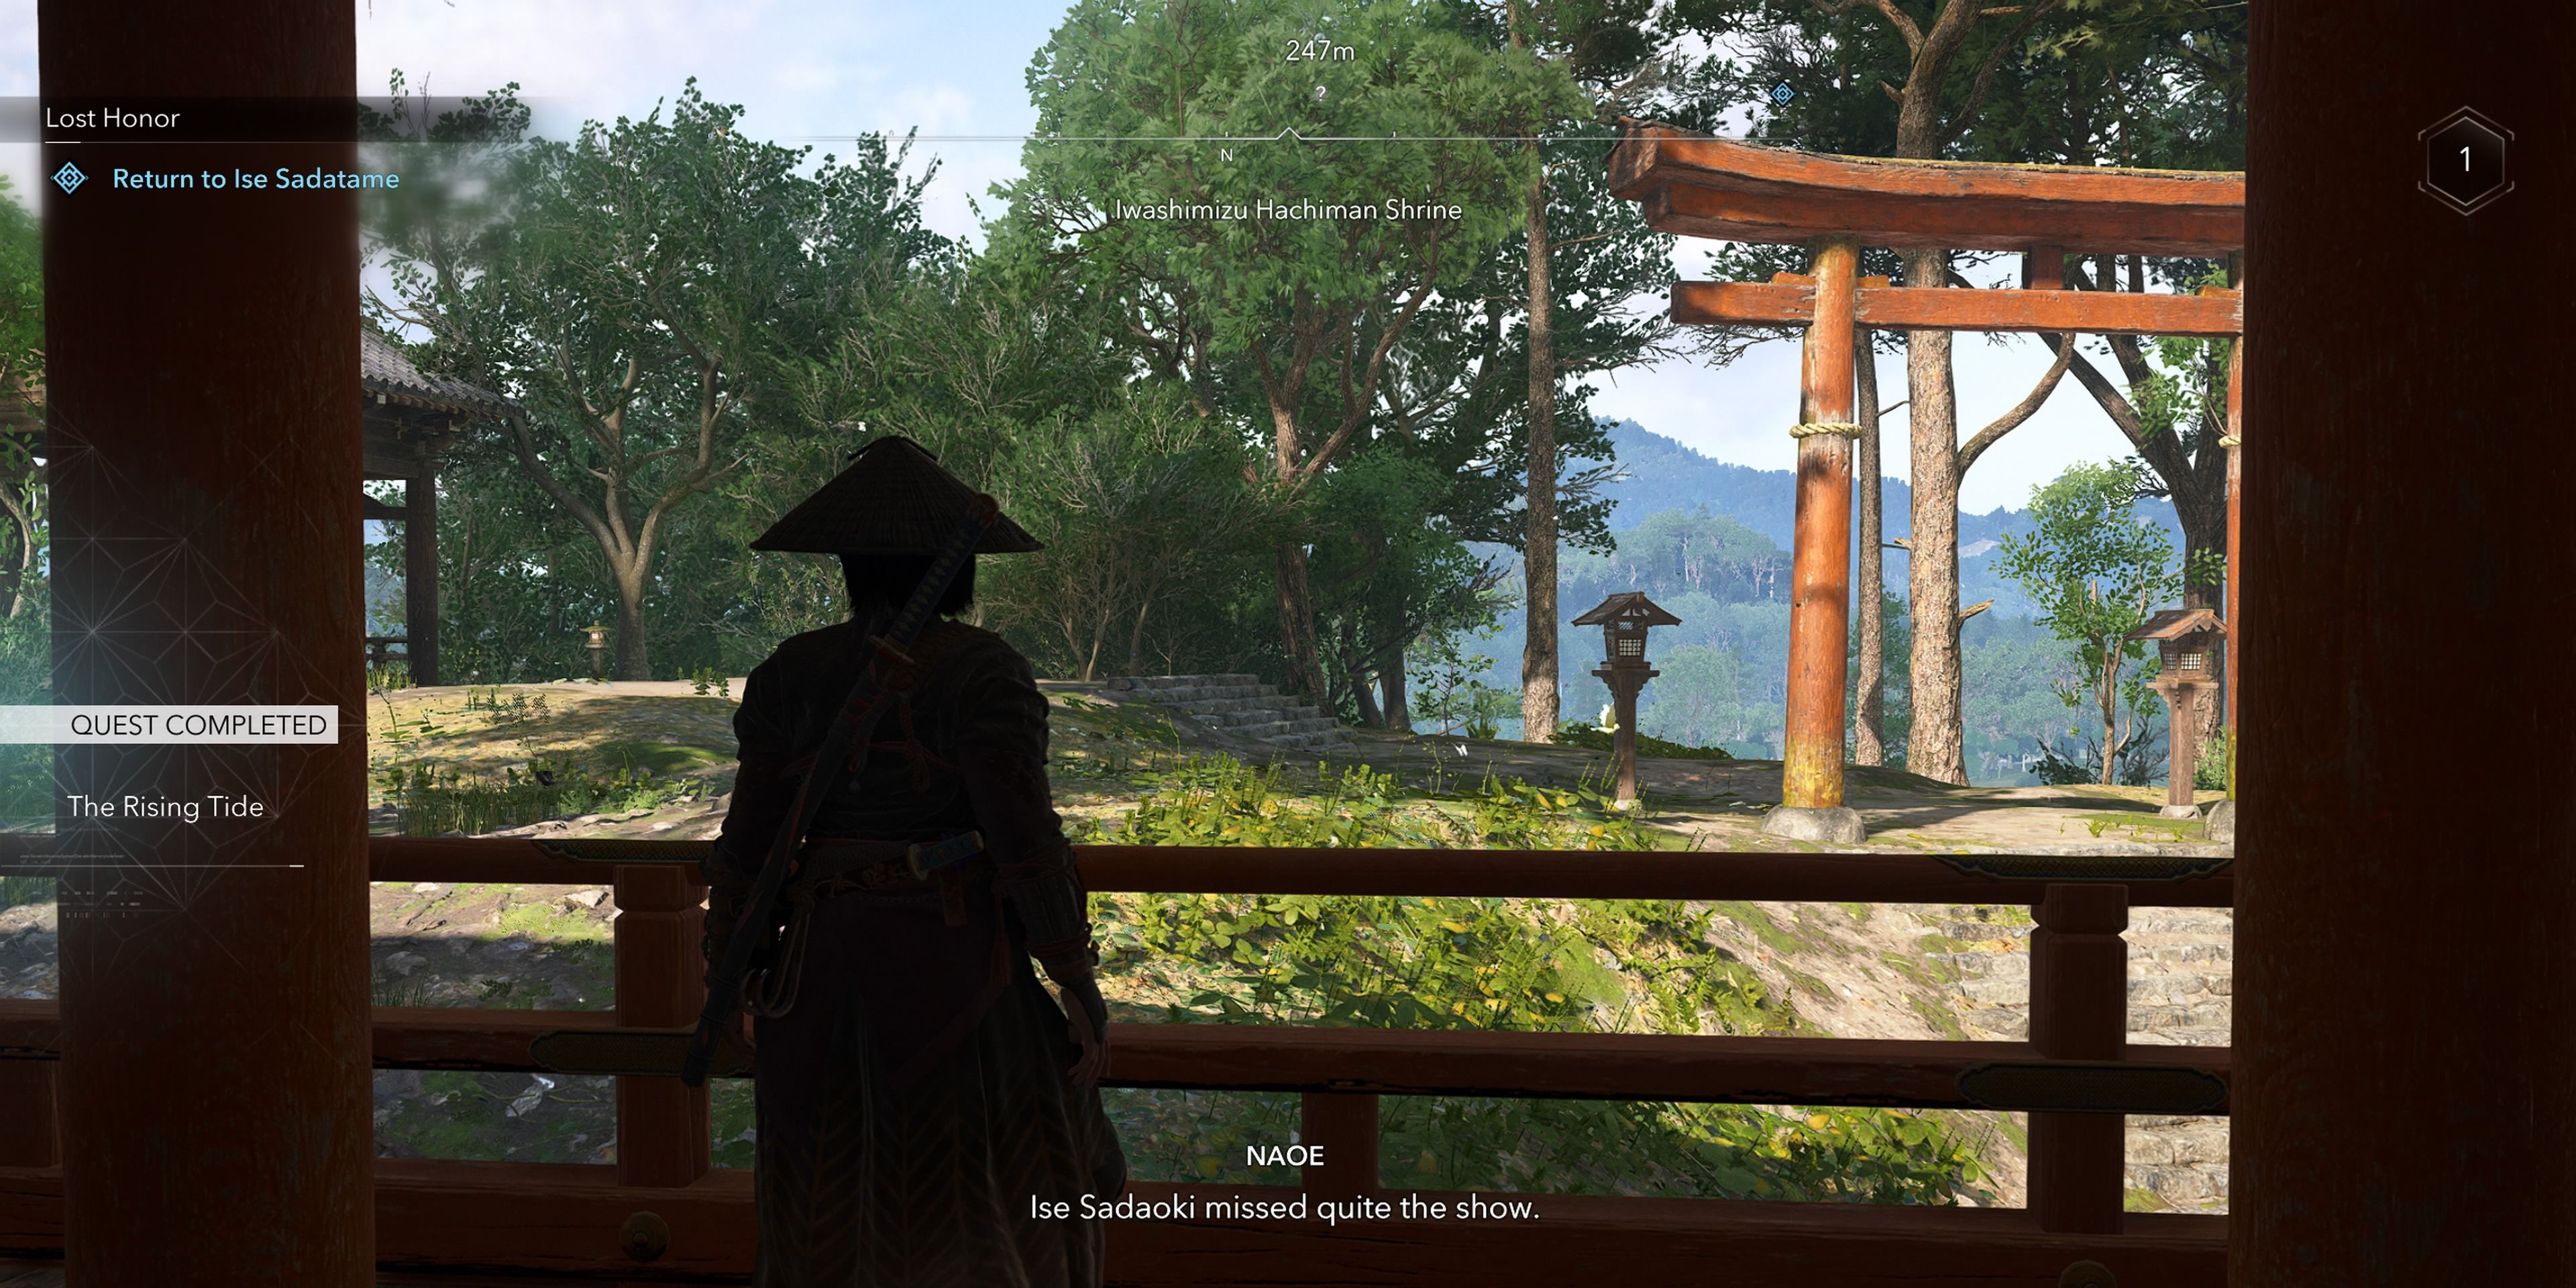
In his absence, this instance turns out to be primarily about deepening the relationship between Yasuke and Naoe, rather than anything else. Remarkably, they even crossed paths with the former shogun, Ashikaga Yoshiaki, in an unanticipated meeting.
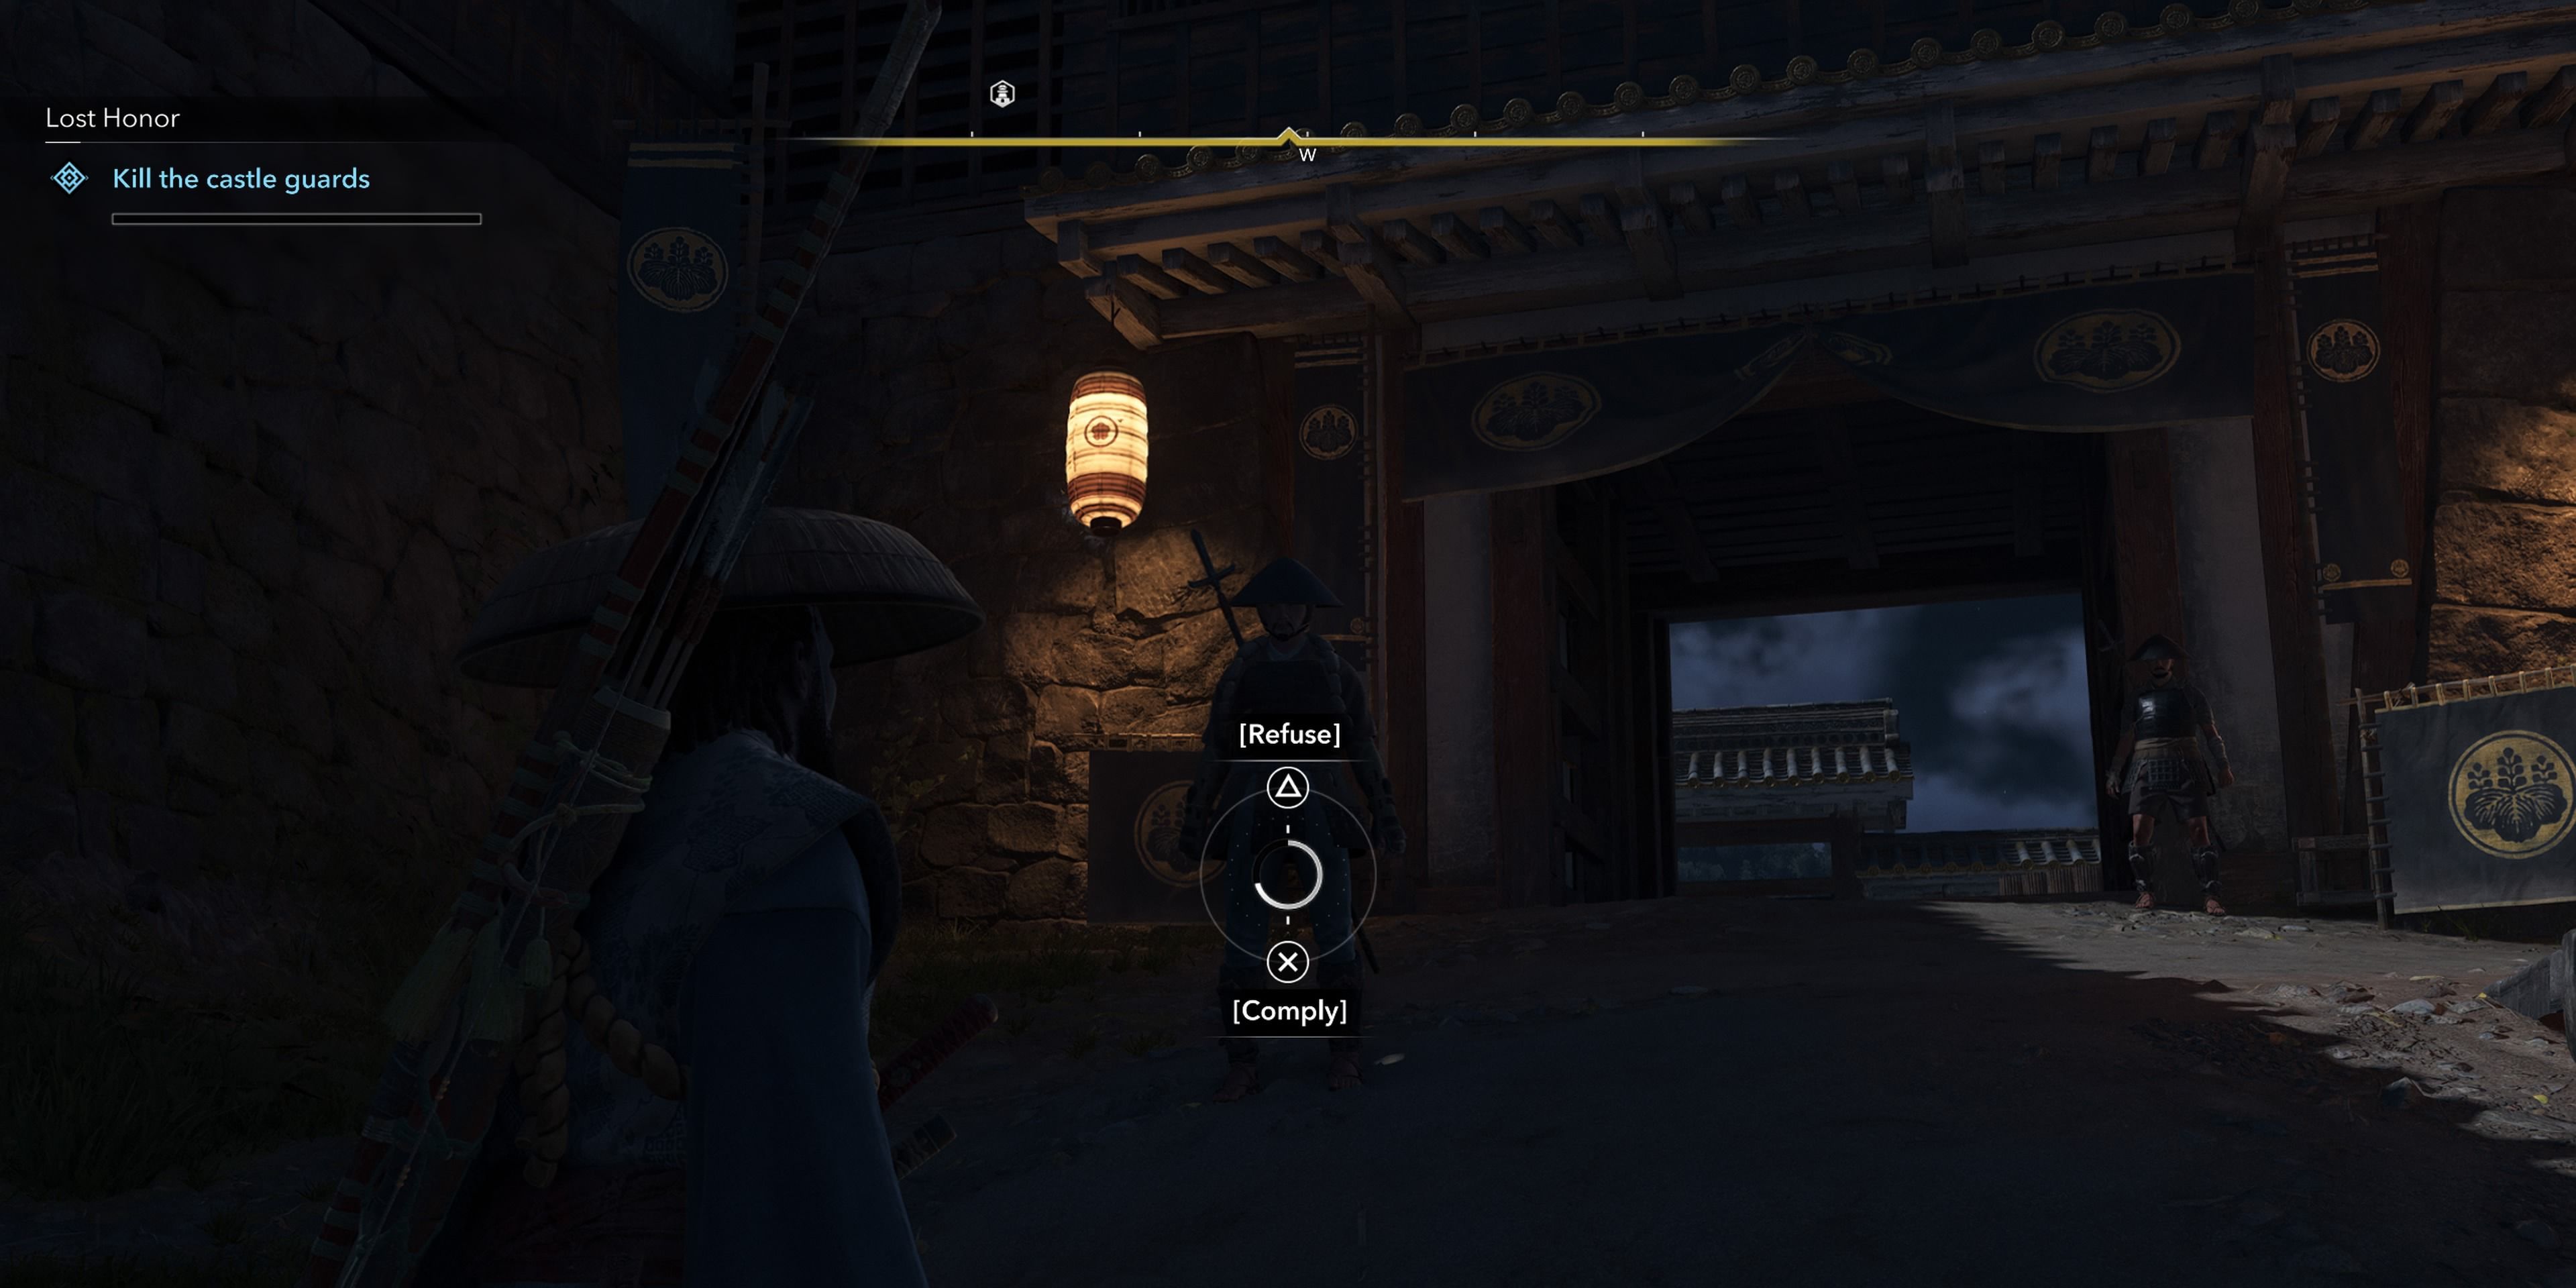
Lost Honor
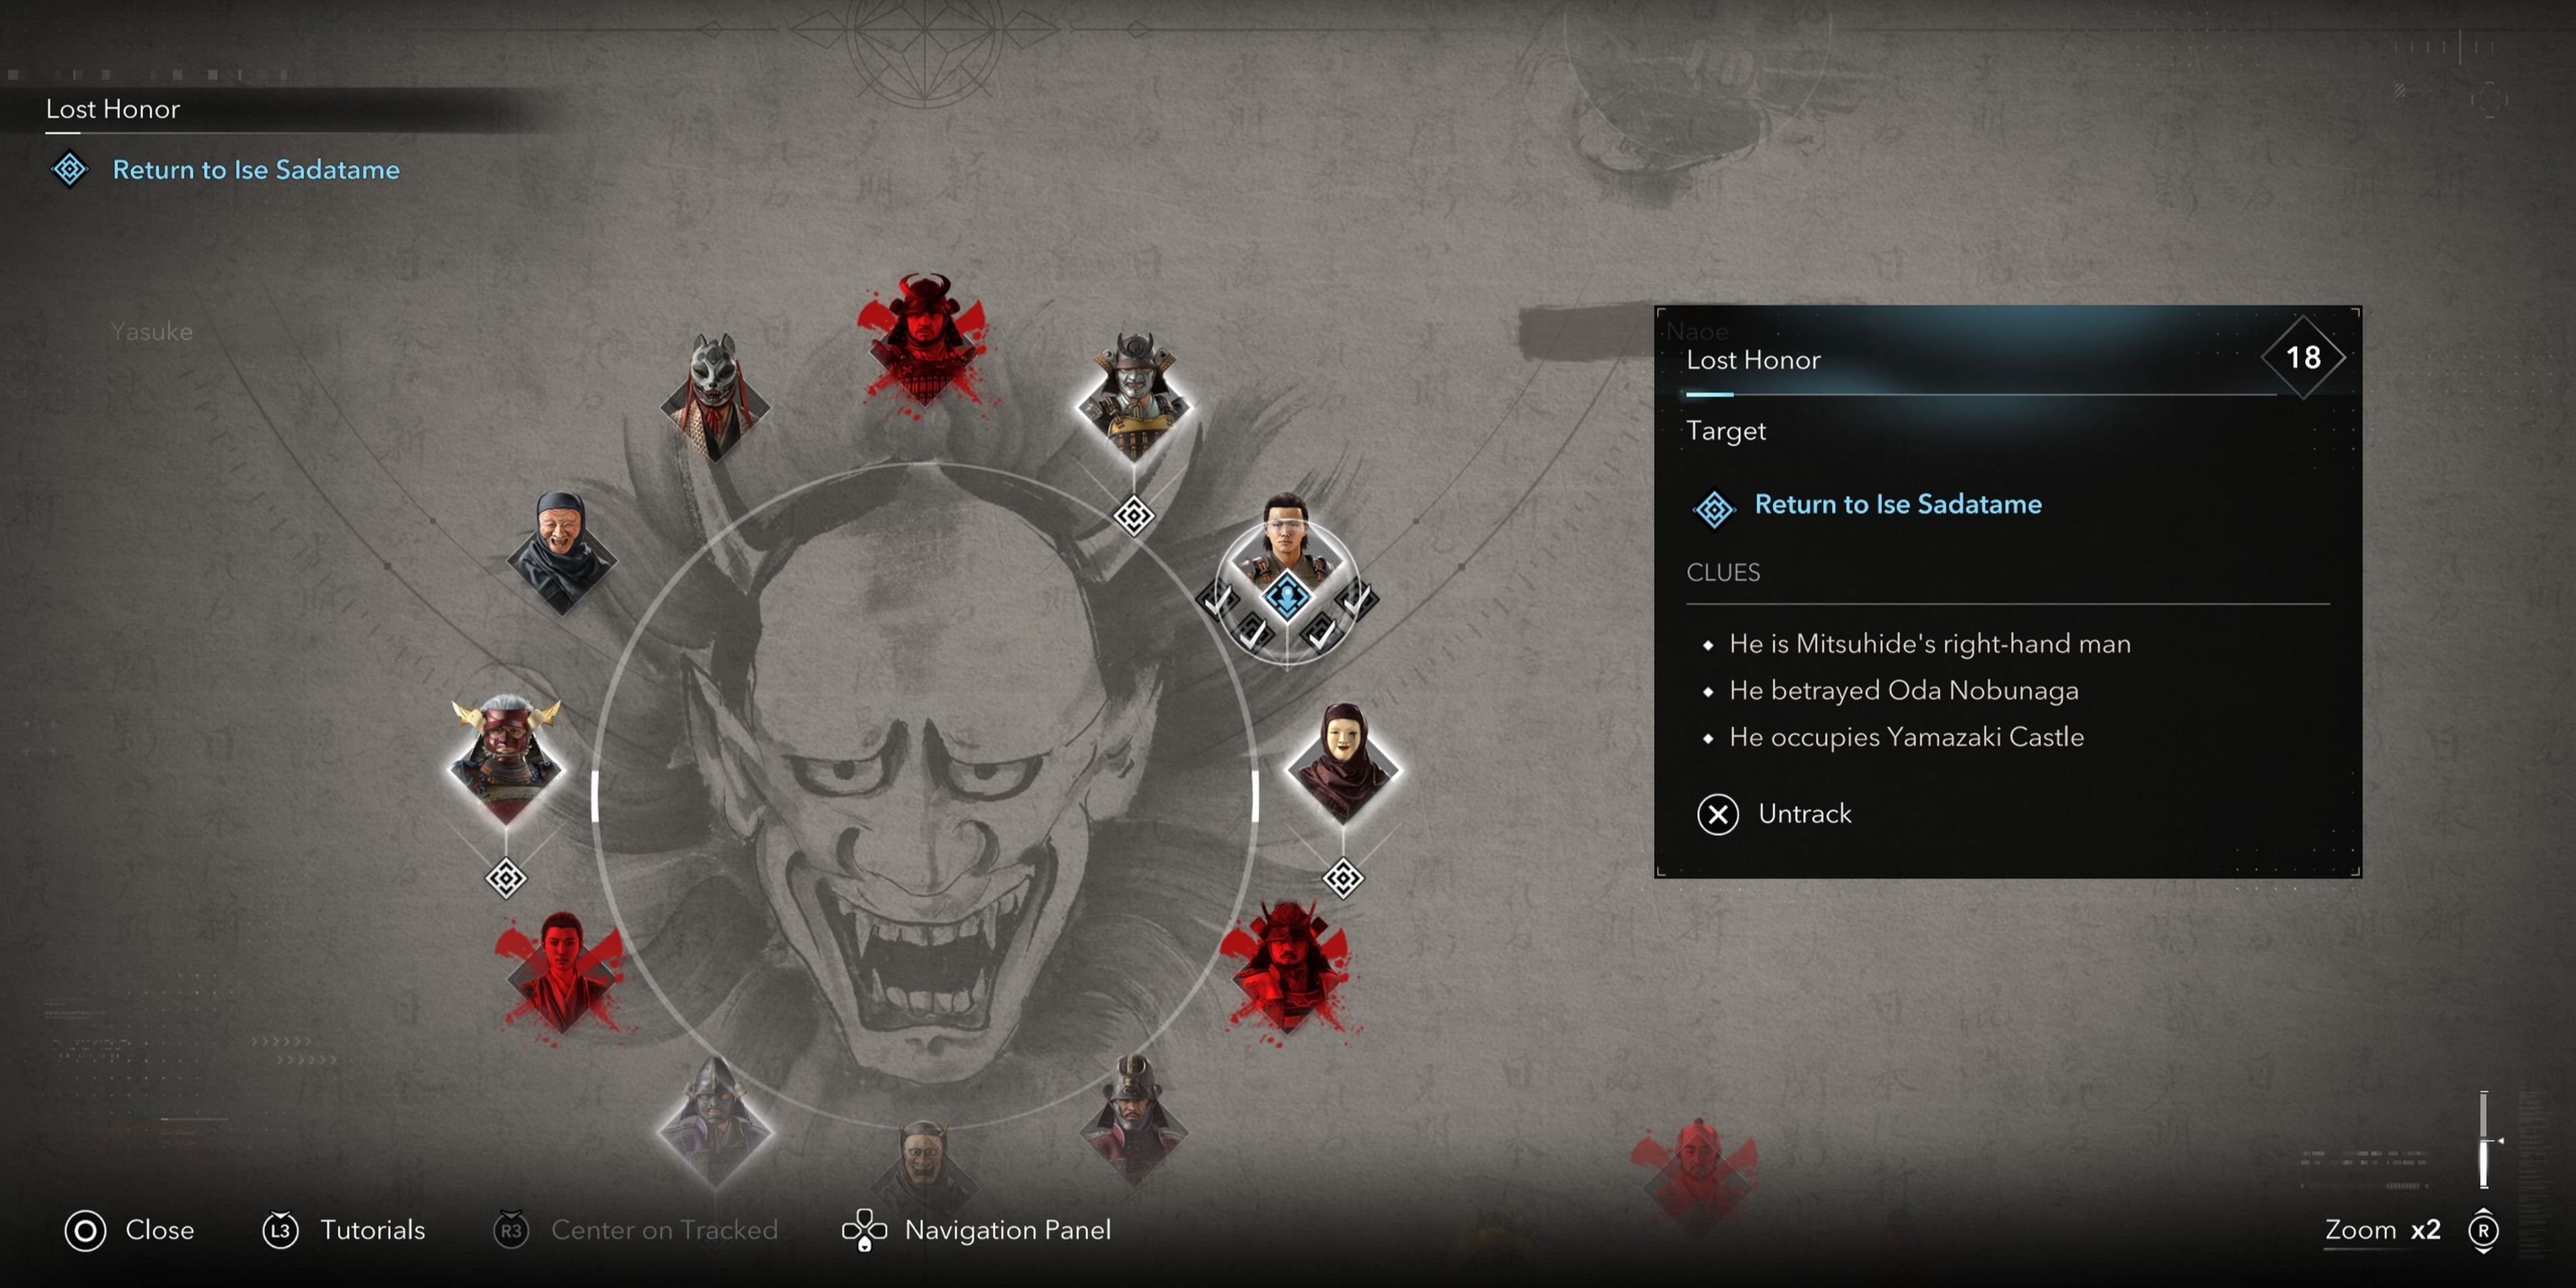
It’s high time to move against Sadaoki. Make sure to check and prepare your equipment, particularly that of Yasuke, as he will be our chosen character for the climactic battle scenes in this quest.
The strategy is to establish a diversion in the outer courtyard so that Yasuke takes out the castle guards, all while Naoe sneaks in, unlocks, and opens the gate to the inner courtyard.
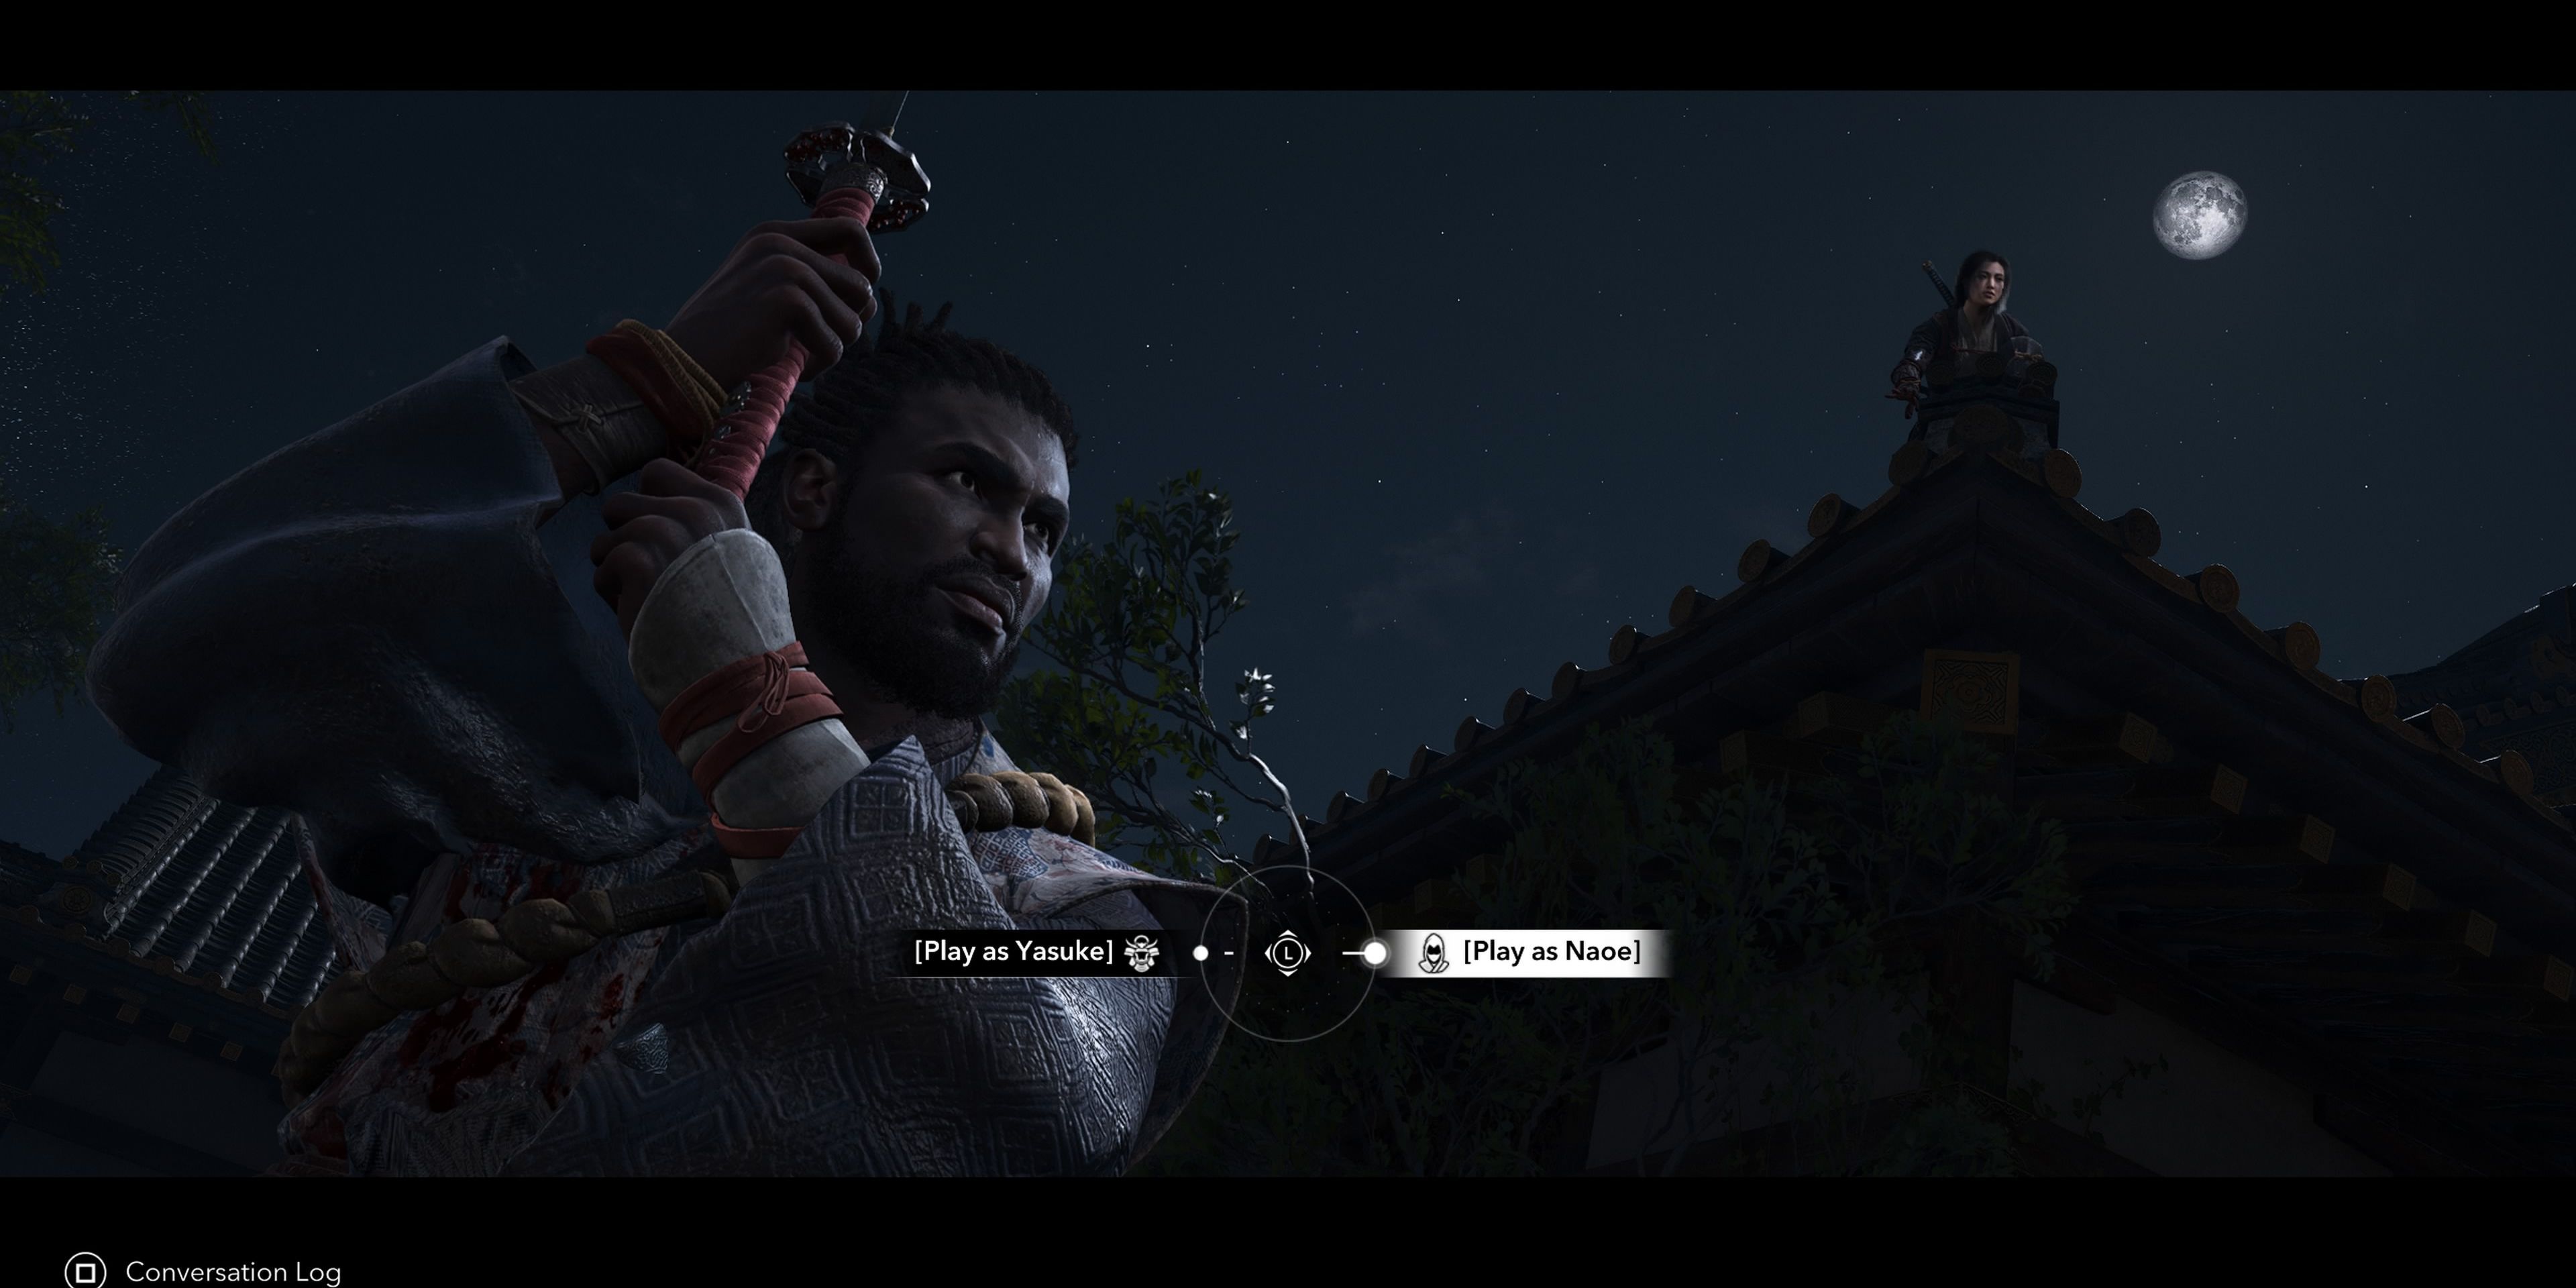
In this game, it alternates between two characters, and I’ve outlined their individual viewpoints as well as their primary goals in the subsequent sections.
The Outer Courtyard As Yasuke
With Yasuke, your primary goal is to accumulate kills of enemy guards. To do this, you should continually advance as new guards will only appear once you progress further.
At the start of this area, you’ll find two guards. Just before a fragile wooden barrier, there’s another guard. After dealing with them, you’ll encounter nothing but enemies that need to be defeated one by one.
I highly recommend acquiring both the Power Dash and Payback abilities for Yasuke’s Long Katana. These skills will greatly assist you in swiftly defeating groups of enemies, particularly tough brutes who can prove challenging during combat.
Additionally, you can immobilize opponents using the Link Attack ability from the Samurai skillset. This skill enables you to seamlessly transition between weapons during combat sequences, maintaining the combo uninterrupted. Notably, the Nagitana makes an excellent secondary weapon thanks to its extended reach.
The Inner Courtyard As Naoe
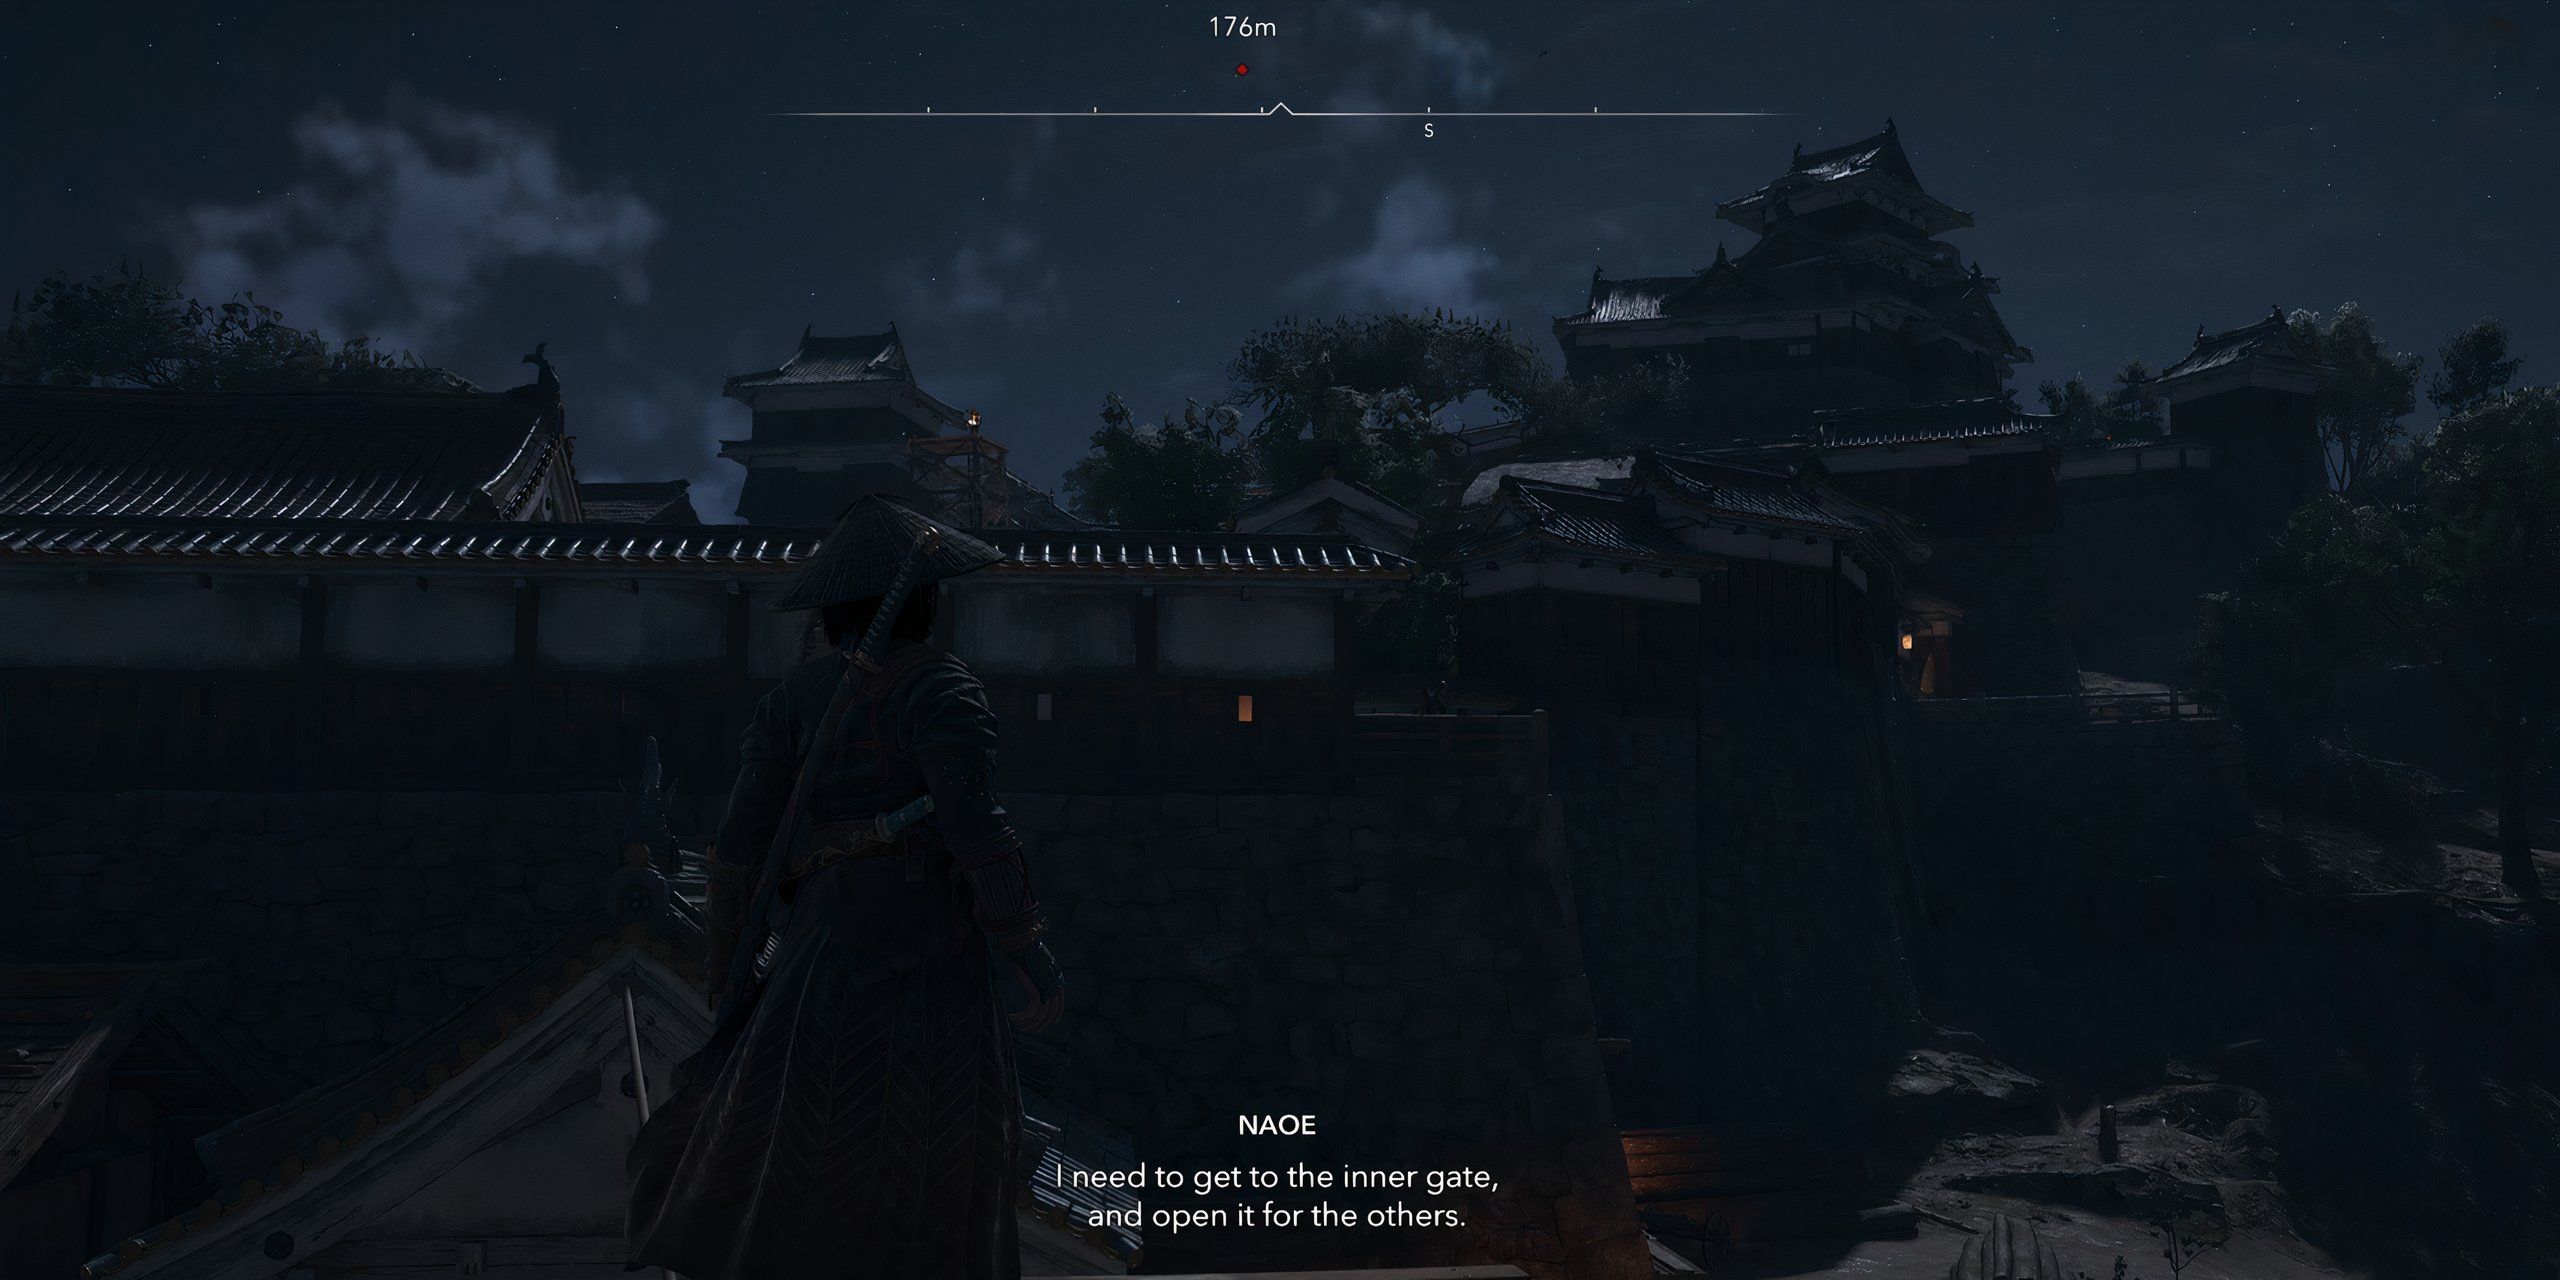
After Yasuke has eliminated all the guards, control of the game will be handed over to Naoe, allowing him to stealthily open the gate to the inner courtyard.
The gate is identified on your Heads-Up Display (HUD), allowing you flexibility in your advancement. However, I recommend adopting a stealth approach whenever feasible throughout your journey.
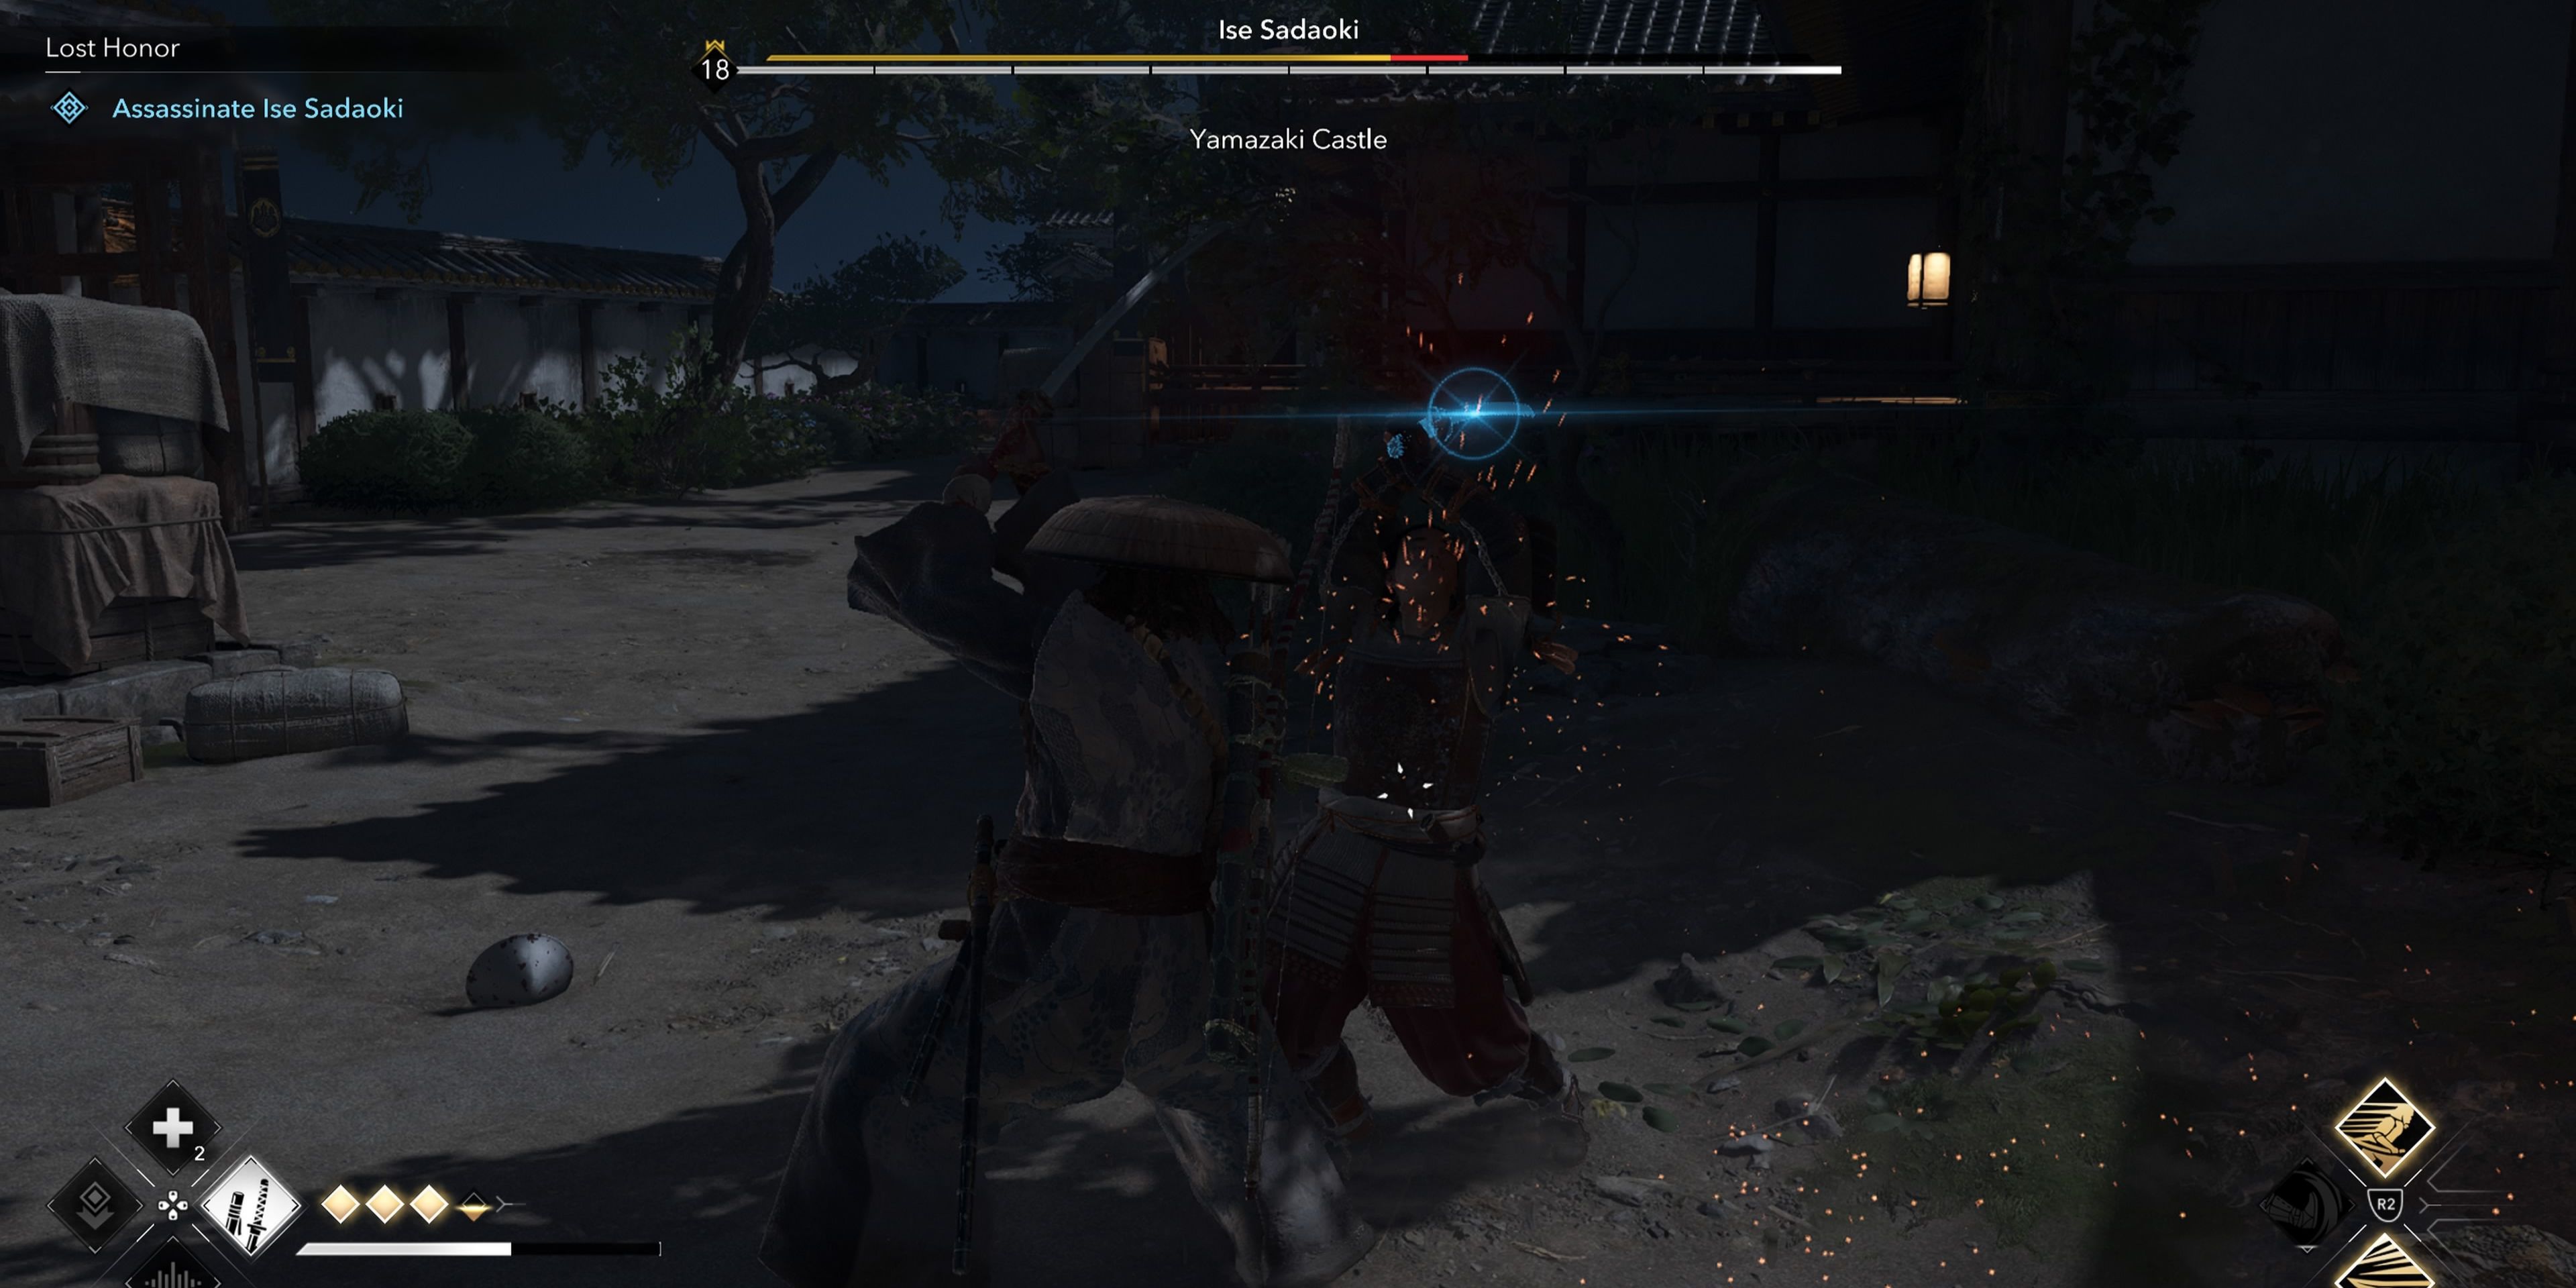
In my gaming experience, I absolutely love how Naoe’s Kunai are designed to be retrievable, making it a breeze to take down opponents with precision headshots. And here’s the cherry on top – if you’ve mastered the Double Assassinate skill from the Assassin tree, you can effortlessly eliminate two enemies at once, just as shown in that demonstration.
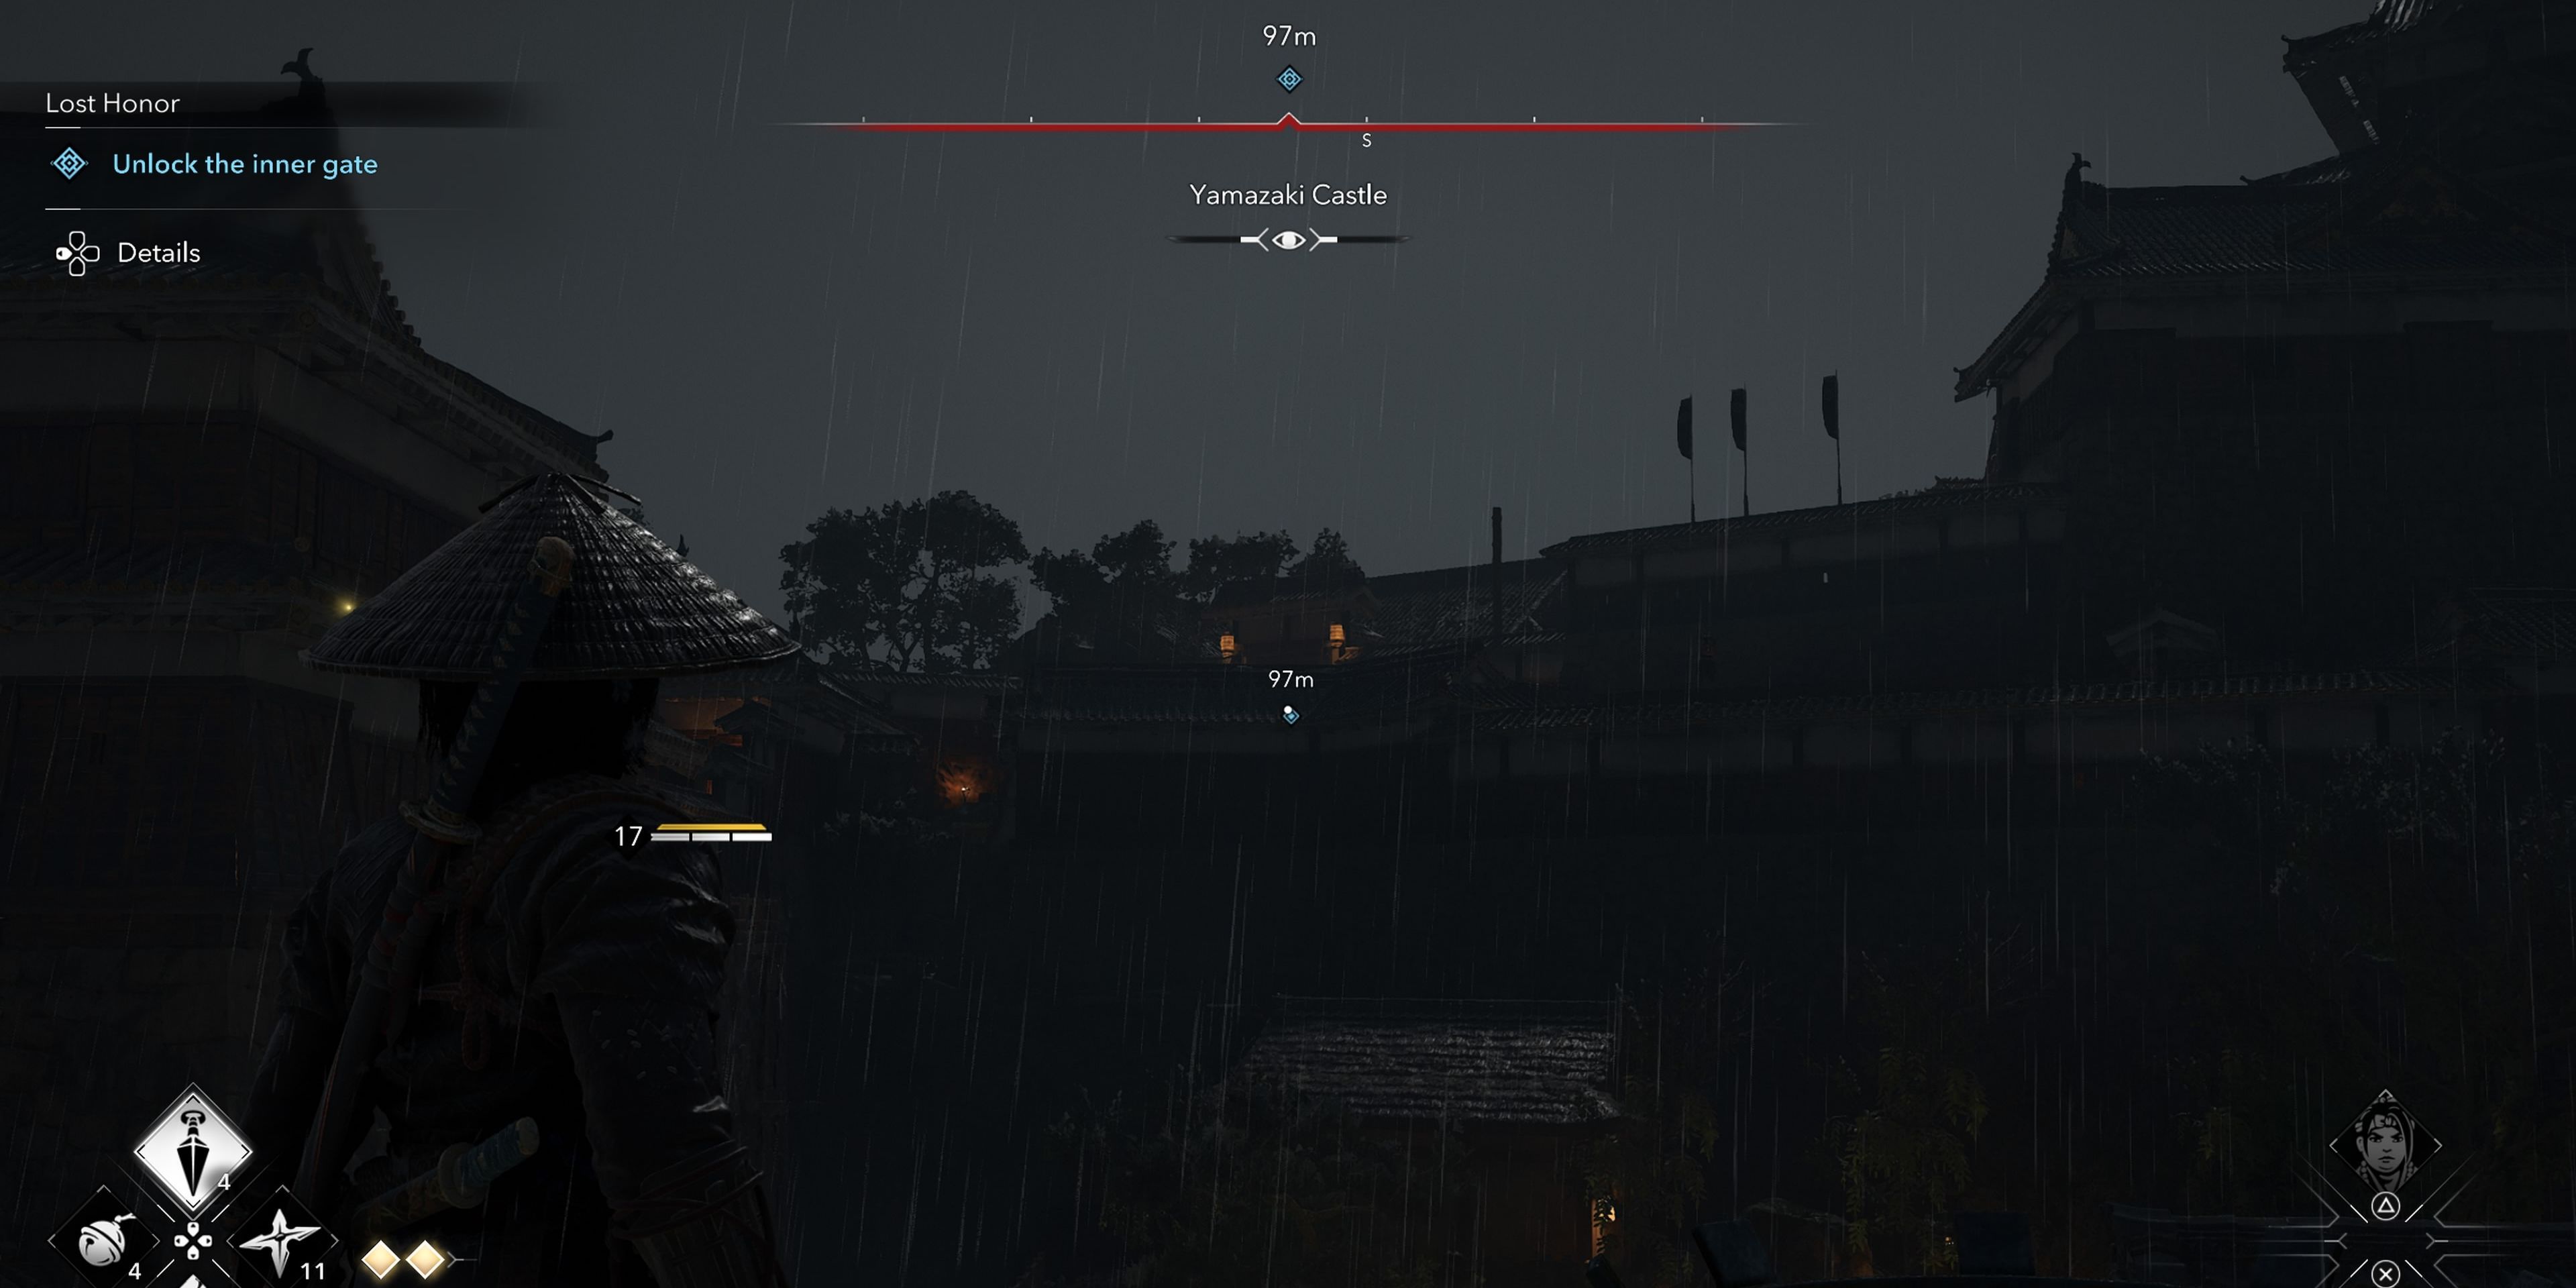
Right before the distant gate lies a particular spot where you should ascend to higher ground. Pace yourself at this location, and should you find yourself surrounded by too many adversaries, remember that using a smoke bomb can provide an escape and allow for reorganization.
After you’ve vanquished all nearby foes and opened the gate, the game will return control to Yasuke for a final time, guiding Sadatame to his sibling.
How To Defeat Ise Sadaoki
Accompanying Sadatame and fending off successive adversaries, you’ll ultimately confront Sadaoki, who is also known as The Fool.
Or
While guiding Sadatame and battling oncoming opponents, you will eventually meet up with Sadaoki, who is more famously recognized as The Fool.
In this game, you have the freedom to pick the character you prefer to control. I opted for Yasuke because of his sturdy gameplay style and capacity to manage crowds effectively. However, if you’re familiar with her fighting style, you can also go for Naoe.
Sadaoki will be accompanied by three bodyguards. It’s crucial to eliminate these guards before focusing on him, and I’ve provided some of his tactics here to help you strategize.
| Attack | Pattern / How To Counter |
|---|---|
| Six Slashes Combo | A series of six slashes, with the last one being a thrust. They can all be easily parried. |
| Roundhouse Kick | An unblockable swinging kick that can be evaded. |
| Three Slashes | Three unblockable sword slashes can kill you if you’re not careful, especially if using Naoe. |
If you’re employing Yasuke, you can swiftly handle the combat thanks to his formidable abilities. Furthermore, you could utilize his War Kick to interrupt and nullify Sadaoki’s attack sequences.
Breaking through his armor might require some effort, but after that, feel free to employ Power Dash to leave him exposed and enable you to inflict substantial harm.
In this situation, Yasuke’s combo transition functions effectively, but remember not to overuse it since Sadaoki has the ability to counterattack during the process.

To successfully eliminate Ise Sadaoki during the quest known as “The Fool” and complete its storyline, you will be rewarded with the legendary Steel Blossom Katana and a sum of 375 Mon.
By accomplishing the mission to slay Ise Sadaoki within the “The Fool” quest and wrapping up its plotline, you’ll earn yourself the prestigious Steel Blossom Legendary Katana and 375 Mon as a reward.
Read More
- All Skyblazer Armor Locations in Crimson Desert
- How to Get the Sunset Reed Armor Set and Hollow Visage Sword in Crimson Desert
- All Shadow Armor Locations in Crimson Desert
- Marni Laser Helm Location & Upgrade in Crimson Desert
- All Helfryn Armor Locations in Crimson Desert
- All Golden Greed Armor Locations in Crimson Desert
- All Icewing Armor Locations in Crimson Desert
- Best Bows in Crimson Desert
- How to Beat Stonewalker Antiquum at the Gate of Truth in Crimson Desert
- Legendary White Lion Necklace Location in Crimson Desert
2025-03-19 22:24