Quick Links
- Freeing Dr. Garrow
-
Finding Dr. Garrow in the Interchange
-
How to Reach Robotics
-
How to Reach the Lower Level of Robotics
- Turning on Power to the Right Wing
- Turning on Power to the Left Wing
-
Finding Dr. Garrow’s Research Notes
- How to Get the Head Office Keycard
-
Run the ERA Command at the Dam Data Store
- Turning on the Dam Data Store
-
Extract a Sample of Oberon for Dr. Garrow
In the game Atomfall, the trail left by Dr. Garrow is quite extensive, so you’ll need some patience to follow it all the way through to the end.
The storyline calls for rescuing Dr. Garrow, collecting her documents, employing the Signal Redirector, and many other tasks. Finishing these steps will provide a distinct conclusion to the game if players persist.
This guide has everything you need to know about completing Dr. Garrow’s lead in Atomfall.
Freeing Dr. Garrow
You can interact with Dr. Garrow for the first time at Skethermoor Prison only after speaking to Captain Sim and agreeing to his interrogation request. Once you do this, he will provide you with the necessary access to the prison.
As I chat with Dr. Garrow behind bars, she’ll plead for my assistance in breaking free, marking the start of the “Dr. Garrow” questline. Before diving into helping her escape, it’d be wise to squeeze some intel out of her regarding Captain Sims and then deliver that info straight to him.
It appears that if you share the data you’ve collected from Dr. Garrow with Captain Sims prior to her rescue, it will make it less likely for the soldiers to question your actions when assisting her in her escape.
To release Dr. Garrow from her cell, start by locating the Hidden Communicator first. Fortunately, it’s situated closeby in the Security Control Room, clearly marked with a sign reading “Security” above the entrance. Inside this room, you’ll discover the Hidden Communicator on a shelf at the back.
With the Signal Redirector in your grasp, make your way towards the Control Center, which lies on the far side of the Security room. The entrance to the Control Center is barred, but there’s a narrow, hidden passageway to the right, high up in the wall that you can squeeze through.
First, direct the power to the master control switch by employing the Signal Redirector located above the yellow generator. Finally, proceed to the master control switch and deactivate it to release all prisoners, including Dr. Garrow, from their cells.
As a fervent admirer, I’ll dash swiftly towards the Interchange door nearby, ensuring to secure it behind me. Now, the challenge lies in locating the elusive Dr. Garrow within the Interchange.
Finding Dr. Garrow in the Interchange
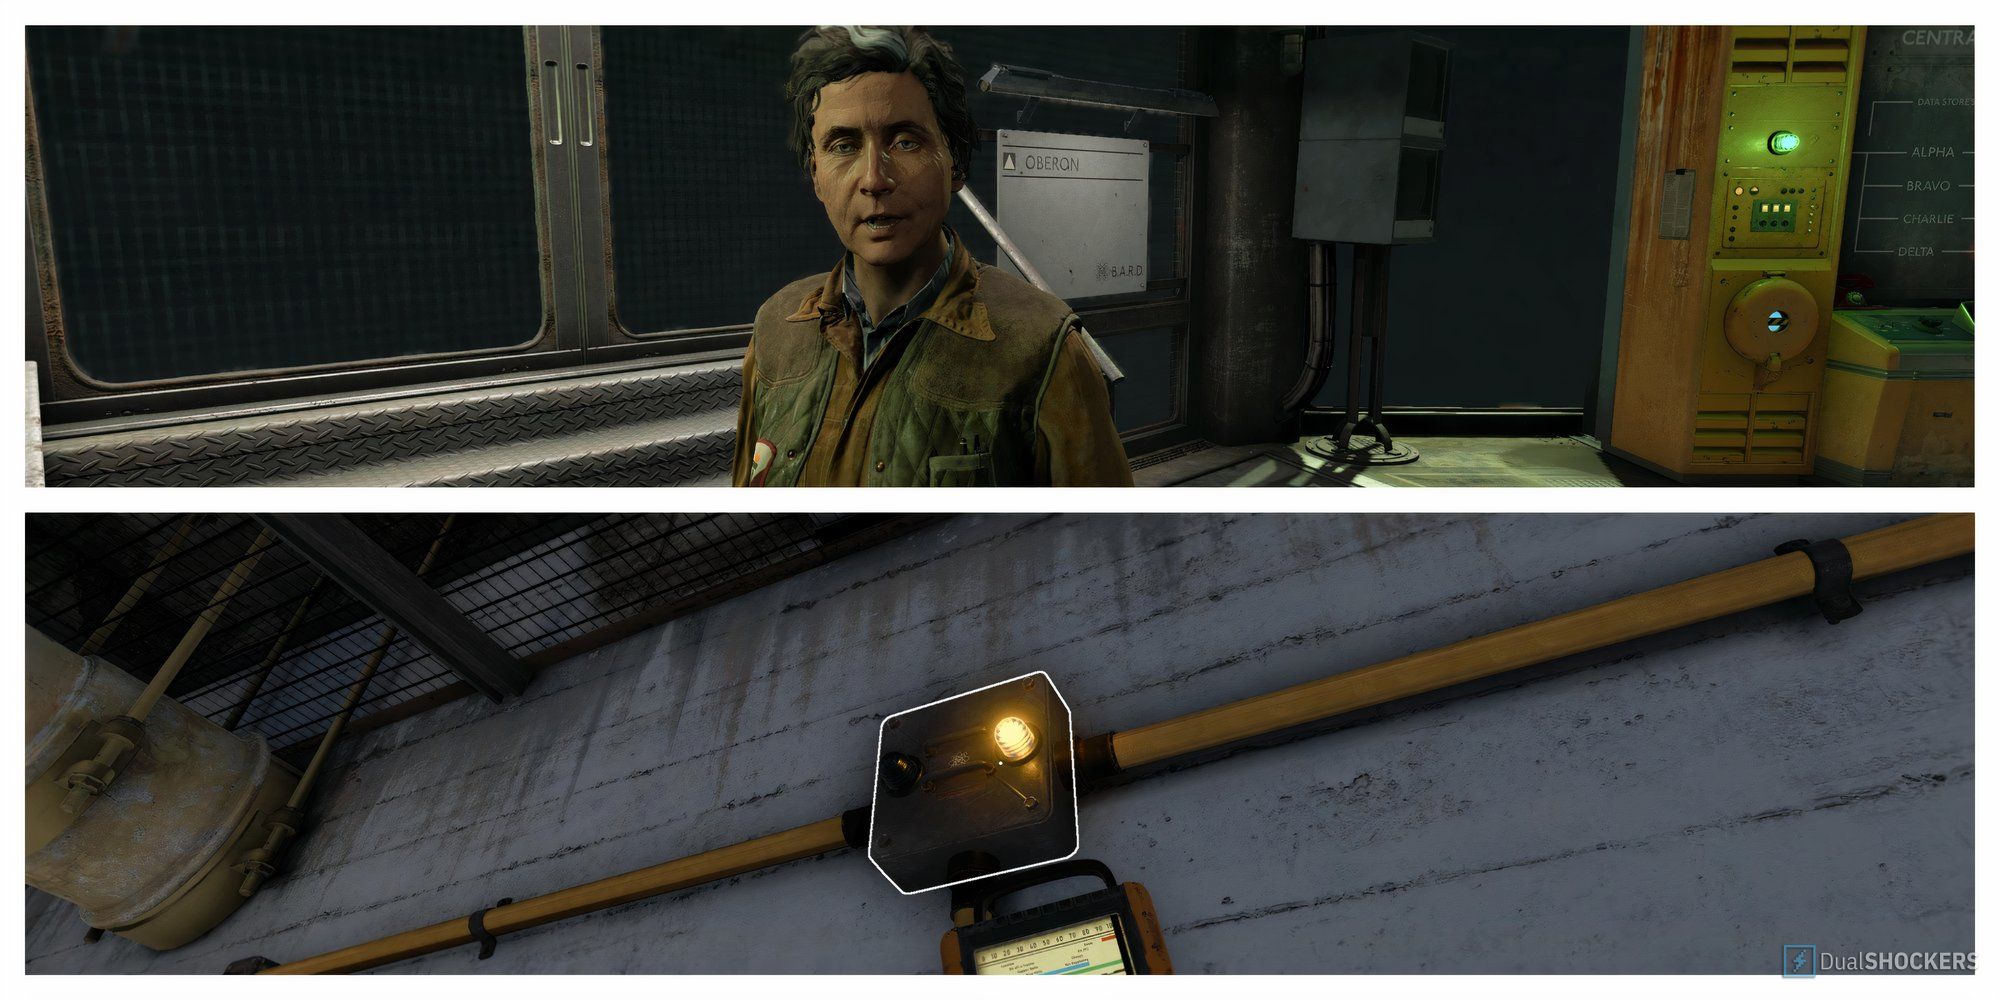
You can locate Dr. Garrow within the Central Processing Area of the Hub. This central space is accessible through any of the Interchange’s doors, making it easy to find regardless of your entry point.
Go find Doctor Garrow in the Central Processor for a chat about the recent events. She’ll appreciate your role in her rescue and may suggest a method to bypass the quarantine. But, she requests your assistance with a couple of jobs beforehand.
Dr. Garrow assigns you a task: Locate her Research Notes, which are situated in the Robotics department on the lower level. Here’s how to get there as detailed below.
How to Reach Robotics
You can gain access to Robotics by using either the Skethermoor or Slatten Dale Interchange entrances. Regardless of your chosen route, you’ll require an Atomic Battery to deposit in the Data Store, which will unlock the door leading to the open section of the Interchange (adjacent to the Central Processor).
Above a yellow door, you’ll come across a big sign displaying the words “ROBOTICS,” indicating that this is your upcoming location.
How to Reach the Lower Level of Robotics
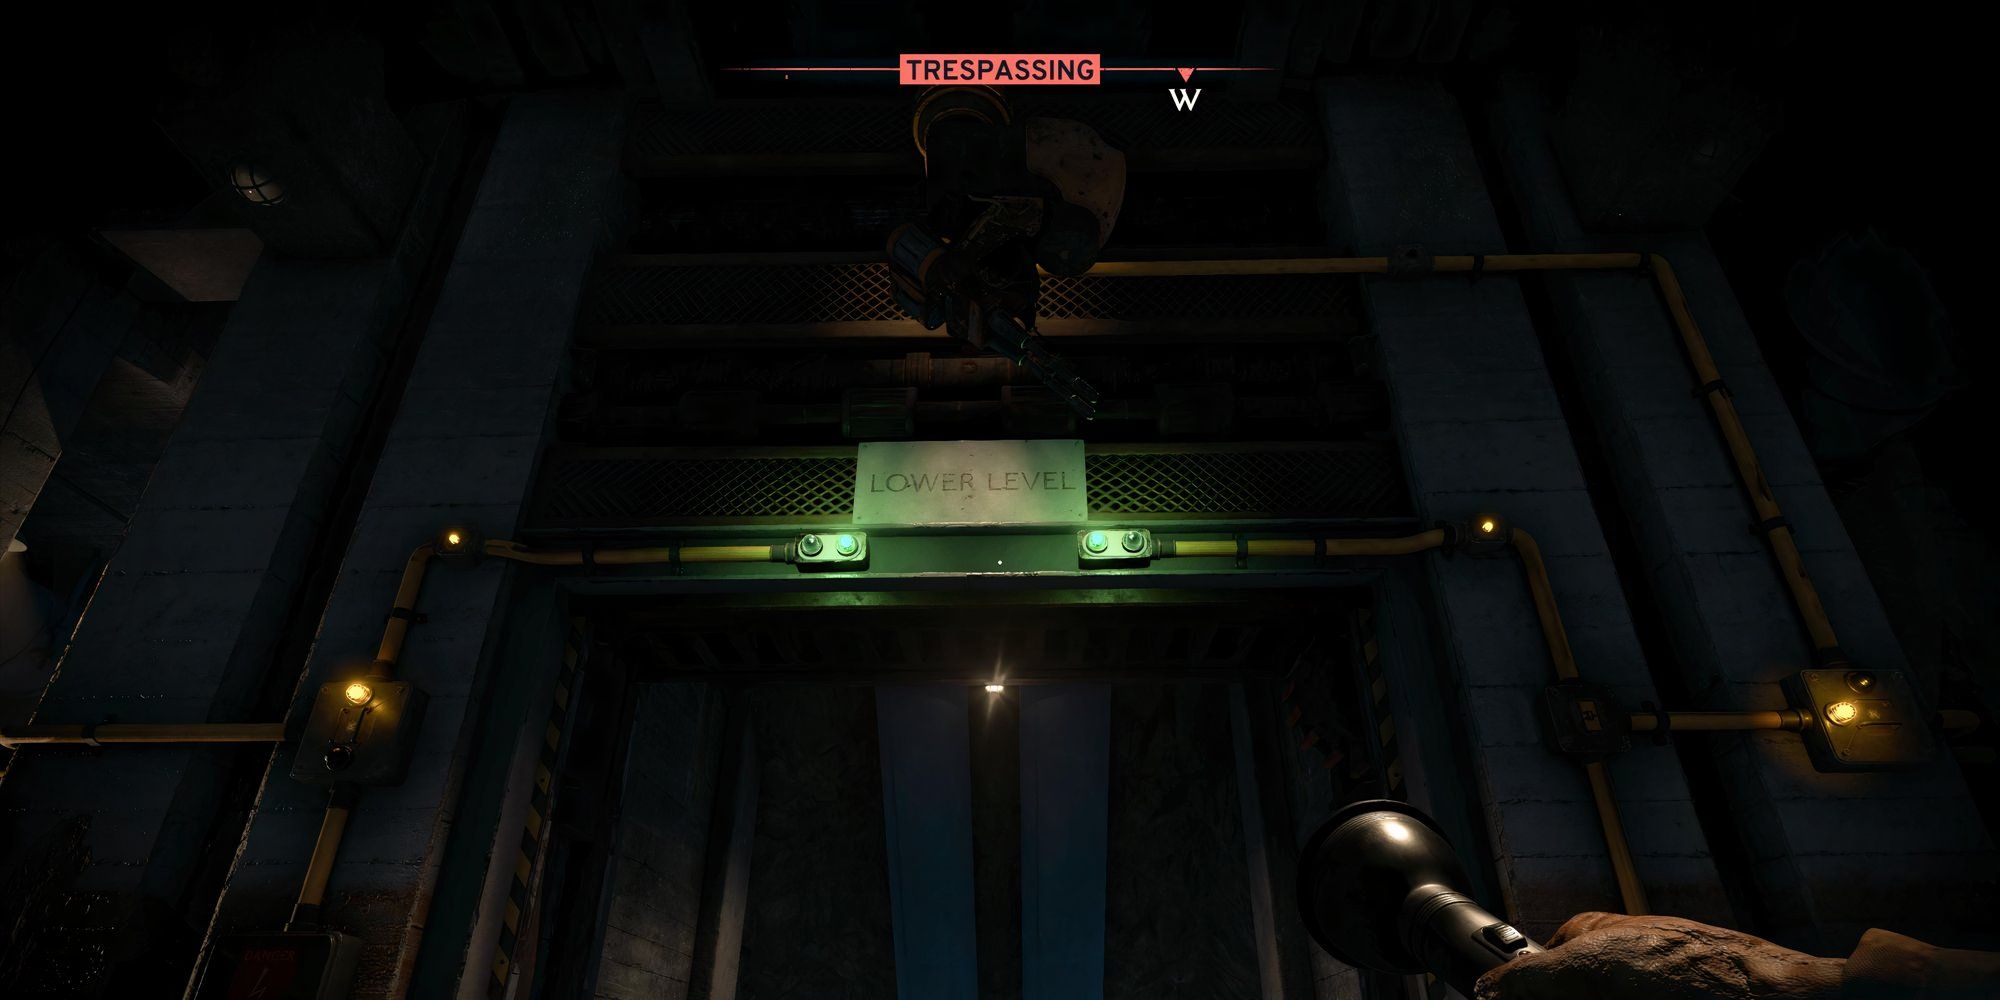
As you delve into Robotics, you’ll encounter white markers guiding your way to the Lower Level. In fact, reaching the Lower Level in Robotics is quite intuitive, given that the route tends to be quite straight and clear.
First, it’s important to note that in order to access the Lower Level, you should activate the power for both the Left Wing and the Right Wing. Once you’ve done that, the main door, which leads to the Lower Level, will be activated as well.
Turning on Power to the Right Wing
In the Robot Assembly area, you can activate power by moving towards the back-left corner of the room, where you’ll find a window with a power switch located on its opposite side.
Utilize your Signal Redirector to direct power towards the nearby door, which will reach the Wing Control switch. After that, pull the Wing Control handle and make your departure from this room, following the same entry path.
Afterward, make an immediate right turn, ascend the brown structure ahead, and search to your left for another power switch on the wall. Then, utilize your Signal Redirector to divert the power supply towards the main entrance.
Turning on Power to the Left Wing
Afterwards, let’s switch the Wing Control handle located in the Power Control Beta area. However, before we can do that, we must first get permission or find a way to enter the room.
Make your way towards the Power Control Beta room, and once there, look to the left side of the door. You’ll spot a power switch visible through a window. Utilize your Signal Redirector to divert power to the entrance of the Power Control Beta room, enabling you to gain access.
Upon entering the Power Control Beta Area, locate the wing lever situated at the far-right corner, then proceed to engage it.
Once you pull the lever, the floor area in front of the lower-level door will be powered with electricity.
or
By moving the lever, the ground near the lower-level door gets electrified.
or
After activating the lever, electricity spreads across the floor towards the lower level’s door.
Leave the Power Control Room beta, turn right, then ascend the staircase. This route allows you to bypass the electric area. Along this path, you’ll locate a power switch that you can utilize with your Signal Redirector.
Last but not least, kindly press the button situated before the Lower Level entrance door. This will let you pass and eventually get to the lower level.
Finding Dr. Garrow’s Research Notes
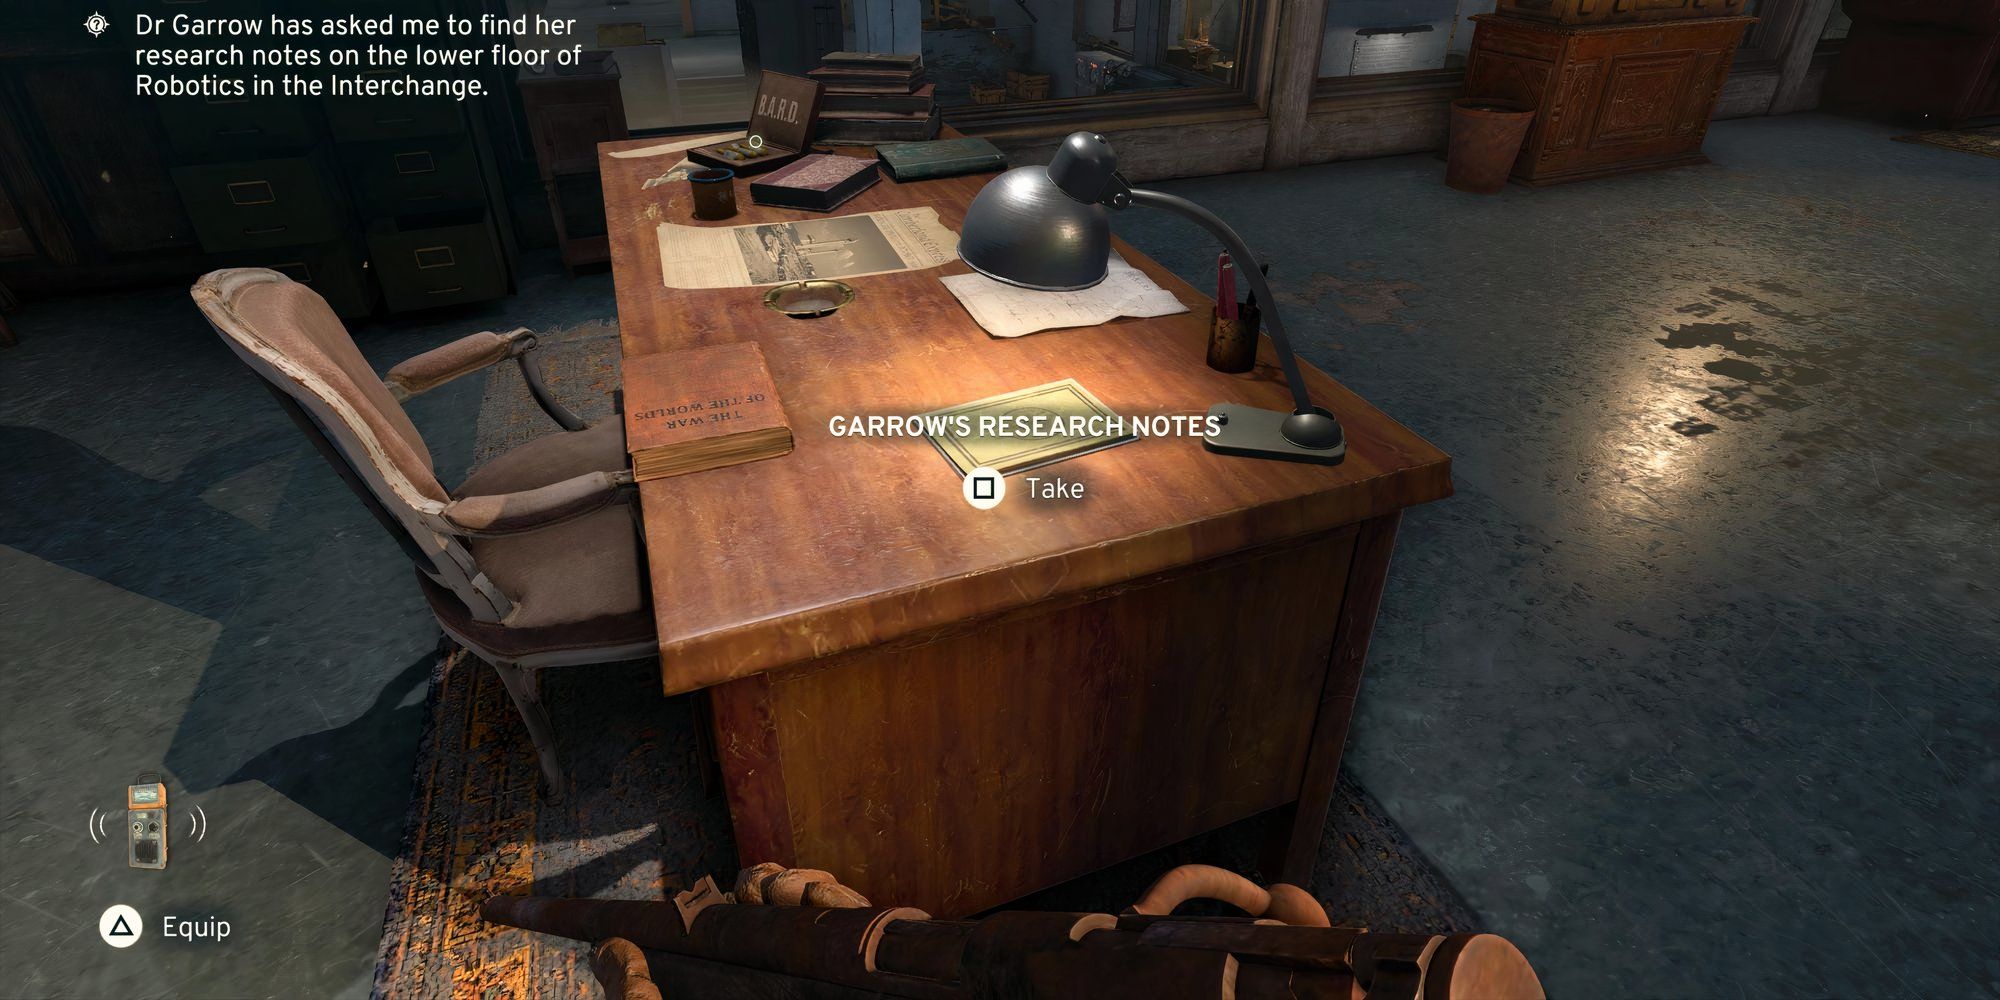
At a lower level in robotics, your task is to retrieve Dr. Garrow’s Research Notes from the main office. However, the door is currently locked, meaning you’ll need to locate the office keycard beforehand to access it.
How to Get the Head Office Keycard
As a curious fan delving into the lower level of Robotics, you’d stumble upon a cryptic message at the entrance. This message hints that the elusive Head Office Keycard can be found within the Weapons Testing section. The note also warns that Weapon Testings are currently off-limits and requires three terminals to be activated before gaining access.
The three locations, marked as A, B, and C, are strategically positioned in the western, northern, and eastern parts of the zone. It’s important to note that a rapid sequence of button presses at these spots will initiate the Weapons Testing procedure.
In my gaming experience, it pays off to take out the roaming robots before focusing on the rapid button pressing tasks. That way, they won’t be causing any distractions. I found myself being most successful against them when using a shotgun and Molotov cocktails.
After you enter Weapons Testing, you’ll spot the Head Office Keycard lying near a lifeless body on the floor. Pick it up and then proceed towards the Head Office, which is located upstairs via the staircase nearby.
To finish off this step in our lead, kindly retrieve Dr. Garrow’s notes from her desk. Once that’s done, simply make your way back to Dr. Garrow.
Run the ERA Command at the Dam Data Store
Once you hand over Dr. Garrow’s notes, she will instruct you to head to the Casterfell Dam’s Data Store and give a voice command there. Fortunately, Dr. Garrow points out the location on your map, ensuring an effortless navigation.
Upon entering the Dam Data Store, you’ll find yourself face to face with a roaming security bot. Since this zone contains another Signal Redirector conundrum, it would be wise to subdue the bot first so it won’t hinder your progress.
Turning on the Dam Data Store
Before giving the voice command to Dr. Garrow, let’s first activate the power in the Data Dam Store following these steps:
1. Navigate to the Data Dam Store control panel.
2. Locate the main power switch and ensure it is off.
3. Flip the switch up to the ‘On’ position.
4. Wait for the system to fully boot up before proceeding with the voice command.
- First, head to the door with the red light above it and enter the room.
- Use the Signal Redirector on the power switch in this room.
- Use the Signal Redirector on the power switch under the turret.
- Climb the brown box next to the crate, and then use the Signal Redirector on the switch on the ceiling.
- Head to the door to the Control Room and use the Signal Redirector on the switch to open the door.
- Use the Dam Data Store Keycard to turn on the power.
Once you’ve completed these instructions, you’ll be able to engage with the Data Interface Console conveniently located in the central area of the main room.
Prior to using the GEN ERA command, don’t hesitate to select the choice that lets you explore recent data and learn about diverse aspects of Atomfall like Oberon, The Interchange, the quarantine zone, and more.
Once you’re prepared, go ahead and type the GEN ERA Command to proceed towards the culmination of Dr. Garrow’s storyline.
Or simply:
Ready? Type the GEN ERA Command to reach Dr. Garrow’s final objective.
Extract a Sample of Oberon for Dr. Garrow
Upon your next visit to Dr. Garrow, she’ll request an additional task from you – obtain a specimen of Oberon. Regrettably, this can transpire only if you have activated the power supply for all Data Stores and initiated the Central Processor.
Regardless of your route, upon reaching Oberon and arriving at ground zero with the violet gemstone, you’ll discover the mining facilities situated to your left.
Engage with the given mining setup to gather a specimen of Oberon, then bring it back to Dr. Garrow to fulfill the mission. This action will lead to a distinct conclusion for Atomfall.
Read More
- All Skyblazer Armor Locations in Crimson Desert
- One Piece Chapter 1180 Release Date And Where To Read
- How to Get the Sunset Reed Armor Set and Hollow Visage Sword in Crimson Desert
- All Shadow Armor Locations in Crimson Desert
- Marni Laser Helm Location & Upgrade in Crimson Desert
- All Golden Greed Armor Locations in Crimson Desert
- All Helfryn Armor Locations in Crimson Desert
- How to Beat Stonewalker Antiquum at the Gate of Truth in Crimson Desert
- All Icewing Armor Locations in Crimson Desert
- Black Sun Shield Location In Crimson Desert (Buried Treasure Quest)
2025-03-25 16:16