Okay, so after the intro and story setup, Ninja Gaiden 4 throws you right into Chapter 1: Bloodsoaked Tokyo. It’s built like the other Ninja Gaiden games – each chapter feels like its own thing, which is cool. If you’re a long-time fan, you’ll get it right away, but even if you’re new, it’s a pretty straightforward way to learn the ropes. Basically, Bloodsoaked Tokyo is where you get to put everything you’ve learned to the test and get ready for some seriously intense action!
Chapter 1 Walkthrough Part 1 – Ninja Gaiden 4
From the Starting Point:
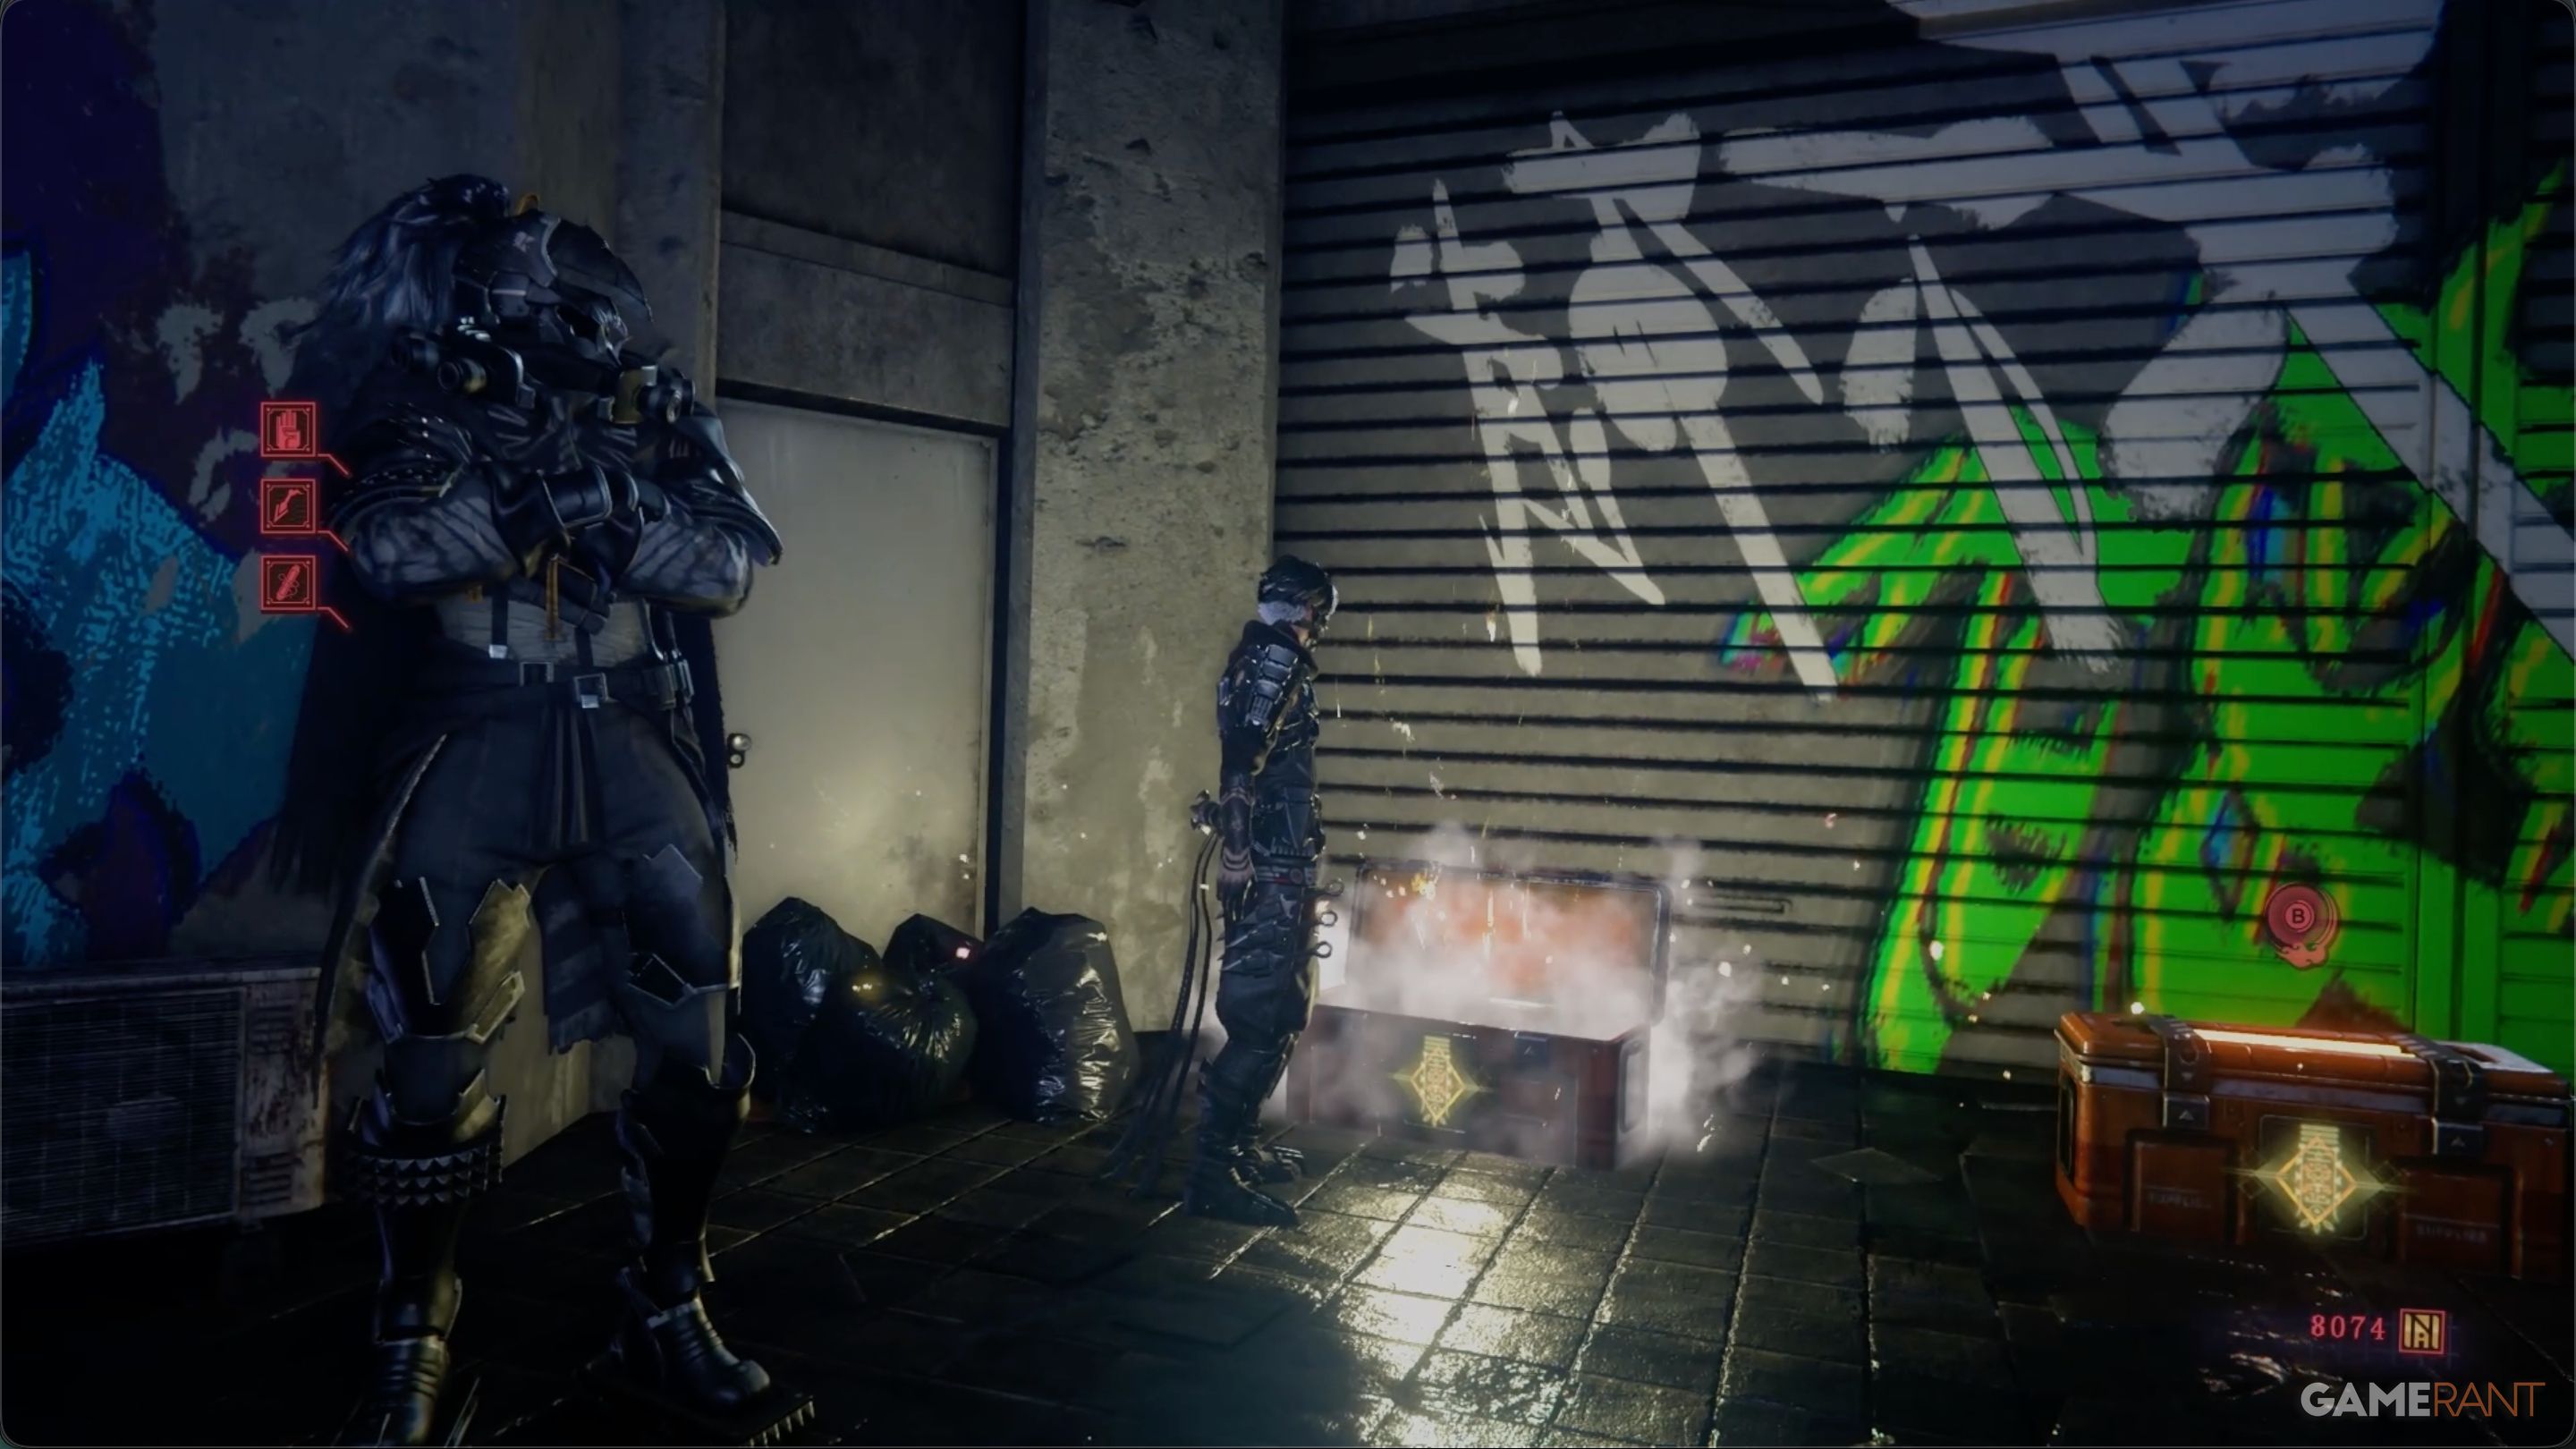
When you start the game in Tokyo, you’ll find yourself in a small courtyard. You’ll notice several alleyways that look like paths, but to help you navigate, remember to press and hold the R3 button. This will show a Destination Marker, pointing you in the right direction to complete the mission.
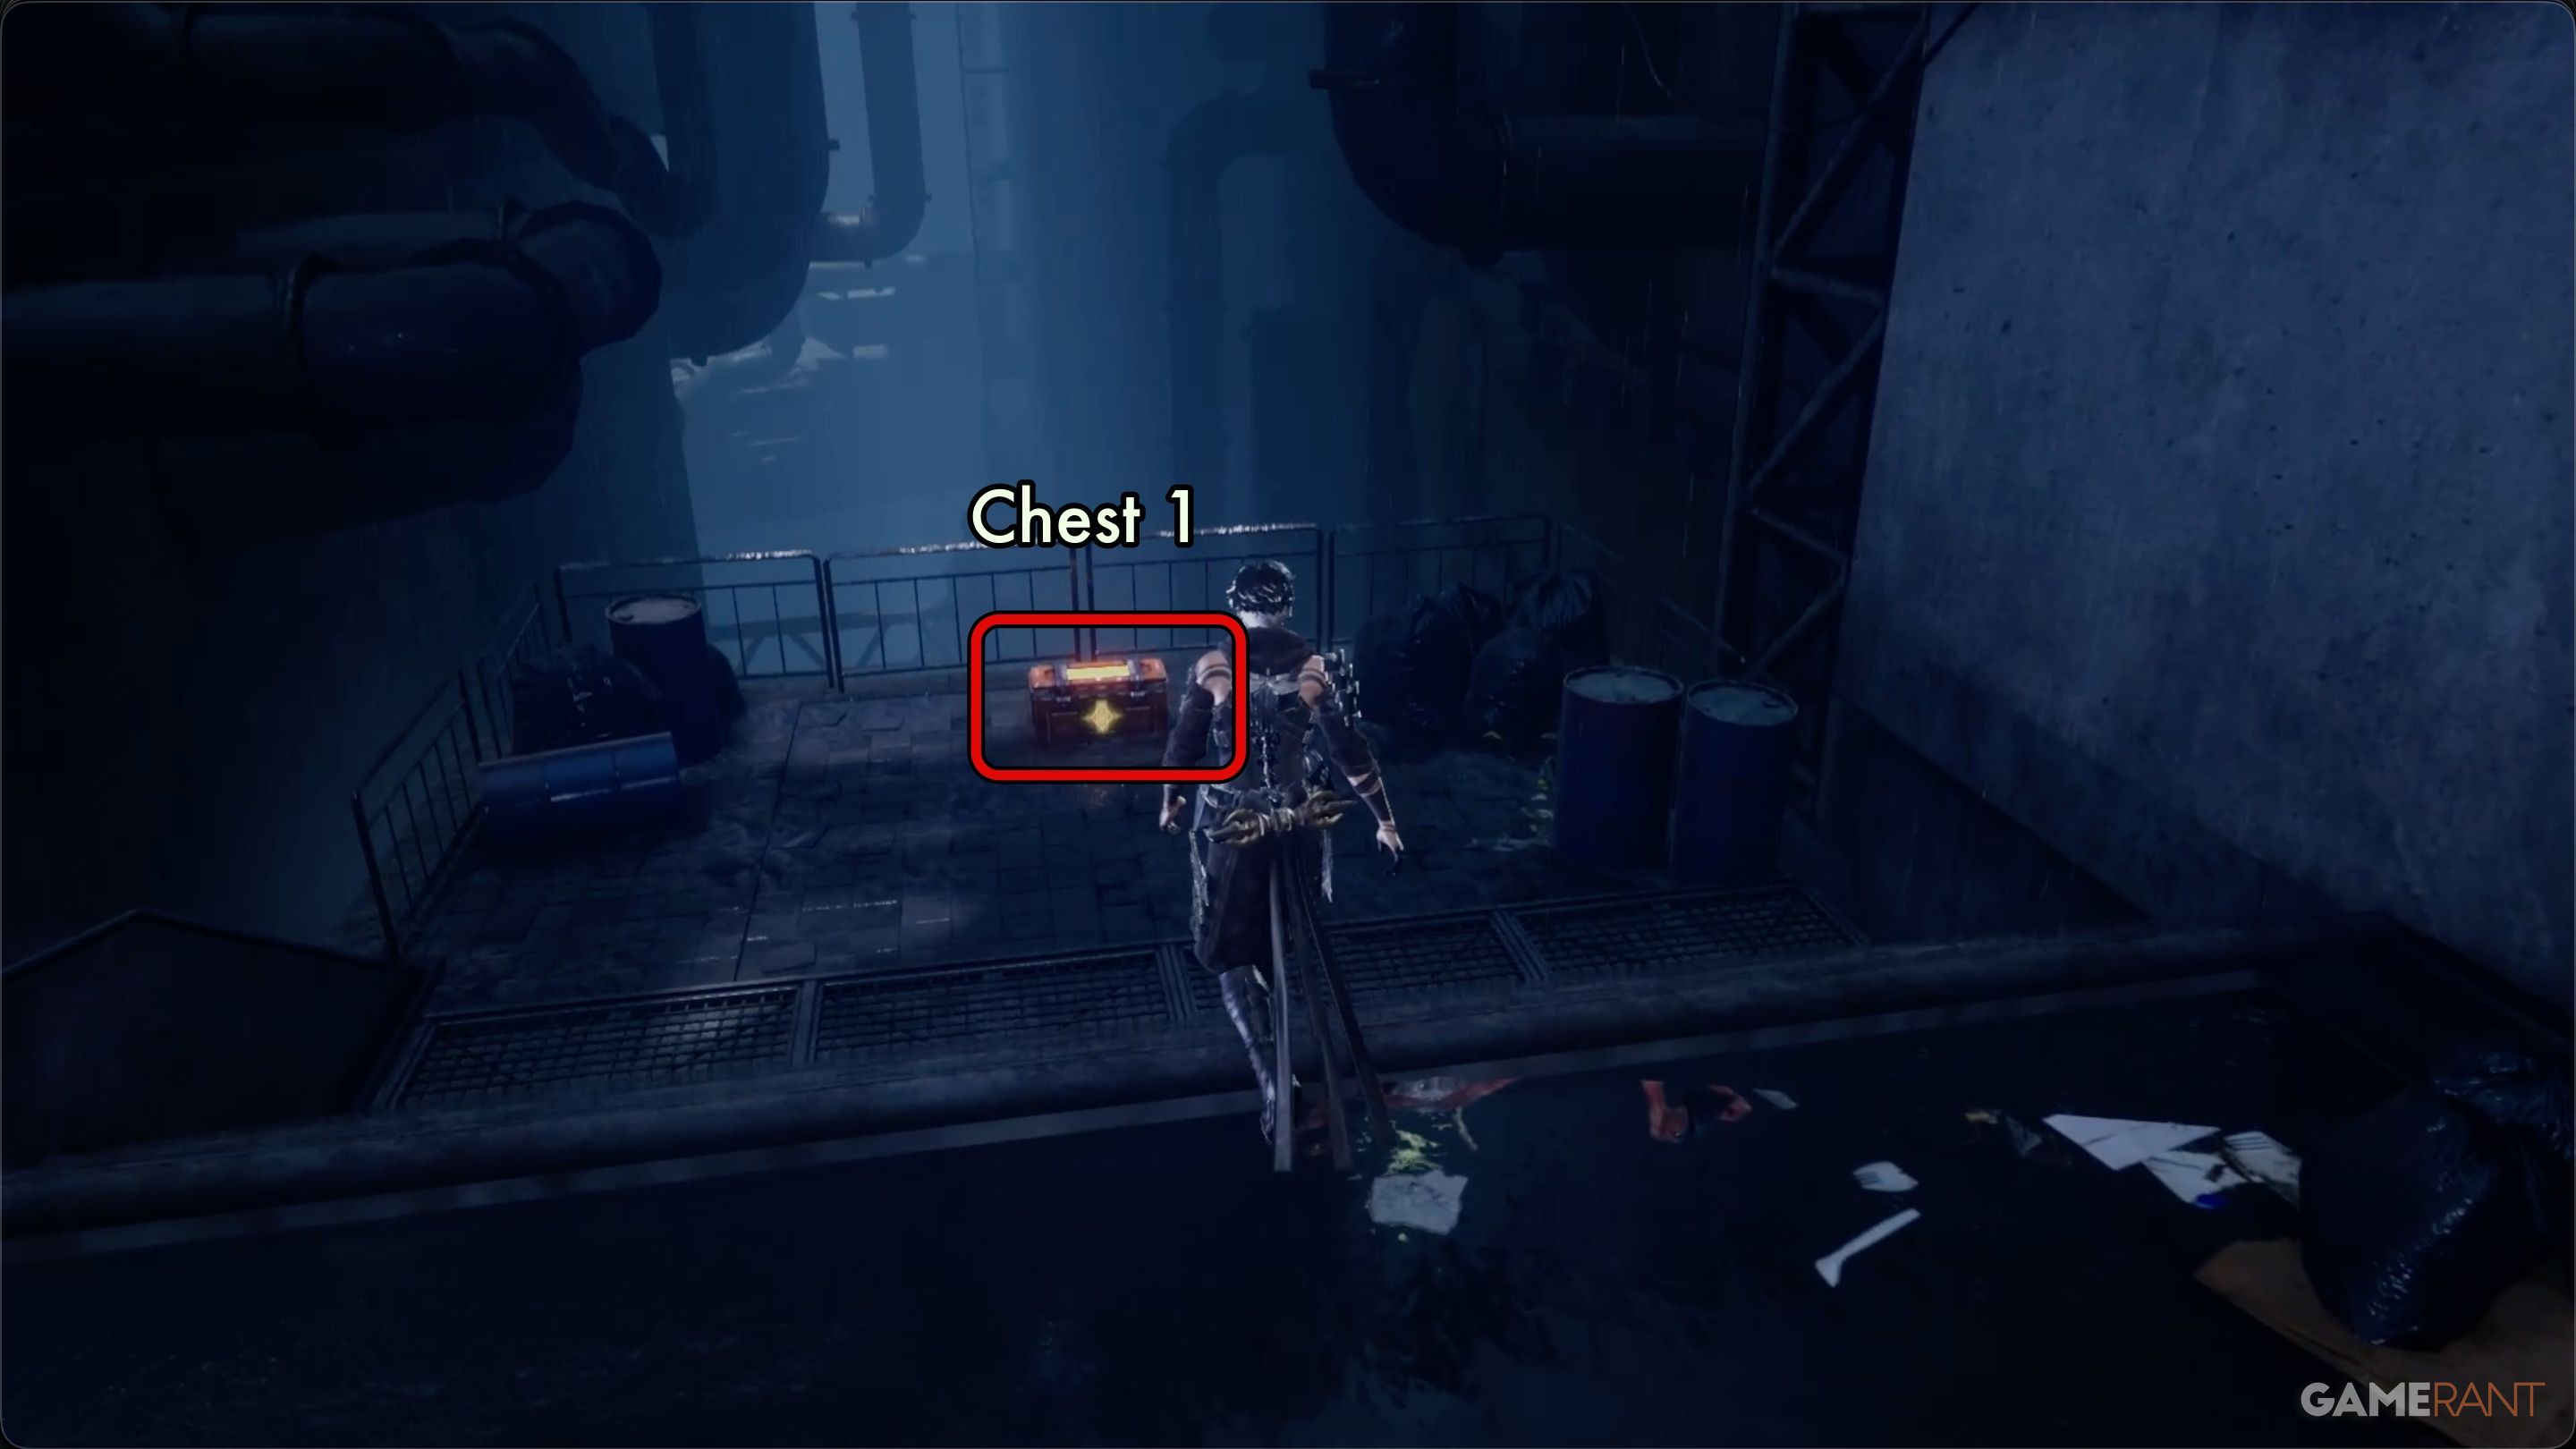
Okay, so I found the first chest – I’m calling it Chest 1 – down a set of stairs, behind that big, tarp-covered thing. Inside, I got one Crimson Blood Balm! Now that I have it, I can finally leave the courtyard and really start the game. Pretty cool!
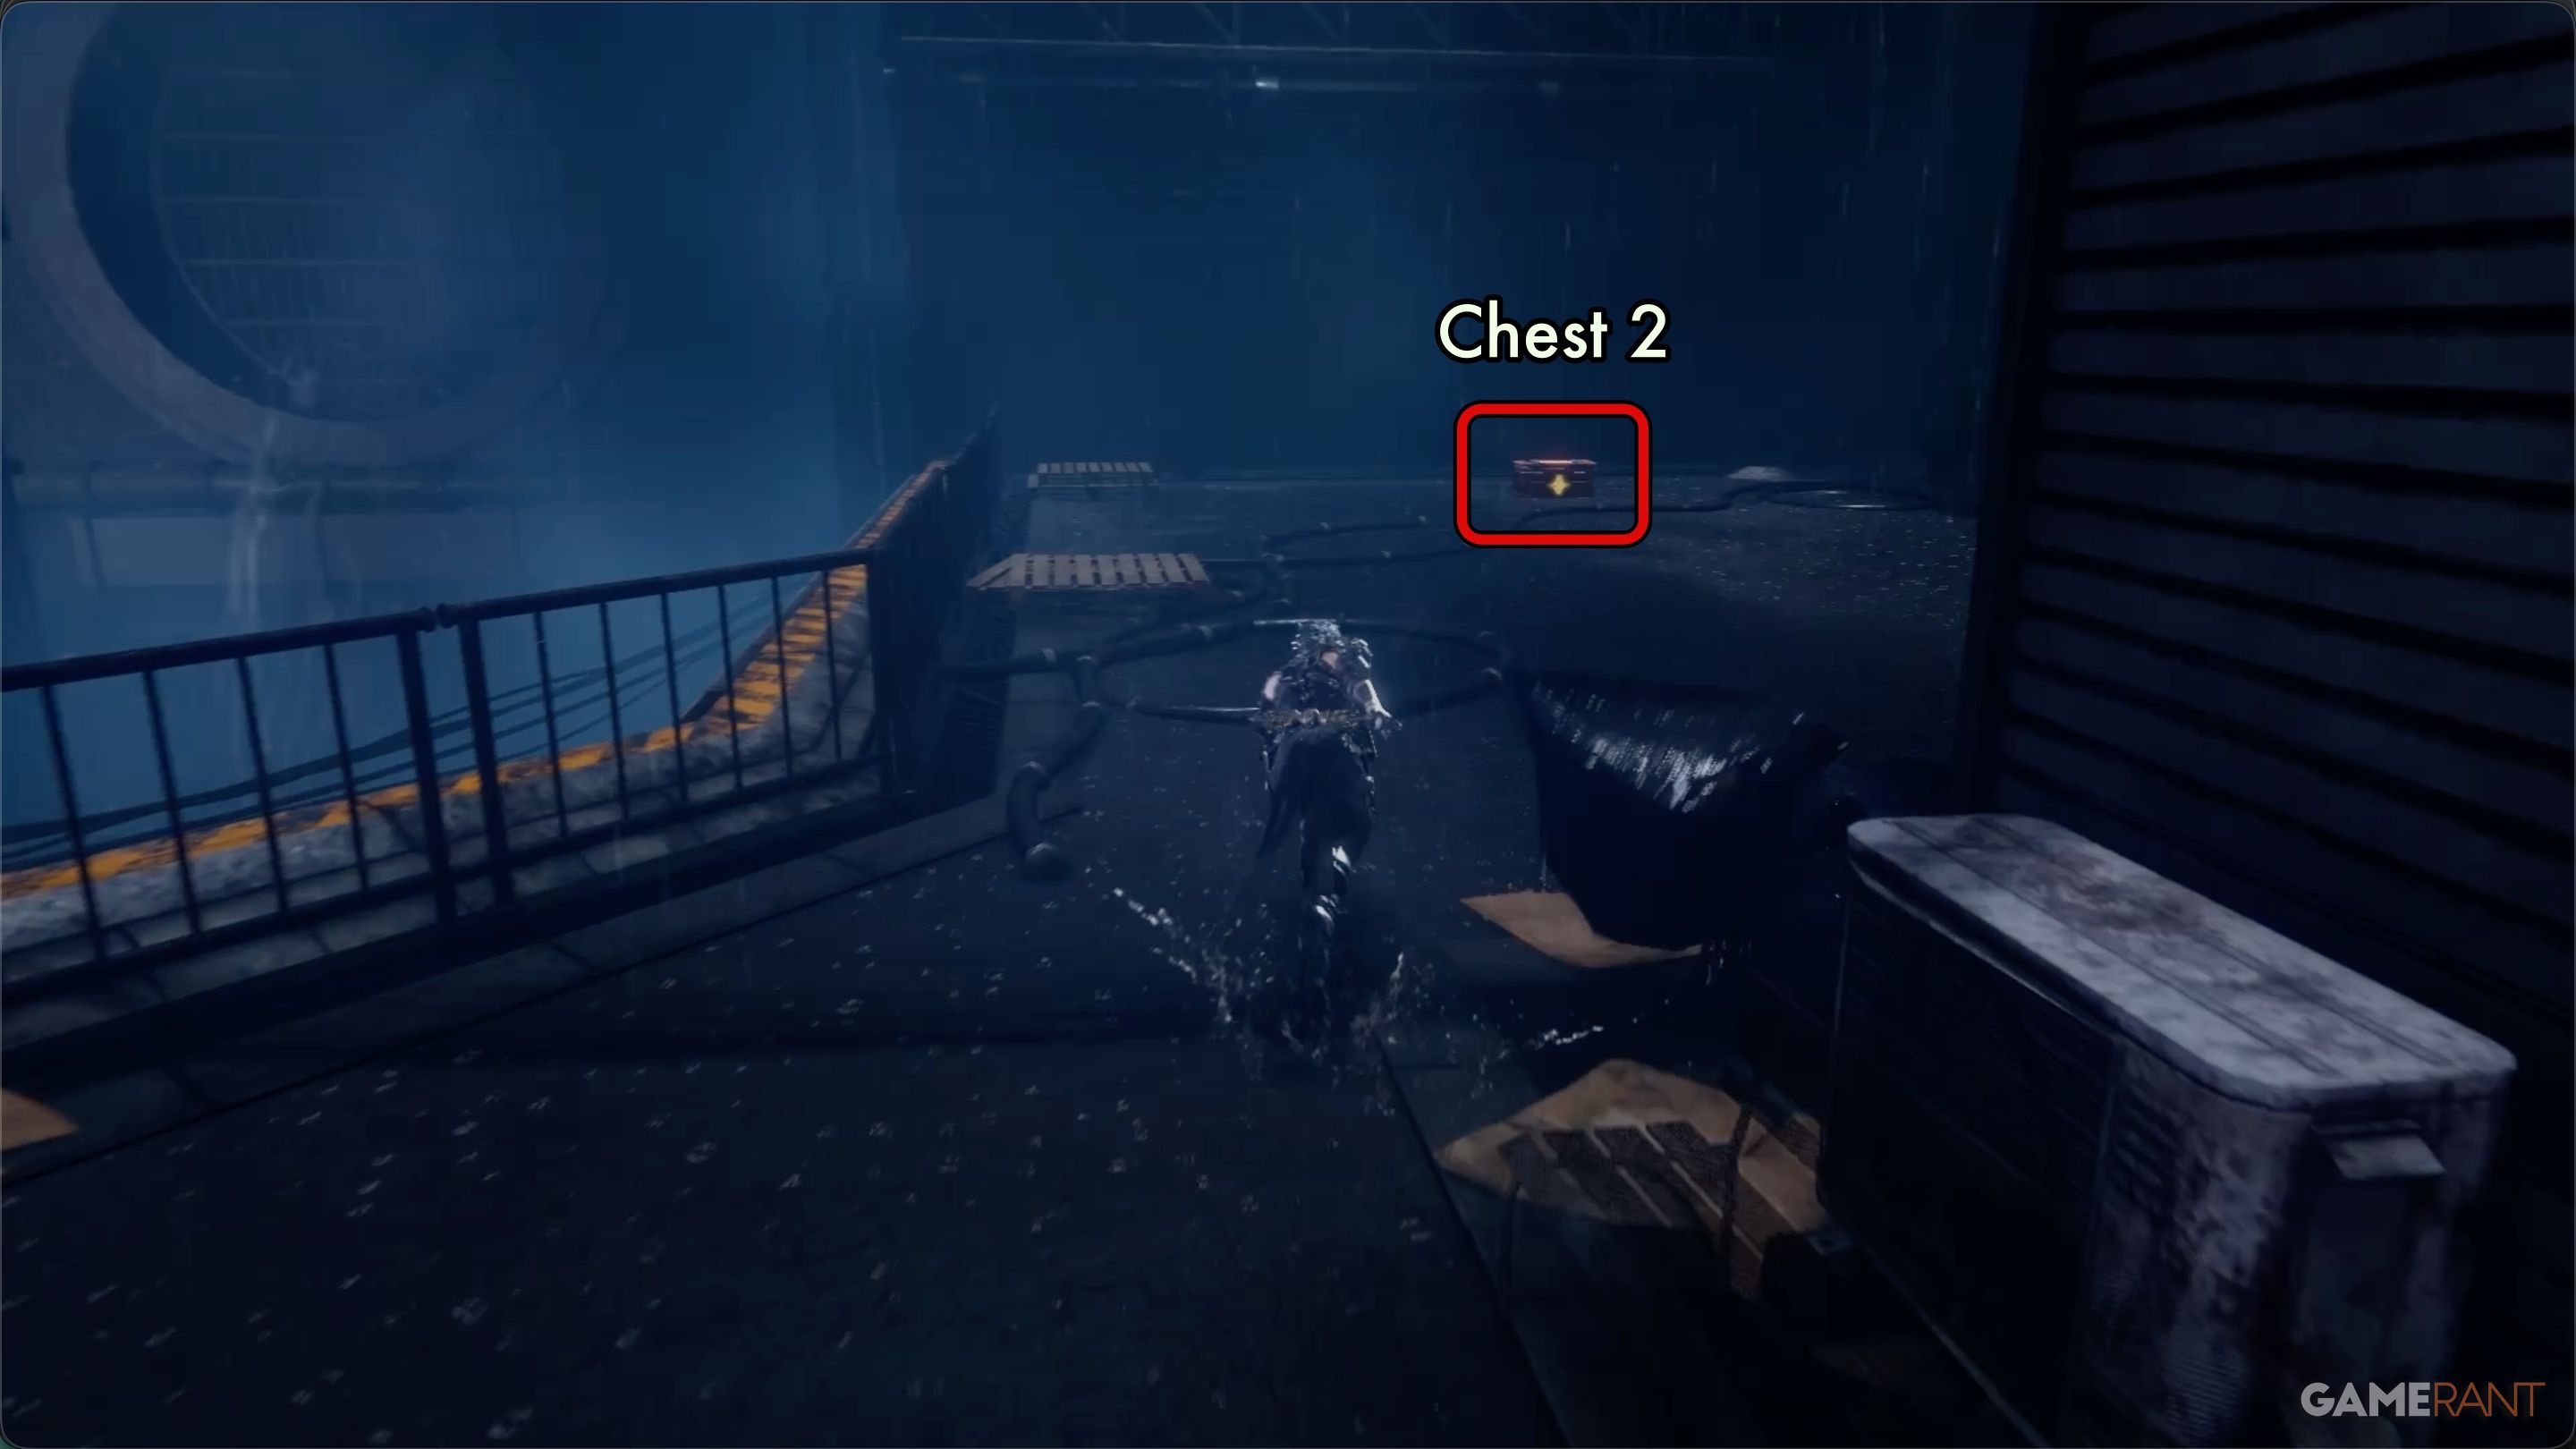
Continue along the path until you reach a door with a metal screen. Before going through, turn left and follow the wall – you’ll find Chest 2 there. Inside, you’ll get one Senjin War Brew, which will temporarily boost your attack power.

Keep following the main path, which has several sections where you need to run on walls. After the first time you run on two walls in a row, you’ll see a big pile of crates blocking a small area. Break these crates to find Chest 3, which contains one Life Elixir. Shortly after finding the third chest, you’ll come across the first DarkNest Terminal – this is where you access many of the game’s key features, and also where you can find the bonuses included with the Deluxe Edition and Pre-Order versions of Ninja Gaiden 4.
DarkNest Terminal: How to Get Deluxe Edition & Pre-Order Items in Ninja Gaiden 4
Interact with the First DarkNest Terminal:
In Ninja Gaiden 4, you’ll use the DarkNest Terminal to access key features like the Item Supply – where you can buy helpful items with NinjaCoin – and the Mission Database, which lets you take on extra quests.
You can find and add your Deluxe Edition and pre-order bonuses in the game’s terminal. Just choose the option to receive content, then select each item you want to add to your inventory.
List of Available Missions:
- Execute the DDO Distribution Officers – Reward: NinjaCoin x2500
- Defeat 25 DDO Soldiers – Reward: NinjaCoin x2000, Crimson Blood Pellets x1
- Capture 1 Gourdy – Reward: NinjaCoin x2000
- Find the Data Chip in Tokyo Sky City – Reward: Phantasmal Herb x1
Some missions will tell you exactly where to go, such as the DDO Distribution Officers mission, which takes place in Sky City Tokyo. Other missions can be completed anywhere, and will simply say “All Areas.”
Chapter 1 Walkthrough Part 2 – Ninja Gaiden 4
First Pylon and Tyran:
Once you’ve explored the DarkNest Terminal, the main part of the level begins. Your first task is to find and destroy several pylons, starting with one located shortly after the terminal. You’ll know you’re in the right area when you see a large, pyramid-shaped building. Defeat the enemies around it, then go inside and destroy the pylon.
After leaving the pylon, go forward through the gate. You’ll then see a raven with glowing red eyes. Talk to the raven, and it will summon Tyran, the combat master of the Raven Clan. Tyran will unlock the Skill system in Ninja Gaiden 4, letting you buy a wide variety of combat skills.
So, just like buying stuff in the shop, you use NinjaCoin to learn new combat skills. They don’t come cheap – they start around the 100s, but the really powerful ones cost more and more!
To the right of Tyran, you’ll see Chest 4 and Chest 5. Both chests contain Life Elixir x1.
If your inventory is full of a particular item, any extra you collect will be automatically turned into NinjaCoin.
Intro to Daemon Shrine & D.D.O Officer Mission:
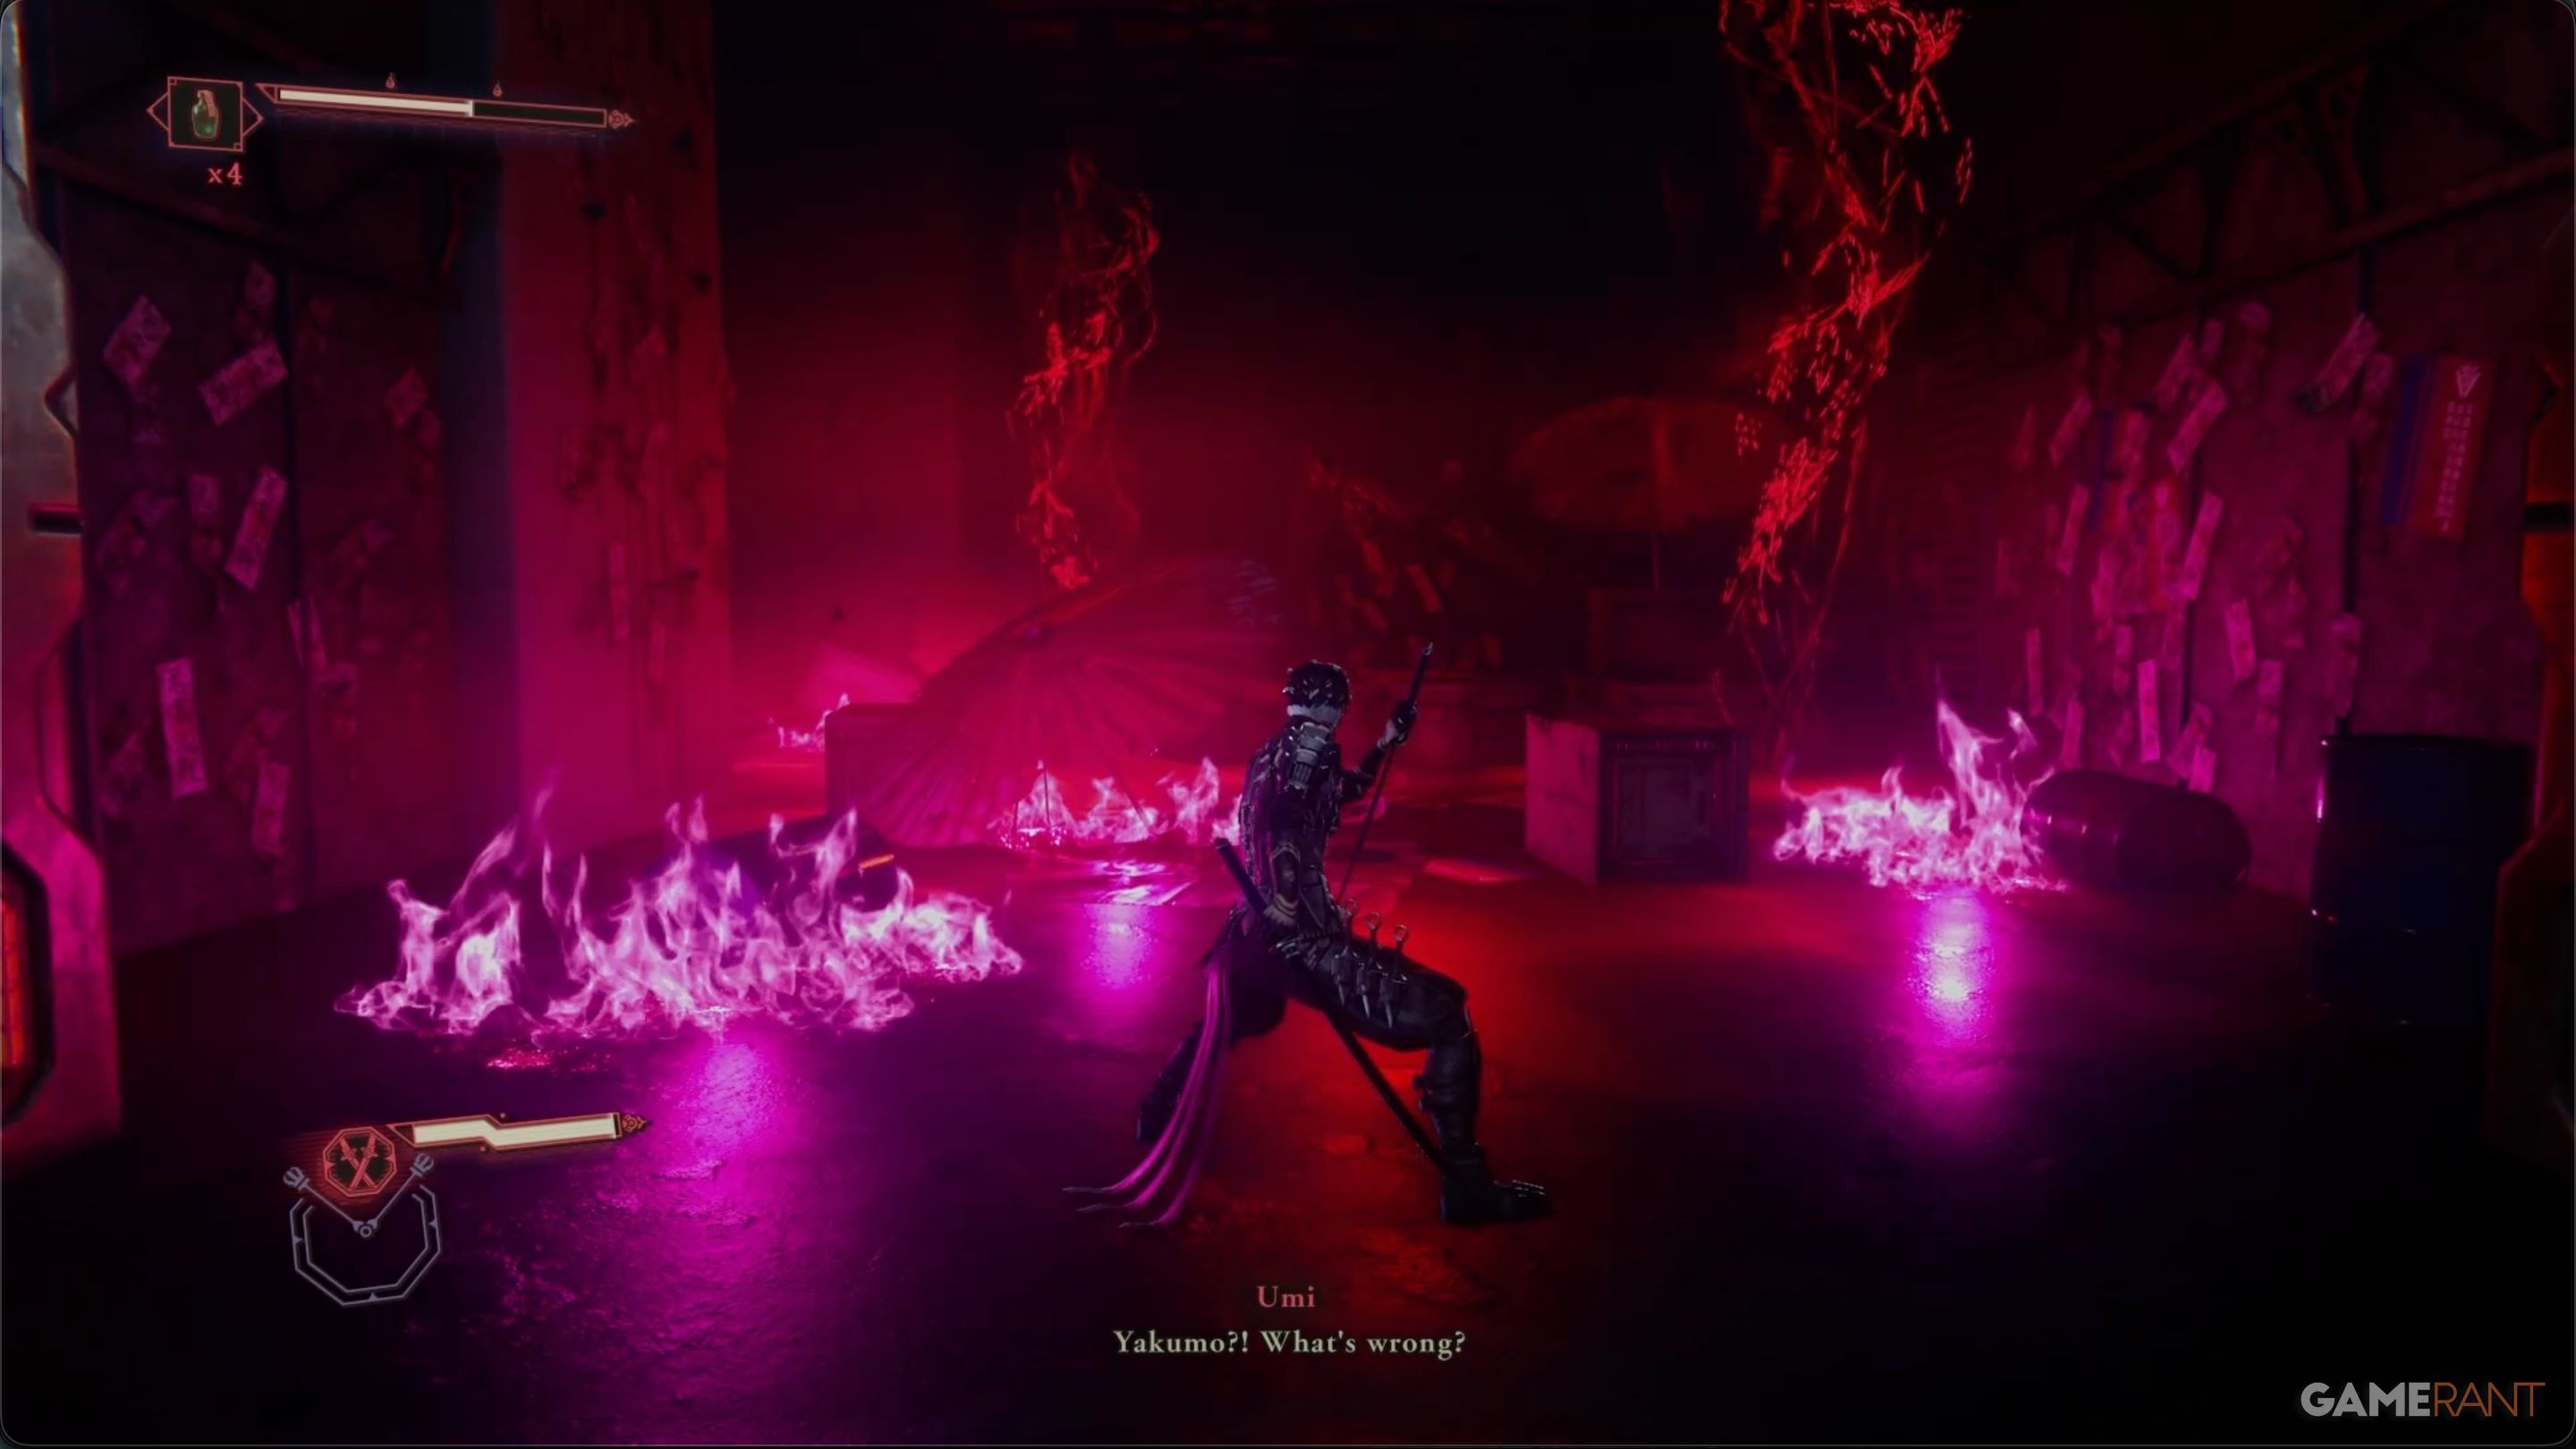
Once you’ve finished talking to Tyran, take the elevator. When you exit, you’ll notice the environment has changed – the hallway will be filled with red flames. As you proceed, be sure to break open the wooden crates; you’ll find Chest 6 hidden behind one near the metal fence.
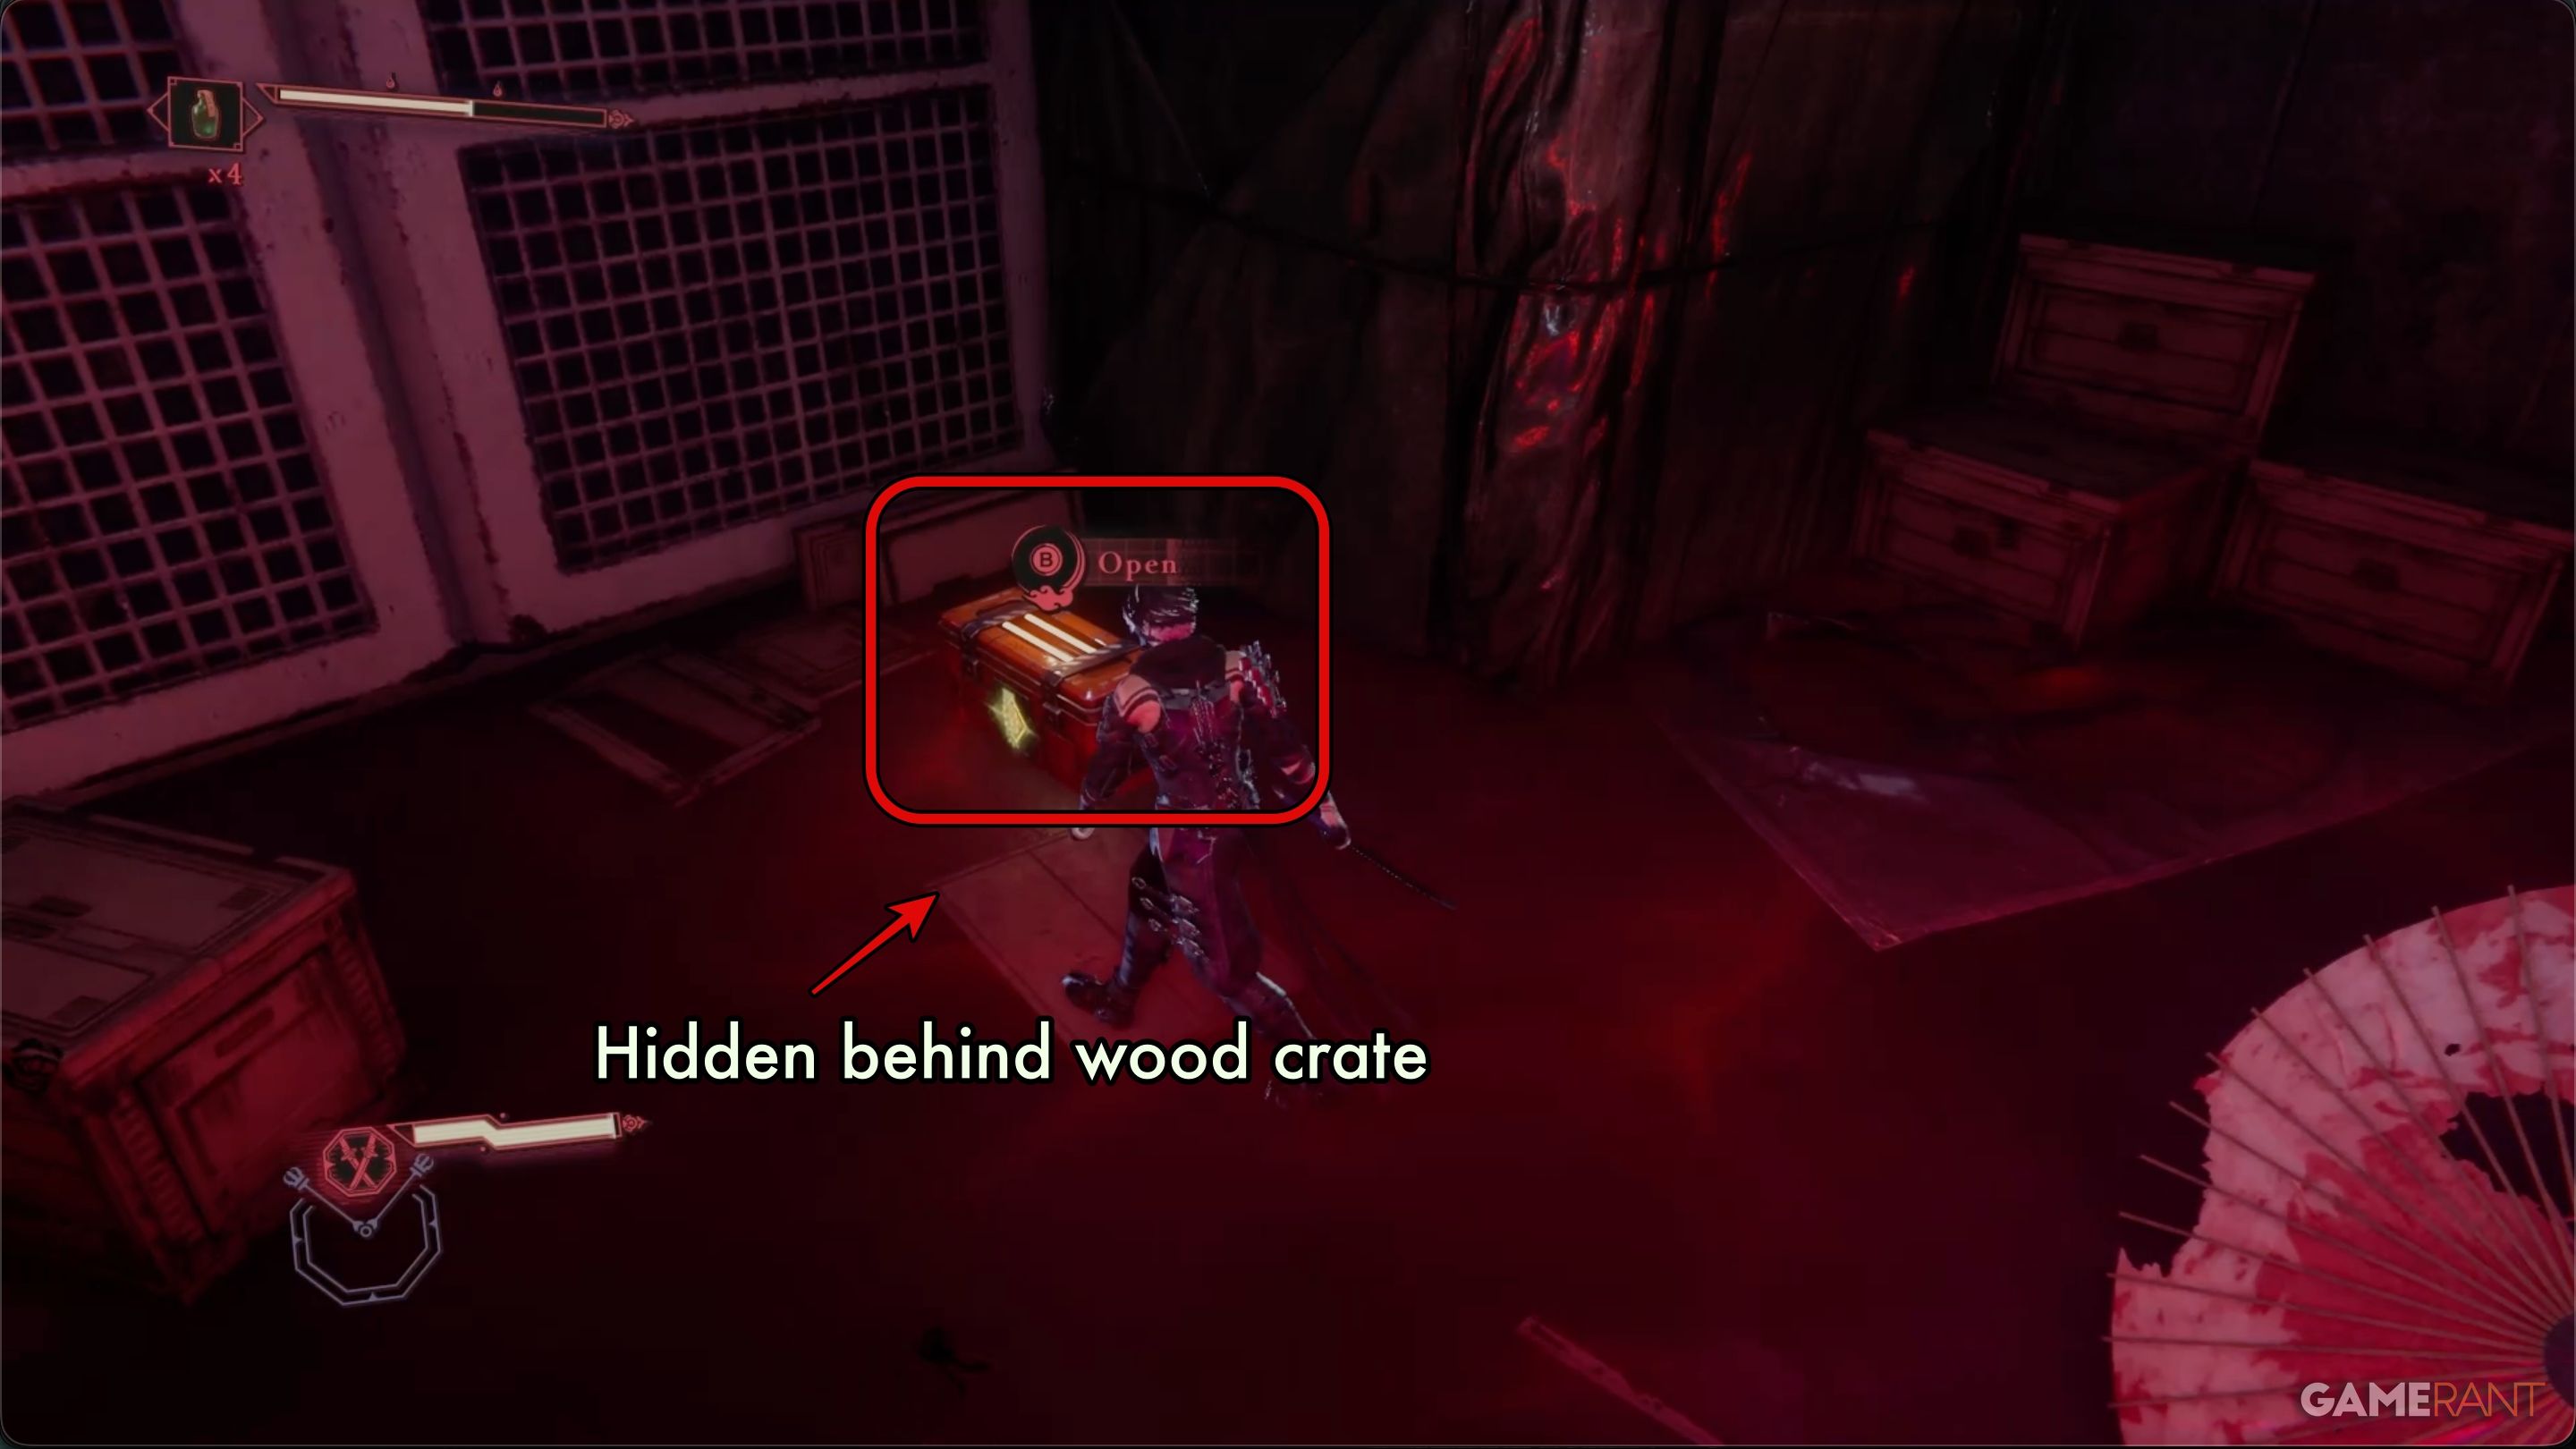
This chest contains an Incense of Rebirth.
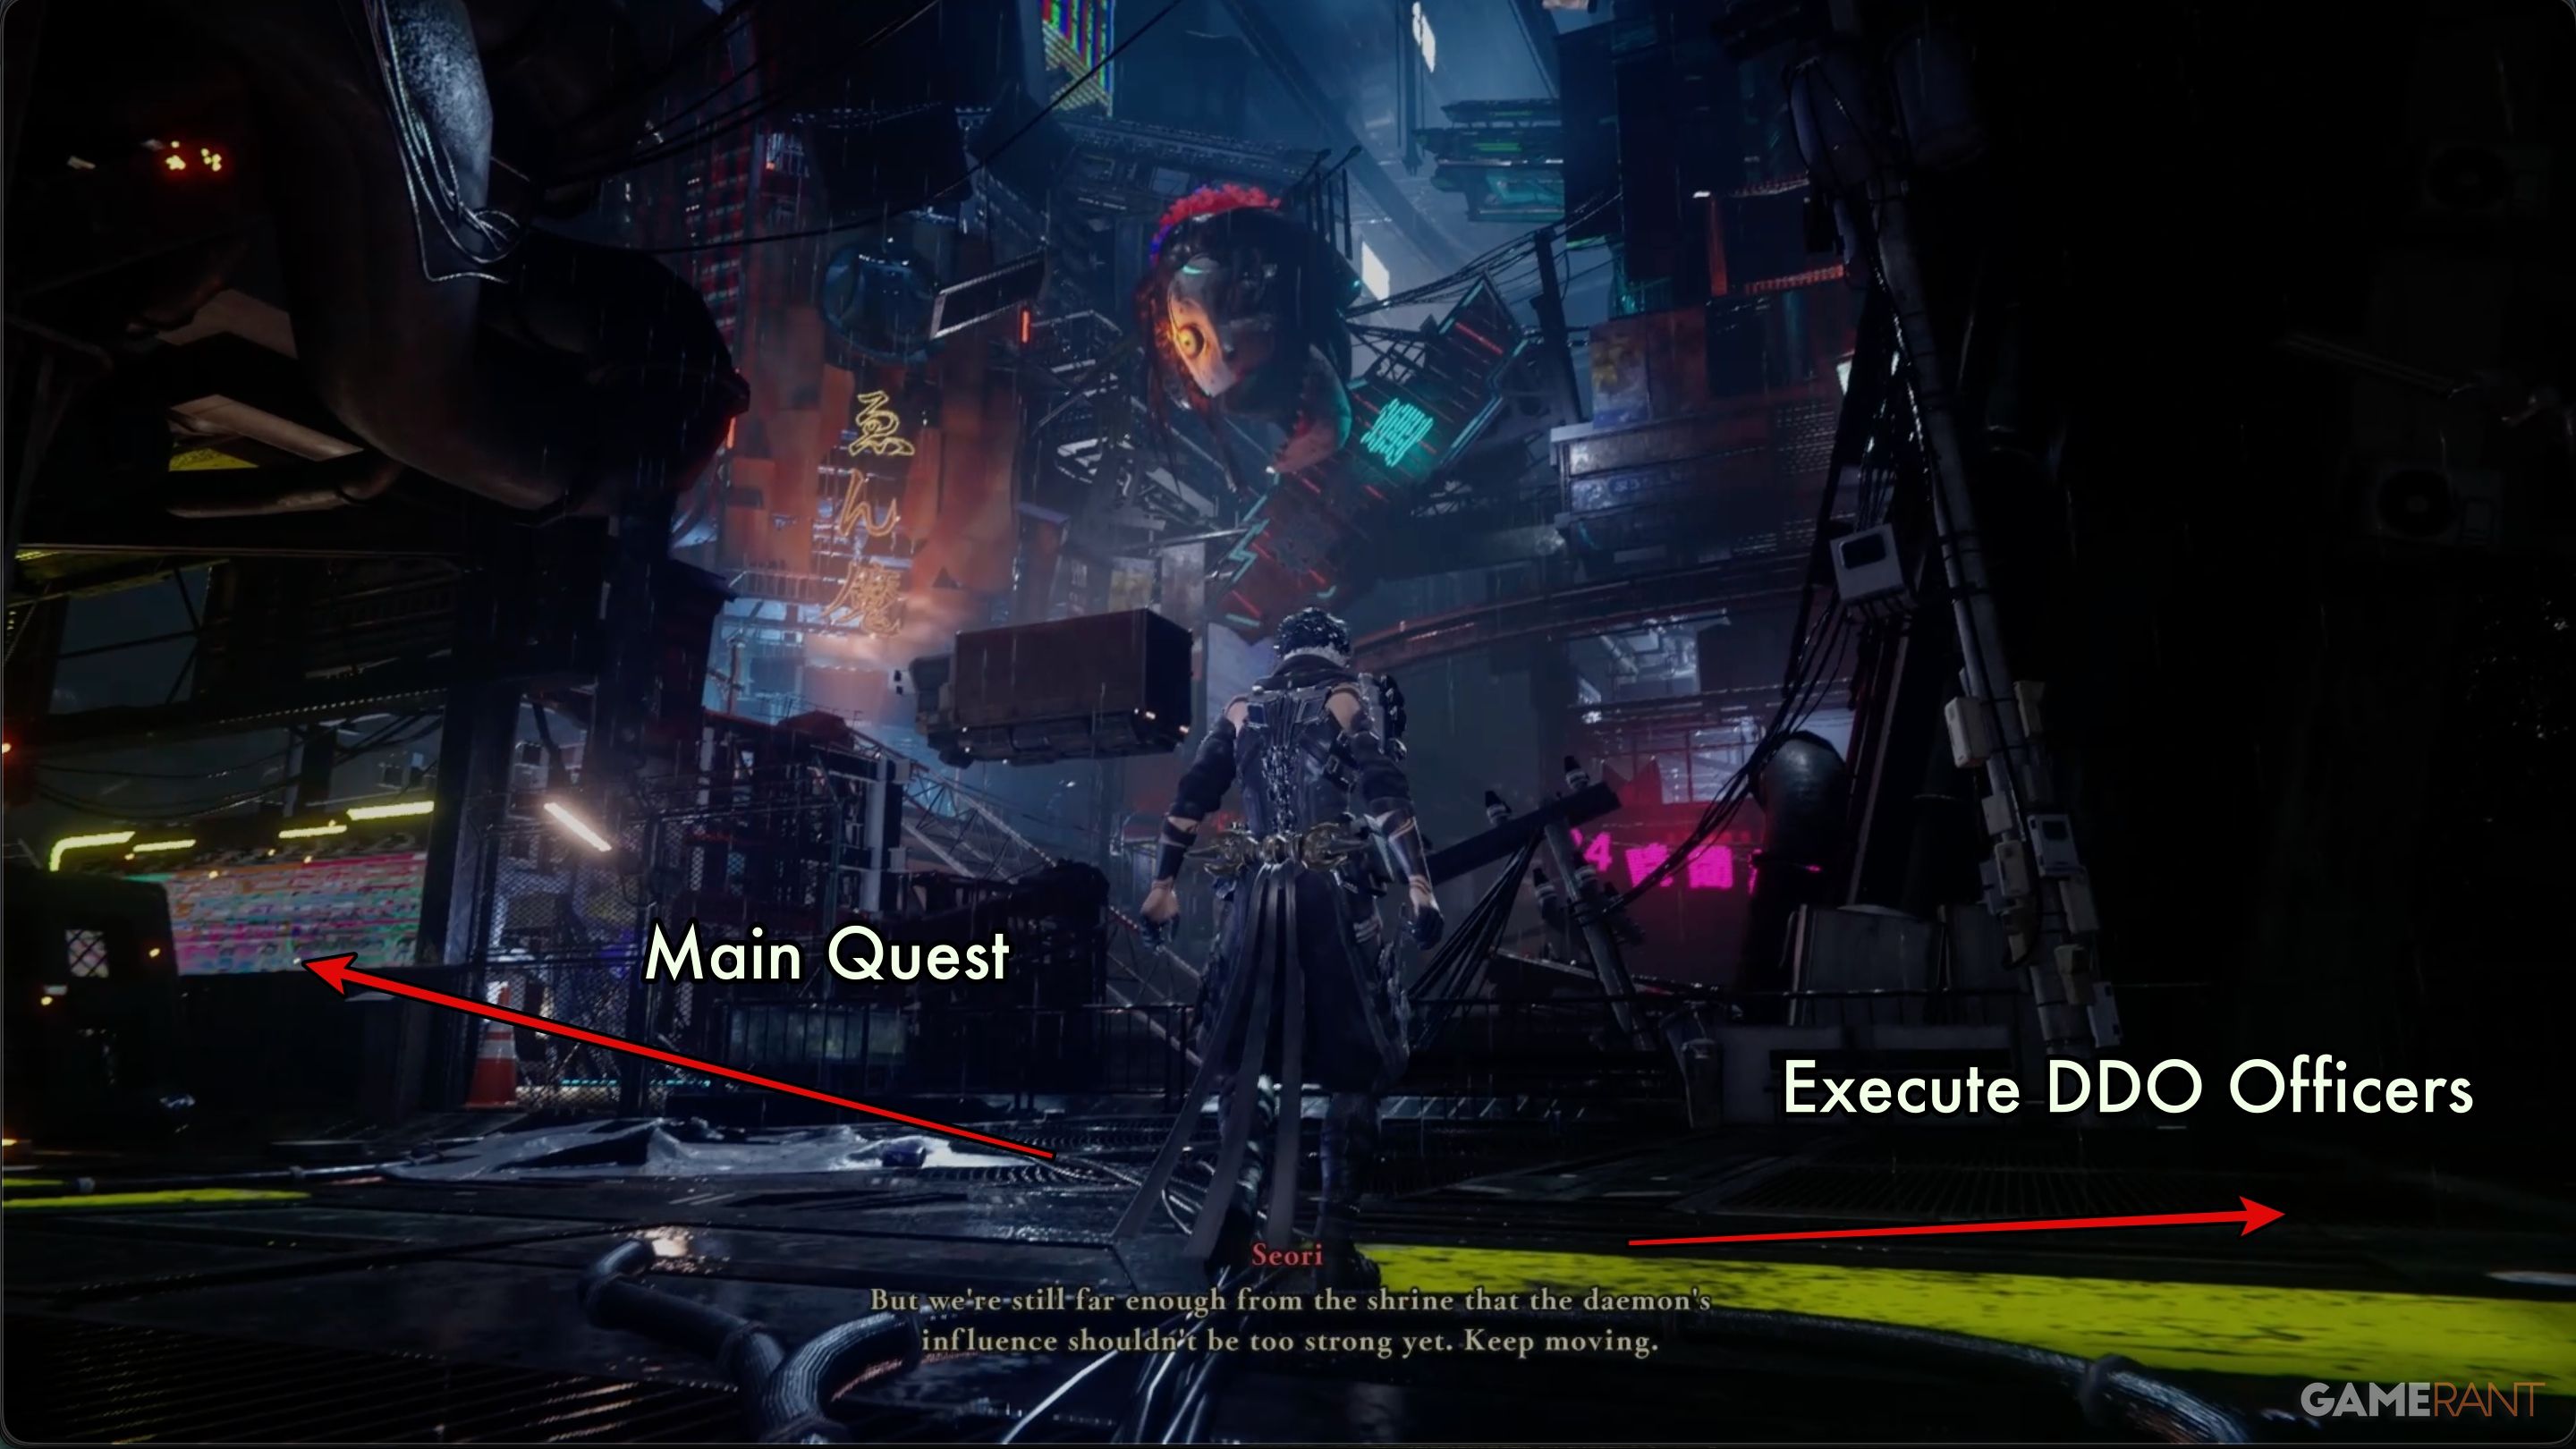
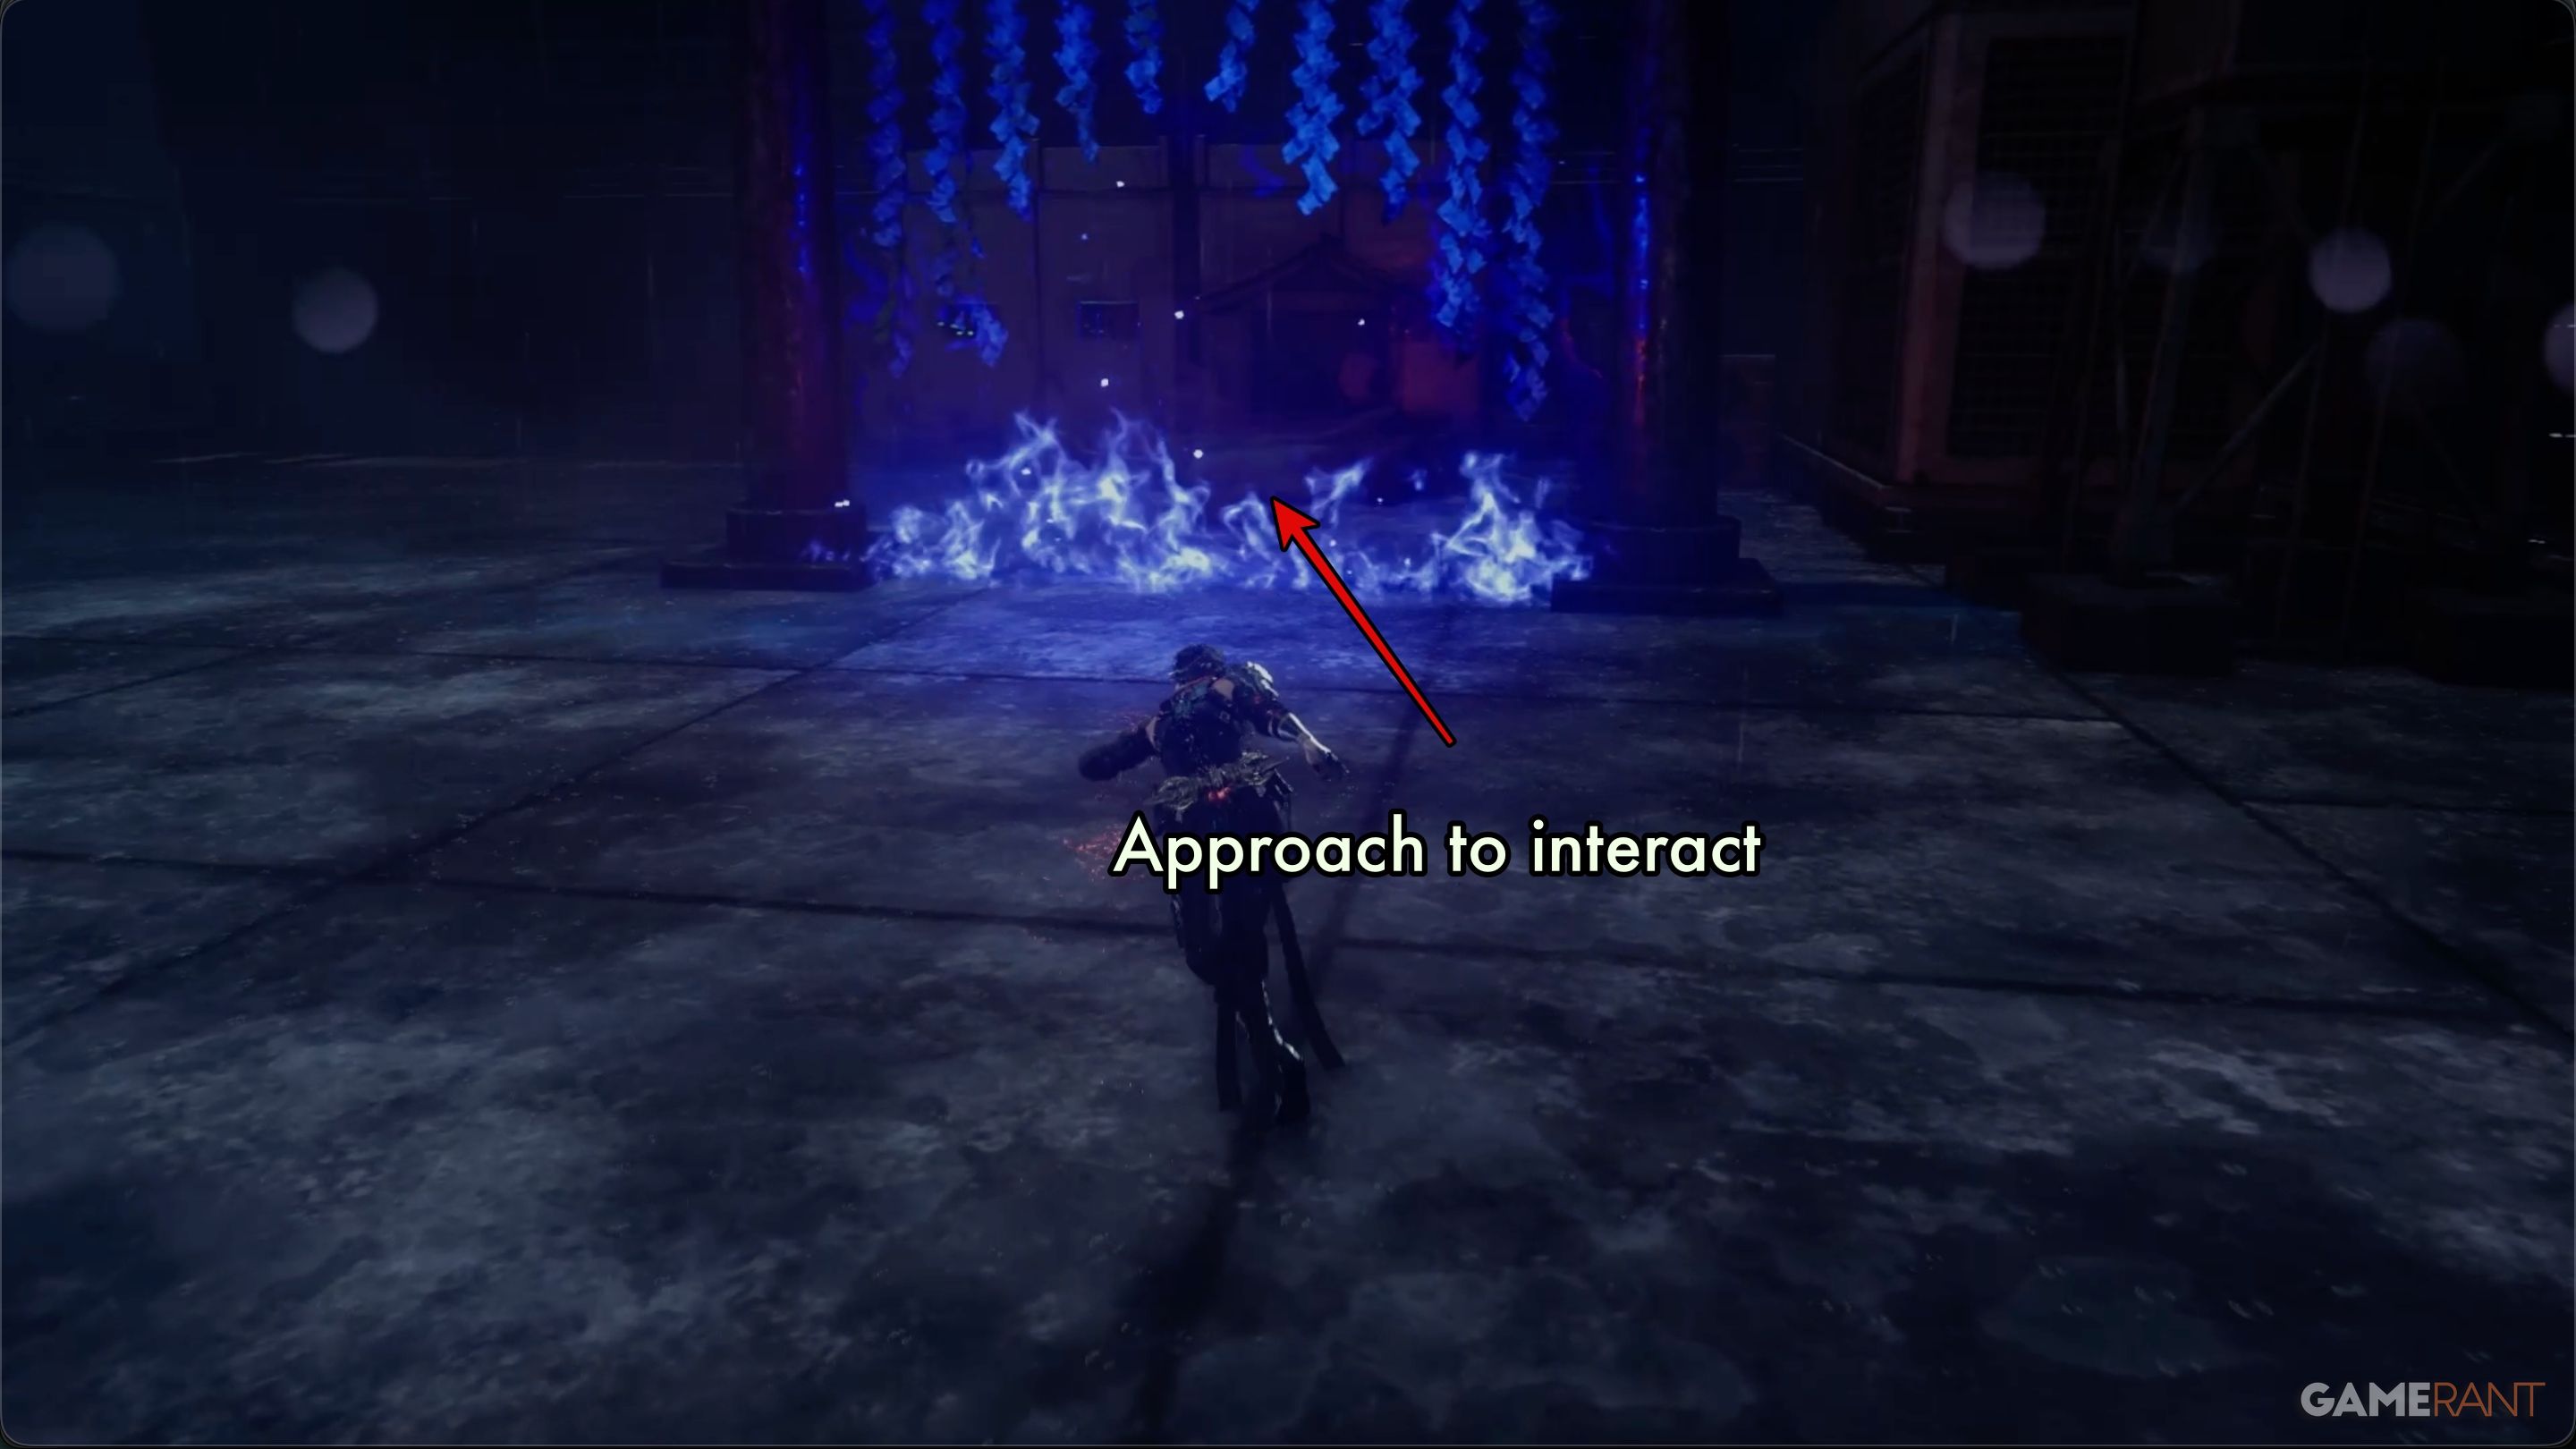
Head down this first hallway, and you’ll enter a bigger space where Seori will tell you about the Shrine Daemon and what happens when you get near it. Looking up at the city, you can go either right or left. If you took the mission to “Execute the D.D.O. Distribution Officers” from the DarkNest Terminal, turning right will start that encounter.
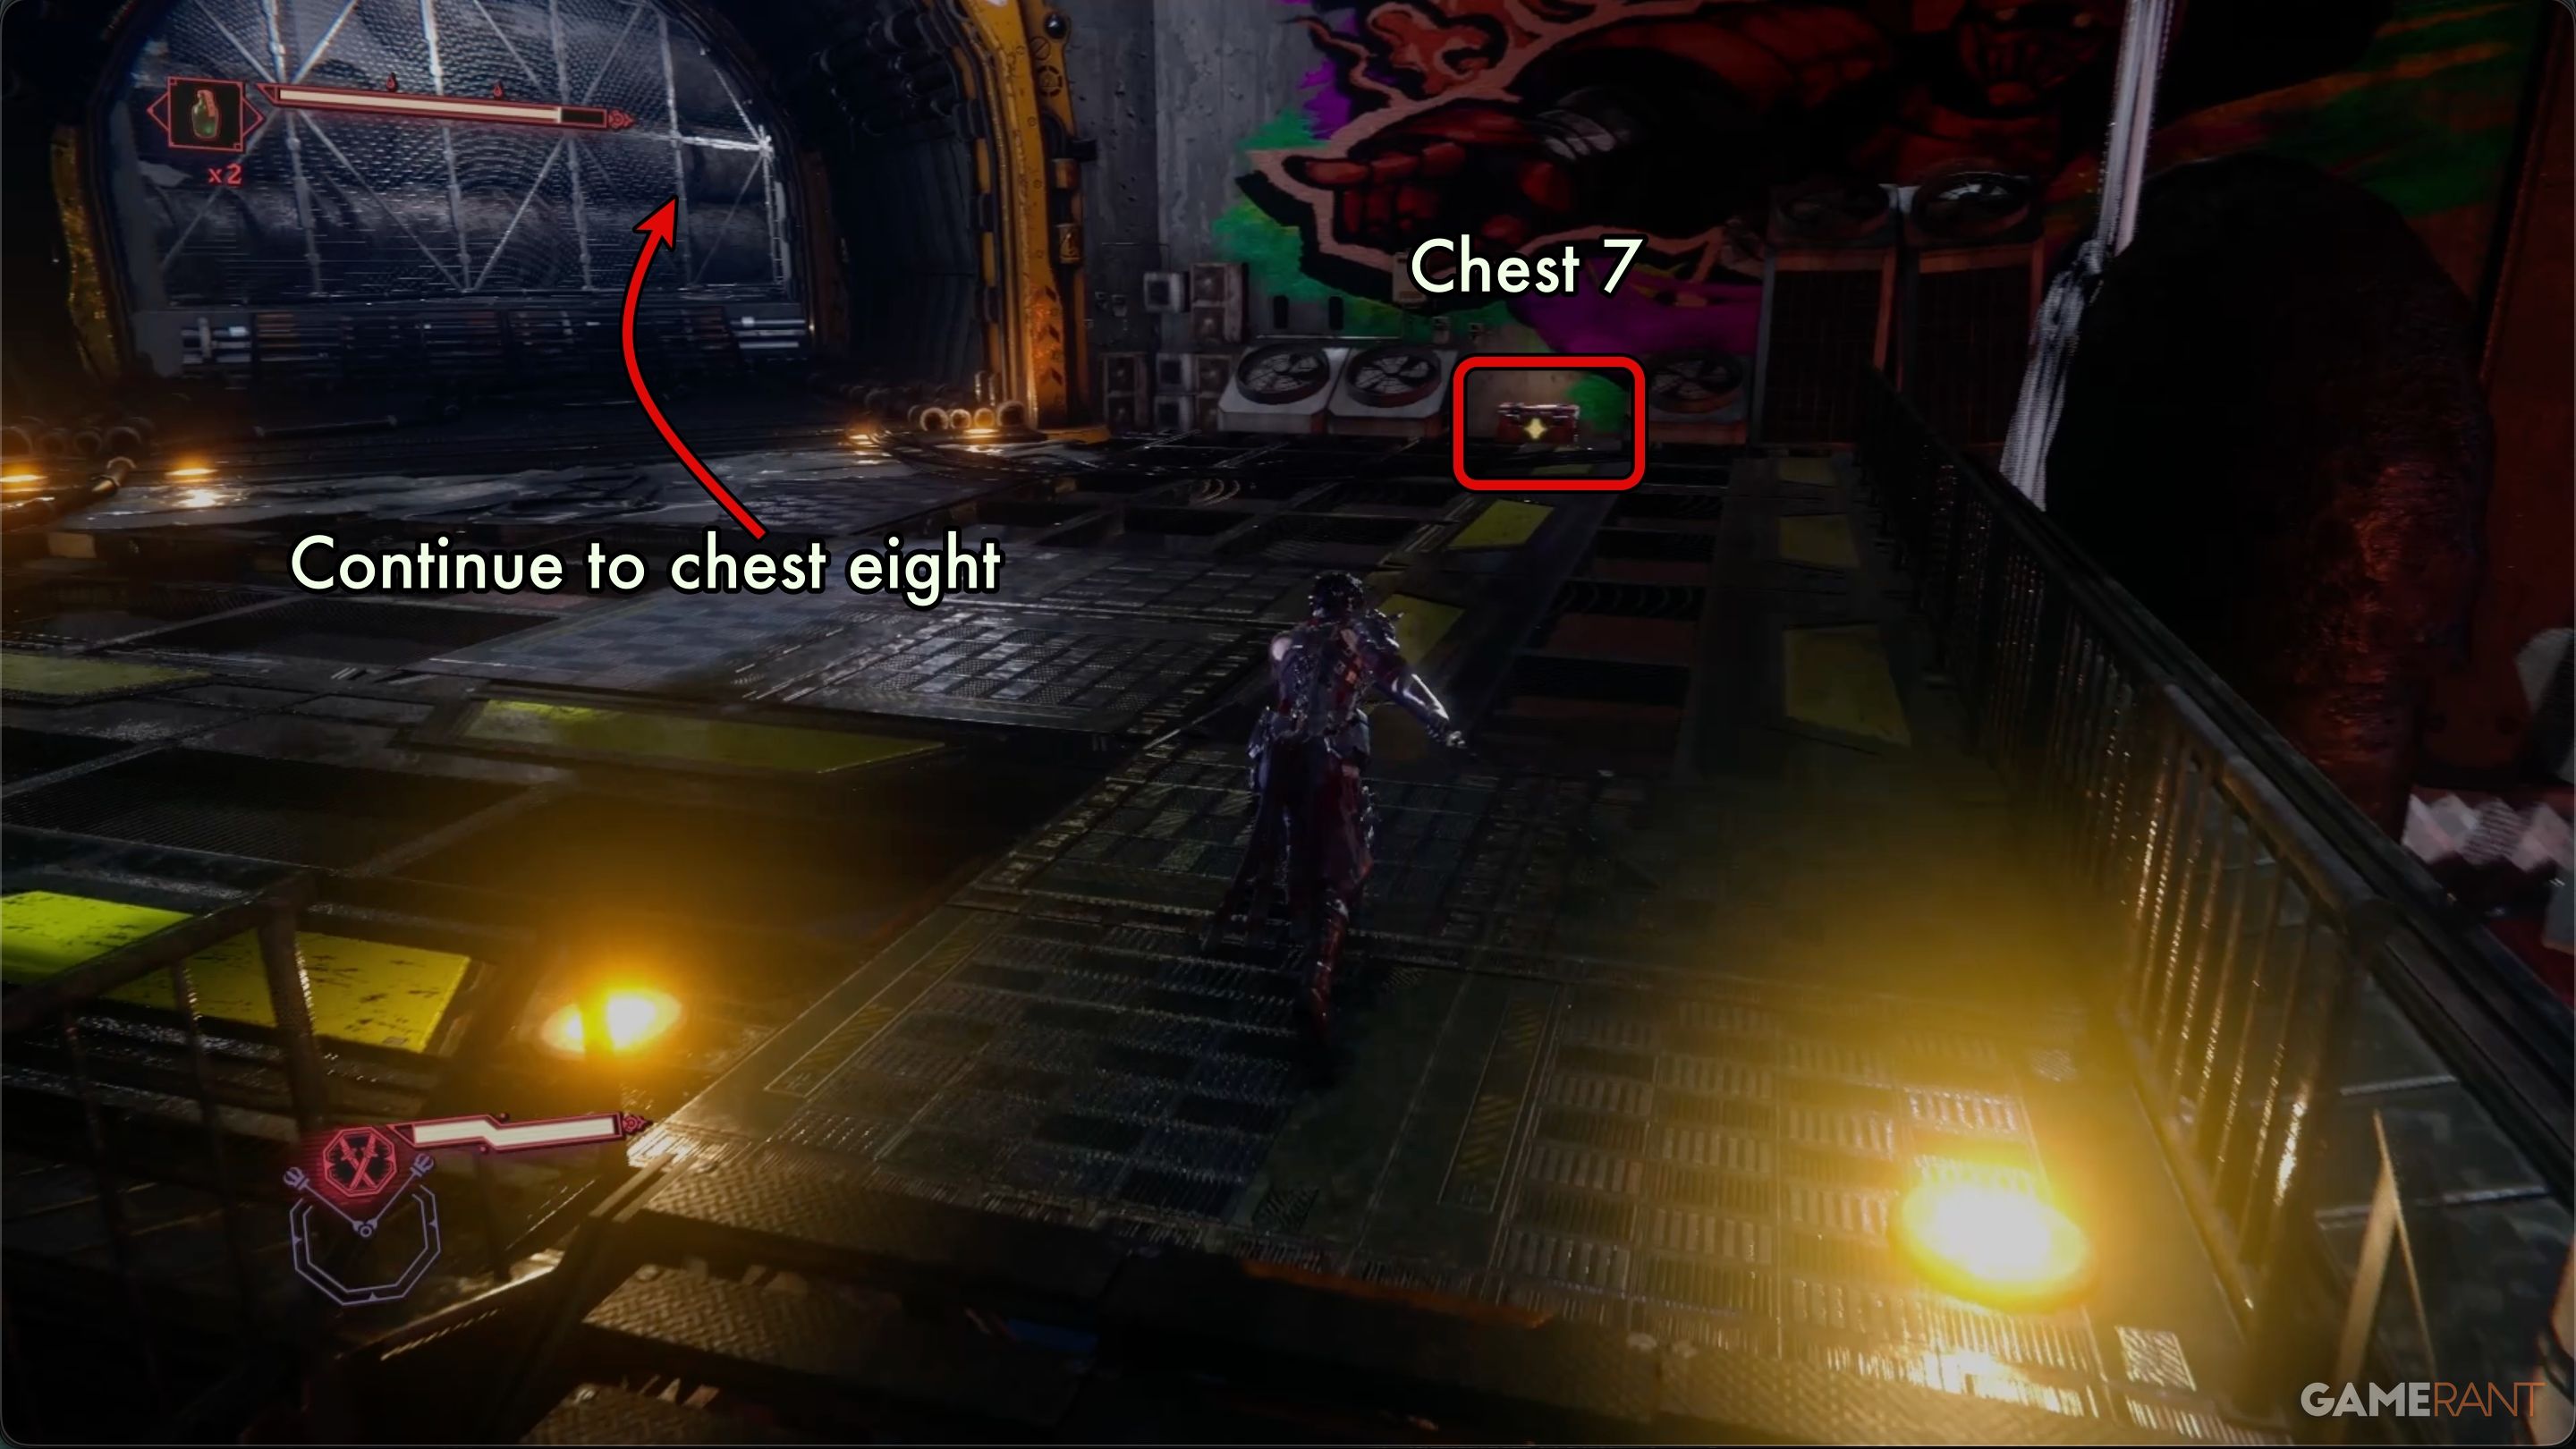
Okay, so if I turn left, that’ll push the main story forward. Heads up though – there’s a tight passage with a bunch of enemies waiting for me. But it’s worth it, because at the end, tucked against the wall, I’ll find Chest 7. And inside? A Life Elixir! Nice, that’ll definitely come in handy.
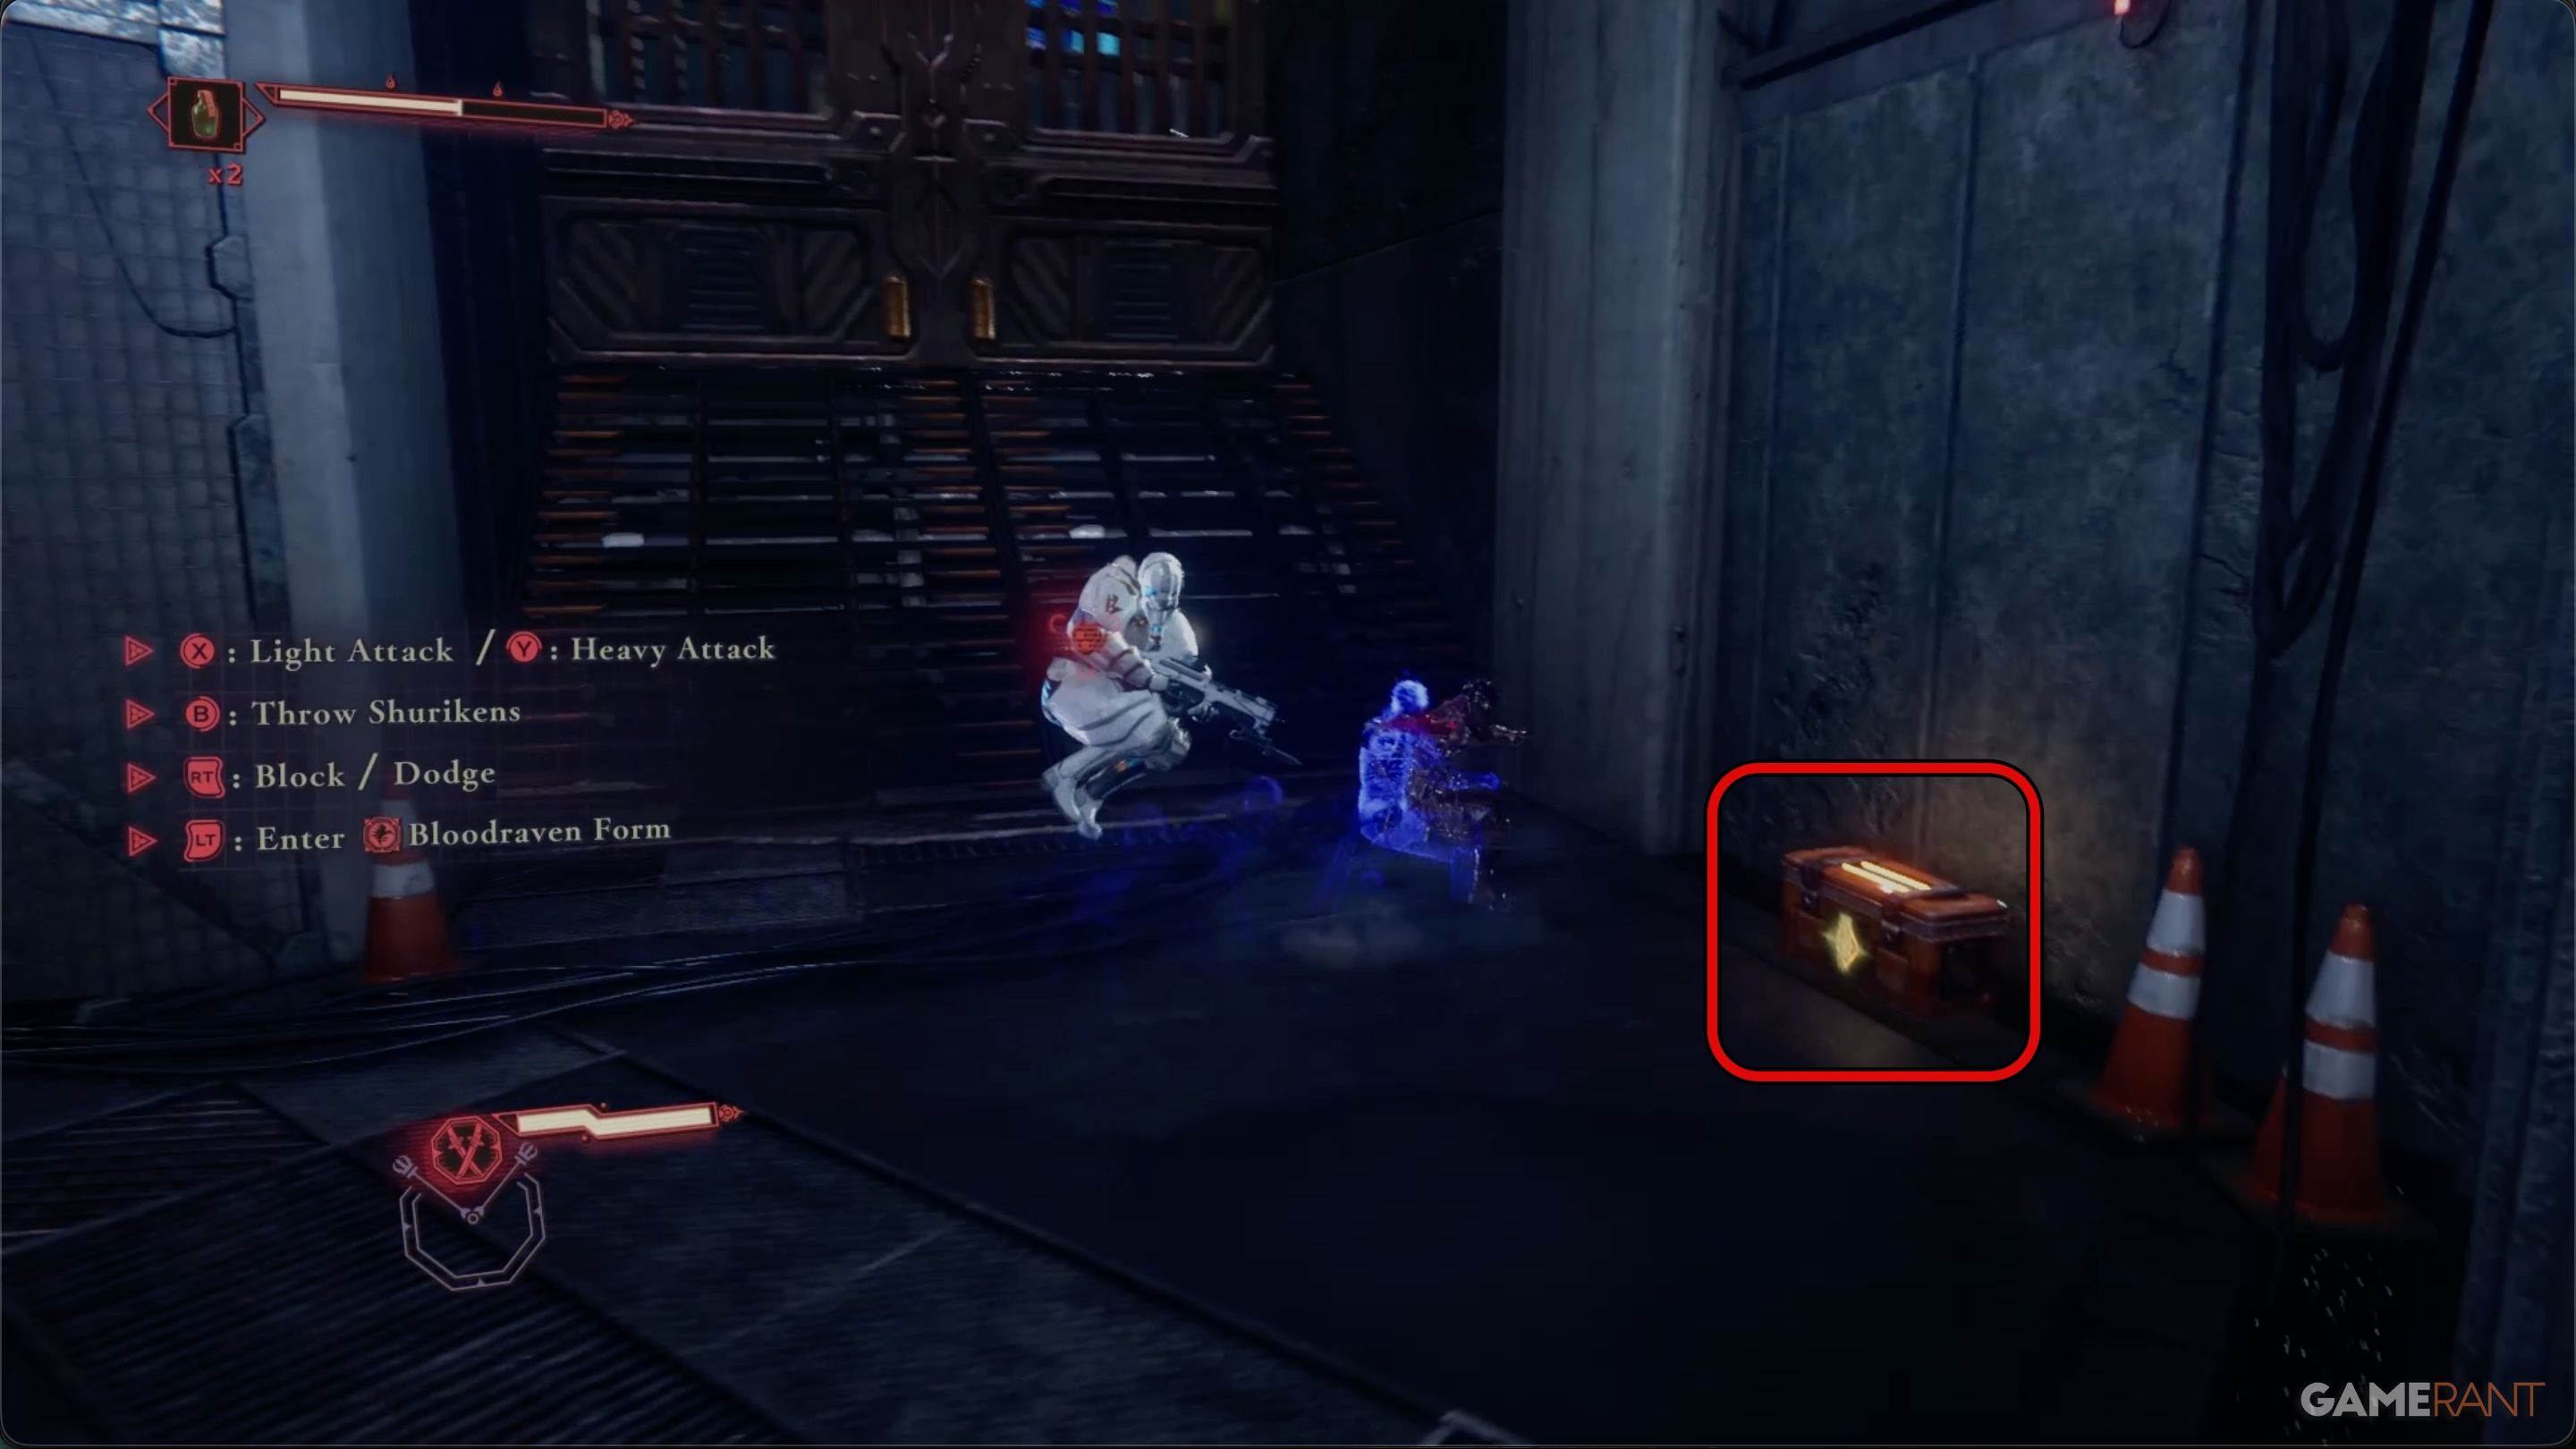
Right after you open Chest 7, a small group of enemies will attack. Keep going down the path and fighting them, and you’ll find Chest 8 on the right side. Inside, you’ll discover another Incense of Rebirth.
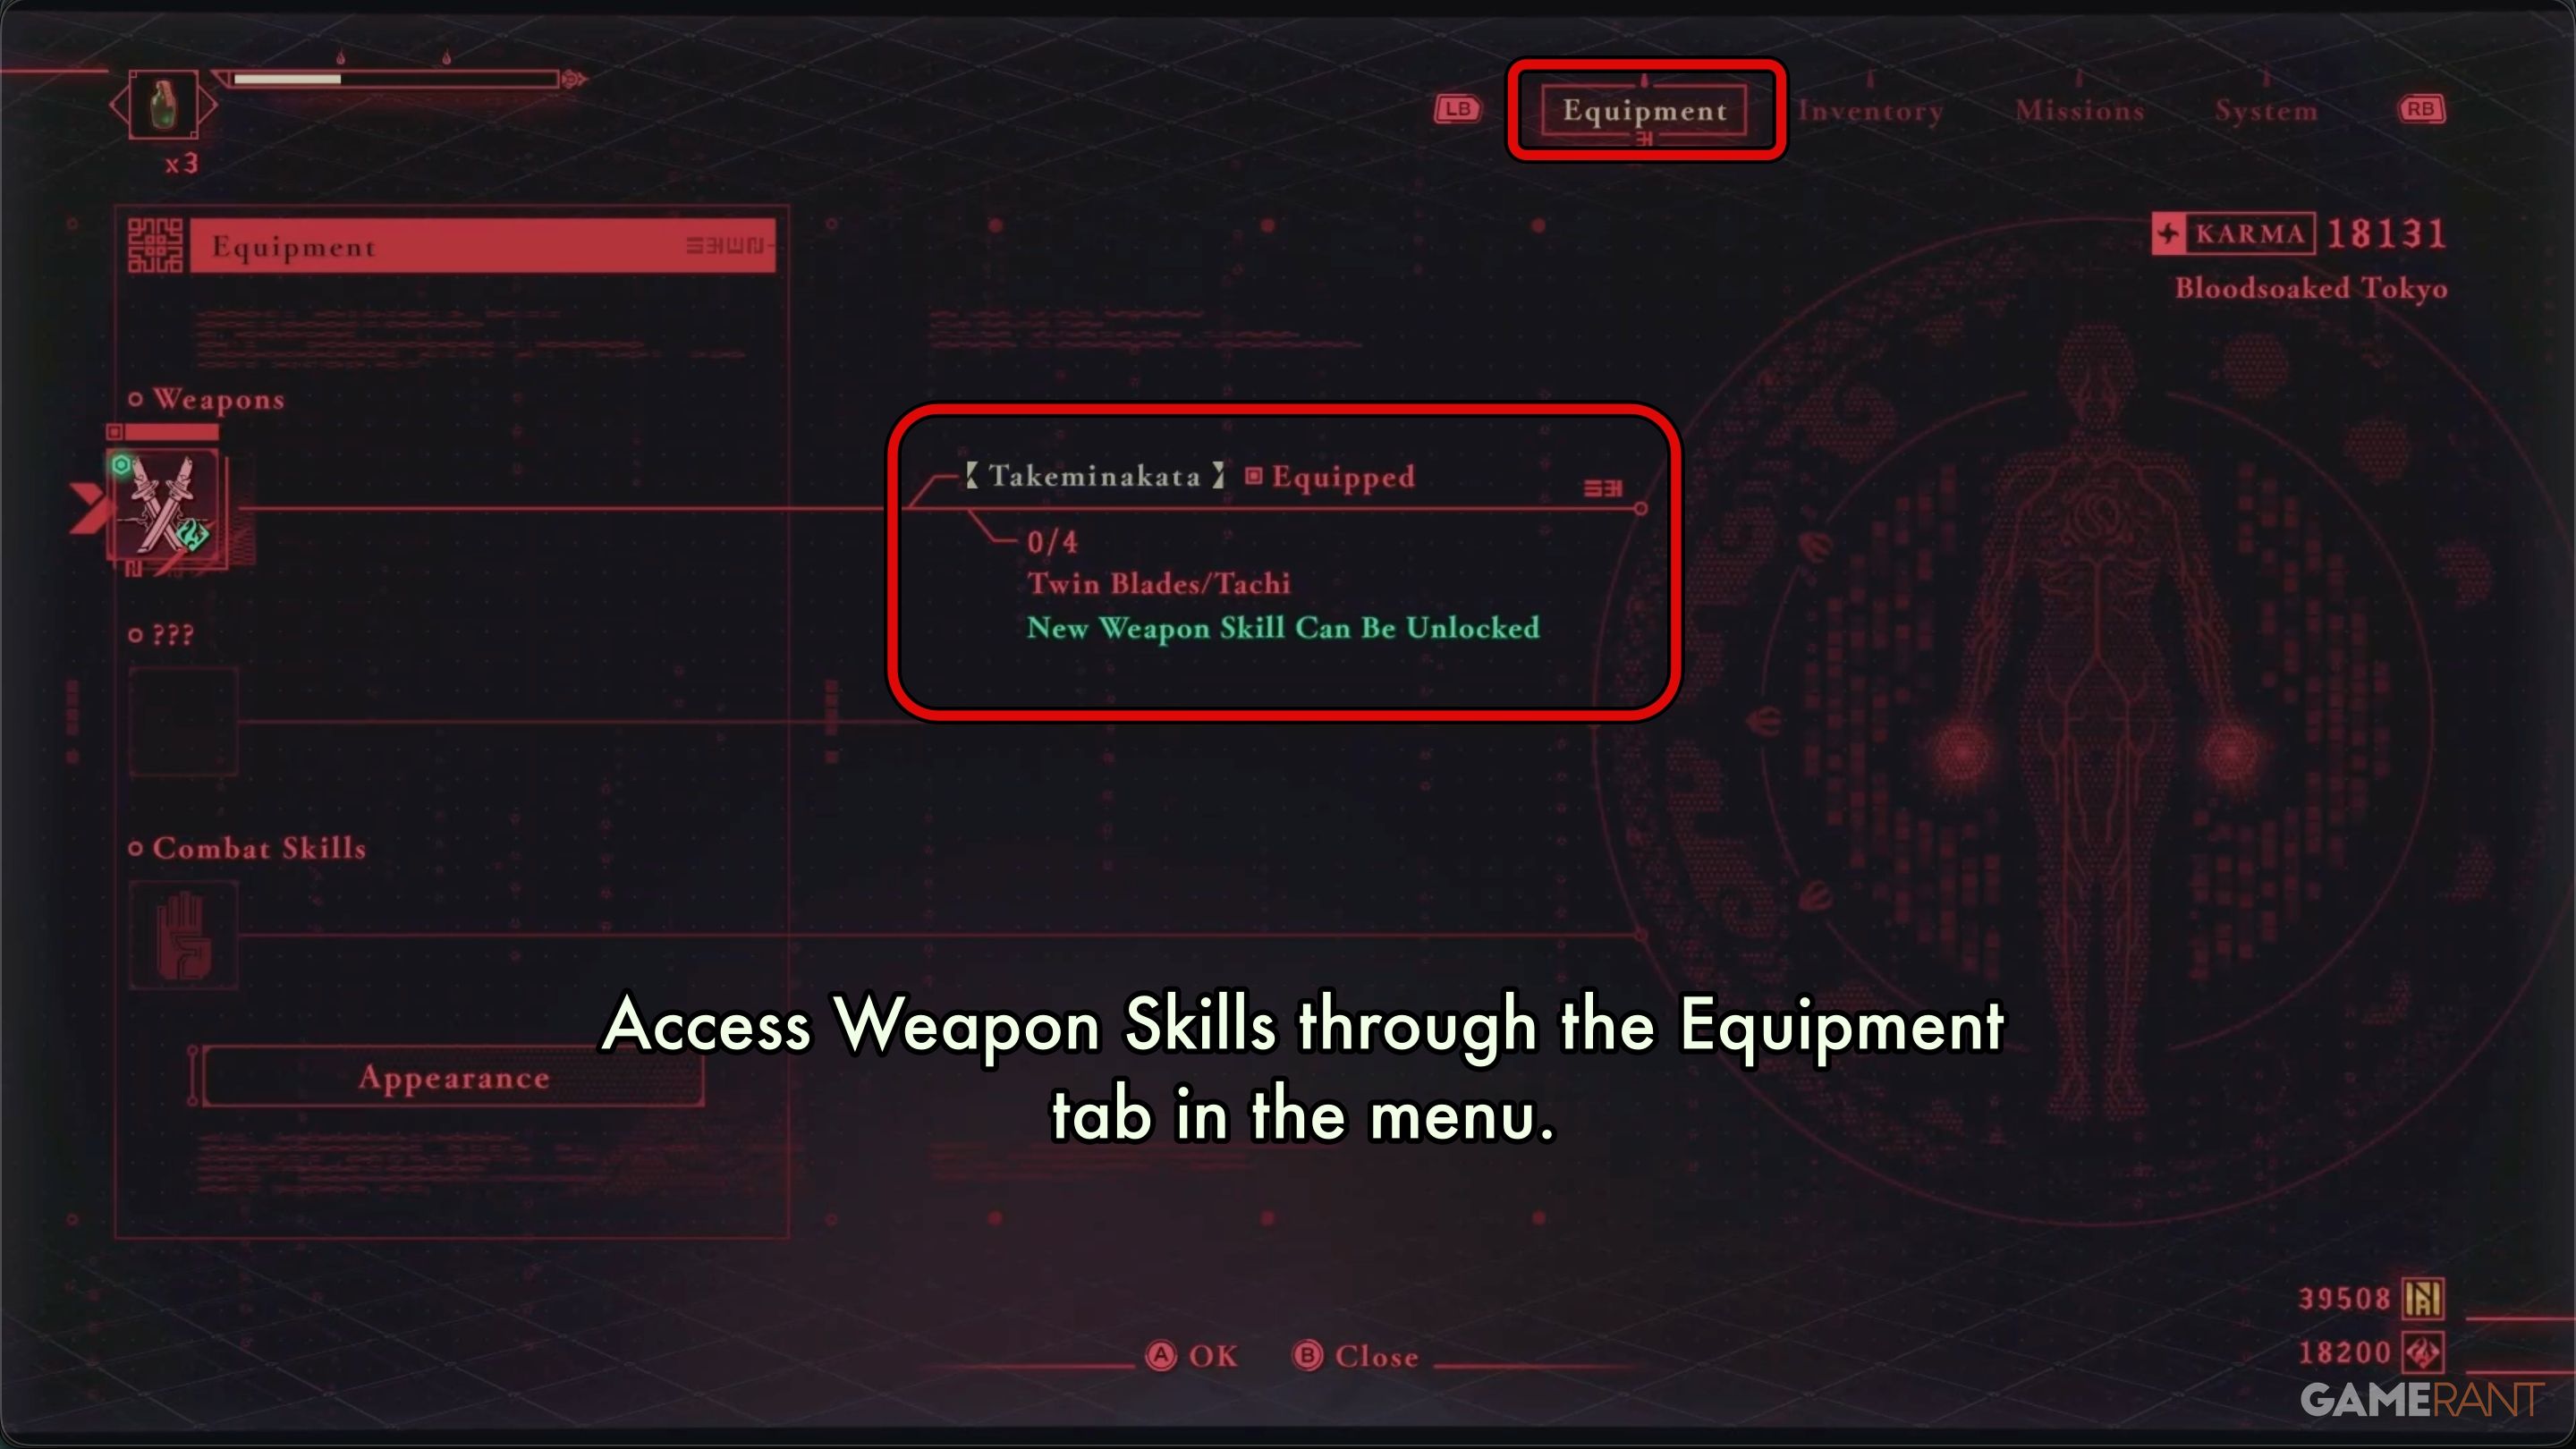
Unlock Weapon Skills in Ninja Gaiden 4:
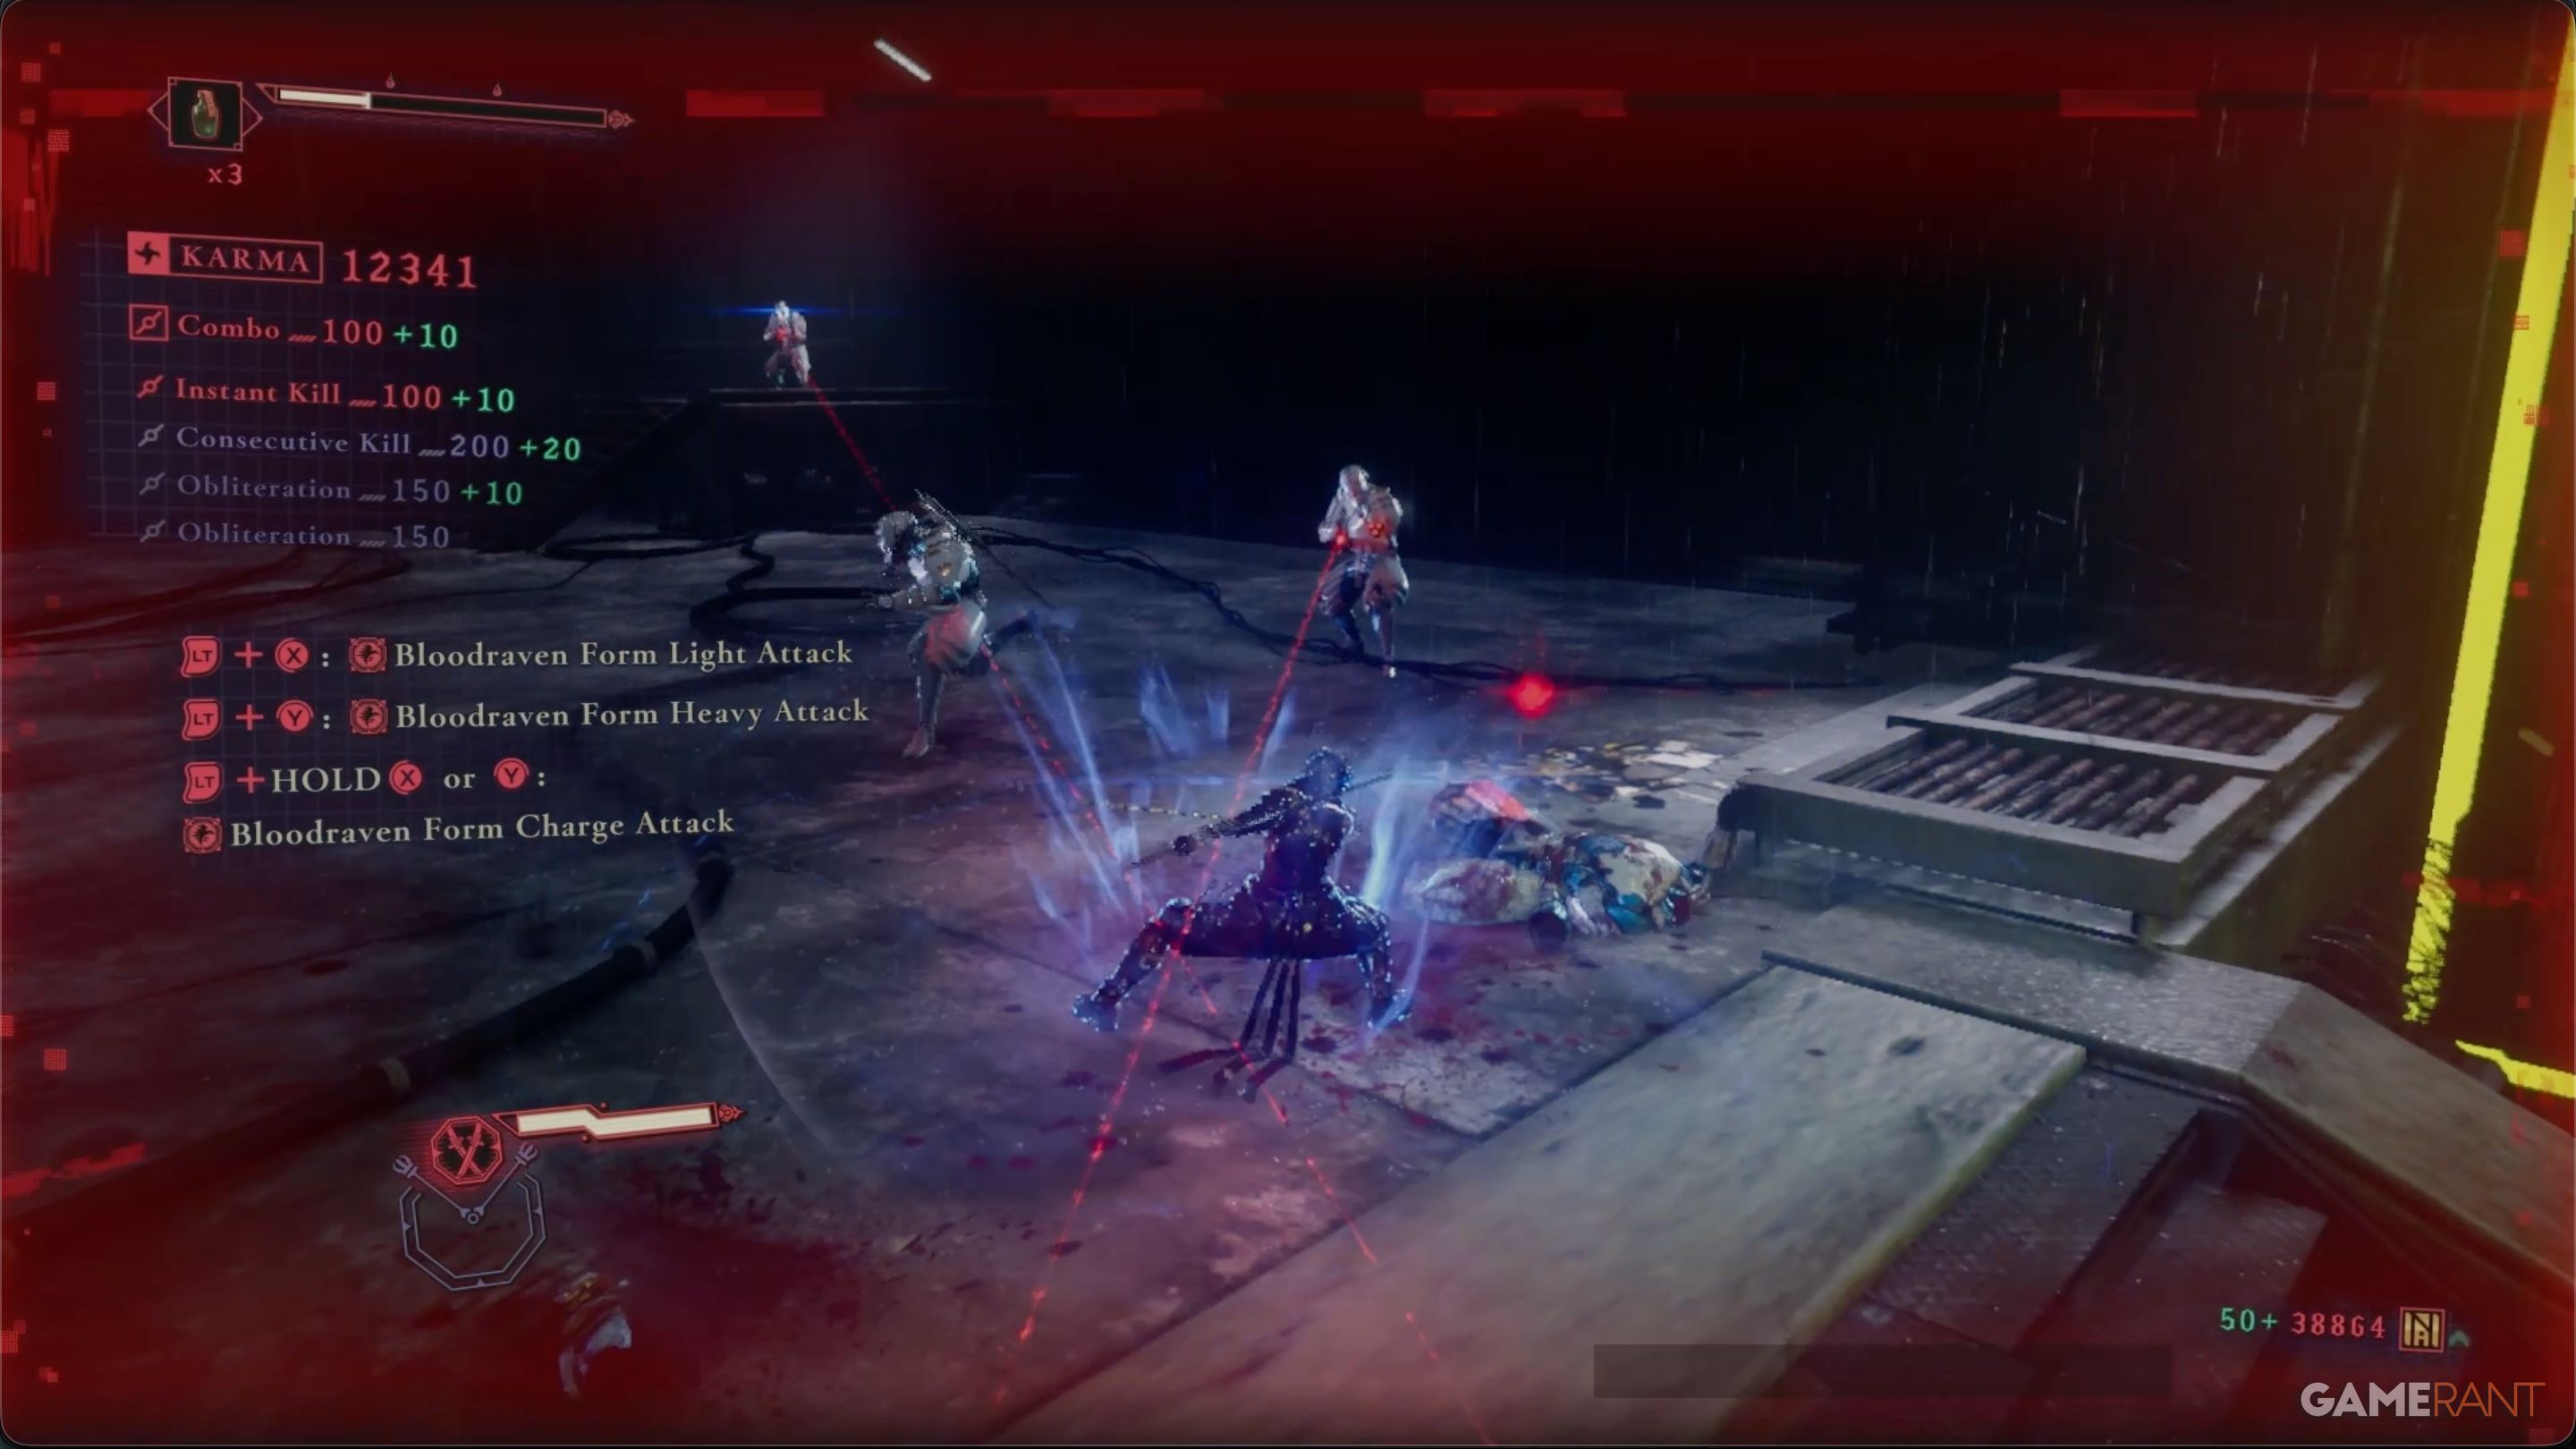
Once you get Chest 8, you’ll face your biggest group of enemies yet. Put all your skills to the test to defeat them, and you’ll unlock Weapon Skills. These are different from your regular Combat Skills – they’re special abilities that depend on the weapon you’re currently using.
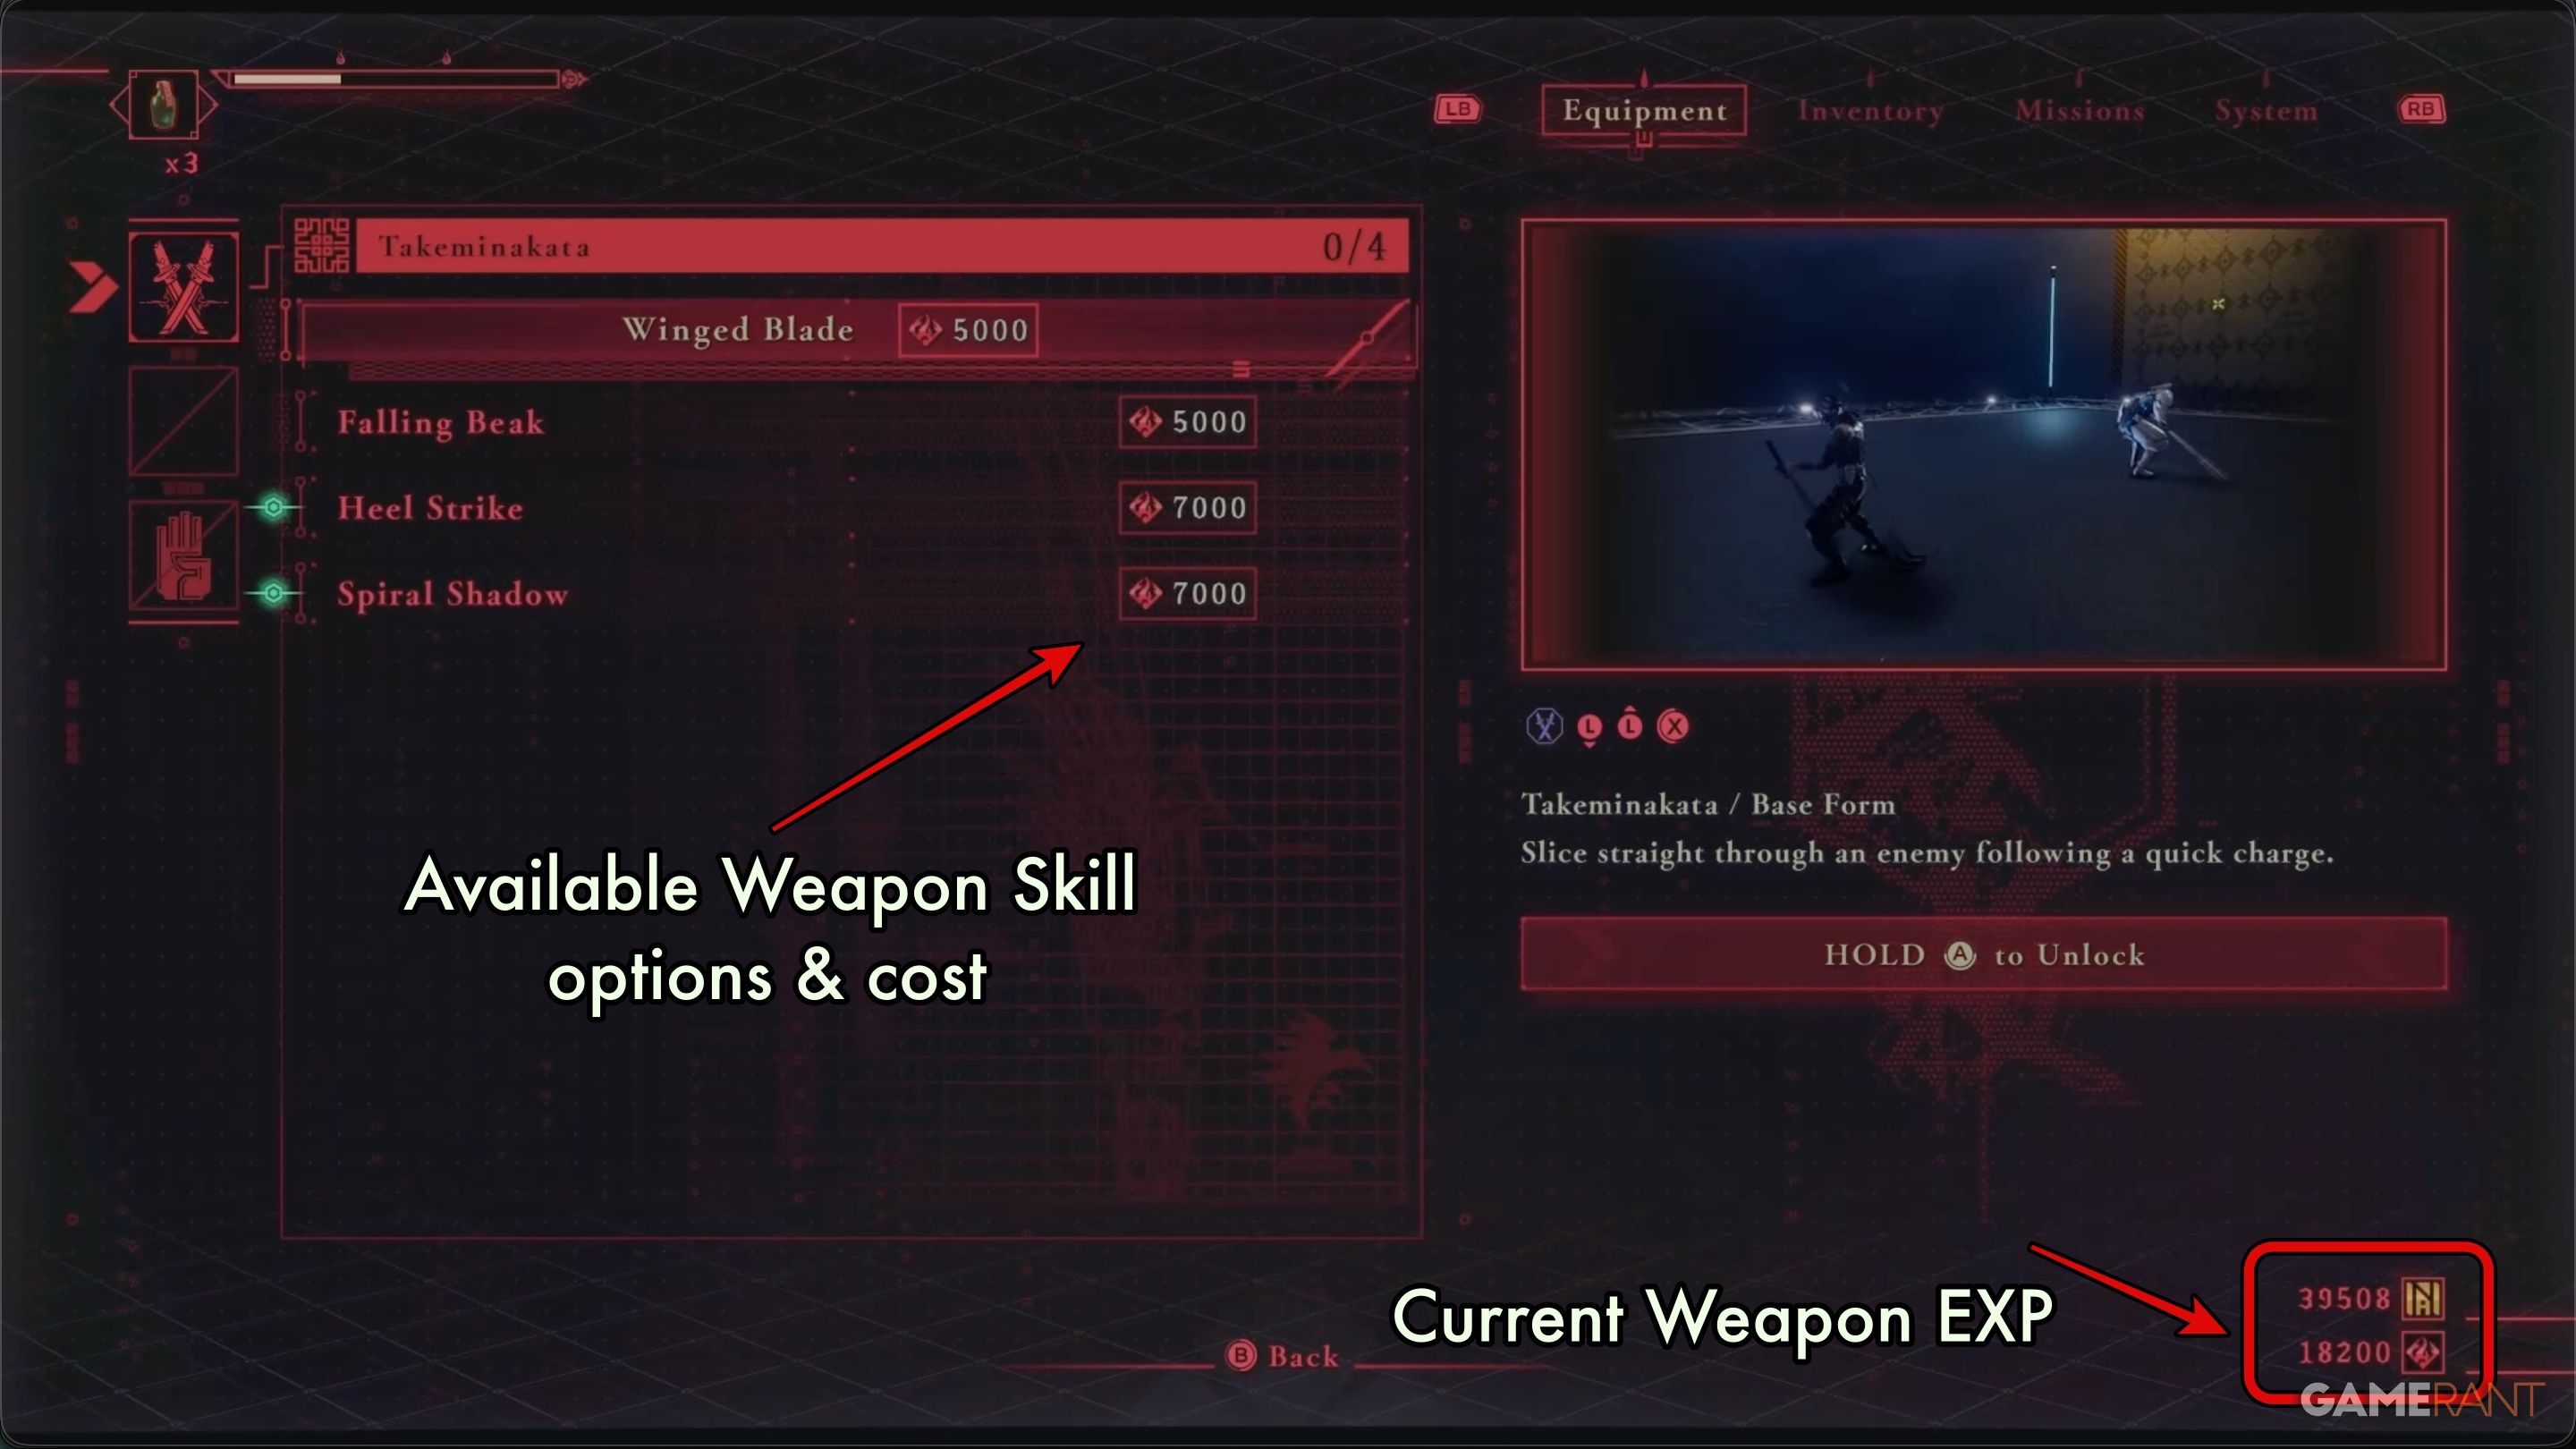
You use Weapon EXP – a special currency earned through battles – to unlock and improve Weapon Skills. After each fight, the game will pause to explain these skills and show you what’s available. The amount of Weapon EXP you get depends on how well you fight – better performance means more rewards.
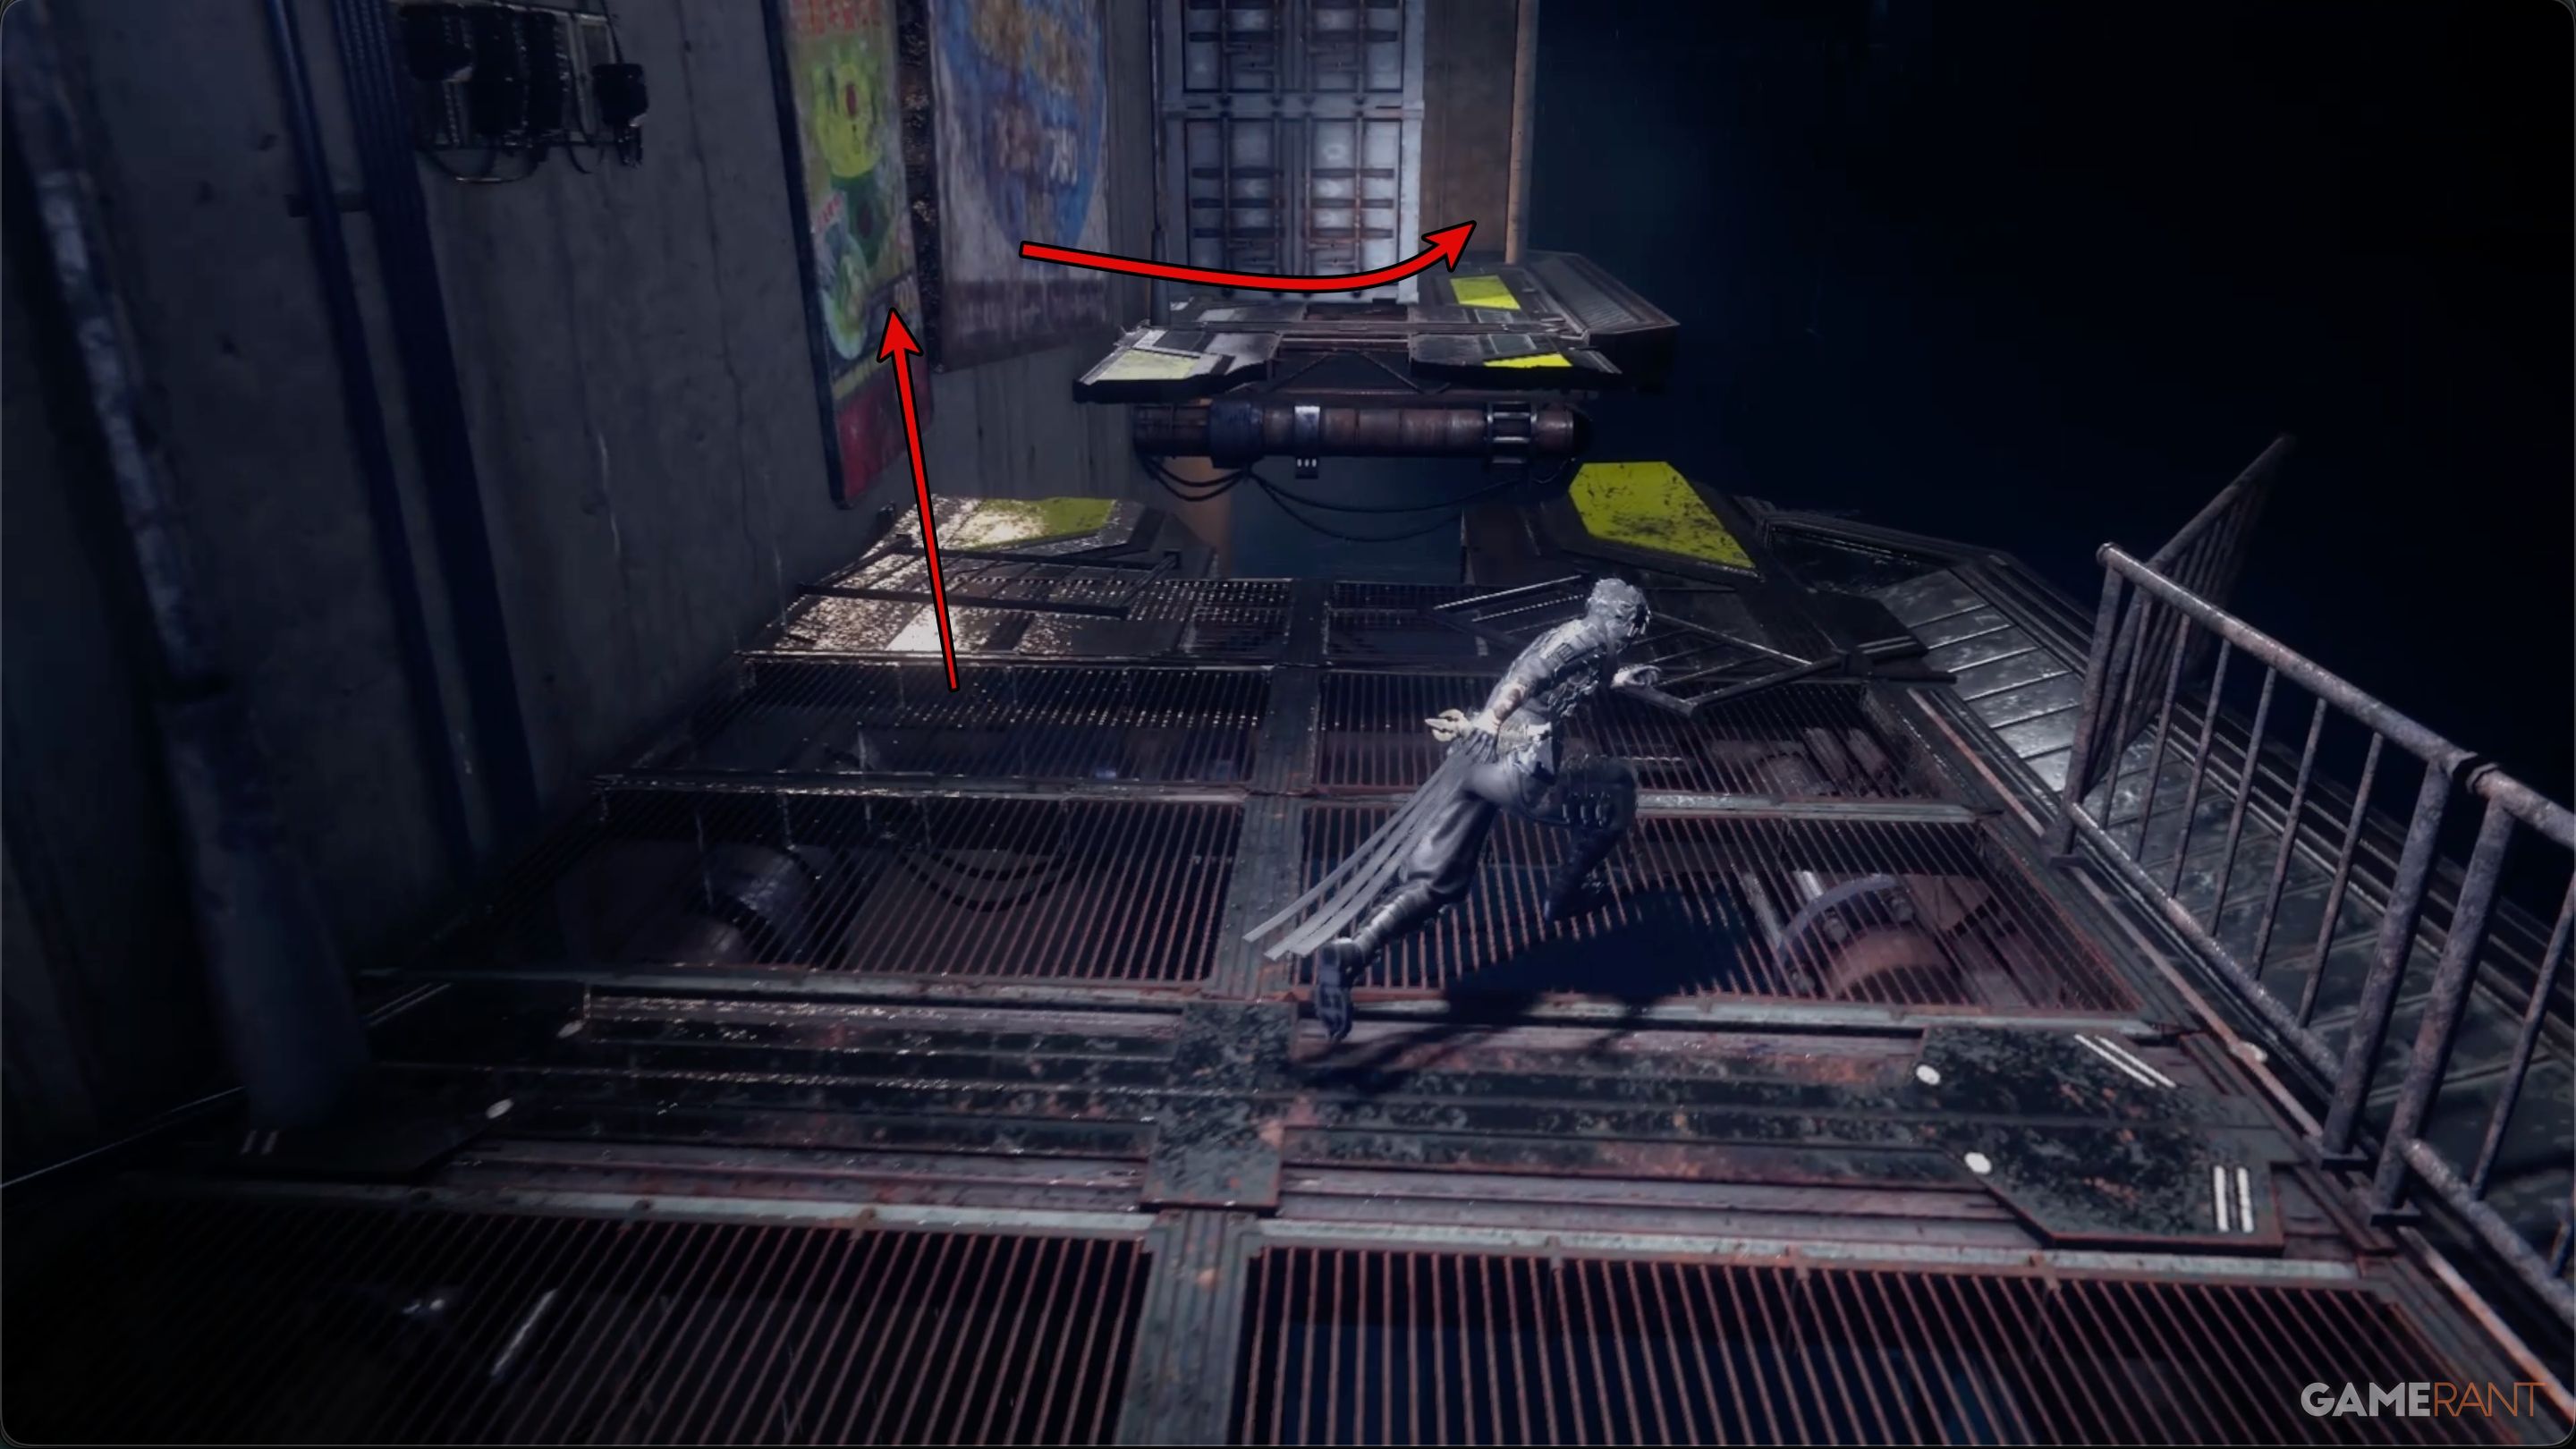
Once you’re past the initial area, you’ll need to jump across a series of large pipes to continue. Look for a curved pipe that seems to lead down into a deep pit – there’s a hidden ladder nearby. Climb down the ladder and turn left to find Chest 9 and Chest 10.
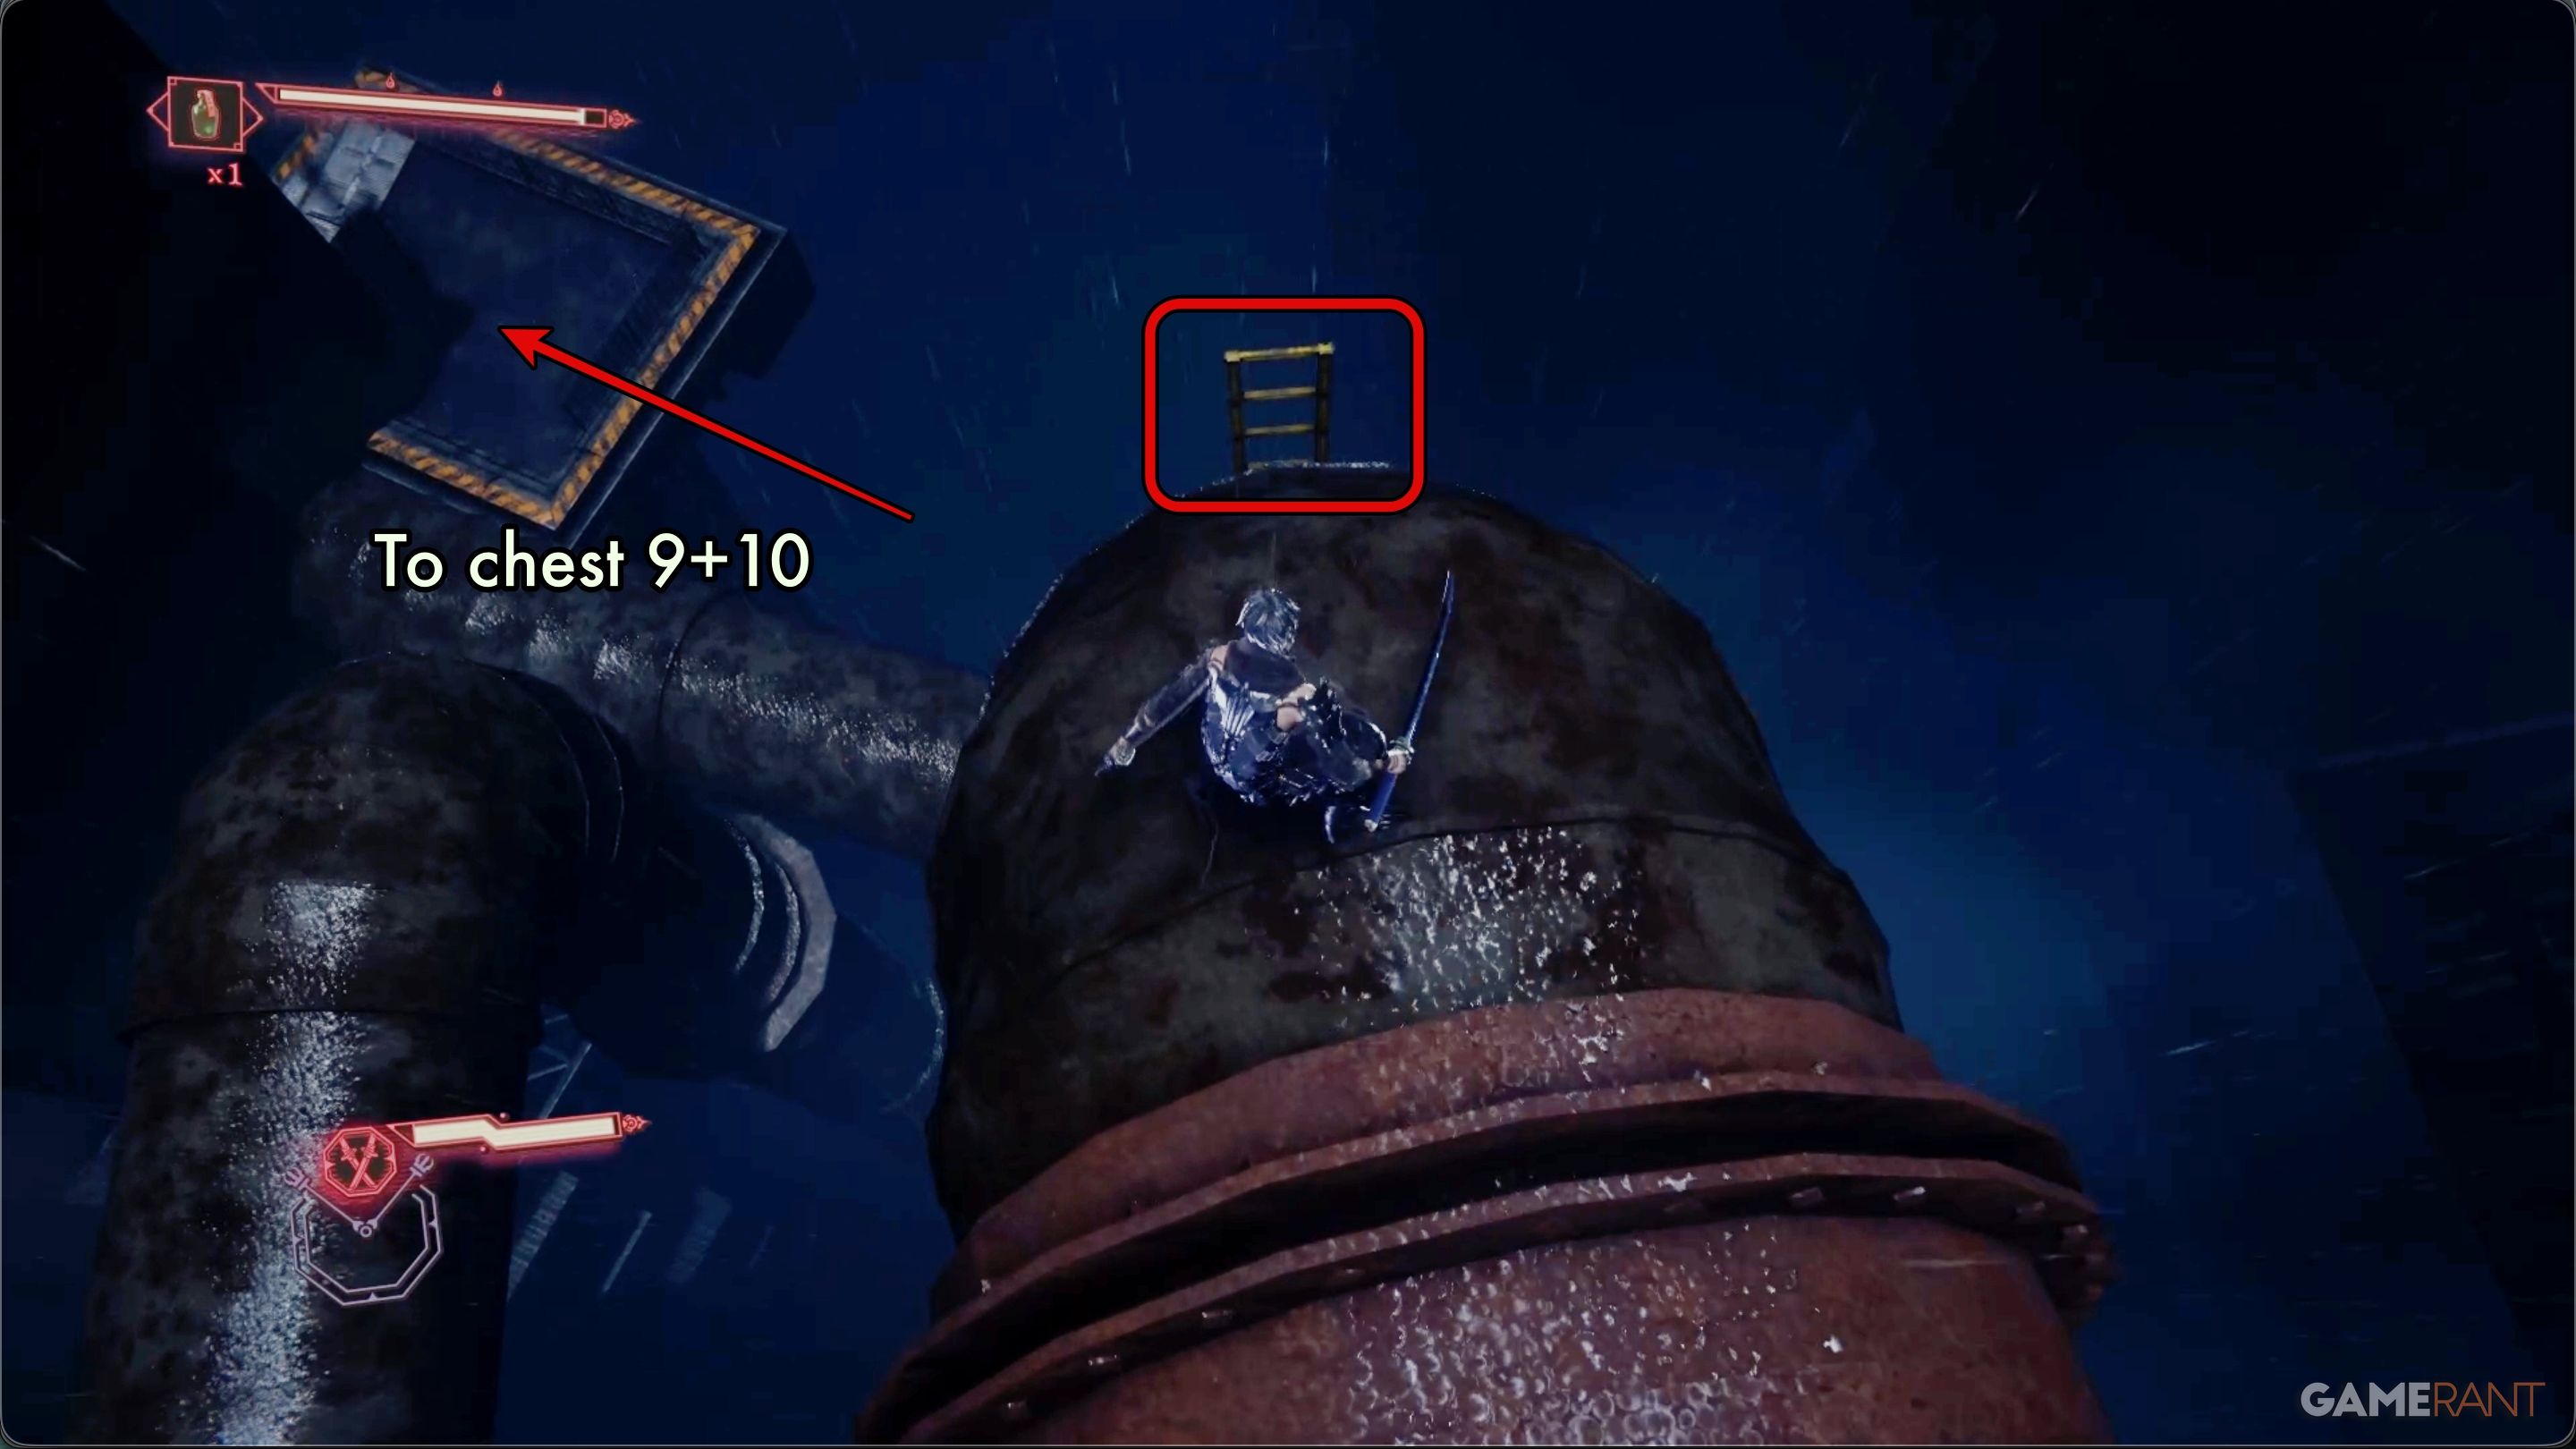
One chest holds a Life Elixir, while the other contains a Kongou Iron Brew. The Kongou Iron Brew will temporarily boost your defense.
Chapter 1 Walkthrough Part 3 – Ninja Gaiden 4

DarkNest Terminal 2 & Caddis Wire Unlock:
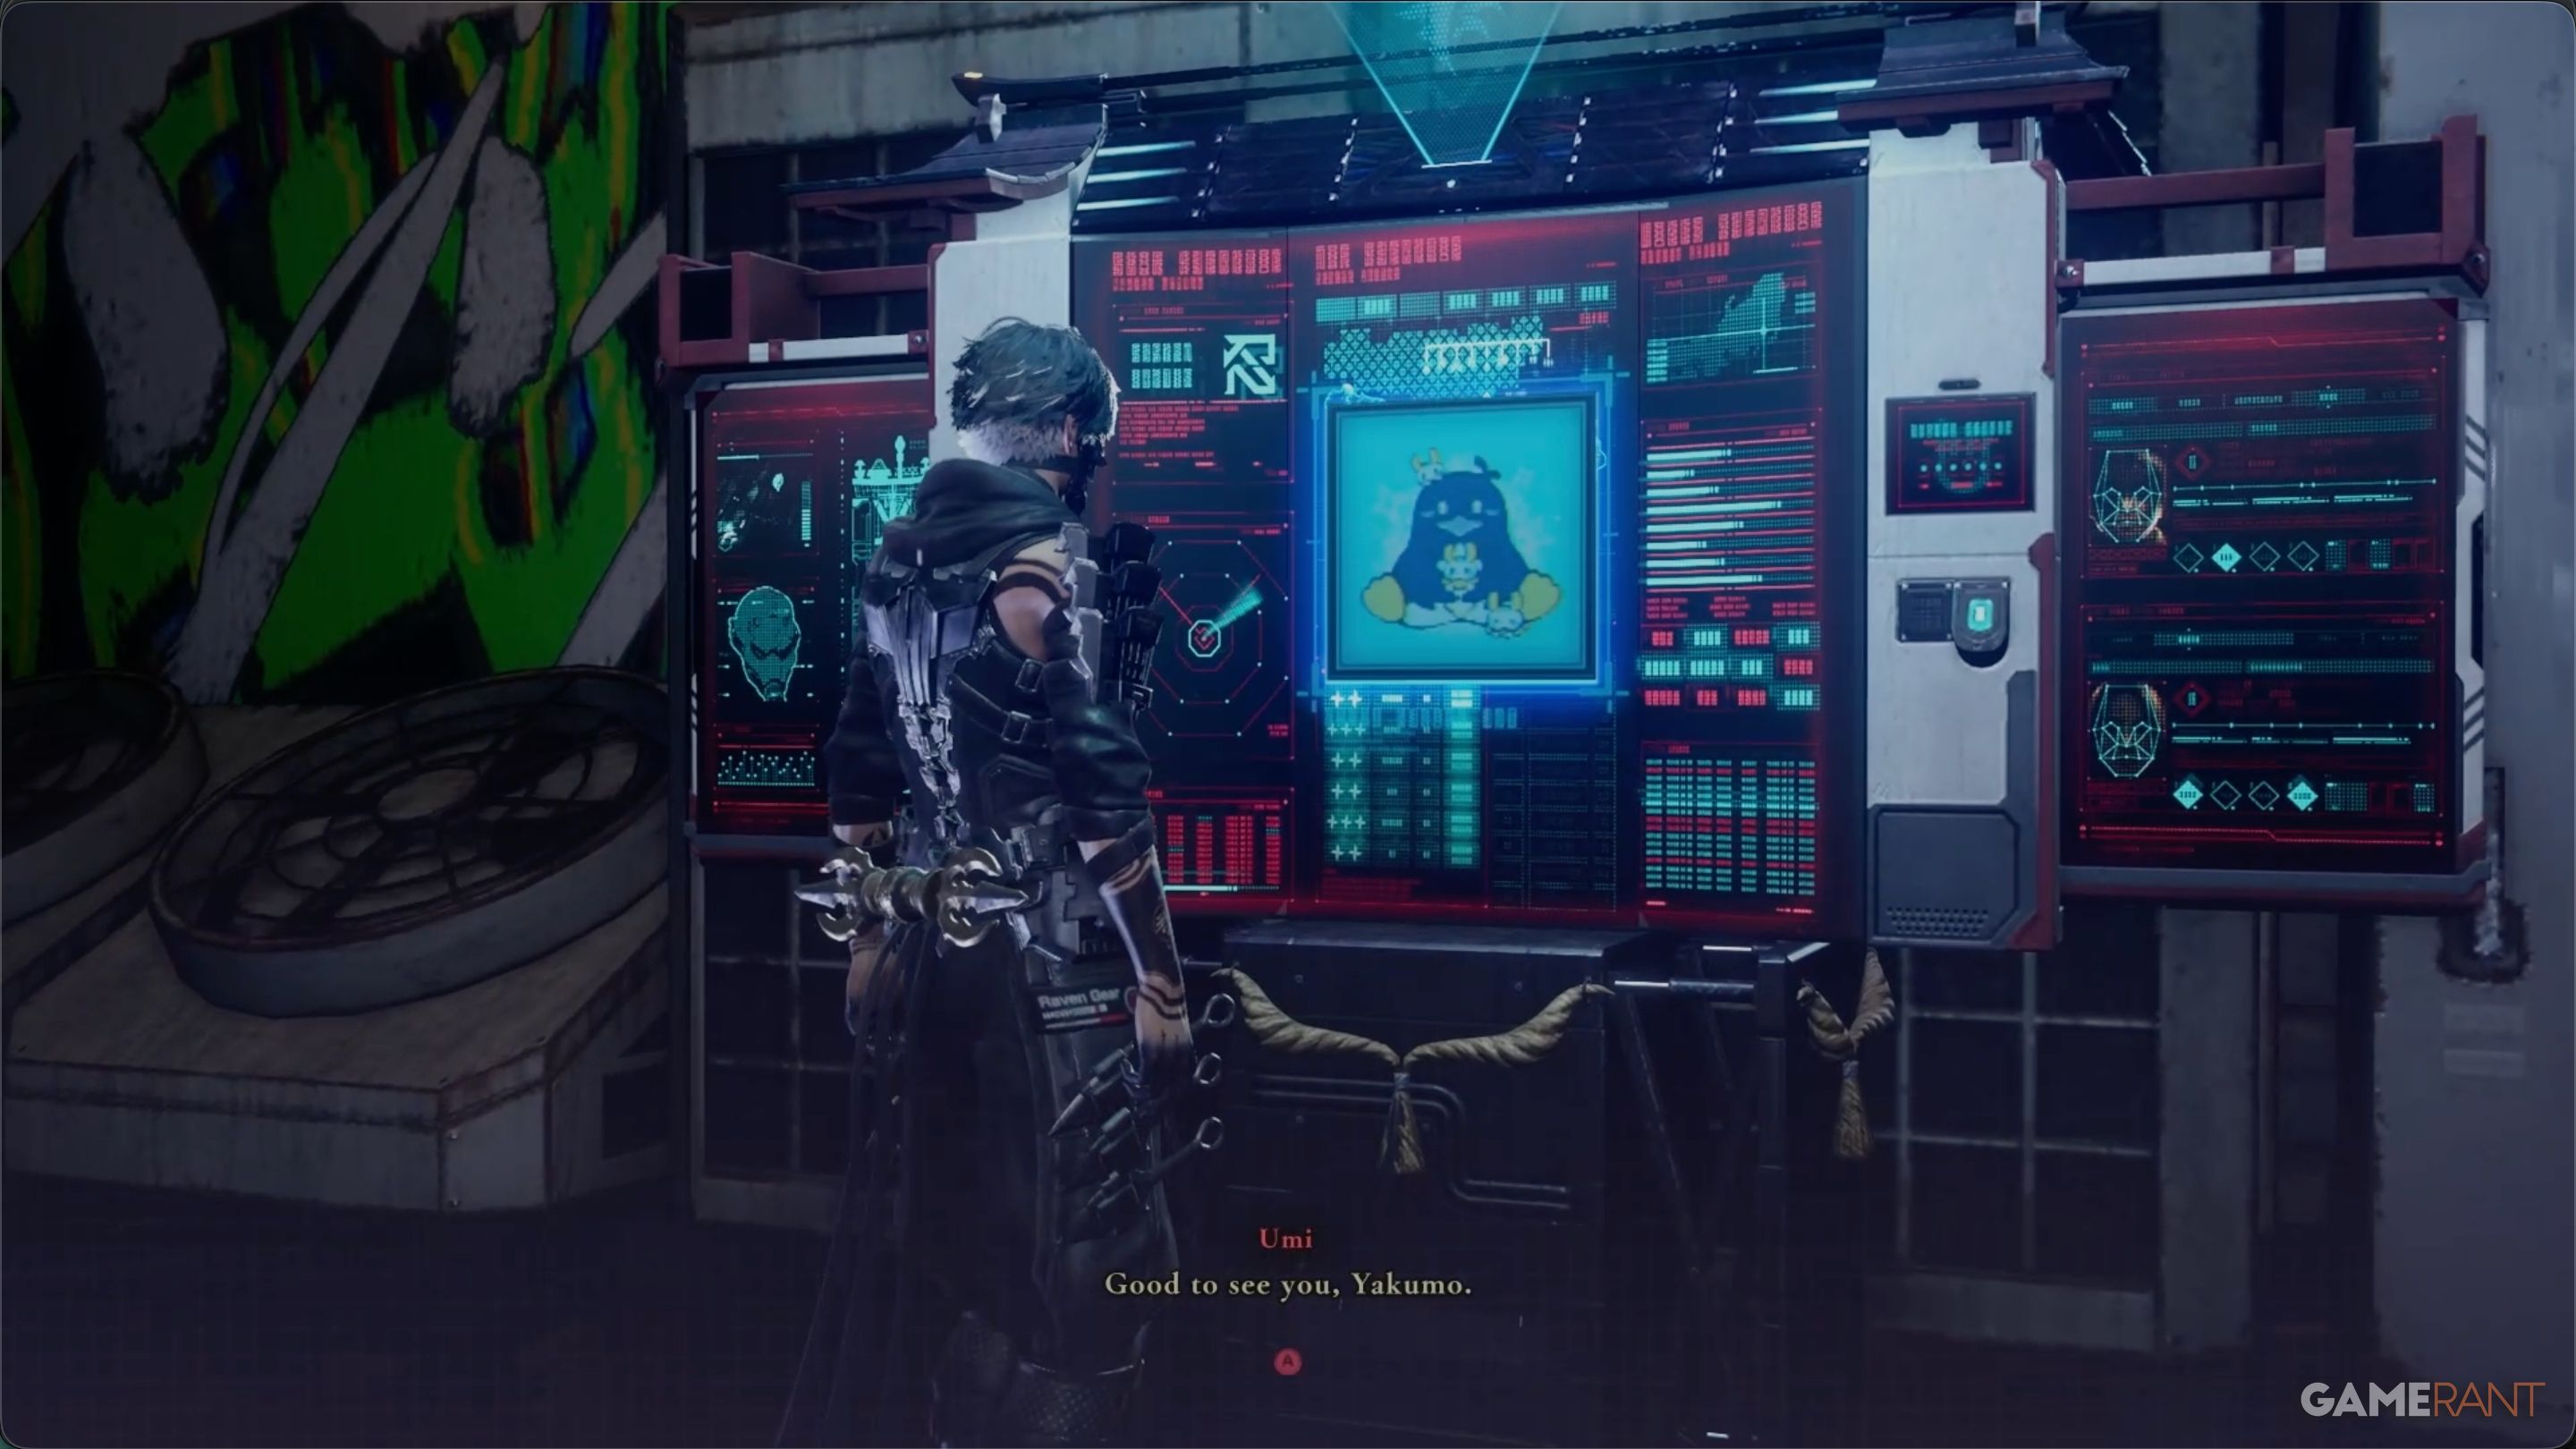
Once you’ve found Chests 9 and 10, go back up the pipe. You’ll then find the second DarkNest Terminal in Chapter 1, and Umi will call you over to talk. She’ll show you the Caddis Wire, a new tool that lets you travel around. It’s not immediately obvious how it works, but it appears to be a type of grapple hook.
Don’t forget to submit your finished missions. If you’ve already visited the D.D.O. Distribution Officers, they’ll be ready to process your reports. You should also be able to report that you’ve defeated 25 D.D.O. Soldiers. After submitting these and collecting your rewards, a new, fifth mission will unlock.
- Use Takeminkata to defeat 50 enemies – Reward: Bulwark God’s Orb x1
Purgatory Location in Chapter 1:
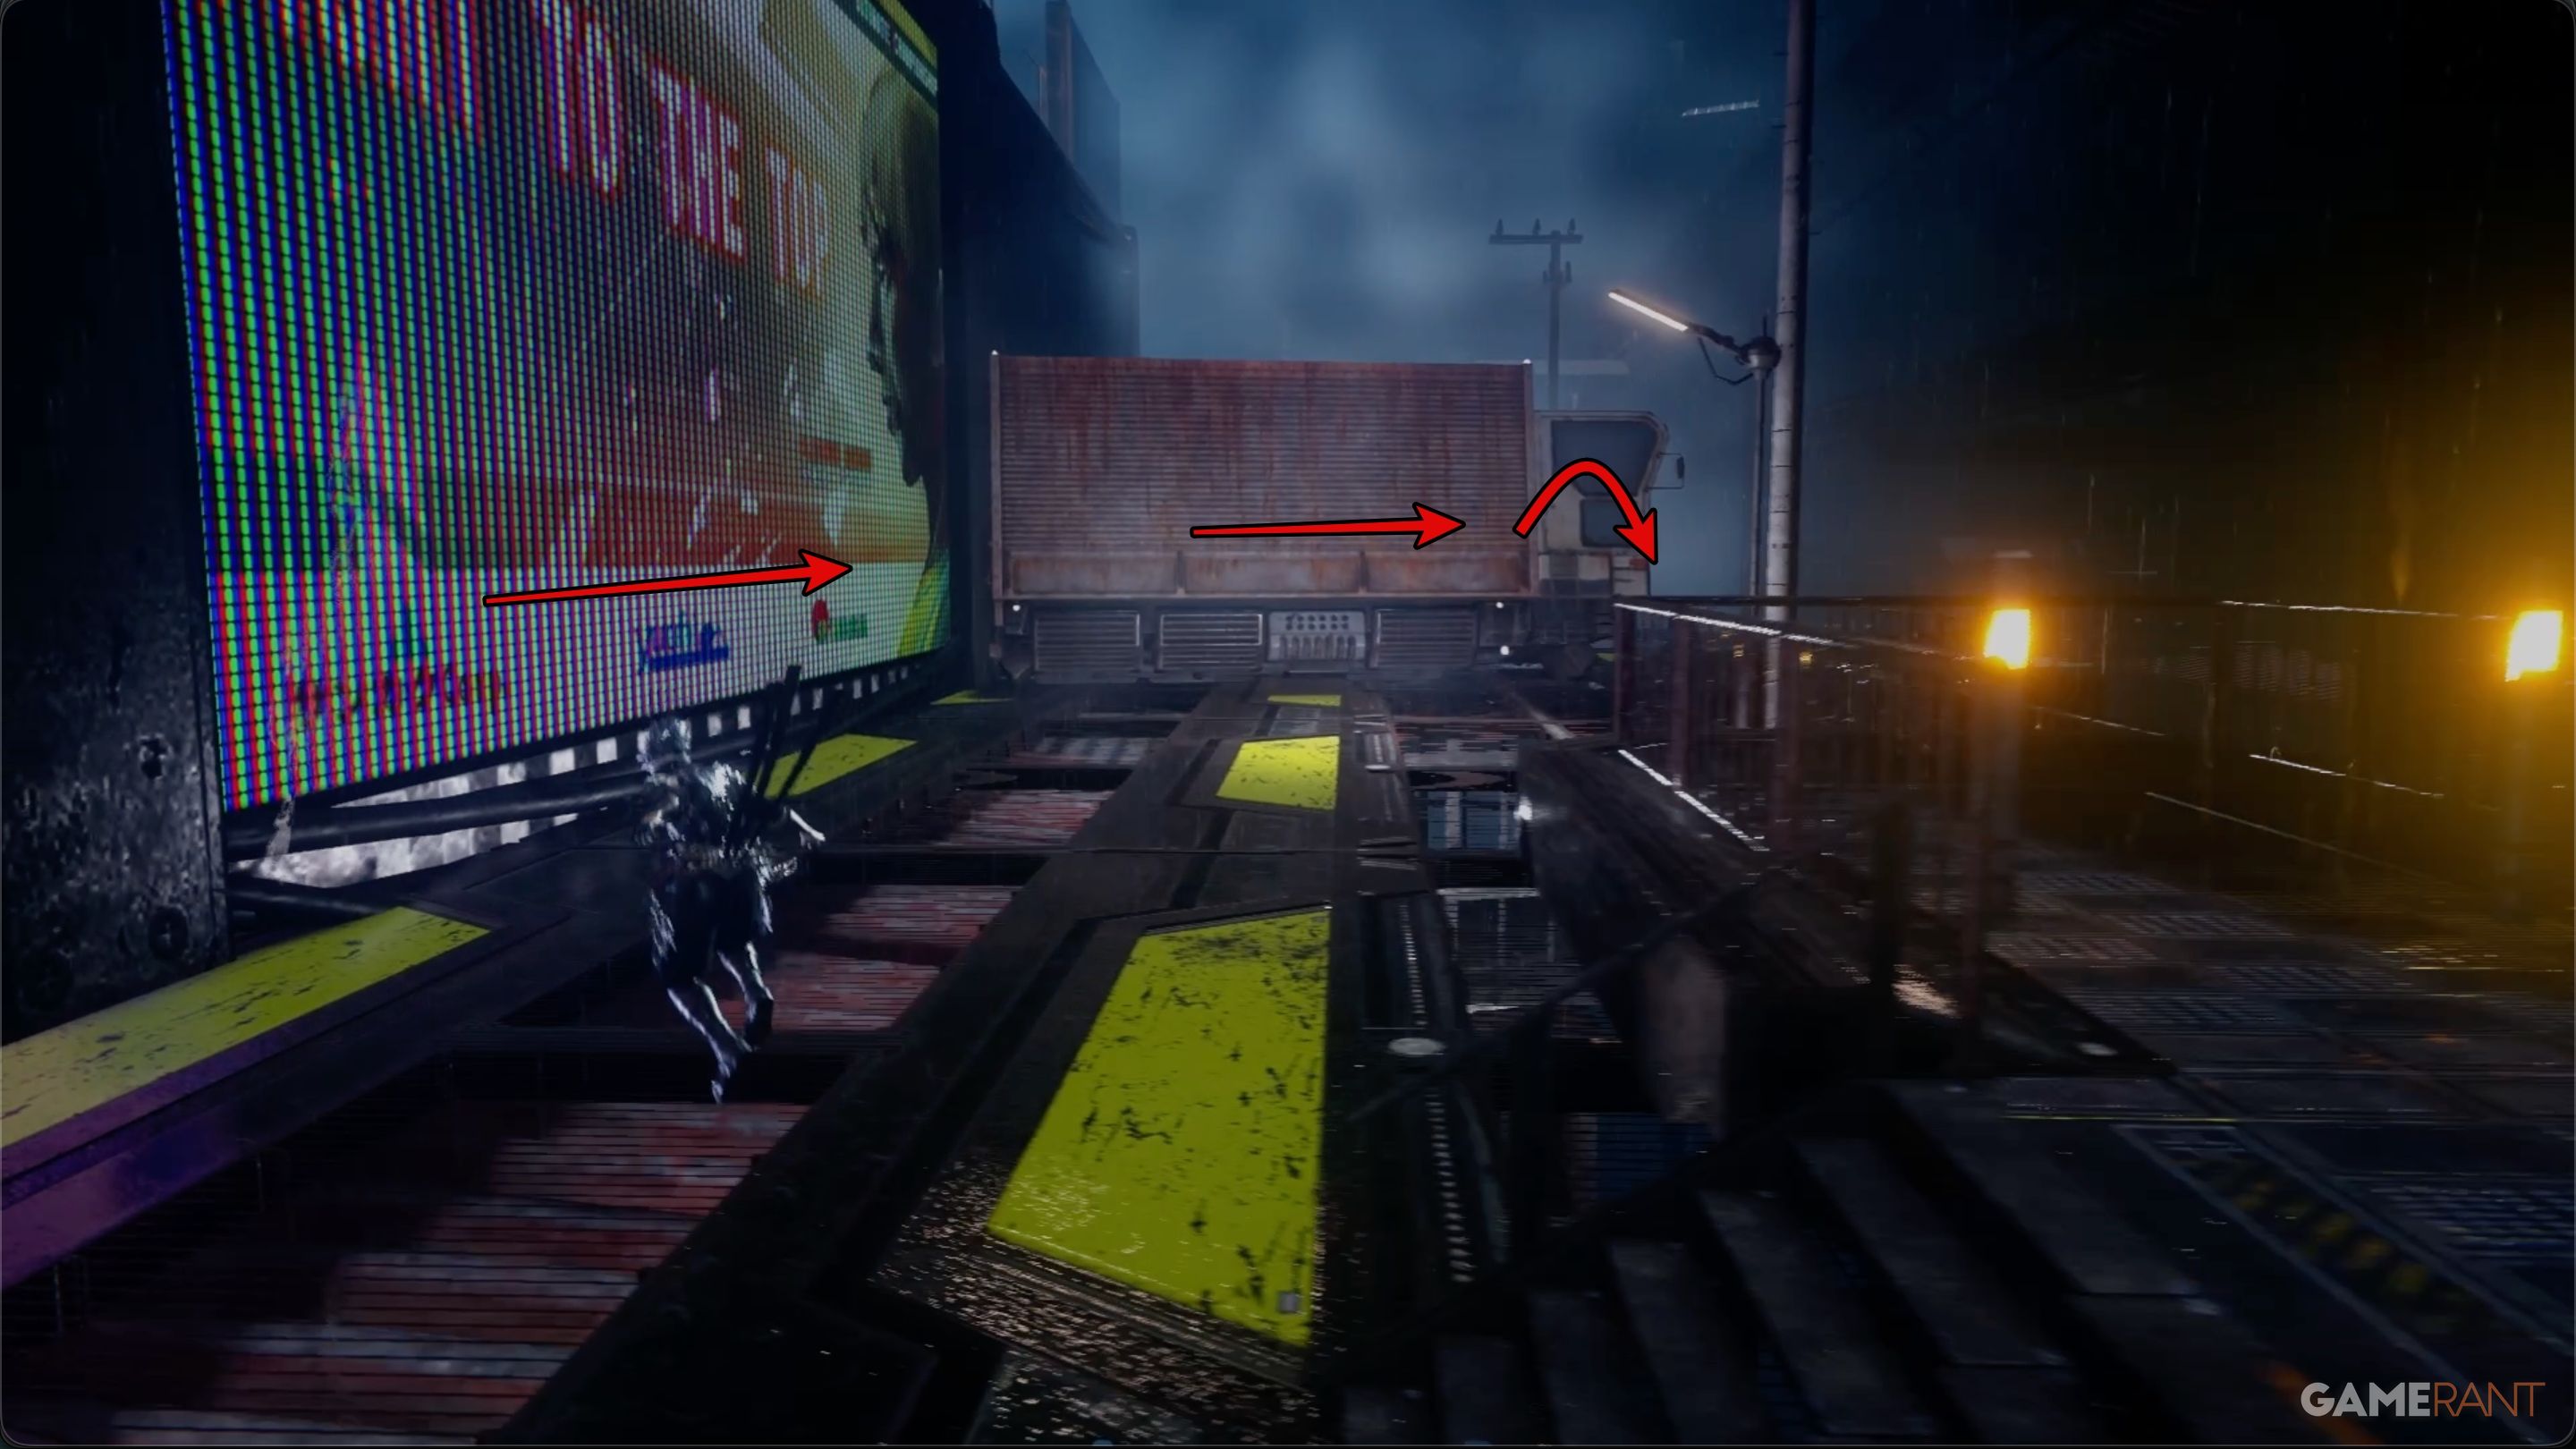
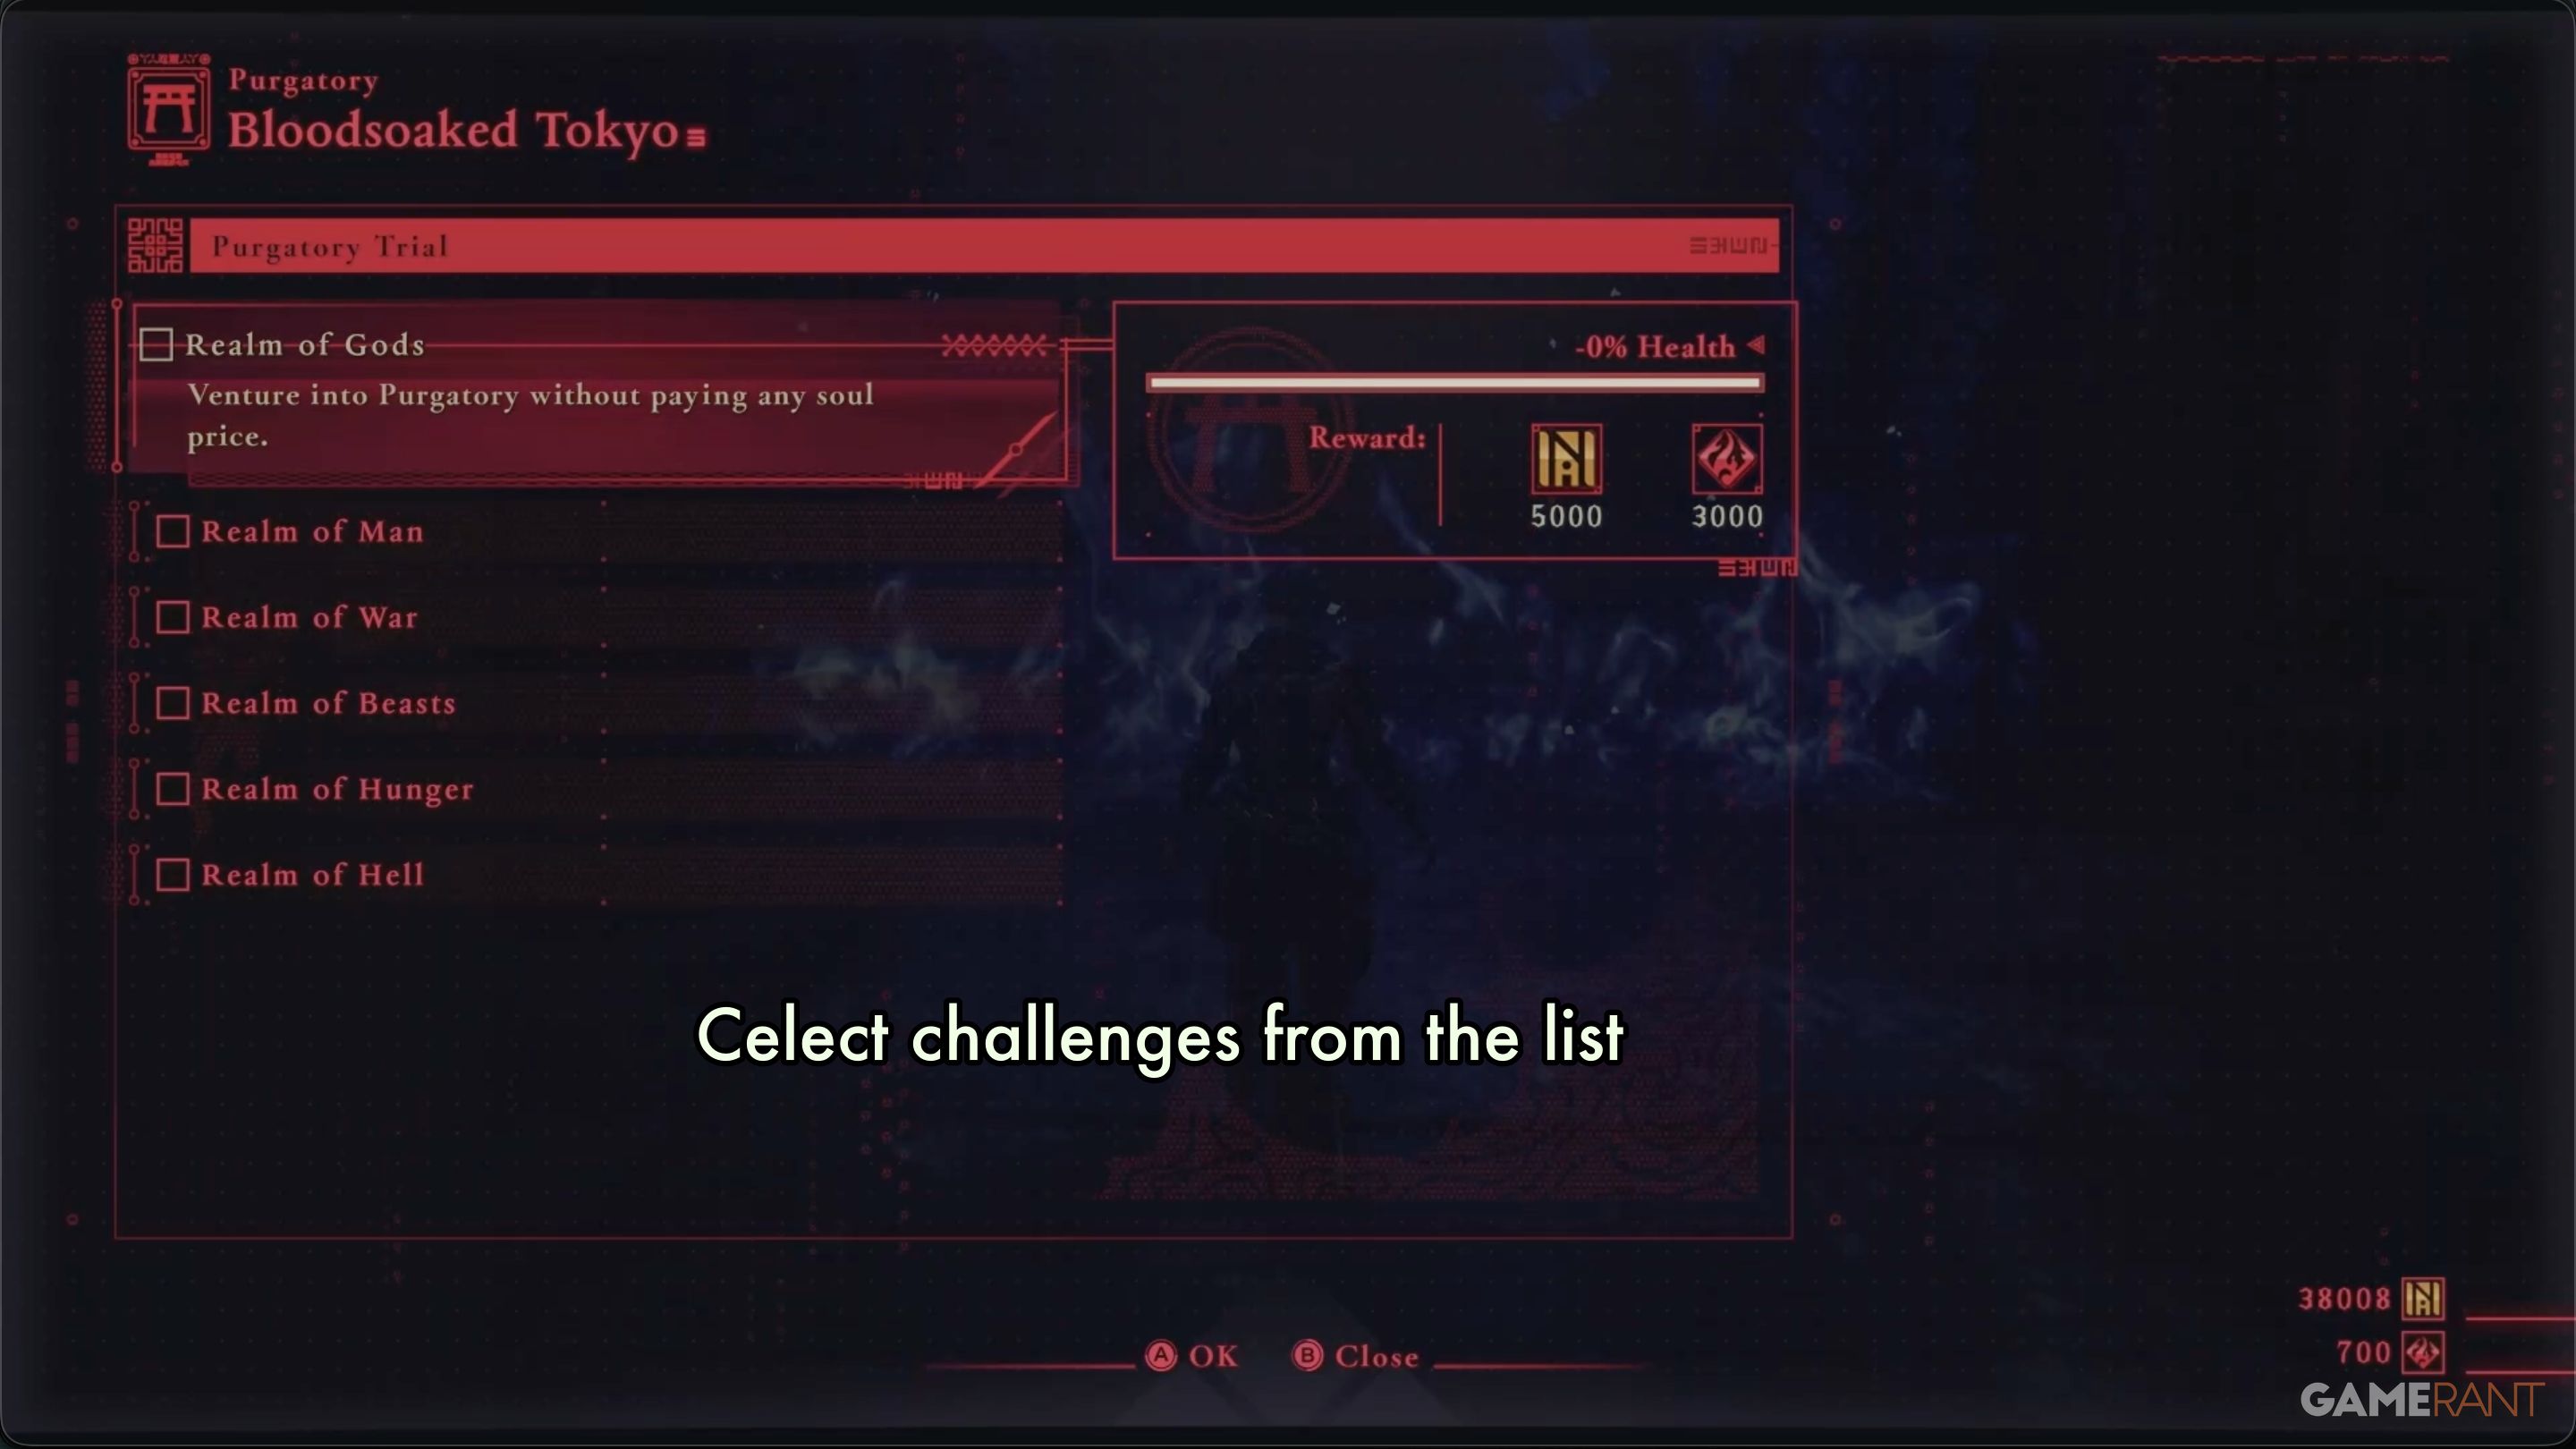
Once you’ve exited the second DarkNest Terminal, use the Caddis Wire to cross the first big gap. Continue forward, and you’ll reach another large chasm. You can cross it to stay on the main path, or turn left to discover the first Purgatory Gate in Ninja Gaiden 4.
These gates unlock special challenges that reward you with NinjaCoin and weapon experience. To start some of these challenges, you’ll sacrifice a portion of your health. Right now, it looks like you can only attempt one challenge per chapter.
Where to Find the Gourdy in Chapter 1 – NInja Gaiden 4
Once you get the Caddis Wire from the second DarkNest Terminal, you can use it to cross two big gaps. After you cross the second gap, turn left – you’ll find the Gourdy near some crates at the end of the path.
When you find a Gourdy, a small message will appear telling you how to catch it. For this one, we needed to press the right buttons quickly. After you catch a Gourdy, don’t forget to go back to the DarkNest Terminal to report your discovery.
Cobalt Ring & Accessories Unlock:
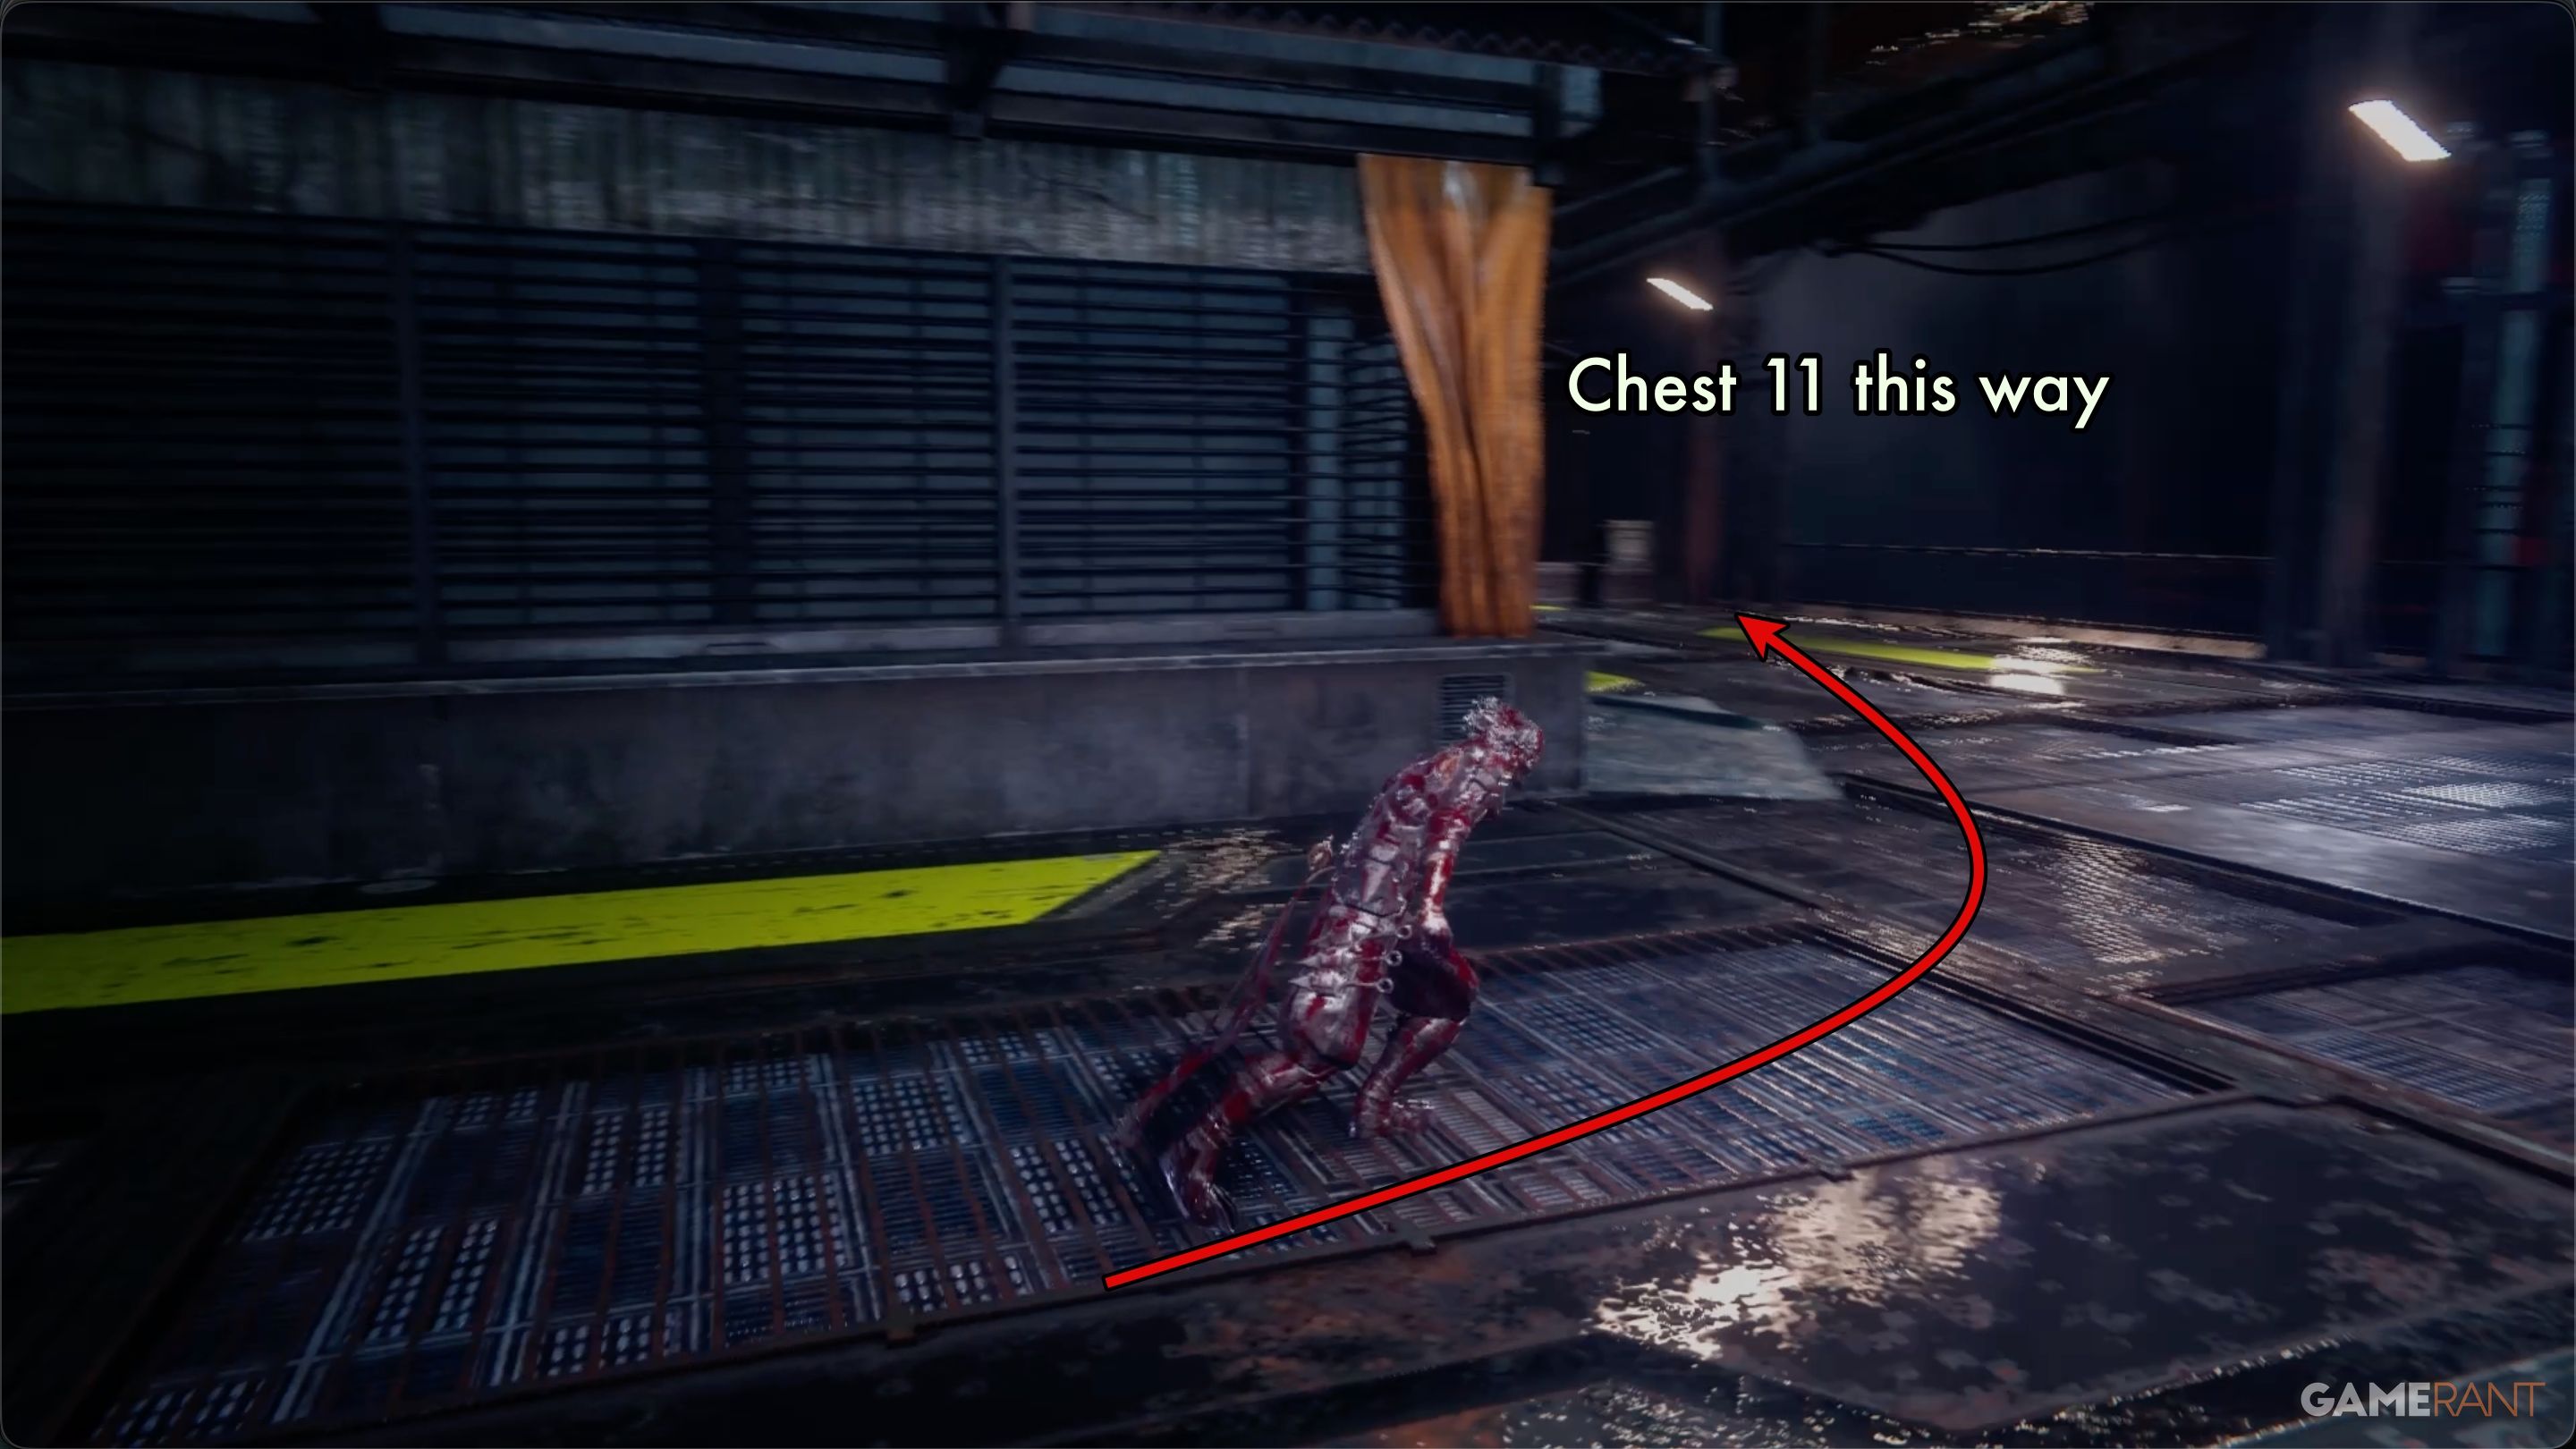
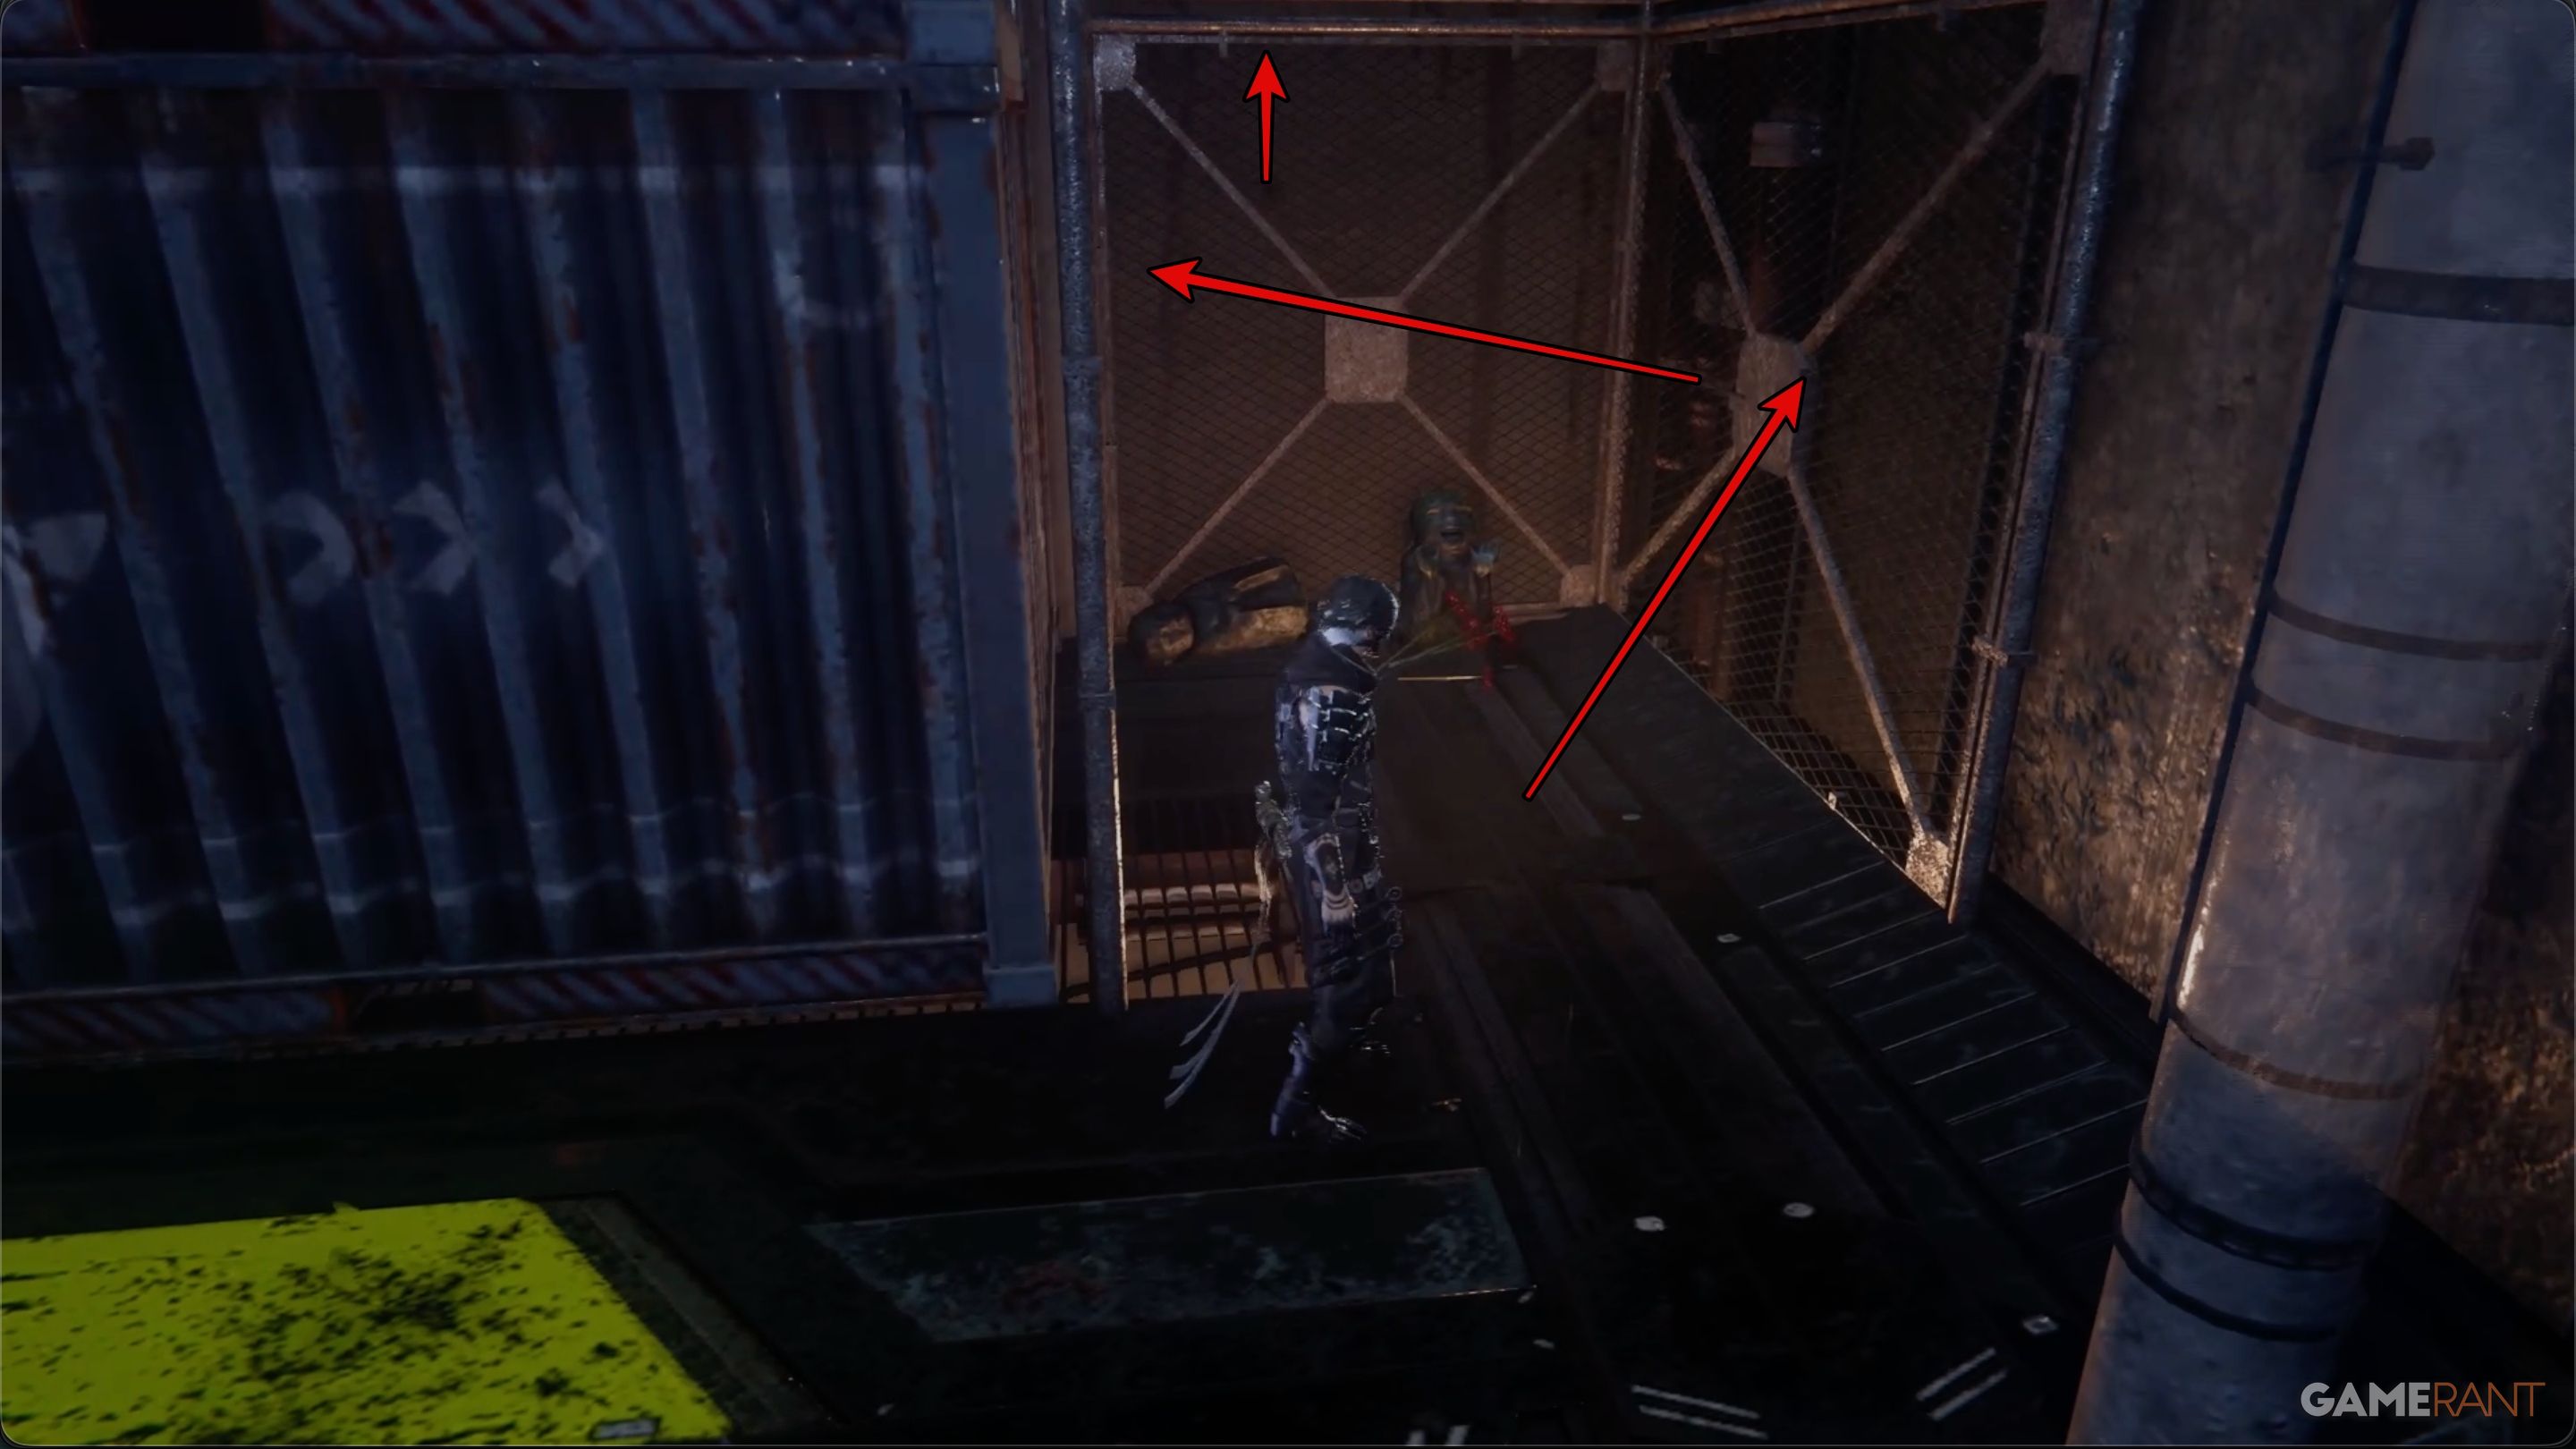
Once you have the Gourdy, use the two grapple points to cross the gap, then fly past the enemies using your drone. Continue through the cargo containers, and go the opposite way from where the game is telling you to go (press R3 to see your main objective).
At the end of a short hallway, you’ll discover Chest 11. Inside, you’ll find the Cobalt Ring, which is the first accessory you can collect in Ninja Gaiden 4.
Be careful when you open the chest – enemies will attack you from behind. Quickly put on the ring for extra protection, and then head back to the main path.
Tyran Location 2 and DarkNest Terminal 3:
Once you have the Cobalt Ring, return to the main path and climb the nearby stairs. You’ll come to a small area where you need to use Flying Bird Flips to get to the top. When you reach the top, you’ll find the second raven, which will summon Tyran. If you have enough NinjaCoin, consider buying some new Combat Skills.
Head to the right of Tyran to find the third DarkNest Terminal. Remember to hand in the Gourdy you caught – this will start a new mission where you need to collect five more. This new mission can be completed anywhere in the game.
Where to Find the Data Chip in Sky City Tokyo – Ninja Gaiden 4
Data Chip and Chests 12-18:
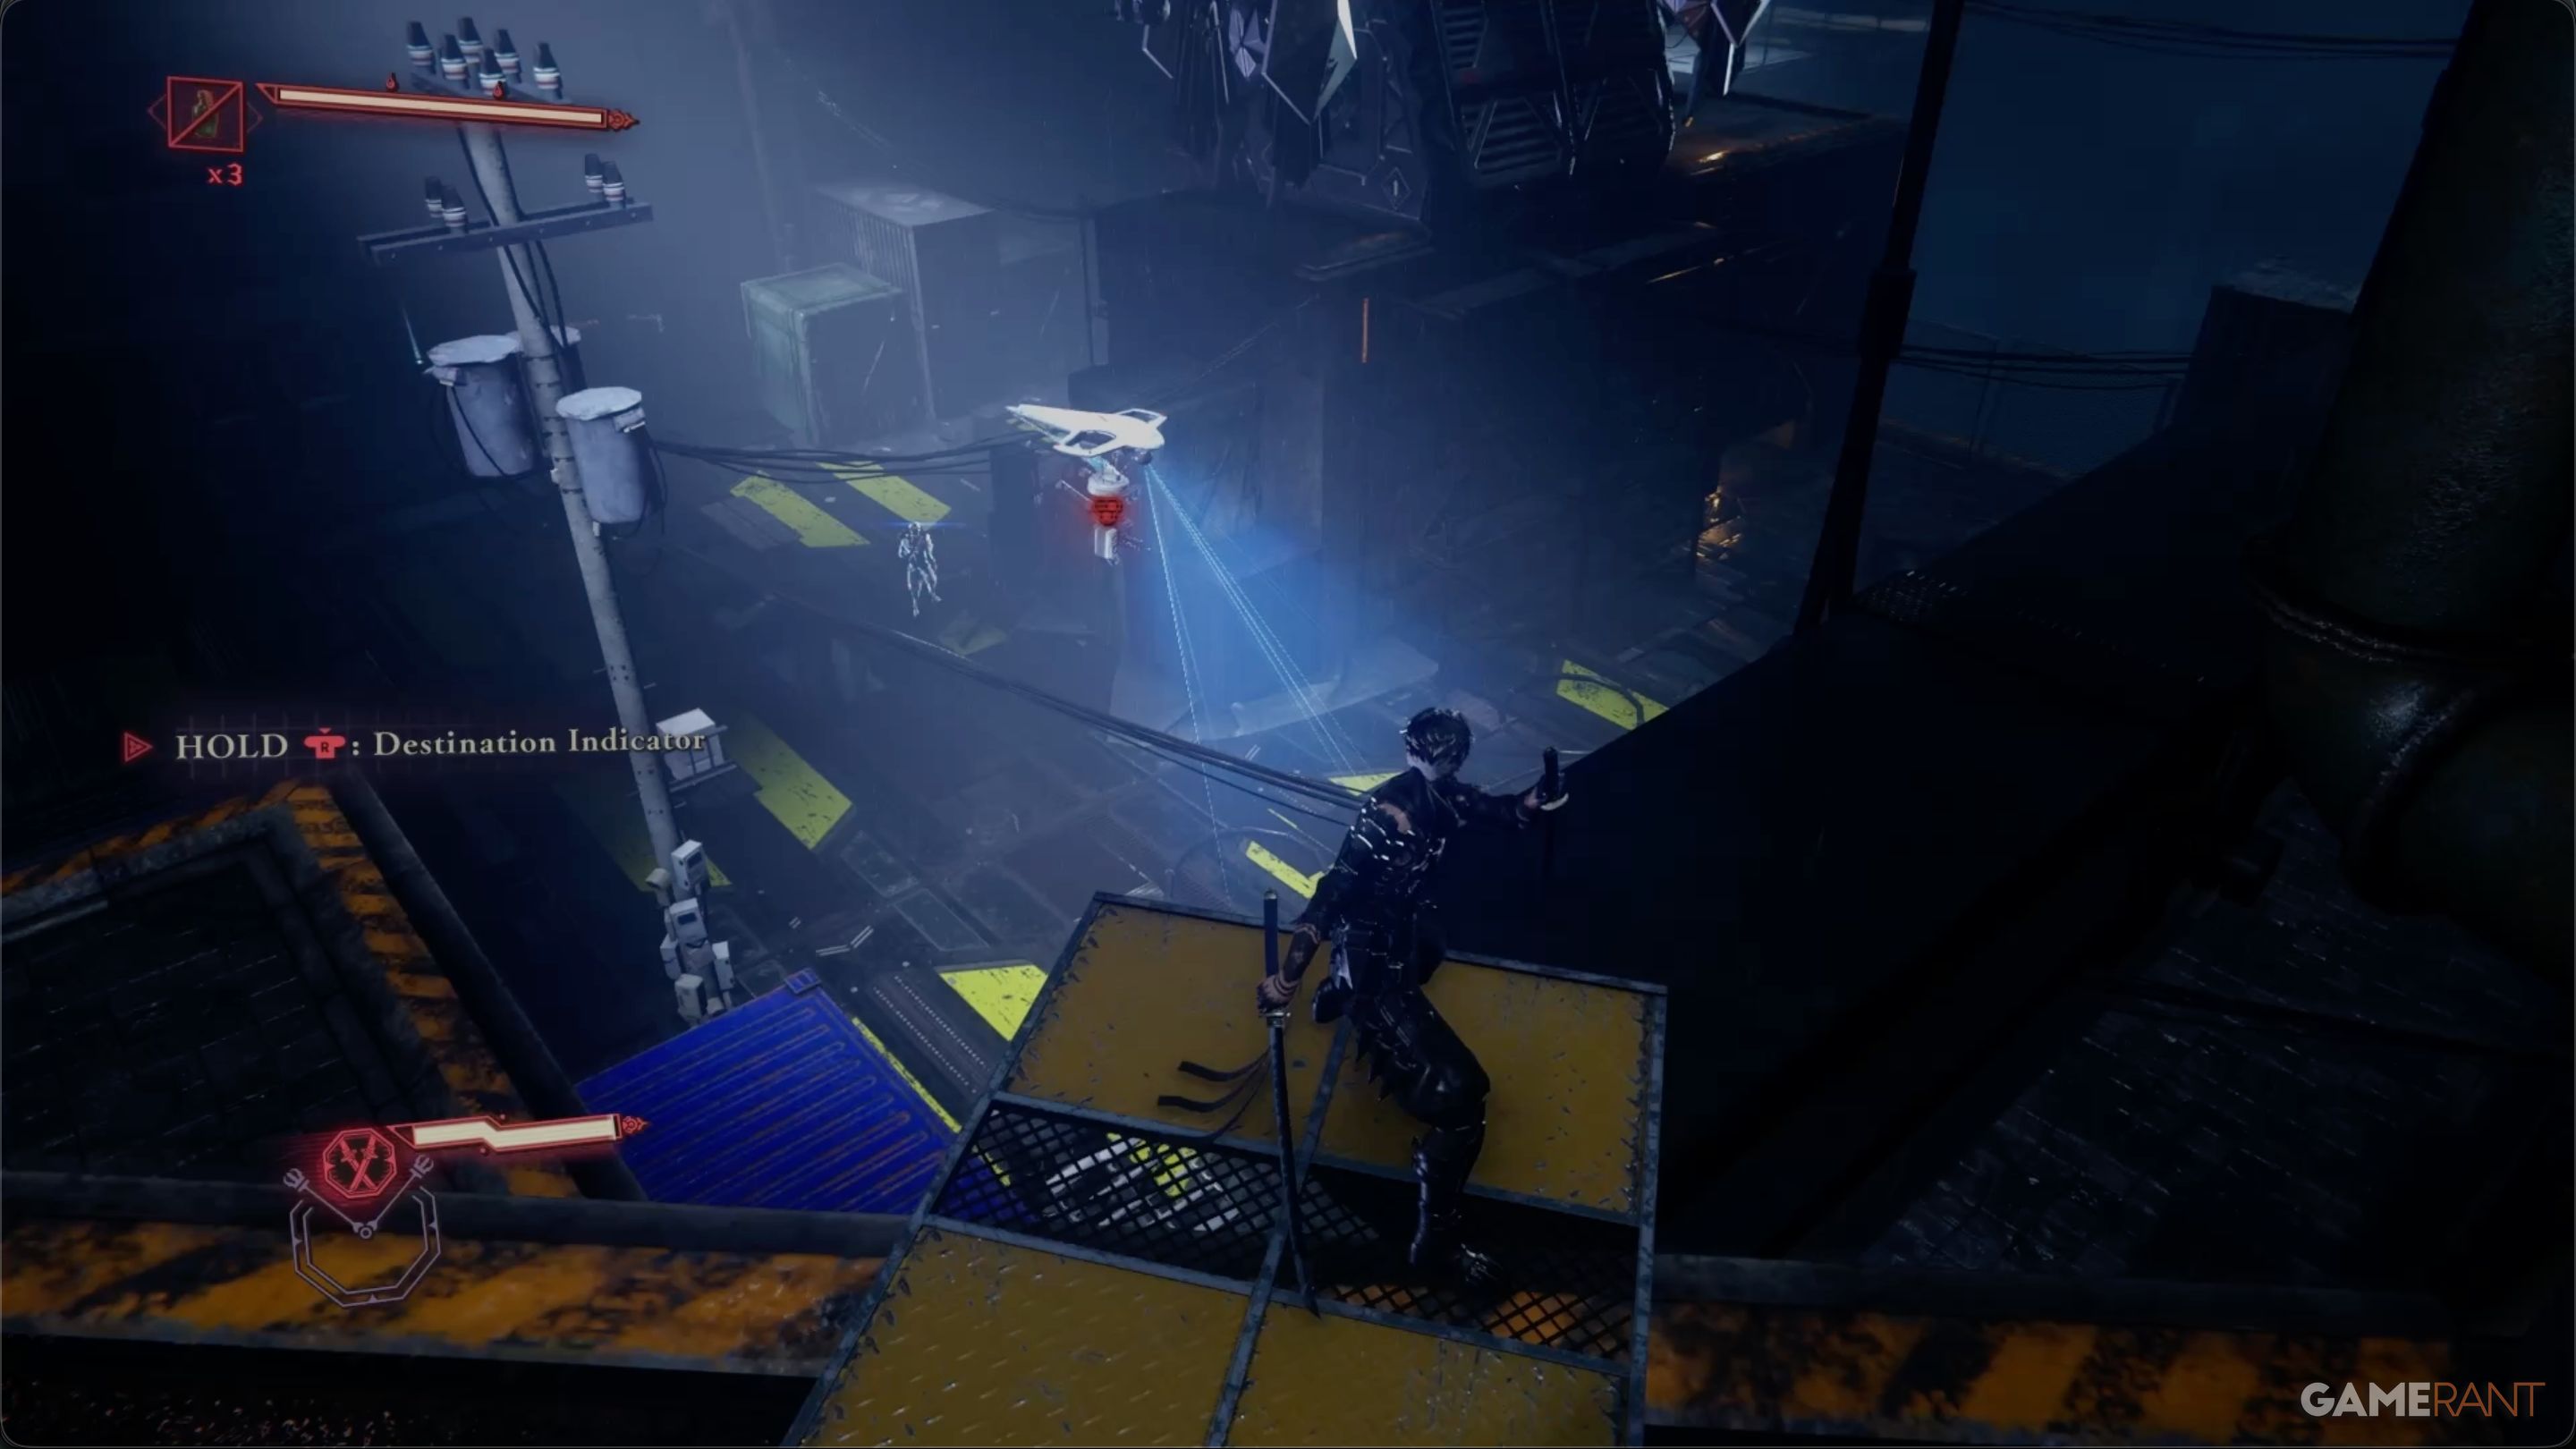
Once you exit the third DarkNest Terminal, you’ll find yourself overlooking an outdoor courtyard. Several enemies are patrolling down below, and a drone is flying above. You can choose to sneakily eliminate some of them, or just jump down and engage in direct combat.
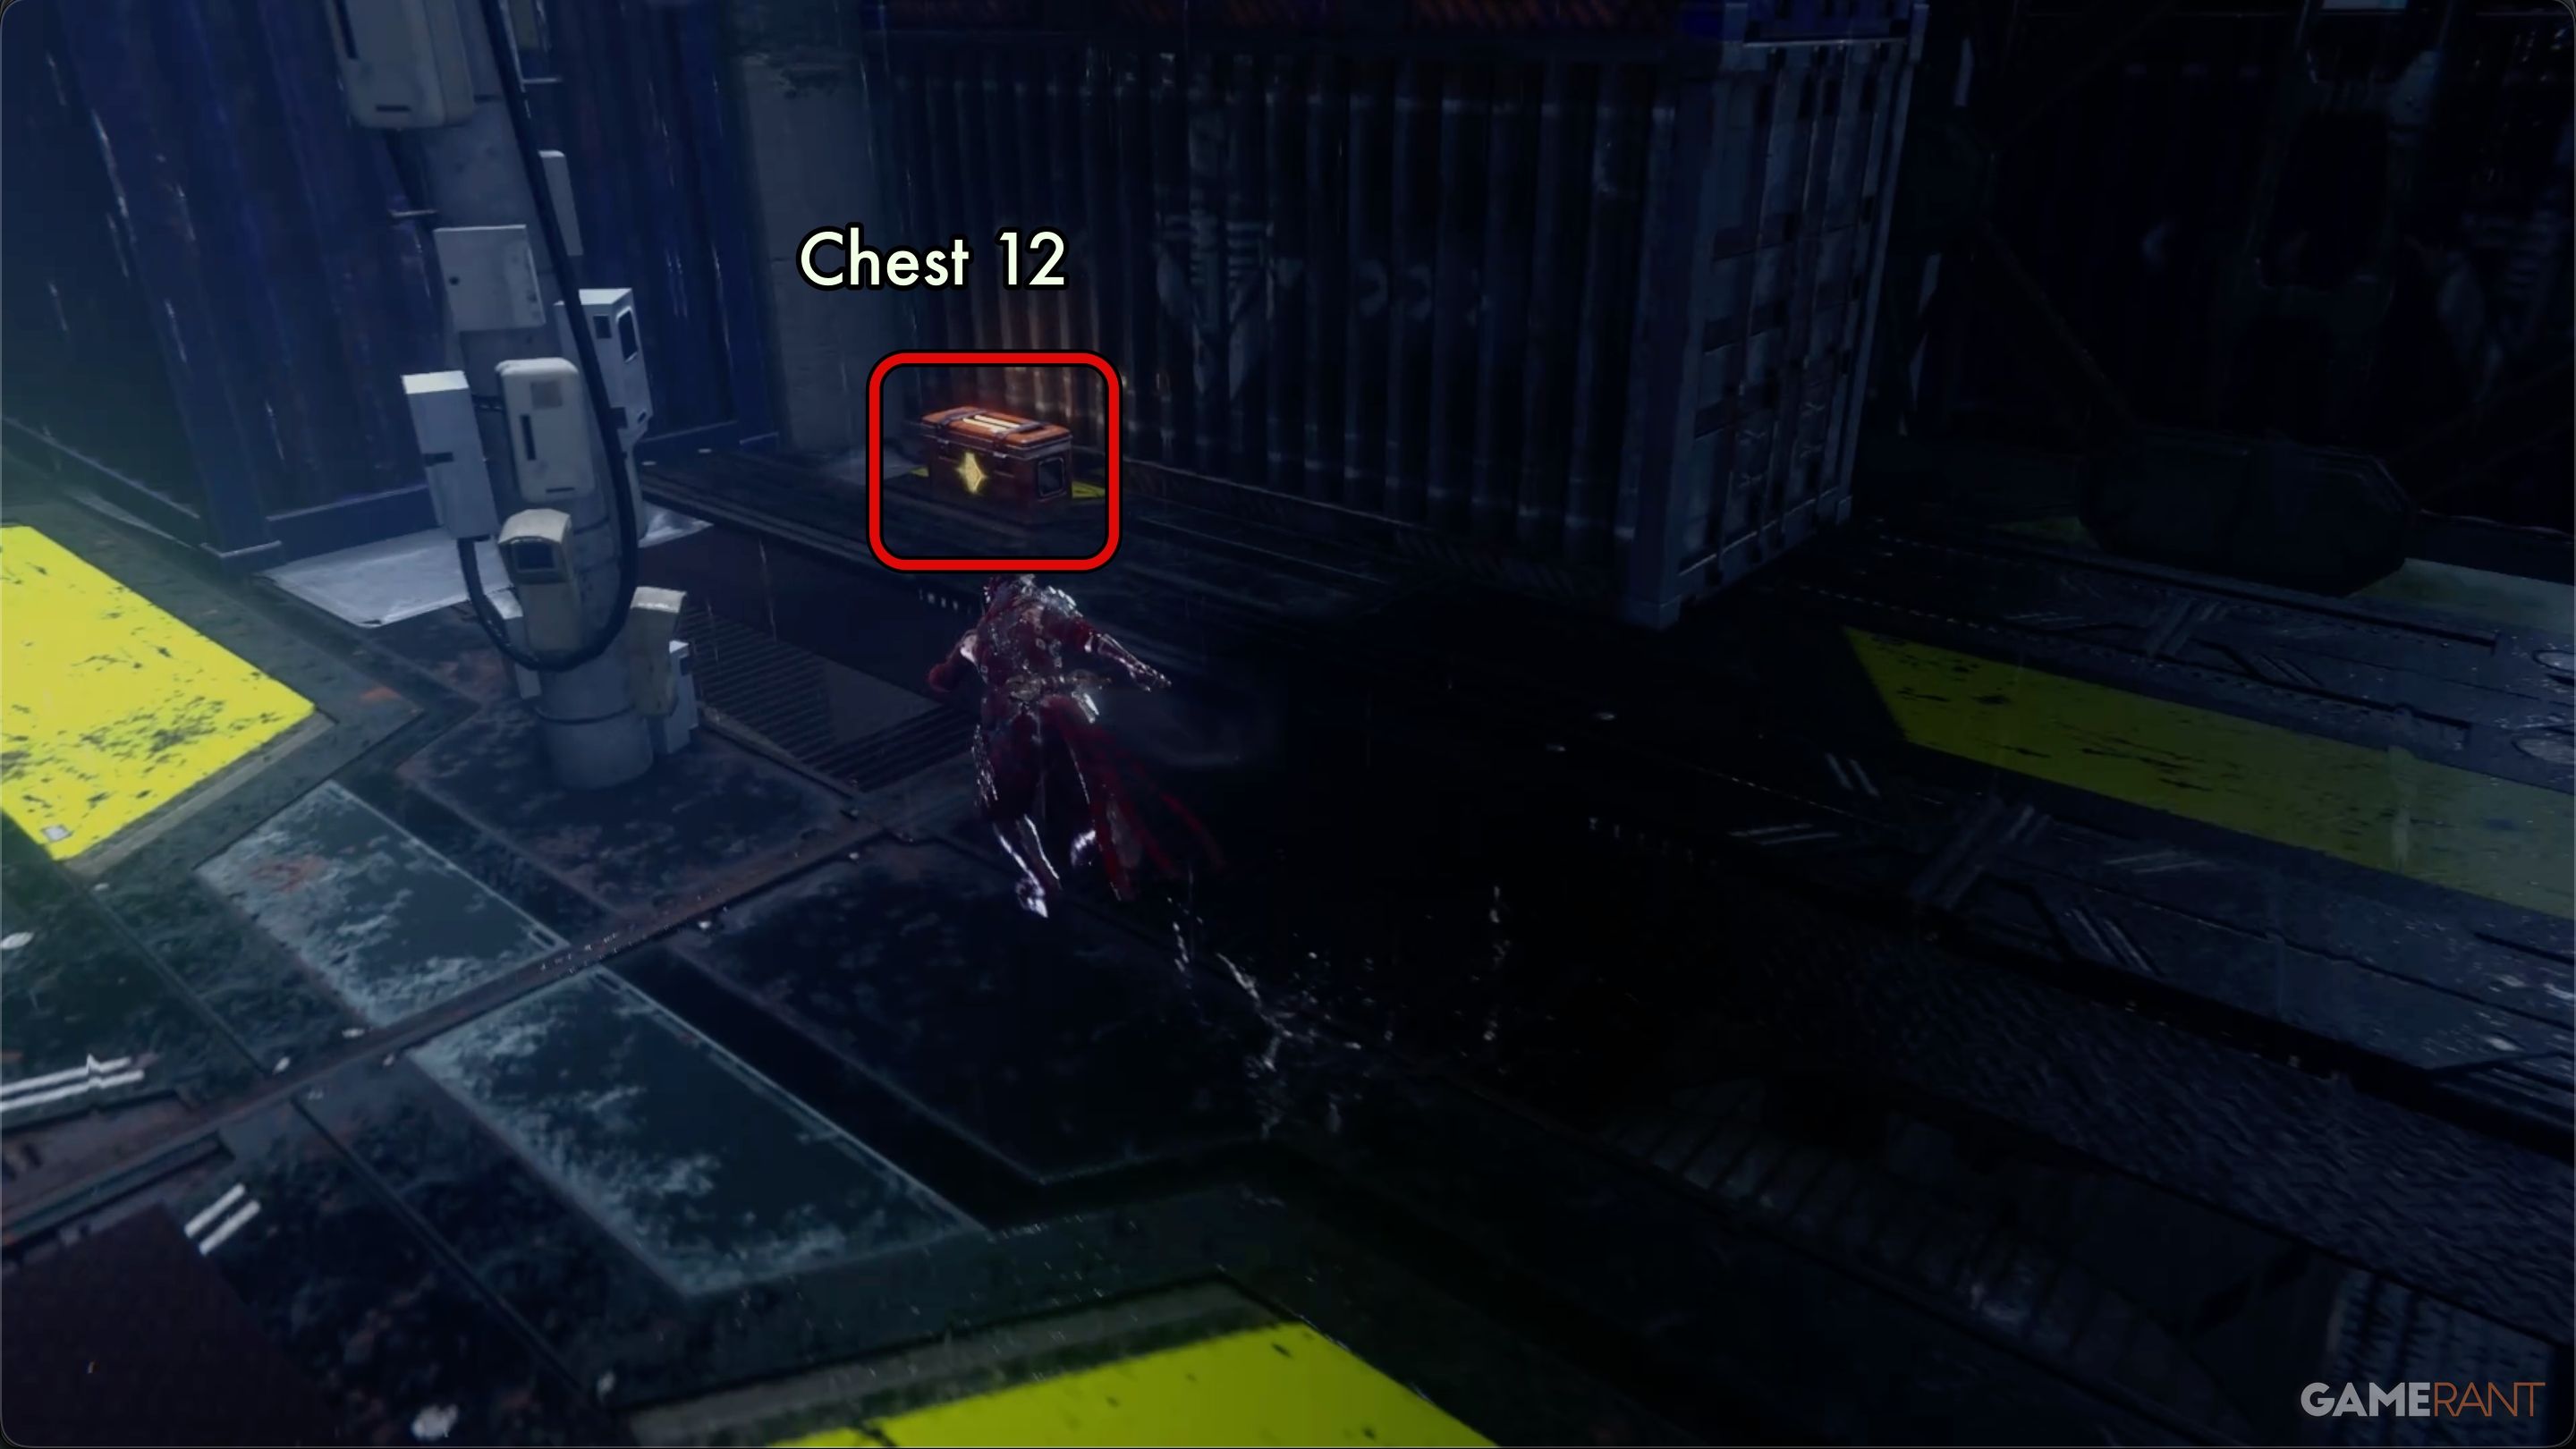
After you clear the courtyard, you’ll find Chest 12 leaning against a wall. Chests 13 through 15 are lined up in a small area created by some containers. The Data Chip is on the ground to the left of these three chests.
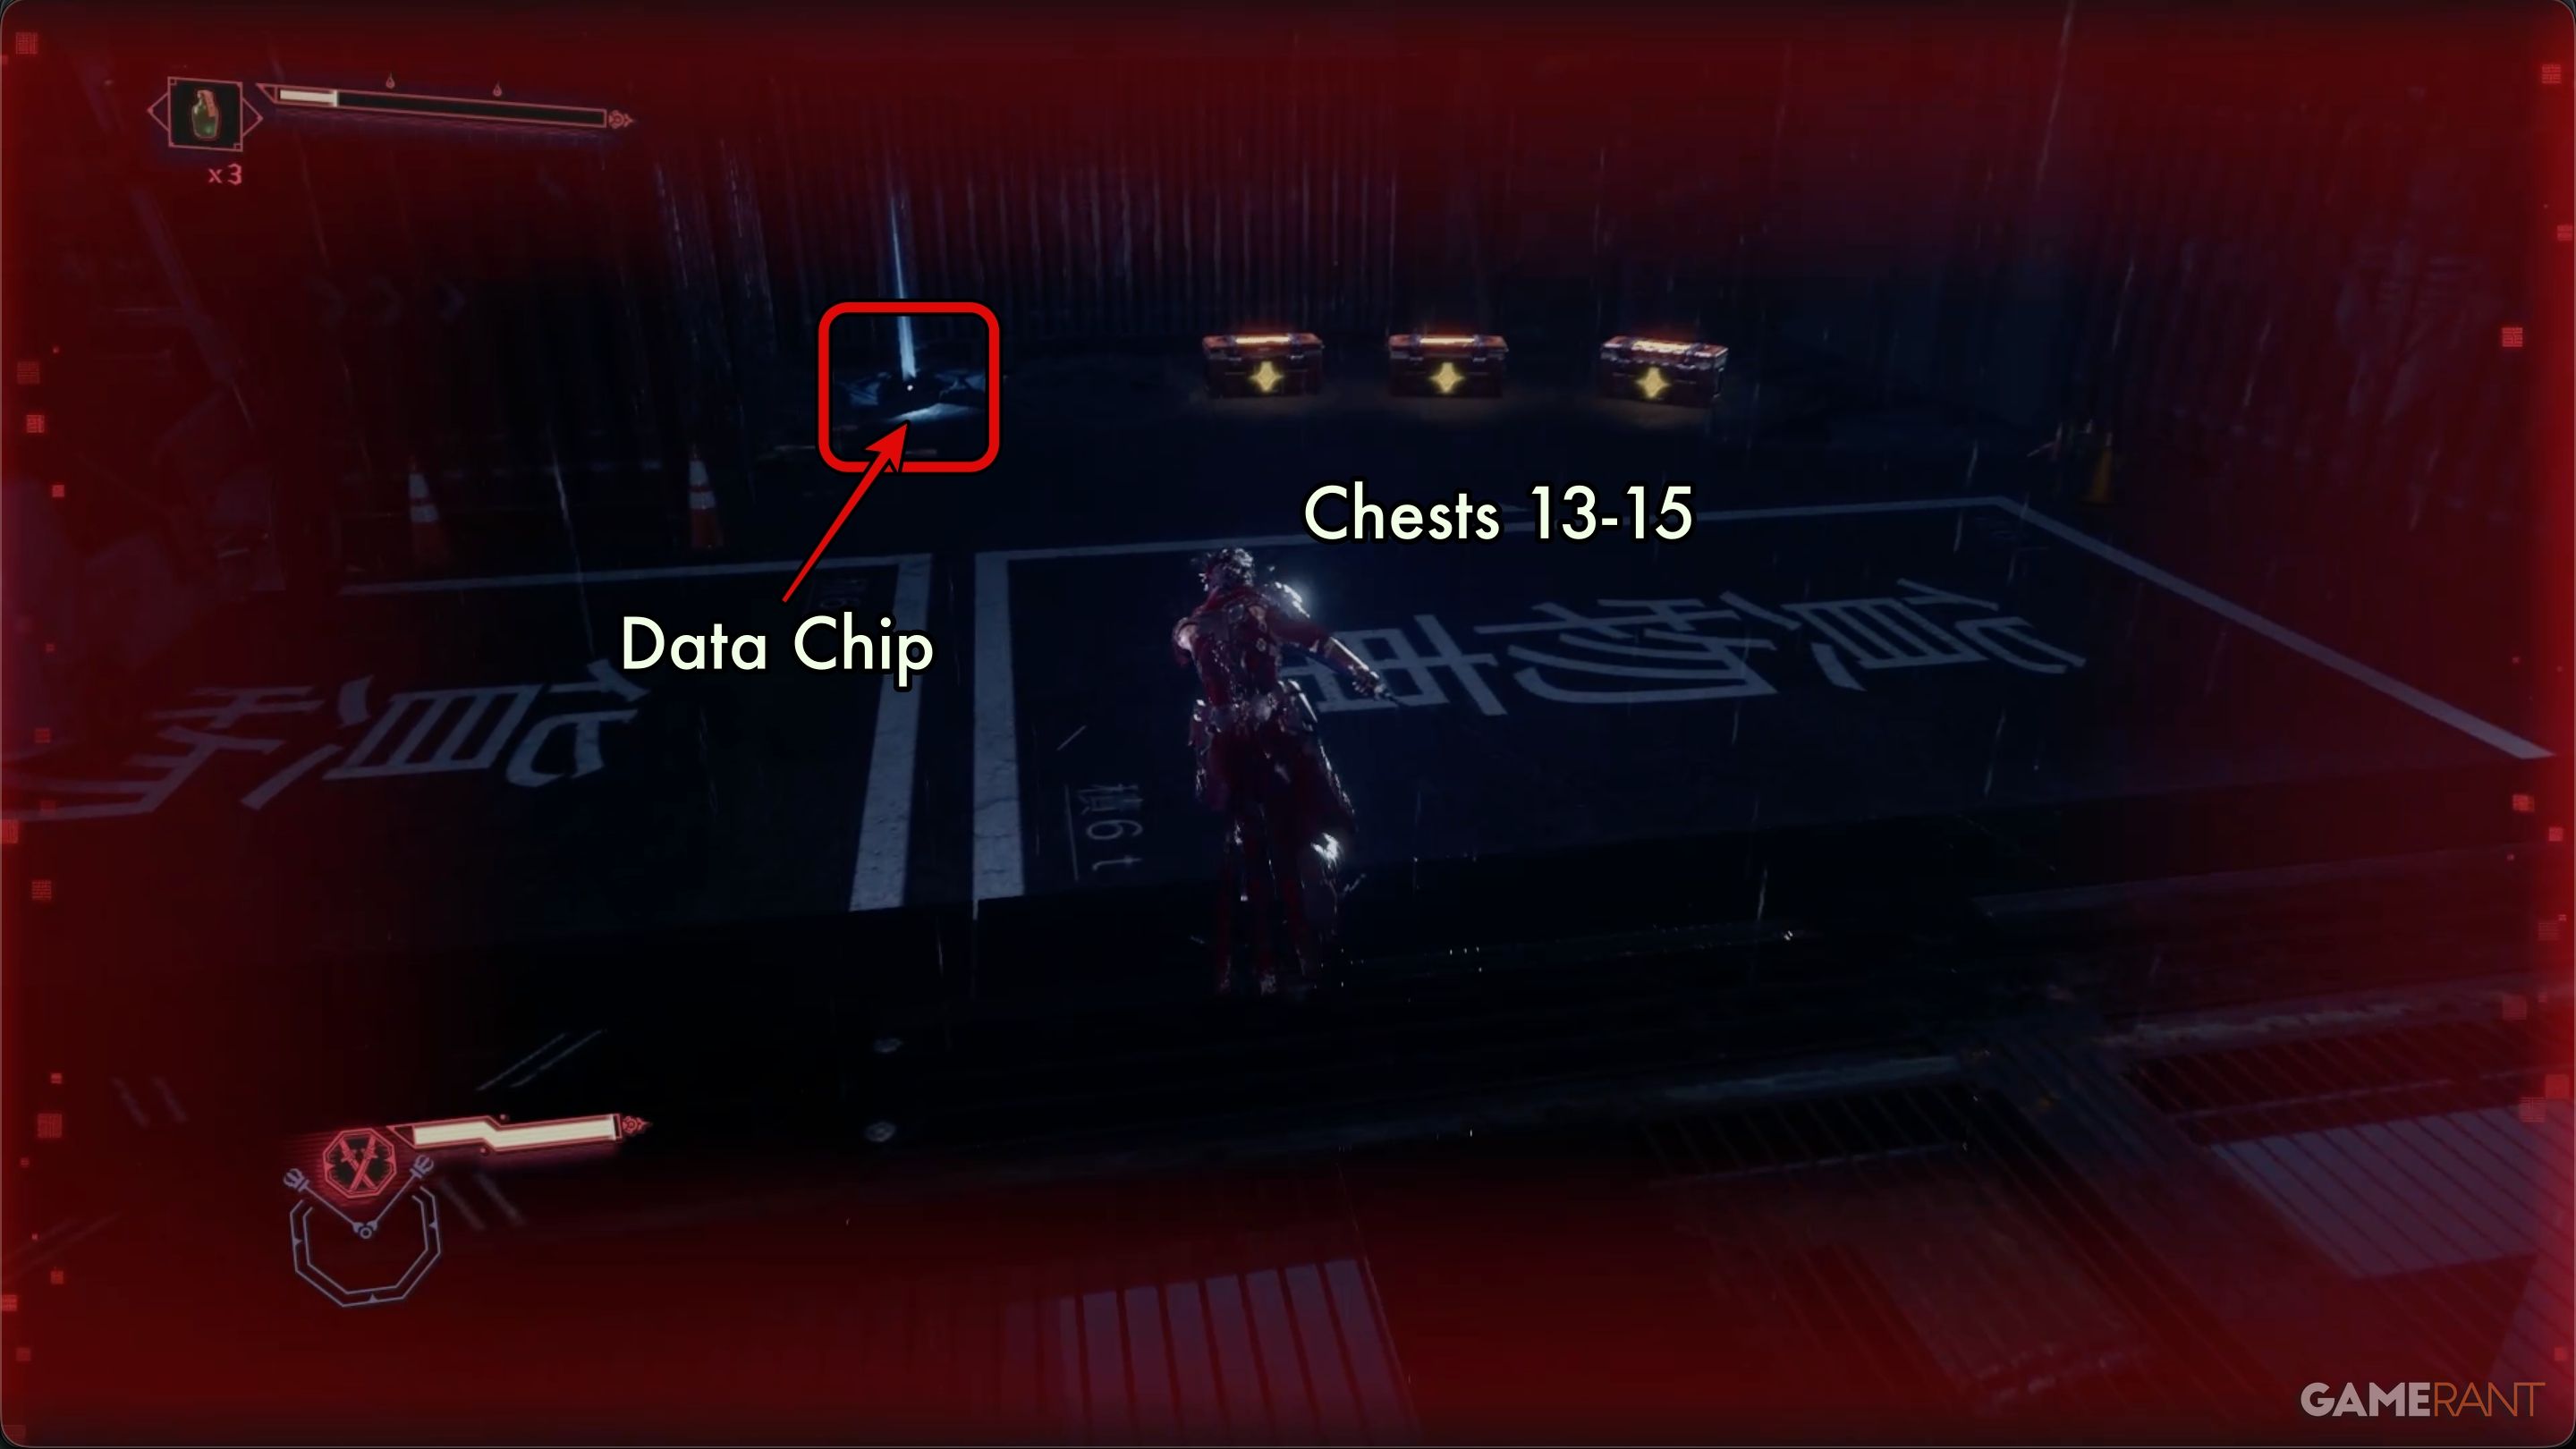
Just walk up to the chip and press the button to pick it up. Getting this chip is important because it gives you the first Phantasmal Herb, and you’ll need two of these herbs to increase your maximum health in Ninja Gaiden 4.
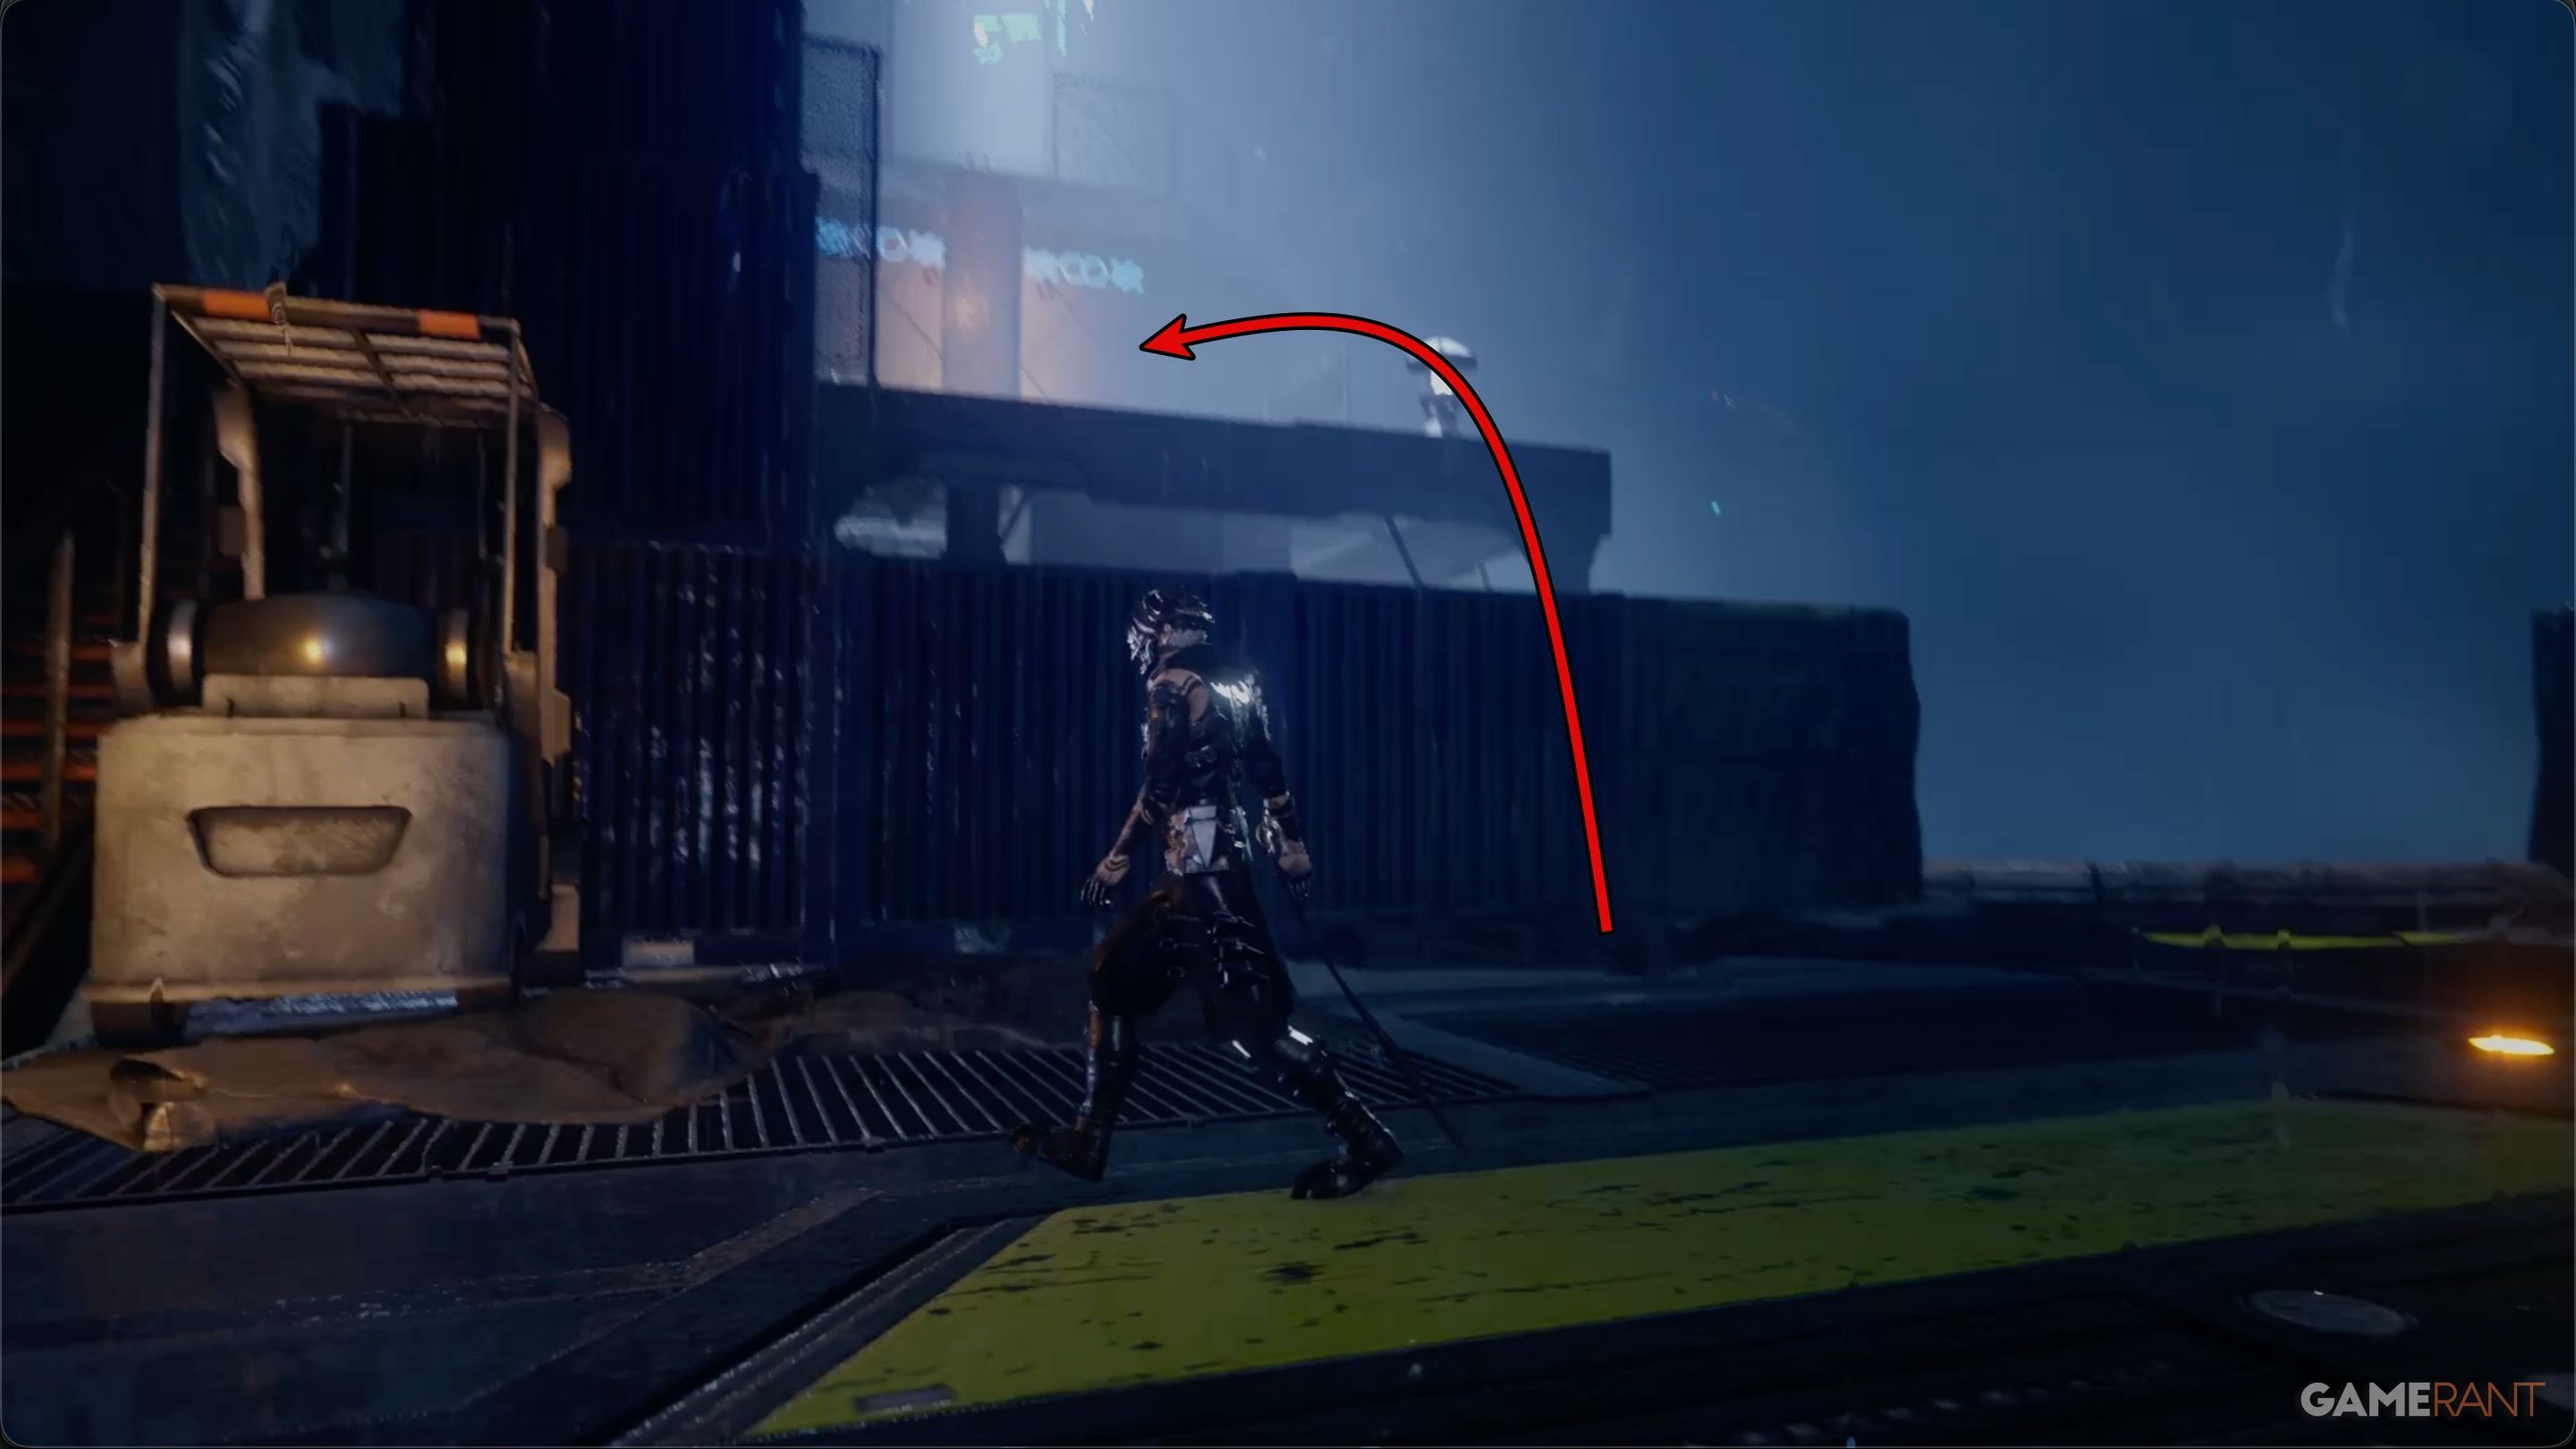
After collecting the chip, make your way over the container and up onto the well-lit platform.
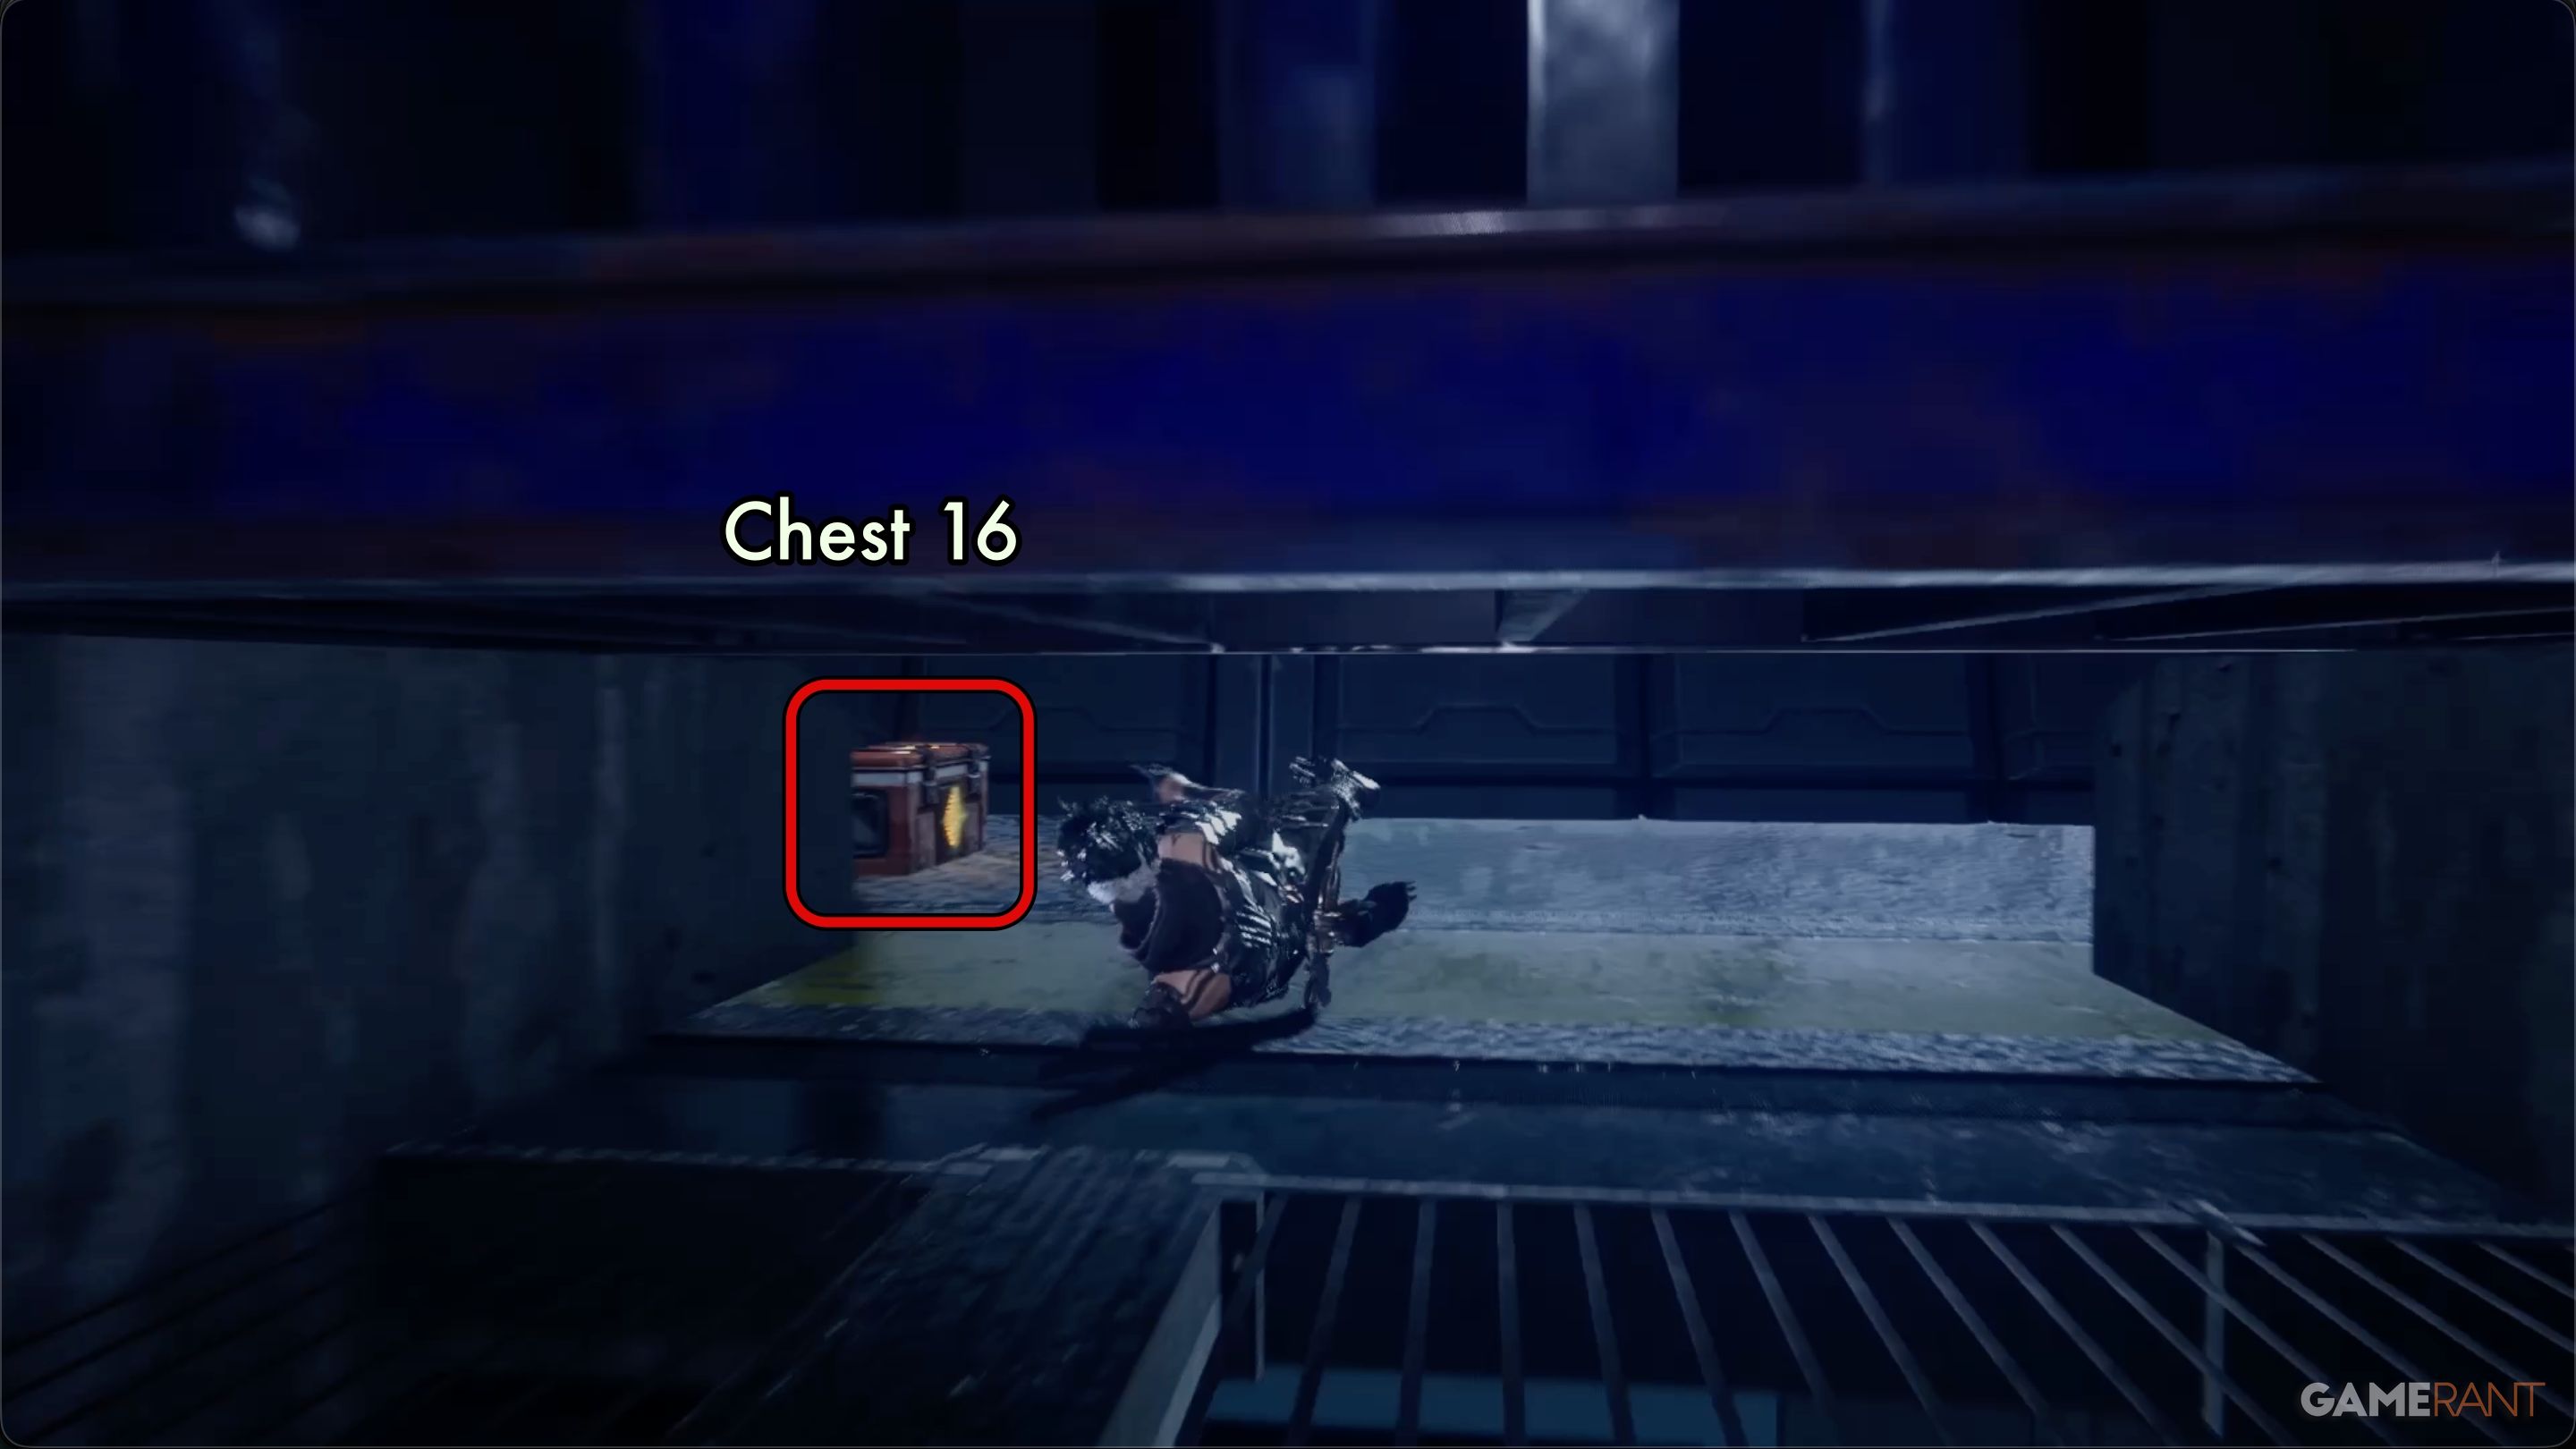
You’ll find Chest 16 in the back corner. You can get to it by either crawling under the containers or going around them. Once you’re there, climb the ladder next to the chest to find Chests 17 and 18 at the top.
- Chest 12: Crimson Blood Pellets x1
- Chst 13: Divine Life Elixir x1
- Chest 14: Life Elixir x1
- Chest 15: Divine Life Elixir x1
- Chest 16: Divine Life Elixir x1
- Chest 17: Incense of Rebirth x1
Beserk State, Tyran Location 3, and DarkNest Terminal 4:
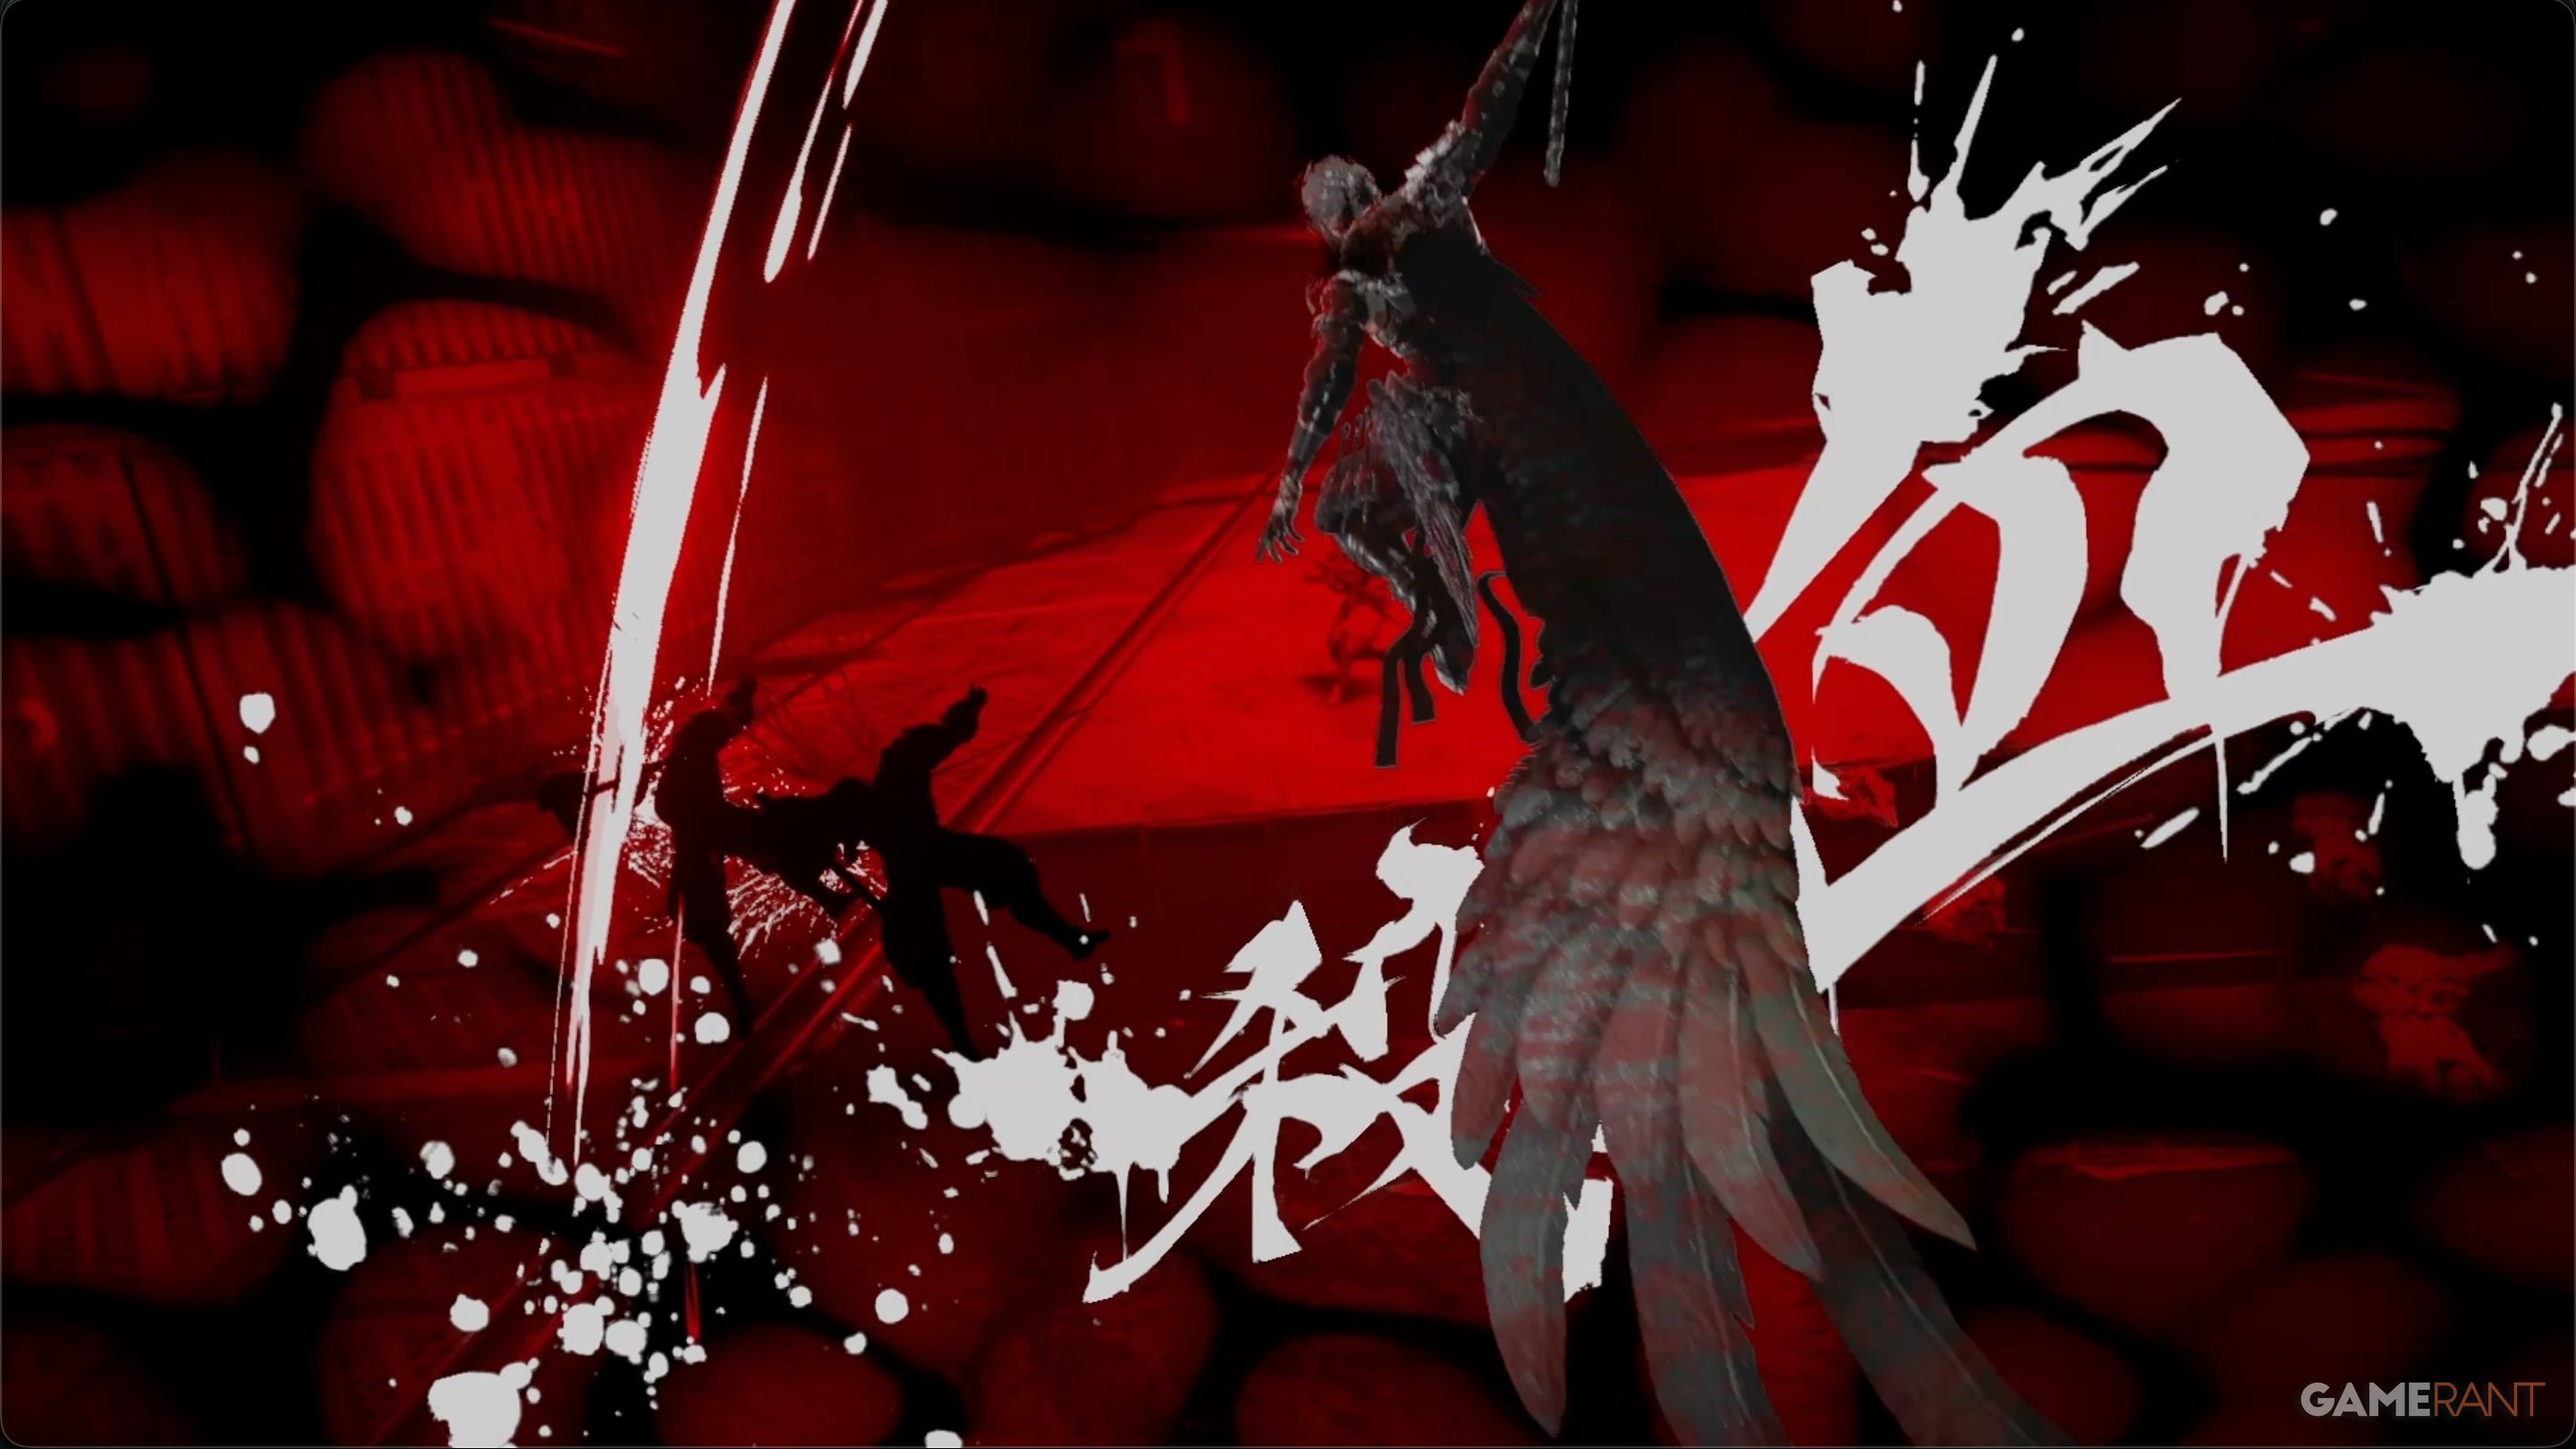
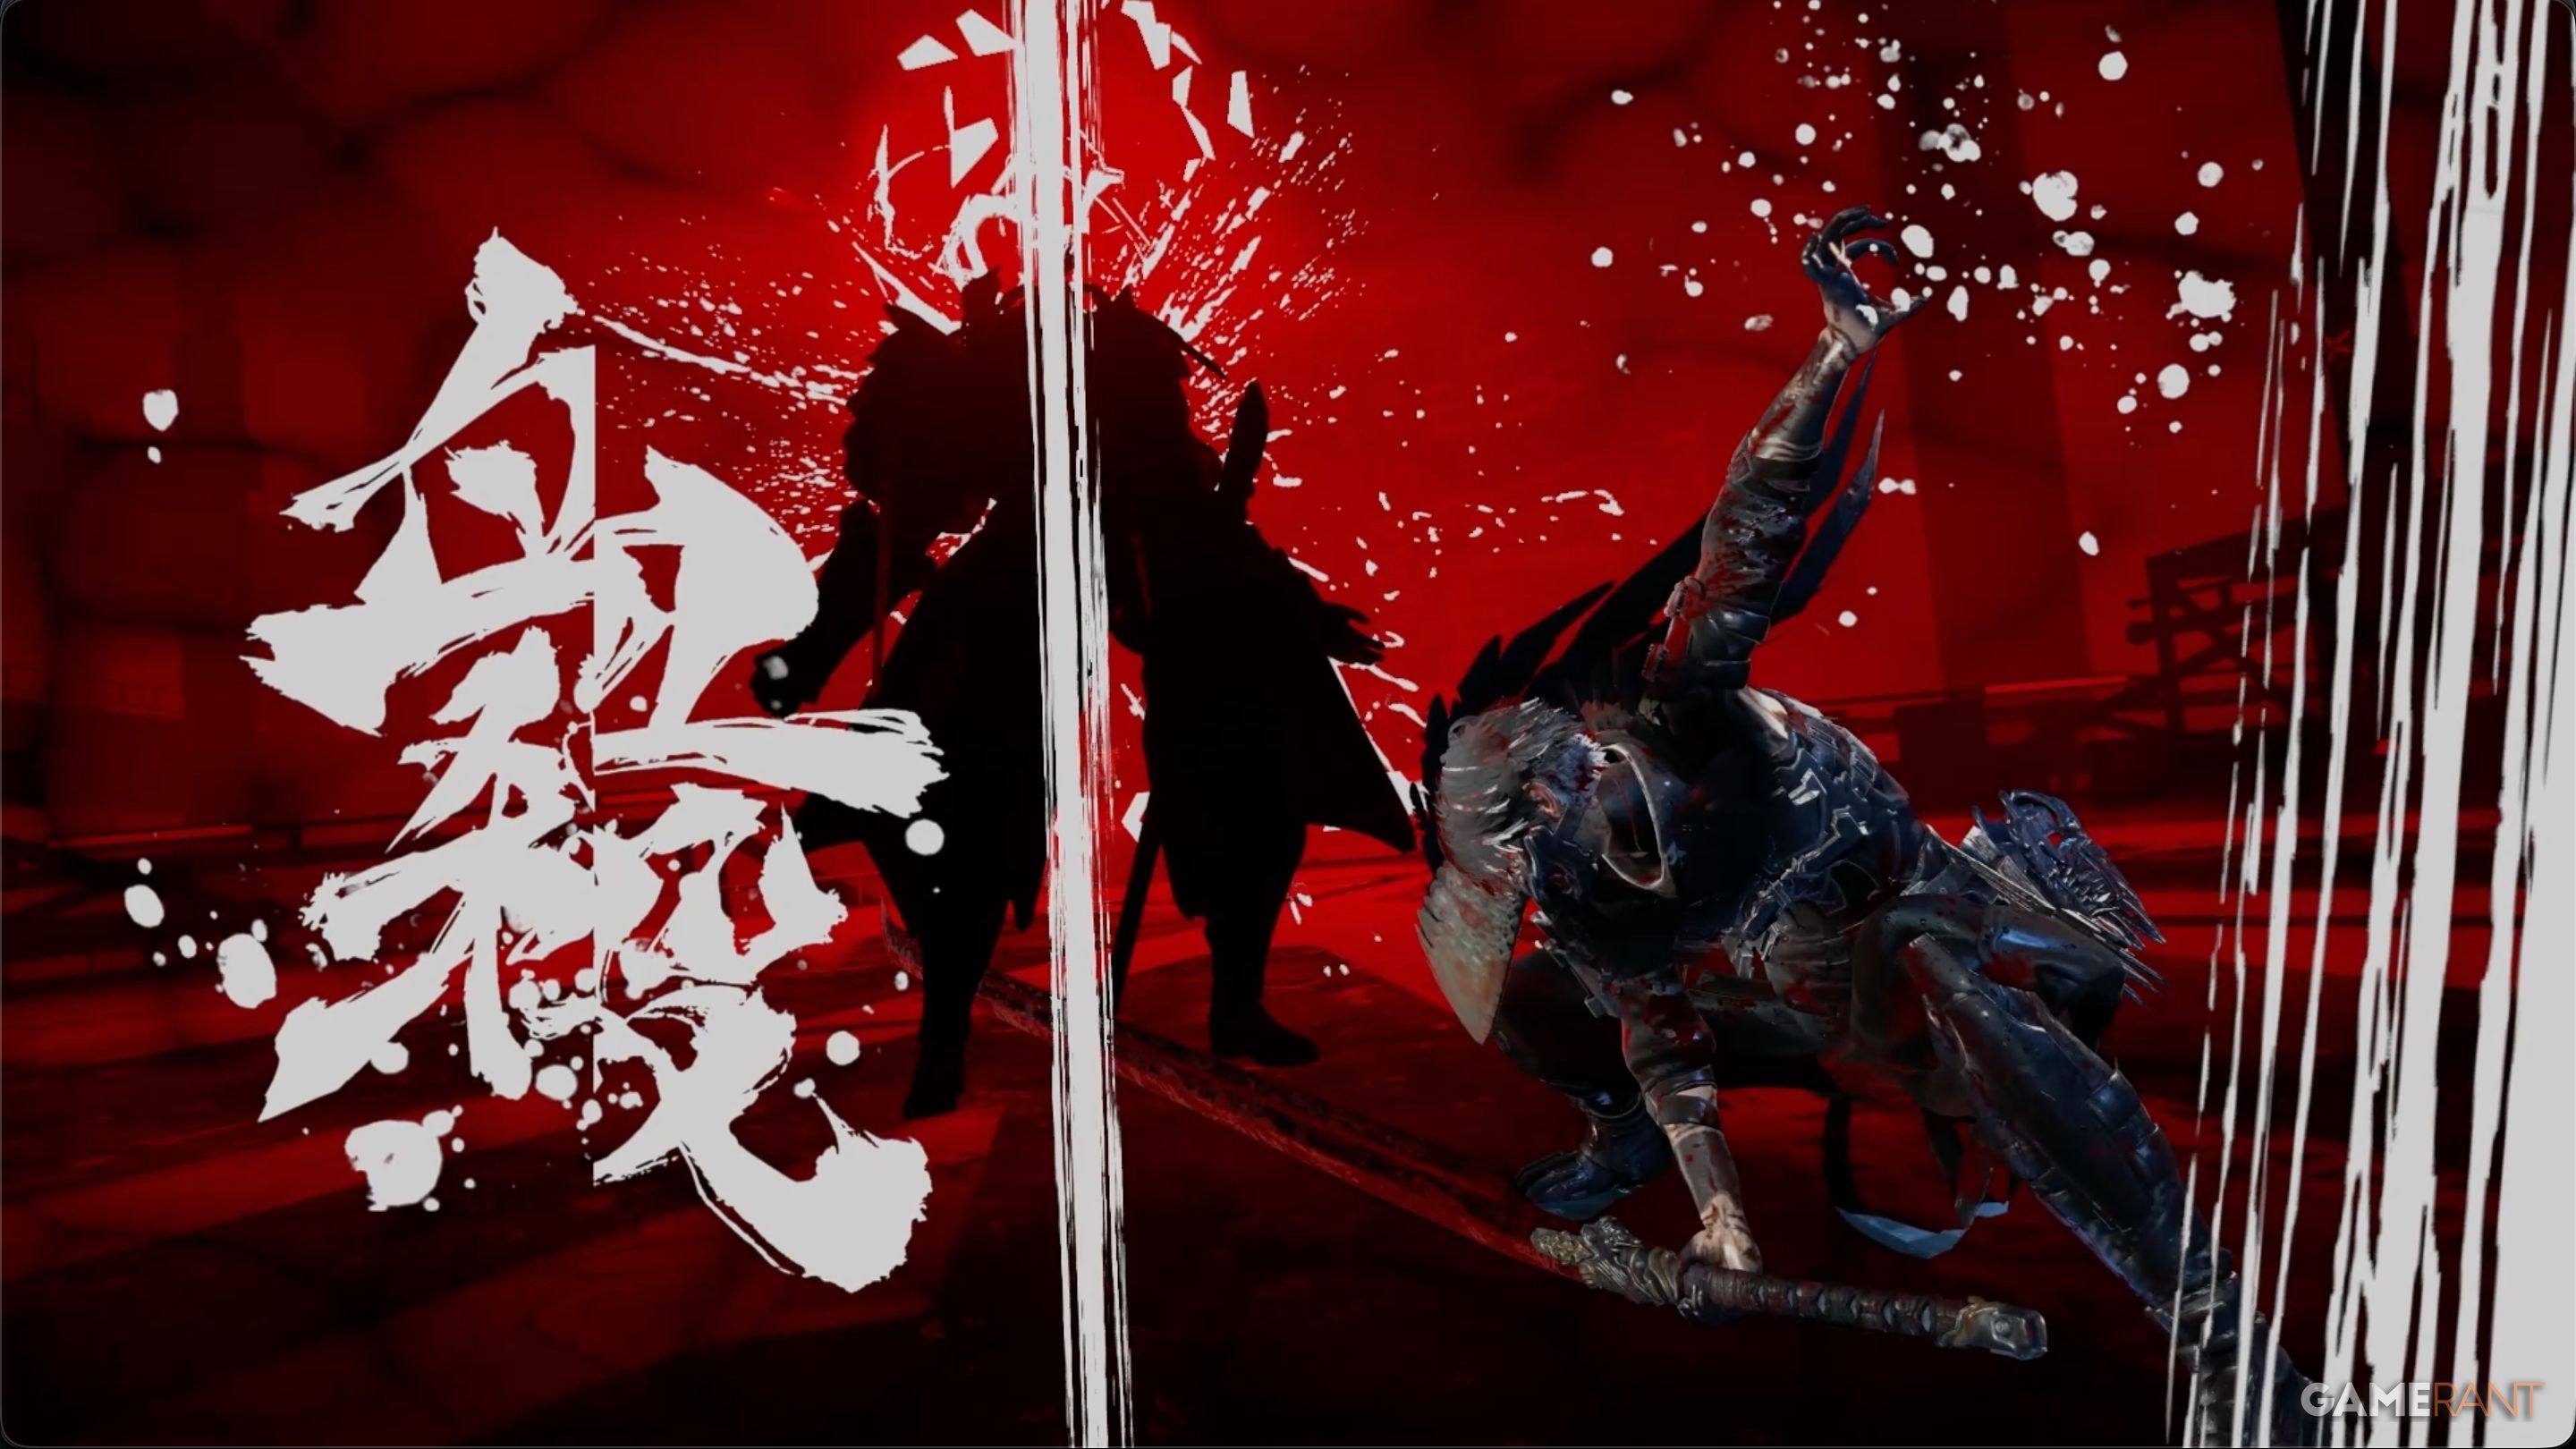
Once you’ve gathered all the chests, you’ll enter a courtyard filled with enemies. Landing there triggers a new feature called the Berserk State. This powerful mode lets Yakumo unleash devastating Bloodbath Kills – attacks so strong they can instantly split enemies in two!
After defeating the enemies in the arena, you’ll find Tyran’s third base and the fourth DarkNest Terminal. Be sure to hand in the Data Chip if you found one.
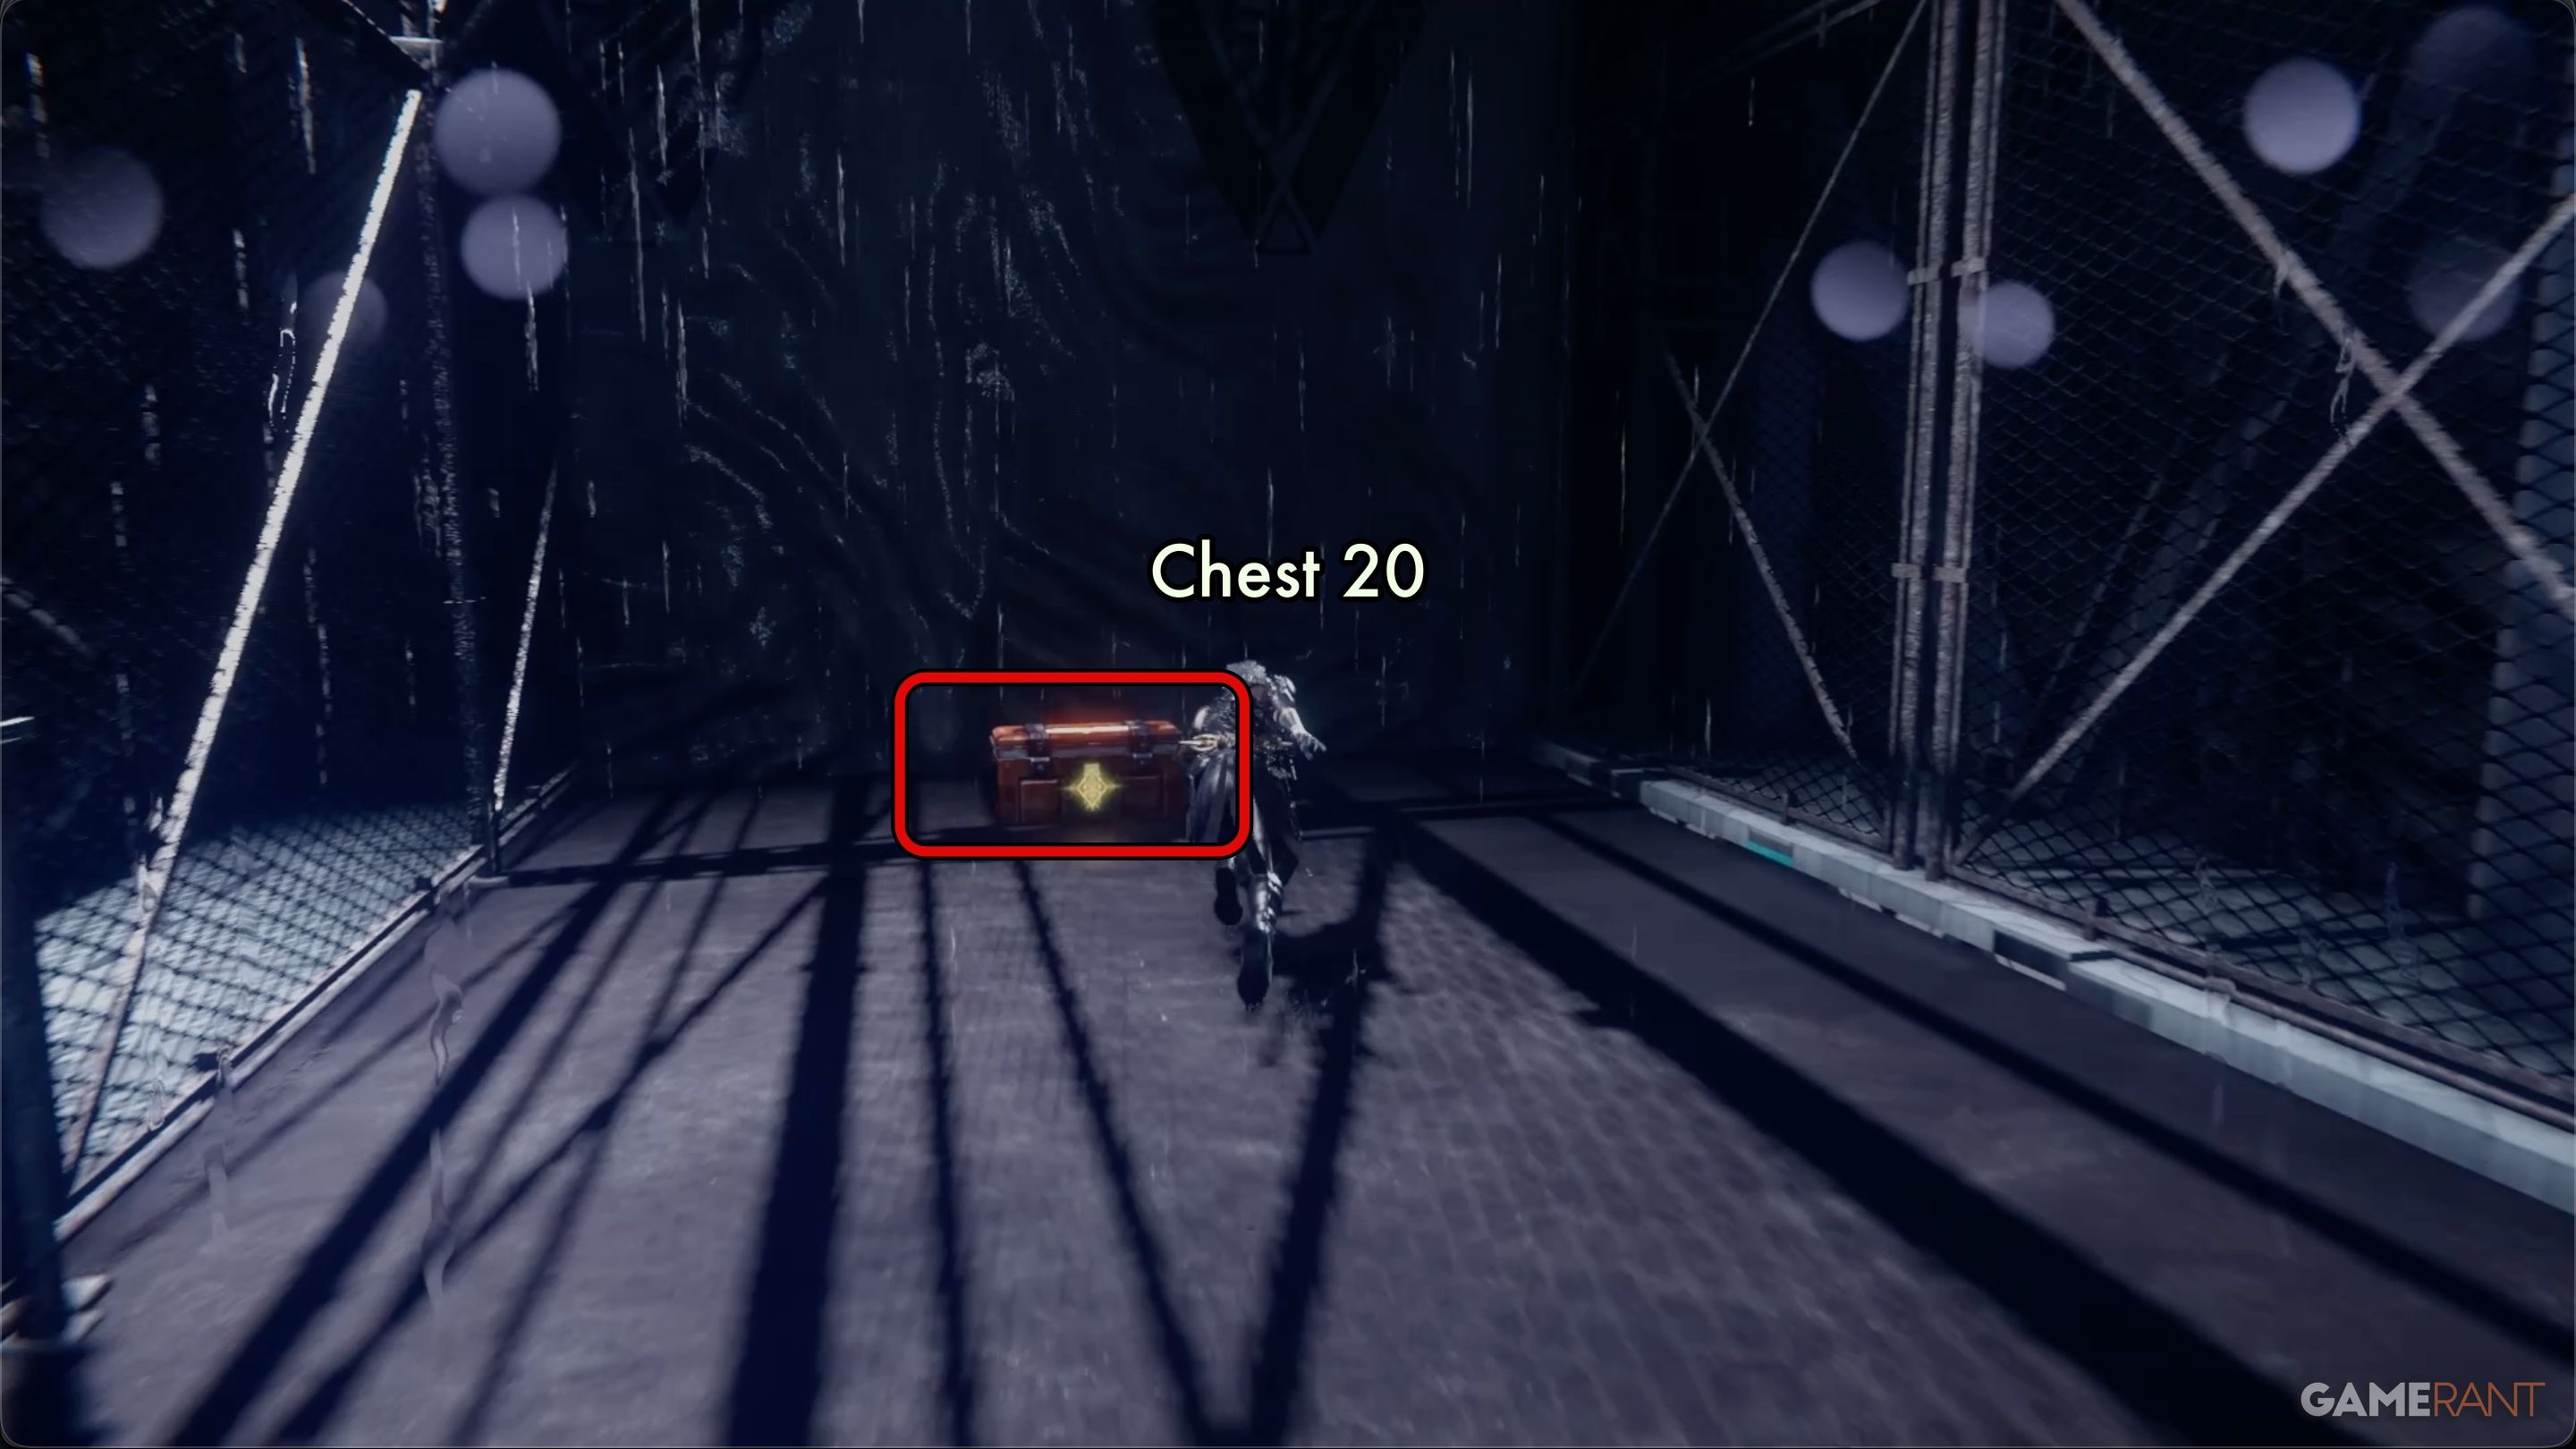
Chest 19 & 20:
Once you’ve left Tyran’s third area, you’ll find Chest 19 at the top of the nearby stairs. It contains one Divine Life Elixir. Soon after getting the chest, you’ll reach a spot with containers where you can choose to go either right or left.

Follow the destination icon to continue, but turning left will lead you to Chest 20, which holds one Incense of Rebirth.
Tyran Location 4 and DarkNest Terminal 5:
After opening Chest 20, you’ll face some enemies while swinging and running along walls over several gaps. Soon after, you’ll find Tyran’s fourth location and the fifth DarkNest Terminal.
Chapter 1 Walkthrough Boss Fight – Ninja Giaden 4
D.D.O. Commander Boss Fight:
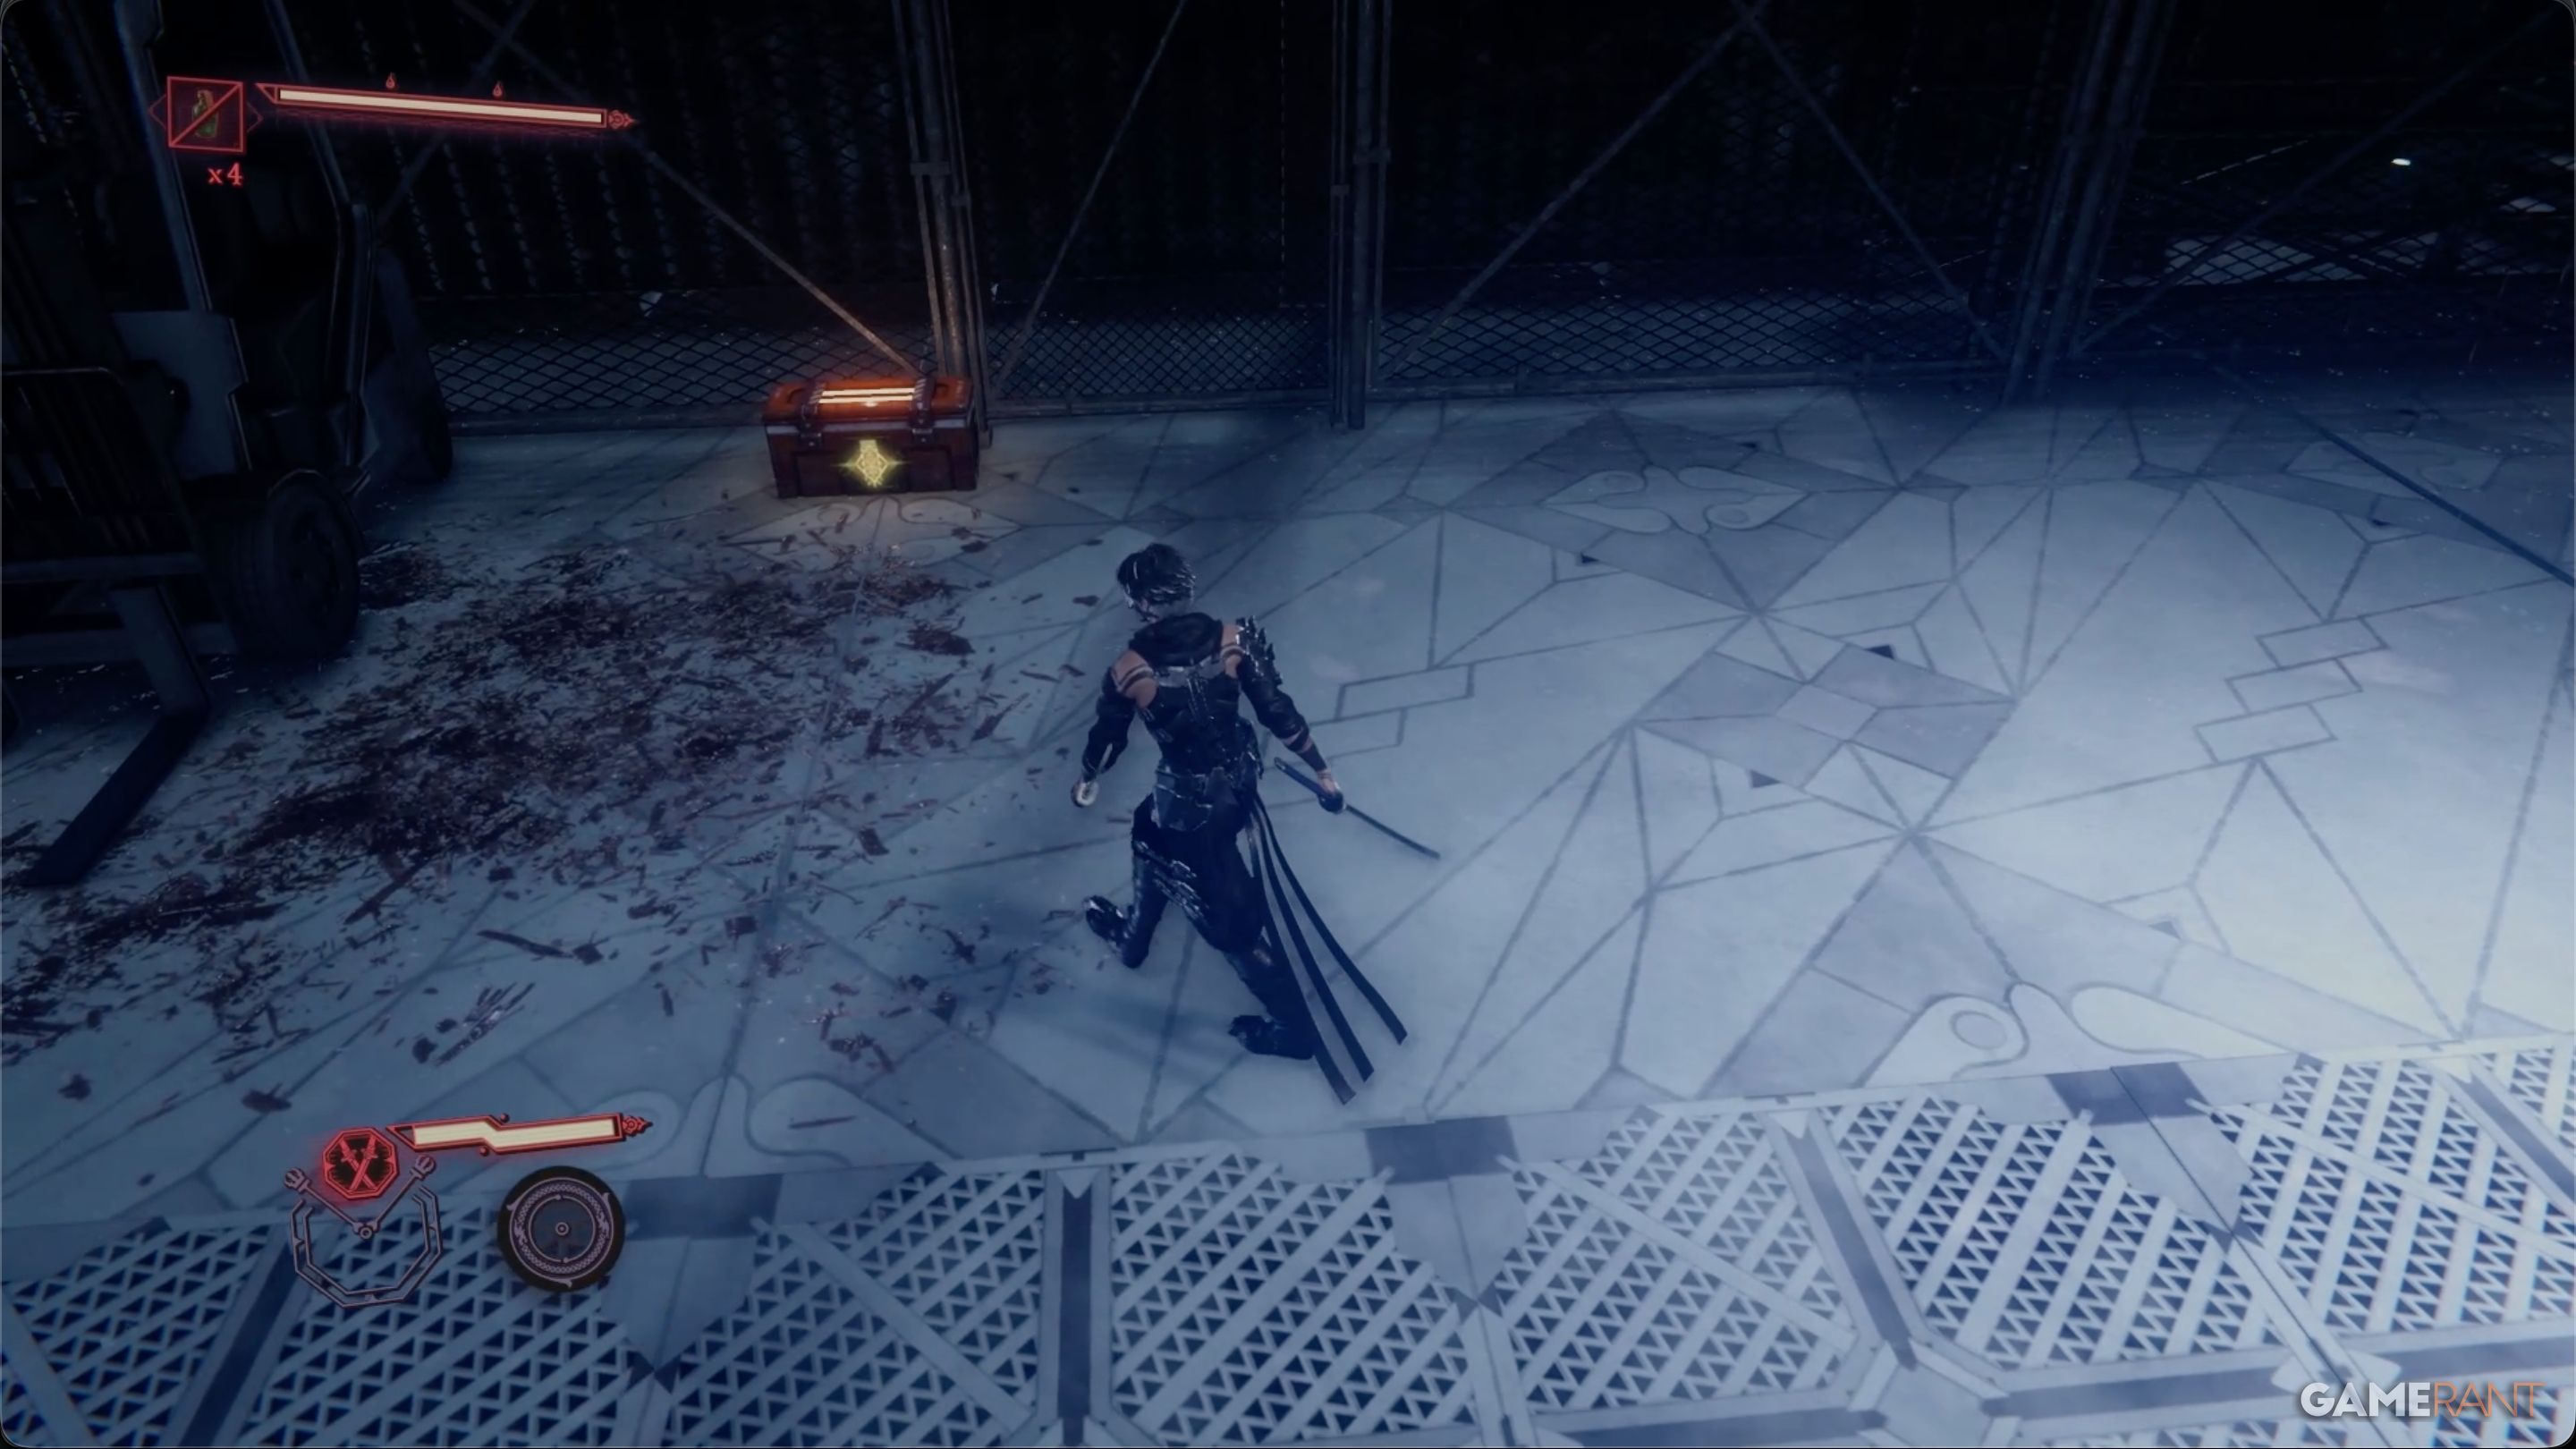
Right after exiting the DarkNest Terminal, you’ll see another chest to your left – Chest 21. It contains one Divine Life Elixir.
Once you have the chest, cross the bridge to fight the final boss of Chapter 1, the D.D.O. Commander. This is the first truly challenging enemy you’ll encounter in Ninja Gaiden 4, and it’s a tough fight!
When fighting the Commander, focus on using Bloodraven Form attacks right as it begins to charge a powerful attack (look for the red exclamation point). Successfully hitting it during this charge-up will stun it, creating an opening for further attacks.
The Commander has two health bars, meaning the fight will be long. Save your healing items and power-ups for the entire duration. Also, watch your Berserk Gauge – filling it lets you deal a huge amount of damage to the enemy.
After defeating the Commander, just destroy the last Pylon to finish Chapter 1.
Read More
- All Skyblazer Armor Locations in Crimson Desert
- How to Get the Sunset Reed Armor Set and Hollow Visage Sword in Crimson Desert
- All Shadow Armor Locations in Crimson Desert
- Marni Laser Helm Location & Upgrade in Crimson Desert
- All Golden Greed Armor Locations in Crimson Desert
- All Helfryn Armor Locations in Crimson Desert
- Best Bows in Crimson Desert
- Keeping Large AI Models Connected Through Network Chaos
- How to Craft the Elegant Carmine Armor in Crimson Desert
- All Icewing Armor Locations in Crimson Desert
2025-10-21 13:13