As a seasoned adventurer who’s navigated through countless labyrinths and faced formidable foes, I must say that this quest to reunite Tri with his friends was quite an intriguing one. The path was filled with challenges that tested my wits and skills, but the satisfaction of finding each friend made it all worthwhile.
In “The Legend of Zelda: Echoes of Wisdom,” during the primary mission called “Jabl Waters Rift,” Zelda will come across a short rift segment situated in the upper part of the tranquil Zora River. This section separates and becomes an independent smaller mission named “Chaos at Zora River Village,”, essentially functioning as a side-quest that branches off from the main quest. These brief rift occurrences happen multiple times in “Echoes of Wisdom, ” with the aim of finding Tri’s companions within the rift remaining consistent throughout each instance.
Task at hand for Zelda and Tri in the adventure “Trouble at Zora River Village” involves sealing the rift over the tranquil upper part of the Zora River. This crucial step is a significant part of the main storyline that eventually leads to the exploration of the “Jabul Ruins dungeon“. Tri requires aid in finding five missing companions scattered across the Still World, and Zelda is more than willing to assist. This walkthrough aims to assist players in completing “Trouble at Upper Zora River“, particularly focusing on locating Tri’s friends within the serene upper section of the Zora River.
How to Enter Stilled Upper Zora River in Echoes of Wisdom
In the course of “The Jabul Waters Rift” mission, Zelda will converse with both Sea Zoras and River Zoras. Following these interactions, they will gather at “Lord Jabu-Jabu’s Den“. However, due to the disagreement between the chieftains of each tribe, Jabu-Jabu becomes enraged upon their attempts to play music. It appears nothing could have pacified Jabu-Jabu, as he was actually a fraud. After becoming angry, Jabu-Jabu heads north towards “Zora River Village“. To initiate “Chaos at Zora River Village”, proceed in the northern direction.
Enter the Rift:
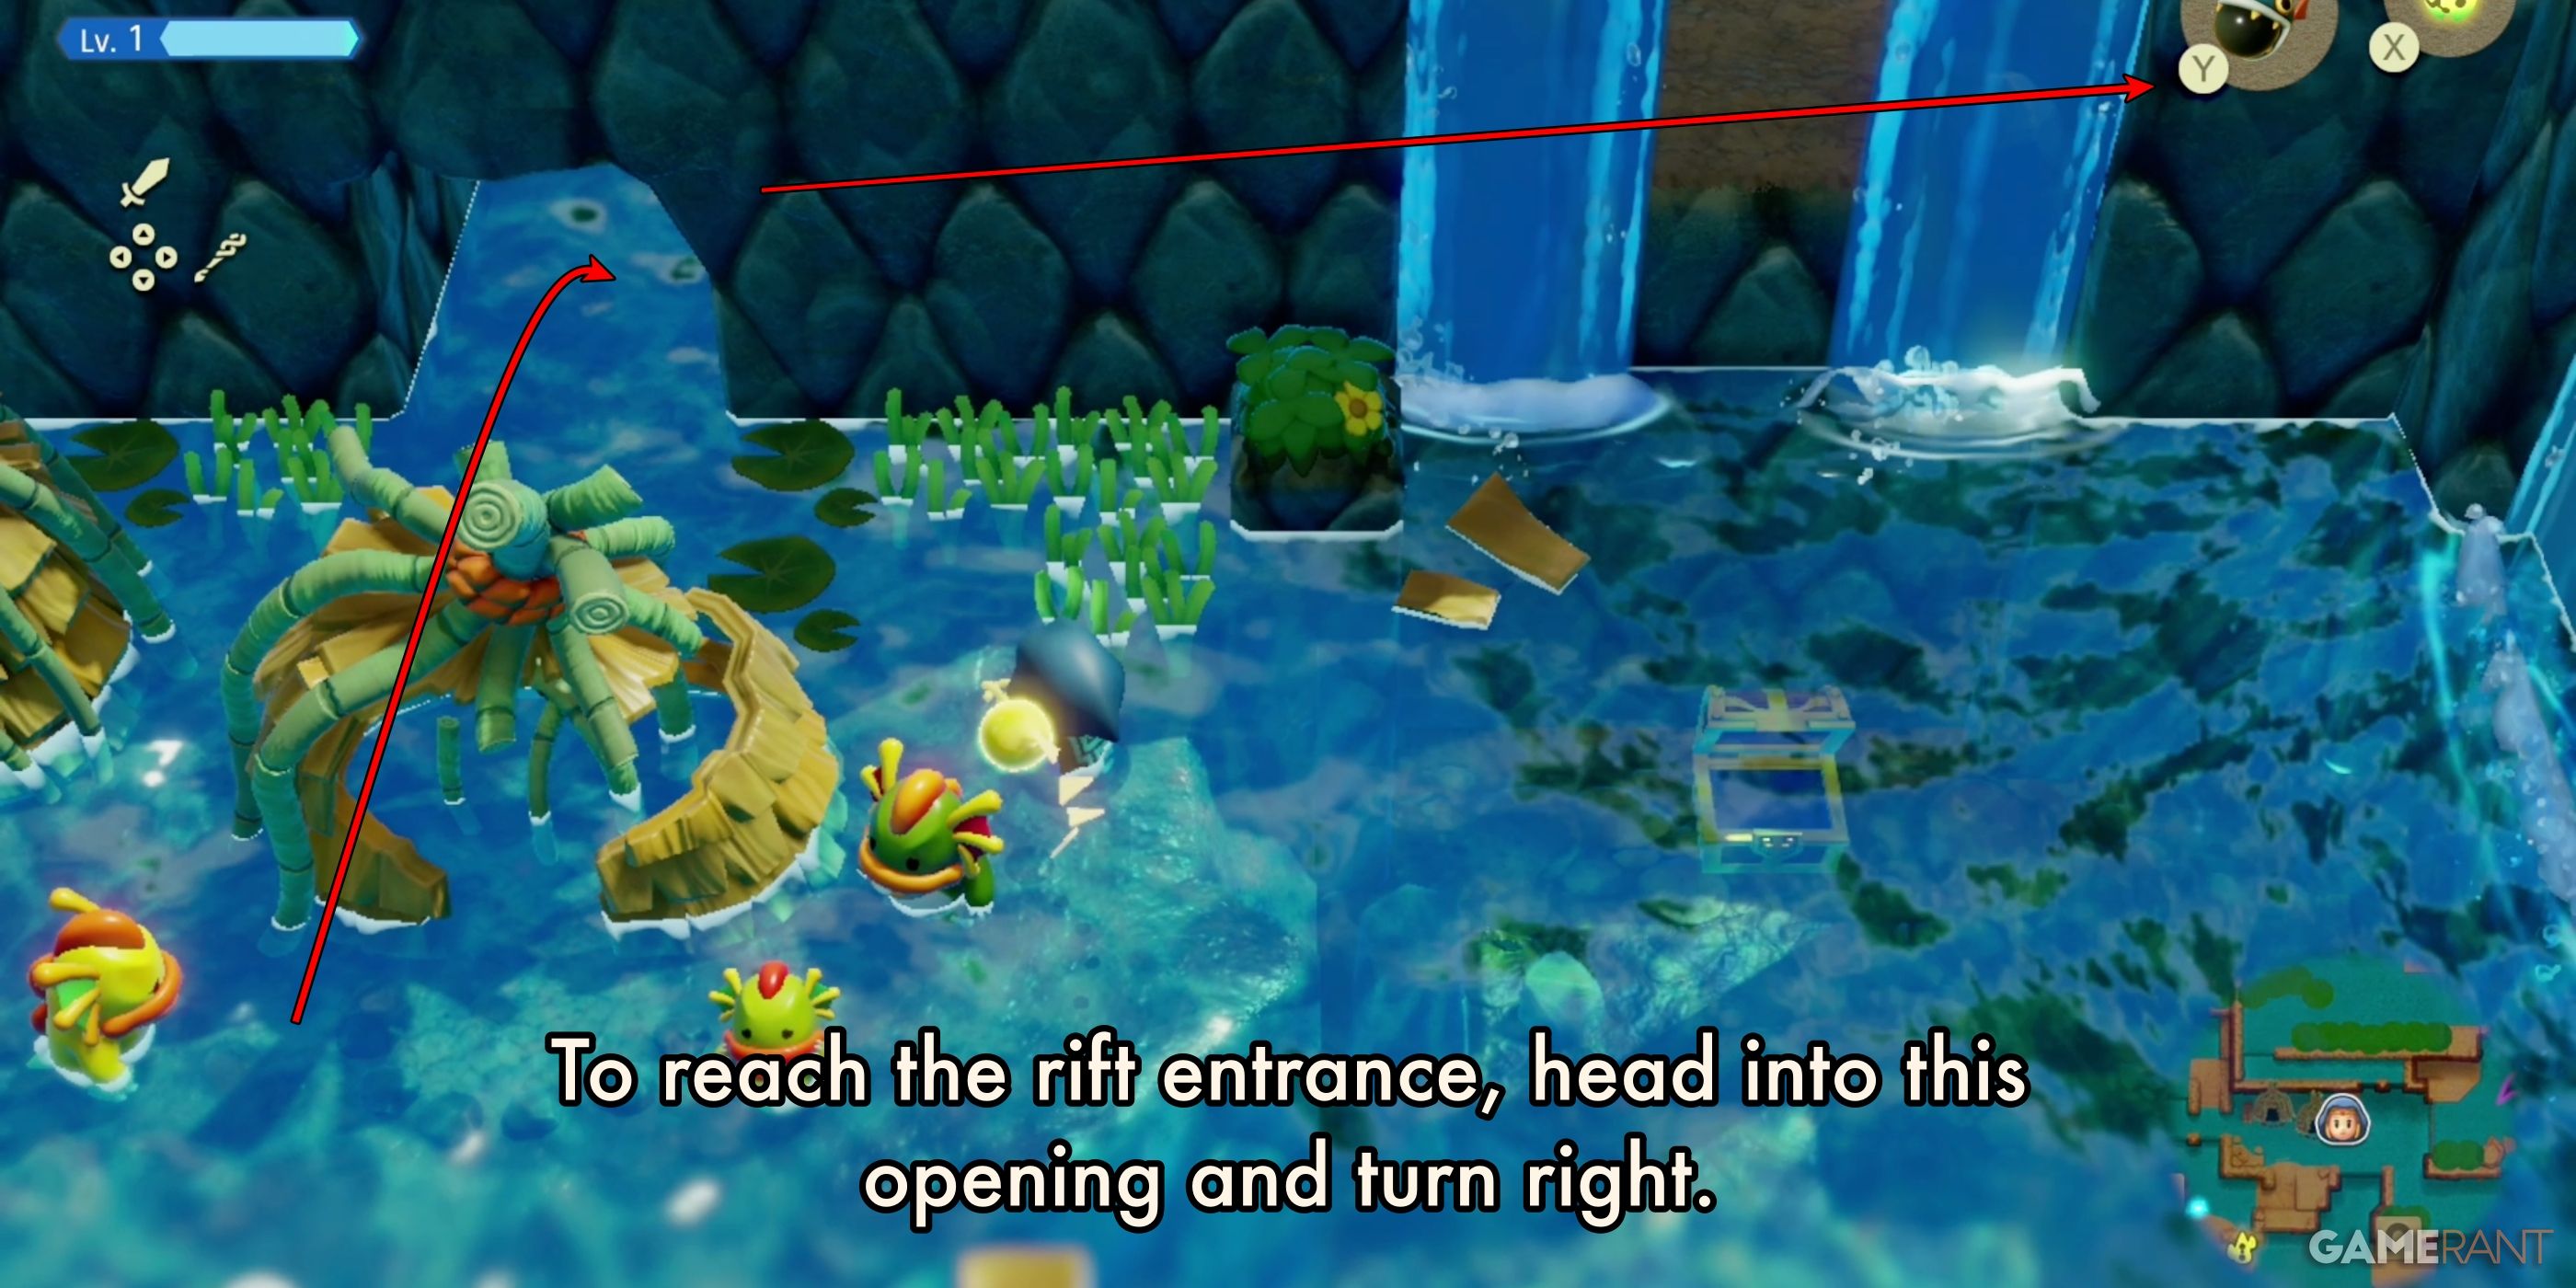
Regardless of whether you opt for the quick-travel system provided by Echoes of Wisdom or choose to walk to the village, once you’ve arrived, a short scene will play signaling the commencement of the quest. The initial objective is to find Dradd, the chief of the River Zoras. To accomplish this, make your way through the opening in the rocky cliff situated behind the dilapidated huts within the Zora River Village.

Instead of following the path ahead, make a right turn to ascend to the higher ground. Carry on moving westward until you come across Kushara, the Sea Zora chief, and a youthful River Zora. They will be positioned in front of the fissure entrance. It’s there where Zelda learns that both Dradd and the young Zora’s father have mysteriously vanished, taken by the rift.
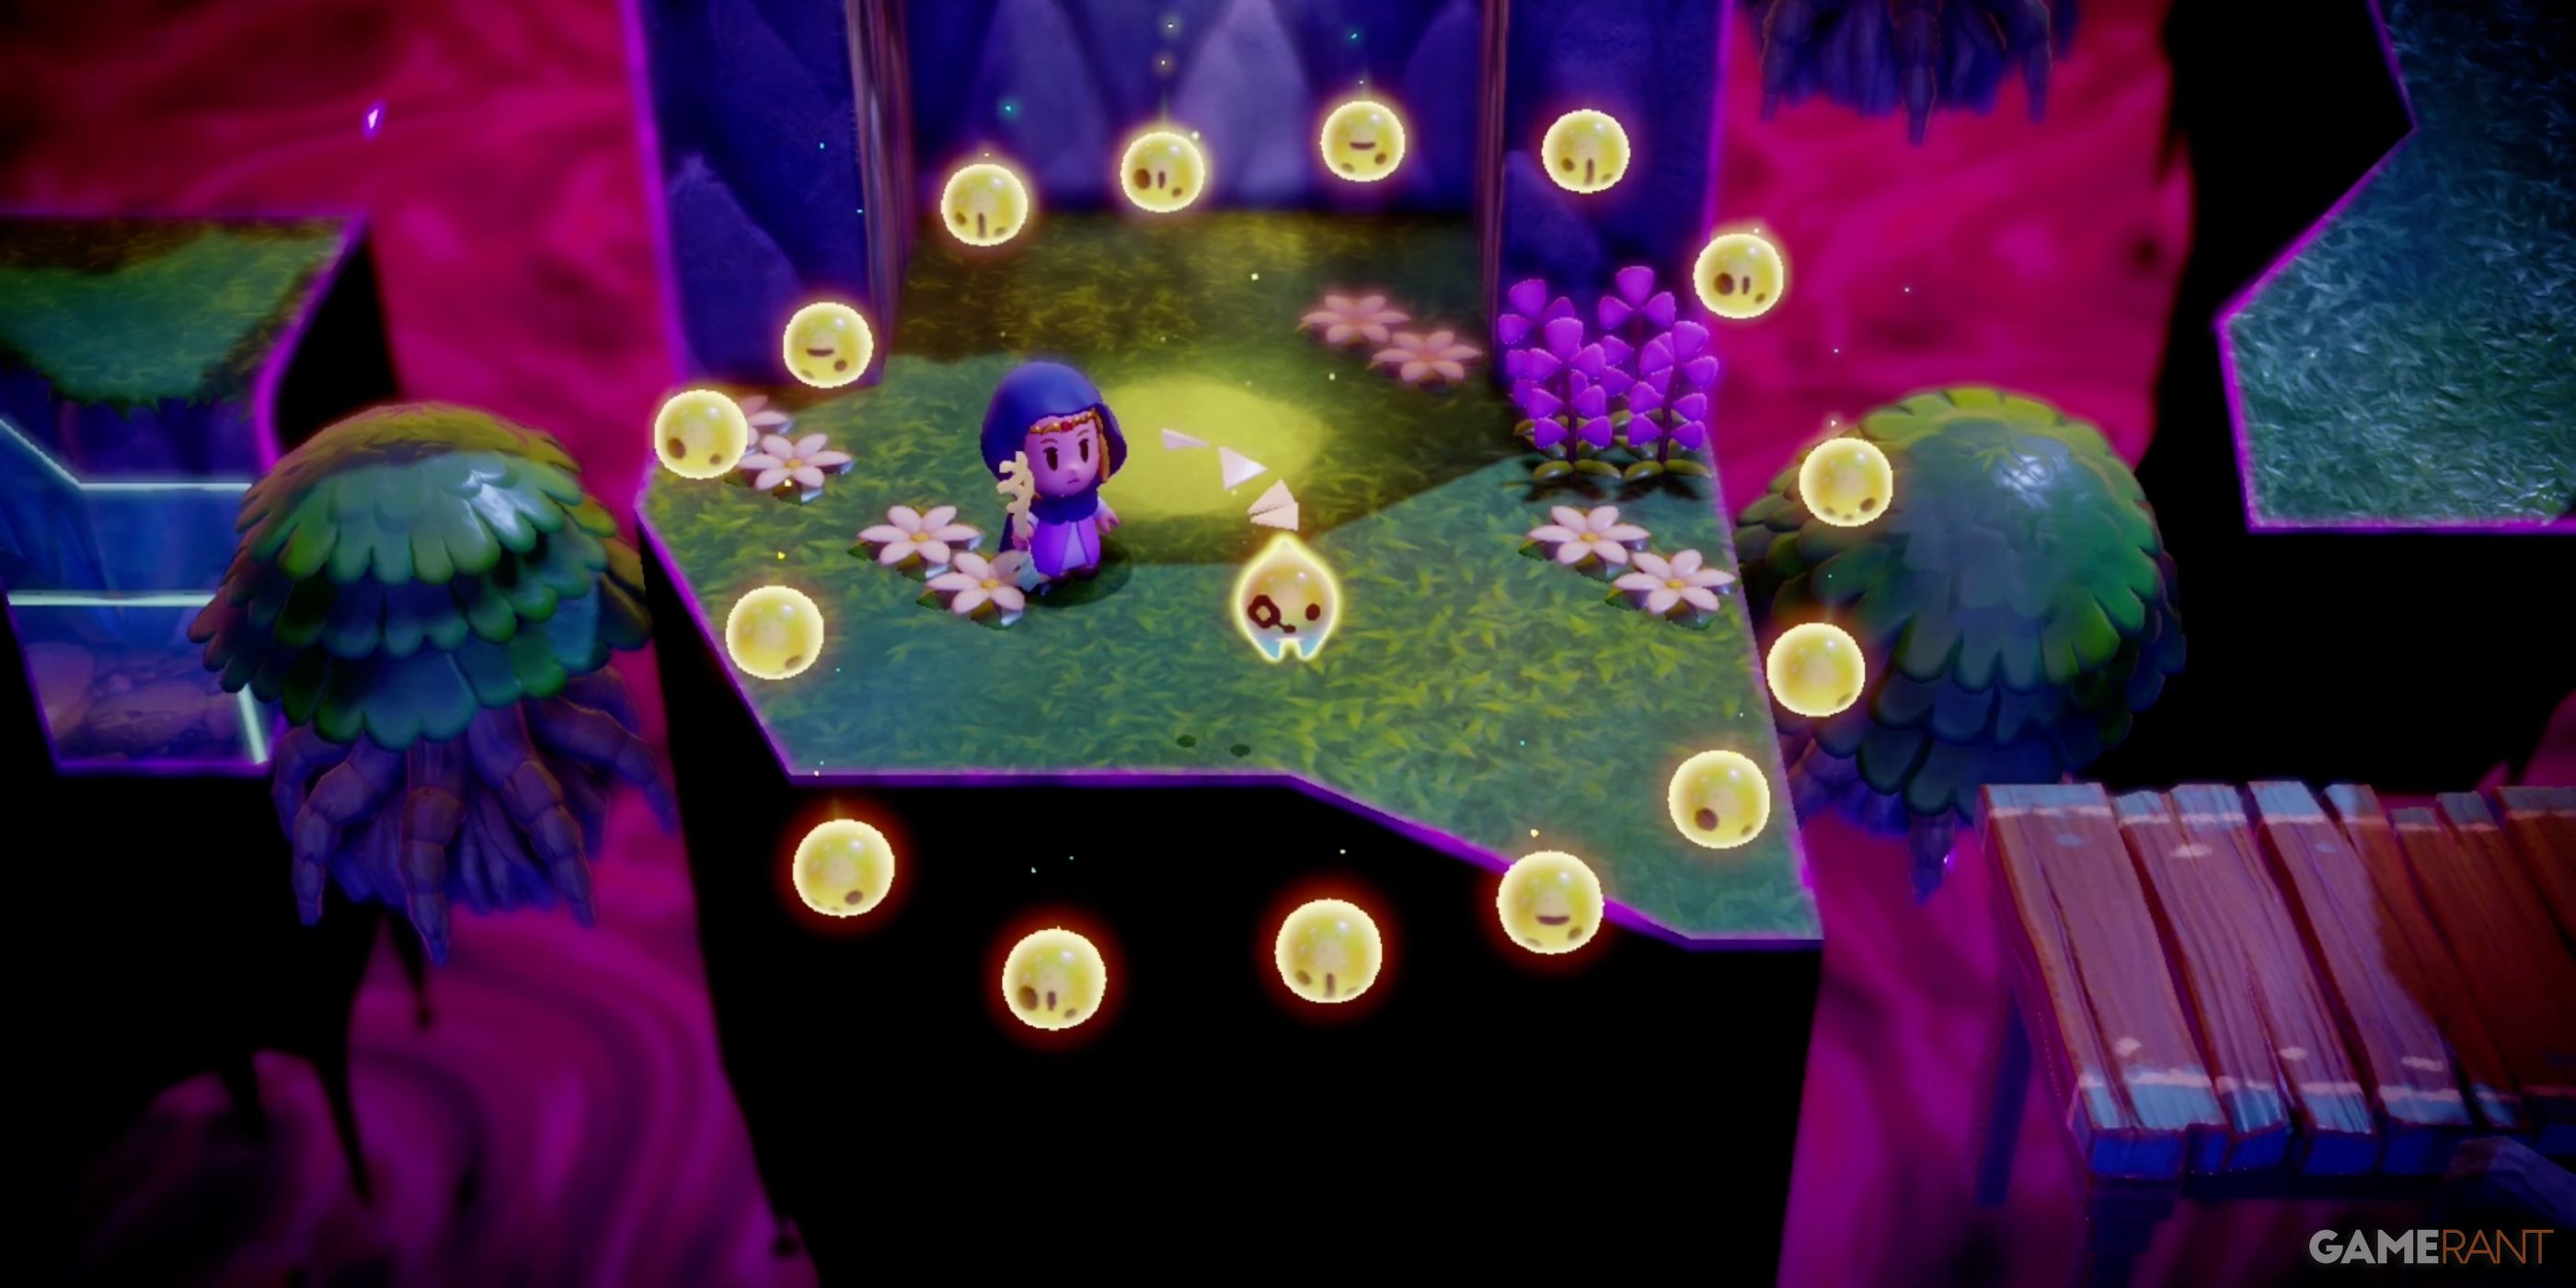
Tri indicates that some friends are trapped within the fissure too, urging Zelda to venture in and rescue them. Approach the rift’s entrance to gain access to the Calmed Zora River Above.
All Tri’s Friend Locations in Stilled Upper Zora River – Echoes of Wisdom
Tri finds himself with five companions residing along the peaceful Stilled Upper Zora River. Each of these friends can be found scattered throughout the chasm, and there’s no particular sequence in which they need to be gathered. Feel free to explore and encounter them in whichever order suits your journey best.
Tri’s Friend 1:
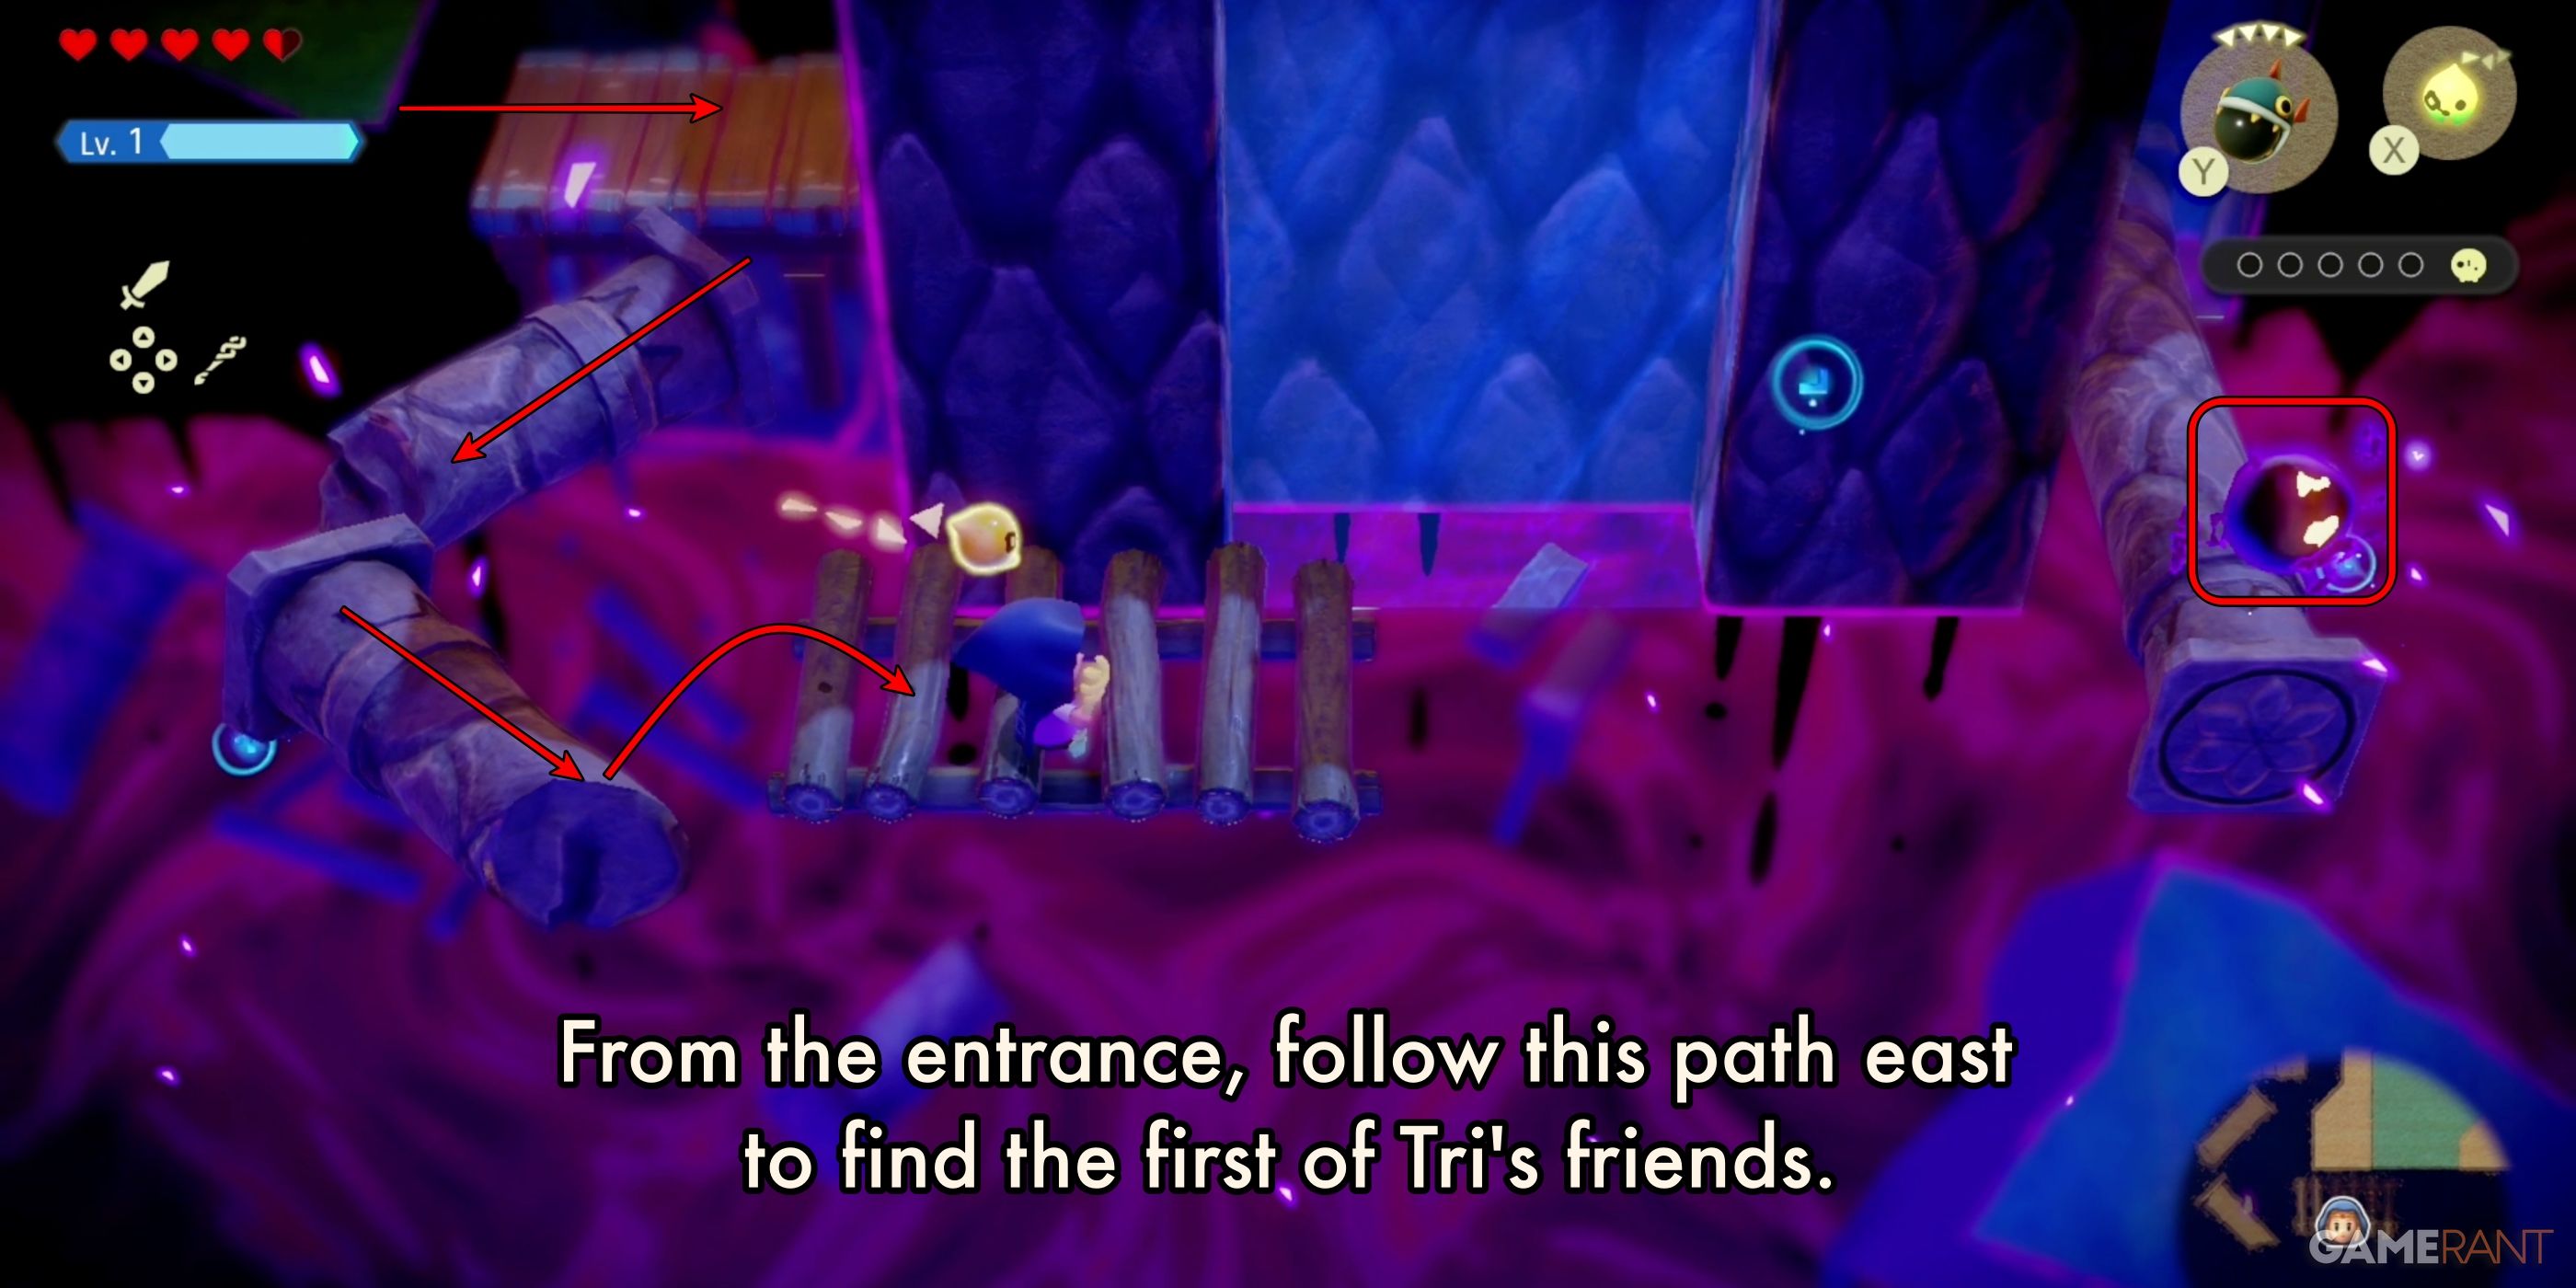
To locate Tri’s initial companion, proceed eastward on the wooden planks, then walk southward following the ancient pillars. Leap onto the ledge crafted from logs, and from this vantage point, you should be able to spot the first friend seated on a different pillar, visible to the east.
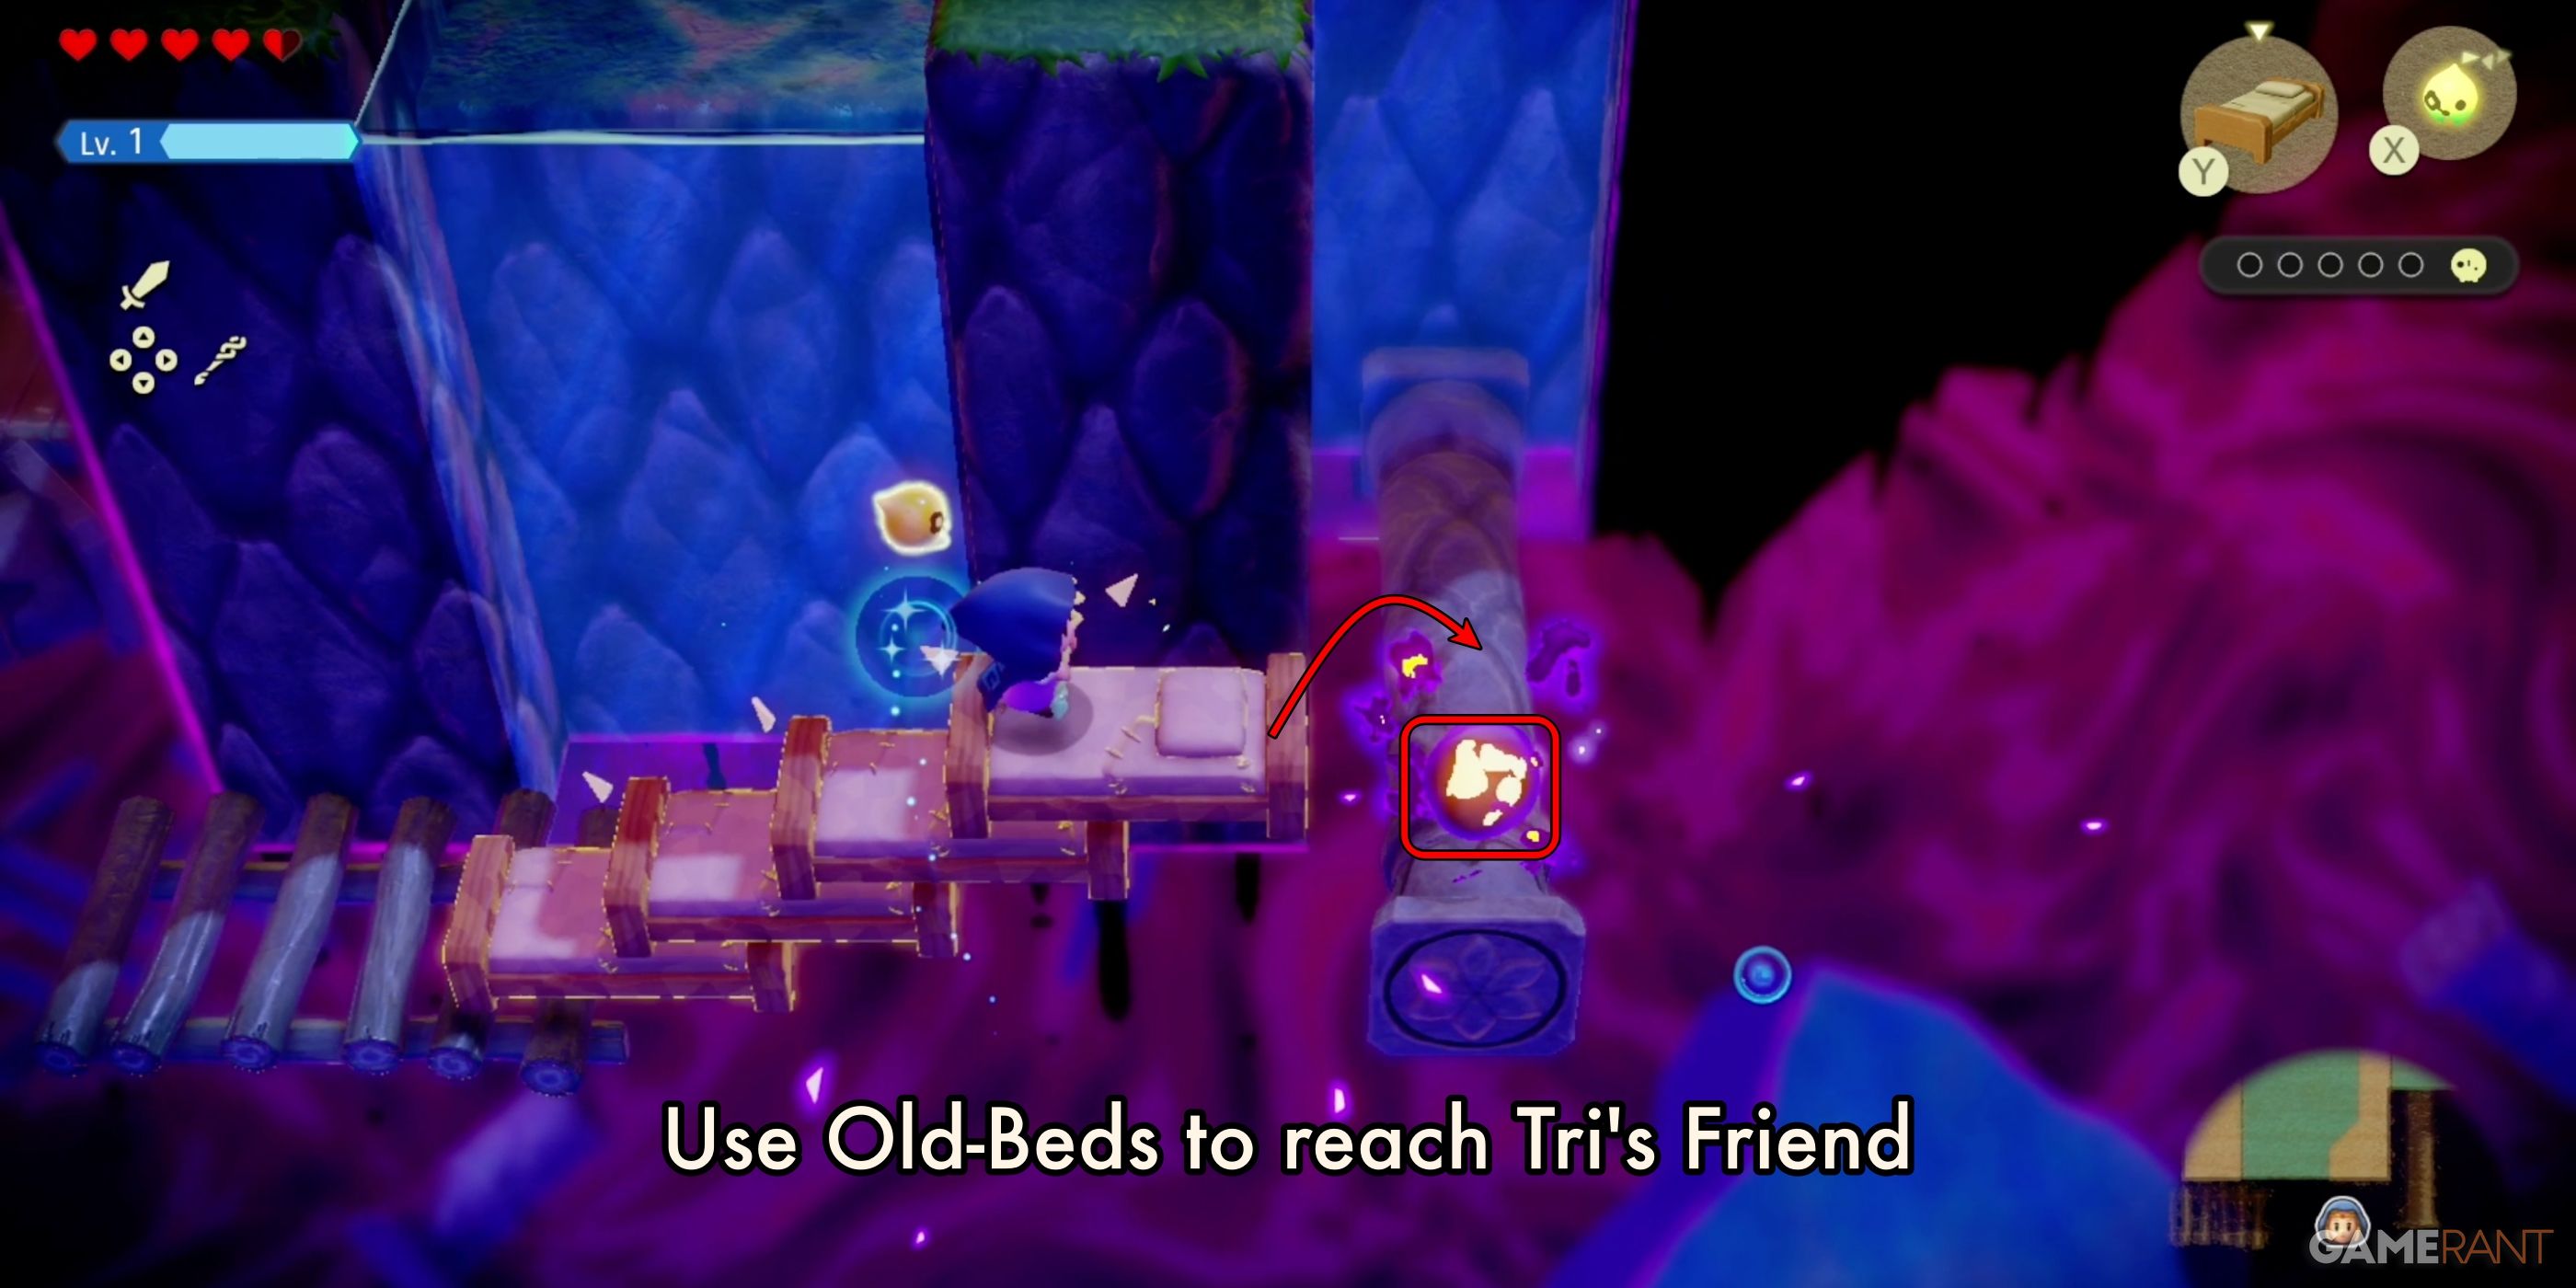
As a gamer, I found several paths to that towering pillar, but what stood out was using the Old-Bed Echoes to construct a ascending bridge. Once you manage to reach the pillar, engage with the radiant orb to free Tri’s companions.
Tri’s Friends 2:
I stumbled upon “Tri’s Friend 2” hidden in a cozy little cavern nestled at the eastern extremity of the chasm. To get there from the first friend, I swam up the channel where a column protrudes, then veered right at the summit. There, I faced off against two Octoroks firing projectiles. I had the option to neutralize them or skirt past them using a table or trampoline to leap onto the upper ledge and reach the cave entrance instead.
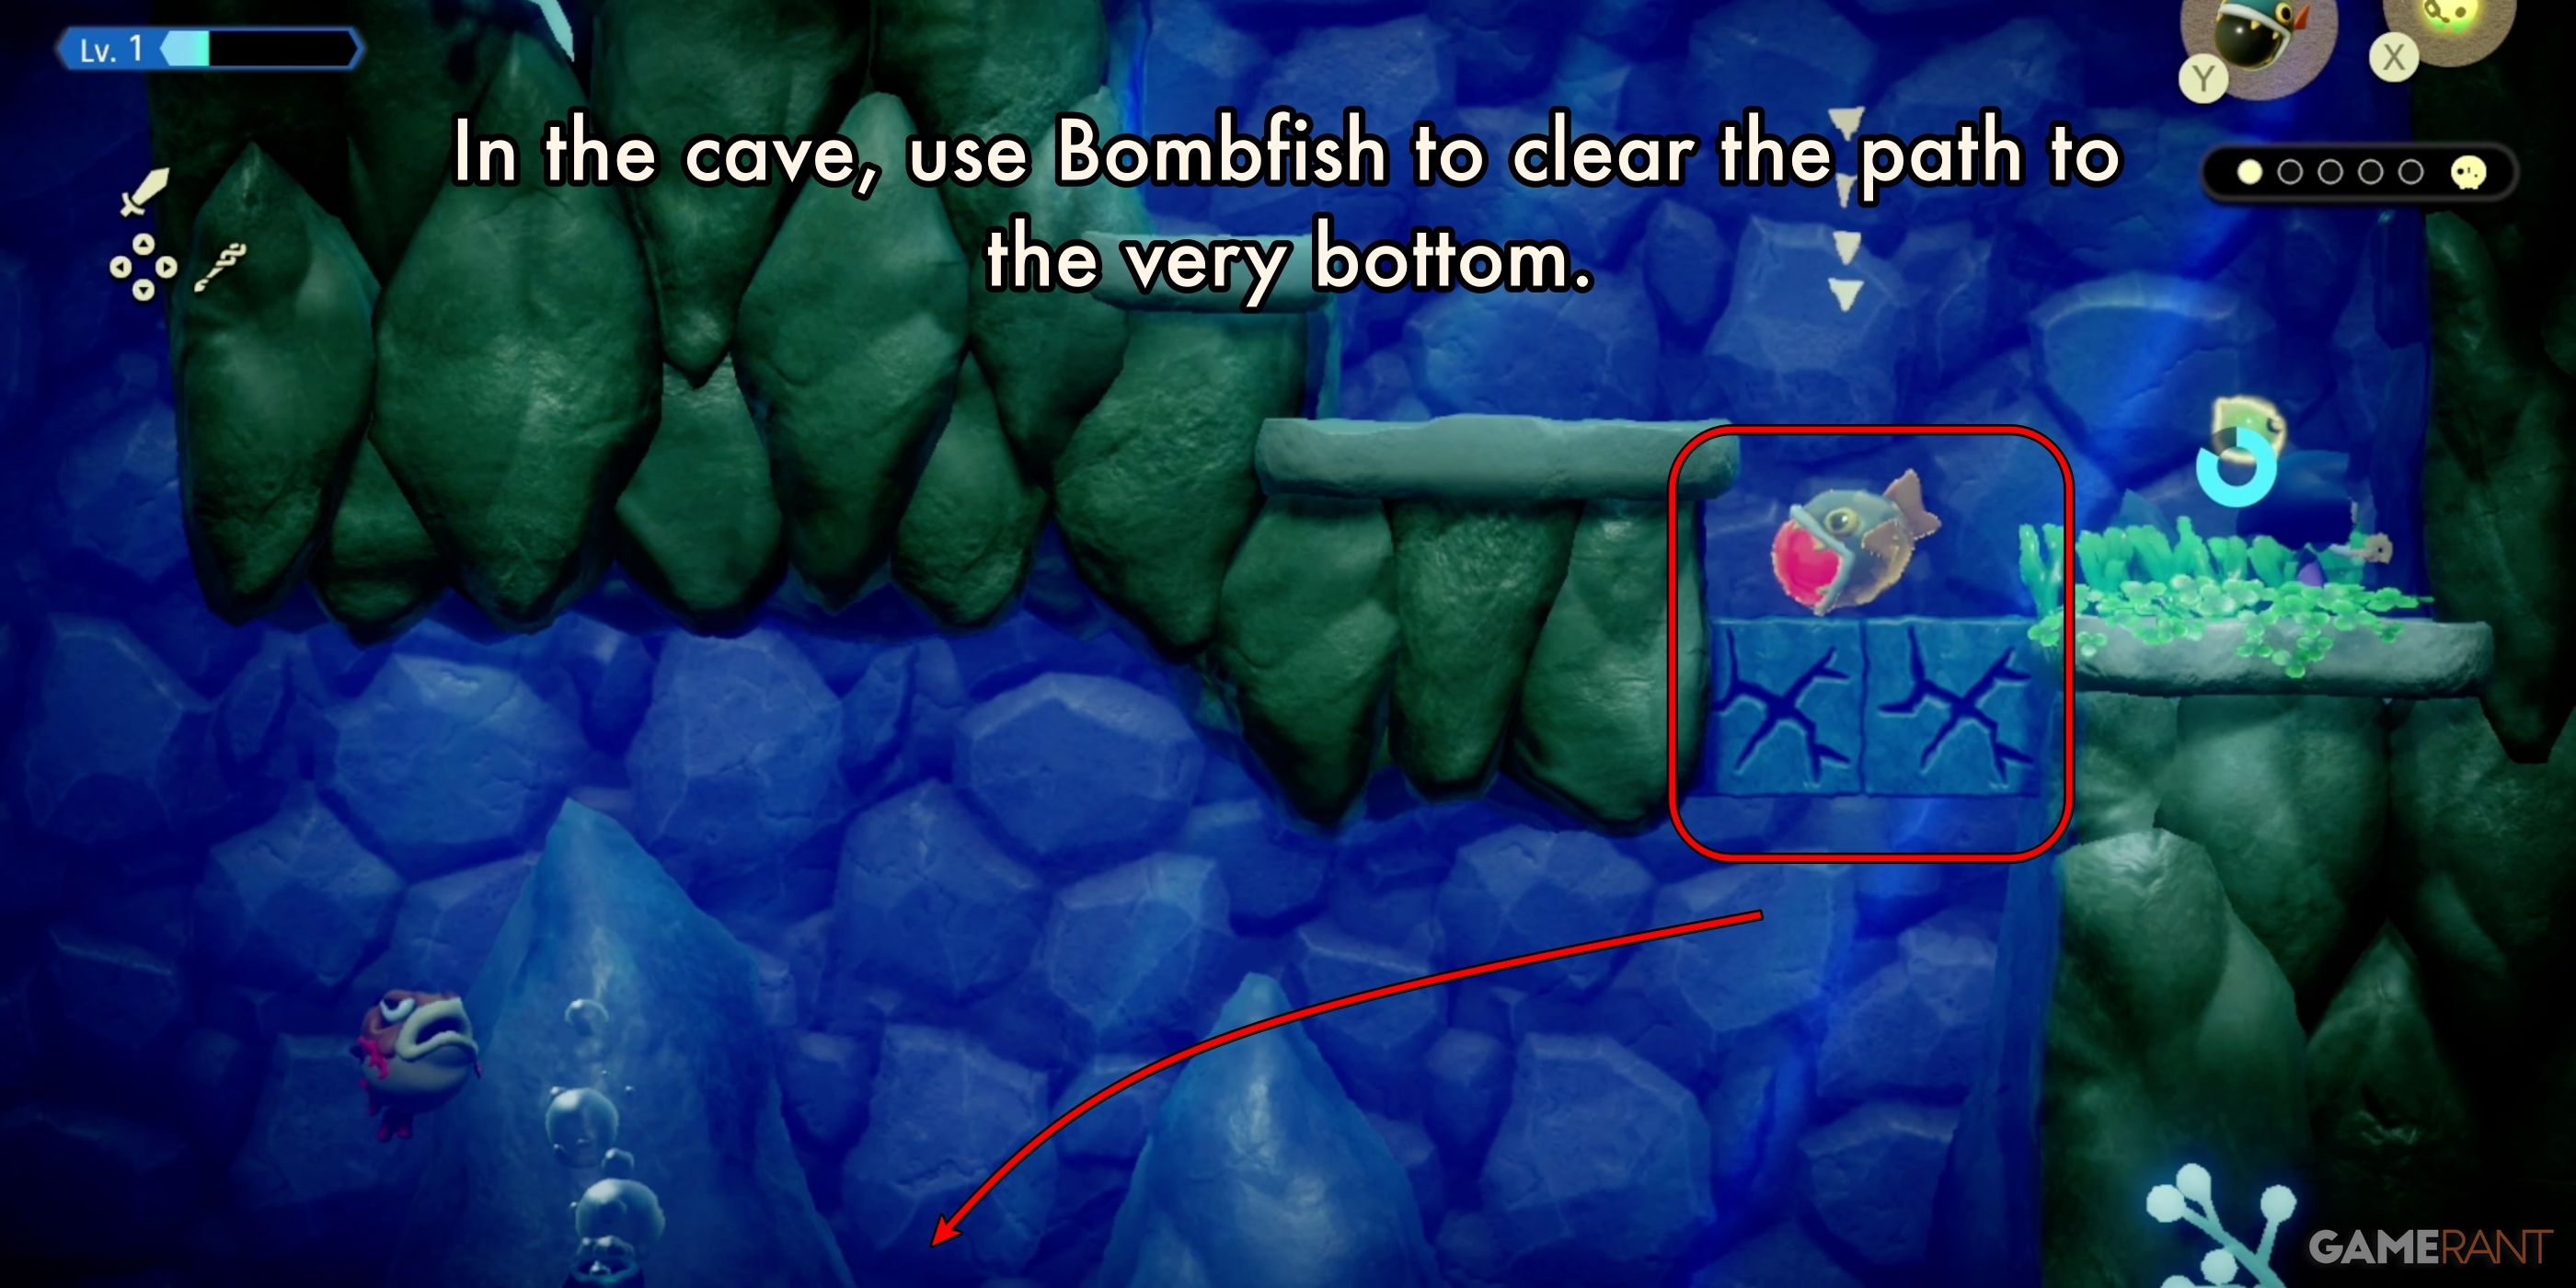
Step into the cavern to initiate a 2D phase for Zelda. Utilize a Bombfish to blast through any obstructions on your route, and subsequently make your way down to the lowest point in the pool.
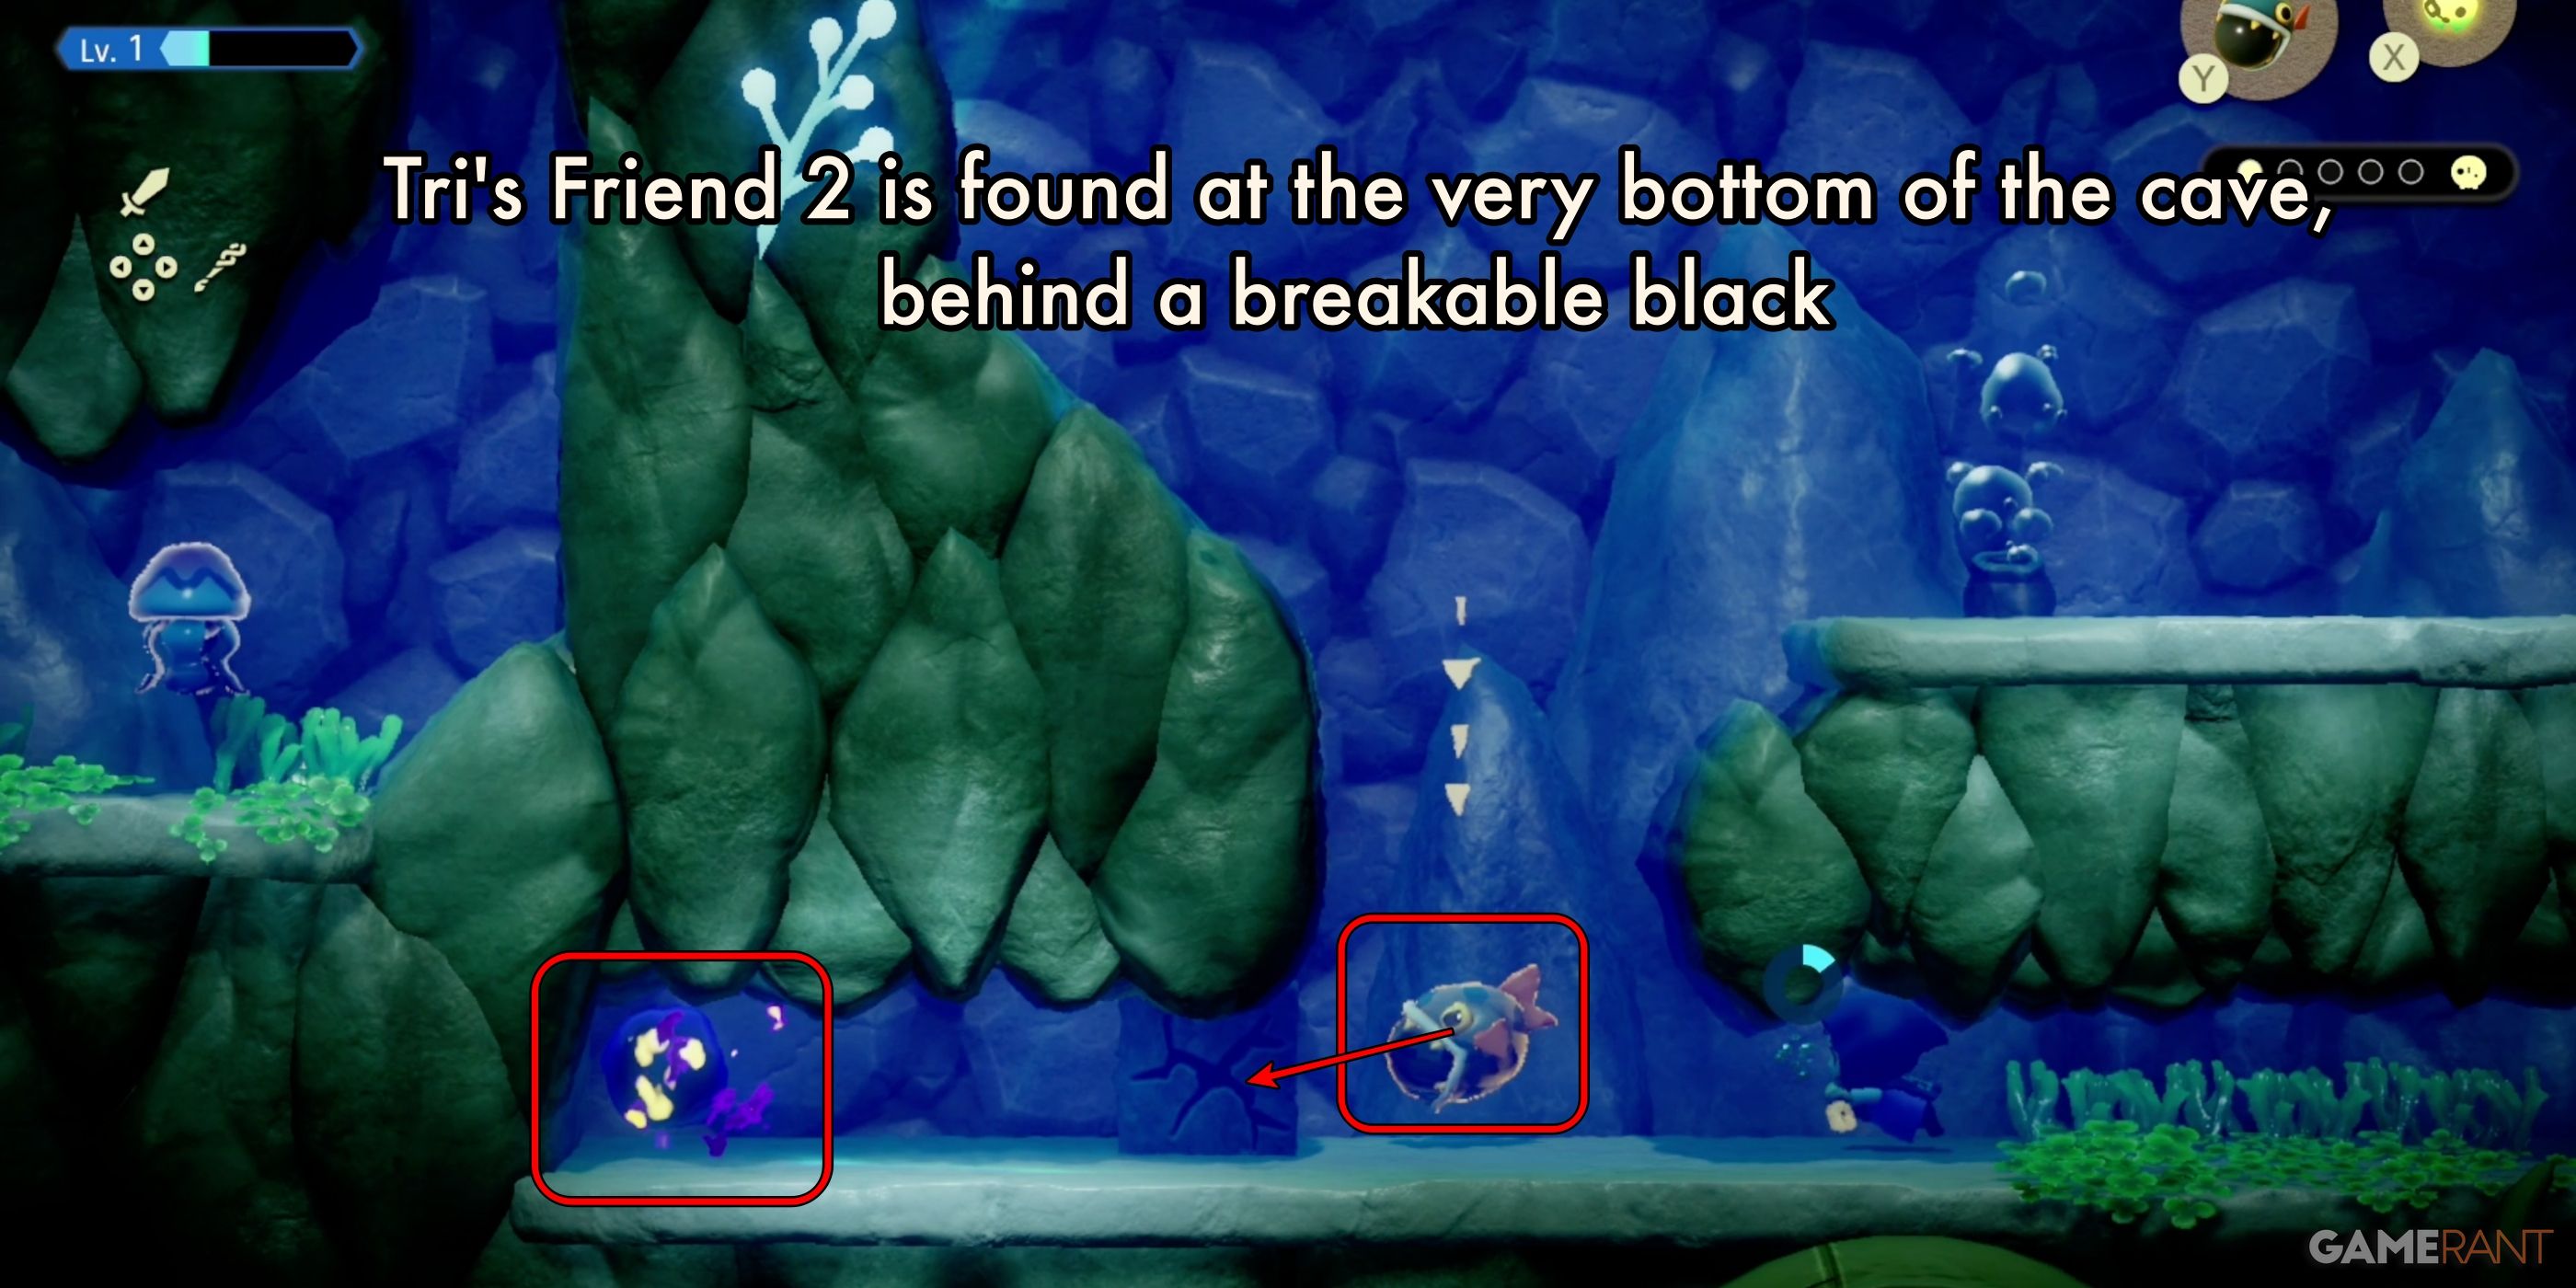
If you head towards the west, you’ll come across a narrow passageway impeded by a fragile obstacle. Utilize another Bombfish to clear the path and gather Friend Two.
Tri’s Friend 3:
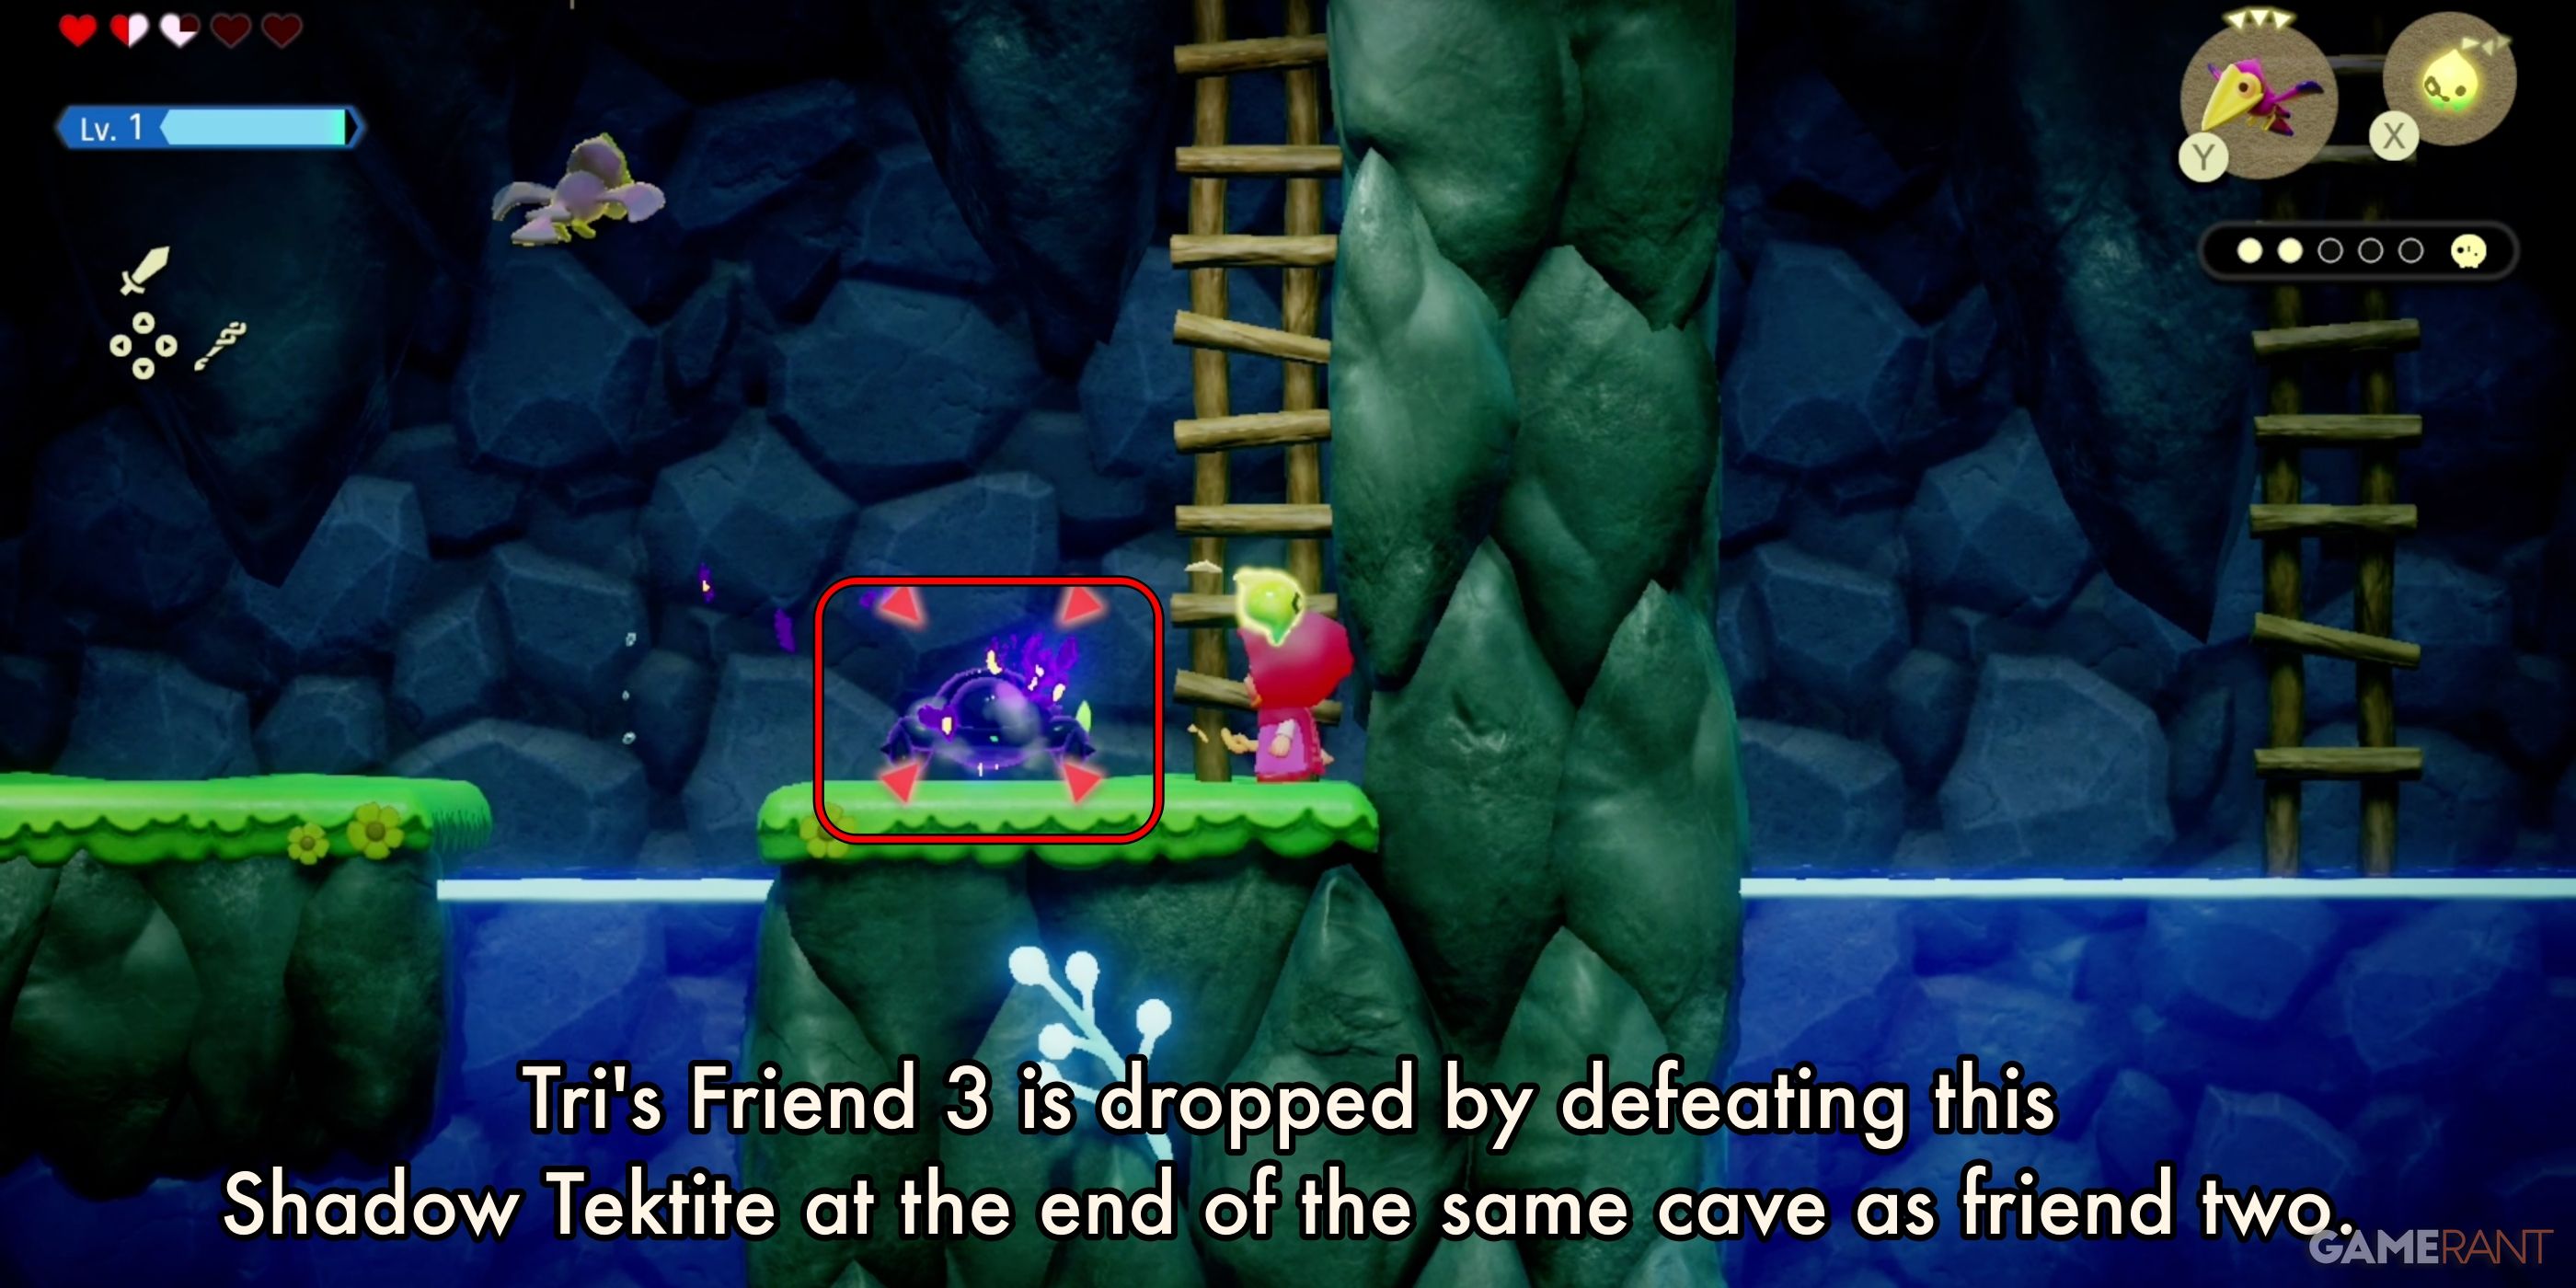
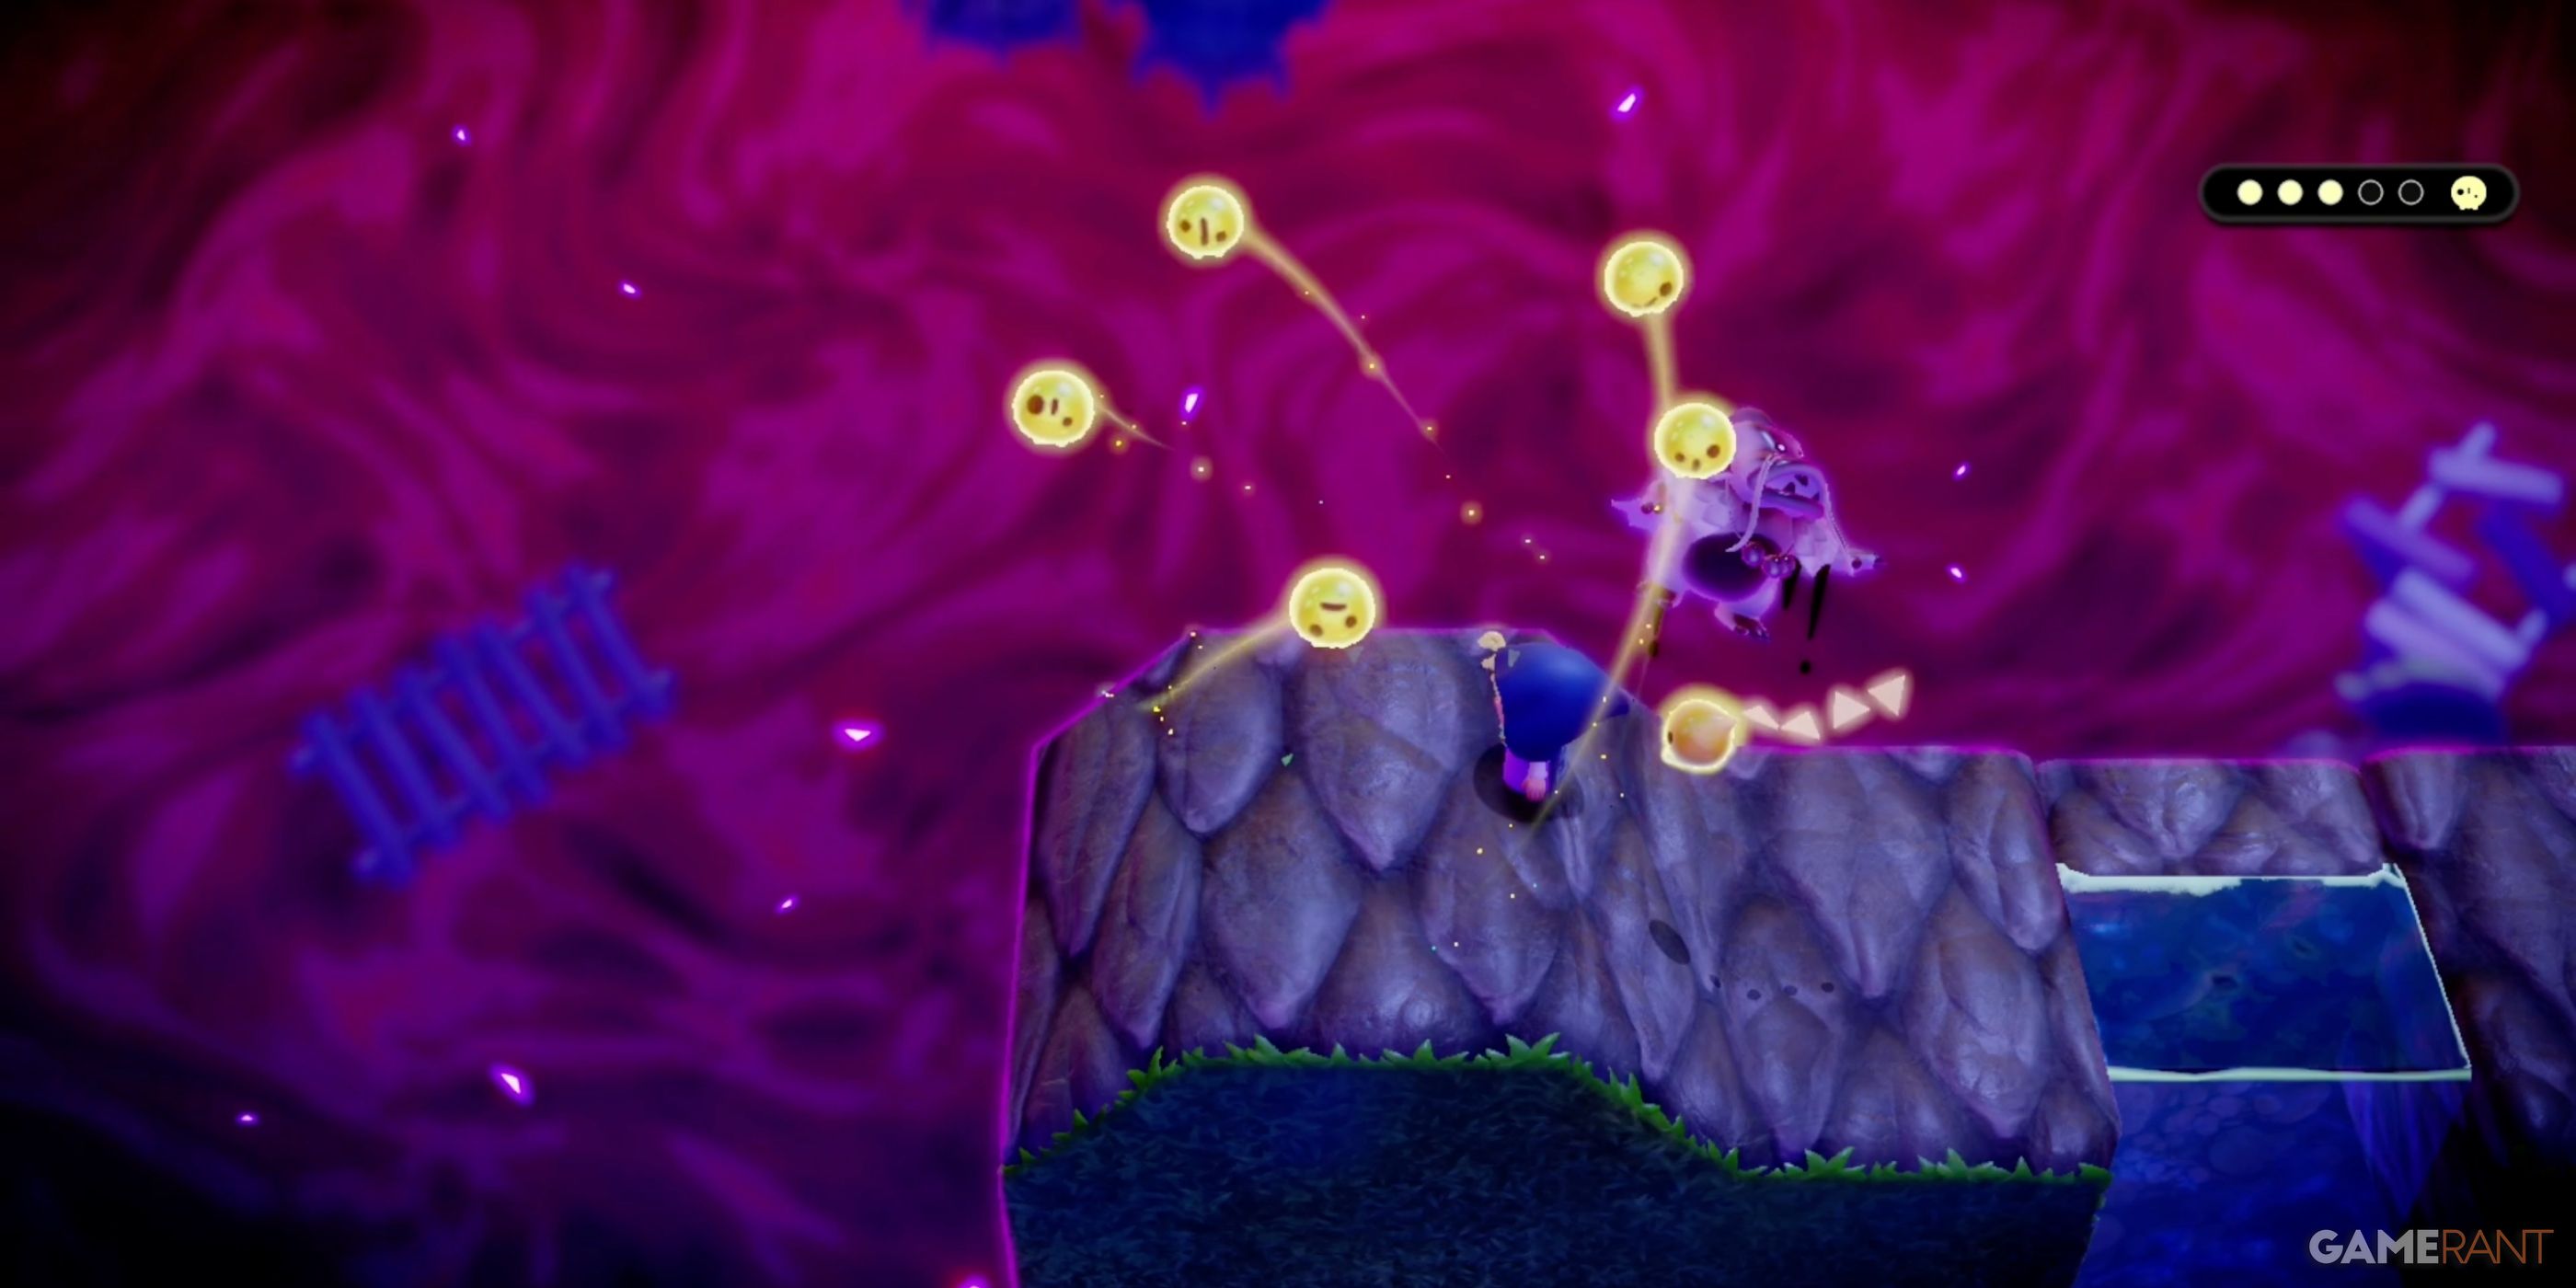
On your journey out of the cave housing your second companion, you’ll run into a Shadow Tektite – a pesky jumping foe. To handle it effortlessly, call forth an airborne Echo, much like a Guay, and then utilize “Bind” to fix the Tektite in its spot. The Guay will quickly dispatch the Tektite, revealing your third friend.
Tri’s Friend 4:
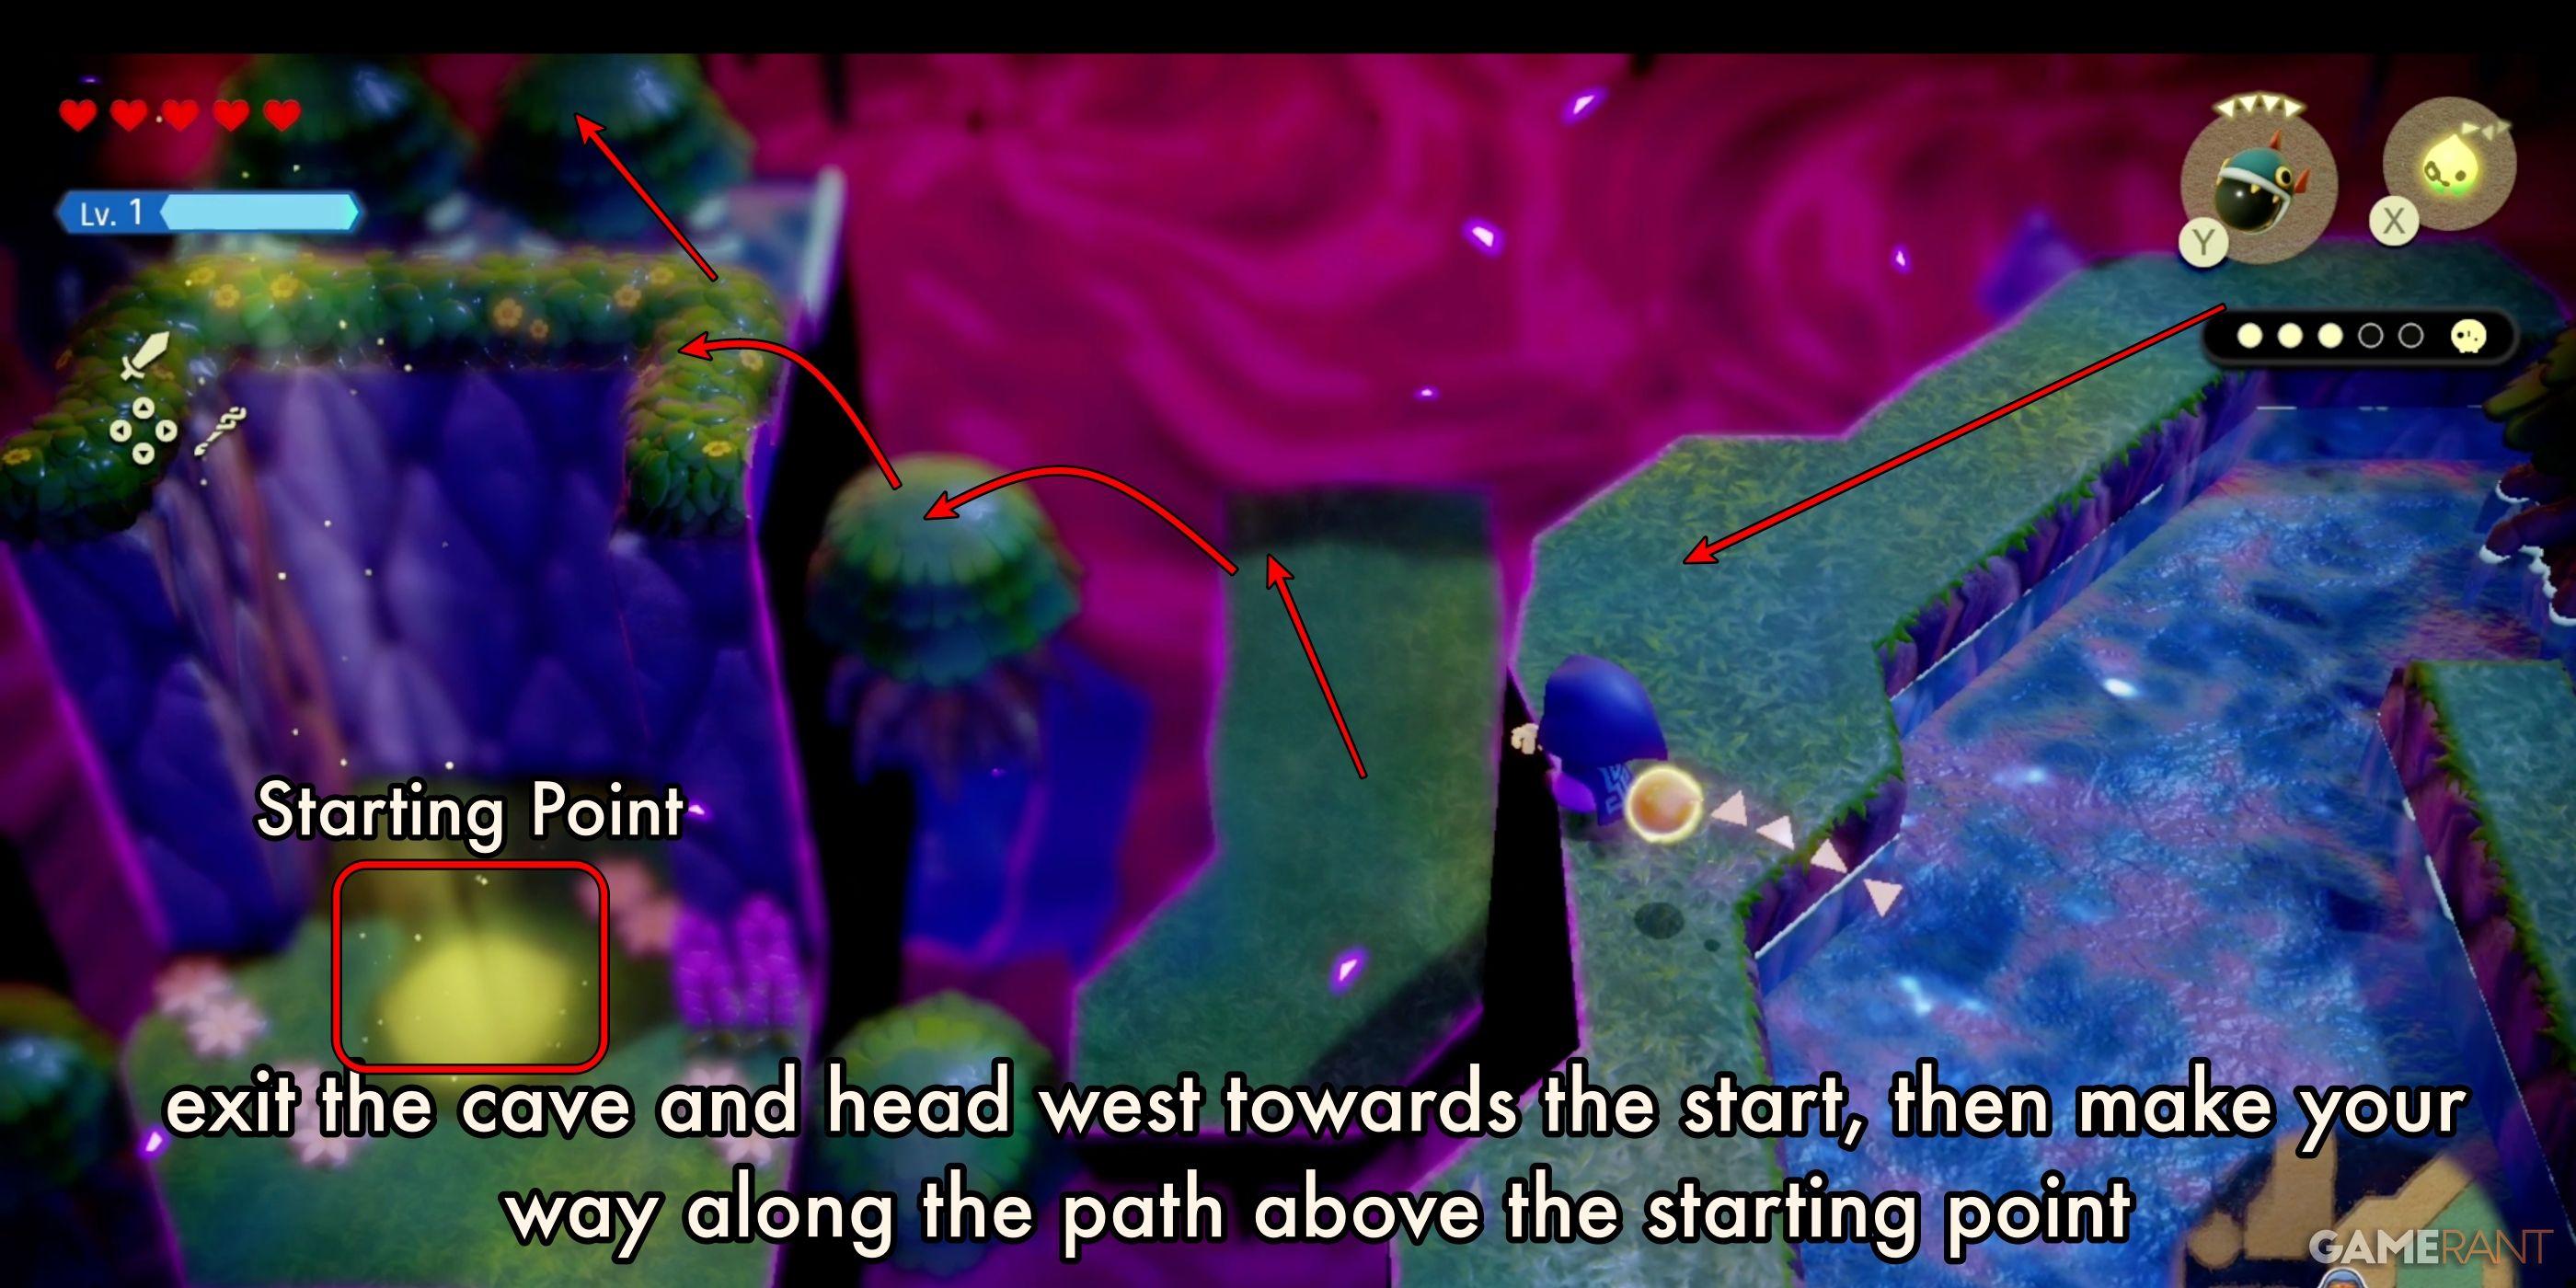
Leaving the cave behind, take a path towards the west, following your original route. When you arrive at the platform marked by a golden circle as an exit point, refrain from leaping onto it. Instead, climb the tree located above that circle to access the higher level.
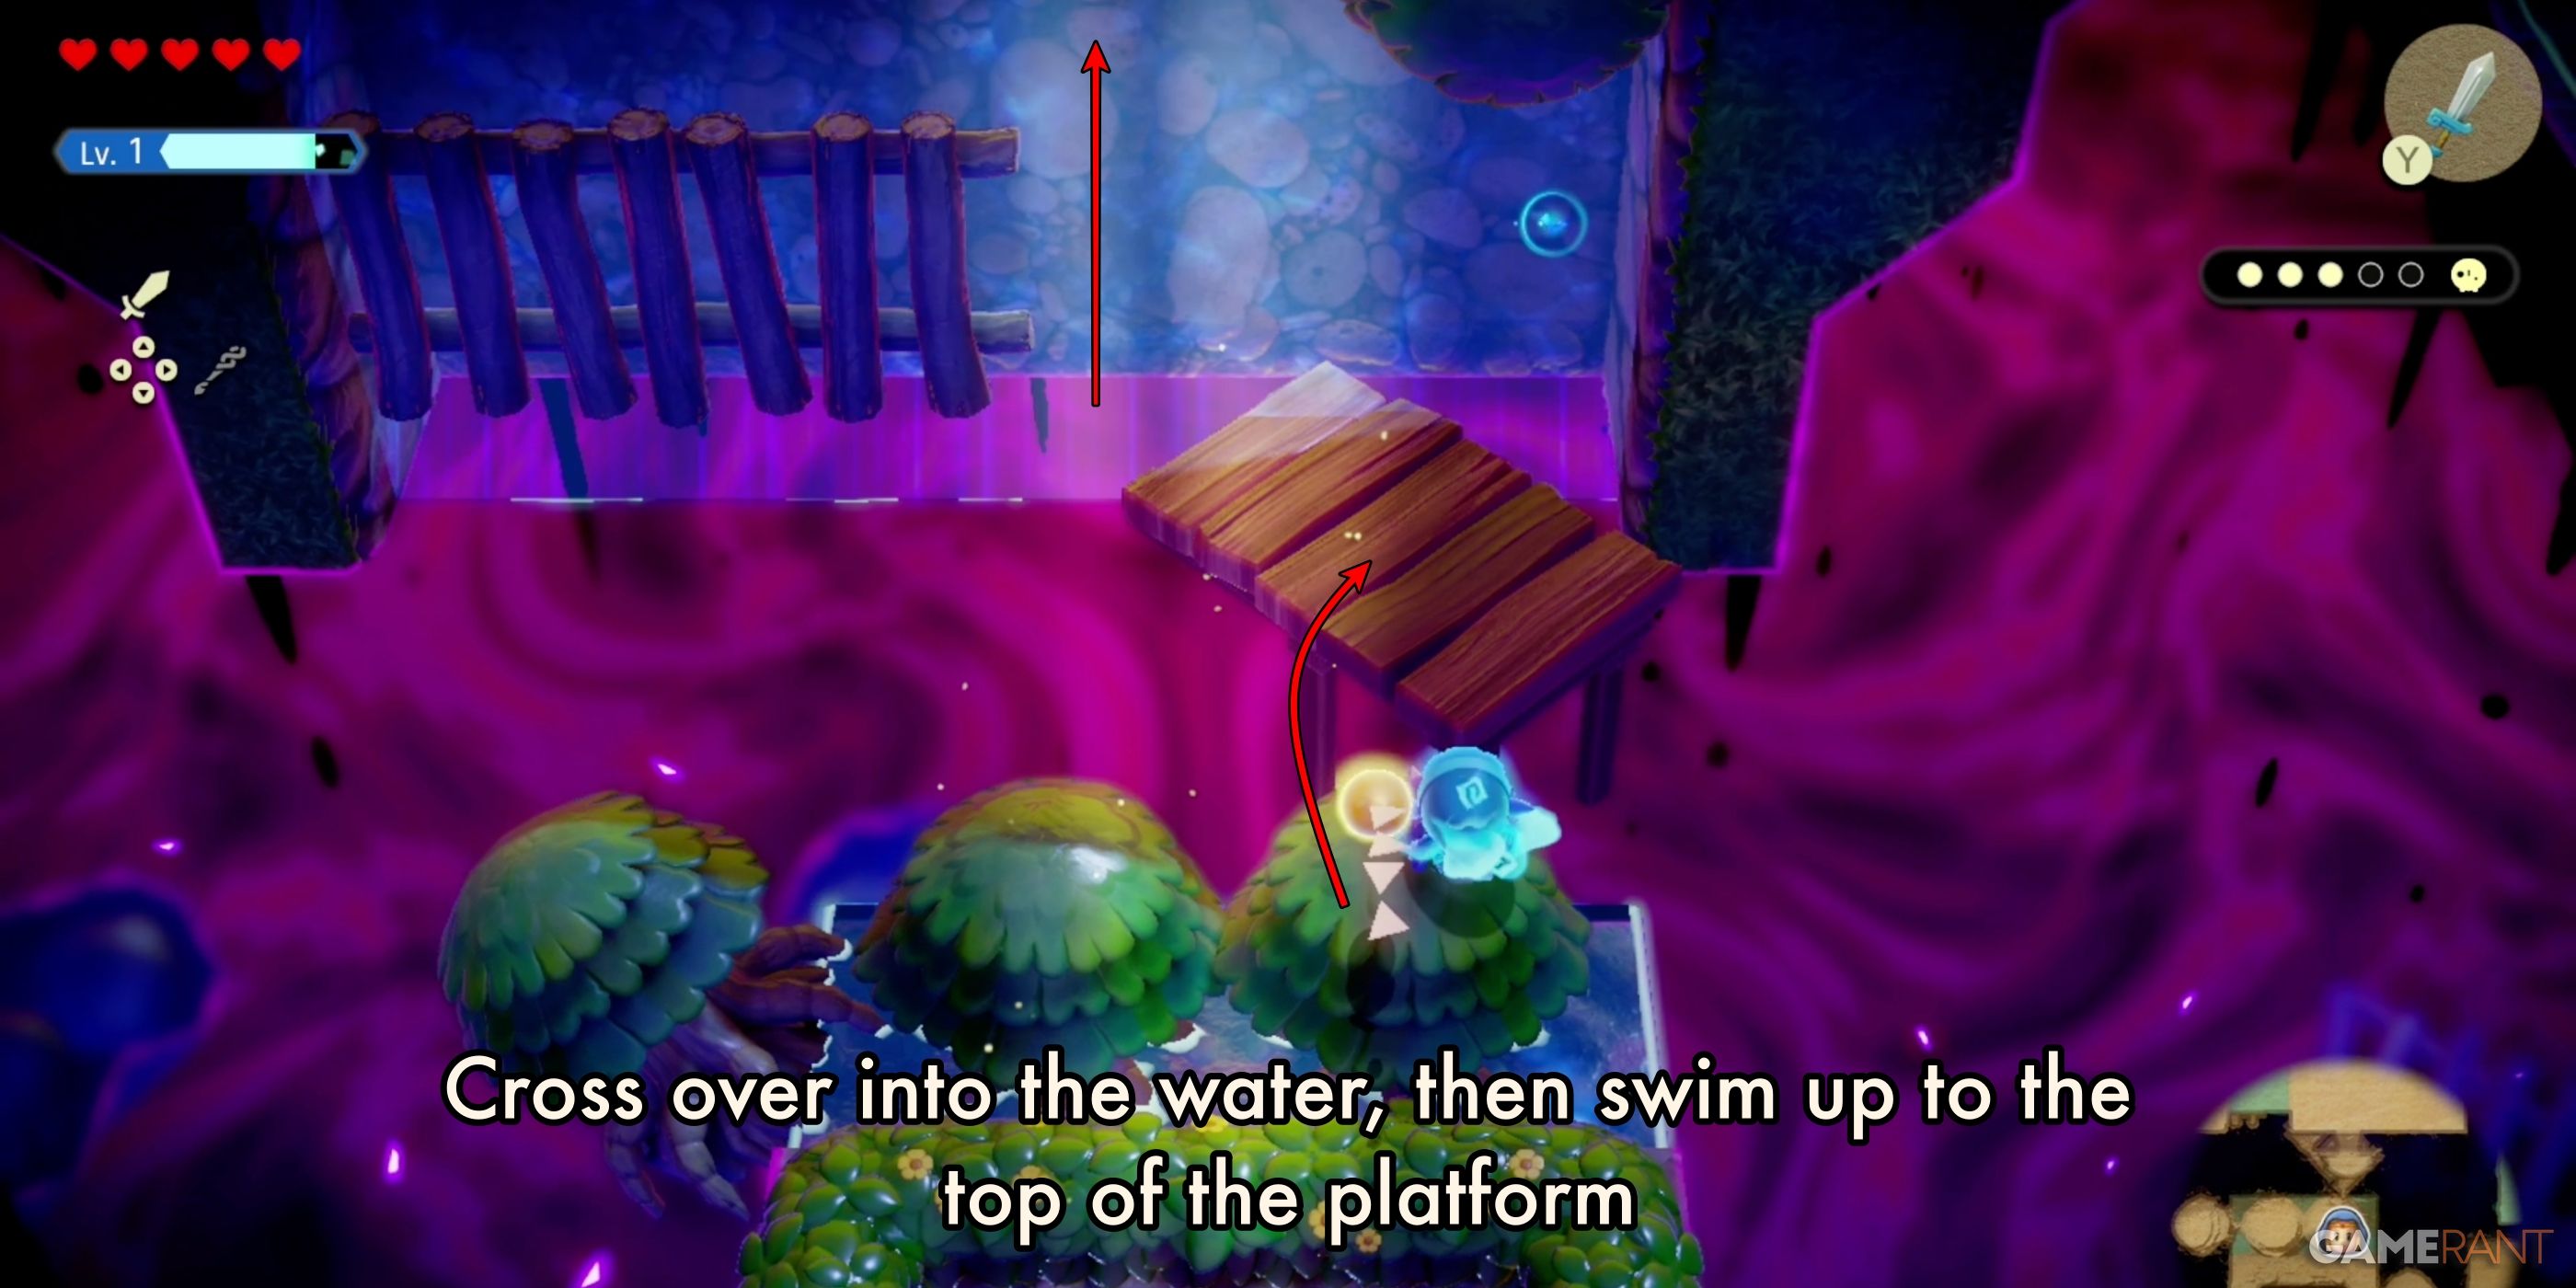
You’ll see a large structure directly above the platform where you started, with a water channel for Zelda to swim up.
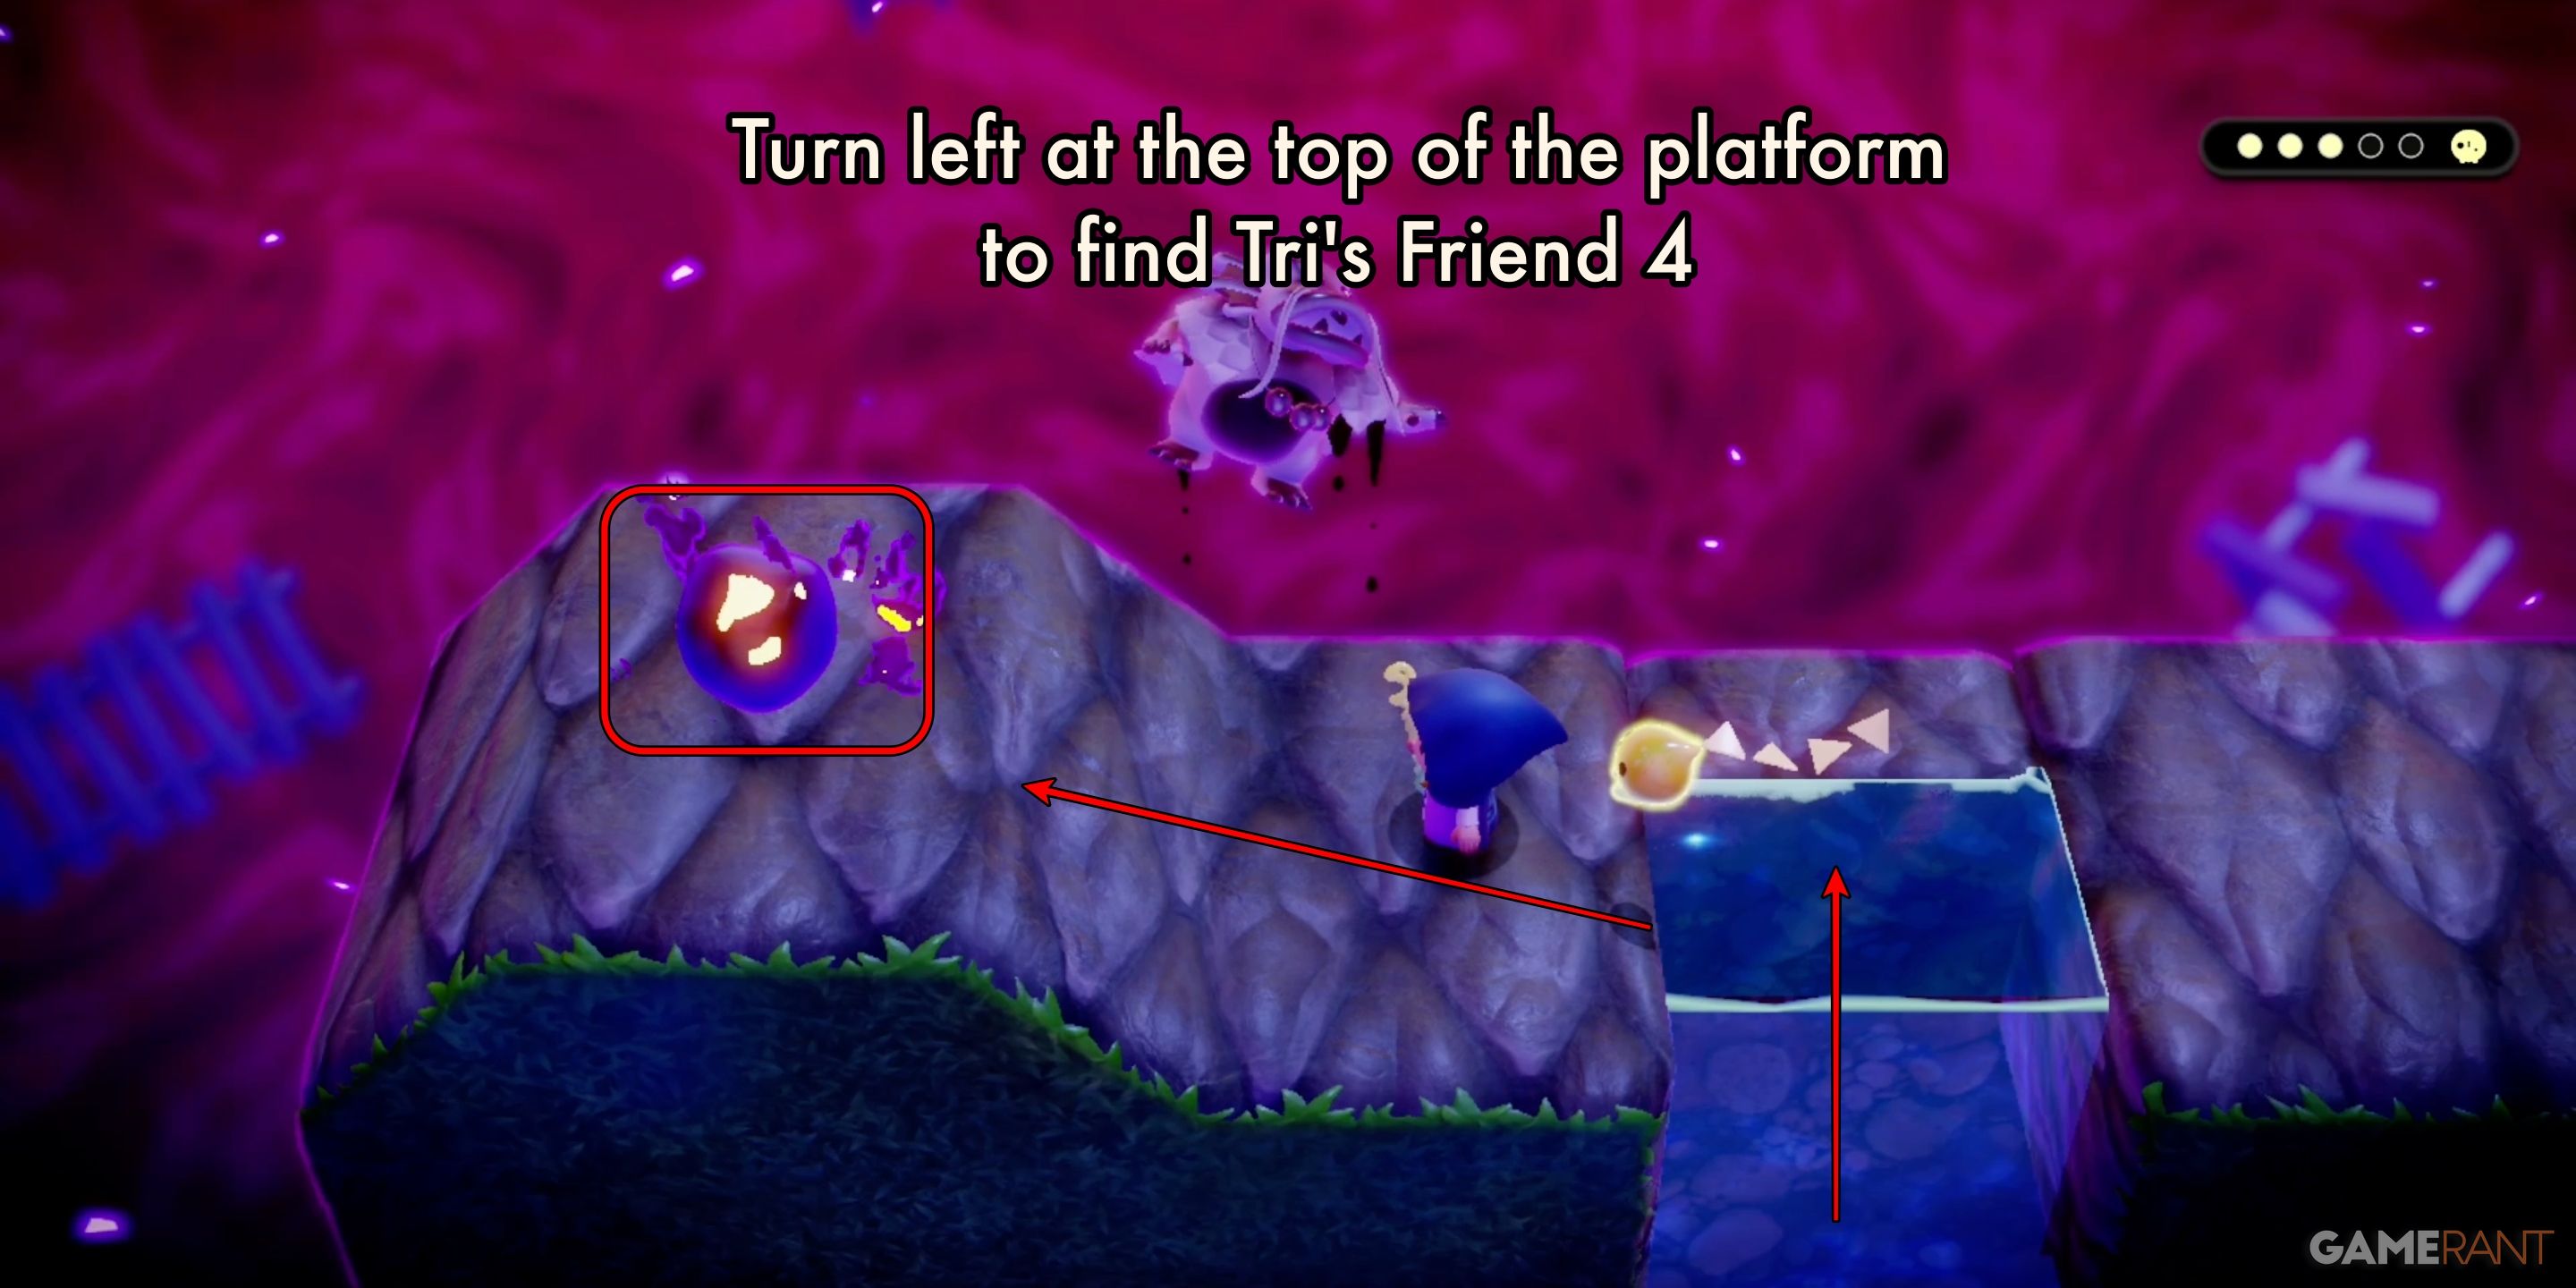
Make your way up to the highest part of the platform, then take a left turn. You’ll promptly come across Friend Four standing beside Dradd’s frozen form.
Tri’s Friend 5:
Return to Friend Four, then journey back to the original launching spot. Travel towards the west along the waterways until you spot Friend Five floating in a tiny pond at the terminus. Gather Tri’s last companion there.
Once all five of Tri’s companions are gathered, Tri will instinctively escort Zelda to the exit. At this point, he will accumulate around 20% boost for the next stage. Additionally, Zelda will receive two Might Crystals as a reward for enhancing the Swordfighter Form.
Completing Chaos at Zora River Village in Echoes of Wisdom
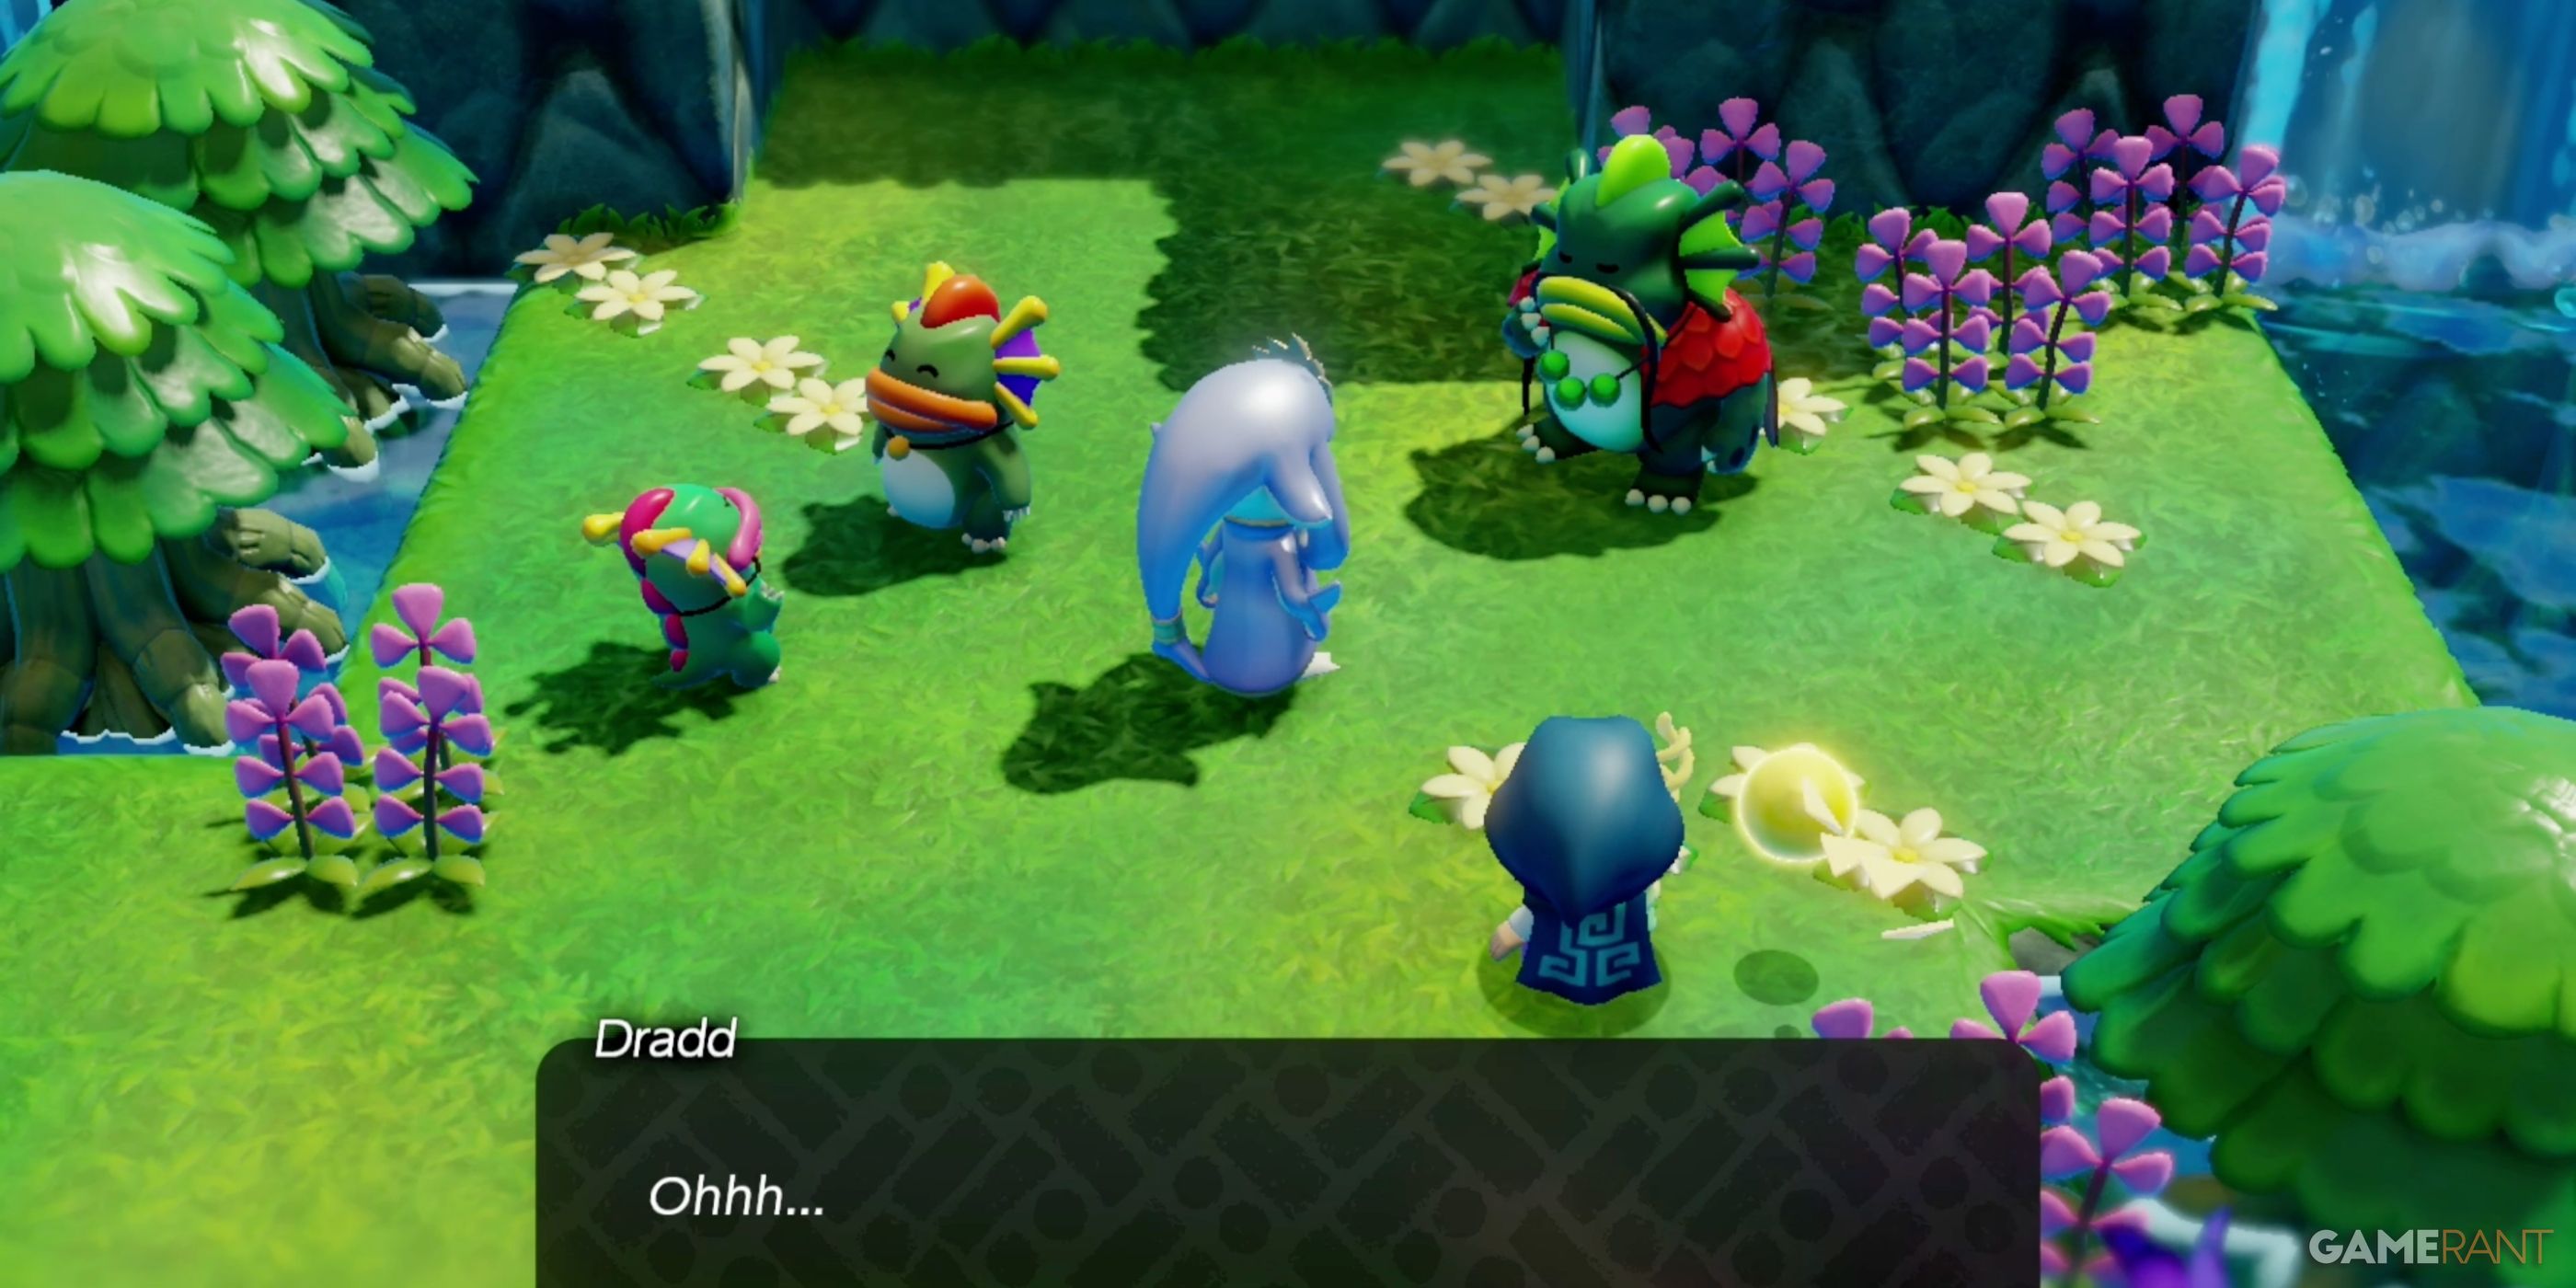
After the fissure over the tranquil Zora River’s peak has been sealed, Kushara and Dradd will exchange a short dialogue. This interaction marks the beginning of their journey to repair their broken bond, leading eventually to the unlocking of the entrance to the Jabul Ruins dungeon.
In this small main quest, no further task related to questing will arise since the primary objective, which was sealing the rift, has been accomplished.
Read More
- LUNC PREDICTION. LUNC cryptocurrency
- BTC PREDICTION. BTC cryptocurrency
- BICO PREDICTION. BICO cryptocurrency
- SOL PREDICTION. SOL cryptocurrency
- USD CLP PREDICTION
- USD COP PREDICTION
- USD PHP PREDICTION
- USD ZAR PREDICTION
- VANRY PREDICTION. VANRY cryptocurrency
- NXRA PREDICTION. NXRA cryptocurrency
2024-09-29 05:43