In the eighteenth level of Ninja Gaiden 2 Black, you will take control away from Ryu and give it to Rachel, who uses a hammer. Although she is not as swift as Ryu, her Inferno Hammer delivers a powerful blow. Similar to the fifth chapter in Ninja Gaiden 2 Black, this level offers a self-contained experience. There are no crucial collectibles within this level, so you can confidently progress without fretting too much about missing out on important items. Here, we’ll guide you through a comprehensive walkthrough for the eighth chapter of Ninja Gaiden 2 Black titled “City of the Fallen Goddess.
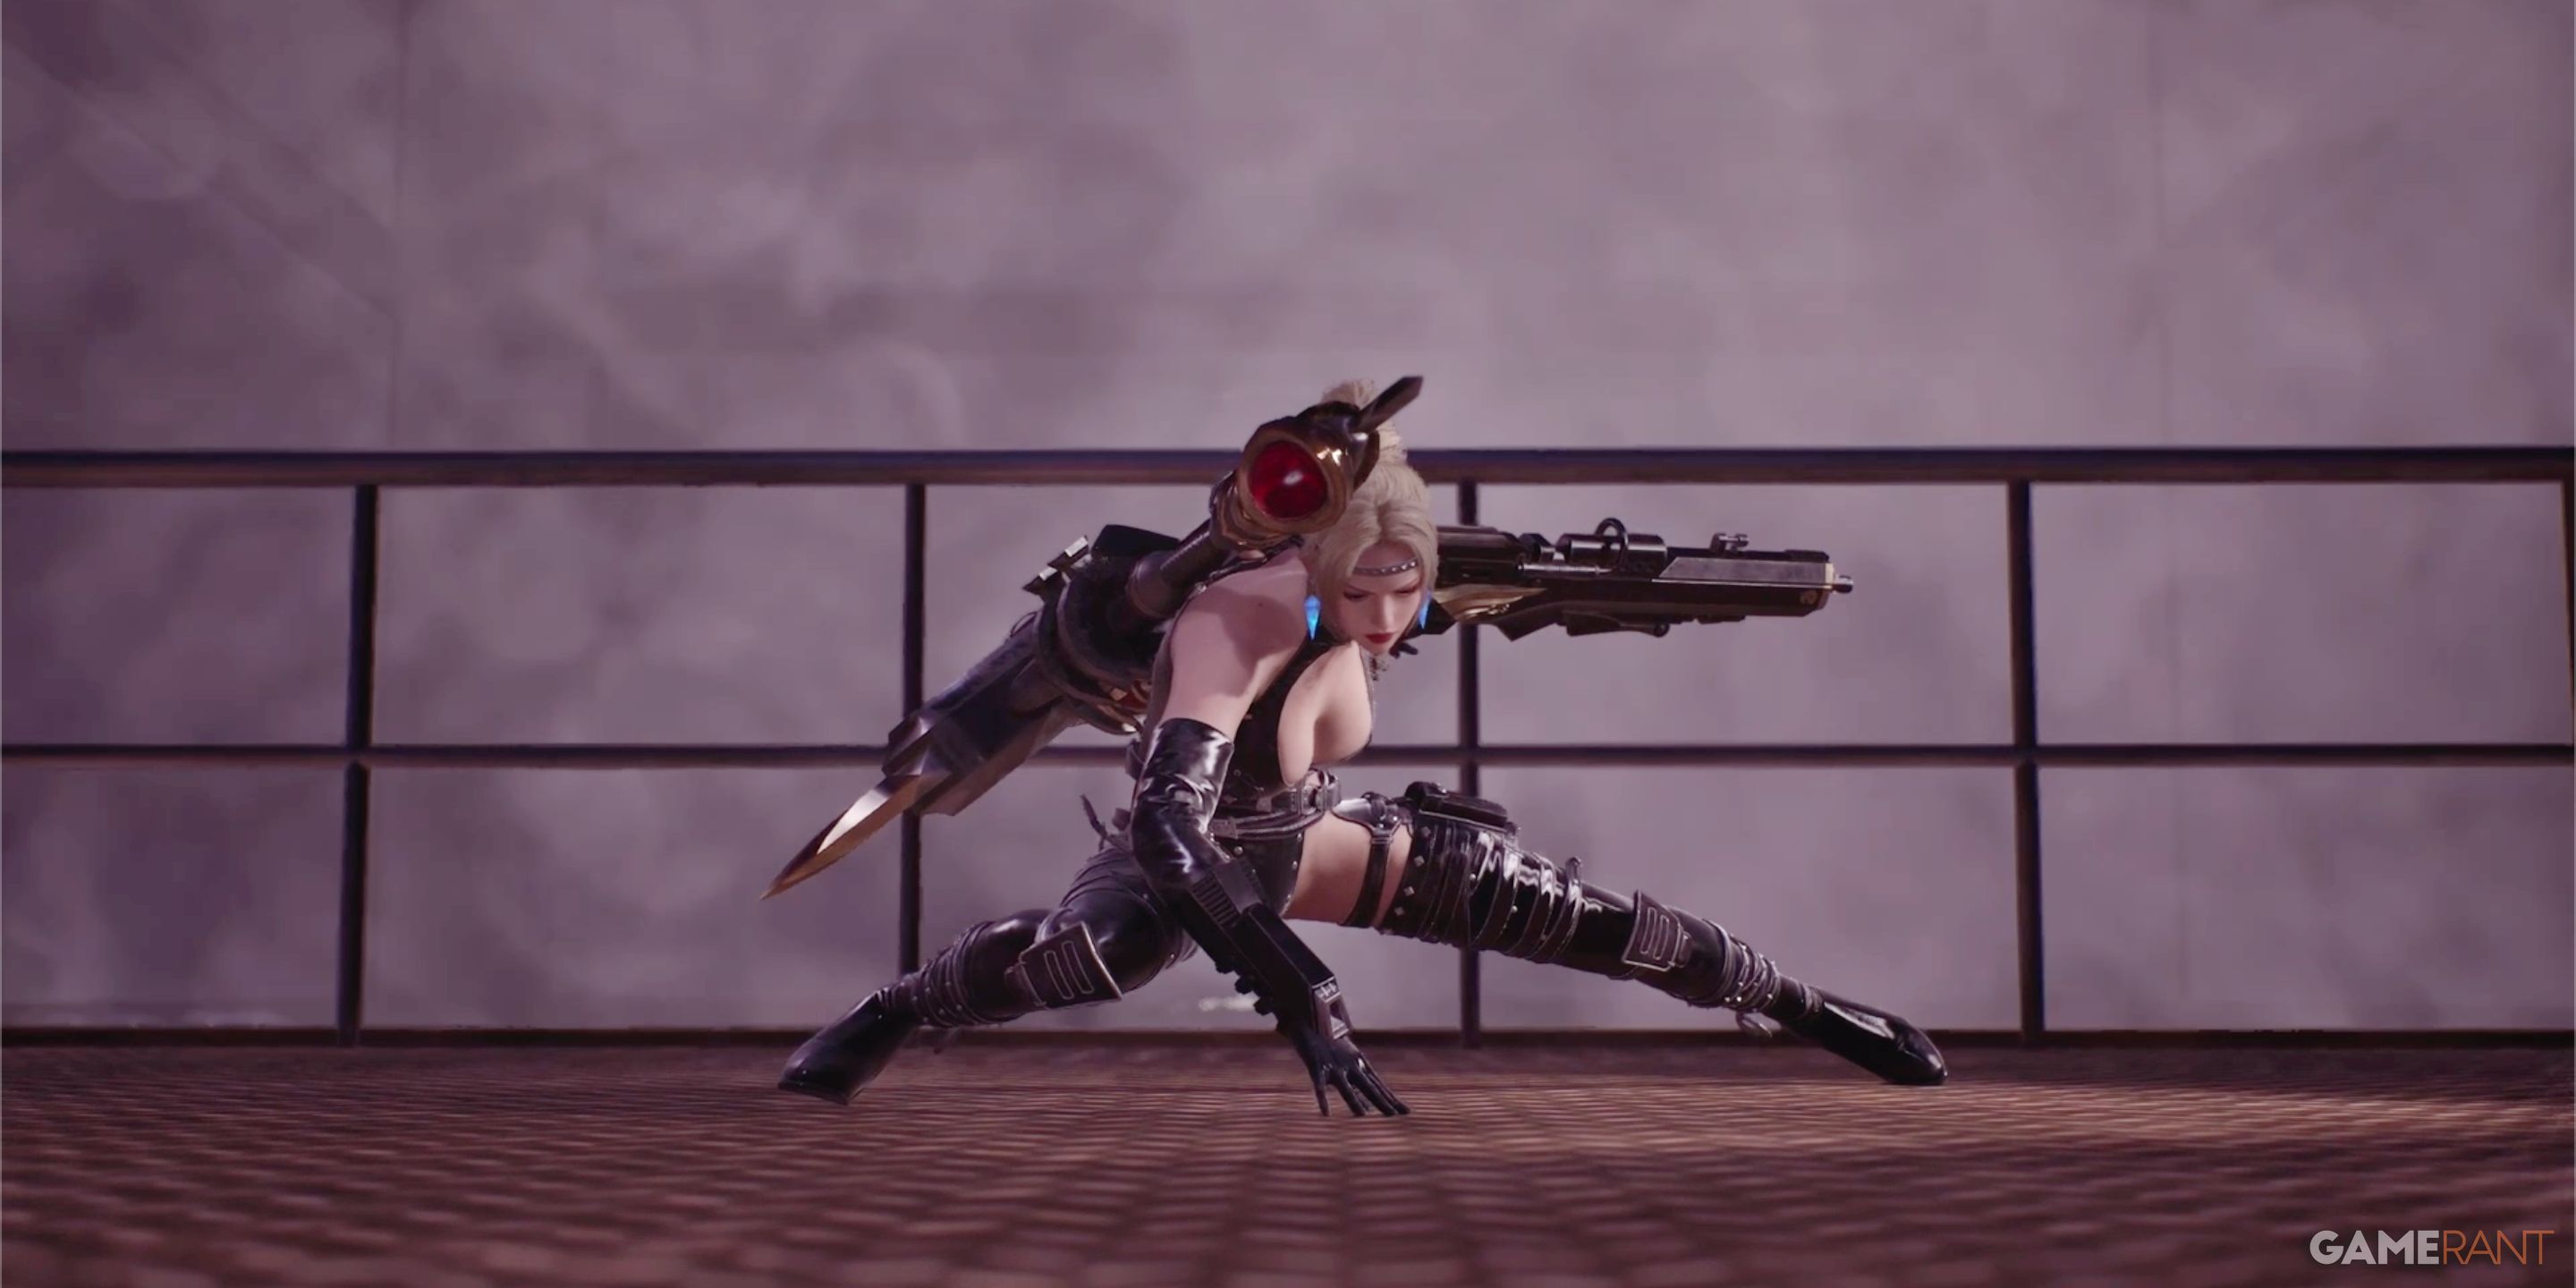
Rachel kicks off the eighth chapter of “Ninja Gaiden 2 Black” with her Inferno Hammer all powered up. It would be wise to spend a moment checking out the skills list, and getting acquainted with the weapon’s diverse combos. Rachel also equips the Type 666 Heavy Machine Gun as her long-range weapon, which can effectively halt enemy assaults. Familiarizing yourself with Rachel’s abilities and limitations will greatly enhance your journey through Chapter 8.
Chapter 8 Walkthrough Part 1: Save Points 1–3 – Ninja Gaiden 2 Black
Start – Save Point 1:
Ninja G
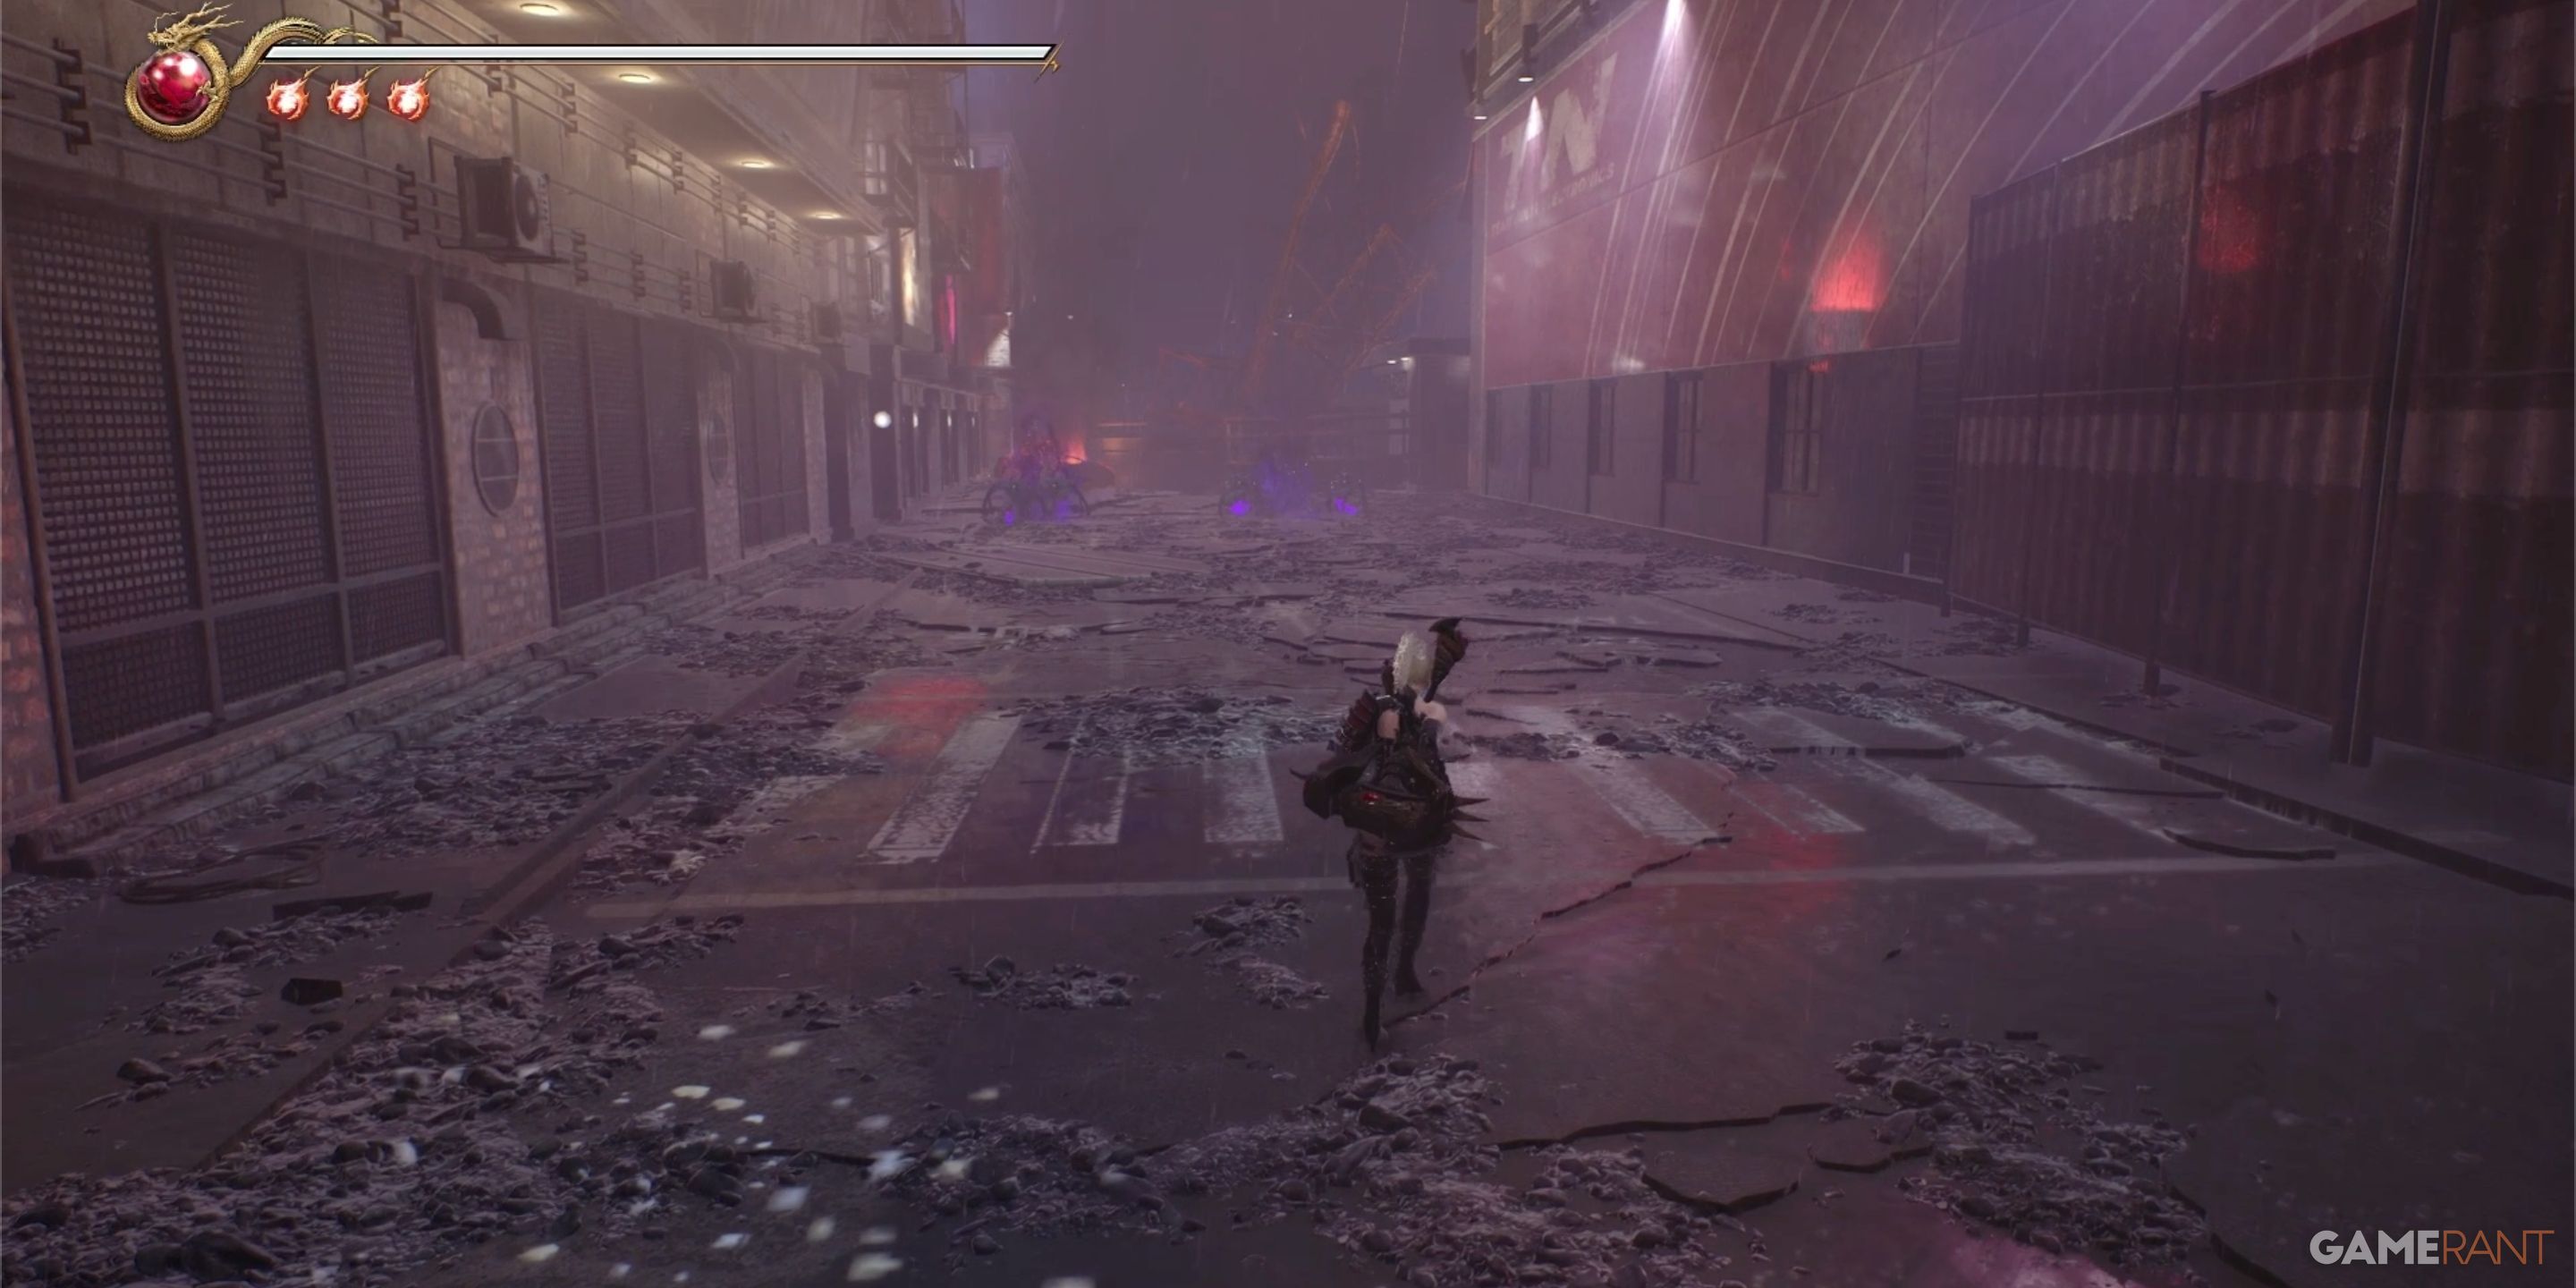
In Chapter 8, we return to the bustling streets of New York and pick up right where Chapter 3 left off – at the enormous gaping hole in the city pavement that Ryu leaped into earlier. To start, move away from the hole and take a left turn onto the solitary street available at this juncture. As soon as you make that turn, prepare for combat as you’ll encounter your first group of demons here. This will be your introduction to battle as Rachel.
Once you’ve dealt with the demons, proceed to the end of the street and take a right at the narrow passageway sandwiched between the smaller and larger structures. Upon making that turn, the first chest you encounter will be on the ground, hugging the right side of the path. This chest holds an Herb of Spiritual Life.
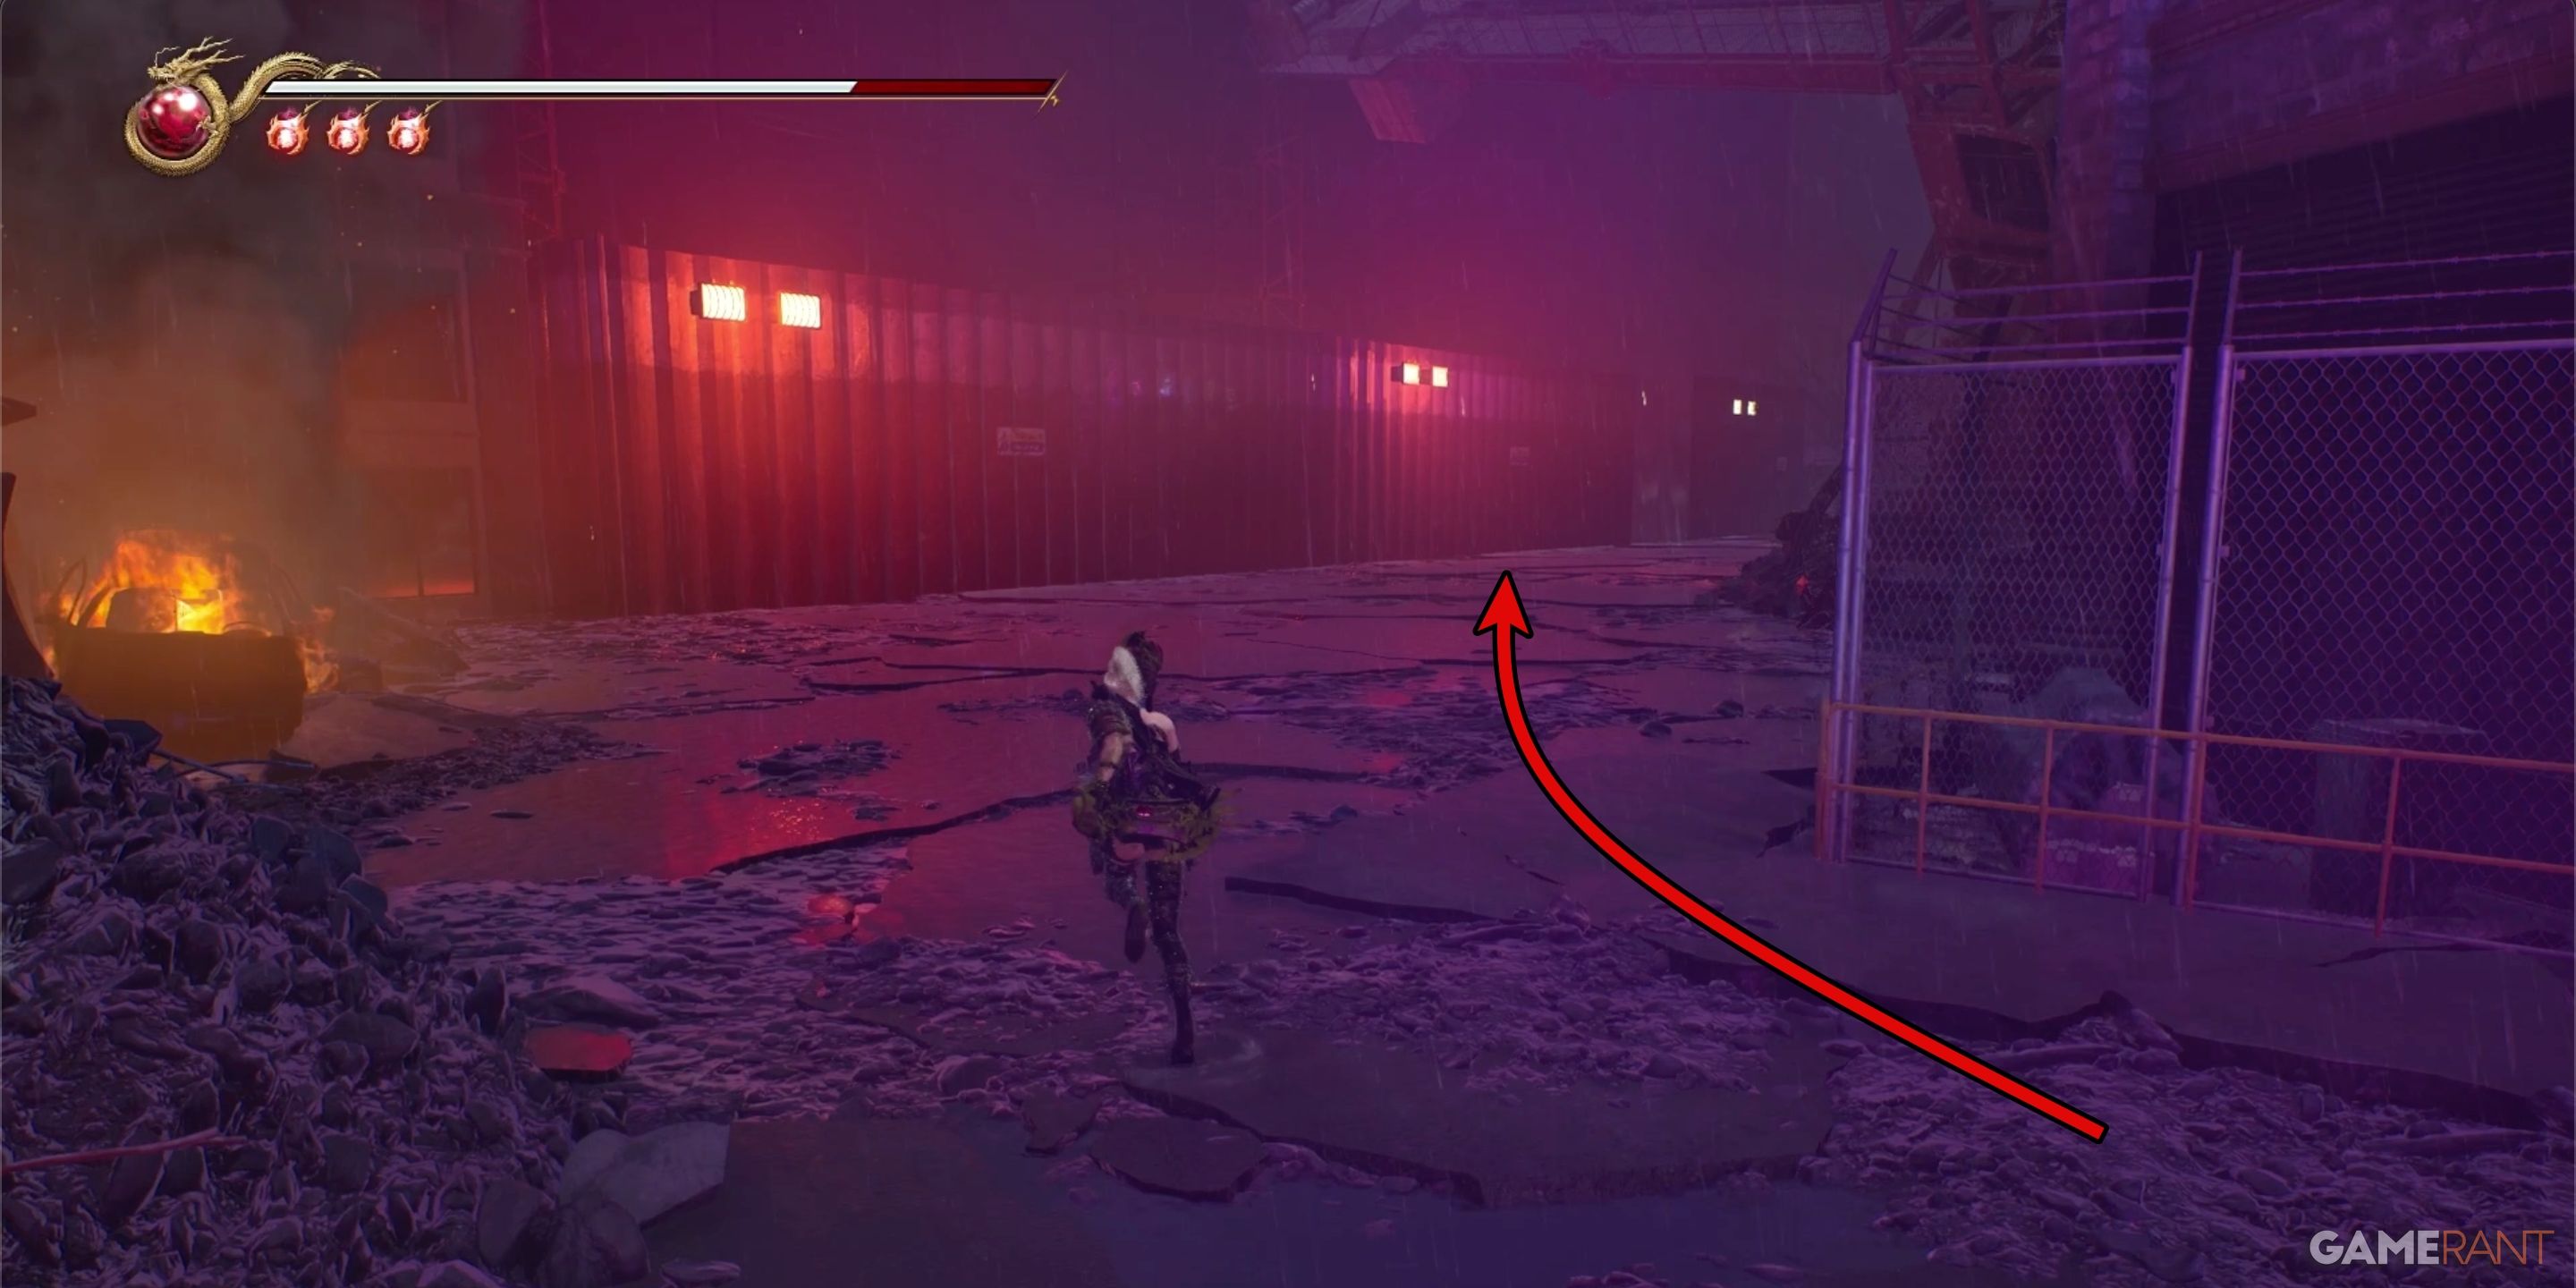

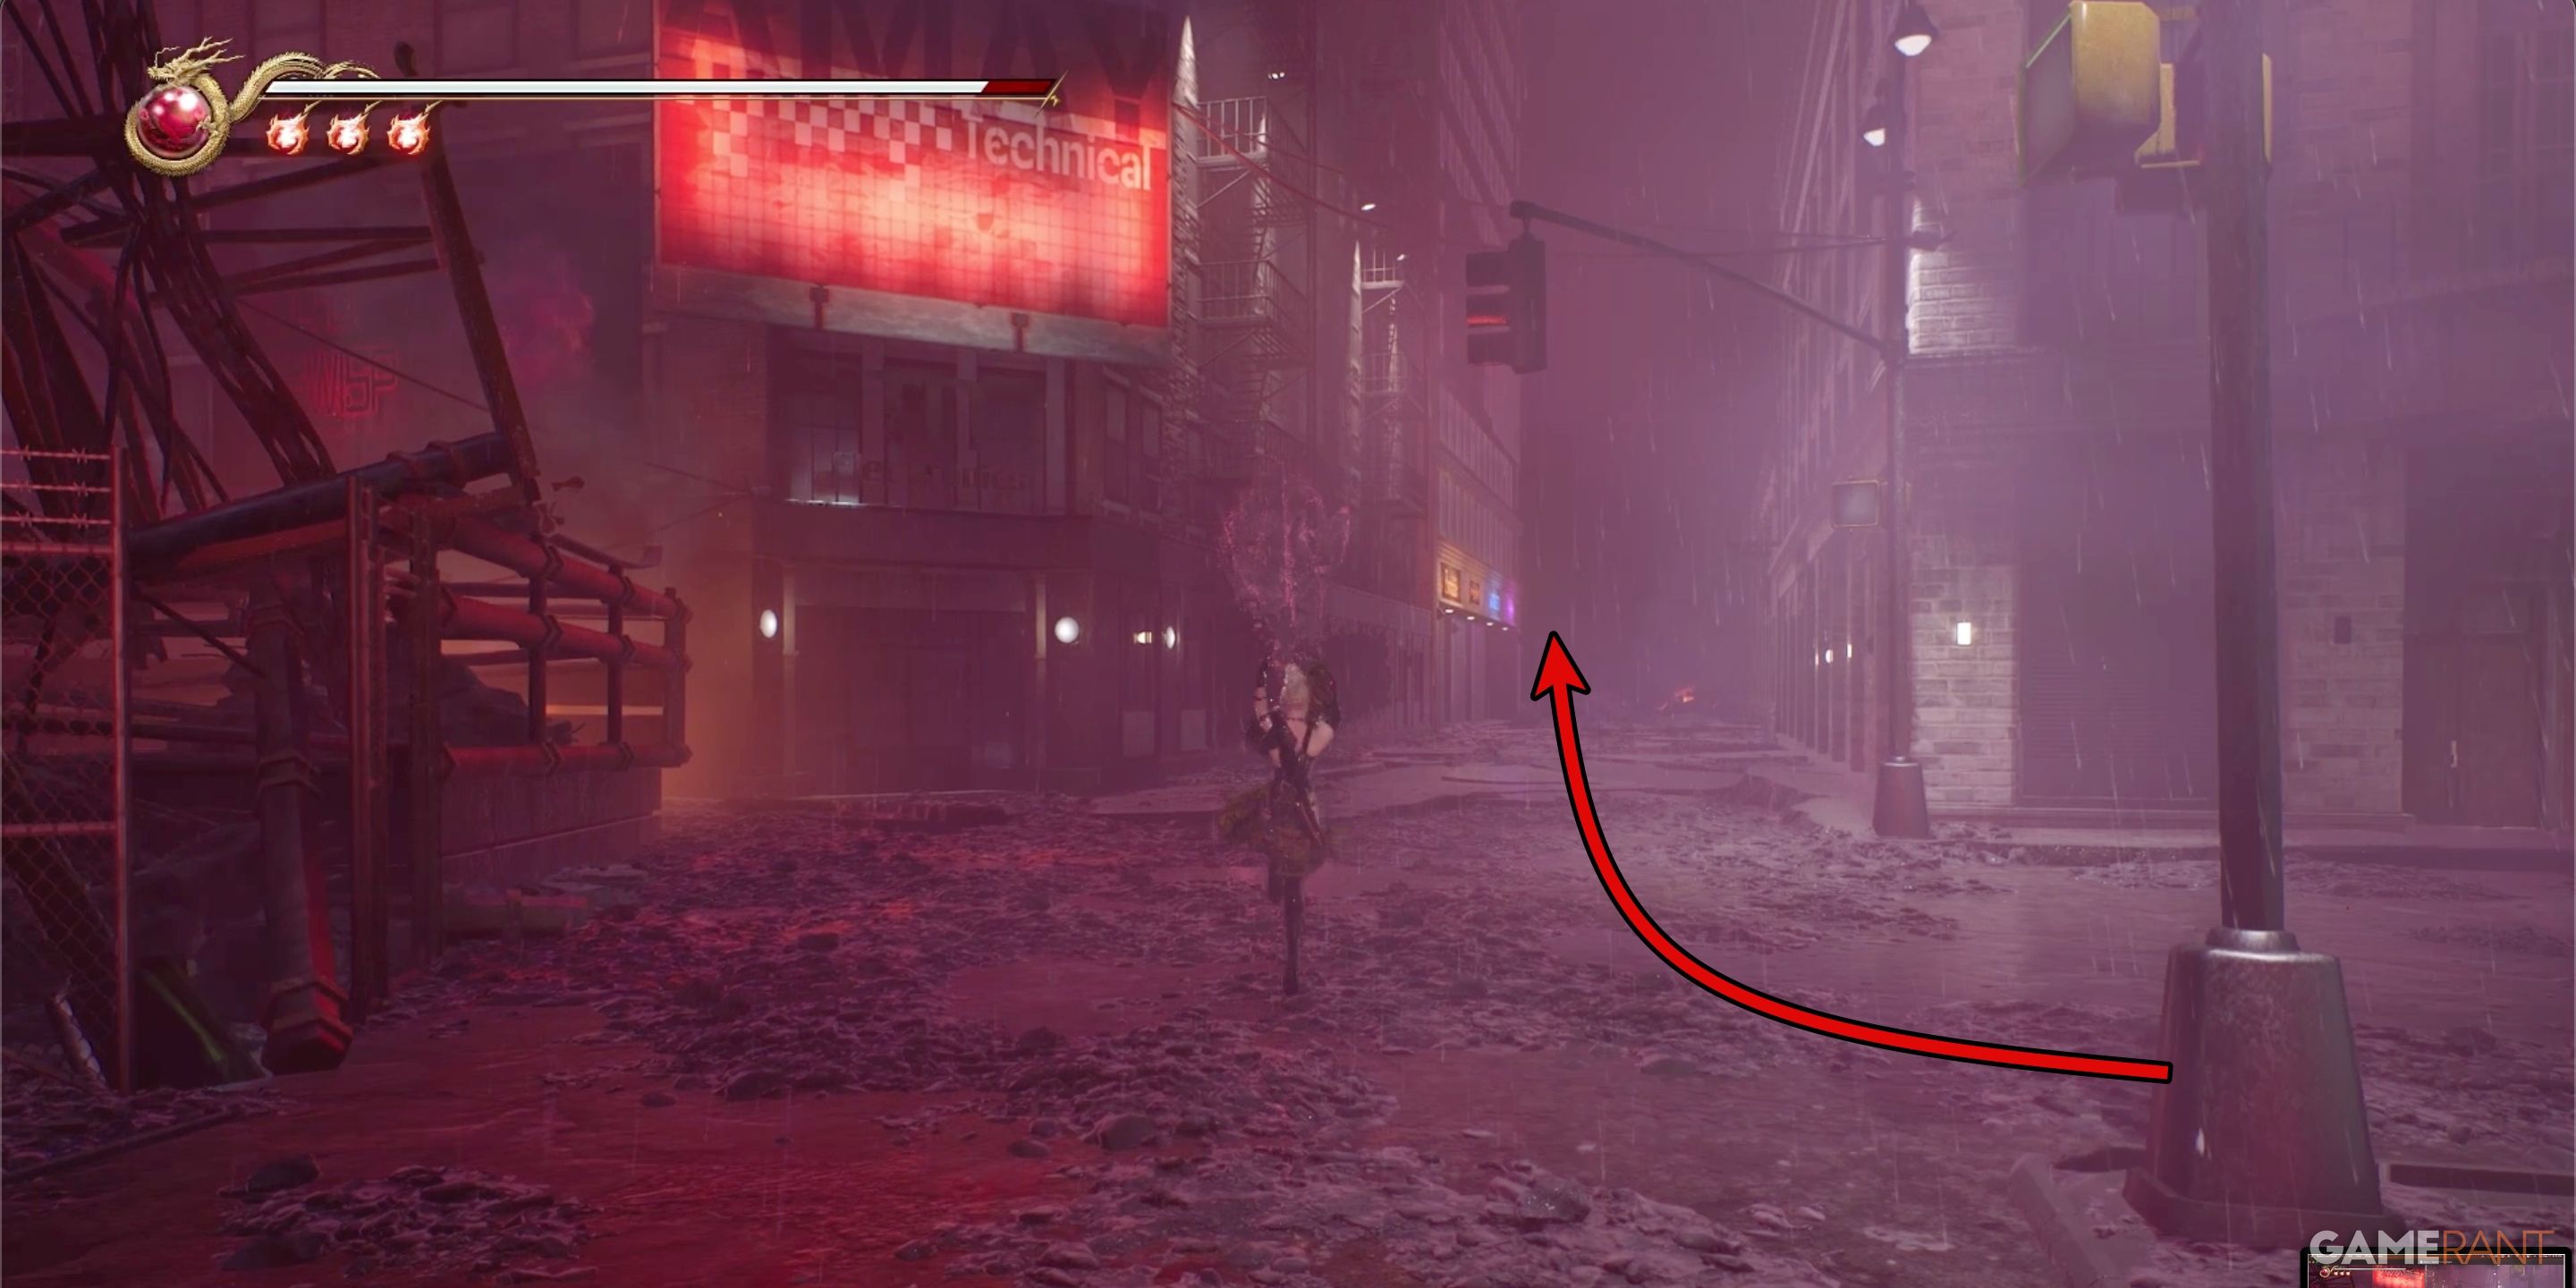
Following the chest, take a left at the upcoming intersection, where you’ll encounter a cluster of winged demonic beings. Overpower them, then venture into the expansive, open space that lies ahead. Be prepared for additional adversaries in this area, as their presence depends on your selected challenge level. Towards the end of the vast open space, head towards the street with the massive, glowing red neon sign, and notice the streetlamp and traffic light. A new batch of smaller demons will appear here.
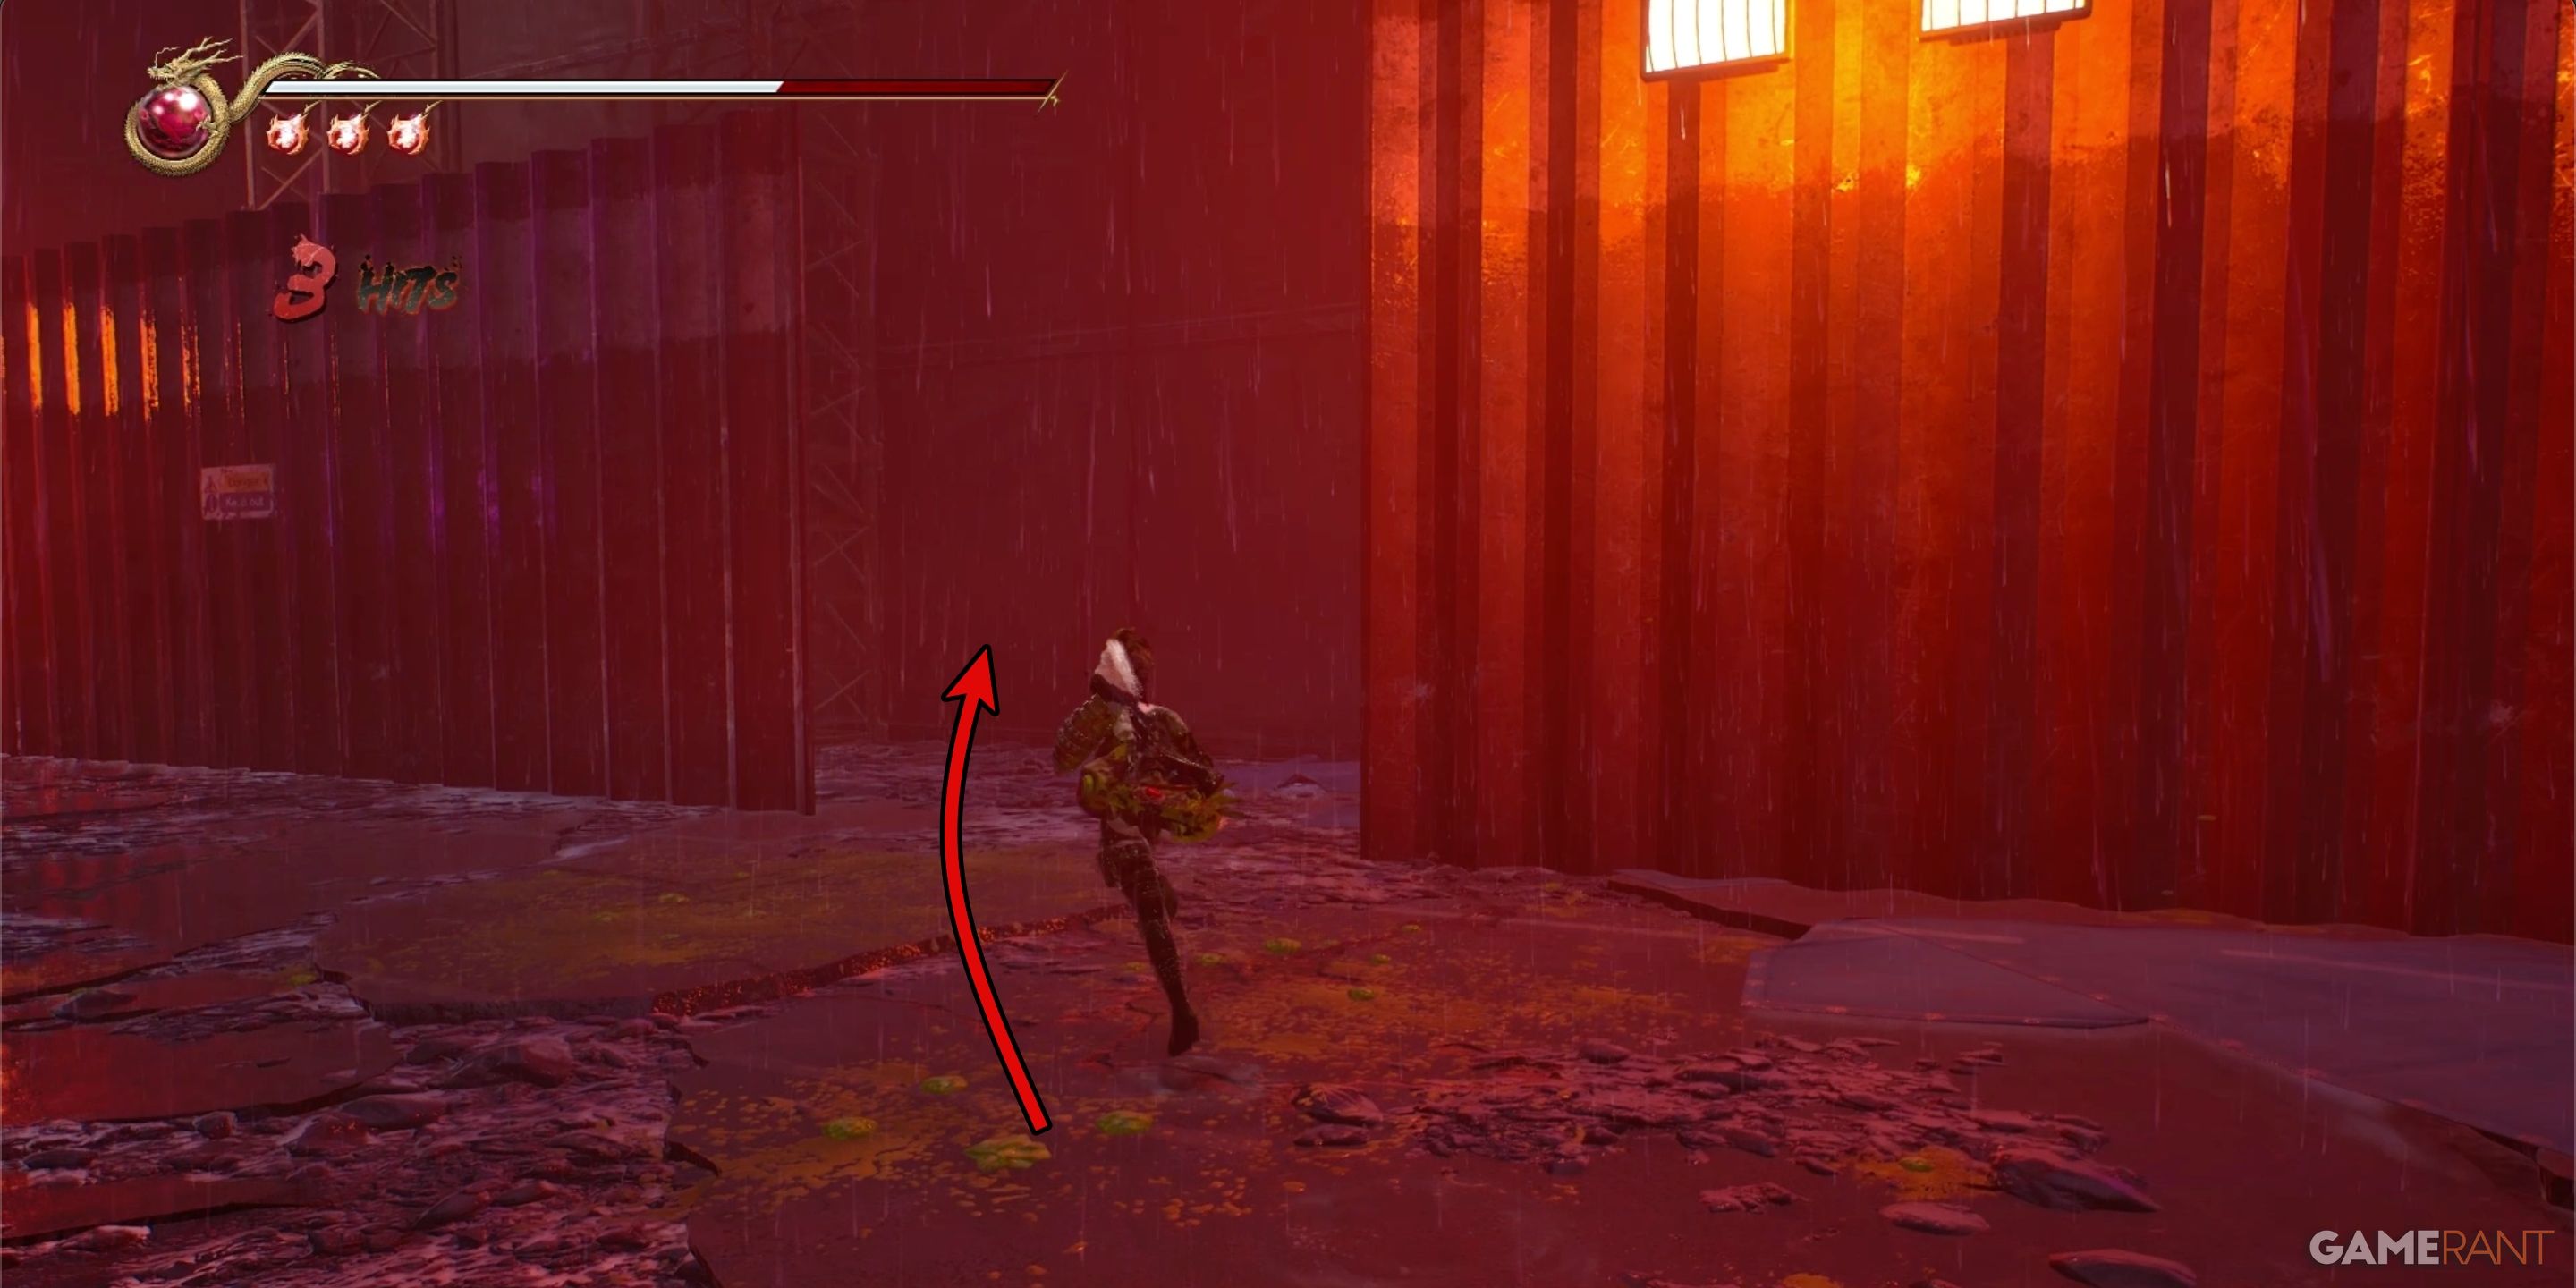
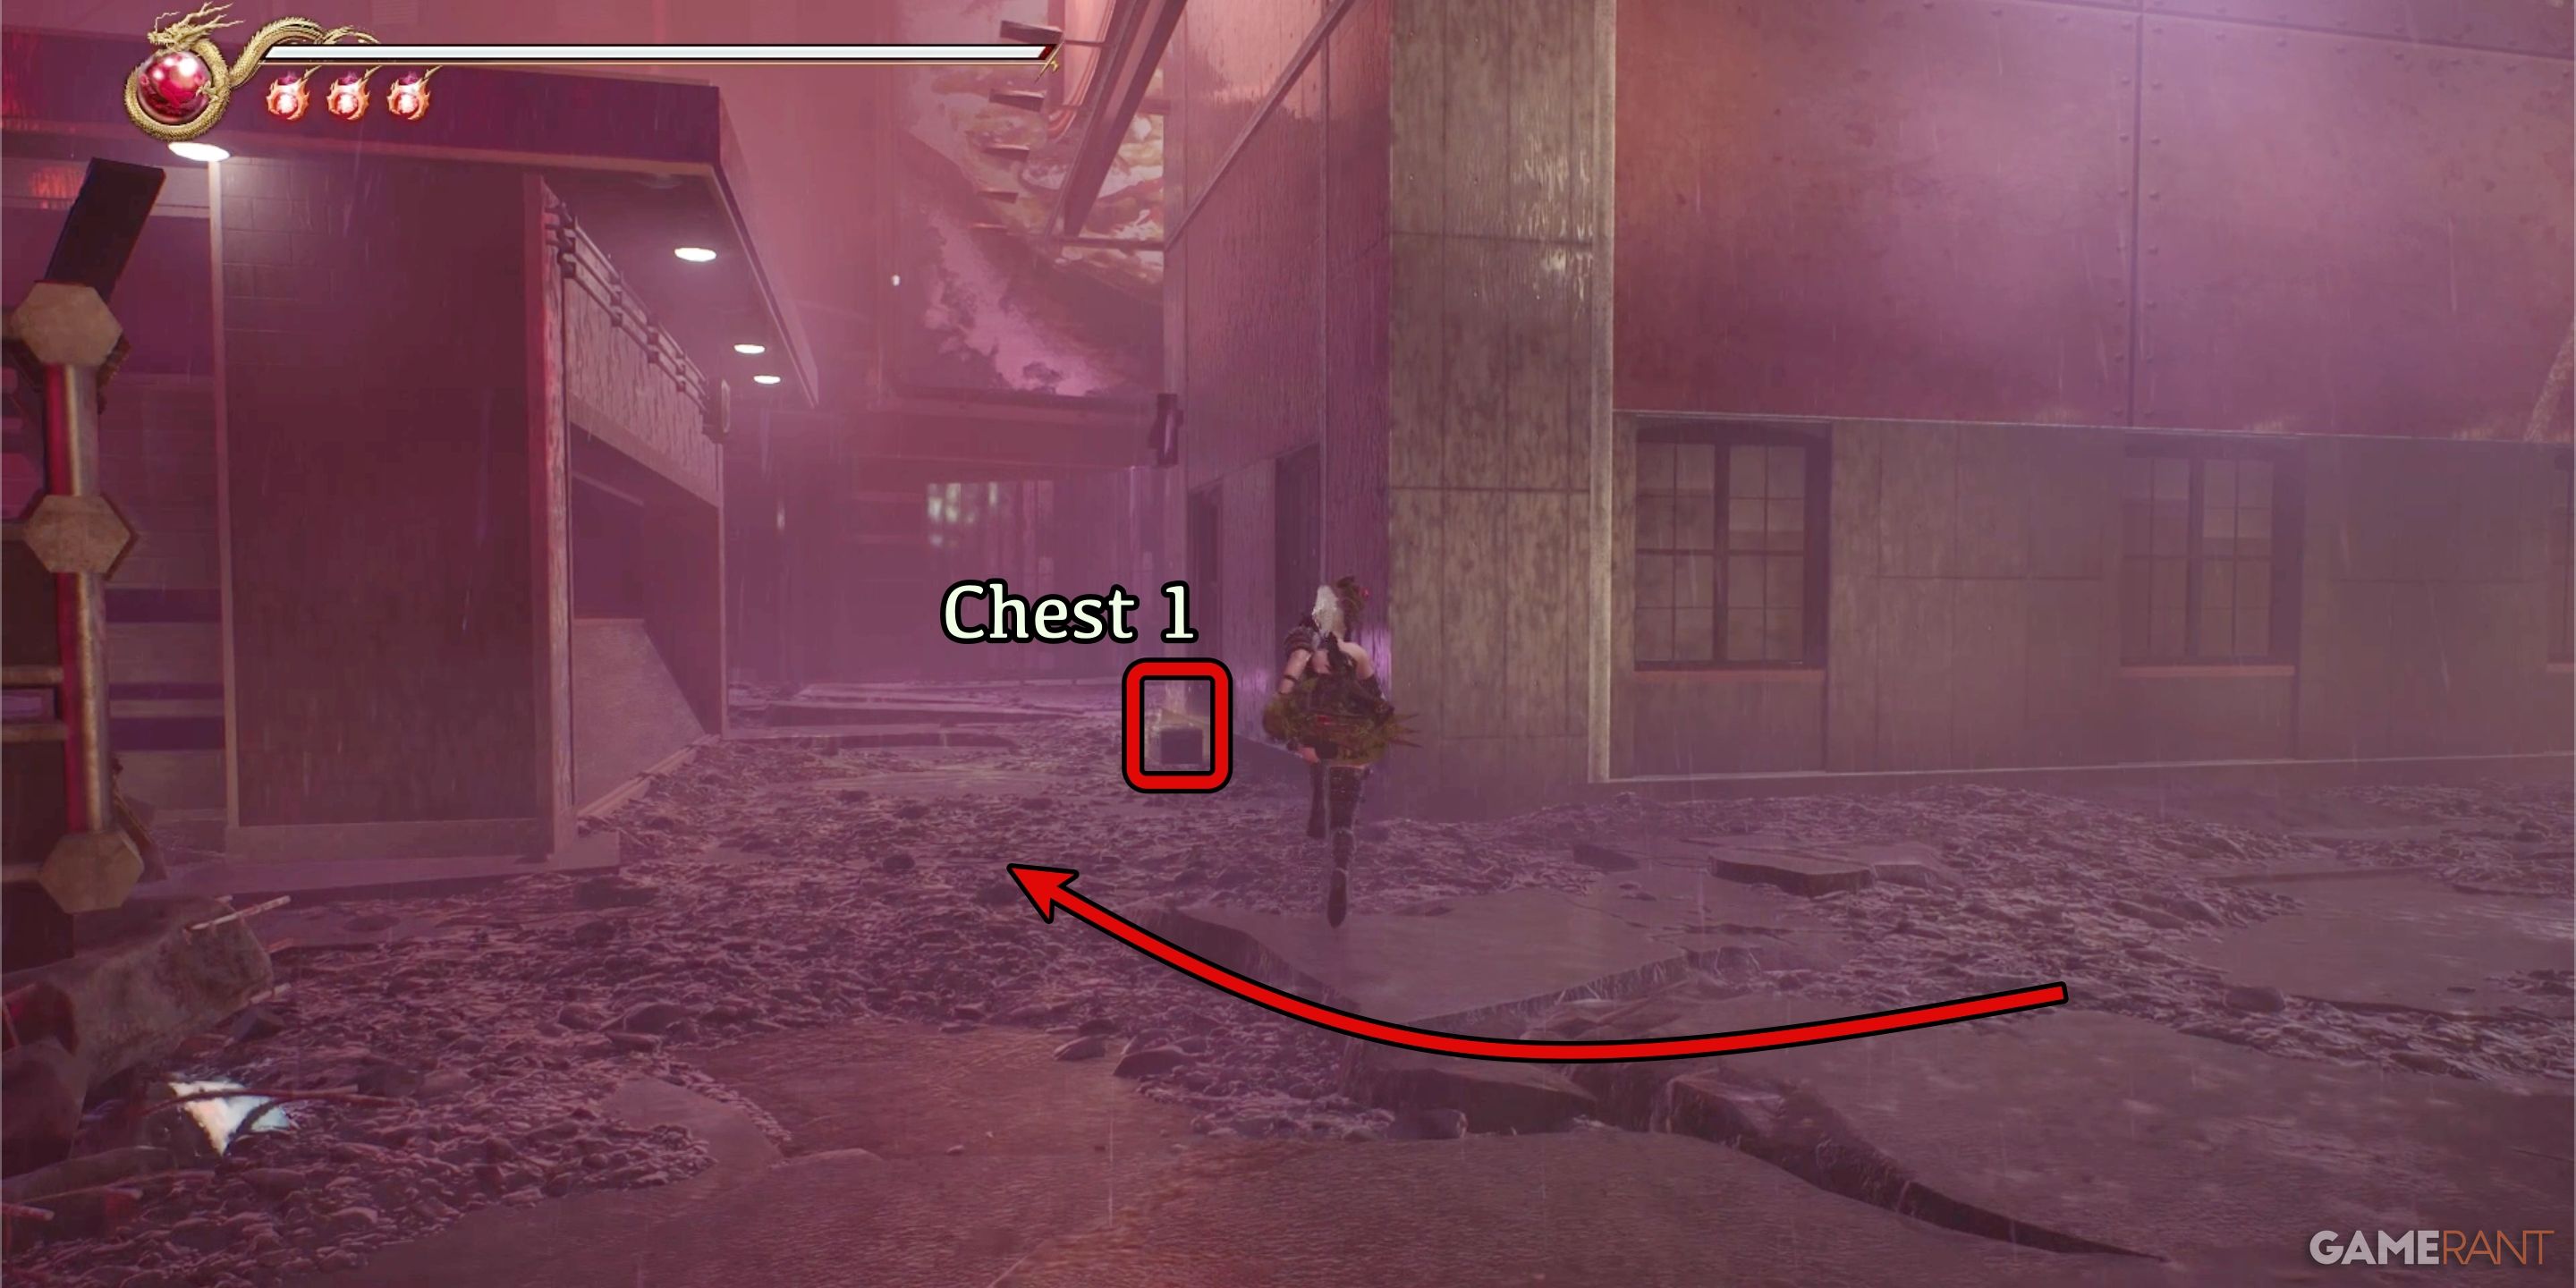
Turn right at the red metal barriers, and stay on the right side of the road to find the upcoming treasure just before a big pile of debris. This treasure holds a single Devil’s Way Mushroom. After retrieving it, prepare for an assault by demons. Defeat them, then navigate through the narrow opening in the red metal enclosure.
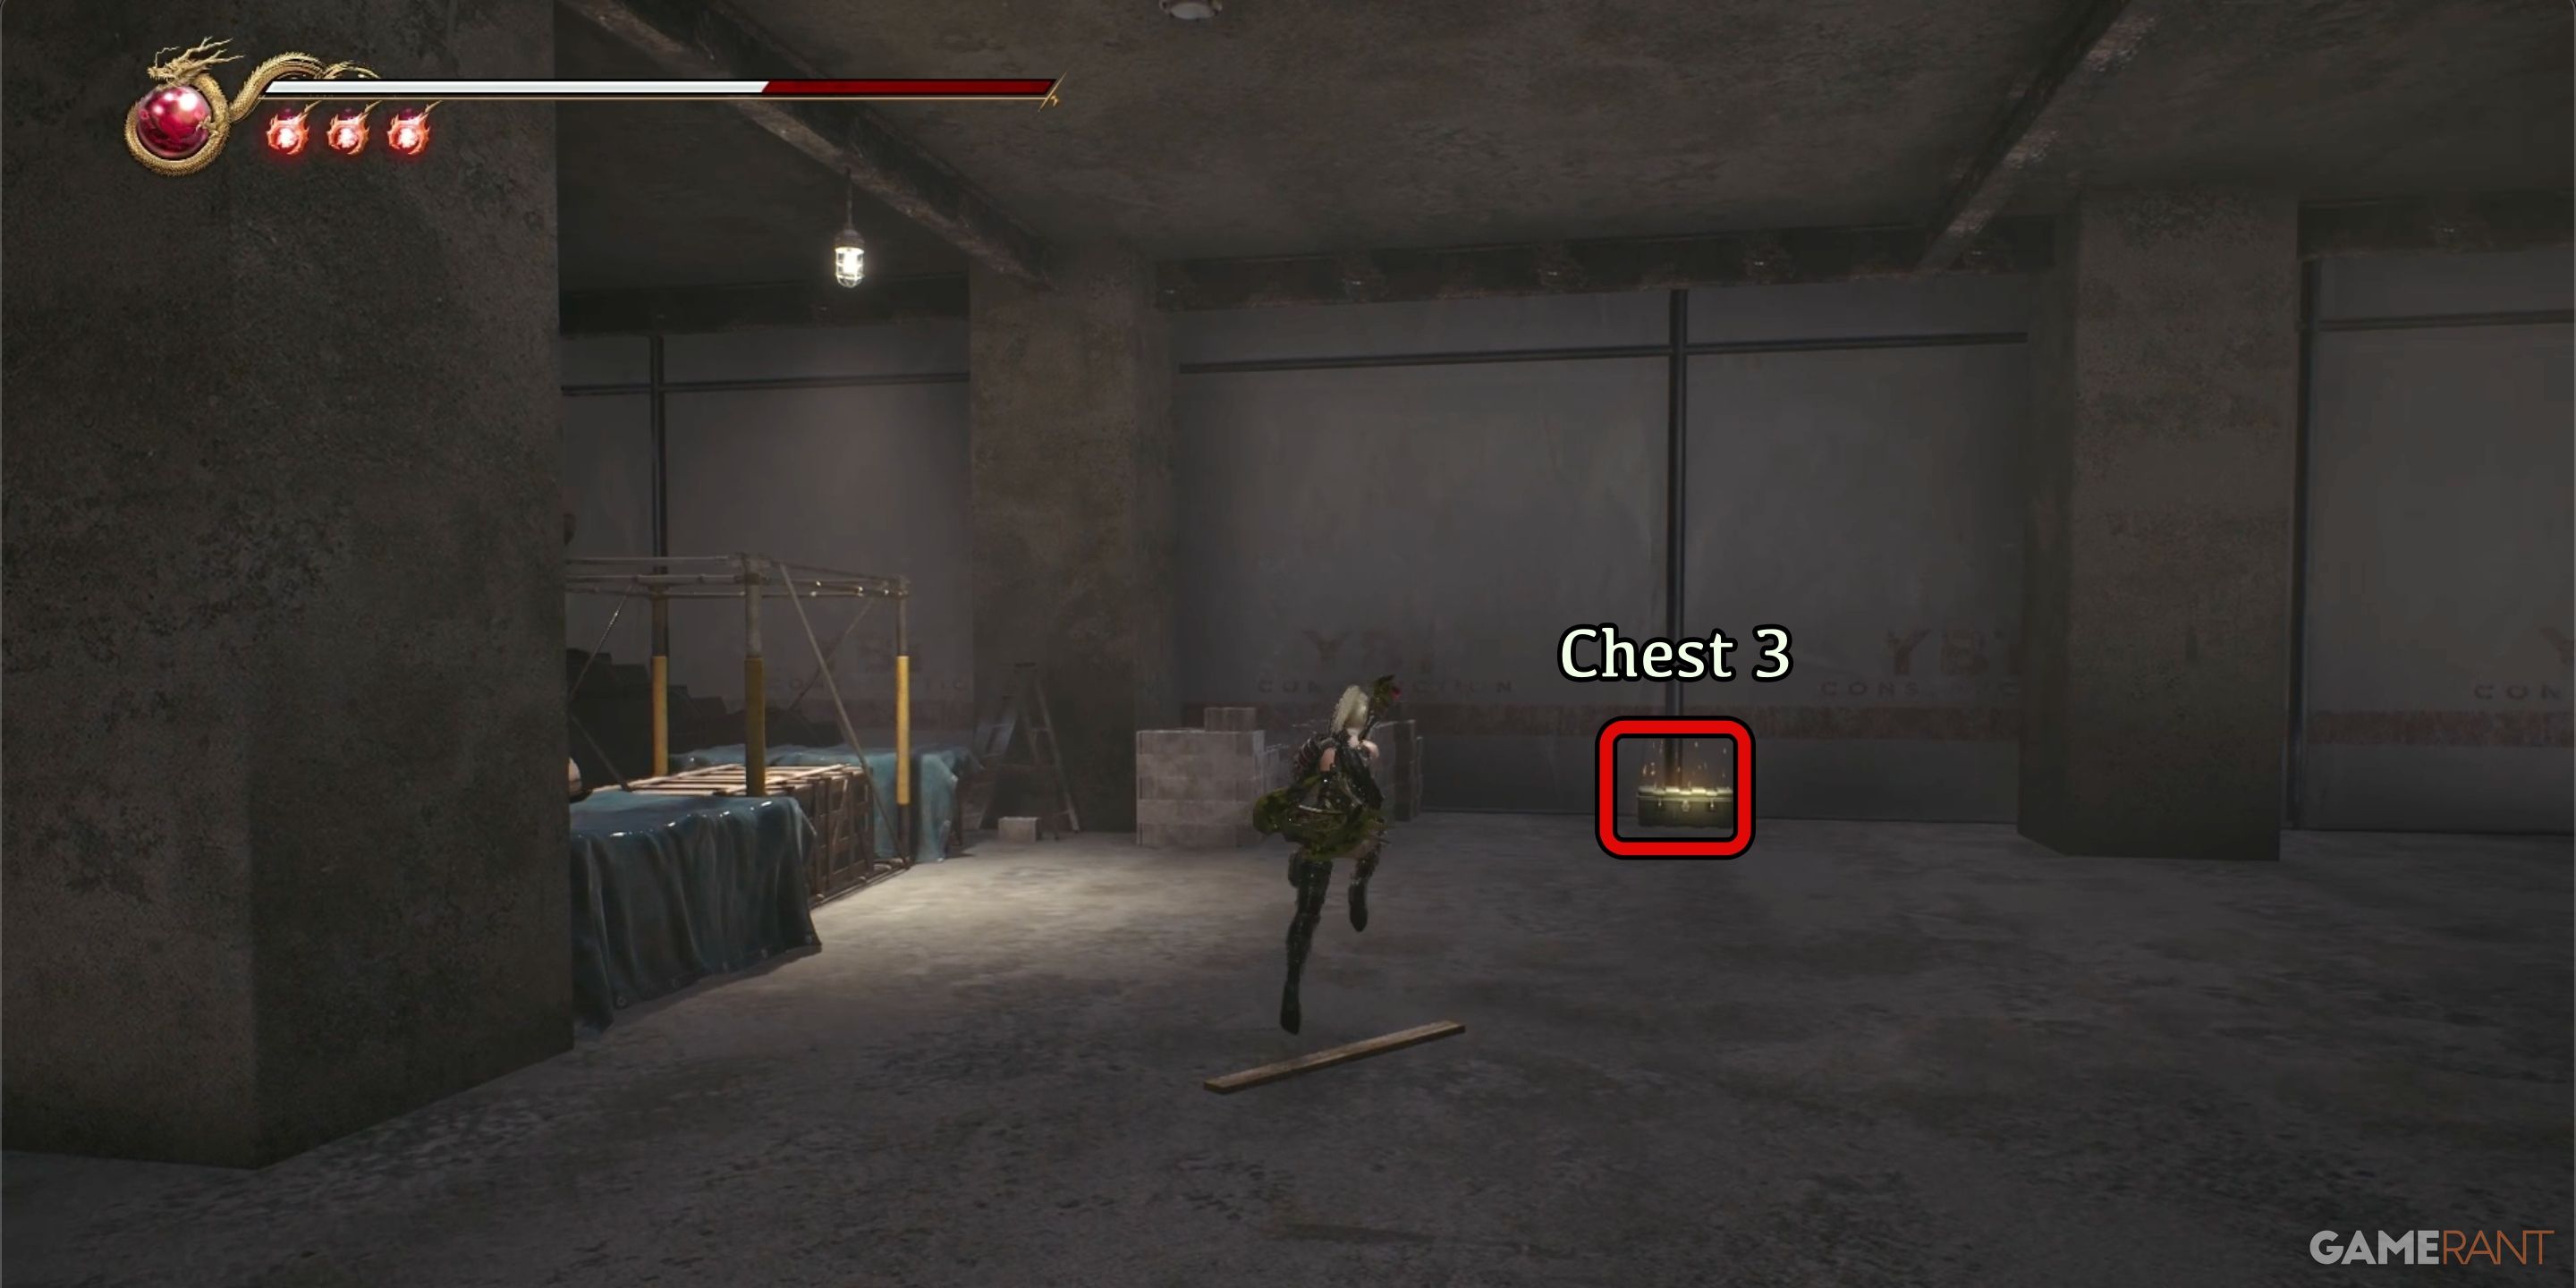
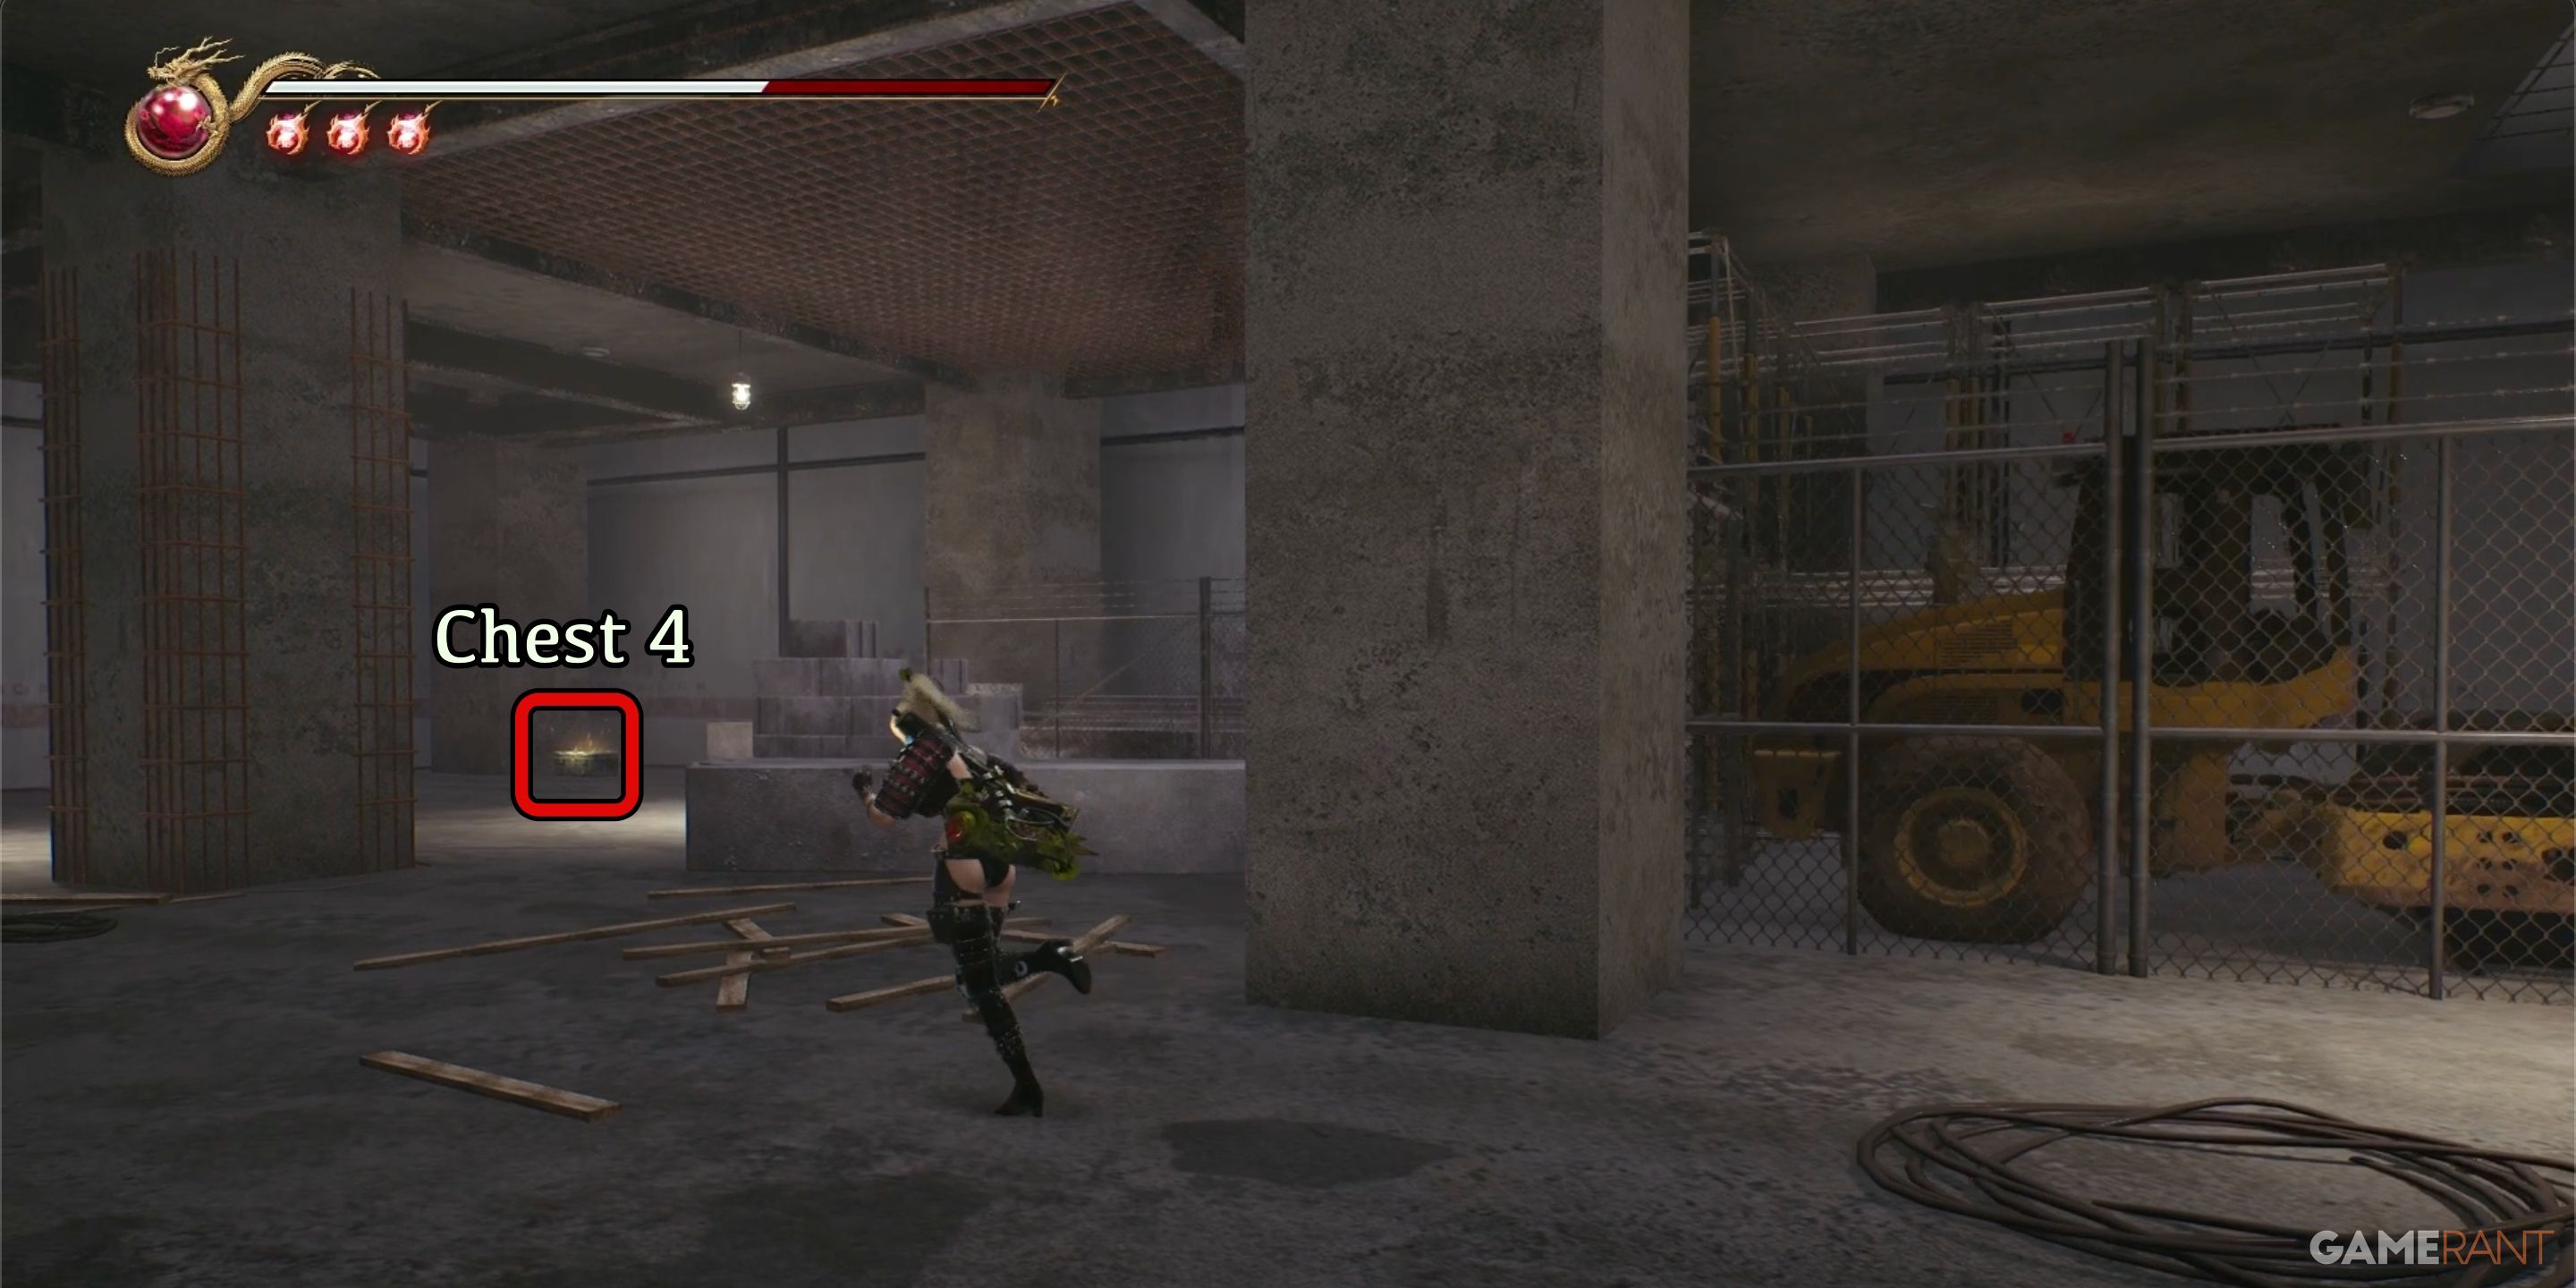
Inside a building currently being built, you’ll soon notice an entrance. Once inside, brace yourself for the onslaught of incoming enemies. On the ground floor itself, there are two additional chests to discover. One of these chests conceals another Herb of Spiritual Existence, while the second one, located near the ramp leading to the upper level in a corner, holds Grains of Spiritual Existence.
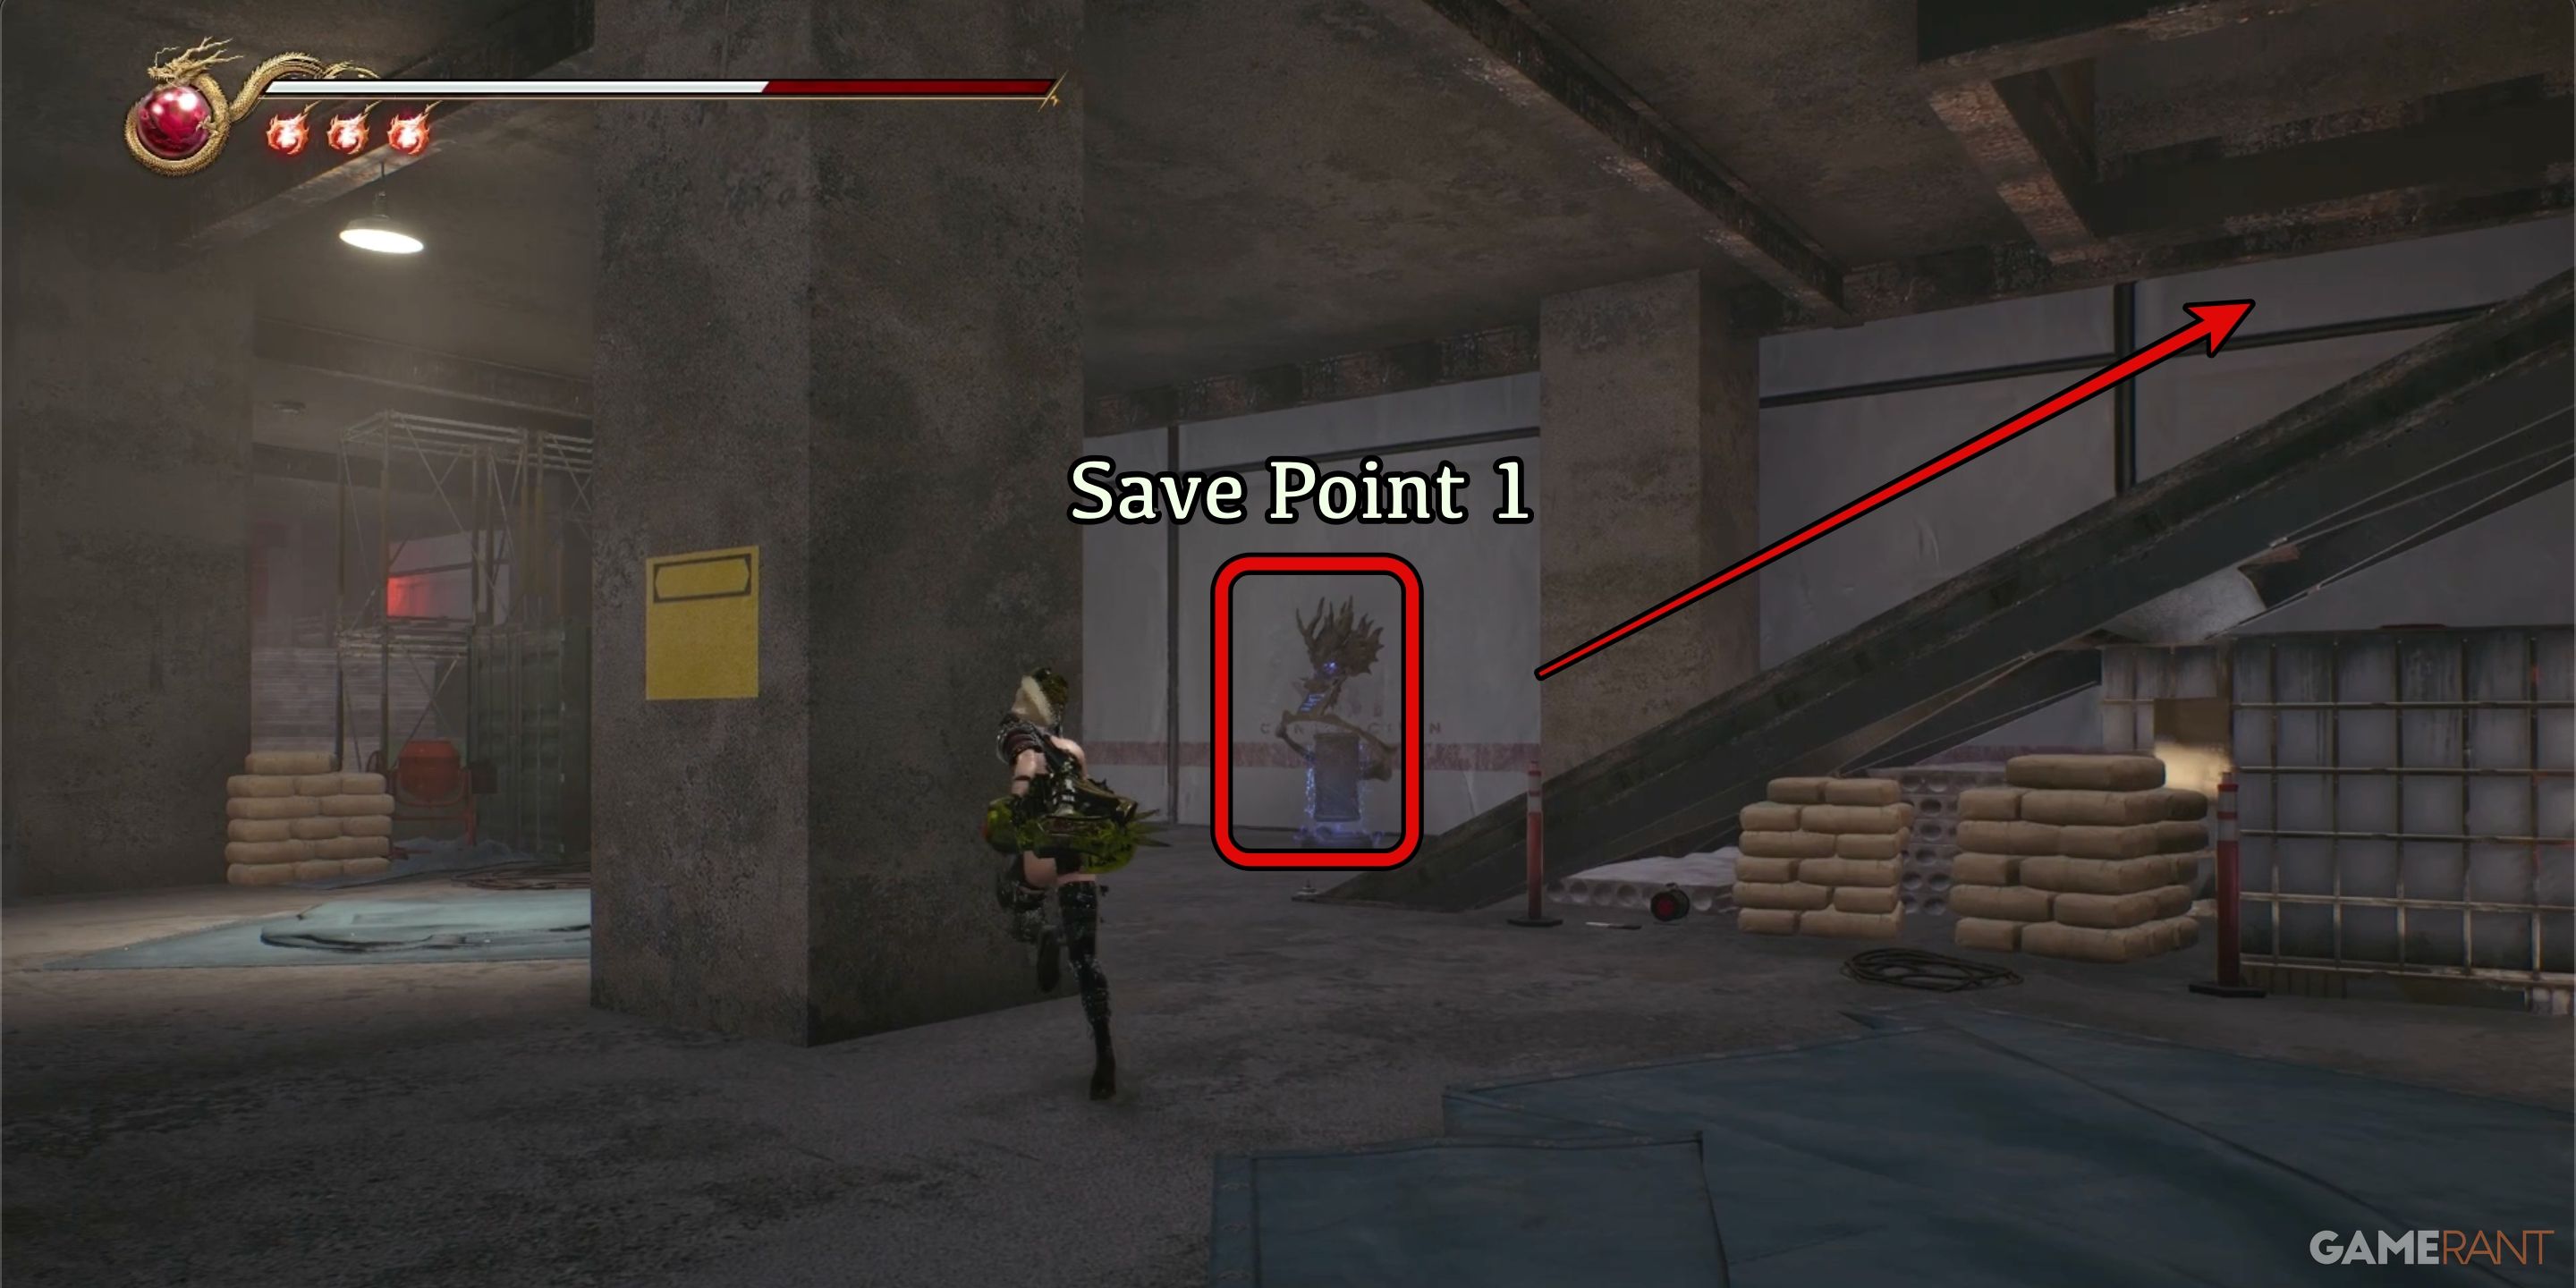
Upon unfastening the chests, you’ll discover a Dragon Statue save spot nestled at the foot of the incline guiding you towards the edifice’s upper tier.
Save Point 2:
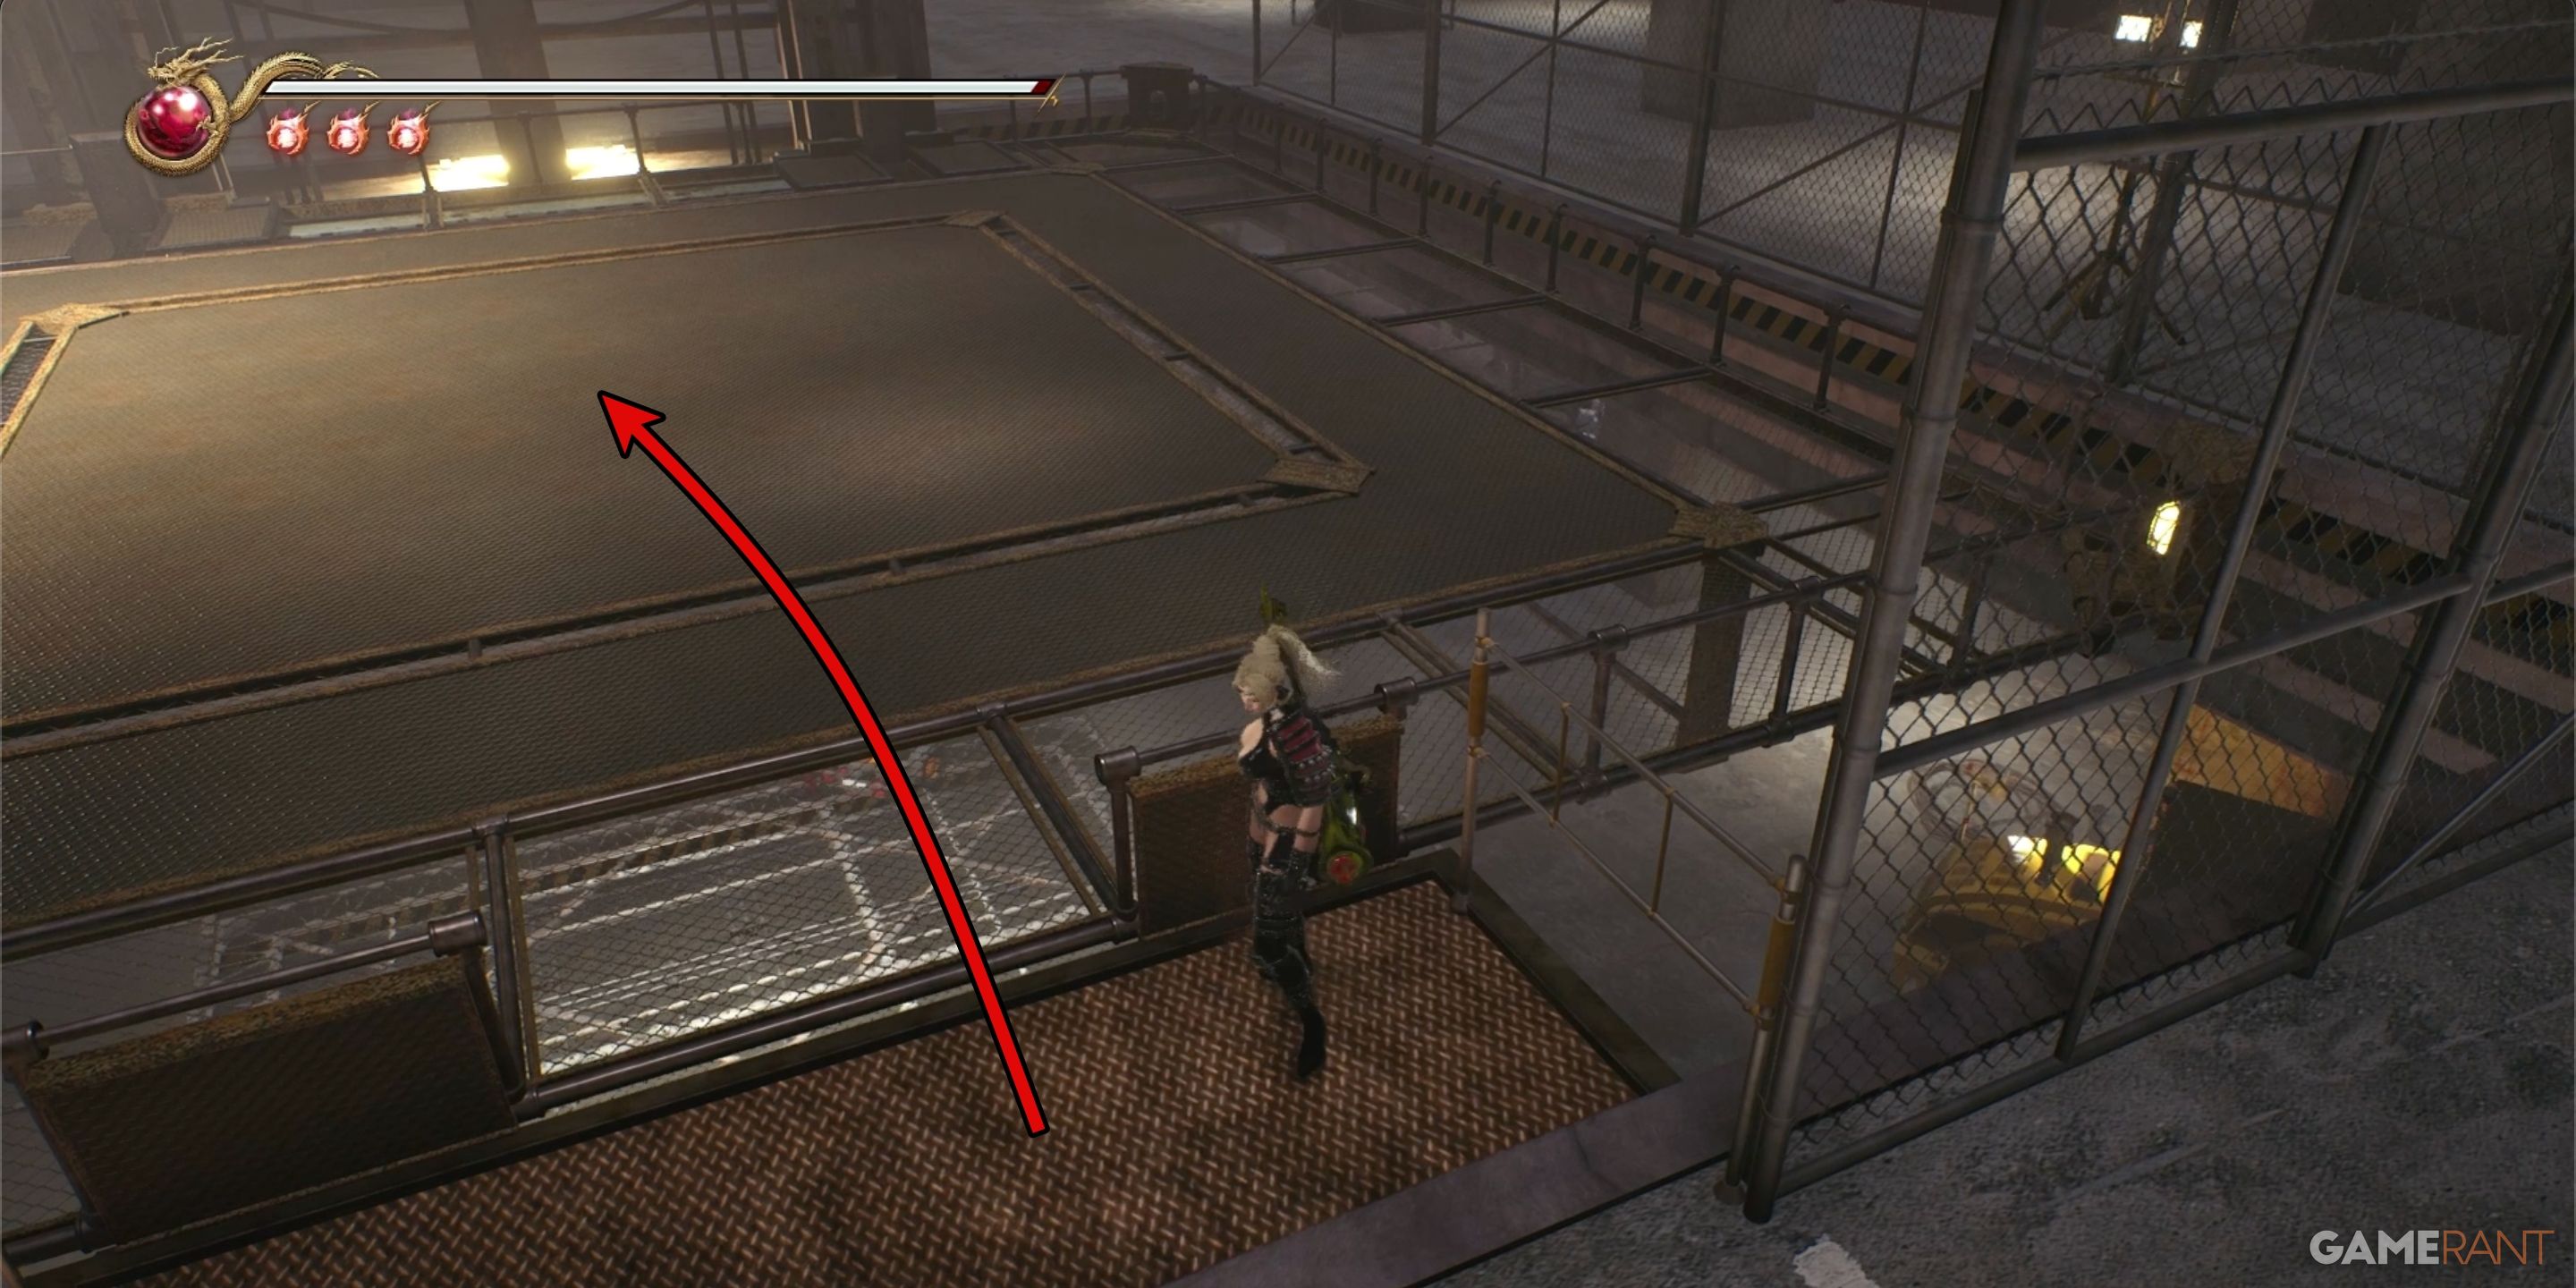
Starting from the initial safe spot, proceed upward along the slope until you reach level two. There, a cluster of little demons will be anticipating your arrival. Once you’ve handled them, move onto the big platform situated centrally in the room. This platform serves as an elevator, transporting you up multiple floors.
As you ride the elevator, you’ll encounter multiple groups of opponents. These foes aren’t especially dangerous, but they help keep you entertained during the journey.
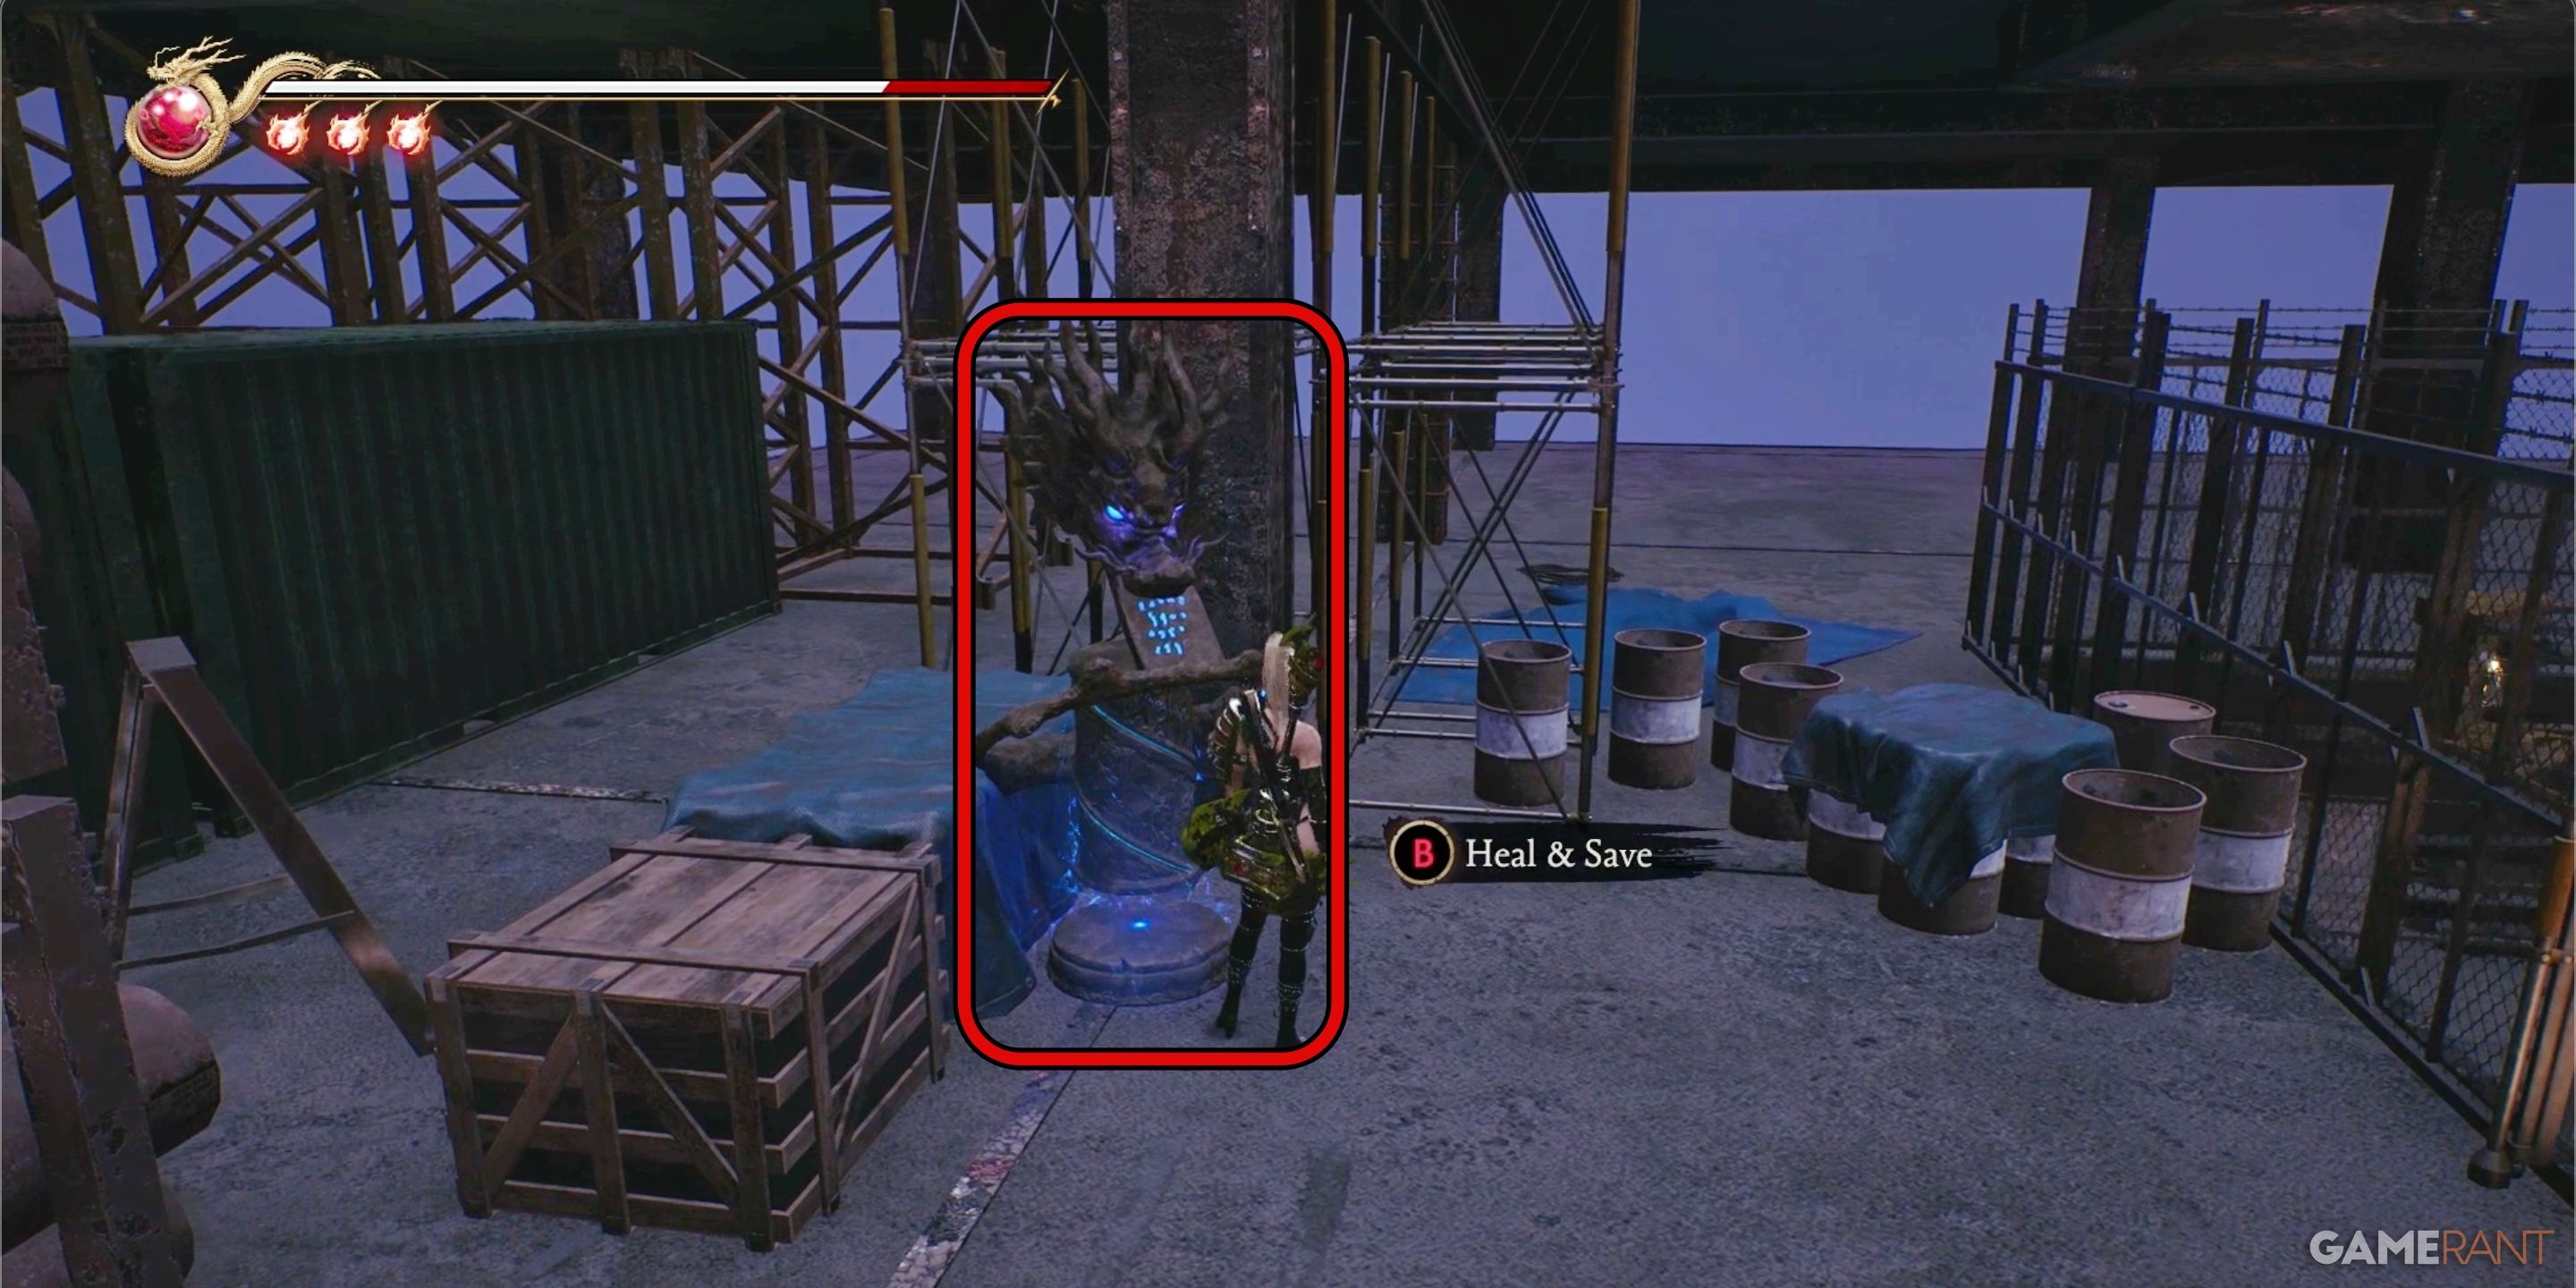
After you’ve vanquished every opponent and the elevator has come to a halt, you’ll discover the next Save Spot right beyond the elevator doors.
Save Point 3 & Muramasa Shop:
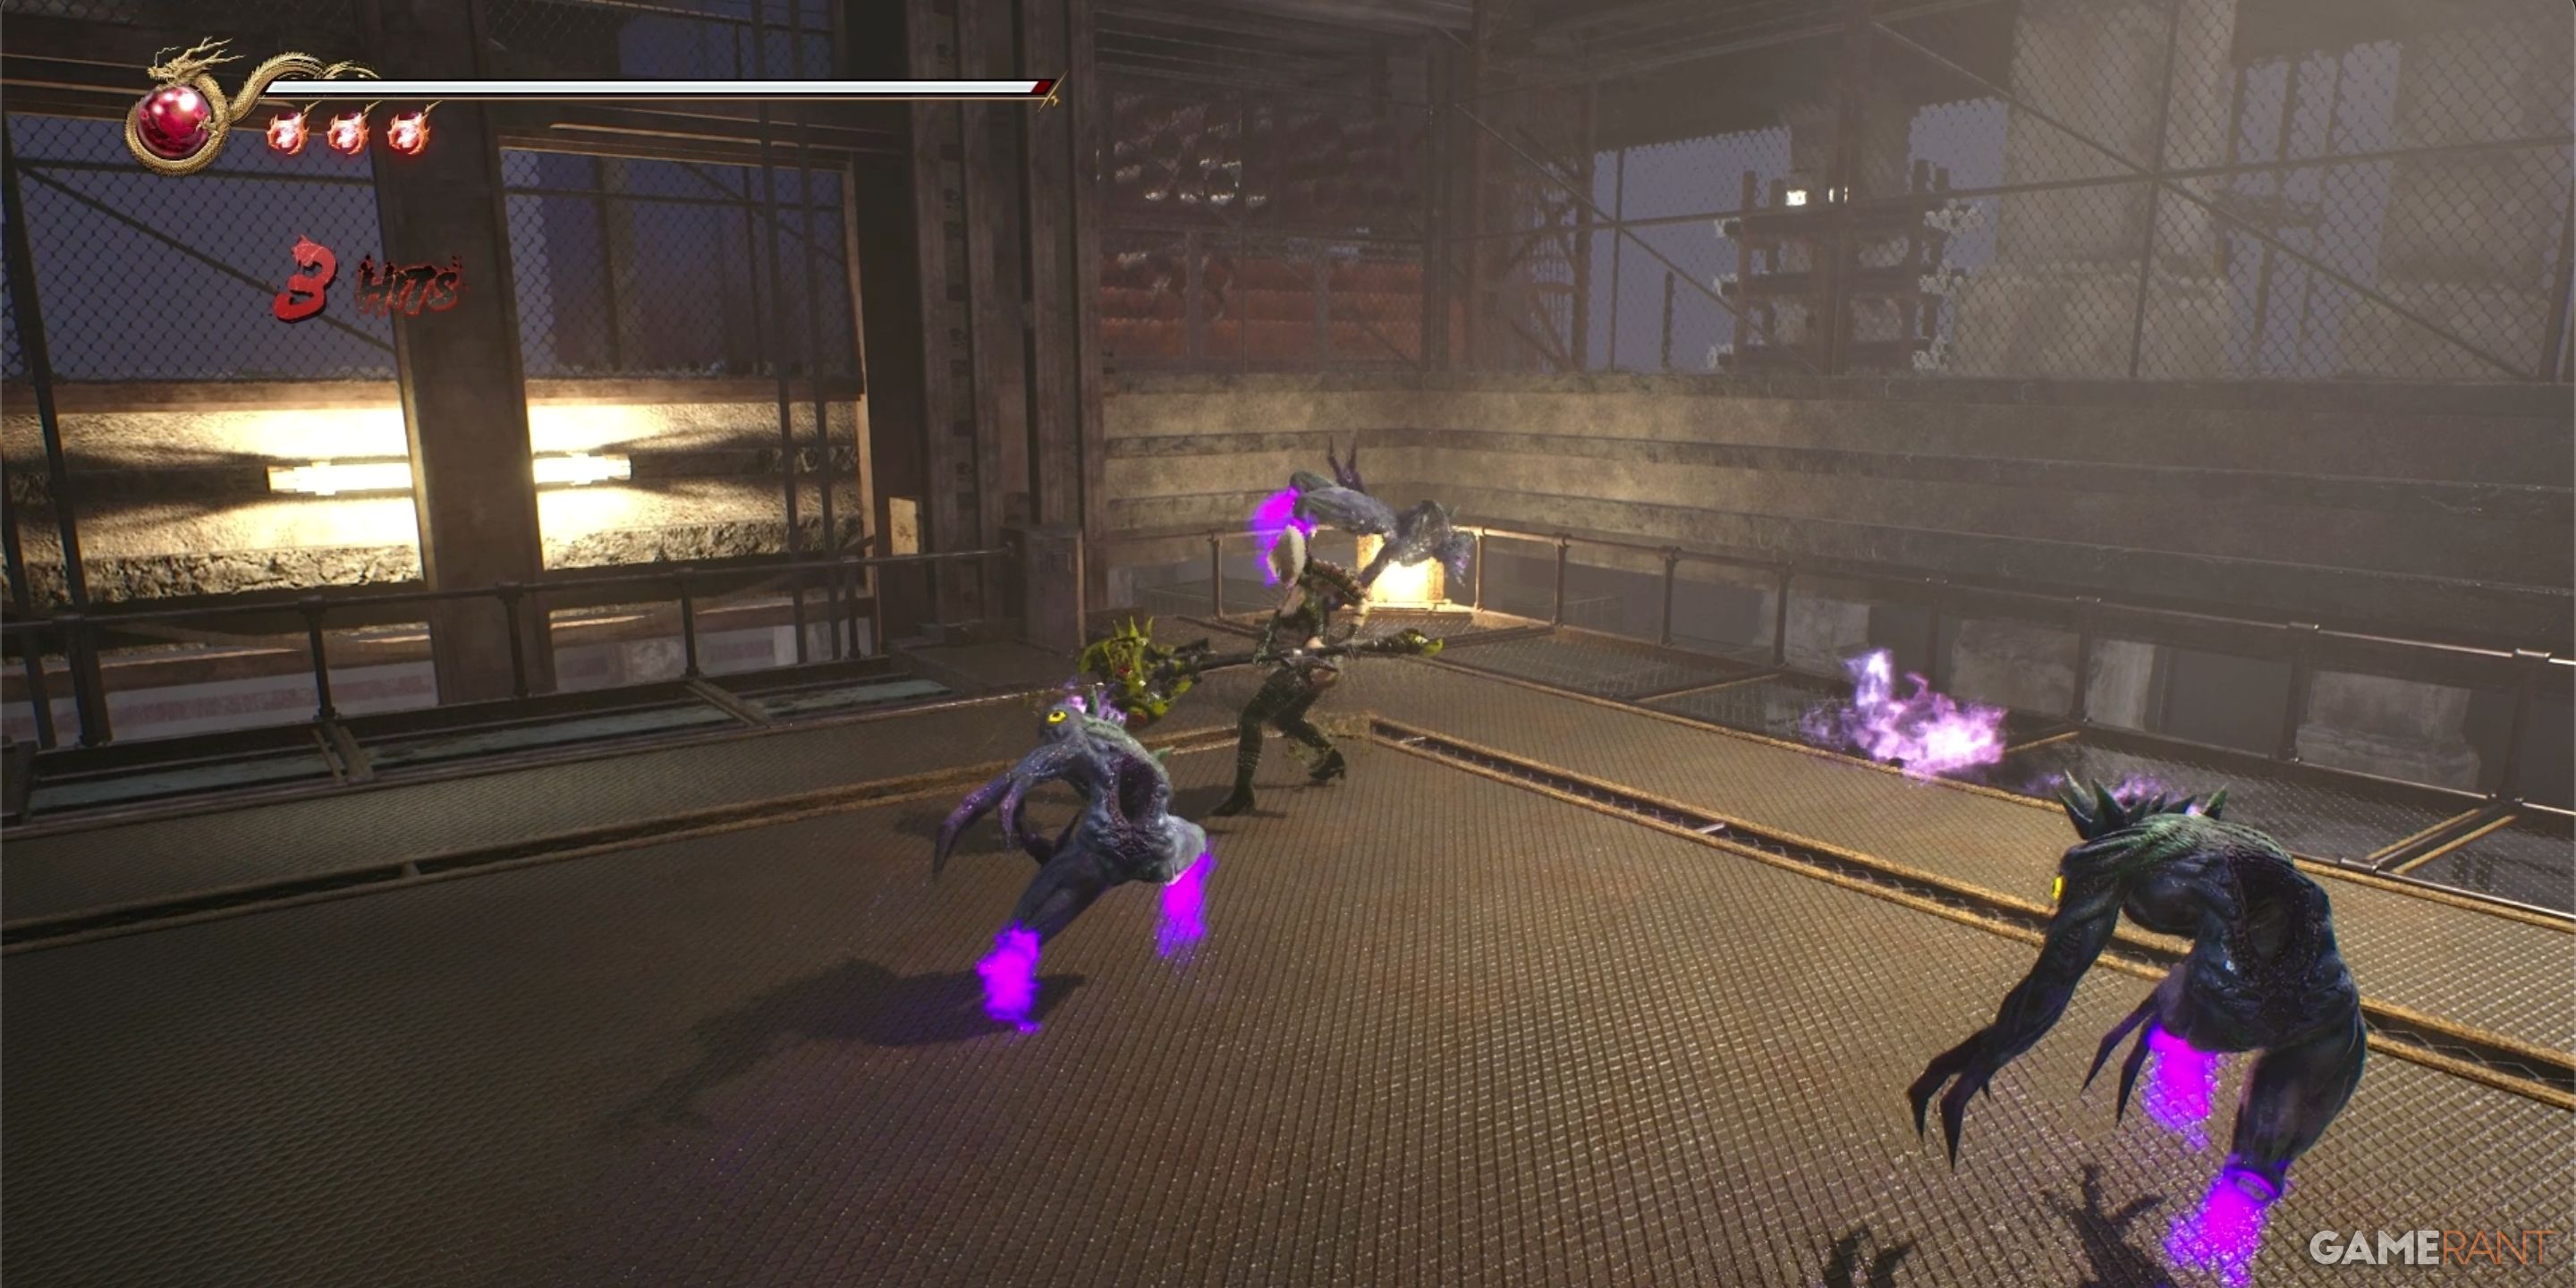
Once you reach Save Point 2, spin around and reboard the elevator. On your ascent, prepare for another pair of confrontations with enemies. In the second skirmish, control will be handed over to the game, and a short video sequence will commence.
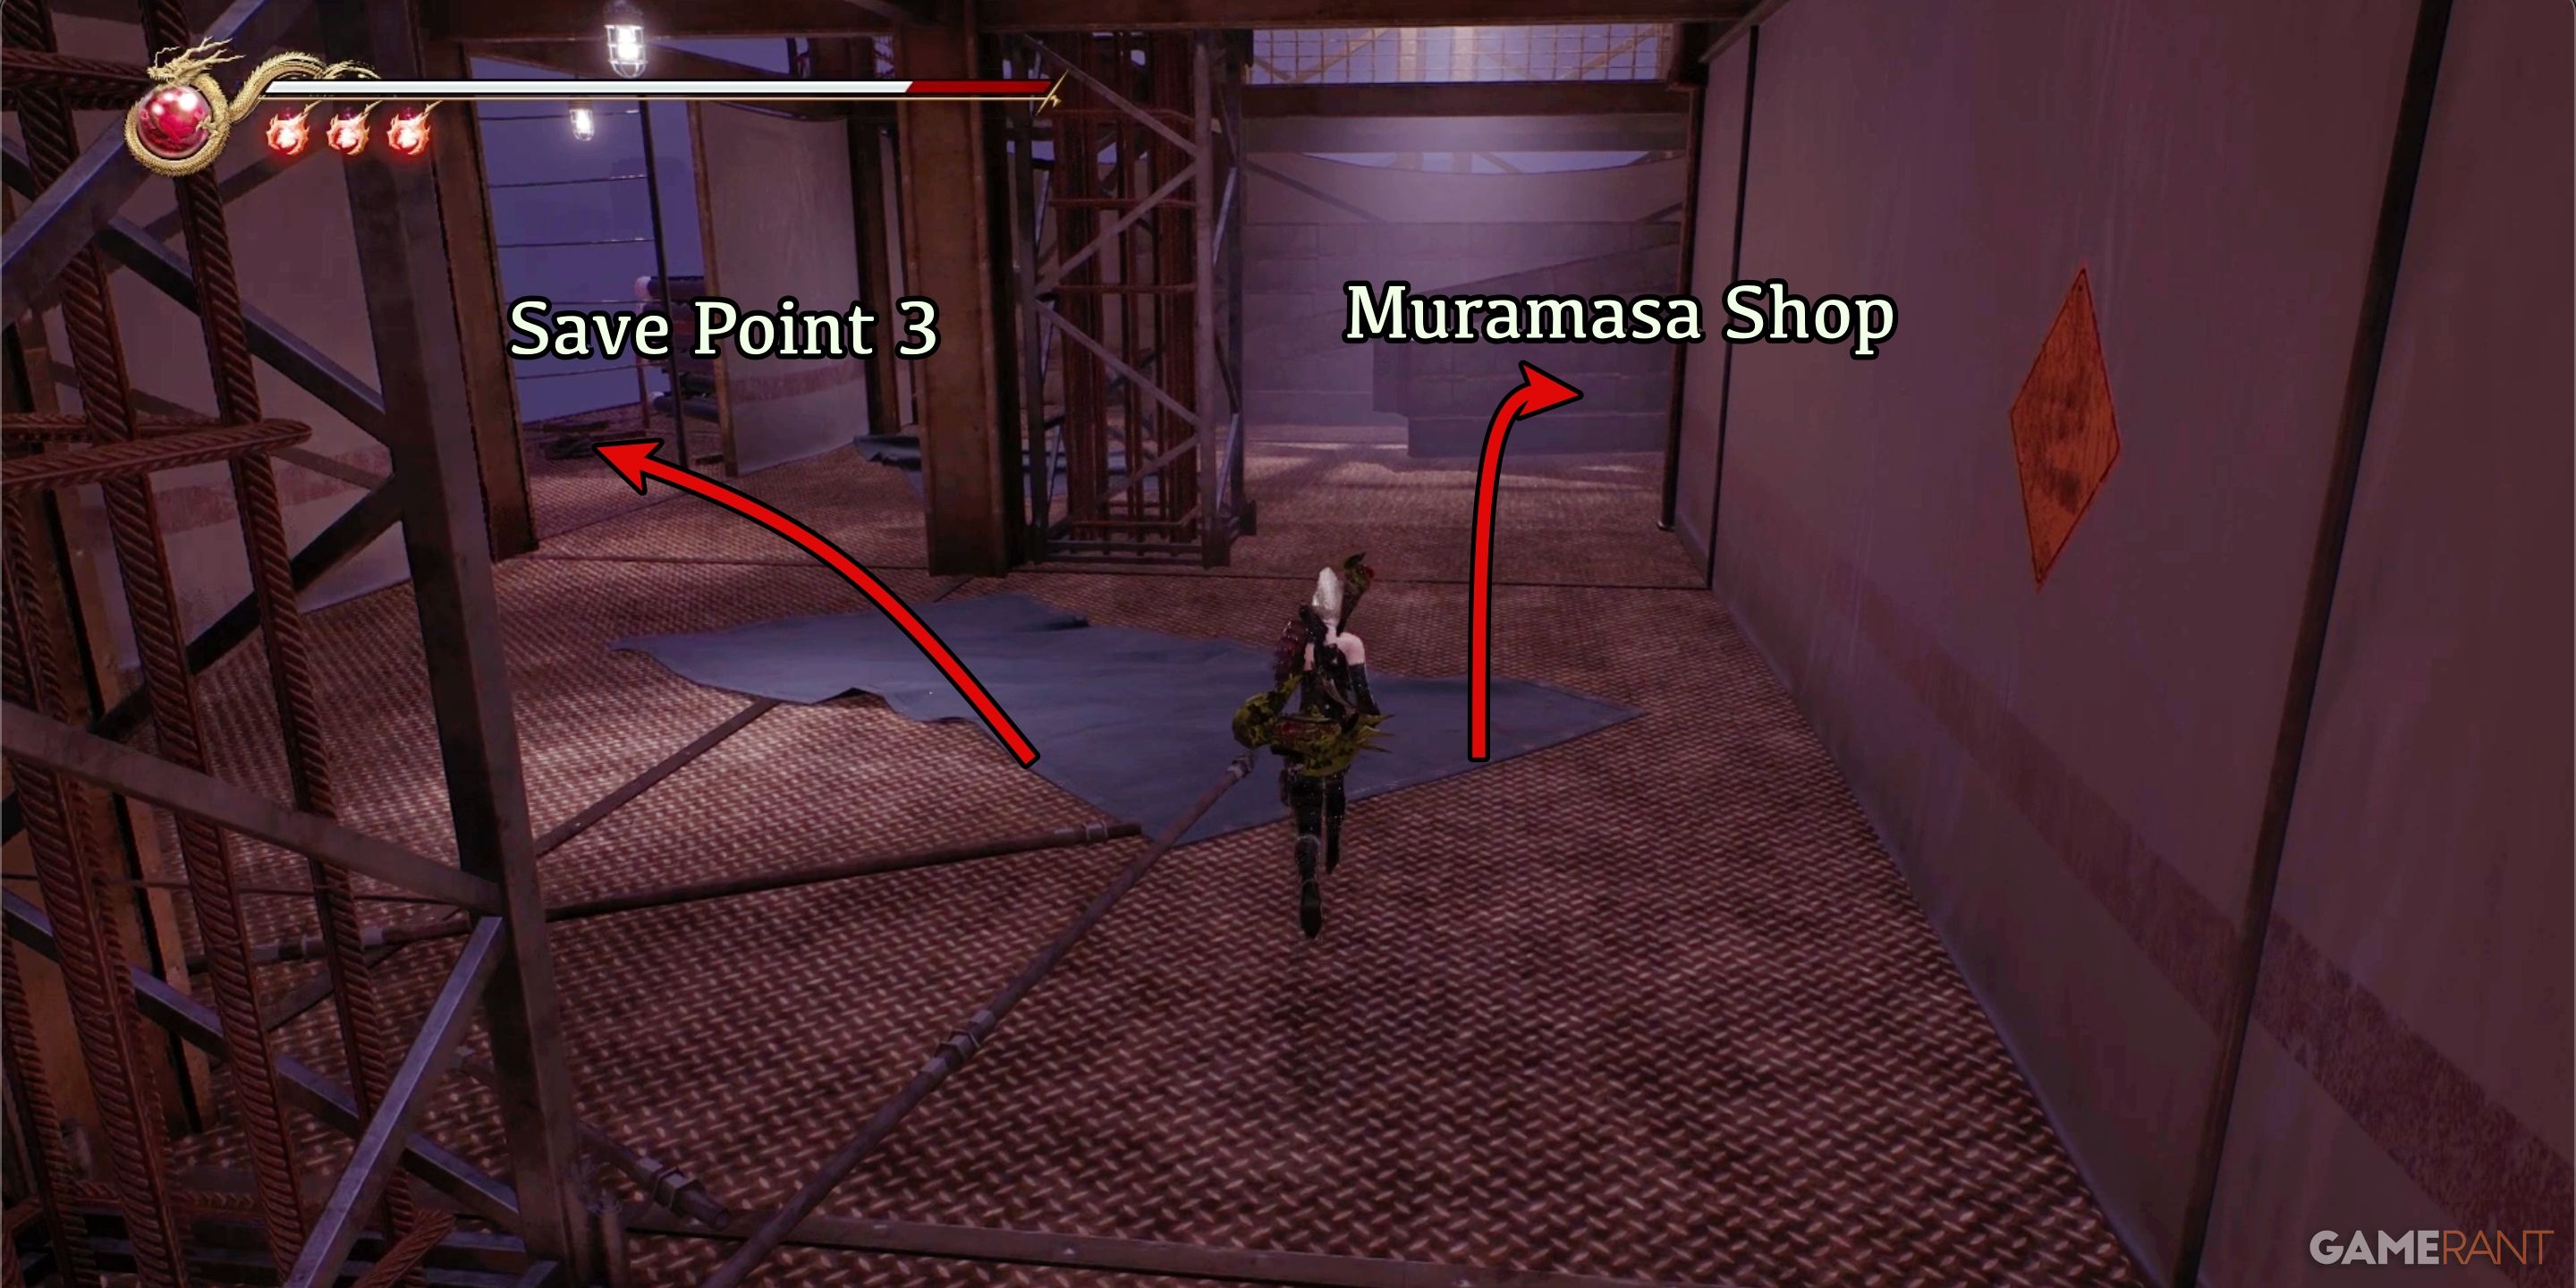
After the scene is over, you’ll get back control of Rachel on one of the higher levels. Defeat the big flying demons first, then navigate until you spot an exit leading to an outer path on your left. If you head right at this junction, you’ll stumble upon a Muramasa Store.
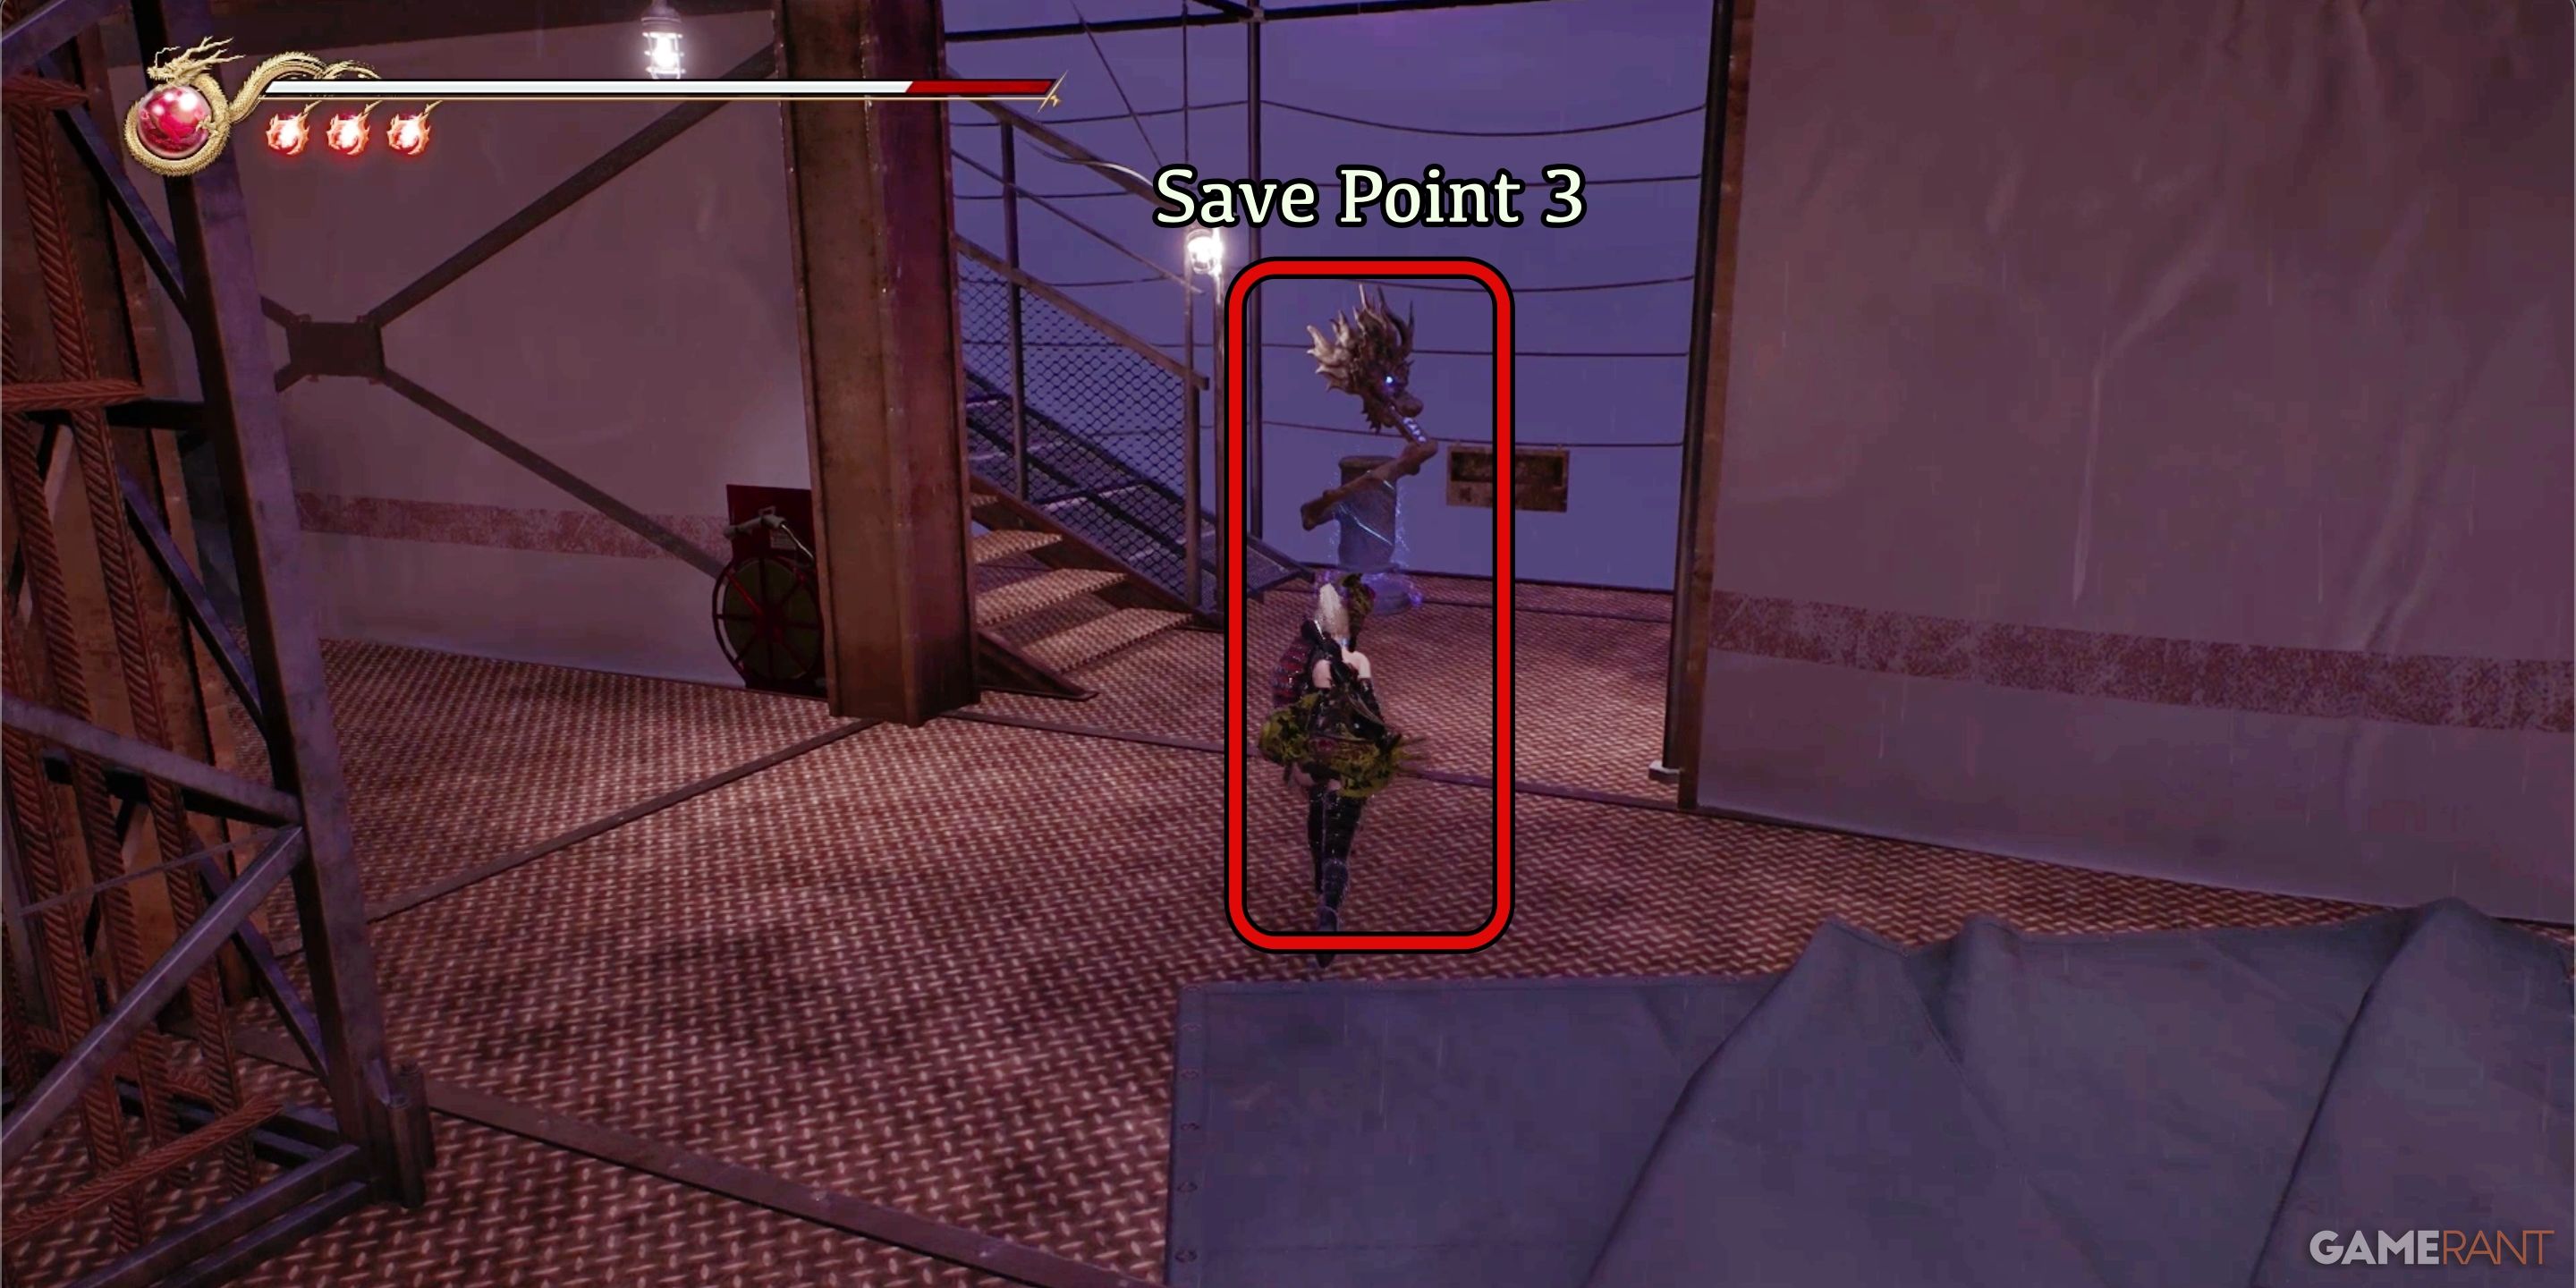
Once you turn left onto the outer route, Save Point 3 is located at the foot of some steps ascending to the location of the Marbus Boss Battle.
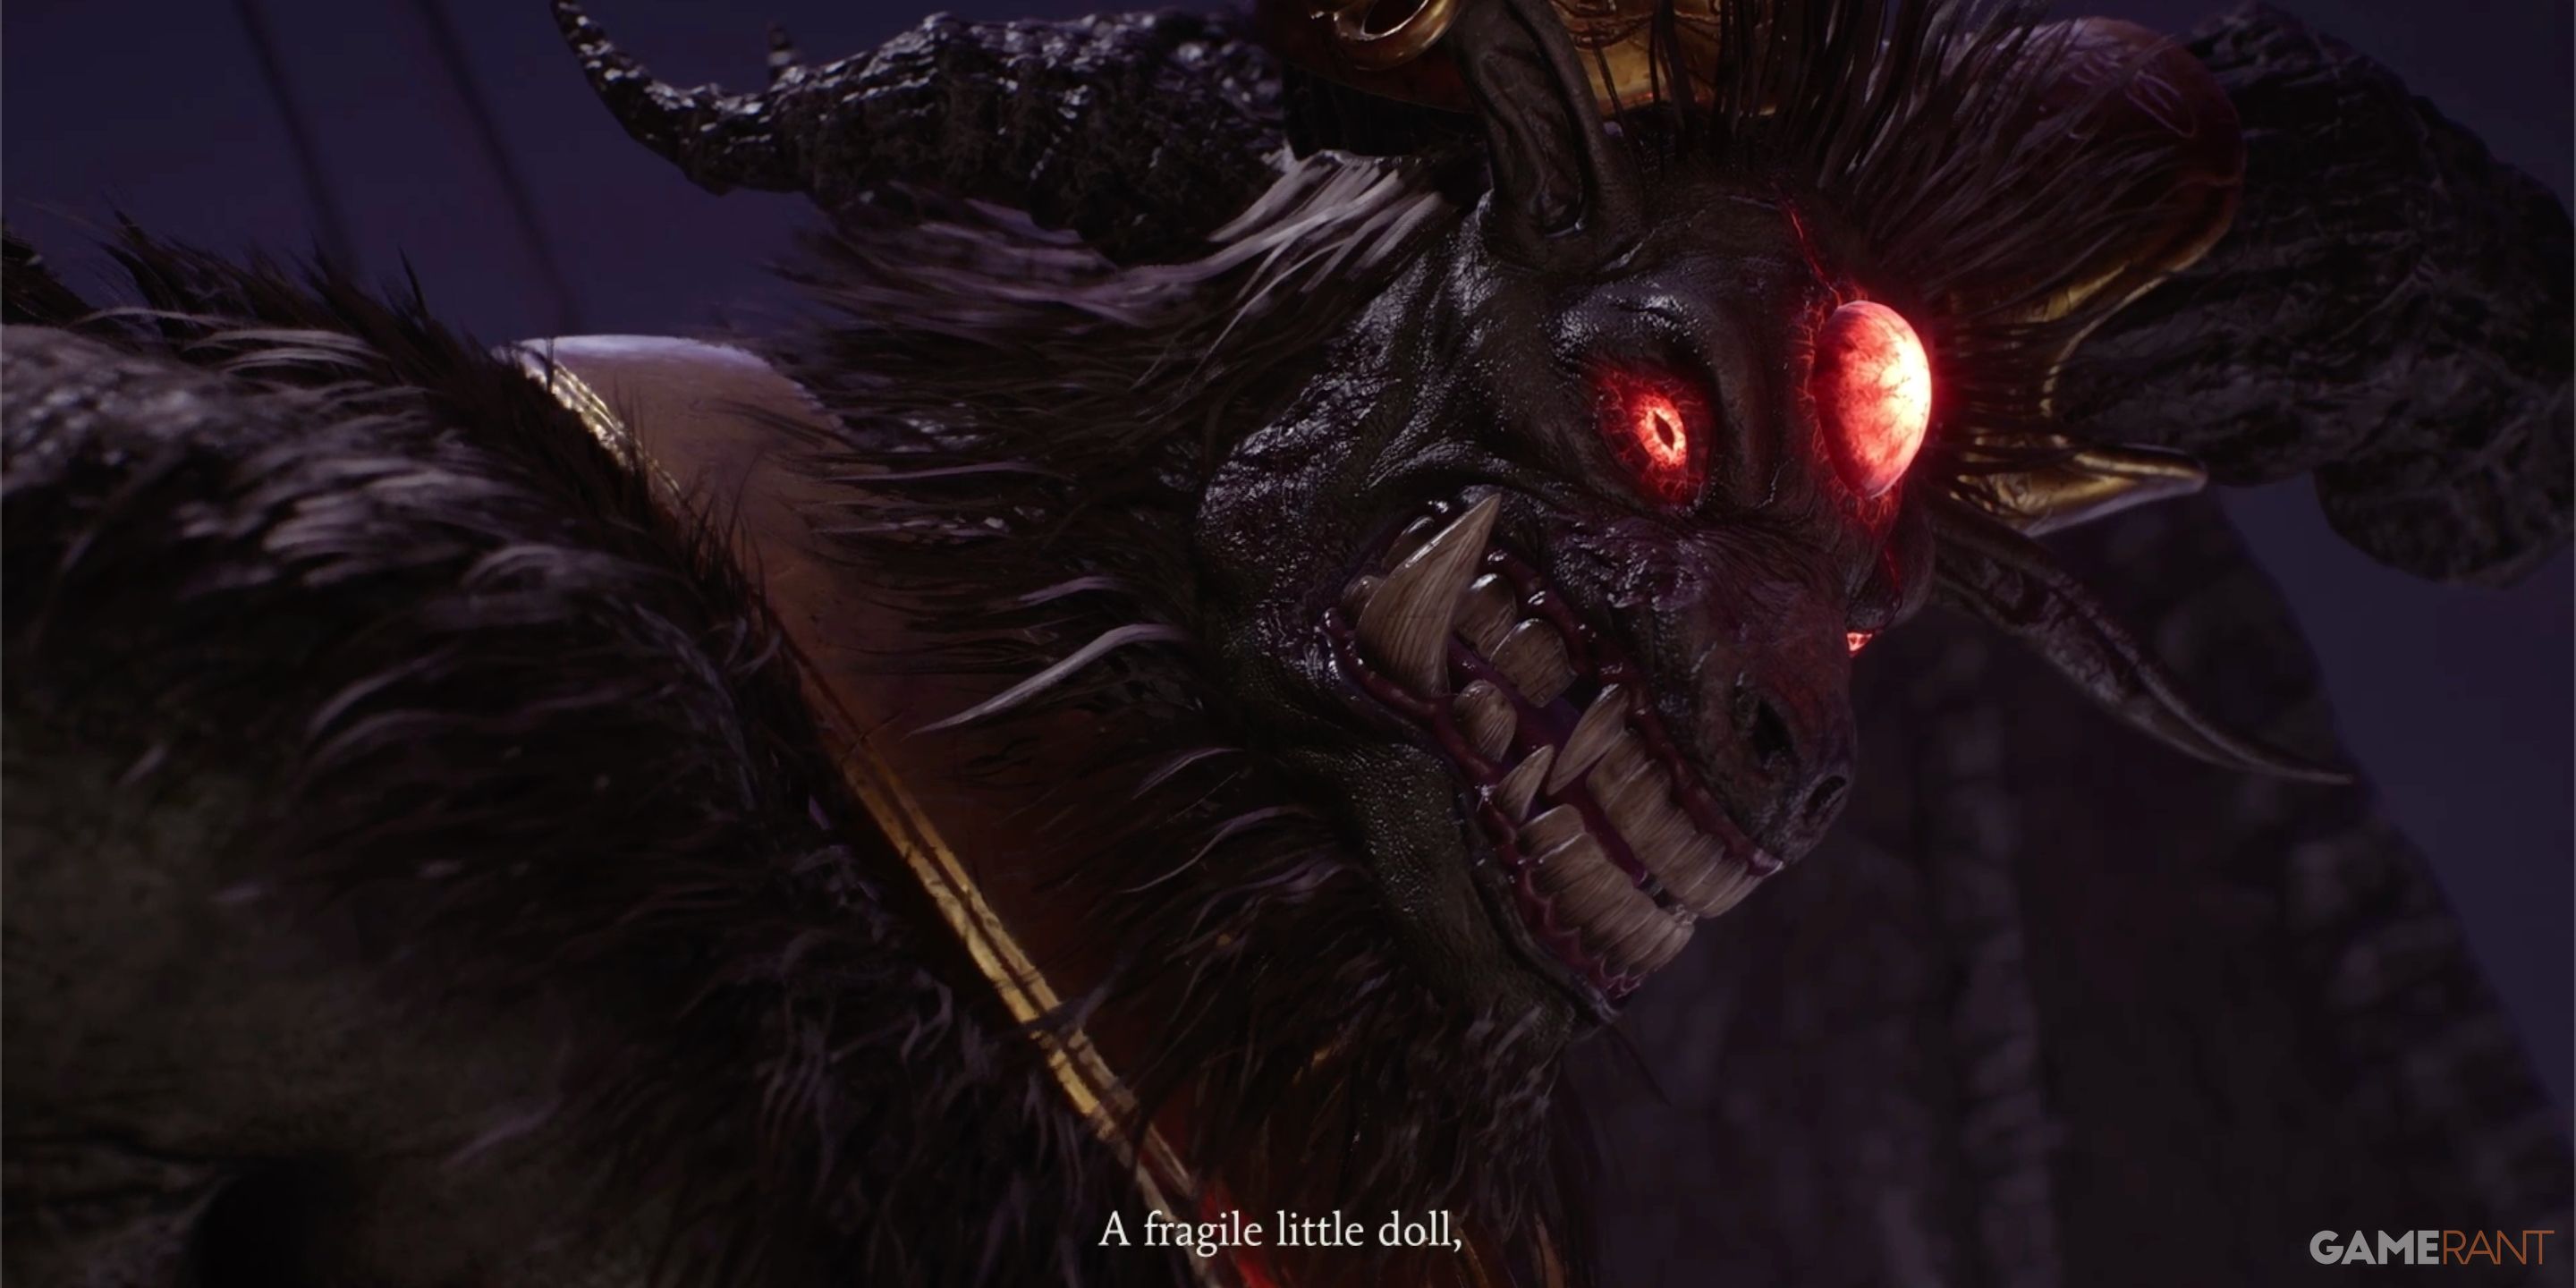
Marbus Boss Fight:
Starting from the third safe spot, ascend the stairway. Along your journey up, you’ll encounter numerous small enemies barricading your path. Some of these adversaries will position themselves at the top of each landing, hurling objects down towards you. Try your best to avoid these projectiles, as they have the power to knock you back to the base.
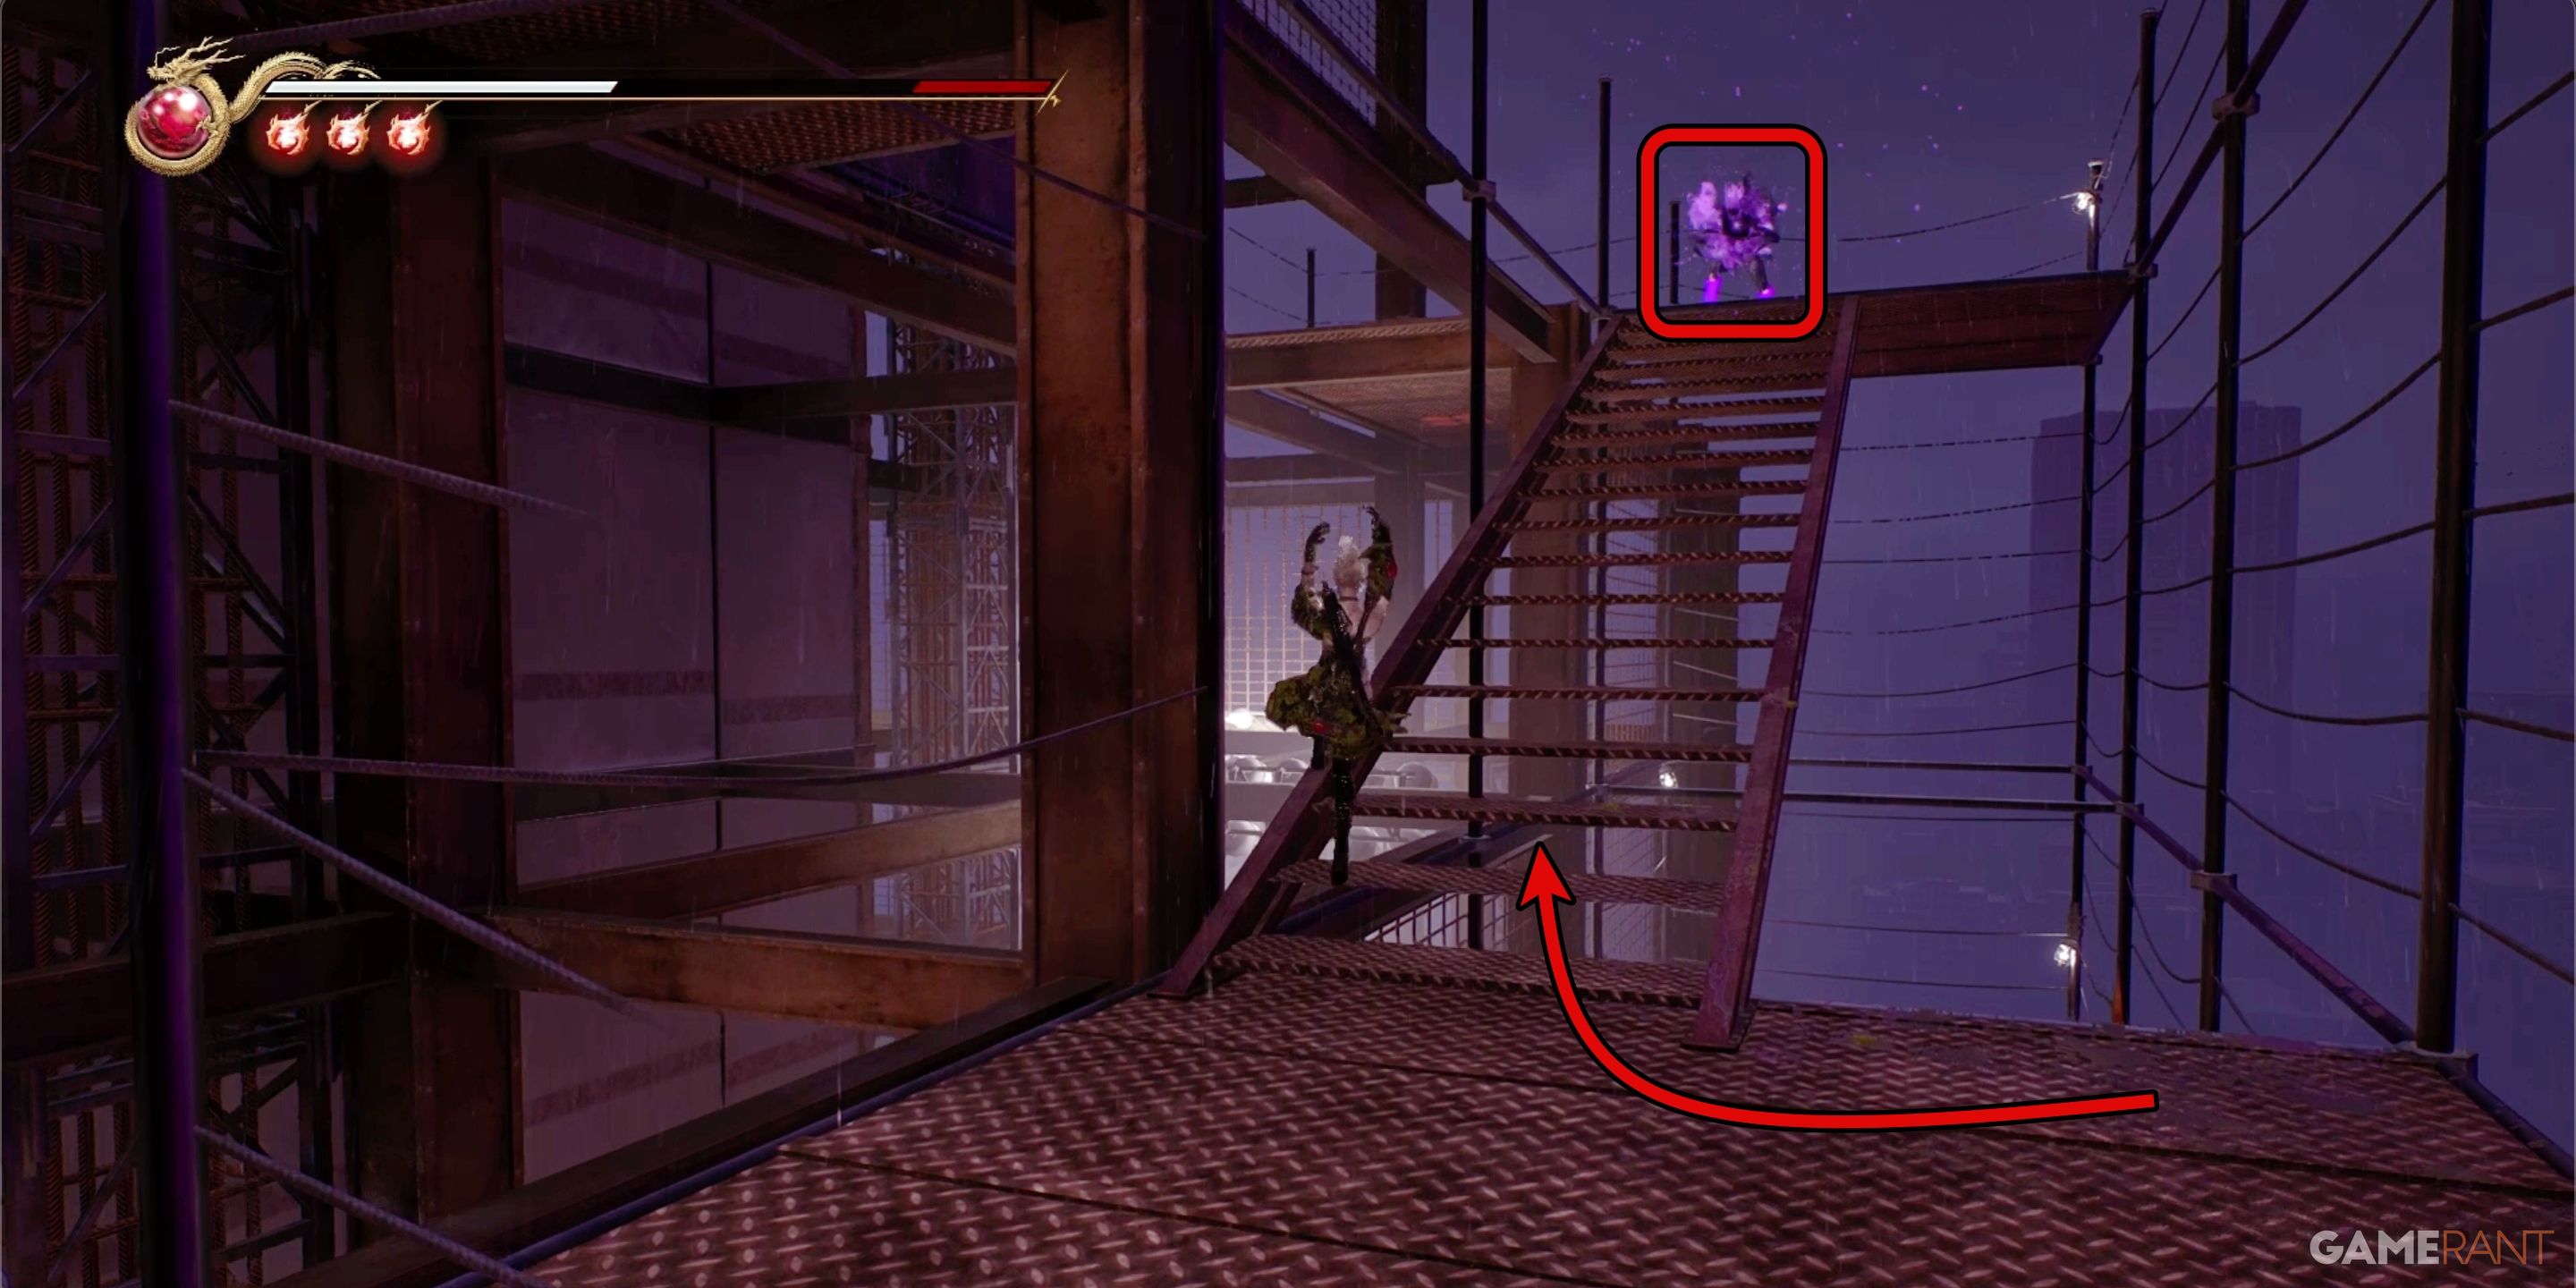
At the peak of the staircase lies Marbus, the colossal aerial demon introduced in the initial cutscene of this chapter. The battle isn’t particularly tough at lower settings, but it becomes quite challenging for players tackling the harder difficulty modes.
During the battle, Marbus summons numerous little imps that might cause a headache. Throughout the fight, Marbus primarily stays airborne, executing rapid assaults. If you’re too preoccupied with the small imps, Marbus has the potential to annihilate you from above in a flash. Conversely, if your attention is on Marbus, the smaller imps could become a hassle.
To ensure success, it’s advisable to eliminate the smaller demons immediately when they appear, all while staying vigilant for Marbus. Be sure to evade any aerial assaults. After vanquishing the smaller demons, concentrate solely on Marbus until he summons more demons again. Repeat this process until Marbus is defeated, which will conclude Chapter 8.
Read More
- All Skyblazer Armor Locations in Crimson Desert
- How to Get the Sunset Reed Armor Set and Hollow Visage Sword in Crimson Desert
- All Shadow Armor Locations in Crimson Desert
- Marni Laser Helm Location & Upgrade in Crimson Desert
- All Helfryn Armor Locations in Crimson Desert
- All Golden Greed Armor Locations in Crimson Desert
- All Icewing Armor Locations in Crimson Desert
- Best Bows in Crimson Desert
- How to Beat Stonewalker Antiquum at the Gate of Truth in Crimson Desert
- Legendary White Lion Necklace Location in Crimson Desert
2025-05-19 07:14