Players who delighted in wielding hefty weapons during their Elden Ring experience are likely to find Raider an ideal pick in Elden Ring Nightreign. He equips a heavy weapon and boasts potent skill maneuvers. Known as the ultimate warrior, this preference is also echoed throughout Raider’s personal story in the Remembrance questline.
Just like every Nightfarer, Raider has his own unique story that delves into his history, revealing aspects of his personality and addressing long-standing enigmas. Completing the Remembrance questline links the present and past of each character, often causing their memories to intersect, resulting in profound insights.
Raider Remembrance Quest Requirements: The Journal And Memory Fragments
For the Raider’s storyline, you may find it less intricate compared to other characters. If you’ve previously finished any Remembrance questlines, you might anticipate unraveling small mysteries or seeking particular items in Roundtable Hold or Limveld. However, unlike those characters, the Raider’s past primarily consists of boss fights, which means his questline has fewer requirements to complete.
Once you finish the training session, the journal becomes accessible automatically. You’ll understand its role during your initial encounter with it. The storylines for each character are composed of several chapters, and some of these tales can be replayed by the player.
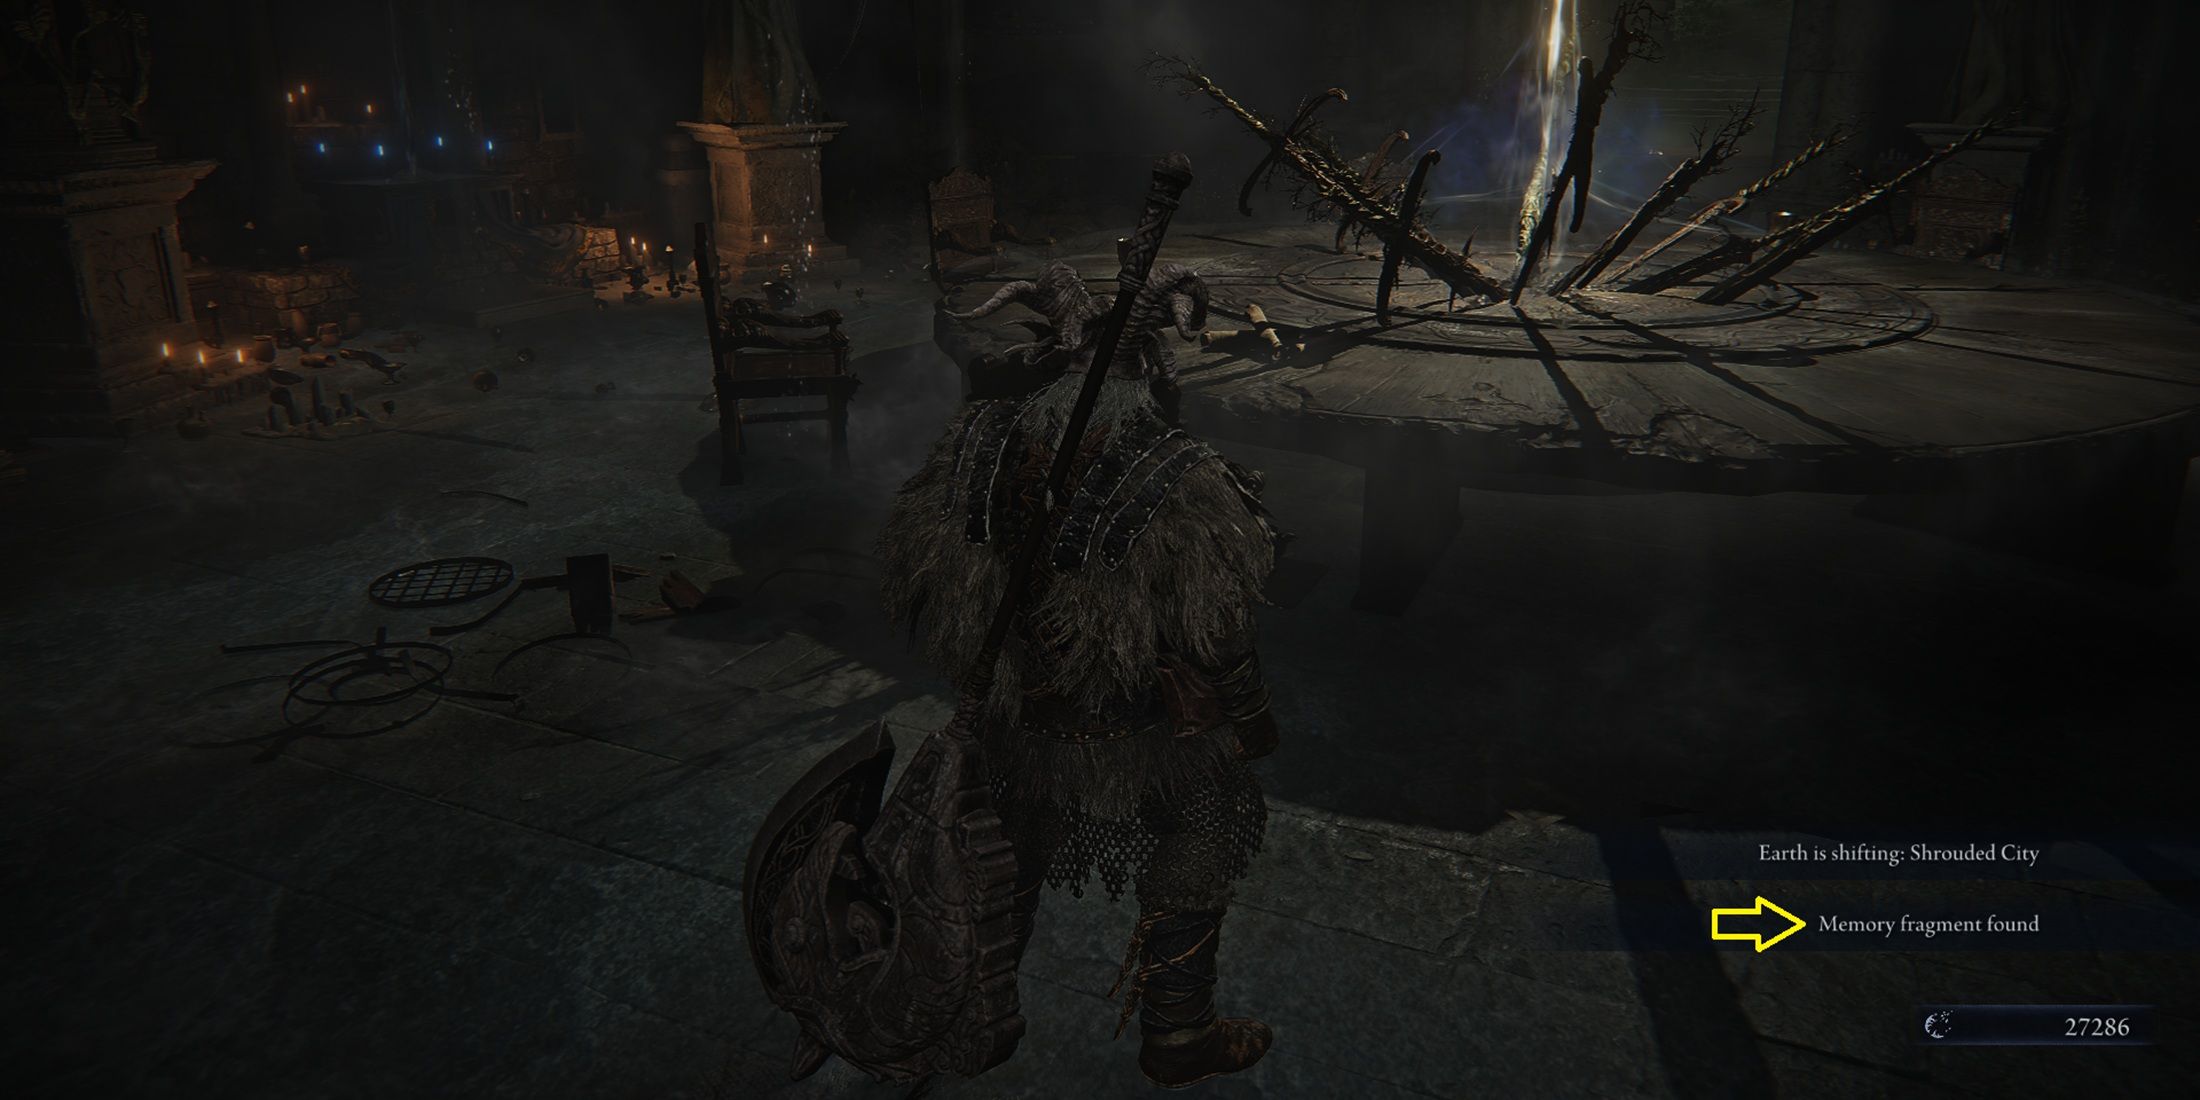
To open these chapters, you need to gather memory shards. You can collect them effortlessly by engaging in the game and overcoming the night bosses and Nightlords. Typically, vanquishing a Nightlord ensures a drop of memory shards, but it doesn’t show up as an item you’ve acquired. Instead, the player will only discover if they’ve obtained a memory shard during their expedition upon returning to the Roundtable Hold.
Previously during your journey, it isn’t essential that you finish every day of an expedition flawlessly; even if you fail, you might still obtain a memory fragment as a reward. Yet, as you progress into the Raider’s chapters, overcoming a Nightlord will become crucial.
Raider Remembrance Quest Guide
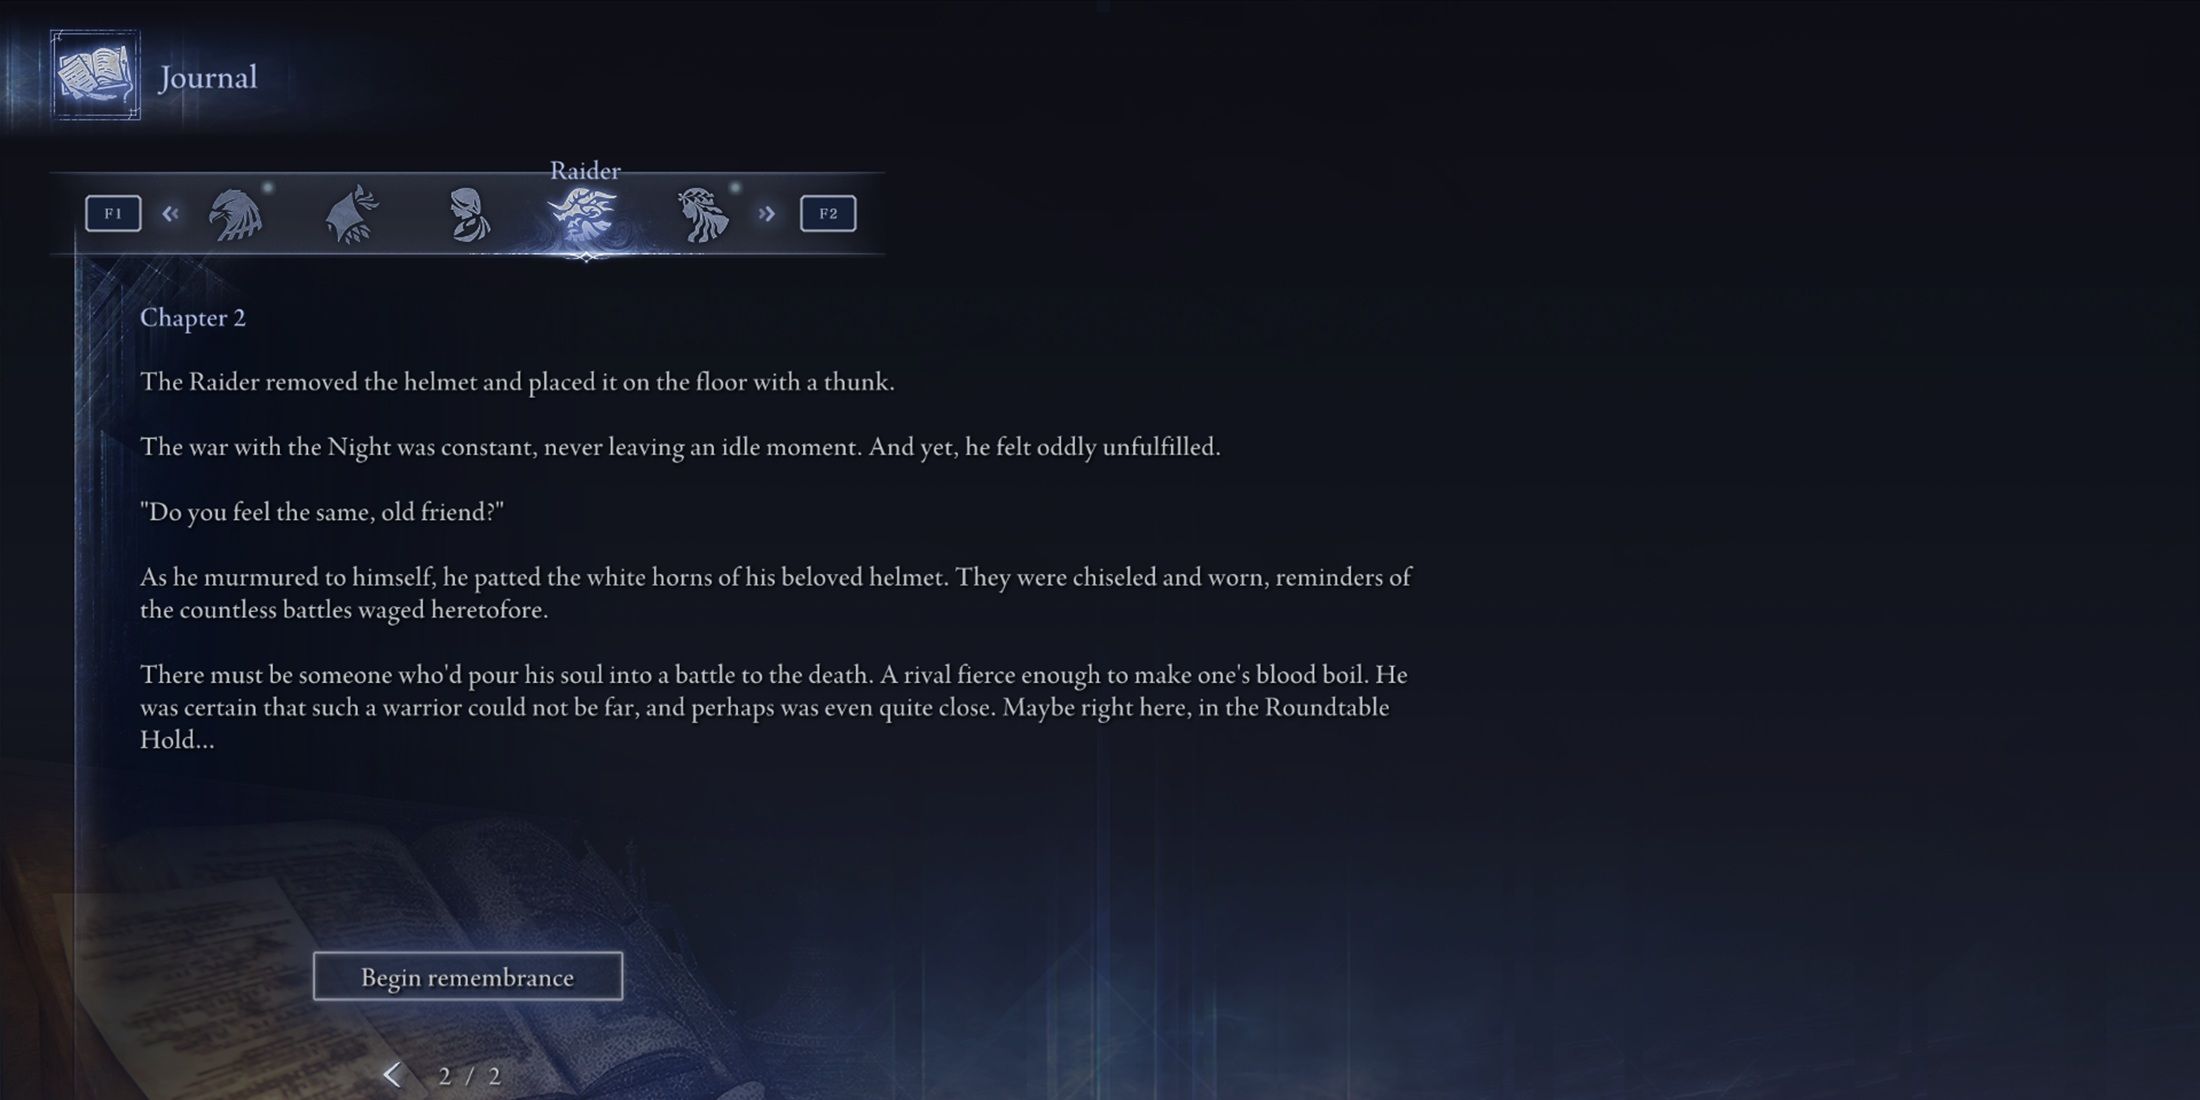
Chapter 2
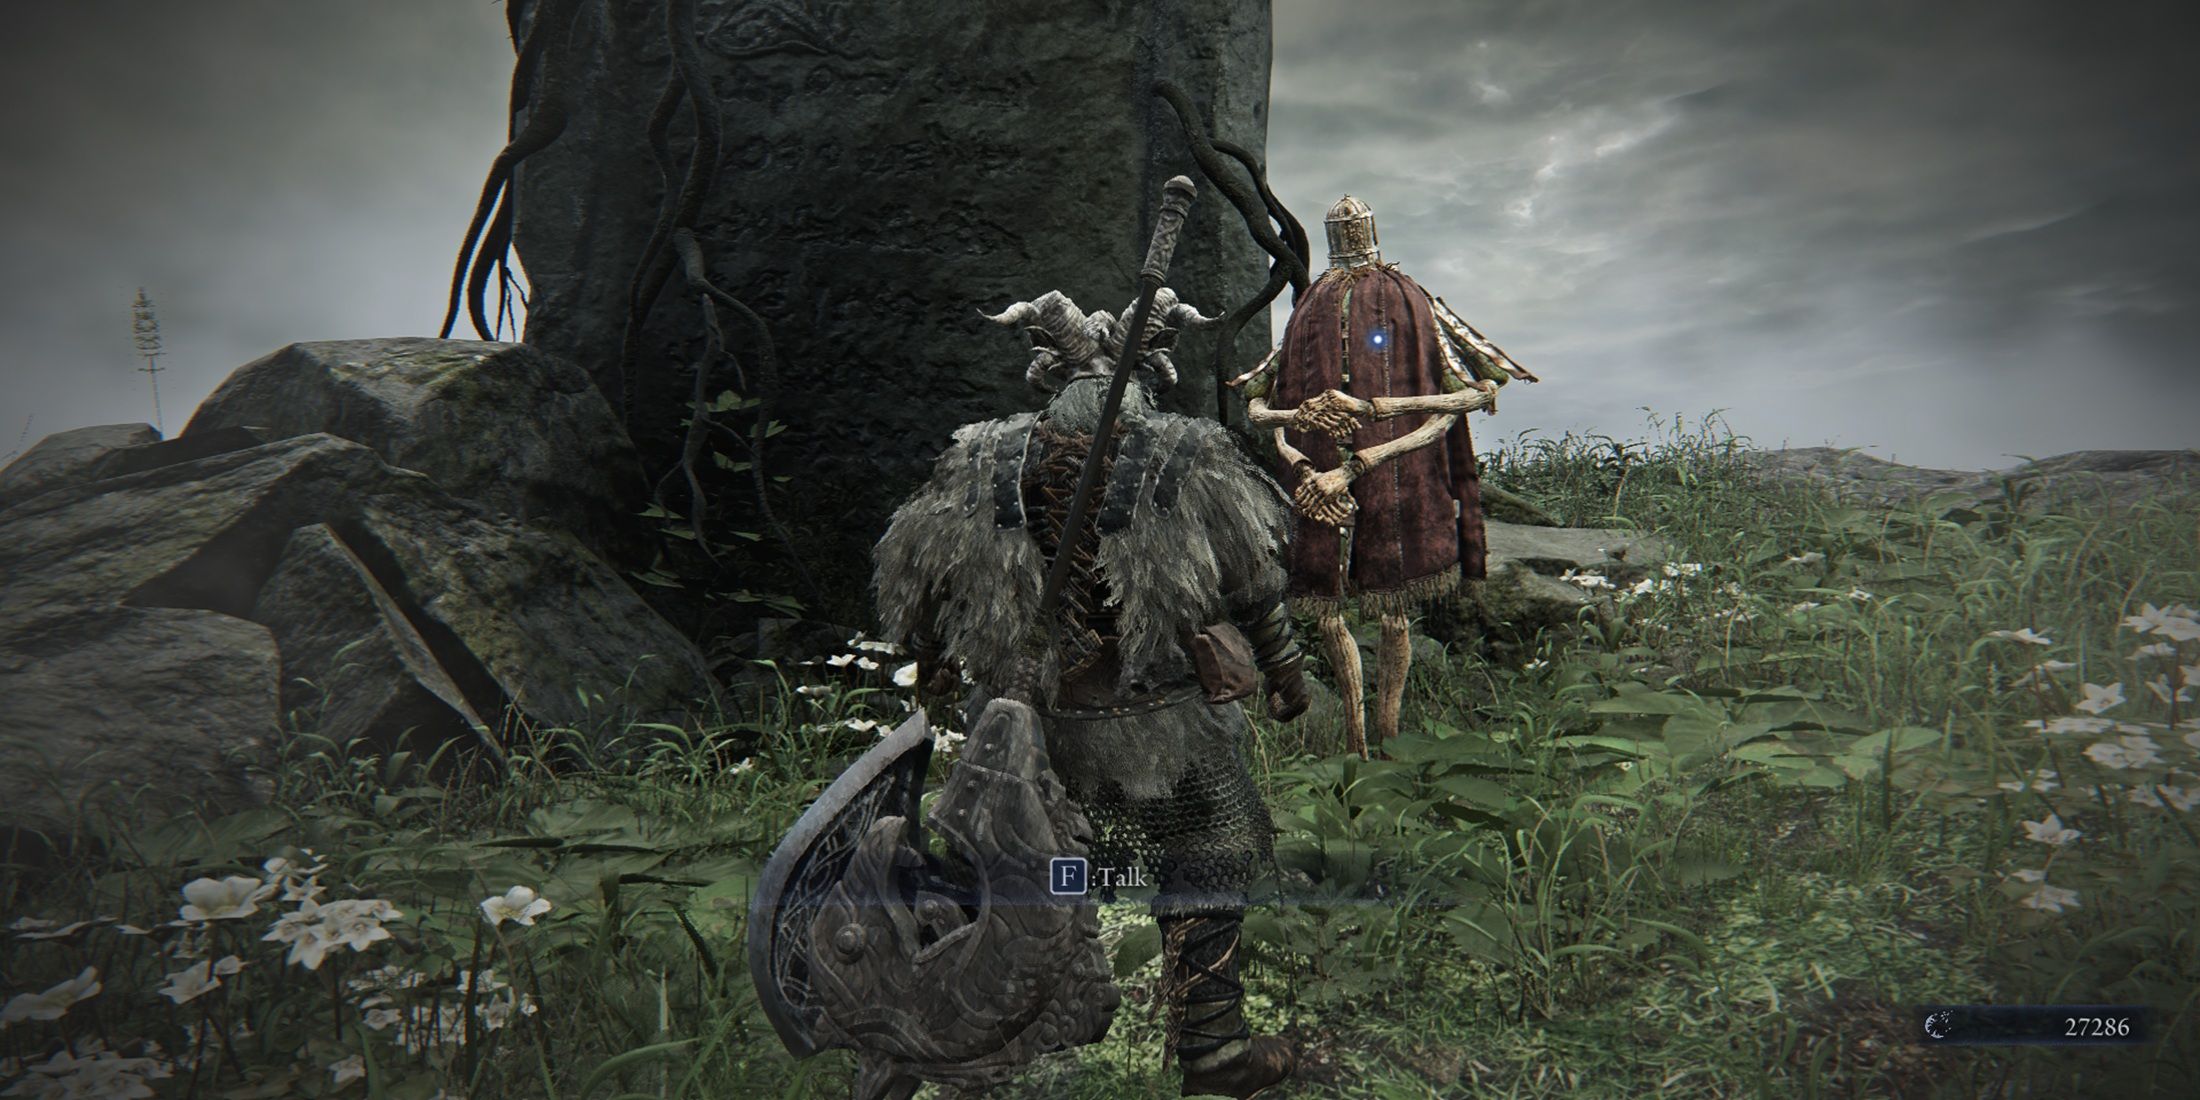
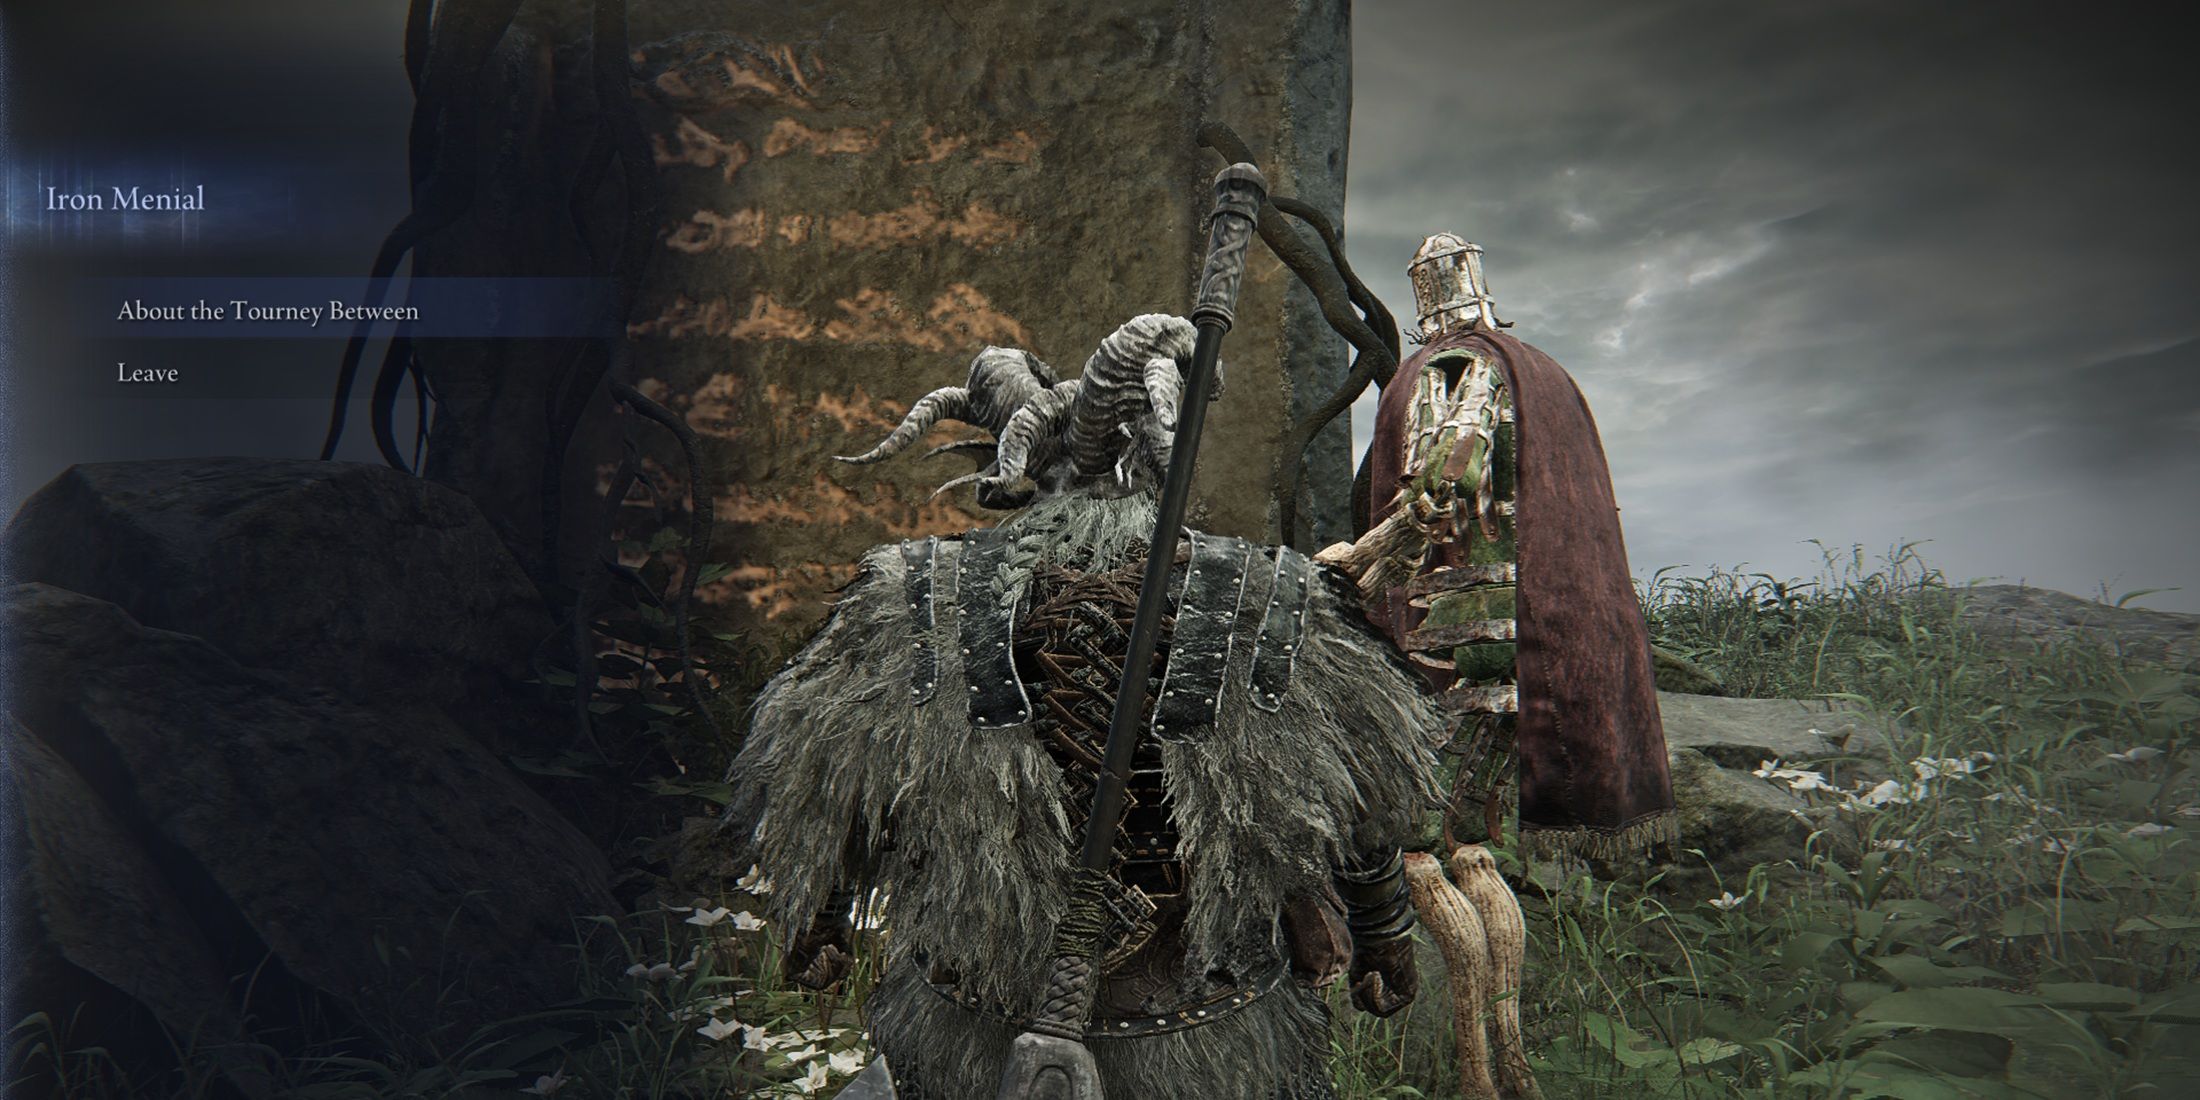
Following your acquisition of the initial memory shard with Raider, Chapter 2 becomes accessible in his journal, containing a recollection. Therefore, activate the memory and engage in conversation with Iron Menial. He will offer some insights about the monument, followed by instructing you to interact with it. This interaction initiates the start of the ‘Tourney Among’ competition, during which Raider must vanquish numerous opponents to emerge victorious.
After chatting with Iron Manual a couple of more times, you’ll be prepared to face the initial adversary. Just prior to engaging the battle, you have the opportunity to switch your active artifacts at the Relic Ritual site.
In the initial bout, Onestrike Gladiator serves as the primary opponent, presenting a generally straightforward battle. To prevail, simply synchronize your offensive maneuvers with his movements. His attacks are relatively simple to dodge. However, be wary of a challenging sequence: when he initiates his weapon’s skill, releasing steam and charging towards you with two consecutive strikes. The initial attack can be avoided effortlessly, but if you don’t respond swiftly by rolling after that, the second blow could connect.
It’s great to know that when Raider uses his non-ultimate skill, it knocks enemies unconscious upon impact. This provides players with an opportunity to deliver two additional weapon strikes while the enemy is down.
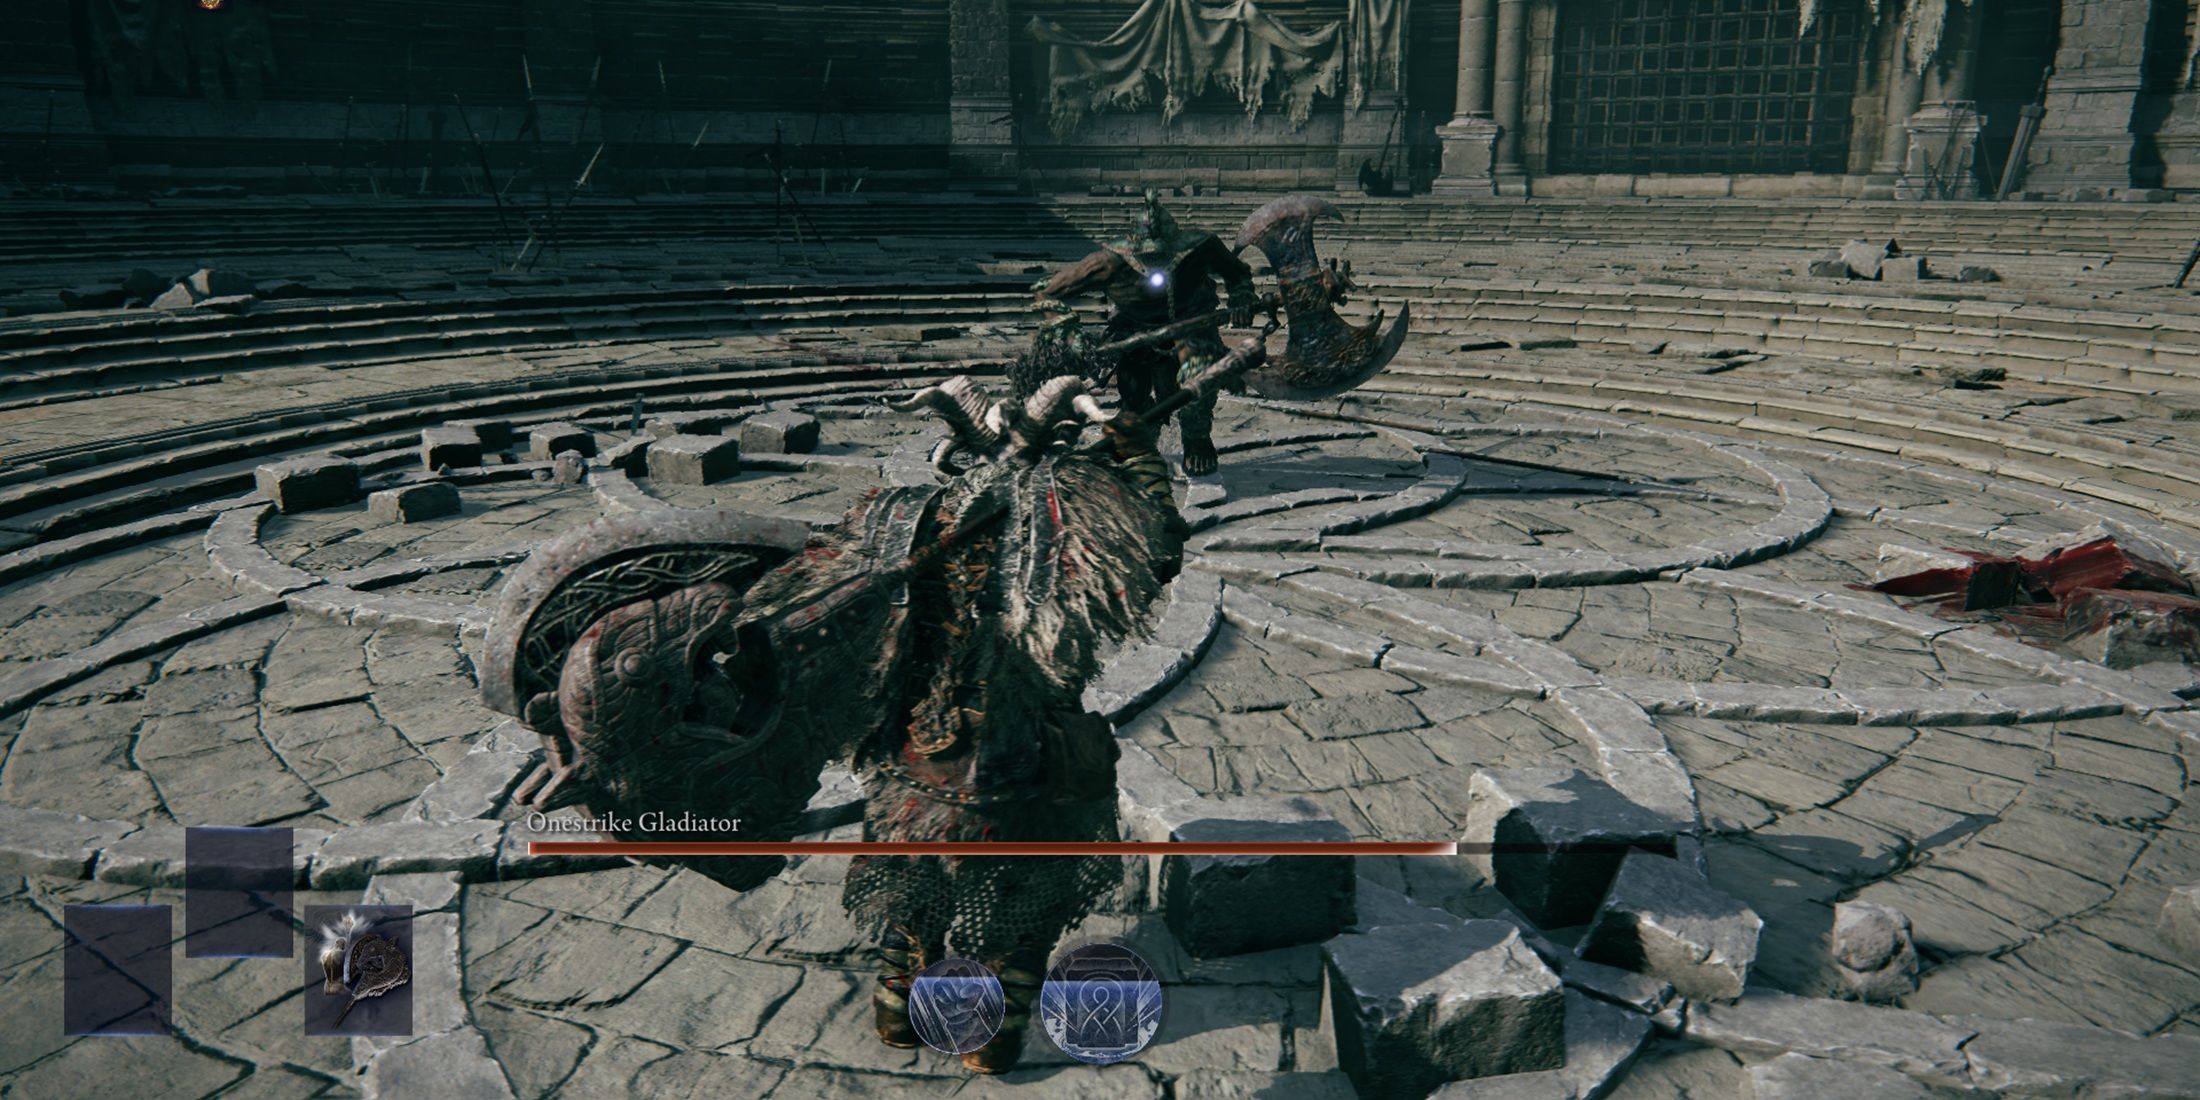
Remember, Onestrike Gladiator is equipped with weapons he can wield. So, be cautious and maintain a safe distance from him once he begins to use his chain as a weapon.
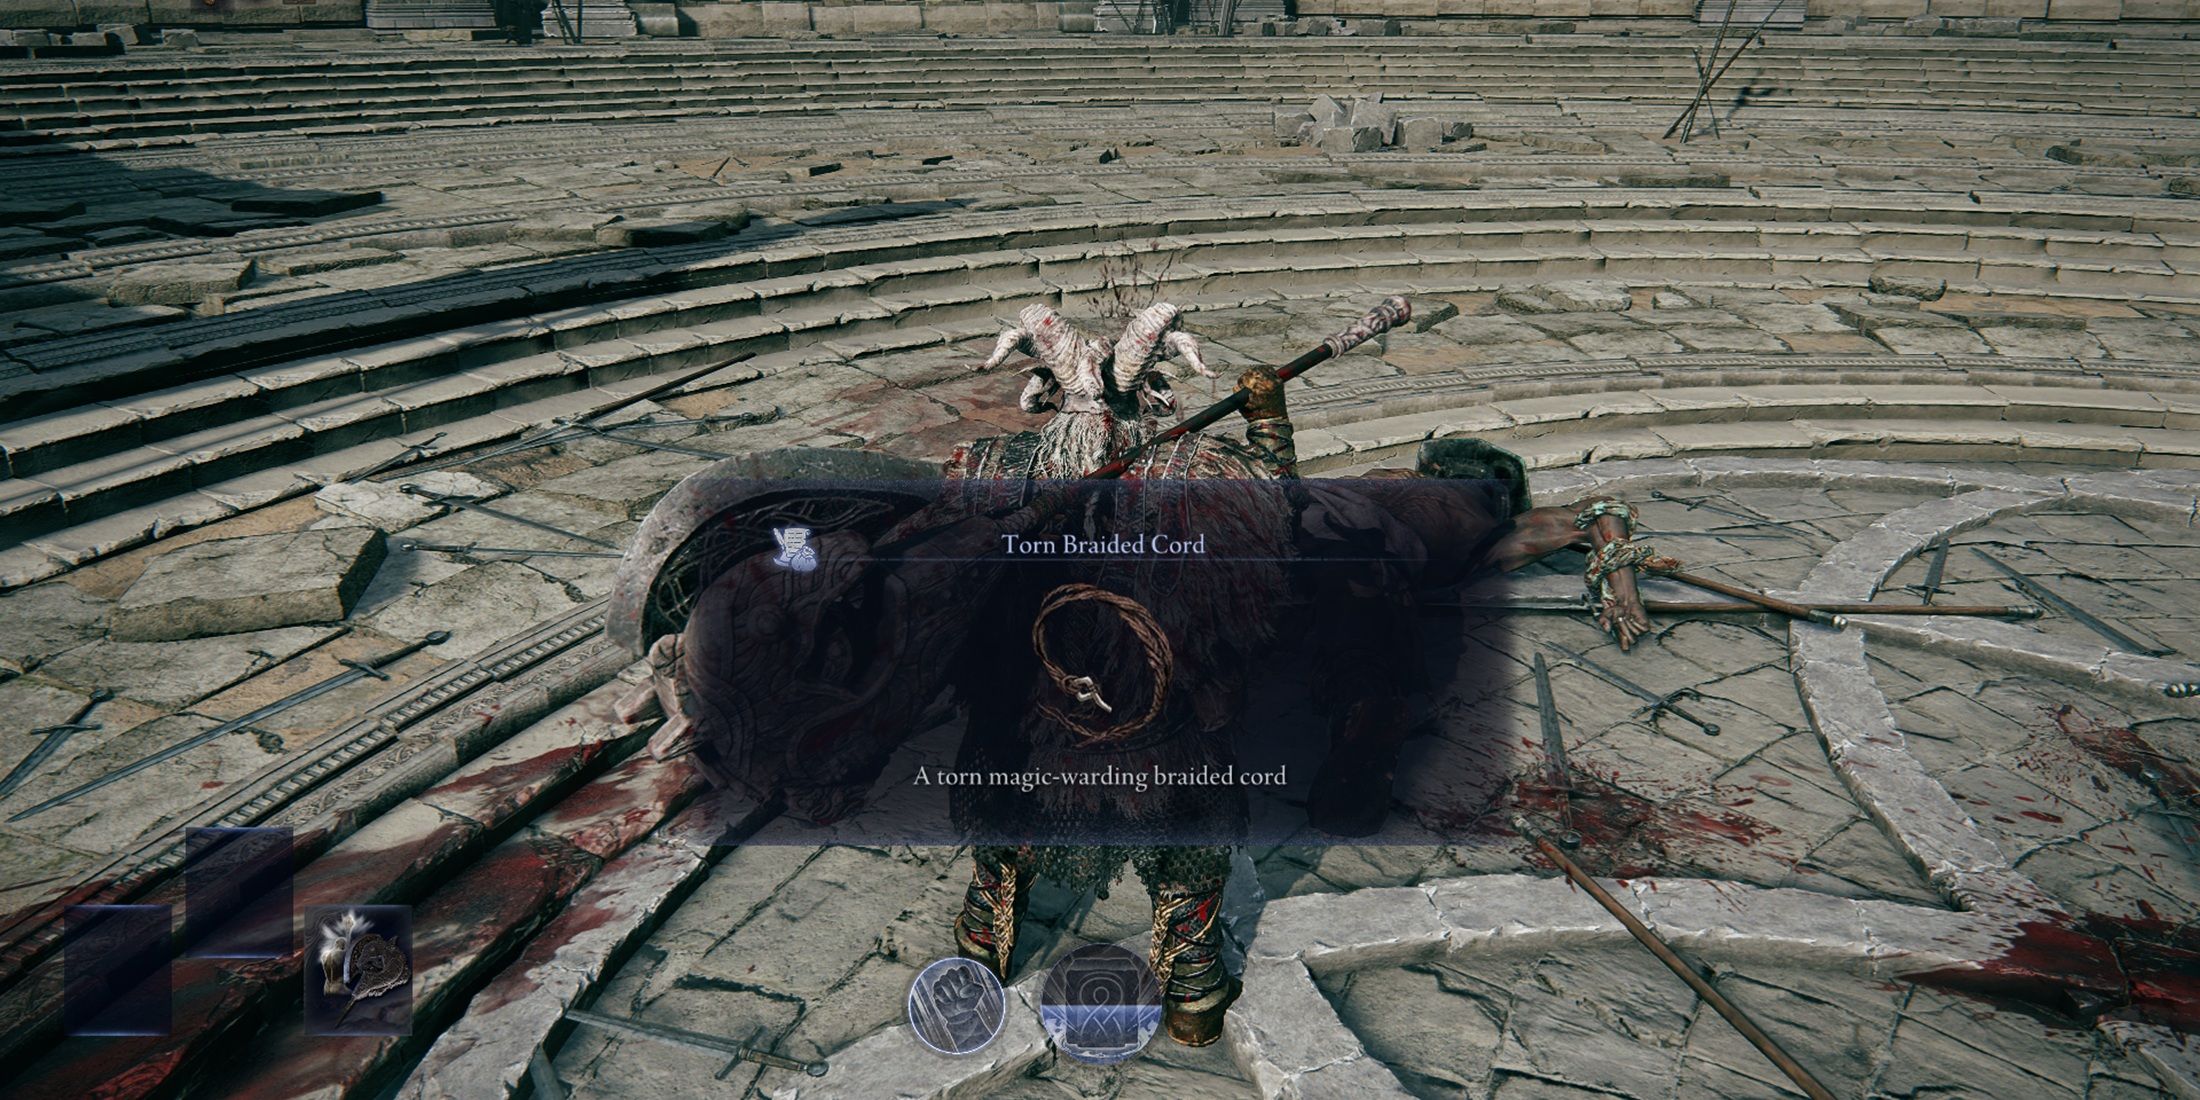
Regardless of whether you lose or win the fight, you’ll find yourself back by the monument, providing an opportunity to reinitiate the battle. If you emerge victorious, chat with Iron Menial and then touch the monument for a new adversary. However, it won’t engage in another fight. Afterwards, have one final conversation with Iron Menial before wrapping up this remembrance.
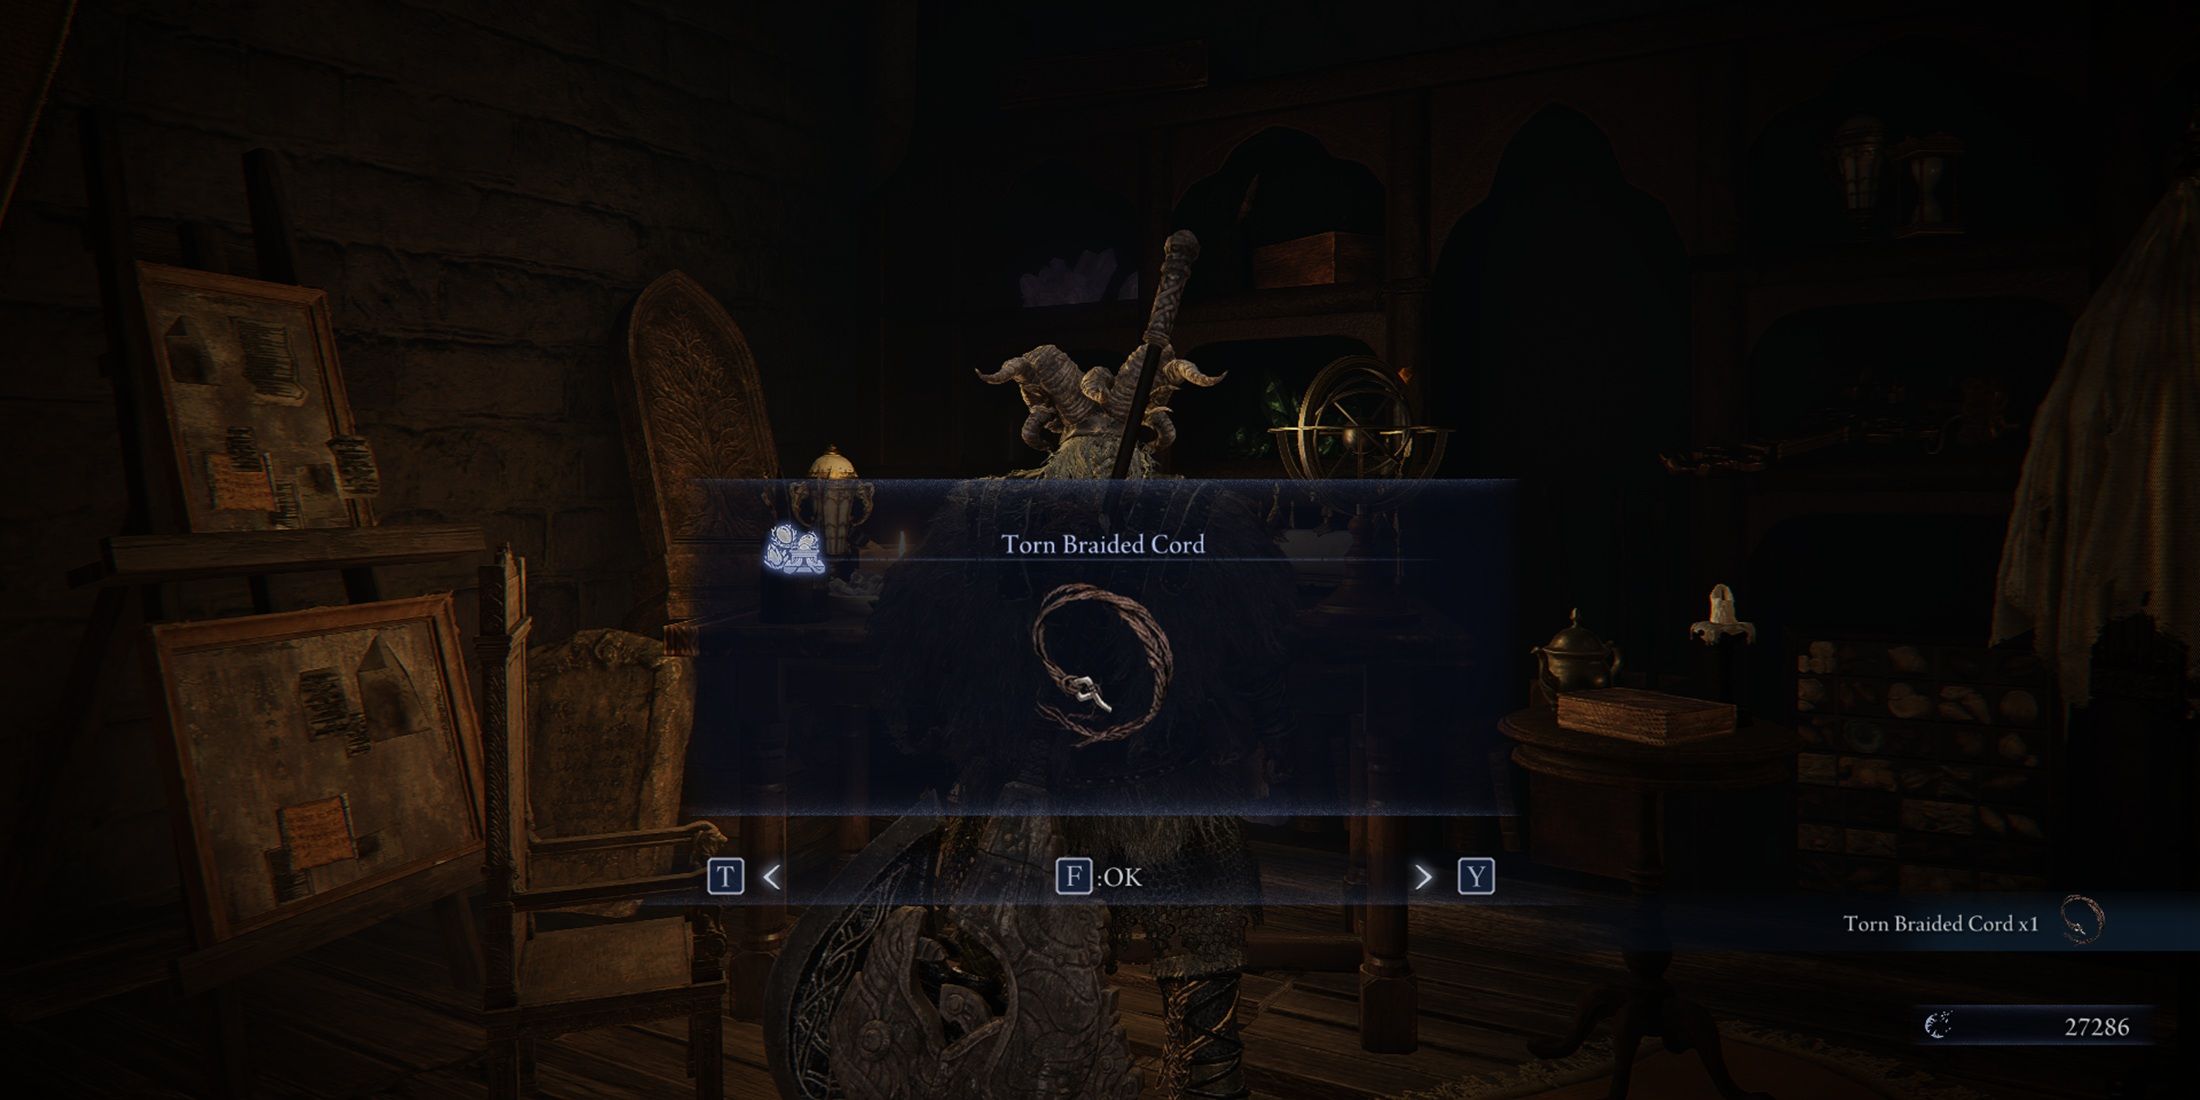
Upon my time-traveling journey back to the here and now, I’ll be handsomely rewarded with the enigmatic Torn Braided Cord relic. This trinket bears a striking resemblance to the prize I was bestowed upon after vanquishing the formidable Onestrike Gladiator in our epic duel.
Chapter 4
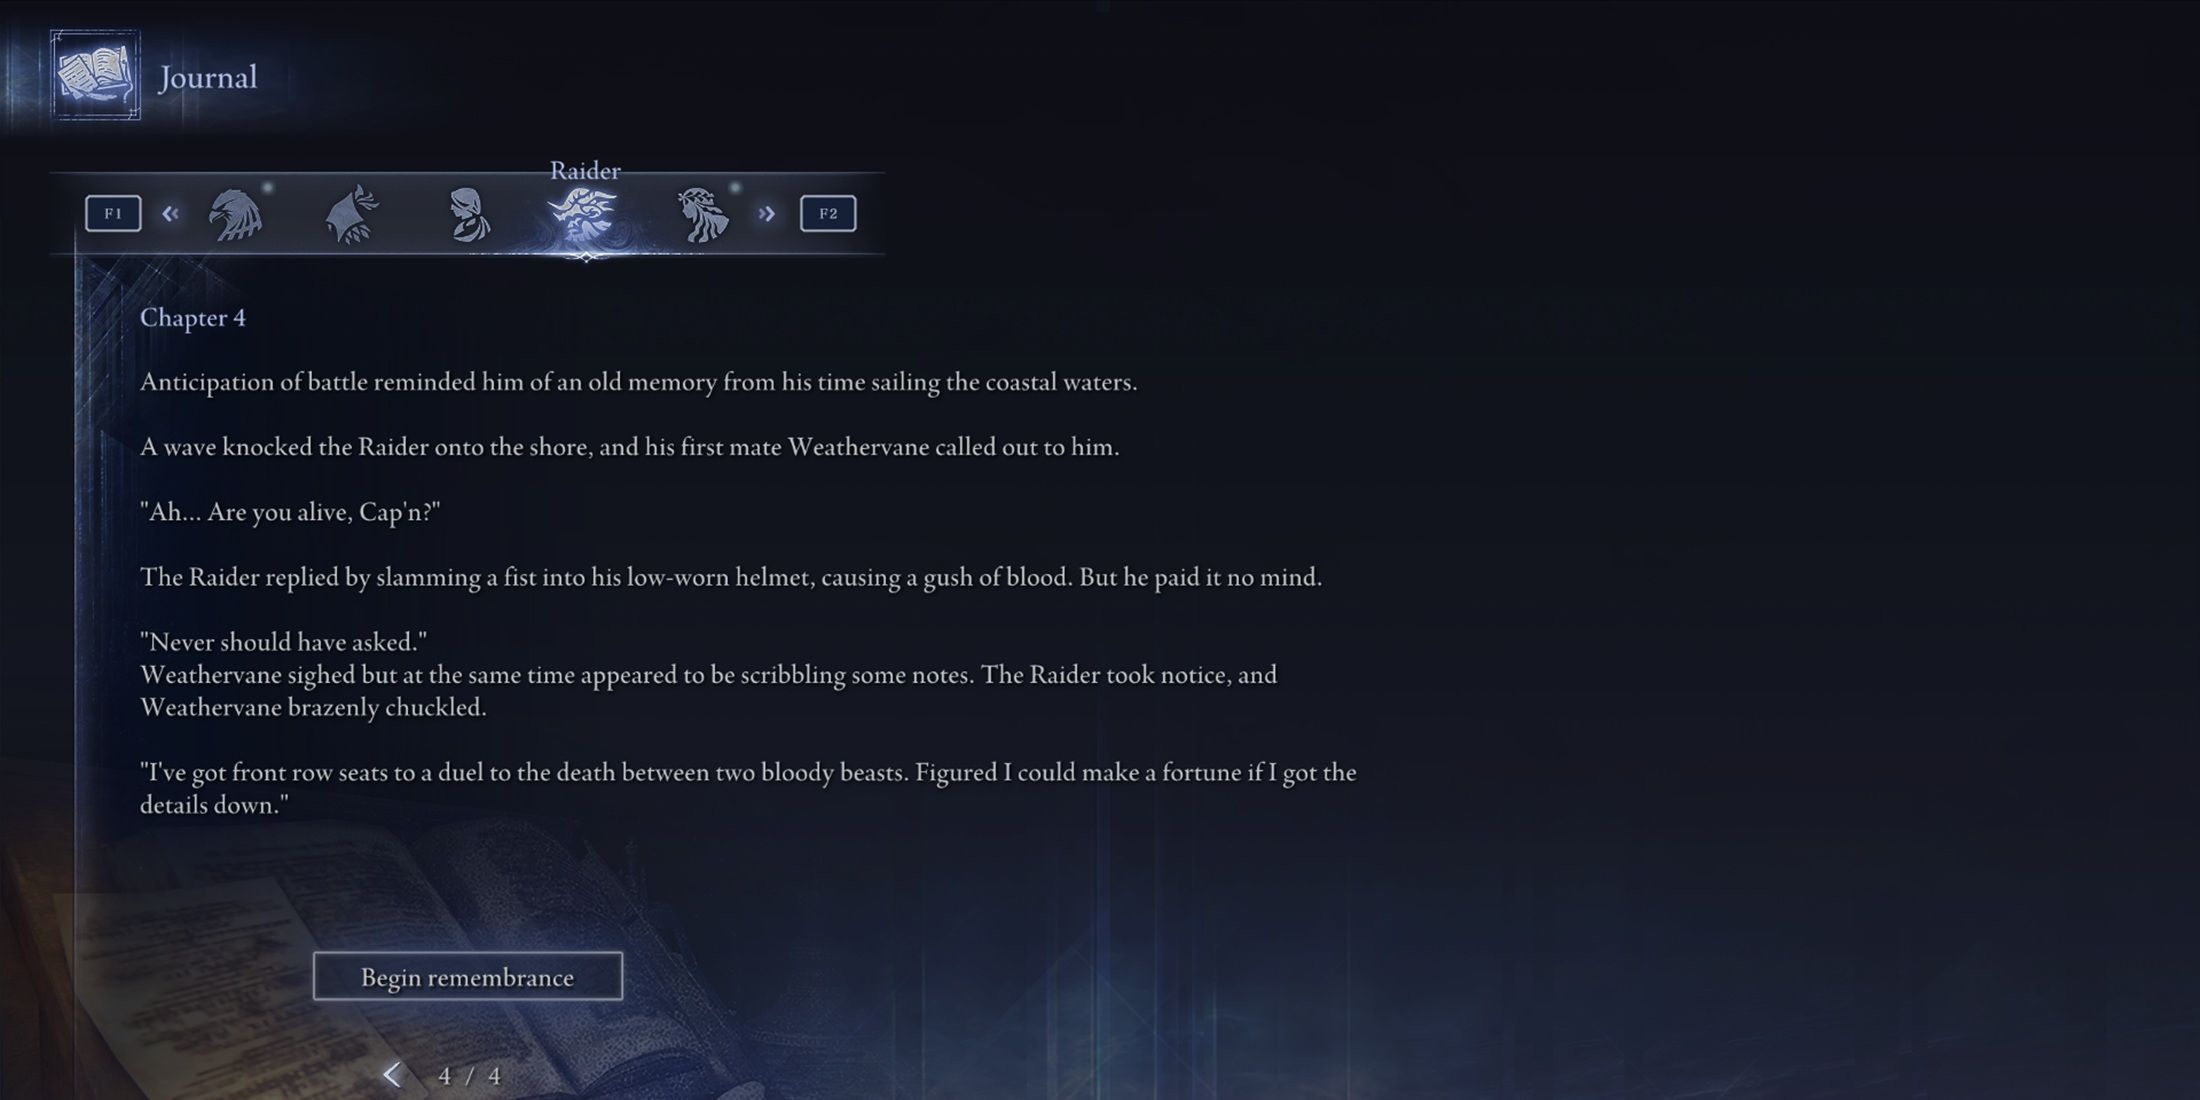
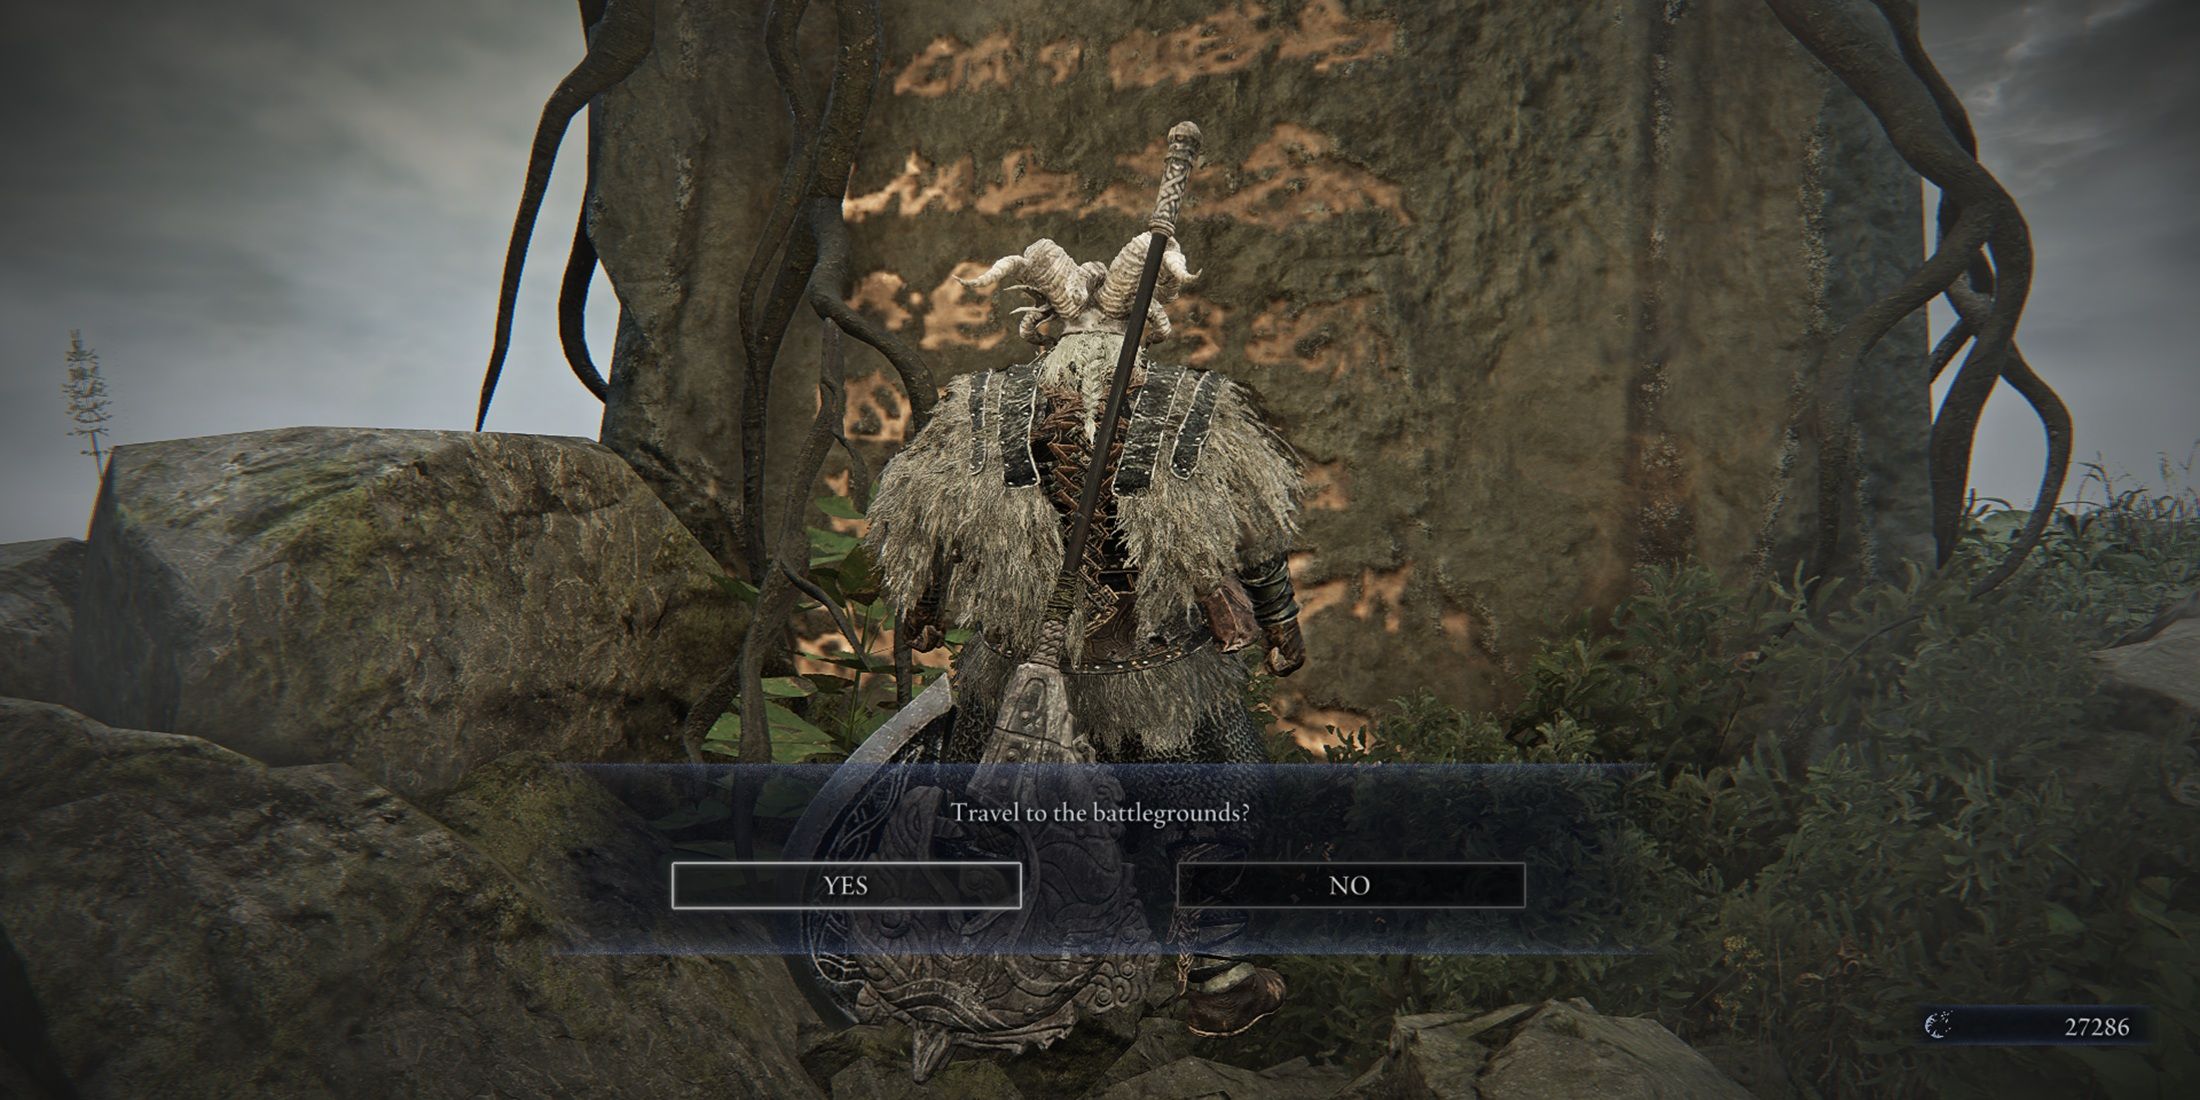
After finishing Chapter 2, access to Chapter 4 will become available immediately. You’ll reappear near the monument, ready for another round. First, speak with Iron Menial, followed by touching the monument to initiate the upcoming battle.
Preparing myself for the formidable encounter against the Blinding Elder Lion – a foe unlike the Onestrike Gladiator in its swiftness and agility. This beast boasts a long-range leap that can significantly deplete your health, while simultaneously making dodging more challenging. In my experience, when tussling with this lion, I’ve found it wiser to execute forward rolls rather than backward ones. The lion’s attacks span a broad range, and even with a reverse roll, you might still take damage. Moreover, during this battle, it proves advantageous to use your abilities more frequently – don’t fret, as you’ll be granted endless opportunities to ultimately conquer the lion!
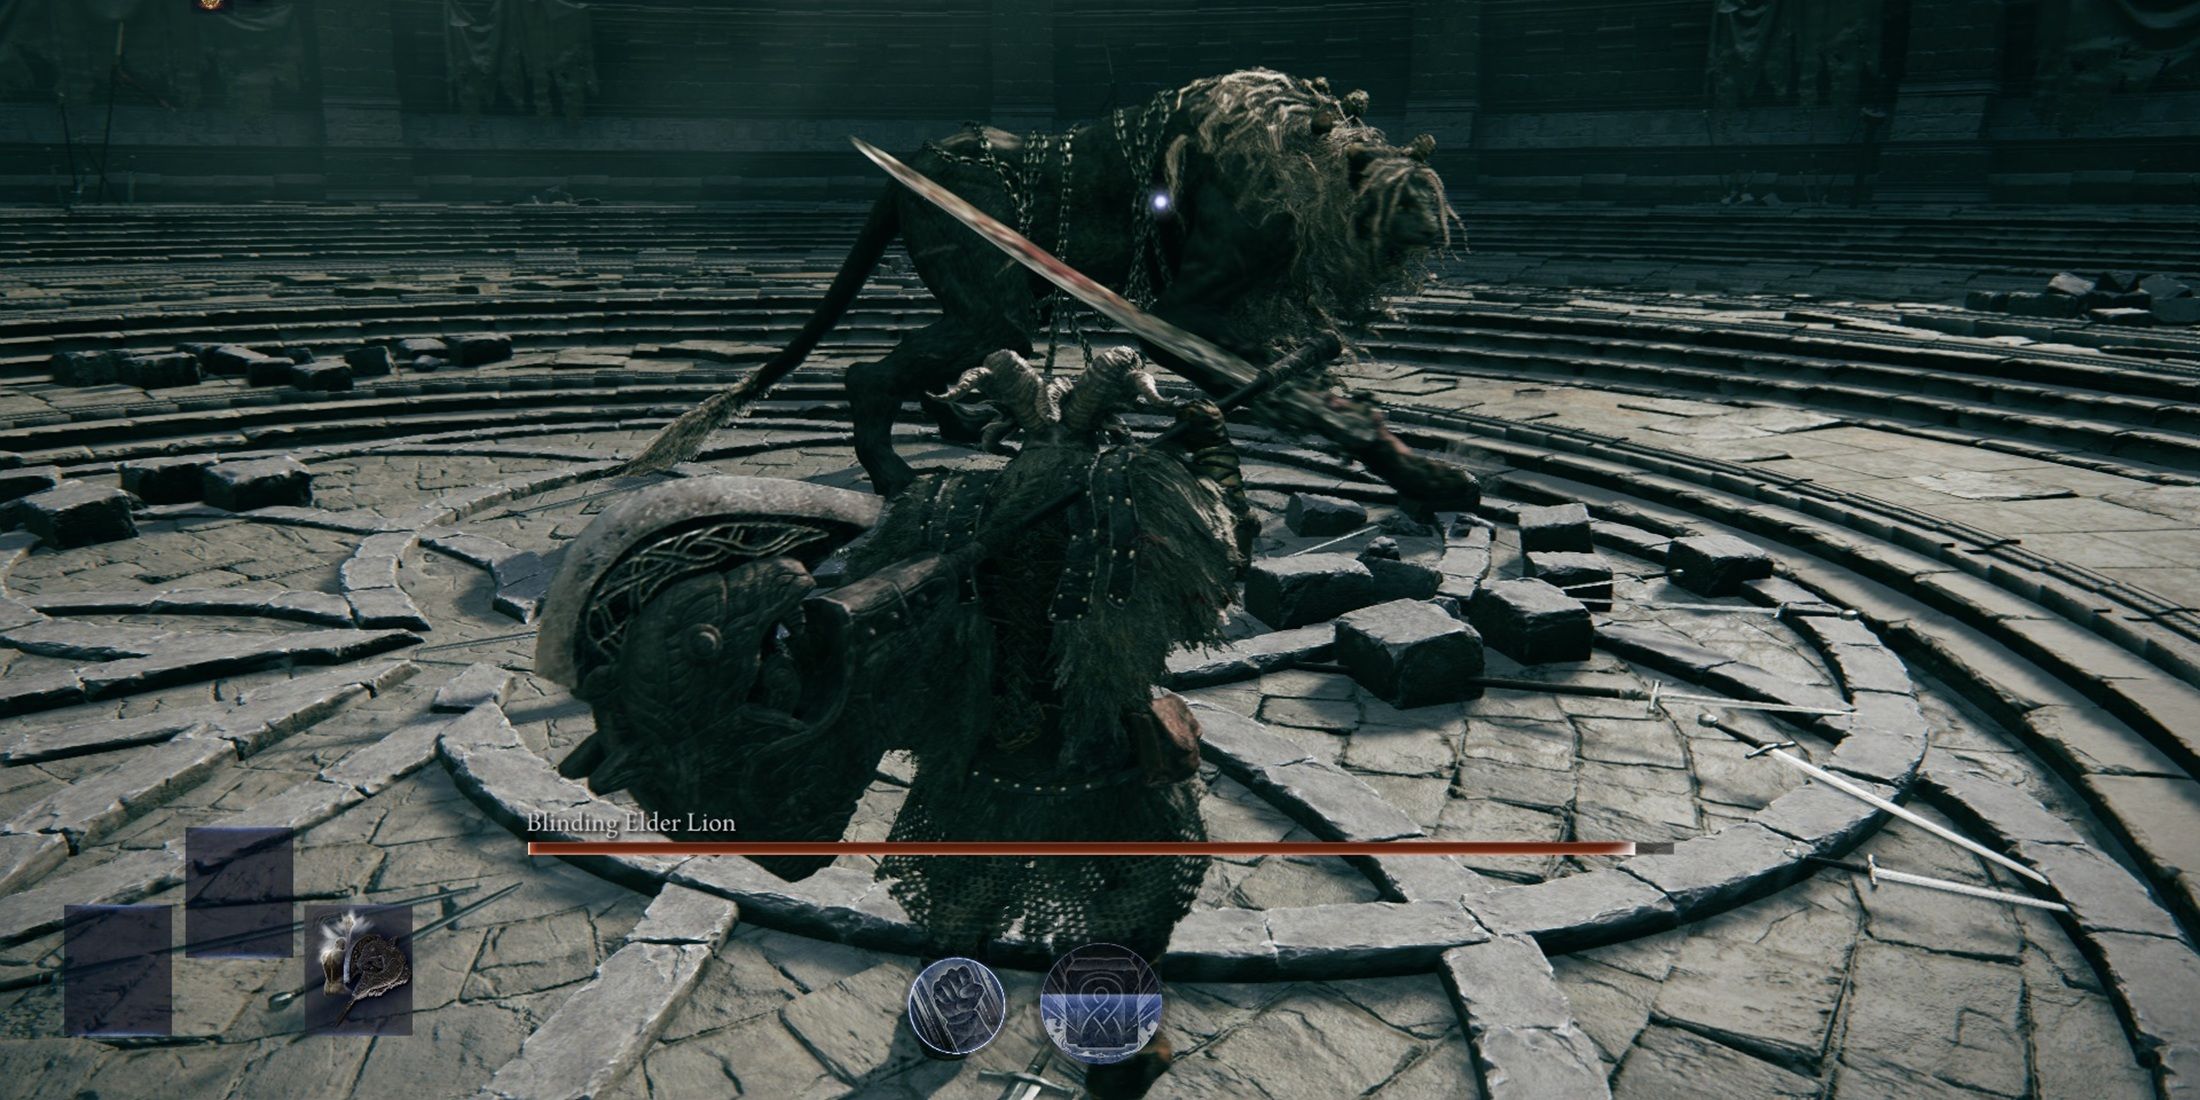
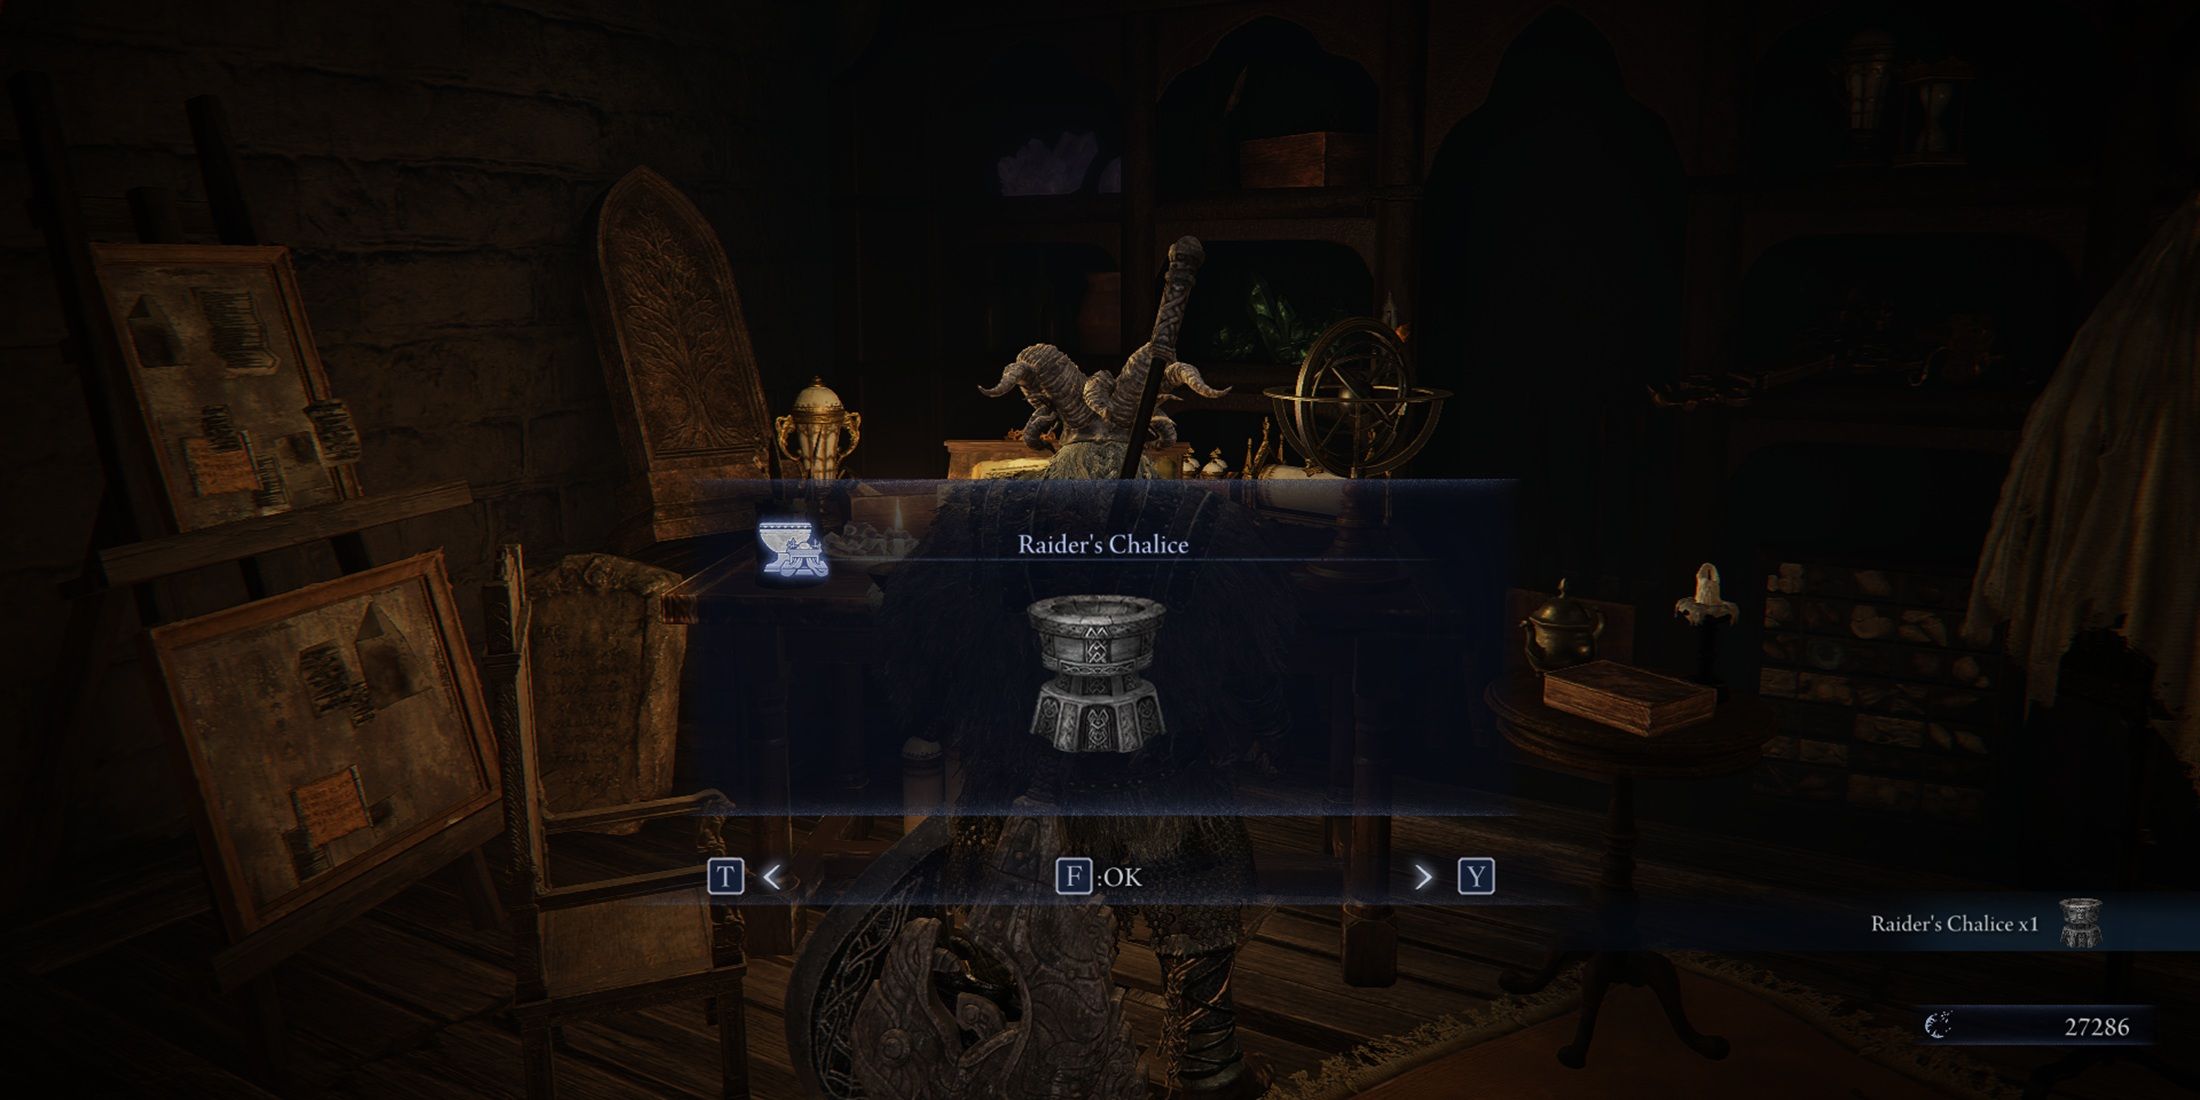
Once you defeat the Elder Lion that blinds, chat with Iron Manual to wrap up this recollection. As soon as you reach there, you’ll obtain the Raider’s Chalice.
Chapter 7
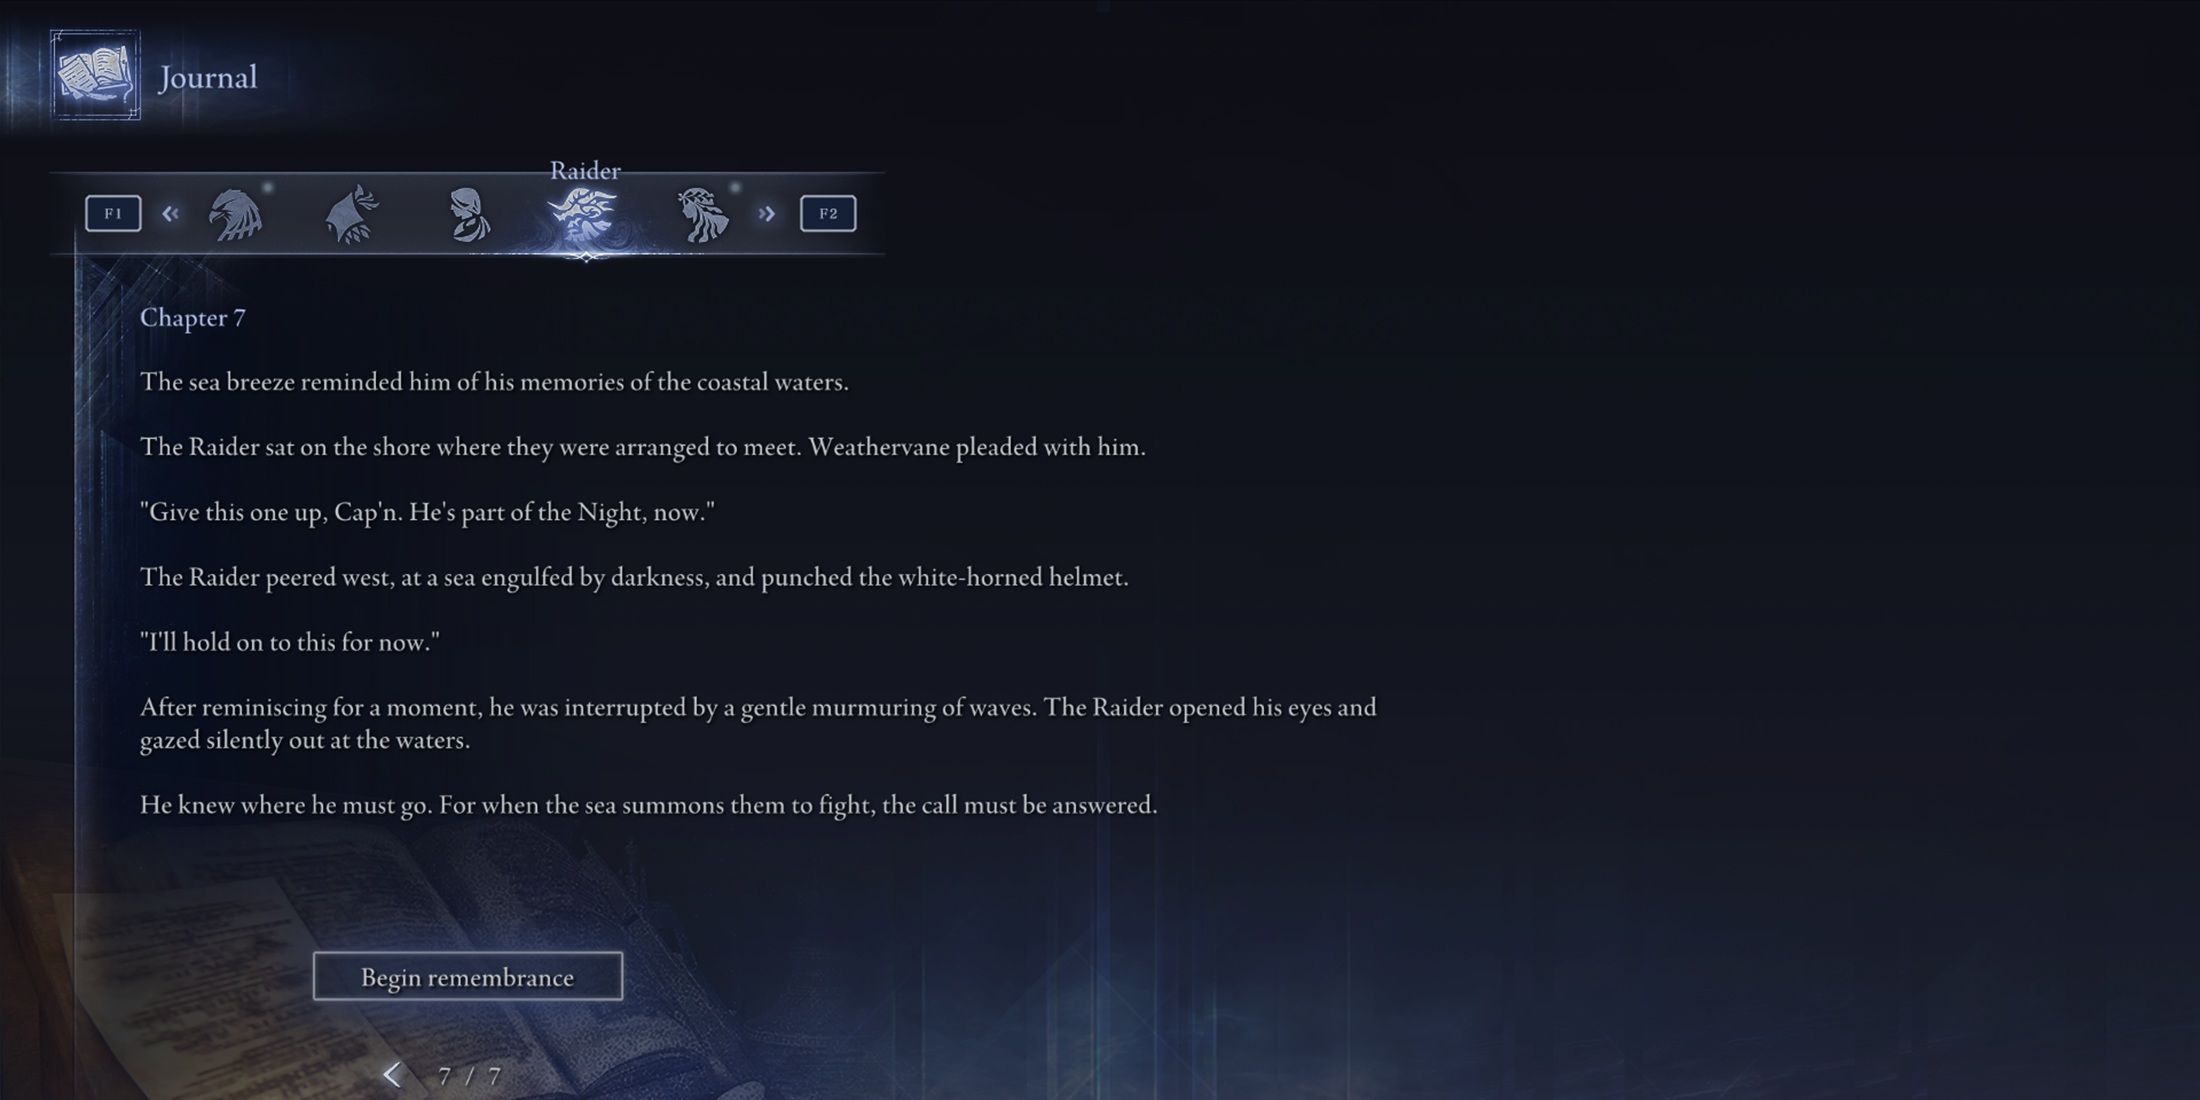
To access Chapter 7 in the journal, you’ll first need to overcome two Nightlords since each memory fragment can open just a single chapter. Once you’ve progressed, engage with the Iron Menial who will inform you that the upcoming contender has yet to appear when the new chapter commences.
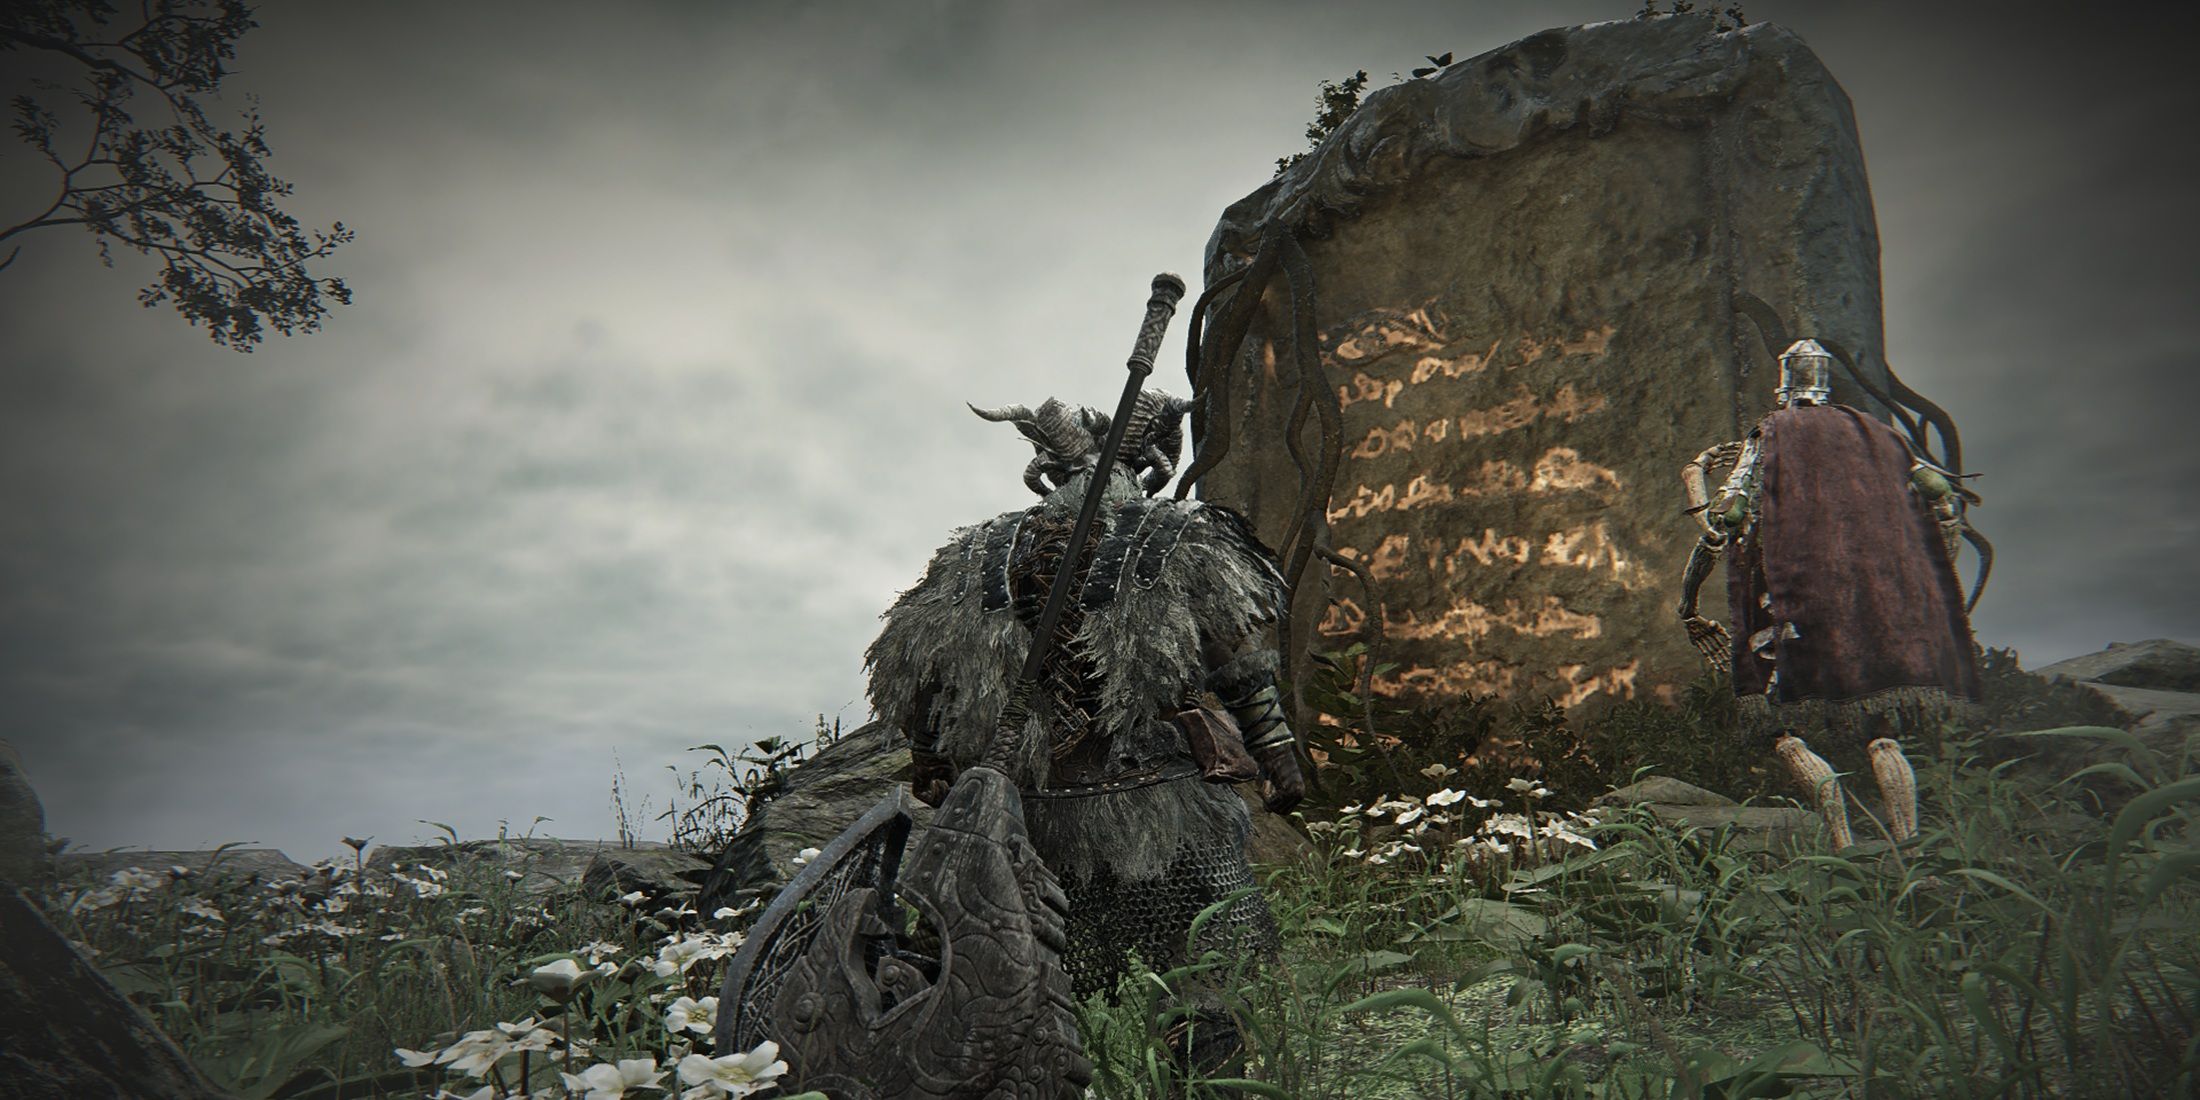
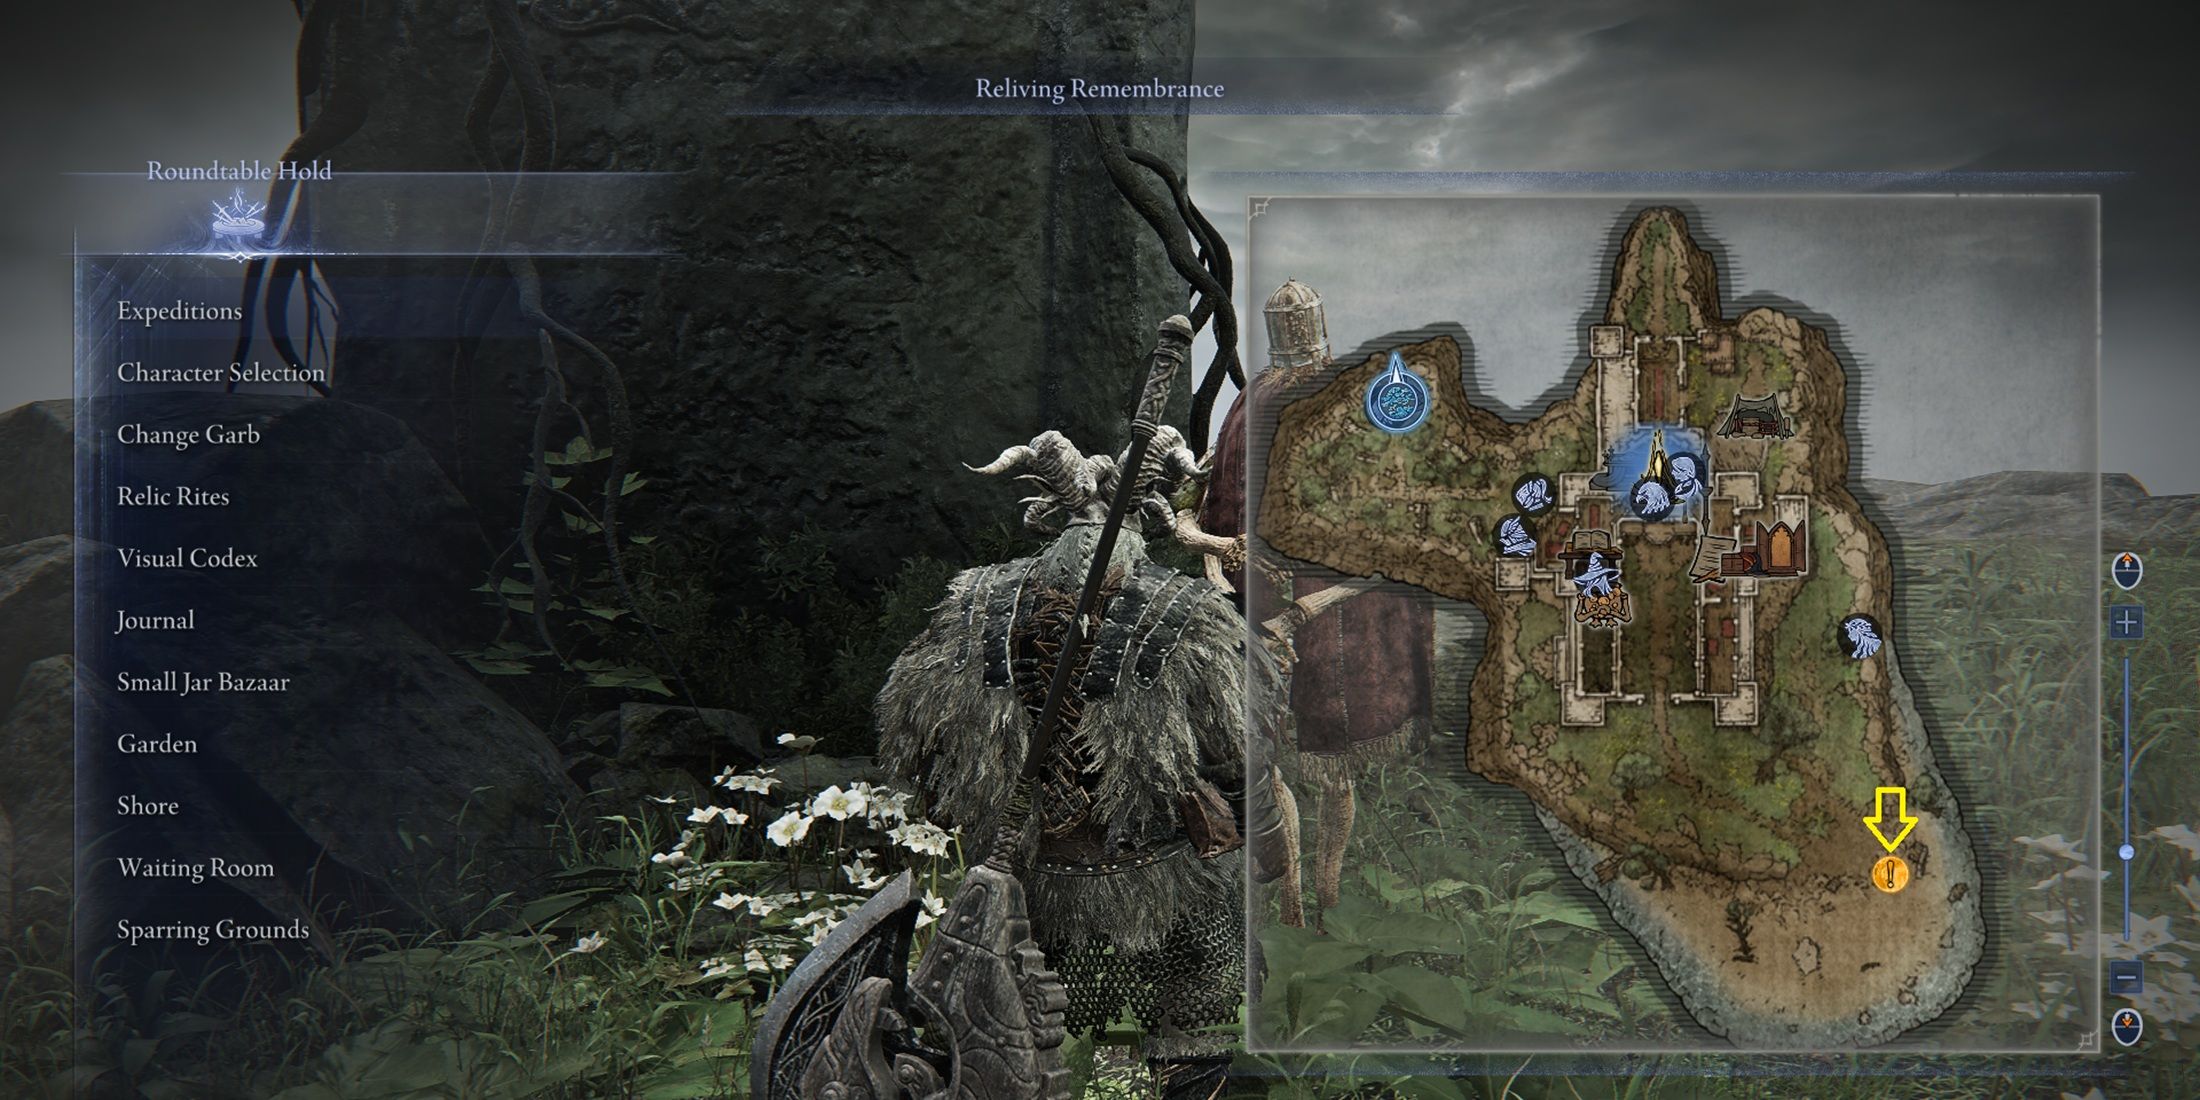
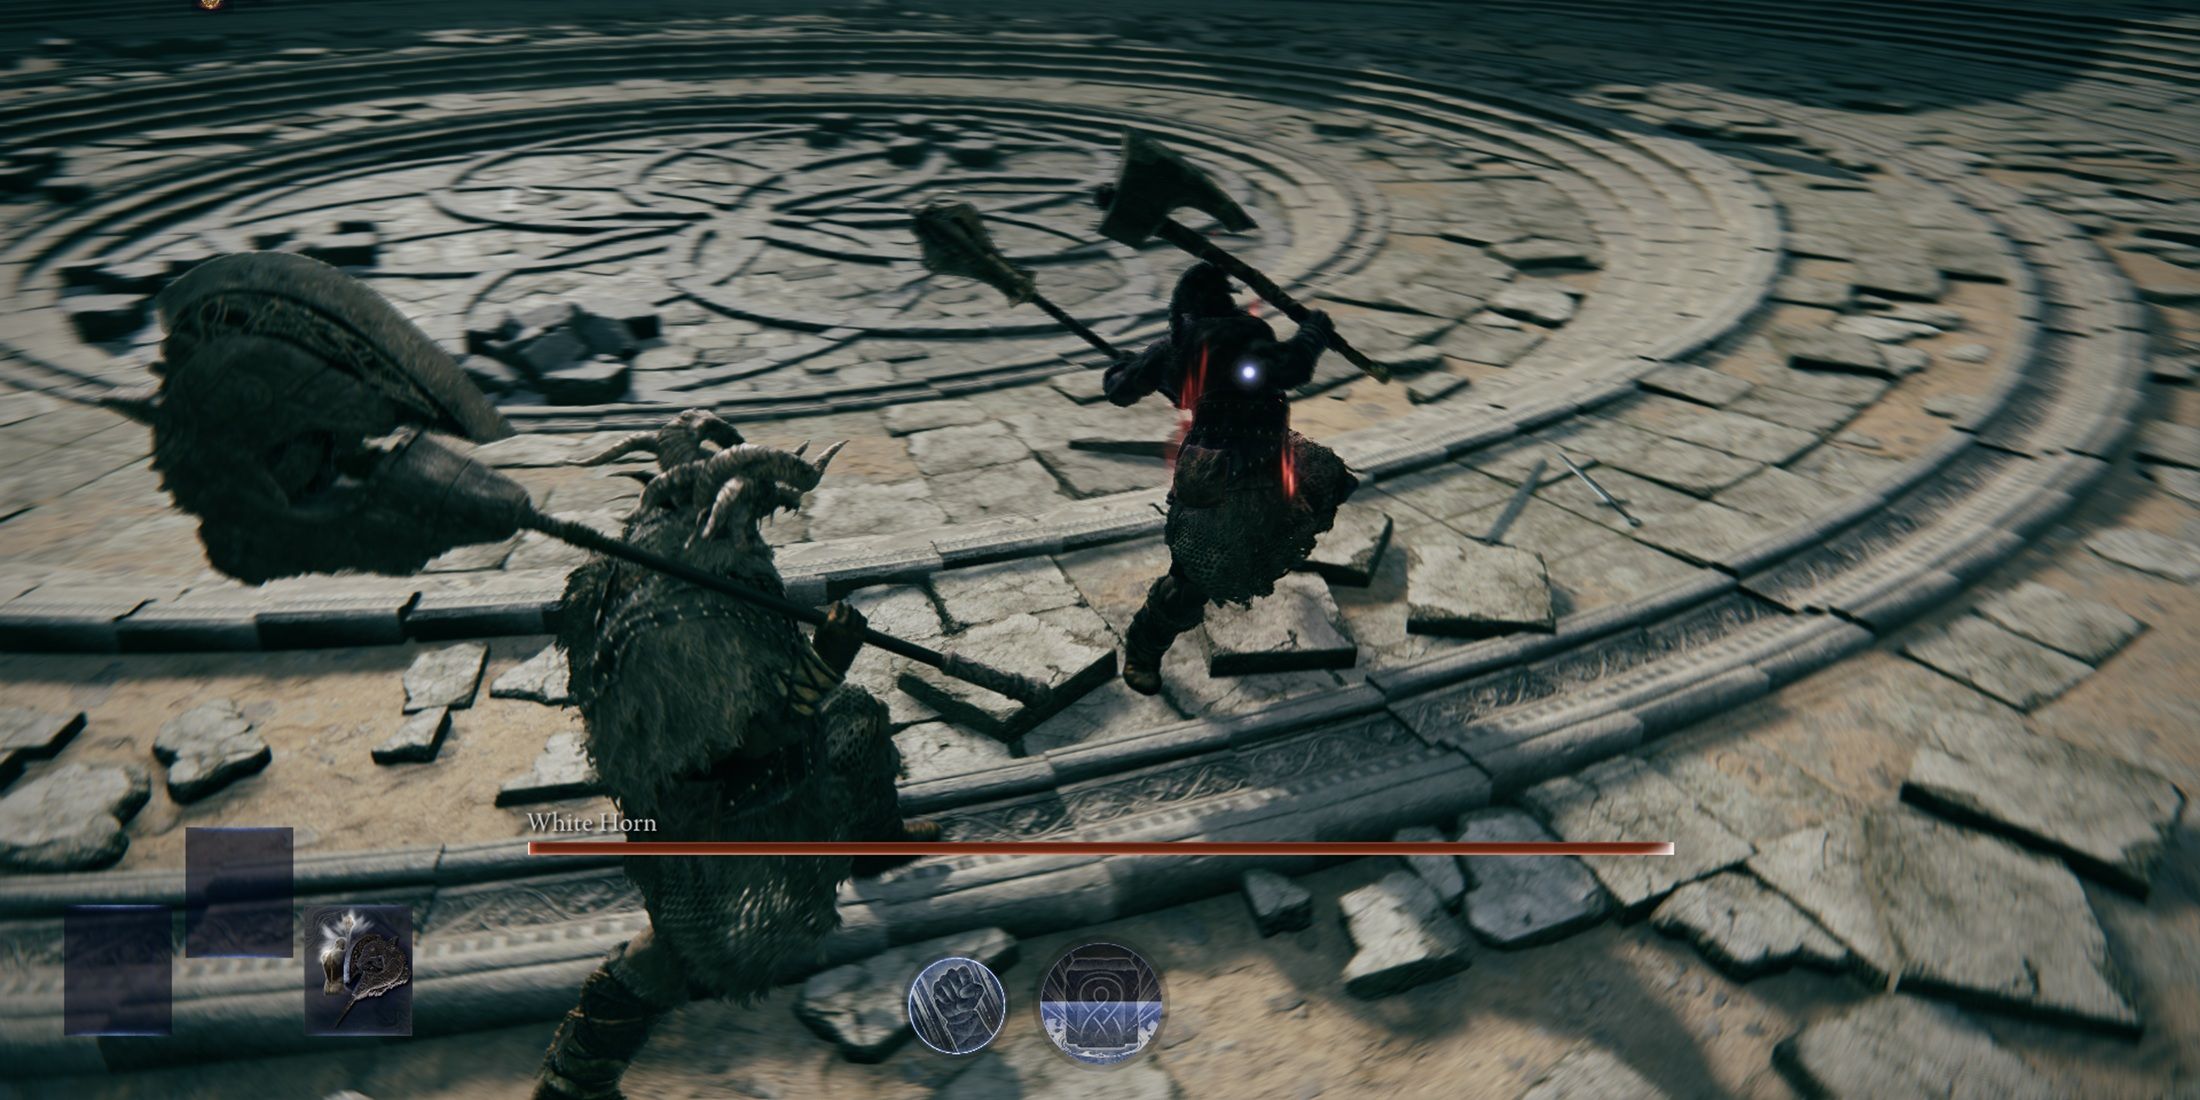
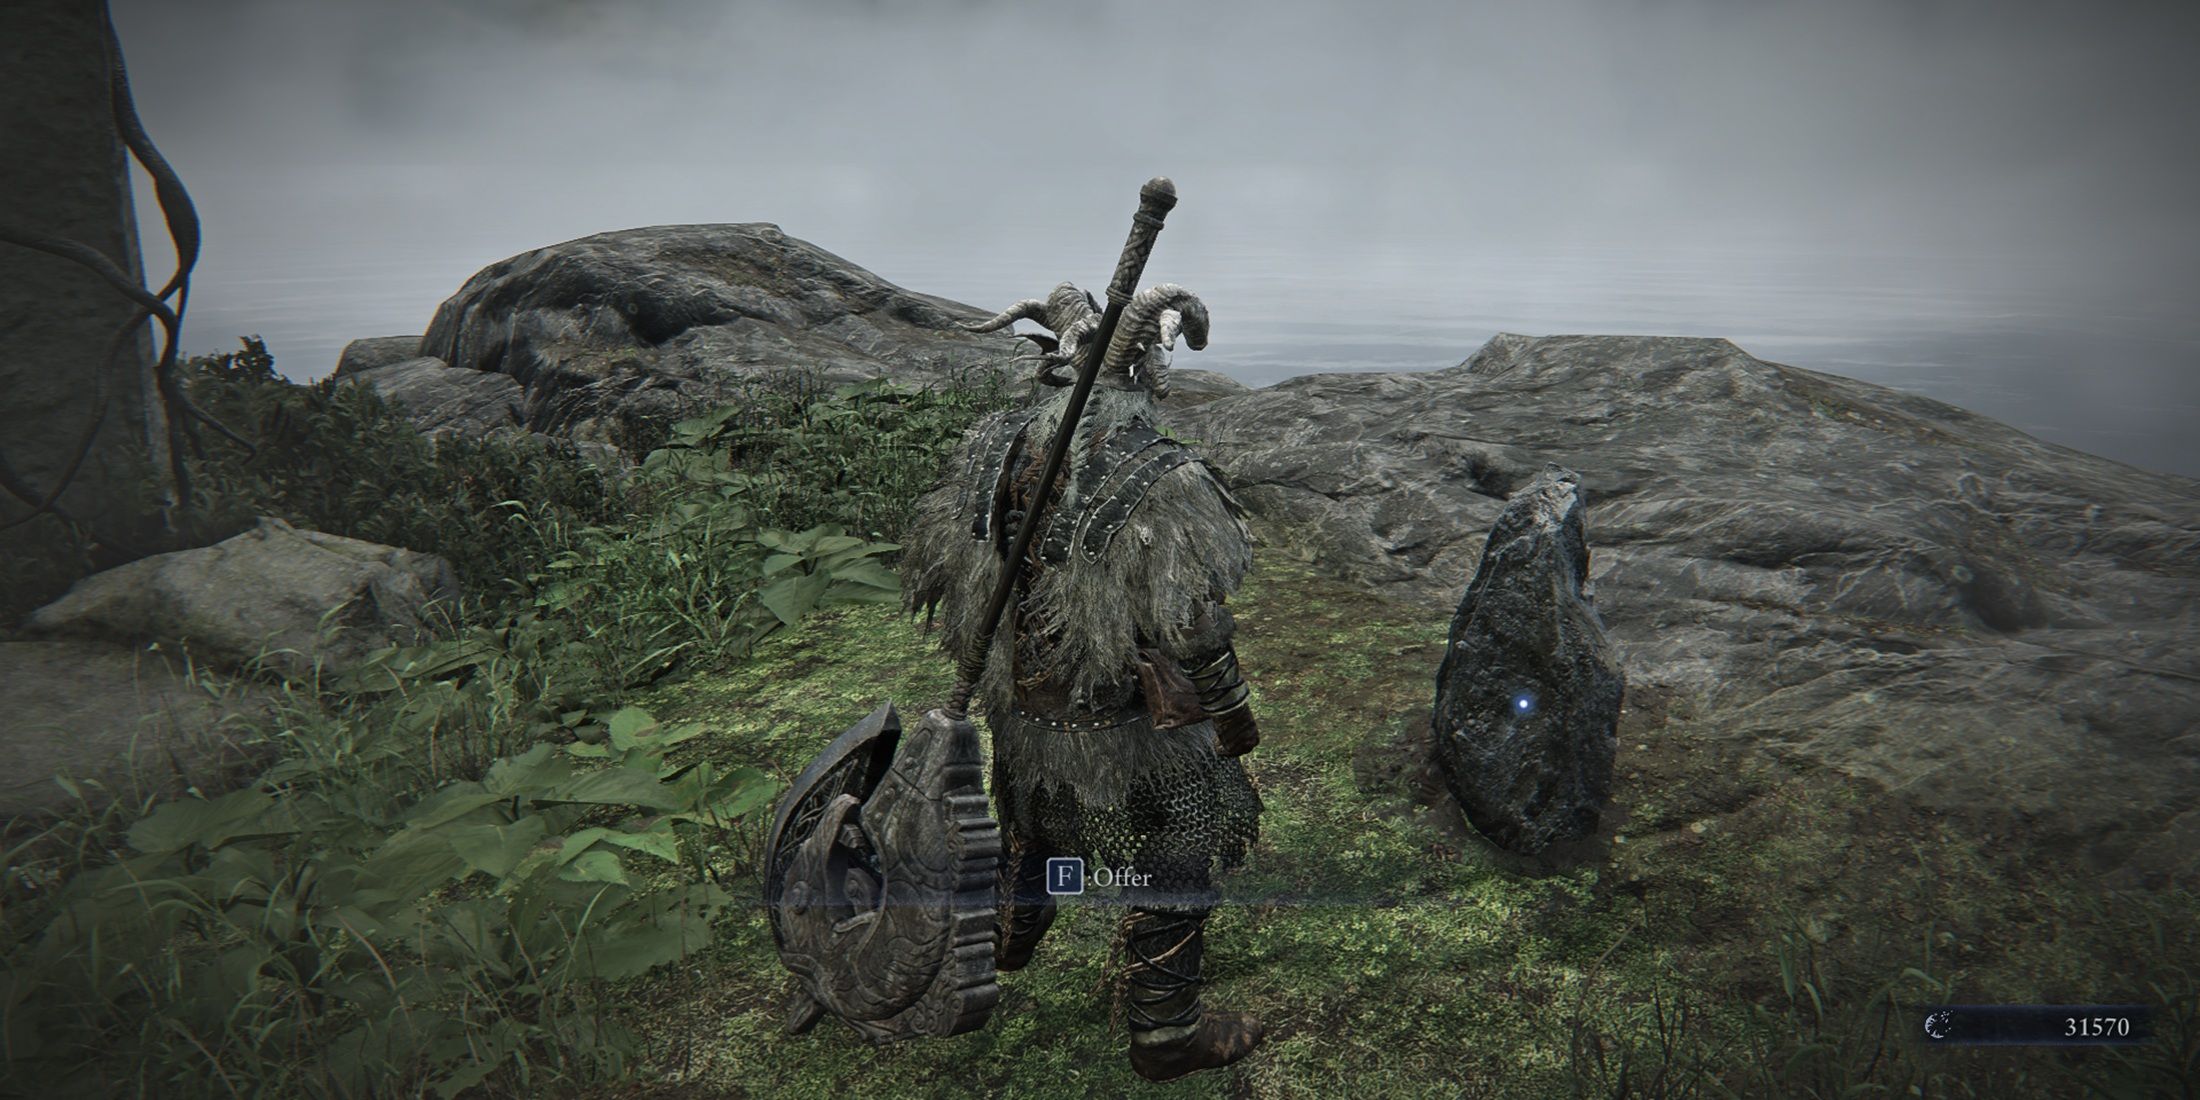
Currently, let’s pull up the map and quickly move to the coast via fast travel. Here, you’ll notice a fallen column. Position yourself nearby, and you’ll be whisked away to the battle arena for one final confrontation against the White Horn. This formidable foe fights much like an Onestrike Gladiator but exhibits additional strength and unique maneuvers.

The challenging part of the fight occurs when White Horn has only 25% health remaining. At this point, an unexpected twist happens as he transforms into a colossal, serpent-like being, making the closing stages of the battle particularly tough. Given Raider’s slow attacks, it’s crucial to strike White Horn at the optimal moment. If you sense that you might not be able to evade his approaching attack, simply use your Ultimate Skill. During this skill, Raider becomes invincible to any incoming damage, serving as a useful trick for avoiding trouble towards the end of the battle.
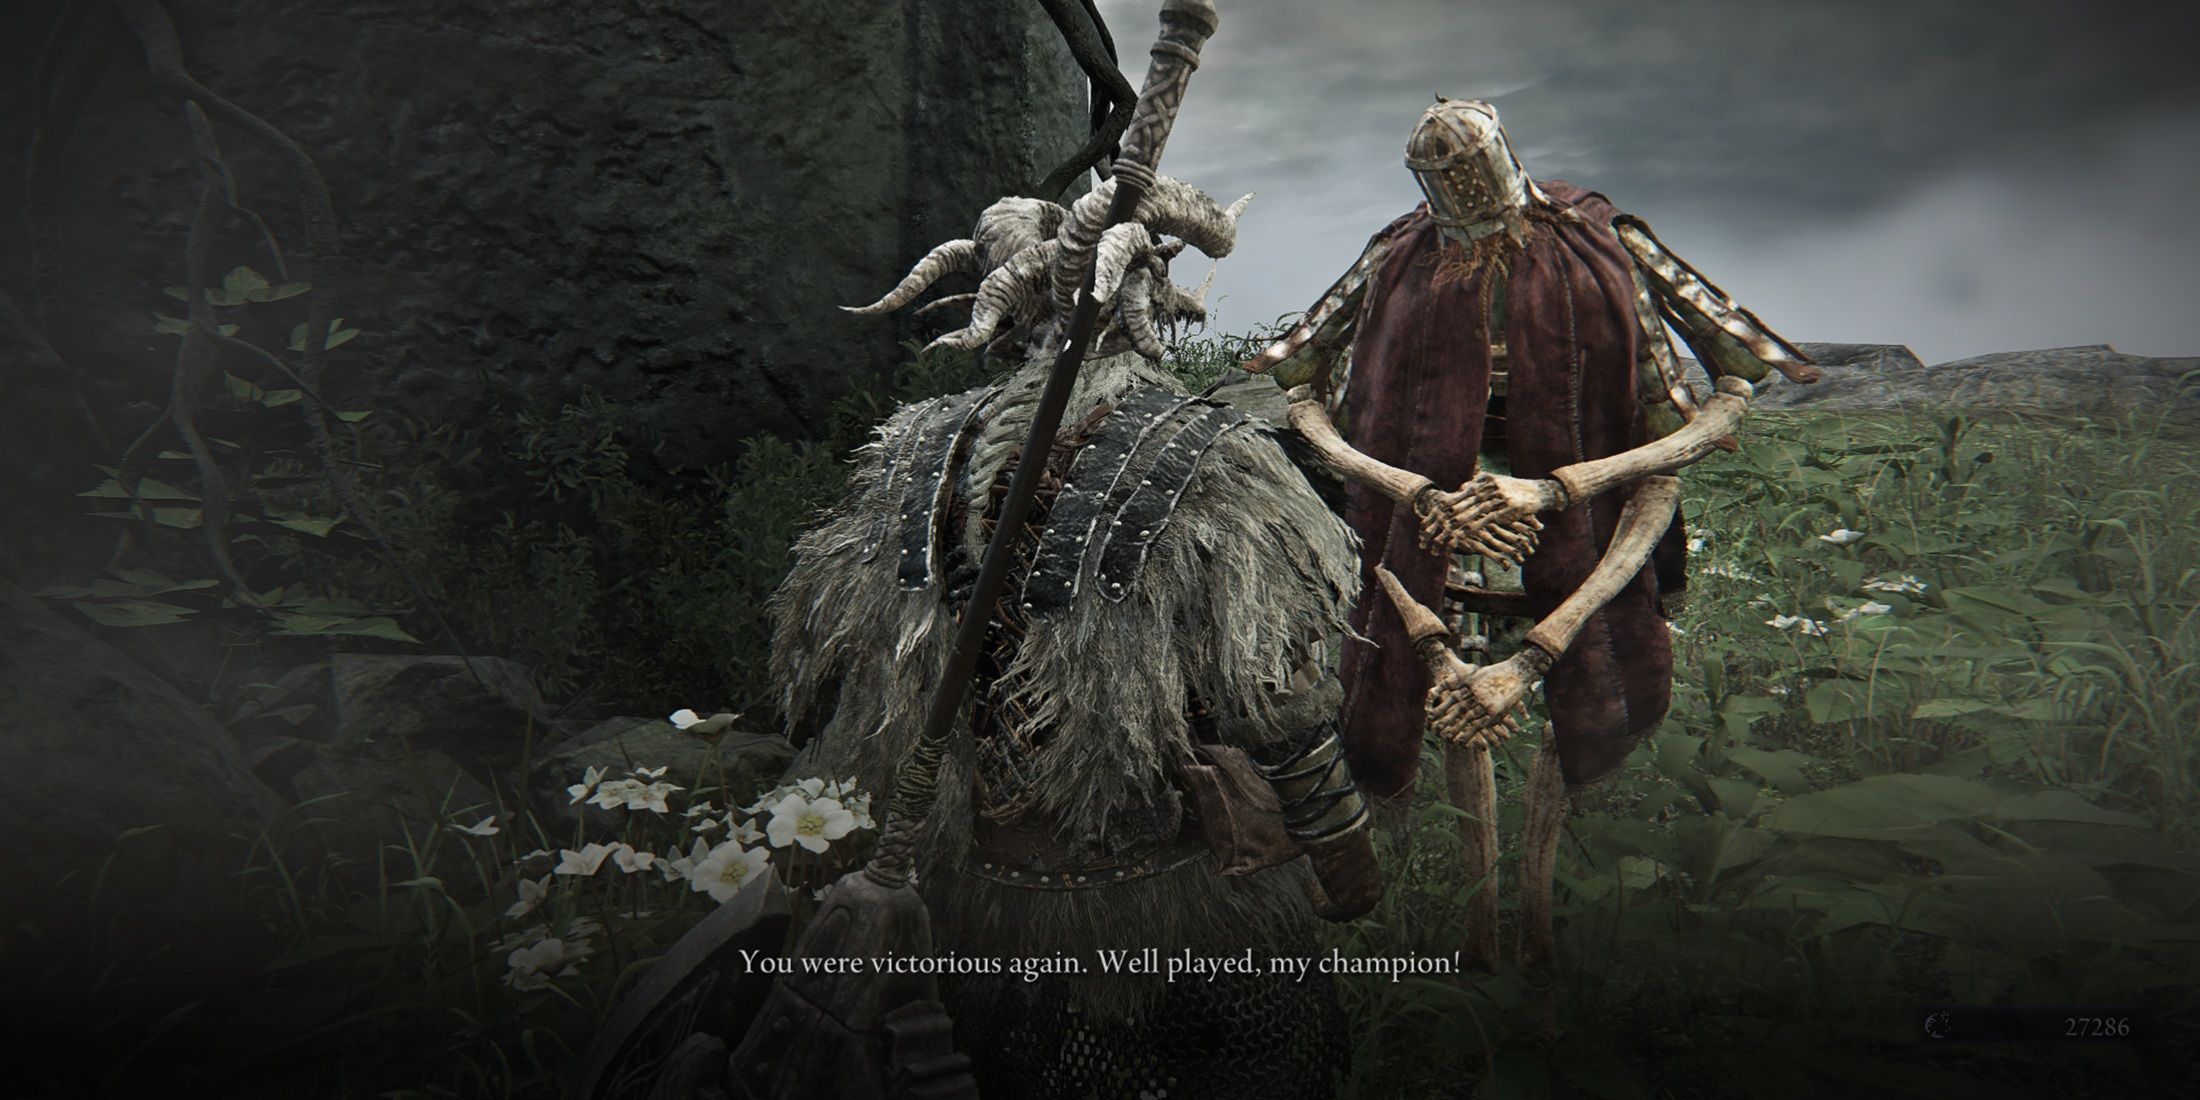
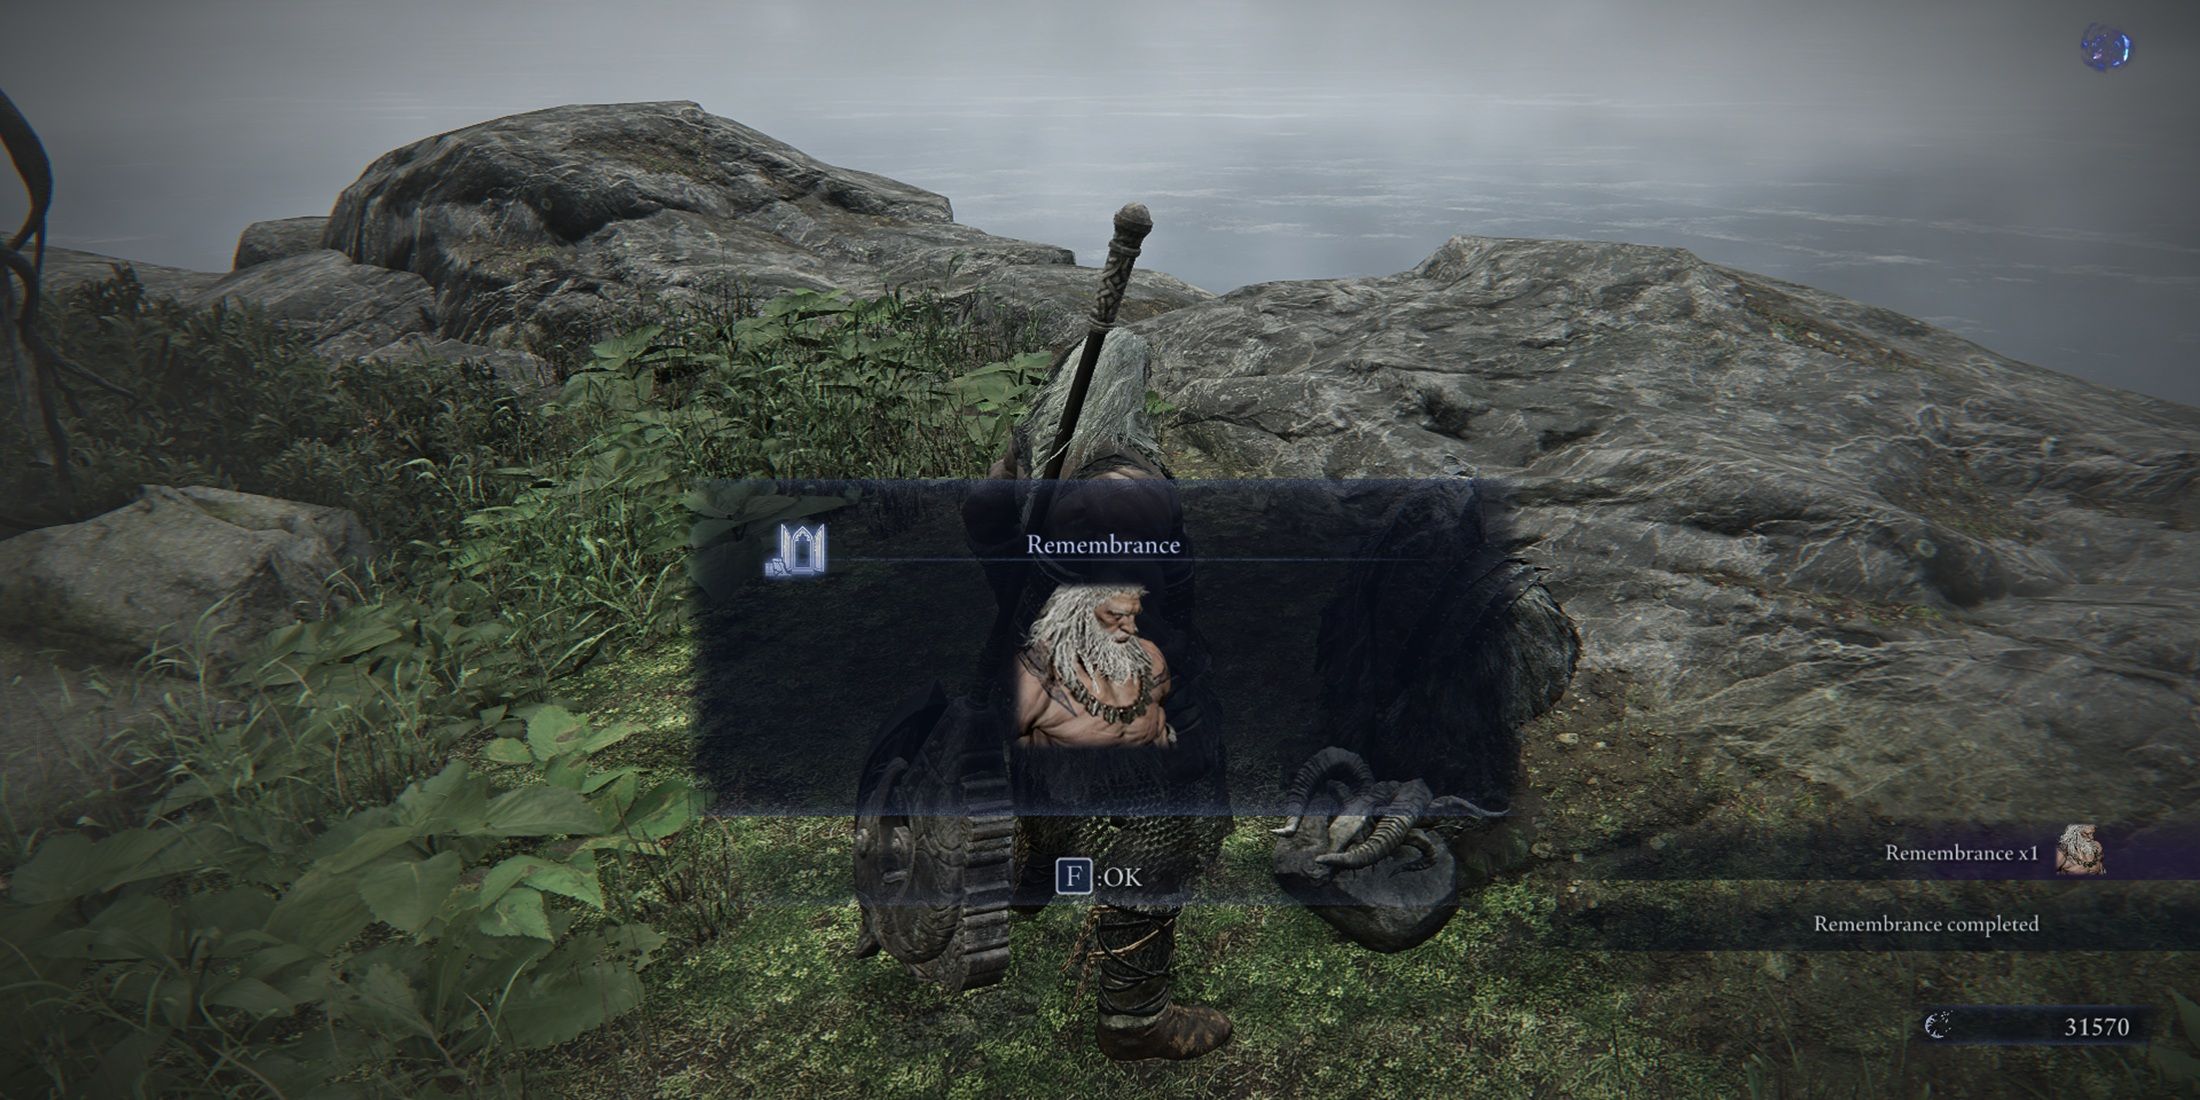
Winning the battle against the White Horn will nearly complete the Raider’s questline. From here on out, all that’s left is to converse with Iron Menial, decipher the inscription on the monument, and honor the White Horn. Moreover, the text on the monument reveals a significant plot twist concerning the Raider’s identity. Ultimately, you will be granted the Remembrance skin, which will automatically be applied to your character.
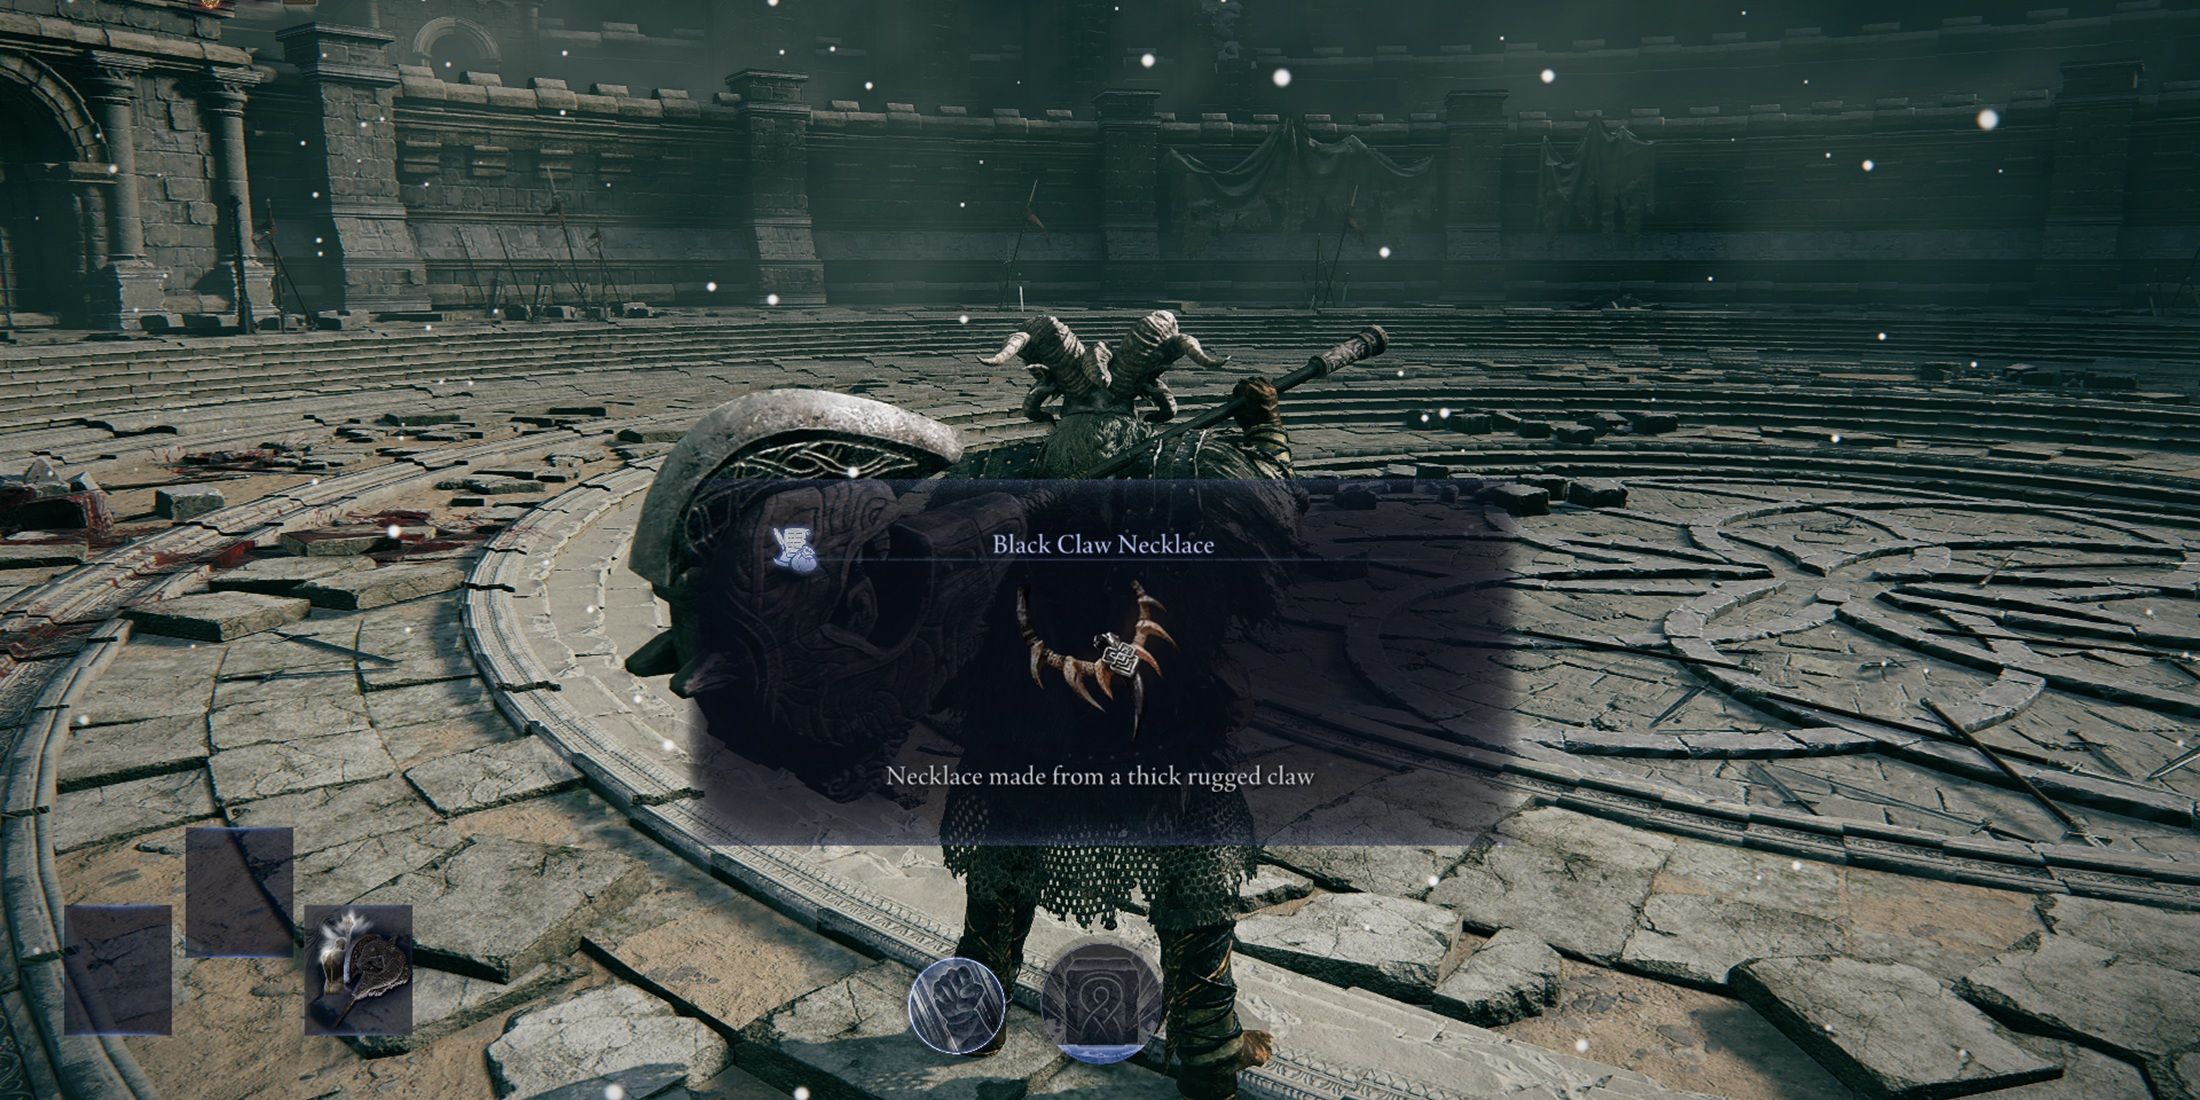
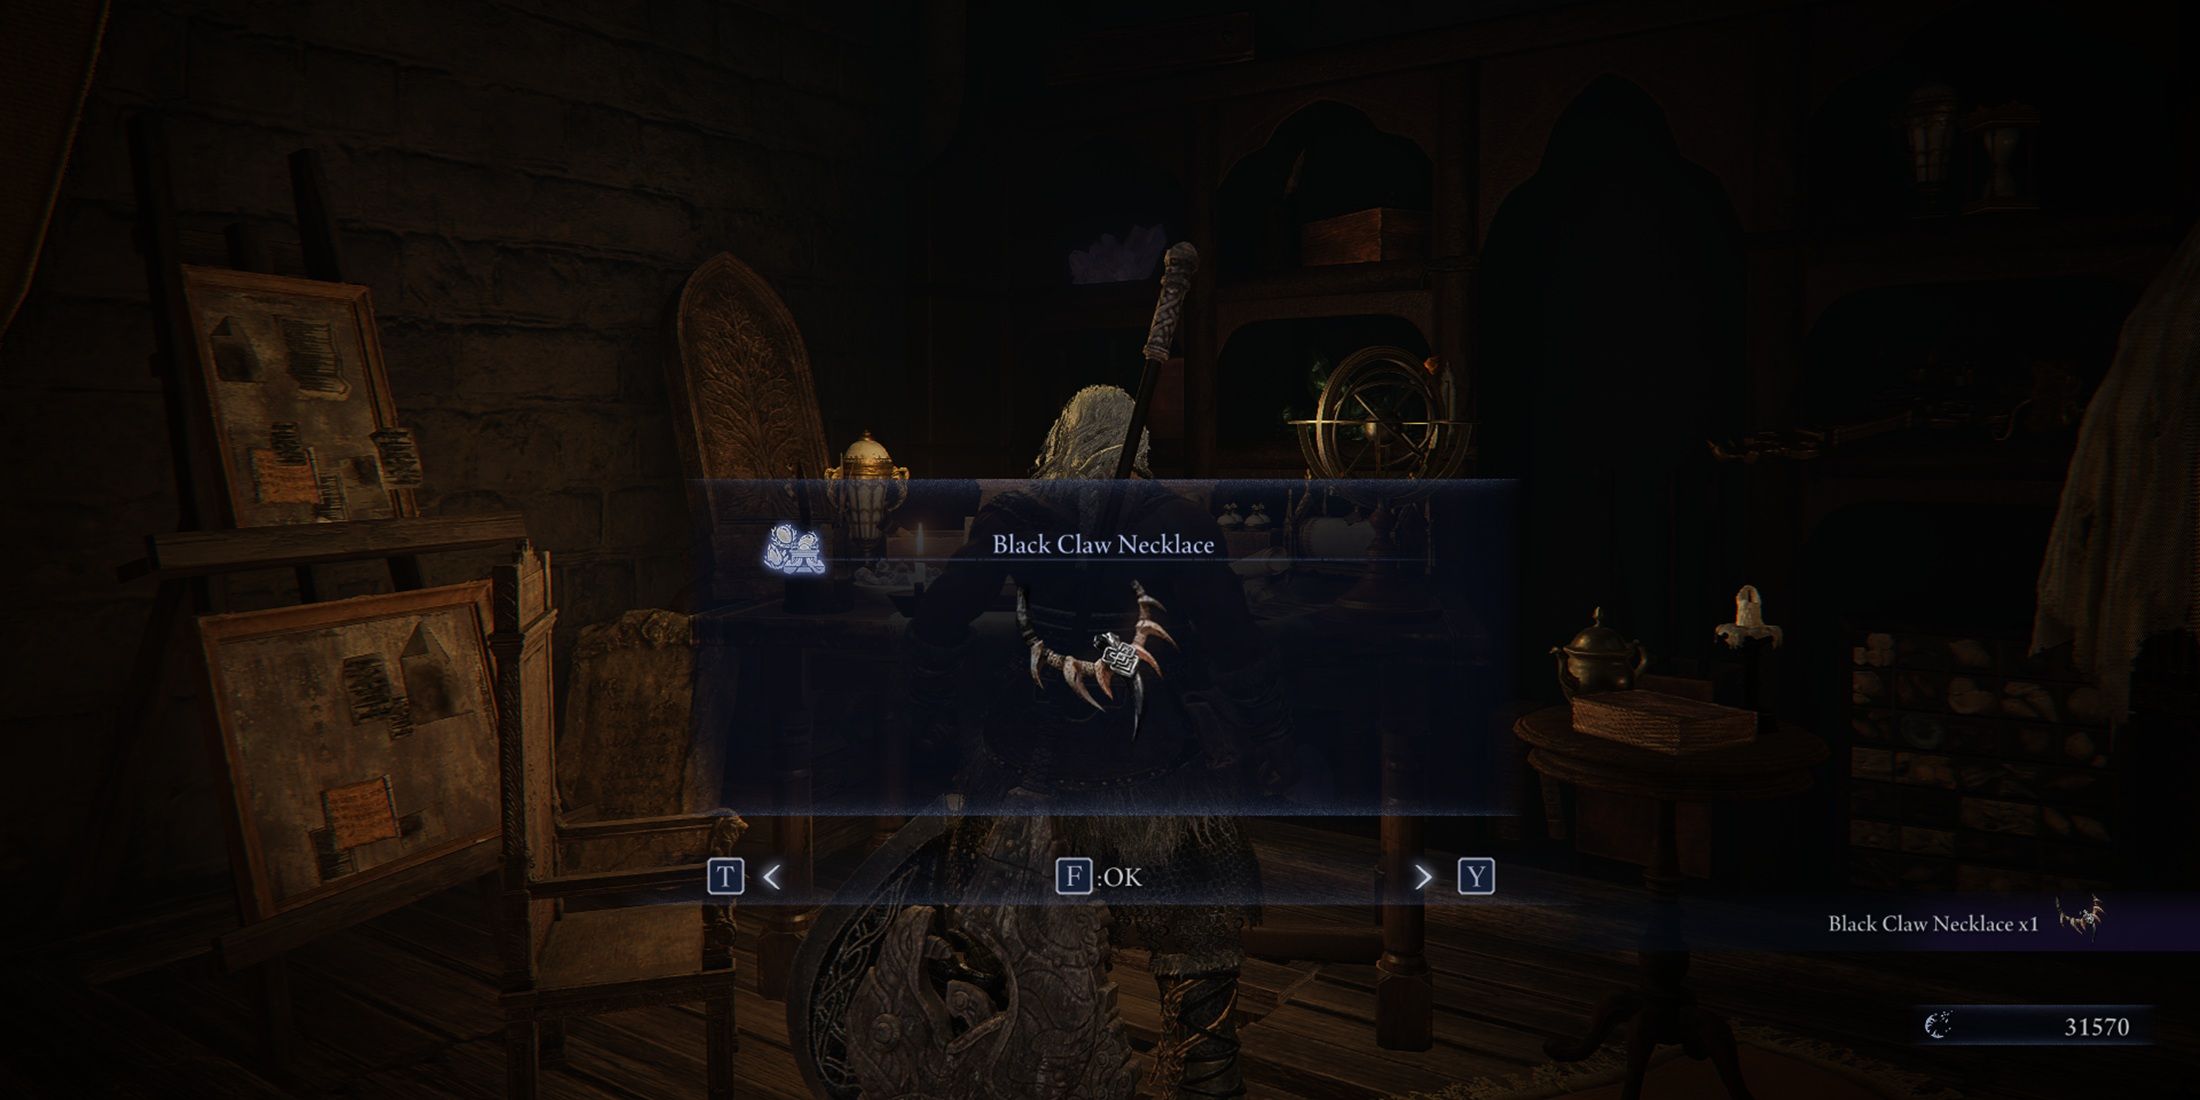
Currently, let’s go back to the present for one final prize in the questline: the Black Claw Necklace relic. Additionally, it would be beneficial to read through the journal as a concluding chapter contains additional details regarding the conclusion of the Raider’s journey.
Currently, Raider appears with his Remembered skin. However, players can switch back to his standard skin by using the “Change Garb” option in their inventory.
Read More
- All Skyblazer Armor Locations in Crimson Desert
- One Piece Chapter 1180 Release Date And Where To Read
- How to Get the Sunset Reed Armor Set and Hollow Visage Sword in Crimson Desert
- All Shadow Armor Locations in Crimson Desert
- Marni Laser Helm Location & Upgrade in Crimson Desert
- All Golden Greed Armor Locations in Crimson Desert
- All Helfryn Armor Locations in Crimson Desert
- How to Beat Stonewalker Antiquum at the Gate of Truth in Crimson Desert
- All Icewing Armor Locations in Crimson Desert
- Black Sun Shield Location In Crimson Desert (Buried Treasure Quest)
2025-06-03 19:48