It’s commonly acknowledged that the Nintendo Switch Pro Controller ranks among the top wireless controllers available for purchase. Yet, it might shock some users to discover the initial challenges they face in establishing a wireless connection between their Nintendo Switch Pro Controller and their Nintendo Switch console or Nintendo Switch Lite.
You can connect the devices in several methods, and I’m going to guide you through them. Additionally, I’ll share a couple of hidden features of your Nintendo Switch Pro Controller that you might not be aware of.
Wirelessly Connecting Your Pro Controller to the Nintendo Switch and Nintendo Switch Lite
If you prefer a quicker approach to connect your Pro Controller to your Nintendo Switch by navigating through some menus, opt for the wireless pairing method since it’s less complex than the other available option.
To team up your controller with the Nintendo Switch Lite, you can do so exclusively via a wireless link, since the Switch Lite lacks the console dock that allows physical connections between devices.
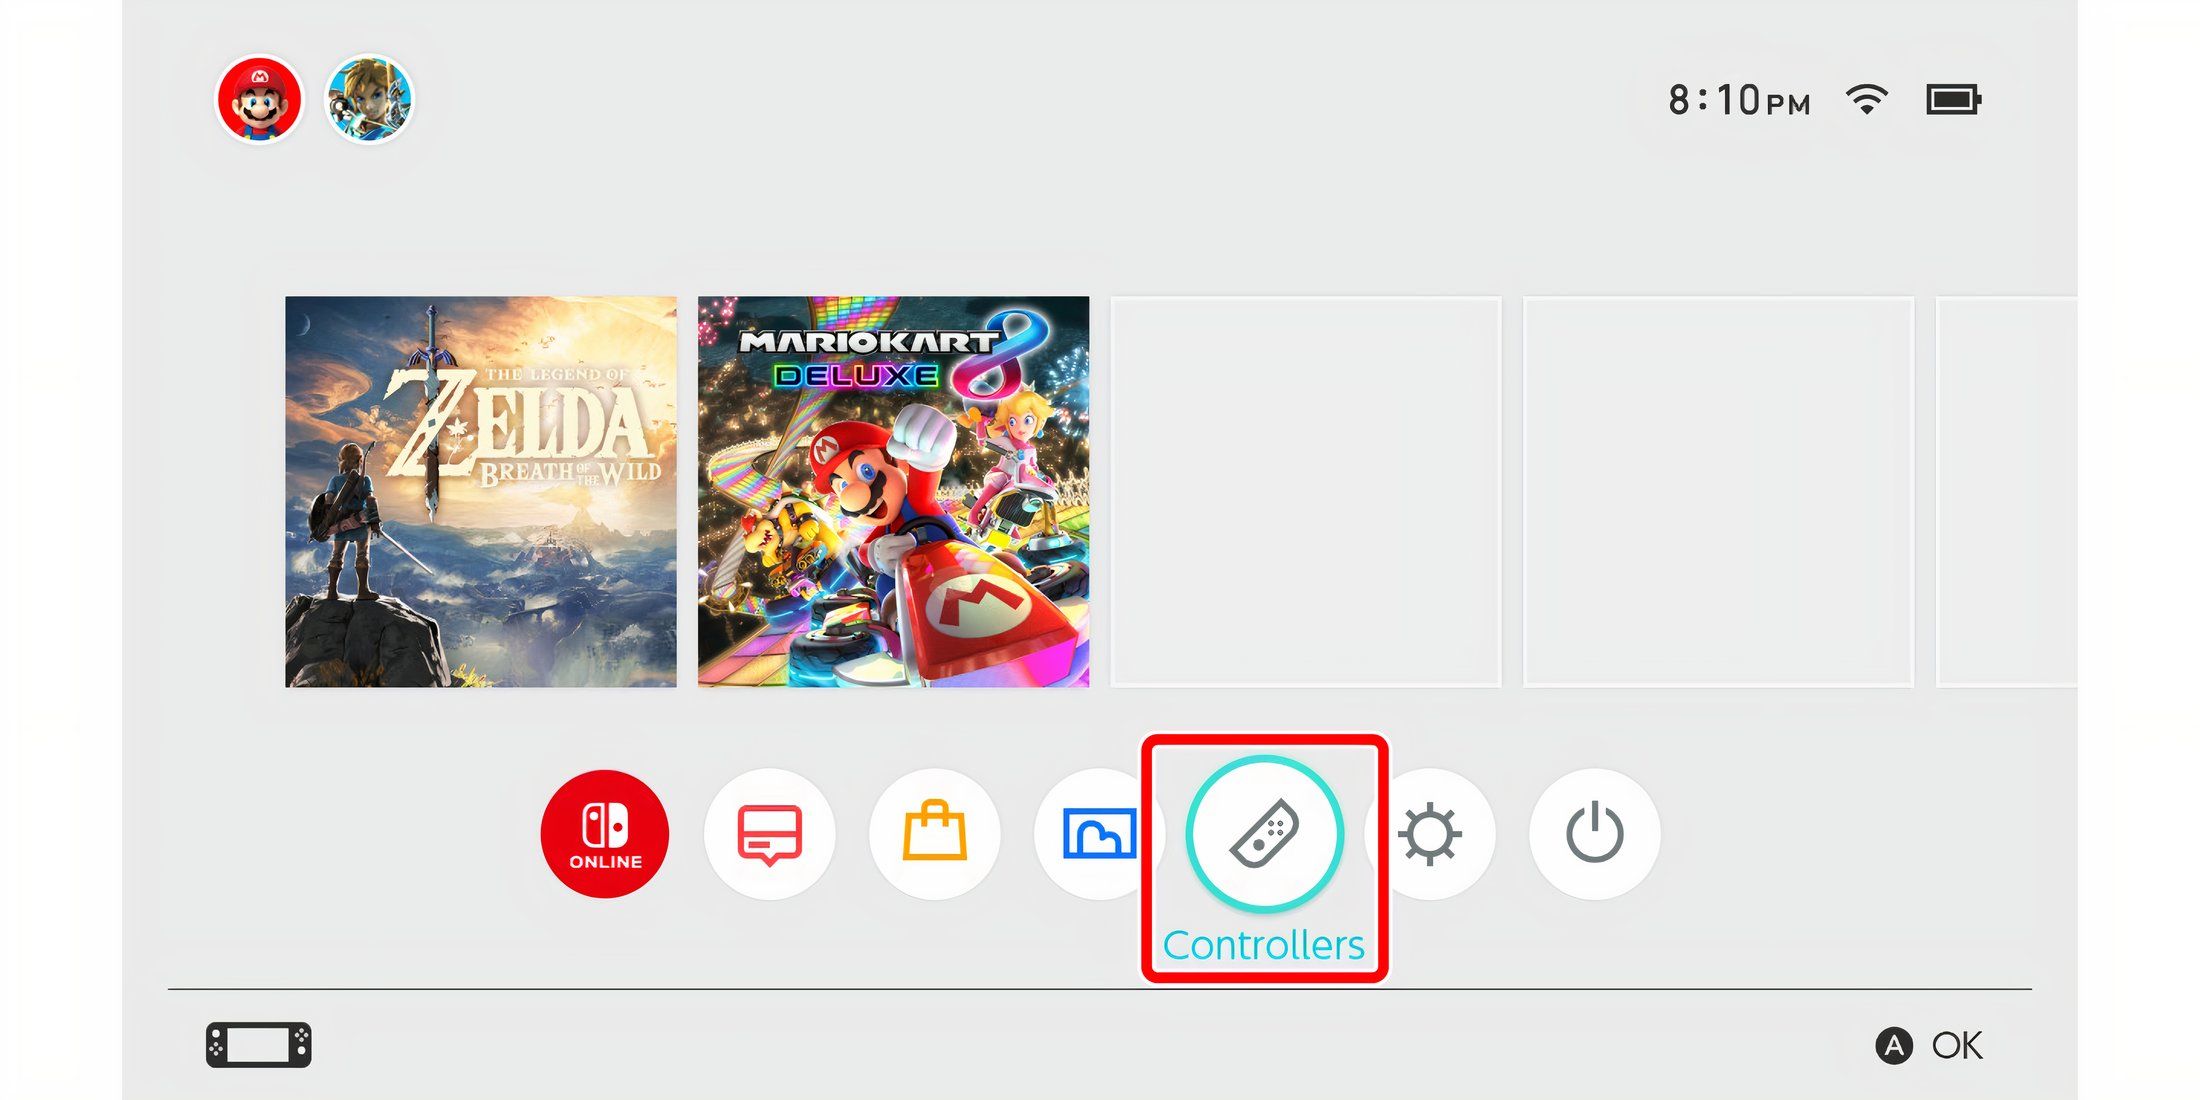
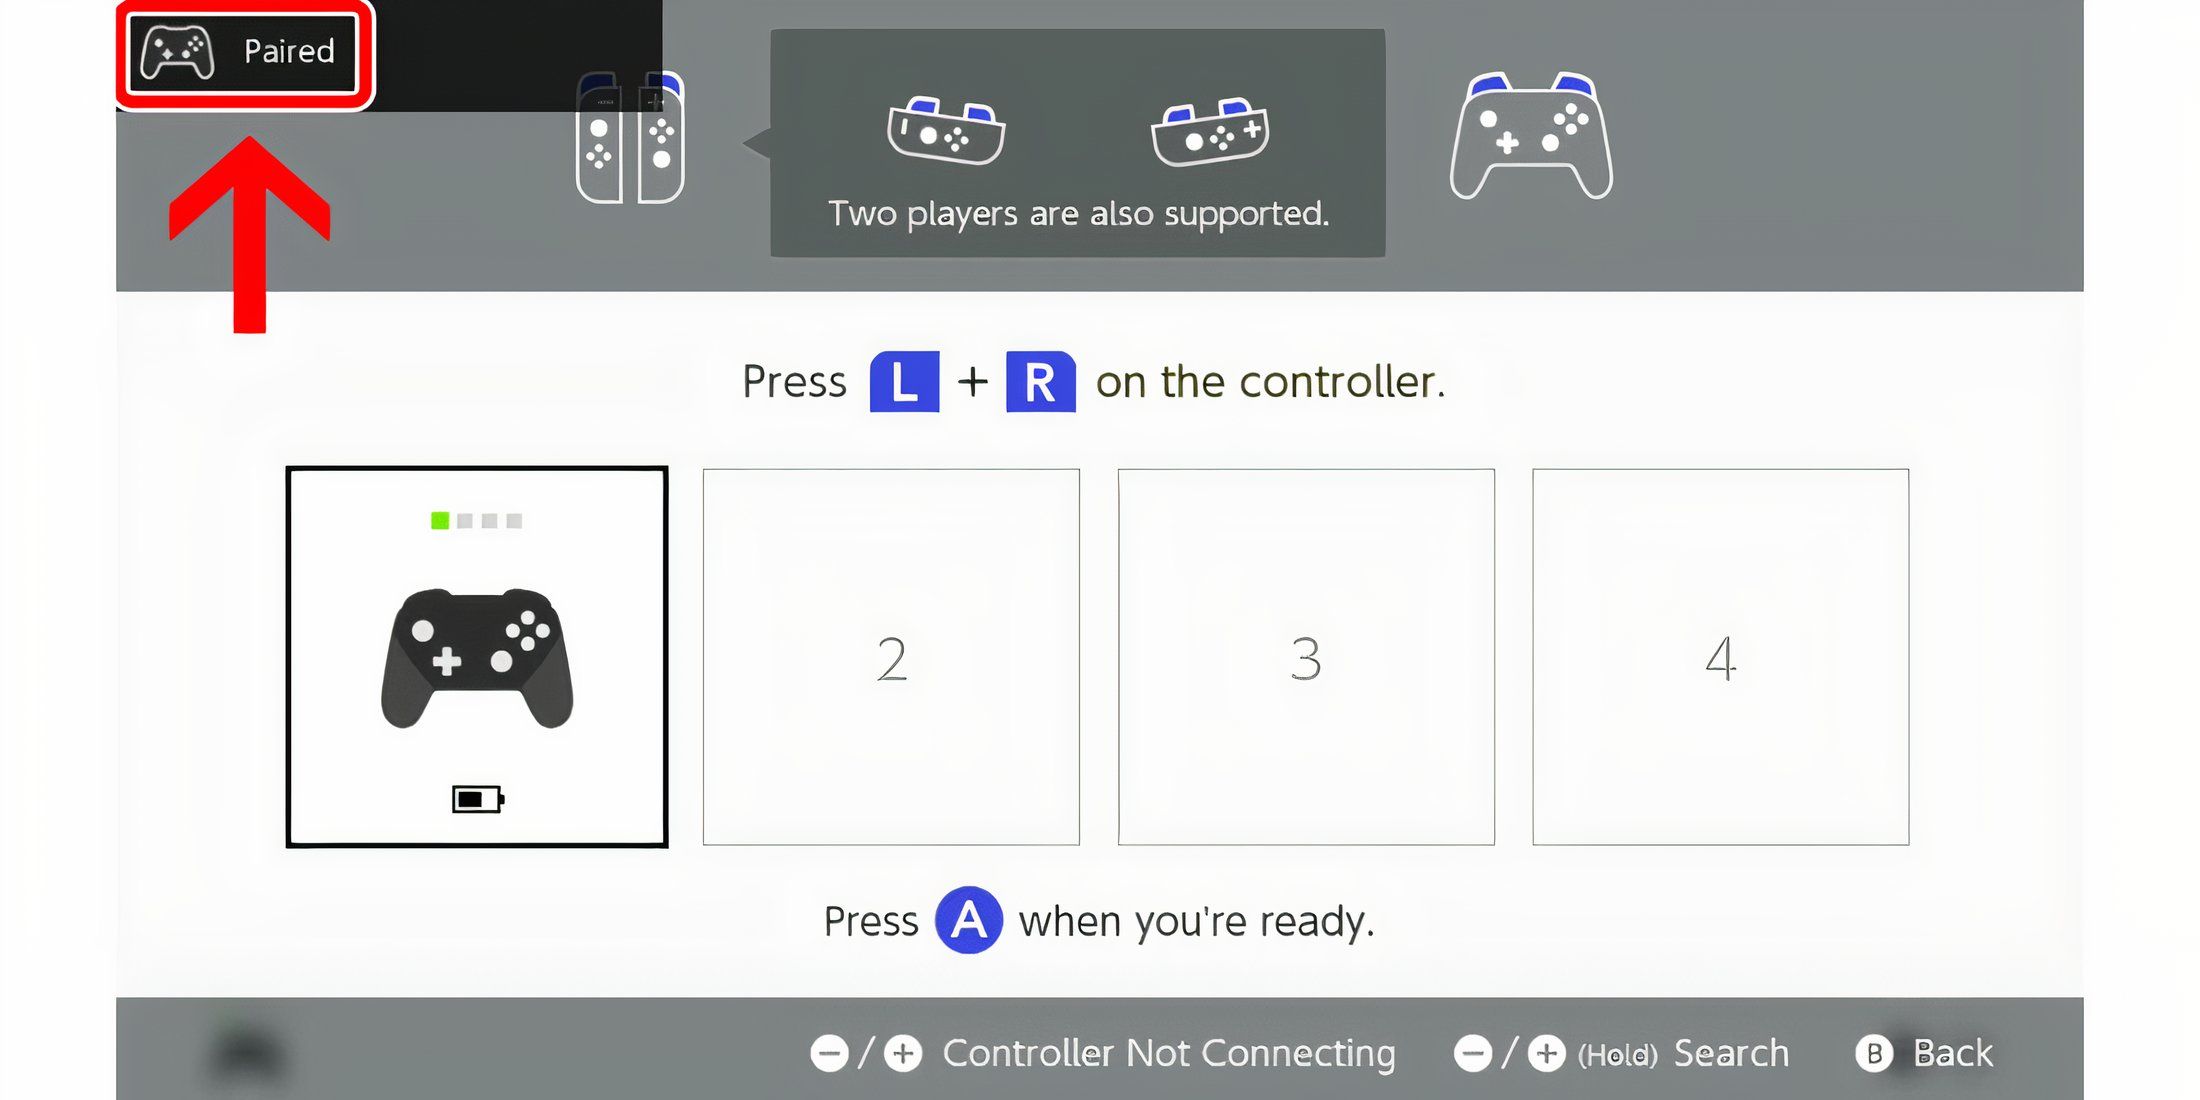
On the home screen of my Nintendo Switch or Nintendo Switch Lite, there are several icons lined up at the bottom. Hovering over the one positioned slightly more than halfway to the left reveals it’s labeled “Controllers”. Choosing this option takes me to a secondary page where I can synchronize both the consoles and controllers.
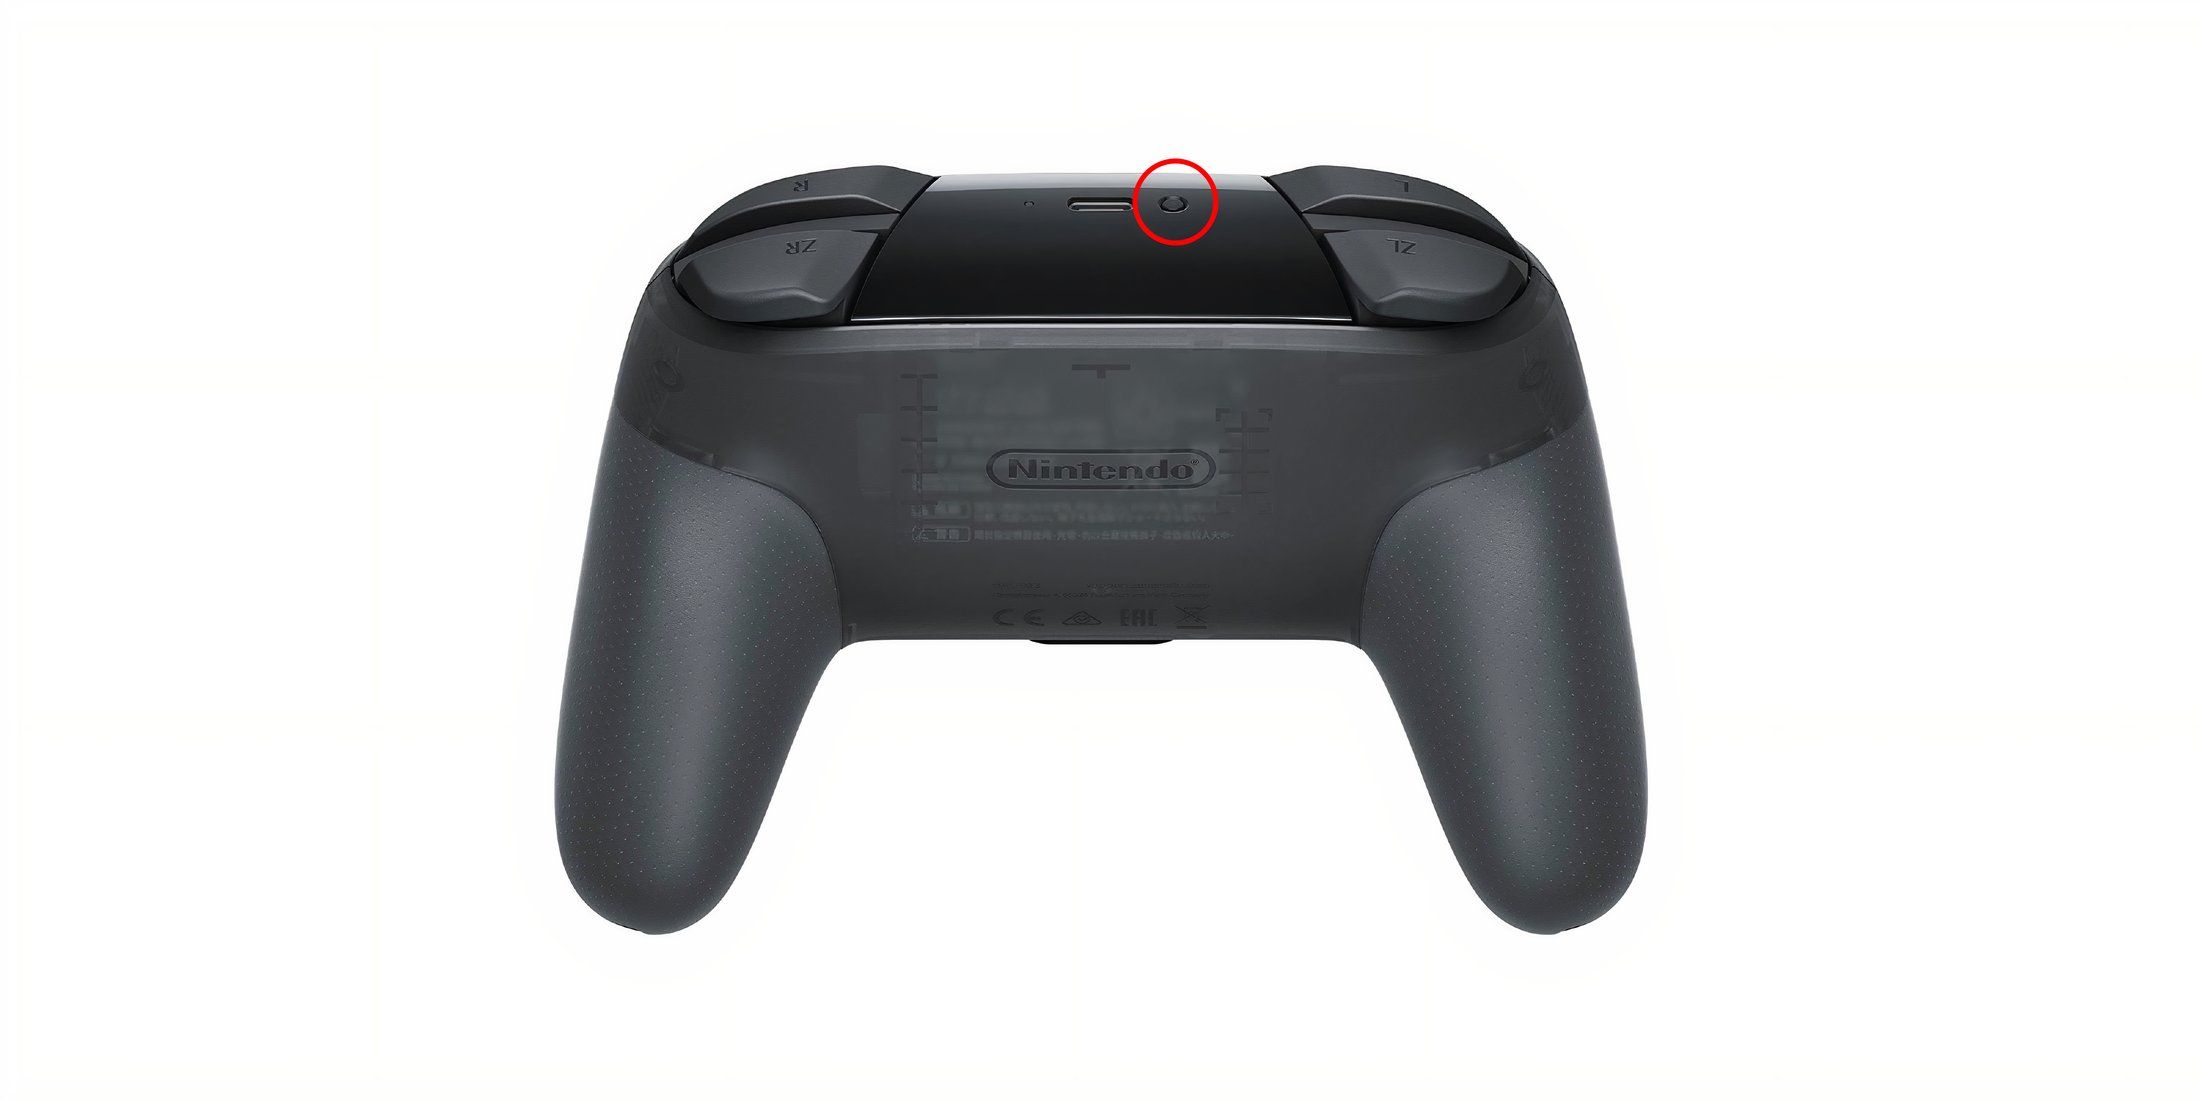
When examining the Nintendo Switch Pro Controller’s front, there’s a tiny sync button situated to its USB-C charging port’s left side. By pressing and holding this sync button, the row of four green lights at the controller’s base should alternate flashing. Perform this action while on the Controllers screen, and you will notice a message appearing on your display’s top left corner, signaling that the Pro Controller has been successfully paired.
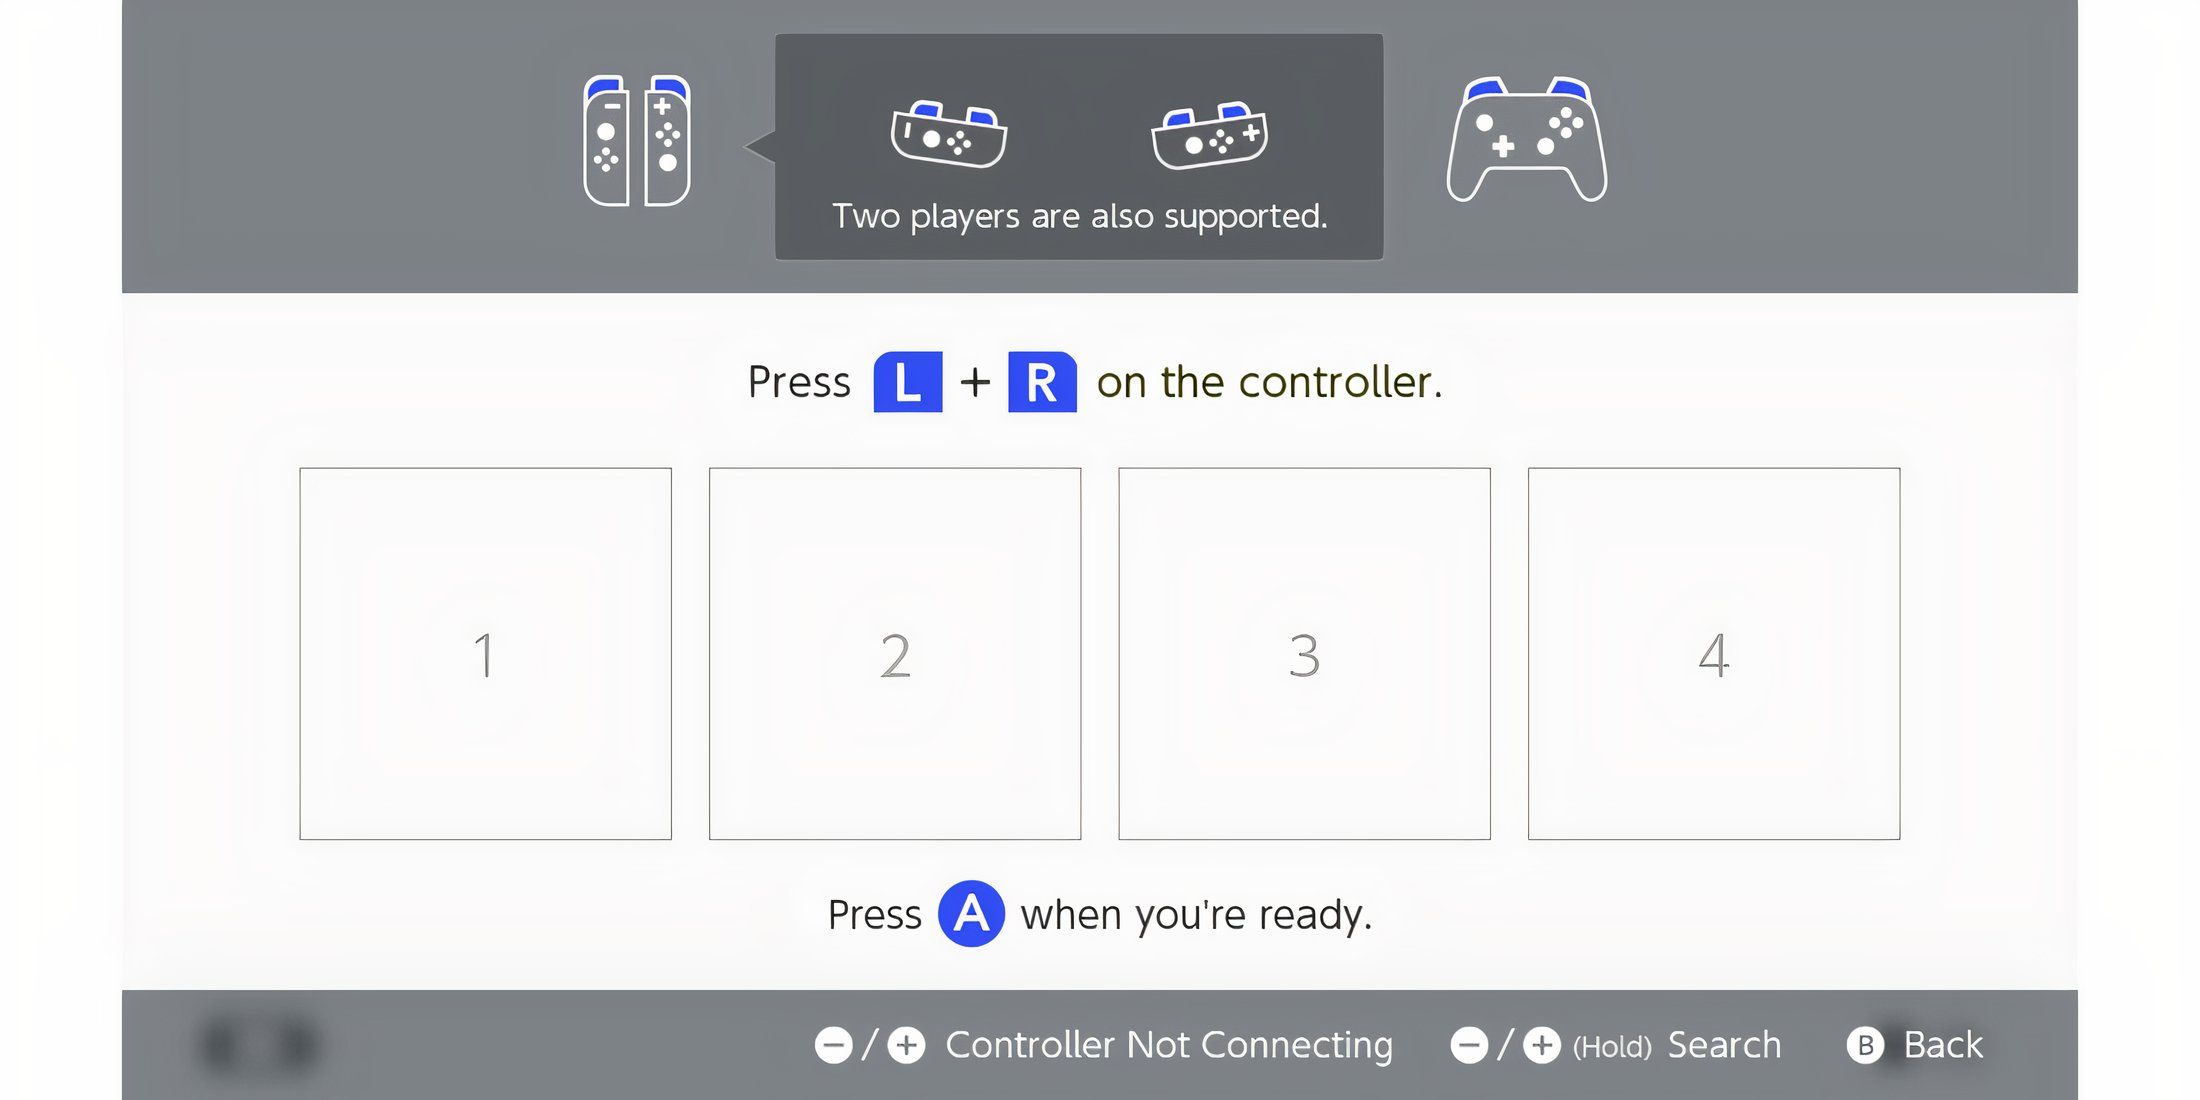
When your Nintendo Switch is connected to a dock, you should use the Joy-Con controllers to access the Controllers menu and connect your controller and system wirelessly. If you don’t have Joy-Cons on hand, follow the steps for manual pairing provided below.
Manually Connecting Your Pro Controller to the Nintendo Switch Through USB-C
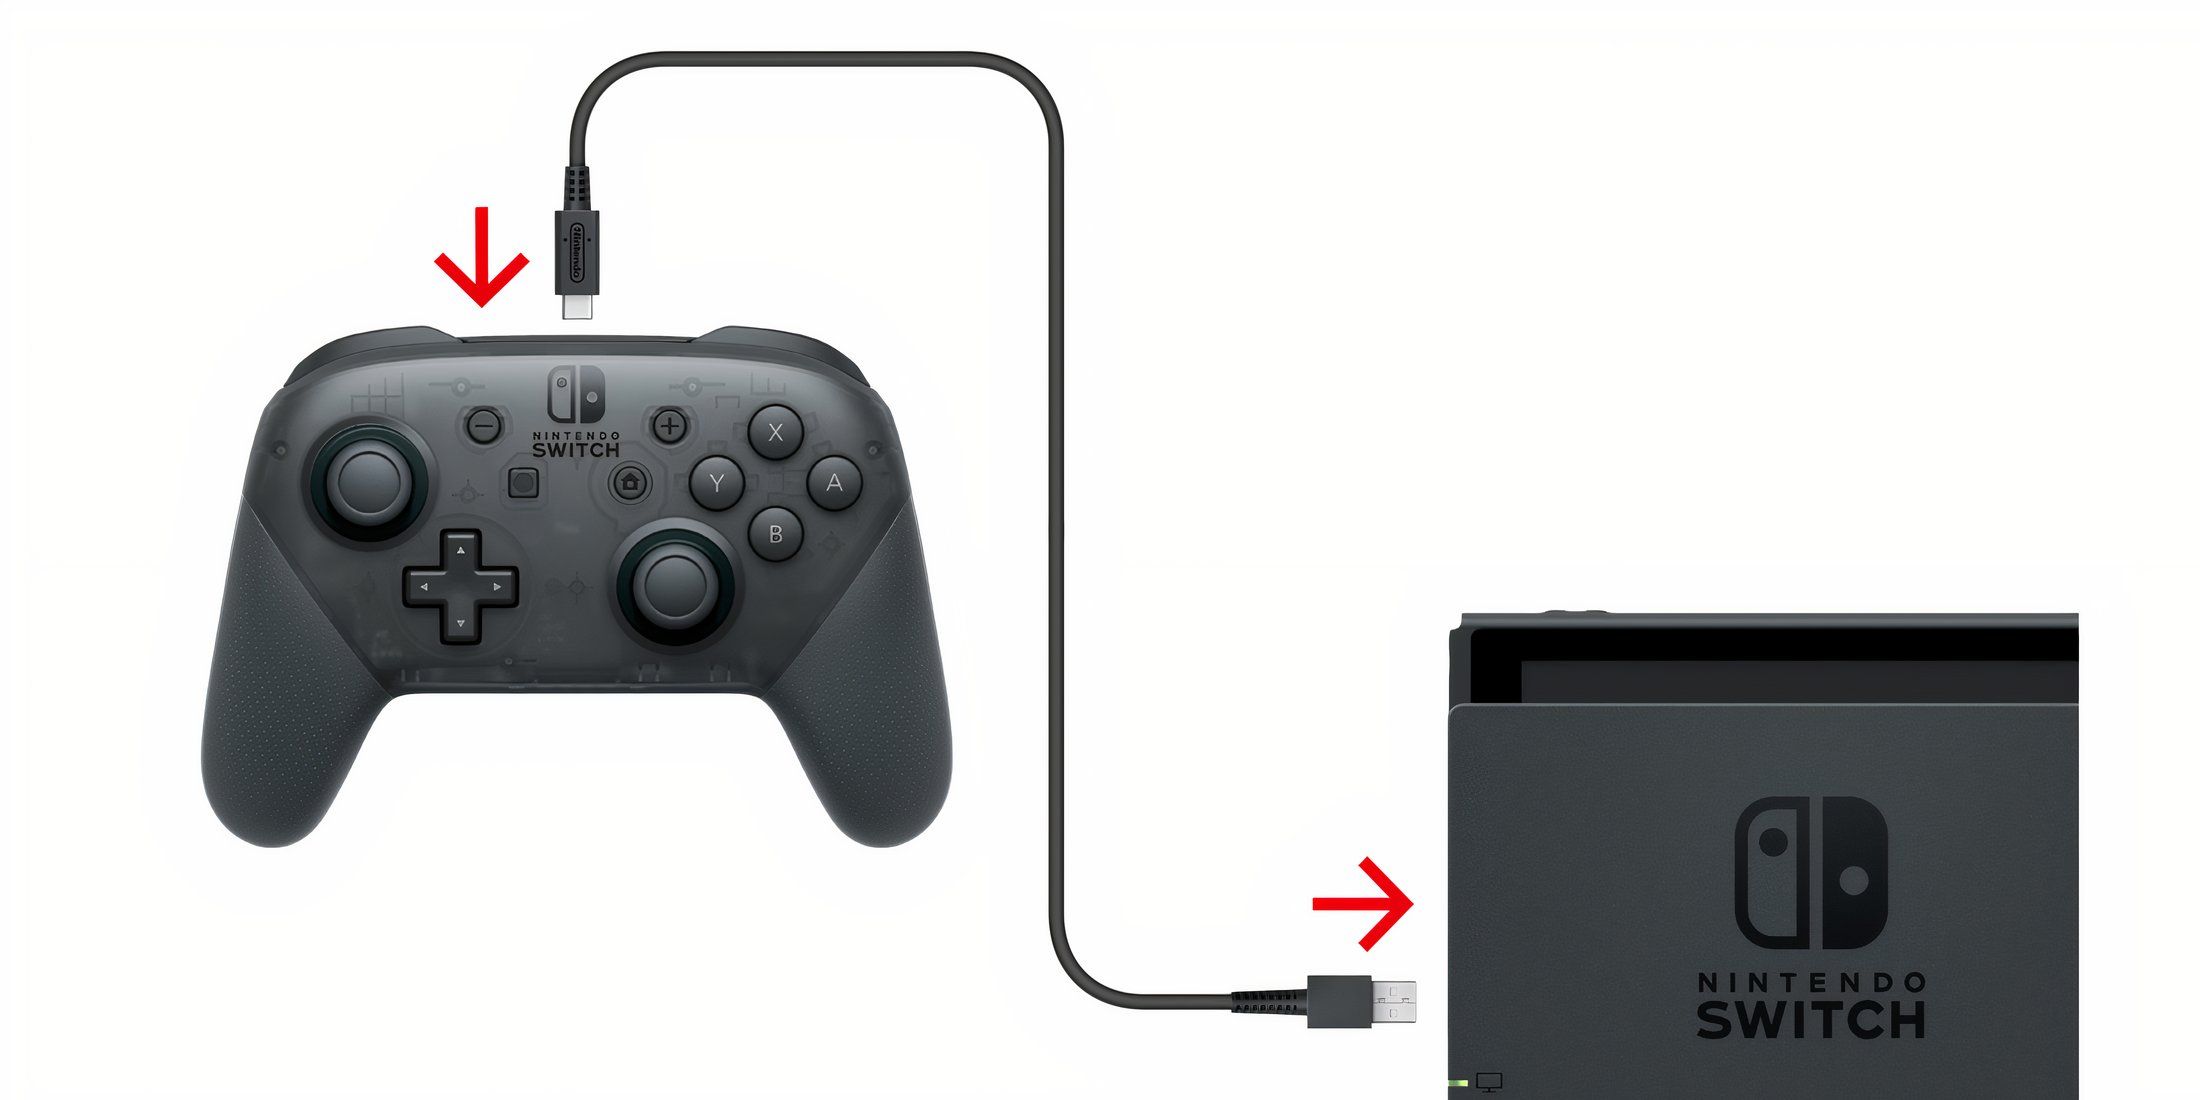
If my Nintendo Switch dock isn’t hidden away in our home’s entertainment center, it might be simpler for me to manually connect it to my Switch console using the USB-C cable that should have accompanied my Switch Pro Controller. To accomplish this, I would need to position the console on its dock and then switch it to TV mode initially.
When your Nintendo Switch is in TV mode, insert one end of the USB-C cable into the dock. Next, place the other end into the top of the Pro Controller. If you’ve connected them correctly, a “paired” message should appear instantly on the upper left corner of your TV screen.
Playing with the Pro Controller While Still Connected to the Switch
Once you’ve successfully linked your Pro Controller to the Switch using the USB-C cable, you have the option to continue playing with the cord attached if desired. This setup enables charging of the device during gameplay, especially useful when battery life is running low. Additionally, a wired connection often provides a slight edge in competitive gaming scenarios since it tends to be faster than wireless connections.
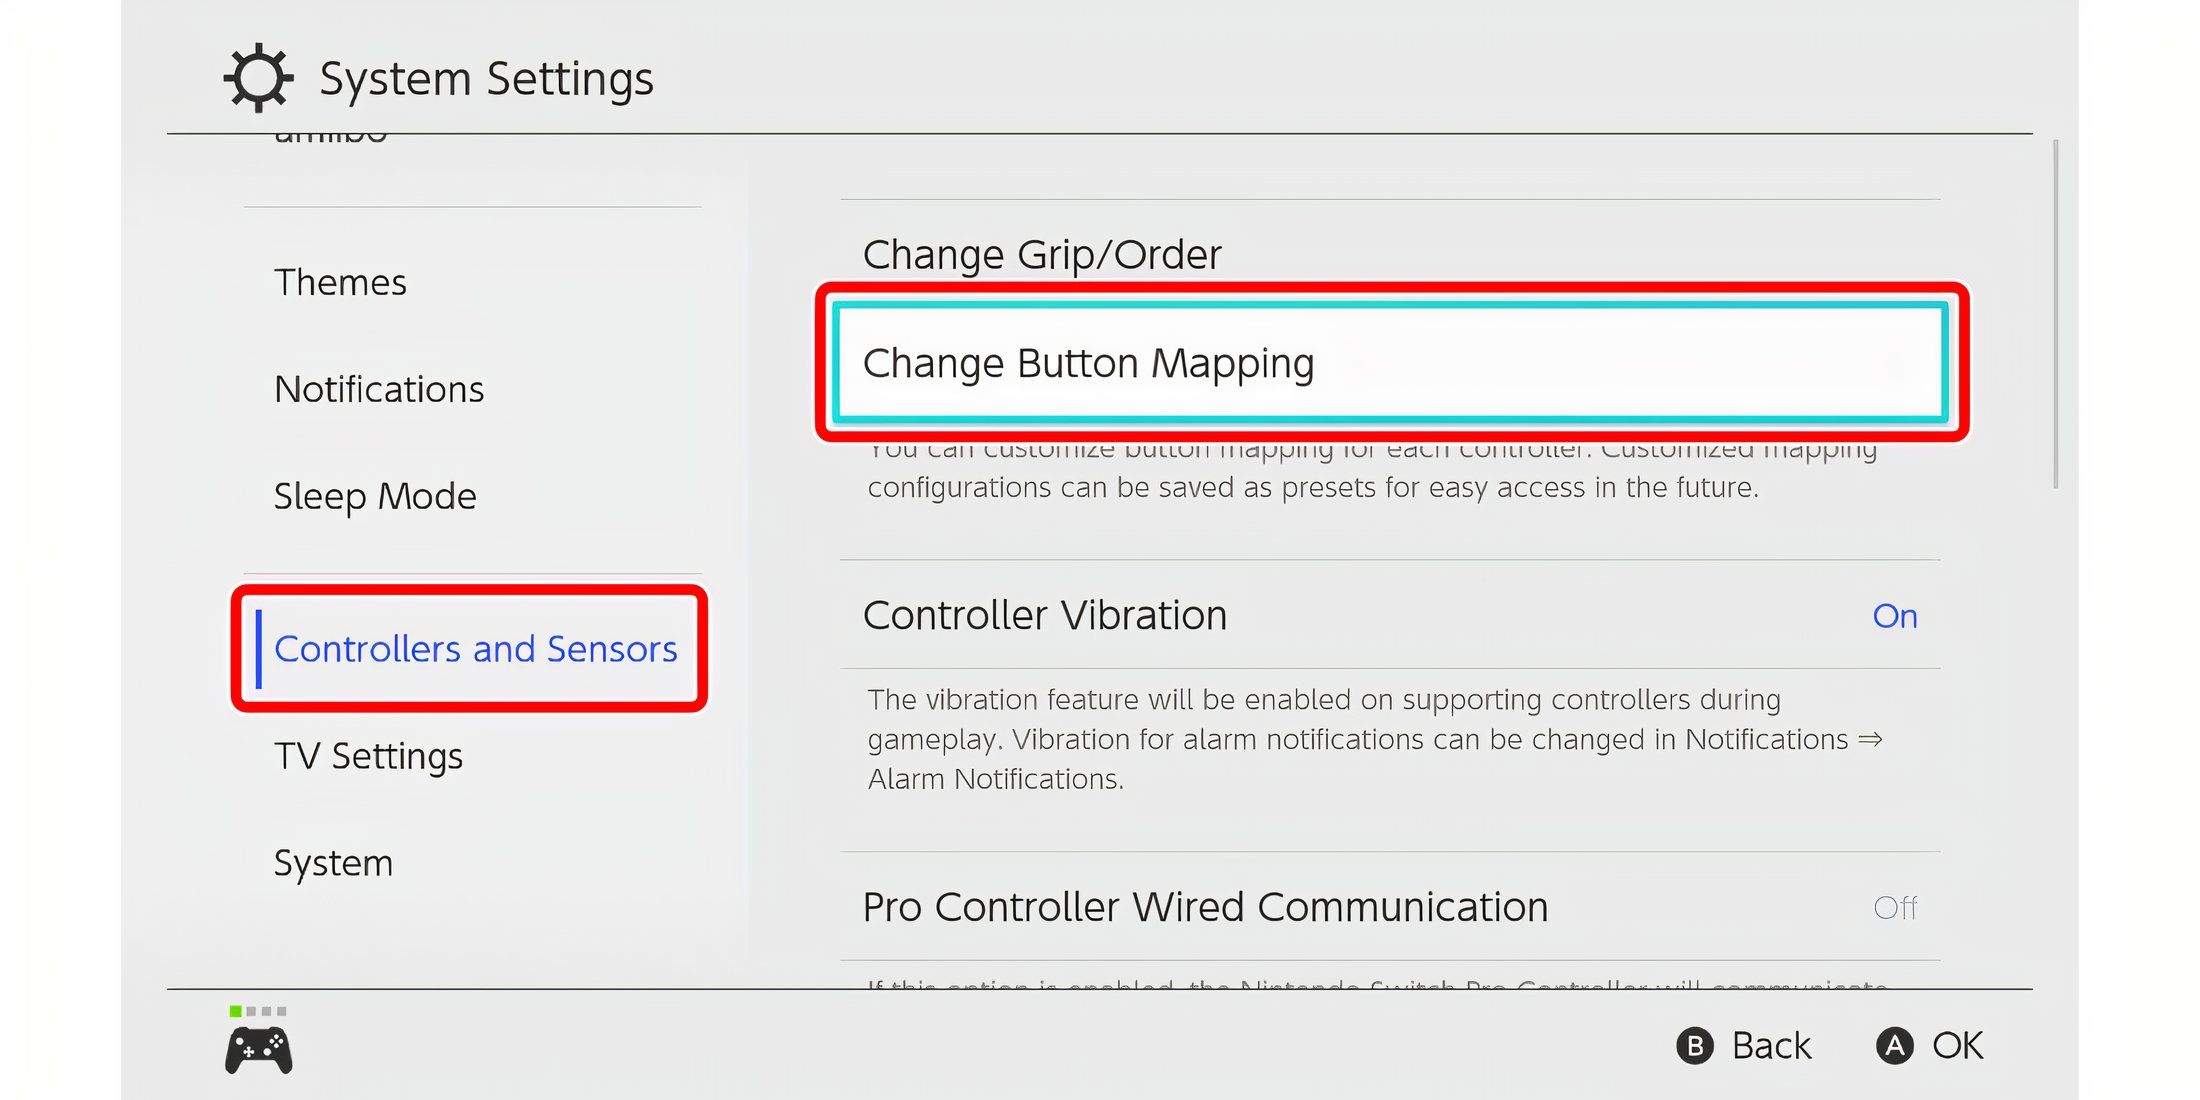
You won’t find an automatic setting for this, but here’s how you can manually configure it: To make your controller communicate via a wired connection only, navigate to the system settings. From the home screen, look for the “System Settings” option located at the bottom right corner. Once there, select “Controllers and Sensors”. Finally, choose “Pro Controller Wired Communication” to enable this feature.
Using a wired connection instead of wireless for your controller disables its wireless capabilities. Consequently, the Near Field Communication (NFC) function on the Pro Controller, which allows it to interact with amiibo toys, will also be deactivated.
Remapping the Pro Controller’s Button Layouts
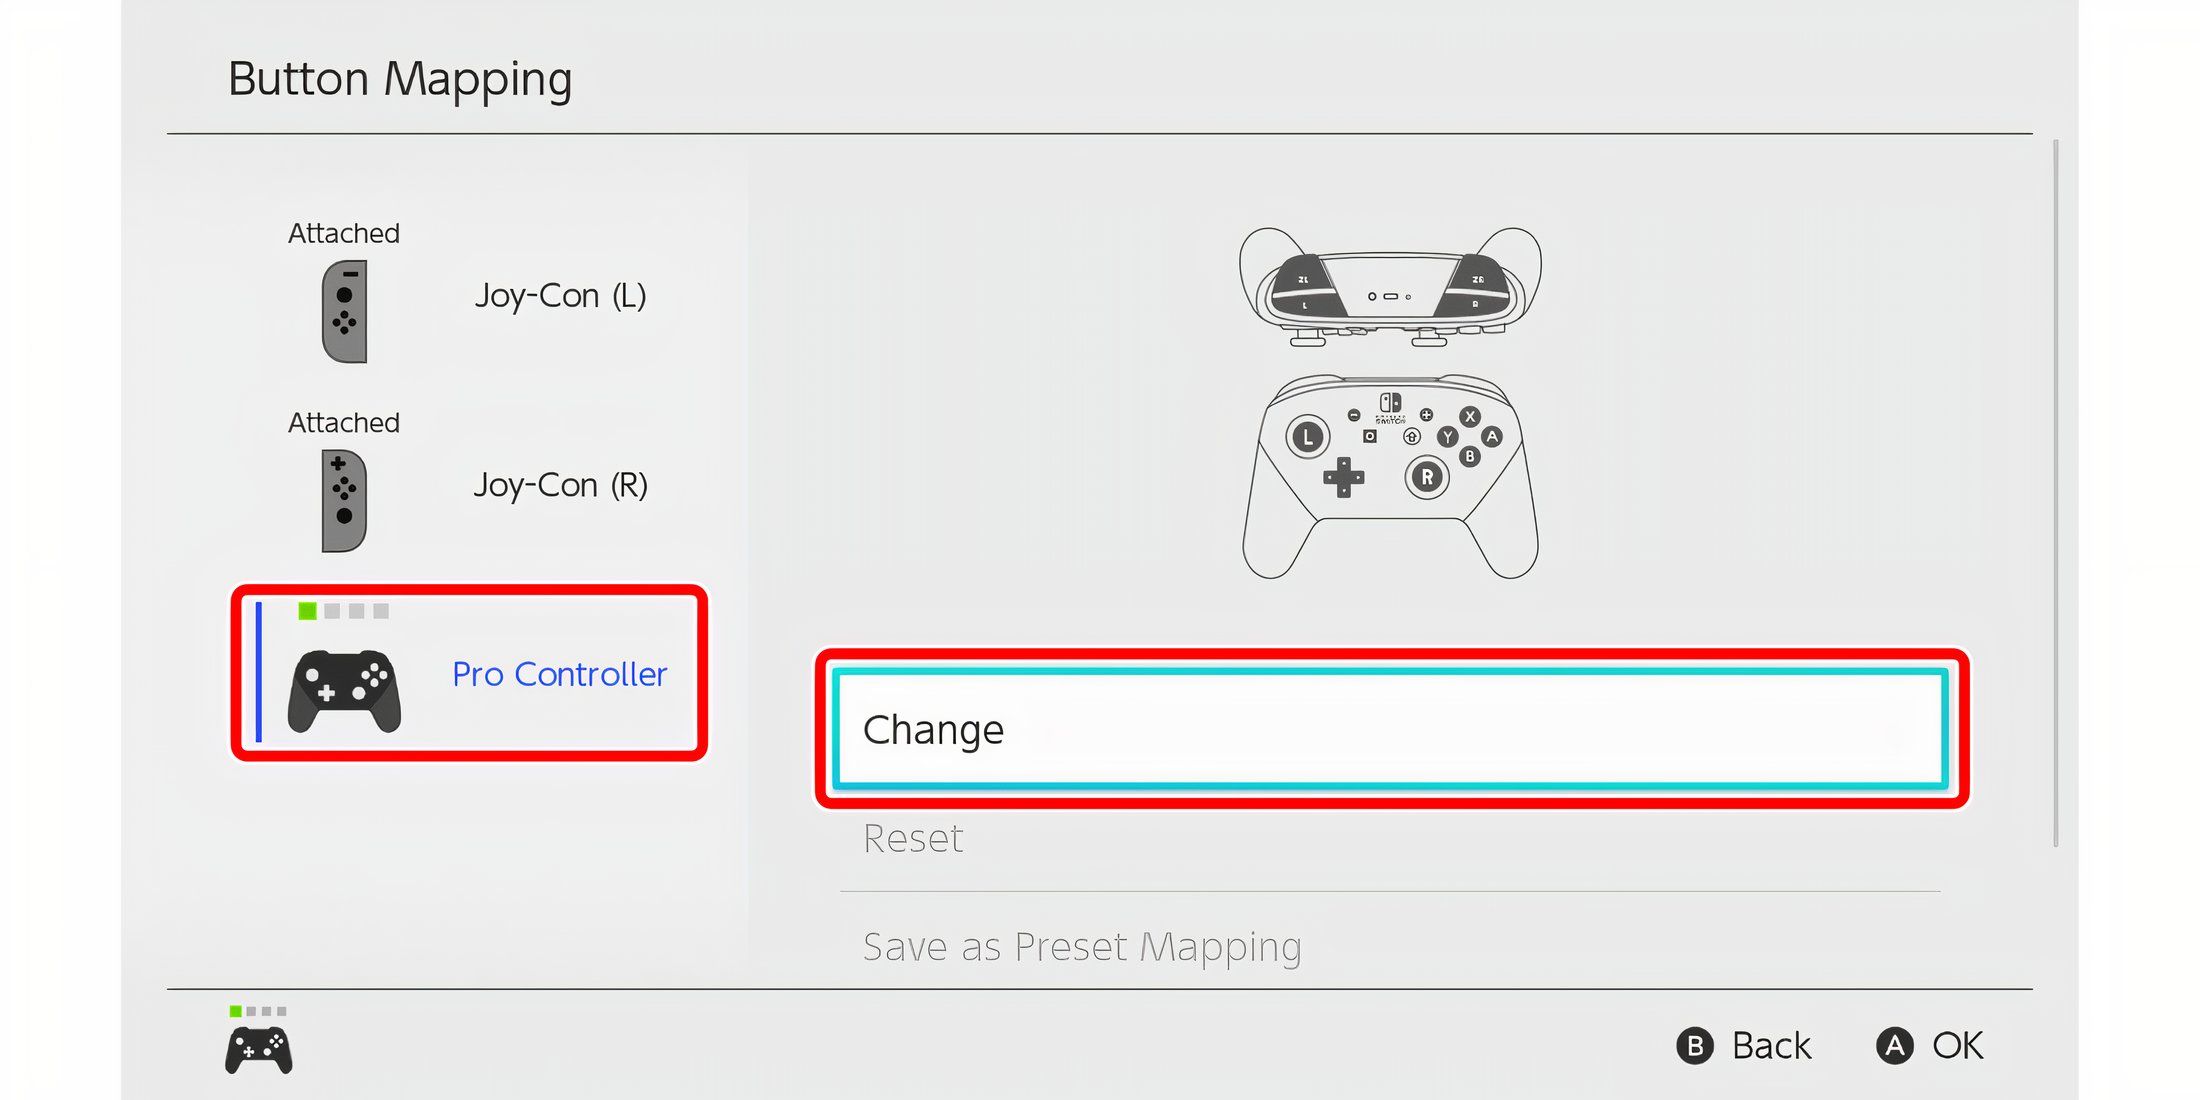
Have you heard? The Nintendo Switch Pro Controller lets you customize the placement of your buttons! Just ensure that your Nintendo Switch is updated to version 10.0.0 or later for this functionality. Once updated, you can adjust your control setup according to your preference. Intriguingly, you can save up to five unique setups for each controller type, making it a breeze to switch between them depending on the game you’re playing.
Nintendo treats each Joy-Con (left and right) as separate controller types, similar to how they view the Pro Controller. This allows for individual customization of each one. The profiles for these controllers are saved on the Switch itself, rather than on the controllers themselves. As a result, all left Joy-Cons share profiles with other left Joy-Cons, while right Joy-Cons share profiles with other right Joy-Cons. Similarly, all Pro Controllers share profiles among themselves. It’s worth noting that since the profiles are stored on the Switch, you can’t transfer your customized remapping configurations to other systems when using connected controllers.

Nintendo has restricted the functionality of reassigning controller buttons exclusively for their official Joy-Cons (left and right), as well as the Pro Controller. This system setting won’t accommodate third-party controllers. Remappable button support is extended to the Nintendo Switch Lite too.
Read More
- All Skyblazer Armor Locations in Crimson Desert
- How to Get the Sunset Reed Armor Set and Hollow Visage Sword in Crimson Desert
- All Shadow Armor Locations in Crimson Desert
- Marni Laser Helm Location & Upgrade in Crimson Desert
- All Helfryn Armor Locations in Crimson Desert
- All Golden Greed Armor Locations in Crimson Desert
- Best Bows in Crimson Desert
- All Icewing Armor Locations in Crimson Desert
- How to Beat Stonewalker Antiquum at the Gate of Truth in Crimson Desert
- Legendary White Lion Necklace Location in Crimson Desert
2025-03-14 01:12