Quick Links
-
Cup Climb
-
Darkest Room
-
Bell Climb
-
Piano Playing
-
Secret Boss Fight
-
Boss Rewards
In each chapter of Deltarune, a hidden boss battle has gained significant attention. This includes the intricately veiled boss in Chapter 3, creating a plentiful supply of enigmatic encounters for players to engage with.
In other words, just like the previous chapter, Chapter 4 follows a more conventional pattern. You can access the hidden boss only if you haven’t closed a fountain up to that point.
Engaging in this battle offers a distinct experience and presents you with another Shadow Crystal – the fourth out of five needed to create something extraordinary, as per Seam’s suggestion from the store.
Reaching that destination follows closely the route outlined in Chapter 1 for reaching Jevil, leading you to locate pieces of a puzzle hidden in less obvious spots throughout the initial sections of the Dark World.
Cup Climb
From the instant you acquire your Climbing Gear, you may embark on your path to the Hidden Boss. After you’ve obtained it by following regular gameplay, simply return to the Study, which will serve as your reference point moving forward.
If you’re only interested in battling the hidden opponent in this tutorial, you could jump straight to the Piano segment without further ado. However, I’d advise you to gather the clues first for a more enjoyable experience.
Based on the study, take a left turn, then walk straight down and again to your right, which will lead you to the library where Ralsei activated Stoole Mode R. From this point, head left to find yourself in a dimly lit room adorned with lanterns and peculiar orbs of darkness.
To reach the upper-left corner of this room, navigate around the black orbs of shadow and ruin, run in circles if necessary. Once you’ve done that, scale the nearby wall to access a new area for climbing. Be aware that you’ll find yourself ascending alongside cascading water, so move swiftly.
To reach maximum speed, give a swift push to the incline and let go at the last instant, but be sure not to collide with any walls. Upon completion of this task, you will be rewarded with the initial section of the piano composition.
Darkest Room
As a devoted admirer, let’s retrace our steps from the previously mentioned library where Ralsei displayed his stunning Stool Forme. This time, instead of going left, we’ll head right. Once we reach a suitable climbing surface, ascend it. The very first doorway you encounter should be your target – that’s the one to enter!
Simply glance down, move upward and slightly to your left, then continue straight ahead until you spot a golden statue. This statue conceals something important in the upper part of the room.
Just take a look at the floor, go up from there, veer slightly left, and keep going straight until you see a golden statue. The top of this statue hides something significant within the room.
This straightforwardly results in a pressure pad revealing the central section of the tune, which you can utilize once we acquire the last and crucial piece of the puzzle.
Bell Climb
Move from your study into the room on the side filled with bookshelves, then continue moving towards the left until you reach the waterfall where donations are accepted. Next, proceed through the door located beyond the fountain, entering a rather dimly lit space.
You’ll find it quite simple to move around here if you keep an eye on the ground and follow the yellow undulations when you spot them. When you discover one leading to a wall, engage with it to ascend a set of bells.
The following room is equally user-friendly for navigation, and at its end lies the resolution of the Piano enigma. After a brief return trip from the Terrifying scenes, take a moment to enjoy some tea, and we’ll swiftly proceed towards the hidden adversary.
Piano Playing
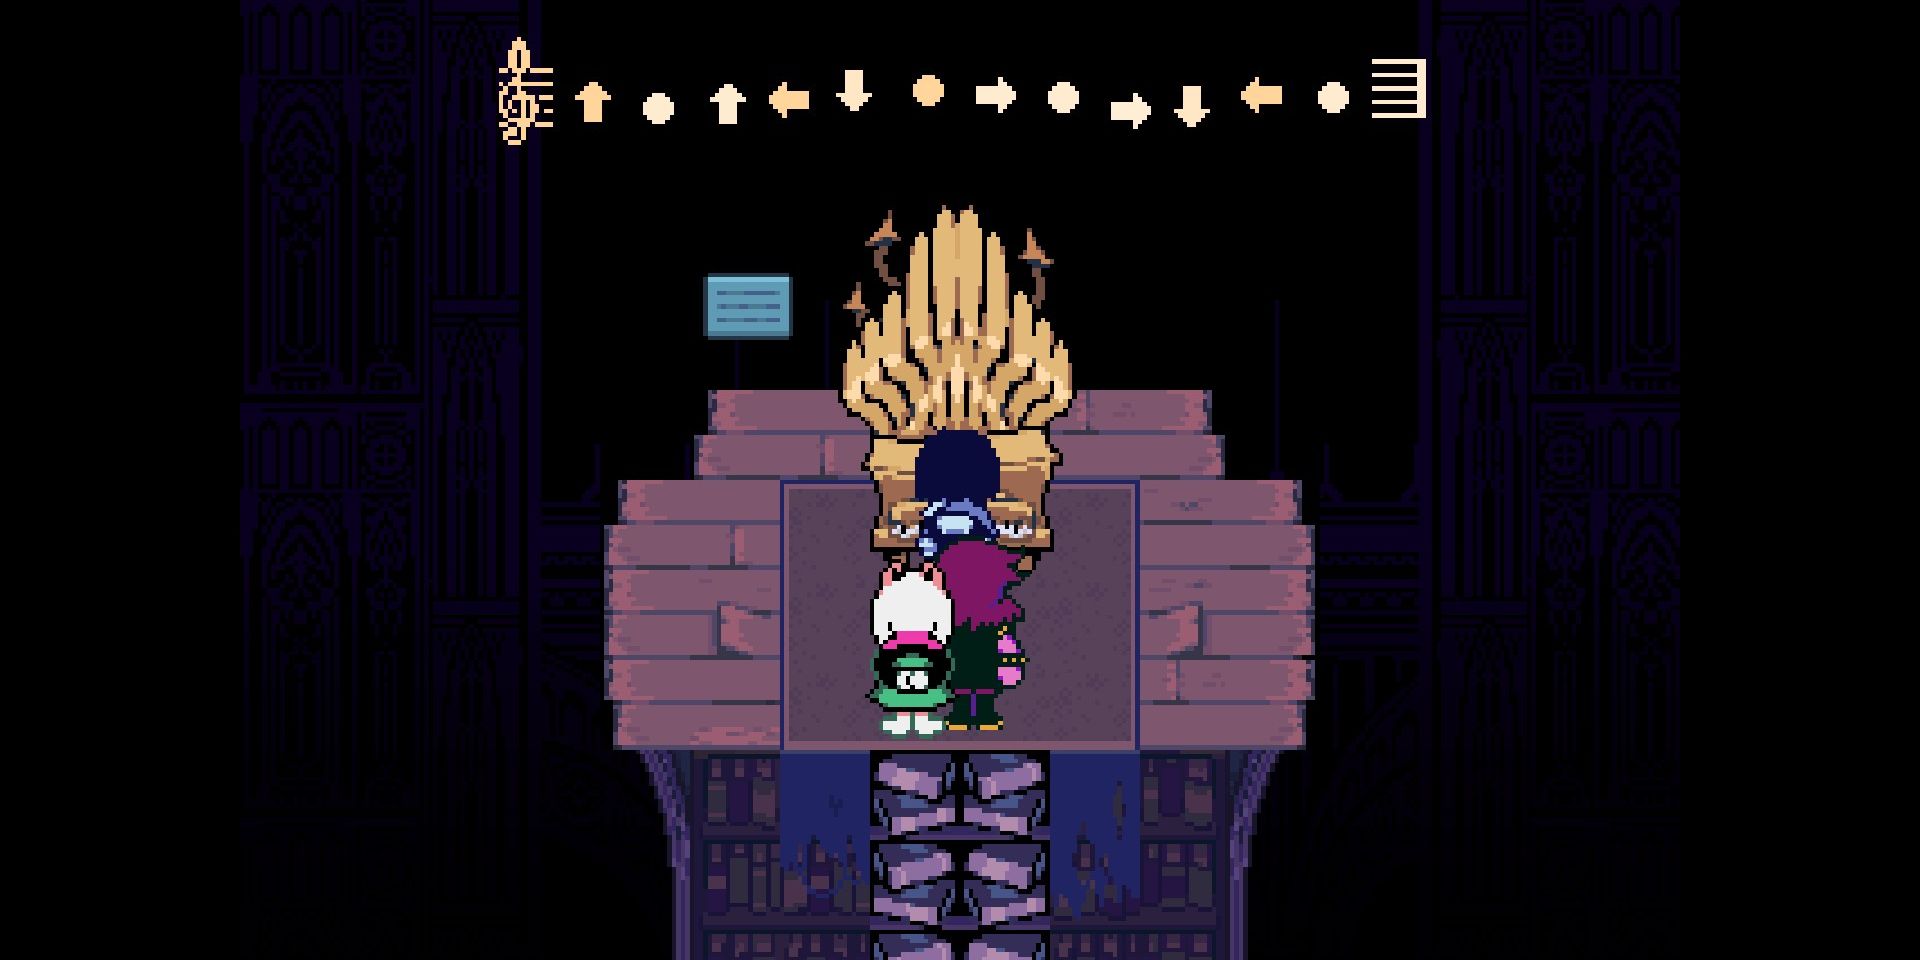
Based on the study, move your gaze upward and slightly to the left, then ascend the bookcase on the right side. Climb further up the subsequent bookcase, and you’ll reach the piano.
Follow this series of moves: Up, neutral, Up, left, down, neutral, right, neutral, right, down, left, and finally neutral again, and you’ll discover a hidden opening in the fireplace located within the Study.
Secret Boss Fight
Before diving into this battle, I’d advise beefing up Susie’s defenses as much as you can, and equipping her with an AbsorbAx for some additional health recovery. Skip the inventory management and focus solely on defense for this fight.
Your supervisor himself, the elderly figure who’s been tailing you throughout, yet in a costume reminiscent of the Hammer of Justice, accompanied by some pulsating tunes.
He will pit you against a face-to-face encounter, both with him and Susie. You’ll be compelled to activate the Green Soul mode that you may recall from Undertale, but this time it includes diagonal movements as well.
In this battle, the boss is highly reactive and requires advanced skills, making it challenging since he removes your gear and limits you to using just Susie, leaving little room for strategic planning.
Instead of the first two hidden opponents, this one doesn’t offer a distinct reward for sparing or defeating him. In fact, the only way forward in this confrontation is by resorting to violence.
Instead of waiting for enemy attacks, try to counterattack at the last moment by barely dodging their strikes, and occasionally use Susie’s less-than-perfect healing abilities to mend your wounds.
As a gamer, I personally find digital controllers challenging for certain fights. The analog stick seems to make defensive strategies more instinctive because there are no backward buttons to fret over, which simplifies the guarding mechanic significantly.
As a gamer, I should mention an interesting aspect: you can deal damage to gain a tad more health, but beware, this comes at the cost of losing out on some Turn Points (TP) that are crucial for defensive purposes. So, it’s a trade-off you might want to consider carefully.
Boss Rewards
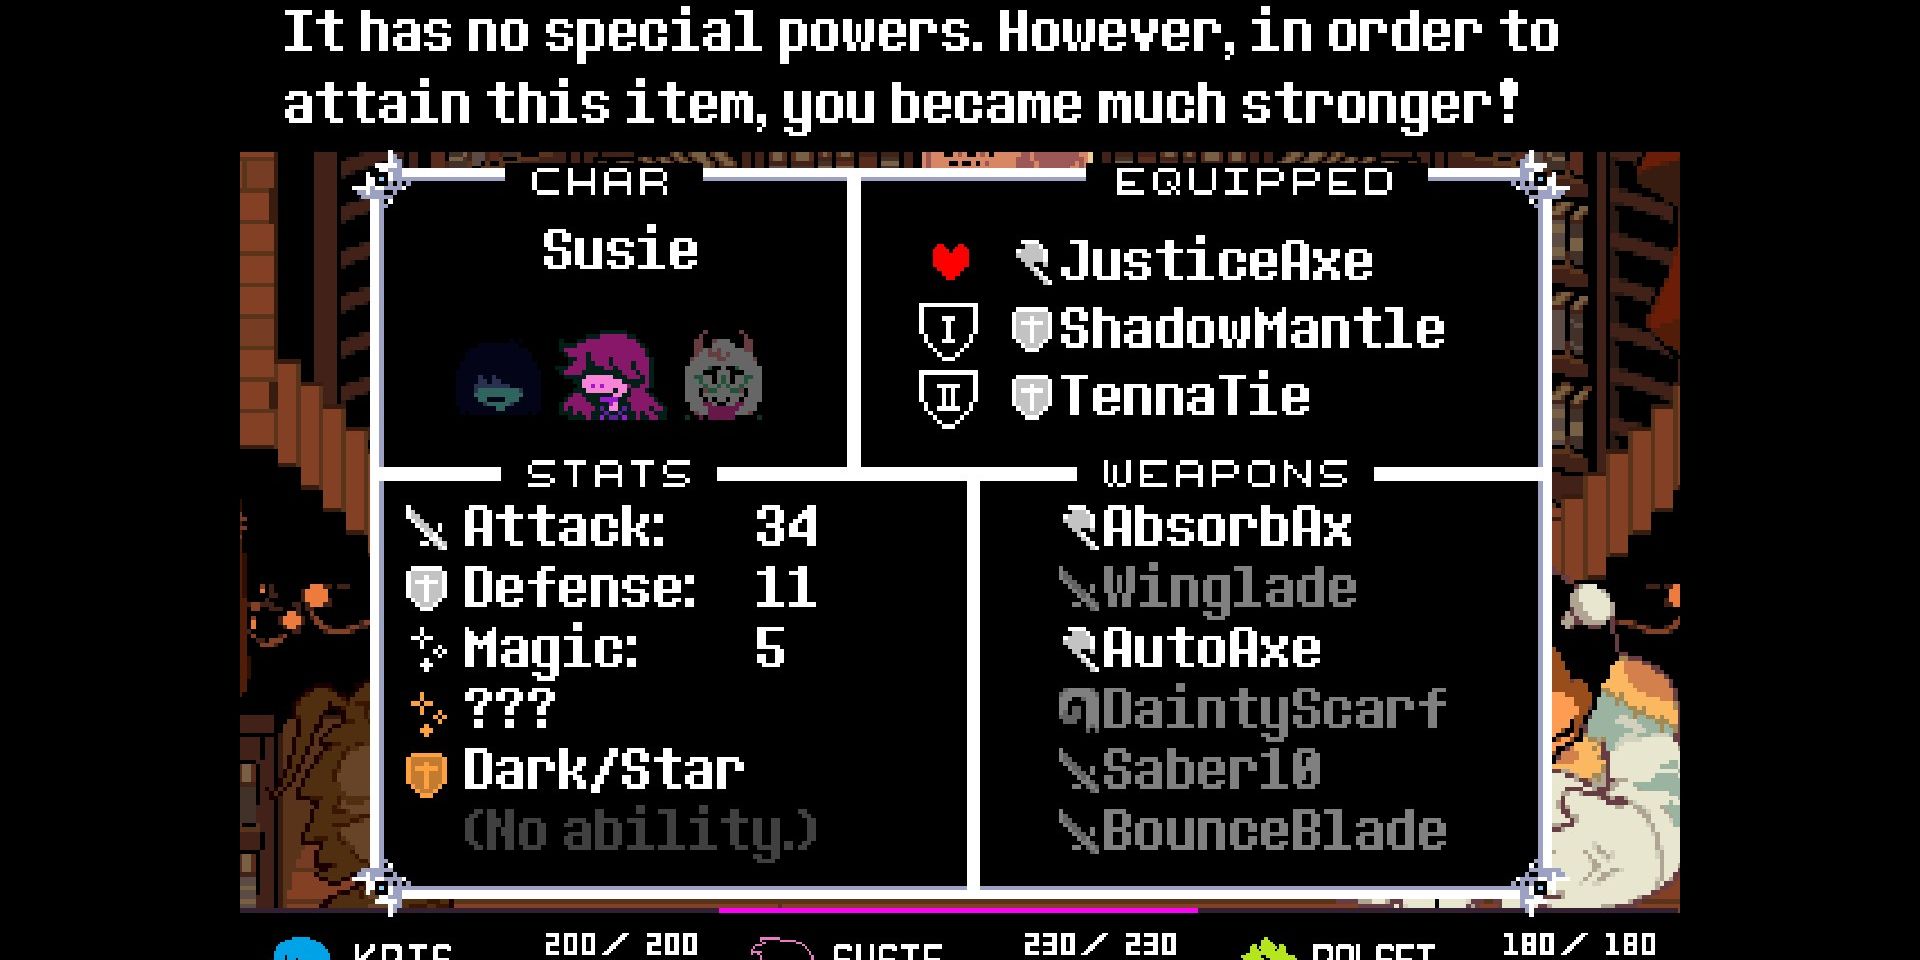
To defeat the Master of the Hammer, you’ll receive another Shadow Crystal as Gaster has been generously distributing them lately, and a top-notch Axe for Susie.
Instead of bestowing vampirism like the AbsorbAx does, it offers a bonus of +4 to your attack stat. This boost is particularly useful during later battles within this chapter.
To put it simply, engaging in this fight offers just one benefit – the enigmatic Shadow Crystal – and it comes with a tradeoff. If you’re already accustomed to resorting to violence often, then this battle might be most advantageous for you.
Read More
- All Shadow Armor Locations in Crimson Desert
- How to Get the Sunset Reed Armor Set and Hollow Visage Sword in Crimson Desert
- Best Bows in Crimson Desert
- Jujutsu Kaisen Season 3 Episode 12 Release Date
- Wings of Iron Walkthrough in Crimson Desert
- All Golden Greed Armor Locations in Crimson Desert
- All Helfryn Armor Locations in Crimson Desert
- How To Beat Ator Archon of Antumbra In Crimson Desert
- How to Craft the Elegant Carmine Armor in Crimson Desert
- Dark Marksman Armor Locations in Crimson Desert
2025-06-07 20:39