Quick Links
-
First Encounter – Break The Ritual
- Introducing Hive Runes
- Walkthrough
- Recommended Loadout
-
Traversal – Explore The Wreckage
- Walkthrough
-
Second Encounter – Ecthar, The Shield Of Savathun
- Walkthrough
- Recommended Loadout
-
Continue To Descend
- Walkthrough
-
Third Encounter – Simmumah Ur-Nokru, Lucent Necromancer
- Walkthrough
- Recommended Loadout
The dungeons in Destiny 2 have consistently stood out as one of the game’s most enjoyable aspects. They offer a balanced level of difficulty for players, making them challenging yet achievable without requiring an overly daunting solo-flawless completion.
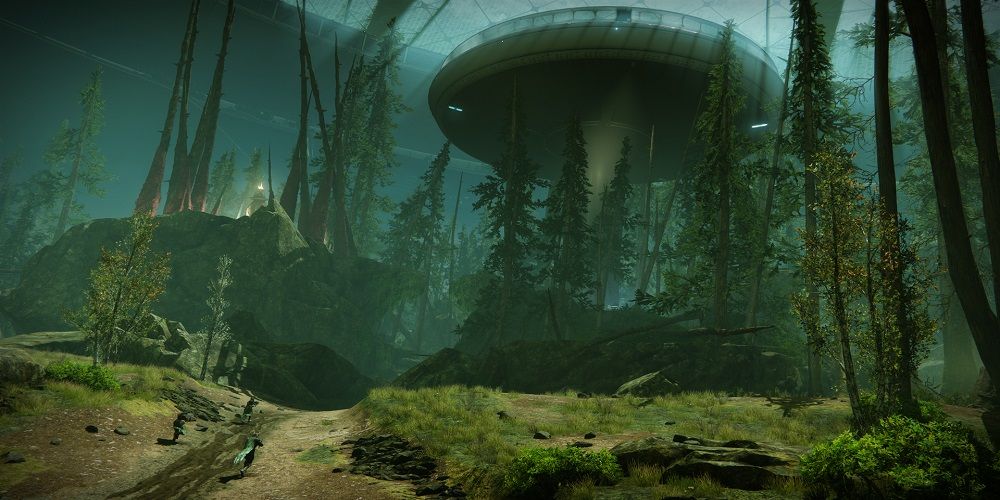
Some dungeons may prove more challenging than others, and the Ghosts of the Deep is no exception. This particular challenge features laborious encounters with bosses and puzzles that require exceptional memory skills. In this underwater labyrinth on Titan, you embark on a mission to thwart a Hive ritual taking place in the methane oceans depths.
This particular dungeon became available during the Season of the Deep, which is set within the Lightfall expansion, on May 23rd, 2023. This guide is one of several that make up the Rite of the Nine series.
In the revised edition known as the Rite of the Nine, the workings of the dungeon largely stay the same. If you explore the Legends tab, you’ll find Memories of Darkness that can help you achieve the “In Memoriam” Triumph. This triumph increases your chances of getting the Navigator Exotic Trace Rifle.
In this lesson, we’ll delve into the essentials of the dungeon, provide step-by-step guides for completing it, and discuss the equipment required for victory.
First Encounter – Break The Ritual
Introducing Hive Runes
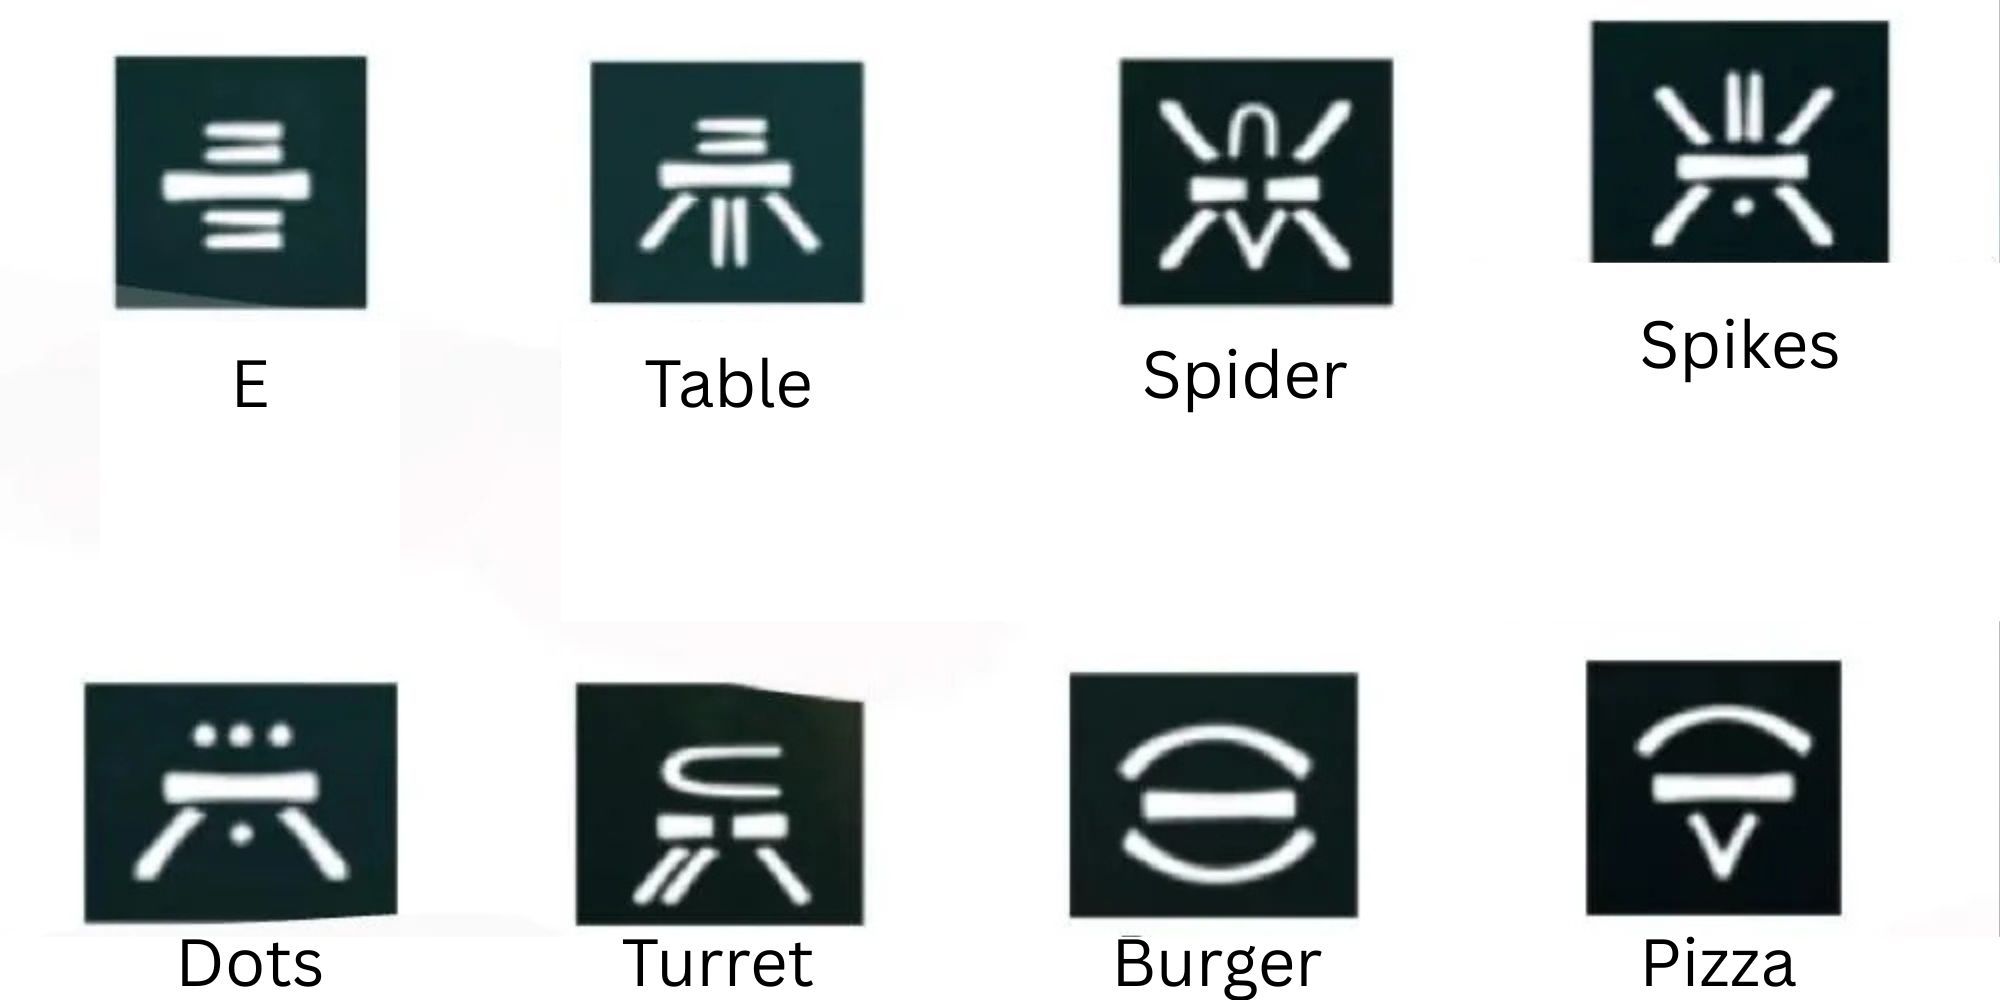
In our upcoming game, Ghosts of the Deep, you’ll encounter various symbols associated with the Hive. For simplicity and consistency in this tutorial, we will refer to these symbols by the familiar names that are commonly used among players in the gaming community.
Feel free to create your personal nicknames for these symbols, however, for the time being, let’s stick with the ones provided.
Walkthrough

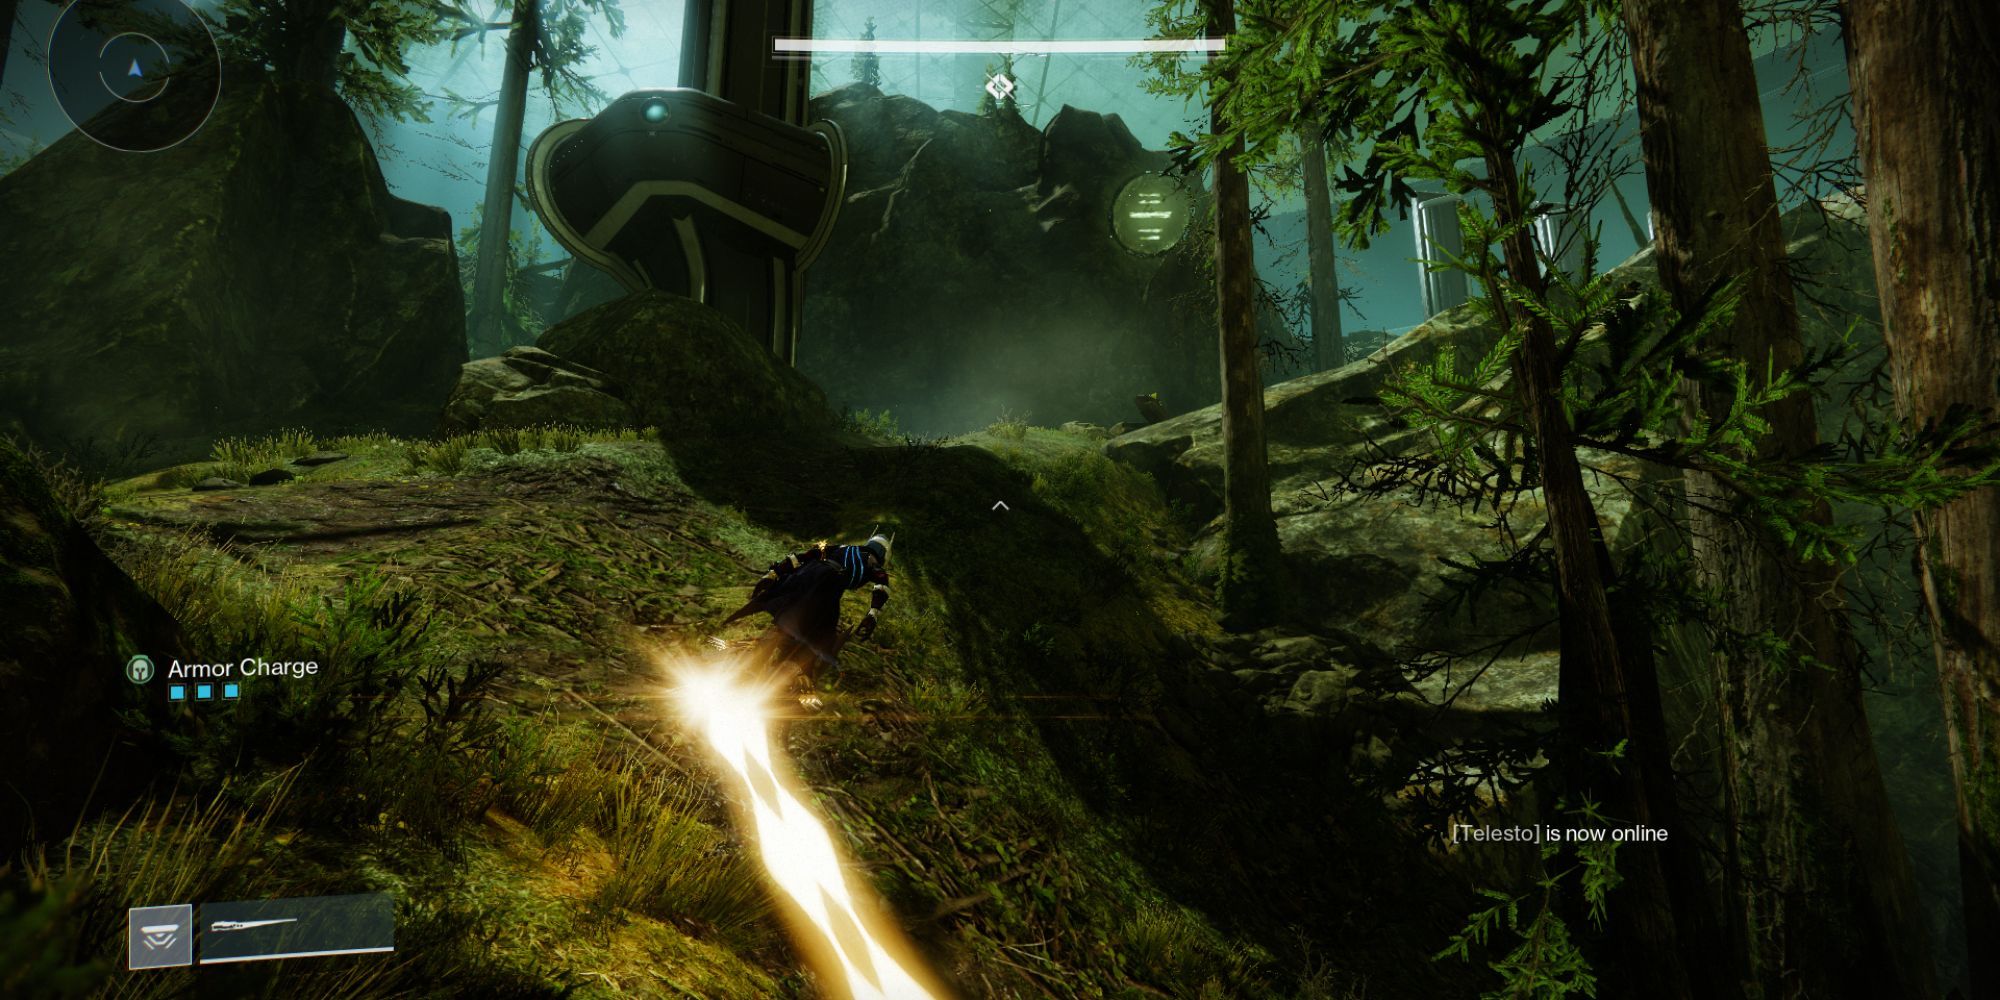
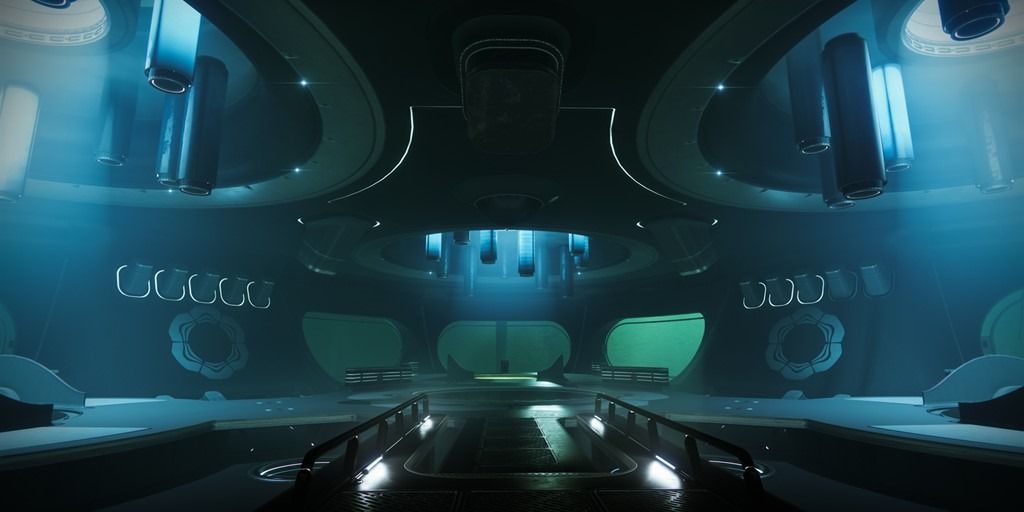
In the futuristic Arcology on Titan, you’ll initially appear. Here, you can conjure up and operate vehicles to navigate around the location. The recent inclusion of the Gryphon vehicle adds an extra dash of excitement, as its secondary fire comes in handy during your adventures.
Move towards a massive door, beyond which lies a sealed door fortified by Hive enchantments and a Hive ritual area encircled by statue-bound thralls. Your mission is to empower these statues with a “Spark of Light.” Gather your forces and let’s initiate the engagement.
From time to time, you may encounter a creature known as the Soulfire Binder, resembling an orange bar Ogre, who appears close to the ritual area. Slaying him results in a trail of hive residue, guiding you towards the vicinity of your next destination.
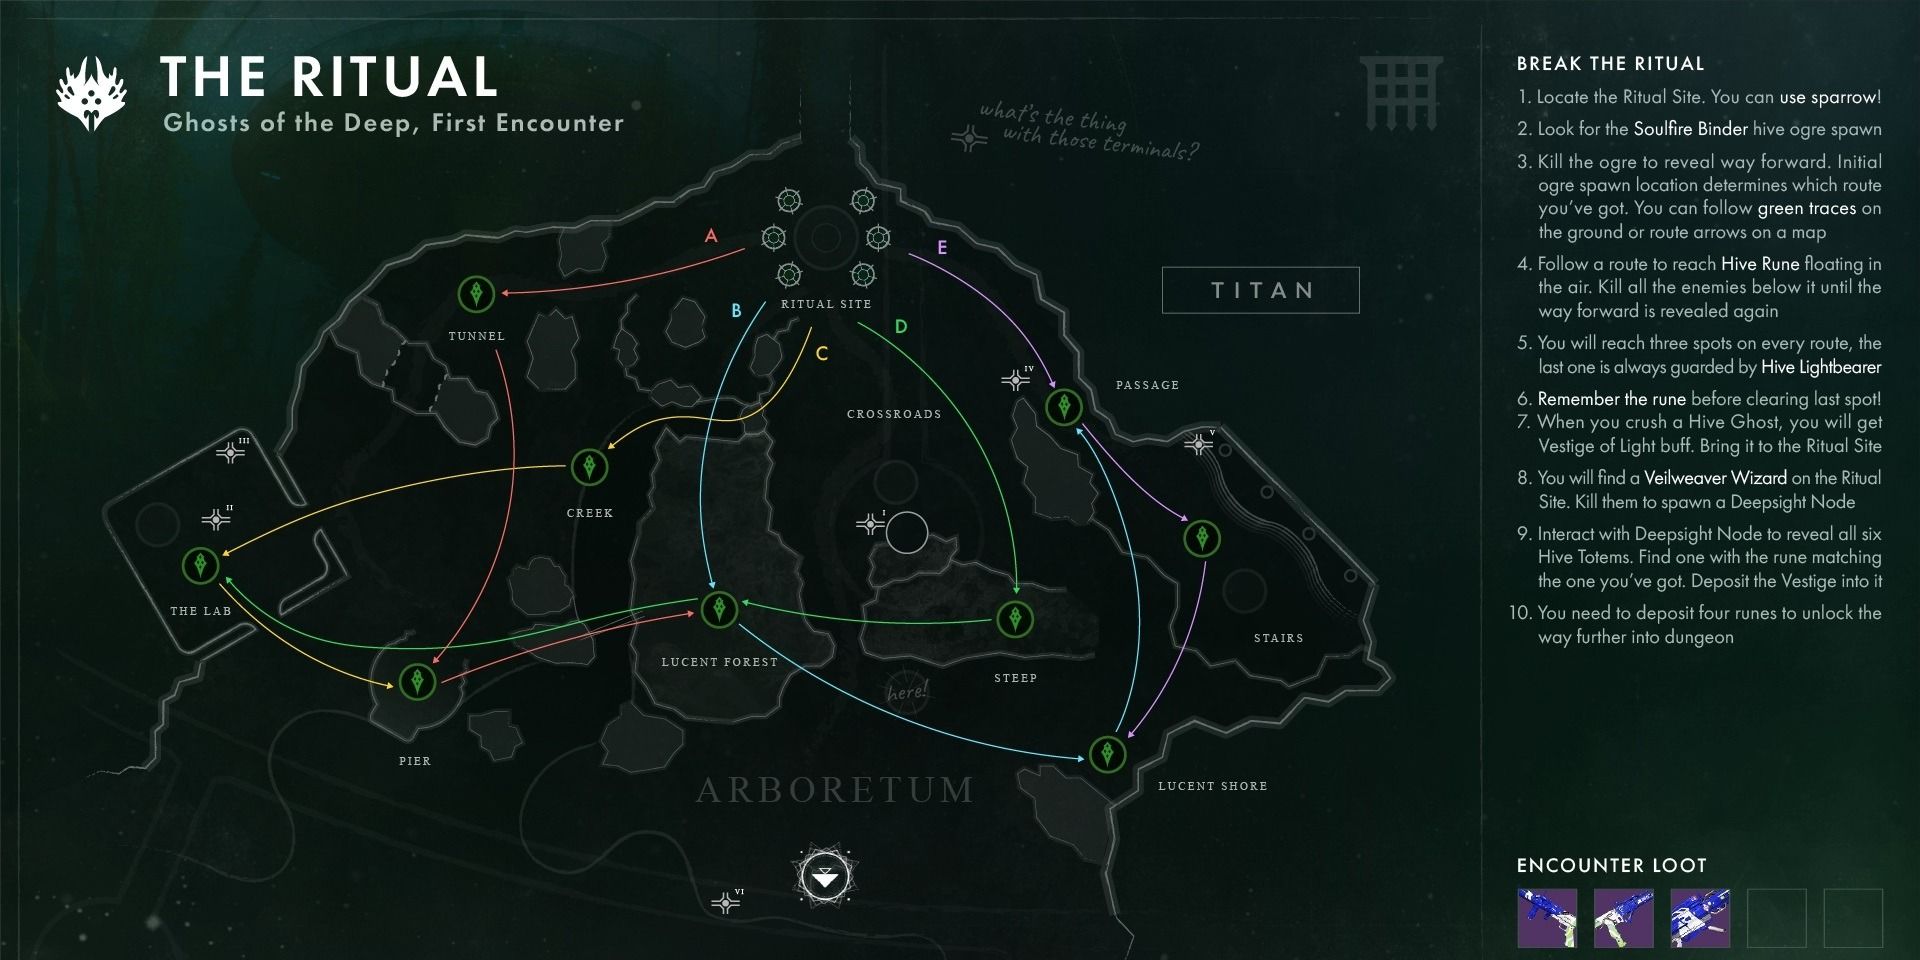
The maps used for this guide were taken from r/DestinyTheGame and were made by user pryanie.
You’ll find a group of Hive soldiers and a few Wizards. Killing them will reveal another path.
Next, you’ll arrive at the next location, and you’ll see a Hive symbol floating above it.
Additionally, you will encounter a fresh band of Hive and a Lightbearer. Overpower them and eliminate the Hive’s spectral entity. or
Besides the new Hive and Lightbearer group, your objective is to subdue them all and get rid of the Hive’s ghostly form.
As a gamer, I’d put it like this: “When I manage to take down the Hive Ghost, a Vestige of Light is mine – but be warned, it only offers temporary invincibility for approximately 90 seconds before it turns deadly.
Pay attention to the Hive emblem hovering close by. In this scenario, suppose the symbol you spotted is “E.
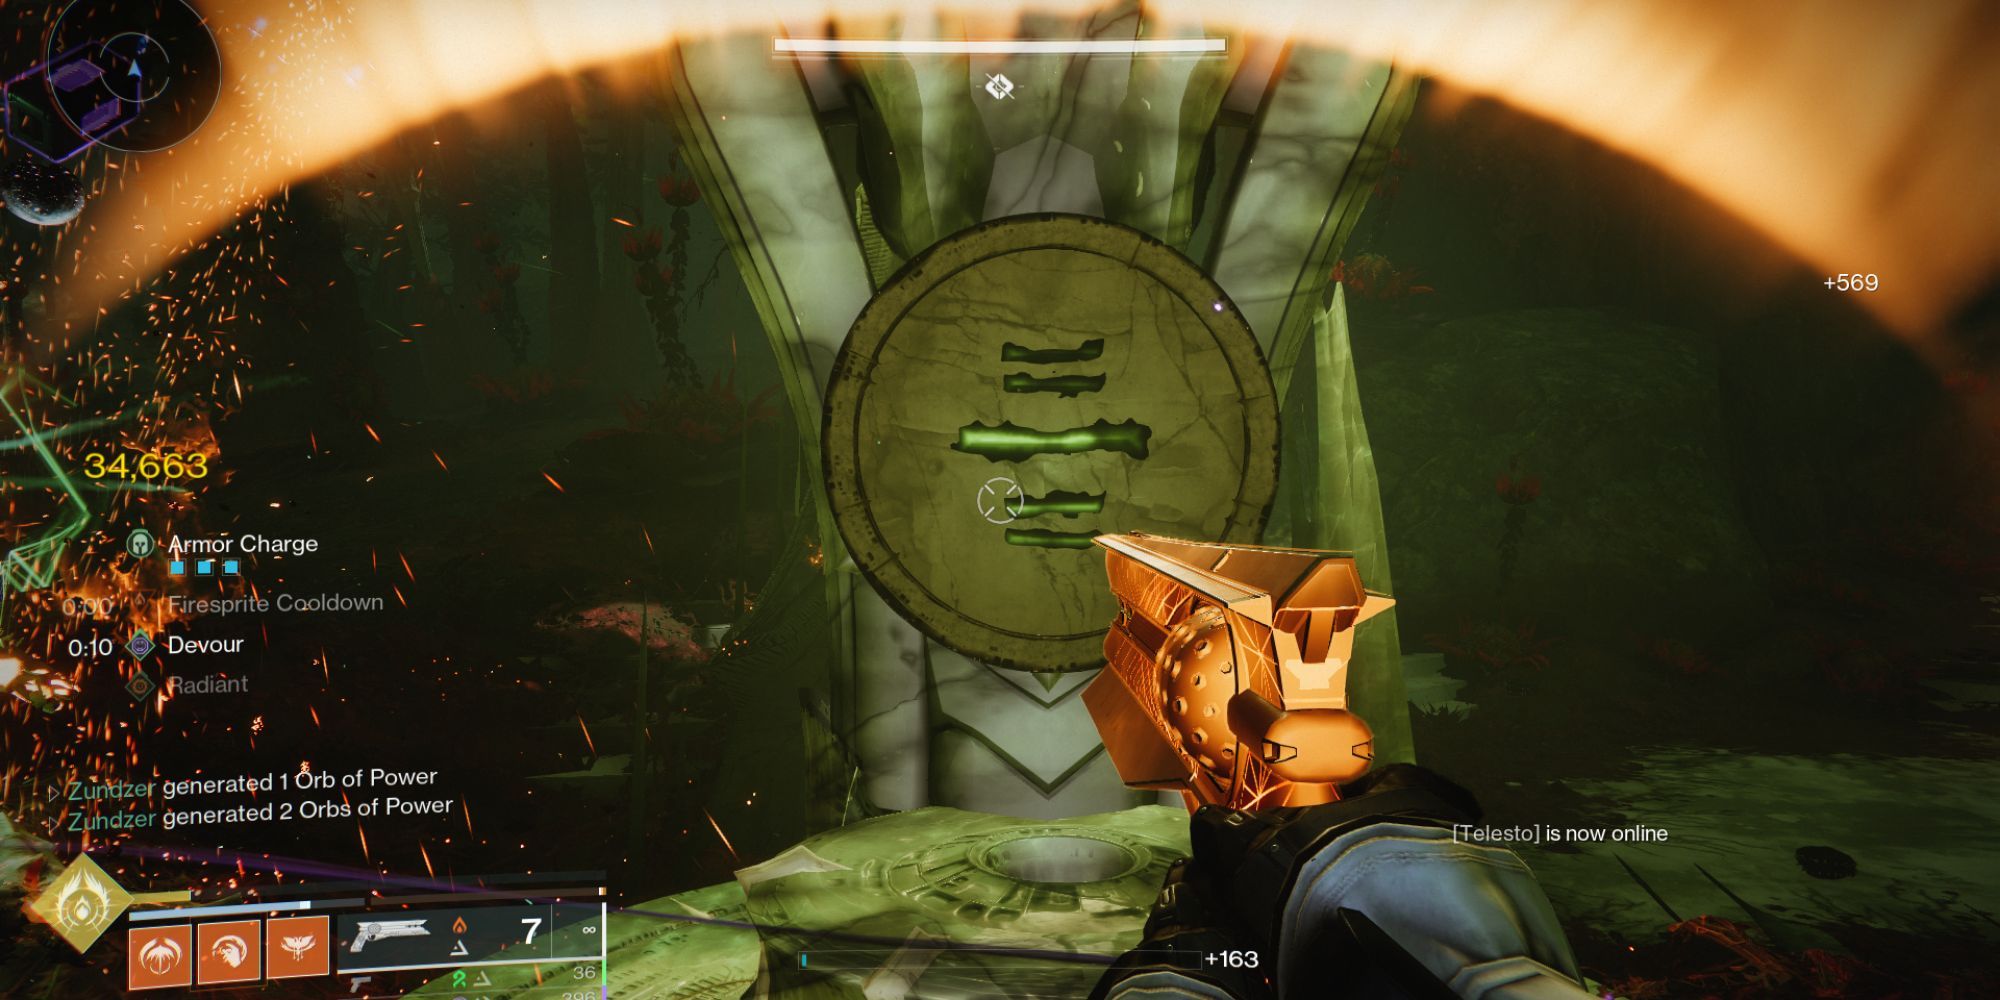
Returning to the mystic gathering spot, I find myself face-to-face with a Veilweaver Wizard. Slaying this foe yields a Deepsight illusion, an enigmatic artifact that, upon interaction, unveils runes etched on every nearby thrall statue.
Place the Light’s Remnant within the statuette bearing the mark you remember, which is symbolized as ‘E’. The right rune will trigger a chime, while the wrong one could be fatal, requiring you to repeat the procedure.
That’s one out of four statues. Do this three more times and you’ll complete the encounter.
Recommended Loadout
In this interaction, you won’t find it overly complex or challenging, and the adversaries you’ll face won’t be excessively difficult, with the exception of the Ogres that can shoot beams from their eyes and the Lightbearers.
Absolutely, you can customize your build according to what makes you feel most at ease, however, for many puzzle-like situations, it’s advisable to focus on survivability and clearing away additional elements first.
Here are two build options for each class available:
1. For players who are new or using the free-to-play version, I offer Light subclass builds.
2. For players who have purchased expansions, I provide builds that include both Dark and Prismatic subclasses.
You aren’t obligated to employ the suggested loadouts; they’re merely my preferred choices, backed by what I find effective. If you’re satisfied with your own setup, please continue using it. Additionally, a link to a Destiny Item Manager will be provided for your convenience.
| Titan | Warlock | Hunter | |
|---|---|---|---|
| Free-To-Play |
Solar Titan with Lorelei Splendor Helm. Aspects: Roaring Flames and Sol Invictus. |
Arc Warlock with Geomag Stabilizers. Aspects: Electrostatic Mind and Ionic Sentry |
Void Hunter with Gyrfalcon’s Hauberk. Aspects: Stylish Executioner and Vanishing Step |
| Expansion |
Prismatic Consecration Titan with either Synthoceps or Stoicism with Assassin/Syntho perk combo. Aspects: Consecration and Knockout. |
Prismatic Arc Buddy Warlock with Getaway Artist. Aspects: Bleakwatcher and Feed the Void. |
Prismatic Melee Hunter with Relativism with Caliban/Liar perk combo. Aspects: Stylish Executioner and Winter’s Shroud |
Feel free to choose any type of weapon that suits you best, but for optimal results, consider weapons capable of delivering large amounts of damage in quick succession. Examples include Rocket Launchers, Shotguns, and rapid-fire Machine Guns, which are great for clearing groups swiftly.
Traversal – Explore The Wreckage
Walkthrough
After gathering your treasures, proceed into the structure. Carry on along the route as it passes through a sequence of open gates and passages.
Alight on several platforms and leap over a damaged grating. Following this, you’ll find yourself in an expansive pipe. Continue by leaping from one suspended walkway to another, and eventually, you’ll reach a spacious chamber where you’ll meet some adversaries.
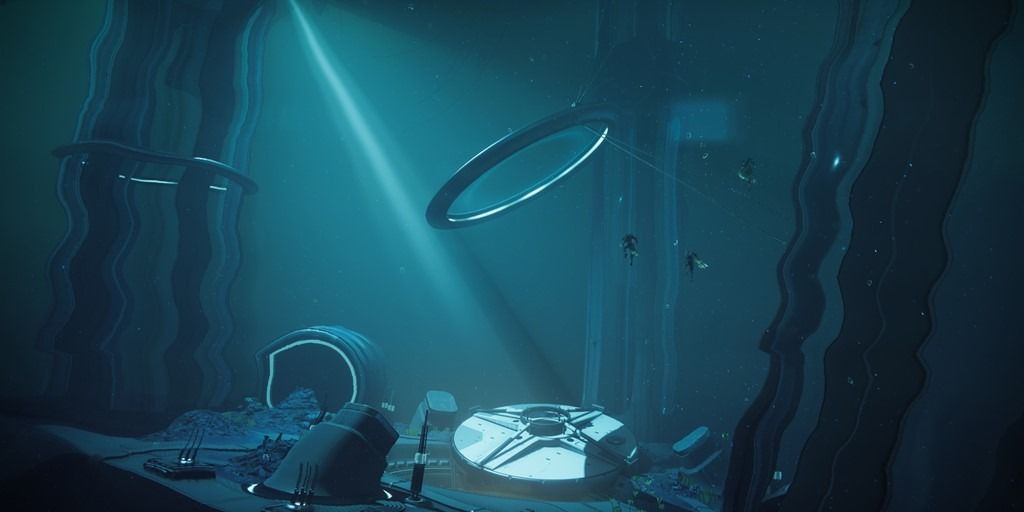
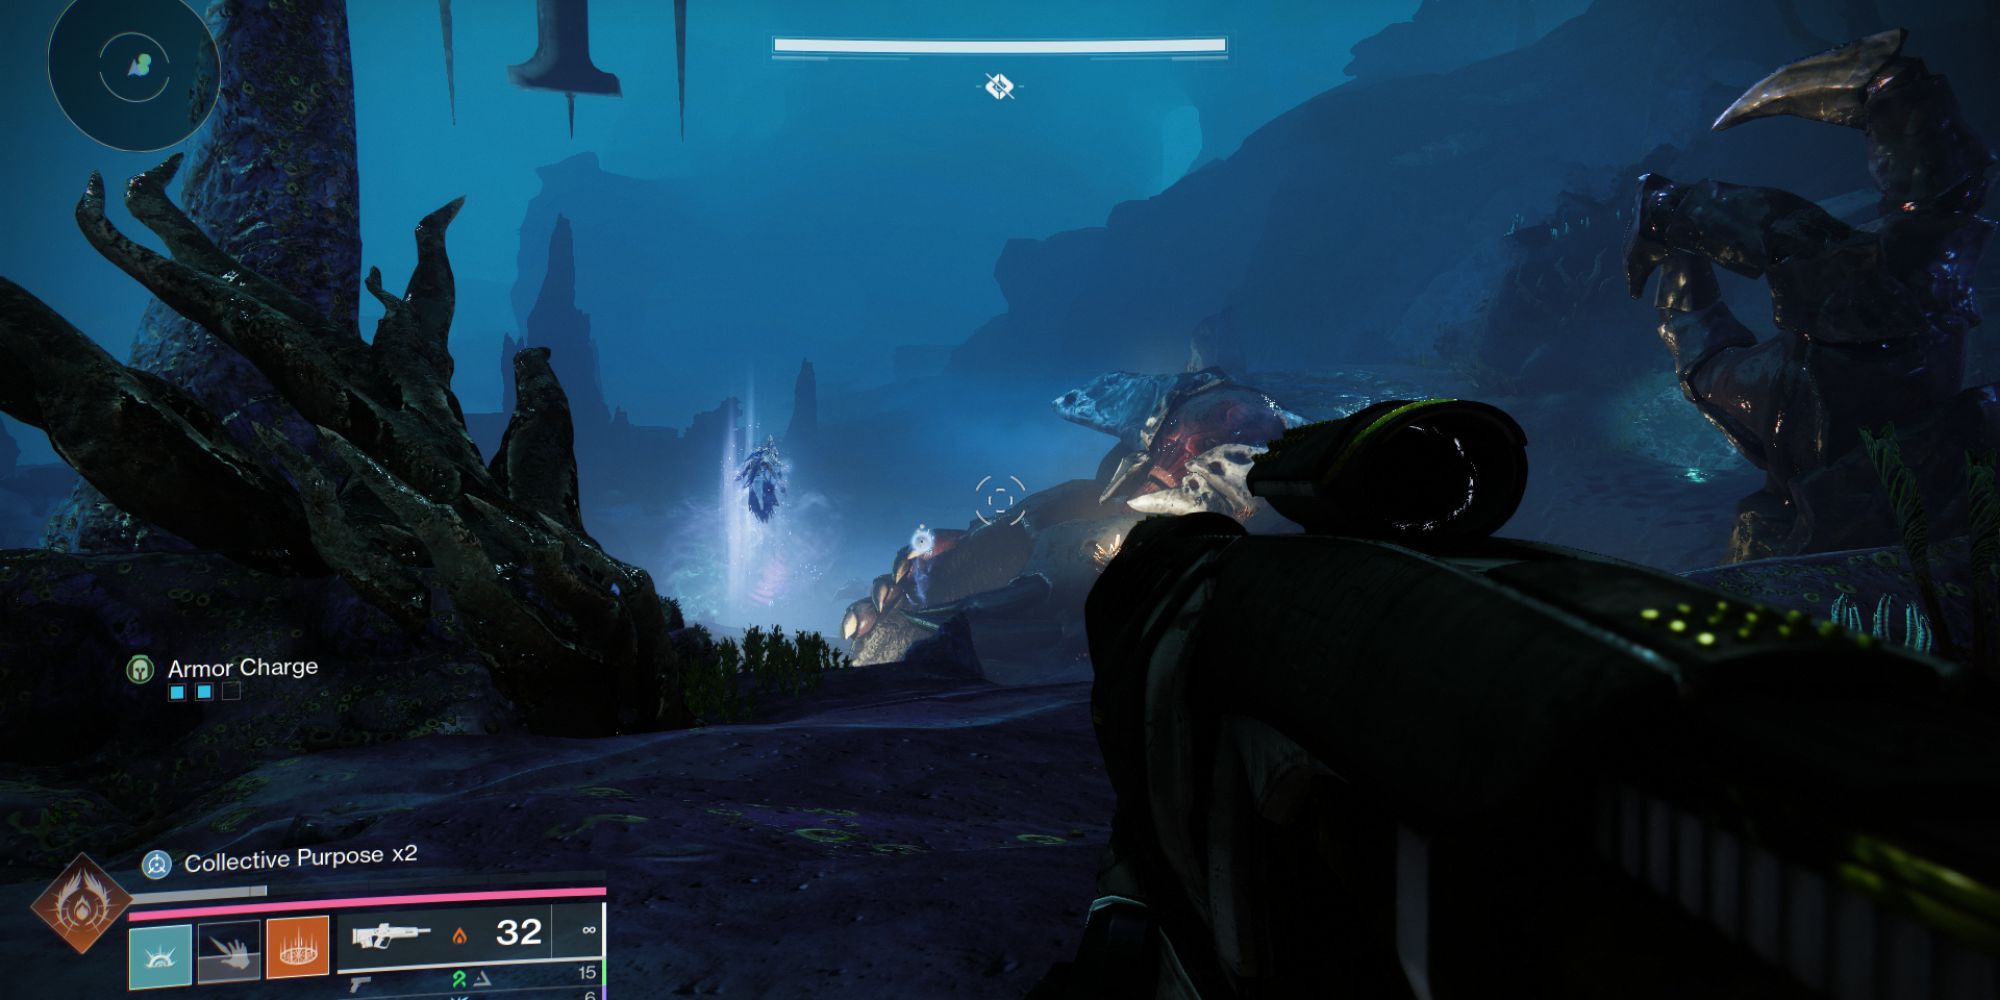
As a gamer, I plunge through, vanquishing every foe that crosses my path as I leap downwards. Eventually, I reach the bottom where a pool beckons me. Diving headfirst into this mysterious body of water, I discover it’s an entrance to an underwater realm. Now, I swiftly don my scuba gear and submerge myself in the depths of this methane ocean, ready for what lies beneath.
If you haven’t participated in Deep Dive activities during the Season of the Deep, you’ll see a gauge gradually decreasing while you’re submerged. This gauge represents your Resistance to Pressure. When it depletes completely, you’ll start taking damage and eventually perish.
To prevent being squashed by the intense ocean depth, you’ll locate air pockets that not only help keep you afloat but also lead the way to your destination.
By gently interacting with them, you’ll replenish your Tactile Reinforcement, a field effect that you can synchronize with your allies if you coordinate the action perfectly.
It’s great that the path ahead is mostly straightforward. Keep exploring downwards as you’ll transition from underwater navigation to regular surroundings when you reach the ocean floor. Along the way, you might come across some creatures, and the decision of whether to interact with them is yours.
Navigate your way into the damaged Hive stronghold via a sequence of challenging underwater leaps. As you progress, engage in combat with various enemies. Eventually, you’ll reach an underwater locale that will have Ecthar pursuing you. Exit this underwater zone by utilizing an elevator on the spout.
Second Encounter – Ecthar, The Shield Of Savathun
Walkthrough
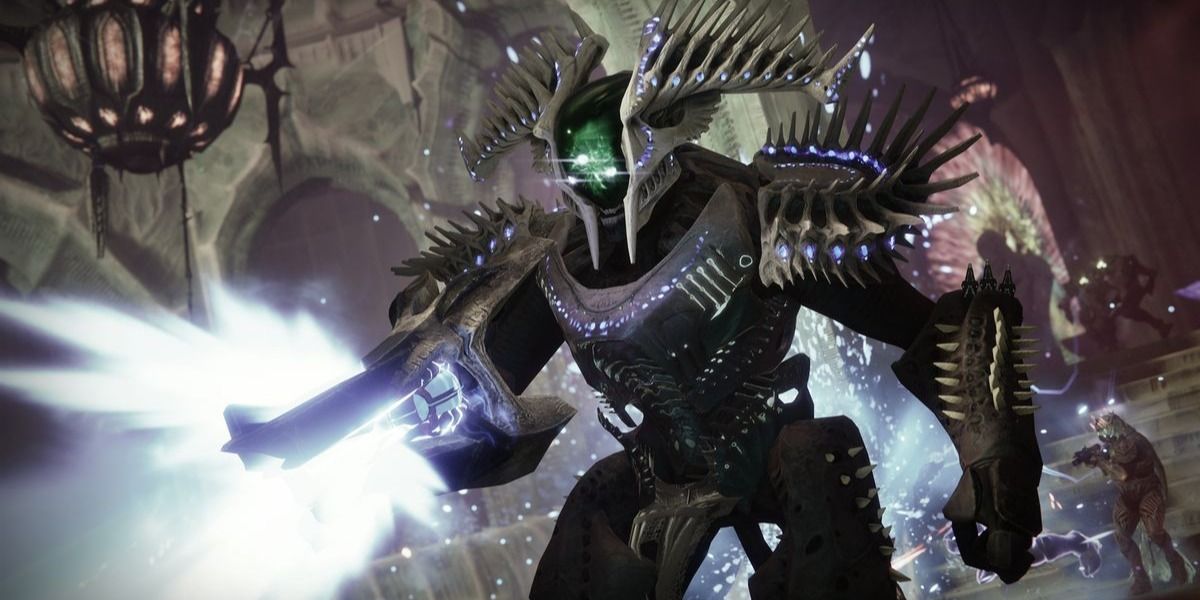
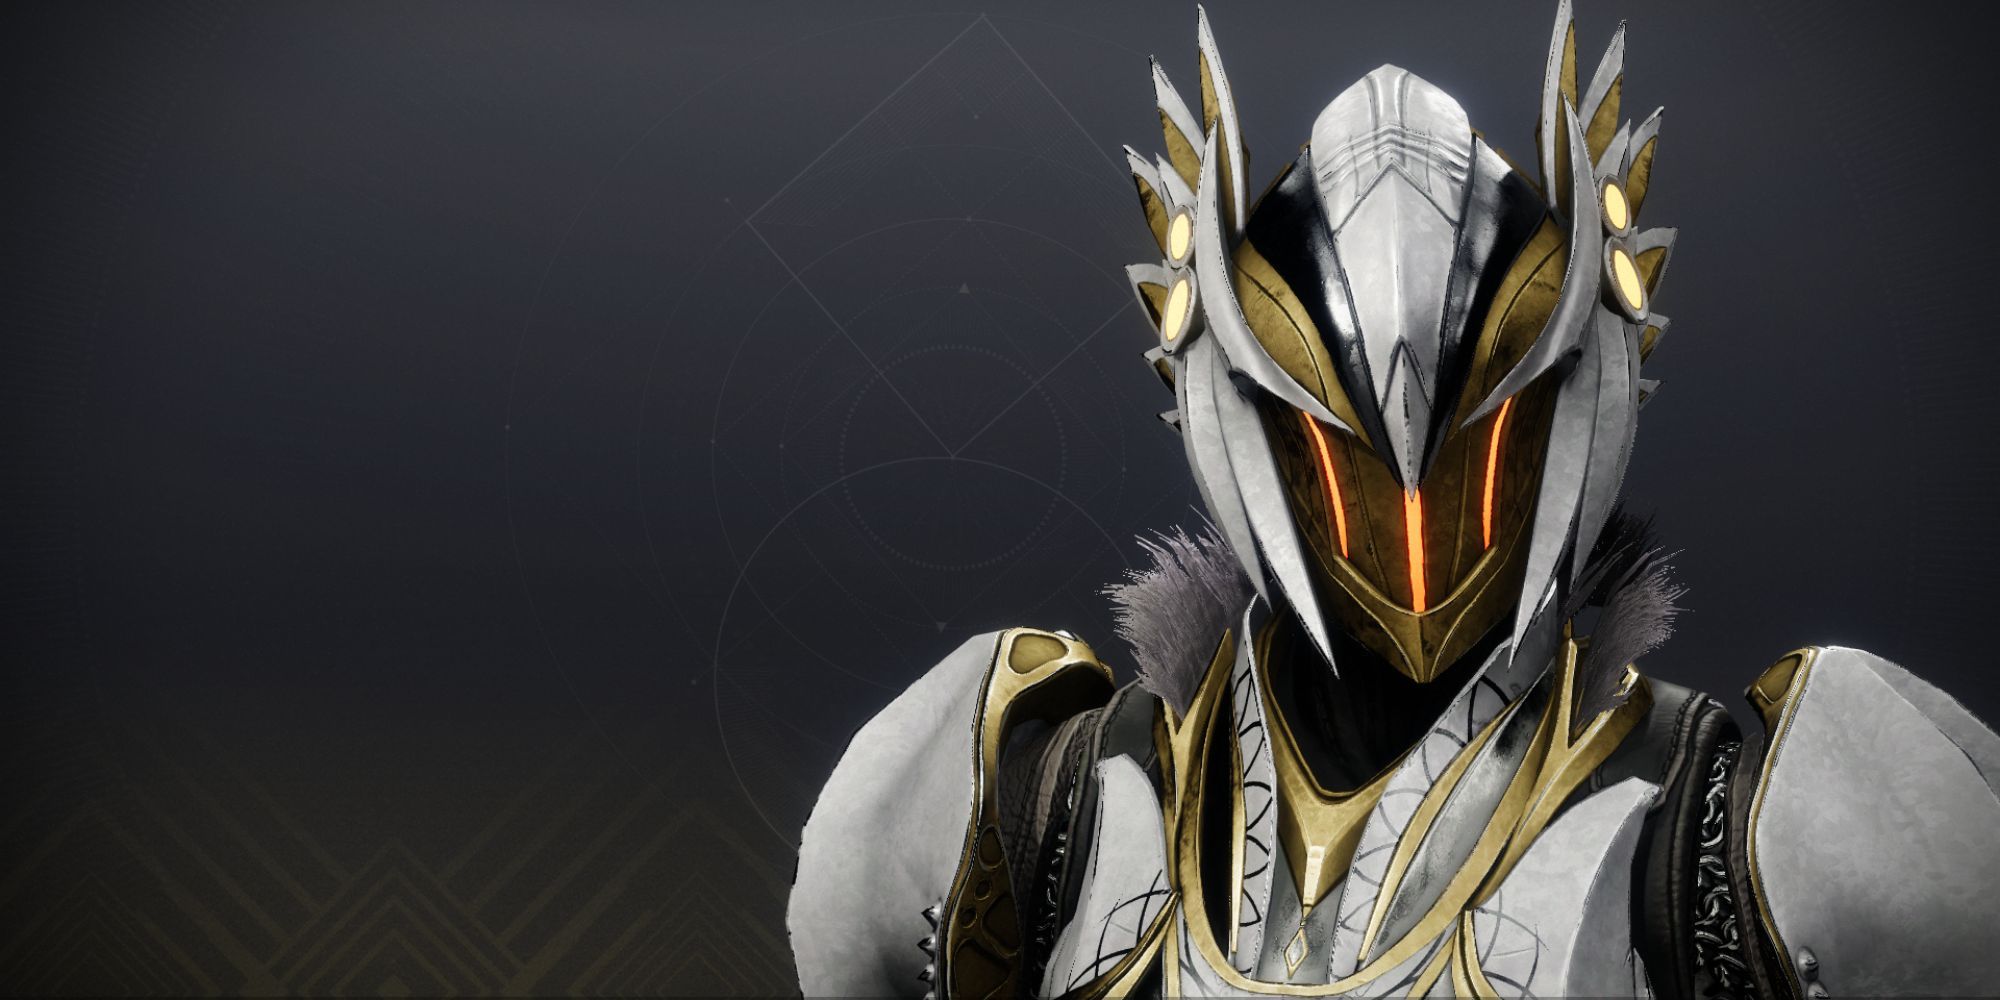
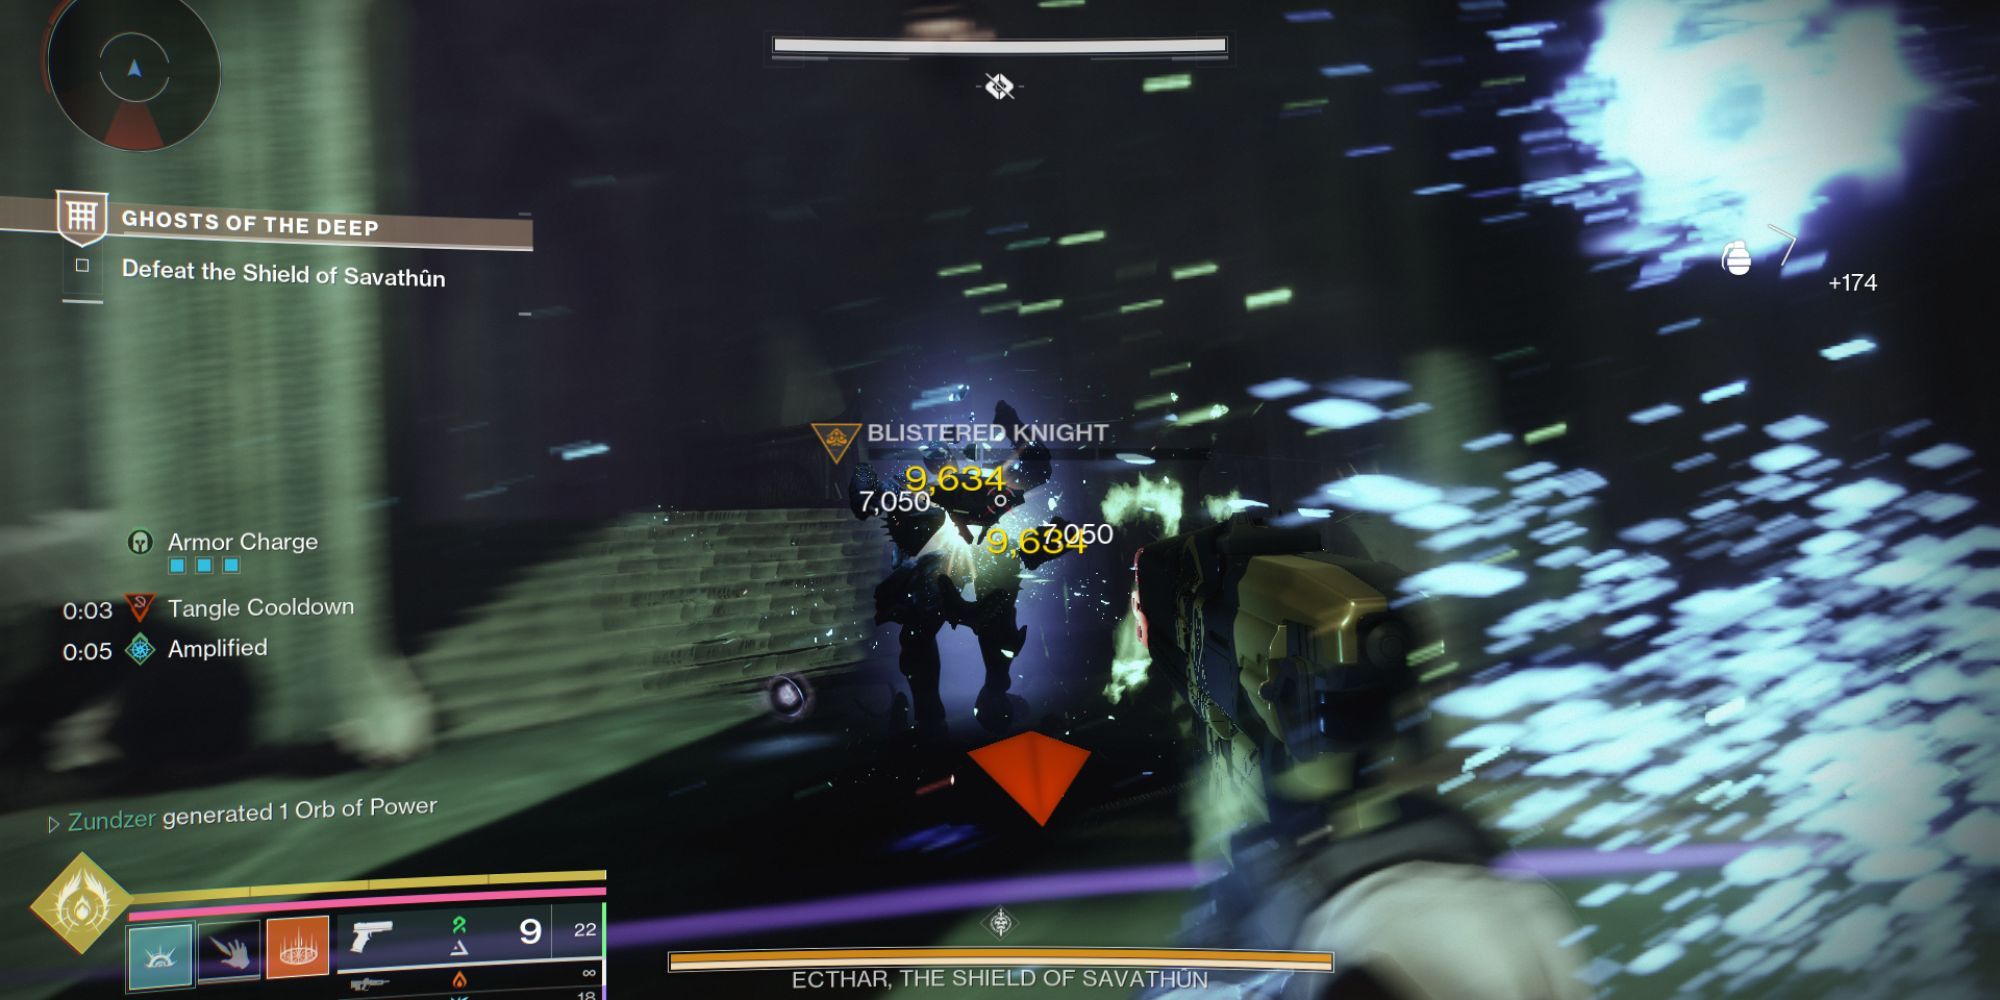
In this battle, you’ll be facing off against Ecthar, a shining Knight of Lucent Light. To start the fight, charge ahead and assault the Acolytes who are praying in the center.
As soon as the battle commences, various opponents will appear. You’ll need to conquer three towering, yellow-barred Blistered Knights that pop up. After defeating these knights, an Ogre will emerge in the center of the platform located at the end of the arena.
Or
During the fight, enemies will start showing up. You’ll have to vanquish three formidable, yellow-barred Blistered Knights that appear. Following their defeat, an Ogre will materialize in the center of the platform situated at the farthest end of the arena.
After the Ogre has been slain, a Deepsight phantom will manifest close to where the Rally Flag once stood. This illusion will display three symbols on the discs suspended from the walls on either side. Be sure to commit these symbols to memory.
For example, the three symbols you see on the walls are “E,” “Spider,” and “Burger.”
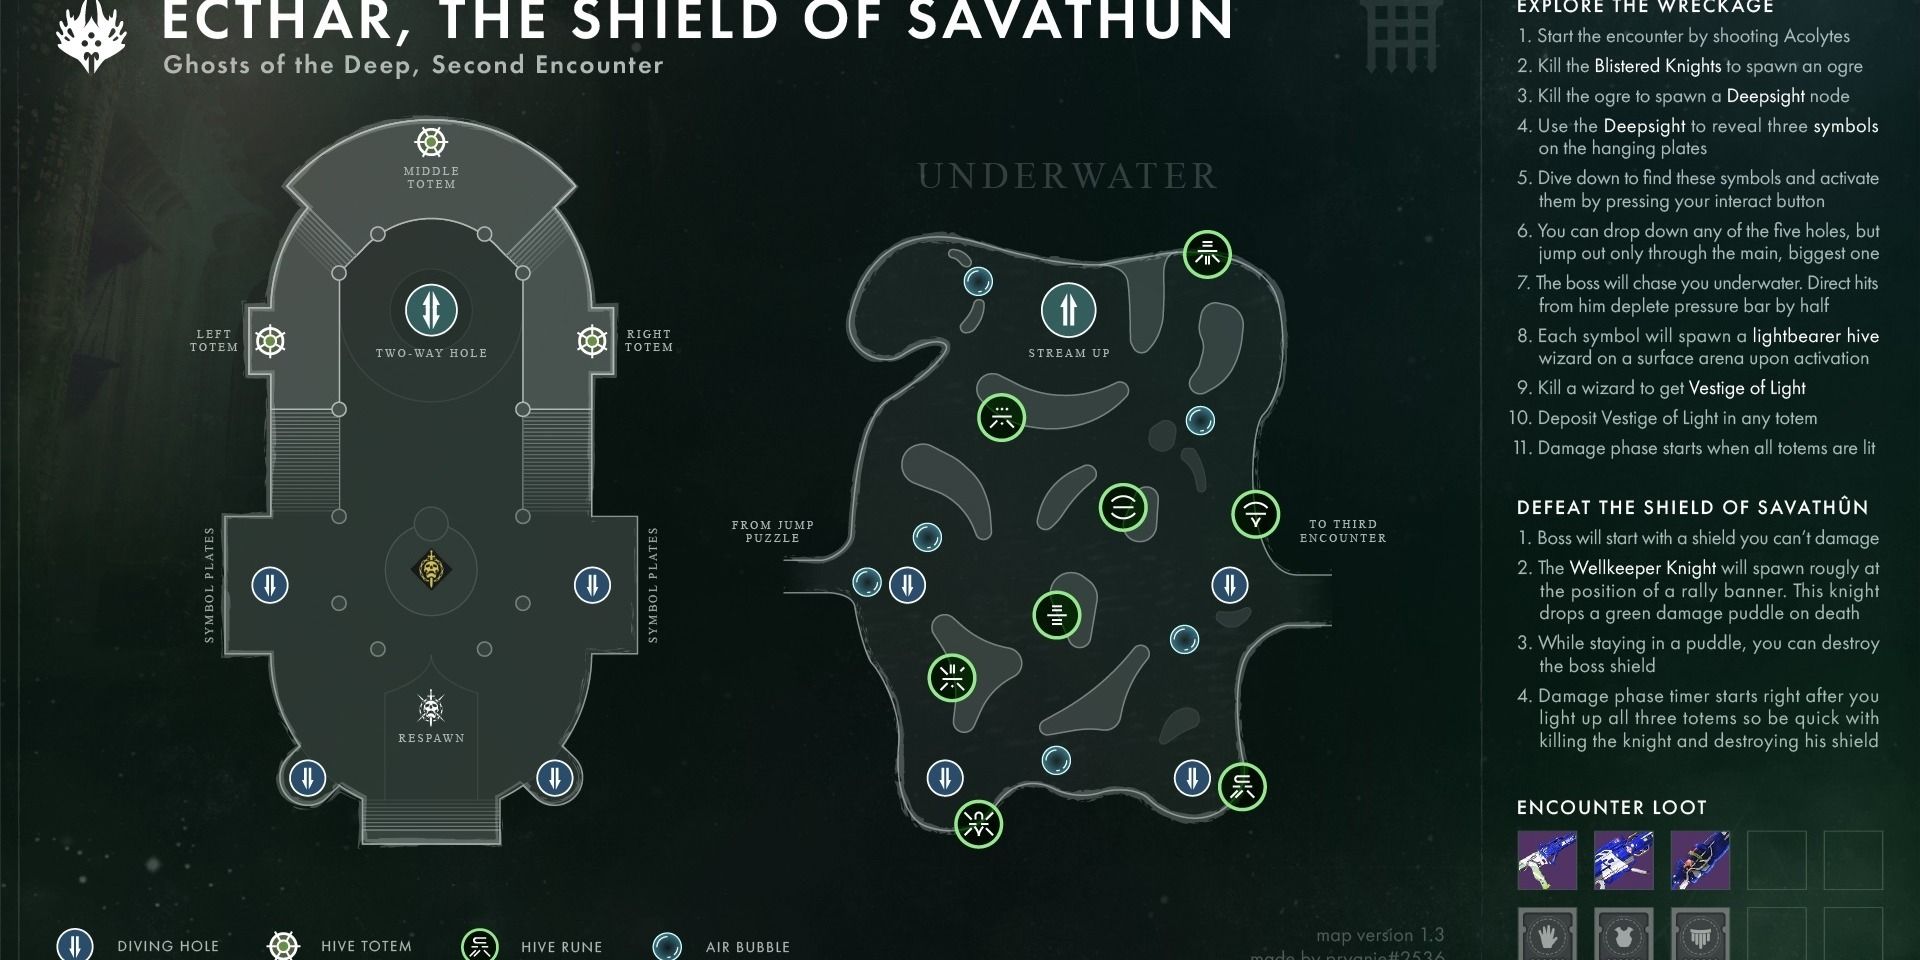
Keeping the symbols at the forefront of your thoughts, feel free to dive into one of the four pools situated within the arena. As you explore the submerged areas in search of the symbols, Ecthar will hotly pursue you. A map of this encounter is provided above for your reference.
His attacks will deplete your Pressure Resistance gauge, so avoid him like the plague!
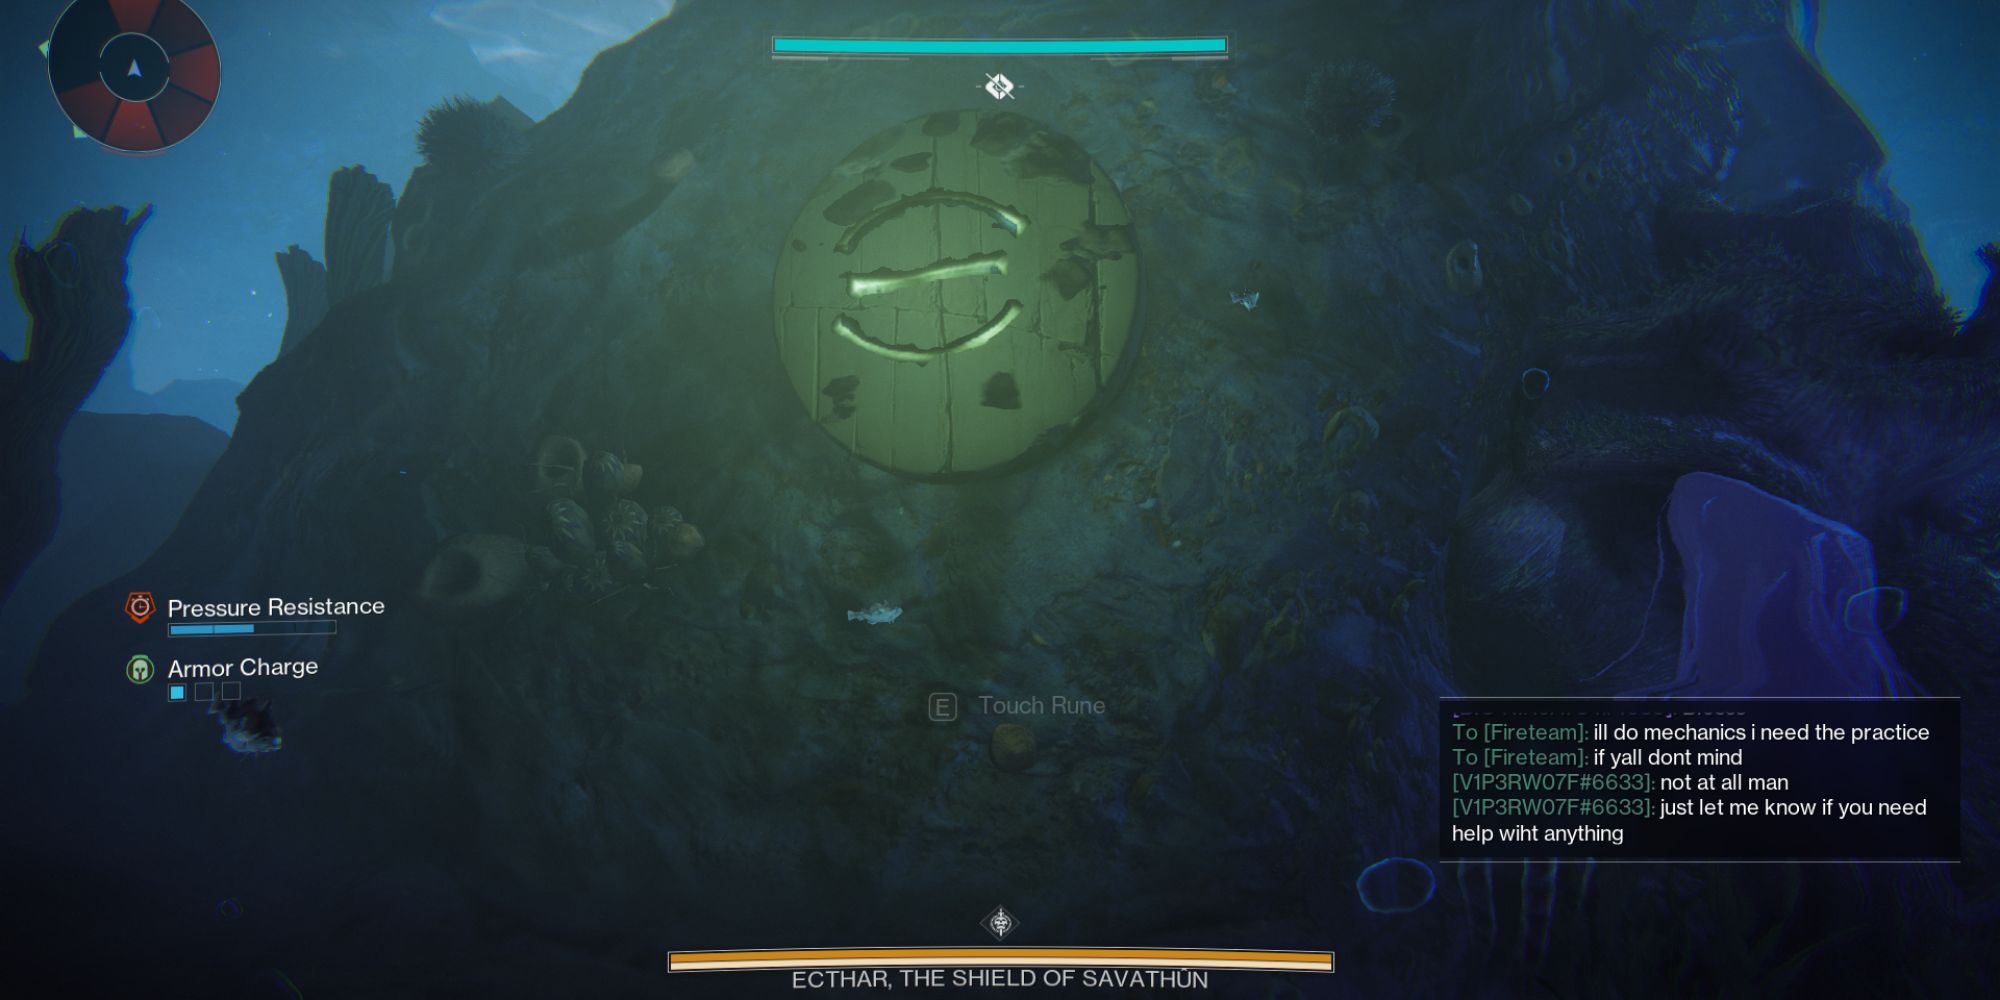
Find the signs and engage with them. You will notice a sound of a bell as verification. But be careful, interacting with the incorrect symbol could lead to your demise.
When you have finished your task, locate the nearby brook, then leap back towards the arena whereupon you will encounter a Lightbearer Wizard for every correctly activated symbol you have touched.
Destroying these Wizards’ spirits yields a pile of Remnants of Radiance. Apply this bonus to three Hive statues scattered throughout the arena.
This action summons a Wellkeeper Knight. Defeating him results in a puddle of Hive Light appearing. Stepping into this puddle initiates the damage phase.
As the Lightbearer, Ecthar is guarded by a protective barrier. To gradually deplete his health, you’ll need to find a way to shatter this shield.
During the damage phase, Ecthar will charge towards you, repeatedly striking you with his Void shield. Also, remember that he’ll set up a Barricade as well to protect himself.
You can either keep your distance or engage him mano a mano in melee combat. The choice is yours.
Repeat this process until you defeat Ecthar.
To completely vanquish this supervisor, you should destroy his spectral form. If you fail to do so, he’ll regenerate with a tenth of his initial vitality!
Recommended Loadout
In this tight battle scenario, you find yourself squared off in a compact arena facing waves of Thralls and Acolytes. To successfully accomplish the mission, you must slay powerful yellow-bar Ogres, Knights, and Wizard Lightbearers.
During this intense skirmish, you’re cornered in a confined setting, surrounded by groups of Thrall and Acolytes. To successfully finish the mission, you must eliminate yellow bar Ogres, Knights, and Wizard Lightbearers.
| Titan | Warlock | Hunter | |
|---|---|---|---|
| Free-To-Play |
Solar Titan with Lorelei Splendor Helm. Aspects: Roaring Flames and Sol Invictus. |
Solar Warlock with Sunbracers. Aspects: Electrostatic Mind and Ionic Sentry Super: Well of Radiance |
Void Hunter with Gyrfalcon’s Hauberk. Aspects: Stylish Executioner and Vanishing Step Super: Deadfall Shadowshot |
| Expansion |
Prismatic Consecration Titan with either Synthoceps or Stoicism with Assassin/Syntho perk combo. Aspects: Consecration and Knockout. Super: Any burst damage super like Thundercrash or Twilight Arsenal. |
Prismatic Arc Buddy Warlock with Getaway Artist. Aspects: Bleakwatcher and Feed the Void. Super: Song of Flame or Nova Bomb |
Prismatic Melee Hunter with Relativism with Caliban/Liar perk combo. Aspects: Stylish Executioner and Winter’s Shroud Super: |
To swiftly eliminate yellow bar enemies, it would be beneficial to have a unique weapon, such as rocket sidearms, at your disposal. For handling adds more efficiently, though, any fast-firing or short-range weapon should suffice.
1. Broadswords
2. Scythes
3. Short-barreled rifles (SBR) or pump-action shotguns (PSA)
4. Any other weapons that deliver a high damage output at close quarters.
- Lament is great for close-quarters combat. Rev the engine and use the following combos: light, light, light, heavy.
- Legend of Acrius hits hard, but can be hard to obtain, as you’ll need at least 240 Spoils of Conquest to purchase it.
- Legendary Vortex Swords combined with Ergo Sum (with Wolfpack Rounds).
- Any Trench Barrel/One-Two Punch shotgun, along with Synthoceps melee attacks if applicable.
Continue To Descend
Walkthrough
Once you defeat Ecthar, collect your loot and continue downwards through more underwater sections.
Traversal’s going to be a little tedious, but thankfully, it’s pretty simple.
Eventually, you’ll find yourself in a spacious cathedral filled with Shriekers and Wizards. Overcome them and carry on your journey.
As you progress, you’ll eventually reach a gazebo where you’ll encounter several ads and an Ogre mini-boss. On top of the gazebo, there’s a bonus treasure chest waiting for you.
After overcoming them, make your way down via a tunnel, and you’ll reach the ultimate battle, set within an open bay characterized by the semi-submerged remains of Oryx, the Taken King.
Third Encounter – Simmumah Ur-Nokru, Lucent Necromancer
Walkthrough
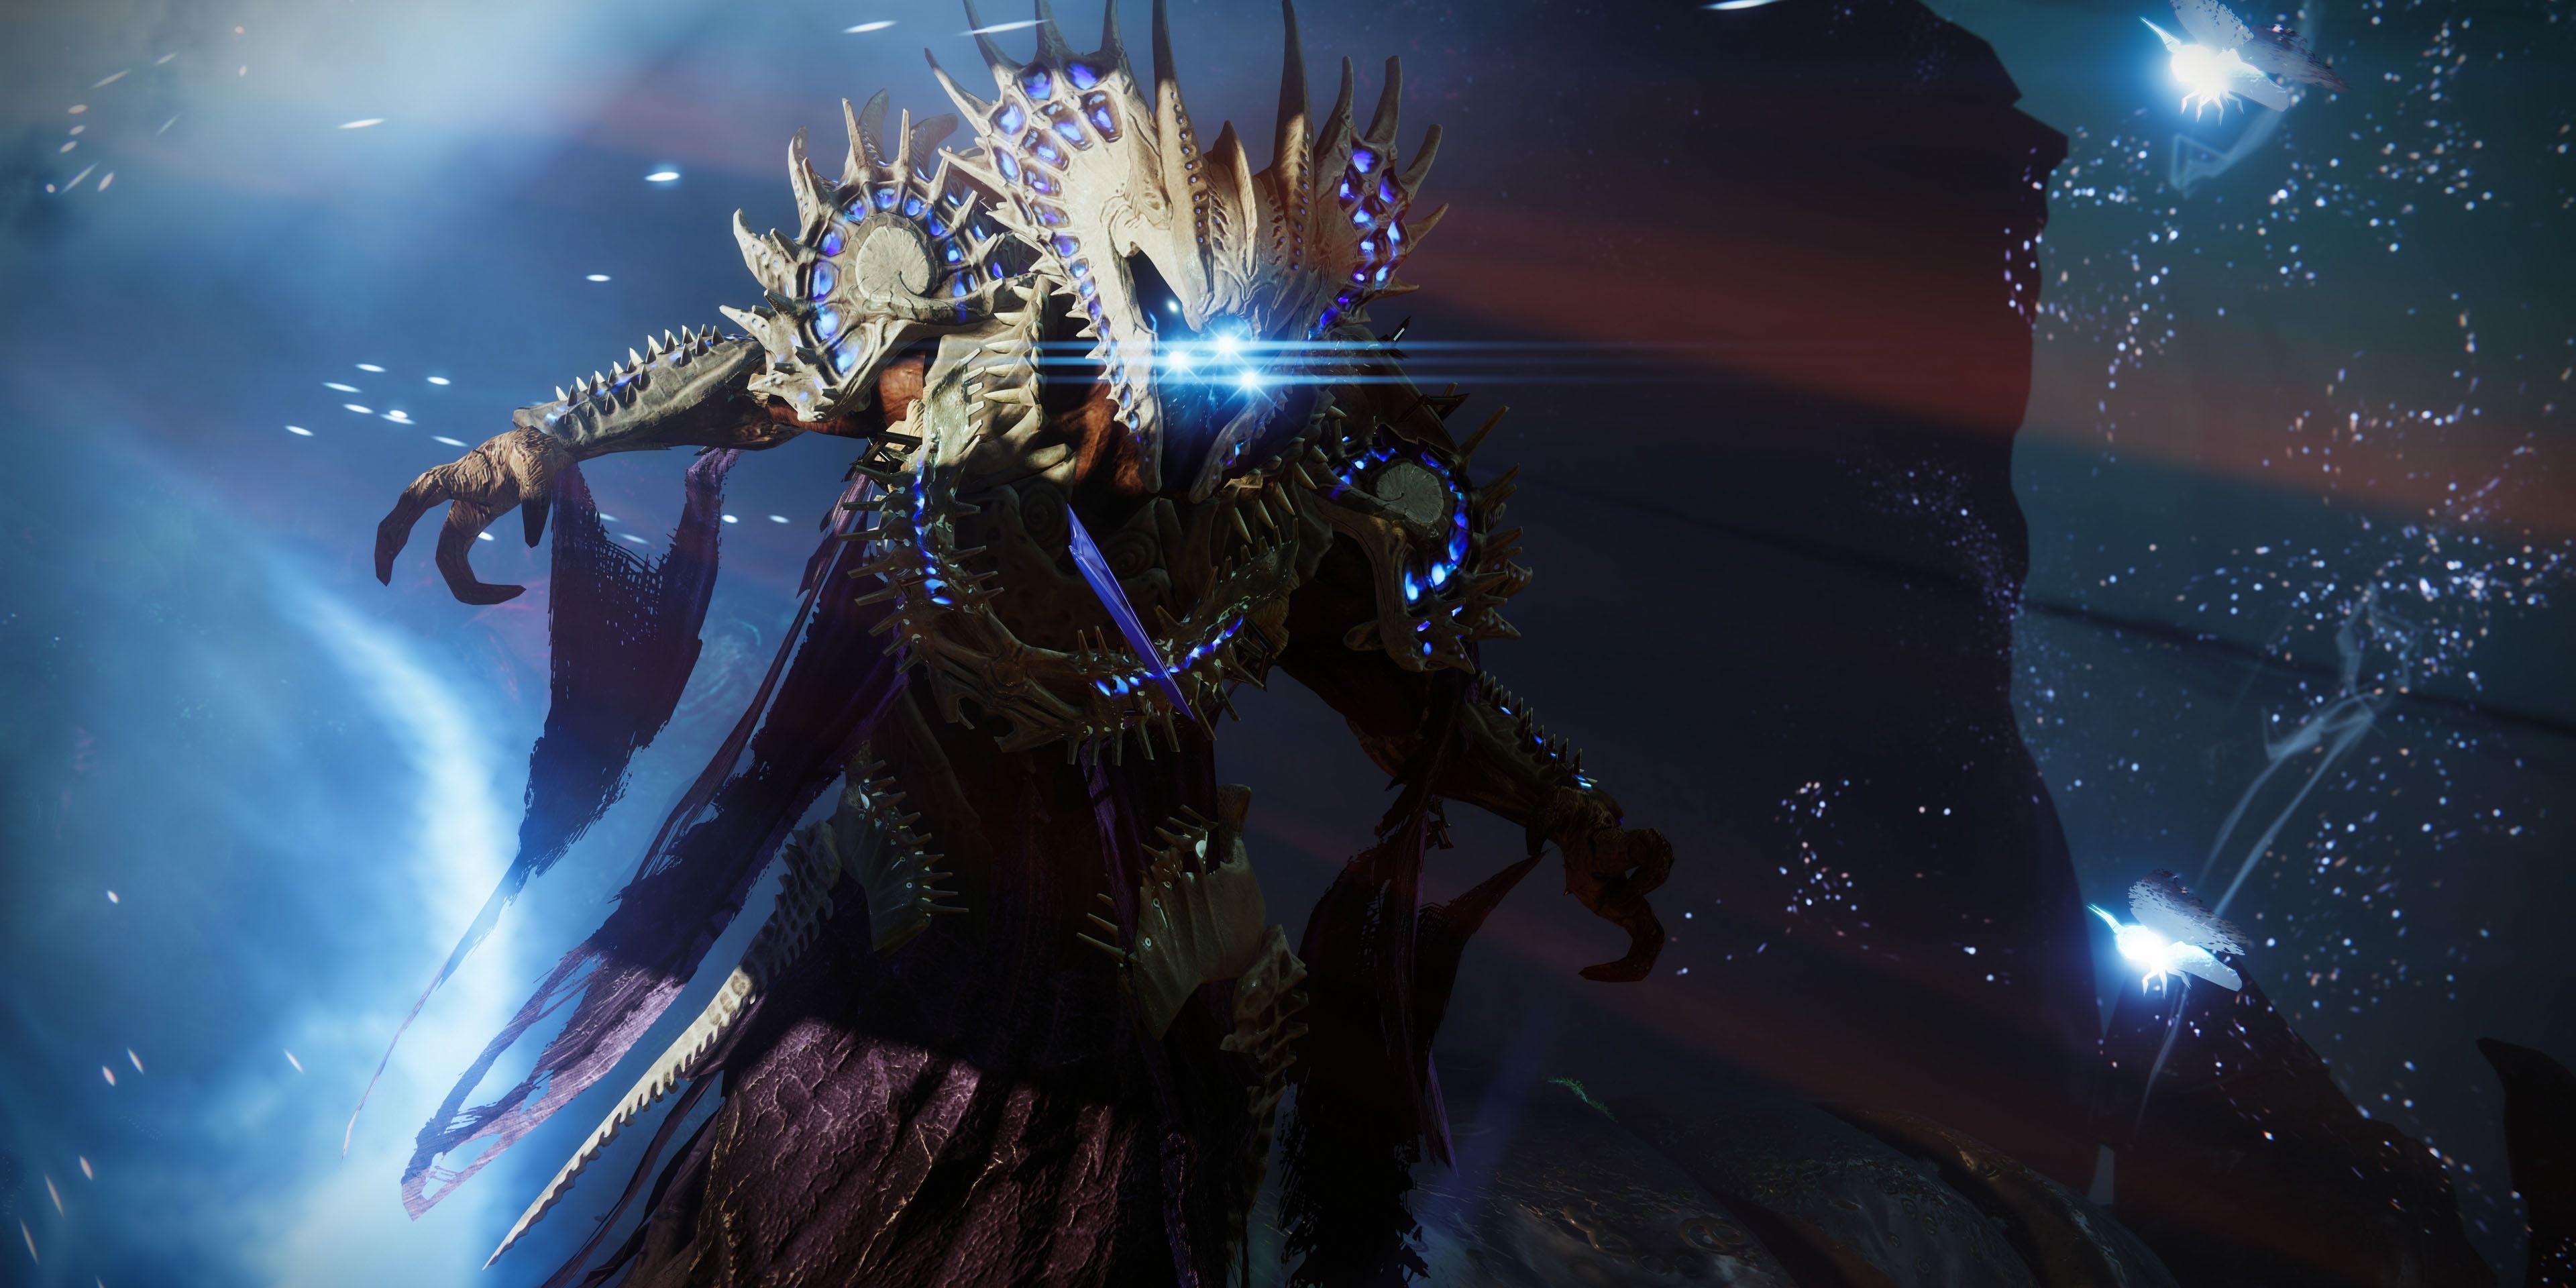
You encounter Simmumah Ur-Nokru, who aims to reanimate Oryx through the use of a Hive specter, transforming him into a bearer of light.
In this sentence, I’ve tried to maintain the original meaning while making it more accessible and engaging for readers.
This interaction can be quite lengthy, especially when it comes to arranging the damage phase, which typically lasts longer compared to many other boss fights. So, please take your time and make every effort to remain unscathed.
The setup for the damage phase in this battle tends to stretch out more than usual, making the overall encounter drag on. Therefore, be patient and do everything you can to stay safe throughout the fight.
Once you’re ready, break the ritual and kick off the interaction by destroying the Hive Specter. As you do so, additional enemies will appear, and it’s likely that she’ll conjure a horde of Radiant Moths that inflict heavy damage.
As the boss calls forth those pesky moths, I find it necessary to take them down before they swarm and harass me mercilessly. A momentary respite from their relentless pursuit is what I crave.

During the course of the battle, you’ll stumble upon a Deepsight illusion within the arena. Activating it will cause three floating orbs to appear above specific body parts of Oryx, namely his head, chest, left hand, right hand, right knee, and left foot. These orbs will arrange themselves in a triangle, and a luminous circle will materialize beneath.
In synchrony, a Hive character named Vorlog, formerly of Heresy, will materialize. This Knight seems invulnerable to death, as he is continually revived by Simmumah. He’ll persistently chase you throughout the arena, and your objective will be to eliminate him only when you are standing on any of the illuminated circles.
After Vorlog has perished, a floating circle will materialize, accompanied by the inscription: “Vorlog has been vanquished from the [body part] of Oryx, summoning Simmumah to his demise!
Simmumah intends to travel to the location you previously visited in order to revive Vorlog. Meanwhile, you should make your way towards a hovering radiant ring and align it with a Taken King emblem that’s above Simmumah’s current position. This action will uncover a hidden Hive Runic symbol.
Keep performing the action until you’ve uncovered three Hive Runes. On both sides of the central battlefield, as well as at the top near Oryx’s head, there are methane pockets that lead to smaller arenas. These arenas house additional enemies and a Hive Lightbearer – a Knight, an Acolyte, and a Wizard.
By vanquishing their spirits, you’ll acquire a Shard of Radiance. Return this Shard of Radiance to the central arena, where you can employ the Deepsight Mirage to unveil an orb. Engage with the matching orb to infuse it with the Shard of Radiance.
Ensure that each Vestige is carefully linked to its appropriate rune. When working alone, focus on one Vestige at a time, and remember the corresponding rune when collaborating in a team.
Once the last rune is imbued, Simmumah’s shield can be damaged, and DPS phase begins.
Ideally, you should begin the damage phase on either Oryx’s head or chest.
To inflict significant damage on Simmumah, you must first shatter her protective barrier. In this stage, she’ll be firing projectiles at you as you’re swarmed by additional enemies.
She’ll also be teleporting around the arena, which make damaging her quite annoying.
Continue following these steps until you defeat her and unveil her spirit. (Make sure to destroy it to conclude the meeting and the dungeon.)
Recommended Loadout
This interaction is rather lengthy and packed with details. Gather your tools for eliminating excess information and choose a setup that emphasizes staying alive.
| Titan | Warlock | Hunter | |
|---|---|---|---|
| Free-To-Play |
Arc Titan with Cuirass of the Falling Star. Aspects: Storm’s Keep and Knockout Super: Thundercrash |
Solar Warlock with Sunbracers or Speaker’s Sight. Aspects: Hellion and Touch of Flame Super: Well of Radiance |
Solar Hunter with Celestial Nighthawk. Aspects: Knock ‘Em Down and Gunpowder Gamble. Super: Marksman Golden Gun |
| Expansion |
Prismatic Consecration Titan with either Synthoceps or Stoicism with Assassin/Syntho perk combo. Aspects: Consecration and Knockout. Super: Twilight Arsenal |
Prismatic Arc Buddy Warlock with Getaway Artist. Aspects: Bleakwatcher and Feed the Void. Super: Nova Bomb |
Prismatic Decoy Hunter with Radiant Dance Machines. Aspects: Threaded Specter and Ascension Super: Marksman Golden Gun |
Given that Simmumah and Hive Knights attack with Arc energy, it would be wise to equip Arc-resistant modifications on your chest armor. Furthermore, considering your frequent encounters with death, using the Riskrunner weapon could significantly improve your survivability.
I suggest setting up a Well of Radiance for optimal damage in the upcoming fight. Accurate firearms such as Linear Fusion Rifles are ideal for this situation.
Try using any (or all) of the following weapons during the DPS phase:
- Queenbreaker is still the reigning king of prolonged DPS phases.
- Arbalest can potentially one-shot Simmumah’s pesky shield.
- Any legendary linear fusion rifle, most notably Cataclysmic, from Vow of the Disciple. I recommend its god roll with Fourth Times the Charm and Bait and Switch.
- Sniper rifles are also useful as backup DPS weapons.
Finishing this dungeon may reward you with the rare Strand Exotic Trace Rifle called The Navigator, which can sever foes and grant your teammates Woven Mail protection.
The Catalyst feature enables it to establish a grappling spot, a functionality that’s been utilized by many melee Titans and Hunters in their high-damage per second (DPS) setups.
Read More
- All Skyblazer Armor Locations in Crimson Desert
- One Piece Chapter 1180 Release Date And Where To Read
- How to Get the Sunset Reed Armor Set and Hollow Visage Sword in Crimson Desert
- All Shadow Armor Locations in Crimson Desert
- All Golden Greed Armor Locations in Crimson Desert
- How to Beat Stonewalker Antiquum at the Gate of Truth in Crimson Desert
- All Helfryn Armor Locations in Crimson Desert
- Marni Laser Helm Location & Upgrade in Crimson Desert
- Black Sun Shield Location In Crimson Desert (Buried Treasure Quest)
- Re:Zero Season 4 Episode 1 Release Date, Where to Watch
2025-05-21 07:41