
As a seasoned gamer with countless hours spent in the post-apocalyptic world of 7 Days to Die, I must say that the game’s difficulty settings are a testament to its depth and customization. Each setting offers a unique challenge, making every playthrough feel fresh and exciting.
As an ardent enthusiast of 7 Days to Die, I must say that crafting a server in this game offers a plethora of customizable options. Among these, there are no less than six distinct difficulty levels to pick from, each one significantly impacting the level of challenge you’ll encounter while playing on your server. For those embarking on their initial server setup journey, it can be a tad overwhelming to decide which setting suits best, given that each difficulty level will fundamentally alter the way you engage with zombies and devise your survival strategies.
When playing the game 7 Days to Die, everyone may prefer a unique gaming experience. However, it’s crucial to decide on your primary gameplay focus. If you’re more concerned about the level of enemy difficulty, adjust the game settings accordingly to find the best fit for you. Keep in mind that you can modify these settings even after setting up a server, so experiment with various levels and assess how well you handle each one.
7 Days to Die Difficulty Settings Explained
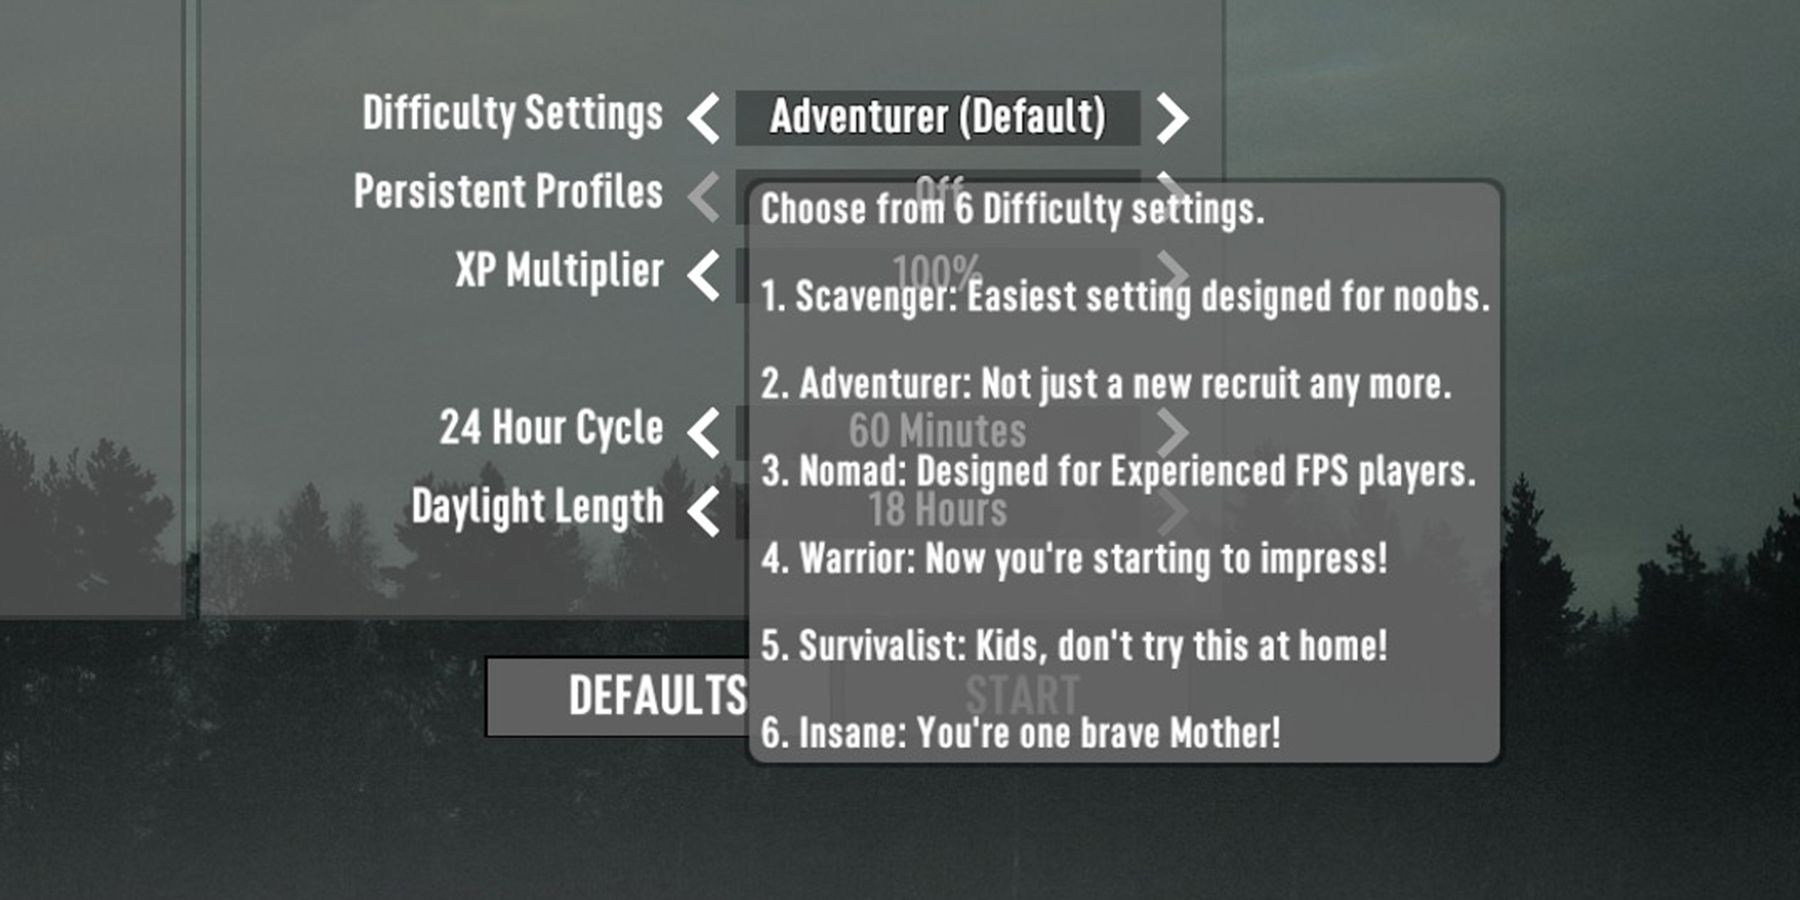
In the thrilling world of 7 Days to Die, I’ve discovered six diverse environments to set up my survival base, each subtly altering the balance between me and the undead hordes. The more challenging the selected environment, the less effective my attacks become against the zombies, and conversely, the more potent their assaults grow. Here’s a breakdown of the damage adjustments for each setting:
Scavenger
- Zombie Damage: 50%
- Player damage: 200%
Adventurer
- Zombie damage: 75%
- Player damage: 150%
Nomad
- Zombie damage: 100%
- Player damage: 100%
Warrior
- Zombie damage: 150%
- Player damage: 83%
Survivalist
- Zombie damage: 200%
- Player damage: 66%
Insane
- Zombie damage: 250%
- Player damage: 50%
Regardless of the chosen difficulty level, all aspects in the game world, such as the quantity of resources and loot you can gather, stay consistent. Moreover, the difficulty settings do not impact the progression of the game’s stage, which refers to how the inherent challenge escalates based on your level and survival abilities.
How to Change Difficulty Settings in 7 Days to Die
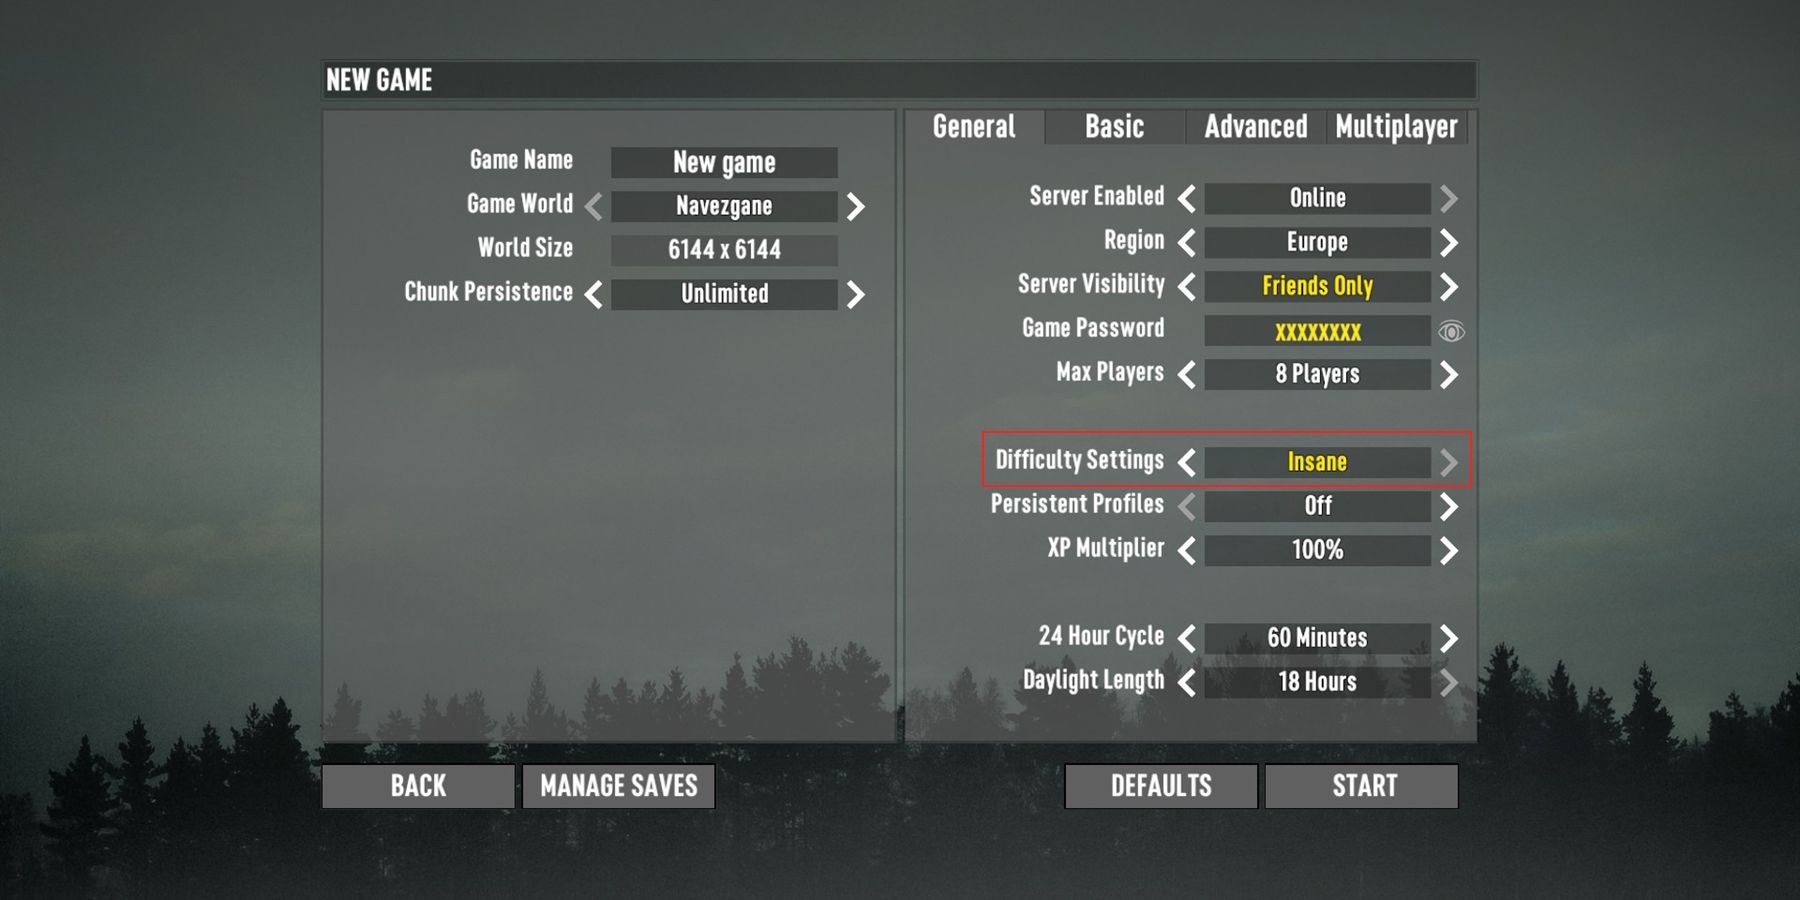
In the game 7 Days to Die, you can adjust the level of difficulty by navigating to the “Difficulty” tab, which is located under the “General” section when you initially set up your server. You can browse through the six different difficulty levels listed and select one that suits your preference. Once you’ve made your choice, simply leave it on that setting, and when you start your server, you’ll enter the game with the chosen difficulty level. If you find the current difficulty too simple or a bit tough, you can easily modify it while playing the game as well.
You can make that adjustment by logging out of your server and moving to the main menu instead. Once there, select “Continue Game”, then find the desired server on the left side of the screen. After that, simply alter your difficulty from the same location as before, and hit “Start Game” at the bottom to begin playing.
The best difficulty setting will range from player to player, so there isn’t one good setting to determine here. If you’re looking for a serious challenge, though, trying out Survivalist or Insane would be your first port of call. 7 Days to Die is quite a challenging game already, so if you’re a newer player, it may be best to start out on Adventurer or Nomad.
Read More
- LUNC PREDICTION. LUNC cryptocurrency
- SOL PREDICTION. SOL cryptocurrency
- BICO PREDICTION. BICO cryptocurrency
- BTC PREDICTION. BTC cryptocurrency
- USD ZAR PREDICTION
- USD CLP PREDICTION
- VANRY PREDICTION. VANRY cryptocurrency
- USD PHP PREDICTION
- SBR PREDICTION. SBR cryptocurrency
- WQT PREDICTION. WQT cryptocurrency
2024-09-16 12:53