As a seasoned adventurer with countless hours spent traversing the lands, I can tell you that each new dungeon holds its own unique challenges and treasures. This particular one, however, seemed to have an air of mystery and intrigue that piqued my curiosity.
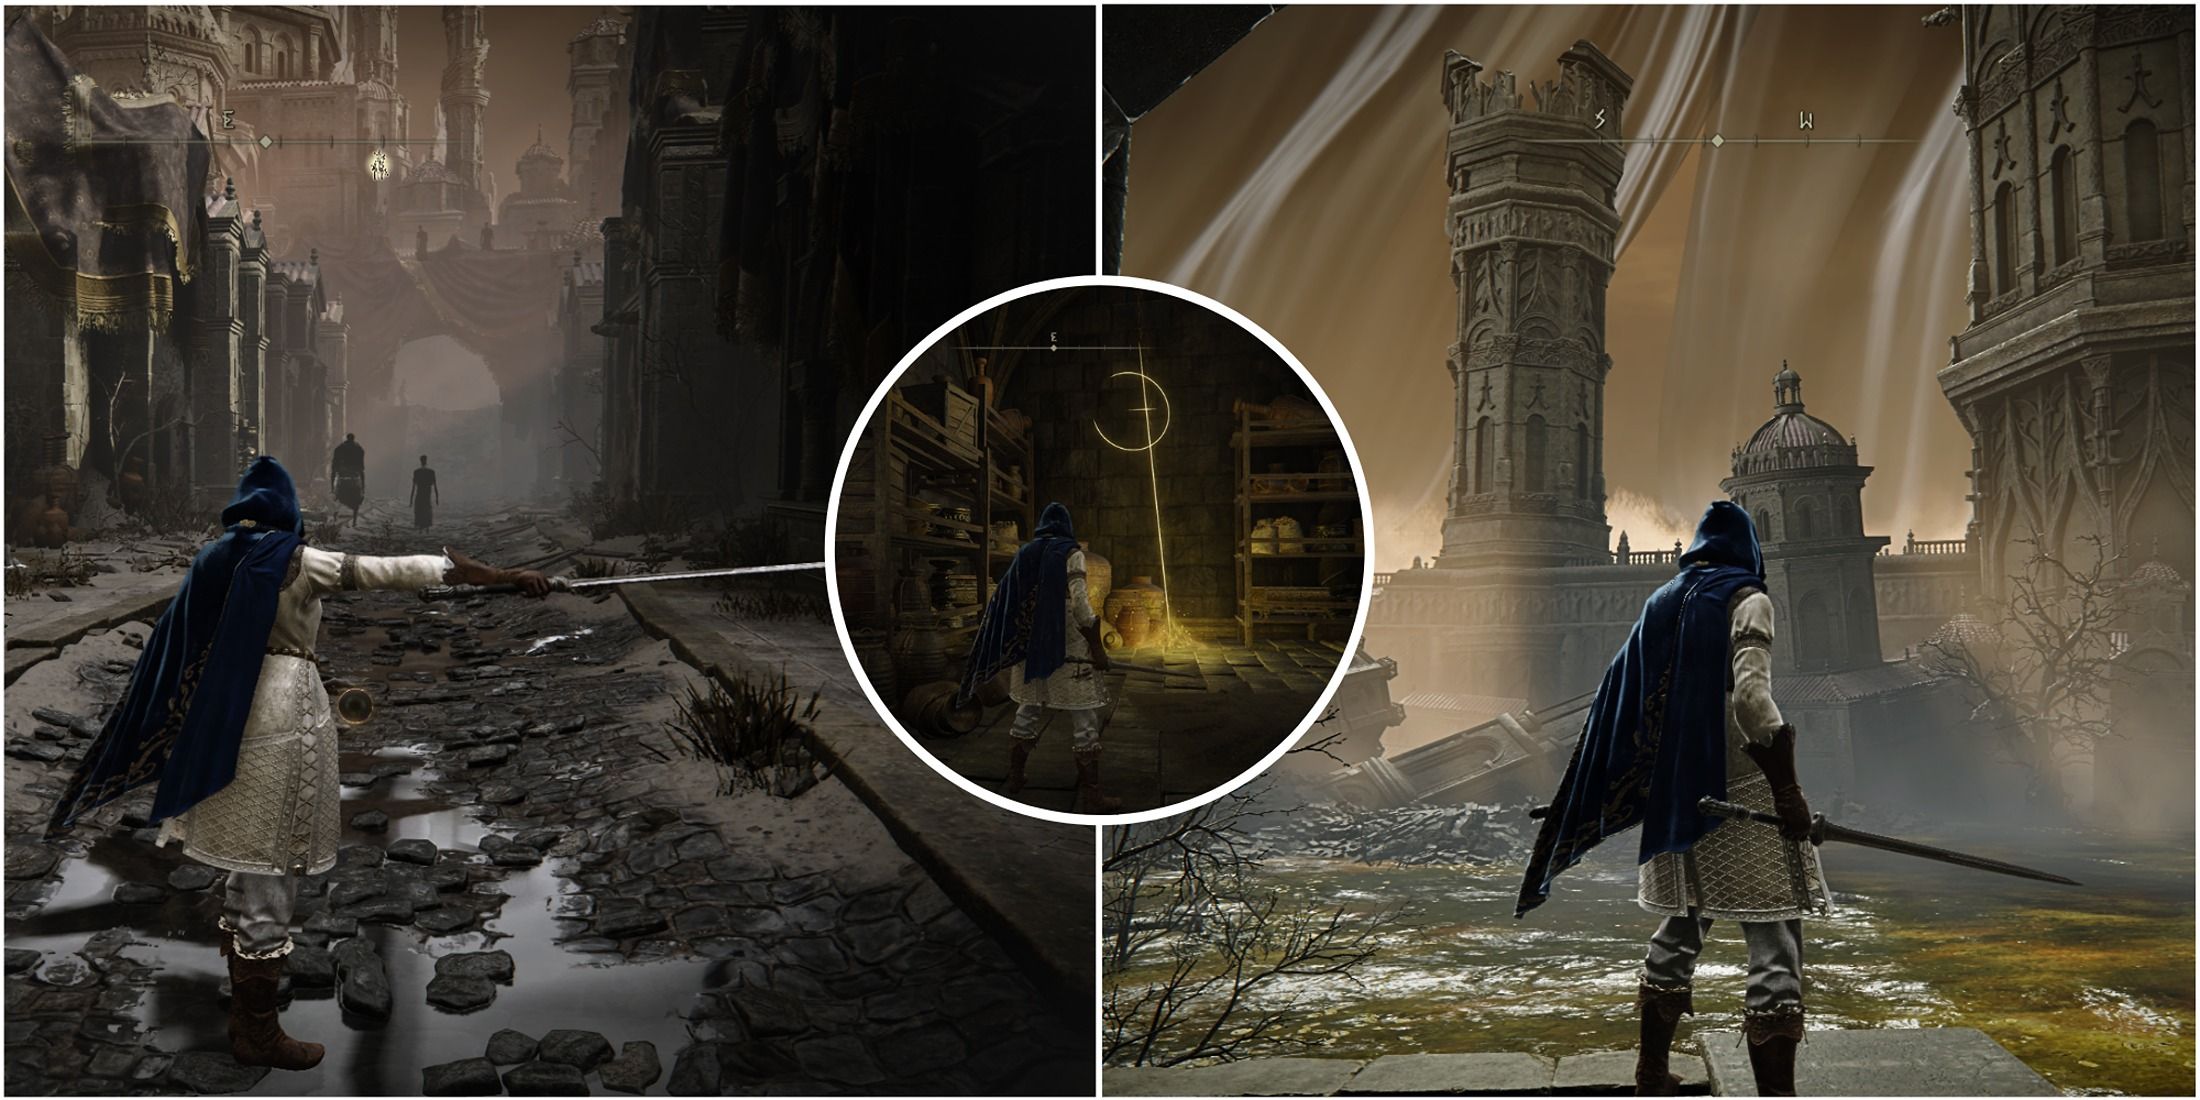
In “Elden Ring: Shadow of the Erdtree,” players will encounter new territories to discover, face formidable remembrance bosses, and conquer massive legacy dungeons. One of the initial dungeons you may stumble upon is the “Belurat, Tower Settlement,” situated in the northwestern part of Gravesite Plain.
In this ancient fortress lies a treasure trove of hidden secrets. Among these concealed gems are three Revered Spirit Ashes, a Scadutree Fragment, and the starting points for two NPC quests. This comprehensive guide will lead you through every nook and cranny of the Belurat Tower Settlement dungeon, ensuring that you uncover all essential aspects as you make your way to completion.
How To Reach Belurat, Tower Settlement
As an excited fan, I’d suggest starting your adventure in Gravesite Plains, the captivating opening scene of the DLC expansion. Hop on your steed and head north from Gravesite Plain’s Site of Grace. Be cautious not to draw the wrath of the menacing Furnace Golem. With a little luck and careful navigation, you’ll stumble upon the enchanting Three-Path Site of Grace and encounter the alluring NPC, Redmane Freyja.
Before taking a break at Freyja’s shrine, which is situated at the Site of Grace, ride westward through a grand archway carved into the hill. Following a brief journey, you will reach the main entrance of the Site of Grace, located outside Belurat’s Tower Settlement. Here, you will encounter two additional NPCs. Engage in conversation with Ansbach and [the other NPC’s name]. Once you have spoken with them, feel free to take a well-deserved rest at the Site of Grace.
Based on my years of adventuring through treacherous dungeons, I strongly recommend taking the time to prepare your arsenal before setting foot inside. Arm yourself with spells, Ashes of War, or even mix a Wondrous Flask of Physick – anything that could give you an edge in the unforgiving labyrinths ahead. Trust me, the extra effort spent in the calm before the storm is well worth it when faced with the unknown perils lurking within.
The recommended Scadutree Blessing level is 5 for clearing Belurat, Tower Settlement.
Ideal Dungeon Progression Path
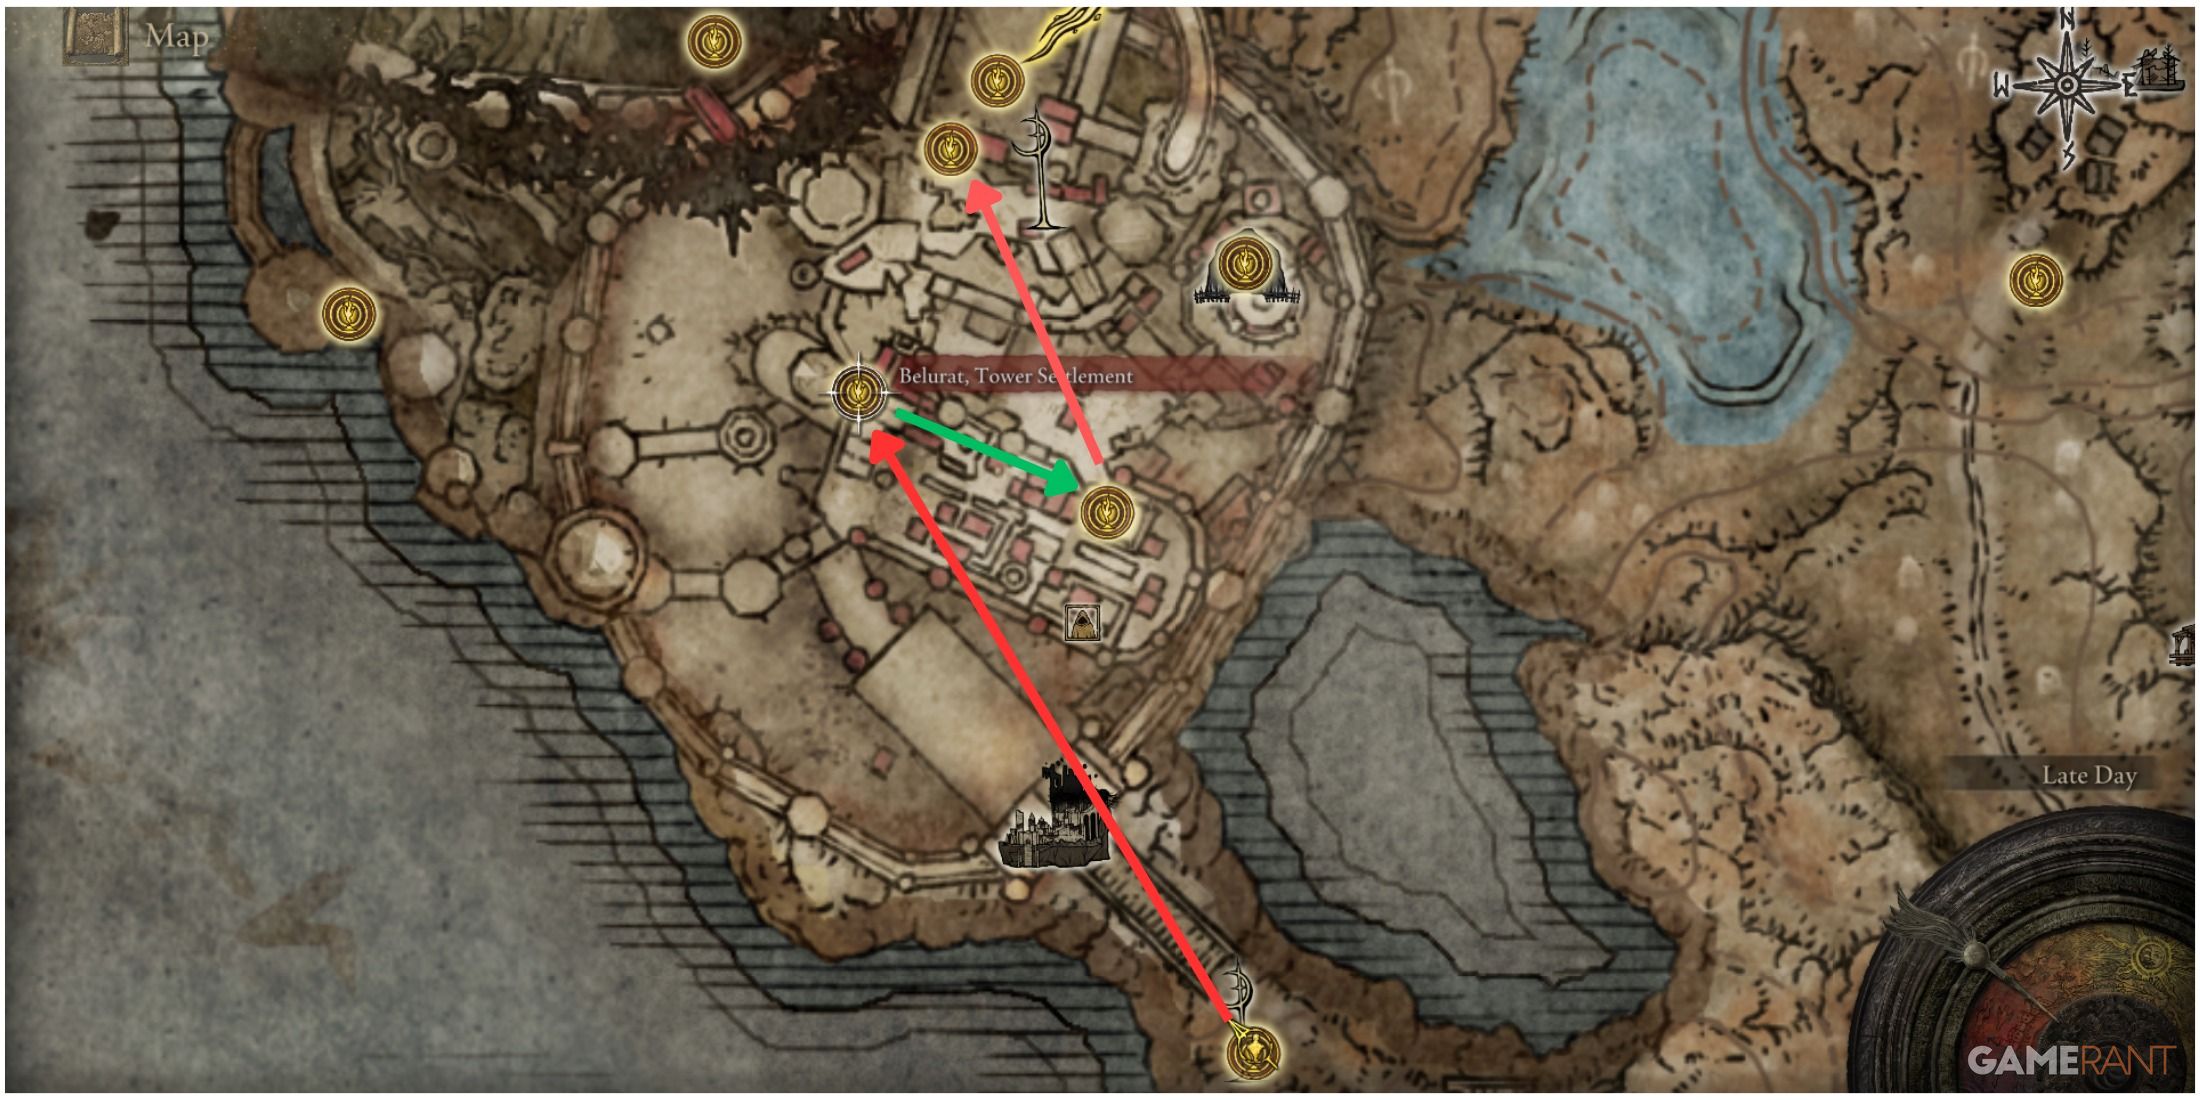
Upon entering the dungeon, your journey becomes fairly straightforward. You’ll encounter three Sites of Grace along the way. The last one is situated just outside the boss’s chamber. These three Sites of Grace are as follows:
- Belurat, Tower Settlement
- Small Private Altar
- Stagefront
As a devoted fan, I’d be happy to share my experience and help you navigate your way from one Site of Grace to another in this captivating game. Rest assured, we won’t miss out on any essential items during our journey!
Reaching Belurat, Tower Settlement Site of Grace
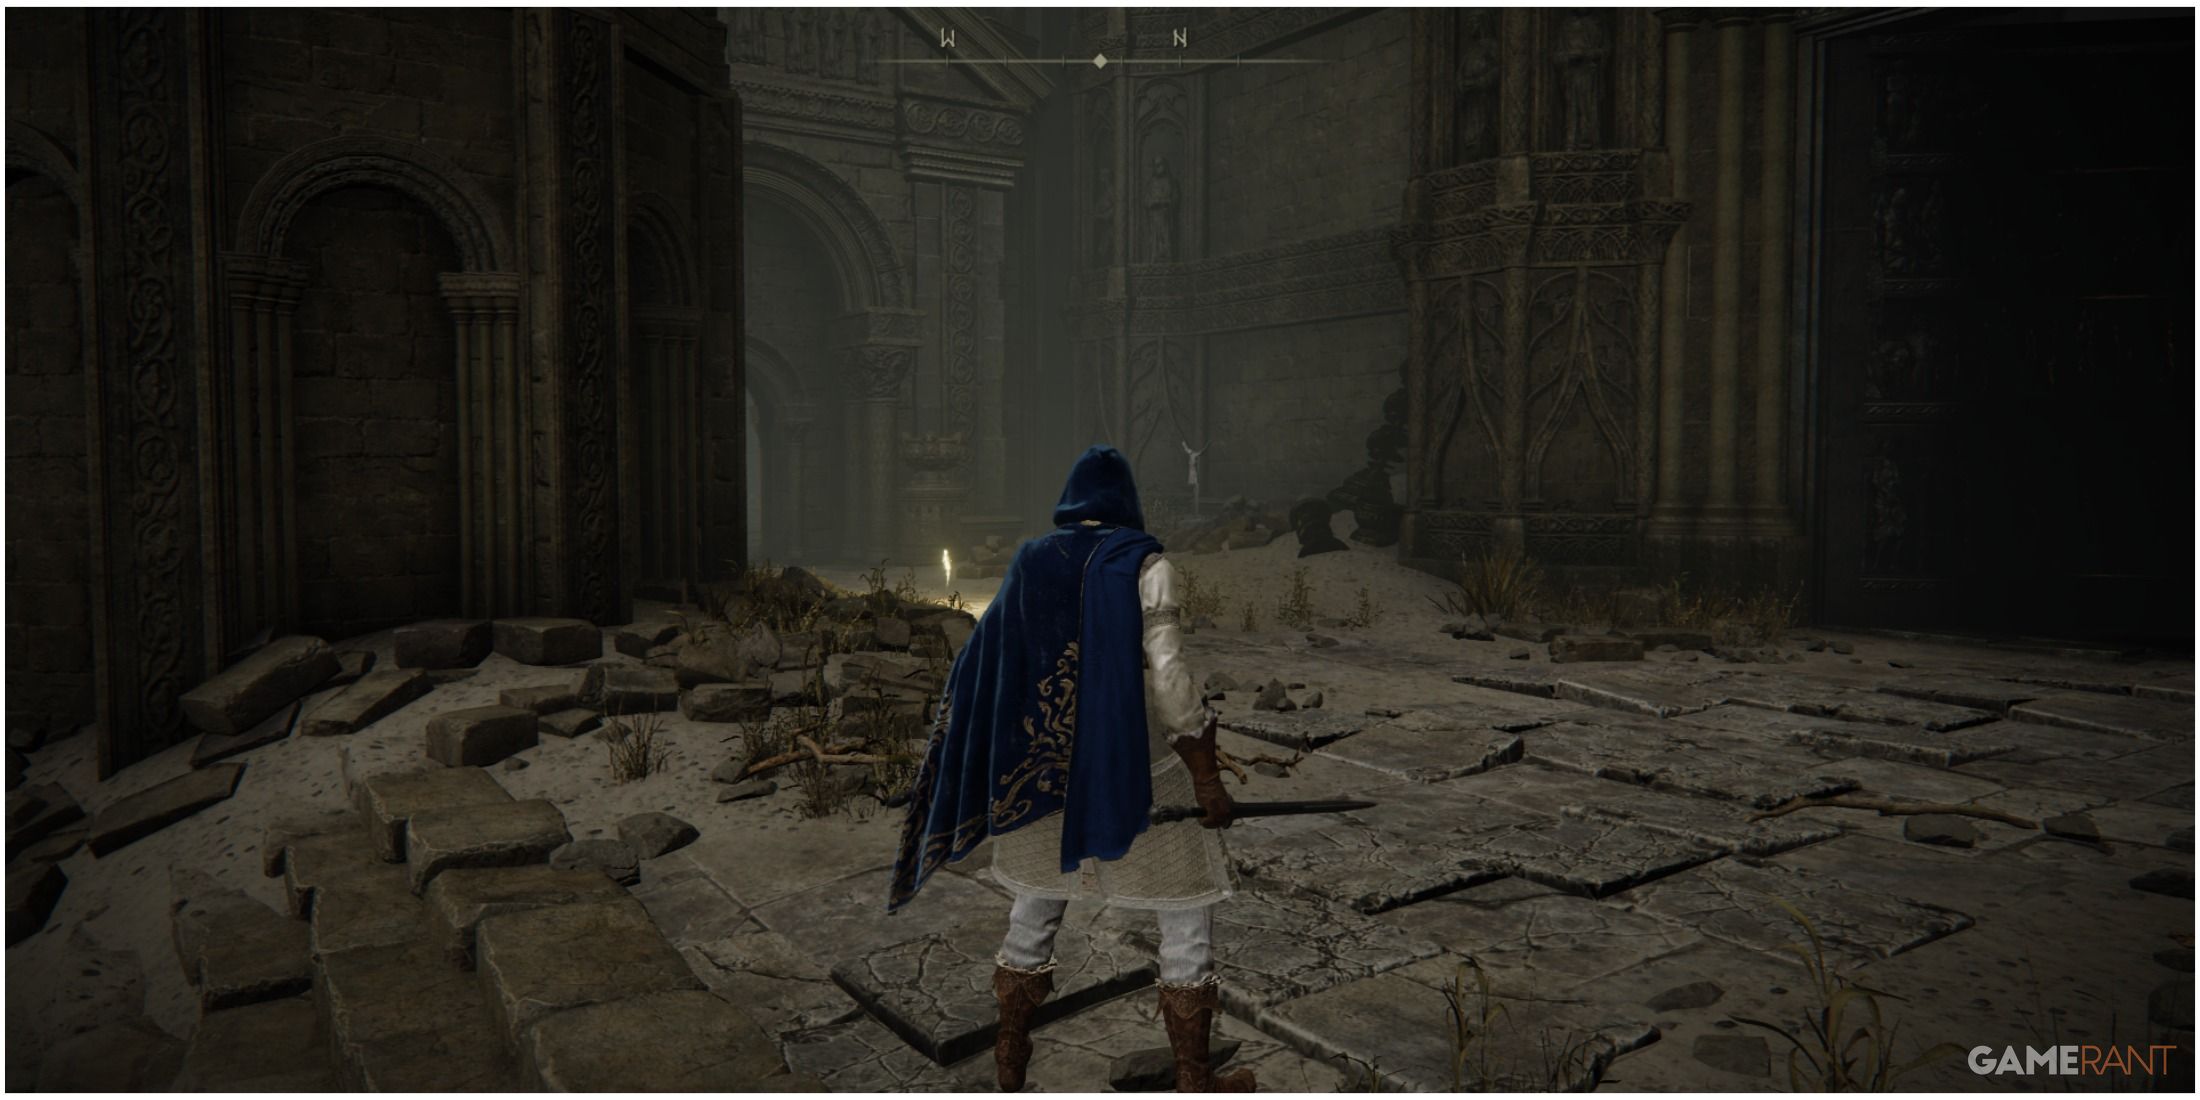
To reach the Tower Settlement in Belurat, just climb the extended staircase and unlock the iron gate. Once inside, explore the wonders of Belurat’s graceful settlement site. Be cautious as you venture into the dungeon, as a large scorpion lies in wait to surprise intruders.
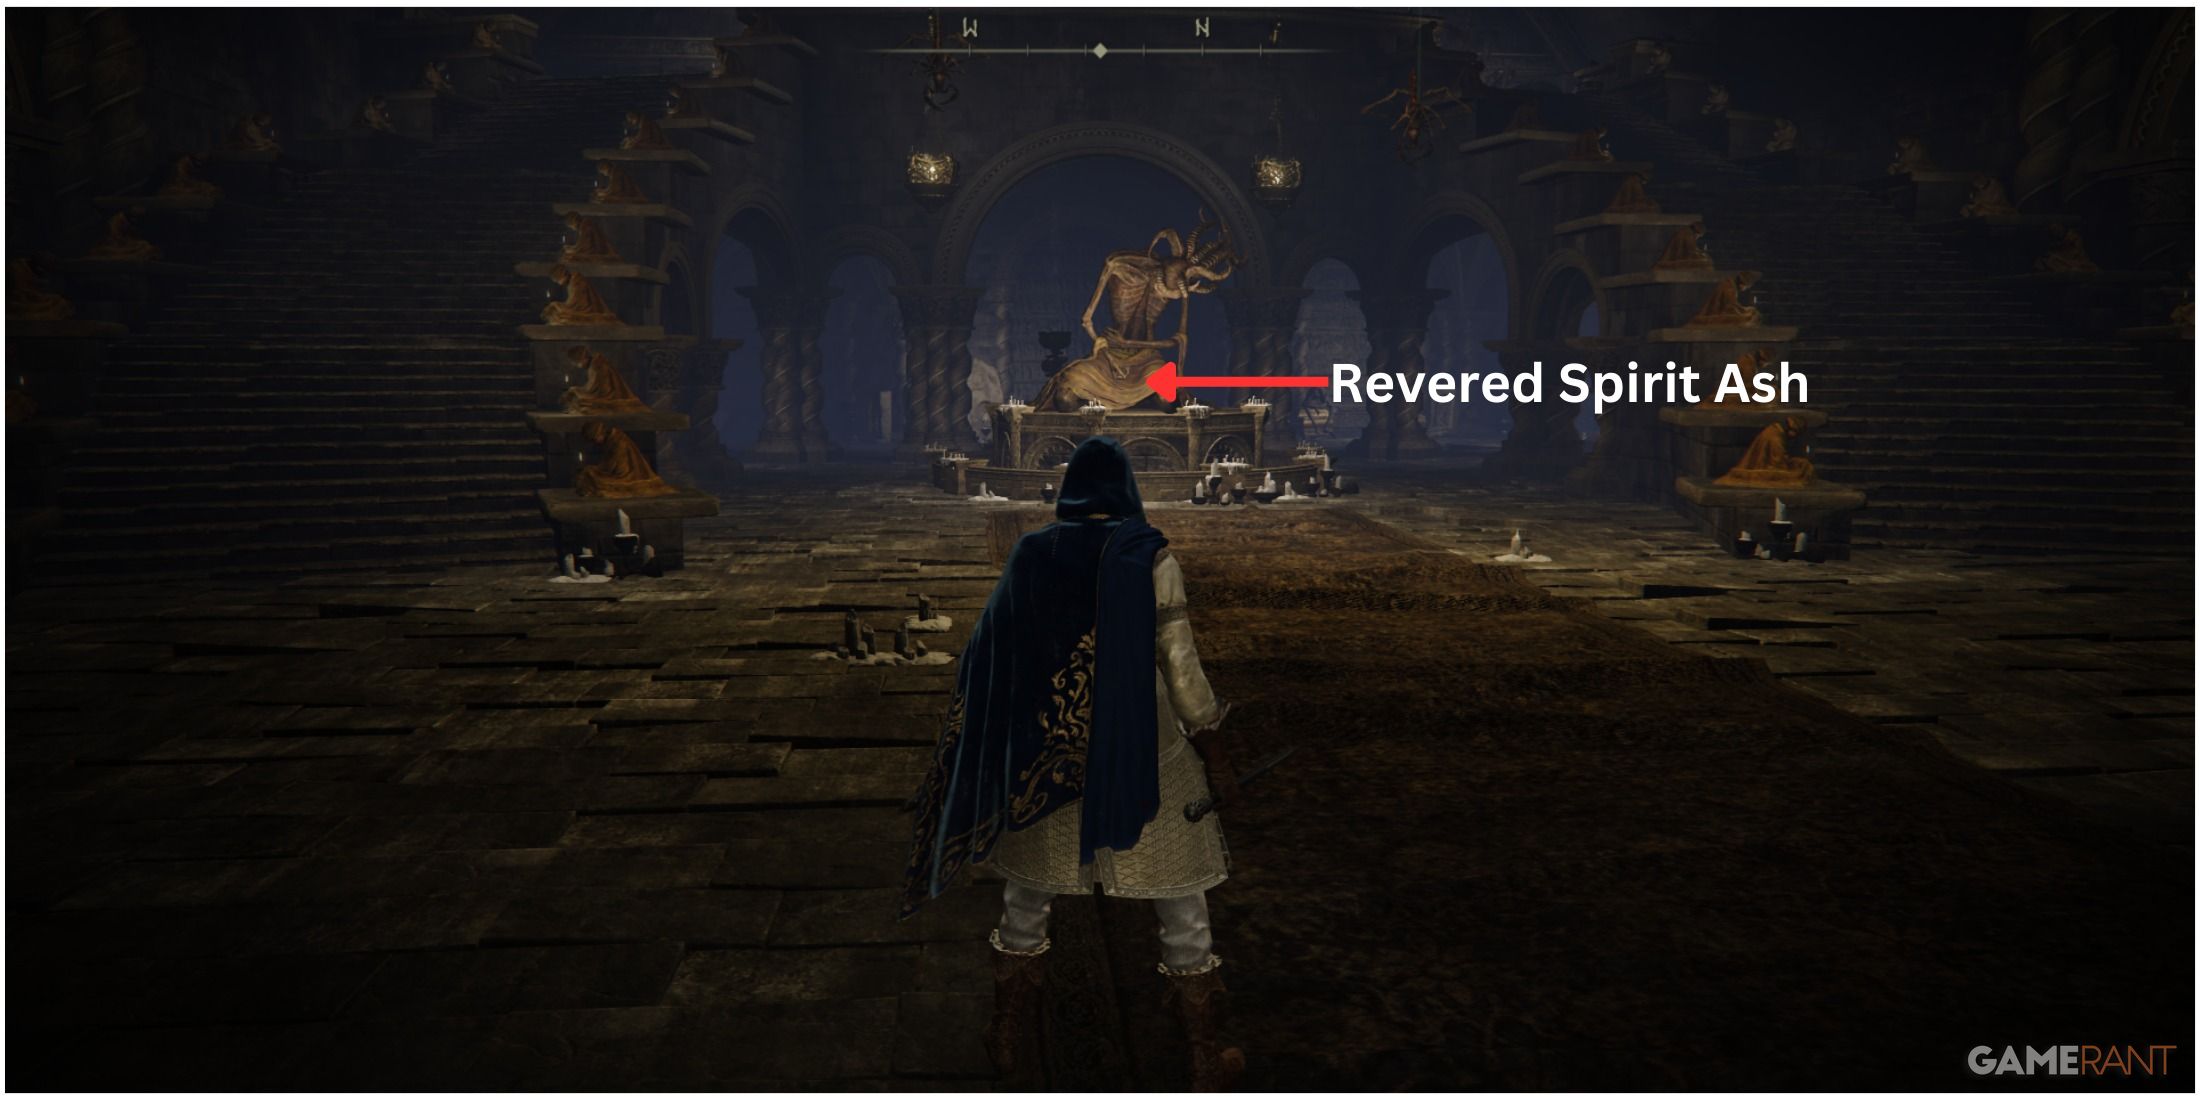
Starting from the dungeon entrance, you’ll find a straight route leading to the initial object – a Revered Spirit Ash, situated at the foot of the large horned statue. Next, ascend the spiraling stairs. For safety reasons, choose the left staircase over the right one to dodge an unexpected encounter with another giant scorpion.
Climb the first set of grand stairs to the northwest and face a scorpion there. Make sure you’re ready before proceeding. About halfway up, watch out for another big scorpion trying to surprise you. Keep ascending the stairs until you come across a locked iron door. Beyond this door lies the Belurat, Tower Settlement Site of Grace. Take some time to rest and gather your strength before continuing on your journey.
Reaching the Small Private Altar Site Of Grace
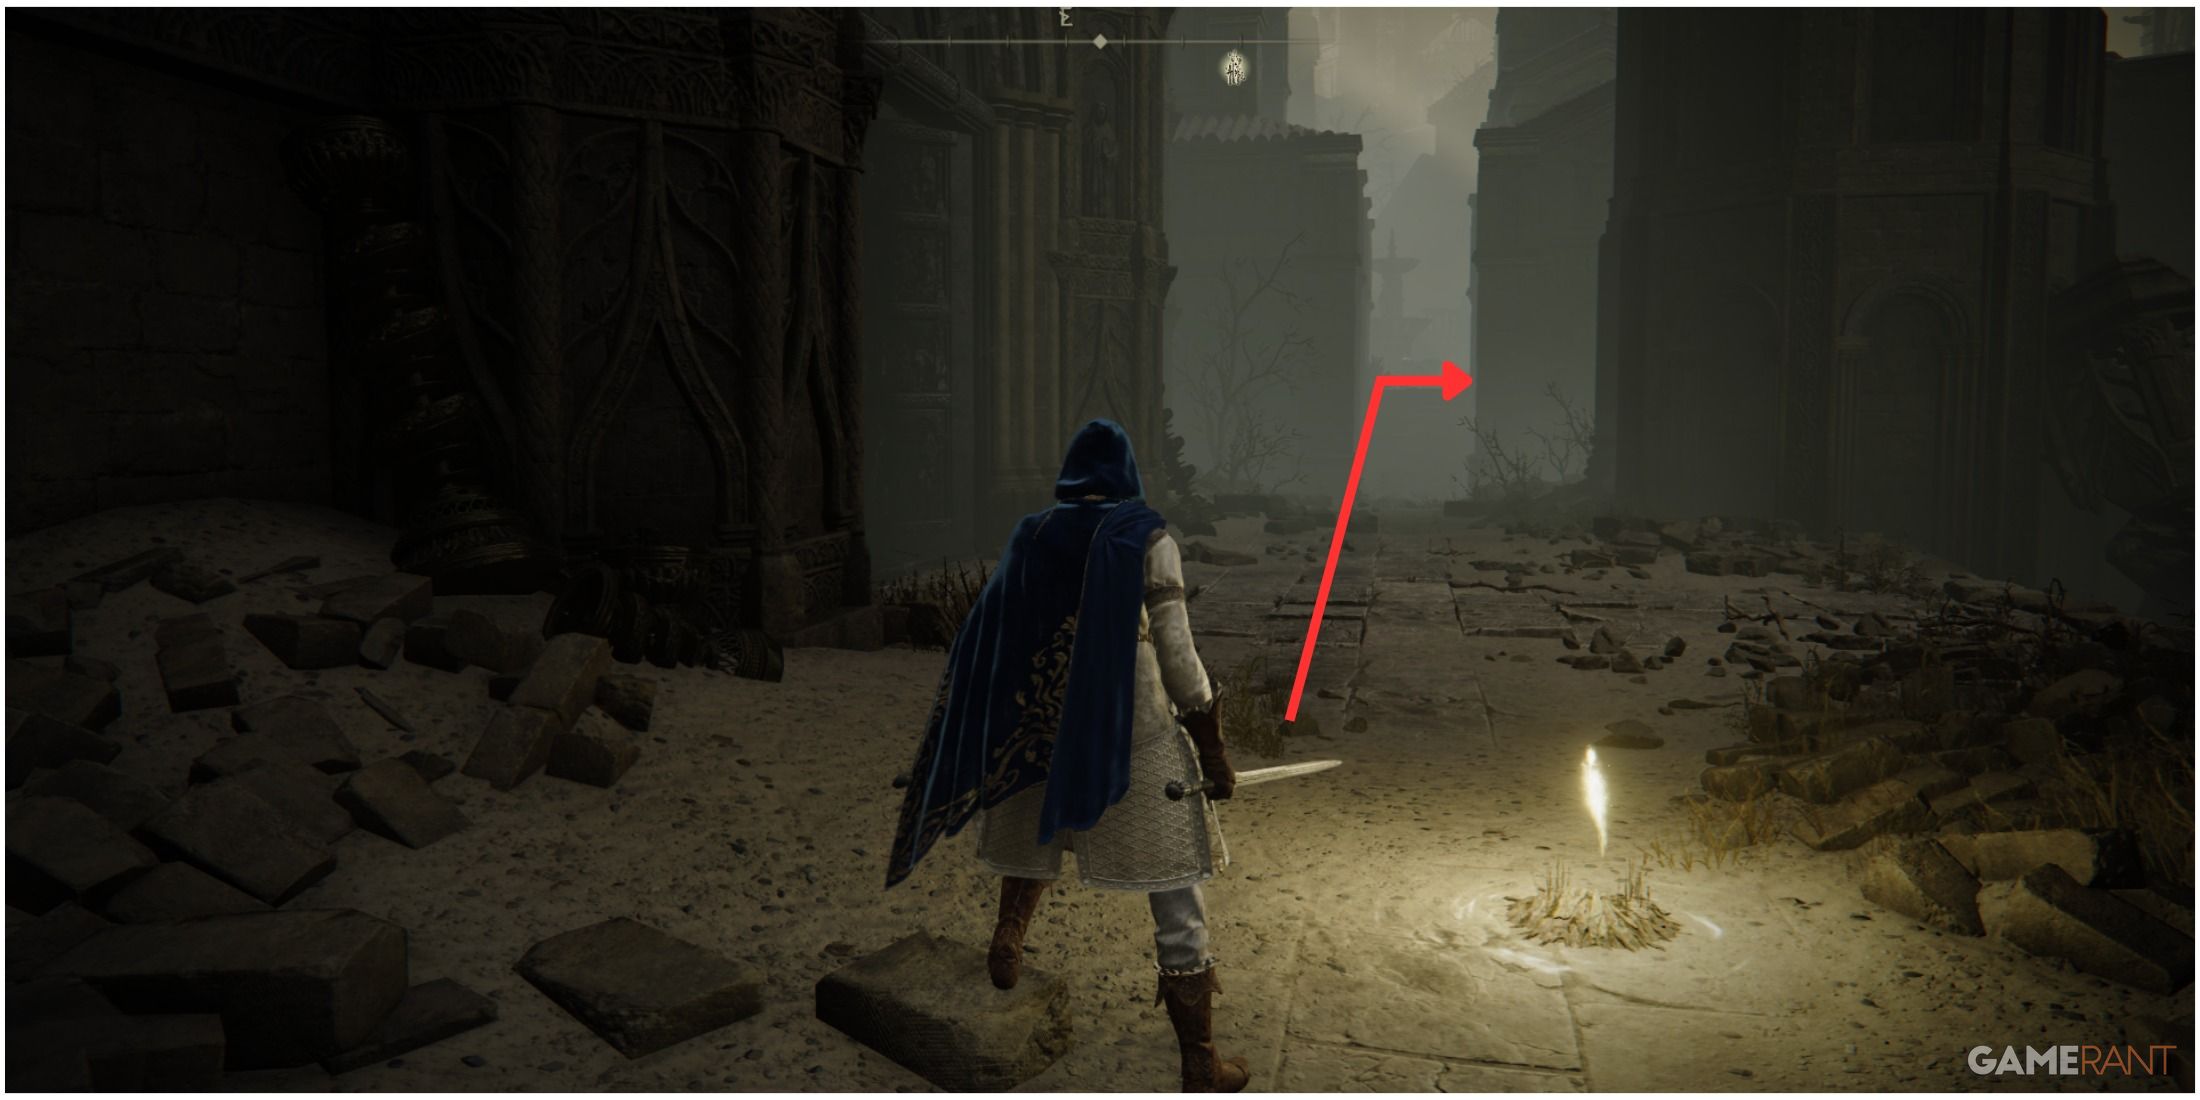
As I leave the Belurat Tower Settlement Site of Grace behind, I head in a southeastern direction. The landscape remains the same for quite some time until I eventually reach a notable circular fountain. However, be prepared as this tranquil spot is guarded by hostile enemies. Keep your guard up, especially against a menacing adversary with a long shadow and a curved sword.
As a fan, I’d describe it like this: I can grab a Large Titanite Shard and a Somber Smelling Stone [3] from near the fountain. After that, I head up the southeastern stairs and eventually end up in a long alleyway. Facing west, I come across four shadowy enemies huddled around the fountain for prayer. Near the base of the fountain is where you’ll find the Somber Smithing Stone [3].
South of the fountain, there’s a well hidden in the vicinity. Reach this spot and you’ll gain access to the Well Depths, a place that can only be explored with the Well Depths Key.
As I make my way backwards, I advise you to be cautious of the two adversaries stationed above on the bridge, casting spells in your direction. Sprint through the alley with haste and avoid their attacks. Once you’ve passed the bridge, look for an arched entrance to your left, which will lead you inside.
Instead of facing any approaching foes, consider making your way upstairs to uncover the hidden, cozy Altar Site of Grace. Take a moment to rejuvenate there before continuing your adventure through the dungeon.
Progressing To the Stagefront Site Of Grace
In order to advance deeper into Tower Settlement of Belurat, first leave the Small Private Altar by using the northwest door. You’ll then come across a compact chamber with two possible exits. One path is towards the southwest, while the other is to the north.
Heading towards the southwest, you’ll encounter the two sorcerers who relentlessly cast spells at you as you made your way over the suspension bridge. Once you reach the end of this bridge, there’s a locked room with an NPC residing inside. To unlock the room, search for the key that will soon be in your possession. Additionally, by jumping onto some nearby rooftops, you can gather a and a [Somber Smithing Stone 4].
To explore the dungeon further, you must head north from the Small Private Altar Site of Grace.
Ash Of War & NPC Invasion
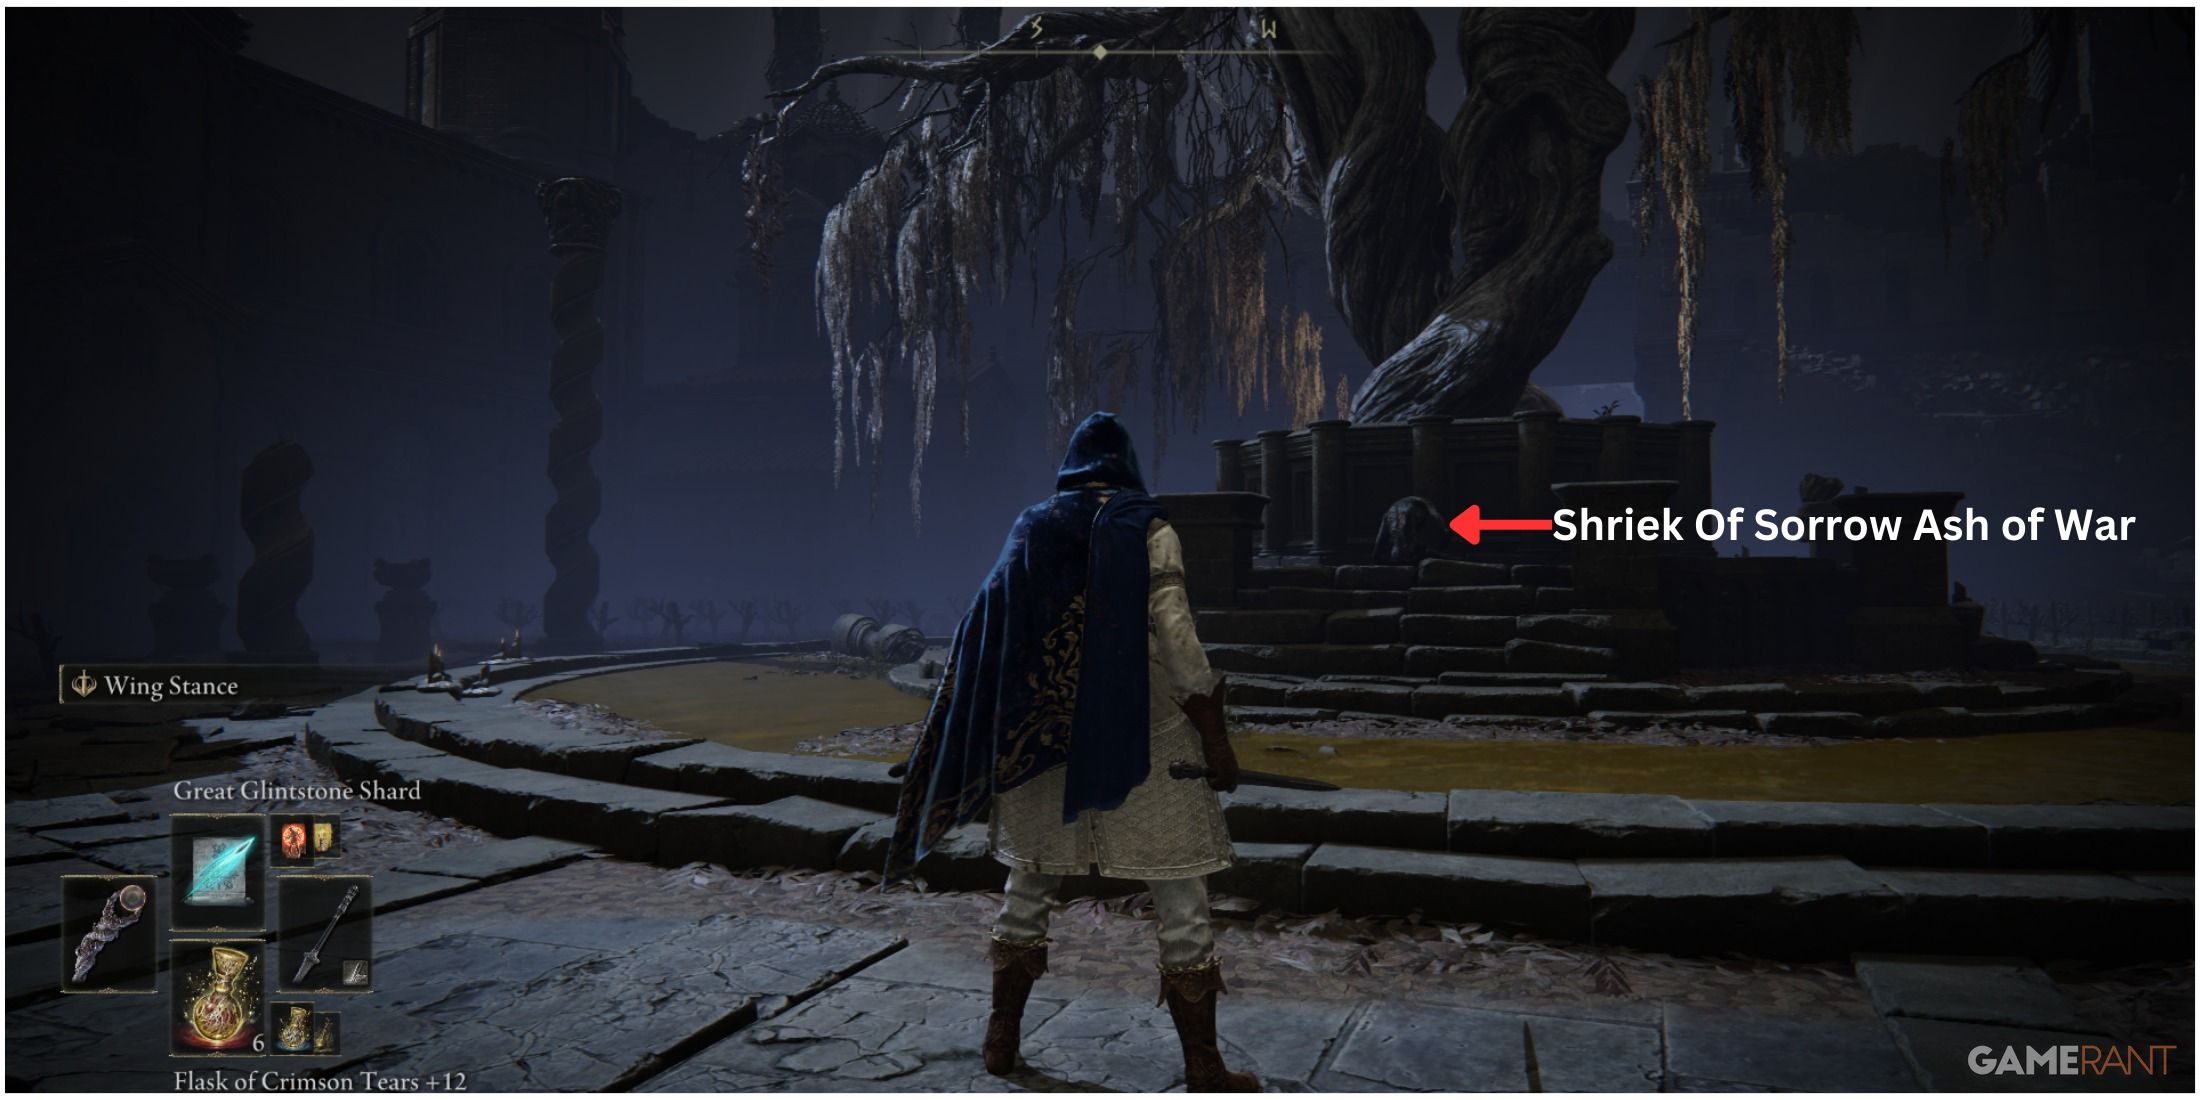
Leaving the Small Private Altar Site of Grace behind, as you journey north, be prepared for an encounter with a roaming Horned Warrior. This formidable adversary can present a significant challenge, but luckily, he won’t detect your presence if you move quietly around him. Once you have some distance between yourself and the Horned Warrier, head in a northeasterly direction to come across a withered spiral tree. Circumvent the tree to uncover a corpse that holds the Shriek of Sorrow Ash of War.
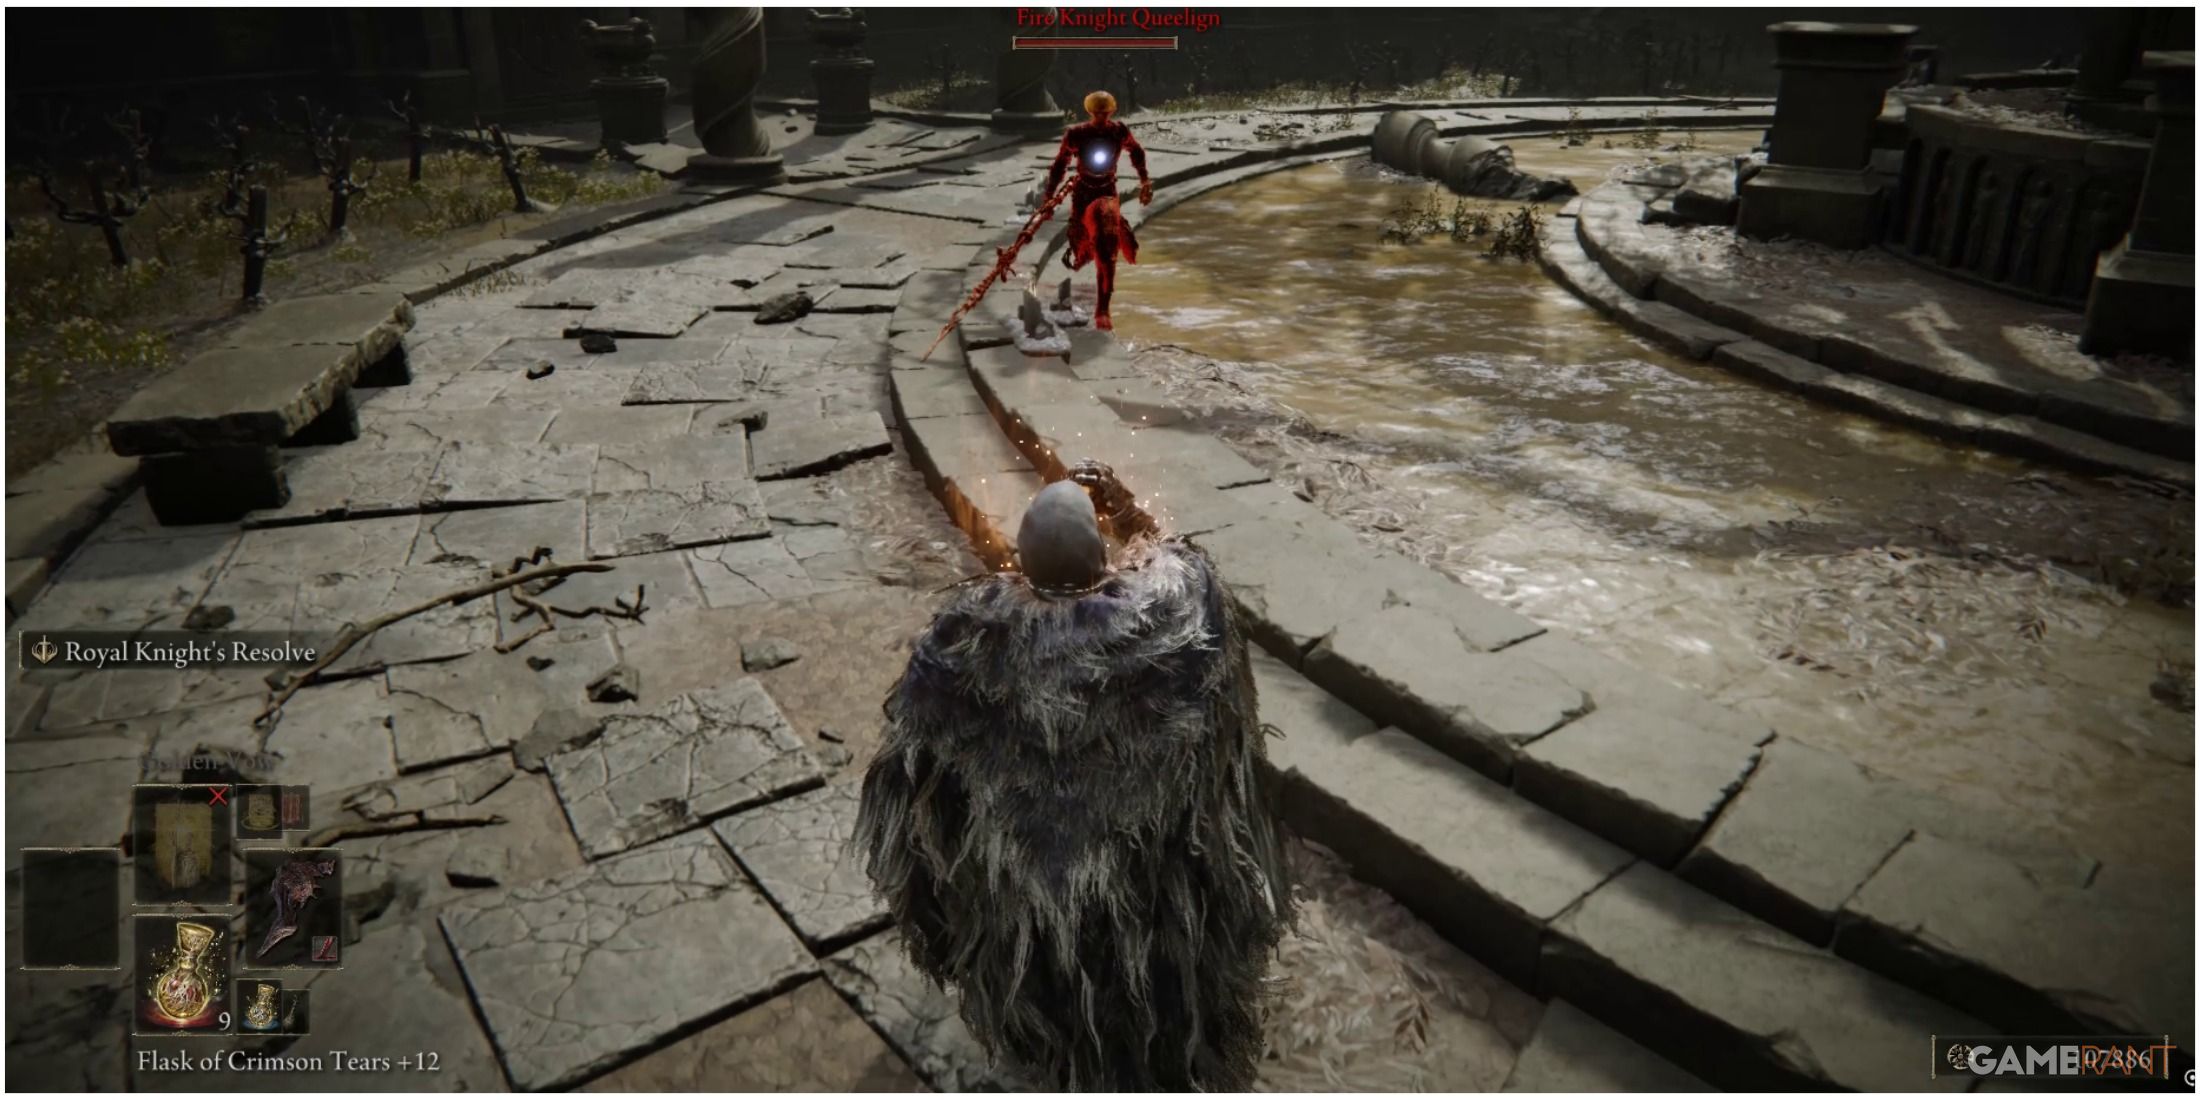
As a seasoned gamer with countless hours spent exploring virtual worlds, I can tell you that not every encounter is as mundane as the next. In fact, at this location in my latest adventure, I was taken aback by an NPC who went by the name of Queelign the Fire Knight. This fellow was no ordinary character; he wielded a long-range spear and unleashed formidable attacks that left me on the brink of defeat.
If you manage to defeat him again, which would be your second time, you’ll obtain the Flame Skewer Ash of War as a reward. For those intrigued, here’s a detailed guide on how to finish Fire Knight Queelag’s quest.
Acquiring the Storeroom Key
After defeating Fire Knight Queelign, go in the direction you came from toward the wilted spiral tree. When you get to the debris, utilize it to climb up to the ruined buildings’ rooftops. Then, move northwest to discover a narrow passageway.
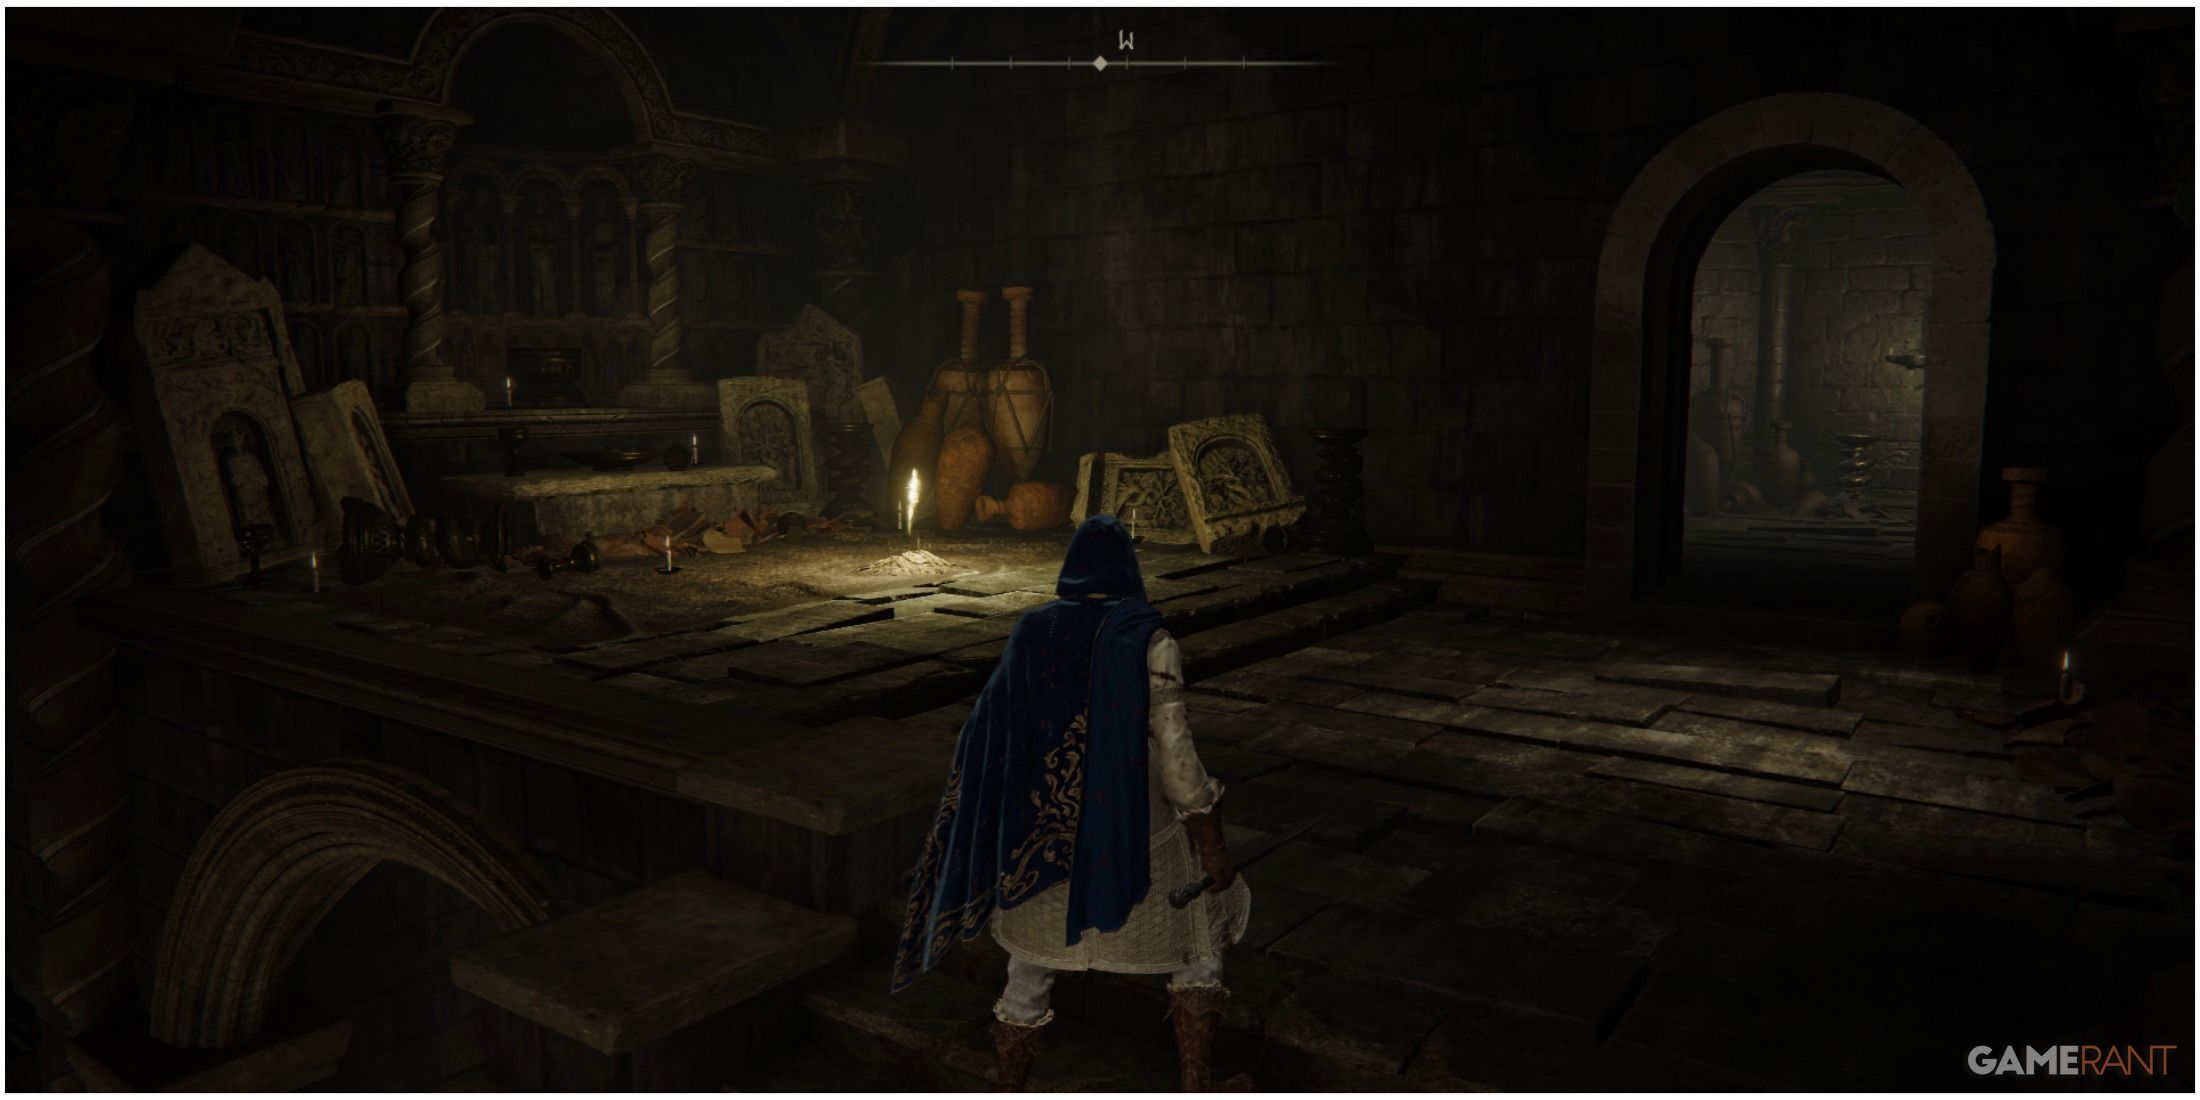
Make your way down the narrow passage to discover a flow of water that looks murky. Continue following it for a brief stretch to the south. Once you reach a dead end, switch directions and head northwest. Ascend the ladders you’ll encounter there and step onto a wooden platform. On this platform, you’ll find a corpse holding the Storeroom Key.
Acquiring Well Depths Key
After obtaining the Storeroom Key, leave the wooden platform through the northwestern archway. Heading south, you’ll come across some stairs leading down. Stay close to the eastern wall as you approach the end of the stairs. Once there, turn towards the southeast to reveal a terracotta ledge. Jump onto the ledge and follow it until you reach its end. Then, make a beeline northeast and leap from the ledge to land on the northeastern walkway. Proceed southeast to enter a room and claim the Well Depths Key lying next to a corpse.
With the Storeroom Key and Well Depths Key now in your possession, you can unlock not only the NPC Storeroom but also an extra section of the dungeon at a later stage in this tutorial.
Unlocking Shortcut To the Belurat, Tower Settlement Site Of Grace
Start at the wooden platform where you obtained the Storeroom Key as your departure point. Then, leave through the northwest gate to reach the Belurat, Tower Settlement Site of Grace shortcut.
To reach the beaten path, climb the stairs northward. Afterward, head down a brief set of stairs to your left (northwest), followed immediately by descending another set of stairs to your right (southeast). These stairs will bring you to an elevator that can be utilized to access the other side of the locked iron gate at the Belurat, Tower Settlement Site of Grace. Here, you may find a lever facing the door, which, when pulled, will unlock it, thus creating a shortcut for you.
Miquella’s Cross & Scadutree Fragment
After getting back on the elevator and riding it to the upper level, disembark and proceed towards the northern stairs. Keep in mind that these stairs lead to a scorpion-infested area, where you’ll find some valuable items, but be cautious as there are two large scorpions lurking around, capable of causing considerable distress.
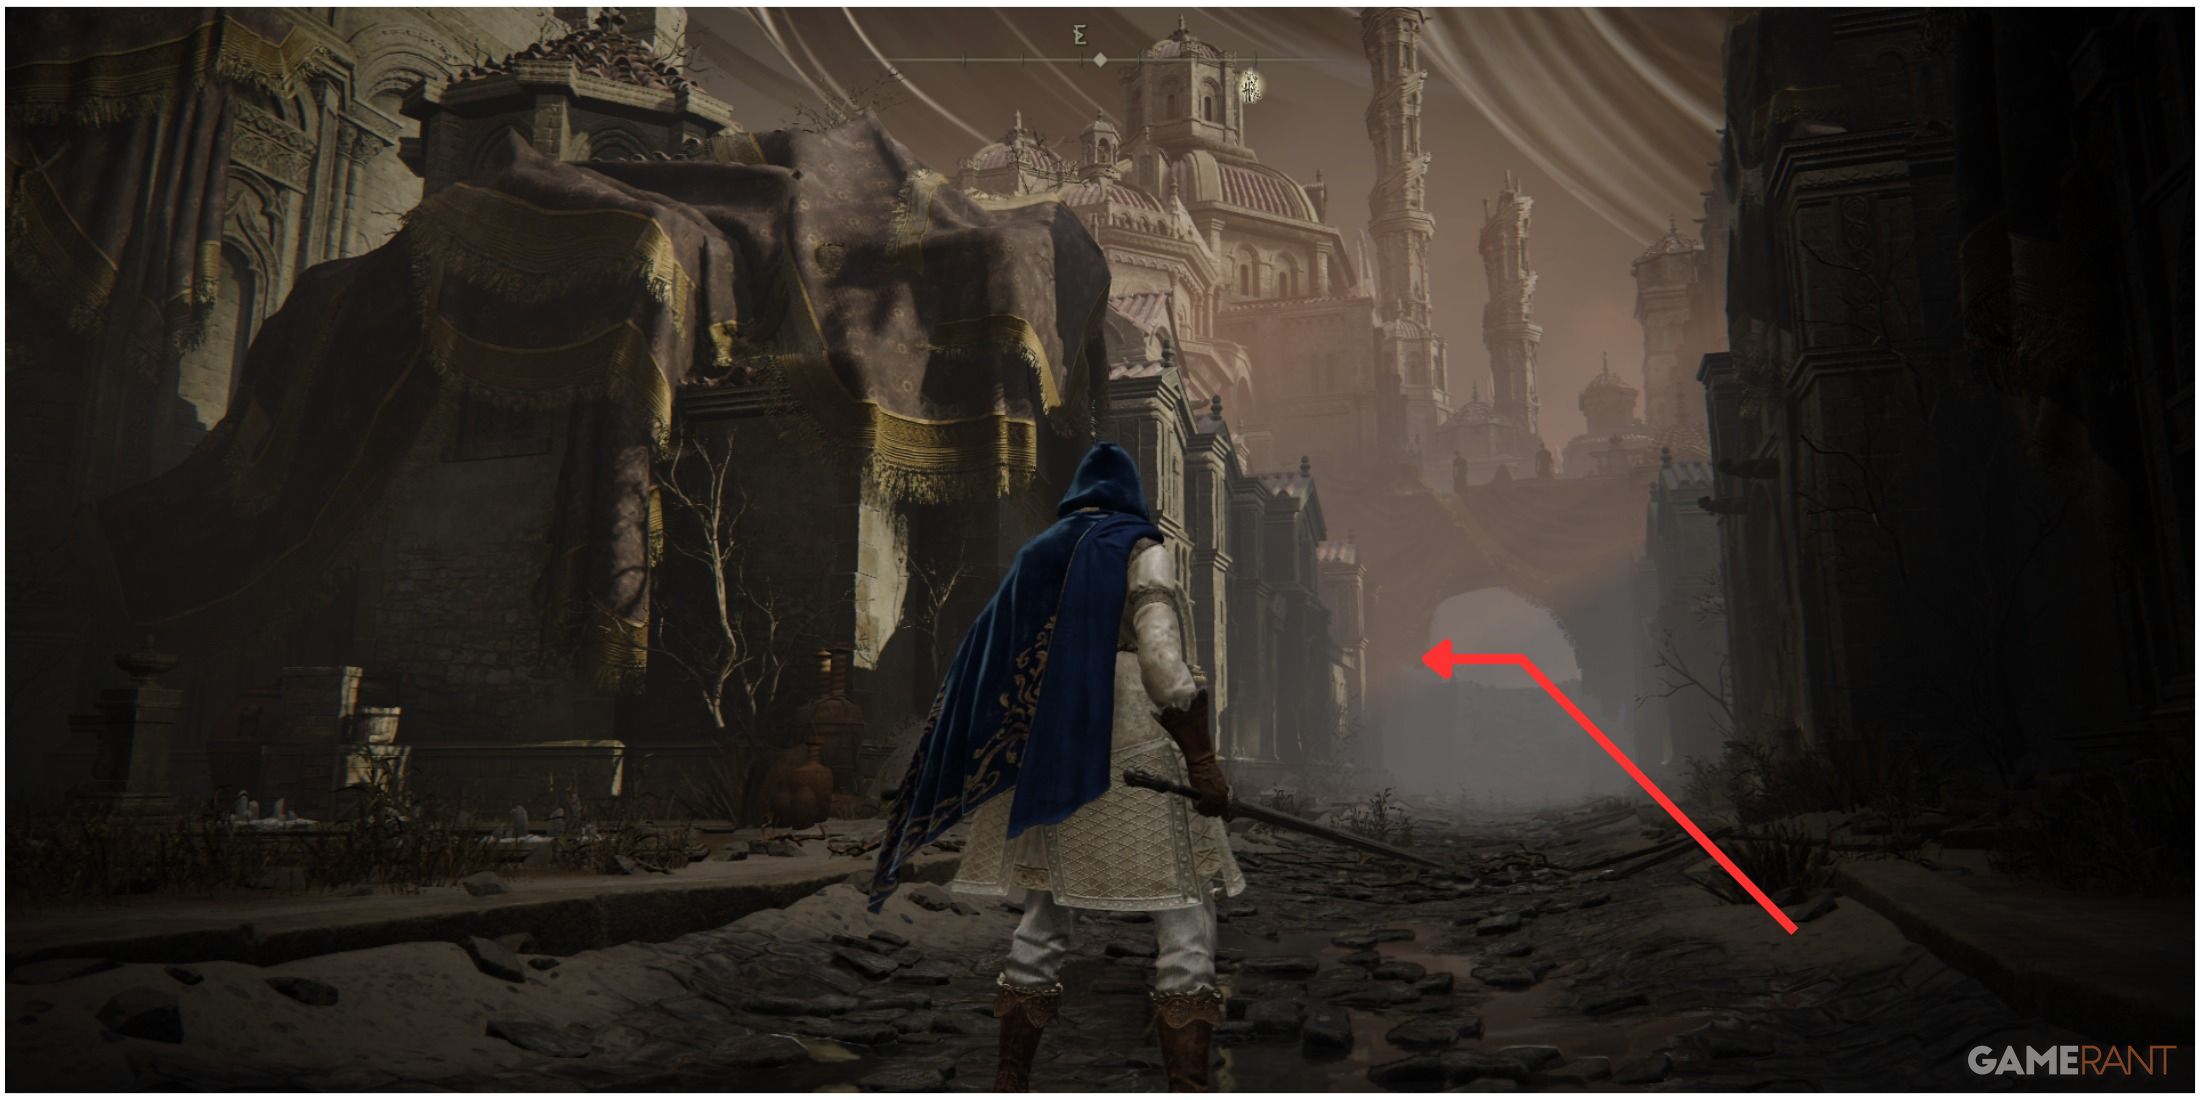
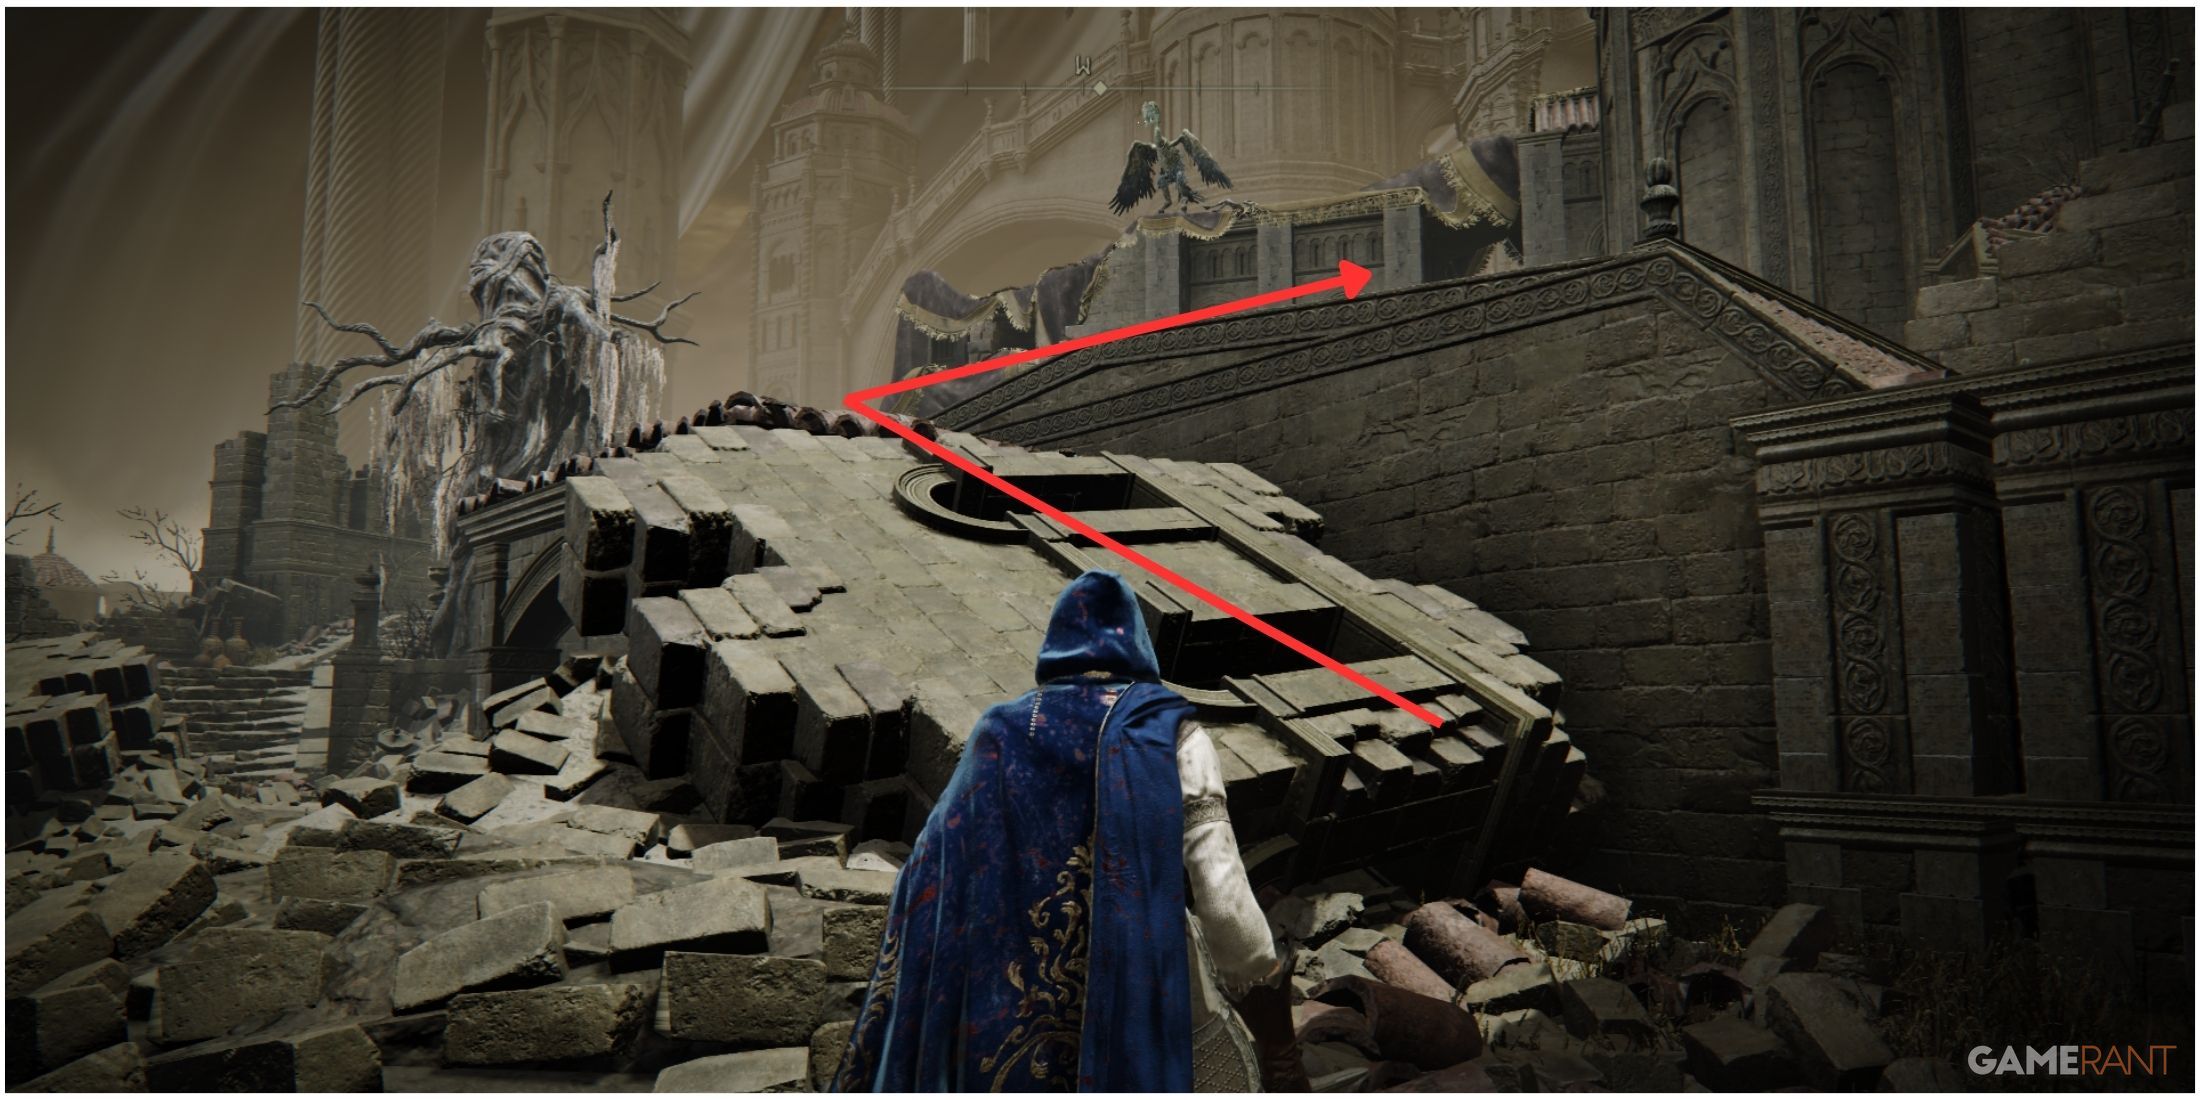
After leaving the scorpion den, go northeast and make your way through the pile of debris. Utilize an arched entrance you’ll find there to enter a building. Once inside, move towards the east to stumble upon one of Miquella’s Crosses and a Scadutree Fragment.
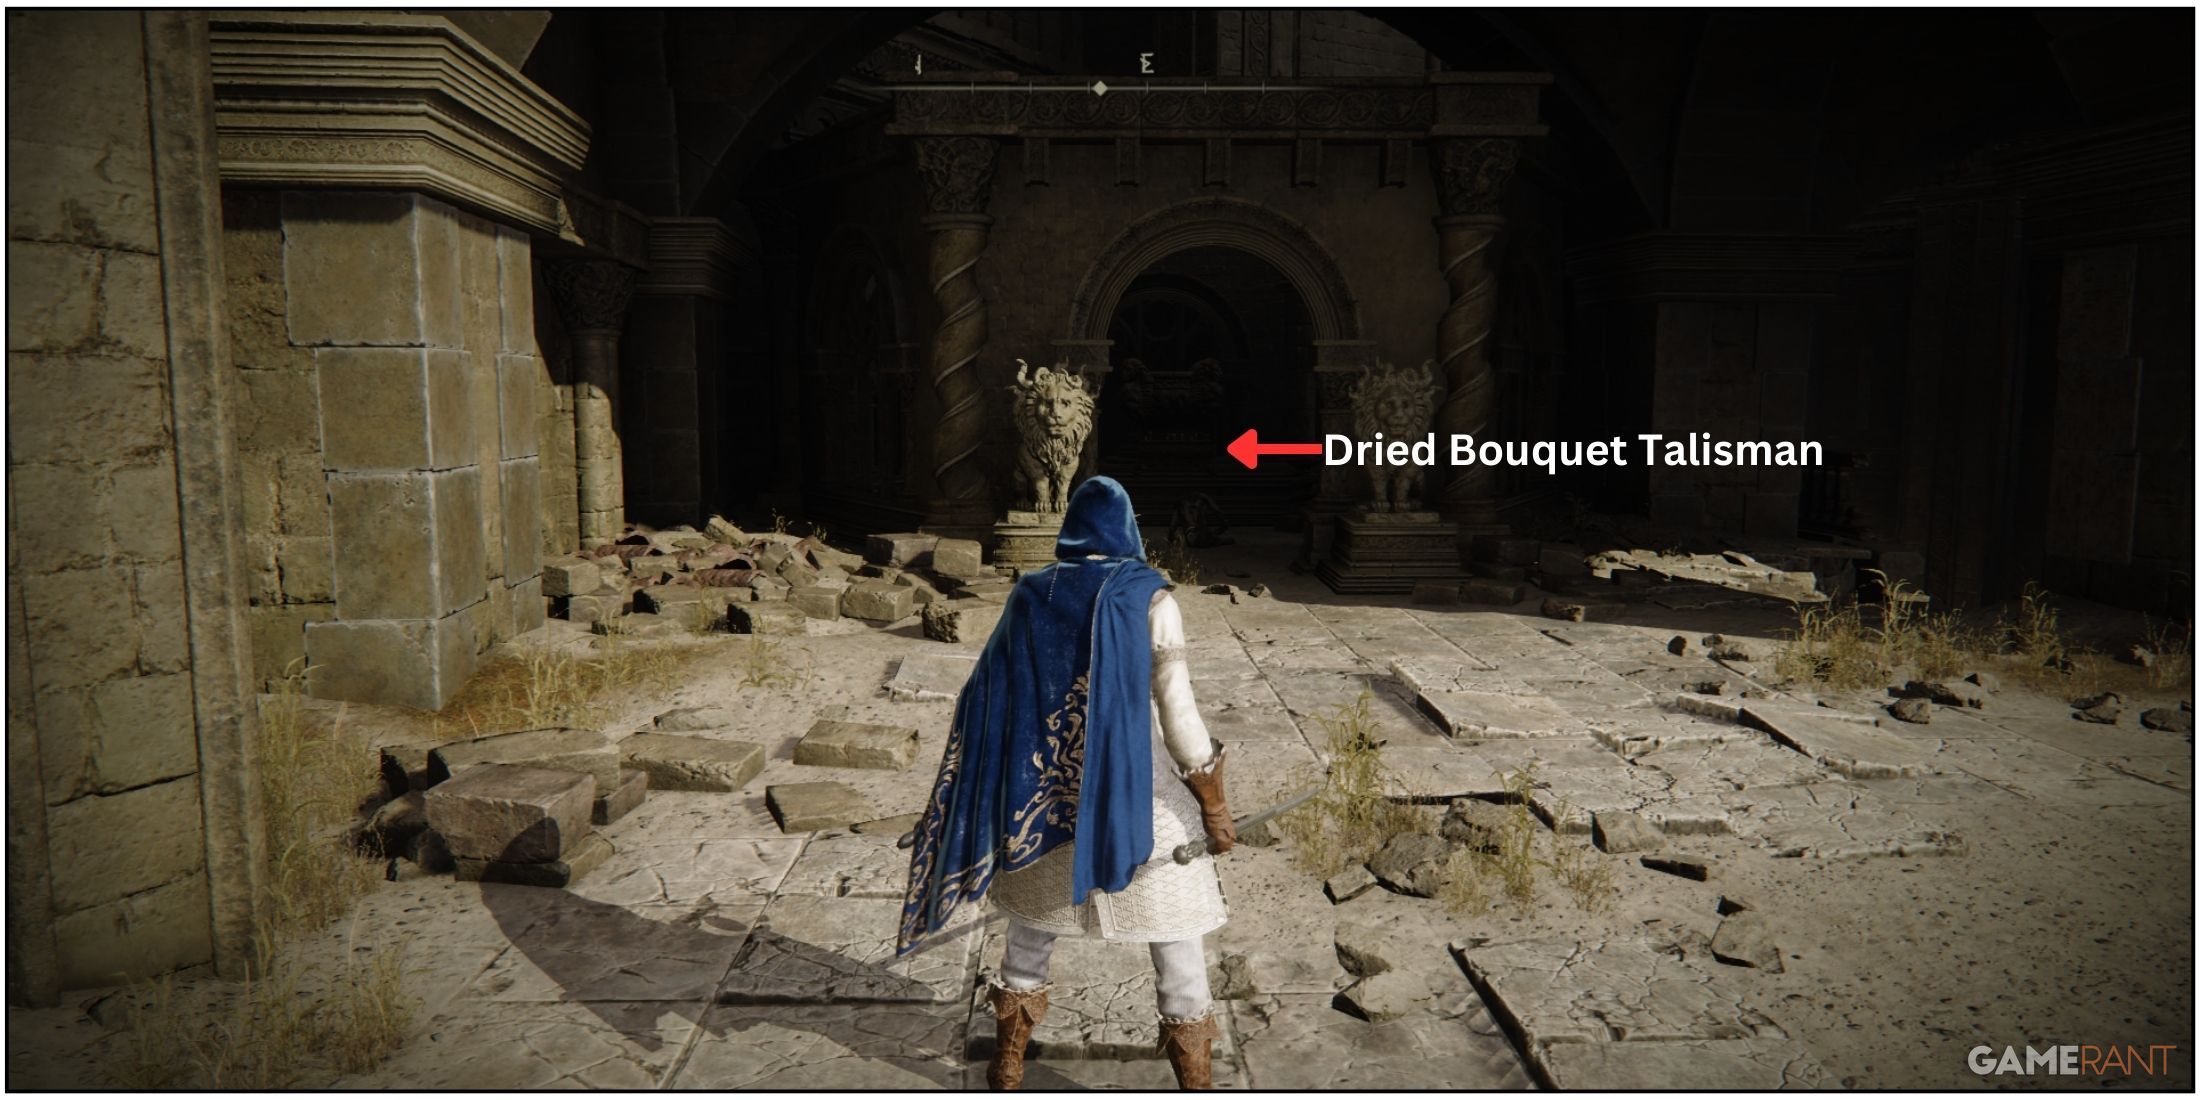
Inside the temple, you’ll find the Dried Bouquet talisman. Exit the building through the southern door. Once outside, you’ll be on a damaged balcony with a lion temple to your east.
Instead of dropping from the balcony into the flooded region for crafting supplies exploration, consider descending and venturing into the submerged area. Afterward, proceed northeast towards a ladder that ascends, bringing you nearer to the dungeon’s final boss encounter.
Two Revered Spirit Ashes
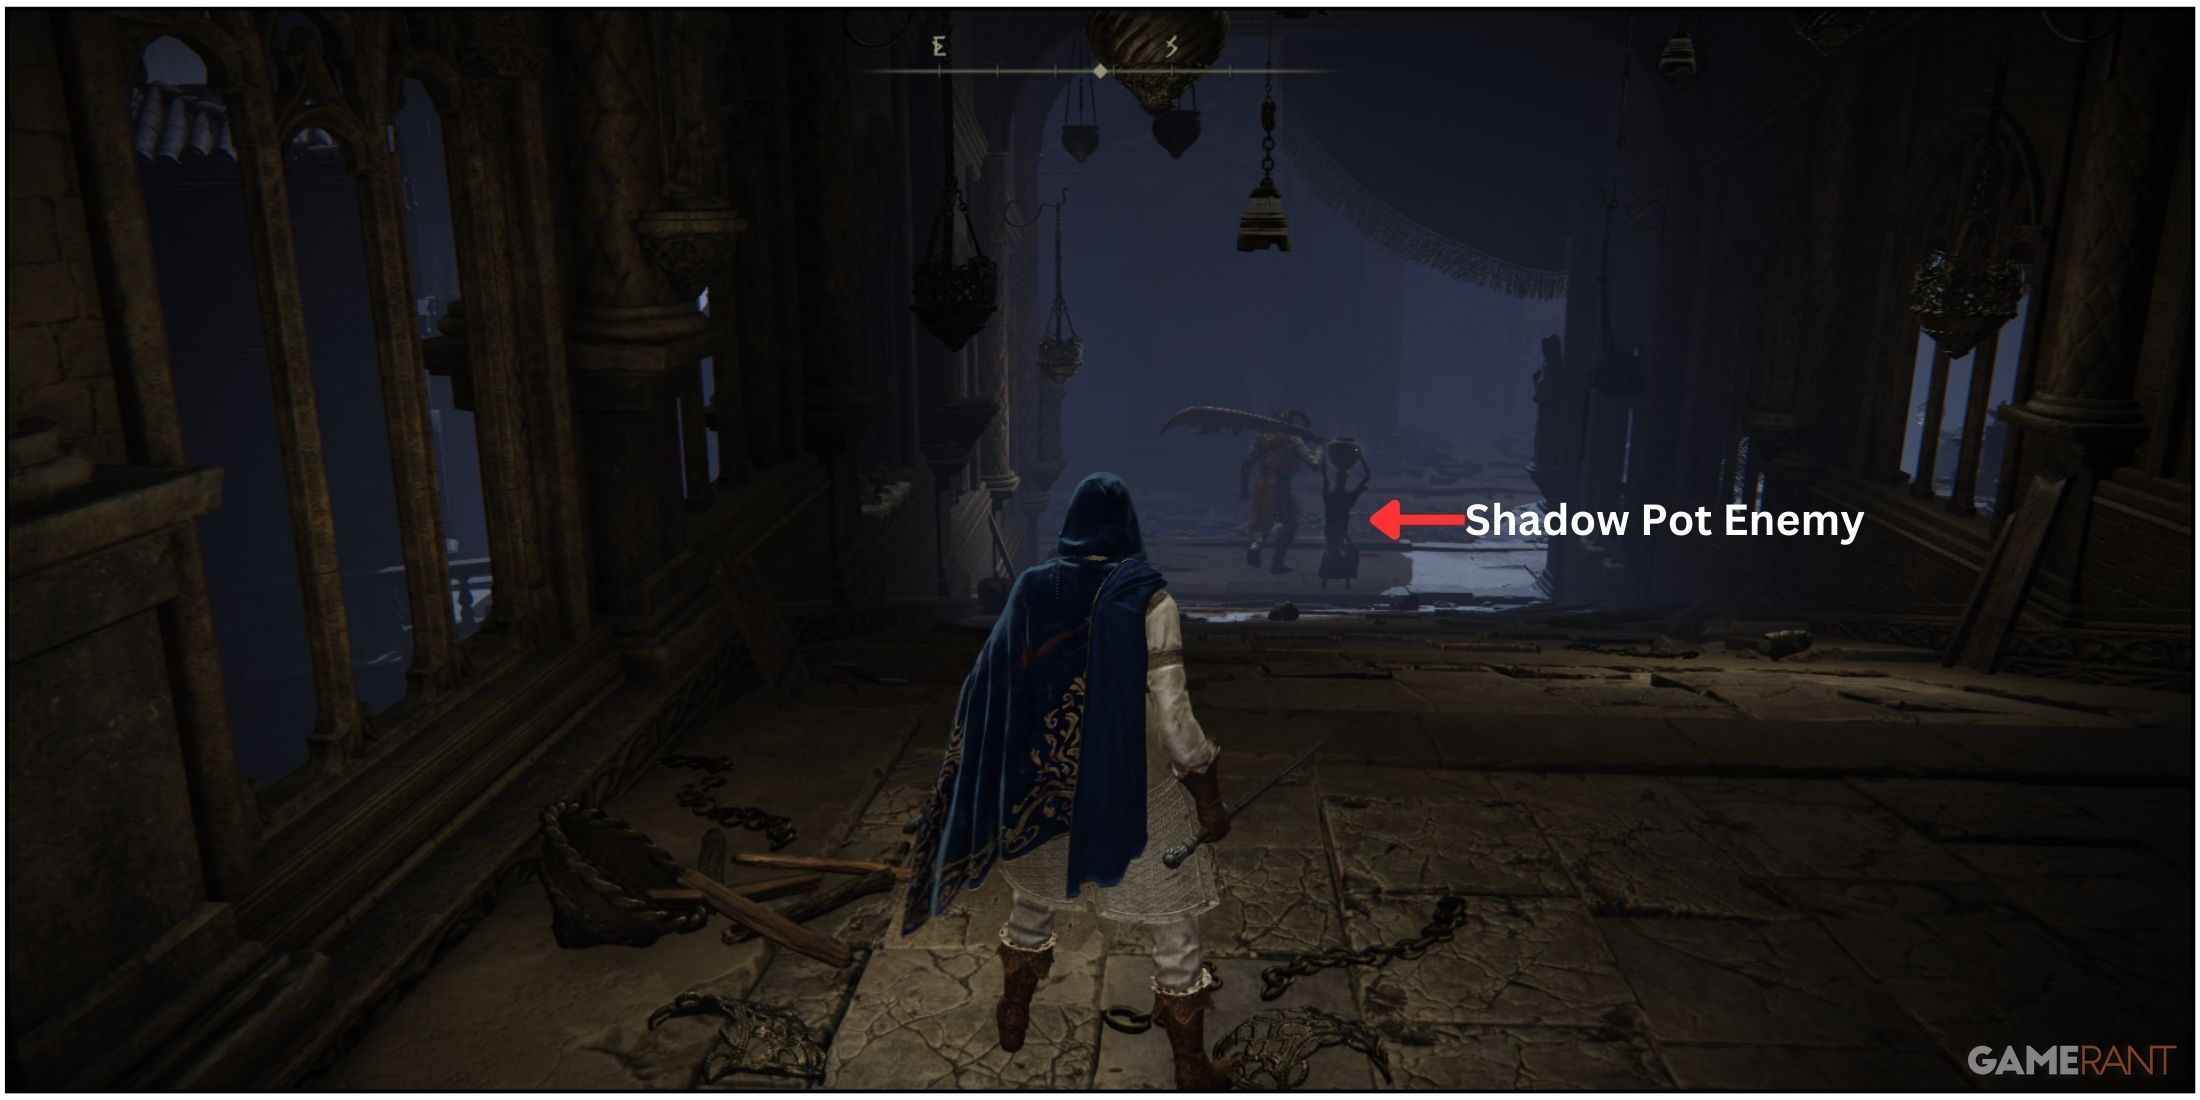
To leave the ladder room, use the western arched door. You’ll find a walkway in the southern direction. A Horned Warrior keeps watch over this bridge and protects a shadow pot foe. Defeating this enemy yields one Revered Spirit Ash.
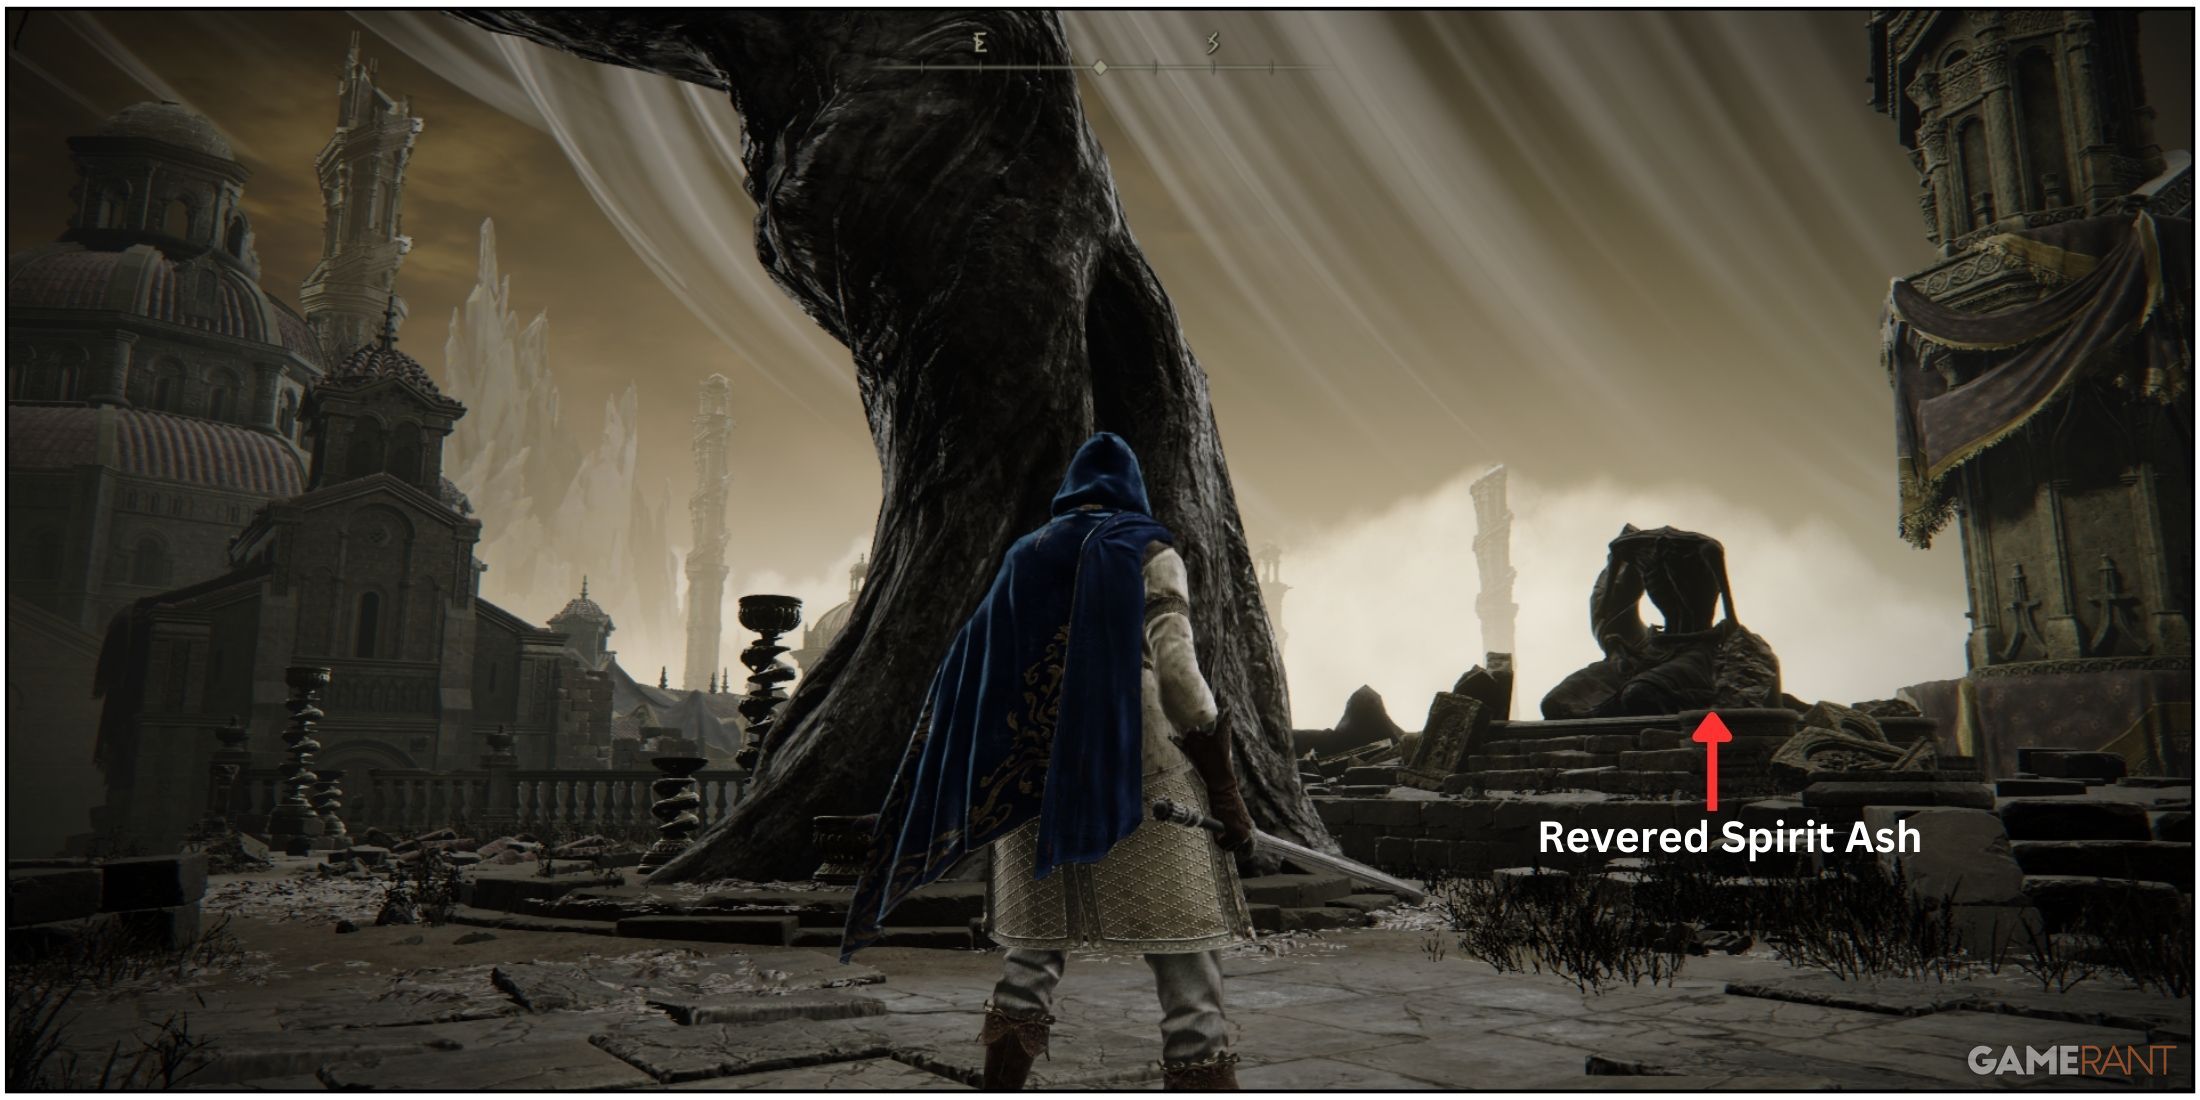
Moving forward to the west, you’ll encounter a wilted tree where a group of shadow foes are paying homage to a Revered Statue. Dispatch the enemies before collecting another spirit ash from the statue’s base.
Alternate Route To Reach Shadow Pot Enemy
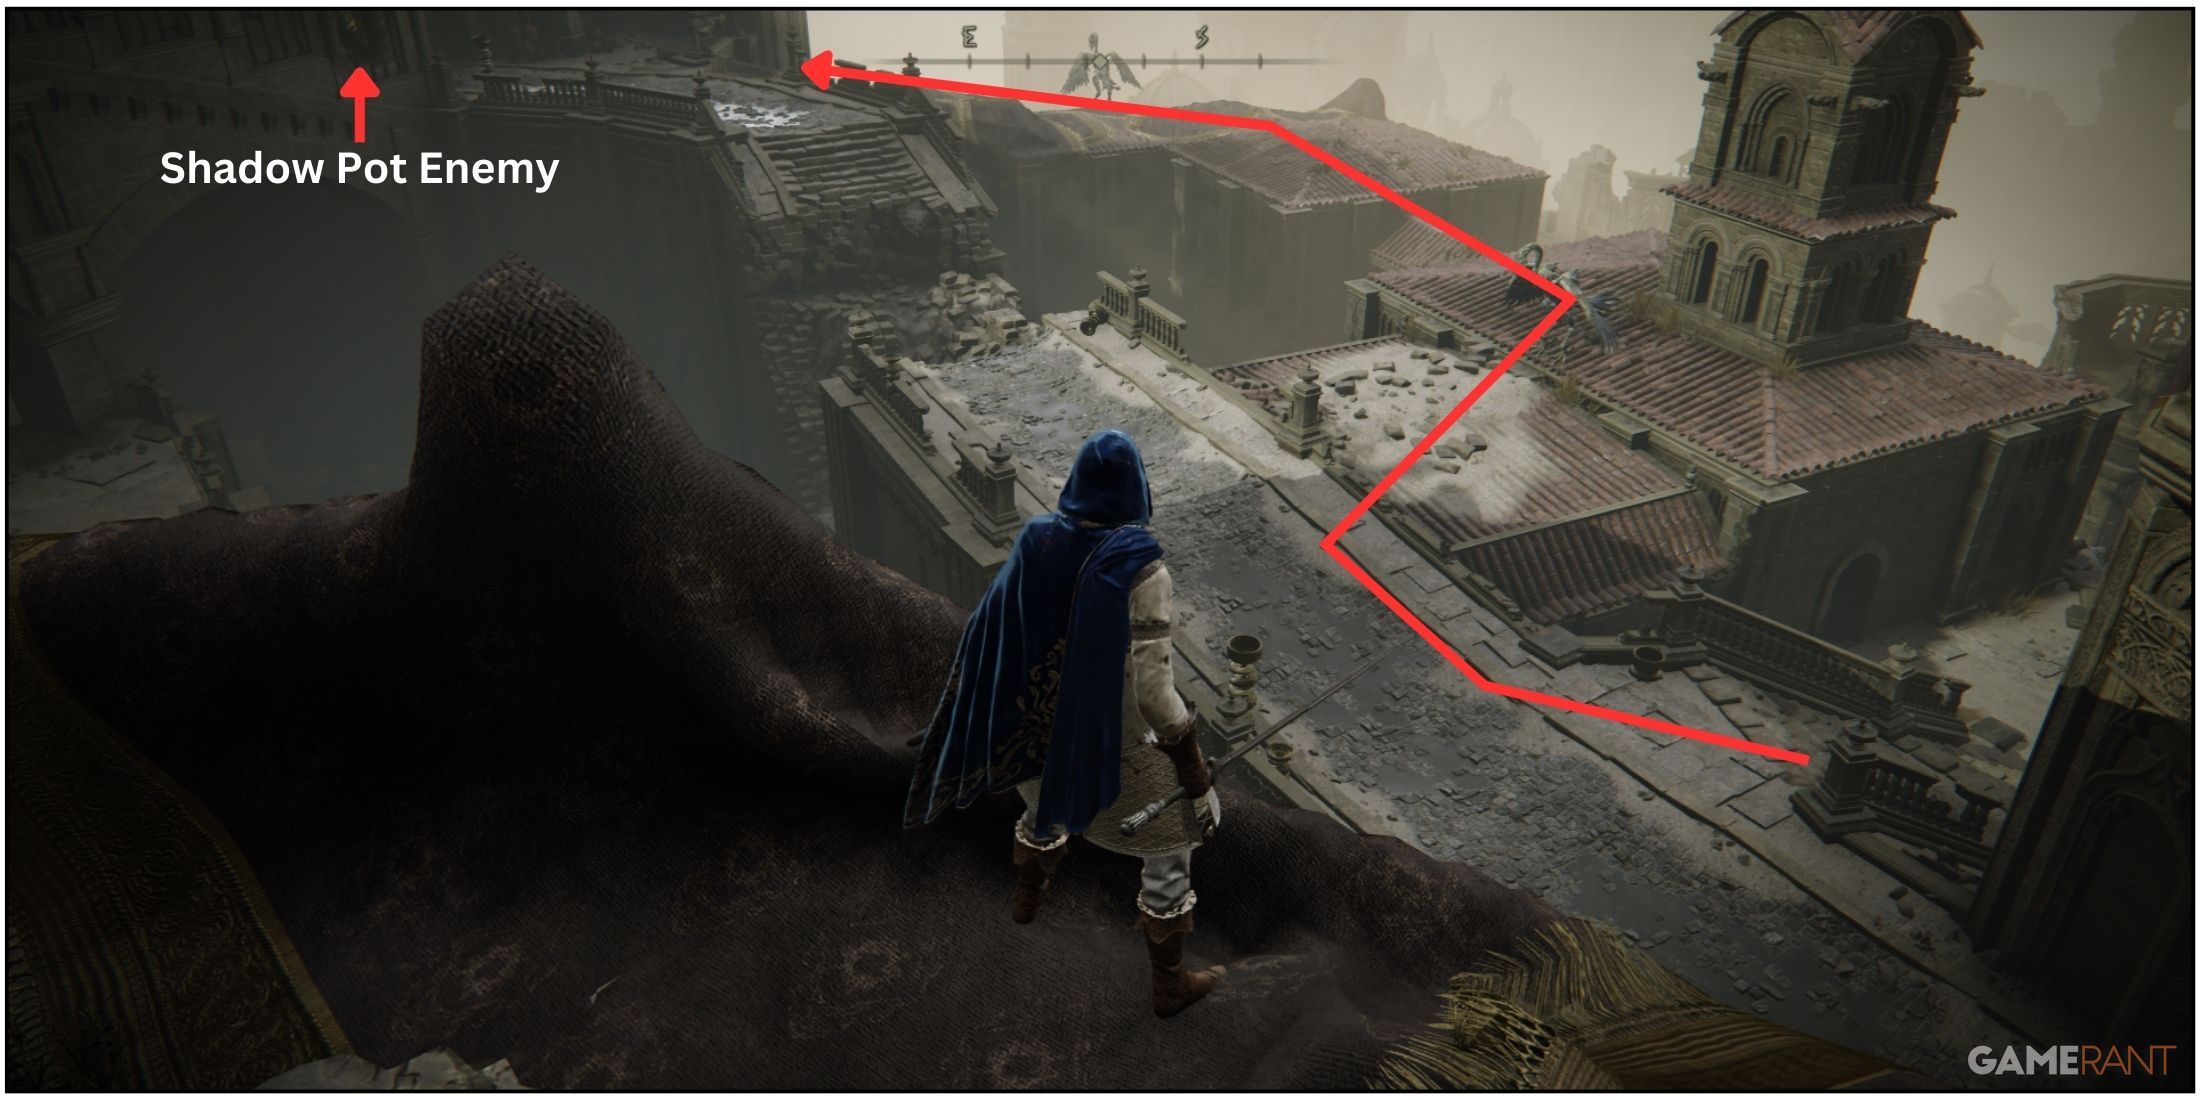
As a gamer, I sometimes find myself wanting to bypass certain parts of a dungeon, especially when the challenge gets too tough or time is of the essence. In such cases, I’d recommend checking out the alternate route depicted in the image above. This shortcut will lead you straight to the Shadow Pot Enemy’s lair. However, be warned that Gravebirds guard the rooftops along this path. If my character meets an untimely demise before reaching the next Site of Grace, I can always opt for this route to get back on track.
Reaching the Stagefront Site Of Grace

After gathering the Revered Spirit Ash, go west towards a big building with a winding staircase inside. A guard stands at the entrance of the staircase, making it tough to engage in combat there due to the narrow stairs. It’s recommended that you quickly bypass her and focus on reaching the Stagefront Site of Grace instead.
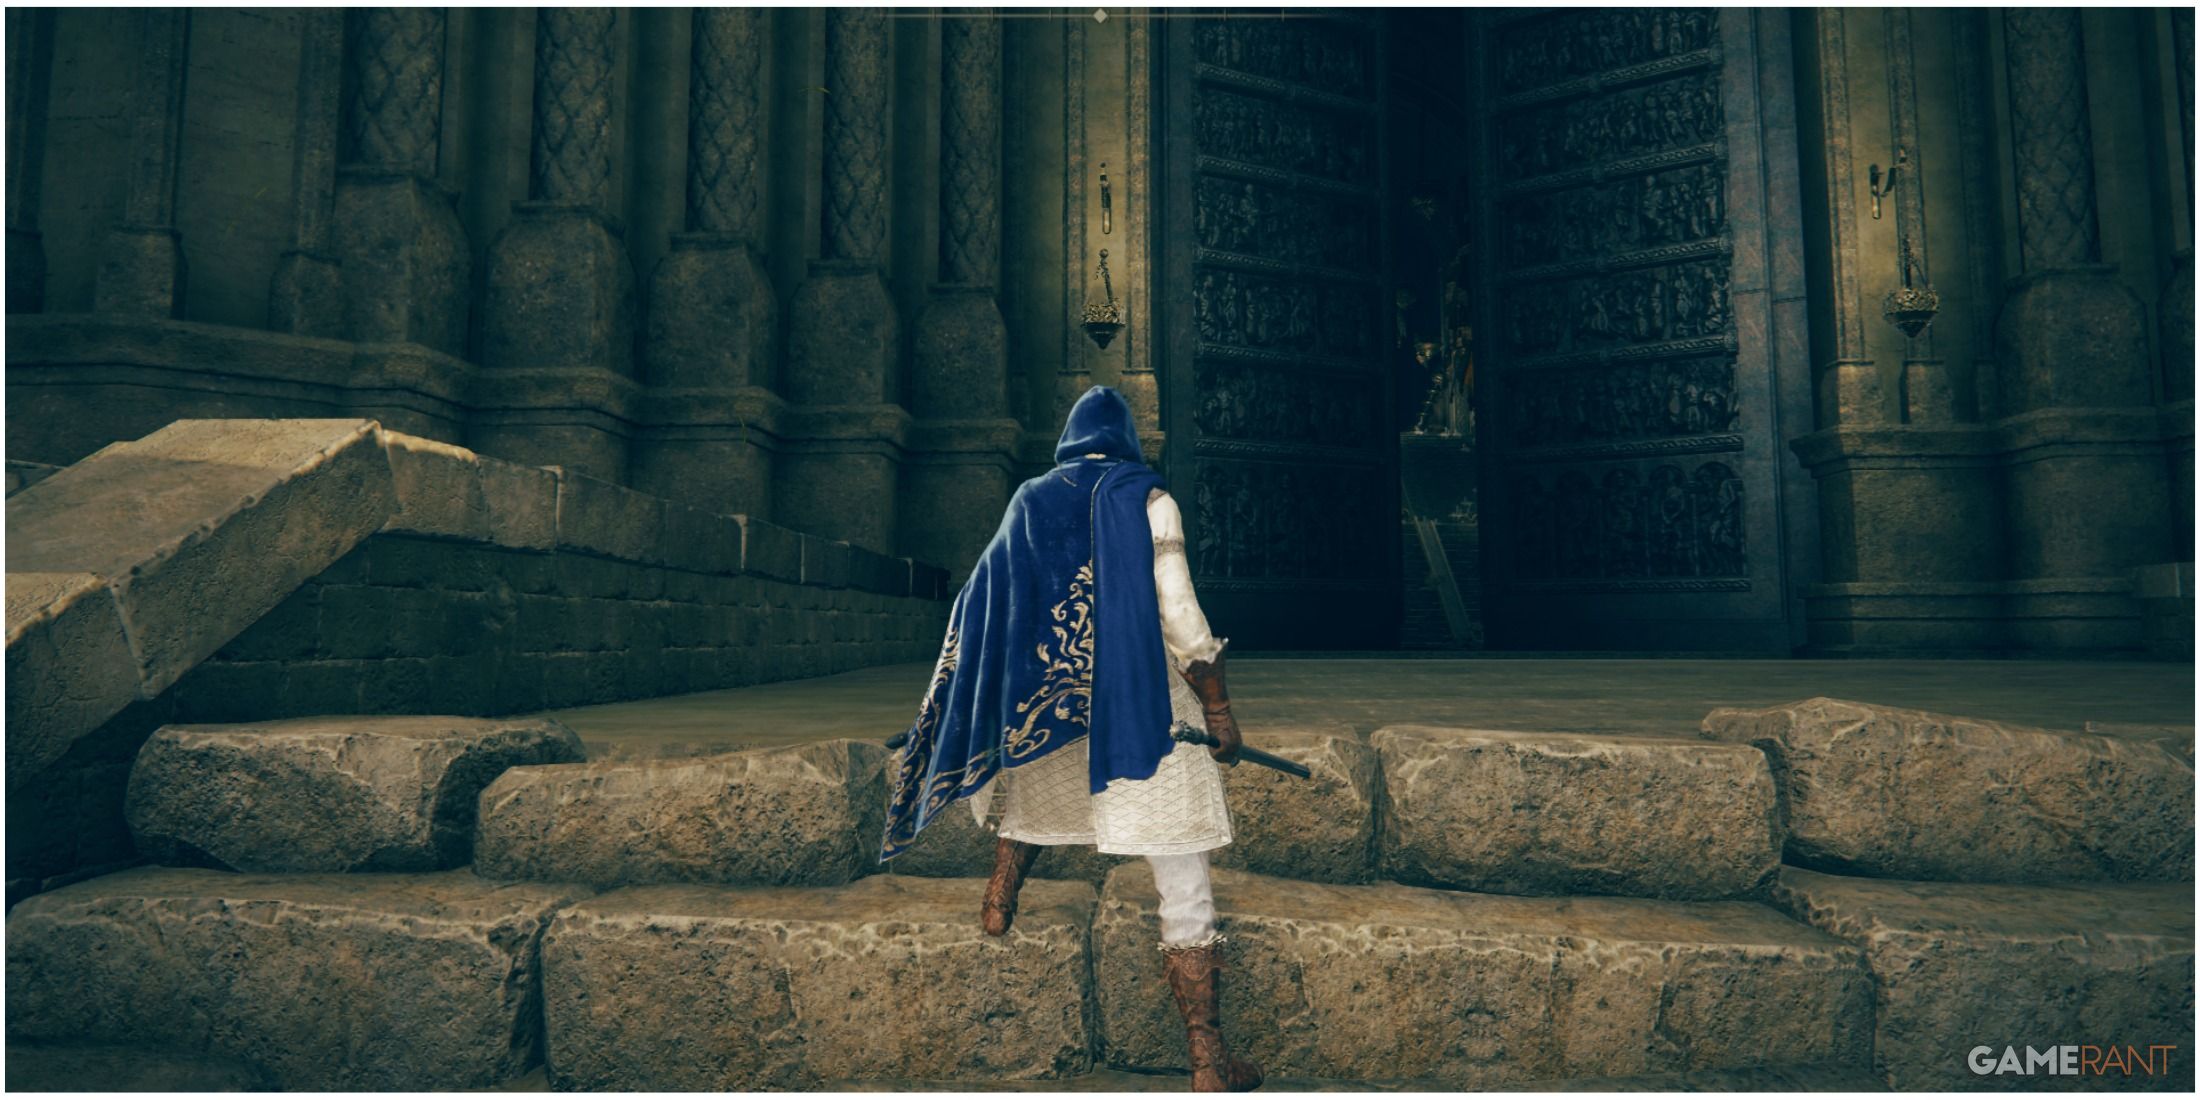
Near the North part of the Grace Stagefront Site, there’s a big gate. Beyond this gate lies the last boss of the dungeon – the Divine Beast named Dancing Lion.
Beating Divine Beast Dancing Lion Boss

The Dancing Lion Divine Beast is a formidable foe with unrelenting hostility during battle. For a more successful encounter, it’s suggested that you reach Scadutree Blessing level 5. Summoning Freyja for aid and utilizing strong spirit summons like Odin or Thor can help manage the fight. Bleed-focused strategies prove particularly effective against the Dancing Lion Divine Beast.
After being bested, the boss yields a renowned helmet named the “Helm of the Divine Beast.” This item is essential for finishing a mission given by an NPC in Belurat, Tower Settlement. Following victory, a new “Divine Beast’s Theater” Site of Grace emerges within the boss chamber. To the southeast of this Site of Grace lies an elevator leading to a massive iron gate. Upon opening the gate, you’ll encounter the final Revered Spirit Ash near a withered tree.
Using the Storeroom Key To Complete an NPC Quest

After obtaining the Divine Beast Helm, make your way to the Small Private Altar Site of Grace using the fast travel option. Subsequently, proceed southwest towards the Storeroom. Inside this area, you’ll encounter an NPC named Grandam. Donning the Divine Beast Helm prior to engaging in conversation with her will unlock the Watchful Spirit incantation as a reward. Additionally, she bestows upon you a consumable called Scorpion Stew that temporarily shields you from physical damage while replenishing some health.
Using Well Depths Key To Access New Area
As a fan, I’d suggest this: Head to the Belurat Tower Settlement Site of Grace now. Once there, locate the well you discovered earlier down the long alleyway. Employ the ladder to descend into the well and continue your journey westward. There, you will find an iron gate that requires unlocking.
At this entrance, you’ll find passage to a hazardous zone populated by creatures called Man Flies. Feel free to venture into this locale for procuring crafting resources and Smithing Stones. Additionally, there’s an armed adversary known as the Horned Warrior residing here. He may yield his weapon (Somber Smithing Stones), or a fragment of his armor during an encounter.
Read More
- LUNC PREDICTION. LUNC cryptocurrency
- BTC PREDICTION. BTC cryptocurrency
- USD COP PREDICTION
- MNT PREDICTION. MNT cryptocurrency
- ETHW PREDICTION. ETHW cryptocurrency
- Ethereum (ETH) Crashes Dramatically, What’s Next? Solana (SOL) Can Still Reach $200, XRP Struggling Before $0.63 Test
- SOL PREDICTION. SOL cryptocurrency
- Survival Horror Games With an Unkillable Enemy
- Marvel Rivals Players Aren’t Happy With The Gold Rank Competitive Reward
- Lucky Animal Crossing: New Horizons Player Discovers Infinite Clam Glitch
2024-07-15 08:05