
As a seasoned survivor of Frostpunk’s harsh and unforgiving world, I can confidently guide you through the Prologue of its upcoming sequel. First off, when the “Whiteout Draws Near” event occurs around Week 65, make a tough choice: either slaughter the seals or let the Elders go.
The prologue of Frostpunk 2 offers a starting point, introducing key gameplay mechanics such as Frostbreaking, Districts, and more. Players will gradually grasp these elements as they progress through the prologue. Although the in-game tutorials offer insights into these mechanics, some enthusiasts might need additional clarification. This walkthrough aims to provide that extra information, making it simpler for players to successfully complete the Prologue in Frostpunk 2.
Following the steps outlined in this guide is advised for smoother gameplay, but making small adjustments along the way generally won’t lead to significant problems.
Frostpunk 2: Prologue Tips
Prior to delving deeply into a comprehensive guide for the Prologue of Frostpunk 2, let me share some broad advice that could prove useful:
- Do not forget to build two Food Stockpile Hubs as soon as Food surplus is achieved. This will increase the player’s Food Stockpile Capacity to a suitable level.
- Make sure to build an Extraction District on a second Construction Wagon. The first Construction Wagon cannot supply enough Prefabs to support all the actions that the player must take during the Prologue.
- Destroy Districts when the tiles that they are harvesting run out of resources to get some additional Prefabs and Scraps.
- Turn off a District to free up Workforce for construction or Frostrbreaking, and then reactivate the District when the construction is complete.
- If a player needs more Scraps, they can click on the Wanderers at the bottom of the screen, click on the Favours tab, and click on “Take Scraps.”
Frostpunk 2: Prologue Walkthrough
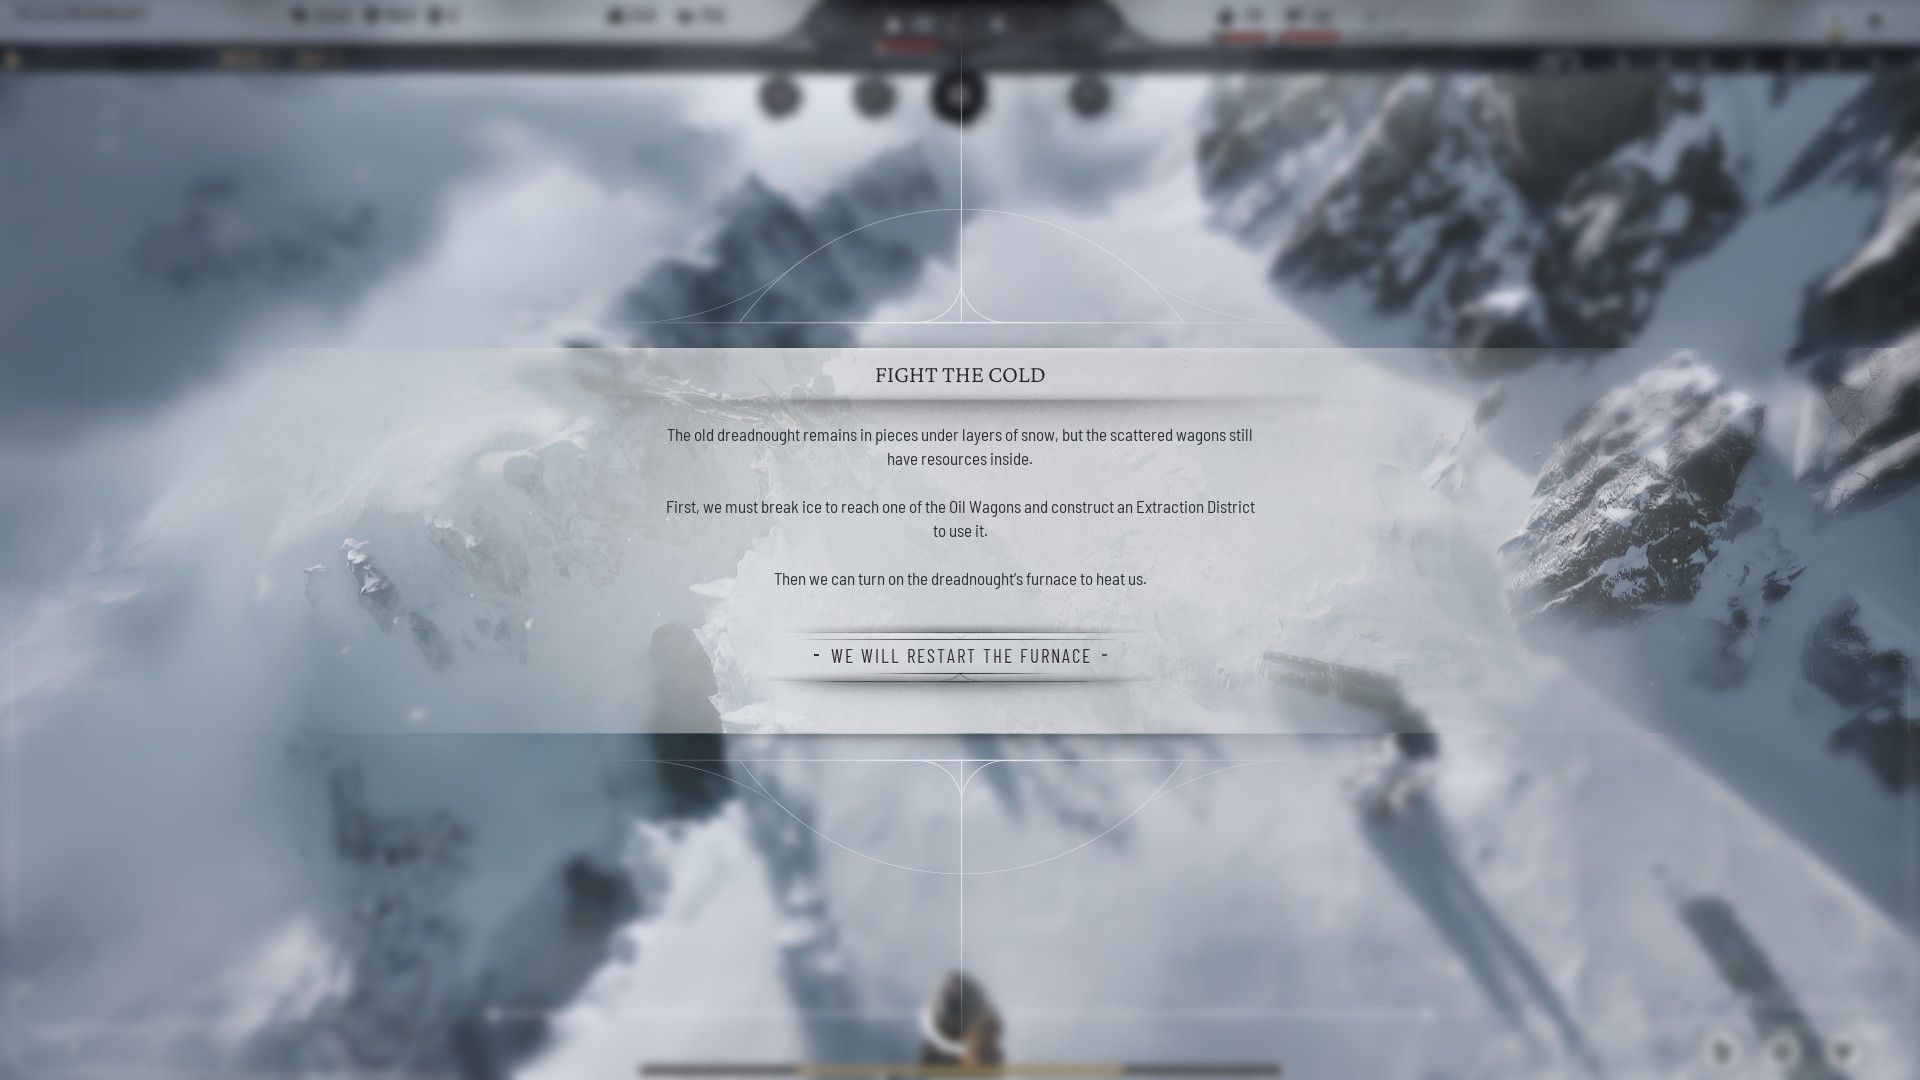
Fight the Cold
- Frostbreak to an Oil Wagon and Construct an Extraction District
In Frostpunk 2, players ought to initiate their game by tapping on the Frostbreak symbol located at the bottom-right corner of the screen. This move will bring forth a glow on several tiles surrounding the Dreadnought Wreck, and it will also disclose the locations of resources scattered across the map.
Strategy game enthusiasts should now find and click on a tile that’s close to an Oil Barrel icon (symbolizing the Oil Wagon). This tap will cause more surrounding tiles to light up in the direction of the Oil Wagon. Keep clicking on tiles until you’ve selected a total of eight, ensuring at least one is an Oil Wagon tile. Once eight tiles are highlighted, a checkmark will appear. Click on it to initiate Frostbreaking.
After Frostbreaking is finished, players can construct an Oil Extraction Zone on the previously cleared spots. To accomplish this, city-building enthusiasts just need to tap on the circle icon in the lower right corner of the screen, select the Oil Extraction Zone, and then click on a cleared Oil tile. Now, players should click on two adjoining tiles to create a checkmark, and clicking on that symbol will start the construction process for the Oil Extraction Zone.
- Turn on the Furnace in the Dreadnought Wreck to provide Heat
In Frostpunk 2, players observant enough to glance at the screen’s top Resource Drawer will now notice an Oil production. This resource can be transformed into Heat by igniting it within the Dreadnought Wreck’s Generator. To set this process in motion, simply click on the Dreadnought Wreck, then select “Generator” from the information panel that pops up, and finally toggle the switch under “Generator Off.
Provide Basic Infrastructure
- Frostbreak to a Construction Wagon and Build an Extraction District to Provide Prefabs
Players need to redo the initial procedure for oil extraction, but with a twist: they should frostbreak to and establish an Extraction District on a Construction Wagon this time. The method commences by clicking on the Frostbreaking icon located in the bottom-right corner of the screen. Once eight tiles have been selected, players can proceed with the task.
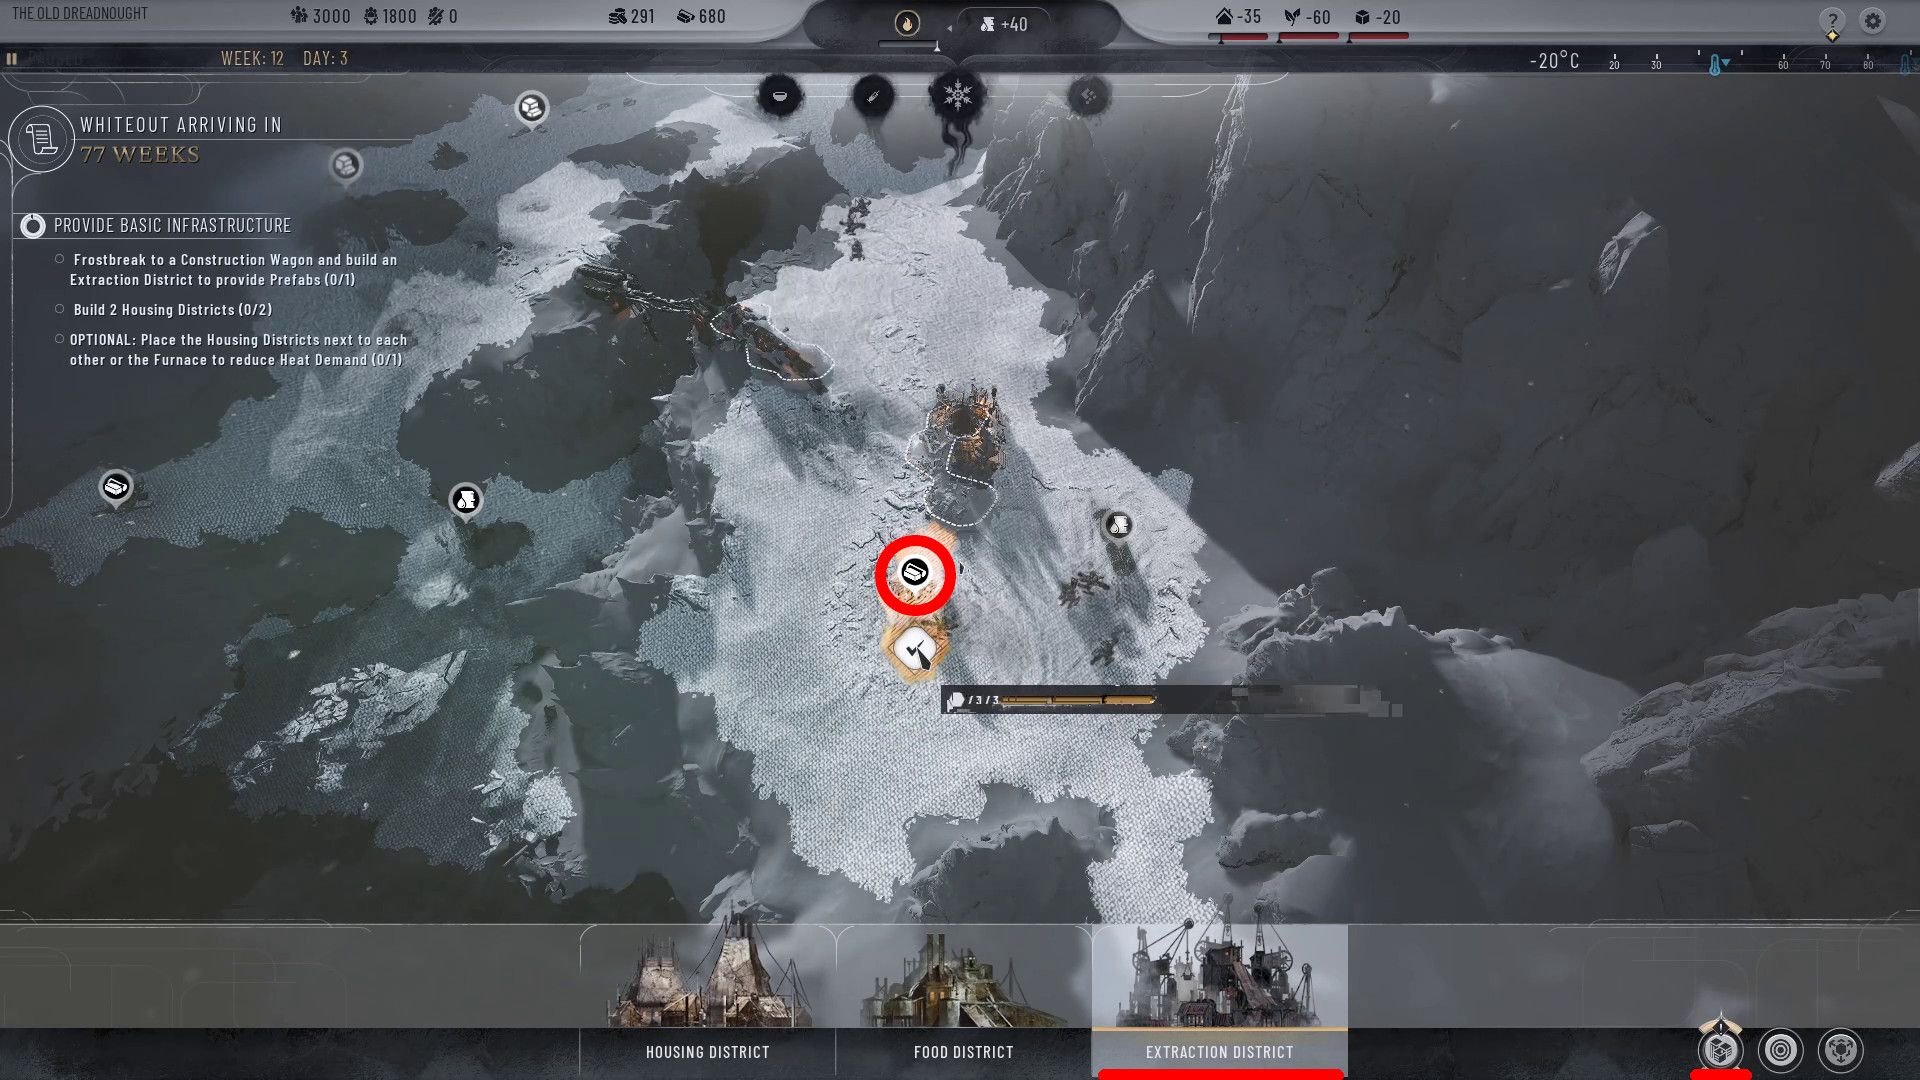
In other words, remember that the Extraction District should be built on a tile marked with a square symbol, which signifies a Construction Wagon. So, while Frostbreaking, ensure you’ve cleared at least one such tile.
- Build 2 Housing Districts
With the Prefab-manufacturing Extraction Zone in operation, players now have the opportunity to focus on establishing two Residential Zones. Similar to the Extraction Zones, Residential Zones are constructed by tapping on the District icon located at the bottom right corner of the screen, selecting Residential Zone, choosing the necessary amount of Frostbroken tiles (six in this case), and finally clicking on the checkmark that appears.
In summary, constructing a single Housing District near the Generator won’t necessitate Frostbreaking. But, fans of survival games may need to Frostbreak extra spaces to establish the necessary area for a second Housing District. Additionally, it’s worth noting that the heat demand of a Housing District is reduced if three of its tiles are adjacent to either the Generator or another Housing District, encouraging players to place them close to each other as it benefits them.
Gain Access to Food
- Frostbreak to Fertile Soil & Build a Food District on Fertile Soil
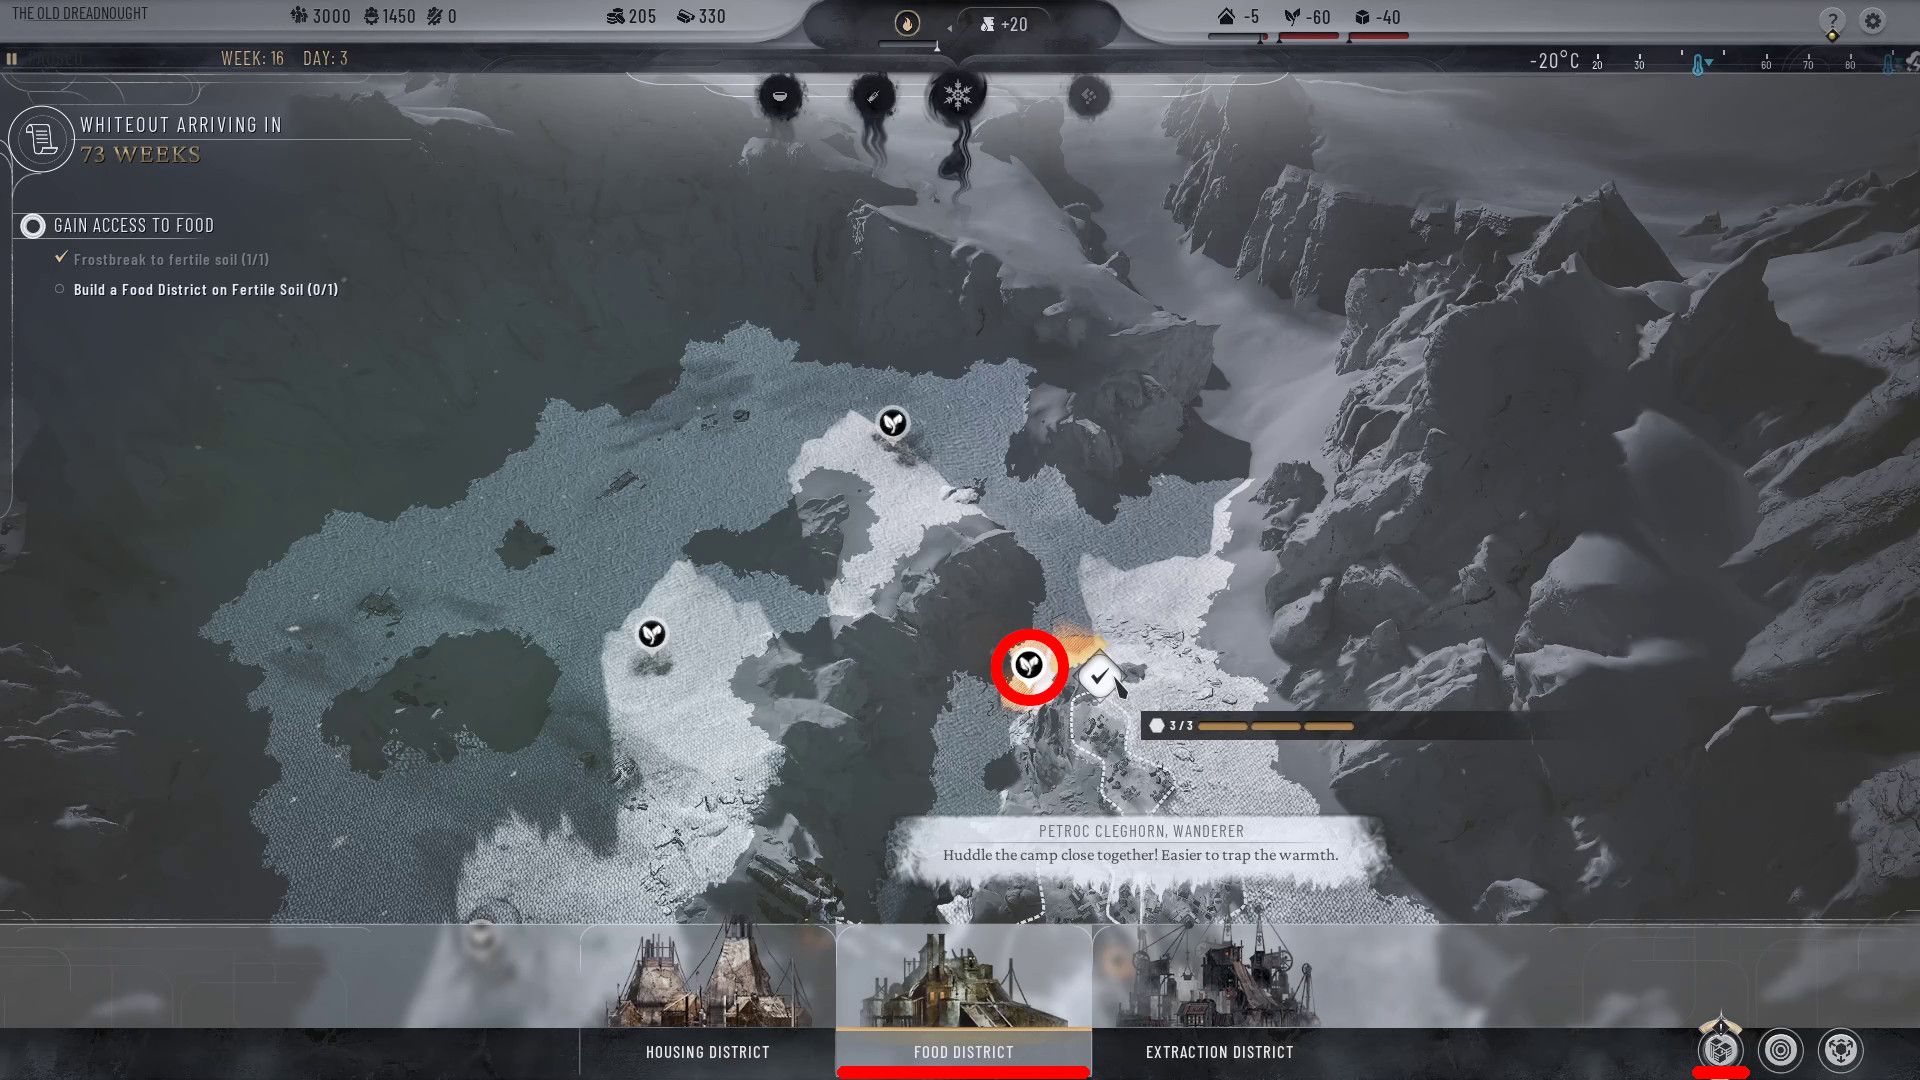
Players ought to move their characters towards the tiles labeled as “Frostbreak,” which can be identified by a plant icon. Once a tile has been “Frostbroken,” players should navigate to the circle in the lower-right corner of the screen, labeled as “Districts.” Then, they should select “Food District” and place it on top of the now fertile soil.
Maintain Infrastructure

In week thirty of Frostpunk 2, I’ll find myself immersed in an event all about scavenging for materials to lessen the misery within our society. To make a real difference, I should choose “I Promise to Gather More Materials” during this momentous occasion. Once the task is bestowed upon me, I’ll use this mission as my guide to accomplish it and bring relief to those in need.
- Build an Extraction District on a Maintenance Wagon & Extract Enough Materials to Satisfy Your Districts’ Demand
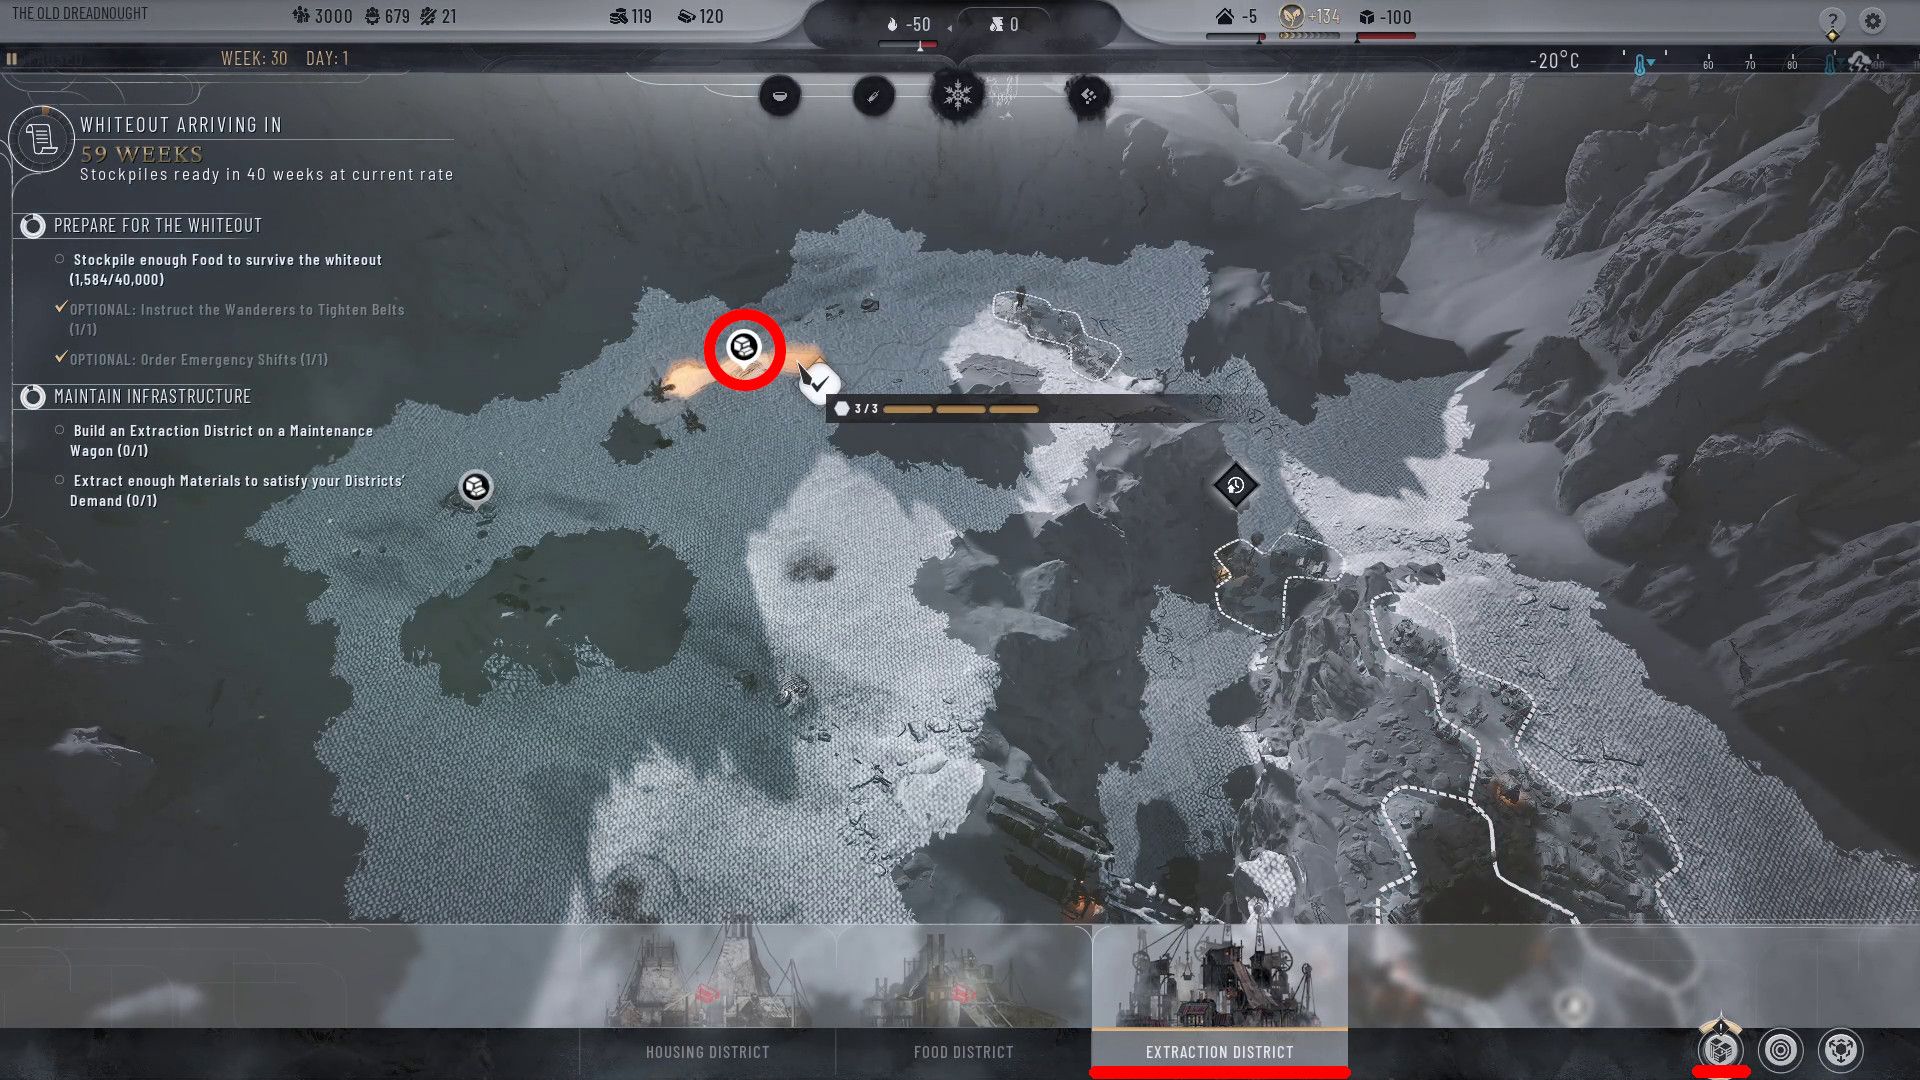
As a gamer immersed in the post-apocalyptic world, I’ve got to find and approach the Maintenance Wagon, symbolized by a cube. Once there, it’s time to establish an Extraction District on top of it. This process might be familiar to fans of similar games, but remember, you may need to repeatedly Frostbreak to eventually reach the Maintenance Wagon.
Prepare for the Whiteout
- Stockpile Enough Food to Survive the Whiteout
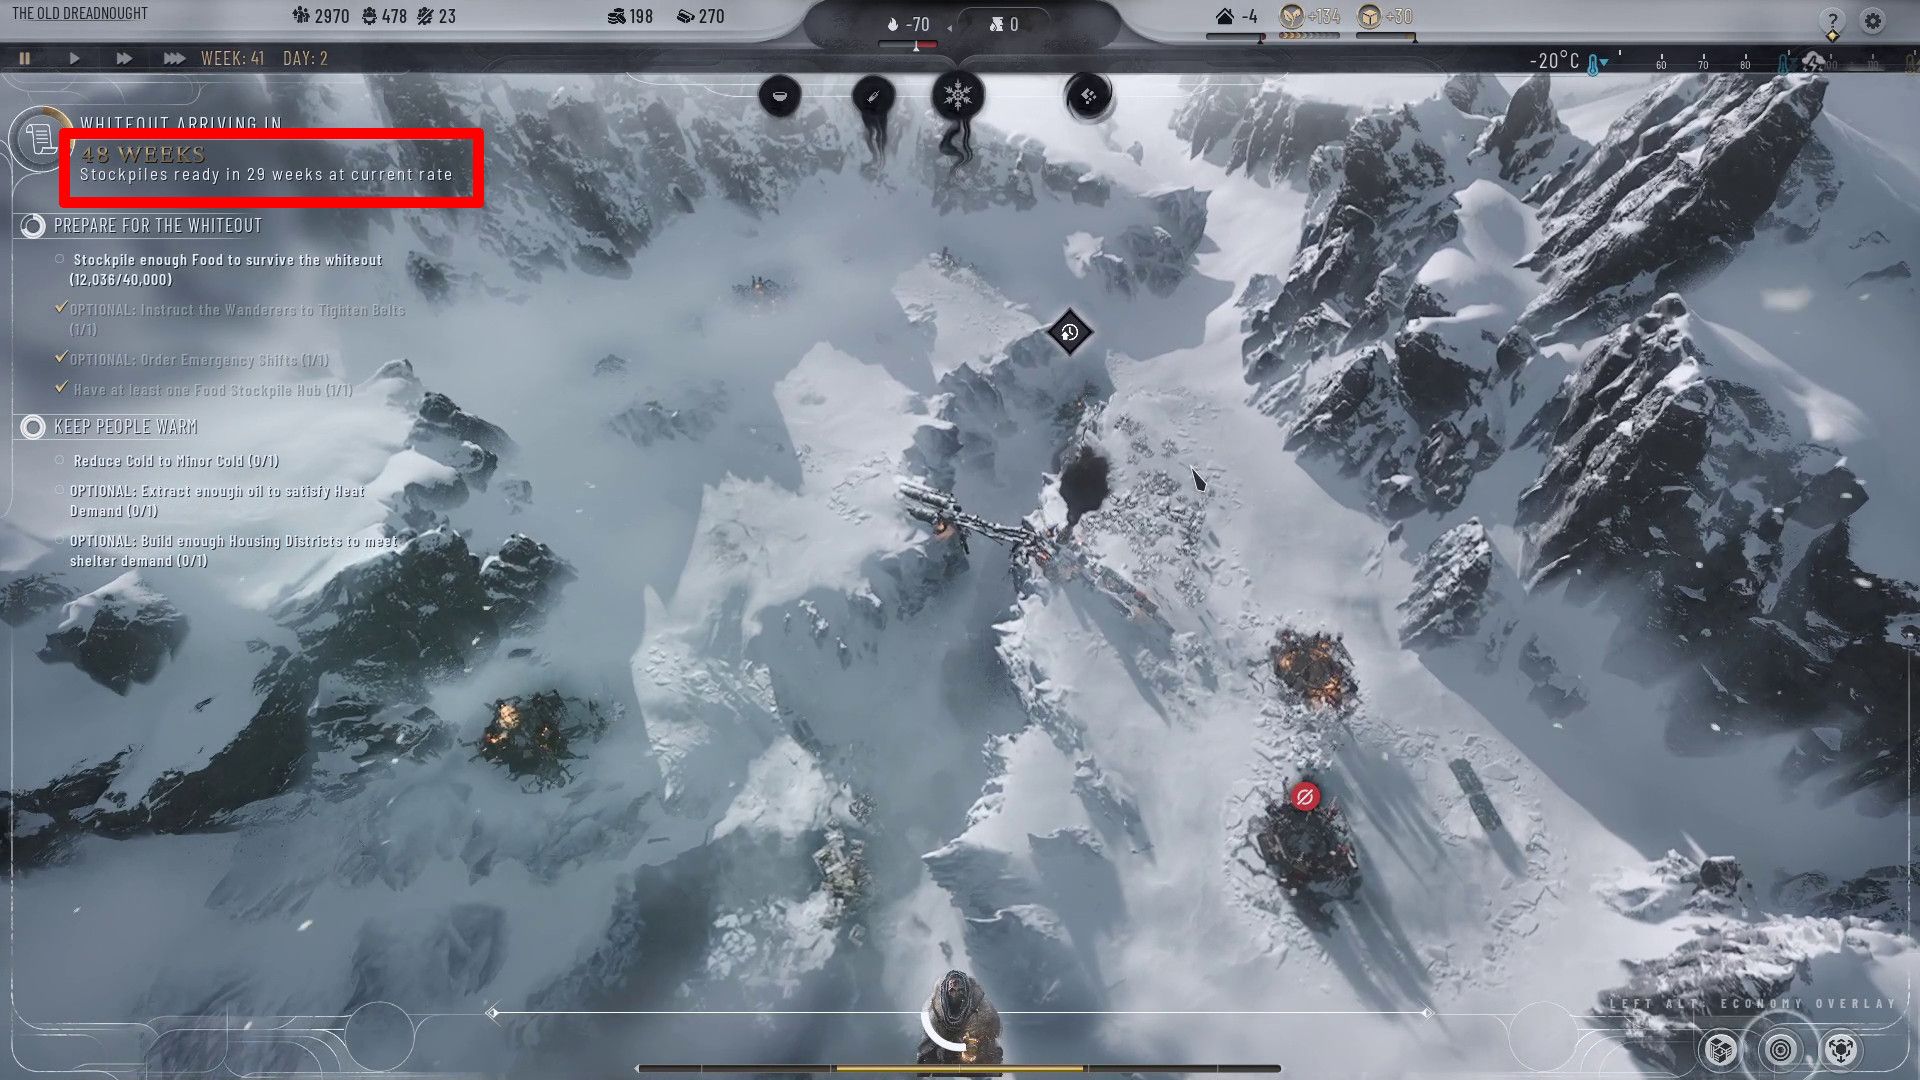
Players need to shift focus towards accumulating 40,000 units of Food, but the solitary Food District currently in place doesn’t produce enough Food for this task. Fans should engage in necessary actions to ensure readiness for the upcoming Whiteout. Here are some possible strategies they can employ, and they should keep taking steps until a message at the top-left corner confirms that the stockpile is ready before the Whiteout occurs:
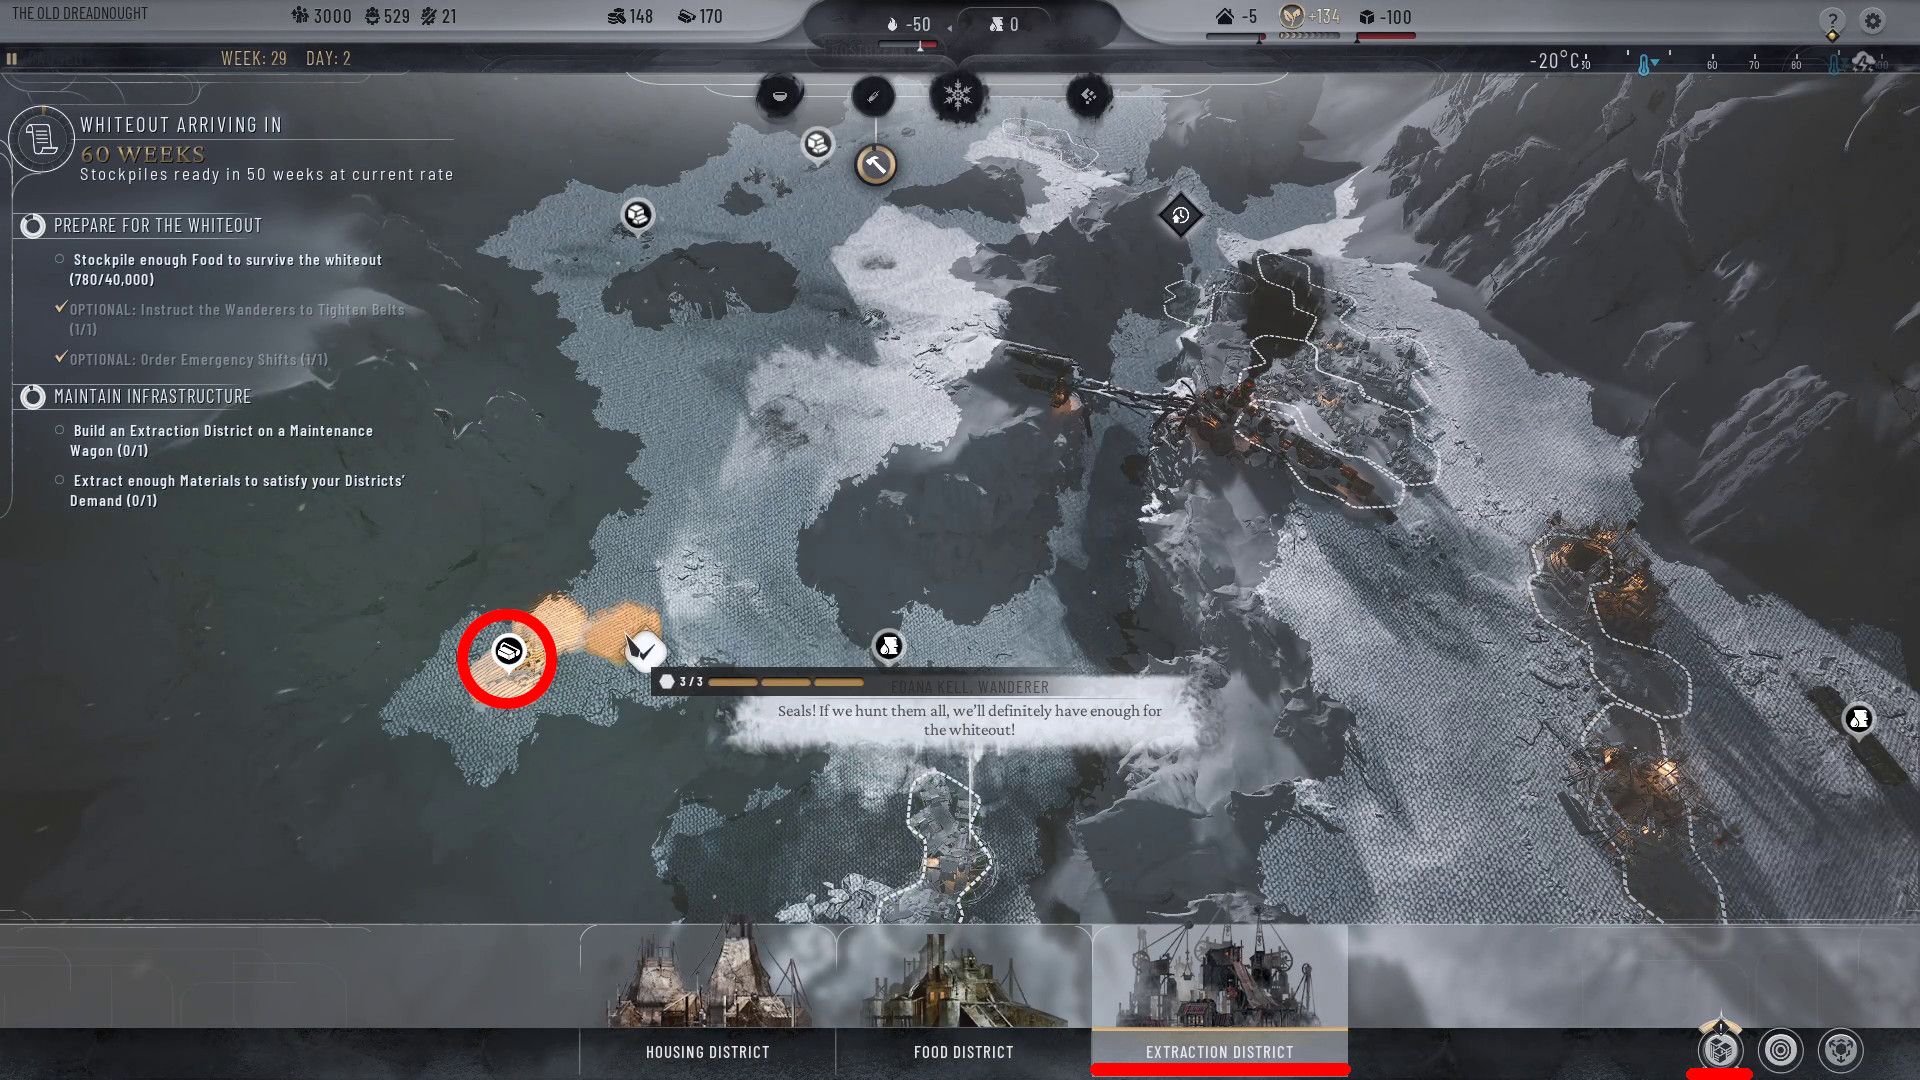
- Frostbreak to, and establish Food Districts on, additional Food tiles. It is recommended that players build two additional Food Districts, one of which should be placed on the Seal Colony in the bottom-left corner of the map.
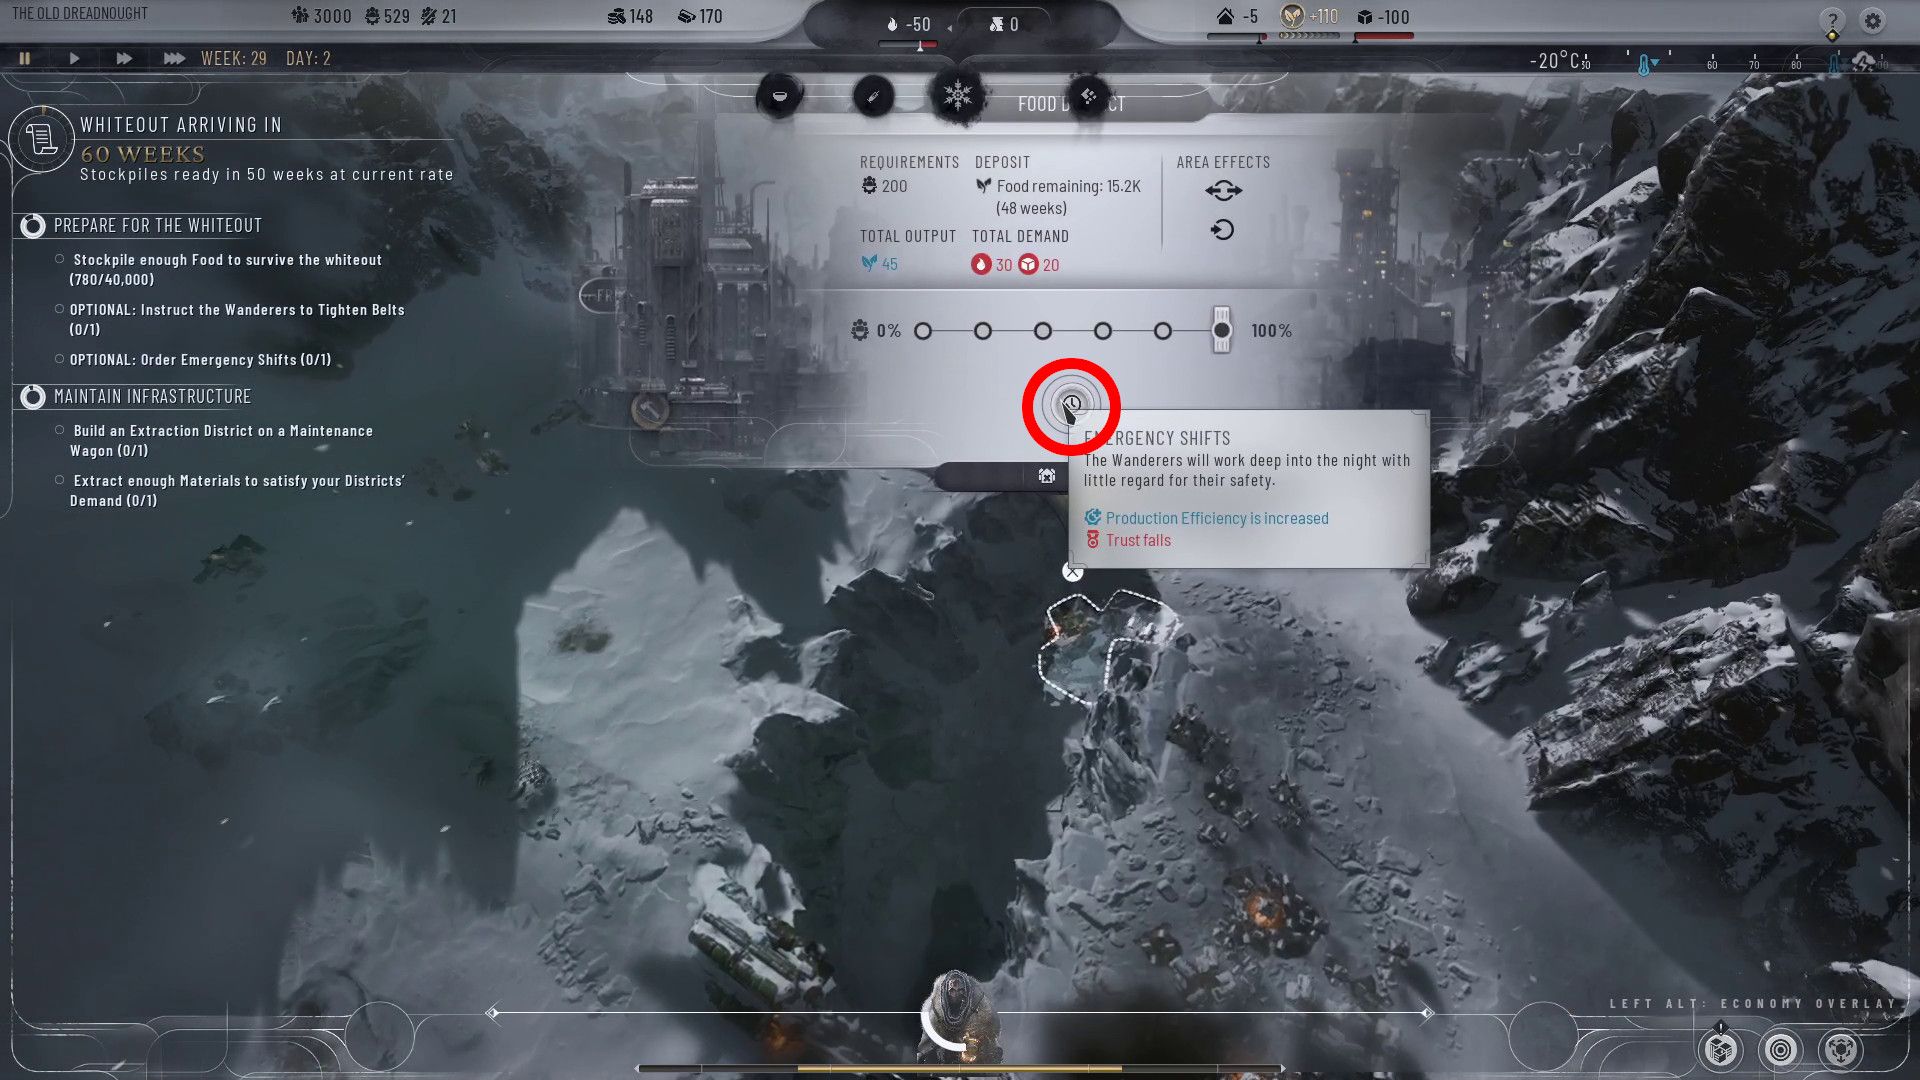
- Use the “Emergency Shifts” ability in Food Districts to increase their output. To use this ability, players should click on a Food District and click on the “Emergency Shifts” circle at the bottom of the information pane.
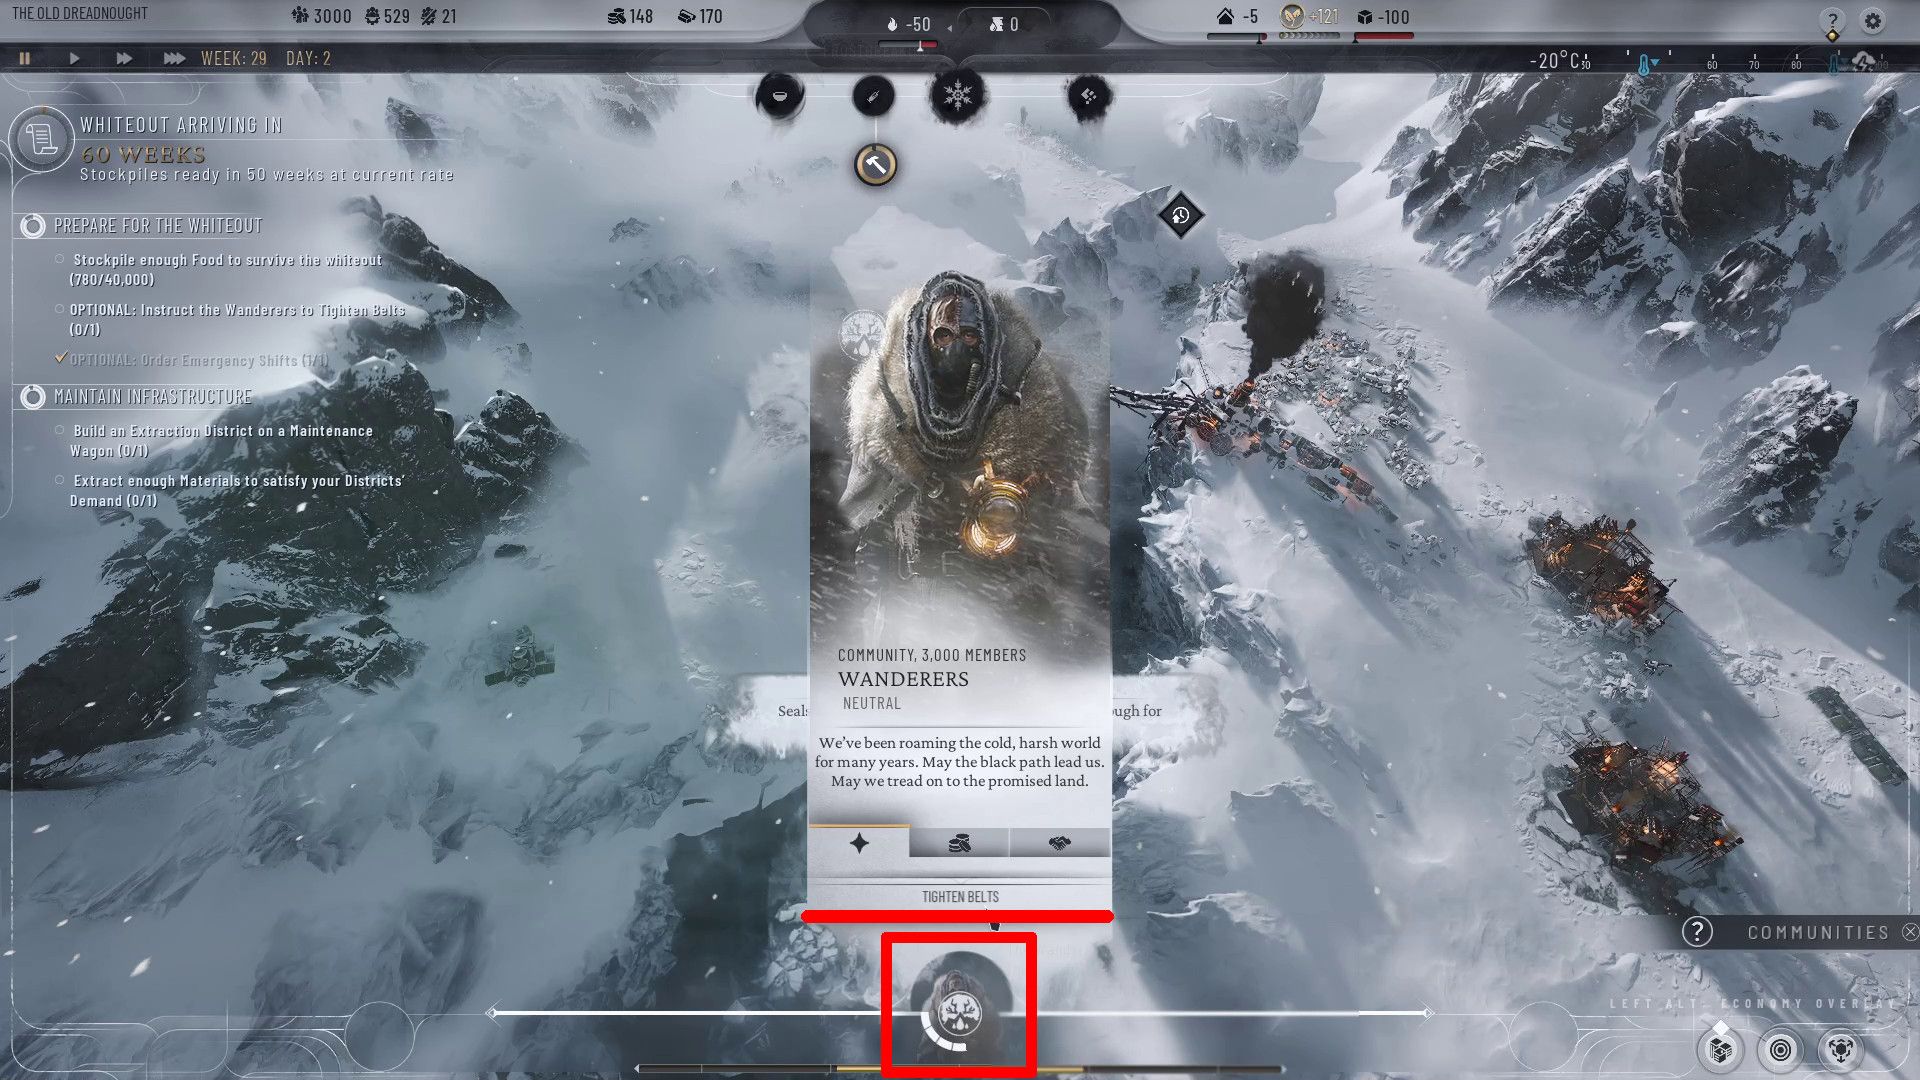
- Instruct the Wanderers to “Tighten Belts.” To perform this action, players should click the Wanderer at the bottom of the screen and then click “Tighten Belts.”
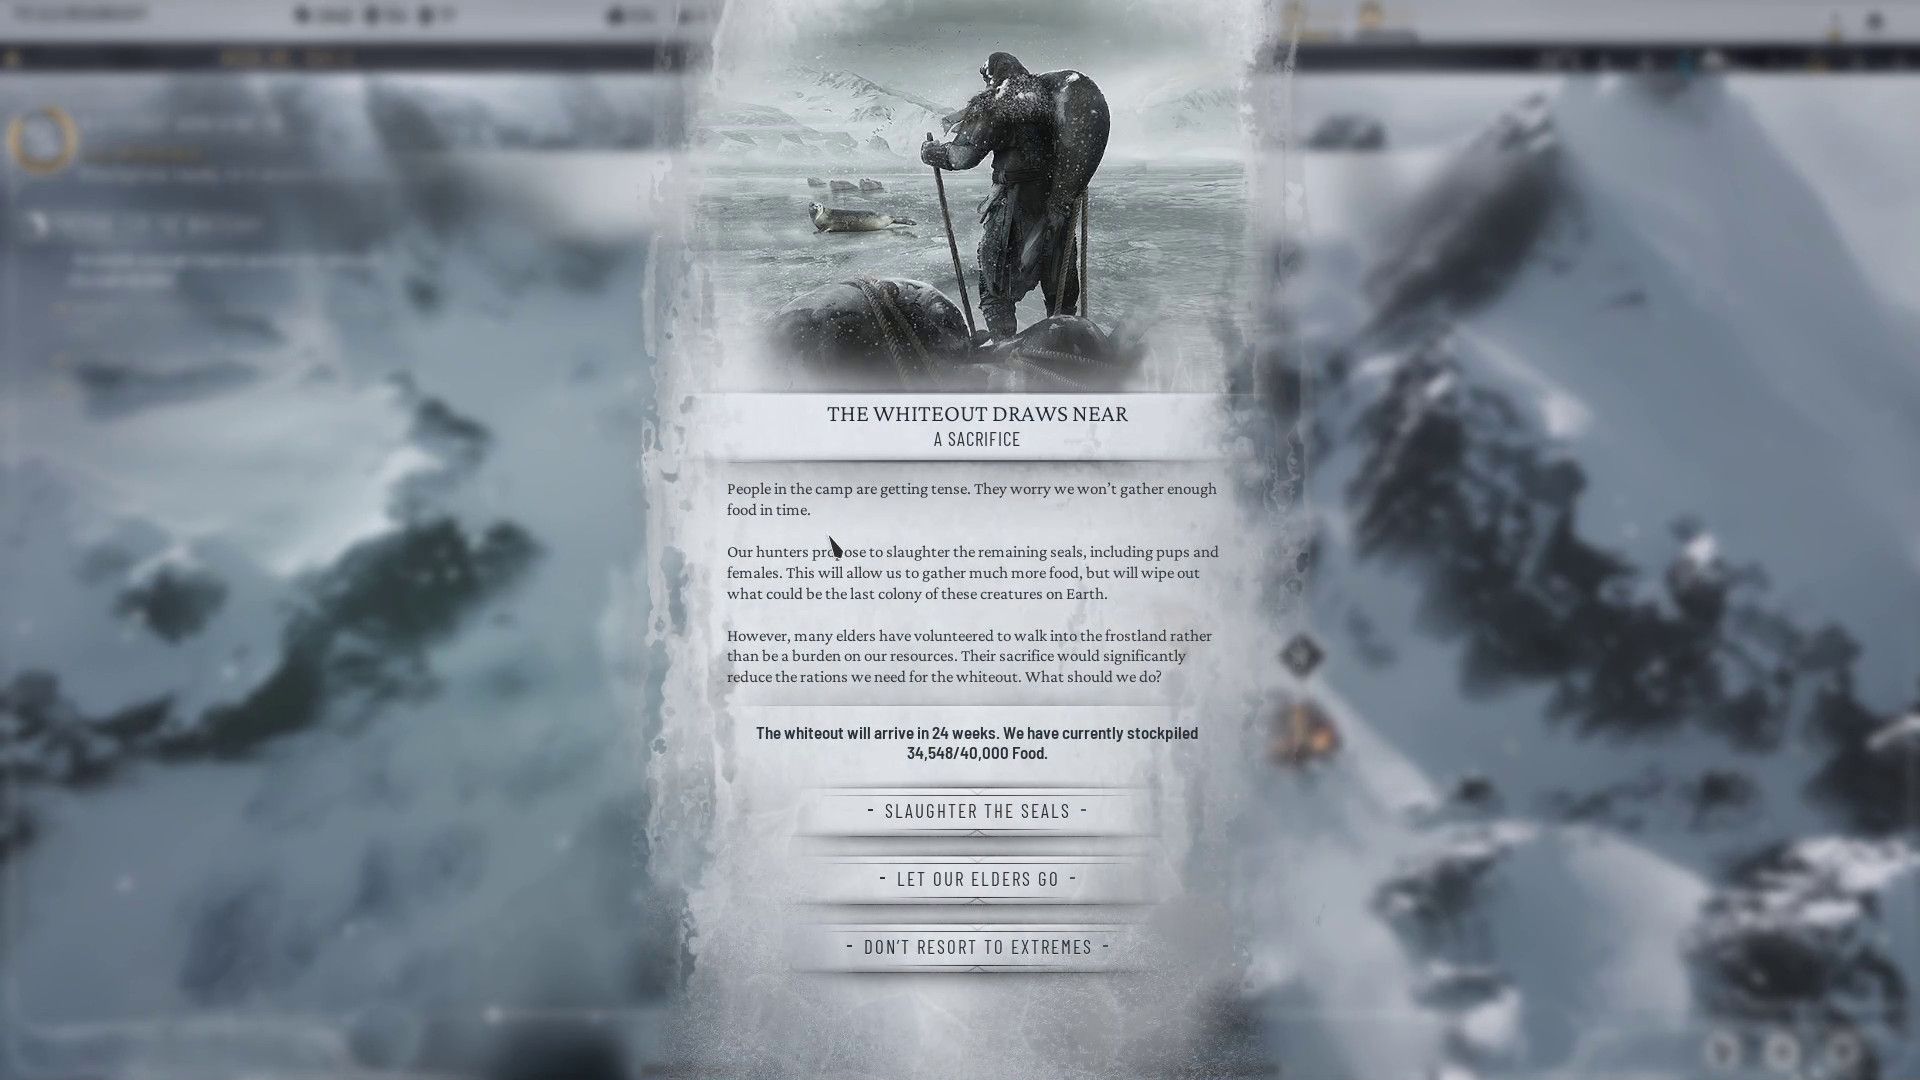
- When the “Whiteout Draws Near” event occurs around Week 65, slaughter the seals or let the Elders go.
To note, there are two additional actions that players should take while working to improve their Food output:
- Frostbreak to a second Construction Wagon and build an Extraction District upon it. This action will guarantee that the player has access to the Prefabs that they need.
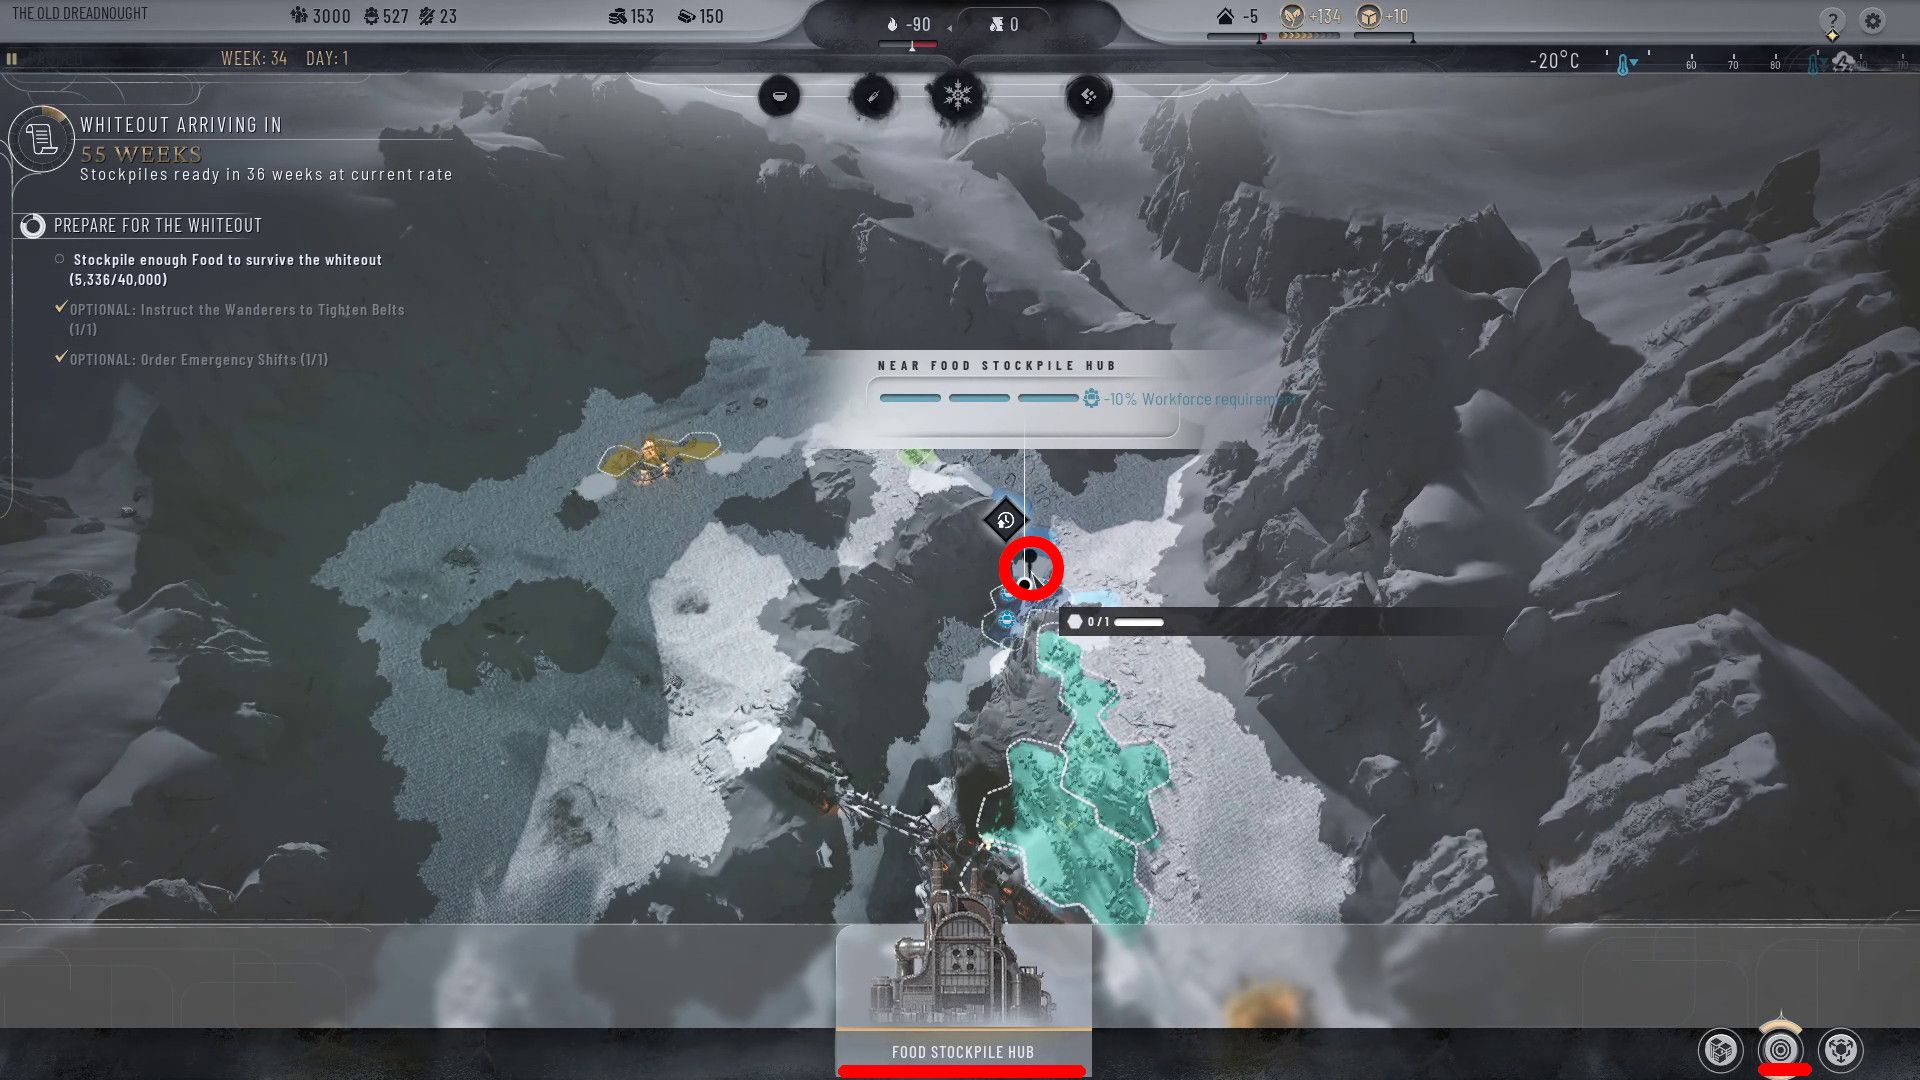
- Build two Food Stockpile Hubs to increase Food Stockpile Capacity to the requisite 40,000. To build these Hubs, fans should simply click on the Hubs circle in the bottom-right corner of the screen, select Food Stockpile Hub, and then click on any Frostbroken tile on the screen.
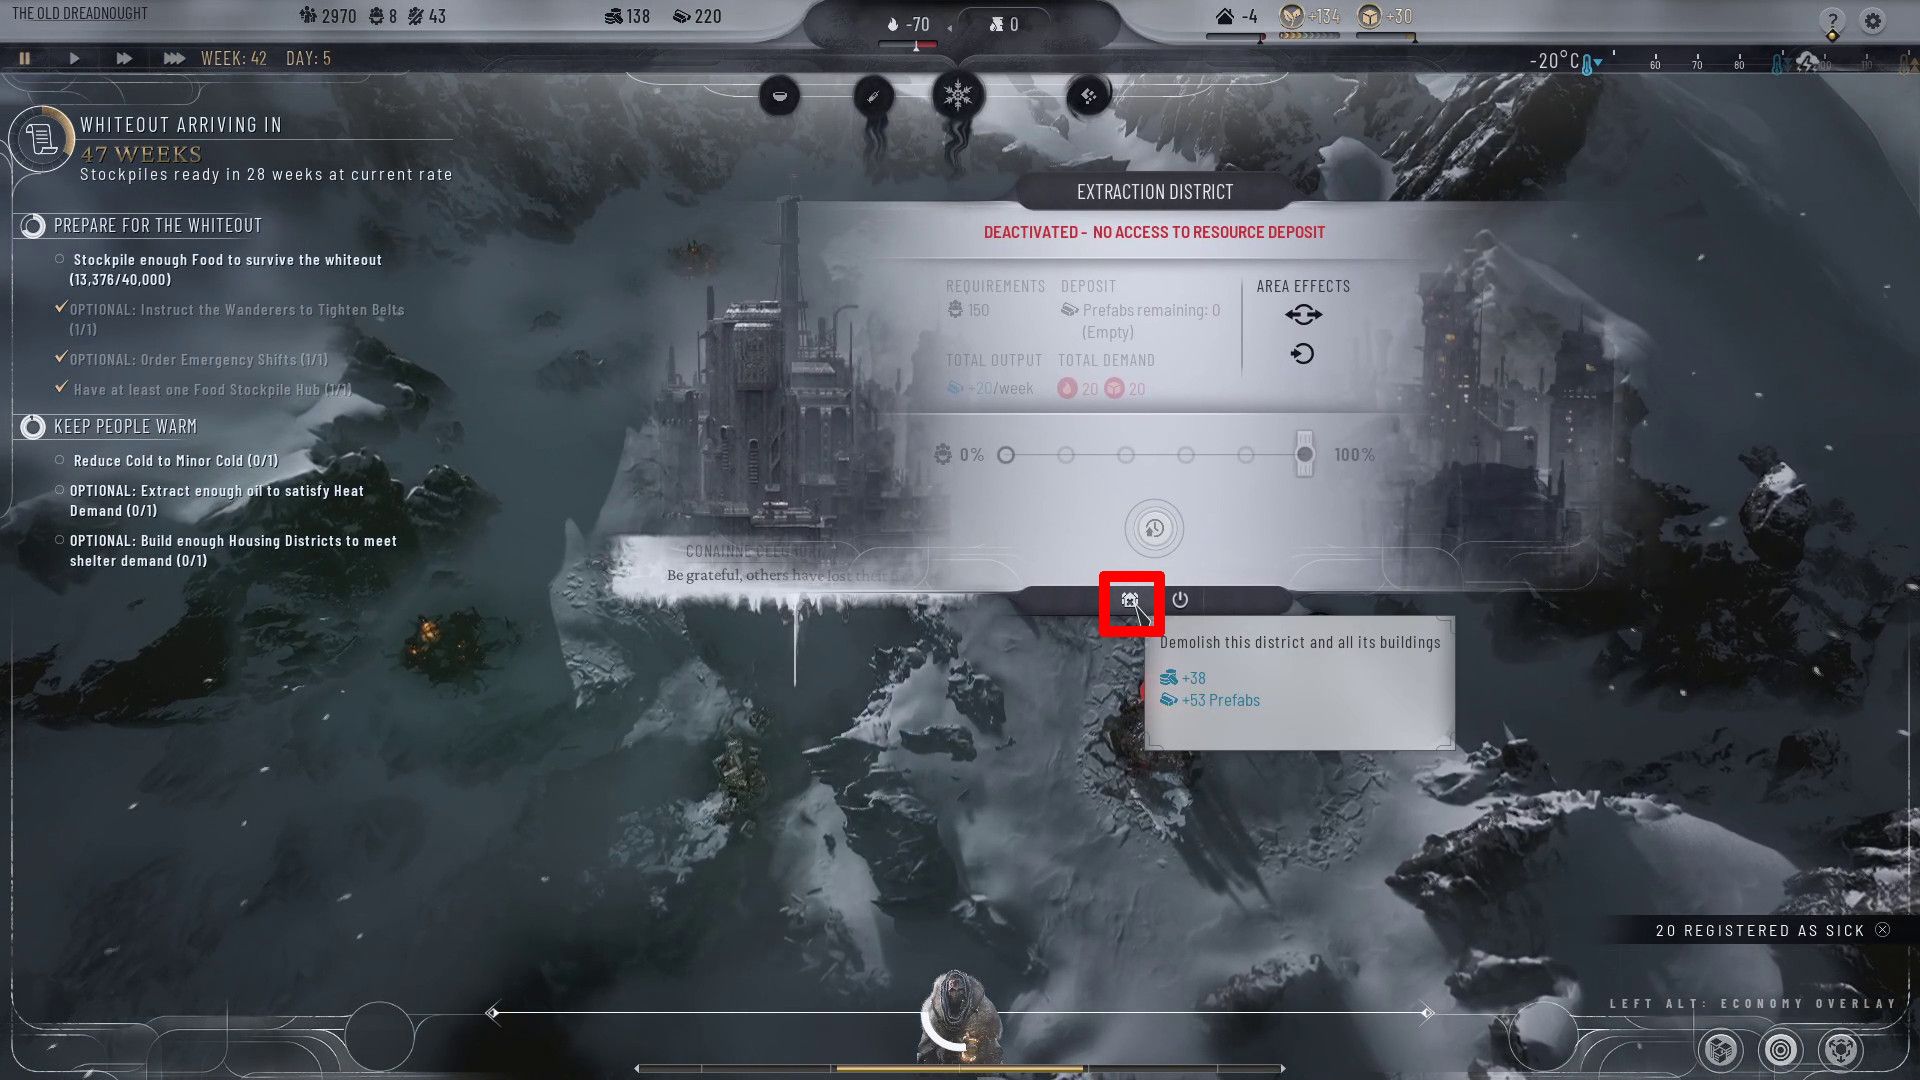
In Frostpunk 2, by week 40, the initial Construction Wagon will exhaust its supply of prefabricated buildings. Once this happens, it’s crucial for players to dismantle the Extraction District built above it to gather some Prefabs and Scraps.
- Wait for the Whiteout to Hit
As a gamer, when I’ve amassed 40,000 Food units, all I need to do is bide my time until the Whiteout hits. Once that happens, the Prologue phase of the game will swiftly come to an end.
Keep People Warm

During the process of storing food, players may experience an occasion focusing on ensuring adequate Heat and Shelter. In such a situation, fans are advised to choose “Supply Heat and Shelter.” Following this selection, here’s what they should do:
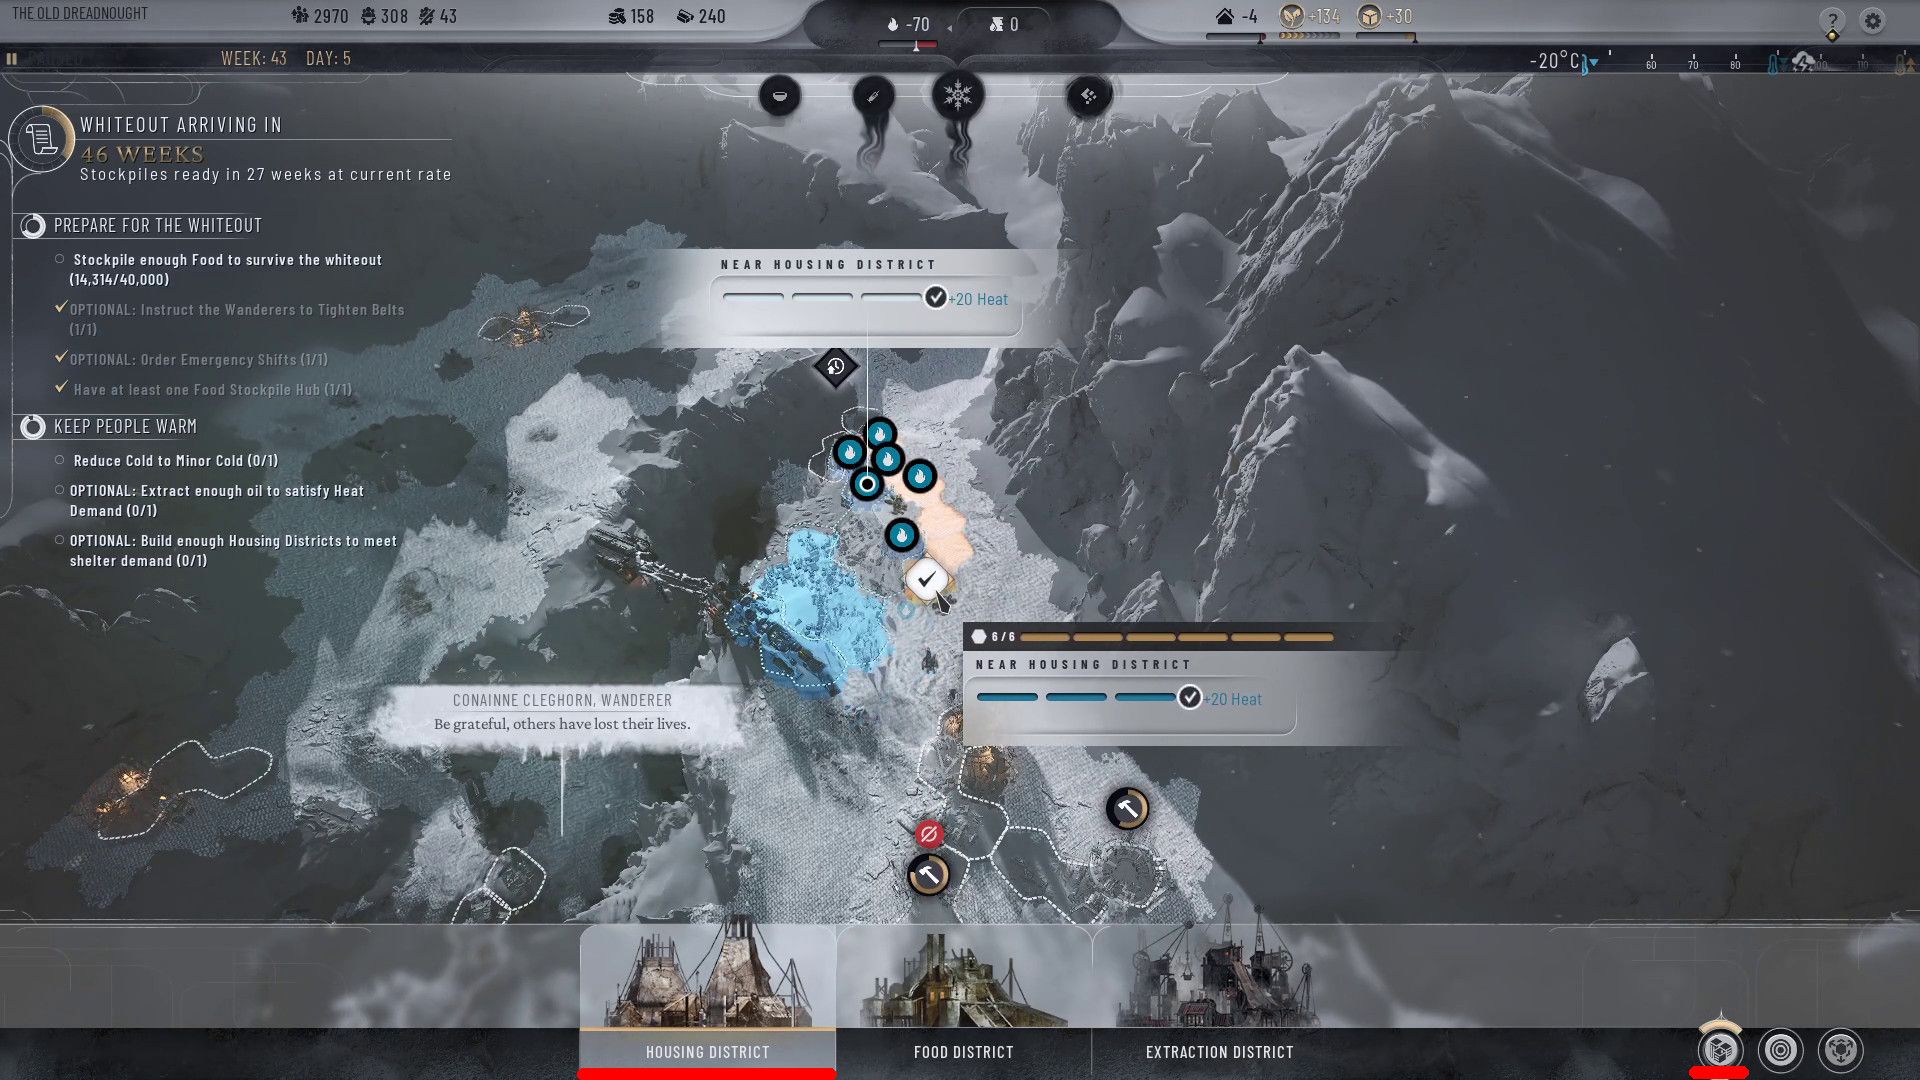
- Build one additional Housing District to meet Shelter demands.
- Build two additional Extraction Districts on Oil Wagons, and activate the “Emergency Shifts” ability in one of them, to meet Fuel demands.
As I progress through the game, I might encounter a situation where my workforce seems inadequate to complete certain tasks. To tackle this problem, fellow enthusiasts can demolish the Extraction District they’ve constructed on their second Construction Wagon. This district is nearly depleted of resources, so it should be easy to find and destroy.
Read More
- LUNC PREDICTION. LUNC cryptocurrency
- SOL PREDICTION. SOL cryptocurrency
- BICO PREDICTION. BICO cryptocurrency
- BTC PREDICTION. BTC cryptocurrency
- USD ZAR PREDICTION
- VANRY PREDICTION. VANRY cryptocurrency
- USD CLP PREDICTION
- EUR PKR PREDICTION
- LPT PREDICTION. LPT cryptocurrency
- BSW PREDICTION. BSW cryptocurrency
2024-09-18 19:04