Indiana Jones and the Circle of Giants – The Gladiator Labyrinth Guide
This game presents a challenge known as the Gladiator Maze, where players must employ their problem-solving skills, channeling their inner Dr. Jones, to maneuver a fireball through intricate twists and repeated routes to ignite all four gladiators. Unraveling the grand secret hidden behind this puzzle is what awaits a successful completion. This is just one of the numerous brain teasers you’ll encounter in Indiana Jones and the Circle of Giants, and for those who are having trouble cracking it, this guide has been designed with them in mind.
Here, players will find the correct sequence of gladiators within the Gladiator Maze, a step-by-step path to follow, and a video demonstrating a complete run. Enjoy your journey through this puzzle!
How to Solve the Gladiator Maze Puzzle
The video you see above provides a comprehensive tour of the Gladiator Maze. This means it shows you every step, including the best times and locations to set up the platforms, ensuring that the fireball moves through unimpeded!
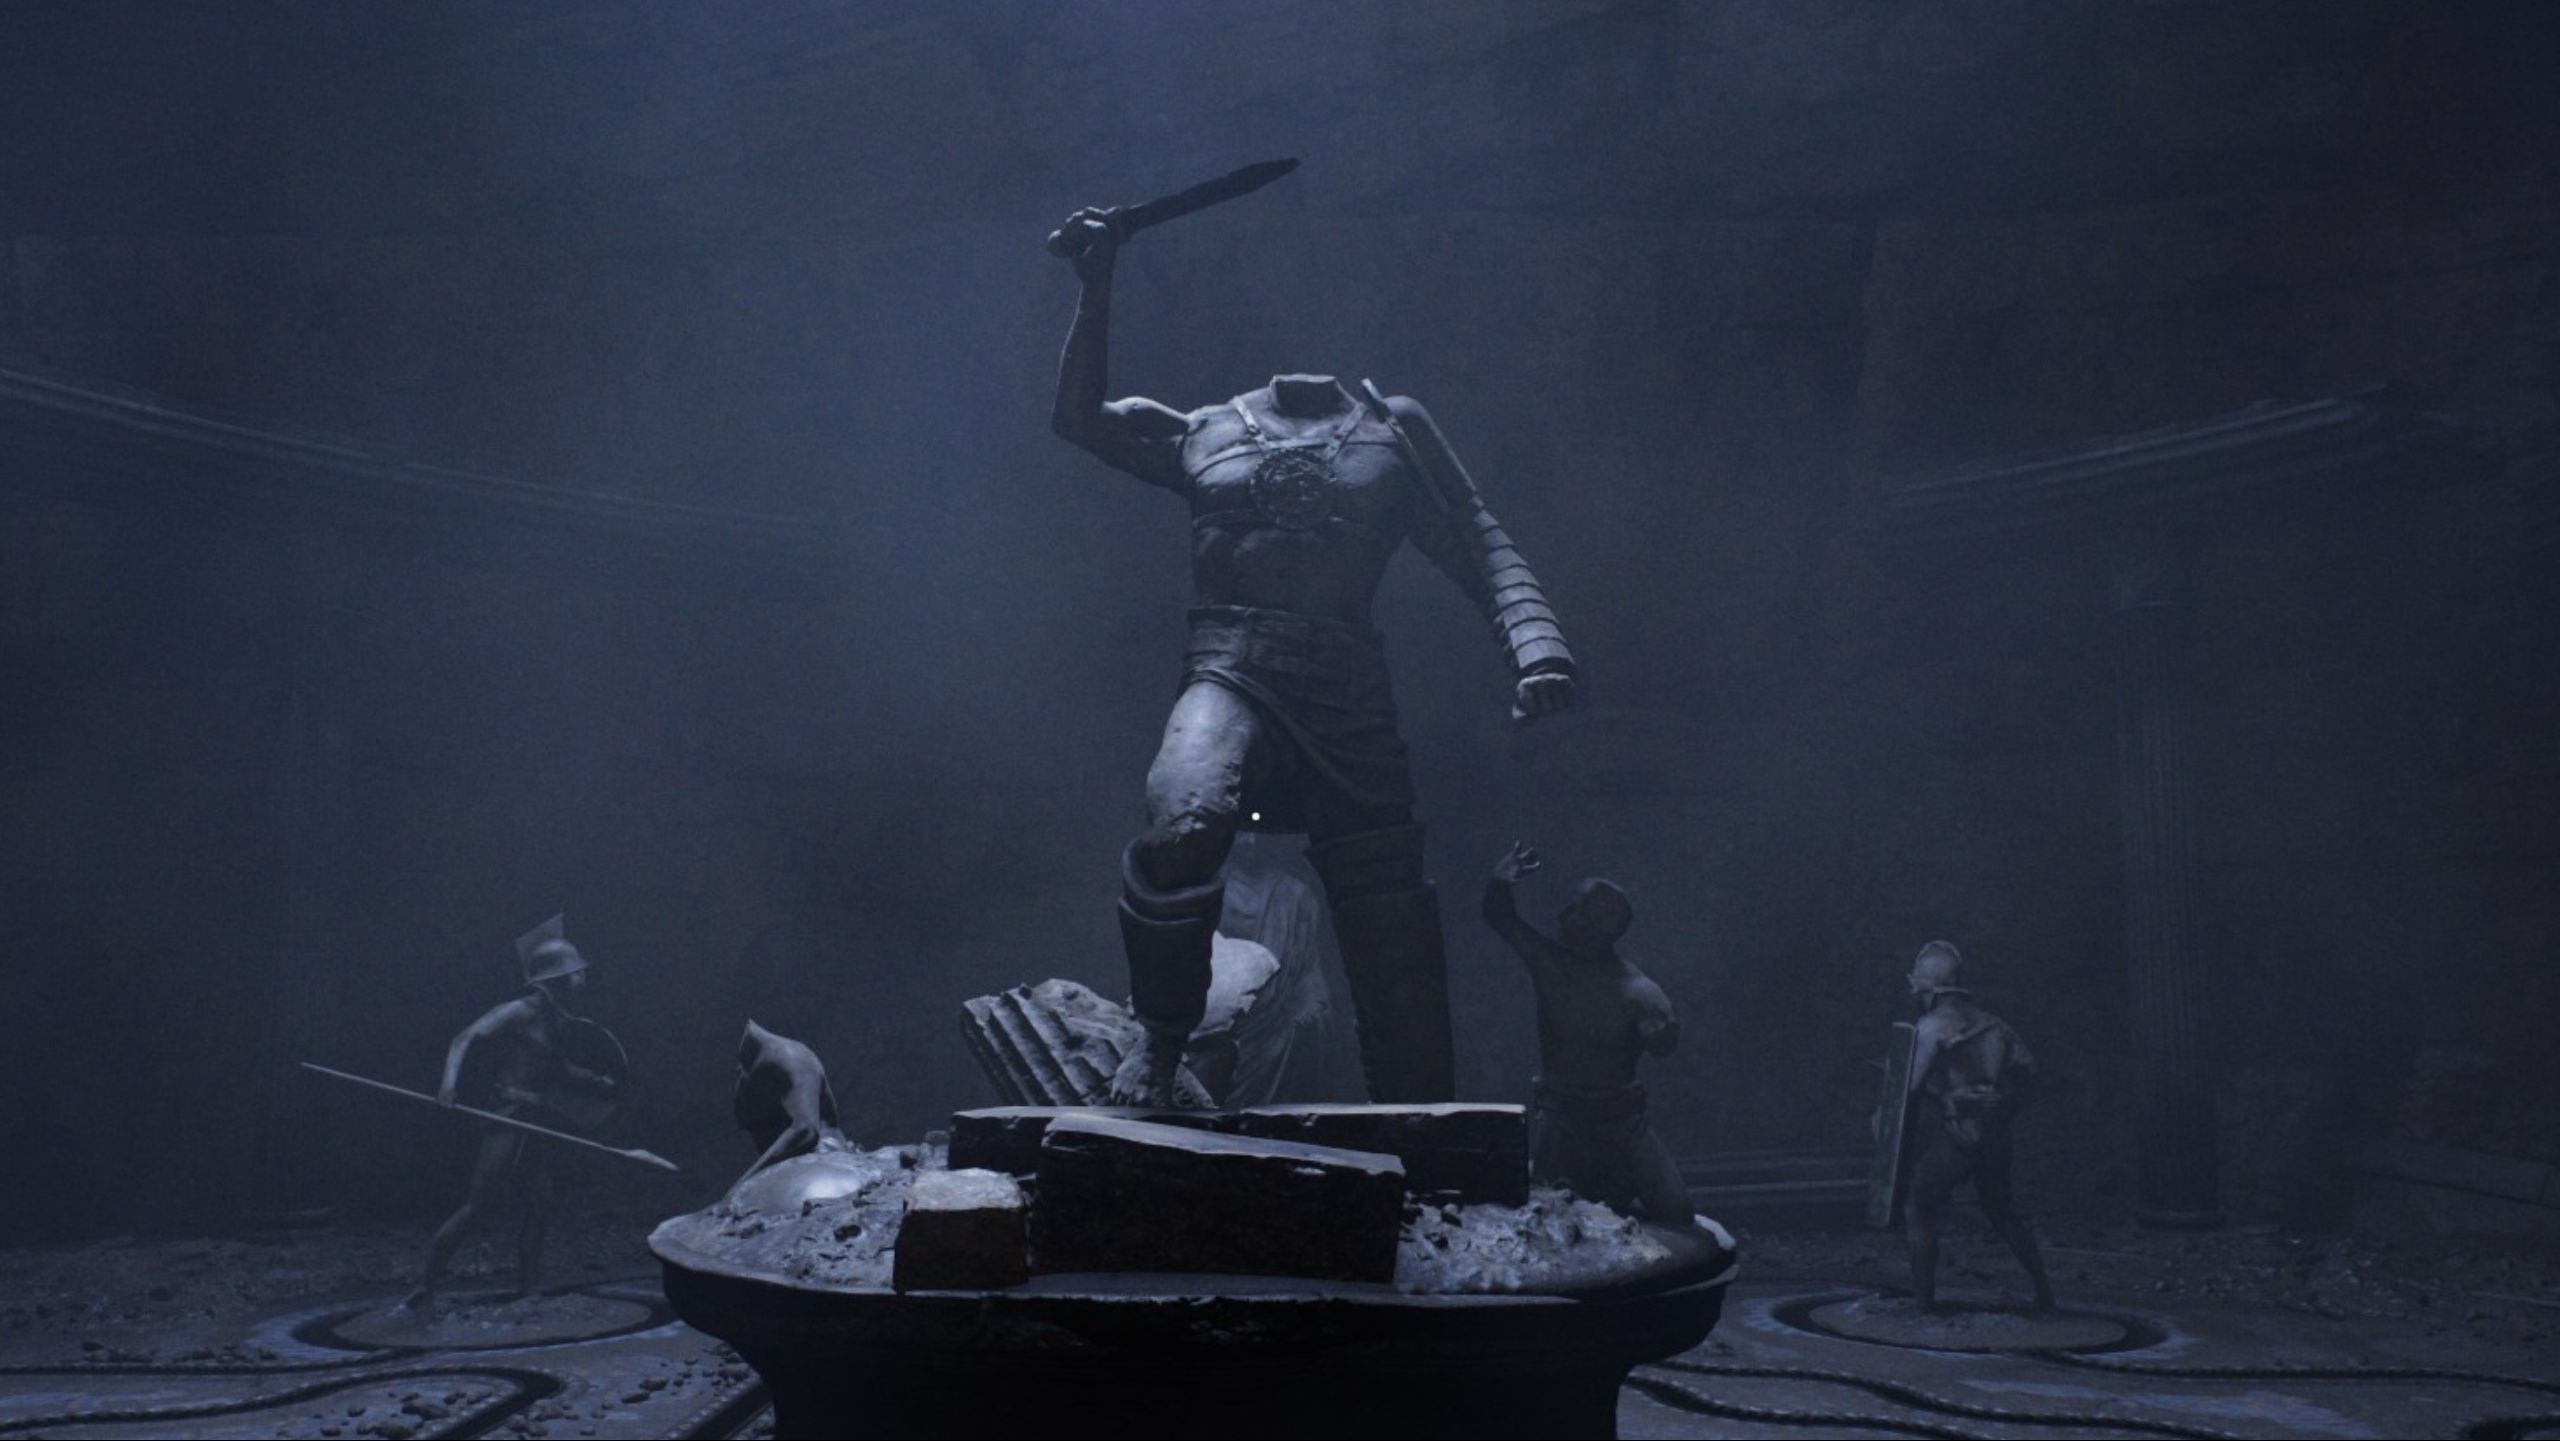
After finding the Headless Gladiator’s sword on the right platform within the labyrinth, players should place the sword in the empty hand of the statue and tug it with their whip. This action will cause the statue to release a rolling fireball. The aim is straightforward: employ the available platforms to navigate the fireball through the maze, ultimately lighting up the four gladiators. However, there’s a specific sequence for this process. Each statue exhibits an animal on its shield, and the sequence can be deciphered by the murals adorning the walls, which are accompanied by Roman Numerals. The fireball must pass through the statues in the following order to solve the puzzle:
1. Gladiator with Lion Shield (I)
2. Gladiator with Bear Shield (II)
3. Gladiator with Eagle Shield (III)
4. Gladiator with Wolf Shield (IV)
- Lion Shield (top left corner)
- Boar Shield (bottom left corner)
- Tiger Shield (top right corner)
- Bear Shield (bottom right corner)
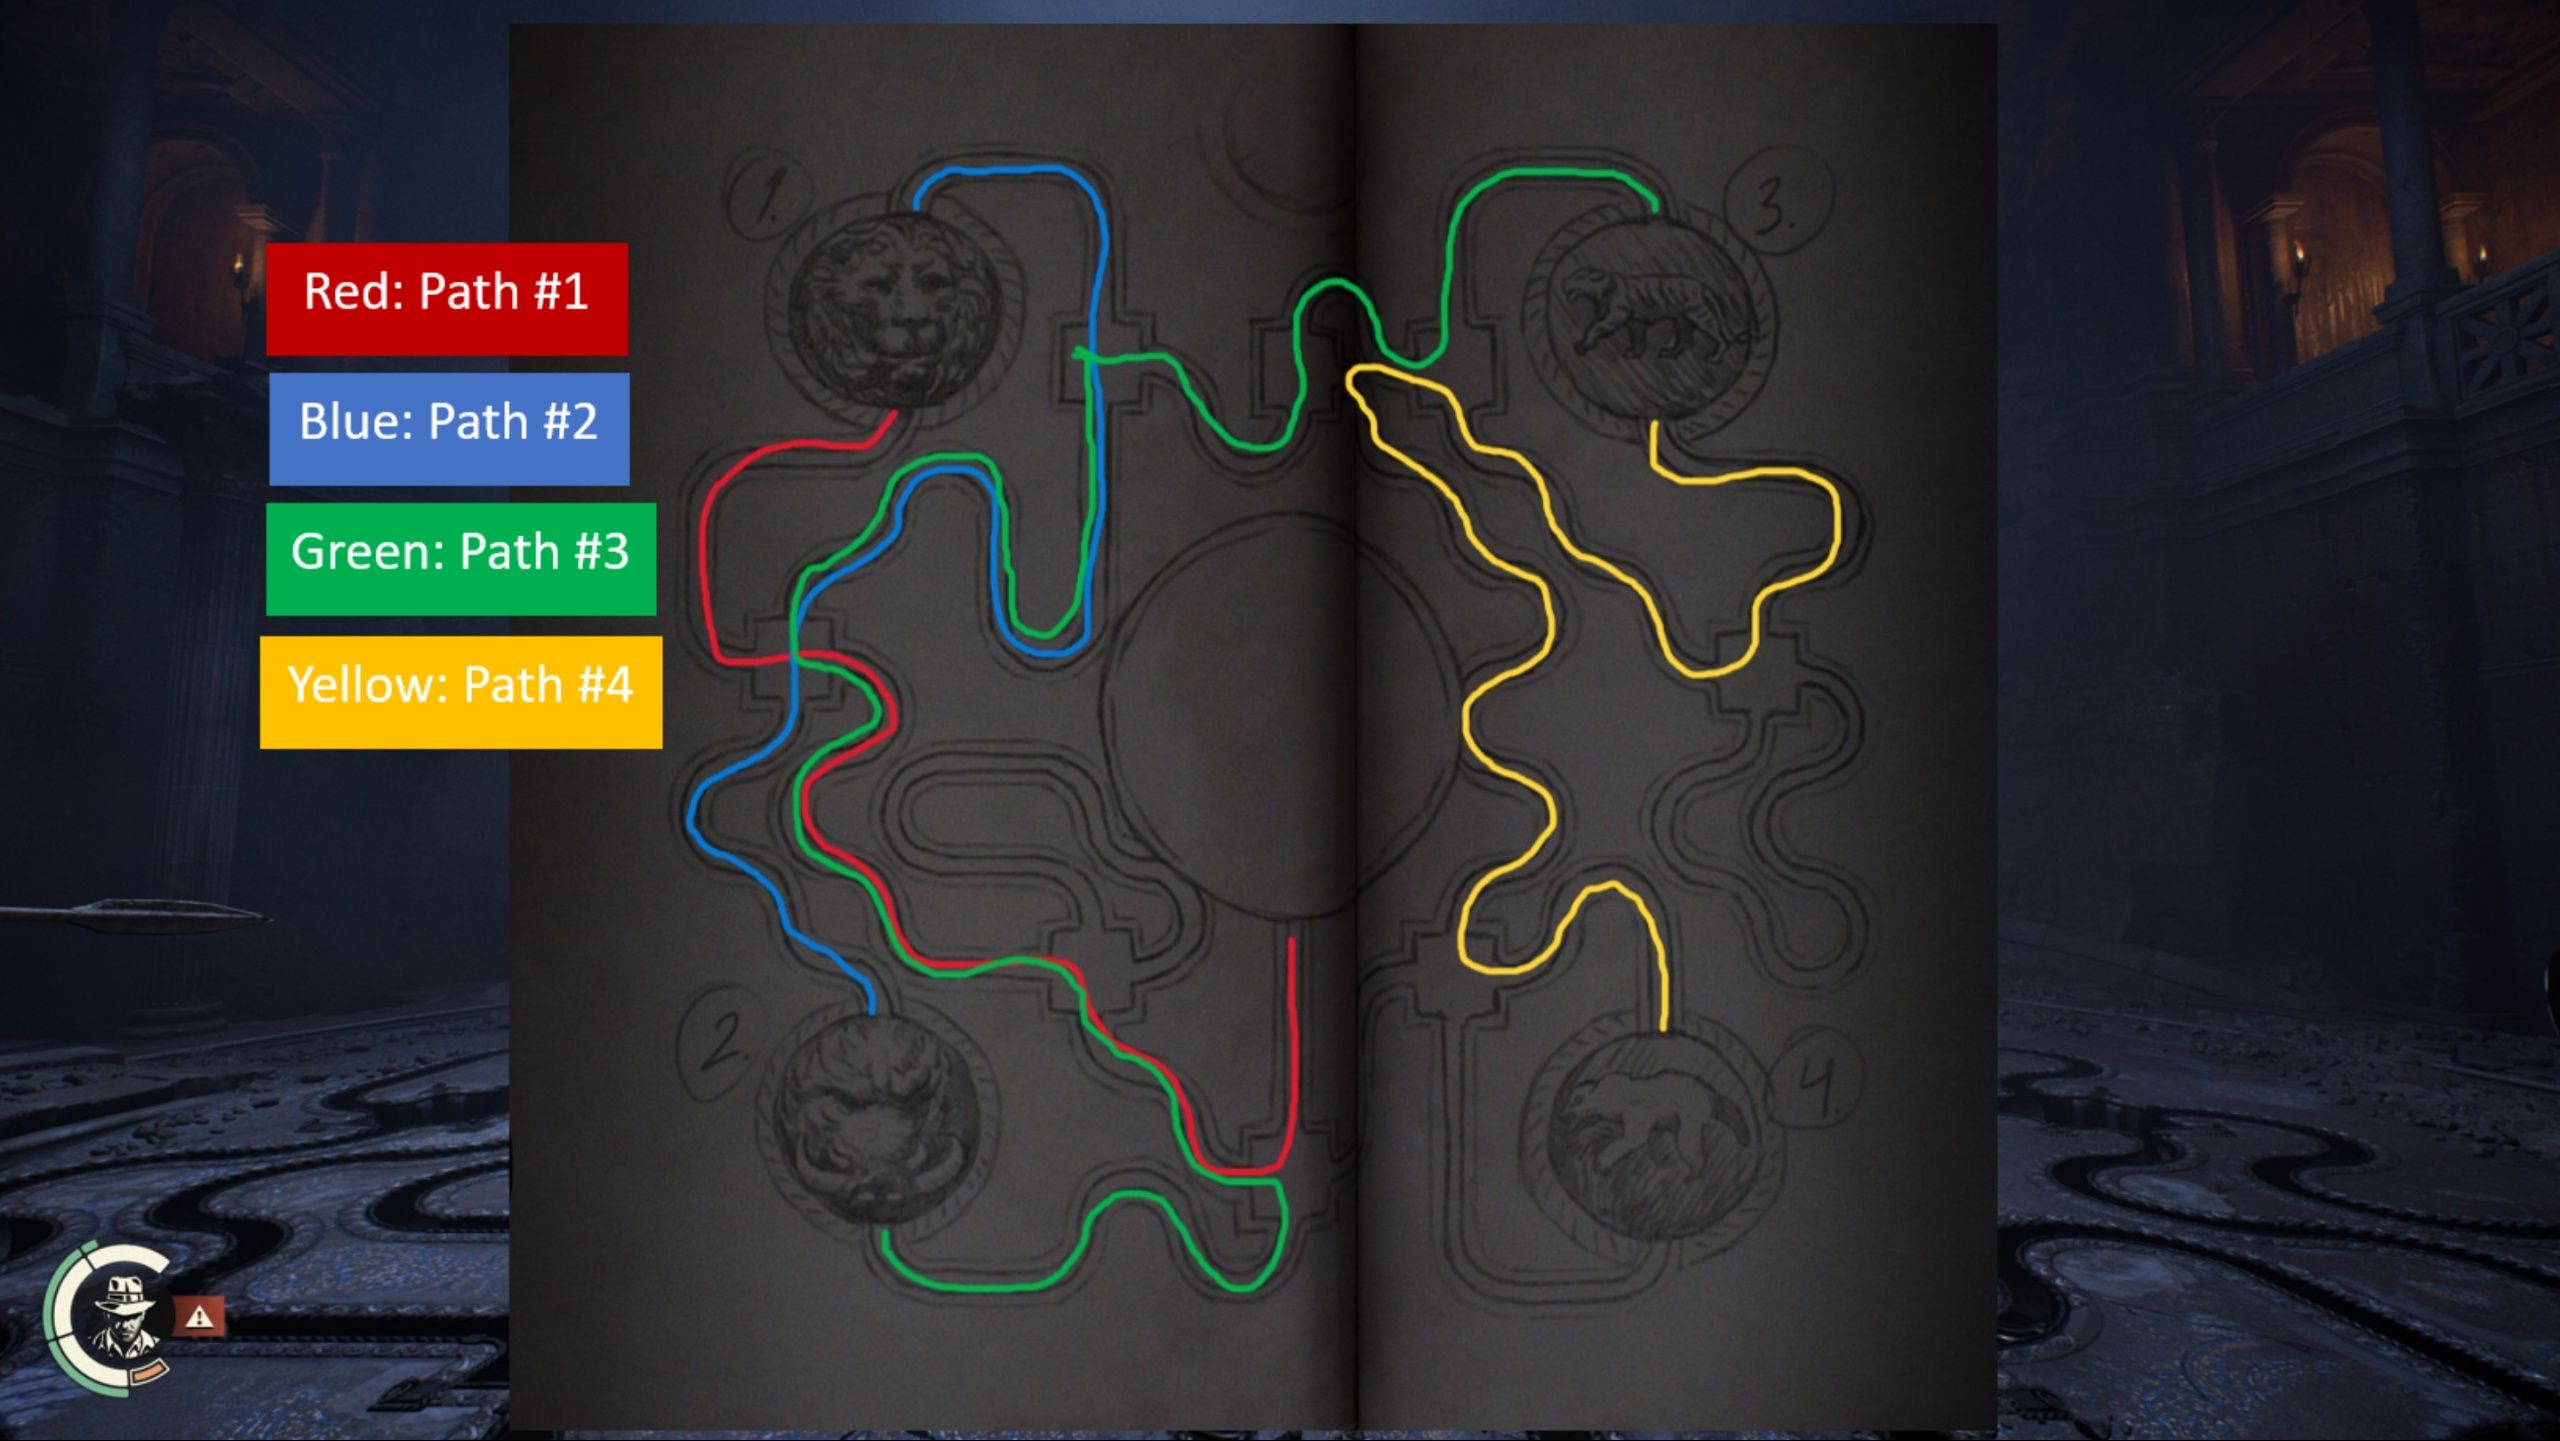
In simpler terms, during the game, players will encounter three movable items in the maze that can assist them in guiding a ball to its final point. These items can be collected and swapped as needed. The setup includes two curved platforms and one straight platform. A video demonstrates how we utilized all these elements to solve the puzzle successfully.
Read More
- All Shadow Armor Locations in Crimson Desert
- Dark Marksman Armor Locations in Crimson Desert
- Jujutsu Kaisen Season 3 Episode 12 Release Date
- How to Get the Sunset Reed Armor Set and Hollow Visage Sword in Crimson Desert
- Keeping AI Agents on Track: A New Approach to Reliable Action
- How to Beat Antumbra’s Sword (Sanctum of Absolution) in Crimson Desert
- Top 5 Militaristic Civs in Civilization 7
- How To Beat Ator Archon of Antumbra In Crimson Desert
- Best Bows in Crimson Desert
- Sakuga: The Hidden Art Driving Anime’s Stunning Visual Revolution!
2025-09-05 01:17