
In the game “Hollow Knight: Silksong”, certain objects won’t become available until players initiate the quest associated with them. For instance, the Druid won’t provide the “Mossberry Stew” until players take on the “Great Taste of Pharloom” quest within Silksong. This guide will help you locate all these items that Hornet needs to find, such as the “Courier’s Rasher”, “Crustnut”, “Pickled Muckmaggot”, and “Vintage Nectar”. Here’s a walkthrough on how to find them all.
Great Taste of Pharloom Quest In Silksong
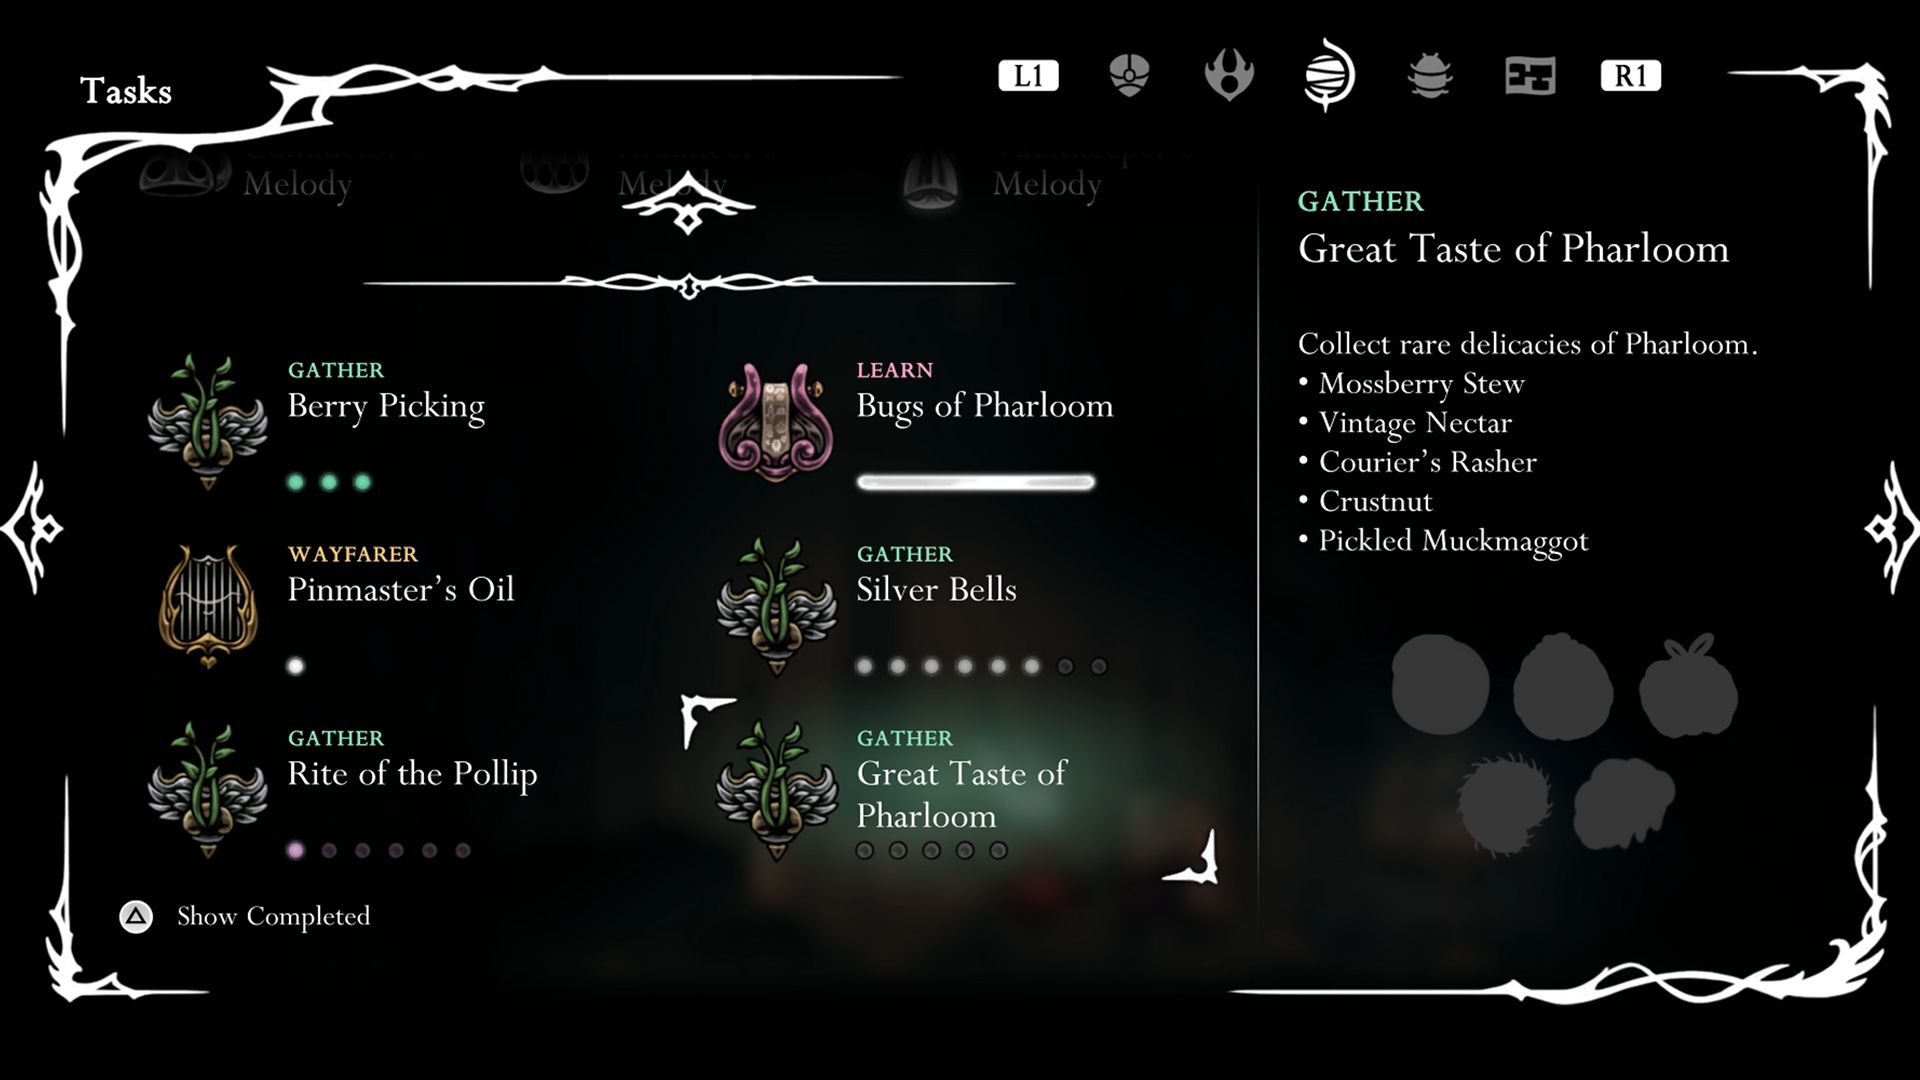
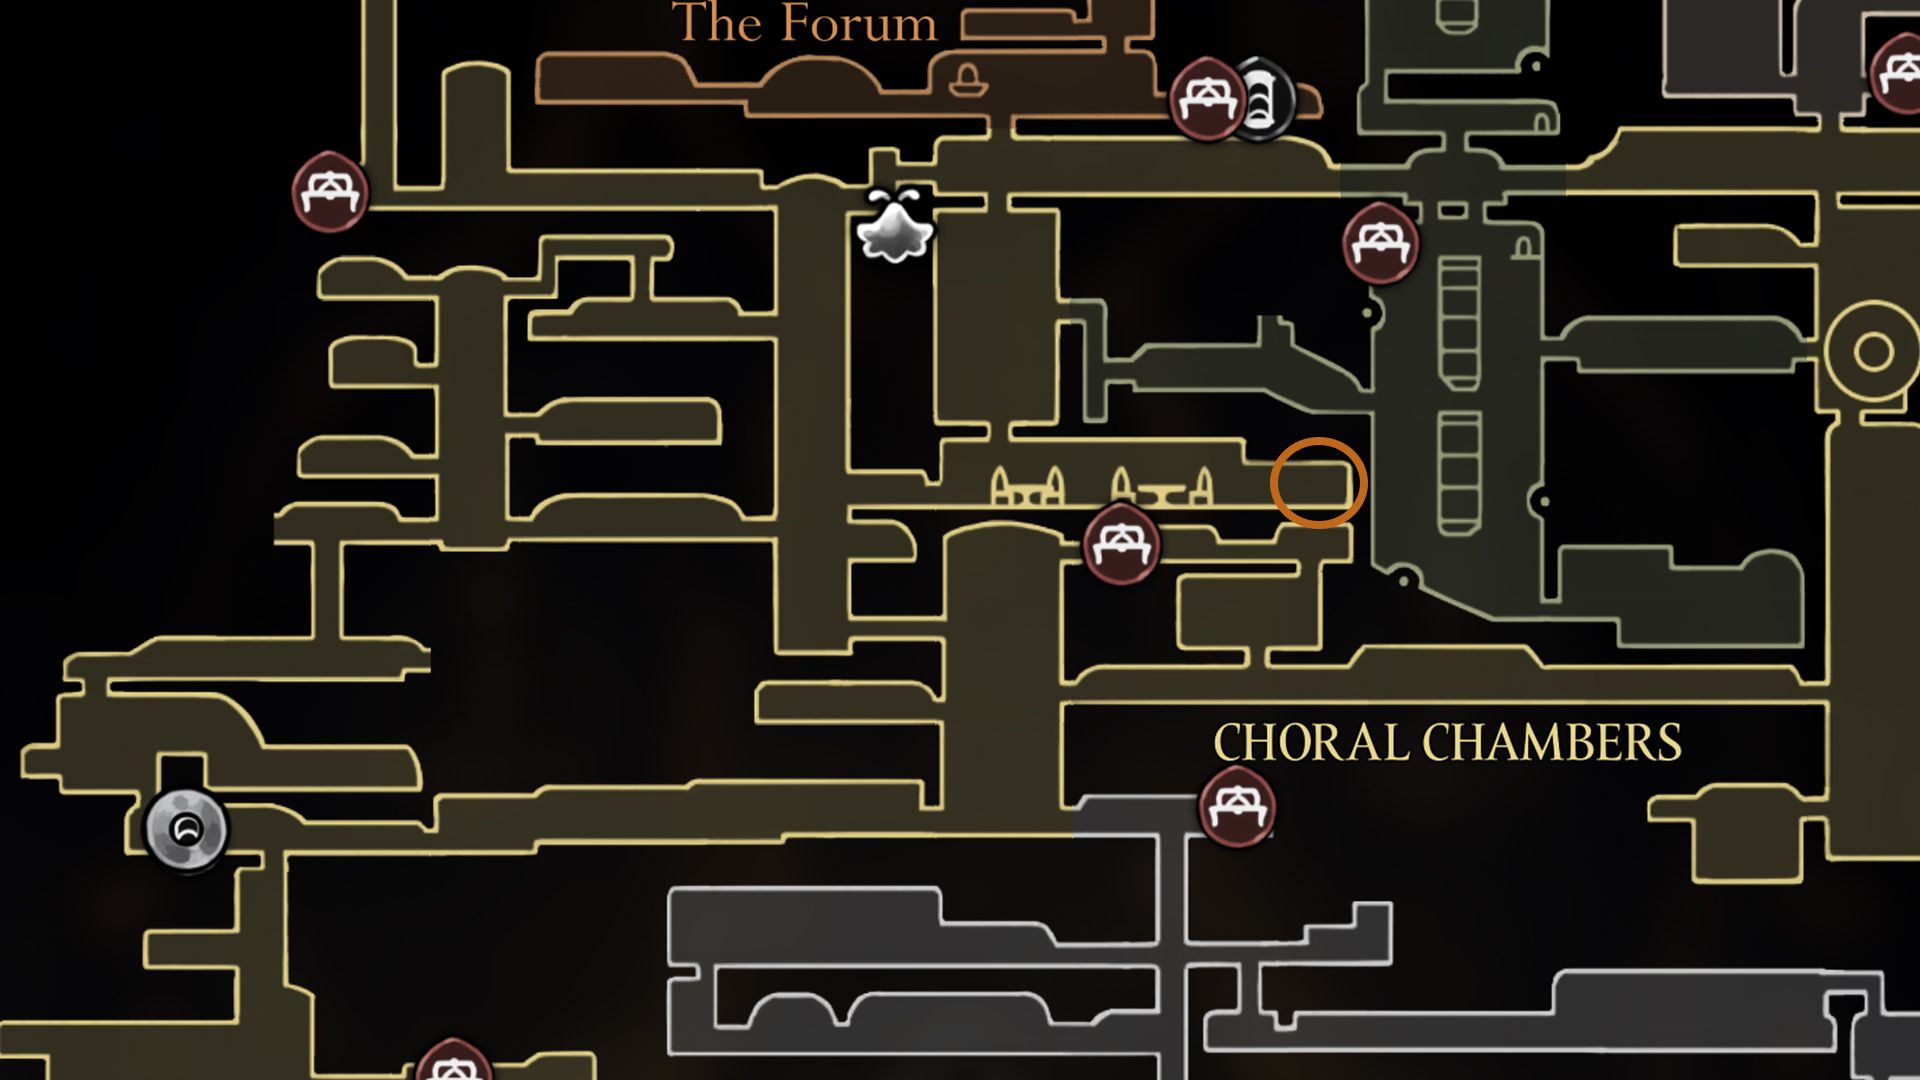
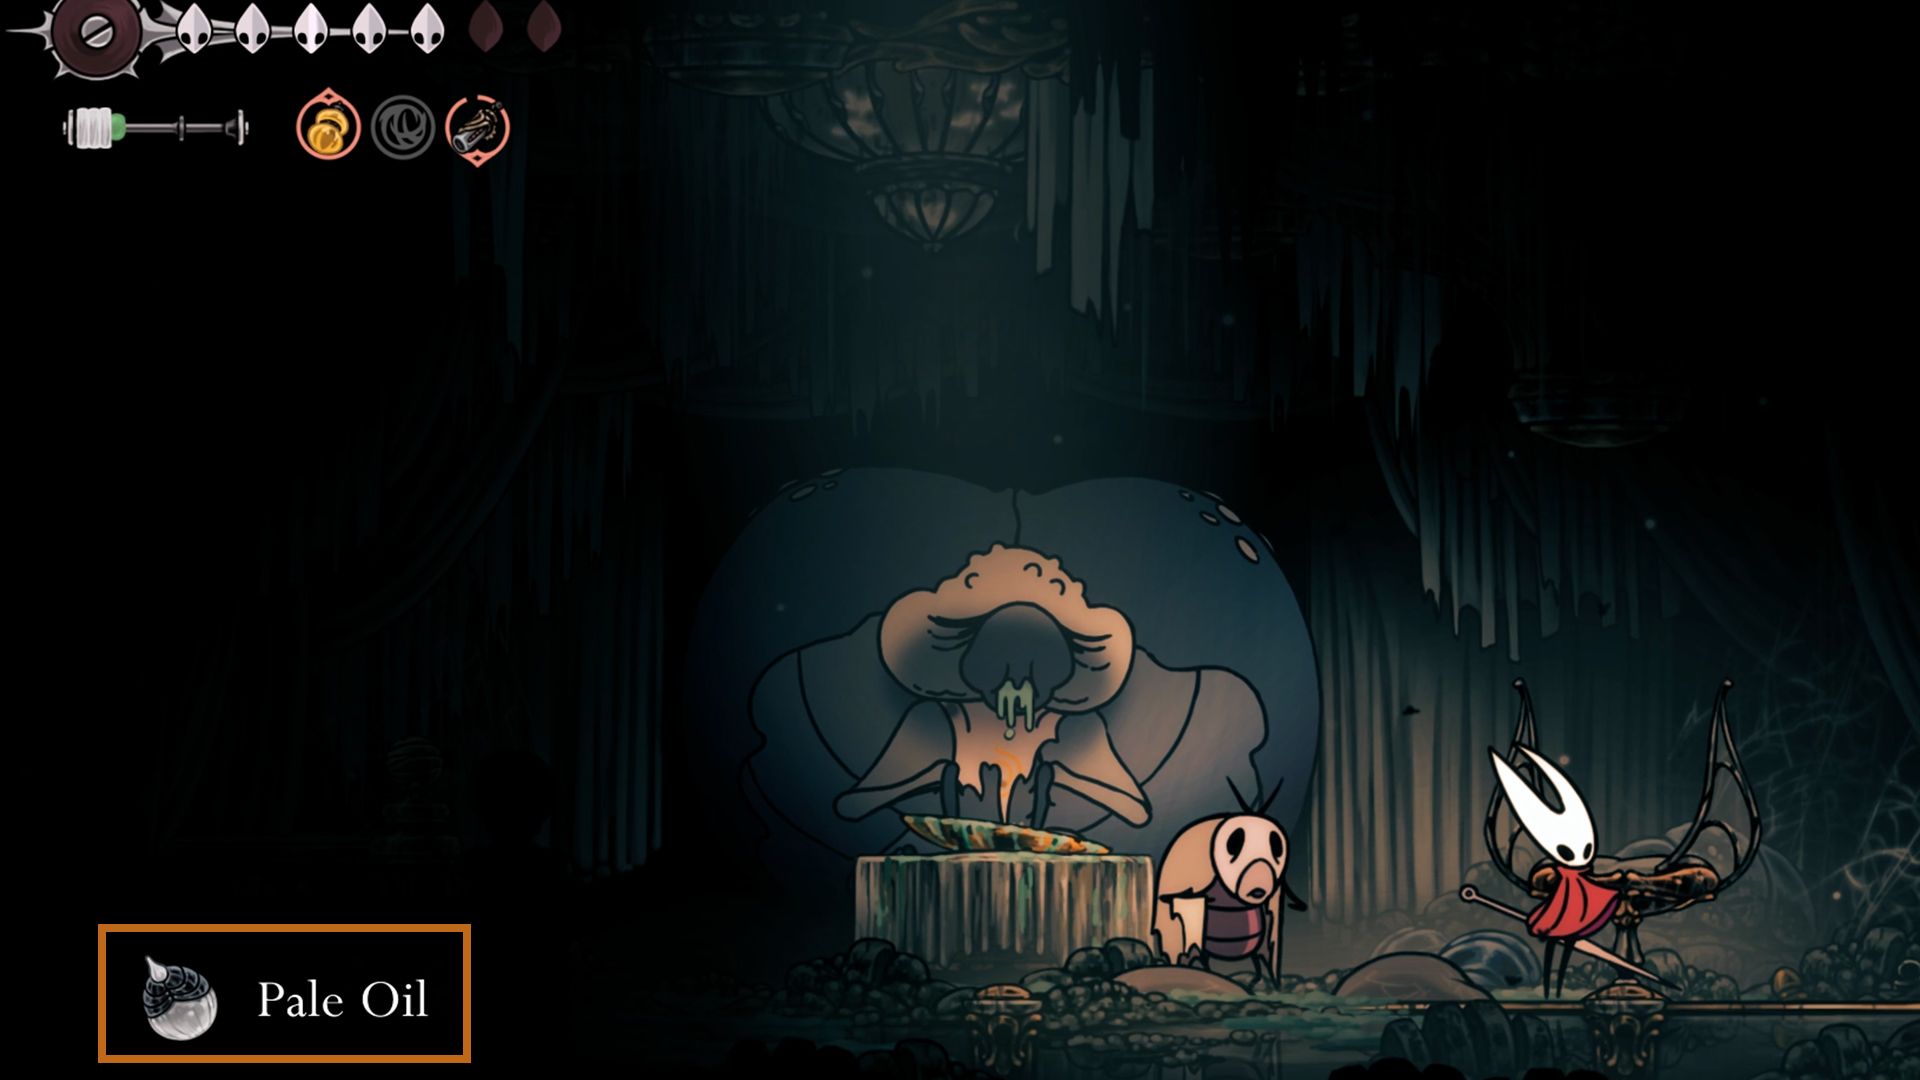
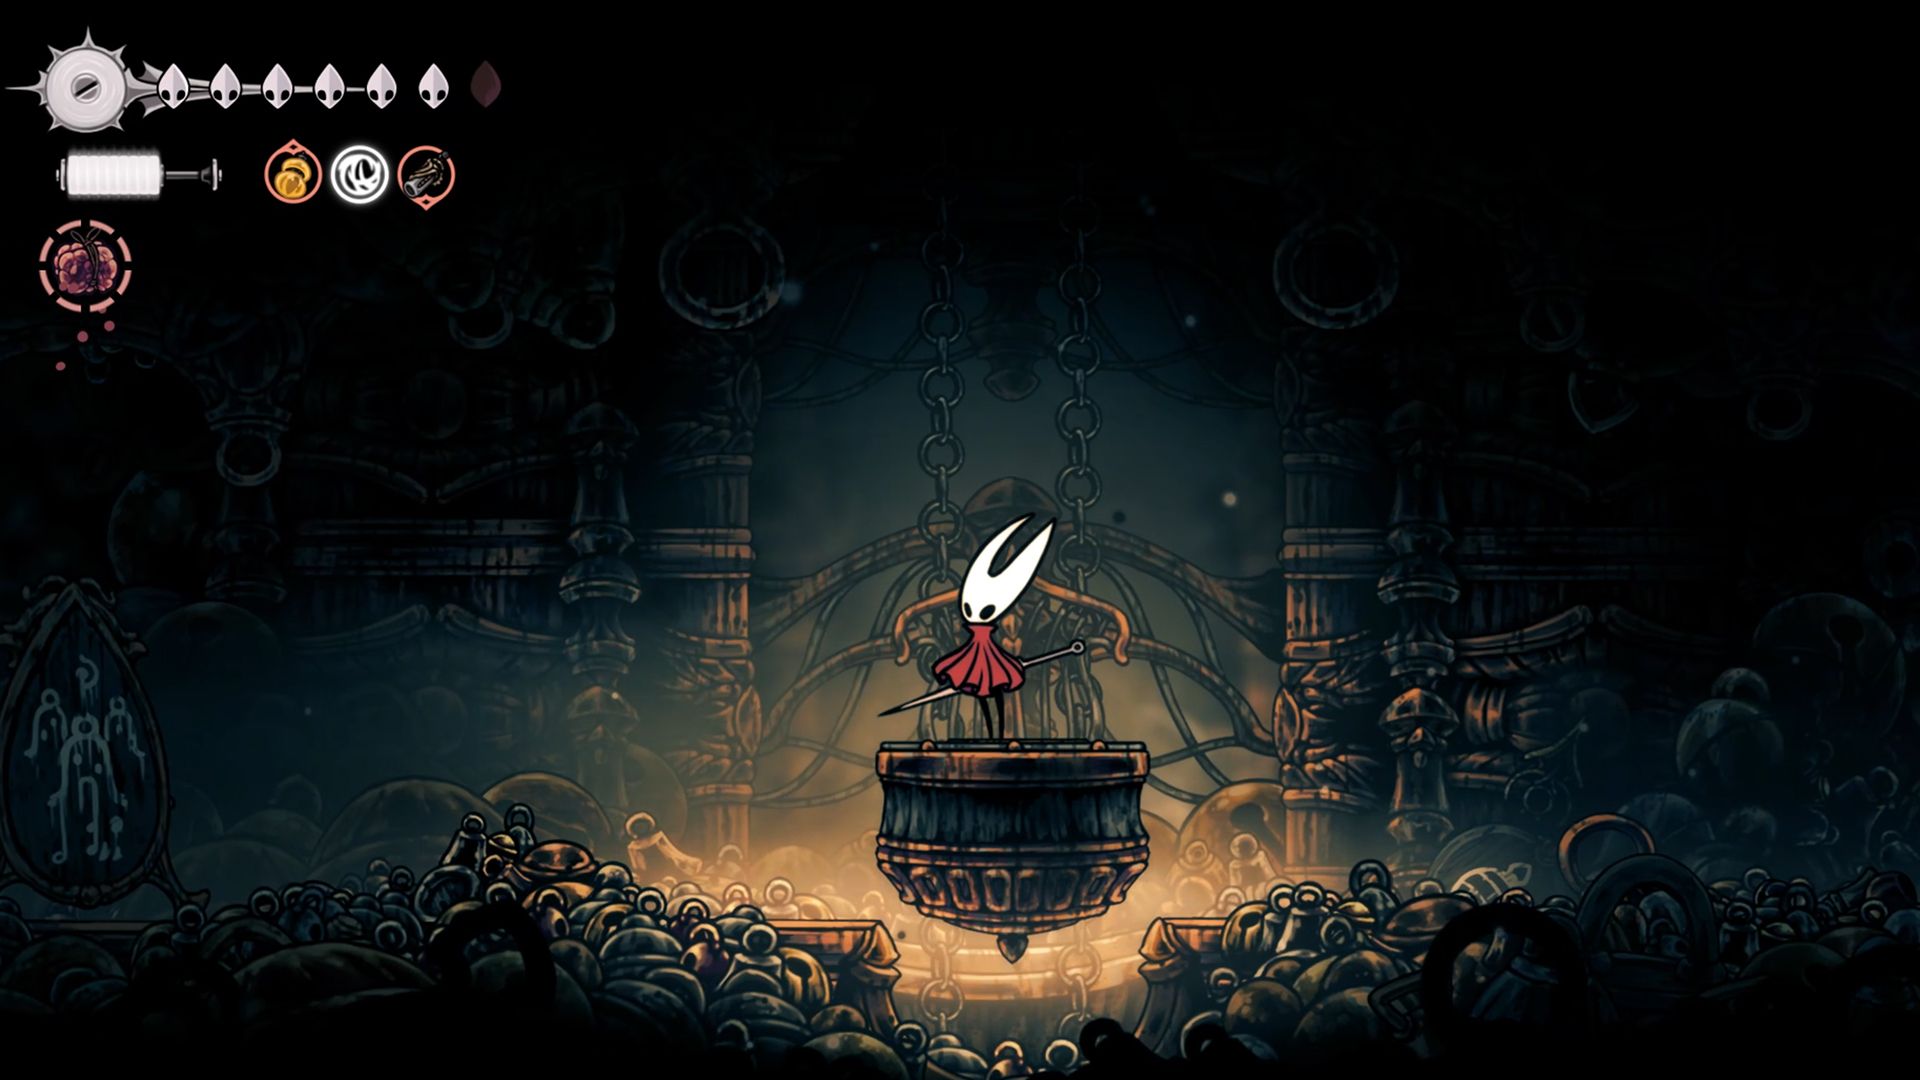
To initiate the “Great Taste of Pharloom” mission in Silksong, look for Loyal Mergwin within the central room in the Choral Chambers. This location is marked by dining tables on your map. The quest is challenging, and Hornet must gather 5 specific items to successfully complete it. However, the effort will pay off as once all items are collected and handed over to Loyal Mergwin, Hornet will be rewarded with a Pale Oil in Silksong. Here are the items required for completing the “Great Taste of Pharloom” mission in Silksong:
1. A Bottle of Crimson Fungus Infusion
2. An Unopened Jar of Elderberry Preserve
3. A Tub of Fresh Mint Paste
4. A Bag of Spiced Honey
5. A Vial of Essence of Nightshade Flowers
- Courier’s Rasher
- Crustnut
- Pickled Muckmaggot
- Vintage Nectar
- Mossberry Stew
How To Get Courier’s Rasher In Silksong
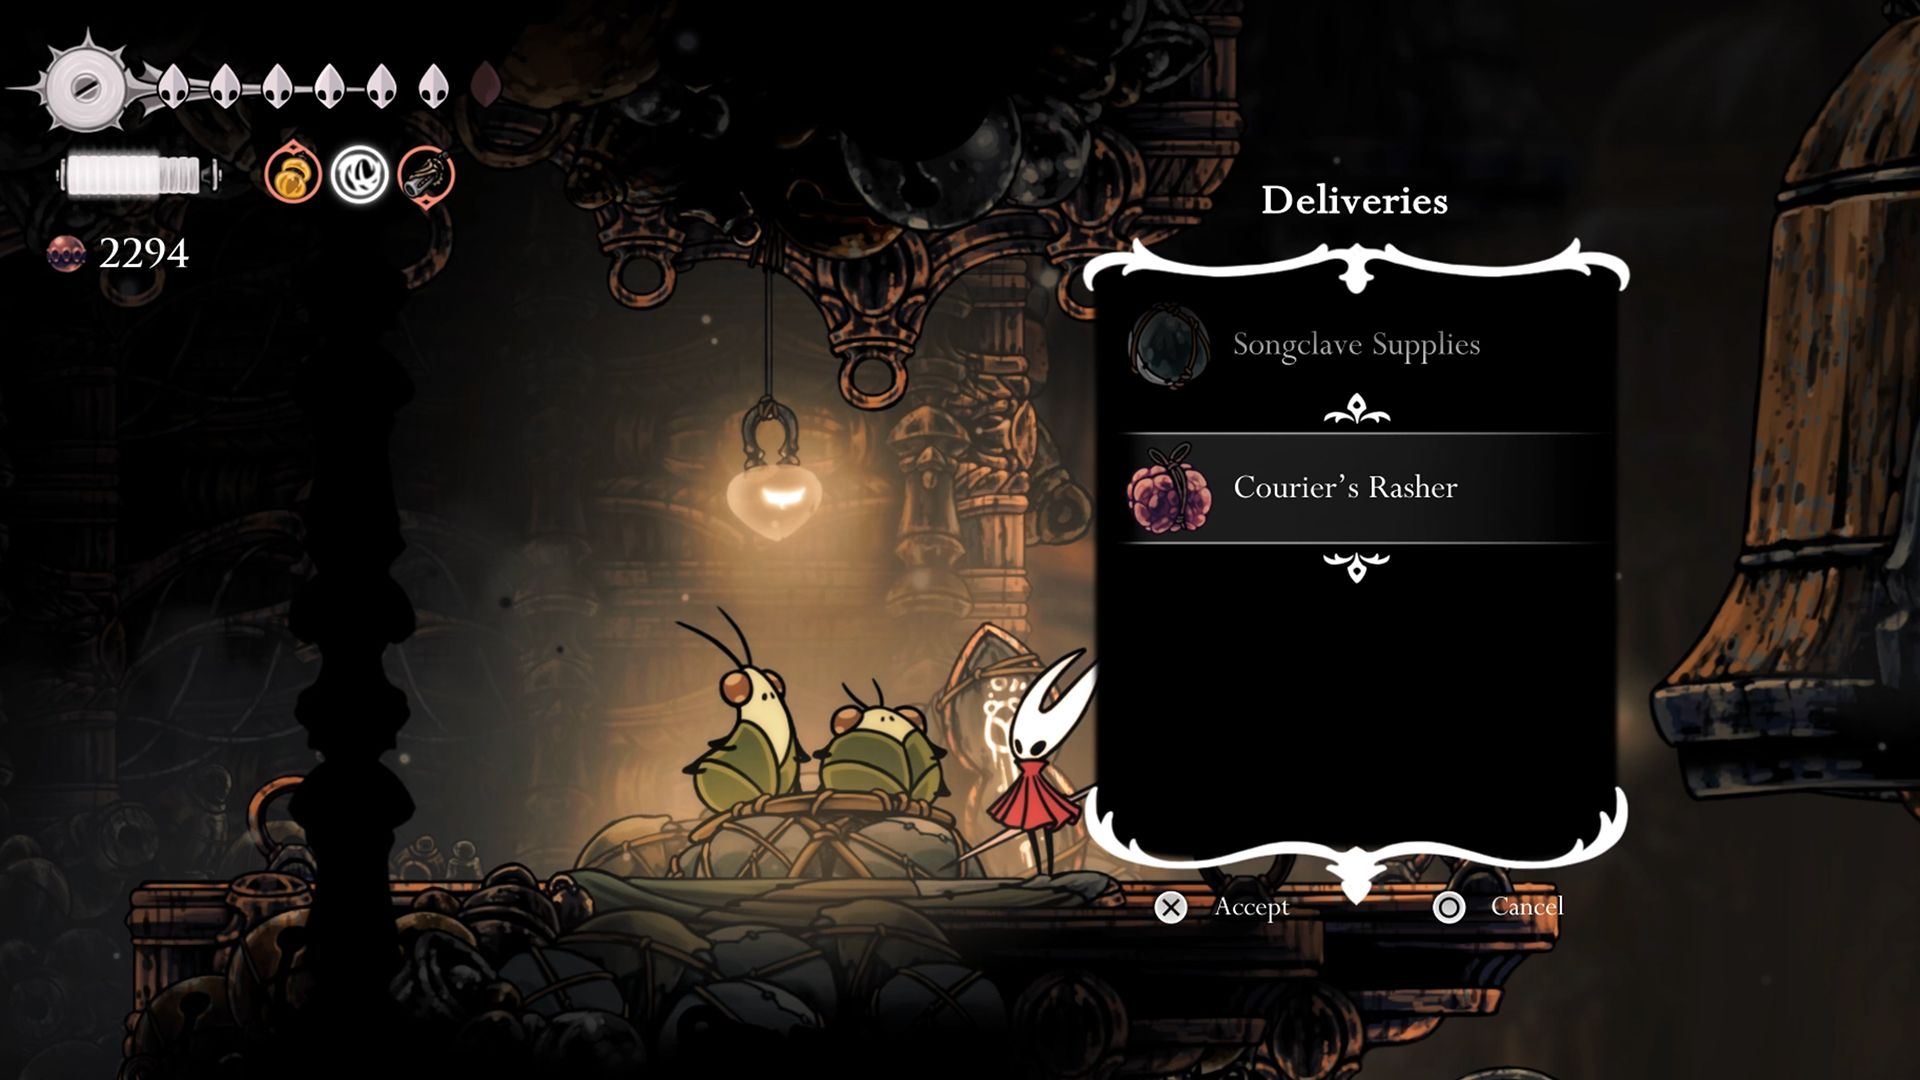
In the game Silksong, obtaining the Courier’s Rasher is not just a challenging task within this quest, it’s one of the most difficult feats. To acquire the Courier’s Rasher, interact with Tipp and Pill in Bellhart. Their deliveries will include the elusive Courier’s Rasher. To locate Tipp and Pill in Bellhart, you must first rescue them both by completing their respective quests.
- My Missing Courier (Wayfarer)
- My Missing Brother (Wayfarer)
The mission requires Hornet to personally transport the Courier’s Rasher from Bellhart, through Choral Chambers, all the way to Loyal Mergwin – without resorting to any quick-travel option available. Moreover, it is crucial to note that the Courier’s Rasher has a finite lifespan; its durability degrades as time passes. Therefore, Hornet must ensure to deliver the item safely and promptly.
- Within a time period.
- Without taking damage.
- Without using fast travel methods.
Given that it’s challenging to accomplish all at once, here are some suggestions for effectively delivering the Courier’s Bacon Strip:
1. Wrap the rashers securely in a suitable container to prevent them from getting damaged during transit.
2. Clearly label the package with the recipient’s name and address to ensure accurate delivery.
3. If possible, use a reliable courier service known for its efficient and timely deliveries.
4. In case of any special instructions or requirements regarding temperature control, make sure they are communicated clearly to the courier.
5. Maintain open communication with the recipient about the estimated delivery time so that they can be prepared to receive their package promptly.
- Equip the Ascendant’s Grip tool, as it helps Hornet sticks to walls.
- Equip the Silk Speed Anklets tool, as it increases Hornet’s running speed.
- Equip the Wavelight tool, as Hornet will use a lot of Silk during the run.
- Get the Clawline Skill to hook and dash faster.
- Get the Faydown Cloak Skill to double jump.
- Make sure to open all the shortcuts along the way.
- Enter the menu map instead of checking the mini-map during the delivery. The menu map will pause the game, giving you all the time you need to check it.
- Defeat all the enemies along the way, so they don’t deal any unwanted damage. (Optional)
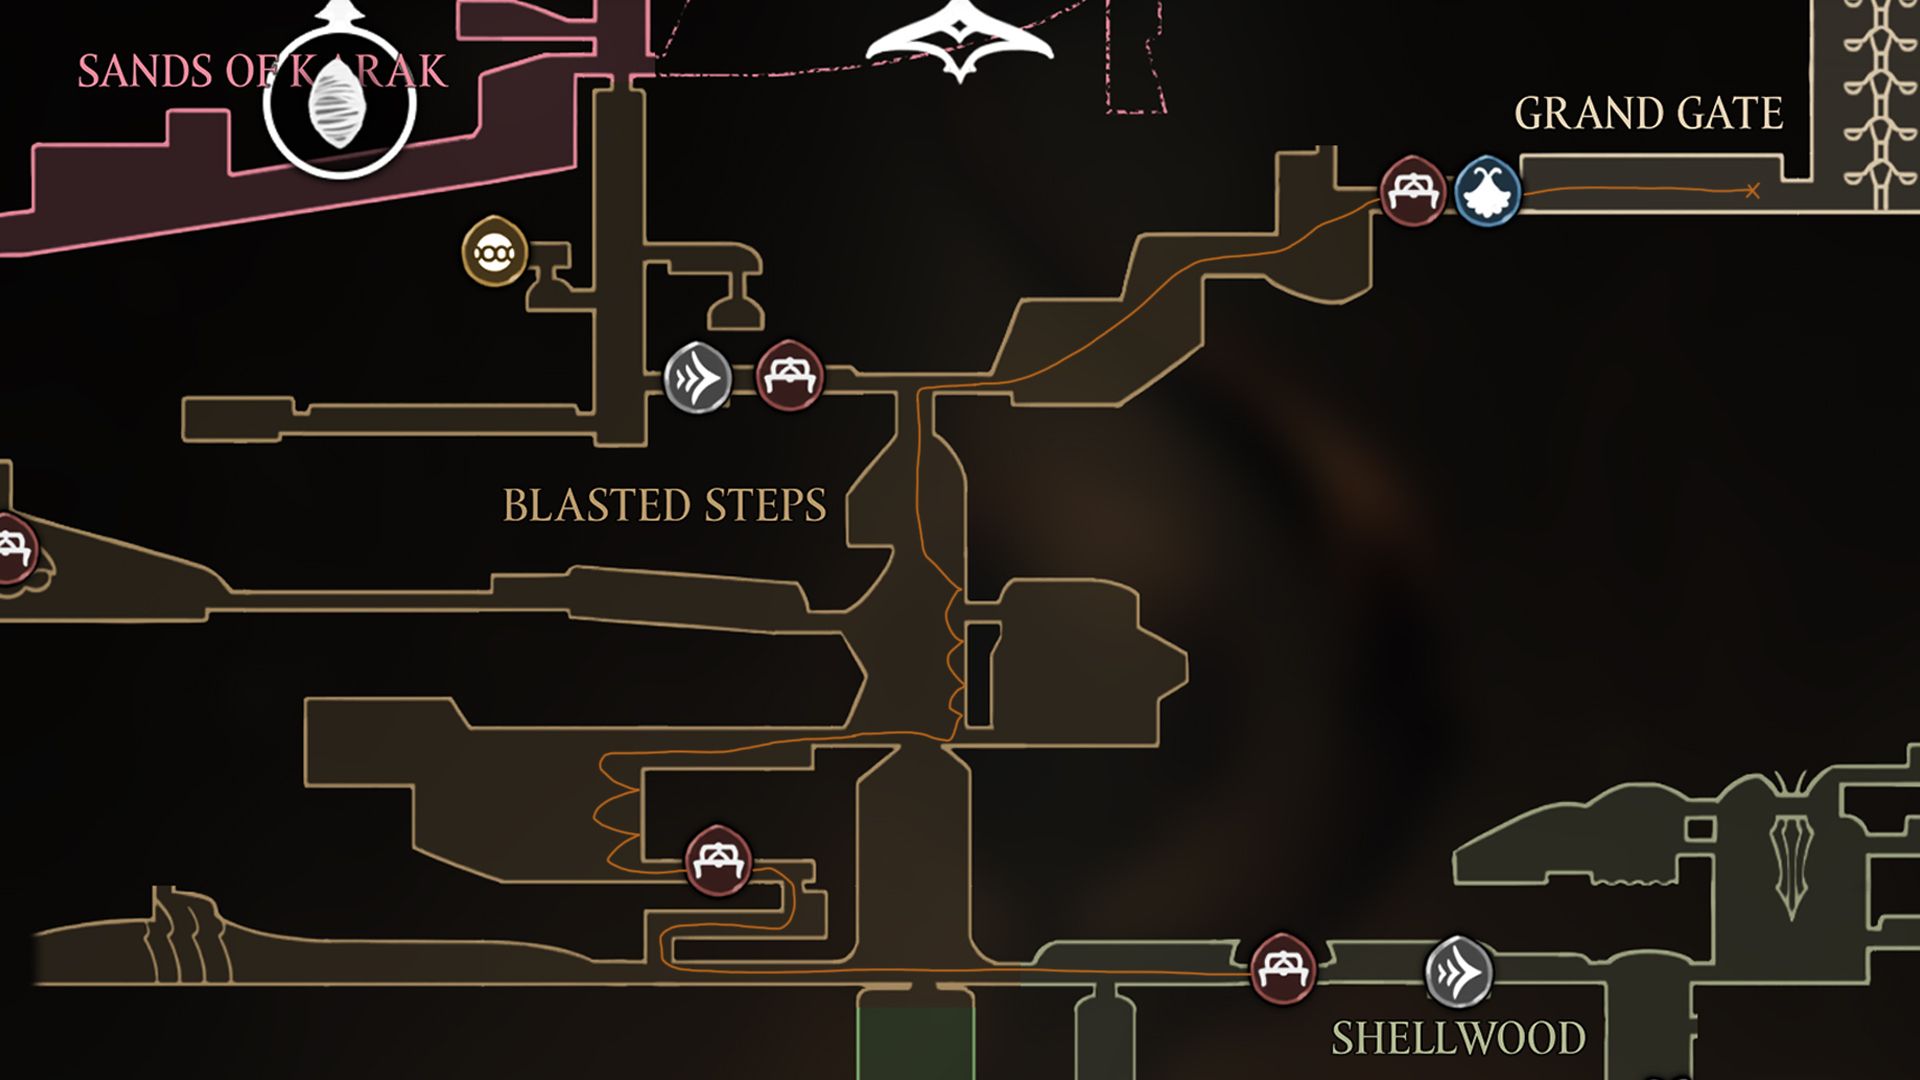
From Bellhart, go to Choral Chambers via Shellwood, Blasted Steps, and Grand Gate.
On this route, you’ll find numerous stretches ideal for running, with fewer adversaries to hinder your progress. There are still challenging sections where you’ll need to navigate obstacles and dodge enemies, but they’re less frequent compared to other paths.
Bellhart and Shellwood
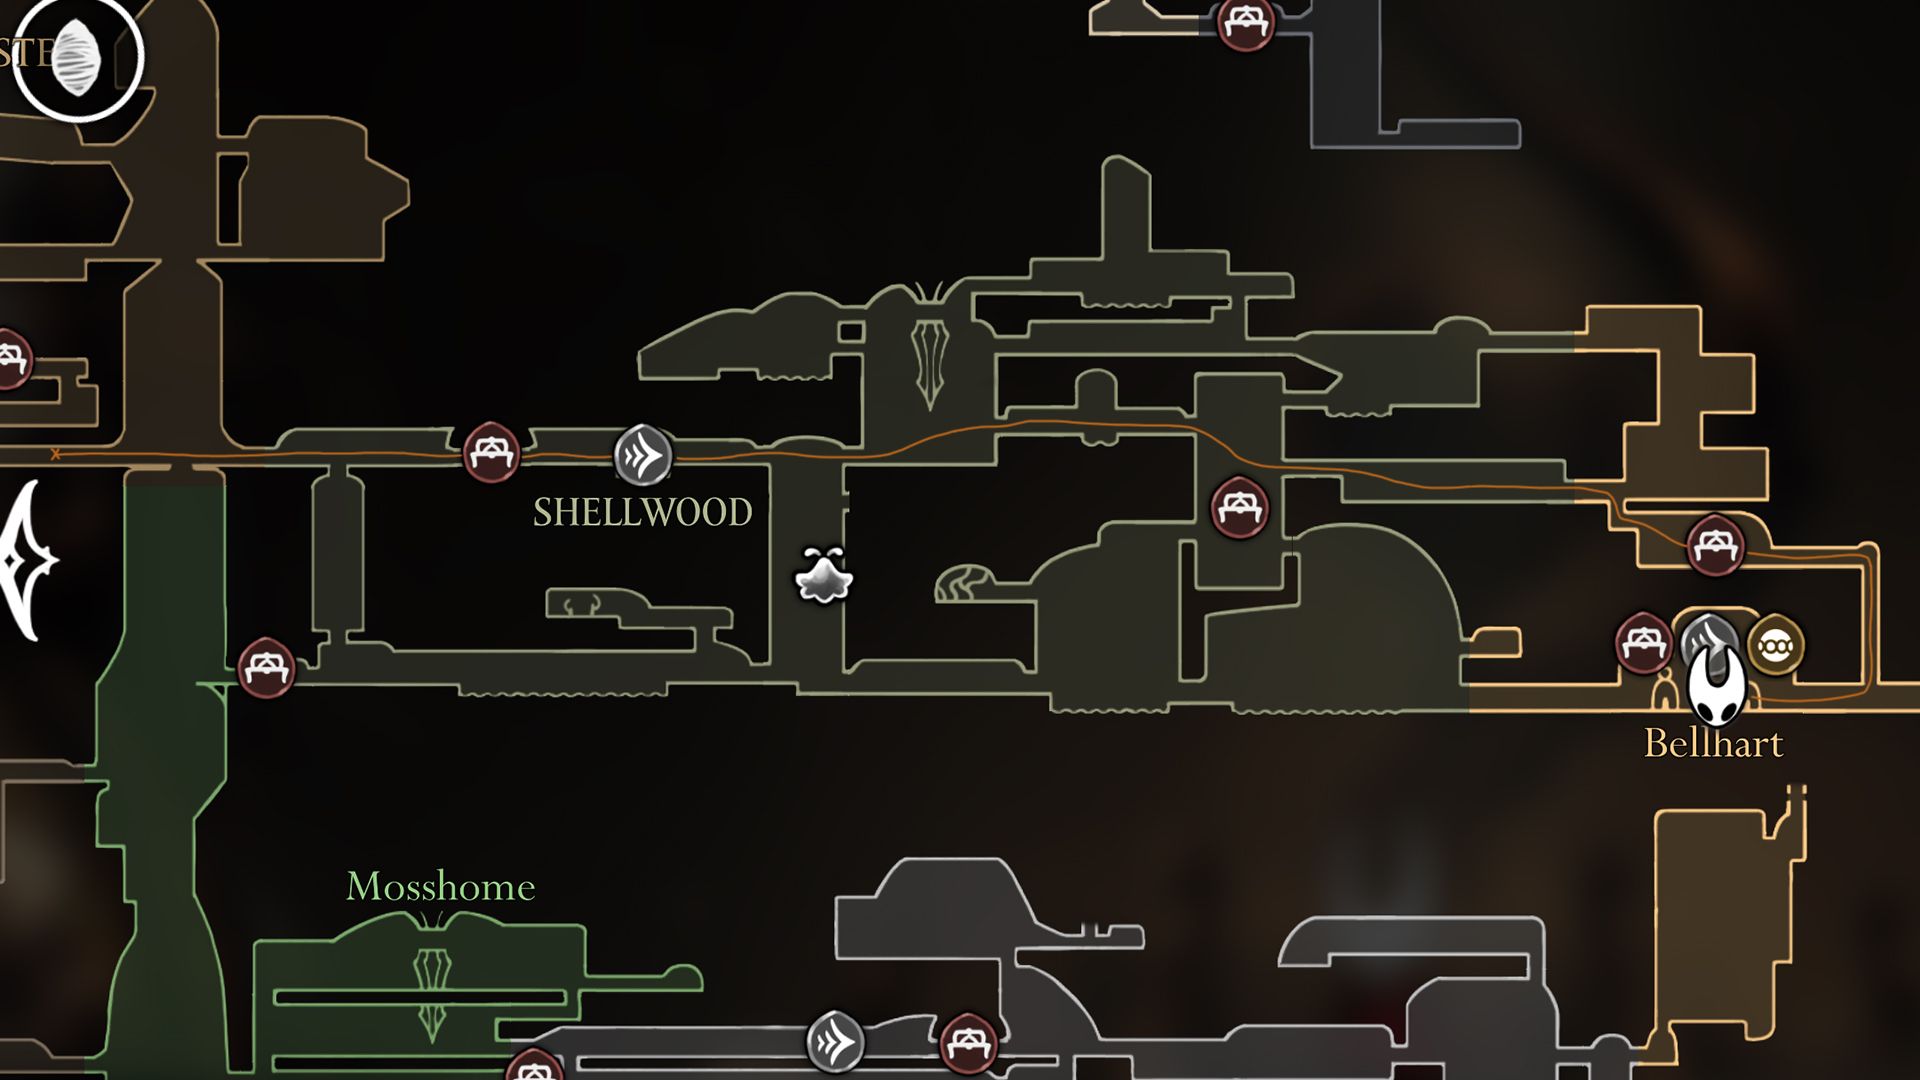
Beginning at Tipp and Pill’s position, head towards the elevator that ascends to Bellhart’s second level. After reaching the second floor, take the first exit to find your way to Shellwood.
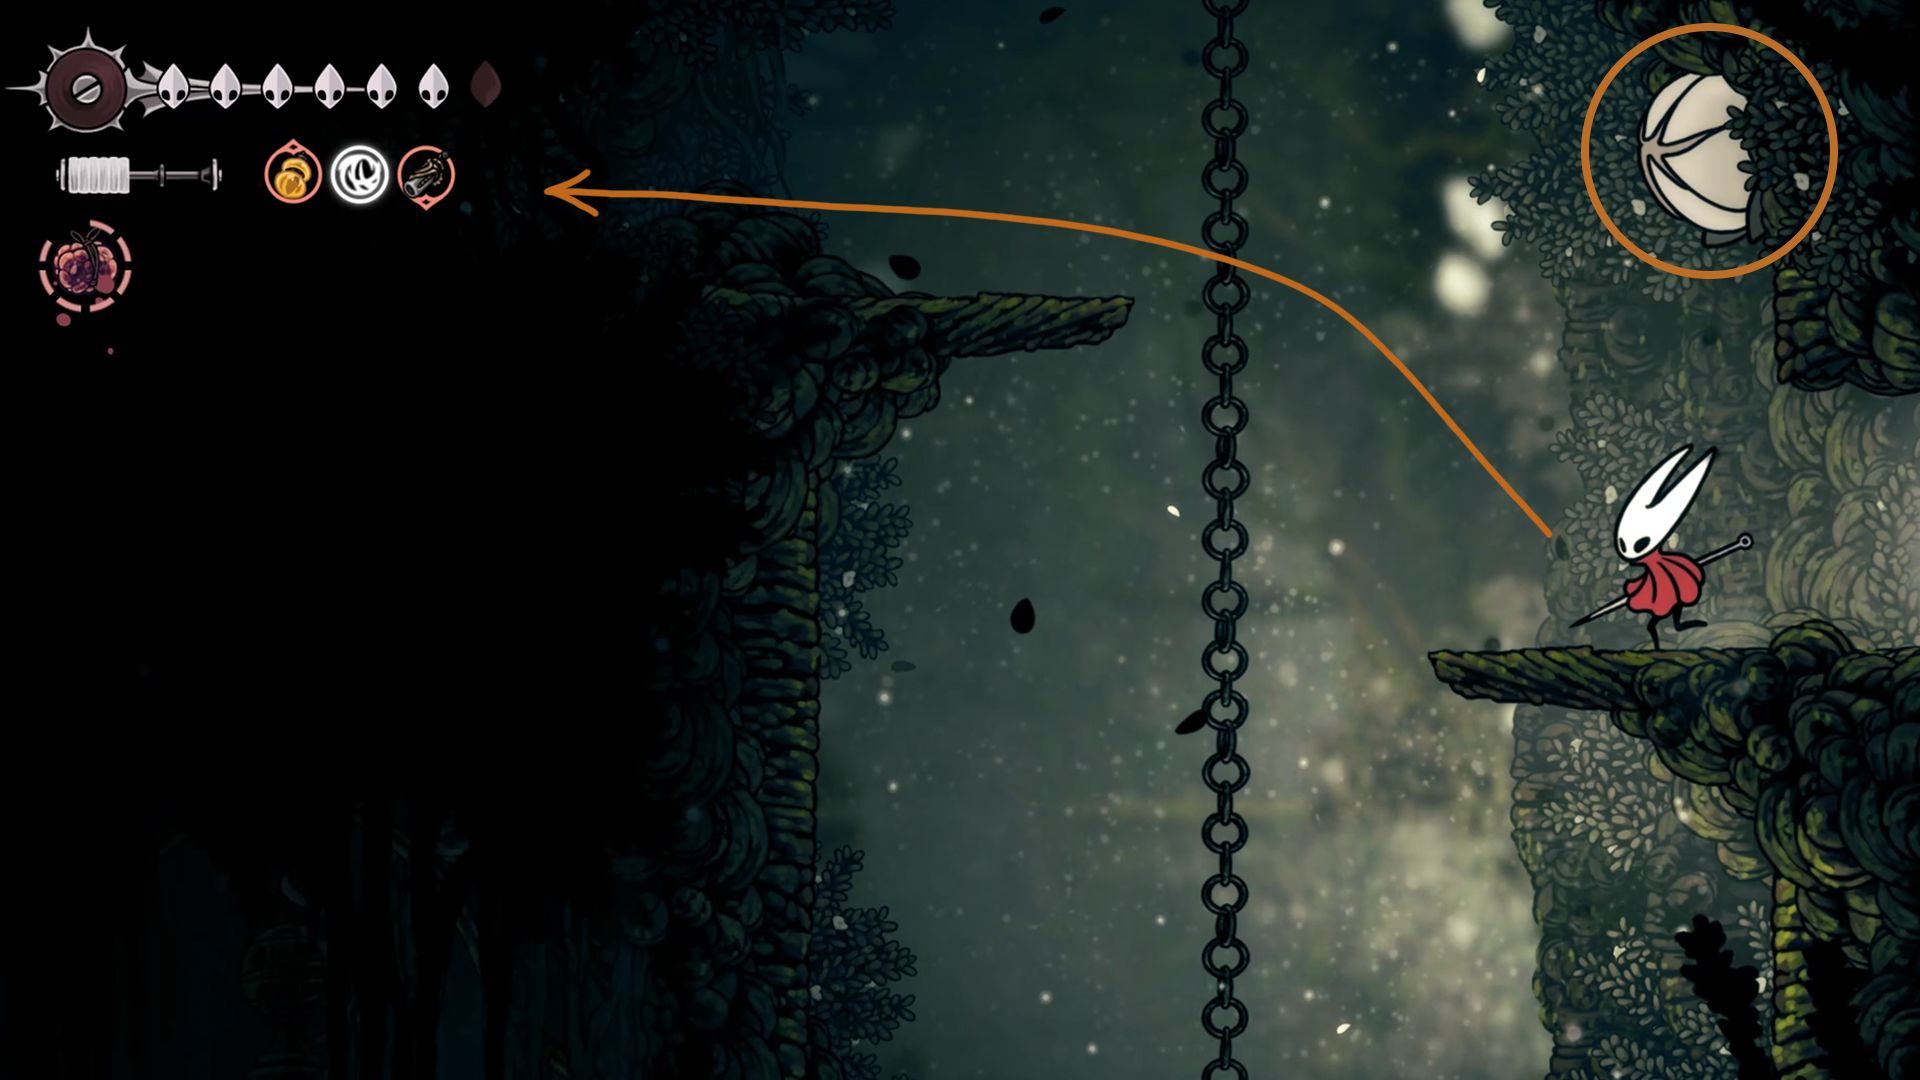
After exiting, watch out for the enemy lurking as a Gahlia flower above. Jump to the branch on the left and proceed to the left, clearing the vines obstructing your path. Continue moving upwards, navigating through the branches, until you reach the top where there’s a road to the left.
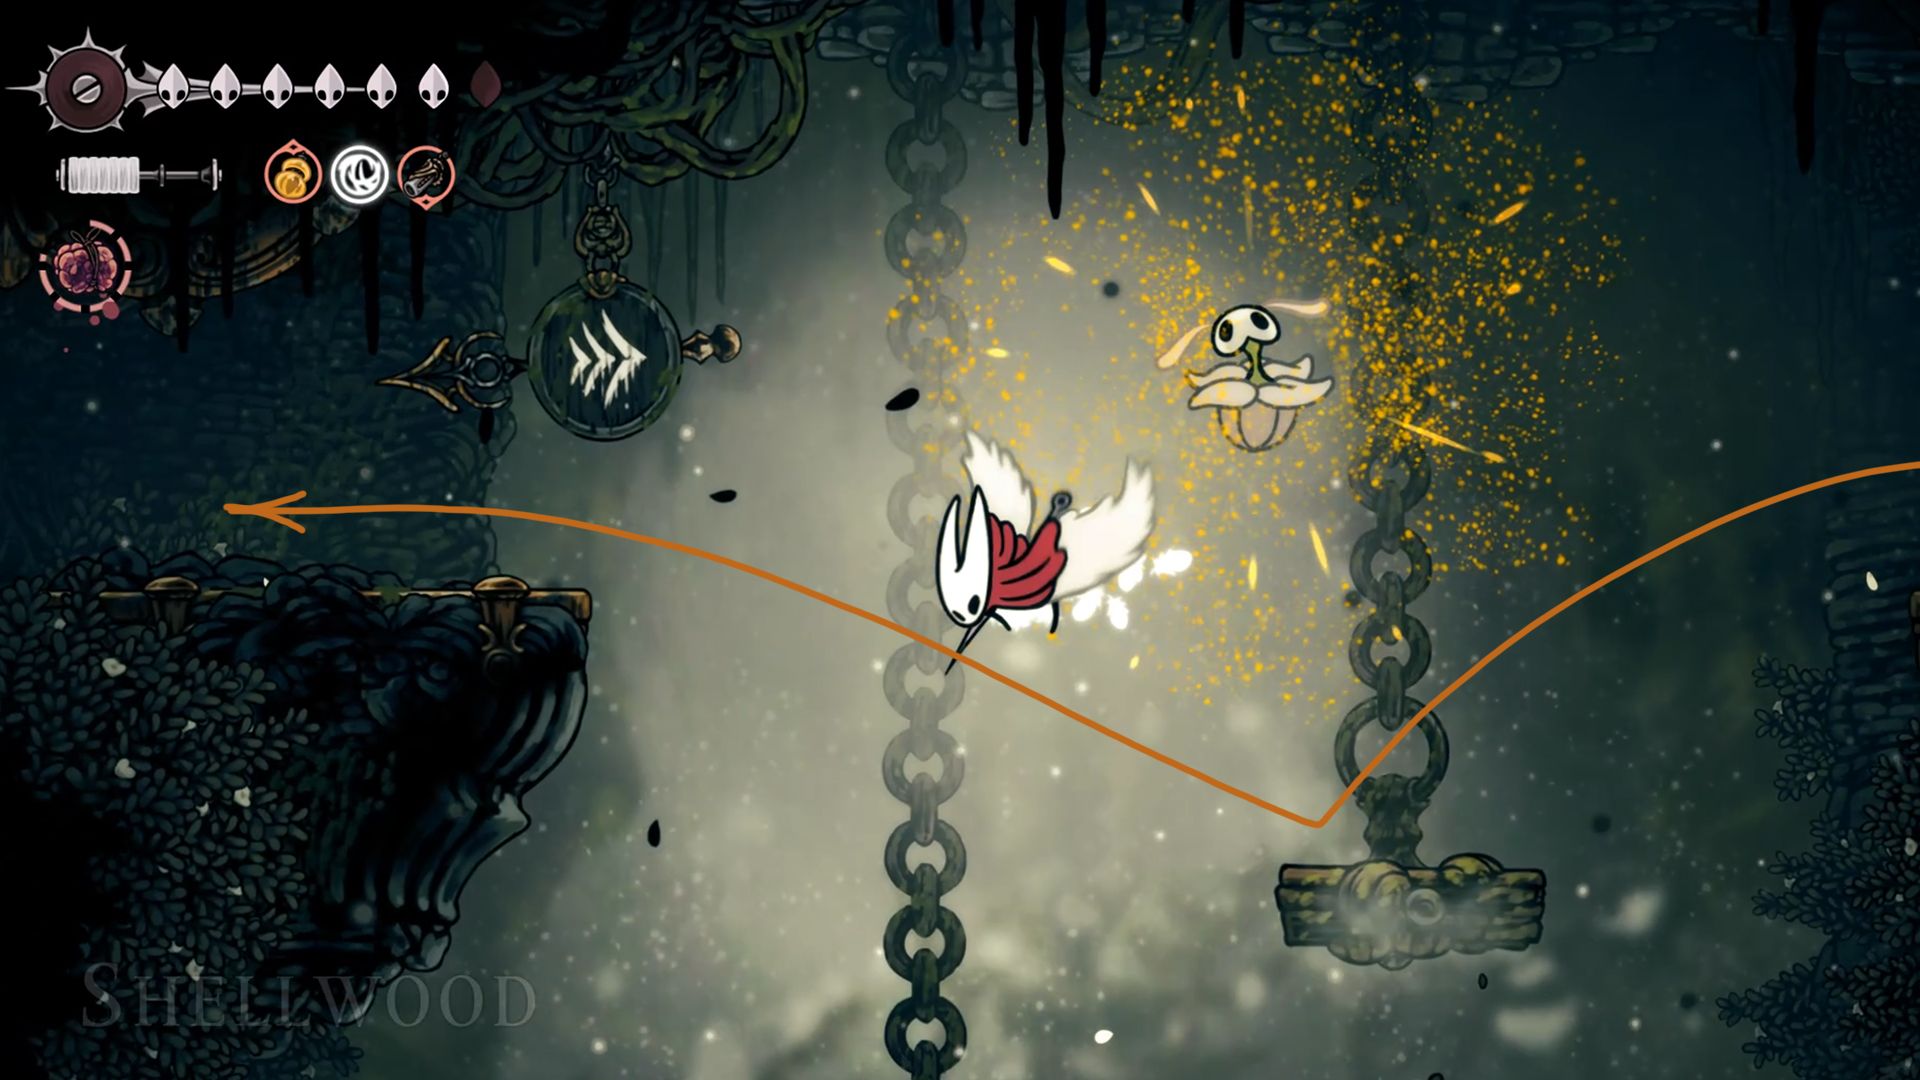
After that, keep running left, avoiding enemies from area to area until you reach Blasted Steps.
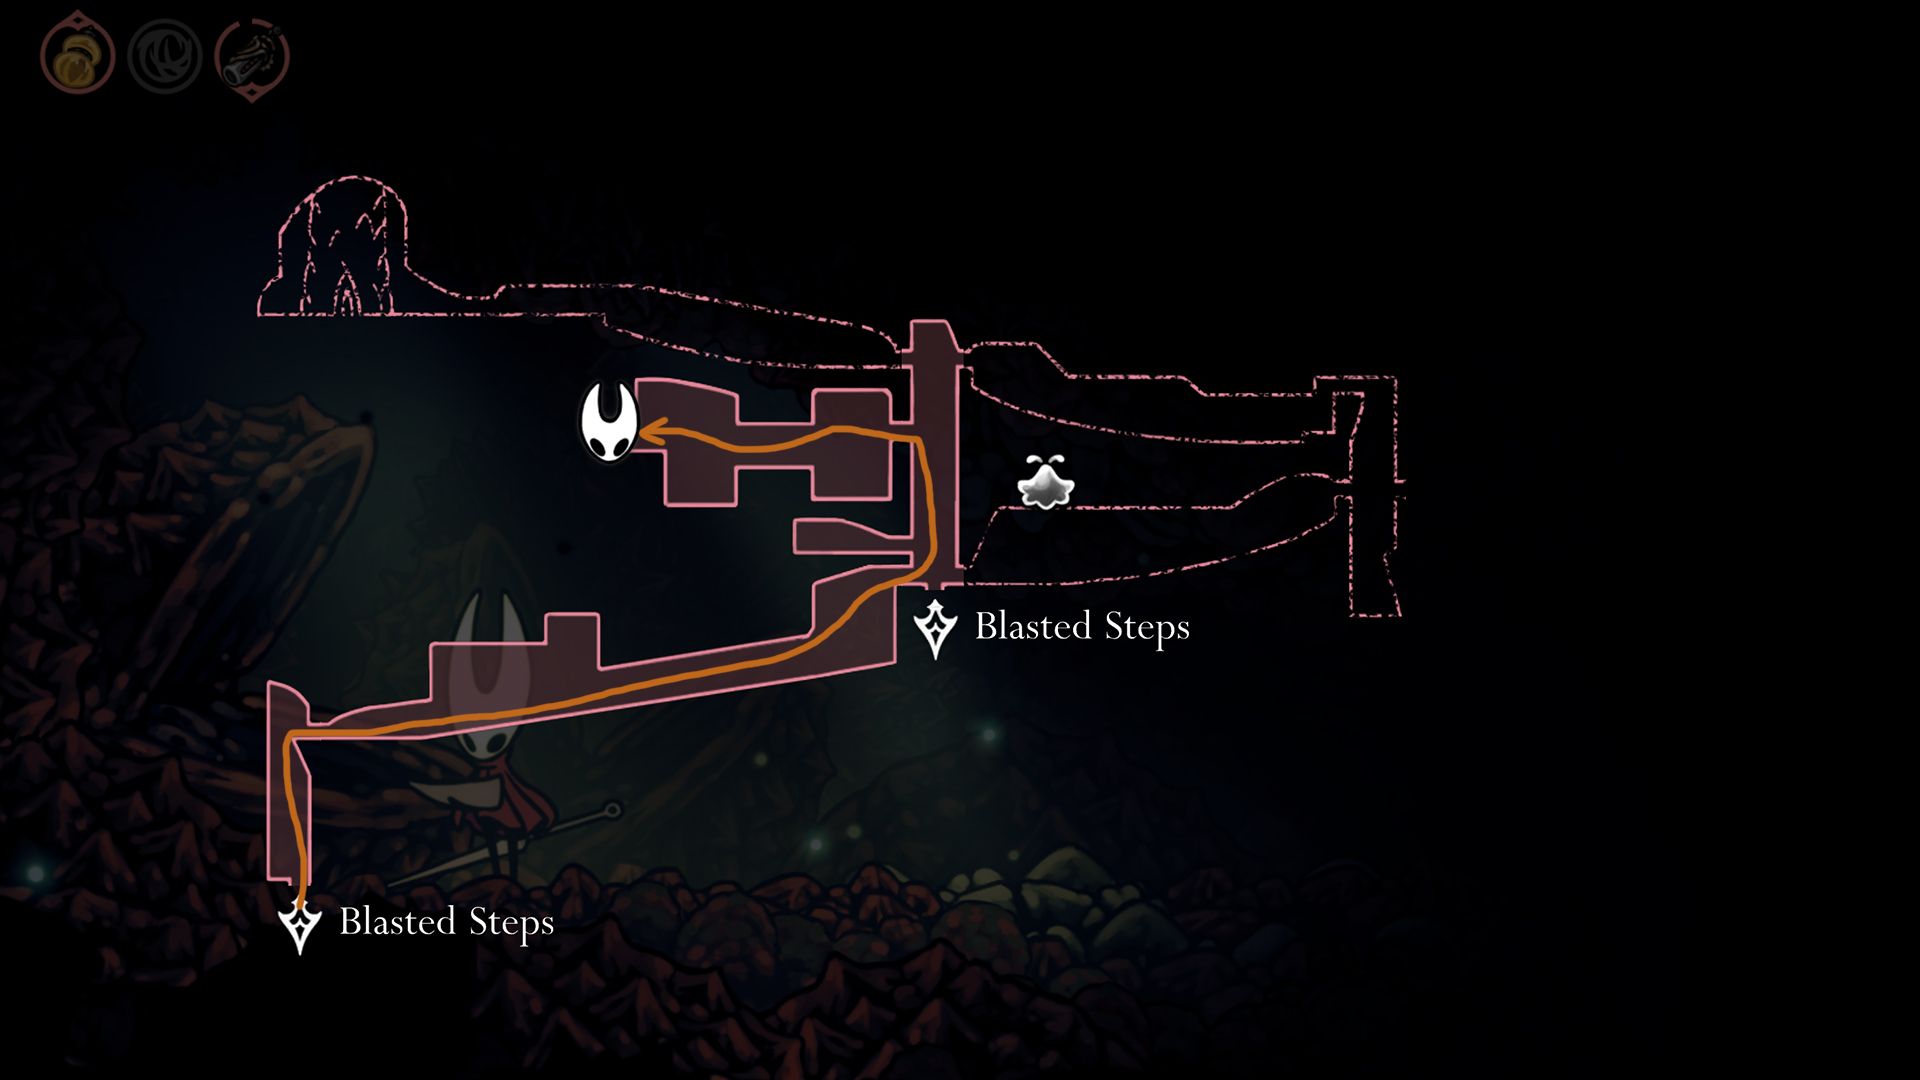
Blasted Steps
In the challenging segment of the Courier’s Rasher known as Blasted Steps, our hero, Hornet, will face a tough test due to its dense population of enemies and parkour challenges. Since there’s no way around them, Hornet must press forward through these obstacles. Upon entering Blasted Steps, locate the first hole and climb it. Then, continue along the path to reach the initial bench in Blasted Steps.
Turn to your left and leap onto the initial platform. As soon as you land there, hop upward to the rock located just above it. Following that, make use of the shortcut platform on your right to bypass this area’s obstacle course and swiftly ascend to the elevated location.
To use this shortcut quickly, make sure you pull the lever first. If the shortcut isn’t accessible yet, remember to unlock it before proceeding.
From here, go through the hole above Hornet and keep going right to exit the area.
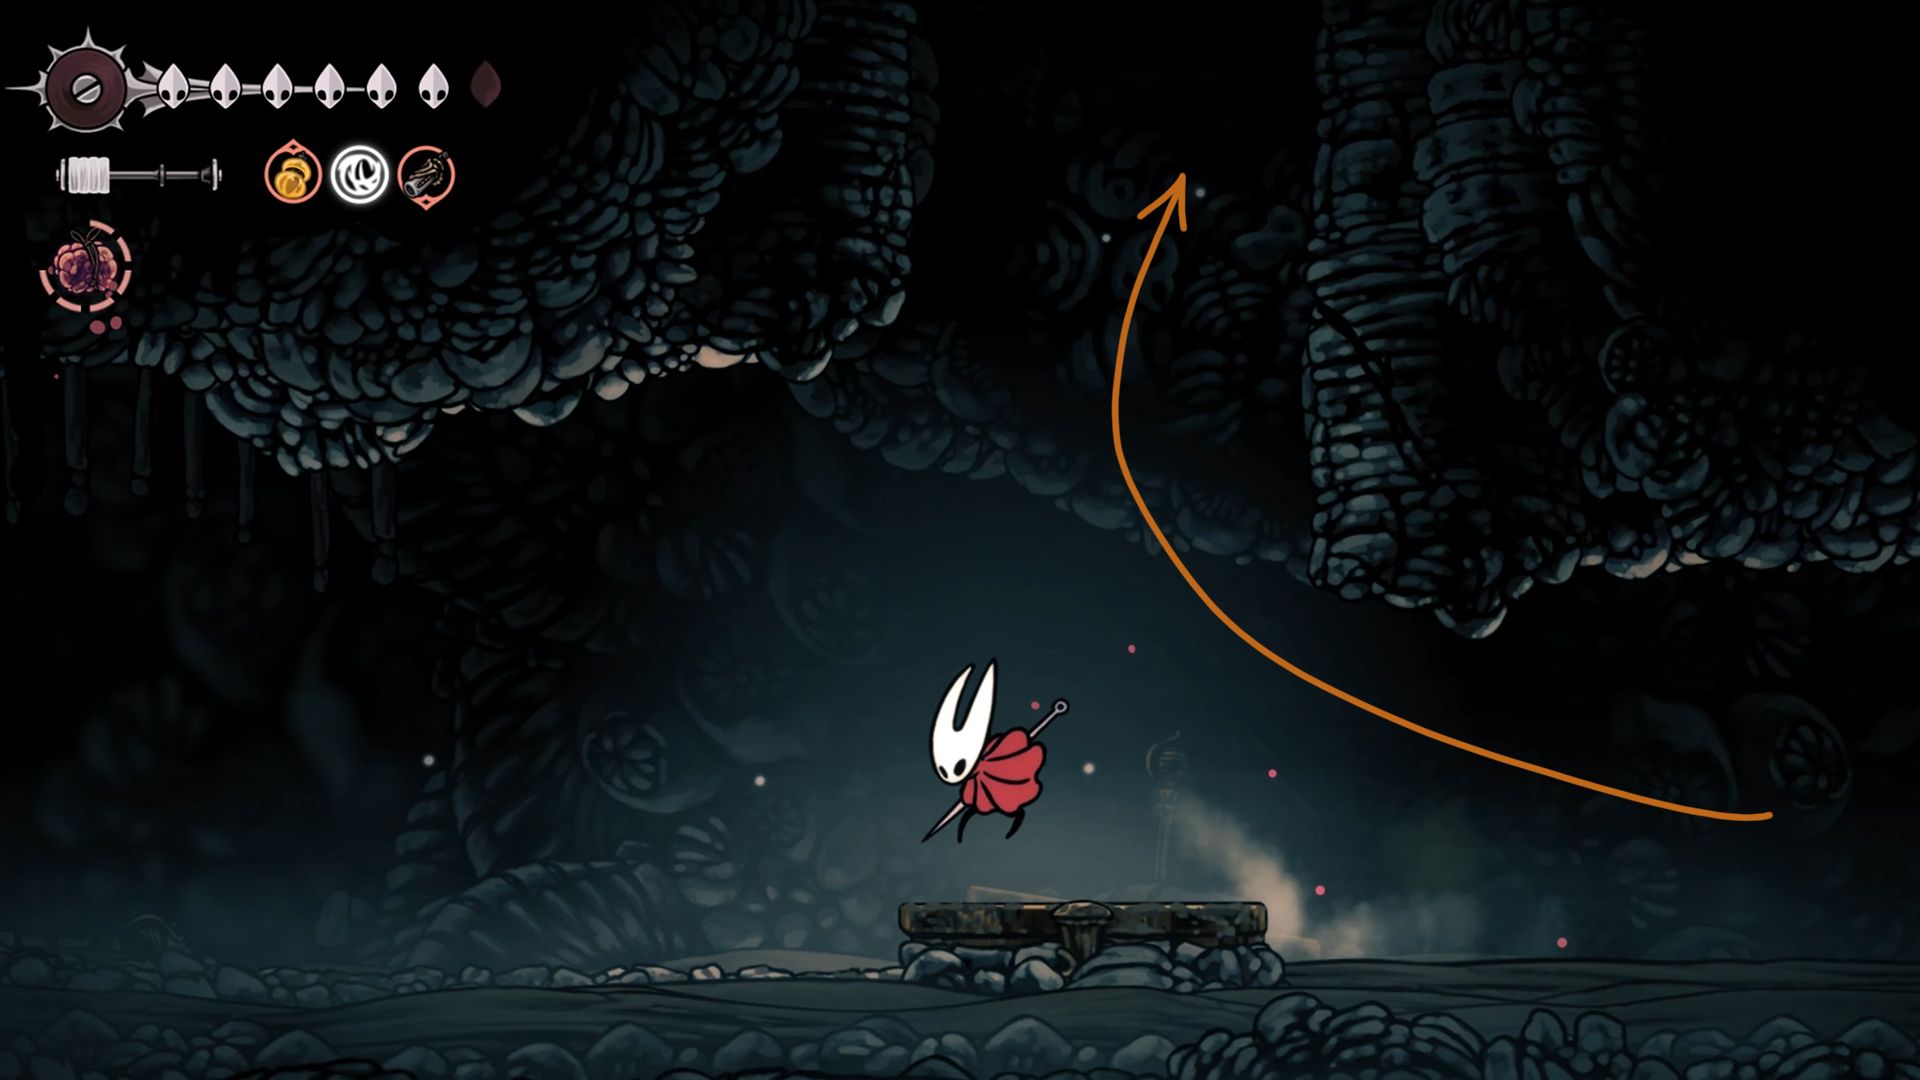
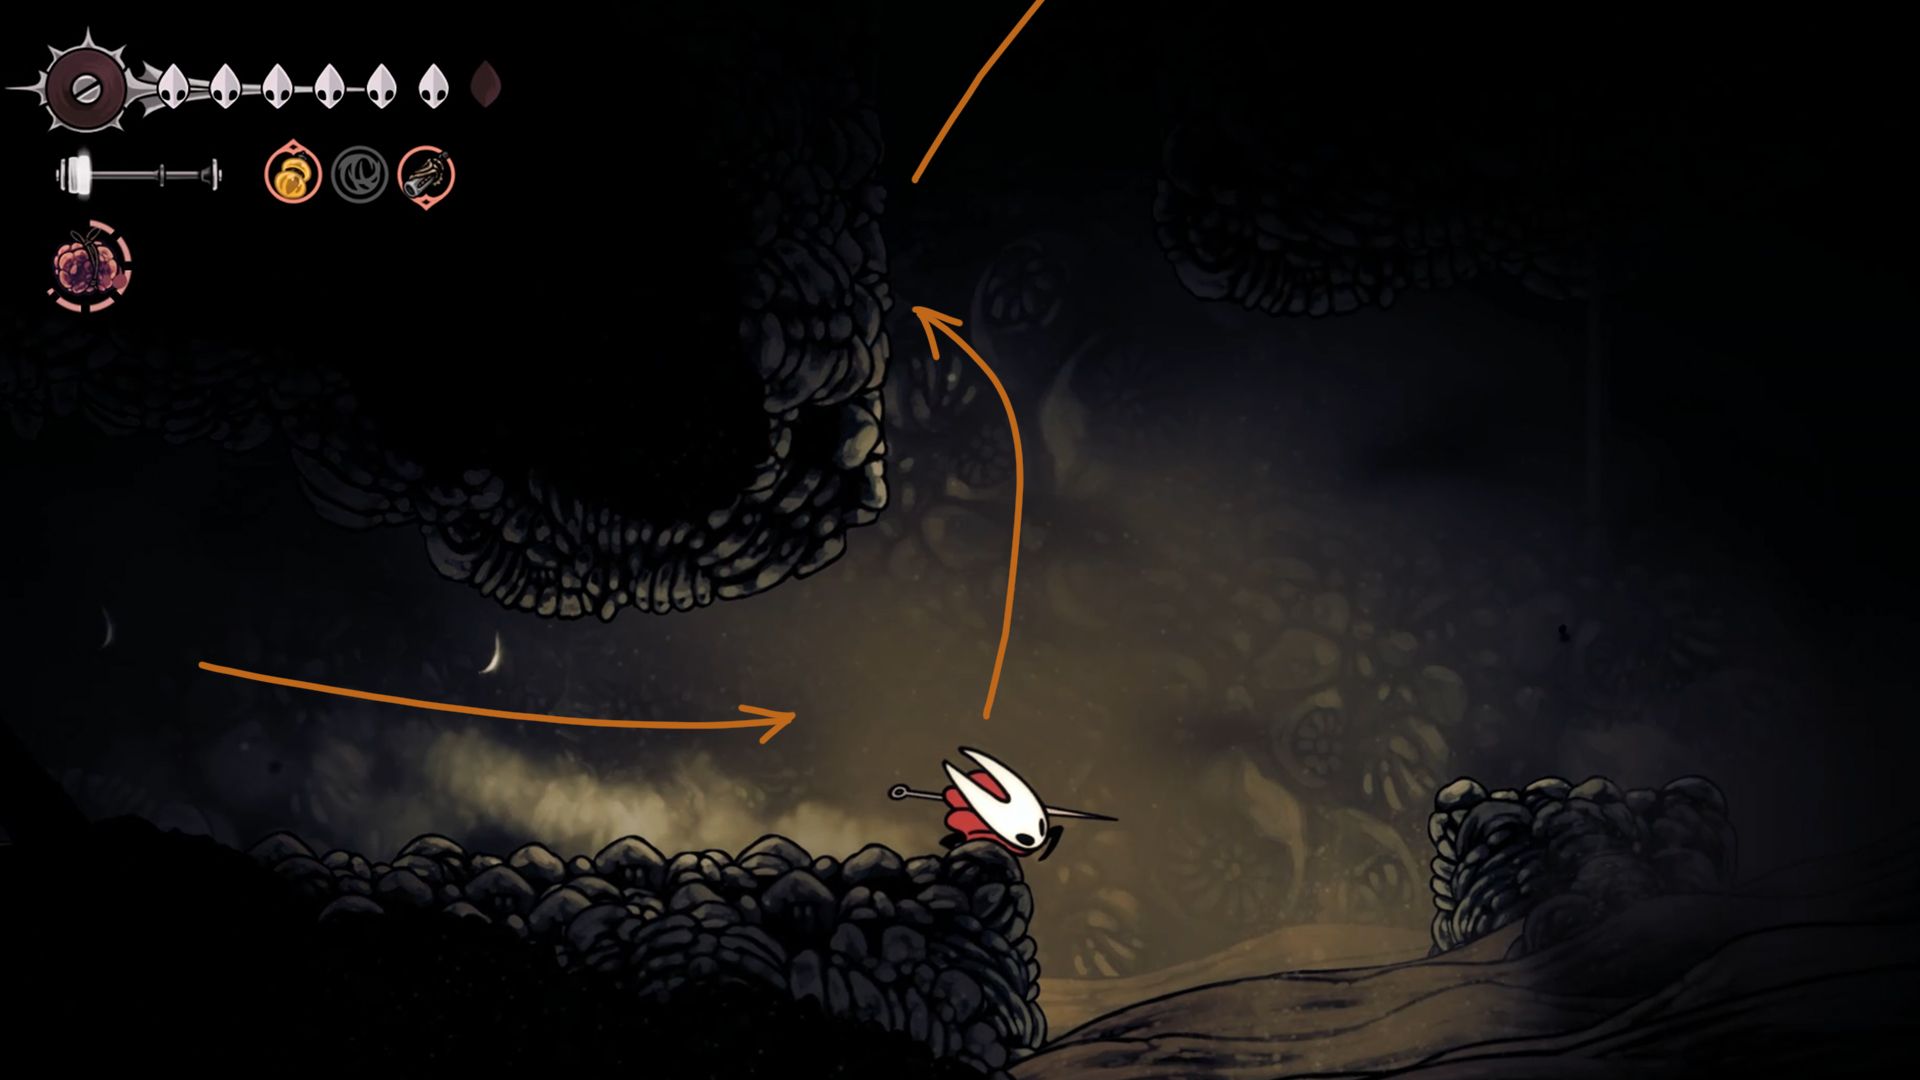
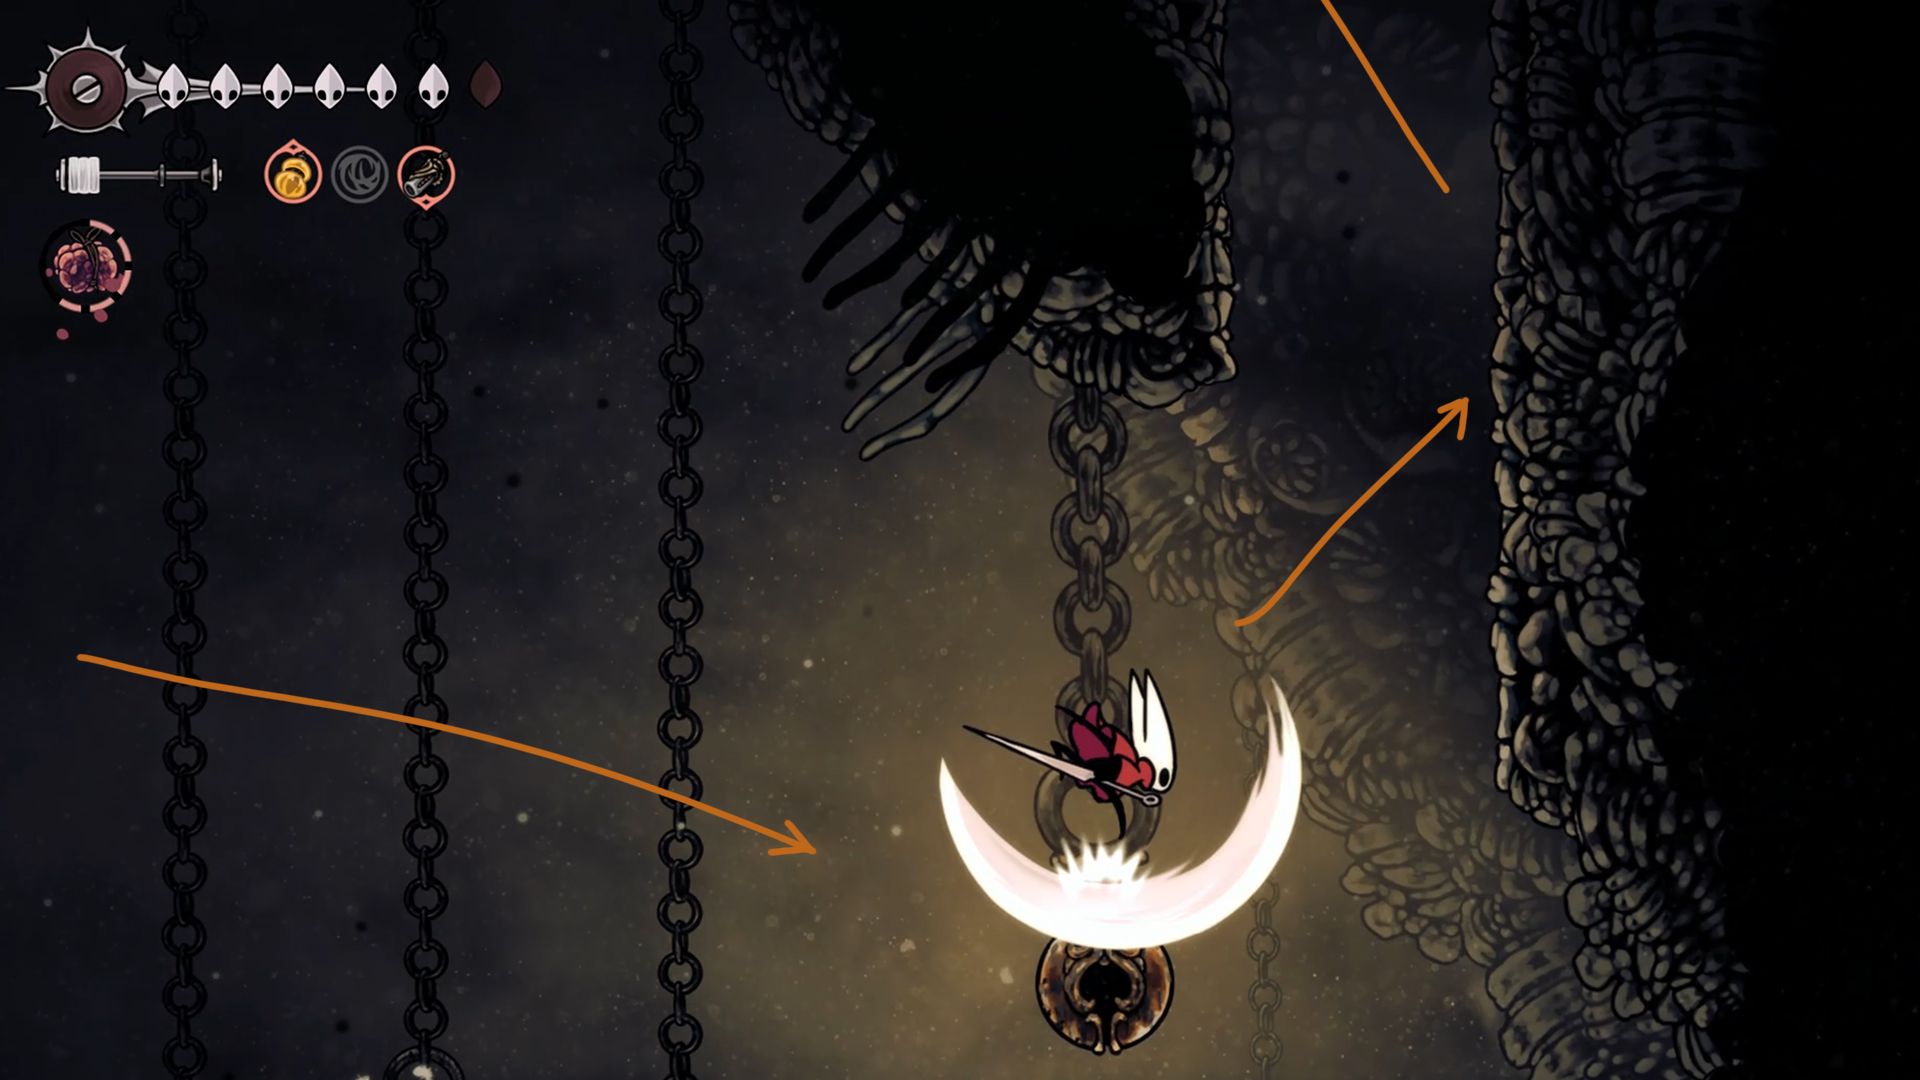
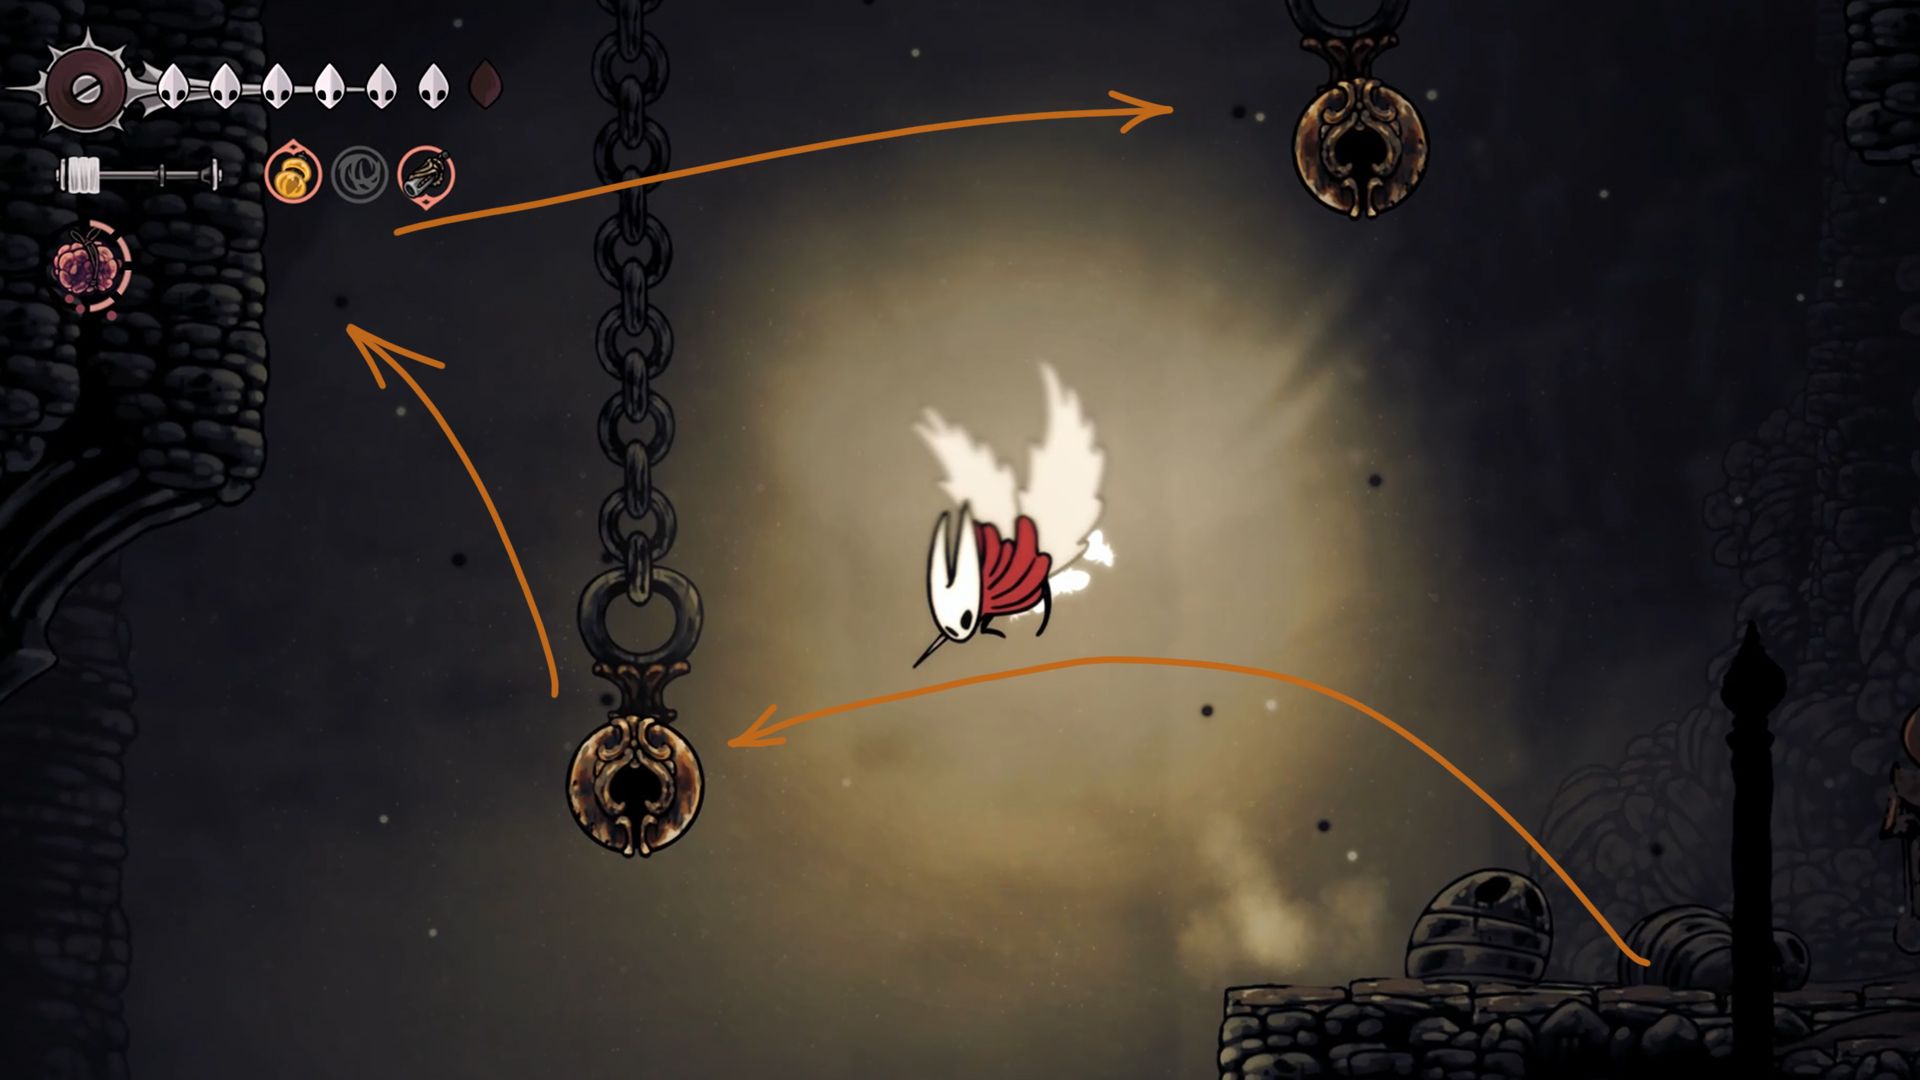
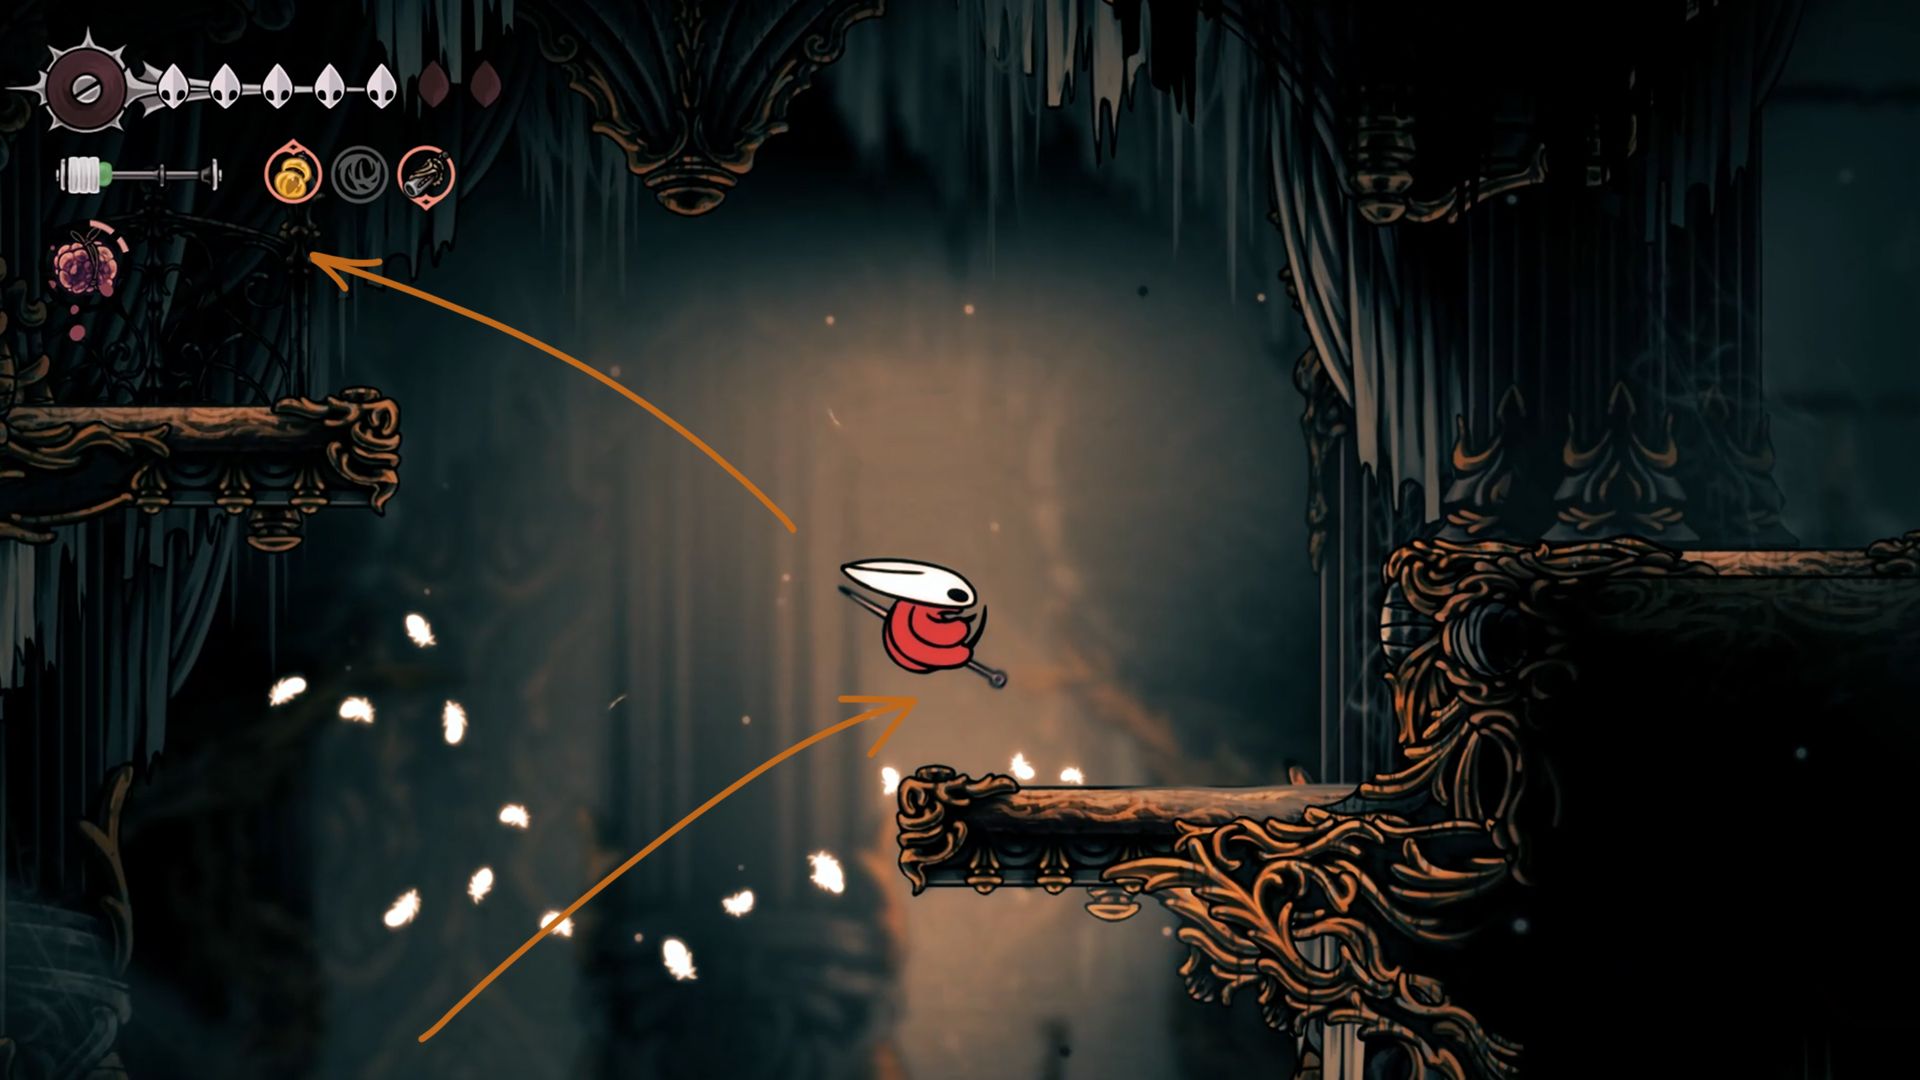
In the following section, steer clear of the enemy that appears. Instead, jump across to the adjacent platform. Afterward, make your way by jumping between the wall and the hovering post to ascend to the top of the post.
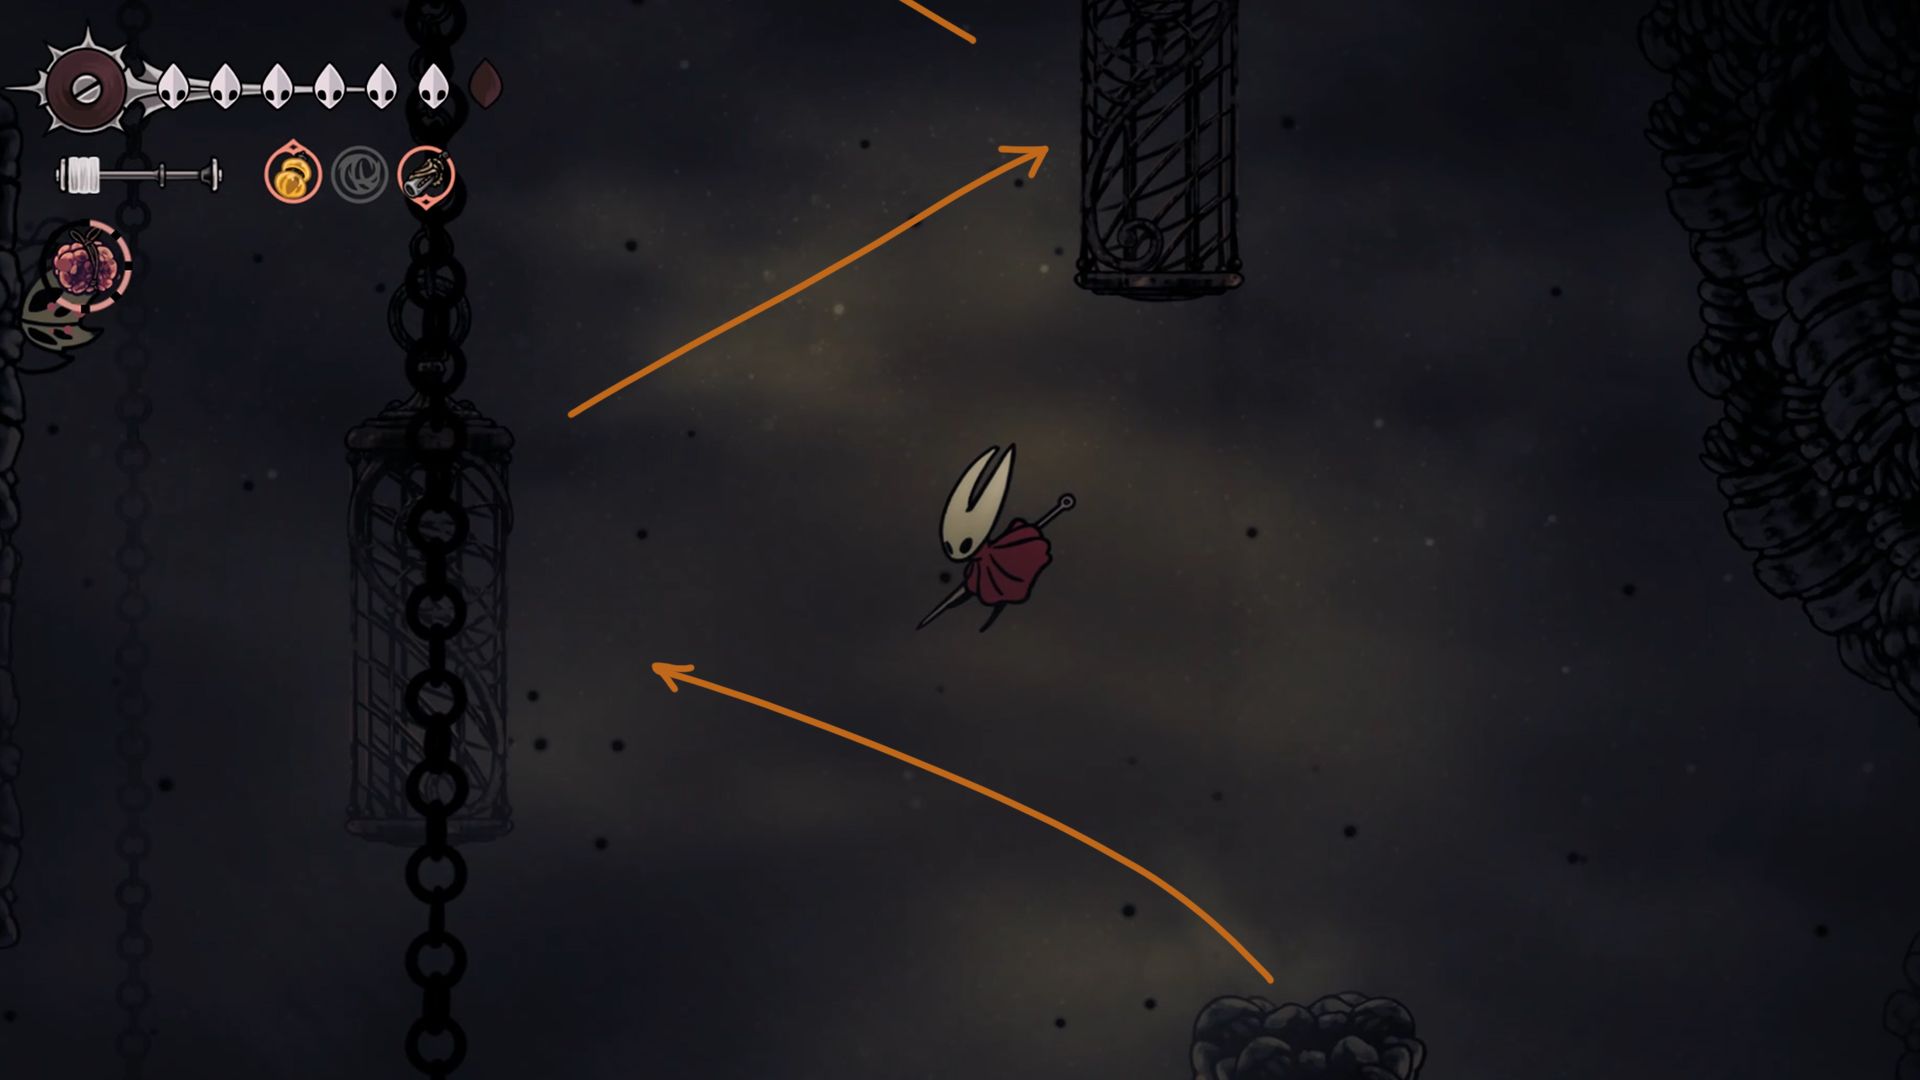
Now jump to the hanging cage in the middle, and keep hopping through all the cages above it.
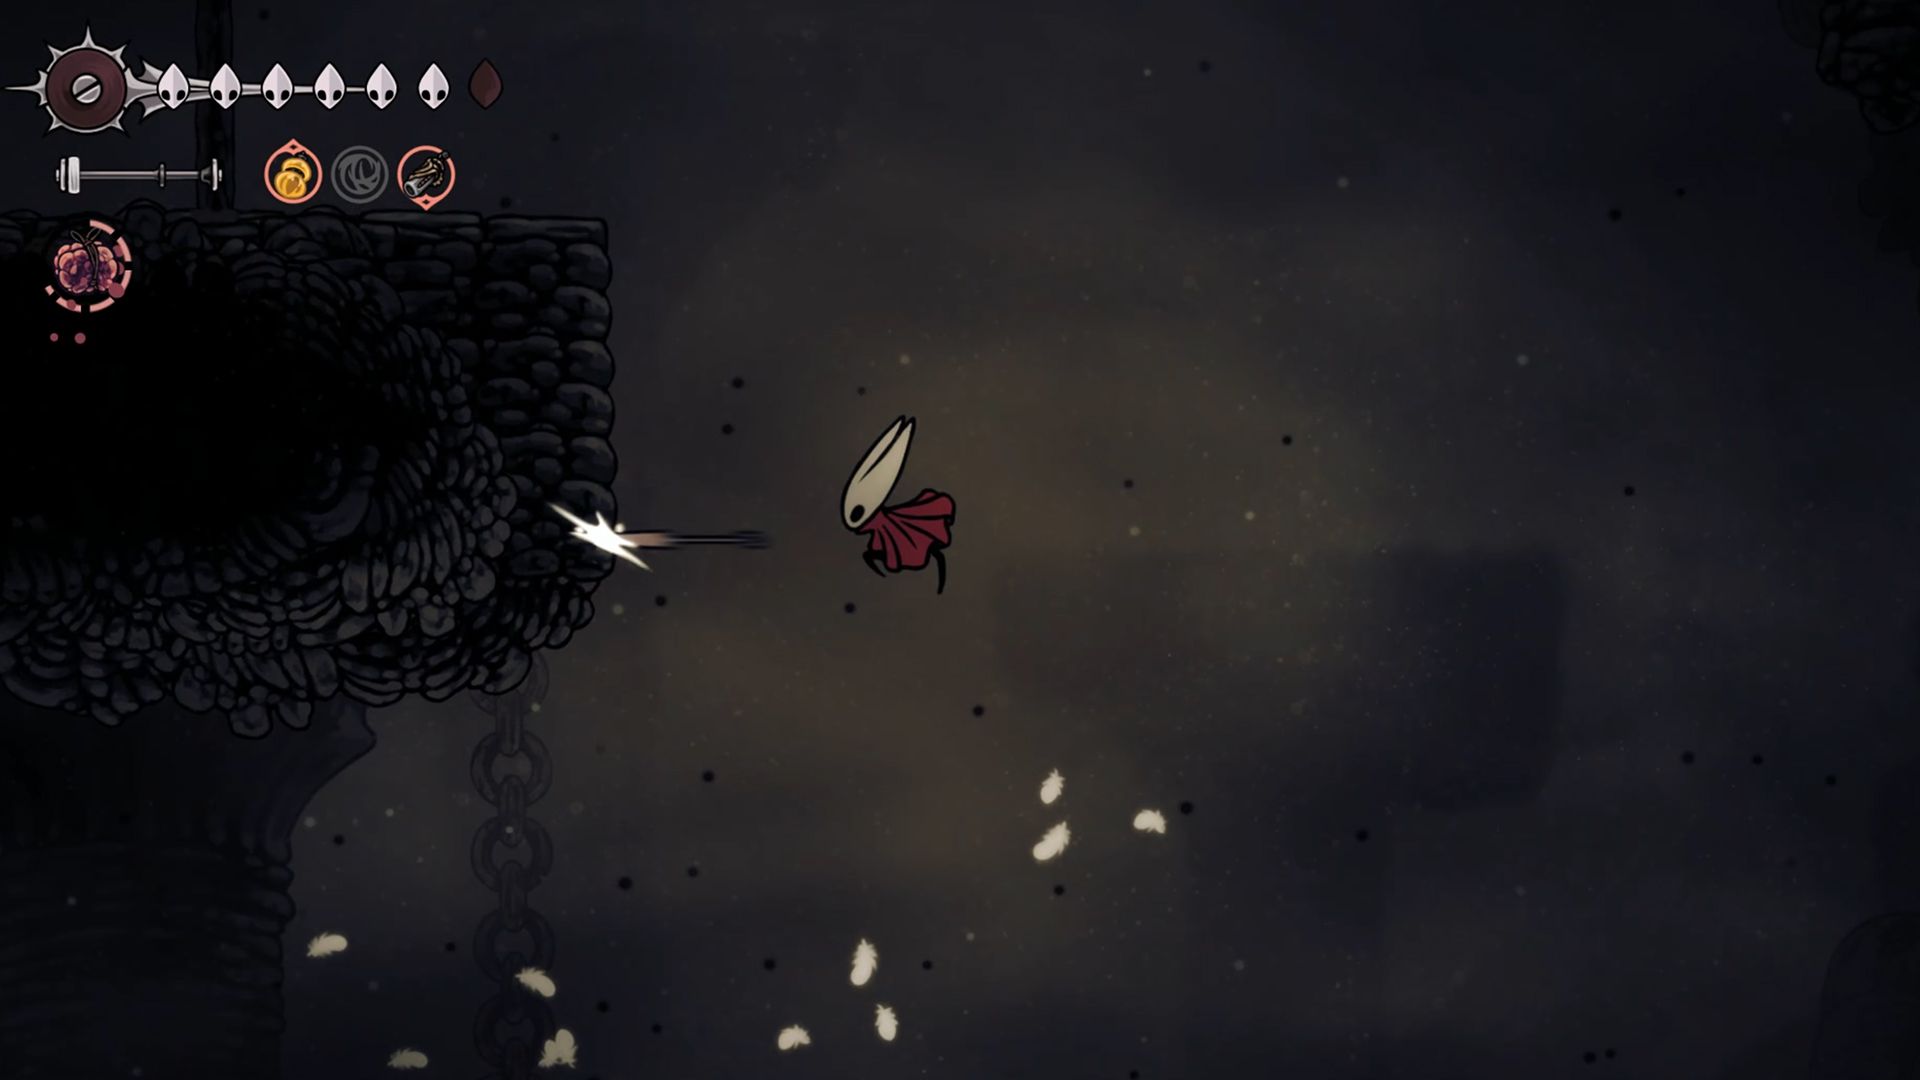
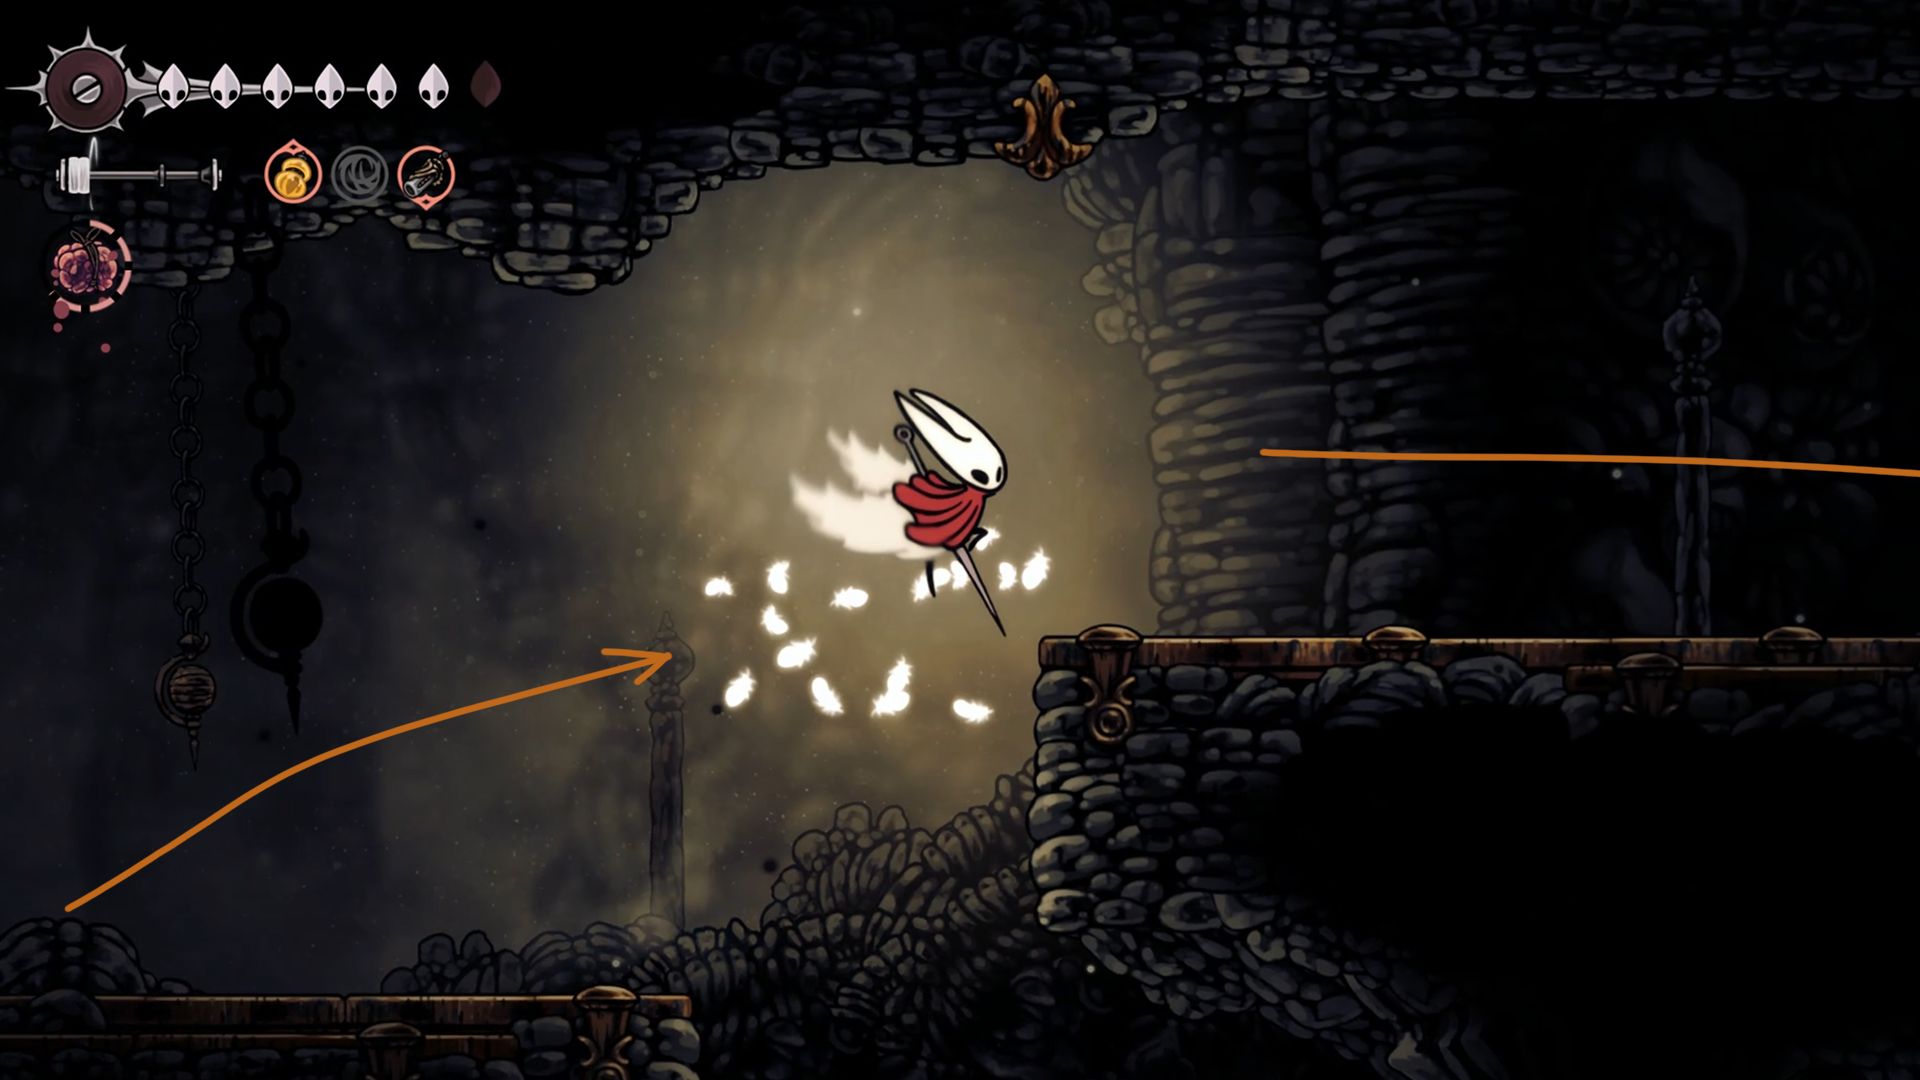
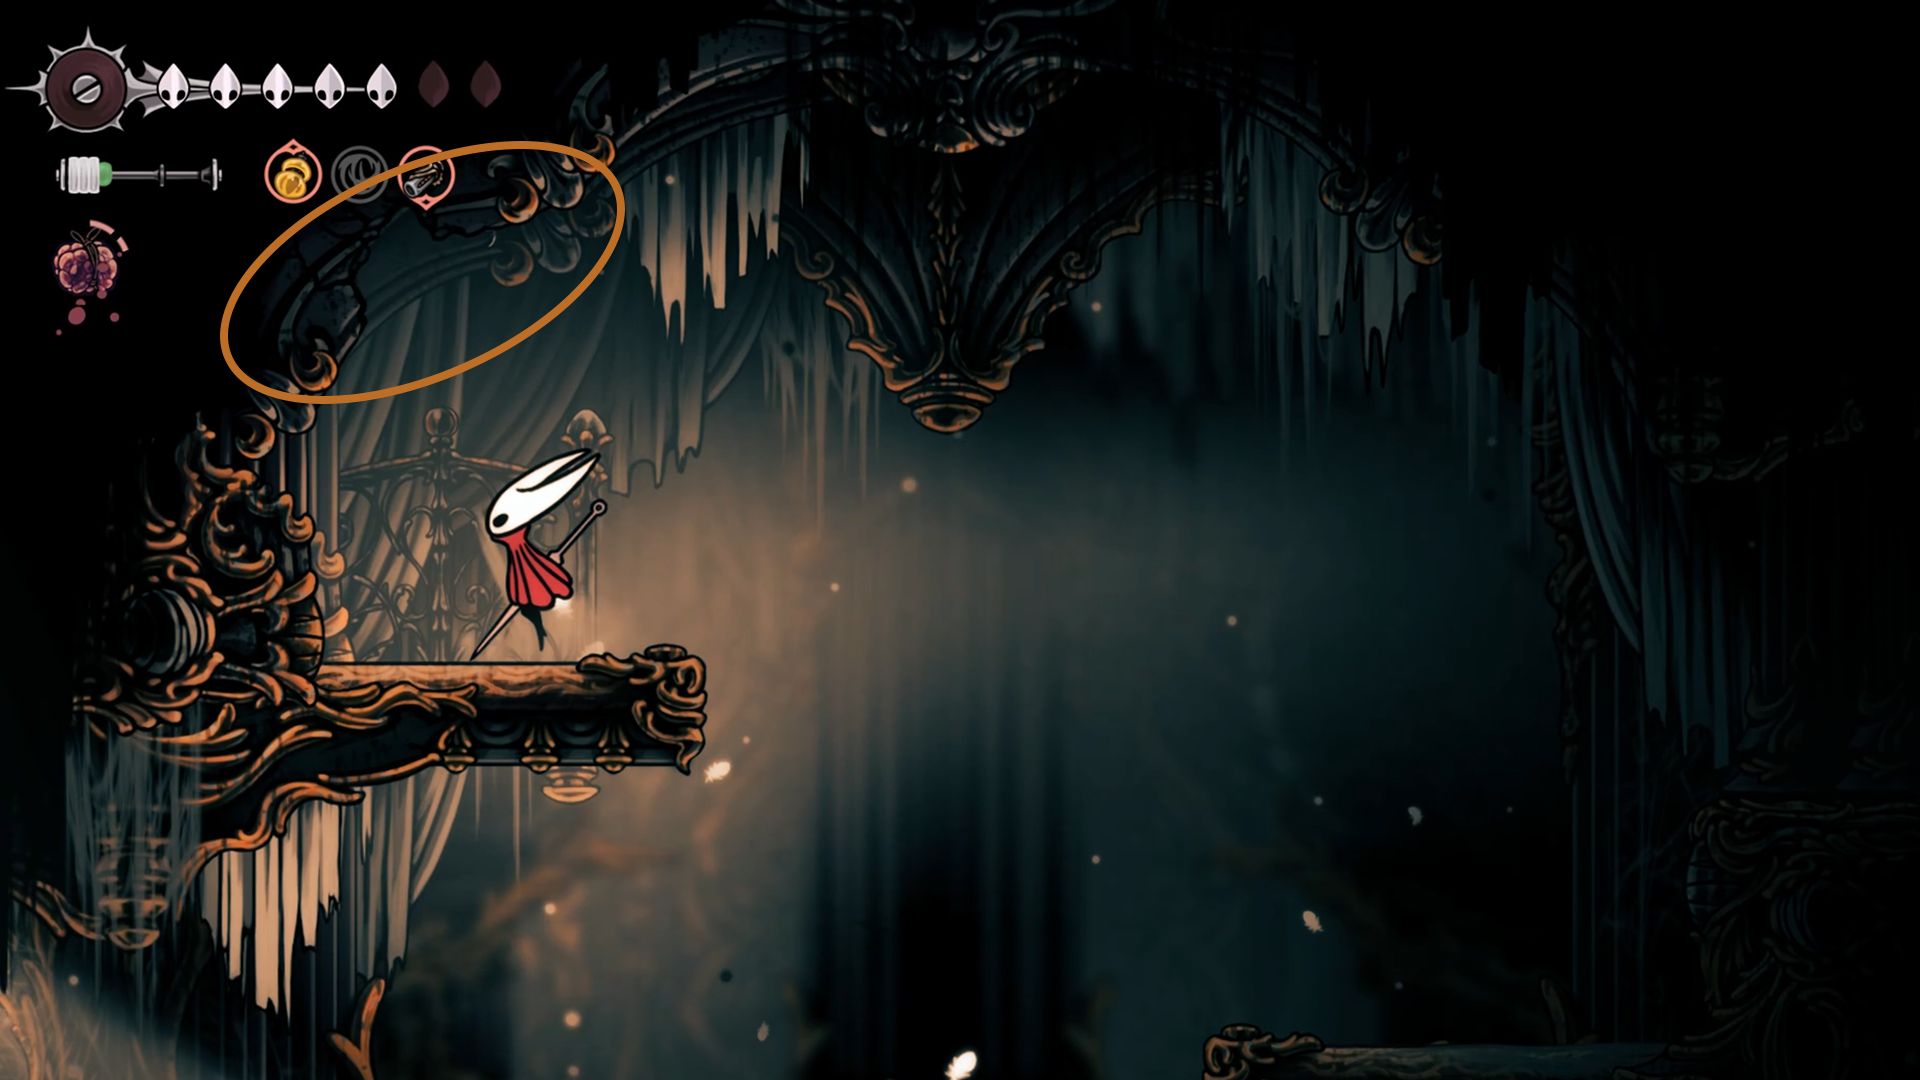
Following several enclosures, you’ll spot a swinging bell on your right; strike it to uncover the wall nearby and move towards the adjacent rock.
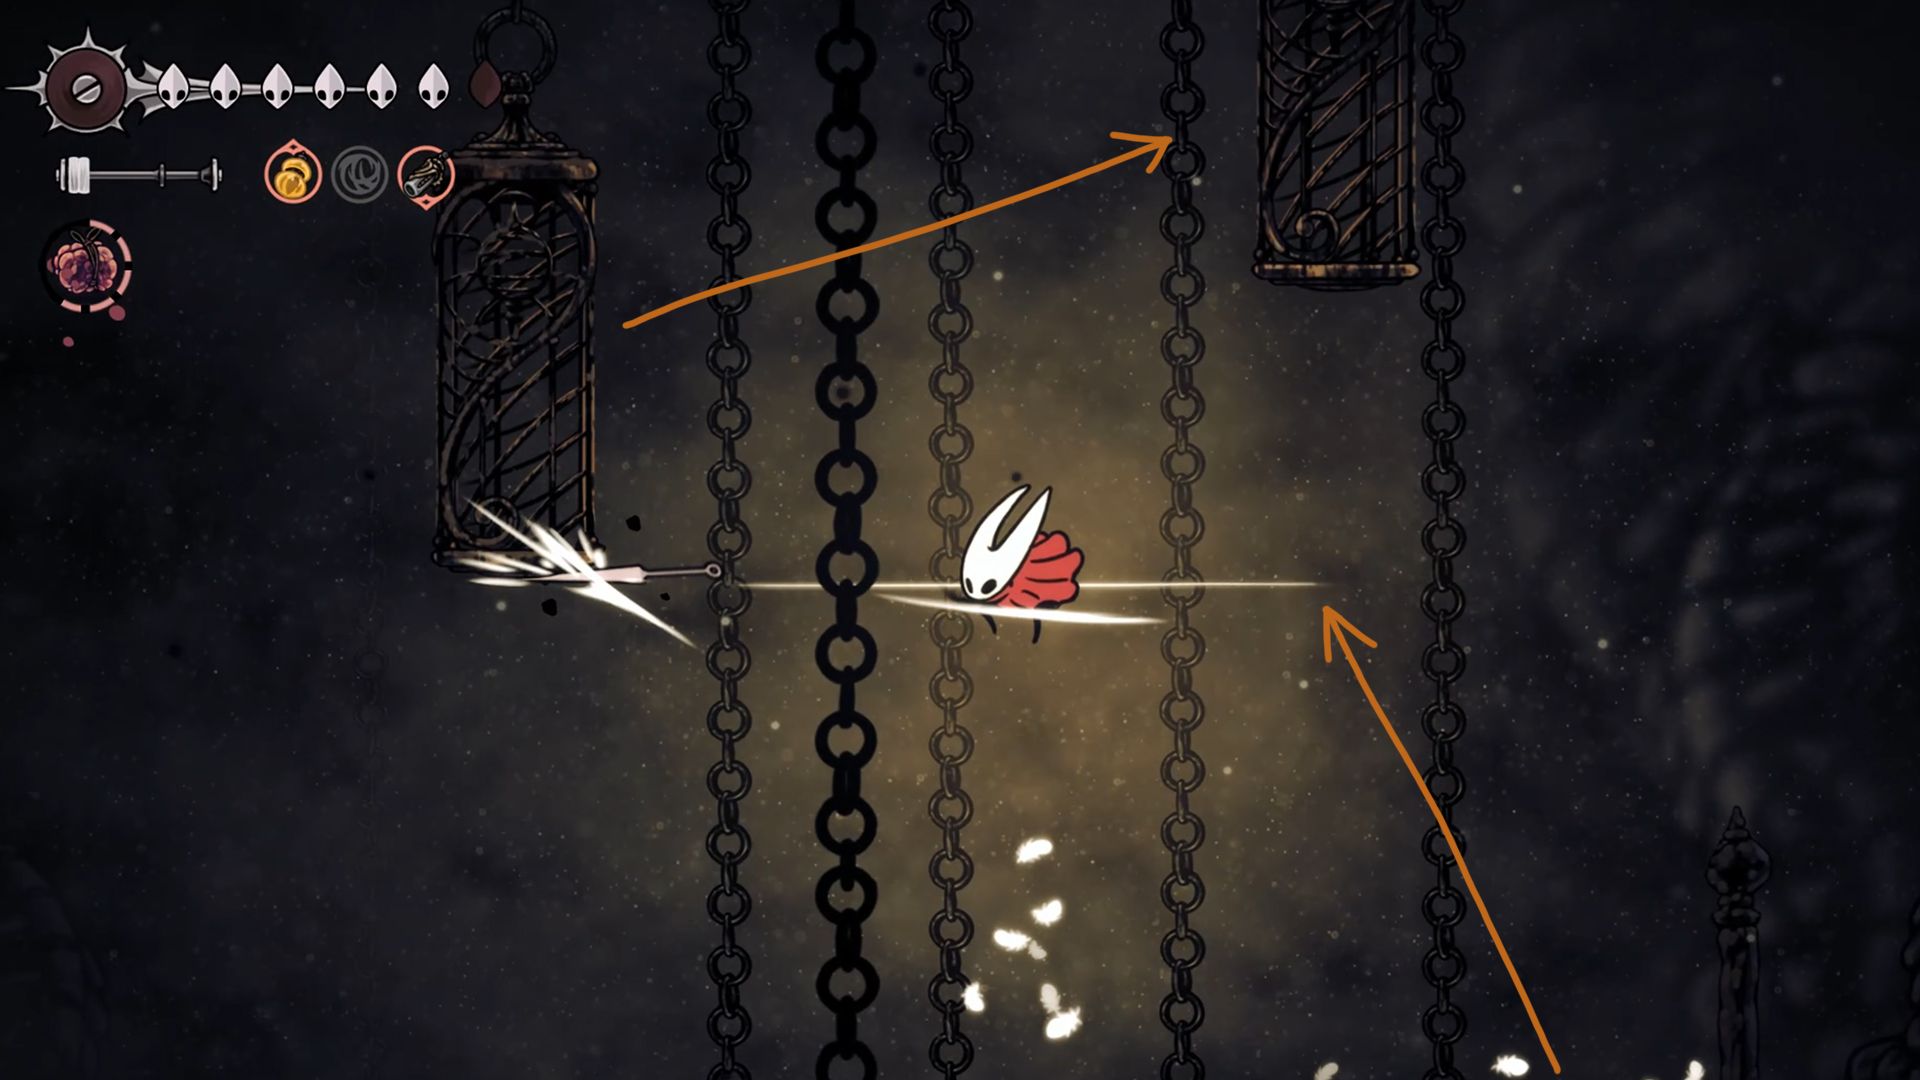
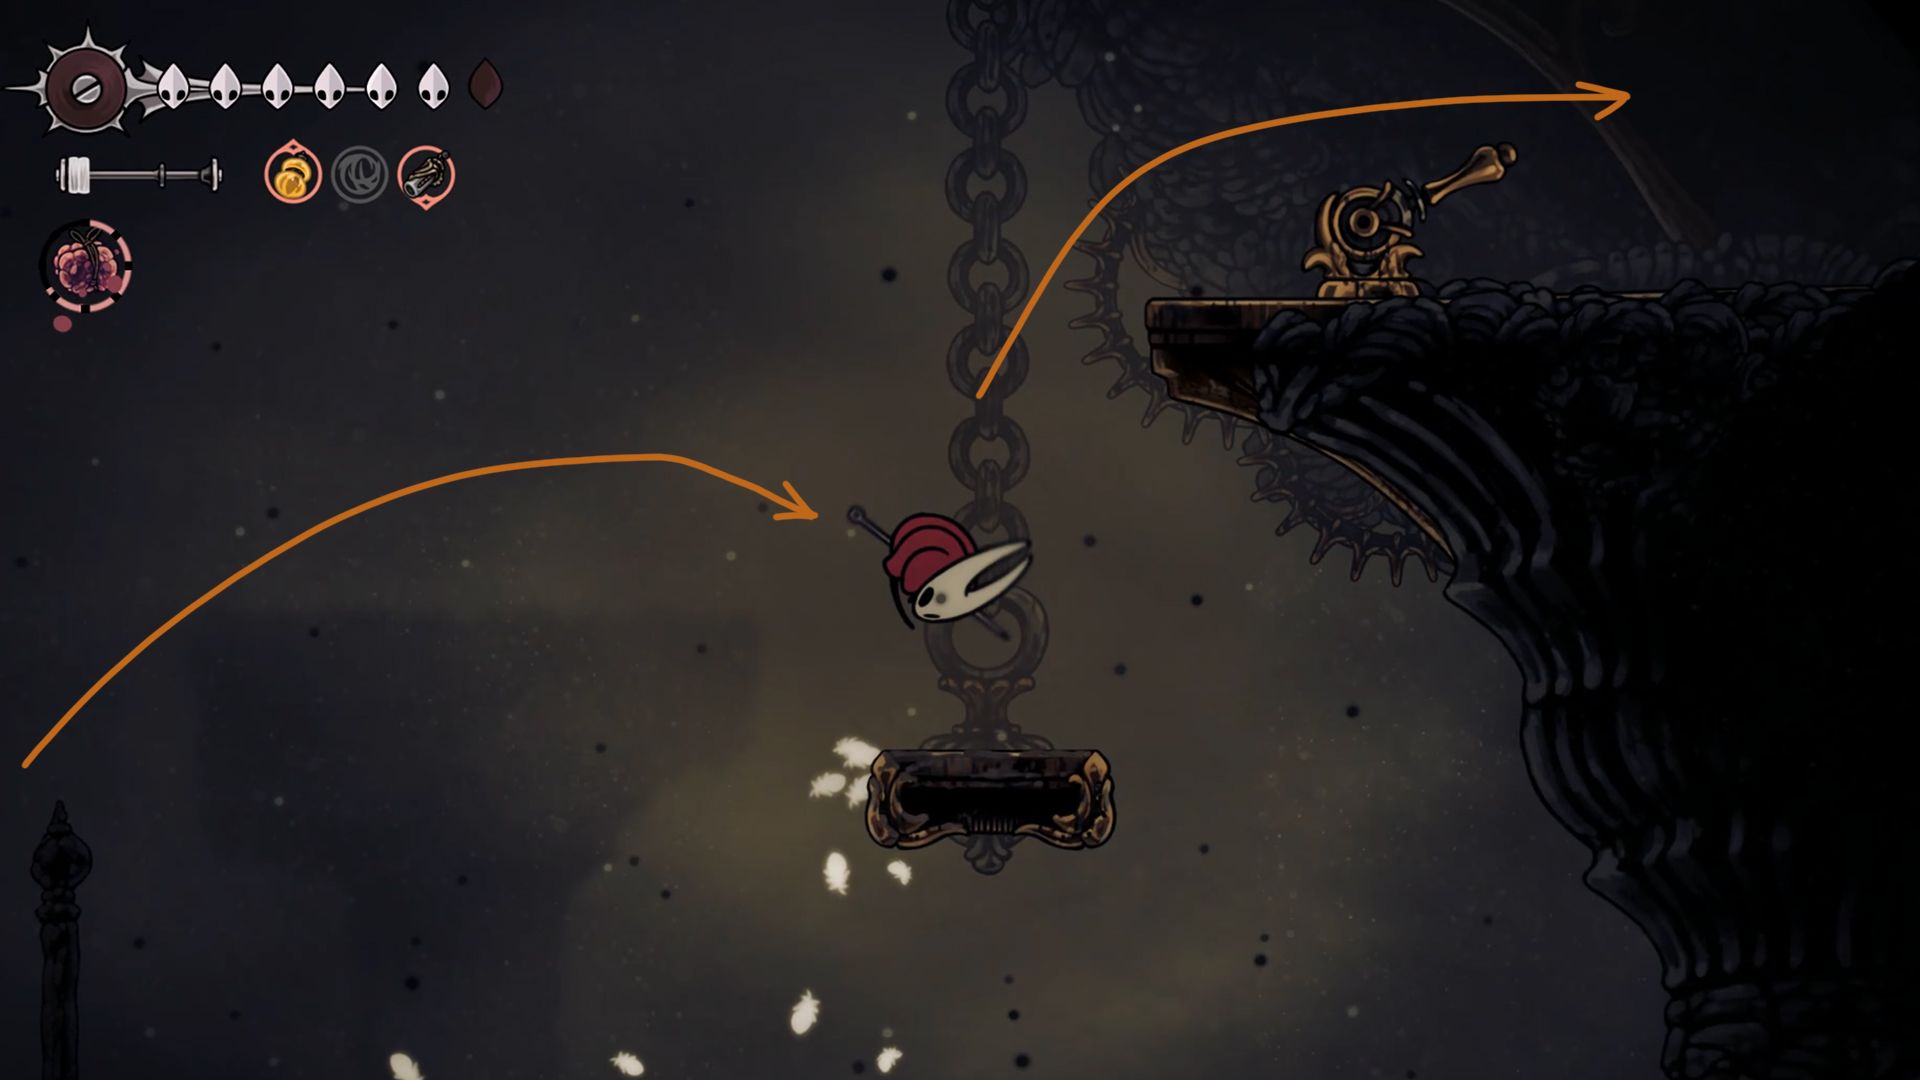
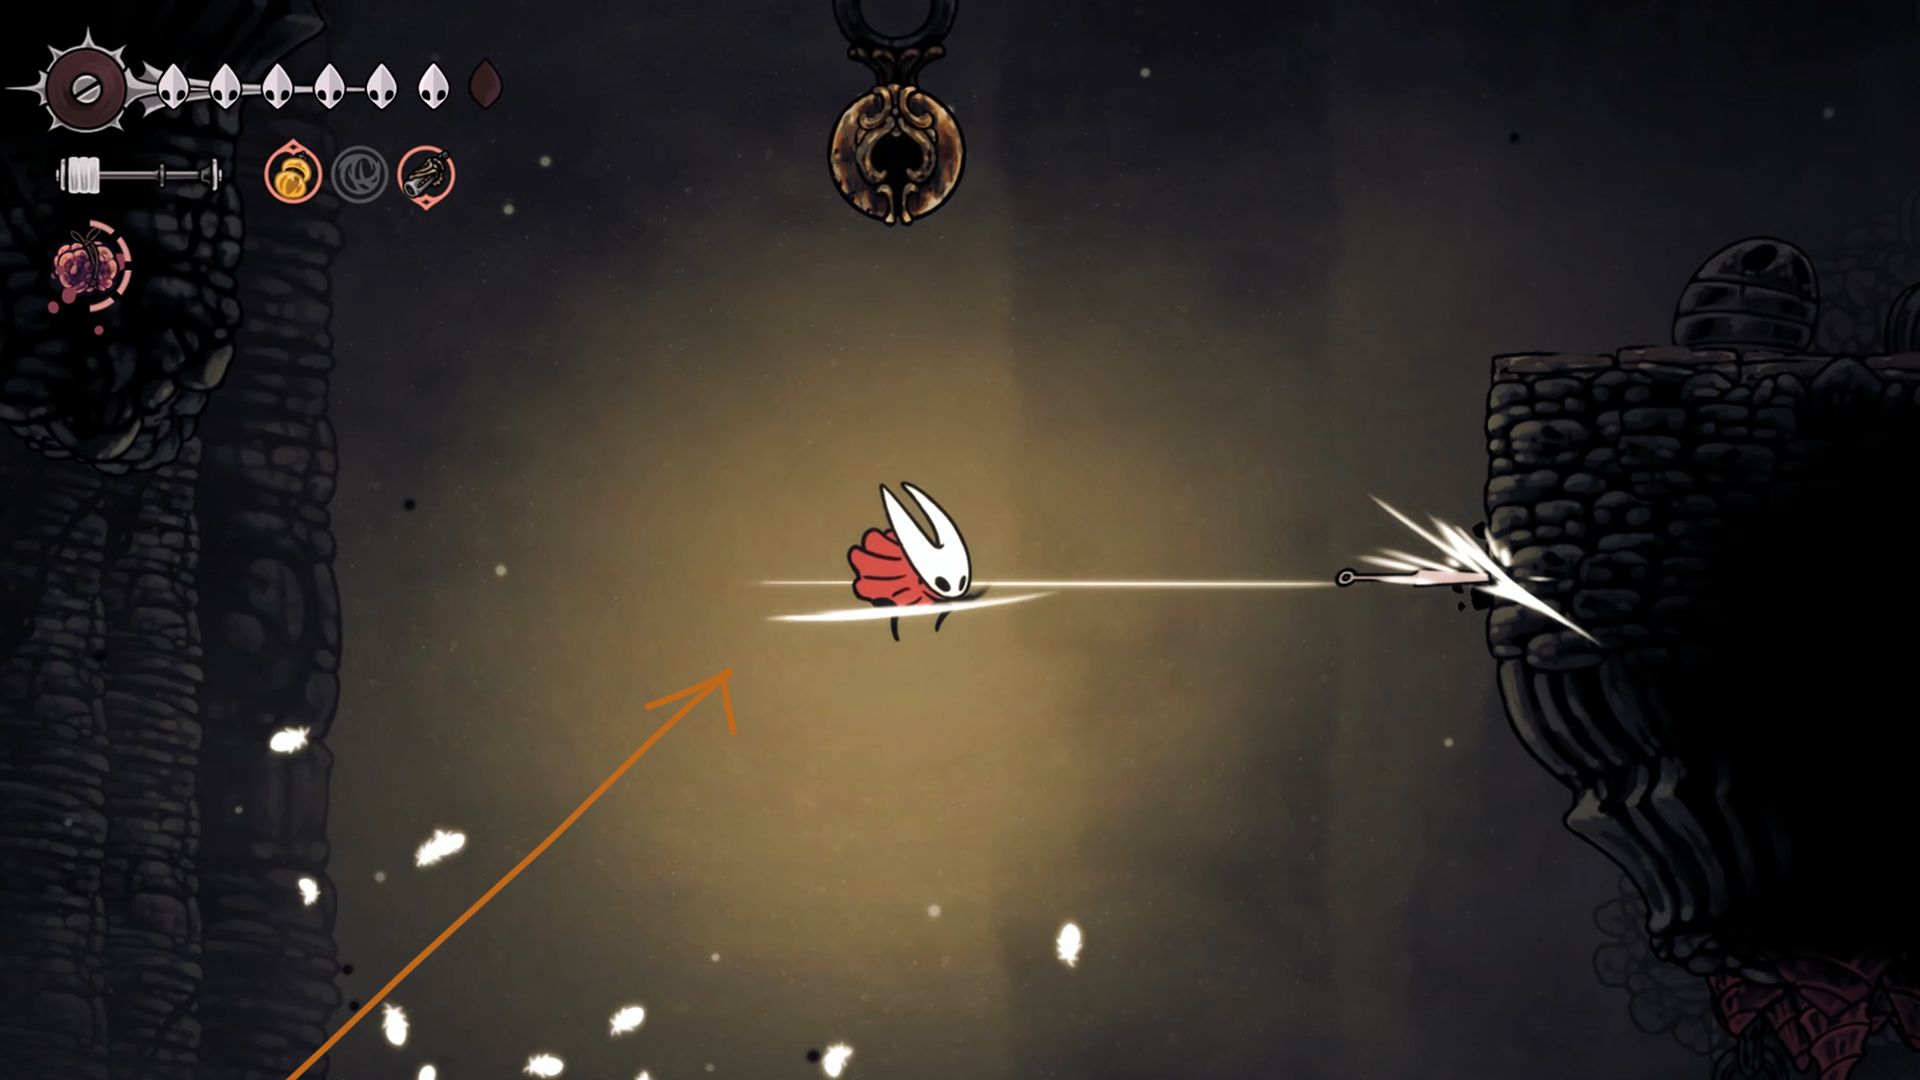
Attempt to jump twice, aiming as high as Hornet can leap. Then, fire a hook shot towards the cage situated to your left. If this proves challenging, you always have the option of proceeding to an easier path on the opposite side. Afterward, continue moving through the cages and obstacles, using the hookshot to lift Hornet higher and closer to her goal.
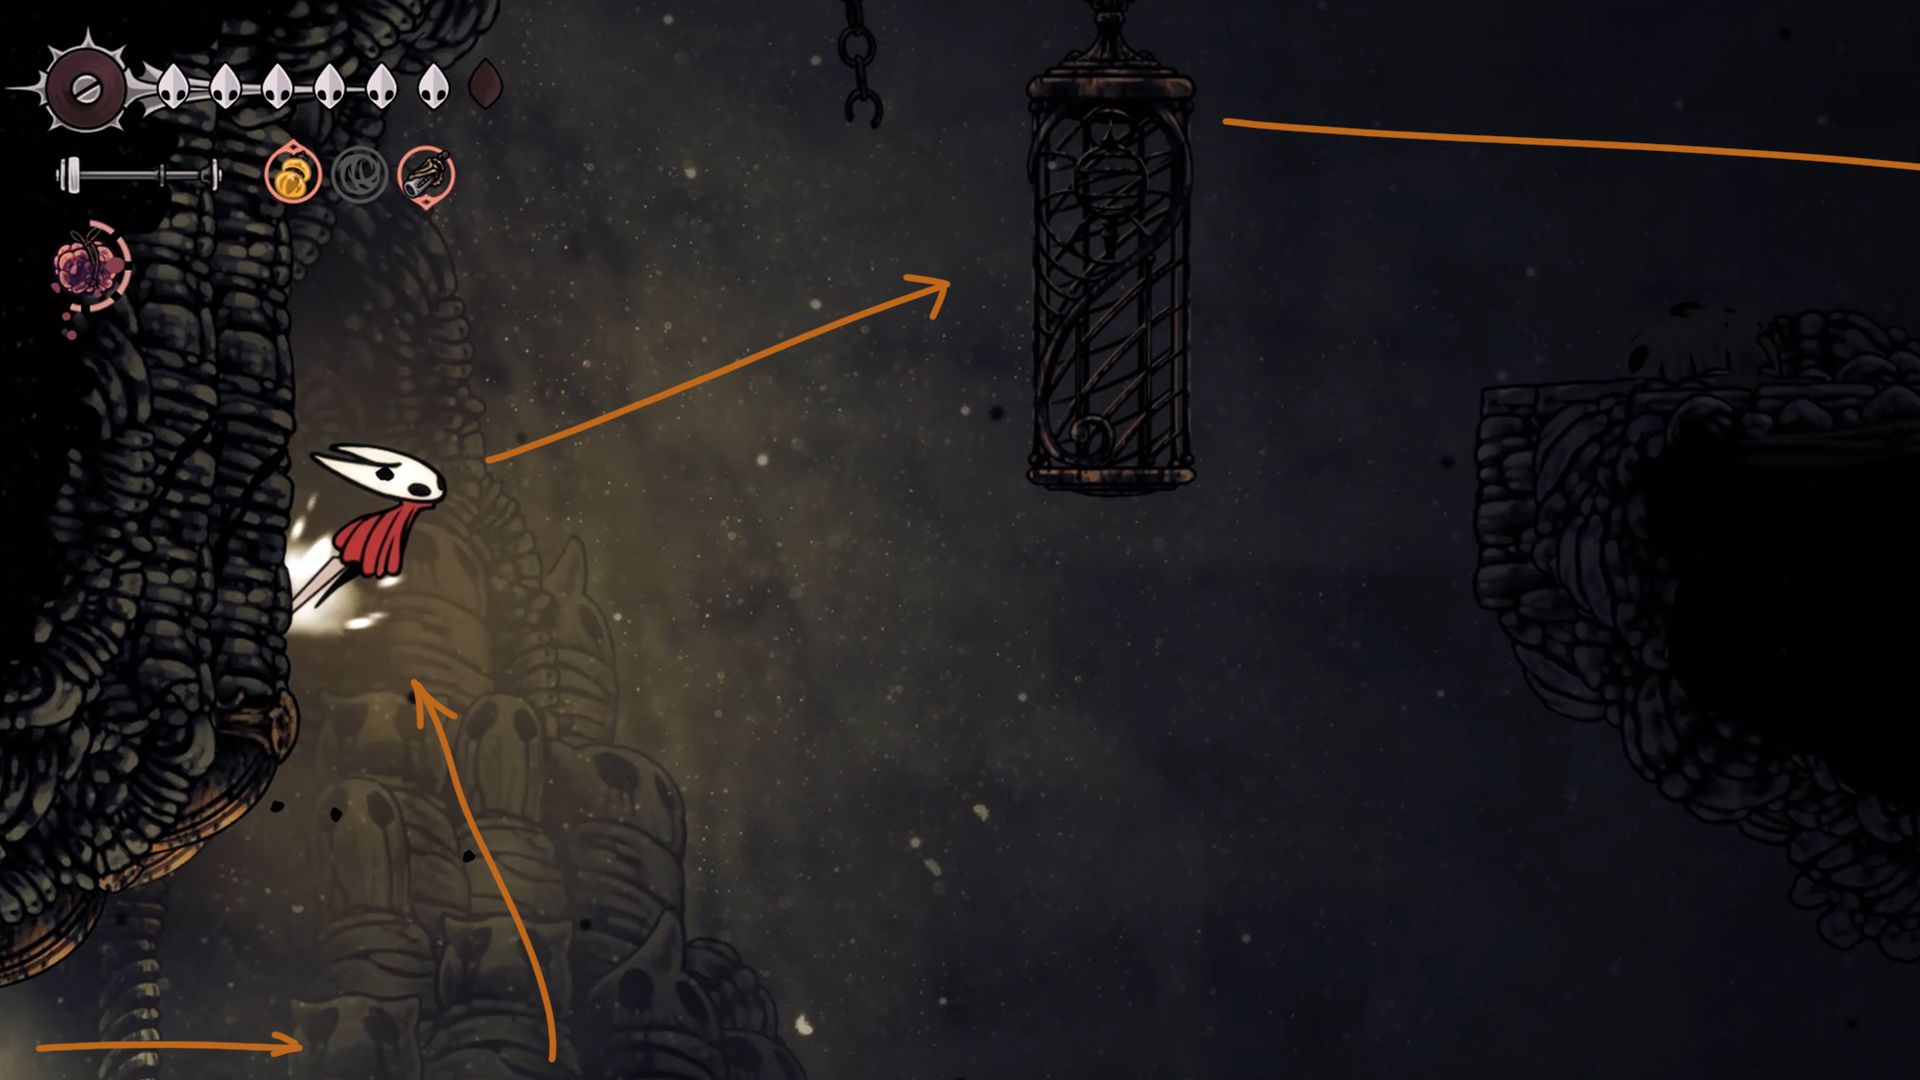
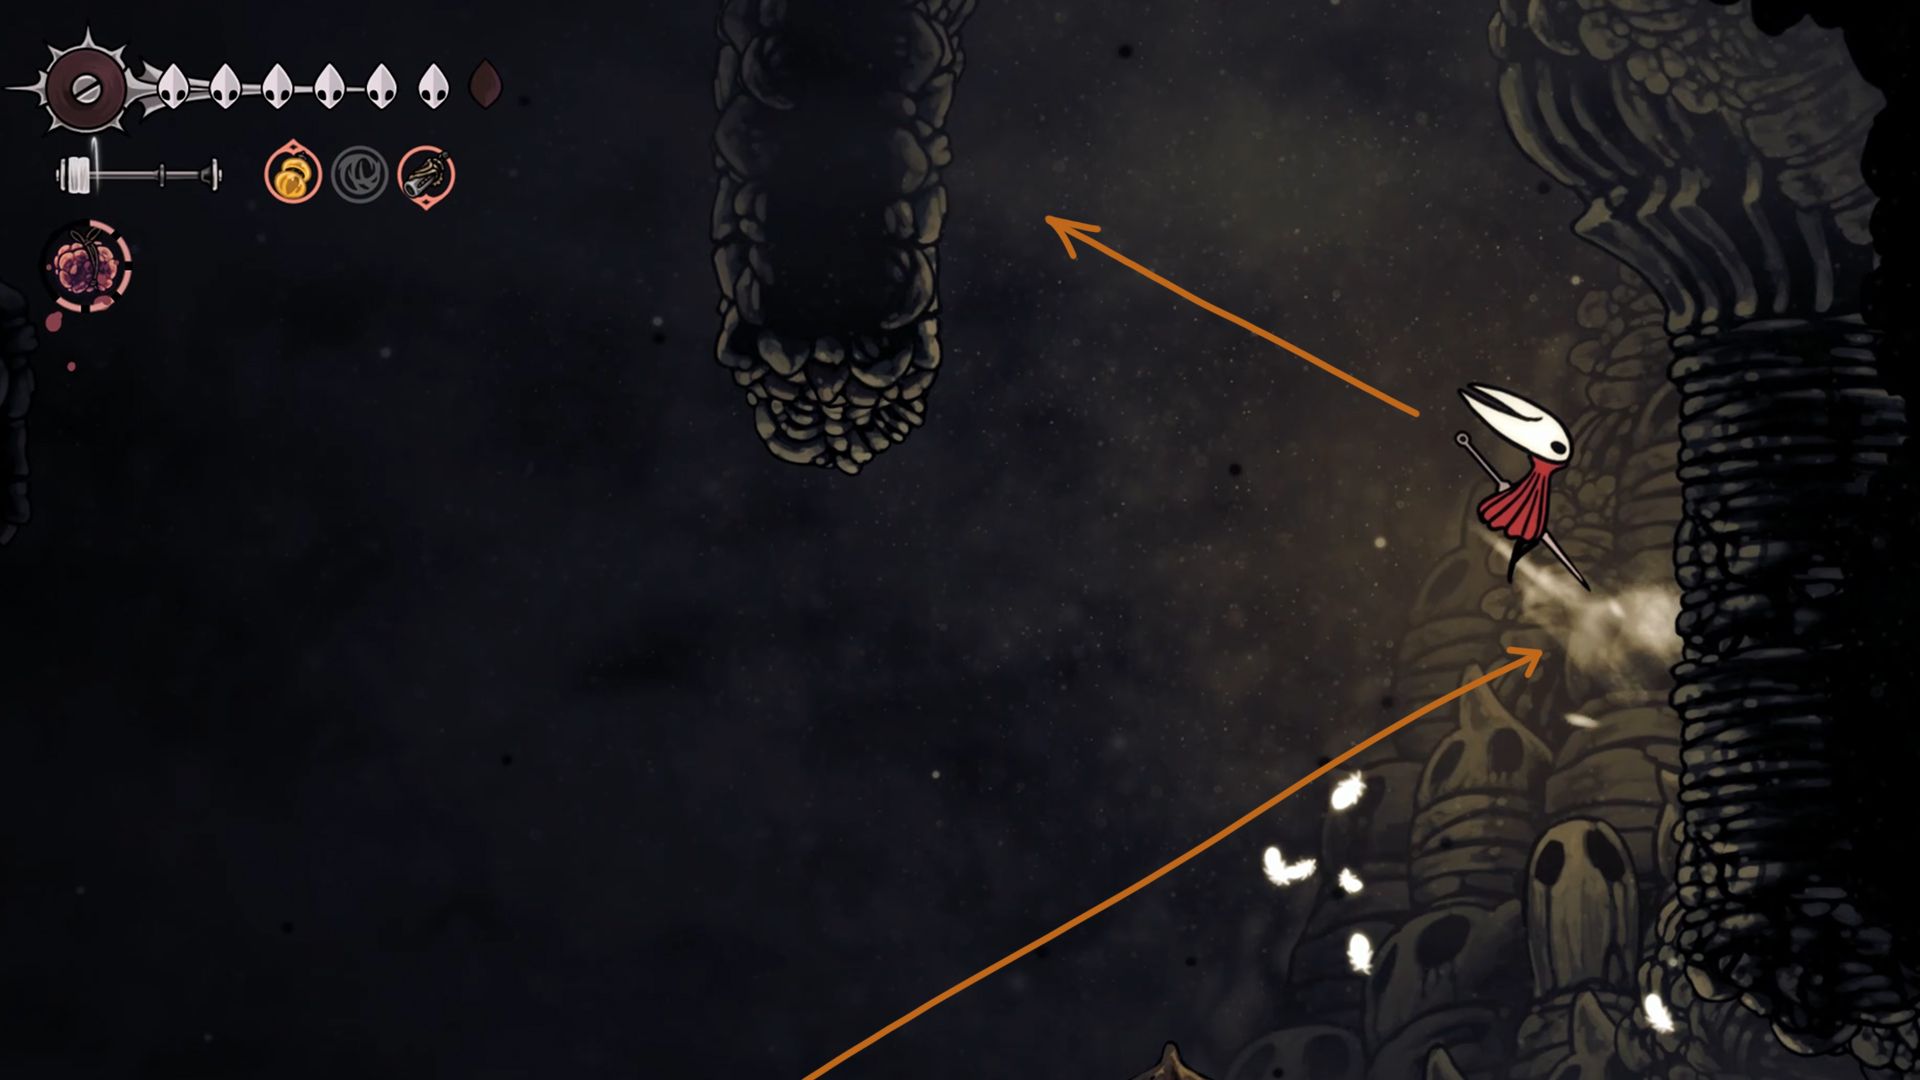
Before reaching some tranquil pathways for running, swiftly scale the wall above Hornet and aim for the cage. Continue moving towards the right side, using one floating rock after another as stepping stones until you get to the two hanging bells at the end. Tap them to propel yourself to the adjacent wall, then to the rock nearby.

In this crucial section, Hornet finds himself faced with two adversaries barring his path to ring the bell overhead. There are essentially two options to navigate through this challenge:
1. Direct confrontation, where Hornet engages and defeats both enemies.
2. A strategic route that bypasses the enemies entirely, if one is available.
- Jump-attack the shielded (Judge) enemy to reach the bell.
- Avoid the enemy by leaping over them and head to the rock on the left. It will provide a safe jump to the bell to reach the upper ledge.
Approach from the opposite direction, jump twice, then grab hold of the rock located on your right-hand side to navigate around a significant part of this area using parkour.
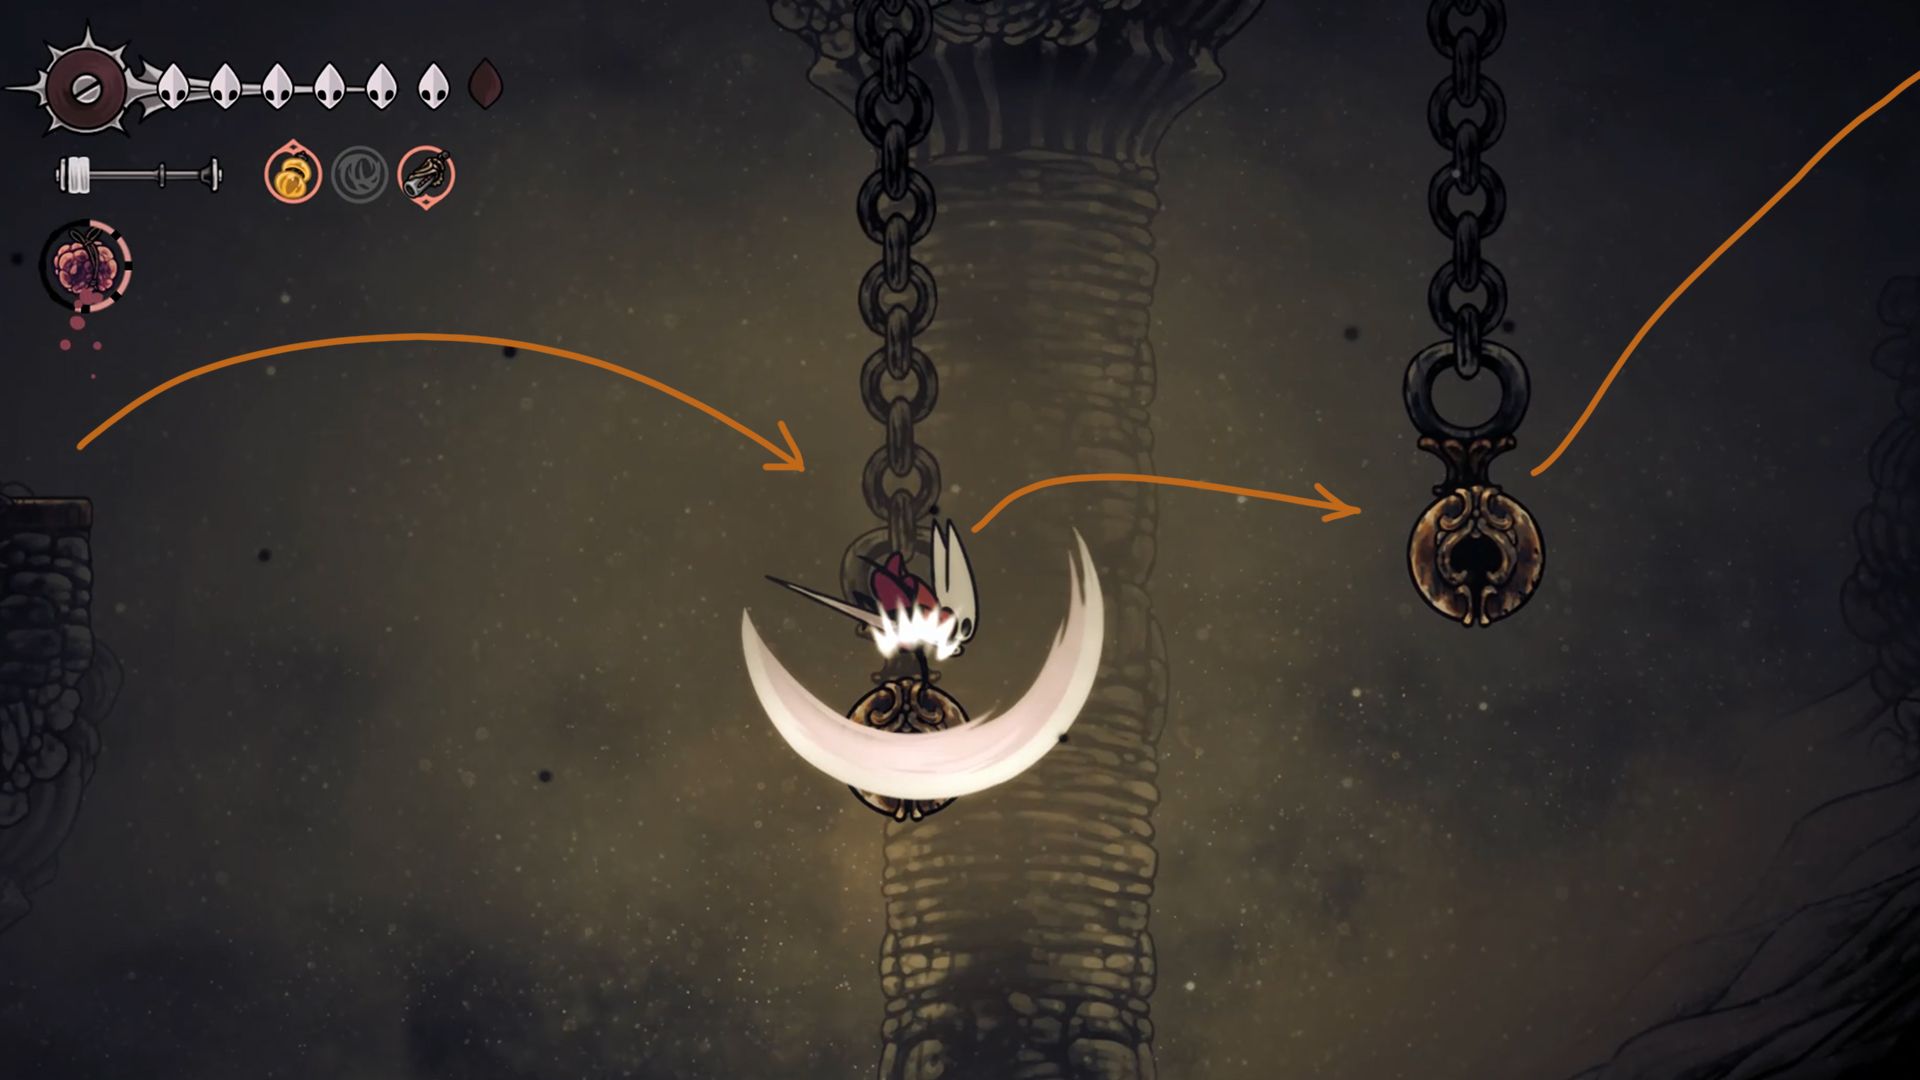
For the last step, aim at the bell located on the left to make it hit the wall. Next, focus on the second bell to propel yourself onto the upper platform. Once that’s done, feel free to continue your run towards the Grand Gate without any concerns.
Grand Gate and Choral Chambers
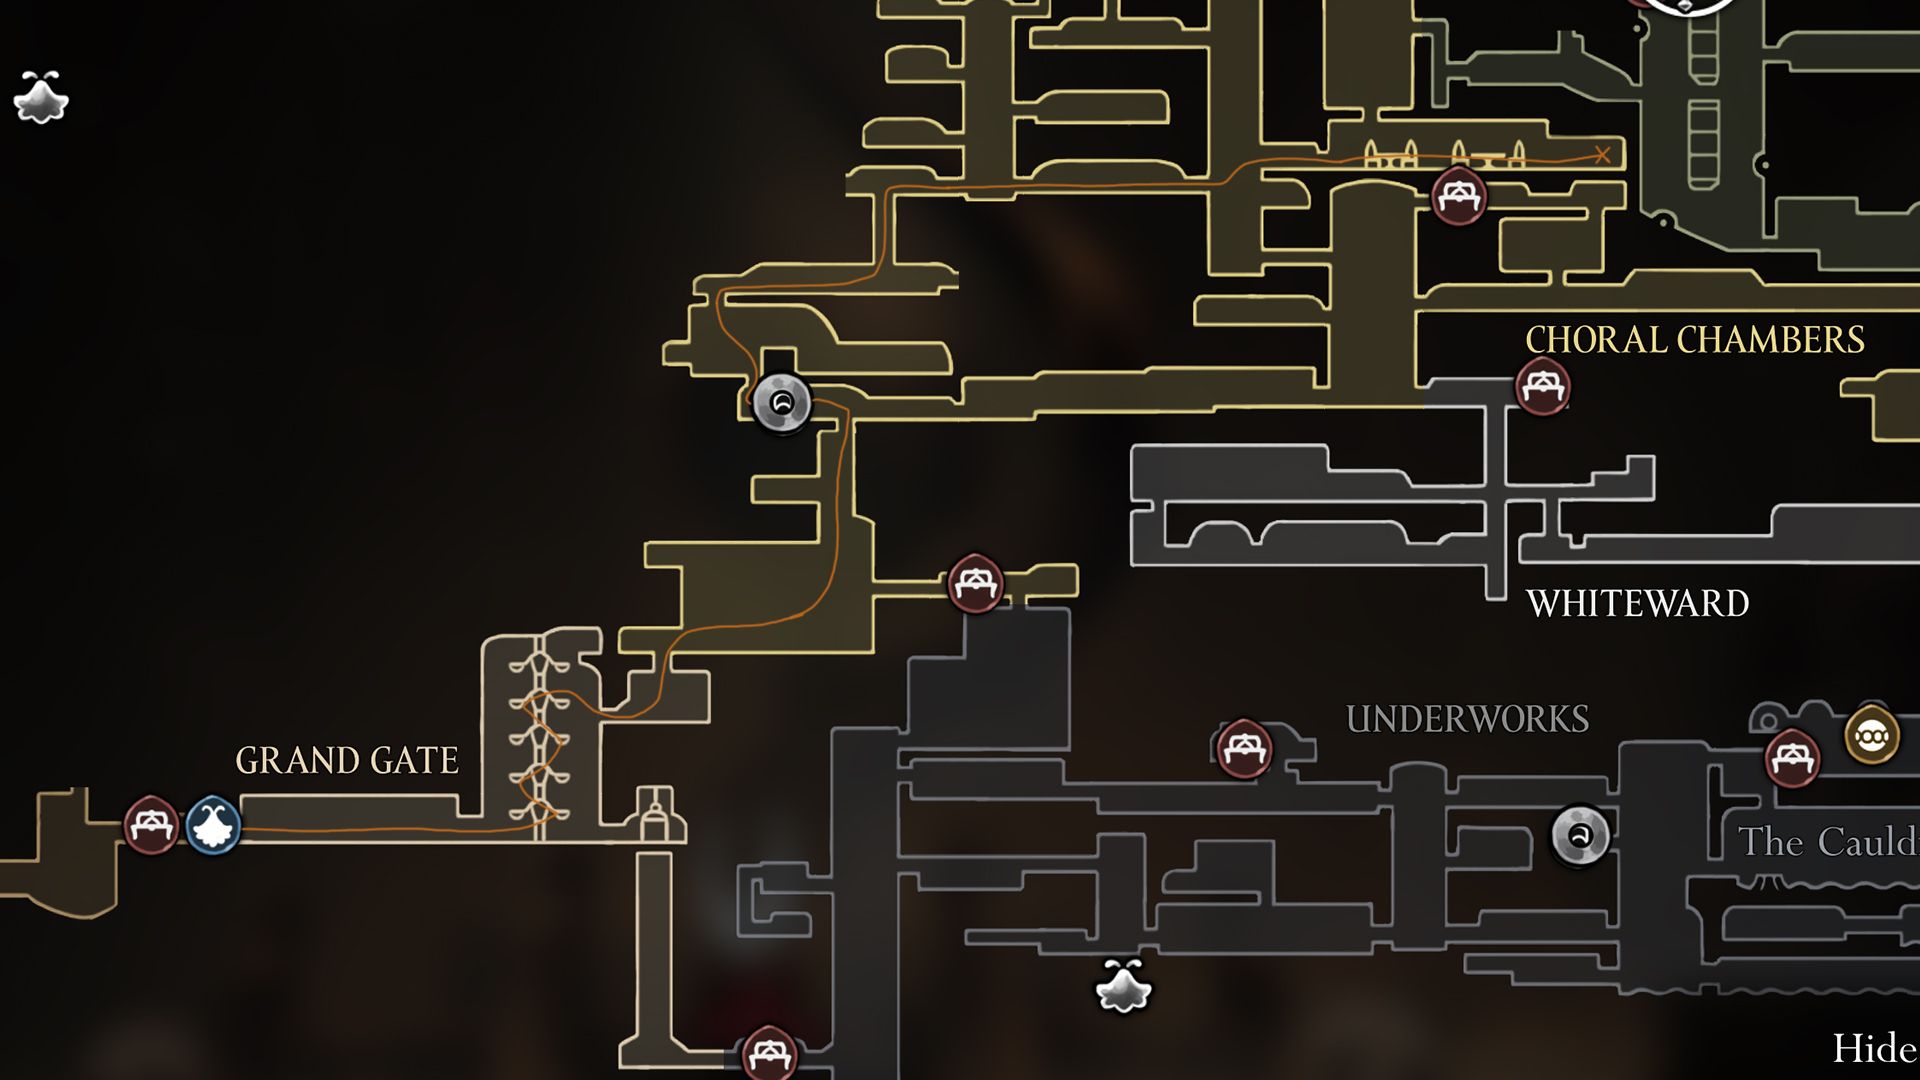
Within the Grand Gate, Hornet can leap and run using parkour to climb a shortcut straight to the Choral Chambers, bypassing the Underworks region. Exit from this compact room is only possible by going upwards, thus placing Hornet in the Choral Chambers. From here, she can effortlessly hop around the area, focusing on reaching the Ventrica chamber above. It’s advisable to dodge enemies as some may obstruct her path.
This shortcut from Grand Gate to Choral Chambers must be opened beforehand.
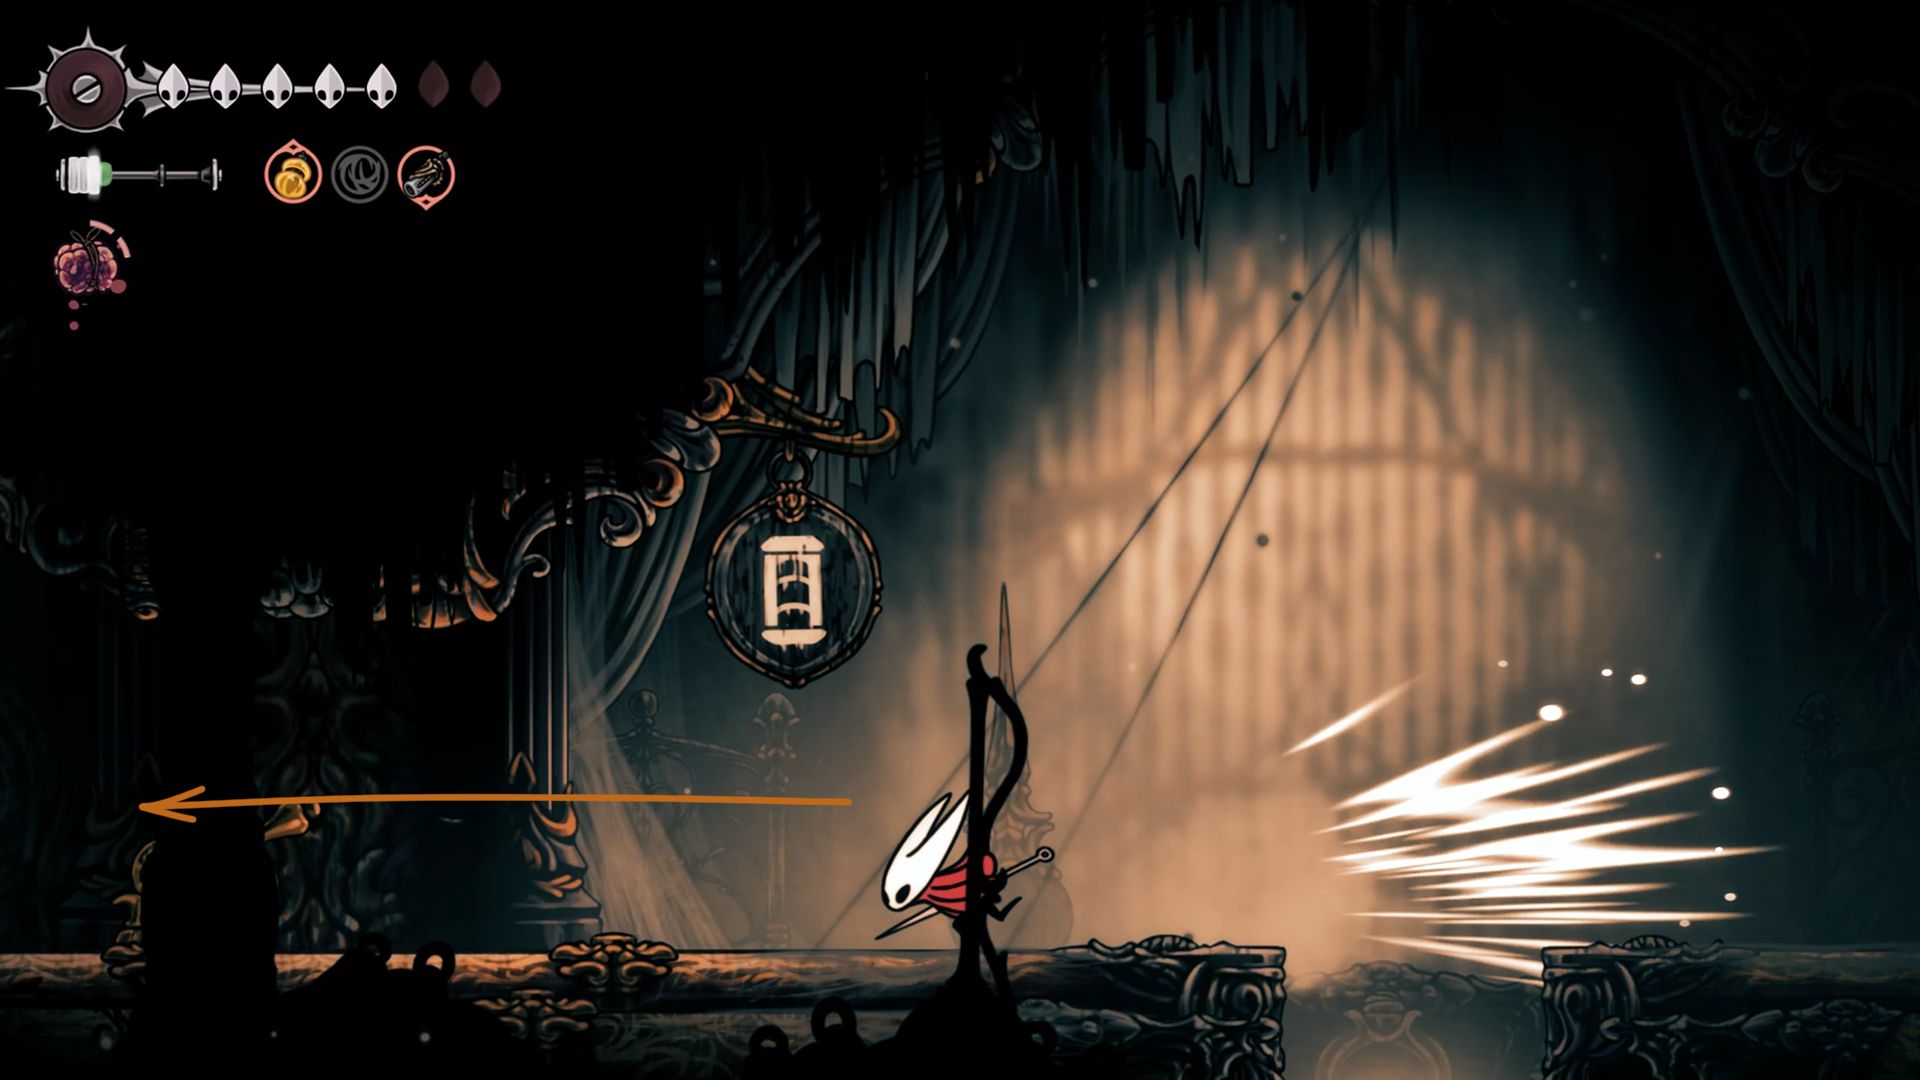
Upon arriving at the Ventrica Chamber, avoid approaching from the right as it’s swarming with enemies and presents challenging parkour obstacles. Instead, opt for the left side, where you’ll find a concealed shortcut and minimal impediments on your journey.
This shortcut to the Citadel Spa must be unlocked beforehand.

Continue overcoming each hurdle until Hornet eventually finds her way to the exit chamber linked to the Slab in “Silksong.” Once there, head towards the right side avoiding most encounters to ultimately reach Loyal Mergwin’s chamber and hand over the Courier’s Rasher.
How To Get Crustnut In Silksong
In Silksong, collecting the elusive Crustnut isn’t necessarily a puzzle to solve, but more of a task that requires precision and patience. This treat is tucked away in the Sands of Karak, which lies above Blasted Steps. On the western side of the Sands of Karak, you’ll find the Crustnut, guarded by an area filled with traps, some of which can be destroyed while others are indestructible. Be prepared to navigate through tight spaces littered with dangerous traps and spikes as Hornet makes her way to the Crustnut. With a measured approach and careful progress, you can successfully obtain the Crustnut in Silksong.
How To Get Pickled Muckmaggot In Silksong
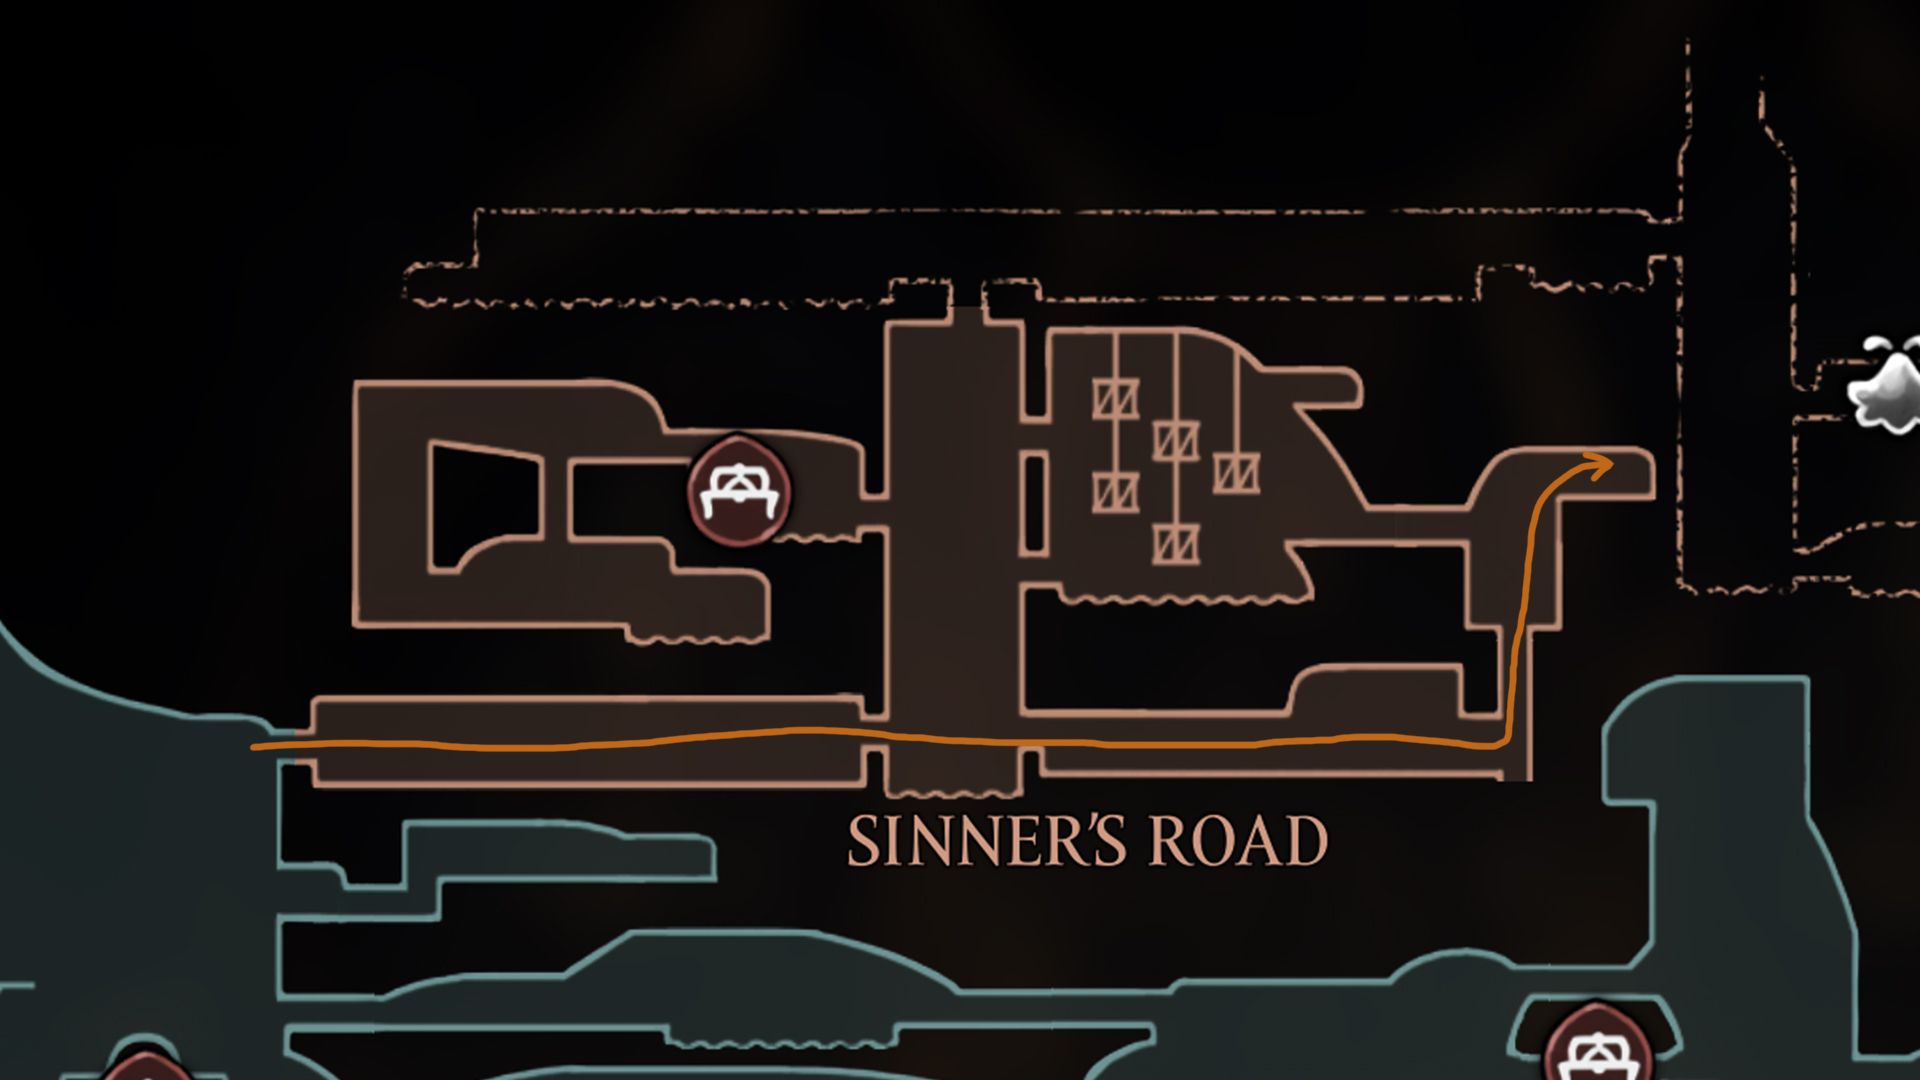
In the game ‘Hollow Knight: Silksong’, Hornet needs to venture up to Sinner’s Road, which is perched above Greymoor, to find the elusive Pickled Muckmaggot. Be aware that this area is vast and filled with traps as well as formidable opponents, so navigate with caution.
The path leading to the Pickled Muckmaggot is simple. Just continue moving forward until you reach the end and climb a few platforms. Upon arriving at the Pickled Muckmaggot’s location, you’ll find yourself in a boss battle; defeat the Disgraced Chef Lugoli to secure the Pickled Muckmaggot in Silksong.
How To Get Vintage Nectar In Silksong
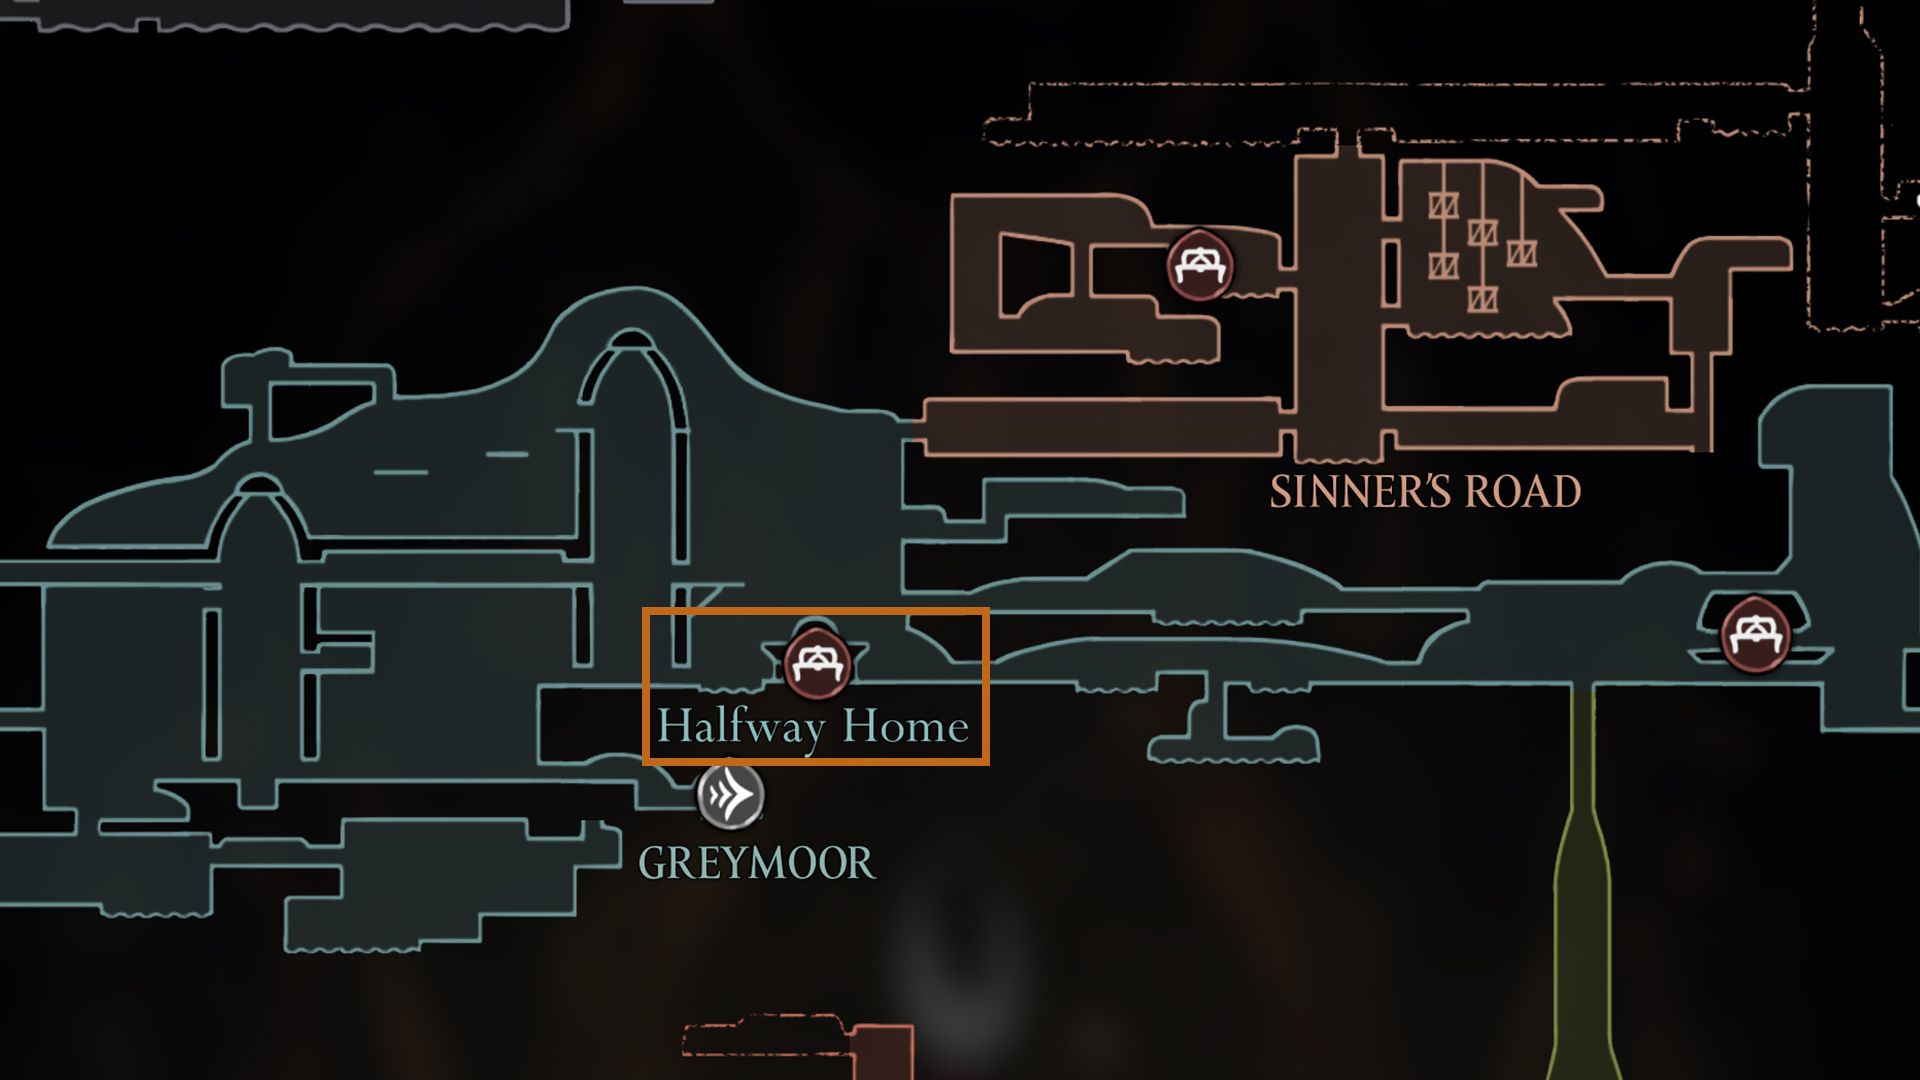
In the game Silksong, you can obtain the Vintage Nectar by having a conversation with Creige at the inn known as Halfway Home, which is situated right in the heart of Greymoor.
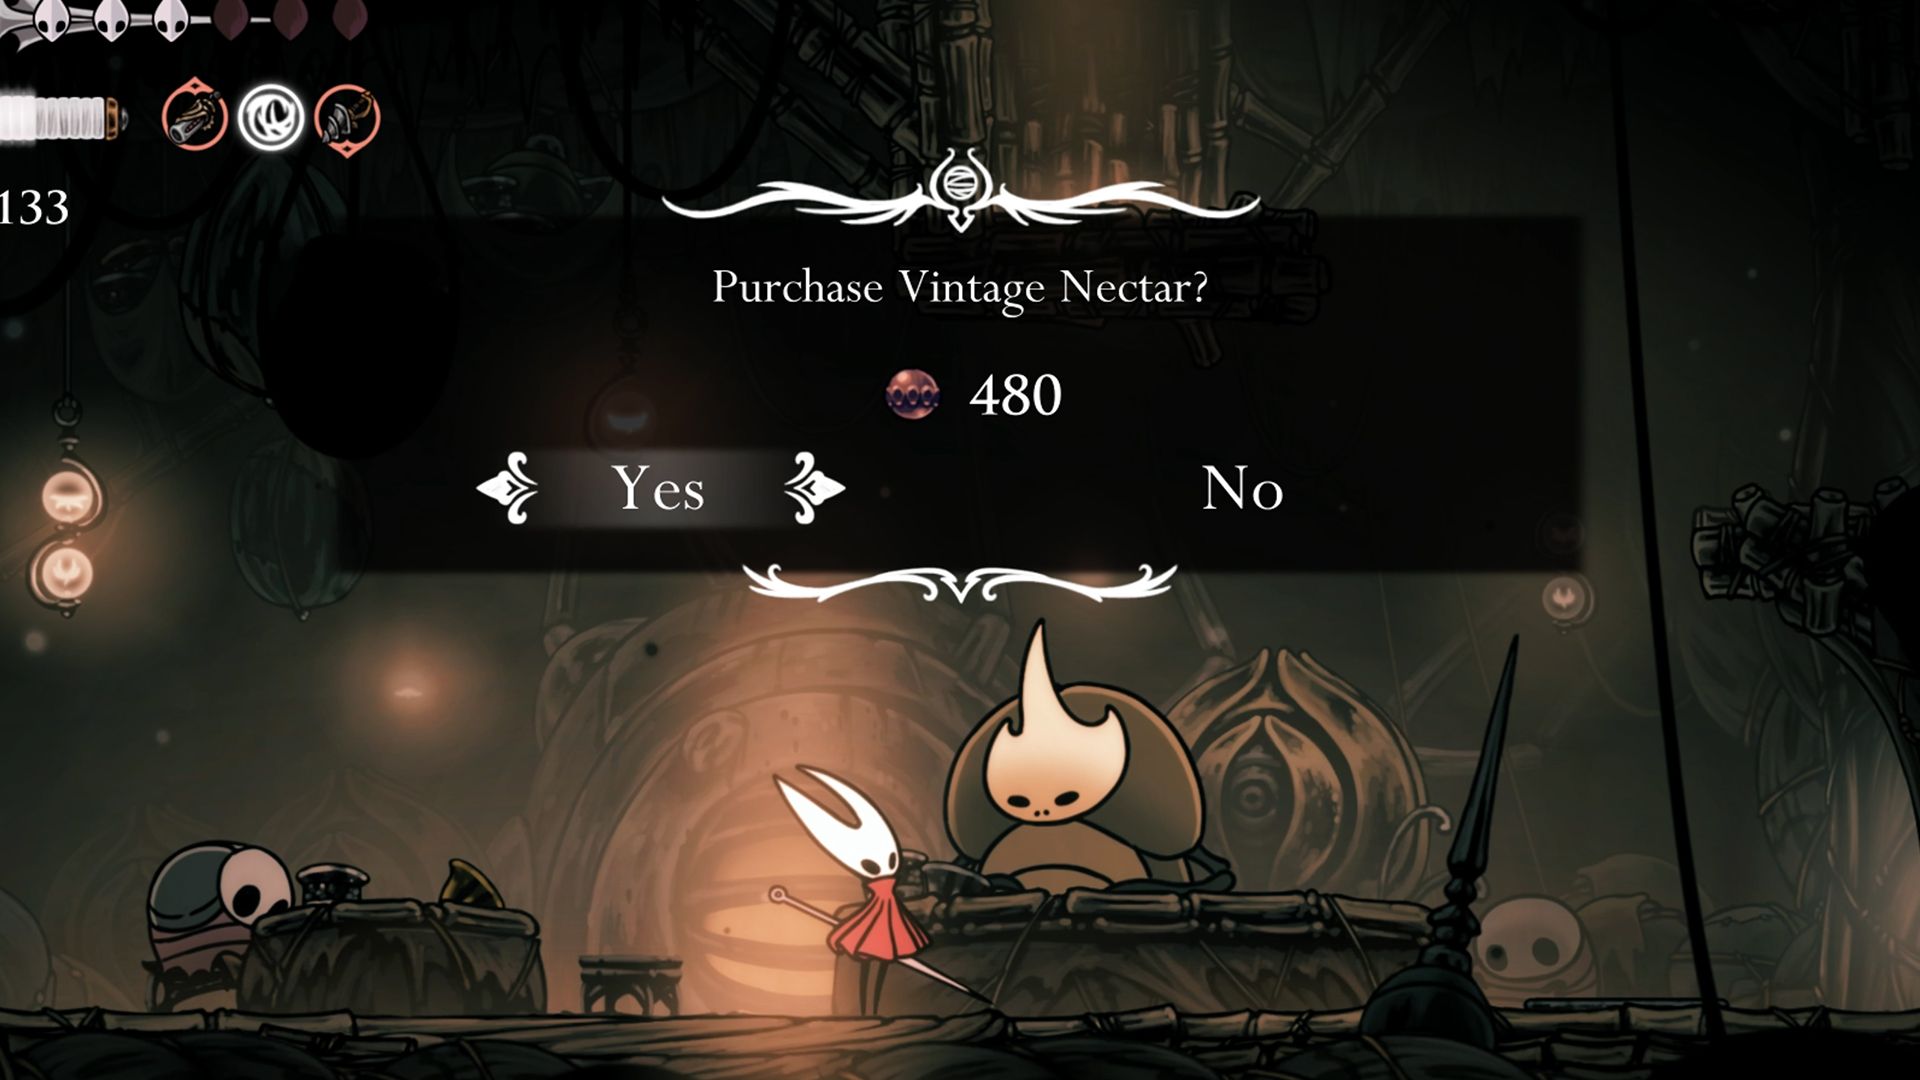
In Silksong, I eagerly anticipate that Creige will require 480 Rosaries as payment for the exquisite Vintage Nectar. Once Hornet tenderly pays, he descends to retrieve it, but is unexpectedly confronted by a formidable horde of ants. Overcoming these ants allows me to obtain the precious Vintage Nectar in Silksong.
How To Get Mossberry Stew In Silksong
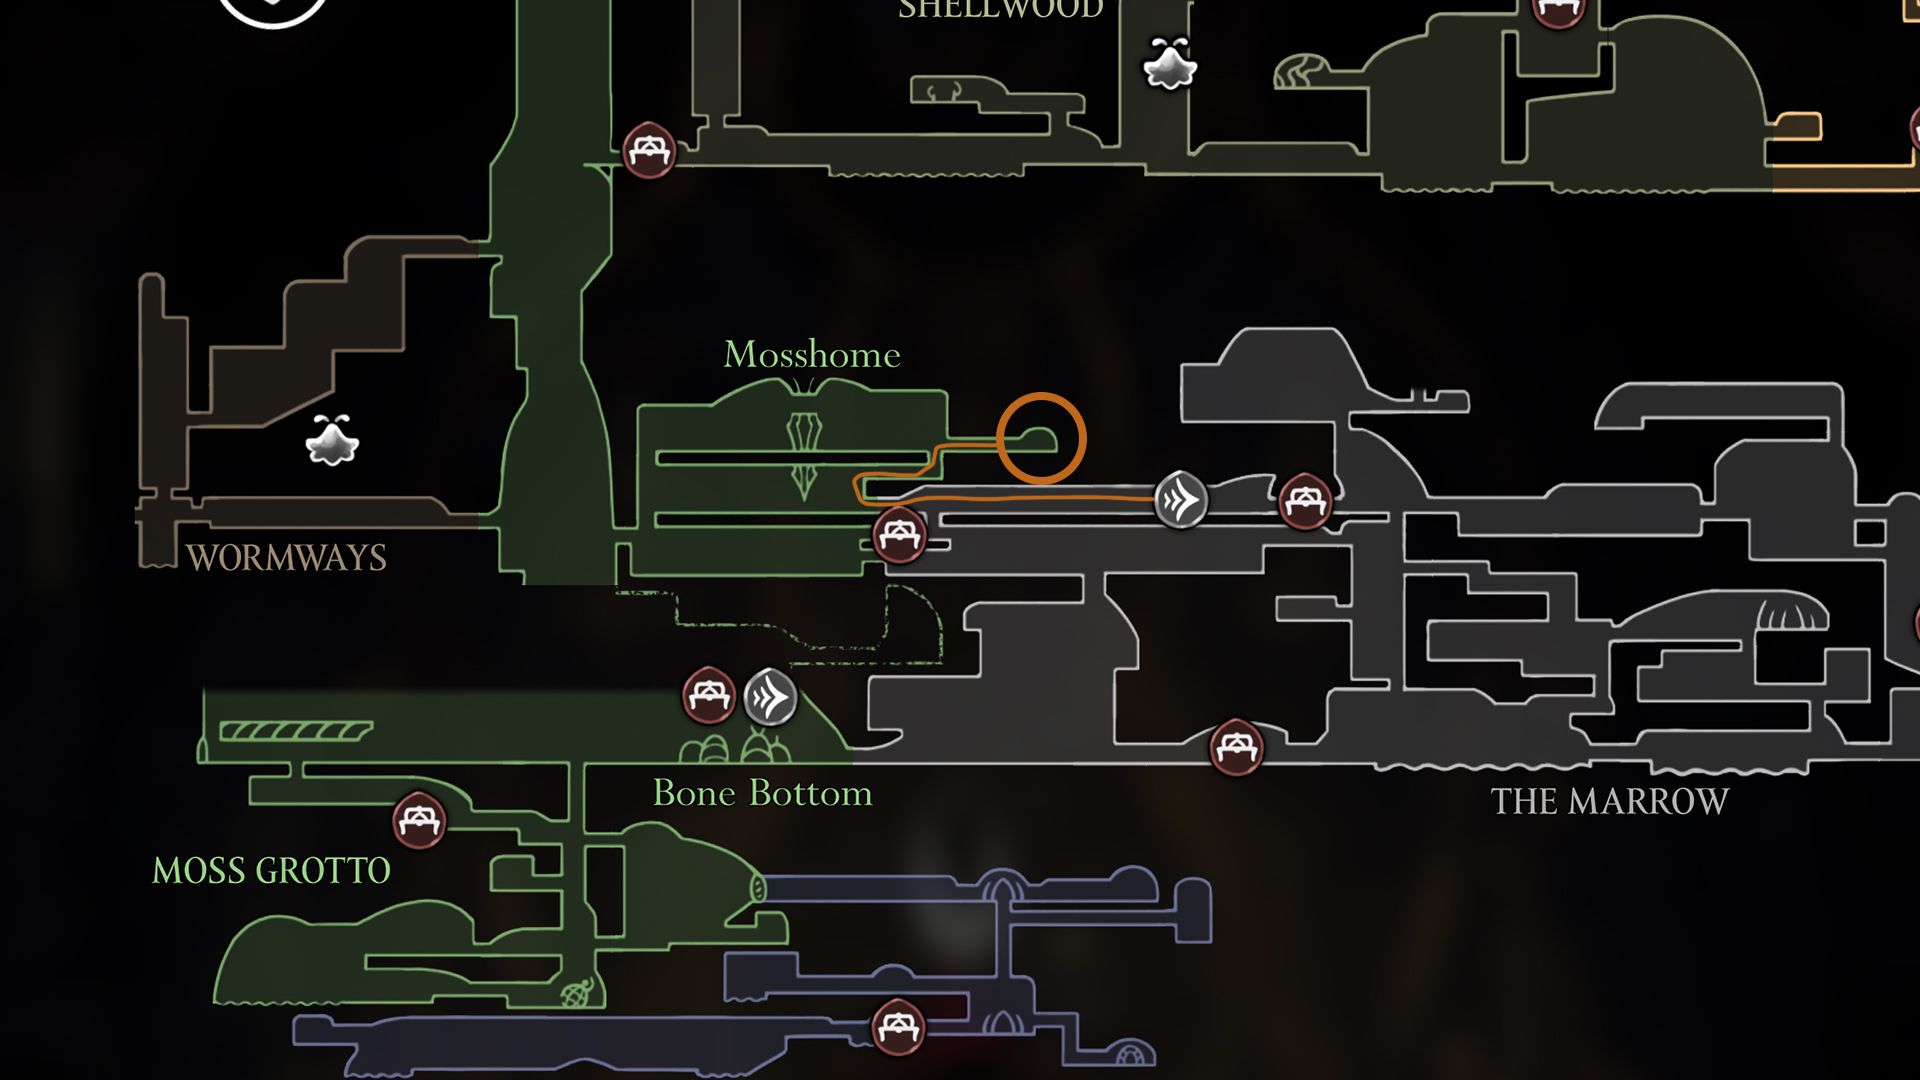
In the game ‘Silksong’, you can find the Mossberry Stew by approaching the Moss Druid, who resides within Mosshome. This is an initial zone, positioned west of the Marrow. There’s no prerequisite for the Moss Druid to provide Hornet with the Mossberry Stew; simply interact with them and they will hand over the Mossberry Stew in ‘Silksong’.
Read More
- All Shadow Armor Locations in Crimson Desert
- How to Get the Sunset Reed Armor Set and Hollow Visage Sword in Crimson Desert
- Best Bows in Crimson Desert
- All Skyblazer Armor Locations in Crimson Desert
- All Golden Greed Armor Locations in Crimson Desert
- Wings of Iron Walkthrough in Crimson Desert
- All Helfryn Armor Locations in Crimson Desert
- Marni Laser Helm Location & Upgrade in Crimson Desert
- How to Craft the Elegant Carmine Armor in Crimson Desert
- Keeping Large AI Models Connected Through Network Chaos
2025-09-10 09:39