Constructing a dwelling within InZOI offers an engaging experience for creative-minded players, as it mirrors The Sims by allowing you to craft stunning properties tailored to your Zois. Imagine designing dream homes from the internet or your own imagination, but with an abundance of choices in windows, doors, wall decorations, and other elements at your disposal.
When it comes to installing flooring, it can sometimes pose a challenge – especially for newcomers. It appears that the floor tiles within Build Mode don’t adjust their size, which makes them hard to fit neatly into the grid. If you’re looking for solutions on how to handle this issue in InZOI, here’s a simple guide to help you lay down flooring in your homes and buildings.
How to Add Flooring in InZOI
During the early access phase of InZOI, there are two methods to incorporate flooring into your space. The first method is an automatic process, while the second necessitates manual placement of floor tiles within Build Mode. Let me explain each option for you:
1. Automatic Flooring: This feature will automatically place flooring throughout your space without requiring any input from you.
2. Manual Tile Placement: In this method, you’ll need to actively select and position floor tiles using Build Mode to create the desired floor layout in your space.
Normal Flooring
Building flooring for Zoi’s home is most conveniently achieved by ensuring the walls are correctly positioned during construction. This way, the game will automatically create a surface without requiring additional steps from you, but only when constructing from scratch. Pre-existing homes already have their flooring in place, allowing you to modify the color and texture for a new appearance instead.
Initially, navigate to Build Mode. Then, commence laying down walls around the vacant area. Remember to activate the Floor Grid (it’s the third icon on the toolbar at the top) and position the first pillar exactly at the start of the grid. Be aware that if you place it below this point, the structure won’t generate any flooring.
If you encounter issues with the arrangement, consider clicking on the wall and moving it so it lines up with the initial blue tile on the grid. This method can also be used to create another level in Zoi’s home by repeating the process. Remember that what appears as a floor from above might actually be a ceiling, so ensure you add a proper one there instead.
Floor Tiles
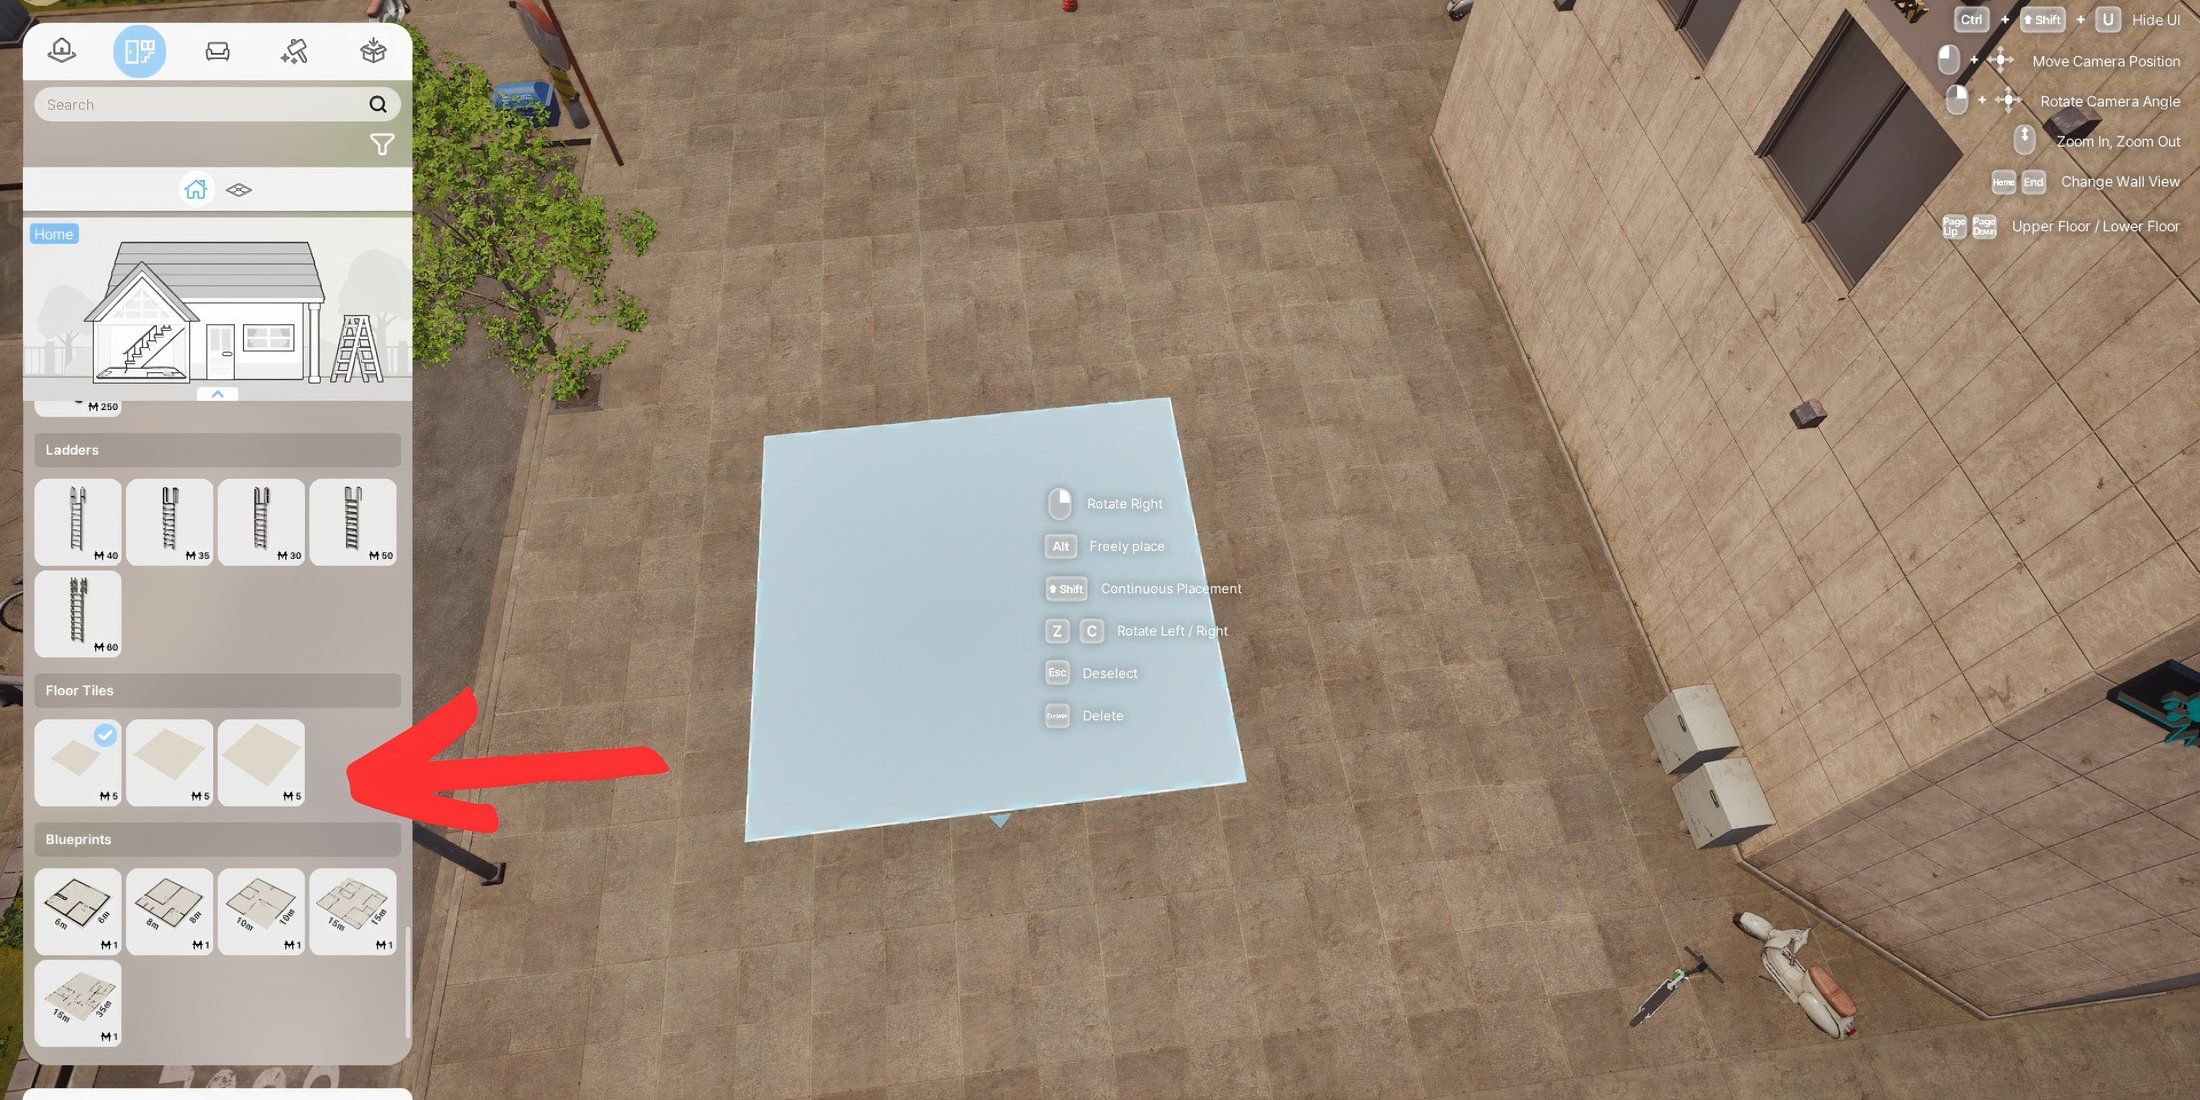
Another method for installing flooring involves placing Floor Mats within your property area. Simply navigate to the ‘Floor Mats’ option in the Build Mode menu, where you’ll discover several size choices.
- 7.5 m x 7.5 m
- 15 m x 15 m
- 30 m x 30 m
In my experience, although this method offers greater control, it might not be the best choice for compact areas because the tiles don’t adjust in size during early access, making placement somewhat challenging. It truly shines in larger properties where you can utilize the provided sizes to construct houses, outdoor flooring, patios, and more. If you’re using a pre-set house design, you won’t need to place tiles as the flooring is already incorporated—you can instead employ platforms to enhance the overall design.
How to Change Flooring Color, Texture, and Material in InZOI
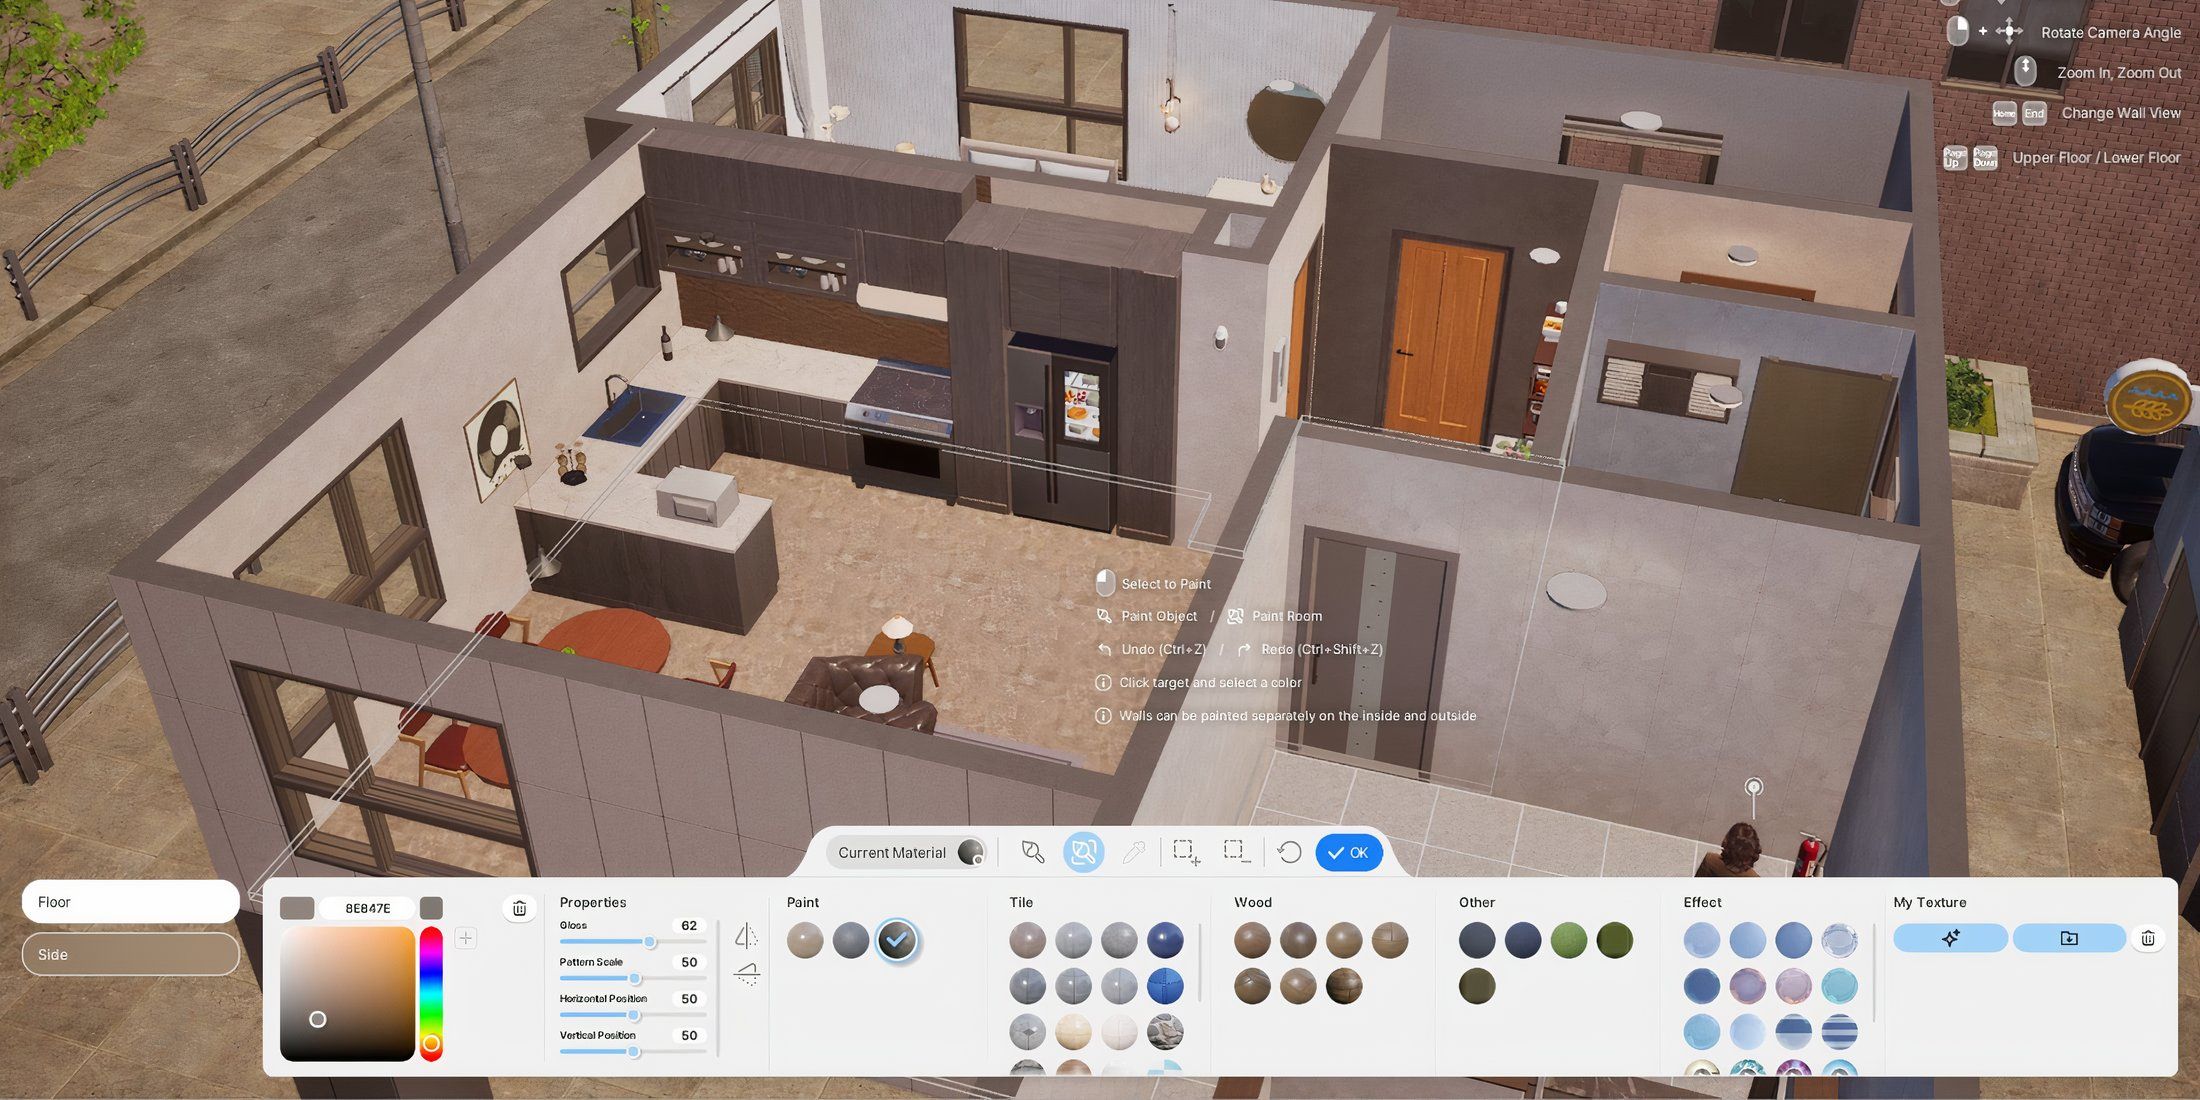
After setting up your floor, feel free to personalize it according to your taste! You can modify it by altering the color (paint), replacing tiles, opting for a wooden or green appearance, adding effects, or even incorporating AI-created textures. To achieve this, merely tap on the floor and click the paint icon. Then, you’ll find all the customization options at the bottom bar. Choose the design that aligns with your imagination and save it.
Read More
- All Shadow Armor Locations in Crimson Desert
- Sega Reveals Official Sonic Timeline: From Prehistoric to Modern Era
- Dark Marksman Armor Locations in Crimson Desert
- Genshin Impact Dev Teases New Open-World MMO With Realistic Graphics
- The Limits of Thought: Can We Compress Reasoning in AI?
- How to Beat Antumbra’s Sword (Sanctum of Absolution) in Crimson Desert
- Where to Pack and Sell Trade Goods in Crimson Desert
- Enshrouded: Giant Critter Scales Location
- Who Can You Romance In GreedFall 2: The Dying World?
- Keeping AI Agents on Track: A New Approach to Reliable Action
2025-03-30 19:09