
Raging Conchfly is a challenging boss in *Hollow Knight: Silksong*. It attacks quickly and unpredictably, which can be really frustrating if you’re not prepared.
To beat the Raging Conchfly, you need to learn its attacks, anticipate its most frustrating moves, and know when to attack and when to defend. This guide will show you where to find it, the quickest way to get back to the fight after a reset, a complete list of its attacks and how to avoid them, and helpful tips to make winning easier. Let’s get started.
Check out everything Pharloom has to offer with our complete Hollow Knight: Silksong Interactive Map!
Where to Find Raging Conchfly in Silksong
Top Left Corner of the Sands of Karak
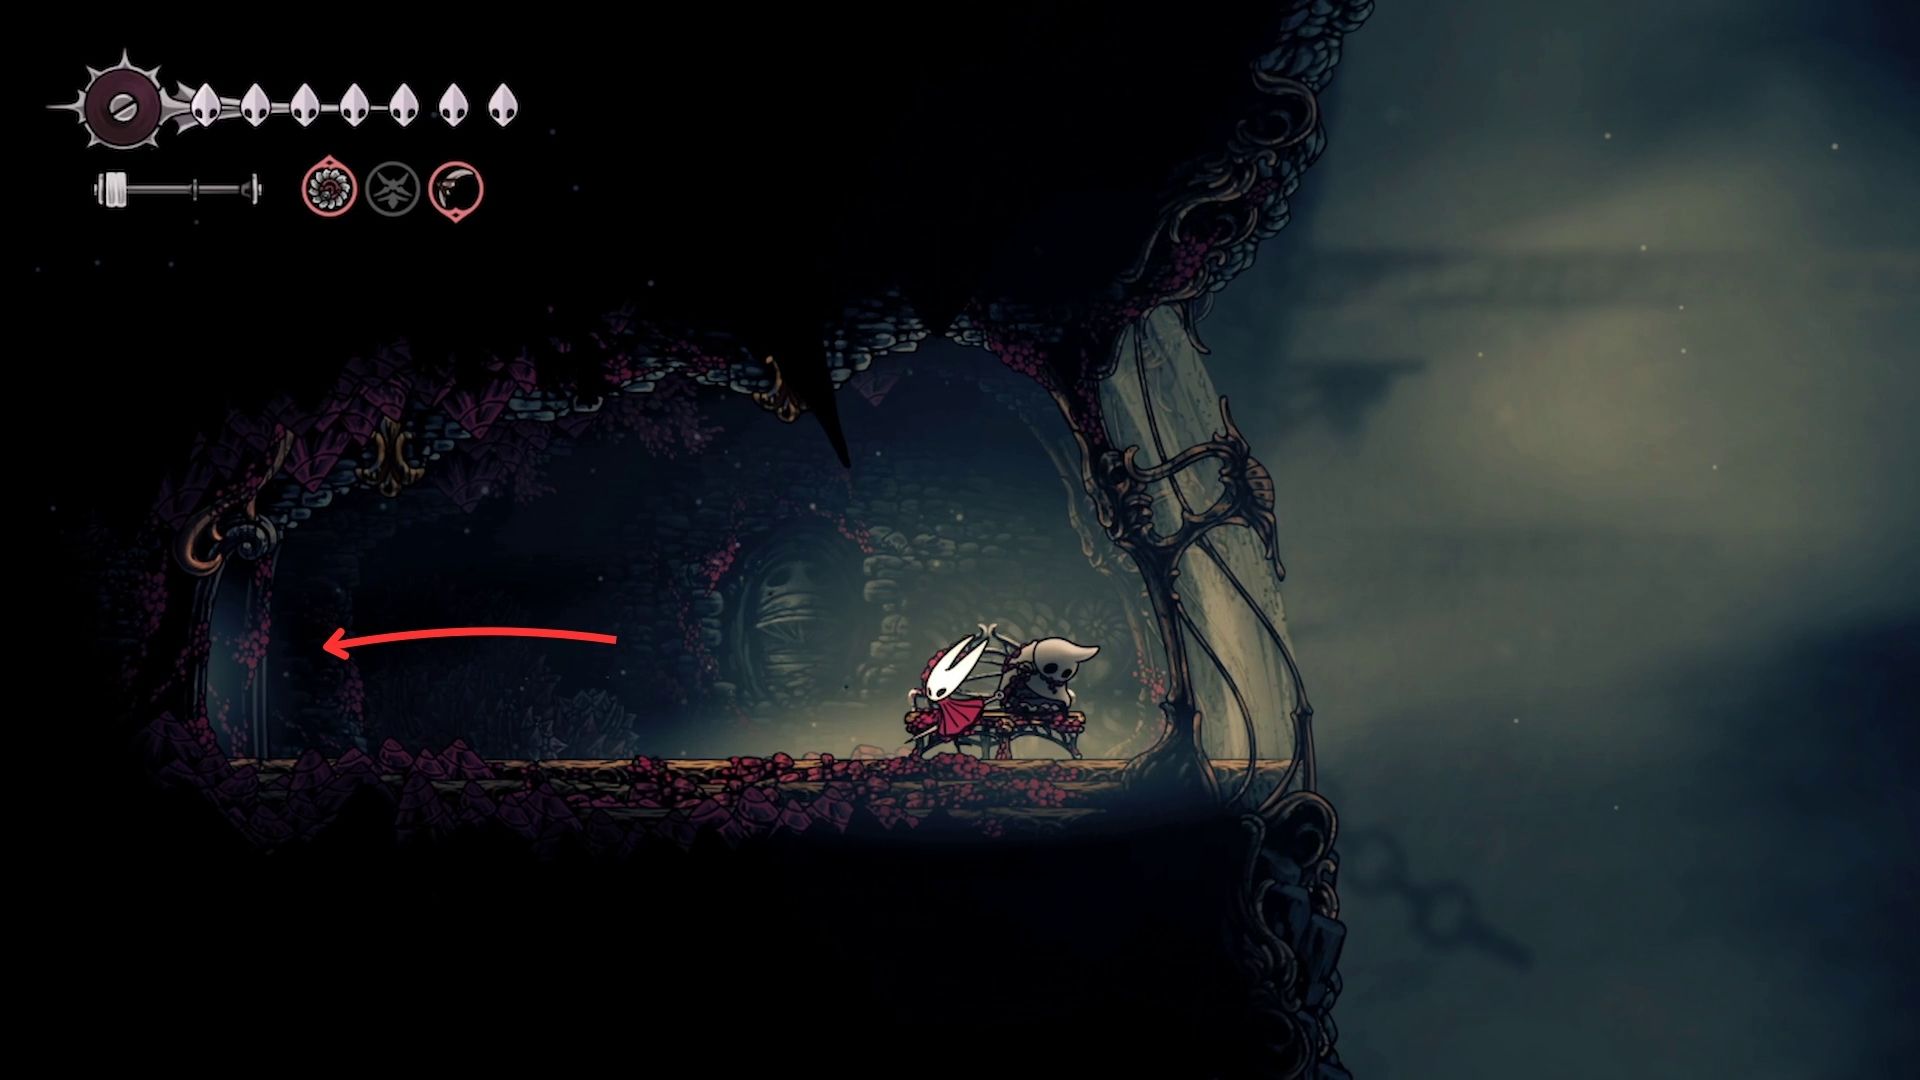
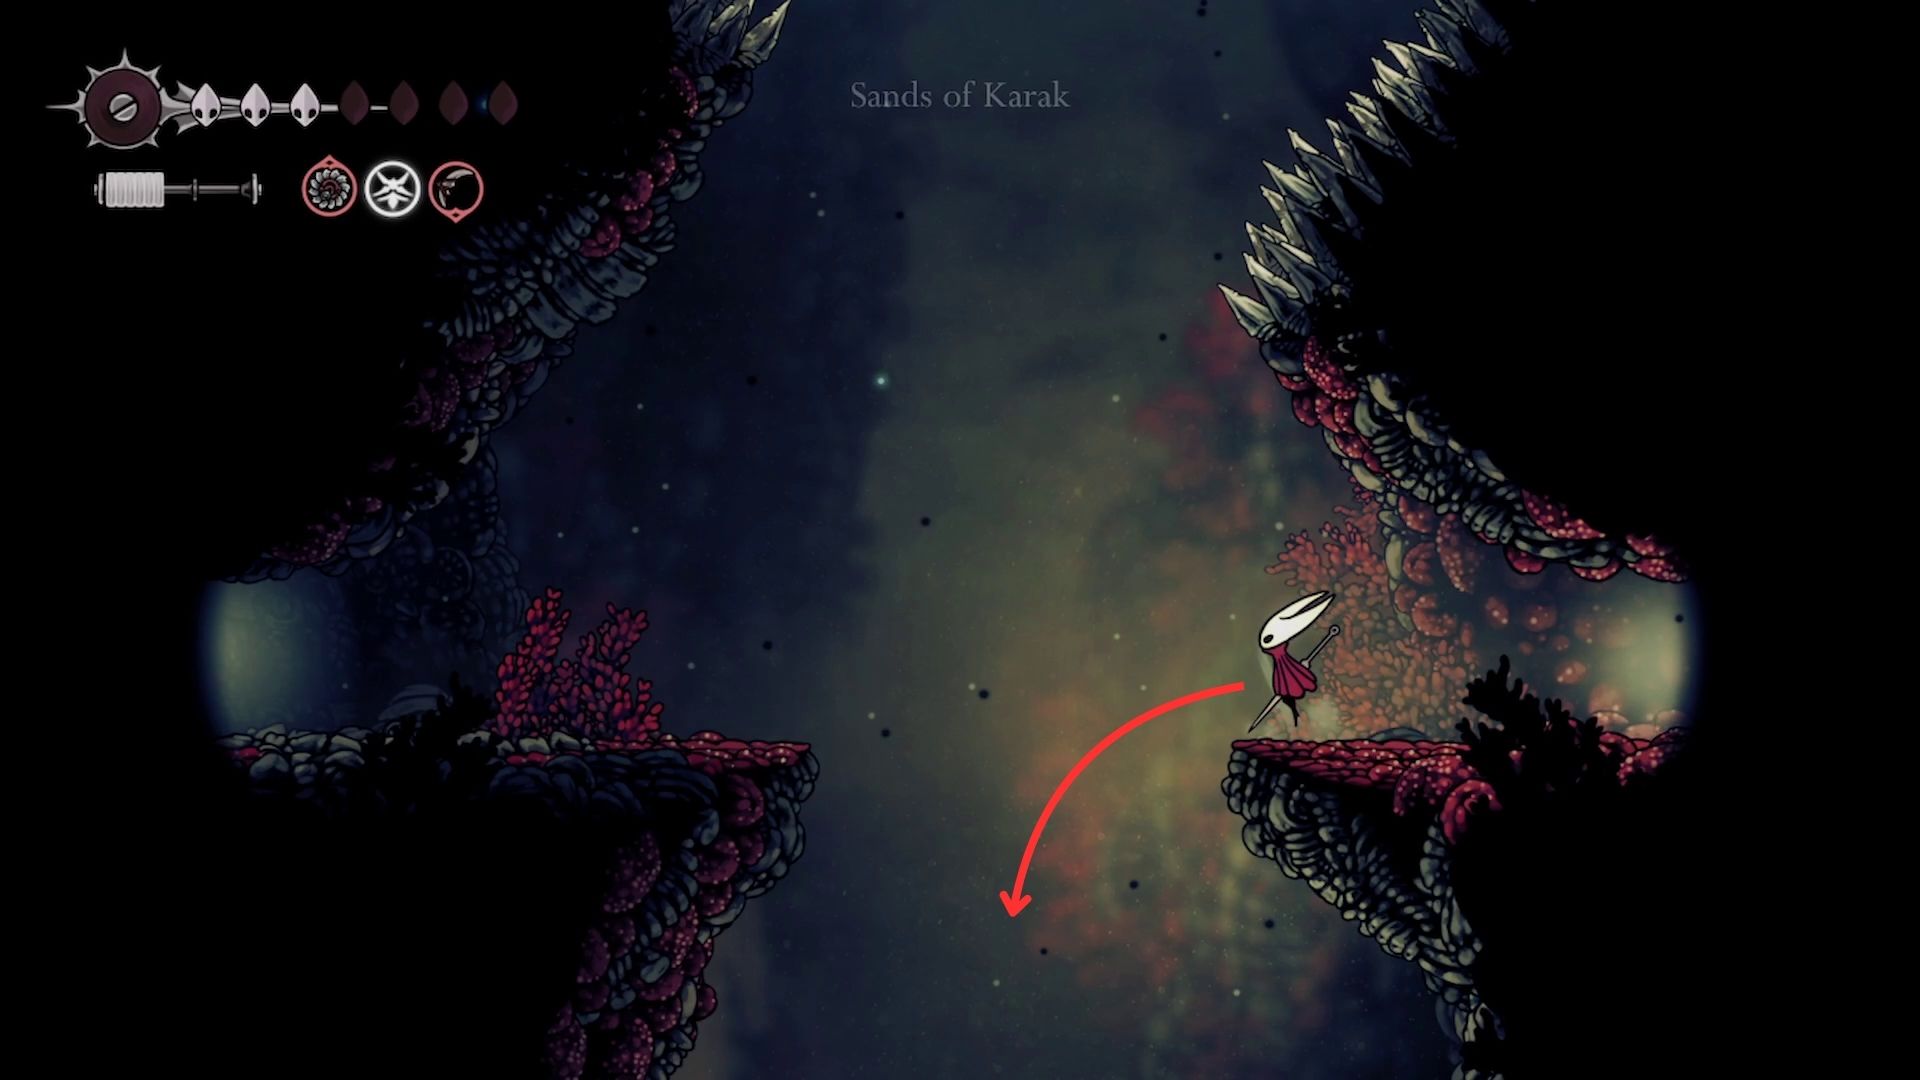
Starting from the bench in the Sands of Karak, turn left and walk past the elevator into the next area. Drop to the lowest level and activate the yellow node to start a timed platforming challenge that will take you to the top. Then, head left into another room and complete a series of platforming sections, one after the other, to reach the room on the left.
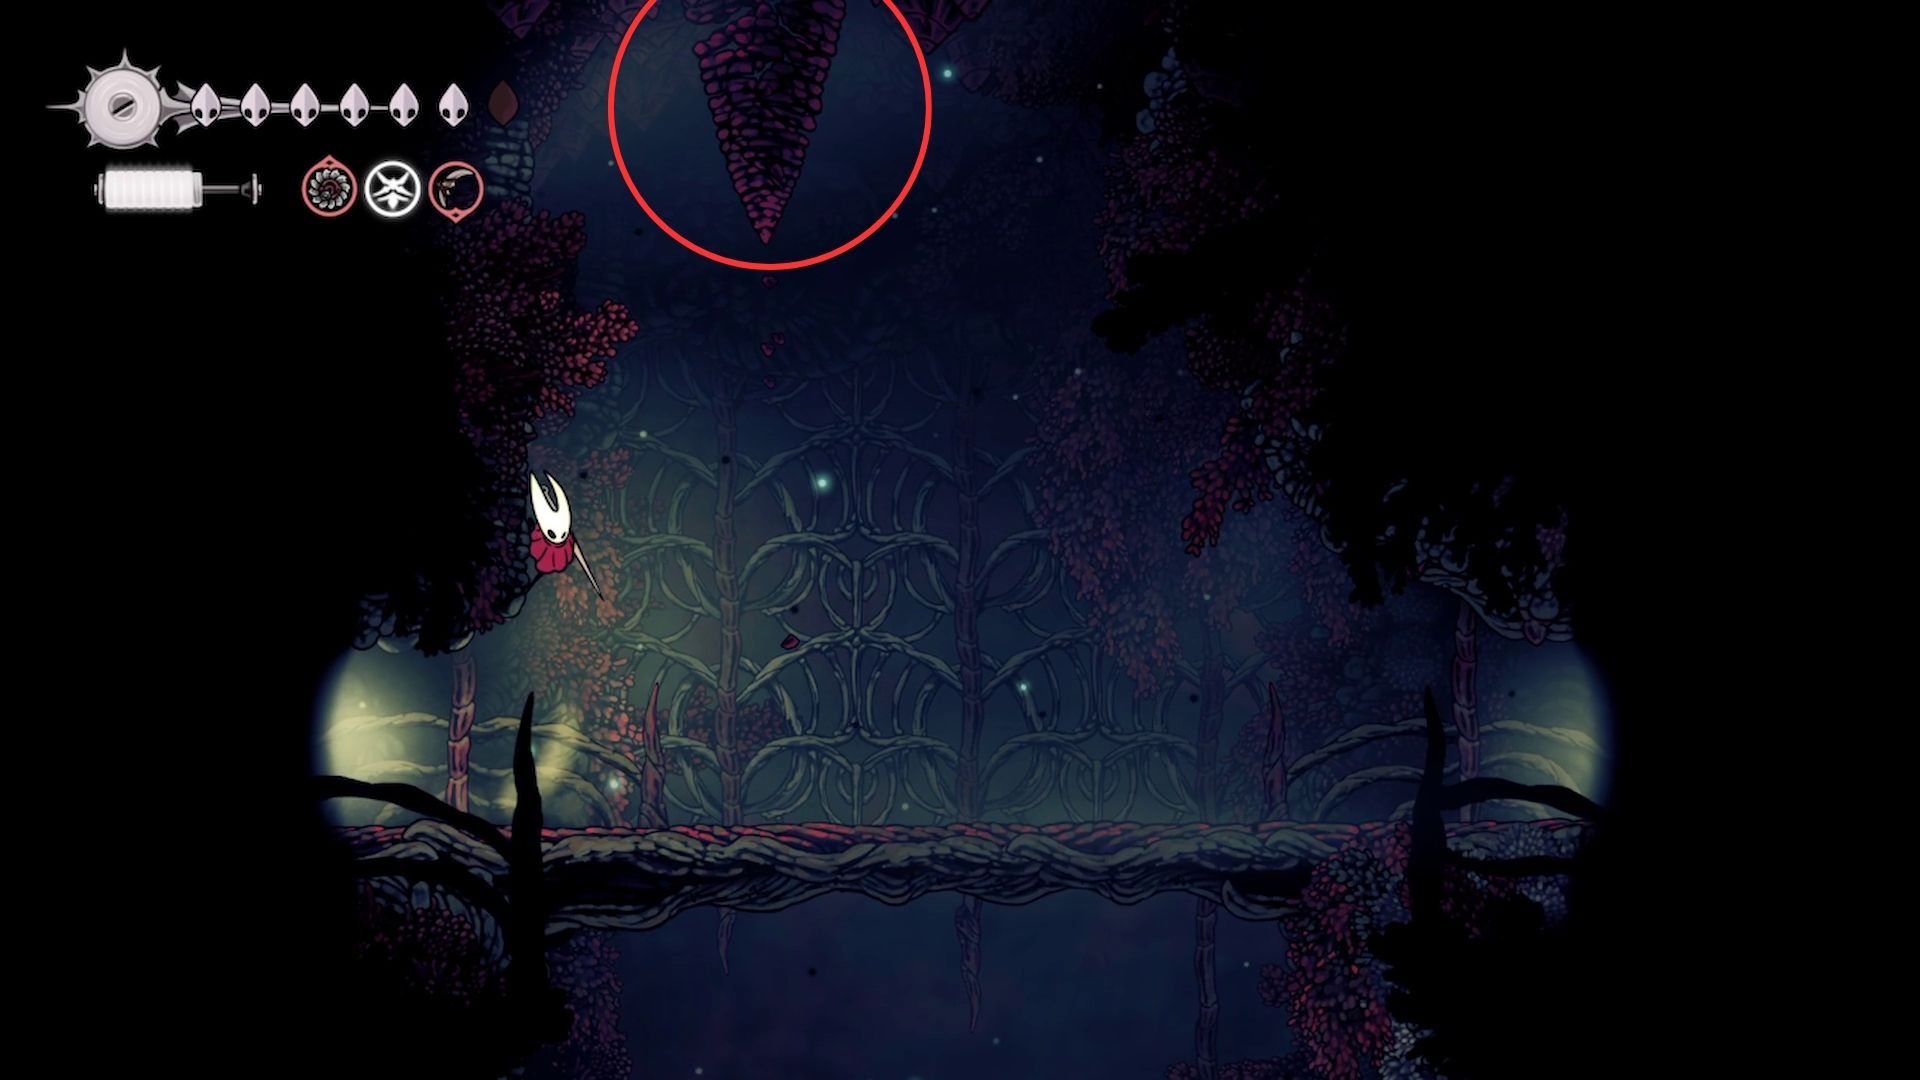
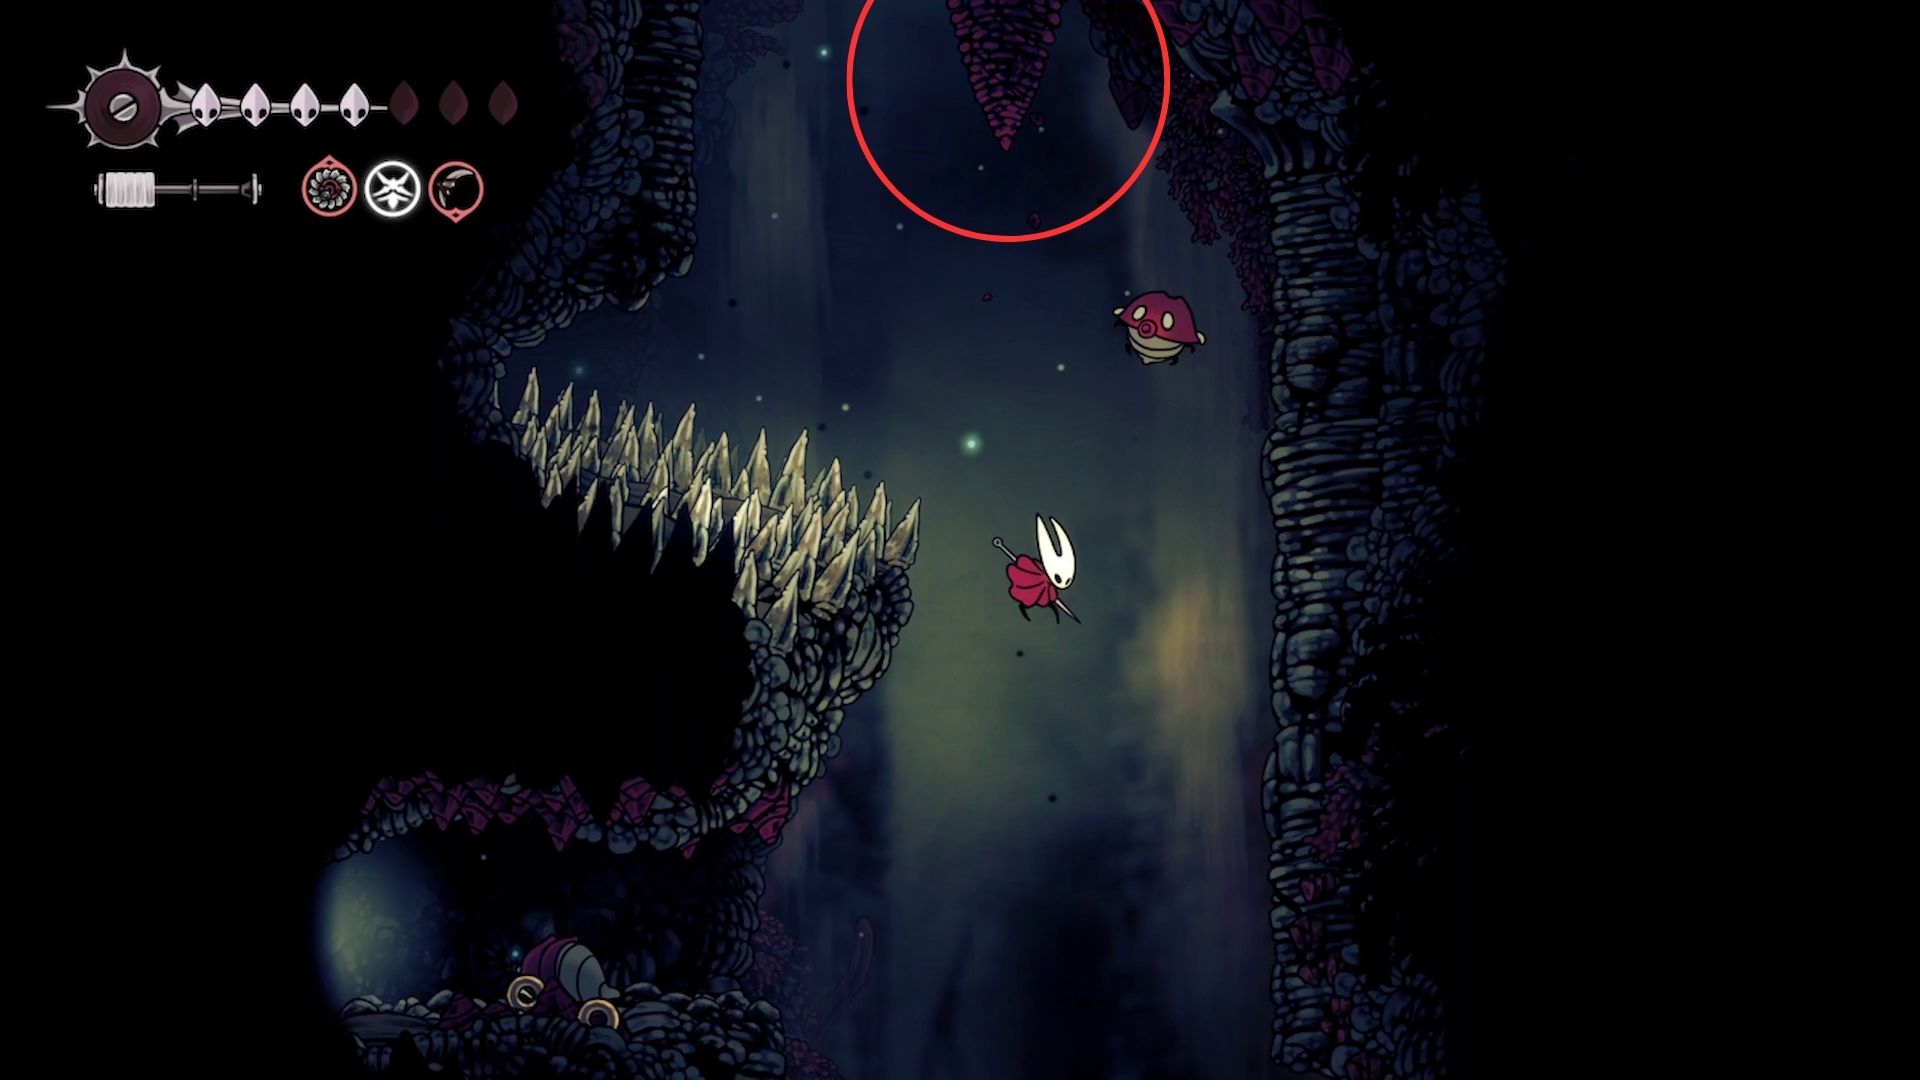
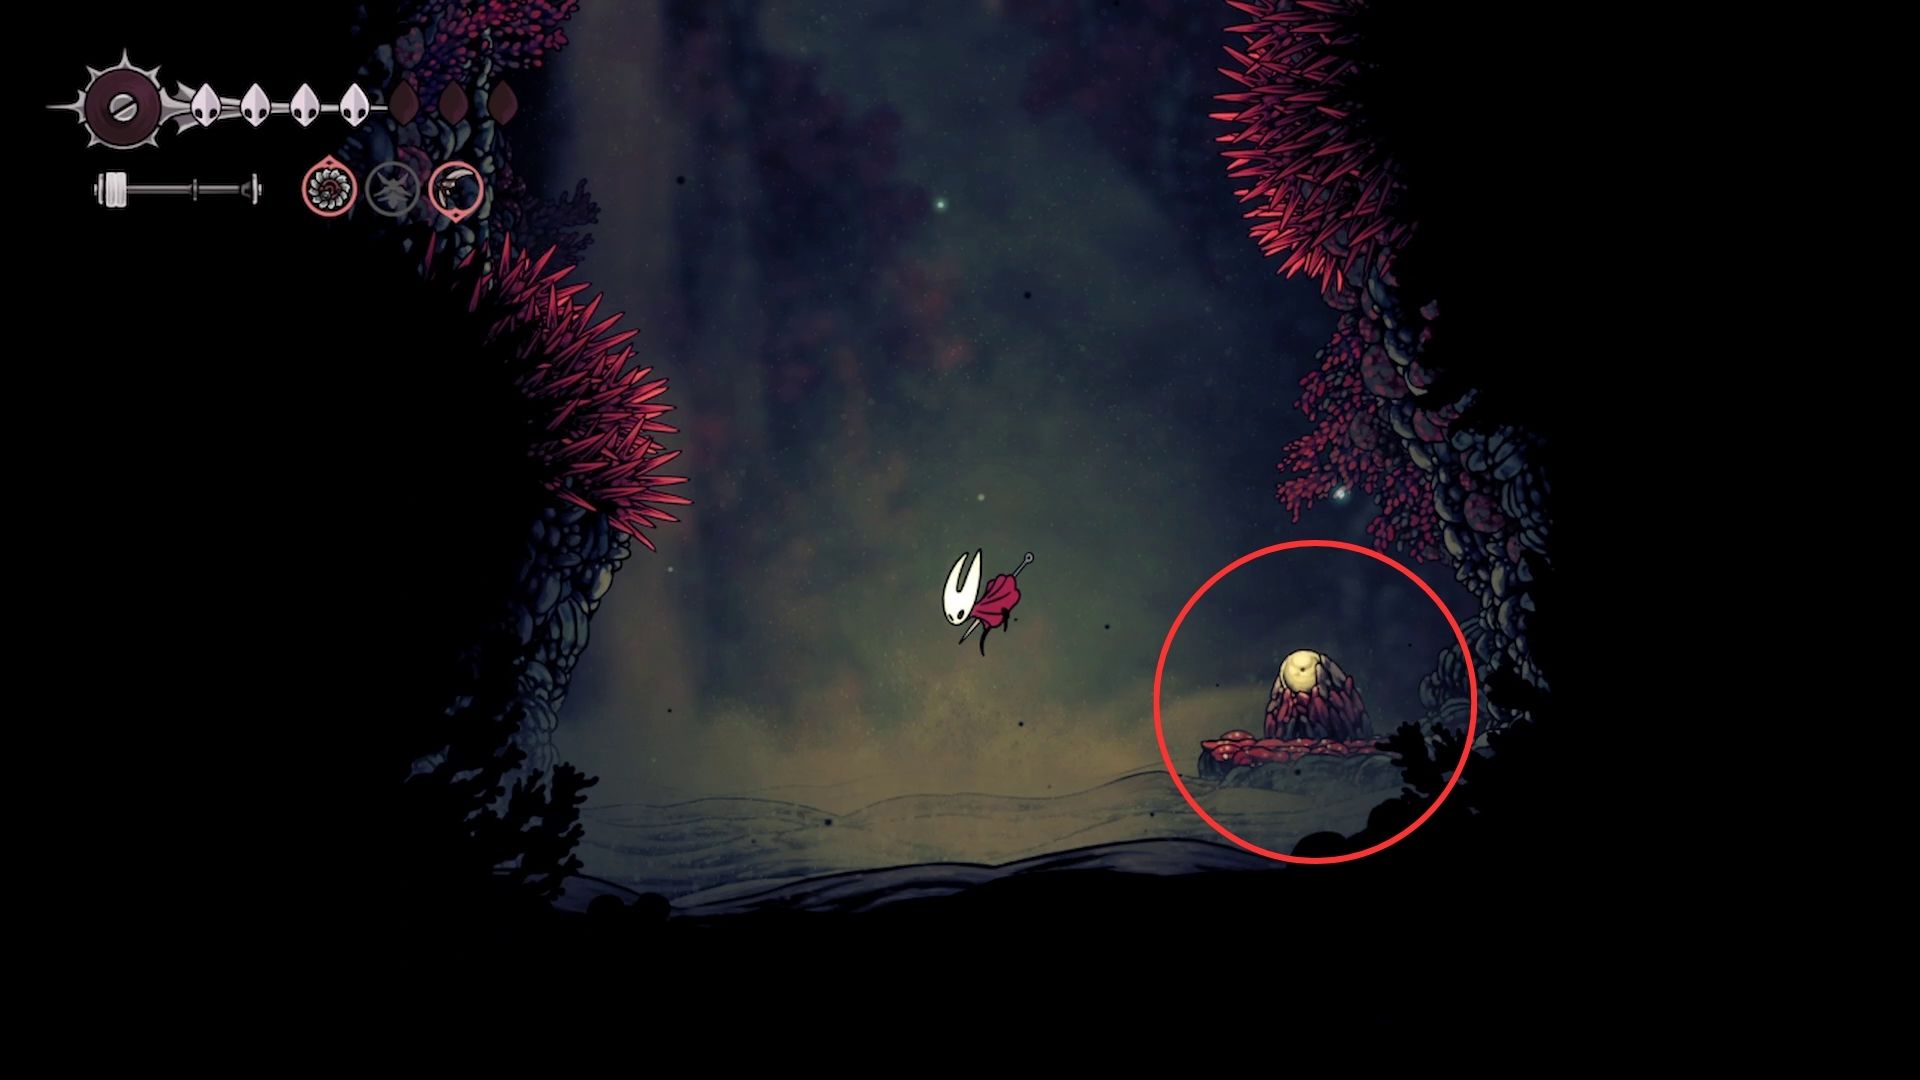
After completing the previous step, you’ll enter a room with a small bridge. Look above the bridge for a large, red pine cone that you can break. Hit it to make it fall and destroy the bridge, creating a shortcut down. Drop all the way to the bottom, and you’ll see another red pine cone above the flying enemy. Destroy this one too, and it will break the ground, revealing a path leading to the Blasted Steps.

Okay, so I just unlocked a shortcut and it’s a game changer! Now, instead of starting my runback from the Sands of Karak bench, I can use the Blasted Steps bench. Seriously, the platforming is way easier from there – it makes getting back so much smoother and less stressful. It’s a total lifesaver!
Raging Conchfly Boss Walkthrough in Silksong
How to Beat Raging Conchfly in Silksong
Raging Conchfly Moveset, Attacks, & Counters
| Attack Image | Move Name | Visual Cues | Counter |
|---|---|---|---|
 |
Drill Attack | The Raging Conchfly burrows into the walls of the arena and emerges from a random location in the form of a drill that moves in a straight line, telegraphed by a plume of smoke. | If the Conchfly comes from the left or right side, jump up and pogo off of its body. If it comes from the top or bottom, dodge away and use regular attacks to deal damage. |
 |
Cone Spit | The Raging Conchfly emerges from the top of the arena, pauses in mid-air, and spits out one or two small red cones that ricochet off surfaces four times, dealing two Masks of damage. It then turns its body into a large drill, moving across the arena, burrowing into the far wall. | Attacking the red drills can allow Hornet to parry them, altering their trajectory. However, since the attack bounces multiple times, always keep an eye out lest it surprises you when coming from odd angles. |
 |
Conchfly Summon | At roughly half health, the Raging Conchfly summons five conchflies to fly across the arena in smaller Drill Attacks, telegraphed by plumes of smoke. | The smaller conchflies are easy to avoid as long as you avoid the trajectory of the smoke trails. |
 |
Conchfly Drills | The Raging Conchfly emerges from a side of the arena and summons three smaller conchflies, which form into drills and fly towards the opposite side in a random order. | Conchflies that are about to shoot across the arena first pull back slightly. Look for ones that do and dodge them by either jumping over them or remaining immobile. |
Recommended Loadout for Raging Conchfly
| Crest | , |
|---|---|
| Silk Skill | |
| Blue Tools | , , |
| Red Tools | , , |
| Yellow Tools | , |
Raging Conchfly Boss Tips & Tricks
- The best time to bind is when you see the Raging Conchfly’s Drill attack smoke coming out from the bottom, left, or right side of the arena. Get out of the way of the attack and immediately heal before the boss even has a chance to complete this attack. By the time it’s finished and coming back around for round two, you’ll already have completed the healing animation.
- Pogoing off the boss is an essential skill to master to make the fight simple. It is an easy way to deal damage and will put you in no danger as long as there are no other field effects to worry about.
- The Cone Spit attack is by far the most troublesome of the Raging Conchfly’s moves since it’s fast, unpredictable, and deals a lot of damage. Luckily, the boss only uses it when it comes out from the top of the arena, meaning you can somewhat predict it. However, since the indicator for the Conchfly’s appearance is the same as the regular Drill attack (a plume of smoke), there is no way to be 100% sure. The safest solution is that whenever you see smoke coming down from the ceiling, always assume it’s the Cone Spit, and either move back to give yourself space to dodge or get ready to parry the attack. Losing out on one potential Needle attack is worth it.
- Attacking the smaller conchflies restores Silk.
- The ‘s fast attack speed makes it extremely useful for parrying the red cone projectiles.
Raging Conchfly Boss Rewards in Silksong
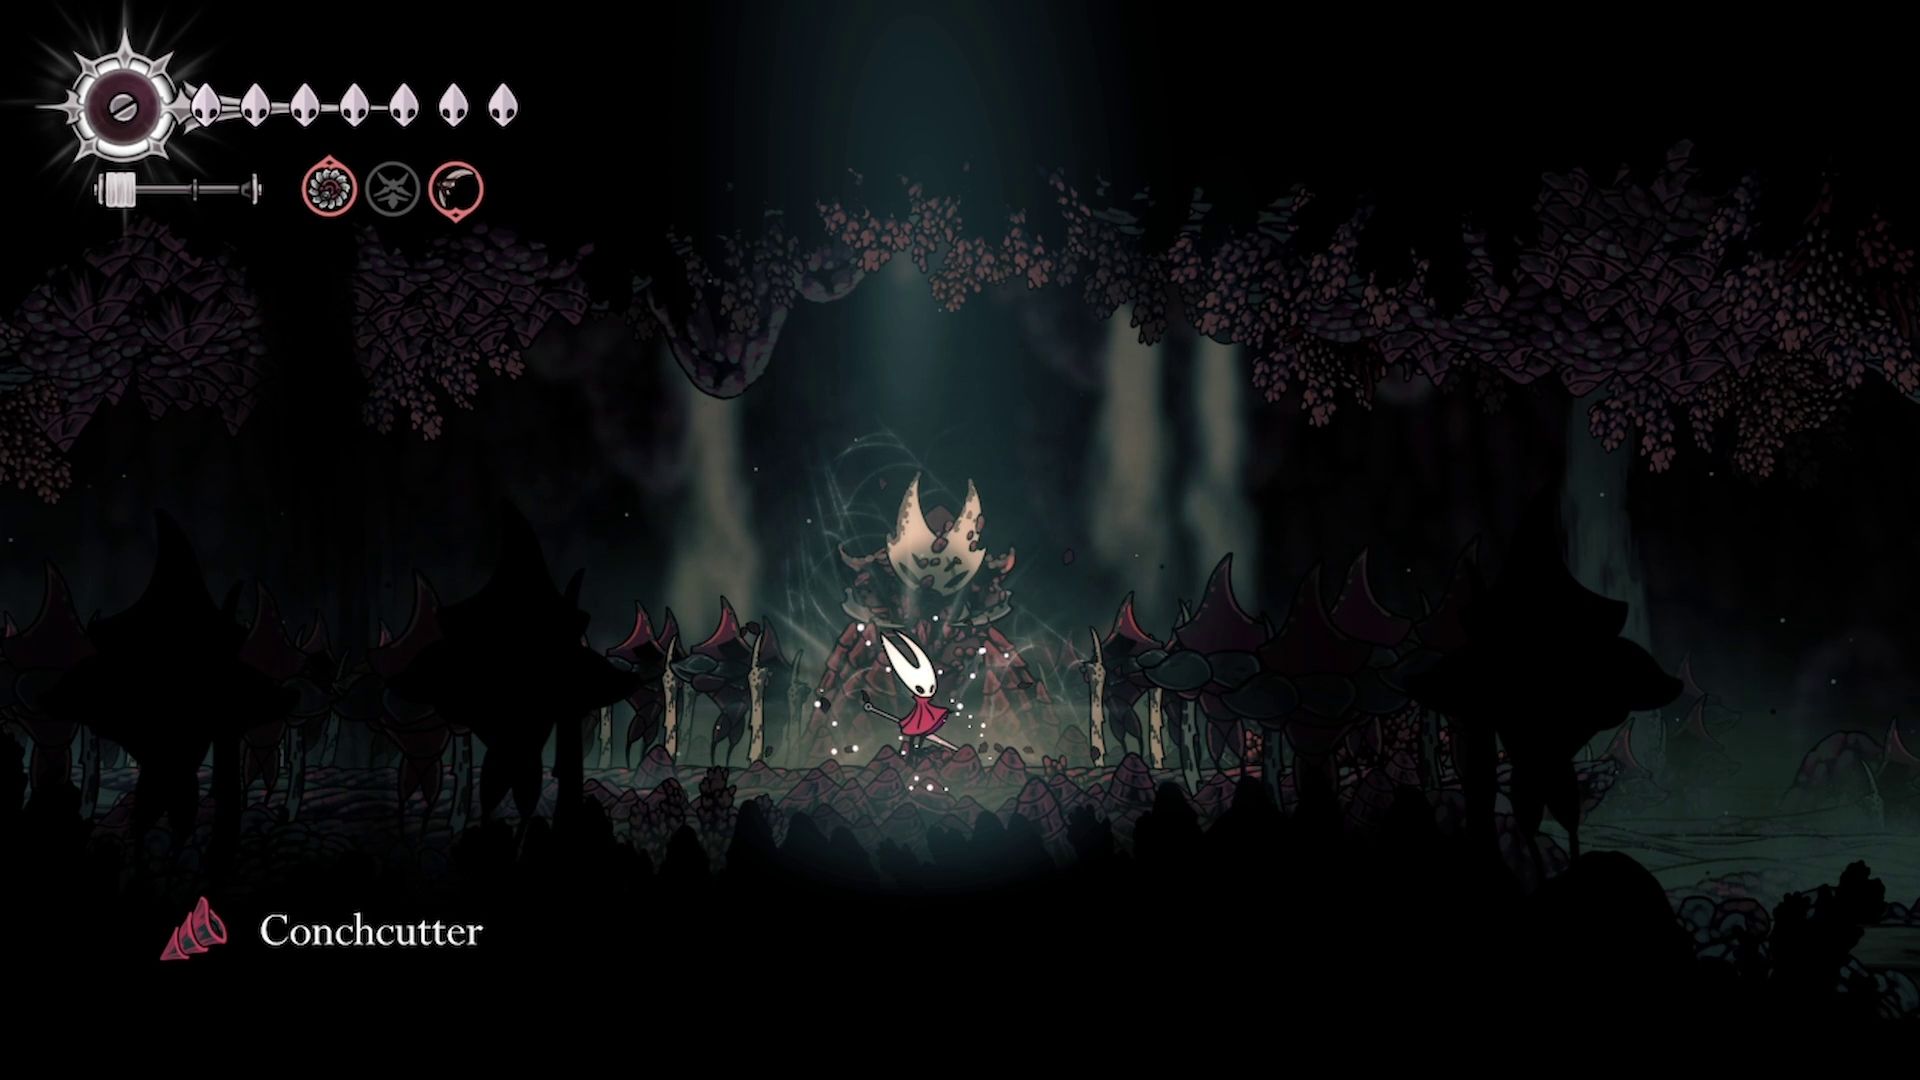
Once you defeat the Raging Conchfly, a new path opens up to the right. This leads to a large room containing a hut. Inside the hut, you’ll discover a Red Tool that functions similarly to the boss’s Cone Spit attack. If you continue to the right, you’ll also find a small, hidden room where Hornet can rest on a bench.
Read More
- All Skyblazer Armor Locations in Crimson Desert
- One Piece Chapter 1180 Release Date And Where To Read
- How to Get the Sunset Reed Armor Set and Hollow Visage Sword in Crimson Desert
- All Shadow Armor Locations in Crimson Desert
- Marni Laser Helm Location & Upgrade in Crimson Desert
- All Golden Greed Armor Locations in Crimson Desert
- All Helfryn Armor Locations in Crimson Desert
- How to Beat Stonewalker Antiquum at the Gate of Truth in Crimson Desert
- All Icewing Armor Locations in Crimson Desert
- Black Sun Shield Location In Crimson Desert (Buried Treasure Quest)
2025-09-24 21:14