As a seasoned Steam Deck user who has spent countless hours navigating its unique ecosystem, I can confidently say that cloning your SSD is a game-changer! The process might initially seem daunting to newcomers, but fear not, for it’s as simple as pie once you get the hang of it.
The Steam Deck is by far the best handheld gaming console available, especially since it offers incredible value compared with the Lenovo Legion GO or the Asus Ally ROG. However, certain aspects could frighten new users. For instance, many Steam Deck owners hesitate to upgrade the internal storage because they assume it is complicated.
Believe it or not, buying a new SSD and installing it on your Steam Deck is an easy process. Of course, you will need to install SteamOS, but there is a way to make this process even simpler than it already is. If you want to install SteamOS on your new SSD along with your game data, you have the option to clone your Steam Deck SSD. Keeping this in mind, this guide will cover everything there is to know about cloning your Steam SSD, along with other useful information.
Steps for Cloning a Steam Deck SSD
To replicate the storage of your Steam Deck, you’ll require a fresh SSD and an external NVMe case. After gathering all necessary components, here are the steps for duplicating your Steam Deck SSD:
- Turn on your Steam Deck.
- Press the Steam button and select Power.
- In the Power menu, select Switch to Desktop.
- Access the Konsole and type passwd to set a password.
- After setting a password, connect your Steam Deck to the external NVME enclosure with your new SSD.
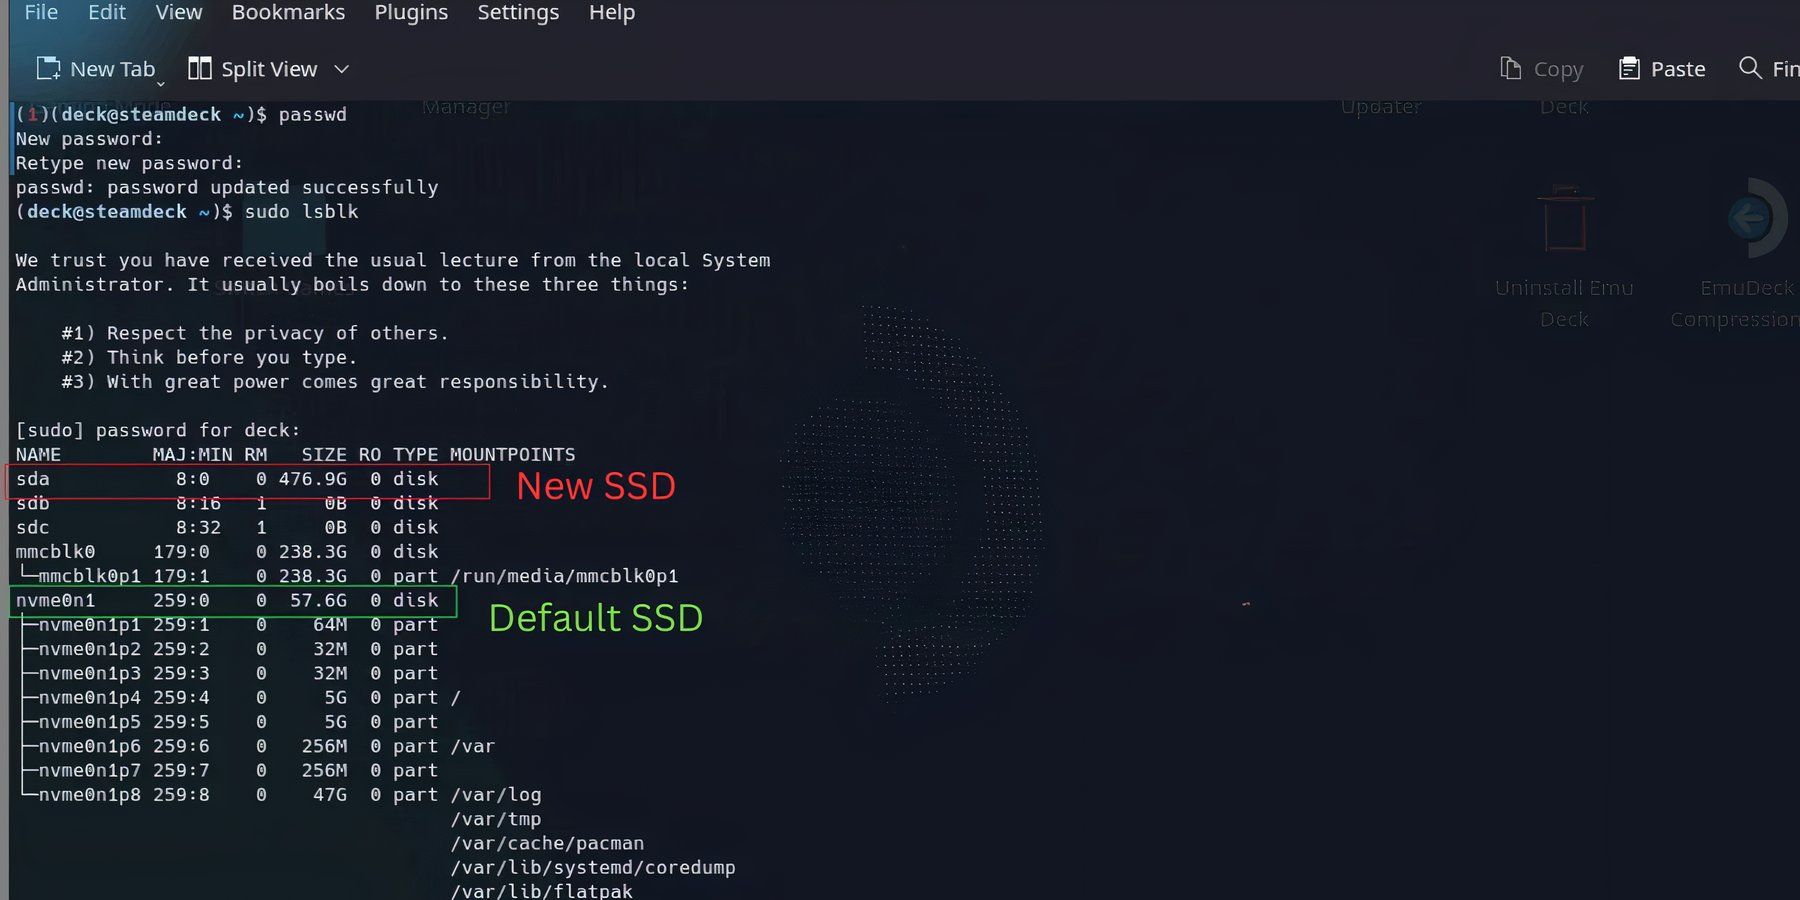
- Type sudo Isblock in the Konsole and enter your password.
- Note your Steam Deck’s SSD and the external NVME enclosure names and type the following command: sudo dd if=/dev/nvme0n1 of=/dev/sda conv=sync status=progress.
- Wait for the process to complete, which could take some time, depending on the size of the internal SSD.
- Once your new SSD is ready, simply swap it out with the old one.
If your newly installed SSD doesn’t appear on your Steam Deck, follow these steps to enter the BIOS:
- Boot from file.
- Eps.
- Efi.
- Steamos.
- Steamcl.efi.
Once you’ve completed these instructions, your Steam Deck should start up with SteamOS. It’s important to mention that you won’t need to go through this procedure again each time you turn on your Steam Deck.
For Steam Deck users employing personalized configurations and distinct ROMs, this choice offers a swift way to configure your device, avoiding the need to start anew each time.
If you adhere to the guidelines given previously, you’ll end up with an exact replica of your old SSD, enabling you to resume playing your preferred games from where you last left without any additional delay in time.
Read More
- BTC PREDICTION. BTC cryptocurrency
- USD ZAR PREDICTION
- SOL PREDICTION. SOL cryptocurrency
- CKB PREDICTION. CKB cryptocurrency
- LUNC PREDICTION. LUNC cryptocurrency
- EUR ILS PREDICTION
- MDT PREDICTION. MDT cryptocurrency
- TAO PREDICTION. TAO cryptocurrency
- ANKR PREDICTION. ANKR cryptocurrency
- WELL PREDICTION. WELL cryptocurrency
2024-10-06 15:03